
We are proud the present a game guide for Alan Wake, a game made by Remedy Entertainment, the creators of Max Payne series. The article consists of general tips about the rules of the game, complete walkthrough of all six episodes and also a list of weapons, equipment and enemies present in Alan Wake's world.
For everyone willing to learn about the plot as much as possible, we prepared a section called "Manuscript", which consists of a list of all pages from the manuscript (including the ones available on the highest difficulty level) along with tips on finding them.
We believe this game guide will be extremely helpful particularly for those gamers, who just started playing action games, therefore it works with the lower difficulty levels. Detail-oriented descriptions, numerous tips, suggestions and lots of images will surely help in understanding the game and finding a way out of any troublesome situations you may face in Alan Wake.
Maciej "Sandro" Jalowiec
1. Collect everything you find on your way. Every single item you may find is useful in some way. There are no useless objects that only occupy space in your pockets. Batteries, ammunition and weapons almost always prove useful;
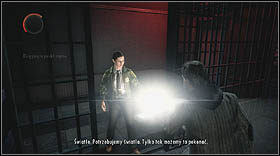
2. The light of your flashlight is incredibly useful. It is used not only in combat against enemies, but also in order to find bear traps (they shine in the light) or supply boxes (the way to boxes is marked with fluorescent paint). Use if often, but please note that focusing the flashlight's light (by pressing [LT]) is not always necessary to do what you want;
3. Battery in your flashlight discharges when you focus the light by holding [LT] button. By pressing [Y], you can put new batteries into your flashlight, and therefore lengthen the duration of flashlight's uninterrupted work. It is extremely useful in combat against tough enemies. If you do not have or do not want to waste batteries, be advised that the battery regenerates itself when you are not focusing the light in one place;
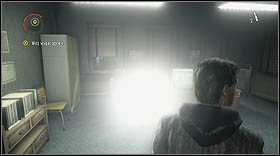
4. Light is a real blessing in Alan Wake's world. Under working light post, you can refill your health bar and enemies cannot attack you in the bright light. We may say that the light provides save spots (and save points as well, in most cases). If it is possible, try turning on every light post, light bulbs, etc. Weaker sources of light (e. g. lamps, flashlight) can help you scare your enemies off;
5. During the fight, do everything to keep your enemies in a distance. Most of them cannot attack Alan from more that one meter. That means you always have a chance to shoot them before they approach and attack you. The only exception refers to Taken, who can throw knives and other sharp tools at the protagonist. Better kill those guys at the very beginning of the fight;
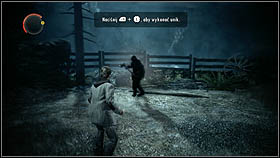
6. Dodge every single knife and other sharp thing thrown towards you. You can do it by simply stepping aside or performing a special dodge by pressing the [LB] button. When you run away from your enemies, keep running with a zigzag. Thanks to that, you won't get a blade stuck in your back;
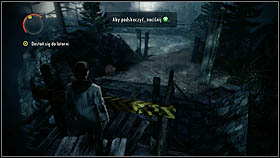
7. When Alan sprints away from his enemies, he gets tired and runs slower. Enemies do not get tires, so they can always catch the writer in a longer run. In order to make the chase more difficult for the opponents, from time to time turn around and attack them with the light of your flashlight. Thanks to that, you can stop them for a while, rest a little and regain stamina, necessary to run;
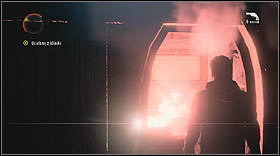
8. When you are surrounded by enemies, the best thing you can do is to launch a hand flare. This item is not very efficient in combat, but on the other hand, flares are popular items, and their light is great at scaring your enemies off. Alternatively, you can also use the flare gun or a flashbang (shoot/throw it next to your feet in order to scare or kill your enemies).
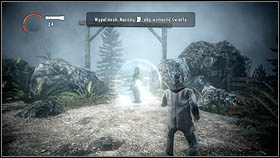
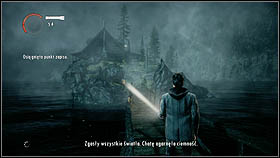
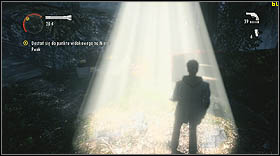
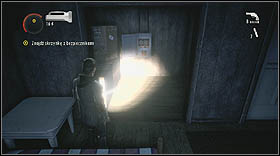
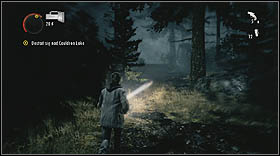
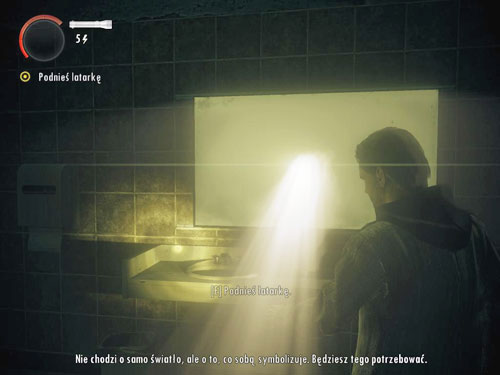
Once you gain control of Alan Wake, look at the light source above the character. Decide, whether you want to change to controls or not, by choosing the right option.
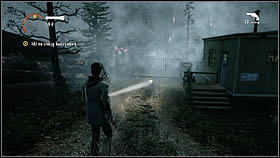
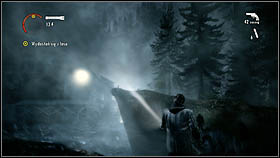
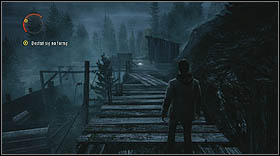
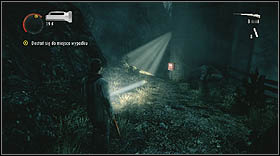
Move forward. You have to get to the lighthouse. From the main road, walk on a wooden platform on the right and continue your journey.
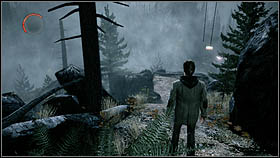
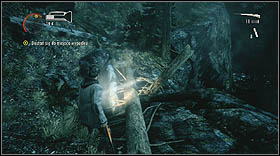
After a short cut-scene, keep moving forward. The path ahead is simple and very narrow, there is no way you will get lost in here. During your walk, you'll find a horizontal obstacle. Jump over it by pressing the [A] button.
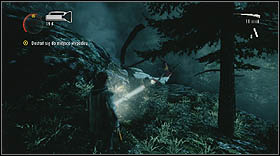
Then, you will encounter an enemy with an axe. Use [RB] button and the left analog stick in order to dodge the axe. Do it a few times and the enemy will vanish. Continue your walk towards the lighthouse.
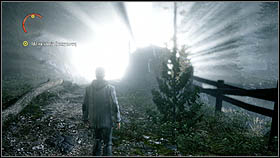
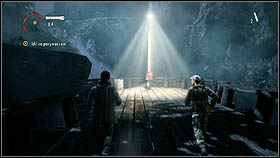
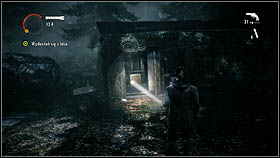
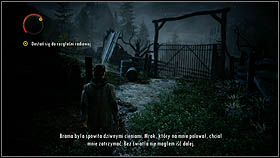
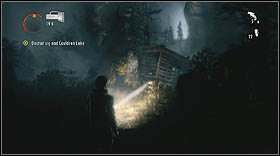
A gate nearby will open suddenly. Walk right through is and move forward. Keep running, until you reach a guy called Clay, and the bridge behind you fall apart.
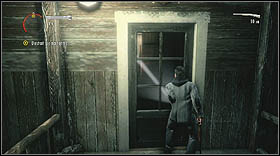
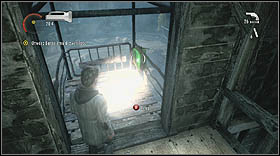
Enter Clay's cabin and watch the cut-scene. Right after it, wait a little while for the cabin's back door to open. You will be able to continue the game, however Alan will lose some of his health. In order to regenerate, you must walk into the light of the light post nearby.
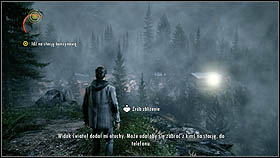
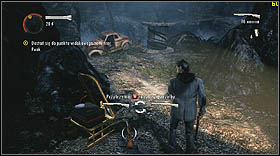
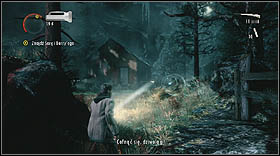
Wait for the stairs ahead of you to assemble. Walk downstairs and go towards the lighthouse. Once again, the guy with an axe will appear in front of you. Pick up the flashlight from a snag nearby, enlighten your enemy and hold [LT] to focus the light and eradicate the Darkness inside him. Then, pick up the gun from the snag and shoot your opponent by pressing [RT]. Notice the ammo crate lying nearby.
Keep moving forward. You'll find another enemy. Deal with him in the same way you did with the last one - light him up and shoot to death. In the bushes ahead of you, there are two more opponents, so approach them cautiously. Once they jump out of the bushes, back up a little and finish them.
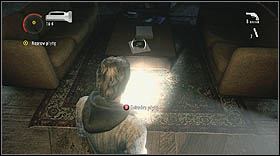
There's an emergency box near the light post right ahead of you. Open it, take the flare gun and its ammunition.

Use the D-pad in order to choose between different types of weapons. Pull out the recently found flare gun and keep moving forward. A few enemies will appear in front of you. Aim at the guy in the middle and shoot one flare to defeat them all.
Continue the walk. Kill one more guy and go towards the asphalt road nearby.
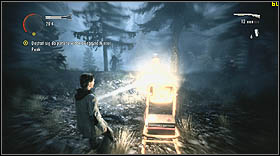
Once you reach that road, start running through the bridge towards the lighthouse. Be careful, as the Dark Presence throws cars at the bridge, making holes in it. Enter the lighthouse as soon as possible.
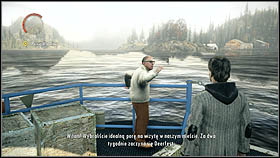
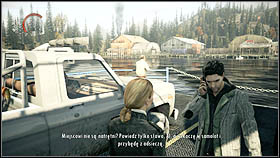
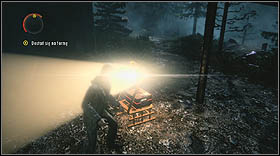
The dream will end. Alan is on a ferry, heading towards Bright Falls. Approach the old man, Pat Maine, standing nearby. After the conversation, come back to Alice. Alan's agent, Barry, will call. After the talk, wait a little while for the ferry to reach the shore. Enter the red car as a passenger.

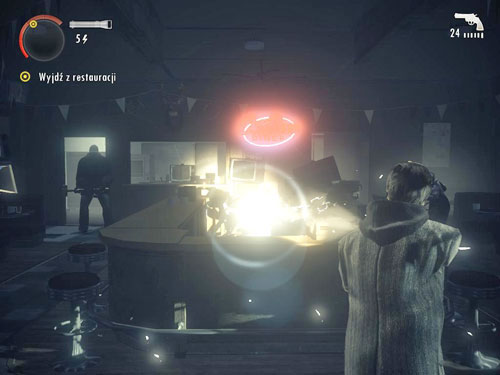
Next scene takes place in a diner. Take the aisle on the left. You will come to an old man, asking you to play his favorite tune by using the jukebox standing nearby. Do it if you want (you'll need to hit it by pressing the [A] button). Keep moving forward and you'll meet a woman talking about the darkness in the corridor up ahead. Enter that corridor, turn left and knock to the men's room. Watch the cut-scene and walk out of the diner through the front door.
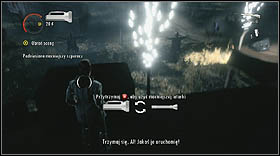
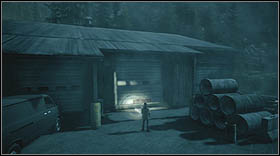
Go towards the rented cabin. Looks like the power is out. Go to the shed and turn on the generator located inside, by pressing the [A] button in the right moments.
Walk out of the shed and watch the cut-scene. If you want, examine the snag located next to the shed. Go to the cabin and look for Alice.
You'll find her upstairs. Alice will tell you that there's a surprise for Alan in the study. Enter the other room located on the upper floor and watch another cut-scene.
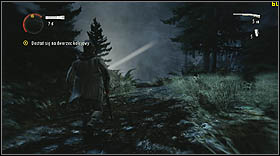
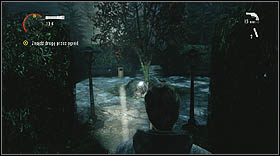
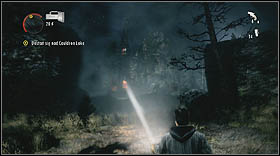
Alan will exit the cabin. You will regain control of him once he walks on the bridge. Run towards the house, trying to avoid birds on your way by dodging them or lighting them up with your flashlight.
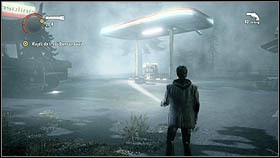
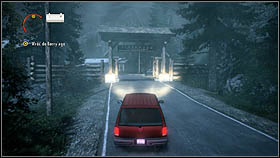
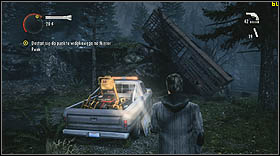
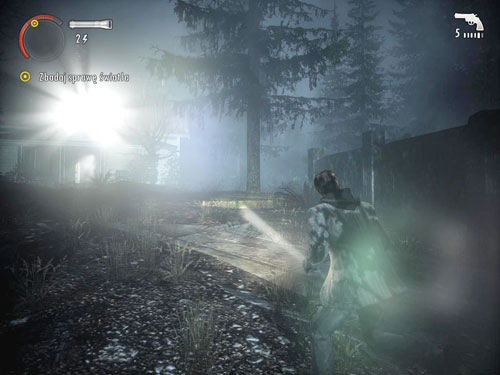
In the next scene, Alan wakes up in a crashed car. Examine the trunk of the car take the mountain path. You'll notice a gas station in the distance - your new destination. Keep walking the path.
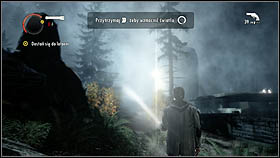
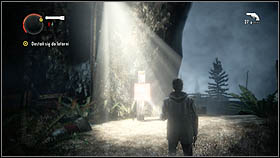
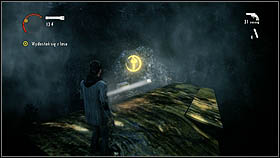
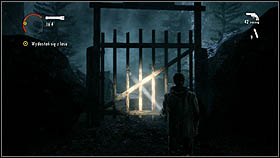
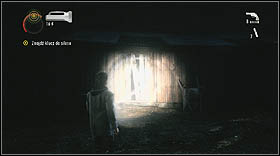
You'll reach a bright, blinding light. Enter it, and you will receive two first pages of the manuscript. And you'll notice a few buildings and a bright light in of them.
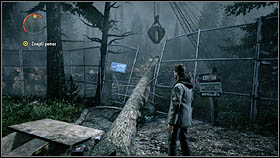
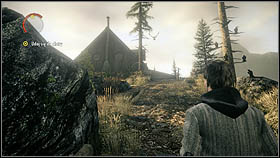
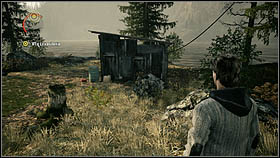
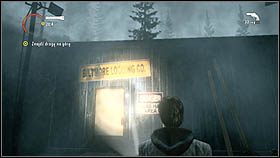
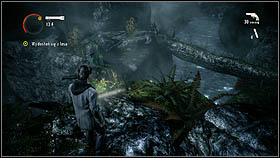
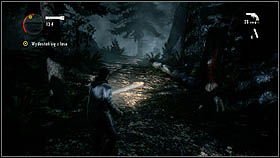
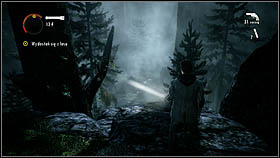
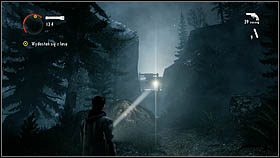
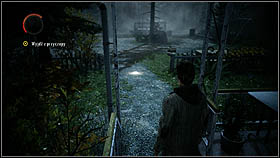
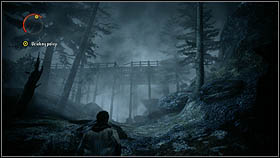
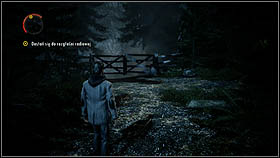
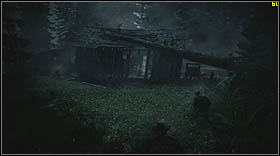
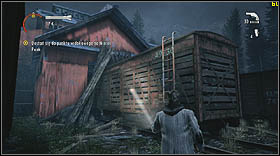
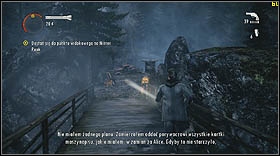
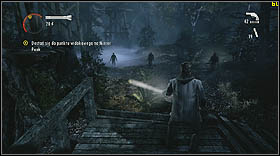
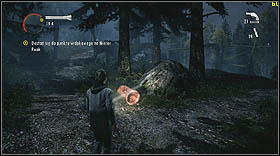
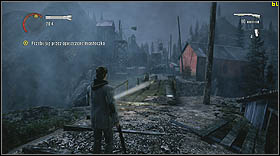
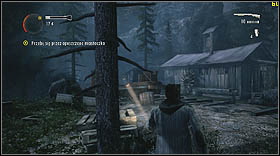
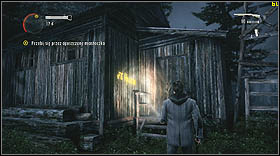
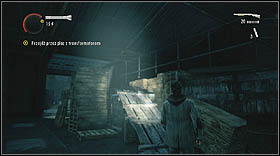
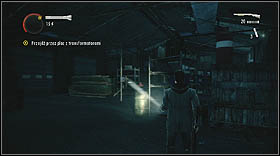
Run forward. Walk over the fallen tree to get to the other side of the damaged fence. Walk among the wood towards the building with bright light you saw a second ago. Watch the cut-scene and continue your journey through the wood supply point.
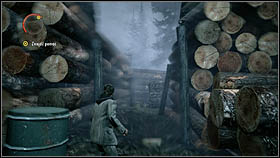
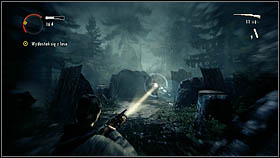
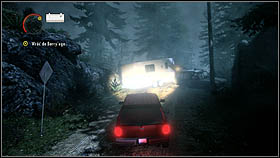
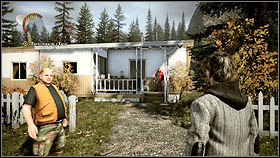
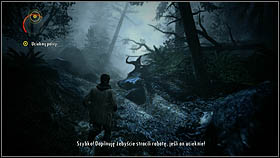
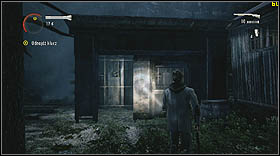
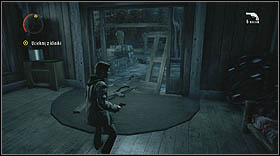
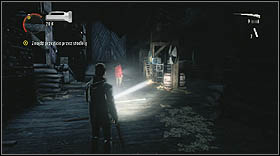
On your way, you'll find Carl Stucky, armed with a n axe. He will try to kill you, dodge his weapon and run away, to the enlightened building. Inside, you will find a gun and a flashlight. Finally, both sides have equal chances.
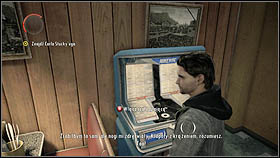
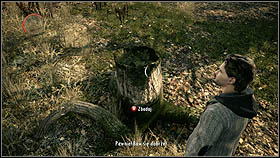
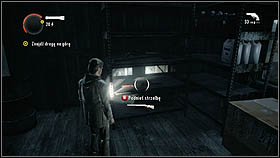
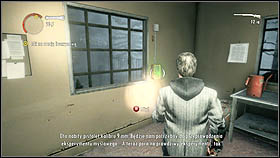
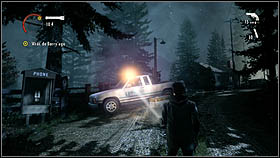
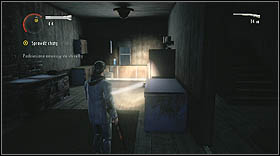
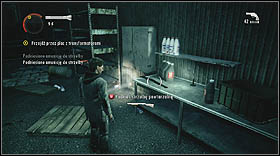
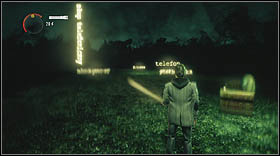
Pick up four batteries to your flashlight from the table, collect the ammunition lying on the shelf. Approach the desk and use the telephone located in there.
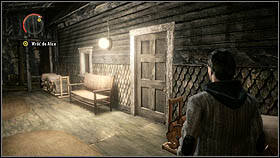
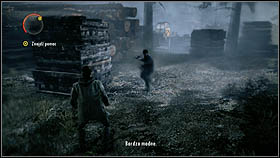
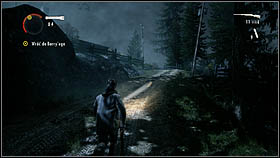
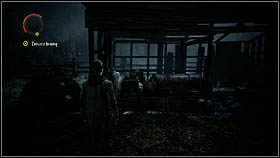
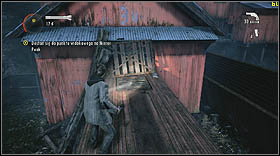
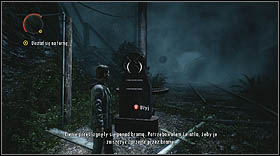
The phone won't work, and what is more, Stucky is about to push the whole building into abyss. Jump out of the building through the back door as soon as you can. The gate nearby will open, walk right through and prepare yourself to fight two enemies armed with sickles.


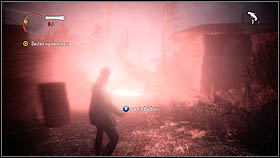
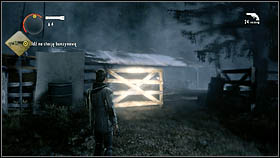
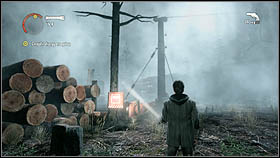
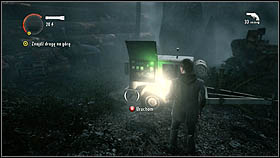
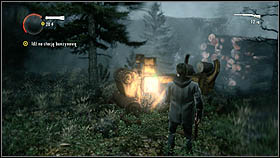
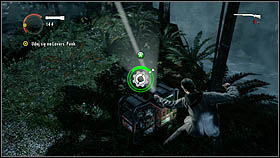
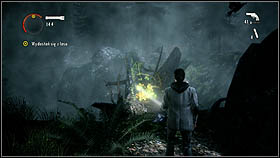
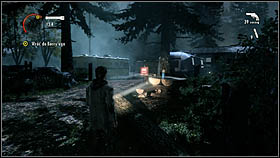
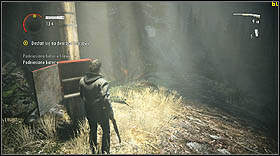
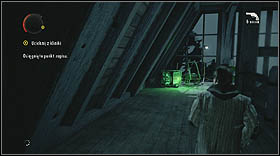
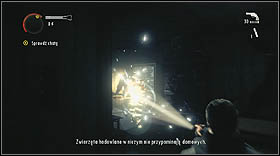
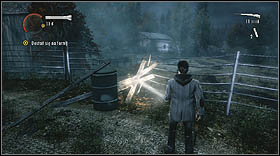
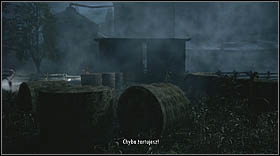
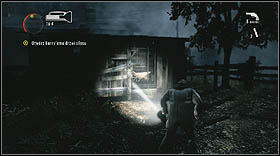
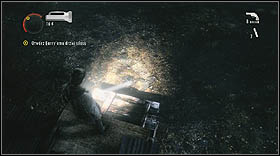
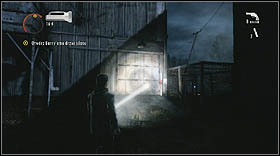
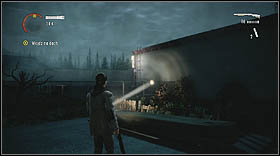
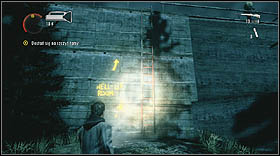
Once you deal with them, pick up the ammo from the barrel and turn on the lamp standing nearby. Its light will reveal two things - the first one is a generator. Approach it and kick it,. The second thing is a yellow arrow painted on the wood. This paint is visible only in the light. Use your flashlight to discover more arrows painted around here. Go in the direction pointed by these arrows in order to discover a supply crate. There's a flare gun inside, I strongly advise you to pick it up.

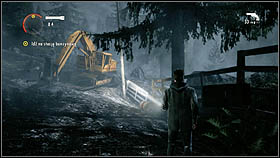
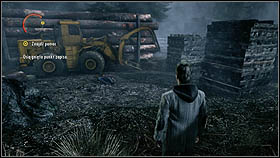
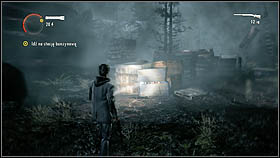
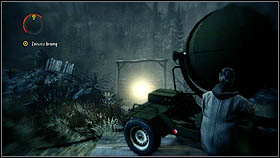
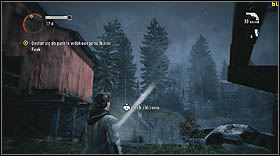
Walk over the damaged fence, using the fallen pole. Keep running forward. You'll reach a damaged excavator and one enemy. Kill him at once, so he won't be able to throw knives at you. There's an emergency box next to the excavator, you'll find some ammunition and batteries inside.


Walk through the damaged fence, right next to the excavator, and continue your journey. Walk over trees and rocks to get to the other side of the river. Walk towards the bright light located in the distance. Pick up ammunition, and lithium batteries, which you'll find on your way through this part of the level. What is more, you'll notice a cabin located on a hill, on your left. Kill two incoming enemies and climb up the rocks in order to reach another wood supply point.
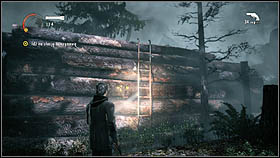
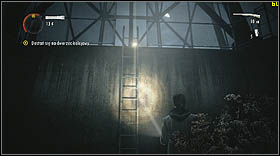
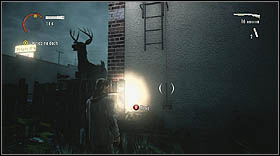
The wood on your left is painted, you can see it thanks to your flashlight. Follow the paint and you'll reach a ladder. Climb it up and turn right in order to find the cabin mentioned before. There's a supply crate over there.
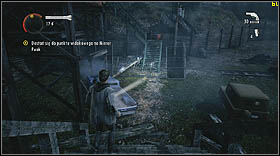
Once you collect everything, come back to the place, where you saw the paint in the first place. Go in the direction opposite to the one pointed by the painted arrows. You'll reach a damaged set of stairs. Take batteries and ammunition from the emergency box nearby.
Search the area. You'll encounter three opponents. Try using the flare gun against them. Once you deal with those guys, check out the building standing nearby. There's a shotgun on the shelf. Quite an interesting weapon, but you still need some shotgun ammunition.
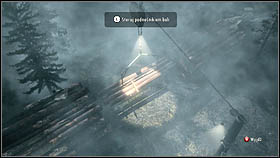
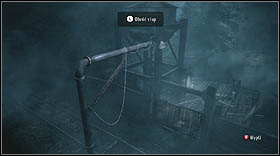
Walk out of the building and use the generator standing nearby. A cut-scene will show you a control panel that has been activated. Use it to move the wood hanging in the air, on ropes. Place the wood between logs lying on the ground, so it will form some kind of a bridge for you to use.
Climb up the logs by using the ladder. Walk over the wood hanging in the air in order to get to the next part of the level.
Walk into the enlightened shed. Pick up the shotgun ammunition and turn on the radio. Keep moving forward. Notice the next sign painted on the right side of the road, visible only in the light. Search the area, and you'll find an abandoned shed and a rusty car. There's a supply crate in that vicinity. Pick up the flare gun located in that crate.

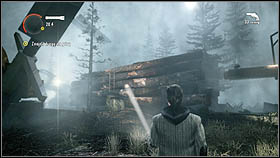
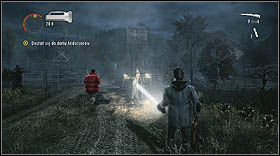
Keep moving forward. In the distance, you'll see the gas station once again. Keep going forward. You'll encounter a few enemies on your way, I advise you to test your shotgun on them. New enemies will just keep coming, so look for the bright light. Go towards it. You can make it easier for you to run away by shooting a flare in the sky.
Once you reach a light post, wait for your health to regenerate. Take the batteries and ammunition from the emergency box and keep moving forward.
You'll find a damaged bulldozer. Notice a yellow sign pained on a stone nearby. Turn left and you'll find another supply crate with a flare gun inside.
If you turn right, you'll find another damaged bulldozer. Some enemies will appear behind your back. Finish them by with a recently found flare.
Your path leads to a big sawmill. Enter the building on the right. Collect all the equipment from the shelves and use the switch located on the wall in order to open the gate to the sawmill.
In that sawmill, you'll find a working machine on your left. Use the switch in order to turn it off if you want. Anyway, keep moving forward. You'll reach an ammo crate and a few batteries. Continue the walk. A large group of enemies will attack you here. If you still have flares, I strongly advise you to use it. If not, grab your shotgun and eliminate your opponents, keeping them in a distance.. They can't throw weapons, so you can easily defeat them. Stucky is one of opponents in this fight. He's still armed with an axe, he can't throw things and is incredibly fast. There is, however, a chance he'll get stuck on the sawmill gate. In that case simply perforate him. If he won't do it, simply light him up a few times with your flashlight, and then finish with ammunition.
Once you kill them all, go to the gate located on the other side of the sawmill. Use the control panel on the right in order to open it, and then continue your journey. The gas station is, fortunately, not that far.

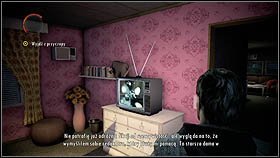
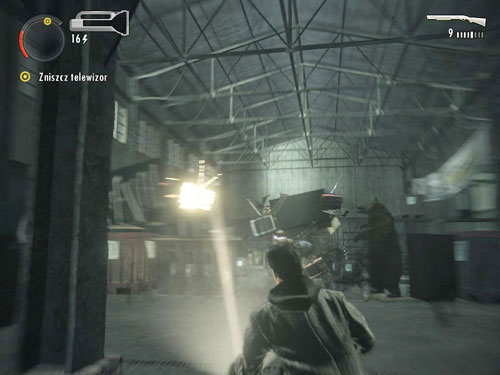
Enter the gas station. Take a look into the building by walking through the garage. The TV set will turn on itself. Watch the show and then use the telephone standing on the counter.
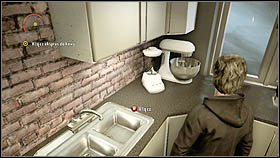
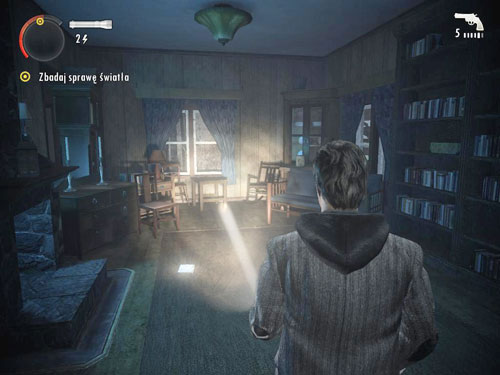
Talk with Alice for a while, then go to the kitchen and make some coffee. Come back to Alice. She will tell you that there are some cover projects on Alan's desk, in his study. Go to the room next door and take a look at those projects. Suddenly, the lights will go out and Alice will ask you to check the fuse box. It is located next to the front door. Well, you won't turn the bring the light back, but at least you'll find a flashlight. Pick it up and go back to Alice.
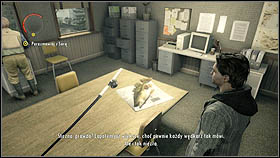
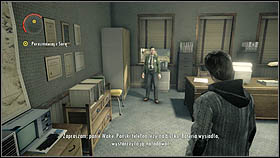
Time to go back to Bright Falls. Alan is now at the police station, just got patched up by Doc. Take a look at the fish on the table and walk out of the room. Turn left and go to sheriff's office. Pick up the cell phone from the desk and watch the cut-scene.
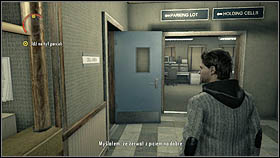
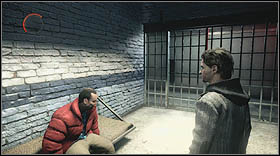
Go to the station's reception desk. A policewoman standing over there will allow you to use the corridor located next to cells in order to get behind the whole building. One of the inmates will ask you to turn the light on. If you want, do it by using the switch located next to the door. Leave the building and go towards the fence on the left.
Get to the fence covered with boards. Kick them and walk on the other side of the fence. Take a look at the rusty, abandoned car. Barry will call. After the conversation return the police station, watch the TV show and leave the station by going through the front door.
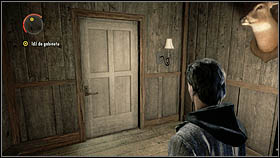
Barry will take you to Elderwood. Talk to him a while, then go to the balcony in order to talk with Rusty. He will ask you to bring some documents from the reception desk, located inside the building, in front of the mammoth skeleton. Take the papers and go back to Rusty. In exchange, you will get the key to your rented cabin. Walk out of the building through the same door you walked in here.

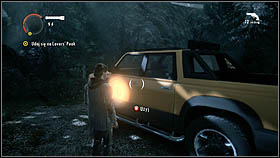
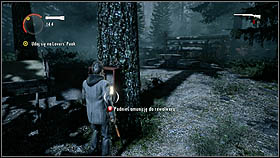
Once you get to the cabin with Barry, you will have a flashlight with you. Walk downstairs. You will find some batteries in the kitchen. Pick them up and walk outside. Walk downstairs and keep walking the path. You can try entering the yellow car, but that won't really work. Continue the journey on foot. In a cabin on your right, you'll find some revolver ammunition in a wardrobe.
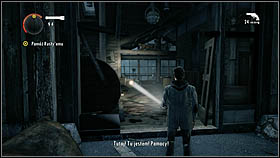
Follow the path, go towards the bright light. A light bulb will break down, but don't worry about it, just keep walking. At some point, you will hear screaming and gunshots. Run straight forward. Enter the demolished building, from which Rusty's screaming comes. Walk up to the wounded man and watch another cut-scene.

Walk out of the building and head towards the one in front of you. With Rusty's key, you will open and enter it without problems. Search the rooms for ammunition and batteries. Once you find the fuse box, you'll notice there's an axe stuck in it. This cannot be fixed. Leave the building and return to Rusty. You will encounter two enemies, but they should not pose a serious threat.

Use your flashlight to eliminate all black goo lying on the ground. Then, enter the building, in which you left Rusty. You will notice a huge hole in the wall nearby. Walk through it outside. Rusty will join you in a minute, but as an enemy now. He's extremely fast and tough, yet quite easy to kill. All in all, he doesn't have other Taken to support him. After the fight, collect some extra ammo from the crate nearby. You can find it next to a wooden fence surrounding this area.
A couple of enemies will show up after Rusty's death. Defeat them as well and walk the way they came to you. There will be a bright light on your left. Go towards it.
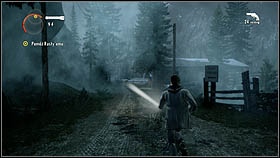
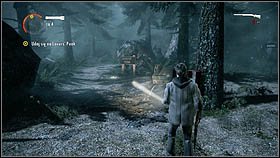
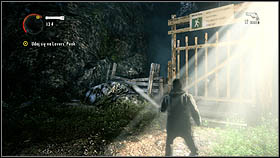
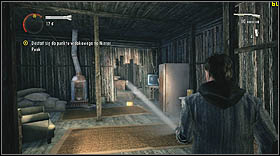
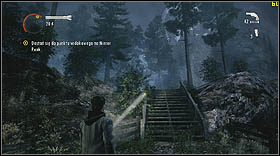
Walk downstairs. Take a look at the surroundings and you'll find an emergency box and another set of stairs. Take everything from the box and walk downstairs. We're now on our way to Lover's Peak.
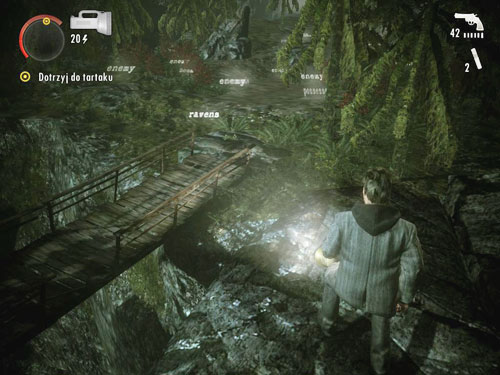
There's a wooden bridge down there, the path splits into two on the other side of the river. If you go left, you will find a cave with a supply crate inside.
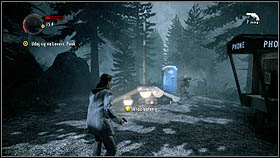
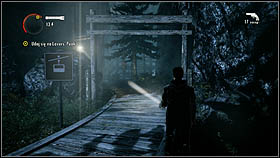
If you go right, you will reach a telephone booth. Pick up the batteries in that booth and kill three enemies that will come after you in this region. Walk through the next bridge. You'll notice a bright light on the left. Go towards it. There, you will find an arbor, a shotgun and some ammunition.
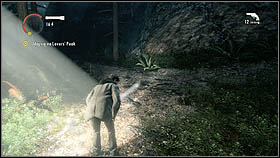
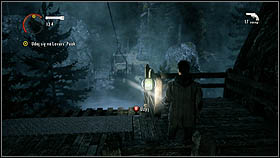
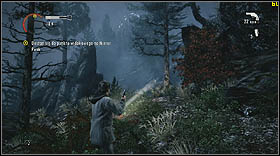
Keep moving forward, in the direction pointed by "Lover's Peak" signs. On your way, you'll encounter a few enemies. Better save your ammo here. If you run out of bullets, start running towards the light post in front of you. Once you get close to it, the light will turn off. Turn on the generator in order to provide yourself with light.
There's an emergency box with some ammunition inside. Take it all and keep walking towards Lover's Peak.
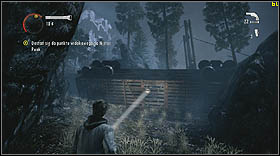
You'll encounter a large group of enemies. There is no sense in fighting them. Turn right and run among your opponents as fast as you can, in order to reach another light post. Once you regenerate your health, take a look around. The gate nearby is blocked, but the fence on the left is damaged. Jump over it.
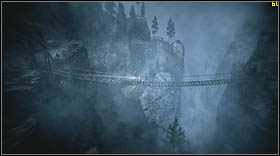
Run forward. You'll reach a river and a cable car above it. Call it by pressing a button located nearby. Once the cable car gets to you, enter it and go to the other side of the river.
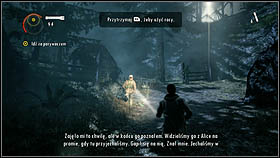
After the cut-scene, take everything from the emergency box located nearby and follow your companion. By holding [RB], you can use flares in order to support your companion in the fight.
You'll reach a wooden gate, Alan will figure out that the guy text to him must be the kidnapper. He will try to open that gate, but such thing takes some time and you must simply scare the enemies off. Take flares from the emergency box and keep using them, so the Taken will be too afraid to approach you. When the kidnapper opens the gate, walk right through to the next part of the level.
You'll find another box with equipment inside. The light post in this area will turn off soon and you'll have to focus on using flares in combat. In cooperation with the kidnapper, eliminate all enemies.
After the cut-scene, collect the equipment lying around and move forward.
Walk down the fallen trees to the next part of this level. Look around and you'll notice bear traps lying around. Try to avoid them. If you step into one of these by accident, keep pressing the [A] button in order to open the trap.
Take the mountain path. Use your flashlight to detect bear traps. Once you reach a small meadow, collect all ammunition and batteries lying around there. Keep moving forward. Walk over the fallen tree and continue your journey through the night. You'll encounter some enemies, you should better move around as much as possible during the fight. You'll reach an abandoned shed. Eliminate all opponents in this area and use the generator in order to turn on the light.
Search the area. You'll find some ammunition, batteries, and a new toy - hunting rifle. Move forward. Jump off the rock, on which you found that generator. You'll notice a crashed plane, falling down to the ground. Examine the plane and you'll notice that you can reach a supply crate by walking over the right wing.
Walk the rocky way in order to get to the next part of the level. Pick up a flare lying on the ground. Once you jump down from the rocks, turn right. You'll find another generator. Throw a flare down to the ground to scare your enemies off. Turn on the generator to provide yourself with a source of light.

There is some ammo lying around. Pick it up and look towards your destination point. You should notice another light source. Move towards that light. Your destination, the mill, is actually on the other side of the river, but if you go along the shore, you'll get to it alright. There will be a couple of enemies on your way to the mill, but they do not pose a serious threat. Once you reach the mill climb up the ladder nearby.
You'll reach the top of a wooden platform. Move forward. At some point, the platform will start falling. Quickly turn left and jump to the level below. You'll land right next to the mill's entrance. Go inside and pick up ammunition located in t here. Go upstairs, eliminating black goo lying on the floor with your flashlight. Upstairs, you'll find some kind a weight with a chain attached. Kick it in order to lift a platform, which you may use to get to the next part of this level.
Search the rooms on this floor. You'll find here some flares and a ladder leading to an even higher floor. Climb up there and look for a balcony. From the balcony, you can walk on solid rocks. Do it and continue your walk.
You'll reach a wood supply point and one enemy. He is quite tough, but not invincible. It would be really nice to test your hunting rifle on his body. In a building nearby, you'll find one model of this weapon. Keep going forward. On your left, you'll notice an emergency box. Take everything from it and continue your journey through the night.
You'll encounter two more tough guys. In order to finish them both off, use a weapon different than the hunting rifle, I advise saving ammunition to this hand cannon. Kill them with other weapons, but watch out for the logs falling down on the right. You'll find another emergency box and you'll see a shed on a hill in a distance. Walk next to a sign with a word Campgrounds. Open the gate located nearby and move forward.
You'll encounter an enemy armed with a chainsaw and his two smaller friends. Pull out your hunting rifle and start attacking the chainsaw guy with your flashlight. Once you eradicate the Darkness inside him, shoot him in the face. Remaining enemies finish with a revolver Continue your walk. Go towards the buildings and lights nearby.
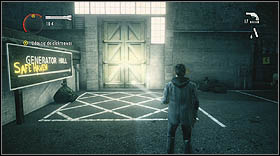
Barry will call you. After the talk, move forward. You'll reach the campgrounds, just like the sign said. Collect all items from the emergency box nearby and enter the camp. Inside, turn left and go to the toilets. In the men's room, you'll find a key to the garage. Take it, watch the TV show and walk out, killing one Taken who will jump out of a toilet stall.
In the ladies' room, you'll find some hunting rifle ammunition. Take it and go to the garage. With a key, you can easily open it. Enter the car parked inside.
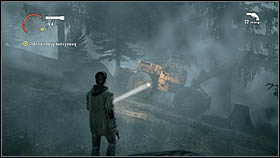
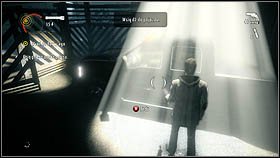
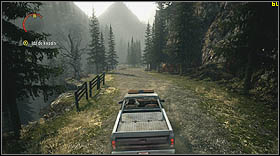
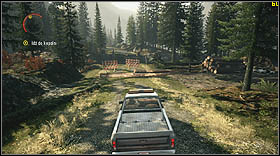
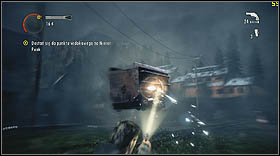
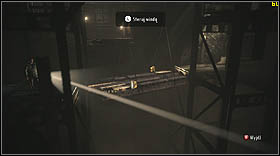
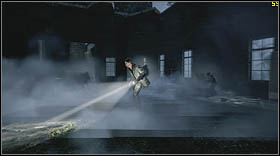
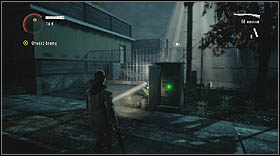
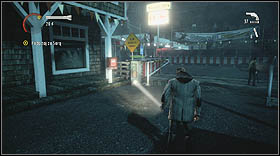
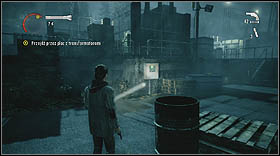
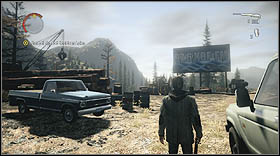
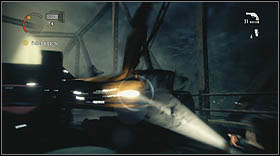
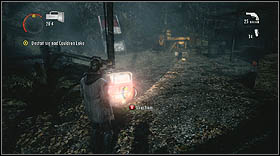
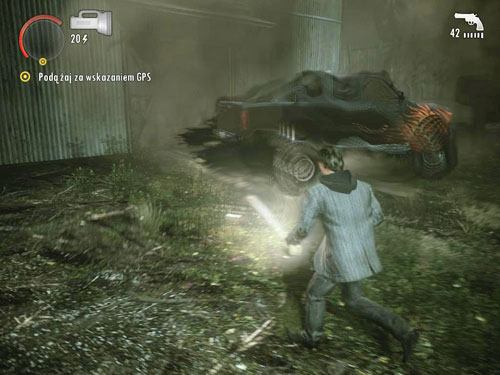
![Hold [RT] to move forward - Walkthrough - Episode 2: Taken Part 2 - Walkthrough - Alan Wake - Game Guide and Walkthrough](https://game.lhg100.com/Article/UploadFiles/201512/2015121215431556.jpg)
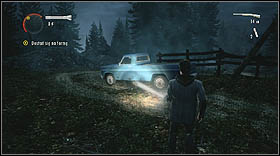
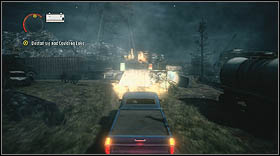
Hold [RT] to move forward. Slightly turn right. Run down the enemy standing in your way and hit the asphalt road ahead of you. Try avoiding objects located on the road (crashed cars, wood, etc.), omit them by driving on the grass. Once you reach a damaged truck with wooden logs, turn left.
You'll reach the place where you met and murdered Rusty. Go towards the cabin you rented. You'll find a trailer blocking your way, and that means there's completely no point in further car usage.
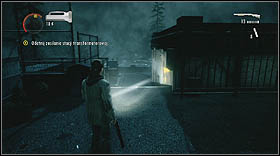
Go on foot then. Right behind the trailer, you'll find a car and lots of nice equipment right next to it, including a flare gun. Collect it all and continue the walk. You'll encounter a rather big group of enemies. Finish them with the flare gun and keep running forward. One of the light posts will turn on, giving you a chance to save the game and refill your health bar. Keep moving forward. The kidnapper will call you soon. Once you reach the yellow car, take a look around. There's a flare gun with ammunition on a box nearby.
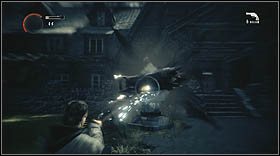
You'll surely notice lots of birds flying over the rented cabin. Approach the front door. Barry won't let you in, but that's not what you have to achieve here. Walk out it the open area, so the birds will attack you. Use your flashlight to burn them all. You can also support yourself with the flare gun and hand flares. If you'll lose a lot of your health, walk around the cabin and hide in a corner, next to a bathtub. In this vicinity, near the rocks, you'll also find a supply box, which items may prove useful in your fight against the birds. Once you destroy them all, Barry will open the door. And that's how the second episode ends.
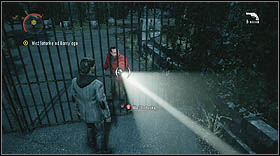
Talk for a while to Randolph, then follow him to Rose's home. Once you get there, knock to her door.
After the cut-scene, watch the TV show. Walk out the room and go to Barry and Rose. Get out of the house and get back to the car the same way you got here before.
Looks like now you've got police looking for you. Run forward and when you'll notice cops on the right, turn left. Ignore police gunshots, just run forward, under a wooden bridge. Continue your journey, even when your enemies will launch a flare in the air.

Once you reach the wall of rocks, turn left. The path here is simple and narrow, it is impossible to get lost in here. Once you reach the light, a police cruiser will crash right next to you. Walk to the light post nearby. From there, take the narrow mountain path. You will see another flare launched by the cops. Don't stop running.
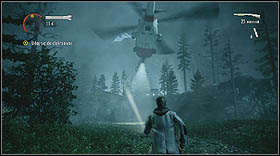
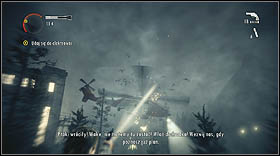
You'll reach another light post, but its light will turn off soon. Move forward, passing by another police car. A helicopter will join the party very soon. Keep moving forward, but try using the rocks on your left in order to avoid bullets.
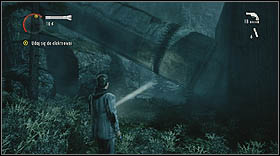
The helicopter will be sooner or later destroyed by birds, and you'll reach a wooden watchtower. If you want, walk up the stairs and take a look through binoculars located on that watchtower. Anyway, the way to your objective leads through a metal gate.
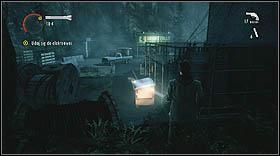
You'll reach a gate, which rattles in a very unnatural way. Turn left and you'll reach a spotlight. Follow its cable to get to the generator. Turn it on and then run quickly to the spotlight. Use it to light up the weirdly rattling gate.
It is possible that the generator will break down and you won't be able to enlighten the gate. In this case, get back to the generator, kick it and then repeat the whole thing. The gate will disappear after enlightening (remember to focus the light with [LT]) and you'll be able to mover forward.
You'll reach another haunted gate. Turn left and take the flashlight from the shed. Get back to the gate and light it up.
Once you'll open your way to the next part of the level, move forward. You'll reach another crashed police car. Take flashbangs from a crate nearby and continue your journey.
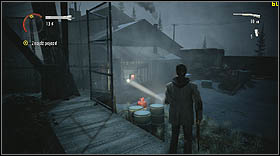
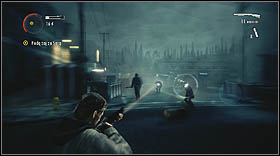
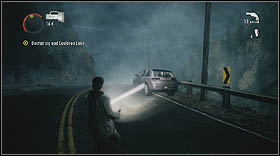
![Once you encounter some enemies, keep pressing [RB] to throw flashbangs - Walkthrough - Episode 3: Ransom Part 1 - Walkthrough - Alan Wake - Game Guide and Walkthrough](https://game.lhg100.com/Article/UploadFiles/201512/2015121215431889.jpg)
Once you encounter some enemies, keep pressing [RB] to throw flashbangs. As you will see, it is a weapon quite similar to the flare gun - it liquidates several enemies at the same time. Make your way through all the monstrosities in the woods and get to the light post. You'll find some extra equipment over there. Move forward through a little bridge, towards the radio station.

Kill the enemies coming for you. You'll find another destroyed police cruiser, take the flashbangs from the trunk and run forward. Once you get to the radio station, walk right through a metal gate on the right.
Enter the building and find the room, where Pat is doing his job. After a cut-scene, continue the walk, but now toward the railway station. Take the mountain path. On your way, you'll find an emergency box with two flares inside.
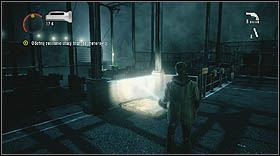
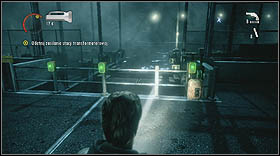
Run forward and you'll reach a generator. Scare your enemies off with a grenade or a flare and turn on the generator to make the light post nearby work. In its light, you'll find a gun and some ammunition. Run further toward the railway station. You'll reach a car and a lamp nearby. Turn it on and search the area.
There is a small cabin nearby, with a shotgun and some ammo inside. Take it all prepare to fight several enemies. Walk out of the cabin and turn on the map nearby. Let the enemies walk to you, into the light, and then throw a flashbang. Remaining enemies should be removed with firearms, in the shed nearby you'll find some batteries and ammunition.
Run toward the railway station. You'll reach the tracks, follow them. On your way, you'll run into a red emergency box, better take the equipment inside.
Move forward. You'll reach a little meadow, from which a water tower can be seen. If you go left, you'll find a crate with extra equipment. Go right in order to continue the walk towards the railway station.
Walk under the bridge. Climb up the ladder located there. Run along the bridge, but be careful, as the are lots of haunted objects in there, Dodge them, when they're flying in you direction. Use your flashlight to destroy them.
Walk out of the bridge and approach the fence. Go left until you reach a ladder. Climb it up and step into the light. Right there, you'll find a better flashlight, hold [B] to exchange your current flashlight for a better one.
Now you need some kind of a vehicle. Walk into the railway station and open the gate nearby. Once you do it, a group of Taken will attack you. Finish them off with a flashbang, kill the remaining ones with your shotgun. Take the equipment from the emergency box nearby.

Walk through the gate you just opened. Walk into the building and kill all the enemies inside. Get to the upper floor, take all the equipment from the desks and get to the wooden balcony. From that balcony, walk the stairs down to the ground.
You'll reach a rather big field with some enemies and a bulldozer. Eliminate the Taken with traditional methods, but if it comes to the bulldozer, I suppose you should just run to the other side of the field and open the gate you can find in there. Once you do it, walk through it, so the bulldozer won't be able to reach you. Get in the car parked nearby.
After the cut-scene, get in the car and drive toward the coal mine. Once you reach the destroyed bridge, turn right and continue your journey.
Sooner of later, you'll get back on the main road again. Drive forward, passing by a wooden watchtower (by the way, there's a lovely car parked near that tower). In the end, you'll reach the mine.

In the coal mine, get out of the car and walk right next to the red building. Go up the stairs and enter the building.
After the cut-scene, walk down to the ground below. Collect all the equipment you can find here and use the lever placed on one of the walls. A hatch in the floor will open.
Use that hatch to get out of the building. Move forward, and you will find a revolver and a lot of ammunition to that gun. Arm yourself and continue your journey. You will encounter some enemies, but they do not pose a serious threat. Haunted objects will join the fight soon, so be careful.
Once you eliminate all your enemies, walk through one of the wagon (you'll find some flashbangs inside) and continue the journey. Finish off two guys that will stand in your way, and then climb up the ladder nearby.
You'll get on top of the wagon. Open the hatch nearby and throw a flashbang inside. The haunted objects inside will disappear, so jump down into the wagon and continue the walk. Once you walk outside, you'll notice the Dark Presence in the distance.
Move forward. There's and electrified fence in front of you. Walk (or drive) along the high voltage cable. You'll encounter some enemies, but with a gun and flashbangs you should handle this problem with ease.
Walk to the enlightened, red building. Take the flare gun and ammunition located in there. Use the machinery, which is also located there.
Get back to the electrified fence. On your way, you'll encounter a large group of enemies and flying objects. Use your flashbangs very often and try to reach that fence mentioned above as fast as possible. Jump over it and walk up the stairs to enter the building.
Inside, you'll find three more opponents. Throw them a flare and finish them off with a gun. Collect all the equipment lying on the desk and shelves, then run forward. You'll encounter more enemies, but they're easy to kill. Climb up the ladder nearby.
Exit the building and jump down to ground. A tree in the distance will fall down. In a small building nearby, you'll find a control panel, with which you can open the gate. Do it and leave the mine.
You'll find some flashbangs outside. Take them all and turn right, passing by a destroyed wagon. Some enemies will be here, waiting for you. If you can keep them in a distance, you'll have no problem eliminating them.
Keep running forward, until you reach some kind of a crossroads. If you turn left, you'll reach an equipment crate. If you go right, you'll find a light post with a lot of useful equipment, which I advise you to collect as soon as possible.
Walk through the bridge and exchange you shotgun for a pump-action shotgun. Continue your journey, preferably by turning left.
You'll find some lamps on your way through the forest. Run from one lamp to another, turning them on and eliminating enemies chasing you. At some point, a large pack of Taken will appear. Finish them with flares and flashbangs. After the fight, take the narrow mountain path.

You'll reach a cemetery with three extremely fast opponents. Kill them all, the best weapon here would be a flashbang. Continue the walk. Enter a little shed and turn on the light inside. Collect all the equipment located in there and continue your journey.
You'll reach an abandoned town. Walk through the bridge, but be careful, as there are lots of haunted objects in here.
'You'll find some batteries in this vicinity. Keep on walking the main road, towards a little source of light, barely visible in the distance. More haunted objects will attack you here. Destroy them with your flashlight, keep hiding behind trees and rocks to avoid damage. Once you reach destroyed wagons, turn left and walk around them.
There is a steam car behind those wagons. It is haunted, so hide behind the tree nearby in order to avoid its flying parts. Destroy the steam car with your flashlight, and then enter the cabin nearby.
The cabin, unfortunately, is locked. Take the key from a shed nearby and open the door. Inside, you'll find some equipment, a hunting rifle and a TV set, in which you can watch another show. Walk out of the cabin through the back door.
Behind the hut, you'll find a ladder. Climb it up and then use another ladder located there. When you reach the high level, examine the vicinity. You'll find some arrows painted on the rocks, indicating the location of another equipment crate. In order to continue the journey, you have to take the rocky mountain way.
Some birds will appear in the sky, and your path consists of wooden, old platforms, ready to collapse at any time. Sprint through this part of the level. Every time you reach a safe and stable ground, take some time to burn a few birds mentioned above.
You'll reach a silver mine. Jump down to the tunnel in order to run away from the birds. The way through the mine is narrow and simple. At some point, you'll reach a large cave, with signs painted on the rocks. Take the narrow tunnel on the left. Once you reach the water, turn around and go back to the large cave. Take the second tunnel, which wasn't visited yet.

You'll reach another great cave, with an exit visible in the distance. However, you'll not be able to get out the mine, as the tunnel leading to the exit will collapse and a group of Taken will attack you. Kill them all using flares and flashbangs.
As you'll notice in a short cut-scene, one of the monsters opened a tunnel, trying to reach you. Walk that tunnel, until you reach an enormous mine shaft.
Walk up to the control panel and use it to lower the steel supports and create some kind of a bridge, that can be used to get to the next part of the level.
On the other end of the shaft, climb up the ladder located there. Use another control panel in order to lift the supports and create a bridge again. Once you walk above over the supports, you'll find a third panel for you to use.
Use it, then climb up the ladder nearby. Walk over the steel supports and walk to the ladder located in there. Kick it in order to make it drop to the level below. Climb it down, and you'll reach a recently used control panel. Use it again to lift the supports even higher, then walk over them to reach the mine's exit.
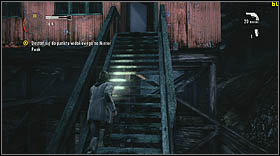
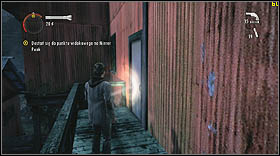
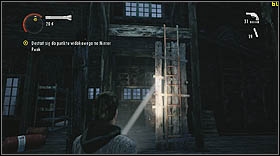
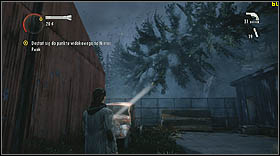
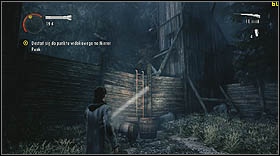
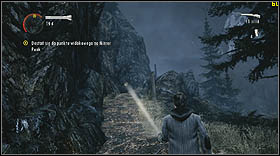
Climb up the ladder and kick the boards located up there. You'll finally get outside. You'll find stairs on your right. If you walk them up, you'll find some flares. If you walk them down, you'll reach the way to Mirror Peak.
Birds will reappear in the sky. Turn on the generator nearby as fast as possible, in order to provide yourself with some light. Collect the equipment lying around.
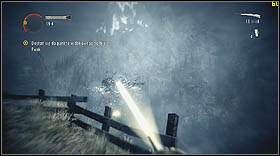
A cable car will arrive. Enter it and continue your journey. During the ride, a lot of birds will come after you. Use your flashlight to scare them off. The cable car will start falling down, and in the end it will hit the mountain in front of you. Finish two incoming enemies and take the only path available.
A railway wagon will fall from the sky, right in front of you. Walk around it and run towards the light nearby. Take the equipment from the emergency box and keep moving forward.
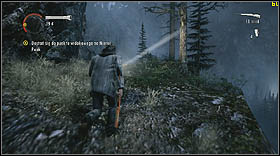
You'll reach some ruins, in which you'll find a hunting rifle and some ammunition. Arm yourself and run down the path to the next part of the level. Kill the enemies standing in your way and reach the next light post.
From there, keep running forward. You'll reach a bridge. Once you walk on it, enemies will attack you from both sides. Pull out your hunting rifle and shoot them all. After the fight, keep running forward. Behind rocks to your left, you'll find an equipment box.
You'll reach some more ruins. Push the boards in front of you, kick the supports of a wooden platform, and then run forward.

Enter the ruins through the basement. You'll notice that it's an extremely weird room. Walk up to a higher floor. Collect all the equipment, and then walk up the stairs in order to get to the highest floor.
Once you walk on the greenish parts of the floor, you'll fall down, back on the lower floor. A group of Taken will attack you here. Use your flashbangs, flares and hunting rifle to eliminate them all.

After the fight get back to the highest floor, jump over the hole and then jumps down to the ground. Continue the walk. At some point, a cut-scene will turn on and the third episode of Alan Wake will end.
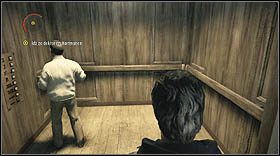
After the awakening, wait a moment for dr. Hartman to come. After a brief conversation, follow him to the elevator.
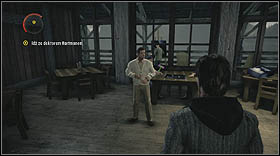
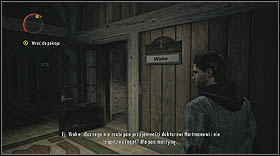
There's a quite walk ahead of you. Just follow Hartman and listen to what he says. In the end, you'll reach a large room full of patients, then you'll walk to the mess hall. Watch the cut-scene, and you'll obtain a manuscript page. Get back to the room with patients, walk up the stairs and return to your room.
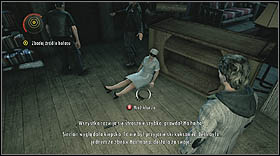
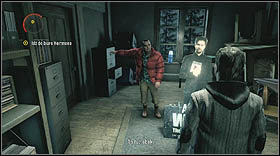
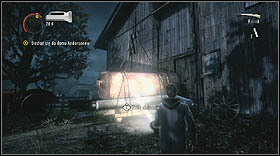
Once you reach the room, another cut-scene will start. Once it's over, go towards the mess hall, you've visited recently. You'll run into Hartman's patients, the Anderson brothers, and an unconscious nurse. There's a key lying next to her. Pick it up and go to Hartman's office. You'll meet Barry on your way.
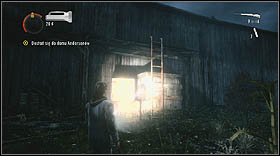
After a cut-scene, run to the room where you found that unconscious nurse. Open the lock in your way, and then walk upstairs, towards Alan's room. However, the room isn't your destination this time. You'll find a generator. Turn it on to eliminate haunted objects.
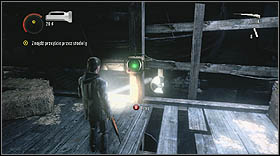
Run forward, and you'll reach a small room. You'll find a flare inside. Take it and use it in the next room. Thanks to that, you'll get rid of all haunted objects located in there. In order to open the way to the next part of the level, you must eliminate bear monuments blocking the door. Eliminate them with a flare. If you don't have one, come back to the room where you already had found one. Another flare will magically appear there.
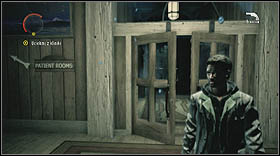
Keep running forward. The path is simple and narrow, so you won't get lost in here. You'll reached a locked door, let the haunted object on the other side destroy the door.
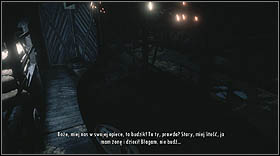
Move forward, and you'll find another locked door. Now here's the trick - you have to stand right between the haunted object and the locked door, so if you dodge the object, it will hit the door. Repeat it several times to destroy the door. Once you break the lock, talk outside and go to Barry.
The gate is locked. Take Barry's flashlight and go towards another gate, the one with light behind it. Beware of haunted objects on your way to the gate.

You can destroy the gate with your flashlight. Do it and move forward. You'll reach a garden maze. In the beginning, turn right. In the next crossroads turn right again, and then turn left. On your way you'll encounter two enemies, but they are not a serious threat. Sooner or later, you'll reach a tree.
From that tree, you should move on and collect all the equipment necessary. In the next crossroads turn right. You will reach a pavement square. Some Taken will attack you here. Finish them off, and then turn right from that square. You'll reach a gate and a light post.
Move forward. You'll find some ammo to your revolver. In the end, you'll encounter one of Hartman's helpers. He's possessed now. What is more, he is supported by birds.
Wait for the opponent to come to you, then sprint to the arbor you've seen him in the first place. There's a flare gun in there, lying on the floor. Pick it up and attack your enemy. That should weaken him pretty much. Grab your revolver and finish that bastard. All of this must be combined with killing birds, so it's not so easy after all. Use flares to keep your enemies in a distance. After the fight continue your journey.
Finish off two more enemies that will stand in your way, then move towards the light post nearby. There's a shed next to the light post. You'll find a shotgun inside. Take it and walk through the gate. Run to the next part of this level.
You'll reach the asylum's gardens. There are some enemies hiding in bushes, so be careful while approaching them. Later on, you'll find a bench (on your right) with a flare on it. Take it and go through a gate nearby. Destroy the gate and haunted wheelbarrow with your flashlight.
Move forward. Take everything from the emergency box. Go upstairs, defeating everyone trying to kill you.

You'll find some extra equipment - flares and a shotgun. Go right to meet Barry again. The gate here is locked, and Barry is looking for a key. Now you must defend your position, as a lot of Taken will suddenly appear. Use your flares and recently found shotgun to fight them off.
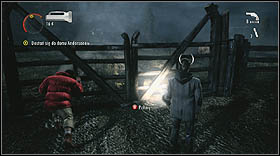
After a cut-scene, take the only path available. In a distance, you'll notice the Andersons' farm. Follow the railway tracks to the next part of this level.
Once you walk out of the railway bridge, turn left. Run among all haunted objects and turn on the lamp located in this vicinity. Try luring the objects into the light. Once you get rid of all (or at least a huge majority) haunted things, move forward.
You'll find another haunted gate here, use the wheel nearby to place the lamp right above the gate.
Then go upstairs to reach a wooden platform. There's a generator at its end, turn it on, but beware, as there are some holes in the wooden platform. This way, you'll destroy the haunted gate. You'll find a flashlight right behind it. Take it and enter the forest nearby.
Run as fast as possible to the nearest source of light. From there, take a narrow path. You'll find a lumberjack camp and a better flashlight. Take it and continue your journey through the night.
You'll find another haunted gate. Destroy it with your flashlight and move on towards a very bright light.
You'll find some flares. The path up ahead is covered with bear traps, so be careful. In the end, you'll notice some buildings and a light up ahead. Go towards them. Start the generator located in there, collect the shotgun and ammunition lying there.
Move towards the farm, but you should still watch, as there are more bear traps on your way. A large group of enemies will attack you, I think you should not fight them, but run as fast as possible towards the farm. Use your flares to scare your enemies off.
Walk in the light to regenerate your health. Then, enter the house nearby. Look for some ammunition, batteries and flares on the ground floor, then go upstairs and push the door located up there. Enter the room. Listen to the man lying on the floor, take the gun and search the rest of the building.
Walk downstairs and finish the enemy located in there. After the fight, jump out through the window and get in the car.
You'll reach a crossroad. Go straight. You'll reach a watchtower. There's a hunting rifle inside with some extra ammo. Take it all and move forward towards the farm. While exiting the watchtower, some enemies will attack you, so be careful.

Finally, you'll reach a farming field. A tower nearby will collapse, but just ignore it. Run down every Taken you can see, do not hesitate to use the lights of your car. Once you finish them all, get out of the car and walk to the next part of the level.
Eliminate the machinery nearby with your flashlight. Also, kill any other enemies that will stand in your way. Next to the light post, you'll find a hole in the fence. Walk right through it.
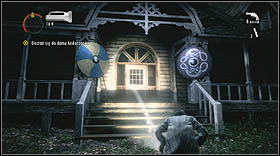
Move towards the Andersons' farm. When you get close to it, a cut-scene will start. Right after it, You will see Alan standing on Andersons' stage. Collect all the equipment (including an incredibly strong flashlight) located in there, in order to wipe out every single enemy incoming. Do not hesitate to use flashbangs and flares, especially against whole groups of opponents.
When the fight over, follow Barry towards Andersons' home. You'll reach a building (probably a barn), which entrance is blocked with some sort of a massive tank.
Climb up the ladder near the building. From the roof, you should be able to reach the control panel, allowing you to move the tank and therefore make the building accessible for you and Barry. Once you do it, enter the barn and search it thoroughly - there's a lot of cool equipment in here.
Upstairs, you'll find a switch. Use it to open the way to the next part of the farm (and to the next part of this level as well). Walk back downstairs, eliminating every enemy that will stand in your way. Move on towards Andersons' home.
Outside of the barn, you'll encounter a large group of enemies. Finish them all off, using all the toys you found in that barn. Go to the light post and reunite with Barry.
Enter the building with Barry. Kick the door inside to reach a stair case. Go upstairs, eliminating everything and everyone. Use the ladder to climb even higher.
There's a generator on top. Turn it on and use the elevator nearby, attached to the wall of the silo you're currently in.
Once you get down to the ground, take everything from the emergency box and walk outside. A harvester will start itself and you will have to defeat it.
Try lighting it up with your flashlight as often as possible, but avoid its blades at the same time. Eliminate other enemies with a your gun, or scare the m off with flares. You must move a lot during this fight, so nobody will hurt or kill you.
Once you get rid of the harvester and other opponents, one more Taken will jump out of his shed and attack you. Destroy him and enter the shed he jumped out from. Inside, you will find a ladder. Climb it up, and then jump down to the ground.
Take the key from a building on the right and use it to open the silo doors on the left.
Push the right wing of the gate, in cooperation with Barry. Run towards the Andersons' house. Push another gate and enter the building.
Go upstairs. Repair the fuse in the bedroom, and after that, go downstairs and play the vinyl record located on a table, next to a drum set and other instruments.

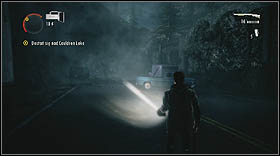
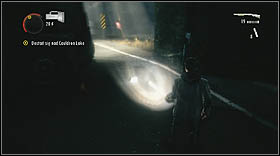
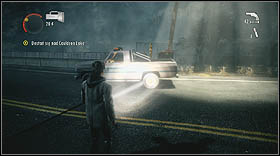
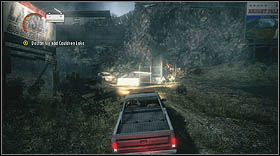
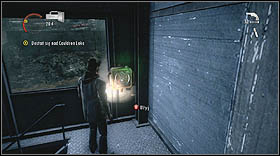
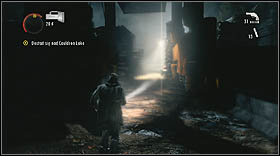
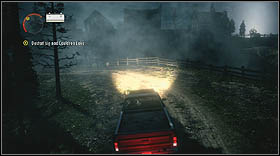
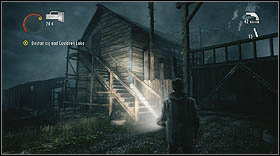
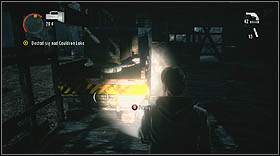
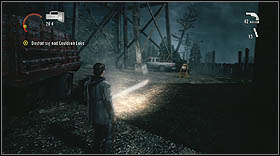
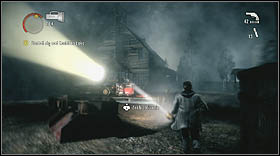
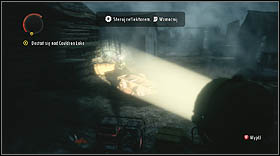
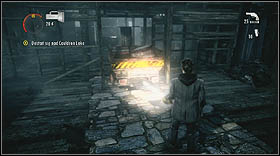
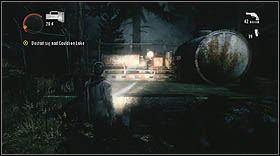
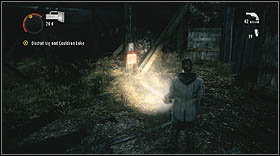
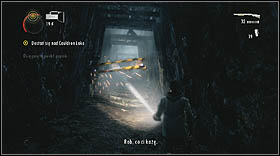
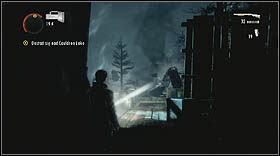
After a cut-scene, go towards the rented cabin - enter it through the door, and then go to the balcony on the other side of the cabin. Wait for Alan to climb out of the Cauldron Lake and return to the cabin. Take a look inside the office upstairs.
Wait a moment for Sarah, the sheriff of Bright Falls, and agent Nightingale to come. Watch the cut-scene, and after it, follow Sarah. When your reach the main hall of the precinct, search the area for flares.
Wait for Sarah to turn on the lights. She will lead you to her office. Pick up the flashlight, batteries, weapon and ammunition. Prepare yourself and return to the main hall of the precinct. Follow Sarah to the back of the building. The gate located there is broken, so you can't just walk out of here. Go to the rusty car you visited in episode two. You'll find a ladder nearby.
Destroy the black goo around the ladder, pull the lever on the wall and climb up to the rooftop. There are two flares waiting for you.

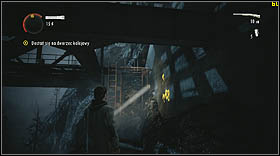
Climb up another ladder to get on top of the reservoir. From that reservoir, jump on the rooftop of another building, but you should still beware of the black goo lying around here. Birds will come after you. Run to the other side of the roof and get on the scaffolding located in there. Jump to the elevator nearby and use it to go down to the ground.
Come to Sarah. There's a control box near her. By tapping [A], you'll be able to open the gate, but you'll lose some of your health during that process. Don't bother, you'll regenerate your health sooner of later. Follow Sarah. You'll reach a crossroads and encounter lots of enemies. Prepare to fight.
Once you finish them all, turn right, at the end of the road, you'll find an equipment box with a flare gun inside. Take it and follow Sarah. You'll see the diner (as far as I remember, it is called Oh Deer Diner) on your left. Inside, you'll find a better flashlight, some extra ammo and more batteries for you to use.
Continue your walk, along with Sarah. Eliminate all enemies attacking you. Take the equipment from the emergency box and press the button located next to it in order to turn on the light post. Keep following Sarah. You'll reach a gate, that Sarah will try to open with a key. Of course, a horde of Taken will attack you at this point of the game. Finish them all with your flare gun and ammunition found in the red box nearby. If it gets to hot, use flares to scare off your opponents.
Keep running with Sarah. Enter the building with her (I believe it is some kind of a public service building, like police or fire department). You have to search this place on your own. The key to a helicopter is on the first floor, in an office, next to the main entrance. You'll also find here a strong flashlight, flashbangs and a hunting rifle in the next room. Watch the cut-scene, that starts right after picking up the keys.

Keep following Sarah. You'll reach a park. Eliminate everyone trying to kill in this area, and then move forward. You'll reach a light post and an exit form the park. You'll surely notice a road nearby.
Go to the book store with Sarah. Walk through the back door and then run with Sarah towards the flare launched in a distance. Go through a playground nearby and approach the church located in this area. In front of that building, you'll find a car and lots of nice equipment lying around in here. Take it all.

Enter the church with Sarah. She will say that the lock is damaged and a group of Taken will appear in a distance. Stand in the corner, like in the image above. Pull out a hunting rifle. There will be two waves of attackers. The first one consists of normal Taken guys, and the other one includes extremely fast opponents. Better be careful with the second wave. After the fight, enter the church with Sarah.
Walk down to the basement, through the vestry. There are a few enemies waiting for you, but they do not pose a serious threat. On the other side of the basement, you will find a door leading out of the church. Kick it and walk out to get a breath of fresh air.
You will meet Barry again. Run after Barry and Sarah towards the helipad. Collect all the equipment you can find on your way to helipad, especially items in the red emergency box located next to stairs. Once you get to an asphalt road, turn right, pick up all flashbangs located in there.
Run towards the helipad. You'll encounter another group of enemies, including another Taken armed with a chainsaw. Destroy them all and keep moving forward. The helipad is actually a part of a local fire department station. Before you approach the helicopter, collect all equipment located in here.
Once you get close to the helicopter, the Taken will attack. Use the pump-action shotgun, flashbangs and lamps located nearby. With all this stuff, you will be able to fight your opponents. Suddenly, Sarah will inform you, that the helicopter is up and running, and she's ready to go. Approach the side door of the machine.
After a cut-scene, get rid of the birds and search the guard station nearby. You'll find a gun, some ammunition and batteries inside.
One of the gates nearby is locked with a chain. Shoot it and immediately turn right and run, in order to avoid damage inflicted by enemies suddenly appearing behind your back. Once you kill them all, enter the building through recently opened gate. You'll find some nice equipment inside, including a pump-action shotgun.
Climb the wood nearby. From up there, you can jump over the fence, to the other part of the warehouse. There's a large pack of opponents waiting there, so prepare for some accurate shooting, quick battery changing and numerous reloads.
Get out of the warehouse and take the narrow path, leading to the next part of the level. You'll reach a transformer yard, and you'll see a power plant in the distance, on the other side of the river. Use the button nearby to open the gate. Right behind the gate, on your left, you'll see an enemy. Just attack him with your flashlight in order to force him to step back. He'll touch the electrified cables and will die immediately.
Take the only way available. You'll reach a box with a switch inside. Use it to turn one the light post standing nearby. Keep running forward. You'll encounter three enemies. Defeat them and go through the metal gate.
Kill the enemy located behind that gate. On your way, you'll find an emergency box. Take everything from it and keep running forward. Take the narrow path among transformers. Two enemies will attack you there. Use flares to find a way out of this troublesome situation.
On your way, you'll run into some kind of elevator, painted blue. Use it to reach the rooftop of the building standing nearby.
Jump off that rooftop on the grass, on the other side of the fence. Run forward and you'll reach an asphalt road and a rotating bridge. Search the building nearby. You will find here one enemy, a flare gun and a control panel you can use to rotate the bridge. Turn it on to simply make the bridge rotate.
Enter the bridge when possible. While on the bridge, you will be attacked by birds. Finish them and jump of the bridge, on the other side of the river, of course. A helicopter will appear in the sky, with Sarah as a pilot. Follow the light of the helicopter. Try using it in combat - lure your enemies into it to kill the Darkness inside them.
In the end, birds will reappear in the sky. Once again, they will force Sarah to leave you. Kill as many birds as possible and move forward.
Four enemies will attack you. They're not very difficult to kill, but you should keep them in a distance. After the fight, move forward and enter the power plant ground. Approach the generator room door.

You will find Cynthia Weaver inside. Collect all equipment located inside the power plant (including a stronger flashlight). Walk outside and go through the gate, that Cynthia will open for you.
Take the only path available. Finish every single enemy standing in your way and go towards the light post nearby. In a distance, you will see a switch, with which you can cut the power to the transformer station. Notice, that there are three other switches nearby. You can use them to control the bridges, leading to your goal. Use the one on the right in the first place. Then use the one in the middle. Thanks to that, all three bridges will be active at the same time. Move forward and cut the power to the transformer station.

After that, collect all the equipment lying in your vicinity. The bridges will go crazy, but with proper timing you won't have any problem getting back to Cynthia Weaver. Return the her by taking the very same path you've already walked. Of course, you will meet more enemies (including one with a chainsaw).
Once you get back to the generator room, follow miss Weaver. Once you reach a pipeline, a cut-scene will turn on. After that, jump off the rocks and go forward.
You will see more birds in the sky. Some of them will attack you. Defeat them and move towards the crashed helicopter.
You'll reach a light post and an emergency box with additional equipment. Collect it all and continue your journey.
Walk over the fallen tree and beware of the birds, they can attack at any time. Approach the crashed machine. You'll find some flare gun ammo and flares nearby. Pick it all up and run forward.
You'll team up with Barry and Sarah soon. Back them up in a fight against the Taken. After the battle, move towards the dam. You'll come to an elevator. Call it down to you. Unfortunately, the elevator is extremely slow and another group of unfriendly monstrosities will come after you. Defend your position. In the box nearby you should find some useful equipment.

Enter the elevator right after its door opens. With that elevator, you'll reach a higher level. Once you get out of it, move forward. Use the switch nearby (you must hold [B] to make that happen). Wait for Barry and Sarah to enter the building, then walk away from the switch.
Things around will go crazy. Eliminate them with your flashlight and walk through the damaged fence, previously covered by defeated objects.
Move forward. You'll reach a metal catwalk. Walk on it and fight the birds off. Once to get rid of them, continue your walk. You'll get to a ladder. Climb it up.

A large group of enemies will attack you. Use the spotlight nearby - with this thing, you'll be able to kill your opponents with ease. After the fight, keep sprinting along the dam. The way is narrow and simple, however it is not so easy to get through this part of the level. Some of the catwalks on your way can simply fall down under Alan's feet. Watch your step during the run.
You'll find Barry, Sarah and Weaver at the end of the dam. Walk into the elevator with other guys. Follow Cynthia, examine the door she will lead you to.
This episode begins with a flashback. Pick up the sunglasses from the bedside table and take some painkillers in the bathroom.
Walk out of the bedroom and play the message recorded on the answering machine. After that, go to the living room and turn on the TV. Alice will enter the apartment soon. Talk to her for a while.
This is where the flashback ends. Enter the car, get to the asphalt road and turn right.
Once you reach a little sawmill, stop the car and examine this place. You'll find a hunting rifle here and eight bullets to this weapon. Moreover, you'll find a path leading to an equipment box. Arm yourself properly, get back to your car and keep driving forward.
You'll reach a blocked tunnel. Walk through it on foot, among all crashed cars in there.
Suddenly, the day will turn into night, and a pack of enemies will show up in front of you. Finish them off and move forward. Enter the car nearby and drive forward.
You'll come to a place, where the asphalt road is blocked. You can omit is by driving through a motel nearby. I advise you to search the motel buildings, as you can find some useful things inside. Pay exceptional attention to agent Nightingale's room. Once you collect everything that may prove useful, get back to the car and hit the road again. The ride won't take long, however - you will reach a blocked bridge.
Get out of the car and walk through the bridge. Be careful, as there are lots of haunted objects in here. Once you defeat the excavator, you'll reach a light post and a car. Drive forward. At some point, you will notice another blockade created by the Taken. Turn right and get on the grass. Defeat the haunted car driving in there. Right after that go towards an enlightened garage.
Get in the car located inside the garage. Get on the asphalt road and keep driving. Drive through a bridge and stop the car in front of another roadblock. Get out of the car and go on foot. Eliminate the black goo, kill your enemies (a flashbang would be very useful here) and enter the tunnel
You'll find some cool stuff inside, right on the ground. Take it all and finish every single enemy in here. There's a light post on the other side of the tunnel, in its light you can regenerate your health. Take everything from the emergency box nearby, get in the car and drive forward.
On the right, you will notice the junkyard entrance. Drive in there. Search the building located in the junkyard and you'll obtain some flashbangs, a few batteries, etc. Moreover, use the switch located on the top floor of the building.

Keep driving. Use the boards to drive through the junkyard. Reach the light post located in the middle of the yard. Climb up the ladder located in here.
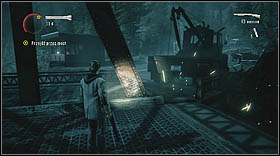
Turn on the generator and climb down back to the ground. Go towards the switch shown in a short cut-scene. Before you'll be able to use it, a bulldozer will attack you. If you have a flare gun and some ammunition, shoot one projectile to defeat the machine.

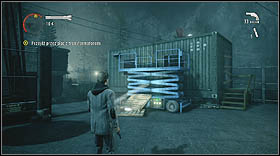
After the fight, use the switch mentioned above. Thanks to that, you will lift up a container standing nearby and open your way to the next part of this level.
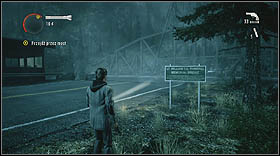
Keep moving forward. You'll reach a light post and a car. Get in the car and follow the mountain way. You'll find an abandoned town. Access it by walking up the stairs.
Jump down to the lower floor through a hole in the floor. You'll find a mine cart. Push it to get to the next part of the level. You'll find a lamp and some stuff that may prove useful in combat situations. Looks like there's a hell of a battle right ahead of you. Go through the town. If someone attacks you, back up and use the lamp to gain superiority in combat.
Once you reach a spotlight, an enormous group of Taken will come get you. Use the spotlight and flares to burn them all alive.
Push the cart nearby and search the building you will automatically enter. In order to get out of it and continue your journey, you must push another mine cart.
Continue the walk. You'll find a wooden construction. Collect all the equipment located in here, then walk down to the cart. Jump into it and release the brake.
Birds will attack you during the ride, but they're not a serious problem. When the cart stops, jump out of it immediately and go towards the nearest light source. In order to continue the journey, you must climb up the ladder to get on the wooden construction. You'll find another cart to push up there.

Push the cart into abyss, then jump over that abyss in order to get to the next part of this level. Beware of the birds the entire time. You'll reach some buildings. Defeat all the enemies in here. After the combat, enter the shed. Pick up everything you find in there and exit the shed through the back door.
Enter the forest nearby. Keep moving forward. When a truck will hit the land right in front of you, a group of enemies will attack you. Kill them all and keep running forward. You'll find a generator. Turn it on to provide yourself a light source.
Keep moving forward. Something will fall from the sky again, and more enemies will appear in the vicinity. Finish them off and run towards the Cauldron Lake. You'll reach an abandoned rail wagon. It is quite an interesting place. Inside, you'll find some flashbangs. What is more, the wagon makes it more difficult for your enemies to reach you if you stand inside.
Once you finish everyone in here, move forward. Some fuel barrels will fall in a distance, you may use them to eliminate one of the bad guys. Keep moving forward. You'll reach a generator. Turn it on to provide yourself with a light source. Collect all the equipment lying nearby and take the mountain way.
You'll reach a crane, and a rail wagon will fall from the sky right next to you. Ignore it all and continue your journey. Once you reach a large boat (which also fell from the sky), take a look around and you'll find stairs. Walk upstairs, but be careful, as there is some black goo in here.
You'll find another abandoned town. Walk into a building nearby (there's a supply box inside) and walk upstairs. From there, jump to the ground.
Search the area in order to find some useful equipment. Arm yourself, turn on the generator nearby and prepare to fight a large group of opponents. Don't move from your position though - there is a chance some of your enemies will touch the electrified cables and die instantly. After the fight, use the control panel nearby.

The panel is responsible for the elevator. Use to reach the higher level. Walk out of the elevator and examine the vicinity. Your way is blocked with haunted objects, and Taken will appear here very soon. Kill them all and use your flashlight to clear the path. Enter the mining tunnel and continue the walk, liquidating every haunted object in your sight.
You'll reach the tornado. Jump of the wooden platform on the soil. Get close to the heart of tornado, using rocks nearby as cover. You'll find a box with a flare gun and plenty of ammunition. Arm yourself, jump forward in order to get closer to the tornado and shoot a flare right in the heart of this unusual enemy.

After the cut-scene, you will be moved to Alan's apartment in New York. Walk out of the bedroom and go to the living room. Light up the word "Clicker" with your flashlight. This way, you'll make this little device physically appear. Go ahead and pick it up.
Now you'll be moved to a place filled with signs. Light them all up with your flashlight. This way, you'll not only make various things appear around you, but you will also unlock the next part of this level, which is filled with even more signs. In the end, you'll make the Bird Leg Cabin appear. Step inside in order to finally deal with the Dark Presence.

First DLC starts in the restaurant, you've previously visited at the beginning of the game. The beginning remains unchanged - one of rockers asks you to start a song. You do not have to do this, if you do not want. Go to a dark hallway and go into a men's room - you have to break down the door.
Once you get inside, the mirror will turn into a screen and Tom will talk to you. He will give you a flashlight and a gun. Leave the toilet.
When you get close to door, you'll be attacked by several enemies. You should have no troubles killing them, since you have a flashlight and a gun in your hands.
Leave the restaurant through the back door - whose which were broke down by one of the opponents. You'll be attacked by several enemies. While you do not have too many rounds, the best solution is to run straight to the house visible nearby. You'll be safe there.
Go to the living room. You'll find a manuscript page on the ground and get a phone with GPS.
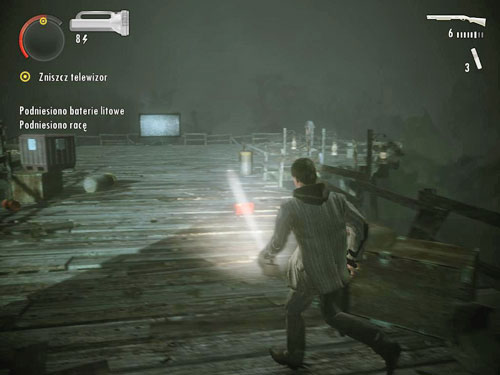
Leave the room and go towards the door. You'll find a sign "flashlight", so point your flashlight there and you'll get a souped-up version of this item. It the room to the left you'll find also a flare gun, flares and some batteries. Leave the house. When you get to the street, possessed cars will attack you. Get rid of them with the flashlight.
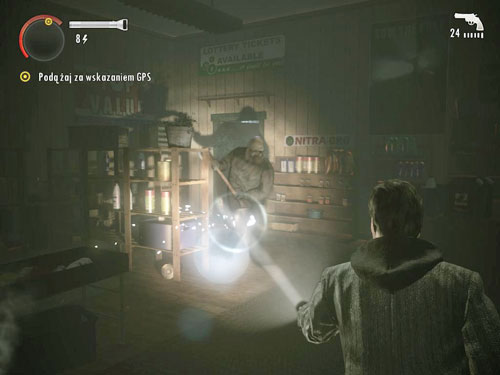
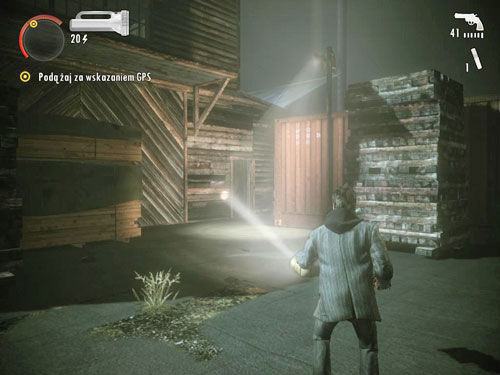
Move forwards until you get to the hardware shop in the left. Get rid of possesses door with the flashlight and get inside. You'll find there some useful tools and shotgun. Go to the other side of the shop, where you'll be attacked.
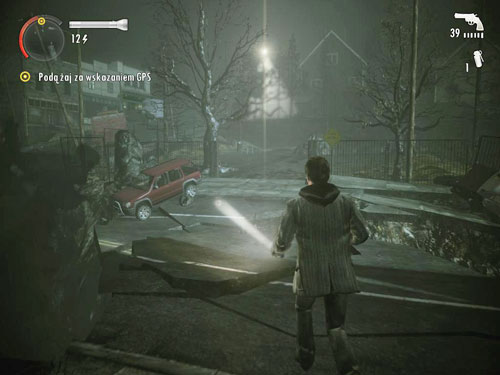
After leaving the shop, move forwards. Move over the fence, climbing on the wooden boxes and crates. You can go to the left to get some useful items. Now go toward the red car. Be careful, because when you get close enough, the ground will collapse. Move straight ahead.
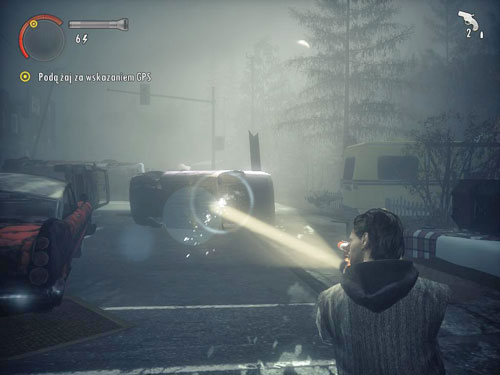
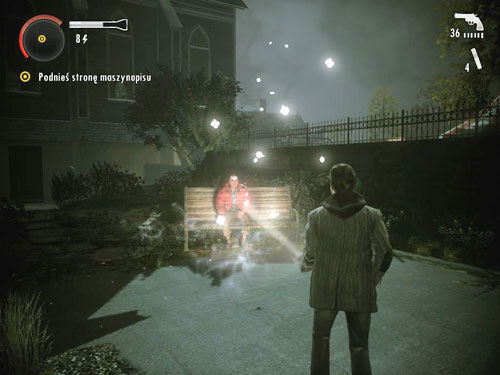
Prepare for more fight in a small park - you might use grenade or flares. After eliminating all enemies, go up the stairs toward the lighthouse. When you come to the street, you'll get a signal - all cars' reflectors will be turned on and the phone rings. Go to the left and jump over the fence in a narrow alley.
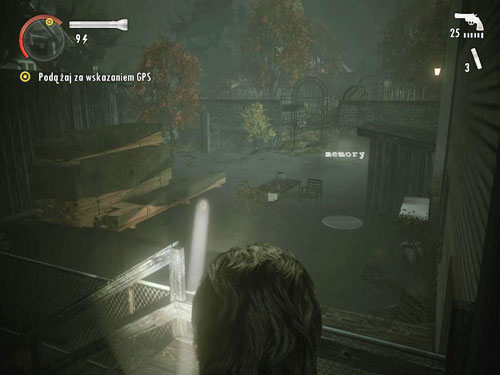
Again, you'll be attacked by more enemies. You can fight them or quickly run to the stairs and jump onto another yard, where you'll find memory. In a nearby shack you'll find batteries and flare gun - you might take them.
Go through the wrought-iron door to the playground. You'll be attacked by all possessed objects there. When you eliminate them, destroy the gate and move forward.
You'll get in front of the church. When you reach the door, a deer on the truck will be possessed and then the truck too. Next to it, on the ground, you'll find the word "key", which unlocks the church door. To get rid of the truck, it is best to shoot a flare at it.
Go through the sacristy to the basement. It is bigger than at the prior visit. It is filled with furnaces, which door you can open (blast), resulting in fire explosion. This allows you to effectively fight with a much larger number of opponents. You have to run to the other side if the basement and create a ladder on the stairs (climb). Use it to leave the basement.
You'll find yourself on the small parking lot with a floating manuscript page. Read it to find the most important word - friend. Thanks to that, your old friend, Barry, will appear.
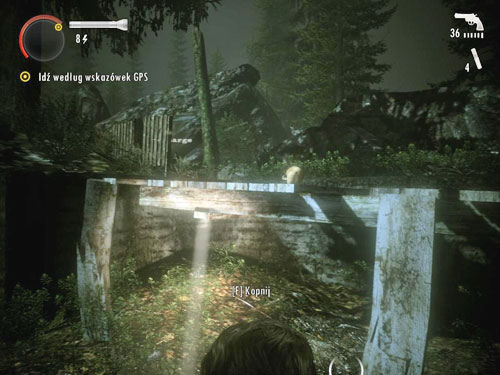
Leave the parking lot by walking through the gate next to the stairs. Near the small shed you'll find wooden platform - kick it to continue your walk. You'll find there also a lantern.
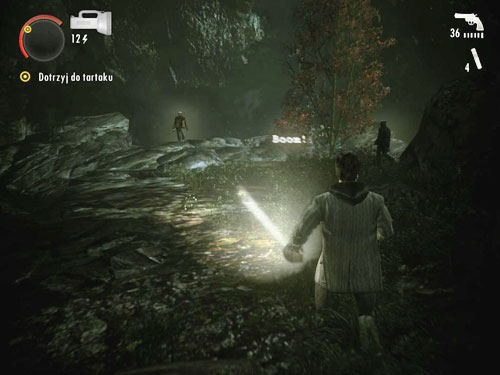
Keep running, until you see sawmill in the distance. You'll get also familiar with word boom here, which creates a bright explosion, eliminating nearby enemies. A little further you'll have the opportunity to use it.
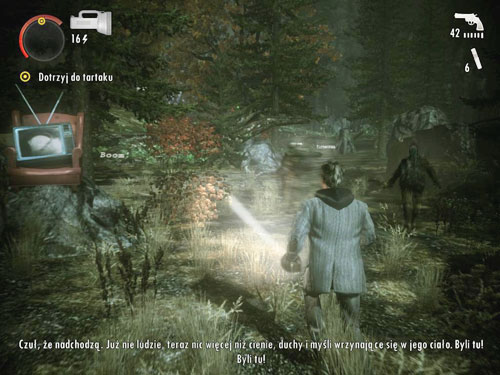
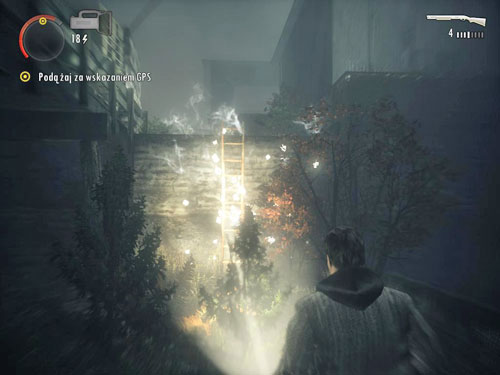
Keep on running until you get into woods. TV will warn you about closing danger. Woods is full both of enemies and boom words. If you have troubles with slow and gradual elimination of enemies, just start running towards the lighthouse marked by GPS, activating all words along your way.
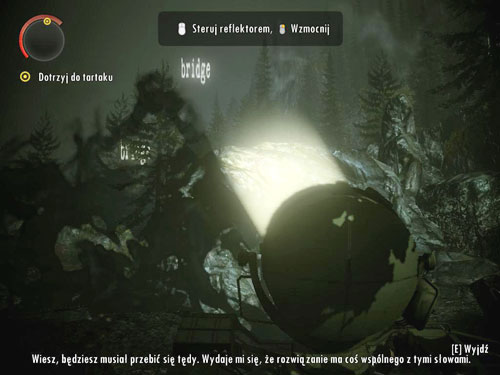
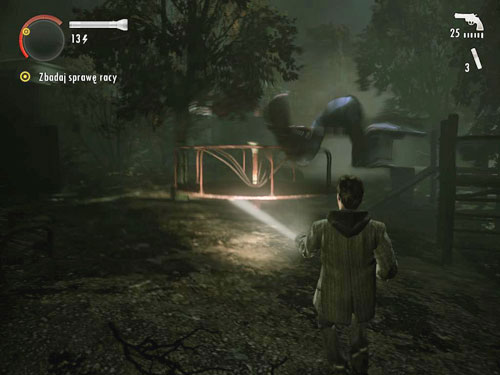
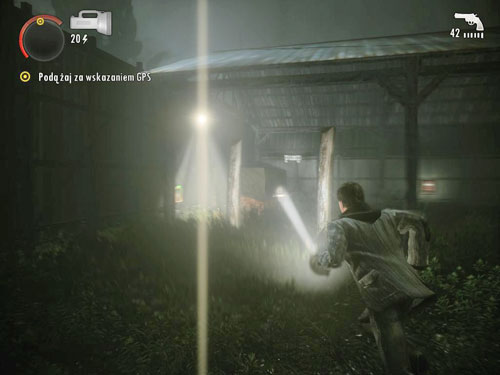
You'll get to the place with large company lamp (turret) and flying words (bridge). You must light them all to keep going.
Go through the first train car and turn left. In the car to the left you'll find a flare gun. Move forwards until you reach the bridge. When you step on it, you'll be attacked by books acting like birds, so fight them with your flashlight. On the other side you'll encounter a "minefield" full of bad words. The best way is to pass them by, pointing your flashlight to the ground. Try to attack flying books only eventually, because probability of activating an opponent increases then tremendously.

Run to the safe haven at the end. Move forwards along the narrow cave - you'll have to break down the door. You'll find yourself in the place full of high-voltage poles and street lamps. Fight here only if you must. Try to run between lamps, so you enemies running behind you will find themselves in the light and die. The way is not easy, so stop and shoot only if you have to.
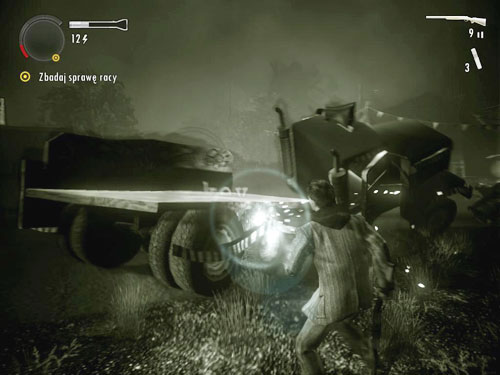
Use the blue crane to go to the large yard. You'll find here few cars (marked with words wheels). Your task here is to open the gate, but the switch is located on the other side of the farm. After a while you'll be attacked by two monster trucks.
Jump into the car and drive in other direction (diagonally). A switch is lighted by a lantern. After you push it, the lantern goes out and you're attacked by a group of enemies. It is worth to pick up a pump shotgun lying nearby (pump) before you push the switch.
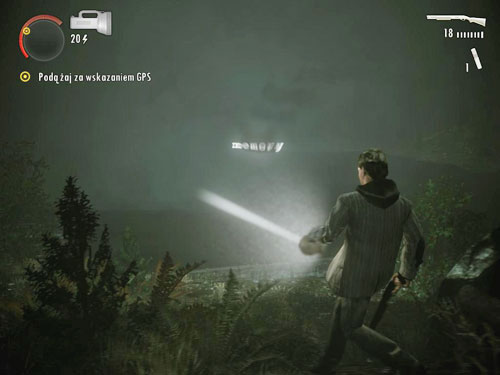
When hangar opens, run into it as fast as possible but prepare for a small "welcoming committee". Go up the stairs and leave the hangar. You'll find yourself near the lake, where you can find another memory.
After listening to it, go to the left where you'll be attacked by several enemies. Be very careful, because there is not too much space to maneuver. After clearing the place, activate the ladder (climb) and ascend it.
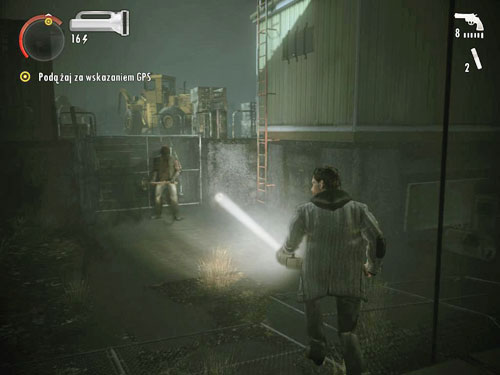
Pick up all useful items before you continue. Go between piles of planks until you encounter a man with chainsaw. You may go back a little, so you do not have to fight in narrow alleys. Once you get rid of him, go through the door on a small yard.
Once you get inside, start destroying gas canisters, which can create a chain reaction, killing nearby enemies. When you clear the place, go up the stairs. Upstairs you'll find few more enemies and more canisters, which will make your life easier.

Leave the building and jump down to the yard. You'll find there another memory. Activate also two words connected to the bridge. Push the planks and activate the button. Then run fast towards the ramp. Jump onto the crate and then jump down from it on the other side.
On the other side you'll deal with several enemies, but you should do this without much trouble. When you kill them all, climb up the ladder to the building rooftop.
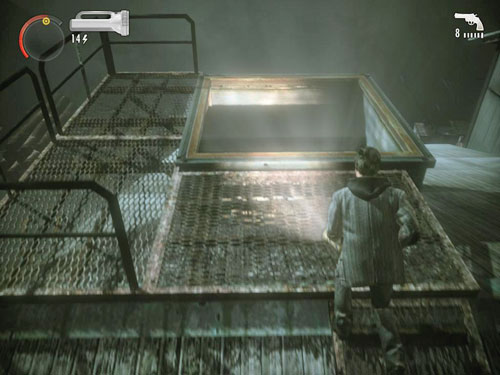
You'll find there another memory - keep climbing. Jump inside the building through the hole in the rooftop.
You'll notice Alice taking pictures of you. Walk by her and leave the room. Go down the stairs and then walk through hanging covers - you'll find yourself in the bedroom. Leave it and head to the living room.
After listening to the broadcast, start attacking the TV. Get rid of all smaller TVs, which are circulating around the plasma. A moment later the fight will continue in the hangar - here you have to watch out for other possessed objects and Taken, who appear from time to time. Nearby you'll find some ammo.
Once you destroy all TVs, run outside towards plasma. At this point first DLC ends.

You start at the gate with Barry on the other side. Turn around and run to the valve on the right. Thanks to it, you'll be able to rotate a pole. You have to swing it, trying to point it to the right to light up the word, which will create a hole in the wall.
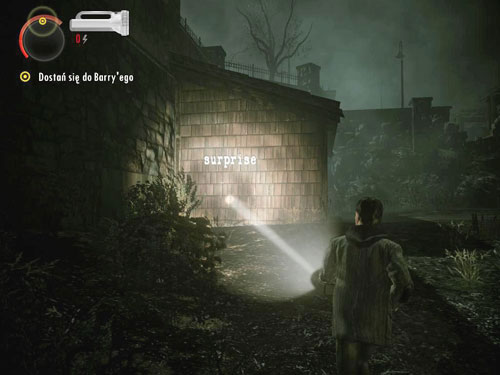
Go through the hole. A flashlight will appear in the distance - go and get it. When you turn around, you'll see a word by the wall of small building. Watch out, because when you activate it, you'll be attacked by a possesses object.
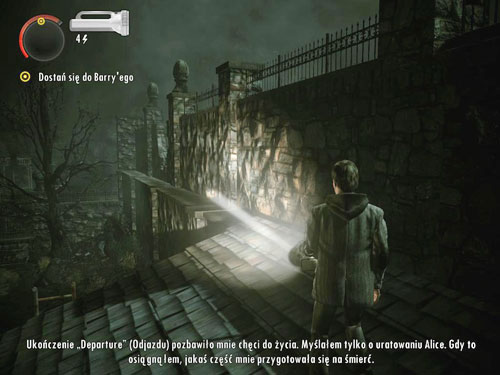
Inside the shed you'll find words adding batteries, ammo and the ladder (climb). Exit the shed. Next to it you'll find a ladder. Climb up the ladder and then walk over the edge.
You'll enter a maze. Turn right next to the statue and you'll reach the exit and Barry.
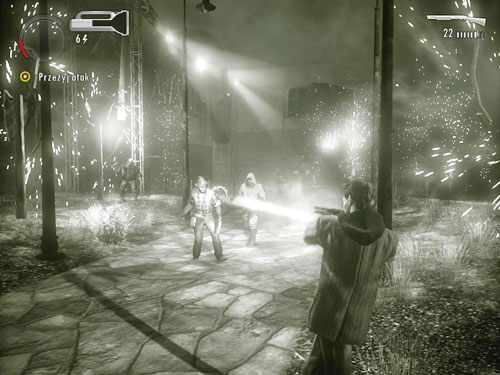
Enter the yard in front of the building. On the right you'll find ammo and weapons and on the left you'll find fireworks. Activate them to keep the light which will drain the darkness from your enemies. But you have to shoot them too. The fight is not easy, but if you stay close to the fireworks, you should survive.
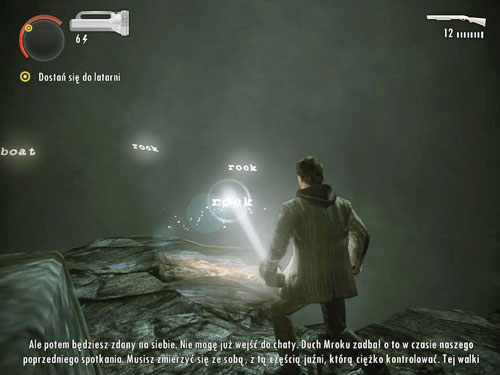
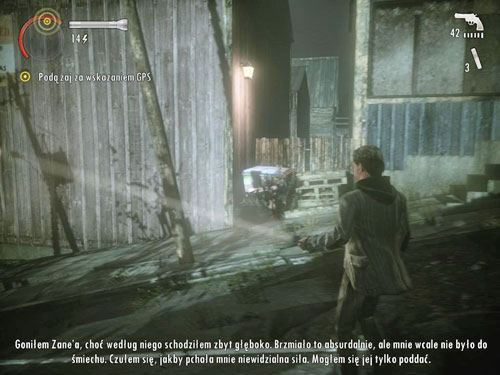
When you get rid of all of them, go inside the building. In the living room you'll encounter flying possessed objects, but they will disappear after a while, thanks to Zane. Go to the balcony to talk to him. He will give you another manuscript page, with several helpful words. First of all, you'll reveal your target, which is the lighthouse (clear). Start activating rocks, to create a path.
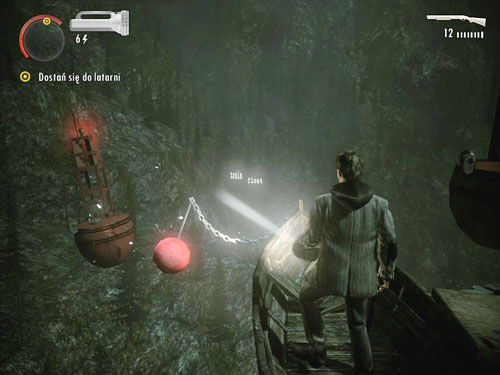
Create also a boat, which can be disconnected from anchor buoy by lightning the chain. Once you heading forward, light up a path (float) visible in the distance. Jump onto it and move forwards. Create a house (cabin) and get inside.
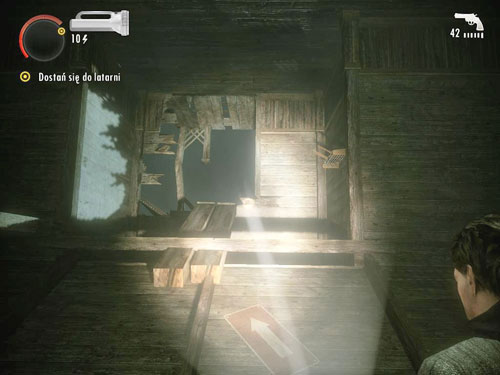
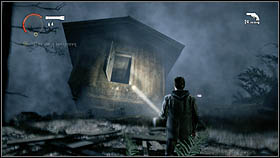
Cabin will start rotating. Note arrows on the walls, which inform you where to go. When the cabin positions itself in a way that you can leave it - do it fast.
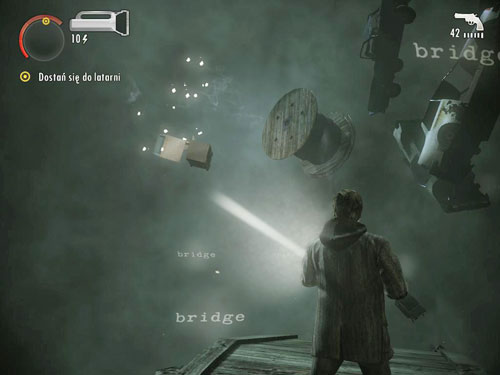
A whirlwind will appear. You'll also get another manuscript page with words bridge. It is best to activate them all. You have to jump onto one of the activated bridges and them jump to the path on the other side (first you have to activate it too - word path).
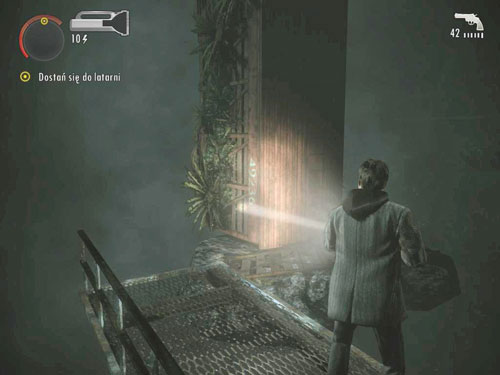
Watch out, because one Taken will jump out from behind the shed. Keep going over the stairs. Again jump on some platform and activate a path on the other side. Jump onto it and then climb up the ladder to the very top.
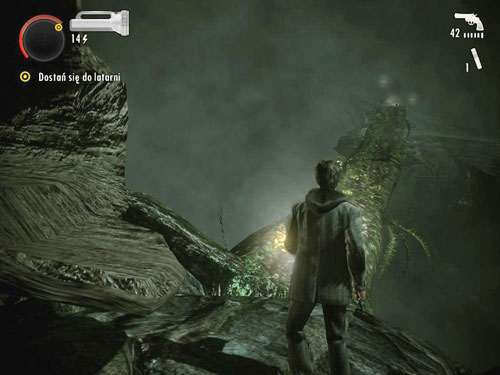
Watch out for a barrel which appears in the middle of the train car. Use rocks to create a further path. Walk inside the big log, picking up useful items on your way (batteries, ammo and flares). On the other side walk over the tree to further area.
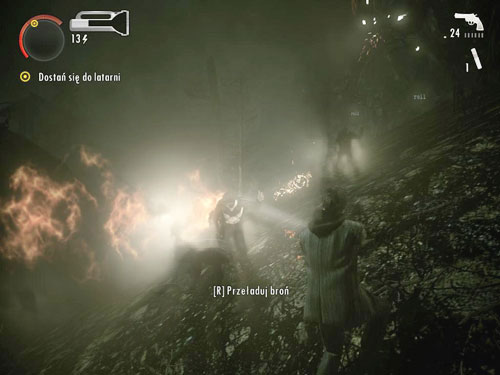
You'll encounter many words creating explosive barrels (roll). Do not spare them in this case - as soon as you see Taken, activate barrels to blow them up, sometimes creating nice chain reactions.
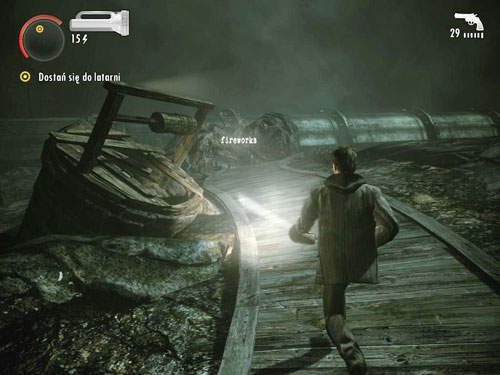
Keep going until you reach a tree. Move over it further. Now keep going on the path, until you get to the pit with word hole and fireworks. You have to use flare here and drop it into the pit. When it lights up a word on its bottom, a metal pipe will break down and you'll be able enter it.
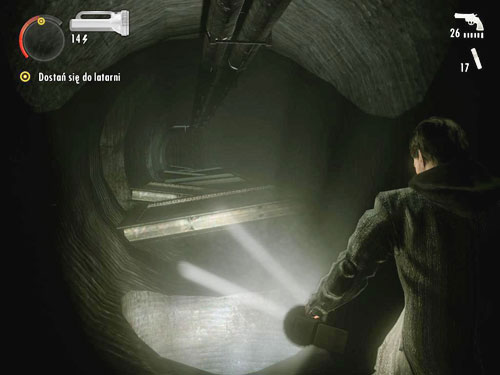
A way inside should not cause you trouble. You'll encounter few groups of Taken there.
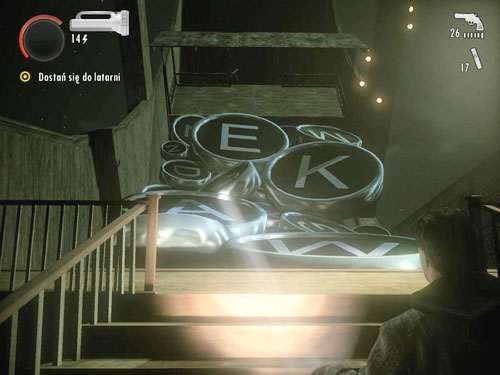
Prepare for crazy part of the level - literally, as you get to the giant Ferris wheel. You have to go through all rooms, trying to keep pace (remember not to accelerate too quickly).
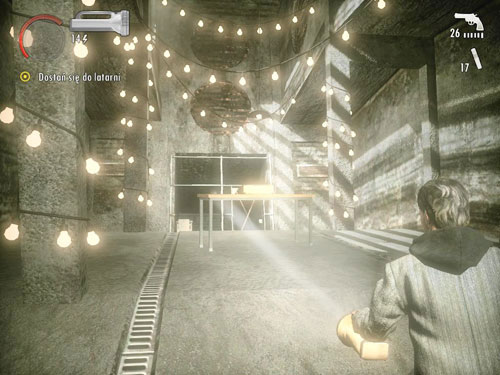
Eventually you'll reach the Well-Lit Room, where you can get to the elevator. You can rest there and heal dizziness.
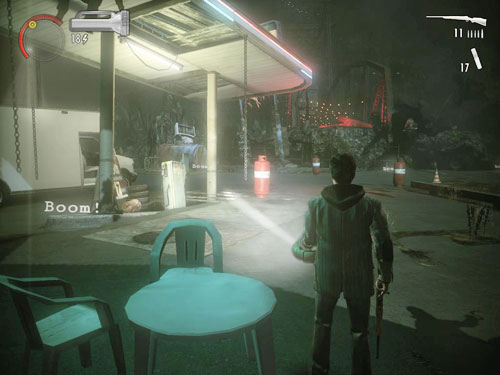
You'll find yourself on the gas station. Leave the room and go outside. The area is full of explosive words, but there are many Taken too. Try to create large chain reactions, to destroy everything you can. Head to the left.
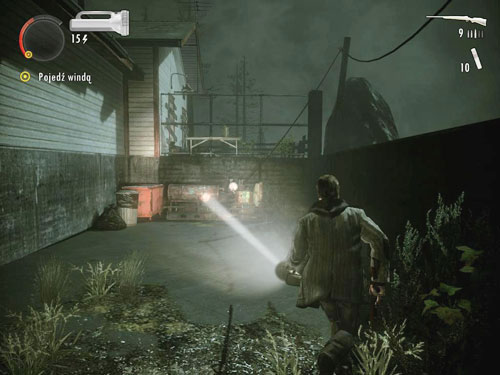
Use the log to go further. Light up all words connected to electric wires (wire) following them to the left. You'll have to create also a bridge on your way. When you finally connect a generator with the button, start the generator.
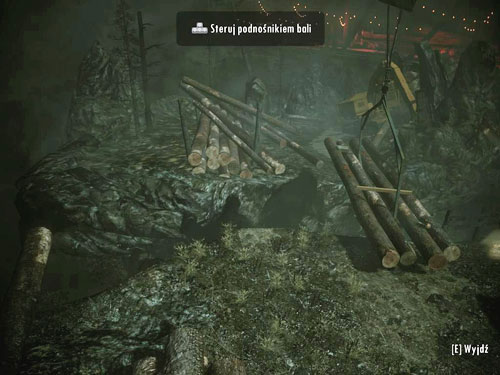
Go back to the button. Now you can control the log lift - try to create a bridge.
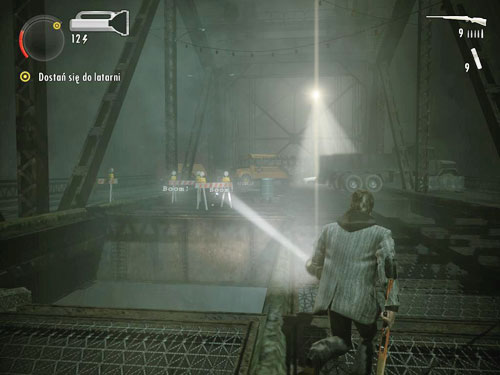
Walk further over logs, until you get to the large red lit bridge. Keep going until you reach the stairs. Go up the stairs, eliminating all danger on your way. At the top prepare for real hard work. There are plenty of enemies there, but you can count on help of words crumble which crumble part of the bridge. Try to light it up and activate in the moment, when many of Taken are close.

At the end of the bridge Zane will help you. He will create descend from the bridge to the ground, using a log. Run forwards until you get to wooden catwalks - move quickly over them.
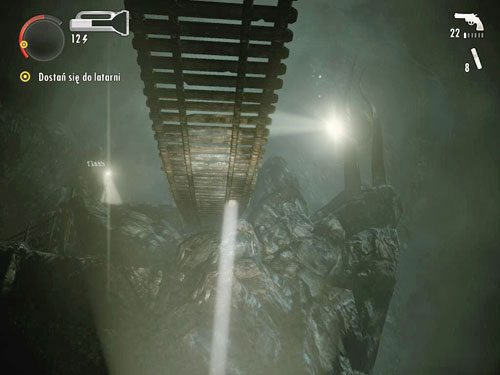
You'll reach bridges and reflectors hanging in the air (flash) - try to activate them as soon as possible because they will help you in the fight with Taken. Watch out for birds attacking you.
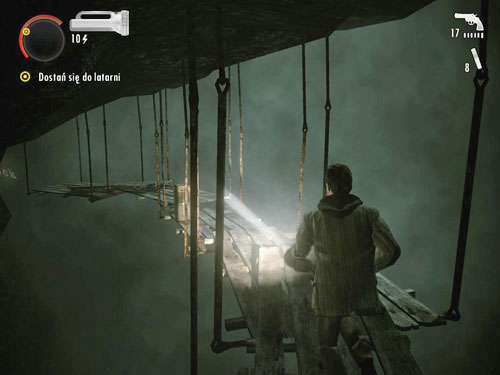
Keep going up the stairs toward the lighthouse. At some moment it will turn off. Do not worry and keep going. Again you'll have to walk over moving wooden catwalks.
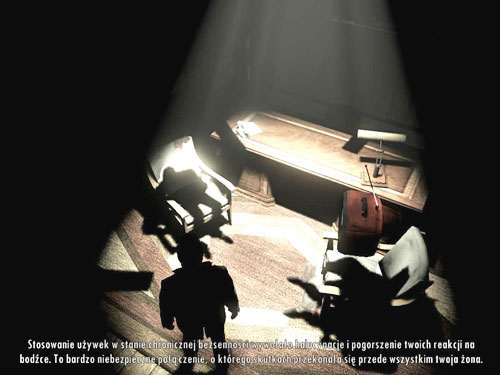
You'll reach a room, where you can see a conversation between Alan and a doctor. After a while you'll have to listen to the recording. When the conversation is over, light is back on. Go to the exit.
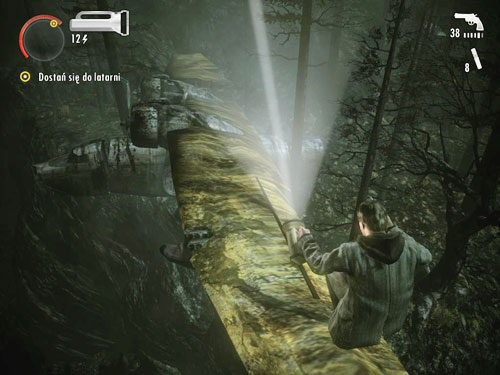
Move forward inside the cave, until you get to the damaged plane. Turn left and go up over rocks. Use word tremor to lower down plane wings, so you can reach them.
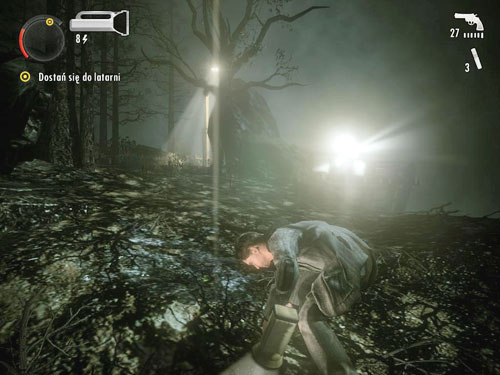
Prepare for a small fight - a good place for that is plane interior, where Taken can reach you only from one side. Once you get rid of them (or not), run to the Safe Haven, where you'll meet Zane again.
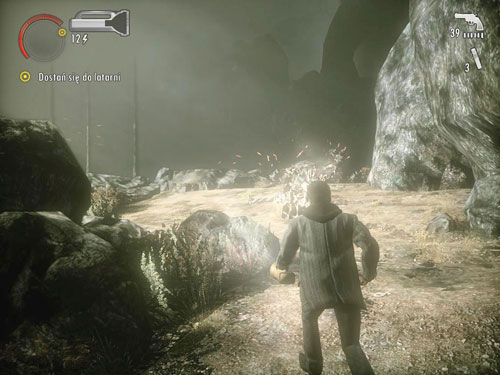
You'll obtain another manuscript page with memory and ignite, which reactivates light in the lighthouse. Next to it you'll find a bridge. Prepare for a last part of your journey. On your way you'll encounter a word clear, which removes rocks. Thanks to that you'll reveal Taken on the ground to a light from the lighthouse. Keep going towards a lighthouse, removing more rocks.
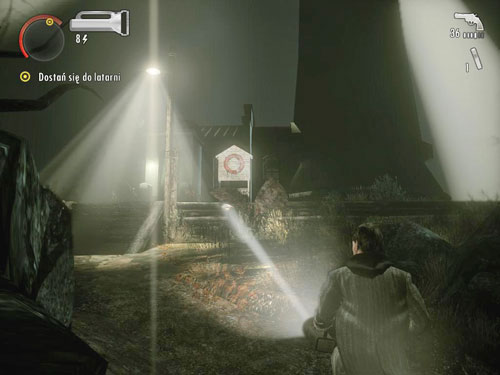
Finally you'll reach the lighthouse. Go inside and run up the stairs to its top. Activate a "return" ladder (return) and climb it to the very top.
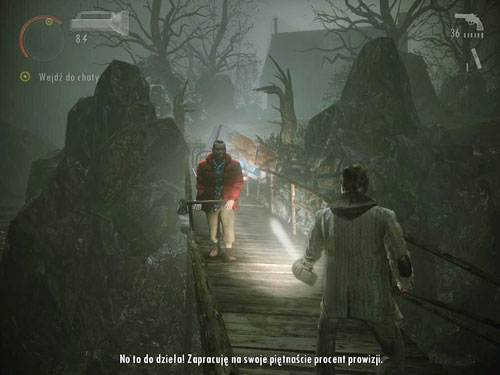
After a short cut-scene you'll find yourself back next to the cabin at the lake. Create a bridge and go to the cabin. At the end of the bridge you'll encounter Barry with an axe. Defeat him.
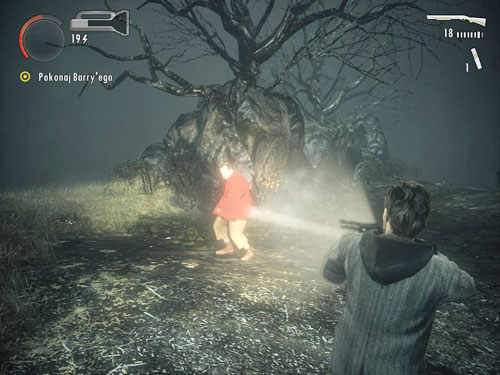
Right in front of the cabin you'll find ammo and batteries, as well as pump shotgun. Dr. Hartman will be your first enemy, but you should have no problems defeating him. Be careful though, because he is very fast. Then you'll have to deal with Odin and Thor and at the end prepare for fighting Barry three times. Once you "free" the cabin, go inside. At this moment your journey with second DLC is over.

First two pages can be found right after leaving the crashed car. It is an element of the plot and they can't be missed.
Next page lies on a fallen tree, you'll find it near the entrance to the wood supply point.
Page available on the highest difficulty level.
Next sheet lies in the wood supply point, on the ground, near a dead body.
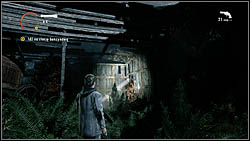
Another one is in a shed, next to a devastated excavator, near the second flare gun in the whole game. It is attached to the wall and glows brightly, so you it's hard to miss it.
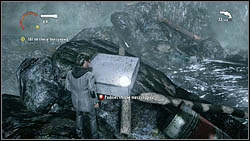
Next page lies on the rocks, near the river, on a white box.
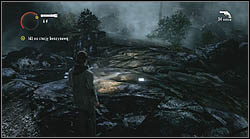
Another sheet lies on the rocks, on your way to the second supply point.
Page available on the highest difficulty level.
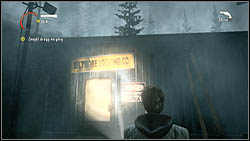
Next page is in a small building located in the second supply point, next to a place, where you encounter three enemies.

Another sheet lies in the middle of a path, you can find it right after turning on the radio in an enlightened shed.
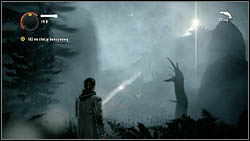
Next page lies on a path leading to a bright light of a light post, right next to a forest, in which you fight with enemies who keep respawning.

Another sheet is next to a gate of a sawmill, on the ground.
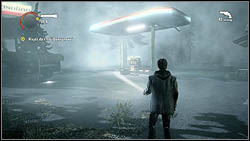
Next page lies on the ground, next to a Deerfest decoration at the gas station.
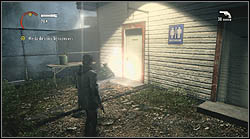
The last page in the first episode in attached to the wall of the gas station, next to the restrooms. Walk the building around in order to find it.
Page available on the highest difficulty level.
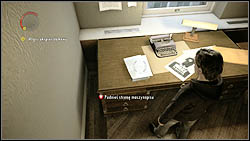
First two pages in the second episode can be found on Alan's desk, in his study, in his apartment in New York.
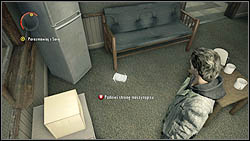
Another page lies on the floor of the police station, in a room with a small table in the middle.
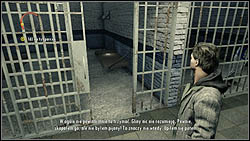
Next sheet is in one of the cells at the police station.
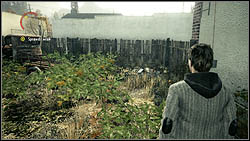
Another page is on a rock, next to the rusty car, behind the building of the police station.

Next sheet of the manuscript can be found after leaving the rented cabin in Elderwood National Park, next to a shed and a yellow car.
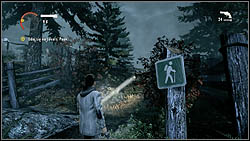
Another page lies on the floor of the arbor, which can be accessed by taking a path on the right of the main road, right after passing by the trailer and a phone booth.
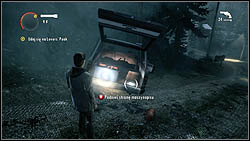
Next sheet of the manuscript is in the trunk of a car standing on the main road, next to a phone booth.
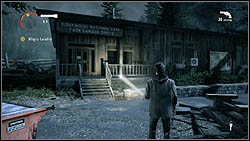
Another page lies next to the entrance to the building, which you can access with Rusty's key.
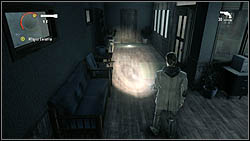
Next sheet lies on the floor in the building you can access with Rusty's key.
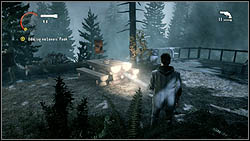
Another sheet can be found after defeating Rusty. It lies on a wooden table, next to a sightseeing point.
Next page can be found after passing by the moonshine cave and a phone booth, near which three enemies attack you. Walk through a bridge nearby to the ext part of the level. Don't go to the light source on the left. Instead, check what's on the right. You'll reach a wooden table and the page you are looking for.
Next page lies on the ground, near the light post (powered by a generator) and a red emergency box.
Another sheet lies on a stone, you'll find it after jumping over a damaged fence.
Next page is on the ground, you'll see it after fighting the Taken on a sightseeing platform along with the kidnapper.
Another sheet is hidden in quite a clever way. Once you enter the forest filled with bear traps, stop near barrels located in there. In a distance, on the other side of a river, you'll see a building. Go towards that building, and you'll see the page on the edge, on the ground.
Next page is on the ground near a generator, with which you provide yourself with a light source in the forest.
Another sheet is in the mill, on a balcony, on the middle floor.
Next page also lies in the mill, on bags with flour, next to a platform you have to lift in order to get to the next part of the level.
Another sheet is in a wood supply point, which you visit after leaving the mill. It lies on boxes, in a building with a hunting rifle inside.
Next page lies next to a trash can, near the toilets on the camping field.
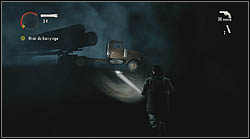
Another sheet can be found in a tunnel. When you drive your car and you reach a truck carrying wood, blocking the road, drive around it and once again follow the asphalt road. In the end, you'll find a tunnel, in which the sheet can be found.
The last page is on the path you follow in order to get back to the cabin and to Barry.
Page available on the highest difficulty level.

First sheet lies in front of Rose's trailer, you'll see it after the cut-scene presenting Alan talking to Rose.

Next page is on a branch you pass by during your run from the police, right before the moment police cruiser crashes.
Once you reach a moment, in which a police cruiser crashes, follow the road the car came to you. On the ground on your left, you'll find another manuscript page.
After leaving the radio station, go towards the railway station. There will be a fence on your left, and a sheet attached to it.
Next page is on the edge, next to a bridge, you'll find it after picking up flashbangs and listening to a radio show in the middle of a forest.
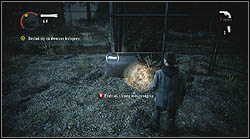
Once you reach a rusty car and a generator, look around a little and you'll find a mountain way leading to a radio transmitter. You'll find your sheet of paper up there.
Next page is attached to a gate, which can be found after leaving a place full of sheds and lamps.
Another sheet lies on a rock, you can find it after leaving sheds with lamps placed among them.
Next page can be found after reaching the railway tracks. On a small meadow, on a snag, you'll find one more manuscript page.
Another sheet lies on the ground, near a ladder, right after going through a railway bridge.
Next page is on a snag. Once you get off the railway bridge and approach the fence nearby, turn tight to see that snag.
Page available on the highest difficulty level.
Another sheet lies on a wooden balcony of the building you have to get through at the railway station.
Next page can be found on the way towards the coal mine. While driving a car, you'll notice a building and a rusty car on your left. Inside that building, you'll find your page, on the top floor.
Another sheet lies on the ground, next to a red building at the coal mine.
Next page can be found after leaving the building through a hatch in the floor. The page lies on the ground.
You can find another sheet after cutting power to the fence, in a building, after climbing a ladder, on wood, next to a FOLLOW sign and a red armchair with a thermos.
Next page is on a rock, next to the path, right after leaving the mine.
You can find another sheet right before entering the abandoned town. The page is on rocks blocking the path.
Page available on the highest difficulty level.

Next page lies next to a bridge, in the abandoned town.
Another sheet lies in the abandoned town. Right after you cross the bridge, search buildings on your left to find the sheet.
Page available on the highest difficulty level.
Next page lies in the silver mine, next to the water, in a place where Alan gets a terrible headache.
In the mine, there is one more manuscript page. You'll find it in a cave, from which you can see a way outside. The sheet lies on the ground.
Once you get out of the silver mine, go upstairs, to the hilltop. You'll find a wooden construction with a ladder over there. Climb it up to find the missing page.
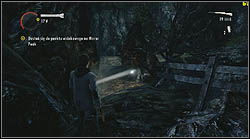
Another sheet can be found after crossing the bridge, on which Alan is attacked by two enemies, from both sides of that bridge. The sheet lies on a rock, next to a narrow path.
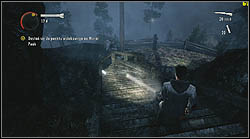
Next page can be found after going through the ruins. The page lies on wooden stairs.

First page in the fourth episode can be received from Hartman's patients, in the dining room.
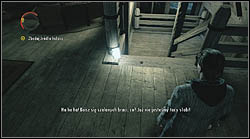
The next sheet lies next to stairs, you'll find it on your way to the keys and an unconscious nurse.
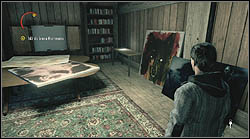
Another page is in the room with Hartman's recordings, you can find this place on your way to his office.
Next sheet is given to you in a cut-scene, in Hartman's office, right after meeting Barry.
Another page lies in the room with a television set. You can visit this place after removing bear statues with a flare.
Next sheet lies in the maze, next to a tree.

Another page can be also found in the maze. After you get to a paved square, turn left to in order to reach a bench with the manuscript page on it.
Next sheet lies in a shed, in front of a light post, which you can see after defeating one Hartman's thugs.
Another page lies on the ground, in the garden, you can collect it after destroying the haunted gate with your flashlight.
Next page is on a stone fence in the garden. Once you reach the table with a shotgun on it, turn left and follow the path in order to find the page.
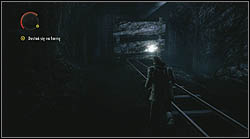
Once you walk through a small railway bridge, turn left and turn on the lamp placed there. Enter the tunnel enlightened by that lamp. The page is at the end of that tunnel
Another sheet lies on a wooden platform, near the generator with which you turn on the light post in order to destroy the haunted gate.

Next page lies on a rock, near the path you walk right after leaving lumberjack camp. Go towards the bright light in order to find it.
Another sheet can be found next to generator, on the ground, in a forest full of bear traps.
Next page lies on the front porch of the cabin, on a carpet. After jumping through the cabin's windows, walk around the building to find it.
Another page is located on the door of the toilet, at the Anderson's farm. You can find it near the barn and the windmill.
Page available on the highest difficulty level.
Next sheet is placed behind Anderson's stage.
Another page is also at the Anderson's farm. After the fight at the stage, Barry will take you to a barn blocked by a tank. Near that barn, you'll find a harvester, tractor and a wooden carriage. The page is right there.
Next sheet can be found on the upper floor of Anderson's barn, next to the coffin.
The last page is located on the upper floor in Anderson's house.
First two pages are lying in the corridor, you'll find them right after getting out of the cell.
Next page is located on the wall, in the diner, next to the restroom. The diner is located on the left side of the road you're following with Sarah.
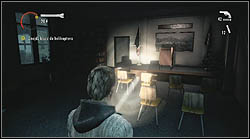
The next sheet is at the town hall, after killing a guy with a chainsaw. The page is located next to the podium.
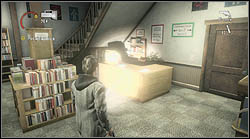
Another sheet from the manuscript lies on the counter in the book store.
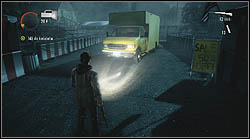
Next page can be found in a yellow truck parked next to the church.
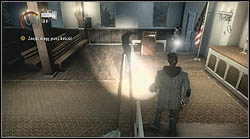
Another sheet is inside the church, next to the altar.

Once you leave the church and take the mountain way, you'll find another page on a wooden table, at the sightseeing point.
Next sheet is at the transformer yard. Once you enter the yard, you'll see the page behind electrified cables, on the ground. Simply continue playing to reach this page.
Another page is on the armchair, which stands on the roof of a small building. You can access that roof with some sort of blue elevator, right after leaving the transformer yard.
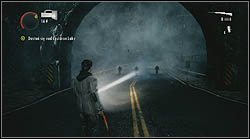
Next page is located near the rotating bridge. The road leading towards that bridge is blocked by crashed cars. The sheet lies right next to them.
Page available on the highest difficulty level.
Another sheet is on a rock, next to the power plant gate. You have to walk around the fence in order to reach it.
Page available on the highest difficulty level.
Next page is on a rock, you'll find it after a cut-scene presenting Alan and Weaver going through a pipeline.

Another sheet can be found on a fallen tree, you'll see it on your way to the crashed helicopter.
Page available on the highest difficulty level.
The last page in this episode is located near the dam. When Alan gets separated from Barry and Sarah, Defeat all haunted objects and walk through the damaged fence. The sheet is on a rock, on your right.
The first manuscript page in this episode is lying on the road, you'll find it right after going through a tunnel blocked by cars.
Next sheet is on the couch in the motel building.
Page available on the highest difficulty level.
Next page is on a shelf, on the upper floor of the enlightened garage.
Page available on the highest difficulty level.
Another manuscript page lies next to a light post, near the tunnel entrance.
Once you reach the junkyard gate, you will see that the asphalt road straight forward is blocked. Drive around the blockade, among trees, or simply pass it by on foot. At the end of that road, you'll find a truck and the page on it.
Next sheet can be found on the desk, on the upper floor of the junkyard building.
Page available on the highest difficulty level.
Another page is at the junkyard, next to the light post, on a box.

Another page lies in an abandoned building, which can be reached by pushing a cart blocking the entrance.

One more page can be found behind the generator, in the abandoned town, with an elevator.
Page available on the highest difficulty level.

The last sheet can be found right after using the elevator in the abandoned town.
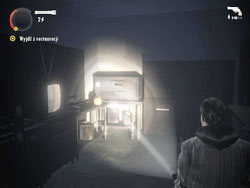
On the counter inside the kitchen at the very beginning. After you get back from toilet, one of the enemies will break down the door.
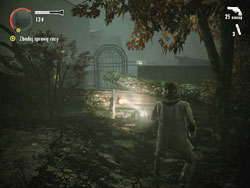
When you enter the playground, you'll find it on then park bench under two trees.
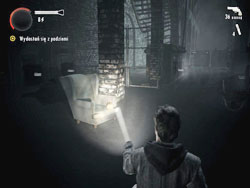
After descending to the basement, keep going to the right, until you get to the armchair with alarm clock.
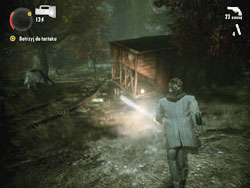
After you get inside the woods full of fireworks and explosions, you'll find a coal car with alarm clock in the corner.
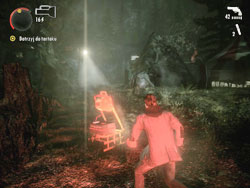
It is located in the tent at the end of woods full of fireworks and explosions. Use the reflector to activate words inside the tent first.
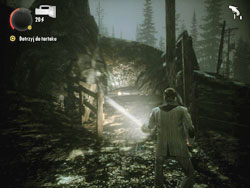
Alarm clock can be found in a small branch on the road with poles and lights. Try to keep on the left, until you get there.
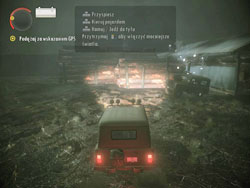
After getting to the farm with monster truck, go straight ahead. Alarm clock is located on logs pile.
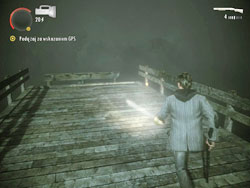
Listen to the memory at the lake. When you climb up the ladder, turn around and go to the end of the bridge.
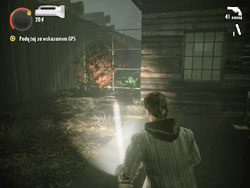
After killing the enemy with a chainsaw, go to the left from the shed. Alarm clock can be found next to the fence.
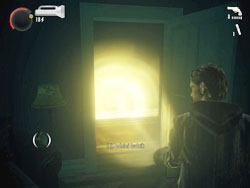
When you get to the flat, go along the corridor until you reach Alan's office. Alarm clock is located right at the entrance.
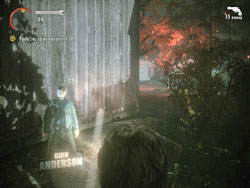
Odin Anderson - right after leaving the hardware store, turn right twice. It is located in a small alley.
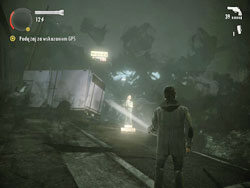
Sarah Breaker - after leaving the tool shop, walk over the fence and then turn left. It is located next to the truck.
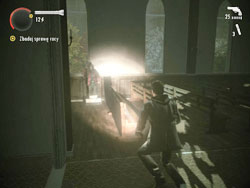
Barry Wheeler - right to the left, next to the entrance inside the church.
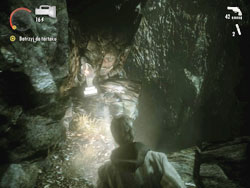
Cynthia Weaver - after creating the train cars bridge, when you go through the first car - turn right.

Tor Anderson - after passing the location with high voltage poles, before you move over the fence next to the crane, turn to the right. You'll find it nearby.
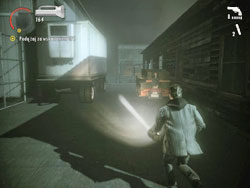
Alan Wake - after jumping to the yard where you can find memory and a bridge, turn to the right and look for it next to the white vehicle.
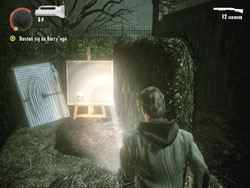
Inside the maze - when you get to the statue, turn to the left and you'll reach it.
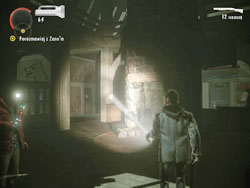
After you get to the resort and Zane deals with possesses objects - turn around to find it next to the fireplace.
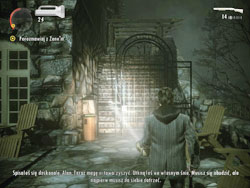
During meeting with Zane, when you go outside - go down the stairs and look for it next to another gate.
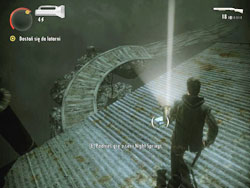
When you use a boat and then create a cabin, go inside and immediately exit it. The cabin will start rotating. Wait until it makes almost full circle and jump over the rooftop. You'll find the game.
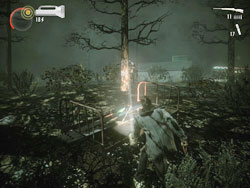
When you go outside the gas station, head to the right. You'll find a bed between trees with a game on it.
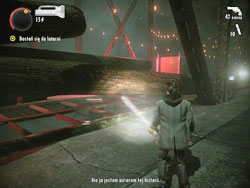
When you reach big red lit bridge, you'll find a truck with logs. Walk around it to find a game on the other side.
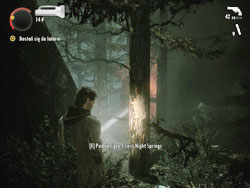
After leaving the red bridge, you'll encounter large rusty construction. Game is hidden behind it, on the right.
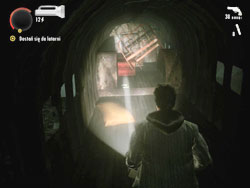
The game can be found inside the damaged plane, shortly after mysterious conversation between Alan and doctor.
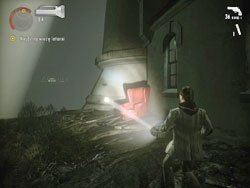
On the red armchair behind the lighthouse.
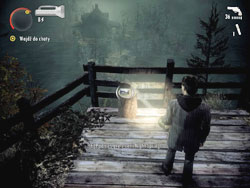
When you get back to the cabin at the lake (right after climbing the ladder in the lighthouse), turn around and run up to the hill top, where you'll find the last game.

A gun (revolver) is Alan's basic weapon. It can hold up to six bullets, the total number of bullets is 42. Range of this weapon is really satisfying, just like its accuracy. The biggest disadvantage of the revolver is connected with damage it inflicts - it is incredibly small. Use this gun as often as possible and when your enemies are not so tough.

Flare gun is an awesome, but rarely seen weapon. It fires flares (how obvious!), which can enlighten your vicinity during the night. The flare gun can be used in two way. The first is simply firing a flare in the sky. Thanks to that, you can improve your visibility in the dark and scare off your enemies. The second way of using the flare gun is much more fun. Try shooting a projectile towards a group of opponents. In such a case, a flare works like a bomb, you can use it to eliminate several enemies at the same time. Do not waste ammunition and use the flare gun only in the worst situations and against the toughest enemies. Remember, that it requires reloading after each shot.
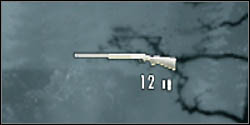
Shotgun is a powerful weapon, after eradicating the Darkness in your enemies, it is quite convenient to use the shotgun to finish off opponents. However, it holds only two shells. Personally, I don't like this weapon. Revolver and hunting rifle are better alternatives.
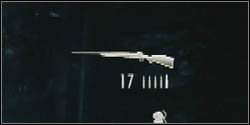
Hunting rifle is a high-class gun. The clip hold up to five bullets, the accuracy is amazing and the power is unbelievable. On lower difficulty levels, even tough enemies die after a single shot. There are, however, two problems with this hand cannon. First of all, it's a rare weapon. Second of all, the reload time is awfully long.
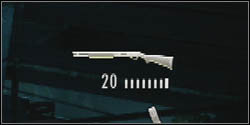
Pump-action shotgun is a awesome weapon. It's extremely powerful and holds up to eight shells. Use it against the toughest opponents. Unfortunately, it rarely appears in the game. What is more, the pump-action shotgun is not very efficient on a long distance, in contrary to the hunting rifle.

Flashlight is a piece of equipment, which is absolutely essential and you can't beat the game without it. It is mainly used to kill the Darkness inside your opponents, which makes them vulnerable to gunfire. What is more, with the flashlight you can find hidden supply stashes or detect and avoid bear traps. The flashlight will surely come in handy during the game, but you must pay attention to the battery level. When you concentrate the light, batteries are running low very quickly and you must either insert new batteries, or give the flashlight a break, so the battery can regenerate. In order to insert new batteries, use [Y].
There are three types of flashlights. You start the game, with the weakest, but while you progress, you find more powerful flashlights.
Flares are - just like the flashlight - for killing the Darkness inside the Taken. When you hold [RB], Alan launches a flare and rises it above his head. Thanks to that, you can break up the fight and scare your enemies off for a few seconds. In such a condition, you can't run or shoot. Releasing [RB] will result in dropping the flare to the ground. Of course, it will keep on burning, but its efficiency in scaring enemies off seems to be a little lower than usually. Also, remember that the flares don't last very long. Don't build your fighting tactics on flares!
Flashbangs are purely awesome. You can throw them by pressing [RB]. These things are extremely efficient against most of your enemies. They have a nice blast radius, so you should throw them among whole groups of opponents. Unfortunately, flashbangs are quite rare in the game world.
Alan's enemies, the Taken, are quite difficult to divide into classes, as they have no names, signatures, nicknames, etc. It is even hard to describe their appearance, as you usually see them in the dark, hiding all the details of their bodies. However, you can distinguish various types of enemies by watching their shape and weapons. These two properties served as a base for me in creating the list below.
Enemies with an average looking body are equipped with only one weapon, and they're extremely popular in the game's world. These guys are quite slow and you can easily eliminate them with a firearm. If a whole group of them wants to attack you, it is essential to keep them in a distance, so they won't be able to surround you.
Frequency of presence: high
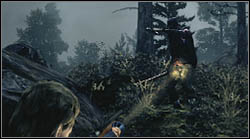
Enemies of an average looking body armed with to weapons are quite fast and - the worst thing - they can throw their axes, knives and other sharp stuff at Alan. Their "ammunition" never runs out and they don't need to get close to the protagonist in order to hurt him. That's why these guys are so dangerous. Eliminate them at the very beginning of the combat. If you run out of ammunition, run away with a zigzag, so you won't get hit with an axe.
Frequency of presence: high
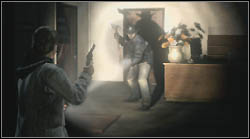
Tall and well-built enemies are extremely tough (with full health, these guys can survive even an attack with a flashbang), they deal incredible damage, but on the other hand, they're very slow. It is possible, that a Taken of this type will perform a devastating charge. In that case, it is always a good thing to get out of his way. Try killing them from a distance, if you run out of battery while you eradicate the Darkness inside your enemy, do not hesitate to put inside a new one. It seems like these massive enemies can regenerate the Darkness, so don't let them get out of the light. Finish them off with a powerful weapon - a shotgun or hunting rifle.
Frequency of presence: medium
Slim and low enemies are very fast. They tend to move in a very acrobatic way, that's way they enter the battle by jumping over a wall, other high objects or through windows. These opponents are not only running fast, but they can also swing their weapon way faster than other Taken. That's why you should never let them approach you. Fortunately, they're incredibly weak, so even with a revolver you can finish them off with ease.
Frequency of presence: medium
Mighty Taken armed with chainsaws are unbelievably tough and extremely slow. They also issue devastating attacks. Use your best weapons to eliminate this type of opponents. If a chainsaw guy attacks you with other enemies at his side, eliminate the others first, and kill the chainsaw Taken in the end.
Frequency of presence: low
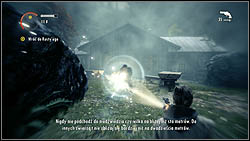
The last type of enemies can be easily recognized, thanks to the way these guys move. Slightly obese Taken are extremely fast (they look very blurred while they run), exceptionally tough and they rarely attack Alan when they operate alone. Each time a guy like this stops, light him up with your flashlight to kill the Darkness inside him. After a few attacks of that kind, the opponent cannot run fast any longer and become an easy prey. If these sprinters are attacking you with other types of Taken, eliminate this type in the end.
Frequency of presence: low
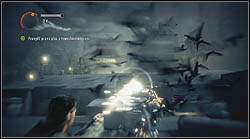
Birds are very significant enemies. They attack Alan by flying towards him, but it is often difficult to realize, from which direction the birds will attack. That's way you have to keep your eyes open and watch the sky every time you hear the crows. Flashlight is the best tool to use against the birds, simply direct its light towards the animals.
Frequency of presence: medium
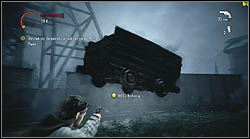
Haunted objects appear it the game numerous times. Every time an object wants to attack Alan, it goes in the air in the first place, then it goes towards the protagonist with great speed. Focus the light of your flashlight on these objects to destroy them. You can also use other methods, like throwing a flashbang, launching a hand flare or using a flare gun.
Frequency of presence: high
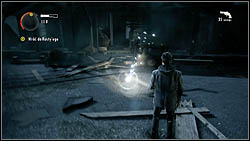
Black goo lying on the ground is completely safe until the protagonist steps into it. Each contact with the black goo ends up with a health loss. Use your flashlight to eliminate the black stains on your way.
Frequency of presence: low
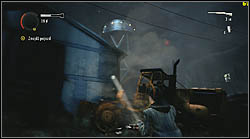
Machines are very serious enemies. There are a few fights in the game, for example against a harvester or a bulldozer. The best thing to do is to run away from such enemies. But if it is not possible, use the flare gun and any other enlightening items to defeat your enemies.
Frequency of presence: low
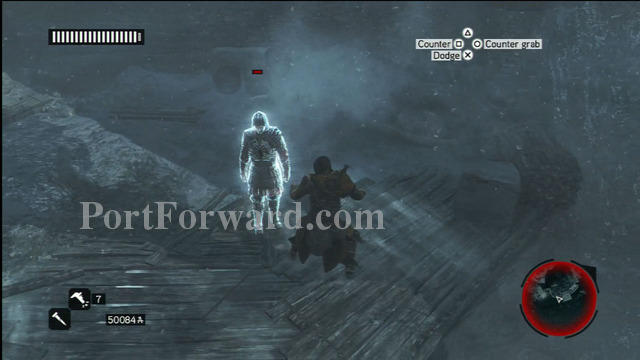

 Assassins Creed (PC) Game Guide & Walkthrough
 Assassins Creed: Revelations Game Guide & Walkthrough
 Aquaria Walkthrough IntroductionAmong The Sleep Walkthrough Prologue
 Altered Beast Walkthrough Level 1