With Ensk being on the smaller size when compared to other maps in World of Tanks it can lead to some difficulty for newer players since engagements/initial positions are crucial to succeeding. This map plays roughly the same for both sides with only minute differences. Both sides benefit greatly from initial aggressive movements by small groups of tanks to pin the enemy close to their starting points. On the flip side however moving to these forward initial positions can lead to you dying rather quickly if you have no backup, so signaling where you will be heading is a smart idea.
This strategy was created using MapTactic which is a great tool for World of Tanks and other games. MapTactic allows you to devise strategies with your friends and/or clan.
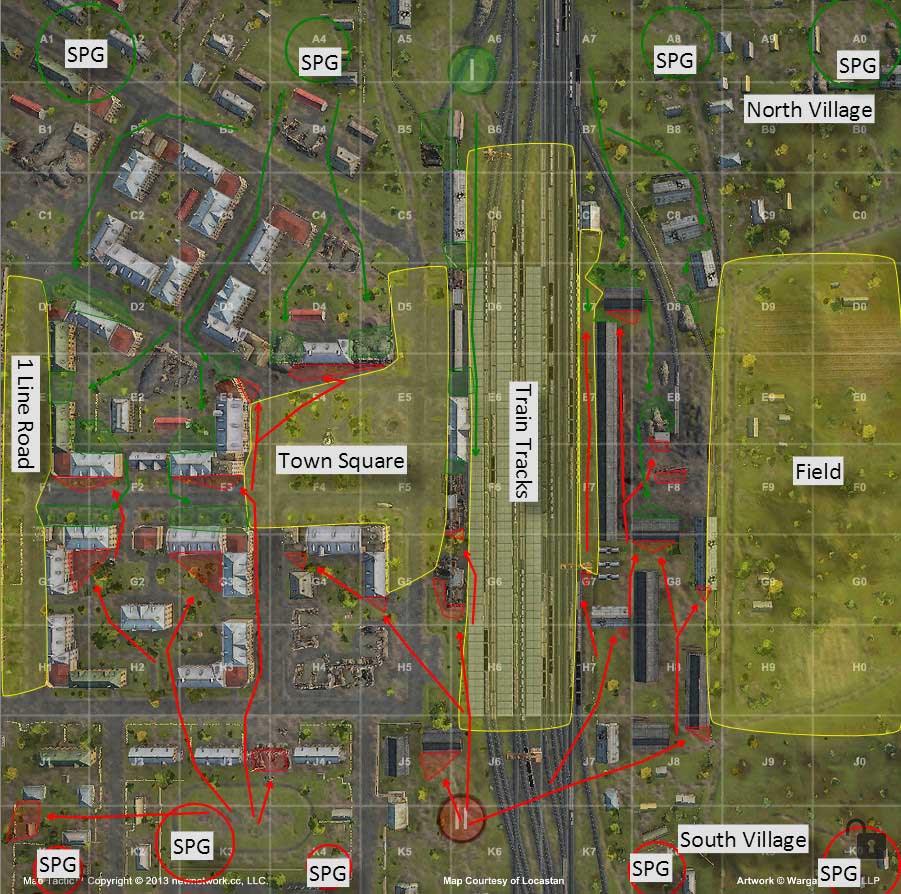
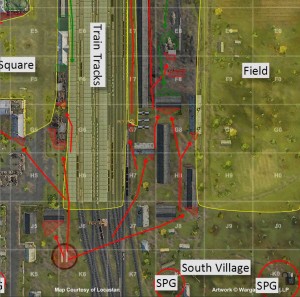
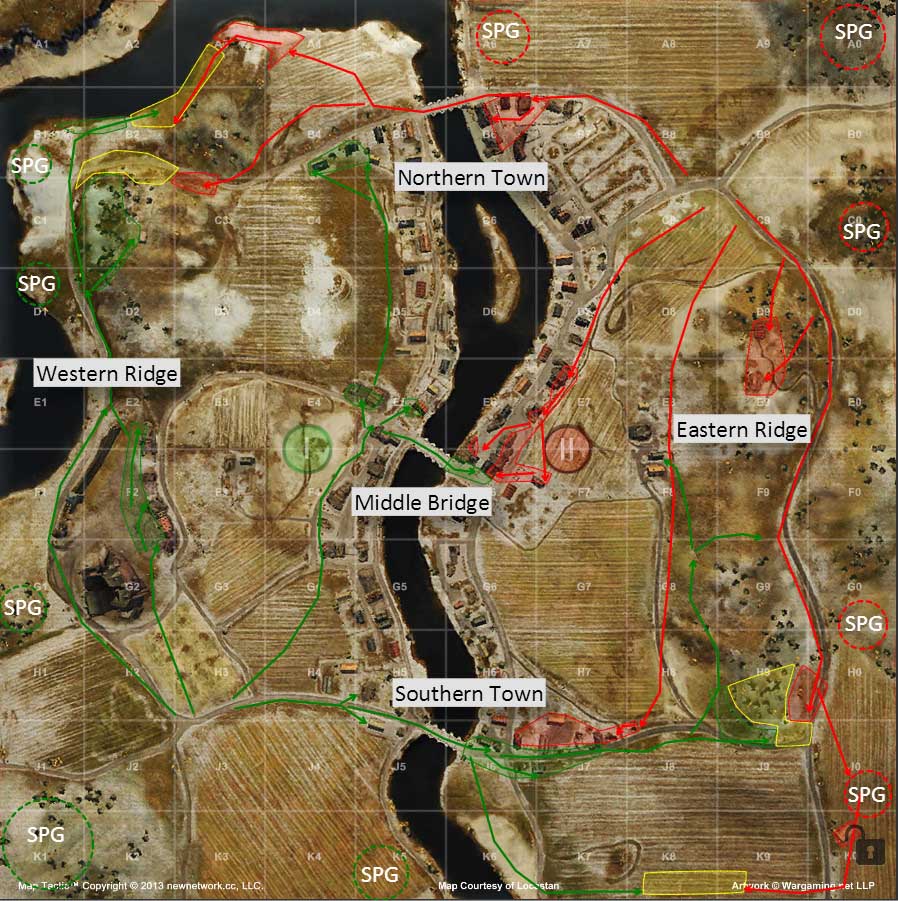
At first glance you can pick out that the map consists of two main funnels where most of the fighting takes place. The 1-3 lines of the map in the main town has a lot of cover and usually sees the largest number of tanks positioned here. The opposite side of the map in the 7-0 lines is equally important but is generally guarded less since the town provides a more direct and “safe” route. The center track and town square areas of the map can be either your team’s Achilles heel or saving grace so keep them in mind.
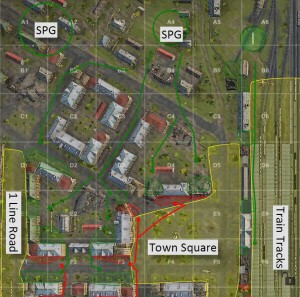
The 1-5 lines of Ensk generally receive the most attention and are very important to winning the match. It is key to grab initial positions and to know when or when not to push since losing this section of the map usually foreshadows defeat.
For both teams the 1 line road is not a good play to advance down initially unless you have a tank sporting insane frontal armor with good back up. It is best to defend/watch this route in D1 or F1/K1 to merely provide a presence. I do not like the B1 lookout for team 1(green) since it prevents you from re-positioning to help others in time.
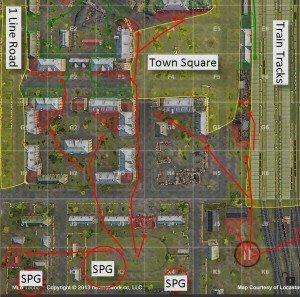
The main fighting in the town takes place in the 2-3 lines for both teams. There is an initial set up position and then an advanced position for either team to utilize. For team 1(green) setting up in the D/E lines is easy to do and the safest option. However, pushing forward to F1-F3 and even to F4 on the north sides of the buildings provides good cover and pins the enemy on the bottom portion of the map. For team 2(red) you can initially set up in the G line and your forward positions then move up to the E/F lines. I find that team 1 usually is easier to play passive/defensive while team 2 it pays to play aggressive and bring the fight to the enemy.
The train tracks provide a great route later on in the match to easily advance across the map to get behind your enemies. The downside is that they provide little cover heading up/down meaning that if you are spotted then you better have numbers on the defenders. Initially scouts(400+ view range) can spot across the entire map to spot any tanks crossing the tracks rather easy and this intelligence can be the key to winning.
On the edge of the 5/6 line there is limited cover that you can use earlier on in the match. I find this route is generally useless unless 2-3 tanks use it to quickly push past the town square since once the enemy sets up in the town you can be hit from the side very easily.
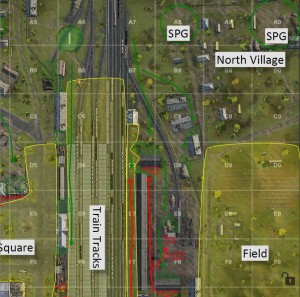
While this side of the map usually receives a little less attention than the western portion of the map(for standard matches) it is crucial to winning. I like to refer to this side as to pivot since the team that wins the field can then pin the enemy into the northwest or southwest corner.
Starting off it is important to stay away from the center of the map while crossing through the 6/7 lines to prevent yourself from being spotted early on. After crossing you have 3 choices….the 7 line, 8 line, or the field. The 7 line is great for tanks with a good amount of frontal armor or high alpha guns since it is a straight path into or behind the enemy. For team 1(green) waiting at D7 to see if any enemies are advancing is smart before heading south. Team 2 on the other hand should wait at G7 near the destructible building initially and then advance north in the cover of the bushes located in front of you.
For tanks that are more “all around” tanks or if the 7 line already has a few teammates on it the 8 line is the main focal point of this side of the map. The “lumber yard” in E8/F8 is a great spot to push to initially if there is not a huge artillery presence. Alternatively G7/G8 for the red team and D7/D8 for the green team are more reserved positions to defend. Personally I like to dart ahead to the small building in the bottom of E8 from either side and then advance further towards the enemy(F8 for side 1 and D7 for side 2).
Option 3 which is the field in my opinion is largely useless aside from very mobile tanks if the enemy is preoccupied in the 7/8 lines. This is due to the lack of cover in the field and also at the end of the field on either side. Instead of trying to pass through and be the hero it is usually a better option to focus on the 7 or 8 lines and destroying those tanks to free up your allies.
With Ensk being such a small map with plenty of cover in most of the high volume areas it can be very difficult to play a SPG on it. For the most part as artillery you are smashed up against the northern or southern edge of the map to begin with since you can be very easily spotted otherwise. For both sides I like to stay in the 1-5 lines since the town is generally the safer bet as far as defense goes. From here you have decent shots to support the eastern flank or if the town is faltering you can shift into direct fire to support it.
As far as moving across the train tracks over to the 8-0 lines I would only do this if your team sends 5 or more tanks over to this side of the map. This is because after your first 1-2 shots you will want to move into the field area to prevent any enemies darting through the 5-7 lines into your base from spotting you.
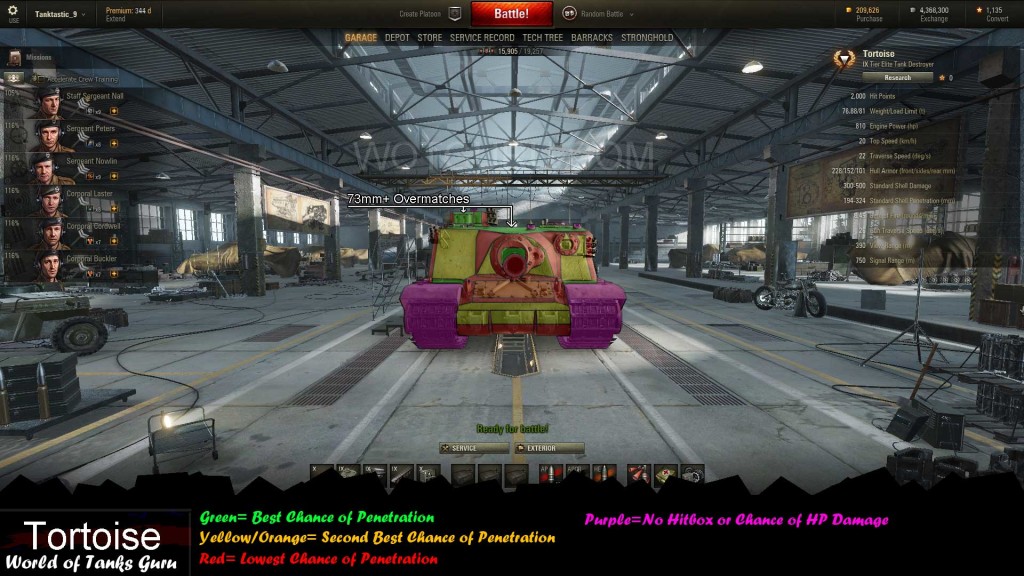 Weak Spot Guide: Tortoise - World of Tanks Guru
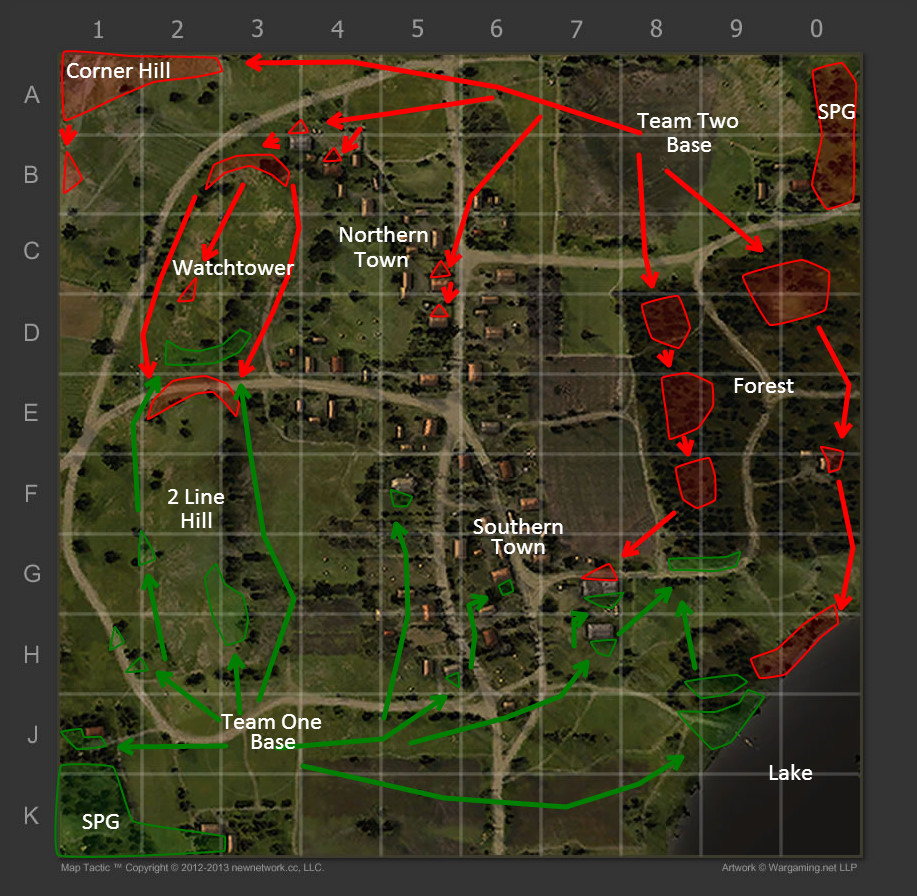 Map Strategy: Murovanka - World of Tanks Guru
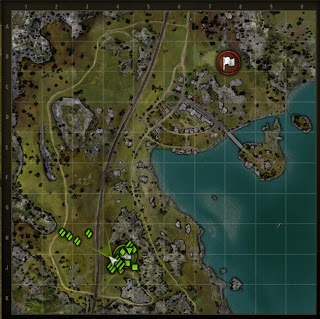 Map Strategy: Serene Coast - World of Tanks Guru
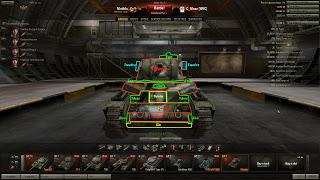 Weak Spot Guide: Matilda - World of Tanks Guru
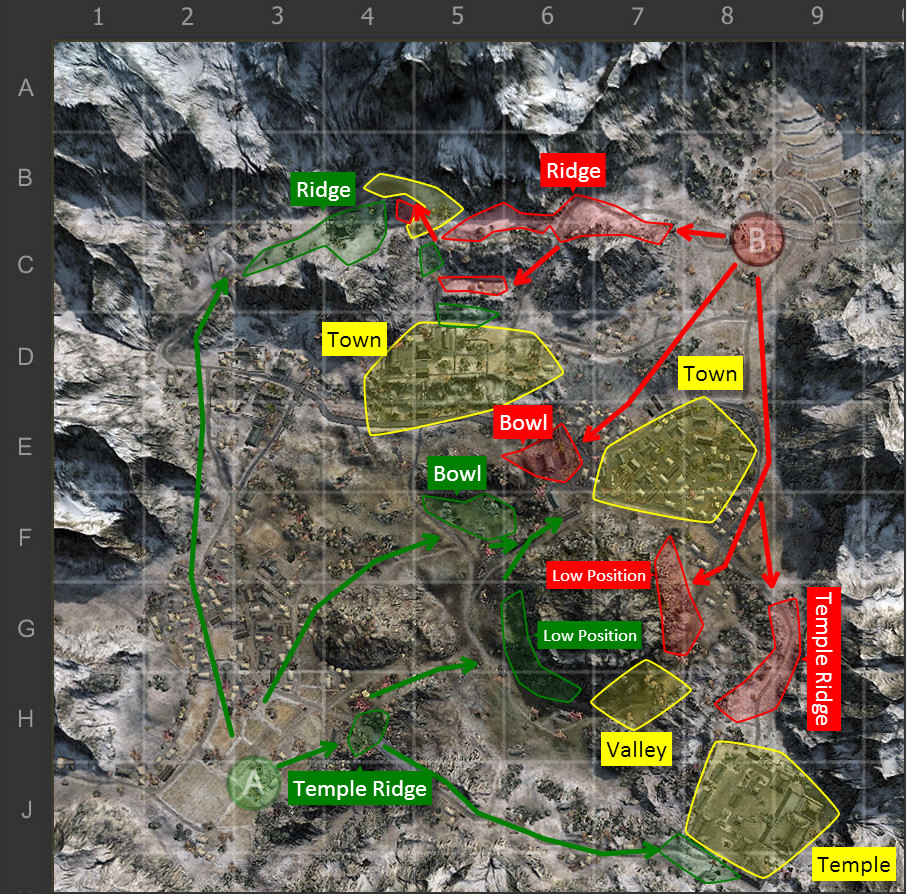 Map Strategy: Sacred Valley - World of Tanks Guru