
This walkthrough for The Last of Us includes everything that is key for the stress-free completion of the game. In here, you can find:
- a detailed walkthrough for all of the chapters;
- tips and hints on how to fight enemies stronger than you and the end-bosses
- descriptions for all of the major battles, thanks to which you will eliminate most of the enemies with ease
- the whereabouts of the more important collectibles like, Firefly Pendants, artifacts comic books or training manuals
Furthermore, in this walkthrough, you can find a detailed description of a hidden achievement, which consists in listening to Ellie's all jokes.
Michal "kwisc" Chwistek
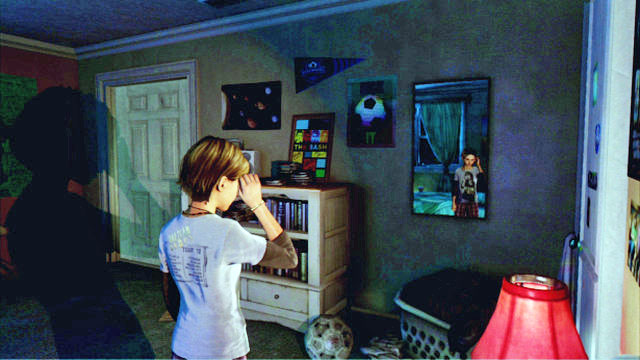
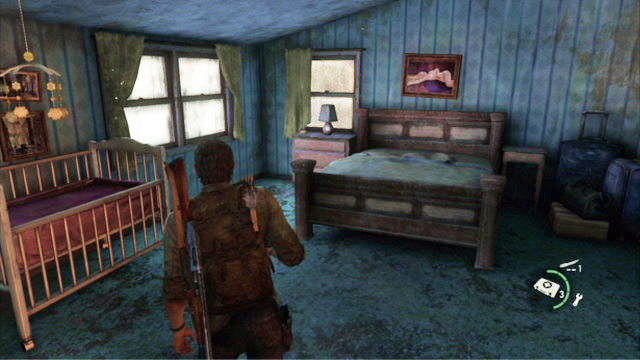
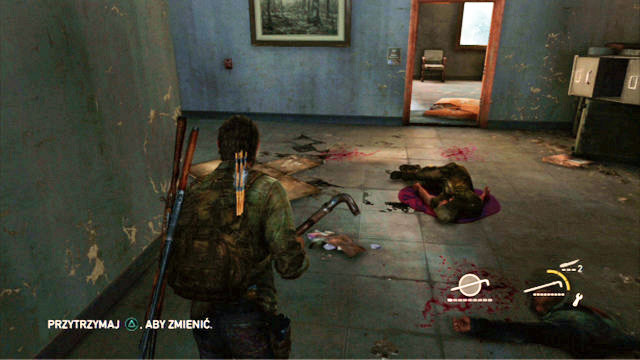
After the intro ends, approach the cupboard to the left. You will find there a birthday card, which the daughter prepared for Joel. Read it and leave the room.
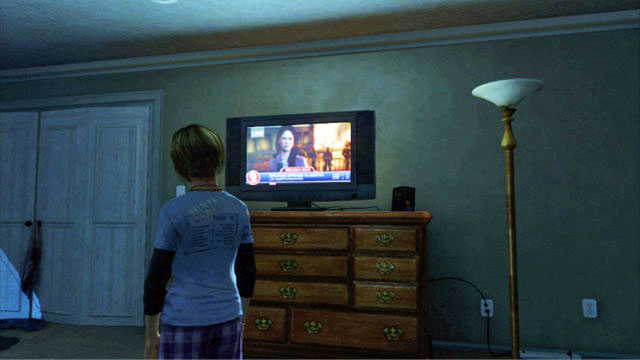
In the bathroom opposite, the father left a newspaper and, when you enter the bedroom, you can watch a fragment of a news broadcast.
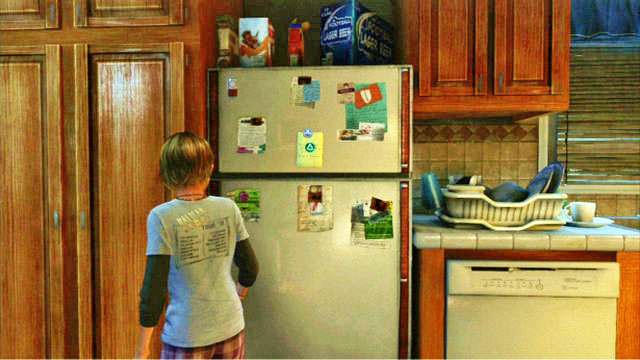
Once you are done, go downstairs and take a look at the mobile on the tabletop, and read the note attached to the fridge door.
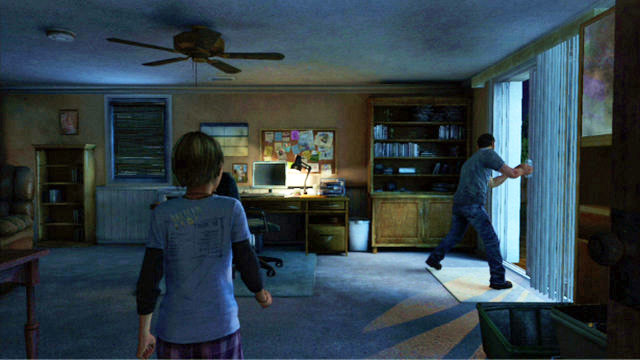
You can now go to the room where there Joel will soon appear.
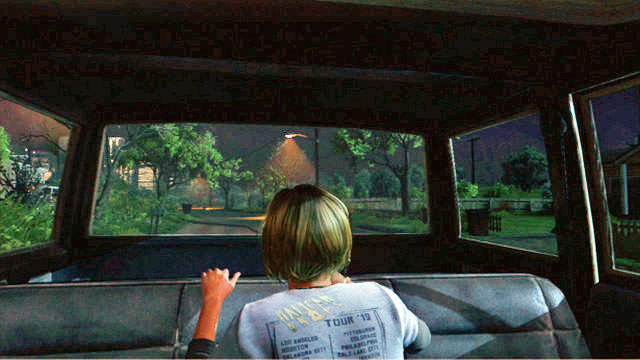
After a short cutscene, you will end up in the car and, the only thing you can do now, is look around. To zoom in an out, press L1.

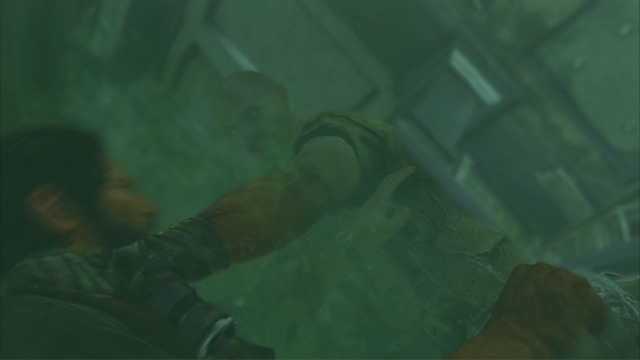
Once the ride draws to an end, keep tapping the square quickly to break the window.
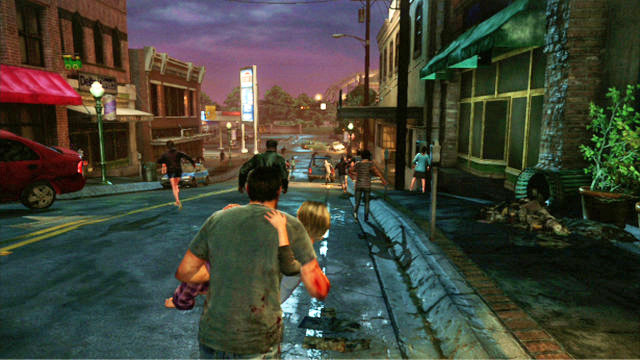
You need to run ahead to lose the beasts behind you.

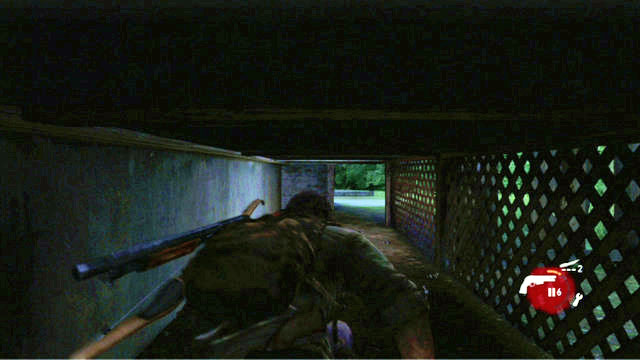
Once you witness a big explosion, turn right.
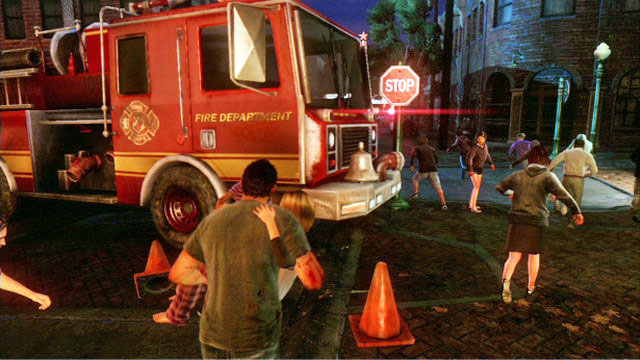
A bit further, you will be passing by a fire truck. Take the alley to the left behind the truck.
Wait there for Tommy to reach the door and run ahead.
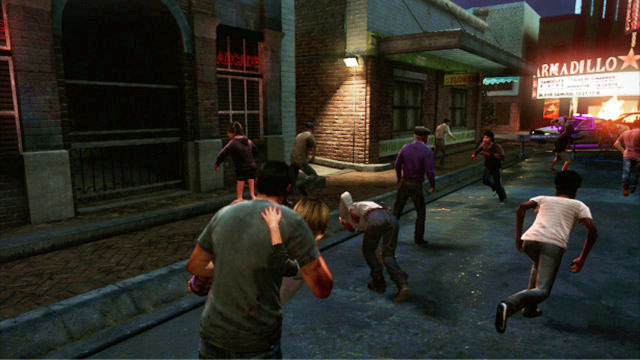
When you are attacked by a zombie, push it away as quickly as you can, by pressing the square.
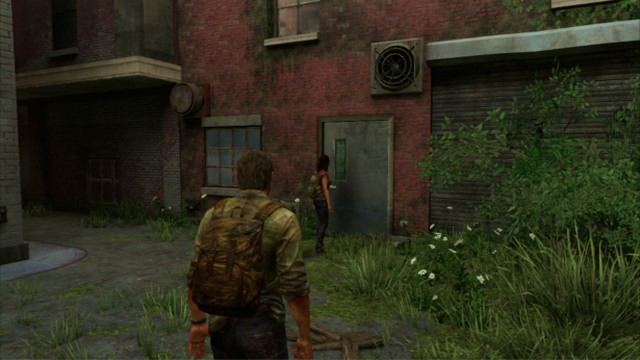
A bit further, you will find the entrance to a building, where you will take part with your companion. You now need to get to a path leading up to the highway.
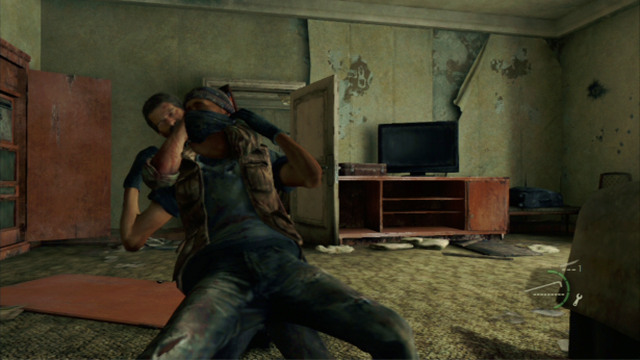
To end the prologue, keep running ahead and ignoring all the enemies around. This way, you will reach a soldier, who will finish this stage in a rather brutal way.
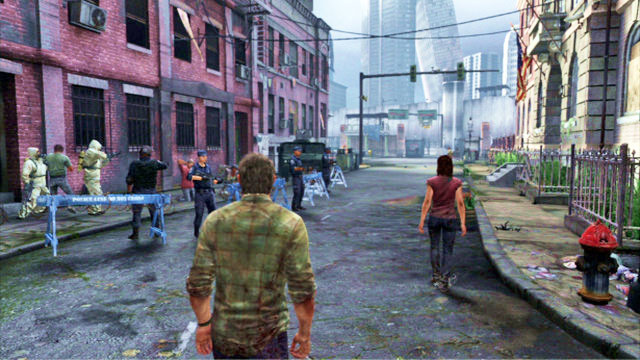
After this chapter begins, keep following Tess. You can take your time here - it is a good idea that you eavesdrop on the citizens' conversation while on the way. Thanks to it, you will learn quite a lot about the conditions in the zone. The largest group of citizens, you will meet on the square.
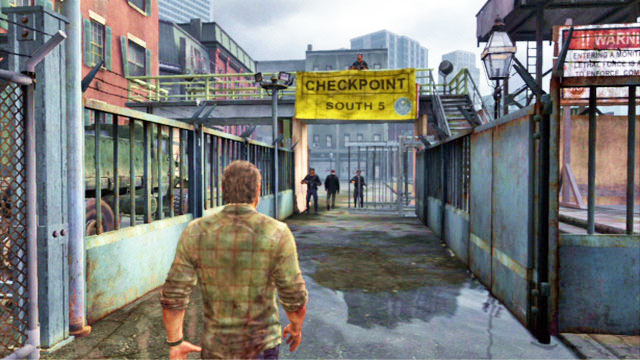
As soon as you are done eavesdropping, approach the exit guarded by soldiers and produce your ID.
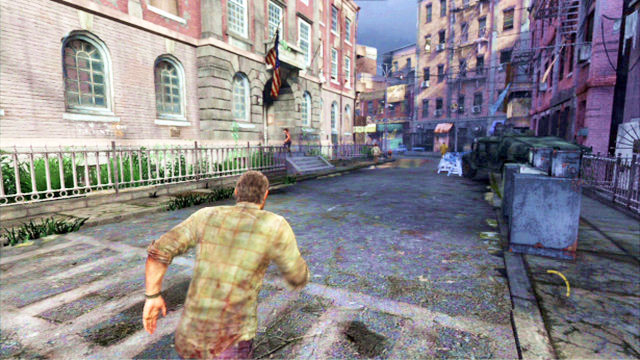
A moment later, there will be an explosion, after which you need to turn around (pull the left analog stick down + X) and follow your companion (press and hold down the L2 button).
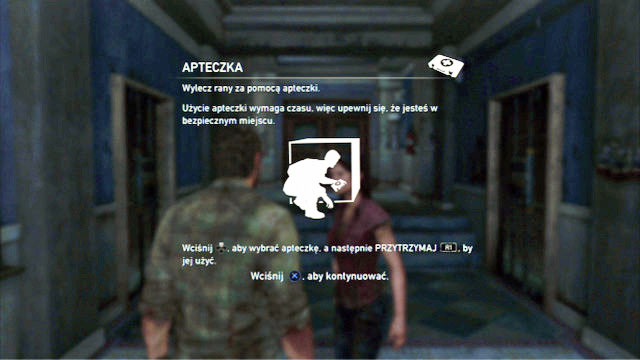
After you enter a nearby building, you will receive a first-aid kit from a woman, to tend to your wounds with. To do this, follow the instructions on the screen. This skill will come I handy many times throughout the game so, you'd better learn it. You also need to remember that, after you abort this action, your health bar will return to its previous state and you will have to start over.
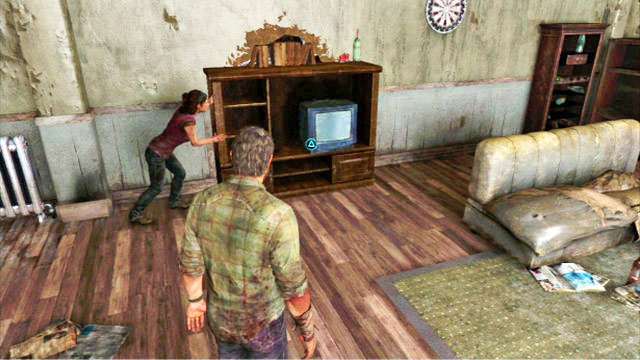
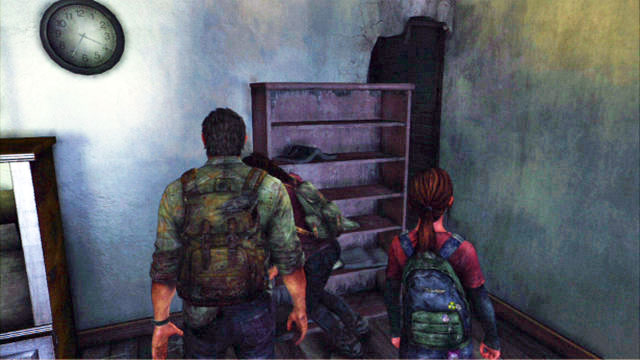
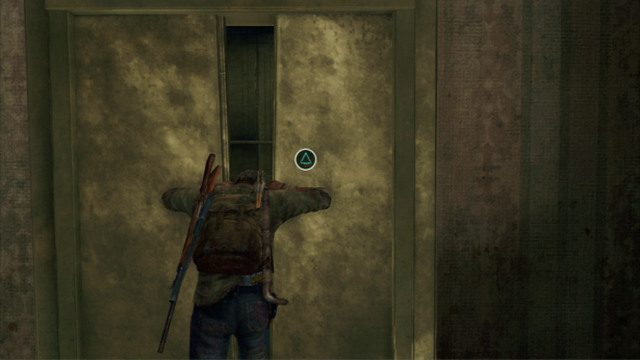
As you follow Tess, you will reach a room with a cabinet blocking further passage. Move it by pressing the triangle and moving the left analog stick to the right.
After you jump down to a lower level, keep following the woman and press the X whenever you need to go around an obstacle.
A bit later, you will reach a place where you will find a backpack with equipment. Collect it by pressing the triangle and reload the pistol (R1). To take a look into the backpack, you need to press SELECT. Inside, there are two items: a map and a pamphlet. The whereabouts of all of the collectibles in the game, can be found in a separate part of this walkthrough.
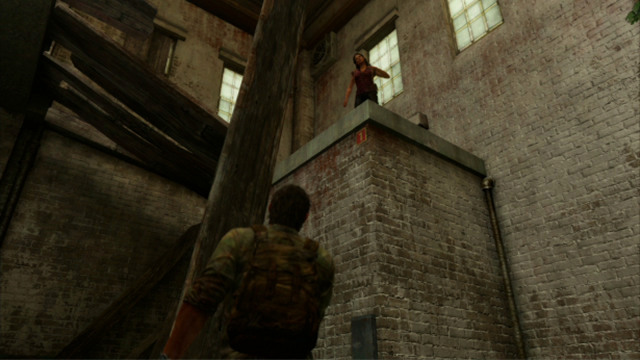
To proceed, you need to go to a higher level. To get there, you need to approach the wall and stand next to Tess. Look up now and press the triangle. That is when Joel will give a boost to the woman and, with her help, he will be able to climb the wall himself (X).
Also, by using the triangle, you should lift a wooden lid a bit further, and get to the surface.
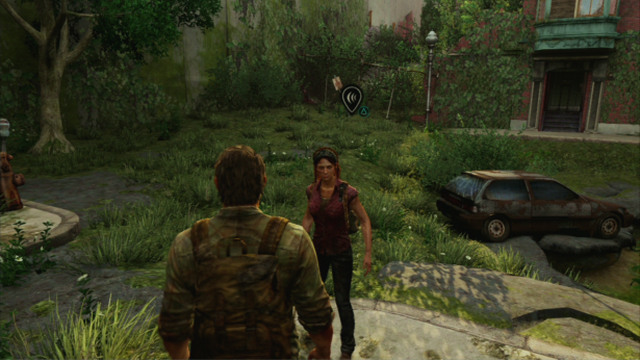
After a short conversation with your companion (triangle) you will be able to keep going.
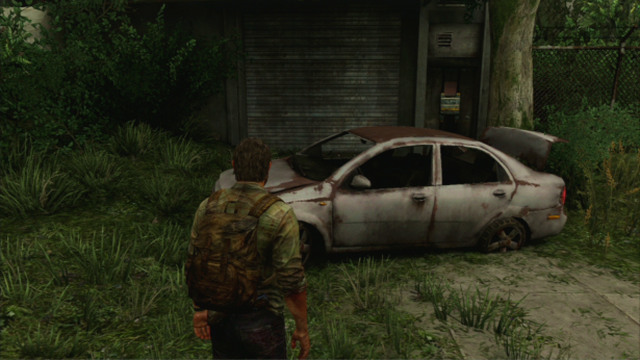
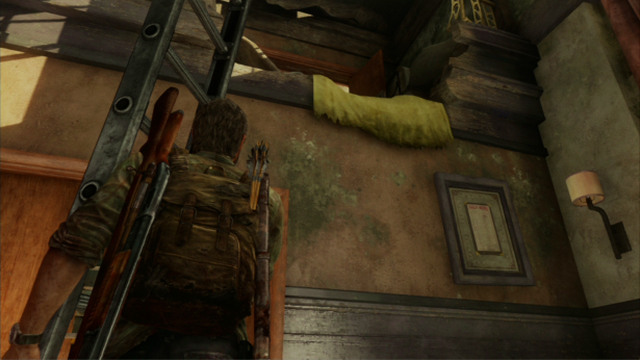
After you cover several meters, you will have to find a ladder. You can find it behind the nearby car wreck.
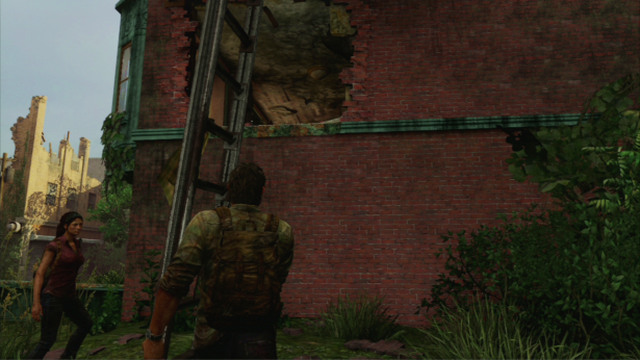
Press the triangle to pick up the ladder, and lean it against the wall, under the hole, by using the same button.
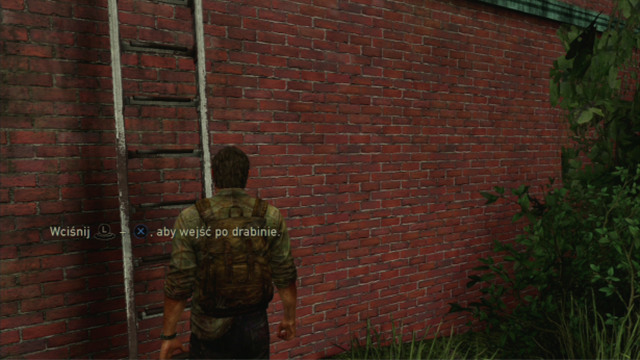
To climb the ladder, you need to press X and move the left analog stick.
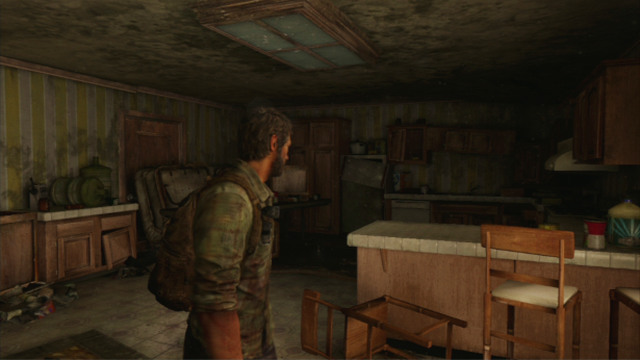
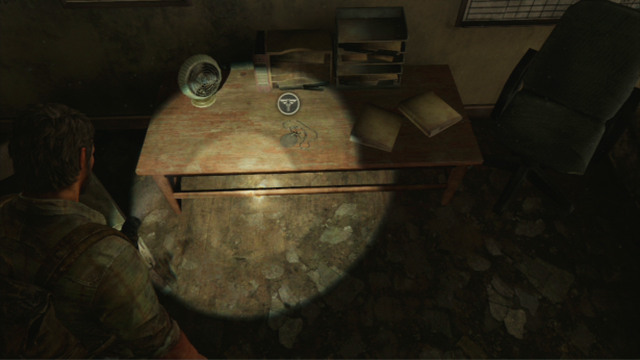
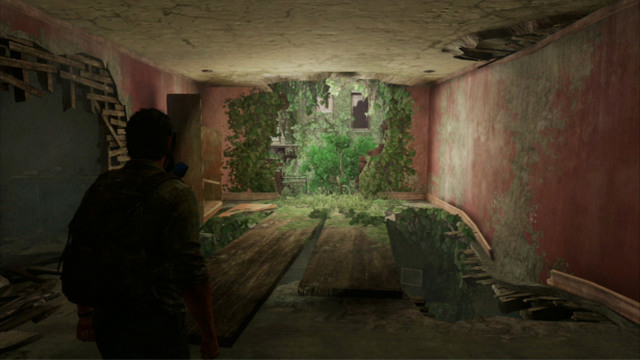
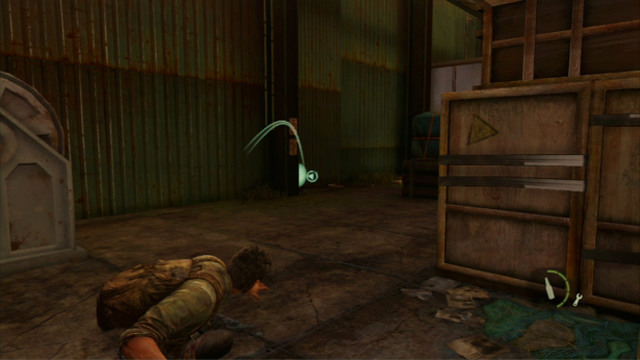
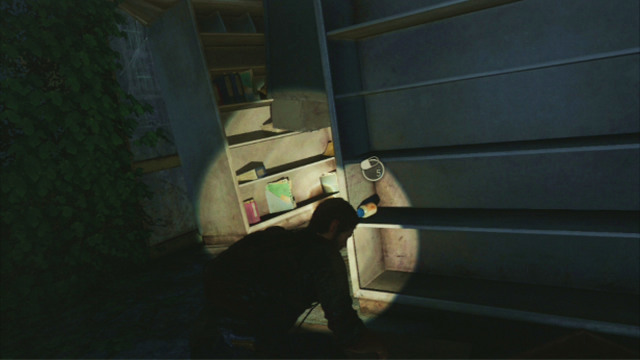
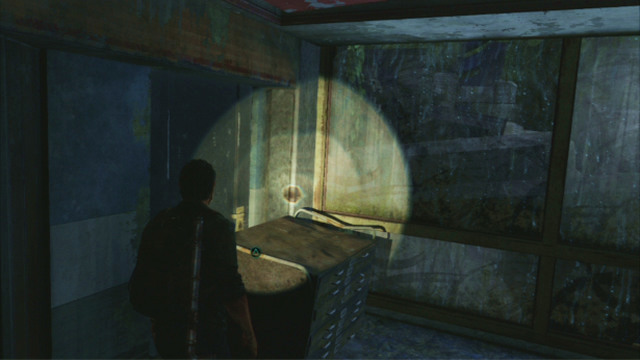
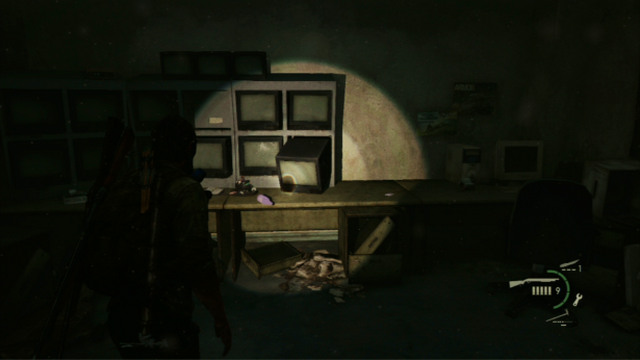
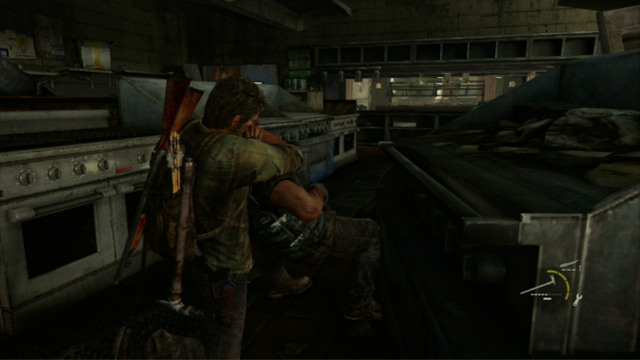
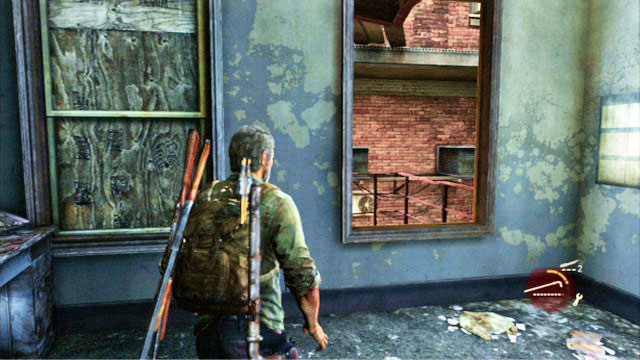
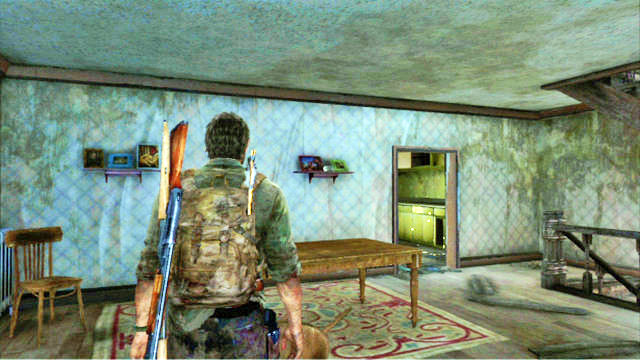
After you reach a derelict flat, search through the kitchen drawers to the right. In one of them, there are spares, which you are going to need later to upgrade your weapon.
It is also a good idea to check out the adjacent room. On the cupboard to the left, there is a Firefly Pendant. The whereabouts of all such pendants can be found in a separate part of this walkthrough.
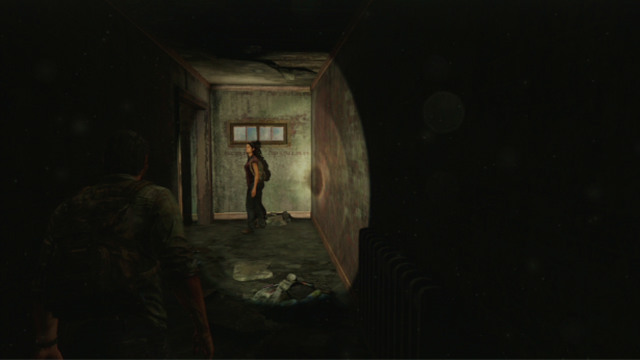
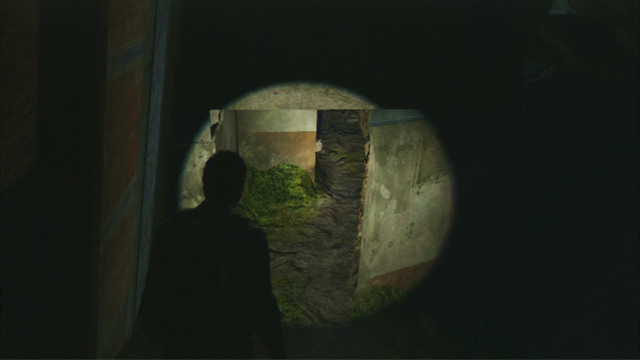
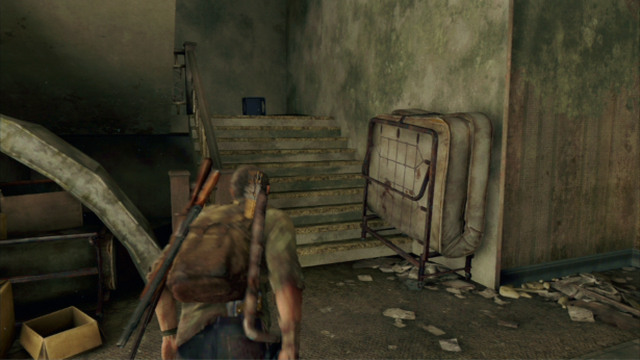
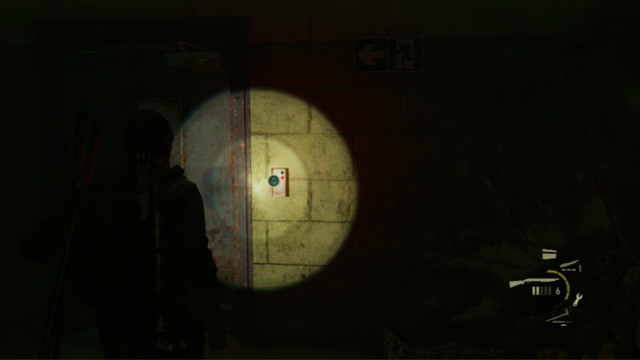
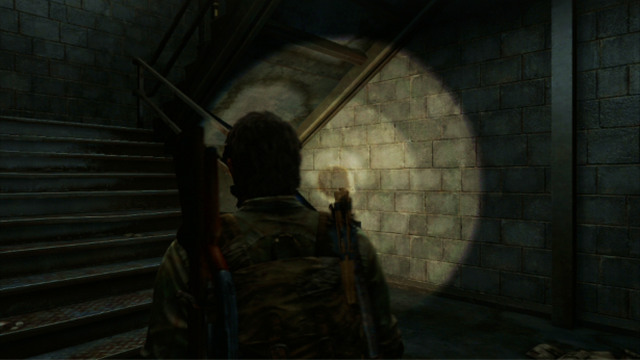
Once you are done collecting the items, climb down the stairs. It is going to be quite dark there se, turn on your flashlight by pressing the right analog stick (R3). If, at any moment, the light will start to fade, simply shake your game pad and everything will be back to normal.
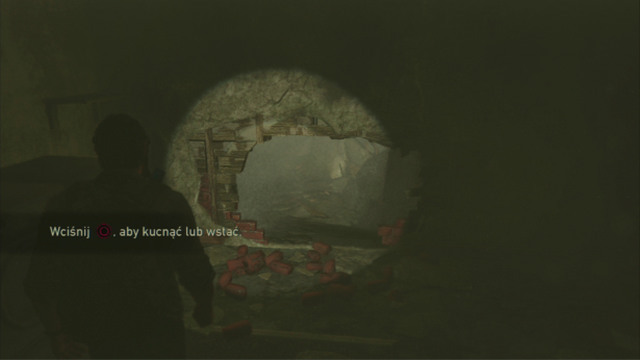
As you follow the woman, you will reach a place full of spores. There is a hole in the wall there, which you need to squeeze through. In order to do that, toggle crouch and press the circle.
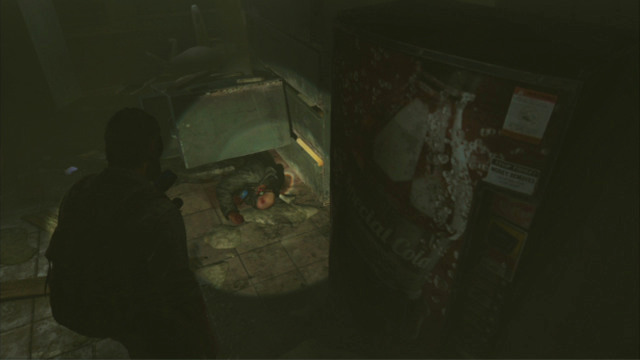
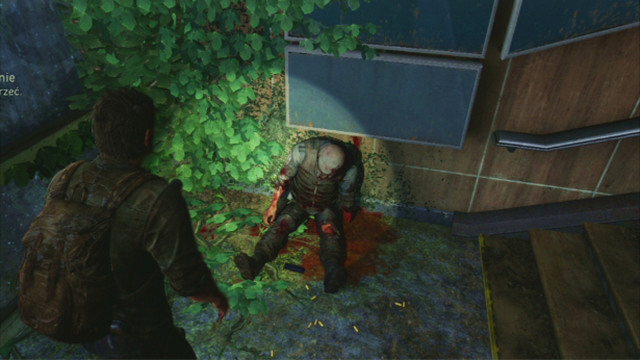
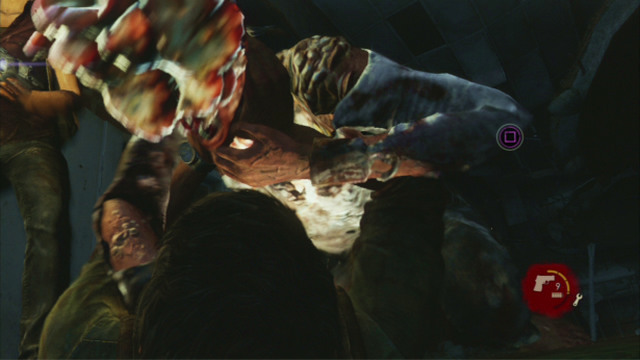
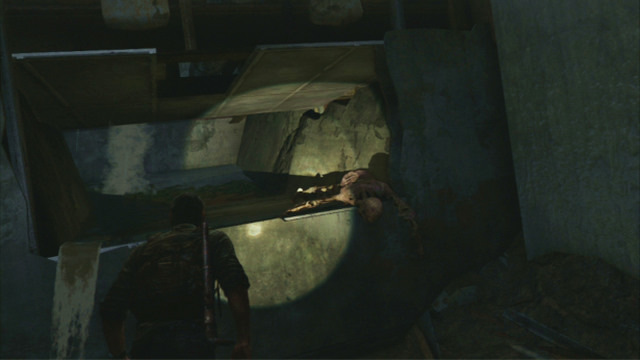
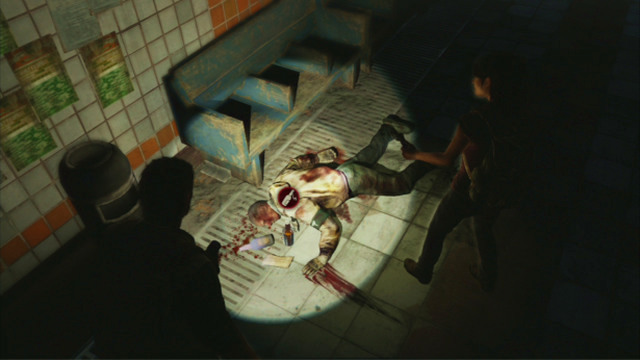
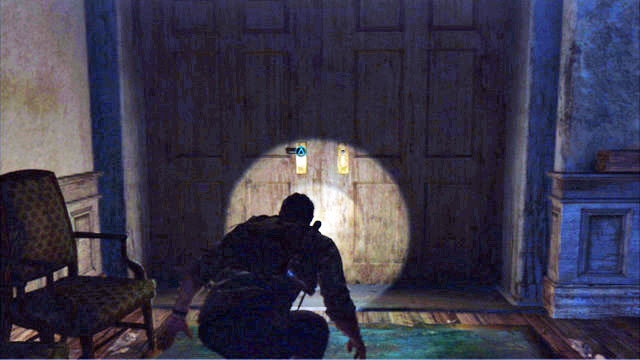
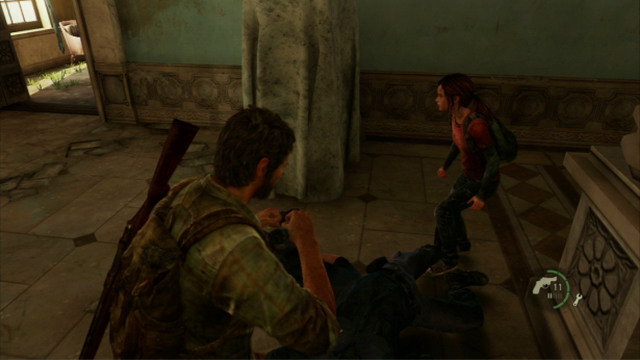
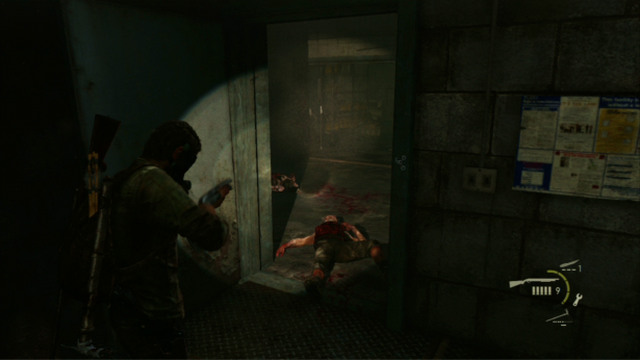
A bit further, you will bump into a man pinned down to the ground by a pile of debris. His gas mask broke so, there is no other thing to do but shoot the poor chap. In order to aim, press and hold down the L1 button, and press R1 to squeeze the trigger. You can replenish ammo by collecting a nearby clip.
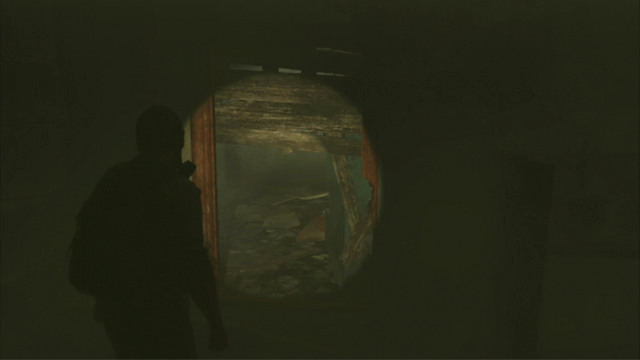
Further passage is through the hole to the left. Beyond the hole, you will encounter the infected or the first time.
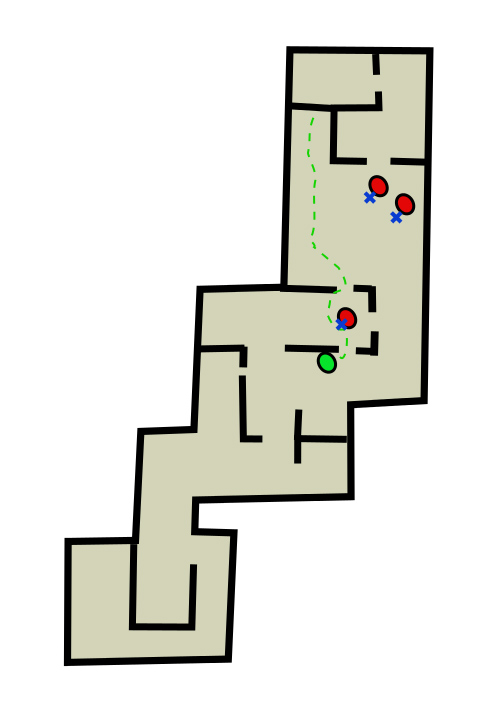
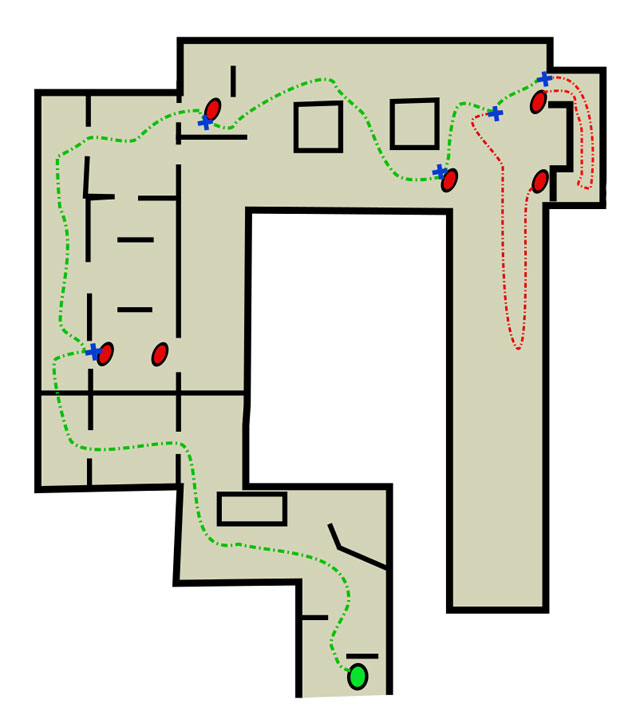
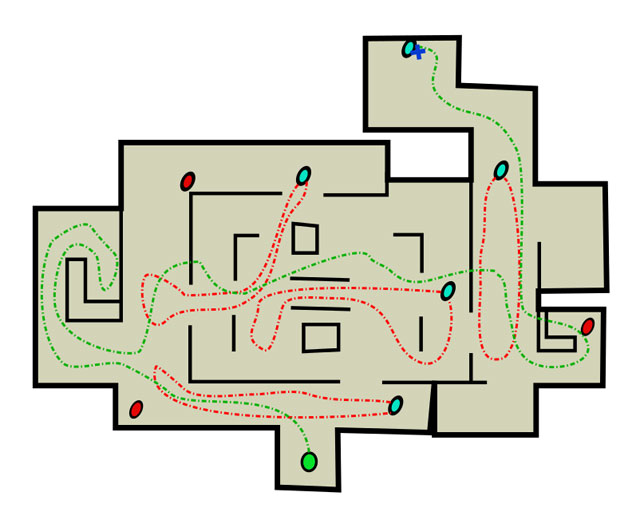
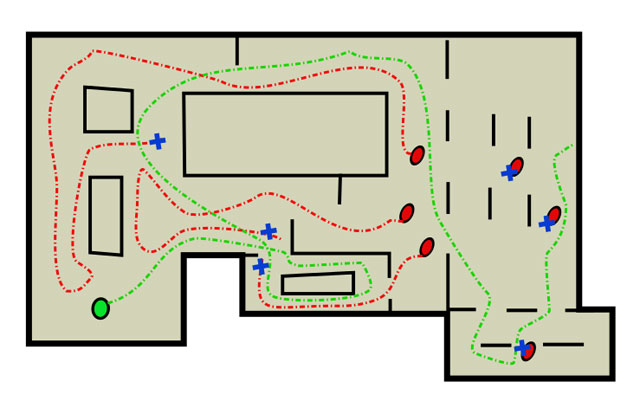
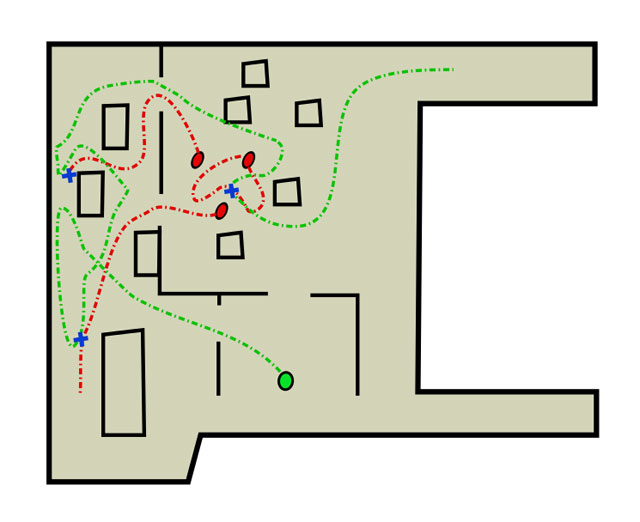
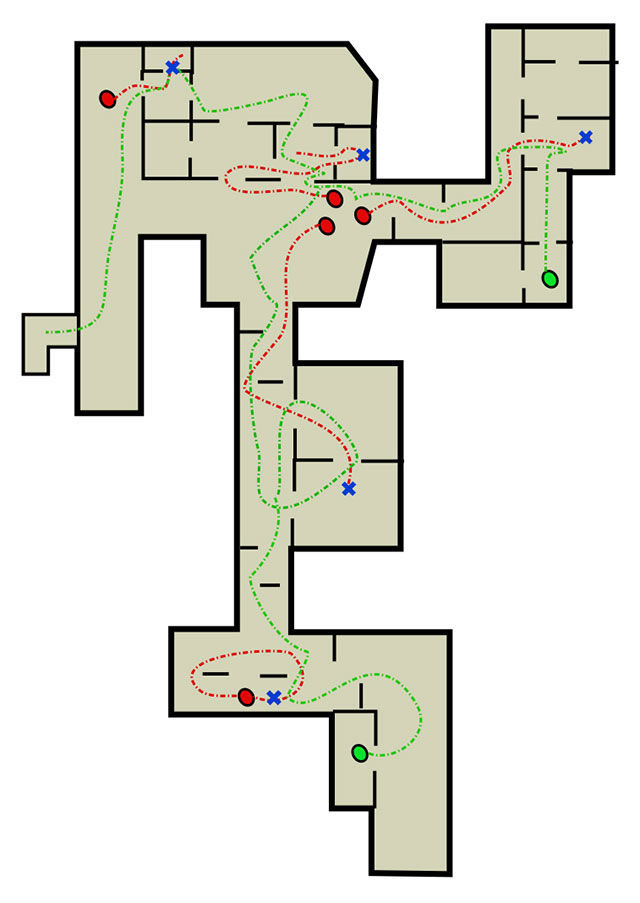
Legend

Start of the fight

Weak opponent

Suggested player route

Suggested kill areas
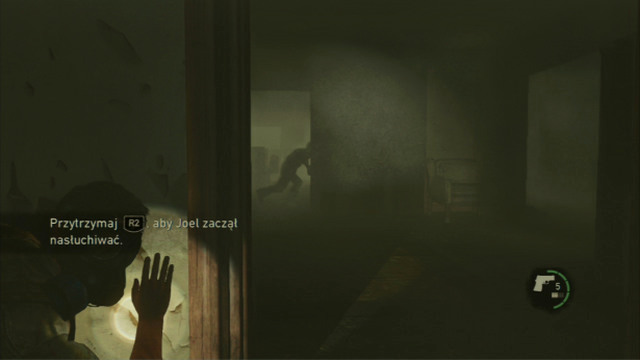
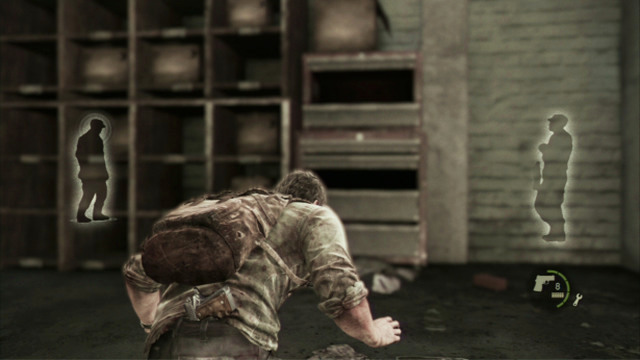
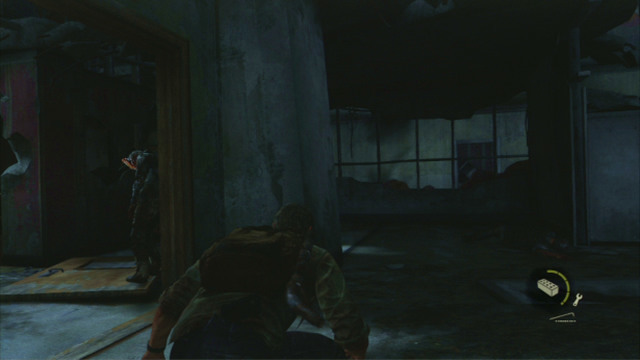
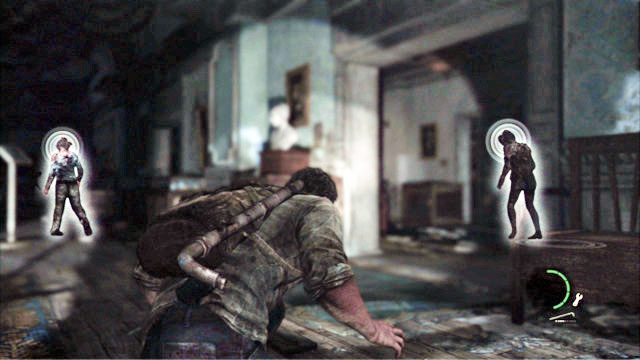
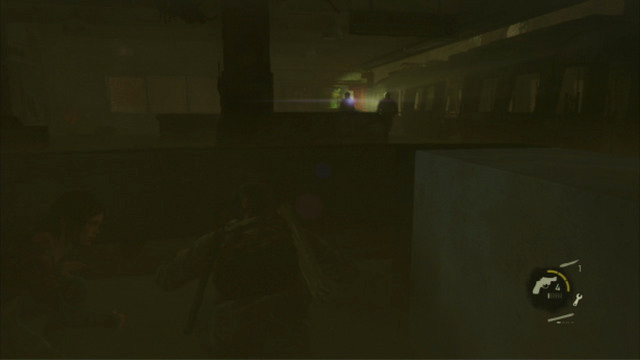
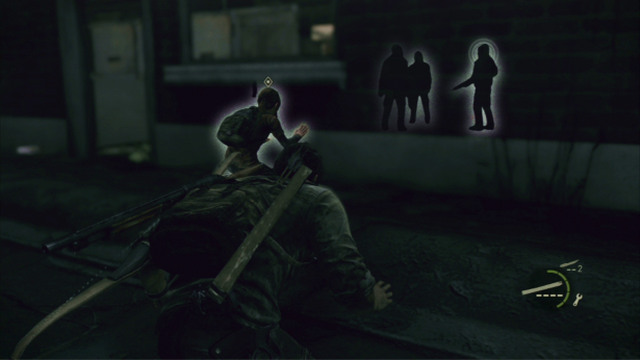
To defeat them, you need to listen out. Thanks to this, Joel will be able to locate all of the nearby enemies quickly. This also includes the ones behind the walls.
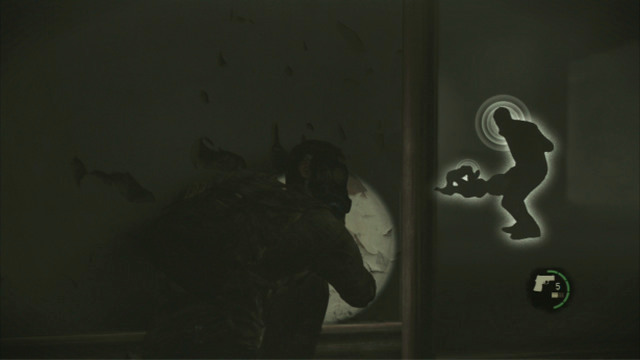
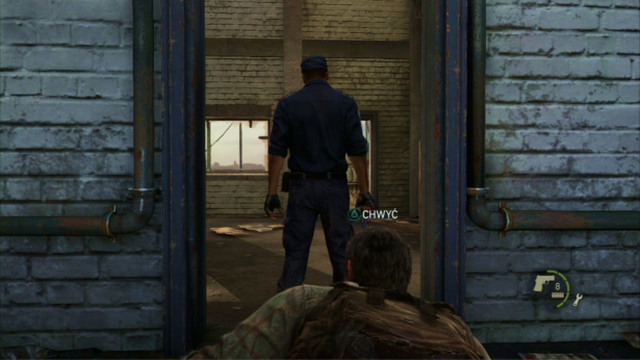
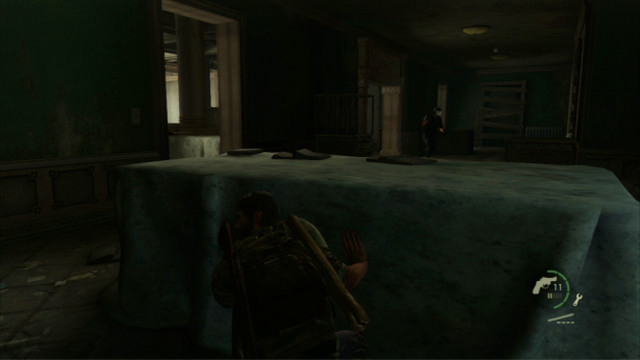
Listen out now, by pressing and holding down the R2 button. Wait for the nearby enemy to turn away and approach silently. Now, press the triangle to grab the enemy by the throat.
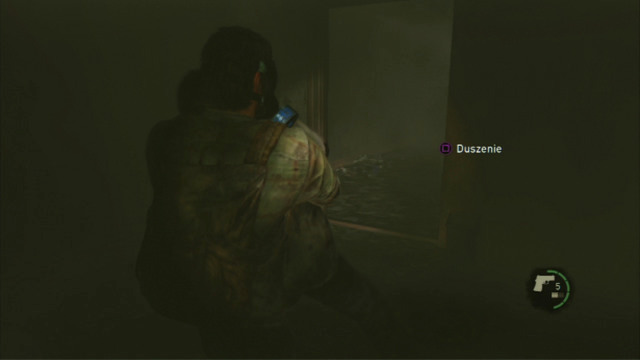
It is enough if you press and hold down the square, for Joel to strangle the zombie. Remember about crouching each time you sneak up to the enemy. You do that by pressing the circle, or the button for listening out (R2).
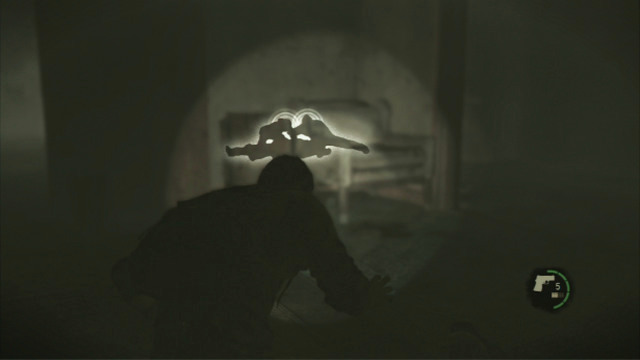
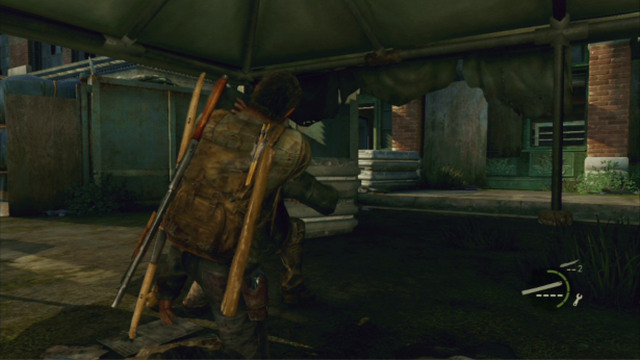
There are two more mutants in the room, which need to be eliminated. Shoot the first one at the distance, by aiming at the head, and beat to death the other one as soon as it comes near.
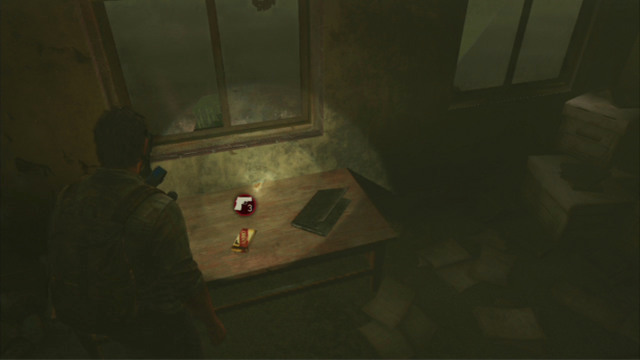
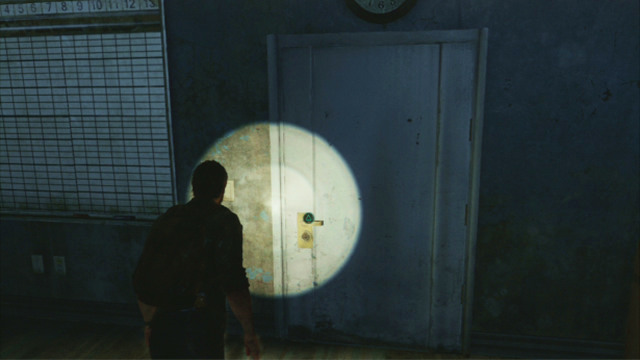
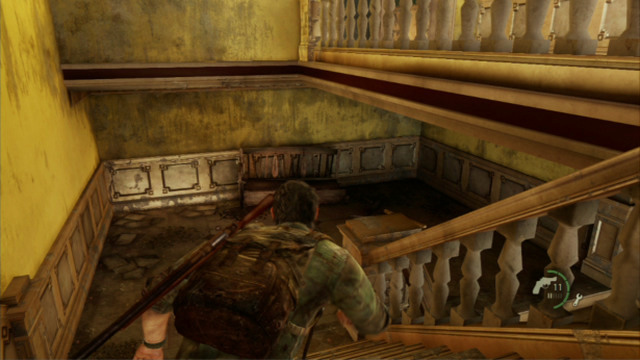
Before you climb the stairs to the next floor, examine the shelf behind the nearby door, to find some ammo.
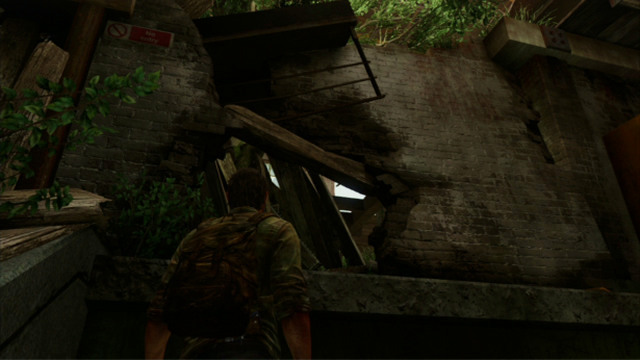
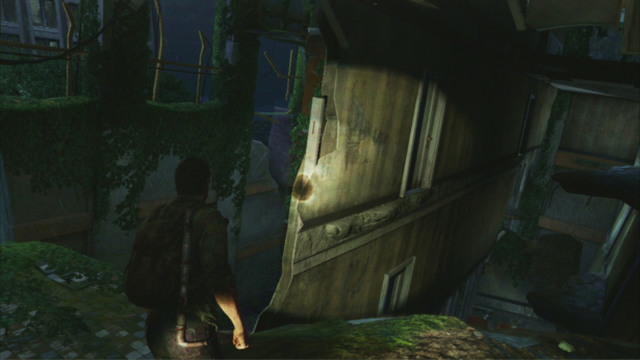
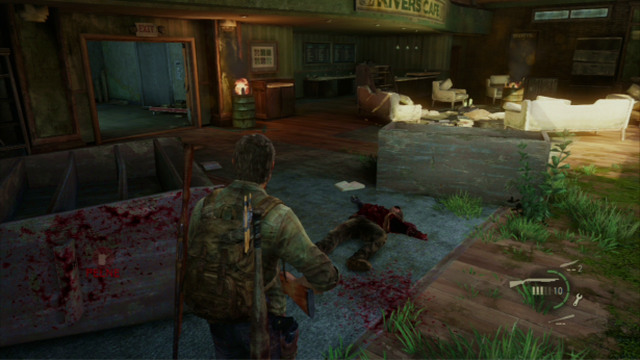
Upstairs, you will notice a big hole in the wall, which you need to take to leave the building.
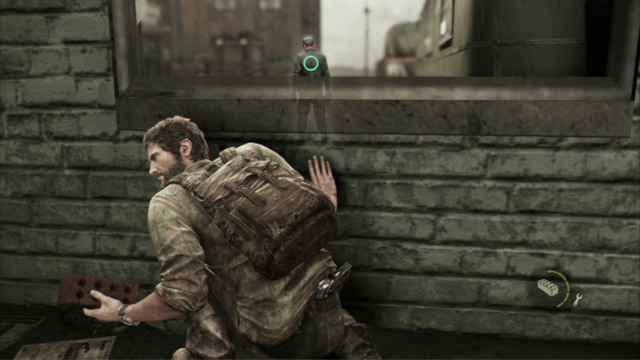
Do this, however, after you search the area to the left.
Once you are outside, turn off your flashlight and follow your companion.
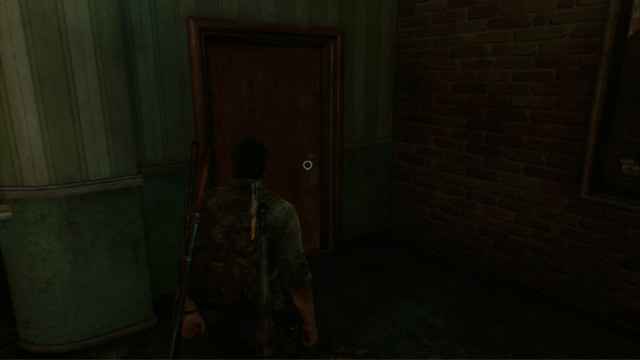
The woman will take you to a hidden passage to the next building.
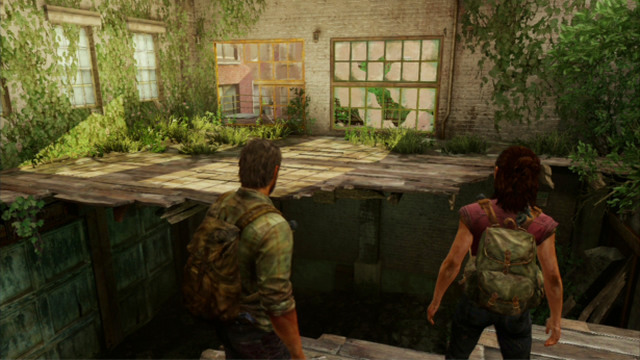
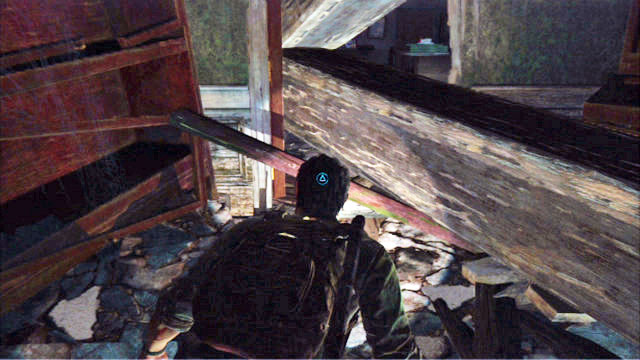
Once inside, climb up and approach the wide gap.
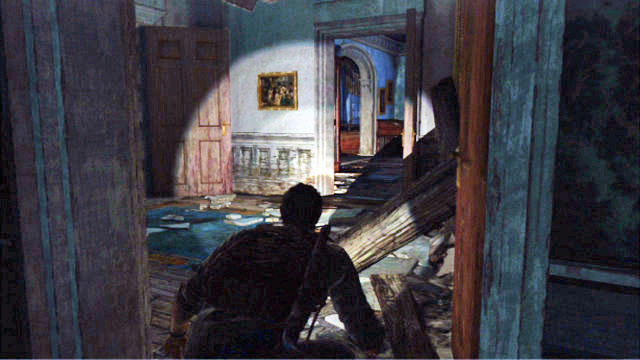
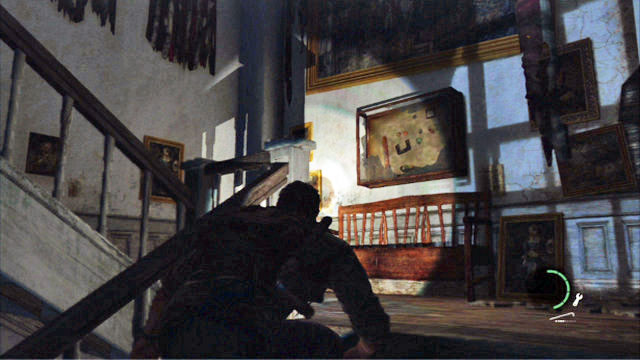
To get to the other side, you need to jump down and carry a plank over to Tess.
The woman will throw it over the opening to create a makeshift footbridge.
You can get back up over the pile of rubble at the other side of the room.
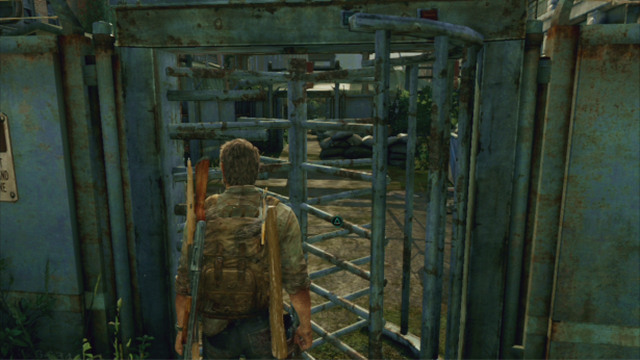
Once you get back out, keep following Tess until you reach a room where the woman points you to ammo. Collect the rounds, approach the door and wait for it to open. This way, you will reach the slum.
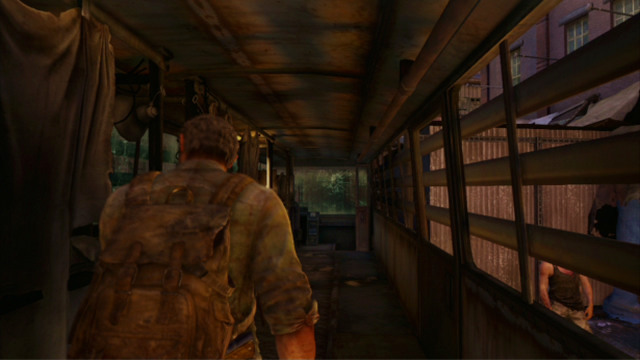
Start by turning left and keep straight ahead, until you reach the other end of the bus.
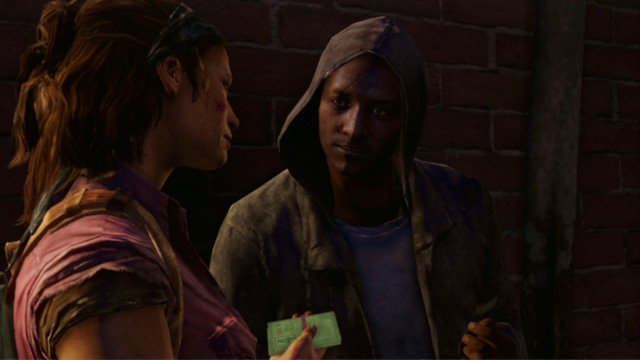
There, Tess will bribe the guard to obtain valuable information.
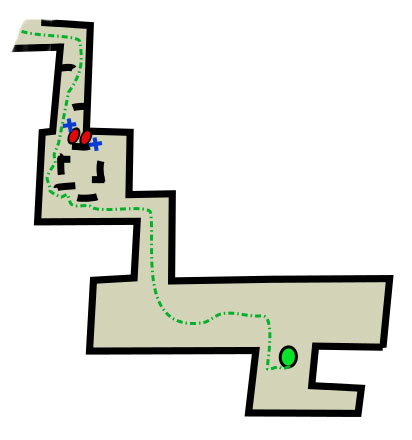
Legend

Start of the fight

Weak opponents

Suggested player route

Suggested kill areas
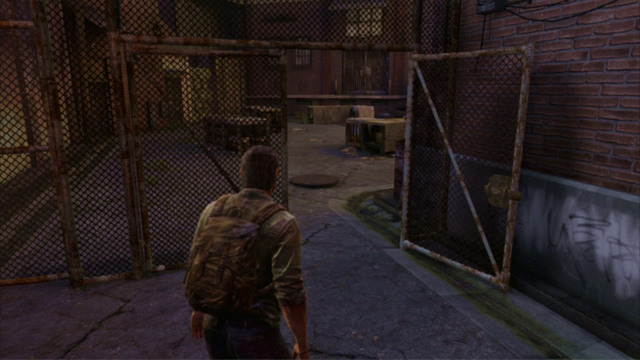
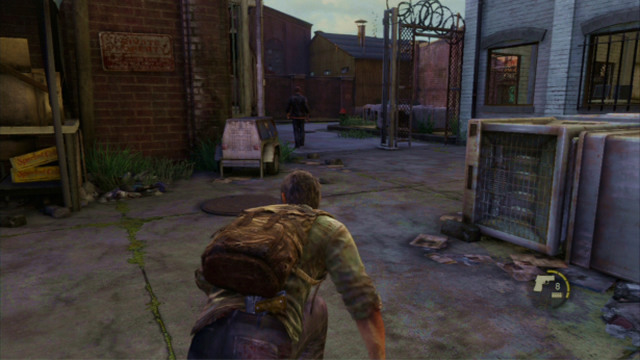
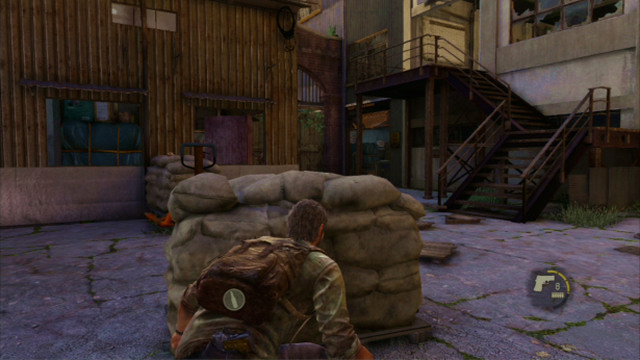
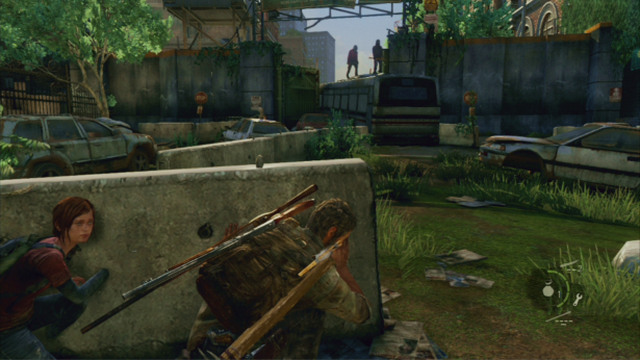
Go ahead to reach an area guarded by three guards. After a short cutscene, there will be only two of them remaining.
To eliminate the enemies, sneak over to the crates to the left and hide behind them to attack them from the side.
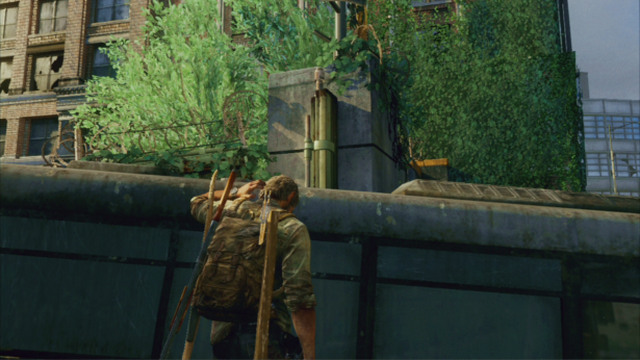
As soon as you get rid of them, keep running straight until you reach a locked gate. You can walk around it by giving Tess a boost up the nearby wall (the triangle), and getting up the wall with the woman's help (X).
Legend

Start of the fight

Weak opponents

Suggested player route

Enemy routes

Suggested kill areas
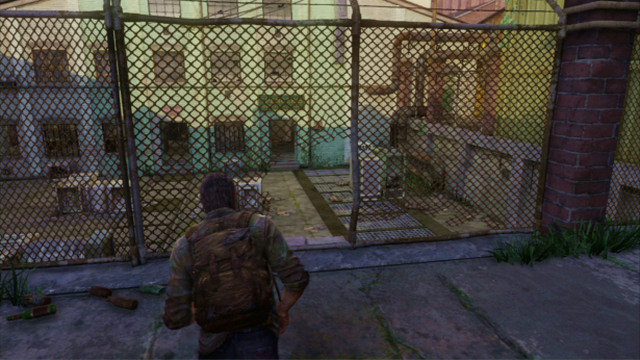
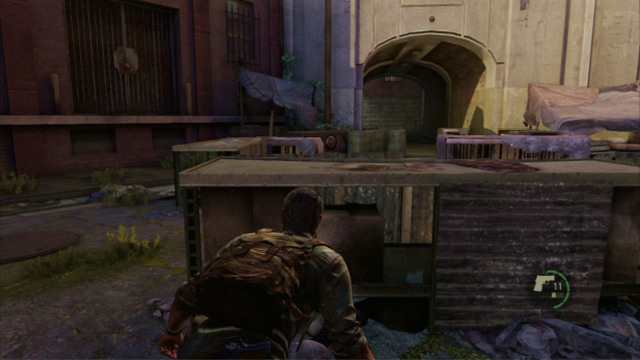
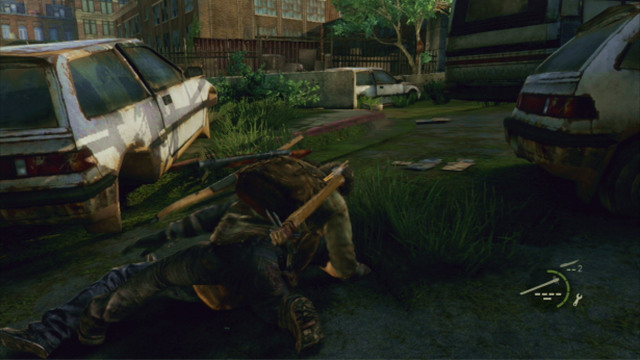
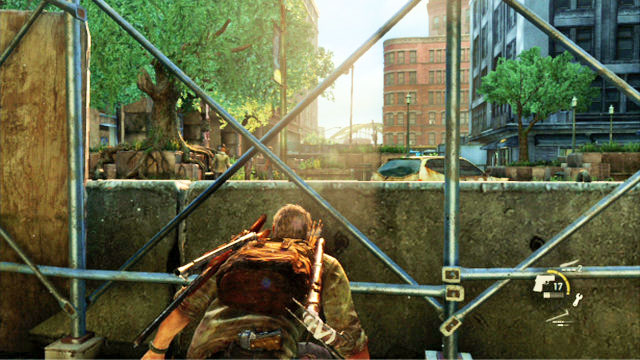
A bit further, you need to squeeze through a hole in the fence where Joel will take cover behind the crates automatically. Now you need to eliminate all of the enemies staying in this area. To avoid losing ammo and health, it is best to take them by surprise.
Start the hunt by attacking the bandit walking on the left. Tess will take care of his companion. To kill the man silently, approach him from behind, press the triangle, and then press and hold down the square. This way, Joel will constrict the enemy.
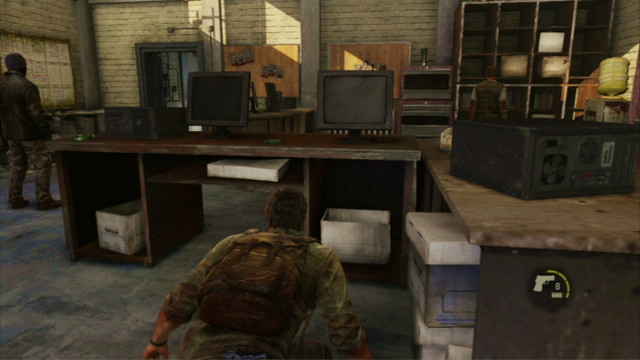
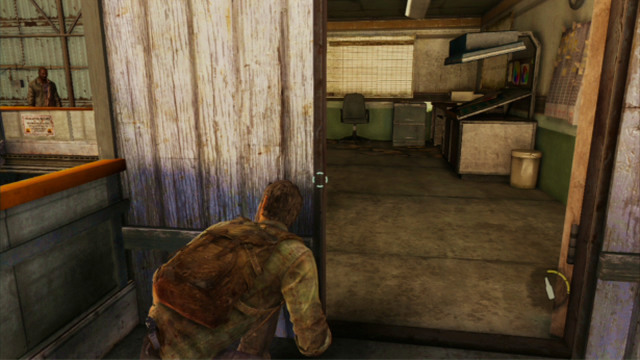
You need to deal with the men inside the building a bit differently. At first, you need to approach them through the room on the right. Use the skill of listening out and wait for both of them to turn to the side. Then, you will be able to approach the one standing further away from you, and grab him by pressing the triangle. Instead of strangling him straight away, use the man as a man shield, which will make it easier to kill his companion. After you do, press the square and the enemy will drop dead.

On the other corpse, you will find a warehouse key, to the nearby door.

Behind the door, there is another phase that will require you to move about stealthily. First, wait behind the crate for one of the enemies to stand in the door, and for the other to start climbing up the stairs to the right.
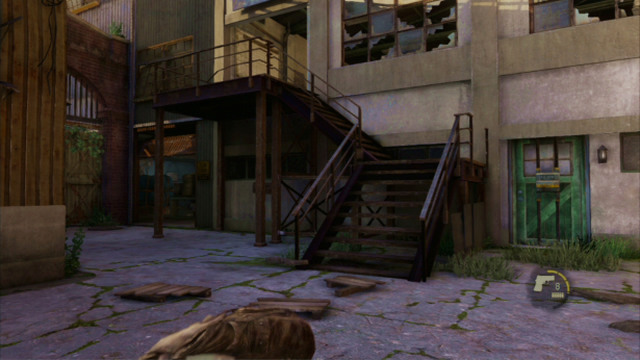
This will enable you to strangle the first one, climb up the stairs and eliminate the other one without any problems.
After you deal with the enemies, go downstairs to eliminate the third one on the ground floor of the warehouse.
Now, you only need to go upstairs and kill the two bandits at the stairs. Use one of them as a man shield to take the other one out without problems.
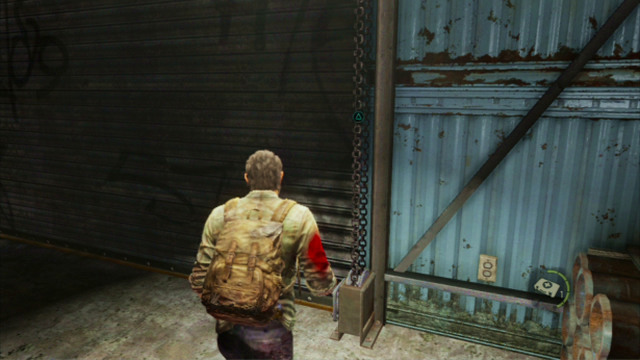
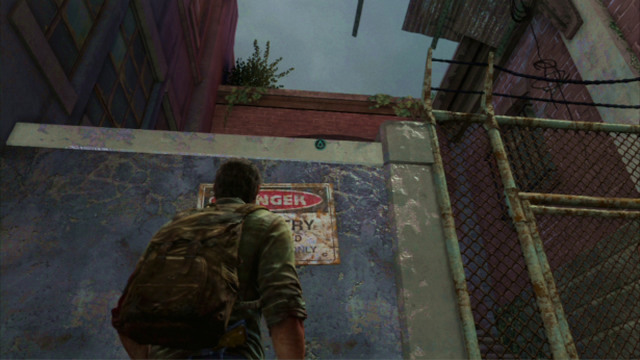
After you secure the area, approach the chain at the gate to the left and pull onto it , by pressing and holding down the triangle. This way you will open the door to the next location.
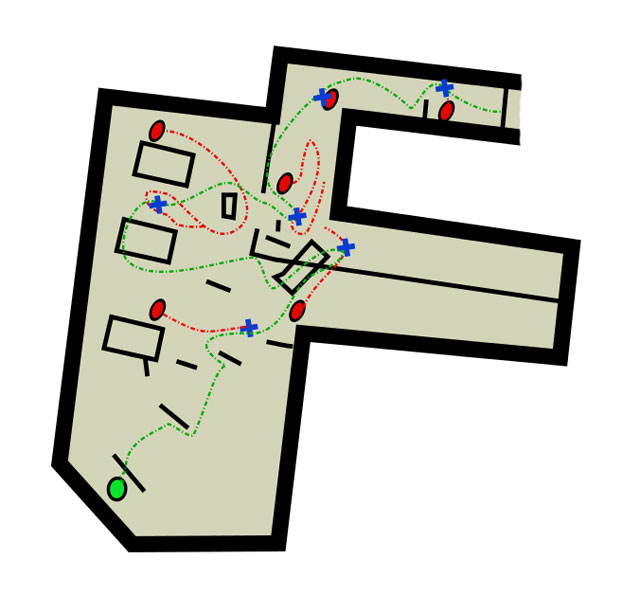
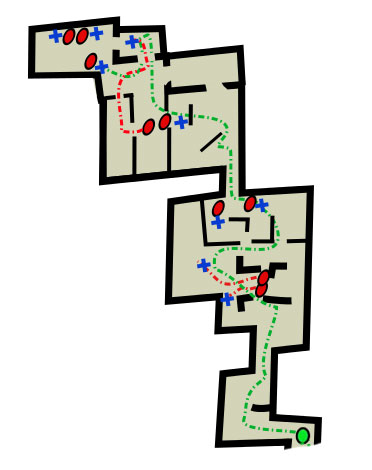
Legend

Start of the fight

Weak opponents

Suggested player route

Enemy routes

Suggested kill areas
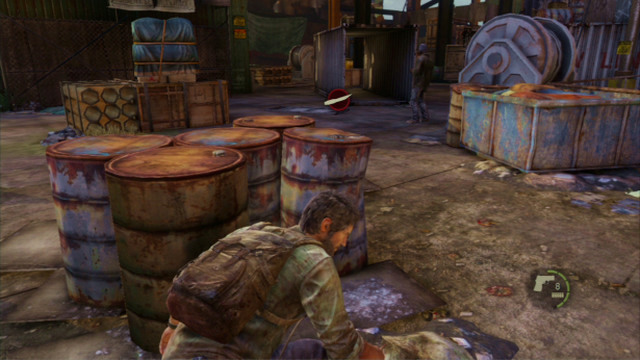
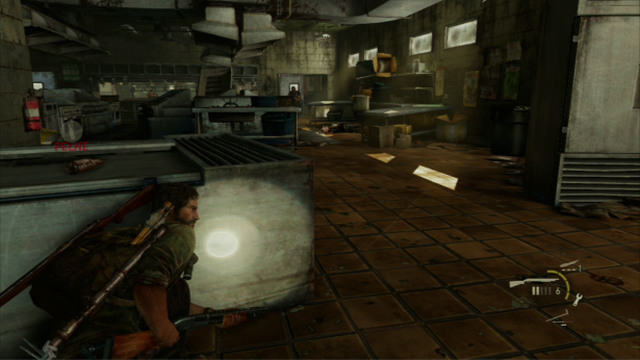
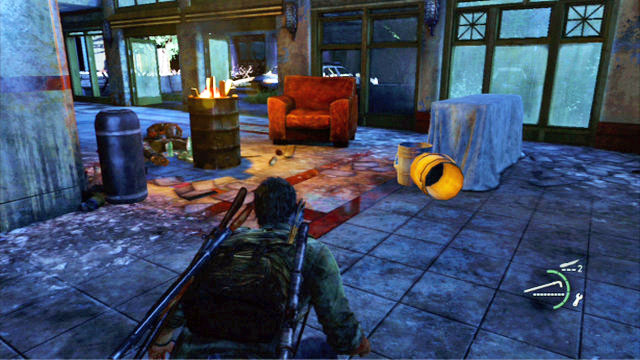
When Joel takes cover, you need to wait a bit and then, take cover behind the barrels to the right.
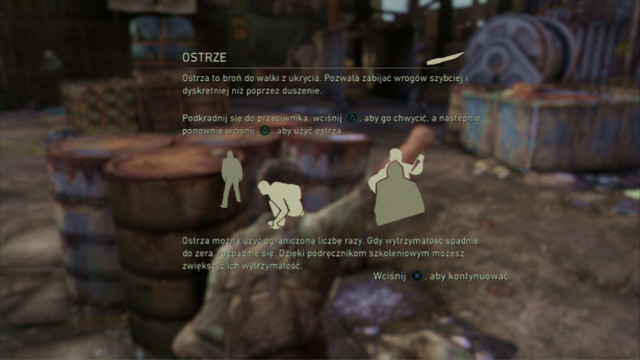
There is a knife on top of the barrels, which you can use in a way similar to strangling - by pressing the triangle instead of the square. It is faster and makes it possible to kill the clickers that you will encounter further in the game.
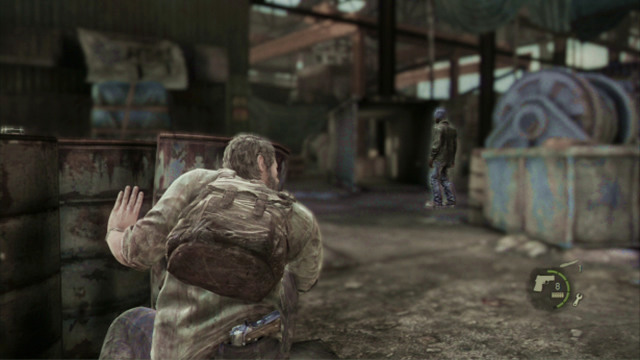
By using the blade that you have just obtained, kill the nearby bandit and eliminate the other enemy to the right, as quickly as possible.
After you've eliminated both of them, return to the beginning and go left. You will encounter a single man there.
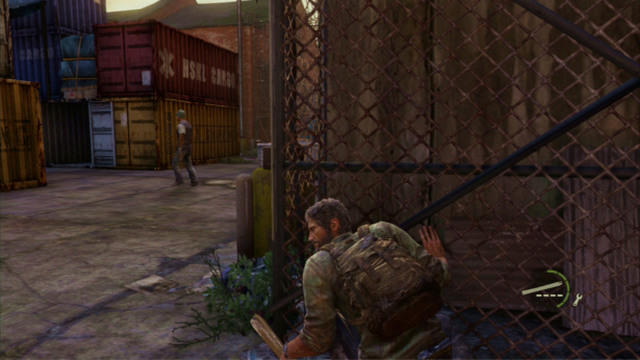
To kill him silently, wait for him to go left. This will give you the opportunity to get him from behind (behind the containers) and strangle him out of his companions' sight.
Now, you only need to deal with three other enemies inside the warehouse. Strangle the first one as soon as he walks a bit to the right and stops there.
The second one will become an easy target then - he is out of sight of the last bandit.
The third one is waiting for you behind the nearby crates. Listen out to locate him.
You cannot attack the man from behind so, you need to encourage him to leave his post. To do that, use a brick or a bottle that are lying about. You only need to throw any of them at the wall to the left. The man will then go there to take a look, which will expose him as a target.
After you secure the area, you can go to Robert's office.
Start chasing the man after he stops shooting. To run, press and hold down L2 and press the X whenever you need to avoid an obstacle.

After you catch up with the swindler, you will see a short cutscene. Then, follow the Firefly leader.
This way, you will reach a room where the woman asks you to help her move the blockade. Before you do, explore this area thoroughly and collect all item that you find.
Legend

Start of the fight

Weak opponents

Suggested player route

Enemy routes

Suggested kill areas
At the other side, you will have to sneak again. At first, dash through the stairs and turn left to enter the nearest building.
You need to get from behind the enemy on your left. Your companion will deal with the other one.
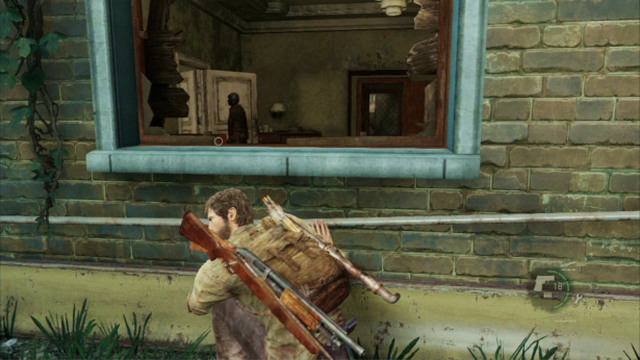
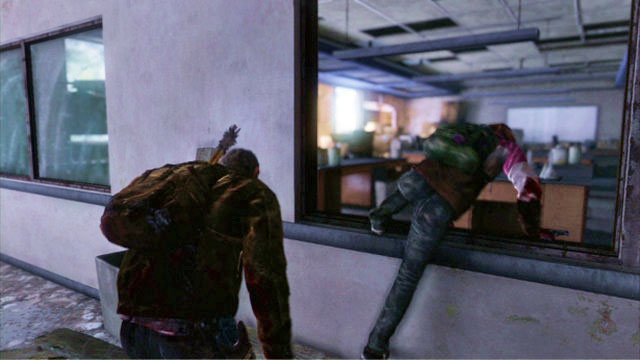
Then, dash to the far end of the room to deal with the enemy behind the window.
To eliminate the remaining enemies, take cover behind the cargo crate and wait for the two soldiers to turn away from you.
You will be able, then, to strangle both of them without raising any suspicion.
The last enemy is on the stairs ahead. Once he starts climbing the stairs, surprise him by hitting him several times.
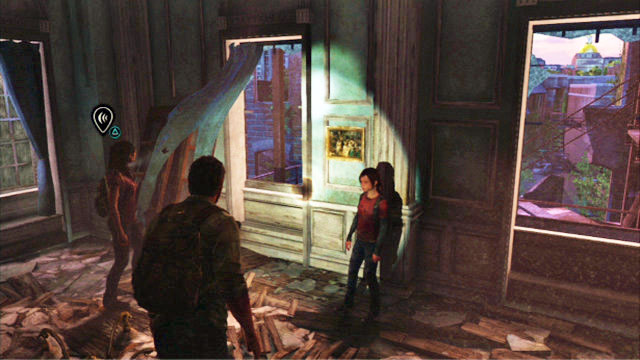
You can now go downstairs and follow the leader. The woman will take you to a room where you will meet Ellie for the first time.
After a short cutscene, keep running ahead until you reach a high fence.

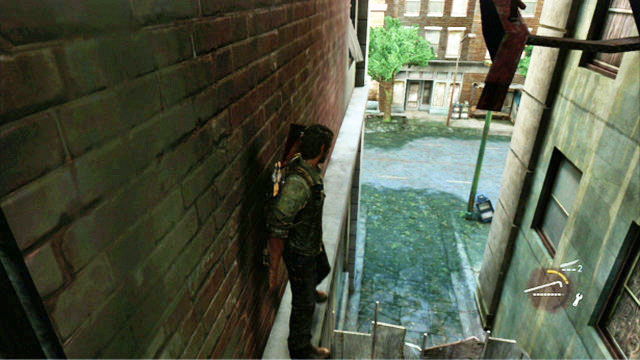
Then, you need to turn right and climb down the narrow staircase.
The path at the wall will take you to another dead end.
To reach the fire escape, you need to find a nearby container and keep pushing it until you will be able to reach the steps. Climb by pressing X.
By going straight, you will finally reach the rendezvous point. This will conclude this chapter.
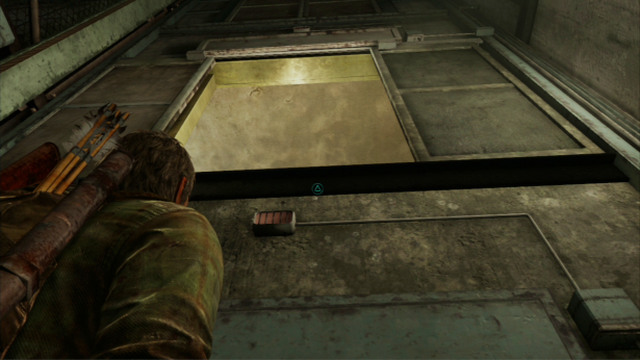
Talk to Tess after the beginning of this part, and squeeze through the hole that will be revealed a moment later.
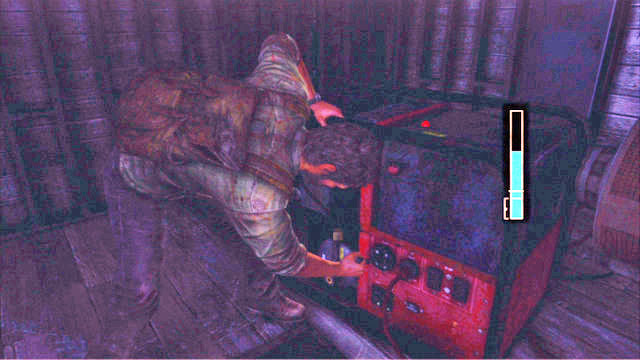
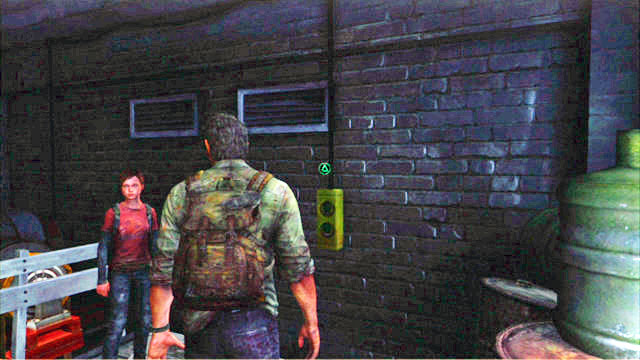
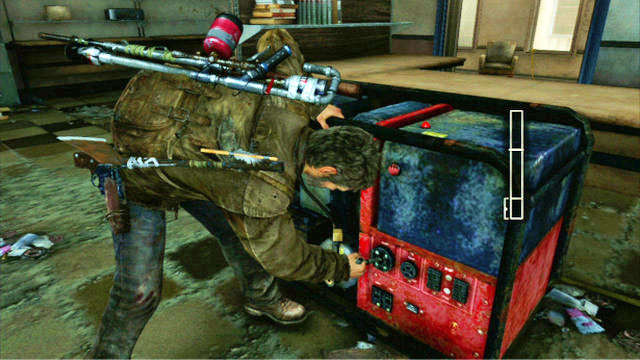
Behind, you will find an elevator that starts working as soon as you start the generator standing next to it. To do this, press the triangle and keep pressing it as soon as the cursor to the right reaches the bottom part of the bar.
After three successful attempts, the machinery will start to operate and you will be able to start the platform.

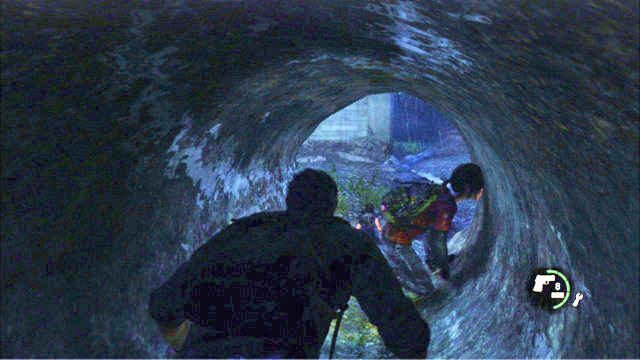
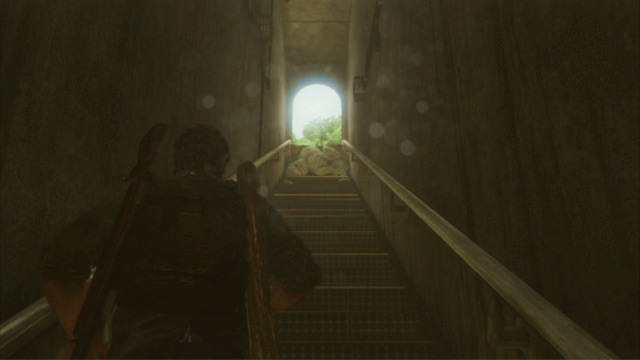
Once you get downstairs, turn on your flashlight and enter the narrow tunnel to the left.
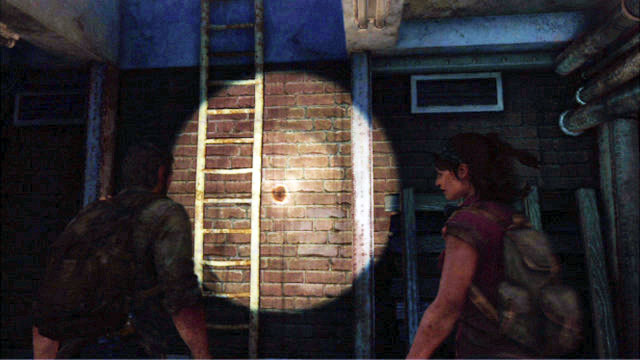
This will lead you to a ladder to the surface.
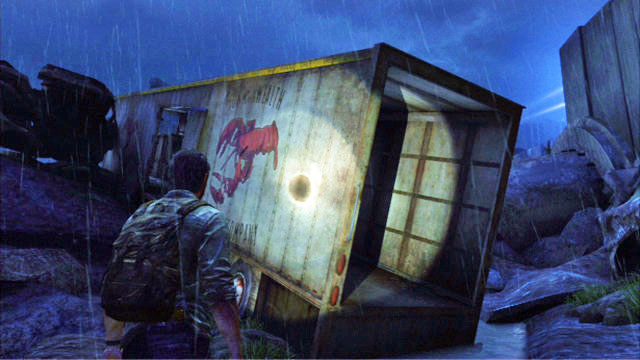
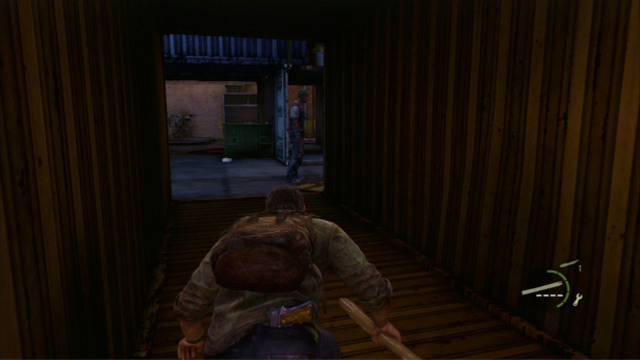
As soon as you reach the surface, go ahead and walk through an empty truck trailer. Soon afterwards, you will see a short cutscene.
After it finishes, crouch and walk over to the other end of the tunnel.
Now you need to follow Tess, while hiding from spotlights. As soon as you go through the next tunnel, Joel will assume the command.
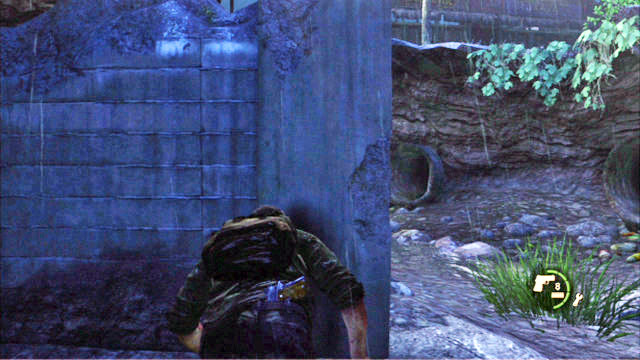
At first, go ahead; as soon as the soldier turns away, sneak quickly to the wall to the right.
Then, you need to run up to the tunnel on the left and make your way to the other side.
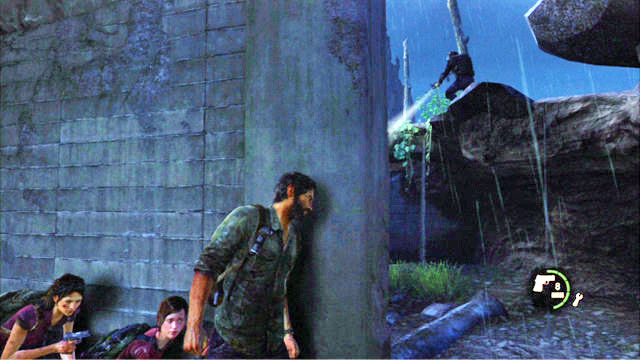
As you go ahead, you will reach a derelict building. You now need to turn left and climb to the very top. There will be another soldier that appears behind your back so, take cover.
To the left of the man, you will find a staircase to the window, which you need to jump through.
At the other side there is a locked gate. Open it by pulling on the chain (triangle).
Once you are outside again, follow Tess to the right.
Take cover and wait for the first one of the enemies to come closer. Now throw a brick or a bottle the other way. As soon as he turns away, you can strangle him quickly. Crouch next to the destroyed exit and wait for the other soldier. Sneak up from behind and eliminate him the same way as the previous one.
Now, it is enough if you go ahead and keep to the right side, and you will reach a tunnel that will take you to the next location. If you are spotted on the way, get up and run the correct direction. You should not take too much damage in the process.
At the other end of the tunnel, dash up the stairs and squeeze through the hole in the wall. There are further soldiers waiting for you here.
Squeeze past them and keep to the left. Run ahead. The wide pipe will take you to the gate, whose crossing will start a short cutscene.
Start by going ahead and climbing the debris.

This way you will reach the edge of a small void, where Tess will show you the Capitol Building (L3).
Continue to the right until you reach a big, derelict building.
At its right end, you will find a corpse of a man and, a bit further, a staircase.
Before you go upstairs, open the nearby door and collect spares located at the other end of the room.
On the landing, there is another dead soldier. Collect the ammo next to the soldier and go upstairs.
Further passage leads to a room at the fifth floor but, it is a better idea to go to the sixth floor first to collect items from there.
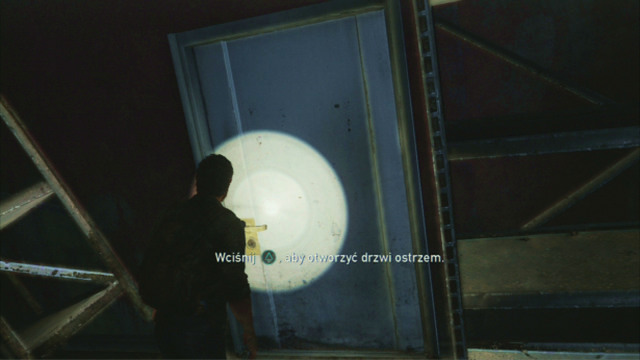
As soon as you encounter a corpse of a dead infected, move it by pressing the triangle . Then, open the door(square).
At the other side, on one of the shelves, there is a supplement that can be used to improve on Joel's abilities. You can modify them by entering the menu (SELECT).
As you walk through the narrow passage to the right, you will reach a bigger room. Explore it and open the only door here.
At the other side, there is an infected waiting for you. Push him away by pressing the square.
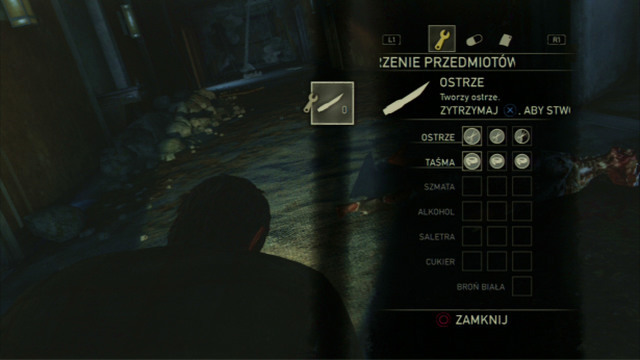
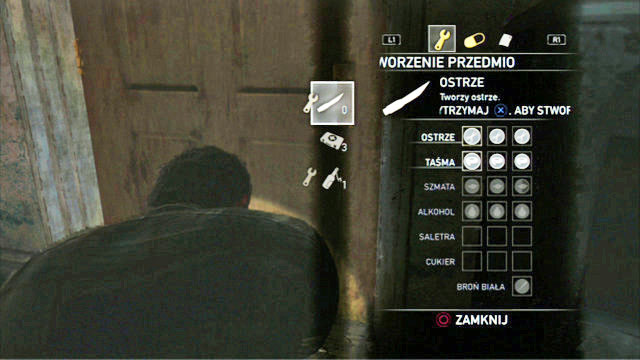
As soon as the beast dies, enter the next room. A moment later, you will learn from Tess how to create your own first-aid kits. To do that, press SELECT and use R1 and L1 to select the correct tab. As of now, you can create only blades and first-aid kits. To craft an item, you need to have to necessary ingredients on you, and press the X. This process take a while so, always try o replenish your supplies before a battle.
Now, create only a knife to open the locked door located a few steps away. Behind the door, you will find a lot of useful items. There are many such doors throughout the game so, it is always a good idea to have at least one blade on you, or the ingredients that you can use to make one.
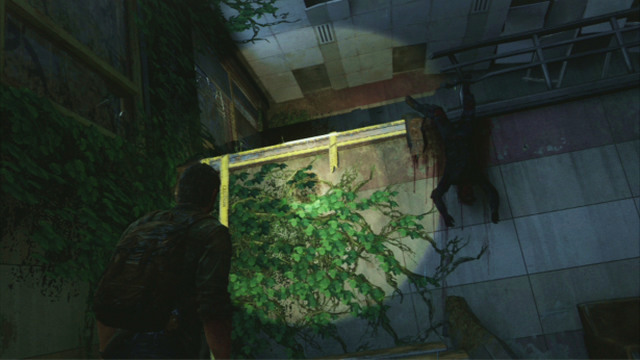
Go left to reach a tall wall with a corpse hanging down from it. Give Tess a boost and use her help to get up there too.
A moment later, an infected will appear. To distract him, pickup a bottle and throw it to the left as far as possible. You need to get to the tall wall ahead.
Climb onto the wall as soon as the infected turns away, and pick up the first-aid kit lying at the soldier's corpse. It is worth remembering that the infected cannot see the light of your flashlight so, you can make use of it without any problems.
Further way leads through the barrier to the left. As soon as you land below, move over the wardrobe that blocks off the stairs and wait until Ellie and Tess walk over to the other side.

Together, walk through the window and make it into the second part of the building.
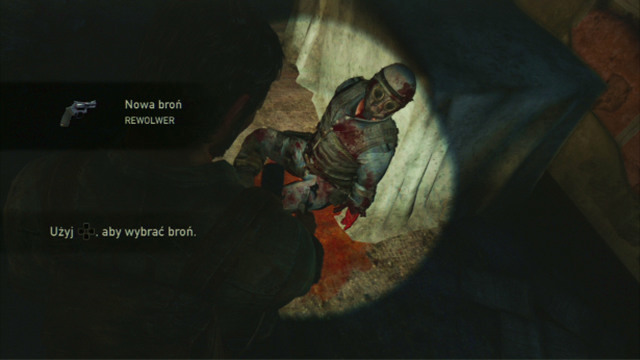
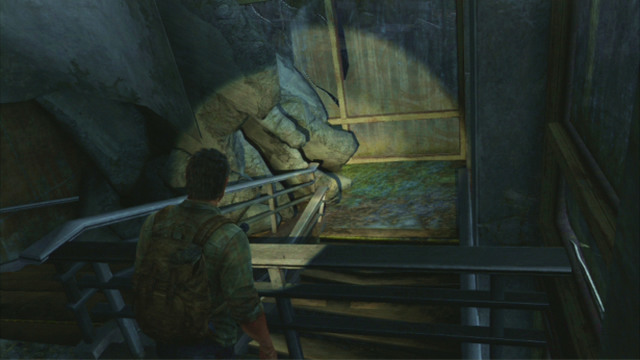
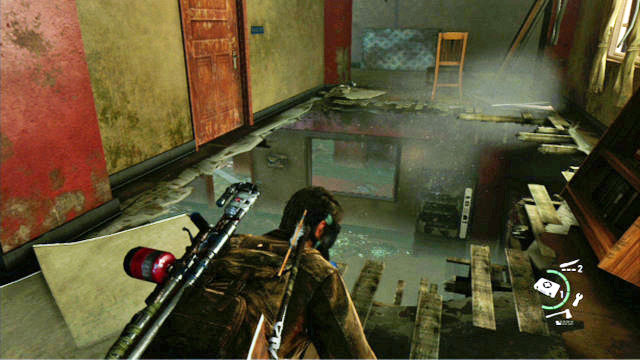
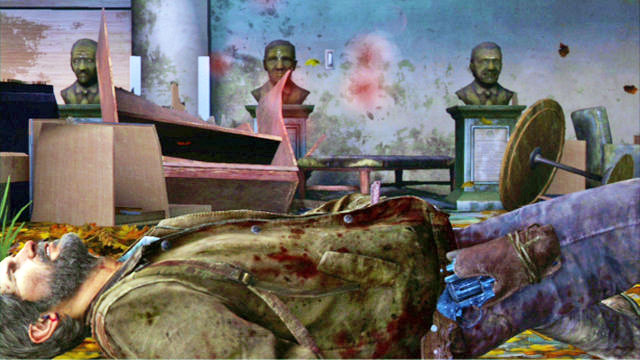
This time, you will bump into the corpse of a soldier with a revolver next to it. Collect it by pressing, and holding down the triangle. To change weapons, you need to press the right arrow on the D-pad and pick the correct item by holding down the X.
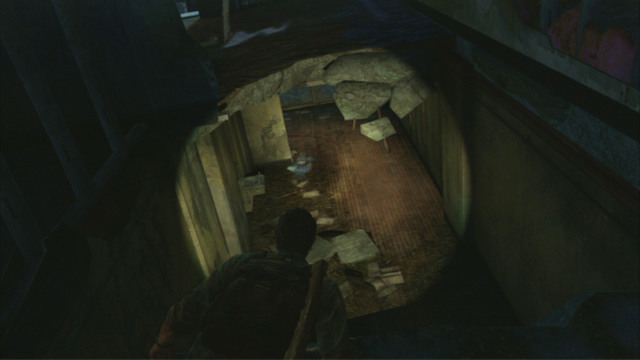
As you go ahead, you will be hearing the voices of the zombies. Get to a lower level then and collect the pipe lying on the ground. This will come in handy if you are spotted by the monsters. Remember, though, that melee is ineffective against the infected and you should always try to kill them from behind with your knife, or at a distance with your revolver.
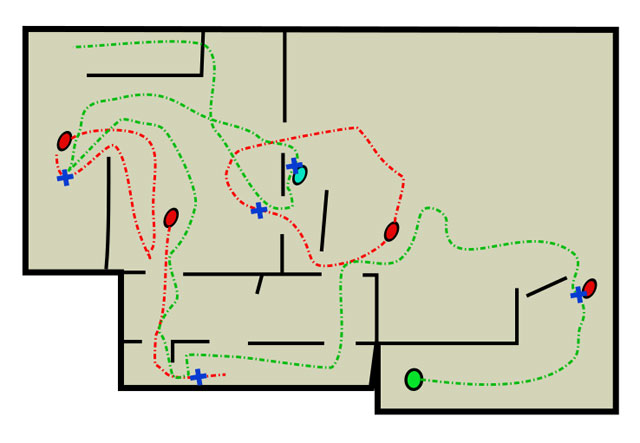
Legend

Start of the fight

Weak opponents

Clicker

Suggested player route

Enemy routes

Suggested kill areas
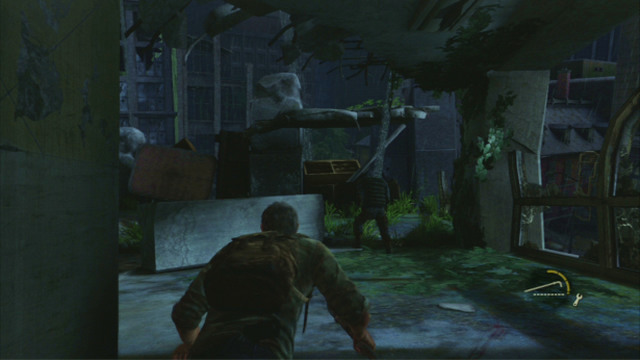
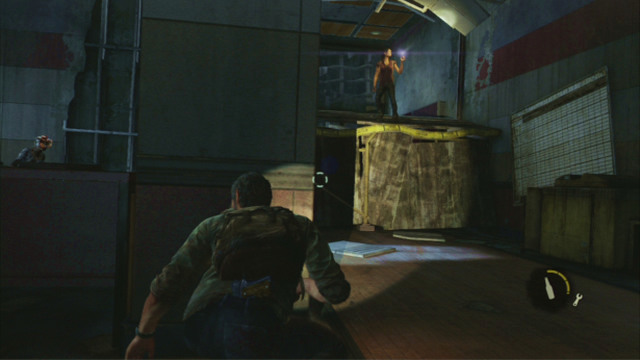
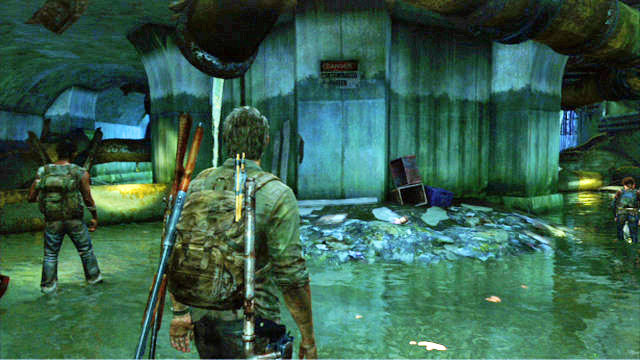
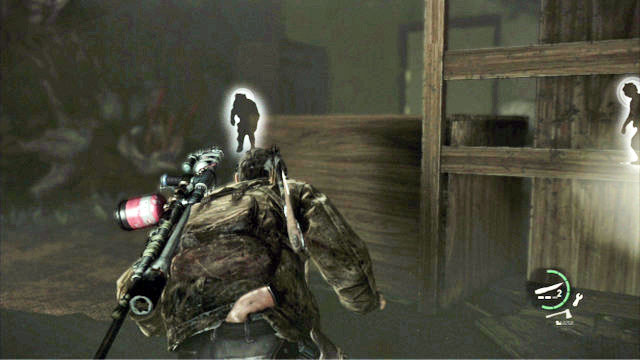
Right behind the corner, you will bump into the first enemy. Strangle him quickly and take cover behind the wall to the left. Further in this location, there is a clicker and a large group of runners, waiting for you. The best way to eliminate them is by sneak-killing, but you can do that using firearms. To dispose of them, first of all kill the clicker at a distance, and then kill as many zombies that are running at you, as you can. When they come close enough, make use of the pipe that you have just obtained. If you end up surrounded, you can press and hold down the L2 and start running, which will make Joel free himself automatically. Below, you can find a detailed description of how to secure the building stealthily.
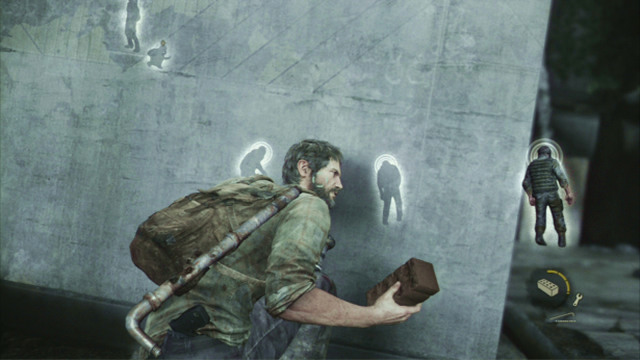
Listen out and wait for the enemy that is standing closest to you, approaches the water that is flowing down and turns away. You will then be able to sneak to the corridor on the left.
Take cover there, behind the barricade, and wait for the next enemy. As soon as the zombie starts entering the room to the left, sneak up to him from behind and strangle him.
Leave the room and approach the hole that the monster walked through. You need to hide behind its edge and wait for the nearest enemy to start walking towards the left-hand end of the building. While waiting, stand as close to the hole as possible, or else the monster may spot you. When the enemy moves in the correct direction, move out and sneak-kill him.
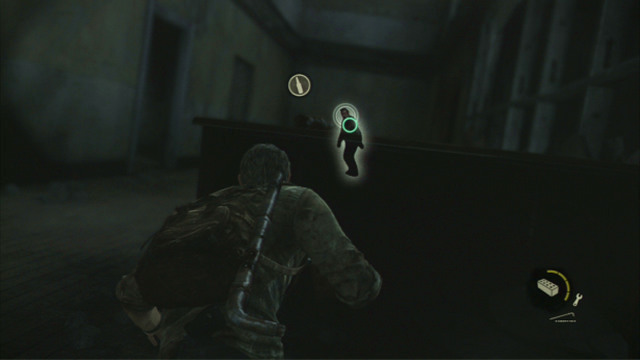
Now, the only ones remaining now are the clicker, and the runner circling around him. First, get rid of the latter one. To do that, take cover behind the rubble near the clicker and wait for the enemy to go right. He is going to be turned away from you, then, which will make him an easy target. When there is only the clicker remaining in the room, you can shoot the beast or lure him into the right spot with a brick, and stab him to death.
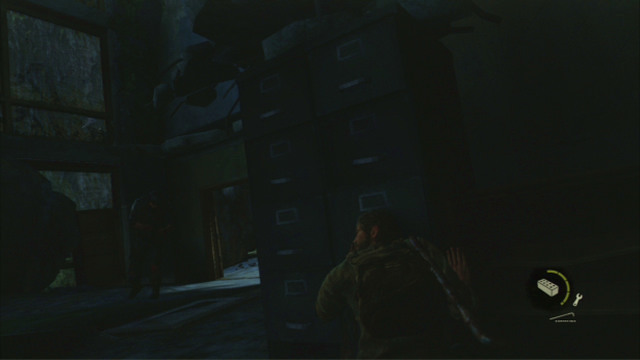
After you clear the area, climb to a higher floor and move the chest of drawers out of your way.
Behind the door, you can find many useful items so, you'd better give a good searching through to the room.
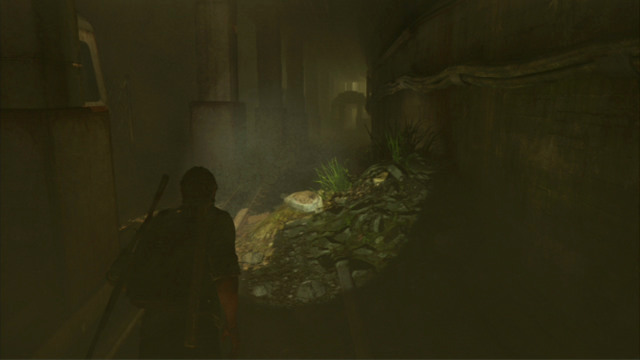
A bit further, you will reach a small void. To get down safely, you need to make use of the passage to the left.
The path will take you up to the flooded part of the rubble heap, where you will have to turn left.
Climb to the higher level and walk through the narrow tunnel.
Further passage goes down, to the place where you can find a corpse with a Molotov's cocktail on it. You use it in the exactly same way as bricks but, unlike them, it inflicts more damage and sets on fire targets within a quite large radius. After you collect the item, you immediately learn how to craft it, and you can do it in the appropriate menu.
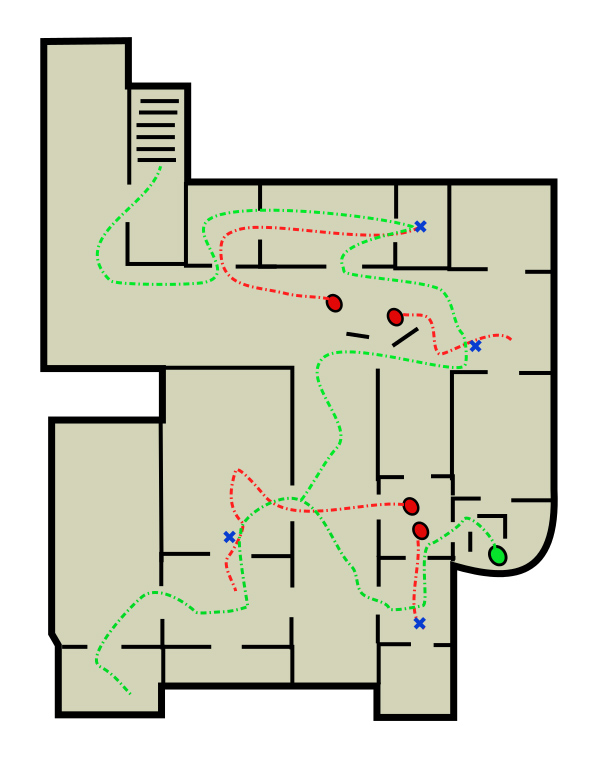
Legend

Start of the fight

Weak opponents

Clickers

Suggested player route

Enemy routes

Suggested kill areas
Behind another narrow passage, there is a longer sneaking part waiting for you. You need to squeeze past several clicker and make it to the building's exit. If you prefer to open fire at them, prepare a larger number of the Molotov's cocktails. Thanks to them, you will be able to eliminate large number of enemies but first, you need to gather them in one place. Narrow passages serve very well to this end.
If you prefer to complete this chapter without getting into open fight, squeeze past, with your flashlight off, to the left because, the nearest clicker will go in the opposite direction. You need to turn the flashlight off because of the runner that is feeding a few steps away.
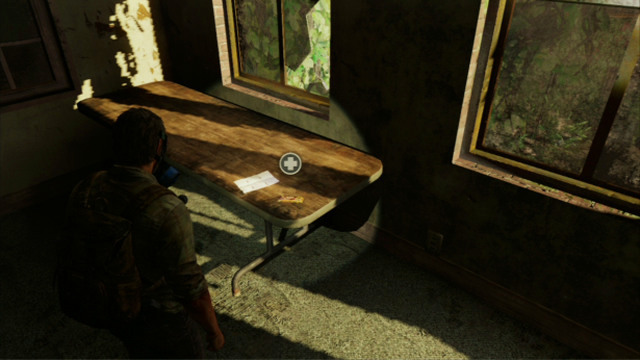
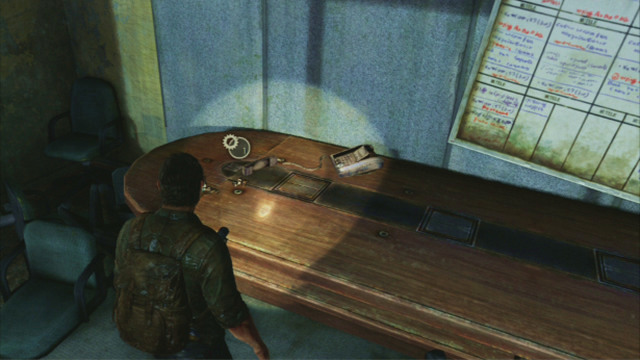
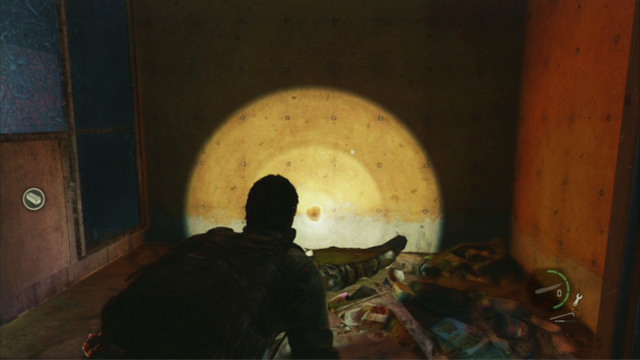
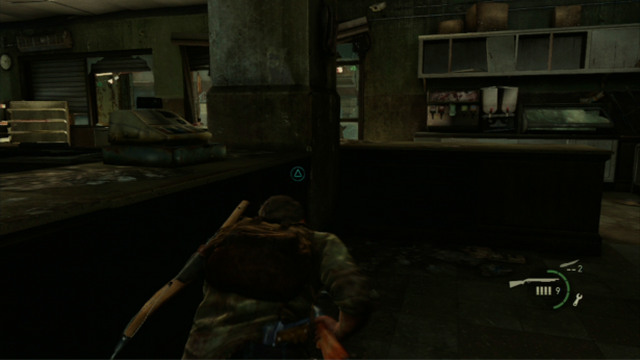
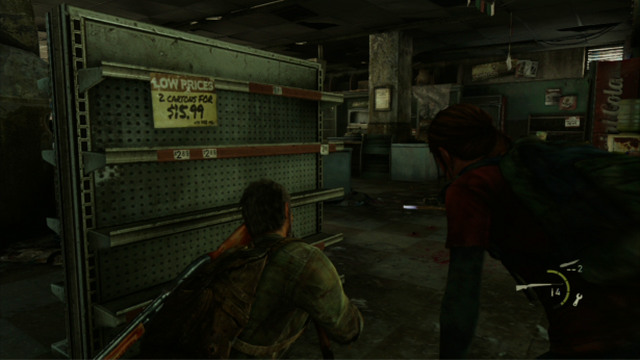
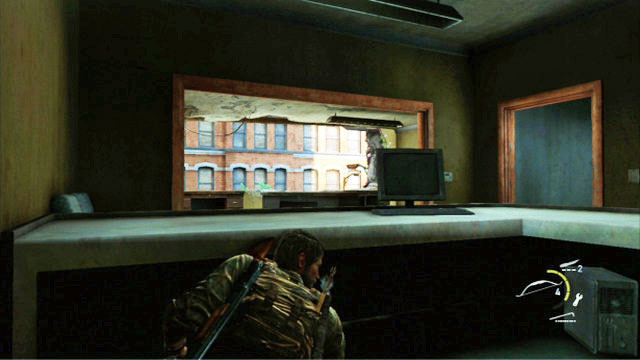
As you go ahead, you will get into a derelict shop with a long counter. In the counter, you can find a drawer where there is a slip of paper with a code.
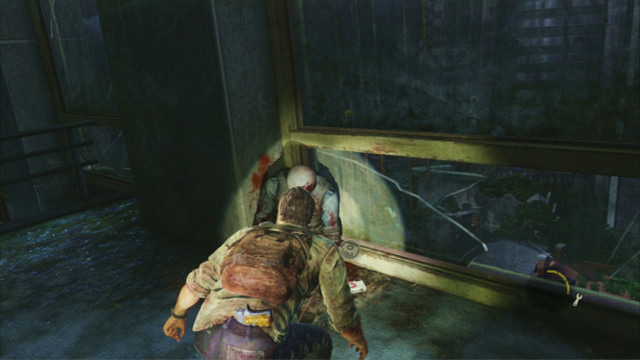
Collect it and locate the nearest monsters by listening out. When the nearby corridor is free of the monsters, approach the window at the other side. You now, carefully, need to go a bit to the left and avoid the stalking zombie.
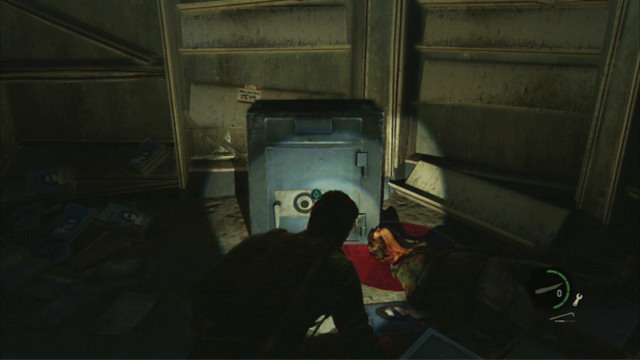
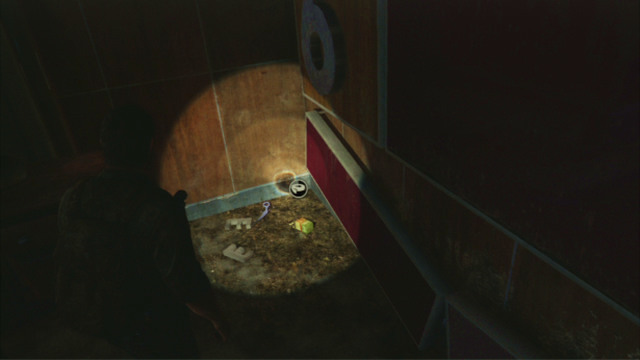
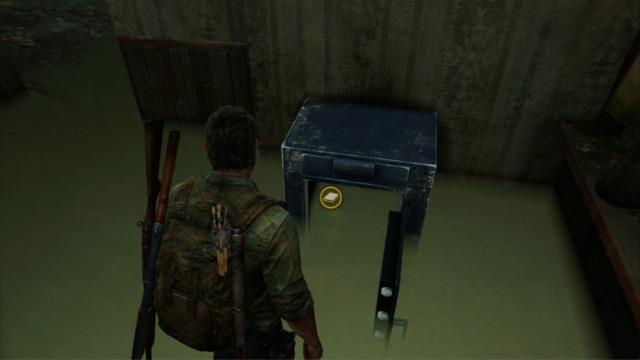
After several steps, turn right and then jump through the window to get to the next corridor with a single clicker in it. You now have two ways out. You can go to the exit straight away, by going left, or follow the monster to the right and hide in the shop to the left. In the latter case, you will reach a safe that you can open with the code you obtained earlier. Inside, there are 50 spares that can be used to upgrade your weapon.

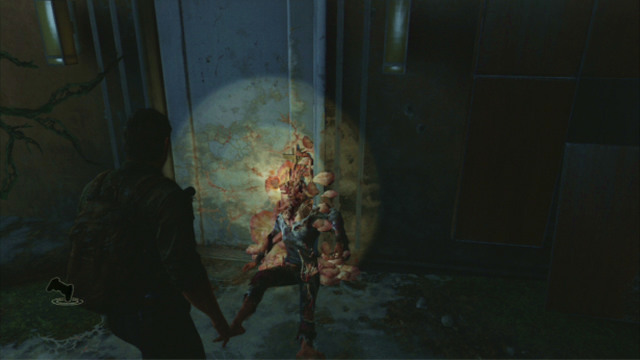
Either way, ultimately, you need to reach the wall at the end of the corridor. Unfortunately, it is also guarded by a clicker.
To get rid of the monster, pick up a brick and throw it towards the left corner of this location. The beast will turn in that direction, and you will be able to kill it with your knife.
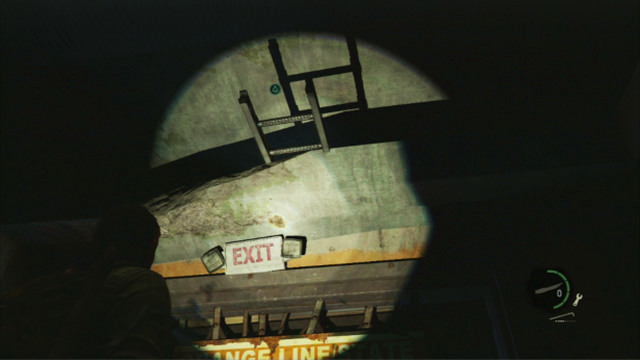
Once the creature dies, approach the wall to the right and pres the triangle to help Tess up. A moment later, the woman will slide down the ladder for you, which will enable further journey.
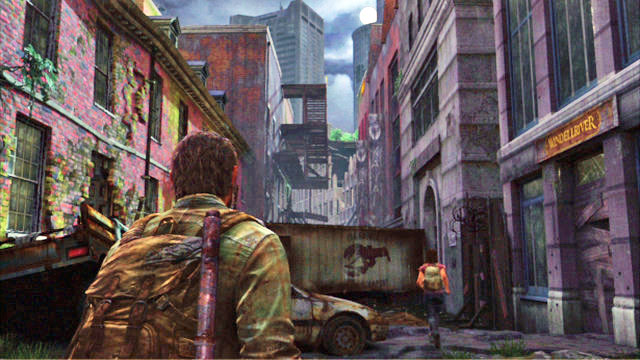
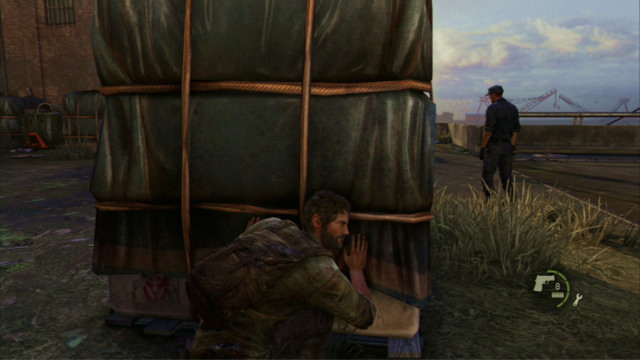
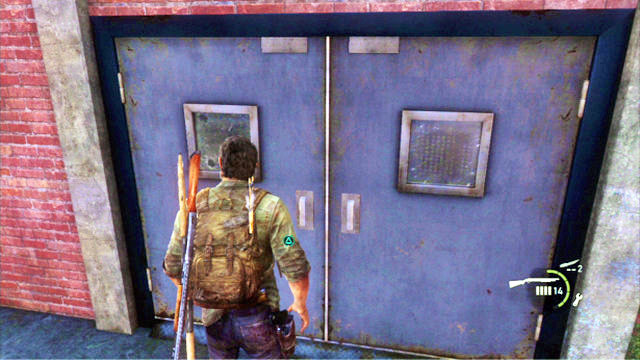
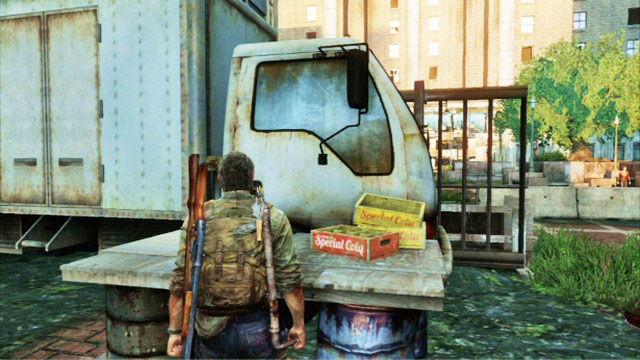
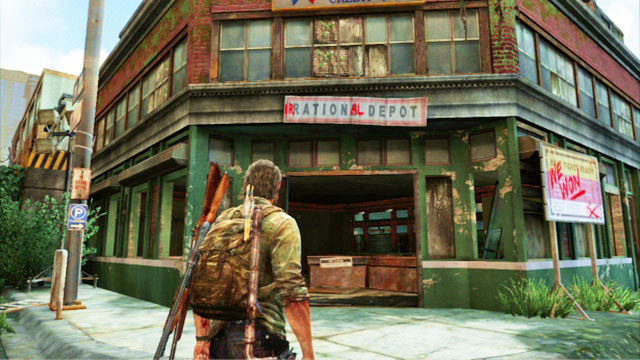
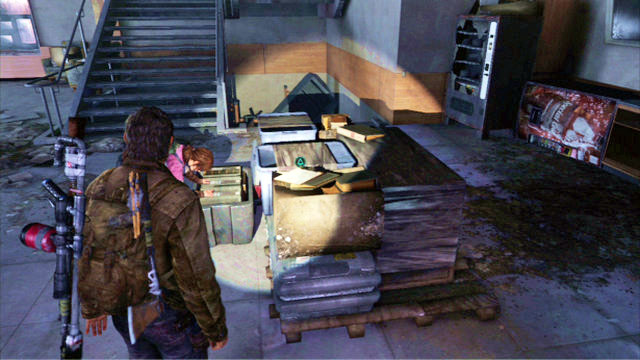
After you get out into the streets, turn right and you will reach a truck standing across the way.
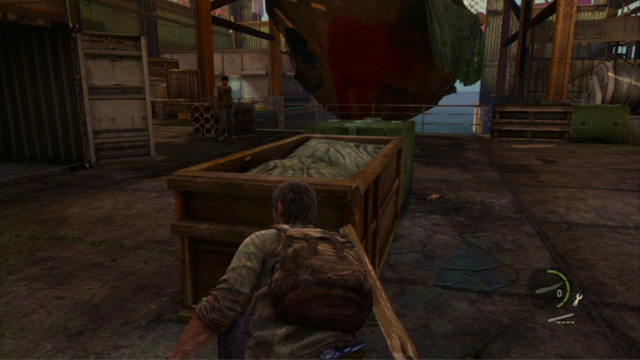
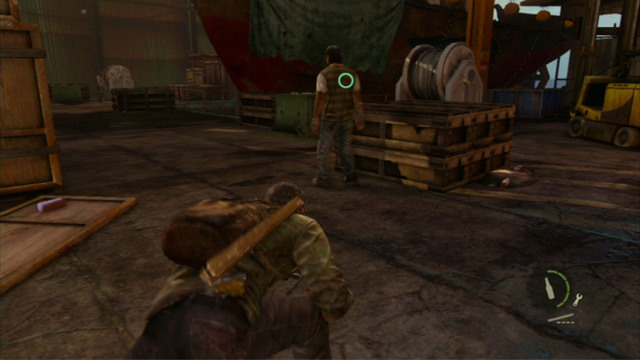
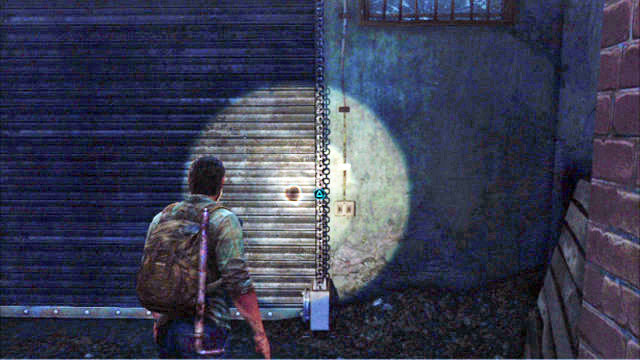
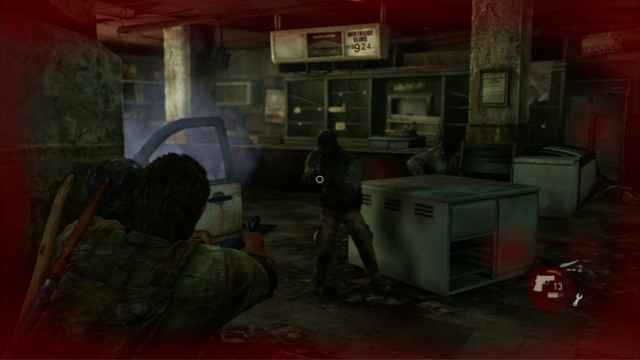
To make it over to the other side, you need to move the container towards the truck. You can fid it in the building to the left. Before you enter, start listening out and turn your flashlight off. Inside the building there are three zombies waiting for you. The creatures do not move so, you can easily sneak up to them from behind and strangle them. First, deal with the beast to the left, then the one to the right. This way, you will be able to squeeze past the last one safely.

Once the area is secure, search through this location and move the container towards the truck.
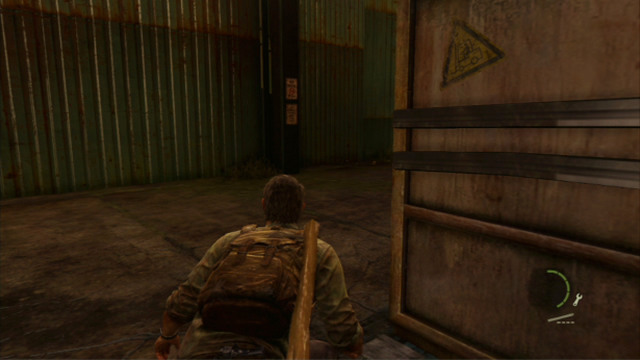
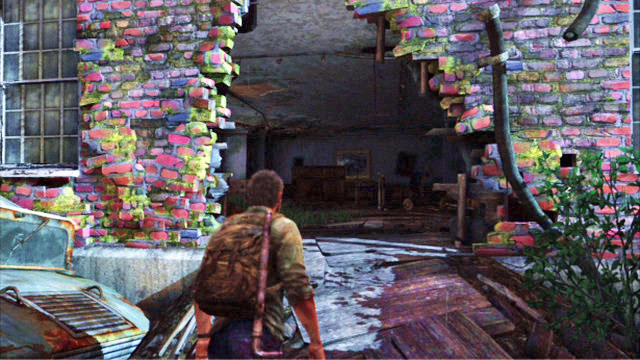
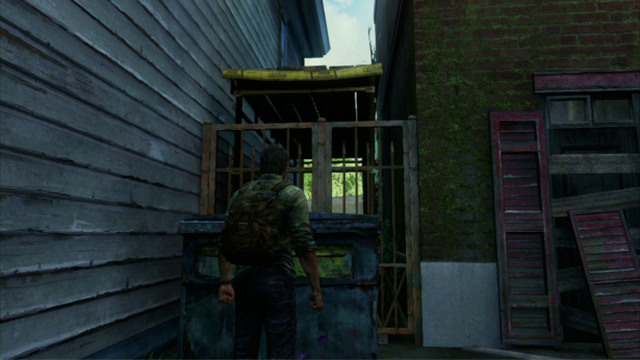
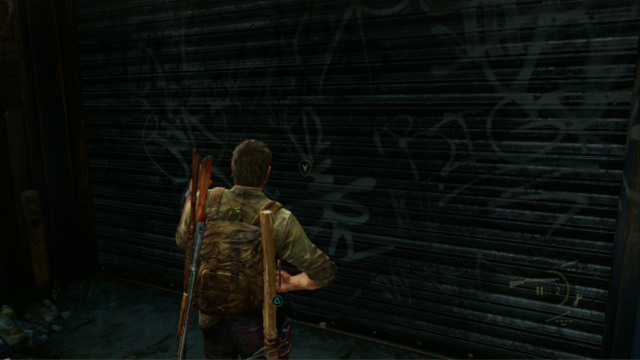
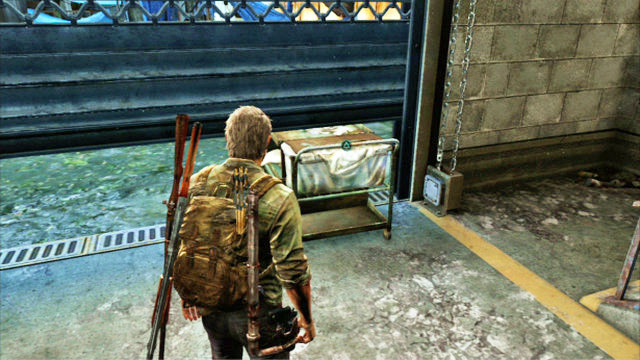
After you walk over to the other side, open the gate to the left and dash inside to avoid the approaching zombie.
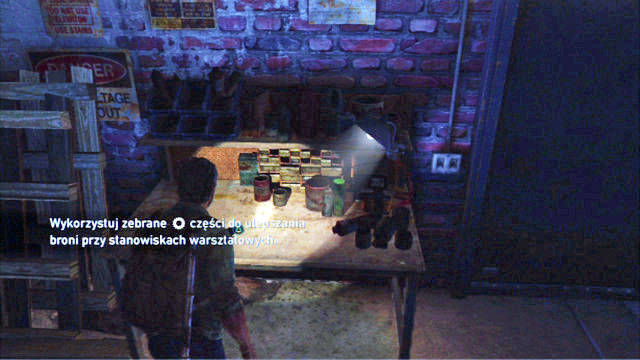
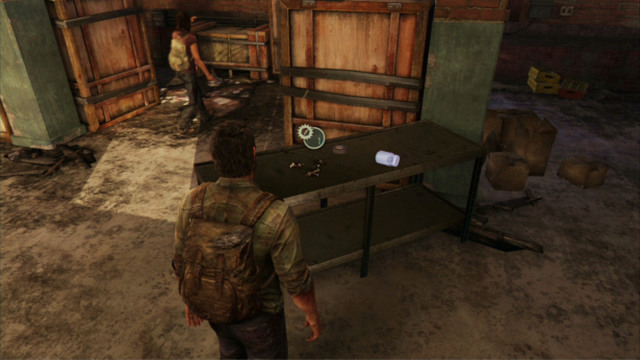
Inside, you will find a workbench, where you can upgrade your weapon with the spares that you obtained earlier. It is a good idea to increase the clip capacity and the increase reload speed to your favorite weapon.
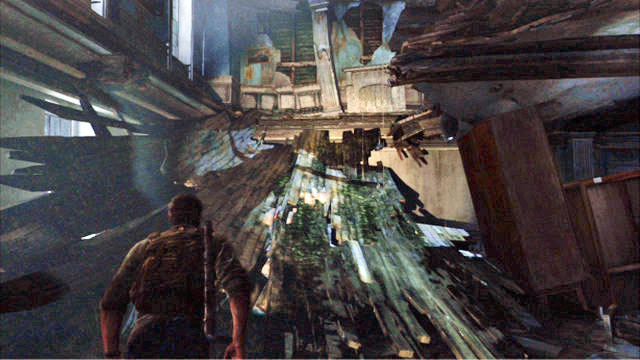
Once you are done, walk over to the nearby door and go left. This way, you will reach a location with collapsed floor.

Before you climb up, though, explore all of the areas because, there is some useful gear stashed here.
Once you limb up, you need to find a passage in the room to the right.
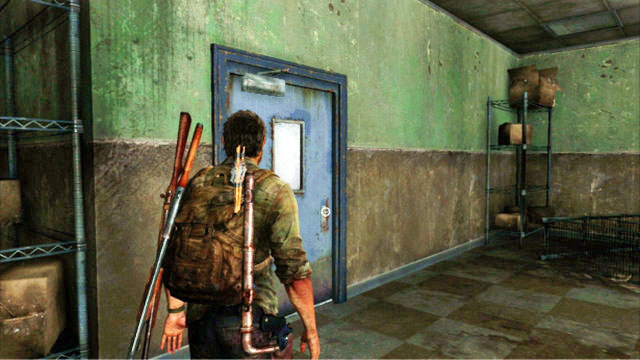
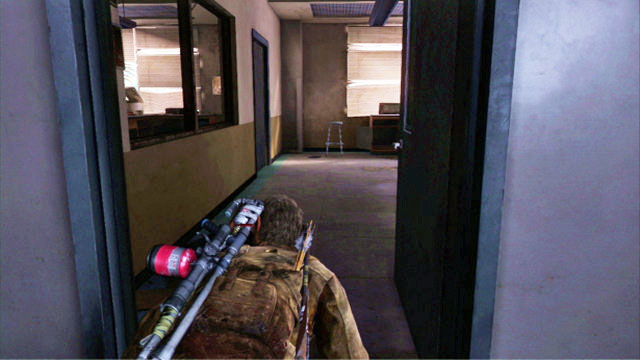
Press the triangle to enable Tess and Ellie to make it to the other side. Still, you won't be able to do it yourself. After a short cutscene, turn back and go left. This way, you will get to a corridor with clickers walking around.
To avoid getting into fight, turn left and follow the first enemy you encounter, until you will be able to take a turn to the left. In the room, you will find a door that you need to open with your blade. Craft the appropriate item and explore the area behind the door thoroughly.
Once you are done, walk over to the location at the other side of the corridor, while minding the creatures walking around here. You now need to turn left and follow the zombie there.
Ultimately, you need to get to the other end of the corridor that you have just been in. You can get around the enemy, patrolling this area, only through this location. When the enemy starts going in the opposite direction, turn right and open the nearby door.
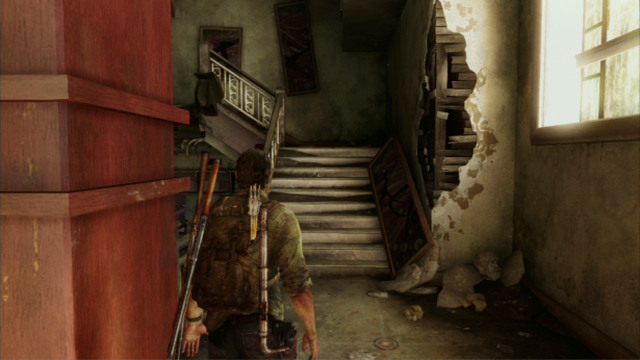
Past the door, there is a staircase that leads up.
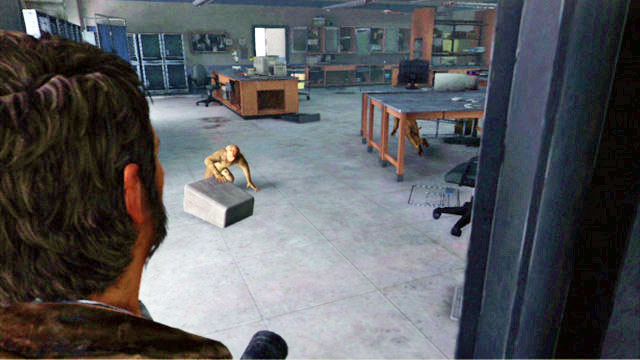
Once you climb up the stairs, turn your flashlight off and eliminate, silently, the enemy banging at the door. You will then be able to walk through the door, where there is Tess waiting for you.

Once the woman eliminates one of the assailants, quickly move to the next room. There, you will have to face a swarm of runners. To eliminate them quickly, it is best to retreat to the smaller room and shoot at the enemies one after another. In a situation when one of them approaches too much, punch him several times.
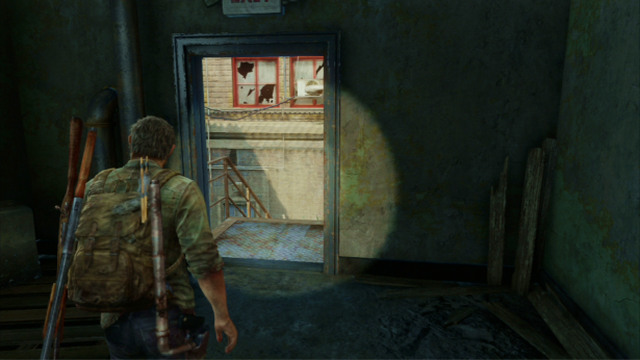
After the last one of the zombies dies, approach the broken window in the corner of the room.
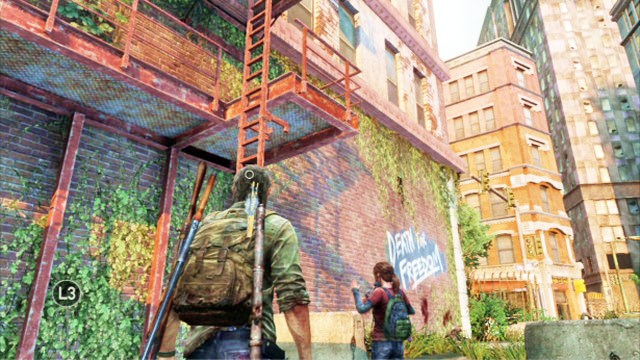
You need to talk to Tess there and then, climb up the fire escape to the rooftop.
Once you get there, find a plank and pick it up by pressing the triangle.
This way you make a makeshift bridge connecting this building with the other one.

After a short cutscene, run ahead to the very bottom of the stairs.

In the right corner of this location, you should notice a locked grate. and a scaffolding.
To get up, you need to move a nearby container.
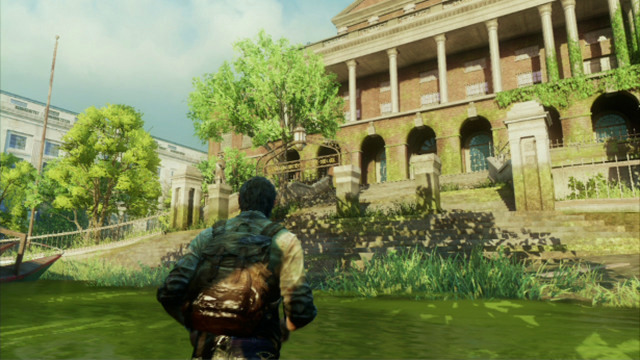
Once you get to the other side, go left until you reach the Capitol Building.
Opening the door will trigger a short cutscene.
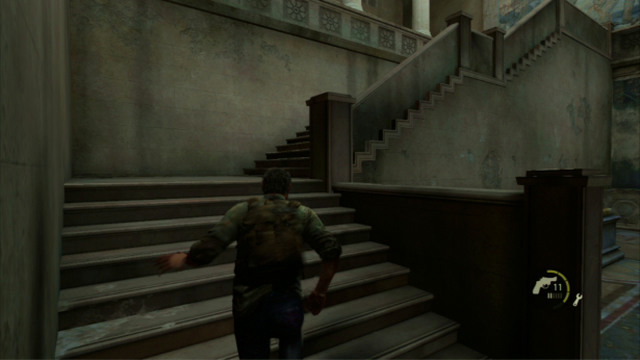
As soon as it is over, run up the stairs to the left and keep going right.
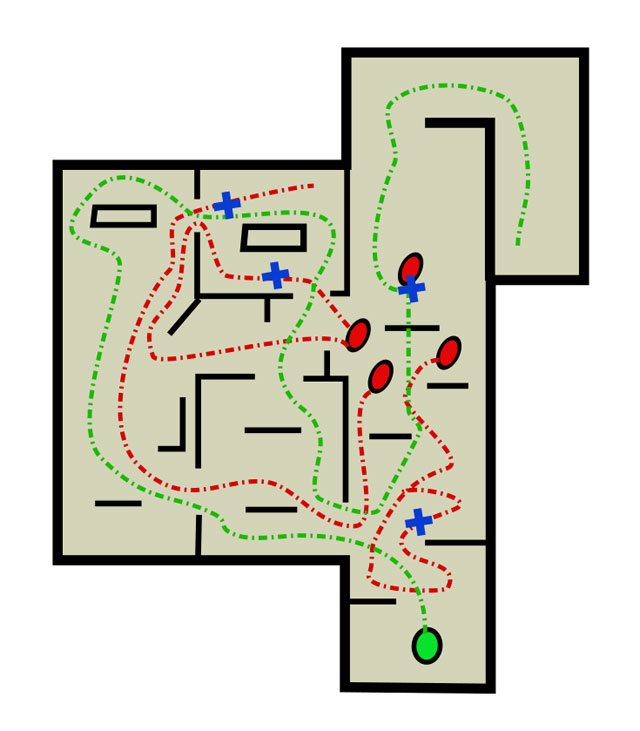
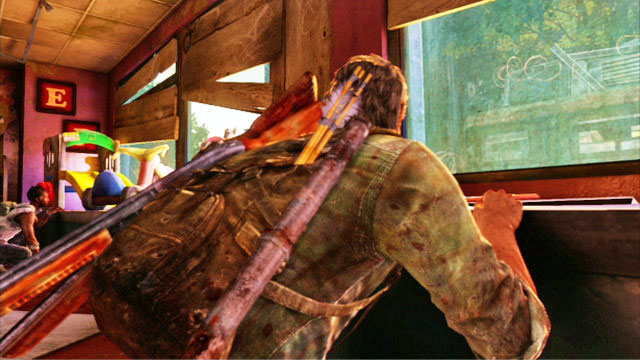
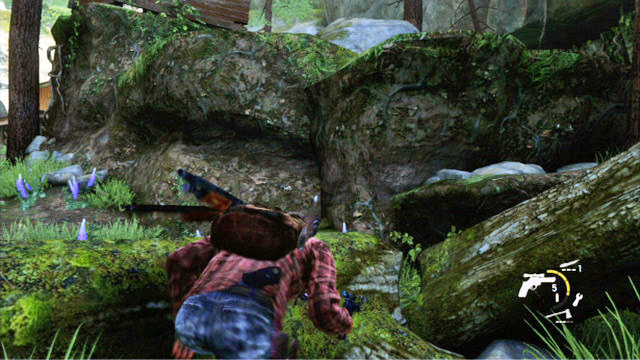
This way, you will reach a shelf that will make it possible for you to get lower.
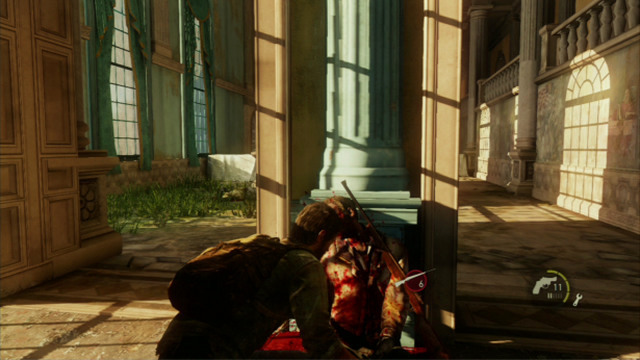
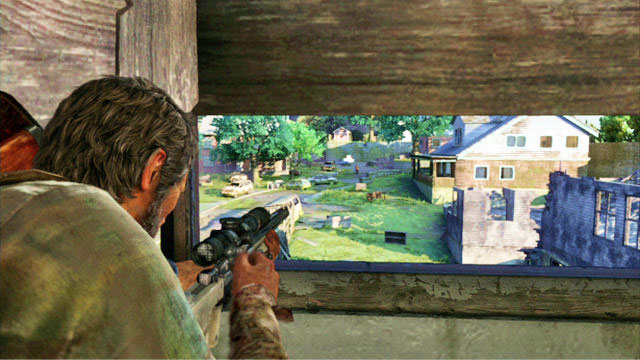
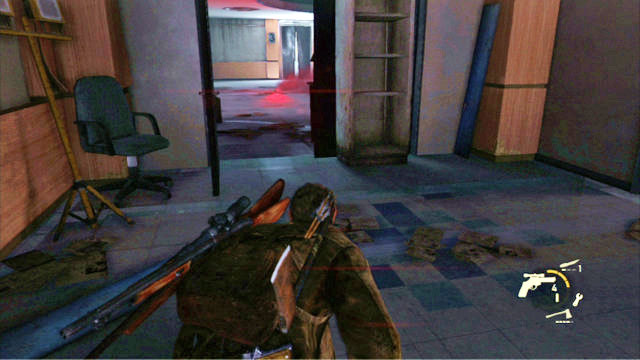
You will find there a corpse with a hunting rifle on it, that will come in handy while fighting soldiers. The longer you aim at a spot, the more precise the shot and the greater the damage.
Legend

Start of the fight

Weak opponents

Suggested player route

Enemy routes
Suggested kill areas
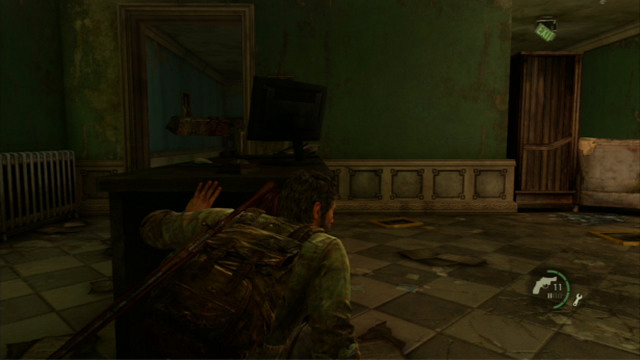
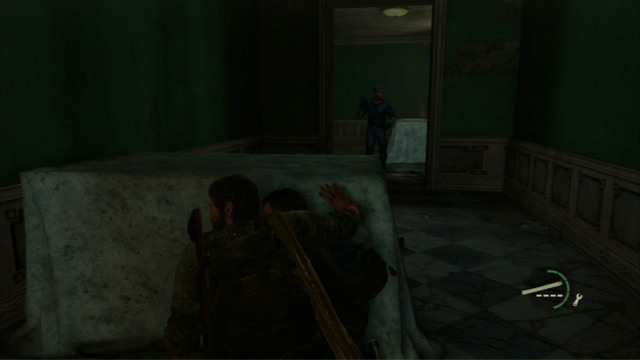
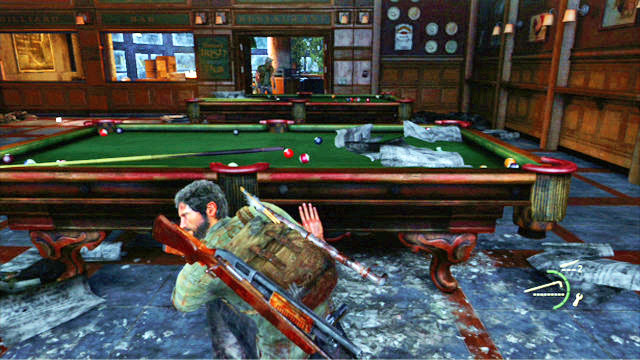
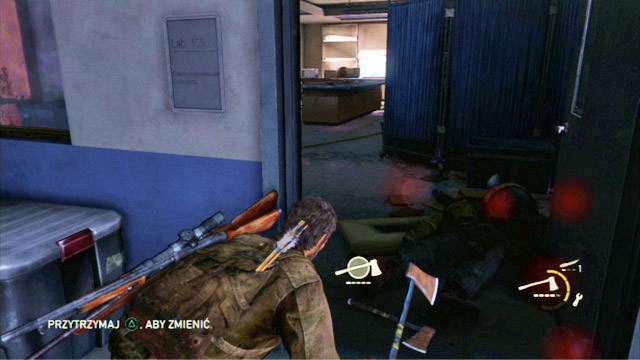
Right after you obtain the new piece of weaponry, go to the room at the left end and take cover behind the desk in the left corner of the room. A moment later, the first one of the soldiers will enter the room. When he starts to leave the room, sneak up to him and kill him.
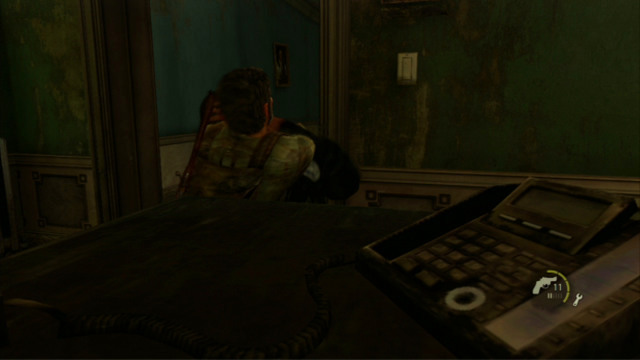
You should now hide behind the cabined in the dark room, to wait for the other one of the enemies. Kill him by grabbing onto his neck and strangling him.
You can now return to the place where you found the rifle and eliminate the enemy that walks in circles.
Once he dies, there is going to be only one soldier left, which should be no problem to you anymore.
After you clear the area, return downstairs via the stairs. There is another band of enemies waiting for you.
Legend

Start of the fight

Weak opponents

Suggested player route

Enemy routes

Suggested kill areas
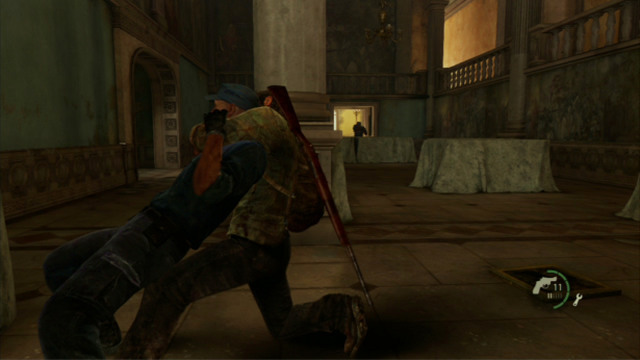
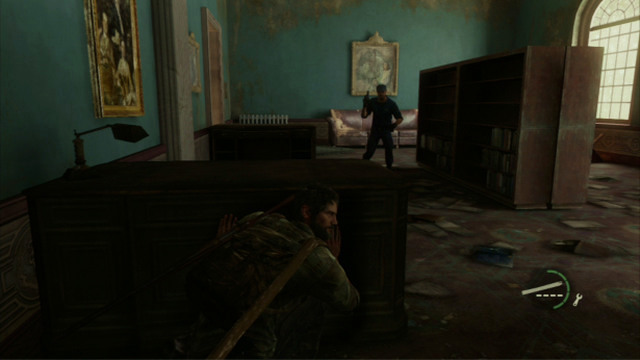
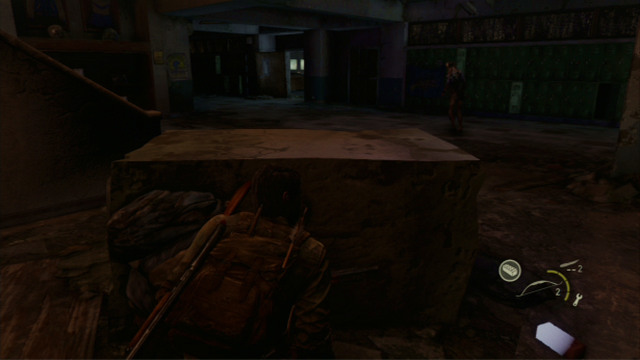
To defeat them, make your way to the dark room to the right as quickly as you can. In the centre of that room there is a big piece of furniture, which you can use as a cover. As soon as an enemy appears, kill him.
The death of the first one will disturb the other ones. They will come to check the room that you are staying in, one by one. When they come, strangle them also.
As soon as the third one drops dead, go right and kill the man walking between the chest and the shelf. Even if he spots you, you should not worry about that.
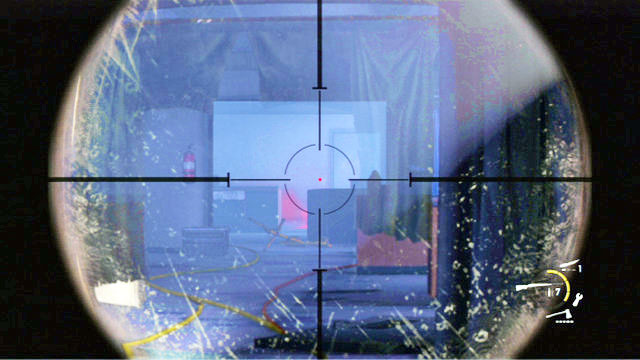
There are only three more soldiers remaining in the building and you can eliminate them without any problems with the rifle that you obtained earlier.
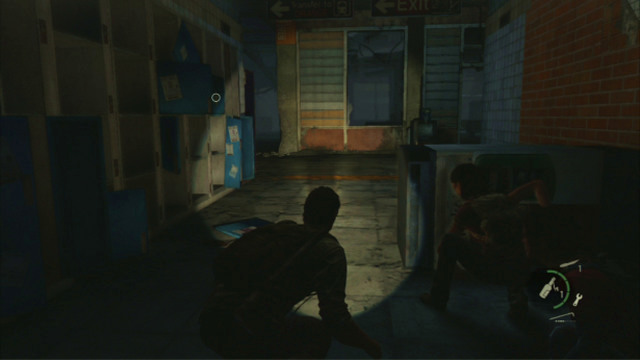
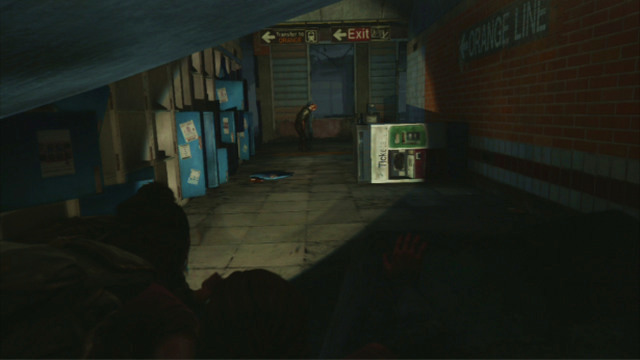
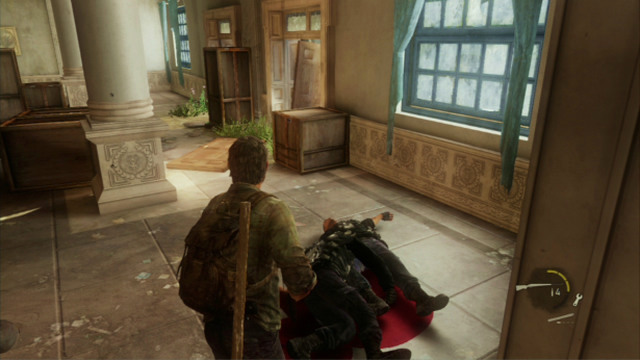
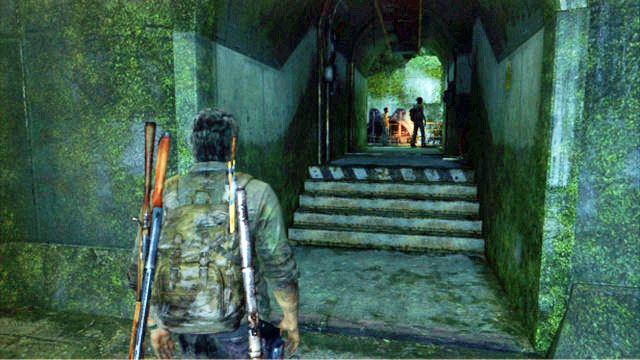
As soon as you deal with the last one of them, leave into the open and run up to the stairs leading to the metro station.
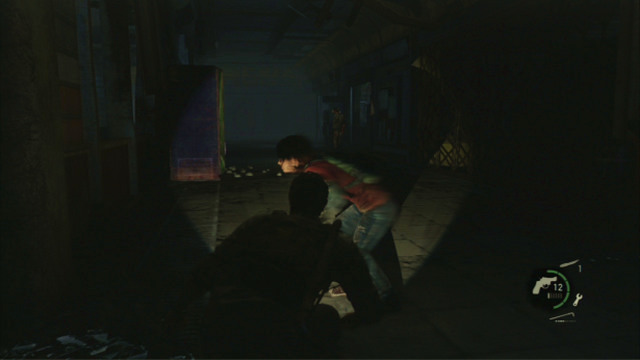
Underground, you will bump into two more enemies. Kill the first one of them by walking around him from the left, and shoot, or sneak kill as soon as he turns away. Most frequently, they do not see each other because of the train on the tracks so, you should experience no difficulties while taking them out.
As soon as the area is clear, run along the tracks, and walk through the railcars here and there. This way, you will reach a flooded part of the metro where you will have to dive several times. To do that, press the circle, and press the X to resurface.
Once Ellie will be able go continue the journey, swim up to the far end of the tunnel and find the drifting wooden plank. You need to grab it (the triangle) and take it over to the girl. After your companion jumps onto the plank, swim over with her to the other end of the tunnel. There, Ellie will go ashore and throw you a ladder.
Climb up the ladder, and then dash into the open up the nearby stairs.
This will start a short cutscene.
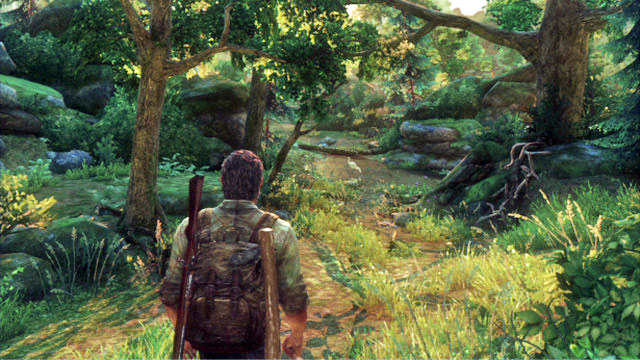
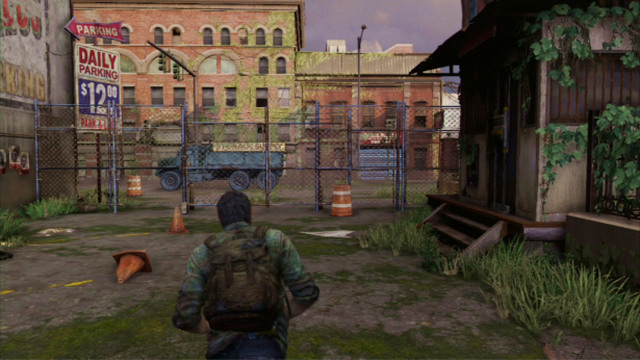
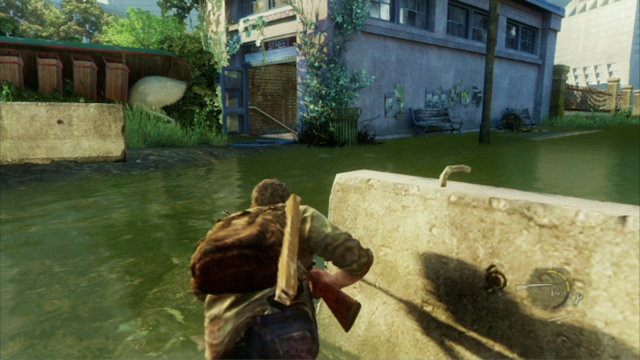
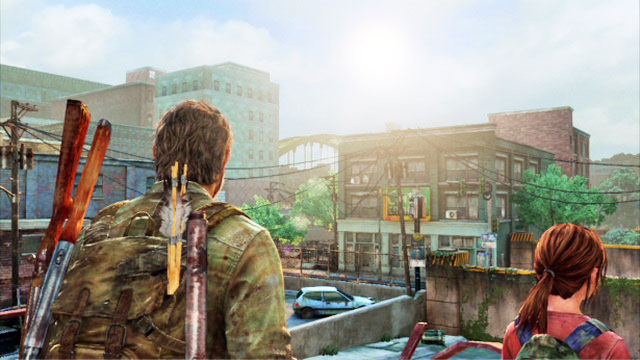
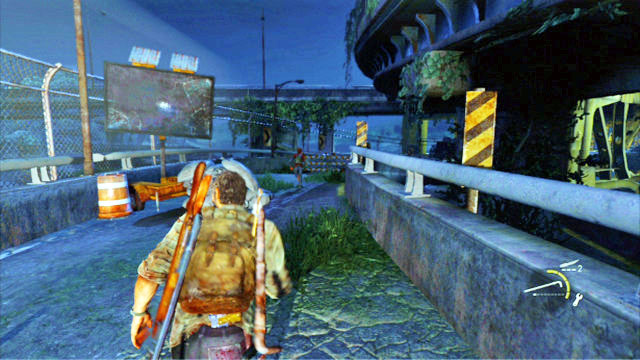
After the chapter starts, go ahead and take the path to the right at the fork.
All the paths lead into the same place, but by going right, you will find additional supplies and materials.
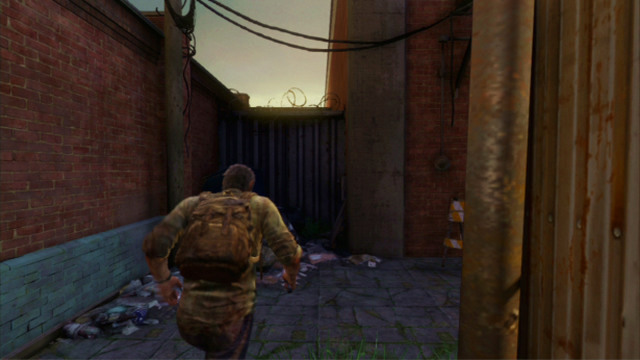
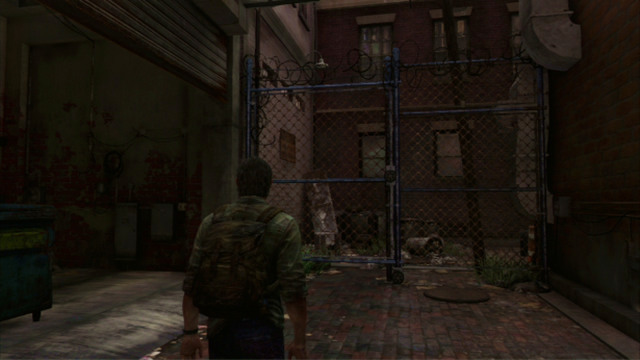
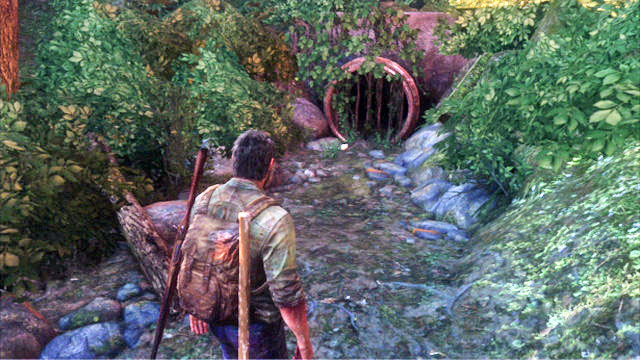
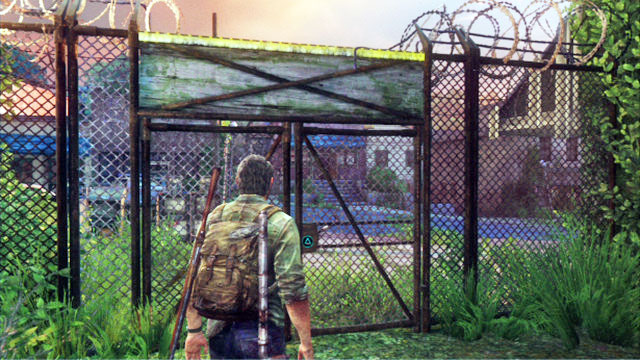
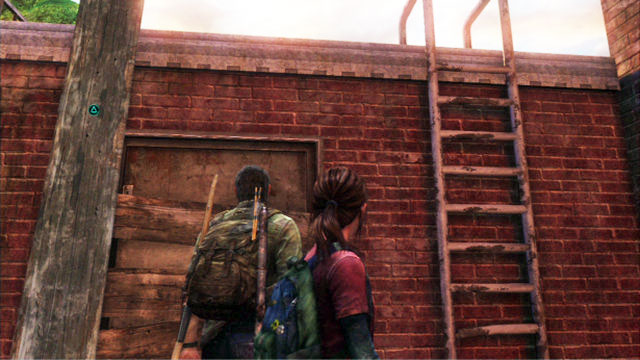
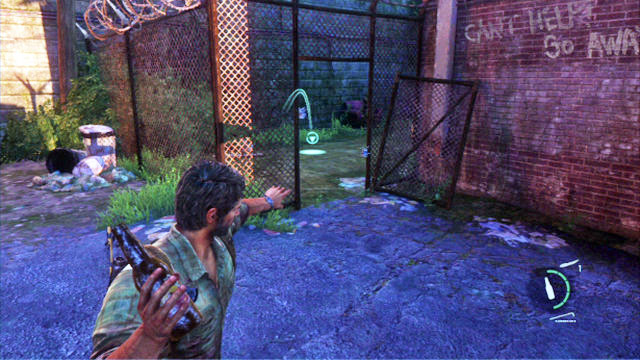
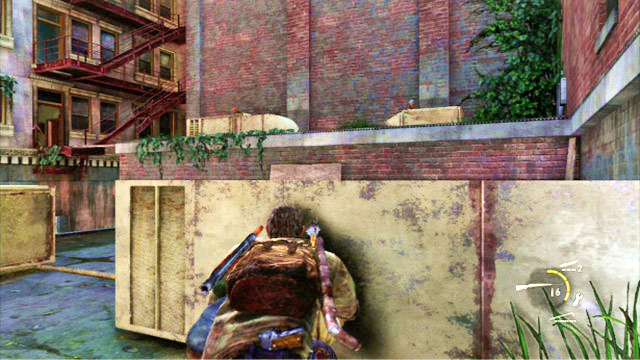
Once you reach a fence with the barb wire, try to open the gate and go left.
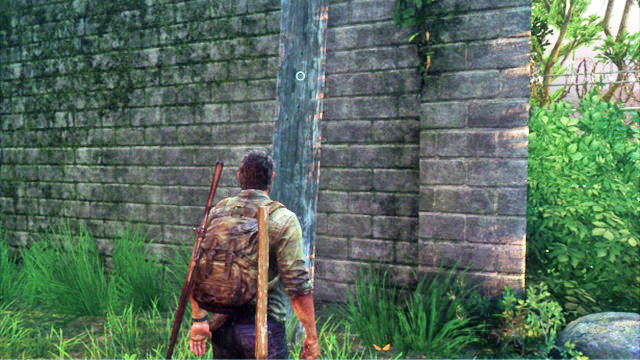
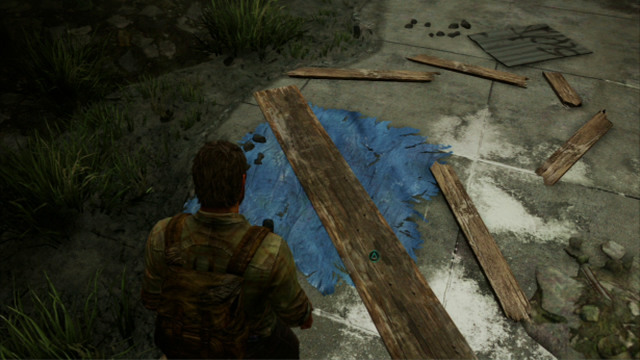
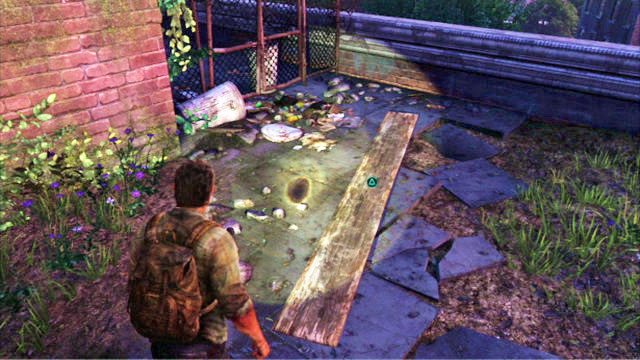
Behind a small building there should be a wooden board leaning against the wall.
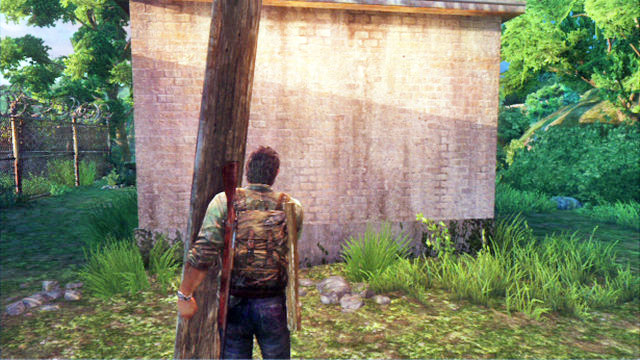
Pick it up and lean it against the structure's wall.
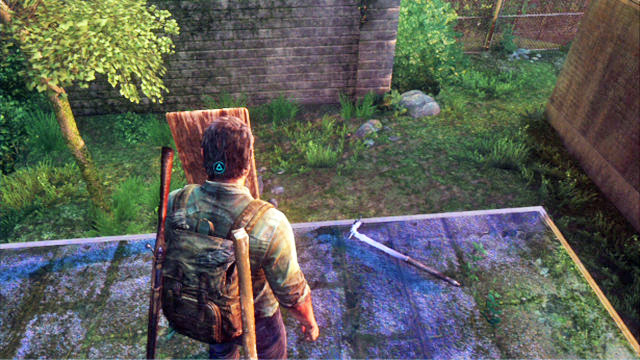
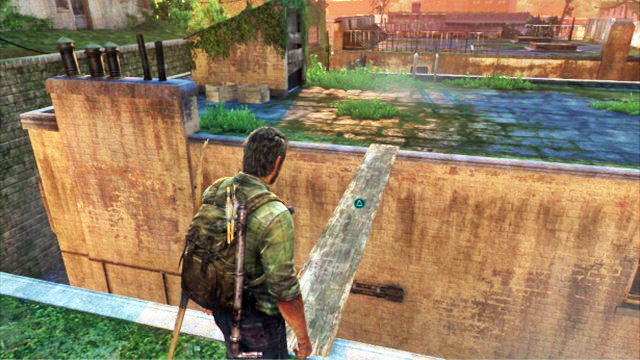
You can climb over the extension at the other side and pull the board to the roof.
You are going to use it as a footbridge to cross the wall.
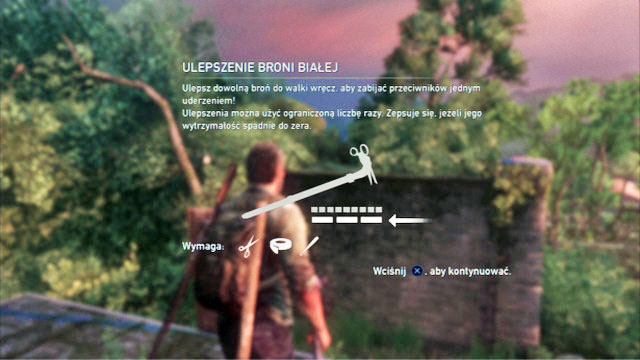
Before you get to the other side, though, pick up the weapon that is lying at your feet. It is and upgraded version of a melee weapon that makes it possible to kill an enemy in one blow. From now on, you can upgrade your weapons yourself, by using the materials you obtain.
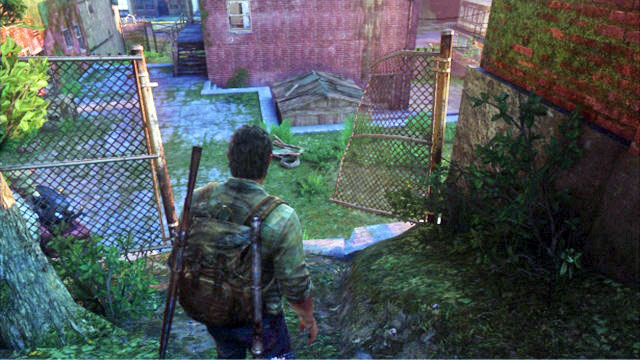
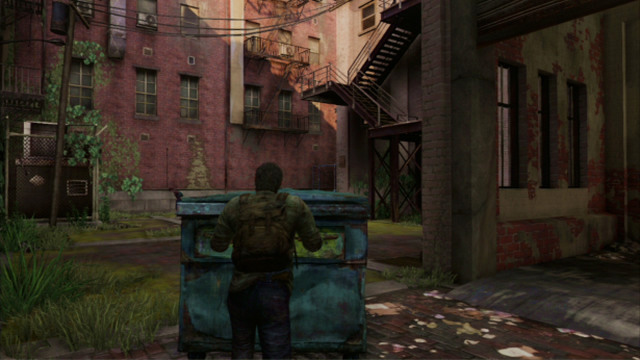
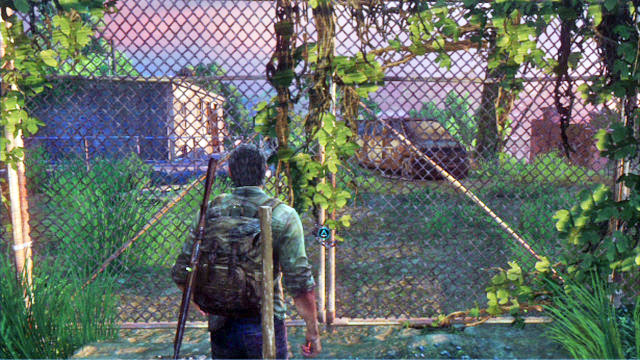
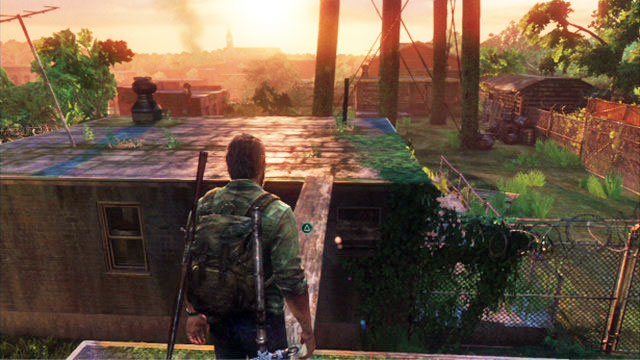
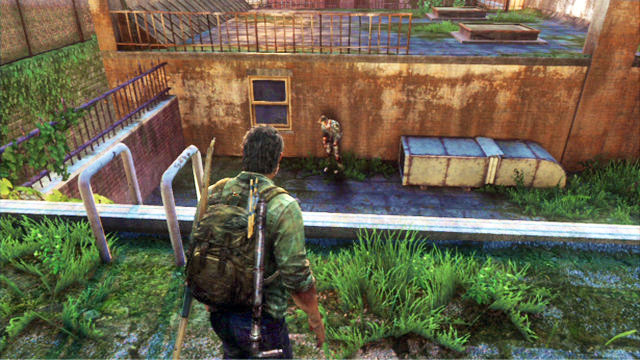
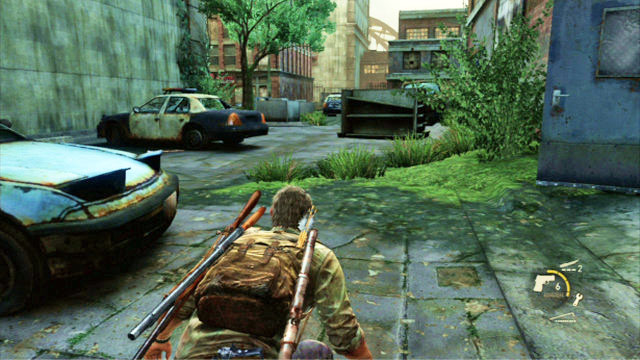
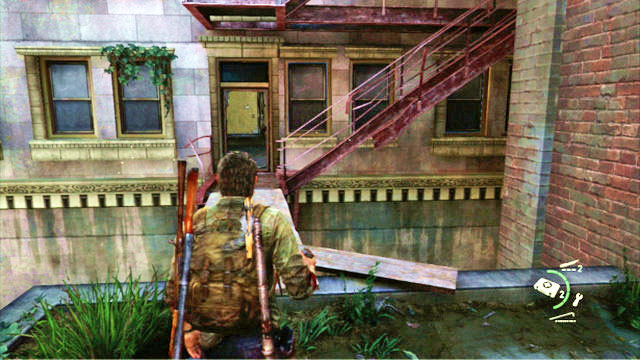
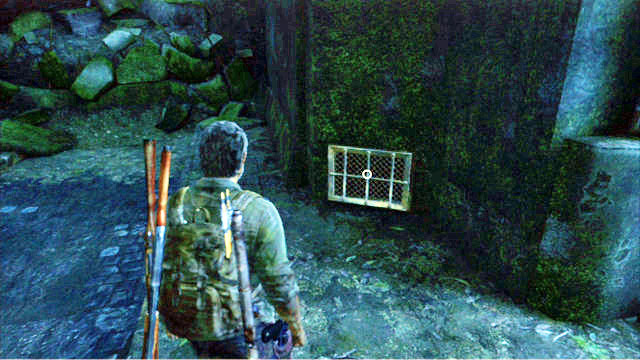
When you get onto the rooftop of the other building, jump down, take a few steps ahead and turn left. You now need to get to the hole in the fence.
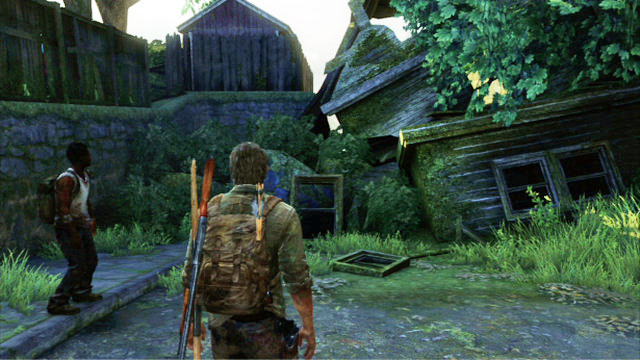
Squeeze through the hole and jump down from the low wall to the right. Silently, approach the wooden shed on the left.
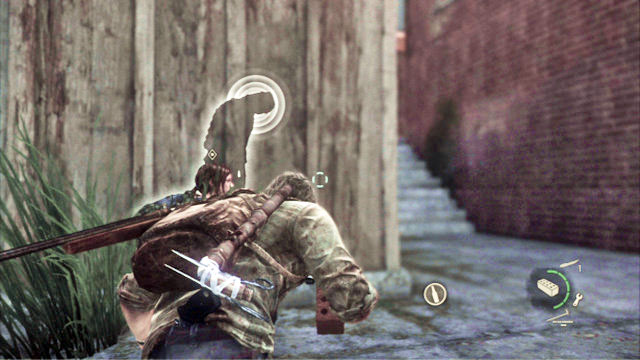
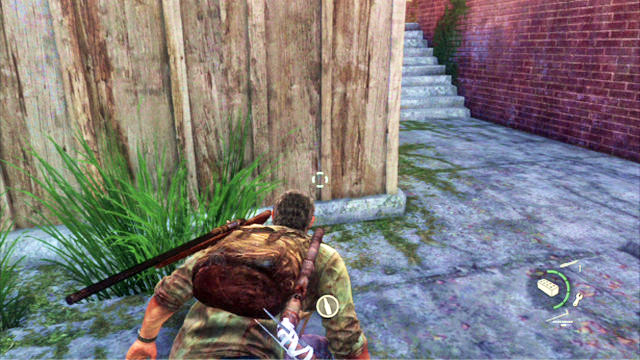
There is an enemy hiding inside.
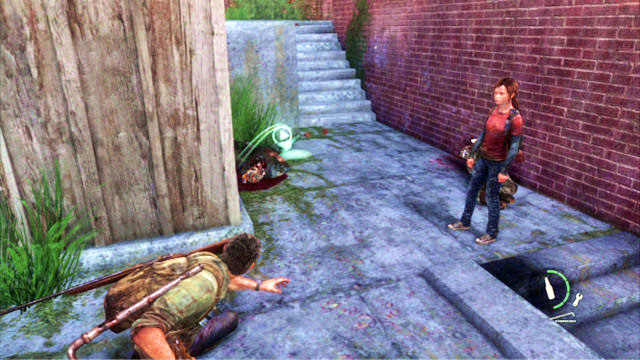
Lure him outside of the shed with a brick or a bottle and kill him quickly with your knife. A moment later, there will be another clicker appearing behind your back that you can eliminate with the weapon that you obtained earlier. After you are done, explore the shed and the derelict building next to it. Inside you can find a lot of useful items.
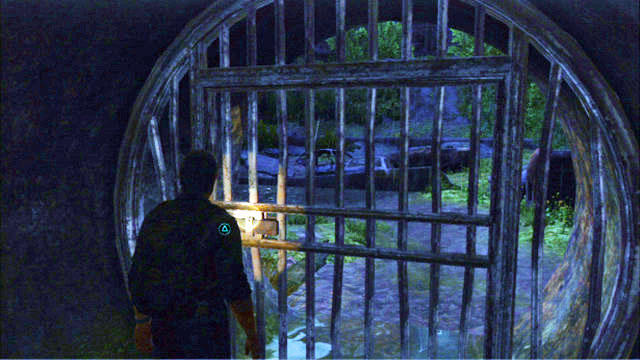
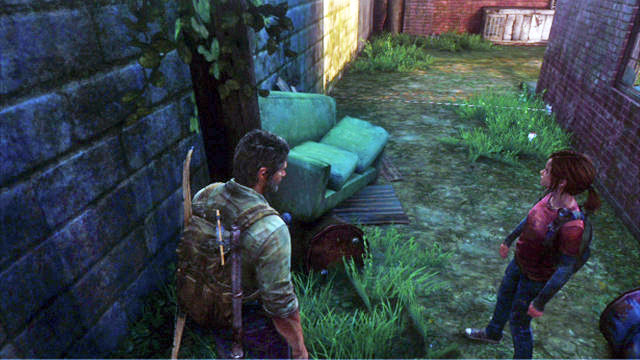
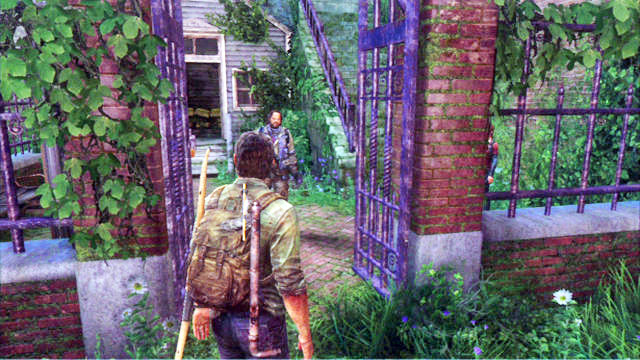
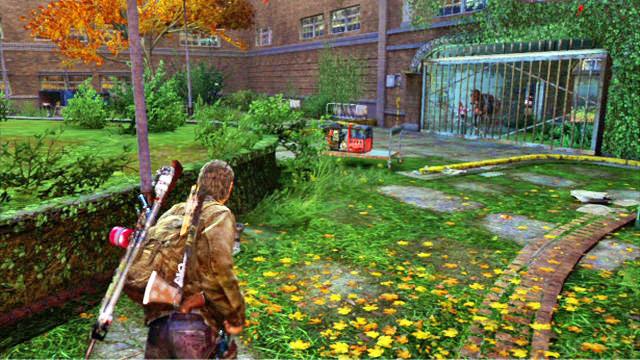
As soon as you finish, go to the left, towards the locked gate. First, try to open it and, if you fail, press L3 + triangle, to give a boost to Ellie. The girl will handle the blockade in no time at all.
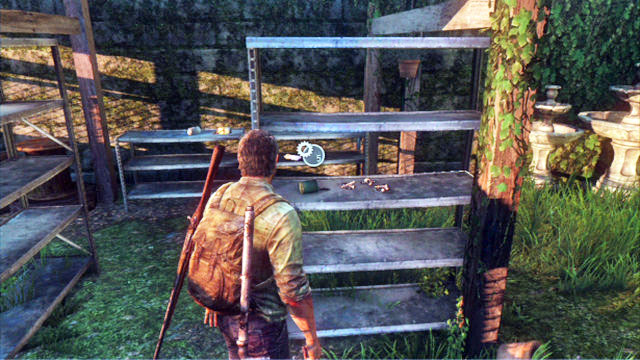
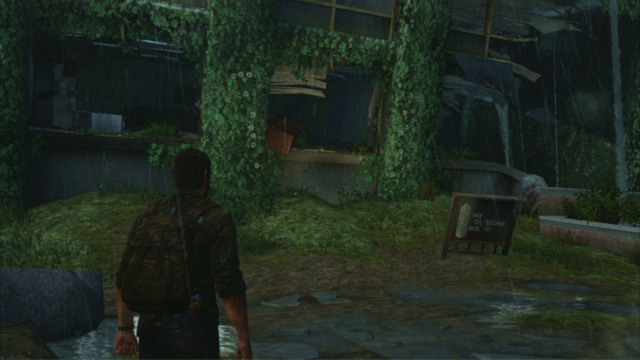
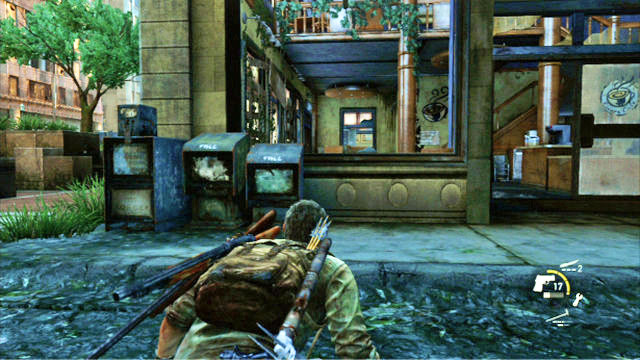
At the other side, search through every corner. To the left, you can find a shop with garden decorations, where there are many useful things.
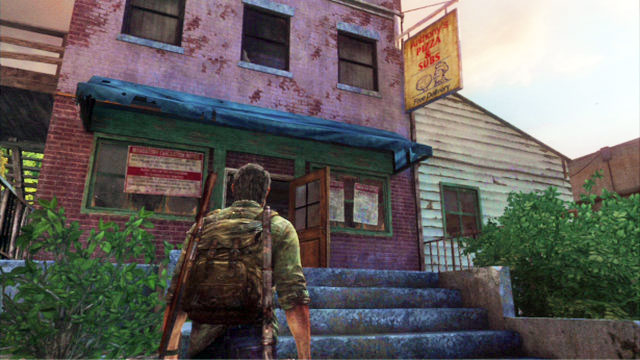
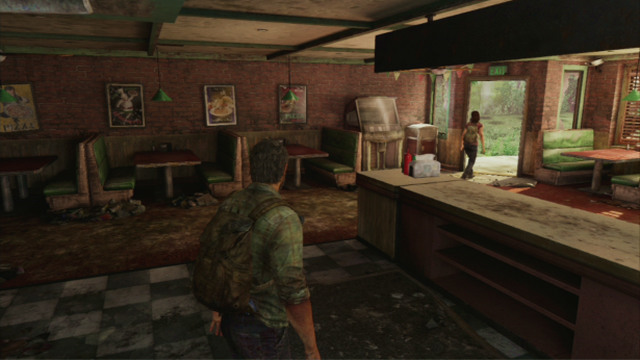
There is also quite a lot of equipment in the Pizzeria opposite the gate. There also are supplies at the back.

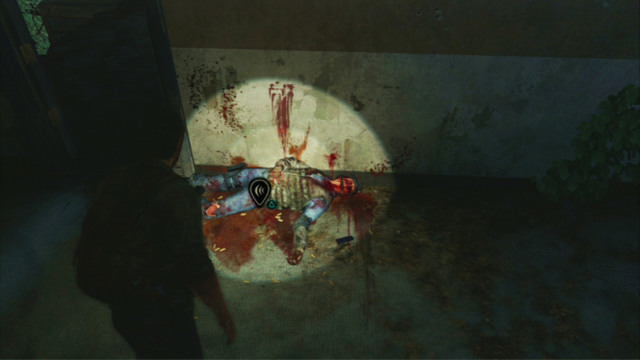
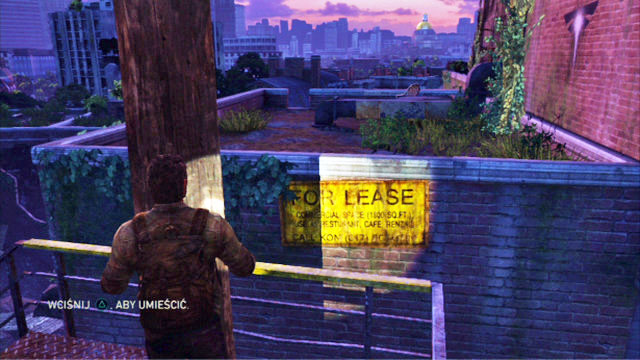
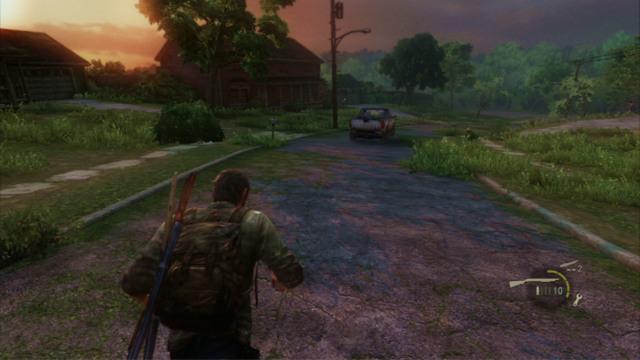
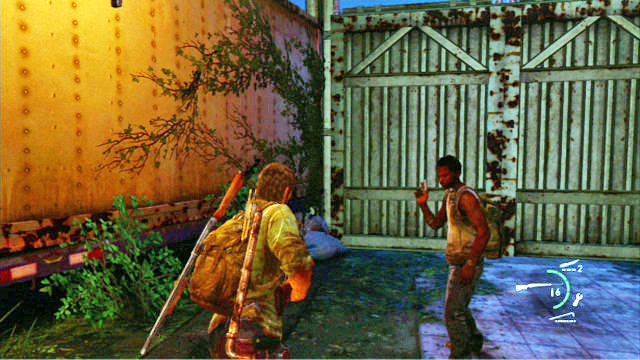
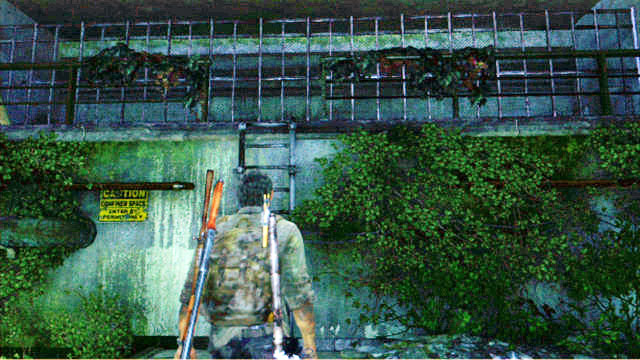
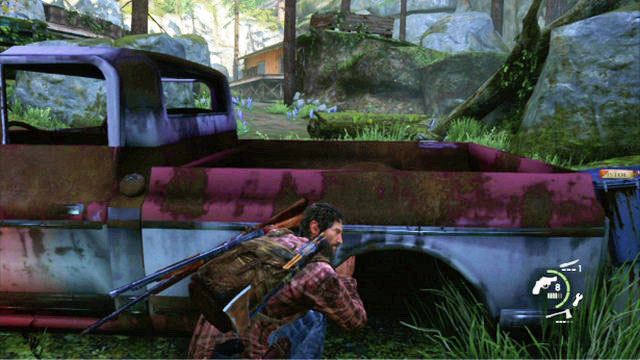
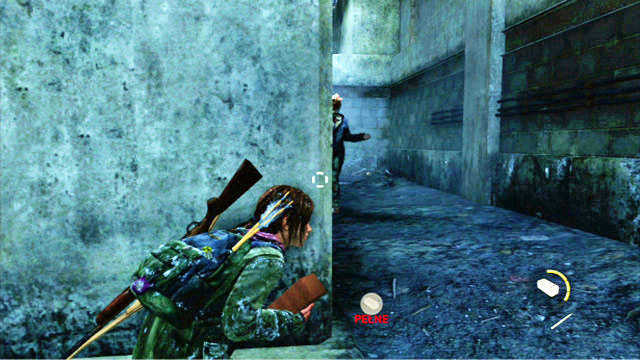
As you walk ahead, you will approach a large barricade. Further passage is located to the left of it but, before you go there, pick up the slip of paper that stuck between the wires.

On the slip of paper, there is a safe code written down. The thieves left it a bit earlier near the rusty pick-up truck. Inside, there are 50 spares, ammo and supplies.
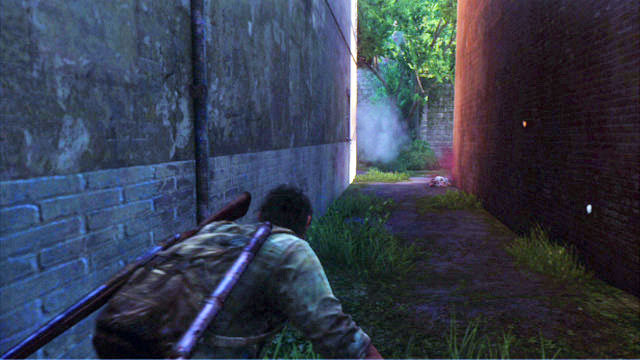
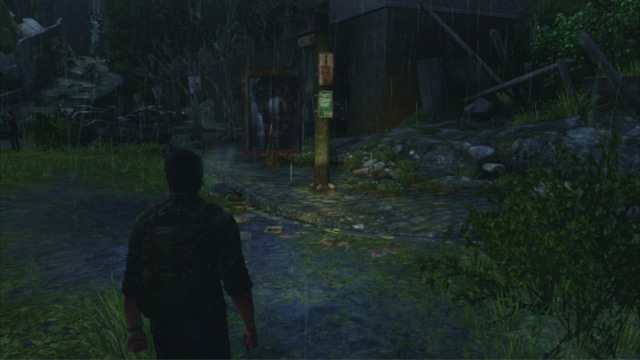
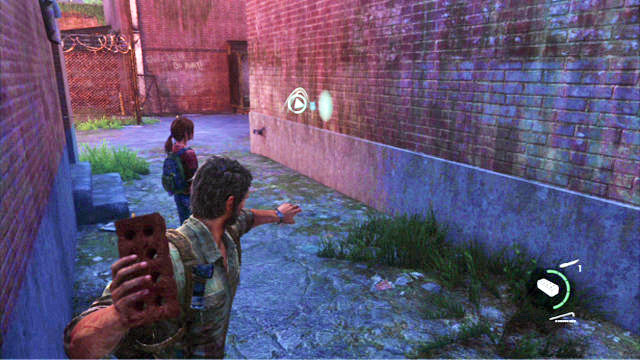
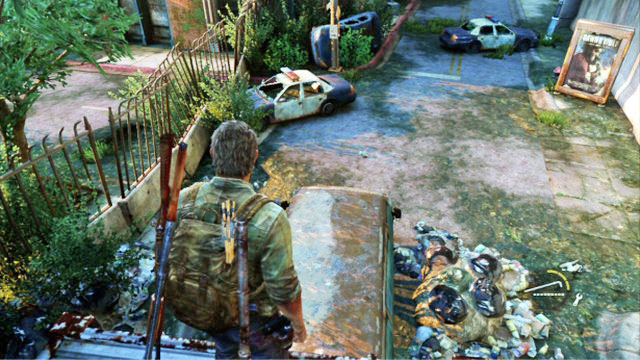
If you take a left turn behind the music shop, you will witness a clicker's death after it walked into a trap. From now on, be vigilant to avoid meeting the same end.
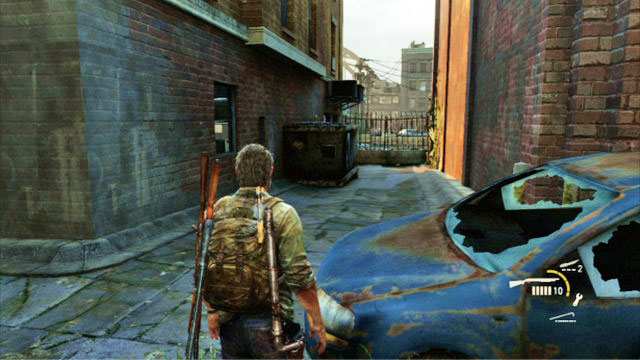
After you go past the trap, you should go to the right but, before you do, it is worthwhile to open the door to the left with your blade. Inside, there are a few useful items.
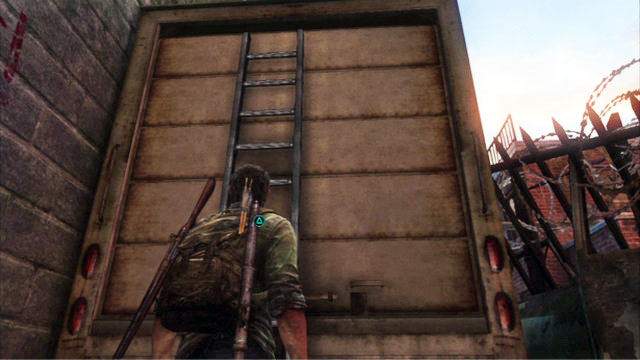
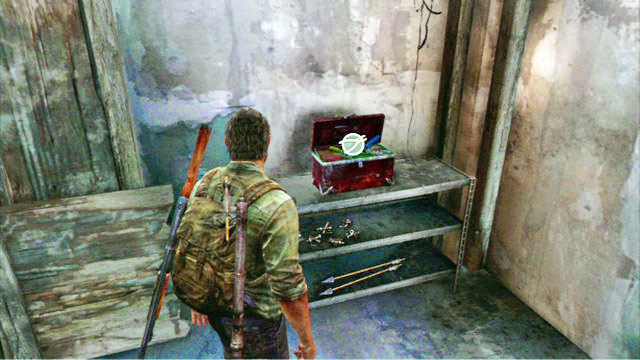
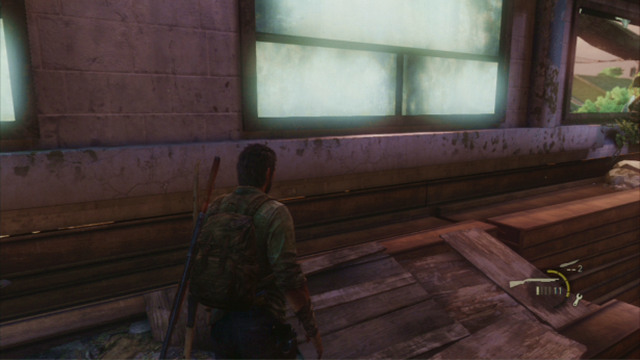
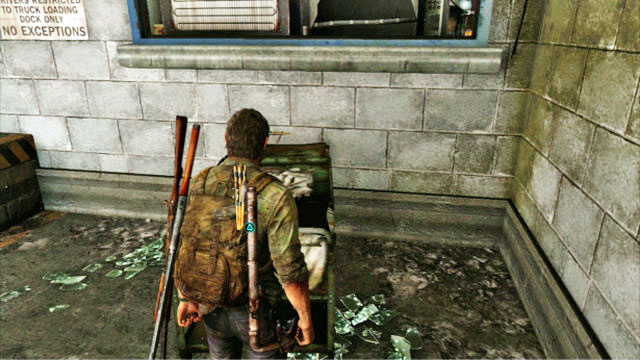
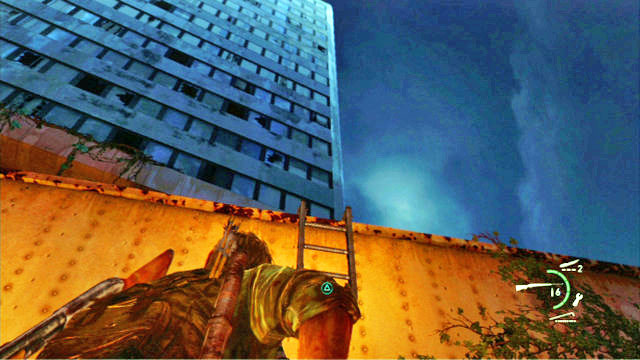
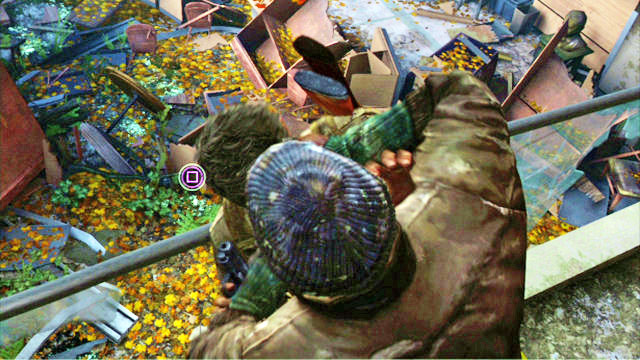
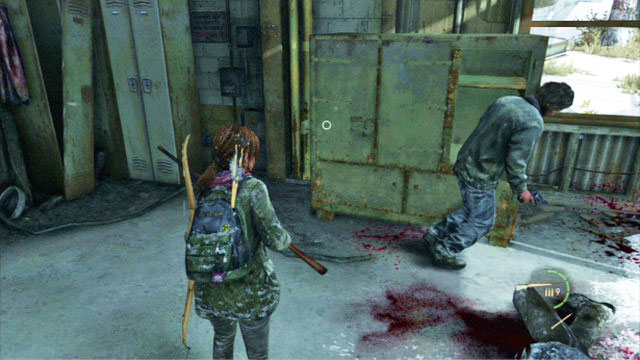
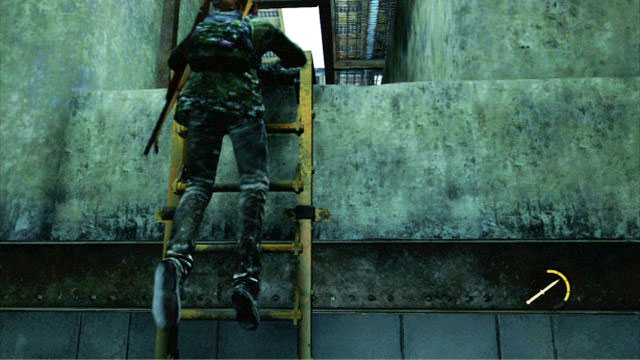
Reach the end of the alley, pick up the arrows stuck in the corpse and climb up to the truck's roof by climbing the ladder that you can find nearby.
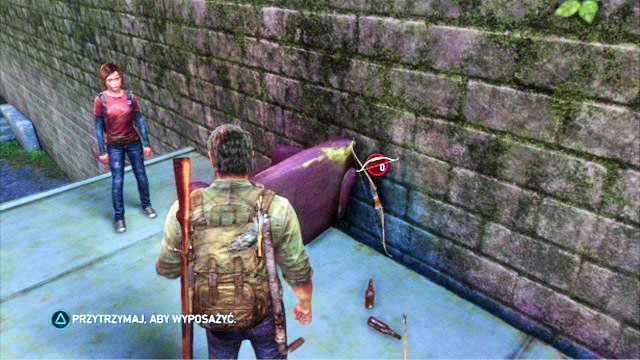
On top, you can find a new weapon - a bow. Pick it up by pressing, and holding down the triangle.
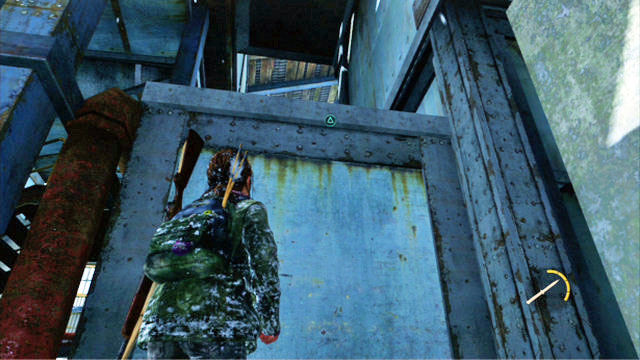
As soon as you walk over the plank, take the board with you and lean it against the nearby wall.
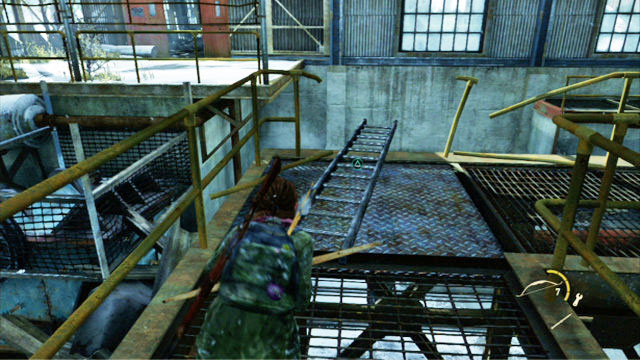
You will then be able to climb the ladder, collect the plank and throw it over to the rooftop of the nearby building.
As you proceed ahead, you will encounter a single zombie. Shoot it with your bow by aiming at the head.

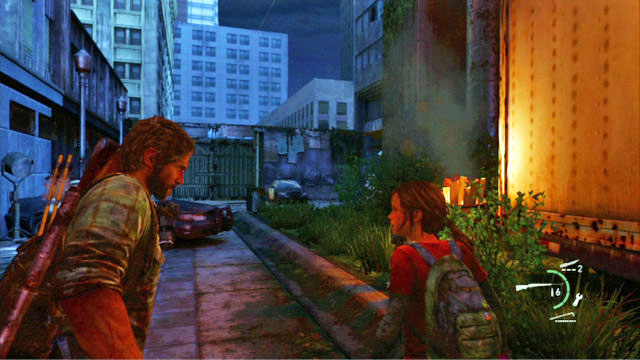
Finally, you will reach a ladder that you can climb down to the street level.
Your exit from the alley will be blocked by another trap. You can crouch underneath, by pressing the circle or detonate it by throwing a bottle, or firing your gun.
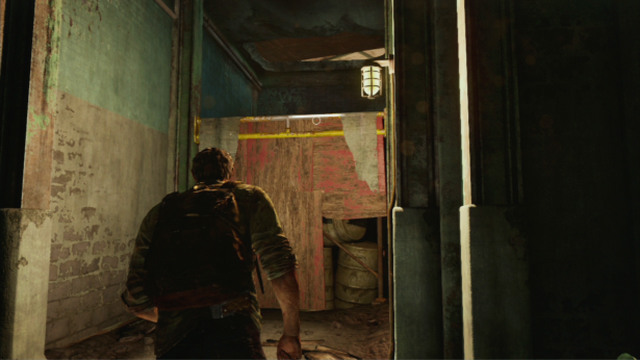
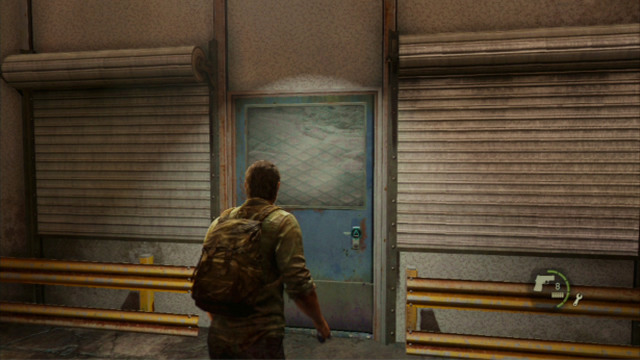
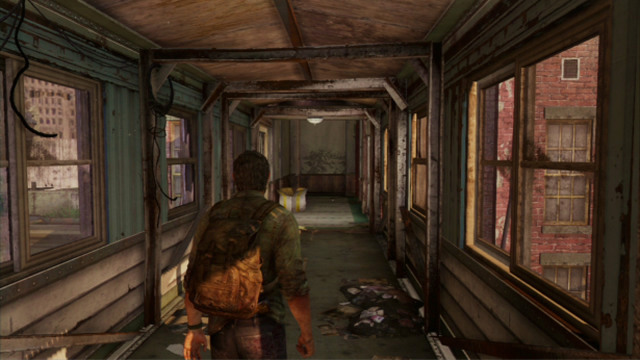
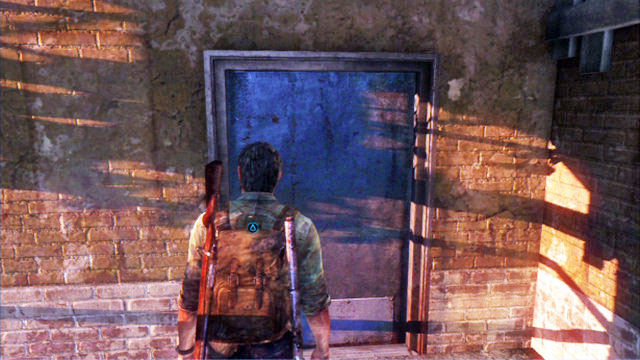
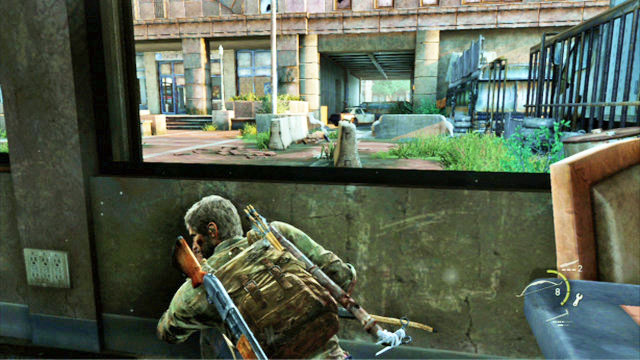
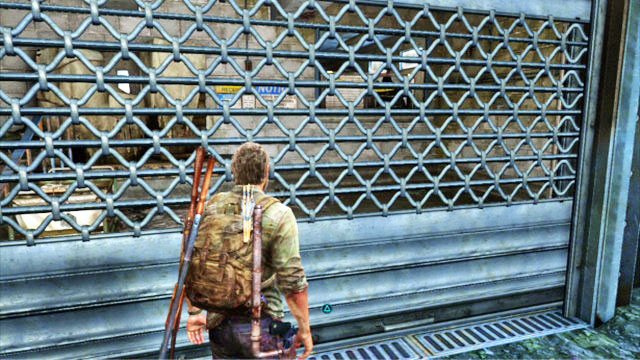
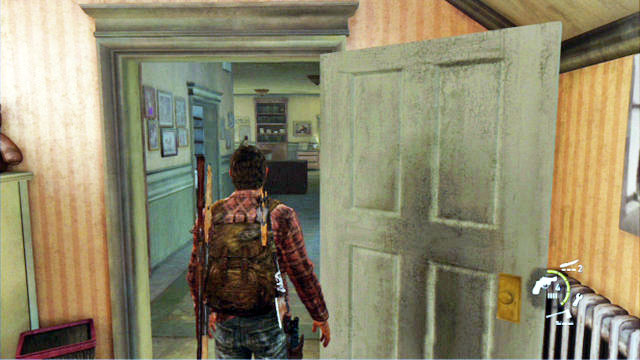
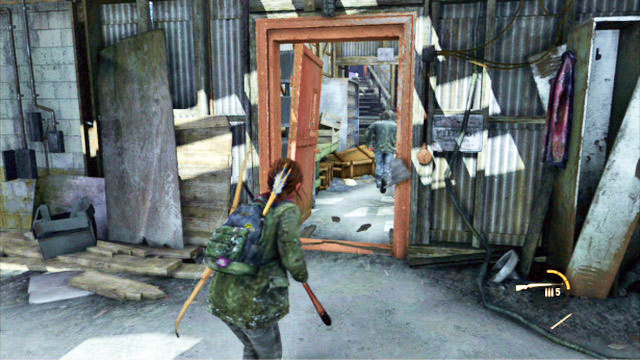
After you reach the end of the wall, turn left and explore thoroughly the building with the moving door. You can find useful items on the first floor but, be prepared for a zombie to jump at you out from the bathroom.
Once you collect everything, go downstairs and detonate the charges attached to the fence. Then, go ahead.
A few steps further, you should notice another trap lying on the ground.
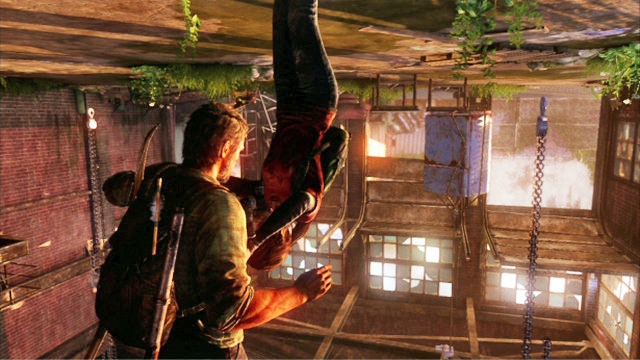
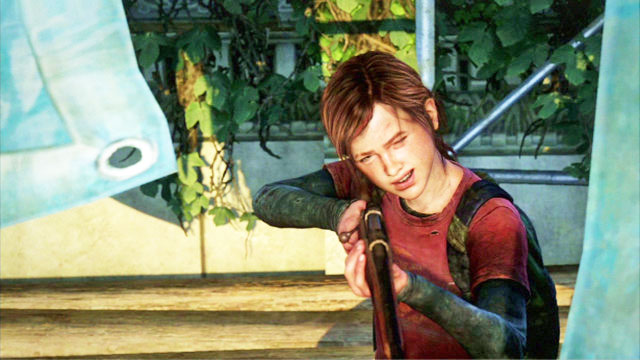
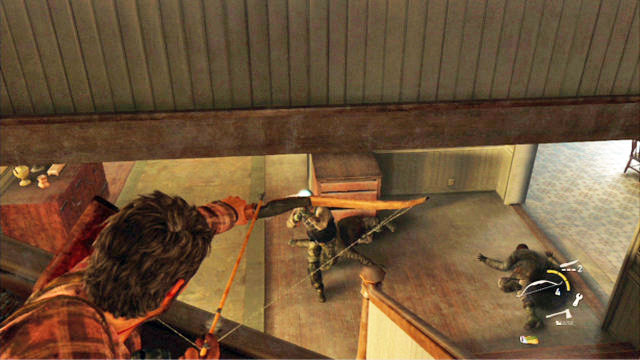
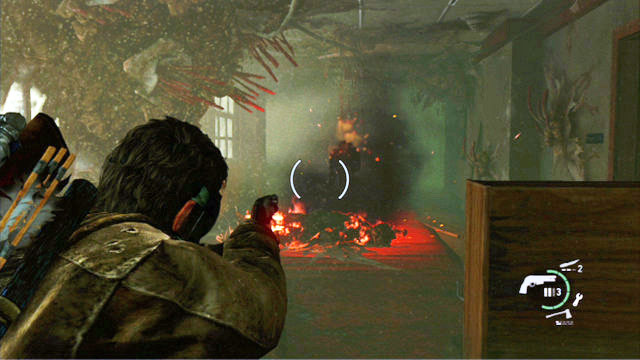
Get rid of it and enter the room to your right, and open the door inside. A moment later you will hang head-down, and will be attacked by the charging monsters. You need to keep shooting at them to prevent them from killing Ellie or you. As soon as they approach you, start tapping the square to set yourself free.
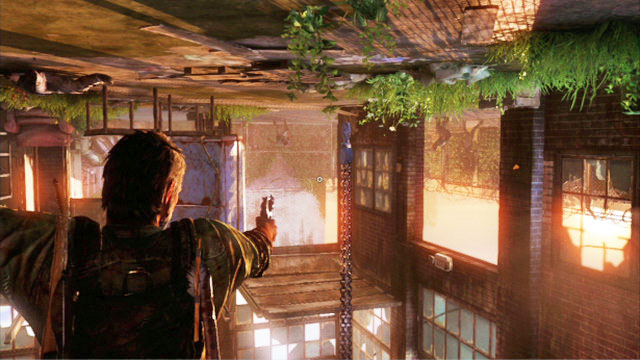
As you keep firing at the enemies, you do not need to worry about the ammo because, the girl will be supplying you with new clips but, you need to remember to reload. It is best to do that between individual waves.
After you set yourself free, keep following Bill. This way you will reach a derelict laundry, where there will be new enemies approaching through the door. You can either shoot them, or set them on fire with one accurate throw of the Molotov's cocktail.
Finally, you will reach your companion's safehouse. That is where another short cutscene starts.
After the cutscene ends, search the area thoroughly. You can find a lot of useful items here that will come in hand throughout your journey.

After you are done, follow Bill to the first floor and explore this area also.
When you finally leave the building, you should get ready to fight off a group of enemies. The monsters will be coming from the right and there will be several clickers among them. Eliminate these ones in the first place.
As soon as the area is clear, follow Bill. The man will take you to the stairs leading to a warehouse.
After the cutscene ends, explore the ground floor of the building thoroughly. You can find here a lot of tools and useful materials, as well as the first level of tools.
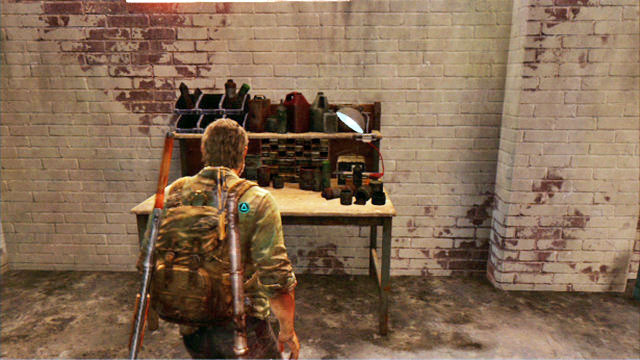
Thanks to these, you will be able to craft weapon upgrades on the nearby workbench.
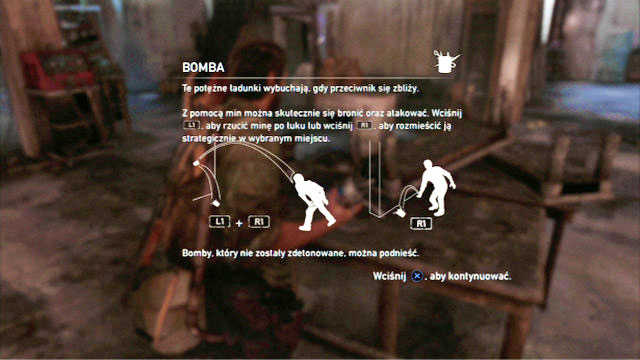
You will also receive a shotgun, and a bomb from Bill. The former is perfect at short distance and the latter can be used instead of the Molotov's cocktail, or set in places where you expect the enemies to walk.
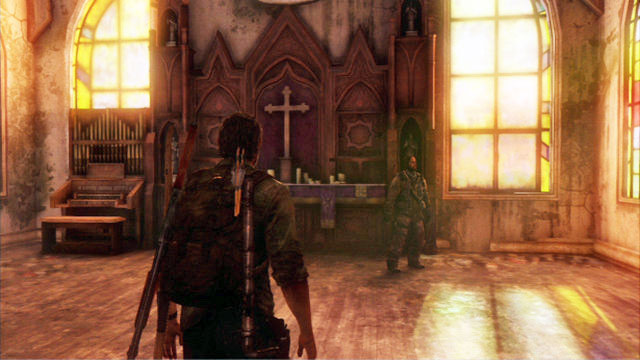
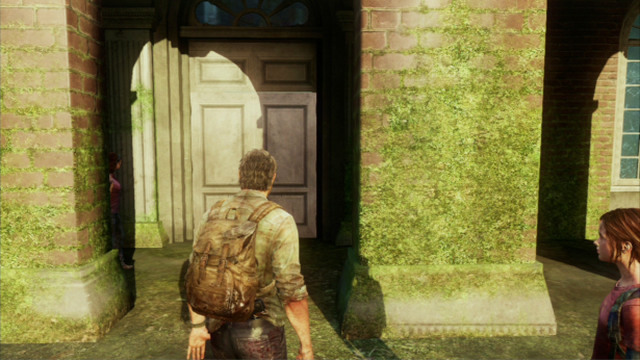
Once you are done with exploration, follow your companion upstairs. The man will take you to the big stained-glass windows and opens one of them. Before you move on, it is a good idea to check out Bill's office to the right.
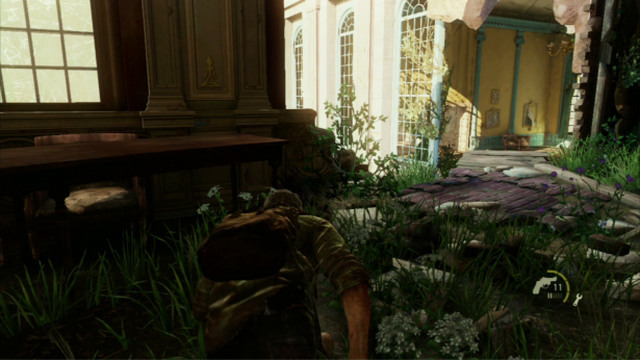
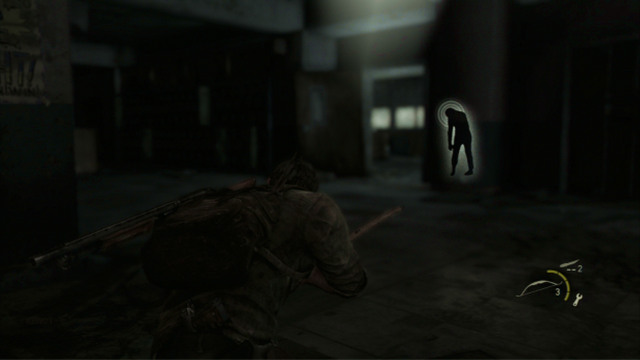
After you get to the graveyard, keep going ahead to reach a wall with a clicker behind it. You can locate the creature by listening out.
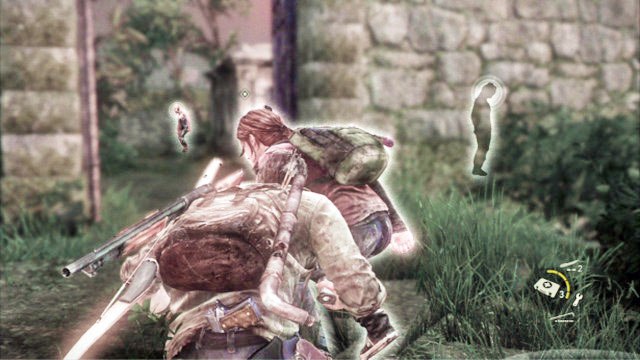
Squeeze past the monster and kill with your blade another enemy that you encounter. Your task now is to get rid of all the mutants so, using knives is not too economical here.
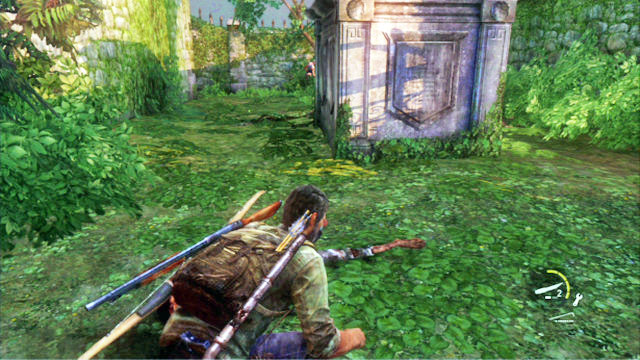
Instead, try and run through the entire graveyard as fast as you can, and gather all of them in a narrow passage. Then, two bombs or Molotov's cocktails will do the work and kill an entire group. The remnants can be finished out with your shotgun. You can also deploy 1-2 bombs in a narrow passage and then, lure all of the beasts into that passage, which results in killing them with a loud, jolly explosion.
Once the area is clear, go to the other end of the graveyard and wait for Bill to open the door.
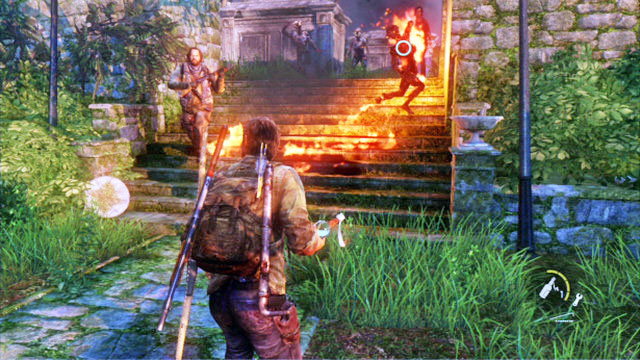
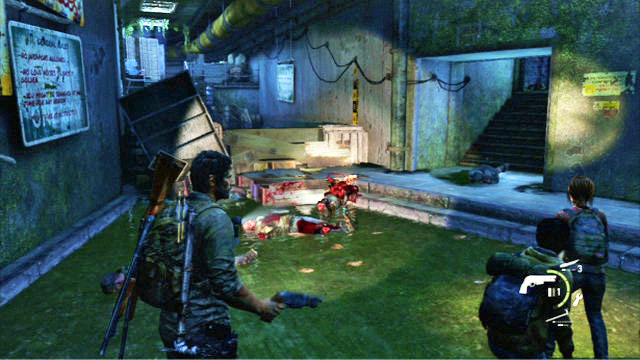
This way, you will exit to the road where there are further enemies waiting for you. Strangle the first two, with your companion's help, and o ahead.
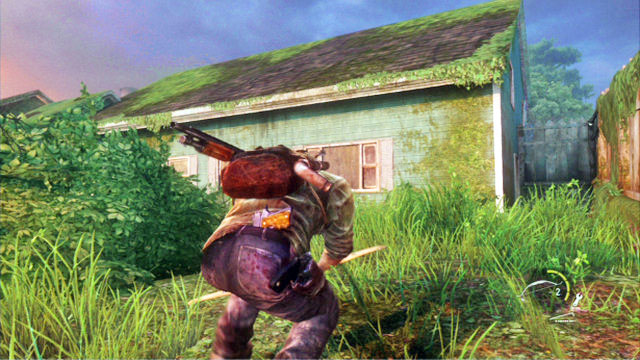
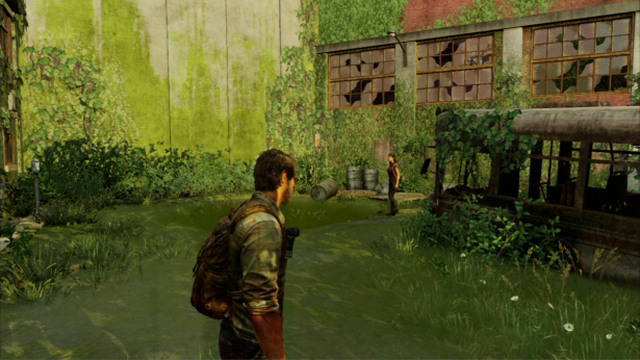
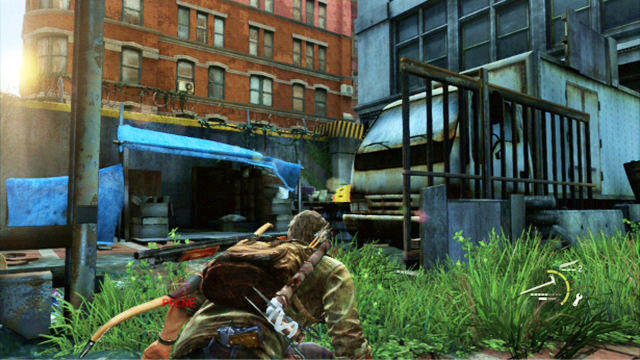
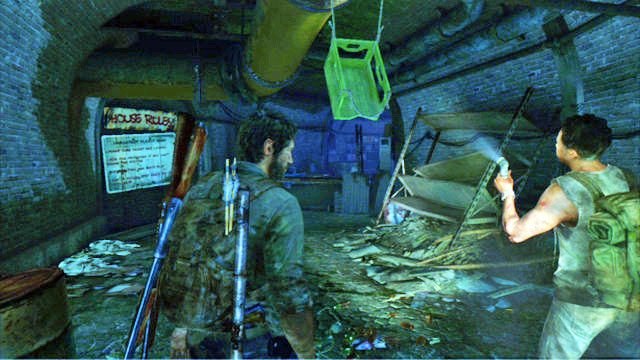
Atop the hill, there is a big green house where you can find some useful supplies.
Explore the area thoroughly and shoot the enemies you encounter.

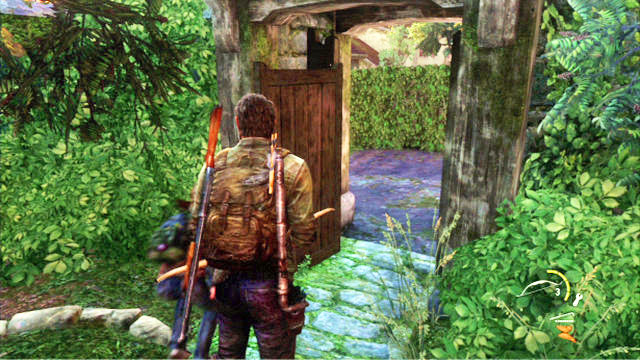
Follow the edge of this location until you reach the gate in the fence on the left.
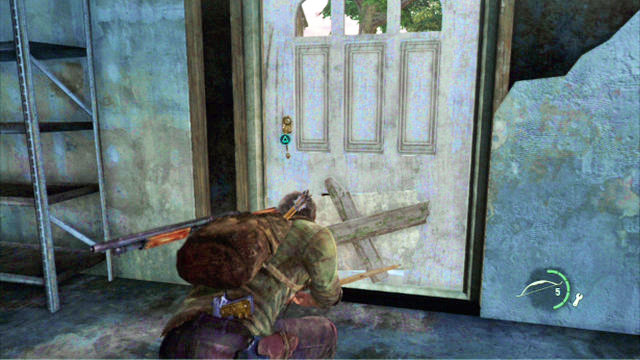
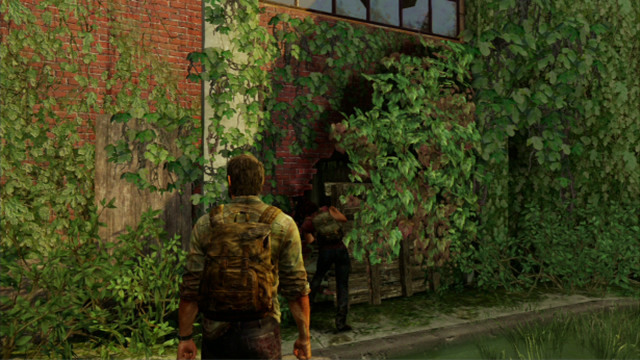
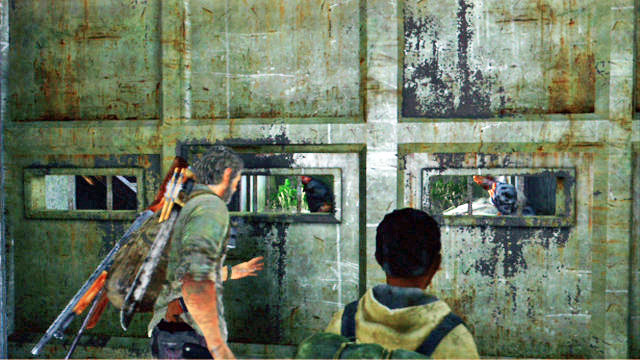
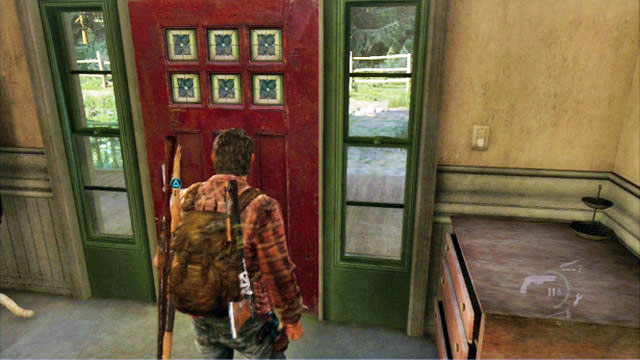
A bit further, there is a building and a door with a door with a pet flap in it.
Ellie will squeeze through to the other side and open the door.
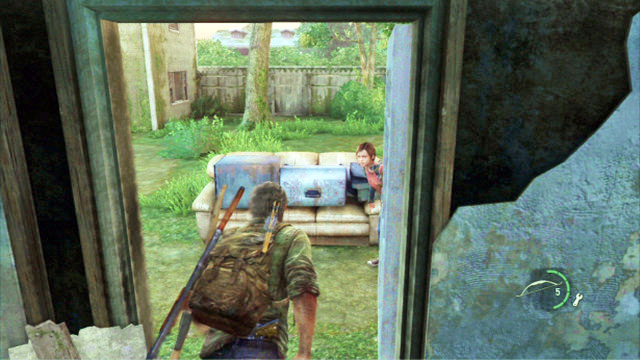
A bit further, you will approach a house with clickers at the door.
Squeeze past the monsters and, while avoiding getting into fight, make it over to the other side of the building. You should now be able to see a tree house with a plank. Climb onto the camper and walk over that plank.
When you reach the next house, explore the upper floor and follow Bill.
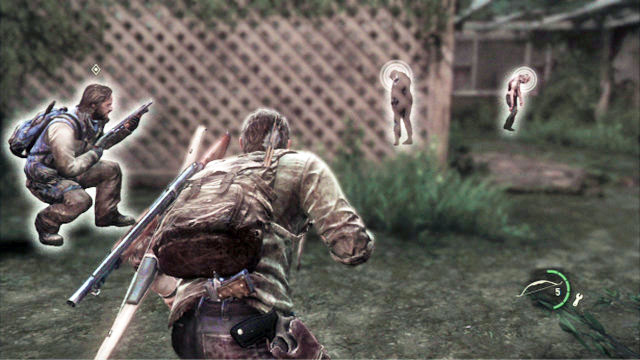
Together, leave through the garage to enter an area swarming with enemies.
Your task is to kill every one of them but, before you start using your firearms, it is worthwhile to take out several of them in a more stealthy way. Produce your bow.
Your first target is the creature behind the wall to the right.
When the monster dies, turn right and take out another one.
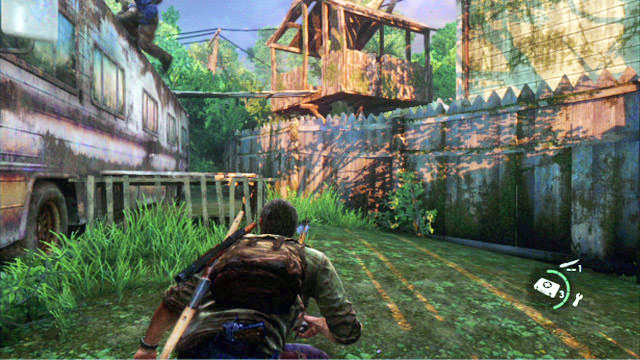
You can now go to the rim of the location (i.e. the direction that the last zombie came from) and kill the enemy that is patrolling the area behind the bus.
Go along the rim of this location until you are, finally, spotted and attacked by a group of mutants. Run now towards the net blocking further passage, turn around and throw a Molotov's cocktail at the enemies. The remaining ones shoot with your shotgun.
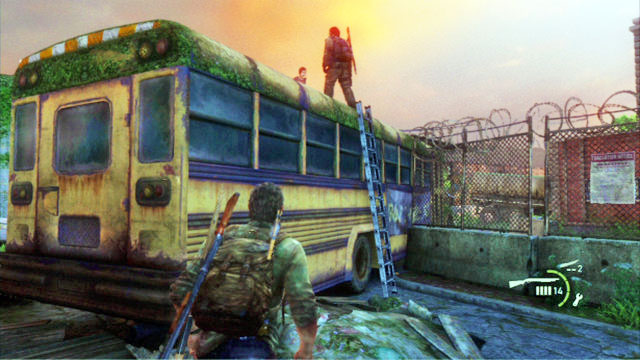
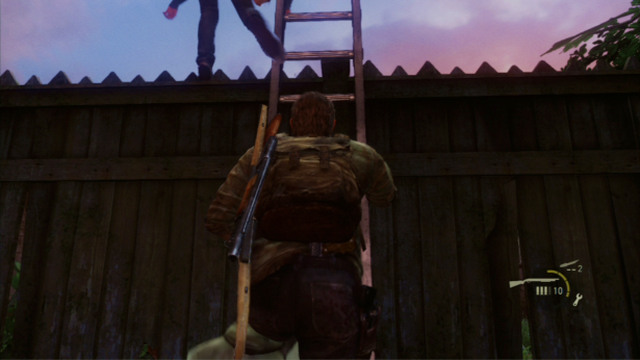
Once the area is clear, take a look at the bus to the left. There is a ladder atop that bus, which Ellie will give to you if you give her a boost.
Once you make it through to the other side of the fence, check out the door of the nearby building. Then, walk around it on the left.
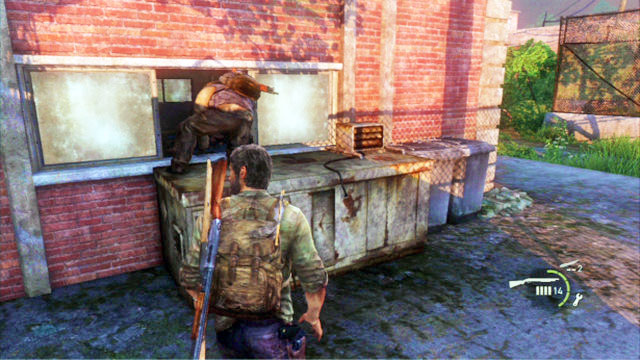
You will find there a small window which you can follow your companions through. In the meantime, keep shooting at the incoming enemies.
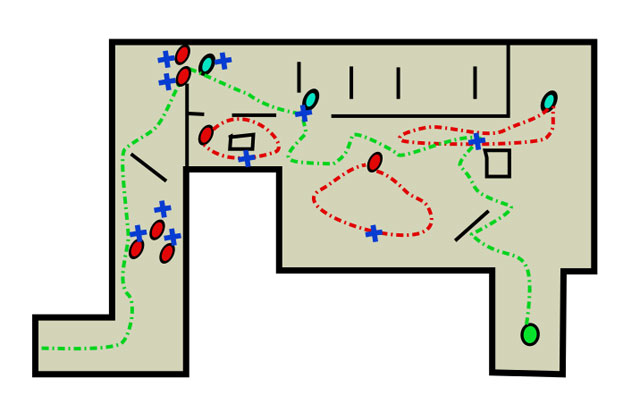
Legend

Start of the fight

Weak opponents

Clickers

Suggested player route

Enemy routes

Suggested kill areas
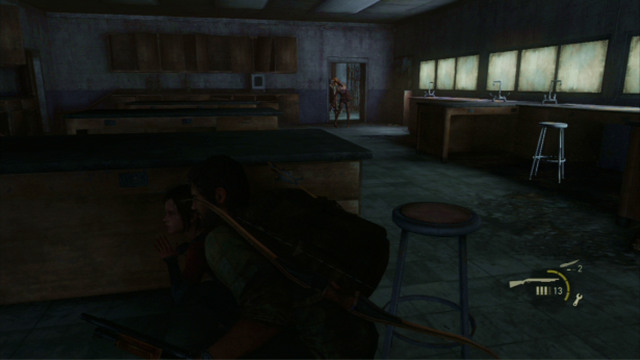
Crouch immediately inside the building and slowly make it over to the cover on the left. You now need to clear the room of all the mutants. To do that, you need to wait, at first, until the runner on the left turns away. Then, take him out with your bow.

When the first enemy dies, wait for the clicker on the right. The enemy will turn back at some point, which will make him an easy target for the silent assassin.
After this one dies, grab a brick. You need to use it to divert attention of the clicker stalking a bit further. It is best to throw the object into the classroom and sneak past the zombie to the desk in the corridor.

There is a runner walking around the desk, which you need to kill.
Now you need to get to the other entrance to the room (on the right). Before you take the door, prepare a Molotov's cocktail. You will need it to throw at the enemies who will enter the room right after you do. The ones that do not die, need to be shot, just like the clicker that you outwitted earlier.
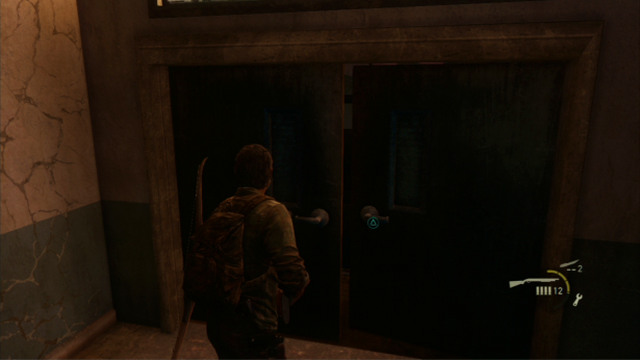
This way, you will clear the area and you will be able to open the door a bit further. To do that, you need to press the triangle and then the square several times. At the other side, you will have to fight a bloater and, that is why you need to prepare the Molotov's cocktail beforehand.
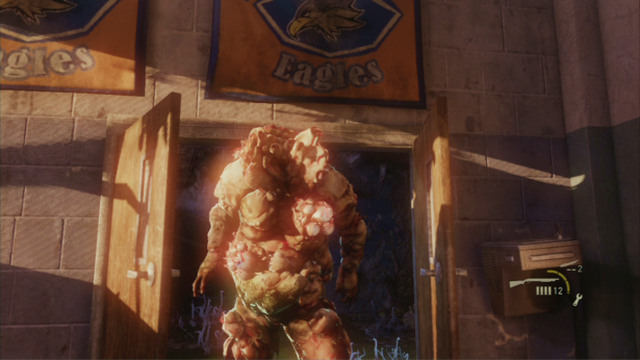
The bloater is a formidable enemy which can launch exploding spores. If you are standing within the poisonous substance's range for too long, you will die so, try to move running among the barricades as much as possible.
At the very beginning of the fight, focus on the left corner of this location. After a while, a group of young runners will appear that you should deal with as quickly as possible.
Take cover when they die, and try to hit the bloater with your Molotov's cocktail. If you succeed, the beast will catch on fire and will become defenseless for a short period of time. You can then take several shots at the target and reinforce that with a bomb. This should do for this enemy.
If, the monster survives though, and you do not have enough materials to craft another cocktail, take single shots at the enemy and run to avoid being hit with a spore. You also cannot let the bloater approach you or you will die quickly.
When the beast falls dead, explore the area it came from and then, help your companion climb onto the platform next to the window.
After a moment, two runners will appear behind your back. Kill them and climb onto the platform also.
After you make it out, keep following Bill until you reach a ladder leaning against the fence. You quickly need to deal with an enemy here and jump over to the other side of the fence.
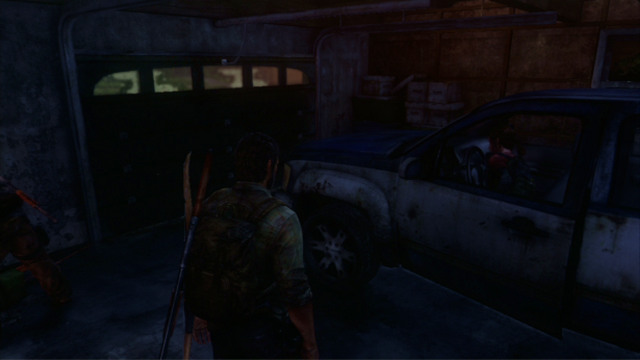
This way, you will reach the garage with a working car in it. Before you give it a push, though (triangle) search through the entire house. There is a lot of useful gear here.
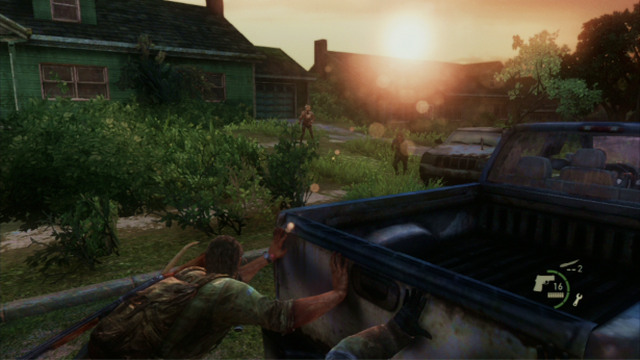
When the car gets out into the road, you will have to keep pushing it and making brief stops for killing the incoming enemies. First, the enemies will be coming from the left, then from the right, and from the left again. First of all, focus on eliminating the clickers because your death is sure if they get too close.
After the car rolls down the hill, you will have to run up to it and, after having driven away the enemies, jump onto the car (triangle).
This way, you will complete this chapter.
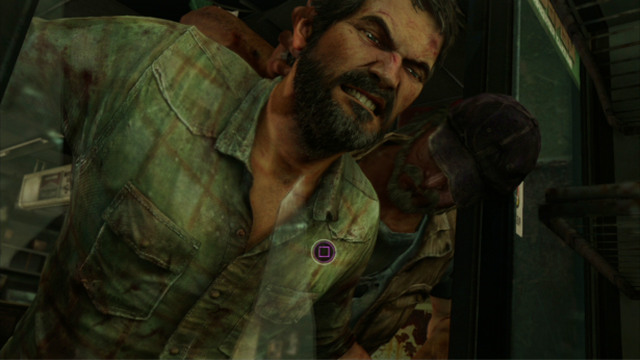
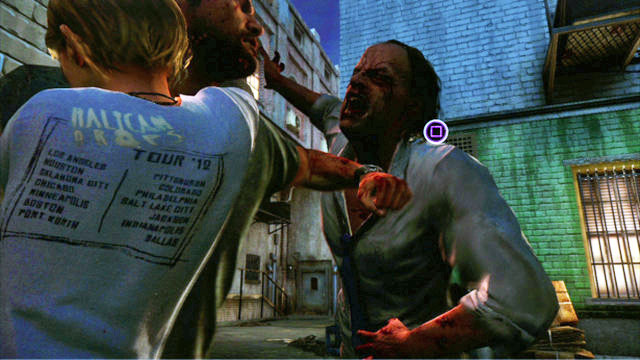
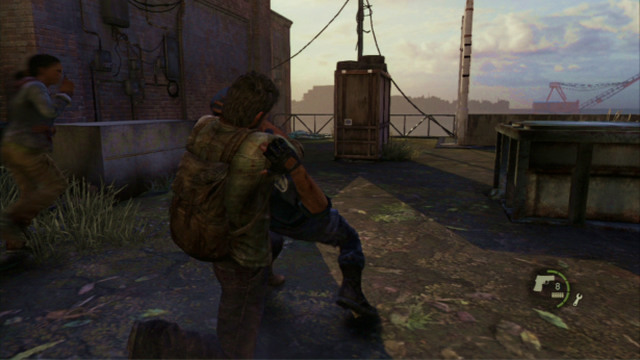
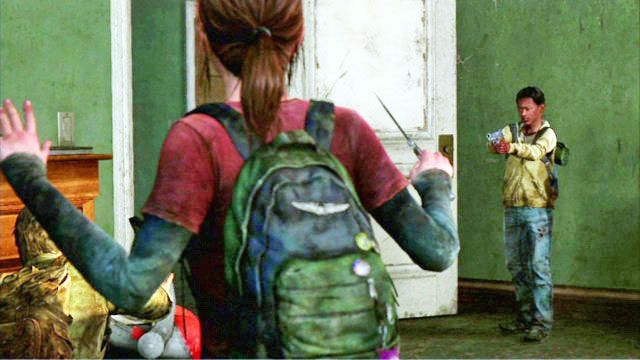
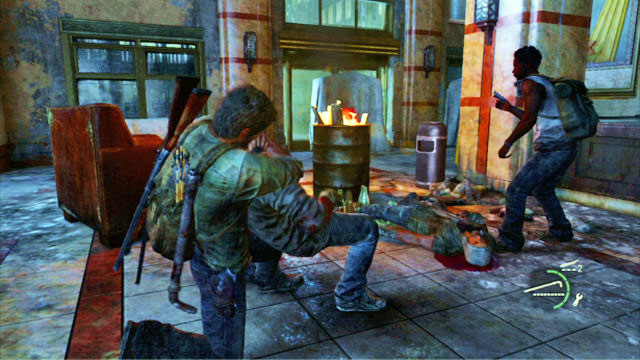
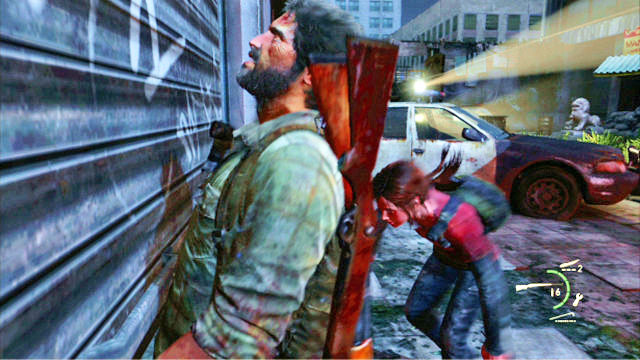
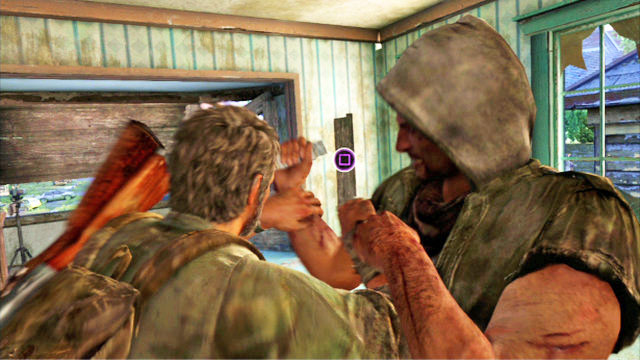
When the cutscene ends, start tapping the square as soon as possible, to avoid the broken glass and kill the assailant that is holding you.

Then, you need to help Ellie who is also fighting a bandit.
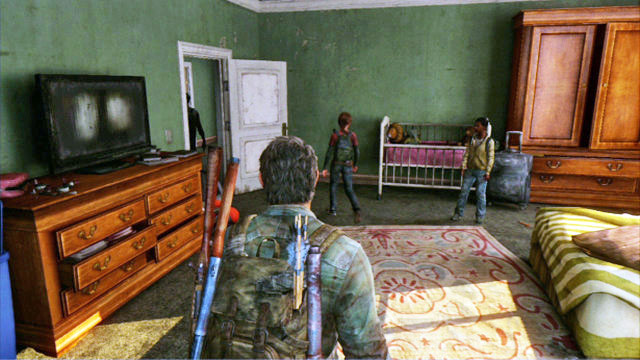
If you succeed, you will have to fight a longer fight with a group of the bandits. What counts here most, is the listening out skill and your accuracy, thanks to which you will know the enemy positions.
First, take out the enemy in front of you, using the rifle. Then, go right and kill the incoming bandits.
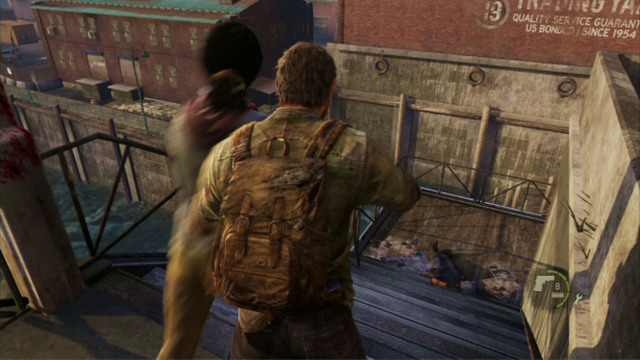
After you kill out the first wave bandits, the second wave will come in, through the smashed windows. Before they land on the ground, you can take them out using your shotgun.
As soon as the last assailant drops dead, take to the exploration of this location.
Once you are done checking every possible corner, open the garage door on at the left end of the valley.
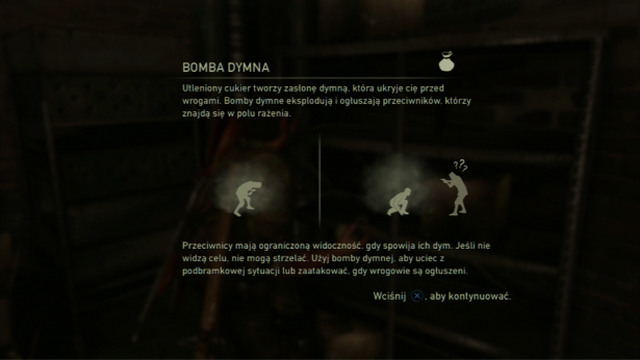
Inside, you will find tools to craft better equipment with, and a smoke bomb that limits the enemy's visibility and allows for approaching them without being seen.
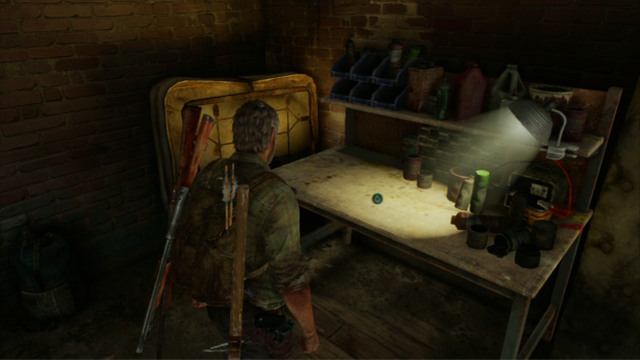
Behind the next door, there are stairs that lead up. Explore the first floor also, and check out the room at the end of the corridor where there is a workbench that you can upgrade your equipment on.
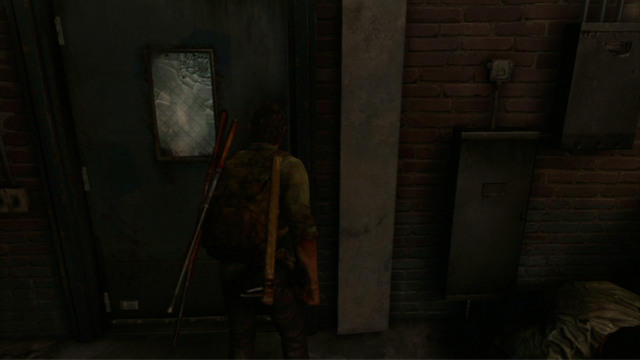
When you finish, leave through the door to the left.
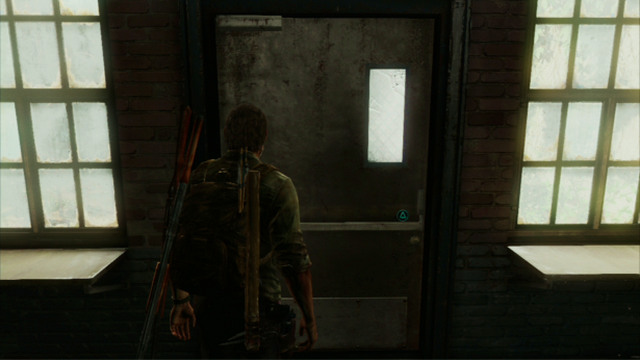
Climb the stairs to get to the first floor, and jump down to the street level.
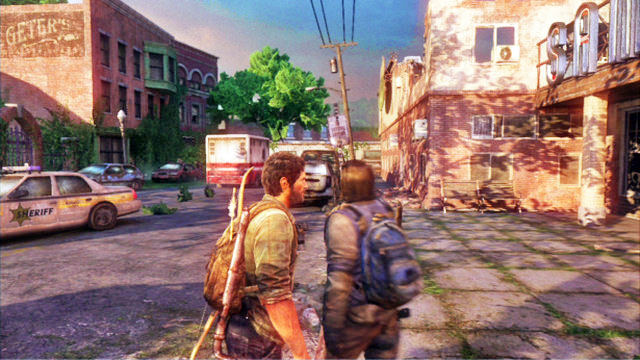
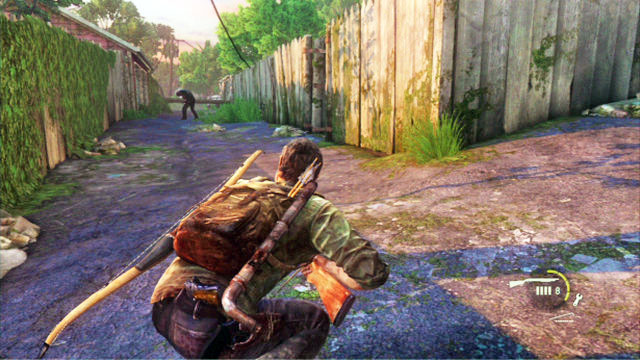
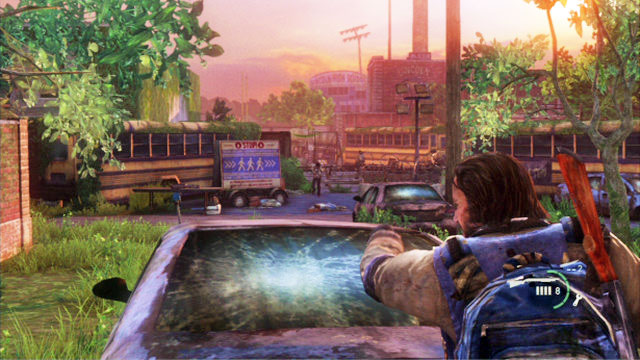
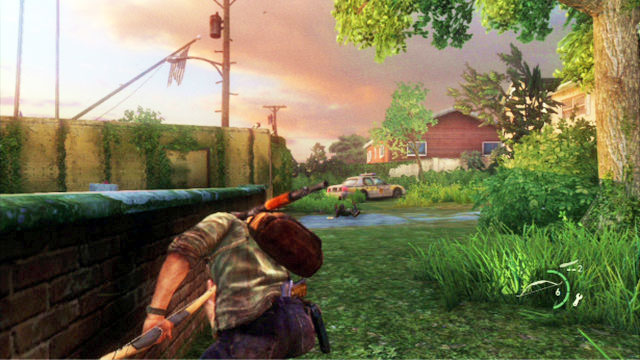
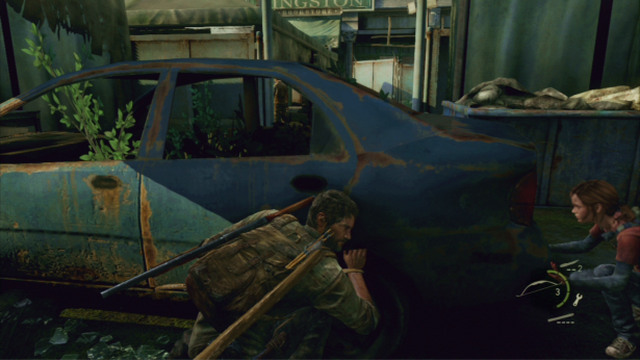
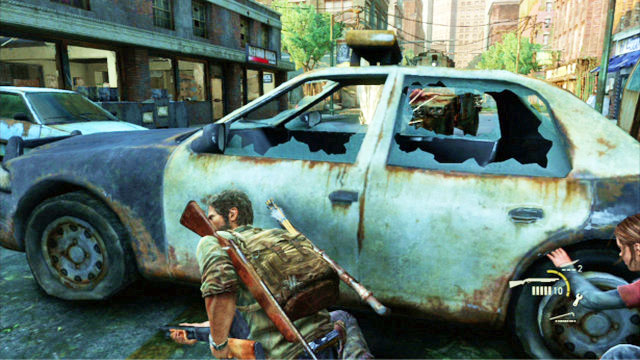
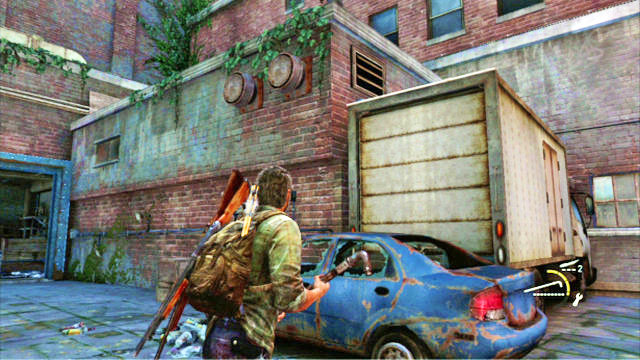
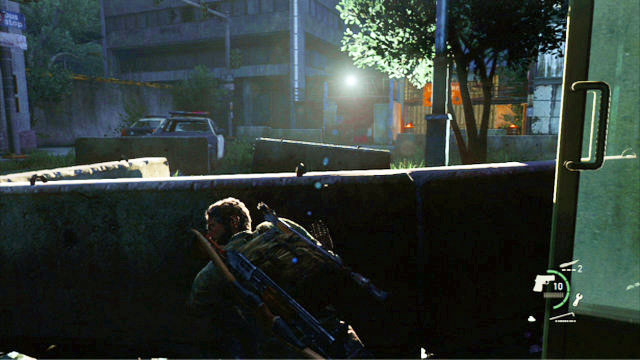
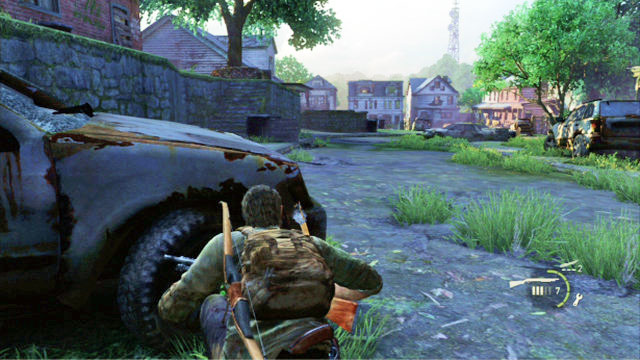
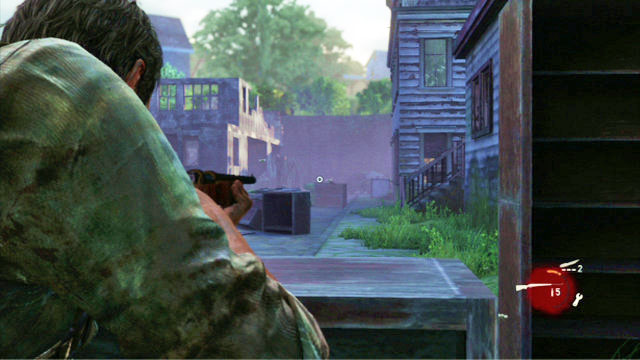
As you go to the right, you will reach a place where you will hear a gun fired. Run quickly into the right corner of the location and take cover behind the car wreck. Soon after, there will, be three men approaching from the left.
After you take cover, wait for the nearest enemy to stop and wake several steps while turned away from you. You will then have the opportunity to kill him silently. Eliminate the remaining two in a similar manner after they walk their ways.
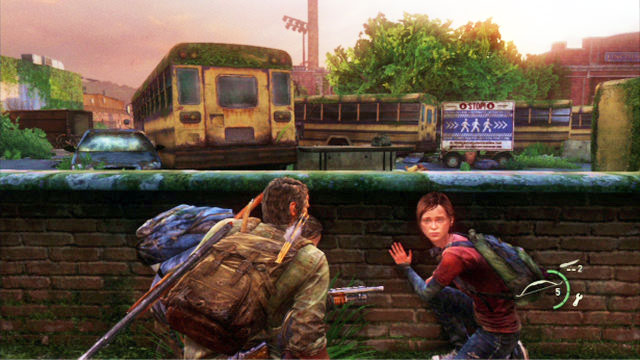
Once you have cleared the area, climb onto the car, and then onto the bus and jump over the fence.
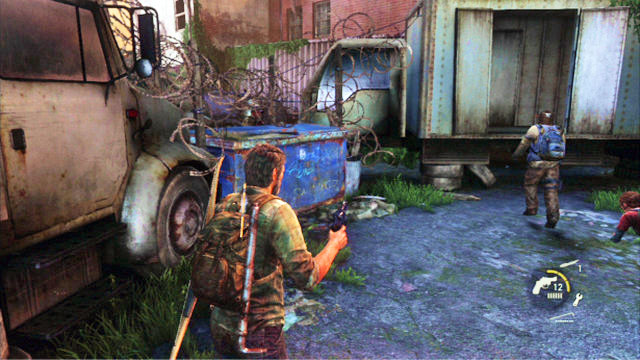
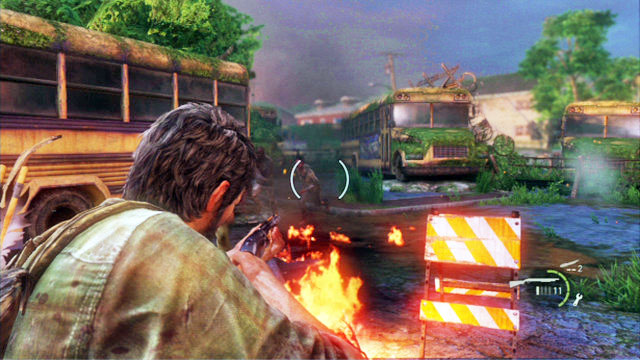
A bit later you will run into a turnstile. Behind you will have to face another group of bandits.
Legend

Start of the fight

Weak opponents

Suggested player route

Enemy routes

Suggested kill areas
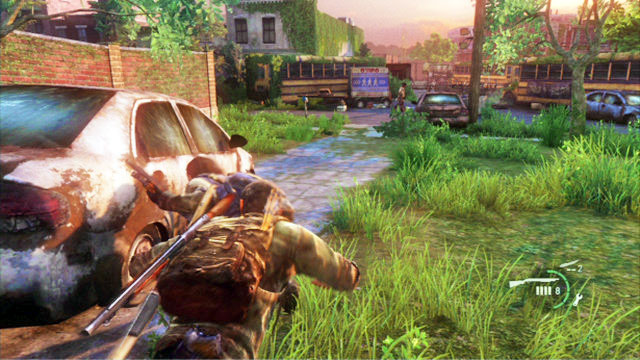
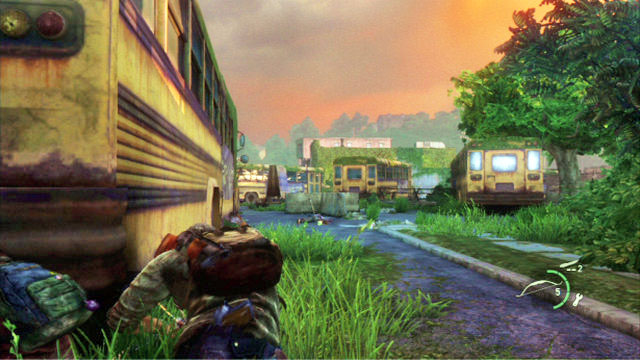
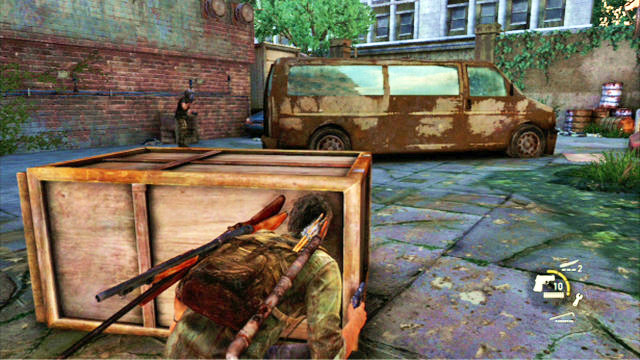
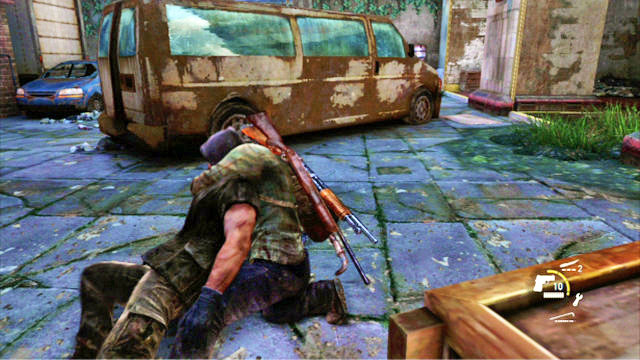
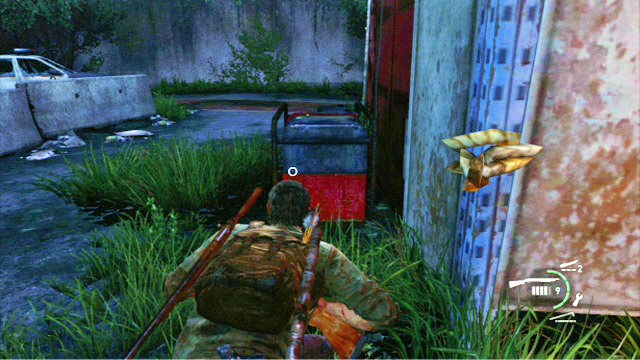
First, go to the left end of this location and take cover behind the blue vehicle. You need to wait for one of the enemies to go behind the bus wreck. You will have the chance, the, to kill him silently.
Take cover behind the car again and wait for the next bandit to come; strangle him too. The third one of the enemies, since he is alone now, should be no problem to surprise.
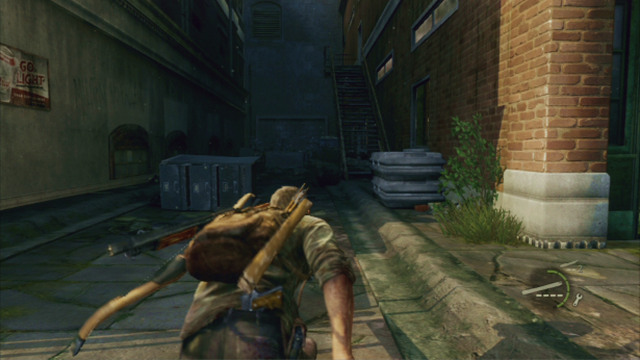
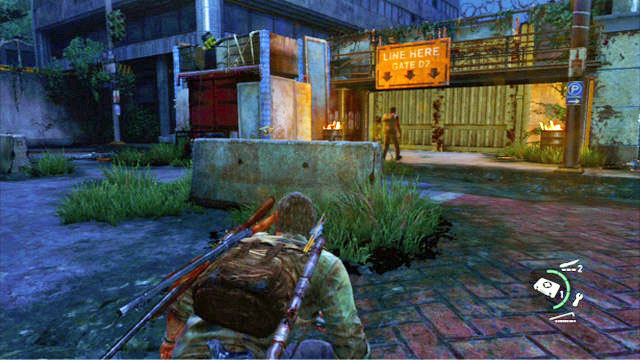
Once the area is clear, sneak slowly to the other end of the location and turn into the alley to the right.
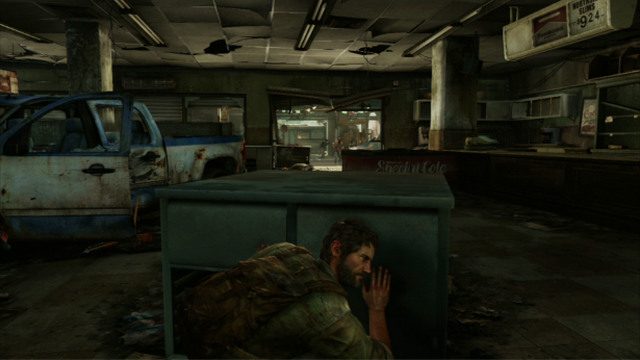
There, you should overhear men talking inside the building. In order not to draw attention to yourself, enter through one of the smashed windows and hide behind the cover to the left.
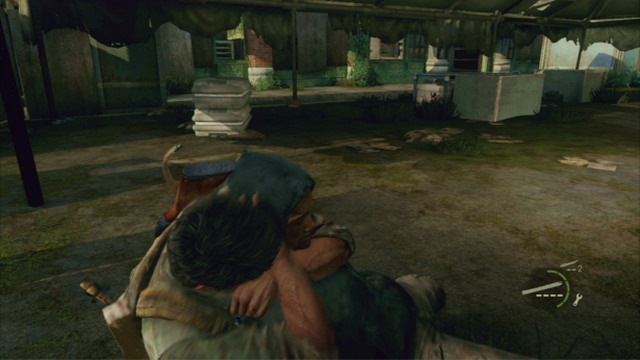
One of the bandits will approach you in a moment. This will create an opportunity to strangle him. The other two will notice his corpse and approach it one by one. This will allow you to repeat the execution.
You can eliminate two other groups in a similar way. One on the ground floor and one on the first floor. It is a tedious process though so, nothing will happen if you go for a more open method of fighting. Several shots, bombs or Molotov's cocktails will do the trick.
After you clear the building, explore it thoroughly. On the first floor, you will find a door in the corner, whose opening requires a knife. There is a lot of interesting gear behind the door. It is also a good idea to talk to Ellie and listen to her jokes.
When you are done, walk into the fire escape behind the shop and go ahead.
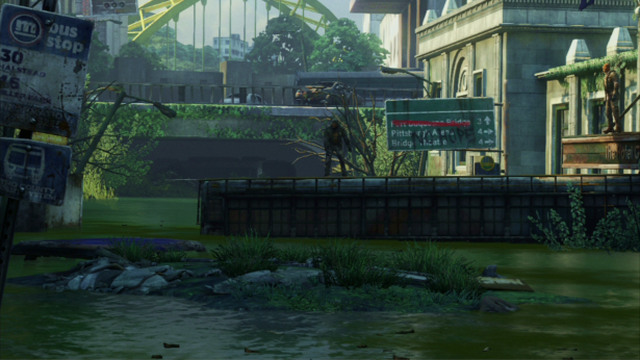
Eventually, you will reach a small, green lake where you will watch a short cutscene.
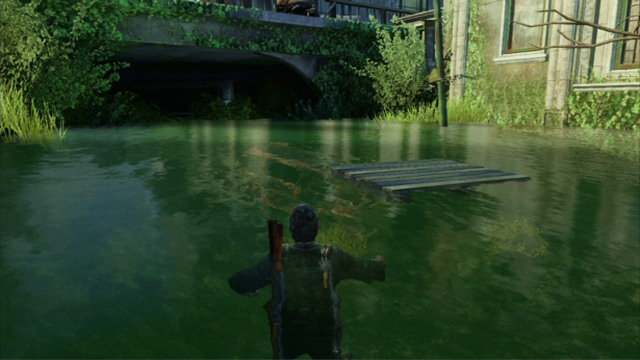
After the cutscene finishes, walk into the water and keep swimming ahead, until you see a drifting plank.
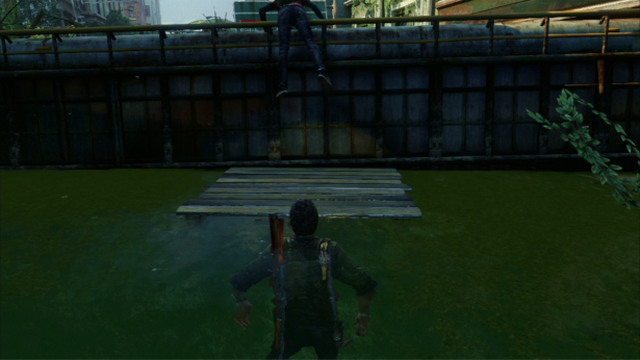
Take the plank over to Ellie and transport the girls to the elevation with a long plank. Your companion will throw the plank over to the other side.
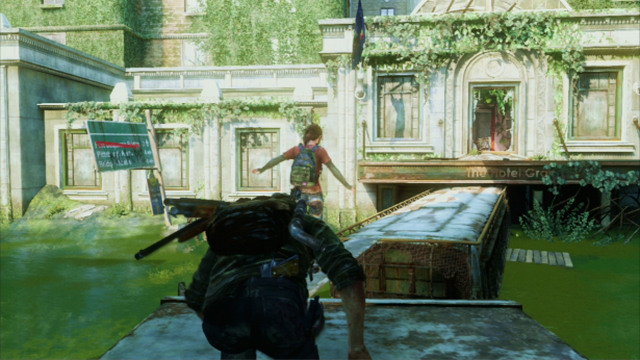
To get up there, swim through the flooded container to the left. You will then end up in a flat that you can go through to meet up with Ellie.
Before you do that, though, search through the first floor of the building. There are several items there. Once you are done, walk over the plank to the other side and enter the hotel building.
Once you get out of the building, grab onto the ladder leaning against the pillar to the right and lean it against the wall pointed by Ellie. You will be able to climb up.
Then, go right and walk, slowly around the hole in the ground.
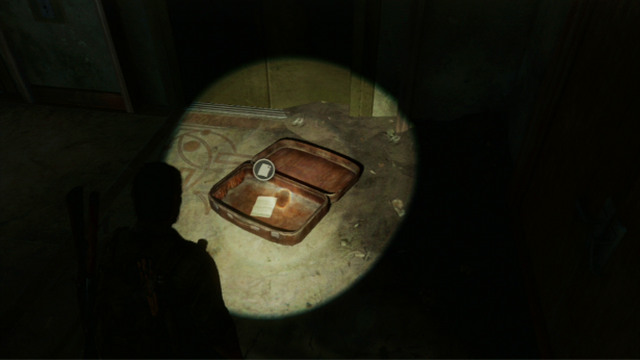
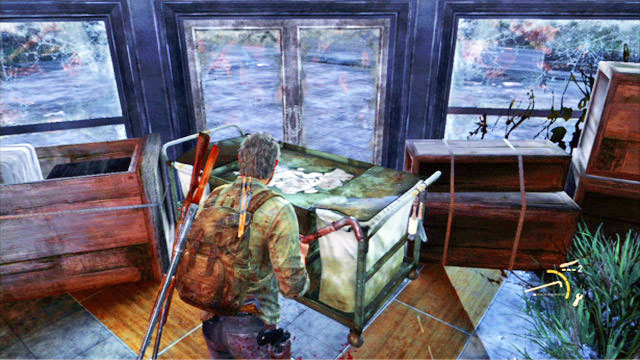
At the other side, there is a suitcase with a slip of paper inside, with a safe combination on it.
The safe is located downstairs in a small room, behind the counter.
Once you have collected all the useful items, climb up and go left.
Legend

Start of the fight

Weak opponents

Suggested player route

Enemy routes

Suggested kill areas
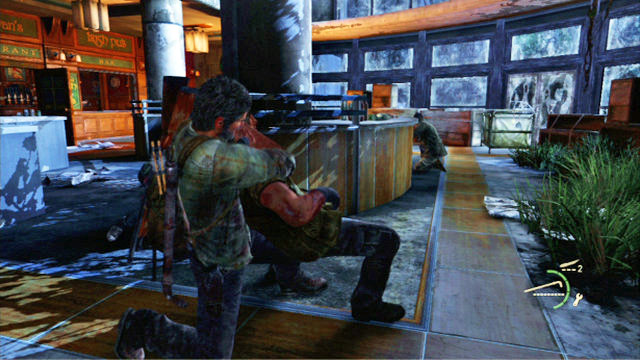
This way you will reach a buildings wing full of enemies. First, get rid of the two to the left.
As soon as they split up, approach them from behind and strangle them. In a similar way, you can deal with re remaining ones, and there is quite a few of them. Fortunately, they always walk alone and it is a rather rare occurrence that someone discovers a corpse. There are even more enemies upstairs, which you can reach over the narrow stairs.
Legend

Start of the fight

Weak opponents

Suggested player route

Enemy routes

Suggested kill areas
When you are upstairs, keep going to the left. This way, you will reach another staircase.
Upstairs there is an inactive elevator shaft, which you can access by pressing the triangle.
After you enter, squeeze through the slit to the right and help Ellie up to the exit.
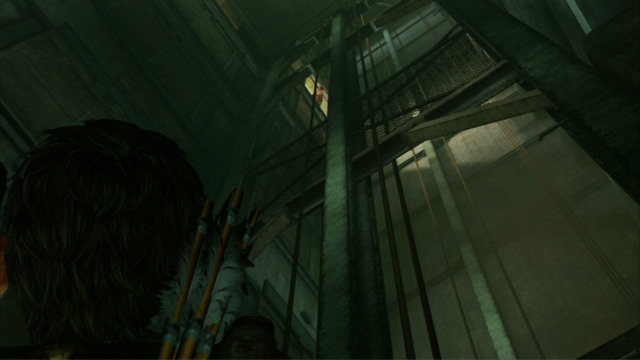
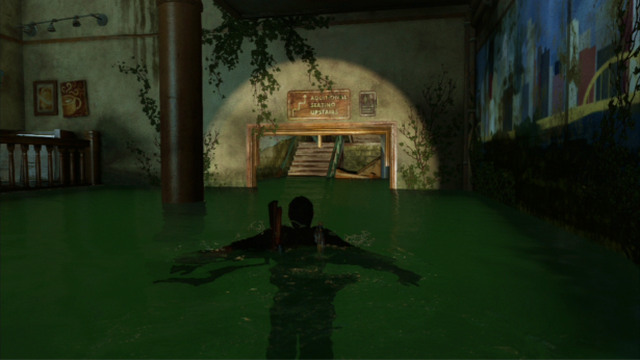
A moment later, you will drop to the very bottom of the building, in a flooded part of the hotel.
Go straight to the exit to reach a staircase.
You will be able to dive then and swim a bit further.
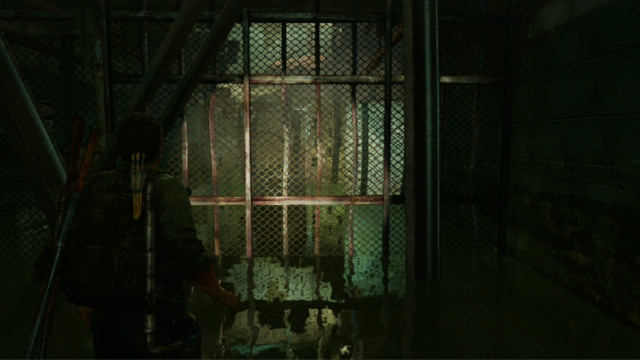
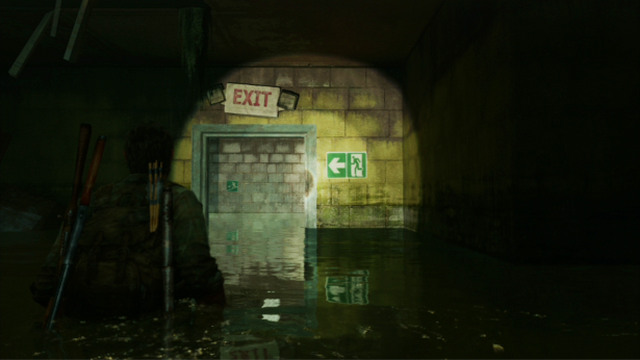
Once you resurface, you will be very close to the barricade that blocks off the tunnel.
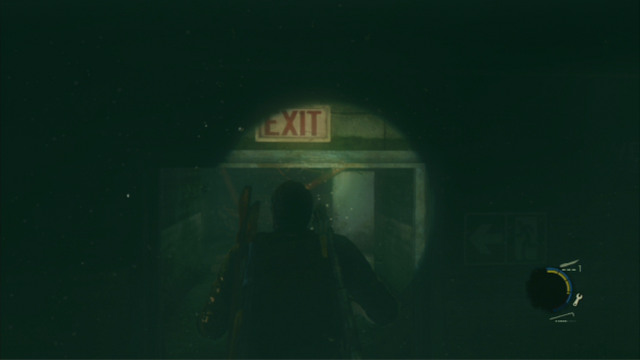
Return then to the water and keep swimming underwater, through the door marked as the EXIT.
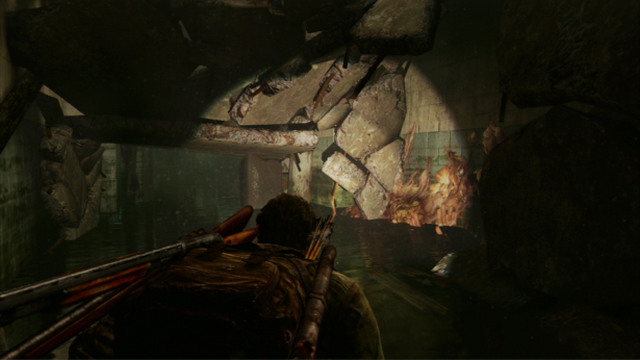
This way, you will reach the part of the hotel full of spores.
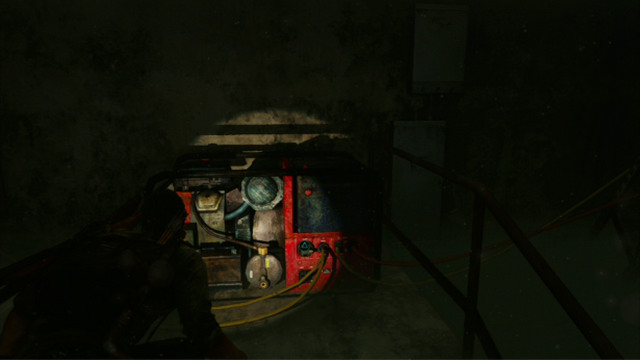
First, explore the area to the left and then keep to the right, until you see a red generator.
Before you start it, deploy bombs in two entrances into this room and prepare to or three Molotov's cocktails. As soon as the engine starts working, you will be attacked by a group of zombies accompanied by a bloater. The weaker enemies can be eliminated with your shotgun, as soon as they come close. Deal with the bloater with your Molotovs reinforced with regular ammo. First of all, you cannot let the beast come close. The bombs that you deployed earlier should be helpful in this respect.
Once the last monster dies, climb the pile of debris to the top. Keep going left and you should reach a locked door that requires a special card to open.
The pass can be found in the security room on the same floor.
After you walk through the door, climb even higher and search through the nearby rooms. You can find useful items there.
A bit further, there is another fight with bandits waiting for you. Take cover and wait for the men to disperse. Then, attack the closest one.
After the thug dies, his companion will come over to check out on him. Be prepared for that and strangle the enemy as soon as he turns away.
Eliminate the two enemies a bit further, in the same fashion. While sneaking, you should watch out for the pots on the floor at all times. If you touch to any of them, the enemies will be alarmed.

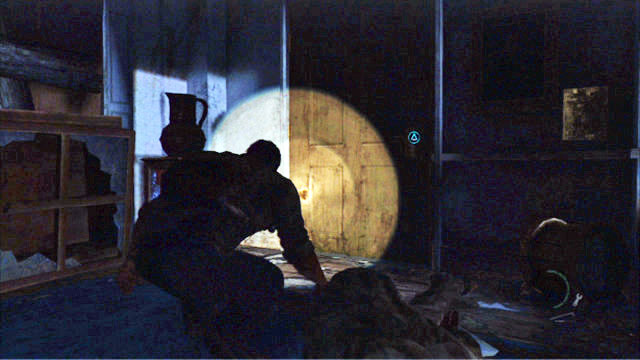
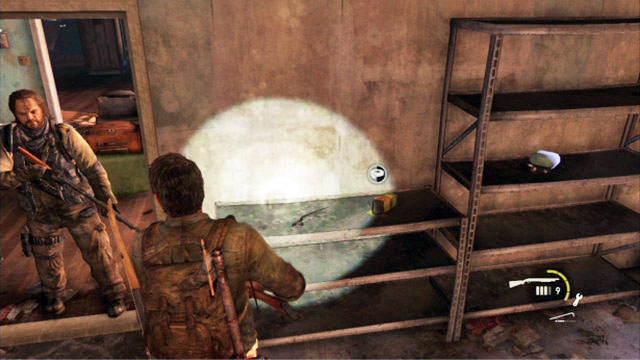
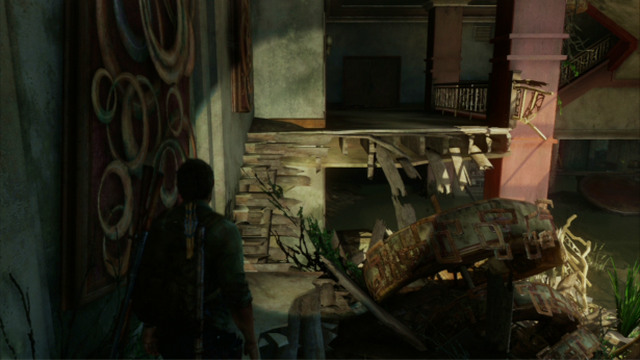
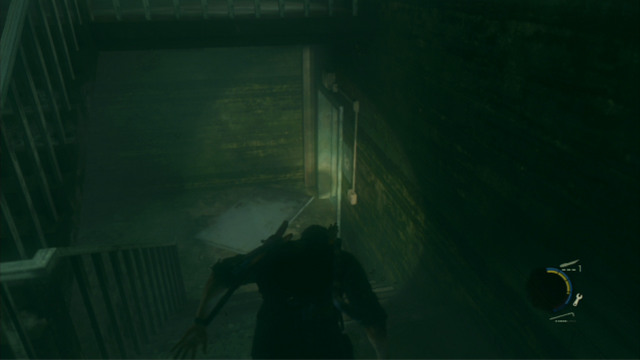
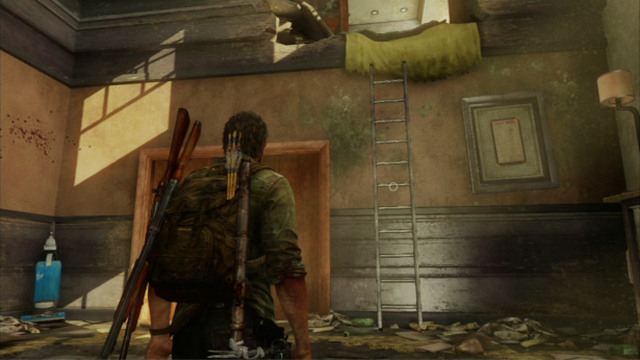
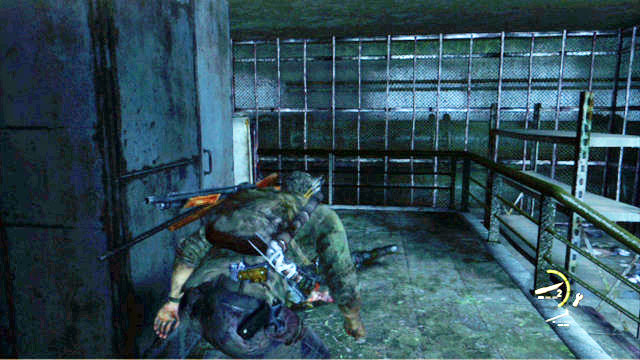
As soon as all of the enemies drop dead, you will have to find a ladder. It is in the left corner of this location.
Pick it up by pressing the triangle and lean it against the wall under the rift above.
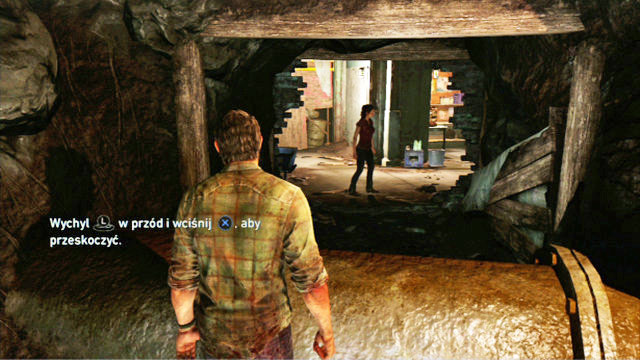
As soon as you climb the ladder, you will be attacked by the last one of the bandits. To liberate yourself from his grip, keep tapping the square quickly.
After you are saved by Ellie, climb the ladder again and go left.
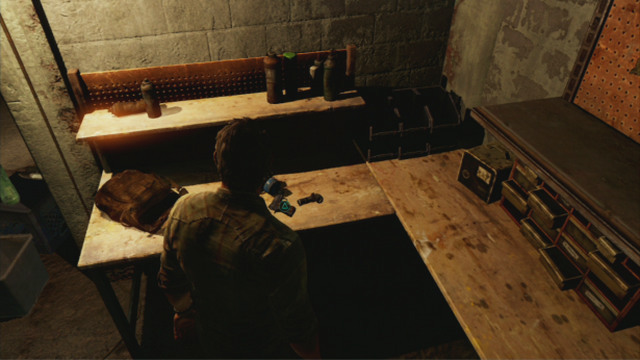
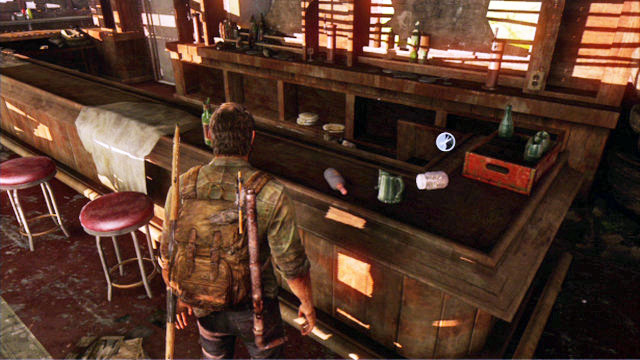
To the left, there is a hole in the floor, which you should slip by.
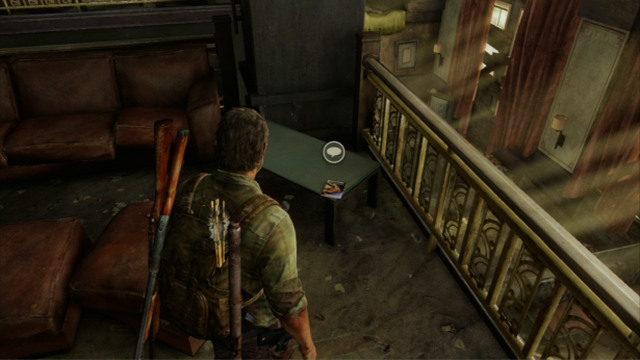
This way you will reach a bar where there are a few useful items.
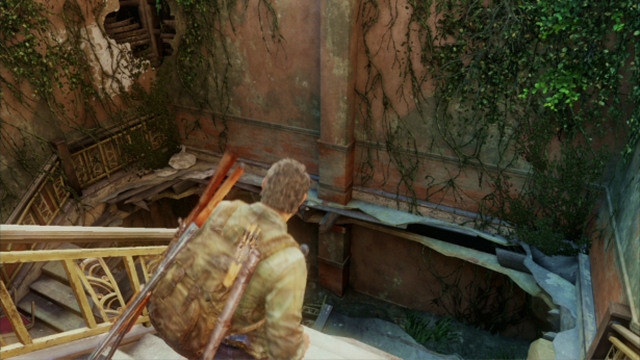
Once you collect everything, return to the corridor and go left. A few steps further, you will reach a broken staircase.

Jump down and run ahead. Search through the rooms you pass by.
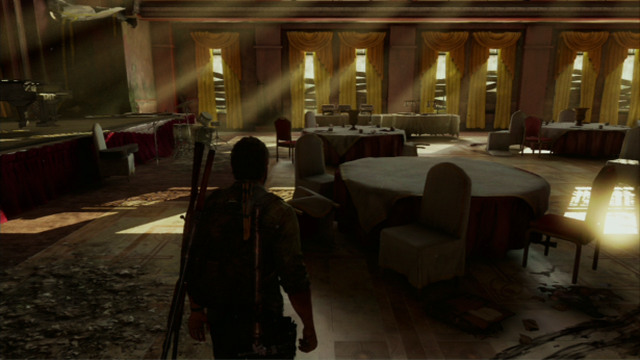
At the end, there is a ballroom with a grand piano in it.
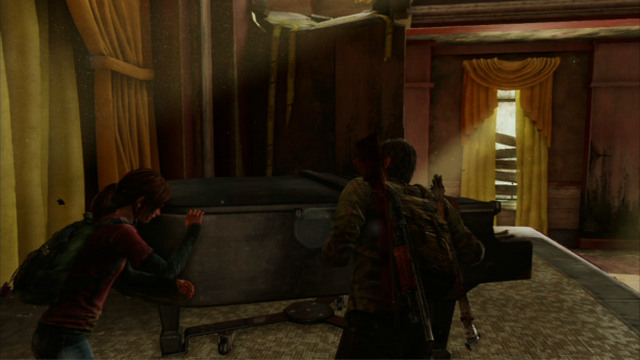
You need to move the instrument over to the nearest wall and climb over it.
Go ahead. After you walk outside, you will have to jump down to the scaffolding, which will start a longer cutscene.
After the cutscene ends, you will have to fight an army of bandits.
At first, keep as far to the right side of the location as possible and slowly proceed ahead. You will be able to kill three goons silently this way.
Once you reach the last building, look through the window on the left. You will notice a single enemy.
Use your bow to shoot him as soon as he turns away, and walk over to the wall on the right. Turn left quickly. You can now hide behind the nearest cover and keep shooting at the approaching enemies. When there is too much of them, make use of your bombs and Molotov's cocktails.
After the last one of them dies, Joel will call out to Ellie, and a short cutscene will start.
You can now climb onto the nearby truck. This way you will reach the upper floor of the building, where there are several useful items.
Once you are done with the exploration, return to the place where you would fire at the enemy and open the gate there.
Ellie will quickly move over to the other side and block the gate with a trolley.
You need to move the trolley to the wall at the other side , so both of you can continue.
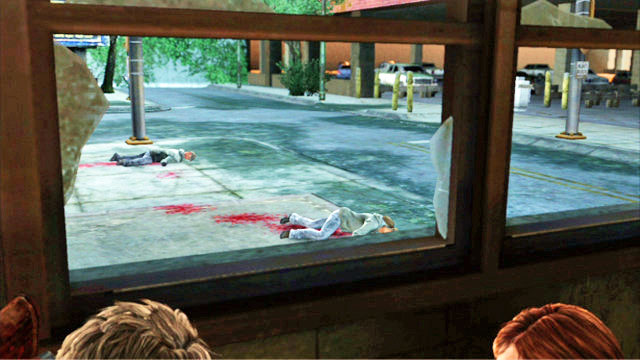
At the window you will witness a pair of refugees being murdered.

As soon as the bandits walk away, continue to the left until you reach a small staircase.
Climb the stairs to the next floor where there are two enemies waiting for you. You can either strangle them silently, or shoot them. They will not call out for reinforcements.
After the last of the enemies dies, search the rooms and jump down to the street level through the hole in the building.

As you go ahead, you will meet bandits again. Three of them are waiting for you on the first floor of the building. First, approach the building and enter using the entrance on the left. The one on the right is also available to use but, if you want to take that one, you need to watch out for the trap right above the floor.
Once you go upstairs, take cover behind the table to the left. You should be able to see two bandits dressed in red from there.

Use your bow to take both of them out because, the third one will come, this time wearing a bulletproof vest. You can simply strangle this one.

Further enemies are waiting downstairs to the right. There aren't too many of them so, shooting all of them should be no problem.
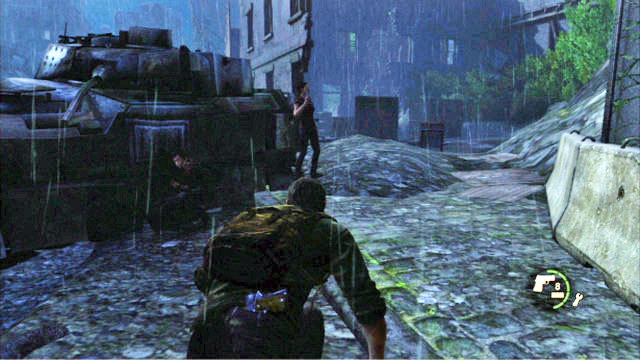
Once they are dead, search thoroughly the building near to the tank.
Inside, you will find a lot of items and a door that can be opened with a knife.
To go further, approach the fire escape next to the tank and give Ellie a boost.
The girl will then slide the ladder down for you to climb onto.
Further way leads to the left. As you go that direction, you will reach a location where a car with a machine gun mounted onto it appears.
For the time being, walk over to the other side of the building and kill the nearest enemy, while watching out for the bush (if you touch it, this will alarm the enemy).
There are two others waiting outside of the building. You do not need to kill them though. Instead, sneak over to the other side of the street as soon as the turret turns the other way.
Then, you should go right, then left, and then start running ahead while avoiding the bandits that you pass. You need to get to the door at the end of the alley. As soon as you enter the building, climb up and enter to the room through the window.

Walk over the wooden plank to the next flat. .
Leave the flat through the window and walk over the ledge a bit further.
A moment later you will see a short cutscene.
After the two introduce themselves, walk down with them, to the ground floor of the building. While on your way, search the rooms that you pass by.
Inside the toy store, you need to make a short stop because of the car going nearby.

Once the car drives away, walk outside through the back door and get ready to meet three bandits.
To eliminate them silently, wait for the enemy to the right to walk away and sneak over to the wall to the right. You are going to find a small cover there that you can wait for the above goon behind. As soon as the man returns, sneak up from behind and kill him.
A moment later, another one will come by. You can also sneak up from behind to this one by hiding behind the nearest cover. After the two die, the third one should be no problem to eliminate.
Once the area is clear, climb one level higher, over the nearby car wreck.
A few steps further, you will bump into two more bandits. Hide behind the nearest cover and aim your rifle, carefully, at the head of one of the enemies. After a headshot, he should drop dead. Thanks to this, the fight with his companion will be much easier.
As soon as the two die, enter the building, go upstairs and walk over a wooden plank to the next building.
The door to the right will take you to Henry's hideout. Go there with the man and a longer cutscene will start.
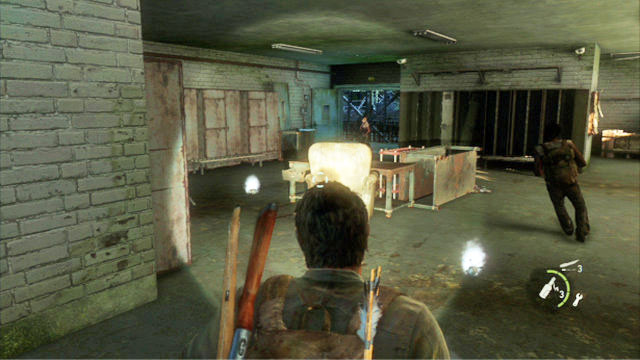
After the cutscene is over, go ahead until you encounter two enemies. Approach the one to the left and strangle him. Your companion will deal with the other one.
You can now start to make some noise and tip over the bottles and buckets on the ground. This will alarm the third one of the enemies, which you also should kill silently.
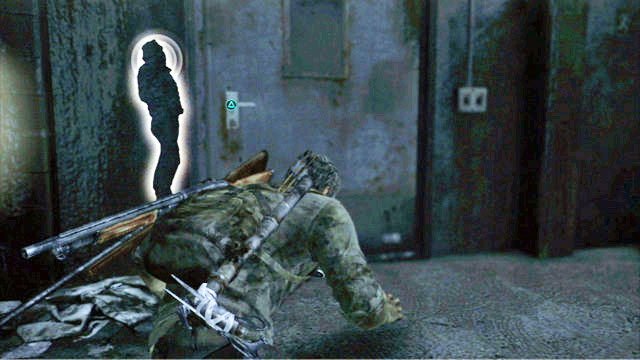
As soon as you perform the last execution, leave the building and sneak over to the outpost with the spotlight. Nobody will notice you if you stay out of the light.
You will notice a red generator when you get there. Turn it off by pressing the triangle, and hide in the shadows to the left.
A moment later, a group of enemies will start to jump down. You can kill them in a conventional way, or set bombs or throw the Molotov's at them. The choice is yours. Still, the latter method is less time consuming.
After the last one of the thugs dies, open the gate to the right of the generator. At the other side, there will appear yet another enemy, but Henry will be able to deal with him.
You can now approach the broken ladder hanging down from the truck and give the others a boost.
Unfortunately, as soon as the car of the bandits appears, Henry and his brother will take it to the hells.
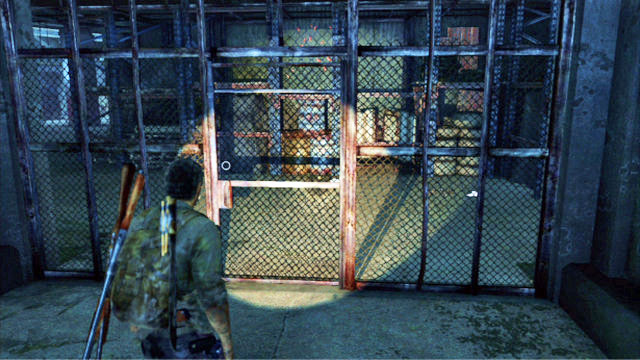
Approach the gate to the left and try to open it by pressing the triangle.
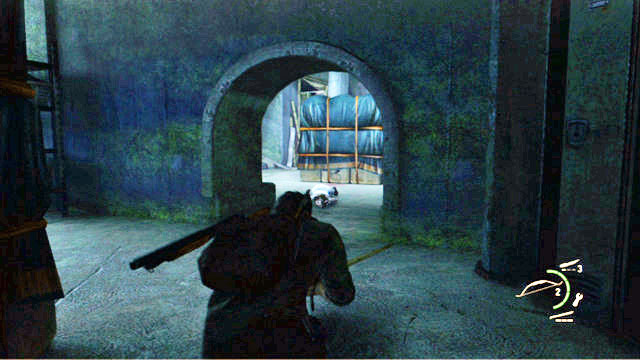
Behind the gate, go left, This way, you will reach a derelict bar where further bandits will arrive. Kill the first two quietly, by diverting their attention with bottles.
The next two are standing behind the counter next to the front door. You can sneak up to them on the left but, you need to remember that listening out will not give away their exact whereabouts.
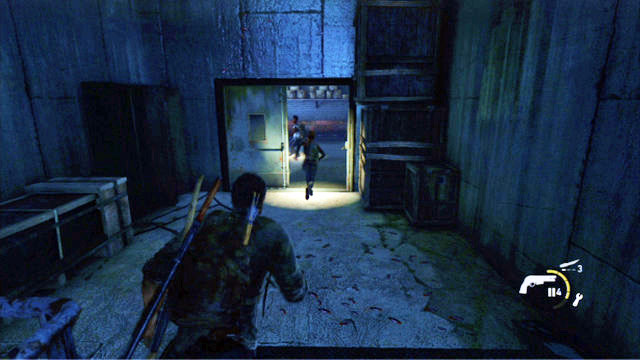
After the last one of them dies, move the trolley that has been blocking the door and leave.
A moment later, a truck with a machine gun mounted onto it will appear. You need to run away from that truck, jump over obstacles and follow Ellie. This way, you will complete this chapter.
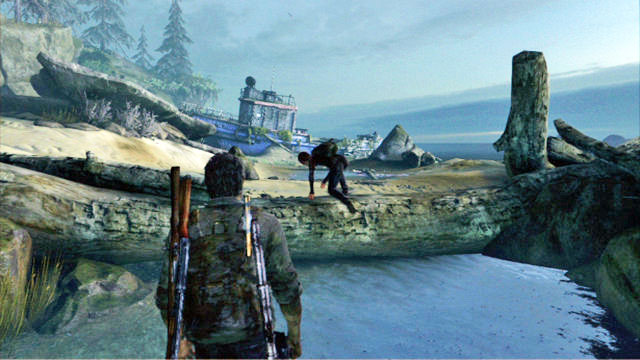
After you start this chapter, keep to the right side of the beach.

While on your way, you will find a shipwreck.
Explore it thoroughly, there are a lot of useful items inside.

Once you are done, jump down under the deck, and leave through the hole in the side.

As you keep to the right, you will bump into a barricade, which you won't be able to go around.
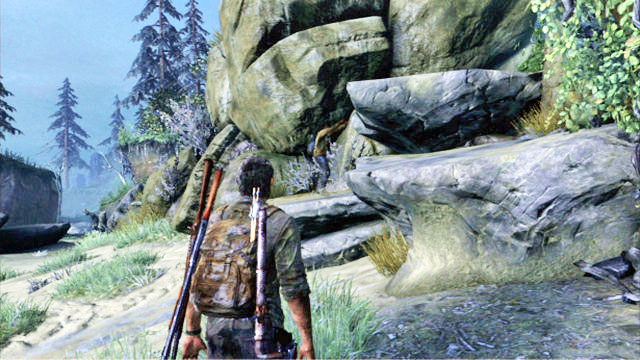
Turn back and backtrack while keeping to the right. After several steps, you will notice one of the black brothers.
As you follow the boy up, you will reach the sewers. Help Henry open it (by pressing the triangle) and enter.

Go ahead and keep an eye on the right side of the tunnel. After some time, you should notice another tunnel with water pouring out of it. You can enter the tunnel and check out what is at the other end.
There are some materials and some spares there.
After you have collected everything, return to the main tunnel and go ahead until you reach a fork. You should go into the path to the right.

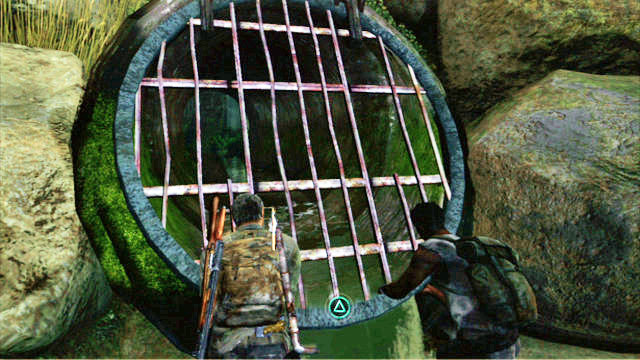
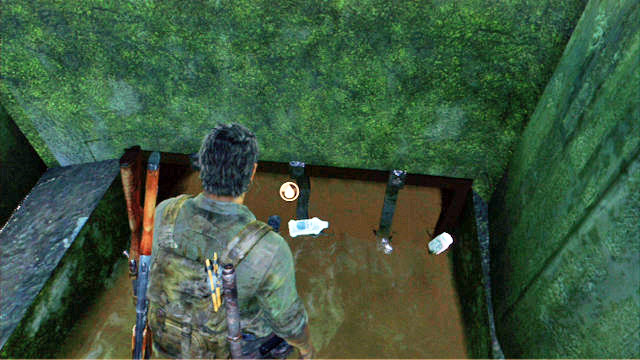
This way you will reach a closed grate with plenty of useful items behind.
To get to the other side, you need to open the ventilation shaft to the left. Ellie will be able to squeeze through the shaft and get things done.
Once you clear the area, return and take the tunnel to the left. Then follow the two men.

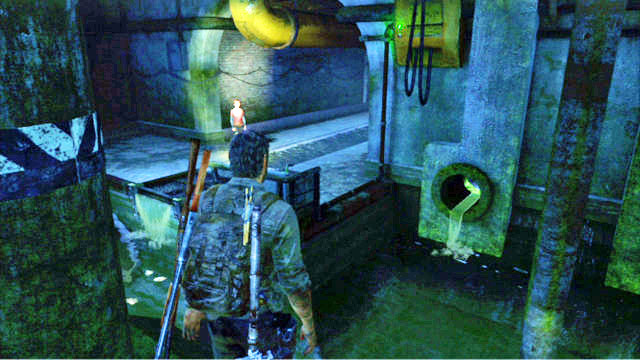
This way you will reach a location with a valve and a locked gate. At first, try and give the valve a turn. Unfortunately, it will turn out to be jammed.
To unblock it, you have to dive and remove the metal bar to the left of the passage (the triangle). A moment later, Henry will be able to raise the gate.
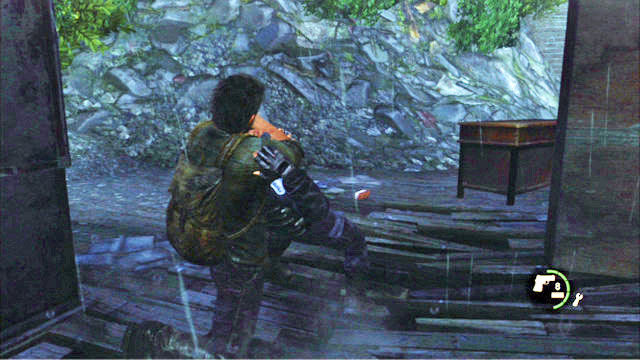
Go ashore at the other side and explore the pile of debris to the left. There are some materials there. To your left, there is a wooden plank that leads to the elevation.
Before you throw it into water, examine the door at the end of the platform. There are two clickers behind the door but, it is worth getting inside to find further items. Avoid or kill silently the first one of the enemies , and collect all of the materials to the left.
When the room is empty, you will have the chance to take out the other enemy, or leave.
Now, you should take the wooden platform and swim up to Ellie with it. Take the girl to the red generator at the other side of the previous room.
After you start the machine, you will be able to mount the platform above and go a bit further.
As you run ahead, you should reach a double door. Open the door which will trigger a trap.
Do not worry about it and search through the room at the end of the tunnel. Right before the room, to the left, there is a new weapon - a sawed-off shotgun (Shorty). Once you collect everything, backtrack a bit and turn right.
The tunnel will take you to a location where you will be attacked by four mutants. You should focus on the fourth one, the clicker. The best way to kill it is by using the newly-acquired weapon.

After you kill out all of the enemies, search through the room to the right and keep going ahead.
At some moment you will be separated from Ellie and the older of the brothers.
Sneak through the grate to the right and turn off your flashlight. Very slowly, proceed ahead and keep to the left wall.
Once you reach the end, take cover and use the bow to take down the zombie approaching from the right. You need to keep going to the left. Be careful, though, because the monsters around are sensitive to noise.

At the end of the child's room you are up for a fight with a clicker. Kill it silently and give a boost to the boy that accompanies you, and wit for him to throw you a ladder.
Go ahead and you will rejoin with Ellie. You now need to run straight. When further passage is blocked by a grate, wait a moment. The boy will squeeze through the venting shaft and unlock the passage.
Eventually, you will get into a room with a table with many parts on it. First of all, collect ammo, Molotov and the bomb. Right after you approach the exit, take to deploying the explosives. Position one of the bombs next to the entrance and, if you have any more, two to the right and to the left of the table. They cannot be deployed too close to each other or else they will both go off at the same time . A well planned defense is very important because, soon, you will be attacked by a quite large group of enemies. There will also be clickers among them. To survive, use the Molotov's cocktails to your aid. Two or three of them thrown at the enemies should definitely thin out their numbers and set the monsters that run here and there, on fire. Out of the firearms, the best here is the shotgun or the sawed-off shotgun, but you need to be very precise while shooting and use every free second to reload. Once the door goes ajar, walk through and leave the beasts behind.
Keep running ahead and search every car wreck and house you pass by on your way .
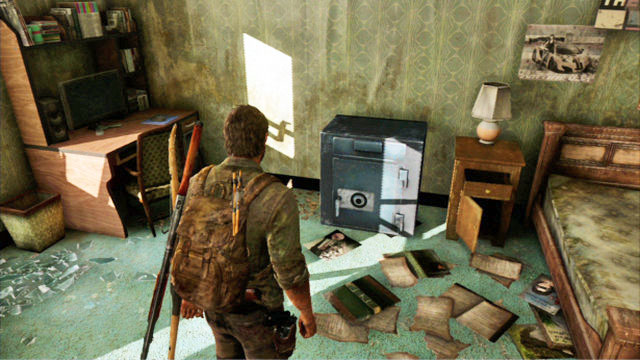
You should especially focus on the buildings to the left of the ice-cream truck. There are plenty of useful items there and on the upper floor of one of the houses, you will find a safe.

To open it, find a matchbook in the attic. The safe combination has been written down on the box.
As you follow the road, you will reach a barricade across the way. To walk around the barricade, you need to go to the back of the building on the left. You will find a passage there.
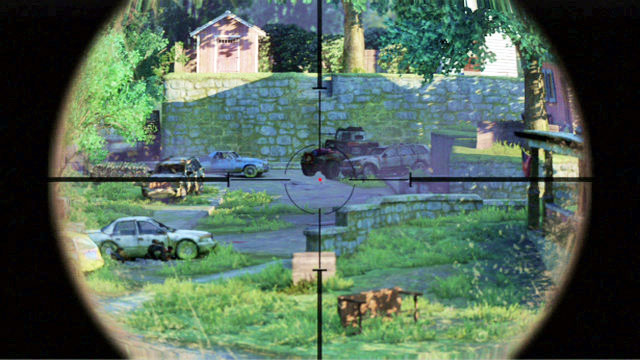
As soon as you walk out into the street again, you will be attacked by a mad sniper hidden at the other end of the location. You need to approach him by sprinting from cover to cover.
\
Keep to the right at first and choose the nearest cover. This way, you will reach a building where there is one of the bandits staying. Kill him and keep going ahead to walk around the remaining houses. To get across the grate separating the gardens, crouch and sneak under the building.
Turn left at the end and eliminate the enemies there. While fighting the bandits, you will find all kinds of explosives, like Molotov's cocktail, or bomb, useful.

After you clear the area, go to the back of the building where the sniper is staying and enter though the door. Your persecutor is upstairs.
As soon as he attacks you, start tapping the square to counter his attack, and use the sniper rifle.
You will now have to cover your companions from the attacking bandits. The first wave of enemies will arrive from the other end of the alley. To make aiming easier for you, use zoom by pressing the X.
Further assailants will arrive from the left and from the right and will try to surround their victims. Once you eliminate them, an armored vehicle will arrive . First of all, eliminate the cars around it, and then keep aiming at the top part of the truck.
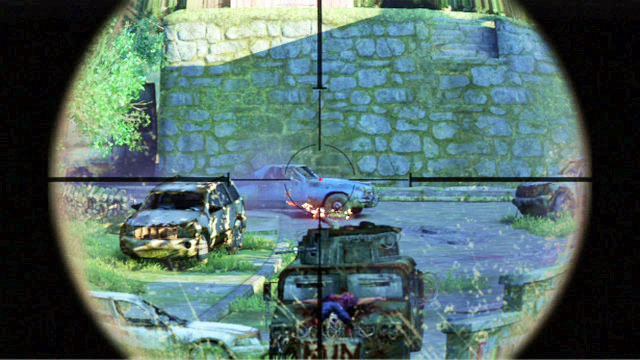
After a while, a man throwing Molotovs will appear there for a second. It is enough if you hit the man once and you will solve the problem. Unfortunately, this is not the end yet.

After you eliminate the bandits, mutants will enter the stage, which you also need to kill. First of all, aim only at these of the monsters that come too close to your companions. As soon as the group starts to run, it is going up to you what to do.
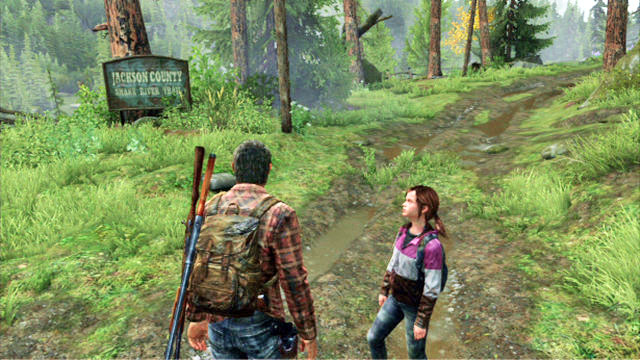
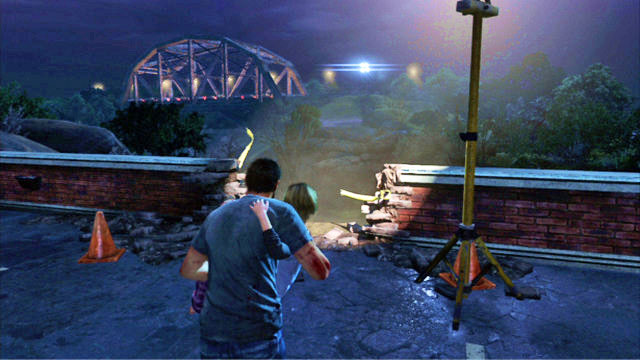
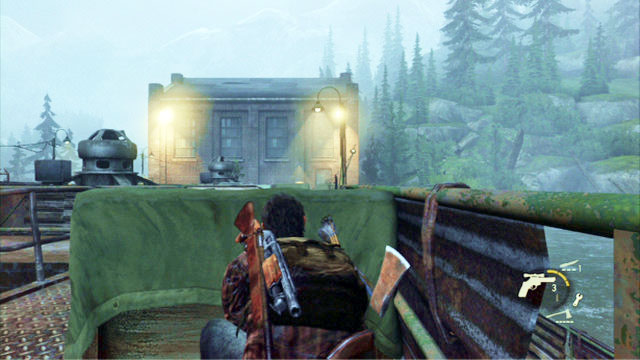
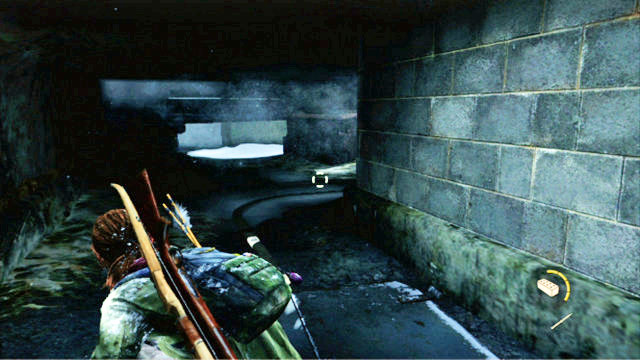
After you start this stage, go ahead until you reach a void. Turn left there and slowly, go down to the brook.
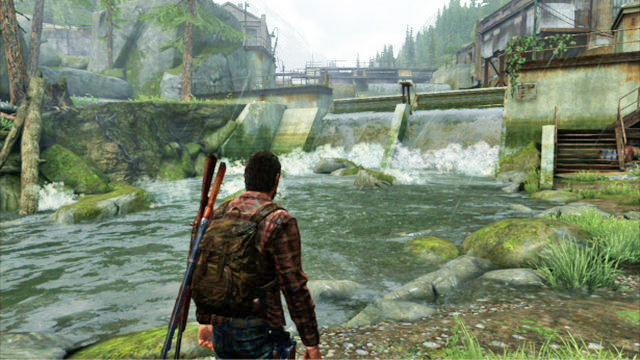
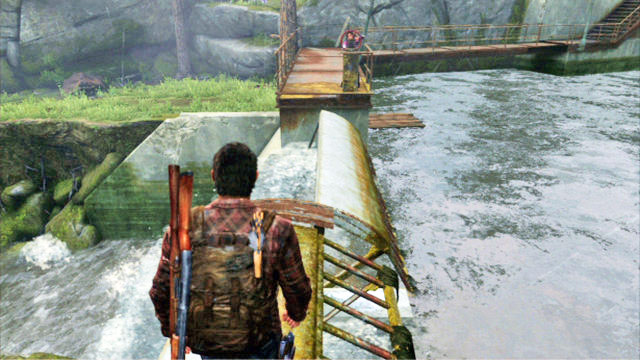
By running against the current, you will soon reach one of the hydroelectric dams.
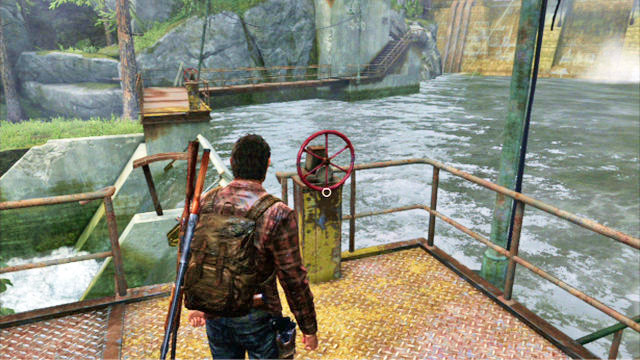
Climb the stairs an turn the red valve. This way, you will raise the first part of the bridge.
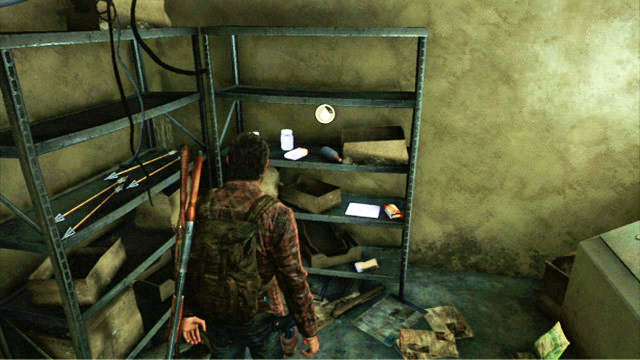
By using your knife, you can then open the door next to the stairs and search through the small storage.
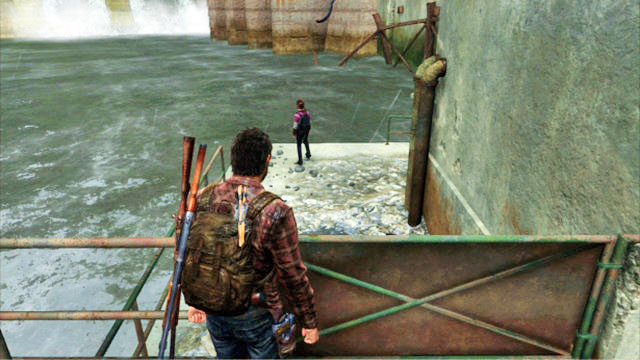
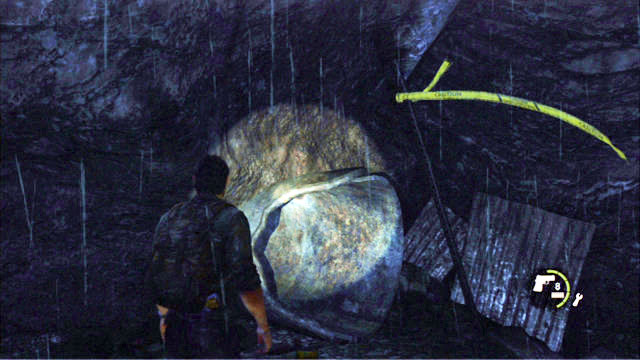
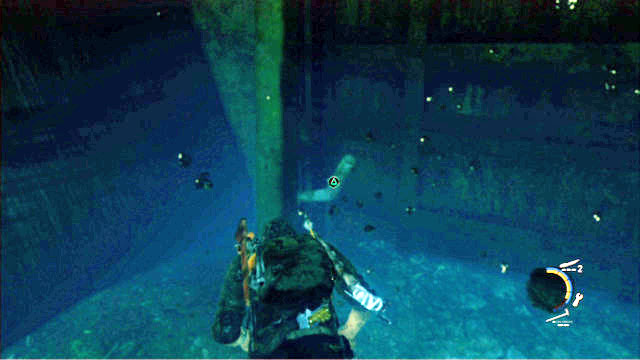
To unblock the second part of the bridge, jump into water behind the small waterfall and dive.
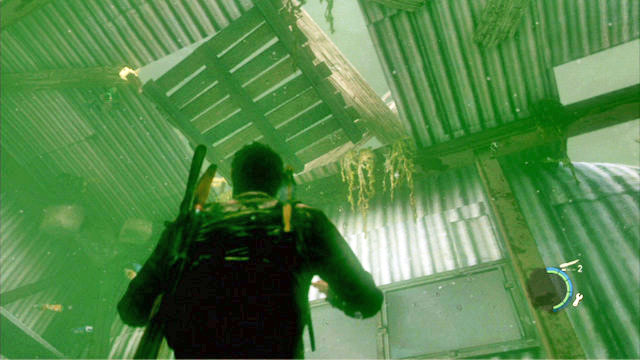
You should notice a big sunken container while underwater. Swim into that container through one of the side walls and push the wooden palette outside, through the hole in the roof.
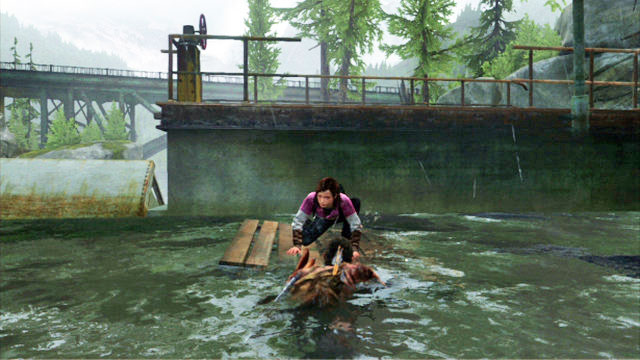
Thanks to the platform, you will be able to transport Ellie over to the other side of the dam.
While there, the girl will turn the other valve, which will raise the other part of the bridge.

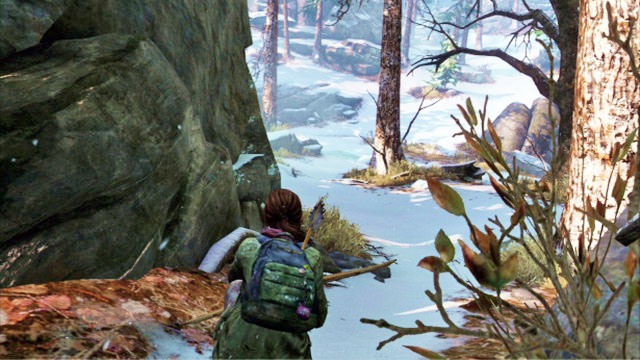
Once you are at the other side, climb the stairs and keep to the right side of the path.

This way, you will reach a big gate. Before you try to open it, search through the entire area. In a small office, you will find some materials and a new revolver - El Diablo.
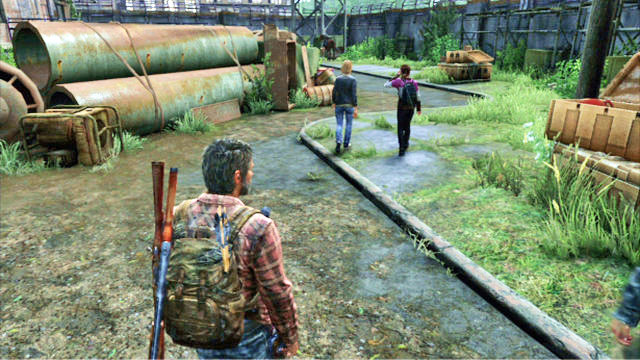
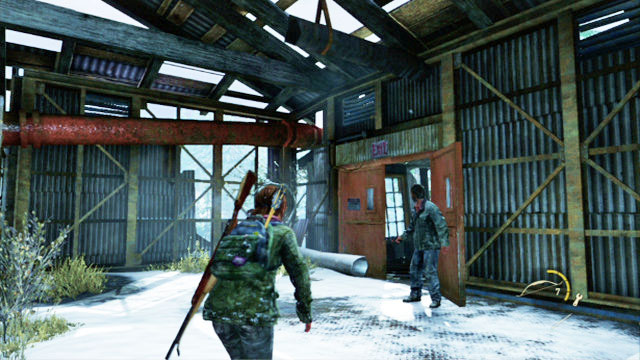
Past the gate, you will meet your brother and his girlfriend. As soon as the cutscene finishes, follow Tommy and check out the rooms that you pass by, in search of useful materials.
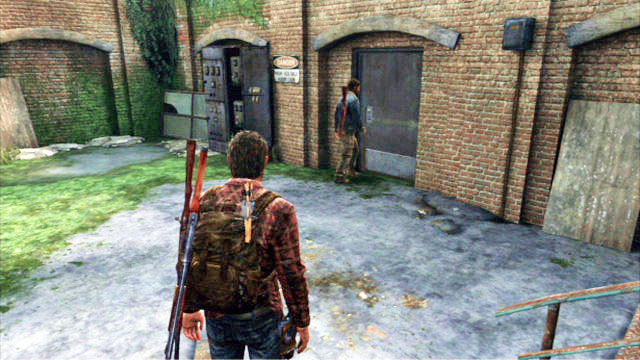
After the turbines are started, continue behind Tommy into the office downstairs.
There, a longer cutscene will start, after which you will be attacked by bandits. First, kill the nearest bandit with the weapon that you have just obtained and take the remaining ones from the left.
Further bandits are waiting on the stairs and in the room with the plan of the plant. Eliminate the latter ones by shooting through the broken windows.
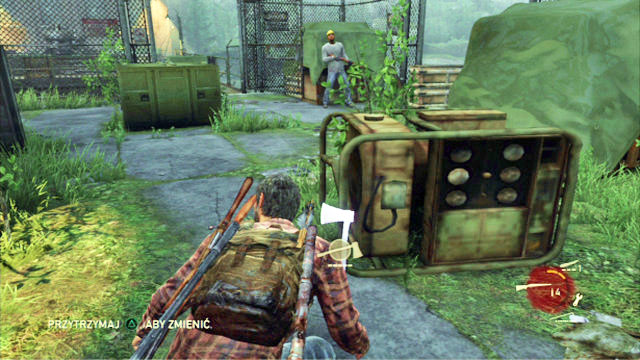
There is another battle to fight outside. Before you start shooting, though, pick up the nearby hatchet.
First, hide behind the nearest cover and jump to the level below, through the breach in the balustrade.
The enemies are waiting for you to your right. After you kill them, you will reach a passage to that leads to the left, which will allow you to steal up on the remaining enemies from the flank.
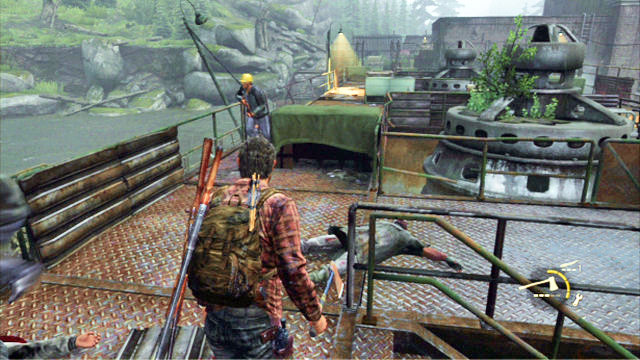
Sneak up to the enemies and kill them with the hatchet.
Another group of bandits is waiting in the room a bit ahead. You need to kill them and then, to free Ellie and Tommy's girlfriend. A bit later, a longer cutscene will start.
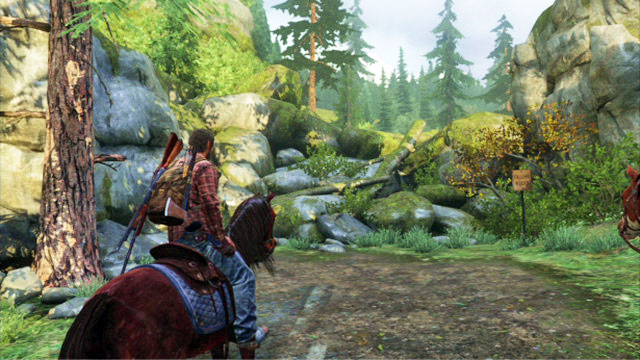
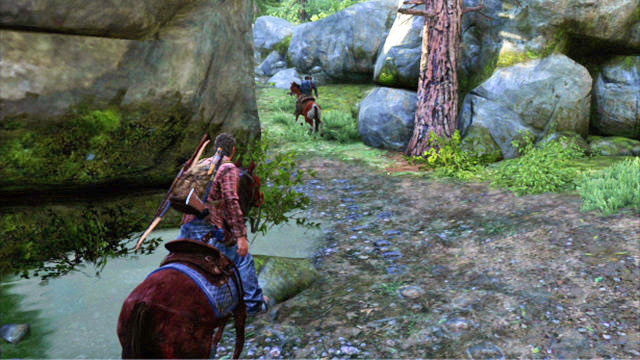
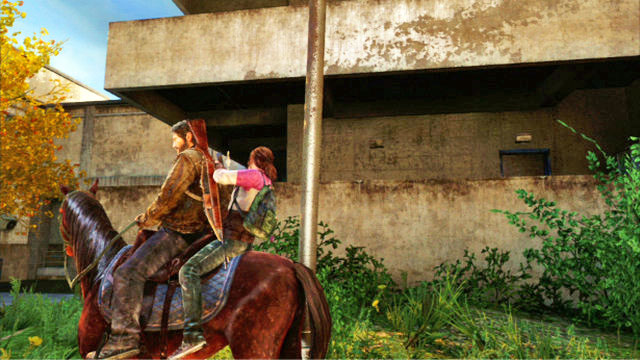
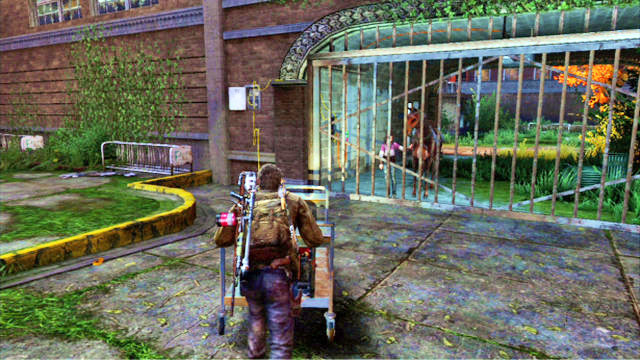
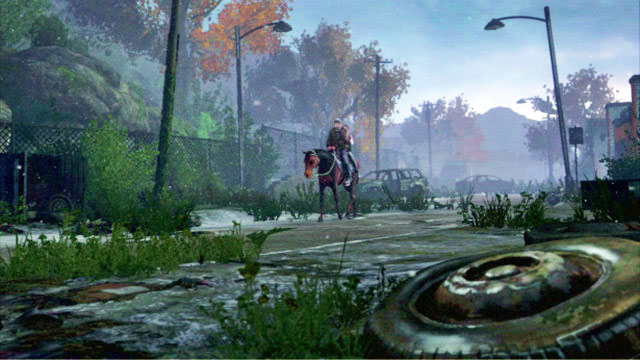
As soon as you get into the saddle, keep riding ahead, until you reach stones that are blocking the way.

You then need to backtrack and take the first path to the left. To urge the horse on, use the L2 button.

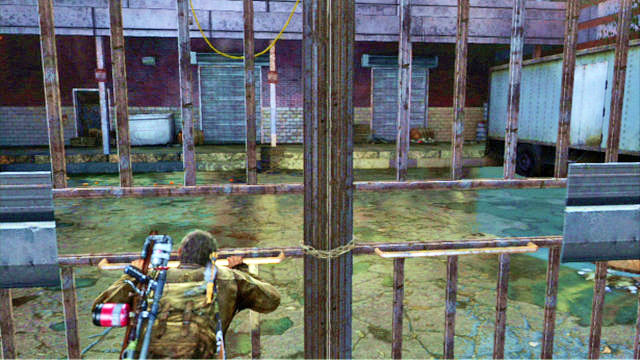
Eventually, you will get to a gorge, where you will be attacked by bandits.
Quickly, eliminate the first two of the assailants and wait in hiding for a moment. The remaining ones should stop shooting and focus on searching the area.
To kill the next enemy, climb silently onto the rocks to the right. The nearest bandit will be walking around a big boulder there, which makes him an easy target.
Strangle him quickly and eliminate the enemy staying in the nearby house. The last one of the enemies is waiting at the other side of the outpost. Get him from behind and kill him.
Once you have cleared the area, you will be able to return for the horses and follow Tommy.

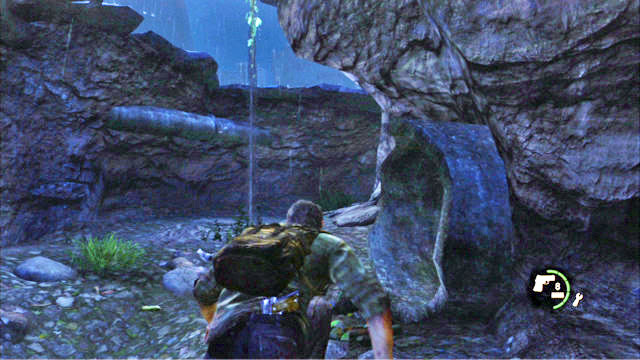
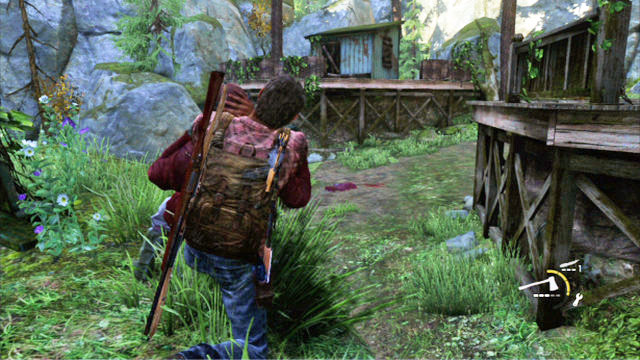
Together, you will reach a derelict ranch. Dismount your horse, approach the veranda and press the triangle.
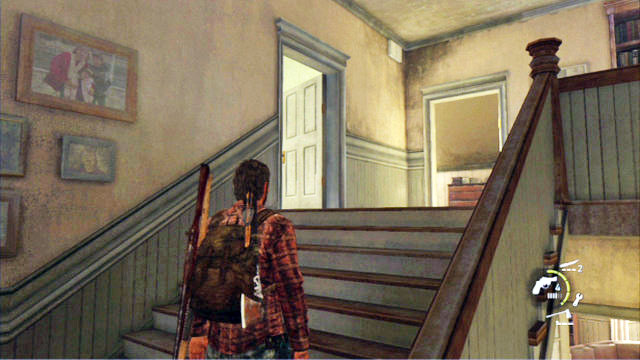
After you enter the building, you should search it thoroughly. Then, walk upstairs to find Ellie.
As soon as you find the girl, bandits will arrive. Strangle the first one of the enemies silently, by hiding behind the cover in the corridor. Finish out the other one with the hatchet blow. Downstairs there are three more bandits.
It is a good idea to use your bow against them. You can hide behind the balustrade of the staircase and shoot from there.
When the last one of the bandits dies, leave the building to complete this chapter.
After this chapter starts, keep going ahead along the only available path.
At some point, you will be passing by a building with large balconies which is standing to the right. Dismount (the triangle) and search through the building. Inside you will find a lot of useful items and a work bench that you can upgrade your weapons on.
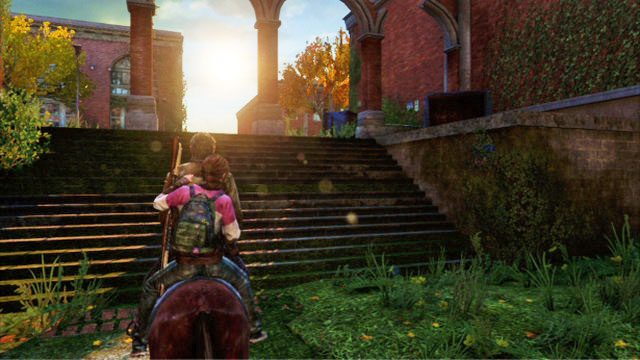
Behind the first blockade, which you need to jump over, and the wide staircase, there is a big barricade.
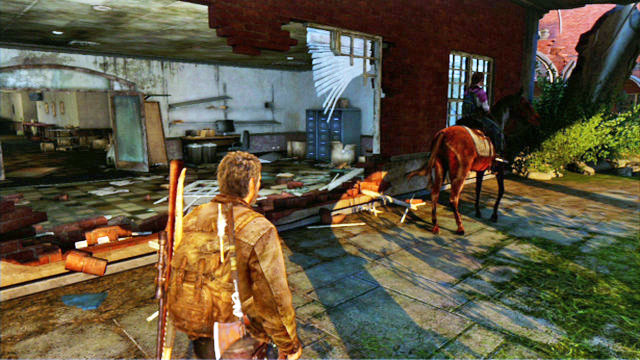
To be able to ride on, you will have to get around it through the destroyed building to the left.

When you take part with Ellie, approach the gate to the right. Next to the gate, there is a new weapon for you to collect - flame thrower. Pick it up and go upstairs where the yellow cable comes from.
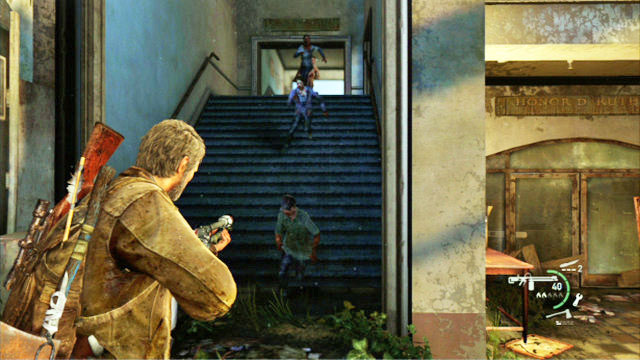
There is quite an army of mutants waiting there for you. To kill them, draw their attention to yourself and run downstairs. Then, in several short series from the flame thrower, set them all on fire.
After you have cleared the area, you will be able to go upstairs again and start the generator.
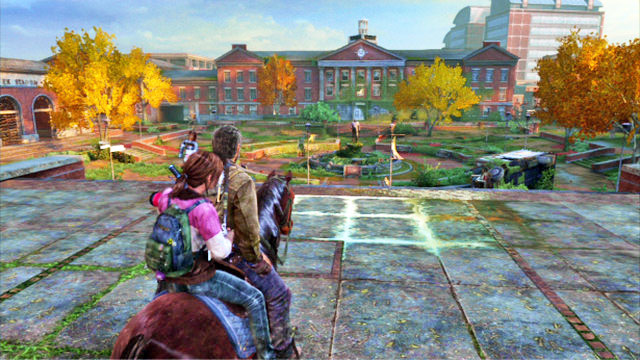
Behind the gate this opens, ride ahead until you reach a big square with a fountain in the middle.
There, you should ride to the left edge and turn right.
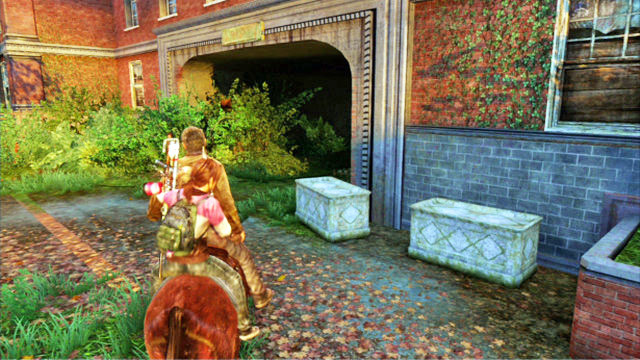
The path will take you to a locked gate, which you can get around by squeezing through the barricaded door to the right.
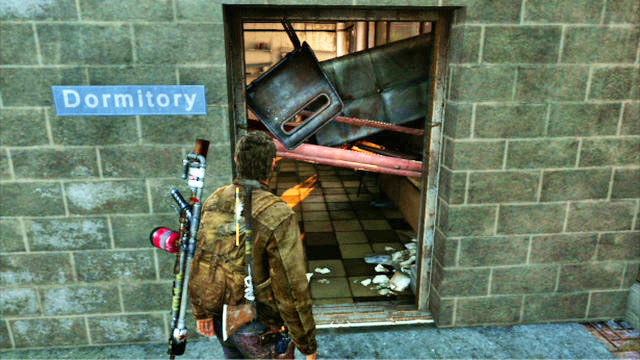
Climb up to the higher floor of the building and search it thoroughly. Then, jump into the hole in the floor to get to a place full of spores and clickers.
To avoid getting into fight, sneak to the room to the left and turn right at the end. Kill the clicker with your knife. As you go ahead, you should be able to locate a bloater (thanks to listening out). You do not need to kill it. It is enough if you squeeze past the creature from the left and open the door at the end of the corridor, by pressing the square.
If you decide to fight, though, throw a Molotov's cocktail at the enemy and finish it out with your shotgun or the flame thrower.
Once you escape from the mutants, climb up the stairs and leave the building. You now need to move the red generator towards the locked gate and start it running.
This way you will make it possible for you and Ellie to ride through.
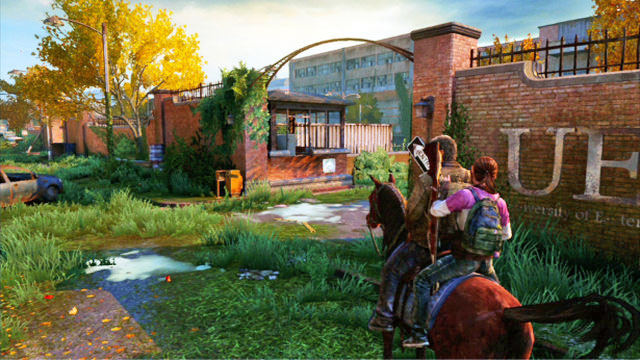
By riding ahead, you will eventually reach a laboratory building. There is a locked gate at its left end.
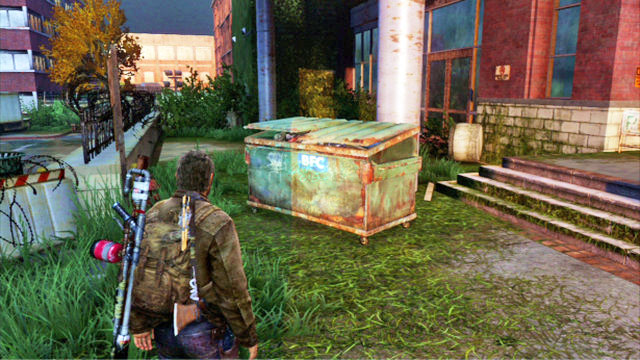
To open it, turn around and give a push to the container on your right.
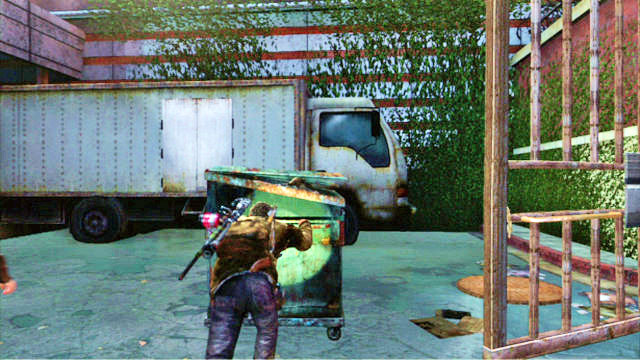
With the gate opened, you need to push the container towards the truck to the right and climb onto the truck to get into the building through the hole in the wall.

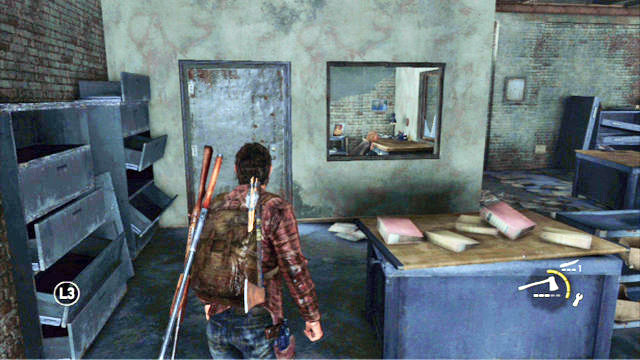
You need to get to the door that the yellow and the red cable go under. Before you cross the door, search through the room at the end of the corridor. You need to use your knife to open it.
As you follow the cables, you will eventually reach a desk with a slip of paper on it. Read the document and climb up the stairs.
Go through the door to the left and go ahead. Search through the rooms that you pass by.
This way, you will reach a room with infected monkeys.
In the next location, Joel will find a voice recorder, which will start a short cutscene.
After it finishes, backtrack to the exit by following the red flares.
Unfortunately, on your way out, you will be constantly nagged at by bandits. The first two enemies appear right after you walk into the corridor. Kill them, and then pick up the hatchet dropped by one of the assailants.
More bandits will come from the opposite end of the corridor. It is worthwhile to eliminate as many of them as you can at the distance, still before they take cover.
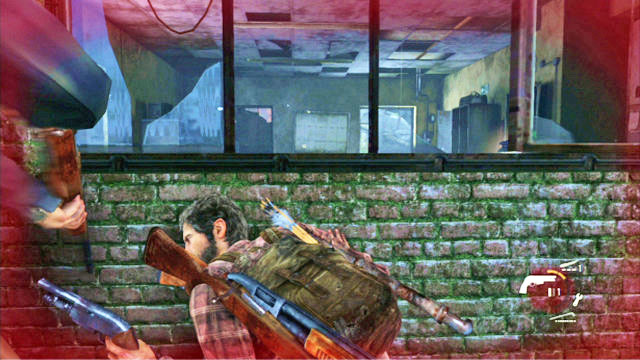
After you eliminate the enemies downstairs, try and open the door on the terrace. There will be a bandit to come through, and he will grab Joel by his throat. To loosen his grip, start tapping the square.
Eventually, you will make it to a lower level and you will be pierced with the metal rod sticking out from the floor.
You now need to keep following Ellie and kill the enemies you encounter.
Once you mount the horse, the chapter will draw to an end.
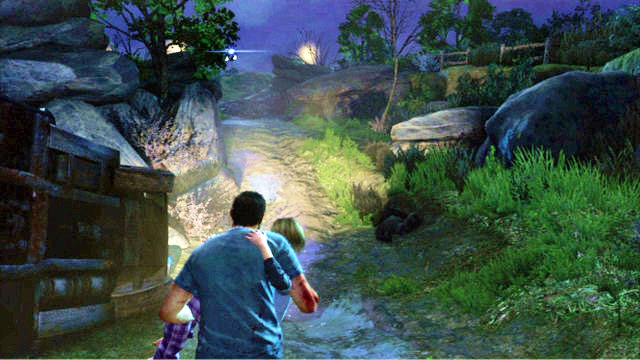
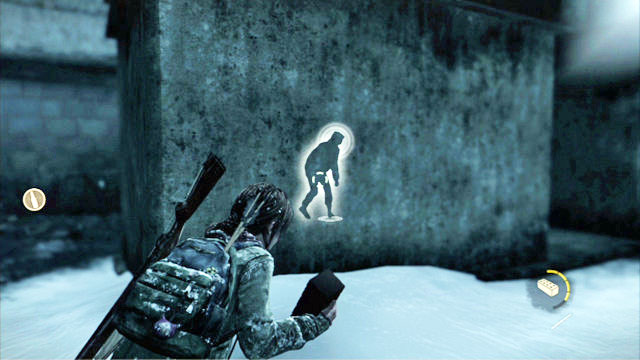
After the chapter starts, toggle crouch and start following the deer that you saw earlier.

You need to approach it silently and watch out for the twigs on the ground. As soon as you are close enough, aim your bow at the animal and release the bowstring.
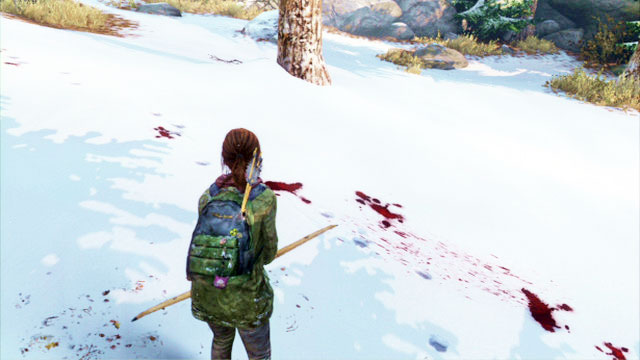
The wounded animal will leave behind not only hoof prints, but also blood stains. Which will make your chase easier.
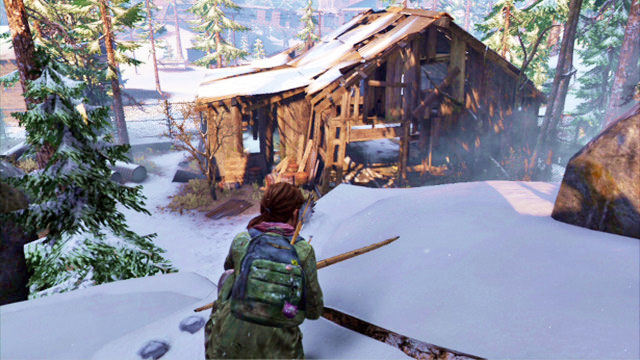
After you get over the wooden fence, you will reach a dilapidating chalet. Walk around the chalet and you will find the deer dead. As soon as you approach the animal, a longer cutscene will start.
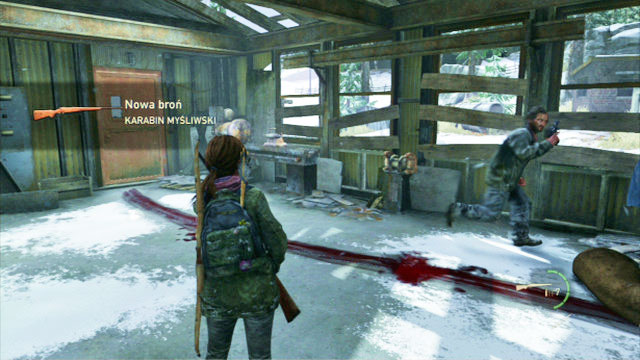
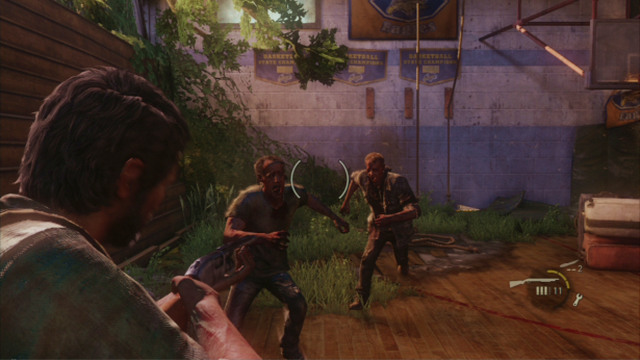
As soon as it's is over, you will obtain a hunting rifle and you will have to prepare yourself for a battle with mutants.
The first wave of enemies will approach right in front of you. Kill them with the hunting rifle and try not to miss . It is a better idea to take more time aiming, than to miss. As soon as you finish out the first wave, focus on the mutants approaching from the opposite direction. Then, collect, quickly, the ammo they dropped.
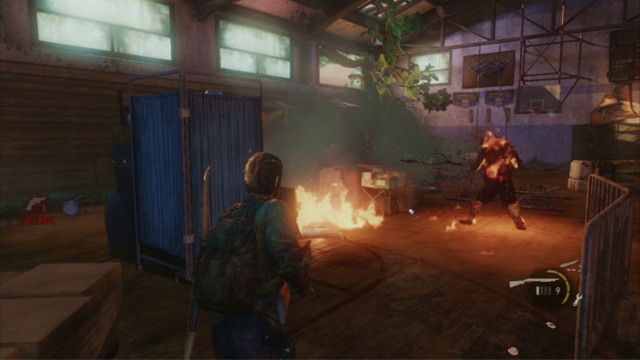
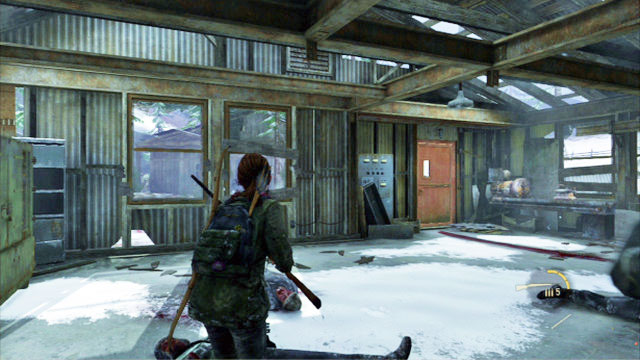
A moment later, you will have to lend David a hand at blocking the windows (triangle). I you get grabbed by one of the monsters, free yourself by pressing the square.

Further enemies will appear behind the window in front and to the left. Eliminate them by killing the clickers in the first place.
When David decides it is time to flee, follow him up the stairs.
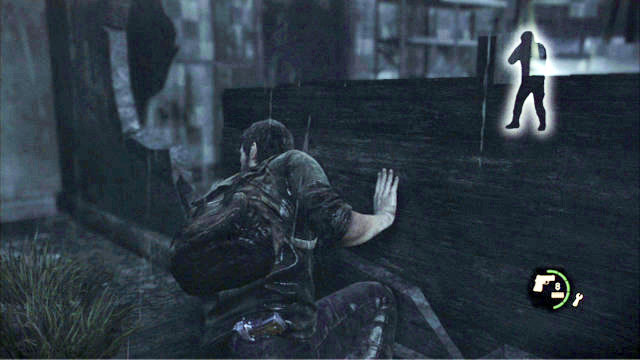
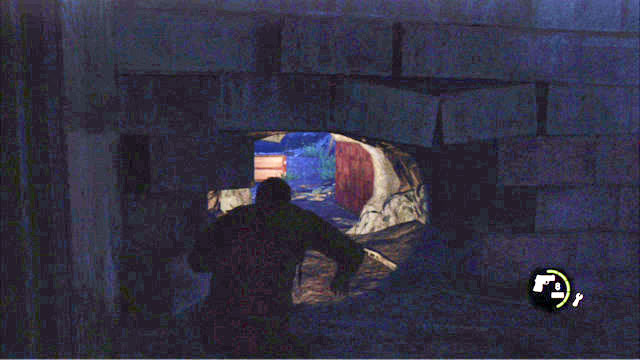
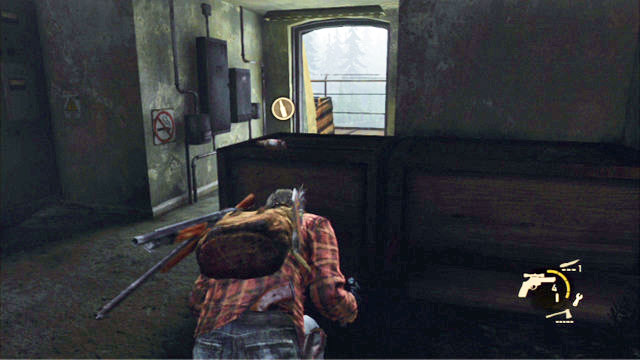
As you walk, the metal footpath will break at some point and you will fall down below. Take cover behind the nearest object and sneak through the low opening to the right.
Then, turn right and keep to the left wall. You need to get around the monsters ahead.
When the enemy that is the closest to you starts going right, you need to sneak ahead a bit and jump into the hole to the left. A few steps ahead, there should be a single mutant. You can get it from the right and kill it with your knife.
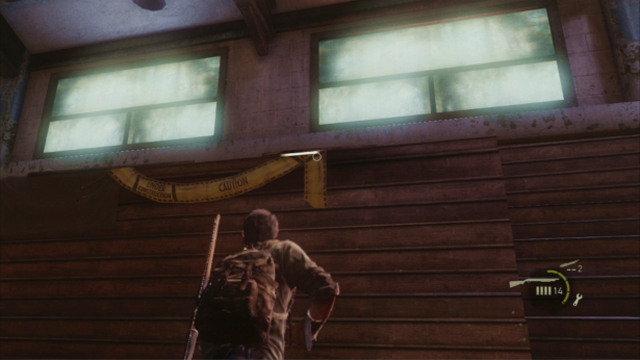
When it dies, sneak over to the nearby ladder. Climb up the ladder to meet David.
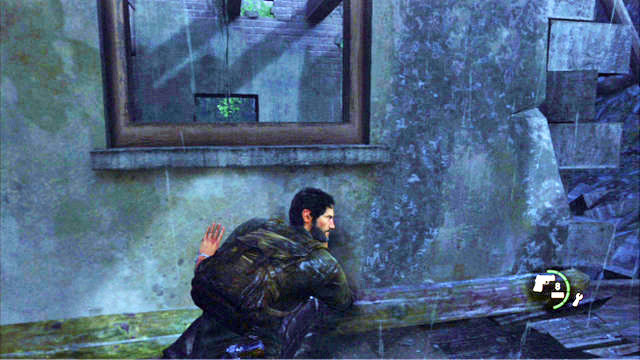
You now need to get to a higher floor and throw down the ladder for your companion to use. To make the first step, you need to approach the wall to the left and press the triangle. This way the man will give you a boost.

Keep to the right and watch out for the monster that will walk out of the room to the left.
Use your bow to kill the creature and throw down the ladder lying at the end of the catwalk.
David will pick it up and you will be able to continue together.
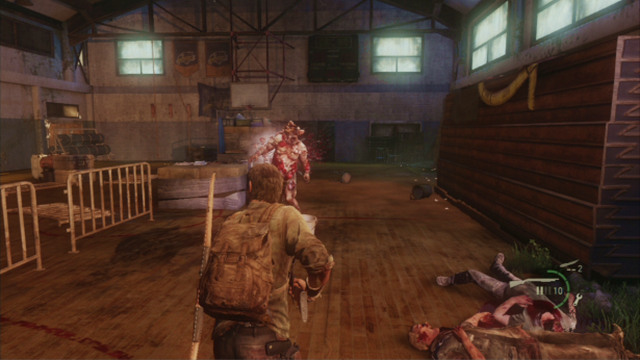
In the room with many corpses on the ground, you will have to fight a long battle with a large number of mutants. Before they start arriving, you will have to collect all the items around and replenish the depleted supplies. Especially bombs and Molotov's cocktails will prove useful but, it is also a good idea to have a first-aid kit ready.
The first wave will approach from the left (where you came from) so, stand opposite the entrance and start shooting the zombies from the distance, as soon as they appear. First, it is going to be three runners with two clickers to follow up.
Once you deal with the first wave, run into the corridor and deploy a bomb underneath the hole in the roof. Several more can come this way. Still, most of them will approach from the opposite direction. Turn towards the supply rooms and start shooting at the incoming enemy. Remember to collect ammo from the corpses in between consecutive waves.
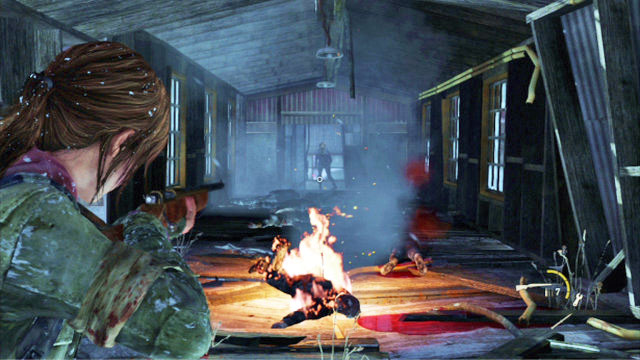
The last enemy to defeat will be a bloater. As soon as you hear the monster, deploy a bomb in the corridor and throw several Molotov's cocktails at the enemy. One or two shot should take care of business.
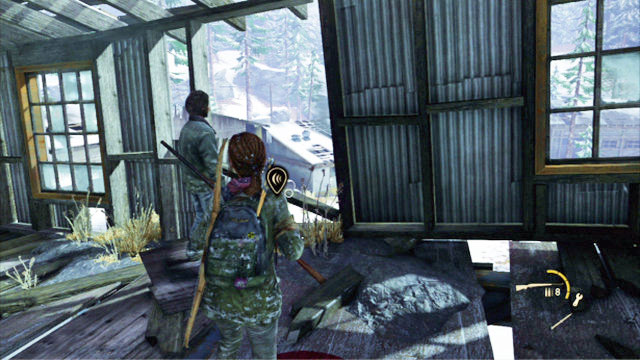
You can now talk to David and watch a longer cutscene.
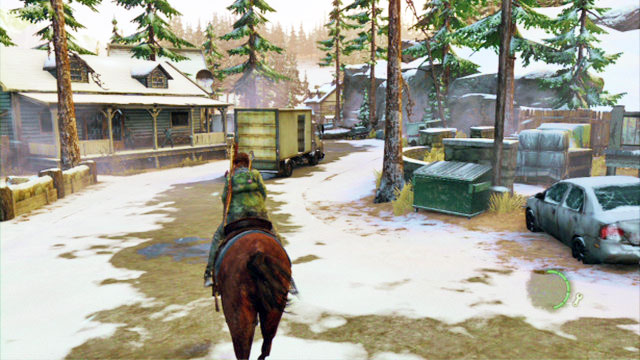
After the cutscene ends, ride as fast as possible ahead and avoid the attacking bandits. Ride around the first car on the right and keep to the left. At the fourth fork, get around the assailants on the right again.
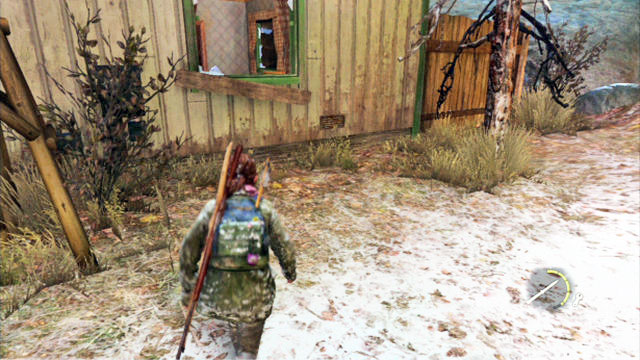
Eventually, you will fall down from a scarp and you will have to run ahead towards the house. Enter the house through the broken window.
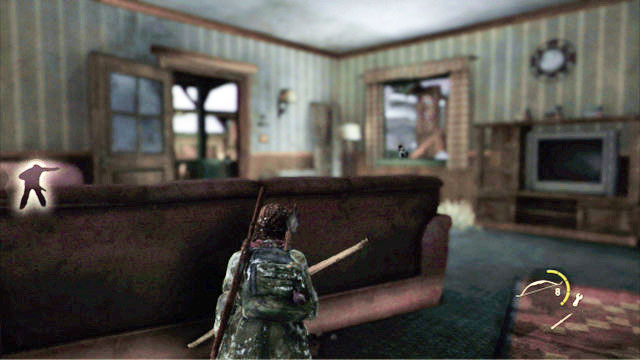
Search all of the rooms and you will eventually reach the exit, where you will hear the bandits.
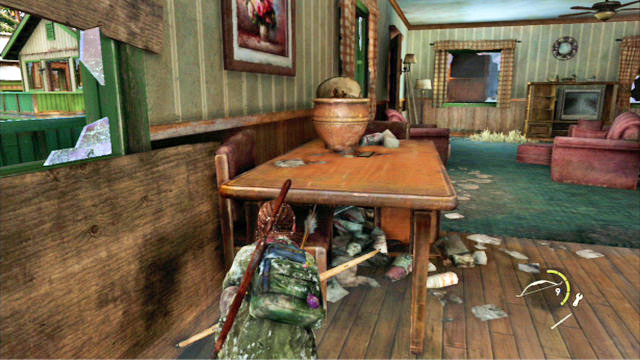
Hide at the wall to the left and wait near the hole for the first one of the bandits to appear. You can take him out using your bow as soon as he appears, or approach him from behind and then shoot.
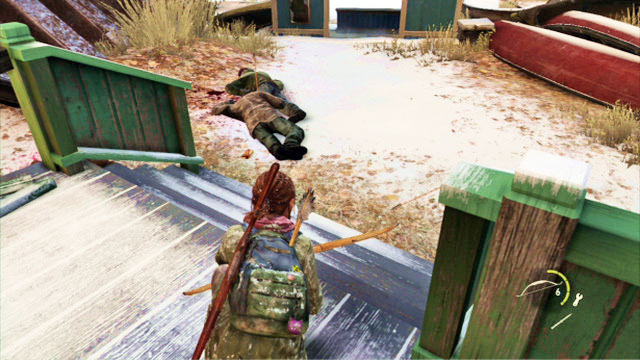
The next enemy will be standing at the entrance to the building, and another two, to the right of the house.
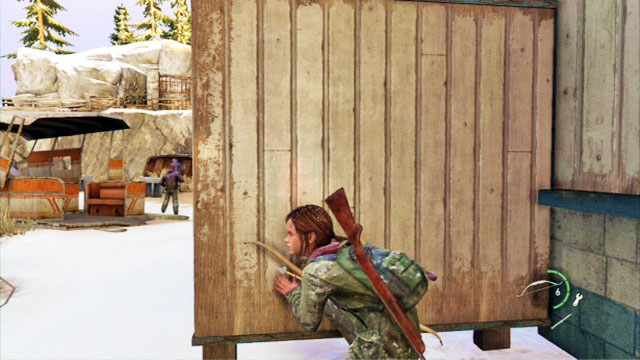
Kill them all and sneak to the warehouse at the lakeside. You will have to eliminate four goons there. Use the bow, or the rifle to kill them.
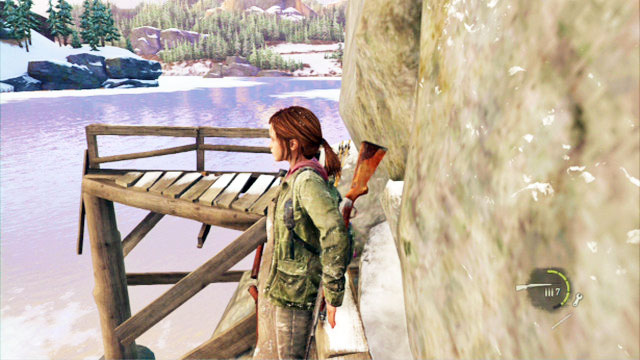
You then need to up the steps to the broken bridge. Walk over the bridge while clinging to the rocks and then, run ahead.
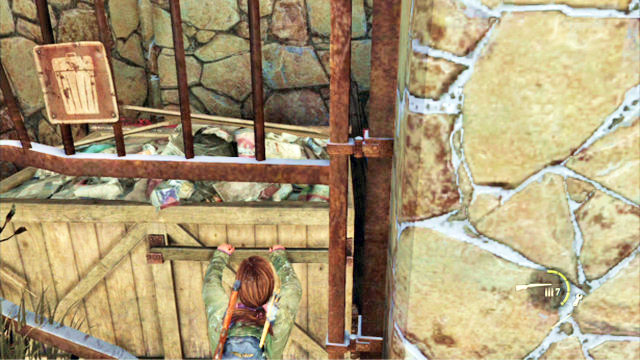
The second red pipe is stuffed up with some waste. To remove it, walk outside and press the triangle.
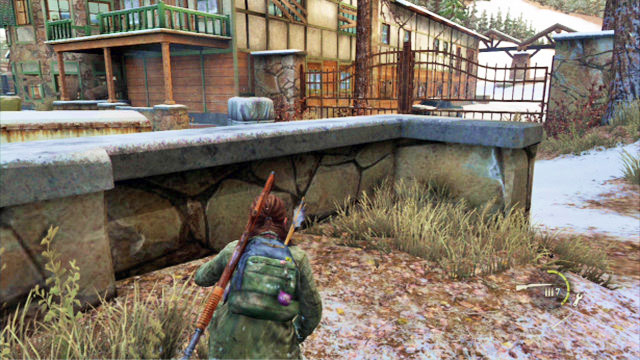
Once you reach another cluster of houses, crouch and go slowly to the left. You should be passing by a hole in the wooden wall on your way. Squeeze through the hole and wait for the enemy on the left, behind a cover. You can eliminate him with the bow when he is standing back to you. Then, take out the enemy on the right. He is standing a dozen or so steps away from the veranda. Your third enemy will appear there several moments later.
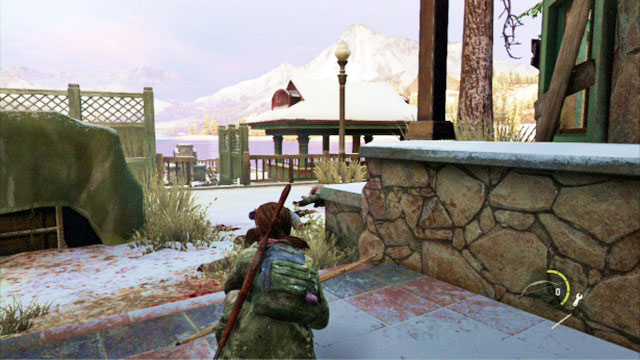
After this one dies, you can quickly sneak up to the corpses and collect their ammo. Then, hide behind a cover. It is highly probable that the remaining bandits will soon spot the corpses. They will approach them one after another, which is going to make them easy targets to get.
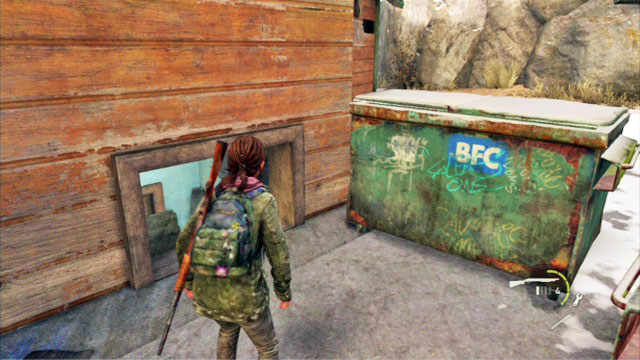
When the last ne of them dies, go ahead, and keep to the left edge of this location. You will reach a locked gate. To the right, there are two containers. Move them and you will unblock an entrance to the building.
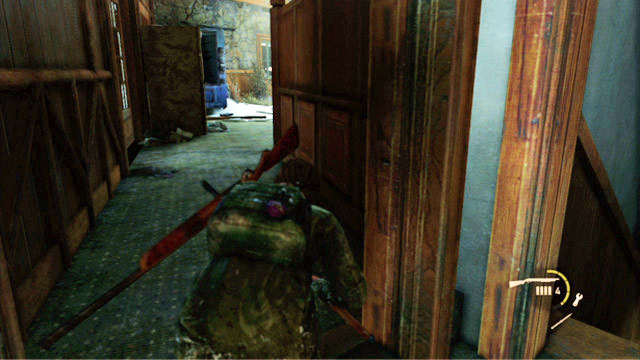
While exploring the area, you should bump into a locked shut. Walk through that door and prepare for the bandits that will attack you from the right.
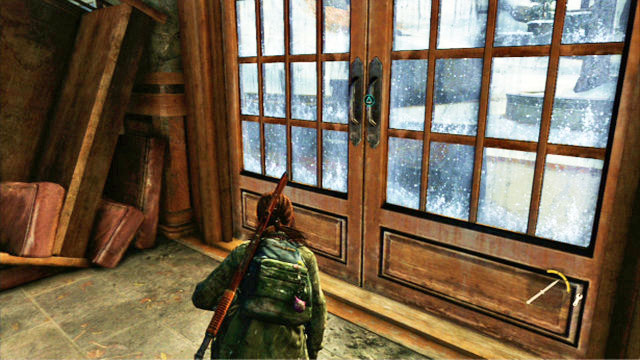
Try to shoot at least one of the bandits and go to the left. There are further bandits for you to face. When the last one of them dies, you will be able to open the exit and complete this part.
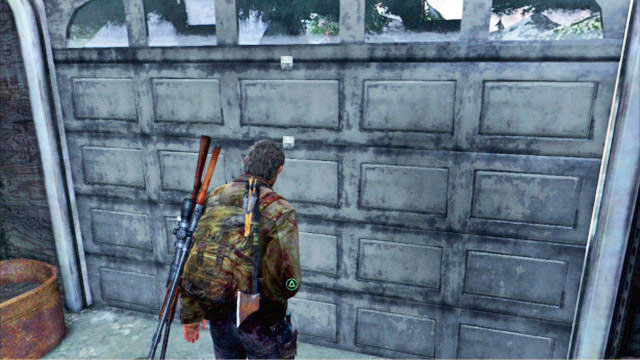
Once you cut back to Joel, climb up the stairs and leave the building.
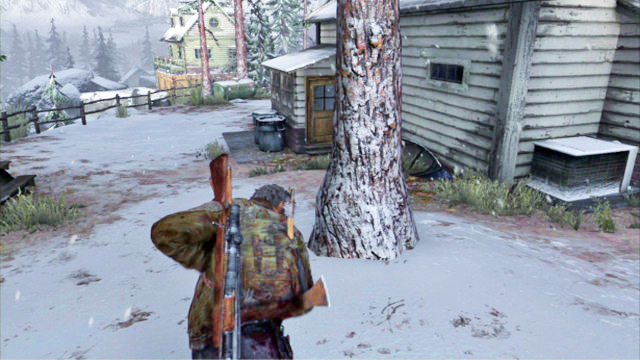
A few steps ahead, you will get under bandit fire. It is enough that you respond with fire and kill one of them. The men will flee.
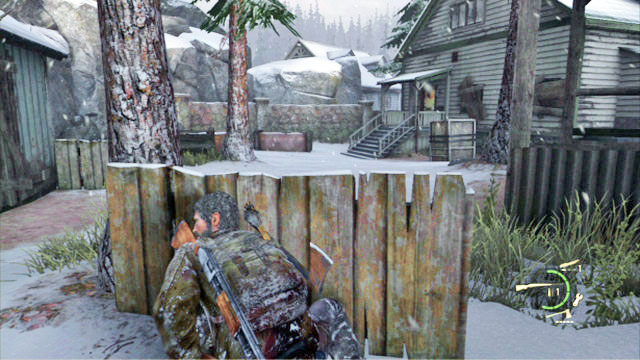
Follow them and repeat the above strategy.
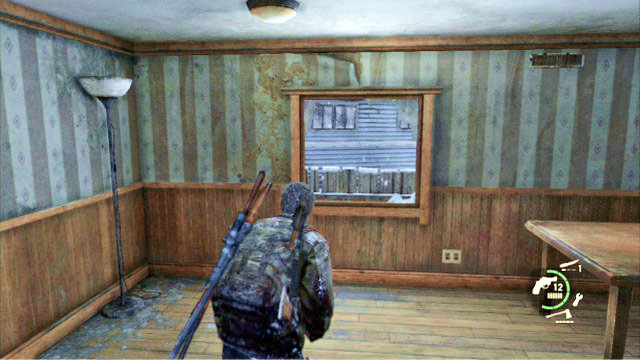
Eventually, you will reach a building which you can leave by jumping out of the window to the left.

Once you do that, you will be grabbed by one of the bandits. Free yourself by tapping the square. Then, watch a brutal cutscene.

After the cutscene, you will cut back to Ellie. At first, sprint ahead and keep to the left of the path.
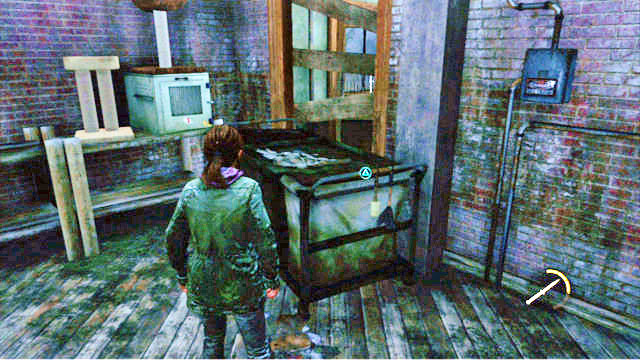
This way, you will reach a door with a blocked passage behind it. To unblock it, you need to move the nearby trolley.
\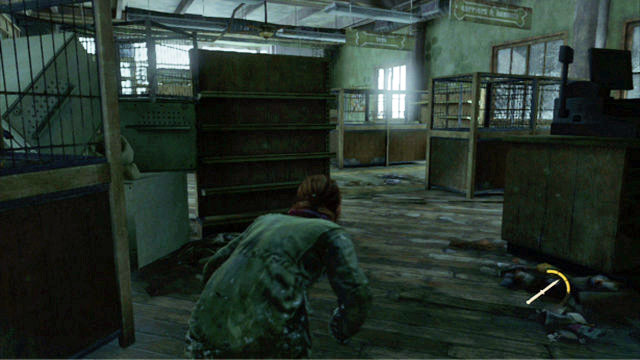
Go to the left and jump through the window to the neighboring building. There are further bandits waiting for you.
Therefore, turn to the left again and squeeze through the narrow passage, and go to the bathroom.
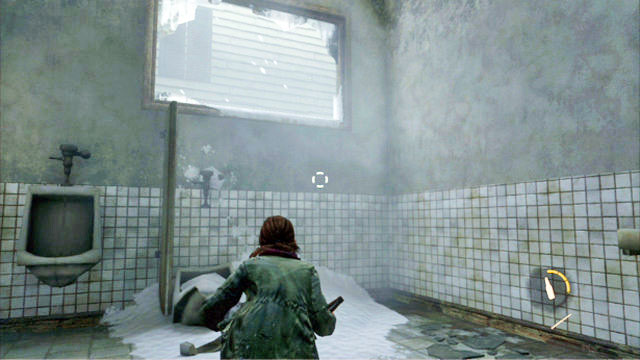
There is an opened window there which you can leave through.
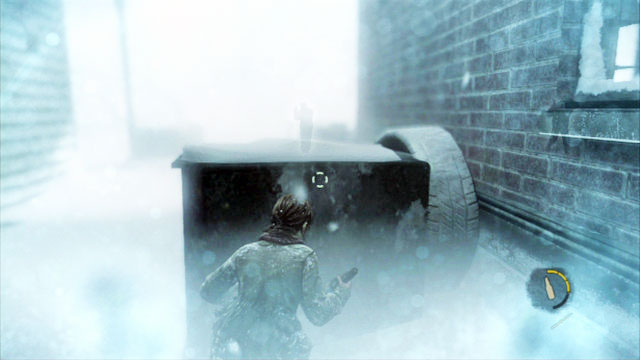
Next to the alley exit, there is a bandit waiting for you. Divert his attention with the bottle that you pick up from the ground (always try to have one in your equipment), and kill him with the knife.
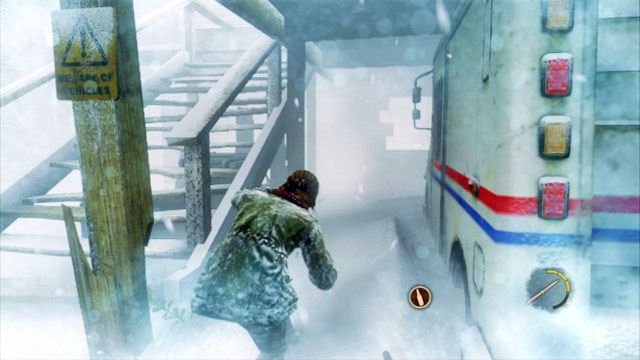
Further way leads to the left, up to the stairs covered with snow. Walk around the stairs and turn right.
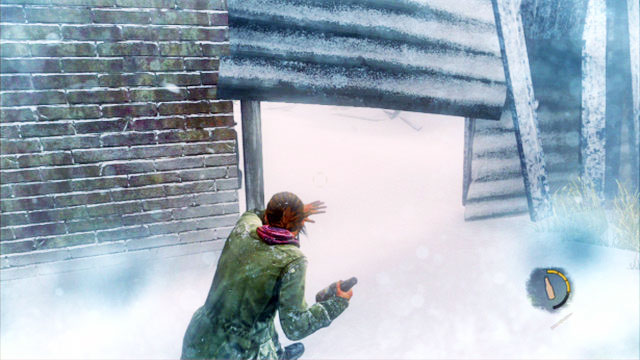
Go up and to the left. Then, go through the breech in the wall to the left.
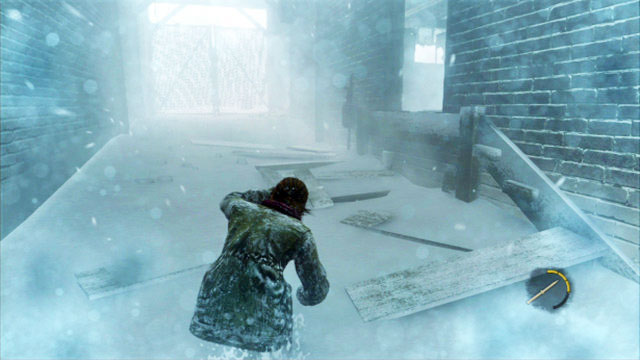
Keep to the left and keep draw the bandits attention off yourself with the items to throw. You will reach an arcade this way.
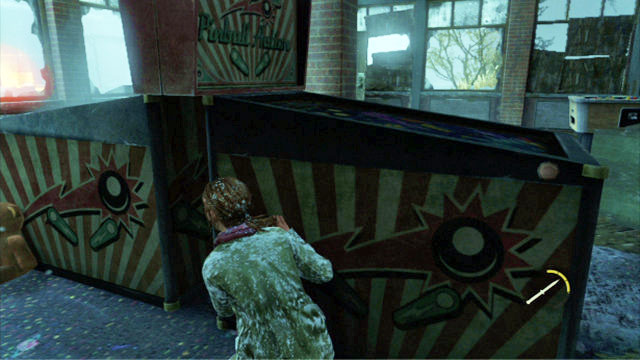
Enter through the hole to the right (when the bandits go away) and jump through the window to the left.
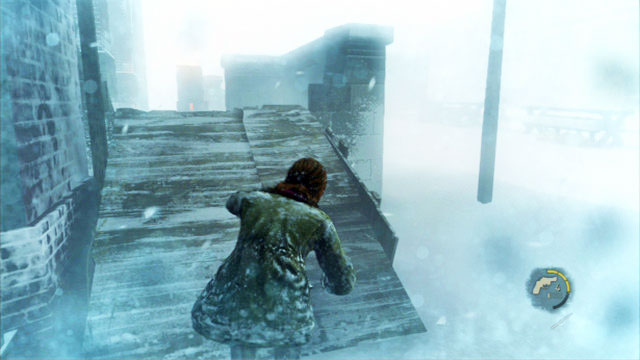
You now need to make your way through t the other side of the road, and go ahead while, at the same time, avoiding the enemy patrols.
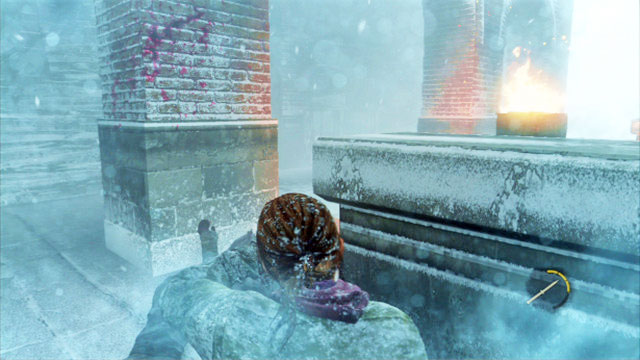
For that purpose very good are the covers on the roadside, and building pillars. If an enemy passes too close to you, you can always kill him with your knife.
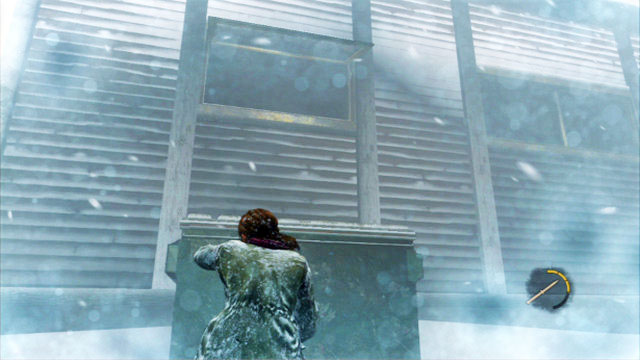
By keeping to the left you should eventually reach a closed gate. To the left of that gate, there is a container which you need to climb to enter a big building.
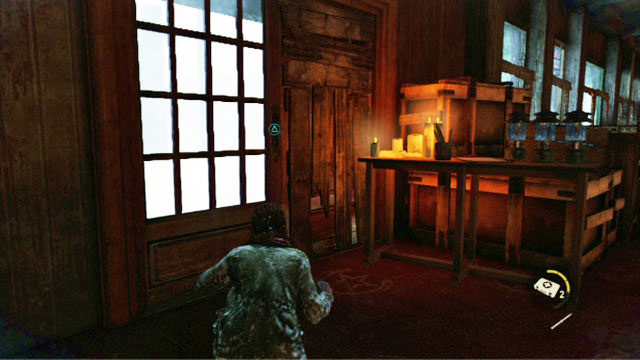
Search the building thoroughly and collect all of the useful items. Then, open the exit door to the right. This will start your encounter with David.
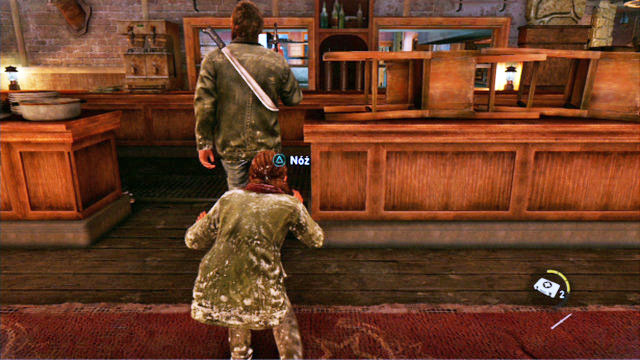
First of all, sneak up to the man from behind and stab him with your knife. To do that, hide behind the nearest cover and follow the man, while listening out.
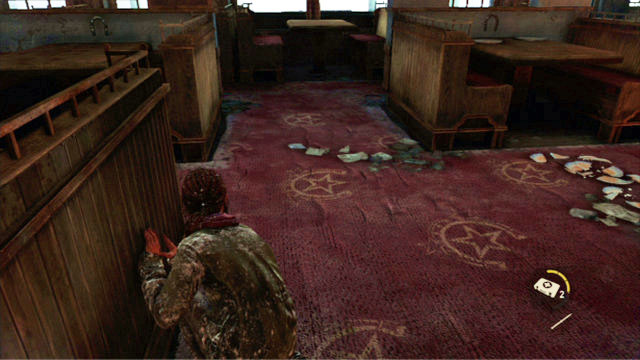
It is not difficult to sneak up to the man but, you need to watch out for the crockery fragments on the floor. If you step on it, and David hears you, he will run towards you. You then need to run away quickly and take cover again. Each time you stab David, the game is saved, and you need to repeat that three times.
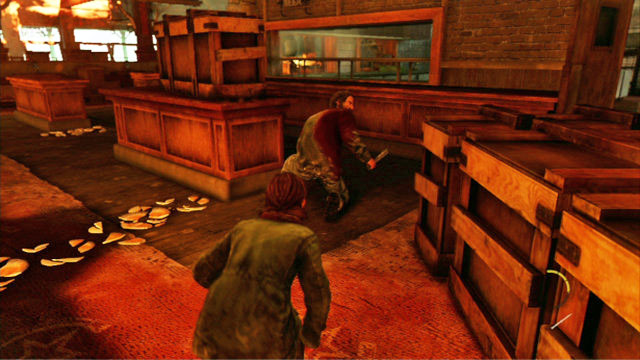
After the third jab, the man will stop ignoring you . Instead of walking around freely, he will start to sneak. He will be running from one cover to another and stay there for several seconds. What you need to do is get him from behind then and attack. Be careful, though, and do not step on a broken plate. After the third attack, you will cut back to Joel.
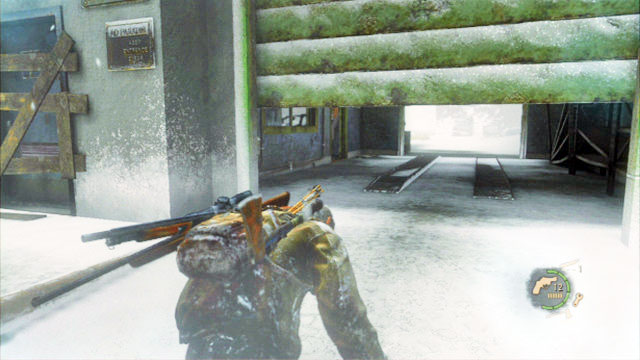
At first, keep to the right of the road and walk under the gate next to the petrol station. A moment later, you will encounter a group of bandits ahead. Take cover behind a broken window and jump outside once the enemy turns away.
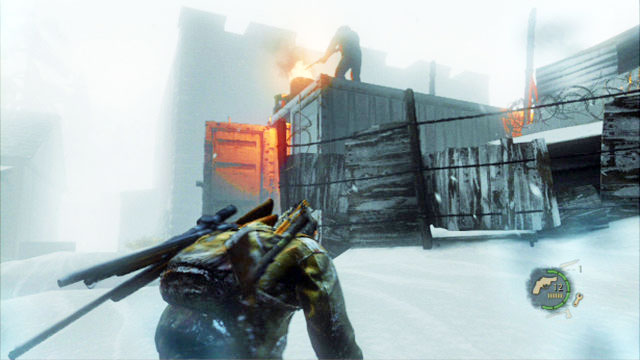
Further way is to the left, up to a truck with a blazing barrel. Use your bow to take down the bandit above and walk over to the other side of the trailer.
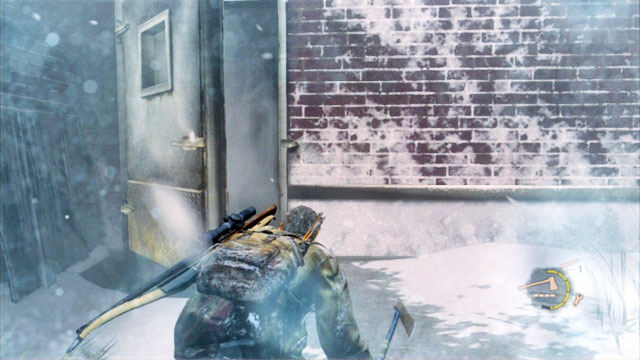
Keep to the left and avoid, or kill, the men that you encounter. This way, you will reach a side street to the right. At the end of the street, there is a door that Joel will automatically walk through, and collect Ellie's backpack.

Past the door, you will cut back to Ellie again. This time, you will only have to crawl to the knife and use it by pressing the triangle. This way you will complete this chapter.
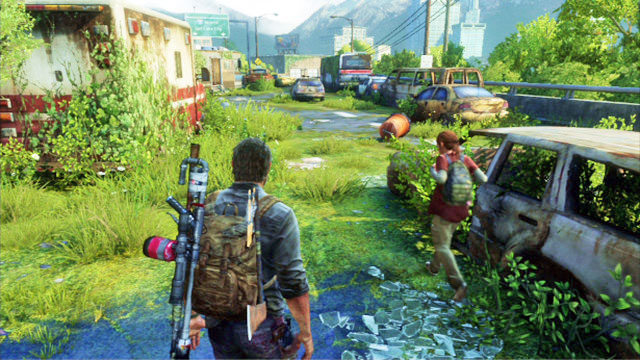
When you start, keep going ahead while searching the car wrecks thoroughly.
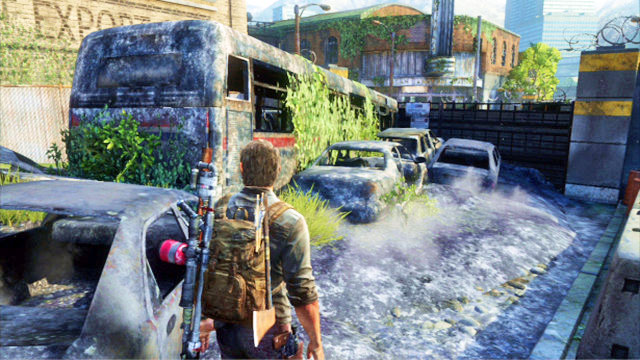
Eventually, you will reach a closed gate. You can walk over it by climbing onto the bus.
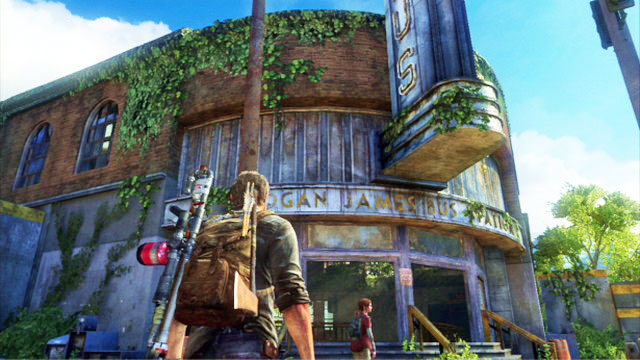
A bit ahead, you should notice the bus depot.
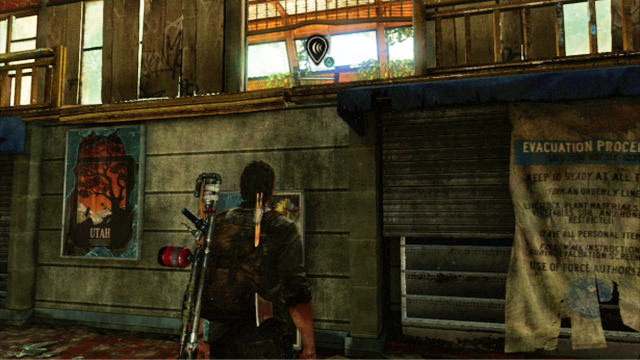
Walk inside and run down the stairs. Then, look at the ladder to the right.

As you look at it, you need to press the triangle three times before Ellie climbs up and pushes it down.
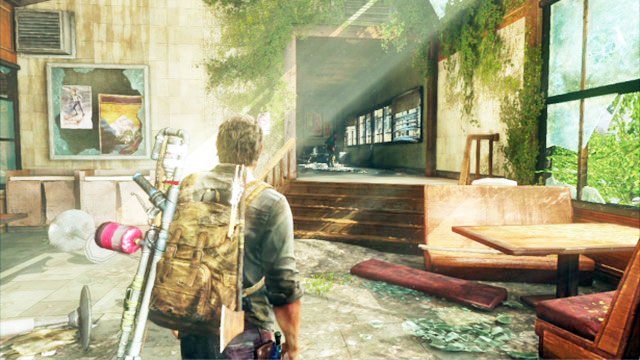
Lean the ladder against the wall and follow the girl.

This way, you will reach a feeding giraffe. After you stroke the animal (the triangle), go ahead.
When Ellie stops, talk to her after you stand to her left.
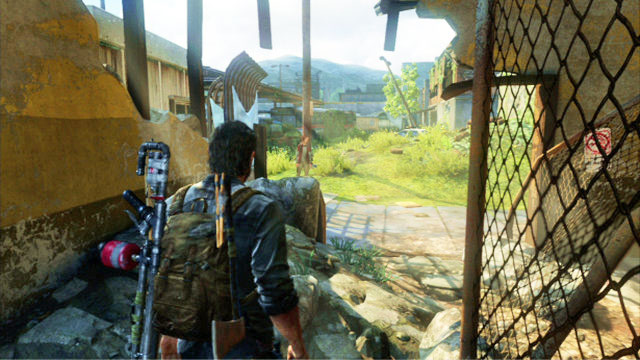
After a short cutscene, walk through the door to the left and go ahead until you reach a depot platform.
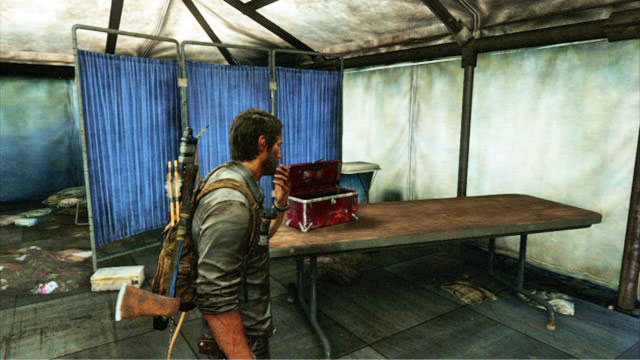
You will find numerous tents there, which you should search through.
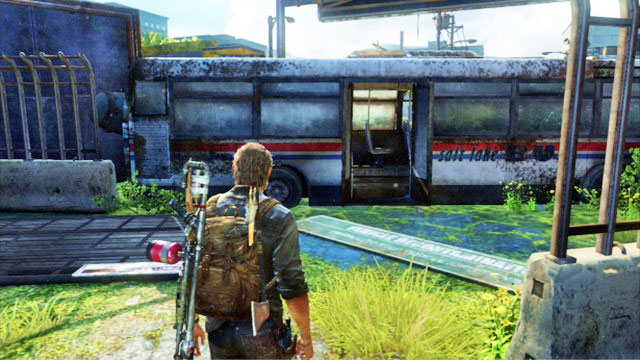
Once you are done with the tents, go to the right edge of this location and walk through the destroyed bus.
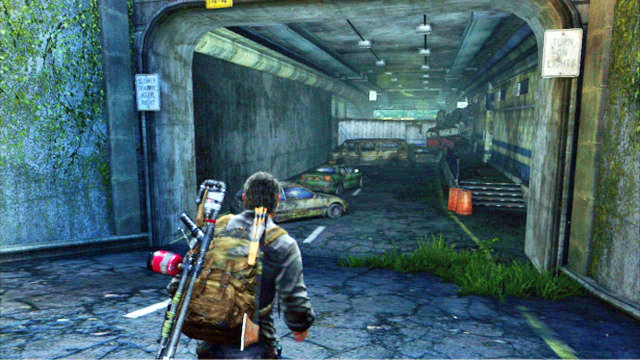
At the other side, you will find an entrance to an underground tunnel.
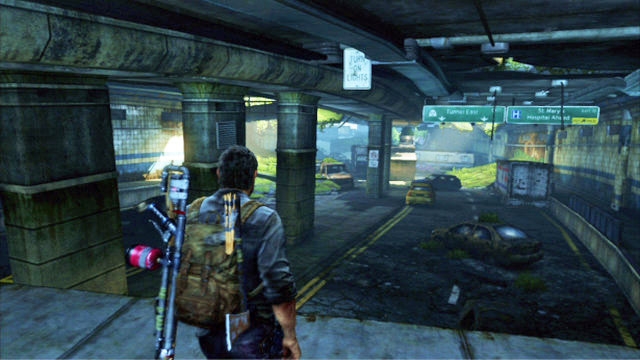
Once you get underground, keep to the wall on the right.
Legend

Start of the fight

Weak opponents

Clickers

Bloaters

Suggested player route

Enemy routes

Suggested kill areas
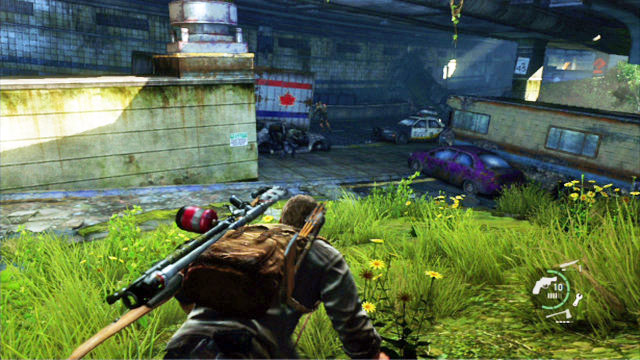
If you move about silently here, you will manage to avoid the majority of the enemies here.
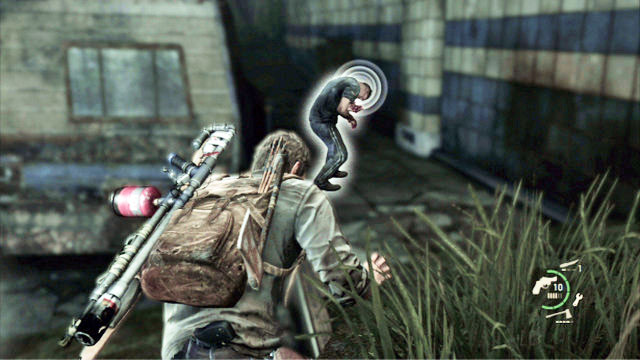
Still, one of the zombies will step in your way. Sneak up to the monster and strangle it.
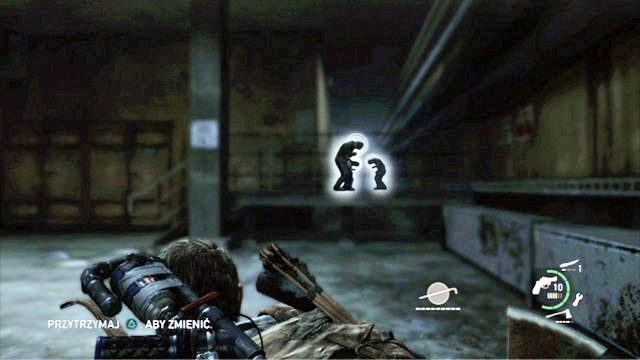
Another enemy that you will have to kill is waiting in the room to the right. After this one is dead, you can go left and leave.

Take a few steps to the right and sneak up onto the truck on the left. You can climb onto it over the cab.
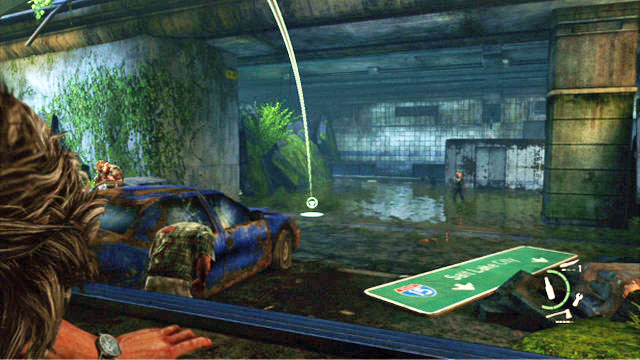
Once at the other side, keep to the left wall. This way you will reach two bloaters. To move forward, you need to draw their attention away with a brick or a bottle.
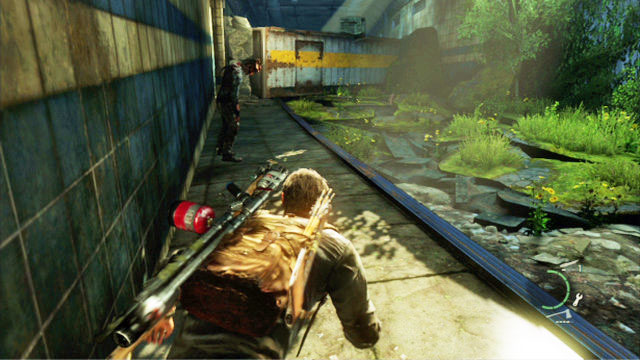
A bit ahead, there is a clocker waiting for you. Stab it with your knife and give Ellie a boost onto the vehicle that is blocking the way.
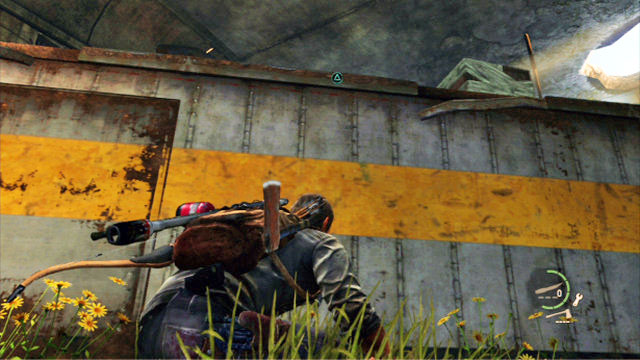
The girl will throw down crate for you to climb over to the roof.
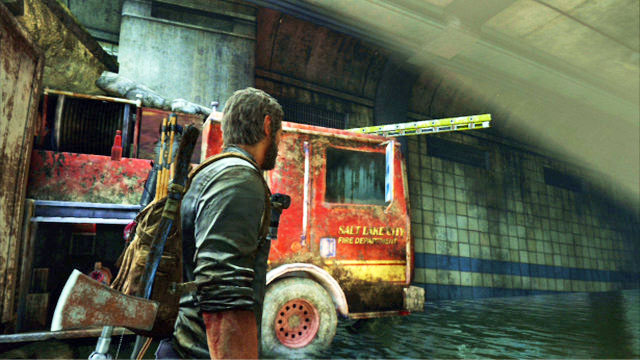
Keep running ahead until you reach a fire truck. You need to dive under the truck, climb up at the other side and throw down a ladder for Ellie to climb onto.
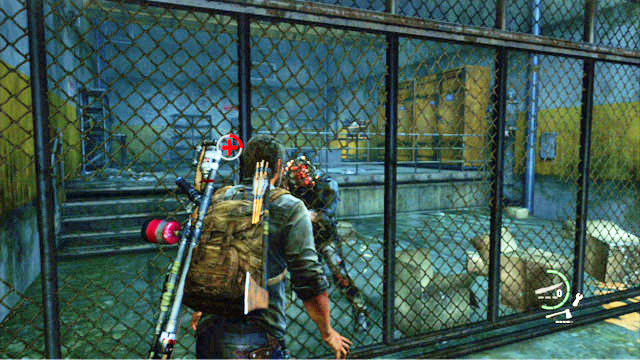
As you proceed ahead, you will reach a closed gate. Give the girl a boost to the hole on the left and save her from a clicker. You need to shoot at the monster through the lops in the fence.
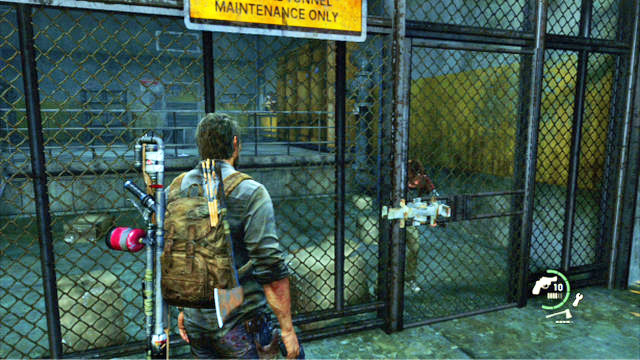
A moment later, Ellie will open the gate.
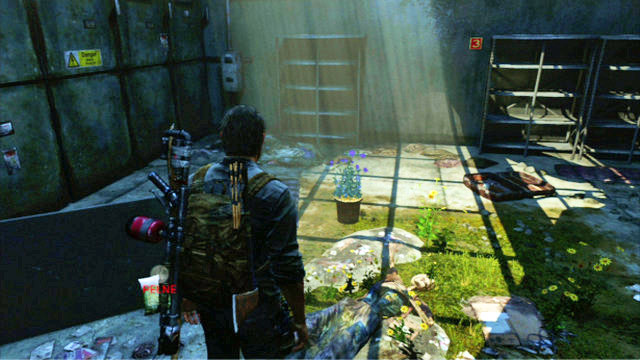
After you reach an abandoned corridor, check out the door to the right. You can open it with the knife and collect many useful items.
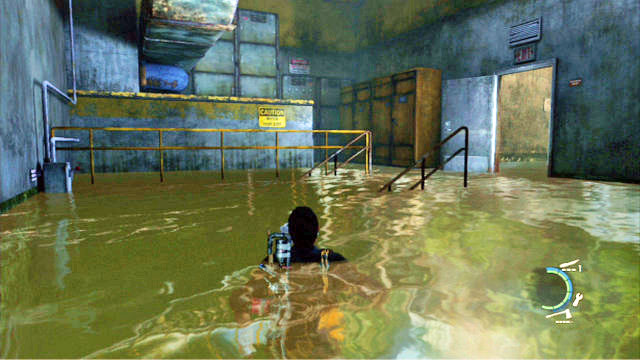
As you run ahead, you will reach a flooded part of the metro. Jump into the water and swim into the room to the right. By keeping to the right, you should soon resurface.
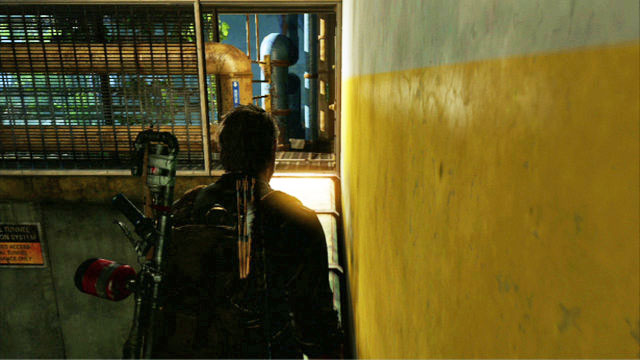
Climb to a higher floor there and get to the other side of the location through the ventilation shaft.
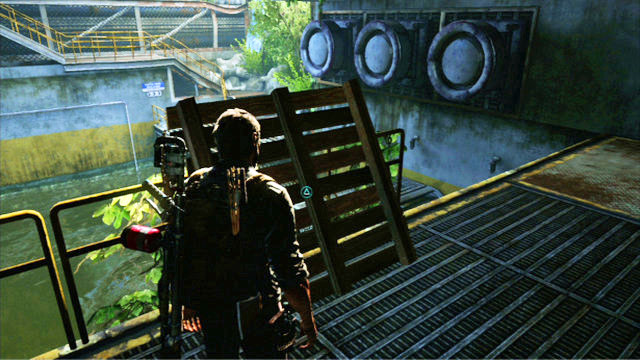
You will find a wooden palette there to transport Ellie with across the water.
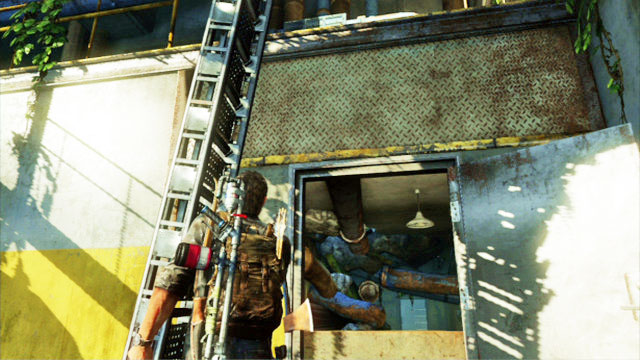
The girl will then slide down the ladder, which you need to climb. Unfortunately, the ladder will break under your weight. Collect the destroyed item and climb onto the place where you found the palette, over the ladder.
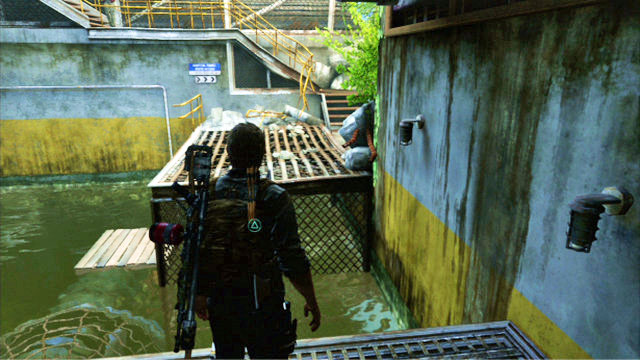
You can now transport the ladder up to the broken footbridge. Use the ladder as a footbridge and go ahead.
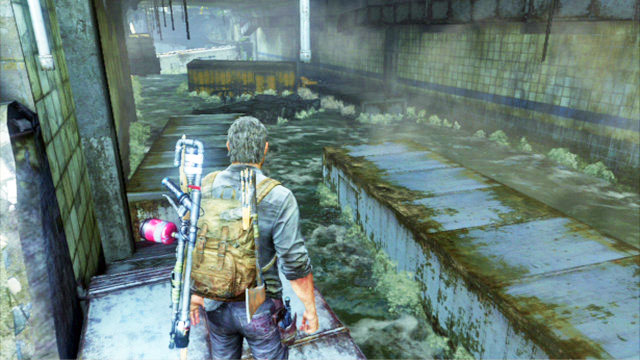
Keep jumping over from one vehicle to another in the big tunnel, until Joel falls down into the water.
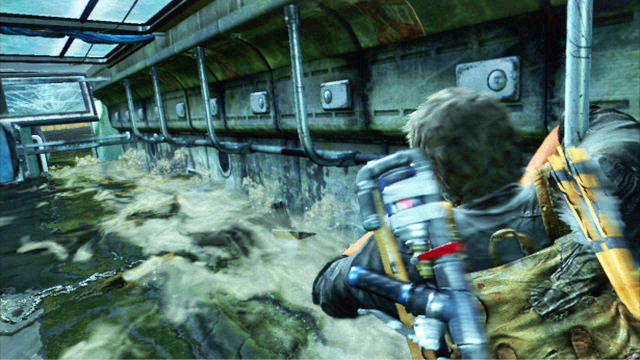
You will then have to grab onto barriers to the right to get to the exit (triangle).
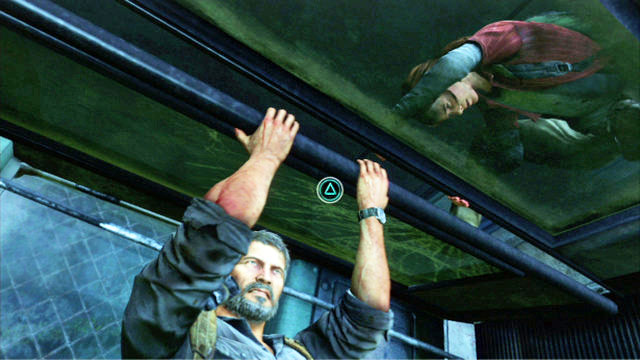
When you get washed down again, press L3 and start pressing the triangle again. A moment later, you will get underwater.

To finish this stage, swim ahead and take the drowning Ellie with you. As soon as you reach the surface, you will see a longer cutscene.
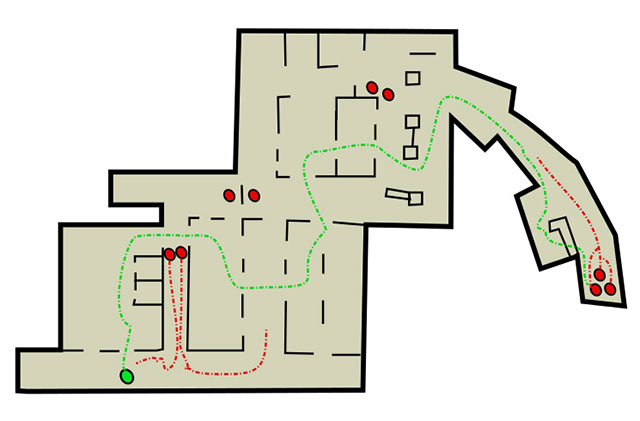
Legend

Start of the fight

Weak opponents

Suggested player route

Enemy routes

Suggested kill areas
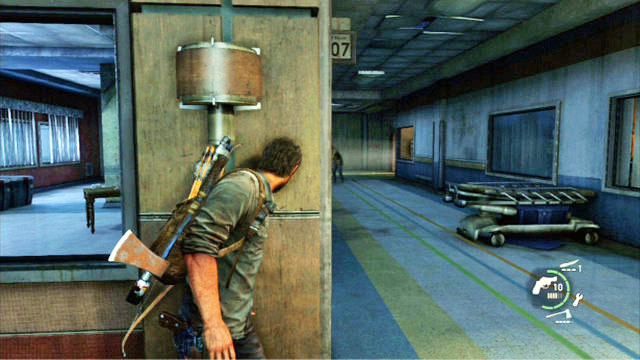
After you start this chapter, crouch and walk through the window to the left.
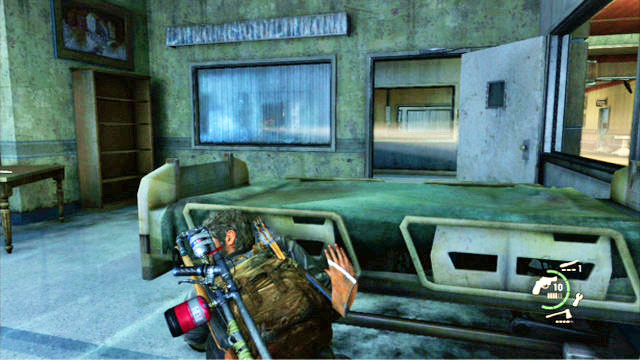
Once you take several steps, you will have to walk out into the corridor through the widow to the right. Wait for 2-3 seconds, next to the toilet, for the enemies to walk away.
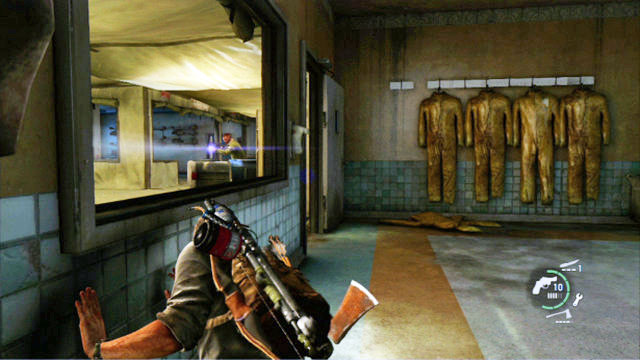
Walk from the corridor to the room opposite and leave it through the window on the right. On the left, there are two soldiers with flashlights. To avoid the light, hide quickly behind a cover and climb into another room through the window. You can now walk around the two soldiers and turn right in the room at the other end of the corridor.
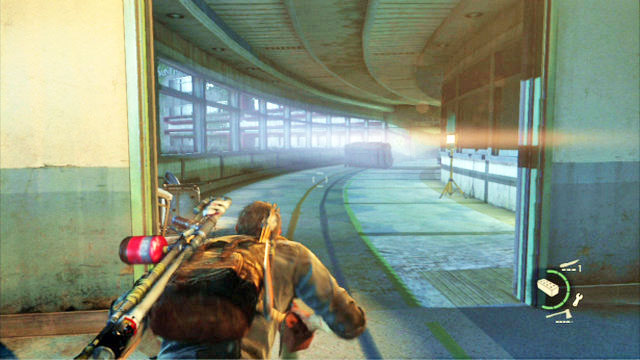
Avoid the light from another pair of soldiers and go ahead, up until the long passageway between the hospital sections.
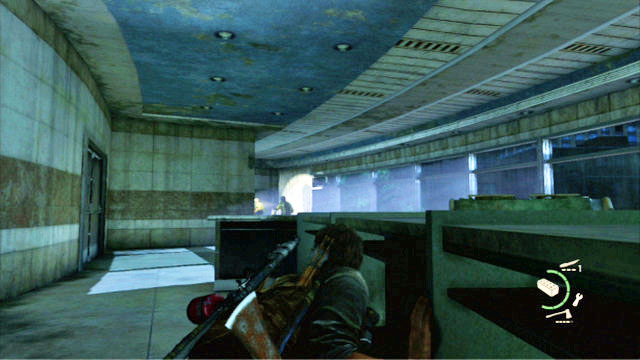
You will notice a tabletop to the right, which you should quickly hide behind. This way you will avoid another Firefly patrol.
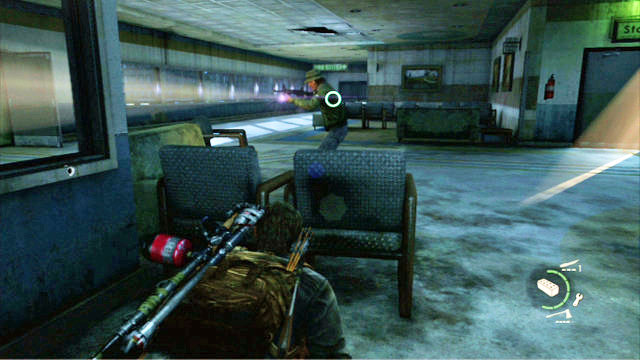
As soon as the soldiers run away, walk out of your hiding place and go ahead. In the next room, you will be attacked by a single enemy which you need to shoot.
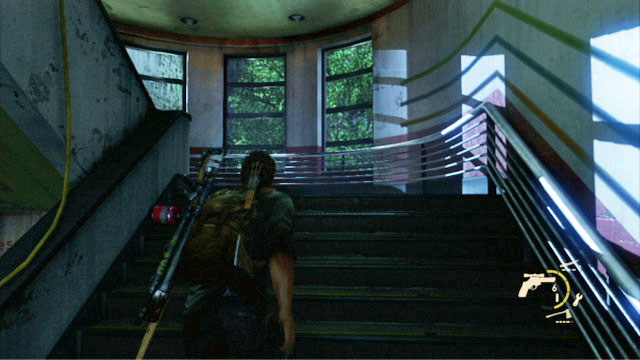
Once the man dies, walk through the door opened ajar and barricade it from the other side. You are now relatively safe. After you climb up the stairs, you will see a tabletop ahead of you, with a locked room behind.
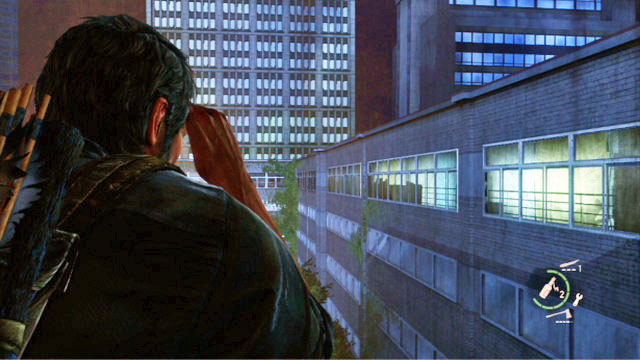
Use your knife to open it and run ahead. This way, you will reach a place where you should press L3. Joel will notice another soldier unit then.
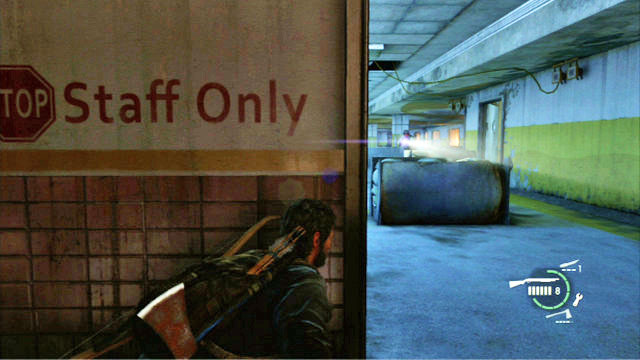
To avoid getting into fight, sneak through, as far away from the beam of the soldier's flashlight , and keep to the right side of the location then.
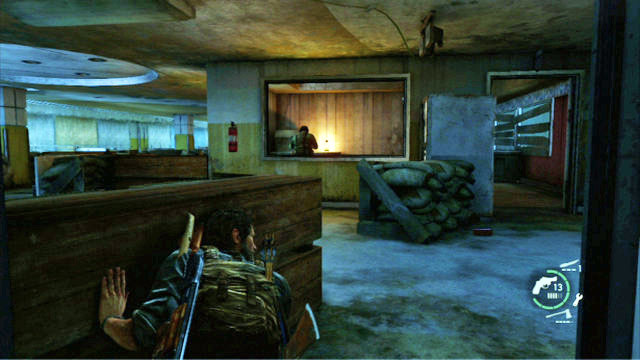
When you encounter another enemy, wait for him t turn away and go ahead as quickly as possible.
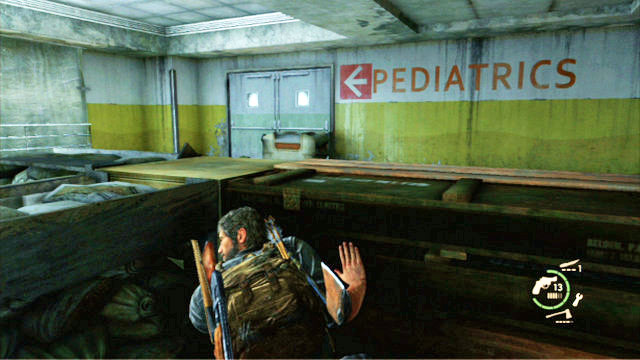
The next one is waiting a few steps ahead. He should be standing back to you but, only for a short moment. Before he turns, hide behind the cover next to the door. After several seconds, you will be able o leave the room and go ahead. As soon as you notice a wide entrance, jump over the barricade to the left and leave this location.
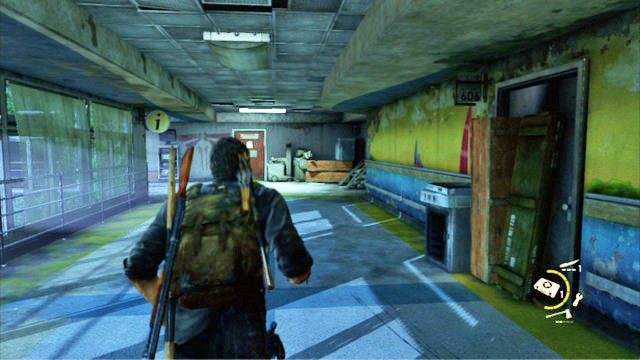
At the other side, there is a long corridor which will lead you to the operating room. Kill the doctor that stands in your way and take Ellie from the table.

You now need to run, while carrying the girl, ahead, and avoid the soldiers that you get past.
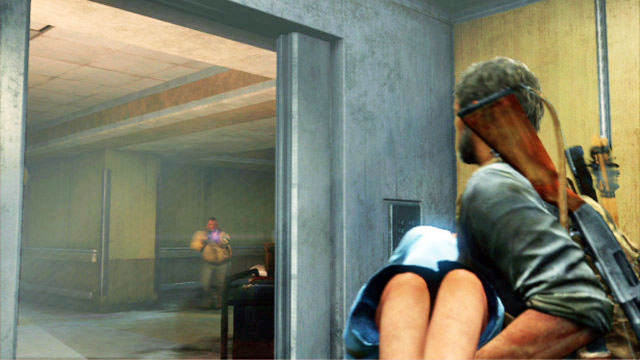
Once you enter the elevator, the chapter will conclude.
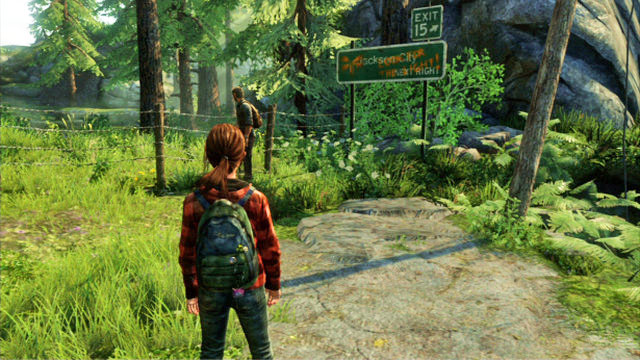
After the chapter starts, follow Joel.

This way you will reach a barbed wire that you need to get through. Your companion will help you at it.
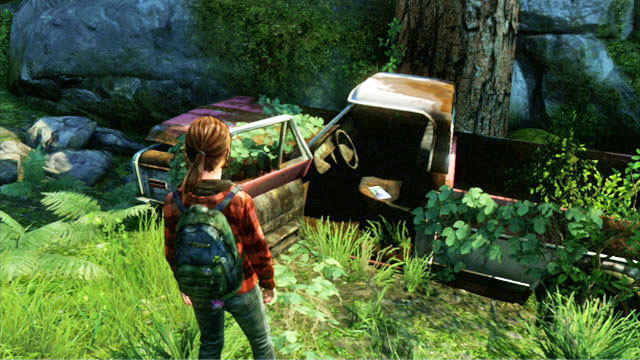
You should now run ahead but, it is worthwhile to check out the car wreck to the right. There is a comic inside.
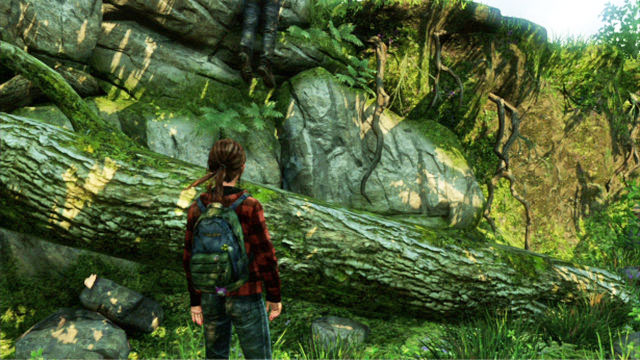
Once you reach the tall rocks, wait for Joel to climb up and take his help.

A bit further, there is a brook and, this is where a short cutscene starts. Congratulations, you have just beaten the game.
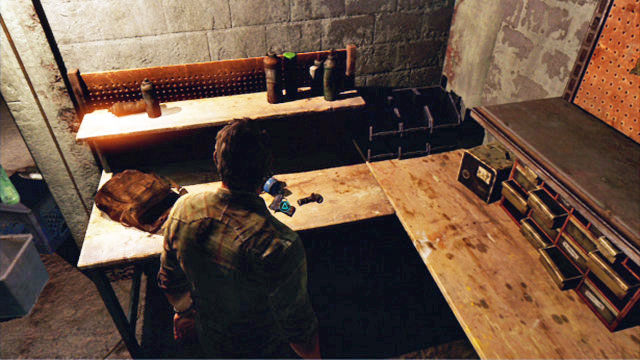
You will obtain the first two artifacts after you collect the backpack with equipment.
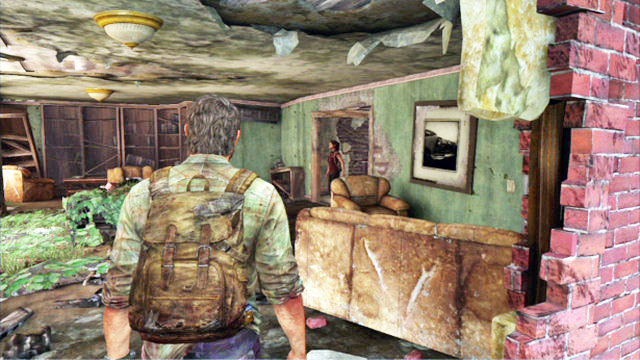
When you climb the ladder for the first time, you will enter a flat.
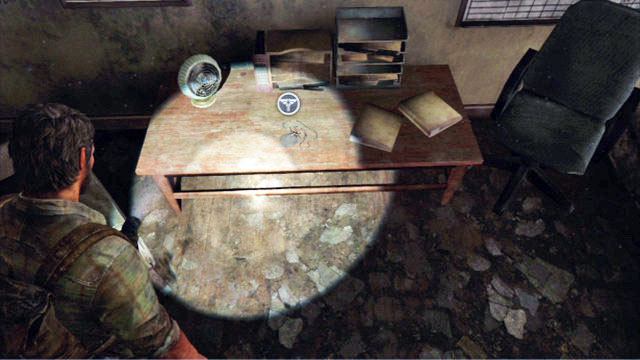
The first pendant is on the table in the bedroom.
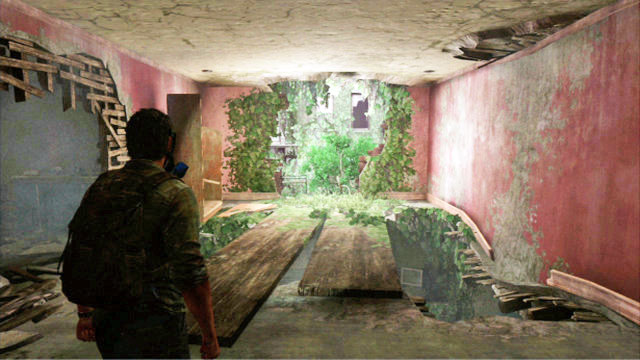
After the first encounter with the infected, climb to the higher floor and open the door to the left.
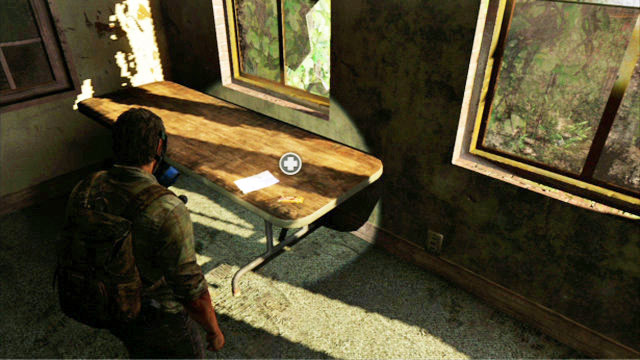
You will walk into a small room with the note on the table.
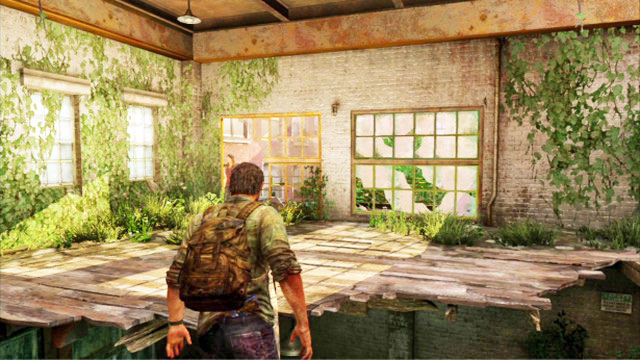
You will obtain the second pendant after you leave the building where you made use of the long wooden board.
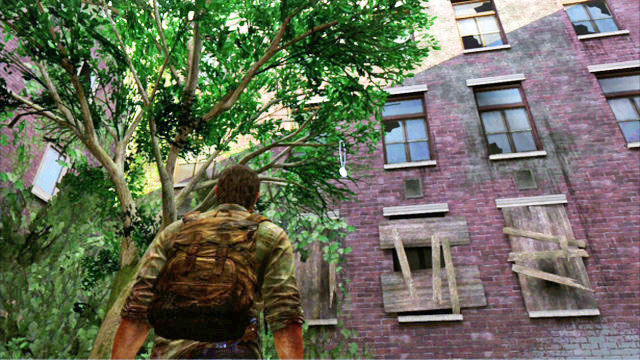
Follow Tess, first, until you reach a place where you will have to crouch. Several meters ahead, there is a tree with the pendant hanging down from its branch.
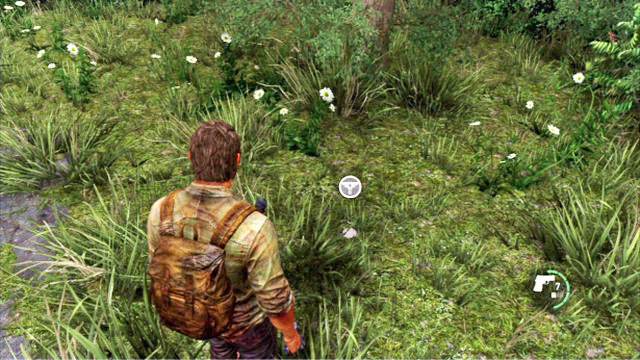
Shoot your pistol at it and pick it up after it falls.
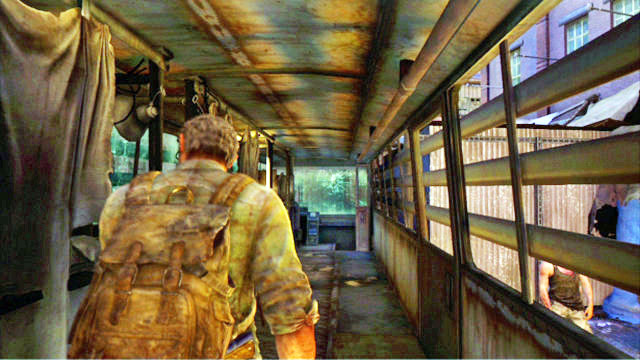
You can find it in the slums right after you walk through the destroyed bus.
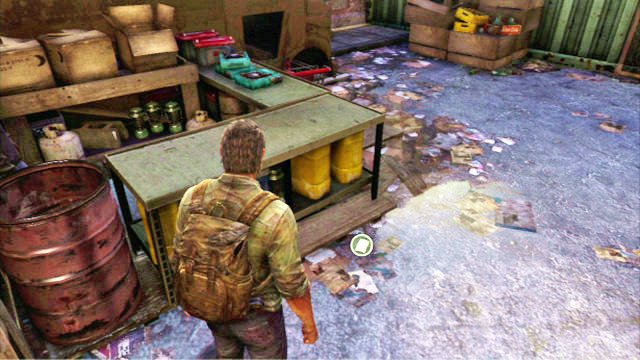
The slip of paper is lying on the ground next to one of the tables to the left.
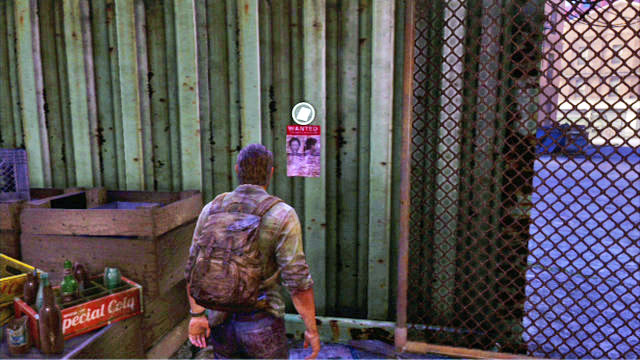
The poster is hanging on a piece of metal plate several steps away from the previous artifact.
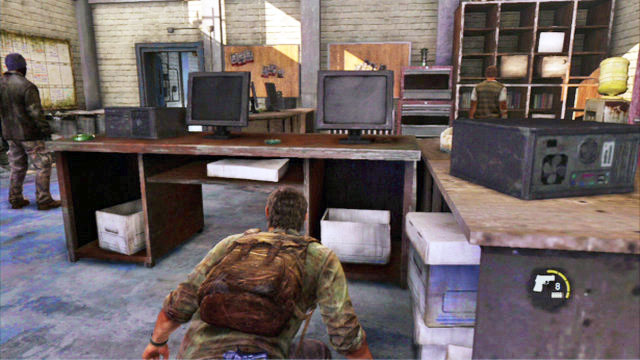
You can find it on one of the men hiding inside the office.
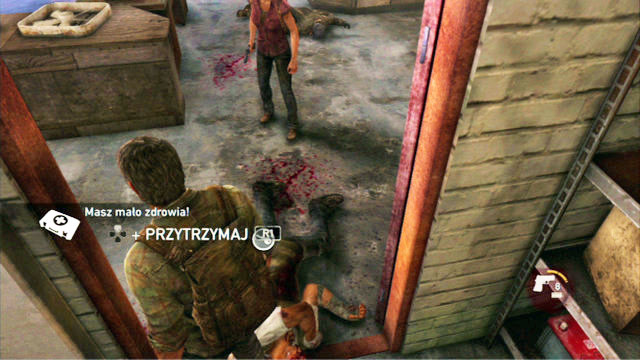
It is the ones that you will be learning stealth killing on.
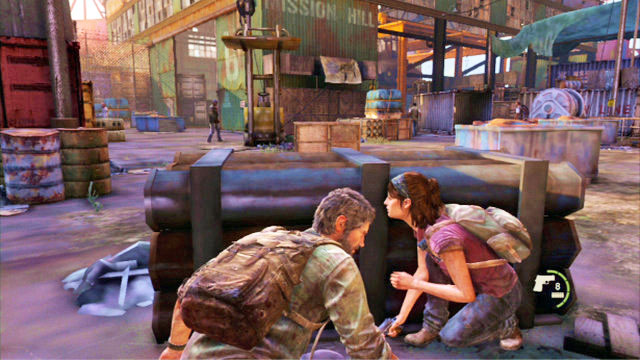
After you open the gate with chain, Joel will automatically hide behind a cover below.
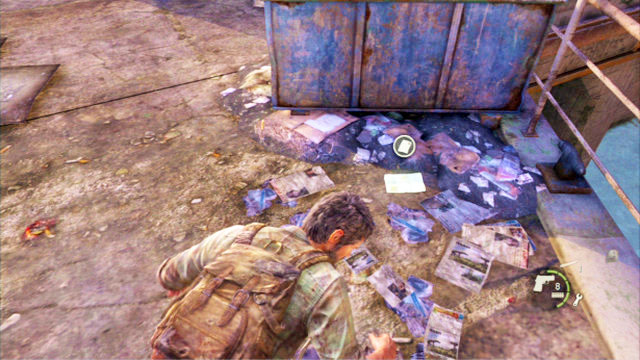
Sneak up to the barrels to the right and hide behind them. You should notice the slip of paper next to the container. It is the next artifact you are looking for.

A few steps ahead, from the previous artifact, there is a large warehouse. Go to its right-hand end to find the note behind a container.
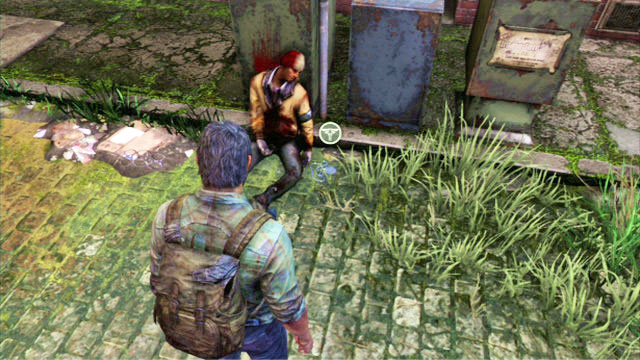
Right after you meet Ellie for the first time, run ahead and search through the nearby corpse. You will find another pendant.
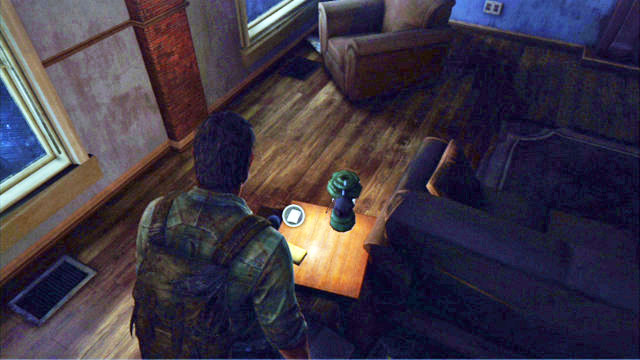
Right after you start your travel with Tess and Ellie, turn back and approach the table with the lamp on it. The slip of paper should be right next to it.
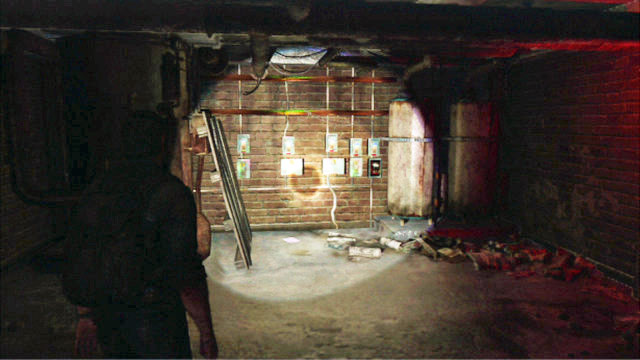
You will find the item right after you walk down from the elevator platform. It is lying on the ground next to the wall on the right.
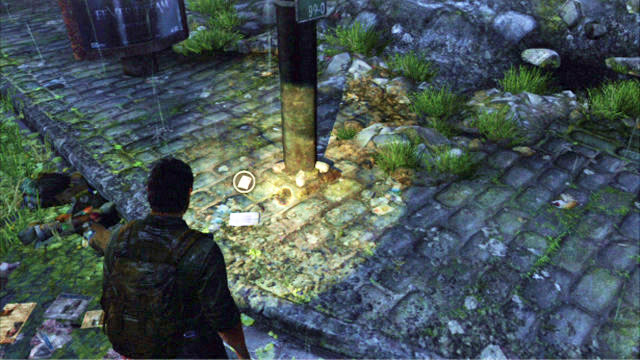
When you climb up to the road, approach the lamppost to the right. You will find the artifact next to the lamp.
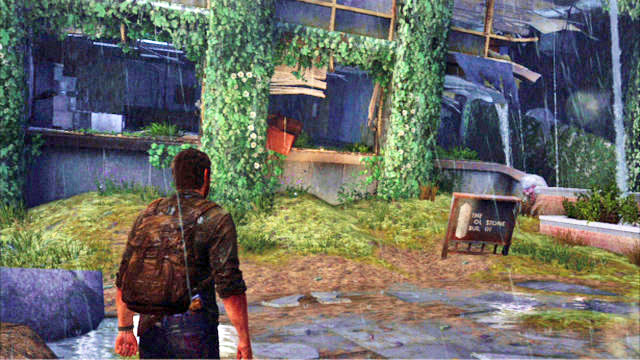
After you climb up to the highway, Tess will point to the Capitol; turn right - you will reach a big building. Do not enter it yet and go to the right.
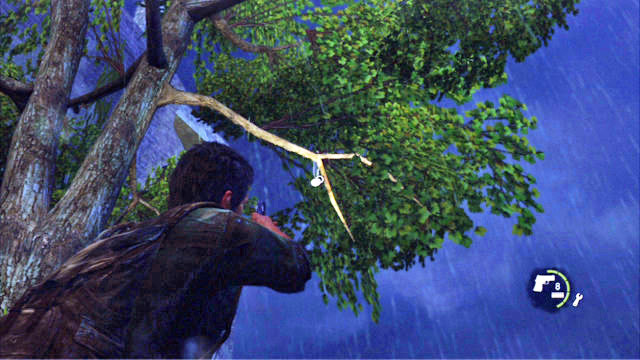
You will see several trees there and a pendant on one of them. Shoot it down and pick it up.

After you climb up to the highway, Tess will point to the Capitol; turn right and enter the big , derelict building.
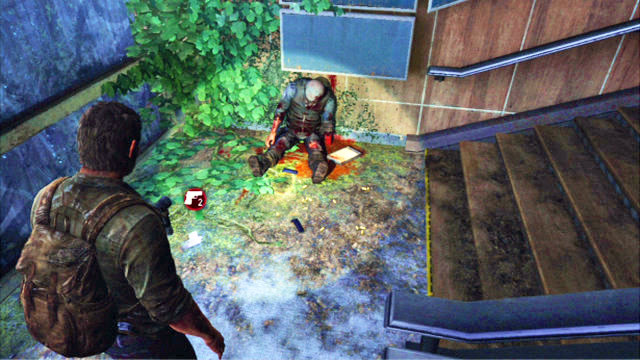
At its right-hand end, there is a staircase and a corpse on the landing. Next to the man, there is the next slip of paper.
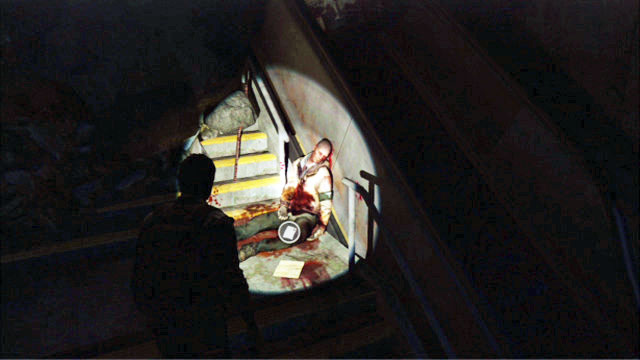
After you get the Molotov's cocktail, you will be passing a wide blocked staircase. There is a corpse of a soldier on the stairs with the next artifact next to it.

After you go down to the very bottom of the building, you will reach a place occupied by large numbers of the clickers.
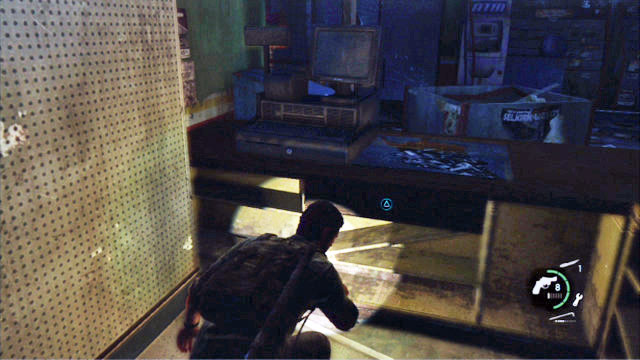
Go to the shop at the left-hand end of the location and search the drawer behind the counter.
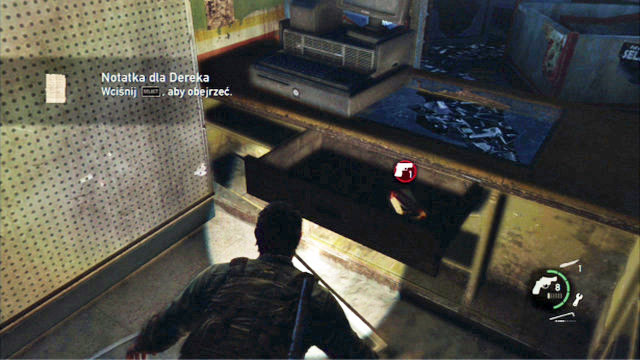
Inside, there is a safe code that allows you to open the safe at the other end of the location.
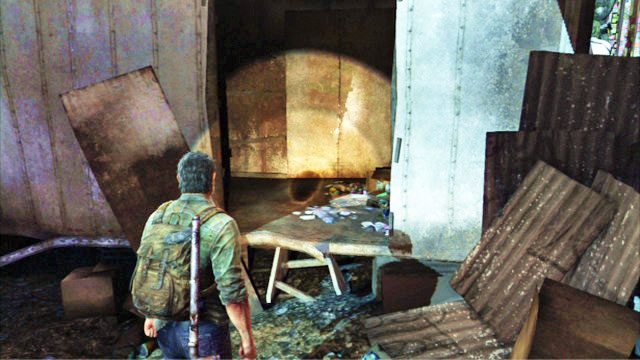
After you jump over the truck that is blocking the road, turn around and enter the trailer. Inside, you will find the pamphlet.

When you go past the workbench where you can upgrade your weapons, open the door and go left. This way, you will reach a room with the collapsed floor.
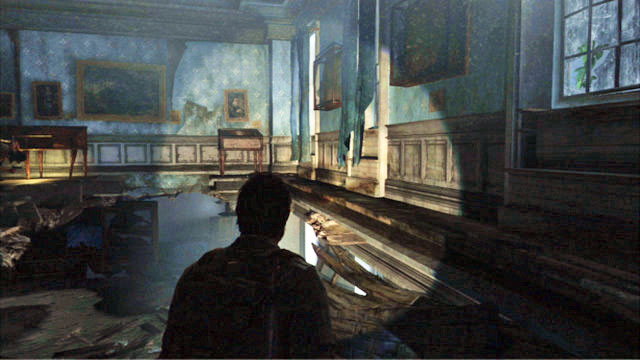
Stand on the top of the slant and jump onto the ledge of the wall to the left.
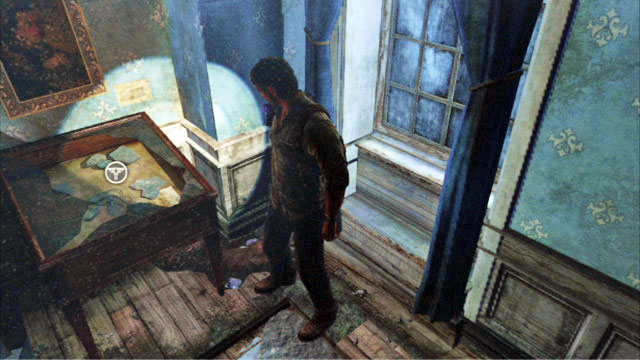
As you walk over the narrow passage, you will reach a cabinet with the next pendant in it.
After you walk over the plank to the other building, you will watch a short cutscene.
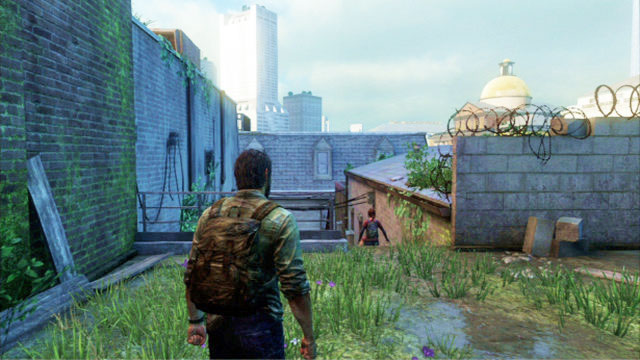
After it ends, go straight ahead until you go down the stairs.
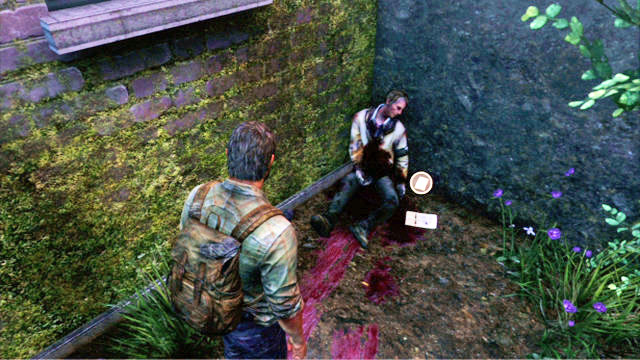
To your right, you should notice a corpse with the artifact next to.
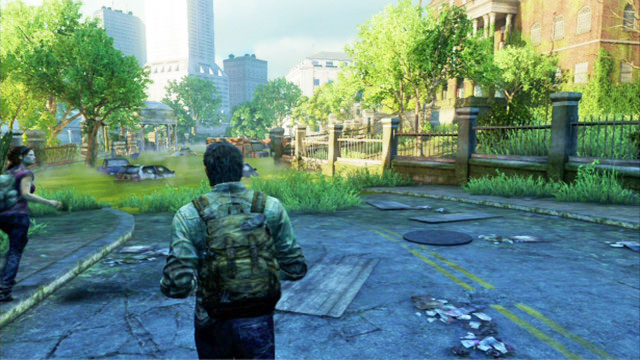
As you go towards the capitol building, you will have to cross a green lake.
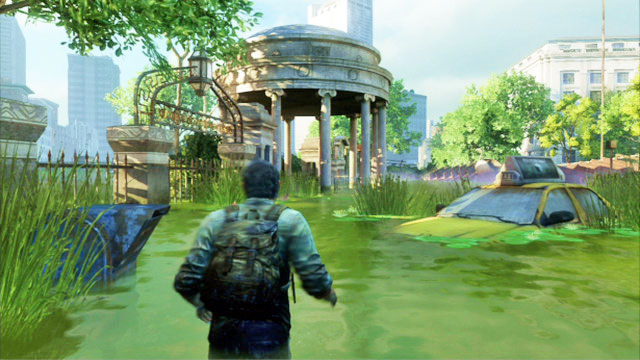
Cross the lake to reach the structure with pillars.
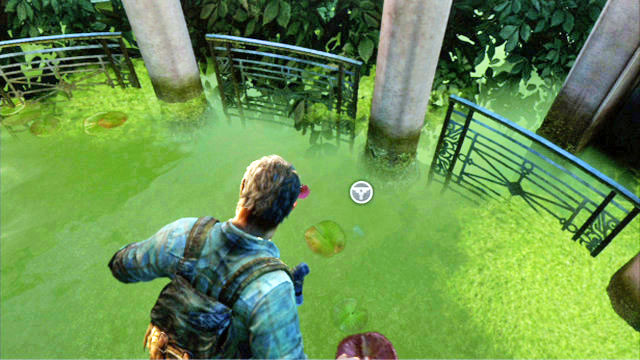
Inside the structure, there is another pendant under the water. Remember that to stand among the pillars, you need to press X.
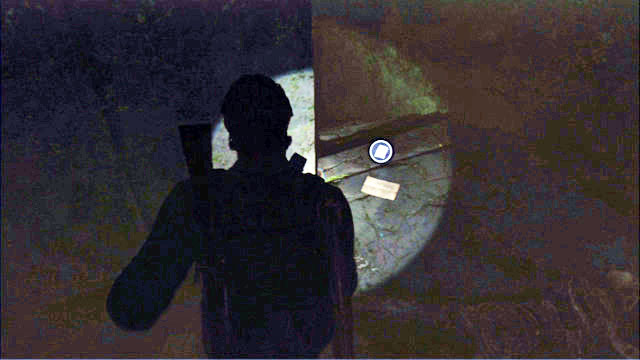
You can find it in the flooded part of the metro tunnel, where Ellie will not be able to go any further. To the right, you should notice a ladder. Opposite the ladder there is the note (right next to your companion).
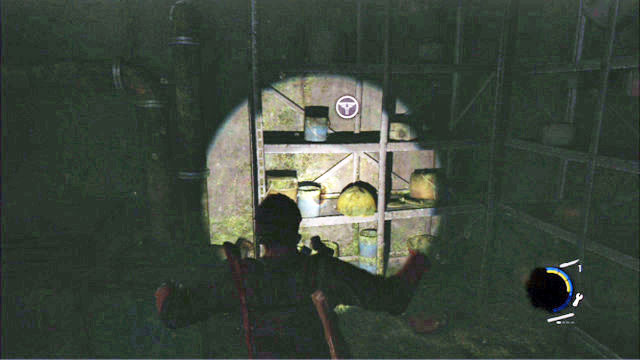
This pendant can be found in the flooded part of the metro tunnel where you need to swim over to Ellie with the wooden plank. Before you help the girl, walk out of the water where she is standing and go to the nearby corridor. At the end of the corridor, you will find another place where you can dive. At the other side of the pile of rubble, there is a flooded office with the pendant in it.
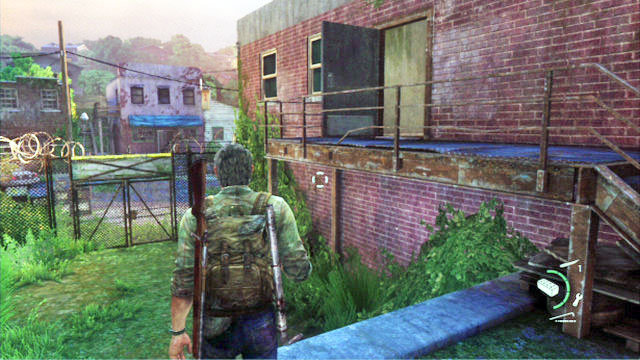
To the right of the place where Ellie jumps over the gate, there is a red brick building.
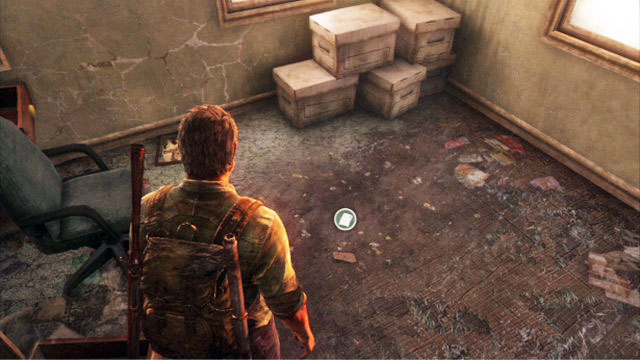
On the first floor in the corner of one of the rooms, there is the artifact.
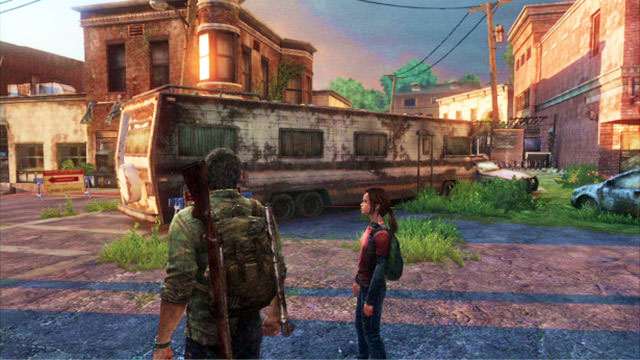
After you go through the abovementioned gate, go right and you will be going past a big camper.
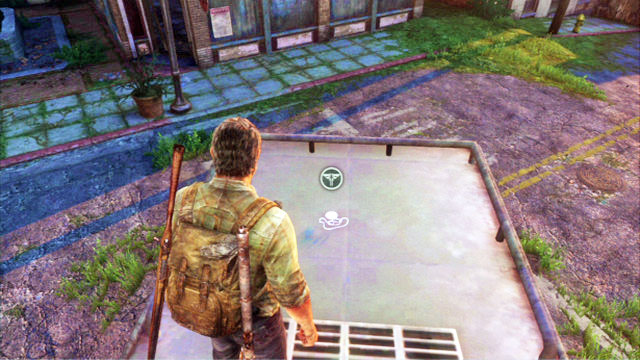
Mount camper over the car wreck and pick up another pendant.
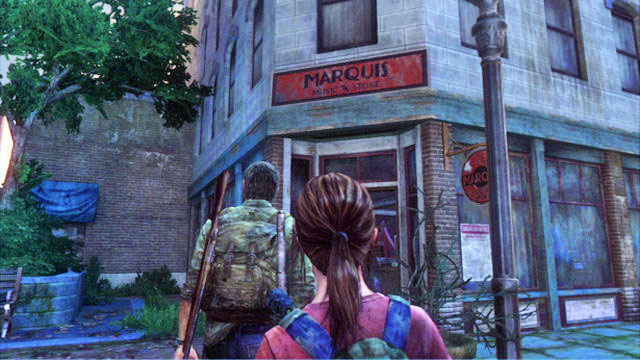
To the left of the camper, there is a music store.
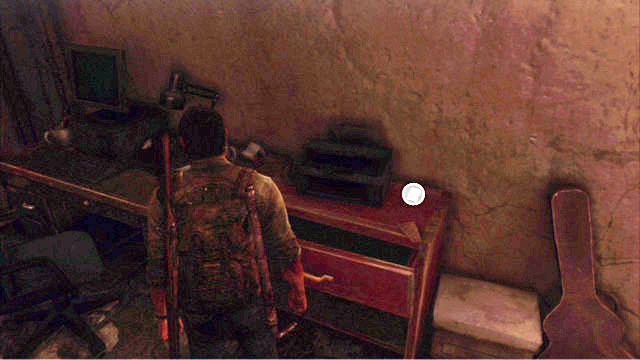
Go to the backroom of the store to find the note.
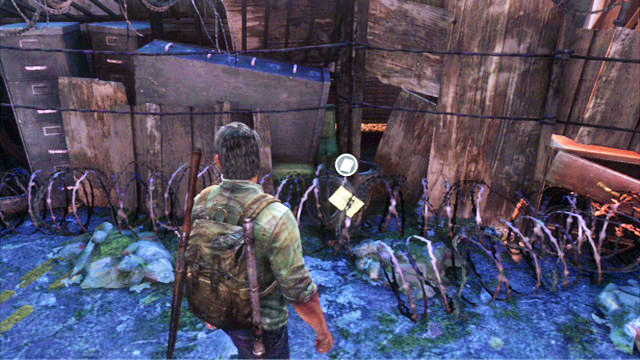
After you leave the music store, turn left and take a look at the barricade across the road. The artifact is to the right of the barrier.
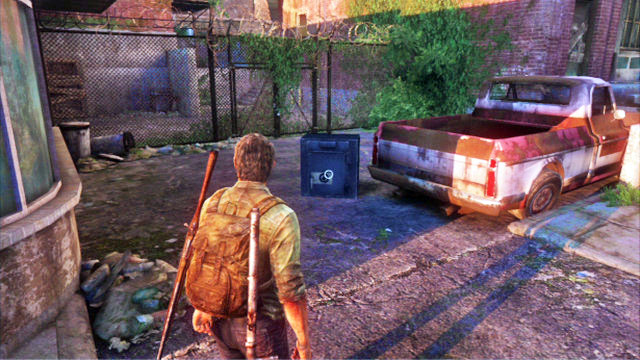
On the note, you will find a safe code for the safe that is standing a bit earlier near the pick-up truck.

Once you go down from the rooftops, you will see Bill's another trap.
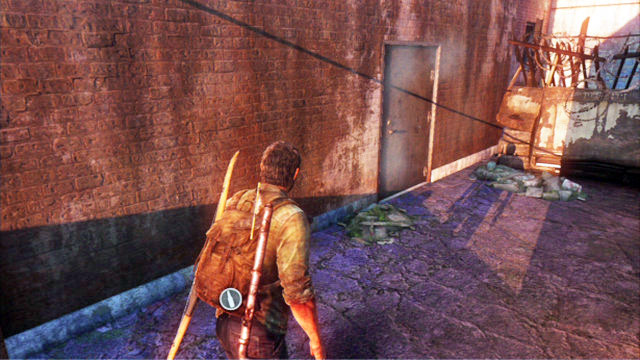
Detonate it and turn left. Open the door.
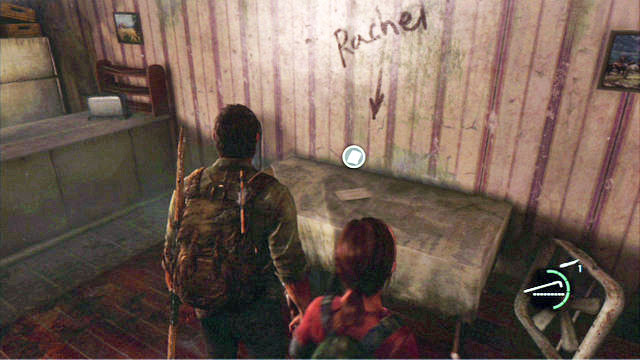
Inside the room on the first floor, there is a note, but be prepared to fight a zombie that will jump at you from behind the corner.
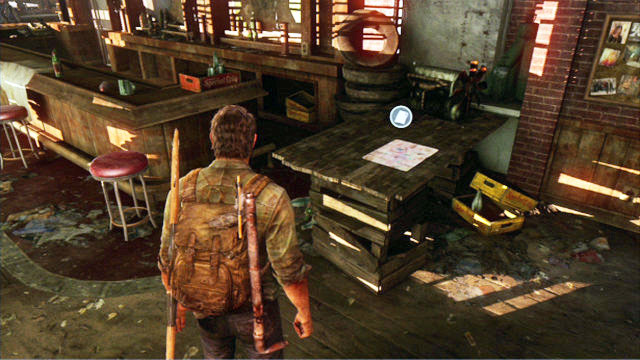
Right after you get into Bill's hideout, turn right. You will notice the map lying on a fragment of wood.
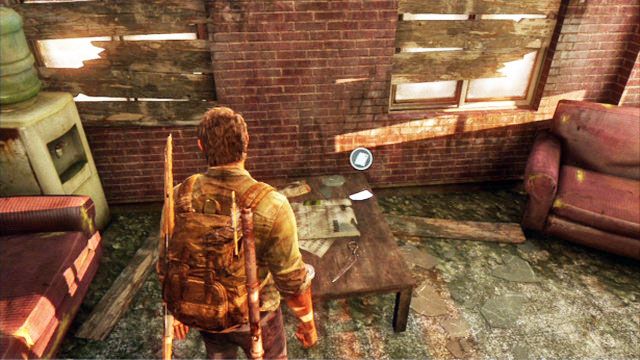
You can find this note in the room at the back of Bill's hideout. Just a few steps away from the previous one.
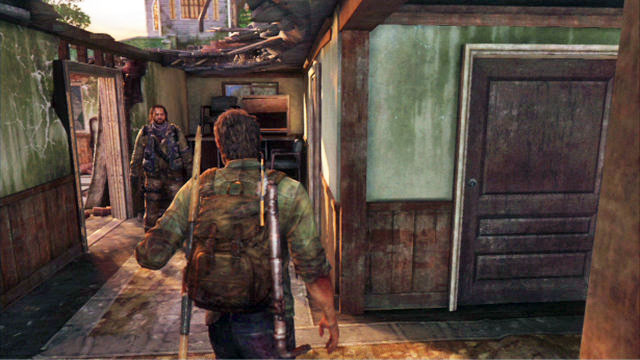
To get hold of this item, follow Bill to the first floor in his hideout.
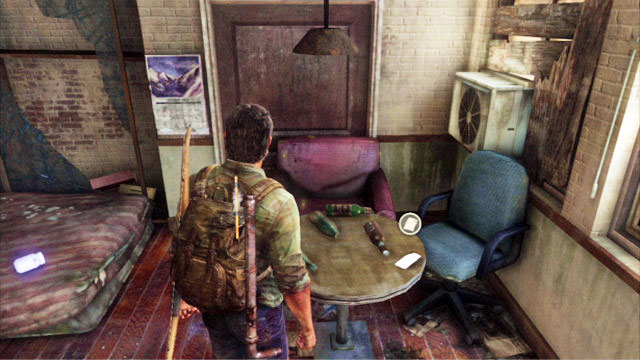
The note is on the kitchen table.
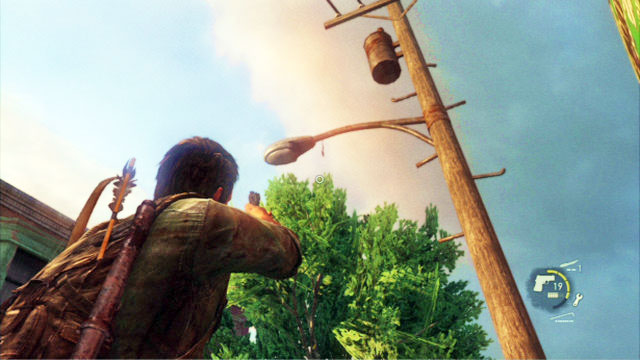
Right after you leave the hideout, turn right. Defeat the group of zombies there and take a close look at the lamppost.
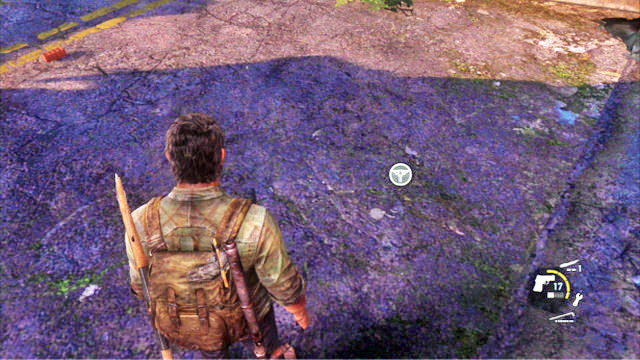
The pendant is on the top of the pole. Shoot it down and collect it.
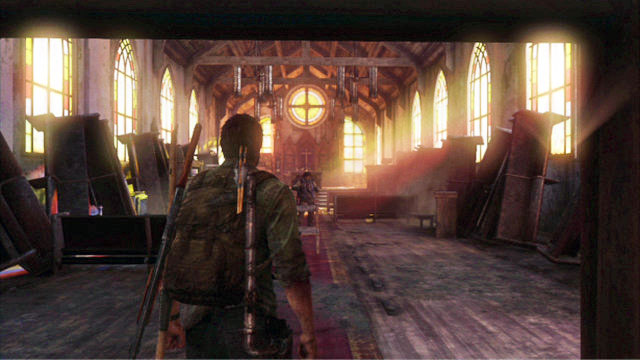
In Bill's second hideout, climb the stairs and approach the stained-glass windows at the other end of the church.
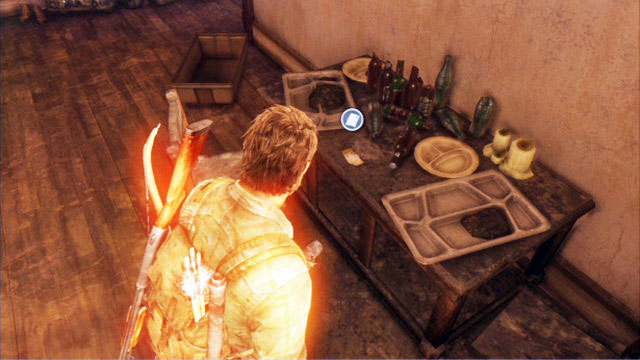
To the right of the windows, there is your companion's office, where another note is. It is on the edge of the desk.

After you leave the graveyard, the church graveyard, turn right and go to the green house on the hill.
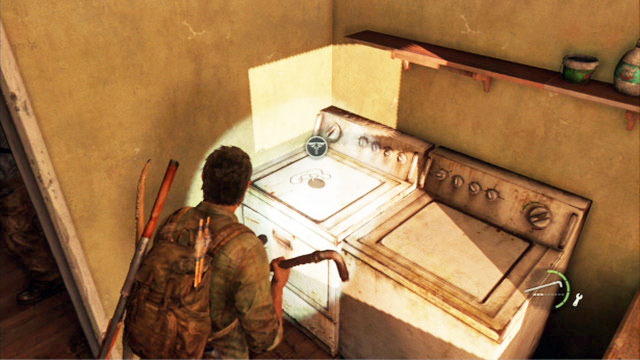
The pendant is in the small laundry.
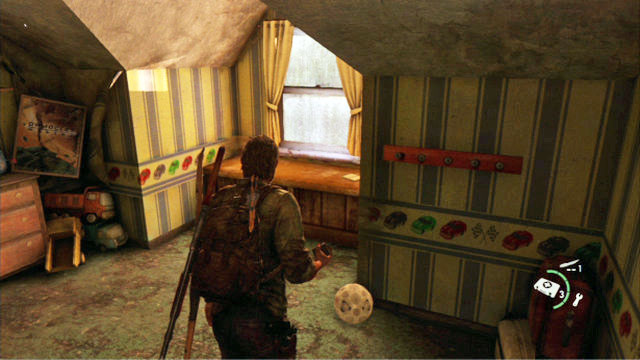
In the house with the swimming pool, go upstairs and find the child's room.

The Diary is on the desk inside the room.
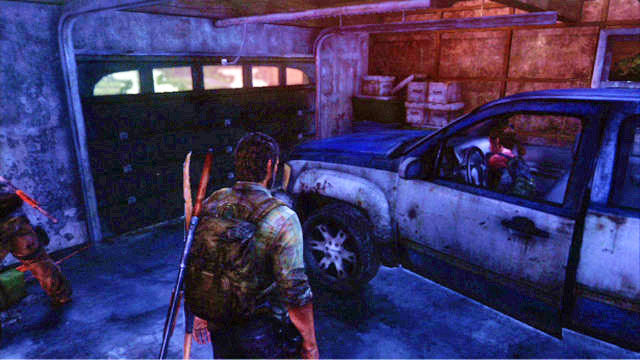
When you enter the garage with the functional car, search through the rest of the house thoroughly.
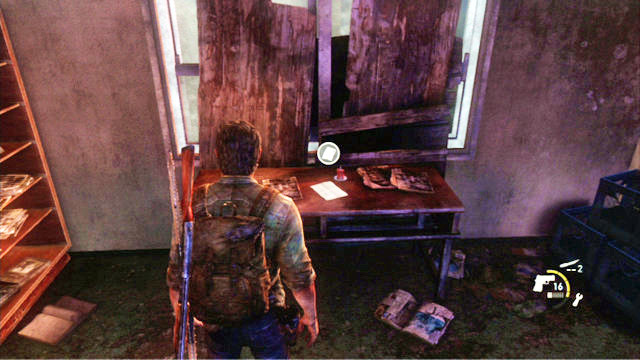
In one of the rooms, you will find the note.
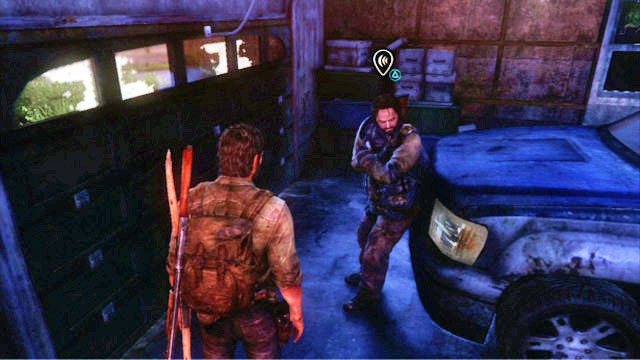
When you hand to Bill the note that you have just found, he will crumple it and throw away.
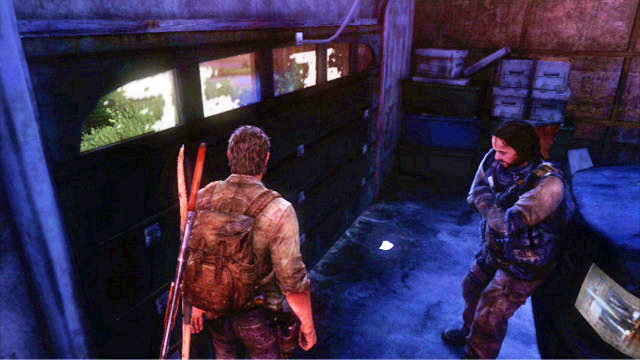
Pick it up to obtain the last artifact in this level.
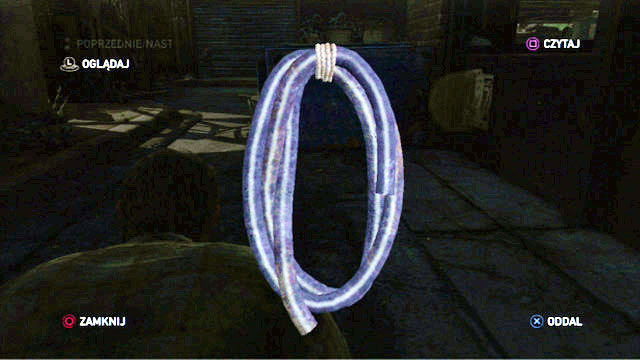
You will receive it automatically before this chapter starts.
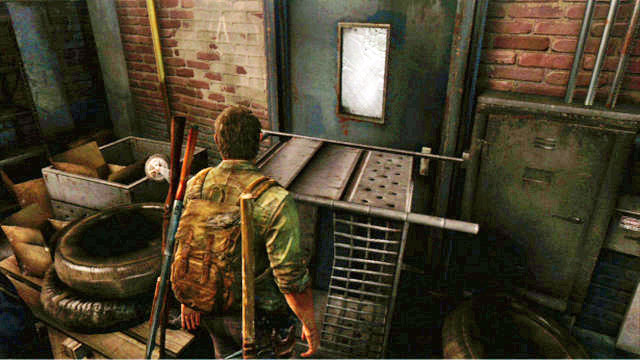
You will find it in the bandits' garage. It is on the heap of trash to your right.
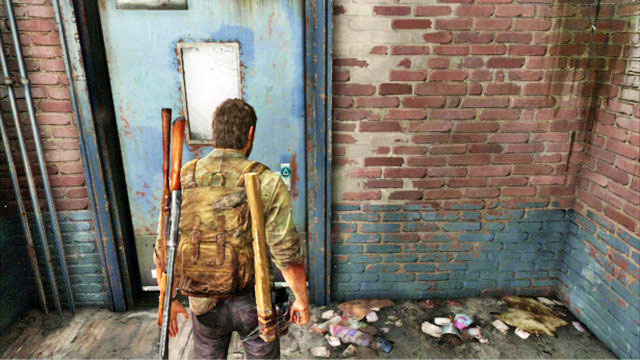
On the first floor of the bandits' garage, go into the room at the end of the corridor.
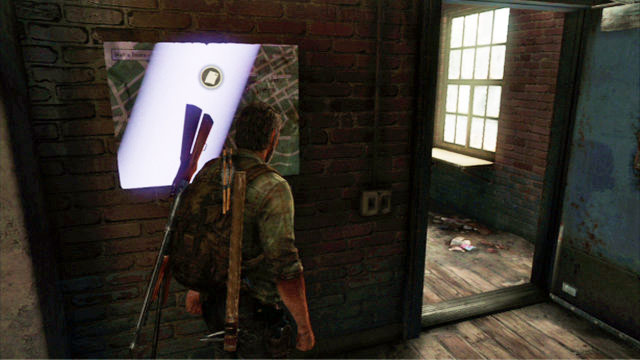
There is a workbench for upgrades there and the map is hanging on the wall.
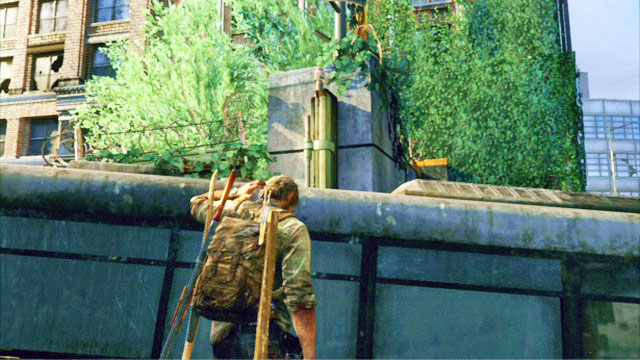
After you defeat the three bandits and jump over t the other side of the bus, you will land in a derelict military post.
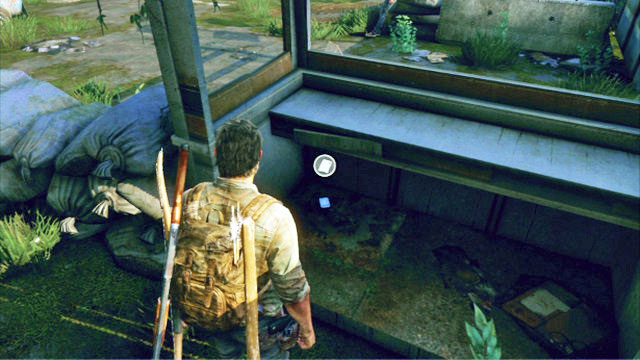
Behind the sandbags, there is a small booth with the artifact inside
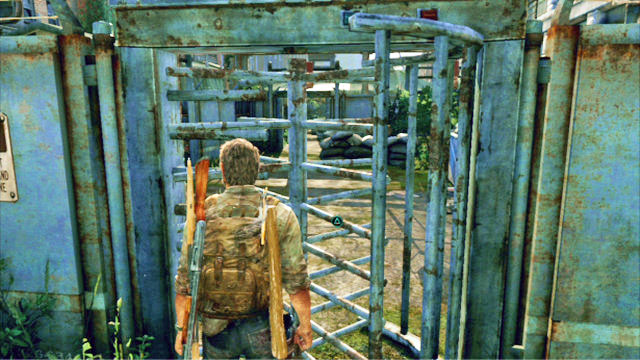
After you leave through the turnstile, go ahead for a moment, turn back and take a look at the wall to the left.
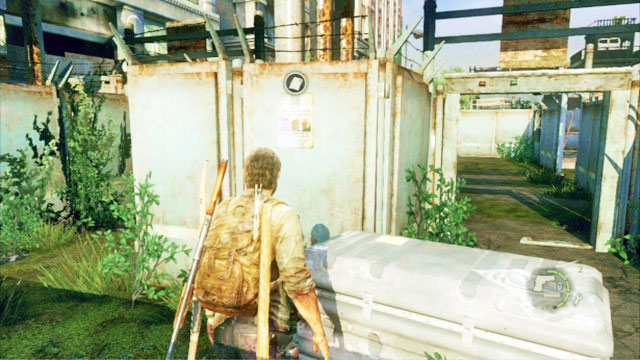
The poster is hanging on that wall.
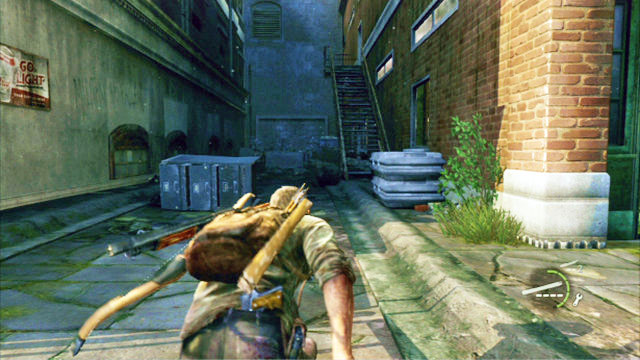
After you defeat the three assailants waiting in front of the big bookstore, go to the other end of this location and walk into the dark alley to the right.
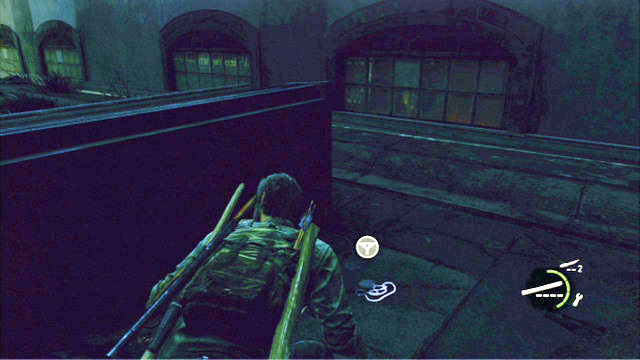
At the end of the alley, there is another pendant.
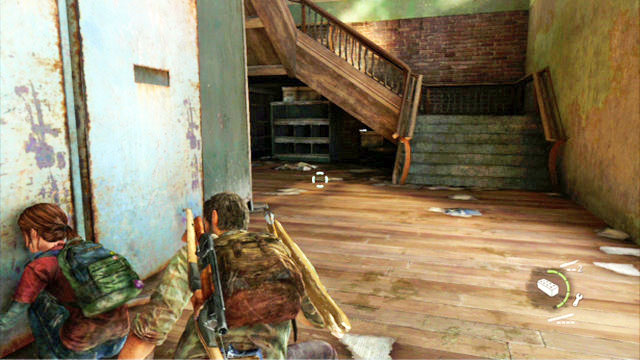
When you enter the building from the dark alley, sneak over to the other side of the store and find the stairs.
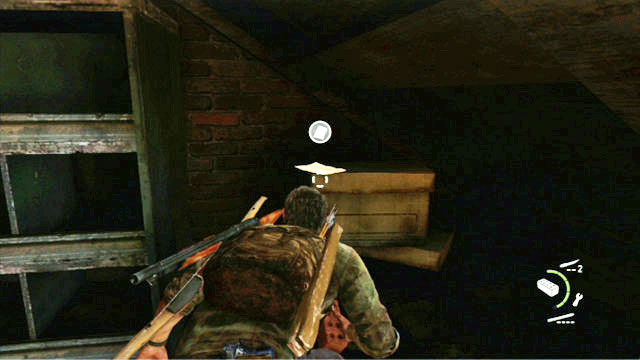
The artifact is under the stairs. .
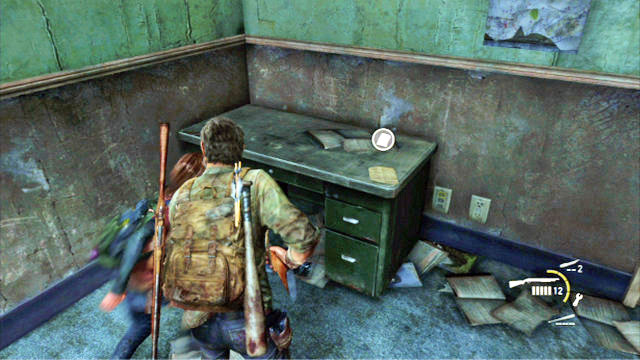
You can now go to the next alley, at the other side of the building and enter the building from that alley. When you do that, turn right and keep to the wall. On the desk in one of the rooms, there is the note.
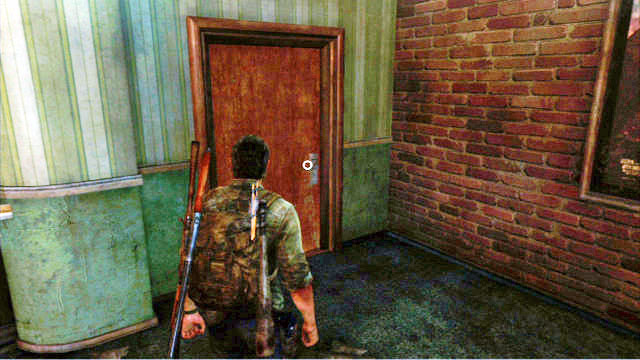
You can find the map on the first floor of the bookstore. It is hidden behind the door that you need the knife to open.

After you watch the cutscene with the bandit taking the long plank, turn left.

You should notice a door marked with a red cross.
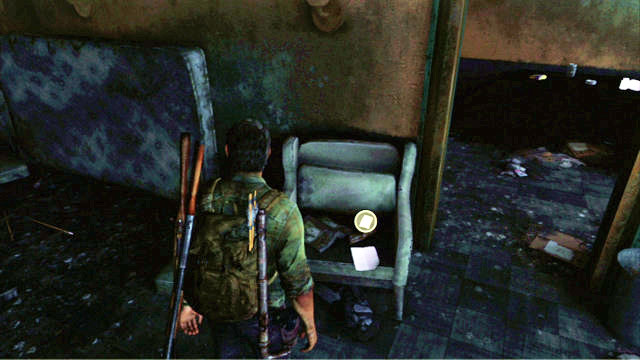
Use your knife to open it and enter. The letter is inside.
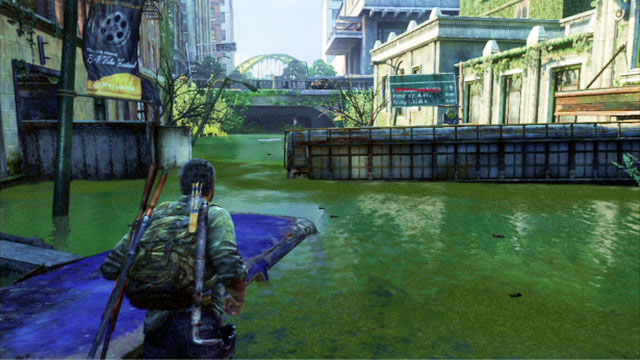
When you will be swimming towards the wooden plank for Ellie, make it over through the container on the left.
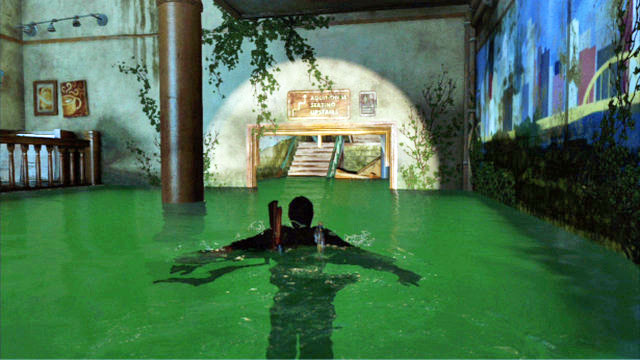
This way you will reach a staircase to the first floor in the building.
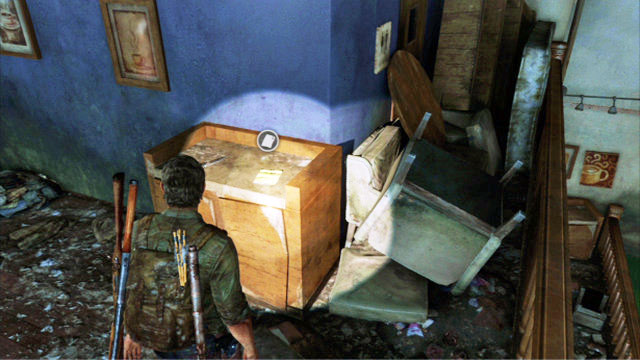
Search through the floor and you will find the artifact on the table.
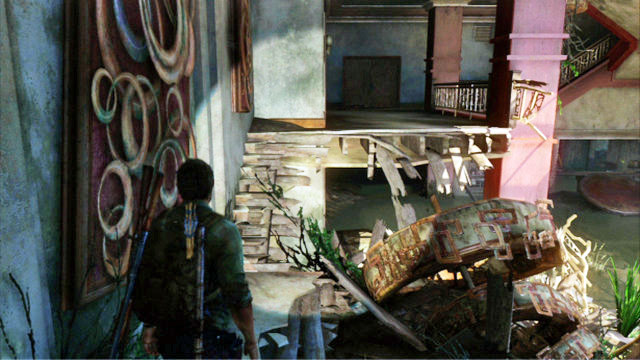
After you make it into the hotel lobby, and walk upstairs, turn right.

Stay close to the wall and slip past the hole, where there is a suitcase with the note in it.

You will find a safe combination written down on the slip of paper. The safe is in the room behind the counter. Inside there are many useful items

After you start the generator and defeat the bloater in the flooded part of the hotel, go upstairs and find the security room.

On the table there is a keycard that you will need to open the door a bit further.

After Ellie saves you, climb up again and go left.
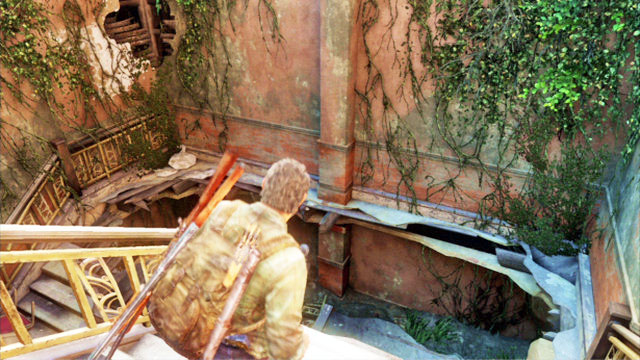
This way you will reach a broken staircase.
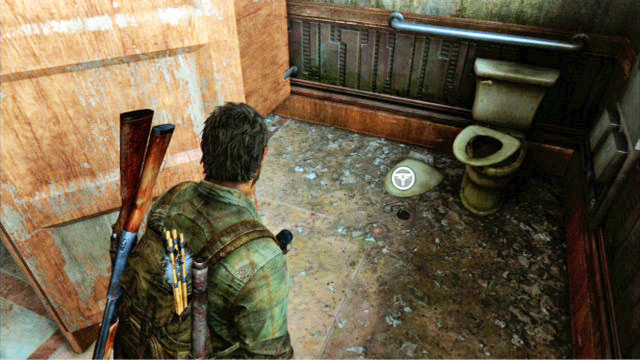
As you walk through the corridor below, you will pass by two toilets. In the second one, search through all of the stalls to find another pendant.

After Joel gives the shotgun back to Ellie, keep to the right side of this location.
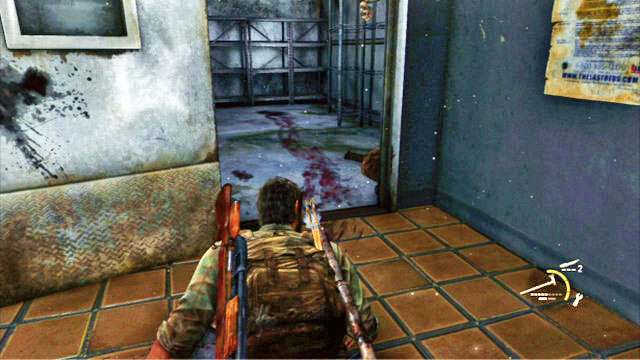
Sneak up to the first enemy and kill him quietly. After you bump into the next one, wait for him to enter a small storage room.
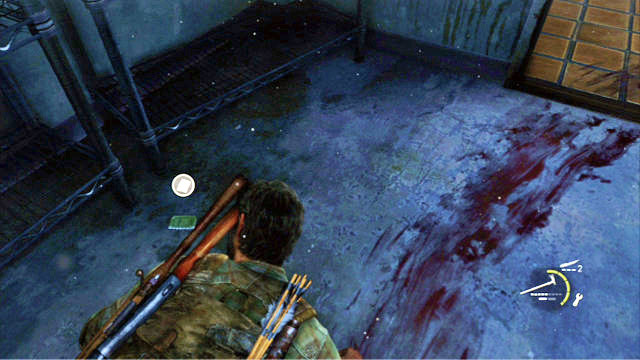
You will be able to strangle him there and collect the note from the floor.

At some point in the game, you will witness a pair of refugees being brutally murdered.
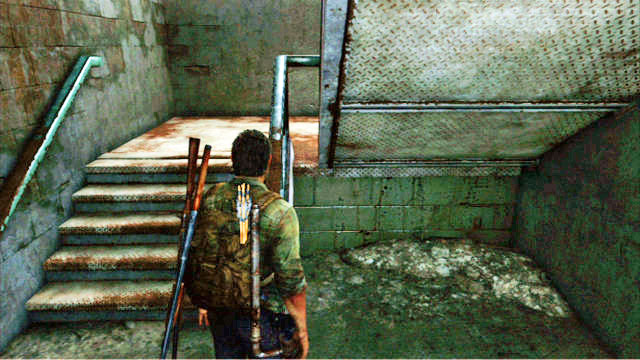
Go left and climb the stairs to the floor above.

Upstairs, there are two guards which you need to kill.
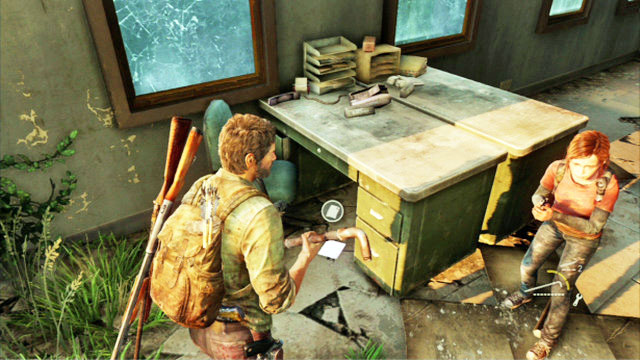
When they die, search the room with many desks thoroughly. Under the desk in the corner, there is another artifact.
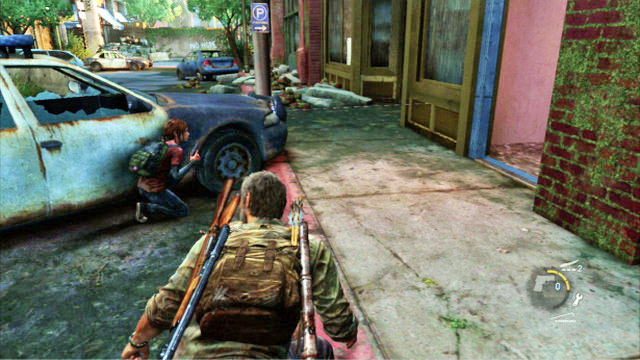
When you reach the building with the three bandits on the floor, enter by taking the entrance to the left.
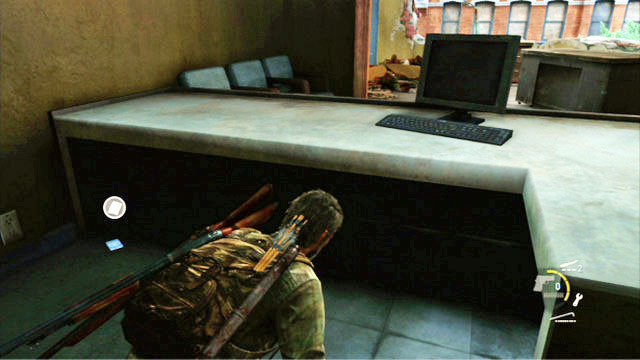
Go upstairs where there is a big wooden tabletop. The note is behind the tabletop.
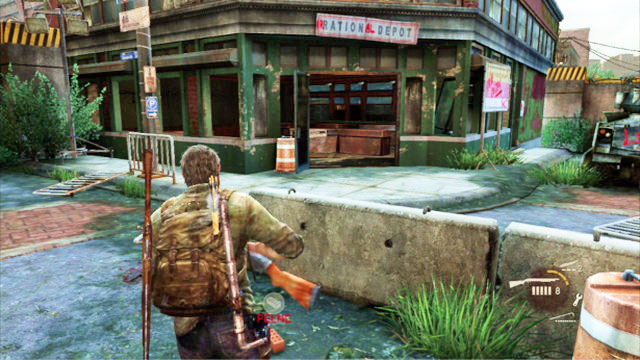
Once you eliminate all the soldiers near the previous artifact, explore thoroughly the building next to the tank.
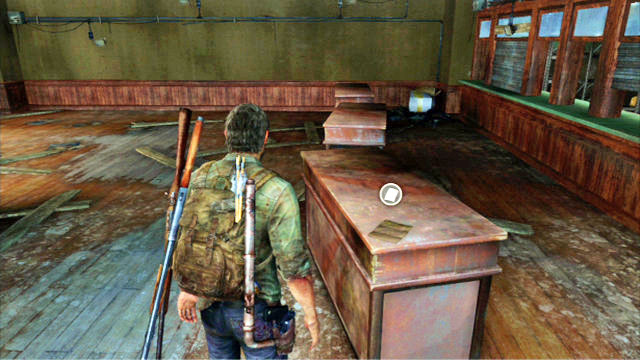
One more note is on the table inside.

After you exit the toy shop, you will bump into three bandits.

Kill them and climb to the top over the car, where you will be attacked by two more thugs.

Once they die, you will be able to walk over the wooden plank into the flat in the next building.
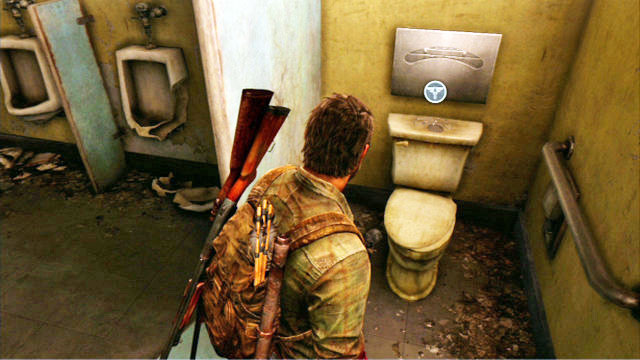
To the right, there is Henry's hideout but before you go inside, search through the toilet to the left. There is a pendant in one of the stalls.
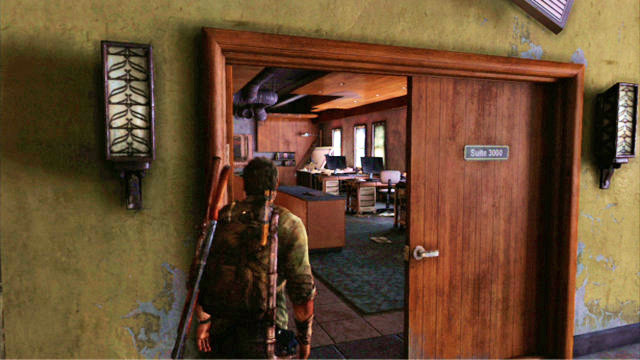
When you enter the flat with Henry's hideout, run ahead until you reach the conference room.
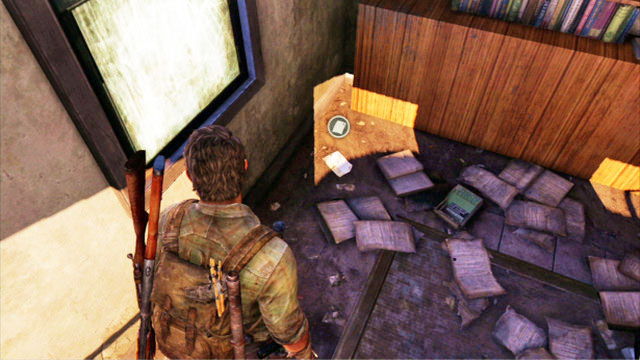
The note is in its right-hand corner.

While going along the beach, you will bump into a shipwreck.
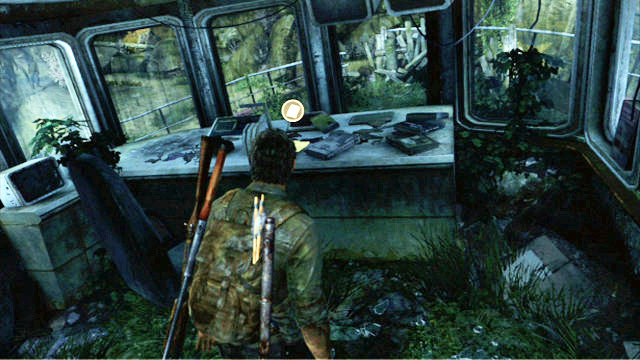
Behind the lost door, there is the first artifact. It is on the ship's cockpit.
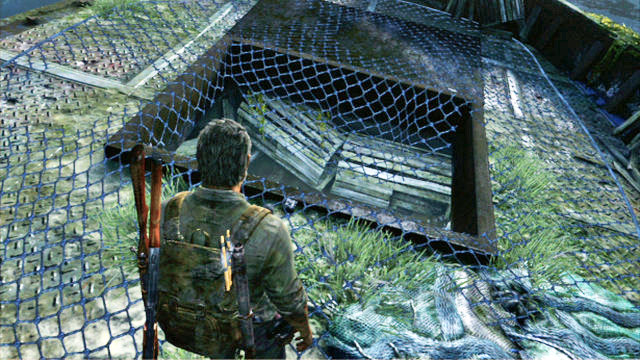
Aboard the same ship, you will find a manhole leading under the deck.

Jump down into that hole and, behind the fishing net, you will find the Firefly Pendant.
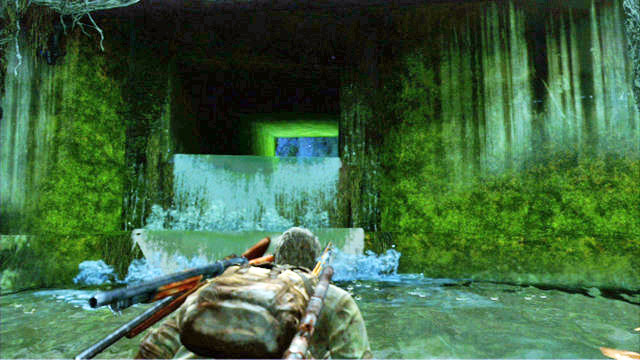
While going ahead, watch the right side of the tunnel. At some point, you should notice another tunnel with water pouring out of it. The pendant is at the other end of this tunnel.

When you reach the fork in the sewers, take the path to the right.
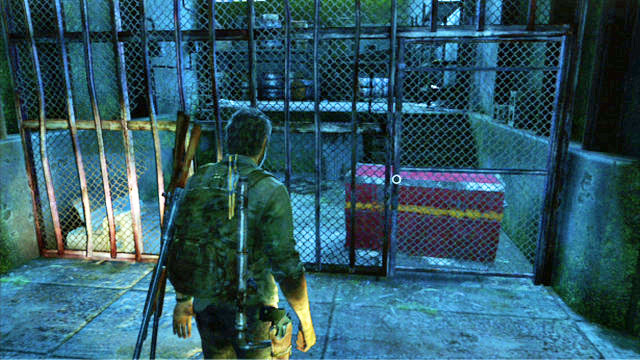
This way, you will reach a grate with many various items behind, including the artifact.

To get to the other side, you need to open the ventilation shaft to your left and wait for Ellie to get things done.
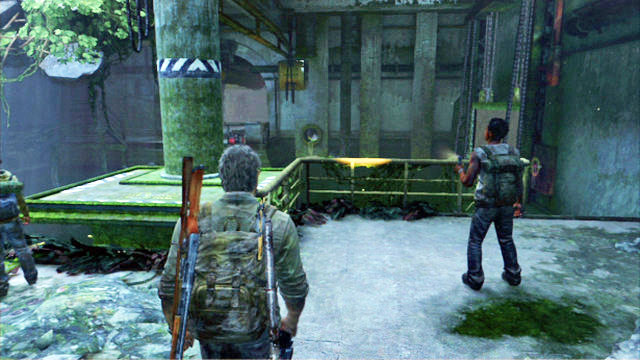
When you reach the area with the valve and the locked gate, you need to jump into the water.

You should notice a car wreck in the right corner, with the pendant next to it, under the water.

In the location with the flooded gate, climb onto the platform to the left. You will find a wooden palette and a locked door there. Open the second one and, by sneaking, go around the clicker or kill it silently.
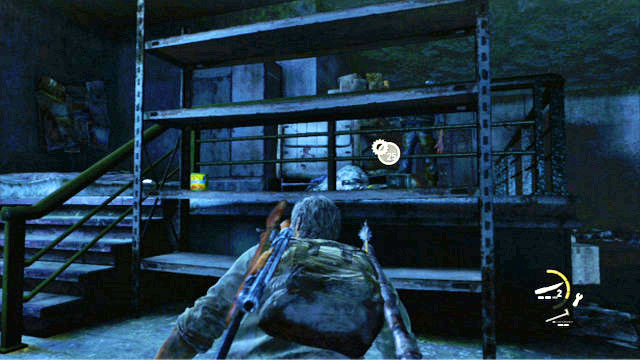
There is one more creature in the room, but you do not need to worry about it, if you make no noise. The artifact is on the shelves to the left.
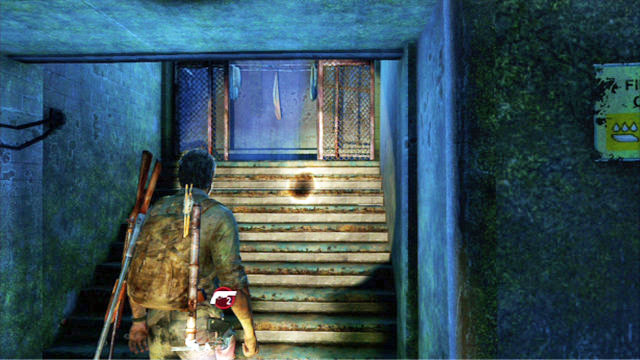
After you defeat the four charging mutants, explore the area with the barrels to the right.
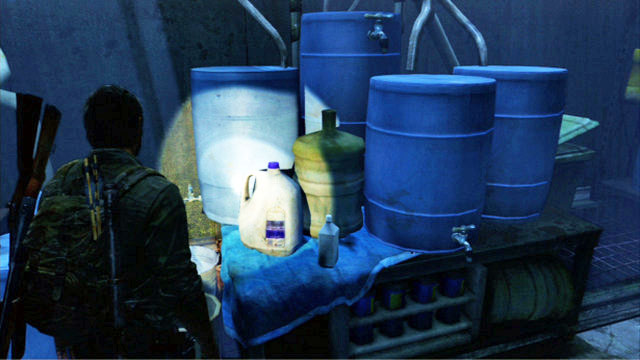
There is another artifact on the table.
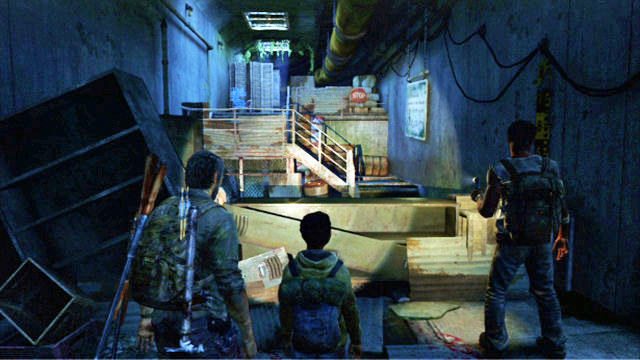
Soon after collecting the previous artifact, you will encounter a low staircase.
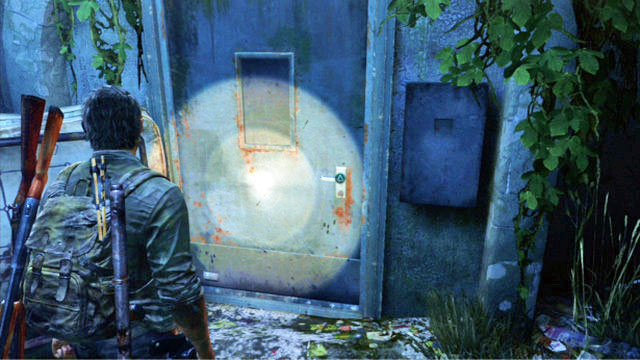
Sneak up the stairs and open the blue door to your left (behind the wooden counter).
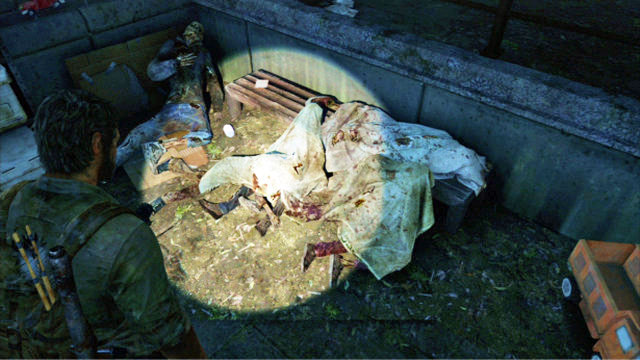
I the left corner of the room there is a corpse with the item on it.
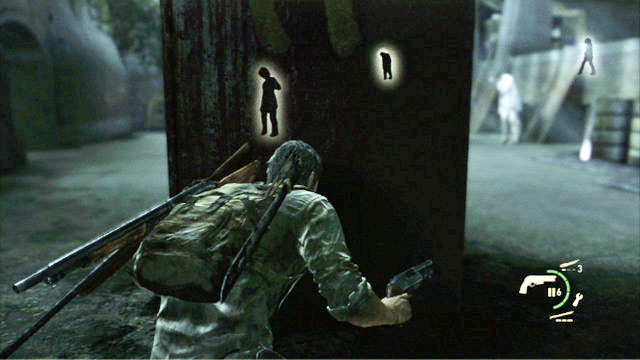
After you and Ellie are parted, you will have to squeeze past many zombies.
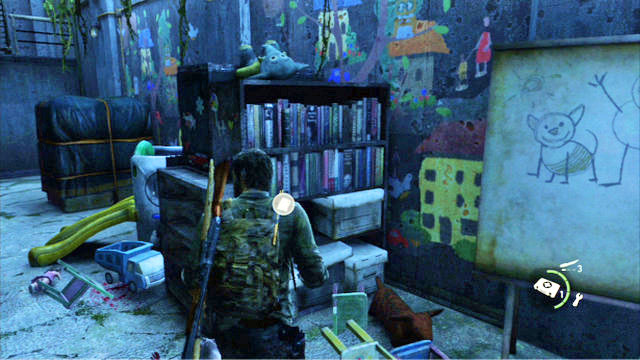
While sneaking, you will find a room that resembles a kindergarten. Take a good look at the shelves there, and you will notice the item on one of the shelves.
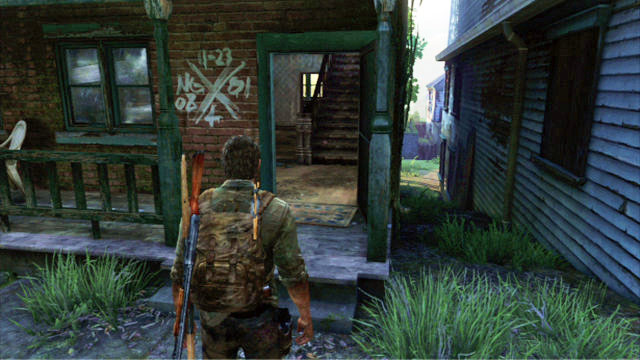
When you escape from the sewers, go ahead until you notice the first house with its door open, to the right.
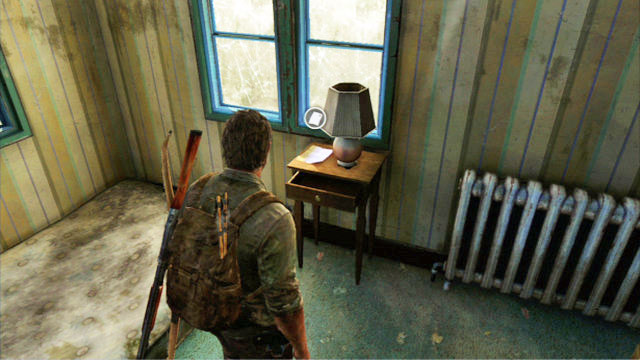
Enter the house and climb up the stairs. In the room with the mattress on the floor, there is another artifact. It is on the small table next to the window.

To the left of the ice-cream truck, there is a red-brick house.
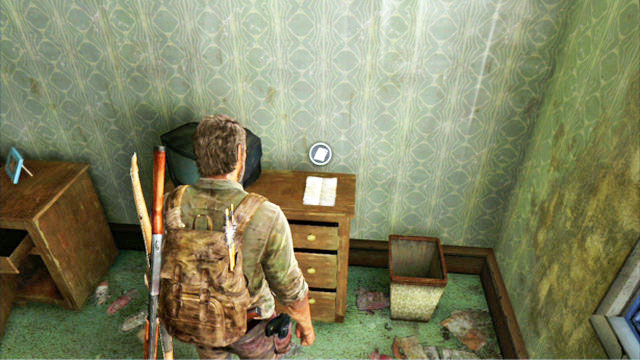
Inside, climb up to the higher floor and search through all of the rooms. This way, you should find the note lying on the chest of drawers.

Right next to the red-brick house, there is another property that you can enter.

The note is on the desk on the first floor.
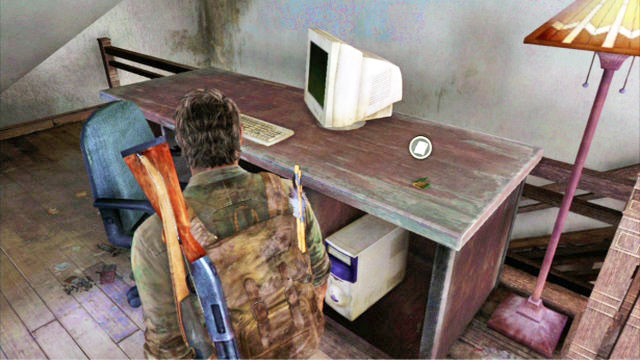
This artifact is in the attic.

It is on the desk close to the computer screen. There is the combination that opens the safe on the lower floor.
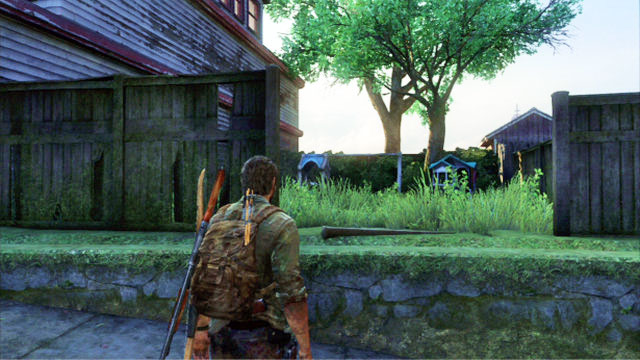
To the right of the abovementioned house, there is a small garden with a tree in it. The pendant is hanging down from one of the tree's branches.
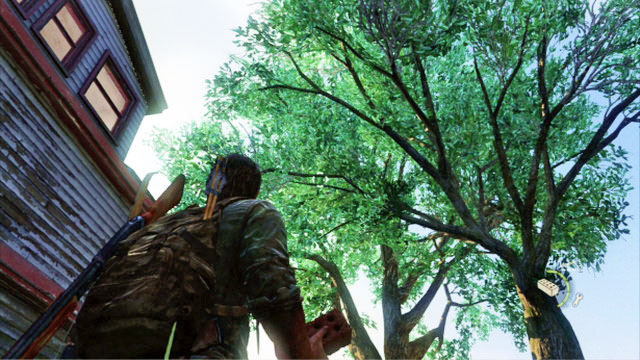
Shoot it down and collect it.
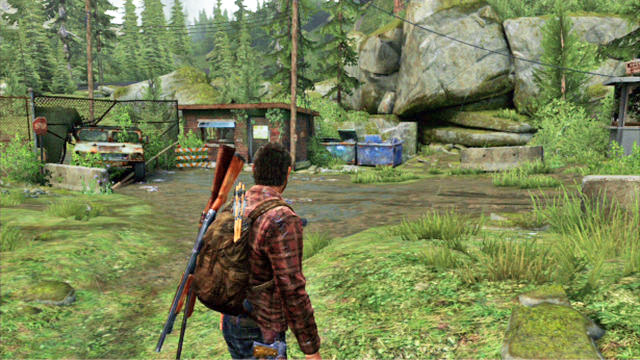
Once you reach the power plant gate, search through the office space to the left thoroughly.
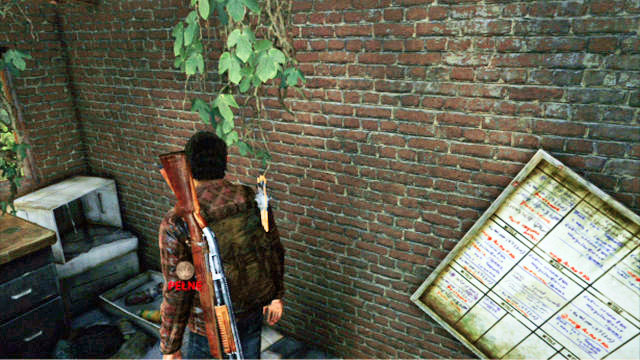
Inside, there is the map on the wall.
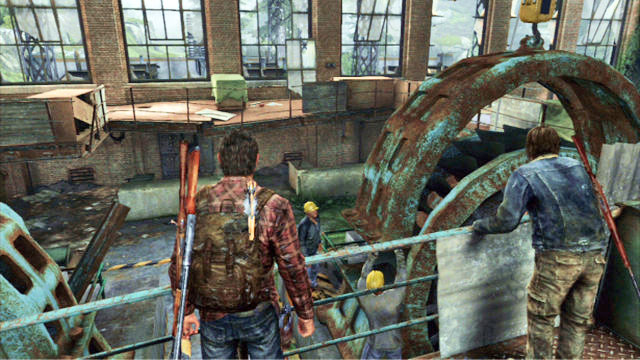
After the turbines go online, follow your brother down and go to the area at the other end of the hall.
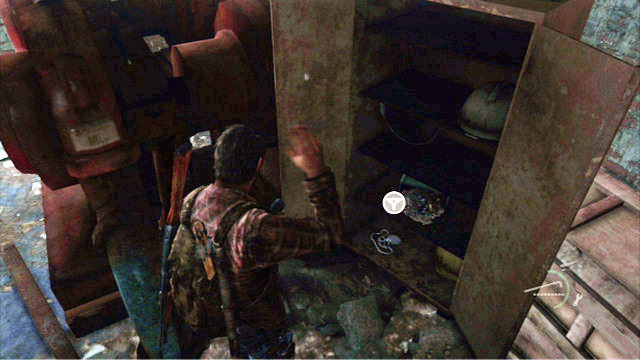
On one of the bookshelves, there is one more pendant.
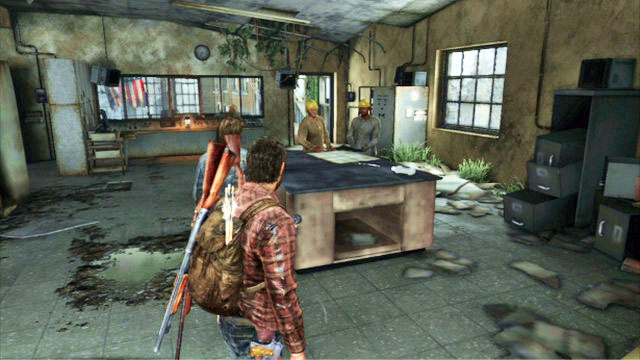
While fighting the bandits, you will reach back the place where Tommy introduced you to two engineers over the schematics.
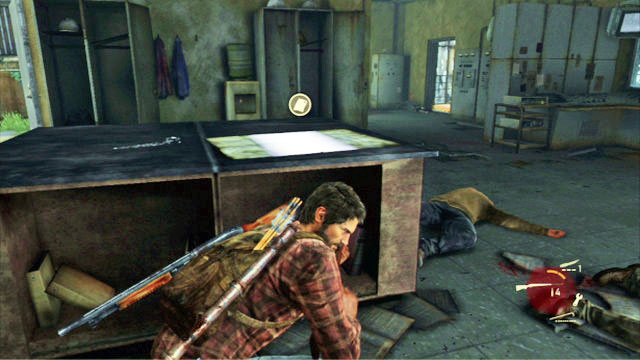
You can now collect the documents from the desk.
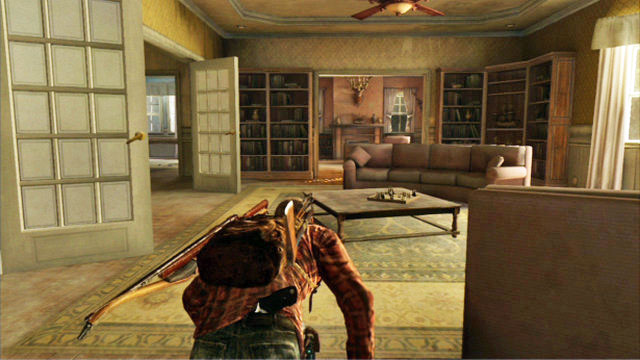
Once you reach the derelict ranch, enter the nearest building and go to the room at the back of the house (to the right).
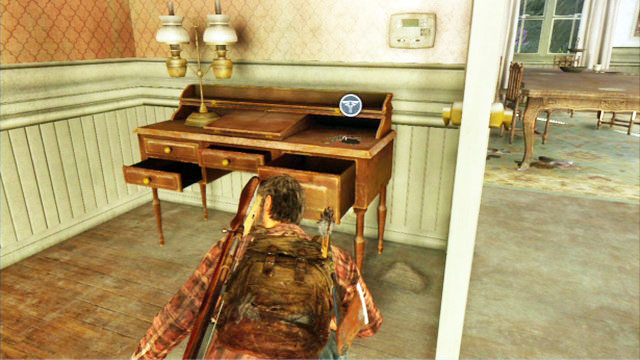
You should see a small table there, where there is the next pendant.

After you enter the campus, keep an eye on the right side of the path. At some point, you will be riding by a building with huge balconies.
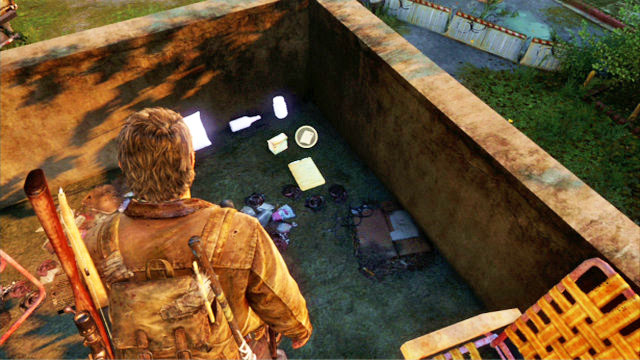
Climb to the top and exit through the door to a big terrace. In the corner of the terrace, there is the note.
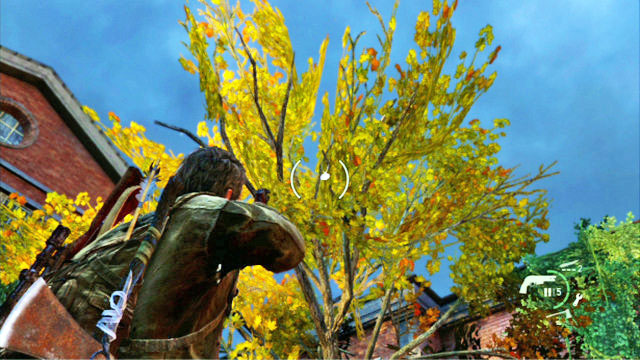
Soon after you jump over the first blockade, there are wide stairs.
Ride up the stairs and turn right. On the tree to the right there is one more pendant hanging.
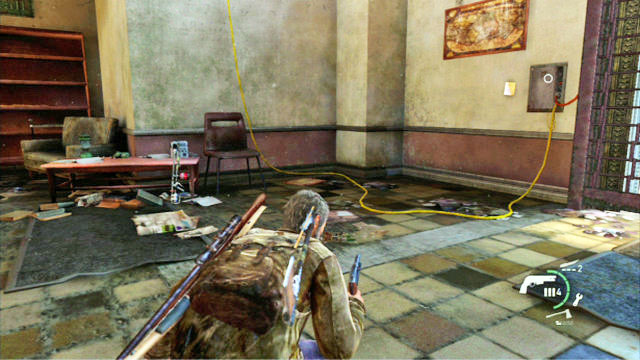
The note is hanging on the wall to the right of the flame thrower, which you will have to collect after you take part with Ellie.
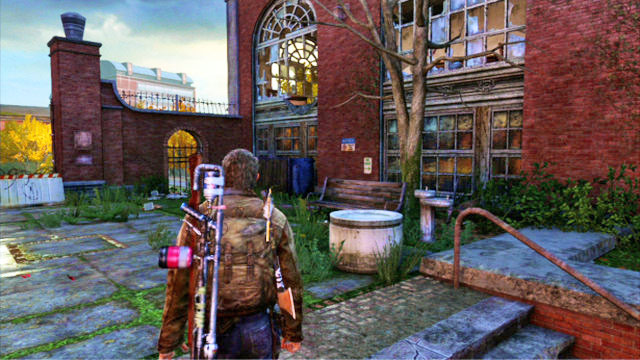
Right before you reach the second barricade (behind the gate with the flame thrower)) turn right. You will notice a hole in the building's wall, which you can squeeze through.
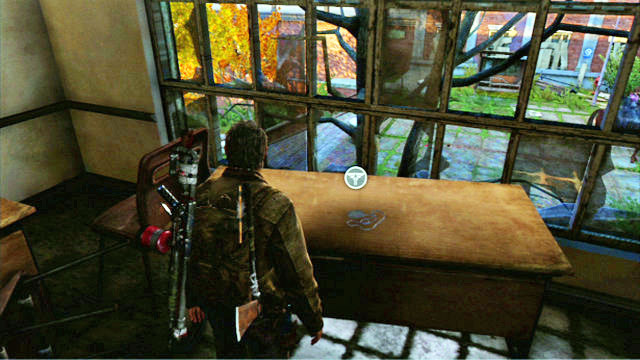
At the other side, there are some parts and the pendant.

When you reach the gate with the generator that does not function, squeeze through the barricaded door to the right.
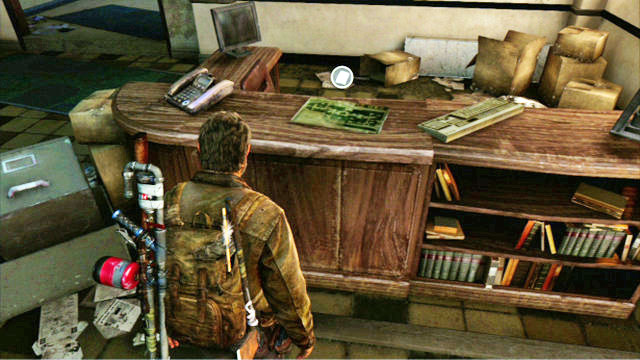
At the other side, there is a desk with the map on it.
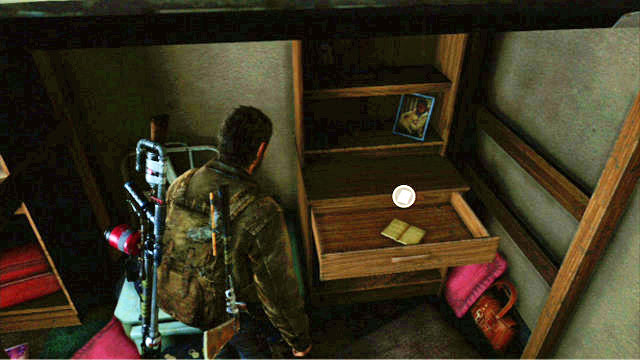
Climb up to the second floor of the building and search through the rooms to the left. In a drawer, close to the door, there is the next artifact.
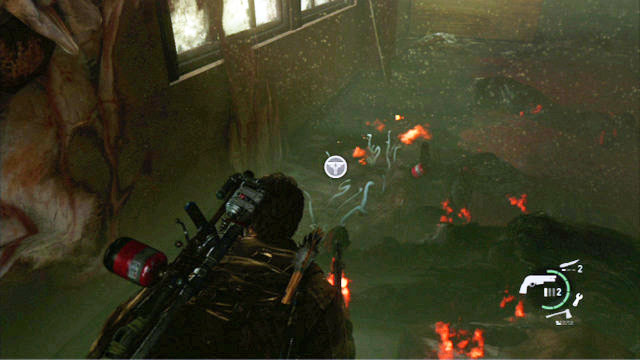
This one can be found on the bloater's corpse. You need to kill the creature to get hold of the pendant.
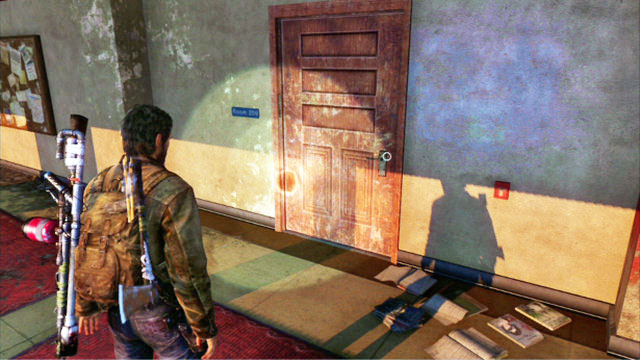
After the encounter with the bloater, climb up to the second floor and search through the room to the right of the stairs.
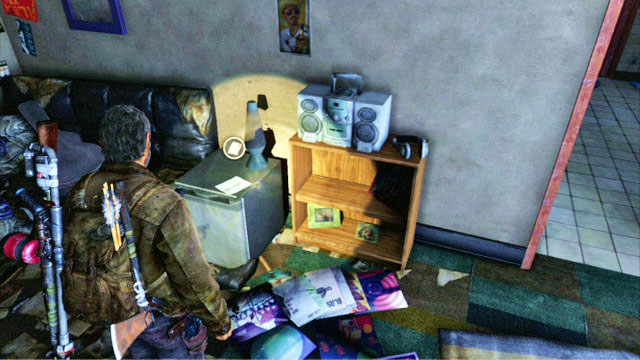
Inside, there is the newspaper clipping
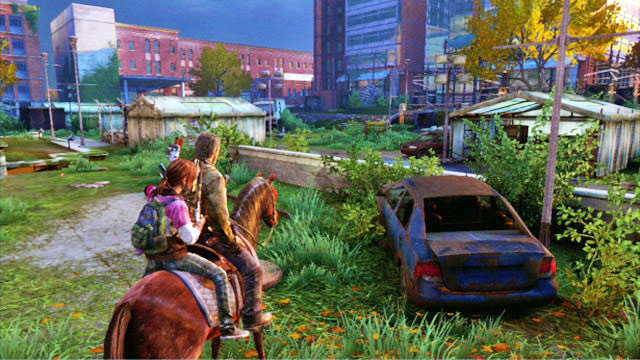
Once in front of the science building, turn left and ride to the very end of this location.
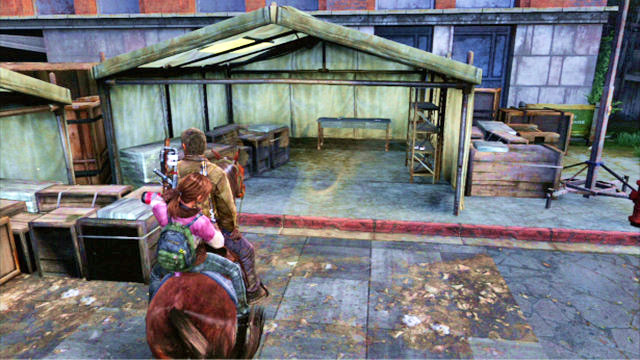
You will find there a tent with another pendant in it.
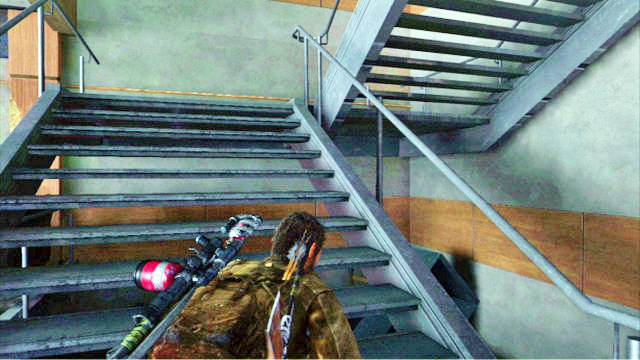
Once you reach the staircase inside the science building, climb up and approach the door to the left.
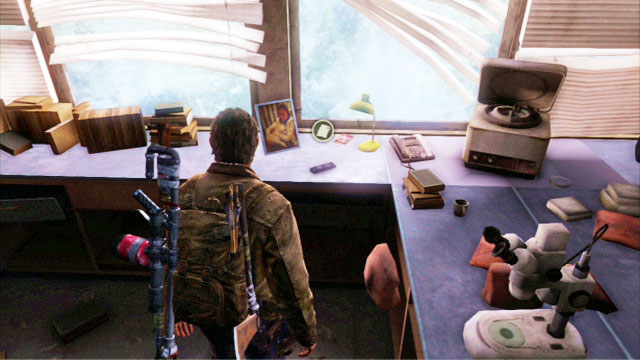
You will notice an opened passage to another room where there is the voice recorder on one of the table tops.
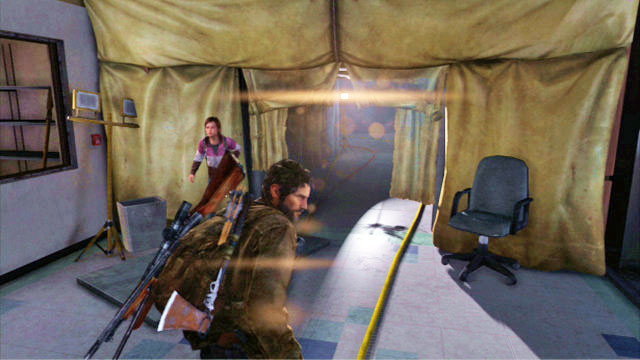
At some point, you will be passing long a corridor with sheets of material.
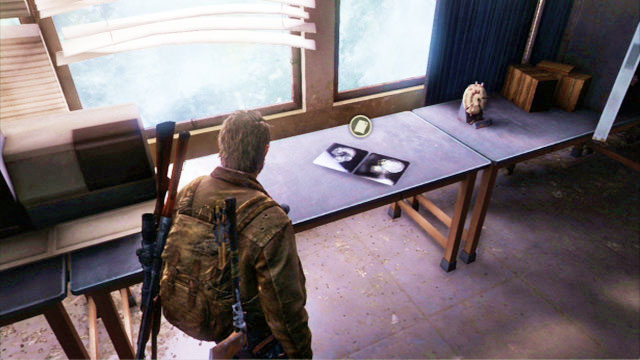
Turn left after you reach the end of the sheets and pick up the X-Ray near the window.

In the room where you encounter the monkeys, there is a table in the middle.
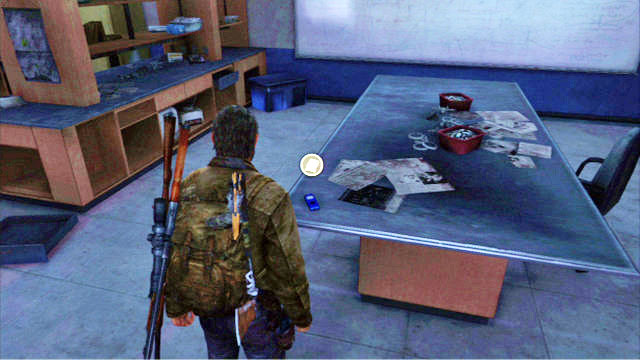
The recorder is on one of its corners.
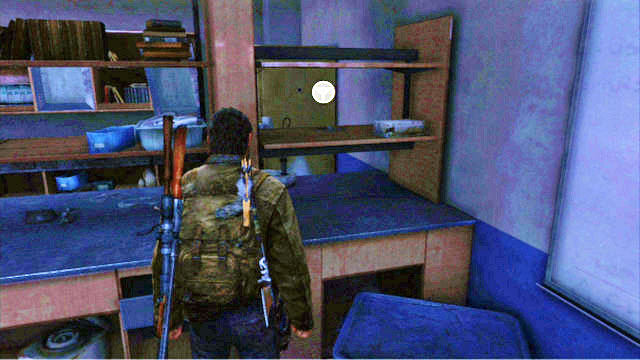
There is also a big whiteboard. There is a bookshelf to the left of the board, with the pendant on it.
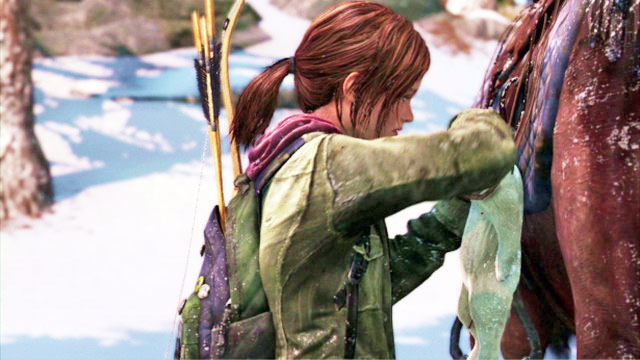
You receive it automatically after the completion of the previous stage.
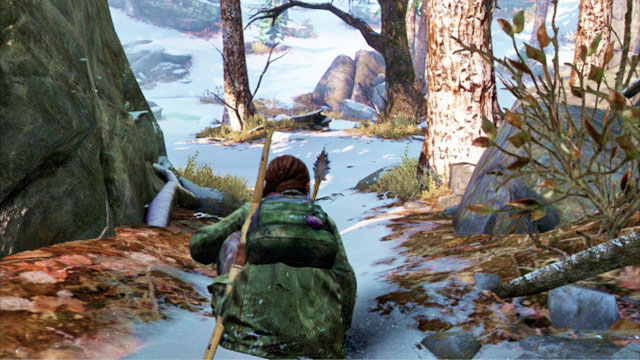
You will find them in Ellie's backpack after you start the stage.
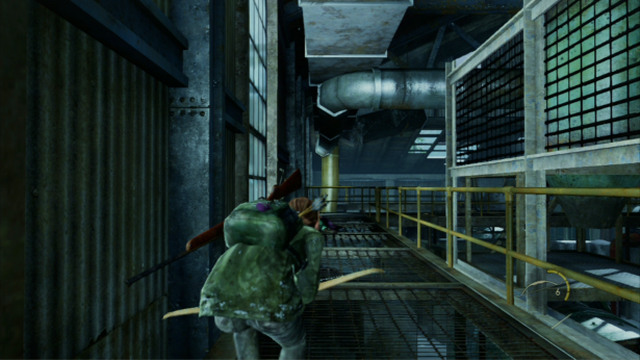
While trying to find a ladder for David, you will bump into a clicker. Coming out of the room to the left.
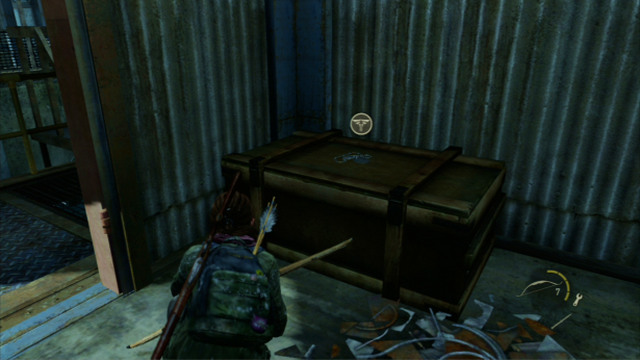
The pendant is in that room.
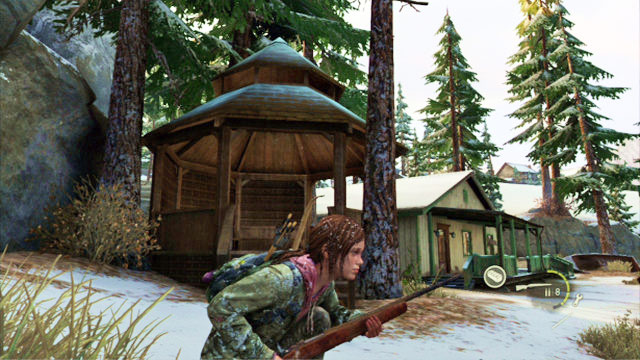
Right after you finish the horseback escape, you will walk inside a cottage. To the right of the building, there is a garden house with the pendant inside.
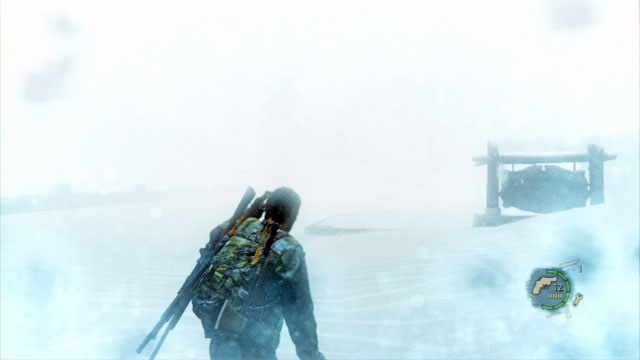
When you cut to Joel for the second time, you will find the map in your backpack.
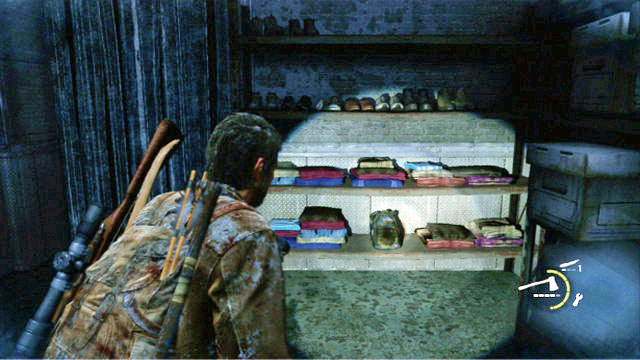
Joel will pick it up automatically after you reach the meat storage.
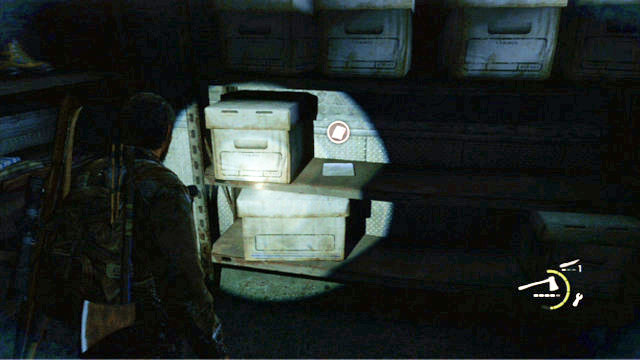
It is to the right of Ellie's backpack.
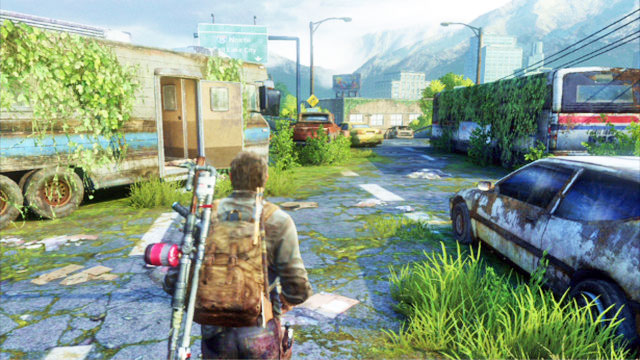
After you start the stage, go ahead until you notice a camper car on the left.
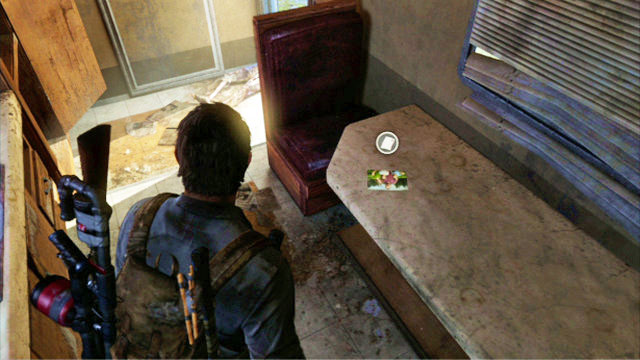
The photo is inside, on the table.
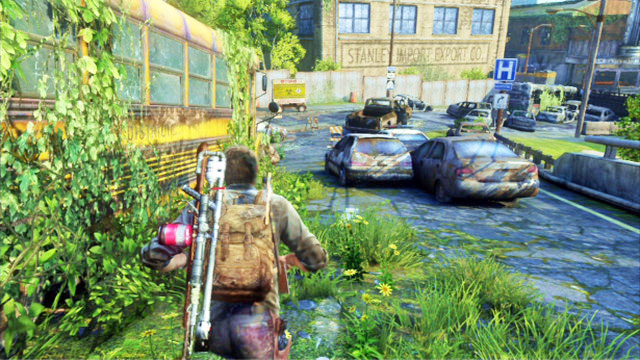
As soon as you go past the bus overgrown with plants, turn left.
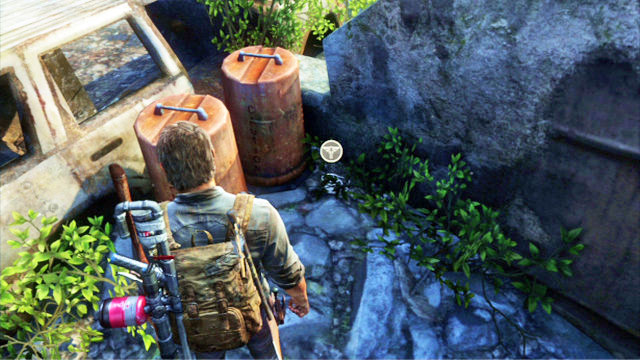
Behind the wreck, next to the barrels you can find the pendant.
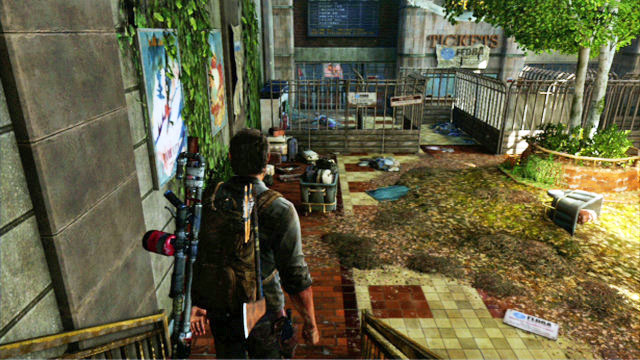
Once you reach the bus depot, turn left right behind the entrance.
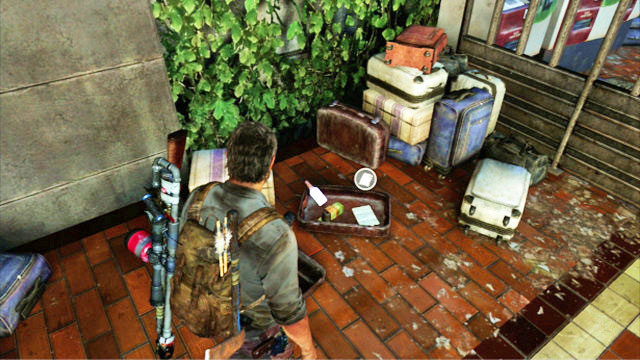
Down below, there is plenty of luggage and the note inside one of them.
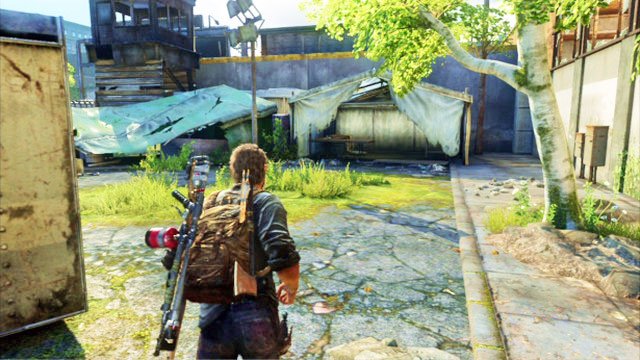
Once you reach the platform, turn right and keep going ahead, until you reach a white tent.
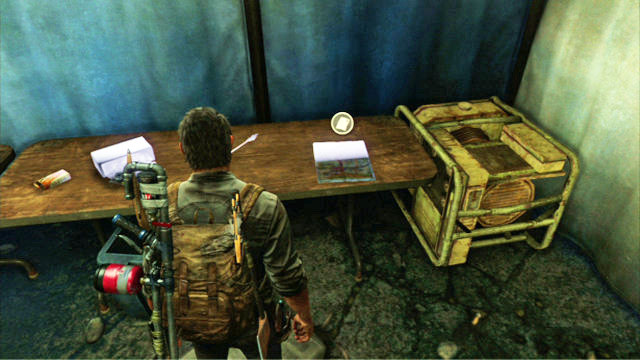
The map is inside the tent.
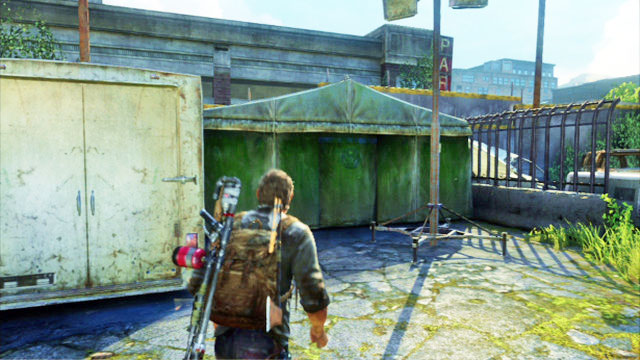
While on the platform, search for a small green tent.
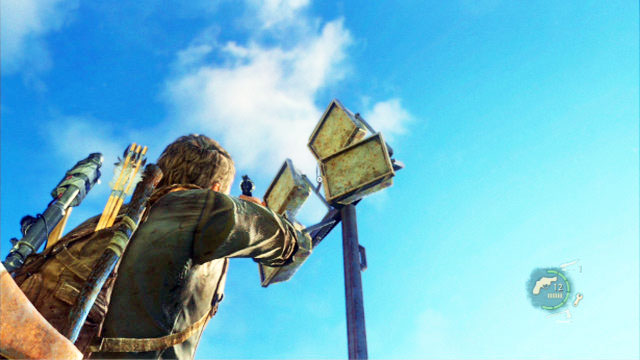
There is a lamppost in front of that tent, with the pendant hanging down from it
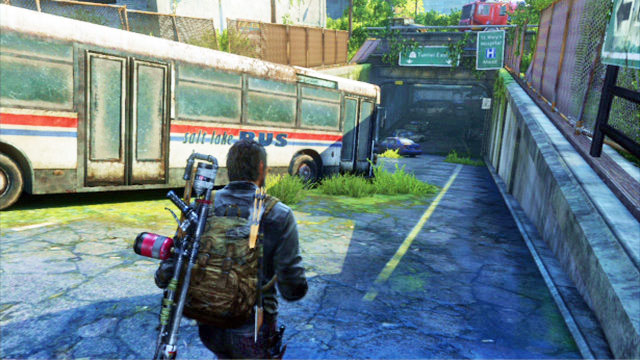
Once you notice the underground tunnel, walk around the bus wreck from the left.

Behind the vehicle, there is one more pendant.
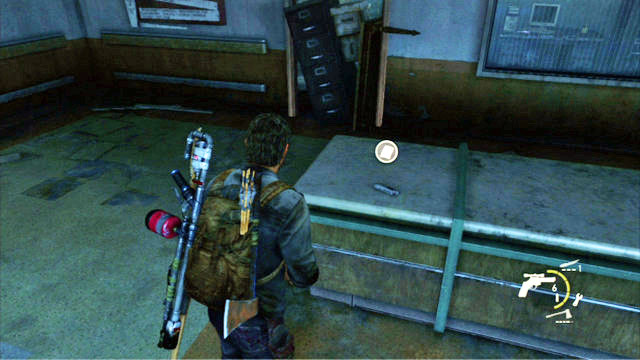
After you climb to the top of the stairs, approach the table in front of you. The recorder is on the tabletop.
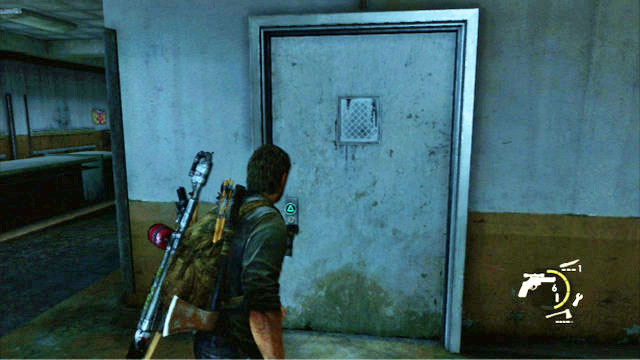
Behind the table, there is a room with a locked door.
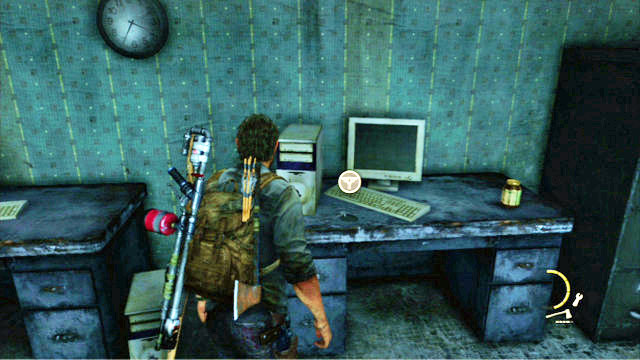
To find the pendant inside, open the door with your knife.
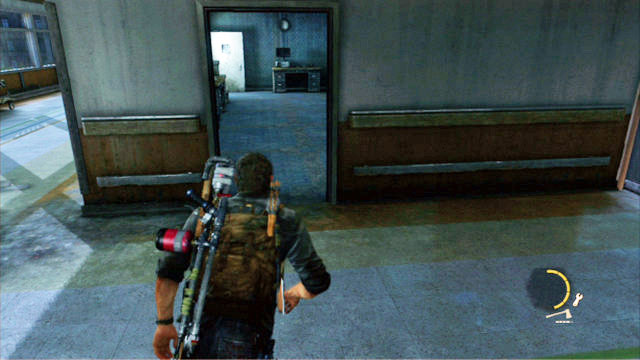
After you leave the staircase go right twice.
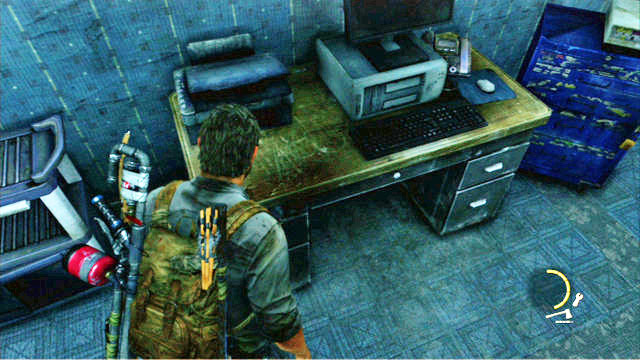
This way, you will enter a room with one more artifact.
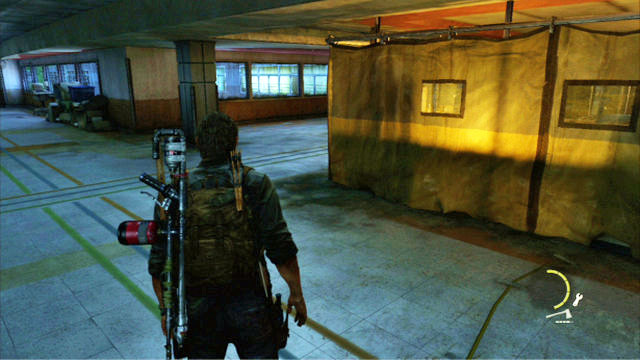
While going ahead, you should notice a big tent.
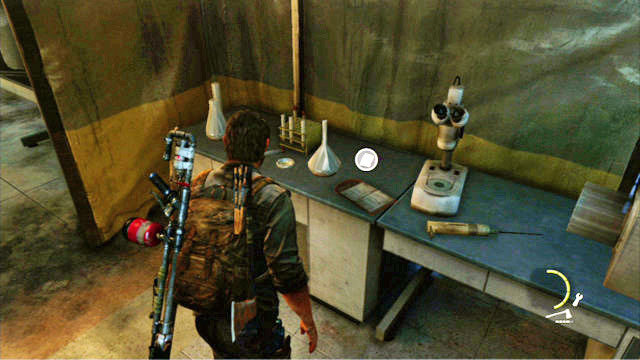
Search it thoroughly because, the journal is inside.
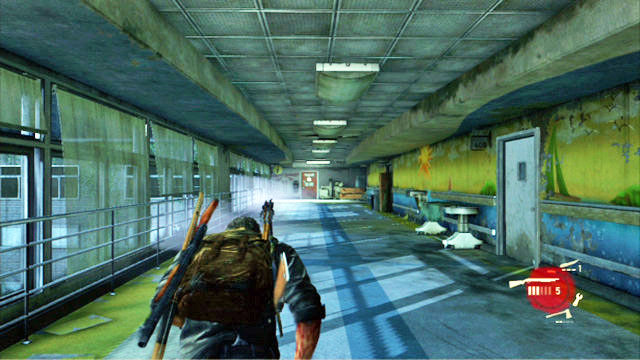
After you barricade the door for the second time and walk into the corridor, open the door to the right.
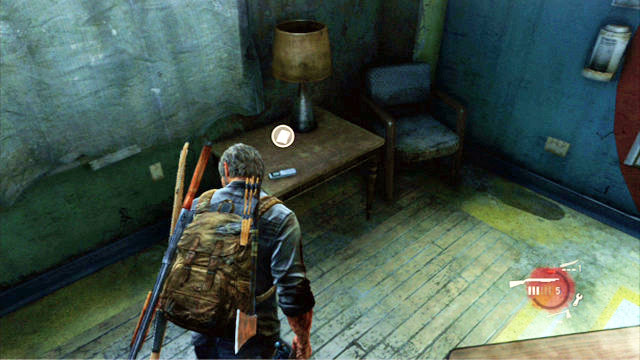
The last artifact is behind the door.
Description: Increases the durability of blades.
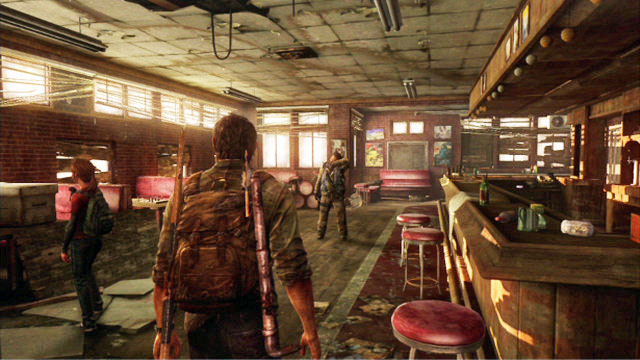
You can find it in Bill's hideout.
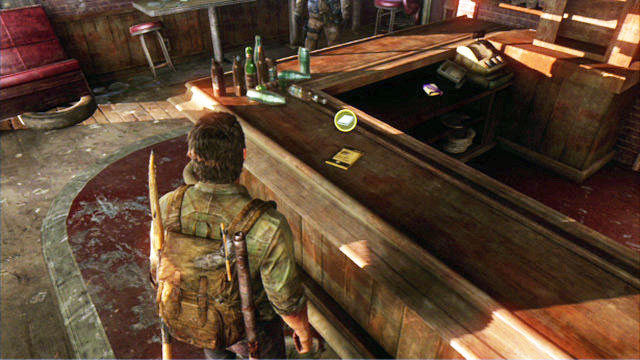
It is on the counter to the right.

They are on one of the shelves in Bill's weapon stash.
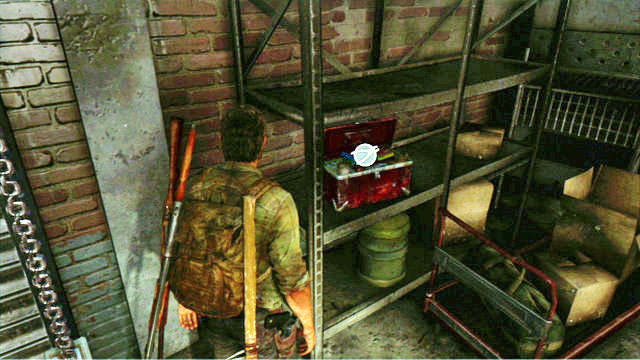
The set of tools is in the bandits' garage. You will get there right after the first fight.
Description: Increases the effectiveness of healing in the battlefield.
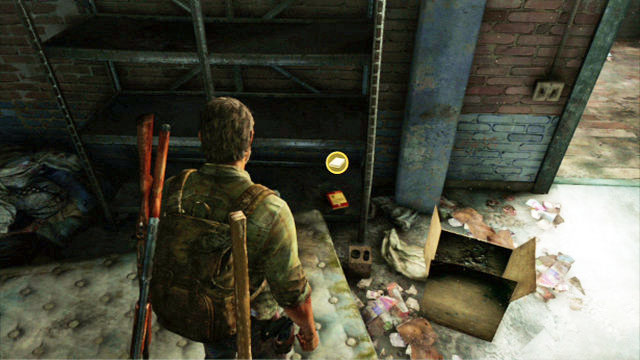
You can find it on the first floor of the bandits' garage (in the room with the mattresses). It is on the shelf to the left.

When you manage to climb the ladder to reach the next floor of the lobby, turn right and slip past the hole carefully.
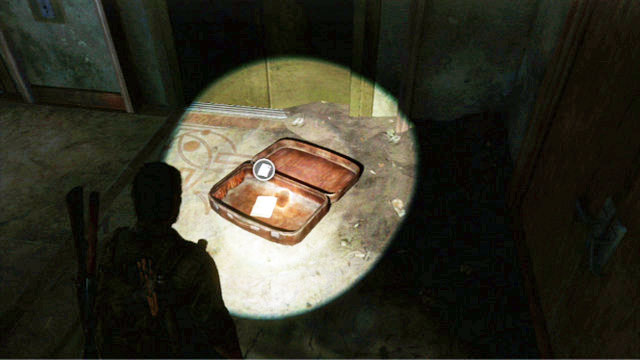
You will find there a suitcase on the floor with a safe combination in it. .

You need to return downstairs to find the safe in the room with the counter. Open the safe and collect the manual.
description: Increases the durability of sharp tools

After you are saved by Ellie, climb up and go left.

This way, you will reach a broken staircase.
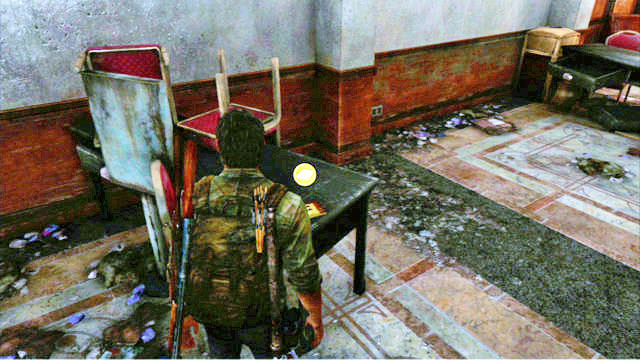
Below, go ahead until you go past two destroyed elevators. Right after that, you will notice two red chairs and a desk with the manual on.
Description: Increases the radius of the incendiary bomb.
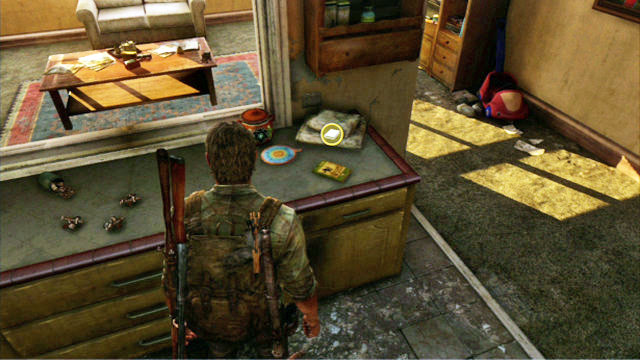
After you talk to the two black brothers, explore the flat that you are in. On the table top, in the kitchen there is the manual.
Description: Increases the range of the ground explosives.

After you bump into the sound trap, take several steps ahead, until you reach a destroyed bookshelf.
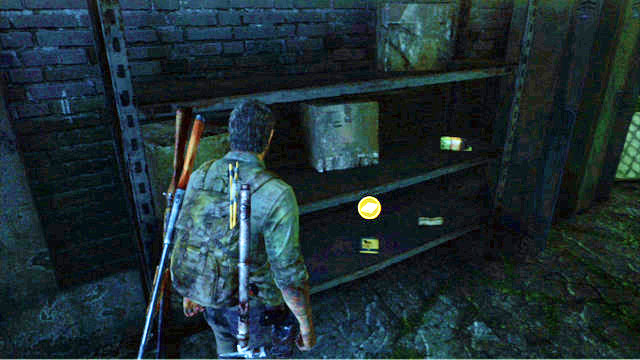
The manual is on the shelf.
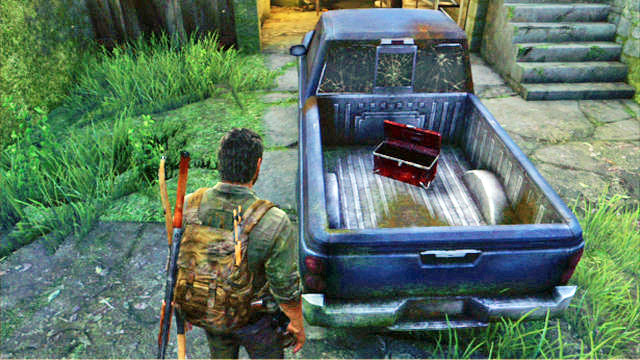
You can find them in the pick-up truck to the left of the ice-cream truck.
Description: Increases the durability of blades.
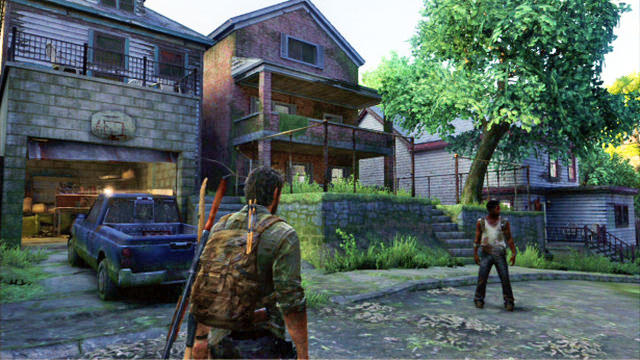
Close to the tools described above, there is a red-brick house.

Walk into the building and climb onto the first floor. Take a careful look at the ceiling. This way, you will find a manhole to the attic, which you can open (triangle).

Joel cannot get up there but he can give a boost to Ellie. The girl will find there the manual.
Description: Increases the range of the ground explosives.

After you bump into the sound trap, take several steps ahead, until you reach a destroyed bookshelf.

The manual is on the shelf.

You can find them in the pick-up truck to the left of the ice-cream truck.
Description: Increases the durability of blades.

Close to the tools described above, there is a red-brick house.
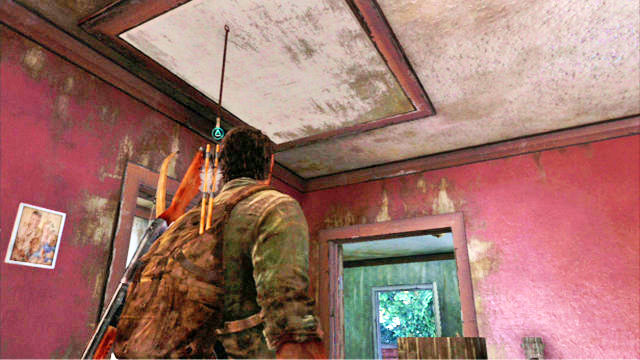
Walk into the building and climb onto the first floor. Take a careful look at the ceiling. This way, you will find a manhole to the attic, which you can open (triangle).
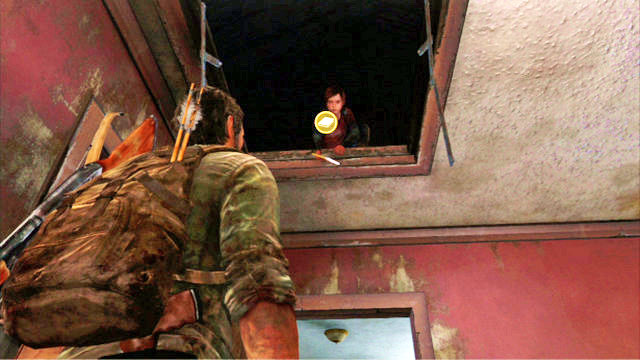
Joel cannot get up there but he can give a boost to Ellie. The girl will find there the manual.
Description: Increases your first-aid skills in the battlefield.
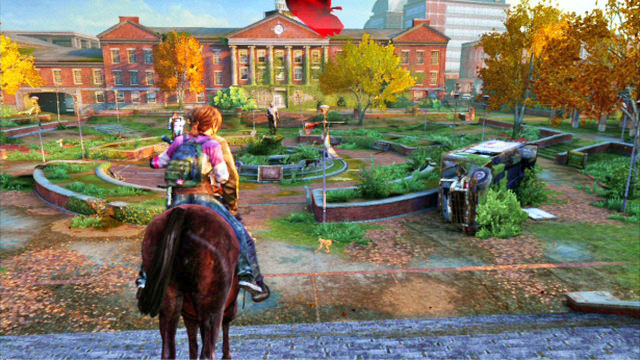
Once you reach a big square with a fountain in the middle, turn right.
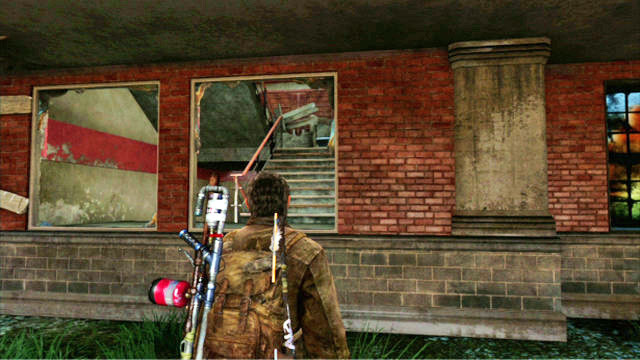
There is a building there which you can walk into through the smashed window.
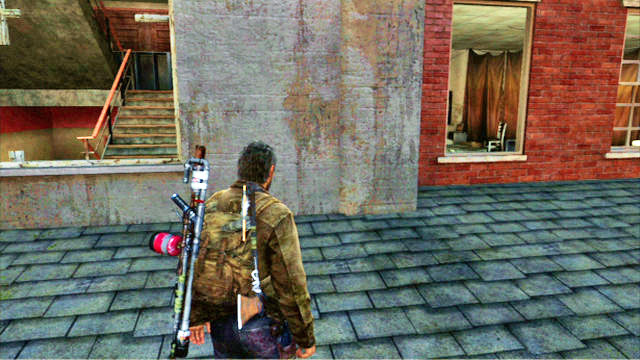
Climb the stairs to reach the upper floor and walk over the roof to get to the next room.
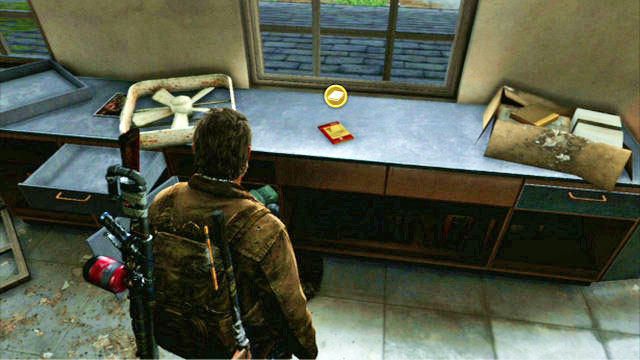
The manual is on the desk at the window.
Description:: Increased range of the incendiary bomb.
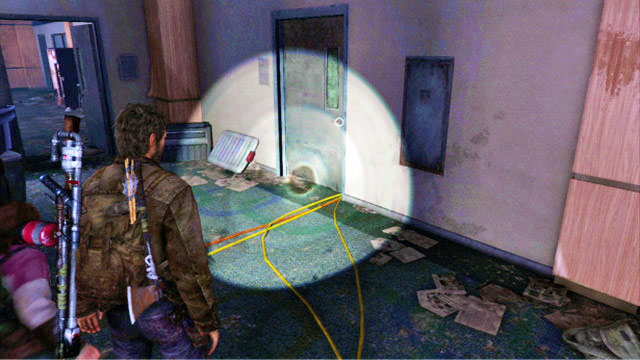
Once you enter the science building through the hole in the wall, find the door with the red and yellow cables underneath.

Do not open the door and go to the left end of the corridor instead. Open the door with your knife. Inside, at the other side of the room, you will find the book.
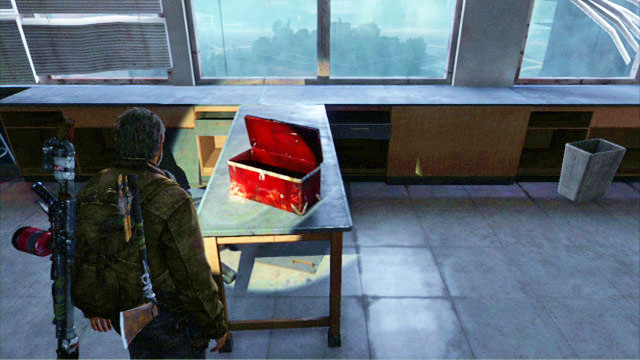
The tools are right to the most recent manual.
Description: Increased range of the smokescreen.

Once you reach the truck with a blazing barrel on it, walk over to the other side of the street and go to the back of the building. You will find a shed there which you can open with your knife. The manual is inside the shed.
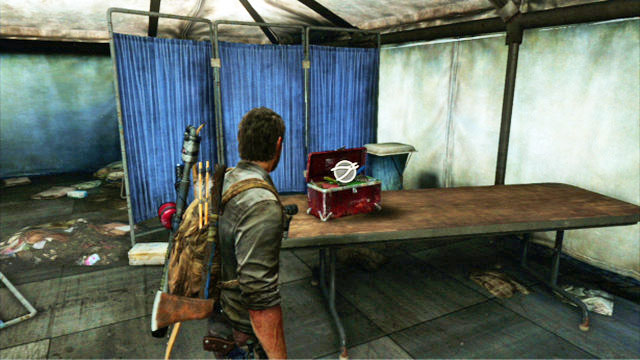
When you get to the platform, examine carefully all of the tents there. Inside the biggest one, there is the toolbox.
Description: Increases the range of explosives.
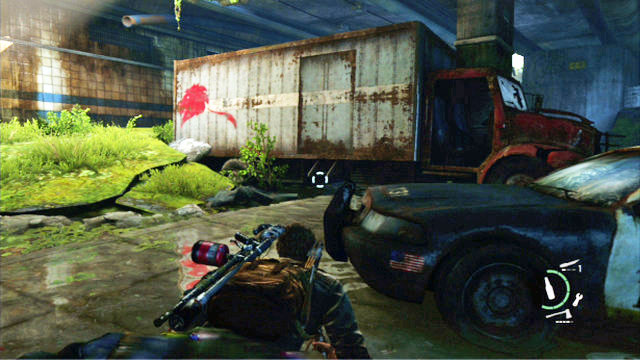
The manual is inside the truck near the two bloaters.
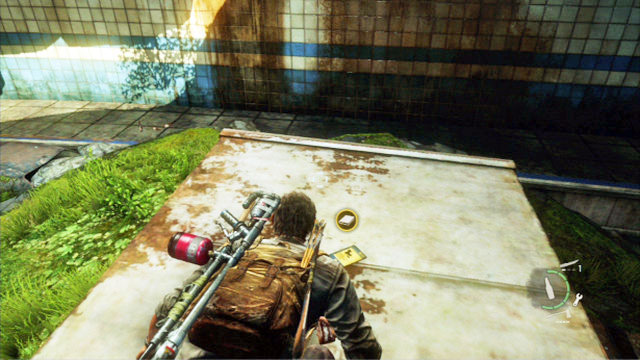
Climb the cab and collect the manual.
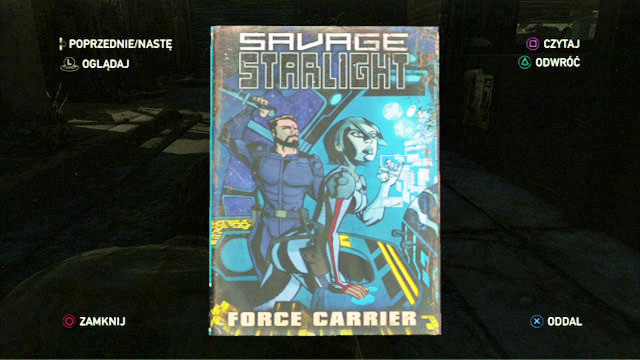
You will receive it automatically after you begin this chapter.
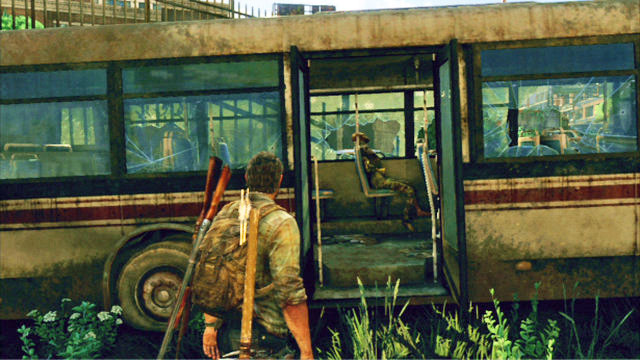
After you jump out of the bandits' place, you will e going by a bus.
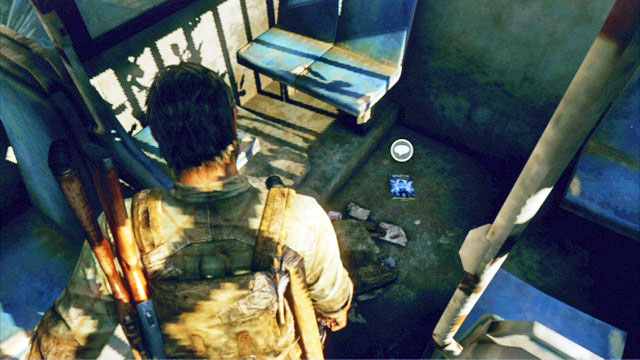
The comic is inside the bus.
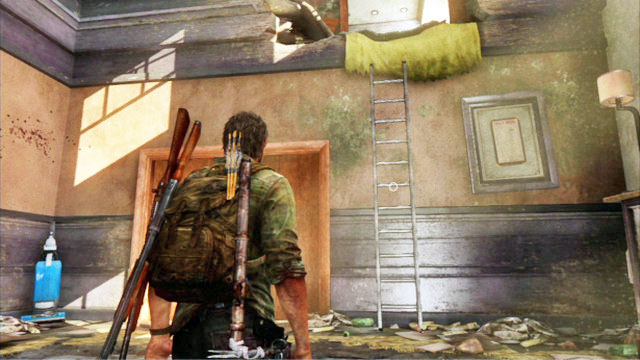
At some point throughout the game, you will be saved by Ellie, who will kill the bandit that grabbed you. Climb the ladder then and go left.
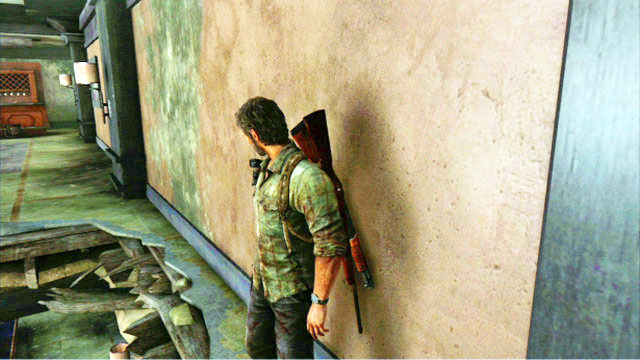
To the left, you will be passing by a collapsed floor.
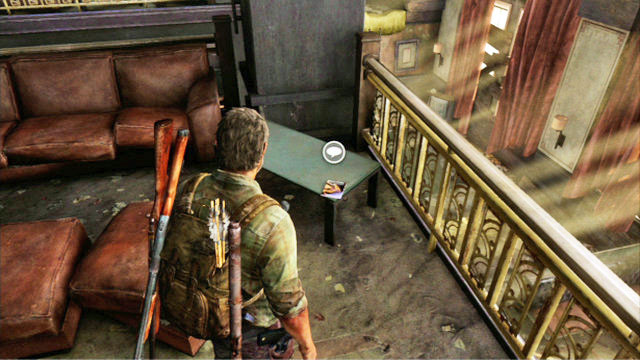
Slip past the hole and pick up the comic from one of the tables.
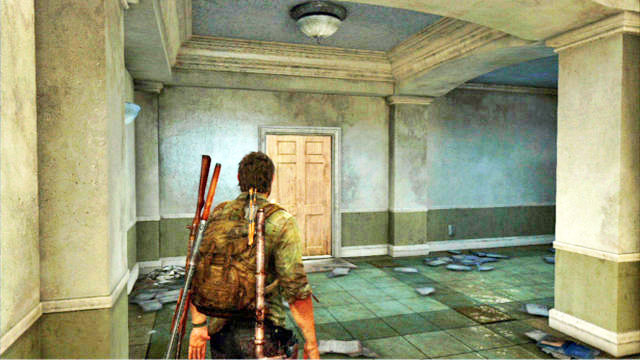
After you meet up with Henry and his brother, go downstairs and open the locked door with your knife.
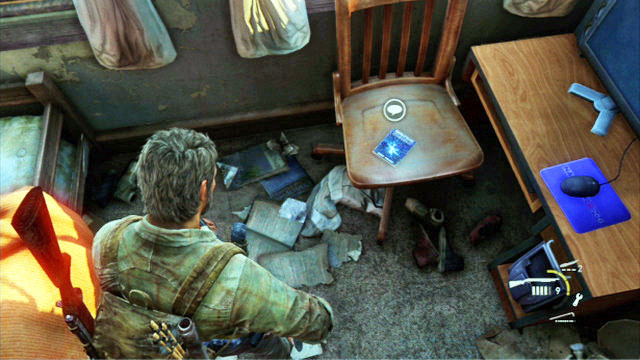
There is a flat behind the door. In the child's room, there is the comic on the chair.
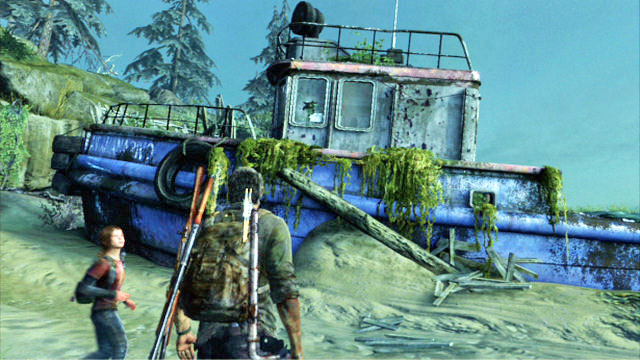
After you start this stage, go ahead until you find a shipwreck.
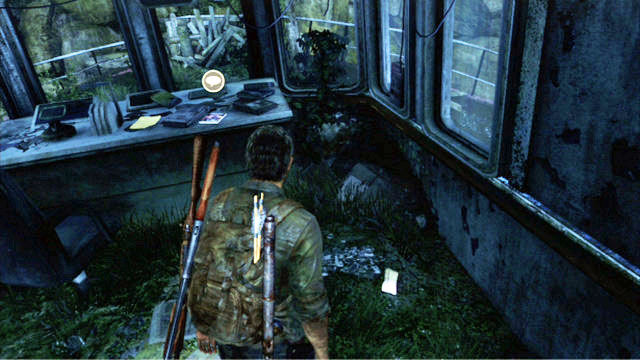
The comic is inside on the desk.

This one can be found near the ice-cream truck standing on the street.
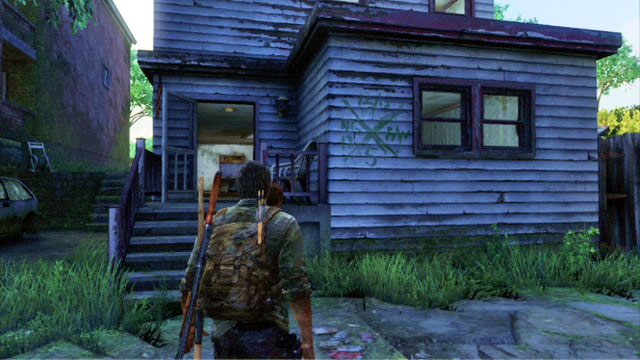
There are two houses with their doors open nearby. Enter the one that is not made of red brick and climb up to the first floor.

The Comic is in the toilet.
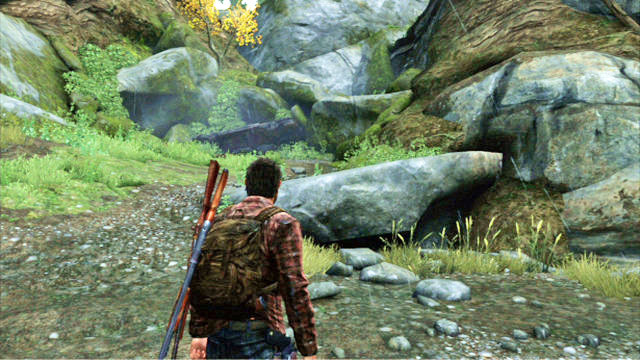
After you reach the brook, you will reach a place where you will have to climb up again.
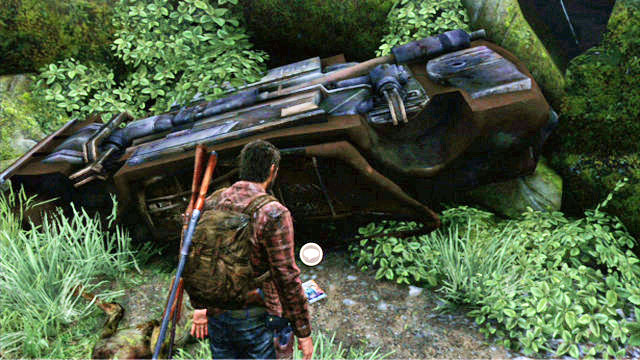
Turn right, and at the car wreck you will find the comic.

Inside the building at the abandoned ranch, climb up the stairs and turn left.
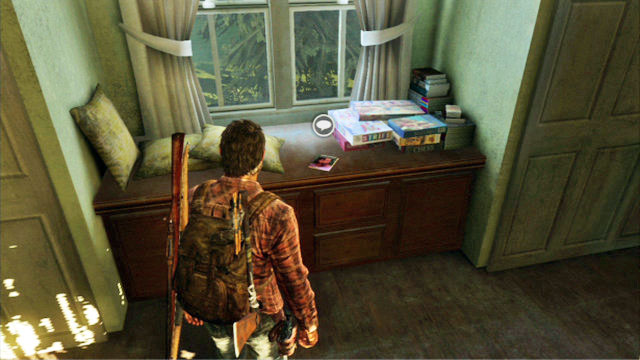
The comic is lying at the window.
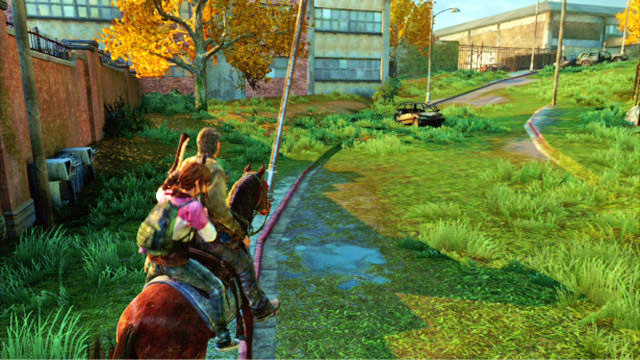
Right after you start this stage, turn back and follow the path to the very end.
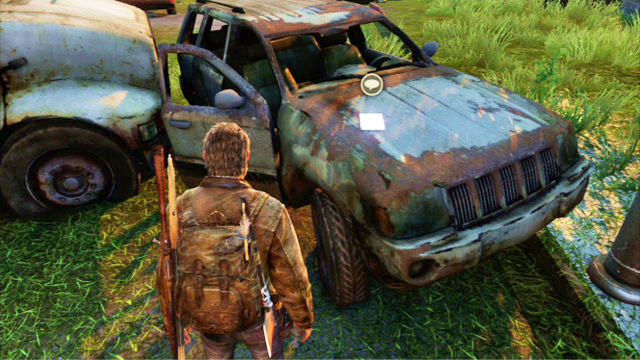
You will find a truck and an SUV wreck there. On the hood of the SUV, there is the ninth comic.

As you follow the wounded deer, you will reach a chalet.
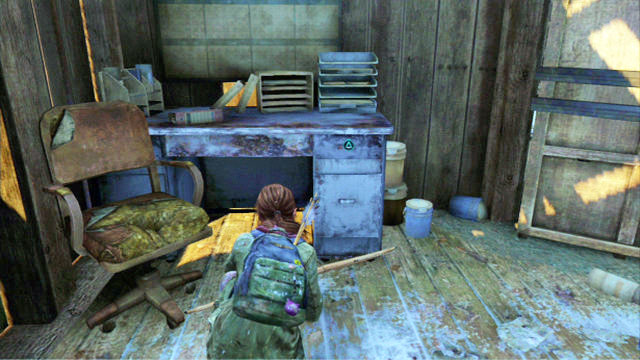
Right after entering, turn left and you will find a desk in a small area. The comic is in the drawer.

As you go along the lakeside, you will reach a short red pipe.
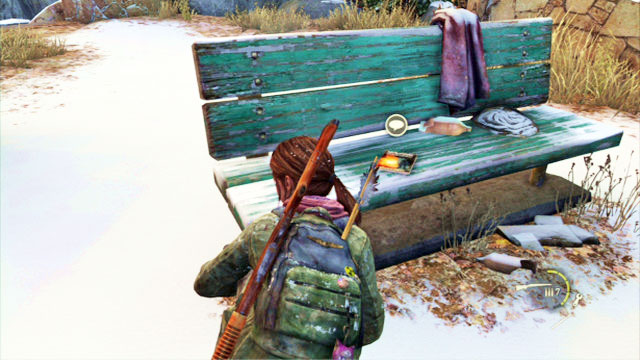
Walk over it and climb the stairs to the left. This will take you to a bench with the comic on it.
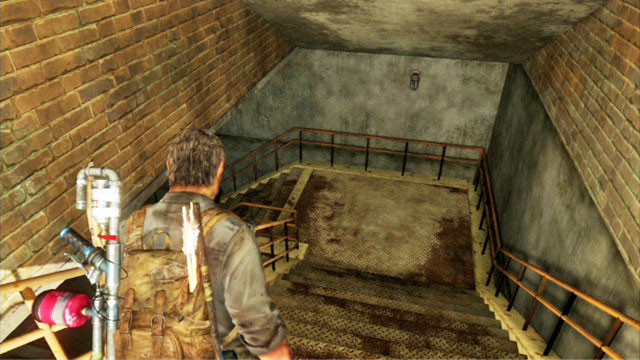
Once you finish observing the giraffes with Ellie, walk through the nearby door and climb down the stairs.

This way you will reach a big room with men's restroom to the right.
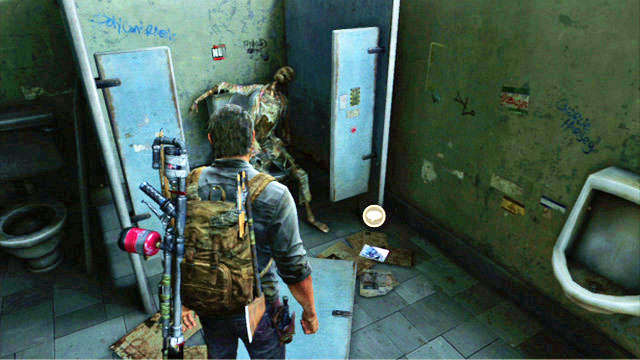
The comic is inside.
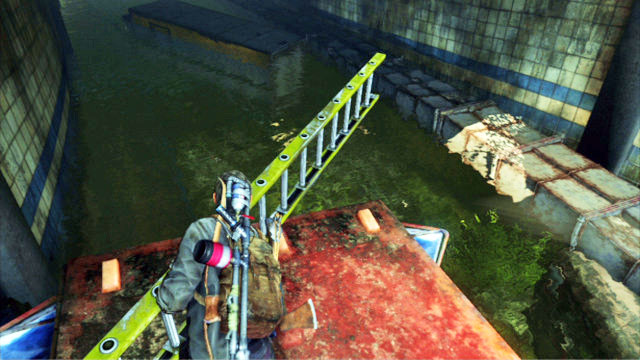
Once you throw down the ladder to Ellie inside the tunnel, turn right.
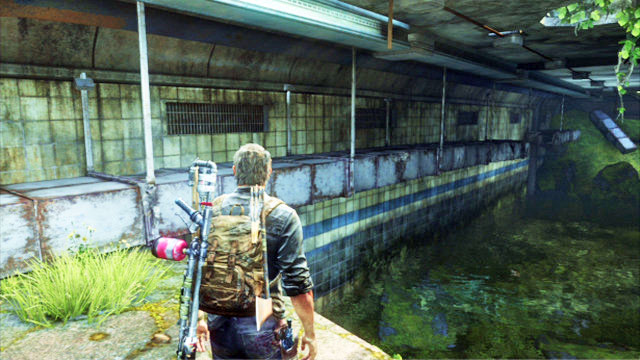
You will notice a ventilation shaft there. At the end of the shaft, there is the thirteenth comic.
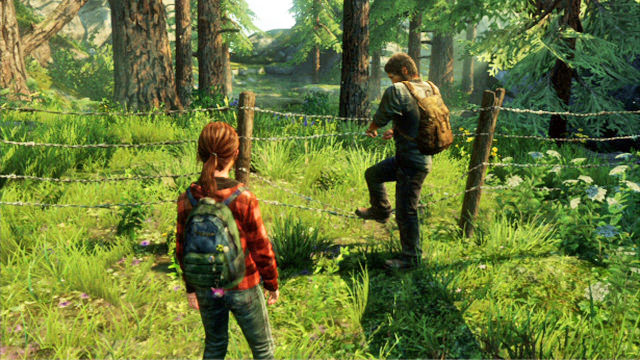
After you go through the barb wire, turn right.

You should notice a car wreck among the trees, with the comic inside.
There is a hidden trophy in the game - That's All I got. To get it, you need to listen to all of the Ellie's jokes, which the girl reads from her joke book that she found back in Pittsburgh. The areas where you can listen to the jokes, have been described below.
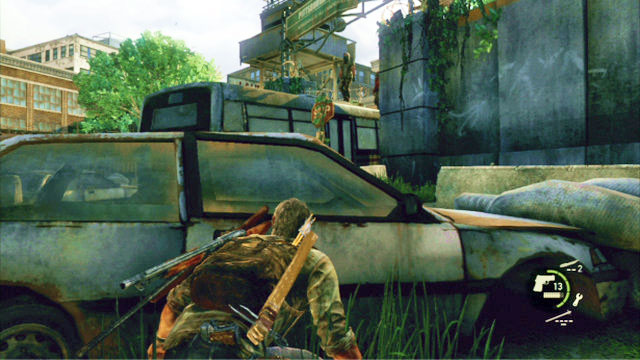
At some point, you will be going over to the other side of a bus. After you have done that, wait for several moments until Ellie starts telling the joke.
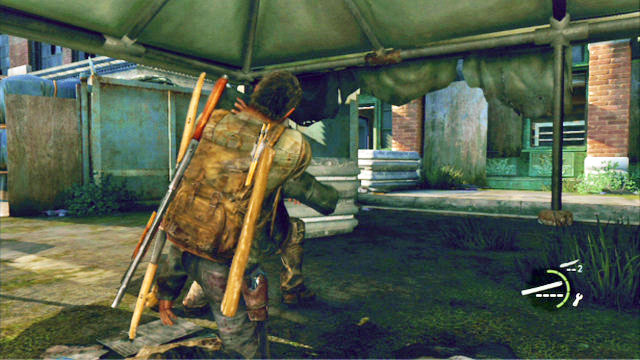
You get to hear the next joke after you kill all of the bandits in the big bookstore.
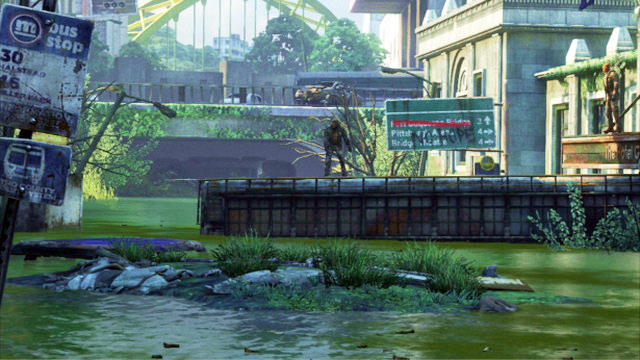
When you see a bandit taking a plank in the flooded part of the city, turn around and approach the poster to the right. After a short conversation with Ellie, the girl should make use of her book once again.
After you go upstairs in the hotel, collect all the artifacts (including the one inside the safe) and climb up the ladder. Ellie should start telling jokes then.
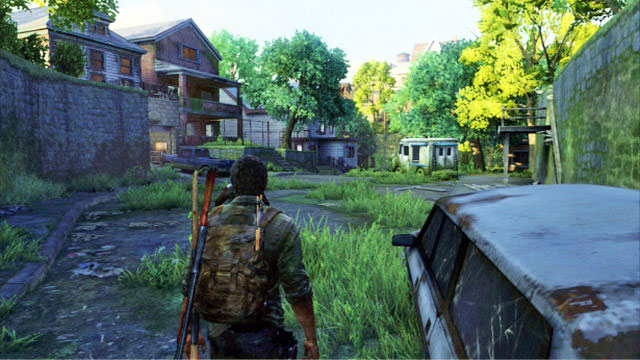
After you get to the suburbs, you will have to listen to the girl next to the ice-cream truck, nect to the big inscription on the wall to the right, in the kitchen inside the building to the left and next to a Firefly symbol at the end of the road (at the barricade).


 The Forest Game Guide & Walkthrough
 The Elder Scrolls V: Skyrim - Dawnguard Game Guide & Walkthrough
 The Bureau: XCOM Declassified Game Guide & Walkthrough
 The Elder Scrolls V: Skyrim Game Guide & Walkthrough
 The Sims Life Stories Game Guide & Walkthrough