A guide to The Bureau: XCOM Declassified is a complete solution, which contains a description of all major and operation missions including localization of all collectibles. In this text you can also find all possible choices which may affect the storyline and many hints concerning how to fight enemies (not only bosses). If you're looking for a particular build, you will find in this guide information and descriptions of weapons and abilities. It's is completed by full and detailed letter of all aliens and a lot of illustrations which present the most difficult parts of the game.
To sump up, this guide contains:
Colors:
To help readers find themselves in this guide and distinguish some particular elements, we have introduced few colors into this guide. They are as following:
Maciej "Czarny" Kozlowski ()
In The Bureau: XCOM Declassified we have four difficulty levels, adjusted for skill and ambition of particular gamers. Every of them modifies strength and endurance of enemies and affects abilities of Carter and his companions. Below you can find a description of all available options.

Rookie - enemies aren't problematic and bleeding time is very slow. Additional agents can be recruited between missions and during them (at Resupply Stations);
Squaddie - enemies are a bit stronger and bleeding time speeds up. Additional agents can be recruited between missions and during them (at Resupply Stations);
Veteran - enemies are challenging and use different tactics. Companions, who are not healed at time, die permanently. New agents can be recruited only between missions;
Commander - enemies are very strong and have advantage. If any agent starts bleeding, you can stabilize him, but he won't take part in current mission. Recrutation takes part only in base between missions.
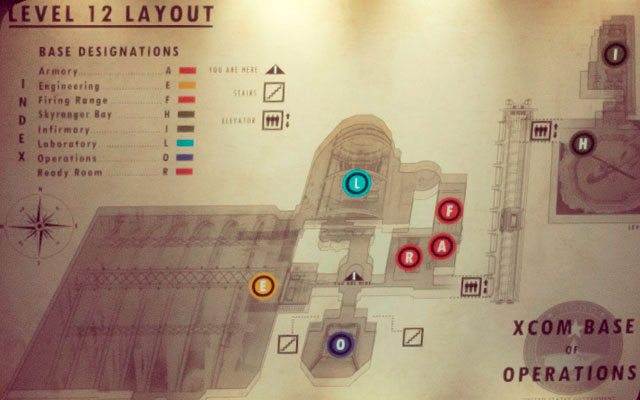
A - Armory
E - Engineering
F - Firing Range
H - Skyranger Bay
I - Infirmary
L - Laboratory
O - Operations
R - Ready Room
Icon
Name
First appearance
Description

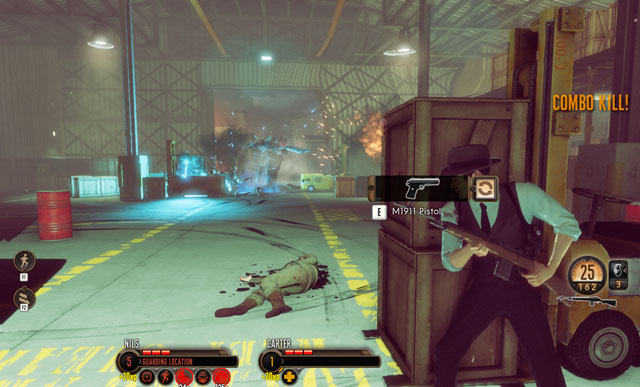
M1911 Pistol
Carter has this weapon from the beginning of mission: Invasion!
Medium damage but very accurate.
Size of clip: 9 bullets
Supply ammo: 90

Z 62 Machine Pistol
You obtain it after mission Invasion!
Rapid firing pistol, available for long series. It causes small damages.
Size of clip: 30 bullets
Supply ammo: 300

M14 Rifle
Mission Invasion!
Basic machine gun with small recoil and causing medium damages.
Size of clip: 25 bullets
Supply ammo: 175

Frag Grenade
Mission Invasion!
Deadly for most nearby enemies.
Maximum quantity: 3

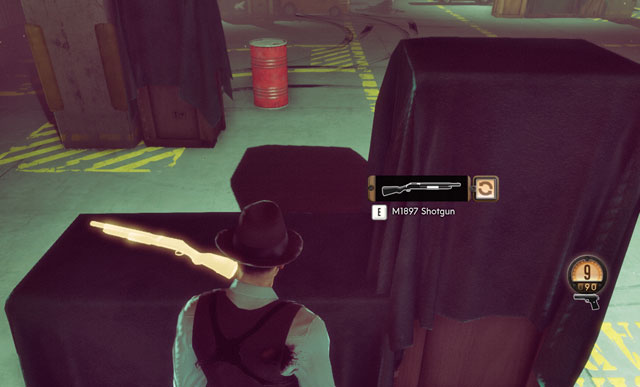
M1897 Shotgun
Mission Invasion!
Effective for short and medium distance, useless for long distance.
Size of clip: 6 bullets
Supply ammo: 30

M1903-A4 Sniper Rifle
Mission Invasion!
Causes high damage, but requires reloading after every shot.
Size of clip: 5 bullets
Supply ammo: 10

Scatter Laser
Mission Doctor
Alien's shotgun, effective for short distance.
Size of clip: 7 bullets
Supply ammo: 21

Laser SMG
Operation Guardian
Rapid but very inaccurate rifle of aliens.
Size of clip: 35 bullets
Supply ammo: 140

Laser Pistol
Operation Grifter
or mission Signal from Beyond
Alien's pistol with small spread and damage.
Size of clip: 25 bullets
Supply ammo: 175

Blaster Launcher
Mission Signal from Beyond
Futuristic bazooka firing three rockets at once.
Size of clip: 3 rockets.
Supply ammo: 6

Laser Pulse Rifle
Operation Longsword
or mission Not of this Earth
Combination of sniper rifle with machine gun. Fires series of maximum three bullets. It deals bigger damage when you use a telescope.
Size of clip: 18 bullets
Supply ammo: 72

Sticky Grenade
Mission Not of This Earth
Attaches do the target and explodes after a while.
Maximum quantity: 3

Plasma Sniper Rifle
Mission Not of This Earth
Alien sniper rifle which deals more damage the longer you aim - at the third "bar" it equals to the normal sniper rifle, after that is much more powerful.
You will run out of bullets quickly, so use them carefully.
Size of clip: 3 bullets
Supply ammo: 6

Heavy Plasma Pistol
Random mission or operation after Not of This Earth.
This pistol deals extremely big damage but has a small clip. Its bullets travel slowly than from the rest of weapons.
Size of clip: 5 bullets
Supply ammo: 25

Rotary Plasma Cannon
Operation Firestorm or mission Crack in the World
Cannon fires impossible quickly and let you eliminate enemies in a moment. On the other hand, it require warming up and has big spread.
Size of clip: 150 bullets
Supply ammo: 450

Plasma Assault Cannon
Mission Crack in the World
One of the most powerful weapons in the game. It fires with short, rather accurate and deadly series. Especially useful while fighting the strongest enemies.
Size of clip: 17 bullets
Supply ammo: 51

Lightning Cannon
Mission The Day the Sky Fell.
This powerful cannon is used only to fight vehicles and the most powerful enemies. The longer you hold the button, the more damage it deals (there are three levels of charging). The strongest level of power kills every unit at once. Unfortunately, it has small ammo supply.
Size of clip: 1 bullet
Supply ammo: 2
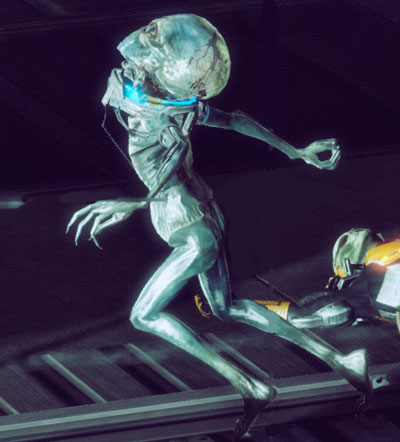
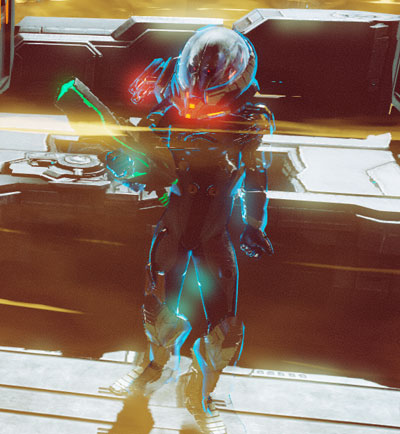
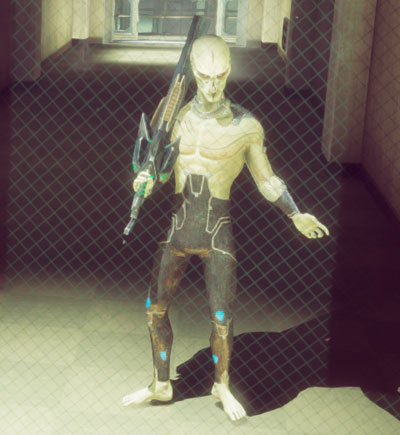
Sectoids are the weakest and the most fragile aliens. They use laser pistols which cause rather little damage. They are very fragile for all types of attacks, especially when you aim at head. Their only advantage is mobility: they climb very skillfully and run between covers.
Sectoids alone aren't a threat, so they are used as a cannon fodder. It means, that you can eliminate them whenever you like.
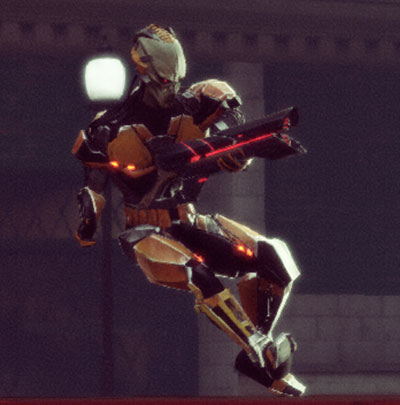
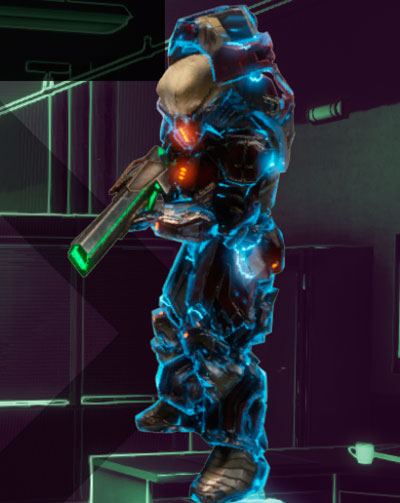
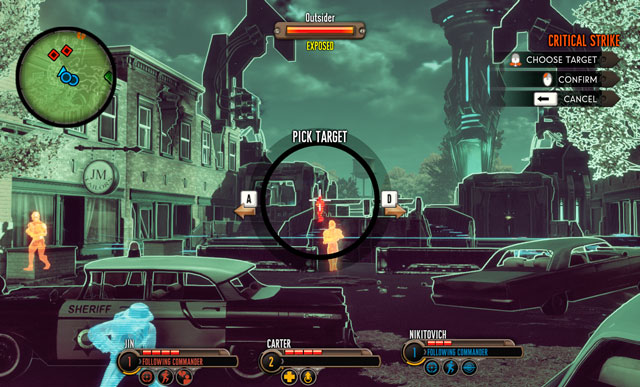
Outsider is the most common enemy in the game, They use rapid firing but very inaccurate Laser SMG and can throw grenades. They are medium endure against normal weapons, but grenades and sniper shots eliminate them quickly (like also ability Critical Strike). They like to hide behind covers, but usually some part of them sticks out, so they are an easy target. But you can't underestimate them: numerous, they can be dangerous, especially while supported by Muton, Dron or Shield Commander.
Drones are flying devices which can cause rather significant damage with missiles. But their biggest asset is an ability of healing: that's why they are a high priority target in every battle. Luckily, they are very fragile: one Critical Strike or series from any machine gun eliminates them. The only difficulty is their side: they are very small and because of that difficult to hit.
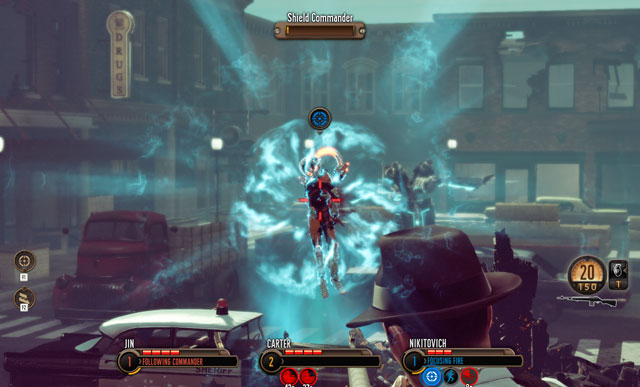
Shield Commander is incredibly annoying unit. It can shield allies with special regenerating shields. That's why, this enemy is a high priority target: enemies augmented with shields are much more challenging, so you can't let that happen.
Unfortunately, a Shield Commander is a difficult enemy himself. Eliminating him requires concentrated fire of all team (he also has a shield). Luckily, he is not very mobile and causes small damage, so you can surround him. The best is to use grenades against him.
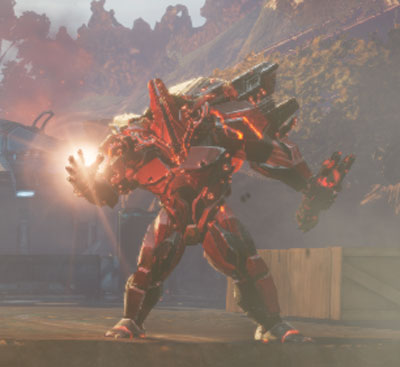
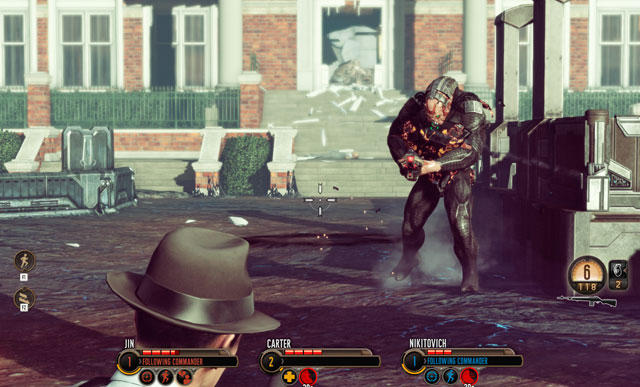
Muton is a very tough enemy: he has strong armor and very high amount of HP. He uses special alien's shotgun, Scatter Laser, which causes huge damage for short distance. Approaching him agents have to be careful about his fists: when he is enraged, he hits the ground causing a small Pulse Wave which causes a lot of chaos.
The most important while fighting Muton is not to get too close to him and fire at him constantly. He is very slow, but you can additionally decrease his mobility with proper abilities, mines or grenades. This is the very best possible tactic.
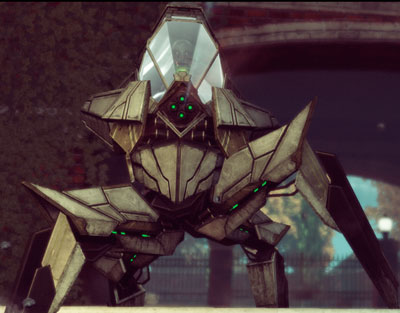
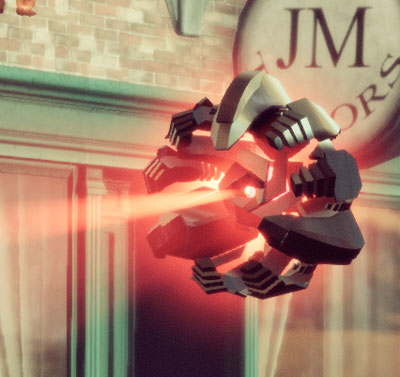
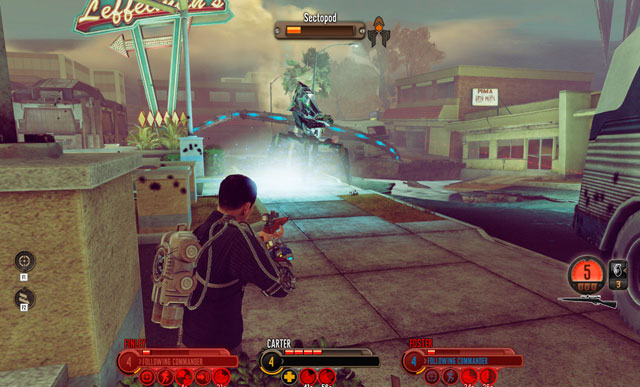
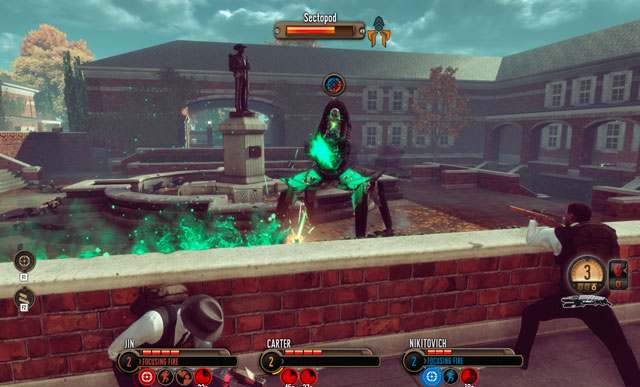
Sectopod is an advanced alien vehicle which has incredible firepower and deadly area attack (stomp made when agents are too close to it). It's heavily armored and surprisingly mobile. Walking him around has no sense, because this machine rotates very quickly.
There is a way to eliminate a Sectopod - you have to break the glass on its "head" and then kill a pilot. The machine will fall down and explode in spectacular way.
Heavy Sectopod has more HP than his weaker brother and uses powerful cannon.
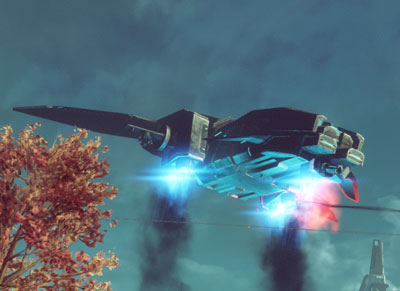
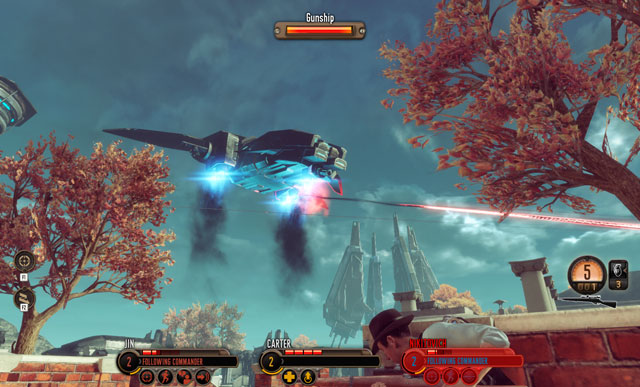
Gunship is a flying vehicle used by aliens and present in Doctor mission, where it plays a role of boss. It fires laser beams which can quickly kill Bureau agents. It hovers and changes position a lot: so you have to change your positions also and look for covers.
A key to win with this flying fortress is a normal, oldschool firing: all members of squad should focus on fighting. What is surprising, the best weapon to use in this fight is a sniper rifle causing huge damage. Use this opportunity and load the machine with bullets.
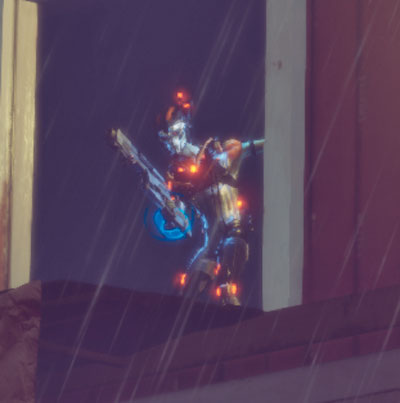
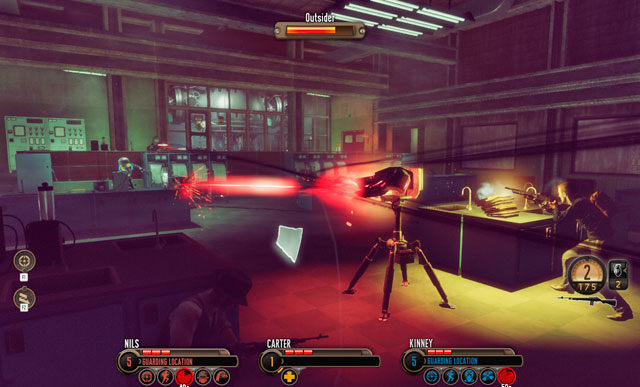
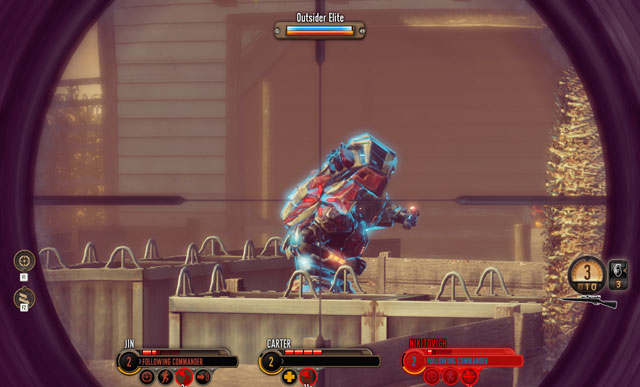
This enemy is called elite for a reason. He has more HP than his weaker kinsmen, fires more accurate and causes more damage. For this isn't enough, he has also regenerating shield and upgrades which allows him for hand-to-hand combat. So, you have to keep Elite Outsider at bay and fire at him constantly: first eliminate his shield and then himself. And very important is to not give him any free time, because he'll regenerate shields and return on the battlefield.
Silacoids are small, nasty creatures which hide in dark corners of the map (like shafts) and then immediately jumps out at squad's members. They cause huge damage in direct fights and are very mobile. Luckily, they die from any hit so you can eliminate them very easily. Carter can't hurt his teammates (there is no friendly fire in this game), so he can fire at the enemies which are on allies.
Rocket Snipers are really pain in the ass. They hide in the far corners of map, aim agents and then fire series of deadly rockets. Their projectiles are so powerful, that they can crush the cover and kill people behind it. Luckily, they always reveal their position before shooting: they use laser sight, which helps in finding them. So it's good idea to have a sniper rifle or recon with ability Critical Strike to get rid off the danger immediately.
Upgraded Drone, like its weaker version, causes lot of damage on medium distance. What is more, it can lift agents what makes them additionally fragile and make impossible to do anything. It has also a lot of HP, so it's not an easy target.
In spite of all, one longer series from machine gun or concentrated fire of all squad is enough to eliminate this device.
Titan is a powerful boss met in mission Signal from Beyond. He has powerful laser cannon which destroys every target and covers. He flies around on the battlefield, so there is no safe zone. A key to win is to change covers constantly and fire at him with blaster launcher. His weak spot is a middle ring: if you hit there, damage is multiplied.
Tech Commander is an upgraded and more dangerous version of Shield Commander. He can not only protect allies with shields but also create Turrets, repair machines and make big covers. He deals little damage but has really powerful abilities. Because of that he becomes your priority target during encounters: you have to destroy his shields ASAP and then eliminate (one Critical Strike isn't enough for that).

This alien is a regular sniper - he deals huge damage from long distance and misses very rarely. Luckily, you can spot him with laser sight.
As he uses advanced shield, you can't kill him with a single headshot. You need at least two hits sniper rifle or longer series of machine gun. When the shields are down, he is very fragile, you can kill him even with standard pistol.
The main asset of this alien is an improbable speed and ability to camouflage: he can flank humans easily and deals huge damage on short distance. He is rather dangerous and difficult to spot during the encounter. Luckily, he has small number of HP, so few good shots and he is eliminated. You have to consider this and eliminate nearby Phantoms relatively quickly: you'll lose little of time and save your people from death.
Phantoms have two version: normal and elite. The only difference is that the latter ones have personal shields.
Axis has strong shields, can teleport, fires accurately and deadly and, also, has a powerful area attack dealing huge damage to the whole squad. During fighting him, you shouldn't use abilities affecting small area because this alien will avoid them easily grenades also (unless he has already use teleportation - it has a several seconds of cooldown). The better idea is to summon Silacoid, supported by a Drone (Carter's abilities) and firing at him constantly by agent Weaver. Simultaneously, you can't forget about healing the squad and keeping an alien at bay.
Mutons are powerful enemies, but their Elite leaders are far more challenging. They have not only more HP, better armor and more effective weapons but also several deadly abilities. First of them is a long jump, which causes a destroying shock wave when he hits the ground. Another one is a possibility of creating Plasma Field: the same like the commandos can. If it's not enough, Elite Muton deals also huge damage at short distance.
A tactic use for encountering normal Mutons (stopping an enemy and usage of area attacks) won't work because an enemy is too mobile. So you have to change your pAxistions, run away and summon allies like Silacoid or Drone (Carter's abilities). Important is firing at the enemy all the time and destroying his armor. Useful will be Blaster Launcher and ability called Weaken, used by support agents.
This psion is a kind of a boss, which you can meet during Operation Hawkeye. He can clone himself and stun Carter's companions during a direct fight, preferring grenades firing from Plasma Assault Cannon and melee fighting. He has strong shields but not so many HP. He is insensible for Taunt and Lift what makes him unpleasant enemy - especially, that he eliminates human shields rather easily.
Defeat him in a conventional way: fire, fire, fire until he dies. The important thing is to not stop assaulting because he will regenerate. When the psion dies, his clone dies also.
This enemy is a real pain in the neck. He has strong shield, deals a lot of damage, can throw grenades and is very good at melee fighting. But those aren't his main features: he is a summoner. If you don't eliminate him quickly enough, he'll summon a group of Drones and several Silacoids. This makes him even more dangerous than the remaining leaders, so you have to kill him as the first one, no matter what.
Powerful alien infantryman with endure shields and an accurate Plasma Assault Cannon can also throw grenades and teleport where he wants to. Also, he deals big damage in melee fight and is rather quick. One of the most challenging enemies in the game almost without weak points. The only effective way of fighting him is Lifting him with proper ability of Carter and firing him down quickly. It is so because this enemy will avoid all area attacks and conventional attacks will take him down very slowly.
This type of enemy may become a very strong support during further battles. It's a good idea to hypnotize them (ability: Mind Control) and use on the battlefield.
You meet Infiltrator two times: during your first visit in the base and in the mission The Last War. During the first time, he can summon Sectoids, has strong shields and fires with short but deadly series. During the second encounter, the situation changes: he is as tough as he was, but this time he can summon Drones and teleport. But alone he is not that tough, so you should take him down without problems.
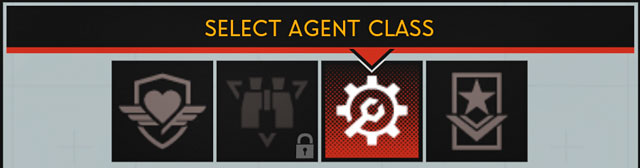
There are five classes in the game, every with specific abilities. Carter gets an access to agent selection immediately after visiting the base (look at: Missions: Welcome to XCOM) and from now on, he decides about the members of the squad.
 Here you can recruit agents.
Computer in the Ready Room allows you to hire new agents and modify the hired ones. You can have maximum three people in the squad (including Carter), so you have to choose very wisely. The worst situation is when your teammates have similar abilities: they are not very unique/universal and falls badly against untypical enemies (e.g. armored, flying or hidden behind covers). There is no optimal/best squad - choice depends on your personal preferences and playstyle. But in the one of following chapters you'll see a proposition of combination which seems to be very effective (according to guide's author).
 Varied squad is a base.
Carter has a special, unique class, unavailable for others. The rest of Bureau agents is divided onto four classes:
Every of them has also six smaller subclasses, which decide about first passive skill (look at: following chapters of guide).
 Newbies won't have a chance against advanced enemies.
Every hero is very important on the battlefield and you have to care about them. It's even more important because you can't change chosen agents within the mission: such an option appears only when you play at two lowest difficulty levels.
Remember also, that Carter and his friends gain experience during the game, what gives them new abilities and (not always) more HP. It means, that veterans are much better than freshly recruited newbies.
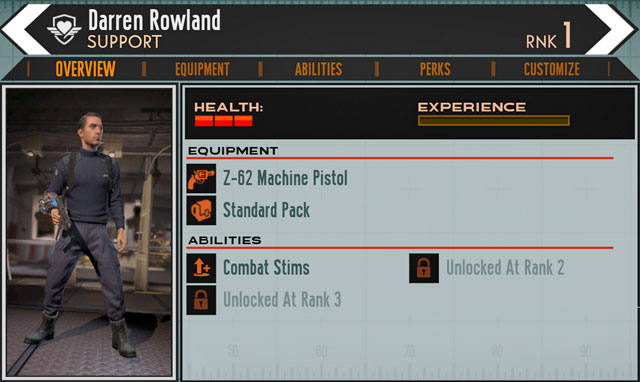
 Carter is unique.
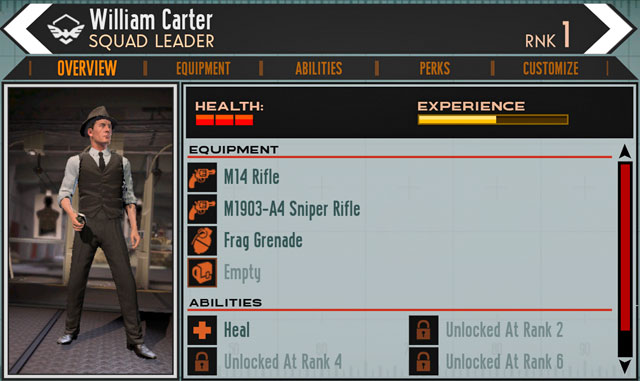
Agent Carter is a very specific hero, without any particular class, but with many useful abilities. He is the only one in team who can heal allies, and he also uses grenades very well. With levels, he gain specific skills which can decide about the result of the battle. Death of Carter ends mission, so you have to care primarily about him.
Carter can use all types of weapons, what makes him very universal.
Name
Level
Description
Alien Exposure
1
Effects are unknown.
Heal
1
Immediately heals squad, but it doesn't affect bleeding ones and dead. It's useful in critical situations when the life of anyone is at risk.
Lift
2
Lifts the chosen object in the air. Effect lasts few seconds. You can lift not only single enemies, but also ally XCOM cannons (what increases their range). It works also on enemies behind covers.
Endurance
2
Increases maximum HP.
Grenadier
3
Doubles the amount of grenades carried by Carter (from 3 up to 6).
It excludes Medic which is a bit more useful.
Medic
3
Shortens cooldown of Heal.
It excludes Grenadier, but it's a better choice (especially in difficult situations).
Silacoid
4
Summons Silacoid who becomes your ally. The beast can stun and distract enemy. After a moment it disappears automatically, but can also die before that. Silacoid is activated by being thrown at enemies, the range is similar to a grenade. Monster causes significant damage and is useful during bigger battles.
Lift Enhancement
5
Lifted enemies obtain much bigger damage. It's very useful especially for fighting strong and armored enemies.
Excludes Corrosive Fluids which are less useful.
Corrosive Fluids
5
Increases damage caused by ally Silacoids but excludes Lift Enhancement which gives you more on the battlefield. Impact of Silacoids is to small for this ability to have sense. 0
Endurance
5
Increases maximum HP.
Drone
6
Summons allied Drone. Summoned unit can fire at enemy, but has no other abilities. You can't control it also.
Combat Drone
7
Summoned Drones can lift enemies. It's very useful but the other one is better.
Excludes Medic Drone.
Medic Drone
7
Summoned Drones can heal Carter and his companions. It's useful in critical situation. Obligatory for higher difficulty levels.
Excludes Combat Drone.
Mind Control
8
Chosen enemy becomes your ally for a short time.
Endurance
8
Increases maximum HP.
Mind Merge
9
Upgrades toughness of enemy charmed by Mind Control and increases his damage. But the other option is more useful.
Excludes Mind Rend.
Mind Rend
9
When Mind Control stops working, the charmed enemy gets a lot of damage. Useful when you control the strongest available enemy (like Muton).
Excludes Mind Merge.
Squad Morale
10
Decreases damage obtained by the squad. Interesting option, but the other one is better.
Excludes Squad Inspiration.
Squad Inspiration
10
Decreases cooldown of all squad members. It allows you to use useful abilities and eliminate enemies faster.
Excludes Squad Morale.
Endurance
10
Increases maximum HP.
 Support agents are the first possible choice.
Support agents aren't very efficient in direct fight but they enhance skills of the rest of squad. They can use only pistols so their offensive possibilities are very small. But they have very useful abilities which give you additional tactical options.
Support agents have six subclasses. Every of them provides you with different bonus:
Icon
Name
Bonus

Pre-med
Extends time during which agent can be saved before he bleeds out.

Officer School
Increases accuracy.
Technical Training
Decreases the cooldown of abilities.

Combat Training
Agent causes more damage.

Endurance Training
Agent obtains less damage.

Adrenal Conditioning
Increases regeneration of small wounds.
Support agents are useful but they cause little damage.Name
Level
Description
Depends on the chosen subclass
1
Depends on the chosen subclass.
Combat Stims
1
Increases allies' accuracy and toughness for a short time. It increases also amount of damage caused by allies.
Shield Sphere
2
Creates big orb which stays for a while in the chosen area and stops enemy's bullets. It can be destroyed if enough damage is applied. It doesn't affect your bullets: they fly through the sphere without damaging it.
Disrupt
3
Destroys enemy's shield and stuns him. Enemies protected by this type of cover appears greatly at the end of game. Shields regenerate very quickly, so effect of this ability is very temporary.
Excludes Weaken.
Weaken
3
Immediately destroys armor of enemy. Only the strongest and the toughest aliens has it, so destroying it gives you big advantage,
Excludes Disrupt.
Medical Breakthrough
4
Upgrades Combat Stims, so agents affected by them cause bigger damage and their fire rate speeds up.
Excludes Guardian Angel.
Guardian Angel
4
Decreases damage received during healing allies. Useful, but the other skill for this level is better.
Excludes Medical Breakthrough.
Helping Hand
4
Abilities last longer (affects all squad).
Savior
5
Expands time during which bleeding ally can be saved (affects all squad).
Excludes Mirror.
Mirror
5
Shield Sphere reflects bullets at enemies. Unfortunately, it isn't that much useful, because your team constantly change position.
Excludes Savior.
Endurance
5
Increases maximum HP.
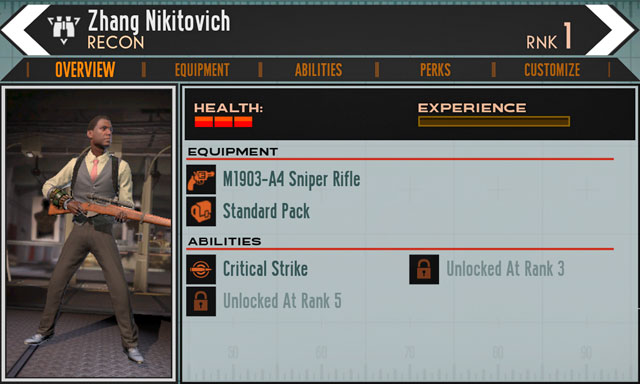
 Recons are true snipers.
Recon agents are excellent shooters, destroying enemies from long range with huge damage. They use sniper rifles and they almost don't miss, so they have a lot of kills (only Carter usually has more). They are not too endure, so keep them away from enemies. They are also good at distraction (Diversion) and eliminating big groups of enemies (Fire Mission).
Recon agents divide on six subclasses. Every of them provides with other bonus:
Icon
Name
Bonus

CIA: Special Ops
Increases flanking damage.

FBI Field Agent
Increases accuracy.

Technical Training
Decreases cooldown of abilities.
Combat Training
Agent causes more damage.

Endurance Training
Agent obtains less damage.

Adrenal Conditioning
Increases regeneration of small wounds.
 Snipers are excellent at eliminating enemies.
Name
Level
Description
Depends on subclass
1
Depends on chosen subclass.
Critical Strike
1
Deals huge damage for chosen enemy (works also through walls!).
Hard to Kill
2
Decreases a chance for being hit. It's equally good as the alternative.
Excludes Sniper.
Sniper
2
Increases damage dealt with sniper rifle. It's equally good as the alternative.
Excludes Hard to Kill.
Eagle Eye
2
Increases damage dealt during flanking or while firing from higher position.
Cloak
3
Makes you invisible for a short time. Agent can work normally, what is useful especially during saving bleeding allies. But the second option is more profitable.
Excludes Diversion.
Diversion
3
Creates a hologram which distracts enemies. It's very useful during regrouping squad or changing its position. It works best during boss fights. Hologram has as many HP as the owner and can be "killed".
Excludes Cloak.
Endurance
3
Increases maximum HP.
Crack Shot
4
Shortens cooldown of Critical Strike. It's useful like it is, but it doesn't give you an asset during fighting with stronger enemies like the other option.
Excludes Armor Pierce.
Armor Piercer
4
With that, Critical Strike deals a lot of damage to all shields and armored enemies. At the late stage of game you will meet a lot of such enemies, so it's very good choice.
Excludes Crack Shot.
Fire Mission
5
Bombards chosen area hurting or killing nearby enemies (works also inside buildings and under the ground).
Endurance
5
Increases maximum HP.
 Engineers provide you with technical support.
Engineers specialize in setting up useful devices on battlefield: they can set up mines and create advanced XCOM cannons which deal huge damage and are endure. Those agents don't fit into direct fight, because they deal minimum damage and use shotguns efficient only for short distances. Mines also aren't too useful as aliens routes are difficult to predict. So, as you can see, the main asset of an engineer is an ability to set up cannons.
Engineers divide on six subclasses. Every of them provides you with different bonus:
Icon
Name
Bonus

Gunsmith
Increases weapon accuracy.

Grease Monkey
Expands time duration of all abilities. Set up XCOM cannons have additional HP.

Technical Training
Abilities regenerate faster.

Combat Training
Agent deals more damage.

Endurance Training
Agent receives less damage.

Adrenal Conditioning
Increases regeneration of small wounds.
 Engineers are very good at short distances.
Name
Level
Description
Depends on subclass
1
Depends on chosen subclass.
Scatter
1
Frightens enemies on the chosen area and force them to run away.
Mines
2
Sets up mines in the chosen place.
Endurance
2
Increases maximum HP.
Demolitions Master
3
Mines regenerates faster. As it's not especially useful ability, this upgrade isn't a good choice.
Excludes Shotgunner.
Shotgunner
3
Increases accuracy and damage of engineer.
Excludes Demolitions Master.
Rocket Turret
4
Sets up rocket turret on the battlefield which deals huge damage and has long range (but it fires rarely). It's good to set up away from enemies, to use its maximum range.
Excludes Laser Turret.
Laser Turret
4
Sets up laser turret which deals a lot of damage for short and medium distance. It fires so rapidly, that it nails enemies down and don't let them move (so they become an ideal target for some grenades).
Excludes Rocket Turret.
Endurance
4
Increases maximum HP.
Fortified Turrets
5
Turrets/Cannons set up by Engineer have shield which makes them more difficult to destroy. It's very useful ability which let you have both very strong fire support and additional cover (squad members can also hide behind shield).
Excludes Monkeywrench.
Monkeywrench
5
Increases damage dealt by squad members to mechanical targets. The previous option is more useful.
Excludes Fortified Turrets.
Heavy Metals
5
Increases damage dealt by all set up tools.
 Commandos is specialized in taking damage.
Commandos is an agent who has to take enemy fire at him, what makes him very similar to tanks in MMO games or MOBAs. He uses rifles and causes a lot of damage for short and medium distance, but he rarely kills anyone. he's useful for luring enemies out from behind covers (Taunt) and shows his true value on higher levels: then a commandos can eliminate all groups of enemies with Plasma Field.
Commandos divide on six subclasses. Every of them provides you with different bonus:
Icon
Name
Bonus

Korean War Veteran
Increases damage dealt to flanked enemies.

Deniable Ops
Decreases chance of being hit.

Technical Training
Abilities regenerate faster.

Combat Training
Agent deals more damage.

Endurance Training
Agent receives less damage.

Adrenal Conditioning
Increases regeneration of small wounds.
 Commandos has a lot of HP from the very beginning.
Name
Level
Description
Depends on subclass
1
Depends on the chosen subclass.
Taunt
1
Forced the chosen enemy to charge at commandos. It's best to lure out enemies from behind a cover.
Pulse Wave
2
Creates a wave of pure energy which throws out in the air small and medium enemies and slows the big ones.
Tunnel Vision
3
Enemies under influence of Taunt gets much more damage. Useful during fights with stronger enemies and bosses.
Excludes Machine Gunner.
Machine Gunner
3
Increases damage dealt by commandos with weapons. Useful during fights with big groups of weak enemies.
Excludes Tunnel Vision.
Endurance
3
Increases maximum HP.
Personal Shield
4
Covers chosen enemy with shield. Useful option, but the other one is much better.
Excludes Plasma Field.
Plasma Field
4
A few meter wide thermal disturbance appears on the chosen area which kills most enemies and weakens the strongest aliens. Very powerful ability, worth investing in.
Excludes Personal Shield.
Resilience
4
Decreases amount of received damage.
Peak Conditioning
5
Increases maximum HP.
Excludes Wave Amplification.
Wave Amplification
5
Increases damage dealt with Pulse Wave.
Excludes Peak Conditioning.
 Engineers become useful at the end of the game.
There is no optimal set of squad members in this game: their skills complement one another in such a way that every combination seems to be interesting. The only thing you should avoid is to have two identical agents, e.g. two commandos or engineers in one squad. Such team isn't to flexible and universal. You will meet very different enemies in the game, so the number of options that you have, should be rather wide.
Below you can find a set which seems to be the most effective and offering the biggest number of tactical options. It doesn't mean that this is the only one right: the game is made for you to made experiments. So the hints below should be treated rather like suggestions.
 Critical Strike is super.
Team without a recon isn't a team. This agent is perfect for all types of enemies and his Critical Strike let him eliminate immediately Silacoids, Sectoids, Drones and Outsiders. On the third level you also gets a useful ability, Diversion, thanks to which he can drag enemies out from Carter and his squad. He also gets Fire Mission, the most powerful ability in the game, which allows you to eliminate whole groups of enemies. This combination is deadly, but has one drawback: recon is easy to kill, so you have to keep him away from the direct battle. To do so, the best choice is to have a commandos.
 Plasma Field is better than a grenade.
The main role of commandos is to keep aliens away from recon and Carter. He has a lot of HP and is tougher than the two of them. He doesn't deal a lot of damage, but he has two very useful abilities: Taunt and Plasma Field. The first one lets you lure out enemies from behind covers and the other one eliminates whole groups of enemies. This combination is especially deadly, when Carter has sniper rifle or blaster launcher. Thanks to that he can eliminate even the strongest enemies taunted by commandos.
 Fire Mission wins all.
Combination with recon and commandos seems to be the most effective also because other classes don't offer too much at the first levels of experience. The best ability of engineer, Laser Turret is available not before the fourth level, what happens very late in the game. Support agents are focused on defence so they increase survivality of the team but don't deal any damage.
The remarks below don't cross out engineers and support agents from any squad, but combination recon + commandos seems to be most profitable.
 Beginning is an introduction to the game mechanics.
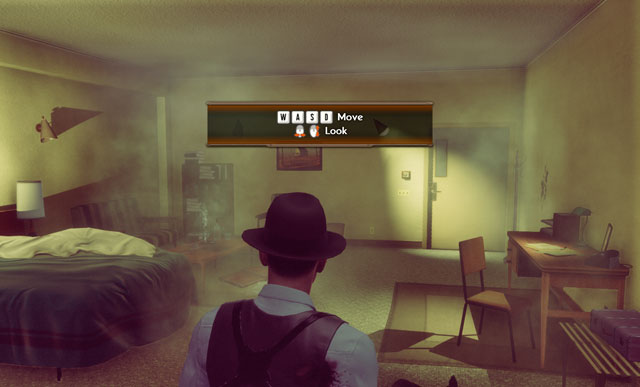
Game begins with tutorial. After a cut scene look around in Carter's room. Using keys to move, walk around and look at the suitcase. In this moment, the hero will see that he has lost his cargo. You can exit the location by the door opposite to the window.
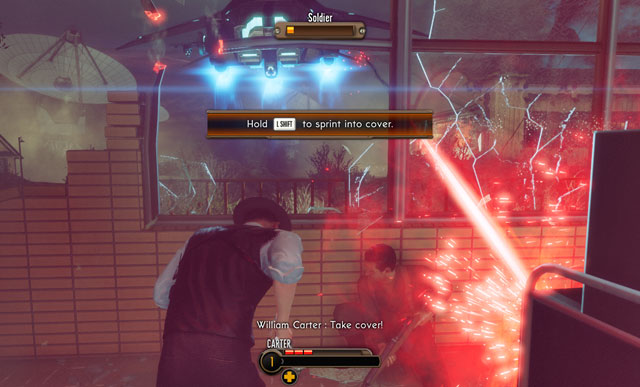 Finding covers is essential.
Go to the corridor and turn behind the corner. When you see an alien ship, sprint to the wall and hide under the parapet. Carter bends automatically when you press sprint button. Soldier you meet here is killed by aliens - you can't do anything.
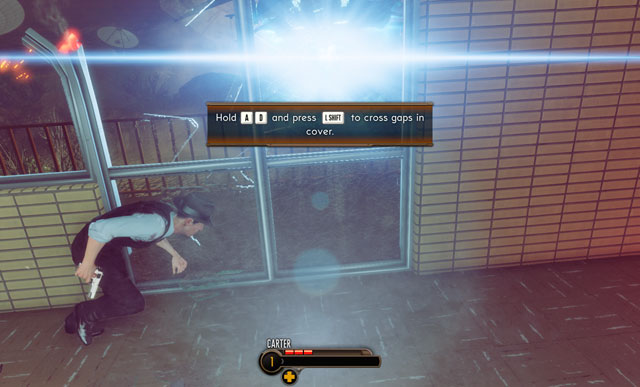 Jumping between covers helps you avoid troubles.
Crawl right, avoid aliens' bullets. When you get to uncovered part of the wall, jump to the next wall (press sprint button and direction in which you want go).
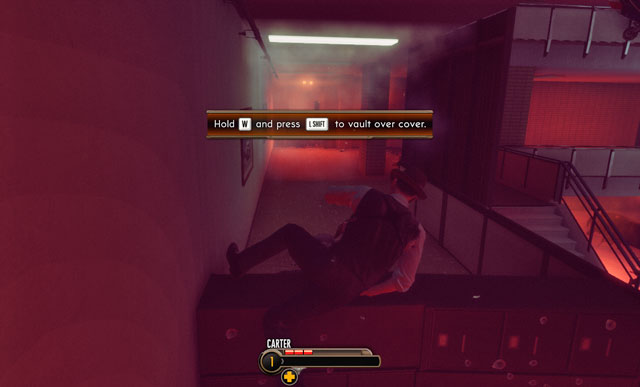 You can jump over small obstacles.
Glue out of the wall and walk to the door. Keep to the left side of room and jump over fallen cupboard. Go downstairs and through few rooms until you get to the exit. On your way you find no enemies, so you can look around. But there are no interactive objects.
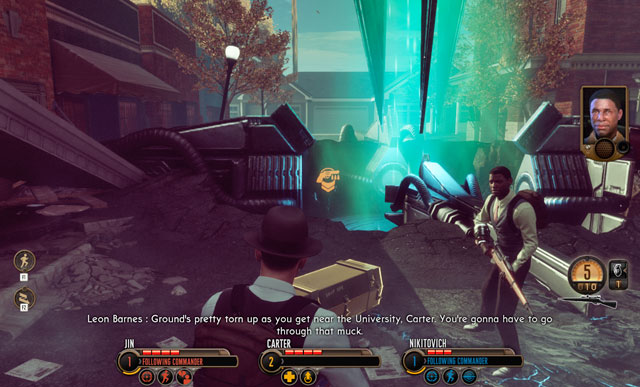
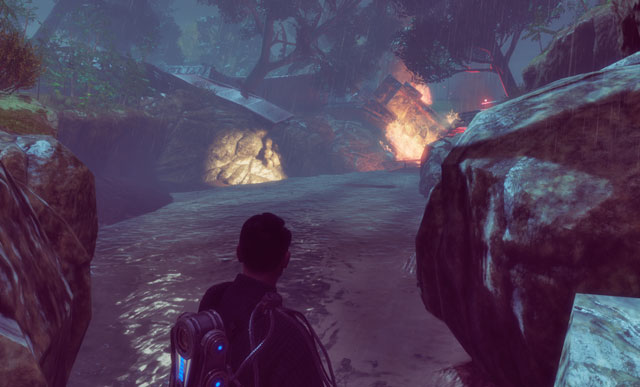
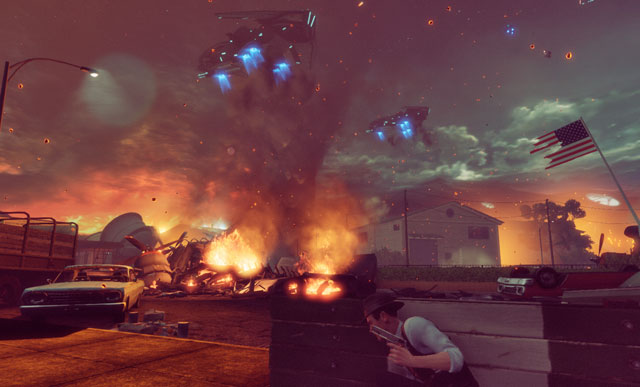 USA are in fire.
Go left, pass burning airplane. Use its wings as a cover and prepare for the first battle. In front of you, you will see few Sectoids, the weakest and the most fragile type of enemies. Aim at them and kill.
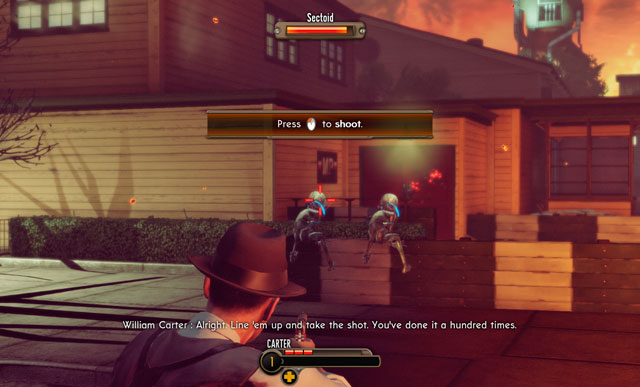 Headshot usually solves all problems.
When you kill the first pair, few more appears. Then, lean out from behind the cover and fire at their heads. Remember that the best moment to shot them down is when they're reloading.
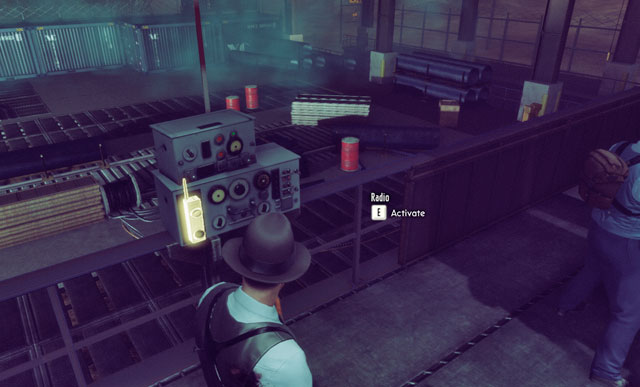
 90s smartphone.
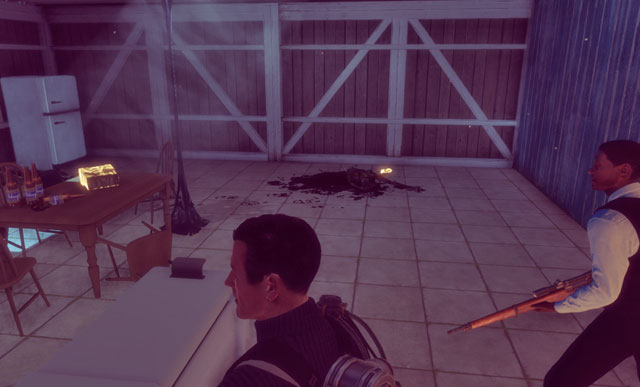
When the aliens are dead, enter the building in front of you. You meet there agent Nils and use radio (lies on the table, screen above). When the conversation is over, leave the room using the exit on left.
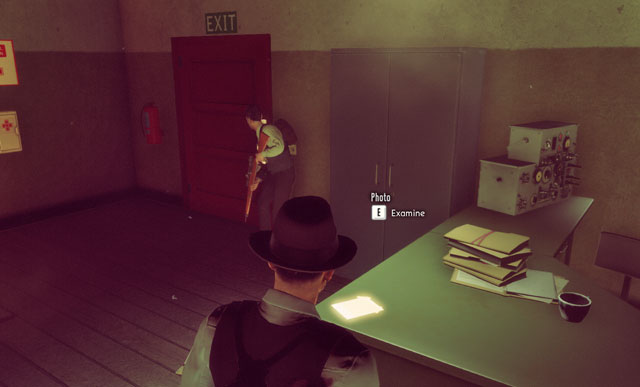 First collectible.
Go upstairs and look around. On the desk next to the agent Nils you find first collectible in the game: photo of laboratory entrance.
 Aliens aren't fooling around.
Go through door secured by your companion and exit the building. Head for the closest building and go upstairs. Now, the sudden explosion separates you from agent Nils
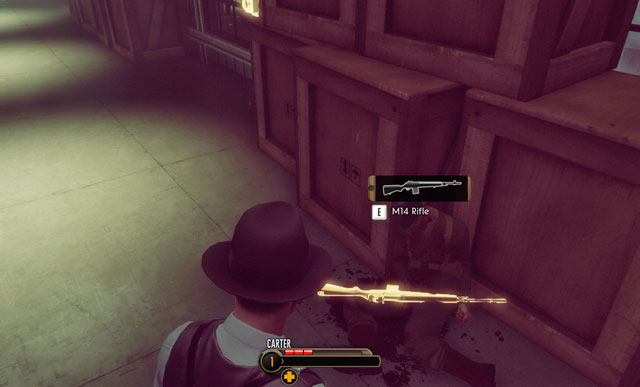 Rifle is better than a pistol.
Enter the storehouse and pick up M14 Rifle, dropped by a dead soldier. Thanks to that you can eliminate bigger groups of aliens in shorter time. Remember to use short series, because recoil decreases accuracy of Carter.
 Enemies can hide - their heads stick out.
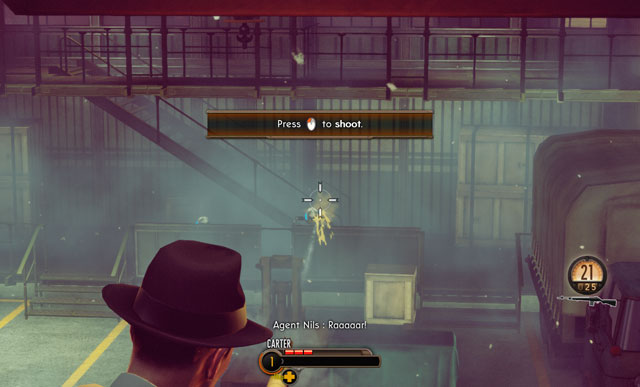
Press button which opens door to hangar and hide behind crates. When agent Nils runs into the room below, open the window and help your companion. In front of you, a small squad of Sectoids appear - you shouldn't have too much problems with them. As you're on the high ground, you can fire at enemies hiding behind covers.
 Here, the enemies are immortal.
When the danger is done, go through door on left and meet with agent Nils. Move forward, go through the flooded room and jump into the burning hole. A bit later you find two aliens torment a fighter pilot: but you can't help him, move on. Pass them and follow the only possible path.
 Leaning out in this moment would be a suicide.
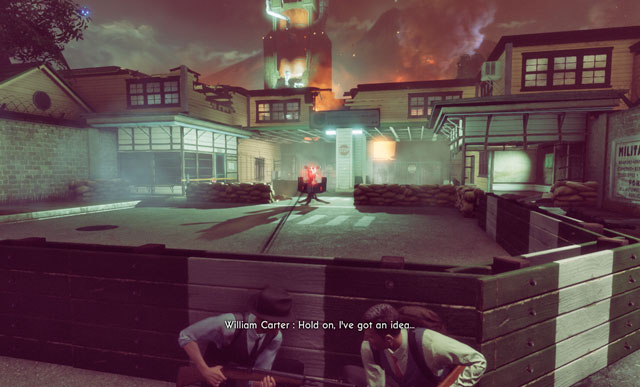
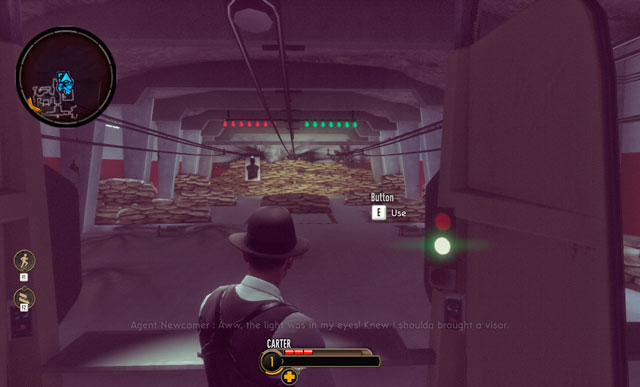
American tanks, which you will see, will be quickly destroyed by an alien ship - you can't do anything about it either. So approach them and hide behind a cover on left. You will be fired at by Gun Turret. And you can't handle it by yourself.
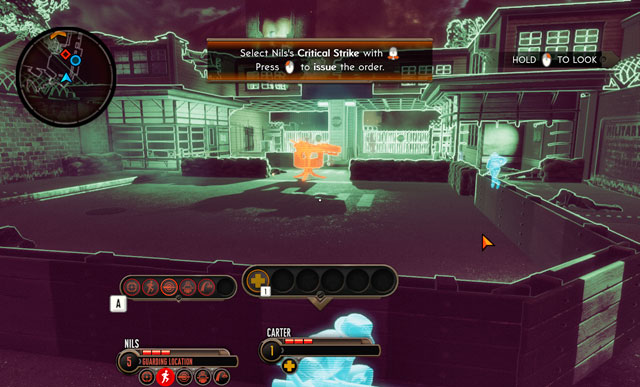 Flanking enemies is crucial.
Move to the focus mode and order agent Nils to walk the enemy around from right. From the available option choose Move and use proper keys to place him, just behind a Turret. It's shown on the screen above.
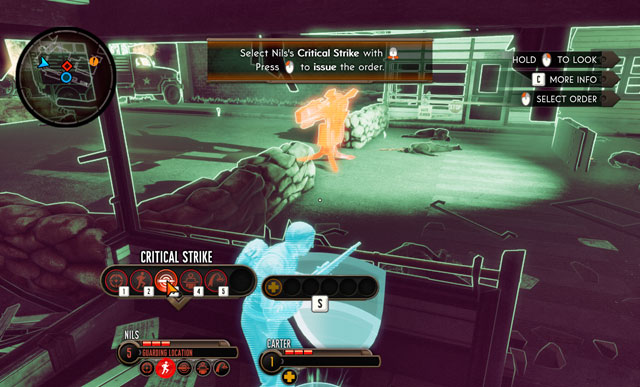 Critical Strike is one of the best sniper's abilities.
When Carter's ally is on the position, choose his ability Critical Strike and aim at a Turret. As it was damaged, one shot is enough. Notice that agent Nils obtained a solid bonus to damage because of flanking the enemy.
 You can also eliminate enemies in 0other way.
When the enemy fortification is blow up, another enemies will appear: Sectoids. But you don't have to worry: positioning of Carter and agent Nils works for you, so elimination shouldn't be a problem. After that, pick up rifles and pistols and then enter the building in front of you. There you'll find few additional weapons and ammo pack.
 Mysterious hole isn't made by human.
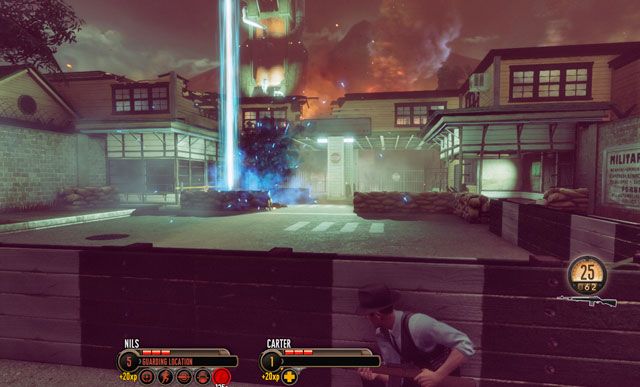
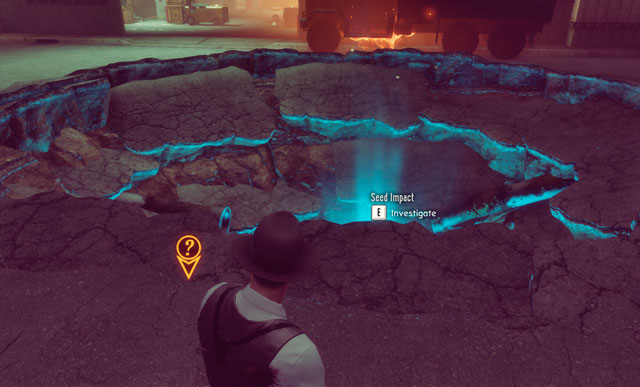
Go through the main hall of building, picking up everything you want and then jump out through the hole in the wall. When the street in front of Carter explodes, approach the crater and look at it. Then, head for the hangar in front of you.
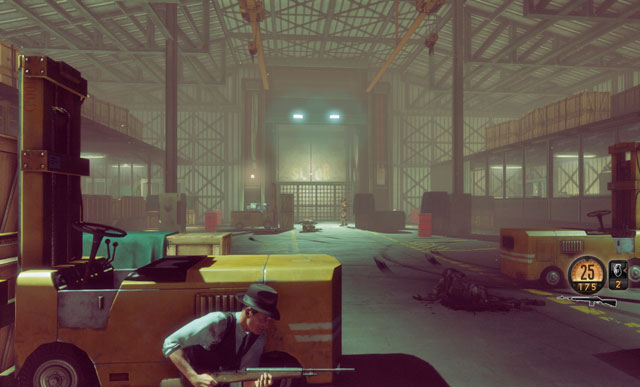 Enemies are not prepared for an attack.
Run into it and hide behind a fork-lift truck picking up grenades from it (screen above). Order Nils to hide behind crates on left. In front of you, you see three enemies: two Sectoids and an Outsider. Use Critical Strike of Nils and kill the new enemy. This choice has a sense: Outsider is a primary target as he has a lot more HP than his weaker companions. Luckily, a good eye of your ally is enough for quick and effortless elimination of enemy.
 Shotgun is useful for short distances.
When you kill all enemies, look around carefully in this room. You'll find few additional grenades and rifles. Look also to the room on right and search crates at the elevator, you find there two M1897 Shotguns. But remember, that Carter can use only two types of guns at once.
Remark! Combination rifle plus shotgun seems to be an optimum, as the first one is good for a medium distance, while the other one for short distance. Pistol is very weak, don't regret it.
 Fire Mission is one of the most powerful abilities in the game.
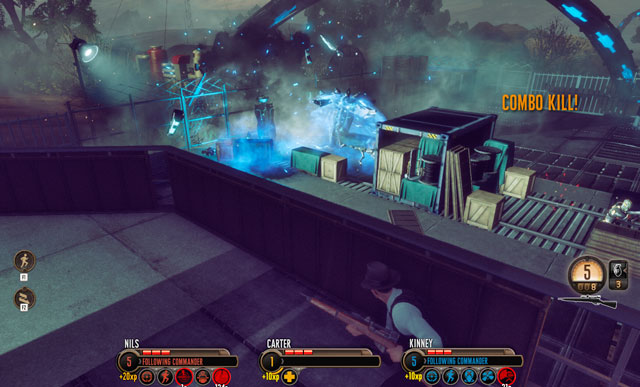
When you press elevator button, two Outsiders enter the hangar. Eliminate them as you like and prepare for a longer battle. After a while, a Drop Pod, few more Outsiders and a Drone appear in the chamber. This fight you can play in two ways: by conventional fire, killing enemies one after another or with Fire Mission ability owned by agent Nils. The second option is more profitable as you can kill enemies and eliminate the device from which they are coming out at once.
If you chose the more difficult option, begin from killing a Drone which can heal allies. That will spare you a lot of problems.
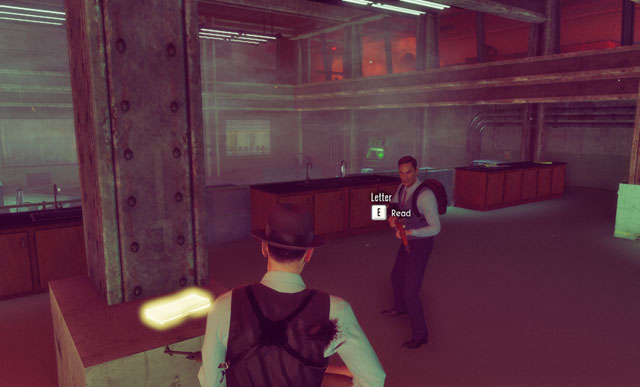
 Letter was left at the screens.
When the danger is eliminated, enter the elevator and ride down. Go to the room in front of you and, in room with screens, find a letter, another collectible. In the nearby corridor you can find more ammo and swap any weapon for a pistol (not recommended).
 Rather untypical place for this item.
Moving forward, you get to a room with world map and a projector. On the table with the device, you can find a photo which shows weird symbols. If you are curious, you can approach the displayed picture and talk about it with agent Nils.
 More symbols.
Enter the shed with TV and two bodies. On the small table you find another photo. When you stop enjoying this view, exit the room by the door on left. Then, follow the only possible path through next corridors and finally meet up with Faulke. Following events will come in the same way independently from your choices.
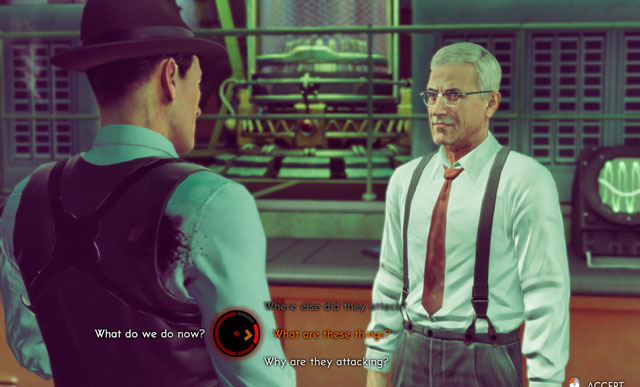 Choices in this conversation don't have any influence.
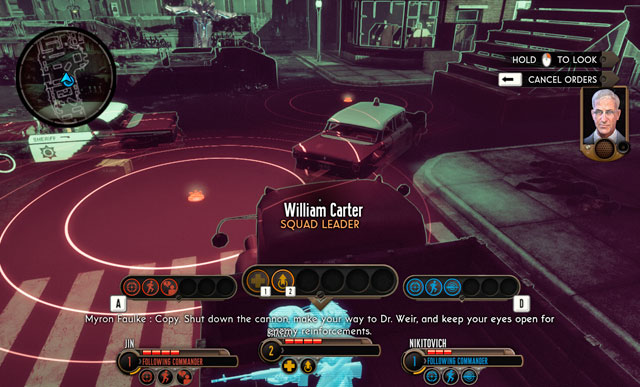
When you finish the conversation, your boss sends you to the other part of base. Notice, that you get another man in your squad: agent Kinney, an engineer. He specializes in setting up traps and frightening aliens, what is a useful combination.
XCOM Turret is very helpful in small rooms.Move forward, along the corridor. When you get to the staircase, look on the floor above where you find a rifle. Then go to the very bottom and prepare to the battle. In the laboratory, you find several Outsiders and Sectoids, who can be challenging. An optimal way of destroying them is to set up XCOM Turret in the middle of the room (use an ability of agent Kinney). It should be enough, but enemy may try to walk you from the right flank. In this case, use a grenade or Critical Strike.
 Alien invasion isn't a good moment for writing letters.
After this fight, look around. On right you find a shotgun, on left a mysterious aliens' artifact (unfortunately, you can't pick it up, only talk about it). By the way - you can look under the column next to the exit from the room, you find there another letter.
 Hidden enemies can be smoked out with grenades.
When you exit the room, move forward until you find two Outsiders hiding behind a crate (you can see them in focus mode, screen above). The best way to eliminate is to throw a grenade. Notice also that just next to it you can find a ammo pack, grenades and a rifle.
 Kinney can set up a Turret while hiding behind a cover.
Follow the only possible path until you get to the room with aliens and enemy Turret. The best thing to do is to send agent Nils on the back of the room and place him behind a cover - as a sniper, he doesn't have to be close to enemies. Kinney's task should be setting up Turret XCOM just before the alien barricade to nail them down and keep them in one place. In this moment, let them taste a grenade and then eliminate they automatic rifle. Remainings may be defeated by agent Nils, who almost always makes a hit. This way of fighting is the optimal one.
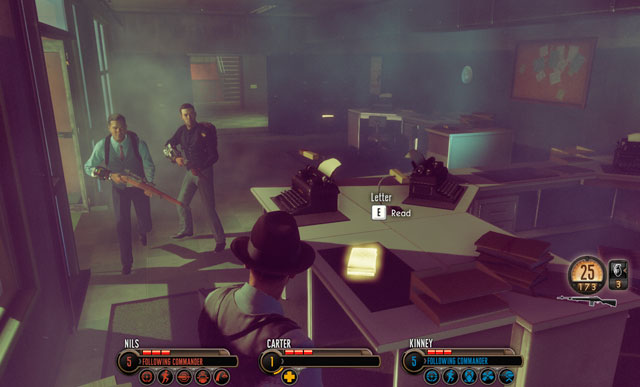 Another letter on the desk.
After replenishing ammo and grenades (plenty of them in the room) you can approach a part of bomb and talk about it with companions. Finally, go to the exit and move on. Pass an alien device and enter the location from where you hear weird sounds. Kill a Sectoid inside and pick up a letter from the desk. Then, look into the cupboard at the door and pick up another note. Go through door and watch a cut scene.
 Choices don't matter.
During this conversation, you don't have to care: your dialogue choices don't matter at all here. You can freely move on to another confrontation. On your way, you find several Sectoids and Outsiders, who can be easily flanked from both sides. It's a good idea to set up a XCOM Turret in the middle of the room and use grenades if there is a need.
 Remember: grenades may bounce from obstacles and return to you.
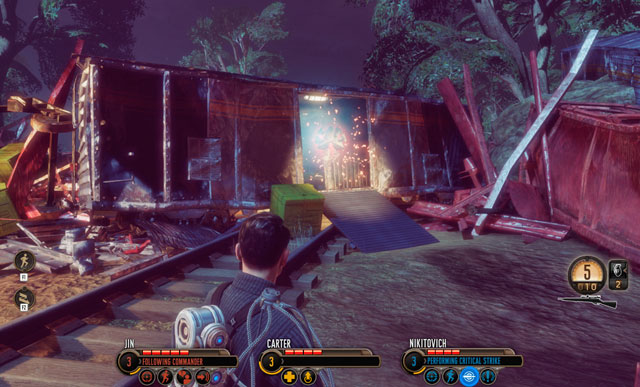
Replenish supplies after a battle and then launch a train in front of you. Watch a cut scene and prepare for a change of scenery. Make yourself comfortable in the new location and pick up everything you think will be useful. In a moment, you'll fight an overnumbering troops of enemies.
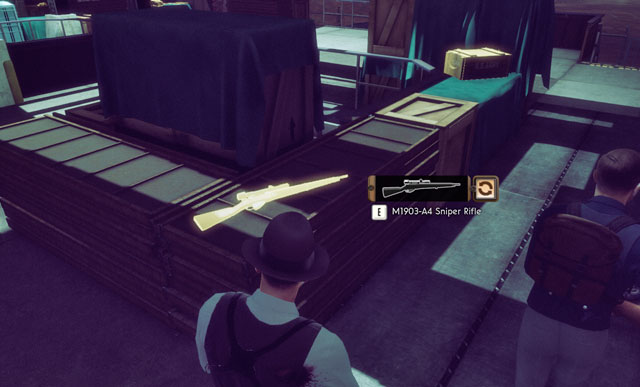 Sniper rifle - it will be your best friend.
Walk on the platform on the top and pick up sniper rifle. Sniper rifle is one of the best and most useful weapon in this game: it allows for the long distance fight (and this is how the battle takes place, mostly) and deals a lot of damage. So, this weapon will be an invaluable help during combats whatever your playstyle is. As the second weapon, I recommend M14 Rifle because it's very universal. This set seems to be good at this stage of the game.
 Enemies will appear after a radio talk.
When you equip enough, approach radio and contact the base. After that, Drop Pods with Outsiders and Sectoids appear in front of you. You can eliminate them with companions' abilities: Laser Turret or Fire Mission. Conventional way of eliminating them is a bit problematic but thanks to flanking bonus you should make it.
 Good Fire Mission ends battle immediately.
Another wave appears when the first one is eliminated - this one is a bit stronger, but still defeatable. Crucial is to not let any squad member to go to the bottom of platform, because it's a pure suicide. Notice, that enemies spread after landing and try to go upstairs using the left side: so you can mines this area. An alternate option is to use grenades or sniper rifle.
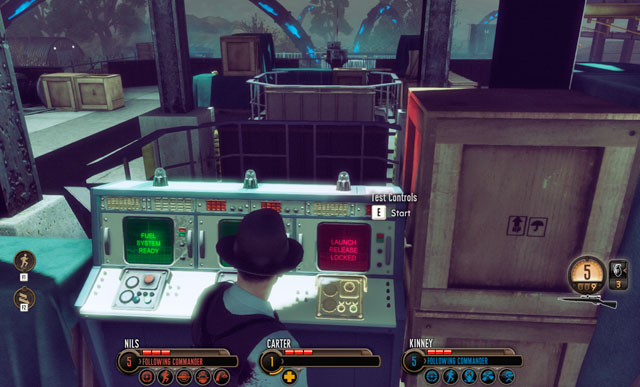 Enemies appear after launching a computer.
When it's done, approach the computer in the middle of location and then launch testing sequence. There is over a minute to an explosion: you have to withstand allies to this moment.
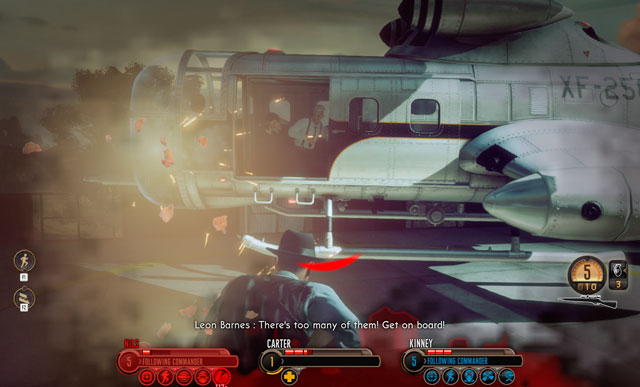 Escape is the only way to a victory here.
Enter the helicopter field and replenish ammo (nearby you find another sniper rifle and bag with bullets). Tell Kinney to set up a Turret at only stairs leading up and then prepare for a battle. In front of you the indestructible Drop Pods appear with unlimited numbers of enemies: Outsiders and Drones. You can't win this fight, so fire at enemies until the help arrives. When the chopper flies to you run to it, run!
Remark! If you don't make it on time, the bomb will kill Carter!
 Welcome to the Bureau!
Beginning sequence is not interactive, agent Carter has a tour around the Bureau. Only after a longer moment you regain control.
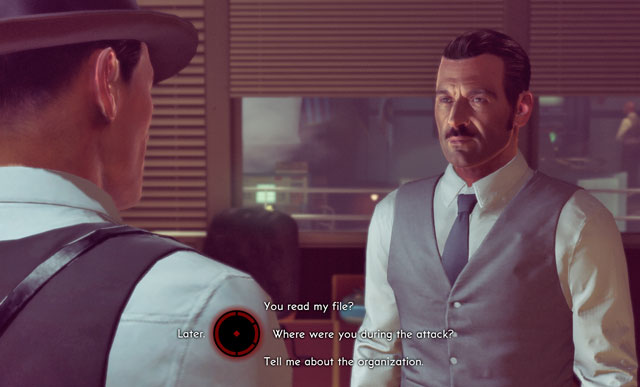 Agent DaSilva - one of the best agents of Bureau.
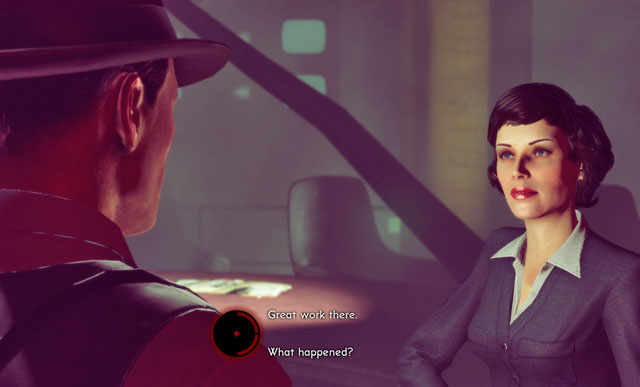
Your first interactive action here is a conversation with agent Nico DaSilva. Choices made in this conversation won't affect anything in the future, so you can play it as you like.
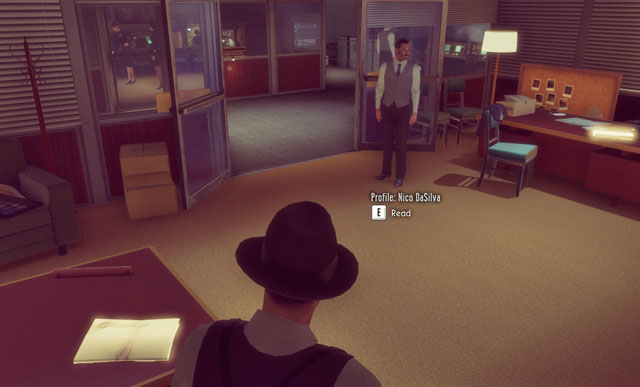 Bureau agents like to know with who they're working.
If you're interested in the past of your newly gained friend, you can look into his files on your desk (your own files are on the DaSilva's desk, on the opposite).
When you exit the room, another cut scene triggers. After that, another conversation with DaSilva, during which you can talk about radio. If you do so, you begin an Investigation: Radio Interference (otherwise, the mission begins automatically a moment later).
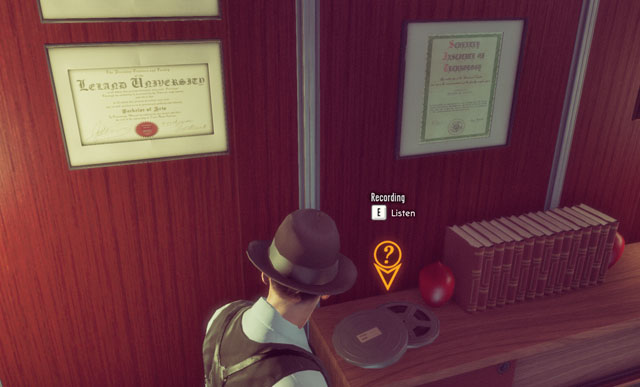 Listening to the records let you understand the storyline better.
Independently on your action with radio, you'll have to meet Faulke in his office. To do so, leave Carter's office and go upstairs (stairs on the left side of the room with a display). But before you talk with your chef, listen to recordings - one can be found in the office, the other one in opposite room. By the way you can also read a note from the Faulke's secretary desk. You don't have to bother with collectibles if you don't want to - they don't affect the storyline.
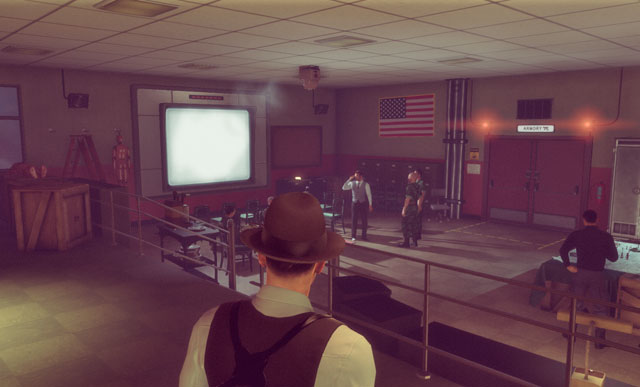 Agents don't waste time.
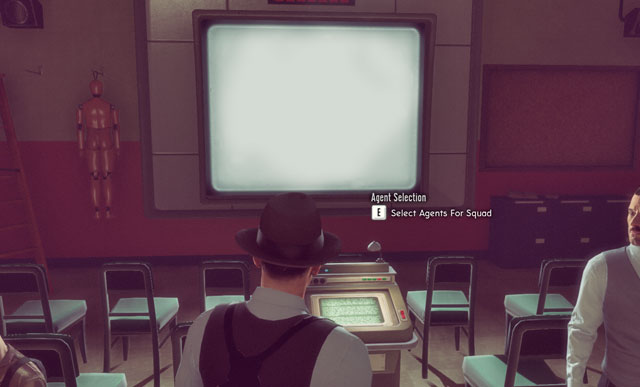
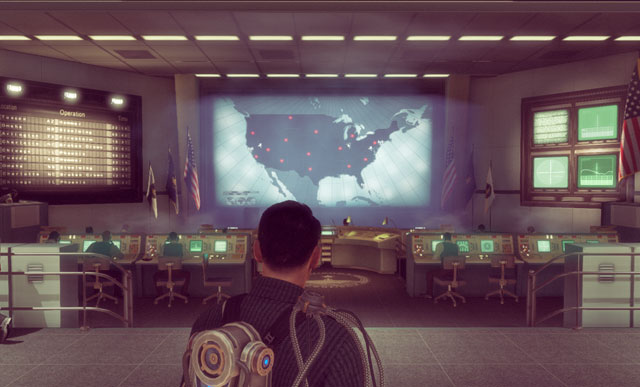
After a conversation with Faulke (during which you have no important decision to make) you have to meet with DaSilva. Go on the lower floor of the base and walk through door with two guards. Then turn right and enter a big room with soldiers. By the way you can listen to recordings, read a letter in the corner and watch a photo at the table with maps. When it's done, approach the computer in the middle of the room and choose two new agents to your squad (look at chapter: Classes and Abilities).
 There is always something to do in Bureau.
When you walk off from the computer, you get a message from agent Nils - he tells you that something bad is happening in the mortuary. Exit this room using the door on left and then head for an elevator at the end of corridor. You'll be moved to a hangar with helicopter. On the right you see files on the pile of cartons: you can look at them if you want.
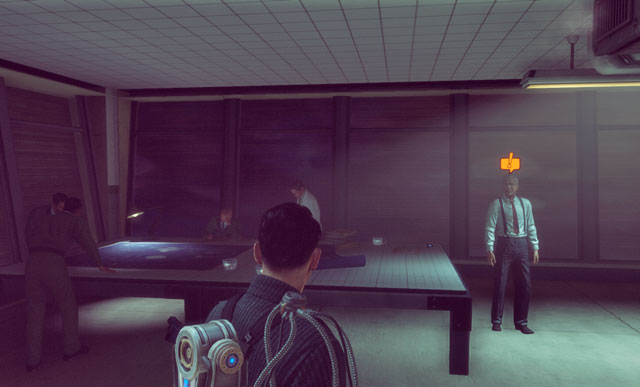
 The alien had no problems in getting to the base.
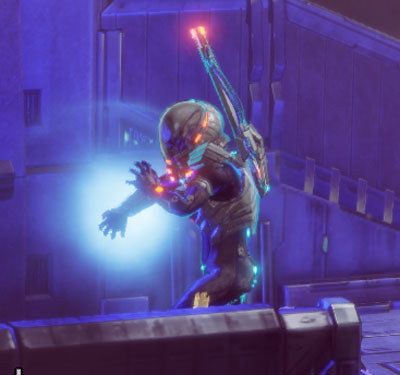
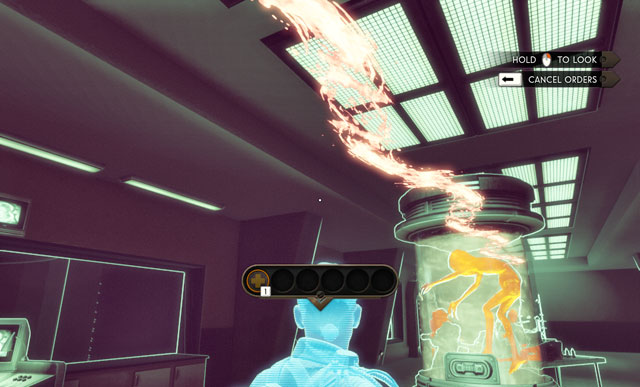
Turn left and enter the mortuary. Being in the vestibule, read a medical note hanging on the cupboard with medicines (left side of room). Then prepare for a storyline twist and fight because the next room is a picture of disaster. Follow the blood trails until you get to the body of agent Nils. In this moment you find an alien Infiltrator and the battle begins.
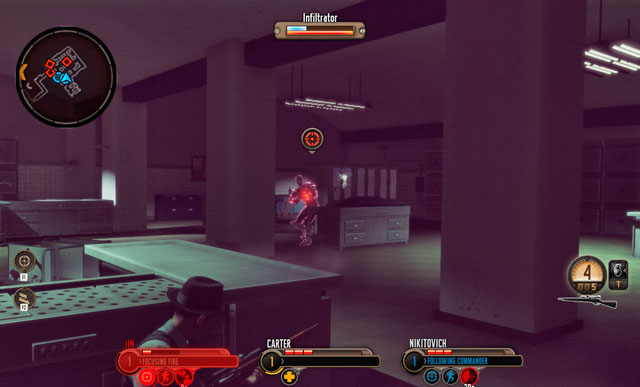 Infiltrator is your main target.
Infiltrator is an advanced enemy. He can summon Sectoids, throw grenades and deal big damage. He has also a regenerating shield. She can't be affected with Taunt, so commandos tactic is a failure. The best way to fight is to conduct a massive fire and throw grenades. You shouldn't bothered with summoned Sectoids, they'll appear as long as their commander lives. The most important is to eliminate the main target ASAP and don't let his shield to regenerate.
 You can practice on the Firing Range.
Return to Faulke and report. On your way you can talk with agent DaSilva at the helicopter, Web in the ready room, new agent on the Firing Range and Percy in Hiring Room. None of this conversation matters: you can make them, but you don't have to. Notice also a note attached at the door to Firing Range.
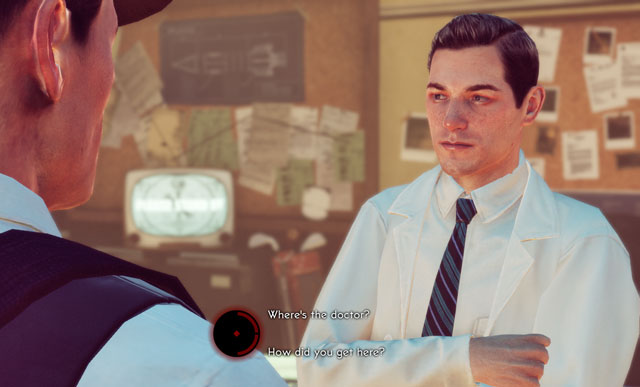
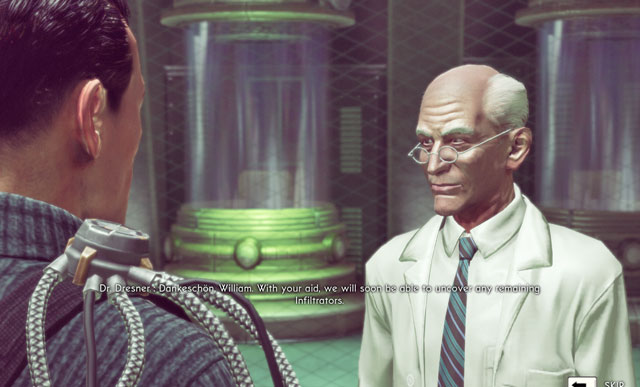
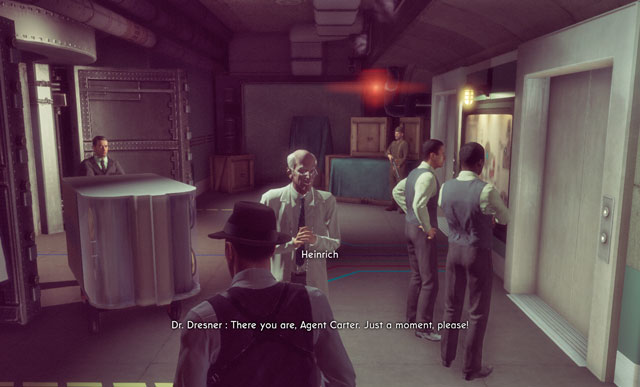 Dr Dresner has unpleasant past.
On your way to Faulke, you'll be accosted by doctor Heinrich Dresner, who gives you a weird device. It's a good moment to make a detour and search freshly unlocked locations. First, turn right and look for a note next to the cartons nearby Operations. Then go through Disinfection Room and enter the doctor's laboratory. There, you find four more notes and you can talk with Krut and doctor Dresner. It doesn't have meaning for a storyline, but you should know the history better, right?
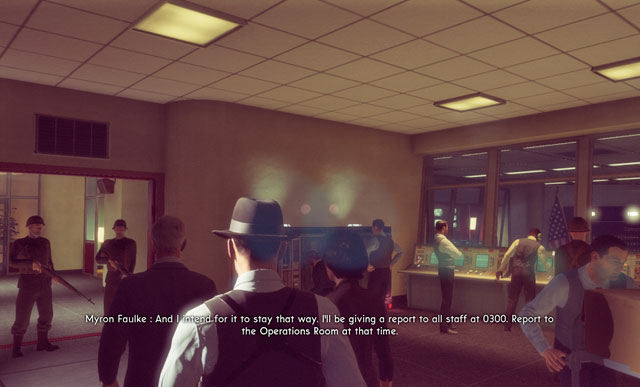
 You have no choice for now on - there is only one mission.
When all those things are done, enter the Operations and meet Faulke. Then approach the computer in the middle of the room and launch another mission - The Doctor (others are unavailable). You'll return to the Bureau only after finishing it so make sure, that you've done all necessary things. It's important, because after every missions new collectibles and dialogue options appear and the base changes. So if you don't do something now, you won't have a chance for making it later.
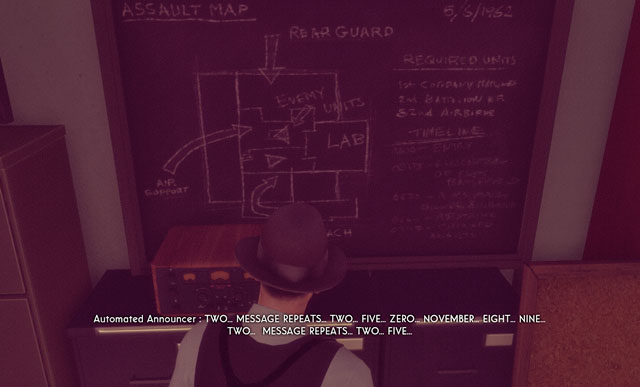
Radio message sounds like a mantra.First Investigation is rather simple: when you wake up, talk to DaSilva about radio standing at the end of the desk. Approach the device and launch it. You'll hear a weird announcement, containing numbers and name of the month. Carter will write this down on the piece of the paper next to the radio.
 Correct combination is : 250, north, 892.
Go to the communication opposite to your room. Talk with officer Chulsky and talk her about a weird signal in radio. Then give her correct coordinates, which are: 250, north, 892. Congratulations, you have saved few humans against aliens!
 Does the mysterious deer have something in common with alien invasion?
Mission begins peacefully. During first few minutes you won't meet up with aliens, so you can explore the area. But there isn't much of a walking: you can go forward along the only path, because other passages are blocked. So move forward until you get to the barricade. Then, turn right and enter a coffee shop.
 Aliens change people into mindless zombies.
Inside you find a man infected by aliens. When the cut scene ends, listen to recordings next to the sick one, you'll know something more. Then exit the building through door behind you and look at the destroyed bus. Follow the only possible path until you get to the other bus. Turn right and enter destroyed building. Be ready as the battle is about to begin.
 Shield Commander is a challenging enemy.
Few Sectoids and Outsiders with a single Shield Commander appears in front of you. The last one is your priority target, because he can protect his allies with shield. The easiest way to eliminate him is to use Taunt, commandos' ability. When enemy goes out from his cover, fire at him and throw grenades.
If you don't have a commandos, use recon's Critical Strike and massacre enemy with our firepower. This might be difficult due to enemy's shield which regenerates and because alien doesn't tend to conduct a direct fight.
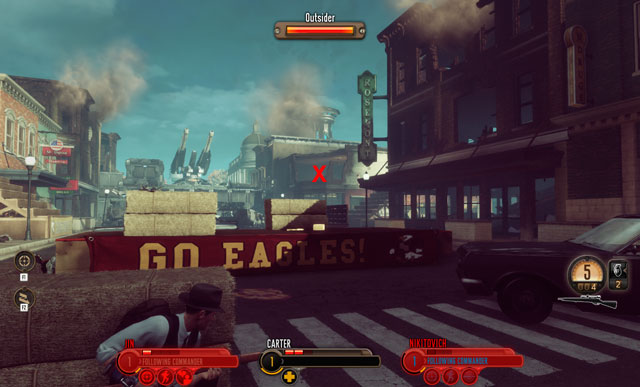
X stand for location of an alien and explosive barrel.
The second wave appears when you clean up the first one - with several more Outsiders and two Drones. As the latter ones can heal allies, you have to eliminate them as first. Luckily, they are very fragile so one Critical Strike or short rifle series is enough to take them down.
Notice also an Outsider-sniper hiding on the roof: you can smoke him out by firing at the explosive barrel (screen above).
 Location and range of mines can be seen in focus mode.
When the battle ends, collect ammo (you find sniper rifle, shotgun and three ammo packs in cars in front of you) and then disarm nearby mines. You can do it in very simple way by firing at them. When it's done, go forward until you get to closed door in front of anti-aircraft cannon. Order one of companions to open door and prepare for another attack. In the meantime, remember to choose a skill for agent Carte - he has surely leveled up.
 Lifted enemies are helpless.
Enemies will again attack in two waves: in the first one with several Outsiders, in the second one more Outsiders and single Shield Commander. Killing the latter one should be much easier than the previous time: use Lift (new Carter's ability) on him and then fire down.
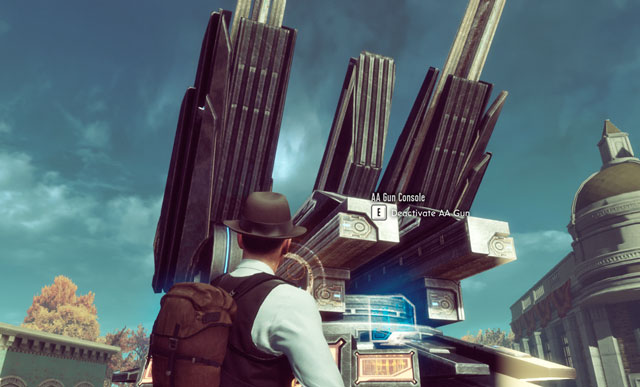 Turn off alien machine and let chopper get to you.
When all enemies are down, go through the freshly open door and turn off anti-aircraft cannon. Then go through the fortification and enter the bank. There you meet few more zombies, you can't talk with them. Pass them and go downstairs to the cellar.
 You can help civilians, but you won't get anything for it.
There you meet a group of survivors. You can promise them help or not: when the mission ends you won't get any information about them, so you can tell that there are no consequences. Make your choice and enter the vault to pick up ammo and leave the building.
 Resupply Stations are rare - use them if you can.
Go through the yard and then through barber. In front of you, you'll see a Resupply Station in which you can change agents, replenish ammo and change weapons or equipment. You can also look into the library on left, but there is nothing more than a shotgun.
 First aliens can be killed within a second.
Jump into breach in front of Resupply Station and go to its very end. Doing so, you'll surprise three wandering Outsiders. When they're dead, you'll see two Drones, one Shield Commander few more Outsiders. You should kill them in the order above.
Drones should be killed with Critical Strike or massive fire, while Shield Commander is a piece of cake after using Lift.
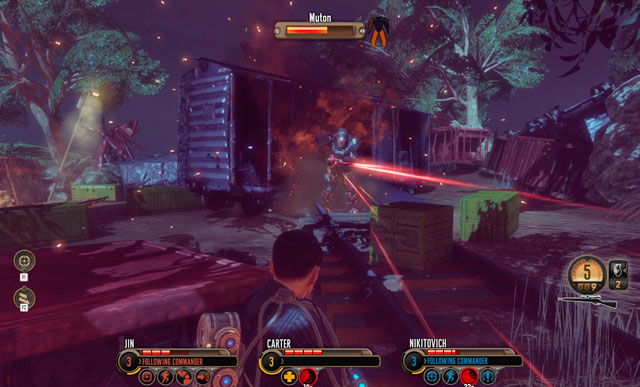
 Muton is a very tough enemy.
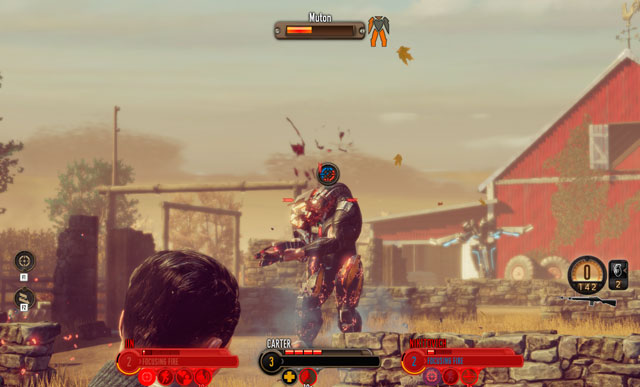
Move on and replenish ammo in front of the park: there you'll have to take a difficult battle with enemies. Besides standard Outsiders and Sectoids you'll face also a new enemy: Muton. This heavy armored alien has a lot of HP, deals a lot of damage on short distance (he uses alien shotguns) and can perform powerful AOE attacks. He is very dangerous on a short distance, so you have to keep him at bay and fire, fire, fire. Very useful is Lift, which slows down enemies and let you kill him easier. You can also use grenades and mines (if you have an engineer in the squad) like also Critical Strike. Finish off remaining enemies in random way, Muton is your main target and danger.
 Assistant's presence in destroyed building is a bit confusing.
Enter the university when the fight ends and find an assistant of doctor Weir. After this conversation, you can look at two photos on the blackboard and listen to recordings left on the cupboard (you can also look at doctor's documents). Then leave the room by door on right. Doing so, you find the first alien weapon which you can use: Scatter Laser. As every shotgun, it's perfect for short range but nothing more. Have said that, Laser isn't too useful.
 Full assault isn't a good idea.
After a short walk, you get to another square full of aliens. There is a team of Outsiders and Sectoids, who don't suspect an attack: elimination of the first few shouldn't be a problem. But the problem is a fact, that there is a Turret a bit later, which can immediately eliminate Carter's men. So your optimal tactic seems to hide behind obstacles/covers and eliminate enemies one after another with short series or sniper shots. When weaker enemies are down, you can focus on the Turret.
At this stage of the game, none of squad members can deal enough damage to it. So the best way is to distract the machine with one of agents and make Carter run Turret around and eliminate it as it rotate very slowly. You can also use grenades but they will be needed later.
After replenishing ammo, go through the gate on right and prepare for a really difficult encounter. In front of Carter and his squad a really Sectopod will appear. This is an advanced alien machine with heavy armor and huge firepower. Sniper weapon doesn't hurt this device, so you have to change it for something more useful (on the right side of this location you can find shotgun and Scatter Laser). Eliminate the machine ASAP or coming Outsider and Sectoids will surround and kill you.
The optimal tactic during fighting Sectopod is usage of grenades, firing at nearby explosive barrels and conduct short range fire (but enemy rotates quickly and stomps, so don't get too close). But, above all, destroy an armor on vehicle's "head" - when the glass breaks, alien inside is an easy target. You can also Lift this machine and fire at its back panels which are weaker.
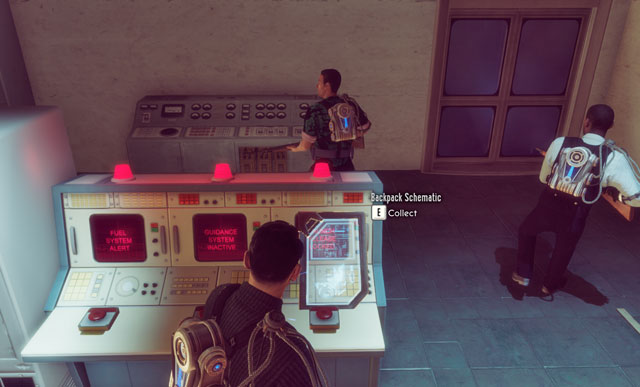
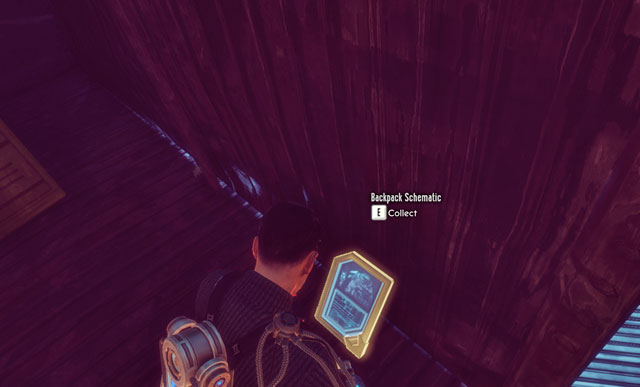
 Schematics let you upgrade your squad.
When the fight is done, collect ammo and go through the gate in front of you: you can return to sniper rifle and throw out short distance weapon. Move forward until you get to Resupply Station and Backpack Schematic. The last one gives you very useful upgrade: Sharpshooter Pack (increases damage of headshots). Equip team with new tools and move on.
 Critical Strike is perfect for Drone elimination.
When you get through few more locations, you get to a larger alien construction. There you find few Outsiders, which you can fire down without any troubles (notice also explosive barrels). Turret is far away enough, to not have any impact for this encounter.
Unfortunately, when you eliminate the first group of enemies, Shield Commander and three Drones (with more Outsiders) will appear on the battlefield. Your priority is, of course, Shield Commander - you have to lift him quickly and eliminate. Then take care of Drones, which will heal themselves. Luckily, recon can eliminate them rapidly with Critical Strike. If you don't have one in your squad, fire at them constantly and distract them: when you use Taunt, alien stops healing allies and will attack commandos. When all Drones are done, walk around the Turret from right eliminating all Outsiders on your way.
 There is no ammo in next location.
After fight, collect ammo. Unfortunately, most of nearby ammo packs suit only Scatter Laser. Because of that, conventional weapon without many bullets is slightly less useful right now. During the next fight you have to think about getting more ammo. So, you have to go through few more locations and collect ammo at laboratory entrance. Watch cut scene with doctor Weir and prepare for difficult battle.
 Sniper rifle is surprisingly effective.
Carter will have to stand the whole army of Outsiders supported by single Shield Commander. What is worse, there is even a flying fortress: Gunship. Gigantic machine has a turret and deadly rockets. Those enemies force you to become very mobile: if Carter and his companions won't shift positions quick enough, the alien ship will fly them from behind and eliminate. So you have to constantly change positions and hide behind covers.
What is interesting is a fact, that the thing which deals the biggest damage to alien ship is sniper rifle and Critical Strike of recon. Use it as an asset, replenishing ammo in the meantime from the containers in the middle of the map.
When battle ends, the mission ends. You can return to the base.
The second visit in the base is very simple thing: when you finish talking to agent Weaver, you have walk to computer in Operations and choose another mission. But it'd be a waste of opportunity, as there is a lot of collectibles to find and talks to make in here now.
 Seems like DaSilva is family-bond.
First collectibles can be found in Carter's office - on agent DaSilva's desk you find two photos: one of his son, and the other of some New Mexico city.
 Signallers are well informed.
When you enter communication room, you can talk with officer Chulsky. She tells you by the way that there is a pile of files, which you can look through.
 Notes will tell you interesting things.
In Operations turn right. On the table between computers you find few additional notes and a talkative Krut a bit further. You can also accost agent Weaver if you want, but she isn't a pleasant interlocutor.
 Recordings are about Infiltrator interrogation.
The two last collectibles are in Faulke's office. In the corner you find recordings, and a photo of weird device on the table.
 Illusion of freedom makes you feel good.
When collectibles and talks are done, approach the computer in Operations. This time you can choose between two missions: Guardian and Grifter. Order of making them doesn't matter.
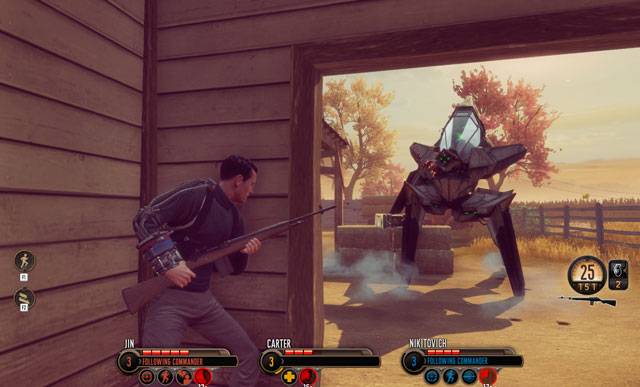
 Hay is bulletproof, you can hide behind it.
This mission begins calmly, but it changes quickly. When you pass few first streets, you get to the truck with hay: in front of it you see a farm occupied by aliens. In this area you find two Outsiders and one Elite Outsider; first ones are easy, but their commander can be challenging. First, weaken his shields with massive fire and then eliminate with a perfect shot (one headshot from a sniper rifle should be enough). Finish the fight quickly, because enemies will start using grenades.
 Shield defends against additional damage from headshots.
When the first group is done, defeat the second one. It consists of two Drones, several Outsiders and one Elite Outsider. You should eliminate them in order listed above. Drones can heal allies, so they are your priority and Outsiders are relatively easy to kill, so you can finish them off quickly. Soften the leader and then eliminate with some strong weapon.
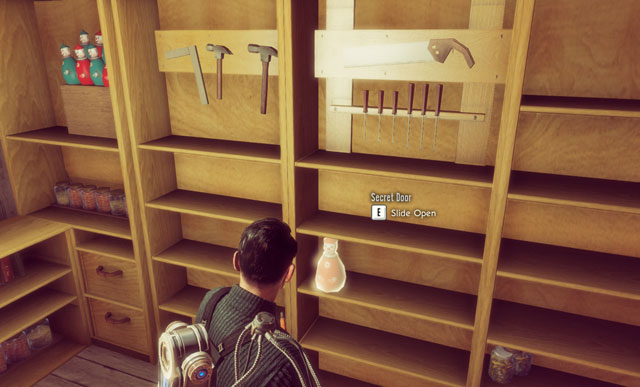 Puppet opens Secret Door.
When the battle ends, approach the barn's door. Move aside doll, which is on the cupboard what opens the secret passage. It's shown on the screen above.
 Someone nice left schematic on the top of computer.
When you enter the room, approach the main computer. You find Schematic which slows down bleeding. When you get it, launch the rocket system (press and hold interaction key) and prepare for a surprise: you have just armed the nuclear warhead instead of disarming it! s
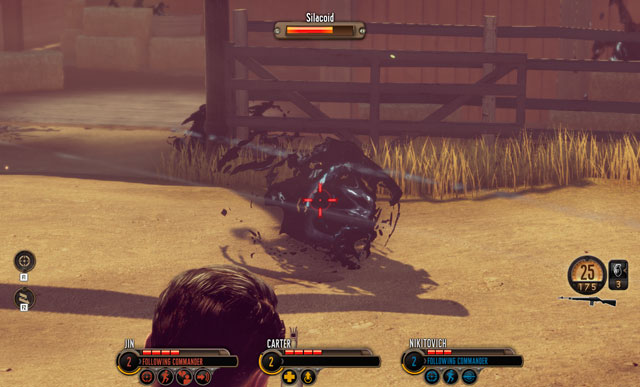 Silacoids are dangerous only for the short range.
Go out through the opposite door and upstairs. Eliminate two Silacoids which will attack Carter and his squad nearby the next shed (one series should be enough). Pick up ammo from box next to the tractor and go forward until you reach another group of aliens.
 Muton is the toughest enemy in this encounter.
Besides few Outsiders you'll have to kill also one Elite Outsider. The latter one can be annoyed by commandos' Taunt and then quickly eliminated. But when you kill most of enemies, a Muton will arrive. He is challenging during fight for a short distance and you should keep him at bay. You should make use of grenades, mines (engineer stuff) and commandos' Pulse Wave. Recon can deal heavy damage with Critical Strike, but remember that only cooperation of whole squad will give you win.
Collect supplies (on left you find two grenades and ammo) and move on. Killed Muton should have dropped Scatter Laser which you can pick up if you run out of conventional bullets. After all go to the big shed in front of you and - like previous time - move aside a doll. When you get into control room, search soldiers and then launch computer. This time it won't work also.
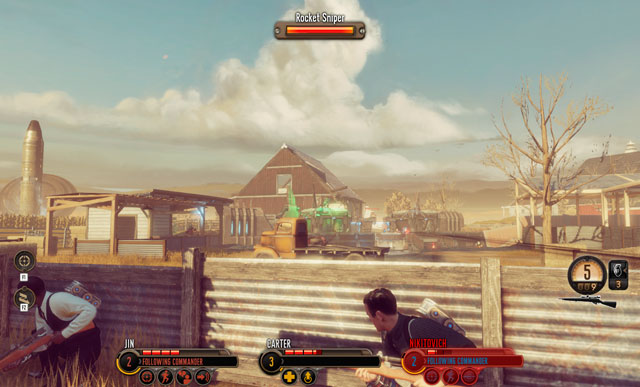 Serious snipers.
Exit the room and read letter from the shelf on the left. Move forward and prepare for battle: you run into a group of Outsiders, supported by one Elite Outsider and two Rocket Snipers. The last ones are extremely dangerous. Their missiles can throw you out from behind a cover and kill at once. That's why you should focus at them always. The easiest way to kill them is to use a sniper weapon or Critical Strike (luckily, they're not that tough).Then, you can eliminate remaining enemies like in previous battles.
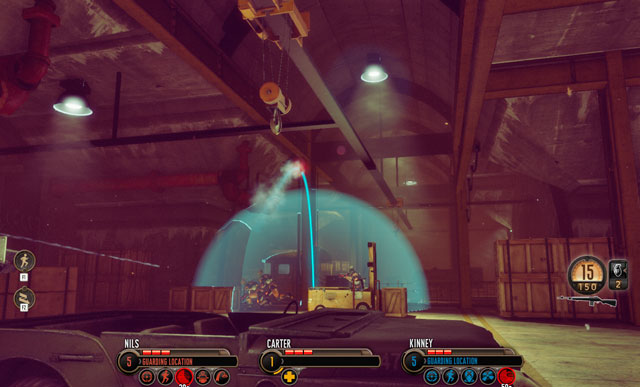
Better hide when Sectopod arrives.Collect all ammo you can: in a moment, you begin extremely difficult battle. When you only approach the alien device, more Outsiders, Elite Outsiders, single Shield Commander and finally also a Sectopod and two Drones will arrive. There is no one good plan for this battle: first of all, you have to use abilities, heal and save ammo. The most important is to eliminate quickly weaker enemies and Drones before they repair Sectopod.
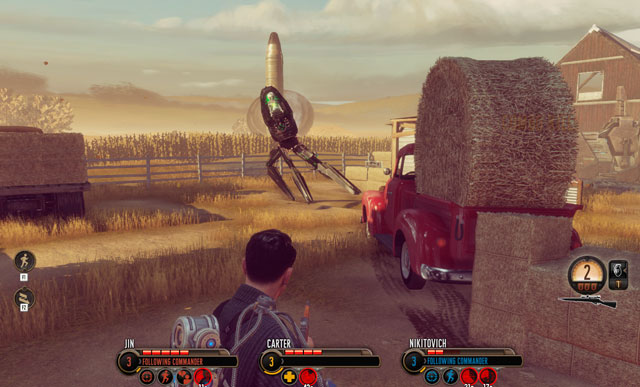 When the glass breaks, you can kill the pilot.
Shield Commander is your primary target: if you let him live, he shields Drones which will protect Sectopod. The last one is rather easy to eliminate when you break its front armor (then it's enough to fire at pilot's head). If you run out of ammo during this encounter, approach one of killed Outsiders - some of them leave Laser SMG with perfect fire rate and medium fire power.
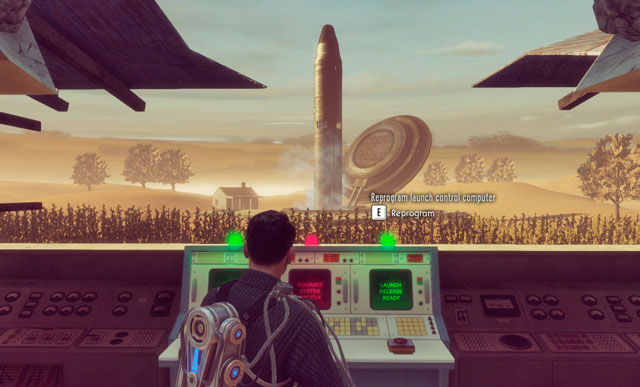 Warhead will wait for you.
When the battle ends, go through the gate and enter the shed with the last one computer. When Barnes gives you coordinates, reprogram system (hold and press E). Congratulations, you have just saved millions of beings!
Remark! Name of this paragraph is identical like one of the previous ones. It's not a mistake, it's a consequence of the game's structure (saves are preserved with particular names). Wanting to describe the game faithfully, we couldn't change the game's setting. Apologies for this little confusion.
 Things have changed in the Bureau.
When you return from the previous mission (Guardian or Grifter) you obtain an access to further parts of the base and get few more targets. All collectibles described in Base Visit II are on its places but there are few more also in the new locations. But before you look for them, you should report Faulke' who can be find in engineer room. To get there, exit Operations and turn left following the corridor.
 Carter's boss works on few cases at once.
Talk to the Faulke when you get to him. He gives you an extraordinary task: you have to interrogate Infiltrator, which you have captured. But before you do, look to the room on right. Inside you find an interesting note about a new Bureau's vehicle and recording of its first tests.
 Documents, documents everywhere.
Exit the room and go to the laboratorial part of the Bureau. There, you find a lot of notes and two more recordings. Their exact localization is included in the proper chapters, there are too many of them to describe it here.

You have to reach an Inflitrator, who is at the very end of laboratory, on right. Notice, that you can talk earlier to doctor Dresner in his laboratory and then make an additional Investigation. When you make it (or ignore), you're ready for interrogation.
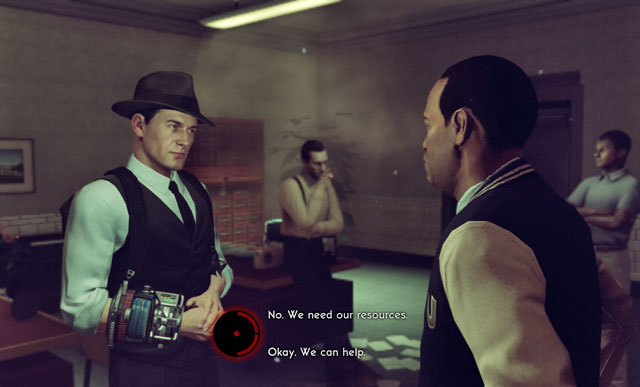
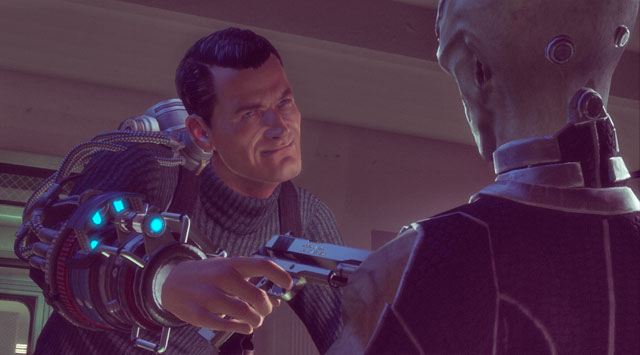 If you fire at the alien, you enrage Faulke.
During interrogation you can play easy (upper dialogue options) or aggressive (bottom dialogue options). Whatever you choose, you get information you need which is an instruction of infiltration the main alien base. But your approach will influence Infiltrator's and Faulke's attitude toward Carter - you'll impress both if you choose the average path (upper option, bottom option and then upper option again).
 The choice is lesser than you can imagine.
After interrogation, return to Faulke and then approach computer in Operations. There you get an access to few more missions.
Notice that Guardian and Grifer are secondary missions: you don't have to make them if you don't want to (but it's profitable). Notice also that you get an access to distract mission: Gearing Up, Recovering Leaders and Nanotechnology (the last one is available only when you completed Investigation Find Missing Silacoids!).
Remember also that you main goal is a mission Signal from Beyond which pushes the storyline further.
 Doctor Dresner can be found in his laboratory.
When you finish Guardian or Grifter and return to the Bureau, you get an access to new locations. When you finish talking with Faulke (look: Base Visit II part 2) go to the laboratory behind a disinfection zone. Go through the room with big container of Elerium and then look to the laboratory of doctor Dresner (on right). Meet the scientist and obtain a mission. He'll appear here only if you've met him earlier in the main laboratory room.
 Just follow the trace.
Two Silacoids run away from the laboratory and you have to find them. You can look up for traces in Focus mode (screen above). Follow the trace and you get to the disinfection room. There you'll be attacked by one of creatures. Kill it quickly.
 There is always a bathroom in game with aliens.
Trace of the other alien takes you to the bathroom on left from Operations. When you get inside, Silacoid will escape to the ventilation shaft and Carter won't kill him. That means, that the investigation isn't over.
 Silacoids explode in very spectacular way.
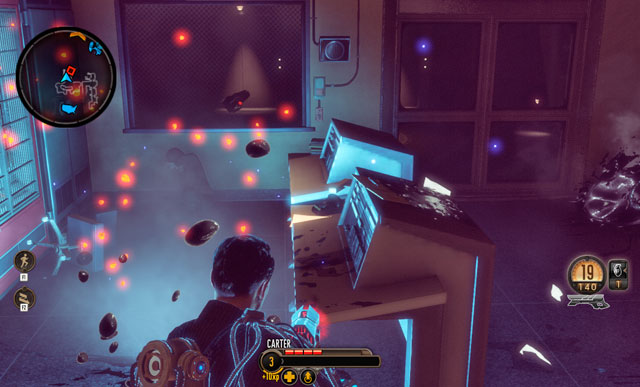
Following the alien trace gives no result, he has split. Luckily, there is a way to get him into the trap. Enter the Operations and turn left, going upstairs on the first floor. Going through the door you notice room full of mucus. Reload and prepare for a battle: few Silacoids will attack a soldier who is hidden in the corner. This gives you an opportunity for fight.
Look also at the note lying on the desk.
 Reward isn't typical but profitable.
When the mission is done, return to doctor Dresner. He gives you a new distract mission: Nanotechnology. To choose it, return to Operations and use computer.
 There is a sniper on right.
When the mission begins, go forward and try to get as close to the enemy position as you can. On the farm you find several Sectoids, one Outsider and one Rocket Sniper (marked on the screen above with "X"). You should eliminate the sniper first, as he has the biggest fire power in this set (one shot from sniper rifle should be enough). Remaining enemies shouldn't be a problem, but this is - unfortunately - only a recon group. And you'll get to know that really quickly - when Carter eliminates all aliens, several more Outsiders and a Drone appear on the battlefield. Your priority is, of course, the flying thing, because it can heal allies. So get rid of him first and then eliminate the rest of dangers (mobility is a key, aliens have a lot of grenades!).
 Enter of the Silacoid isn't subtle.
When you kill all enemies and collect ammo (from the cars) head for the shed. Inside, turn left and enter the small room where you kill Silacoid. Notice also, that there are two types of weapon on the floor: shotgun and Laser Pistol. You can pick them up if you want.
 The difficult part begins further on.
Go through the shed (killing another Silacoid on your way) and exit through the door on the backs. Look to the Resupply Station on the shore and go to the river. Follow its current and you get to the locations shown on the screen above. Jump down and kill two approaching Silacoids. Then, use a footbridge which was abandoned by those monsters. This takes you to the further part of the location.
 Look for Schematics.
Go forward until you get to the ruined wagon. Look inside and pick up Gunner Pack Schematic, which decreases amount of obtained damage and increases capacity of clips. Then kill another Silacoid, who will try to attack you from behind.
 Drones appear rather surprisingly.
When you move on, you get in between trains. Here, you find three wandering Outsiders, which you can take down easily (they're not expecting an attack). When it's done, three Drones and few more Outsiders will get out from the wagon on right. Eliminate the first ones quickly with Critical Strike or with sea of bullets. Notice that Carter's squad mobility is very limited in here: there is a plenty of deadly mines around. If you have to avoid enemy grenades, shoot at the mine first and then try to tumble.
 Killing Muton may take a while.
When you go through the wagon from which Drones and Outsiders emerged, you'll notice artifact sought by the Bureau. Unfortunately, it will be stolen by the alien which cannot be stopped (he is immortal). What's left, is a powerful Muton on the battlefield. Use grenades, mines (if you have an engineer), Diversion (recon) and bullets to eliminate this threat. Probably, you'll use a majority of your supplies in this fight, but you can replenish it thanks to packs in the nearby wagons.
 Forcing enemy to move through train is a perfect tactic.
Notice, that enemy is supported by an Advanced Drone, who has nasty ability which lifts Carter's companions. Eliminate him first, otherwise the battle will last forever.
If this encounter is difficult, you can play game of a cat and mouse. Muton is so big, that he can't move between cartons on left. As he is forced to move every time through the wagon, he is an easy and not mobile target. Use it, setting up mines or throwing grenades.
 Here comes your goal.
When the fight ends, go through the carrier in front of you and pick up artifact. In this moment the mission ends.
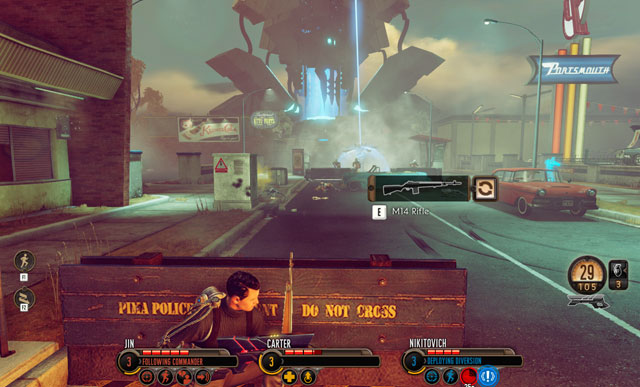 It's only a prologue to real carnage.
When the missions begins, go forward and jump over the barricade. Run up to cover made by police and kill three enemies- an Outsider and two Sectoids. When enemies are dead, you'll see far away a Drop Pod, from which several more Outsiders will run out. Move between covers and avoid grenades killing enemies. This shouldn't be difficult, but watch out for Rocket Sniper, who will appear on right.
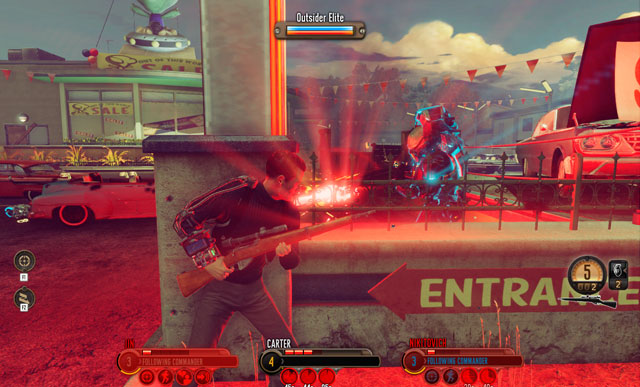 Getting too close to enemy won't end up well.
When you defeat the second assault group, the third one emerges on right (parking lot). It consists of several Sectoids and Outsiders, supported by single Elite Outsider. You'll use lot of ammo surely, so collect it currently; between vehicles and covers you can find a whole store of weapons and bullets. Kill enemies how you like, using all possible abilities (especially Diversion, dragging enemies out from Carter, is useful). When you fight an Elite unit, destroy its shield (with some rapid firing weapon) and then finish off with something (like Critical Strike or sniper rifle).
 An alien? Here?
Enter the car showroom on left side of parking lot and look around. On the counter you find and in the room on right you can find notes. Move forward in corridor - remember to turn left and enter a small room. You find there some interesting recordings to listen.
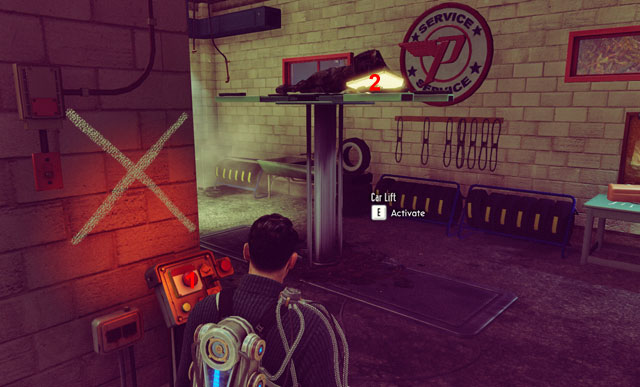 1 - button, 2 - schematics.
Move forward, going through the room with cars. When you get next to the exit, turn around about 180 degrees. On the lift you can see a useful schematics. So, lower the lift using a button on right (screen above) and pick up schematics. This one increases range of abilities and amount of damage dealt. What is more, it enhances also character's defence.
 They come to the rescue.
Move forward until cut scene with sieged agent DaSilva triggers. Help him fight aliens: between you is a small squad of Sectoids and Outsiders. Don't use special ability of DaSilva (explosives detonation) as you will have a better opportunity for it in a while.
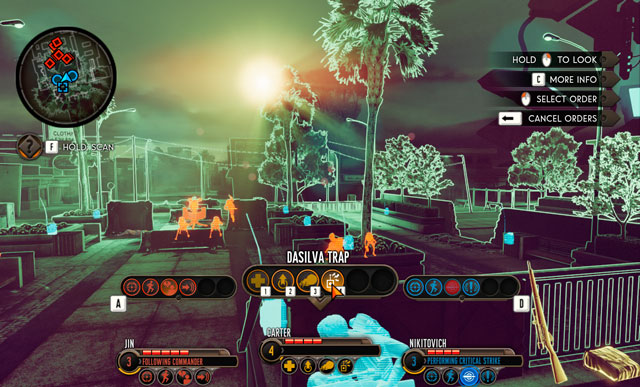 Without DaSilva's traps, you won't win it.
When you talk with infected DaSilva, new enemies will appear on the battlefield- Outsiders, Sectoids, Silacoids, and even a Laser Turret and a Shield Commander. With such an amount of enemies, you have almost no chance so you have to play dirty. When enemies approach any of DaSilva's Traps, marked with blue in the Focus mode, trigger explosives in the selected area (screen above). This eliminates most of aliens and you can take care about the rest of them in ordinary way. Doing this, use special abilities of your squad like Critical Strike, Diversion (recon), Taunt, Pulse Wave (commandos), Disrupt (support) and Carter's abilities (especially Heal, Lift and Silacoid).
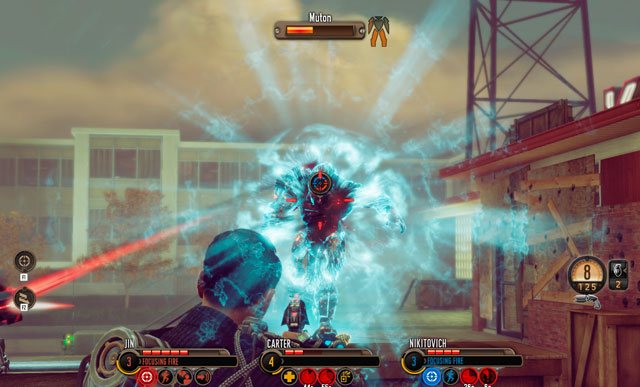 Muton is problematic, as always.
When you kill all enemies, the last one arrives: powerful Muton. Try to lure him in between traps (using Diversion, or squad members) and then blow out with DaSilva's ability. If it's not enough, fire at him and throw grenades. Every effective solution is a good one.
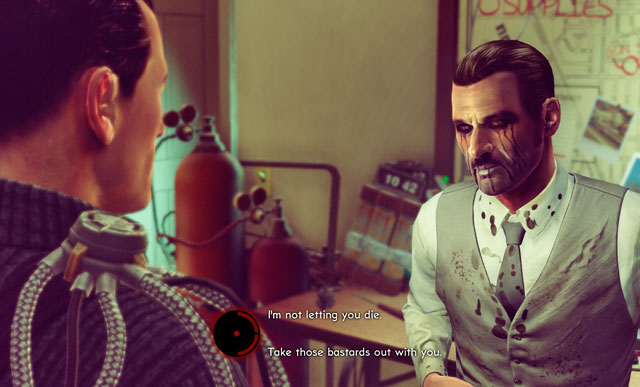 When you choose the lower option, DaSilva dies!
When the battle ends, look around. On the parking lot you find plenty of weapons, grenades and ammo. When you pick those things up, enter the building where agent DaSilva is hiding. Read notes from one of rooms and then listen to the recording lying on one of desks. Then, meet with an agent and talk about the current situation. During this dialogue, you can make a storyline choice: upper option (screen above) let you take infected DaSilva to the Bureau, where scientists will take care of him. On the other hand, if you let him blow himself up with aliens inside of him (bottom option), you'll never see him again. Choice is your.
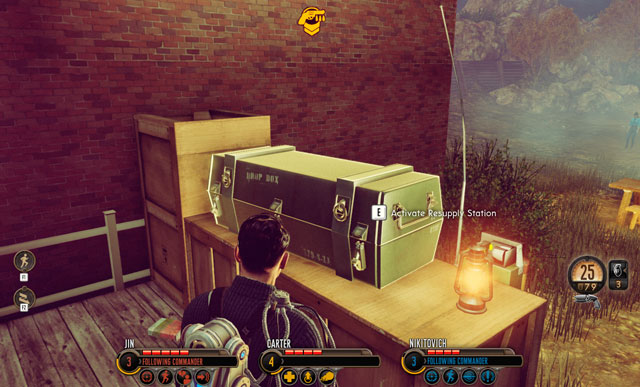 Resupply Stations give you a moment of rest.
Look inside DaSilva's bedroom (on the left) before you leave the hideout. You find there interesting documents. You can also notice a photo of your goal, attached to the kitchen wall. Look closely at that.
When the collectibles are done, go out. Carter and his squad can use Resupply Station, in which you can swap weapons and resupply ammo. Use it wisely, because further part of this mission is a real challenge.
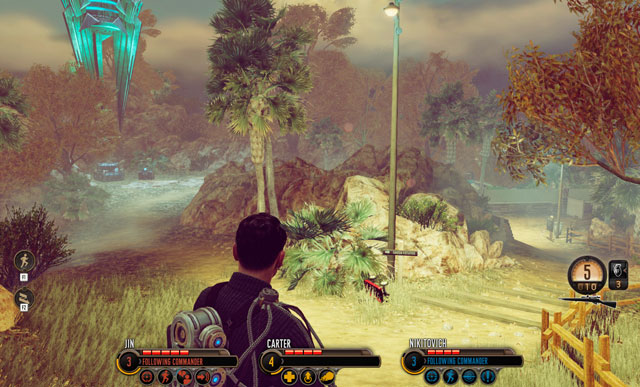 Turning left, you get more resources and collectibles.
Turn right and approach a small puddle. Next to it, you should notice a tombstone and an attached note. Read it and move forward. When the terraforming machines appear, turn left and go to the locations shown on the screen above. Turn left and approach the body of the child lying under the treehouse. Next to it, you find another note. Then, turn back and head for alien's computer, killing a Sectoid on your way. On the alien device you find Shield Disruptor Pack, which increases damage dealt to enemy shields.
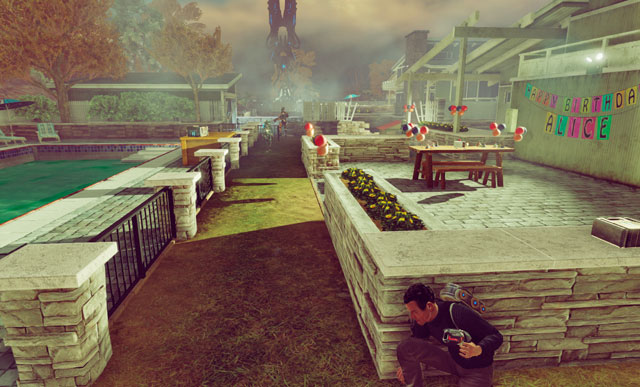 Bulletproof balloons!
Move forward and prepare for a battle. At the patio decorated with balloons you find several Sectoids supported by Outsiders. During this fight don't fire at balloons, as they are bulletproof and prevent enemies from being shot (sic!). When the first group of enemies bite the dust, defeat the second wave (consisting of the same aliens) and then move forward. In the buildings in front of you, there are several more Outsiders and one single Elite Outsider protected by Rocket Sniper. The last one listed should be killed at the beginning, because he is the most dangerous one.
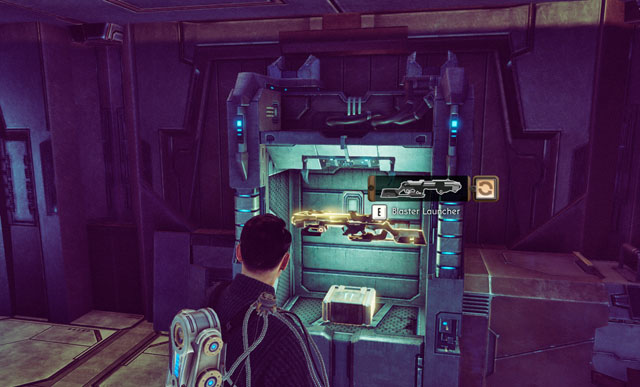 One of the most powerful weapons in the game.
Enter the alien building and pick up Blaster Launcher and its missiles. This powerful weapons plays as bazooka and will be needed later on. For the time being, try not to overuse it and save its missiles.
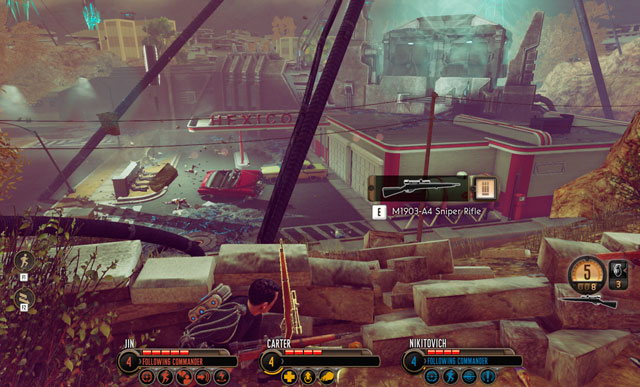 Bureau agents die with class.
Move on getting to an edge. Eliminate few first aliens and prepare for an explosion. DaSilva's car will cause a huge detonation which will kill the majority of aliens. Turn left and open passage to fortified enemy position. Go through another locations (killing one, single Silacoid) and get to the another parking lot, where you begin battle with numerous enemies.
 This time Sectopod won't be a problem.
Move closer to enemies and wait for Outsiders to eliminate a Sectoid. Then eliminate all enemies and prepare for the second wave. You'll be flooded with the whole army of Outsiders and Sectoids to deal with. Fire at them, use abilities, change positions. When the Sectopod appears, immobilize him with Lift and then fire down with Blaster Launcher (if you're lucky, three series should be enough). After fight collect ammo as you'll need it later.
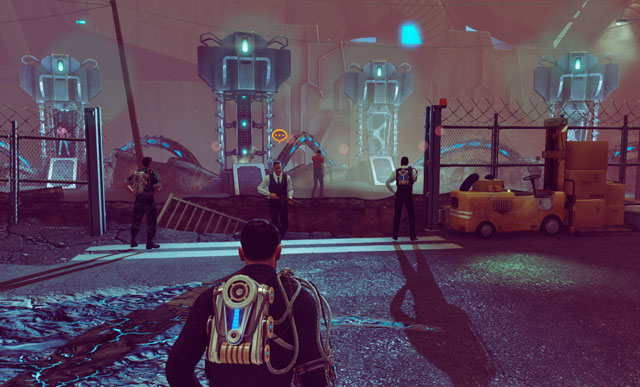 Meeting happens in bad conditions.
Enter the supermar and find three notes in here - on the left (on the counter) and two more deep inside the building, on right. Then exit the building and meet doctor Weir. Next to him you find another letter (on yellow machine).
After conversation, enter the building on right and head for the corridor with big window, eliminating two Silacoids on your way. Turn left and read another note, left on the desk.
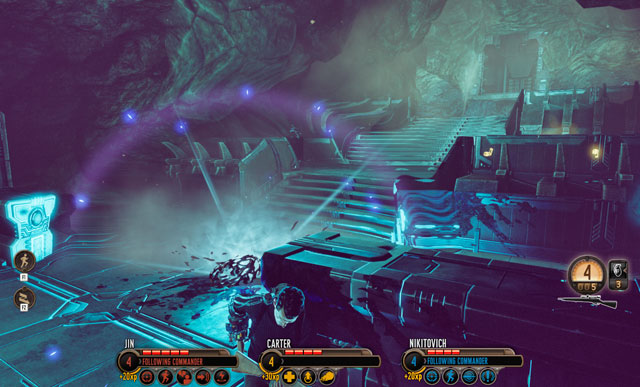 Silacoids are rather problematic
In the further part of location you find Resupply Station which you can use. After that follow doctor Weir, until you get to the gate steering computer. Let the scientist take care of electronics and focus on eliminating Sectoids and Silacoids who will attack you from behind.
 Your predecessors made it really far.
Go through unlocked gate and move forward. You'll find nothing dangerous for a long time, so you can freely look around. Notice that in one of rooms (where doctor Weir tells you to look for an elevator) you can find human notes - they are behind barrels, next to the shotguns and pack of ammo.
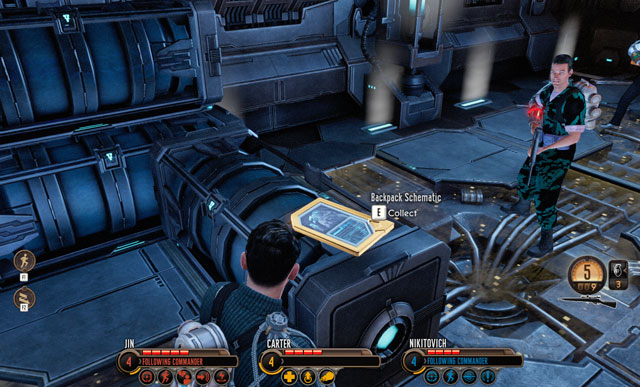 Another Schematic.
GO through teleport and then look around. Next to the Carter you find Armor Piercer Pack, which allows you to destroy armor very fast.
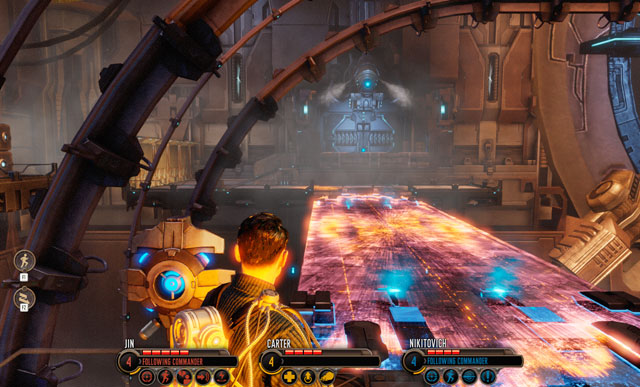 Turn right behind this bridge.
Move forward and go through two bridges. In the big room turn right, ignoring the door in front of you. Enter the storehouse where you see a dead body and read two notes which he has left. Only after that go through door in front of you.
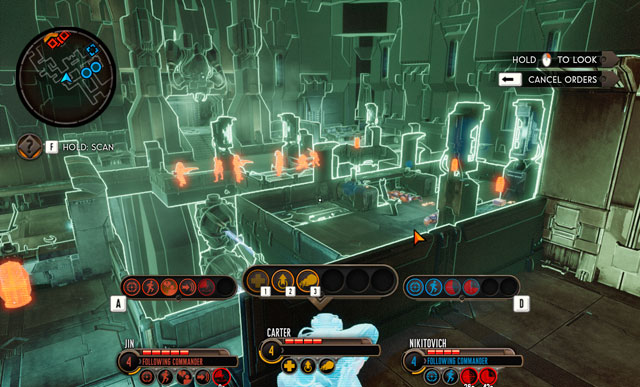 There is many of enemies and many yet to come.
Next part of location is a one big battlefield. You find plenty of Outsiders and Elite Outsiders, Shield Commander and (after a while) Laser Turret against you. During this fight use all abilities and terrain assets (there are explosive barrels here and there) The key thing is to weaken enemy shields: especially useful is support agent's ability called Disrupt. You can also lure enemies out from behind the cover with grenades what combines with summoning Silacoid (Carter) very well.
Try not to overuse Blaster Laser, because you'll need it later on.
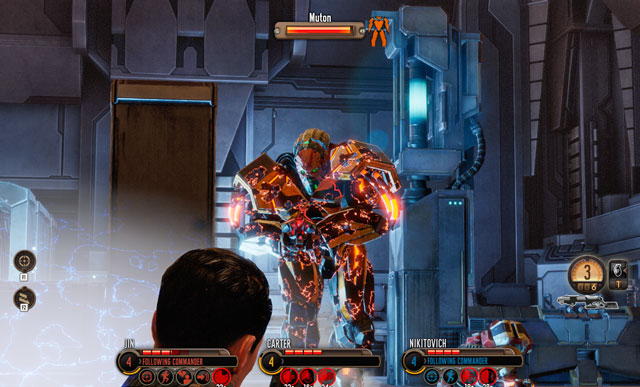 Now you have to use your artillery.
When the enemy army shrinks, Muton supported by three Drones appear. You have to eliminate Drones at the beginning or the battle will end up in failure. The best way to do so is to Critical Strike, which will eliminate them immediately. When it's done, use Blaster Laser and take down Muton.
If you have any weapon using normal (earth) ammo, replace it with alien guns: there are no conventional bullets in the further part of location.
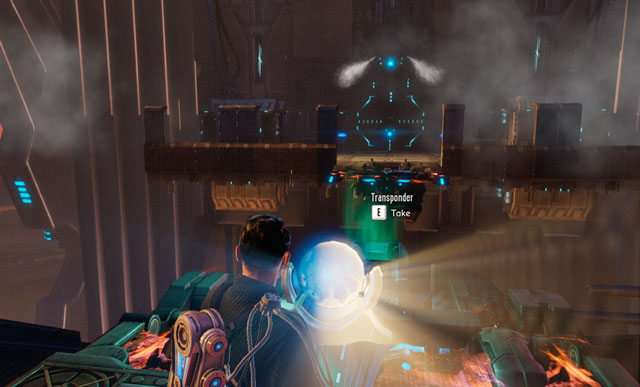 Something has gone wrong.
Move forward, pick up ammo and kill surprised Outsider and Sectoid. When you get to transponder (small, shining ball) use it. Unfortunately, the alien leader, Axis, will take over the main computer. Now you have to go through the corridors and get to Resupply Station. Using it, equip Carter with blaster launcher and something rapid firing. There is a boss ahead, you have to be prepared.
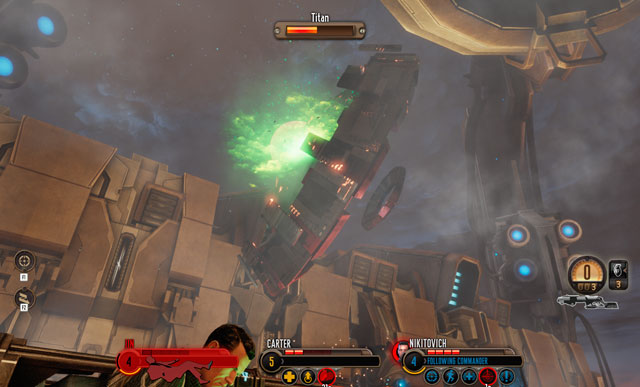 Titan is a powerful enemy.
Your last enemy in this location is Titan - flying sauces with outstanding fire power. He focuses beams of light at the target and fire destroying ray which annihilates everything on its way (including covers!). One hit with that and the agent is dead, so you have to constantly run around the location and avoid it. Remember that heroes behind containers don't get hurt, but when the shot is performed, their cover is destroyed.
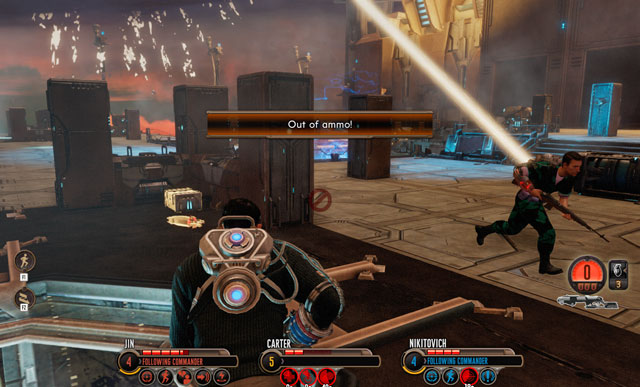 Direct hit is a death.
The key to win is rather simple: fire at Titan from Blaster Laser, constantly change your position and collect ammo from boxes. The weak spot of this devise is shining circle in its very middle, You should focus on firing right there.
During this fight very useful is Taunt which let you distract enemy. Also Diversion used by recon may be useful but the XCOM Laser Turrets (engineer) are rather bad choice.
Defeating Titan ends mission and you return to the base. Congratulations: you have defeated one of the most powerful enemies in the game!
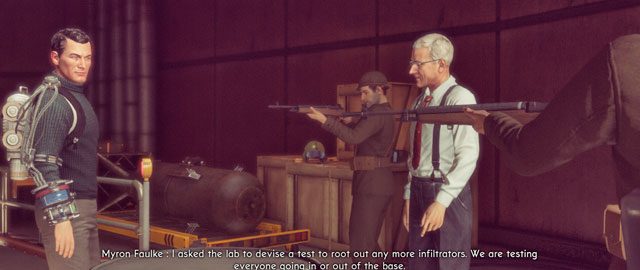 Very unpleasant surprise.
When you return from Signal from Beyond you'll be unpleasantly surprise. The sequence you will watch isn't interactive. Watch all cut scenes and be patient, it may take a while.
 Agent DaSilva appears in here if he survived.
After all scenes end, look around. On right side of room you find a doctor with who you can talk. Next to him you find a note about test concerning humanity. Behind a glass you will see agent DaSilva or infected woman (depending on if you have rescued an agent in the last mission) and on the nearby chest very interesting recording, which's content depends on the same choice.
 Doctor is on the left from the main room, in the corridor.
Exit the hospital. Passing the helicopter, look at the nearby chests - you'll find another note. Then, enter the elevator and ride down. Before you enter Operations, meet with Faulke, look into the recreation part of the Bureau and talk with doctor Dresner. You unlock an Investigation Sleepwalkers.
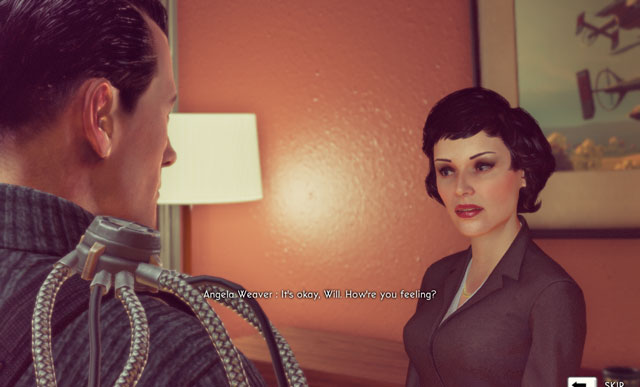 Agent is very, very upset.
Move to the office of Faulke and wait until he finishes arguing with agent Weaver. Then, talk with your boss and follow the furious woman. After a short conversation you get a simple task: you have to consult with officer Chulsky and doctor Weir.
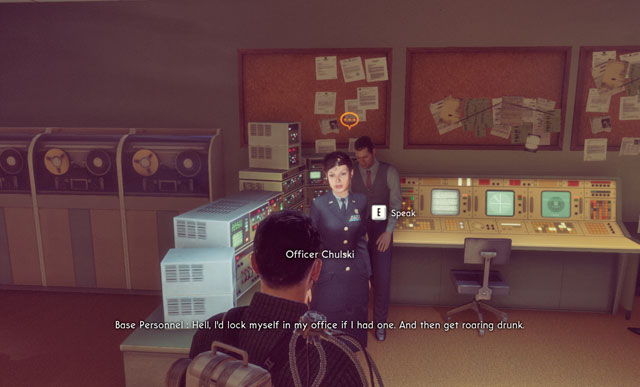
Officer Chulsky may be found in communication room, opposite to Carter's office. Doctor Weir is sitting in laboratory, where he is busy with some math. Choices you make in this conversations won't affect anything, so you can relax.
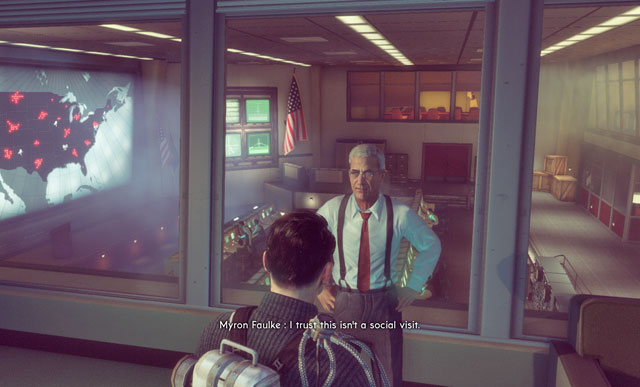
After collecting all necessary information, return and report to director Faulke. After that, you get to know that agent Weaver has left the base illegally and began chasing Axis. To follow here and solve the problem, you have to complete the main quest Not of This Earth.
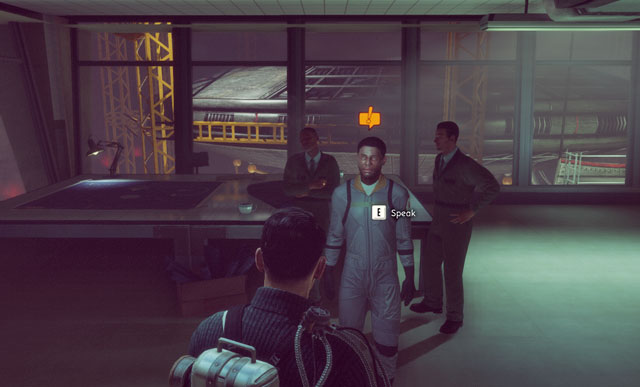 Mission Keeping Things Secure you get from Barnes in the engineering wing.
But before you leave the base, you can look around and perform few additional activities. Besides mentioned above Investigation Sleepwalkers, you can also obtain other one: Keeping Things Secure. What is more, in the Bureau you can find a whole bunch of collectibles - detailed list of them can be found in proper chapters of this guide. If you're bored, you can also talk with XCOM employees but it has no consequences.
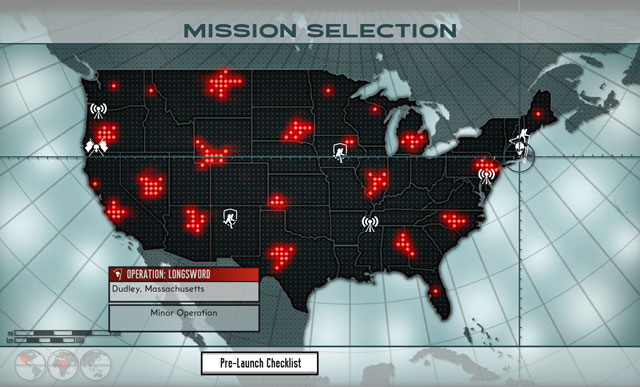 Additional mission are worth completing not only because of XP but also additional equipment.
When you're satisfied, approach the computer in Operations and choose mission. Notice, that beside main mission Not of this Earth you can also choose Operation Longsword. First one pushes storyline forward while the other one lets you gain additional XP.
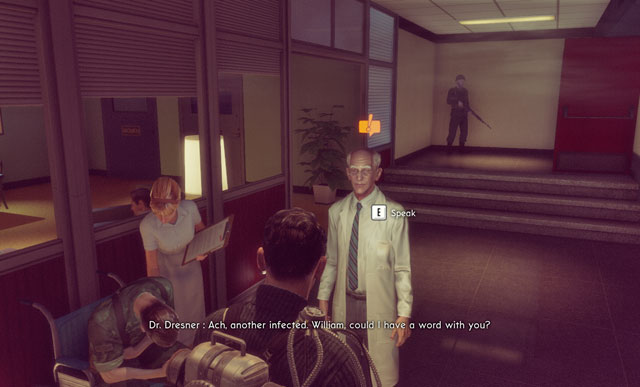 Scientist is standing on the corridor.
This Investigation can be unlocked while visiting Bureau after mission Signal from Beyond. Go to the recreation part of building (on left from Operations) and look for doctor Dresner. he orders you to scan employees - somehow infection got inside the Bureau.
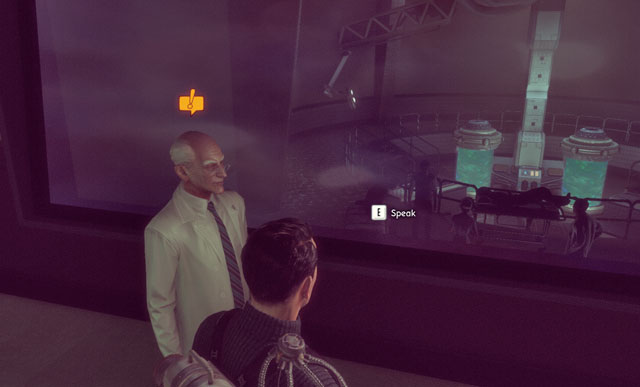
Your task is to scan several rooms listed above: Laboratory, Operations, Ready Room and Engineering. To do so, you have to enter mentioned location and activate Focus mode (in PC version you need to press F key).
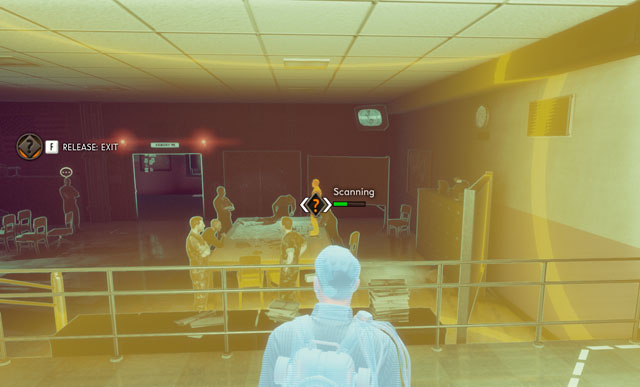 You have to aim at agents to scan them.
Infected agents are always in the same rooms: one in Ready Room, the other one in Laboratory (next to elerium container). When you identify them, tell them to go to the hospital part of the Bureau and then return to doctor Dresner in his office, on right side of Laboratory.
Scientist is bustling, so wait until he notices you.Wait a moment standing next to the doctor and when he notices you, report to him. Thanks to that, you unlock new distract mission: Sleepwalkers.
 Barnes can be found in Engineering.
This Investigation can be completed after mission Signal from Beyond. In the Engineering you have to find a pilot, Barnes. He tells you that some Russian tried to sabotage secret weapon of XCOM. Your task is to interrogate the spy, who is sitting in the room on right.
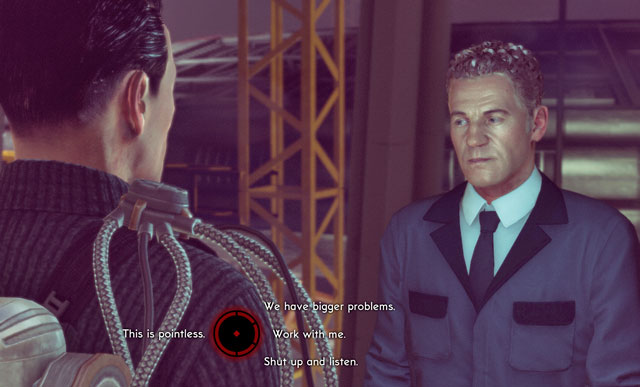 The good choice is "Work with me".
Conversation with Russian isn't difficult. First made choice doesn't matter and in the second one you have to choose the middle one, offering the spy a cooperation (screen above). Don't give up during conversation (left option) because it fails the mission.
As a reward for interrogation, you get additional distract mission: The Russian.
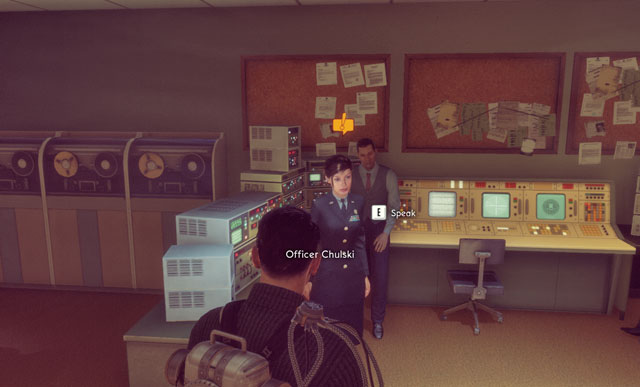 There are not so many women in the Bureau - they stick together.
This mission is available after escape of agent Weaver (check: Base Visit III). Enter the communication room and talk with officer Chulsky about escape of her friend. Whatever you choose in the dialogue, she'll tell you to talk with soldier called Percy. He is in the Ready Room.
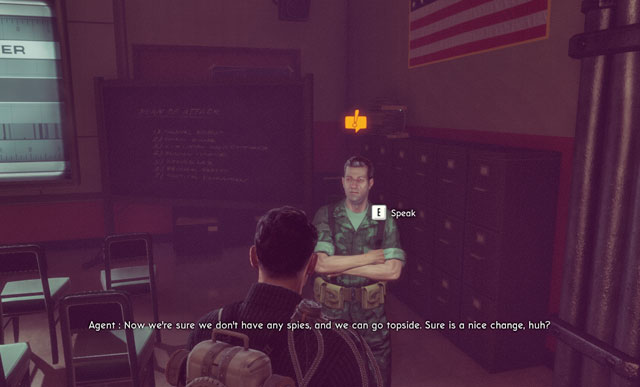 Percy isn't nice, but he can help you.
Enter the room with recruits and talk with Percy. He tells you that agent Weaver has an obsession about Axis and blames this alien about what had happened to her brother. In this case you have no other choice than to look for more evidences and traces about agent.
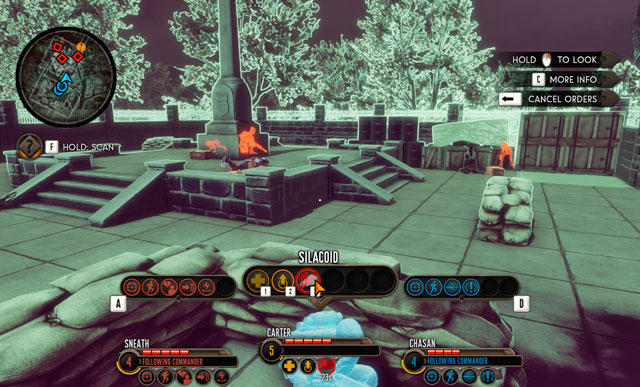
Enter the Weaver's office and take off the big painting from the wall. Behind it you find a safe (screen above). Then, rotates about 180 degrees and look for a small photo on the wall, next to the door. There is cipher for the safe. Approach the safe, open it and get to know with documents inside.
After completing mission Not of This Earth and random Operation after that, you can an access to additional Distract: Vendetta.
New weapons are always nice to see.When you land, go forward until you get to the soldiers bodies. Turn at them right and enter the park. You'll meet there three Outsiders, one Sectoid and leading Shield Commander. They shouldn't be challenging, especially that you'll find a Laser Pulse Rifle which deals huge damage for medium and long distance and has zoom, at the first wall. Using it is recommended, as you'll find a little of ammo packs while most of enemies use this rifle.
It's an ambush!.When the battle ends, go upstairs disarming mines. Up there you will fight three Silacoids and a single Outsider. Such a group shouldn't be a problem for you, so crush them. When they are dead, move on going through the next locations. Resupply ammo in a small army camp in front of you and then prepare for an encounter.
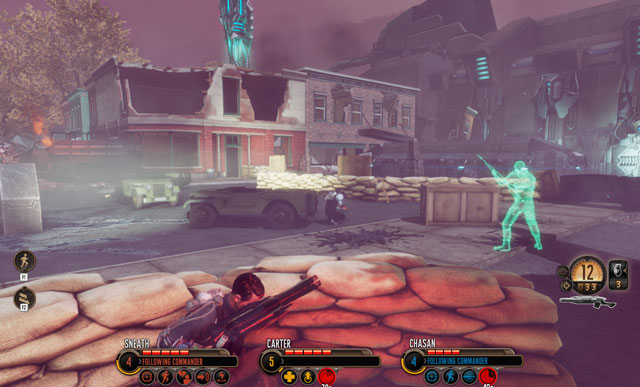 First encounter is just a prologue for the battle.
You'll see three Outsiders - when you eliminate them, on right you'll see more incoming enemies, including a powerful Tech Commander, two Drones, stationary Turrets, Outsider and a Muton. Order of elimination should be like the order of lettering them above. The most important is to eliminate Tech unit very quickly as he can repair machines and become quite problematic. Muton is the smallest threat in here, as his weapon can't cause any serious harm from down there (hide a squad behind a cover). Very effective may be Plasma Field of commandos: enemies are placed on a small area, so you can easily burn them.
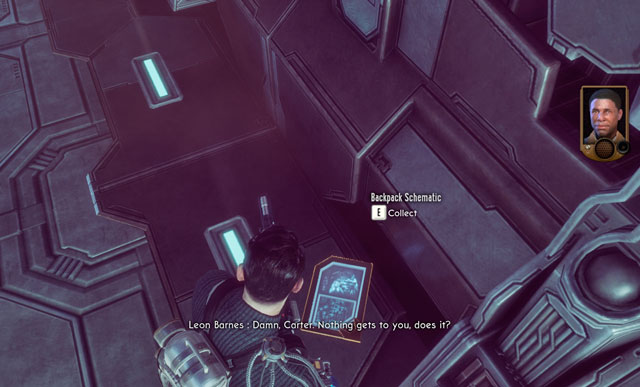 Schematics is on the right side of corridor.
When the battle is over, go through the fortifications on left, resupply ammo and go through the alien defending spots. Then, enter the long corridor and pick up a schematics of Kinetic Acceleration Pack, which increases damage dealt to enemies without shields.
 A lot of things happen in here.
When you enter the building, look for a Resupply Station and use it. Then, go through the gate and defeat a Shield Commander and two Sectoids (the best way is to lift the first one and fie down quickly). Then, go forward and prepare for an army of Sectoids and Silacoids, there will be a many of them. Enemies will try to drown you down with the same number of them, but don't get nervous: series from pulse rifle will stop the wave.
In case of need, you can use abilities like Fire Mission and Plasma Field like also useful Laser Turret.
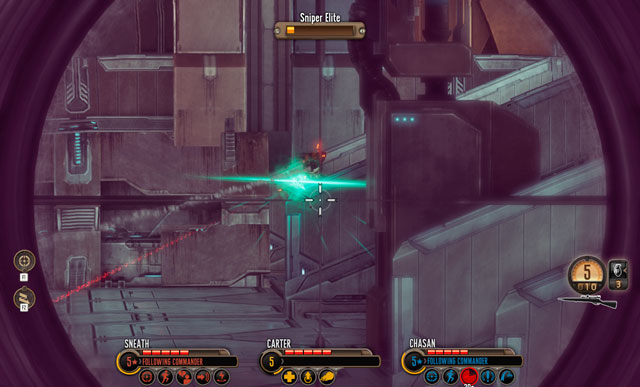 Elite Sniper may kill your soldiers rapidly.
When the battle ends, approach the big container in front of you and turn off the device. Then, go to the next room and kill immediately an Elite Sniper, who is on the opposite side of the room (Critical Strike plus two hits from sniper rifle should be enough for that). Then, eliminate two wandering Sectoids. When they are down, a huge Sectopod enters the battlefield.
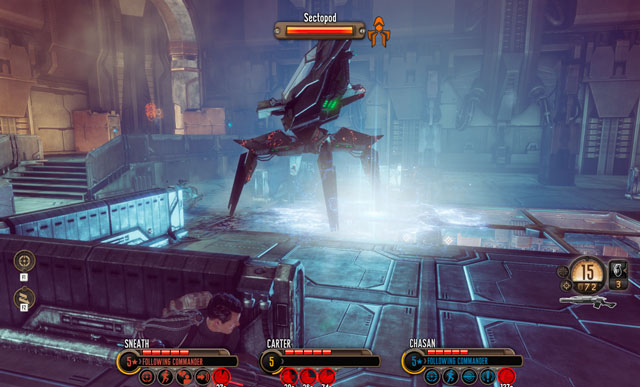 Sectopod under the Fire Mission and Plasma Field will stand only few seconds..
At this stage of the game, this machine shouldn't be problematic: especially when you round it and use your abilities. When the moloch falls, two Drones appear, but they are nothing against you and your squad.
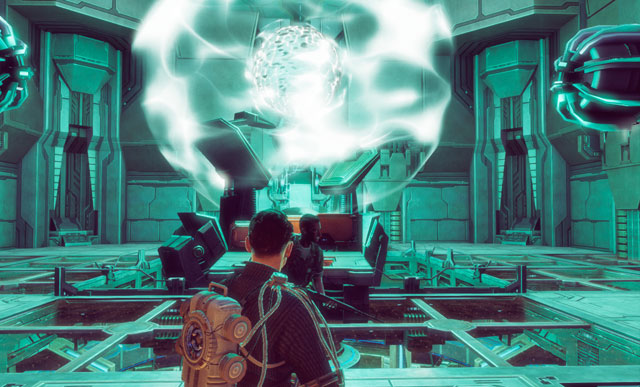
After this encounter go to the oppAxiste room and turn off alien factory. Doing so, you'll save hundreds of people and stop production of Silacoids.
 Office? It's a standard hunter hut.
When the mission begins, go forward until you get to the fireplace and find a hunter letter. Then follow the path until you get to the hunter hut (screen above). On the bench in front of it, you can find another collectible: page from the journal. Before moving on, turn left and find a small path between the scrubs. It leads to a small cave, inside of which you find a photo, another page from the journal and a schematics (decreases abilities cooldown but worsen weapon accuracy).
 "Treasure" cave looks like that.
When you exit the cave, prepare for the fight: you run into a small group of aliens including an Outsider and two Drones. Eliminate them and return to the hut, passing it from the left. After a few moments you get to the puddle at which you find Outsider, Drone and Elite Outsider. They shouldn't occupy you for more than few quick seconds.
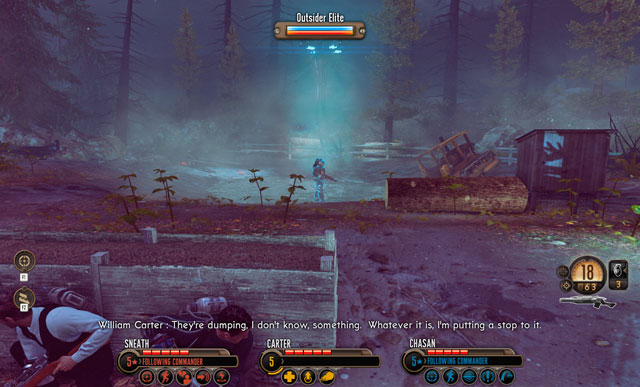 Lift an Elite alien and destroy Drones with Lift.
Kill enemies, go through the puddle and eliminate nearby mines. After that, you'll have a long walk, during which you find another page from journal on one of bridge supporting piles. When you get to the fisherman hut nearby the sea, prepare for three Drones and a Muton. Firstly eliminate the flying aliens, to prevent them from healing bigger monster. You can kill them with short series of rifles or using Critical Strike.
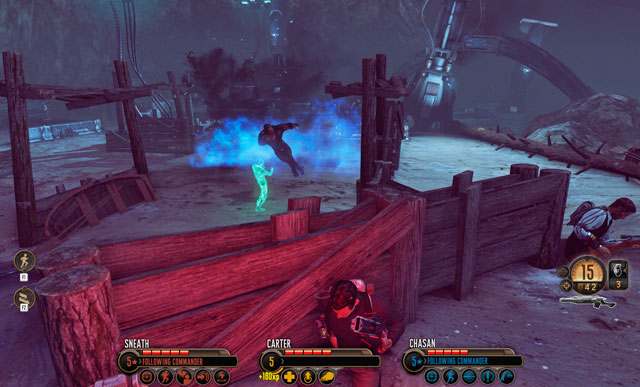 Muton ins't a threat.
Muton can be killed with Plasma Field (commandos), which can eliminate an enemy within few seconds. Good idea is also to summon a Silacoid (Carter) or use Fire Mission (recon). XCOM Laser Turret (engineer) will be also effective. f you run out of ammo, look at sides of this location where you can find boxes with bullets to laser weapons.
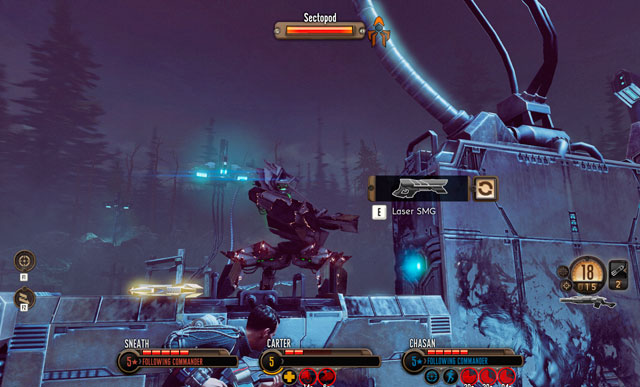 Plenty of weapons around, don't complain about it!.
Moving forward, search the piles of weapon (on one of shelves you can find Sticky Grenades). Then, approach the panel on left and, after talking with agent Weaver, order one of the squad members to hack the broken gate. Then prepare for a battle with the whole alien army. In the first wave, you'll fight against three Drones and a group of Sectoids (eliminate the healers first), and then several Outsiders. When the last one are dead, Sectopod will join the party. Rounding him won't be that easy (as you have only two agents). The optimal way to defeat him is to distract an enemy with ally Silacoid (Carter's ability) and firing at him constantly (preferably at its back, where the armor is weaker).
If you run out of bullets, move back to the gate. Just next to it you find a box with laser ammo.
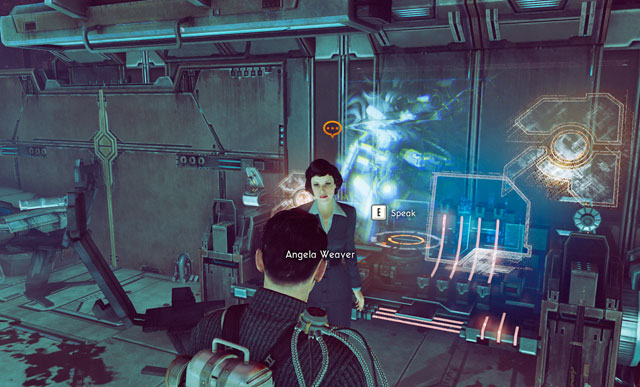 Agent was caring about her brother, who is an author of the journal.
When all enemies are down, go through the unlocked gate and enter the huge factory. When you get to agent Weaver, talk with here and go to onto the other side of the bridge (activate it first). In the following rooms you find a Resupply Station, which you can use.
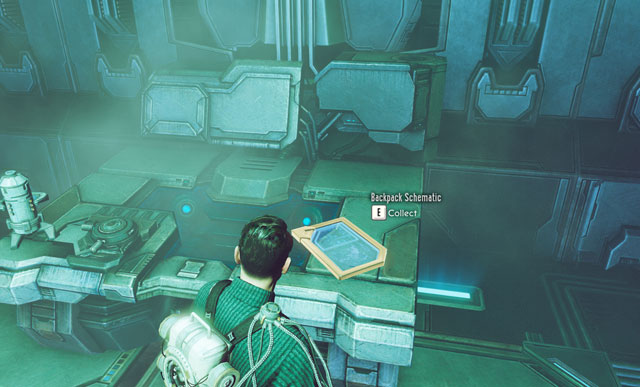 Not the most useful pack, but still useful.
You get to the crossroads - turn right and look around in the scary room, where the experiments on humans take place. On the laboratory shelf on right you find schematics of Range Enhancer Pack, which increases an effective distance of all abilities. In the nearby corridor you find another page from the journal and when you approach it, two Outsiders to kill appear in the room.
Return to the crossroads and turn left.
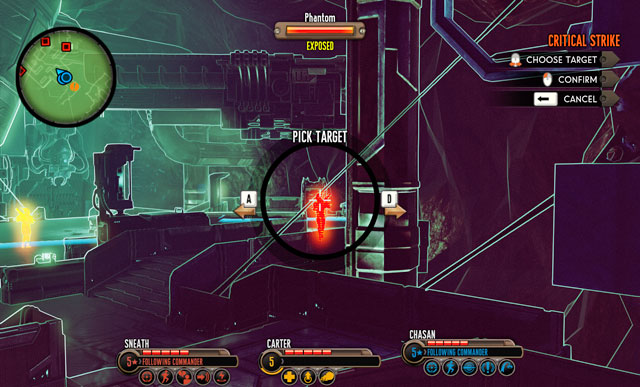 Elimination of Phantoms takes few seconds.
In the big room you'll have a not easy battle with enemies. There are two Elite Snipers under the ceiling and two Phantoms walking on the floor, Elite Outsider and a standard Outsider. As the shooters are well hidden and are far away from you, you won't kill them that quickly. That's why focus on Phantoms - if you eliminate them quickly enough, they won't be able to use a camouflage (what saves you against being flanked). Then deal with Elite Outsider and Drone, which will appear in this very moment. At the very end, move a bit closer to Snipers.
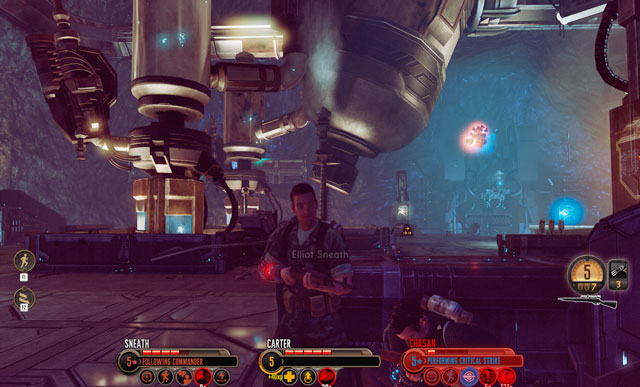 Drones must be destroyed before they heal allies.
When the majority of enemies is dead, a small group of Outsiders and Sectoids will join the party. But your priority are snipers who have the biggest fire power in here. It's a good idea to lift and eliminate quickly one of them, dealing with the other one later, when being involved in fighting other aliens. You can pick up ammo from the box in the middle of the room, or from plasma rifles left by the enemies.
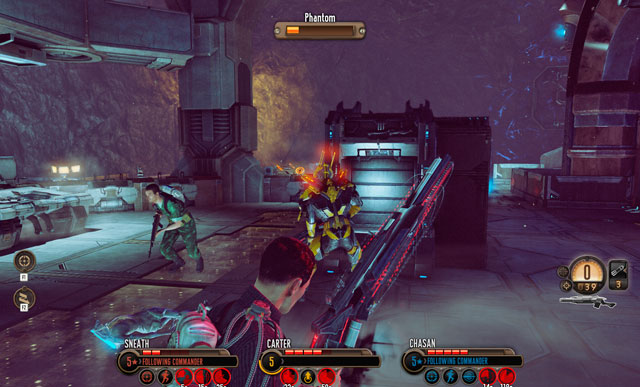 Surprise a Phantom from behind - it's not that easy.
It's not the last difficult encounter at this stage: behind a corridor you find another room where you find even stronger enemies. Firstly, get rid of a Phantom and Tech Commander - after that it should be relatively easy. What left are Sectoids who won't trouble you so much: because they know that Carter's entering to the laboratory, is an ambush.
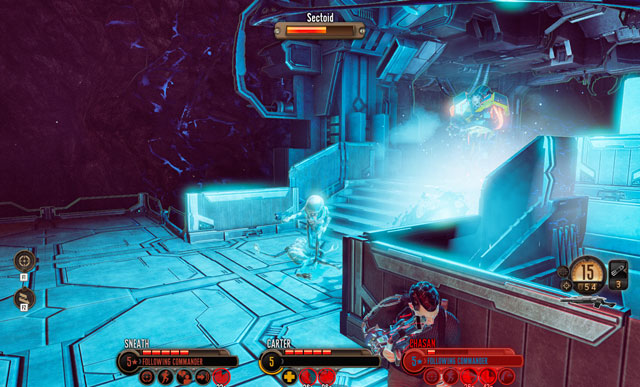 Plasma Field crushes armor.
And indeed: when you kill few first enemies, a Muton and two Sectoids will appear behind you. You'll have to change your position a lot and weaken the big monster: useful may be Plasma Field, XCOM Laser Turret, Fire Mission and Ally Silacoid. And you have to be quick, because in some time three Drones will appear and immediately heal a Muton. If you didn't kill him before that, now focus on the flying things. Ammo may be resupplied at the pillar next to the entrance, at the computer panels in the end of arena.
 Sad fate of Angela and her brother.
When the battle ends, enter the room with agent Weaver and Pete's body. Plug him out or let Angela do it. Then return to the chamber where you fought and move left, passing a long corridor. When you get to the crossroads turn left: in the following rooms you find fragment of a weird book and Schematics (increases damage dealt to heavy wounded enemies). When it's done, return to the crossroads and choose the path on right. On your way, three Outsiders will attack you. Kill them freely.
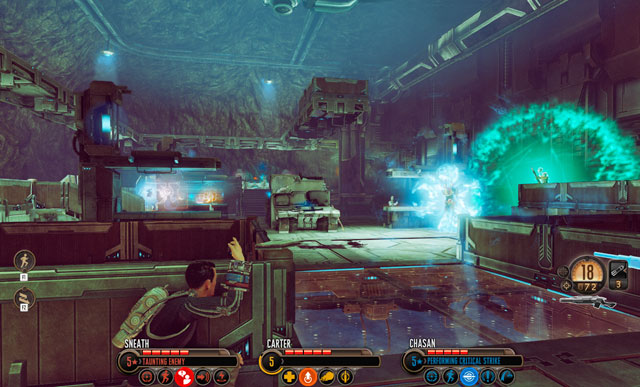 Teamplay is a base of the success.
In the next room you find two Outsiders and one Elite Outsider, which should be quickly eliminated. When the encounter begins, a Tech Commander, supported by several Sectoids, Outsiders and Silacoids will run into this room. Luckily, agent Weaver will lend you a hand: use her abilities to eliminate enemies (begin from the Tech unit!). When it's done, look at the Plasma Sniper Rifle in the middle of the room: if you don't have a regular sniper rifle, this upgraded version will suit you. Equipped, go look for an Axis.
 Computer which you have to turn off.
You archenemy will be met further, behind a several corridors and empty rooms. When an alien sees Carter, he'll cloak himself with indestructible shield and summon several Sectoids and Outsiders. Eliminate the first wave of enemies and notice another danger - two Phantoms trying to round the squad and a Tech Commander creating a Turret. When it's done, enter the random room powering the shield of Axis and turn off a computer (screen above). You need to do it two more times to win!
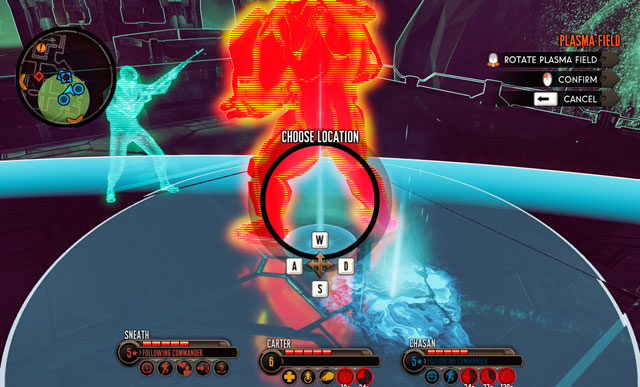 Lure Mutons with Diversion and eliminate with area attacks.
When the first of shields is deactivated, more enemies will arrive on the battlefield: Phantoms, Outsiders, Drone and a Muton. Luckily, agent Weaver will support you once again and her deadly ability has a short cooldown. Eliminate all enemies and save ammo (which can be resupplied in rooms powering the shields of Axis) using all useful abilities. Don't hurry to turn off another computer - heal the squad and look for additional equipment (enemies will arrive in the moment of deactivation).
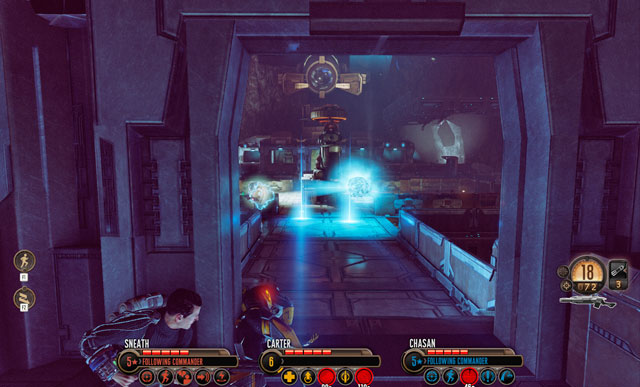 Axis is a tough enemy - he avoids area attacks easily.
Defeat all aliens which appear when you turn off the second computers (Elite Sniper, Phantom, Outsiders and a bit later also a Muton - eliminate them in this order). and then approach the third device. Make sure, you have enough ammo and you have regenerated all the abilities, you can wait for it, there is no hurry. When you're ready, turn off the last of the computers: now you'll face Axis.
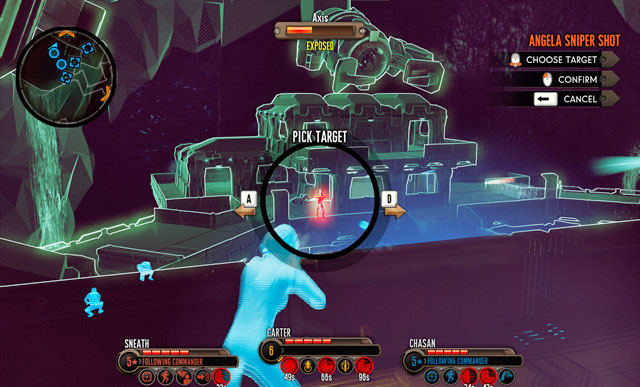 Agent Weaver is an ace up your sleeve.
Axis has strong shields, can teleport, fires accurately and deadly and, also, has a powerful area attack dealing huge damage to the whole squad. During fighting him, you shouldn't use abilities affecting small area because this alien will avoid them easily grenades also (unless he has already use teleportation - it has a several seconds of cooldown). The better idea is to summon Silacoid, supported by a Drone (Carter's abilities) and firing at him constantly by agent Weaver. Simultaneously, you can't forget about healing the squad and keeping an alien at bay.
When the Axis is down, the mission is completed. You can return to the base.
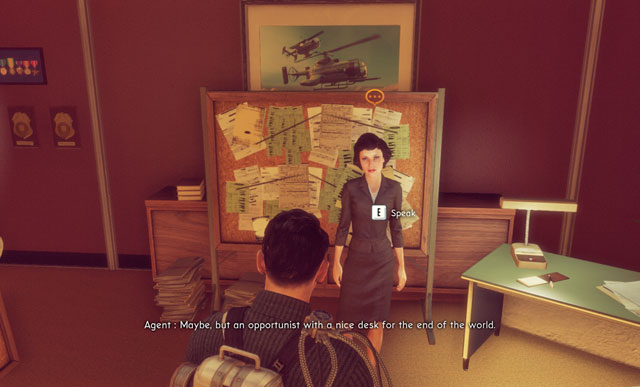
After meeting with director Faulke go upstairs and talk with agent Weaver. After that, look inside boss' office - you'll find a Recording and a note. Then go downstairs and look for doctor Weir in his part of laboratory. By the way, you can also talk with doctor Dresner and complete the Investigation Cure. If you look into lower part of laboratory, you find another note - it is left next to the container of elerium.
 Collectibles, collectibles.
After talking with Weir return to director Faulke and report to him. On your way there, look into the corridor next to the Ranging Fire. You find there a Recording. And in the Ready Room you can find an interesting photo. Then go to the Engineering and enter the board of the Avenger. You can help earlier Barnes with an Investigation Test Flight if you want. It'll upgrade an American flying saucer.
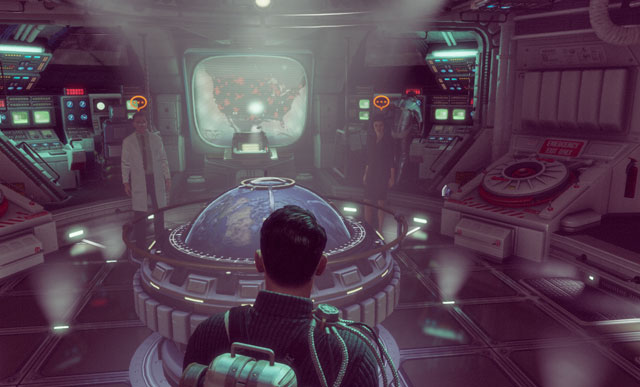 Avenger is working now.
When you board the Avenger, you can choose one of available missions: Hawkeye, Firestorm and Crack in the World. Two first are optional, while the last one is obligatory. It's worth to complete additional mission because they give you more XP and more abilities. But the choice is yours.
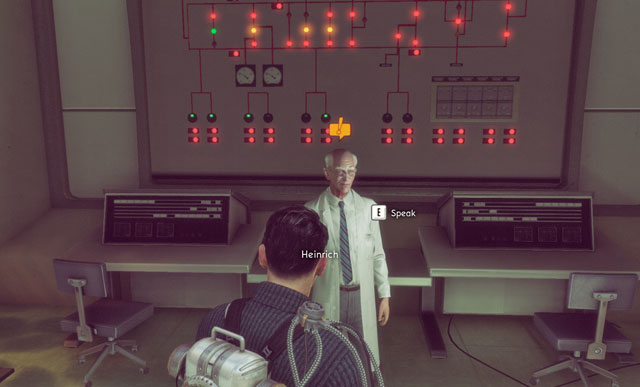 Doctor Dresner has again something for you.
Remark! This mission is available regardless of the completion (or not) the Moonwalkers Investigation!
When you return from the mission Not of This Earth look to the Laboratory in the Bureau and talk with doctor Dresner. He'll tell you that he has made a breakthrough during examining the moonwalkers. For his final test, he needs you - as only Carter can perform some mission.
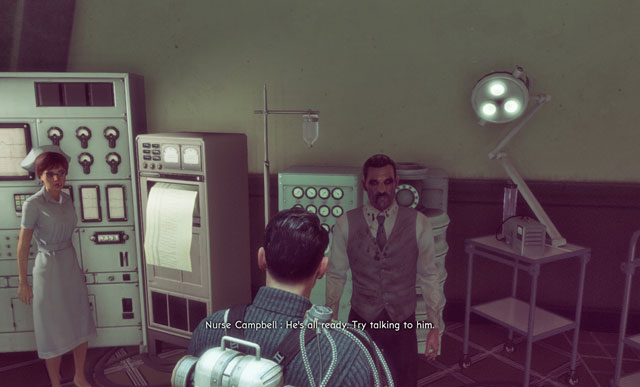 If everything goes well, DaSilva won't get hurt.
Go to the part of laboratory where doctor Desner used to work and talk with the doctor. The, enter the test room and meet a nurse and the subject of the test. If you had saved agent DaSilva in mission Signal from Beyond, he'll be tested one (otherwise he is replaced by a random soldier).
 It's a proper answer.
Waking up the moonwalkers is based on choosing the proper words in conversation. In the first part of the experiment, you have to choose un upper right option (screen above).
 Convincing a sick one that he is needed. Nice idea.
During the second part, you have to choose an option on left (screen above).
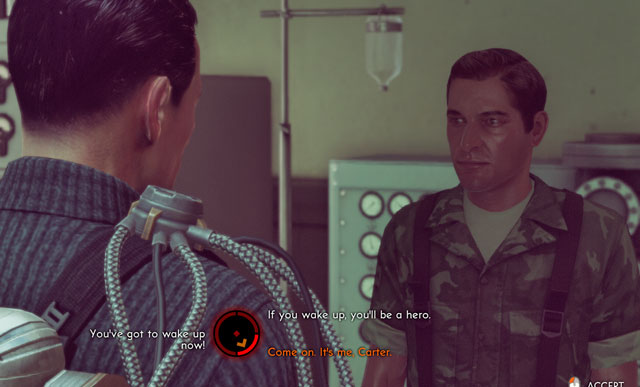 In this moment DaSilva recognizes Carter and returns to the world of living.
During the final conversation, choose the dialogue option on right bottom (screen above).
When it's done, return to doctor Dresner and pick up a reward. It's a Distract called Cure.
 Barnes may be found in the Engineering.
Investigation Test Flight is a simple logic riddle. When you talk to Barnes in Engineering, move to the Avenger via stairs on left. Launch the Focus mode and look for three leaks. To find them, you have to aim at highlighted placed and use a scanner (in PC version it's made by F button).
 When you scan the system, a schematics will appear.
If you do everything well, you'll reveal all three leaks. Scan each of them to find the most broken channel (screen above).
 Only the valve on left should be turned off.
Go onto the board of Avenger and approach three pipes on left. Turn off the first of valves, the rest must remain untouched (screen above).
 The proper combination.
Exit the vehicle and turn left, entering a small platform with switches. Turn off the first and the last one, the middle one should be turned on (screen above).
After all, return to Barnes and report to him. When you complete another random Operation, you get an access to new distraction mission: Flight Test.
 Mission begins with a hot shooting.
When you get to the place, you'll be fired at by a group of Sectoids. Try to eliminate them only with abilities, as you'll find a little of ammo in this level. And you'll need it very, very much.
When you kill first few enemies, they'll fall back and get reinforcements. Also those one should be defeated without using precious bullets. Otherwise, you'll lose the upcoming encounter.
 One of the most difficult battles in the game.
When you get to another fortification, a Drop Pod with several more Outsiders and a Shield Commander (focus on him) falls from the sky. This time save both bullets and abilities, because when the last one alien dies, an Elite Muton will enter the battlefield.
 Deadly jump of Elite Muton.
Mutons are powerful enemies, but their Elite leaders are far more challenging. They have not only more HP, better armor and more effective weapons but also several deadly abilities. First of them is a long jump, which causes a destroying shock wave when he hits the ground. Another one is a possibility of creating Plasma Field: the same like the commandos can. If it's not enough, Elite Muton deals also huge damage at short distance.
 And now a look at the Muton creating the Plasma Field - be careful!
A tactic use for encountering normal Mutons (stopping an enemy and usage of area attacks) won't work because an enemy is too mobile. So you have to change your positions, run away and summon allies like Silacoid or Drone (Carter's abilities). Important is firing at the enemy all the time and destroying his armor. Useful will be Blaster Launcher and ability called Weaken, used by support agents.
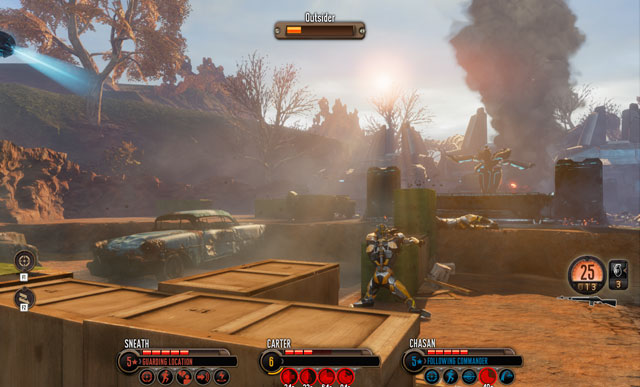 At the end of encounter, you'll have to use a conventional weapons.
When the HP of Elite Muton falls down, five more Outsiders will appear on the battlefield. Defeat the main enemy and only then concentrate on the remaining aliens: otherwise you'll be smashed.
You will, probably, run out of ammo in some moment. If so, use a standard machine gun lying at the boxes and collect ammo from this place. The other pack is on the trucks in front.
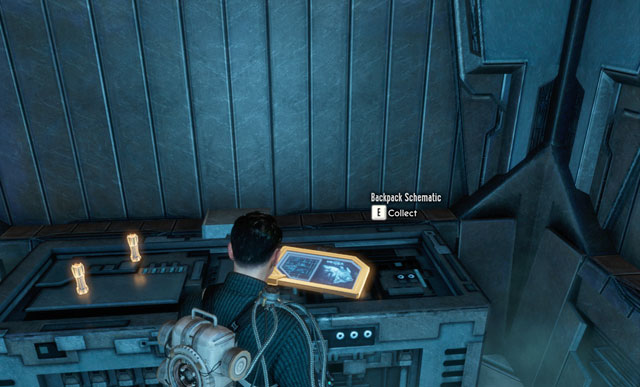 You probably have this schematics already.
Enter the alien storehouse and equip yourself: you'll find a plenty of alien weapons ( like, for the first time, Heavy Plasma Pistol) and a box with laser ammo. Then, turn off a barrier to further part of the room with z button on left. But before you move on, turn right and pick up schematics of Kinetic Acceleration Pack from the shed.
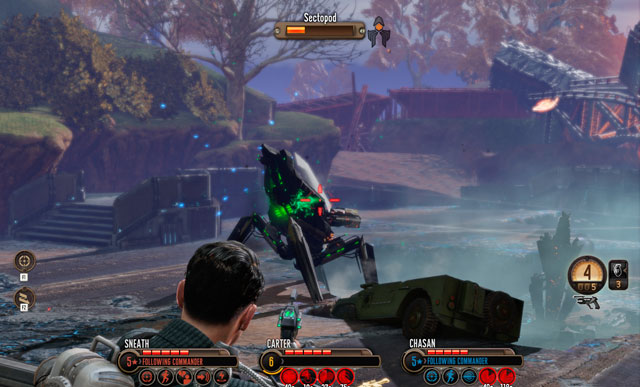 Two Sectopods at once? Piece of cake.
Moving forward, you run into two human soldiers defending against a Sectopod and Drone. Destroy the alien machines (they are already damaged, don't let the Drone repair!) and prepare for more enemies. In a moment, another Sectopod and few additional Outsiders will arrive at the battlefield. In this case, you should eliminate all of them with area attacks (like Fire Mission, Plasma Field or grenades) and then finish off the remainings. When the battle ends, collect ammo (enemies surely dropped several Laser Pulse Rifle).
Saving human soldiers won't affect the storyline.
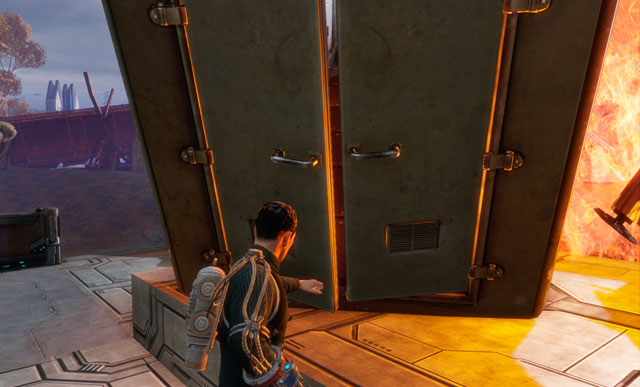 In this container you find a hostage.
When the dust falls, approach the burning container in front of you. When you open it, Mu'ut Jeen, a powerful alien psion will rush our of it. Don't waste your ammo on him: he'll hypnotise one of your men and then run away. So you have to chase him. What's interesting: you don't have to hurry. You'll meet him in the end in the dedicated place - in a shed few locations further.
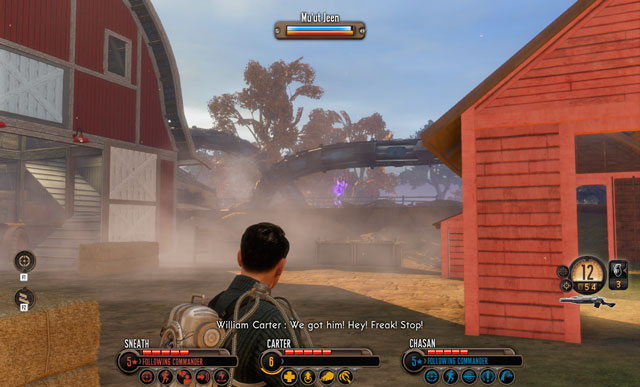 Psion can clone himself.
You'll find nothing in particular on your way to the shed, you can at best look at the civilians bodies. Only when you get to the building, you meet Mu'ut Jeen - he'll leave his clone to fight Carter and run away. Kill the illusion, enter the shed and go upstairs. Then go out through the hole in the roof and enter alien structure. Prepare for a difficult battle!
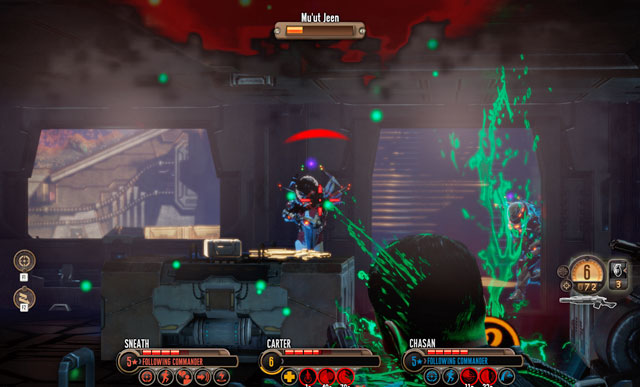 Rounded enemy isn't too scary.
You'll fight against an Elite Outsider and few his fellows. Mu'ut Jeen will hide behind them and throw grenades at you. During the battle, more Outsiders and their Elite leaders will get on the battlefield (the wave of enemies is countless). Summon allies (Silacoid and Drone), massacre enemies with your abilities and kill Mu'ut Jeen. During this fight, you have to hide in buildings and chase enemies: the more of them you kill, the less damage will be dealt to humans. Notice also, that in this buildings you can find ammo boxes.
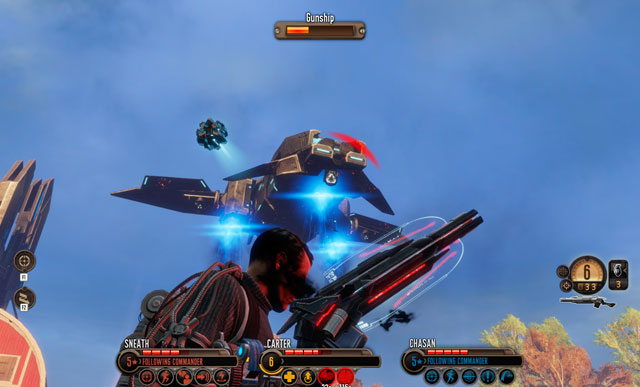 Gunship may be destroyed in game of cat and mouse.
Mu'ut Jeen has a little more HP and much better shields than Elite Outsiders, but you should eliminate him easily. You can kill him in a random time, but try to fire at him constantly - otherwise, his shields will regenerate quickly. When you kill the psion, his clone dies immediately, so focus at firing at one target.
When Mu'ut Jeen dies, a flying Gunship appears. What seems to be obvious, you'd rather to fight this machine one vs one, so before you do that, eliminate remaining Outsiders.
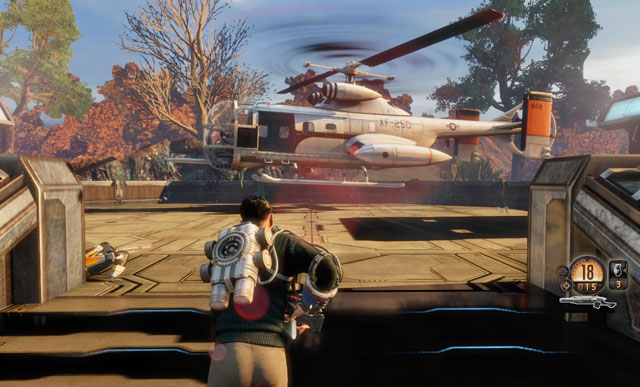 Mission completed, we're coming home.
Fighting the alien ship isn't difficult. Fire at him form all you've got and then return to safe buildings to avoid his missiles. He fires in series so you will notice a pause between the. When it's done, approach to XCOM Helicopter and fly away.
 There are hamburgers next to it. Bon appetit!
When you begin the mission, enter the gas station and pick up whatever weapons suit you, you'll find a whole arsenal there. Then listen to the Recording from the counter. You can also take a look at the back, where you'll see something interesting.
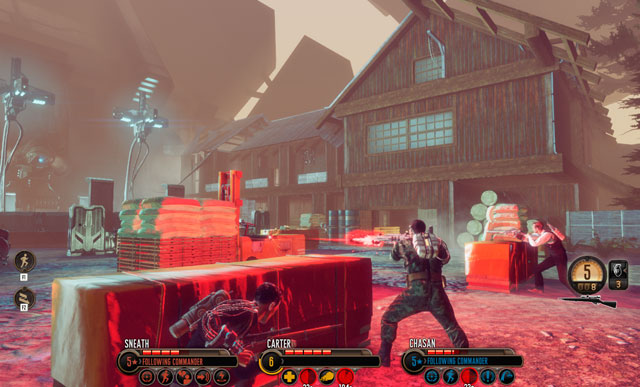 Harmonious team will win easily.
Then, you can move on. When you get to the burning truck, walk it round from right and head for the big shed. If you make it quick enough, you'll surprise Shield Commander and four Sectoids. Lift and eliminate the first one and then deal with the remaining aliens. In the second wave you'll have to eliminate few more Sectoids while in the last one: several Outsiders, two Drones and a Muton. Luckily, during this fight you can easily resupply your conventional ammo, there is a plenty of ammo packs nearby. If you haven't got Heavy Plasma Pistol yet, you'll find few of them at dead aliens bodies.
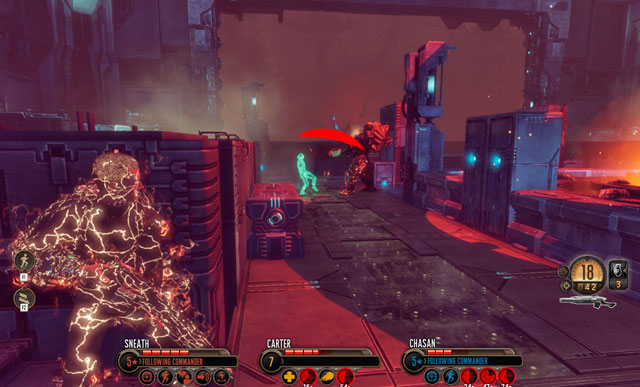 Elite Muton can create Plasma Field dealing a lot of damage.
Move on and infect alien machine. Before the enemies arrive make sure that you have enough ammo. If you don't, there are several laser ammo boxes on right and left side of location like also at the very device. Then, prepare for a strong attack: you'll see several Outsiders, supported by their Elite leaders and a single Elite Muton. First of all, eliminate the weaker enemies (what decreases a danger) and then take care of the miniboss. The best way to kill him is to summon allies, change position and fire constantly at him.
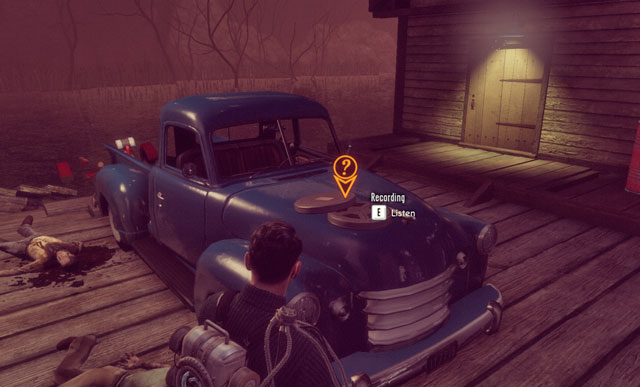 Last words of local citizens.
After killing them and a short conversation with Barnes, approach the landing side, turn off the barrier and go into the forest. When you get to the house at the lake, approach the car and listen to the Recording on it. You can also use Resupply Station, which is under the street lamp.
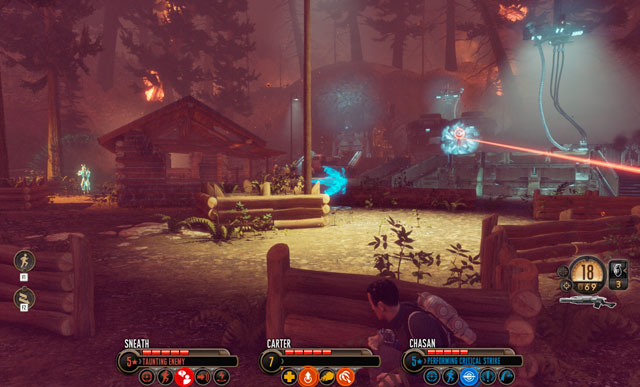 The most dangerous in here is the Sniper.
Move on and prepare for a long battle. You'll see three Elite Phantoms and one Elite Sniper in front of you. Lift and eliminate the latter one, otherwise he'll decimate your squad. Then deal with the remaining enemies. For sure, they'll try to flank you what makes their moves predictable and easy to defeat.
 Kill the Tech quickly or he will become troublesome.
When the first group is down, more aliens will appear, including several Elite Outsiders and another Elite Phantom. Kill the latter one, before you round and bite your squad. Then, prepare for the third wave of enemies containing of more Elite Outsiders and a Tech Commander. Kill the Tech as the first one, because otherwise he'll create a Turret which will be problematic. If you run out of ammo, you should find some additional conventional bullets in the house in the middle of location and on the right side of location (laser ammo).
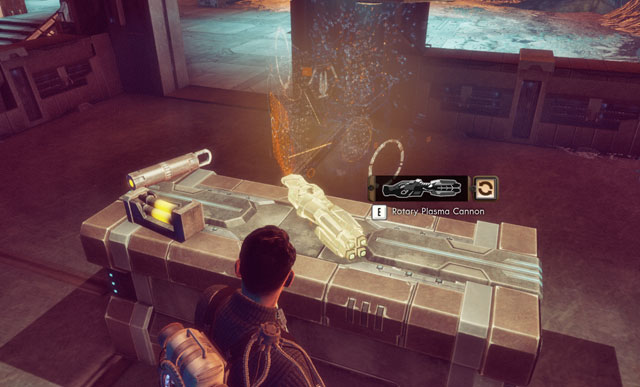 Sectopods use similar weapons.
Enter the bunker on the right side of the battlefield and pick up Rotary Plasma Cannon. This powerful weapon let you eliminate whole groups of enemies within a moment. It'll be very useful for you.
After that, enter the alien building and pick up a schematics of Anti-Personel Pack in the corridor - it increases damage dealt to enemies without an armor.
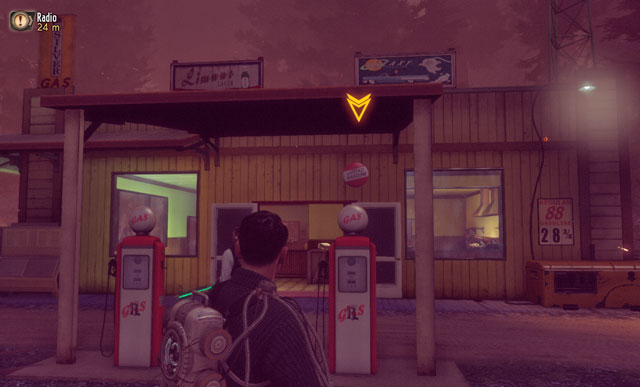 Roof stairs are on the right side of the building.
Leave the location and go forward. Finally, you get to the gas station, the same which you have left at the beginning of the mission. Go for the roof of building, using stairs on right and collect some ammo (a lot of it just around you). Then talk with Barnes by radio and prepare for a real siege.
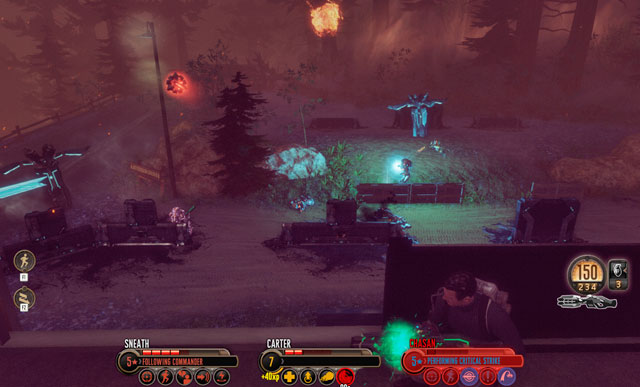 Kill a Minion Commander or he'll summon Sectoids and Silacoids.
In the forest in front of the gas station a Drop Pod will land with few first enemies: Outsiders and Elite Outsiders. When you begin eliminating them, another troop arrive, identical but additionally with dangerous Minion Commander (kill him or he'll summon more aliens!). Kill enemies carefully using Rotary Plasma Cannon and all useful abilities: it'll be a longer battle. If you run out of ammo, swap weapons and go to the ground floor, where you find more supplies (but all human, nothing alien).
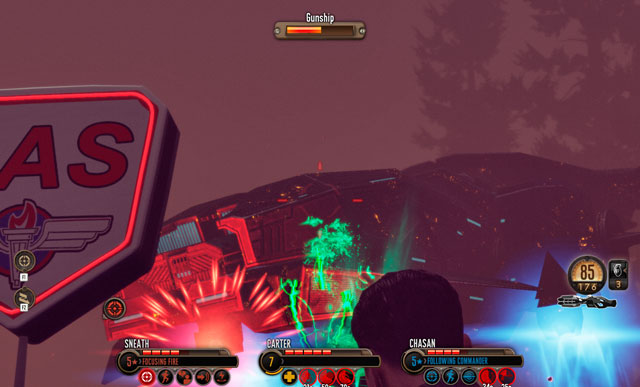 Enemy armor melts against Turrets.
When you eliminate two waves of enemies, the third one, coming from the breach, will appear. It contains several Outsiders with their Elite versions and a powerful Gunship. First of all, eliminate the weaker enemies, what decreases the danger and then take care of the boss. He has no chance against Rotary Cannon, especially when you go downstairs and you will move in and out of the building (plane's laser cannons cannot break the ceiling).
Defeating all enemies ends the mission.
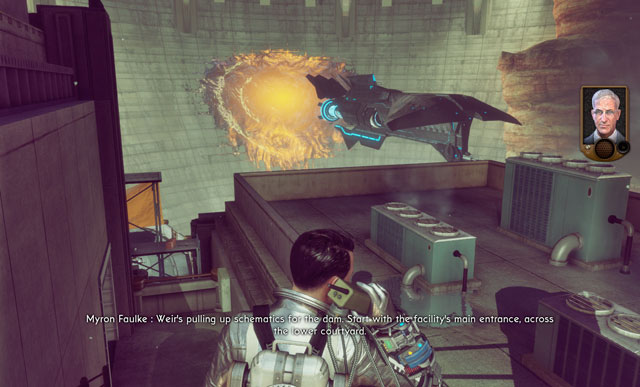 Untypical place for the invasion to begin.
When the mission begin, move forward going through the next floors of the dam. When you enter the first building (with a moonwalker at pumps) turn left and read the note left there. Then, go downstairs using the staircase and stop at the dying moonwalker. A man will vomit, releasing the Silacoid which will attack Carter. Kill an alien and enter the room on right: you find there another document. When you read it, exit the building (notice some conventional ammo and weapons in here).
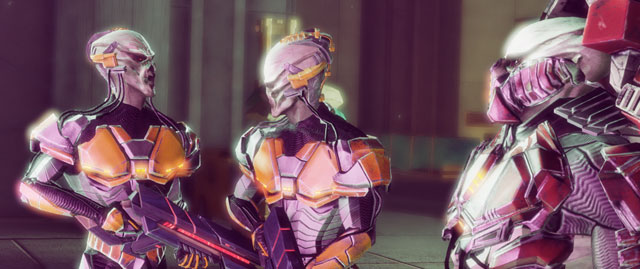 Aliens don't expect they'll die.
When you get to the next part of the building, you'll see a cut scene. When it ends, deal with two Outsiders, one Elite Outsider and one Psion Commander. The last target is the most problematic, as he can clone himself. After all, it's better to finish off weaker enemies at the beginning, what decreases enemy fire power. When the reinforcements arrive (Outsiders and their Elite versions), kill them as you like. If you didn't kill a Psion Commander yet, he'll run to the further part of the building. Collect ammo (chests on right) and move forward.
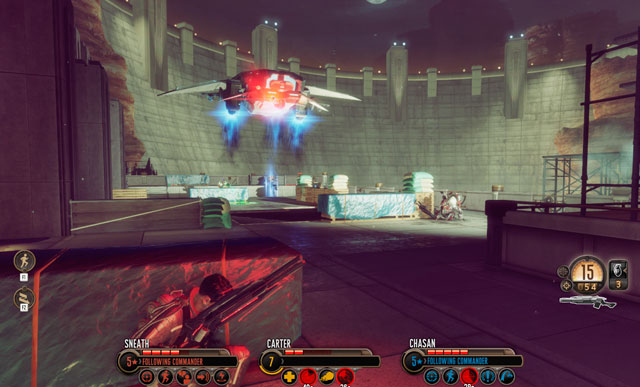 Enemies are numerous.
Here, a little more difficult task awaits. You'll run into a group of Outsiders and Elite Outsiders, who have good position. After a while a huge Gunship with additional Outsiders appear. Don't hurry with eliminating the flying machine - every time its HP decreases significantly, it drops a troop of enemies (it has two such groups on board). So focus on the infantry and then on the plane. If you run out of ammo, look into the room on right (you have to go upstairs).
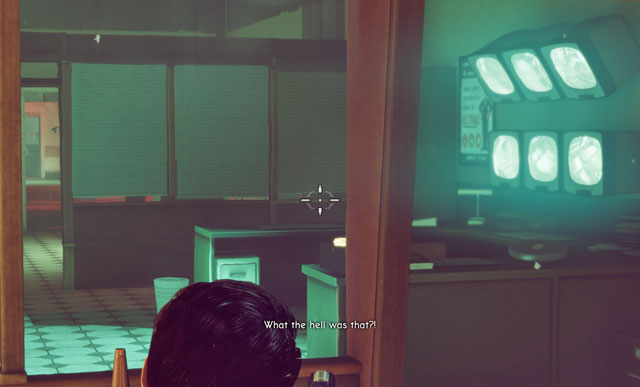 Enemy disappears so quickly I didn't make a printscreen.
After the fight, enter the next room and use Resupply Station. In the next room you find an alien Scout who will quickly disappear (no time to harm him). Look for collectibles in this room, you'll find three of them: Recording, note and photo. Move forward, you run into a Scout once again. Don't fight him, just duck behind a cover and wait. When he disappears, move forward and read another note from the shed in front of you. Then return to the corridor and kill an Outsider coming out from the corner. Move the squad into the room from which he emerged.
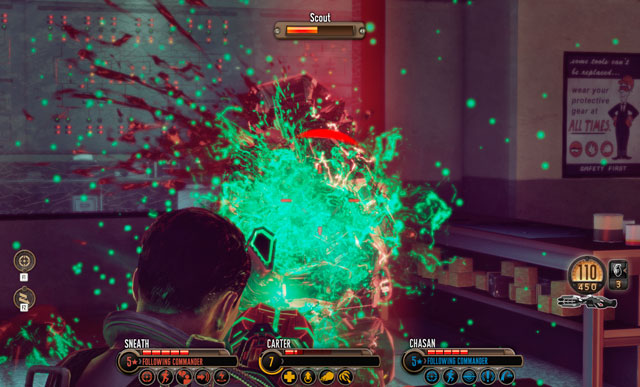 Rotate Cannon kills everyone in a moment.
After a short walk you get to the great chamber with three alien devices. Approach the first one and turn it off with a switch. When you get on the bridge leading to the next machine, two Scouts, two Elite Outsiders and single Elite Phantom will appear in front of you. Deal with the first ones at the beginning: they are tough but they also deal a lot of damage. An optimal way to do so is to use Lift and firing at them. You can also make use of summoned allies (Silacoid and Drone), because enemies have impressing fire power. You can also bombard your targets or set up XCOM Turrets.
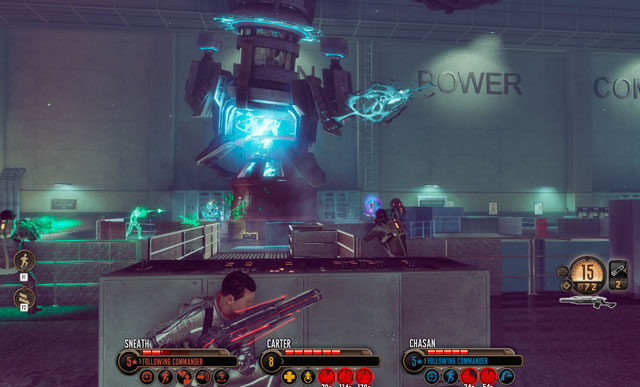 Turning off alien machines is a torment.
Enter the room from which enemies emerged and collect ammo from there. When you move forward, you'll be attacked by Elite Outsider, three Elite Phantoms, Scout and a Minion Commander. Kill the latter one first, as he can summon Drones and Silacoids. Lift him and fire down, eliminating the remaining enemies in random order (use area of effect abilities and grenades). If Carter has a Mind Control use it against a Scout to get the best output.
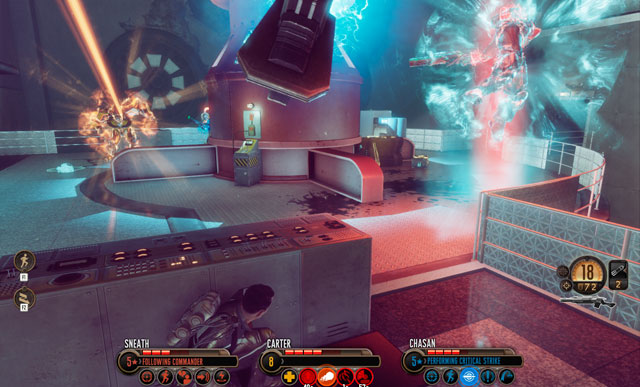 Kill enemies rapidly.
When you approach the third alien device, a Muton, Scout and Shield Commander teleport next to you. Ignore the Muton for the time being as the rest of enemies is much more dangerous. Don't let the Commander shield his allies (Lift him, Taunt him or just kill him) and then eliminate dangerous Scout. Lonely Muton shouldn't be a problem. When it's done, pick up a schematics Laser Efficiency Pack from the shelve on right (increases the clip size in laser weapons) and turn off the alien device.
 Not numerous but deathly enemies.
When you turn off the last device, enter the room in front of you. In this moment you'll be attacked by Elite Phantom, Scout and Minion Commander (after a while two more aliens will appear). Neutralize the Commander and then his fellows. Then enter the room and listen to the Recording on its right side. If you run out of ammo, enter the roof and use weapons from there. After that, push the button ultimately disabling all alien machines and go through the opened gate.
 You'll fight for this little note.
When you get into the corridor, turn right and enter the room moonwalker sitting at the table. Under the wall you find another note you can read. In this moment you'll hear a man screaming in the other room - you won't be able to safe him and run into a group of Silacoids. When you kill them, return to the corridor and go downstairs.
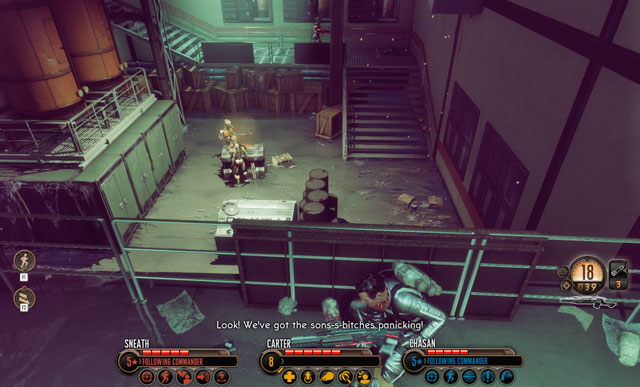 They won't know what hit them.
After a short walk you get into room with three Outsiders. Eliminate them and go downstairs. On the computer in the middle you find a Recording to listen to. Then, go through the door and use Resupply Station. Enter the big, flooded hall and move forward eliminating more Silacoids. Notice also, that in one of passage room you find another Recording. Don't forget listening to it. Before you get into a tunnel, look also at the middle part of the hall and collect a schematics Anti-Personel Pack (increases damage dealt to enemy without an armor).
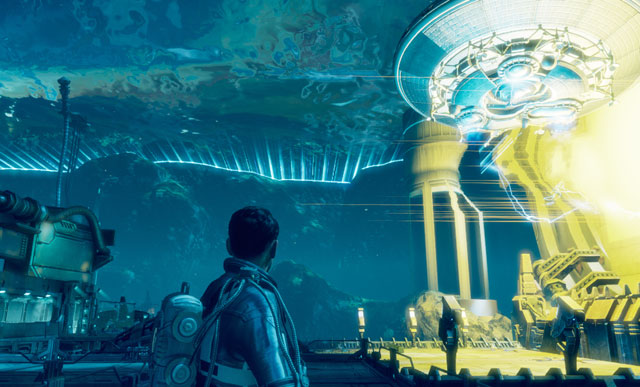 Avenger got to the other side.
Go through the breach in the wall to the next part of the building. For a some time you walk without any attention from enemies, but finally you run into several Outsiders. Kill them and enter the room on left - an alien arsenal all for you. Then go forward and when you meet more Outsiders, defeat them and collect ammo. Open the gate and head for an Avenger. When you get close to it, it turns out that the gates to alien planet are closed. So you have to go to the Command Center and deal with this problem.
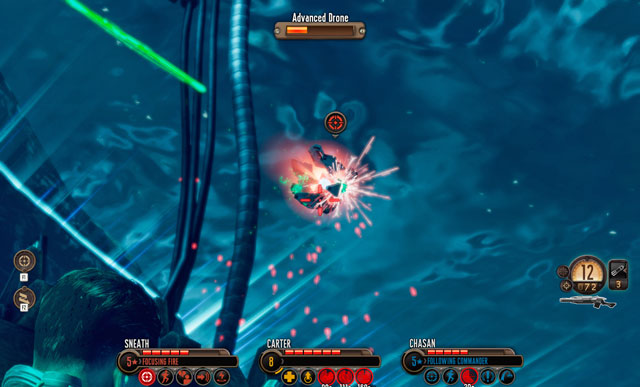 Eliminate Drones in the first place.
Prepare for meeting Elite Outsider, two Elite Phantoms and an Advanced Drone when you get to the place. Eliminate the latter one at the beginning, because he can Lift your squad members. Then kill off remaining aliens in random order. When it's done, approach the main console and launch it (you can also collect nearby ammo). Prepare for a heavy fight!
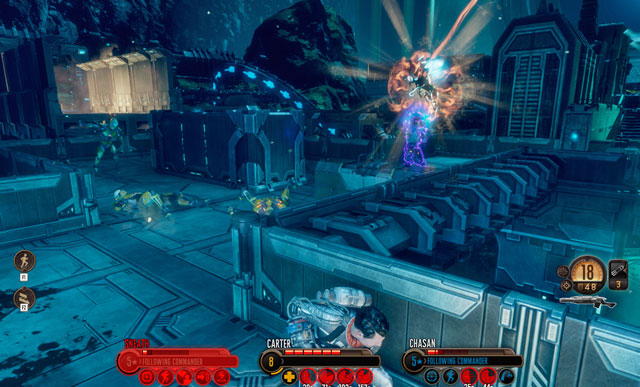 You have to play it tactically.
When enemies appear, kill the Drone first. Then take control over one of two Elite Outsiders (if Carter has a proper ability) and then Lift Minion Commander and fire it down. It's only a beginning. After a while Elite Phantoms and more of Elite Outsiders appear. Approach chest on left and pick up Plasma Assault Cannon, which is one of the best weapons in the game. If you run out of ammo, ammo box can be found in the same chest and behind you, on the console. In the further part of battle use new weapons and all abilities; especially the area ones will be useful on the left side of footbridge (from where enemies are coming).
 Welcome on the alien planet!
Head for Avenger and stop at the computer - there you find an Endurance Pack, which increases maximum HP and makes the healed character regenerate with additional HP. When you pick it up, enter the flying saucer and watch a cut scene. In a moment you'll be taken to the alien planet!
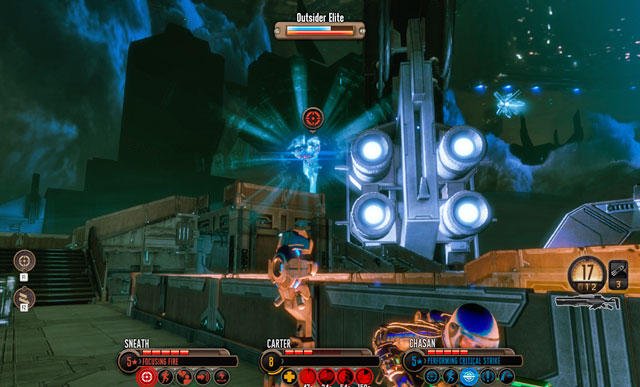 You can lift not only Muton but also infantrymen!.
When you land, approach the Resupply Station and use it. In the next room, you'll have a difficult but schematic battle. When you launch the panel in the middle of the room, a huge Elite Muton appears. When you take him one third of his HP, he runs away and summons several Elite Outsiders and Phantoms (don't care about transporting them Gunship). When they're killed, boss will return to the battlefield, jumping on the podium on left. Scheme will repeat: when you deal proper amount of damage to hum, he runs away and summon reinforcements (the same like previously but more numerous).
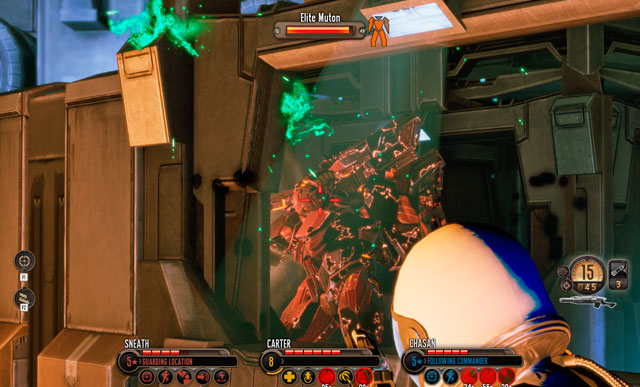 Summoning allies weaken enemies.
Third encounter is decisive. Muton jumps on the platform on right supported by the another group of enemies, this time with Minion Commander. Kill the Commander first, then the infantrymen and then focus on the boss. Change position and pick up ammo during this battle - you find a lot of useful things in nearby buildings. Use all abilities and don't fear to fall back: sometimes it may help you win.
 The only interactive part of the game - just capture the "demon".
When the battle ends, approach the console and turn right - on the box you'll find Kinetic Acceleration Pack, increasing damage dealt to the enemies without shields. Then launch the mechanism and watch a cut scene. When you capture the mysterious "demon", you can go back to your base.
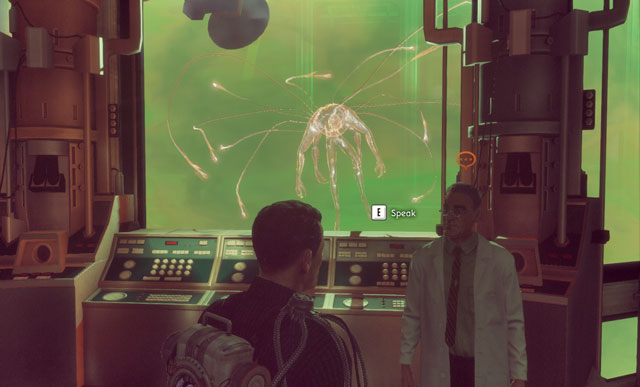 Alien floats in the elerium container.
During this visit in the base, there won't be many attractions. You can walk around the Bureau and talk with people but it won't change anything in the game. There shouldn't be also too many collectibles in here - in the Communication Room (the one with officer Chulsky) you find a photo attached to the board and one Recording in Operations. That's it.
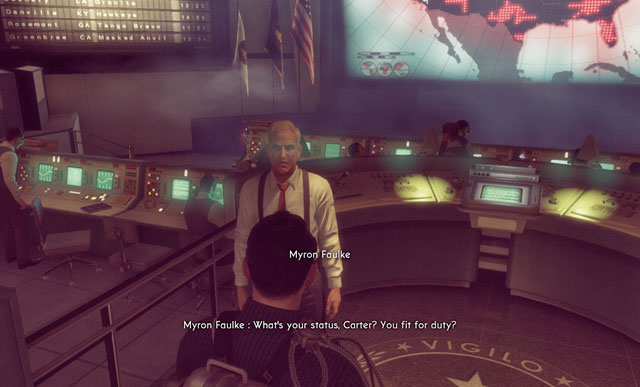 Faulke is nice and subtle like always.
When all is done, approach the Faulke in the Operations and talk with him. Then, use a main computer and choose the next mission. For the time being, you should have an access to Operation Angel, mission The Last War and two Distracts: Claiming What's Ours and Space Junk. Choice is yours, but remember if you choose The Last War there will be no going back. If you have some unfinished businesses in Bureau or out of it, take care of them now.
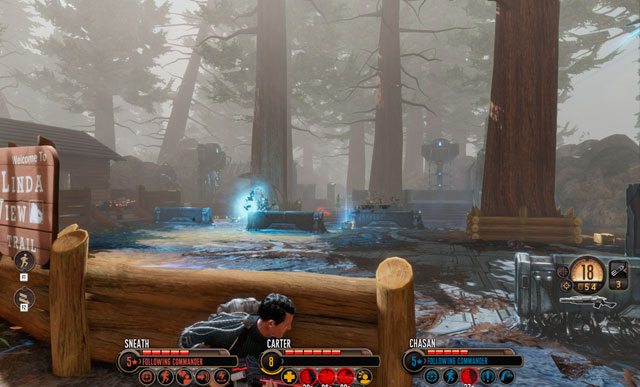 Picnic quickly changes into the battlefield.
When you begin the mission, approach the police car and read a letter. Then enter the park in front of you. After a short walk you get to the place where three Outsiders and one Tech Commander are holding two moonwalkers. Lift the leader of aliens and fire him down, eliminating remaining enemies. At this moment, more Outsiders and four Drones (one of them Advanced) will join the battle. Take care about the flying ones, focusing them one by one. If you run out of bullets, don't worry: you find supplies on both sides of the cutting. In the house on left you find a letter explaining the current situation.
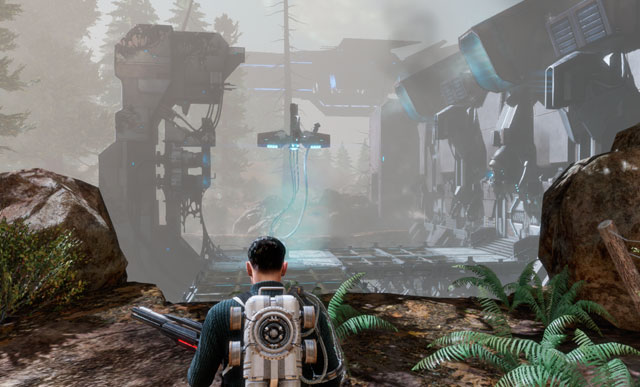 You can use alien weapon against aliens.
When you move forward, you'll be attacked by few more Outsiders. They aren't a challenge at this stage of the game: you have to watch out more to not step at the mine (there are two on your way). What's interesting, you can use this explosives against aliens - it's enough to fire at the mine when aliens are close to it.
Entrance looks impressing.When you finish off aliens and collect bullets (shed can be found on right) approach moonwalkers and launch a mechanism next to them. When you finish talking with doctor Dresner move on, picking up a letter from corpses at right. When you get to alien structures, approach the device in the middle of platform and pick up Health Converter Pack, which decreases HP and abilities cooldown. Then, enter the building and from the armory on right take whatever weapon suits you. After that, enter the platform at which aliens are moving.
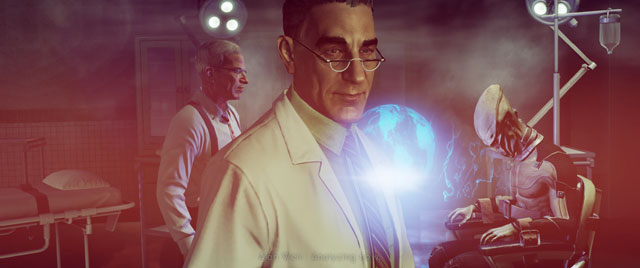 Muton dies within seconds under the heavy fire.
You find three Outsiders, with Tech Commander and an Elite Sniper on your way. First of all, eliminate the leader by lifting and killing him before he set up a Turret. Then, get rid of a Sniper and finish off the remaining aliens. When the last one dies, an Elite Muton appears. As he is alone, you shouldn't have problems with killing him (you can Lift him or lure down with Diversion and eliminate). Collect ammo from boxes on both sides of the battlefield. After that, enter the platform in front of you and release more moonwalkers. Behind a cover on right you should see two Elite Snipers and an Elite Outsider - take care of them without leaning out your head too often.
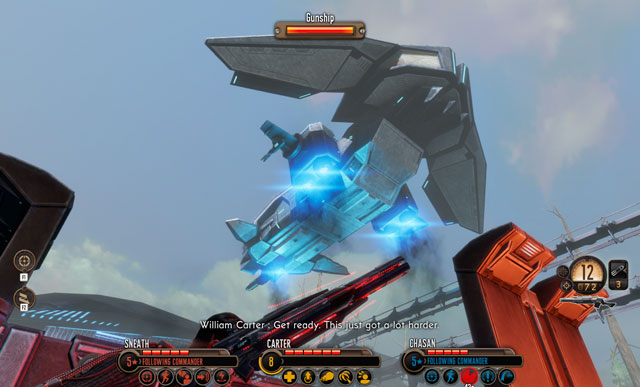 This machine was a boss once - not it's a piece of cake.
Move forward and fight three Outsiders and an Elite Sniper. When they're down, a Gunship with reinforcements emerges. Eliminate another squad of enemies and then fire down the alien vehicle. You have to be quick or the incoming Drones (two, to be precise) will quickly repair the machine. If you didn't make it in time, firstly eliminate the healing bastards and then the big plane. If you run out of bullets, look for in side corridors, there is a lot of different weapons and few ammo boxes.
When the battle is finished, approach the computer on the other side of the room and launch it. The mission ends.
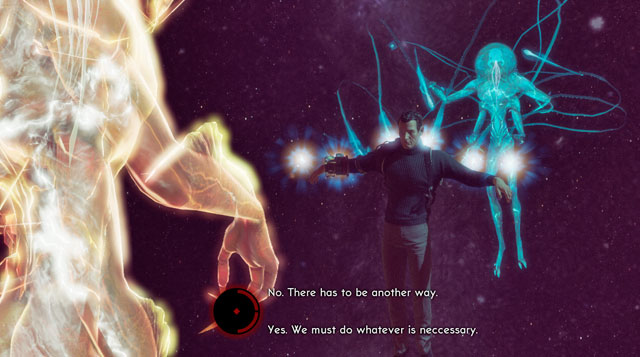 In fact, this choice doesn't matter at all.
When the mission begins, there is a breakdown in the Bureau. After a while you get a message from doctor Weir, that its cause is an awakening of the alien from the big container of elerium. Go to the Laboratory and meet the immaterial alien. The cut scene launches in which you have to choose: save the humanity or sacrifice it for the bigger good. But as it will turn out, the choice you make here won't affect the future events.
Interrogation was going well just to the some moment.When the sequence ends, you wake up in the Hospital. Open door to the room with an Infiltrator, doctor Weir and director Faulke. After a short cut scene you'll have to chase the alien. On your way there use a Resupply Station and choose whatever weapon suits you. During the chase don't waste your ammo: enemy is immortal. But read the note, which can be found at the entrance to the big room with imprisoned aliens.
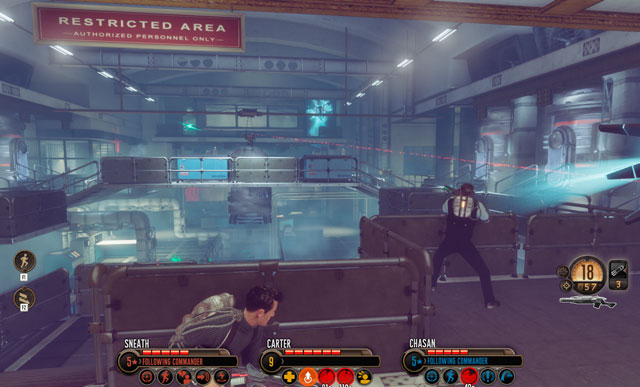 Aliens using human weapons?
When you get to the room, you'll be attacked by a big group of Outsiders - but they are armed with human weapons instead of their owns (stealers!). They aren't a threat due to the weak damage and weak defence. It becomes a bit worse when two Elite Snipers and a Shield Commander join the battle. They should be your priority targets. When you clean the room, go on the other side and upstairs. You'll reach the next floor (you can collect ammo from the very bottom of the room).
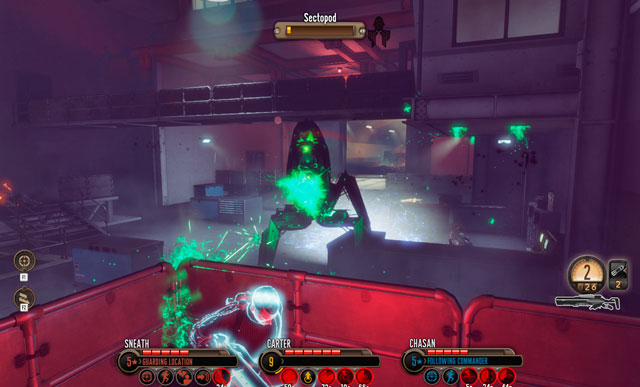 Infiltrator appears when all of the other aliens are dead.
Run forward moving through next rooms. When you get close to the weird device at the bottom of stairs, look for a nearby note. A bit further, in the corner of the room before moving to the next part of the building, you find another letter. There, after a short walk, you get to the Resupply Station. Then, enter the room with two hiding Elite Outsiders and two weaker aliens. Kill them with Mind Control, Lift and other useful abilities and prepare for another fight. Another group consists of a Tech Commander, two Elite Outsiders and a Sectopod. Eliminate them in the order listed above. Try to safe Lift for later on, as it'd be useful during fighting the Infiltrator. When he shows up, use this ability and kill this enemy - it'll save you from the long and exhausting battle.
 Your perspective changes rapidly.
Move through more rooms - in one of them you can watch at the photo - and then go to the next level. In a room behind a part with moonwalkers you find a document, about examination of infested ones. When you get to the next part of building, a cut scene appears, and you'll be playing as Ethereal. In this form approach and take over Carter.
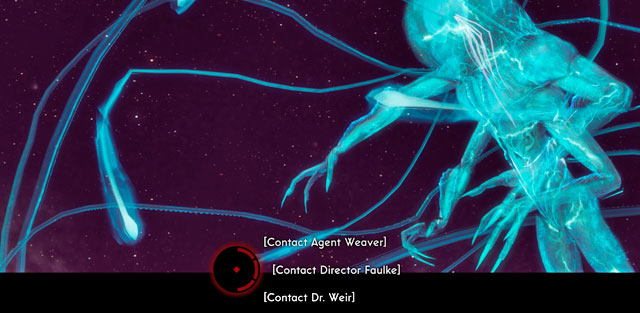 This is a decisive moment for the storyline.
After the next animation, you have a choice: wait until the bomb explodes and die during an explosion (what ends the game) or leave the Carter's body and run away. In the second option, you have to choose your next character which you'll be playing: agent Weaver, director Faulke or doctor Weir.
Your choice does matter that up to the end of the game, you'll observe the game from the particular perspective. It changes the point of view from which you will watch at the events but doesn't affect the way it will go (the game always ends up in the same way.
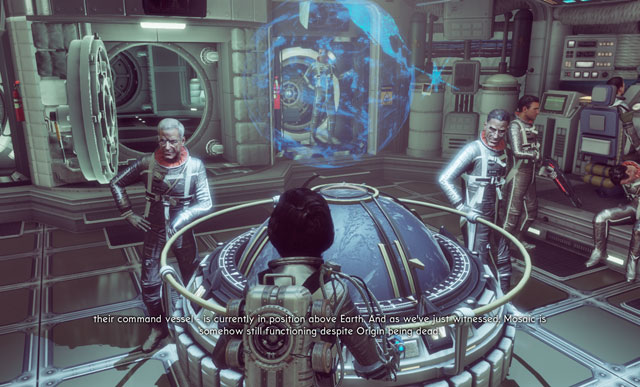 Final mission in a moment!
Whoever you chose, you'll end up on the board of Avenger where you can find four collectibles. They are:
Behind you, you can find a note about the fate of remaining Bureau agents. In front of you, you can see a grainy photo, attached to the metal container. Second note can be found in a small room which you can enter by a manhole. The third and last one is left on right from the photo, next to the small screen.
When you get all collectibles and talk with all nearby characters (it isn't obligatory), approach the computer and choose the last mission in the game: The Day the Sky Fell.
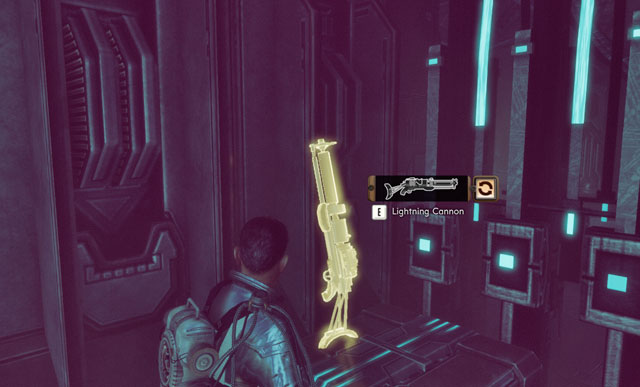 Weapon can be spotted through holes on right.
When you begin, go forward: you'll meet no enemies. You'll be accompanied both by chosen in computer agents and two characters which you could have chosen in the previous mission.
Finally you get split up with your companions - move on, getting to the simple maze. In one of its branch you find a powerful Lightning Cannon which destroys single targets. Finding there isn't difficult because the maze has only one crossing: new weapon can be found on left, moving forward you get to the next location.
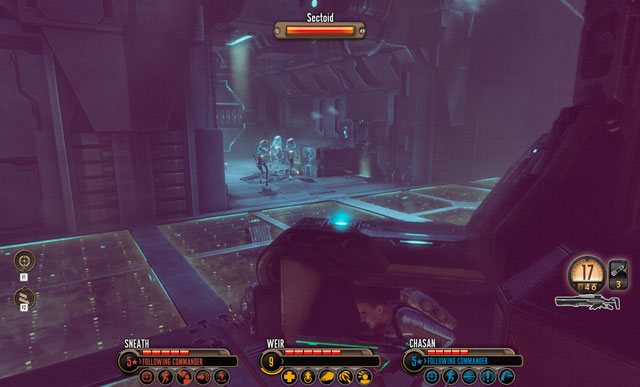 Elimination takes less than a second.
In one of the next rooms you'll be attacked by several Silacoids and a bit further you run into patrol of Sectoids. They shouldn't be problem at all, eliminate them and move on. You'll get to the elevator which will take you upstairs. Being there, enter the big room with a lot of weapons and ammo boxes. Resupply and approach the computer in front of you. When the cut scene ends, be prepare for a difficult battle.
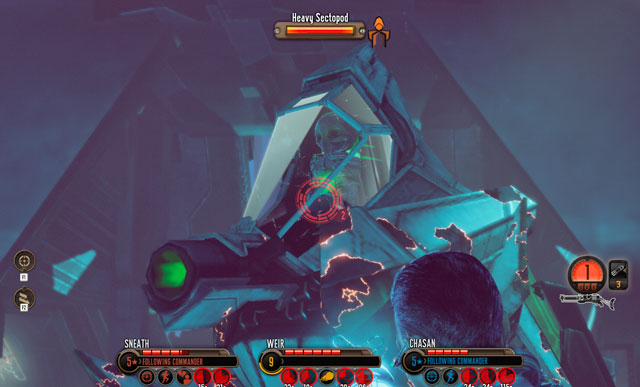 Lighting Cannon weakens Sectopod immediately.
You'll fight against two Elite Outsiders and three Elite Phantoms. Take over one of them and eliminate the rest with regular firing, summoned allies and other useful abilities. Try not to use everything you've got, because there will be second wave of enemies with: two more Elite Outsiders, one Elite Phantom, Drone, Advanced Drone and a Minion Commander. Kill the Commander first, then Drones and the infantry at the very end.
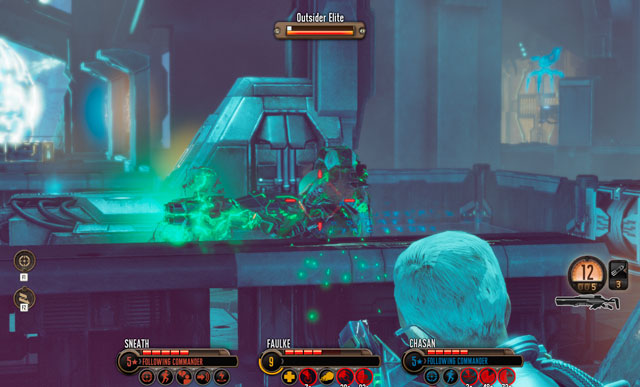 Don't underestimate the infantry, it may be painful for you.
When everyone are dead, a heavy Sectopod with two more Elite Outsiders enters the battlefield. If you have a Lightning Cannon charge it maximally and fire at the alien machine - it will lose more than a half of HP and whole armor. Otherwise, play typically: distraction and firing at the upper part of the armor. You shouldn't run out of ammo, because there is a plenty around you and also aliens will drop it.
 The character you choose will live through.
When the battle ends, you have to choose: you can save only one of characters, while the other one will die. Decision you make will change the order of locations and fights but won't affect the end of game.
Remark! On the following pages of this guide you'll see two possible paths, one after another. Notice, that you'll visit sooner or later both rooms shown on the screen above and you'll meet the same enemies. Your decision limits only to the change of order and saving one out of two characters.
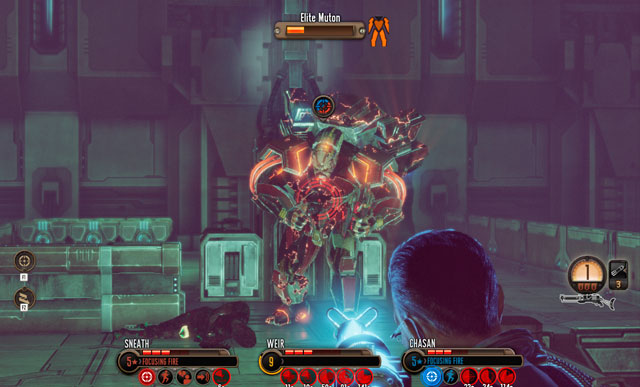 Muton is seconds from his death.
When you get to the left part of this building, you'll fight two Outsiders and a further from that, two more of them. Finally, you get to the companion which you should help. Battle isn't easy, because you'll be facing two Elite Snipers, two Elite Phantom and a single Elite Muton from the beginning. Eliminate them in order of listing them.
You do so, because snipers has the smallest HP, so they're easiest to kill. Remaining enemies are much more challenging. You can Lift Muton or summon Drone and an ally Silacoid - this will make the elimination easier. If you have a Lightning Cannon, use it against the strongest enemy.
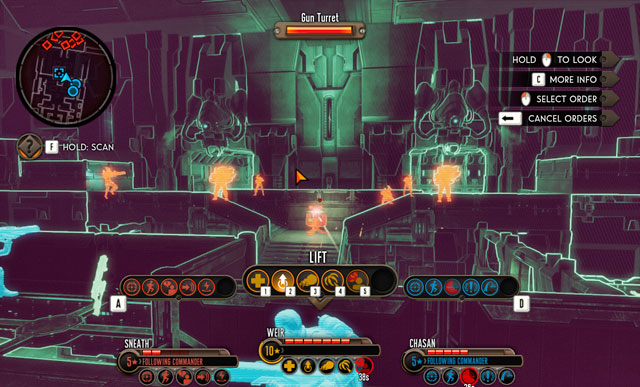 One of the most difficult battles in the game - prepare well!
When you eliminate most of enemies, more aliens will appear: two Elite Phantoms, one Tech Commander, one Outsider and a Laser Turret. Finish of the Tech first and then the remaining ones - order has no meaning. But don't hurry and don't go too much forward, because when you get to the end of the room, another deadly group will join the battle: two Elite Mutons and four Elite Phantoms. So before you fight them, collect ammo from both side of the battlefield and from its bottom level.
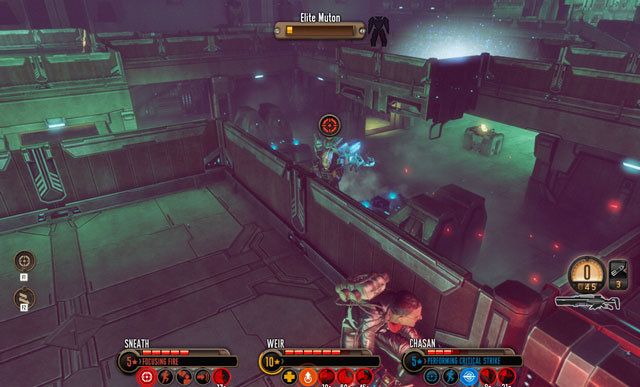 Muton, who is at the bottom, can be easily killed.
You have to play this battle wisely. First of all: immobilize both Mutons - one with Lift, and the other one using Mind Control. Then eliminate the enemy Turret and concentrate on Phantoms. When Mutons get out of the trap, summon a Drone and Silacoid to take care about one of them. Then round the other one and kill with all weapons and abilities you will consider useful. When there is only one enemy left, regroup and collect ammo. Regenerate abilities and finish off the enemy.
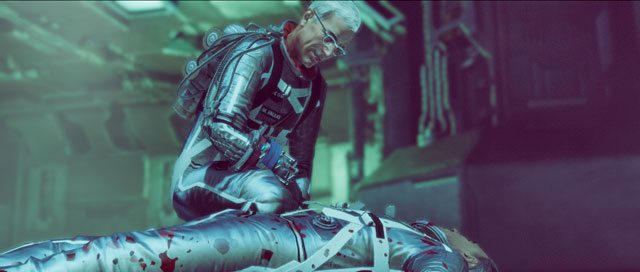 Earlier decision has a consequence.
Remark! If you have already been in "rooms on right", you'll find a body of your companion.
Move forward and use Resupply Station at the teleport. Then use a terminal in the middle of platform and teleport further.
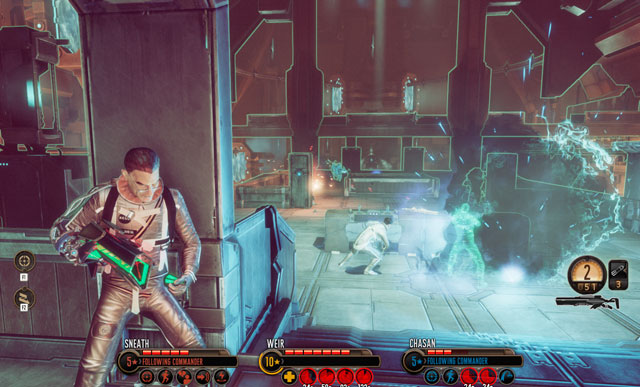 Battle isn't easy, but you should win.
Moving forward, kill two Outsiders and enter the room where your companion is defending. Encounter won't be easy, because there is a single Minion Commander, two Drones (one of them is Advanced), one Elite Sniper and three Elite Outsiders. Eliminate them.
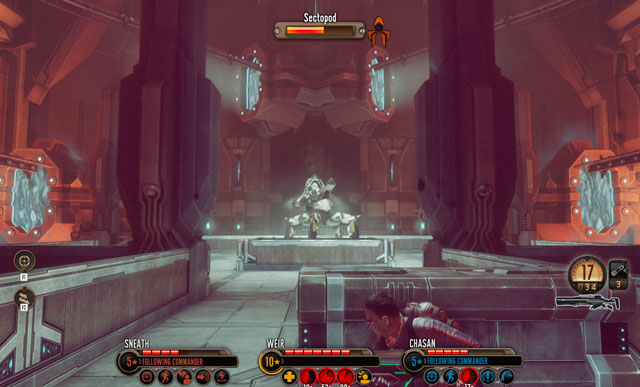 First Sectopod is only a recon.
When you finish off the aliens, go down and collect ammo. Then, approach the weird container with black fluid: after a while Sectopod goes out of it. Kill him without using too many abilities and firing from Lightning Cannon, because more aliens will arrive. In a moment you'll be fighting three Elite Outsiders, Psion Commander, two Advanced Drones and a Heavy Sectopod. First of all, Lift the Commander and eliminate the flying things - only then finish off the Lifted alien. Also, take over the Sectopod with Mind Control gaining a precious ally.
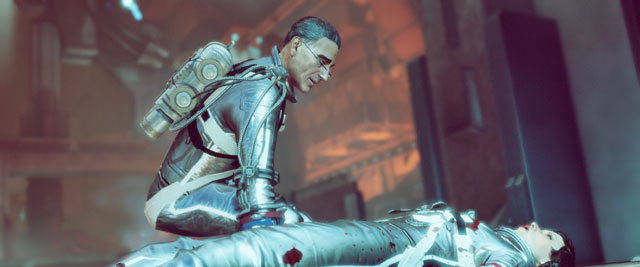 You have decided who has to die.
Remark! If you have already been in "rooms on right", you'll find a body of your companion.
Approach the terminal and launch it. If you want, you can also use the Resupply Station in the corner. Then go through the teleport.
 Decision is yours.
When you open all three mechanism you will be a witness of Carter's rebellion. After a short cut scene and a conversation you can make a decision: kill or spare the agent. To do the first thing fire at him, to do the other move through the door behind you. Your choice won't affect the further events, because the game ending is always the same.
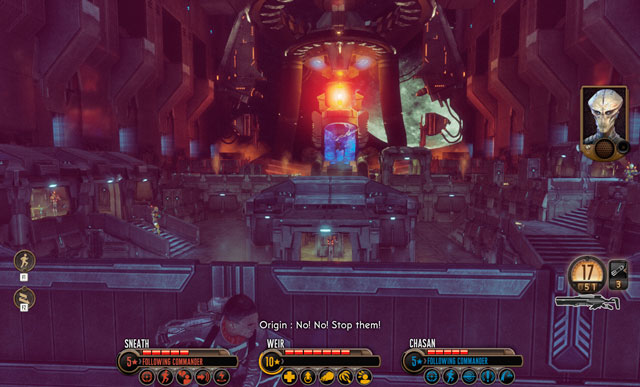 The Final is coming!
After that, you get into a big, long corridor, at which's end there is a terminal with an elevator. Ride upstairs and go to the further part of location (you'll be tempted by the enemy on your way there). After a long walk here, you get to the room full of enemies. There are: Tech Commander, three Elite Snipers and three Elite Phantoms. Finish off the Commander first, so he won't set up a Laser Turret. Then kill Snipers and Phantoms at the very end. If you run out of ammo, look into the side corridors of the location, where you can find two ammo boxes. Try to replenish ammo using the weapon you find, because you won't find a lot of supplies and this battle is long and challenging.
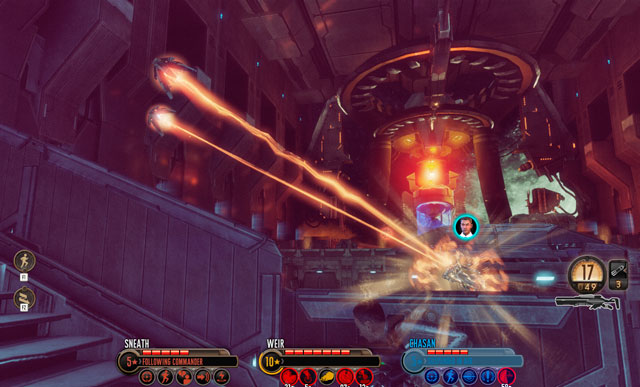 Advanced Drones are very onerous.
When most of aliens is dead, two Scouts will join the battle and then two more. Don't get round and eliminate your enemies one after another (they can avoid area attacks easily). But it's not an end - when you finish off the Scouts four Drones (two Advanced) will appear. You have to destroy them ASAP because in a while another assault squad will arrive on the battlefield: two Elite Outsiders, three Elite Phantoms and a Minion Commander. Kill the Commander first so he won't be able to summon allies. Prepare also that after a while more Elite Outsiders and Elite Phantoms will be joining the battle.
 The last, most difficult, wave.
It's only a warm-up. When two Advanced and two regular Drones appear, regroup in the middle and collect ammo using the boxes from the corners and in the center of the location (don't use all of them yet!). When you destroy the flying machines, the last wave will appear on the battlefield: two Tech Commander, two Minion Commander, two Elite Mutons and a group of Elite Outsiders and Elite Phantoms. Firstly defeat Commanders, then infantry and only at the end the muscles.
 Game finishes with a spectacular win.
When you finish the battle approach the computer in front of you and turn off the shields. Go through the gates and watch the cut scene. It's the end of the game, congratulations!
When you complete few first storyline mission, you get an access to so called Distractions. Carter doesn't take part in that, but he sends his companions (like in Assassin's Creed series). Agent assignment is made via computer in Operations, like in case of normal missions.
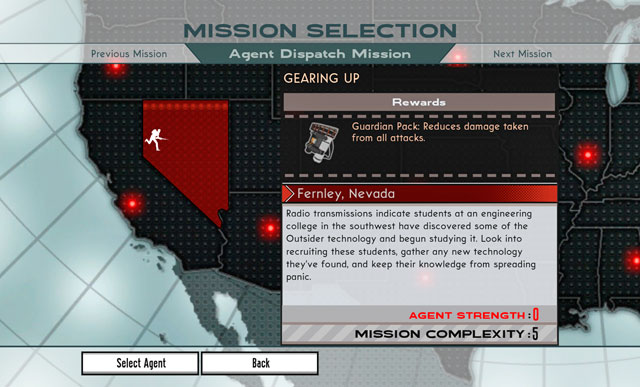 This is Distraction window.
Every Distraction has a difficulty level, it decides about how many agents you have to send there to complete mission (and for Carter to obtain a reward). In those operations freshly recruited agents and veterans can take part but if they do, they will be unavailable for Carter's missions. Notice also that advanced heroes are much better than the newbies. For example: if the Mission Complexity is 5, you can fulfill by sending 5 freshly recruited agents or one agent on level 5 (you can also send 2+3 or 2+2+1).
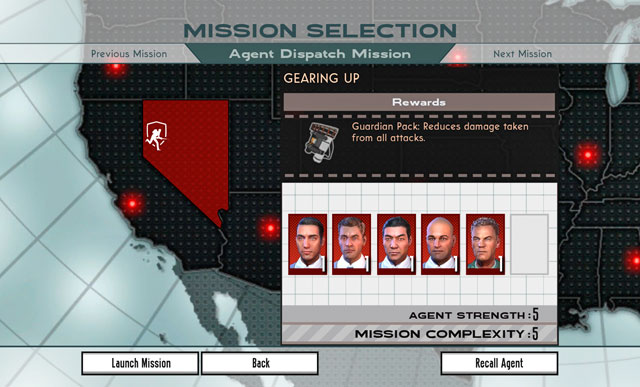 At the beginning you don't have a lot of options.
When the mission ends, all agents which were participating in, gain a level. Remember, that the mission will be completed only when a sum of heroes' levels will be equal to the Mission Complexity. Otherwise, the mission will fail and you get nothing in return.
Below you can find a table with all Distractions.
Name
How to unlock
Mission Level
Reward
Gearing Up
Finishing mission Guardian or Grifter.
5
Guardian Pack, decreasing amount of obtained damage.
Recovering Leaders
Finishing mission Guardian or Grifter.
7
3rd level Recon.
Nanotechnology
Finishing Investigation Find Missing Silacoids.
7
Stabilization Assistance Pack, increasing accuracy of all weapons.
The Russian
Finishing Investigation Keeping Things Secure.
8
4th level Engineer.
Sleepwalkers
Finishing Investigation Sleepwalkers (yes, they have the same name!).
8
Point-Blank Pack, increasing short range damage.
Cure
You have to finish Investigation Cure.
10
Rupture Pack increasing damage dealt to armors and shields.
Behind Enemy Lines
Appears after completing the mission Not of This Earth.
10
3rd level Commandos.
Vendetta
Appears after completing the mission Not of This Earth if you have finished an Investigation Vendetta
9
Blast Protection Pack decreasing amount of damage obtained of explosions.
Flight Test
You have to complete Investigation Test Flight and then a random Operation.
10
Quick Charge Pack decreasing the cooldown of all abilities.
Claiming What's Ours
Appears after completing the mission Crack in the World.
10
Corrosive Plasma Pack increasing damage of plasma weapon against vehicles.
Space Junk
Appears after completing the mission Crack in the World.
10
Health Converter Pack decreasing HP and decreasing the abilities cooldown.
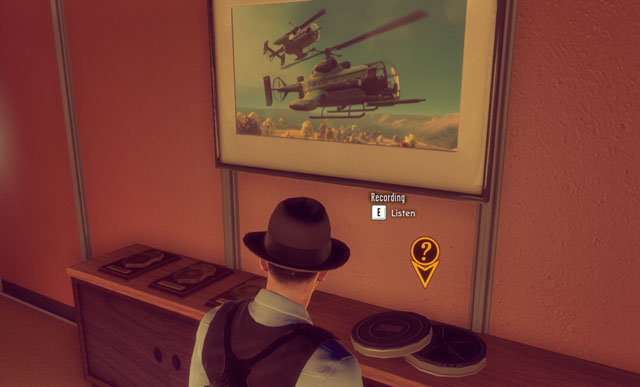 Game helps you in search.
Recordings , in general, contain additional information about the game universe: they help understand the storyline but don't affect it. First one you can find in the Bureau - it's on the cupboard, opposite to the Faulke's office.
 Darkest under the lamp.
Second Recording is in boss office on the left side of the room. Recordings are easy to notice as the game highlights their position.
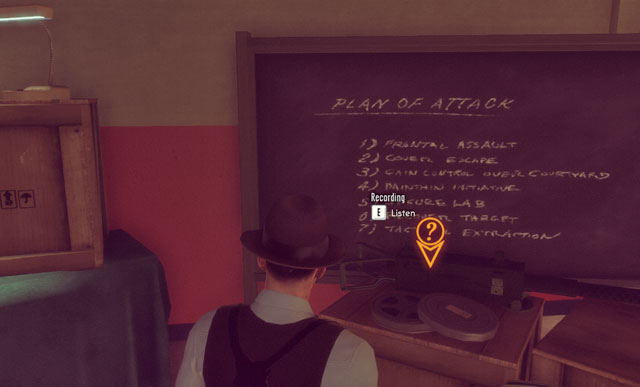 Last one Recording at this stage can be found in Ready Room.
Another Recording can be found in room with recruits, at the boxes, near to the stairs. You can get there only after conversation with Faulke.
 Who was recording them?
Recording can be found in the coffee shop at the beginning of level. Enter the building and approach the counter. It lays next to the infected citizen.
 Recording is about doctor's researches.
The second Recording is much further: in the university, in the room with assistant of doctor Weir. You just need to look under the cupboard on left, under the blackboard.
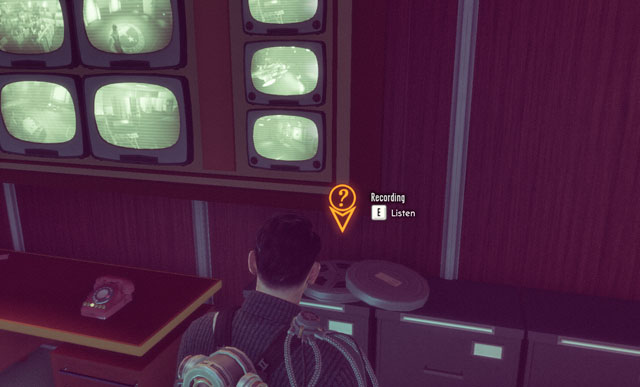 This Recording is about Infiltrator's interrogation.
During the second stay in base (after the mission Doctor) you can enter Faulke's office and listen to Recording. It's left on the cupboards, behind the boss desk. Recording contains information about Infiltrator's interrogation. It looks like aliens can be very comunicative if they are "cared" about.
 You can find test of a new vehicle on the Recording.
When you return from Operation Guardian or Grifter you get an access to new locations in the Bureau. When you meet Faulke in Engineering, look inside the room on right. Inside, next to the two scientists, you find a note about new XCOM weapon and a Recording. Those materials are very interesting, it would be a shame to miss them.
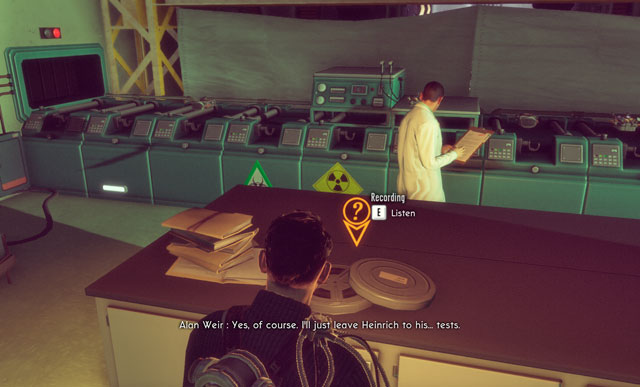 In the Labs you can always find something to read.
When you enter the lower part of Laboratory (this one with big container of green elerium) look around. On nearby boxes and desks you find three notes and one Recording.
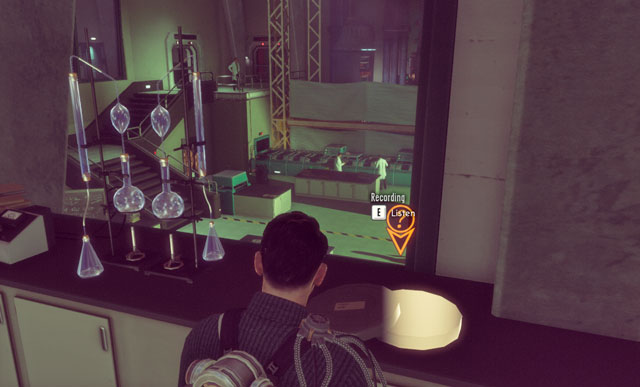 Recording tells more about past of doctor Dresner.
Heading for room with Infiltrator look around in laboratory of doctor Dresner. On the left side of room you find a pile of notes and another Recording. Unfortunately, you can't talk with the scientist about his past.
 Citizens could have foreseen what happened.
Recording can be found in the car showroom, nearby the beginning. You will have to go through the whole army of aliens on your way, but you get there. When you're inside, walk around the cash and move forward. Turn left and look inside the small room. On the counter you find Recording.
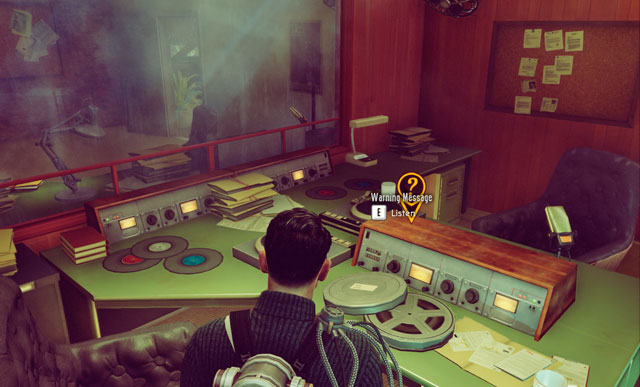 Second Recording is very visible.
Second Recording can be found in agent DaSilva's hideout. Look inside the recording room, just before the hideout and look at the table. The Recording is right there.
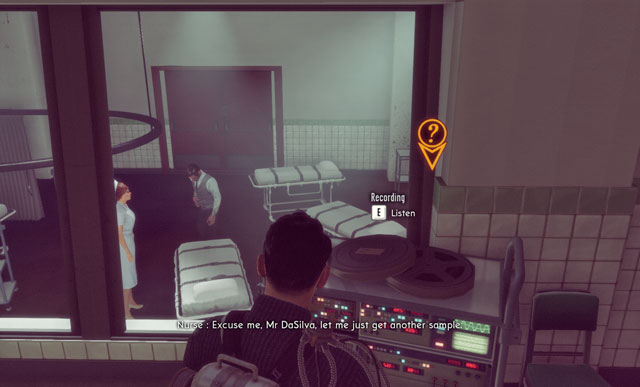 Recording depends on the previous choices.
When you're in the hospital, approach the window and listen to the Recording on the computer. Its content depend on the fact saving (or not) agent DaSilva in mission Signal from Beyond. If you did, you'll hear his voice. Otherwise the Recording will contain words of some accidentally caught woman.
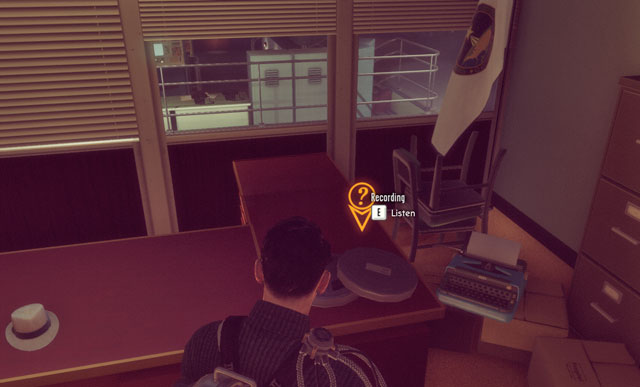 Agents weren't expecting what was waiting for them.
Another Recording can be found in Carter's office. It's put on the desk of agent DaSilva.
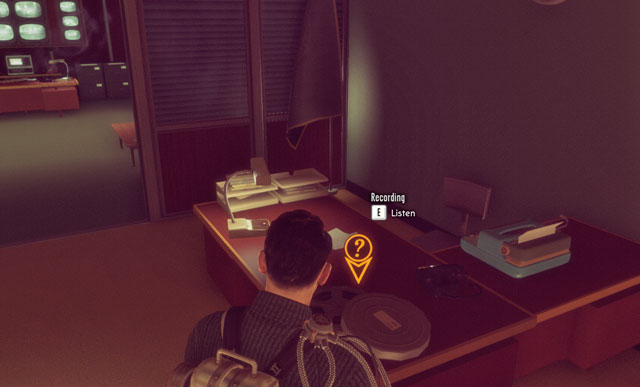 Recording is in front of the Faulke's desk.
After talking with director Faulke, head to his office. Recording is left where his secretary used to sit.
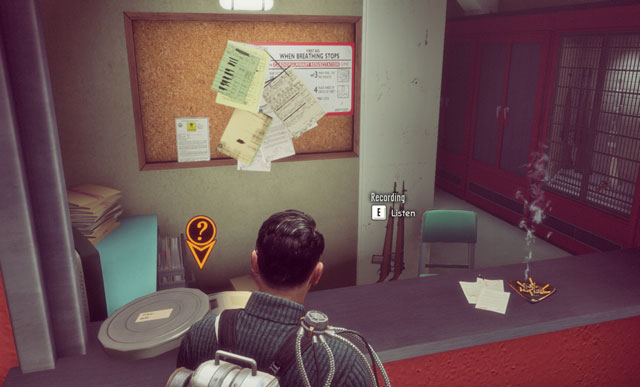 Another Recording.
The next Recording is found in the corridor between Ready Room and Ranging Fire - on the desk where the quartermaster used to sit.
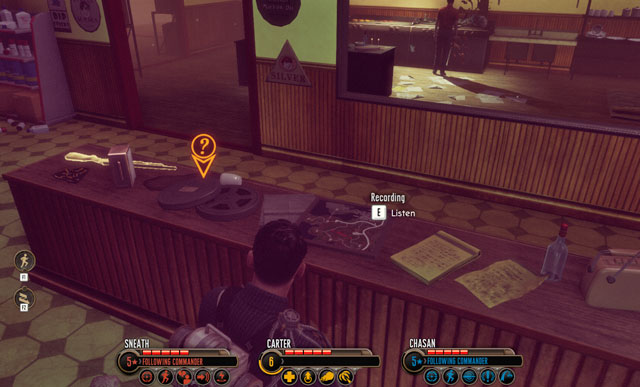 Recording tells you about station's workers.
When the mission begins, enter the gas station. On the counter you find a Recording and a lot of weapon around. Probably, the station's workers were trying to secure themselves against the aliens. You can see how that turned out at the back.
 Recording contains last words of people lying around the car.
Another Recording can be found after fighting an Elite Muton and his bodyguards, when you enter the forest and stop at the lake. Recording is on the car.
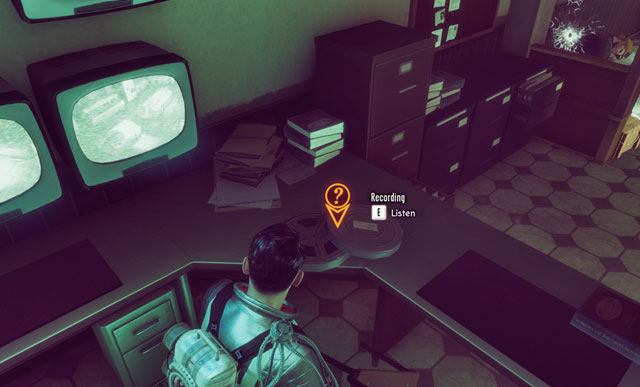 Recording lies on the table, next to the monitors.
Recording is in the room at the dam, where you've met the alien Scout for the first time. You find here also a photo and a note.
 You can listen to Recording after a fight.
Another Recording is left further away, behind three alien devices, which you had to turn off. It's in the small room on which's roof you find the last one switch. Recording lies at the desk in the corner.
 People talking in this Recording may be found a bit later.
Another Recording lies on the computer in the room with three Outsiders. You get there after turning off all alien devices and moving to the lower storey of the building.
 Workers knew what will happen to them.
The last Recording on this level is in the big, flooded chamber with Silacoids. To get it, enter one of the room which you see under the wall. Recording lies on the computer.
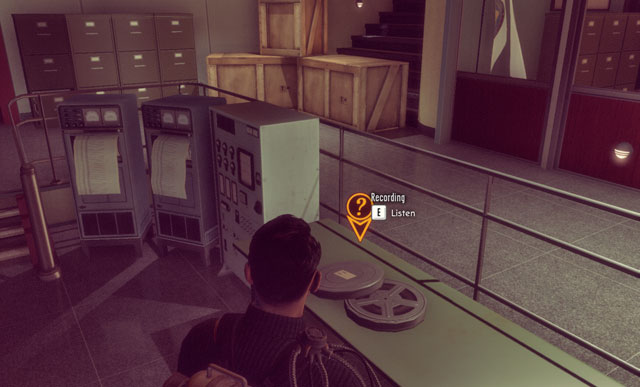 Bureau employees start to celebrating.
Recording is left in Operations and contains a dialogue between officer Chulsky and one of agents. Recording can be found on the right side of room, next to the computer.
 Photo is shining.
First photo can be found on the desk just after meeting with agent Nils. It shows an entrance to the laboratory..
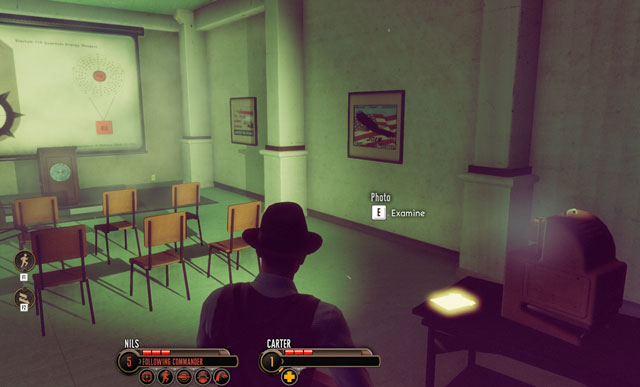 Second photo.
Another photo is in the room with world map and projector, next to the device. It shows weird symbols and numbers.
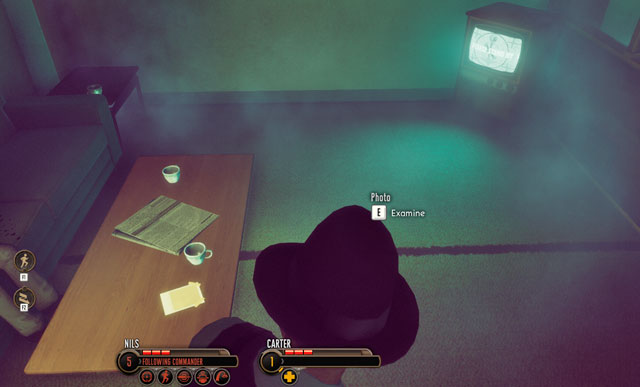 And third one.
Another collectible is in the same room, on the table in front of the TV. This photo also contains some mysterious numbers.
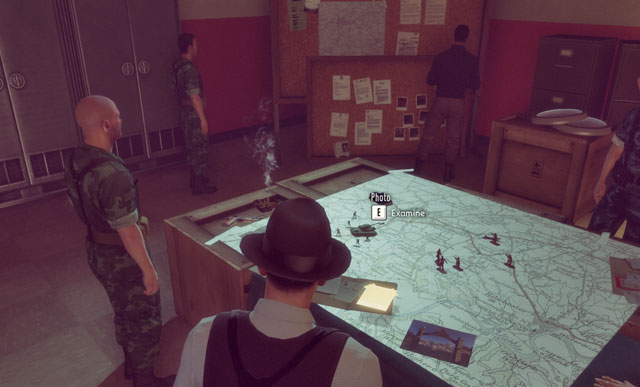 Photo shows a university in Rosemont.
During your first stay in Bureau, you can find only one photo. As you can see on the screen above, it's put on the map in the Ready Room. You can get there only after official conversation with Faulke.
To enter the Ready Room, exit Operations, pass two soldiers and turn right. When you get to the crossroads, Bureau employees will show you the proper way. Now approach the table and look at the photo.
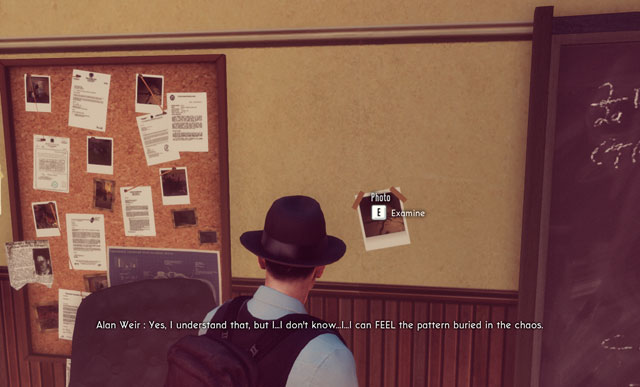 Both photos are in the same place.
Two photos can be found in the university, in the room with doctor Weir's assistant. To get there, you have to defeat a Muton on the yard. The photos are attached to the cork blackboard behind the scientist's desk. They both presents doctor Weir and his coworkers.
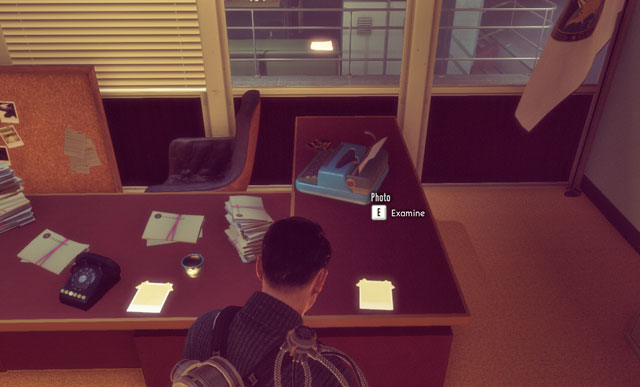 DaSilva is a family-type man.
Two photos are in the Carter's office - agent DaSilva left them on his desk. They present his son and some city in New Mexico.
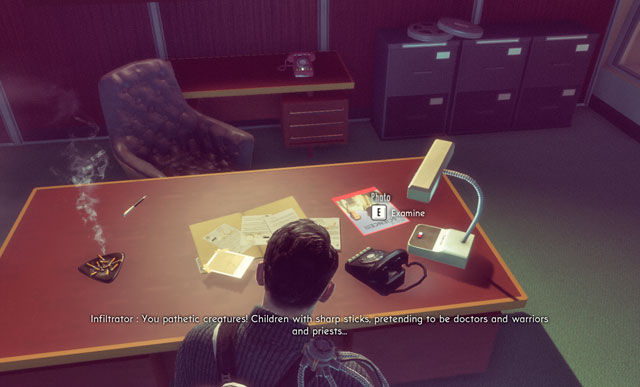 The Bureau is working on something.
The next photo can be found in Faulke's office on the first floor. It's put on the very desk, next to the phone. It shows the prototype of a weird vehicle, probably produced by the Bureau.
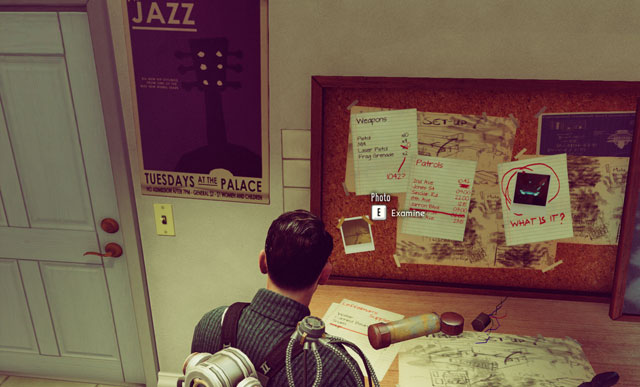 Photo is hidden between notes and some drawings.
Photo showing an entrance to the supermarket can be found in DaSilva's hideout, just in front of the frightened agent. Look at the cork board at the exit door and find it among different documents.
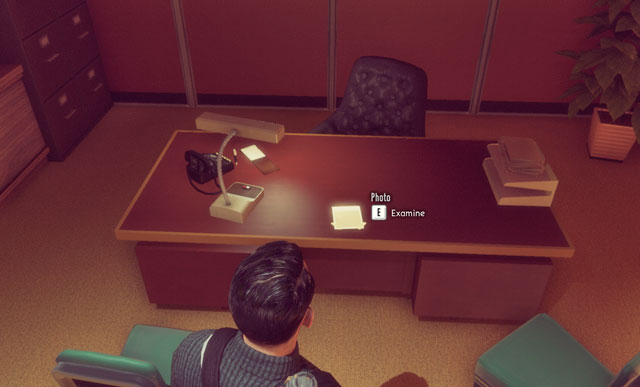
Photo with mountains and tress can be found in the office of Angela Weaver - in front of the Faulke's office. Photo is left on the woman's desk.
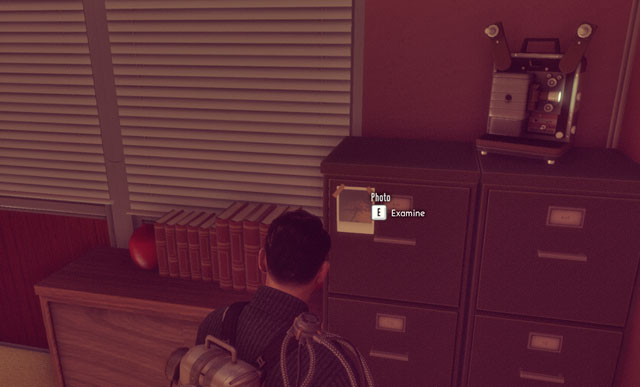 Photo was here earlier but you couldn't use that.
Access to this photo is difficult: you can find only during the Investigation Vendetta. After talking with officer Chulsky and agent Percy head for the office of agent Weaver. Inside, take off the painting from the wall, discovering a safe. Then turn around and look for a Photo on the cupboard (it was inactive earlier).
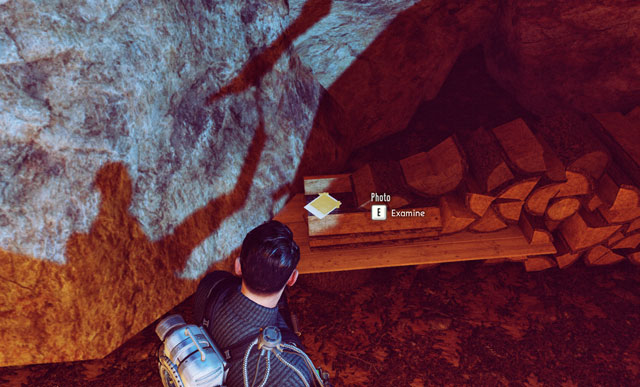 Photo shows a man attached to the alien device.
Getting to this Photo is rather problematic. When you begin the mission, go forward until you get to the hunter hut. Being there, turn left. You should follow a small path between the brushes which leads to the cave. Photo can be found in the middle of the cave, next to the schematics and a page from the journal.
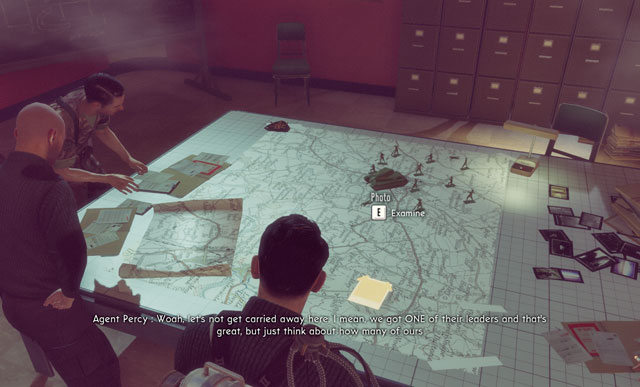 Not anyone grows out of toying with soldiers.
This photo can be found in the Ready Room on the map table. It shows a dam, which is important for aliens. Who knows what they are looking for?
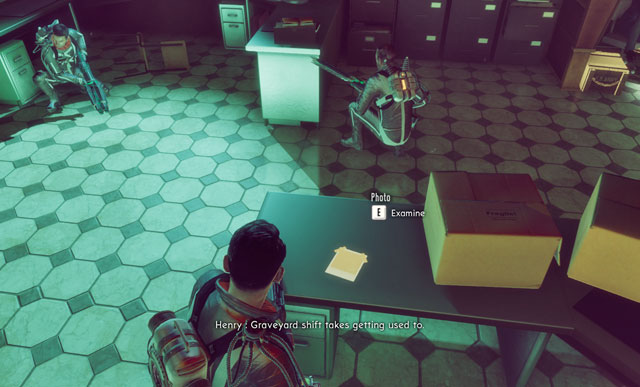 Photo lies at the table, next to the cartons.
Interesting photo may be found in the room at the dam, in the same where you've met the alien Scout for the first time. Here you can find also a Recording and a note.
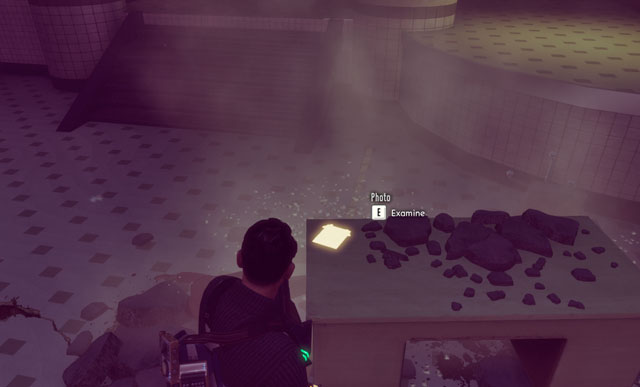 It's too easy to celebrate.
Photo showing capturing of an alien may be found in the Communication Room, next to the officer Chulsky. Photo is attached to the cork board.
Photo survived the catastrophe.This photo can be found after fighting with Infiltrator in one of the rooms on the desk. It tells you sad truth about the Moonwalkers tested by the Bureau.
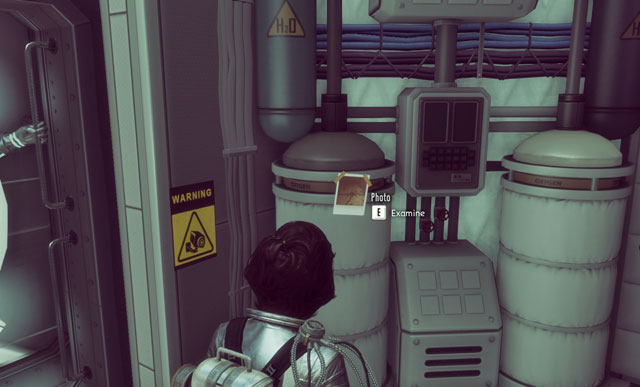
While on the board of Avenger, you can find three collectibles: two documents and a single photo. Photo is hanged in front of you on the wall, it's difficult to miss that.
Backpacks are special upgrades which improve statistics of carrying them heroes. Those devices can be collected during missions: Major ones like also Distractions and Operations. Backpacks are very useful, as every squad member can get an equipment dedicated for his class.
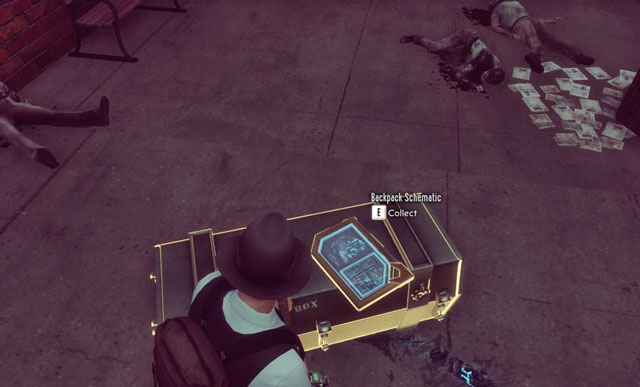 That's how Backpack Schematic looks like.
Backpacks can be changed between missions, during your stay in the Bureau or at Resupply Stations. Every character can have only one device like that, so you have to think every decision thoroughly.
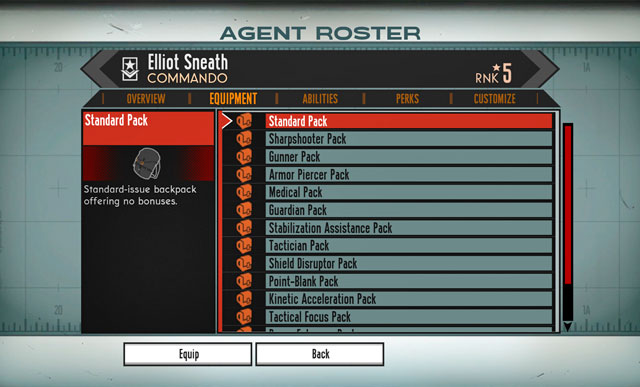 List looks impressive.
In the following tables you'll find a description and localization of all in-game available backpacks.
Name
How to get it
Effect
Sharpshooter Pack
During the mission Doctor you have to look at the second Resupply Station - schematics is right on it (you can get there after a fight with Sectopod).
Increases headshot damage.
Medical Pack
Schematics can be found during the mission Guardian, when you're visiting the first missile control center. Item lays on the computer.
Slows down bleeding (more time to save a character).
Gunner Pack
During Operation Grifter look inside the train, next to the alien artifact, behind the river.
Decreases obtained damage and increases capacity of clips.
Tactician Pack
During Signal from Beyond enter the car showroom and find car lift at the exit. Press button to lower the device (on left) and pick up schematics.
Increases abilities range and amount of damage dealt. Improves defence.
Shield Disruptor Pack
During Signal from Beyond find an alien computer and pick up schematics from it. You can get there just after you see first terraforming towers. Computer is on right from the treehouse and is guarded by single Sectoid.
Increases damage dealt against enemy shields.
Armor Piercer Pack
During Signal from Beyond go through the first teleport in alien base and then look around. Schematics is jest next to you.
Increases damage dealt against armored targets.
Kinetic Acceleration Pack
During the Longsword look into the corridor leading to the alien factory. Schematics is on its right.
Increases damage dealt to enemies without shields.
Tactical Focus Pack
When in Not of This Earth you get to the hunter hut, turn left and get to the cave. Schematics is nearby the fire inside of it.
Decreases the cooldown of all abilities but also decreases accuracy of weapons.
Range Enhancer Pack
After meeting agent Weaver in mission Not of This Earth go through the bridge and turn right behind a Resupply Station. Schematics is in the laboratory, on right.
Increases range of all abilities.
Reaper Pack
After finding Pete in mission Not of This Earth go through few more corridors until you reach the crossroads. Turn left: schematics is at the very end of the room, behind the screens with Axis.
Increases damage dealt to heavy wounded enemies.
Kinetic Acceleration Pack
After meeting an Elite Muton in Operation Hawkeye enter the alien storehouse and turn off the barrier. Before you go through it, turn right and pick up a schematics from the shed.
Increases damage dealt to enemies without shields.
Anti-Personel Pack
During Operation Firestorm enter the big alien building (just after fighting Elite Phantoms and their fellows). Schematics is in the corridor.
Increases damage dealt to enemies without armor.
Laser Efficiency Pack
Schematics lies nearby the last alien device which you have to turn off in the mission Crack in the World.
Doubles the size of clip for laser weapons.
Anti-Personel Pack
In the mission Crack in the World, go through the flooded room with Silacoids and climb up using chests to the central part of the hall. Schematics lies on the boxes.
Increases damage dealt to enemies without armor.
Endurance Pack
You find it in front of the Avenger, in the mission Crack in the World. First of all, you have to turn off gates to alien world using a switch - schematics is put on the other end of the area, just under the flying saucer.
Increases maximum HP and healed character obtains additional HP.
Kinetic Acceleration Pack
You find it at the console, just after fighting an Elite Muton (mission Crack in the World).
Increases damage dealt to enemies without shields.
Health Converter Pack
This schematics can be found at the entrance to the alien factory in the Operation Angel.
Decreases HP but also decreases abilities cooldown.
Name
Mission
Effect
Guardian Pack
Gearing Up
Decreases obtained damage.
Stabilization Assistance Pack
Nanotechnology
Increases accuracy of all weapons.
Point-Blank Pack
Sleepwalkers
Increases damage for short distance.
Rupture Pack
Cure
Increases damage dealt to armor and shields.
Blast Protection Pack
Vendetta
Decreases damage obtained from explosions.
Quick Charge Pack
Flight Test
Decreases cooldown of all abilities.
Corrosive Plasma Pack
Claiming What's Ours
Increases damage dealt to vehicles by the plasma weapon.
Health Converter Pack
Space Junk
Decreases HP but also decreases abilities cooldown.
 Letter is at the screens.
First letter can be found in the room with screens, opposite to the elevator. To get there, you have to exit an elevator and go forward, entering the closest building.
 This letter is easy to miss.
Second letter is left under the column in the laboratory. You get there a moment after meeting Faulke. But first you have to eliminate enemies in this room.
 You could expect that.
Another letter lies on the desk in the room of stenotypist. Next to this location you will surely notice an alien device producing some unpleasant sounds.
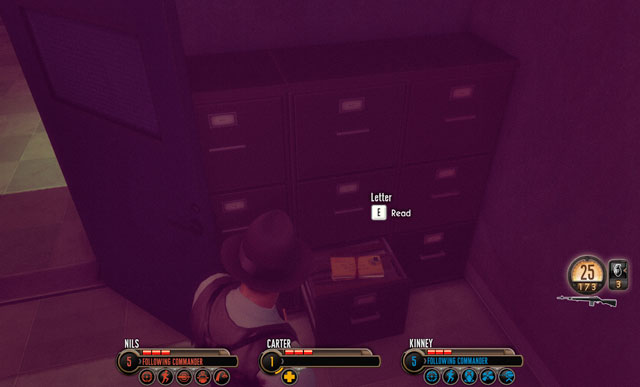 You can skip that note in a hurry.
In the same room you can find the last one note - next to the door in one of open drawers.
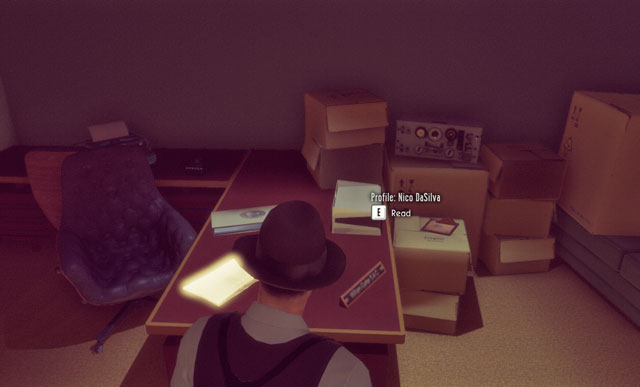 Files of your companion are on the desk.
You can read several Documents while you're in the Bureau. First one is Nico DaSilva File, on the Carter's desk.
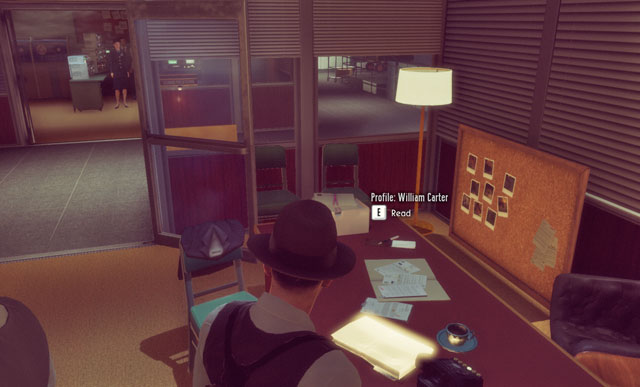 You can't hide anything in Bureau.
Your own Files you can find on DaSilva's desk, just opposite to your.
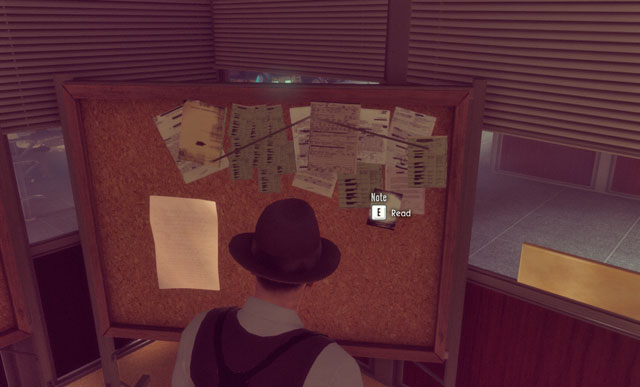 Note is attached to cork board.
When you enter communication room where officer Chulsky is working, turn right. Another note is attached to the small board in the corner.
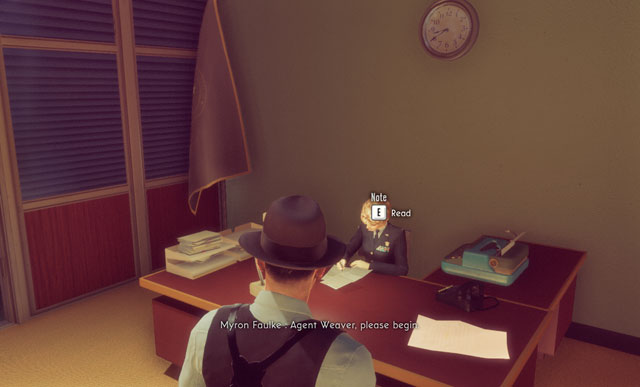 Sniff around before you talk to the boss.
Another pile of Documents is placed just in front of Faulke's office. It lays on the secretary's desk, next to the door.
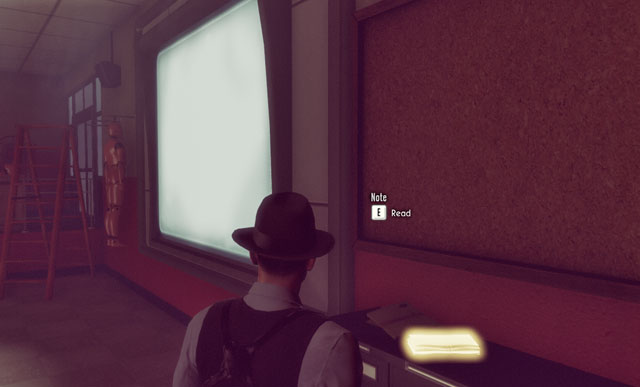 Luckily, Documents are highlighted.
Short note can be also find in Ready Room. You can get there after talking with Faulke. Exit Operations, pass two soldiers and follow corridor until you get to the place. Document is placed next to the wallscreen.
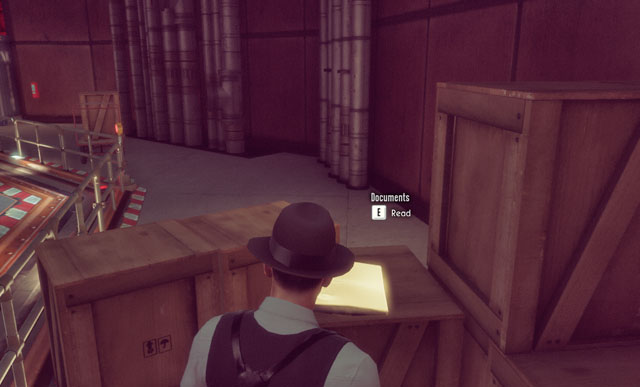 This note is easy to skip.
More Documents is in the helicopter hangar, on right side of the room, on wooden boxes. You can get there after completing squad in Ready Room.
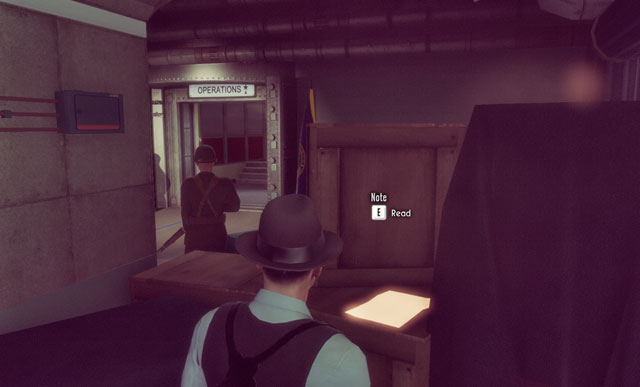 There are no drugs in the base.
You can read a note about lacking drugs in the mortuary. It's attached to the locker in the corner.
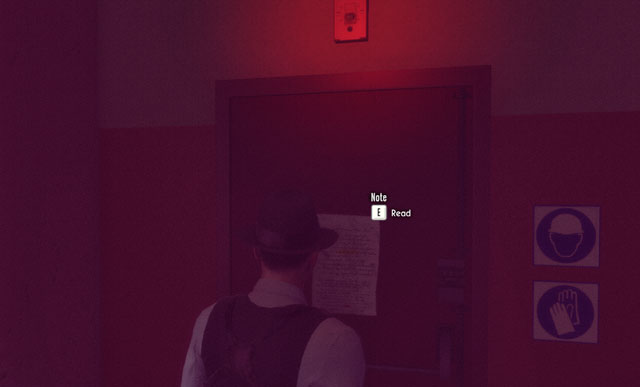 Untypical place for important information.
Next to the Firing Range you find another note attached to the door. It appears after confrontation with Infiltrator.
This note is difficult to see.After talking with doctor Dresner, turn right and walk the wall around: you find more Documents on the chests, opposite to the Operations.
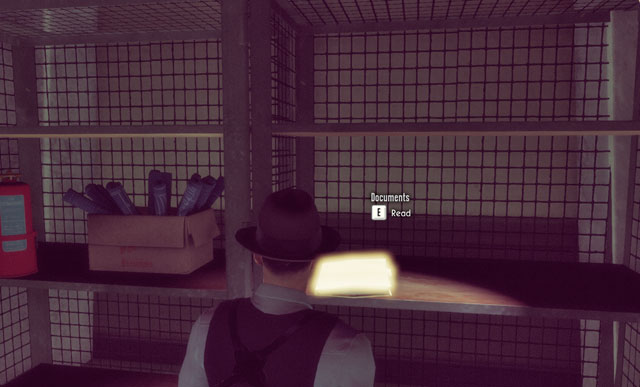 You find a lot of materials in Dresner's Laboratory.
Moving through the disinfection zone you get to the doctor Dresner's Laboratory. In various places you find documents about aliens autopsy (three pieces), and more general Documents in the corner on right.
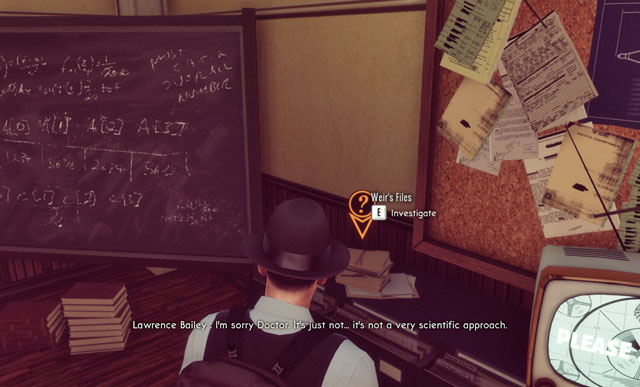 Scientists' notes are rather difficult to understand.
Documents written by doctor Weir can be found in his office - in the ruined building of university, where his assistant is. Note is left on the cupboard, net to the blackboard. In this location you find also photos and recordings. You can get into this location only after defeating Muton.
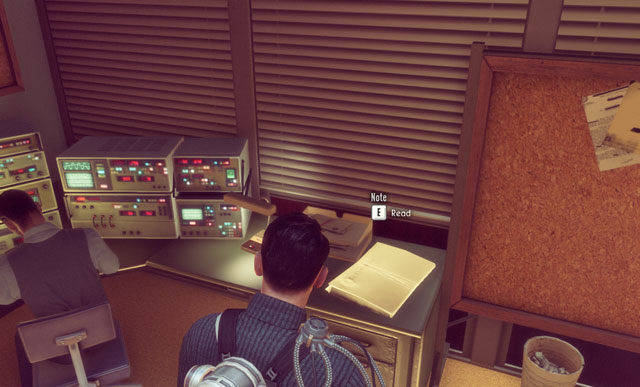 Guys in here are well informed.
When you get into communication room you can talk with officer Chulsky. Notice also, that there is a pile of Documents on right.
 Notes can tell you many useful things.
When you get to the Operations, turn right. On the table, between computers, you find few additional notes and a bit further talkative Krut is standing. You can also accost agent Weaver if you want.
 Unfortunately, it isn't a good recipe.
Letter can be found on the farm, behind the second control room. Exit the room with computer and turn left. You should find a note next to the pickles.
 New ship documentation seems to be promising.
When you return from Operation Guardian or Grifter you get an access to new areas in Bureau. When you meet Faulke in Engineer, look inside the room on right. Next to the two scientists you find a note about new XCOM weapon and Recording. Those materials are interesting, it's worth to find them.
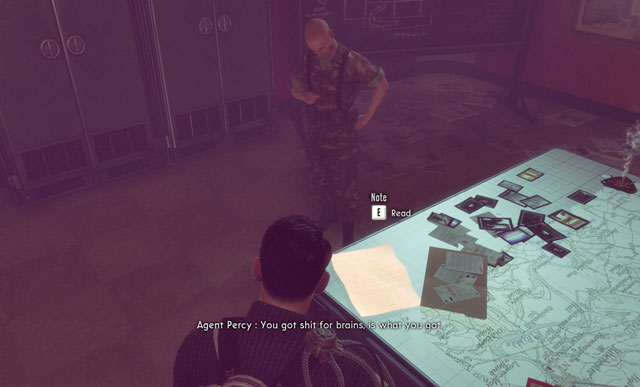 There is always something to read in Ready Room.
More Documents are in Ready Room, on the map in the middle of room.
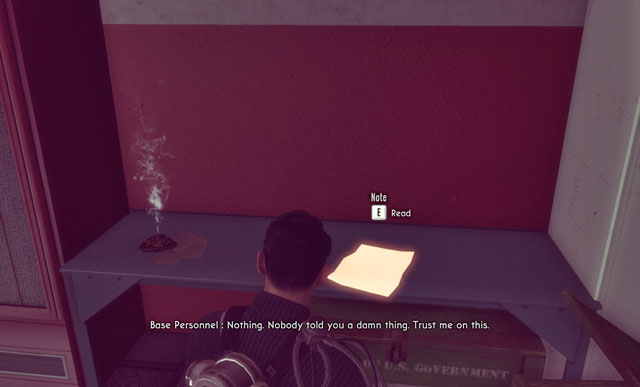 Firing Range isn't too pleasant for reading.
You should also look to the Firing Range, where you find more Documents.
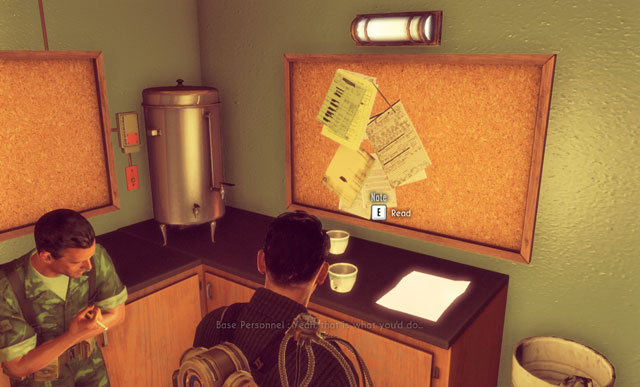 Great place for reading with coffee.
In the room on left from Operations you find also something interesting. Note is placed in the corner, next to the coffee machine.
 Bureau scientists work all the time.
When you get through disinfection zone, you can enter Laboratory. In the first room (with orange containers) you find two notes - one about Muton, the other about Infiltrator.
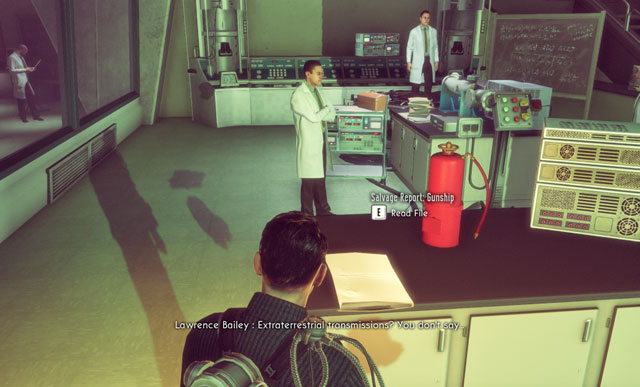 You can read all day, all night.
When you enter the lower part of Laboratory (container of green Elerium), look around. On the boxes and desks you can find three notes and one Recording.
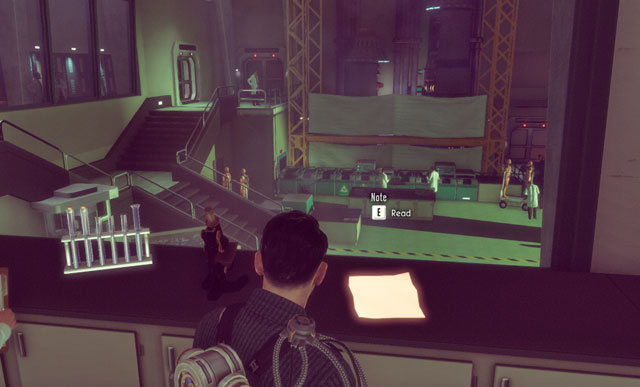 More Documents.
Next note is in the Laboratory of doctor Dresner, on the left side of main Laboratory (on your way to Infiltrator). You find it at the window, on the cupboard. Next to it you can find also Recording about doctor's past.
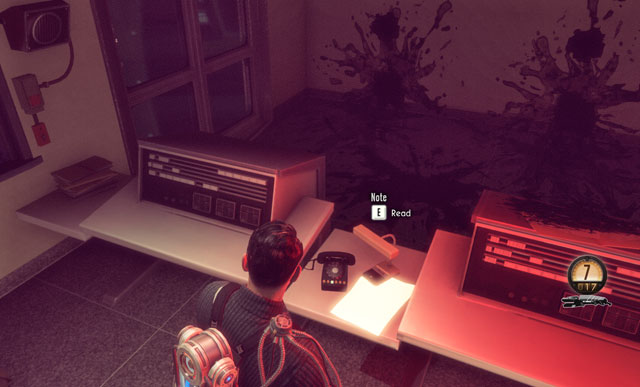 You can get here thanks to the additional mission.
Another note can be found during the Investigation Find Missing Silacoid ordered by doctor Dresner. To find this note, you have to kill the first alien in the disinfection room and then scare the other one from the bathroom. Only then you can enter the room with frightened soldier, on the first floor. Documents are on the table.
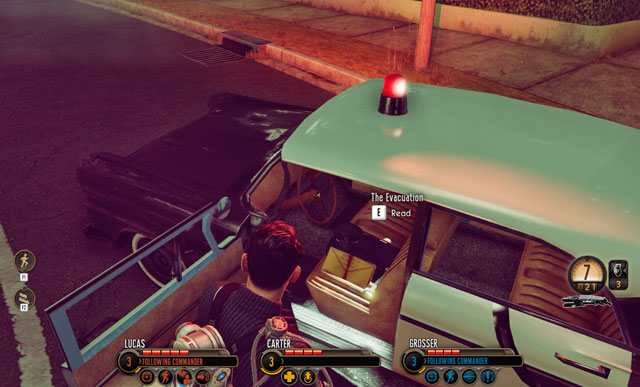 Document is about evacuation.
First Document can be found at the very beginning of the Level, in the police car on the right side of the street.
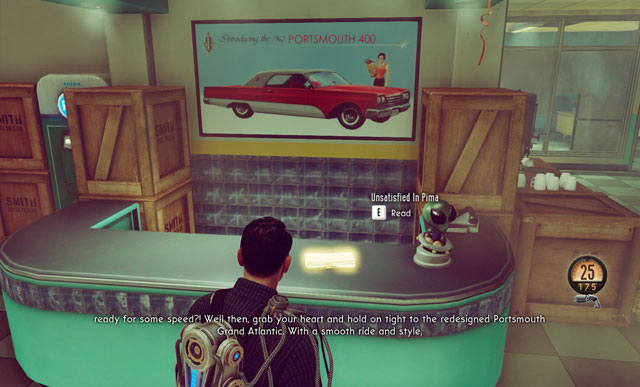 Alien statue here is very confusing.
This note can be found in car showroom. Enter through the main door (you meet few troops of aliens on your way) and look at the counter for Documents.
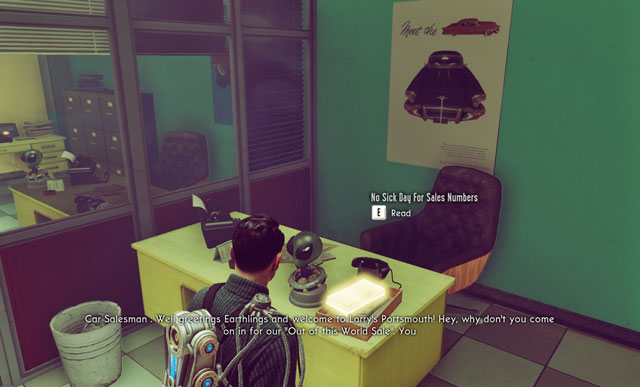 Shop owner was an alien collectioner. What a irony.
Second note is in the office of this car showroom. It lays on the desk, next to the alien statue.
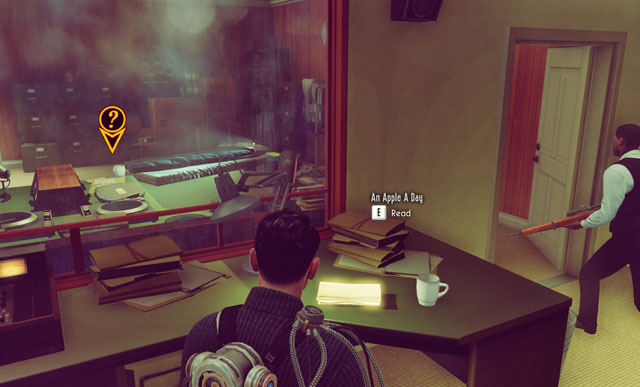 There was a good life before an invasion.
Third note is in the building where agent DaSilva is hiding. Enter the second room and look under the desk on left.
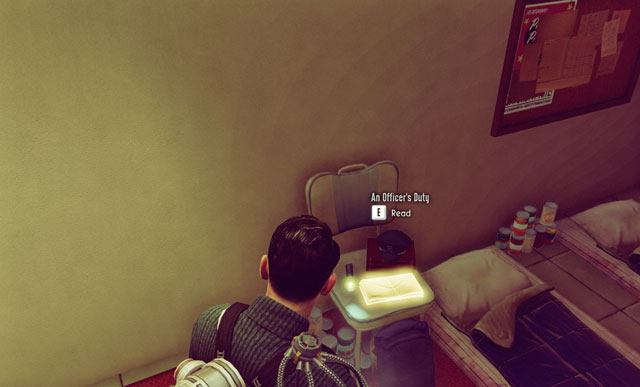 Note asks to be read.
Another Document is in the agent DaSilva's bedroom on left from the room where this agent is standing. Papers are on the chair next to the bed.
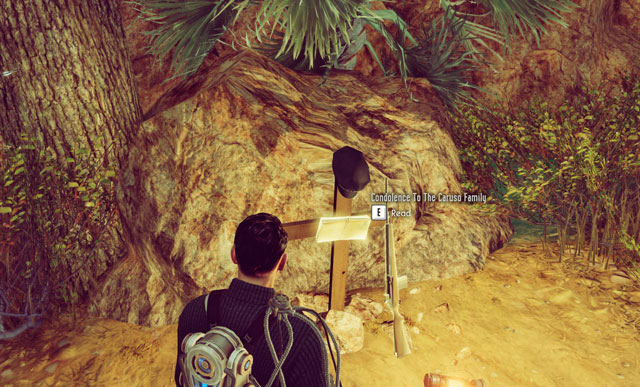 There is a condolence note on the grave.
Another note is just behind DaSilva's hideout, at the puddle on the right side of the park. After getting there, approach the tomb and read condolences.
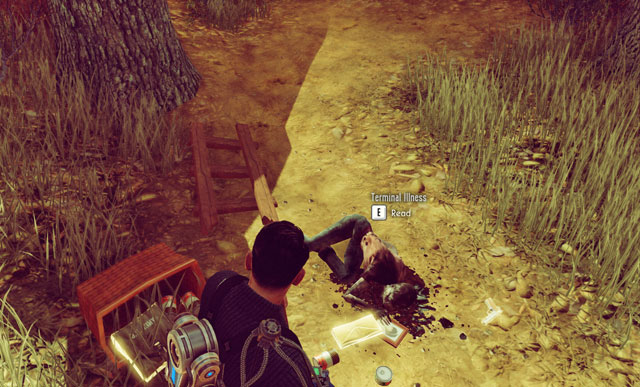 Touching scene.
Another letter is at the dead baby, under the treehouse. To get there, you have to turn left on the path nearby the breach (soon after you see terraforming towers).
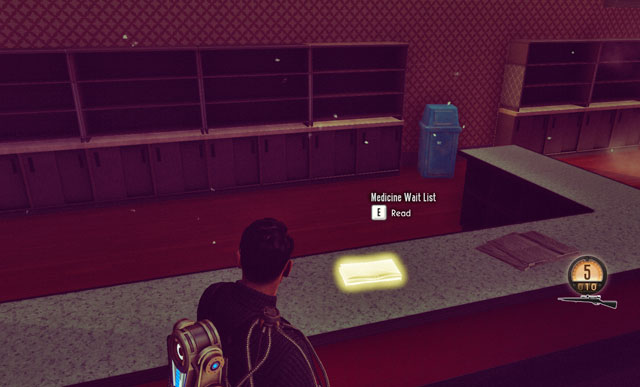 Three notes in the supermarket.
Three more notes are found in the supermarket, after a fight with Sectopod. First one is on the counter on left and two more deeper inside on right.
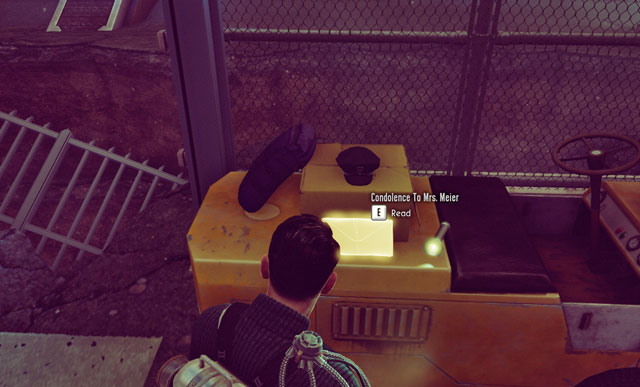 Letter won't get to the addressee.
When you meet doctor Wier, look at the yellow machine on right. You find another Document on it.
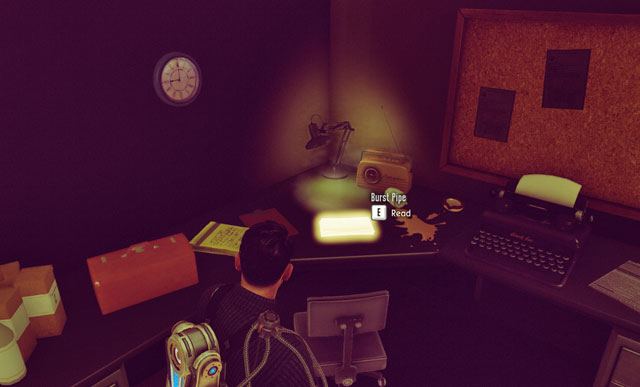 This note is easy to miss.
When you meet doctor Weir approach the window through which you can see infected. Standing there, turn left and enter small room. Inside you can find a note.
 Those people got very far.
When you are inside the alien base after doctor Weir let you go through the gate, move forward. When the scientist suggests looking for an elevator, look around. Behind chests on left you find note, shotgun and ammo pack.
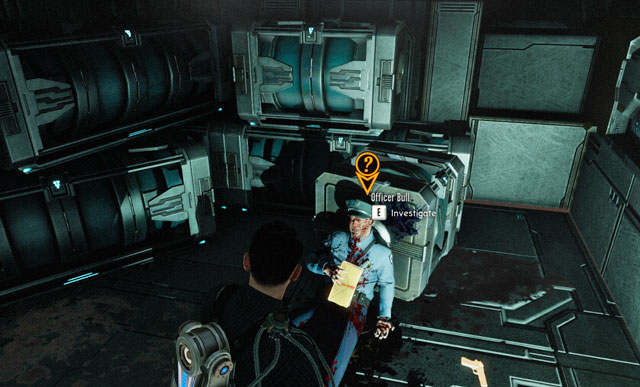 Sad fate.
When you get through the teleport and two bridges, you enter a big room. Instead of moving forward (as game suggests), turn right and open door. On the left, between shelves and chests, you find a policeman body with a note.
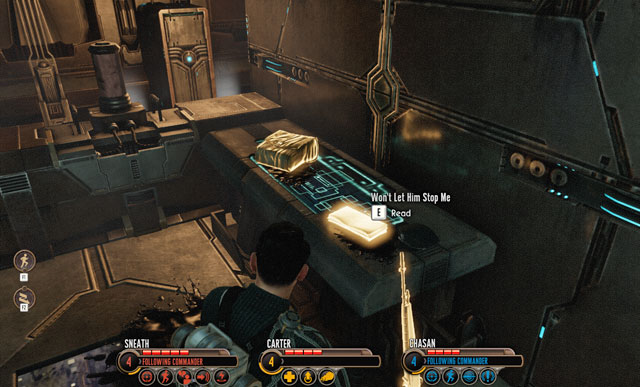 New Mexico policeman was very determined.
In the same room you find another Document. It's on the chests on right, next to the entrance.
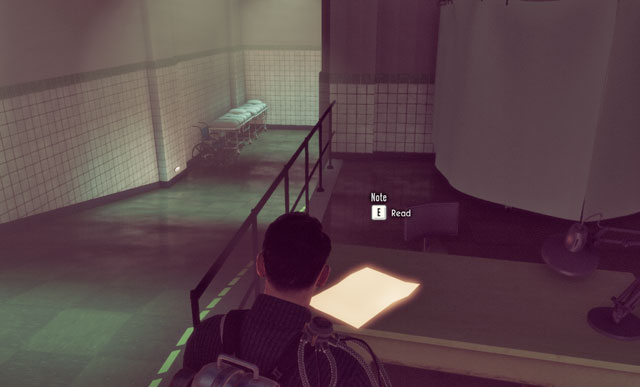 Note is about test for humanity.
When you're in Hospital, approach the desk on right, next to the doctor. Note can be found there.
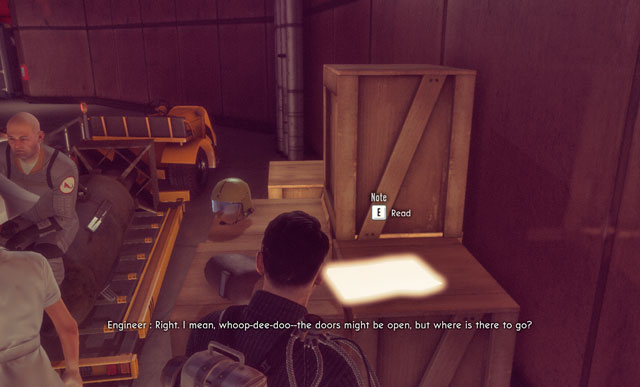 Document is always in the same place, but the content is different.
When you exit Hospital, pass the helicopter and look at the Documents lying on the cartons. It was also another note lying here previously.
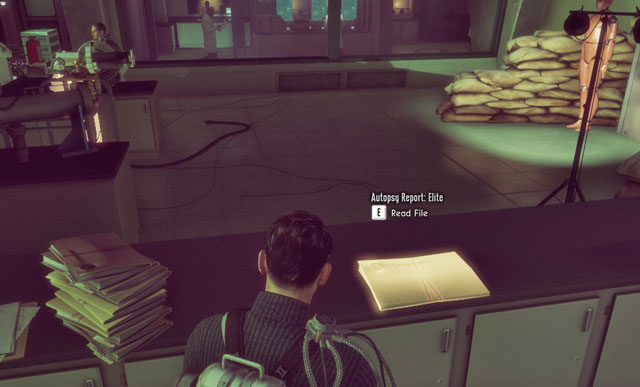 Scientists analyze all the time.
In the Laboratory you can find plenty of Documents. First of them is next to the cannon, on the right side of main room.
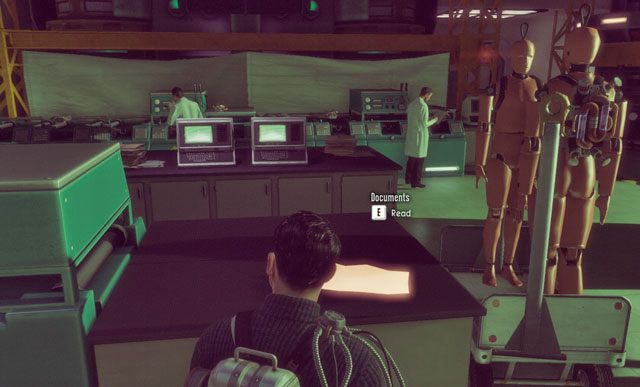 Documents are everywhere.
More papers are next to the dummies on the left side.
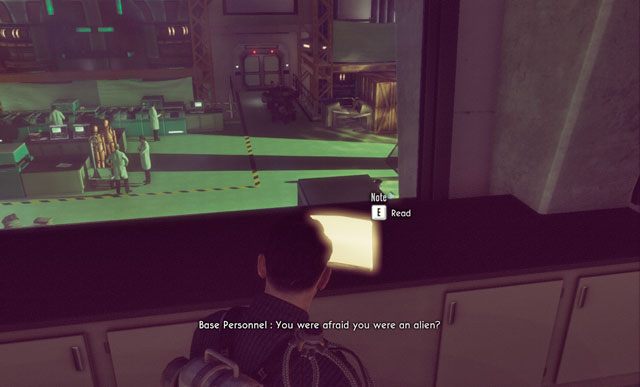 Wreck was checked quickly.
Behind the previous Documents, closer to the door, you find a report about Titan.
Notes on the cupboard.More Documents are left in the doctor Dresner's office on the floor.
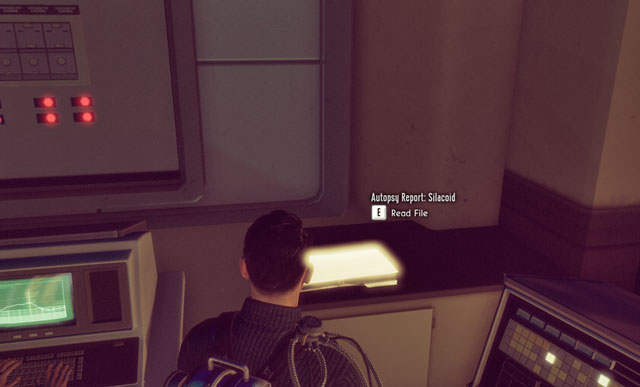
Before you leave Laboratory, look at the cupboard behind computers, net to the container with Sectoid. You find there a Document about Silacoid autopsy.
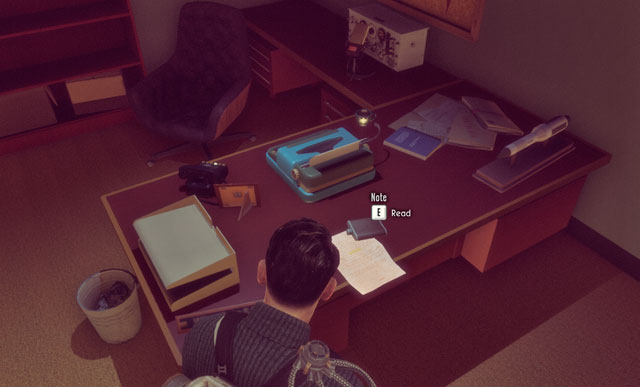 Very nice present.
Interesting note (and a bottle of whiskey) can be found on Carter's desk.
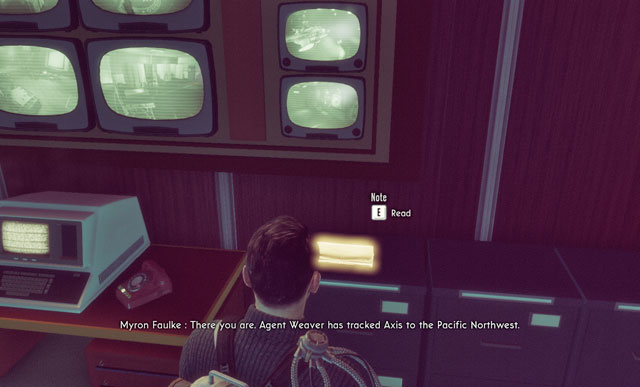
In Faulke's office, look at his cupboard. You find there interesting note.

Access to this photo is difficult: you can find only during the Investigation Vendetta. After talking with officer Chulsky and agent Percy head for the office of agent Weaver. Inside, take off the painting from the wall, discovering a safe. Then, turn back and look for a Photo with a cipher on the cupboard. Return to the safe, unlock it and read documents from inside.
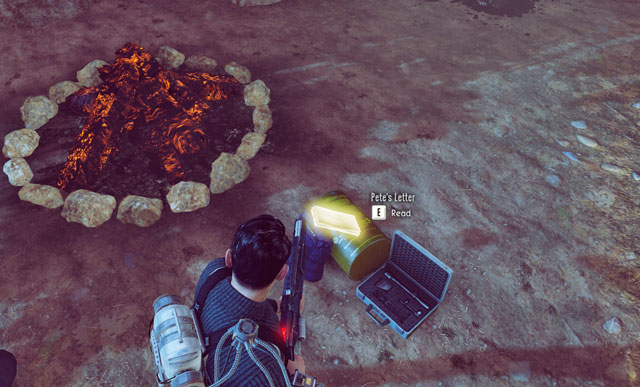 Hunting seems to not end up happily.
Pete's Letter lies next to the campfire, at the very beginning of location. There is also suitcase with hunting equipment. Interesting.
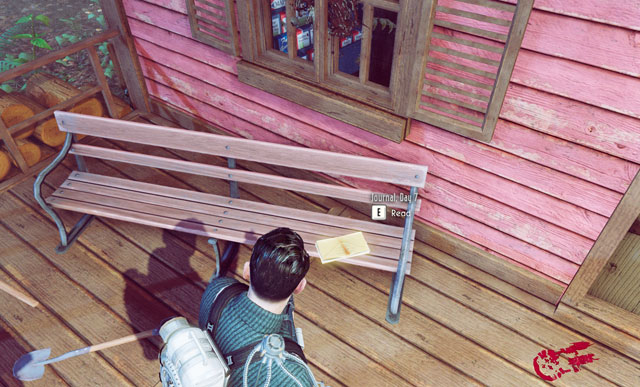 Bloody traces tell you all.
Page from the journal may be found on the bench in front of the hunting hut, which is at the path nearby the beginning of the location.
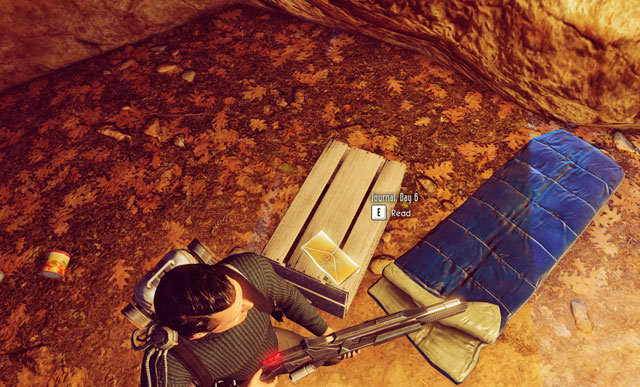 Where are the remaining pages?
The next Page from the journal may be found in the cave. To get there from the hut, you have to turn back and look for a small path between the scrubs. It leads to the cave where you find not only the mentioned document but also a schematics and a photo.
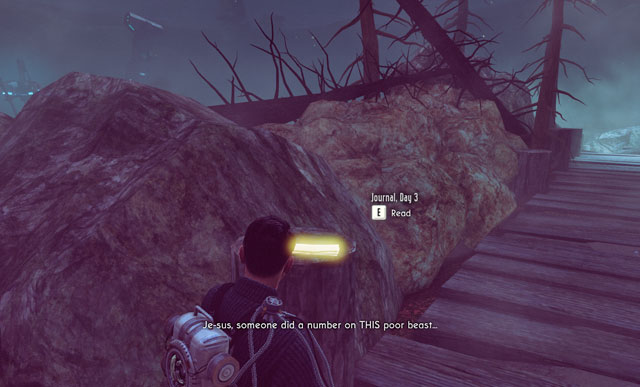 Document can't be missed.
Another page lies further away, at one of supporting the bridge pales. On your way you'll have to pass two puddles filled with corpses.
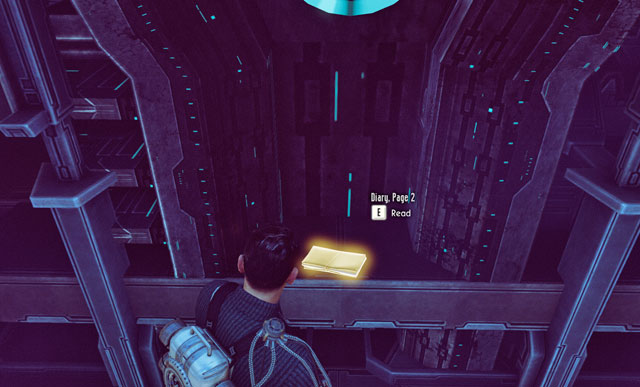 When you turn around, you'll be attacked by two Outsiders.
After meeting agent Weaver go through the bridge and pass a Resupply Station. On the crossroads turn right and enter the laboratory where aliens are experimenting on humans. On the right side of the room you find not only useful schematics but also another Page from the journal.
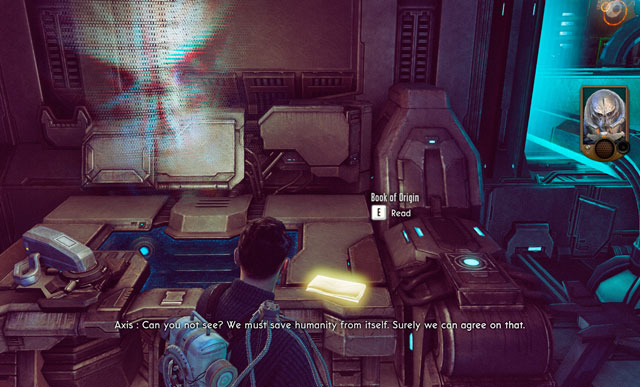
This document may be found after you run into Pete. Exit the room where you've found the body and go through the several more corridors. Finally, you get to the crossroads - turn left. Part of the book is left on the desk, next to the monitors with Axis.
Before you leave this room, look behind the monitors: you find there a schematics.
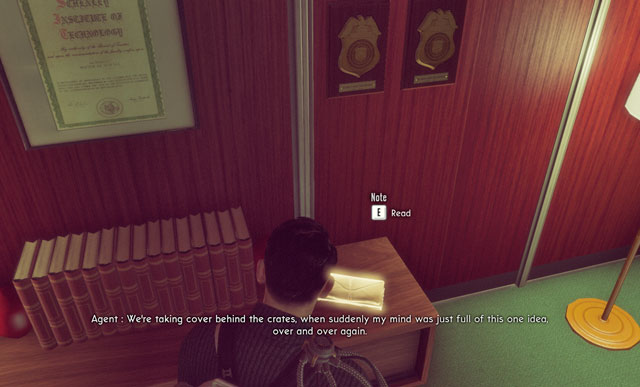 Note is on the cupboard.
After conversation with director Faulke head for his office. Note is on the left side of room, on the cupboard.
 This time only one note in the Laboratory.
One small note may be found also in the laboratory, on the lower level. Approach the big container of elerium and turn right. Document is on one of desks.
 Documents about the Avenger.
Another documents may be found in Engineering, in the hangar of Avenger. Enter the platform on right (the one with switches) and look around for gas bottles. Note is just nearby.
 Document lies on the desk.
Fist note can be found in the building at the dam, on the left side of room. There is also a standing sleepwalker walking with pumps - you surely will notice him.
 Note is placed next to the typewriter.
Another document is left on the lower floor of the same building, in the room on right from a vomiting sleepwalker.
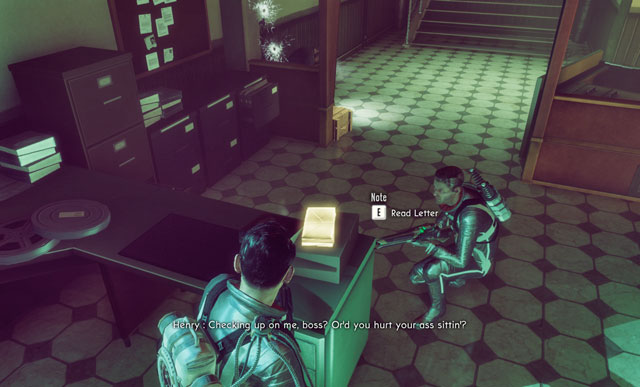 Document lies on the desk, next to the Recording.
Note is in the room at the dam, where you've met the alien Scout for the first tie. There is also a photo and a Recording.
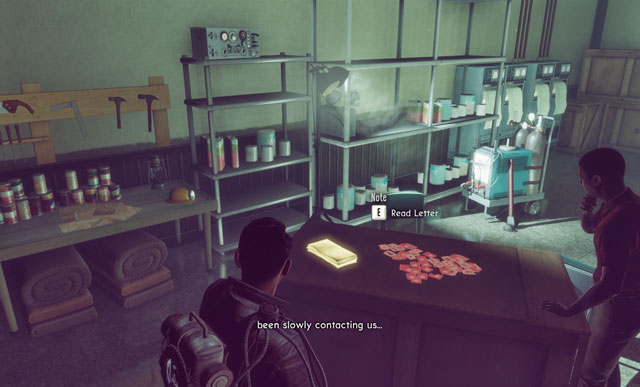
Another note is placed in the storehouse, behind a corridor where the Scout (the one from the previous room) is hiding.
Another document is placed a way ahead. When you turn off all three alien devices and open the gate to the further part of the building, enter the corridor. Turn right, going into a canteen. Note is on the table at the wall. To get it, you have to fight several Silacoids.
 Letter is left on the police car.
On the police car at the beginning of the mission you find a letter for a someone named Carol.
 Letter lies on the floor.
When you defeat the first group of enemies, going through the forest cutting, enter the wooden house on left. Inside you find another letter.
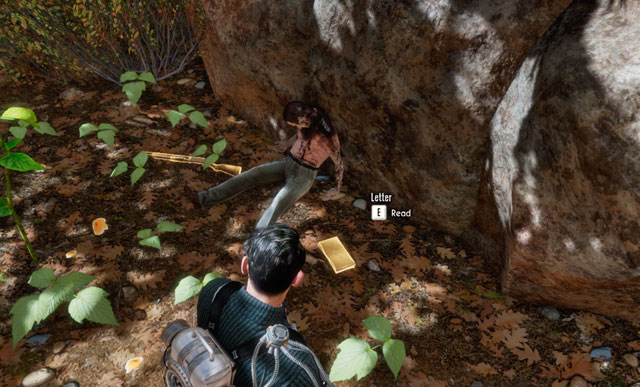 The man ended up sadly.
Another letter can be found a bit further away, behind group of awaiting moonwalkers. Collectible lies at the man's corpse.
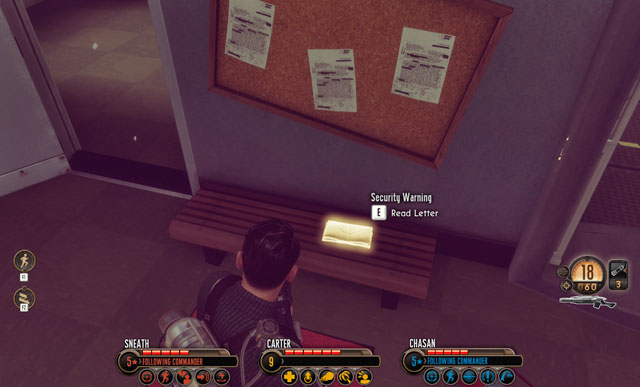 Warning lies on the bench.
This note can be found during the chase after Infiltrator, in the corridor in front of the prison for aliens.
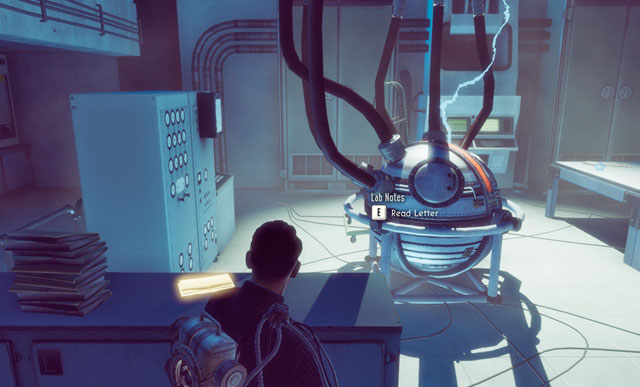 Humans have begun weird experiments.
A longer note can be found in the further stage of the chase after an Infiltrator, next to the weird machine on the lower floor.
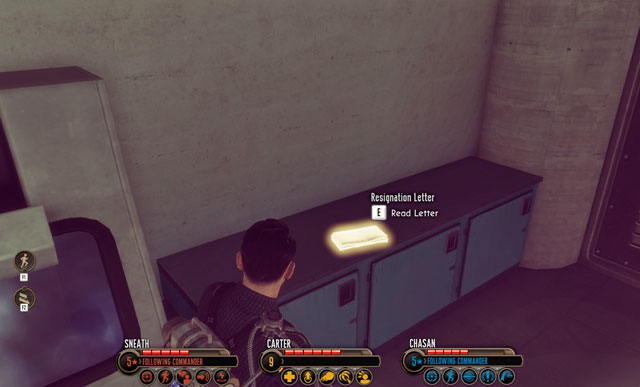 Resignation seems to be a bit too late.
Several meters ahead you find another note - to get it, you have to go through the broken window.
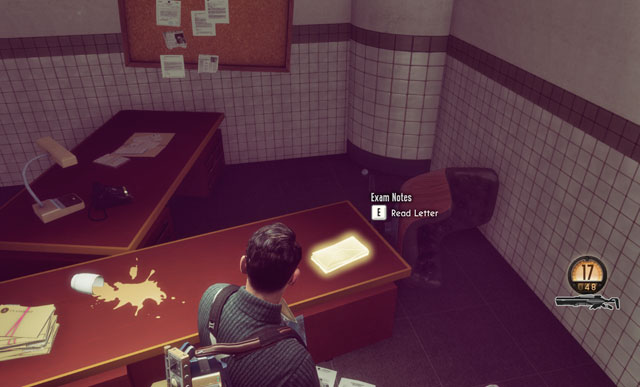
Another document is a way ahead. You get there after fighting Infiltrator, behind a room with moonwalkers. To read the note, you have enter the small room on left and pass the infected woman.
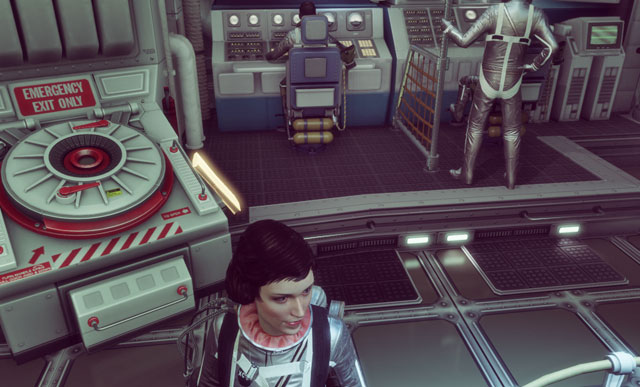 Collectibles are always the same, no matter who did you choose.
On the board of the Avenger you can find three collectibles: one photo and two notes. First of documents is just behind you.
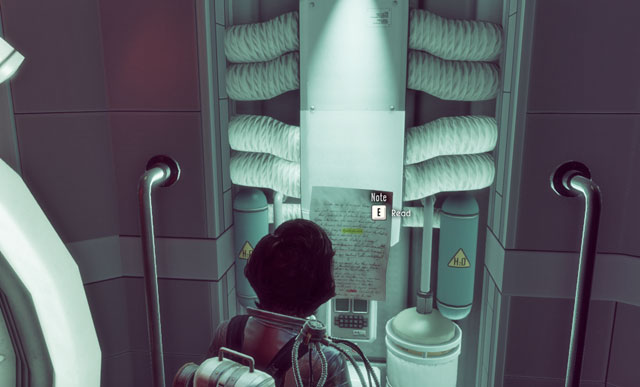 There won't be too much to read where you are going.
Second note is on the side room, on the wall. To get there, you have to go through the manhole and pass a soldier.
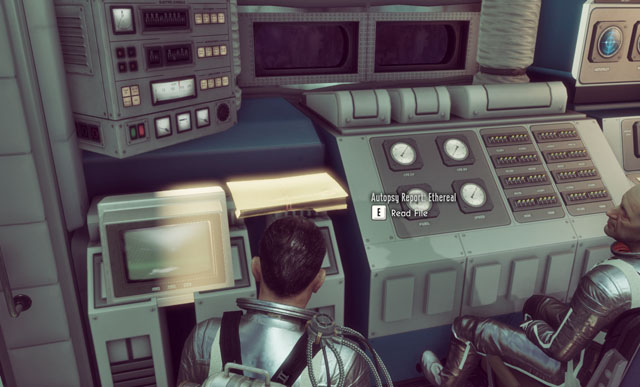 This document is especially interesting.
Third and the last note is placed on right from the photo, next to the small screen. It contains an autopsy of Ethereal.


 The Inner World Game Guide & Walkthrough
 The Chronicles of Narnia Game Guide & Walkthrough
 Test Drive Unlimited Game Guide & Walkthrough
 The Amazing Spider-Man Game Guide & Walkthrough
 The Sims 3 Game Guide & Walkthrough