Featuring: Oblivion Game Guide, Oblivion Atlas, Knights of the Nine Game Guide and Shivering Isles Game Guide.
Behold, our unofficial strategy guide to overwhelmingly gigantic The Elder Scrolls: Oblivion. Here you will find everything you need to know about the game and was afraid to ask anywhere else.
First, some technical stuff. As you may know from other texts about Oblivion, the game's world reacts to the player's progress and evolves with him. That means that you can actually beat the main quest without even bothering to do anything except it, 'cause if you don't level up your character, you'll be fighting some basic enemies over and over again to the very end. That leads to the fact that we can't actually point out how many or what type of enemies you will be facing in certain situations. These factors depend on your character's level. If you don't want to "loose" time on leveling up, go ahead and endlessly fight Scamps and basic Dremora soldiers.
We didn't cover the things that are pretty obvious in our guide. There's no point in telling you exactly what to do in each dungeon, so we stick to the essentials. Hey, you're a gamer, you shouldn't feel like a fish out of water when you're deep underground surrounded by skeletons, now should you?
There are a lot of bugs in this game. Bugs that keep you from completing certain quests, make objects disappear or NPCs talk rubbish. Save often, that's the best advice we can give you. Every quest is beatable under certain circumstances and bugs seem to appear randomly, so you might not have a problem at all when you beat them the second time round.
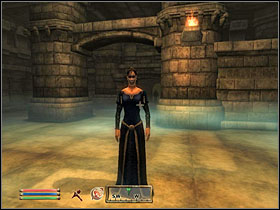
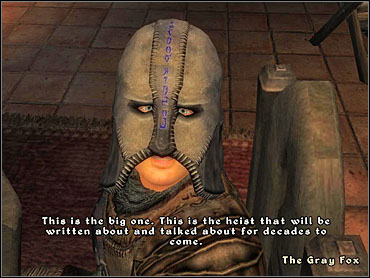
 The guide's author after dozens of hours of work.
Your great adventure kicks off in a cell. Wait for the Emperor and his guards to come. When they tell you to back off from the door, stand by the window. Follow the rest through the secret passage. Don't engage into combat, the guards will do just fine without your help. You'll find a decent blade and a torch when you search the body of the guard that dies. When you reach the end of this level, you'll be left alone. Defeat some rats and go through a hole in the wall. Look around, you'll find some useful stuff here - lockpicks, a bow, an armor and some weaponry. Search the dead goblin's body to get yourself a key and use it to go through the door.
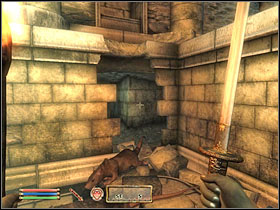
Cross the dungeon fighting those rats (one zombie will make his appearance as well). Try to get all the items, in this stage of the game everything is noticeably valuable. You'll reach Natural Caves, where rats will be replaced by goblins. There's a mortar near the entrance, handy if you want to start training Alchemy. In a big room you'll encounter a few enemies (including one priest with a fancy staff). When you pull the stone hanging on a rope, you'll unlock the rat pen below.
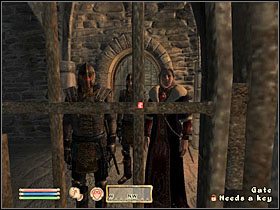
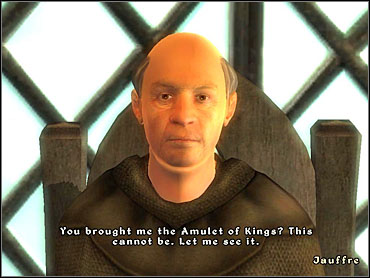
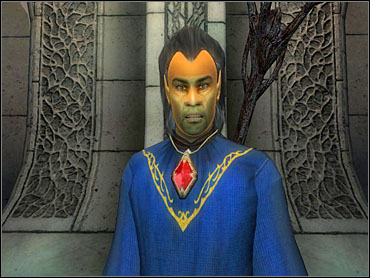
You'll meet back the Emperor's team on the next level. Uriel will ask you about your birthsign - it's one of the points when you continue to create your character. Choose wisely and follow the rest. Eventually, you'll be left alone with the Emperor. He'll give you the Amulet of Kings and tell you to take it to Jauffre, Blades' grandmaster. Seconds later, Cyrodiil's respectable rules meets his end. Talk to Baurus. You can now choose your character's class. He'll tell you to find Jauffre In Weynon Priory near Chorrol. But first, you must get out of here through the sewers. Go through the secret passage that the assassin used, and open the door using Baurus' key.
Cross the water and go up the stairs, head for the exit. At the end, you'll be able to review the character creation process and make some changes if you want to.
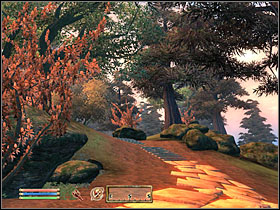
Head to Weynon Priori and find Jauffre, give him the amulet. You'll get some new information. Now your mission will be to find the Emperor's lost son, supposedly stationing in Kvatch. If you ask Jauffre for assistance, he'll give you access to a chest filled with some goodies. Go around the priory and ask everyone the same, you'll get some additional stuff. The most important gift is a horse from Prior Maborel.
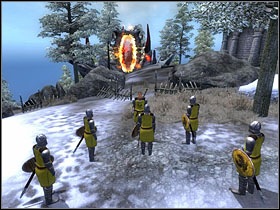
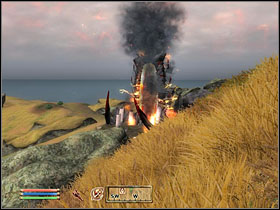
When you reach Kvatch, you'll be told that the whole city is destroyed by forces of evil. Go up the path and meet Savlian Matius, local guard captain. He will ask you to close the Oblivion gate nearby. Agree to that, defeat some enemies, and cross the gate.
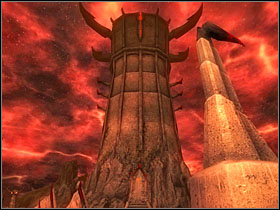
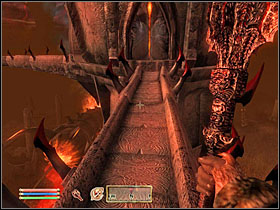
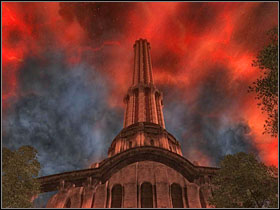
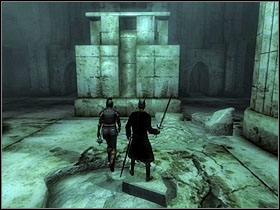
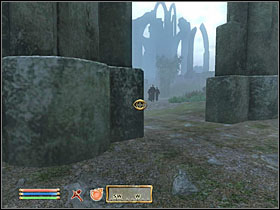
Well, here you are. Oblivion. Go to the left and follow the path to the end. Watch our for enemies and some rocks falling from the cliff. To the right, you'll see some mean looking towers. Go towards them and enter the biggest one.
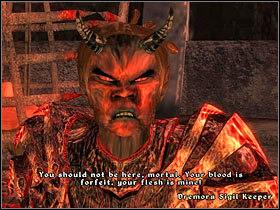
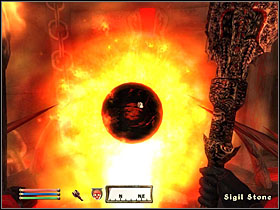
When you're inside The Blood Feast, get rid of some enemies. Your goal now is to reach the top of this tower. Go through the door to Rending Halls. There go to the central room (the one with fountain in it) and use the door to get back to The Blood Feast. Go up and enter Corridors of Dark Salvation. Find the exit (to Plane of Oblivion) and cross the bridge to Reapers Sprawl. You'll hear a voice calling for help. Go to the top of the tower and you'll face a mini-boss - Dremora Sigil Keeper. You'll find a key when you search his body. Talk to the prisoner and go back to Corridors of Dark Salvation. Use the key and go up, finding yet another door to The Blood Feast. Enter the moving platform. Continue going upwards until you reach Sigillum Sanguis. Enter the central room in there and reach the top. Touch the Sigil Stone, and you'll find yourself back in Kvatch. Kudos, your first Oblivion gate is down. Go talk to Matius and tell him you're ready to enter the city.
A short battle on the market square follows, nothing big after walking through hell itself. Once you deal with all the monsters talk to Savlian and enter the Chapel. There you will meet Martin, the Emperor's son you are looking for. Tell him about everything and he'll gladly join you back to Weynon Priory.
There, it turns out the place is being attacked by the very same cultists that took care of the Emperor. You'll find Jauffre in the Chapel (a small building to the right). Talk to him and go to his office, when you'll find out that the amulet is gone. Talk to everyone. You will agree to go to Cloud Ruler Temple.
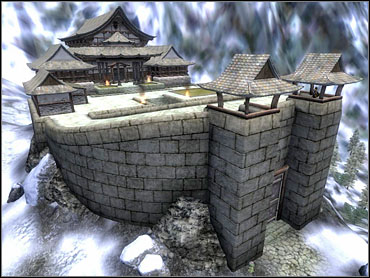
When you reach Cloud Ruler Temple, north of Bruma, local Blades will pledge their allegiance to Martin. Talk to both your companions. It's time to find the lost amulet.
Jauffre will tell you to find Baurus - a guard, who just like you was the Emperor's death's eyewitness. Go to Elven Gardens in Imperial City, to Luther Broad's Boarding House. When you talk to Baurus, he'll tell you to sit down. Do as he says. When he walks out to the basement, wait for the second man to follow him, and then go there yourself to help Baurus defeat the spy. Search his body to find a book about Mythic Dawn. Talk to Baurus to find out that Tar-Meena in Arcane University might be able to help you with finding the cult.
She will tell you that in order to find the Mythic Dawn you will have to find four tomes of their "handbook". You've already got the first one, Tar-Meena will give you the second one. She'll suggest that you begin your search in First Edition, a bookstore in Market District. The proprietor will tell you that he actually has one copy of the third part in stock, but it is a special order for a customer who has already paid for it. You have to Speechcraft him (raise his disposition to about 85) and he'll sell it to you for 100 Gold. The other way is to wait for the customer to come. Talk to him and tell him that the Mythic Dawn is behind the Emperor's assassination. Not only will he give you the book for free, but share some details of a meeting he arranged with some cultists to get the fourth tome. Go to Baurus and tell him what you found out.

Baurus turns out to be quite familiar with city sewers and will lead you to the meeting point. Follow him there. You will have to decide who will attend the meeting and who will watch it from the shadows. It doesn't matter, really, as cultists will find out your identities either way and you'll have to kill them. Take the key and the book from the body of one of them. Talk to Baurus (try not to let him die in this fight, he'll prove useful later), who will now go to Cloud Ruler Temple to serve Martin. Go through the door the cultists used. You'll find some stuff in what seems to be their underground post. Leave the sewers and go back to Tar-Meena, who'll help you solve the puzzle hidden within the books. You'll have to talk to her three times, each time giving her 24h to make some progress.
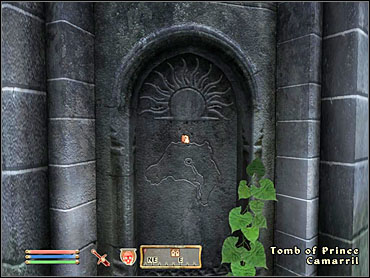
Go to Imperial City Palace and wait until noon. In a place indicated by a green dot on a compass (door of Tomb of Prince Camarril) a map will appear. You've found your cult, now it's time to pay it a visit.
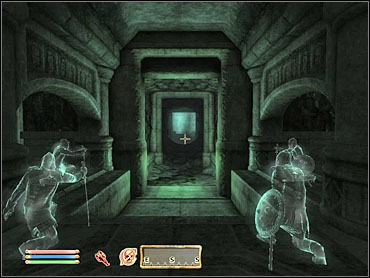
Inside the cave you will receive a warm welcome - everyone thinks that you're there to join them. The first priest will open the door for you, the second will tell you about your initiation as a member. Agree to his proposal, giving him all your stuff (you'll get it back eventually, but if you don't feel like parting with everything you've got then just drop some stuff on the ground before actually talking to him) and wearing the red robe. Follow him to the shrine. You'll witness a speech made by Mankar Camoran. Get on the "stage" when you are encouraged to. You have to make a sacrifice in order to become one of them. You can follow the order and slay the Argonian or disobey and start killing everyone. Either way you won't be able to leave here without raising the alarm so it doesn't really matter what you choose. You have to do 2 things: kill Harrow (he's got all your stuff, remember?) and steal the book Mysterium Xarxes. While you can sneak kill the wretched Dunmir, the book can't be stolen without somebody noticing. Just grab it, then, and run for your life, following the path indicated on your map. Once you leave the cave, go back to Cloud Ruler Temple and give the book to Martin.
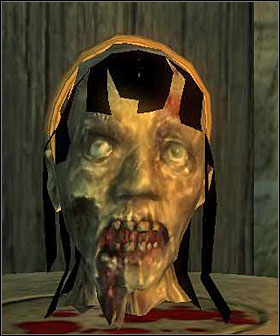
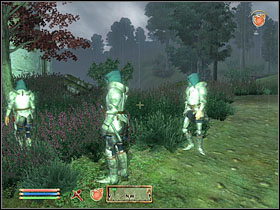
 Looks familiar, doesn't it?
While the Septim heir researches the enchanted book, Jauffre has a mission for you. You have to get rid of some suspicious spies wandering around the temple. Talk to Steffan, who will tell you where they usually meet at night. Go there and kill everyone. You'll find some keys when you search their bodies. Go to Bruma and talk to guard captain Burd. He'll allow you to legally search Jearl's house. Go there and enter the basement through a hatch on the floor. There you'll find a letter. Take it to Jauffre.
Meanwhile, Martin deciphered the first part of the book, thus finding out the first item needed to open a portal to Mankar Camoran's Paradise. You need a daedric artifact. On Martin's desk there is a book "Modern Heretics". Read it to know the location of Shrine of Azura.
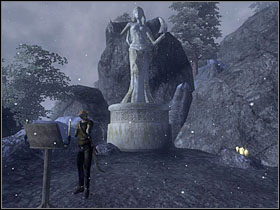
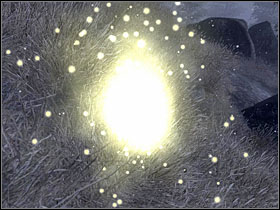
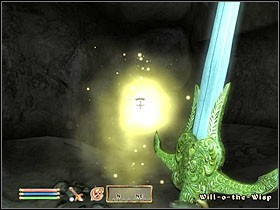
Talk to Mels Maryon. Raise his disposition in order to make him talk. He'll tell you that you need some Glow Dust in order to summon Azura. That substance is left by dead creatures known as Will-o-the-Wisps. Those "sparks" can be found a little bit to the north. Wait until 6 a.m. and then present the gift to Azura. She'll tell you to go to Gutted Mine.
You'll have to deal with 4 vampires here. They can be a problem, so watch out. There's a lot of silver around the mine, take time to get some if you need cash badly. When you return to Azura, you'll receive an artifact. Take it back to Martin.
HINT: The Azura mission is one of 15 daedric quests. All of them are basically about finding a shrine, making an offering, and performing some kind of dungeon-like task. You'll get an artifact for each of them - and daedric artifacts are some of the best items out there. You can perform any one of them in this part of the story. You'll find details on all 15 quests in the full version of the guide.
The Mythic Dawn cultists are beginning to set things into motion around Bruma, and one Oblivion gate just opened by the city gates. Jauffre will tell you to guard captain Burd, who is waiting for you there. Do so and cross the gate with the rest.
Just like in Kvatch, your goal is to get into the tower. This time you'll see it on your left. The bridge is down, you'll have to go straight ahead until you see a path allowing you to get near the tower. After defeating some enemies enter The Fury Spike.
This tower is very similar to what you've seen in Kvatch. Go to Rending Halls and get one floor higher in there, then back to The Fury Spike through the next door. Then go to Corridors of Dark Salvation and do the same. You'll encounter another Sigil Keeper, kill him to get the key. Go to Sigillum Sanguis, go to the top and touch the Sigil Stone. Another day, another Oblivion gate closed.
When you're back in Bruma, talk to Burd and go back to Jauffre.
When you're back to Cloud Ruler Temple, both Martin and Jauffre will have some stuff for you to do. The former translated another part of the book. Talk to Jauffre, who'll tell you to go to Sancre Tor in order to find Tiber Septim's ancient armor. He'll also give you a key enable you to enter the dungeon.
On the first level you'll be attacked by an undead Blade. When you defeat him, his spirit will appear and tell you to free the other three Blades just like you did with him. Go to the lower level. Now you're in the center of the dungeon. Firstly, go to Sancre Tor Prison.
Kill Warder Kastav and get a key from him. Find the undead Blade (follow your compass) and defeat him. You'll find some nice equipment on him. Go back to Entry Hall and continue to Hall of Judgement, where you'll have to kill another Blade. The last one of them is in Catacombs. When you have them all "freed", go to Entry Hall once again and to Tomb of the Reman Emperors. All 4 ghosts will join their powers and lift the curse, allowing you to enter and grab the armor. Do so and go back to Martin.
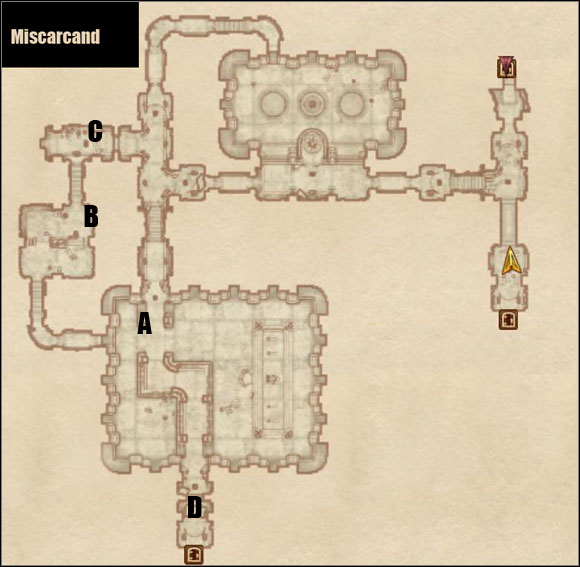
The Septim heir has another task for you. You have to get Great Welkynd Stone from Ayleid ruins Miscarcand, west of Skingrad.
On the first level, go towards the point indicated on your map. When you reach the big room at the end, jump down (A) and go right. Follow the corridor and go up the stairs to reach a button (B). Use it to open the door. Stand on a raised plate (C) and finally go to the next level, Sel Vanua (D).
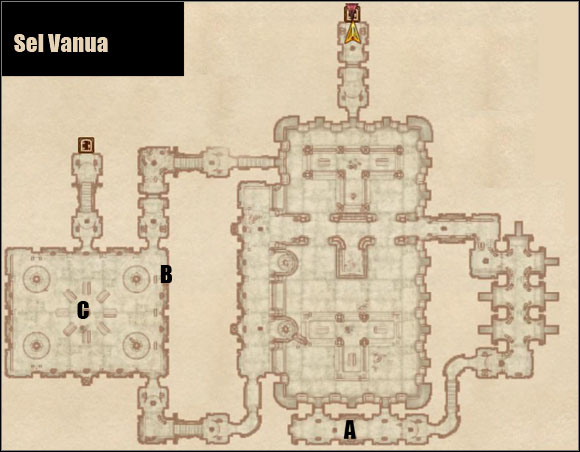
This one's pretty much the same. Push the button (A) and go lower. At B there is a switch, you can use it to get yourself a Varla Stone (C).
Morimath. The Great Welkynd Stone can be fund at A. You can go back up using the same path as before or defeat a lich (B) and use a shortcut (C).
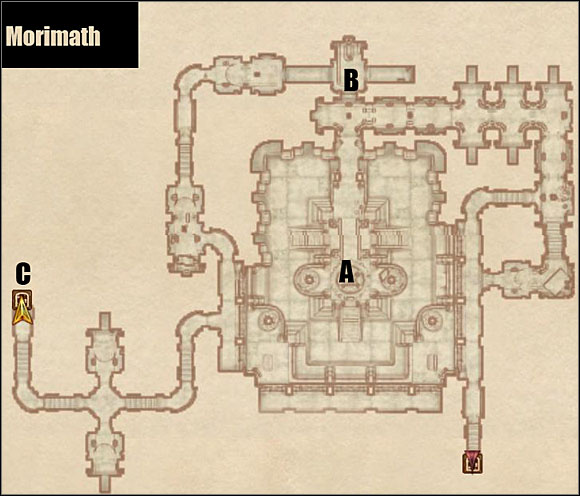
HINT: There's a lot of Welkynd Stones in these ruins, collect some of them as they get useful in some sidequests.
Jauffre is afraid that just Burd's guards won't be enough to defend Bruma in the coming battle. The city needs as much allies as it can get. Time to talk to other cities' counts and try to persuade them to send reinforcements. It won't be easy, though, as most of them are troubled by their very own Oblivion gates., which will have to be closed. Guess who's up to the task.
This quest is in fact optional. You don't have to close all the gates, you don't even have to close any one of them, but keep in mind that the battle for Bruma won't be a walk in the park and some help would be useful.
Elder Council
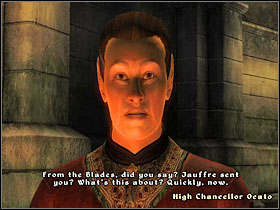
Go to palace in Imperial City and find chancellor Ocato. He'll refuse to send any help and will tell you to pay each city an individual visit. You can't do anything about him right now.
Kvatch
When you close the Kvatch gate, Savlian Matius will ask you for further help in taking the city back. Agree and follow him. After defeating some monsters talk to him and go back to the Chapel to talk to Berich Inian. Follow him through the underground pass. Eventually you'll reach a wheel that opens the castle courtyard gate, use it.
You'll get some backup from Savlian and his men now. Talk to him and go inside the castle. You have to find a prince. Turns out you were too late after all, as he lays dead on the floor. Take his royal ring and give it to Matius, who'll give you his cuirass in return. He'll also agree to send some help to Bruma.
Anvil
First you have to find and enter the Oblivion gate north of the city. Once you're in there, go forwards to see a bridge and a tower on the left. Inside you can get some stuff from the body of a Mythic Dawn cultist. Go further and enter Nether Tunnels. After going through some simple dungeon levels, you'll end up outdoors again. Go to Red Gnash Tunnels. This time it's shorter. When you are outside yet again, follow the path to reach The Tower Portal. Enter doors in that order: Rending Halls, Flesh Spire, dead Halls, Flesh Spire, Corridors of Dark Salvation, Sigillum Sanguis. There's another Sigil Stone in there. Touch it to close the gate.
When you do this, go to Countess Umbranox in Castle Anvil and tell her about your deed.
HINT: You'll have to do pretty much the same in Chorrol, Cheydinhal, Leyawiin, Bravil and Skingrad. The procedure of gate-closing is identical as in Anvil, Bruma and Kvatch. It's always about getting to Sigillum Sanguis and touching the Sigil Stone.
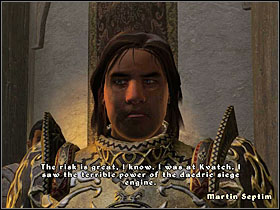
The last piece of the Misterium Xarxes puzzle is a Great Sigil Stone. The problem is that the only chance of getting it is by allowing the enemy to open a Great Gate. Martin's plan seems desperate, but that's the only choice you have. Bruma must survive the attack. Septim will tell you to inform Narina Carvain about everything. Co to Castle Bruma, then.
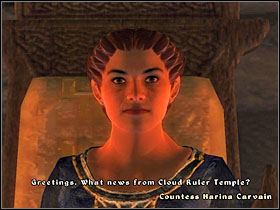
It turns out that the countess is quite willing to take the risk. She'll promise to meet Martin in Chapel of Talos. Now is the time to finish up with Allies for Bruma quest - if you're not afraid to loose, of course. When you think that you're ready, talk to the countess.
Everyone will be waiting by the city gates. Go there and watch the scene. The number of soldiers that is fighting on your side varies depending on how much allies you found earlier. After some speech by Martin, battle begins. Fight off enemies until a Great Gate appears. When it does, go through it.
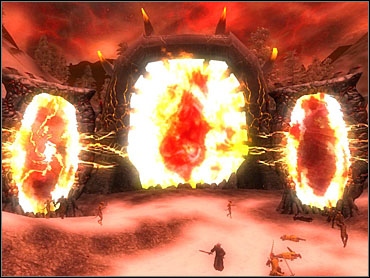 Yikes!
A giant siege engine is approaching the gate from this side. You have to get to Great Sigil Stone before it reaches your world. You've got 15 minutes. Go inside World Breaker Guard through the door on the right. Get on the platform and hit the mechanism to go up. Go to the top and leave through the door. Cross the bridge to another tower, then go down to the middle level and go out. Jump across the broken bridge. There is a path on the right that'll lead you to the next tower. Follow it, avoiding the fire from turrets. If you don't manage to jump across, go left to enter a short dungeon. Either way you'll eventually end up in of the two identical towers. Go to the top and use the lever to open the gate. Go outside (through the middle-level door) and run to the main tower.
Go to Vaults of End Times. Defeat a Sigil Keeper and take his key. Go upwards until you reach Sigillum Sanguis. Touch the stone. It's over, you've won this battle. Bruma is safe. Talk to Martin. It's time to pay Camoran a visit.
When you're back to Cloud Ruler Temple, Martin will be ready to open a portal to Camoran's secret dimension. Get yourself ready (potions, items, u know) and let Septim open the thing. Go through.
Paradise is a not-so-peaceful land inhabited by Camoran's former servants, whose immortality proves to be the greatest curse of all. Follow the path and you'll meet one of them. Ask him about everything and continue on, across the bridge. Go straight ahead, twice turning right at crossroads.
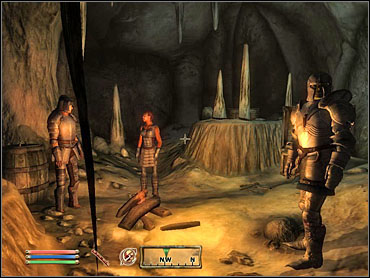
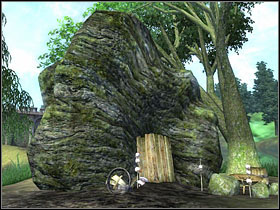
You'll meet a dremora named Kathutet, who's guarding the exit from the gardens. He'll give you a choice: defeat him in a fight or perform a quest for him. If you choose the latter, a map marker for Lair of Anaxes will be added to your map. Go there and free Anaxes himself (by moving the two logs that keep the boulder in place), who's trapped in the back part of the cave. When you do that, go back to Kathuter (he's inside The Flooded Grotto). You can kill him now if you like. Either way, wear Bands of the Chosen and enter The Forbidden Grotto.
Talk to Eldamil, Camoran's former lieutenant, who wants to help you. Agree to that and step into the cage when he tells you to. When you're free again, go right, cross another bridge and use the door leading to the next level.
Eldamil will take off your Bands of the Chosen, enabling you to leave the grotto. Agree when he proposes to help you defeat Camoran. At the end of this quite long level you'll encounter a dremora named Medrike, who will have to be killed.
HINT: On the first level of the grotto you can kill the prison warder Orthe and his dremora sidekicks. They are quite a challenge, though.
HINT: If Eldamil dies, don't worry. He's immortal and will soon reappear.
 Cyrodiil's greatest supervillain.
Outdoors at last. Camoran's palace stand before you. You'll meet your old buddies Ruma and Raven near the entrance. They will lead you in. Mankar will give a standard villain speech and engage you into a fight. Don't bother fighting Ruma and Raven, as they're immortal as well and will respawn in a few seconds after getting killed. Concentrate on Camoran himself. When he dies, pick up the Amulet of Kings from his body. The Paradise vanishes, and you're back to Cloud Ruler Temple. Give Martin his legacy back.
Together with Martin and Jauffre (if he survived the battle for Bruma) you'll agree that you have to go to Imperial City and declare Martin the new Emperor. Go to palace.
Chancellor Ocato will immediately declare his obedience, but his speech will be interrupted by a guard, who tells everyone that the city is under attack. Gates of Oblivion are opening all over the place. You have to escort Martin to Temple of the One. This time the Emperor won't be following you - it's you who'll have to wait for him.
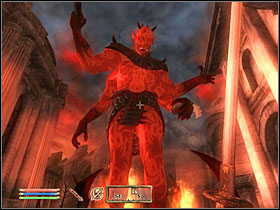
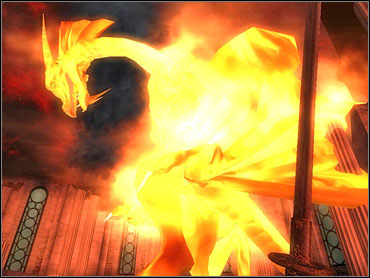
When you're in Temple District, it turns out that Mehrunes Dagon himself walks upon the earth! It means that crowning Martin won't do the thing any more, as barriers between Tamriel and Oblivion have been breached. Martin tells you that you have to go to the temple with him. Dagon stands before you, but surprisingly it's enough just to walk by him (lol). Enter the temple and watch what happens. We bet you're as disappointed as we were when it turned out that we don't get to kick daedric prince's but ourselves. Martin will sacrifice his life, do some weird stuff with the amulet, and transform into a dragon. After a short struggle both Dagon and Martin will be gone, thus ending the Third Era etc. Well, congrats.
After the battle you will be approached by Ocato, who'll give you the title of Champion of Cyrodiil and inform that an Imperial Dragon Armor is being prepared for you. It will be ready in two weeks.
Well, that's pretty much the end of the most important quest of the game. Fear not, though, as there is still a LOT for you to do. There are hundreds of dungeons, tens of quests, thousands of characters, all just standing there and waiting for you to come and see them. We'll help you, of course. Soon.
Save for the Main Quest, the four Guilds are the longest and the most complicated series of quests in Oblivion. It's interesting that one character can actually join and become the master of all four of them simultaneously. That may not be the best thing when it comes to the game's replayability, but on the other hand it can certainly lengthen the play time to some extreme values.
 The guide's author after even more work.

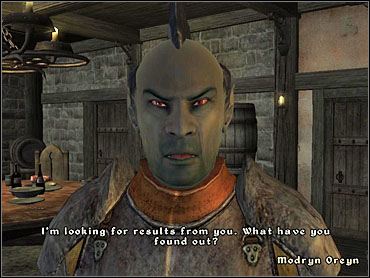
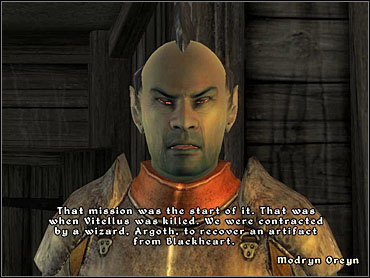
Missions are assigned to you by the Fighters Guild in the form of so called 'contracts'. In order to get one, just talk to one of the branch leaders: Azzan (Anvil), Burz gro-Khash (Cheydinhal), or Modryn Oreyn (Chorrol). If the one you choose doesn't have any contracts for somebody at your rank, you will be told to go to one of the other branches.
Joining the Fighters Guild is not a problem, all you have to do is to pay all the fines that you might have with the city guard. You can sign in by talking to either Azzan, Burz gro-Khash or Vilena Donton (Chorrol). You will be advanced to a higher rank when you complete a set number of quests.
Contract from: Azzan
Rank: Associate
Azzan, Anvil branch leader, will tell you to investigate a rat problem in Arvena Thelas' house. When you go to the Dunmer woman, it turn out that the problem is actually a mysterious animal that is killing her beloved rodents in her basement. Go there and kill a Mountain Lion, then go back to Arvena. She'll suggest you to go to Pinarus Inventius, who might just know how to get rid of these lions permanently.
Enter Pinarus' house and ask him for help. He'll offer to go hunting with you. Follow him outside the city gates to find four Mountain Lions. Get rid of them and return to Arvena. The problem hasn't been solved, apparently, as one predator is killing the rats even as you speak. Go to the basement and kill it, then. Arvena will tell you that she suspects her neighbour Quill-Weave of doing something that lures the animals into her basement.
You won't find out anything from talking to Quill-Weave directly. Sneak behind Arvena's house and wait until nightfall. You'll see Argonian planting some meat by the cellar's entrance. Talk to her. Now you have a choice: tell Arvena the truth (some Gold and bonus to Speechcraft), or tell her that Quill-Weave was innocent (Gold from Arvena and bonus to Acrobatics from Quill-Weave).
Contract from: Azzan
Rank: Apprentice
The Guild will order you to solve Norbert Lelles' problem, whose shop is being robbed by some gang on a regular basis. You'll find it in Anvil docks. Ask the proprietor about the robberies. He'll tell you to stay in the shop overnight. Do so, and about 1 A.M. three bandits appear. When you kill them, find Norbert in a nearby inn, The Flowing Bowl.

Contract from: Burz gro-Khash
Rank: Apprentice
The Guild orders you to deliver some weapons to Desolate Mine, north-west of Cheydinhal. Near the mine entrance you'll encounter some goblins. Go inside and find three warriors awaiting their weaponry. Give them what they need and help them rid the mine of all the goblins. You can join them or just wait for them to deal with the problem - either way is good as long as all of them survive. If someone dies, you reward will be cut. When you get a journal entry saying that the mine is clear, go back to Cheydinhal.
Contract from: Modryn Oreyn
Rank: Journeyman
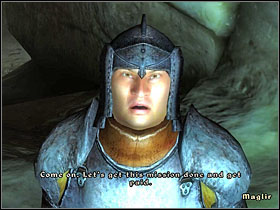
Gro-Khash tells you to contact Vilena Donton in Chorrol. She will inform you that the Guild Champion, Modryn Oreyn, will be assigning your contract from now on. Talk to him to get the first one. Your mission is to find Maglir, guild member who didn't complete his contract and vanished. You'll find him in West Weald Inn, Skingrad. He'll tell you that the reward from the guild is not worth the risk of completing this one. Darn n00b, he is. The contract will automatically be passed on to you. Head to Fallen Rock Cave.
So, here's a small dungeon filled with zombies and ghosts. You have to find a Journal that is marked on your map. When you get it, go back to Maglir and talk to him once again. When you return to Chorrol, you have to choose whether to tell Modryn the truth or cover Maglir and tell that he was the one completing the quests. Either way is good, but the second one will save you some traveling later on.
Contract from: Modryn Oreyn
Rank: Journeyman
Some guild member have been misbehaving in Leyawiin, and you are the one to find out what's going on. You'll find them in Five Claws Lodge. It turns out that they are depressed from not receiving any contracts. They promise to be with the good guys again if only you get them a job. Talk to Leyawiin's folk and you'll find out that Margarte might be able to help you out. Her house is near the city Chapel. She'll tell you that she might have a job for the guild warriors, but first you have to bring her 5 samples of Ectoplasm.
This substance is always left by defeated ghosts. You can also find it in alchemy stores around Cyrodiil. When you get 5 samples, Margarte will gladly hire your fellow guild members - tell them the good news and go back to Chorrol to inform Modryn of your epic victory.
Contract from: Azzan
Rank: Swordsman
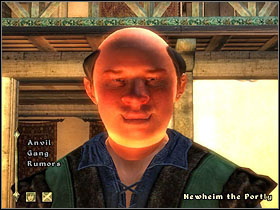
You'll be doing this one together with your lazy pal Maglir. The mission is to rid the city of bandits that have been scavenging it for some time. Ask around about them (some Speechcraft wouldn't hurt), and you'll learn that Newheim the Portly might know something more specific. Go to his house and talk to him. Additionally, he'll tell you to find his stolen chalice. You'll be told to go to Hrota Cave, north of the city.
Now you just have to clear the mine from all bandits that occupy it. Maglir will help you - watch over him so he doesn't get hurt too much. When all the thieves are dead, you can go back to the guild.
Contract from: Newheim the Porty
This mission is closely related to the Den of Thieves quest, but you don't have to be with the fighters guild to get it. The goal is to find the Newheim's family chalice in Hrota Cave. It's marked on your map, so the only problem is to kill/avoid all the thieves occupying the cave. When you return the chalice to Newheim, he'll give you some of his special liquor.
Contract from: Burz gro-Khash
Rank: Swordsman
Go to Water's Edge, a small village around Leyawiin, to talk to Biene Amelion. She wants to retrieve her grandfather's lost armor and sword, so she can pay off her father's debts. Another dungeon for you it is, this time it's Amelion Tomb.

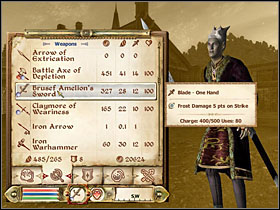
This cave is filled with the undead. It's worth to look around, as some of the chests and coffins here contain useful items. Somewhere around the middle of the map you'll find a rock hanging on a rope - pull it to open the passage. At the end, you'll find the entrance to Sarcophagus Chamber. Defeat some skeletons there and get the Brusef Amelion sword and armor. Leave using the second passage, which turns out to be a shortcut. Go back to Biene and give her the stuff. Yet another spectacular success.
HINT: You can decide to give Biene 1000 Gold and keep the equipment for yourself.
Contract from: Modryn Oreyn
Rank: Protector
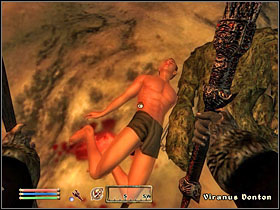
This time you'll be working with the Guildmaster's son, Viranus Donton. You'll find him in Vilena Donton's house in Chorrol. Together you'll head out to Nonwyll Cavern. There are some ogres and trolls in there, occupying both levels of the dungeon. In the second level, approach a body marked on the map, and you'll get a journal entry saying that you should return to Modryn. Do so, and you'll get a nice blade, Longsword of Diminishing.
HINT: You don't have to watch over Donton, really. Even if he receives mortal damage, he just drops unconscious for a while.
Contract from: Modryn Oreyn
Rank: Protector
It's all about Maglir once again. He's defected on yet another contract. This time you'll find him in Bravil, in Lonely Suitors Lodge. He'll tell you that he's with Blackwood Company now. If you covered Maglir in Unfinished Business quest, he'll just give the contract to you. If not, you have to travel back to Chorrol to get it from Modryn. Either way, go to local Mages Guild branch and talk to Aryarie. She needs 10 samples of Imp Gall. You can get it from any imps you kill. As she sais, some of them are hiding in Robber's Glen Gave.
You shouldn't have any problems dealing with imps, but it's pretty pointless to clear the whole cave. You won't find anything useful in there, so it's best just to quit when you have 10 Imp Galls. Deliver the goods to the Mages Guild and you'll get a Ring of Aegis. Go back to Modryn.
Contract from: Modryn Oreyn
Rank: Defender
When asked for new assignments, Modryn will tell you to meet him in his house after dark. There, he'll tell you the story of Blackwood Company. Agree to help him investigate, and you'll meet him in the guild branch in Leyawiin. Talk to him and you'll both head to Ayleid ruins of Arpenia.
Arpenia is quite a big, empty dungeon. You won't encounter any monsters in there, except for the rats. Walk around the level to search through the whole map, then leave. It turns out you weren't supposed to find anything in there - Modryn will tell you that you both have to go to Atatar. Follow him there. A big, 3-level dungeon stands before you.
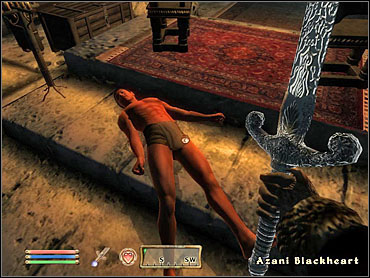
On the fourth level, you'll be caught in a boss fight with Azani Blackheart. Once he's dead, search his body, and take the ring (and some other cool items you find on him, including full Elfish armor and a great sword called Sinweaver) to give it back to your buddy Modryn. You'll be promoted to the rank of Warder.
Contract from: Burz gro-Khash
Rank: Warder
Burz tells you to kill some fugitives that have been terrorizing Bravil. Go to that city and ask somebody about the bandits. When his disposition is at around 65, you'll know that they are hiding in Bloodmayne Cave.
The cave is divided into 2 levels, and there are 2 fugitives on each one. Save for them, you won't find anything of interest in there. When you kill them all, go back to the guild.
Contract from: Azzan
Rank: Warder
You have to go to Brittlerock Cave and help Elante to conduct her research there. It's a very simple task, just follow her around the cave and kill everything that threatens her (there are some Daedra in there). At the end of the cave, you'll find the shrine she was looking for, and you'll be free to leave. There is a second level of this cave, but you don't have to go there at all. Go to Azzan to receive your reward.
Contract from: Modryn Oreyn
Rank: Guardian
Some guild members are lost in Forsaken Mine, south of Leyawiin. You'll find some bodies of both Guild and Blackwood warriors, and on the second level - the body of your colleague Viranus Donton. There's a journal nearby, pick it up. It turns out that the Blackwood Company attacked the Guild! Go back to Modryn to tell him the news.
Contract from: Burz gro-Khash
Rank: Guardian
Go to Lord Rugdumph's mansion and ask him about his missing daughter (listen to what he says, lol!). You'll get a new map marker indicating the daughter's whereabouts. She's being held hostage by some ogres. Kill them (there are three of them) and talk to her. Escort her back to the mansion, and you'll get a special reward - quite funny looking family sword of theirs. Inform gro-Khash of your success.
 Cyrodiil's smartest.
Contract from: Burz gro-Khash
Rank: Guardian
Go to Harlen's Watch, a settlement south of Cheydinhal. Enter the house of Drarana Thelis and talk to her. There have been some "light-sights" around the town. Go to the place the marked on your map to find out that the lights are in fact Will-o-the-wisps. Enter the Swampy Cave.
Inside the cave, you'll find a stack of human bones, apparently left by trolls. You have to clear both levels of the cave from these monsters. Once you're done, go back do Drarana. You'll get a Mind and Body Ring. That's it already, go back to the guild.
Contract from: Azzan
Rank: Guardian
After receiving the quest, go to Chapel of Talos in Bruma and talk to the priest Cirroc. A new marker will be added to your map - go there to meet K'Sharr, one of the thieves you're looking for. He'll tell you that his group has been ambushed by ogres and he's the only survivor. The holy chalice has been taken to the Ayleid ruins of Sedor.
For Ayleid ruins this dungeon is very simple. The chalice is marked on your map. In order to get past the gate that block the passage, you have to turn right in a big room in the middle of the map, then go up using the side corridors, and push the button once you're on the upper level.
When you retrieve the chalice, go back to Chapel of Talos. A grateful priest will give you some healing potions. When you're back in Anvil, you will be promoted to Champion.
Contract from: Modryn Oreyn
Rank: Champion
While you were working your way to the rank of Champion, Oreyn has been held responsible for Viranus' death and sacked from the Guild. He still wants to take revenge on Blackwood Company, who are apparently responsible for Guildmaster's son's demise. He'll send you to Glademist Cave to kidnap one of their leaders.
Once you're inside, you have to kill all the guards, and then find Ajun-Kajin to order him to follow you. Without any bodyguards, he won't be hesitating to cooperate. Escort him to Modryn's house.
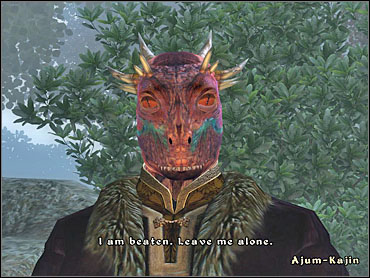
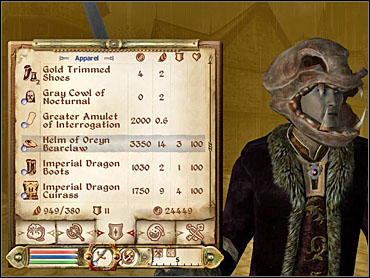
It's your duty to interrogate the prisoner now. First, be kind to him (use Speechcraft or some disposition-raising magic), and he'll answer one of your questions. To get the second answer, you'll have to beat him almost to death (watch his health bar). After that, the Argonian will commit suicide, and Modryn will give you the Amulet of Interrogation for a job well done.
Contract from: Modryn Oreyn
Rank: Champion
You still need more information on Blackwood. Modryn will tell you to infiltrate their ranks. Pay their headquarters in Leyawiin a visit, and talk to Jeetum-Ze. He'll let you to join their group. Follow him to the training room. You'll get a magical potion of some sort, and an assignment to join other three mercenaries in their raid on a goblin-infested village.
Drink the potion, and you will be automatically transported to the battle site. Join the rest in killing all the goblins (some of them are indoors). You'll loose consciousness and wake up in Modryn's house. Go back to that village, Water's Edge. You'll meet Marcel Amelion, who'll tell you that the whole population has been annihilated by bandits. Yup, you're right, you were hallucinating from the magical potion they gave you, and thus helped them commit that atrocity. Back to Modryn's house.
Contract from: Modryn Oreyn
Rank: Champion
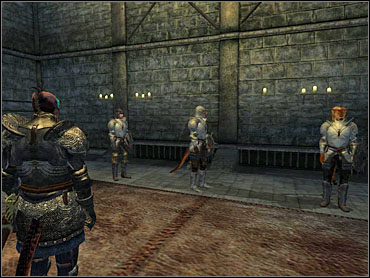
Now you have enough proofs - it's time to get rid of that Blackwood Company once and for all. You have to find the source of their power, the Hist Tree. Once you're inside their HQ, you'll be attacked by 3 warriors. Search Ja'Fazir's body to find a key to Jeetum-Ze's room. In there, defeat the Argonian and get yet another key. This time it's to Ri'Zakar's room. Face the Company's leader and kill him. It won't be easy, he's a tough one. Once he's dead, take the final key from his body and go to the basement.
So here's the infamous tree. Kill the Argonians working on it and pick up two pipes laying by the southern wall. Use them to block the pumps, and the whole machinery will meet its end.
When you leave the room, you'll meet your old pal Maglir, who will accuse you of destroying his life and eventually attack you. Enjoy killing him, he truly deserves it.
Modryn Oreyn will display his gratitude by giving you the Helm of Oreyn Bearclaw. All that's left is to go to the Guild's HQ in Chorrol and inform Vilena Donton about everything that happened. She agrees that you and Oreyn have proven to be braver and smarter than herself, and hereby asks you to take her place as the Guildmaster. Go to Modryn and tell him that you want him to be your first in command. Well, that'd be it.
 Is it..?
As the Guildmaster, you are partially responsible for managing the Guild's business. Modryn is the executive power here, but it is you to decide whether he should concentrate on signing more contracts or hiring more recruits. If you decide on the former, you'll get some money by the end of each month. The latter will result in some free items.
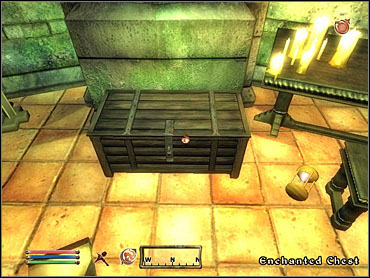
Your "payment" is delivered once a month to a chest in your new office in Chorrol.
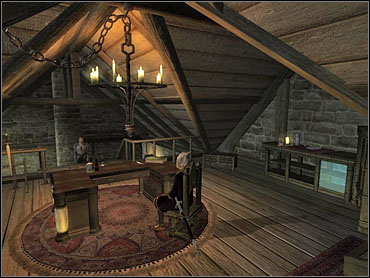 The new Guildmaster at work.

To become a Mages Guild member, your character doesn't have to be a strict magic user of any sort. The missions' structures usually suggest using magic, but in very few places you are forced to do so without any other way around (and even there you can always get away with it using scrolls). And yes, that means that you can actually become an arch-mage while not being virtually a 'mage' at all.
Joining this Guild is not a problem, just as with the Fighters Guild - you are only expected to have a clear criminal record. Talk with one of the branch leaders in one of the Mages Guild outposts around Cyrodiil. To become a full member and gain access to the Arcane University, though, you have to get a recommendation from each of the 7 branches. In other words, there are 7 initial quests to be performed.
Quest from: Carahil;
To get a recommendation from Anvil, you must solve the mystery of merchant assassinations north of the city. Go to Brina Cross Inn and talk to Arielle Jurard. She'll tell you to hire the room and wait for her there. Talk to innkeeper Christophe and tell him you're a merchant. When going upstairs, you'll be approached by Caminalda, who'll warn you about the bandits in the area. Go to sleep, and Arielle will wake you up. She'll fill you in her plan. Go to sleep once more, and once you wake up go along the road towards Kvatch.
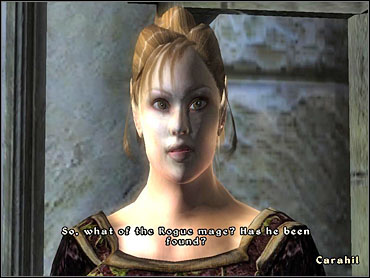
After a short walk, you'll be ambushed by Caminalda, who turns out to be the murderer. Arielle and the other battlemage will help you deal with her. Once you're done, go to Carahil for your recommendation.
Quest from: Kud-Ei;
Kud-Ei from Guild's branch in Bravil will tell you to talk to Varon Vamori and retrieve a stolen staff from him. He's somewhere nearby, as he's with the Guild as well. Use some Speechcraft or Charm on him and he'll tell you that he sold the staff to Soris Arenim. He lives in Imperial City Talos Plaza. Talk to Kud-Ei and go over there.
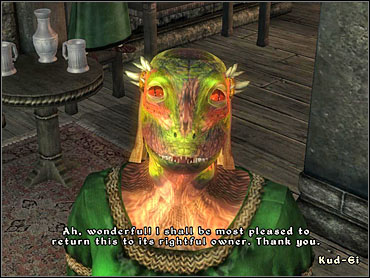
When you raise the Dunmer's disposition high enough, he'll offer you to buy the staff for 200 Gold. Do so, and Kud-Ei will gladly give you the recommendation. She'll also teach you the spell Captivate.
Quest from: Jeanne Frasolic
Jeanne wants you to find a missing mage named J'Skar, who is probably trapped in other dimension of sorts. Seek help from Volanaro, who'll agree to solve your problem in exchange for a favor. You just have to sneak into Jeanne's room and steal a Manual of Spellcraft from her desk.
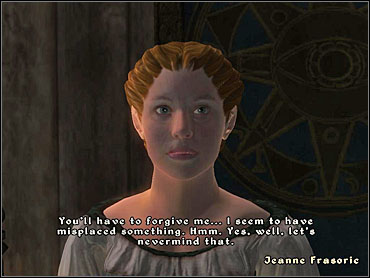
That's an easy task. Once you're done, Volanaro will tell you to meet him in living quarters downstairs at 10 P.M. Wait until this hour and Volanaro will just dispel the invisibility spell on J'Skar. Those ruffians were just making a fool out of their boss, who apparently doesn't know a thing about magic. Anyways, you can now tell Jeanne that your mission is complete and receive your recommendation.
Quest from: Falcar;
Falcar orders you to find a particular ring, which has been thrown into the well behind the Guild building. The Argonian named Deetsan hold the key to the well. Wait until Falcar leaves the guild and she'll tell you that this mission might be dangerous, and will teach you the spell Buoyancy. Leave the building and enter the well.
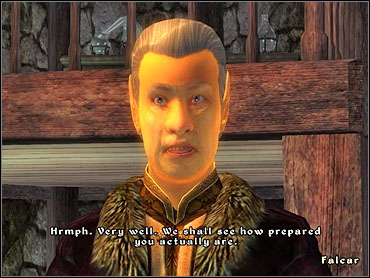
Deetsan's spell turns out to come in very handy, as the well is (what a surprise) filled with water. The ring can be found by dead Vidkun's body.
It turns out that while you were down there, there was a fight between Falcar and Deetsan. As a result, the former denied your recommendation. Follow the Argonian's suggestion and enter the cellar to search Falcar's room. You'll see two Dark Soul Gems in there. When you show them to Deetsan, she'll tell you that she'll personally take care of your recommendation. You'll meet Falcar again - far, far later on.
Quest from: Teekeeus;
Teekeeus, Chorrol branch's leader, wants you to find a book "Fingers of the Mountain". An elf called Earana, who usually hangs round in The Gray Mare, would also want a peak on that ancient artifact. There's a long journey ahead of you, towards the place marked on your map. Watch it, as it gets really steeply in there.
You'll reach an Ayleid shrine. The book is by the burned body laying around. If you get it back to Teekeeus, he'll immediately give you a recommendation. However, if you decide to give it to Earana, there's more to get. Wait 24 hours to give her time to work on the book.
She will give you the "manual" of the shrine you've just seen. To get some of its power, you need a Welkynd Stone - these are always found in Ayleid ruins (consult out World Map section). When you have it, go to the Shrine and cast the spell Shock on it. You'll learn a new spell: Finger of the Mountain, which is a stronger version of standard Shock.
OK, but what about our recommendation? Teekeeus won't be too happy about you giving the book to Earana, but will give you a second chance. You have to steal it back from her. Simple as it gets - just sneak into her room in The Gray Mare overnight.
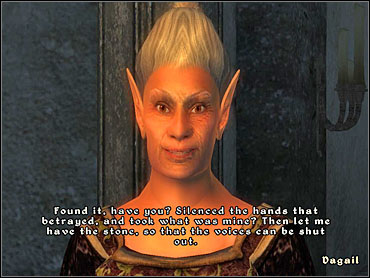
Quest from: Dagail;
A little weird guild leader Dagail will tell you to talk to Agata about her missing amulet. She will order you to investigate the local guild mages, who might know something about it but aren't very eager to share that knowledge. The gossip will lead you to Kalthar, who openly protests about Dagail being the boss around here. Tell Agata about that - she'll tell you to question Dagail again. You will be told a riddle, which is automatically solved by the game: head to Fort Blueblood, east of the city.
The fort is occupied by some bandits. Defeat them and enter the second level (Fort Blueblood Halls). The tomb's key is being held by Marauder Warlord. When you get it from here (don't expect peaceful solutions to work here) enter the crypt and take the amulet from the coffin. When you head back, you'll meet Kalthar. No other way but to kill him here.
There's a short way outside indicated on your compass. The first door can be opened by warlord's key, the second - with a level on the right. Go back to Leyawiin and give Dagail her property.
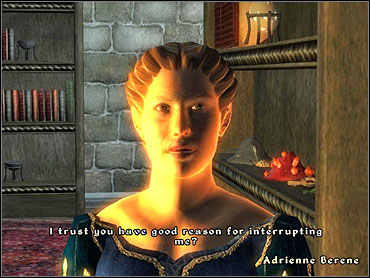
Quest from: Adrienne Berene;
Adrienne tells you to find Erthor, a guild member who hasn't given any signs of life in a few days. Talk to Argonian named Druja to find out that he's to be found in Bleak Flats Cave. Talk to Adrienne again - she'll give you the Weak Fireball spell. Go to the aforementioned cave.
Finding Erthor is not a problem, but he won't leave until you defeat all the zombies inside. When you're done with them, talk to him and agree for him to follow you. When you're back in the guild, Adrienne will gratefully give you the recommendation.
When you have all 7 recommendations, go to The Arcane University in Imperial City. One there, talk to Raminus Polus. Now you can think of yourself as a full-time Mages Guild member.
Quest from: Raminus Polus;
Your first duty will be to obtain some special wood for your very own mage's staff. Head to Wellspring Cave. It turns out that something's not right. One of the mages you were supposed to contact lays dead before you, and you are attacked by a group of Necromancers. You'll find a key while searching the body of one of them, which you can use to open the passage at the other end of the cave. There you'll face even more enemies and discover that the second mage you were told to find is as good as dead. Well, no matter. In a stone chest nearby you'll find an unfinished staff - that's what you're looking for.

Raminus will be a little upset with what you've discovered. While he talks to the council, you finish up with the wand. Enter the University and find Delmar. He'll ask you some questions about what type of staff you want to have. Answer him and wait 24 hours. Then you can pick up your new item from the closet at the back of the room.
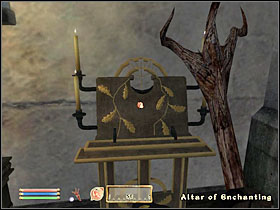
HINT: There's an Altar of Enchanting in here - use it to create your own magical equipment.
Quest from: Raminus Polus;
Raminus will tell you to go to Skingrad to recover a book from count Janus Hassildor.
Talk to the steward Mercator Hosidus, who'll tell you to go back the following day. Wait 24 hours and talk to him again, so he can tell you that the meeting will take place outside the city gates, at 2 P.M.
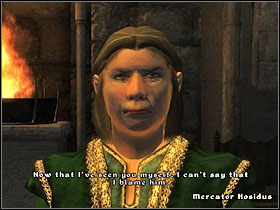

As you might have guessed, the whole Hing is a set-up. Mercator and two allies of his will attack you. After the fight, count appears and explains you some of the things that occurred. Go back to Raminus and report.
You'll get a Spelldrinker Amulet for completing this task.
Quest from: Raminus Polus;
First go to Irlav Jarol and talk to him about Vahtacen. You have to go there and find Skaleel, who's supervising the research. She'll tell you that the mystery of the great pillar remains unsolved and you should take care of it.
You'll meet Denel on your way to the Pillar, who'll bring mysterious notes on the walls to your attention. Go back to Skaleel and ask her for a book that will enable Denel to translate these inscriptions for you. Talk to him again to hear what they mean.
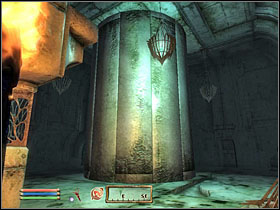 Mysterious column.
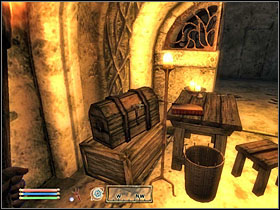 Scroll chest.
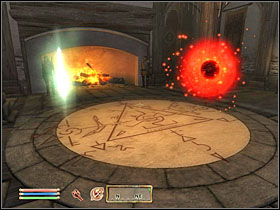
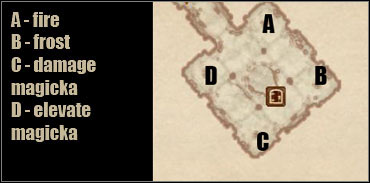
In order to solve the puzzle, you must use 4 spells on the pillar in the right order. Start from using a fire spell at point A, then the frost spell at B and so on. If you lack the spells needed for this task, all of them are in a chest near Denel. The first two are pretty obvious. Use "Sever Magicka" at point C (approach the column, you have to stand next to it in order for this one to work!) and "Elevate Magicka" at D.
So you've solved the puzzle. Now go to the lower level of these ruins, fighting off ghosts and avoiding traps. In the end you'll find yourself in a huge room. Go up the stairs and hit the button, so you can approach the treasure hidden in the metal cage. To get rid of the cage itself, use another button, the one right by next to it, on one of the pillars. You'll find an ancient, elfish helmet. Leave this place using the shortcut that's been marked on your map. Inform Skaleel about your findings and go back to Irlav.
Quest from: Raminus Polus;
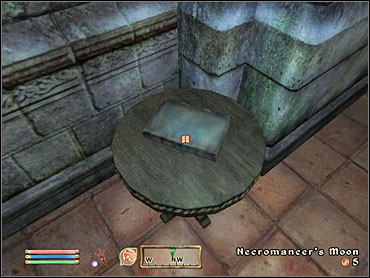
Raminus will send you to the University Archives to inquire Tar-Meena about Black Soul Gems. She'll tell you to look through a book called "Necromancer's Moon". It's laying on the table nearby (look at the screenshot). Talk to Tar-Meena again. Return to Raminus, then go and talk to Bothiel, who's also hanging out somewhere in the University grounds.
You'll receive Falcar's note from here. Raminus will point you towards a cave called Dark Fissure.
Near the entrance, there's a necromantic shrine. Wait until Thursday (Thurdas) night, and you'll see the process of creating Black Soul Gems by necromancers.
When you get an appropriate journal entry, go back to the guild. You don't have to enter the cave at all.
HINT: You can create you own Black Soul Gems in here, just the way necromancers do. Just leave normal Soul Gems in the shrine and wait for the mysterious light to appear on Thurdas. Then cast a Dispel Magic spell on the shrine, and you're done.
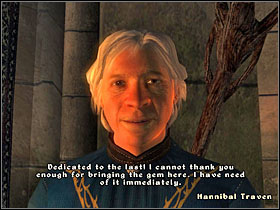
Quest from: Hannibal Traven;
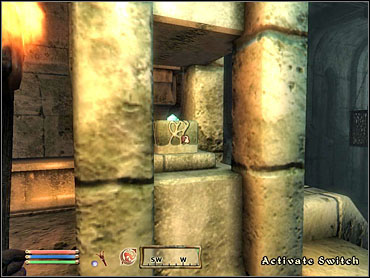
From now on, your tasks will be assigned to you directly from the Arch-mage himself. The first mission coming from him is to find and save Mucianus Alias. You have to get him out of Nenyond Twyll, an Ayleid ruins occupied by necromancers.
Once inside, you'll meet Fighragaer, the only survivor of the battlemages group that was sent here before you. He'll tell you to follow him and show you exactly why is everyone else dead - he just walks right into a trap and dies. Nothing like a professional battlemage, eh? Avoid the trap that killed him and head to Nenyond Twyll Riellesel.

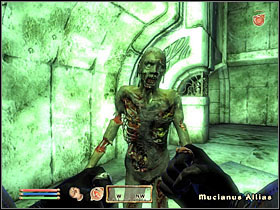
You will be approached by a necromancer Mariette Rielle, who tells you that Mucianus has already been transformed into a zombie. Defeat her and enter the big room filled with enemies. Deal with them as you like, and use the button on the north-western wall. Inside the hidden room, there will be Mucianus in all his misery. You can kill him or just leave, it doesn't matter.
Go back outside using the other, shorter way. When back to the first level, use the switch to open the path.
Once you get back to the University, Raminus Will grant you the rank of Warlock, and Traven will have another task for you to do.
Quest from: Hannibal Traven;
It's time to pay Skingrad's vampire ruler another visit. Talk to Hal-Liurz, who turns out to be the new steward, and wait for Hassildor to come. It seems he has some essential information for the Guild, but will share it only when granted a very special favor.
Bloodcrust Cavern near Skingrad is being used by some vampires as a lair. That resulted in several vampire hunters to come to the city, which can lead to some serious trouble provided the count's special state. You can deal with the problem in two ways: kill vampires and hunters separately, or confront them with each other. The second way is much more enjoyable.
The hunter's chief resides in Two Sisters Inn. Tell him where the vampires' lair is (you might have to raise his disposition a bit so that he believes you), and give hunters some time to get there. After a few hours go to the cave yourself and finish off anyone left standing - no matter which side they're on.
Go to Hassildor once more. He'll tell you that a powerful necromancer named Mannimarco is in Cyrodiil, and his intentions are to destroy the Guild completely. Go back to tell Traven the news.
Quest from: Hannibal Traven;
Before you get this mission, you must give Traven 2 days to consult the rest of the council. He'll tell you that the situation is getting worse all the time.
The Guild has lost contact with its branch in Bruma. Hannibal will tell you to go there and see what happened.
It turns out that the guild has been attacked by the necromancers. Go to the basement (Living Quarters) and reach the other side of the corridor, then enter Jeanne's office. You'll meet a necromancer, who has to be killed after a short talk. When she's dead, J'Skar will reveal himself and tell you exactly what happened. Go back to Traven.
Talk to Raminus Polus to be promoted to the rank of Wizard and learn a spell called Wizard's Fury.
Quest from: Hannibal Traven;
After all the events that have taken place recently the High Council is in fact no more, each member decided to deal with the problem his own way. You have to retrieve two artifacts that have been taken by them from the University's treasury. The first one is Bloodworm Helm, which has been taken by Irlav Jarol to Fort Teleman.
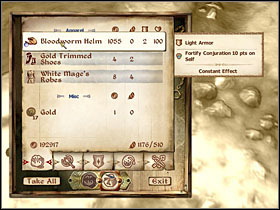
The first level is very simple - just go straight ahead the whole time, fighting off necromancers. You'll reach the door to Fort Teleman Order of the Black Rose. On the second level, you have to reach the green map marker, while facing some daedra monsters. You'll find Irlav's body. Search it to find the helmet. Give it back to Traven and be on your way to find...
Quest from: Hannibal Traven;
The amulet has been taken by Caranya to Fort Ontus. The Mages you encounter on the first level are not very friendly, but still don't seem to be aggressive. Reach the second level, open the door using the lever and enter the big room, where you will talk to Caranya. She turns out to be a traitor! That must be solved with a fight - kill her, take the amulet, and go back the same way you used before, only this time you have to fight all the mages.
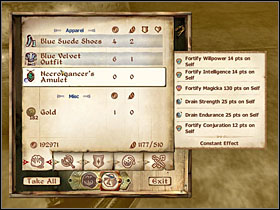
When you're back to the Guild, you'll be promoted to Master Wizard and told by Traven that the time has come to strike back.
Quest from: Hannibal Traven;
Your goal is to capture an unique Black Soul Gem, which is held somewhere in ruins of Silorn.
Talk to Thalfin. She was in charge of the operation until you arrived. The entrance to Silorn is sealed by some magic enchantment and the only chance you have is to wait until someone tries to take the gem out of there.
You have to decide the battle positions of your group. Thalfin and Iver should stand near the door, Merete should keep her distance.
When everyone's in place, talk to Thalfin again and the operation will commence. Wait patiently until the necromancers get near your positions. The one you should take care of is Falcar - your old buddy from Cheydinhal (told you you'd meet again?). Ignore the rest and go for him as soon as the battle turns out. Some sort of paralysis spell would greatly help (ex. Burden), as he will make a run for the ruins.

If you don't manage to kill Falcar before he reaches the dungeon, it's best to quick load the game and try again. If you don't find it cool to cheat this way, no problemo - go into this yet another standard dungeon and find the traitor in there. Either way is good.
Quest from: Hannibal Traven;
It's time to confront Mannimarco himself. Traven will give you this one last mission and cast some kind of spell on himself that will trap his soul in the Black Soul Gem you received. Take it from his body and you'll become invincible to Mannimarco's enthralling spell. The fight would be quick and painless without it, as you wouldn't stand a chance.
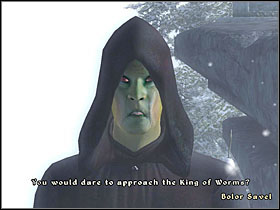
The necromancer's lair is in Echo Cave. Before the entrance stand the keymaster, Bolor Savel. He's saying that he'd sooner die than let you pass. Treat his words seriously and take the key from his body.
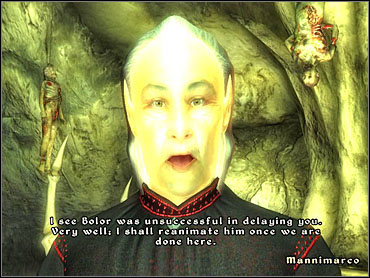
Echo Cave is a three level cave, and the last one (Necromancer's Chamber) is a typical boss battle arena. Mannimarco will welcome you with a long and self-confident speech, inevitably leading to a fight. He won't be easy to deal with, but provided you have the Black Soul Gem he is at all beatable. When he eventually dies, take the Staff of Worms from his body. You'll have some fun with this one.
Go back to the University and talk to Polus. You will be officially acknowledged as an Arch-Mage.
And that's how you reach the top of the Mages Guild hierarchy. As the boss, you get to receive some special perks.
From now on, the Arch-Mage's apartment is yours to live in. You have your own spell-making and enchanting altars in here, and also one particularly interesting chest. Once a week you can leave any alchemical ingredient in it, and in 24 hours it will spawn some additional samples of the same substance. Handy, isn't it?
The other bonus is that, like with Dark Brotherhood, you can now order one of the recruits to follow you and help you in your battles. Don't expect too much from them, though.

The missions that are given to you by the thieves guild obviously require high Sneak and Security abilities. In most of them you are supposed to avoid combat, as any unnecessary casualties result in gold penalties from the guild itself.
Except for completing mission after mission, you also have to 'fence' a certain amount of money in order to be assigned some new special tasks. You fence money by stealing goods and selling them to special guild member known as, well, fences. That's the only way to earn money on stolen goods in Oblivion. See the quest "Independent Thievery" for details.
Rank
Required amount of fenced money:
Quest requirement:
Pickpocket
-
May the Best Thief Win
FootPad
50
Untaxing the Poor
Bandit
100
The Elven Maiden
Prowler
200
Ahdarji's Heirloom
Cat Burglar
300
Misdirection
Shadowfoot
500
Taking Care of Lex
Master Thief
700
Arrow of Extrication
Gray Fox
1000
The Ultimate Heist
After some time spent in Cyrodiil, you'll surely notice Wanted posters in all bigger cities, pointing out the mysterious character of Gray Fox. He's presumed to be the Thieves Guild leader. You'll hear a gossip that the beggars are his eyes and ears. Question one of them (at least 2 of them are in every city), and raise his Disposition. You'll know that in order to join the Guild you are to be in the Garden of Daleroth in Imperial City Waterfront exactly at midnight. When you're there (there's a map marker for you), you'll meet Armand Christophe, together with two other guild-wannabes.
HINT: Armand won't talk 'business' with you in any other time or place, each time you want to report after performing a quest you have to wait until midnight and go to Garden of Daleroth.
HINT: A shorter way to find the Thieves Guild is to actually let city guard arrest you. When you have spent some time in jail, you'll be approached by a guild's messenger who'll tell you about the meeting place.
Your first task is to race the other two candidates in finding a man named Amentius Allectus and stealing his journal. Ask any beggar in the city about Amentius and you'll know that he lives in the Temple District. You'll find his house following the map marker. Picklock the door and steal the journal from the house - piece of cake. Armand will be satisfied with your performance and will gladly make you a guild member.
This mission follows you throughout your whole career as a Fighters Guild cooperative. To make things short, it's all about stealing and selling what you steal. The higher your rank, the more fences you'll be allowed to contact. All of them have a very high Mercantile ability, so cope with the fact that you probably won't be pulling any good bargains on them. After each quest you are informed how much money you need to fence before the next one becomes available.
The stolen goods are marked with a red hand in your inventory. You can't sell them in ordinary shops. Where do you get them? Well, you steal, of course. Steal from houses and pockets of every possible NPC in Cyrodiil. Sneak and Security are a must here.
Fence
City
Ongar the World-Weary
Bruma
Dar Jee
Leyawiin
Luciana Galena
Bravil
Orrin
Castle Anvil
Fathis Ules
Imperial City, Elven Gardens
You have to take back the taxes that have been collected by the city guard from the Waterfront's people. They are being kept in South Watch Tower (access through Temple District or Arboretum). Climb the ladder up three times, using the lockpick the third time. The money and a tax record are in a closet to the right. Take them all and go back to Christophe. He says you can keep the money.
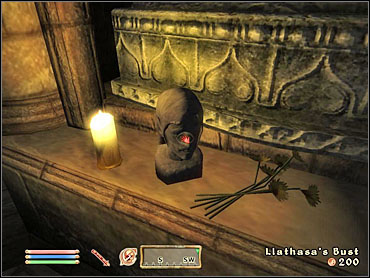
Go to Cheydinhal. Talk to one of the beggars, paying him for some information. You'll know that the statue you are looking for is in Chapel Undercroft. Go there through the Chapel, opening the Average lock by the way. The only problem here is a guard, who shouldn't see you in any case. Sneak past her and get the statue. Back to Waterfront.
It turns out that while you were doing the job, the city guard raided the Waterfront in order to find and arrest Christophe. Methredhel will tell you all the details once you find her. You have to plant the statue you stole in Myvryna Arano's house (leave it in a closet). Find Hieronymus, who's hanging around somewhere, and tell him that Arano was the one stealing the statue. You'll have to persuade him a bit to make him believe. Follow him to her house. After a short scene wait for some time and Armand will appear as usual at midnight in a given place.
You'll get a promotion and access to a new fence - Dar Jee in Leyawiin. Next missions will be assigned to you by S'krivva in Bravil.
Your new Doyen will send you to Leyawiin in order to speak with Adharji. When you're there, talk to some beggars, then go to her house. She wants you to find a thief named Amusei - remember him? He's the one you beat in a race to join the guild. Talk to some beggars again, and you'll know that the Argonian is being held prisoner in the castle. Go there. In exchange for a lockpick, he'll tell you everything about the ring. The Countess has it.
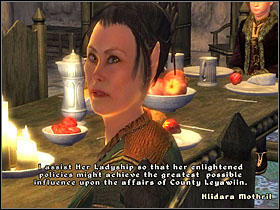
Again, question the beggars. You have to find Hildara Mothril, countess' handmaiden. She's hanging out somewhere in the Leyawiin Castle. Talk to her, rising her disposition, and she'll tell you some useful things about Countess' habits and a secret torture chamber hidden somewhere in the castle.
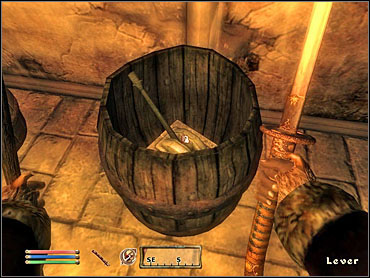
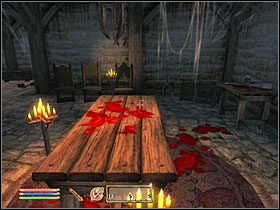
Wait until midnight. Go down to the basement and use the lever hidden in one of the barrels (screenshot above). First you'll find yourself in the torture chamber, then go to the Countess' living quarters. Sneak past her and either picklock the Jewelry box or steal the key to it from the sleeping Countess. When you have the rind, go back to Adharji.
HINT: Adharji will double her reward for you if you tell her that Amusei tried to sell the ring - before you give it to her, obviously.
S'krivva tells you that Hieronymous Lex is posing trouble in the Waterfront again. Go to Imperial City and talk to one of the beggars, asking about Methredhel. You'll know that she's hiding in Dynari Amnis' House in Talos Plaza District. It turns out she has already come up with a plan to turn the tide. Your next target is The Arcane University.
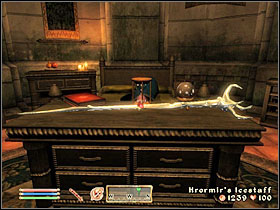
The job is surprisingly easy. Go through the front door, and Sneak to use these magical portals twice. You'll reach the Arch-Mage's quarters. Take his staff and leave a note on the nightstand - well, so much for the mages' high security. Go back to Methredhel, who tells you to keep an eye on Lex.
The guard captain can be found somewhere around Waterfront's houses. You'll witness a funny scene in which a fake Dremora is sent from the Arcane University to deliver his new orders. Take the message that he drops, and go back to Methredhel.
As an act of goodwill, the Guild wants you to return the stolen staff. Break into Ontus Vanin's house and leave in a crate marked on the map. Go back to S'krivva to receive your reward.
S'krivva wants you to find a thief named Theranis, who disappeared while looking for a unique book in Skingrad. Go there and as usual start with questioning the beggars. Theranis has been arrested. Go to Skingrad Dungeon in the castle.
The warder will tell you that the count's steward is looping for someone to work with the prisoners. Find him (his name is Shum gro-Yarug) and apply for the job. That will grant you access to the cells.
Instead of Theranis, you'll meet Larthjar in there. Talk to him and free him if you like. There are some blood stains on the floor. On the right wall there's a movable candlestick that opens a secret passage. When you reach the wine cellar, search for another movable candlestick to go further. A vampire named The Pale Lady stands before you.
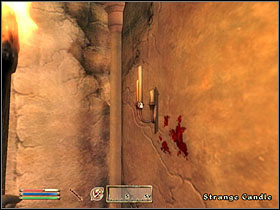 The first...
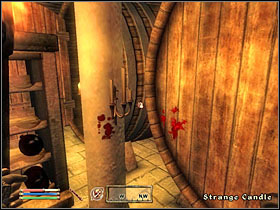 ... and the second candlestick.
When you defeat her, approach dead Theranis' body. Behind the bars on the right, there's you old pal Amusei. Free him, using the key that you found by the vampire's body. Help him sneak out of the castle through the Dining Hall.
Amusei will gratefully tell you about the book that Theranis hid. It's under one of the bushes in Skingrad - an appropriate map marker will be added. Go back to S'krivva with it.
It's time to 'eliminate' Hieronymus Lex the thieves way. Go to Anvil to talk one of the beggars. He'll tell you to find a man named Orrin in the castle. When you talk to him, he'll open a secret passage for you. When you reach the other side, touch the left pillar to find yourself in the corridor. Sneak to the desk and open the lock in it. Take the List of Candidates.

Talk to one of the beggars once again. You will be told to go to an abandoned house near the local Mages Guild. In there, you'll meet a man named The Stranger. Talk to him and pay him 500 Gold to fence the letter. Wait 24 hours and your phony recommendation for Lex is ready.
Go to Imperial City Prison and break into Imperial Legion Offices. Use the Imperial Legion Seal that is laying on the desk. Go back to Anvil Castle and give the fenced List of Candidates to the Countess. Now find Lex in Imperial City and tell him that he has been reassigned. So much for the Thieves Guild's greatest nemesis.
Go back to S'krivva to tell her the good news.
If you completed all the missions above and fenced at least 600 Gold, you will be contacted by Methredhel, who'll tell you that Gray Fox himself is waiting for you in Helvius Cecia's House in Bruma.
HINT: If you want to speed up the messenger, go to Imperial City and Wait for several hours.
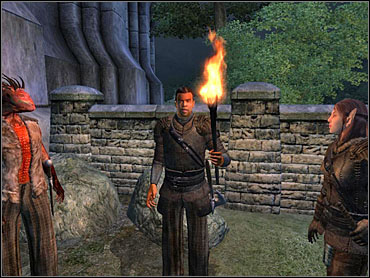
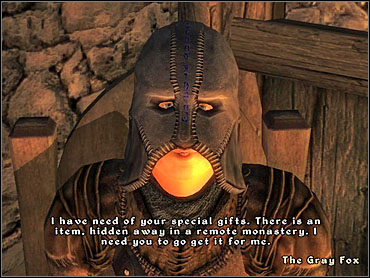 Ephemeral Gray Fox in all his shadowness.
Gray Fox tells you to go to the Temple of the Ancestor Moths and retrieve a certain crystal from there. You'll receive an appropriate map marker. Once there, go inside the building and talk to all the monks. Raise Brother Holger's disposition and he will agree to show you the entrance to the catacombs. Follow him there.
He'll open the passage to the dungeons, where you'll be left alone. There are a few levels of caves before you. Always follow the map marker and you won't get lost. The crystal you are looking for is on the last level. Look around and you'll see a ladder that will take you immediately to the ground level. In one of the crates there's a note about Fox's mysterious cape - if you read it, you'll get an additional dialogue option later on. Go back to Bruma.
HINT: Unlike other Thieves Guild quests, this time you can freely attack monks that are guarding the dungeon.
The procedure is similar as before. You will be contacted by a messenger, who will tell you to go to Malintus Ancrus in Chorrol. After listening to what Gray Fox has to say, go to Bravil and talk to one of the beggars. Head to the castle.
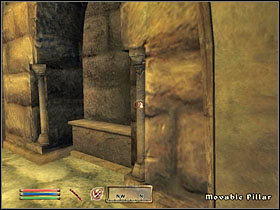
Sneak into Fathis Aren's room. You won't find anything particular in there, but there's a Movable Pillar on the northern wall (the right screen above). There are two levels of dungeons before you. In the first one, you'll have to dive between two corridors, as there's no key to the door that's blocking your way.
After getting on the ground level again, you can either kill Fathis and take the key from his body (no penalty from the Guild) or steal it from him. If you feel comfortable with Security, ignore him completely and just sneak into his laboratory on the upper level. In there, open the chest with the arrowhead you're looking for. Take the tower key and use it to leave this place.
If you fenced at least 900 Gold, once again wait in the Imperial City for the messenger to arrive. This time you have to go to Gandredhel's house in Cheydinhal.
Your goal is to steal boots of a legendary thief, who was buried with them 300 years ago. From the beggars in the Imperial City you'll know that the thief's ancestor lives in Talos Plaza District. Break into Jakben Imbel's House. You won't find anything of interest here - you need to find Jakben personally.
At night, he's walking around the city, and during the day he's in his house. When you talk to him, he'll totally freak out and give you the key to his basement. You can go in there or just kill him where he stands - he's a vampire. In fact, he IS the original Springheel Jak. The boots you are looking for are actually on him, so there's no way to get them but to finish him off. If you decide to enter the catacombs, though, there will be some more vampires to kill, and also an interesting book named Jak's Journal.
When you get the book, Gray Fox will tell you that there is only one more task before you.
Again, the procedure is very similar to all the previous quests from Gray Fox. You must have fenced at least 1000 Gold to get this one. Amusei will approach you and tell you that Gray Fox is waiting in Orthelos' House in Elven Gardens. He'll tell you that your last objective to steal the Elder Scroll from the palace library!
 Fox doesn't hide his excitement. You can tell, even through the cowl.
Go to the Palace in the central part of the Imperial City. Follow the map marker, breaking in to the cellar. You'll see a huge hourglass called the Glass of Time. Touch it and go back outside. Head to Imperial City Aboretum and use the sewer entrance pointed on your map. Now to cross three levels of sewers. You'll encounter some doors that require turning the handles nearby. Finally, you'll reach The Old Way.
The Old Way is an irritating dungeon, consisting of a few separate parts. It's fairly easy to get lost in here - just try to uncover the whole maps, and you'll find your way eventually. You'll get to The Lost Catacombs. In the end of the level, you'll have to wear Jak's boots (if you haven't worn them all the time, and you should have) to jump on the upper level of the room (left screenshot). Use one of the buttons there and run through the open door to the Hall of Epochs.
 Use Spinheel Jak's Boots here.
 Use Arrow of Extrication here.
Enter the huge room and you'll get a journal entry that you probably should use the Arrow of Extrication somewhere around here. Go through the door in the southern part of the room and use the button here. Continue on due south. Go to the next section of Hall of Epochs. Look around over there, you'll find another button. Use it and go back to the huge room with a statue. The stone blocks have disappeared and you're free to use the arrow in the right spot.
Practice a little bit using ordinary arrows. Your crosshair should be somewhere around the statue's hands, where they are holding the sword. When you hit the right spot, you hear a recognizable sound. When you feel confident already, use the Arrow of Extrication. If you miss, you'll have to go for the arrow, pick it up, return to the shooting point, and try again.
Go through the door that appeared before you.
You're in the palace already. Sneak into Elder Scrolls Library. When you're on the level with blind monks sitting around, use the lever (left screenshot above, it's hard to see it without a torch). Sit on the chair and wait for the monks to bring the scroll to you. Take it, stand up and sneak up the stairs. Picklock the door and sneak past the guard to Moth Priests' Quarters, then to Battlemage's Quarters. You're in Chancellor Ocato's private room! Approach the fireplace and jump down. You've done it!
HINT: Jumping down the fireplace takes a LOT of damage, unless you're wearing Boots of Springheel Jak. They are destroyed in the process, though. Decide whether you prefer to keep the boots and risk death or loose them once and for all.
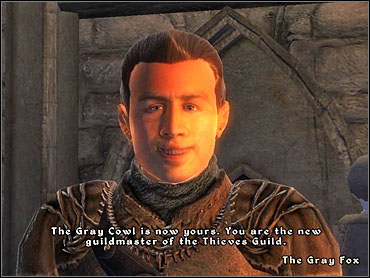 Dude, put that cowl back on.
When you're back to Fox, he'll have a last request for you. Take the ring from him and deliver it to Countess Umbranox in Anvil. You'll see a touching cutscene in which the mystery of the Gray Fox is finally solved. The Gray Fox, you say? You mean yourself, of course? Yup, from now on YOU are Cyrodiil's most wanted. Enjoy.
The most important reward you get from completing the Thieves Guild quests is the Gray Cowl of Nocturnal. It's something like a second, separate identity. When you wear it, city guards automatically start to pursue you, and you have a fine of 500 Gold on your head that you can't pay off. On the other hand, once you take off the cowl, you get rid of all the fines that you earned as the Gray Fox. That means that you can perform any evil deed, kill anyone, steal everything, and then just take the cowl off and you're cool with the guard.
The only exception to that rule is when the guards are actually on your tail. You first have to loose them somehow, then take off the cowl.
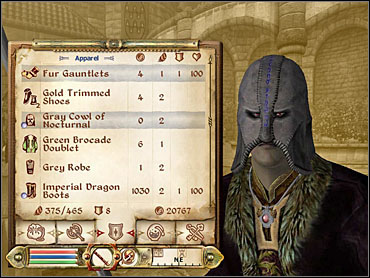
Apart from that, the cowl gives a +25 bonus to your Sneak ability, and also has some other perks like constant Detect Life and Fearther enchantments.

The other feature of being the prince of thieves is access to your new guild headquarters in Dareloth Garden, Waterfront. You can meet your fellow thieves in there and visit a gallery of the valuables you stole throughout your career.

Dark Brotherhood is, in other words, the Assassins Guild, a secret group that specializes in killing for money. Most of the missions given by the Brotherhood are, not surprisingly, assassinations. Sneaking is a very handy ability in most of them, almost as crucial as efficient weapon handling.
To become a member, you have to kill an innocent. Bandits and other quest-related murders don't count. The question is who to choose and not to make any other quest impossible to get or finish? Most of the NPC in the game are involved in some missions, so you have to choose wisely. The safest way is to kill somebody who has already played a role in a small quest of some sort.
When you perform the murder, you'll see a message on screen saying that you deed has been "observed by the forces unknown". Next time you rest, you'll be approached by Lucien Lachance, who has a little proposal for you..
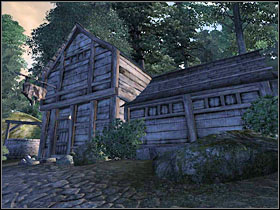
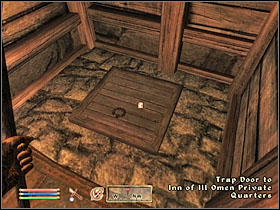
This mission will be given to you as a test. You have to kill a man named Rufio in Inn of the Ill Omen, south of Imperial City. It's as easy as it gets. The proprietor of the inn will tell you that Rufio is in the basement - use the trap door next to the entrance. Your victim is sleeping on his bed, and one hit is all he requires. Do so, and rent yourself a room in the inn. Lucien will appear and tell you that, well... you're in.
Head to Cheydinhal, towards a map marker. By the enchanted door, say "Sanguine, my brother", and talk to Ocheeva. Welcome to the family.
Talk to the vampire Vicente Valtieri and accept your first mission. You have to kill the captain of Marie Elena, a ship stationing in Imperial City Waterfront.

Approach the crates at the end of the pier - a message will appear, asking if you want to hide in them. Do so, and once you're inside, sneak to the captain's cabin and kill Gaston Tussaud. Take the key from his body and open the booty chest. The rest of the crew noticed that something's wrong and is at the door. You can wait and fight them or escape through the window (using the captain's key once more).
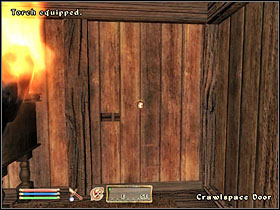
Another mission from Vicente. This time you have to make the assassination look like an accident. Go to Bruma and break into Baenlin's house between 8 and 11 P.M. Hiding from the lord and his servant, go to the first floor and turn right. You'll find a barely visible Crawlspace Door in here. Use it and loosen the fastening. Sneak out of here and go back to the Sanctuary.
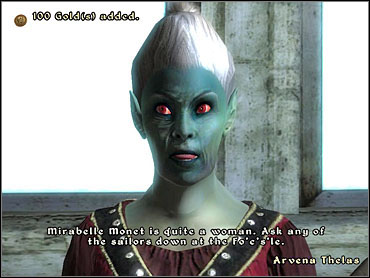
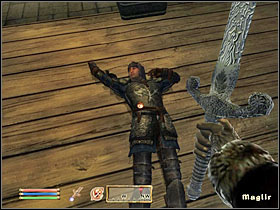
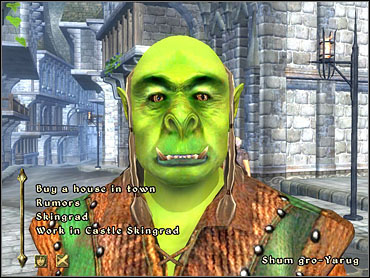
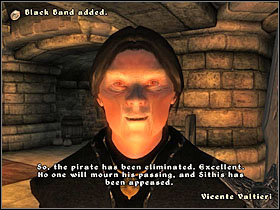
You remember that Dunmer that mocked you at the very beginning of the game? Now it's time to pay him a little visit - Vicente will order you to kill him.
You'll have to traverse through some boring sewers. Just head towards the right map markers. When you reach The Sanctum, you'll have to sneak past some guards. Wait until they finish talking, and then overtake the one who's heading your way. If you're late, he'll stand in the place that makes him almost impossible to sneak by. In Imperial Subterrane there's only one guard, but fairly easy to avoid.
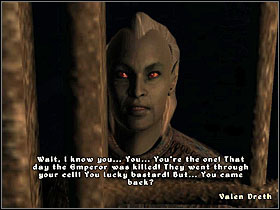
When you enter your old cell (ahh, memories), wait for the guard to finish talking to Valen. When he leaves, approach Dreth and kill him. The key to his cell and to the entrance door is on the table to the left.
What's interesting, you don't have to leave the place using the sewers again. You can just leave through the front door, nobody will see anything suspicious in it.
The next mission is to fake the Heath of Fancois Motierre. Go to Chorrol and break into his house. Talk to Francois and arm yourself with Languorwine Blade (you just got it from Vicente). Wait for the Argonian Hides-His-Heart to appear. After a short scene, attack Francois with a blade and run for it. You can't kill the Argonian, if you want to receive the bonus from the Brotherhood. Leave the house and get out of Chorrol.
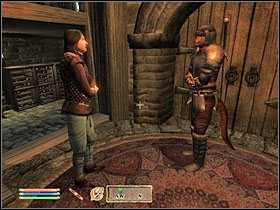
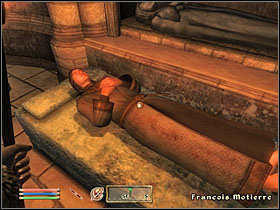
Wait for 24 hours, to give the townsfolk the time to move Francois' body to the Chapel. Go to the Chapel Undercroft and use the antidote on him. You'll be attacked by a few zombies. Get Francois out of there, and escort him to The Gray Mare. Talk to him once again and go back to Cheydinhal.
Vicente will once more advance you in rank and give you the well key (thanks to it you won't have to enter the Sanctuary through that annoying cellar any more, but directly inside through the well next to the abandoned house). He'll also offer to pass his vampirism onto you. The choice is yours.
This mission is not in the Dark Brotherhood's main course of events, but to get it you have to be its member. After doing some initial quests for Vicente, talk to Teinaava, who'll ask you for a favor. You are to find and kill a traitor named Scar-Tail, who's hiding in Bogwater, far to the south.
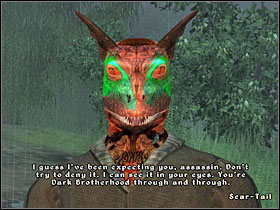
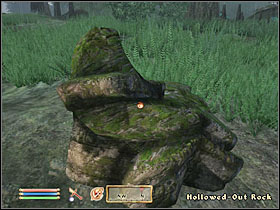
When you reach his hideout, he'll offer you a deal: spare his life and get his treasure (200 Gold hidden in a Hollowed-Out Rock a few steps to the East from the tent). You also get another Argonian's heart to ensure Teinaava you did the task (take it from dead Argonian laying under the tree to the west).
Teinaava will believe you no matter if you really killed Scar-Tail or made a deal with him. You'll get Boots of Bloody Bounding for this one.
The first mission given to you directly by Ocheeva is to find and kill an elf named Faelian. Go to Imperial City Talos Plaza, to Tiber Septim Hotel. In there you'll find an elf Ataena, who'll tell you about your victim's habit: he's hanging out in Lorkmir's House in Elven Gardens most of the day. Now you have three ways to deal with the problem: break inside (Hard lock), or wait for him to come out. Then you can either steal the key from him or talk to him and bring him some of the drug called Skooma.
You can buy Skooma from a trader named Nordinor, who's running an illegal business in Bruma overnight. Grateful Faelian will invite you to Lorkmir's House for a party. In there, you can get the world rid of him without any witnesses.
Ocheeva wants you to go to Fort Sutch and switch Roderick's Medicine with the poison she provides. Do it without being seen, or you'll loose the bonus. Next to the place where you enter the Fort is a gate (Hard lock). If you're able to open it, you're one step ahead. If not, there's some sneaking ahead of you.
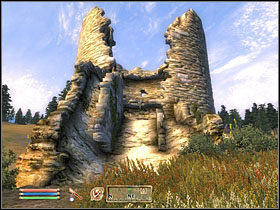
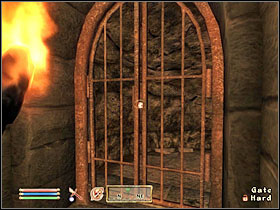
Sneak past the first guard so you can use the lever to the left of the door. This will open the passage. It's dark in here, the Nightvision spell comes in very handy. Sneak to the green map marker, and once you reach the closet, take Roderick's Medicine and put in Roderick's Poison.
You can leave the dungeon the same way you came in (a lot of sneaking included) or use the tunnels in the right part of the map (you might have to steal a key from one of the guards, if you can't manage to open all the locks). Go back to Ocheeva. If you managed to leave discretely, you'll get a cool looking finery.
Now that's what makes a good RPG. The idea is simple: you're one of the guests invited to a competition taking place in Summitmist Manor in Skingrad. Everyone else think that the goal is to find a chest filled with gold. You are the only one who knows that nobody is leaving the manor alive - except you.
Your mission is to kill all 5 guests without anyone knowing that you are the killer. You eliminate them easily one by one when they split, searching for the gold, but it's way cooler to take time to talk to everyone, win their trust, and confront them with each another. If you're good, you might even talk them into killing each other! It's not a difficult mission, but a very pleasant one indeed.
When all of the guests lie dead, go back to Ocheeva to get another reward. This time it's a blessing that constantly increases some of your stats.
Your next mission is to kill the former Imperial City Guard captain, Adamus Philida. He can be killed in any way possible, but we'll do it with some finesse. Head to Leyawiin and wait until about 3 P.M. Find the captain, who is marked on your map. He's taking a bath in a pond! Arm yourself with a bow and an arrow called Rose of Sithis, which you received from Ocheeva minutes ago. Use it to kill him from a distance (Sneaking won't hide you in the daylight, and you don't want to have the whole guard after your head, so it's best to use an invisibility spell like Chameleon on yourself).
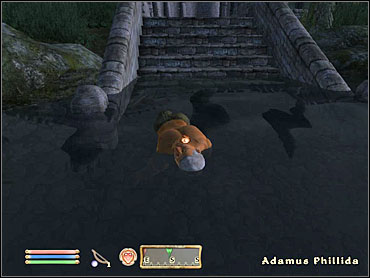
Approach Adamus' body and take some useful keys and his finger. Go to Imperial City Prison and sneak into Imperial Legion Offices, using the left door. Sneak to the guard captain's desk and leave the finger in there. That's called a "message", you know.
When you ask Ocheeva abort your next assignment, she'll tell you that Lucien sent a letter for you. Read it and go to Fort Farragut. If you want to avoid getting stuck in a long and undead-filled dungeon, use the passage that leads directly into Lachance's chambers (marked B on the map below).
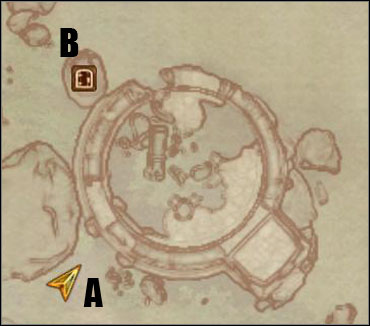
I bet you've grown custom to all your buddies from the Sanctuary, haven't you? Well, too bad for you, 'cause now it's time to kill them all! Lucien will support you with some additional 'accessories' - a poisoned apple and a scroll. You can use them to help you, but it's far easier just to kill brotherhood members one by one, preferably utilizing some sneak-kill bonuses.
If you want to use the apple, though, you have to take all the food that is laying on the tables in the Sanctuary and leave your 'trap' on one of them. Sooner or later, someone will go for it. The scroll can be used using the fight, just as any other spell.
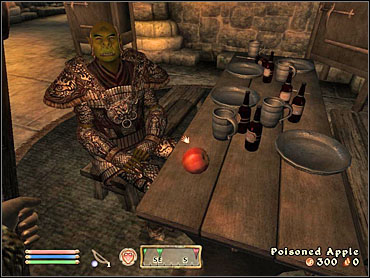
Try to avoid the skeleton called Dark Guardian, who's walking around the place. He's the toughest opponent of them all and you don't have to kill him to complete this quest. He won't attack you on his own as long as you keep the fight far from him.
Each brotherhood member holds a key to his or her chest in the living quarters, once you kill them all it's useful to go in there and check out what you can make of them.
When you finish 'purifying' the Sanctuary, go back to Lucien, and he'll advance you to his personal Silencer, and will give you a great, black horse called Shadowmere as a reward. From now on, missions will be given to you using dead drop letters. The first one is awaiting you in Hero Hill.
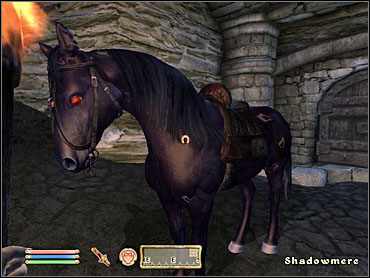
You'll find the letter with your instructions in a rock at Hero Hill. You have to go to Leafrot Cave. There's a book near the map marker, look through it. You'll know that in order to kill the mage you have to steal a magical hourglass from him. Go to the second level of the dungeon, Leafrot Hollow.
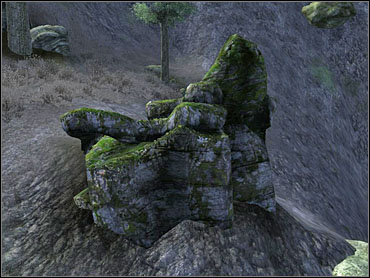 Search here for your instructions.
Sneak up on the mage from behind and pickpocket him to get the hourglass. He'll drop dead instantly. If he detects you, you'll have to deal with him the traditional way.
Your reward (500 Gold) is waiting for you behind the great tree of Chorrol. With it, you'll find instructions for the next mission.
You have to kill all members of the Draconis family. First you have to go to Applewatch, west of Bruma.
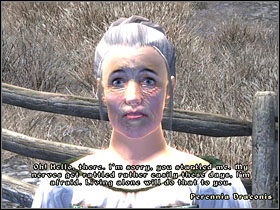
Talk to Perennia Draconis - she'll take you for a gift deliverer of some sort and provide you with a list of her children. Kill her and start your Draconis-killing marathon throughout Cyrodiil.
Matthias Draconis works in Umbacano Manor In Talos Plaza. You can ambush him any time of the day - just don't do it on the streets or the guards will be all over you.
Caelia Draconis is a city guard in Leyawiin. Each day around noon she's spending some time alone in a room in Three Sisters. If you can't sneak-kill her, she'll probably give you a standard city guard speech - you'll have to choose "resist arrest" option and finish her off.
Andreas Draconis is an innkeeper of the Drunken Dragon Inn in the eastern parts of Cyrodiil. His inn is always guarded by a fully armed guard, but you should manage to deal with the problem quietly (preferably during the night hours).
Sybilla Draconis is in Muck Valley Cavern, inhabited also by bears and wolves. It's quite simple here - go through the cave and do your thing.
The reward (500 Gold) and the next orders will be waiting for you in a well in Skingrad Castle Courtyard
Your next victim is a Khajiit named J'Ghasta, living in Bruma. Break into his house when the sun is down and enter the secret training room, using the Trap Door under some cloths in the basement. Defeat him (he's a master of unarmed combat) and go to Old Bridge, south of Imperial City. There's 500 Gold waiting for you in a crate below it, together with new orders.
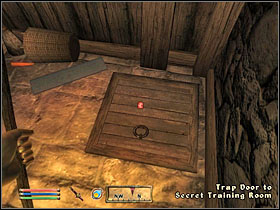
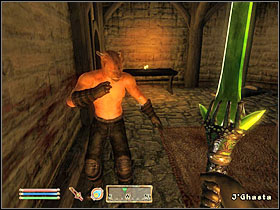
Another typical execution. Go to The Flooded Mine, where you'll find (some swimming will be in order) an Argonian named Shaleez. Kill her and go to Fort Redman, south of Leyawiin, to get orders and 500 Gold from the coffin by the entrance.
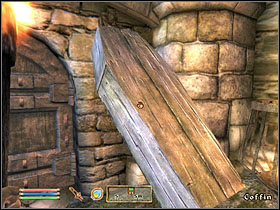
Alval Uvani is your next target. He's a traveling merchant, whom you can meet in various cities around Cyrodiil. His schedule was included with the orders. During the week, he's staying in Bravil, Skingrad and Bruma - and spends the seventh day in his home in Leyawiin.
You can kill him the old way - and the wisest would be to attack him on his way from one city to another. The problem is, he's a really powerful battlemage and it won't be easy to confront him openly. It's far easier to deal with him by planting some Mead for him to drink. He's allergic to honey and will become a sitting duck when he has a go of it.
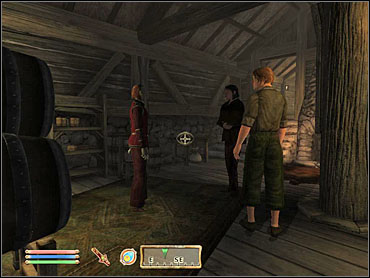
Bringing this plan into morion won't be easy, though. To make him drink some mead, you'll have to steal ALL the food from a tavern he's staying at (so he can't actually choose anything else to food or drink), and then drop some mead here and there. He'll eventually drink some - killing him then won't be any problem.
Your reward is in a hollow stump behind the Stonewall Shield shop in Market District, Imperial City.
Yet another mission just like the previous ones. This time your victim is Havilstein Hoar-Blood, hiding in a camp at Gnoll Mountain. This time it's not complicated, as you don't have any other possibilities rather than killing him in a traditional fight. Your reward is in an underwater chest in Ayleid ruins of Nornal (you'll have to lockpick a door underwater).
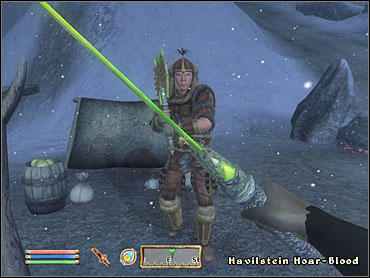
Go to Bravil and sneak to the Old Lucky Lady statue. About 6 A.M. and about 1 P.M. and elf named Ungolim comes here to pray. Sneak on him and kill him. This time the city guard won't interfere. After you get rid of Ungolim, Lucien appears and asks you just what the bloody hell you are doing. It turns out that your missions have been faked, and you have just eliminated most of the Black Hand itself!
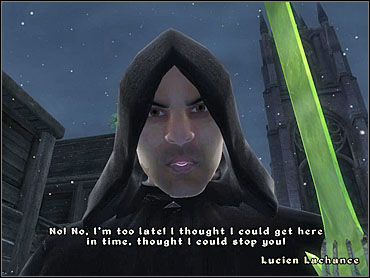
Go to the place indicated on your map as a next dead-drop location, next to the barrel behind the statue in Anvil. Soon, an elf named Enilrorth will appear. Talk to him to know that he's only been hired to deliver this message. He tells you that the traitor is living in Anvil Lighthouse. Go to the top of the structure and talk to Ulfgar the janitor. Frighten him a bit and he'll give you the key to the basement.
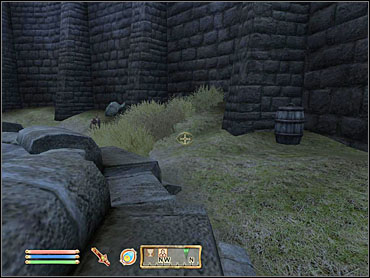
Go through the grotesquely decorated room and approach the 'shrine'. Take the traitor's journal and the mother's head. Head to Applewatch - the place where you killed Draconis' mother.
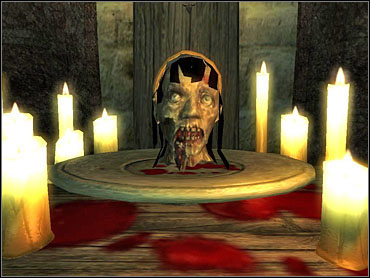 There's something to it, isn't there?
It turns out you're too late. The rest of The Black Hand have already taken care of Lachance, who was accused of treason. You are to take his place as the Speaker. Wait until midnight and talk to the elf Arqueen, then agree to go with the rest to consult the Night Mother.
HINT: You can use the Mother's Head in here in Applewatch. Just drop it on the ground in front of the whole council. The traitor will react to it, but you can't expose him yet.
 There goes Lucien's career. And to think he was innocent.
After a short cutscene, join the rest and enter the crypt. The traitor will strike now, killing some Black Hand members at once, and trying to assassinate The Night Mother herself. Get rid of him, working together with Arqueen. When he's dead, Mother will promote you to the rank of Listener, and allow you to take anything you like from the crypt (some random items, quite good indeed). Talk to her once more and you'll be teleported back to the Sanctuary in Cheydinhal. Now to start your new life as a Listener.
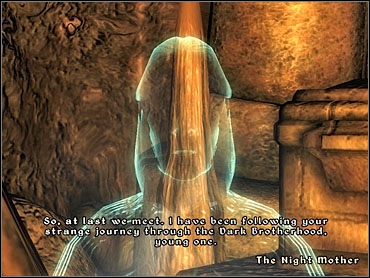
As the Dark Brotherhood's leader, you have but one task to perform: each week go to the Lucky Old Lady statue in Bravil and listen to what she says. Then pay Arqueen a visit and deliver Mother's words. You'll get some gold each time you do that.
Besides, when the Sanctuary starts to fill with new recruits, you'll be able to tell one of them to follow you around. You can call it a free bodyguard.
Quest From: Gogan and Maelona;
When talking to Anvil townsfolk, you'll hear that there's a female gang threatening the city. You'll be told to talk to Gogan about it, who turns out to be their last victim. Talk to Maelona in his house. She'll tell you to reclaim a valuable ring from the gang's hands.
Go to Flowing Bowl in the docks. In a few moments you'll be approached by two gals, who will tell you to meet them in a house outside the city (they'll tell you to join them if you are a woman).
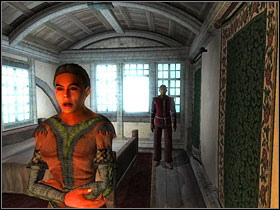
Go to the house indicated by a map marker and enter it after 11 PM. Sooner or later, fight breaks out. You'll have to defeat all the girls. After they're dead, Gogan and Maelona appear. It turns out they are sort of secret agents and just had you do their Job. As your reward, you can take anything you like from the house. Look around - you'll find some interesting stuff here (including possessions of gang's former victims).
Quest From: Varulae;
There's a ship named The Serpent's Wake in Anvil docks. On its deck there an elf Varulae, who'll ask you to go to the storage hold and find a magical artifact that is in there. Go below the deck, and enter captain's cabin. Take a key from his body - you can use it to open the treasure chest nearby. Go to the lower level and follow the map marker. You'll eventually find a crystal ball you're looking for. In exchange for it, Varulae will give you an enchanted cutlass, Redwave.
Quest From: Velvyn Benirus;
Velvyn is in The Count's Arms. He'll offer you to buy his mansion for 2500 Gold. Agree and you'll be able to enter Benirus Manor in eastern part of the city. Enter your new house and have some sleep. You'll be attacked by ghosts. Go downstairs and you'll see a broken flask on the floor, together with a skeletal hand and a note. You have to find Velvyn, as only a member of Benirus family can open the secret passage, where the riddle's solution is hidden.
Ask around the city about Velvyn. You'll know that he's off to Imperial City. You'll find him in The King and Queen tavern in Elven Gardens. Tell him everything and he'll agree to back to Anvil with you. Meet him again in The Count's Arms and follow him to the manor. Enter the basement.
Approach the map marker. Velvyn will open the passage for you and run. Touch the altar and use the skeletal hand. The necromancer will come back to life, and you'll have to make sure his visit among the living is as short as possible. When you (re)kill him, go back to The Count's Arms.
Quest From: Ursanne Loche;
The people of Bravil will tell you about Aleron Loche's disappearing. Go talk to his wife Ursanne about him. She'll tell you to go to The Lonely Suitors Lodge to talk to Kurdan gro-Dragol. He won't be too talkative at first, but raise his disposition a bit and he'll tell you that if you want to save Aleron you have to do him a favor first. Agree to go to Fort Grief and use the boat he prepared for you in the city center.
Enter the fort. Aleron is standing right in there. When you talk to him, it will turn out you've fallen into Kurdan's trap just as he did. The only way to get out of here is to get the key from hunters in the dungeon below.
There are two levels of dungeon before you - and three enemies await you in there. When you get all three keys, go back to Aleron. You'll witness his death from the hands of Kurdan. Fight the bloodthirsty Orc and you'll get yourself a real key. Use it to open a room near the dungeon entrance, where you'll find a wheel that opens the gate. Once you're done, go back to Ursanne to tell her the bad news.
Quest From: Kud-Ei;
Kud-Ei from the Mages Guild in Bravil is looking for someone who can help her friend Henantier. If you agree to help her, she'll lead you to his house. He's been trapped in his own mind, as a result of some dream-world experiments. Kud-Ei gives you the amulet - wear it and use one of the beds in here.
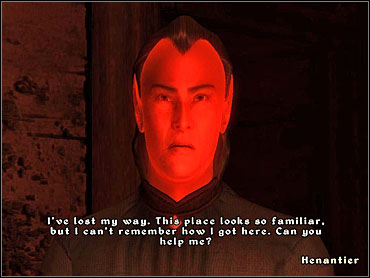
Talk to Henantier and go down the starsi. There are 4 passages-tests before you.
Test of resolve - arm yourself with the equipment in the chest and enter the arena. Defeat the minotaurs and take Element of Resolve from the upper level.
Test of Courage - take a potion from the chest and dive. Swim down until you find the next potion, then continue on even lower. You'll reach a door to Grotto of Courage, where the second element is.
Test of Patience - go straight ahead, avoiding the traps using the drawings below. Third element is at the end of the corridor.
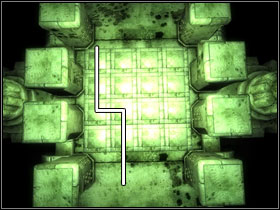


Test of Perception - another trap-filled catwalk. Go straight ahead, but watch out - these traps are more unpredictable than the former. The most irritating are stones falling from the floor, as you can't really notice them before they hit you. Reach the end of this level by taking the last Element.
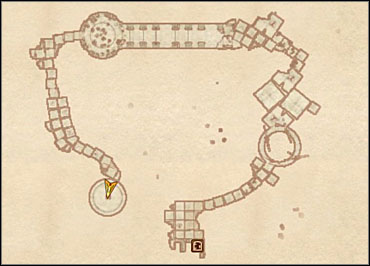
When you give Henantier all the Elements, you'll both be teleported back to the real world. Talk to him again and you will be rewarded with some scrolls.
Quest From: Gildondrin;
You'll hear a gossip in Bravil saying that there's a ghost wandering around the city at night. Go to Gildondrin in Silverhome-on-the-water. He'll point Bawnwatch Camp on your map and tell you that the ghost appears in there every evening at 8 PM. Go there and wait until that hour.
There's a long walk before you - follow the ghost until he speaks to you. Go back to Gildondrin and ask about "mouth of the panter", and he'll give you another map marker. This time it's a sunken ship. Enter it through a hole in the hull.
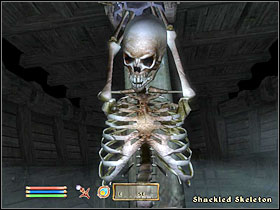
There's a journal on the first level of the ship. It seems there was a mutiny here. Head lower and defeat the captain's ghost. There's a key next to his "body". Use it to open the door ahead and to release the skeleton in there. The Watchman will appear and thank you for releasing his soul. You'll be rewarded with a treasure map.
See the map for the location of his treasure. You'll find some valuables in there, but don't expect too much.
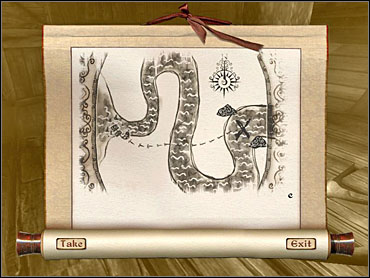
Quest From: Arnora Auria;
You'll hear gossip that Arnora's husband has been arrested. Go to her house to hear her version of the story - quite different from what people say. Anyhow, go to see Jorundr in the city prison.
He won't talk to you unless you're a prisoner too. Commit any crime and decide to go to jail. His story seems to be 180 degrees from what you've heard from Arnora. He'll ask you to kill her for him.
Talk to Arnora again and you'll be given a final choice. Fight her now to get her amulet or let her give it to you willingly in order to make Jorundr think she's dead.
Upon seeing the amulet, Jorundr gladly tell you the location of a buried treasure. Go to the map marker. A corrupted city guard will appear and try to kill you. Defeat him and claim the treasure. Visit Arnora's house once again, only to confirm that she has been killed by that guard.
Quest From: Erline;
In random NPC conversations you'll hear that there's a vampire hunter in town. He lately executed one of the townsfolk. Go to Bradon Lirrian's House and talk to Carus Runellius. Raise his disposition and he'll tell you the story behind the assassination. Talk to Bradon's wife, Erline. She'll beg you to clean her dead husband's name.
Raynir Dralas, said vampire hunter, is staying in Olav's Tap and Tack. Talk to the innkeeper - raise his disposition high enough and you'll get a key to Raynir's room. There's Gelebourne's Journal to be found there, behind one of the wardrobes. Take it to Runellius. Now it's time to find Raynir himself - try Boreal Stone Cave.
HINT: You'll have to be quick from now one, you only have one day to stop Raynir from fleeing.
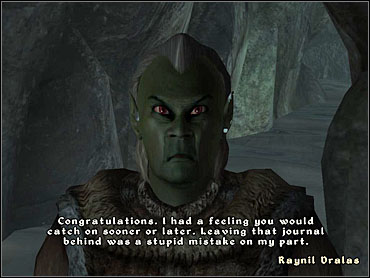
The only solution here is to kill the Dunmer. When you get rid of him, take the keys from his body and use them to get an amulet from a chest nearby. Take it back to Erline - she'll gratefully unlock its true power and give it to you for your help.
Quest From: Tolgan \ Narina Carvain;
When walking around Bruma, you'll be approached by local Countesses' steward, Tolgan, who will tell you to visit his lady in the castle. Head there to find out that she needs your help in recovering an Ayleid artifact for her collection. When you're done talking, go to Dragonclaw Rock.
 Dragonclaw Rock
 The Sentinel
Go west, towards the Sentinel statue, and then north. You'll see the entrance to Pale Pass. There's a skeleton inside, take the orders that lay next to it. Leave the cave using the second passage and head to the ruins pointed on your map. There will be some Ogres along the way.
Serpent's Trail is quite a big dungeon, consisting of a few levels. Head through them in the following order: Mouth of the Serpent, Scales of the Serpent, Venom of the Serpent. There's also a fourth level - Fangs of the Serpent, which you can cross instead of Scales. On the last level, there will be a ghost Akaviri captain. Give him the orders taken from the Pale Pass skeleton. The item you are searching for is in a room past him. Take it back to Countess Carvain and you'll get a ring called Ring of the Vipereye.
HINT: You can fast-travel as soon as you leave Serpent's Trail.
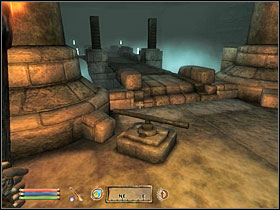
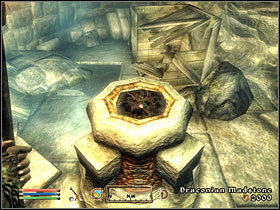
Quest From: Llevana Nedaren;
You'll hear about the city guard corruption from random townsfolk, and be told to talk to Llevana Nedaren about it. She'll tell you about Ulrich, a corrupted city guard captain. Garrus Darelliun, his second in command, might turn out to be your ally, though. Go to Castle Cheydinhal and talk to Garrus. Raise his disposition and he'll tell you about the suspicions around Ulrich's motives and will suggest that you should bring a drunkard named Aldos Othran to him.
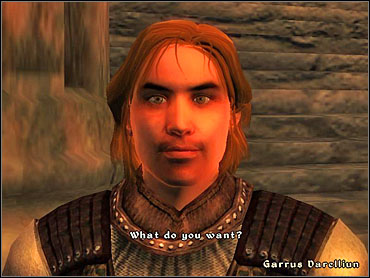
Aldos can be found wandering around Cheydinhal streets. He'll tell you to follow him and you'll witness his final mistake - attacking the city guard. As a result, poor Aldos gets killed. Find Llevana and tell her about what you've seen. She'll tell you to go to Ulrich himself and deliver him her message. When you're back to Garrus, he'll tell you that it would be better to find real proof of Ulrich's guilt before taking drastic matters.
Ulrich can be most likely found in barracks near the Castle. If you decide to take part in Llevana's plan, tell him to follow you to her house. In there, you'll witness an assassination. Garrus won't be happy about this. He'll report to the count and tell you to meet him in an inn a few hours later. You'll get some gold for your time.
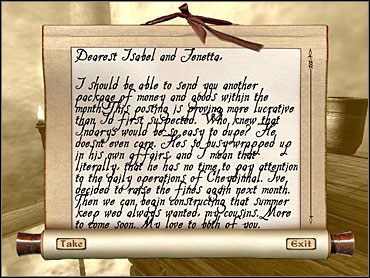 Way to go about hiding your stuff, Ulrich.
Garrus' way is better, but requires considerable Sneak skill. Steal the key to Ulrich's quarters from the captain himself (or try to pick the lock), and sneak into his room (left door on barracks' ground floor) and take the Suspicious Letter from there. Take it to Garrus. Meet him in an inn a few hours later. You get more gold than from following Llevana's plan.
Quest From: Tivela Lythandas;
You'll hear a gossip that a famous painter named Rythe Lythandas has gone missing. Go to his house and talk to his wife. If you agree to help her, she'll give you a key to his study. Touch the painting in there and you'll be teleported to a mysterious forest. Rythe is standing just next to you. Talk to him to know that this is an enchanted world, painted with his magic brush that has been stolen.
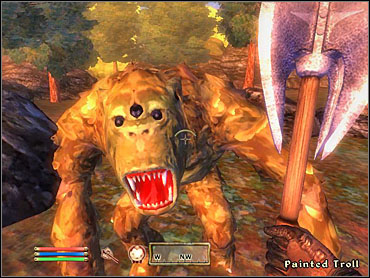 This Troll can bite, no matter he's just painted.
Take a walk through this cool looking forest, fighting off the trolls. You'll find the thief's body - take the brush from it and go back to Rythe. When you're both back to his home, you'll get an Apron of Adroitness.
Quest From: Valus Odiil;
Near the southern gate of Chorrol you'll meet an old man looking for his sons. Agree to help him. Sons are around Weynon Priory - talk to them, and you'll all go to Odiil Farm for a goblin hunt. They will be attacking in small waves. After the fight, go back to Valus, who is awaiting you in The Grey Mare. You'll get a nice sword Chillrend as your reward.
HINT: Try to keep Valus' sons alive. If you don't, you'll only get a small amount of Gold for this quest.
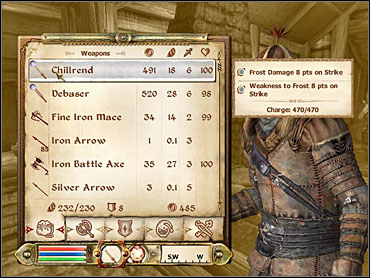
Quest From: Seed-Neus;
When wandering around Chorrol, you'll be approached by an Argonian named Dar-Ma. A few days later it will turn out she's lost somewhere around Hackdirt. Go to her mother Seed-Neus, proprietor of Northern Good and Trade, and you'll be sent to find Dar-Ma.
Villagers won't be too kind for you. Talk to some of them. Behind the building of Moslin's Dry Goods you'll find Dar-Ma's beloved horse. Shop's owner will tell you that the horse is hers - something's not right here.
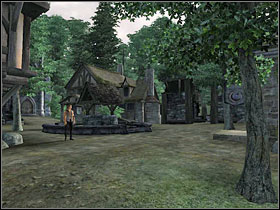 Hackdirt - Innsmouth in Cyrodiil.
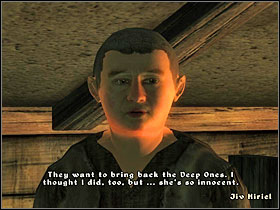
Jiv Hiriel will tell you to come to his house after dark. You'll get a dungeon key. Go to Moslin's Inn and open the trap door in there. Dar-Ma is in a cell nearby. Open it with the key Jiv gave you and get out of here. You'll have to escort her to her horse.
When you're back in Chorrol, Seed-Neus will raise your Mercantile skill.
Quest From: Reynald Jemane;
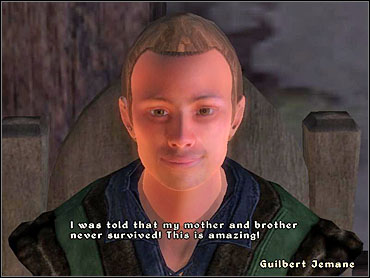
When walking around Chorrol, you'll hear that people talk about Reynald Jemane's strange behaviour. You'll find him in The Gray Mare. Talk to him and he'll tell you to go to Cheydinhal and find someone who's supposed to look just like him. The mysterious lookalike is in Newlands Lodge hotel. Tell him about Reynald and he'll be off to Chorrol to find his, as it turns out, lost twin. Go back with him and find both brothers reunited in The Gray Mare. They will have another quest for you - Legacy Lost.
Quest From: Guilbert Jemane;
Jemane brothers will ask you to find their family legacy, a farm of Weatherleah. Talk to Sabine Laul in local Fighters Guild branch and a map marker will be added to your map. Head there. It turns out the mansion is overrun with Ogres. You can either go back to Chorrol to get a formal request to get rid of them from Guilbert, or just deal with the problem at once.

When you kill all the Ogres (3, one is inside the house), go back to the twins and tell them it's safe to go there. Go to Weatherleah with them, and you'll get some gold as your reward.
Quest From: Fathis Ules;
A few days after helping Jemanes reclaim Weatherleah, a mysterious Dunmer names Fathis Ules will come to Chorrol. He'll tell you to go to Redguard Valley Cave to find a particular item.
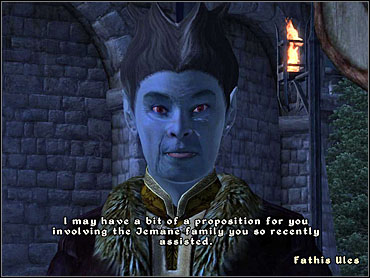
The cave is a small dungeon, in which you have to find the ogre leader. The sword you were told to find is on him. You can either give it back to Fathis (1500 Gold) or to Castle Chorrol (you'll get a very cool shield called Escutcheon of Chorrol).
Quest From: Countess Valga;
Meet Countess Valga in Castle Chorrol. Talk to her and you'll be asked to solve a mystery of stolen painting, her late husband's property. When you agree, she'll give you the keys allowing you to access all areas of the castle.
 Was it the mage..
 .. or the servant?
Talk to everyone who's marked with a green arrow. You can notice that Chanel is up to something, as she tells you that during the night the painting was stolen she was conducting star research, while two other people tell you it was raining back then. You'll need proof:
- in West Tower, lower level, there's painting equipment;
- in Chanel's room there are brushes and paints;
- in Castle dining room there are paint stains on the carpet.
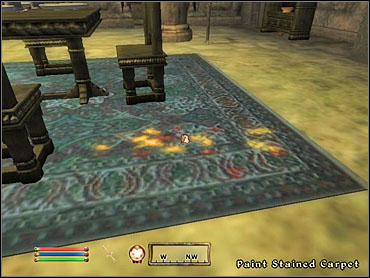
Talk to Chanel and accuse her of committing a crime. You'll have to raise her disposition in order for her to confess. Go back to the countess and either tell her the truth or cover Chanel. If you decide to keep her secret, visit her in 3 weeks and she'll have a painting for you. You can use it as a furniture in one of your houses.
When you decide to sleep in The Bloated Front in the Waterfront for the first time, you'll wake up to find that the ship set sail and is already far away from the port! Leave the room and talk to Lynch. Kill him and take both key and a note. Open the Storage Room and talk to the inn's bouncer - the ship's been hijacked!

Enter the upper level and kill another gang member. Take the next key from his body and use it to reach the bridge. Kill yet another bandit in there and take yet another key. Enter Ormil's cabin to meet the gang's leader. If you talk to her the right way ("I took the key from Wrath", "I'm here to join your gang", "Three months ago", "To find the Golden Galleon", "In Bravil"), she'll surrender without a fight and give you her sword. Escort her to a room-cell at the lowest level of the ship and talk to Ormil. Go to sleep again - you'll wake up in Waterfront again. Plus, you'll get some money for saving the inn.
Quest From: Ralsa Norvalo;
One time when walking around Temple District, you'll be approached by Ralsa Norvalo, who'll tell you to go to her husband in Seridur's House. Go there and talk to Seridur, who'll lead you to his basement - the headquarters for so-called Order of the Virtuous Blood. The knights will ask you to get rid of a vampire named Roland Jenseric.
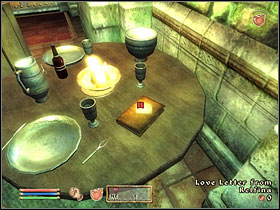
Break into Jenseric's house. There's a note on the table (Love Letter from Relfina). A new map marker will be added, indicating Roland's hideout. Talk to him and it will turn out that he can't really be a vampire - moreover, he tells you that Seridur himself is the beast here! He'll tell you to go to The First Edition in Market District.
Talk to Phintias. You'll find out that Seridur often travels to Memorial Cave. That's your next stop. This time it will be a common dungeon, filled with vampires and undead. In the end, you'll meet Seridur. Kill him and take his key. Go back to Roland.
Return to Temple District and pay a visit to Seridur's House again. Roland has taken the traitor's place as the leader of vampire hunters. As your reward, you'll get a Ring of Sunfire and a title of the Order's honorary member.
Quest From: Jensine;
The proprietor of Jensine's "Good as New" will ask you to solve a mystery of suspiciously low prices set by the owner of Capious Coinpurse. Head there and talk to Thoronir. He won't tell you anything of interest. Wait until 11 PM and stand near the entrance of his shop. When he leaves it, follow him. He'll go to the tavern to have something to eat and then go to a garden near The Market Sewers. You'll see him meet a mysterious man named Agarmir. Follow that one when they're done.
Reach Agarmir's House. Wait until about 6 PM and enter. There will be evidence in the Cellary: a book and a shovel. Take the book and show it to Thoronir. He'll agree to help you in exposing Agarmir's crimes. Go towards the map marker, to Trentius Family Mausoleum.
It turns out Agarmir sensed that you're after him and prepared for a fight. Kill both him and his companion. Look around and take their shovel. There's a key by Agarmir's body that'll allow you to leave here.
Go back and talk to both Thoronir and Jensine. Another job well done.
Quest From: Lurong gro-Glurzog or Ruslan;
Find either an Orc named Lurong or a Redguard named Ruslan to hear a story about a corrupted guard captain here in Imperial City. Go to Jensine, the proprietor of Jensine's "Good as New". Raise her disposition to get the captain's name: Audens Avidius.
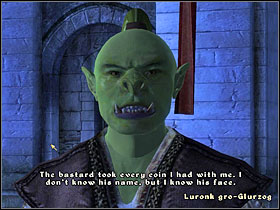
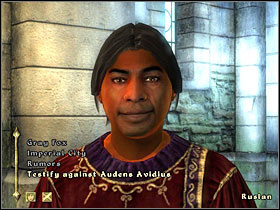
Only another city guard captain can do something about Avidius' crimes. Ask any of the guards about it, and you'll be told to talk to Servantius Quintilius, wandering around Arboretum during daytime. He will reject to risk his career and suggest you to try with Itius Hayn, patrolling the Elven Gardens.
Raise his disposition and he'll tell you that he will personally see Avidius arrested, but you have to find two witnesses willing to confess against him. Jensine will reject it, but Lurong and Ruslan won't. Tell them to do it and matters will solve themselves from now on.
HINT: Corrupted Avidius will escape the prison after a few days and try to take his revenge on you. You'll be randomly attacked by him. Once he's dead, it's all over.
Quest From: Umbacano;
In order to get this quest, you have to go to one of the Ayleid ruins listed below and find an object called Ayleid Statue. When you obtain it, go to any shop and sell it. Wait a few hours, and a messenger from Umbacano will approach you and invite you to his master's mansion in Talos Plaza.
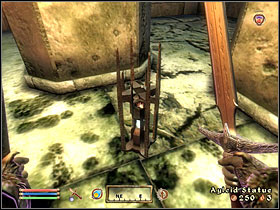
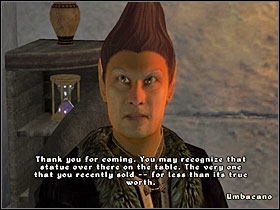
The Butler will escort you to his master. Umbacano wants you to find 9 other statues, just like the one you retrieved before. A lot of work? Indeed, it's the second longest quest in the game, beaten only by "Seeking Your Roots".
Statues can be found in the following ruins: Culotte (8s28), Fanacas (9s39), Mackamentain (8s24), Moranda (6s6), Ninendava (3s17), Sardavar Leed (5s10), Vilverin (5s45), Welke (8s1), Wendelbek (11s6), Wendir (2s46), Wenyandawik (4s6).
If particular ruin consists of more than one level, the statue is most likely on the lowest one. The difficulty in this quest is really only due to lack of map markers. You'll have to find the statues entirely yourself. It takes considerable time, but isn't too complicated. Just a lot of scavenging.
When you bring the second statue to Umbacano, he'll support you with a few names of ruins that you should look in (doesn't make any difference as you already have a full list a few lines above). When you deliver the third one, he'll have another quest for you - "Nothing You Can Possess".
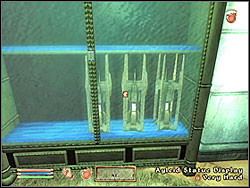
There are 10 statues to be found, and Umbacano pays 500 Gold for each of them. When you gather all 10, he'll additionally pay you a bonus of 5000 Gold. You do the math.
What's peculiar, you can also steal the statues from his mansion in order to sell them to a Thieves Guild Fence. Talk to his guard Umog gra-Marud and for some gold she'll take a break in order for you to make a hit meanwhile.
Quest From: Umbacano;
When you sell three statues to Umbacano, he will have another assignment for you. Now you have to find an antique, carved panel. The first step is to find out the contemporary name of the Ayleid city once known as The High Fane. When you leave Umbacano's mansion, you'll be approached by Claude Maric, who turns out to be the elf's bounty hunter just like you. He'll invite you to Tiber Septim Hotel for a drink. Follow him and ask about The High Fane. He'll tell you to read the book called "Cleansing of the Fane". You can find it in The First Edition in Market District. You can just as well raise Maric's disposition and he'll tell you that the place you're looking for is Malada (11s13).
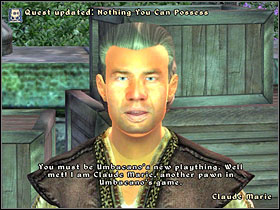
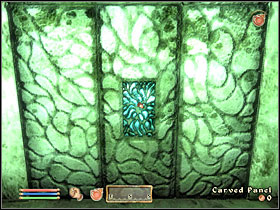
The artifact is on the second level. In order to get to it, you'll need Umbacano's "key" that he gave you. When you take the panel, watch out for the falling wall. Leave this place, only to find out that Claude has prepared a surprise for you.
He wants you to give him the panel so he can have the reward. You can choose: obey and loose a considerable amount of money, fight three mercenaries, or just run. Either way go back to Umbacano. He has a final assignment for you.
Quest From: Umbacano;
Once you finish the "Nothing You Can Possess" quest, Umbacano will have another task for you. This time it's about retrieving an Ayleid crown from another collector, Herminia Cinna. You'll get 1000 Gold to "cover your expenses".
There are two solutions to this. The first one is just to steal the crown from her house - it's in Ayleid Cask in her bedroom. The other way is to talk to Herminia personally and hear that Umbacano shouldn't really get this crown as it might be dangerous in his hands. She'll advise you to retrieve another, less powerful crown from Lindai (3s9) - Umbacano can't really tell the difference between each other. You'll find it in Ayleid Cask on the second level of Lindai.
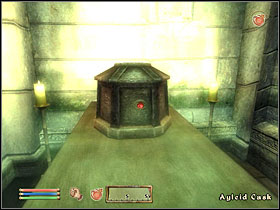
Either way you chose (you might just as well get both crowns and now decide which one to give your 'boss') go back to Umbacano and give him the crown. He'll ask you to meet him near the Nenalata entrance in 3 days. Do so - and don't be surprised to meet your buddy Claude in there. This time you're both on one side.
There's a three-level dungeon to cross. You have to escort Umbacano through it. On the third level there will be an entrance to the throne room. The elf will open it before you. You'll witness a scene: if you gave him the real crown, he'll now transform into an evil Lich, and if you switched it for the other one he'll die. In both cases you'll get to fight a large group of undead. Well, that's it for Umbacano the Collector.


HINT: It's pretty obvious that when you decide to take this quest you can't complete "The Collector" any more. If you don't want to loose the money for doing it, wait until you get all the statues and sell them to Umbacano.
Quest From: Agronak gro-Malog;
When you talk to the arena Grand Champion, Agronak gro-Malog, he'll ask you to solve the mystery of his legacy. You'll get a key and a map marker indicating Crowhaven.
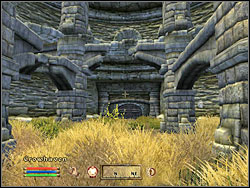
Head through the small dungeon to find a door that can't be picked. Use the key here. You'll encounter Lord Lovidicus, a vampire whose bloodlust turned him mad. Look around to find his diary. Take it back to Agronak. He won't be happy about what you've found out, but will help you raise your blade and block skills.
HINT: Another good thing about this quest is that once you've beaten it, you don't have to fight Agronak for a Grand Champion title, as he will simply give in.
Quest From: Savlian Matius;
After you retake the Kvatch Chapel, Savlian will ask you for further help in fighting for the city. Agree and follow him. Defeat some monsters and talk to him again. Go back to the Chapel and talk to Berich Inian about the key. Follow the map markers until you reach the mechanism that opens the castle gate - use it, and you'll meet up with Savlian's men again.
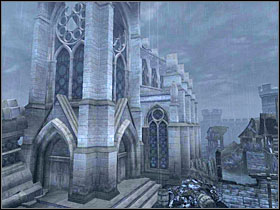
Defeat the daedra occupying the courtyard, talk to Marius again, and enter the castle. He'll tell you to find the count. Follow the map marker again, fighting off the daedra, and eventually you'll find count's body. Take the ring from it and go back to Matius in order to give it to him. You'll get a Kvatch Cuirass as a reward.
Quest From: S'drassa;
S'drassa, Mages Guild alchemist in Leyawiin will ask you to find rare crystals known as Garridan's Tears for him. You'll have to talk to Julienne Fanis in Arcane University for some more detail on their location. She'll tell you to find a book called Knightfall. It can be bought in The First Edition in Market District. After reading the book, a new map marker will be added. In order to get there, you'll need Refined Frost Salts - you can buy them from Julienne.
Go to Frostfire Cave. Use enchanted door (screenshot above) and you'll find yourself in Garridan's chamber. There's a Frost Atronach here, together with 5 barely visible crystals. Use the map below to find them. Be quick about it, as the frost in this room impacts your health. Go back to S'drassa to get your reward.
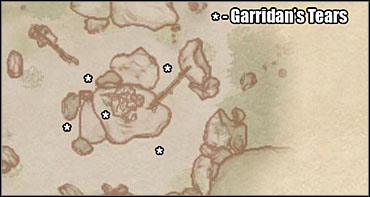
Quest From: Rosentia Gallenus;
When talking to Leyawiin townsfolk you'll eventually hear about strange noises and smells coming out of Rosentia Gallenus' house. Go there and break in. Inside you'll meet Rosentia herself and a few scamps. Talk to Rosentia to find out that these creatures are here because of cursed staff she recently bought. Go to Alves Uvenim in local Mages Guild.
It turns out that the only way for Rosentia to get rid of the staff is if somebody accepted it willingly. Agree to that and go to Darkfathom Cave east of the city. The cave is a small dungeon filled with daedric monsters. When you reach the altar in the eastern part of the map, drop the staff and leave. You'll get Ring of Eidolon's Edge as your reward from Rosentia.
HINT: When you possess the staff, Everscamps that follow you are good training assistants. Just practice your battle skills on them if you like.
Quest From: Count Marius Caro;
In Leyawiin castle there's an Orc named Mazoga. Talk to the Count about her, he'll ask you to try and solve the problem. Talk to Mazoga herself to find out she wants to speak to Weebam-Na. Find him in Leyawiin and escort to the castle. You might have to raise his disposition in order for him to agree.
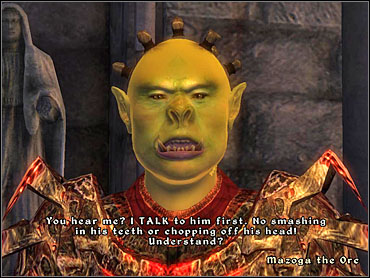
Mazoga wants to go to Fisherman's Rock north of the city, but Weebam-Na won't go with her. Tell her that you will accompany her and do so. Once you're in there, Mazoga will start a conversation with some bandits. Assist her when the fight breaks out. When they're all dead, go back to the Count.
Quest From: Count Marius Caro;
The Count will promise you a title of Knight-Errand if you kill a bandit named Brugo. Mazoga knows that he's hiding in Telepe, west of Leyawiin. Head there overnight.
Ruins are not well guarded, apart from Brugo there will be some low-level bandits. By the leader's body you'll find a key that'll allow you to open the chest in (C). To get to it, past the gate at (B) you'll have to press the button at (A).
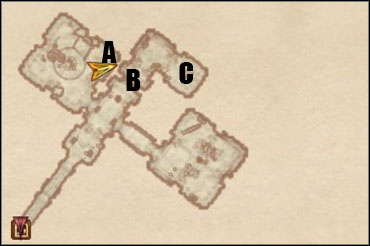
The grateful Count will grant a knight title to both you and Mazoga. You'll get a key to White Stallion Lodge, north of the city, and a cool Leyawiin Shield.
Quest From: Lerexus Callidus;
Outside the north gate of the city, you'll meet Lerexus Callidus, who is after a drug dealing gang. He'll tell you to go to Greyland and kill Kylius Lonavo.
Easy as it gets - just enter the house and do your thing. Nobody will bother you with any alternative solutions to this quest. Take the ring from Kylius body and show it to Lerexus for some gold.
Quest From: Glarthir;
Glarthir is Skingrad's very own weirdo, a paranoid wood elf who sees conspiracy all around him. He'll talk to you when he first sees you on the streets, and will ask for help in uncovering the mysteries that surround him. He'll tell you to meet him at midnight at the back of the chapel. Go there to find out that he suspects some people to plan against him. The first person you'll have to check out for him is Bernadette Peneles. Be next to her house at 6 AM. You might be approached by a city guard named Dion, who tells you to keep an eye for Glarthir and don't trust him too much.
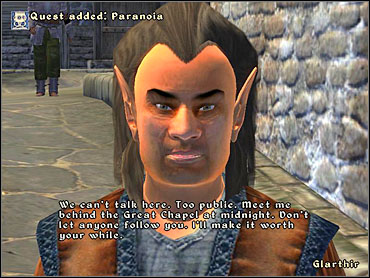
Bernadette will leave her house after 6 AM and head to work. You can keep track of her all day long, but won't see anything suspicious. The same appeals to other two people that Glarthir tells you to follow. Just meet him every night at midnight at the back of the chapel (you don't have to follow them at all). If you tell him that nobody's after him - he'll think that you are involved as well and will try to kill you. If you tell on somebody, he'll pay you to kill that person. You can do as he wants for some Gold or show city guards the assassination order he gives you.
HINT: When Glarthir is dead, find a key to his house by his body. A lot of valuable stuff in there. In the basement, you'll find his personal notes on the conspiracy.
UPDATE:
The Rosethorn Cache
i bought the seemingly large house in skingrad called rosethorn hall.
i then followed my curser to the colovian traders where i bought everything for my house.
i ventured the house to see what its like.
then in the rosthorn top floor i turned and saw a small structure of which that has the door you come out of it.
i realized it does not go all the way to the ceiling so i went to the other side of it jumped on some barrels and found a letter.
the letter was called 'long forgotten note" and it tells of a treasure inside the walls of rosethorn hall. it has a riddle on the letter and it says,
"Two bodies have I. though joined in one.
the more i stand still the faster i run."
(submitted by: soda_pop (level 37 khajiit, Dylan)).
Quest From: -;
While travelling around Cyrodiil, you'll eventually find a mysterious plant ingredient known as Nirnroot. When you have one, go to any Mages Guild branch and talk to their alchemist for a piece of advice. You'll be forwarded to Sinderion, who lives in West Weald Inn basement. As you might have guessed, the rest of this quest is a big and tiresome scavenger hunt.
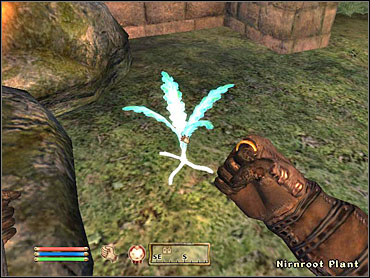
Sinderion wants you to bring him 10 roots, and will point you towards a grove to the north where you'll find some of them. Well, that's but the pick of an iceberg, as Seeking Your Roots is easily the longest quest in Oblivion. You can find Nirnroot in all kinds of random places, usually near water.
Sinderion will mix the ingredients you bring him according to their number. The reward for completing this quest isn't really worth the trouble if you ask me. If you feel like picking roots instead of fighting beasts and saving princesses, fine by me. To finish the quest, you'll have to find 100 Nirnroots. After doing so, Sinderion will pay 250 Gold for each 10 more you bring him. You, on the other hand, can spend money by buying various versions of Nirnroot Potion.
Potion Level
Nirnroots required
Weak
10
Moderate
20
Strong
30
Grand
40
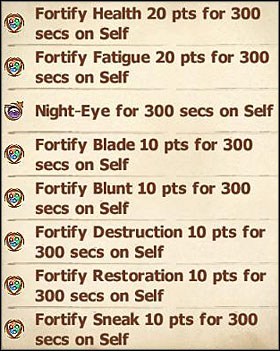 Strongest potion's effects.
Quest From: yourself?
If you find yourself as a vampire and don't feel comfortable about it, there is a way to get rid of the disease. Talk to a chapel priest or Vicente (Dark Brotherhood) about the Vampire Cure. The topic sometimes appears while talking to entirely random NPCs, and the effect is always the same.
You'll be told to go to Raminus Polus, whom you surely know if you've already started doing the mages guild. He's in Arch-Mages Lobby at Arcane University. He'll tell you that Count Hassildor of Skingrad might be able to help you.
The Count is looking for a cure for his wife, who rejected her vampirism and refused to feed, which lead to her falling in some kind of coma. Hassildor will tell you to go to Drakelowe and find a witch who is supposed to know the secret of the cure.
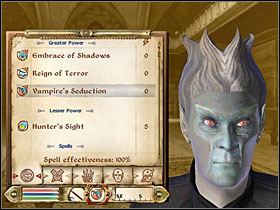
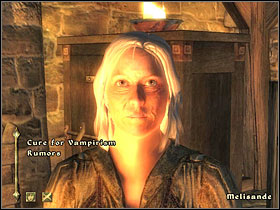
Melisande wants a favor before she will help you. You are to find and bring her 5 Grand Soul Gems. They can be bought in Mages Guild branches in most cities, and found in various random locations.
When you bring her the gems, time will come to find the real ingredients of the potion itself. You'll need 6 units of Garlic (check out cellars in some of Skingrad's mansions), five leaves of Nightshade (see Main Ingredient in Imperial City Market District), two samples of Bloodgrass (Oblivion plane), an Argonian's blood and ashes of a certain vampire.
Argonian blood is relatively easy to get, you just have to attack anyone of that race with the Enchanted Dagger Melisande gives you. It doesn't matter who the Argonian is, so it's simple. Remember, you can attack daedric worshipers without being punished in any way (see Peryite's Shrine for an Argonian).
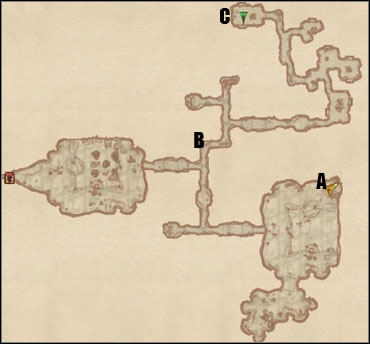
The vampire you have to kill for his ashes is in Redwater Slough (map above). You have to find and kill Hindaril (C). In A there's a key that you can use to open door in B (or you can pick the Very Hard lock in it). Hindaril is accompanied by some lower-level vampires and undead. When you defeat him, head back to Melisande.

You'll get two samples of the potion: one for you and one for count's wife. Go back to Castle Skingrad and talk to the butler. Follow her to Hassildor's quarters. After a scene you'll be left alone. Wait 24 hours, and Janus will reward you with a bit of gold.
HINT: You can drink the potion any time you want, it will instantly bring you back to normal.
Quest From: Thorley Aethelred (Shardrock, 2s14);
Thorley has a serious problem with bears attacking his sheep. You are to kill 6 of them and bring him back their fangs (West Weald Bear Fangs) as a proof. Look around the farm, you won't have any problems finding them (you can use Detect Life to speed things up). When you have 6 fangs, go back to the farmer to get a book Battle for Sancre Tor (increases your Blade skill).
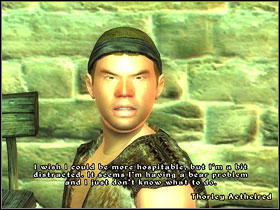
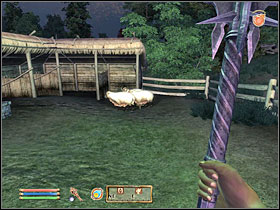
Quest From: Barthel Gernand (Crestbride Camp, 8s30);
Barthel will tell you to talk to Mirisa about the goblins. It turns out there are two tribes fighting each other nearby, which keeps the settlers from taking Cropsford. You have to end the goblin war by performing one of two deeds: steal a Totem Head from Timberscar Cave or kill a shaman in Cracked Wood Cave.
Both ways are good, but the "sneaky" one seems quicker and easier. The way through the cave isn't too well guarded and you shouldn't have real problems.
Either way you choose, after solving the problem talk to Mirisa and Barthel again.
Quest From: Aelwin Merowald (Weye, 5s35);
Aelwin is a fisherman who needs your help in collecting 12 Slaughterfish Scales. This quest is quite simple, because you always have an appropriate map marker, indicating the position of a next fish. When you kill a dozen of them, go back to Aelwin to get your reward - Jewel of the Rumare (ring that allows you to breathe under water).
Quest From: Malene (Roxey Inn, 5s52);
Innkeeper Malene wants you to get rid of a necromancer Raelynn the Gravefinder, who stations in Moss Rock Cavern a little bit to the north. This is a one-level dungeon. Your victim is in a closed room, behind the door with a Hard lock in it. If you can't open it, the key is in a chest to the north.
Malene will give you some gold for performing this quest.

Quest From: Lithnilian (Imperial Bridge Inn, 8s16);
Lithnilian wants you to find his precious notes in Bramblepoint Cave. The cave is bigger than you might expect - and it's full of hostile creatures as well. Your target (Lithnilian's Research Notes) is in a chest on a third level. When you give them back to Lithnilian, you'll get a few potions in exchange.
Quest From: S'jirra (Faregyl Inn, 5s3);
Khajiit named S'jirra will ask you to find her lost potatoes (?!). A new map marker will be added, indicating the position of an ogre who stole them. Kill him and take the vegetables. When you give them back to S'jirra, you'll get some of S'jirra's Famous Potato Bread. Now that was a quest worthy of Tamriel's greatest heroes.
Quest From: Corrick Northwode (Harm's Folly, 9s34);
Corrick wants you to avenge his late wife by going to Exhausted Mine and killing the goblins that occupy it. You don't have to kill all of them, it seems. Just kill their leader (he's the one marked on the map) and take Jade Amulet from him. Go back to Corrick with it and you'll get a few jewels.
Quest From: none (Shetcombe Farm, 1s21);
When you enter Shetcombe Farm, you'll see that it's been abandoned not long ago. There's a note on the table, read it. Go to Sandstone Cavern north of here.
The cave is full of random leveled creatures. Follow the map marker to find another note. Go to the lower level to find the body of its author. There will be a bag with some valuable jewels next to it. That's all, nothing else to do here.
Quest From: Nerussa (Wawnet Inn, 5s34);
Nerussa wants you to find 6 bottles of Shadowbanish Wine. They can be found in most Forts around Cyrodiil. Below are three examples of wine's whereabouts. You'll get 100 Gold for doing this one.
Fort Carmala
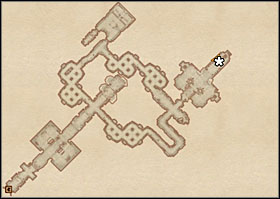
Fort Irony
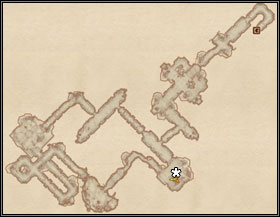
Fort Vlastarus
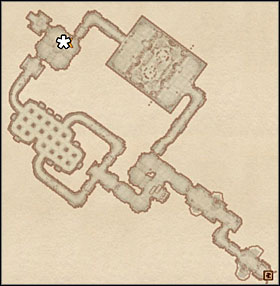
Quest From: Maeva the Buxom (Whitmond Farm, 1s15);
Maeva will tell you to reclaim her family mace, Rockshatter, from the hands of her husband Bjalfi. Go to Fort Strand and to the lower level, Fort Strand Great Dome. Bjalfi will be there, surrounded by his fellow bandits. You'll have to slash your way through them. When you retrieve the mace, go back to Maeva to get some gold as a reward.
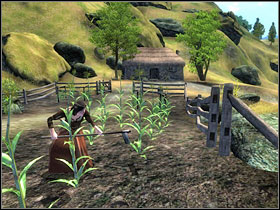
Quest From: Diram Serethi (Aleswell, 5s50);
Visit Aleswell and wander around the town. Where is everybody? In a few moments you'll be approached by Diram Serethi. It turns out the townsfolk has been turned invisible by a mage named Ancotar. Go to Fort Caractacus to talk to him.

You don't get to fight him, surprisingly. Just tell him about everything and you'll get a scroll with the appropriate counter spell. Talk to him once again and you'll be given a ring which is supposed to protect you from negative effects of casting that spell (-50 Luck, reversible by Restore Luck). When you're back in the village, cast the spell from the scroll. You'll be considered a hero and Diram will grant you a free room in his inn any time you'll want to rest.
Character creation process may seem to be the essential feature of every RPG, but in Oblivion things are a little bit different. Your initial decisions and choices don't seem to influence all the hours of gameplay that follow as much as you'd expect them to. Obviously it's important to connect the style you prefer with appropriate race, sign, and class - things get a lot easier then. Don't treat these choices too seriously, though. The most (only?) important thing about character creation is choosing the right Major Skills. We'll get to that.
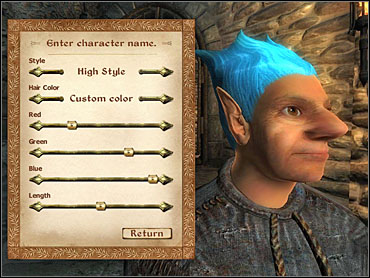 Careful with that editor, son.
The most basic of all values that define our hero are the Attributes. There are 8 of them.
Attribute
Skills governed
Values determined
 Strength
Blade, Blunt, Hand-to-Hand.
Encumbrance, Fatigue, melee damage.
IntelligenceAlchemy, Conjuration, Mysticism.
Magicka, Spell Effectiveness.
 Willpower
Alteration, Destruction, Restoration.
Fatigue, resistance to magic, Magicka regeneration rate.
 Agility
Security, Stealth, Marksman.
Fatigue, bow damage.
 Speed
SpeedAcrobatics, Athletics, Light Armor.
Movement speed, jumping height, Light Armor rating.
 Endurance
Armorer, Block, Heavy Armor.
Fatigue, Health added when reaching new level (Endurance divided by 10).
 Personality
Illusion, Mercantile, Speechcraft.
NPCs' Disposition.
 Luck
LuckNone.
?
A few words of explanation for the above table. What are "governed skills"? The answer requires to say a few words about the leveling-up system.
We level up each time we raise our Major Skills (see the "Skills" section) 10 times. It doesn't matter which and how many times each of them was raised - the number of additions must equal 10 and you're given the message that you should rest and meditate on what you've learned. When you do, welcome to the higher level.
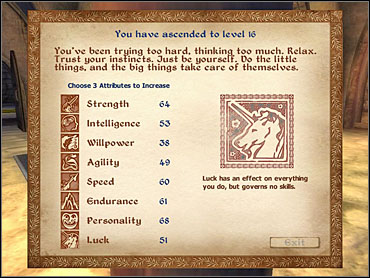
Multiplier value based on number of additions of governed skills:
1-4 - x2
5-7 - x3
8-9 - x4
10 - x5
The perk of getting a new level is the ability to raise three of your main attributes. Basically, you add one point to each of them. You must have noticed, though, that sometimes there's a multiplier next to a certain attribute, allowing you to raise it by 2, 3, 4, even 5 points at once. Its value is based on the number of additions you make to the skills governed by that attribute. It might seem a little bit complicated, but look: Strength governs the skill of Blade. If you raise Blade 10 times (and it's one of your Major Skills), you'll level up and get a x5 multiplier for Strength.
HINT: The skills you work on, that in the end determine the multiplier's value, don't have to be in your Major Skills. That means that by working on the right Minor Skills you can get, for example, x5 multiplier for all three next-level additions. Everything you need is a little patience in training them.
There are two things you should keep in mind when choosing a race for your hero. The first one, which we can call "visual", can't be clearly classified in such a guide, as it's just a matter of taste. Whether you like lizards, predatory cats, or just ordinary humans - it's up to you. The second factors is somewhat based on math. Practice shows that racial stats and abilities aren't all important in the end, so you probably should just think about what you like.
Three tables follow. The first two of them show you the starting attributes for each race and gender, while the third one points out all the racial abilities and perks.
All in all, you can always take the upper hand in this game, no matter what the initial statistics show. You can make a mage out of an orc, and change a high-elf into a bloodthirsty berserker. Sure, the suggested way is easier and faster, but don't feel too tied with it. Take a loot at the "Bonus Skill Points" column in the third table, it seems somehow the most important in all this, as it can in a way impact our leveling tempo. Just remember - leveling "faster" doesn't mean "better" in Oblivion.
HINT: There's no right way to create a character, but the archetypes are probably Orc-Warrior, Breton-Mage, and Khajiit-Thief.
HINT: Let's repeat once again - think MOSTLY about your own taste in characters here. There's nothing worse than playing with a character that you don't like, now is there?
Table 1.
Race\Attribute
Strength
Intelligence
Willpower
Agility
M
F
M
F
M
F
M
F
Argonian
40
40
40
50
30
40
50
40
Breton
40
30
50
50
50
50
30
30
Dark Elf
40
40
40
40
30
30
40
40
High Elf
30
30
50
50
40
40
40
40
Imperial
40
40
40
40
30
40
30
30
Khajiit
40
30
40
40
30
30
50
50
Nord
50
50
30
30
30
40
40
40
Orc
45
45
30
40
50
45
35
35
Redguard
50
40
30
30
30
30
40
40
Wood Elf
30
30
40
40
30
30
50
50
Table 2.
Race\Attribute
Speed
Endurance
Luck
Personality
M
F
M
F
M
F
M
F
Argonian
50
40
30
30
50
50
30
30
Breton
30
40
30
30
50
50
40
40
Dark Elf
50
50
40
30
50
50
30
40
High Elf
30
40
40
30
50
50
40
40
Imperial
40
30
40
40
50
50
50
50
Khajiit
40
40
30
40
50
50
40
40
Nord
40
40
50
40
50
50
30
30
Orc
30
30
50
50
50
50
30
25
Redguard
40
40
50
50
50
50
30
40
Wood Elf
50
50
40
30
50
50
30
40
Table 3.
Race
Skills
Bonus skill points
Notes
Argonian
Disease and poison resistance.
Breathing under water.
+5 to Alchemy, Athletics, Blade, Hand-to-Hand, Illusion, Mysticism
+10 to Security
Their racial skills are low-level spells you can easily learn as representative of any other race.
Breton
+50 Magicka;
Dragon Skin once a day;
Magicka Resistance 50%.
+5 to Alchemy, Alteration, Illusion
+10 to Conjuration, Mysticism, Restoration
Their Magicka resistance is great, and it makes Bretons one of the best races out there to choose.
Dark Elf
Ancestor Guardian once a day;
Fire resistance 75%.
+5 to Athletics, Blunt, Light Armor, Marksman, Mysticism
+10 to Blade, Destruction
Ancestor Guardian is pretty useless, even on lower levels. Fire resistance comes in handy. A pretty good race for thieves.
High Elf
Fire, Frost, and Shock weakness 25%;
Disease resistance;
Magicka +100.
+5 to Alchemy, Conjuration, Illusion
+10 to Alteration, Destruction, Mysticism
A typical magic-oriented race. Their elemental weaknesses don't really hurt, and handy bonus skill points tell you clearly what to do with a High Elf.

Imperial
Star of the West once a day;
Voice of the Emperor once a day.
+5 to Blade, Blunt, Hand-to-Hand, Heavy Armor
+10 to Mercantile, Speechcraft
Two weak spells, one absorbing Fatigue and the second functioning as Charm - in other words, nothing special.
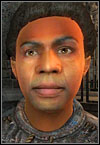
Khajiit
Eye of Fear once a day;
Eye of the Night (Night Visio) for unlimited uses;
+5 to Athletics, Blade, Light Armor, Security, Sneak
+10 to Acrobatics, Hand-to-Hand
Just as with Imperials, these spells are just not good enough. They seem to be pointed towards sneaking.
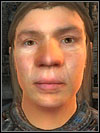
Nord
Nordic Frost once a day;
Woad once a day;
Frost resistance 50%.
+5 to Armorer, Block, Restoration
+10 to Blade, Blunt, Heavy Armor
A warrior-style race. Their abilities come in handy only on lower levels.
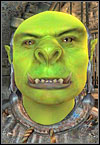
Orc
Berserk once a day;
Drain Agility once a day;
Magicka Resistance 25%.
+5 to Hand-to-Hand
+10 to Armorer, Block, Blunt, Heavy Armor
Probably the best choice for a warrior o any other strictly melee character.
Redguard
Adrenaline Rush once a day;
Resist Poison spell;
Resist Disease spell.
+5 to Heavy Armor, Mercantile
+10 to Athletics, Blade, Blunt, Light Armor
Another warrior-oriented race. Their most important perk is the Adrenaline Rush.
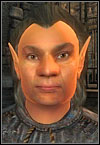
Wood Elf
Beast Tongue once a day;
Resist Disease spell.
+5 to Acrobatics, Alteration, Light Armor
+10 to Alchemy, Marksman, Sneak
Beast Tongue is a weak spell functioning as Command Creature. Not very handy. Theoretically they're meant to be good thieves and arches. Turn out to be nothing special, really.
You have to choose your birthsign in the beginning of the game, while escaping the prison with the Emperor. This decision can be a little bit more essential than choosing your race, as some of the signs (ex. The Astronach) can really influence your gameplay. Again, don't expect any clear rights and wrongs here.
Sign
Bonuses
Notes
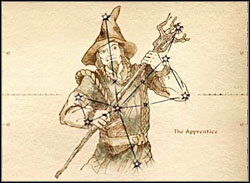 The Apprentice
- Magicka +100;
- Weakness to Magicka 100%.
Useful for all magic-users that aren't afraid of exposing their weaknesses (some defensive spells are essential).
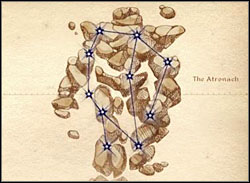 The Atronach
- Magicka +150;
- Spell Absorption 50%;
- no Magicka regeneration.
A great Spell Absorption effect, bonus to Magicka, at the expense of no Magicka regeneration. A great, but very expensive (potions!) sign.
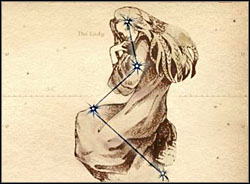 The Lady
- Willpower +10;
- Endurance +10.
Not as interesting as The Thief or The Warrior.
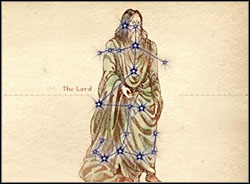 The Lord
- Restore Health spell;
- Weakness to fire 25%.
Nothing special.
 The Lover
- Paralyze spell (10 seconds);
- Loose 120 Fatigue each day.
Paralyze can really save your day, but this Fatigue loss is totally unnecessary.
 The Mage
- Magicka +50.
A safe bet for every magic user.
 The Ritual
- Restore Health spell;
- Turn Undead spell.
Two weak spells, what's there to tell.
 The Serpent
- a spell that we can use once a day, which mixes the effects of: Damage Health, Dispel, Cure Poison and Damage Fatigue.
Again, nothing out of ordinary.
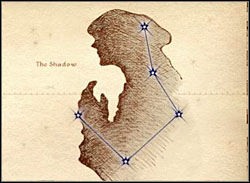 The Shadow
- Invisibility spell (60 seconds), once a day.
Useful in various quests in the game, but one use a day can't really make a difference. Besides, you can always just learn this spell.
 The Steed
- Speed +20.
Nothing special again.
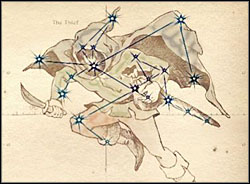 The Thief
- Agility +10;
- Speed +10;
- Luck +10.
Excellent choice, not only for sneak-oriented characters. The most interesting of attribute-boosting sings.
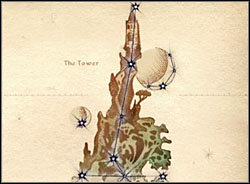 The Tower
- Open Average Lock spell once a day;
- Reflect Damage spell.
Only if you truly hate the lockpicking mini-game.
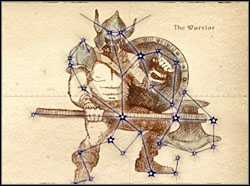 The Warrior
- Strength +10;
- Endurance +10.
Great for melee fighters.
The character class in The Elder Scrolls system is just a configuration of Major and Minor skills. 7 out of 21 skill are chosen as your Major Skills. There are various default possibilities to choose in the game, but it's just as good to create your own, new class from the beginning.
You want your Major skills to be set in a way that lets you level-up with the right pace. All monsters in the game develop just as you do, so you should always think twice before deciding to advance a level. In fact, the common thought that your Major Skills should be the ones you use most frequently isn't at all right. If you choose skills like Blade, Acrobatics, Destruction etc., you'll find yourself in a point in which you'll know you've leveled too fast and everyone around can beat the crap out of you. You should always control the tempo of Major Skills' growth, combining both useful and fully controllable skills in them. You don't want the difficulty to raise too high, but you have to be able to actually level up when you decide that you're powerful enough already.
Remember about the multipliers that we talked about in the character creation introduction. Major Skills rise faster, remember about it while trying to build up your multiplier. If you want to focus on melee combat, you'll be needing a lot of Strength. In order to raise it, you have to practice skill that are governed by it (ex. Blunt). Remember that the multiplier is the one factor that lets you actually get an advantage over the rest of the world when you level-up. Keep in mind that if you want to get such great multipliers as three times x5 in one level (yup, it is possible), you have to practice the right minor skills also.
Skills are undoubtedly the most important values that define your character. Your attributes and birthsign can influence the game in a way, but skill values are the essence of what you can and can't do - on how you fare with just about everything in the game. The better you are with Sneaking, the easier it will be to steal and sneak past unaware enemies; the higher your Speechcraft stat, the easier is the disposition mini-game.
Each of 21 skills we posses is on one of 5 levels of mastery, indicated in a table below with the corresponding value ranges. Each next level means new perks and additions.
Two fastest ways to train our skills are trainers and books - you'll find everything about them below, with particular skills' descriptions. Besides them, you can always train on your own. "Practice makes perfect" is your motto in Oblivion, you're always to learn the ones you use most often.
There are 5 trainers for each skill. Two of them can raise your skill value to 40, two to 70, and there's one Master Trainer that can get you all the way to 100 (which is the maximum base value, which can then be raised by item bonuses). The latter will almost always have a quest for you to perform before he agrees to train you.
HINT: In order to train with the Master, you have to be sent to him from one of the mid-level trainers. If you reach skill value of 70, just ask one of them about "Training" (you might have to gossip with them earlier). You'll get a new map marker, indicating the location of master trainer.
Range
Rank
5-24
Novice
25-49
Apprentice
50-74
Journeyman
75-99
Expert
100
Master

Description: Acrobatics is a skill of efficient jumping. Besides raising you jumping range, it lets you minimize damage taken while falling from heights.
Governing Attribute: Speed.
Apprentice Skills: You can perform normal attacks during jumping or falling.
Journeyman Skills: Dodge ability (performed by holding Block and jumping while attacked).
Expert Skills: Fatigue loss for jumping halved.
Master Skills: Ability to jump on water surface.
Normal Training: Jumping and falling from heights..
Low-level trainers: Quill-Weave (Anvil), Ida Vlinorman (Imperial City Elven Gardens).
Mid-level trainers: Tsrava (Leyawiin), Ganredhel (Cheydinhal).
Master Trainer: Torbern (10s1)
Master Trainer Quest: none.
Books: The Black Arrow 1 (Brindle Home, 2s33, Torbal's House) A Dance in Fire 1 (Ganredhel's House, Cheydinhal), A Dance in Fire 4 (Ganredhel's House, Cheydinhal), Mystery of Talara 1 (various locations, ex. reward in "Two Sides of a Coin" quest), Thief (S'krivva's House, Bravil).
Description: Alchemy is a skill of mixing potions and poisons from ingredients found all around Cyrodiil, with the use of special quipment: Mortar & Pestle (required to start preparing anything), Retort (increases magnitude and duration of all positive effects), Calcinator (increases magnitude and duration of all the effects), Alembic (reduces the duration of all negative effects). Alembic and Retort don't affect poisons At all. Alchemical equipment of a higher level is obviously Belter, but requires higher sill levels.
Governing Attribute: Intelligence.
Apprentice Skills: You can see two of four ingredients' effects.
Journeyman Skills: You can see three of four ingredients' effects..
Expert Skills: You can see all the ingredients' effects.
Master Skills: You can make potions out of single samples.
Normal Training: Mixing potions and poisons.
Low-level trainers: Felen Relas (Mages Guild, Anvil), S'drassa (Mages Guild, Leyawiin).
Mid-level trainers: Ardaline (Mages Guild, Bravil), Brotch Calus (Bruma).
Master Trainer: Sinderion (basement of West Weald Inn w Skingrad).
Master Trainer Quest: Sinderion wants you to bring him bottles of Tamika and Surilie Brothers wines from the Lear 399. You can find it in various places, the closest one seems to be in Castle Skingrad's wine cellar.
Books: Calcinator Treatise (ex. reward in "Two Sides of a Coin" quest), De Rerum Dirennis ( All Things Alchemy, Skingrad), Mannimarco: King of Worms (Mystic Archives in Arcane University), Song of the Alchemists (Lustratorium in Arcane University).
Description: Alteration is a skill that focuses on various, helpful spell such as water breathing or opening locks. It's the best way for a mage to avoid having to learn some non-magical skills.
Governing skill: Willpower.
Novice Spells: Open Very Easy Lock, Protect, Protect Other
Apprentice Spells: Defend, Ease Burden, Electric Shield, Frost Shield, Heat Shield, Hindering Touch, Open Easy Lock, Sea Stride, Water Breathing.
Journeyman Spells: Encumbering Touch, Guard, Ice Shield, Lighten Load, Lightning Shield, Open Average Lock.
Expert Spells: Fire Shield, Glacial Wall, Lightning Wall, Open Hard Lock, Oppressing Grasp, Pack Mule, Shield, Weight of the Word.
Master Spells: Aegis, Beast of Burden, Flame Shield.
Normal Training: Casting spells.
Low-level trainers: Dovyn Aren (Imperial City Elven Gardens), Deetsan (Mages Guild, Cheydinhal)
Mid-level trainers: Athragar (Mages Guild, Chorrol), Abhuki (Faregyl Inn, 5s3)
Master Trainer: Tooth-in-the-Sea (he's north of Bravil and spends most of his day underwater).
Master Trainer Quest: Tooth-in-the-Sea tells you to spend 3 hours underwater with him (you'll have to talk to him before 1 P.M.). You can do this either way you like - using Water Breathing spell, potions, special equipment (such as water-breathing helmets). If you're an Argonian, you won't have to pass his test.
Books: Daughter of the Niben (Skingrad, Mages Guild Living Quarters), Dragon Break (Dovyn Aren's House, Elven Gardens), Lunar Lorkhan (Henantier's Dream World in "Through a Nightmare, Darkly" quest, "Two Sides of a Coin" quest reward), Reality and Other Falsehoods (Southern Books, Leyawiin), Sithis (The Great Chapel of Zenithar, Leyawiin).
Description: Armorer is a skill of armor and weapon repair, reducing their degradation effects and, in time, enhance their power. You must have Repair Hammers to repair items.
Governing skill: Endurance.
Apprentice Skills: Hammer breaking possibility halved.
Journeyman Skills: You can repair magical items as well.
Expert Skills: You can enhance items up to 125% of their power, meaning weapons will deal more damage and armor protect you better.
Master Skills: No possibility of breaking a hammer.
Normal Training: Repairing weapons and armor.
Low-level trainers: Eitar (Margarte's House, Leyawiin), Tadrose Halas (Fighters Guild, Bravil).
Mid-level trainers: Rohssan (Fighting Chance, Imperial City Market District), Rasheda (Fire & Steel, Chorrol).
Master Trainer: Gin-Wulm (The Best Defense, Imperial City Market District).
Master Trainer Quest: Gin-Wulm will tell you a riddle that you can't answer until you've read "The Armorers Challenge". You can buy it in First Edition in Marker District. When you read it, answer his question with "He won the Armorer's Challenge".
Books: The Armorers Challenge (First Edition, Market District; Fighters Guild, Cheydinhal), Cherim's Heart of Anequina (First Edition, Market District), Heavy Armor Repair (random bandit loot), Last Scabbard of Akrash (A Fighting Change, Imperial City Market District), Light Armor Repair (Castle Barracks, Bravil).
Description: Athletics is a skill of fast moving - running and swimming. Apart from speeding up, raising it increases Fatigue regeneration rate.
Governing skill: Speed.
Apprentice Skills: 25% faster Fatigue regeneration while running.
Journeyman Skills: 50% faster Fatigue regeneration while running.
Expert Skills: 75% faster Fatigue regeneration while running.
Master Skills: Normal Fatigue regeneration while running.
Normal Training: Running all the time (Caps Lock is in order), swimming.
Low-level trainers: Uuras (Uuras the Shepherd's House, Skingrad), Mahei (Mahei's House, Leyawiin).
Mid-level trainers: Hauls-Ropes-Faster (Fo'c'sle, Anvil Docks), Honditar (Chorrol).
Master Trainer: Rusia Bradus (Silgor Bradus' House, Anvil)
Master Trainer Quest: You must have at least 30 locations found on your World Map in order for Rusia to teach you.
Books: A Dance in Fire 3 (Uuras the Shepherd's House, Skingrad), The Argonian Account 1 (random loot), Beggar (Great Hall, Cloud Ruler Temple 6s21), The Ransom of Zarek (Arena Bloodworks, Imperial City Arena), The Red Kitchen Reader (Private Quarters, Castle Anvil).
Description: Blade weapons are daggers, swords, and so on. Build up this skill to deal more damage with them and learn some new, more powerful moves.
Governing skill: Strength.
Apprentice Skills: Power Attack (hold left mouse button).
Journeyman Skills: Power Attack with a chance to disarm the opponent (hold left mouse button + either left or right) .
Expert Skills: Power Attack with a chance to knock down the opponent (hold left mouse button + back) .
Master Skills: Power Attack with a chance to paralyze the opponent (hold left mouse button + forward) .
Normal Training: Using this kind of weapons. (HINT: In Cloud Ruler Temple stand by the two practicing Blades and wait for a few minutes, your Blade ability will raise by 2).
Low-level trainers: Naspia Kosma (Castle Cheydinhal), Right-Wing (Fighters Guild, Bruma).
Mid-level trainers: Sherina (Fighters Guild, Leyawiin), Rhano (Fighters Guild, Anvil).
Master Trainer: Alix Lencoila (Faregyl Inn, 5s3).
Master Trainer Quest: Alix won't train you unless your Fame or Infamy is at least 20. Each of these stats is raised by performing quests.
Books: 2920 - Morningstar (Uleve Hrelvu's room - Private Quarters, Castle Anvil), Battle of Sancre Tor (Great Hall, Castle Bravil), Fire and Darkness (chest in Imperial City Sewers while doing the last Thieves Guild quest - The Ultimate Heist), Song of Hrormir (a chest near two practicing gladiators in Imperial City Arena), Words and Philosophy (Modryn Oreyn's House, Chorrol).
Description: Block is a skill of parrying enemies' attacks with shields or weapons to reduce the damage taken from their blows. Remember that you can also use the bow to block.
Governing skill: Endurance.
Apprentice Skills: No Fatigue loss while blocking.
Journeyman Skills: Weapons and shields don't take damage from blocking.
Expert Skills: A chance for counterattack after a successful block..
Master Skills: Counterattack might also disarm the opponent..
Normal Training: Blocking the opponents' blows (HINT: In Cloud Ruler Temple stand by the two practicing Blades and wait for a few minutes, your Block ability will raise by 2).
Low-level trainers: Fadus Calidius (Fighters Guild, Skingrad), Huurwen (Fighters Guild, Anvil).
Mid-level trainers: Lum gro-Baroth (Fighters Guild, Chorrol), Ambroise Canne (Ambroise Canne's House, Skingrad).
Master Trainer: Andragil (Andragil's House, Bravil).
Master Trainer Quest: In order for Andragil to train you, you have to survive 45 second while being attacked by her. You can't use weapons, only blocking her attacks. You can use the table nearby to keep away from her.
Books: A Dance of Fire 2 (North Watch Tower, Elven Gardens) Death Blow of Abernanit (Fighters Guild, Anvil), The Mirror (City Watch Barracks, Leyawiin), The Warp in the West (Great Hall, Cloud Ruler Temple 6s21), Warrior (count's bedroom, Castle Leyawiin).
Description: Blunt weapons are warhammers, maces, axes and so on. Build up this skill to deal more damage with them and learn some new, more powerful moves.
Governing skill: Strength.
Apprentice Skills: Power Attack (hold left mouse button).
Journeyman Skills: Power Attack with a chance of disarming the opponent (hold left mouse button + either left or right) .
Expert Skills: Power Attack with a chance of knocking down the opponent (hold left mouse button + back) .
Master Skills: Power Attack with a chance of paralyzing the opponent (hold left mouse button + forward) .
Normal Training: Using this type of weapons.
Low-level trainers: Burak gro-Bol (Southern Books, Leyawiin), Vigdis (Fighters Guild, Anvil).
Mid-level trainers: Christophe Marane (Brina Cross Inn, 1s18), Azzan (Fighters Guild, Anvil).
Master Trainer: Irene Metrick (Irene Metrick's House, Imperial City Elven Gardens).
Master Trainer Quest: Irene will only train you if you've killed at least 50 people - it doesn't matter if they were mere bandits or some important NPCs. Check your character statistics to see your "score".
Books: The Importance of Where (Castle Bravil Dungeon), King (Private Quarters, Castle Anvil), The Legendary Sancre Tor (Vilena Donton's House, Chorrol), Mace Etiquette (lrandom loot), Night Falls of Sentinel (Goblin Jim's Cave, 2s26).
Description: Conjuration is a type of magic that focuses mostly on summoning creatures that will fight for you. Other group of Conjuration spells are those summoning magical armor and weapons, lasting for a limited amount of time.
Governing skill: Intelligence.
Novice Spells: Bound Boots, Bound Dagger, Bound Gauntlets, Bound Helmet, Turn Undead.
Apprentice Spells: Bound Greaves, Bound War Axe, Repulse Undead, Summon Ghost, Summon Scamp, Summon Skeleton, Summon Zombie.
Journeyman Spells: Bound Bow, Bound Cuirass, Bound Mace, Rebuke Undead, Summon Dremora, Summon Flame Atronach, Summon Headless Zombie, Summon Skeleton Guardian.
Expert Spells: Bound Shield, Bounds Sword, Dismiss Undead, Summon Clannfear, Summon Daedroth, Summon Frost Atronach, Summon Skeleton Champion, Summon Skeleton Hero, Summon Spider Daedra.
Master Spells: Summon Dremora Lord, Summon Gloom Wraith, Summon Storm Atronach, Summon Xivilai.
Normal Training: Casting this type of spells. HINT: It's useful to mix training Conjuration with training some offensive skills such as Destruction or Blade. Just summon yourself a monster and then kill it.
Low-level trainers: Fathis Aren (Castle Bravil), Sulinus Vassinus (Mages Guild, Skingrad).
Mid-level trainers: Alberic Litte (Mages Guild, Chorrol), Arentus Falvius (Great Chanel of Talos, Bruma).
Master Trainer: Olyn Seran (Molag Bal's Shrine, 2s43)
Master Trainer Quest: Olyn wants you to summon a Fader Wraith for him to see. In order to use this spell (you can buy it from Athragar in Chorrol Mages Guild), your Conjuration skill must be at least 75. You'll to raise it manually, by casting spells, or find a scroll with that spell (appears as random loot from spellcasters).
Books: 2920 - Heartfire (Great Chapel of Talos, Bruma), 2920 - Frostfall (Chapel of Dibella, Anvil), The Doors of Oblivion (Mages Guild, Anvil), Liminal Bridges (2nd floor of Mystic Archives in Arcane University), The Warriors Charge (reward in "Two Sides of a Coin" quest).
Description: Destruction is a magic discipline that emphasizes offensive spells that deal straight damage to your opponents, and in some cases cast negative curses upon their skills and attributes.
Governing skill: Willpower.
Novice Spells: Burning Touch, Cold Touch, Curse of Weakness, Damage Attribute: Agility, Damage Attribute: Endurance, Damage Attribute: Luck, Drain Attribute: Agility, Drain Attribute: Endurance, Drain Attribute: Luck, Flare, Minor Ennervation, Minor Wound, Shocking Touch, Snowball, Spark.
Apprentice Spells: Corrode Armor, Damage Attribute: Speed, Damage Attribute: Willpower, Drain Attribute: Speed, Drain Attribute: Willpower, Drain Skill: Illusion, Drain Skill: Marksman, Electric Touch, Entropic Bolt, Flame Touch, Flash Bolt, Frost Touch, Hailstone, Magicka Drain, Major Ennervation, Major Wound, Sever Magicka, Shock, Weakness to Fire, Weakness to Frost, Weakness to Poison, Weakness to Shock
Journeyman Spells: Blazing Spears, Corrode Weapon, Damage Attribute: Intelligence, Damage Attribute: Strength, Dire Wound, Drain Attribute: Intelligence, Drain Skill: Alteration, Drain Skill: Destruction, Drain Skill: Hand-to-Hand, Drain Skill: Heavy Armor, Fireball, Frost Bolt, Greater Magicka Drain, Hail Storm, Lightning Bolt, Lightning Grasp, Searing Grasp, Shocking Burst, Weakness to Magicka, Winter's Grasp, Withering Touch
Expert Spells: Arctic Blow, Dire Enervation, Disintegrate Armor, Drain Skill: Blade, Drain Skill: Conjuration, Drain Skill: Restoration, Fire Storm, Heat Blast, Ice Bolt, Ice Storm, Lightning Bolt, Lightning Blast, Lightning Surge, Scorching Blow, Superior Magicka Drain, Superior Wound, Withering Bolt
Master Spells: Blizzard, Disintegrate Weapon, Electrocution, Flame Tempest, Ice Blast, Immolating Blast, Legendary Magicka Drain, Lightning Storm
Normal Training: Casting this type of spells.
Low-level trainers: Chanel (Castle Chorrol), J'skar (Mages Guild, Bruma - he's not there until you do the Bruma Recommendation quest).
Mid-level trainers: Marc Gulitte (Mages Guild, Anvil), Delphine Jend (Mages Guild, Bravil).
Master Trainer: Bralsa Andaren (west of Weatherleah, 2s40).
Master Trainer Quest: Bralsa will only train you if bring her 20 Bear Pelts. There's no one solution to this quest, just find and kill 20 bears. If you don't feel like it, try to find the pelts in shops throughout Cyrodiil.
Books: The Art of War Magic (Leafrot Cave, 11s8), The Horrors of Castle Xyr (Mages Guild, Bravil), Mystery of Talara III (random loot), Response to Bero's Speech (Mystic Archives, Arcane University).
Description: The art of unarmed combat. This skill's value mostly determines the damage you can deal with your bare hands.
Governing skill: Strength.
Apprentice Skills: Power Attack (hold left mouse button).
Journeyman Skills: Power Attack with a chance to disarm the opponent (hold left mouse button + either left or right) .
Expert Skills: Power Attack with a chance to knock down the opponent (hold left mouse button + back) and a chance of counterattack while blocking.
Master Skills: Power Attack with a chance to paralyze the opponent (hold left mouse button + forward) and a chance of paralyzing counterattack while blocking.
Normal Training: Unarmed combat. HINT: In Imperial City Arena stand by the two practicing gladiators and wait for a few minutes, your H2H ability will raise by 5.
Low-level trainers: Nahsi (Fighters Guild, Bravil), Rufrius Vinicius (Fighters Guild, Anvil).
Mid-level trainers: Davela Hlaren (Imperial Bridge Inn, 8s16), Ra'quanar (Castle Cheydinhal).
Master Trainer: Helvius Cecia (Helvius Cecia's House, Bruma).
Master Trainer Quest: Helvius tells you to punch him so he loses 40% of his hit points.
Books: Ahziir Traajajazeri (J'Ghasta's House secret training room, Bruma; Dark Brotherhood Sanctuary Training Room, Cheydinhal), Immortal Blood (Seridur's House, Temple District; J'Ghasta's House secret training room, Bruma), Master Zoaraym's Tale (random loot), Way of the Exposed Palm (Fieldhouse Cave lower level, 7s26), The Wolf Queen II (Lord's Manor, Castle Skingrad).
Description: The art of wearing a heavy armor in a way that best protects the warrior's body from harm. The higher the value of this skill, the better armor rating of all heavy armor-based accessories.
Governing skill: Endurance.
Apprentice Skills: Normal rate of armor degradation.
Journeyman Skills: Rate of armor degradation halved.
Expert Skills: Only half of the equipped armor's weight counts to Encumbrance.
Master Skills: Equipped armor's weight doesn't encumber us.
Normal Training: Wearing heavy armor and taking damage in it.
Low-level trainers: Brodras (Fighters Guild, Leyawiin), Bumph gra-Gash (Fighters Guild, Bruma).
Mid-level trainers: Valus Odiil (Chorrol), Varnado (The Best Defense, Imperial City Market District).
Master Trainer: Pranal (Roxey Inn, 5s52).
Master Trainer Quest: Pranal will ask you to get a gift for his love: 4 glasses (silver) and a silver pitcher. You can buy them in various shops around Cyrodiil, even steal from some of the richer houses and castles. When you have them, go back to Pranal. He'll send you to the innkeeper Malene. Give her the present and go back to your new teacher.
Books: 2920 - Midyear (Fire and Steel, Chorrol), Chimarvamidium (Imperial Legion Barracks [entry through Imperial Legion Offices], Imperial City Prison), Fighters Guild History (Fighters Guild, Anvil and Chorrol; Mystic Archives, Arcane University), Hallgerd's Tale (Fighters Guild, Chorrol), How Orsinium Passed to Orcs (Lord's Manor, Castle Bruma).

Description: Illusion concentrates on charms cast upon your enemies, making them tremble in fear before you, sometimes even join your side and kill their own. There are some very useful magical torch-substitutions here as well (ex. Daylight).
Governing skill: Personality.
Novice Spells: Alluring Gaze, Beguiling Touch, Frenzy, Illuminate, Inspiration, Inspiring Touch, Serenity, Soothing Touch Starlight, Touch of Frenzy
Apprentice Spells: Command Creature, Command Humanoid, Commanding Touch, Eyes of Eventide, Heroic Touch, Heroism, Mesmerizing Grasp, Moonlight, Pacification, Rage, Seductive Charm, Touch of Fear, Touch of Rage.
Journeyman Spells: Calming Touch, Candlelight, Chameleon, Debilitate, Dominating Touch, Enthralling Presence, Eyes of Midnight, Hush, Shadow Shape, Voice of Dread, Voice of Rapture.
Expert Spells: Dominate Creature, Dominate Humanoid, Fearful Gaze, Ghostwalk, Immobilize, Mute, Shadow, Torchlight.
Master Spells: Cloak, Daylight, Grasp of Terror, Paralyze, Silence, Spectral Form, Terrifying Presence.
Low-level trainers: Hil the Tall (Great Chapel of Arkay, Cheydinhal), Jantus Brolus (Istrius Brolus's House, Bruma).
Mid-level trainers: Carahil (Mages Guild, Anvil), Kud-Ei (Mages Guild, Bravil).
Master Trainer: Martina Floria (Chironasium, Arcane University).
Master Trainer Quest: To convince Martina to train you, you'll have to bring her 10 Welkynd stones. As Mages Guild Apprentice (you wouldn't be able to get to The University if you weren't one) you must have encountered them already. You'll find them in all Ayleid ruins (see World Map).
Books: The Argonian Account 3 (Mystic Archives, Arcane University), Incident in Necrom (Willow Bank, Cheydinhal), Mystery of Talara 4 (Fort Caractacus' tower, 5s49), Palla 1 (Arkved's Tower, 9s5), The Wolf Queen 3 (Mages Guild basement, Bruma).

Description: The art of wearing a light armor in a way that best protects the warrior's body from harm. The higher the value of this skill, the better armor rating of all light armor-based accessories.
Governing skill: Speed.
Apprentice Skills: Normal rate of armor degradation.
Journeyman Skills: Rate of armor degradation halved.
Expert Skills: Equipped armor's weight doesn't encumber us.
Master Skills: Armor rating up 50% if you only wear Light Armor elements.
Normal Training: Wearing heavy armor and taking damage in it.
Low-level trainers: Dul gro-Shug (Dul gro-Shug's House, Imperial City Elven Gardens), Olfang (Nord Winds, Bruma).
Mid-level trainers: Luciana Galena (Luciana Galena's House, Bravil), Ahdarji (Ahdarji's House, Leyawiin).
Master Trainer: J'Bari (J'Bari's House, Leyawiin).
Master Trainer Quest: You'll have to bring J'Bari an Elven Cuirass. If you're not at least level 15, the only certain place you can find it in would be Azani Blackheart quest for the Fighters Guild (you find it by dead boss' body). If your level is high enough, such equipment gets quite popular among common bandits.
Books: Ice and Chitin (Adharji's House, Leyawiin), Lord Jornibret's Last Chance (Bleak Flats Cave, 2s25), The Rear Guard (Dark Brotherhood Sanctuary, Cheydinhal), The Refugees (First Edition, Imperial City Market District), Rislav the Righteous (random loot).
Description: Marksman allows you to use bow effectively and deal serious damage with it. Bows are quite weak in Oblivion and it's really difficult to create a decent character that concentrates on them.
Governing skill: Agility.
Apprentice Skills: No Fatigue loss while bow is drawn out.
Journeyman Skills: An additional Zoom possibility (press Block while shooting).
Expert Skills: Chance of knocking the opponent back on strike.
Master Skills: Chance of paralyzing the opponent on strike.
Normal Training: Shooting arrows.
Low-level trainers: Edla Dark-Heart (Regner's House, Bruma), Shameer (Shameer's House, Skingrad).
Mid-level trainers: Reman Broder (Reman Broder's House, Skingrad), Pinarus Inventius (Pinarus Inventius' House, Anvil).
Master Trainer: Alawen (Troll Candle Camp, 1s9).
Master Trainer Quest: It's best to talk to her at night, when she's asleep. She'll tell you to bring her an Elven Bow. The easiest way to get it is to buy it from The Archer Paradox in Bravil.
Books: A Dance in Fire 5 (Regner's House, Bruma), The Black Arrow 2 (Dark Brotherhood Sanctuary, Cheydinhal), Father of the Niben (Castle Bravil), The Gold Ribbon of Merit (Dark Brotherhood Sanctuary, Cheydinhal), Vernaccus and Bourier (Renoit's Books, Chorrol).

Description: Mercantile, allows you to negotiate better prices in all shops in Cyrodiil. Gold is a problem only in the beginning of the game, so this skill is definitely not among the essentials.
You can negotiate prices by using Haggle - with it, you raise prices of the items you sell and lower prices of those you buy. This is closely related with Speechcraft, as most NPCs will be more acceptant if they actually like you. Every transaction they reject lowers their Disposition.
Governing skill: Personality.
Apprentice Skills: No price reduction when selling damaged goods.
Journeyman Skills: You can sell any item in any shop (not only weapons in weapons shop etc. as before)
Expert Skills: You can invest 500 Gold in a shop, which enhances the maximum price they can pay for your goods.
Master Skills: All the shops have additional 500 Gold.
Normal Training: Selling and buying goods, haggling.
Low-level trainers: Forosh (Gottshaw Inn, 1s17), Mach-Na (Mach-Na's Books, Cheydinhal).
Mid-level trainers: Margarte (Margarte's House, Leyawiin), Seed-Neeus (Northern Goods and Trade, Chorrol).
Master Trainer: Palonirya (Divine Elegance, Imperial City Market District).
Master Trainer Quest: Palonirya wants you to prove your financial talent by showing her 10000 septims. You only have to posses these money, you don't get to pay her that much.
Books: 2920 - Sun's Height (Black Horse Courier, Imperial City Market District), A Dance of Fire 6 (Casta Scribonia's House, Chorrol), A Dance in Fire 7 (Casta Scribonia's House, Chorrol), The Buying Game (Fathis Ules' House, Imperial City Elven Gardens), The Wolf Queen 4 (Office of Imperial Commerce, Imperial City Market District).
Description: Mysticism is all about manipulating the magic itself - deflecting it, absorbing etc. Spells especially worth taking a peak at are Life Detection (a kind of radar) and Soul Trap (allows you to fill your Soul Gems with beasts' souls and use them to refill your magical items).
Governing skill: Intelligence.
Novice Spells: Minor Dispel, Minor Life Detection.
Apprentice Spells: Dispel Other, Major Dispel, Major Life Detection, Remote Manipulation, Soul Trap.
Journeyman Spells: Greater Dispel, Greater Dispel Other, Greater Life Detection, Greater Soul Trap, Greater Spell Reflection, Psychic Motion, Spell Absorption.
Expert Spells: Superior Dispel, Superior Life Detection, Superior Soul Trap, Superior Spell Absorption, Superior Spell Reflection, Telekinesis.
Master Spells: Legendary Dispel, Legendary Life Detection, Legendary Soul Trap, Legendary Spell Absorption, Legendary Spell Reflection, Movement Mastery.
Low-level trainers: Angalmo (Mages Guild, Chorrol), Druja (Mages Guild, Skingrad).
Mid-level trainers: Ita Rienus (Mages Guild, Bravil), Boderi Farano (Mystic Archives, Arcane University).
Master Trainer: Dagail (Mages Guild, Leyawiin).
Master Trainer Quest: Dagail won't train you until you close at least three Oblivion gates (including the ones from the main quest).
Books: 2920 - Sun's Dawn (Chapel of Julianos, Skingrad), Before the Age of Man (Chironasium, Arcane University), The Black Arts on Trial (Mystic Emporium, Imperial City Market District), The Firsthold Revolt (Mages Guild, Cheydinhal), Souls - Black and White (Fort Cuptor, 11s9).
Description: Restoration is a magic discipline that focuses on manipulating character parameters - enhancing its attributes and skills, and also healing wounds and diseases.
Governing skill: Willpower.
Novice Spells: Absorb Attribute: Agility, Absorb Attribute: Endurance, Absorb Attribute: Intelligence, Absorb Attribute: Luck, Absorb Attribute: Speed, Absorb Attribute: Strength, Absorb Attribute: Willpower, Absorb Fatigue, Absorb Health, Absorb Magicka, Absorb Skill: Acrobatics, Absorb Skill: Athletics, Absorb Skill: Illusion, Absorb Skill: Security, Fortify Fatigue, Heal Minor Wounds, Minor Respite.
Apprentice Spells: Absorb Skill: Hand-to-Hand, Absorb Skill: Light Armor, Absorb Skill: Mercantile, Absorb Skill: Mysticism, Absorb Skill: Restoration, Convalescence, Cure Paralysis, Cure Poison, Fortify Agility, Fortify Endurance, Fortify Health, Fortify Intelligence, Fortify Luck, Fortify Personality, Fortify Speed, Fortify Strength, Fortify Willpower, Greater Fortify Fatigue, Heal Major Wounds, Leech Health, Major Respite, Restore Agility, Restore Endurance, Restore Intelligence, Restore Luck, Restore Personality, Restore Speed, Restore Strength, Restore Willpower.
Journeyman Spells: Absorb Skill: Alteration, Absorb Skill: Block, Absorb Skill: Conjuration, Absorb Skill: Heavy Armor, Absorb Skill: Marksman, Consume Health, Cure Disease, Fortify Magicka, Greater Convalescence, Greater Fortify Agility, Greater Fortify Endurance, Greater Fortify Intelligence, Greater Fortify Luck, Greater Fortify Personality, Greater Fortify Speed, Greater Fortify Strength, Greater Fortify Willpower, Heal Greater Wounds, Minor Magic Resistance.
Expert Spells: Absorb Skill: Blade, Absorb Skill: Blunt, Absorb Skill: Destruction, Absorb Skill: Sneak, Devour Health, Greater Fortify Health, Greater Fortify Magicka, Heal Superior Wounds, Superior Convalescence.
Master Spells: Legendary Dispel, Legendary Life Detection, Legendary Soul Trap, Legendary Spell Absorption, Legendary Spell Reflection, Movement Mastery.
Low-level trainers: Cirroc (Great Chapel of Talos, Bruma), Marie Palielle (Great Chapel of Julianos, Skingrad).
Mid-level trainers: Marz (Great Chapel of Mara, Bravil), Ohtesse (Great Chapel of Arkay, Cheydinhal).
Master Trainer: Oleta (Great Chapel of Akatosh, Kvatch).
Master Trainer Quest: It's simple - you just have to perform the "Battle for Castle Kvatch" quest. It's given to you by Savlian Marius, the same person who told you to close the Oblivion gate of Kvatch near the beginning of the game.
After you retake the Kvatch Chapel, Savlian will ask you for further help in fighting for the city. Agree and follow him. Defeat some monsters and talk to him again. Go back to the Chapel and talk to Berich Inian about the key. Follow the map markers until you reach the mechanism that opens the castle gate - use it, and you'll meet up with Savlian's men again.
Defeat the daedra occupying the courtyard, talk to Marius again, and enter the castle. He'll tell you to find the count. Follow the map marker again, fighting off the daedra, and eventually you'll find count's body. Take the ring from it and go back to Matius in order to give it to him. You'll get a Kvatch Cuirass as a reward.
Books: 2920 - Rain's Hand (Chapel of Mara, Cheydinhal), The Exodus (Chapel of Julianos, Skingrad), Mystery of Talara 3 ("Two Sides of a Coin" quest reward), Notes on Racial Philogeny (Chapel of Stendarr, Chorrol), Whiteshins (Mages Guild, Leyawiin).
Description: Security is a skill of opening locks in doors, chests, and everything else that can have one in it.
Opening locks is served as a kind of mini-game, that gets easier every time you increase your skill. Success is a matter of two things, then: your own ability to play the mini-game, and the additional bonuses from skill points, that can make things a lot easier. Practice makes perfect, again - and not only on the game's side, you'll also learn to hear and see exactly when to click and win.
You'll need lockpicks to open locks. They can be found in various random locations, and bought from Thieves Guild Fences. In a Daedric quest from Nocturnal, you'll get a special, unbreakable lockpick called Skeleton Key, that will once and for all solve your "out of lockpicks" problems.
Governing skill: Agility.
Apprentice Skills: If you miss, three tumblers will fall.
Journeyman Skills: If you miss, two tumblers will fall.
Expert Skills: If you miss, one tumbler will fall.
Master Skills: If you miss, no tumblers will fall.
Normal Training: Mini-game practice (you don't even have to succeed in it).
Low-level trainers: Malintus Ancrus (Malintus Ancrus' House), Samuel Bantien (Samuel Bantien's House, Imperial City Talos Plaza).
Mid-level trainers: Dro'Shanji (Dro'shanji's House, Bravil), Mandil (Othrelos's House, Imperial City Elven District).
Master Trainer: J'baana (Imperial City Prison; in order to get to him, you'll have to get past the gates to the north-eastern part of the map. Either steal the key from one of the guards or open it with a lockpick [Very Hard lock]).
Master Trainer Quest: J'baana will tell you to go to S'krivva in Bravil (you might know her from various Thieves Guild quests) and take a message from her. As easy as it gets - just pay her a visit and go back to J'baana.
Books: Advances in Lockpicking (March-Na's Books, Cheydinhal), The Locked Room (Smuggler's Cave, Castle Anvil), Proper Lock Design (Dareloth's House, Imperial City Waterfront [after completing the whole Thieves Guild]), Surfeit of Thieves ("Two Sides of a Coin" quest reward), The Wolf Queen 1 (Dro'Shanji's House, Bravil).
Description: Sneak not only allows you to move unnoticed, but also pick pockets. The higher the skill, the less chance of detection there is. Weight of your boots also determines the possibility of failure.
Governing skill: Agility.
Apprentice Skills: x6 multiplier to sneak-attack from a single-handed weapon or hand-to-hand, x3 multiplier to sneak bow attacks.
Journeyman Skills: Boot weight doesn't impact your detection chance.
Expert Skills: Moving doesn't impact your detection chance.
Master Skills: When you sneak-attack, you deal damage ignoring the enemy's armor rating.
Normal Training: Practicing sneaking past enemies.
Low-level trainers: City-Swimmer (City Swimmer's House, Bravil), Glistel (Malintus Ancrus' House, Chorrol).
Mid-level trainers: Othrelos (Othrelos's House, Imperial City Elven Gardens), Mirabelle Monet (Fo'c's'le, Anvil Docks).
Master Trainer: Marana Rian (Marana Rian's House, Imperial City Temple District).
Master Trainer Quest: You have to steal a coin that Marana has in her pocket. This shouldn't be too difficult, provided your Sneak ability is already at a high level.
Books: 2920 - Last Steed (City Swimmer's House, Bravil), Legend of Krately House (Cloud Ruler Temple library), Purloined Shadows (random loot), Sacred Witness (Lake Arrius Caverns, 9s38), The Wolf Queen 7 (Dark Brotherhood Sanctuary, Cheydinhal).

Description: Speechcraft is an ability to make friends in Cyrodiil. The perks of high Speechcraft (and Personality) are various, starting from easier information gathering, and all the way to lower prices in shops.
Using Speechcraft always comes in pair with a mini-game, in which we have to choose arguments the way the NPCs like. The higher the skill, the easier it is to raise somebody's Disposition. Its value range is 0-100.
HINT: You can use Charm-like spells instead of Speechcraft.
Governing skill: Personality.
Apprentice Skills: Additional "rotate" option.
Journeyman Skills: Disposition falling rate halved.
Expert Skills: Lowers the penalty for choosing the worst possible argument.
Master Skills: Bribes cost halved.
Normal Training: Mini-game practicing.
Low-level trainers: Alga (Honmund's House, Bruma), Uravasa Othelas (Great Chanel of Mara, Bravil).
Mid-level trainers: Varon Vamori (Varon Vamori's House, Bravil), Gruiand Garrana (Great Chapel of Arkay, Cheydinhal).
Master Trainer: Tandilwe (Temple of the One, Imperial City Temple District).
Master Trainer Quest: Tandilwe will send you to a tramp-talking marathon. You have to talk to every single beggar in Cyrodiil. There are 19 of them: five in Imperial City and two in every other city. It's not difficult to find them, they usually just hang out on the streets during the day and sleep there during the night. Their appearance is also recognizable.
Books: 2920 - Second Seed (Chancellor Ocato's Quarters, Imperial Palace), Biography of the Wolf Queen (Armand Christophe's House, Imperial City Waterfront), The Wolf Queen 5 (Hastrel Ottus' House, Imperial City Temple District), The Wolf Queen 6 (Ottus' House, Imperial City Temple District).
After running the game with this mod enabled, you'll get a log entry saying that you've found a note from Snak gra-Bura, the proprietor of Chestnut Handy Stables near the Imperial City. It says that you're welcome there to receive your free horse armor. Go there and talk to Snak. If you don't own a horse, you can convince or threaten her into giving you one. In that case, you'll get an Old Nag equipped with a steel armor.
From now on, you can equip any horse with an armor: a steel one or an elfish one. Their functionality is exactly the same (they double the horsey's health), so you should only think about which one you like better.

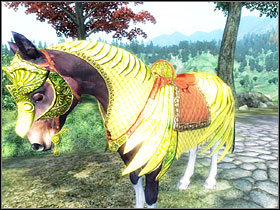
HINT: You can't buy an armor for a stolen horse, you have to legally own one.
The bandits have stolen some artifacts from the mages guild's transport. Go to Camp Ales, one of their hideouts. You'll find two enemies in there. One of them (Bandit Carrier) will have the artifact - Dwarven Cog - with him. You'll also find an Undelivered Letter, listing the locations of all other parts of the mechanism.
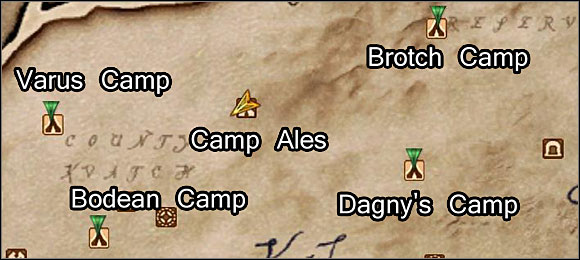
There will be 4 new markers on your map, indicating the parts' whereabouts: Varus Camp, Bodean Camp, Dagny's Camp, and Brotch Camp. The thing is simple here - you have to visit them one by one and defeat the Bandit Carriers to grab the artifacts. You'll encounter one or two enemies on each spot.
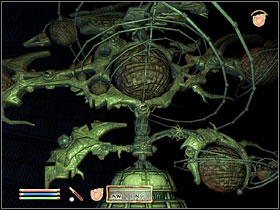
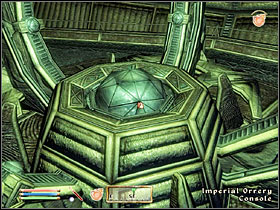
Go to Arcane University and talk to Bothiel. When she leaves, wait 24 hours and you'll be able to enter the Orrery through a newly opened door in the Mages Guild Lobby (you don't have to be a member to access that area). Enter the place and start the machine by activating the Imperial Orrery Console. Touch it again to get a new skill, one that's depending on the current moon phase. You can come back here later, when the phase is different, to swap your ability with a different one. See below for a full list.
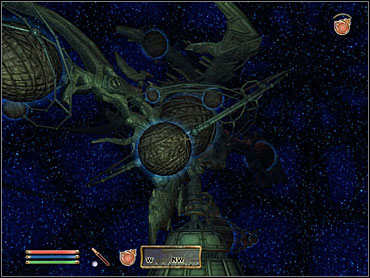
Each of the skills allows you to temporarily alter your attributes, increasing one of them by 20 points and simultaneously decreasing the other one by the same amount.
Spell
Positive effect
Negative effect
Masser's Alacrity
Speed +20
Strength -20
Masser's Courage
Endurance +20
Agility -20
Masser's Grace
Agility +20
Endurance -20
Masser's Might
Strength +20
Speed -20
Secunda's Brilliance
Intelligence +20
Willpower-20
Secunda's Magnetism
Personality +20
Luck -20
Secunda's Opportunity
Luck +20
Personality -20
Secunda's Will
Willpower +20
Intelligence -20
When you run the game with this mod on, it will turn out you've inherited a mansion known as Frostcrag Spire. Its location is now marked on your map. Go there immediately and enter. The first thing you'll see will be the journal of a former owner. Read it to get the name of the shop that you'll be able to buy upgrades in: it's the Mystic Emporium in Imperial City Market District.
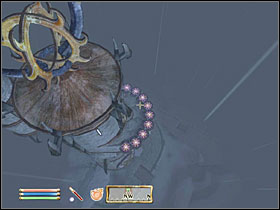
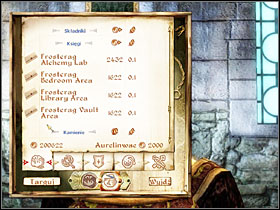
Talk to Aurelinwae and buy all expansion packages: Alchemy Lab, Bedroom Area, Library Area, and Vault Area. Buy two sets of Magetallow Candles as well (they're at the bottom of the list). The quest will be over - and you've just gotten yourself the coolest house in the game (even better than the other plug-in expansions). Go there and use the candles on both Altar of Enchanting and Altar of Spellmaking.
Now, what have we here? In the main hall there are two altars mentioned above, allowing you to create spells and enchant items. The central altar allows you to summon Atronachs - creatures that will serve and obey you. They don't have any time limit on them, so they'll keep existing until they are beaten in battle or dismissed by your will. You can choose to summon a Storm Atronach (3 Void Salts are required), a Flame Atronach (3 Fire Salts), or Frost Atronach (3 Frost Salts). You can issue commands to them by approaching and activating them. Then you get a dialog box allowing you to choose whether they should follow you, wait, or be dismissed. You can only own one Atronach at a time.
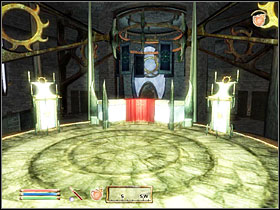
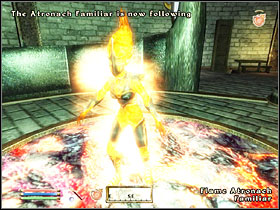
In the Living Area you'll see a huge botanical garden, an alchemist's paradise. Even the daedric plants are there, and they're almost impossible to find once you've cleared all the oblivion-based quests. The altar nearby fortifies your Alchemy skill by 15 points when you're near it, so keep close to it when you mix potions. There's also a balcony here that allows you to instantly teleport to any Mages Guild outpost in Cyrodiil, Arcane University included.
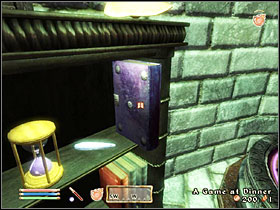

HINT: On a shelf in a cupboard near the bed there's a skill book on Alchemy: A Game At Dinner (screenshot on the left). A little more higher there's a Jewelry Box (screenshot on the right) containing a cool ring called Pentamagic Loop.
The Vault is a huge storage room in which you can leave your riches. There's also a rare wine collection that can come in handy in some quests.
You've heard a story about a missing pirate ship in caverns somewhere under Anvil. Go to Dunbarrow Cove, which is marked on your map. You'll get a new journal entry. Swim over to Smuggler's Cave and go to the marked spot. Before you is a lost pirate ship, overrun by undead skeletons. You have to defeat them all before you own the place. When you're done with that, enter the Captain's Quarters and kill Cap'n Dugal, or what's become of him. Now you have to go to Dahlia Rakham, owner of the Sea Tub Clarabella in Anvil Docks, who can help you to upgrade your new hideout.
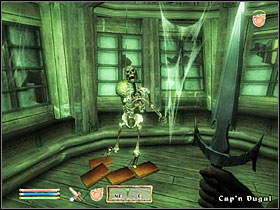
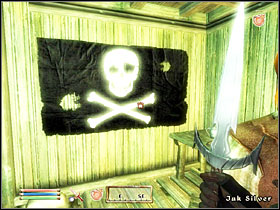
This time the upgrades are mostly NPCs for hire, swashbucklers and rascals who will serve in your newly formed pirate crew. You can hire two traders-fences here (you can sell stolen goods to them), three expert teachers (Security, Sneak, and Marksman), and also get some extra furniture for your cabin. When you buy it all, the quest will be over.
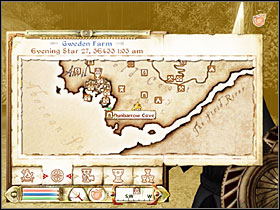
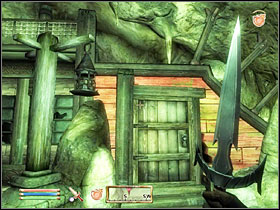
You're a captain now - you don't get to sail and rob for yourself, but you can send your crew on a raid and snatch your share of the profit when they're back (it takes them one full week to finish the procedure).
You've heard about a blade known as Mehrunes Razor and are about to find it. Go to Sundercliff Watch (marked on your map). Enter the caves and go straight ahead before you reach the door. Take a look inside the Abandoned Knapsack to the right and look through the journal there to get a password. Try to open the door and say "Chimer" when asked.
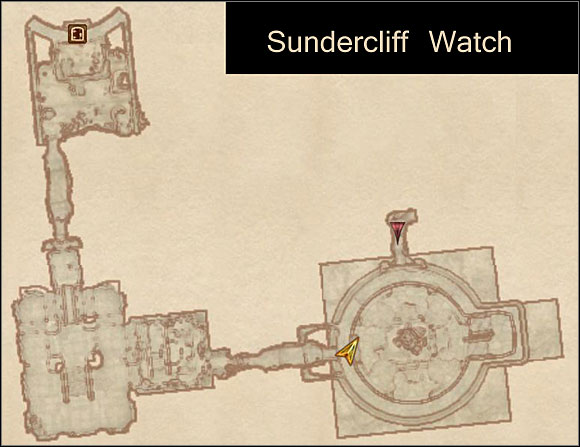
Slash through all the enemies and go towards the map marker that will lead you to the lower level (Sundercliff Village). You'll reach an underground town. Its citizens are all hostile, so watch your step and don't get surrounded by too many at a time. Sneak to Sundercliff Commune. Defeat some more Drothmeri soldiers and get to Frather Drothan's Quarters to find the local leader's journal.
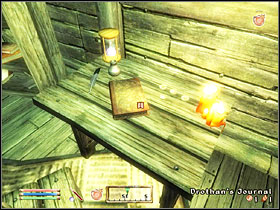
You now have two markers on your map. Go to Commander's Quarters and defeat the soldier there. Go to the first floor of his house and grab the Enchanted Bezoar. Now go back to Sundercliff Village and get through the town to reach the Sundercliff Forge. Now go to Sundercliff Mines (this is not the door marked on your map, you can't reach that one yet).
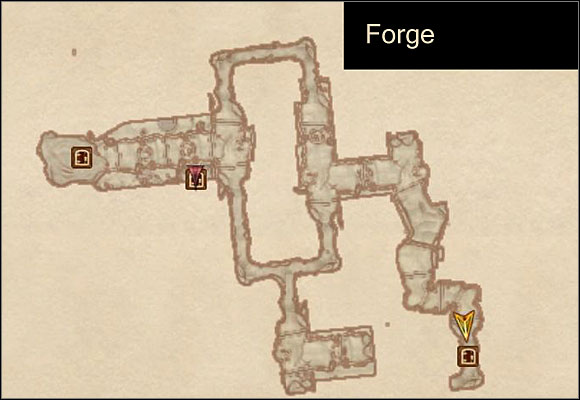
Now to get to the marked door, you first have to reach the mines' upper level. You'll do that by first reaching the almost-destroyed tunnel in the South-Eastern corner of the map. You'll end up at a higher level - go trough the rope bridges to the door, back to the Forge.
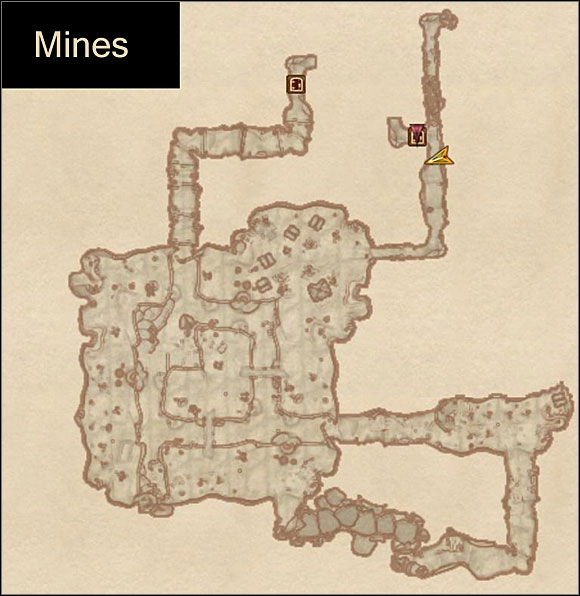
Go along the way until you see the Forgemaster. Kill him and enter his tent to get the second Bezoar from the table. Get back to the village using the corridor to the North from the tent - you'll open up the passage by pulling the rope coming out of the ceiling. Go forth, passing through both Village and Commune. Place the Bezoars on the two pillars at the end. You'll reach the Excavated Ruin. Not much action here. Just go on until you enter Varsa Baalim.
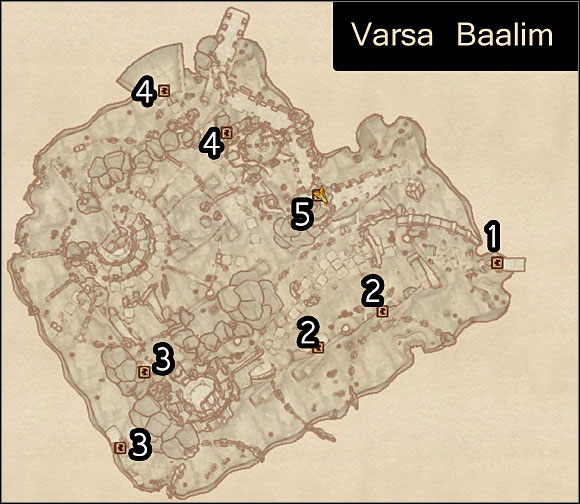
You begin in a spot marked by #1. You'll see a Drothmeri unit fighting off some vampires. Wait for them to weaken each other and then kill all that remain alive. You'll see the entrance to Cave Armenia (#2) - you don't have to enter it, though, as there's nothing worth fighting for in there. Go West until you reach Cave Beldameld (#3) - go through the short corridor to leave it from the other side. Continue on through the city, this time heading North, then East. Enter Cave Marspanga (#4) when you see it. When you're back to the city, climb up the plank. Follow the stone platforms until you reach a huge, bright crystal. The entrance to Nefarivigum (#5) is just by it.
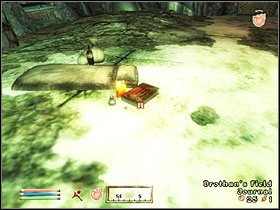
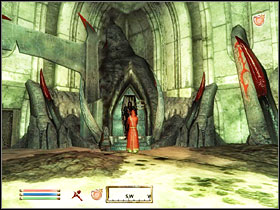
Go down the stairs and enter the creepy room ahead. Drothan's in there - you have to kill him. Take the key and some cool equipment from his body. Read his journal - it's laying on the floor somewhere around here. Take the heart from Msirae Faythung (the statue that Drothan was "talking to"). There's a metal gate nearby - you can try to force it open or eat the heart that you've just taken. Either way you'll end up fighting the statue, which proves to be quite tough indeed. When you're done, go through the door to finally get the blade (that's why you came here in the first place, remember? Phew, that was a long one!). At the back of the room you'll see a passage to Forgotten Tunnels that will quickly take you straight to the surface.
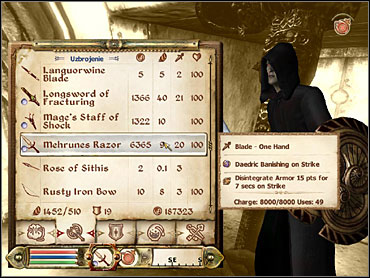
Another mission that gets you a new kind of lair to live in. This time you'll get a journal entry saying that you've inherited a place called Deepscorn Hollow. Go there and dive when you're near the map marker. You'll see a sunken trunk - the entrance is inside it. Read the journal you'll find inside, and you'll be told to pay a visit to Rowley Eardwulf in Wawnet Inn (near the Imperial City) to get some additional equipment. As always, you'll have to buy all the expansions in order for the quest to end.
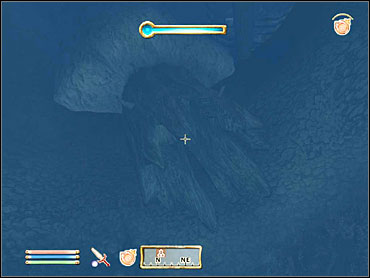 The trunk that contains the hidden entrance to the mansion.
Rowley's "store" is only open at night - when you talk to him during the day, you won't be able to trade with him. The mission is over when you buy all the furniture elements for your evil lair. Besides them, also buy the Ichor of Sithis. When you're back to Deepscorn, use it on the Sithis' altar to create an evil version of the shrines you find in Chapels throughout Cyrodiil. You can use it to heal diseases and lift curses.
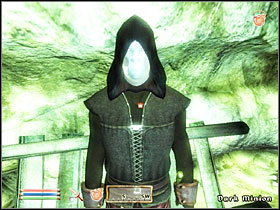 Our vampire minion.
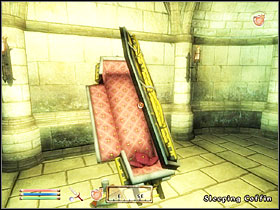 A deluxe coffin = the quickest way to vampirism.
As a ruler of such an evil and dark place as Deepscorn, you have a handful of things to entertain yourself with. The coolest thing is you can instantly become a vampire and cure vampirism at any time. To become one, just have a sleep in a decorated coffin in one of the rooms. To lift the curse, take some Purgeblood Salts from the vein on the wall (screenshot below) and touch the pillar in the middle of the "fountain" room. It's really that simple now.
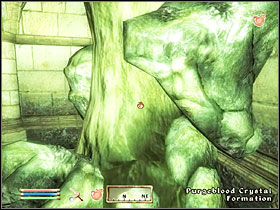 Purgeblood Salts, a perfect vampire cure.
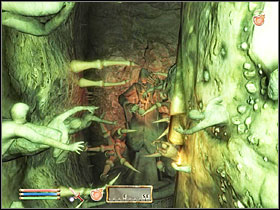 An altar of Sithis - comfy.
Apart from all that, you'll also find a botanical garden here, filled with all sorts of poisonous plants, a prisoner in an eternal coma (you can use it to feed as a vampire), and a vampire minion whom you can send to assassin somebody and bring you the loot.
The Imperial City Arena is Cyrodiil's theatre of blood and pain, a place where the best warriors cross their blades fighting to death. You can sign up by talking to Owyn, standing somewhere in Arena Bloodworks. At first, you'll be mocked and laughed on, but with each victorious fight your prestige will rise and so will your rewards.
The Arena matches are none too easy, the opponents are always a few levels above your own. You can fight any time between 9 A.M. to 9 P.M.
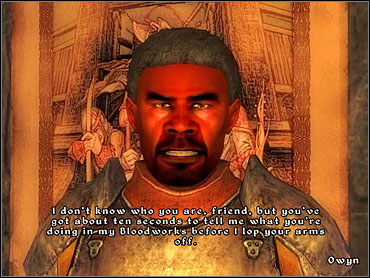
When fighting, you must wear an Arena Raiment. You'll get it from Owyn when registering for the first time. You'll have to choose whether you want to use Light or Heavy Raiment. When choosing, just keep in mind in which armor your character actually feels better. The arena is not a place to practice new skills, there's no time to hold back.
Because you can't use your own armor, try to make up for it by wearing the best helmet, shield, weaponry and jewelry you can get.
Before each match, you have to tell Owyn that you're ready. After the fight you go back to Arena Bloodworks, freshen up in the fountain, and talk to the blademaster once again, to get your reward and, each three matches, an advancement in rank.
HINT: Due to a game bug, it's quite easy to win any match against any enemy that doesn't have a ranged attack. Just hop on the shelf shown on the screenshot below (first to the lower, then to the upper level). When you're standing there, no melee attacks can reach you, and you can easily use arrows or magic to kill your opponents.
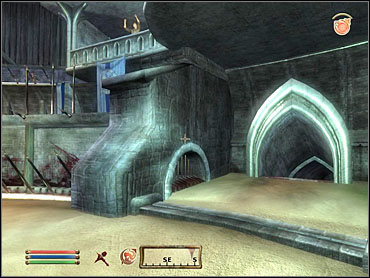
Pit Dog
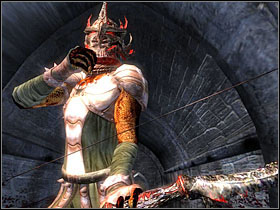
Brawler
Bloodletter
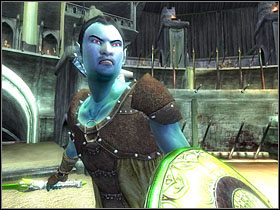
Myrmidon

Warrior
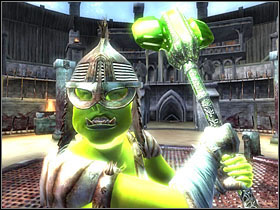
Gladiator
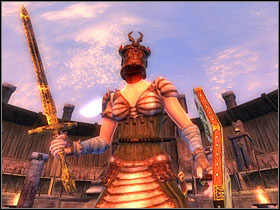
Hero
When you are named Champion, the only challenge left is to fight Agronak gro-Malog, the Grand Champion. Ask Ysabel Andronicus about that, and challenge Agronak personally. He'll accept it. This time the rules are a little bit different: you can use any armor you like, and after you win you get to take Agronak's equipment.
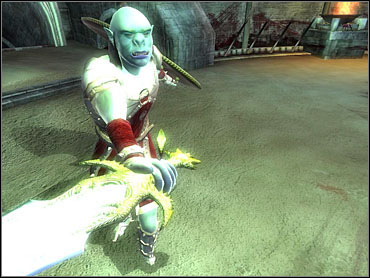
Ysabel will tell you to choose your nickname (heh) and prepare for the worst. Enter the arena, warrior. What happens now depends on whether you have performed a quest called 'Origin of the Gray Prince' (given by Agronak himself). If you have, the half-orc will just stand there and beg you to kill him, so ashamed of his heritage. If you haven't, there's a difficult battle before you. When you win, take his armor and take it to Ysabel to get your own super-raiment.

As the Grand Champion, virtually unmatched throughout Cyrodiil, you won't receive any challenges. Ysabel will tell you, though, that you can both benefit from your abilities by organizing special shows, where you will be fighting some wild beasts. You can participate in such event once a week - and get some decent money from it.
The second perk is that you actually get to have an adoring fan. When leaving the arena, you'll be accosted by a funny Wood Elf, who offers his service as your everyday bootlicker. Should you agree, he'll follow you around, not doing anything particular. There's nothing special to him - treat him more like an Easter Egg.


There are 15 daedric quests in the game. All of these missions are given to us by various daedric princes, whom we contact through their secret shrines. Finding these shrines is up to us - we can get the locations by talking to the right people, reading the right books, or just wandering around. The location of each shrine is indicated below, using the following key:
[World map segment number]s[location number]
All these quests have 1 thing in common: you have to make an offering in order for the prince to speak with you. To know what kind of offering the prince demands, you have to speak to his or her followers, sometimes raising their disposition to a higher level. In most cases you have to offer items that are found by certain enemies' bodies, such as Bear Pelts. Sometimes, however, things get much more complicated.
The last quest - Hermaeous Mora - is available only when you complete every other daedric quest.
Also, keep in mind that Daedric Quests are among few (if not the only ones) missions that actually require your character to be on a certain level before you can get them.
Location: 10s2;
Offering: Glow Dust;
Required level: 2;
Talk to Mels Maryon. Raise his disposition in order to make him talk. He'll tell you that you need some Glow Dust in order to summon Azura. That substance is left by dead creatures known as Will-o-the-Wisps. Those "sparks" can be found a little bit to the north. Wait until 6 a.m. and then present the gift to Azura. She'll tell you to go to the Gutted Mine.


You'll have to deal with 4 vampires here. They can be a problem, so watch out. There's a lot of silver around the mine, take time to get some if you need cash badly. When you return to Azura, you'll receive an artifact - Azura's Star, a kind of non-disposable Soul Gem.
Location: 9s9;
Offering: Daedra's Heart;
Required level: 20;
Haekwon will tell you to offer Daedra's Heart to the prince. The easiest way to get it is throughout the main plot, as it can be found by all Dremoras' bodies. If you've already finished the main quest, find a dungeon filled with daedric monsters (try Brittlerock cave, 1s29)
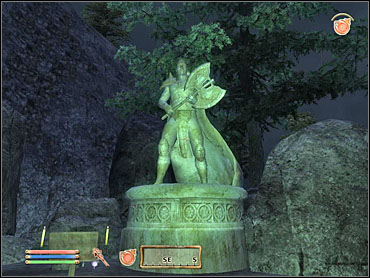
Boethia will offer you to take part in a tournament. When you're ready, step into the portal. Open your cage and go left or right - it doesn't really matter. Either way you have to go and defeat 9 enemies, each of another race. When you defeat them all and thus win the tournament, Boethia will open another portal for you. Talk to the statue once again, you'll get a nifty sword Goldbrand, dealing some Fire-based damage.
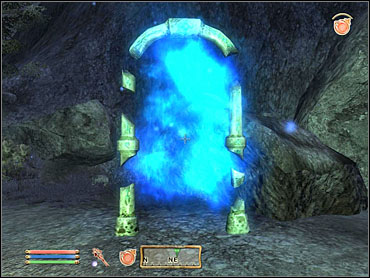
Location: 5s16;
Offering: 500 Gold;
Required level: 20;
Talk to Ma'Raska to know about the offering. Give 500 Gold to Clavicus. He wants you to retrieve a certain sword. Go to Pell's Gate, south of Imperial City. Once you're there, Barbas will talk to you - he's Clavicus' dog and servant. He tells you not to complete this quest. Ignore him for now.
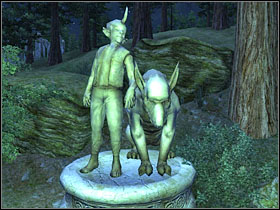
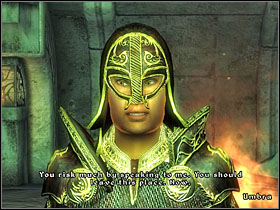
Go to Irroke the Wide's House and talk to Irroke. Use Speechcraft on him, and he'll tell you about Umbra - a sword that took control over his apprentice. Go to ruins of Vindasel.
Watch out for the trap on the floor in the first big room. Go towards the map marker to meet Umbra herself. She'll give you a choice: you can fight her or just leave. Leaving is not an option for a true gamer and you know that. When you defeat her, take her sword.
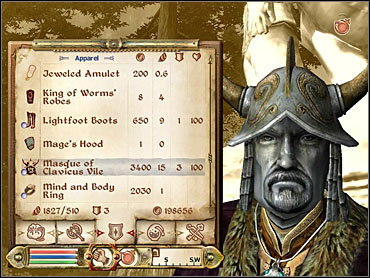
Go back to Clavicus' shrine. You can either give him the sword or tell him that you're keeping it to yourself. Do as you will. In the first case you'll be getting a Masque of Clavicus Vile, fortifying your Personality by 20 points.
Location: 5s8;
Offering: Bear Pelt;
Required level: 17;
Hircine's quest is, all in all, a unicorn hunt! Go to Harcane Grove, south of here.
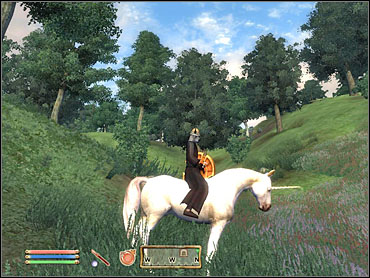 Yes, it's true, you CAN ride a unicorn in this game.
The mission is simple. Unicorn is surrounded by some minotaurs and trolls, and is no real threat itself. You can kill it and take its horn without any problem. The thing is, that you can actually ride it - and it's a fairly enjoyable thing to do. Take advantage of it, have some fun. Then kill it. Hey, it's a cruel world.
When you give the horn to Hircine, you'll get a unique light armor Saviour's Hide.
Location: 1s30;
Offering: Troll Fat;
Required level: 10;
Talk to Shobob gro-Rugdush. You have to raise his disposition a bit. He'll tell you that Malacath wants some Troll Fat as an offering. When you get it and give it to the statue, the prince will send you to Lord Drad's Manor.
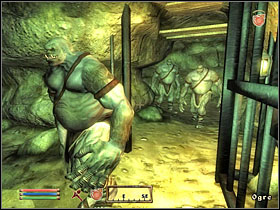
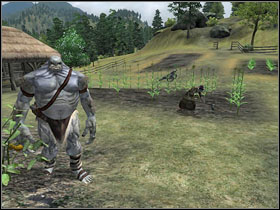
Talk to Drad about ogres working in his mine. Be nice to him ("I admire your efforts.") and he'll give you the mine's location. If you upset him, you'll have to talk to his wife. Either way, go to the new map marker.
Inside the mine you have to free two groups of ogres. The guards won't attack you until you start doing something suspicious. You can picklock the cages (Hard locks) or use the key, stolen (or taken) from any of the guards. When you free both groups, go back to Malacath. If you're interested in how the story ended, pay Drad another visit - he and his wife are now slaves to those ogres. Well, that what I call a U-turn.
Malacath will reward you with a warhammer Volendrung.
Location: 6s5;
Offering: Nightshade;
Required level: 15;
Dredena Hlavel will tell you that Mephala wants Nightshade as an offering. You can find some in The Main Ingredient in Imperial City Market District. Your quest seems complicated: you have to go to Bleaker's Way and turn two families who live there against each other.
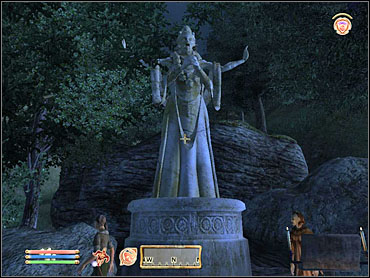
You have to kill two people: Nivan Dalvilu and Hrol Ulfgar. Go to the Hrol's house. There's a Ulfgar Family Ring on the table on the first floor. Go to Nivan Davilu's House to find a Davilu Ceremonial Dagger. Now you can kill the two men, planting the evidence that point the opposite families as murderers. Leave the ring by Nivan's body, and the dagger by Hrol's body.
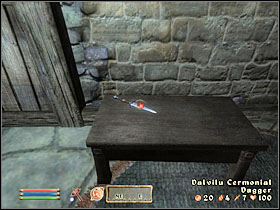
Inform any of the townspeople about the assassination. You'll witness a massacre, in which two families slay each other. Go back to Mephala to get your reward, Ebony Blade.
Location: 2s15;
Offering: either Ectoplasm, Mort Flesh, or Bonemeal;
Required level: 10;
This time the offering is quite easy to get, as it can be any substance that you get from the undead's bodies.
Meridia will tell you to go to Bowling Cave and get rid of necromancers that live there. The cave is not a big one. Your victims wait on the second level, Howling Cave Lower Galleries. They are not very powerful themselves, but are accompanied by numerous undead.
Once you're done with them, go back to Meridia to get Ring of Khajiiti, fortifying your speed by 10 and giving you constant, 35% invisibility.
Location: 2s43;
Offering: Lion Pelt;
Required level: 17;
Amir will tell you to give Molag one Lion Pelt as an offering.
Molag Bal has an interesting task for you. He wants you to force Melus Petilius to.. kill you. You have to make sure Melus kills you with the cursed mace Molag provides. Go to Brindle Home.
Talk to Tobal (he's likely to be fund home at night). Ask him about Melus - Speechcraft might prove useful. He'll tell you where your target lives. Melus leaves his house about 10 A.M. every day to pray at his wife's grave nearby. You have to attack him over there, as he won't pick up the fight anywhere else. Drop the Cursed Mace on the ground nearby and hit Melus. He'll get upset and attack you, picking up the mace. Don't fight him - just let him kill you.
You'll wake up by Molag's shrine and get a Mace of Molag Bal as a reward.
Location: 6s15;
Offering: your own ugliness;
Required level: 5;
Hjolfrodi the Harrier tell you that you are far too pretty to worship Namira. You now have to lower your Personality to about 20. Use some magic and alchemy to do so. Alcohol works pretty well, too - especially Cheap Wine, found in every inn around Cyrodiil.
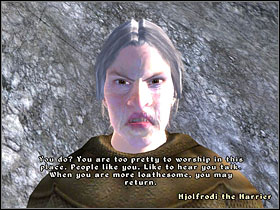
When you're as ugly as you can get, talk to Hjolfrodi again, and she'll let you speak to Namira. Daedric princess wants you go to the ruins of Anga. In there, you have to find four priests that try to help ruins' savage inhabitants. Cast Namira's Shround on each of them - that will take out their torches, the only thing that is keeping the locals from killing them. Afterwards, you can just watch as those savages deal with the priests the hard way. You don't have to engage in combat in any way.
Namira will give you a Ring of Namira (Reflect Damage 12% and Reflect Spell 10%).
Location: 7s24;
Offering: none;
Required level: 10;
Talk to Mor gra-Gamorn - this time you won't be making any offering, just approach the shrine and listen to what Nocturnal has to say. You have to find a missing artifact, that is supposedly somewhere in Leyawiin.
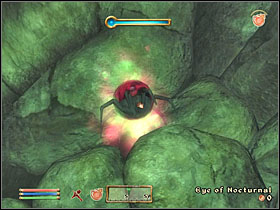
Go to Weebam-Na's house to question the owner and Bejeen about the Eye of Nocturnal. You'll have to eavesdrop a bit - leave, and enter again, but this time in Sneak. You'll overhear that the artifact is hidden in Tidewater Cave.
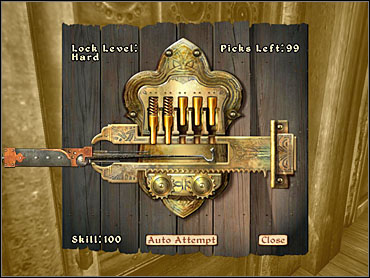 Skeleton Key - every thief's dream.
You'll find the item by following the map marker - you'll have to dive for it. When you get it back to Nocturnal, you'll get a great reward - an unbreakable lockpick Skeleton Key. No more "out of lockpicks" for you!
Location: 8s18;
Offering: none;
Required level: 10;
When you reach the Shrine of Peryite, you'll find his followers in a kind of weird trance. Approach the statue and touch it. Peryite wants to teleport you to Oblivion, where you'll have to find five of his followers' souls, trapped between worlds.
This task is very simple, but long as heck. Just follow the map markers to find the followers - the map is very big, so you'll be doing a lot of running. When you gather all 5, Peryite will open a portal for you. Talk to the statue again, and you'll get a powerful shield known as the Spell Breaker.
Location: 2s31;
Offering: Cyrodilic Brandy;
Required level: 8;
Engorm will tell you to bring a bottle of Cyrodilic Brandy as your offering. You can buy it in The Main Ingredient in Imperial City Market District.
Sanguine wants you to go to Leyawiin and spice up the countess' party by casting the spell Stark Reality on her guests. Go to Leyawiin Castle.
 Bow before the party-god.
Go to the locked door marked on your map. Wait until evening (about 7 P.M.), and a guard will appear in front of it. Talk to him - he'll let you in if you're dressed for the party (forget about armor, get yourself some finery). If he doesn't seem to cooperate, use Speechcraft to raise his disposition.
If Alesia Caro is not there, wait 24h and try again. When everyone's at the party, cast a spell on them and run for it. You'll probably be caught by one of the guards: either go to jail or try to run out of the castle resisting arrest. Notice that you actually lost all your equipment and are running around in you undies - don't panic, though. You'll get it back.
Go back to Sanguine's Shrine. You'll get a staff called Sanguine Rose. Your lost equipment is in the chest nearby.
Location: 7s28;
Offering: Lesser Soul Gem, Lettuce, Yarn
Required level: 2;
Sheogorath's followers are a bunch of weirdos. You have to get the prince a lesser soul gem, a lettuce, and some yarn. These can be found in various random locations, in all assortment of chests, barrels, shops etc. Once you have all three items, talk to Sheogorath - you have to go to Border Watch.
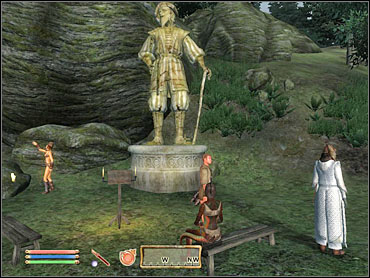
Talk to Ri'bassa. Your goal is to make their ancient prophecy of armageddon come true. The signs that they are looking forward to are invasion of rats and cattle disease.
Go to Border Watch Inn. Talk to the proprietor S'thasa about the Cheese. The one you want, a rare sample of Olroy Cheese, is on display near the entrance. Open the Display Case (or steal the key from S'thasa) and get Olroy Cheese from there.
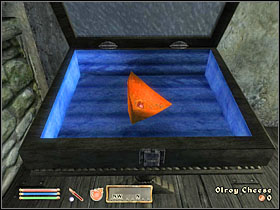 The Olroy Cheese.
 The Cooking Pot.
Use the Cooking Pot in the middle of the town - you'll automatically put cheese in there. Wait for an hour and the whole village will be crawling with rats. Ri'bassa will be dropping Rat Poison here and there to get rid of them. Take one sample and use it on the Feeding Trough near the sheep. Poor animals just have to die.
HINT: If you can't find the poison, you can just as well kill all the sheep the traditional way.
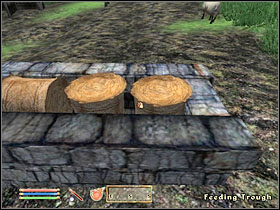
Sheogorath will speak to you. Go to the town square and fair for the final sign to come to pass. When the show ends, go back to the shrine. You'll get a funny staff called Wabbajack, which allows you to randomly morph one creature into another. You can use it to turn Liches into Rats, if you're lucky. If you're not, it might work just the other way round.
Location: 9s14;
Offering: Black Soul Gem
Required level: 5;
Talk to Aymar Douar. He'll tell you to get a Black Soul Gem for his master - an "evil" version of common soul gems, used by necromancers. How to get it? You've surely come across some of them already, if you're doing the Mages Guild. The easiest and quickest way to get one is to do the "Cheydinhal Recommendation" quest.
When you make the offering, Vaermina will speak to you. She wants you to find her lost jewel, stolen by a man named Arkved. His tower is south of the shrine.
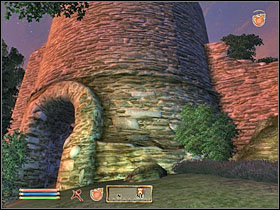
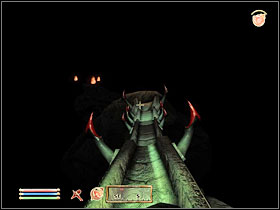
Enter and go forth. You'll eventually meet two monsters. Defeat them and enter Arkved's Void. Quite a nice place to live indeed. Follow the map marker and reach Arkved's Lost Halls, then Hall of Changes. In there, you'll find a trap door to Arkved's Rending Halls. Defeat all the monsters on your way and *finally* enter Arkved's private quarters.
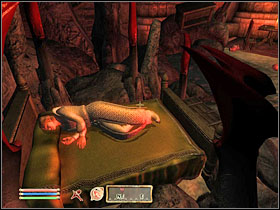
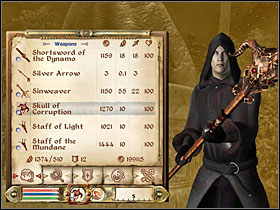
Don't expect any epic fight with the owner of all these insanities around. He's sleeping, trapped in some kind of magical coma. Take the jewel from a table and leave, using the door that lead directly back to the ground level.
Go back to Shrine of Vaermina to get your reward, a staff called Skull of Corruption.
Location: 3s18;
If your character is on at least level 20, you've performed all the daedric quests above, and you've beaten the "Blood of the Daedra" quest in the main plot, you'll be approached by Hermaeous Mora's servant next time you rest. This works identically as encounters with Lucien from the Dark Brotherhood or Gray Fox' messengers in Thieves Guild quests.
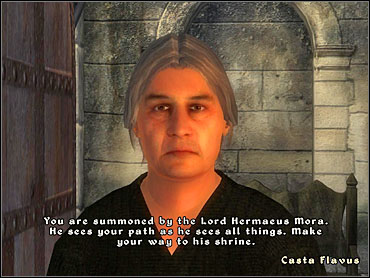
Hermaeous Mora wants you to pay a visit to his Shrine. Go there and talk to him. You have to gather 10 souls for him, one for each race inhabiting Cyrodiil. As I said in Dark Brotherhood's Introduction section, killing random people doesn't pay in Oblivion, as you might accidentally block your way to complete some quests.
The solution is very simple, though. You just have to visit other daedric shrines, killing the princes' followers. They've already player their role in the game and aren't meant to do anything else for you. Heck, you can even kill Hermaeous' followers as well. They are all unarmed, weak and don't defend each other, meaning you don't have to fight the whole group when you attack one of them.
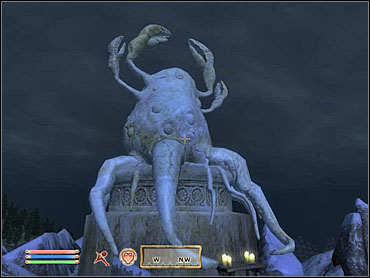 Hermaeous is the most grotesque of all princes, that's for sure.
You need to get yourself souls of: Altmer, Argonian, Bosmer, Breton, Dunmer, Imperial, Khajiit, Nord, Orc, and Redguard. The procedure of soul-gathering would be very simple indeed, if not for a certain glitch. Everything should work this way: you cast a spell called Mora's Soul Trap on somebody, then kill him within two minutes of the spell's durability. Unfortunately, some bug keeps the spell from working most of the time, which can cause some unnecessary problems.
In my case, the following trick did the thing. I was to cast a spell twice on another person (meaning not the one I wanted soul from), then cast it twice again, but this time on the right character - the second time there appeared a warning that the character is already under the spell. That meant that the trick worked, and I could now kill the person to get his or her soul. Let's hope this issue is fixed soon by some patch.
When you gather all 10 souls, get back to Hermaeous. He has something special for you: a book entitles Oghma Infinium. When you read it, you will be given a choice about which path you want to follow: Steel, Shadow, or Spirit.
Steel - increases you Blade, Heavy Armor and Blunt abilities;
Shadow - increases your Sneak, Security and Light Armor abilities;
Spirit - increases your Destruction, Conjuration and Restoration abilities.
They say that you can't be a hero without occasional lawbreaking. You'll surely perform a handful of illegal deeds throughout your adventures. Each time you are seen or caught, you'll get a fine.
Crime
Fine
Trespassing;
5 Gold;
Pickpocketing or stealing;
Value of stolen goods;
Assault;
40 Gold for each level of assaulted NPC;
Murder;
1000 Gold.
When you have a fine to pay and you are approached by a city guard, you'll be given a choice: go to jail, pay the fine or resist agrest. The last way is just stupid in most cases - save for when you intend to run. You don't stand a chance fighting city guards, they are several levels above you and great in numbers.
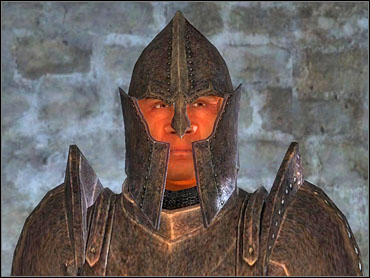
Paying the fine always seems the most reasonable choice. Each time you decide to do so, you'll be escorted to the castle courtyard (Imperial City Prison in Imperial City) and disposed of all stolen goods. If you want to avoid loosing them, just drop them on the ground when the guards approach you in the first place.
Going to jail and serving your time results in some random negative points to your skills. You have to serve 1 day for each 100 Gold of the fine, with 24 hours being the minimum serving length. There is a way to escape the prison. You have to possess a lockpick - if you don't have one on you (sometimes you can smuggle one in your inventory), try to steal it from the passing guard.
Escaping the prison is quite troublesome (fighting is not an option here, and you have to find a chest with your belongings) and it increases the fine we have to pay next time we're caught.
HINT: Thieves Guild members have two perks related with breaking the law. When you're with the thieves, you can sell stolen good to so called Fences, and you can pay your fines halved by talking to Armand or S'krivva. Check out our Thieves Guild section for details.
Vampirism is not as important in Oblivion as it was in Morrowind. To become a vampire, you have to contract Porphyric Hemophilia and don't cure it in any way (potions, prayers, magic) for 3 days. After that time, next time you sleep you will awake as a bloodthirsty child of the night.
Where to get the disease? There are two ways: contract it while fighting vampires (you can find them in various caves, for example) or get it from Dark Brotherhood's very own Vicente Valtieri, who offers to turn you into vampire once you complete a number of quests he has for you.
Vampirism has 4 stages, and what determines the stage you're in is how much time passed since your last feeding. To feed you just have to find someone sleeping, and activate him, choosing the "Feed" option. Each time you drink blood you are set back to the first stage of the disease, in which the symptoms are least visible. Each stage is activated after the next 24 hours.
The following table points out vampires' pros and cons in each stage of the disease.
Time passed since the last feeding
Less than 24 hours
One to two days
Two to three days
Four days and more
Pros
- +5 to Willpower, Strength, Speed, Athletics, Acrobatics, Destruction, Illusion, Hand-to-Hand, Mysticism, Sneak;
- 5% resist normal weapons;
- Hunter's Sight.
- additional +5 to all first stage skills;
- 10% resist normal weapons;
- Vampire's Seduction.
- additional +5 to all second stage skills;
- Reign of Terror.
- additional +5 to all third stage skills;
- Embrace of Shadows.
Cons
- 20% fire weakness
- 30% fire weakness
- sunlight damage, 1 hit point per second.
- 40% fire weakness
- sunlight damage, 4 hit points per second.
- 50% fire weakness
- sunlight damage, 8 hit points per second.
- most NPCs won't talk to you due to your appearance.
 The same character in the last stage of vampirism and completely free of the disease. You guess which is which.
Hunter's Sight - Night-Eye + Detect Life for 30 seconds;
Vampire' Seduction - once a day, +50 to NPC's disposition;
HINT: If you raise NPC's disposition to 100, he will talk to you even if you're in the last stage of vampirism.
Reign of Terror - once a day, Silence+Demoralize;
Embrace of Shadows - once a day, Night-Eye (90 seconds) + Invisibility (180 seconds)
HINT: There is a quest called "Vampire Cure" that allows you to get rid of the disease. See Miscellaneous quests -> Other section.
Horses are every traveller's friends, companions that can change long and troublesome journeys into quick and enjoyable rides. There are a various types of horses in the game, each having different stats.
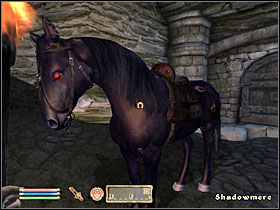
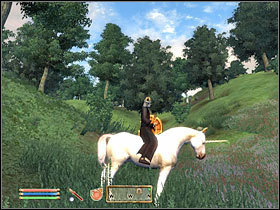
Name
Price
Where to get it?
Speed
Health
Bay Horse
1000
Ex. Bay Roan Stables (4s3);
26
250
Black Horse
5000
Ex. Black Waterside Stables (9s27);
33
325
Chestnut Horse
2500
Ex. North Country Stables (3s5);
29
200
Paint Horse
500
Ex. Wildeye Stables (6s25);
23
300
Prior Maborel's Horse
-
You get it for free after escorting Martin to Weynon Priory in the main plot;
23
300
Shadowmere
-
You get it for performing a Dark Brotherhood quest "Purification";
33
500
Unicorn
-
Encountered in a daedric quest "Hircine";
29
300
White Horse
4000
Ex. Horse Whisperer Stables (1s1);
29
400
You can buy a house in every city in Cyrodiil. You usually have to talk about it to the city Count - directly or through his or her butler. When you buy yourself a more or less decent home, it's time to furnish it. Each time you get a house you are told the name of a shop that sells furniture for it. All quests called "Buying a house in [city]" end when you buy all the available furniture elements.
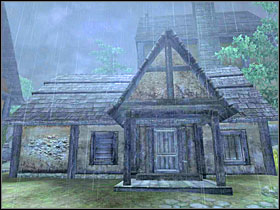
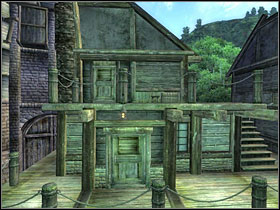
Person - NPC you have to talk to about buying the house;
Shop - the one that sells furniture in a given city;
City
Person
Shop
Price
Notes
Anvil
Velvyn Benirus (The Count's Arms);
-
5000;
See (1).
Bravil
Count Terentius (Castle Anvil);
The Fair Deal;
4000;
Bruma
Countess Carvain (Castle Bruma);
Novaroma;
10000;
Cheydinhal
Count Indarys (Castle Cheydinhal);
Borba's Goods and Stores;
15000;
Chorrol
Countess Volga (Castle Chorrol);
Northern Goods and Trade;
20000;
Imperial City
Vinicia Melissaeia (Office of Imperial Commerce, Market District);
Three Brothers Trade Goods;
2000;
Leyawiin
Count Caro (Castle Leyawiin);
Best Goods and Guarantees;
7000;
Skingrad
Shum gro-Yarug (Castle Skingrad);
Colovian Traders;
25000;
See (2).
(1) - The Anvil house quest is called "Where Spirits have Lease" and is described in detail in out Miscellaneous section.
(2) - Skingrad Manor is connected to two small side-quests. One of them is to hire a servant (Eyja in Colovian Traders will offer her service to you once you buy a Servant's Quarters to your house), and the second one - finding a hidden treasure. In your bedroom upstairs you'll find a letter that triggers the quest. In order to get it, you have to jump to the place seen on the left screenshot below (you might have to buy bedroom furniture before). The treasure is in the basement, hidden in an hourglass. Its jammed in the column - see the right screenshot below. There are a few jewels in there, plus a nice ring for a sneaky character - Ring of the Gray.
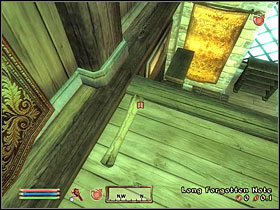 Letter in the bedroom.
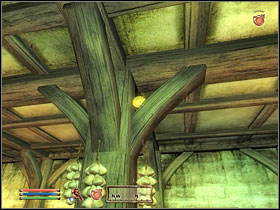 Hourglass in the cellar.
Oblivion Character Levelling Guide
Submitted by: Wolfspirit
A guide to a Godlike, hmmm, perhaps Daedra Lord alike character.
First of all, it's important to understand the complete levelling process.
To level up, you must have a combination of 10 skill increases across your primary skills. At that level up, you get to increase your stats in a range of +1 to +5. In order to get +5, you need to get 10 increases in the 3 skills associated with the relevant stat at the point of level up.
Also, as you can only increase 3 of the 8 stats at level up, there is no point in training skills that produce increases above 1 for more than 3 of the stats.
The stats and their associated skill are :
Strength - Blade, Blunt & Hand to hand.
Intelligence - Conjuration, Mysticism & Alchemy.
Willpower - Destruction, Alteration & Restoration.
Agility - Security, Sneak & Marksman.
Speed - Light Armour, Acrobatics & Athletics.
Endurance - Armourer, Block & Heavy Armour.
Personality - Speechcraft, Mercantile & Illusion.
Luck - no skills.
So, in order to maintain any level of control over the levelling process, we have to decide which of the skills we have control over, or more importantly, which ones we don't have control over. Secondly, as our Endurance stat governs the amount of hit points we have and will end up with, it's necessary to increase this stat to 100 a.s.a.p. to get as many hit points as possible.
Our first stat for increase to 100 must be Endurance.
So which skills do we not have control over. Well, if you do not wish to walk everywhere, which is very tedious, then the alternative of running automatically increases Athletics. There are going to be times when you have to use jump in dungeons etc which increases Acrobatics. We must heal ourselves which means increases in Restoration. Also, either of the armour skills, light or heavy. We must have a way to kill stuff, so either destruction or one of the strength skills. Mercantile to some extent, but this can be kept to a minimum and it doesn't overly affect the ability to increase personality towards the end of the process.
From the above, the most difficult skills to control are Athletics, Acrobatics and Restoration. None of these can be primary skills as they are far too unwieldy. As they will be secondary stats, they will be contributing to the +5 for Speed and Willpower, combine this with our need to increase Endurance and we have our first 3 skill sets to increase. This means that we will be using destruction to kill everything to start with as it is a Willpower based skill.
To have control over the process, I found that it was necessary to have ONE of each of the 7 stat based skills as primary skills. So which?
To start with, Athletics and Acrobatics cannot be primary skills, so our first primary skill is Light Armour. Restoration cannot be a primary skill, Alteration is eminently controllable, but as Destruction only increases when you do damage, I decided to make Destruction the primary skill for Willpower so it's easier to increase it towards the end of the game. Finally Endurance, as we have Light Armour in the primary skills, we cannot have Heavy there as well, as this will allow us to change armour sets and control the level up. Block can be used a lot to fire low power destruction spells quickly, the more you use a skill the faster it raises. So the Endurance primary skill is Armourer.
So we have:
Armourer, Destruction and Light Armour.
For strength, just choose whichever you like, I went for Blades for Goldbrand and Umbra.
For Intelligence, I went for Mysticism. The reason for this is that Conjuration will be the intelligence increasing skill and you don't want it being limited by primary skill level up. Also, Alchemy can be used for creating gold, but its best to save the early levels if you can.
For Agility, I went for Sneak, mainly because the other 2 are a real pain to increase. By using the run into a wall in a trespassing zone, i.e. Rufio at the Inn of Ill Omen or the buxom farm girl at Whitmond Farm just outside Anvil, sneak is easy to increase and control.
For Personality, I went for Illusion, as again the other 2 are tedious to increase through normal game play or intensive training.
So our primary skills are:
Armourer, Destruction and Light Armour, Blade, Sneak, Illusion and Mysticism. So create a custom Class and chose these skills. As a matter of interest, I chose a Breton for race, mainly for extra magicka and spell resist. For birthsign, The Mage for extra magicka.
I also chose mage skills to increase these skills quicker and start them slightly higher. In order to maximize hit points, its best to start with Endurance at 55, but that means using a different race.
I'm sure there are other ways to create the primary skill list, but this seemed to me to be the optimum way to produce the best results in the shortest time.
So to training.
The first thing to do is keep a record of your skills, so you know when the combination of each 3 skills has combined to produce an increase of 10 for each stat. Remember, we need 30 skill increases per level up for Willpower, Speed and Endurance. As an example, it doesn't matter if you have (2 Light Armour(primary skill), 5 athletics, 3 acrobatics for Speed), (5 Destruction(primary skill), 2 Restoration, 3 Alteration for Willpower) and (3 Armourer(primary skill), 4 Block and 3 Heavy Armour) or any combination of those as long as each stat gets 10 increases, no more no less and that the 3 primary skills also add up to 10 which creates the level up. Note that you have to take the final increase in 1 of the primary skills which adds up to 30 for all skills and makes the primary stats add up to 10 at the same time.
Remember that Athletics and Acrobatics will increase very fast to start with, so don't overdo it and get more than 10 increases. Remember that if any stat has more than 10 increases across all 3 skills at level up your just making it harder for yourself later on as skills get progressively harder to increase. So it's best to fast travel to Weynon Priory, then double back down the road to the Imperial City and find Fort Ash. Fort Ash is your friend, there is a rat to the left of the first T junction and this is ideal for block, both the armours, I wore a combination of light and heavy to start with, and restoration. Another more interesting and somewhat productive way to increase athletics and acrobatics is to start on the Nirnroot quest, this a reasonably safe scenario as most of the time you will only be fighting mud crabs as Nirnroot only grows next to water, its best to just dispatch the mud crabs with destruction as they hurt at low levels. The area around Leyawiin is the capital of Nirnroot growth. Also, when you see rock formation near the shoreline, always spin around and check around the rocks, as Nirnroot love to grow in crevices etc next to the rocks.
This combination gives you access to the first 3 skill stats and only those. Continue to increase by whatever means, I did the regional mage quests etc. Just try to limit any use of any skill other than the first 3 stat based skill sets or you just make it harder later. Once athletics and acrobatics start to increase a bit, it's easier to use a skill trainer for 1 or both of these. You can also use castle Skingrad for Acrobatics, just run up the stairs and leap over the banister, when you take fall damage, acrobatics increases quickly.
So once you have 10 combined skill points for 2 of the stats, go ahead and increase a primary skill in the 3rd group that makes 10 skill points for that stat as well as combining to make 10 primary skill increases, this means that if you have done it perfectly, then you will be increasing either Destruction, Armourer or Light Armour by 1 which also gives 10 for that skill set you just increased and these 3 skills (Destruction, Armourer or Light Armour) also add up to 10 at the same time which levels you. Now rest and take your +5's for Willpower, Speed and Endurance. Now make a note of your new skill numbers and increase all 3 sets by 10 again. Continue to rinse and repeat.
If you started as a Breton and chose Willpower as a primary stat, then by level 9 Willpower will be at 100.
Remember that you can now use Restoration and Alteration to your heart's content without having to keep an eye on their numbers, but be aware that Destruction contributes to level up still.
At this point I started to work on Strength. Mainly because you are starting to see better items dropping from mobs and you want to carry these back to the shops for cash. Also, Blade, Blunt and Hand to Hand works nicely with the endurance skill set and you can increase both easily. By this time, Athletics and Acrobatics are becoming a real pain to increase, so NPC skill train them and increase light armour to pick up any balance. Rinse and repeat till endurance and speed hit 100.
Now it starts to gets easy, start working on Intelligence and Agility in combination with Strength. Only use conjuration to increase intelligence to start with and go all the way to 100 in blocks of 10 per level by spamming spells. Use marksman to start with for Agility, once it starts to rise a bit, NPC skill train marksman with Pinarus Inventius in Anvil and use the running into a wall method to increase sneak. Pick up Security as and when. As soon as I got lvl 10, I did Nocturnes quest for the security key. Strength will max out next. Once this does, start working on Personality with Agility and Intelligence, use speechcraft on any NPC, just click the quadrants as quickly as possible, don't worry about what happens to the disposition, just increase speechcraft to the desired level in combination with illusion and mercantile in blocks of 10. You can sort the NPC's disposition out later if you need to.
Continue with this until all stats are at 100.
Once all are at 100, start increasing your primary skills to 100 if they are not there already, train any of the secondary skills at a skill trainer, restoration and mercantile are good ones to get to 100, never train a primary skills at an NPC skill trainer as it's a waste of resources. As a Breton, I did the primary quest up to Baurus' excursion into the sewers to join the Mythic Dawn fairly early after completing all stats to 100 because Manco Cameron's son drop a mundane ring with 50 magic resist. With 100 resist, you are completely immune to all magical effects including those from staves. I also went from Oblivion gate to Oblivion gate to get Transcendant Stones with fortify 50 magicka using the save game, check the stone, continue or reload as required.
With this method, I finished up with the following character:
Race : Breton
Birthsign : The Mage
Class : Whatever you want to call your custom class.
Level : 51
Health : 665 (blue number, no artificial increases)
Magicka : 524 (green number, 4 enhanced armour items with fortify 50 magicka from transcendent stones) Also using daedric boots with 105 feather and the Escutcheon of Chorrol, so could add another 100 magicka if I wanted to replace these 2 with fortify magicka items.
Fatigue : 450 (blue number, no artificial increases)
Resist Magic 100%
Reflect Damage 47%
Strength : 120 - green
Intelligence : 112 - green
Willpower : 118 - green
Agility : 102 - green
Speed : 100 - blue
Endurance : 110 - green
Personality : 98 - red (scales of pitiless justice)
Luck : 76 - blue
Armourer : 100
Blade : 105
Destruction : 110
Illusion : 100
Mysticism : 100
Light Armour : 100
Sneak : 100
Obviously a lot of these secondary skills can still be increased, but with every quest complete and the ability to take out the entire imperial legion in the imperial city in 1 game day at 75% on the difficulty slider, I think I will leave them for the expansion. I had as many as 15 imperial guards attacking me at any time during the test, the most important thing is to make the archers change to melee, or you are hardly ever on your feet!
Athletics : 63
Block : 71
Blunt : 55
Hand to hand : 60
Heavy Armour : 100
Alchemy : 33
Alteration : 100
Conjuration : 110
Restoration : 110
Acrobatics : 74
Marksman : 73
Mercantile : 100
Security : 76
Speechcraft : 36
These figures do not include being a Vampire and were achieved without using any cheats whatsoever.
Anyway, hope you find this of some use. It certainly makes for some seriously heated battles with large numbers of mobs which is a lot of fun :)

1 Door to Cyrodiil
19 Fetid Grove
37 Deepwallow
2 Gardens of Flash and Bone
20 Split
38 The Howling Halls
3 Passwall
21 Puddlejump Camp
39 Flooded Camp
4 Xeddefen
22 Knifepoint Hollow
40 Hill of Suicides
5 Hardscrabble Camp
23 Camp Hopeful
41 Knotty Bramsle
6 Blackroot Lair
24 Dunroot Burow
42 Xavara
7 Xaselm
25 Cann
43 Fellmoor
8 Xaselm Secret Entrance
26 Brellach
44 Blood Island Camp
9 Longtooth Camp
27 Highcross
45 Swampgas Hole
10 Knotbone Chamber
28 Frenzied Camp
46 Inlet Camp
11 Aichan
29 Ebrocca
47 Rotten Den
12 Wretched Camp
30 Breakneck Camp
48 Xedilian
13 Dire Warren
31 Fain
49 Backwash Camp
14 Camp Talltrees
32 Bliss
50 Vitharn
15 Cylarne
33 New Sheoth Palace
51 Xiditte
16 Hale
34 Crucible
52 Lost Time Camp
17 Milchar
35 New Sheoth Graveyard
53 Corpserot Passage
18 Dreamwalk Camp
36 Runoff Camp
54 Pinnacle Rock
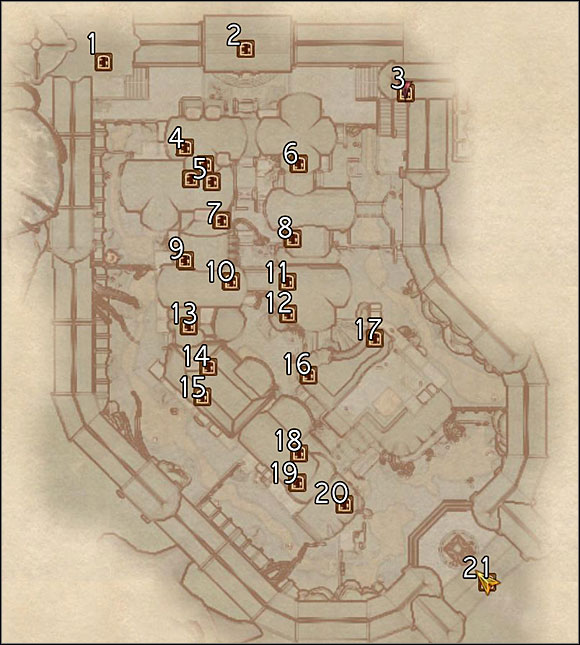
1 Sacellum Arden-Sul
12 Muurine's House
2 Bliss
13 Things Found
3 Palace Grounds
14 Ma'zaddha's House
4 Cutter's Weapons
15 Ma'zaddha's House
5 Museum of Oddities
16 Sickly Bernice's Taphouse
6 Ushnar gro-Shadborgob's House
17 Sickly Bernice's Taphouse Guest Rooms
7 Earil's Mysteries
18 Hirrus Clutumnus' House
8 Caldana Monrius' House
19 Brithaur's House
9 Earil's Mysteries Upper Floor
20 Brithaur's House
10 Things Found Upper Floor
21 Dementia
11 Muurine's House Upstairs
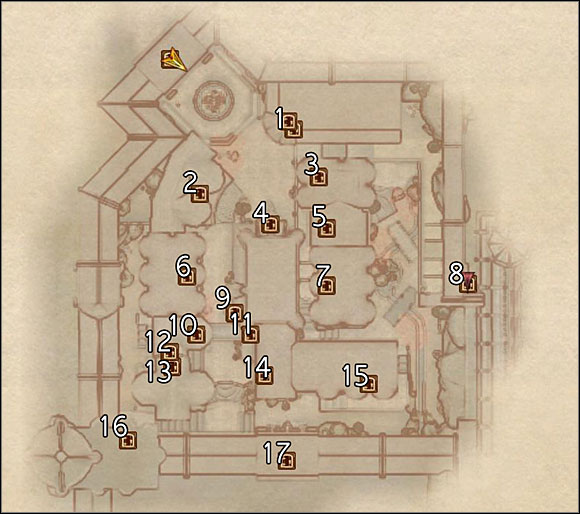
1 The Choosy Beggar
10 Orinthal's House
2 Common Treasures
11 Books of Bliss
3 Rendil Drarara's House Upstairs
12 Orinthal's House
4 The Missing Pauldron
13 Thaedil's House
5 Rendil Drarara's House
14 Books of Bliss
6 Amiable Fanriene's House
15 Tove the Unrestful's House
7 Big Head's House
16 Sacellum Arden-Sul
8 Palace Grounds
17 Crucible
9 The Missing Pauldron
Reach the spot shown on the screenshot below to find a new island in the middle of Niben Bay. In there, you'll see a portal that leads to Sheogorath's domain. Talk to Gaius Prentus and help him defeat an aggressive Dunmer. In a few seconds you'll hear the Prince of Madness calling to you. Nothing to do but to go through the portal.
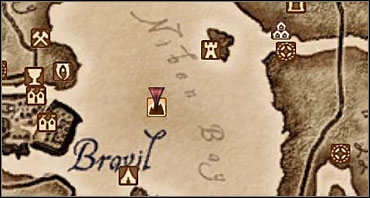 The red arrow marks the portal's location.
You'll find yourself in a modest room, where you'll be greeted by the prince's most loyal servant, Haskill. Sit in front of him and talk to him twice, agreeing to enter this daedric plane.

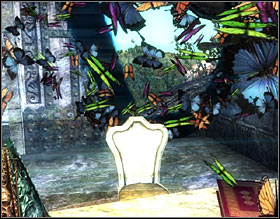
You're now in an area known as The Fringe. Go to a local village called Passwall to talk to Felas and Shelden. Follow them and you'll see the Guardian taking care of some adventurers. As you might have guessed, your task will be to eliminate this monster. Talk to both men once more and you'll be told that Jayred Ice-Veins is actually planning to assassinate the Guardian. Find him somewhere in the area and offer your help. He'll lead you to the Gardens of Flesh and Bone. Open the gate using the lockpick and talk Jayred defeat the Shambles.

When it's all over, Jayred will tell you that he's going to prepare some custom arrows for you and they'll be ready in a few hours.
Enter the inn (Wastrel's Purse) and talk to Relmyna Verenim. She'll tell you to go bother Nanette Don. Find her and ask her about the Gatekeeper - some Speechcraft will be in order. It'll turn out that Relmyna visits the monster around midnight every single day. Wait until 12 am and follow the dark elf sorceress on her trip. After a short scene, pick up the tissue she dropped. You can use the tears that it was soaked with to poison your weapon.
Go back to Jayred's place and tell him that you're ready. You'll both go and fight the Gatekeeper. You'll get 20 Bonekeeper Bone Arrows from Jayred, use them to deal some extra damage. Don't forget about Relmyna's tears! When you bring the beast down, take the keys from its body and talk to Haskill who's shown himself to congratulate you. It doesn't matter which gate you choose now, you can travel between Mania and Dementia freely at all times. The only difference is the spell you get when crossing the gate: Blessing of Mania or Blessing of Dementia.
To keep up with the main quest of Shivering Isles, go through the whole island all the way to New Sheoth, and then reach the palace (SI33).
When you finally meet Sheogorath in person, he'll send you on a quest to restore Xedilian to its former glory as a prison for troublesome adventurers. Talk to Haskill once more to get further instructions.
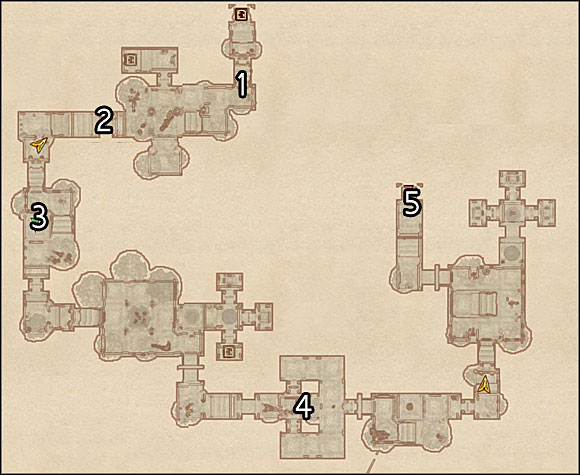 Xedilian
Use the button to the right of the door (1). Defeat the Grummites and push another button to go even further. Just after the gate, use the third button (2). Near the Judgement Nexus (3) defeat a Grummite Shaman Torturer, then grab his staff and activate the mechanism. Go further to reach a statue with a button on it - push it.
In the next room defeat some more Grummites and grab another Shaman's staff. Activate the second Nexus (4) and go to Halls of Judgement (5).
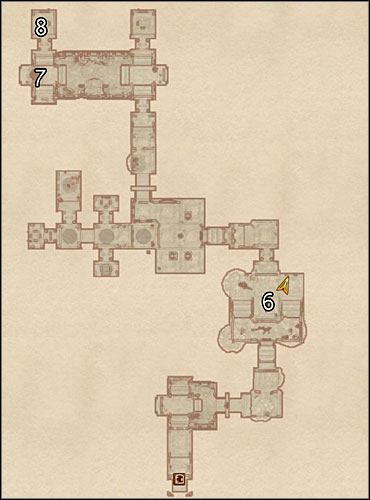 Halls of Judgement
Find the final Shaman and activate the last Nexus (6). A door will open, it will lead you to the Resonator. Defeat all the enemies on you way and switch on the mechanism (7). Use the teleport to the right (8).
You'll meet Kiliban Nyrandil, a local caretaker. He'll explain to you that you are to deal with some adventurers that entered the dungeon. There are three rooms before you: in each one you have to make a decision whether to activate a deadly trap or try to drive the prisoners crazy by using some more gruesome techniques. Kiliban will explain everything at each step. Your choices don't really matter as for the quest's outcome, so just have fun.
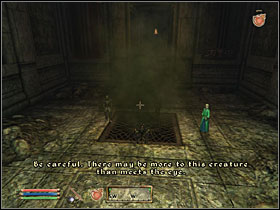
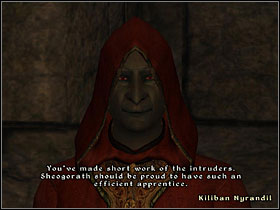
When you eliminate all three adventurers, talk to Kiliban once more. You'll get a cool sword - Duskfang (or Dawnfang). Each time you kill 10 enemies with it, it gets stronger, but unfortunately is reset every 12 hours.
When you try to leave the dungeon, you'll be attacked by Knights of Order. Defeat them and ask Kiliban about the situation. Go back to Sheogorath's palace.
When you're back, the Prince of Madness will order you to get acquainted with the dukes of Mania and Dementia. First, pay a visit to Lady Syl, who resides during day hours in nearby House of Dementia. She'll tell you to take Herdir with you and investigate the matter of a conspiracy among the servants.
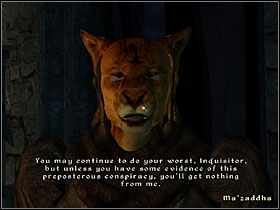
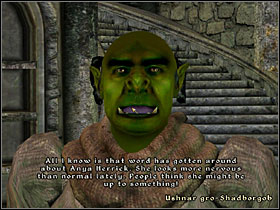
Go to Crucible and ask some random NPCs about the conspiracy. You can tell Herdir to torture the interrogates if you feel like it. In my case it was Ushnar gro-Shadborgob who told me that I should talk to Anya Herrick. Find and interrogate her, asking Herdir to do some of his magic on her. She'll point you towards Ma'zaddha. The Khajiit won't be too keen on telling you anything, even if you torture him. Ask around the town about him (try Sickly Bernice) and you'll know that he's been secretly meeting one of the city guards during late night hours. Spy on one of these meetings (use the map markers to know where to go) and tell Ma'zaddha that you've heard everything. He'll agree to help you. One day later, you'll find him dead in his house. Search the body, go upstairs and look in one of the cupboards. You'll find Nelrene's sword and a letter.
Go to Nelrene and she'll confess that she's been working under orders from Muurine. Pay a visit to the old lady and she'll confess as well. Go back to Lady Syl and have the honor of watching Muurine get killed in the torture chamber.
Time has come to finally meet Thadon, ruler of Mania. His quest for you will be to retrieve a Chalice of Reversal. Talk to Wide-Eye, his argonian assistant. She'll tell you that the chalice can be found in Dunroot Burrow. Also, you'll know that in order to get inside, you'll have to eat some Felldew.
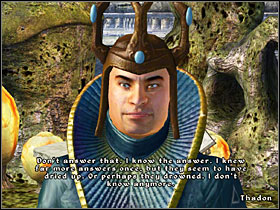
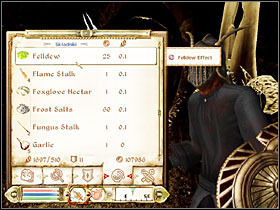
When you're at the spot, defeat an Elytra Hatchling and take Felldew from its body. Consume it and you'll be able to get inside the cave. The dungeon itself is very large, it has no less than 5 levels. You are temporarily addicted to Felldew, and if you don't eat new portions regularly, some of your stats will be lowered. You can tell that Elytra is holding some Felldew by the green glow around it.
On the last level of the dungeon you'll find some Felldew addicts. The chalice will be somewhere around their hangout. Leave this place using a shortcut, then go back to Thadon.
Sheogorath wants you to light the great torch in favor of Mania or Dementia. Head for Cylarne. Talk to both sides of the conflict there: Dark Seducers (Dementia guards) and Golden Saints (Mania). The former reside outside the ruins, the latter dwell deep inside. You have to choose which side to support. You can scout the area for the Aureals (Mania), or lead them into a trap as told by the Mazken (Dementia). Do as you will, their forces are quite balanced so anyway you are the one who will make a difference here. When the battle is over, watch the victors' leader to sacrifice her life to extract the holy flame. Go outside and step into the fire marked on your map.
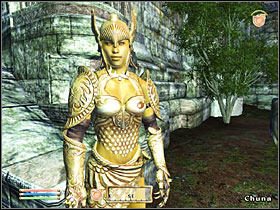
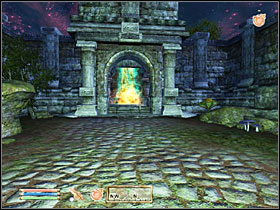
When you're back to New Sheoth, go to Sacellum Arden-Sul and talk to the priests in there. You have to choose which side you want to support. Your choice determines the reward that you get (a set of clothes).
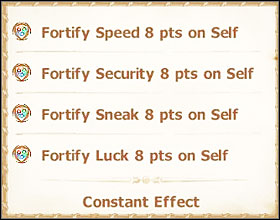 If you support Dementia.
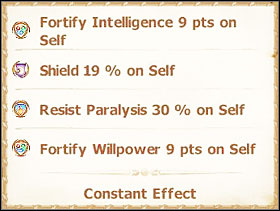 If you support Mania.
Sheogorath orders you to take place of one of the dukes. You now have to make your choice - it will somehow affect the rest of the main quest, but the differences between the quests that follow are actually quite vague. Talk to both priests to know what's the ritual you have to perform, and then tell the Prince what you've decided.
The Ritual of Mania sees you assassinating the duke by making him overdose a drug known as Greenmote. Go to Thadon's court and talk to Wide-Eye. Raise her disposition if you have to, and she'll share some secrets with you. First, every day around noon she has runs a special errand for the duke. Wait until 12 pm and follow her all the way to a secret Geenmote Silo.
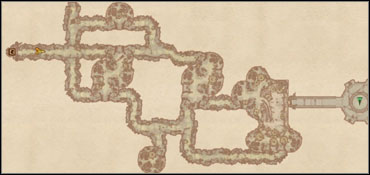 Greenmote Silo
You have to sneak to the silo on the right side of the map. If you are spotted, you'll be thrown out and have to try again. Watch out for the guards and for Wide-Eye herself. When you reach the storage room, grab two units of Greenmote and take your leave.
Wait until around 6 pm and sneak towards your map marker - you are to add Greenmote to the duke's dinner and wine. Obviously you can't get caught this time either.
When you finally succeed in poisoning the duke's dinner, visit him around 8 pm, when he's having the meal with his subordinates. Once he's dead, touch his body to get some blood. You might also want to grab his crown, as it's quite a cool item.
Go back to the temple and touch the altar to complete the ritual.
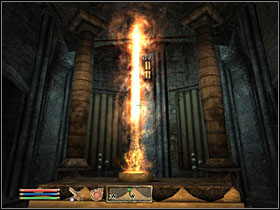
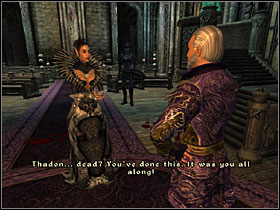
To become the duke of Dementia, you have to kill Lady Syl. Go to House of Dementia and talk to both Anya Herrick and Kithlan. Raise their disposition if they don't want to help you.
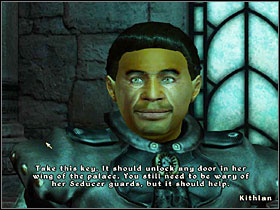
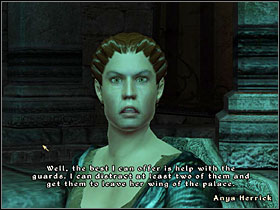
Anya agrees to distract some of the guards, and Kithlan gives you a key that opens all the doors around House of Dementia. Follow the map marker to find Syl's bedroom. Once you're there it turns out the duchess has escaped. Go back to the garden and touch the statue to the right of the bedroom door, to reveal an entrance.
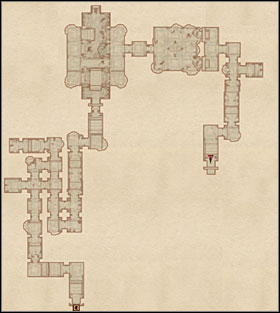 Xirethard
First level of Xirethard isn't anything out of ordinary. Watch out for fireball-throwing traps along the walls. Later on, you'll have to battle some royal guards.
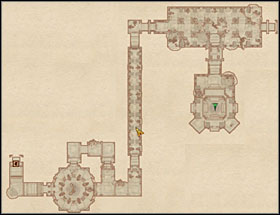 Xirethard Depths
In the first room of Xirethard Depths, find a switch on one of the pillars to reveal a secret passage (screenshot below). Thanks to it, you can go around the blocked door. Reach the map marker - here is where you fight Syl. When you defeat her, grab her heart and her hammer. Go back to the temple to complete the ritual.

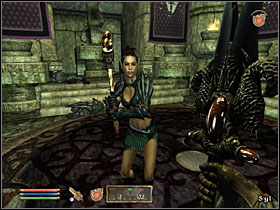
After a long scene it'll turn out that Thadon is betraying Sheogorath and joining the enemy. Your next task is to retake The Fringe.
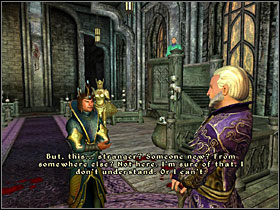
Go to The Fringe. Around Passwall you'll see a unit of your guardians (Mazkens or Aureals, depending on your duke title). Talk to their leader and help them defeat the attackers. When she asks you whether you'd like to lead the defense yourself, just let her take care of that.
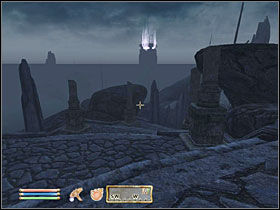
After defeating three waves of Knights of Order, you'll be sent on a quest to the nearby ruins of Xeddefen. Defeat the knights guarding the entrance and go inside, following the map marker. The very-hard door that you encounter can be opened with a key held by a nearby Priest of Order.
Xeddefen
When you're on the lower level, you'll see Shelden - self-proclaimed mayor of Passwall. He'll ask you to escort him out of here. It doesn't matter if you agree, you don't get any reward for helping him anyway. A little bit ahead you'll see an Obelisk. In order to destroy it, you have to place 3 Hearts of Order in it. They can be obtained from dead Knights of Order. When you overload the obelisk, the place will start to collapse. Keep you chin up and look at the ceiling at all times. Don't run around blindly, but be careful not to get crushed by the falling rocks.
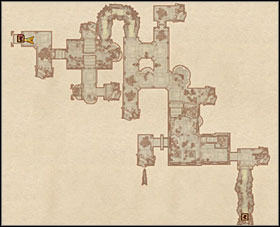 Xeddefen Felles
Talk to the guards' leader once more, then go back to Sheogorath. It's time to rebuild the Gatekeeeper.
After talking to Sheogorath, find Relmyna in the ruins of Xaselm. She's on the third level of this dungeon, deep inside her laboratory called Sanctum of Vivisection. After a short conversation she gives you the list of ingredients she needs to create a new Gatekeeper.
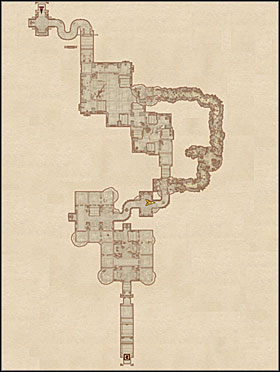 Xaselm
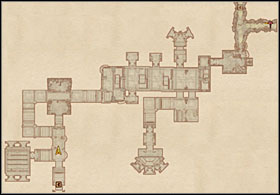 Xaselm, Experiment Chambers
In order to get the ingredients, go to the Gardens of Flash and Bone - the dungeon that you've already passed by, at the very beginning.
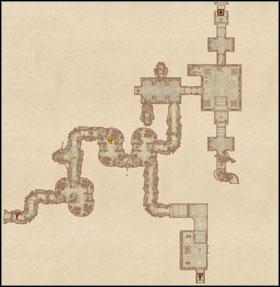 Gardens of Flesh and Bone
First two plants can be found in Conservatorium Corpusculum.
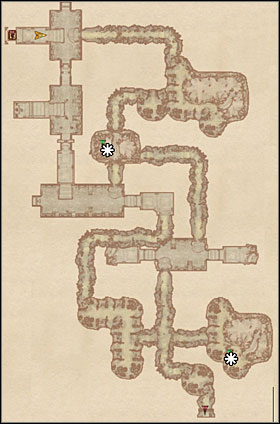 Conservatorium Corpusculum
The third ingredient, Essence of Breath, is in Caverns of Resurration. This level is quite a labyrinth, so watch your step and try not to get confused.
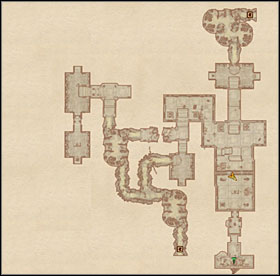 Caverns of ResurrationNotatorium of Wound Bled Tears
The final plant is in Notatorium of Wound Bled Tears. When you have them all, go back to Relmyna. She orders you to choose the Gatekeeper's body parts - go towards the map markers and make your choices there, selecting the head, hands, torso, legs, and heart that you like best. Tell Relmyna that you're done and she'll tell you to meet her by the Gates of Madness.
HINT: You can ask Relmyna about her victims and convince her to stop tormenting them. If you agree to take their place, next time you talk to her she'll give you Manacles of Pain.
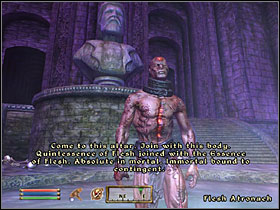
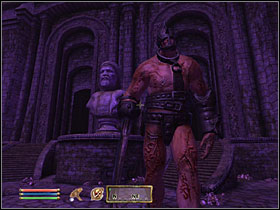
Go towards the map marker and see through the ritual, throwing ingredients into the pool when asked to. When it's over, you'll get a Summon Flesh Atronach spell. You can now go back to the palace.
Your conversation with the Prince of Madness will be interrupted by one of the guards who enters the room and tells you that a guardian stronghold is under attack. If you're Duke of Mania, you'll have to help the Mazken in Pinnacle Rock. If you're the ruler of Dementia, it'll be Aureals in Brellach.
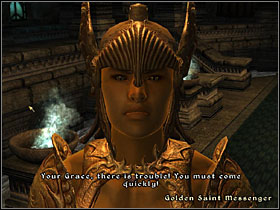

HINT: This quest is virtually identical in both Pinnacle Rock and Brellach: even the dungeon maps are the same.
When you're at the spot, talk to the remaining guardians' leader. Tell her that you're ready to attack.
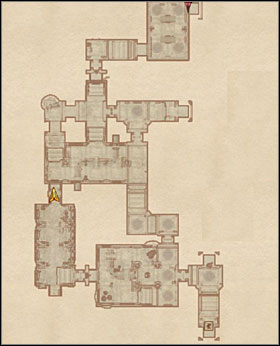 Hall of Honor
When you're in Hall of Reverence, you can open the gate that's blocking your way (1) using the button upstairs (2). Use the chime (3) to crush the crystals that form the guardian leader's prison (4). Talk to her and together go to the next level (5).
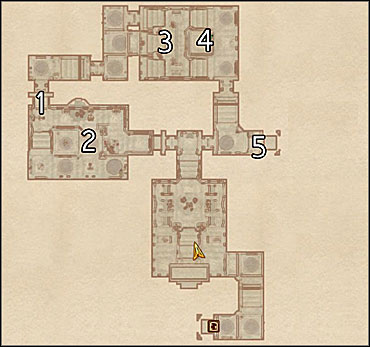 Hall of Reverence
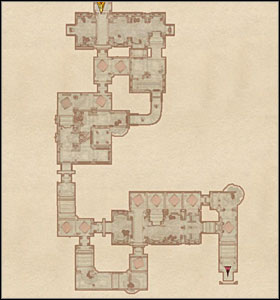 Hall of Devotion
At the beginning of the next level, all your companions will suddenly die and you'll be left alone. Use another chime to open the door. When you're in the big room in Font of Rebirth, use the four chimes in all corners of the room (*) to destroy the crystal in the middle and restore the guardians' lives. Their leader will gratefully give you a summon Mazken/Aureal spell (the one you don't already have). Go back to the palace.
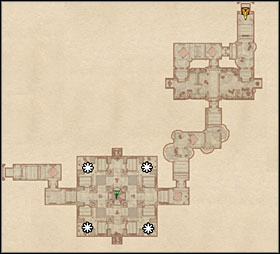 Font of Rebirth
After a short speech, Sheogorath will finally change into Jyggalag and disappear. From now on, Haskill will be your guide. You are to obtain the Staff of Sheogorath. The one used by the original Prince of Madness has been destroyed, so the only way for you is to forge a new one. Haskill tells you to go to Knifepoint Hollow.
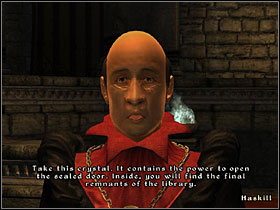
Follow the map marker to open the enchanted door and meet a fella named Dyus - he's Sheogorath's prisoner and an ancient scholar. He tells you that you need to find two items to form a new Staff. First, let's take care of Ciirta's Eye.
Go to Howling Halls. On the first level you'll be attacked by some Apostles. Defeat them and be sure to grab their ceremonial daggers. When you're down to the second level, you'll meet a Khajiit named Ra'kheran. He'll give you a deal: you provide him three daggers and he kills Ciirta. Fair trade - if you don't have the daggers, you can try and find some around this level as well.
Once you seal the deal, follow Ra'kheran into Ciirta's private chambers and watch him and his companions take care of her. When she's dead, take her eye from her.
HINT: This quest can obviously be completed without any deal with Ra'kheran - should you prefer to just kill everyone in sight (or sneak past them, whatever).
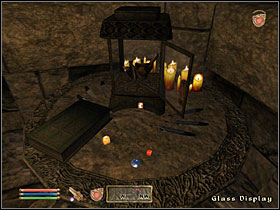
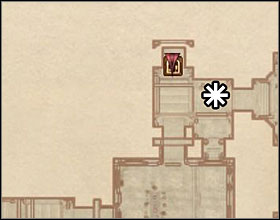
HINT: On the screenshots above you can see the location of Pelvis of Pelagius, one of the items that you can donate to Museum of Oddities.
The second artifact you have to retrieve is a branch of some ancient tree. Go to Milchar and follow the map marker to reach a pond with an enchanted stone in it. When you touch it, you clone will spawn and attack you. He might be difficult, as he's got all your skill, spells etc. When you're done with him, take his weapon (Shadowrend) and touch the stone once more. You can now take the branch.
Go back to Duys' room, and he'll create the Staff for you. To activate its full power, you need to return to the palace and soak it into the stream that's flowing there.
When you're back, Haskill will tell you that your enemies cut off the stream and you cannot complete your staff. You have to go down there and take care of the enemy priests that taint the water. The entrance is on the backside of a giant tree growing behind the throne.
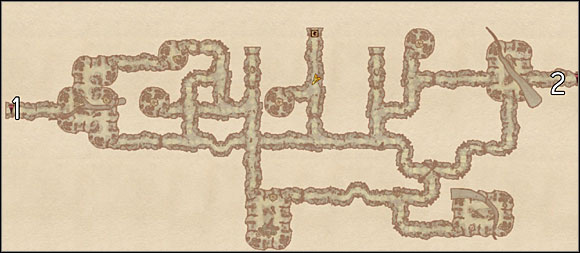 Fountainhead
Your goal is to defeat all the Priests of Order around this area. In the main hub of the dungeon - Fountainhead - they can be found by the small ponds on both sides of the map. The enemy's main strike force is lower, near the Pools of Mania and Dementia.
In this dungeon you'll surely come across passages blocked by enemy crystals. To get past them, you need help from tamed Gnarl Cultivators. If you don't see any around a barricade, find a Chrysalis and activate it. The gnarl will start moving towards the nearest barrier by himself.

Near one of the pools you'll meet either Thadon or Syl - depending on which one you've already killer when becoming a duke.
When you defeat all the priests, the pools will be cleansed and you'll be able to go back and use the fountain to release the full power of your new staff.
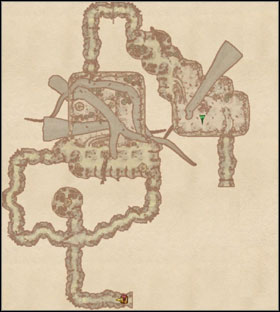 Pool of Mania
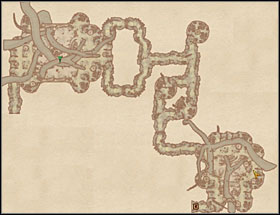 Pool of Dementia
When the staff is complete, one of the guards will enter the palace and tell you that you are under attack - there's an Order Obelisk right on the courtyard. Order your men to attack the enemy and follow them. You now have to overload two Obelisks the same way you did with the previous ones (use three Hearts of Order on each of them).
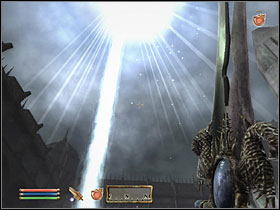
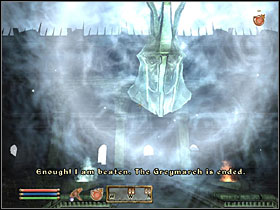
When both Obelisks are down, Jyggalag himself will make an entrance. You have to battle him. You can try out your new staff here, but eventually it all comes down to your blade and spells. When you defeat the enemy god, he'll speak to you and tell you that from now on you are the Prince of Madness. You are Sheogorath.
Go back to the palace and speak to Haskill, who'll fill you in on your new privileges and tasks:
- You'll get two new spells: Manipulate Weather and Sheogorath's Protection. The former is especially enjoyable, as it lets you change weather condition in all Shivering Isles.
- In you throne room you'll find a wide range of souvenirs from your journeys through the Isles, placed under the walls on stone panels. On the central panel there'll be a Sword of Jyggalag (unfortunately, it's pretty useless).
- You can summon a dancer for your enjoyment, just talk to Haskill.
- Staff of Sheogorath can be recharged by placing it in the fountain behind the throne.
- You can order any Aureal or Mazken to follow you around as your bodyguard.
- There's a healer in your palace, if you are wounded just talk to her.
- Haskill will also tell you about your new duty: ensuring the Isles' safety. If he informs you that your lands are under attack, you have to either send your forces there or go and deal with the matter personally.
Where: Crucible, Museum of Oddities (C5);
The museum needs new exhibits. Every time you find something odd enough to be on display here, you'll get an appropriate journal entry. The proprietor pays you 200-300 Gold for each item. Most of the oddities are unfortunately found in completely random places: as loot, contents of chests, or when collecting alchemical ingredients. There are 12 items to be found in this quest, but only locations of 2 of them can be described.
Pelvis of Pelagius can be found when doing the Symbols of Office quest. Check out the main quest guide for details.
Din's Ashes are on a hidden level of Ebrocca (SI29). To get there, you have to find a hidden button under one of the leather shields not very far from the main entrance (screenshot below). Ashes are in one of the urns there.

Finding any other, random oddities will require some luck. Here's the list:
Ring of Disrobing
Dagger of Friendship
Blind Watcher's Eye
Houndtooth Key
Deformed Swamp Tentacle
Sheogorath-shaped Amber
Soul Tomato
Mute Screaming Maw
Mixing Bowl
Double-Headed Coin
Where: Bliss/Crucible, Cutter/Dumag gro-Bong;
Now, this is listed as a quest in your journal, but there's really nothing to be completed here. You just find out that blacksmiths' in Bliss (Dumag) and Crucible (Cutter) can forge Amber (found in Mania) and Madness Ore (found in Dementia) into new types o weapons and armor. Additionally, Amber is a random loot left by Gnarls, and Madness Ore is often found by dead Grummites.
Besides, from time to time you'll come by an item called the Matrix - these are elements that can add magical abilities to forged weapons.
Amber is forged into Light Armor, Madness Ore into Heavy Armor.
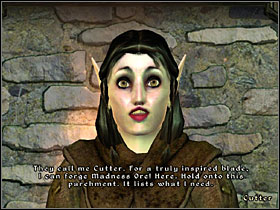
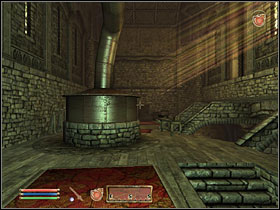
Where: Sickly Bernice's Taphouse (C16);
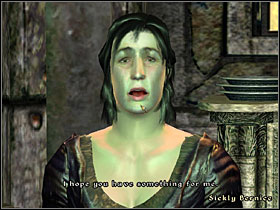
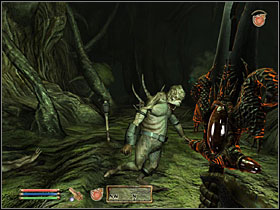
The proprietor of Crucible's inn is very sick and needs your help. You have to go to Knotty Bramble and collect a cure for her - it's called Aquanostrum. Head to the cave that's been marked on your map. The medicine is found on the second level. The dungeon is crawling with Grummites - it's a good opportunity to collect some Madness Ore. When you grab the Aquanostrum (you just have to approach the statue in the middle of the pond), go back to Bernice. She'll give you a Circlet of Verdure - it gives you 50% poison and disease resistance, as well as an increase in health and endurance.
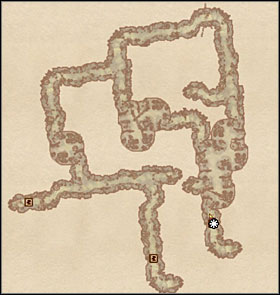 Knotty Bramble
Where: Crucible, Ushnar gro-Shadborgob;
During the day, Ushnar can be found in the central part of Crucible. He'll ask you to get rid of a beggar called Bhisha. You can pay the poor fella to leave (100 Gold), kill him, or raise his disposition high enough so that you can convince him to go away. Your reward for this quest will be a disgusting little doggy, who'll aid you in combat.
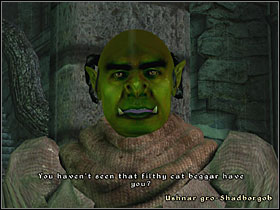
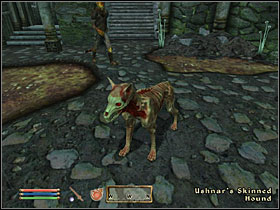
Where: Crucible, Earil (C7);
Earil wants to get rid of a thief named Brithaur. The little crook doesn't want to leave or change his evil way until you bring him 5 Flawless Pearls. You can try to find them and bring them to him, but it isn't really worth the trouble. Just kill the bosmer and take his heart to show Earil that you've solved the problem.
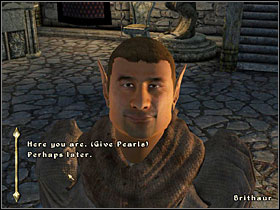

Where: Crucible, Things Found (C13);
Ahjazda, the proprietor of Things Found in Crucible wants you to bring her some items. She needs the Amulet of Disintegration, the Ring of Desiccation, and Calming Pants (must have the calming pants!)
Ring of Desiccation is on display in Museum of Oddities - just steal it then the lady's not looking.
Calming Pants are owned by Fimmion, an elf wandering around Bliss. He'll gladly part with them if you give him a Sweetroll. If you don't have the patience to look for it, just kill him and take the loot.
HINT: You can find a Sweetroll in Pyke's house in Hale (SI16).
Amulet of Disintegration is in the ruins of Milchar. A map marker will show you a shortcut - use it and you won't have to go through the whole complex. You'll find yourself in a shrine with a frozen container in the middle. To get it open, you have to light the three bonfires, using the enchanted torch (you can't equip it, so just hold it by pressing 'Z' on your keyboard). You have to be quick about it - the fires go out faster than you'd expect and they have to be lit simultaneously. Grab the amulet and go back to Ahjazda. She'll teach you a spell called Ahjazda's Paranoia.
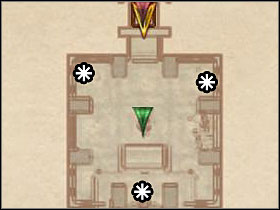 The bonfires you have to light.
HINT: After performing the quest, you can kill Ahjazda and give the Ring of Desiccation back to the museum.
Where: Crucible, Hirrus Clutumnus;
When you find Hirrus on the streets of Crucible, he'll ask you to meet him after dark. Wait until nightfall and go to the map marker. He tells you that he wants you to kill him in a sneaky way. Agree and wait until the next day. Find him standing near the edge of high stairs - talk to him and push him down. Take a key from his body and go to his house. You can find a Ring of Happiness in there. How ironic.
Where: Bliss, Amiable Fanriene
Despite being quite wealthy, Amiable lives on the streets of Bliss. That's because he's afraid of walls. You are to find him a safe spot to sleep. Talk to one of the beggars and you'll be told to speak with Uungor. You can find him in the temple during the day. If you raise his disposition high enough, he'll agree to switch beds with Amiable. Your reward for this little quest is a Burst of Power scroll.
Where: Bliss, Big Head;
An argonian called Big Head is searching for the Fork of Horripilation. In order to find it, you have to talk to Bolwing. The beggar can be found in the southern part of Crucible. He'll tell you to go to Longtooth Camp (SI9). Defeat some zealots there. The fork is in the jewelry case marked on the map. Take it back to Big Head, and he'll reward you with a skill point (to either Blade, Sneak, or Alchemy).
Where: Bliss, Tove the Unresftul (B15);
Tove the Unrestful wants you to help him build his flyboat. He needs calipers and tongs to finish his work. To finish this quest, you have to bring him 100 items total. He'll pay you 5 Gold for each one. If you gather enough of them, take your money from him and the quest will be done.
HINT: If you want to have this done quickly, try battling trolls of Tidewater Cave (7S1, Cyrodiil).
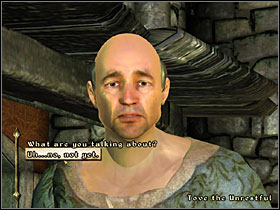
Where: Fellmoor (SI43);
Talk to Kishashi - she won't trust you until you collect 5 plants from the farm that she's working on. When you do that, she'll give you a spoon. Take it to Ranarr-Jo and ask him about Cindanwe. He asks you to get rid of the farm's supervisor.
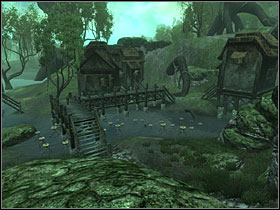
Speak with Cindanwe and ask her about her notebook. Raise her disposition and she'll give it to you. Break into her house and make some mess in there (throw around some items that lay on shelves, etc., you'll get a journal entry when you've messed up enough). Go back to Ranarr-Jo and tell him you've done your job. He gives you a Ring of Mind Shielding for getting rid of her, and a book (The Wolf Queen, v4 - +1 Mercantile) for retrieving the journal.
Where: Vitharn (SI50);
When you reach Vitharn on the southern outskirts of Dementia, you'll witness a battle between two groups of ghosts. Fight with the aggressive ones, and leave the others in peace. The front door is magically sealed, so get inside through the big tree (screenshot below).

Go through Vitharn Stump and Virtharn Reservoir, all the way to Vitharn Keep. You'll meet Count Cirion in there. He'll tell you what's going on in this place. You have to lift the curse from him and his men.
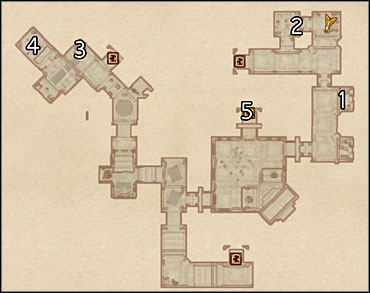 Vitharn Keep
At (1) you'll find a doll - take it with you. A little bit further break into the armory (2) and take blue arrows that you see in there (watch out so that the blacksmith doesn't see you). Use the button (3) to open a secret room, where you'll find a blue dagger (4). Now go to Vitharn Bailey (5).
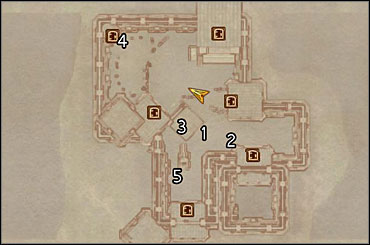 Vitharn Bailey
You can't interfere with the battle that you see - not directly, at least. Talk to Althel (3) and give him the arrows. Speak with Desideratus (2) and Hloval (1). Give the dagger to the mage. Go to Virthan Mausoleum (4) and throw the doll into the fire. Talk to Desideratus once again.
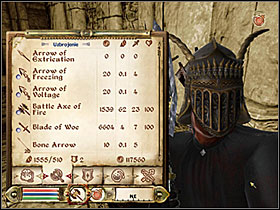
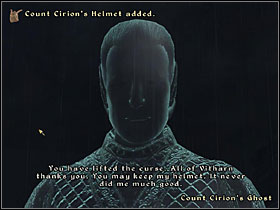
You've changed the fate of three of the defenders. Go back to Cirion. He'll give you his helmet and ask you to defeat the last invader who breaks through Vitharian lines (wait for him at (5)). Do, and the curse will finally be lifted. Your reward for this quest is the aforementioned helmet.
Where: Hale (SI16);
A Redguard named Pyke, member of the proud Knights of the Thorne, wants you to retrieve his stolen medallion from Grummites living in Fetid Grove. It's an easy dungeon to beat. Your target is on the second level, just follow the markers and you'll quickly be done. Your reward is a cool looking shield.
Where: Split (SI20);
The village of Split has been magically divided, and all of its people separated into two beings - one Demented, one Manic. The southern part of the town is inhabited by the Demented, and the northern part - by the Manic. Talk to Harvir Break-Arms (doesn't matter which "version" of him you encounter) and he'll tell you to eliminate all the inhabitants of the opposite side. Just wait until nightfall and slay everyone in their homes. Watch out - if you kill the wrong "version" of any person, you'll fail the quest.
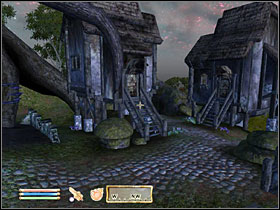
Where: Highcross (SI27);
A woman named Mirili is conducting some research around the area of Highcross. Find her and offer your help. You'll get a list of items she needs (Mirili's List). It consists mostly of easy-to-find plants and enemy remains. When you bring back most of them to her, she'll give you another assignment: to bring her live animals. She needs a Baliwog, an Elytra, a Gnarl, and a Scalon (in that order). You can buy some powerful Charm spells to make it easier for yourself. When you complete her list, the quest will be over. And all you get for your trouble is a handful of money.
Where: Deepwallow (SI37);
This quest is very tiresome and demanding, mostly because it's not shown in your journal. Yup, no lame map markers for you this time. Go to Deepwallow and talk to Erver Devani. He'll tell you about the Hill of Suicides (SI40). There are 5 cursed ghosts wandering around it. To lift the curse that's upon them, you have to find their skulls. Get ready for a real marathon through the Isles' caves and ruins.
Who?
Where?
How?
Bog-Trotter
Knotty Bramble (SI41), Lost Crypt
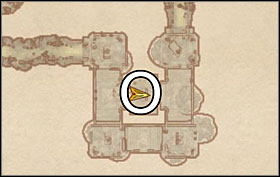 The button that opens the secret room is below one of the dead zealots' bodies nearby.
Gadeneri
Knifepoint Hollow (SI22), Chantry
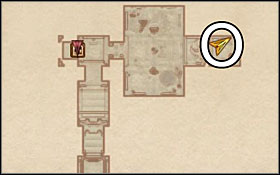 The button that opens the secret room is on one of the pillars in the previous one.
Limark
Milchar (SI17), Xetrem
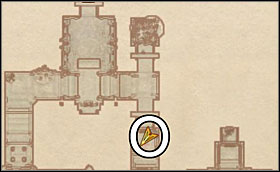
M'Desi
Rotten Den (SI47), Sanctum
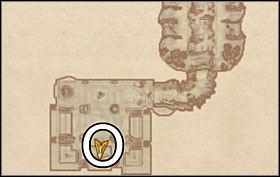
Viria
Cann (SI25), Amphitheater
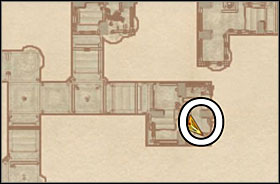
When you collect all the skulls, go to Hill of Suicides and free the Ghosts by trying to talk to them. You'll get some serious Health bonuses, as well as a new spell - Risen Flesh. When you go back to Erven, he'll throw in some gold as well.
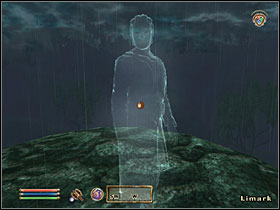
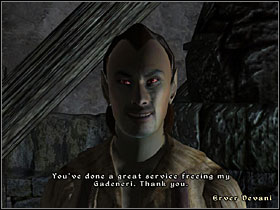
The following walkthrough guides you through quests related to Knights of the Nine, a sort of guild that you will rebuild and bring back to its greatness. In order to start these quests, travel to Anvil and talk to any NPC in there. You should notice a new conversation topic, concerning the attack on the local chapel
Go to Anvil and listen to the local NPC gossip. You'll get an on-screen message saying "New top: Eight and One". Talk to anyone and ask about the attack on Anvil chapel.
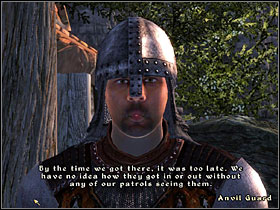
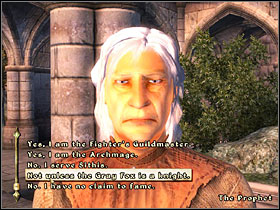
Near the eastern gate of the city you'll see The Prophet. Talk to him using all dialogue options and admit that you'd like to gather all of the Crusader's relics. He'll eventually give you a Washrines Map, indicating 9 shrines you have to pay a visit to in order to set things into motion. Before leaving Anvil go to the Chapel of Dibella. Inside grab a key from one of the bodies and get to the Chapel Hall. In there, you'll find some books on the history of the Crusader.
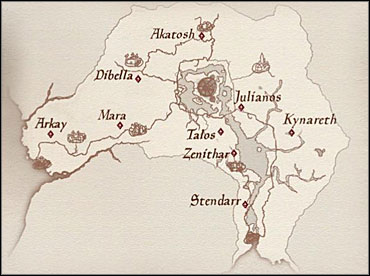
The map that the Prophet gave you (shown above) lacks accuracy. As the Shrines' locations don't appear as map markers, use the screenshots below to know the exact locations of all of them.
HINT: Completing the "Pilgrimage" quest sets your infamy to 0, and you can complete it as many times as you need to.
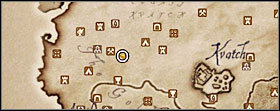
Arkay - near Brina Cross Inn
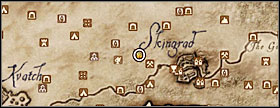
Mara - near Cursed Mine
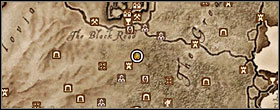
Dibella - near Fort Camala
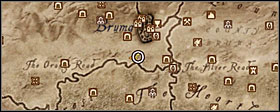
Akatosh - near Bruma Caverns
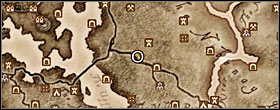
Julianos - near Fort Sejanus
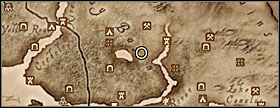
Kynareth - near Fort Entius
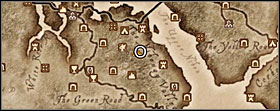
Talos - near Hircine's Shrine
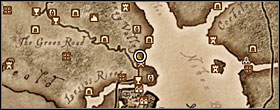
Zenithar - near Flooded Mine
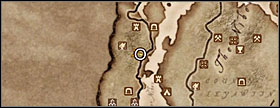
Stendarr - near Sheogorath's Shrine
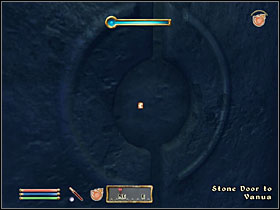
After visiting the last shrine, you'll hear a voice of Pelinal Whitestrake who'll teleport you to a different dimension for a brief talk. After a short scene you'll be back to Cyrodiil, and on your map you'll see a new shrine. It'll turn out that it's actually underwater. Dive in the indicated spot and use the door leading to Vanua.
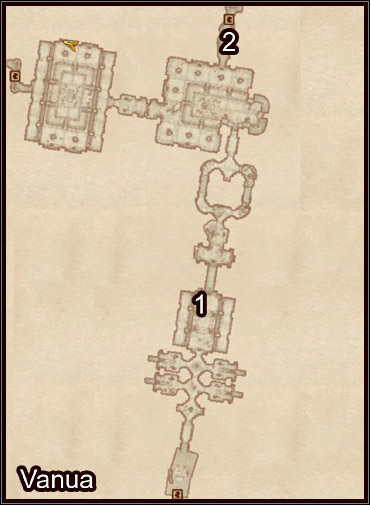
A quite usual Ayleyd ruin before you. At (1) use the button on the wall to open up the passage. Go forth until you reach a way down to The Shrine of the Crusader (2).
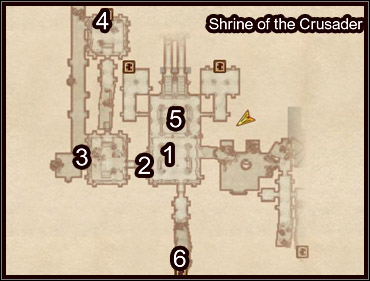
In here you'll find Sir Amiel's body (1) by which you'll see a journal and some trademark Knights of the Nine equipment. That will trigger another quest - Priory of the Nine. Grab the journal, a ring and a key.
Use the key to open the door to the west (2). Go through a crack in the wall (3) and reach the passage to The Lost Catacombs (4). In there, go through the corridor and another crack to find another door back to The Shrine of the Crusader. Now you can grab the helmet (5). Leave this place using the passage to Vanua (6), then hurry back outside using the path you already know.
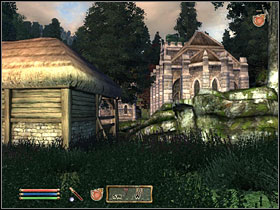
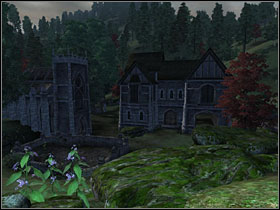
Go to the Priory and enter it. Use the symbol on the floor to the left of the entrance, and an entrance to the basement will be revealed (you must have Amiel's ring in your inventory for that). Go even lower, to the Undercroft.
Sir Amiel's ghost will appear and tell you that in order to get Pelina's cuirass, you have to fight all 8 Knights' ghosts. They will engage you into duels one by one. They're not too tough, merely plain warriors who just approach you and hack their way through. When you defeat them all, take the cuirass from the display up ahead.
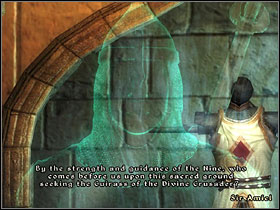

Now by talking to other Knights you trigger next quests that see you searching for the Crusader's equipment.
Quest from: Sir Casimir;
Sir Casimir will tell you the story of the Crusader's gauntlets, which are now probably in the Chapel of Stendarr in Chorrol. Head there. The gauntlets are indeed laying on the floor in there, but they're too heavy for anyone to pick them up. Talk to Areldur (if he's not in the chapel, check the Chapel Hall below) and ask about Gauntlets of the Crusader. You'll know that Casimir's descendant lives here in this Chapel. His name is Kellen and he's cursed for his ancestor's sins. Talk to him (he's in the Chapel Hall), asking about the curse. He'll tell you that Areldur know something he's not saying. Go back to the elfish priest and speechcraft him a bit.
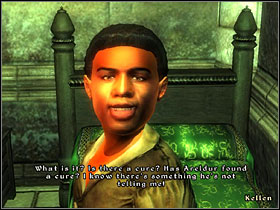
It will turn out that the only way to lift the curse from Kellen is to accept it yourself. Approach the altar and activate it, agreeing to do so. Next, set your active spell to Lay Hands and use it on Kellen. Now you can pick up the gauntlets.
Quest from: Sir Juncan;
This time you'll be looking for the Crusader's boots. Talk to Sir Juncan and he'll tell you to go to Kynareth's shrine West of Imperial City. In there talk to Avita Vesnia. Agree to take Kynareth's test and do as she says - head to a grove to the West. Go there and stand on a little clearing.
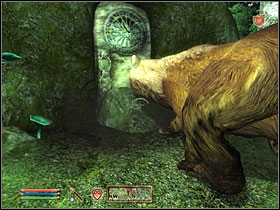
After a while a giant bear will appear and attack you. Don't return fire - just stand there and take a few hits. You'll get a journal entry saying that you succeeded. Nearby a door will open, use it to reach the boots you were looking for.
HINT: If you actually attack the bear, you'll have to go back to Avita and agree to take the test once again.
Quest from: Sir Ralvas;
Speak with Sir Ralvas and he'll tell you to go to the Chapel in Leyawiin to find the Mace of the Crusader. Inside you'll meet Carodus Oholin, who didn't succeed in retrieving the weapon. Go down to Chapel Undercroft and approach the marked shrine (Tomb of Saint Kaladas). Activate it and you'll be teleported to another plane. Just go forth and grab the mace. Yup, it's so simple - as long as you have Boots of the Crusader on you, hah.
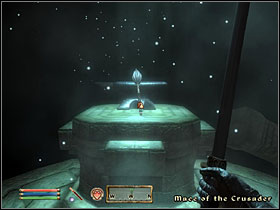
Once you're back to the chapel, you'll see it's being attacked by Umaril's minions. Help the priests defend the place and then talk to Carodus again. Let him join the order.
Quest from: Sir Henrik;
Sir Henrik will tell you that the Crusader's shield is in Fort Bulwark on the western outskirts of Cyrodiil. When you reach the place, defeat the enemy outside and enter through the main gate. You'll be encountering some trigger-happy Conjurers in here. Remember to chase them instead of fighting their summons.
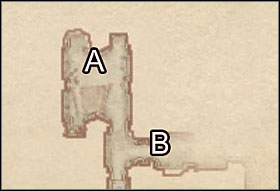
Reach (A) and use the turnstile there, then go through the open gate (B). Use another switch there to open up a bridge.
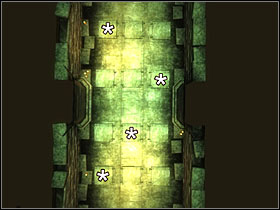
You'll see a puzzle on the floor. Go through the left, center, right, and left tile to open up the passage ahead.
When you're on the lower level, in the cell to the right you'll see Sir Thedret. Free him by using the switch and talk to him. Go through the dungeon, heading West, and when you're in a room with a bridge use the two levers to go further. You'll end up in a room with 4 statues in it - use the switches on them to turn them so they all face the center of the room, and a passage will be open.
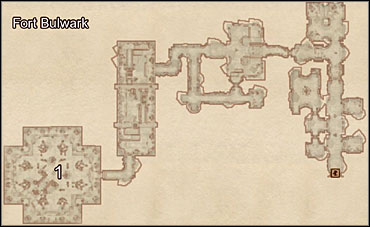
You'll reach a big room with a stone chest in the middle and 8 statues by the walls. You now have to take certain objects from the chest and place them in the chests near the statues in a way that's shown on the screenshot below. When you do that, a secret passage will open and you'll be able to grab the shield at last.
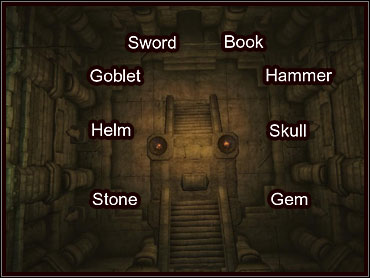
Quest from: Lathon;
When you're back to the Priory after retrieving all the artifacts, you'll meet a man named Lathon in there. He'll give you Greaves of the Crusader and tell you to get back the Sword of the Crusader. If you want, you can have him follow you on this quest. Go to Underpall Cave. Go through the Cave and the Keep (nothing special in there, just a simple cave filled with undead).
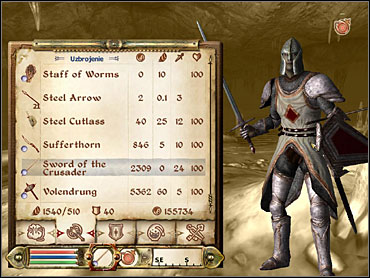
When you're in Underpall Reflecting Chamber, you'll see Sir Roderick's body. In the next room you'll face Lord Berich Vlindrel's ghost. When you defeat him, grab the sword from his body. It is cursed and if you try to equip it you'll, you'll be as well. Tough luck.
The complete Crusader's outfit.
Head to Cheydinhal Chapel. It's also being attack by the Aurorans. When you succeed in helping the priests defend their home, touch the altar and the sword will be pure once again. Go back to the Priory and enter the Chapel (it's a smaller building right next to the main one).
Quest from: Prophet;
Talk to The Prophet and he'll give you a new ability - Blessing of Talos, thus completing your preparations to face Umaril. Talk to the people gathered here and accept their membership in the Order (you might recognize some of them from the previous quests), and then head to Garlas Malatar, that's been marked on your map.
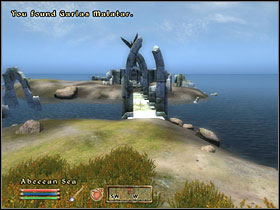
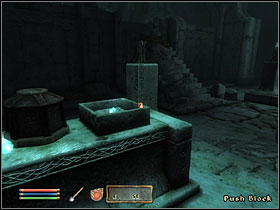
Once you're inside, you'll be joined by a group of knights. There's a handful of enemies on this level so their help will be greatly appreciated. Go through the first level (use the block shown on the right screenshot above to open the passage) and head do Cevsel.
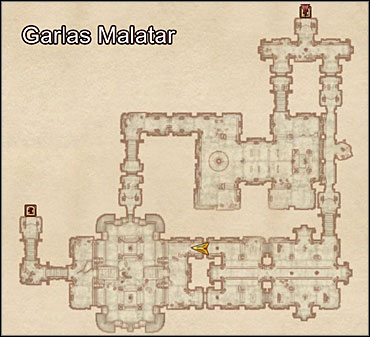
At the beginning of the level press the button and a set of doors will open. You'll enter a room with a black sphere in the center. The enemies here will respawn endlessly, so leave your comrades to fight them and head right, up the stairs, and touch the sphere. Doing so will stop the time. Go North, reaching the door to Carac Abaran.
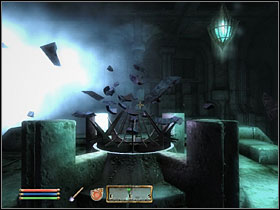
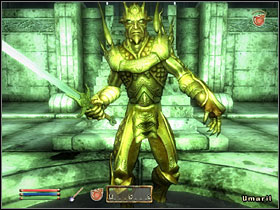
Go through the long corridor until you reach a room with a black pond in the middle. Umail will show himself - defeat him (he's a tough one, so watch out) and when he's down use the Blessing of Talos spell. Before you do so, take a moment to look through the monster's stuff.
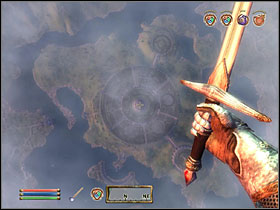
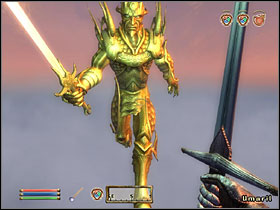
You'll find yourself way above the Imperial City, fighting Umaril once again. When you defeat him for the second time, you'll be teleported back to the Priory of the Nine. Listen to Amiel, then speak to Berich. Go outside to watch a short scene with the rest of the Knights. And that's it, folks.
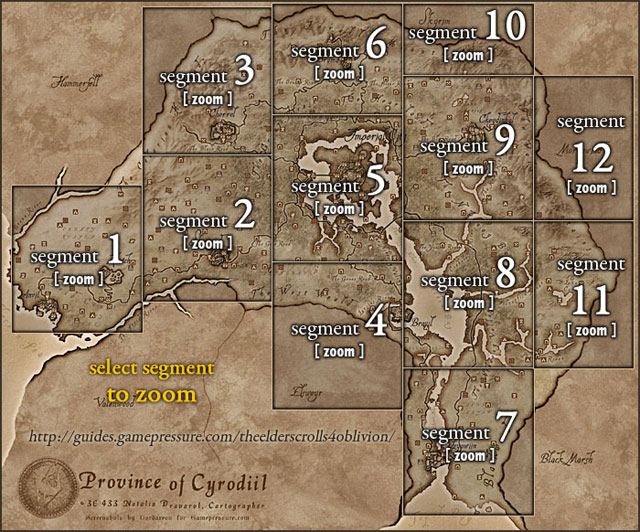
Well, that's pretty much all there is to Knights of the Nine. As you see, these quests are no mach for real guilds that we got in the retail version of Oblivion. Being the leader of the Knights doesn't hold any special benefits neither, except for being able to take one of the Knights with you as a bodyguard. Remember where you took the Cuirass from the Undercroft? Now you can put all the relics on the display there - it doesn't mean anything in particular, but looks quite cool.
During these quests, you've encountered some people that offered their service to you as Knights. Sooner or later all of them appear in the Priory and await your approval of their membership.

Ayleid Ruins - elfish remains of an ancient civilization that ruled Cyrodiil before the Empire was proclaimed. These are usually quite big, 2 or 3 level dungeons, filled with traps and (mostly) undead. Ayleid Ruins are the only place where you can come by Welkynd and Varla stones, which are useful in some quests and also quite valuable. Most of the Ayleid ruins play a certain role in a miscellaneous quest called "The Collector" (found in Imperial City).

Camps - small bandit encampments, a few tents and a fireplace is all there is to them.

Caves - just yer everyday RPG caverns, what's there to tell? They are very different from each other when it comes to monster encounters and size. Not all of them are related to some quests.

Cities - gates, districts, etc. Most of them are already marked on your map when you start the game.

Daedric Shrines - there are 15 of them, and each one is connected to a particular quest. See "Daedric Quests" chapter for details.

Forts - ruined imperial posts, usually consisting of both underground and on-ground facilities.

Inns - places to stay and rest, sometimes to find a quest in.

Mines - not very common around Cyrodiil. The only difference between a mine and a common cave is a presence of silver/gold veins, from which you can get some nuggets.

"Peaks" - well, the name isn't too accurate, but it's hard to define this type of locations. They are mostly some terrain irregularities that you are lead to by certain quests.

Settlements - farms, priories, temples and such. Most of them are connected to some quests.
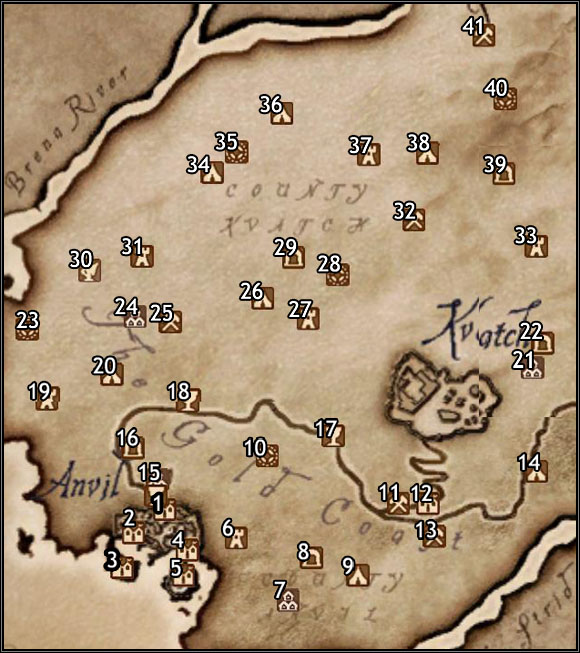
1 - Anvil Main Gate
2 - Anvil Dock Gate
3 - Anvil Lighthouse
4 - Anvil Castle Gate
5 - Castle Anvil
6 - Fort Strand
7 - Gweden Farm
8 - Smoke Hole Cave
9 - Troll Candle Camp
10 - Garlas Agea
11 - Belletor's Folly
12 - Kvatch
13 - Dasek Moor
14 - Mortal Camp
15 - Whitmond Farm
16 - Hrota Cave
17 - Gottshaw Inn
18 - Brina Cross Inn
19 - Crowhaven
20 - Atrene Camp
21 - Shetcombe Farm
22 - Sandstone Cavern
23 - Beldaburo
24 - Lord Drad's Estate
25 - Bleak Mine
26 - Bodean Camp
27 - Fort Wariel
28 - Trumbe
29 - Brittlerock Cave
30 - Malacath's Shrine
31 - Fort Sutch
32 - Shattered Mine
33 - Fort Linchal
34 - Varus Camp
35 - Niryastare
36 - Last Chance Camp
37 - Fort Hastrel
38 - Camp Ales
39 - Mongrel's Tooth Cave
40 - Varondo
41 - Infested Mine
Ayleid Ruins - elfish remains of an ancient civilization that ruled Cyrodiil before the Empire was proclaimed. These are usually quite big, 2 or 3 level dungeons, filled with traps and (mostly) undead. Ayleid Ruins are the only place where you can come by Welkynd and Varla stones, which are useful in some quests and also quite valuable. Most of the Ayleid ruins play a certain role in a miscellaneous quest called "The Collector" (found in Imperial City).
Camps - small bandit encampments, a few tents and a fireplace is all there is to them.
Caves - just yer everyday RPG caverns, what's there to tell? They are very different from each other when it comes to monster encounters and size. Not all of them are related to some quests.
Cities - gates, districts, etc. Most of them are already marked on your map when you start the game.
Daedric Shrines - there are 15 of them, and each one is connected to a particular quest. See "Daedric Quests" chapter for details.
Forts - ruined imperial posts, usually consisting of both underground and on-ground facilities.
Inns - places to stay and rest, sometimes to find a quest in.
Mines - not very common around Cyrodiil. The only difference between a mine and a common cave is a presence of silver/gold veins, from which you can get some nuggets.
"Peaks" - well, the name isn't too accurate, but it's hard to define this type of locations. They are mostly some terrain irregularities that you are lead to by certain quests.
Settlements - farms, priories, temples and such. Most of them are connected to some quests.
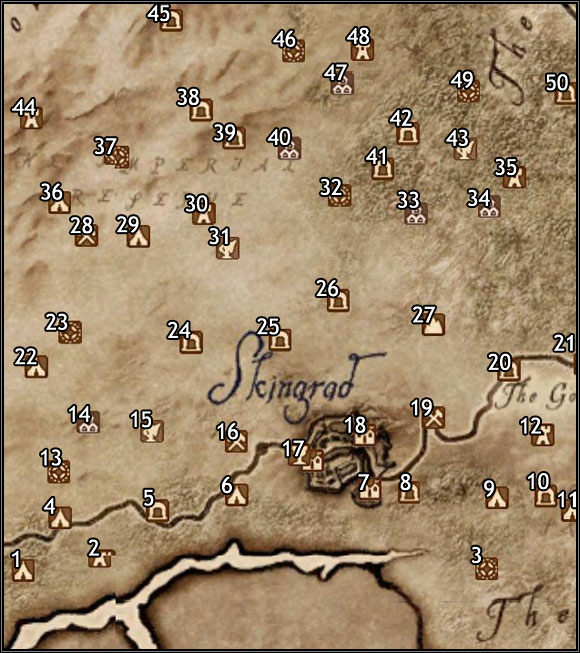
1 - Gnoll's Meeting Camp
2 - Fort Istirus
3 - Silorn
4 - Ra'sava Camp
5 - Fyrelight Cave
6 - Fat Ramp Camp
7 - Castle Skingrad
8 - Bloodcrust Cavern
9 - gro-Bak Camp
10 - Howling Cave
11 - Collarbone Camp
12 - Fort Vlastarus
13 - Miscarcand
14 - Shardrock
15 - Meridia's Shrine
16 - Cursed Mine
17 - Gratefull Pass Stables / Skingrad West Gate
18 - Skingrad - East Gate
19 - Derelict Mine
20 - Grayrock Cave
21 - Greenmead Cave
22 - Dagny's Camp
23 - Talwinque
24 - Fallen Rock Cave
25 - Bleak Flats Cave
26 - Goblin Jim's Cave
27 - Shadeleaf Copse
28 - Echo Mine
29 - Valley View Camp
30 - Fort Dirich
31 - Shrine of Sanguine
32 - Elenglynn
33 - Brindle Home
34 - Gottlesfont Priory
35 - Fort Wooden Hand
36 - Brotch Camp
37 - Nonungalo
38 - Wind Cave
39 - Rock Bottom Cave
40 - Weatherleah
41 - Redguard Valley Cave
42 - Serpent Hollow Cave
43 - Molag Bal's Shrine
44 - Fort Ontus
45 - Broken Promises Cave
46 - Wendir
47 - Hackdirt
48 - Fort Carmala
49 - Narfinsel
50 - Breakneck Cave
Ayleid Ruins - elfish remains of an ancient civilization that ruled Cyrodiil before the Empire was proclaimed. These are usually quite big, 2 or 3 level dungeons, filled with traps and (mostly) undead. Ayleid Ruins are the only place where you can come by Welkynd and Varla stones, which are useful in some quests and also quite valuable. Most of the Ayleid ruins play a certain role in a miscellaneous quest called "The Collector" (found in Imperial City).
Camps - small bandit encampments, a few tents and a fireplace is all there is to them.
Caves - just yer everyday RPG caverns, what's there to tell? They are very different from each other when it comes to monster encounters and size. Not all of them are related to some quests.
Cities - gates, districts, etc. Most of them are already marked on your map when you start the game.
Daedric Shrines - there are 15 of them, and each one is connected to a particular quest. See "Daedric Quests" chapter for details.
Forts - ruined imperial posts, usually consisting of both underground and on-ground facilities.
Inns - places to stay and rest, sometimes to find a quest in.
Mines - not very common around Cyrodiil. The only difference between a mine and a common cave is a presence of silver/gold veins, from which you can get some nuggets.
"Peaks" - well, the name isn't too accurate, but it's hard to define this type of locations. They are mostly some terrain irregularities that you are lead to by certain quests.
Settlements - farms, priories, temples and such. Most of them are connected to some quests.
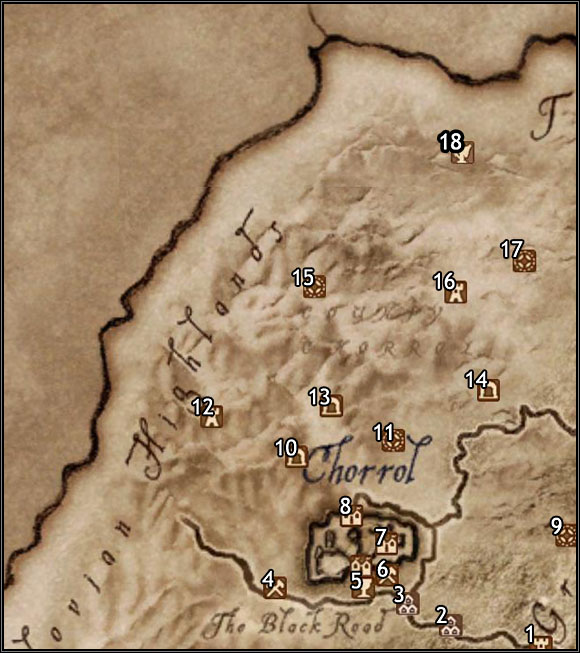
1 - Fort Ash
2 - Odiil Farm
3 - Weynon Priory
4 - Pillaged Mine
5 - North Country Stables
6 - Crumbling Mine
7 - Castle Chorrol
8 - Chorrol North Gate
9 - Lindai
10 - Black Rock Caverns
11 - Hrotanda Vale
12 - Fort Rayles
13 - Nonwyll Cavern
14 - Shadow's Rest Caverns
15 - Lipsand Tarn
16 - Sancre Tor
17 - Ninendava
18 - Hermaeus Mora's Shrine
Ayleid Ruins - elfish remains of an ancient civilization that ruled Cyrodiil before the Empire was proclaimed. These are usually quite big, 2 or 3 level dungeons, filled with traps and (mostly) undead. Ayleid Ruins are the only place where you can come by Welkynd and Varla stones, which are useful in some quests and also quite valuable. Most of the Ayleid ruins play a certain role in a miscellaneous quest called "The Collector" (found in Imperial City).
Camps - small bandit encampments, a few tents and a fireplace is all there is to them.
Caves - just yer everyday RPG caverns, what's there to tell? They are very different from each other when it comes to monster encounters and size. Not all of them are related to some quests.
Cities - gates, districts, etc. Most of them are already marked on your map when you start the game.
Daedric Shrines - there are 15 of them, and each one is connected to a particular quest. See "Daedric Quests" chapter for details.
Forts - ruined imperial posts, usually consisting of both underground and on-ground facilities.
Inns - places to stay and rest, sometimes to find a quest in.
Mines - not very common around Cyrodiil. The only difference between a mine and a common cave is a presence of silver/gold veins, from which you can get some nuggets.
"Peaks" - well, the name isn't too accurate, but it's hard to define this type of locations. They are mostly some terrain irregularities that you are lead to by certain quests.
Settlements - farms, priories, temples and such. Most of them are connected to some quests.
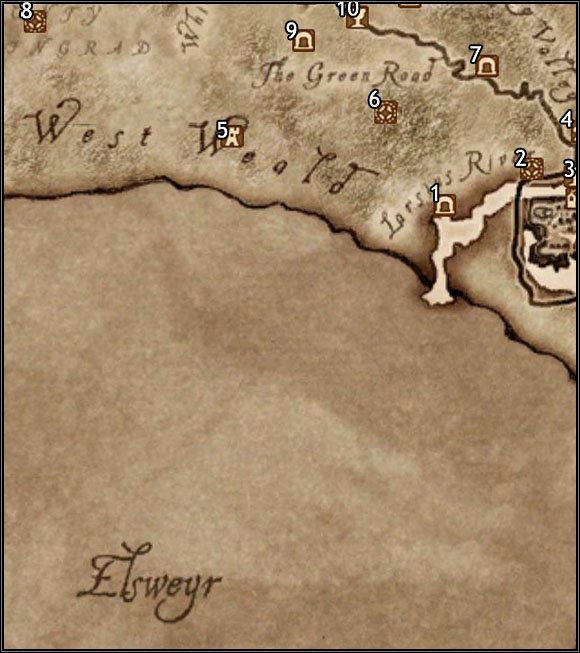
1 - Bloodmayne Cave
2 - Anutwyll
3 - Bay Roan Stables
4 - Flooded Mine
5 - Fort Black Boot
6 - Wenyandawik
7 - Robber's Glen Cave
8 - Nornalhorst
9 - Pothole Caverns
10 - Inn of Ill Omen
Ayleid Ruins - elfish remains of an ancient civilization that ruled Cyrodiil before the Empire was proclaimed. These are usually quite big, 2 or 3 level dungeons, filled with traps and (mostly) undead. Ayleid Ruins are the only place where you can come by Welkynd and Varla stones, which are useful in some quests and also quite valuable. Most of the Ayleid ruins play a certain role in a miscellaneous quest called "The Collector" (found in Imperial City).
Camps - small bandit encampments, a few tents and a fireplace is all there is to them.
Caves - just yer everyday RPG caverns, what's there to tell? They are very different from each other when it comes to monster encounters and size. Not all of them are related to some quests.
Cities - gates, districts, etc. Most of them are already marked on your map when you start the game.
Daedric Shrines - there are 15 of them, and each one is connected to a particular quest. See "Daedric Quests" chapter for details.
Forts - ruined imperial posts, usually consisting of both underground and on-ground facilities.
Inns - places to stay and rest, sometimes to find a quest in.
Mines - not very common around Cyrodiil. The only difference between a mine and a common cave is a presence of silver/gold veins, from which you can get some nuggets.
"Peaks" - well, the name isn't too accurate, but it's hard to define this type of locations. They are mostly some terrain irregularities that you are lead to by certain quests.
Settlements - farms, priories, temples and such. Most of them are connected to some quests.
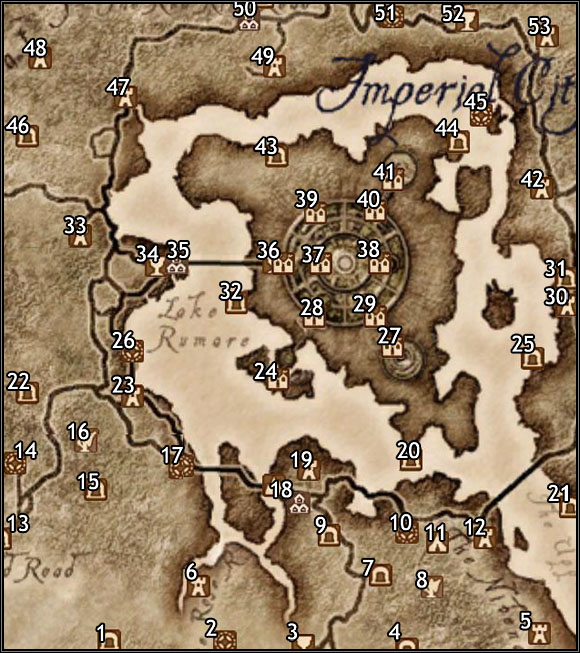
1 - Nisin Cave
2 - Nenyond Twyll
3 - Faregyl Inn
4 - Mingo Cave
5 - Fort Variela
6 - Fort Roebeck
7 - Charcoal Cave
8 - Hircine's Shrine
9 - Horn Cave
10 - Sardavar Leed
11 - Sweetwater Camp
12 - Fort Alessia
13 - Greenmead Cave
14 - Ceyetatar
15 - Felgageldt Cave
16 - Clavicus Vile's Shrine
17 - Vindasel
18 - Old Bridge / Pell's Gate
19 - Fort Homestead
20 - Fattback Cave
21 - Shinbone Cave
22 - Haynote Cave
23 - Fort Virtue
24 - Imperial City Waterfront
25 - Memorial Cave
26 - Fanacasecul
27 - The Arcane University
28 - Imperial City Temple District
29 - Imperial City Arboretum
30 - Fort Magia
31 - Wellspring Cave
32 - Dzonot Cave
33 - Fort Nikel
34 - Wawnet Inn
35 - Weye
36 - Chestnut Handy Stables / Imperial City Talos Plaza District
37 - Imperial City Palace
38 - Imperial City Arena
39 - Imperial City Elven Gardens
40 - Imperial City Market District
41 - Imperial City Prison
42 - Fort Urasek
43 - Sinkhole Cave
44 - Imperial Prison Sewer
45 - Vilverin
46 - Yellow Tick Cave
47 - Fort Empire
48 - Fort Coldcorn
49 - Fort Caractacus
50 - Aleswell
51 - Sercen
52 - Roxey Inn
53 - Fort Chalman
Ayleid Ruins - elfish remains of an ancient civilization that ruled Cyrodiil before the Empire was proclaimed. These are usually quite big, 2 or 3 level dungeons, filled with traps and (mostly) undead. Ayleid Ruins are the only place where you can come by Welkynd and Varla stones, which are useful in some quests and also quite valuable. Most of the Ayleid ruins play a certain role in a miscellaneous quest called "The Collector" (found in Imperial City).
Camps - small bandit encampments, a few tents and a fireplace is all there is to them.
Caves - just yer everyday RPG caverns, what's there to tell? They are very different from each other when it comes to monster encounters and size. Not all of them are related to some quests.
Cities - gates, districts, etc. Most of them are already marked on your map when you start the game.
Daedric Shrines - there are 15 of them, and each one is connected to a particular quest. See "Daedric Quests" chapter for details.
Forts - ruined imperial posts, usually consisting of both underground and on-ground facilities.
Inns - places to stay and rest, sometimes to find a quest in.
Mines - not very common around Cyrodiil. The only difference between a mine and a common cave is a presence of silver/gold veins, from which you can get some nuggets.
"Peaks" - well, the name isn't too accurate, but it's hard to define this type of locations. They are mostly some terrain irregularities that you are lead to by certain quests.
Settlements - farms, priories, temples and such. Most of them are connected to some quests.
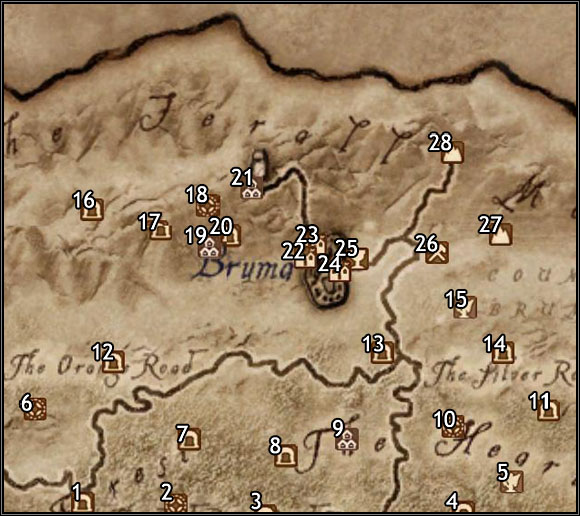
1 - Glademist Cave
2 - Piukanda
3 - Fingerbowl Cave
4 - Moss Rock Cavern
5 - Mephala's Shrine
6 - Moranda
7 - Outlaw Endre's Cave
8 - Unmarked Cave
9 - Bleaker's Way
10 - Anga
11 - Frostfire Glade
12 - Underpall Cave
13 - Toadstool Hollow
14 - Red Ruby Cave
15 - Namira's Shrine
16 - Echo Cave
17 - Boreal Stone Cave
18 - Rielle
19 - Applewatch
20 - Capstone Cave
21 - Cloud Ruler Temple
22 - Castle Bruma
23 - Bruma North Gate
24 - Bruma East Gate
25 - Wildeye Stables
26 - Plundered Mine
27 - Gnoll Mountain
28 - Dragonclaw Rock
Ayleid Ruins - elfish remains of an ancient civilization that ruled Cyrodiil before the Empire was proclaimed. These are usually quite big, 2 or 3 level dungeons, filled with traps and (mostly) undead. Ayleid Ruins are the only place where you can come by Welkynd and Varla stones, which are useful in some quests and also quite valuable. Most of the Ayleid ruins play a certain role in a miscellaneous quest called "The Collector" (found in Imperial City).
Camps - small bandit encampments, a few tents and a fireplace is all there is to them.
Caves - just yer everyday RPG caverns, what's there to tell? They are very different from each other when it comes to monster encounters and size. Not all of them are related to some quests.
Cities - gates, districts, etc. Most of them are already marked on your map when you start the game.
Daedric Shrines - there are 15 of them, and each one is connected to a particular quest. See "Daedric Quests" chapter for details.
Forts - ruined imperial posts, usually consisting of both underground and on-ground facilities.
Inns - places to stay and rest, sometimes to find a quest in.
Mines - not very common around Cyrodiil. The only difference between a mine and a common cave is a presence of silver/gold veins, from which you can get some nuggets.
"Peaks" - well, the name isn't too accurate, but it's hard to define this type of locations. They are mostly some terrain irregularities that you are lead to by certain quests.
Settlements - farms, priories, temples and such. Most of them are connected to some quests.
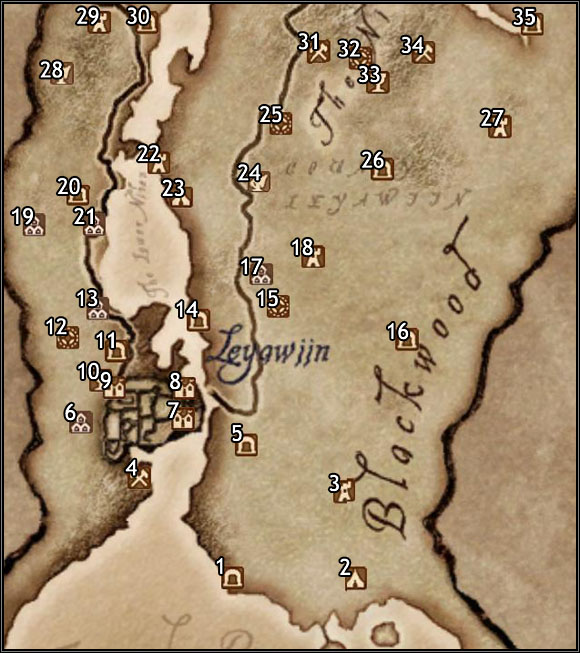
1 - Tidewater Cave
2 - Bogwater
3 - Fort Blueblood
4 - Forsaken Mine
5 - Darkfathom Cave
6 - Greyland
7 - Leyawiin Castle
8 - Leyawiin North East Gate
9 - Leyawiin West Gate
10 - Five Riders Stables
11 - Undertow Cavern
12 - Telepe
13 - White Stallion Lodge
14 - Amelion Tomb
15 - Veyond
16 - Onyx Caverns
17 - Blankenmarch
18 - Fort Doublecross
19 - Border Watch
20 - Water's Edge
21 - Rockmilk Cave
22 - Fort Redman
23 - Fisherman's Rock
24 - Nocturnal Shrine
25 - Arpenia
26 - Fieldhouse Cave
27 - Fort Teleman
28 - Sheogorath's Shrine
29 - Fort Namore
30 - Reedstand Cave
31 - Barren Mine
32 - Atatar
33 - The Drunken Dragon Inn
34 - Haunted Mine
35 - Shattered Scales Cave
Ayleid Ruins - elfish remains of an ancient civilization that ruled Cyrodiil before the Empire was proclaimed. These are usually quite big, 2 or 3 level dungeons, filled with traps and (mostly) undead. Ayleid Ruins are the only place where you can come by Welkynd and Varla stones, which are useful in some quests and also quite valuable. Most of the Ayleid ruins play a certain role in a miscellaneous quest called "The Collector" (found in Imperial City).
Camps - small bandit encampments, a few tents and a fireplace is all there is to them.
Caves - just yer everyday RPG caverns, what's there to tell? They are very different from each other when it comes to monster encounters and size. Not all of them are related to some quests.
Cities - gates, districts, etc. Most of them are already marked on your map when you start the game.
Daedric Shrines - there are 15 of them, and each one is connected to a particular quest. See "Daedric Quests" chapter for details.
Forts - ruined imperial posts, usually consisting of both underground and on-ground facilities.
Inns - places to stay and rest, sometimes to find a quest in.
Mines - not very common around Cyrodiil. The only difference between a mine and a common cave is a presence of silver/gold veins, from which you can get some nuggets.
"Peaks" - well, the name isn't too accurate, but it's hard to define this type of locations. They are mostly some terrain irregularities that you are lead to by certain quests.
Settlements - farms, priories, temples and such. Most of them are connected to some quests.
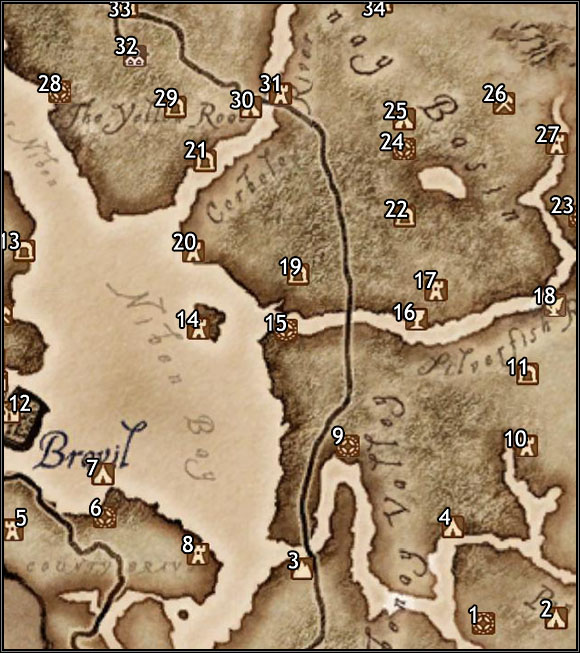
1 - Welke
2 - Marsh-Punk Camp
3 - Mouth of the Panther
4 - Black Dog Camp
5 - Fathis Aren's Tower
6 - Bawn
7 - Bawnwatch Camp
8 - Fort Irony
9 - Morahame
10 - Fort Gold-Throat
11 - Bedrock Break
12 - Castle Bravil
13 - Veyond Cave
14 - Fort Grief
15 - Nenalata
16 - Imperial Bridge Inn
17 - Fort Flecia
18 - Peryite's Shrine
19 - Bramblepoint Cave
20 - Fort Aurus
21 - Newt Cave
22 - Sage Glen Hollow
23 - Ondo
24 - Mackamentain
25 - Trossan Camp
26 - Deserted Mine
27 - Fort Entius
28 - Culotte
29 - Timberscar Hollow
30 - Crestbridge Camp
31 - Fort Cedain
32 - Cropsford
33 - Cracked Wood Cave
34 - Crayfish Cave
Ayleid Ruins - elfish remains of an ancient civilization that ruled Cyrodiil before the Empire was proclaimed. These are usually quite big, 2 or 3 level dungeons, filled with traps and (mostly) undead. Ayleid Ruins are the only place where you can come by Welkynd and Varla stones, which are useful in some quests and also quite valuable. Most of the Ayleid ruins play a certain role in a miscellaneous quest called "The Collector" (found in Imperial City).
Camps - small bandit encampments, a few tents and a fireplace is all there is to them.
Caves - just yer everyday RPG caverns, what's there to tell? They are very different from each other when it comes to monster encounters and size. Not all of them are related to some quests.
Cities - gates, districts, etc. Most of them are already marked on your map when you start the game.
Daedric Shrines - there are 15 of them, and each one is connected to a particular quest. See "Daedric Quests" chapter for details.
Forts - ruined imperial posts, usually consisting of both underground and on-ground facilities.
Inns - places to stay and rest, sometimes to find a quest in.
Mines - not very common around Cyrodiil. The only difference between a mine and a common cave is a presence of silver/gold veins, from which you can get some nuggets.
"Peaks" - well, the name isn't too accurate, but it's hard to define this type of locations. They are mostly some terrain irregularities that you are lead to by certain quests.
Settlements - farms, priories, temples and such. Most of them are connected to some quests.
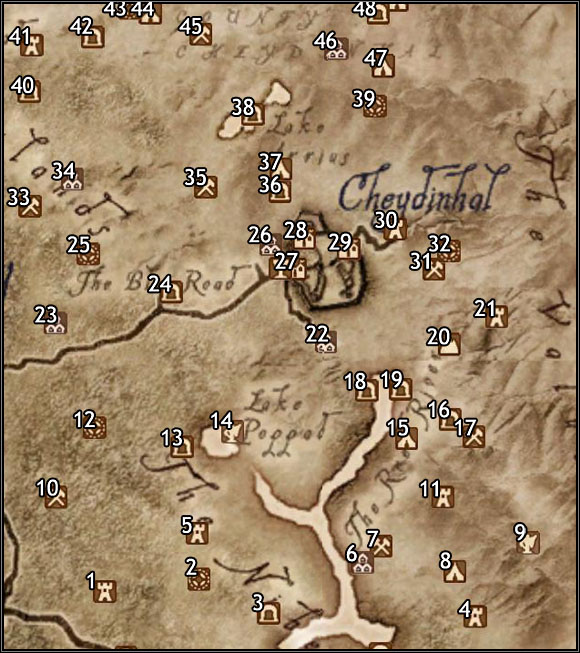
1 - Fort Sejanus
2 - Nornal
3 - Wenderbek Cave
4 - Fort Facian
5 - Arkved's Tower
6 - Drakelowe
7 - Squandered Mine
8 - Sercen Camp
9 - Boethia's Shrine
10 - Empty mine
11 - Fort Naso
12 - Nagastani
13 - Muck Valley Cavern
14 - Vaermina's Shrine
15 - Carbo's Camp
16 - Dark Fissure
17 - Doomed Mine
18 - Vahtacen
19 - Swampy Cave
20 - Hero Hill
21 - Fort Scinia
22 - Harlun's Watch
23 - Roland Jenseric's Cabin
24 - Barren Cave
25 - Belda
26 - Knights of the Thorn Lodge
27 - Black Waterside Stables / Cheydinhal West Gate
28 - Castle Cheydinhal
29 - Cheydinhal East Gate
30 - Fort Farragut
31 - Rickety Mine
32 - Kemen
33 - Exhausted Mine
34 - Harm's Folly
35 - Desolate Mine
36 - Quickwater Cave
37 - Wind Range Camp
38 - Lake Arrius Caverns
39 - Fanacas
40 - The Beast's Maw
41 - Fort Horunn
42 - Silver Tooth Cave
43 - Sedor
44 - Hidden Camp
45 - Gutted mine
46 - Lord Rugdumph's Estate
47 - Walker Camp
48 - Kingscrest Cavern
Ayleid Ruins - elfish remains of an ancient civilization that ruled Cyrodiil before the Empire was proclaimed. These are usually quite big, 2 or 3 level dungeons, filled with traps and (mostly) undead. Ayleid Ruins are the only place where you can come by Welkynd and Varla stones, which are useful in some quests and also quite valuable. Most of the Ayleid ruins play a certain role in a miscellaneous quest called "The Collector" (found in Imperial City).
Camps - small bandit encampments, a few tents and a fireplace is all there is to them.
Caves - just yer everyday RPG caverns, what's there to tell? They are very different from each other when it comes to monster encounters and size. Not all of them are related to some quests.
Cities - gates, districts, etc. Most of them are already marked on your map when you start the game.
Daedric Shrines - there are 15 of them, and each one is connected to a particular quest. See "Daedric Quests" chapter for details.
Forts - ruined imperial posts, usually consisting of both underground and on-ground facilities.
Inns - places to stay and rest, sometimes to find a quest in.
Mines - not very common around Cyrodiil. The only difference between a mine and a common cave is a presence of silver/gold veins, from which you can get some nuggets.
"Peaks" - well, the name isn't too accurate, but it's hard to define this type of locations. They are mostly some terrain irregularities that you are lead to by certain quests.
Settlements - farms, priories, temples and such. Most of them are connected to some quests.
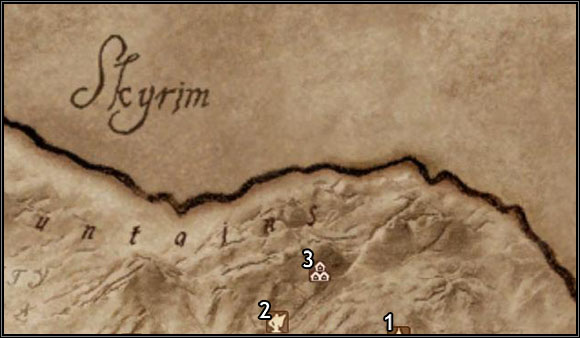
1 - Aerin's Camp
2 - Azura's Shrine
3 - Temple of the Ancestor Moths
Ayleid Ruins - elfish remains of an ancient civilization that ruled Cyrodiil before the Empire was proclaimed. These are usually quite big, 2 or 3 level dungeons, filled with traps and (mostly) undead. Ayleid Ruins are the only place where you can come by Welkynd and Varla stones, which are useful in some quests and also quite valuable. Most of the Ayleid ruins play a certain role in a miscellaneous quest called "The Collector" (found in Imperial City).
Camps - small bandit encampments, a few tents and a fireplace is all there is to them.
Caves - just yer everyday RPG caverns, what's there to tell? They are very different from each other when it comes to monster encounters and size. Not all of them are related to some quests.
Cities - gates, districts, etc. Most of them are already marked on your map when you start the game.
Daedric Shrines - there are 15 of them, and each one is connected to a particular quest. See "Daedric Quests" chapter for details.
Forts - ruined imperial posts, usually consisting of both underground and on-ground facilities.
Inns - places to stay and rest, sometimes to find a quest in.
Mines - not very common around Cyrodiil. The only difference between a mine and a common cave is a presence of silver/gold veins, from which you can get some nuggets.
"Peaks" - well, the name isn't too accurate, but it's hard to define this type of locations. They are mostly some terrain irregularities that you are lead to by certain quests.
Settlements - farms, priories, temples and such. Most of them are connected to some quests.
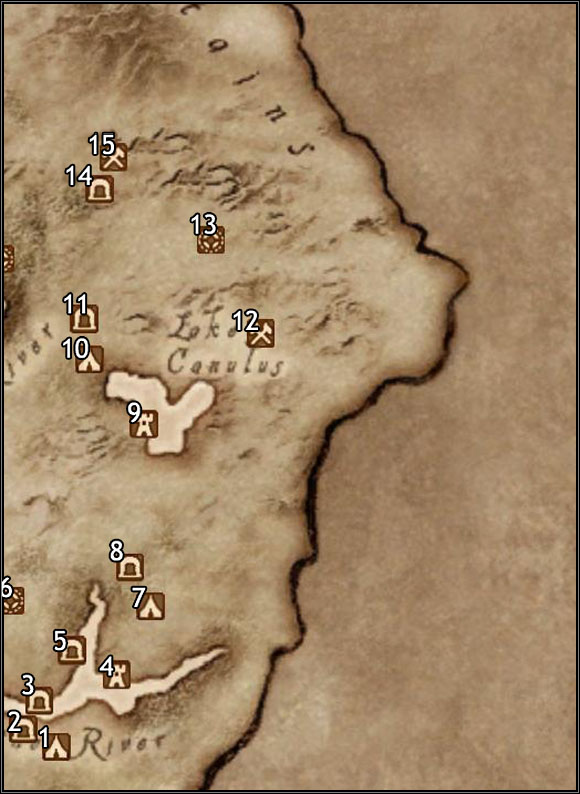
1 - Seran Camp
2 - Bloodrun Cave
3 - Kindred Cave
4 - Fort Redwater
5 - Redwater Slough
6 - Wendelbek
7 - Garnet Camp
8 - Leafrot Cave
9 - Fort Cuptor
10 - Nanyon Camp
11 - Lost Boy Cavern
12 - Adandoned Mine
13 - Malada
14 - Arrowshaft Cavern
15 - Collapsed Mine
Ayleid Ruins - elfish remains of an ancient civilization that ruled Cyrodiil before the Empire was proclaimed. These are usually quite big, 2 or 3 level dungeons, filled with traps and (mostly) undead. Ayleid Ruins are the only place where you can come by Welkynd and Varla stones, which are useful in some quests and also quite valuable. Most of the Ayleid ruins play a certain role in a miscellaneous quest called "The Collector" (found in Imperial City).
Camps - small bandit encampments, a few tents and a fireplace is all there is to them.
Caves - just yer everyday RPG caverns, what's there to tell? They are very different from each other when it comes to monster encounters and size. Not all of them are related to some quests.
Cities - gates, districts, etc. Most of them are already marked on your map when you start the game.
Daedric Shrines - there are 15 of them, and each one is connected to a particular quest. See "Daedric Quests" chapter for details.
Forts - ruined imperial posts, usually consisting of both underground and on-ground facilities.
Inns - places to stay and rest, sometimes to find a quest in.
Mines - not very common around Cyrodiil. The only difference between a mine and a common cave is a presence of silver/gold veins, from which you can get some nuggets.
"Peaks" - well, the name isn't too accurate, but it's hard to define this type of locations. They are mostly some terrain irregularities that you are lead to by certain quests.
Settlements - farms, priories, temples and such. Most of them are connected to some quests.
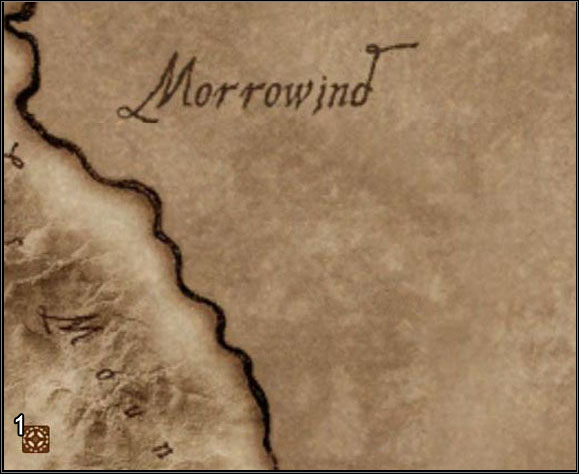
1 - Hame
Ayleid Ruins - elfish remains of an ancient civilization that ruled Cyrodiil before the Empire was proclaimed. These are usually quite big, 2 or 3 level dungeons, filled with traps and (mostly) undead. Ayleid Ruins are the only place where you can come by Welkynd and Varla stones, which are useful in some quests and also quite valuable. Most of the Ayleid ruins play a certain role in a miscellaneous quest called "The Collector" (found in Imperial City).
Camps - small bandit encampments, a few tents and a fireplace is all there is to them.
Caves - just yer everyday RPG caverns, what's there to tell? They are very different from each other when it comes to monster encounters and size. Not all of them are related to some quests.
Cities - gates, districts, etc. Most of them are already marked on your map when you start the game.
Daedric Shrines - there are 15 of them, and each one is connected to a particular quest. See "Daedric Quests" chapter for details.
Forts - ruined imperial posts, usually consisting of both underground and on-ground facilities.
Inns - places to stay and rest, sometimes to find a quest in.
Mines - not very common around Cyrodiil. The only difference between a mine and a common cave is a presence of silver/gold veins, from which you can get some nuggets.
"Peaks" - well, the name isn't too accurate, but it's hard to define this type of locations. They are mostly some terrain irregularities that you are lead to by certain quests.
Settlements - farms, priories, temples and such. Most of them are connected to some quests.
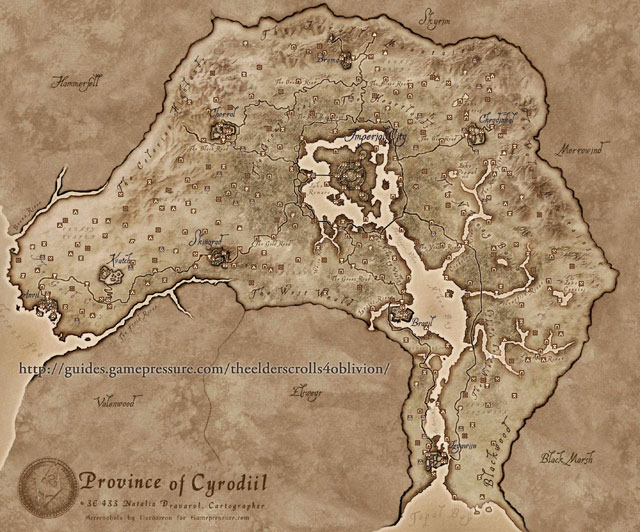 Oblivion World Map
Ayleid Ruins - elfish remains of an ancient civilization that ruled Cyrodiil before the Empire was proclaimed. These are usually quite big, 2 or 3 level dungeons, filled with traps and (mostly) undead. Ayleid Ruins are the only place where you can come by Welkynd and Varla stones, which are useful in some quests and also quite valuable. Most of the Ayleid ruins play a certain role in a miscellaneous quest called "The Collector" (found in Imperial City).
Camps - small bandit encampments, a few tents and a fireplace is all there is to them.
Caves - just yer everyday RPG caverns, what's there to tell? They are very different from each other when it comes to monster encounters and size. Not all of them are related to some quests.
Cities - gates, districts, etc. Most of them are already marked on your map when you start the game.
Daedric Shrines - there are 15 of them, and each one is connected to a particular quest. See "Daedric Quests" chapter for details.
Forts - ruined imperial posts, usually consisting of both underground and on-ground facilities.
Inns - places to stay and rest, sometimes to find a quest in.
Mines - not very common around Cyrodiil. The only difference between a mine and a common cave is a presence of silver/gold veins, from which you can get some nuggets.
"Peaks" - well, the name isn't too accurate, but it's hard to define this type of locations. They are mostly some terrain irregularities that you are lead to by certain quests.
Settlements - farms, priories, temples and such. Most of them are connected to some quests.
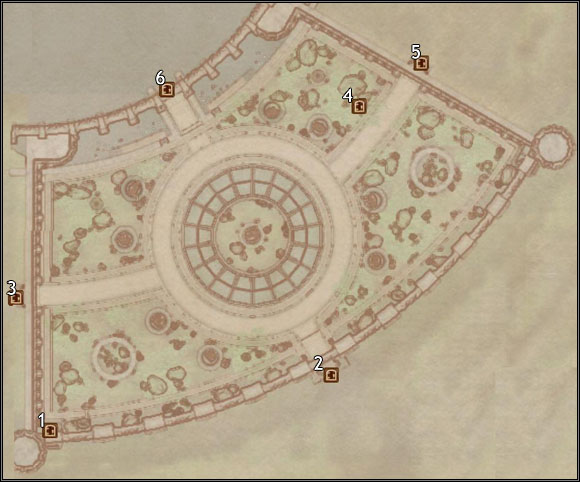
1 - South Watch Tower
2 - City Isle
3 - Temple District
4 - The South East Tunnel
5 - Arena District
6 - Green Emperor Way
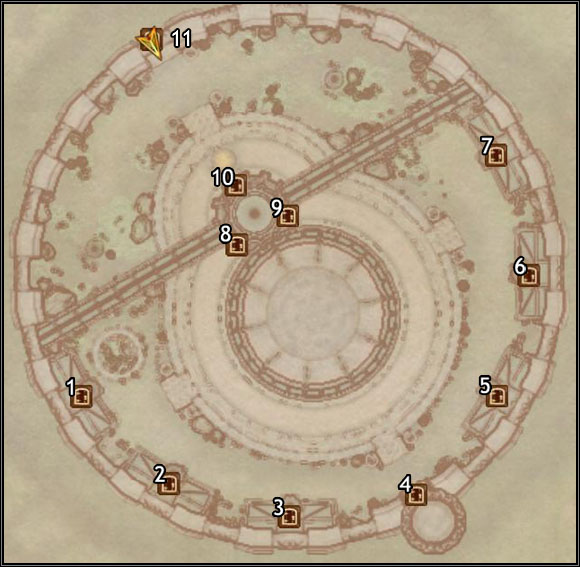
1 - Lustratorium
2 - Chironasium
3 - Practice Rooms
4 - Imperial Watchtower
5 - Mage Quarters
6 - Mystic Archives
7 - Praxographical Center
8/9/10 - Arch Mage's Lobby
11 - City Isle
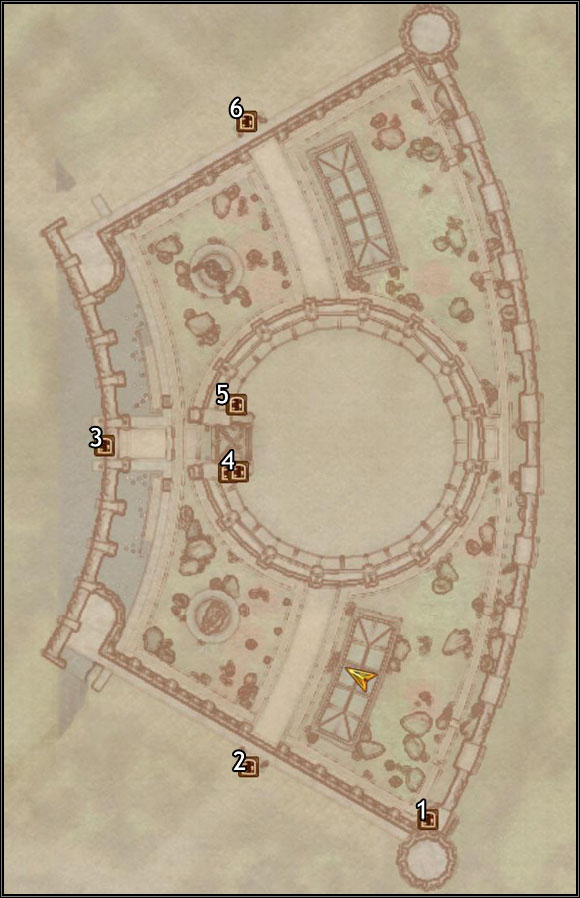
1 - Southeast Watch Tower
2 - Arboretum
3 - Green Emperor Way
4 - Arena
5 - Arena Bloodworks
6 - Market District
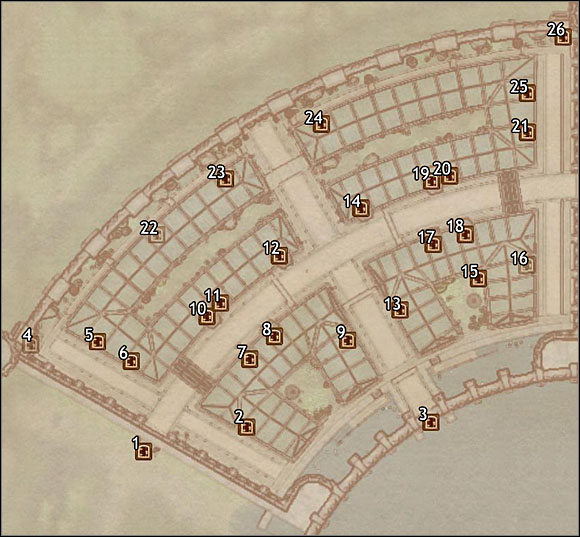
1 - Talos Plaza District
2 - Geem Jasaiin's House
3 - Green Emperor Way
4 - Northwest Watch Tower
5 - Adrian Decanius' House
6 - Dul gro-Shug's House
7 - Wumeek's House
8 - Fathis Ules' House
9 - Jastia Sintav's House
10 - Lorkmir's House
11 - Iniel Sintav's House
12 - The King and Queen Tavern
13 - Kastus Sintav's House
14 - Luther Broad's Boarding House
15 - The Elven Garden Sewers
16 - Hermina Cinna's House
17 - Roderic Pierrane's House
18 - Ra'jhan's House
19 - Dovyn Aren's House
20 - Ida Vlinorman's House
21 - Marinus Catiotus' House
22 - Irene Metrick's House
23 - Cyronin Sintav's House
24 - Guard House
25 - Othrelos' House
26 - North Watch Tower
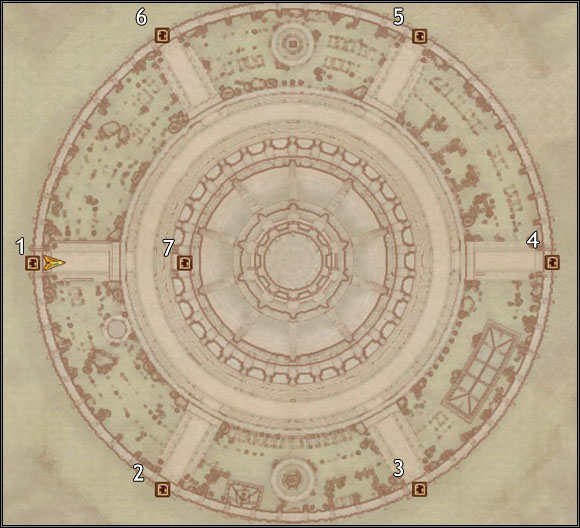
1 - Talos Plaza
2 - Temple District
3 - Arboretum
4 - Arena
5 - Market District
6 - Elven Gardens
7 - Elder Council Chambers
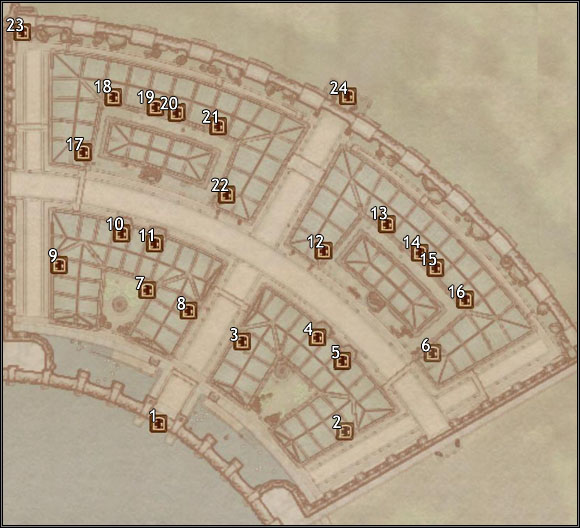
1 - Green Emperor Way
2 - The Main Ingredient
3 - First Edition
4 - The Merchants Inn
5 - A Fighting Chance
6 - Red Diamond Jewelry
7 - The Market Sewers
8 - The Copious Coinpurse
9 - Stonewall Shields
10 - Edgar's Discount Spells
11 - Rindir's Staffs
12 - Black Horse Courier
13 - Three Brothers Trade Goods
14 - Jensine's 'Good as new' Merchandise
15 - Warehouse
16 - The Feed Bag
17 - Divine Elegance
18 - Mystic Emporium
19 - Slash 'N Smash
20 - The Gilded Carafe
21 - The Best Defense
22 - Office of Imperial Commerce
23 - North Watch Tower
24 - City Isle
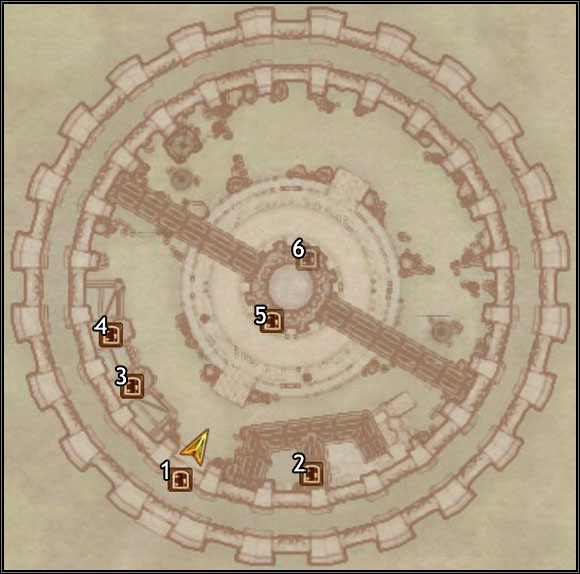
1 - City Isle
2 - Armory
3/4 - Imperial Legion Offices
5/6 - The Bastion
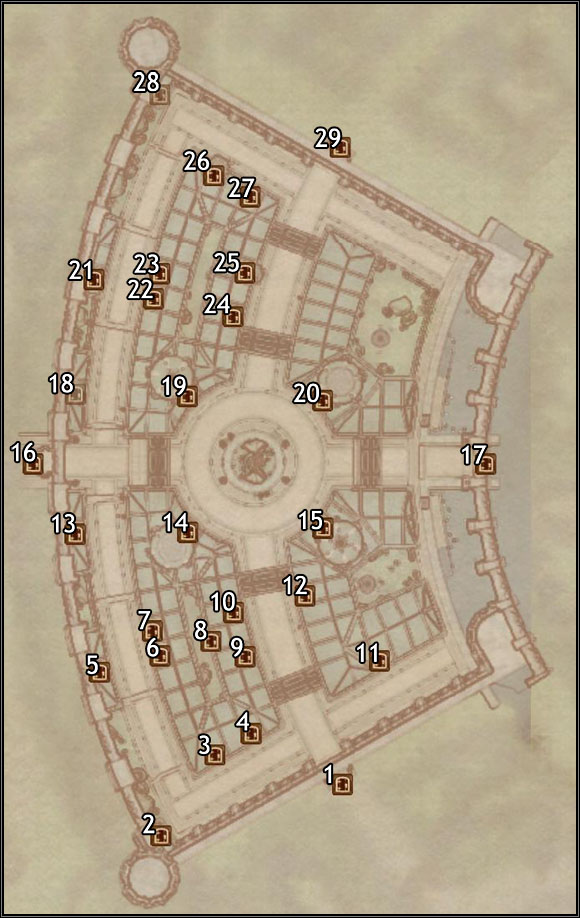
1 - Temple District
2 - Southwest Watch Tower
3 - Samuel Batien's House
4 - Angelie's House
5 - Ontus Vanin's House
6 - Matthias Draconis' House
7 - Agarmir's House
8 - Talos Plaza Sewers
9 - Helvo Atius' House
10 - Sevarius Atius' House
11 - Areldil's House
12 - Dorian's House
13 - Claudius Arcadia's House
14 - The Tiber Septim Hotel
15 - Jakben Imbel's House
16 - City Isle
17 - Green Emperor Way
18 - S'rathad's House
19 - Ulen Athram's House
20 - Umbacano Manor
21 - Usheeja's House
22 - Astinia Atius' House
23 - Soris Arenim's House
24 - Dynami Amnis' House
25 - Thamriel's House
26 - The Foaming Flask
27 - Ra'jiradh's House
28 - Northwest Watch Tower
29 - Elven Gardens District
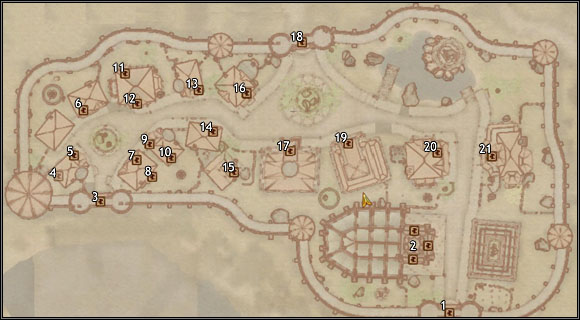
1 - City Isle
2 - Seridur's House
3 - South Watch Tower
4 - Stantus Varrid's House
5 - Roland Jenseric's House
6 - J'mhad's House
7 - Salomon Geonette's House
8 - Amantius Allectus' House
9 - Arboretum
10 - The Temple of the One
11 - Southwest Watch Tower
12 - Gilen Norvalo's House
13 - The All-Saints Inn
14 - Algot's House
15 - Hastrel Ottus' House
16 - Surius Afranius' House
17 - Talos Plaza
18 - Pennus Mallius' House
19 - Marana Rian's House
20 - Green Emperor Way
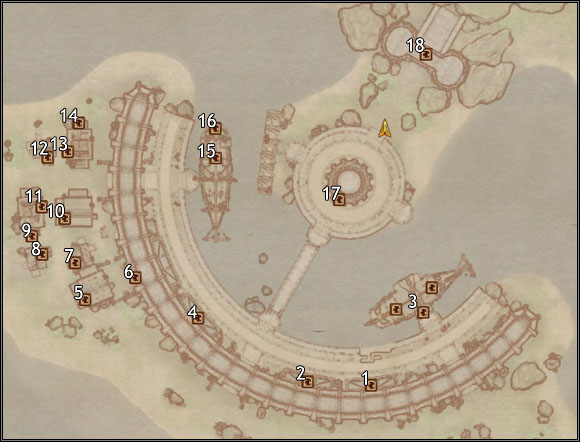
1/2 - Imperial Trading Company Warehouse
3 - The Bloated Float
4 - Imperial Trading Company Office
5 - Abandoned Shack
6 - Dareloth's Garden
7 - Methredhel's House
8 - Kvinchal's Shack
9 - Jair's Shack
10 - Myvryna Arano's House
11 - Jair's Shack
12 - Shack for Sale
13/14 - Armand Christophe's House
15/16 - Marie Elena Captain's Cabin
17 - Waterfront Lighthouse
18 - Temple District
1 - The Gold Coast
2 - Chapel of Dibella
3 - The Gold Coast
4/5 - Jesan Sextius' House
6 - Quill-Weave's House
7/8 - Newheim the Portly's House
9/10 - Pinarus Inventius' House
11/12 - The Count's Arms
13 - Arvena Thelas' House
14 - Silgor Bradus' House
15 - Abandoned House
16 - Morvayn's Peacemakers
17 - Anvil Mages Guild
18 - The Gold Coast
19 - Fighters Guild
20 - Heinrich Oaken-Hull's House
21 - Benirus Manor
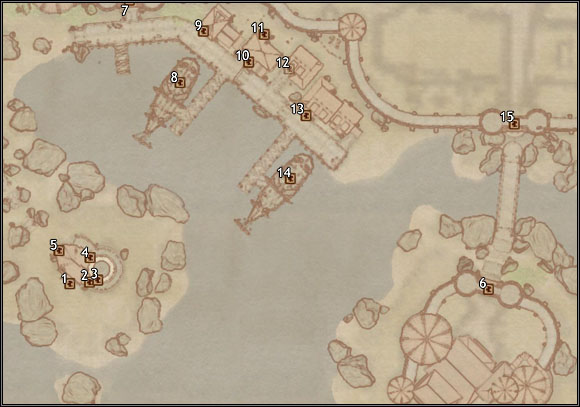
1 - Anvil Lighthouse Cellar
2/4/5 - Ulfgar Fog-Eye's House
3 - Anvil Lighthouse Tower
6 - Anvil Castle Courtyard
7 - Anvil
8 - The Serpent's Wake
9 - The Flowing Bowl
10/11 - Lelles' Quality Merchandise
12 - Harborside Warehouse
13 - The Fo'c's'le
14 - The Sea Tub Clarabella
15 - Anvil
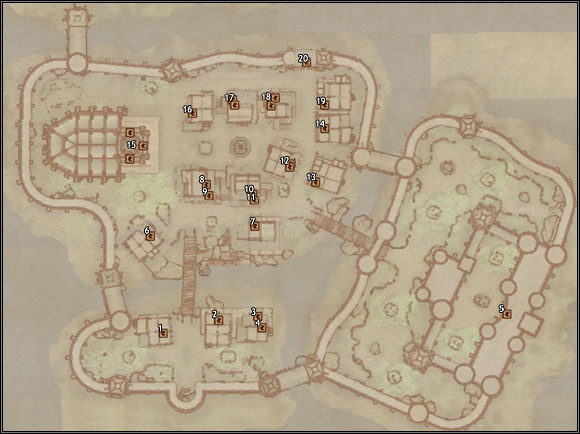
1 - The Lonely Suitor Lodge
2 - The Archer's Paradox
3 - House for Sale
4 - Luciana Galena's House
5 - Castle Bravil Great Hall
6 - Bravil Mages Guild
7 - A Warlock's Luck
8 - Aleron Loche's House
9 - Henantier's House
10 - Skooma Den
11 - Carandial's House
12 - Dro'shanji's House / Andragil's House
13 - Fighters Guild
14 - The Fair Deal
15 - Great Chapel of Mara
16 - Varon Vamori's House
17 - Ungolim's House / Ranaline's House
18 - City Swimmer's House / S'krivva's House
19 - Silverhome on the Water
20 - The Nibenay Valler
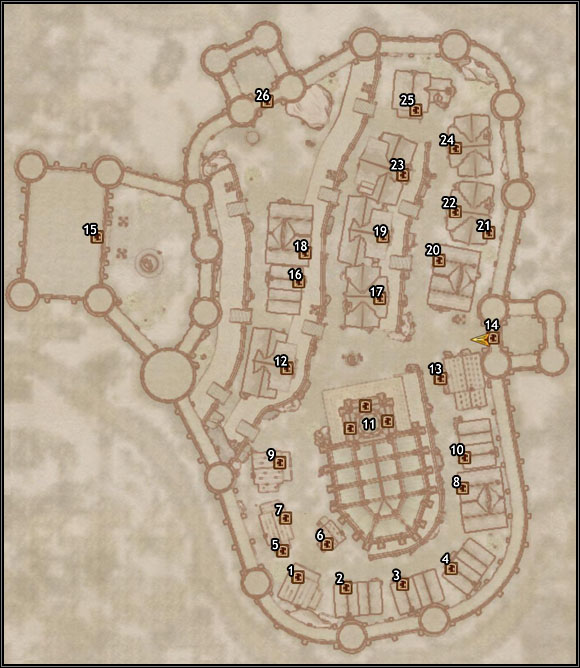
1 - Jearl's House
2 - Arnora's House
3 - Regner's House
4 - Helvius Cecia's House
5 - Istrius Brolus's House
6 - Ongar's House
7 - Istrius Brolus's House
8 - J'Ghasta's House
9 - Bradon Lirrian's House
10 - Brotch Calus' House
11 - Great Chapel of Talos
12 - Jerall View Inn
13 - Olav's Tap and Tack
14 - The Jerall Mountains
15 - The Great Hall
16 - Novaroma
17 - Honmund's House
18 - Nord Winds
19 - Bruma Fighters Guild
20 - House for Sale
21 - Baenlin's Basement
22 - Baenlin's House
23 - Bruma Mages Guild
24 - Lyra Rosentia's House
25 - Hammer and Axe
26 - The Jerall Mountains
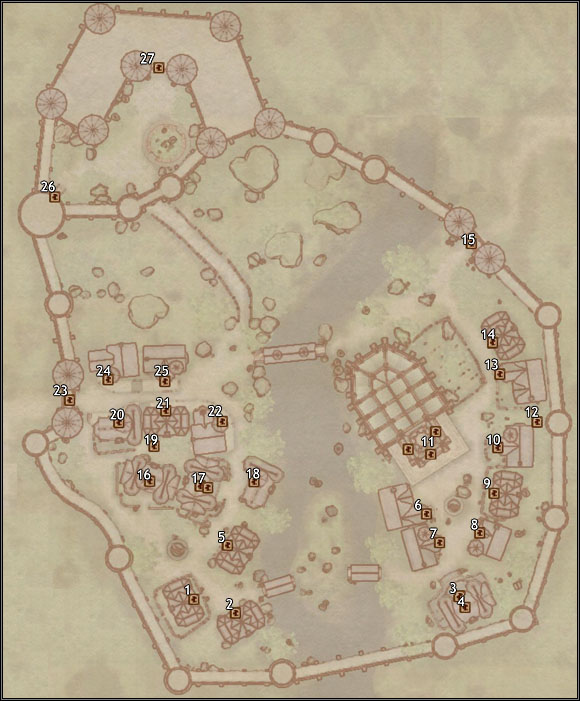
1 - House for Sale
2 - Willow Bank
3/4 - Riverview
5 - Rythe Lythandas's House
6 - Aldos Othran's House
7 - Llevana Nedaren's House
8 - Ohtimbar's House
9 - Ganredhel's House
10 - Abandoned House/Dark Brotherhood Sanctuary
11 - The Great Chapel of Arkay
12 - Dark Brotherhood Sanctuary Well
13 - Oghash Gra-Magul's House
14 - Bazur Gro-Gharz's House
15 - The Nibenay Basin
16 - Mages Guild
17 - Cheydinhal Fighters Guild
18 - Magrum gra-Orum's House
19 - Mages Guild Well
20 - Cheydinhal Bridge Inn
21 - Mach-Na's Books
22 - The March Rider
23 - The Nibenay Basin
24 - Newlands Lodge
25 - Borba's Goods and Stores
26 - Cheydinhal Castle Guard Barracks
27 - Cheydinhal Castle County Hall
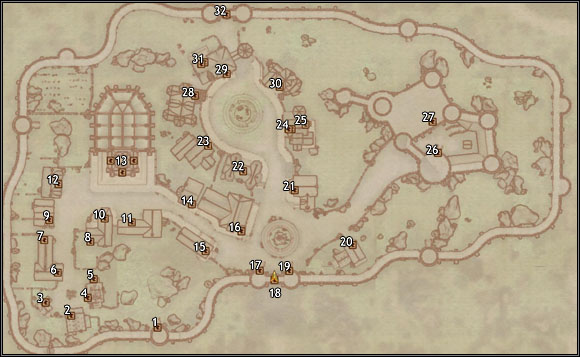
1 - Southwest Wall Tower
2 - Valus Odiil's House
3 - Malintus Ancrus' House
4/5 - Modryn Oreyn's House
6/7 - Reynald Jemane's House
8/10 - Alberic Litte's House
9 - Casta Scribonia's House
11 - Jirolin Doran's House
12 - Eugal Belette's House
13 - Chapel of Stendarr
14 - Renoit's Books
15 - Northern Goods and Trade
16 - The Oak and Crosier
17/19 - Chorrol Castle Gate Tower
18 - The Great Forest
20 - The Grey Mare
21 - Fire and Steel
22 - Francois Motierre's House
23 - Arborwatch
24/25 - Vilena Donton's House
26 - Castle Chorrol Barracks
27 - Castle Chorrol Great Hall
28 - Chorrol Mages Guild
29/31 - Fighters Guild
30 - Rimalus Bruiant's House
32 - The Great Forest
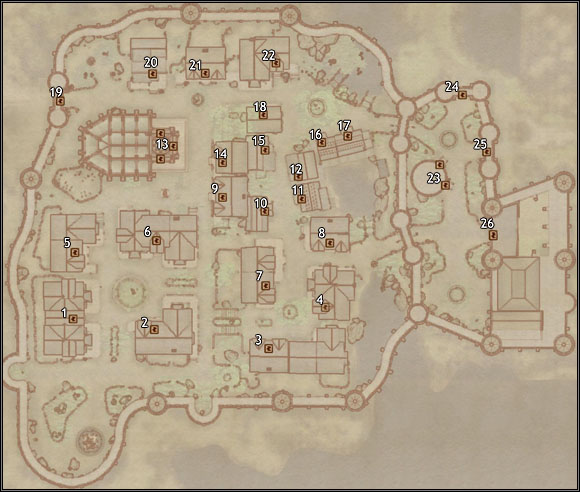
1 - Leyawiin Mages' Guild
2 - Blackwood Company Hall
3 - Mahei's House
4 - J'Bari's House
5 - Southern Books
6 - Fighters' Guild
7 - Rosentia Gallenus's House
8 - Adharji's House
9 - Three Sisters' Inn
10 - House for Sale
11 - Weebam-Na's House
12 - Dar Jee's House
13 - The Great Chapel of Zenithar
14 - Margarte's House
15 - Cingor's House
16 - Otumeel's House
17 - Betto Plotius' House
18 - Ra'Jahirr's House
19 - Blackwood
20 - Five Claws Lodge
21 - The Dividing Line
22 - Best Goods and Guarantees
23 - City Watch Barracks
24/25 - Cyrodiil
26 - Castle Leyawiin County Hall
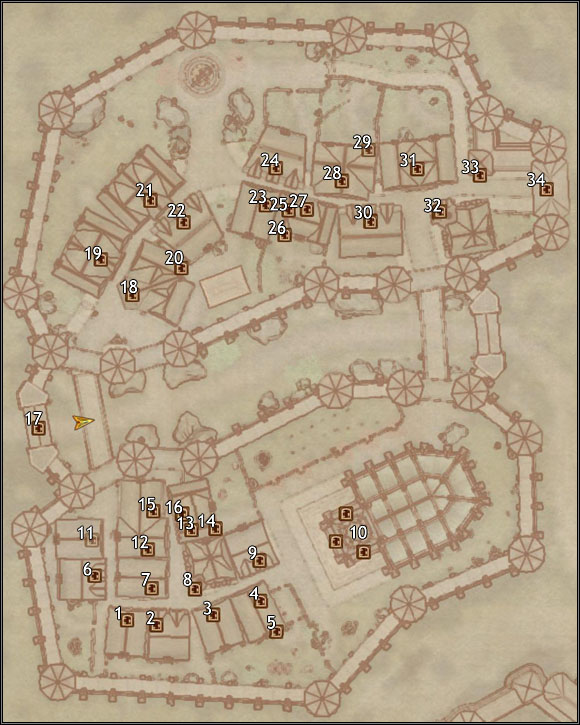
1 - Undena Orethi's House
2 - Uuras the Shepherd's House
3 - Bernadette Peneles' House
4/5 - Tamika's House
6 - Ambroise Canne's House
7 - Salmo the Baker's House
8 - Glarthir's House
9 - Shameer's House
10 - The Great Chapel of Julianos
11 - Reman Broder's House
12 - Two Sisters Lodge
13/14/16 - Surilie Brothers' House
15 - Two Sisters Lodge
17 - The West Weald
18/20 - West Weald Inn
19 - Skingrad Fighters Guild
21 - Skingrad Mages Guild
22 - Colovian Traders
23 - All Things Alchemical
24 - Lazare Milvan's House
25/26/27 - Hammer and Tongs
28/29 - Nerastarel's House
30 - Rosethorn Hall
31 - Summitmist Manor
32 - Toutius Sextious' House
33 - Skingrad Town Guard House
34 - The West Weald


 The Da Vinci Code Game Guide & Walkthrough
 The Darkness II Game Guide & Walkthrough
 The Crew Game Guide & Walkthrough
 The Bureau: XCOM Declassified Game Guide & Walkthrough
 The Godfather II Game Guide & Walkthrough