
This is a Red Faction: Guerrilla guide. You can find many interesting advices here. I wanted to describe the main plot in a very detailed way, in addition you can find some informations about side missions too. Moreover, you can find here some equipment descriptions (with all upgrades) which you can buy for scrap. I have created some maps too. They should help all readers who want to destroy more than 500 objects deployed in the games world. I will try to answer the most important question: what is the best weapon for each mission. At the end, there is a list of achievements and trophies that will certainly interest all console players.
Lukasz "Terrag" Znojek
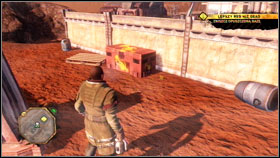
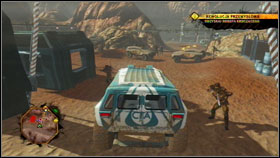
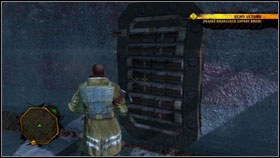
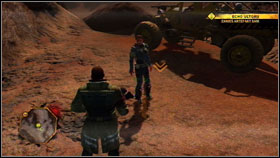
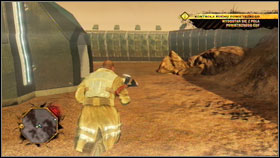
When your brother will end his speech run downstairs and take all scrap that you will find near the car #1. Then you have to find a way to enter the base. Use your hammer on the wall to do that #2.
You have two main objectives here. The first one is laboratory #1, where you can use remote explosives. The second one is tower. To destroy the building you have to go inside and deploy the bomb on the wall. Then exit the building and detonate explosives. When the construction will be destroyed you have to take care of the tower #2. This will be a simple task - couple of attacks with a hammer will be enough. You have to notice that some pieces of the building may fall on your character. Simply run away in the proper time.
Remember about collecting the scrap that you can find near the construction #1. Your training mission will be over when you will return to your brother #2.
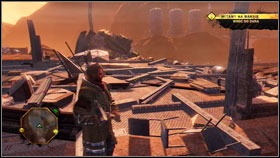
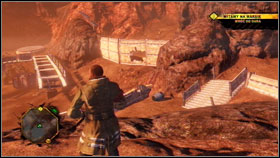
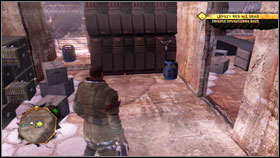
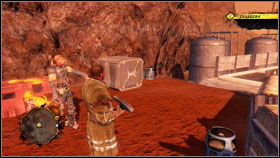
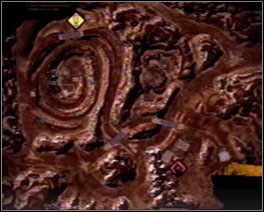
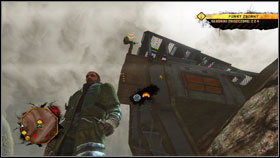
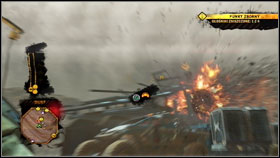
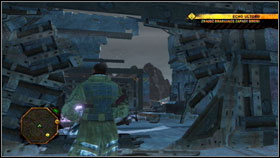
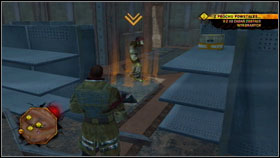
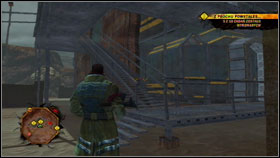
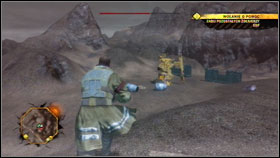
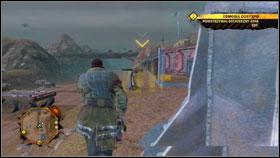
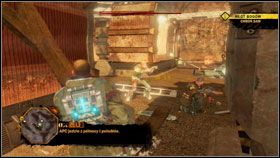
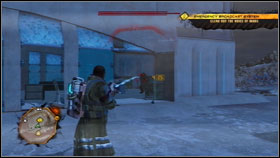
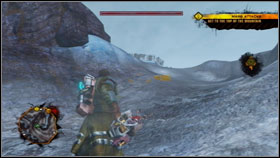
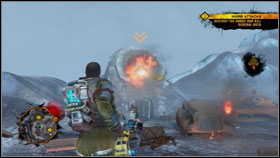
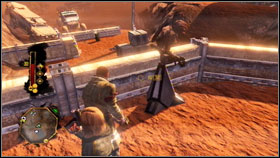
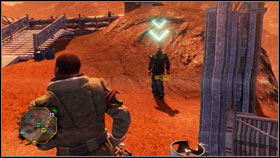
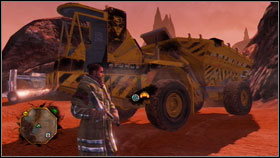
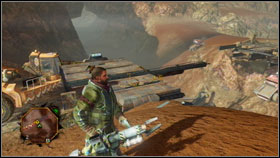
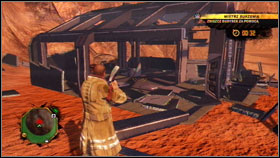
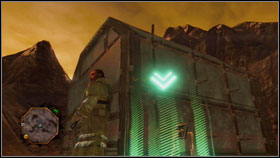
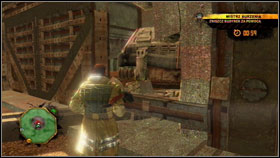
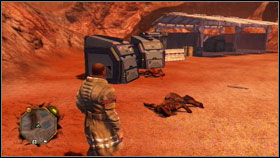
The first of our main missions is to dismantle the abandoned guerrilla base. When you will be there you will see the whole terrain from above #1. Go to the stairs and you will find a chest with ammunition there #2.
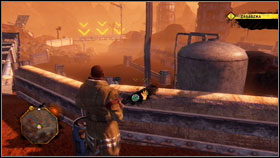
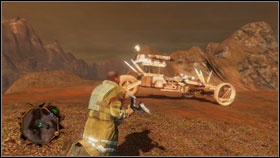
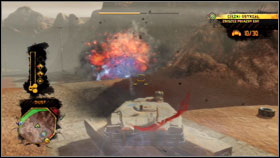
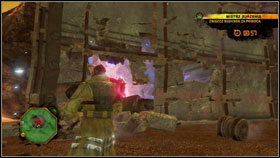
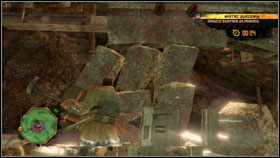
Red Faction members were so kind, that they have left some hydrogen barrels here #1. Moreover outside the building you will find many explosive barrels and petrol tankers. It is only up to you if you decide to destroy the base by setting some remote explosives, or by shooting the tankers #2. After a while couple of EDF soldiers will show up, but they shouldn't be a problem for you. You can even try to kill them with a hammer. After completing the quest you have to go back to the Parker hideout.
Reward: 50 scrap + bonus for morale.
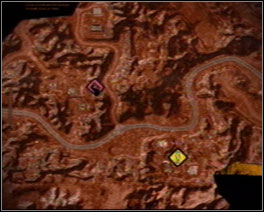
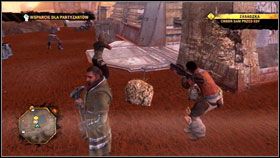
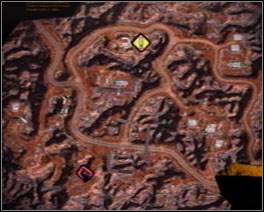
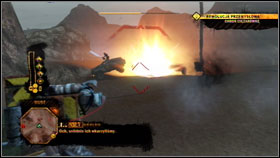
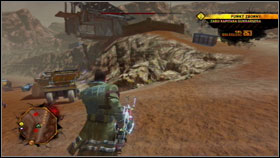
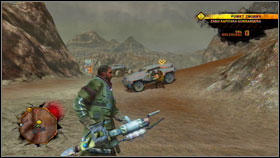
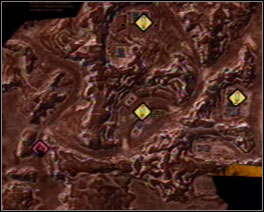
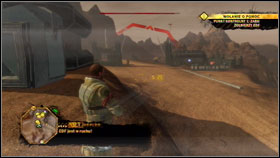
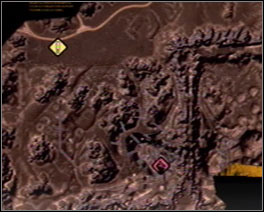
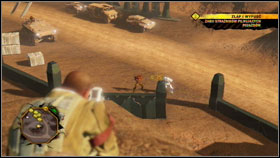
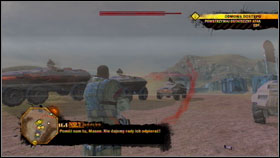
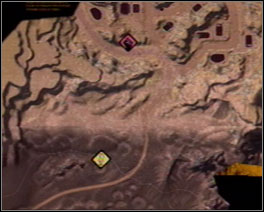
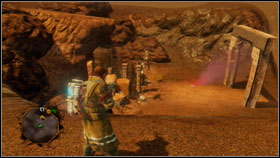
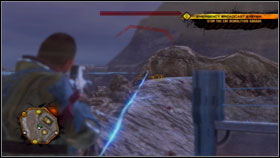
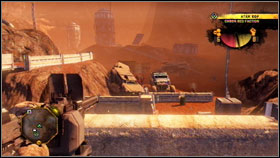
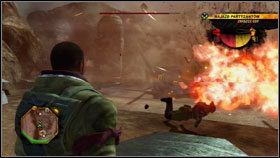
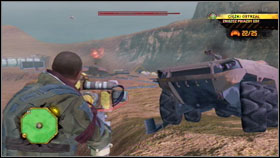
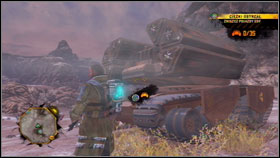
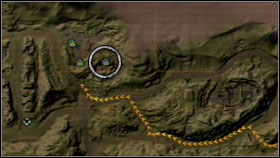
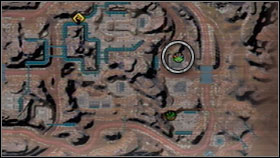
First you have to find Sam, who is in the base marked on the map. Use the car to get there. After a while you will find out that the guerrilla forces are fighting with EDF soldiers #1. Kill all enemy troops. Sam #2 will lead you to the hill from which you will have a great view on the base entrance.
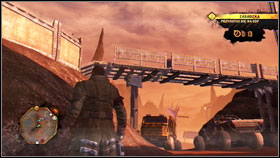
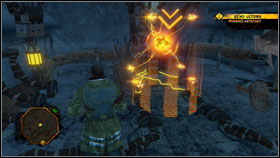
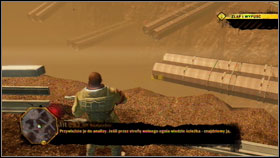
Leave some explosive charges under the bridge and then (if you have a while) you can block a road with some vehicles #1. Take control of the turret located on the wall #2 and start the massacre.
Reward: 50 scrap + bonus for morale.
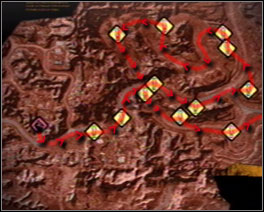

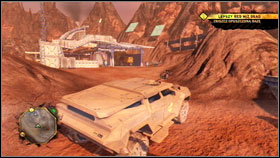
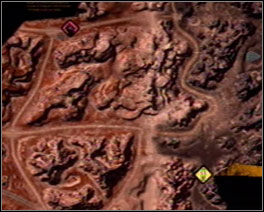
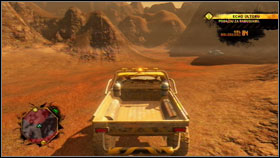
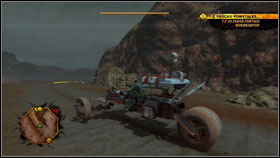
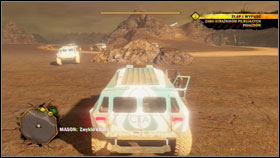
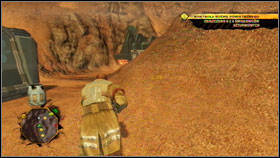
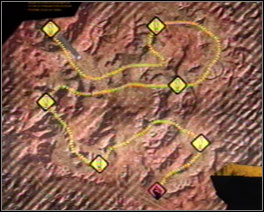
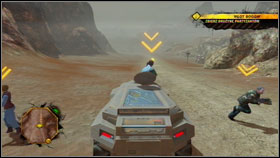
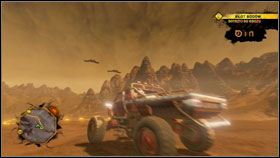
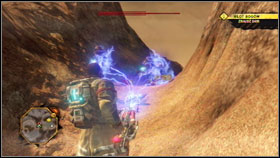
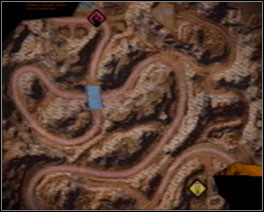
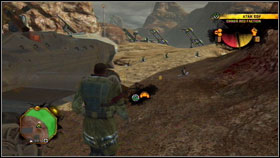
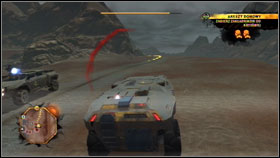
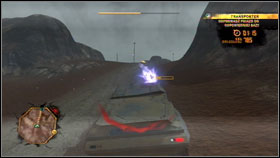
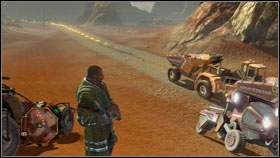
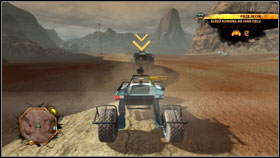
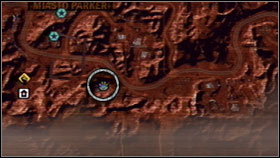
Take control of the marked car #1 and go straight ahead. It is good to check the route first. Your main objective is to get to the 12 violet transmitters #2. When you will reach the first one - some EDF troops will attack you.
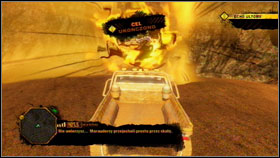
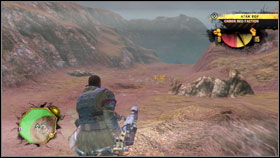
Remember to protect your car. If somehow it will be destroyed you will have to start the whole mission from the beginning. It is why you have to avoid the enemy bullets #1. Now, you have to reach all transmitters (notice that you don't have to smash them with your car, strength is not important here). In one moment you will have to jump over the road #2. Now you have only 3 more to go.
Reward: 50 scrap + bonus for morale.

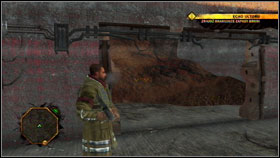
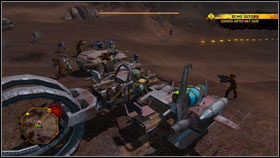
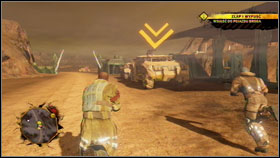
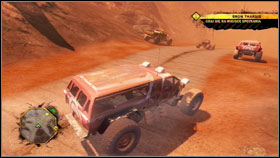
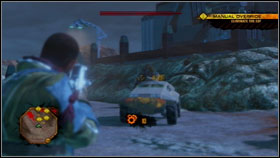
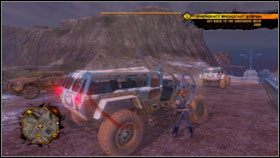
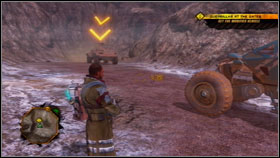
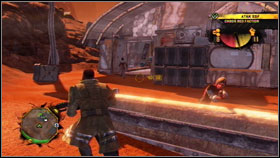
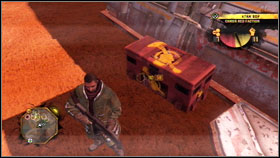
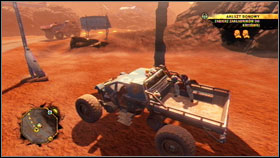
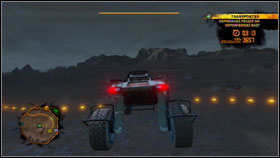
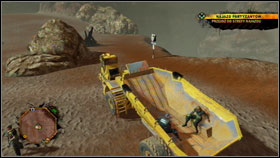
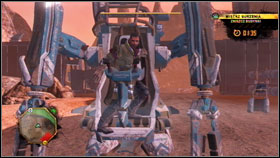
It is good to buy Salvage Collector upgrade before the quest. It will allow you to collect the scrap from left vehicles. You have to get inside the EDF base so enter the complex with maximum speed and crush all barricades #1. Do not fight with soldiers. Just go to the back of the hangar and crush the wall with your hammer to get the mech #2.
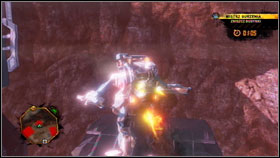
With that robot you can easily destroy all buildings in the base #1. Just demolish all structures and collect the scrap. If you have time, you can easily gather loads of it here. When you will be ready just end this missions by parking your machine on the special carriage #2.
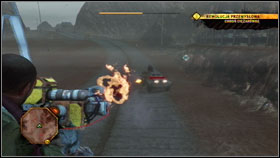
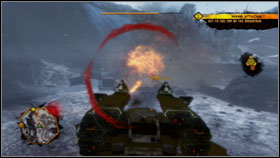
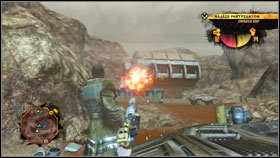
Take control of the turret #1 and shoot the cars that are chasing you. Rockets that are exploding near the cars can be very effective too (there is a chance that you will hit more than one vehicle) #2. When the guerrilla will destroy the bridge - the mission will be over..
Reward: 75 scrap + bonus for morale.
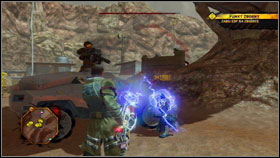
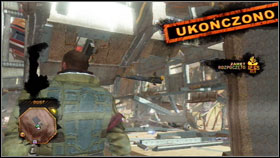
Kill soldiers inside the car with the welder #1. Then get back to your previous place and kill the rest of the enemy troops #2.
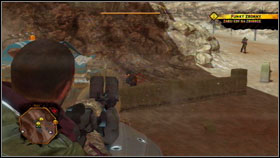
When all soldiers will be dead your main objective will be to destroy four loudspeaker located on the roof #1. You can do it from the long distance if you have rocket launcher #2. But if you don't, then you will have to use your hammer or remote explosives.
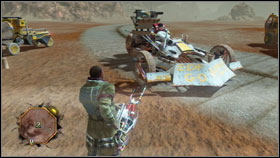
The last target is to kill general. You have to find a car #1 and start chasing your enemy. When you will be in front of him he will start shooting #2. Do the same but in a much more effective way.
Reward: 75 scrap + bonus for morale.
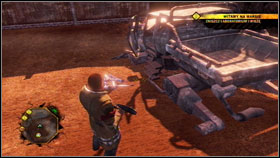
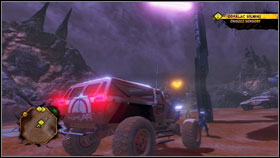
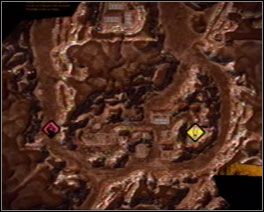
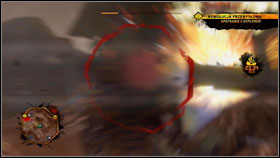
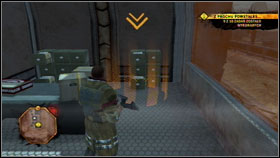
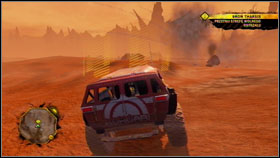
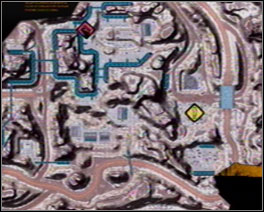
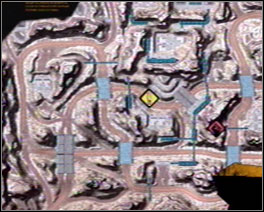
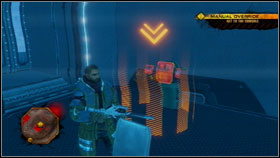
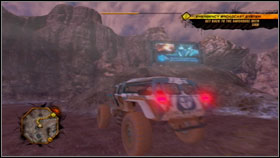
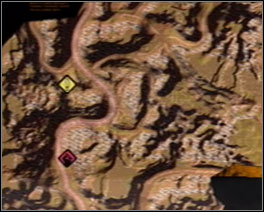
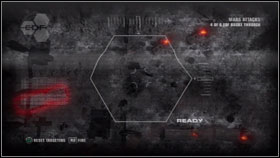
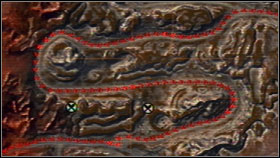
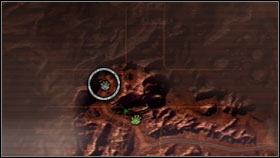
When you will get to the Marauders area you will have to keep the proper distance from the vehicle you are following. Look on the mini map. You have to be between the two red circles #1. After a while you will have to speed up (when you will get to the hologram) #2.

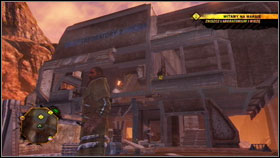
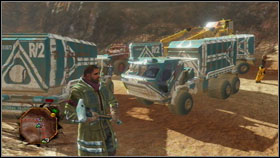
You will find the followed vehicle and some marauders buildings at the end of your journey #1. Go down and reach the opposite side of the complex. Find a huge hole in the wall #2 and go to the right. Then turn left and go upstairs.
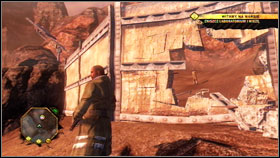
You will find a metal door there #1 and a hangar wall #2. Use your hammer to destroy them and go further.

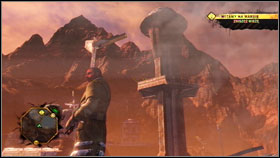
Now you will notice a huge building #1. Destroy the wall to get to the artifact that you have to steal #2.
Go back, but beware of the EDF troops. Then steal Marauders car #1 and go to the Sam #2.
Reward: 75 scrap + bonus for morale.
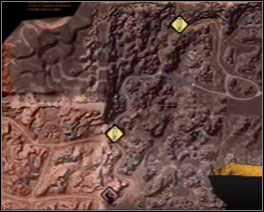
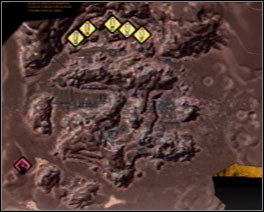
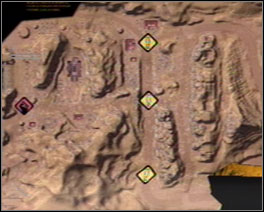
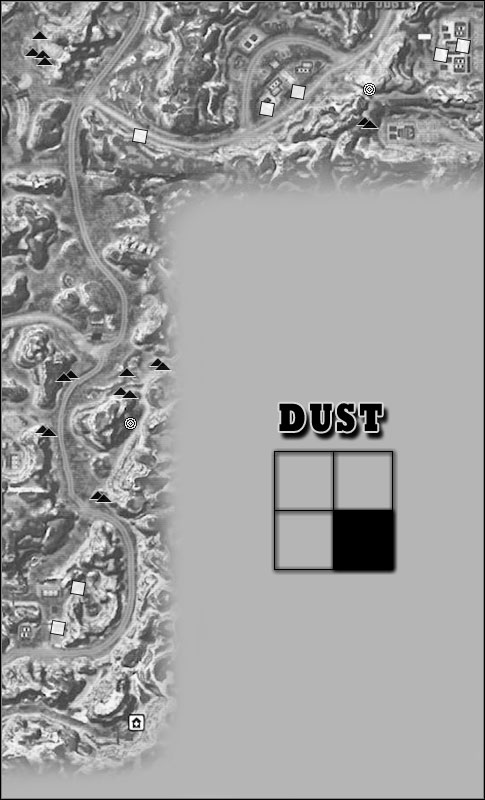
Our objective is to get to the 10 targets in Dust. In the first marked place we will find 5 of them, 3 in the north and 2 in the south. When you have to find a human #1, then you will have only to get close to him. Sometimes you will have to examine some area #2 (second target in eastern area).
To move faster, you can use vehicles (the are many of them here) #1. Try not to destroy any walls because it is easy to damage some computer console or other objective #2.
Reward: 100 scrap + bonus for morale.

You have to kill all soldiers in marked EDF bases #1. The are not so many of them in the first camp, so it should be very easy.
In the second one you can get a mech #1. Now it is very easy to kill all enemies #2 and, couple of seconds later, some EDF cars.
Reward: 75 scrap + bonus for morale.
Along with some guerrilla soldiers #1, you have to go to the hill and prepare your machine gun #2. You have to kill all enemies, but remember not to destroy the car.
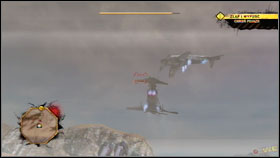
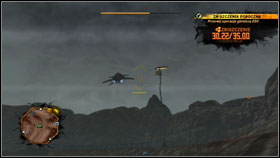
Get close to the car #1 when all enemy soldier will be dead. Now, you will take control of a AA Gun. Your objective is to shoot down every aircraft #2.
Do not forget about EDF cars that are chasing you #1. The hole in the ground #2 will end our mission.
Reward: 75 scrap + bonus for morale.

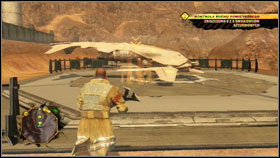
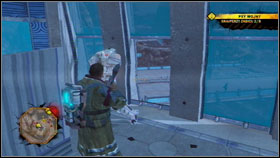
You can do it in normal or silent way. Personally, I can recommend you the first option. It is because completing missions in silent way in Guerrilla is very difficult (mostly because of the game mechanics and NPC's intelligence). That's why you have to get to the planes as fast as it is possible #1 and leave some bombs there #2.
To the next machines you can get through the gorge #1. When all planes will be destroyed (with bombs or machine gun) you have to run away. The best option is to make a hole in the wall with your hammer #2.
Reward: 100 scrap + bonus for morale.

You have to kill some enemies in the marked building #1, and you have to run to all you targets #2. After a while EDF cars will show up. Simply destroy them with rocket launcher, proximity mines or remote charges.
You have to handle with three waves. Every time you will see enemy vehicles on your mini map. You can use ground rocket launcher to strengthen your firepower #1. There will be nothing wrong when some enemy troops will survive. They will simply gather near the marked building waiting for your rockets #2.
Reward: 75 scrap + bonus for morale.
You have to destroy five tanks. The first one will come from the south #1, two others from the north and last two from north and south. Use your rocket launcher #2 (you will need four rockets to destroy them). Refill your ammunition near special chests.
Try to move you character, because your enemies can shoot you with easy. Both infantry #1 and tanks #2.
Reward: 100 scrap + bonus for morale.
The beginning of this mission is simple. You have to get to some checkpoints along with some guerrilla soldiers #1. You have to be very precise and drive through the center of them #2.
After this, you will have to destroy three generator cores. You cannot do this with hammer #1 because they will explode. There is another option: destroy wall with machine gun, or you can simply do it from the long distance by using a rocket launcher #2.
Reward: 100 scrap + bonus for morale.
Now you will have to kill some businessmen in the targeted building #1. Go to the hill, you will have a great view there #2.
Take your rocket launcher and start the massacre #1. You can shoot wherever you want to. The best option is to start from the downstairs. If someone will be still alive then get closer to him and kill him in another way #2.
Reward: 100 scrap + bonus for morale.
You have to kill eight snipers. They are standing in the upper floors of the buildings (near windows or on the roofs). When you will find them, you can kill them in many ways: hit them with your hammer #1 or with rocket launcher #2.

You can use nano gun and jetpack to get on the roof #1. Two shots will be enough for each sniper #2.
Reward: 100 scrap + bonus for morale.
Take "Charlies Angels" #1 and go to the marked target. Then you will to go to your hideout in badlands. Some EDF bombers will fly along with you #2.
Your base is completely destroyed. Luckily you will find Sam there with some guerrilla soldiers #1. Our friends will die soon for sure, but not Sam. She is almost immortal. You have to watch for yourself then by killing as many enemies as it will be possible. You can use Arc Welder #2.
After the cut scene buy upgrade called Radiation Shielding and go to the Marauders base #1 (find the red smoke #2 that is very characteristic for main missions). This will be your new hideout in badlands now.
Reward: 100 scrap + bonus for morale.
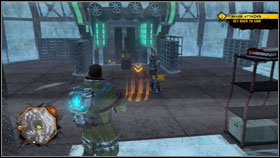
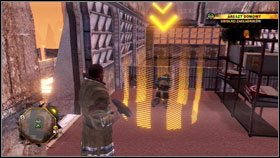
The complex will be guarded by some soldiers. Kill them with nano gun #1. When the terrain will be clear, you can get to the main computer console #2 you will be able to take control of the satellite now.
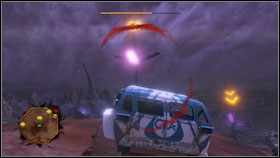
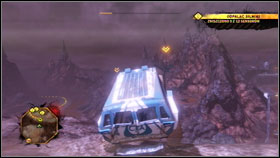
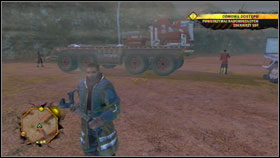
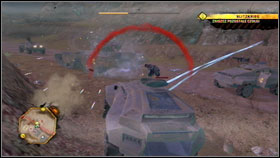
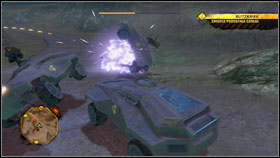
Truck marked with yellow must be guarded. Keep your sight before it #1 and destroy every red object. When all enemies will be dead you will notice that EDF has prepare a trap #2. Shoot them with this satellite and the mission will be over.
Reward: 100 scrap + bonus for morale.
Take Sam #1. During the journey, you have to destroy some barricades #2. Do not fight with them, just drive.
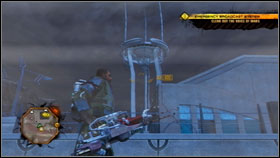
Kill some soldiers at the radio broadcast station #1 and wait for Sam, she will start the transmission. Take your position under the high transmitter #2.

Nano gun or sniper rifle will help you with killing all soldiers. They will come only from two directions. The first one is hills #1, the second one - canyon #2. If some of your enemy will run away, make sure that they didn't set a bomb near the building.
Take Sam #1 to the hideout #2.
Reward: 100 scrap + bonus for morale.
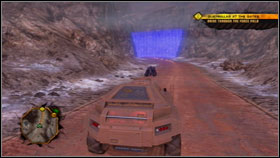
Take control over the modified car #1. You have to drive through the energetic barrier #2 that leads to the northern area.
Your next target is to destroy the core #1 that power up the barrier. You have to do it in the same way that before - use nano gun to destroy the wall or rocket launcher from the safe distance. Then four new targets will show up. You have to find mech #2.


Now you have to destroy all buildings #1. Notice, that your targets are deployed on the hills so you have to be cautious #2. You should handle with all structures with easy.
Reward: 100 scrap + bonus for morale.
Sam is waiting for us in targeted place. She will ask you to use the computer console #1. Your next target is to get to the satellite console, downstairs #2.
Now you have to destroy all EDF forces that will show up #1. You will notice some slow tanks too #2. Shoot them later. They are very slow and as a matter of fact the rest of vehicles will stop near them making our quest very easy to complete.

Return to your woman #1 and she will order you to attack the enemy troops. Luckily, you can use an upgrade version of your rocket launcher now #2.

You will have to go through the guarded EDF terrain now. It is not very simple. You have to handle with barricades with soldiers and ground turrets. Shoot all the time #1 and try not to loose your way. At last you will get to the hill and you will have to take a walk. Some of your guerrilla friends will take care of EDF infantry #2.
Go higher #1. You will have to destroy some well-armed vehicles with rocket launcher. In your free time you have to destroy shield marked with yellow #2. That's the end of the main plot. You can return to game now to complete other quests.
Reward: 100 scrap + bonus for morale.
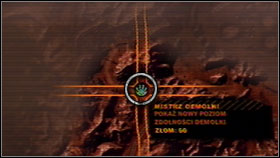
In every sector we will be able to do a series of side quests. Icon of each of them can be found on the world map. However - if your status is not green (and therefore we are wanted by EDF), is likely that these icons will disappear for a moment (they will be back when the situation will be normal once again). We have following types of tasks:
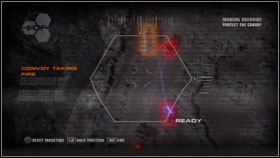
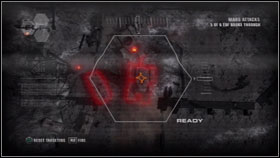
Upon reaching the place, the area on the mini map will be separated from the rest with green, and in the upper right corner of the screen, you will see an indicator showing the current situation on the battlefield #1. Soon, the enemy soldiers will show up and that's why it is good to find (white icon) a chest with ammunition where you can refill your ammunition #2.
Sometimes we can find machine gun located near the defense wall #1. The mission should be easy with it. While shooting your enemies try hide yourself from bullets #2. Look on the mini map too, your enemies will be shown there (red color).
It is also a good idea to use some remote charges or proximity mines #1. Rocket launcher can be very effective too #2. It is less precise but much more deadly. When the last enemy soldier will be dead our quest will be over.
This quest is given by the guerrilla soldier #1 marked with green. Do not enter with the main entrance. Make a hole in the wall with hammer (rocket launcher can kill some hostages so do not use it) #2.
Rebels are marked with yellow #1. Some of them are upstairs #2 others are in different rooms in the building. Remember that they can be killed very easily. Do not hurt them or shoot them. But remember: to end this mission you have to rescue only one hostage.
Try to avoid vehicles where your friends will be unsecured #1. They can fell out of the car very easily and that will make your escape much slower. The best option is to use well defended EDF vehicles #2.
This quest is about transporting the vehicle to our base #1. Beware, because you do not have much time to do it. There are many types of cars in these tasks and that can be difficult #2.
In couple of cases you will have to deal with some real fire power #1 and barricades. Do dot stop and fight. Just drive and keep to the patch #2. Riding on roadside sometimes can be very effective too.
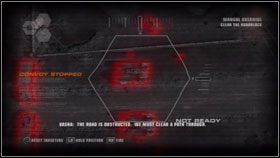
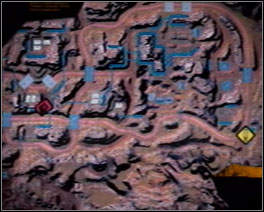
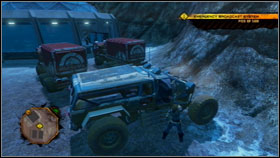
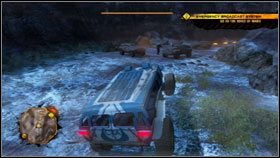
The convoy track will be marked with red #1. If the quest is located in canyon it is the best for you. Chose the point, and deploy some heavy trucks there to block the road #2.
A very good solution is to destroy the bridge #1. But remember that it will make your journeys more difficult in the future. The last thing is to prepare the trap. Deploy some proximity mines and remote charges #2 and wait for your enemies with rocket launcher. If you have to steal the vehicle kill soldiers that are inside with arc welder and simply run away.

This quest we can divide to three stages. The first one is to catch courier car and destroy it (driver will go out). Some barricades or car with turret will be handy here #1. After the courier death take documents #2 and lose EDF soldiers that are following you.
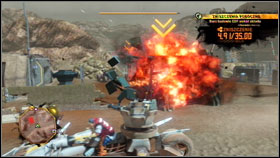
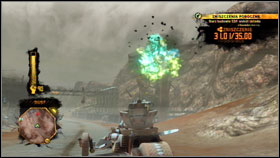
When you will accept this mission you will find yourself with some guerrilla soldiers and a car #1. Go as fast as possible to the marked area. You do not have much time so be quick. When you will reach the place you will see a bar showing the number of dead soldiers #2. One of the option to end the mission is to kill every enemy.
The second option is to destroy #1 marked building. Sometime it could be very difficult because building are quite large and your enemies are attacking you all the time. So the best option is to kill everyone #2 and the guerrilla forces will do the rest.
Get inside the guerrilla car #1 and take control of rocket launcher. You have to do damages that will be worth imposed amount of money. When you will be attacked by enemy vehicles, destroy them. Do not forget about planes #2. One is worth 5 millions.
Try to look in front of you. You can start destroying buildings #1 as soon as you will see the yellow mark. Do not forget about lesser objects too #2. Try not to destroy bridges, they can be handy in the future.
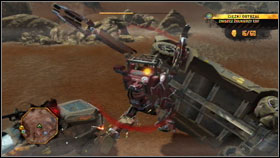
The main objective is to use some well armed vehicle and kill some enemy troops or destroy vehicles. We will be able to use robots #1 and even tanks #2.
Sometimes you will have to use ground rocket launcher #1 but in some missions you will be able to use the most deadly weapon in the game #2. Generally, the quest is simple: just kill everything. It is also a very good occasion to collect some scrap.
Apart from the quests mentioned in the previous chapters, we will be able to deal with 16 tasks from Demolition Master set. These quests are time limited and we will be given a weapon that we have to use. Below you can find some descriptions, maps and advices that will be helpful during the game.
Sector: Parker
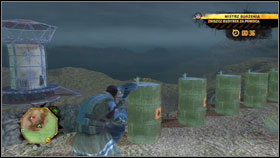
Armament: hydrogen tanks (13), pistol (64)
Time: 03:00
The best time: 01:00
Reward: 25 scrap
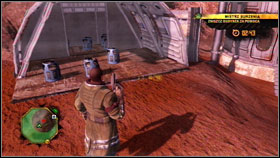
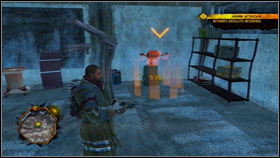
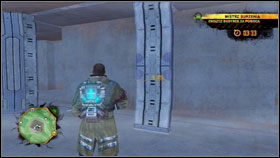
Take hydrogen tank #1 and now you will have two choices. The first one is to throw the barrel, but is not very accurate. The second one is to move tanks to the marked area and shoot them with your pistol from the secure distance #2.
Sector: Parker
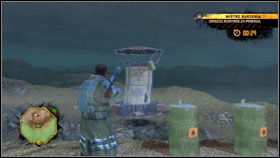
Armament: Rocket launcher
Time: 00:55
The best time: 00:16
Reward: 25 scrap
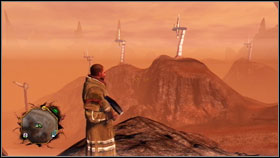
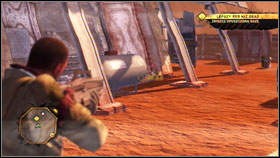
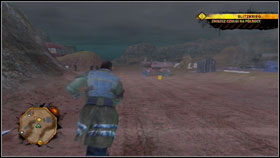
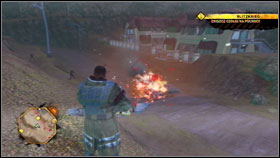
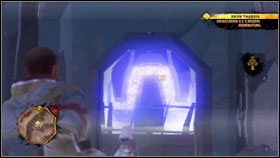
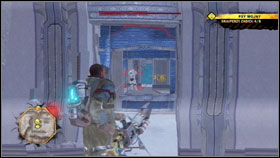
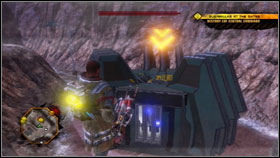
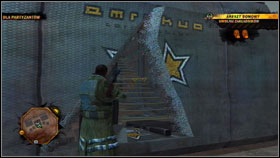
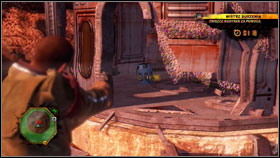
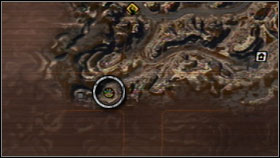
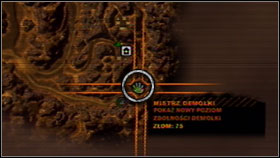
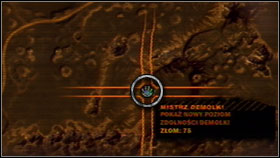
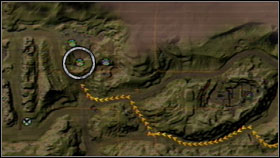
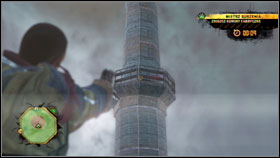
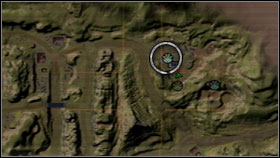
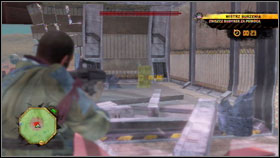
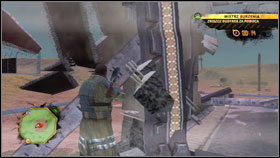
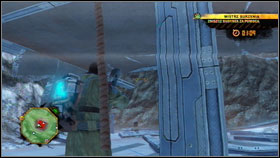
We can see many of the transmission towers on the horizon #1. We have to destroy them #2. There is no difference if you will blow up the whole construction or just scratch the transmitter. Look very carefully because they are very wide spread and you have to destroy all of them.
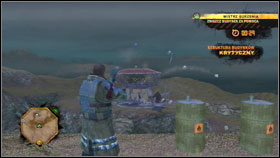
Sector: Free Fire Zone
Armament: Hammer, Remote Charges (12)
Time: 01:20
The best time: 00:20
Reward: 50 scrap

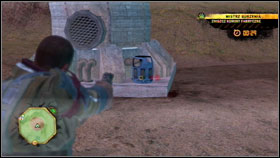
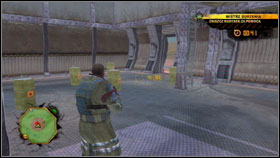
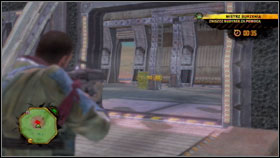
Our target is a small building #1. We can use some remote charges #2 but they are not so effective in this situation.
That's why the best weapon in this mission is hammer. Try to destroy walls and leave everything that is inside #1. After few second you should see that the building is almost destroyed #2. Few more hits and the quest will be completed.
Sector: Free Fire Zone
Armament: Hammer, Mech
Time: 01:45
The best time: 01:00
Reward: 50 scrap
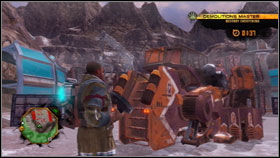
This is our first contact with mechs #1. We have four targets (marked with red). To move between them you can use flying ability of your robot #2.
I must admit that this is not a very complicated quest. We are walking and destroying everything that we can see #1. Destroy buildings (using our robot weigh) by walking through them #2.
Sector: Dust
Armament: Hammer
Time: 02:00
The best time: 00:55
Reward: 50 scrap
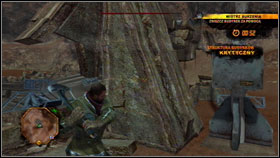
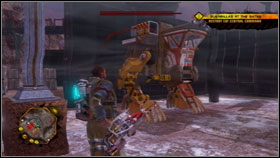
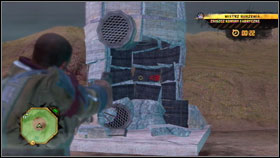
Another mighty construction #1 that we have to destroy. Our weapon is not so strong. We have to run all over the building and hit the walls #2 with hammer.
Sector: Dust
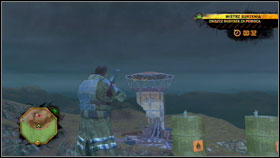
Armament: Rocket Launcher (9)
Time: 00:50
The best time: 00:25
Reward: 50 scrap

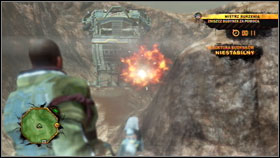
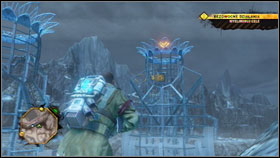
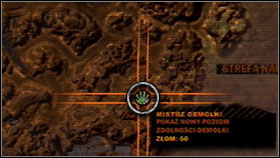
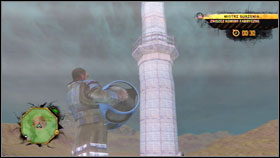
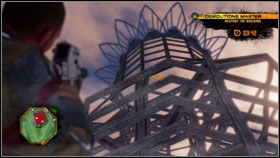
This is an easy and funny quest. We have to destroy the tower. The best option is to hit the base and the rest of the construction will simply fall down. That's why, first of all we are hitting the left side of the building #1 and then right side of the tower #2.
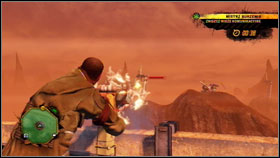
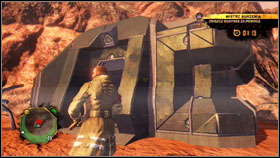
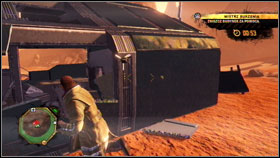
Sector: Badlands
Armament: Hammer, Singularity Bomb, Remote Charges (4)
Time: 01:20
The best time: 00:45
Reward: 50 scrap
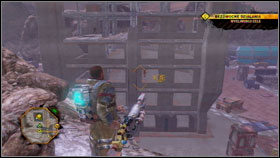
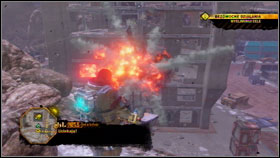
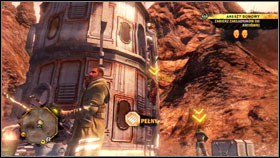
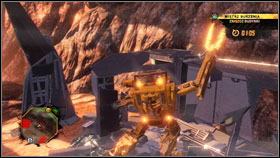
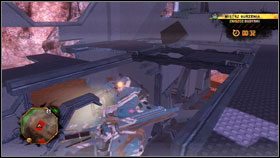
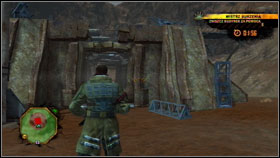
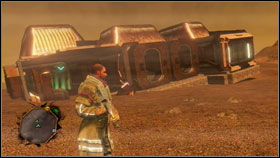
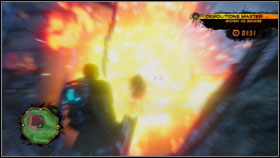
We have to destroy a huge bunker #1. Run to the wall and make a hole with your hammer #2.
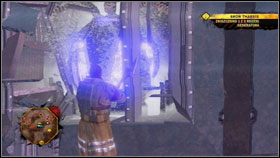
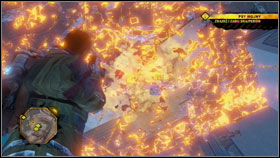
In the middle of the room you have to put Singularity Bomb and run away from the building. Watch the effect #1 and then take care of the rest with your hammer #2 or remote charges. It's up to you. Note that, the only way you can get some singularity bombs is to steal them from EDF buildings.
Sector: Badlands
Armament: Hammer, Remote Charge (1)
Time: 01:00
The best time: 00:15
Reward: 75 scrap
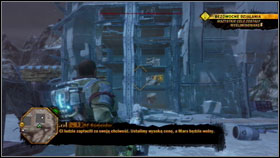
Another tower #1 to destroy. Ignore this building on the left #2 it will be demolished anyway. If you want to have a excellent time then you have to run up to the top of the building and throw a remote charge to the hole.
But if you want to use the hammer then remember not to hit the core that is inside #1. The better option is to destroy the base of the tower #2 and smash it into pieces.
Sector: Badlands
Armament: Remote Charge (1), Proximity Mines (25)
Time: 01:30
The best time: 00:50
Reward: 75 scrap
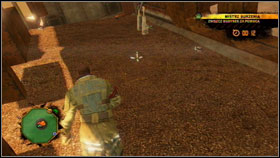
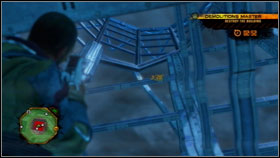
Now we have to destroy a construction that is built from three smaller rooms #1. Run inside and on the floor of the first one deploy 8 proximity mines #2 near the walls. In the middle of the room put one mine and throw remote charge there.
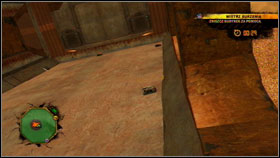
Do the same in the second and third room #1. Remember to put mines as close to the wall as it is possible. Run outside and detonate remote charge. Now you can watch the effect #2.
Sector: Badlands
Armament: Remote Charges (10), Hydrogen Tanks (13)
Time: 02:30
The best time: 01:15
Reward: 75 scrap
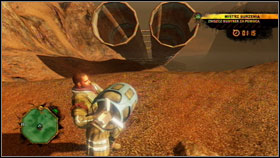
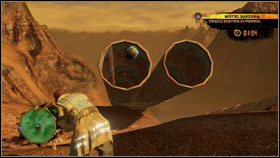
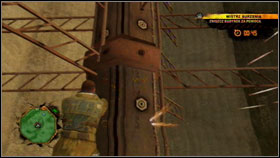
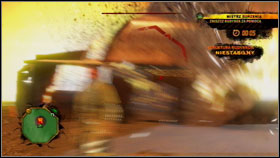
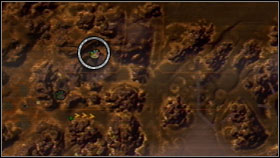
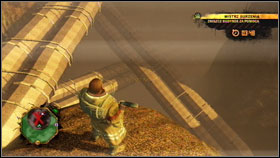
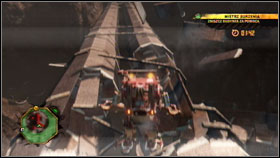
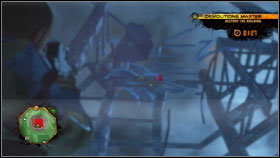
A very difficult quest, mostly because of the fact that we need luck here. You have two pipes and there is a building below them that is almost invisible from our position. Put a remote charge on the hydrogen tank. Remember that the charge cannot touch the ground. If it will, simply restart the mission. Throw tanks with charges #1 to the pipes (they must not hit the pipe) #2 (target the upper side of the hole).
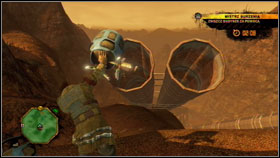
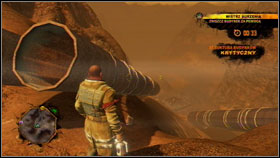
We can experiment and try to put many charges on one tank #1. You can throw barrels without any explosives too. From the hill #2 you should see when the barrels will get out from the pipes. There is no sense in throwing all tanks at once. The better choice is to throw two barrels - detonate it, then another two, then another, etc. If you will fail in destroying this building you will have to restart the whole mission.
Sector: Badlands
Armament: Mech, Hammer, Remote Charges (15)
Time: 04:00
The best time: 02:00
Reward: 100 scrap
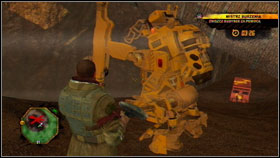
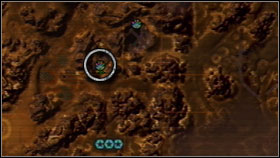
You will start with the hammer. You have to go down #1 until you will find a mech and chest with ammunition #2 (15 remote charges).
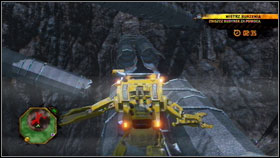
Now you have to be very precise and delicate. Our robot is very heavy and even the small jump #1 can damage the construction. It is a very difficult way to do this quest. There is also another (more simple) option. You can always leave 2 remote charges on the pipes and jump to another location #2. You have to be very cautious here (there is a risk that you will fall into the abyss). If you have problems with that quest then you can always do another quests and return here when you will have a jetpack.
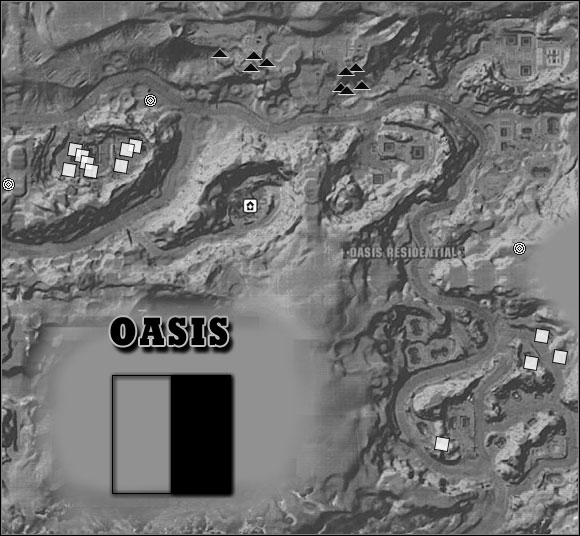
Sector: Oasis
Armament: Hammer, Fuel Barrels (8)
Time: 00:50
The best time: 00:10
Reward: 75 scrap
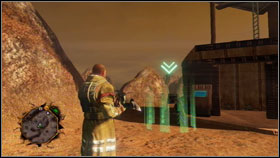
You can see a tower and a lot of barrels with fuel. The most important thing is to hit in a proper way. You may think that you have to smash a barrel with a hit from down #1. It won't be very effective. Tank will fly in random direction. You have to hit from the top, vertically #2.
You need only few barrels to destroy the tower #1. After few seconds construction should fall #2 and the quest will be over.
Sector: Oasis
Armament Pistol (3), Hydrogen tank
Time: 00:40
The best time: 00:10
Reward: 75 scrap
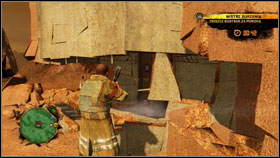
Now you have to be very accurate. Please don't do it as it is shown on the pictures above. If you will detonate Hydrogen tank #1 here, you will only make a small hole in the tower #2.
What you want to achieve is to put tank above, on the special terrace #1. This is a very difficult task. When the barrel will be there you have only three bullets to detonate it #2.
Sector: Oasis
Armament: Hammer, Machine Gun (120), Fuel Tanks (14)
Time: 00:45
The best time: 00:25
Reward: 100 scrap
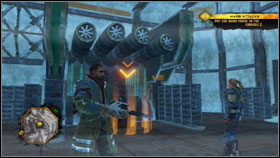
Inside the building, you will find some fuel tanks #1. Shoot barrels deployed on the left side from the safe distance #2.
Turn right and do the same #1. Then take your hammer and demolish the rest #2. If you want to have a better time then you can also shoot some barrels that are on the upper floor of the building.
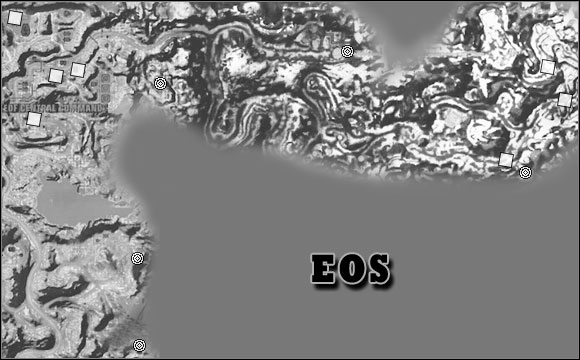
Sector: EOS
Armament: Hammer, Heavy Jeep
Time 01:40
The best time: 00:50
Reward: 100 scrap
You will take control of a powerful mech #1. Destroy all objects deployed in the area. #2.
Sector: EOS
Armament: Hammer, Nano Gun (5), Thermobaric Rockets (2)
Time: 04:00
The best time: 01:40
Reward: 100 scrap
A very difficult quest where the luck is most important. Generally, we have two types of columns here. Thicker #1 that are indestructible and thinner #2, that can be destroyed with nano gun. You have only 5 bullets at the beginning but can find more on the ground floor, third floor and four floor.
Take all ammunition and run outside of the building. Look above and target the columns that are holding the "crown" of the building #1. remember that you cannot destroy thicker pillars so target only thin ones #2.
Do the same on the opposite side of the building and destroy pillars that are holding the "crown" #1. After this, building will be almost destroyed. Eventually you can use thermobaric rockets #2 to do the rest. If you want to achieve the better time then you can do it in another way. Use rockets to destroy the "crown" and then demolish the rest with your nano gun.
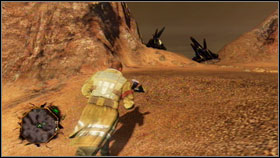
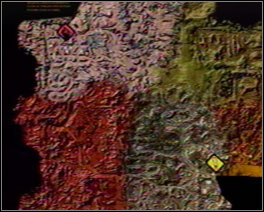
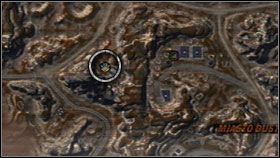
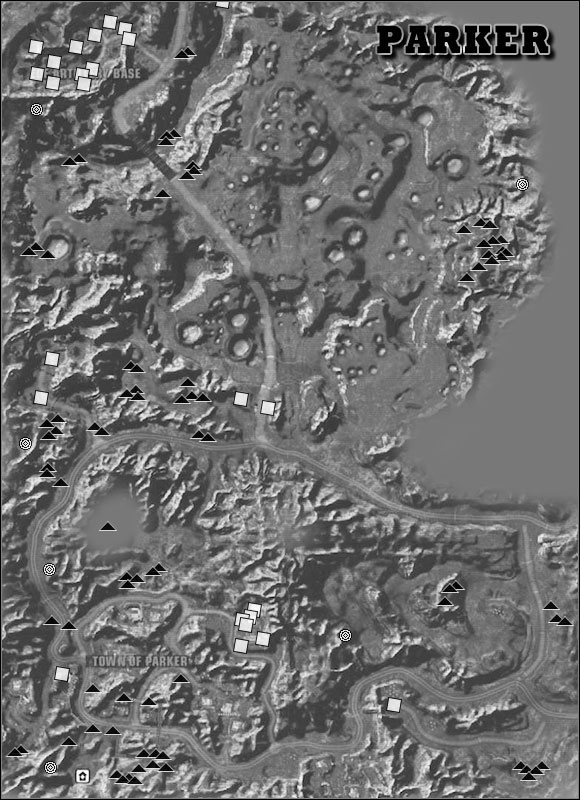
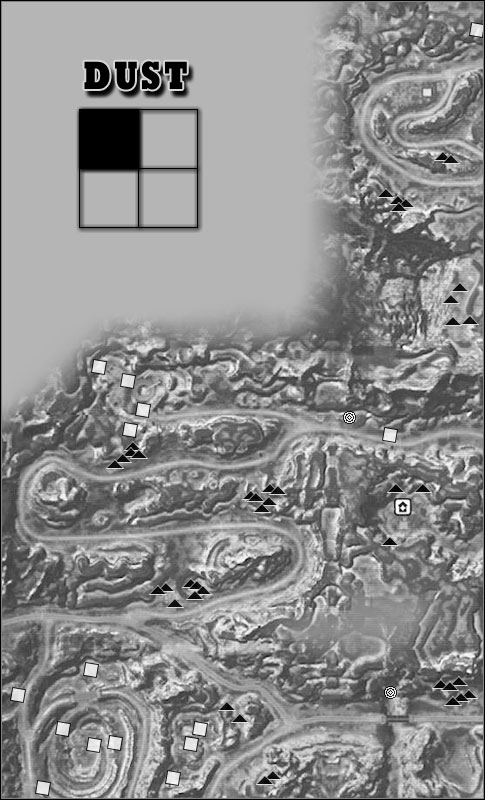
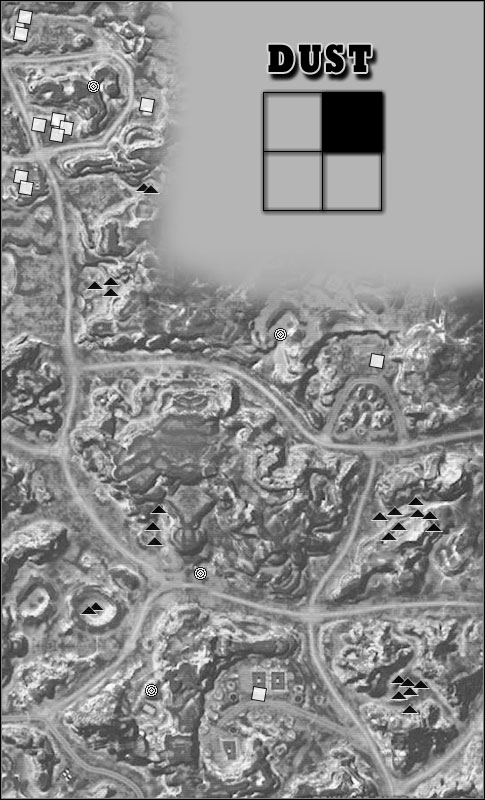
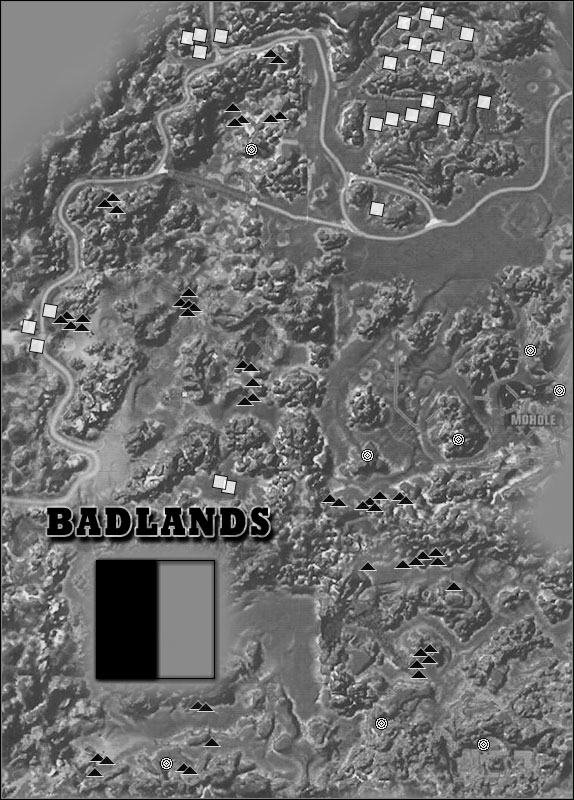
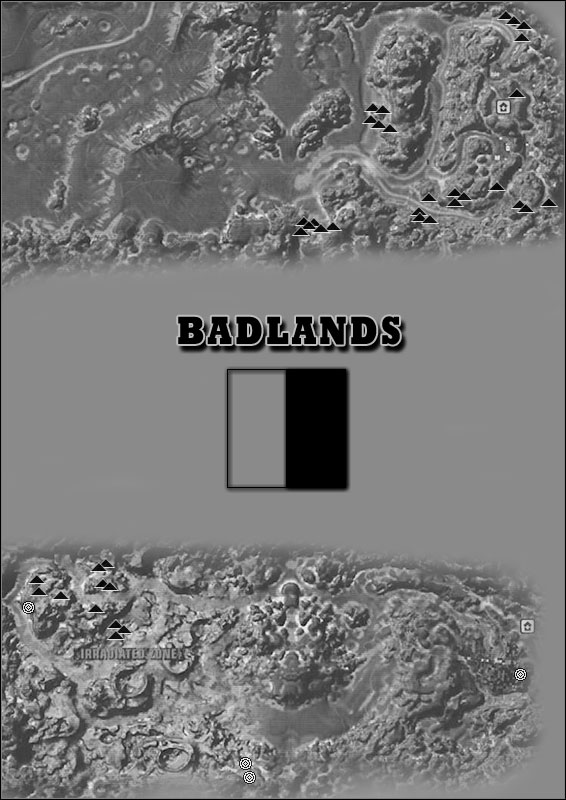
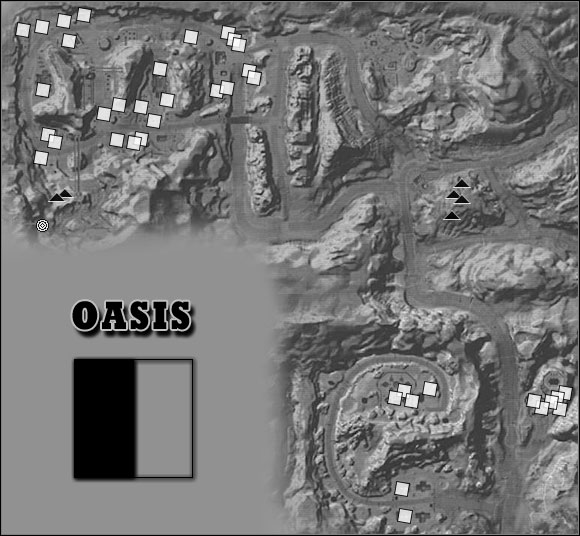
U can find many interesting things on the red planet. Ore is waiting for you here #1 (you can find 300 pieces), something called as a radio tags ("only" 36) and EDF chests #2 in a number of 250. Look at the maps below. You can find an exact location of all mentioned objects.

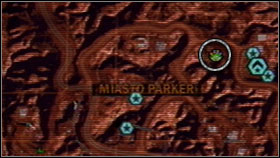
One of the 36 radio tags. Marked with green on our mini map.

EDF Chests that are deployed in a large number.

That's the mark of all ores. You can destroy then even with a vehicle.

Arc Welder
Casual - 225
Normal - 300
Hard - 325
Insane - 375
Available from the beginning. Welder is a weapon that is very effective in close combat. It is very good for killing soldiers in cars or to eliminate the infantry. You can attack many enemies at once. One hit will paralyze your enemy. Then you can just hit them in the back and the party is over.
Arc Welder 3rd Arc
Casual - 225
Normal - 300
Hard - 325
Insane - 375
It is available when you have arc welder. You can hit one soldier more in the fight, but it is not very important, especially if you are attacking as I described above. Attack your enemies rapidly with short series. The weapon is not limited to 2 or 3 enemies then.
Smart Arc
Casual - 150
Normal - 200
Hard - 225
Insane - 250
It is available when you have arc welder. You cannot hit your allies when you have this upgrade.
Arc Welder Ammo
Casual - 225
Normal - 300
Hard - 325
Insane - 375
It is available when you have arc welder. Additional ammunition to your arc welder. It is always handy.
Salvage Collector
Casual - 25
Normal - 25
Hard - 25
Insane - 25
Available from the beginning. With this upgrade it is possible to collect the scrap while sitting in the vehicle. Very handy and time-saving.
Remote Charges
3 Charges
Casual - 25
Normal - 50
Hard - 50
Insane - 50
4 Charges
Casual - 75
Normal - 100
Hard - 100
Insane - 125
5 Charges
Casual - 100
Normal - 125
Hard - 125
Insane - 150
6 Charges
Casual - 100
Normal - 150
Hard - 175
Insane - 175
7 Charges
Casual - 125
Normal - 175
Hard - 200
Insane - 225
8 Charges
Casual - 150
Normal - 200
Hard - 225
Insane - 250
9 Charges
Casual - 175
Normal - 225
Hard - 250
Insane - 275
10 Charges
Casual - 175
Normal - 250
Hard - 275
Insane - 300
11 Charges
Casual - 200
Normal - 275
Hard - 300
Insane - 350
12 Charges
Casual - 225
Normal - 300
Hard - 325
Insane - 375
Available from the beginning. This upgrade will rise the limit of charges that we can set before the detonation.
More Charge Ammo
Casual - 250
Normal - 350
Hard - 375
Insane - 425
It will allow you to have more remote charges in your backpack.
Ore Additive
Casual - 25
Normal - 50
Hard - 50
Insane - 50
Available after completing 2 side quests. It will rise the ore limit that you can take from the ore deposits.
Proximity Mines
Casual - 175
Normal - 250
Hard - 275
Insane - 300
Available after completing 5 side quests. This mines are detonating when someone is near them. Beware, because they can hit you as well. They can be very handy in quests like convoy or EDF assault.
Proximity Mines Ammo
Casual - 200
Normal - 250
Hard - 275
Insane - 300
It is available when you have proximity mines. More mines that you can put in your backpack.
Smart Mines
Casual - 150
Normal - 200
Hard - 225
Insane - 250
It is available when you have proximity mines. Proximity mines will not hit your character. Very useful upgrade.
Personnel Detector
Casual - 100
Normal - 150
Hard - 175
Insane - 175
Available after completing 8 side quests. Our mini map will never show us all of our opponents (they are visible only when they will attack us). With this upgrade you are able to see all enemy troops.
Grinder
Casual - 225
Normal - 300
Hard - 325
Insane - 375
Available after completing 12 side quests. It can hit many enemies at once but is not very effective.
Fast Grinder
Casual - 225
Normal - 300
Hard - 325
Insane - 375
It is available when you have grinder. Your grinder is shooting faster.
Explosive Discs
Casual - 400
Normal - 550
Hard - 600
Insane - 675
It is available when you have grinder. It will change grinder to more effective weapon. If you have fast grinder upgrade too then you may use that weapon from time to time.
Quantum Multiplier
Casual - 50
Normal - 75
Hard - 75
Insane - 100
Available after completing 12 side quests. You will find more Singularity Bombs with this upgrade. The only way to gain these explosives is to find them in enemy base, so it is a very useful upgrade.
Stone Breaker
Casual - 75
Normal - 75
Hard - 75
Insane - 75
Available after completing 25 side quests. It will raise your hammer effectiveness. But not very much.
Shattermaster
Casual - 100
Normal - 125
Hard - 125
Insane - 150
Available after completing 35 side quests. It will raise your hammer effectiveness. But not very much.
Rocket Launcher
Casual - 325
Normal - 450
Hard - 500
Insane - 550
Available after clearing sector: Parker. It is very useful when you want to destroy enemy structures and vehicles. Especially when you have additional ammo.
Heat-Seeking Rockets
Casual - 300
Normal - 400
Hard - 450
Insane - 500
Available when you have rocket launcher. It will allow you to target your enemies with more accuracy. But the process of targeting is quite long.
Multi-Rockets
Casual - 175
Normal - 250
Hard - 275
Insane - 300
Available when you have rocket launcher. Now you will be able to shoot with three rockets at once. This is a very handy upgrade, especially when you have to destroy enemy buildings.
Rocket Ammo
Casual - 300
Normal - 350
Hard - 375
Insane - 400
Available when you have rocket launcher. It is an additional ammo to your rocket launcher. Just buy it.
Level 1 Armor
Casual - 150
Normal - 200
Hard - 225
Insane - 250
Available after clearing sector: Parker. It will raise your health bar and as a matter of fact you can get more hits before death. Very useful.
Guerrilla Express
Casual - 25
Normal - 50
Hard - 50
Insane - 50
Available after clearing sector: Dust. Now, you can almost "teleport" from one hideout to another. It is a very time-saving upgrade and nothing more.
Nano Forge
Casual - 575
Normal - 700
Hard - 750
Insane - 825
Available after clearing sector: Dust. Very fast, very powerful and very useful. It is good in destroying building and enemy infantry. It can also do some damages to aircrafts. EDF Fighters will be destroyed after two hits.
Nano Enhance
Casual - 375
Normal - 500
Hard - 550
Insane - 625
Available when you have nano forge. It will raise your nano forge fire power.
Nano Ammo
Casual - 375
Normal - 500
Hard - 550
Insane - 625
Available when you have nano forge. Very useful, it will raise total amount of ammunition that you can put in your backpack.
Level 2 Armor
Casual - 225
Normal - 300
Hard - 325
Insane - 375
Available after clearing sector: Badlands. When you will buy this upgrade, you health bar will be surrounded by a new bar. Now your vitality will raise twice. The new indicator will regenerate when you are not fighting (the same as normal health bar).
Jetpack
Casual - 475
Normal - 650
Hard - 725
Insane - 800
Available after clearing sector: Oasis. It will help you in dealing with high building and hills. You won't be able to fly but the game will be much easier with this upgrade.
Jetpack Recharge
Casual - 375
Normal - 450
Hard - 475
Insane - 525
Available when you have Jetpack. Your Jetpack energy will regenerate much faster now. Unfortunately, you won't be able to fly all the time.
Radiation Shielding
Casual - 100
Normal - 150
Hard - 175
Insane - 175
Available after completing mission called Hammer of the Gods. This upgrade is necessary to end the game. It allow you to move in south-western area of Badlands (Marauders area).
Thermobaric Rockets
Casual - 925
Normal - 1250
Hard - 1375
Insane - 1550
Available after clearing sector: Free Fire Zone. A very effective but also very expensive weapon. Use it when you have to destroy any building in the game. The only disadvantage is the total number of ammo (only two).
Thermobaric Ammo
Casual - 1600
Normal - 2000
Hard - 2200
Insane - 2400
Available when you have thermobaric rockets. If you have enough cash - buy it. The only disadvantage of the most powerful weapon in the game will be over now. You can take more rockets with you.
Red Faction - Guerrilla is offering you 50 achievements that will give 1000 points in Gamerscore. Below you have all of them with a description. You have also the full list of trophies (for PlayStation 3 players).
Achievement | Trophy
Gamerscore | Trophy
Requirements
Welcoming Committee
10 | bronze
Complete the Tutorial mission
Martian Tea Party
10 | silver
Complete 2 missions for the Red Faction
Spread the Word
10 | bronze
Liberate Parker Sector
Death From Above
20 | bronze
Liberate Dust Sector
Friendly Skies
30 | bronze
Liberate Badlands Sector
Don't Tread On Me
40 | bronze
Liberate Oasis Sector
Coup D'etat
50 | bronze
Liberate Eos Sector
Red Dawn
100 | gold
Liberate Mars
Insurgent
5 | bronze
Complete 5 Guerrilla Actions
Guerrilla
10 | bronze
Complete 25 Guerrilla Actions
Freedom Fighter
15 | bronze
Complete 50 Guerrilla Actions
Revolutionary
25 | silver
Complete all Guerrilla Actions
Clean and Righteous!
15 | bronze
Destroy 5 High Importance targets
Warp Speed
15 | bronze
Beat all Transporter Pro times
Got Any Fingers Left?
15 | bronze
Beat all Pro times in Demolitions Master
Lost Memories
25 | bronze
Locate all missing radio tags
Working the Land
25 | bronze
Mine all ore locations
Free Your Mind
25 | bronze
Destroy all instances of propaganda
One Man Army
25 | bronze
Complete 25 killing sprees during the Campaign
Disaster Area
50 | silver
Destroy 1 billion credits worth of EDF property.
Broken Supply Line
10 | bronze
Destroy 250 EDF supply crates
Power to the People
10 | bronze
Raise the Morale of 3 sectors to 100%
Tank Buster
10 | bronze
Blow up 100 small hydrogen tanks
Best Friends Forever
10 | silver
Kill 100 EDF with the sledgehammer during the Campaign
Coming Down!
10 | bronze
Destroy 50 EDF owned buildings
Freed Space
10 | bronze
Destroy 50 EDF flyers
Just the Beginning
5 | bronze
Win a Matchmaking match
Start of Something Special
5 | bronze
Play 5 Matchmaking matches
Doing Your Part
10 | bronze
Kill 10 enemies in a Matchmaking Match
Juggernaut
5 | bronze
Destroy a Siege target
Doozer
5 | bronze
Reconstruct a Damage Control target
Grab Some Popcorn
5 | bronze
Enter Spectator mode and enjoy the show!
Try Anything Once
10 | bronze
Finish a match in every mode
Check Your Map
10 | bronze
Finish a match on every map in Multiplayer
Tools of the Trade
10 | bronze
Score a kill with every weapon in Multiplayer
Field Tested
10 | bronze
Earn 1,000 XP in Multiplayer
Battle Scarred
25 | bronze
Earn 10,000 XP in Multiplayer
War Veteran
50 | gold
Earn 100,000 XP in Multiplayer
A Winner is You!
20 | bronze
Win 250 matchmaking games
Topher Would Be Proud
20 | bronze
Play 250 matchmaking games
Courier of Pain
20 | bronze
Score 5,000 kills in Multiplayer
Experimenter
10 | bronze
Complete 4 hidden challenges in Multiplayer
Detective
20 | bronze
Complete 8 hidden challenges in Multiplayer
Mad Genius
40 | silver
Complete 16 hidden challenges in Multiplayer
Jack of all Trades
10 | bronze
Score 10 kills while wearing each backpack
The High and Mighty
10 | bronze
Kill a flying opponent using a remote charge stuck to them
Party Time
10 | bronze
Play all Wrecking Crew modes once
Can't Get Enough
20 | bronze
Play every mode on all maps in Wrecking Crew
Wrecking Ball
40 | bronze
Score 25 million points worth of destruction in Wrecking Crew
Red Faction Member
50 | gold
Play online with another player who has completed the Campaign


 Resident Evil 5 Game Guide & WalkthroughRocket League Game Guide & Walkthrough
 Resonance Game Guide & Walkthrough
 Rise of the Tomb Raider Game Guide & Walkthrough
 RuneScape 3 Game Guide & Walkthrough