
The guide to Might & Magic: Heroes VII offers all the information required for enjoying the newest game developed by Limbic Entertainment and for completing the main storyline in 100%. The guide has been divided into two large parts. The first one - strategy guide - contains information related to general rules and such aspects of the game as interface, gathering resources, waging battles, traveling through the game map and general rules of developing cities. In the guide you will also find all ability trees and magic schools, including lists of skills and spells, supplemented with a commentary about their usefulness. The factions available in the game - Haven, Necropolis, Academy, Stronghold, Dungeon and Sylvan - have a part of the guide focusing on them as well. All buildings, heroes, specialists and units available for each of them have been described. Second part of the guide consists of walkthrough for all campaigns available in the game. Each campaign mission description contains a specially prepared map with most important locations marked on it and walkthrough for all main and side quests available during it. Might & Magic: Heroes VII is the next installment in the very popular series of fantasy turn based strategy games. The game tells a story of a war for the throne of the Empire. The game campaign focuses on the character of a young prince named Ivan. The game was developed by Limbic Entertainment studio, responsible for creating the previous parts of the series.
Patryk Greniuk ()

The guide to Might & Magic: Heroes VII contains all information required for effective and joyful playing. This game is the next installment in the very popular series of turn-based fantasy strategies. It tells the story of a war for the throne of the Empire. The campaign is focused on the young prince named Ivan. The game has been developed by Limbic Entertainment, the same studio that created the previous installment of the series. In this guide you will find all basic information about moving through the world map, exploration, city development, unit recruitment, using units on the battlefield and gathering resources. In addition to describing all these matters, this guide also consist of advices related to these topics. The comprehensive descriptions of all spells, units and buildings available in the game are an important part of this guide as well. Useful advices related to the suggested might and magic characters development for all 6 available factions: Academy, Dungeon, Necropolis, Haven, Sylvan and Stronghold.
The guide to Might & Magic: Heroes VII game contains:
A precise walkthrough of all campaign missions divided into chapters focusing on various factions and supplemented with comprehensive maps can be found in a separate guide.
Patryk Greniuk ()
The guide to Might & Magic: Heroes VII game consists of two main parts. In the first part the gameplay basics have been described - including general ones and related to specific factions.
The first, general part describes such matters like interface of the world map and of the battlefield, discusses the process of city development, unit recruitment, their application in battle, and answers the question: how to gather resources. One of the chapters focuses on battles, both on the field and during siege. In each chapter, in addition to general description of the matter, you will also find practical advices to be used during game.
In the general part you will also find a list of all spells and heroes skills, divided into various magic schools or "trees". In each case, the chapters have been supplemented with a comment about usefulness of a specific spell or ability on the battlefield.
All factions available in the game: Academy, Necropolis, Haven, Dungeon, Stronghold and Sylvan, have separate chapters in the guide. In those chapters you will find a list of all buildings available for a faction, including information about their cost, requirements needed to be fulfilled in order to be able to build them and description of how they work. In this chapter you will also find information about all the units that can be recruited, including their statistics and abilities.
A thorough walkthrough for all campaign missions, divided into various fractions and supplemented with precise maps, can be found in the second part of the guide to Might & Magic: Heroes VII.
Color markings used in the guide:
Green color - units and heroes
Orange color - places and locations
Blue color - spells and abilities
Brown color - buildings
Italics - other important definitions requiring highlighting

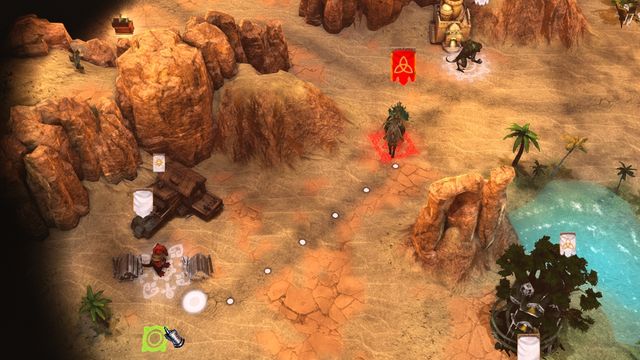
You will spend most of the time in Might & Magic: Heroes VII at the world map screen. There you will be moving, searching for resources and initiating battles with enemies. Below you will find most important elements of the interface, including their description informing you what are they responsible for and how you can use them.

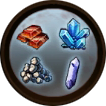
At the top of the game window there's a bar containing the number of all available resources. There are 7 resources in the game: gold, wood, ore, Dragonblood crystals, Starsilver, Dragonsteel and Shadowsteel. Most of them are received from special buildings found on the map and are added automatically to your stock with each new day.
In the bottom left corner of the screen world map is located. At the beginning of the game its majority is covered with the fog of war which allows you to see only the territories you visited. As you explore, the visible territory will gradually increase.
The icons on the right are responsible for: the most bottom one for switching map levels, second from the bottom activates/deactivates influence zones on the minimap, next one is responsible for map settings in which you can change the amount of details, and at the top there's an icon responsible for collecting the treasure maps.
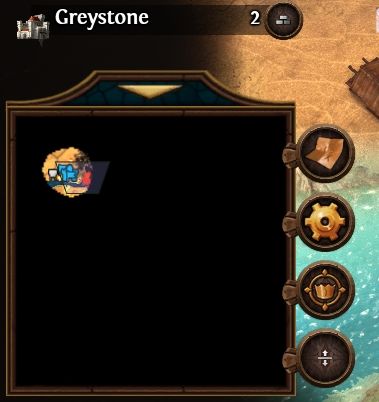
Additionally, above the minimap there's a bar that shows all the cities you have, including their name and development level. A brick icon opens the building screen of a city.
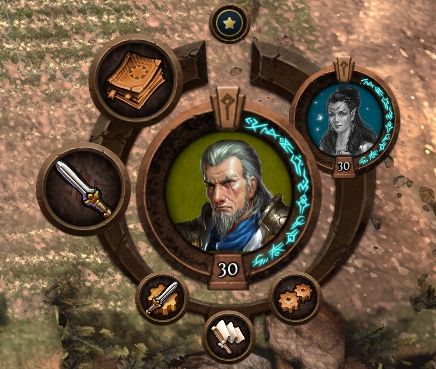
In the middle of the main screen there are icons of all your heroes. The currently selected hero is marked with a larger circle. In addition to character portraits, the icon can tell you other important information - the number of move points represented by a green line, the number of mana points represented by a blue line, and character level, shown at the bottom of the portrait.
In the bottom right corner of the screen you will find a menu containing all most important functions.
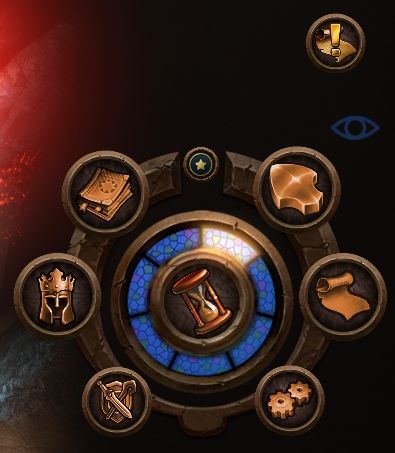
Spellbook icon in the upper left corner allows you to check all spells available for your heroes. The circle on the left that presents helmet will move you to hero management window. Next icon from the left - the shield, sword and a wand - opens heroes development window, where you can spend the points you obtained.
In the upper right corner of the round menu there's an icon that allows you to continue the previously started move. Thanks to that, you don't need to click the mouse button on the destination each time. Parchment scroll icon opens mission window, where you can find information about both main and side quests. It's especially useful during campaign, as you can check objectives and the reward you receive for fulfilling them. At the bottom there's a button opening the game menu, in which you can save or load the game, restart the map or open options menu.
In the middle of the panel there's a button that allows you to end the turn. It can also inform you about the current day of the week.

The last element worth mentioning is icons showing all players. They are located in the upper right corner of the screen and they inform you about how many players are on the map, which factions they control and whose turn is it now.
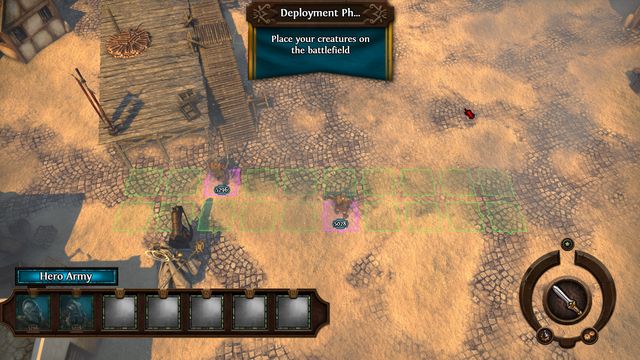
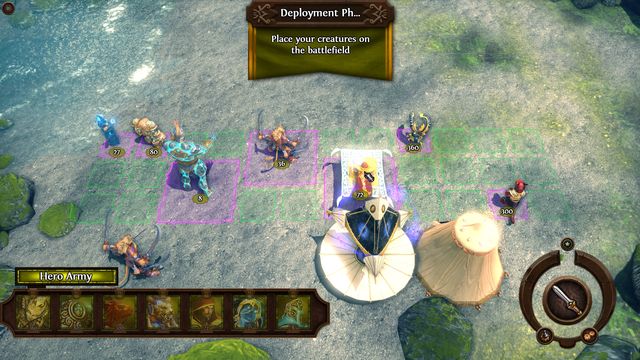
First thing you must do during battle is position your units properly. To do it, simply click a squad you're interested in and move it to the destination field.
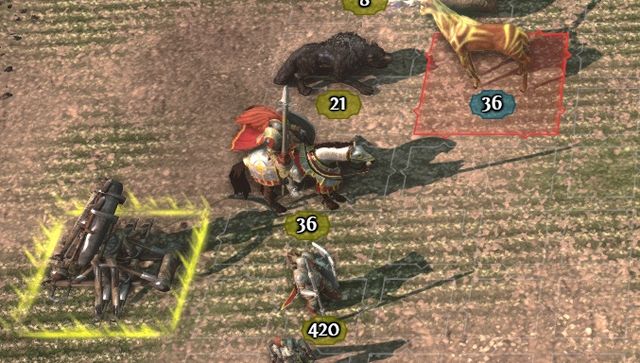
Units are filling the most of the main screen during battle. Under each group there's a number informing you about the number of soldiers it consists of. Its color will tell you which units are yours and which are belonging to your enemy. In order to open a window with full statistics and special abilities, you must click right mouse button on selected squad.
During battle, all your units are positioned in two lines. Regular units, recruited in the cities, are fighting on the battlefield, while the hero and special units are in the second line. You can only move the regular units, but using abilities or attacking is possible in case of all troops.
In the bottom left corner of the screen, unit which currently can perform an action is shown. Above her there are icons allowing you to perform special action, such as waiting through the turn, not taking any action, defending or using a special ability.

At the bottom there's a bar with troops icons. It shows you in which order units will be taking action.
In the bottom right corner of the screen there's a battle and hero management panel. Here you can use hero's spells or give him an order for direct attack. It is wise to observe this place as the hero doesn't appear in the units queue and you can easily miss the opportunity to use him.
Three lower icons allow you to activate the automatic battle mode (the icon of a gear with a sword), give up a fight (a white flag icon) which automatically kills all your units and sends the hero to the Hall of Heroes, and game menu (icon of two gears).
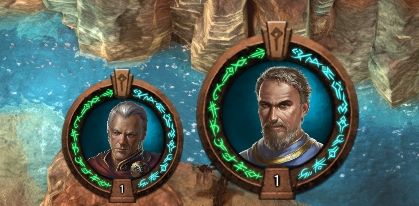
In the central and right part of the panel there are heroes' icons - yours and your enemy, with information about their level and mana points.
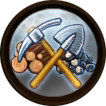
During most of the time, the players will ask themselves the question - "Where can I get the resources to build another building or recruit new units?". In this chapter all the ways of gathering additional resources will be listed. There are seven resources in Might & Magic: Heroes VII: two basic ones, four special ones and gold. Wood and ore are considered basic resources. Special resources are Dragonblood crystals, Starsilver, Dragonsteel and Shadowsteel.
 Almost always when building objects that generate resources, you will have to choose: more basic resources or less special ones?
Most of all, you must remember that part of the resources is generated by your cities. Especially the gold, which you can obtain even few thousands a day if you develop your settlement enough. Most of the factions also have a possibility to construct a special building which can add one of the basic resources or one of the special ones. It is wise to check the list of all available buildings found further in this guide and make decision whether you should take interest in such building.
 Mines are almost always protected. Before fighting, check enemy strength to avoid losing army, or even your hero, unnecessarily.
In the first phase of the game you will gather most resources from single piles scattered through the whole map. The most basic resources aren't usually guarded in any way. However, sometimes you might find protected places where in one location you can find even few dozens of different resources. In that case, you should consider whether fighting the opponent will be profitable, maybe it will be better to wait one or two turns, improve the army and attack the enemy after that, gathering the resources with smaller losses.
The most reliable way of gathering resources is claiming a mine or other building that generates a specific resource. It is added to your warehouse automatically each day, without the need of taking any actions. It is worth remembering that by claiming a building you assign it to your city, making it impossible to any enemy hero to claim it for himself. Because of that, you should claim as many buildings as possible in the shortest time possible. It especially applies to ore mines and lumber mills.
 The stronger the enemy, the more valuable chests and resources he guards.
There are also other, less popular ways of gathering resources. First one is plundering enemy buildings. It uses all movement points of a character and usually adds 3-4 pieces of a resource. Plundering can be repeated every three days. However, in order to claim a mine permanently, you must conquer the nearby quarter of enemy - usually it will be a city.
Small amounts of resources are also obtained after battling very strong enemies, mostly in ruins, caves etc. You shouldn't consider it as a way for gathering resources, only as a bonus for won battle.
As the title of the game suggests, heroes have the lead role in it. They are the main aspect of the gameplay. You will spend most of the time on moving them through the map, developing their abilities and using them to fight various enemies.
You will usually start with one hero at your side. Other ones can be recruited in a special building in your city, usually it is the Hall of Heroes. Usually you will have 4 different heroes to choose from, two from your faction and two from other ones. They mostly differ in statistics and starting armies. One hero cost at least few thousand of gold.
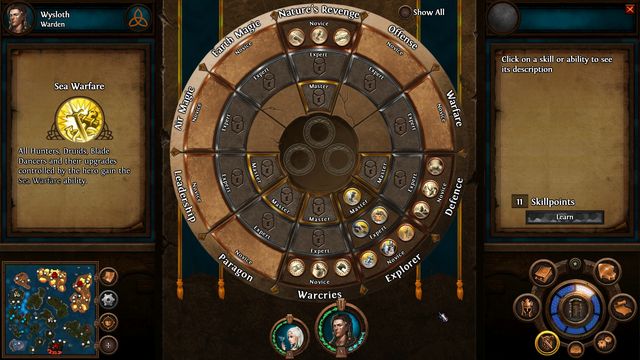 Each character differ in statistics, special ability and available skill trees.
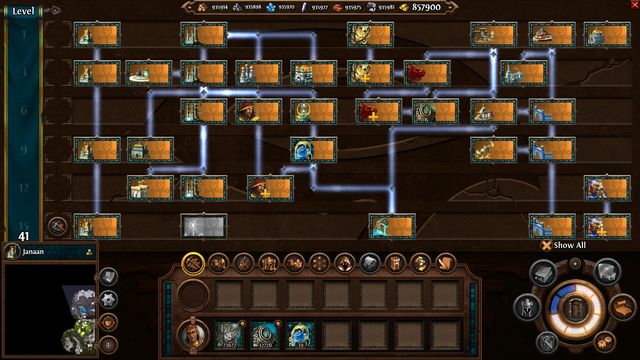
During the game, each hero obtains experience points thanks to which he or she gains new levels. With each new level you obtain a new skill point that can be spend on buying a skill. Depending on hero, the skill circle will look differently. It differs not only due to Might and Magic, but also due to special abilities or hero's preferred magic schools. There are 26 skill trees available in the game, and each hero can pick skills from only 10 of them. The maximum experience level, which is set at 30, limits him as well.
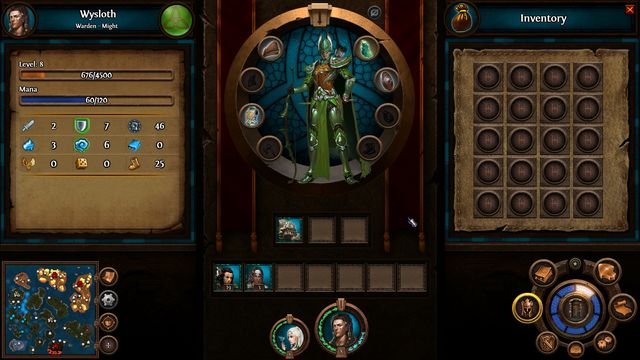 In the hero management window you will not only equip your heroes in obtained artifacts, but divide or combine armies as well.
In addition to obtaining new skills, each hero can be equipped with items that increase statistics or add special abilities. There are 8 slots available: head, shoulders, torso, right arm, necklace, left arm, hands and feet. Equipment can be obtained in two ways: it can be found in chests scattered through the map or it can be received for defeating especially strong opponents.
All heroes which you will control have various different statistics. Some of them focus on all heroes, some only on representatives of Might or Magic. These factors have great impact on the usefulness of a hero on the battlefield. Below you will find a presentation of all variables available in the game with a short description of their impact on the gameplay.
Name
Description

Damage
Damage dealt by the hero in battle. The damage increases with each new hero level.
The icon changes depending on what damage type you deal.

Might
Might of the hero is added to attack of all creatures in the army of a hero and it increases the damage dealt by the hero.

Defense
Hero's defense is added to defense of all creatures in his army.

Magic
Magic increases strength of most spells casted by the hero.

Spirit
Spirit determines the amount of hero's mana and the speed of its regeneration.
Each spirit point increases maximum mana limit by 10.
+2 daily mana per one spirit point.

Arcane Knowledge
Arcane Knowledge allows the hero to learn more powerful spells.
Second level spells require 2 Arcane Knowledge points.
Third level spells require 5 Arcane Knowledge points.
Fourth level spells require 8 Arcane Knowledge points.
You can increase hero's Arcane Knowledge by teaching him magic skills.

Leadership
Hero's leadership level is added to morale of all creatures in his army.

Destiny
Hero's destiny is added to the luck of all creatures in his army.

Movement
Moving through harsh terrain is 40% slower and 50% faster through the roads.
Gathering resources and entering not owned buildings costs 2 movement points.
While playing Might & Magic: Heroes VII, the beginning of the adventure, when your main objective is to explore the surrounding world, collect resources, claim buildings and fight less dangerous enemies, is very important. Below you will find a handful of basic advice related to that part of the game.
In first order you should obtain at least two heroes whom you will be able to send in different directions of the map. One you should have since the beginning. In order to obtain the second one, first you must build the Hall of Heroes and then spent few thousands of gold on recruiting the hero. Having two heroes will allow you to quickly claim large part of the map, including key building that produces resources. It will also allow you to gather various items. If it is possible, you should use the Observatory which will allow you to see the nearby territory and plan the route of claiming resources.
First, start with collecting single piles of unguarded resources and with entering empty buildings, this will give you some gold and other bonuses. Fight only very weak enemies. At this point of the game it is not a good idea to waste valuable units only to gain few pieces of wood. Most of all, this is the time when you should develop all buildings that allow you to recruit new unit types.
During the second week of the game, after you add all the recruited units to one of the hero, you can start conquering most important buildings. Gold mines, ore mines and lumber mills are your priority number one. If you feel strong enough, you can also try to conquer them earlier. Take interest in lairs that can give you additional warriors as well.
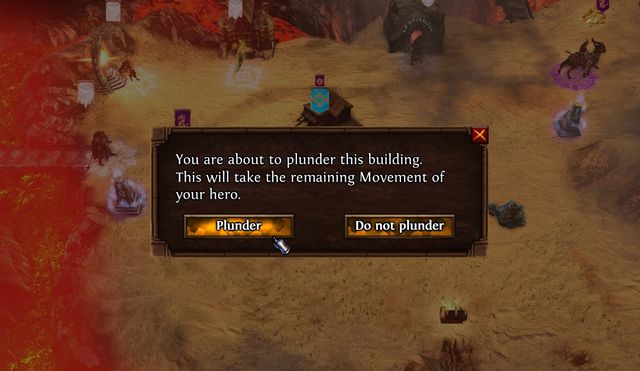
The last phase of the exploration is finding and dealing with the enemy. The possibility to plunder buildings owned by the enemy is worth mentioning as well. It uses all the remaining movement points of a character and adds a few pieces of resources of a specific type. A building can be plundered once every three days.
During the game, you should spend most of the time on searching for and claiming buildings that generate resources. They are the key to city development, unit recruitment and, in the bigger picture, to victory.
In first order you should claim Ore pits, Gold mines and sawmills. These are the most important buildings at the beginning of the game. You can claim them even at the cost of other undefended buildings. Only later in the game you should focus on buildings that generate special resources (Dragonblood crystals, Starsilver, Shadowsteel and Dragonsteel). You should start with checking all buildings available for your faction and learning what resource you will need the most. In the last resort, you can trade resources, but it is absolutely not profitable for you.
Name
Description
Ore pit
Generates 2 ore per day.
Gold mine
Generates 1000 gold per day.

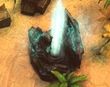
Meteor crater
Generates 1 starsilver per day.
Crystal mine
Generates 1 dragonblood crystal per day.
Blood forge
Generates 1 dragonsteel per day.
Alchemist lab
Generates randomly 1-3 dragonblood crystals, dragonsteel, shadowsteel or starsilver per week.
Warehouse
Generates 3-5 wood or ore which you can collect once per week.
Tax collector
Generates 500 gold during first and 1000 gold during second week. You can collect it once per week.
Underground pit
Generates 1 shadowsteel per day.
Trading post
Visiting hero can buy and sell resources.
Sawmill
Generates 2 wood per day.
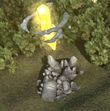
Special buildings are much more common but they are less useful. Some of them add a permanent statistic boost, other uncover parts of the map. There are also some that teach you new spells. Before visiting each of them you must ask yourself if it is really profitable to fight the creature guarding such building. Might hero could use +2 to Attack obtained from the Arena, but he doesn't need to visit the Mage Guild. A high level hero can pass on fighting the army guarding a Stone of Enlightenment that adds 1000 experience points if during the same time he can claim a building that generates resources. You should plan the route of your hero's march carefully and pick the buildings that will give you most useful profits.
Name
Description

School of War
Upgrades a Might ability known to the hero by one level for a fee. Works only once.
Arena
Permanent bonus: you can choose from +2 Attack or +2 Defense.
Fountain of Restoration
Regenerates 4 Movement points of the visiting hero.
+5 Leadership for the three incoming battles.
Mage Guild
Teaches the visiting hero of few random spells.
Stone of Inspiration
Permanent bonus: you can choose from +2 Spirit or +2 Magic.
Stone of Enlightenment
Permanent bonus: +1000 experience points.
Shrine of the Seventh Dragon
Permanent bonus: Spent some resources and the hero will be promoted by one level. Works only once.
Cartographer
For a fee, it will uncover the neighborhood.
Blind Brother Monastery
Teaches the hero one ability for a fee.

Blacksmith
Permanent bonus: +1 Attack.
Crystal of Power
Permanent bonus: +1 Magic.
Crystal of Warding
Permanent bonus: +1 Spirit.
Merchant
Buys and sells artifacts.
Lighthouse
Gives a Lighthouse boost to all heroes once per week.
Available only if you control nearby territory: all your heroes swim 15% faster.
Arcane Academy
Upgrades a Magic ability known to the hero by one level. Works only once.

Magic Shrine
Teaches the visiting hero few new spells.
Dangerous Cave
Both here and in other buildings of such type you will face very strong enemies. As reward for defeating them you will usually receive an artifact, gold and resources.

Oasis
Regenerates 6 Movement points of the visiting hero.
+15 Leadership for the 3 upcoming battles.
Observatory
Uncover the surrounding territory. Range: 30 fields.
Portal / Passage
Leads to another place - it might be lower or higher level, or part of the territory that is inaccessible in any other way.
Shelter
Hero can find shelter here.
Dwelling
Each week, it adds few units to the closest city. You can also recruit creatures there.
Each faction has different nests, both basic and elite ones.

Dragon Vein
Once per week it fully restores visiting hero's mana.

Dragon Nexus
Doubles and fully restores the total mana of visiting hero.
Stables
+5 to the Movement of the visiting hero (lasts till the end of the week).
Stockyard
Allows buying ships for a fee.
Elemental Conflux
Allows you to hire various creatures for gold.
2 Earth, Fire, Water, Air Elementals per week.
War Ancient
Restores 6 Movement points of the visiting hero.
+10 Leadership and Destiny for the upcoming 3 battles.

Blind Maiden
Restores 6 Movement points of the visiting hero.
+10 Destiny for the 3 upcoming battles.
Mysterious Crypt
First hero visiting this place will find an artifact but he will be cursed with -20 Morale for allied creatures during the next battle.

Whirlpool
Moves the ship to another whirlpool.

Fortune Teller
Tells you what the next week will come.

Armoursmith
Permanent bonus: +1 Defense.
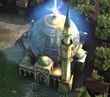
One of the most frequently visited places while playing Might & Magic: Heroes VII are cities. During each game you will spend dozens of minutes while deciding which buildings you should place in first order and with which you should wait until the next turn. Cities are responsible for basic gameplay elements such as recruiting and upgrading units, trading resources, learning new spells and even generating resources.
To place a building, you will always need one turn and a specific amount of resources. Usually it's gold, wood or ore. Higher level buildings require also special resources. Each faction has one "favorite" resource. It means that you will require more of it than other ones. Sometimes a building has an additional requirement - you must first build another object or your city must reach a specific level.
 A strong army left in the garrison can stop enemy offensive for long time.
Each new building increases the level of your city by 1. You gain new possibilities when you reach level 3, 6, 9, 12 and 15. The number of available combinations is different depending on the faction you choose, but usually it's around 30-40 buildings. What's worth mentioning is that during one game you can have few cities. For example, building barracks in one of them doesn't mean that the same building will appear in other cities. Some buildings can be constructed only in the capitol, which is one city of your choosing that is your main base of operations.
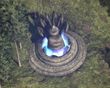
During the game you will also frequently find forts that look similar to small cities. However, their task is much more limited. A fort is a place that is only generating your area of influence. You cannot construct building nor recruit units there. However, you can leave there some of your creatures as a garrison tasked with protecting your mines from being captured by enemy. Garrisons, shown on the world map as gates, have even more limited function - they are only protecting a territory from the attack of enemy forces.
 Thanks to dwellings you can greatly strengthen your army. Don't forget to use them actively.
The last group of buildings is dwellings, different for each faction. They allow you to recruit a specific number of units each week. Usually it is from few to more than a dozen of units. They can be found in two versions - basic and elite. As the name suggests, they differ in units that can be recruited there. In order to avoid having to visit this building each week, you can connect the dwelling and your city or fort using a caravan. This will allow you to recruit units from each dwelling directly in your city. The requirement to create such connection is having a Marketplace.
City development is the key aspect of each game. It allows you to recruit new units, upgrade the old ones and use spells. Below you will find a list of most basic advices related to optimizing the development of your capitol.
In first order you should develop the buildings that generate gold: Town Hall, City Hall, Capitol. This will allow you to generate dozens of thousands of gold during few weeks.
Marketplace and Hall of Heroes should be one of the first buildings you build. Thanks to them you will gain additional heroes used for exploring the map and gathering resources, and you will be able to trade resources you don't need for more needed ones.
 Cities of each faction have different maximum development level. It all depends on the number of buildings you can construct in them.
Check which special resources you will require most often and keep attention to them when exploring the game world.
First focus on constructing all buildings related to unit recruitment. Then you can start upgrading them. The difference between the basic and upgraded unit is too small to invest in them at the start of the game.
Consider whether your hero will be using spells. If not, then don't waste your resources and time on building next levels of Mage Guild. The only exception is when the Mage Guild is required to build another building.
Don't build Walls, Guard Towers and other buildings responsible for city's defenses during the first week of the game. Before the enemies will develop and attack you, at least few dozens of days will pass. You can use that time to upgrade your economy and army.
Check if it is possible to obtain the Tears of Asha on the map on which you are playing (If yes, there are Obelisks to be found on the map, visiting which will uncover new fragments of the treasure map). If yes, try to find it as quickly as possible and build the special building in your capitol. It will be a great help to your army.
Units that are part of your army are the key to victory in almost every game. Below you will find a description of each way to increase the numbers of your military forces. You must pay a specific amount of gold for each unit. In special circumstances you must also pay in resources. The stronger the creature you want to hire, the more it will cost you.
New units are recruited mostly in the cities. By constructing a specific building you gain access to few or slightly more than a dozen of units of selected type. The dwelling can be also upgraded, this will give you a "better versions" of the same units. Of course, the price you must pay will increase as well. There are also few optional buildings that increase the weekly growth of units available as well. Sadly, usually these buildings exclude each other and you are forced to select which units you are interested in more. The number of units available to recruit "regenerates" at the start of each week.
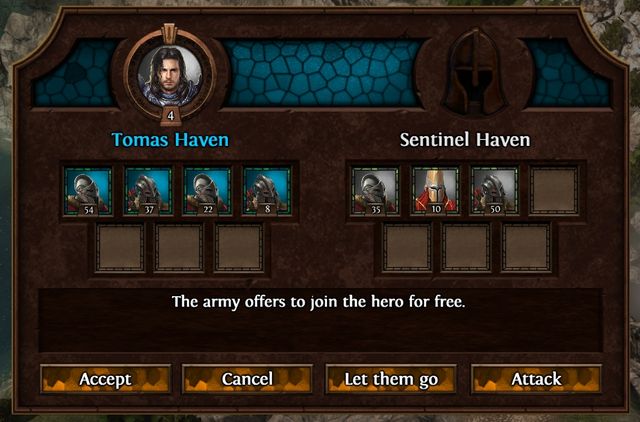 Very often, a neutral army that wants to join you becomes a great empowerment.
You can also add new units to your army in dwellings that are available in basic and elite version, different for each of six factions. Similarly as in the cities, they "regenerate" at the start of each week and you must pay for them a specific number of resources. If you don't want to go to the dwelling at the start of each week, you can order an automatic transfer of creatures to one of your cities. In order to do it you must build a Marketplace.
The third option that allows you to obtain new units is adding the neutral armies to your forces directly from the main map. Some of them are friendly towards you from the start and they will gladly join you. This happens mostly during campaign. Other armies can join you, but it depends on a random factor. You can increase your chances by developing the Diplomacy tree of your hero. Some armies will join you for free, others will require you to pay a fee. In case of stronger creatures it might be even few dozen thousands of gold.
 When traveling through the game world, notice the buildings that allow you to reinforce your army.
The last way to obtain new units is visiting the special buildings scattered through the world map. Each week, you can add a specific number of units there, for example Elementals in case of Elemental Conflux. This option is especially effective at the start of the game, when you don't have a well developed faction army and your hero have free slots for units.
Battles and skirmishes are one of the most important aspects of Might & Magic: Heroes VII. You will spend majority of the time with the game in combat mode, so it is important to properly lead your forces to victory. Below you will find some basic advices related to waging battles in the field.
The first action you must perform is properly positioning your forces. Remember about placing the melee warriors as close to enemy troops as possible (unless you intend to use a defensive tactic). Ranged units should be positioned as far from the enemy as possible, preferably in one of the corners or behind a cover. By default you can position the troops in two rows. It can be changed by selecting ability for your hero. Tactics from the novice level in the Leadership tree increases the number of available rows to 3.
 A proper positioning of the troops is the first step to victory.
Once the battle starts, you must use a proper tactic. If the enemy has strong ranged units, it is a good idea to attack immediately. The more you wait, the more damage you will receive. It's the opposite when enemy has only melee fighting units. In that case, you should retreat your units and focus on defensive stances (a shield icon above the troops icon). This will give you at least one turn to deal free damage. Whenever it is possible, try to attack the enemy forces from the side, preferably from the back. This will give you a great boost to damage.
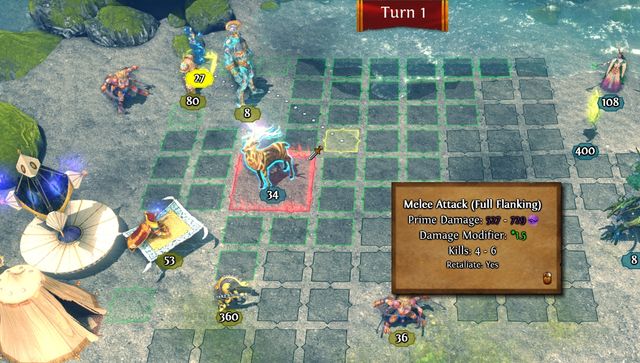 Use the flanking whenever it is possible.
Remember to actively use the abilities and spells of your hero. He isn't shown in the queue of movement at the bottom of the screen, so you must keep it in mind. You can perform one of two actions: attack directly or use the spellbook. Direct attack is recommended especially in easy and fast battles, where the time is more important than tactics. If you are fighting with a strong army, you should always use the abilities of your character. This can allow you to weaken enemy forces, strengthen your own troops or deal damage with area of effect. Of course, you should also consider the class of your character, Might heroes will have less options than Magic heroes. Don't forget that some of your troops also have special abilities which you can use.
The second battle type in which you will participate is siege. A siege occurs when the battle takes place in a city, fort or garrison. The main difference between sieges and regular battles is additional elements appearing on the battle map. Most of all, there are city walls that separate two armies. In order to destroy them, the attackers have a siege machine that is destroying a part of the wall during each turn. After hitting 2-3 times in the same place the wall is falling and the units are able to get through it. By default, you cannot control the siege machine. It selects the attacked wall fragment randomly. You can change it with the Siege Warfare ability from the Warfare tree. Not only will it allow you to attack twice, but you will also be able to select place that you intend to destroy.
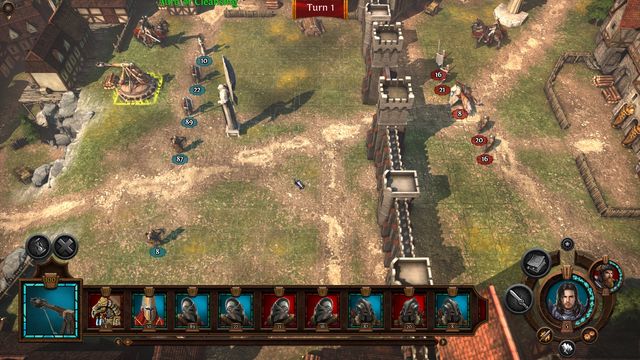 Battles for cities are harder than regular ones. Remember that before deciding to attack.
There are always gates in the walls. They can be used by the defenders to leave the walls and counterattack. In order to get through the gate, the attacking army must first destroy it. Additional elements that appear only during sieges are guard towers, from one to even three. During each turn they deal rather large damage to attacking forces, they also cannot be destroyed by siege machines.
The tactic you use should mostly depend on whether you are attacking or defending. In case of attack, you don't have many options, you must patiently wait for a break in the wall and attack with your ranged units. In case of defense, you must consider two things - the number of allied ranged units and the number of enemy ranged units. If enemy has advantage in ranged units, then it is pointless to hide behind the walls and lose your forces. In such case, you must get outside the walls and attack the enemy directly. If you have more ranged firepower, then it is better to remain behind the safe walls and attack enemy units until they get through the walls.
Spells in Might & Magic: Heroes VII are divided into 7 schools and battle cries. In each category you will find from 6 to 10 spells. They are not exclusive only to one faction. Each hero can learn and use spells of all schools.
 The process of obtaining spells is completely random, as player you have very limited influence on it.
Hero can learn new spells in few ways. Each Magic hero knows few basic spells since the beginning which he can use in battle. His spellbook can be enriched with new spells by building and then upgrading the Mage Guild. On first level you will receive 5 random spells and you will be able to select a preferred school of magic. This will give you certainty that at least one spell on each level will be from that school. On second level you will receive 4 random spells, on third level 3 spells and on the last, fourth level only one spell from the selected school of magic.
 Spells are grouped by their schools (tabs on the left) and their effect (tabs on the right).
Strength of the spell depends on the level on which you received it. The higher the level, the bonuses from the spell and its damage is higher. Additionally, with each level the mana consumption rises as well (from 10 to 40). The stronger the spell, the more Arcane Knowledge the hero will need to be able to cast it. First level doesn't require any points of Arcane Knowledge, second level requires 2 points, third level 5 points, fourth level 8 points. The points can be obtained by unlocking the main levels of magic abilities like Master Earth Magic or Novice Fire Magic. Unlocking the full tree of magic school will increase your Arcane Knowledge by 6 points.
Another way to learn new spells is by visiting special buildings on the world map, like Mage Guild or Magic Shrine. Thanks to the Arcane Intuition ability from the Paragon tree you can learn a spell from enemy hero during battle.
Name
Description
Agony
Deals Dark Magic damage to selected enemy soldier. Lasts 3 turns.
The damage dealt depends on the spell level and the number of Magic points of the hero.

Despair
Reduces Morale of selected enemy creature. Lasts 3 turns.
The number of reduced Morale points depends on the spell level and the number of Magic points of the hero.

Face of Fear
Attacks of selected allied creature will make enemy escape for two fields instead of counterattacking. Additionally, their morale will be reduced for 3 turns.
Next levels increase the amount of Morale reduced, but it will also depend on hero's Magic.

Malassa's Temptation
Increases the chance for neutral armies to join the hero. Lasts till the end of the day.
Depending on the level, the growth is from +5% to +20%.
Purge
Immediately removes some buffs from selected enemy creature.
Next levels increase the amount of removed buffs (up to 3) and reduce the number of mana points required for casting the spell.

Shadow Cloak
Attacks automatically miss the selected allied creature. The time the spell lasts: 3 turns or until all the attacks miss.
Next spell levels increase the number of blocked attacks (up to 2) and reduce mana cost of the spell.

Shadow Image
Summons a copy of selected creatures. A copy is destroyed when it receives any damage.
Further levels increase the percent of the copied group (how many units will be copied).
Weakness
Reduces the Attack of selected enemy creature for 3 turns.
The number of reduced Attack points depends on spell level and the Magic of your hero.
Name
Description

Armageddon
Immediately deals Fire Damage to all units.
The damage depends on spell level and hero's Magic.

Blessing of Arkath
At the beginning of the next battle it will deal Fire Magic damage to random enemy targets.
The damage depends on the level of the spell and hero's Magic.
Burning Determination
Increases Morale of a selected allied creature. Lasts for 3 turns.
The effectiveness of the spell depends on its level and on hero's Magic.

Fire Ball
Immediately deals Fire Magic damage to all groups on a selected 3x3 territory.
The damage depends on spell level and hero's Magic.

Fire Bolt
Immediately deals Fire Magic damage to selected enemy group.
The damage depends on spell level and hero's Magic.

Fire Wall
Creates a 1x5 fire wall in selected place. The wall lasts for 3 battle turns and it deals Fire Magic damage to all units that are on it or passes through it.
The damage depends on spell level and hero's Magic.

Frenzy
Selected creature will attacks the neighboring unit with increased or reduced Attack level, depending on hero's Magic.
At the beginning the spell has -50 to Attack. Points are added to that for each Magic spells multiplied by spell level (from x1 to x6).

Inner Fire
Increases the Attack and Initiative of selected group. Lasts 3 turns.
Increasing the Initiative depends on spell level and increasing the Attack depends on spell level and hero's Magic.
Name
Description

Dispel Magic
Immediately removes all buffs and debuffs from selected creature.
At first level the spell costs 50 mana, at fourth level only 10 mana.
Instant Reinforcements
Immediately teleports selected creatures from the closest city with a Town Portal to the hero.
Mana cost depends on the amount of creatures that you intend to teleport. It doesn't work between surface and underground.

Fortune
Increases Luck of all allied creatures on the marked 4x4 territory. Lasts for 3 turns.

Implosion
Immediately deals Prime Magic damage to selected creature. The damage is equal to a specific part of his total health. It also drags all creatures that are less than 3 fields away to the target.
The damage depends mostly on hero's Magic and on spell level.

Instant Recall
Immediately teleports the hero and his army to the closest allied city with a Town Portal.
Doesn't work between the surface and underground.

Summon Elemental
Immediately summons random Elementals to the battlefield.
Further levels increase the number of summoned Elementals.

Teleport
Teleports selected allied creature to a free field in spell's range.
Depending on spell level, the range might be 3, 5, 7 or 100.

Time Control
Increases the Initiative of selected allied creature and reduces the Initiative of selected enemy creature. Lasts 3 turns.
Spell effectiveness depends on its level and range from 5 to 15.

Time Stasis
Selected creature cannot act and is treated as if it doesn't exist. Time Stasis spell can be dispelled. It lasts from the start of the next round.
The higher the spell level, the less it costs (from 80 to 30 Mana points).
Name
Description
Chain Lightning
Immediately deals Air Magic damage to selected creature, then it skips to three next random groups, dealing half of the previous damage with each new target.
The damage depends on spell level and hero's Magic.

Gust of Wind
Immediately pushes the selected creature in straight line or diagonally.
The distance depends on spell level and ranges from 1 to 4.

Lightning Bolt
Deals Air Magic damage to selected enemy creatures.
The damage depends on spell level and hero's Magic.

Lightning Burst
At the start of selected enemy's turn deals Air Magic Damage to all units surrounding him. If no creature is hurt, the spell remains active until it deals damage.
The damage depends on spell level and hero's Magic.

Cyclone
Deals Air Magic damage to all creatures on selected 2x2 territory and immediately moves them in random way to the surrounding 8x8 territory.
Damage depends on spell level and hero's Magic.

Lightning Reflexes
When attacking, gives one additional attack with modified attack parameter. Lasts for specific amount of turns.
Further levels increase the lasting time of the spell (up to 3 turns) and the damage dealt. The latter, however, mostly depends on hero's Magic.
Storm Arrows
Increases the Attack of allied creature attacking from distance. Lasts 3 turns.
The damage increase is based on spell level and hero's Magic (multiplier x1).

Ylath's Clairvoyance
Immediately uncovers territory around the marked point.
The higher the spell level, the larger the uncovered terrain.
Name
Description

Celestial Armor
Consumes damage dealt to selected allied creature. Lasts for 3 turns.
Depending on spell level, the armor can consume from 27 to 54 damage points.

Cleansing Light
Immediately removes a specific number of negative magic effects from selected allied creature.
Each next spell level increases the number of removed negative effects and reduces mana cost by 10.

Elrath's Conviction
Increases Defense and Leadership of the hero in the upcoming battle.
Depending on level, the spell can increase Defense from +2 to +7 points and Leadership from +5 to +25.
Heal
Immediately resurrects and heals selected allied creature or deals Light Magic damage to enemy Undead creature (doesn't work on Constructs).
The number of healed or taken health points depends on spell level and hero's Magic.

Resurrection
Immediately resurrects and heals selected allied creature. The creature you selected heals and resurrects all allied creatures. Lasts for 3 turns (doesn't work on Undead and Constructs).
The number of restored health points depends on spell level and hero's Magic.

Retribution
Deals Light Magic damage to every creature that attacks selected allied creature. The spell lasts 3 turns.
The damage dealt depends on spell level and hero's Magic.

Summon Golden Dragon
Summons five Golden Dragons to selected 2x2 territory.

Sun Beam
Immediately deals Light Magic damage to selected enemy creatures.
The damage depends on spell level and hero's Magic.

Sun Burst
Deals Light Magic damage to enemy groups which are hit by one of eight beams spreading from selected point in eight directions. The beams are blocked by groups and obstacles. The point selected with the spell must be an empty field.
The damage depends on spell level and hero's Magic.
Name
Description
Blizzard
Summons a blizzard on selected 4x4 territory which lasts for 3 turns. Creatures whose turn starts inside the blizzard will have reduced Movement till the end of their turn.
Depending on spell level, Movement reduction ranges from -1 to -5.

Circle of Winter
Immediately deals Water Magic damage to all units inside a round 3x3 territory.
Damage depends on spell level and hero's Magic.

Fog Shroud
Selected enemy cannot be a target of ranged attacks and cannot use ranged attacks nor activate abilities for 2 turns or until it receives damage.
Further spell levels reduce the number of mana points required for casting the spell.

Frost Bolt
Immediately deals Water Magic damage to selected enemy group.
Damage depends on spell level and hero's Magic.

Ice Strike
Selected allied creature deals additional Water Magic damage when attacking. The enemy it attacks receive Movement penalty. Lasts for 3 turns.
The damage depends on spell level and hero's Magic.

Liquid Membrane
Reduces all damage dealt to selected allied creature. Lasts for few turns.
Damage reduction ranges from 10% to 50% depending on spell level.

Tsunami
Deals Water Magic damage to all groups on the selected territory and pushes back smaller creatures two fields to the back. Destination territory is 5 columns wide.
Further spell levels increase damage dealt, similarly to hero's Magic.

Vessel of Shalassa
Summons a ship to the nearby waters.
Name
Description
Earthquake
Immediately deals Earth Magic damage to all creatures, walls and towers that are on the ground. Damage dealt to fortification is doubled.
Damage depends on spell level and hero's Magic.

Entangle
Reduces the Movement of selected enemy creature and makes it impossible for them to use movement based abilities for 3 turns.
Depending on level, Entangle movement reduction ranges from 2 to 6 points.

Poison Cloud
Generates a poison cloud on the selected 3x3 territory. The cloud becomes larger with each turn and lasts for 3 turns. The poison immediately deals Earth Magic damage to all creatures within its reach. It also deals damage at the beginning of the turn to all creatures that walk into the cloud.
Damage dealt depends on hero's Magic and spell level.

Poison Spray
Deals Earth Magic damage to selected enemy creature at the beginning of his turn. Lasts for three turns.
The damage depends on spell level and hero's Magic.

Regeneration
Heals selected allied creature at the beginning of his three turns.
The number of restored health points depends on spell level and hero's Magic (multiplier x5).

Stone Skin
Increases Defense of selected allied creature for 3 turns.
Spell strength depends on its level and on hero's Magic.

Stone Spikes
Immediately deals Earth Magic damage to all groups that are on selected, cross-shaped territory.
Damage depends on spell level and on hero's Magic.

Sylanna's Bounty
Doubles the production of selected sawmill or ore mine in the same area of influence. Lasts few days.
Depending on spell level, the effect lasts for from 2 to 5 days.
Name
Description

Advance!
+5 to Initiative and +1 to Movement of allied creatures. Creatures' bonuses for flank and full flank are increased by 25 percent. Lasts for 1 turn.
Attention!
+2 to Attack and +3 to Defense of allied creatures. If a creature is performing a retaliation attack, special unit shoots the attacker. Lasts for 1 round.

Engage!
+5 bonus to Attack of allied melee fighting units. +15 to Attack when attacking enemy unit that will not perform retaliation attack. Lasts for 1 turn.

Hold Positions!
+6 to Defense of allied creatures and +8 to Attack of melee fighting allied creatures. Moving creatures lose the bonus. Lasts for one turn.
Open Fire!
+10 to Attack of allied creatures attacking from distance. Creatures can perform ranged flanking and full flanking attacks. Lasts for 1 battle round.
Skills from the economy tree are unique and they are useful only in few specific situations. Most of all, use them only during long games, for example on very large maps or during campaign. The bonuses offered by these skills will be profitable only in long term. You shouldn't buy all the economy skills that are available.
On the first level you should buy the mandatory Novice Economy and Architect. Second level, in addition to the mandatory Expert Economy, should also consist of Town Planner which will allow you to quickly develop the cities you claim. In case of the third level you should take interest only in the main skill which is Master Economy. Except for the skills mentioned above, there is nothing else interesting in this tree and you should rather focus on other branches of the skill tree.
Name
Description
Novice Economy
+150 daily gold.

Merchant
The hero increases the exchange values, as if you had an additional marketplace.
Foreman
Governor: production in lumber mills and ores in the city's area of influence increased by one.

Architect
Governor: -10% building cost in the city.
Name
Description

Expert Economy
+150 daily gold.

Town Planner
Governor: you can place two buildings a day in this town.
Alchemist
Additional 1 Dragonblood crystal, Dragonsteel, Shadowsteel or Starsilver (selected randomly) daily.
Name
Description

Master Economy
+150 daily gold.

Recruiter
Governor: Creatures' recruitment in this city costs 15% less gold.
Name
Description

Estates
All your cities deliver 15% more gold.
Exploration tree is one of the most useful ones in the game, but it should be developed only in some situations. Most of all, you shouldn't invest any skill points in it if you play a quick game and the map isn't large. In that case you won't have the time to fully utilize the profits obtained. Exploration skills should be selected mostly during campaign, when the hero is moved from map to map and the ability to perform longer moves is very important at the beginning of the adventure. Another thing that you should remember is to select exploration abilities on early character level, preferably before he reaches level 10. Once he, for example, reaches level 20, it won't be profitable to spend ability points on skills that at this point will no longer be useful.
On first level, in addition to the mandatory Novice Exploration, you should most of all select the Snatch skill. If you're on a map with large amount of water, you can also pick Navigation. On the second level you must pick Expert Explorer, and the Scouting will be best for additional skill. Developing to the Master level will be profitable only in case of the campaign, in regular skirmishes it is not recommended to upgrade this tree any further.
Name
Description

Novice Exploration
Increases character Movement by 1.
Snatch
Hero doesn't lose turn when gathering resources, entering buildings and performing similar actions.

Native Terrain
Governor: if your heroes are moving on foot, they are moving 10% faster in the city's area of influence.
Navigation
Hero moves 50% faster if he is using a ship.
Name
Description

Expert Exploration
Increases character Movement by 1.

Scouting
Sight of the hero is increased by 2. The hero sees the exact numbers of creatures in armies and the bonuses of enemy heroes if they are in his sight.
Pathfinding
The penalty for moving in harsh territory is reduced by 50%.
Name
Description

Master Exploration
Increases character Movement by 1.

Rover
Doubles the temporary attribute bonuses received from places.
Name
Description

Familiar Terrain
If hero moves on the land, he is 20% faster in territories controlled by all your cities and forts
Only a small part of Might heroes can invest in Defense. However, it doesn't make this tree very good. People who prefer simple, direct battles without the use of many spells and special attacks should be interested in these abilities.
On first level, in addition to the mandatory Novice Defense, you should choose between Defensive Stance and Vitality. The decision should depend on how many melee units you will be using on the battlefield. If there will be more of them than ranged units, then you should select the Defensive Stance and use it actively. On the next, expert level, you should, in addition to the Expert Defense, select the Preemptive Strike which will work greatly together with Defensive Stance. If you don't have many spare skill points, you don't need to continue developing this tree further, unless you intend to focus on defense during the whole game and adjust your whole tactic and other skills to such fighting style.
Name
Description

Novice Defense
Increases hero Defense by 2.
Defensive Stance
If an allied creature haven't attacked or used any active skill, it receives +6 to Defense from the start of the next turn.
Town Protector
Governor: The number of basic creatures of the local guard in this city is increased to 60, and in case of elite creatures is increased by 20.
Vitality
+3 Health of all allied creatures.
Name
Description

Expert Defense
Increases hero Defense by 2.
Preemptive Strike
Allied creature which used defend action will be performing a preemptive retaliation until the next turn starts.
Evasion
Allied units receive +6 to Defense from ranged attacks.
Name
Description

Master Defense
Increases hero Defense by 2.

Alertness
Enemy creatures' flanking and full flanking bonus is reduced by 25%.
Name
Description

Perfect Defense
Whenever allied creature is attacked, its Defense is increased to the level equal to enemy Attack.
Offense skills are available not only for Might heroes as one could assume, but for Magic heroes as well. However, they work much better for the first of the mentioned groups. Since the bonuses provided aren't very strong, this tree isn't useful frequently. It will definitely be a good choice for players who prefer a simple, regular battle, without the use of spells or special abilities.
On the first level you must mandatory pick Novice Offense. As additional skill you should select Battle Frenzy or Accuracy, depending on whether you will have more melee fighting or ranged units in your army. On the second level, in addition to the Expert Offense, you should pick Giant Slayer, which is a useful skill later in the game. Since master level the available skills are much more useful and all of them should be added to your hero if it is possible.
Name
Description

Novice Offense
Increases hero Might by 2.

Homeland
Governor: all allied heroes that are in the area of influence of this city receive +8 to Might.

Battle Frenzy
+1 to basic damage dealt by allied creatures in melee combat.
Accuracy
+1 to basic damage dealt by allied creatures in ranged combat.
Name
Description

Expert Offense
Increases hero Might by 2.

Archery
There is no half range penalty for ranged attacks.

Giant Slayer
Allied units receive +6 to Attack when attacking large creatures or retaliating from their attacks.
Name
Description

Master Offense
Increases hero Might by 2.

Master Flanker
Damage dealt by allied units attacking from flank or full flank increased by 25%.
Name
Description
Perfect Offense
Whenever allied creature is attacking, its Attack is increased to the level equal to Defense of the attacked unit.
Shroud of Malassa skills are exclusive for Dungeon heroes, no other faction has access to them. Because of that, they are well adjusted to special abilities of Dungeon units and related to buildings' bonuses. If you control Dungeon hero, you should definitely take interest in developing that tree.
At first level you must buy the Novice Shroud of Malassa. As an additional skill you should select Confusion which is especially useful against stronger opponents. Expert level requires you to unlock Expert Shroud of Malassa. As the next skill you should select the Weak Spot. However, if you want to utilize the bonus from that skill you must remember that you must attack the enemies properly. All abilities from the Master and Grandmaster trees are very good and you should buy them if you plan to actively use the bonuses offered by the Shroud of Malassa tree.
Name
Description

Novice Shroud of Malassa
All allied creatures are Hidden at the start of the battle. Hidden status allows a creature to move through any other creature. The status is removed when the creature will attack.

Smoke Bomb
When the allied creature loses the Hidden buff, all neighboring creatures receive -25 to Initiative effective till the battle turn ends.

Confusion
Hero's attack additionally makes it impossible for the attacked creatures to retaliate. It lasts till the end of the turn of the currently active creature.

Mephitic Scent
When the allied creature with Hidden buff is moving through enemy group, it deals 1 Dark Magic damage multiplied by the size of enemy group.
Name
Description

Expert Shroud of Malassa
Hidden creatures have +1 Movement.

Dead Angle
If enemy soldiers were fully flanked by allied creature, they retaliate with 0 Attack.
Weak Spot
Enemy forces receive -3 to Attack and -3 to Defense after they are attacked by melee units. The effect lasts till the end of the battle turn.
Name
Description

Master Shroud of Malassa
Hidden creatures receive +4 to Attack and +10 to Luck during attack.

Hide
Allied creatures receive Hidden status at the end of the battle turn during which they haven't received any damage.
Name
Description

Coordination
If the first action of allied creature during a battle turn is an attack after which there was no retaliation, the creature immediately receives another, free attack performed on the same target.
Diplomacy tree is one of the most unique ones, and at the same - the least useful tree in the game. Diplomacy abilities will mostly give you greater chance for adding neutral units to your army or will reduce the cost of such addition. You will rarely use neutral armies and the price of few hundred of gold for such operation will be not a trouble for you.
Only the Grandmaster skill is worth your attention - the Suzerain which makes the passive hero bonuses affect all cities. However, to be able to use it you must get through all the lower levels, which will require you to spent some skill points and to have a hero that has at least some of the skills from the Governor group.
Name
Description
Novice Diplomacy
Increases chance for neutral armies to join you by 10%.

Amnesty
Giving up during battle becomes free.

Silver-Tongued
Reduces by half the gold cost of recruiting neutral creatures from Elemental Conflux and Magic Menagerie.

Necessary Alliance
If there are creatures from different factions in hero's army, each of them receives +5 Morale instead of the -10 Morale penalty.
Name
Description

Expert Diplomacy
Increases chance for neutral armies to join you by 10%.
Diplomatic Immunity
When hero is outside the area of influence of the allied cities, he receives +5 to Defense.

Golden-Tongued
Neutral armies want 25% less gold when they want to join you.
Name
Description

Master Diplomacy
Increases chance for neutral armies to join you by 10%.
Volunteers
Governor: weekly growth in basic dwellings in this city is increased by 25%.
Name
Description

Suzerain
Governor: the hero backs you up with all his governor bonuses. Each of these bonuses can be applied only once per city.
Bloodrage is a skill tree available only for Stronghold heroes. The skills focuses on the unit special ability which is the named Bloodrage. It greatly strengthens your army, both the hero and units, so adding few points to this tree should be a mandatory step for each player.
On the Novice level, in addition to the mandatory Novice Bloodrage, select Warlord's Fury, and if you have more spare skill points, the Bursting Rage as well. From the expert level, in addition to the mandatory Expert Bloodrage, select the Might over Magic. You can develop the higher levels once your hero reaches higher experience levels, preferably 20+.
Name
Description

Novice Bloodrage
Hero starts with 5 points of Bloodrage. It is added to the Attack of allied creatures, but drops during battle:
-2 each time when the creature waits or defends itself.
-2 at the end of each turn of the battle.
The Bloodrage ends when it reaches 0.

Rush
During Bloodrage, allied creatures receive +1 to Movement.

Warlord's Fury
Basic damage of the hero is increased by the number of Bloodrage points multiplied 20x.

Bursting Rage
When the Bloodrage ends, all allied creatures deal damage to enemy units. The damage equals 100 x number of battle rounds during which the Bloodrage was active.
Name
Description

Expert Bloodrage
The hero starts with 2 additional Bloodrage points.

Might over Magic
While in Bloodrage, allied creatures receive only half of the spell damage.
Fiery Rage
While in Bloodrage, allied creatures receive +5 to Initiative.
Name
Description

Bloodrage Master
The hero starts with 2 additional Bloodrage points.

Bloodlust
Current Bloodrage, multiplied by two, is added to Morale of all allied creatures.
Name
Description

Father Sky's Fury
The hero starts with 1 more point of Bloodrage. The Bloodrage increases whenever enemy group dies.
Dark Magic is one of many magic trees available in Might & Magic: Heroes VII. Before investing any points in the skills listed below, make sure that your character knows at least 2-3 spells of this school.
You should develop the Mage Guild in your capitol at least to level two, preferably to level three, and check how many Dark Magic spells you received. You can also select Dark Magic as the preferred one, thanks to that you will receive at least one Dark Magic spell of each level.
Dark Magic tree development should be done similarly to all other magic skill groups. First invest in Novice Dark Magic, then in Dark Scholar. If it will be your main magic school, you can additionally buy Master of Darkness I. On the second level unlock the mandatory Expert Dark Magic. If you have the spells mentioned in the description of the Master of Darkness II, buy this skill. If not, then invest in Dark Wisdom. Develop the Master and Grandmaster levels only if the Dark Magic is your preferred magic school and the Mage Guild is developed to level four.
Name
Description

Novice Dark Magic
Makes the Dark Magic spells more effective and increases the Arcane Knowledge of the hero by 1.

Dark Scholar
Reduces the mana cost of Dark Magic spells by 20%.

Master of Darkness I
Despair and Weakness are now casted on creatures on a 4x4 territory.

Soul Harvest
Whenever hero's attack kills at least one creature, the hero receives 20 Mana.
Name
Description

Expert Dark Magic
Makes the Dark Magic spells more effective and increases the Arcane Knowledge of the hero by 2.
Master of Darkness II
Purge spell additionally makes the target immune to positive spells and magic effects for 3 turns.
Enemy creatures attacked with Face of Fear spell cannot retaliate during 1 turn.

Dark Wisdom
+4 to Magic for Darkness spells. Every second wisdom skill adds another +4 to this bonus.
Name
Description

Master Dark Magic
Makes the Dark Magic spells more effective and increases the Arcane Knowledge of the hero by 3.
Master of Darkness III
Agony spell is now casted on creatures on a 4x4 territory.
First attack at the Shadow Image will miss and won't destroy it. The effect lasts for three turns.
Name
Description

Shadow of Dread
Whenever the hero casts a Dark Magic spell on enemy creature, their numbers is decreased by 5% (rounding down). The creatures lost in that way will return to their army if it won't be defeated.
Fire Magic is one of many magic trees available in Might & Magic: Heroes VII. Before investing any points in the skills listed below, make sure that your character knows at least 2-3 spells of this school.
You should develop the Mage Guild in your capitol at least to level two, preferably to level three, and check how many Fire Magic spells you received. You can also select Fire Magic as the preferred one, thanks to that you will receive at least one Fire Magic spell of each level.
Fire Magic tree development should be done similarly to all other magic skill groups. First invest in Novice Fire Magic, then in Fire Scholar. If it will be your main magic school, you can additionally buy Master of Fire I. On the second level unlock the mandatory Expert Fire Magic. If you have the spells mentioned in the description of the Master of Fire II, buy this skill. If not, then invest in Fire Wisdom. Develop the Master and Grandmaster levels only if the Fire Magic is your preferred magic school and the Mage Guild is developed to level four.
Name
Description

Novice Fire Magic
Makes the Fire Magic spells more effective and increases the Arcane Knowledge of the hero by 1.
Ardent Caster
+1 to Might for each Fire Magic spell casted. Lasts till the end of the round.
Master of Fire I
Fire Bolt deals additional 80 to 120 Fire Magic damage. Lasts three turns.
Burning Determination spell is now casted on creatures on 4x4 field.

Fire Scholar
Reduces the cost of Fire Magic spells by 20%.
Name
Description

Expert Fire Magic
Makes the Fire Magic spells more effective and increases the Arcane Knowledge of the hero by 2.

Master of Fire II
Inner Fire spell is now casted on creatures on a 4x4 territory.
Fire Wall spell additionally stops creatures and deals from 80 to 120 Fire Magic damage. Lasts for 3 turns.

Fire Wisdom
+4 to Fire Magic spell's Magic. Every second wisdom skill adds +4 to this bonus.
Name
Description

Master Fire Magic
Makes the Fire Magic spells more effective and increases the Arcane Knowledge of the hero by 3.
Master of Fire III
Creature that is the target of Frenzy spell will now prefer to attack enemy units and will have +20 Attack.
Fire Ball deals additional 80 to 120 Fire Magic damage. Lasts for 3 turns.
Name
Description
Fire Mantle
Allied creatures deal additional Fire Magic damage - from 56 to 84 damage when using melee attacks and from 16 to 24 damage when they are attacked by melee attacks.
Prime Magic is one of many magic trees available in Might & Magic: Heroes VII. Before investing any points in the skills listed below, make sure that your character knows at least 2-3 spells of this school.
You should develop the Mage Guild in your capitol at least to level two, preferably to level three, and check how many Prime Magic spells you received. You can also select Prime Magic as the preferred one, thanks to that you will receive at least one Prime Magic spell of each level.
Prime Magic tree development should be done similarly to all other magic skill groups. First invest in Novice Prime Magic, then in Prime Scholar. If it will be your main magic school, you can additionally buy Master of Prime I. On the second level unlock the mandatory Expert Prime Magic. If you have the spells mentioned in the description of the Master of Prime II, buy this skill. If not, then invest in Arcane Exaltation. Develop the Master and Grandmaster levels only if the Prime Magic is your preferred magic school and the Mage Guild is developed to level four.
Name
Description

Novice Prime Magic
Makes the Prime Magic spells more effective and increases the Arcane Knowledge of the hero by 1.

Prime Scholar
Reduces Prime Magic Mana cost by 20%.

Master of Prime I
Fortune and Time Control are now casted on creatures on a 4x4 territory.

Reneval
Once the battle ends, hero receives 30 Mana.
Name
Description

Expert Prime Magic
Makes the Prime Magic spells more effective and increases the Arcane Knowledge of the hero by 2.
Master of Prime II
Teleport spell now increases the Initiative of selected creature by 50. Lasts for 2 turns.
Dispel Magic is now casted on creatures on a 3x3 territory.

Arcane Exaltation
+2 do Magic.
+2 do Spirit.
Name
Description

Master Prime Magic
Makes the Prime Magic spells more effective and increases the Arcane Knowledge of the hero by 3.
Master of Prime III
Implosion is now casted automatically again at the start of the next turn on the same target.
The number of Elementals summoned with the Summon Elemental spell is increased by 4 at the start of the next round.
Name
Description
Clarity
When casting Prime Magic spell during battle, the hero obtains another turn in this round. During the second turn the spells are casted with -20 Magic.
Light Magic is one of many magic trees available in Might & Magic: Heroes VII. Before investing any points in the skills listed below, make sure that your character knows at least 2-3 spells of this school.
You should develop the Mage Guild in your capitol at least to level two, preferably to level three, and check how many Light Magic spells you received. You can also select Light Magic as the preferred one, thanks to that you will receive at least one Light Magic spell of each level.
Light Magic tree development should be done similarly to all other magic skill groups. First invest in Novice Light Magic, then in Light Scholar. If it will be your main magic school, you can additionally buy Master of Light I. On the second level unlock the mandatory Expert Light Magic. If you have the spells mentioned in the description of the Master of Light II, buy this skill. If not, then invest in Light Wisdom. Develop the Master and Grandmaster levels only if the Light Magic is your preferred magic school and the Mage Guild is developed to level four.
Name
Description

Novice Light Magic
Makes the Light Magic spells more effective and increases the Arcane Knowledge of the hero by 1.

Light Scholar
Reduces the Mana cost of Light Magic spells by 20%.

Master of Light I
Heal spell is now casted on creatures on a 4x4 territory.
Sun Beam additionally reduces Attack and Defense of hit units by 1. Effect lasts for 3 turns.

Uplifting Light
+3 to Leadership for each Light Magic spell casted. Lasts till the end of the battle.
Name
Description

Expert Light Magic
Makes the Light Magic spells more effective and increases the Arcane Knowledge of the hero by 2.
Master of Light II
Celestial Armor spell is now casted on creatures on a 3x3 territory. Cleansing Light is now casted on creatures on a 4x4 territory.

Light Wisdom
+4 to Light Magic spell's Magic. Every second wisdom skill adds +4 to this bonus.
Name
Description

Master Light Magic
Makes the Light Magic spells more effective and increases the Arcane Knowledge of the hero by 3.
Master of Light III
Retribution spell is now casted on creatures on a 4x4 territory.
Blinded additionally reduces Attack and Defense of hit creatures by 1. The effect lasts for 3 turns.
Name
Description
Chosen of the Light
Whenever hero casts a positive Light Magic spell on allied creature, the target receives +2 to Attack, +2 to Defense, +5 to Morale, +5 to Luck. Additionally, deals maximum damage till the end of the current turn.
Water Magic is one of many magic trees available in Might & Magic: Heroes VII. Before investing any points in the skills listed below, make sure that your character knows at least 2-3 spells of this school.
You should develop the Mage Guild in your capitol at least to level two, preferably to level three, and check how many Water Magic spells you received. You can also select Water Magic as the preferred one, thanks to that you will receive at least one Water Magic spell of each level.
Water Magic tree development should be done similarly to all other magic skill groups. First invest in Novice Water Magic, then in Water Scholar. If it will be your main magic school, you can additionally buy Master of Water I. On the second level unlock the mandatory Expert Water Magic. If you have the spells mentioned in the description of the Master of Water II, buy this skill. If not, then invest in Water Wisdom. Develop the Master and Grandmaster levels only if the Water Magic is your preferred magic school and the Mage Guild is developed to level four.
Name
Description
Novice Water Magic
Makes the Water Magic spells more effective and increases the Arcane Knowledge of the hero by 1.

Water Scholar
Reduces the Mana cost of Water Magic spells by 20%.

Master of Water I
Fog Shroud spell isn't removed when the creature receives damage.
Blizzard spell now reduces Movement of creatures for 3 turns.

Water Shield
All allied creatures start the battle with a Water Shield that reduces the first received damage by 25%. The shield lasts for 3 turns.
Name
Description

Expert Water Magic
Makes the Water Magic spells more effective and increases the Arcane Knowledge of the hero by 2.

Master of Water II
Creatures hurt by Frost Bolt or Ice Strike now receive additional -3 to Movement for 3 turns.
Water Wisdom
+4 to Water Magic spell's Magic. Every second wisdom skill adds +4 to this bonus.
Name
Description

Master Water Magic
Makes the Water Magic spells more effective and increases the Arcane Knowledge of the hero by 3.
Master of Water III
Liquid Membrane additionally increases Movement by 5.
Creatures hurt by Circle of Winter spell additionally receive -3 to Movement for 3 turns.
Name
Description

Frostbite
At the start of enemy creature's turn it receives up to 120 damage per each negative water status.
Air Magic is one of many magic trees available in Might & Magic: Heroes VII. Before investing any points in the skills listed below, make sure that your character knows at least 2-3 spells of this school.
You should develop the Mage Guild in your capitol at least to level two, preferably to level three, and check how many Air Magic spells you received. You can also select Air Magic as the preferred one, thanks to that you will receive at least one Air Magic spell of each level.
Air Magic tree development should be done similarly to all other magic skill groups. First invest in Novice Air Magic, then in Water Scholar. If it will be your main magic school, you can additionally buy Master of Air I. On the second level unlock the mandatory Expert Air Magic. If you have the spells mentioned in the description of the Master of Air II, buy this skill. If not, then invest in Air Wisdom. Develop the Master and Grandmaster levels only if the Air Magic is your preferred magic school and the Mage Guild is developed to level four.
Name
Description

Novice Air Magic
Makes the Air Magic spells more effective and increases the Arcane Knowledge of the hero by 1.

Gathering Storm
+8 to Magic of the first Air Magic spell casted during battle.
Master of Air I
Storm Arrows spell is now casted on creatures on a 4x4 territory and allows the units to shoot with no distance penalty.
Lightning Burst spell no longer deals damage to allies and the creatures that are hit with it have Initiative reduced to 1.

Air Scholar
Reduces the mana cost of Air Magic spells by 20%.
Name
Description

Expert Air Magic
Makes the Air Magic spells more effective and increases the Arcane Knowledge of the hero by 2.
Master of Air II
Gust of Wind spell deals from 60 to 260 additional Air Magic damage.
Lightning Bolt reduces Initiative of the hit creature to 1 for 3 turns and deals from 45 to 195 Air Magic damage to the neighboring creatures.

Air Wisdom
+4 to Air Magic spell's Magic. Every second wisdom skill adds +4 to this bonus.
Name
Description

Master Air Magic
Makes the Air Magic spells more effective and increases the Arcane Knowledge of the hero by 3.
Master of Air III
Lightning Reflexes' additional attack is performed before the enemy will retaliate and is done with a +10 Attack modifier.
Cyclone spell is now casted on a 3x3 territory and moves the creatures that are in a 9x9 neighboring territory. Additionally, small creatures receive double damage.
Name
Description

Storm Lord
When enemy unit is damaged due to an attack, all enemy forces gathered around it receive from 60 to 260 Air Magic damage.
Earth Magic is one of many magic trees available in Might & Magic: Heroes VII. Before investing any points in the skills listed below, make sure that your character knows at least 2-3 spells of this school.
You should develop the Mage Guild in your capitol at least to level two, preferably to level three, and check how many Earth Magic spells you received. You can also select Earth Magic as the preferred one, thanks to that you will receive at least one Earth Magic spell of each level.
Earth Magic tree development should be done similarly to all other magic skill groups. First invest in Novice Earth Magic, then in Earth Scholar. If it will be your main magic school, you can additionally buy Master of Earth I. On the second level unlock the mandatory Expert Earth Magic. If you have the spells mentioned in the description of the Master of Earth II, buy this skill. If not, then invest in Earth Wisdom. Develop the Master and Grandmaster levels only if the Earth Magic is your preferred magic school and the Mage Guild is developed to level four.
Name
Description

Novice Earth Magic
Makes the Earth Magic spells more effective and increases the Arcane Knowledge of the hero by 1.

Earth Scholar
Reduces the Mana cost of Earth Magic spells by 20%.

Master of Earth I
Stone Skin and Regeneration are now casted on creatures on a 4x4 territory.
Rock Solid
+1 to Defense for each casted Earth Magic spell. Lasts till the end of the battle.
Name
Description

Expert Earth Magic
Makes the Earth Magic spells more effective and increases the Arcane Knowledge of the hero by 2.
Master of Earth II
Entangle deals additional 120 Earth Magic damage when the creature affected moves.
Poison Spray lasts till the end of the battle.

Earth Wisdom
+4 to Earth Magic spell's Magic. Every second wisdom skill adds +4 to this bonus.
Name
Description

Master Earth Magic
Makes the Earth Magic spells more effective and increases the Arcane Knowledge of the hero by 3.
Master of Earth III
Earthquake now deals double damage to buildings and enemy creatures.
Stone Spikes now deals double damage to unit on the middle field.
Name
Description

Nature's Vitality
+15% Health for allied creatures.
Metamagic is a tree available exclusively for Academy heroes. Typically for this faction, the skills focus on strengthening the spells and on various magic effects. Because of that, the tree is recommended mostly for Magic heroes who will be able to use it most effectively.
On the first level you must pick Novice Metamagic, then, select the Arcane Catalyst. It's not a very useful skill, but the alternatives are even worse. As for the Expert and Master level, you should buy all skills. It will cost large amounts of skill points, but will provide great power for the spells. Grandmaster level provides a rather small bonus, you can resign from buying it and invest the spared point in any other magic school.
Name
Description

Novice Metamagic
At the start of each round the hero receives +1 Metamagic point, up to +3 in total. Hero's Magic is strengthened by Metamagic.
Once Metamagic reaches +3, the level of all spells casted by the hero increases to Novice.
Arcane Catalyst
Each spell casted by hero increases the Metamagic by 1.

Arcane Channeling
The first attack of the Small Pyramid in each turn increases Metamagic by 1.

Arcane Shield
At the start of each round all allied creatures receive an Arcane Shield that consumes the damage equal 2 x the number of Metamagic points.
Name
Description

Expert Metamagic
Metamagic can increase to +5.
Once Metamagic reaches +5, the hero is casting all spells at least on Expert level.

Arcane Brilliance
Hero's Magic boost coming from Metamagic is doubled.

Arcane Empowerment
Before allied creature is hit with a melee attack for the first time, enemy creature will receive damage equal to each Metamagic point multiplied by the number of creatures in allied stack.
Name
Description

Master Metamagic
Metamagic can rise to +10.
Once Metamagic reaches +10, the hero casts all spells at least at Master level.
Arcane Attunement
Metamagic increases the Defense and Initiative of allied creatures.
Name
Description

Arcane Amplification
Magic damage dealt to enemy creatures is increased by 1% for each Metamagic point.
Necromancy is a special skill tree available exclusively for Necropolis heroes. The best and most useful skills in the game can be found on necromancy tree. Below skills mostly focus on resurrecting fallen units. Because of that, even after a hard battle you will still have large numbers of creatures that will be added to your army.
In order to maximize the effect, you should buy all skills except for the Dark Nova. However, it is important to buy them in proper order. An optimum development of Necromancy tree is as follows:
Name
Description

Novice Necromancy
Resurrects Skeletons from living creatures. The undead join your army after a won battle. 5% Health of the killed creatures is transformed into Skeletons Health.

Mana Drain
The hero regains 10 Mana after killing a stack of enemy living creatures.

Putrid Bones
When melee attacked, Skeletons and Skeleton Hoplites deal 1 Earth Magic damage for each creature in the stack.

No Rest for the Wicked
Necromancy also resurrects the undead creatures.
Name
Description

Expert Necromancy
Instead of the regular Skeletons, resurrects Skeleton Hoplites.
Additional 5% of Health of killed living units is transformed into Skeleton Hoplites' health.

The Face of Fear
All enemy creatures receive -15 Morale during battle.

Dark Nova
The Dark Bolt of the Namtaru hits all enemy units around the target.
Name
Description

Master Necromancy
Additional 5% Health of killed living units is transformed into Skeleton Hoplites' Health.

Ghost Ride
Necromancy additionally resurrects Banshee with 8% Health of killed living creatures.
Name
Description

Eternal Servitude
Resurrects 40% of destroyed Skeletons and Skeleton Hoplites from the stack if it were attacked and completely destroyed during an attack.
Warcries tree is one of the most useful ones for Might heroes and at least few of the skills it offers should be developed. They increase statistics of warcries and, on higher level, add a new one. Frequently this will have great impact on the battle as the warcries are the Might heroes' equivalent to spells.
When developing War Cries, your priority should be reaching Grandmaster level. If you don't have such possibility, develop the tree to Master Warcries skill, by first picking Novice Warcries, Overhelm, Expert Warcries and Vicious Shot.
Name
Description

Novice Warcries
The hero learns the following warcries: Advance! and Hold positions!

Overhelm
Advance! warcry additionally increase the bonus received by allied creatures for flank and full flank attacks. The increase equals 25%.

Alertness
Hold position! warcry additionally increase the Defense of melee fighting units by 2 and their Attack by 8.

Opportunism
Whenever the hero uses a warcry, another allied creature receives +25 to Luck which lasts till the end of the battle round. If other creature becomes active earlier because of Initiative change, it doesn't become influenced by this skill.
Name
Description

Expert Warcries
The hero learns following warcries: Open fire! And Engage!

Vicious Shot
Open fire! warcry additionally increase Attack of the range fighting units by 2. Allied units also obtain the possibility to use flank and full flank with their ranged attacks.

Onslaught
Engage! warcry additionally increase Attack of the melee fighting creatures by 15 when attacking enemy creature that won't retaliate.
Name
Description

Master Warcries
The hero learns Attention! warcry.

Artillery Support
Attention! warcry additionally increase Attack and Defense by 1 point and the special unit will shoot the attacking creatures when the attacked creature is retaliating.
Name
Description

Warlord
Warcries now lasts for 2 rounds.
Righteousness is a skill tree exclusive for Haven heroes. It focuses mostly on increasing the Morale of allied units, which makes them more effective in battle. The tree will be useful with basic gameplay style that focuses mostly on direct attacks of the units. It corresponds well with skills from the Warfare tree.
On the novice level you must pick Novice Righteousness. As the second skill, choose between the United We Stand and Sisters of Mercy. On the second level, in addition to the mandatory Expert Righteousness, select Rightful Justice. Develop the Grandmaster level only if you intend to focus on the tactical aspect of the battles.
Name
Description

Novice Righteousness
Whenever allied creature has high Morale, all other allied creatures receive +2 to Morale until they too will have high Morale. The effect can stack.

Sisters of Mercy
In each its turn, Sister Mercy can heal twice.
The target of the second healing is selected anew.

United We Stand
Neighboring allied creatures receive +1 to Defense.

Coordinated Effort
If enemy stack dies, another allied creature gets high morale. If another allied creature becomes active earlier (because of Initiative change), it doesn't get affected by this skill.
Name
Description
Expert Righteousness
Morale boost coming from Righteousness is increased by additional +2 points.

Blessed Words
Whenever a positive spell is casted on allied creature, that creature receives +10 to Morale until it has high morale. The effect can stack.
Rightful Justice
Allied creatures perform retaliation attacks with a +6 Attack bonus.
Name
Description
Master Righteousness
Morale bonus coming from Righteousness is increased by additional +2 points.

Brothers in Arms
Whenever an allied creature has high morale, all neighboring allied creatures will receive +10 to Morale until they will have high morale. The effect can stack.
Name
Description

Victorious Streak
Allied creatures deal 75% damage and have 75% Movement during morale turns instead of half damage and half Movement.
Destiny is one of the most interesting and less useful skill trees. Only players that count on random factor and plain luck should spend some points on skills listed below.
If you're really eager to spend some points on this tree, invest in Novice Destiny, then Traveler's Luck, Expert Destiny and, depending on hero type (Magic or Might), in Perfect Strike or Chaos Magic.
Name
Description
Novice Destiny
Increases hero's Destiny by 5.
Blessed Ground
Governor: all allies of the hero in this city's area of influence receive +20 to Destiny.

Traveller's Luck
Every week hero receives a random temporary boost.

Treasure Finder
Treasure chests collected by the hero contain 50% more gold.
Name
Description

Expert Destiny
Increases hero's Destiny by another 5 points.

Perfect Strike
Enemy will not retaliate after receiving a critical hit.
Chaos Magic
When this hero is casting a spell that deals damage, luck test based on Destiny is conducted. Success of the test increases damage dealt by the spell by 150% (+175% when combined with Deadly Strike).
Name
Description

Master Destiny
Increases hero's Destiny by another 5 points.

Deadly Strike
Critical hits of your allied creatures now deal 200% damage instead of 150%.
Name
Description

Fickle Magic
There is a 50% chance that a spell casted by enemy on your ally will not work.
Leadership is a unique skill tree which only a handful of players will find interesting. It's a good choice for players who during the battle intend to focus on maneuvering, taking advantage of the landform and using unit's special abilities. If you have a strong tactic sense, this tree is perfect for you.
Despite obvious advantages, it is not recommended to develop Leadership above expert level. On the novice level pick the mandatory Novice Leadership and the very good Tactics skill. On expert level you should pick all available skills, but prioritize obtaining the Outnumbering.
Name
Description

Novice Leadership
Increases hero's Leadership by 5 points.
Tactics
Hero can position his creatures in first 3 rows.

Resolution
When allied creatures cannot perform any action during their turn due to low morale, they receive half of the turn instead.

Patriot
Governor: all allied heroes in this city's area of influence receive +20 to Leadership.
Name
Description

Expert Leadership
Increases Leadership of the hero by another 5 points.
Outnumbering
Hero can deploy up to 9 stacks of creatures.

Rousing Speech
+10 to Morale and +5 to Initiative of allied creatures. Lasts for first 3 turns of the battle.
Name
Description
Master Leadership
Increases hero's Leadership by another 5 points.
Leading by Example
When the hero will attack enemy creature, all allied units will receive +10 to Attack if during the same turn they will attack the same enemy.
Name
Description

Reinforcements
At the start of the battle the number of allied creatures is increased by 5%. The creatures added this way will not remain in the army once the battle ends.
Warfare skill tree focuses on special units which can be added to your army. They offer statistic boost or additional attack. Before developing these skills learn about the special units of your faction and decide whether you want to spend precious points on these upgrades.
On the first level pick the mandatory Novice Warfare and Town Defense as secondary skill. Remember that it gives bonuses to you only when your hero is in a city. On the second level pick the mandatory Expert Warfare and Siege Warfare which will make it much easier to defeat enemy's walls and units. Higher levels should be developed only if you suspect that you will fight for cities and forts frequently. Otherwise it is not recommended to spend any points on them.
Name
Description

Novice Warfare
Hero's special units are on level 2.
Town Defense
Governor: towers always perform three shots at the same target.
Improved Durability
+100% to Health of hero's special units.
Swift Deployment
+20 to Initiative of hero's special units.
Name
Description

Expert Warfare
Hero's special units are on level 3.
Artillery
You can manually control attack of the hero and special (backup) unit.
Siege Warfare
You can manually control special (siege) unit of the hero who now shoots the same target twice.
Name
Description

Master Warfare
Hero's special units are on level 4.

Artillery Barrage
Hero's special units shoots the same target three times
Name
Description
Perfect Warfare
Hero's special units are on level 5.
Skills from the Paragon tree focuses on hero's statistics. Because of that, these skills will be most useful when given to hero whom you will use for long time, for example during campaign or very long skirmishes.
On the first level, in addition to the mandatory Novice Paragon, you should select Dragon Blood for Magic heroes or Fighter for Might heroes. On higher levels, in case of a Governor hero, you should add the Enlightened Leader. On the expert level you must buy the Expert Paragon and you should add the Arcane Intuition as well. It is profitable to develop the master level only in case of high experience levels, preferably 20+.
Name
Description

Novice Paragon
The hero receives 5% more experience points.

Dragon Blood
+2 to Magic
+2 to Spirit
Fighter
+2 to Might
+2 to Defense

Enlightened Leader
Governor: all allied heroes that are in this city's area of influence receive +20% more experience points.
Name
Description

Expert Paragon
The hero gathers additional 5% more experience points.

Arcane Intuition
+5 to Arcane Knowledge. The hero has 75% chance to learn the spells casted during the battle by enemy heroes. However, the Arcane Knowledge requirements of spells still must be met.
Scholar
+30% to maximum Mana.
Name
Description

Master Paragon
The hero gathers additional 20% more experience points.

Mentor
During an meeting with other heroes, increases the experience level of other allied heroes up to 15% experience points of the hero and teaches them all the spells the hero knows (if the requirements for learning the spells are met).
Name
Description

Master of Magic
Spells in which the hero has at least Novice rank are casted on Master level.
Nature's Revenge is a skill tree available exclusively for Sylvan faction and only Sylvan heroes can develop it. It focuses mostly on the so-called marks which reduce enemies' statistics or add bonuses to attack. These skills will definitely not suit everyone as each battle will require the player to spend some time on preparing an optimum queue of attacks and special skills.
If you decide to develop the Nature's Revenge, try to pick all the available skills. You can only skip the Nature's Wrath, especially if you play a Might hero.
Name
Description

Novice Nature's Revenge
After enemy creatures are selected as the target of an attack or an allied stack's skill, up to 1 mark is being placed on them.
Creatures that attack enemy with a mark will receive +4 to Attack for each mark on the target.
The mark ends as the battle round ends.
Mark of the Avenger
Attack of the hero places additional mark on the creature it hits.
Impede
Each mark placed on enemy creature reduces its Movement by 1.
Fast Reload
Sylvan Ballista receives second attack after attacking a creature with a mark.
Name
Description
Expert Nature's Revenge
Up to 2 marks can be placed on enemy creature.
Nature's Wrath
The hero receives +1 Magic point for each mark placed on enemy creature. Lasts till the end of the battle round.

Enliven
Mother Treant's support ability additionally gives +2 to Movement and +10 to Initiative to the selected stack.
Name
Description

Master Nature's Revenge
Up to 3 marks can be placed on enemy creature.

Sting
At the end of each battle turn each enemy creature will receive 50 Earth Magic damage for each mark on it.
Name
Description
Nature's Luck
Allied creatures that attack enemy with 3 marks on it will always perform a critical hit.
Name
Description/Set

Crystal Circlet
+2 Spirit;
Bloodforged set.

Cap of the Explorer
Increases character sight radius by 2.
Gladiator Helmet
- 5 to enemy creatures' Morale

Assassin's Mask
- 5 to enemy creatures' Morale
Assassin's Set.

All-Seeing Crown
Increases character sight radius by 1;
Increases obtained experience by 5%.
Name
Description/Set
Ranger's Hat
+2 to Defense;
Increases character sight radius by 1;
Ranger's Set.
Arcane Circlet
+2 to Spirit;
Mana cost for all spells reduced by 1;
Bloodforged Set.

Shamanic Mask
+5 to Morale;
Allows casting Gust of Wind spell once per battle.
Scout's Hat
Increases character sight radius by 4;
Allows casting Ylath's clairvoyance spell once per battle.
Mask of Doom
-10 to Luck for enemy troops.
Helmet of the Naga Lord
Increases character sight radius by 2;
Once per battle allows casting Ice Strike.
Turban of Attunement
The hero receives a +1 bonus to Metamagic at the start of each battle turn;
Available only for Academy heroes.
Name
Description / Set
Windsword Helmet
+4 to Defense;
+10 to Leadership;
Increases the obtained experience by 10%.

Crag Hack's Helmet
+6 to Might;
+5 to Initiative of allied creatures;
Warlord's Set.
Shantiri Helmet
+2 to Defense;
+10 to Leadership;
Increases character sight radius by 2;
Shantiri Treasure Set.
Supreme Crown of the Magister
+4 to Magic;
+4 to Spirit;
Magister's Set.

Guardian's Helm
+10 to Morale;
+10 to Initiative of allied creatures;
Guardian's Set.

Mask of the Shadowsmith
+4 to Magic;
Once per battle allows you to cast the Shadow Image spell;
Shantiri Treasure Set.

Crown of Persistence
All positive spells are lasting 2 turns longer;
+8 mana points daily;
Bloodforged Set.
Name
Description / Set

Cape of Protection
+2 to Defense.
Bone Spaulders
+2 to Defense;
Warlord's Set.
Guardian's Spaulders
+5 to Leadership;
Guardian's Set.
Dwarven Spaulders
+5 to Leadership;
Dwarven Work.

Diplomat's Coat
Increases the chance for neutral army to join your hero by 5%.
Magister's Cloak
+2 to Magic;
Magister's Set.
Name
Description / Set

Cloak of Darkness
-1 to basic damage of enemy ranged creatures;
Assassin's Set.

Barbarian Cape
All allied creatures receive 10% less Magic damage.

Cloak of Sylanna
All allied creatures receive 30% less Earth Magic damage.
Dragon Blessed Set.

Cloak of Shalassa
All allied creatures receive 30% less Water Magic damage.
Dragon Blessed Set
Cloak of Elrath
All allied creatures receive 30% less Light Magic damage.
Dragon Blessed Set.

Cloak of Arkath
All allied creatures receive 30% less Fire Magic damage.
Dragon Blessed Set.

Cloak of Ylath
All allied creatures receive 30% less Air Magic damage.
Dragon Blessed Set.

Cloak of Malassa
All allied creatures receive 30% less Dark Magic damage.
Dragon Blessed Set
Cloak of the Lich
+5 to Destiny;
-5 to Morale of enemy creatures;
Great Lich's Set.
Name
Description / Set

Dead Man's Cape
-10 to Morale of enemy creatures;
All healing effects are two times weaker.
Shoulderpads of the Ambassador
+10 to Leadership;
10% greater chance for neutral armies to join the hero.

Cloak of Warding
+2 to Defense;
All allied creatures receive 15% less Magic damage.

Ranger's Cape
+12 to Magic for earth magic spells. All allied creatures receive 30% less Earth magic damage.
Ranger's Set.

The Griffin's Mantle
+12 to Magic for Light Magic spells;
+ 80 to maximum mana;
Battle Garb of the Griffin Set.
Name
Description / Set

Ranger's Armour
+2 to Spirit;
Ranger's Set.

Necromancer's Chasuble
+40 to maximum mana;
Great Lich's Set.
Name
Description / Set

Shantiri Armour
+2 to Defense;
+5 to Leadership;
Shantiri Treasure Set.
Regal Armour
+2 to Defense;
+1 to Movement of allied flying creatures.

Robe of Innervation
+1 to lasting time of spells casted on allied creatures;
Allows casting the Inner Fire spell once per battle.
Windsword Plate
+2 to Defense;
All allied creatures receive 30% less damage from Prime Magic;
Shantiri Treasure Set.
Magister's Robe
+2 to Magic;
+2 to Spirit;
Magister's Set.
Alchemist's Robe
+1 to time during which the spells casted on allied creatures lasts;
1 piece of Dragonblood crystal, Dragonsteel, Shadowsteel or Starsilver per day.
Name
Description / Set

Armour of the Forgotten Hero
+2 to Might;
+2 to Defense;
+2 to Magic;
+2 to Spirit;
Shantiri Treasure Set.
Griffin's Gorget
+2 to Defense;
+5 to Destiny;
+2 to time during which the spells casted on allied creatures lasts;
Battle Garb of the Griffin Set.

Robe of the Prophet
All allied creatures receive 5% less Magic damage;
+3 to Health of allied creatures.
Dragon's Scale Armour
+4 to Might;
+4 to Defense;
Dragon Blessed Set.
Pirate Armour
+4 to Defense;
+2 to Health of allied creatures.

Rob of Sar-Issus
+4 to Spirit;
Mana cost for all spells reduced by 2.

Guardian's Breast Plate
+4 to Defense;
All allied creatures receive 30% less Light Magic damage;
+3 to Health of allied creatures;
Guardian's Set.
Name
Description / Set
Pirate Crossbow
+1 to basic damage dealt by allied ranged shooting creatures;
Warlord's Set.

Assassin's Blade
+1 to Might.
Assassin's Set.
Name
Description / Set
Djinn Scimitar
+12 to Destiny.

Ideal Crossbow
+1 to basic damage dealt by allied ranged shooting creatures;
+5 to Initiative of allied ranged shooting creatures.
Minotaur's Axe
+6 to damage per each hero level.
Crimson Scythe
+5 to Might.

Crystal Wand
+2 Magic;
Prime Magic spell's mana cost reduced by 4.

Asha's Wil
+3 to damage per each hero level;
+2 to Health for all allied creatures;
Dragon Blessed Set.

Unicorn Horn Bow
+1 to basic damage dealt by allied ranged shooting creatures;
All allied shooting creatures have no range penalty;
Elven Craft.

Avenger
+1 to basic damage dealt by allied ranged shooting creatures;
All enemy creatures receive 1 additional Nature's Mark at the start of the battle;
Available only for Sylvan faction;
Elven Craft.
Celestial Staff
+2 to Spirit;
Allows casting Celestial Shield spell once per battle.
Hallowed Set.
Dwarven Hatchet
+3 to damage per each hero level;
+1 to basic damage dealt by allied creatures;
Dwarven Work.
Name
Description / Set
Staff of the Lyre
+8 to Magic;
Bloodforged Set.
Dragon Flame Tongue
+9 to damage per each hero level;
+2 to Might;
Dragon Blessed Set.
The Griffin's Resolve
+3 to Might;
+3 to Spirit;
+5 to Leadership;
Battle Garb of the Griffin Set.
Rod of Torment
+4 to Magic;
+2 to lasting time of negative spells casted on enemy creatures.

Sword of Thorns
+6 to damage per each hero level;
-1 to Movement of enemy creatures;
Elven Craft.
Ranger's Bow
+9 to damage per each hero level;
+1 to basic damage dealt by allied ranged shooting creatures;
+10 to Initiative of allied shooting creatures;
Ranger's Set.
Dwarven Crossbow
+1 to basic damage dealt by allied ranged shooting creatures;
All allied shooting creatures receive no range penalty;
+10 to Initiative of allied shooting creatures;
Dwarven Work.
Name
Description / Set

Purse of Endless Gold
250 pieces of gold per day;
Elven Craft.
Dwarven Shield
+2 to Defense;
Dwarven Work.
Dwarven Pickaxe
1 piece of ore per day;
Dwarven Work.

Sacred Seed
1 piece of wood per day;
Elven Craft.
Name
Description / Set
Moonblade
+5 to Magic.

Crest of Courage
+10 to Leadership;
Hallowed Set.
Celestial Shield
Whenever allied creature has high morale, all enemy units will receive -10 Morale lasting till the end of the battle turn;
Hallowed Set.

Thunderskin
+12 to Morale.

Four Leaf Clover
+10 to Destiny.

Magister's Codex
+2 to Magic;
+5 to Destiny;
Magister's Set.

Lion's Shield
+5 to Leadership;
+2 to Defense;
Guardian's Set.
Cursed Dice
-10 to Destiny for all enemy creatures;
Shantiri Treasure Set.

White Wolf's Shield
+4 to Defense;
Hallowed Set.

Master's Grimoire
+4 to Spirit.

Horn of Plenty
1 piece of Dragonblood crystal, Dragonsteel, Shadowsteel or Starsilver per day;
Shantiri Treasure Set.

Starstone
1 piece of Starsilver per day;
Bloodforged Set.
Shadowsteel Heart
1 piece of Shadowsteel per day.

Alchemical Flask
1 piece of Dragonsteel per day.

Crystal Eyeglass
1 piece of Dragonblood crystal per day.
Dwarven Work.
Bag of Endless Gold
500 pieces of gold per day.
Name
Description / Set

Crest of Honor
+20 to Leadership.

Gold Feather
Allows you to cast the Gold Dragon spell once per battle.

Notebook of the Engineer
+10 to attack of offensive and supportive warfare units of the player;
Dwarven Work.

Shackles of the Last Man
During the battle heroes cannot escape nor give up.

Chest of Endless Gold
1000 pieces of gold per day.

Golden Horseshoe
+20 to Destiny.

Archmage's Codex
+8 to Magic.

Libram of Last Rites
All allied creatures receive 5% less Magic damage;
Each healing is reduced by half;
Great Lich's Set.
Dragon Shield
+8 to Defense;
Dragon Blessed Set.
Sextant of the Sea Elves
Increases character sight radius by 4;
The hero is 15% faster when traveling through a ship.
Name
Description / Set
Legendary Boots
+5 to Destiny;
Shantiri Treasure Set.

Sandals of the Swift Journey
+1 to maximum Movement of the hero.

Guardian's Boots
+1 to maximum Movement of the hero;
+1 to Defense;
Guardian's Set.

Magister's sandals
+1 to maximum Movement of the hero;
+1 to Magic;
Magister's Set.
Boots of the Walking Dead
+1 to maximum Movement of the hero;
+5 to Initiative of allied melee fighting creatures;
Great Lich's Set.
Name
Description / Set

Ranger's Boots
+2 to maximum Movement of the hero;
+5 to Initiative of allied shooting creatures;
Ranger's Set.
Elven Boots
+1 to maximum Movement of the hero;
+10 to Initiative of allied shooting creatures;
Elven Craft.
Shifting Boots
+1 to Movement of all allied creatures that uses Hiding;
Available only for the Dungeon faction.
Boots of the Explorer
+4 to maximum Movement of the hero.
Sandals of the Blessed
+1 to Might;
+1 to Defense;
+1 to Magic;
+1 to Spirit;
Hallowed Set.
Name
Description / Set
Monk's Sandals
Mana cost for Water Magic spells is reduced by 4;
+10 to Initiative of allied creatures.
Assassin's Boots
+1 to basic damage of allied shooters;
+10 to Initiative of allied creatures;
Assassin's Set.

Boots of the Wayfarer
+2 to maximum Movement of the hero;
500 pieces of gold per day;
Elven Craft.
Griffin's Talons
+3 to maximum Movement of the hero;
+1 to Movement of allied creatures;
Battle Garb of the Griffin Set.
Name
Description / Set
Black Guard's Gloves
+2 to Might.

Ring of Swiftness
+5 to Initiative of allied creatures;
Elven Craft.
Bracelet of the Druid
+1 to Magic;
Allows using the Regeneration spell once per battle;
Elven Craft.

Ring of Conjuring
+1 to Magic;
+20 to maximum mana;
Bloodforged Set.

Ranger's gloves
+2 to Might;
Ranger's Set.
Name
Description / Set

Elemental Ring
Allows casting the Summon Elemental spell once per battle;
Bloodforged Set.
Assassin's Glove
+2 to Might;
+5 to Destiny;
Assassin's Set.

Guardian's Gauntlet
+3 to damage per each hero level;
+2 to Health of allied creatures;
Guardian's Set.

Bracelet of the Free Mage
+2 to Magic;
Allows casting the Lightning Bolt spell once per battle.
Gauntlets of the Minotaur
+4 to Might.

Ring of Celerity
+10 to Initiative of allied creatures;
Dwarven Work.
Name
Description / Set

Gauntlets of the Cyclops
+8 to Might.
Gauntlet of the Khan
+4 to Might;
+1 to basic damage of allied creatures;
Warlord's Set.

Skull Ring
20% chances for immobilizing the enemy till his next turn during hero's attack.
Arcane Bracelets
+4 to Magic;
Allows casting the Implosion spell once per battle.

Ring of Haste
+1 to Movement of allied creatures;
+5 to Initiative of allied creatures;
Shantiri Treasure Set.

Ring of Unrepentant
+6 to Magic;
Allows casting the Teleport spell once per battle;
Great Lich's Set.
Name
Description / Set

Crystal Necklace
+2 to Magic.

Amulet of Disguise
+1 to Defense;
Allows casting the Fog Shroud spell once per battle;
Guardian's Set.

Amulet of Health
+1 to Health of allied creatures;
Elven Craft.
Name
Description / Set
Elrath's Unity
+5 to Spirit.

Sea Elf Charm
+5 to Defense.

Amulet of the Jaguar
+4 to Attack;
Warlord's Set.
Dragon Fangs Necklace
+4 to Magic;
Dragon Blessed Set.

Blazing Eye
+12 to Magic for Light Magic spells.

Shadow Veil
+12 to Magic for Dark Magic spells.
Emerald Leaf
+12 to Magic for Earth Magic spells.

Dream Drop
+12 to Magic for Water Magic spells.

Pristine Breath
+12 to Magic for Air Magic spells.
Scarlet Spark
+12 to Magic for Fire Magic spells.
Necklace of Vitality
+2 to Health of allied creatures.
Amulet of Necromancy
Necromancy resurrects additional 5% health points;
Available only for Necropolis faction's heroes.

Pendant of Primal Rage
+5 to Defense of allied creatures with Bloodrage;
Available only for Stronghold heroes.
Hourglass of Order
-10 to Morale of enemy troops;
Great Lich's Set.
Name
Description / Set

Vial of Poison
-4 to Health of enemy creatures;
Assassin's Set.
Dragon Heart
+8 to Magic;
Dragon Blessed Set.

Moon Talisman
+4 to Magic;
+10 to Destiny;
Magister's Set.

Lifeblood Pendant
+4 to Health of allied creatures;
Bloodforged Set.

Pendant of the Conflux
The hero gains 1 mana point for each 2 mana points used by the enemy;
Bloodforged Set.
Head
Crag Hack's Helmet
Neck
Amulet of the Jaguar
Shoulders
Bone Spaulders
Torso
Barbarian Armour
Hands
Gauntlet of the Khan
Right hand
Pirate Crossbow
2 parts of the set:
+1 to basic damage dealt by allied ranged shooting creatures.
4 parts of the set:
+10 to Destiny.
6 parts of the set:
+4 to Defense;
+10 to Initiative of allied creatures.
Head
Ranger's Hat
Shoulders
Ranger's Cape
Torso
Ranger's Armour
Hands
Ranger's gloves
Right hand
Ranger's Bow
Feet
Ranger's Boots
2 parts of the set:
+4 to Movement of allied creatures.
4 parts of the set:
+5 to Might;
+5 to Initiative of allied creatures.
6 parts of the set:
+6 to Spirit;
+1 to base damage of allied creatures.
Neck
Hourglass of Order
Shoulders
Cloak of the Lich
Torso
Necromancer's Chasuble
Hands
Ring of Unrepentant
Left hand
Libram of Last Rites
Feet
Boots of the Walking Dead
2 parts of the set:
-5 to Initiative for enemy ranged shooting creatures.
4 parts of the set:
-10 to Morale of enemy creatures.
6 parts of the set:
+6 to Magic.
Head
Supreme Crown of the Magister
Neck
Moon Talisman
Shoulders
Magister's Cloak
Torso
Magister's Robe
Left hand
Magister's Codex
Feet
Magister's sandals
2 parts of the set:
+40 to maximum mana.
4 parts of the set:
+4 to Defense.
6 parts of the set:
+6 to Magic;
+5 to Initiative of allied creatures.
Torso
Regal Armour
Right hand
Celestial Staff
Left hand
Crest of Courage
Left hand
Celestial Shield
Left hand
White Wolf's Shield
Feet
Sandals of the Blessed
2 parts of the set:
250 pieces of gold per day.
Shoulders
The Griffin's Mantle
Torso
Griffin's Gorget
Right hand
The Griffin's Resolve
Feet
Griffin's Talons
2 parts of the set:
+10% more experience received.
3 parts of the set:
+1 to Might;
+1 to Defense;
+1 to Magic;
+1 to Spirit.
4 parts of the set:
Heals and resurrects up to 1320 Health points of selected creature. Selected creature heals and resurrects 120 Health points of neighboring allied creatures for 3 turns.
Head
Assassin's Mask
Neck
Vial of Poison
Shoulders
Cloak of Darkness
Hands
Assassin's Glove
Right hand
Assassin's Blade
Feet
Assassin's Boots
2 parts of the set:
-1 to Health of enemy creatures.
4 parts of the set:
+3 to Might;
-1 to basic damage of enemy creatures.
6 parts of the set:
+3 to Destiny;
+5 to Initiative of allied creatures.
Head
Guardian's Helm
Shoulders
Guardian's Spaulders
Torso
Guardian's Breast Plate
Hands
Guardian's Gauntlet
Left hand
Lion's Shield
Feet
Guardian's Boots
2 parts of the set:
+1 to Health of allied creatures.
4 parts of the set:
+2 to Might;
+5 to Leadership.
6 parts of the set:
+4 to Defense;
+2 to Health of allied creatures.
Neck
Dragon Heart
Shoulders
Cloak of Arkath
Shoulders
Cloak of Elrath
Shoulders
Cloak of Shalassa
Shoulders
Cloak of Ylath
Shoulders
Cloak of Sylanna
Shoulders
Cloak of Malassa
Torso
Dragon's Scale Armour
Right hand
Asha's Will
Right hand
Dragon Flame Tongue
Left hand
Dragon Shield
2 parts of the set:
+2 to Magic.
Shoulders
Dwarven Spaulders
Hands
Ring of Celebrity
Right hand
Dwarven Hatchet
Right hand
Notebook of the Engineer
Right hand
Dwarven Crossbow
Left hand
Dwarven Shield
Left hand
Dwarven Pickaxe
Left hand
Crystal Eyeglass
2 parts of the set:
+2 to Defense.
Head
All-Seeing Crown
Neck
Amulet of Health
Hands
Bracelet of the Druid
Hands
Ring of Swiftness
Right hand
Unicorn Horn Bow
Right hand
Sword of Thorns
Right hand
Avenger
Left hand
Purse of Endless Gold
Left hand
Sacred Seed
Feet
Elven Boots
Feet
Boots of the Wayfarer
2 parts of the set:
+5 to Initiative of allied creatures.
Head
Crystal Circlet
Head
Arcane Circlet
Head
Crown of Persistence
Neck
Lifeblood Pendant
Neck
Pendant of Conflux
Shoulders
Shoulderpads of the Ambassador
Hands
Ring of Conjuring
Hands
Elemental Ring
Right hand
Staff of the lyre
Left hand
Starstone
2 parts of the set:
4 mana points per day.
Head
Mask of the Shadowsmith
Head
Shantiri Helmet
Torso
Shantiri Armour
Torso
Armour of the Forgotten Hero
Hands
Ring of Haste
Left hand
Cursed Dice
Left hand
Horn of Plenty
Feet
Legendary Boots
2 parts of the set:
10% more experience gained.
During skirmishes and multiplayer games you can select from 11 different Haven heroes. Each of them has a special ability which can make the game easier. In most cases special abilities focus on Light Magic, Fire Magic or skills related to Might. If it is possible, pick Melisande, who has the Explorer ability, for the beginning of your journey. It will allow you to move few fields further in each turn, which might become vital for the victory. Serguei will be a good choice as well if you prefer to control a Might character and Kryzstoff in case of Magic hero.
Hero
Specialization
Description
 Amilcar
 Tactician
The hero starts the game with Leadership skill on novice level and with Tactics skill.
 Murazel
 Master of Light Magic
Each Light Magic Spell casted by the hero has +6 to Magic.
Edric Beast Tamer
Governor: +5 to growth of Dire Wolves and Silverbacks in this city's area of influence.
 Ella
Ella Enlightened
The hero starts the game with the Prime Magic skill on novice level and with Renewal skill.
 Kryzstoff
 Spellweaver
The hero starts with a +4 Magic bonus.
 Melisande
 Explorer
The hero starts with Exploration skill on novice level and with the Familiar Terrain skill.
Orna Adept of Heal
The hero starts the game with Light Magic on novice level and with Heal spell.
The spell is casted with one level higher than the current level of that school.
 Serguei
 Gladiator
The hero starts with a +4 Might bonus.
 Tyris
Tyris Cavalry Officer
Governor: +1 to growth of Cavaliers and Cuirassiers in this city's area of influence.
 Wilhelm
 Adept of Firebolt
The hero starts with the Fire Magic skill on novice level and with Fire Bolt spell.
The spell is casted with one level higher than current level of that school.
 Ymoril
 Justicar Captain
Governor: +2 to growth of Guardians and Justicars in this city's area of influence.
Haven city development requires various resources. The number of needed gold and ore is similar. The same goes for special resources, there is none dominant one. The haven has no buildings that give you special options and possibilities.
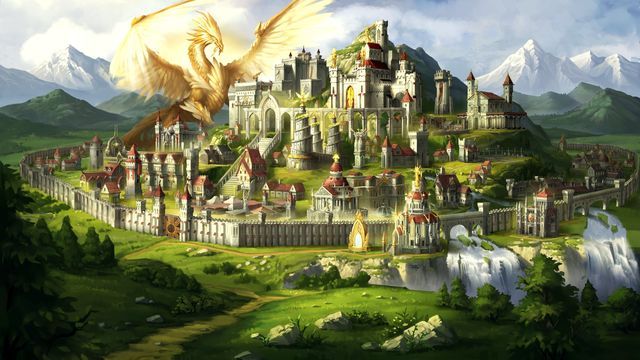 A fully developed Haven city.
Below you will find a list showing the suggested order of constructing 14 buildings in your city. The number of objects is much larger, but the first two weeks of the game are the key ones. Not always, mostly due to the lack of resources, you will be able to construct the buildings exactly in recommended order. Slight differences from the list won't mean that your city is developed in wrong way.
Order
Name
Description
1
Hall of Heroes
Allows you to recruit new and defeated heroes.
2
Barracks
Basic nest.
Allows you to recruit 21 Sentinels per week.
3
Town Hall
Gives additional 500 pieces of gold per day.
4
Beast Lair
Basic nest.
Allows you to recruit 10 Dire Wolves per week.
5
Loophole Tower
Basic nest.
Allows you to recruit 20 Crossbowmen per week.
6
Mage Guild - level 1.
Gives 5 random level 1 spells to this city.
Each hero visiting this city, as long as he meets the requirements, will receive the spells.
7
Convent of Elrath
Produces special unit.
Allows you to buy Sister Healers.
8
Horse Stables
Visiting heroes receive +5 to movement till the end of the week.
9
City Hall
Gives additional 1000 pieces of gold per day.
10
Choral of Believers
Light Magic spells casted by your heroes remaining in the area of influence of this city are one level higher.
11
Priory
Elite nest.
Allows you to recruit 5 Chaplains per week.
12
Training Grounds
Elite nest.
Allows you to recruit 2 Cavaliers per week.
13
Watchtower
Elite nest.
Allows you to recruit 5 Guardians per week.
14
Marketplace
Allows you to trade resources.
Building
Description
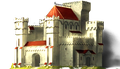 Village Hall
The object is built since the start of the game.
Gives the ability to build new objects in the city.
Gives 500 pieces of gold per day.
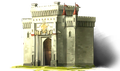 Barracks
Cost:
800 gold
Basic nest.
Allows you to recruit 21 Sentinels per week.
 Garrison
Requirements:
Barracks
Cost:
1400 gold
5 ore
Upgrade of the basic nest.
Allows you to recruit and upgrade Sentinels to Legionnaires.
 Loophole Tower
Cost:
1000 gold
5 wood
Basic nest.
Allows you to recruit 20 Crossbowmen per week.
 Marksman Tower
Requirements:
Loophole Tower
Cost:
1500 gold
10 ore
Upgrade of the basic nest.
Allows you to recruit and upgrade Crossbowmen to Marksmen.
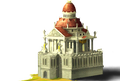 Hall of Heroes
Cost:
500 gold
5 ore
Allows you to recruit new and defeated heroes.
 Blacksmith
Cost:
500 gold
5 ore
Produces special unit.
Allows you to buy Haven Ballista.
 Marketplace
Cost:
500 gold
Allows you to trade resources.
Building
Description
 Town Hall
Requirements:
Village Hall
Cost:
2000 gold
Gives additional 500 pieces of gold per day.
 Recruiters Office
Requirements:
Barracks
Cost:
800 gold
Upgrade of the basic nest.
+21 Sentinels or Legionnaires per week.
 Wall level 1.
Requirements:
Blacksmith
Cost:
800 gold
15 ore
10 wood
Surrounds the city with walls and gates used during siege and adds local guard consisting of Sentinels and Legionnaires.
 Convent of Elrath
Requirements:
Mage Guild - level 1.
Cost:
500 gold
2 ore
Produces special unit.
Allows you to buy Sister Healers.
 Mage Guild - level 1.
Cost:
1000 gold
5 wood
5 ore
Gives 5 random level 1 spells to this city.
Each hero visiting this city, as long as he meets the requirements, will receive the spells.
 Horse Stables
Cost:
1000 gold
5 wood
Visiting heroes receive +5 to movement till the end of the week.
 Choral of Believers
Cost:
500 gold
5 wood
Makes it impossible to build the Embassy
Light Magic spells casted by your heroes remaining in the area of influence of this city are one level higher.
 Embassy
Cost:
1000 gold
5 ore
Makes it impossible to build the Choral of Believers
+20% success chance when negotiating with neutral armies in city's area of influence.
 Beast Lair
Cost:
1000 gold
5 wood
Basic nest.
Allows you to recruit 10 Dire Wolves per week.
 Beast Den
Requirements:
Beast Lair
Cost:
1500 gold
5 ore
2 shadowsteel
Upgrade of the basic nest.
Allows you to recruit and upgrade Dire Wolves to Silverbacks.
Building
Description
 Priory
Requirements:
Convent of Elrath
Choral of Believers or Embassy
Cost:
2500 gold
5 wood
1 Dragonblood crystal
1 Starsilver
1 Dragonsteel
1 Shadowsteel
Elite nest.
Allows you to recruit 5 Chaplains per week.
 Cathedral of Light
Requirements:
Priory
Cost:
3750 gold
2 Dragonblood crystals
2 Starsilver
2 Dragonsteel
2 Shadowsteel
Upgrade of the legendary nest.
Allows you to recruit and upgrade Chaplains to Abbots.
 Town Portal
Requirements:
Mage Guild - level 1.
Cost:
500 gold
2 wood
2 ore
2 Dragonblood crystals
All heroes visiting this city receive the Town portal spell.
Allows the heroes who have this spell to return to this city if it is the closest available city.
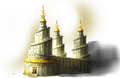 Mage Guild - level 2.
Requirements:
Mage Guild - level 1.
Cost:
1000 gold
5 wood
5 ore
1 Dragonblood crystals
1 starsilver
1 dragonsteel
1 shadowsteel
Gives 4 random level 2 spells to this city.
Each hero visiting this city, as long as he meets the requirements, will receive the spells.
 Resource Silo
Requirements:
Marketplace
Cost:
3000 gold
2 ore
2 wood
Makes it impossible to build the Moat
Each day it gives you 1 piece of random rare resource: Dragonblood crystal, Starsilver, Dragonsteel, Shadowsteel.
 Moat
MoatRequirements:
Wall level 1.
Cost:
400 gold
2 wood
Makes it impossible to build the Resource Silo
Adds a moat to the city during siege.
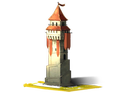 Wall level 2.
Requirements:
Wall level 1.
Cost:
800 gold
5 wood
5 ore
2 Starsilver
Increases the number of hit points of walls and gates during siege.
Adds Guardians and Chaplains to local guard.
Increases the number and growth of creatures in local guard.
 Shooting Range
Requirements:
Loophole Tower
Cost:
1000 gold
Makes it impossible to build the Butchery
Upgrade of the basic nest.
+20 Crossbowmen or Marksmen per week.
 Butchery
Requirements:
Beast Lair
Cost:
1000 gold
5 wood
Upgrade of the basic nest.
+10 Dire Wolves or Silverbacks per week.
Building
Description
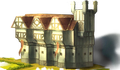 City Hall
Requirements:
Town Hall
Cost:
5000 gold
Gives additional 1000 pieces of gold per day.
Officers HousingsRequirements:
Watchtower
Cost:
3000 gold
5 ore
5 dragonsteel
Makes it impossible to build the Monastery
Upgrade of the legendary nest.
+5 Guardians or Justicars per week.
 Monastery
Requirements:
Priory
Cost:
2500 gold
10 ore
Makes it impossible to build the Officers Housings
Upgrade of the legendary nest.
+5 Chaplains or Abbots per week.
WatchtowerCost:
3000 gold
10 ore
5 dragonsteel
Elite nest.
Allows you to recruit 5 Guardians per week.
 Justicar's Tower
Requirements:
Watchtower
Cost:
4500 gold
5 ore
5 wood
5 shadowsteel
Upgrade of the legendary nest.
Allows you to recruit and upgrade Guardians to Justicars.
 Champion Guard Tower
Requirements:
Wall level 1.
Cost:
1000 gold
5 wood
5 ore
Increases the capacity of local guard.
If there's a legendary nest in the city, the local guard will be each day reinforced with one legendary creature coming from there until there are 5 such creatures in the guard.
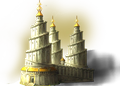 Mage Guild - level 3.
Requirements:
Mage Guild - level 2.
Cost:
1000 gold
5 wood
5 ore
3 Dragonblood crystals
3 Starsilver
3 dragonsteel
3 shadowsteel
Gives 3 random level 3 spells to this city.
All heroes visiting the city, as long as they fulfill the requirements, receive these spells.
Building
Description
 Training Grounds
Requirements:
Horse Stables
Cost:
6500 gold
1 wood
10 Starsilver
Elite nest.
Allows you to recruit 2 Cavaliers per week.
 Proving Grounds
Requirements:
Training Grounds
Cost:
10 000 gold
10 wood
5 dragonsteel
Upgrade of the legendary nest.
Allows you to recruit and upgrade Cavaliers to Cuirassiers.
 Thieves Guild
Cost:
500 gold
5 wood
Makes it impossible to build the Artillery Range
Allows you to buy information about your enemies.
 Artillery Range
Requirements:
Wall level 2.
Cost:
400 gold
10 ore
Makes it impossible to build the Thieves Guild
During siege, the city has 2 towers.
 Alchemist Lab
Requirements:
Mage Guild - level 2.
Cost:
3000 gold
2 wood
2 ore
Generates 1 Starsilver per day.
Building
Description
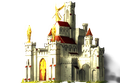 Capitol
Requirements:
City Hall
Unique
Cost:
10 000 gold
10 wood
10 ore
Gives additional 2000 pieces of gold per day. You can have only one Capitol.
 Wall level 3.
Requirements:
Wall level 2.
Cost:
800 gold
5 wood
5 ore
2 Starsilver
Increases the number of hit points of walls and gates during siege.
Increases the number and growth of creatures in local guard.
 Transept of Heaven
Requirements:
Priory
Watchtower
Cost:
12 000 gold
5 wood
10 ore
10 Dragonblood crystals
Makes it impossible to build the Hall of Honor
Legendary nest.
Allows you to recruit one Seraph per week.
 Transept of Elysium
Requirements:
Transept of Heaven
Cost:
15 000 gold
5 wood
10 ore
10 Dragonblood crystals
Upgrade for the legendary nest.
Allows you to recruit and upgrade Seraphs to Celestials.
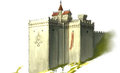 Hall of Honor
Requirements:
Priory
Watchtower
Cost:
12 000 gold
5 wood
10 ore
5 Starsilver
5 shadowsteel
Makes it impossible to build the Transept of Heaven
Legendary nest.
Allows you to recruit 1 Landsknecht per week.
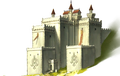 Hall of Glory
Requirements:
Hall of Honor
Cost:
15 000 gold
5 wood
10 ore
10 dragonsteel
Upgrade for the legendary nest.
Allows you to recruit and upgrade Landsknecht to Swordmasters.
 Recruiters outpost
Requirements:
Recruiters Office
Cost:
6000 gold
15 wood
5 ore
Makes it impossible to build the Training Arena
Upgrade of the basic nest, increases the growth of Sentinels and Legionnaires.
Buildings that increase growth in the city start also increasing growth in outside nests that are in city's area of influence.
 Training Arena
Requirements:
Training Grounds
Cost:
6500 gold
10 wood
Makes it impossible to build the Recruiters Outpost
Upgrade of the legendary nest.
+2 Cavaliers or Cuirassiers per week.
 Mage Guild - level 4.
Requirements:
Mage Guild - level 3.
Cost:
1000 gold
5 wood
5 ore
5 Dragonblood crystals
5 shadowsteel
5 starsilver
5 dragonsteel
Gives 1 random level 4 spell to this city.
All heroes visiting the city, as long as they met the requirements, receive these spells.
 Elrath's Infinite Mercy
Requirements:
There's a hero in the city that has the Tears of Asha
Cost:
4000 gold
5 wood
5 ore
5 Dragonblood crystals
5 starsilver
5 dragonsteel
5 shadowsteel
Adds 5000 gold per day and increases creatures' growth in this city by 50%.
After each battle, 10% of units you lost are resurrected.
 Sentinel
Cost: 43 gold
 Legionnaire
Cost: 56 gold

Shieldguard
Neighboring creatures receive only half of melee and ranged damage and the Legionnaire receives 25% of that damage.
 Crossbowman
Cost: 45 gold
 Marksman
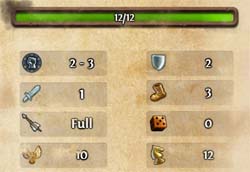
Cost: 59 gold

Piercing Shot
This creature shoots all units that are in a line.
 Cavalier
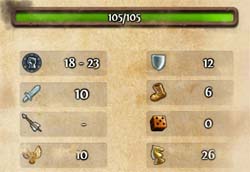
Cost: 1300 gold

Charge
The creature attacks with +1 to Attack for each field it moves through before the attack.
 Cuirassier
Cost: 1690 gold

Charge
The creature attacks with +1 to Attack for each field it moves through before the attack.

Bash
Enemies hit by this creature cannot retaliate to its attack and will be stunned till the end of the turn.
 Dire Wolf
Cost: 110 gold

Unlimited Retaliation
The creature always retaliates when it has an opportunity to.
 Silverback
Cost: 143 gold

Unlimited Retaliation
The creature always retaliates when it has an opportunity to.

Feral Charge
The creature attacks a target with no range limited by Movement and the target cannot retaliate.
It hits with +5 to Attack and its Defense is reduced to 0 till the end of its next turn.
Usable once per battle.
 Guardian
Cost: 400 gold

Unlimited Retaliation
The creature gains a free possibility to retaliate on the neighboring enemy that attacked other allied unit.
 Justicar
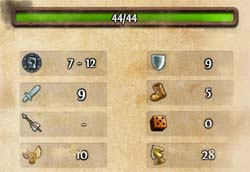
Cost: 520 gold

Unlimited Retaliation
The creature gains a free possibility to retaliate on the neighboring enemy that attacked other allied unit.

Cleave
The creature always hits twice. Attacked enemies can retaliate after the first hit.
 Chaplain
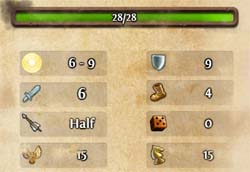
Cost: 400 gold

Aura of Cleansing
The creature and allies neighboring with it receive +4 to Defense and at the start of their turn they lose random negative magic effect.
 Abbot
Abbot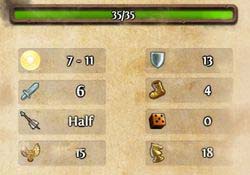
Cost: 520 gold

Aura of Cleansing
The creature and allies neighboring with it receive +4 to Defense and at the start of their turn they lose random negative magic effect.

Ranged Retaliation
The creature attacked from a distance can, if it isn't participating in a melee combat, perform a retaliating shot.
 Seraph
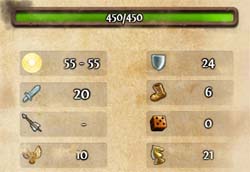
Cost: 5500 gold, 1 Dragonblood Crystal

Aura of Purity
The creature and neighboring allied creatures cannot receive any negative magic statuses.
 Celestial
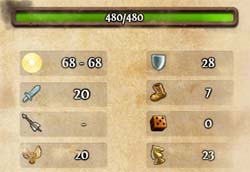
Cost: 7150 gold, 1 Dragonsteel, 2 Dragonblood Crystals

Aura of Purity
The creature and neighboring allied creatures cannot receive any negative magic statuses.

Resurrection
Heals and resurrects allied creature, restoring 50 Health (doesn't work on Undead and Constructs).
 Landsknecht
Cost: 5500 gold, 1 Starsilver

Indomitable
The creature is resistant to negative mind effects: its Morale cannot drop, Hypnosis and Face of Fear doesn't work on it when it is attacked.
 Swordmaster
Cost: 7150 gold, 2 Starsilver, 1 Shadowsteel

Indomitable
The creature is resistant to negative mind effects: its Morale cannot drop, Hypnosis and Face of Fear doesn't work on it when it is attacked.
 Haven Ballista
Cost: 1000 gold
 Sister
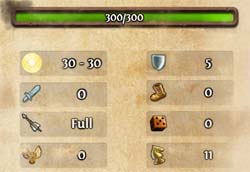
Cost: 500 gold

Healing
Heals selected allied creature, restoring 20 of its Health (doesn't work on Undead and Constructs).
Perfect Warfare unlocks the action: Sister can also resurrect fallen creatures.
When playing as Sylvan faction during skirmishes, you can choose from only 9 different heroes. Despite that, you shouldn't have trouble with selecting a good candidate. Ciele with the Explorer skill is a good choice. This skill will give you few additional movement points since the start of the game. If instead of mobility you prefer gold, you should select Jenova who will give you 350 pieces of gold per day. It's a great bonus not only during the beginning of the game, but later as well.
Hero
Specialization
Description
 AgathinArchery Master
The hero starts the game with Offensive skill on novice level and with Accuracy skill.
 Ciele
Ciele Explorer
The hero starts the game with Exploration skill on novice level and with the Native Terrain skill.
 Dirael
 Pixie Enchanter
Governor: +10 to growth of Pixies and Sprites in this city's area of influence.
 Jenova
 Delver of the Royal Purse
The hero gives 350 gold per day to its kingdom.
 Lasir
Lasir Plenipotentiary
The hero starts with Diplomacy skill on novice level and with Necessary Alliance skill.
 Ossir
Ossir Treasure Hunter
The hero starts with Destiny skill on novice level and with the Treasure Finder skill.
 Sailin
 Blade Dancer Leader
Governor: +2 to growth of Blade Dancers and Blade Masters in this city's area of influence.
 Sinithala
 Dryad Conjurer
Governor: +10 to growth of Dryads and Oak Dryads in this city's area of influence.
 Sylrael
 Stone Skin Adept
The hero starts with Earth Magic skill on novice level and with Stone Skin spell.
The spell is casted on one level higher than current level of that school.
Sylvan city development isn't very different than the development of other factions. In addition to gold, you will mostly need wood which is the main building resource. As for the special resources, Dragonblood Crystal is needed the most. Sylvan doesn't have a special building.
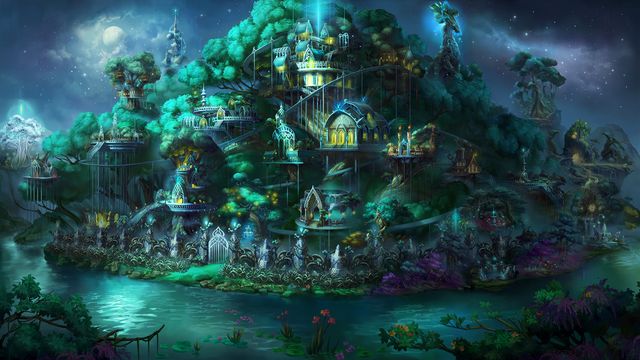 A fully developed Sylvan city.
Below you will find a list showing the suggested order of constructing 14 buildings in your city. The number of objects is much larger, but the first two weeks of the game are the key ones. Not always, mostly due to the lack of resources, you will be able to construct the buildings exactly in recommended order. Slight differences from the list won't mean that your city is developed in wrong way.
Order
Name
Description
1
Hall of Heroes
Allows you to recruit new and defeated heroes.
2
Hallow Grove
Basic nest.
Allows you to recruit 20 Dryads per week.
3
Town Hall
Gives additional 500 pieces of gold per day.
4
Marketplace
Allows you to trade resources.
5
Faery Trees
Basic nest.
Allows you to recruit 19 Pixies per week.
6
Mage Guild - level 1.
Gives 5 random level 1 spells to this city.
Each hero visiting this city, as long as he meets the requirements, will receive the spells.
7
Mage Guild - level 2.
Gives 4 random level 2 spells to this city.
Each hero visiting this city, as long as he meets the requirements, will receive the spells.
8
Stone Circle
Elite nest.
Allows you to recruit 6 Druids per week.
9
City Hall
Gives additional 1000 pieces of gold per day.
10
Blade Dance Terrace
Elite nest.
Allows you to recruit 5 Blade Dancers per week.
11
Stone Bridge
Upgrade of the legendary nest.
+6 Druids or Druid Elders per week.
12
Moon Glade
Elite nest.
Allows you to recruit 2 Moon Does per week.
13
Mage Guild - level 3.
Gives 3 random level 3 spells to this city.
Each hero visiting this city, as long as he meets the requirements, will receive the spells.
14
Town Portal
All heroes visiting the city receive Town portal spell.
Allows the heroes who have this spell to return to this city if it is the closest available city.
Building
Description
 Village Hall
The object is built since the start of the game.
Gives the ability to build new objects in the city.
Gives 500 pieces of gold per day.
 Faery Trees
Cost:
1000 gold
5 wood
Basic nest.
Allows you to recruit 19 Pixies per week.
 Faery Woods
Requirements:
Faery Trees
Cost:
1500 gold
2 starsilver
Upgrade of the basic nest.
Allows you to recruit and upgrade Pixies to Sprites.
 Hallow Grove
Cost:
800 gold
Basic nest.
Allows you to recruit 20 Dryads per week.
 Sacred Grove
Requirements:
Hallow Grove
Cost:
1200 gold
5 wood
Upgrade of the basic nest.
Allows you to recruit and upgrade Dryads to Oak Dryads.
 Mage Guild - level 1.
Cost:
500 gold
5 wood
5 ore
Gives 5 random level 1 spells to this city.
Each hero visiting this city, as long as he meets the requirements, will receive the spells.
 Hall of Heroes
Cost:
500 gold
5 ore
Allows you to recruit new and defeated heroes.
 Blacksmith
Cost:
500 gold
5 ore
Produces special unit.
Allows you to buy Sylvan Ballista.
 Marketplace
Cost:
500 gold
Allows you to trade resources.
Building
Description
 Town Hall
Requirements:
Village Hall
Cost:
2000 gold
Gives additional 500 pieces of gold per day.
 Sparkling Fountain
Requirements:
Faery Trees
Cost:
500 gold
5 wood
Makes it impossible to build the Shrine of Perfect Harmony
Upgrade of the basic nest.
+19 Pixies or Sprites per week.
 Shrine of Perfect Harmony
Requirements:
Hallow Grove
Cost:
400 gold
Makes it impossible to build the Sparkling Fountain
Upgrade of the basic nest.
+20 Dryads or Oak Dryads per week.
 Garden of the Sacred Seed
Requirements:
Hallow Grove
Mage Guild - level 1.
Cost:
500 gold
5 wood
Produces special unit.
Allows you to buy Mother Treants.
 Mage Guild - level 2.
Requirements:
Mage Guild - level 1.
Cost:
500 gold
5 wood
1 Starsilver
1 Dragonsteel
1 Shadowsteel
Gives 4 random level 2 spells to this city.
Each hero visiting this city, as long as he meets the requirements, will receive the spells.
 Horse Stables
Cost:
1000 gold
5 wood
Visiting heroes receive +5 to movement. Lasts till the end of the week.
 Thieves Guild
Requirements:
Hall of Heroes
Cost:
500 gold
5 wood
Makes it impossible to build the Embassy
Allows you to buy information about your enemies.
 Embassy
Requirements:
Hall of Heroes
Cost:
1000 gold
5 wood
Makes it impossible to build the Thieves Guild
+20% success chance when negotiating with neutral armies in city's area of influence.
 Hunters Cabin
Requirements:
Blacksmith
Cost:
1400 gold
10 wood
Basic nest.
Allows you to recruit 11 Hunters per week.
 Hunters Lodge
Requirements:
Hunter's Cabin
Cost:
2100 gold
5 dragonsteel
Upgrade of the basic nest.
Allows you to recruit and upgrade Hunters to Master Hunters.
Building
Description
 Stone Circle
Requirements:
Mage Guild - level 2.
Cost:
4000 gold
10 ore
Elite nest.
Allows you to recruit 6 Druids per week.
 Stone Ring
Requirements:
Stone Circle
Cost:
5500 gold
2 Dragonblood crystals
2 Starsilver
2 Dragonsteel
2 Shadowsteel
Upgrade of the legendary nest.
Allows you to recruit and upgrade Druids to Druid Elders.
 Town Portal
Requirements:
Mage Guild - level 2.
Cost:
500 gold
2 wood
2 ore
2 Dragonblood crystals
All heroes visiting the city receive Town portal spell.
Allows the heroes who have this spell to return to this city if it is the closest available city.
 Mage Guild - level 3.
Requirements:
Mage Guild - level 2.
Cost:
500 gold
5 wood
3 Dragonblood crystals
3 starsilver
3 dragonsteel
3 shadowsteel
Gives 3 random level 3 spells to this city.
Each hero visiting this city, as long as he meets the requirements, will receive the spells.
 Fountain of Restoration
Cost:
1000 gold
5 ore
Makes it impossible to build the Golden Path
Visiting hero receive +5 to Leadership. Lasts 3 battles.
 Golden Path
Cost:
300 gold
2 wood
Makes it impossible to build the Fountain of Restoration
Doubles the amount of Movement of caravans moving from the city.
 Wall level 1
Cost:
1500 gold
10 wood
5 ore
Adds walls and gates used during siege and local guard consisting of Pixies and Hunters.
 Archery Range
Requirements:
Hunters Cabin
Cost:
700 gold
5 ore
Upgrade of the basic nest.
+11 Hunters or Master Hunters per week.
 Archery Platforms
Requirements:
Mage Guild - level 1.
Wall level 1
Cost:
600 gold
2 Starsilver
The city has 2 towers during siege.
Building
Description
 City Hall
Requirements:
Town Hall
Cost:
5000 gold
Gives additional 1000 pieces of gold per day.
 Stone Bridge
Requirements:
Stone Ring
Cost:
2000 gold
10 ore
Makes it impossible to build the Bladesmith
Upgrade of the legendary nest.
+6 Druids or Druid Elders per week.
 Bladesmith
Requirements:
Blade Dance Terrace
Cost:
1500 gold
15 ore
Makes it impossible to build the Stone bridge
Upgrade of the legendary nest.
+5 Blade dancers or Blade Masters per week.
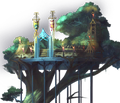 Blade Dance Terrace
Cost:
3000 gold
15 ore
Elite nest.
Allows you to recruit 5 Blade Dancers per week.
Blade Dance ArenaRequirements:
Blade Dance Terrace
Cost:
4500 gold
10 Starsilver
Upgrade of the legendary nest.
Allows you to recruit and upgrade Blade Dancers to Blade Masters.
 Dream Forest
Requirements:
Mage Guild - level 2.
Cost:
500 gold
2 Starsilver
Makes it impossible to build the Moat
Increases the cost of enemy heroes march through this city's area of influence by 25%.
 Moat
MoatRequirements:
Wall level 2
Cost:
600 gold
5 wood
Makes it impossible to build the Dream Forest
Adds a Moat to the city during siege.
 Wall level 2
Requirements:
Wall level 1
Cost:
1500 gold
5 wood
Increases the number of hit points of walls and gates during siege.
Adds Blade Dancers and Druids to local guard.
Increases the number and growth of creatures in local guard.
Mystic Pond
Requirements:
Marketplace
Cost:
3000 gold
2 wood
2 ore
Makes it impossible to build the Sylanna's Infinite Gift
Generates 1 of the randomly selected resources per day: Dragonblood crystal, Dragonsteel, Shadowsteel, Starsilver.
 Sylanna's Infinite Gift
Requirements:
Marketplace
Cost:
3000 gold
2 Starsilver
Makes it impossible to build the Mystic Pond
Adds 1 wood and 1 ore per day.
Building
Description
 Moon Glade
Requirements:
Stone Circle
Cost:
6000 gold
15 wood
10 Starsilver
Elite nest.
Allows you to recruit 2 Moon Does per week.
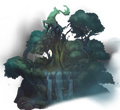 Sun Garden
Requirements:
Moon Glade
Cost:
9000 gold
5 dragonsteel
5 shadowsteel
Upgrade of the legendary nest.
Allows you to recruit and upgrade Moon Doe to Sun Deer.
 Mage Guild - level 4.
Requirements:
Mage Guild - level 3.
Cost:
500 gold
5 wood
5 Dragonblood crystals
5 Starsilver
5 dragonsteel
5 shadowsteel
Gives 1 random level 4 spell to this city..
Each hero visiting this city, as long as he meets the requirements, will receive the spells.
 Wall level 3
Requirements:
Wall level 2
Cost:
1500 gold
5 wood
Increases the number of hit points of walls and gates during siege.
Increases the number and growth of creatures in local guard.
Building
Description
 Capitol
Requirements:
City Hall
Unique
Cost:
10 000 gold
10 wood
10 ore
Gives additional 2000 pieces of gold per day. You can have only one Capitol.
 Sacred Tree
Requirements:
Moon Glade
Cost:
3000 gold
15 wood
5 Starsilver
Upgrade of the legendary nest.
+2 to Moon Doe or Sun Deer per week.
 Dragon Altar
Requirements:
Dream Forest or Moat
Mage Guild - level 4.
Cost:
15 000 gold
20 ore
5 Dragonblood crystals
Makes it impossible to build the Treant Refuge
Legendary nest.
Allows you to recruit 1 Green Dragon per week.
 Dragon Shrine
Requirements:
Dragon Altar
Cost:
18 000 gold
5 ore
10 dragonsteel
5 shadowsteel
Upgrade for the legendary nest.
Allows you to recruit and upgrade Green Dragons to Emerald Dragons.
 Treant Refuge
Requirements:
Dream Forest or Moat
Mage Guild - level 4.
Cost:
15 000 gold
20 wood
5 Dragonblood crystals
Makes it impossible to build the Dragon Altar
Legendary nest.
Allows you to recruit 1 Treant per week.
 Treant Sanctum
Requirements:
Treant Refuge
Cost:
18 000 gold
5 wood
10 Dragonblood crystals
5 shadowsteel
Upgrade for the legendary nest.
Allows you to recruit and upgrade Treants to Ancient Treants.
 Sylanna's Perfect Balance
Requirements:
There's a hero in the city that has the Tears of Asha
Cost:
4000 gold
5 wood
5 ore
5 Dragonblood crystals
5 starsilver
5 dragonsteel
5 shadowsteel
Generates 5000 gold per day and increases the creature income in this city by 50%.
Each Sylvan hero marks each enemy creature with his mark at the beginning of each battle.
 Pixie
Pixie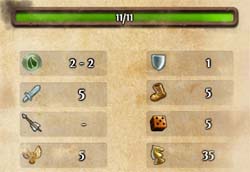
Cost: 48 gold
 Sprite
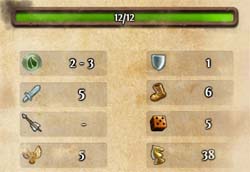
Cost: 62 gold

No retaliation
Enemy creatures cannot retaliate after this unit's attack.
 Dryad
Dryad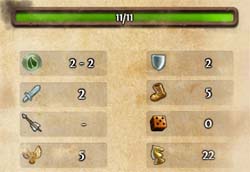
Cost: 45 gold

Treant Synergy
The creature and allied units neighboring with it receive +5 to Defense. The creature heals any neighboring allied Treants at the end of its turn by 20 Health per each Dryad.
 Oak Dryad
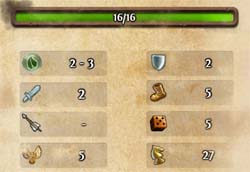
Cost: 59 gold

Gift of Life
Mother Treants skill also resurrects Dryads.

Treant Synergy
The creature and allied units neighboring with it receive +5 to Defense. The creature heals any neighboring allied Treants at the end of its turn by 20 Health per each Dryad.
 Hunter
Cost: 100 gold
 Master Hunter
Cost: 130 gold

Double Shot
If during the first hit of its ranged attack the creature killed at least once, it receives another attack.
Attacked creatures can retaliate after the first hit.
 Blade Dancer
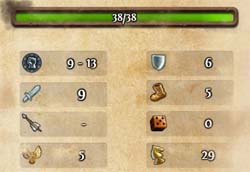
Cost: 400 gold

Vigilance
This creature cannot be flanked.
 Blade Master
Cost: 520 gold

Whirling Death
The creature attacks all neighboring enemy units.

Vigilance
This creature cannot be flanked.
 Druid
Druid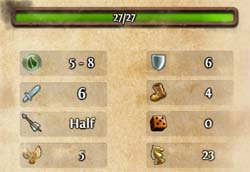
Cost: 334 gold

Leaf Daggers
Once per battle the creature can shoot with full reach to all enemy units positioned in a line. The shot ignores Defense and Cover.
 Druid Elder
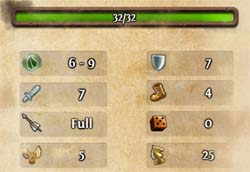
Cost: 434 gold

Thorns
A 2x2 territory becomes covered with thorns. Lasts for 3 turns.
Enemy creatures that start their turn on thorns receive -3 to Movement in their turn and 60 Earth Magic damage for each Druid Elder when they move.

Leaf Daggers
Once per battle the creature can shoot with full reach to all enemy units positioned in a line. The shot ignores Defense and Cover.
 Moon Doe
Cost: 1300 gold

Unfettered
The creature is immune to any Movement reductions.
 Sun Deer
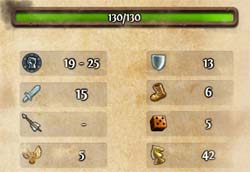
Cost: 1690 gold

Inspiring Presence
The creature and neighboring allied creatures receive +20 to Luck and to Morale.

Unfettered
The creature is immune to any Movement reductions.
 Green Dragon
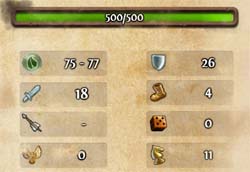
Cost: 5500 gold, 1 shadowsteel

Regeneration
Creature regains 180 Health at the end of its turn.

Immune to Earth
The creature cannot be targeted when using negative Earth Magic spells or effects. Enemy attacks deal only half Earth damage.
 Emerald Dragon
Cost: 7150 gold, 2 Shadowsteel, 1 Dragonsteel
Acid Breath
Creature spit acid at enemy units.
Enemies that are hit receive half of this attack's damage during next turn and 25% damage the second turn after it is over.

Regeneration
Creature regains 180 Health at the end of its turn.

Immune to Earth
The creature cannot be targeted when using negative Earth Magic spells or effects. Enemy attacks deal only half Earth damage.
 Treant
Cost: 5500 gold, 1 Starsilver

Living Shield
The creature receives Defense bonus and shields its allies. Additionally, it stops enemy stacks walking nearby and allies can walk through it. Living Shield works until the unit moves or attacks.
 Ancient Treant
Cost: 7150 gold, 1 Dragonblood Crystal, 2 Starsilver

Living Shield
The creature receives Defense bonus and shields its allies. Additionally, it stops enemy stacks walking nearby and allies can walk through it. Living Shield works until the unit moves or attacks.

Entangling Roots
Enemies that are hit with it cannot move nor use abilities based on Movement. The effect lasts until the Treant moves.
 Sylvan Ballista
Cost: 1000 gold
 Mother Treant
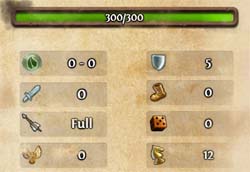
Cost: 500 gold

Renewal
Restores 10 Health points at the start of the turn of allied creature. Lasts for three turns.
When playing as Academy during skirmishes or multiplayer games, at the start you can pick one of twelve different heroes. Each of them has different special ability. However, in general, all of them are related to recruiting additional units or to strengthening one of the magic schools.
Yasir, who delivers 350 pieces of gold per day to you, seems to be the best choice. Such amount of gold is great help at the beginning of the match, when you don't have a developed city or many mines. Second good choice is Masfar. He allows you to recruit few additional units which will definitely be useful at the beginning of the game.
Hero
Specialization
Description
 Aali
Aali Enlightenment
The hero starts with Paragon skill on novice level and with the Enlightened Leader skill.
 Tanis
Tanis Adept of Time
The hero starts with Prime Magic skill on novice level and with Time Control spell.
The spell is casted on one level higher that the current one of this school.
 Solmyr
 Chain Lightning Master
The hero starts with Chain Lightning spell on novice level and with +3 Magic bonus active when casting it.
 Asad
Asad Rakshasa Officer
Governor: +1 to growth of Rakshasa and Rakshasa Raja in this city's area of influence.
 Gloria
 Disciple of Fire
Fire Magic spells casted by this hero have +6 Magic.
 Johari
 Artillery Master
The hero starts with a special unit, Warfare skill on novice level and with Improved Durability skill.
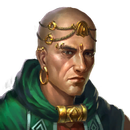 Masfar
 Father of Golems
Governor:
+3 growth of Golems and Sandstone Golems in this city's area of influence.
+6 growth of Gargoyles and Obsidian Gargoyles in this city's area of influence.
 MinasliMaster of Water
Water Magic spell casted by this hero have +6 Magic.
 Mirym
Mirym Protector
The hero starts with Defense skill on novice level and with Town Protector skill.
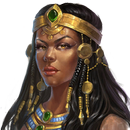 Saabira
 Cabir Summoner
Governor: +8 to growth of Cabir and Master Cabir in this city's area of influence.
 Theodorus
 Apprentice Trainer
Governor: +2 to growth of Apprentices and Disciples in this city's area of influence.
 Yasir
Yasir Delver of the Royal Pulse
The hero gives 350 pieces of gold to the kingdom per day.
When developing an Academy city, you must prepare for larger gold expenses. In comparison to other factions, Academy buildings require about a dozen percents more gold. Additionally, you will need large amounts of ore and special resources, mostly Dragonblood crystals. During the development you will be able to raise two buildings that will give you new possibilities - dismantling artifacts and buying spell scrolls. No other faction allows you to do that.
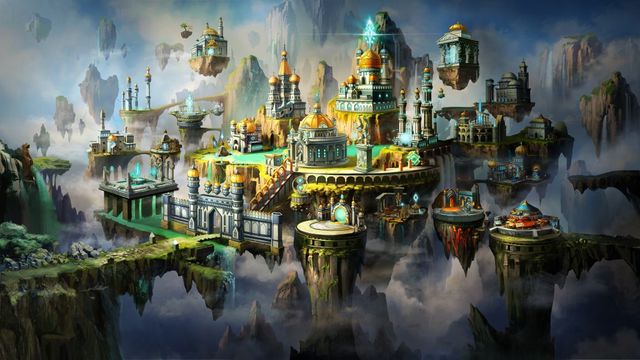 A fully developed Academy city.
Below you will find a list showing the suggested order of constructing 14 buildings in your city. The number of objects is much larger, but the first two weeks of the game are the key ones. Not always, mostly due to the lack of resources, you will be able to construct the buildings exactly in recommended order. Slight differences from the list won't mean that your city is developed in wrong way.
Order
Name
Description
1
Hall of Heroes
Allows you to recruit new and defeated heroes.
2
Stone Parapet
Basic nest.
Allows you to recruit 18 Gargoyles per week.
3
Town Hall
Gives additional 500 pieces of gold per day.
4
Mage Guild - level 1.
Gives 5 random level 1 spells to this city.
Each hero visiting this city, as long as he meets the requirements, will receive the spells.
5
Mage Guild - level 2.
Gives 4 random level 2 spells to this city.
Each hero visiting this city, as long as he meets the requirements, will receive the spells.
6
School of Magic
Elite nest.
Allows you to recruit 4 Apprentices per week.
7
Workshop
Produces special unit.
Allows you to buy Sylvan ballista.
8
Fire Cave
Basic nest
Allows you to recruit 15 Cabirs per week.
9
City Hall
Gives additional 1000 pieces of gold per day.
10
Golem Foundry
A basic nest.
Allows recruiting 8 Golems per week.
11
Mage Guild - level 3.
Gives 3 random level 3 spells to this city.
Each hero visiting this city, as long as he meets the requirements, will receive the spells.
12
Mana Core
Doubles the maximum level of Mana of the hero who visits this place. Lasts till the end of the week.
13
Altar of Wishes
Elite nest.
Allows recruiting 3 Djinns per week.
14
Silver Pavilion
Elite nest.
Allows recruiting 2 Rakshasas per week.
Building
Description
Village Hall
The object is built since the start of the game.
Gives the ability to build new objects in the city.
Gives 500 pieces of gold per day.
 Stone Parapet
Cost:
1300 gold
5 ore
Stone Parapet
Basic nest.
Allows you to recruit 18 Gargoyles per week.
 Silver Parapet
Requirements:
Stone Parapet
Cost:
700 gold
2 starsilver
Silver Parapet
Upgrade of the basic nest.
Allows you to recruit and upgrade Gargoyles to Obsidian Gargoyles.
 Mage Guild - level 1
Cost:
500 gold
2 wood
2 ore
Gives 5 random level 1 spells to this city.
Each hero visiting this city, as long as he meets the requirements, will receive the spells.
 Hall of Heroes
Cost:
500 gold
5 ore
2 wood
Allows recruiting new and defeated heroes.
 Workshop
Cost:
500 gold
5 ore
Produces special unit.
Allows you to buy Sylvan ballista.
 Marketplace
Cost:
500 gold
5 wood
Produces special unit.
Allows you to buy Healing Tent.
Building
Description
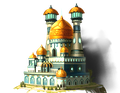 Town Hall
Requirements:
Village Hall
Cost:
2000 gold
Gives additional 500 pieces of gold per day.
 Casting Stage
Requirements:
Mage Guild - level 1.
Cost:
1000 gold
5 wood
Makes it impossible to build a Thieves Guild.
Allows your heroes to place two negative magic effects on two random enemy creatures during each battle waged in this city's area of influence.
 Thieves Guild
Requirements:
Mage Guild - level 1.
Cost:
500 gold
5 shadowsteel
Makes it impossible to build a Casting Stage
Allows you to buy information about your enemies.
 Town Portal
Requirements:
Mage Guild - level 2.
Cost:
500 gold
2 wood
2 ore
2 Dragonblood crystals
All heroes visiting the city will receive the Immediate Return spell.
Allows the heroes who have this spell to return to this city if it is the closest available city.
 Mage Guild - level 2
Requirements:
Mage Guild - level 1.
Cost:
500 gold
2 wood
2 ore
1 Starsilver
1 Dragonblood crystal
1 Dragonsteel
1 Shadowsteel
Gives two random level 2 spells to this city.
Each hero visiting this city, as long as he meets the requirements, will receive the spells.
 Fire Cave
Requirements:
Stone Parapet
Fire Cave
Cost:
1300 gold
5 ore
Upgrade of the basic nest.
+18 Gargoyles or Obsidian Gargoyles each week.
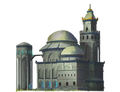 Resource Silo
Requirements:
Marketplace
Cost:
3000 gold
2 wood
2 ore
Makes it impossible to build Artifact Recycler
Each day it randomly gives you 1 piece of rare resource: Dragonsteel, Dragonblood crystal, Shadowsteel, Starsilver.
 Artifact Recycler
Requirements:
Marketplace
Cost:
2000 gold
2 shadowsteel
Makes it impossible to build Resource Silo
Allows you to change artifacts into resources.
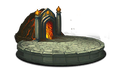 Fire Cave
Requirements:
Workshop
Cost:
1500 gold
5 ore
Basic nest
Allows you to recruit 15 Cabirs per week.
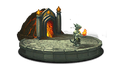 Fire Nest
Requirements:
Fire Cave
Cost:
800 gold
2 Dragonblood crystals
Upgrade of the basic nest.
Allows you to recruit and upgrade Cabirs to Master Cabirs.
 Arcane Library
Requirements:
Mage Guild - level 1.
Cost:
500 gold
1 Dragonblood crystal
1 Shadowsteel
1 Dragonsteel
1 Starsilver
Adds two level 1 and level 2 spells and one level 3 and level 5 spells to the Mage Guild.
Building
Description
 School of Magic
Requirements:
Mage Guild - level 2.
Cost:
3400 gold
8 wood
2 Dragonblood crystals
Elite nest.
Allows you to recruit 4 Apprentices per week.
 University of Magic
Requirements:
School of Magic
Cost:
3000 gold
10 ore
2 Dragonblood crystals
2 Starsilver
Upgrade of the elite nest.
Allows you to recruit and upgrade Apprentices to Disciples.
 Mana Core
Requirements:
Mage Guild - level 2.
Cost:
500 gold
2 Dragonblood crystals
Doubles the maximum level of Mana of the hero who visits this place. Lasts till the end of the week.
 Mage Guild - level 3
Requirements:
Mage Guild - level 2.
Cost:
500 gold
2 wood
2 ore
3 Dragonblood crystals
3 starsilver
3 dragonsteel
3 shadowsteel
Gives three random level 3 spells to this city.
Each hero visiting this city, as long as he meets the requirements, will receive the spells.
 Pyramidal Craft
Requirements:
Workshop
Cost:
500 gold
5 wood
2 shadowsteel
Makes it impossible to build Lightning Pyramid
Produces special unit.
Allows buying Small Pyramids.
 Lightning Pyramid
Requirements:
Wall level 1
Workshop
Cost:
600 gold
2 ore
2 Dragonblood crystals
Makes it impossible to build Pyramidal Craft
The city has 2 towers during siege.
 Wall level 1
Cost:
1500 gold
5 wood
10 ore
Adds walls and gates used during siege to the city as well as local guard consisting of Gargoyles and Cabirs.
 Golem Foundry
Requirements:
Workshop
Cost:
1700 gold
5 ore
A basic nest.
Allows recruiting 8 Golems per week.
 Golem Forge
Requirements:
Golem Foundry
Cost:
900 gold
5 Starsilver
Upgrade of the basic nest.
Allows recruiting and upgrading Golems to Sandstone Golems.
Lava LakeRequirements:
Fire Cave
Cost:
1500 gold
Makes it impossible to build the Starsilver Forge
Upgrade of the basic nest.
+15 to the weekly growth of Cabirs or Master Cabirs.
 Starsilver Forge
Requirements:
Golem Forge
Cost:
1700 gold
5 ore
Makes it impossible to build the Lava Lake
Upgrade of the basic nest.
+8 to the weekly growth of Golems or Sandstorm Golems.
Building
Description
City HallRequirements:
Town Hall
Cost:
5000 gold
Gives additional 1000 pieces of gold per day.
 Alchemist Laboratory
Requirements:
Mage Guild - level 2.
Cost:
3000 gold
2 Dragonblood crystals
Gives 1 Dragonblood crystal per day.
 Altar of Wishes
Requirements:
Mana Core
Cost:
3700 gold
7 wood
3 ore
2 dragonsteel
Elite nest.
Allows recruiting 3 Djinns per week.
 Pinnacle of Wishes
Requirements:
Altar of Wishes
Cost:
3300 gold
7 wood
2 Dragonblood crystals
3 Dragonsteel
Upgrade of the elite nest.
Allows recruiting and upgrading Djinns to Djinns Channelers.
 Moat
MoatRequirements:
Wall level 2
Cost:
600 gold
2 Dragonblood crystals
Adds a moat to the city used during siege.
 Wall level 2
Requirements:
Wall level 1
Cost:
1500 gold
2 wood
2 ore
2 Dragonblood crystals
Increases the number of hit points of gates and walls during siege.
Adds Djinns and Apprentices to the local guard.
Increases the number and growth of creatures in the local guard.
Building
Description
Silver Pavilion
Cost:
7000 gold
10 wood
5 dragonsteel
Elite nest.
Allows recruiting 2 Rakshasas per week.
 Golden Pavilion
Requirements:
Silver Pavilion
Cost:
6000 gold
10 ore
5 Dragonblood crystals
Upgrade of the elite nest.
Allows recruiting and upgrading Rakshasas to Rakshasas Raja.
 Quarters of Magic
Requirements:
School of Magic
Cost:
5100 gold
3 wood
4 ore
1 Dragonblood crystal
1 Starsilver
Makes it impossible to build the Well of Wishes.
Upgrade for the elite nest.
+4 to weekly growth of Apprentices or Disciples.
 Well of Wishes
Requirements:
Altar of Wishes
Cost:
5500 gold
5 wood
1 Dragonsteel
Makes it impossible to build the Quarters of Magic
Upgrade of the elite nest.
+3 to weekly growth of Djinns or Djinn Channelers.
 Inscriber
Requirements:
Mage Guild - level 3.
Cost:
2000 gold
5 wood
5 ore
Adds the possibility to buy spells.
 Mage Guild - level 4
Requirements:
Mage Guild - level 3.
Cost:
500 gold
2 wood
2 ore
5 Dragonblood crystals
5 starsilver
5 dragonsteel
5 shadowsteel
Adds 1 random level 4 spell to this city.
Each hero visiting this city, as long as he meets the requirements, will receive the spells.
Building
Description
 Capitol
Requirements:
City Hall
Unique
Cost:
10 000 gold
10 wood
10 ore
Gives additional 2000 pieces of gold per day. You can have only one Capitol.
 Roaring Tower
Requirements:
Silver Pavilion
Cost:
7000 gold
10 wood
5 dragonsteel
1 Dragonblood crystal
Upgrade of the elite nest.
+2 to weekly growth of Rakshasas or Rakshasas Raja.
 Cloud Coliseum
Requirements:
Altar of Wishes
Pyramidal Craft
or Lightning Pyramid
Cost:
12 000 gold
10 ore
5 Dragonblood crystals
10 starsilver
Makes it impossible to build the Arcane Tower
Legendary nest.
Allows recruiting 1 Colossus per week.
 Thundercloud Coliseum
Requirements:
Cloud Coliseum
Cost:
12 000 gold
10 ore
5 Dragonblood crystals
5 dragonsteel
5 shadowsteel
Upgrade of the legendary nest.
Allows recruiting and upgrading Colossuses to Titans.
 Arcane Tower
Requirements:
Altar of Wishes
Pyramidal Craft
or Lightning Pyramid
Cost:
12 000 gold
5 wood
5 ore
10 Dragonblood crystals
5 starsilver
Makes it impossible to build the Cloud Coliseum
Allows you to recruit 1 Arcane Eagle per week.
 Arcane Vortex
Requirements:
Arcane Tower
Cost:
12 000 gold
5 wood
5 ore
10 Dragonblood crystals
5 starsilver
Upgrade of the legendary nest.
Allows recruiting and upgrading Arcane Eagles to Simurghs.
 Wall level 3
Requirements:
Wall level 2
Cost:
1500 gold
2 wood
2 ore
2 Dragonblood crystals
Increases the number of hit points of the gates and walls during siege.
Increases the number and growth of creatures in local guard.
 Arcane Portal
Requirements:
There's a hero in the city that has the Tears of Asha
Cost:
4000 gold
5 wood
5 ore
5 Dragonblood crystals
5 starsilver
5 dragonsteel
5 shadowsteel
Gives 5000 pieces of gold per day and increase the growth of creatures in the city by 50%.
+100 to maximum mana for all your heroes.
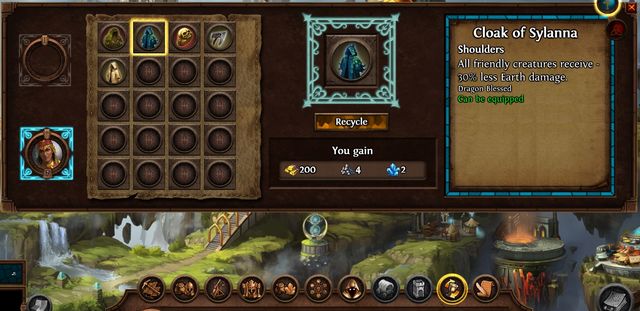 Sacrifice only the items which you will not use in the Artifact Recycler.
While developing the Academy cities, you can buy two special buildings which will unlock additional options for you. First one is Artifact Recycler which, as the name suggests, allows you to sell the artifacts you have gathered. In addition to gold, you will also receive resources. The number of received resources depends mostly on the value of the sacrificed item. Remember to sell only the artifacts that none of your heroes find useful.
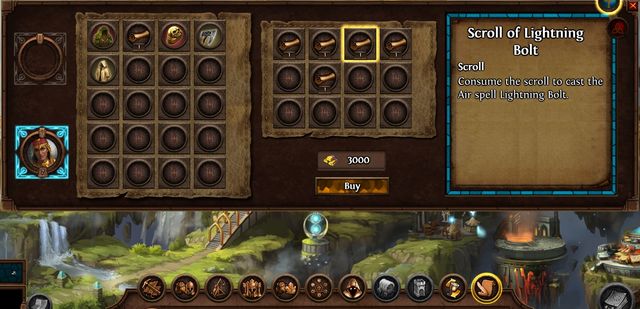 Before buying scrolls, develop your Mage Guild to level 4. It is possible that you will receive the spell you're interested in for free.
The second building that gives you new options is the Inscriber. This building allows you to buy new spells for your hero. They usually cost from 3 to 8 thousands of gold and are random generated. Remember that the spell you buy can be assigned only to a single hero.
 Gargoyle
Cost: 50 gold

Construct
The creature is resistant to poison, blindness, mind effects and morale. It cannot be healed or resurrected.

Magic immunity
The creature cannot be targeted with negative spells or effects of any magic school. All magic damage dealt by enemy's attacks is reduced by half.
 Obisidian Gargoyle
Cost: 65 gold

Construct
The creature is resistant to poison, blindness, mind effects and morale. It cannot be healed or resurrected.

Magic immunity
The creature cannot be targeted with negative spells or effects of any magic school. All magic damage dealt by enemy's attacks is reduced by half.
 Golem
Golem
Cost: 138 gold

Construct
The creature is resistant to poison, blindness, mind effects and morale. It cannot be healed or resurrected.

Unfettered
The creature is resistant to all forms of movement reduction.
 Sandstone Golem
Cost: 179 gold

Construct
The creature is resistant to poison, blindness, mind effects and morale. It cannot be healed or resurrected.

Unfettered
The creature is resistant to all forms of movement reduction.
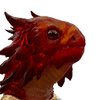 Cabir
Cabir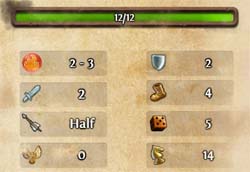
Cost: 60 gold

Vulnerable to Water
The creature receives 25% more Water Damage.

Immune to Fire
The creature cannot be targeted with negative Fire Magic spells or effects. Enemy fire attacks' damage is reduced by half.
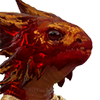 Master Cabir
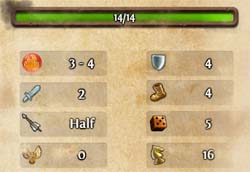
Cost: 78 gold

Vulnerable to Water
The creature receives 25% more Water Damage.

Immune to Fire
The creature cannot be targeted with negative Fire Magic spells or effects. Enemy fire attacks' damage is reduced by half.

Soldering Hands
Immediately repairs allied construct by recovering 150 of its Health points. It also repairs destroyed Constructs.
 Apprentice
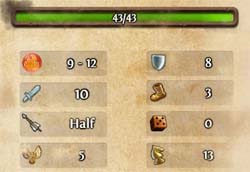
Cost: 500 gold

Piercing Shot
This creature shoots all units that are in a line.
 Disciple
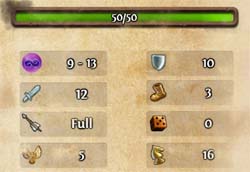
Cost: 650 gold

Piercing Shot
This creature shoots all units that are in a line.

Nova
The creature deals from 36 to 52 Prime Magic damage to all units on a 3x3 territory. Cannot be used during melee combat.
 Djinn
Djinn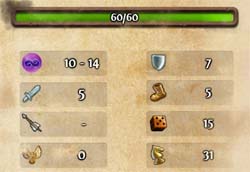
Cost: 667 gold

Mana Drain
Each creature killed by this unit restores 1 Mana point of the hero. The number of Mana points regained after a single hit is limited by Magic level of the hero.

Immune to Prime
The creature cannot be targeted by negative Prime Magic spells or effects. Enemy attacks deal half of Prime Magic damage.
 Djinn Channeler
Cost: 867 gold

Mana Drain
Each creature killed by this unit restores 1 Mana point of the hero. The number of Mana points regained after a single hit is limited by Magic level of the hero.

Immune to Prime
The creature cannot be targeted by negative Prime Magic spells or effects. Enemy attacks deal half of Prime Magic damage.

Magic Touch
Creature that is hit receives a random negative magic status.
 Rakshasa
Cost: 1300 gold

No retaliation
Enemy creatures cannot retaliate after this unit attacks.
 Rakshasa Raja
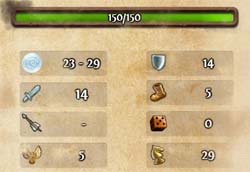
Cost: 1690 gold

No retaliation
Enemy creatures cannot retaliate after this unit attacks.

Sweep
The creature hits all enemies neighboring at some angle with the unit that is the target of the attack.
 Colossus
Cost: 5500 gold, 1 Dragonsteel

Construct
The creature is resistant to poison, blindness, mind effects and morale. It cannot be healed or resurrected.

Magic Absorption
All magic damage received from spells is added as Prime Magic damage to next attack of the creature.
The maximum number of additional damage is the number of units in the stack multiplied by maximum basic damage.
 Titan
Titan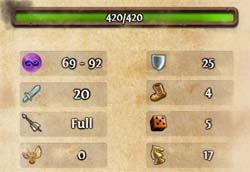
Cost: 7150 gold, 2 Dragonsteel, 1 Shadowsteel

Construct
The creature is resistant to poison, blindness, mind effects and morale. It cannot be healed or resurrected.

Magic Absorption
All magic damage received from spells is added as Prime Magic damage to next attack of the creature.
The maximum number of additional damage is the number of units in the stack multiplied by maximum basic damage.
 Arcane Eagle
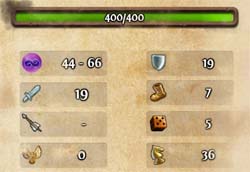
Cost: 5500 gold, 1 Starsilver

Arcane Wings
At the end of the turn of the creature all enemy units neighboring with it receive random magic status.
 Simurgh
Cost: 7150 gold, 2 Starsilver, 1 Dragonblood Crystal

Magic Catalyst
All neighboring creatures receive 50% more direct spell damage.

Arcane Wings
At the end of the turn of the creature all enemy units neighboring with it receive random magic status.
 Small Pyramid
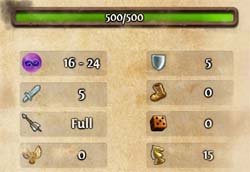
Cost: 1000 gold
 Healing Tent
Cost: 500 gold
Healing
Regenerates 20 Health points to allied creature (doesn't work on Undead).
When controlling Necropolis, you can pick one of eleven heroes. Each of them has different specialization. They mostly focus on recruiting new units or dark magic, but in case of this faction the choice is wide.
Necropolis has at least three very good heroes which will make playing much easier, not only during the start of the adventure. Giovanni with his specialization is one of better heroes. His skill adds bonus for flanking enemy, in some cases it might have a key importance for the outcome of a battle. Kaspar is a good hero suited for various play styles as well. His specialization will not only generate addition gold each turn, but will reduce the cost of all buildings as well. The last hero worth recommending is Lyla who has a +60 bonus to maximum mana. However, it is worth remembering that for her to use this much mana one should invest in various magic schools.
Hero
Specialization
Description
 Anastasya
 Namtaru Caller
The hero starts the game with a Namtaru unit.
 Charna
 Ghost Caller
Governor: +9 to growth of Ghosts and Banshees in this city's area of influence.

Giovanni
 Backstab
The total bonus for flanking by allied creatures is increased by 15%.
 Kaspar
 Master Builder
The hero starts the game with Economy skill on novice level and with Architect skill.
 Ludmilla
 Vampire General
Governor: +1 to growth of Vampires and Vampire Lords in this city's area of influence.
 Luna
Luna Pathfinder
Reduces the penalty for moving through harsh territory by 50%.
 Lyla
Lyla Medium
The hero starts with a bonus +60 maximum mana.
 Merikh
 Master of Dark Magic
Dark Magic spells casted by this hero are casted with +6 Magic.
 Moander
 Lich Scholar
Governor: +2 to growth of Lich and Archlich in this city's area of influence.
 Zakera
 Skeleton Master
Governor: +13 to growth of Skeletons and Skeleton Hoplites.
 Zoltan
 Spider Tamer
Governor: +5 to growth of Ebon Spiders and Death Spiders in this city's area of influence.
When developing the Necropolis cities, you must prepare for large expenses of ore, especially early in the game and in the late phase of it. Similarly to most other factions, the dominant special resource is the Dragonblood crystals. Necropolis has a special building that allows transforming living units into their undead counterparts.
 A fully developed Necropolis city.
Below you will find a list showing the suggested order of constructing 14 buildings in your city. The number of objects is much larger, but the first two weeks of the game are the key ones. Not always, mostly due to the lack of resources, you will be able to construct the buildings exactly in recommended order. Slight differences from the list won't mean that your city is developed in wrong way.
Order
Name
Description
1
Hall of Heroes
Allows you to recruit new and defeated heroes.
2
Ruined Tower
Basic nest.
Allows you to recruit 18 Ghosts per week.
3
Town Hall
Gives additional 500 pieces of gold per day.
4
Graveyard
Basic nest.
Allows you to recruit 25 Skeletons per week.
5
Namtaru Nest
Produces special unit.
Allows you to buy Namtaru.
6
Spider Nest
Basic nest.
Allows you to recruit 10 Ebon Spiders per week.
7
Mage Guild - level 1.
Gives 5 random level 1 spells to this city.
Each hero visiting this city, as long as he meets the requirements, will receive the spells.
8
Mage Guild - level 2.
Gives 4 random level 2 spells to this city.
Each hero visiting this city, as long as he meets the requirements, will receive the spells.
9
City Hall
Gives additional 1000 pieces of gold per day.
10
Pestilent Tomb
Elite nest.
Allows you to recruit 5 Lamasu per week.
11
Sepulcher
Elite nest.
Allows you to recruit 5 Liches per week.
12
Vampire Mansion
Elite nest.
Allows you to recruit 2 Vampires per week.
13
Marketplace
Allows you to trade resources.
14
Altar of Sacrifice
Allows you to transform living creatures into Skeletons and Skeleton Hoplites.
Building
Description
 Village Hall
The object is built since the start of the game.
Gives the ability to build new objects in the city.
Gives 500 pieces of gold per day.
 Graveyard
Cost:
800 gold
Basic nest.
Allows you to recruit 25 Skeletons per week.
 Ossuary
Requirements:
Graveyard
Cost:
1700 gold
5 ore
Upgrade of the basic nest.
Allows recruiting and upgrading Skeletons to Skeleton Hoplites.
 Ruined Tower
Cost:
1000 gold
10 ore
Basic nest.
Allows you to recruit 18 Ghosts per week.
 Haunted Tower
Requirements:
Ruined Tower
Cost:
1900 gold
2 shadowsteel
Upgrade of the basic nest.
Allows you to recruit and upgrade Ghosts to Banshees.
 Mage Guild - level 1.
Cost:
500 gold
2 wood
2 ore
Gives 5 random level 1 spells to this city.
Each hero visiting this city, as long as he meets the requirements, will receive the spells.
 Hall of Heroes
Cost:
500 gold
5 ore
Allows you to recruit new and defeated heroes.
 Namtaru Nest
Cost:
1000 gold
5 ore
Produces special unit.
Allows you to buy Namtaru.
 Marketplace
Cost:
500 gold
Allows you to trade resources.
Building
Description
 Town Hall
Requirements:
Village Hall
Cost:
2000 gold
Gives additional 500 pieces of gold per day.
 Pile of Bones
Requirements:
Graveyard
Cost:
800 gold
Makes it impossible to build the Howling Parapet
Upgrade of the basic nest.
+25 Skeletons or Skeleton Hoplites per week.
 Howling Parapet
Requirements:
Ruined Tower
Cost:
1000 gold
5 ore
Makes it impossible to build the Pile of Bones
Upgrade of the basic nest.
+18 Ghosts or Banshees per week.
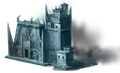 Resource Silo
Requirements:
Marketplace
Cost:
3000 gold
2 wood
2 ore
Each day it adds randomly 1 piece of one of the resources: Dragonblood crystal, Shadowsteel, Dragonsteel, Starsilver.
 Mage Guild - level 2.
Requirements:
Mage Guild - level 1.
Cost:
500 gold
2 wood
2 ore
1 Starsilver
1 Dragonblood crystal
1 Dragonsteel
1 Shadowsteel
Gives 4 random level 2 spells to this city.
Each hero visiting this city, as long as he meets the requirements, will receive the spells.
 Wall level 1
Cost:
1000 gold
10 wood
10 ore
Adds walls and gates used during siege and local guard consisting of Skeletons and Ghosts.
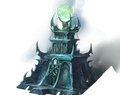 Moonlight Amplifier
Cost:
500 gold
Makes it impossible to build the Embassy
Prime Magic spells casted by your heroes that remain in the area of influence of this city are one level higher.
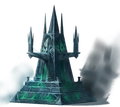 Embassy
Cost:
1000 gold
5 wood
Makes it impossible to build the Moonlight Amplifier
+20% chance of success when negotiating with neutral armies in city's area of influence.
 Spider Nest
Requirements:
Namtaru Nest
Cost:
1200 gold
10 wood
Basic nest.
Allows you to recruit 10 Ebon Spiders per week.
 Spider Lair
Requirements:
Spider Nest
Cost:
2100 gold
5 Dragonblood crystals
Upgrade of the basic nest.
Allows you to recruit and upgrade Ebon Spiders to Death Spider.
Building
Description
 Icky Web
Requirements:
Spider Nest
Cost:
1200 gold
5 wood
Upgrade of the basic nest.
+10 Ebon Spiders or Death Spiders per week.
 Dragonblood Laboratory
Requirements:
Namtaru Nest
Cost:
3000 gold
2 Dragonblood crystals
Generates 1 Dragonblood crystal per day.
 Town Portal
Requirements:
Mage Guild - level 2.
Cost:
500 gold
2 wood
2 ore
2 Dragonblood crystals
All heroes visiting the city will receive the Town portal spell.
Allows the heroes who have this spell to return to this city if it is the closest available city.
 Mage Guild - level 3.
Requirements:
Mage Guild - level 2.
Cost:
500 gold
2 wood
2 ore
3 Dragonblood crystals
3 starsilver
3 dragonsteel
3 shadowsteel
Gives 3 random level 3 spells to this city.
Each hero visiting this city, as long as he meets the requirements, will receive the spells.
 Choir of Despair
Requirements:
Ruined Tower
Cost:
500 gold
5 wood
Makes it impossible to build the Asha's Hourglass
Visiting heroes are reducing Morale of enemy creatures by 10 during next three fights.
Asha's HourglassRequirements
Ruined Tower
Cost:
500 gold
2 Dragonblood crystals
Makes it impossible to build the Choir of Despair
Increases the cost of enemy heroes' movement and reduces Initiative and Movement of all creatures in this city's area of influence.
 Wall level 2
Requirements:
Wall level 1
Cost:
1000 gold
5 wood
5 ore
Increases the number of hit points of walls and gates during siege.
Adds Liches and Lamasu to the local guard.
Increases the number and growth of creatures in local guard.
 Altar of Sacrifice
Requirements:
Graveyard
Mage Guild - level 2.
Cost:
500 gold
5 wood
2 Dragonblood crystals
Allows you to transform living creatures into Skeletons and Skeleton Hoplites.
Building
Description
 City Hall
Requirements:
Town Hall
Cost:
5000 gold
Gives additional 1000 pieces of gold per day.
 Mage Guild - level 4.
Requirements:
Mage Guild - level 3.
Cost:
500 gold
2 wood
2 ore
5 Dragonblood crystals
5 Starsilver
5 dragonsteel
5 shadowsteel
Gives 1 random level 4 spell to this city.
Each hero visiting this city, as long as he meets the requirements, will receive the spells.
 Namtaru Temple
Requirements:
Namtaru Nest
Wall level 2
Cost:
500 gold
10 ore
During siege, the city has 2 towers.
 Pestilent Tomb
Cost:
2500 gold
5 wood
5 Dragonblood crystals
Elite nest.
Allows you to recruit 5 Lamasu per week.
 Pestilent Catacomb
Requirements:
Pestilent Tomb
Cost:
3500 gold
5 wood
5 Starsilver
Upgrade of the legendary nest.
Allows you to recruit and upgrade Lamasu to Plague Lamasu.
 Thieves Guild
Requirements:
Wall level 2
Cost:
500 gold
5 wood
Makes it impossible to build the Moat
Allows you to buy information about your enemies.
 Moat
MoatRequirements:
Wall level 2
Cost:
500 gold
2 wood
Makes it impossible to build the Thieves Guild
Adds a moat to the city during siege.
 Sepulcher
Cost:
3500 gold
10 wood
5 ore
Elite nest.
Allows you to recruit 5 Liches per week.
 Mausoleum
Requirements:
Sepulcher
Cost:
5000 gold
5 ore
5 Starsilver
Upgrade of the legendary nest.
Allows you to recruit and upgrade Liches to Archliches.
Building
Description
 Vampire Mansion
Requirements:
Namtaru Nest
Cost:
6000 gold
10 ore
10 Dragonblood crystals
Elite nest.
Allows you to recruit 2 Vampires per week.
 Vampire Palace
Requirements:
Vampire Mansion
Cost:
9000 gold
10 dragonsteel
Upgrade of the legendary nest.
Allows you to recruit and upgrade Vampires to Vampire Lords.
 Deep Catacomb
Requirements:
Pestilent Tomb
Cost:
2500 gold
5 wood
5 Dragonblood crystals
Makes it impossible to build the Moon Altar
Upgrade of the legendary nest.
+5 Lamasu or Plague Lamasu per week.
 Moon Altar
Requirements:
Sepulchrum
Cost:
3500 gold
10 wood
5 ore
Makes it impossible to build the Deep Catacomb
Upgrade of the legendary nest.
+5 Lishes or Archliches per week.
 Tower of Necromancy
Requirements:
Mage Guild - level 4.
Cost:
1000 gold
5 Dragonblood crystals
The necromancy of your Necropolis heroes resurrects 5% more creatures.
Building
Description
 Capitol
Requirements:
City Hall
Unique
Cost:
10 000 gold
10 wood
10 ore
Generates additional 2000 pieces of gold per day. You can have only one Capitol.
 Blood Tank
Requirements:
Vampire Mansion
Cost:
6000 gold
10 ore
5 Dragonblood crystals
Upgrade of the legendary nest.
+2 to Vampire or Vampire Lords growth per week.
 Cave of Eternal Wings
Requirements:
Vampire Mansion
Mage Guild - level 4.
Cost:
12 000 gold
10 wood
15 ore
5 Shadowsteel
Makes it impossible to build the Dark Moon Stables
Legendary nest.
Allows you to recruit 1 Bone Dragon per week.
 Pit of Eternal Wings
Requirements:
Cave of Eternal Wings
Cost:
15 000 gold
10 starsilver
5 shadowsteel
Upgrade for the legendary nest.
Allows you to recruit and upgrade Bone Dragons to Spectral Dragons.
 Dark Moon Stables
Requirements:
Vampire Mansion
Mage Guild - level 4.
Cost:
12 000 gold
10 wood
10 ore
5 Dragonblood crystals
5 shadowsteel
Makes it impossible to build the Cave of Eternal Wings
Legendary nest.
Allows you to recruit 1 Grim Rider per week.
 Eternal Moon Stables
Requirements:
Dark Moon Stables
Cost:
15 000 gold
10 dragonsteel
5 shadowsteel
Upgrade for the legendary nest.
Allows you to recruit and upgrade Grim Riders to Grim Reapers.
 Wall level 3
Requirements:
Wall level 2
Cost:
1000 gold
5 wood
5 ore
Increases the number of hit points of walls and gates during siege.
Increases the number and growth of creatures in local guard.
 Asha's Undying Resolve
Requirements:
There's a hero in the city that has the Tears of Asha
Cost:
4000 gold
5 wood
5 ore
5 Dragonblood crystals
5 starsilver
5 dragonsteel
5 shadowsteel
Generates 5000 gold per day and increases growth in the city by 50%.
Necromancy is increased by 10%.
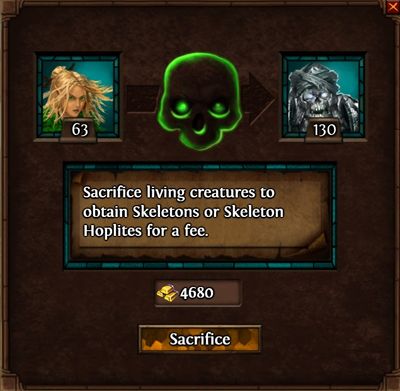 Sacrificing living creatures is profitable only in rare cases.
When developing the Necropolis cities, you can construct one special building - Altar of Sacrifice. Building it will allow you to use additional option available in the lower city menu. By sacrificing part of the gold, you can transform selected living creatures into Skeletons or Skeleton Hoplites, thus strengthening your army. By sacrificing a basic creature you will receive a regular Skeleton while after sacrificing an upgraded creature you will receive a Hoplite. It is wise to think if it is profitable for you. You should sacrifice units only under two conditions. First, you should only sacrifice weak and very weak creatures. Second condition is the lack of free slots in the army for additional troops. Remember that the troops you created will almost always be much weaker than the ones you sacrificed.
 Skeleton
Cost: 36 gold

Undead
The creature is dead and has no Morale. It cannot be healed or resurrected.
It is immune to poison, mind effects and fear.
It receives 25% more Light Magic damage and is immune to its positive spells and effects.
 Skeleton Hoplite
Cost: 47 gold

Undead
The creature is dead and has no Morale. It cannot be healed or resurrected.
It is immune to poison, mind effects and fear.
It receives 25% more Light Magic damage and is immune to its positive spells and effects.
 Ghost
Ghost
Cost: 50 gold

Undead
The creature is dead and has no Morale. It cannot be healed or resurrected.
It is immune to poison, mind effects and fear.
It receives 25% more Light Magic damage and is immune to its positive spells and effects.
 Banshee
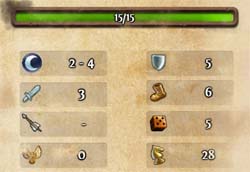
Cost: 65 gold

Undead
The creature is dead and has no Morale. It cannot be healed or resurrected.
It is immune to poison, mind effects and fear.
It receives 25% more Light Magic damage and is immune to its positive spells and effects.

Vigilance
This creature cannot be flanked.
 Ebon Spider
Cost: 110 gold

Undead
The creature is dead and has no Morale. It cannot be healed or resurrected.
It is immune to poison, mind effects and fear.
It receives 25% more Light Magic damage and is immune to its positive spells and effects.
 Death Spider
Cost: 143 gold
Undead
The creature is dead and has no Morale. It cannot be healed or resurrected.
It is immune to poison, mind effects and fear.
It receives 25% more Light Magic damage and is immune to its positive spells and effects.

Withering Venom
Creature that is hit by it receives additional damage at the start of its turn. It starts with 34 Dark Magic damage for each Death Spider and it increases each turn by 2 damage points for each Death Spider. Lasts 5 turns.
 Lich
Lich
Cost: 400 gold

Undead
The creature is dead and has no Morale. It cannot be healed or resurrected.
It is immune to poison, mind effects and fear.
It receives 25% more Light Magic damage and is immune to its positive spells and effects.
 Archlich
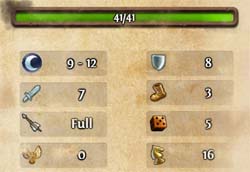
Cost: 520 gold

Undead
The creature is dead and has no Morale. It cannot be healed or resurrected.
It is immune to poison, mind effects and fear.
It receives 25% more Light Magic damage and is immune to its positive spells and effects.

Hex of Disruption
Ranged attack of the creature will reduce Defense of selected enemy and all enemy units near him by 10. Lasts for 2 turns.
 Lamasu
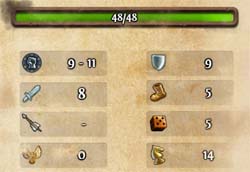
Cost: 400 gold

Undead
The creature is dead and has no Morale. It cannot be healed or resurrected.
It is immune to poison, mind effects and fear.
It receives 25% more Light Magic damage and is immune to its positive spells and effects.
 Plague Lamasu
Cost: 520 gold

Undead
The creature is dead and has no Morale. It cannot be healed or resurrected.
It is immune to poison, mind effects and fear.
It receives 25% more Light Magic damage and is immune to its positive spells and effects.

Aura of Pestilence
Neighboring creatures receive 50 points of poison damage (Earth Magic) at the start of their turn and they receive +5 to Attack and -1 to Movement for 2 turns (doesn't affect Undead and Constructs).
 Vampire
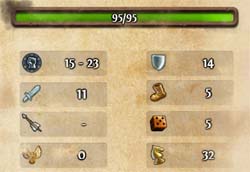
Cost: 1300 gold

Undead
The creature is dead and has no Morale. It cannot be healed or resurrected.
It is immune to poison, mind effects and fear.
It receives 25% more Light Magic damage and is immune to its positive spells and effects.

Life Drain
When the creature attacks, for each two points of damage dealt it regenerates one point of its health. It can resurrect fallen units.
 Vampire Lord
Cost: 1690 gold

Undead
The creature is dead and has no Morale. It cannot be healed or resurrected.
It is immune to poison, mind effects and fear.
It receives 25% more Light Magic damage and is immune to its positive spells and effects.

Life Drain
When the creature attacks, for each two points of damage dealt it regenerates one point of its health. It can resurrect fallen units.

Vigilance
This creature cannot be flanked.
 Bone Dragon
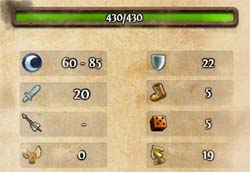
Cost: 5500 gold, 1 Dragonsteel

Undead
The creature is dead and has no Morale. It cannot be healed or resurrected.
It is immune to poison, mind effects and fear.
It receives 25% more Light Magic damage and is immune to its positive spells and effects.

Soul Reaver
The creature attacks selected enemy unit and for each killed creature it transports one Mana point from enemy to allied hero. The number of Mana points transferred is limited by hero's Magic.
 Spectral Dragon
Cost: 7150 gold, 2 Dragonsteel, 1 Dragonblood Crystal

Undead
The creature is dead and has no Morale. It cannot be healed or resurrected.
It is immune to poison, mind effects and fear.
It receives 25% more Light Magic damage and is immune to its positive spells and effects.

Soul Reaver
The creature attacks selected enemy unit and for each killed creature it transports one Mana point from enemy to allied hero. The number of Mana points transferred is limited by hero's Magic.

Soul Flaying Breath
The creature breaths at enemies with a ray of Dark Magic. The further away the target, the less damage it receives.
 Grim Rider
Cost: 5500 gold, 1 Shadowsteel

Undead
The creature is dead and has no Morale. It cannot be healed or resurrected.
It is immune to poison, mind effects and fear.
It receives 25% more Light Magic damage and is immune to its positive spells and effects.

Nightmarish Presence
Neighboring enemy creatures have -30 Morale.
Grim Reaper
Cost: 7150 gold, 2 Shadowsteel, 1 Starsilver

Undead
The creature is dead and has no Morale. It cannot be healed or resurrected.
It is immune to poison, mind effects and fear.
It receives 25% more Light Magic damage and is immune to its positive spells and effects.

Nightmarish Presence
Neighboring enemy creatures have -30 Morale.

Fatal Strike
If the creature deals at least one damage point, it always will kill at least one enemy.
 Namtaru
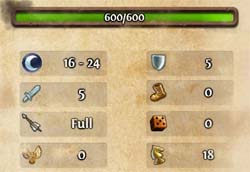
Cost: 1500 gold

Dark Touch
Dispels all negative effects of Light Magic placed on creatures. Each creature in the stack deals 1 additional Dark Magic damage point when attacking.
Lasts for 3 turns.
If you select Stronghold during a skirmish with AI or a multiplayer game, you will start the game with one of eleven heroes. A correct choice might help you at the beginning of the game or later. Most of the specializations of Stronghold heroes focus on recruiting additional units, Warcries or Air Magic. If you wonder which hero to pick, think about Yog who has the Cyclops Befriender skill. It's a good choice for the later phase of the game, when you will have Cyclops. What's important, it's not a Governor skill and you will be able to use the hero in regular way. Other useful heroes are Kente and Amari.
Hero
Specialization
Description
 Kente
Kente Master of Warcries
The hero starts with Warcries on novice level and with Overhelm skill.
 Amari
Amari Lightning Adept
The hero starts with Air Magic skill on novice level and with Lightning Burst spell.
That spell is casted with one level higher than the current level of that school.
 Anga
Anga Master of Air
Air Magic spells casted by that hero are casted with +6 Magic.
 Bilashi
 Painless
Hero starts with a +4 Defense bonus.
 Drakon
 Gnoll Chieftain
Governor: +12 to growth of Gnolls and Gnoll Hunters in this city's area of influence.
 Gird
Gird Spellweaver
The hero starts with a +4 Magic boost.
 Ishi
Ishi
Master of Earth
Earth Magic spells casted by that hero are casted with +6 Magic bonus.
 Kibwe
Kibwe Stone Skin Adept
The hero starts with Earth Magic skill on novice level and with Stone Skin spell.
The spell is casted on one level higher than the current level of this school.
 Reem
Reem Centaur Chieftain
Governor: +3 to growth of Centaurs and Centaur Marauders in this city's area of influence.
 Shani
Shani Orc General
Governor: +6 to income of Brutes and Crushers in this city's area of influence.
 Yog
Yog Cyclops Befriender
+8 to Attack and +8 to Defense of Cyclops and Enraged Cyclops.
The development of Stronghold cities requires you to have large amounts of wood, which is the dominant resource. The main special resource is the Dragonblood crystal. To avoid any trouble with the lack of building materials, you should build the Marketplace early. The Stronghold doesn't have a special building that would provide you any additional options.
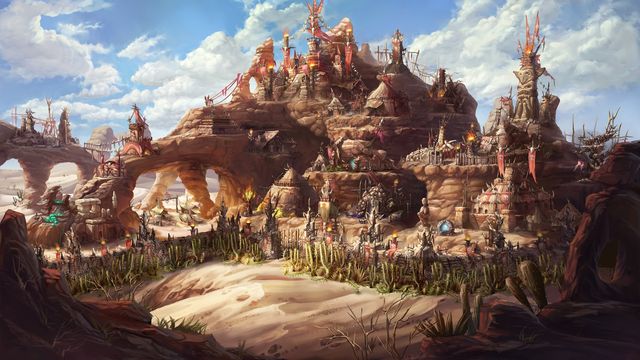 A fully developed Stronghold city.
Below you will find a list showing the suggested order of constructing 14 buildings in your city. The number of objects is much larger, but the first two weeks of the game are the key ones. Not always, mostly due to the lack of resources, you will be able to construct the buildings exactly in recommended order. Slight differences from the list won't mean that your city is developed in wrong way.
Order
Name
Description
1
Hall of Heroes
Allows you to recruit new and defeated heroes.
2
Harpy Nest
Basic nest.
Allows you to recruit 20 Harpies per week.
3
Town Hall
Gives additional 500 pieces of gold per day.
4
Marketplace
Allows you to trade resources.
5
War Tent
Basic nest.
Allows you to recruit 12 Brutes per week.
6
Centaur Camp
Elite nest.
Allows you to recruit 7 Centaurs per week.
7
Gnoll Slums
Basic nest.
Allows you to recruit 24 Gnolls per week.
8
Father Sky Totem
+4 to Blood Frenzy for your Stronghold heroes in city's area of influence.
9
City Hall
Gives additional 1000 pieces of gold per day.
10
Wyvern Rock
Elite nest.
Allows you to recruit 6 Sand Wyverns per week.
11
Altar of Broken Blades
Visiting hero's creatures receive +1 to Movement and +5 to Attack. Lasts 3 fights.
12
Hall of Raiders
Gives 250 gold for each won battle.
13
Basilisk Cavern
Elite nest.
Allows you to recruit Basilisk Riders.
14
Stone Pillars
Upgrade of the legendary nest.
+2 Basilisk Riders or Basilisk Lancers per week.
Building
Description
 Village Hall
The object is built since the start of the game.
Gives the ability to build new objects in the city.
Gives 500 pieces of gold per day.
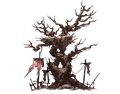 Harpy Nest
Cost:
500 gold
Basic nest.
Allows you to recruit 20 Harpies per week.
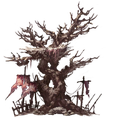 Fury Roost
Requirements:
Harpy Nest
Cost:
700 gold
2 Dragonblood crystals
Upgrade of the basic nest.
Allows you to recruit and upgrade Harpies to Furies.
 Gnoll Slums
Cost:
600 gold
5 wood
Basic nest.
Allows you to recruit 24 Gnolls per week.
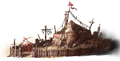 Gnoll Hunting Shack
Requirements:
Gnoll Slums
Cost:
800 gold
Upgrade of the basic nest.
Allows you to recruit and upgrade Gnolls to Gnoll Hunters.
 Wall level 1
Cost:
800 gold
10 wood
5 ore
Surrounds the city with walls and gates used during siege and adds a local guard consisting of Gnolls and Brutes.
 Hall of Heroes
Cost:
500 gold
5 ore
Allows you to recruit new and defeated heroes.
 Father Sky Totem
Cost:
500 gold
5 Starsilver
+4 to Blood Frenzy for your Stronghold heroes in city's area of influence.
 Marketplace
Cost:
500 gold
Allows you to trade resources.
Building
Description
 Town Hall
Requirements:
Village Hall
Cost:
2000 gold
Gives additional 500 pieces of gold per day.
 Harpy Colony
Requirements:
Harpy Nest
Cost:
500 gold
5 wood
Makes it impossible to build the Gnoll Firecamp
Upgrade of the basic nest.
+20 Harpies or Furies per week.
 Gnoll Firecamp
Requirements:
Gnoll Slums
Cost:
600 gold
5 wood
Makes it impossible to build the Harpy Colony
Upgrade of the basic nest.
+24 Gnolls or Gnoll Hunters per week.
 Wall level 2
Requirements:
Wall level 1
Cost:
800 gold
5 wood
Increases the number of hit points of walls and gates during siege.
Adds Sand Wyverns and Centaurs to local guard.
Increases the number and growth of creatures in local guard.
Mage Guild - level 1.Cost:
1000 gold
5 wood
5 ore
Gives 5 random level 1 spells to this city.
Each hero visiting this city, as long as he meets the requirements, will receive the spells.
Thieves GuildRequirements:
Marketplace
Cost:
500 gold
5 wood
Makes it impossible to build the House of Smalltalks
Allows you to buy information about your enemies.
 House of Smalltalks
Requirements:
Marketplace
Cost:
1000 gold
5 wood
Makes it impossible to build the Thieves Guild.
+20% success chance during negotiations with neutral armies in city's area of influence.
 War Tent
Cost:
800 gold
Basic nest.
Allows you to recruit 12 Brutes per week.
 War Pavillon
Requirements:
War Tent
Cost:
1100 gold
5 dragonsteel
Upgrade of the basic nest.
Allows you to recruit and upgrade Brutes to Crushers.
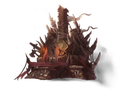 Altar of Broken Blades
Requirements:
Father Sky Totem
Cost:
500 gold
5 wood
Makes it impossible to build the Mother Earth's Wisdom
Visiting hero's creatures receive +1 to Movement and +5 to Attack. Lasts 3 fights.
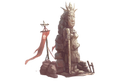 Mother Earth's Wisdom
Requirements:
Father Sky Totem
Cost:
500 gold
5 Shadowsteel
Makes it impossible to build the Altar of Broken Blades
+10 to experience points for won battles for your heroes that are in this city's area of influence.
Building
Description
 Centaur Camp
Cost:
4000 gold
10 wood
Elite nest.
Allows you to recruit 7 Centaurs per week.
 Centaur Outpost
Requirements:
Centaur Camp
Cost:
6000 gold
5 wood
5 dragonsteel
Upgrade of the legendary nest.
Allows you to recruit and upgrade Centaurs to Centaur Marauders.
 Centaur Lodge
Requirements:
Centaur Camp
Cost:
4000 gold
5 wood
Upgrade of the legendary nest.
+7 Centaurs or Centaur Marauders per week.
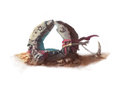 Town Portal
Requirements:
Mage Guild - level 1.
Cost:
500 gold
2 wood
2 ore
2 Dragonblood crystals
5 Dragonsteel
All heroes visiting this city will receive Town portal spell.
Allows the heroes who have this spell to return to this city if it is the closest available city.
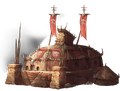 Mage Guild - level 2.
Requirements:
Mage Guild - level 1.
Cost:
1000 gold
5 wood
5 ore
5 Dragonblood crystals
1 starsilver
1 dragonsteel
1 shadowsteel
Gives 4 random level 2 spells to this city.
Each hero visiting this city, as long as he meets the requirements, will receive the spells.
 Blood Magic Crucible
Requirements:
Wall level 2
Cost:
500 gold
Makes it impossible to build the Moat
-3 to Magic of all enemy heroes that are in this city's area of influence.
 Moat
MoatRequirements:
Wall level 2
Cost:
500 gold
2 wood
Makes it impossible to build the Blood Magic Crucible
Gives a moat to the city during siege.
 Orc Barracks
Requirements:
War Tent
Cost:
800 gold
5 wood
5 ore
Upgrade of the basic nest.
+12 Brutes or Crushers per week.
Building
Description
 City Hall
Requirements:
Town Hall
Cost:
5000 gold
Gives additional 1000 pieces of gold per day.
 Wyvern Rock
Cost:
3500 gold
10 ore
5 Starsilver
Elite nest.
Allows you to recruit 6 Sand Wyverns per week.
 Wyvern Nest
Requirements:
Wyvern Rock
Cost:
5000 gold
10 Shadowsteel
Upgrade of the legendary nest.
Allows you to recruit and upgrade Sand Wyverns to Venomous Wyverns.
 Deep Mine
Requirements:
Wyvern Rock
Cost:
2000 gold
5 wood
Generates 1 shadowsteel per day.
 Dream Lodge
Requirements:
Orc Barracks
Cost:
1000 gold
5 wood
Produces special unit.
Allows you to buy Dreamwalkers.
 Hall of Raiders
Requirements:
Altar of Broken Blades or Mother Earth's Wisdom
Cost:
2500 gold
5 wood
5 ore
Gives 250 gold for each won battle.
 Sky and Earth Totems
Requirements:
Dream Lodge
Wall level 2
Cost:
300 gold
2 Starsilver
2 Shadowsteel
During siege, the city has 2 towers.
Building
Description
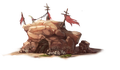 Basilisk Cavern
Cost:
7000 gold
5 wood
10 ore
5 Dragonblood crystals
Elite nest.
Allows you to recruit Basilisk Riders.
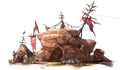 Basilisk's No Man's Land
Requirements:
Basilisk Cavern
Cost:
9000 gold
5 dragonsteel
5 shadowsteel
5 starsilver
Upgrade of the legendary nest.
Allows you to recruit and upgrade Basilisk Riders to Basilisk Lancers.
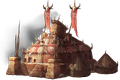 Mage Guild - level 3.
Requirements:
Mage Guild - level 2.
Cost:
1000 gold
5 wood
5 ore
3 Dragonblood crystals
3 Starsilver
3 dragonsteel
3 shadowsteel
Gives 3 random level 3 spells to this city.
Each hero visiting this city, as long as he meets the requirements, will receive the spells.
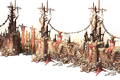 Wall level 3
Requirements:
Wall level 2
Cost:
800 gold
5 wood
Increases the number of hit points of walls and gates during siege.
Increases the number and growth of creatures in local guard.
 Wyvern Hatchery
Requirements:
Wyvern Rock
Cost:
3500 gold
10 wood
5 ore
Makes it impossible to build the Stone Pillars
Upgrade of the legendary nest.
+6 Sand Wyverns or Venomous Wyverns per week.
 Stone Pillars
Requirements:
Basilisk Cavern
Cost:
7000 gold
5 wood
10 ore
5 Dragonblood crystals
Makes it impossible to build the Wyvern Hatchery
Upgrade of the legendary nest.
+2 Basilisk Riders or Basilisk Lancers per week.
 Idol of Fertility
Requirements:
Sky and Earth Totems
Cost:
5000 gold
5 wood
5 ore
2 Dragonblood crystals
2 Starsilver
2 dragonsteel
2 shadowsteel
Allows you to select one nest a week which will immediately deliver its weekly growth.
Building
Description
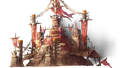 Capitol
Requirements:
City Hall
Unique
Cost:
10 000 gold
10 wood
10 ore
Gives additional 2000 pieces of gold per day. You can have only one Capitol.
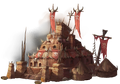 Mage Guild - level 4.
Requirements:
Mage Guild - level 3.
Cost:
1000 gold
5 wood
5 ore
5 Dragonblood crystals
5 dragonsteel
5 shadowsteel
5 Starsilver
Gives 1 random level 4 spell to this city.
All visiting heroes, as long as they met the requirements, receive them.
Cyclops MoundRequirements:
Dream Lodge
Wyvern Hatchery or Stone Pillars
Cost:
12 000 gold
5 wood
15 ore
5 Dragonblood crystals
Makes it impossible to build the Behemoth Abyss
Legendary nest.
Allows you to recruit 1 Cyclops per week.
 Pillar of Rage
Requirements:
Cyclops Mound
Cost:
15 000 gold
10 ore
10 shadowsteel
Upgrade for the legendary nest.
Allows you to recruit and upgrade Cyclops to Enraged Cyclops.
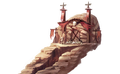 Behemoth Abyss
Requirements:
Dream Lodge
Wyvern Hatchery or Stone Pillars
Cost:
12 000 gold
15 wood
5 ore
5 Dragonblood crystals
Makes it impossible to build Cyclops Mound
Legendary nest.
Allows you to recruit 1 Behemoth per week.
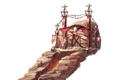 Behemoth Rift
Requirements:
Behemoth Abyss
Cost:
15 000 gold
10 dragonsteel
10 wood
Upgrade for the legendary nest.
Allows you to recruit and upgrade Behemoths to Ancient Behemoths.
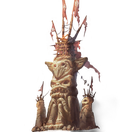 Father Sky's Furor
Requirements:
There's a hero in the city that has the Tears of Asha
Cost:
4000 gold
5 wood
5 ore
5 Dragonblood crystals
5 starsilver
5 dragonsteel
5 shadowsteel
Provides 5000 gold per day and increases creature growth in this city by 50%.
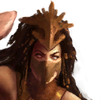 Harpy
Harpy
Cost: 45 gold

Strike and Return
After attacking, the creature will return to its previous position as long as that place is still available.
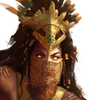 Fury
Fury
Cost: 59 gold

Strike and Return
After attacking, the creature will return to its previous position as long as that place is still available.

Unfettered
Any creatures cannot retaliate after this unit's attack.
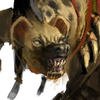 Gnoll
Gnoll
Cost: 38 gold
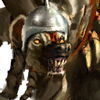 Gnoll Hunter
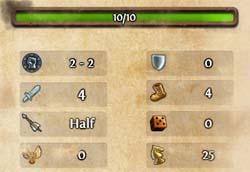
Cost: 49 gold

Opportunity Shot
If the creature isn't in the middle of melee battle, it can perform an immediate, free shot at enemies that have been melee attacked.
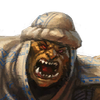 Brute
Brute
Cost: 92 gold

Demonic Lineage
Fire resistance. Fire Magic's spells and effects are twice weaker and Fire damage dealt by enemy is reduced by 25%.
Vulnerability to Light. The creature receives 25% more damage from Light Magic.
 Crusher
Cost: 120 gold

Demonic Lineage
Fire resistance. Fire Magic's spells and effects are twice weaker and Fire damage dealt by enemy is reduced by 25%.
Vulnerability to Light. The creature receives 25% more damage from Light Magic.

Unfettered
The creature is resistant to all forms of Movement reduction.
 Centaur
Cost: 286 gold

Maneuver
When the creature is supposed to retaliate after a melee attack, it gets away from enemy and responds with ranged attack.
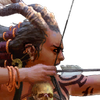 Centaur Marauder
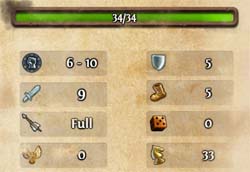
Cost: 372 gold

Manuever
When the creature is supposed to retaliate after a melee attack, it gets away from enemy and responds with ranged attack.

Mobile Shooter
The creature can move and then shoot or first shoot and then move.
 Sand Wyvern
Cost: 334 gold

Regeneration
The creature regains 20 Health at the end of its turn.

Resistant to Earth
Earth Magic spell's and effect's damage is reduced by half and enemy attacks that deal Earth Magic related damage are reduced by 25%.
 Venomous Wyvern
Cost: 434 gold

Regeneration
The creature regains 20 Health at the end of its turn.

Resistant to Earth
Earth Magic spell's and effect's damage is reduced by half and enemy attacks that deal Earth Magic related damage are reduced by 25%.

Acid Breath
Enemies that are hit will receive half of the damage dealt during first strike in their next turn and 25% damage in their third turn.
 Basilisk Rider
Cost: 1300 gold

Petrification
Creatures that receive a critical hit are stunned till the end of their next turn or until they receive other damage.
 Basilisk Lancer
Cost: 1690 gold

Long Range
Small creatures cannot retaliate to attacks of this unit.

Petrification
Creatures that receive a critical hit are stunned till the end of their next turn or until they receive other damage.
 Cyclops
Cost: 5500 gold, 1 Dragonblood Crystal

Sweeping Bash
Creature hits all enemies that are neighboring the target under small angle.
Enemies that receive critical hit are stunned till the end of their next turn.

Demonic Lineage
Fire resistance. Fire Magic's spells and effects are twice weaker and Fire damage dealt by enemy is reduced by 25%.
Vulnerability to Light. The creature receives 25% more damage from Light Magic.
 Enraged Cyclops
Cost: 7150 gold, 1 Starsilver, 2 Dragonblood Crystals

Sweeping Bash
Creature hits all enemies that are neighboring the target under small angle.
Enemies that receive critical hit are stunned till the end of their next turn.

Demonic Lineage
Fire resistance. Fire Magic's spells and effects are twice weaker and Fire damage dealt by enemy is reduced by 25%.
Vulnerability to Light. The creature receives 25% more damage from Light Magic.

Fiery Eye
The creature shoots at maximum reach and deals from 40 to 47 fire damage.
 Behemoth
Cost: 5500 gold, 1 Dragonsteel

Piercing Claws
Attacks of this creature ignore half of the target's Defense.
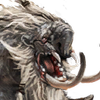 Ancient Behemoth
Cost: 7150 gold, 2 Dragonsteel, 1 Shadowsteel

Piercing Claws
Attacks of this creature ignore half of the target's Defense.

Mighty Pounce
Once per battle the creature can perform a jump twice as long as their movements reach and it can attack the neighboring enemy units which cannot retaliate.
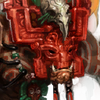 Walking in Dreams
Cost: 1500 gold

Deadth Cloak
Regenerates 20 Health points of allied creature (doesn't work on Constructs and Undead).
When you pick Dungeon during skirmishes or multiplayer games, you will control one of eleven heroes, at least during the beginning of the adventure. Each of them differs in specialization, from which most are related to dark magic, unit recruitment or placing negative effects on enemies.
In case of Dungeon you can pick from few interesting heroes who will greatly help you during the game. Lethos is the best one. His specialization will be useful in each battle, especially during the beginning phase of the game. If there will be many cities and forts on the map, you should consider using Sylsai which will help you during sieges and defenses of cities. In case of magic classes you should take a closer look at Ashbeth.
Hero
Specialization
Description
 Jorgen
 Jorgen
Dark Magic spells casted by this hero are casted with +6 Magic.
 Ashbeth
 Adept of Weakness
The hero starts with Dark Magic skill on novice level and with Weakness spell.
The spell is casted on one level higher than the current level of that school.
 Darkstorm
 Minotaur General
Governor: +1 to growth of Minotaurs and Minotaur Guards in this city's area of influence.
 Eruina
 Natural Born Leader
The hero starts with a +10 Leadership bonus.
 Lethos
 Soulvenom Aura
All enemy units receive 40 points of poison damage at the start of their turn.
 Sinitar
 Catalyst
The hero starts with Prime Magic skill on novice level and with Reneval skill.
 Sorshan
 Strider Blacksmith
Governor: +2 to growth of Striders and Soulless in this city's area of influence.
 Sylsai
 Artillery Master
The hero starts with a special unit, Warfare skill on novice level and with Improved Durability skill.
 Yeshtar
 Gladiator
The hero starts with a +4 Might boost.
 Yrbeth
 Disciple of Darkness
When the hero is casting a Dark Magic spell, the spell is casted with +6 Magic.
 Yrris
Yrris Stalker Officer
Governor: +10 to growth of Stalkers and Trackers in this city's area of influence.
The development of Dungeon cities is based mostly on ore. Especially the higher levels are based on this resource. Because of that, try to claim an ore mine on the world map in first order. Shadowsteel will be the most used special resource. Dungeon has a special building that allows you to sell and buy artifacts.
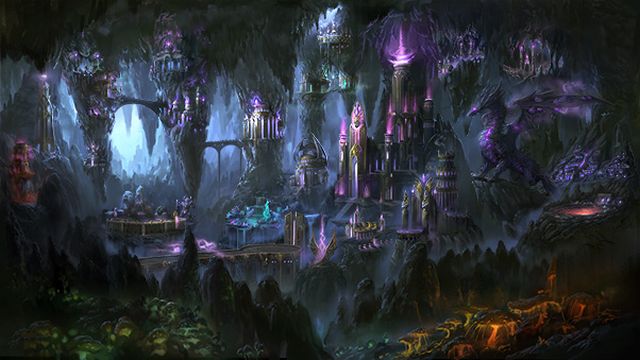 A fully developed Dungeon city.
Below you will find a list showing the suggested order of constructing 14 buildings in your city. The number of objects is much larger, but the first two weeks of the game are the key ones. Not always, mostly due to the lack of resources, you will be able to construct the buildings exactly in recommended order. Slight differences from the list won't mean that your city is developed in wrong way.
Order
Name
Description
1
Hall of Heroes
Allows you to recruit new and defeated heroes.
2
Shadow Arena
Basic nest.
Allows you to recruit 19 Stalkers per week.
3
Town Hall
Gives additional 500 pieces of gold per day.
4
Cradle of Stone
Basic nest.
Allows you to recruit 9 Troglodytes per week.
5
Halls of the Unseen Hand
Basic nest.
Allows you to recruit 20 Assassins per week.
6
Marketplace
Allows you to trade resources.
7
Mage Guild - level 1.
Gives 5 random level 1 spells to this city.
Each hero visiting this city, as long as he meets the requirements, will receive the spells.
8
Chthonian Deposit
Generates 2 ore per day.
9
City Hall
Gives additional 1000 pieces of gold per day.
10
Strider Forge
Elite nest.
Allows recruiting 4 Striders per week.
11
Mage Guild - level 2.
Gives 4 random level 2 spells to this city.
Each hero visiting this city, as long as he meets the requirements, will receive the spells.
12
Maze
Elite nest.
Allows recruiting 2 Minotaurs per week.
13
Lake of Stilled Voices
Elite nest.
Allows recruiting 5 Medusas per week.
14
Thieves Guild
Allows you to buy information about your enemies.
Building
Description
 Village Hall
The object is built since the start of the game.
Gives the ability to build new objects in the city.
Gives 500 pieces of gold per day.
 Shadow Arena
Cost:
1200 gold
5 ore
Basic nest.
Allows you to recruit 19 Stalkers per week.
 Shadow Ring
Requirements:
Shadow Arena
Cost:
1600 gold
Upgrade of the basic nest.
Allows you to recruit and upgrade Stalkers to Trackers.
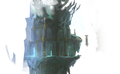 Halls of the Unseen Hand
Cost:
1100 gold
5 wood
Basic nest.
Allows you to recruit 20 Assassins per week.
Halls of the Black HeartRequirements:
Halls of the Unseen Hand
Cost:
1500 gold
2 shadowsteel
Upgrade of the basic nest.
Allows you to recruit and upgrade Assassins to Shades.
 Mage Guild - level 1
Cost:
1000 gold
5 wood
5 ore
Gives 5 random level 1 spells to this city.
Each hero visiting this city, as long as he meets the requirements, will receive the spells.
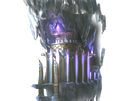 Hall of Heroes
Cost:
500 gold
5 ore
Allows you to recruit new and defeated heroes.

Thieves Guild
Cost:
500 gold
Allows you to buy information about your enemies.
 Marketplace
Cost:
500 gold
Allows you to trade resources.
Building
Description
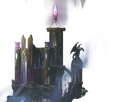 Town Hall
Requirements:
Village Hall
Cost:
2000 gold
Gives additional 500 pieces of gold per day.
 Training Camp
Requirements:
Shadow Arena
Cost:
2100 gold
5 ore
Makes it impossible to build the Assassin's Guild
Upgrade of the basic nest.
+19 Stalkers or Trackers per week.
 Assassin's Guild
Requirements:
Halls of the Unseen Hand
Cost:
2000 gold
5 wood
Makes it impossible to build the Training Camp
Upgrade of the basic nest.
+20 Assassins or Shades per week.
 Town Portal
Requirements:
Mage Guild - level 1.
Cost:
500 gold
2 wood
2 ore
2 Dragonblood crystals
All heroes visiting the city will receive the Town portal spell.
Allows the heroes who have this spell to return to this city if it is the closest available city.
 Black Market
Requirements:
Marketplace
Cost:
500 gold
Allows buying and selling artifacts.
 Chamber of Whispers
Requirements:
Halls of the Unseen Hand
Cost:
1000 gold
Produces special unit.
Allows you to buy Faceless.
Dark WatchRequirements:
Thieves Guild
Mage Guild - level 1.
Cost:
500 gold
5 wood
Makes it impossible to build the Soulvenom Crucible
Visiting heroes receive +10 to Initiative for 3 next battles.
 Soulvenom Crucible
Requirements:
Thieves Guild
Mage Guild - level 1.
Cost:
500 gold
2 Dragonblood crystals
Makes it impossible to build the Dark Watch
During each battle that takes place in the area of influence of this city, each enemy creature will receive 40 points of Earth Magic at the beginning of first three turns.
 Cradle of Stone
Cost:
1400 gold
5 wood
5 ore
Basic nest.
Allows you to recruit 9 Troglodytes per week.
 Chthonian Abyss
Requirements:
Cradle of Stone
Cost:
2200 gold
5 shadowsteel
Upgrade of the basic nest.
Allows you to recruit and upgrade Troglodytes to Chthonians.
Building
Description
 Pillar of Eyes
Cost:
1000 gold
2 shadowsteel
Produces special unit.
Allows you to buy Shadow Lurkers.
 Spies Guild
Requirements:
Chamber of Whispers
Dark Watch or Soulvenom Crucible
Cost:
1000 gold
10 ore
2 shadowsteel
Thieves Guild gains the ability to send spies to plunder random enemy mine.
 Unfathomable Caves
Requirements:
Cradle of Stone
Cost:
2200 gold
5 wood
5 ore
Upgrade of the basic nest.
+9 Troglodyte or Chthonian per week.
 Mage Guild - level 2.
Requirements:
Mage Guild - level 1.
Cost:
500 gold
5 ore
1 Dragonblood crystals
1 starsilver
1 dragonsteel
1 shadowsteel
Gives 4 random level 2 spells to this city.
Each hero visiting this city, as long as he meets the requirements, will receive the spells.
 Shadowsteel Refinery
Requirements:
Black Market
Cost:
3000 gold
2 ore
2 wood
Makes it impossible to build the Chthonian Deposit
Generates 1 Shadowsteel per day.
 Chthonian Deposit
Requirements:
Cradle of Stone
Cost:
3000 gold
5 wood
Makes it impossible to build the Shadowsteel Refinery
Generates 2 ore per day.
 Wall level 1
Cost:
1000 gold
10 ore
5 wood
Adds walls and gates to the city used during siege and adds local guard consisting of Assassins and Stalkers.
Building
Description
 City Hall
Requirements:
Town Hall
Cost:
5000 gold
Gives additional 1000 pieces of gold per day.
 Strider Forge
Requirements:
Shadowsteel Refinery or Chthonian Deposit
Cost:
2500 gold
10 ore
5 shadowsteel
Elite nest.
Allows recruiting 4 Striders per week.
 Soulless Forge
Requirements:
Strider Forge
Cost:
3700 gold
5 starsilver
5 dragonsteel
5 shadowsteel
Upgrade of the legendary nest.
Allows recruiting and upgrading Striders to Soulless.
Lake of Stilled VoicesRequirements:
Mage Guild - level 2.
Cost:
2700 gold
10 wood
Elite nest.
Allows recruiting 5 Medusas per week.
 Frozen Statuary
Requirements:
Lake of Stilled Voices
Cost:
3400 gold
5 Dragonblood crystals
Upgrade of the legendary nest.
Allows recruiting and upgrading Medusas to Medusa Sorceresses.
 Dark Watch
Requirements:
Wall level 2.
Pillar of Eyes
Cost:
500 gold
5 ore
2 shadowsteel
During siege, the city has 2 towers.
 Hall of intrigue
Requirements:
Spies Guild
Cost:
1000 gold
2 wood
Thieves Guild obtains the ability to start sabotage missions in random nest of enemy city. Due to such action weekly production of sabotaged building is reduced by half.
 Wall level 2
Requirements:
Wall level 1
Cost:
1000 gold
5 wood
5 ore
Increases the number of hit points of walls and gates during siege.
Adds Minotaurs and Medusas to local guard.
Increases the number and growth of creatures in local guard.
 Mage Guild - level 3.
Requirements:
Mage Guild - level 2.
Cost:
500 gold
5 ore
3 Dragonblood crystals
3 shadowsteel
3 dragonsteel
3 starsilver
Gives 3 random level 3 spells to this city.
Each hero visiting this city will receive them as long as he meets the requirements.
Building
Description
 Maze
MazeCost:
5000 gold
20 ore
Elite nest.
Allows recruiting 2 Minotaurs per week.
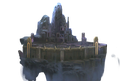 Labyrinth
Requirements:
Maze
Cost:
7500 gold
5 dragonsteel
5 Dragonblood crystals
Upgrade of the legendary nest.
Allows recruiting and upgrading Minotaurs to Minotaur Guards.
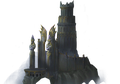 Mage Guild - level 4.
Requirements:
Mage Guild - level 3.
Cost:
500 gold
5 ore
5 Dragonblood crystals
5 Starsilver
5 dragonsteel
5 shadowsteel
Gives 1 random level 4 spell to this city.
Each hero visiting this city, as long as he meets the requirements, will receive the spells.
 Moat
MoatRequirements:
Wall level 2.
Cost:
500 gold
2 shadowsteel
Adds a moat during siege.
 Snake Tower
Requirements:
Lake of Stilled Voices
Cost:
3400 gold
10 wood
Makes it impossible to build the Shadowsteel Pool
Upgrade of the basic nest.
+5 Medusas or Medusa Sorceresses per week.
 Shadowsteel Pool
Requirements:
Strider Forge
Cost:
3700 gold
10 ore
2 shadowsteel
Makes it impossible to build the Snake Tower
Upgrade of the basic nest.
+4 Striders or Soulless.
Building
Description
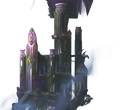 Capitol
Requirements:
City Hall
Unique
Cost:
10 000 gold
10 wood
10 ore
Gives additional 200 pieces of gold per day. You can have only one Capitol.
 Wall level 3.
Requirements:
Wall level 2.
Cost:
1000 gold
5 wood
5 ore
Increases the number of hit points of walls and gates during siege.
Increases the number and growth of creatures in local guard.
 Hissing Temple
Requirements:
Snake Tower or Shadowsteel Pool
Mage Guild - level 3.
Cost:
12 000 gold
10 wood
10 ore
5 Dragonblood crystals
Makes it impossible to build the Dragon Spire
Legendary nest.
Allows you to recruit 1 Cave Hydra per week.
 Rattling Temple
Requirements:
Hissing Temple
Cost:
15 000 gold
10 wood
10 shadowsteel
5 Dragonblood crystals
Upgrade for the legendary nest.
Allows you to recruit and upgrade Cave Hydras to Dark Hydras.
 Dragon Spire
Requirements:
Snake Tower or Shadowsteel Pool
Mage Guild - level 3.
Cost:
12 000 gold
20 ore
10 Dragonblood crystals
Makes it impossible to build the Hissing Temple
Legendary nest.
Allows you to recruit 1 Shadow Dragon per week.
 Dragon Pinnacle
Requirements:
Dragon Spire
Cost:
15 000 gold
10 dragonsteel
10 shadowsteel
Upgrade for the legendary nest.
Allows you to recruit and upgrade Shadow Dragons to Dark Dragons.
 Altar of Broken Chains
Requirements:
Maze
Cost:
8000 gold
10 ore
Upgrade of the legendary nest.
+2 Minotaurs or Minotaur Guards per week.
 Mark of Malassa
Requirements:
There's a hero in the city that has the Tears of Asha
Cost:
4000 gold
5 wood
5 ore
5 Dragonblood crystals
5 starsilver
5 dragonsteel
5 shadowsteel
Adds 5000 gold per day and increases the growth of units in this city by 50%.
Spies can sabotage and plunder 2 additional objects.
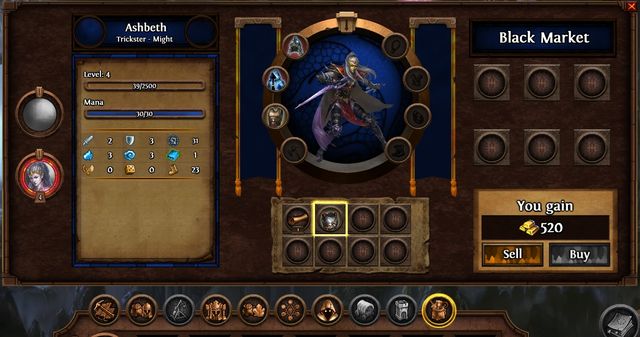 Remember to sell only the items that none of your heroes is or will be using.
The Dungeon has the most special buildings of all the factions. These buildings give various additional options. First one is the Black Market which allows you to sell and buy artifacts. The price of a sold artifact varies from 300 to 600 gold. If you want to buy an artifact, you must pay at least 2000 pieces of gold.
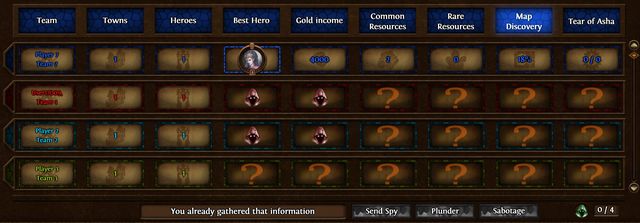 Remember that the number of available spies is limited to 4. Additionally, a spy mission lasts at least few days.
Other two buildings - Spies Guild and Hall of intrigue - are focused on unlocking new options related to the Thieves Guild. Thanks to them you can not only gather information about enemies, but send spies on missions to sabotage the dwellings and plunder enemy mines as well. Plundered mines will stop generating resources for few days and you will receive few pieces of a resource. Sabotaging will remove half of the units from one random city dwelling.
 Stalker
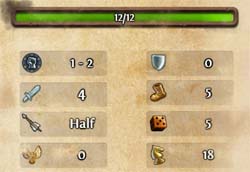
Cost: 48 gold
 Tracker
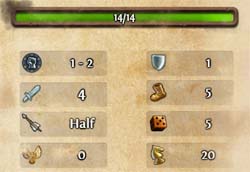
Cost: 62 gold

Armour Piercing
Ranged attack of this creature ignores Defense of the target.
 Assassin
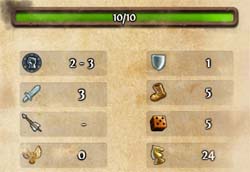
Cost: 45 gold

Backstab
The total bonus for flanking is increased by 50%.
 Shade
Shade
Cost: 59 gold

Backstab
The total bonus for flanking is increased by 50%.

Poisoned Blades
Enemies that are hit receive additional damage at the start of their turn. It starts with 15 Dark Magic damage for each Shade and with each turn it increase by 1 point of damage for each Shade.
It lasts 5 turns.
 Troglodyte
Cost: 123 gold

Blind
The creature is naturally blind and no blinding effects work on it.

Immune to Earth
The creature cannot be targeted by negative Earth Magic spells or effects. Enemy attacks deal only half Earth damage.
 Chthonian
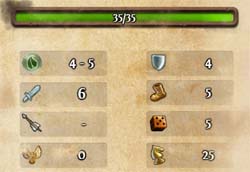
Cost: 159 gold

Blind
The creature is naturally blind and no blinding effects work on it.

Immune to Earth
The creature cannot be targeted by negative Earth Magic spells or effects. Enemy attacks deal only half Earth damage.
 Medusa
Cost: 400 gold

Mesmerize
Creatures that receive critical hits are stunned till the end of their next turn or until they receive other damage.
 Medusa Sorceress
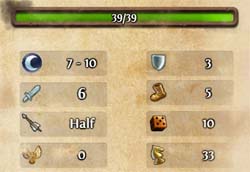
Cost: 520 gold

Mesmerize
Creatures that receive critical hits are stunned till the end of their next turn or until they receive other damage.

Mobile Shooter
The creature can move and then shoot or first shoot and then move.
 Minotaur
Cost: 1300 gold

Preemptive Strike
The creature retaliates before it is hit.
 Minotaur Guard
Cost: 1690 gold

Preemptive Strike
The creature retaliates before it is hit.

No retaliation
Enemy creatures cannot retaliate after this creature's attack.
 Strider
Cost: 500 gold

Immune to Darkness
The creature cannot be targeted by Dark Magic's spells or effects. Enemy attacks deal only half of Dark damage.

Construct
The creature is resistant to poison, blindness, mind effects and morale. It cannot be healed or resurrected.
 Soulless
Cost: 650 gold

Immune to Darkness
The creature cannot be targeted by Dark Magic's spells or effects. Enemy attacks deal only half of Dark damage.

Construct
The creature is resistant to poison, blindness, mind effects and morale. It cannot be healed or resurrected.

Heart of Darkness
The creature and allied units neighboring with it are resistant to Light and enemy creatures that are standing nearby become vulnerable to Darkness.
 Cave Hydra
Cost: 5500 gold, 1 Dragonblood Crystal

Six Heads
The creature hits all enemy units that are neighboring the target under wide angle.
 Dark Hydra
Cost: 7150 gold, 1 Starsilver, 2 Dragonblood Crystals

Six Heads
The creature hits all enemy units that are neighboring the target under wide angle.

Life Drain
When the creature attacks, for each two points of damage dealt it regenerates one point of its health. It can resurrect fallen units.
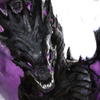 Shadow Dragon
Cost: 5500 gold, 1 Shadowsteel

Immune to Darkness
The creature cannot be targeted by Dark Magic's spells or effects. Enemy attacks deal only half of Dark damage.

Withering Breath
The creature breaths a ray of Dark Magic at enemy units. The enemies that are hit will receive half of this attack's damage during their next turn and 25% damage during their third turn.
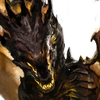 Dark Dragon
Cost: 7150 gold, 1 Dragonsteel, 2 Shadowsteel

Withering Breath
The creature breaths a ray of Dark Magic at enemy units. The enemies that are hit will receive half of this attack's damage during their next turn and 25% damage during their third turn.

Magic Immunity
The creature cannot be targeted by any negative spells or effects from any magic school. All magic damage is reduced by half.
 Shadow Lurker
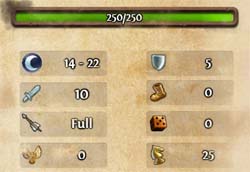
Cost: 1000 gold
 Faceless
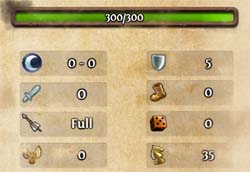
Cost: 500 gold
Deadth Cloak
Puts a cloak of death on allied creature. When that creature is hit with melee attack, the cloak deals 30 points of Dark Magic damage to the attacker.
Perfect Warfare unlocks action: The Cloak of Death explodes once the battle round ends.

Might & Magic: Heroes VII is another installment of the very popular series of fantasy turn based strategy games. It tells the story of a war for the throne of the Empire and the campaign focuses on the person of a young prince named Ivan. The game was developed by Limbic Entertainment, the same studio that created the previous part of the series. The walkthrough contains a full set of information required to quickly and efficiently complete all the campaign missions. The guide has been divided into parts focusing on all 7 campaigns: Haven, Sylvan, Academy, Stronghold, Dungeon, Necropolis and the main campaign of Prince Ivan. Each chapter contains a special map that shows the most important places, cities, allies, strong enemies and treasure chests. The maps were enriched with a thorough walkthrough of all main and side quests in each location.
The walkthrough for Might & Magic: Heroes VII contains:
Patryk Greniuk ()
The walkthrough to Might & Magic: Heroes VII game contains a description of all 7 campaigns available in the game, divided into specific missions. In chapters focusing on specific missions there was also another division into pages about main and side quests. This allows to quickly and easily navigate through the whole guide.
Description of each mission contains an exclusive map on which all most important places related to the quests, neutral cities, friendly and enemy units, strongest opponents and all treasure and artifacts finding missions have been marked. Since in the game there are enormous amounts of buildings, enemies and resources, there was no way to show them on such small map in a clean way. Because of that, we have selected only the points that are most useful for player.
Under each map there's additionally a description of all quests available as part of that mission. They are separated into main quests and side quests and are ordered based on the suggested order in which they should be completed.
The whole guide has been divided into two main parts: the game guide and the walkthrough. If you're interested in general information about the buildings, units, spells or abilities available in the game, you should check the game guide instead of the walkthrough.
Color markings used in the guide:
Green color - units and heroes
Orange color - places and location names
Blue color - spells and skills
Brown color - buildings
Italics - other important definitions that require to be marked
In the first mission of the Sylvan campaign you will learn the story of a young sea elf named Wysloth. When he was on a journey, his ship sunk due to a storm. The adventure starts when he is casted away on a shore of an unknown continent. You don't need to rush during this mission, enemy units aren't becoming stronger nor are they acting against you. Calmly finish further phases of the quest, defeat enemies and gather army required for defeating 5 cyclops. On the map, in addition to most important places related to the mission, stronger enemy groups, potential new recruits for your army and chests with gold, experience and items have been marked.
It's the first mission added to your journal. You must explore the shore on which you were casted away. At first go north and click the Lone Unicorn. Wysloth will climb on his back.
Your next step is finding a Deer (M1,2). When you walk close, the animal will start running away. You must follow it. However, if you feel strong enough, you can try fighting nearby enemies. This will give you a bit of experience and resources. Once you finish the chase, you will be able to add Deer to your army. You will also notice another group of units with which you can do the same - 25 Pixies. Journal will be updated and you will be tasked with following obelisks, starting from the place where you're standing now.
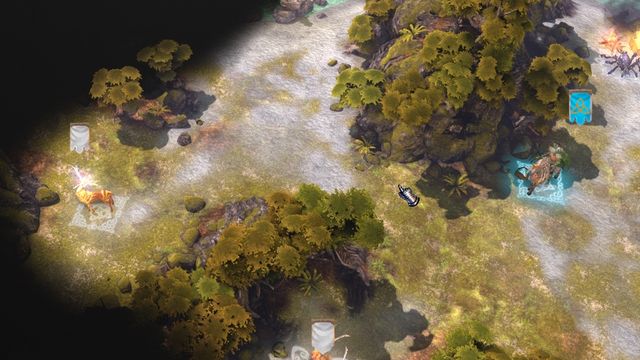 Follow the deer and you will be able to add this unit to your army.
They will lead you to an elven hero - Danan (M1,3). Talk with her and she will tell you to follow her. In about 2 turns you will reach the city (M1,4). There you must talk with Sylrael. You will learn that they have trouble with nearby cyclops. You will have to deal with it.
The mission will be completed successfully. You will receive 1000 experience points and access to your first city - Shalven. Danan, the elven hero, will also join you.
The mission will start automatically after talking with Sylrael in Shalwan (M1,4). You will have to build a ship that will take you to cyclops' island.
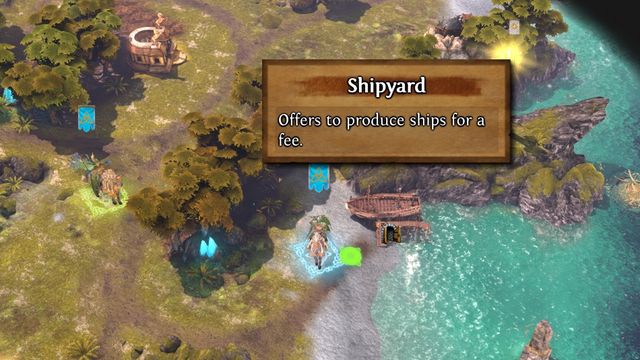 You don't need to rush building the ship. Calmly gather all required resources.
In order to build the ship you must go to Shipyard (M1,5), which is located nearby the city, and you must pay for the boat. It will cost you 6500 gold, 16 wood and 8 ore. Luckily, you aren't rushed by time, you can waste as much of it as you want on searching for resources and developing the city. Walk through the whole available map and gather all resources you can.
Once you do it, go back to the shipyard and build the ship. The mission will end and you will receive 2500 experience points and Ranger's Armour which adds +2 to Spirit.
The mission will start automatically after you build the ship in the Shipyard (M1,5). Your objective is very simple. You must swim to the other side of the sea, to the cyclops' island. Before doing it, you should explore the whole water territory and the coast, large numbers of gold, experience and resources can be found there. However, remember not to pass the line of rocks (M1,6). Once you do it, every few fields you move you will be attacked by a cyclops that will destroy part of your army. Few such attacks and you will lose all your warriors.
 Don't get behind the rocks before beating the cyclops.
Once you search the sea, go to the teleport (M1,7). Now, swim to the other side and defeat the cyclops in the gate. Your last task will be to get to the top of the hill and defeat the enemy forces in the stronghold (M1,8). It will be pretty hard, mostly because of the 5 cyclops. It is a good idea to prepare for this battle and recruit as many units as possible, preferably flying and ranged ones. Once you manage to win, you will receive 1 attack, defense and morale point as a reward.
Now go back to the ship, use the teleport (M1,7) and then swim through the rocks (M1,6). If you want to end the mission in this campaign, you must use another teleport (M1,8) which appeared after defeating the cyclops.
The map above shows the second mission of the Sylvan campaign during which you will still be controlling Wysloth. This time the map is quite large and consists of an islands archipelago. For the first time you will face opponents that, just like you, are upgrading cities, gathering resources and claiming buildings. There are three of them, but if you quickly take control of the strategic points of the map, such as cities and forts, they shouldn't be a great threat to you. The main mission objective is getting through an orcs' blockade. To do it as quickly as possible, you must complete one side quest that is the key to victory.
The quest will start automatically when you begin the second mission of Sylvan campaign. You will have to find a way to get through the blockade. You should hurry as there are 3 Stronghold towns on the map and they will be actively developing.
First send one hero to Sylvan Fort (M2,3). The battle won't be hard, there are only 6-7 weak opponents there. After winning you will be able to rebuild the fort. However, you will need proper resources: 1500 gold, 10 ore and 10 wood. All you need to do is explore the small island on which you currently are - you should easily gain the resources you need. On the same island there's the fort that will allow you to recruit additional troops as well. At the same time, as your second hero, enter the Teleport north from the island. The hero will be teleported slightly south. First thing you should do as him is claiming the Stronghold Fort (M2,5).
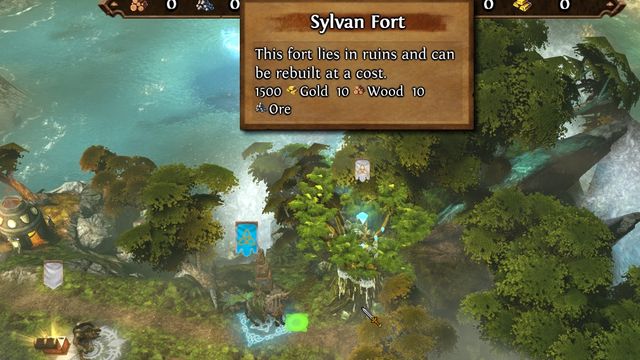 Claiming successive forts is the key to victory on this map.
At this point you should have enough forces to go to the island north and conquer your first city - Talalir (M2,4). The city itself isn't protected at all, but you must defeat few groups of enemies to get to it.
Once you conquer two forts and the city, you should go to the Undead Island (M2,6). There you will find another fort, this time belonging to Necropolis and protected much better. You will have to fight a pretty strong army of vampires. The last step of the preparations to war should be taking over the neutral Sylvan city located on the island in the middle of the map (M2,8). It is protected by a small garrison of Centaurs.
Once you have three forts and two towns, you can start the main mission objective, which is getting through the barricade. To do it, conquer one of the enemy cities - Mwanya (M2,10), Mchanga (M2,11) or Mweusi (M2,12). Once you do it, your attention should focus on strange obelisks scattered through the map. They should be your next target.
The process of activating all obelisks can be found in the walkthrough to Uncharted quest. Once you do it, another quest, Into the Maelstrom, will activate, allowing you to leave the map.
As reward for completing the quest you will receive +1 to Attack, +1 to Magic and gloves that add +2 to Might.
The quest will start when you will walk close and interact with the strange obelisk (M2,2) on one of the isles where you start. Your objective is to gather clues from all five constructions scattered through the whole map. The second obelisk can be found on the Undead Island (M2,6), more precisely on its southern part. It is protected by less than twenty spiders. The third obelisk can be found on one of the central islands (M2,7). Watch out, as it is guarded by the Behemoth, one of the strongest creatures in the game. Luckily, the creature is alone. Fourth obelisk can be found on the north of one of the islands in the center of the map (M2,9). The last one is located on the green island in the southeastern corner of the map (M2,13). It is guarded by a group of 5 strong Ancient Treants, so prepare yourself before going at them.
 Obelisks are more important than you think.
Once you click the last obelisk, the quest will end and you will receive the Sextant of the Sea Elves which adds +4 to sight radius and makes traveling in a ship 15% faster.
It will also automatically start the Into the Maelstrom main quest.
The quest will start automatically after gathering the information from five obelisks during the Uncharted quest. A mysterious whirl appeared on the north of the map (M2,14). You must swim into it. Once you do it, you will receive +1 to Morale and +1 to Luck/Destiny.
This will also end The Blockade main quest and make you leave the map.
The map above shows two locations that make the map for the third mission of the Sylvan campaign. It's the largest territory of all missions played as Wysloth. You will spend long time here. Luckily, you won't need to hurry as enemies will be developing slowly. Here you will complete few main and two side quests, conquer few cities, gather dozens of treasures and participate in hundreds of duels. Large part of the territory is blocked until you complete a specific main quest. The most common enemies met during this mission will be Dungeon armies.
Wysloth has been separated from rest of his crew and he landed alone on the coast. The location in which you currently are will have a weird influence on other heroes and you will have to find out why. In order to start the exploration you must take the near Gilthal city (M3,2). It is weakly protected and pretty well developed for the beginning of the mission.
Now you can start exploring near territories and claiming buildings. Once you feel strong enough, go to Lurthil Bush (M3,4). When you will notice thorns, the quest will end.
As reward you will receive 20000 experience points and +2 to Morale. At the same time the Scorching Therapy quest will start.
The quest will start automatically after you find one of the Lurthil Bushes. Your objective will be to burn all four bushes scattered through the whole map.
First of them, located east (M3,4), is protected by 30 Assassins and 10 Medusas. They shouldn't possess a great threat to you. Defeat them and burn the bush by clicking it. The second bush can be found south (M3,9). It is protected by 12 Sun Deers which can be quite a challenge.
The third bush is located on the west of the map (M3,10). However, you cannot burn it because it is protected by Sylrael. If you defeat him, the game will end because of failing the Innocent Blood quest. You must burn the bush from the western side. You can get there by first going north, then west, and then south. After burning it enemy hero will appear. A short conversation will trigger, but it will not end in combat.
The last bush is located in the northwestern part of the map (M3,11). When traveling to it, watch out for Danan who is traveling nearby and with whom you mustn't fight.
Once you burn all four bushes, you will receive 30000 experience points as reward. You will also regain control of all your heroes.
Danan and Sylrael have been separated from Wysloth. They have landed in different parts of the map and have been hypnotized. You must make them rejoin your party without hurting them. The best way to complete this quest is simply avoiding them and keeping as far as possible from the two. If you see them, you can even start running away. As reward for completing the quest you will receive 15 Master Hunters and 5 Blade Dancers.
South from the place where Wysloth landed (M3,3) you will meet a group of mercenaries who seek a powerful artifact. You should join the search and find it as first.
It is located on the island in southeastern part of the map. Sadly, to take the treasures you must open the gate. In order to do that you must pull three levers during a single turn. Two of them are located south from the island and the third one is on the island north (M3,6). You will need at least two heroes to complete this task. One of them should pull the lever north, the second should pull the two near the gate. Now you can swim into the bay.
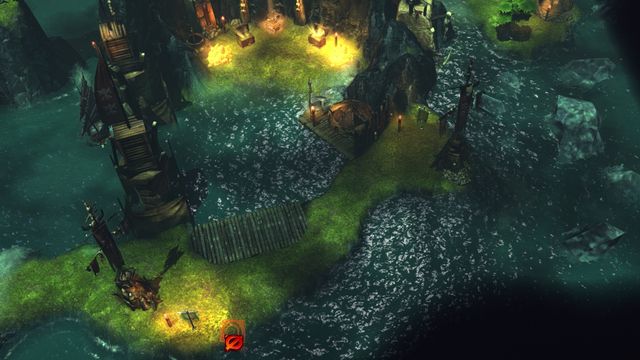 To get to the treasure, you must coordinate the efforts of at least two heroes.
You will find two chests there which will allow you to gain 2000 pieces of gold or 1000 experience points and the Dragon Heart which adds +8 to Magic. If you want, you can give it to the mercenaries met during the start of the mission (M3,3). You will receive 3000 experience points for that and you will receive a chance to add 6 Blade Masters to your army. The chest with 1500 pieces of gold or 1000 experience will become available as well.
The quest will start automatically after you notice one of three armies of pirates. You must get rid of all of them.
You should start with Drakon (M3,5). Don't fight with him at the start of the game as he has a rather strong army of 20 Crushers, 20 Centaurs and 60 Gnolls. The second army can be found not far north from Drakon, on the small island (M3,6). This time you will face 10 Centaurs and 5 Basilisk Riders. The last, third army can be found on the tiny island south (M3,7). Defeat 20 Gnolls and a single Cyclops and the quest will end.
You will receive 2500 pieces of gold and the Pirate Crossbow as reward. The crossbow adds +1 to Attack of all allied ranged fighting creatures
The quest will start automatically after completing the Scorching Therapy quest. You will have to find and defeat Ashbeth. Watch out, from this point enemy heroes will start walking from portals scattered through the whole map. If you will leave your cities unprotected, they might become a threat to them.
To get down to the underground you must find the proper portal. It is located in the southern part of the location (M3,13). A large amount of walking and unlocking portals awaits you. First go to the Arkath's Altar (M3,16) and take the key. Use it to open the Arkath's Seal (M3,15). Now go to Elrath's Altar (M3,18), take the key and walk through the north passage (M3,14). Keep going north and walk through the teleport. At the end of the road you will find Malassa's Altar (M3,19). Thanks to the collected key you will be able to open Malassa's Seal (M3,17).
Keep going until you will be stopped by Ashbeth. During the short conversation you will learn some interesting fact and you will have an opportunity to fight with enemy heroine. After winning the quest will end and you will receive 5000 gold and 35000 experience points.
The quest will start automatically after completing the Lure of the Darkness quest. You must simply find the passage that will lead you to the next map. Walk through one of the portals west from Moralin city (M3,20). It doesn't matter which portal you will choose. At the same time, the barricade (M3,21) in the middle of the map will disappear. You will find many whirls there that will teleport you. They aren't connected in any simple way, so you must keep trying using them until you get to where you want. It's not like you have anyone left to fight, so you don't need to hurry. You can keep clicking the same whirl in which you have appeared, you will be transported to different places.
In order to complete the map you must defeat one of two enemies - Shadris or Sorleth. The army of the first one consists of 30 Ancient Behemoths and the second one has 20 Cave Hydras and 10 Dark Hydras. It doesn't matter which enemy you choose, they both have similar strength.
After winning you will receive +5 to Attack and +5 to Morale.
The map above shows the final location of Sylvan campaign in which you will see the end of the story of the sea elf. This location is smaller than the previous map. However, since the beginning you will be facing 3 enemies. The beginning is of key importance. You must quickly claim territories and gather resources to improve your cities. There are many artifacts on the map. Try to use it to your advantage and in first order collect the ones that will be most useful for your hero. During this mission you will mostly face armies of Academy and Stronghold.
The quest will start automatically once you begin the fourth mission of Sylvan campaign. You must reach the Elemental Forge of Summer located on the north. You will have only 12 weeks to do it. It might seem to be enough time, but remember that on your way you will have to defeat many opponents.
Your first step should be claiming the neutral Sylvan city north from the starting location (M4,3). It's very weakly protected which means you can claim a base of operations for further journey at low price. Use the other heroes to claim as many mines and buildings as possible.
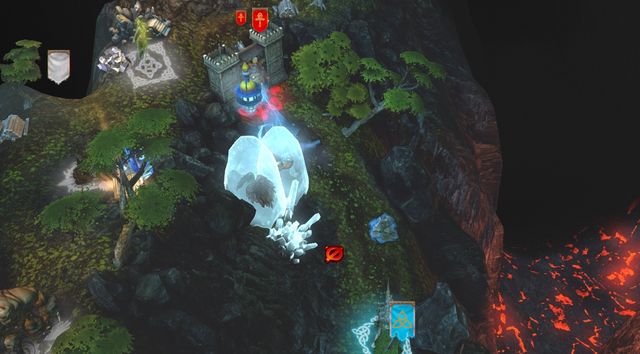 Part of the nearby creatures has been cursed into strange crystals.
Now move your main army through the western path to the city of Isaar (M4,4). Go east from there until you reach the bridge. A cutscene during which you discover a Forge should be triggered. Once you do it, the quest will end and you will receive 20000 experience points, +5 Luck/Destiny and Ranger's Cape which adds +12 Magic whenever you cast earth spells and which reduces Earth Magic damage by 30%.
The quest will start automatically after you find the Forge during The Thread of Dragonmist Island quest. You must defeat the Mage that is residing inside the Forge. You no longer have a time limit, so you can slowly claim new cities and build your army.
Once you feel strong enough, go near the Forge and defeat Saabira. She is commanding 30 Djinn Channelers, 10 Colossuses and 10 Simurghs, so you better prepare before the battle. Once you win, enter the forge. The quest will be completed and you will receive 50000 experience points, +10 Magic and +10 Spirit.
The quest will start automatically once you notice the territory of one of three opponents. You will have to choice one enemy to defeat. You can destroy the armies of the Wizard or Orcs or Animalmen.
If you decided to destroy the Wizard, you must conquer the Zawbaa city (M4,7). It is most strongly protected, but you won't have to fight other opponents.
Conquering the city of Animalmen, Gathalrath (M4,2) in first order seems like much safer choice. You should do it as quickly as possible, while the enemy still doesn't have strong units. Once you do it, you can take care of the second city - Isaar (M4,4).
Remember that claiming the cities is not enough, you must also defeat all enemy heroes. Once you do it, you will receive 20000 experience points, +5 Morale and +5 Attack.
The quest will start once you notice one of the crystals in which Animalmen are cursed. Your task will be to release them from the influence of mages. It's not a very complicated objective, you must simply defeat one group of enemies. The only trouble might be reaching the destination and fighting 15 Simurghs.
 In order to release part of the creatures from the influence of the mage you must defeat an army of Simurghs.
The destination is on a small arena southwest from Academy city (M4,5). Once you defeat the enemies, you will receive 10000 experience points and +10 to Defense.
The quest is the last part of the Sylvan's campaign story. You must decide whether you want to finish the ritual in the Forge or return to your father and sea elves.
If you decided to return to your father, go to the place where you started the adventure (M4,1). A ship will be waiting for you there. All you need to do is click on it. If you want to finish the ritual, click on the Forge. The choice will impact the story of the campaign, but the reward remains the same - 50000 experience points.
The map above shows the first mission of the Dungeon campaign. Your objective will be to defeat few armies of Sylvan and Haven. You start the adventure with one city and two heroes at your disposal. You don't need to rush, enemies aren't developing and you have plenty of time to improve the city and recruit new units. To efficiently complete this map you should first claim the whole underground and walk to the surface through the proper stairs.
This quest will start automatically after loading the first mission of Dungeon campaign. The number of objectives is impressive, but the truth is you will simply have to defeat three different enemies. To do that you will require an army of medium size. Start with exploring the underground, gathering resources and claiming buildings. Don't forget about upgrading your main city - Wanleth (M5,1) - as well.
Once you gather an army of at least 200-300 units, you can go at your first enemy - Sylvan Army (M5,2). In order to avoid fighting a strong garrison, go there through the underground, using the passage number 5. Meet Agathin there, the heroin who has an army of 100 Sprites, 75 Oak Dryads, 50 Master Hunters, 25 Druid Elders and 15 Blade Masters. Don't forget about taking the key to Altar of Sylanna.
In next order you should destroy three Armies of Ancient Treants (M5,5). They all consist of 3 units per army. However, each is also protected by Seal of Sylanna (M5,4) which you can remove with the key from Altar of Sylanna (M5,2).
The last objective in this mission is defeating the Haven hero - Edric (M5,8). He has a rather strong army of 100 Legionnaires, 35 Silverbacks, 70 Marksman, 15 Guardians and 15 Chaplains.
Once you defeat all three armies (actually, 5 armies) the quest will end and you will receive the Assassin's Blade which adds +2 to Might.
Similarly to the previous quest, this one will be active since the start of the map. Your first objective will be to meet with the leader of the nearby Blackfang Guild.
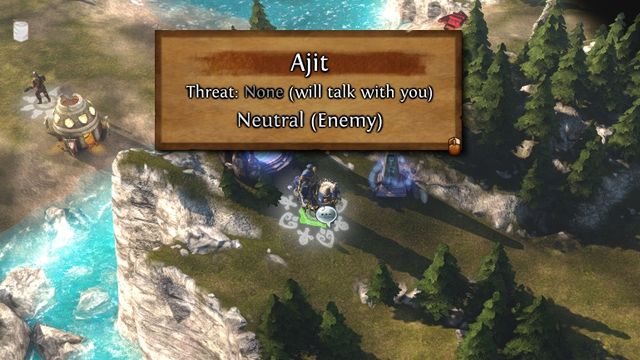 Don't forget about taking the key from Altar of Shalassa after the conversation with Ajit.
The leader is named Ajit and you will find him at the eastern coast of the river (M5,3). To get there it is best to use the underground passage number 6. Talk with him and the first mission objective will be completed. Now you must plunder three mines of the wizards.
In first order take the key from Altar of Shalassa (M5,3). This will allow you to open Seal of Shalassa (M5,6). Now you can go to the Wizards' Mine (M5,7), defeat all three armies and plunder the mines. As reward you will receive the Assassin's Mask.
The map above shows two locations that make the second mission of Dungeon campaign. Once more you will have one city in the underground and two heroes at the start of the mission. First, focus on claiming the whole lower level and walk to the surface once you have good enough army. Sadly, this time you should hurry, as two Academy and two Haven cities will be your opponents. They are not very difficult opponents, but if you waste too much time they might interrupt you in completing the Gossipmonger quest.
The quest will start automatically after you begin playing on the second map of Dungeon campaign. Your main objective is conquering two enemy forts - Academy and Haven. Before going to the surface, explore the underground, claim mines and train a proper army.
To conquer Haven Fort (M6,3) you will have to pass a long road. While underground, go to the entrance number 2, and then go through the surface to the entrance number 3. Now go north until you reach passage number 4. Once you're on the surface, all that's left is to go west, to the fort. The battle shouldn't be hard, even at the start of the adventure you should be able to deal with the opponents.
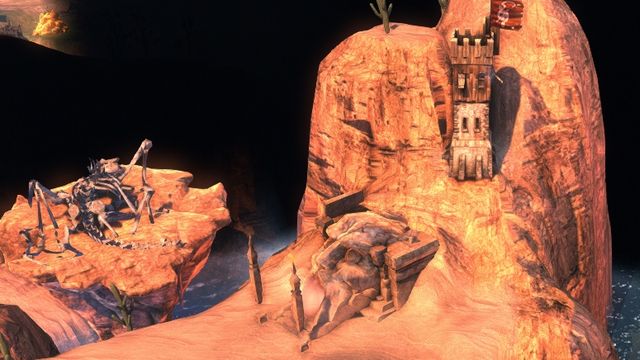 To take the fort you must efficiently travel between underground and surface.
Academy Fort (M6,5) is located in the southeastern part of the map. To reach it you must travel a long way. While in the city, first go to the entrance number 2 and, while on the surface, to the passage number 7. Walk through the underground to the stairs number 8. While again on the surface, go west. After a while you will reach the Academy fort. Similarly to the previous one, this place isn't strongly protected.
Once you destroy the two forts, the quest will end and you will receive 2500 experience points, 10 Dragonblood Crystals and 10 Starsilver.
The quest will start automatically after completing the Border Incident quest. Your objective is very simple but it will require you to travel a long distance. You must visit four merchants located in different parts of the map.
You must visit Western Trading Point (M6,6), Southern Trading Point (M6,7), Northern Trading Point (M6,8) and Eastern Trading Point (M6,9). Once you do it, you will receive 5000 experience points and +2 to Morale.
The only objective of this quest is avoiding battle with enemy Academy hero - Johari. The easiest way to complete this quest is by quickly completing The Last Crusade quest, before Johari will reach to you.
After visiting the last merchant, the door leading to Crusader Commandery becomes open. All that you must do now is go there and defeat the forces stationed there. Remember that the attack can be performed only as Malwen heroine. In the commandery you will find 100 Sentinels, 60 Legionnaires, 50 Crossbowmen, 30 Dire Wolves and 15 Guardians.
As reward for winning the battle you will receive 15000 experience points and +2 to Attack.
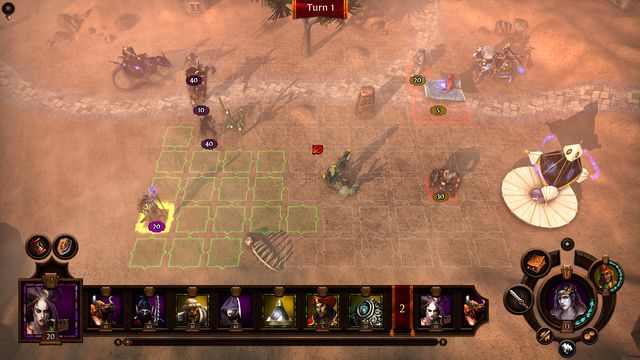 First eliminate the Wizards, then Brutes, and finally Golems.
After a short cutscene the battle with Academy hero will start. You will have an automatically allocated army. The fight shouldn't be hard. What's important, don't use the automatic battle mode. Once you win, the mission will end.
The map above shows two locations that make the third mission of Dungeon campaign. This time you will face opponents of the same faction as yours. Since the enemies won't be idling, you should hurry and quickly claim as big territory as possible. There are many Altars and Seals on the map which you must unlock. For the mission to go efficiently, complete the quests in the order shown below. Thanks to that, you will avoid unnecessary returns to once visited places.
It's the first quest you must complete in this mission. It's also the shortest and simplest one. You must conquer your first city and base of operations. From the spot where you start the mission (M7,1) you must simply walk few steps west and claim the completely unprotected Tarshal (M7,2). The quest will be completed and you will receive 2000 experience points and 5000 pieces of gold. At the same time three new quests will start.
The quest will start automatically after you claim your first city (M7,2). Your main objective will be to find and defeat Banshee.
She can be found in the upper level of the location. To get to the Altar of Despair, first you must collect the key from Altar of Shalassa (M7,3) and then you must go to the exit from the underground number 1. Then go through the teleport and use the key (M7,5). Now you have a free path to the altar. When you click it, a battle with 24 Banshee will start. If the sequence doesn't want to start, try attacking the building as Malwen.
 When traveling through the game world, keep attention to altars, they are the key to completing all quests.
After a won battle, the quest will end and you will receive 10000 experience points and Vial of Poison which reduces enemy Health by 4.
The quest will start automatically after you claim your first city (M7,2). You will have to go as your hero Vayaron to the gates of the Invisible Library (7,14).
The Library is located in the northeastern part of the underground, but you can't go there directly. First you must obtain the key to Seal of Shalassa (M7,13). It is located on the surface, in the Altar of Shalassa (M7,6). To get there, you must walk through another barrier. The walkthrough for getting there can be found in the description of Tears of Despair quest.
Once you have the key, go to the Invisible Library (M7,14) and click on it. Remember that you must do it as Vayaron. The quest will be completed and you will receive 5000 experience points and +3 to Attack.
The quest will start automatically after you claim your first city (M7,2). You will have to take over the Prison. It is best to do it after completing the previously described two quests - Tears of Despair and Best Served Cold. You will have access to few passages. The only remaining thing that you must get is Seal of Ylath (M7,16). It can be found in the Altar of Ylath (M7,15).
 Remember about rebuilding the Prison as a Fort once you destroy it.
The Prison (M7,17) is located behind the barrier. You will have to face a medium-sized Dungeon army. The last objective will be to rebuild the destroyed stronghold. Once you do it, the quest will end and you will receive 7000 experience points and the Dragon Scale Armour which adds +4 to Might and Defense.
The quest will start automatically after you free Sylsai from Prison (M7,17). All you need to do is unlock the Seal of Elrath (M7,10). You can do it with the key taken from the Altar of Elrath (M7,9). As a reward you will receive 5000 experience points and +5 to Morale.
During this quest you must destroy all enemies on the map. In order for the quest to be completed you must destroy all enemy heroes and conquer Lethygg (M7,4), Bethlad (M7,7), Malaya (M7,19) and Eye of Malassa (M7,18).
As a reward you will receive 10000 experience points and +5 to Defense.
The map above shows two levels of the last mission of Dungeon campaign. You will start the adventure with a single city. You should start by taking over the second city, which is also located underground. Go to the surface only after you explore the whole lower level, claim buildings and develop your forces enough. You will face three enemies. The good news is, they don't have cities, only heroes. Despite that, don't wait too long with completing the mission, otherwise enemies might claim large areas of the upper level.
The quest will start automatically when the mission starts. Your objective is to find the exit from the Fang Bay. The beginning should be similar as during all other Dungeon missions. First focus on exploring the underground, gaining new buildings and resources, and on expanding your army. Once you feel strong enough, you can go to the surface. You don't need to rush yourself too much, the enemies aren't very active.
In order to walk through the barrier you must find three obelisks.Once you gather large enough army, go near the Barrier (M8,5). Listen to the story and your quest will be updated. In order to remove the barrier you must visit three obelisks (M8,6), (M8,7), (M8,8). They aren't guarded by anyone, so it shouldn't be hard. However, watch out for the three enemy heroes that can be found nearby.
The quest will end when you will walk through the barrier. As reward, you will receive 1000 experience points, 25 Sea Elven Pirates and +1 to Attack.
The quest will start automatically after completing the Fang Bay. Your objective will be visiting three Thief's Hideouts and three Trading Points.
To learn the exact location of all six points, check the provided map. All Trading Points are marked with number (M8,12). All hideouts are marked with number (M8,11). After visiting all locations you will receive reward in the form of +1 to Morale and +1 to Luck/Destiny.
During the next turn two enemy heroes will appear on the map and you will receive a new quest to complete.
The quest will start automatically after you complete the Broken Alliance quest. In the northeastern part of the location enemy Necropolis hero, Merikh, has appeared (M8,14). You must simply defeat him. He has an army of 14 Spectral Dragons, 14 Grim Reapers, 150 Archliches, 138 Plague Lamasu and 49 Vampire Lords. As reward for winning the battle you will receive +1 to Attack and +1 to Defense.
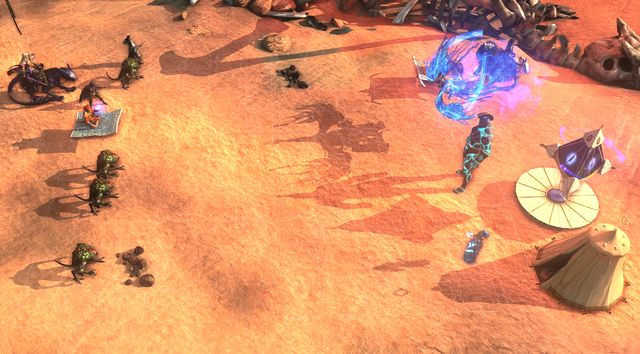 The final three battles will be very hard, so make sure that you have a powerful enough army.
The quest will start automatically after you complete the Broken Alliance quest. Enemy Academy heroin, Gloria (M8,13), appeared in the eastern part of the map. You must defeat her. Gloria has an army of 17 Simurghs, 18 Titans, 160 Apprentices and 118 Djinn Channelers. You will receive +1 Magic and +1 Spirit for winning the battle.
The quest will start automatically after completing the two previously described quests - The Day the Law Died and Infernal Affairs. Your objective is to defeat Wilhelm. He can be found in the middle of the map (M8,15). Once you get close, you will be attacked by Malwen whose army consists of 45 Minotaur Guards, 19 Black Dragons, 618 Shades, 18 Dark Hydras, 642 Trackers and 134 Medusa Sorceresses. After winning the battle the quest and the whole Dungeon campaign will end.
The map above shows the first mission of Haven campaign, during which you will learn the story of prince Tomas. It's one of the most interesting and most interactive maps available in Might & Magic Heroes VII. This mission is perfect for beginning players who want to learn about the game mechanics. Remember about adding all creatures you encounter to your army. You don't need to hurry too much, you will have plenty of time for completing most of the quests. During the game you will face only one opponent who, except for increasing the amount of units in his city, will not develop.
The quest will be active since the start of the mission. Your objective is simple - you must clear the road ahead of you. To do it, recruit new units, defeat the enemies and gather resources. Keep going ahead of you.
The first problem you will face will be a broken bridge (M9,2) which will make it impossible to go any further. In order to fix it you will need 500 pieces of gold, 4 ore and 8 wood. All resources should be available in the village. You can also take some time now to complete the Justice for All side quest.
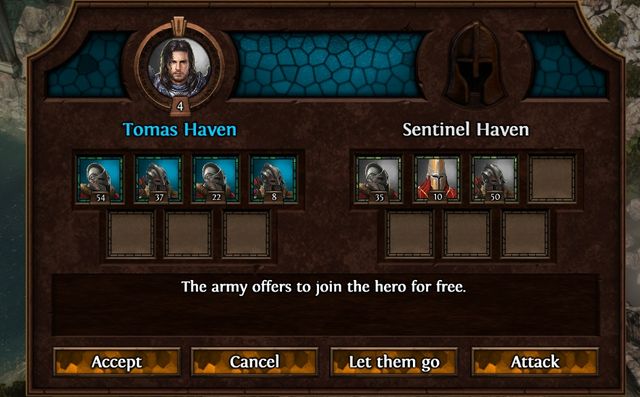 Adding new units to your army is the key to victory in the beginning phase of the mission.
Quickly after you will pass the bridge, you will be attacked by enemy Haven hero. He has an army of 5 Griffins, 15 Legionnaires and 10 Marksmen. If you will play the battle wisely, keeping your ranged units at the back and decline on charging on enemy, you shouldn't have any trouble winning. After the battle, Tomas will walk to the observation tower and uncover the whole valley.
Your next objective is to conquer the enemy city - Warhagen (M9,3). You should hurry because the defense of the city improves with each turn. If you will waste too much time, you won't be able to win the battle nor replenish your troops. Once you win, a hero will arrive at midnight and he will declare war with you in the name of his kingdom. Important! Sometimes the game doesn't want to move to the next part of the quest after conquering the city. The solution is saving and reloading the game.
After the conversation, you will have 18 days to prepare proper defense. First focus on claiming mines and building constructions that will allow you to recruit units. You can also complete the Starsilver Lining and The Wolf King side quests. Remember about being in the city once 18 days pass, this will give you bigger chances for victory. Keep recruiting new units and buildings until the battle starts.
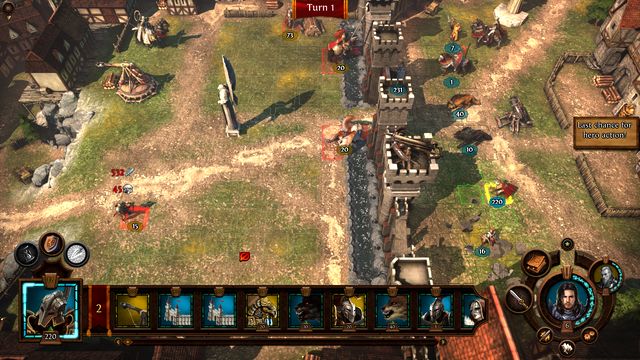 When the enemy hero attacks your city, remember to not leave the walls and to eliminate enemy shooters in first order.
From the appearing of the enemy hero to the attack on your city around 4 turns will pass. You can use that time to further strengthen your defenses. Enemy army consists of 20 Imperial Griffins, 20 Cuirassiers, 80 Legionnaires and 70 Marksmen. Remember to avoid walking behind your walls and first focus on killing the Marksmen. If you use that strategy, the duel should be easy to win. As reward for completing the quest you will receive +1 to Luck/Destiny and Guardian's Spaulders.
The quest will start when you will enter the small village near the broken bridge (M9,2). Your objective is to find and defeat a group of bandits. The group is located on a small hill southeast from the village. You will have 30 Gnolls and 10 Brutes to defeat. If you have recruited all the units on your way, the opponents shouldn't be troublesome in defeating. You will receive +2 to Morale as reward for completing the quest.
The quest will start after you conquer the Warhagen city (M9,3). Your objective is to claim the starsilver mine on the south (M9,4). In order to get there you must walk through the underground. Go to the passage number 1 located south from the city. Through the bottom walk to the passage number 2 and, after reaching the surface, claim the mine which is not protected by anyone. For completing the quest you will receive 5 pieces of starsilver.
The quest will activate more or less during the 7-10 day of waiting for enemy attack in the Falcon Road quest. Your objective is to find and defeat the Wolf King. You will find him south from the city (M9,5). It is also possible that he will appear in a different place on the map. When traveling through the world map, look for a black wolf and avoid fighting the brown ones. The army of the King consists of 10 Silverbacks and 30 Dire Wolves. For winning the duel you will receive 10 Silverbacks whom will join your army.
The map above shows two locations that make the second mission of Haven campaign. You will be still controlling the young prince Tomas who must prove his worthiness to the kingdom. You start the mission with a city and two heroes. It's another example of a well designed map and surprising story. You will have few main and side quests to complete here. It is important to prepare for each of them and gather large army as at some points of the game you will be cut from your city.
In order to prove your usefulness, you must claim three buildings that generate resources near your starting city - the Brightsgate (M10,1). The location of the buildings can be seen on the map, each of them was marked with the same point (M10,2).
All buildings are protected by enemy forces but you shouldn't have trouble dealing with them. If you do have some trouble, try to move all your forces from one hero to another and create one, large army. After claiming all three buildings the quest will end and you will receive +2 to Might and the Guardian's Gauntlets which add +3 damage per each character level and +2 to all allied creatures' Health.
The quest will start automatically after completing the First Things First quest. Your objective is to appoint Ymoril as the governor of the Brightsgate (M10,1). In order to do that, enter the city as her and move her portrait to the window in the upper left corner of the townscreen. You will receive +2 Morale as reward for completing this quest.
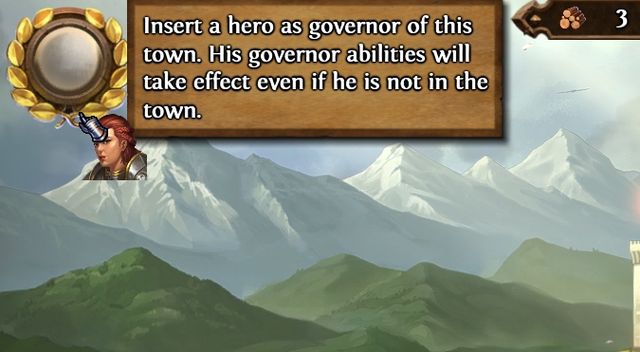 In order to appoint Ymoril as the governor of the city, move her portrait to the window in the upper left corner.
The quest will start after you appoint Ymoril as the governor of the city. As the quest name suggests, your objective will be to build the Convent of Elrath in Brightsgate. It's a second level building, so it should take you not more than two or three turns to complete the quest. As reward you will receive 200 experience points.
The quest will start after you claim three mines during the First Things First quest. Now your objective is to conquer the two nearby forts. First of them - the Southstar - is located east from your city (M10,3). It is protected by a medium sized group of opponents who shouldn't be difficult to defeat. If you have trouble with them, go back to your city and add more units to your army. Remember that after conquering the fort you must rebuild it. It will cost you 1500 gold, 10 wood and 10 ore.
The second fort is northeast from your city (M10,4) and it is guarded by a strong Necropolis army. Defeat the enemy, take the fort and rebuild it.
Once you have both forts, both of your heroes will be close to the Garrison (M10,5). Now you must take all units from Ymoril. In order to do that, select one hero, click on the second one and then move all stacks from Ymoril to Tomas. After a short conversation, Ymoril will disappear and you will receive the Plainwatch side quest.
In order to continue the quest you must finish the Elemental Disturbance quest. Once you do it, another objective will appear - a battle with demons which is supposed to lead to escaping from Gloria's trap. First go east, then north. After a while you will face a strong enemy army that consists of 150 Juggernauts and 60 Lilim. If you win the battle, you will gain +1 to Attack, +1 to Luck/Destiny and 2000 experience points.
After completing the quest, a battle between Gloria and Masfar will be triggered automatically. You will control Masfar. Remember to use the walls to your advantage. At the same time, don't be afraid to attack the opponent. The Lilim that attack from distance will quickly destroy large part of your forces. Once you win, the whole mission will end.
The quest will start after you move all your forces from Ymoril. Your objective will be to rebuild a ruined fort. Plainwatch is located on the eastern shore of the river (M10,6). In order to rebuild it you will need 1500 gold, 10 ore and 10 wood.
After rebuilding the fort, two Academy heroes will run towards you (under the condition that you haven't talked with them previously). A short conversation will occur and you will receive the Elemental Disturbance quest. You will receive 200 experience points for rebuilding the fort.
The quest will start after talking to two Academy heroes (M10,7). You will have to explore the nearby lands and undergrounds. In first order go to the passage number 1, then move southeast until you reach the Fire Gate (M10,8).
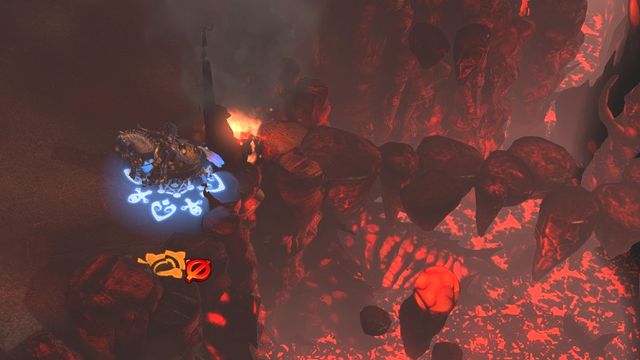 After obtaining the Shards of Fire, talk with Gloria only if you have a really strong army.
After hearing the narrator, go back to Masfar (M10,7), one of the mages, who can be found now near the gate leading to Academy fort. After the conversation you must go to Gloria, another Academy hero, who is standing east from Plainwatch (M10,6). She will burn part of the forest, allowing you to use the passage number 2. Now go south and take the Shards of Fire. Go again to the Fire Gate (M10,8) and talk with Gloria. Important! Walk through the pass only if you have a very strong army, otherwise gather all troops before talking with Gloria. Once Tomas walks through the gate, the quest will end and you will receive 500 experience points.
The quest will start when Tomas will pass through the Fire Gate (M10,8). The mission objective is to not let Gloria get through the pass (M10,5). As Tomas, you must quickly walk to the army of demons and defeat it.
The above map presents the third mission of the Haven campaign. Now, you are up for the one of the most interesting missions, and one of the most complicated ones, at the same time. The entire mission revolves around defending your own main city and the key heroes, in the face of the overwhelming enemy forces. You need to be in a hurry, through and through and plan well on your steps. Simultaneously, you will have to take several actions, learn therefore their objectives and whereabouts of locations, on the map, to be able to manage your time effectively. Your main opponents in this mission are the other armies of the Haven .
This mission activates at the moment of beginning of the third mission in the Haven campaign and it boils down to defending your heroes - Thomas and Ymoril, as well as your main city of Hammer Fall. After you establish the Orcish Camp during the Divided We Fall mission and seize control over the hero of the Stronghold - Bilash, you will have to defend him also.
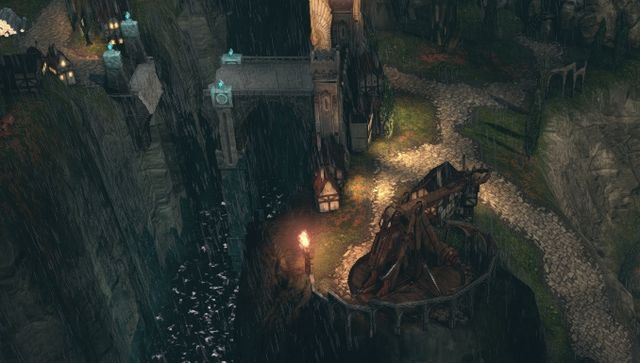 Use catapults to slow the enemy down.
To defend all, and to prevent your main city from being captured, you need to slow down the enemy armies as much as you can. Konrad, within the Last Man Standing mission, if he is appropriately managed, can slow down the enemy by 7 turns. To win more time, destroy all of the bridges that the enemy will be crossing and use catapults that additionally cause avalanches that block their route. Each such obstacle wins you an additional turn. Also, remember to seize and strengthen two additional cities - New Market (M11,6) and the Old City (M11,13).
Your mission is to keep Konrad, one of your heroes, alive for as long as possible. You will be attacked by waves of enemies and you gain 100 Blade Masters.
You stand no chance of withstanding the last wave, but even in spite of a failure, the quest will be completed and you receive 500 experience points.
The objective is to destroy six bridges that lead up to your capital city - Hammer Fall (M11,1). With Tomas, go West towards the Avalanche (M11,2) and clear the passage. This is going to cost you 500 gold and one turn of waiting. Meanwhile, as Ymoril, go towards the First Shantiri Bridge (M11,3) and destroy it. As soon as you cross Avalanche two additional quests start - Divided We Fall and Soul Quest.
As Ymoril destroy the second Shantiri Bridge (M11,5). Go up ahead a little and destroy the third Shantiri Bridge (M11,8). Remember, though that you should not cross it, before you destroy it. As for the fourth bridge (M11,9), you should destroy it as Thomas. Now, as Ymoril, you only have to destroy the two remaining bridges - the fifth (M11,11) and the sixth (M11,12). Just remember that you should be staying within city walls, while destroying the last one. For completing this quest, you will receive +2 to Defense and +2 to Soul.
The quest starts at the moment, at which Thomas crosses Avalanche (M11,2). Your objective here is to visit there locations around the map and gather your forces before the enemy attack.
First of all, go to Tomas to Murazel's Tower of Light (M11,4) and talk to the Archangel. This will complete the first objective of the quest.
Then, you need to go East, where you can set up the Orcish Camp (M11,14). All you need to do is approach the spot. After you make the camp for your party, an additional hero will join you and you obtain two additional den.
The last location you should visit is the elite dwelling Knights of Evergrey (M11,17). As soon as you get there, you can obtain a group of around 10 Blade Masters for your party. After you visit all three places, you complete the quest and you receive 500 experience points.
This quest starts at the moment at which Thomas crosses Avalanche (M11,2). You need to find three obelisks scattered around the map. The first one is to the North of New Market (M11,7). It is being defended by a small group of golems. The second one is in the North-Eastern corner of the map (M11,15) and it is defended by a similar group of golems. The last one is a bit Southwards (M11,16) and t is not being defended.
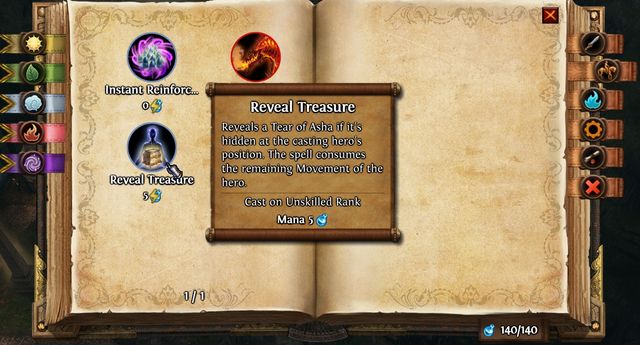
To collect the Tear, you need to use the Reveal Treasure spell in the appropriate spot.
As soon as you find all three obelisks, you need to find the Tear of Asha. For this, go East to the last one of the obelisks, around a small rubble (M11,18). Once you get there, you need to use the Reveal Treasure spell, thanks to which you can collect the Tear. Remember that this must be done by Tomas. Now you need to return to Hammer Fall and meet with Ella at the Ancient Spirit Gate (M11,19). This raises a barrier around the city and completes this quest. You will be rewarded with 500 experience points.
From the Ancient Spirit Gate, you can take along a group of 500 Shantiri Titans, which you will use in a fight with the enemy.
This quest starts as soon as you cross the Fourth Shantiri Bridge (M11,9). The three nearby ballistas seized by the enemy army and they are now barraging your positions. You need to eliminate them all. To learn their exact positions, see the map that has been prepared by us. All three groups of enemies have been marked with the same number (M11,10). The armies include around 20 Imperial Griffins each. For completing this quest, you receive 500 experience points.
This quest starts after you complete Soul Quest and the objective is to defeat three enemy armies ravaging your lands - Kryzstoff, Mateus and Serguei.
 Fights with the enemy heroes will be the most interesting in the entire game.
The best solution is to defend in one of the two additional cities - Old City or New Market. You will then stand a high chance of winning. Remember that from the Ancient Spirit Gate (M11,19), you can take a group of 500 Shantiri Titans. Together with your army, they should be prepared even for a direct clash. For completing this quest, you receive 500 experience points.
The above map presents the fourth and the last mission of the Haven campaign. Your main objective is to destroy the enemy cities of Haven. Right from the outset, you will own three cities , which makes your task easier. There only are two main objectives to complete here, which makes the quest resemble a regular skirmish, most of all.
You receive this quest right after you start the last mission in the Haven campaign. You need to talk to three allied heroes - Ella, Bilashi and Ymoril. You can find them to the North, South and West of your current location (M12,1). After you talk to Ella, there appear four chests of artifacts to the right of her.
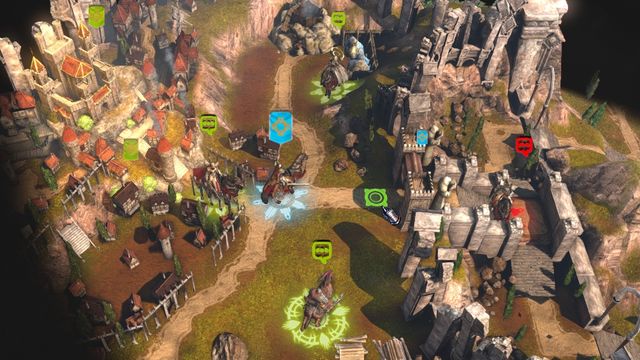 The first phase of the mission is to talk to all the heroes in the area.
As soon as you have visited all three heroes, you need to send an answer to the enemy hero in the East. After the conversation, the quest will be completed and you receive a reward - Guardian's Breastplate, which provides +4 to Defense and decreases damage from Light magic by 30%.
This quest starts at the moment, at which you start Before the Storm. Your task is easy. You need to defeat all of your opponents and, at the same time, you cannot lose, at any point of the game, any of your cities.
At first, you are going to defend three cities: Hammer Fall (M12,2), Black Forge (M12,3) and Orc Camp (M12,4). All in all, you can issue orders to four heroes. Use this to your advantage and seize as many mines and resources as possible. Also, remember about dens, both the basic and the elite ones. There are quite a few of them around and they can considerably strengthen your army.
As soon as your army gets strong enough, seize Cliff Danaron (M12,6). The city is cut off from the rest of the enemy cities and it is quite poorly defended. Also, remember that on this map, you can obtain the Tear of Asha, which raises your chances of succeeding considerably. For this, visit all of the Obelisks (M12,5), go where the treasure is hidden (M12,10) and use the spell Reveal Treasure. By your capital, build a special building and you can set out against your enemies. There are two more cities to destroy - Oak Moor (M12,8) and Stream of White Sands(M12,9).
For completing this quest, you receive 50 000 experience points, +10 to Attack and +50 to Morale. This also ends the Haven campaign.
The above map presents the first mission in the Necropolis campaign. Time is short and you need to plan precisely on each of your steps. With each turn, the enemy heroes will be approaching your capital. To stop them, you need to destroy bridges that slow the enemy down. At the same time, this quest is short and you should be able to complete it within a dozen-or-so turns, at most.
This quest becomes active at the moment, at which you start the first quest in Necropolis campaign. Its objective is to defend your starting city - Al-Betyl (M13,1). For this, you need to destroy bridges, which will win you some time. You need to slow enemy down enough to complete The Secret Harbor.
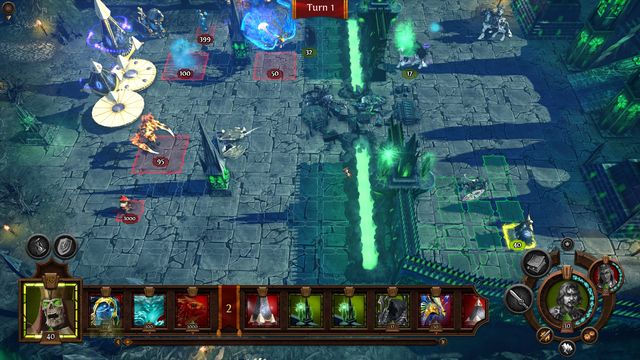 You cannot, or even must not win the final battle, therefore you do not need to try too hard.
The attack is launched even if the enemies have not managed to reach you before you completed the Secret Harbor quest. You will face the army of 50 Simurghs, 100 Fire elementals, 100 Water elementals, 400 Medium Genies and 1000 Cabir Masters.
You cannot win this battle, so you do not even need to try. The end of the battle marks the end of the first quest in the Necropolis campaign.
This quest becomes active at the beginning of the mission. You need to activate the Watchtower, which will help you defend the city. It is several steps Northwards of the city (M13,2). All you need to do is approach it and click on it.
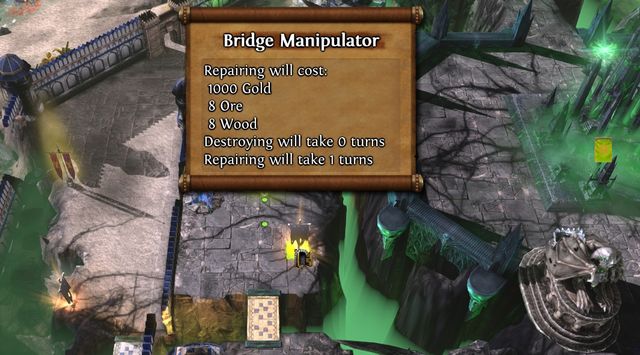 Destroying bridges wins you more time.
You will be rewarded with 50 000 experience points. Additionally, the tower destroys the path to your city, which postpones the attack. Also, you have the another character at your disposal.
The mission starts after you complete No Turning Back. You will receive another hero - Anastasya. With her help, you will have to find the underground bay.
Go North, where you find hero Zenda, who you need to talk to. After the conversation, she halts one of the Academy armies and you will be able to proceed with your quest. After a while, you encounter an enemy hero - Natalu, whom you will have to defeat. Even if you decide to solve the battle automatically, he should pose no threat.
Be on your way and you soon meet Adar-Malik. After the conversation, you will gain entrance to the underground. While there, you need to find the ship. Go up and then right. There, you can choose one of two paths to the waterfront. The upper path is shorter but you will have to fight a more difficult battle there. The lower one is longer and the enemies are much weaker. After you defeat the enemy, you can pass without being bothered to the ship(M13,3). After a short conversation, you will complete the mission and receive 15 Luck/Destiny and +5 to Defense. Automatically, you start a battle with the Academy, for the control over the city.
The above map presents the second mission in the Necropolis campaign. Your main mission is to restore your armies after the battle that you have lost in the previous mission. At first, you do not have any resources. All you have is the city and some tiny army. You need to move around the map carefully, especially at the beginning. Your enemy are the rest of the Necropolis cities and they will also be trying to expand their control. In this mission, there are several main and side quests.
The objective is to keep your main heroes alive. At first, you only need to worry about Zenda. After you complete Zenda's Doubts, you will also gain access to Ludmilla. After you gain control over Adar-Malik (M14,6), you will also have to take care of him. Simply put, you cannot lose a battle with any of the heroes.
You receive this quest right after you start the mission. Your main objective is to reach Namtaru Temple. Go to passage 1. There, you will have to follow a short path to Namtaru Temple (M14,2). As soon as you get there, you witness a spider snatching something from one of the altars. Do not follow, because this will be in vein. First, you need to "deactivate" three Obelisks in three different spots of the cave. They have been marked on the above map with one number (M14,3).
 To immobilize the spider, you need to "deactivate" all three obelisks.
As soon as you get to all three obelisks, passages between them collapse and you receive 20 Ebon Spiders for your party and you can collect a Vial of Venom from one of the altars.
This will complete the quest and you will be rewarded with 3000 experience points, and 3 Luck/Fate. You now need to leave the cave. Doing this starts a short cutscene and three more quests appear in your log.
This mission starts after you complete Zenda's Doubts. Your mission is to gather six refugee groups scattered all around the map. If you want to learn their exact whereabouts, use the map provided by us. All of the groups have been marked as (M14,5). For completing this quest you receive 1100 experience points.
This mission starts after you complete Zenda's Doubts. The objective is simple - you need to build the Capitol in Nar-Heresh (M14,1), which is the last level of the main municipal building. For completing this quest, you receive 1000 experience points.
This mission starts after you complete Zenda's Doubts. You need to rebuild the might of your city by seizing all of the mines on the map. In total, there are 16 of them and the "mine" category encompasses all of the buildings that generate resources, so this also means, e.g. sawmills. To learn the whereabouts of all the mines, use the map provided by us. Buildings that generate resources have been marked as (M14,4).
It is impossible to seize some of the buildings. In some cases, you will first need to seize a nearby fort or city. For completing this quest, you receive 1300 experience points.
This mission starts after you discover, and interact with, one of three obelisks on the world map. What you need to do is find all of the fragments of the treasure map.
The first obelisk is in the South-Western part of the map (M14,7). It is being defended by a group of weak opponents. The second treasure is unguarded and it is in the East (M14,9). The last obelisk (M14,11) is also unguarded and it is in the North-Eastern corner of the map.
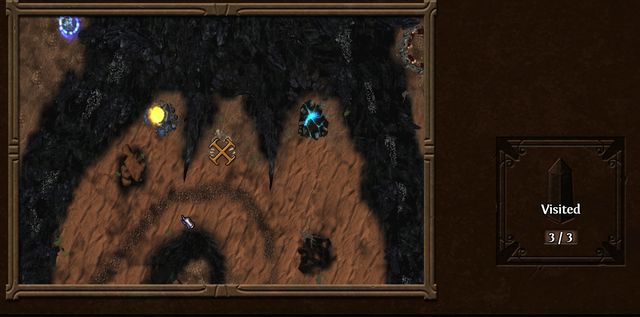 To collect the Tear of Asha, you need to stand precisely in the spot, where the treasure has been hidden.
As soon as you collect all three fragments of the map, you receive 200 experience points and you can collect the treasure. It is between two mines, more or less in the center of the map (M14,12). Walk into the marked spot and use Reveal Treasure spell. You receive the Tear of Asha, thanks to which you can build the special building in your capital.
This mission starts at the moment at which your hero discovers a rebel city on the map. Your mission is simple - you need to defeat two opponents and both seize their city, and obliterate all of the armies. The cities in question are Enlil-Zeri (M14,8) and Nabu-Shuma (M14,10).
The above map presents two locations that comprise the area of the third mission in the Necropolis campaign. The first one is a maze of a kind, which consists of islets and canals and where it is easy to get lost. Additionally, there are 5 Sylvan cities as your opponents. Not only do you need to hurry to prevent them from gaining too much power, but you also need to gain some new territories. There is only one long mission that you need to complete.
This mission becomes active the moment you start the third mission in the Necropolis campaign. Your main task is to find the portal that will take you to the Treasure. First off, you need to travel to the North-West, where you find Spirit Gate of Myr-Gathal (M15,2). Unfortunately, the portal entrance is behind three barriers. To bring them down, you need to find the appropriate altars.
In the South-Eastern part of the map, there is the Altar of Ylath (M15,5). You only need to click on it, collect the key and unlock the Sigil of Ylath. On your path to the altar, you will have to pass by the city of Adangath (M15,4). You can either avoid the battle or try to seize it. The latter is much more beneficial, but you need to consider whether your army is strong enough.
The second altar - of Elrath - is in the North-Eastern part of the map (M15,7). It is not being guarded in any way and you should have little problems reaching it. The Altar of Sylanna, which is the last one, is in the North-Western part of the map (M15,11). Now you can simply cross all of the barriers and use the portal.
In the other location, you first need to rebuild the bridge, which is going to cost you 500 gold, 3 ore and 3 wood, and lasts 1 turn. Now you need to get inside the stronghold walls. To do this, go to one of the portals which are located to the North and to the South. As soon as you get there, you need to use the Solar Sigil (M15,13). Activate the sigil as one of the heroes and cross the barrier as another one. You can now collect the Deadwood Staff from the Treasure(M15,14).
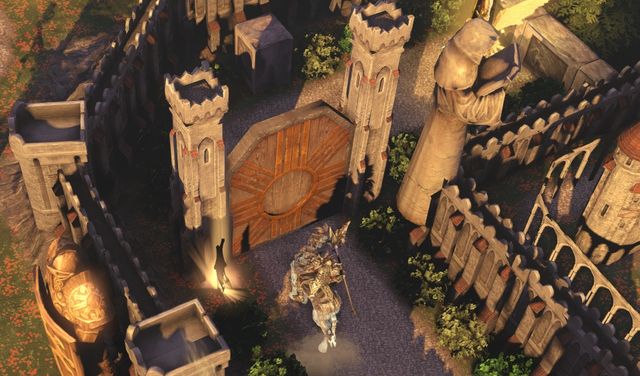 You can destroy the wooden door by clicking on the banner in front of it.
After you collect the staff, you need to escape this location as Ludmilla. To do this, go to the small banner to the South-East of the Treasure and click on it. This destroys the wooden door. You need to do the same in the case of the other door. Now, you are going to fight two battles with quite weak opponents.
Out of the Southern portal, a very dangerous opponent emerges. It is best to escape from here, before he reaches you. As soon as you reach portal 4, you complete the quest and you receive 4000 experience points.
The above map presents the fourth mission of the Necropolis campaign. As a matter of fact, there is only one simple mission that you have to complete here, so in this case it resembles a regular battle against the computer AI. At the beginning, you only have one city and one hero, where you have four enemies. It is on your swiftness and speed of action that depends whether you manage to build a mighty army and conquer all. Your opponents are heroes of Academy and of Haven.
This mission becomes active the moment you start the fourth Necropolis mission. The main goal here is to seize the enemy city of Al-Jamasht (M16,12). First of all, expand your city and harvest nearby resources. Then, go West and defeat one Simurgh (M16,2). This will open your way deeper into the map. Go North-East, where you can seize mines and a fort, among others.
 After you destroy Al-Jamasht, the city disappears.
You now have the outpost for your next expeditions. The entire mission should consist of seizing more buildings, resources and cities. Ultimately, you reach the North-Western part of the map, where you find Al-Jamasht. For destroying it, you will be rewarded with Vein's Skull.
This mission starts after you seize the city of Al-Jamasht (M16,12) and complete Skull of Sorrows. As Adar-Malik, you need to reach the South-Eastern end of the map (M16,13). There you meet Zenda and the mission ends in a success.
The above map presents the last, fifth, mission of the Necropolis campaign. You return to the location where you have played the second mission, but the surroundings are a bit different, this time. Also, a big area to the North has been unlocked. Your main goal is to restore your faction to its former power. To do this, you will have to complete several missions, the main goal of which is to walk around and seize more and more locations. Your opponents here are two cities of the Academy and a Necropolis city.
This mission becomes active the moment you start the last mission in the Necropolis campaign. Its goal is to kill, or lose, a total of 500 units. From the bodies of the dead, souls will be harvested to expand the Well of Souls. For completing this quest, you receive 1000 experience points.
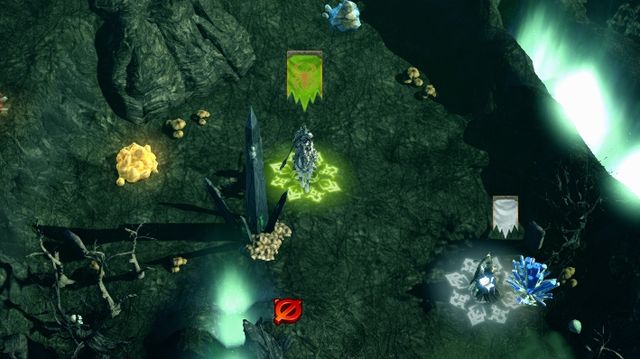 To restore power to the Well of Souls, you need to activate 8 obelisks.
The goal is to visit eight locations all around your city of Nar-Heresh (M17,1). All of the objects have been marked on the map provided by us as (M17,2). For completing this quest, you receive a unit of 300 skeletons.
This mission starts the moment you complete the previous two - Harvest of Souls and Expand the Well of Souls. Your goal is to bring the Deadwood Staff to the Well of Souls. The staff is in the possession of both of the heroes, so it does not matter which one you do this as. You simply need to return to the city. The entrance to the Well is a bit Southwards of the city.
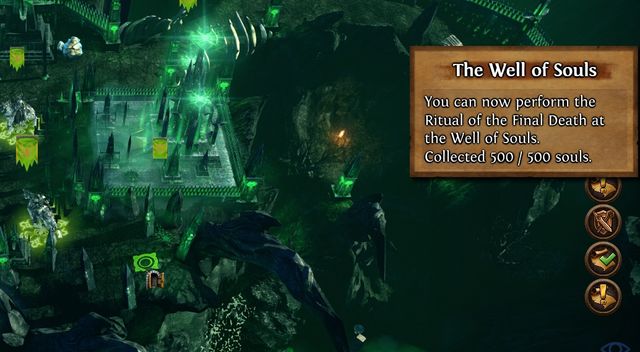 Performing the ritual ends the mission and the Necropolis campaign.
For completing this quest, you receive 1000 experience points. This also ends the Necropolis campaign.
The goal is to send your hero, Charna, to Ludmilla to capture her. You should be looking for her near Nabu-Shuma (M17,5), to the East of your starting city. You need to fight and, what is key here, win against her army. For completing this quest, you receive 1000 experience points.
The map above shows the first mission in the Stronghold campaign. The location itself is rather small, so it shouldn't take you long to complete it. There's no need to waste time gathering resources or capturing any non-essential resource generating structures as they're not necessary to complete the mission. However, try not to lose too much of your units, or you will be unable to complete the mission objectives. Before you move, check your surroundings and capture only structures that offer some actual benefits; don't engage in random battles.
The quest begins automatically after the intro to the first campaign mission of the Stronghold and requires you to visit four places. You need to convince Gnolls, Centaurs, Rakshasas, and Harpies to join your army. To achieve the extra objective, complete the mission in less than four weeks.
To finish this mission you will need to complete four other quests:
The quest begins as soon as your hero sees the Gnoll cages (M18,2). Your mission is to find a way to free the Gnolls from their confinement. To do so, you just need to talk to them. The quest will be completed, you will be joined by 20 Gnolls, and receive +1 to Morale as well as 1000 experience points.
The quest begins after you visit the Blackfang Hideout (M18,3). You need to find the place where the Harpies are being held (M18,4). To free them, you need to destroy two of the three magical pillars that form a barrier containing them.
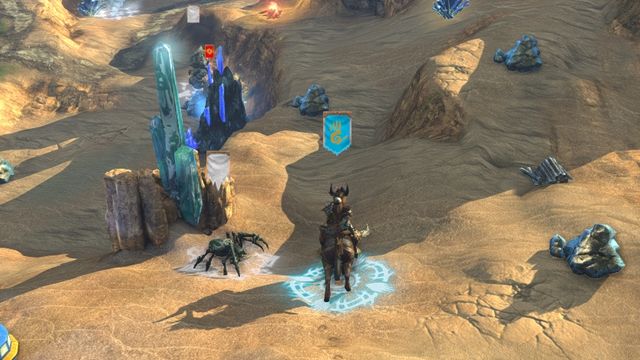 Freeing the Hapies requires you to destroy two out of three crystal pillars.
The pillars have been marked on the map with the number (M18,5). They are guarded by hostile armies:
The one on the North is defended by 12 Cabirs and 18 Ebony Spiders;
The one on the South East by a group of 10 Apprentices;
The one on the South West by a group of 30 Skeletons.
After you destroy at least two pillars the quest will be completed and you will be able to recruit 20 Harpies to your army and will receive +1 to Morale as well as 2000 experience points.
The quest begins after you visit the Blackfang Hideout (M18,3). To free the Centaurs, you need to go to the Pyramid (M18,6). When you get there, a representative of the Centaurs will approach you. After the dialogue, just click the pyramid. It will destroy the dam and free the beastmen. All you have to do now is talk to them once more and the quest will be completed. As a reward, you will get 20 Centaurs to your army, +1 to Morale, and 3000 experience points.
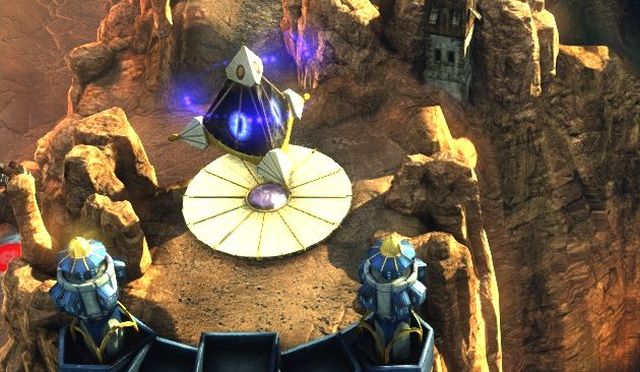 Just click the pyramid to destroy the dam.
The quest begins after you visit the Blackfang Hideout (M18,3). You need to convince a group of Rakshasas located in the South-Western part of the map to join you. The recruitment will fail, however. Instead, you will be forced to fight 9 Rakshasas. After the battle is won, the quest will be completed, and so will be the first mission in the Stronghold campaign.
The map above shows the first mission in the Stronghold campaign. Throughout its course you will face you brethren and will have to capture two enemy cities. Additionally, there will be several side quests for you to complete. Locations relevant to all available quests as well as enemy cities and artifact chests have been marked on the map. To learn the details, read the quest descriptions located below.
The quest begins automatically after the intro to the first campaign mission of the Stronghold. Your main objective is to defeat Jengo. He can be found, together with his army, in the city of Kulazimisha (M19,7). Before you challenge him, try to capture a good amount of structures on the map, complete the side quests, and conquer the second enemy city - Kuaminifu (M19,6). Attack Jengo only after gathering sufficient forces.
As a reward, you will receive 4000 experience points, +1 to Attack and an artifact called Pirate Crossbow, which adds +1 to base damage of all allied ranged units.
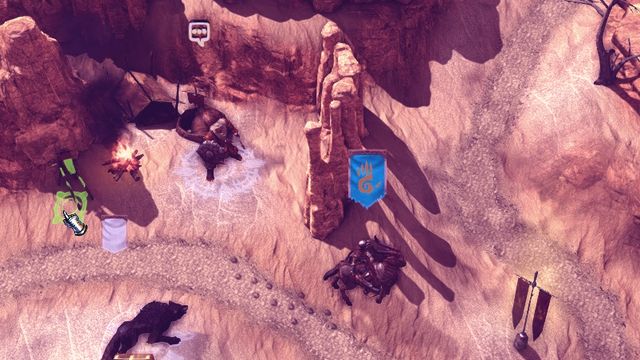 Look for creatures with a box over their heads. In most cases, this means that they have a side quest for you.
This quest can be given to you by a group of orcs (M19,2) located North from your first city. To gain their acceptance you need to carry out a funeral rite. To do this, first, you need to gather the necessary resources: 10 wood, 15 ore, and 2000 gold. Everything can be found in the area surrounding your city. You just need to take a walk and gather them.
After you gather the resources, go to the Burial Mound (M19,3). Click on the pyre and the ritual will be carried out automatically. As your reward, you will receive +3 to Morale as well as Bone Spaulders that add +2 to Defense. Additionally, you will be able to recruit 20 Brutes (M19,2).
The quest begins when you find one of the three obelisks (M19,4) and click it. Your task is to find the remaining ones and thus complete a treasure map, which in turn, will allow you to locate the Tear of Asha. All three obelisks have been marked on our map with the same number (M19,4).
After you visit all three obelisks, you will receive 1000 experience points and Malathua's Cleaver, which offers a bonus of +6 to Power, +6 to Defense and +2 to Bloodrage.
Since you've gathered all the pieces of the map, you can now go get your Tear of Asha. It is located in the north-eastern part of the location (M19,9). Just remember to stand exactly on the spot marked on the map and use the Reveal Treasure spell.
The quest begins after you visit the Mysterious Oasis (M19,8) located at the center of the map. Your task is to find the true oasis. If you've been observant, you may have noticed that a new oasis has appeared a bit more to the South (M19,10). Unfortunately, that one turns out to be a mirage as well. Third subsequent place will appear North-West from your current location, at (M19,11).
The third oasis is the real one, and you will be transported to another location. The quest will be completed and you will receive 1000 experience points. Simultaneously, the side quest Piercing Claws begin.
The quest begins after you have completed Path of Mirage and your hero was teleported to some other location. Your task is to capture the Behemoth Dwelling (M19,12). The building is guarded by 5 Behemoths. As soon as you capture it, the quest will be completed and you will receive +2 to Attack.
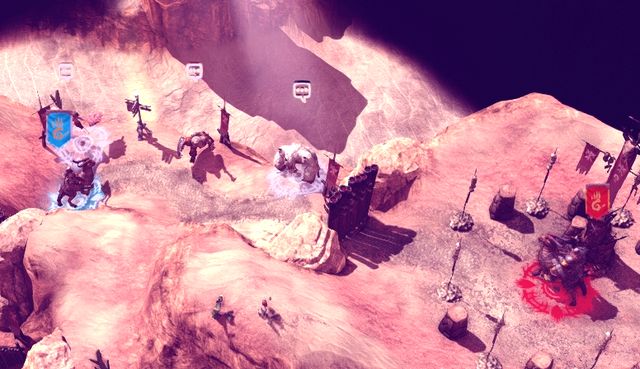 Before the duel, don't forget to add the creatures to your army.
The quest will begin after you defeat Jengo in Kulazimisha (M12,7) and complete Lines in the Sand. Your hero will be teleported to an enclosed area in the northern part of the map.
Before the battle, gather the additional units - 80 Harpies, 80 Brutes and 5 Ancient Behemots. Proceed to the hill and defeat Jengo once more. As a reward, you will receive +2 to Attack and +2 to Luck/Destiny. The second mission in the Stronghold campaign has just been completed.
The map above shows the third mission in the Stronghold campaign. The adventure begins on a desert and, especially in the initial stages, you need to hurry to avoid losing most of your army. Your opponents this time will be the armies of Haven, which, luckily, are not as determined to expand and build their forces as they could be. There are only two, long side quests to complete in this mission. Don't forget to visit the obelisks and complete the treasure map necessary to find the Tear of Asha.
You and your tribe are stuck on a way too big desert. Your first objective is to find a way out. Head North-West, until you reach the Oasis (M20,2). The quest will be updated as soon as you see it.
You will be given a new objective - claiming the city of Castelroc (M20,3). Since from now on you won't be losing a part of your forces every turn, you can slow down a bit. Begin capturing the structures on the map and build your army. When you feel that you're strong enough, attack and conquer Castelroc (M20,3).
After the battle is won, your hero will gain control over a second Stronghold city - Ninakula (M20,7). You will be tasked with reinforcing its defenses. You have 7 days to achieve that. After that mark, an enemy hero will appear in the Eastern part of the map. The safest way is to hold your ground hidden behind the city walls and defeat him during a siege. You can also challenge him in the field if your army is strong enough. His forces are not very big. No wonder, as he was nothing more than a scout.
Soon after, two more enemy heroes will appear from the portal, with bigger armies, and they also will have to be defeated. Two battles later, you will be challenged for the final duel with Asad. His army comprises of 28 Rakshasa rajas, 24 Djinn channelers and 152 Master cabirs. After you've beaten him, the quest will be completed, and you will receive +1 to Attack, +1 to Magic and +1 to Luck/Destiny.
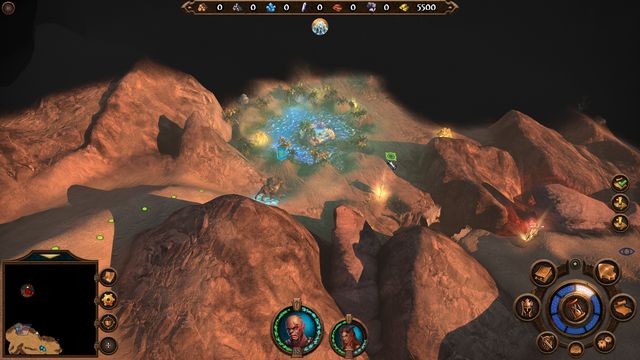 Locating the oasis should be your top priority during this mission.
Staying for too long on the desert can mean starvation for your tribe. You need to find a new home for your people, as soon as possible. The quest needs to be completed without any delays, for every day you will lose 5% from your total unit count. To survive on the desert, one of your heroes needs to head to the Oasis (M20,2). As soon as he gets there, the quest will be completed.
As a reward, you will be given 1000 gold, 1000 experience points and Barbarian Armour, which gives you +2 to Power and +2 to Defense.
The map above shows the fourth, and final, mission in the Stronghold campaign. It is one of the most interesting, but at the same time, most difficult missions in the whole game. You will have several main and side quests to complete, which will require good cooperation from your heroes. To avoid any complications, read the detailed quest descriptions below. Remember not to leave any cities, holds, or garrisons unattended, as the map is crawling with enemy heroes just waiting for a chance to claim them.
The quest begins automatically after the intro to the mission and will span throughout all of its course. You begin with three heroes - Kibwe (M21,1), Imani (M21,2) and Reem (M21,3), separated, and each of them located in a different part of the map. You will have to lead them so they can assist each other in need.
Have Kibwe head for the passage number 1. Go through the underground and up with the stairs number 2. On the surface collect the groups of 20 Crushers and 15 Brutes and proceed to capture an elite dwelling belonging to the Academy. That's as far as you will go unfortunately, because on the East you will find a garrison so strong that your current forces won't even put a dent in its numbers, and a Seal of Ylath (M21,8) will block your way on the other side. You will need some help to proceed.
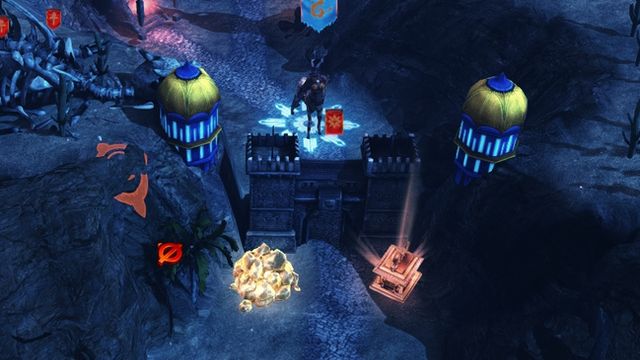 Avoid fighting the garrisons. Usually, there's an underground path allowing you to slip past them.
With Imani, head East and later South to capture the city of Mbewha (M21,7). It is very poorly guarded. Head further East to collect a group of 45 Brutes and cross the bride. If you have the resources, you can rebuild the Fort. Now, go North - this will allow you not only to avoid an enemy hero, but also find the Altar of Ylath (M21,9). The key you found will open the blocked passage for Kibwe.
With the last of your heroes - Reem - you will have to go South. Soon after you've crossed the bridge, you will see a strong enemy garrison. To avoid a battle, you will have to go underground down the stairs number 3. Pick up a group of 9 Crushers and go back up using the stairs number 4. On the surface, gather the armies of 15 Brutes, 15 Centaurs, and 15 Crushers in the south-western part of the map and head to portal number 5. You will be teleported to the underground. Take your army South and later West. That's where you will find a Seal of Malassa (M21,10), and, for now, that's the end of the road for Reem.
Back to Kibwe. Go past the now-inactive Seal of Ylath (M21,8). The road was opened thanks to Imani. Go through the portal number 6. You will be teleported underground. Collect the group of 9 Brutes in the South and head for the Altar of Malassa (M21,11). Collect the key and go past the Seal of Malassa (M21,10) in the North. On our map, it's got the same number. Head further North and use the stairs number 7. You will appear near the House of Invention (M21,5). Before you attack, switch once more to Imani.
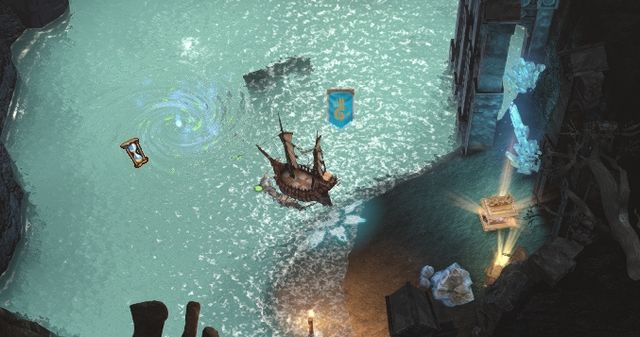 The ship will be available only after you've activated the Ancient Shantiri Monolith.
Have Imani head to the south-eastern part of the central island you are currently on and click the Ancient Shantiri Monolith (M21,13). It will cause the water level in the underground cave to rise. Now, switch to Reem and cross the now-inactive seal, then head North. There, you will find a ship - board it and sail into the teleport number 8. After the travel, sail East until you reach the vicinity of the city Burtuqaali (M21,6).
The quest will be completed the moment you click the Ancient Shantiri Monolith. As a reward, you will be given 3000 experience points, +2 to Morale and Crag Hack's Helmet, which provides a bonus of +6 to Power and +5 to Initiative for all allied creatures.
The quest begins, after you move one of your heroes and see an enemy hero. You will have two tasks. Imani must reach the Ivory Bridge (M21,12), which should be relatively easy. If you encounter any problems, check the description for the quest Teamwork. The second part of the quest can be a bit more difficult. You need to cross the bridge without catching the attention of guards. To do so, enter the Shelter (M21,14). Finish your turn and the guards should leave the vicinity of the bridge. Now you can cross it.
 Use the shelter, to avoid enemy heroes.
Your second, simultaneous objective is to capture the House of Invention (M21,5) and the city of Burtuqaali (M21,6). The fort needs to be captured by Kibwe, while the city on the south by Reem. Additional objective requires you to do it within two days, which means that after capturing one of those locations you have two days to capture the remaining one. Your heroes need to attack simultaneously. Make your heroes approach good attack positions and wait until they are ready. If you don't know how to reach the city or the fort, check the description for the quest Teamwork.
For completing the quest you will receive 5000 experience points, +3 to Morale, +2 to Attack and the Amulet of the Jaguar, which adds +4 to Power.
The quest begins, after you move one of your heroes and see an enemy hero. Your main objective is to capture the city of Al-Jabr (M21,4) in less than four weeks. To learn how to reach the city, see the descriptions for Teamwork and Coordinated Assault. Defeat Asad and Yasir, then proceed to the city.
As a reward, you will receive 1000 experience points.
The map above shows the first mission in the Academy campaign. You will have to get by without your own city and help allied cities repel an Orc attack. Don't forget to collect allied units scattered throughout the map, to help you build you army. There's no need to focus on resources during this mission, as they won't really be necessary to complete it.
This is your first task. You will need to defeat three Stronghold armies located near the city of Azhar (M22,1). The armies are have been marked on our map with the number (M22,2). They consist of:
Army on the East: 30 Gnolls and 25 Brutes.
The quest will be completed after you defeat all three armies, and you will receive 1000 gold and 2500 experience points as a reward.
The quest will begin after you have completed The Night of a Thousand Fires. You need to talk to Quasi, the hero, who approached your hero - Fahada. As soon as the quest is completed, you will receive 500 gold.
The quest begins after you have completed The First of the Circle. Your objective is to stop the Orcs attacking the city of Manaar (M22,3). To do so, you need to defeat the Stronghold hero Kibwe before he launches an assault on the city located in the south-western part of the map.
The quest will begin after you have completed The First of the Circle. You will be tasked with defeating six enemy armies. Three of them are in the North, the other three on the South.
The northern armies have been marked on our map with the number (M22,5).
The first army constitutes of 75 Harpies;
To reach the second one, you will need to go past The Seal of Elrath (M22,6). To do so, collect the key from the Altar of Elrath (M22,8). The second army features 10 Brutes and 10 Crushers;
The third one has 2 Basilisk Riders, and is located further East of the second one.
The southern armies have been marked on our map with the number (M22,7).
The first army constitutes of 50 Gnolls and 15 Gnoll Hunters;
The second army constitutes of 10 Centaurs;
The third army constitutes of 4 Basilisk Riders.
As a reward for completing the quest, you will receive +2 to Magic, 2500 gold as well as 1000 experience points.
To begin the quest, you need to go to the room with levers (M22,10). You will get there through the passage number 1. After you reach the monument, you will need to activate the levers in the following order:
If you make a mistake, you will be attacked by a small group of enemies and will have to begin the sequence anew. After you switch all four levers, an entrance will open to the North. Proceed inside. It's a trap, as it turns out, and you will be attacked by an enemy hero from the Stronghold - Jengo. Luckily, his army is not very impressive, so you should be fine. After you have beaten him, the quest will actually begin.
 Activating the levers in the right order will save you some unnecessary battles.
Take the Flower of the Desert from the room you will find yourself in. It gives you +50 to max mana and +10 to daily mana regeneration. As soon as you do it, the quest will be updated - you will be given two new objectives, but you will lose the hero Fahada. You will also need to hurry, as you have only one week to complete the quest.
Get back to the lever room and head East. Take the key from the Altar of Shalassa (M20,11). Head further East and through the passage number 2. After you get to the surface, you will need to head North-East, to the teleport number 3. After the transition, go up and enter portal number 4. You are now near the city of Shahibdiya (M22,4). Defeat the group of 20 Brutes standing before the city, and the hero Malathua, who has pretty strong army at his disposal, not to mention the city walls.
After you have beaten him, the quest will be completed, and you will receive +3 to Spirit, +3 to Magic, as well as 5000 experience points. Thus ends the first mission in the Academy campaign.
The map above shows two locations constituting the second mission in the Academy campaign. Same as the map, the gameplay part is divided into two distinctive sections. The first one includes map exploration, capturing buildings, and gathering your army. The second one requires you to navigate through a complicated system of magical activators. To avoid unnecessary irritation, read the detailed description of the Be Careful What You Wish For quest.
The quest will begin automatically after the intro to the second mission in the Academy campaign. Your main objective is to find some clues concerning the location of the Blue Gem. You just need to circle around your city and visit the local areas. After some time, you will be asked to find a Necromant on the East. As soon as you enter the darker terrain, a hero will approach you and begin a conversation. After the dialogue, the quest Lyla will begin, and it needs to be completed first.
After you complete the abovementioned quest, go to the Spirit Altar (M23,16) and speak to the now beaten Lyla. Path of Dolor will be completed, and you will receive +5 to Luck/Destiny.
The quest will begin after you speak with the enemy hero during the Path of Dolor quest. You need to defeat heroes Lyla and Luna, as well as capture the city of Bel-Enlil (M23,13). For completing this quest, you will receive +5 to Attack.
The quest begins after completing the Path of Dolor quest. You will be transported to an alternative world (M23,17), where you will have to locate Jadwa's Essence.
 Watch out for figures and symbols near the magic circles.
First, head West. Enter every magic circle you see. After a while, you will meet Khalida. After the conversation, she will enter one of the circles, leaving you to enter the second one. Follow her. You will be separated and teleported into two different locations, and you will be given control over Khalida as well. Before you, there is a lot magic circles, forming an identical pattern on both sides of the map. You need the two heroes to enter subsequent circles. It is crucial to enter circles in the right order. Below is the correct sequence for entering the circles:
Now, you just have to go to the end of the path that just emerged and step into both the final circles. One of your heroes will be teleported to the place where Jadwa's Essence can be acquired. After you take it, you will be transported back to the previous map, where a battle with Shantiri Titans and Shantiri Golems will automatically begin. After your victory, the second mission in the Academy campaign will be completed.
The map above shows the third mission in the Academy campaign. You will be given several main as well as side quests that will form an interesting bigger picture. Haste is recommended, as you have only 12 weeks to complete the mission. There's no need to worry about enemy armies though, as there are no enemies as such, other than neutral creatures, in this mission.
The quest begins after the intro to the third mission in the Academy campaign. Your first objective is completing The Cost of Water. This will allow you to gather resources necessary to build a Well. To commence the construction, you need the click the flag that appeared near your city - Tiin-Hajar (M24,1). The construction will take 1 turn.
 To fill the oasis with water, you need to remove those boulders.
When the construction is complete, you will have to redirect the river. Approach the two boulders (M23,4) and click them. The dam will collapse, and the water will flow to your city. As a reward, you will receive 5 Titans and +15 to Morale.
The quest begins after the intro to the third campaign mission of the Academy. You will need to gather the required amount of resources to build an oasis for your people. You will need:
You just need to walk around the map and gather the resources you need. For completing the quest, you will receive +15 to Luck/Destiny.
The quest begins after the intro to the third campaign mission of the Academy. You objective is to locate the Obelisks on the map. All 5 Obelisks have been marked on our map with the number (M24,2). The order, in which you visit them is irrelevant.
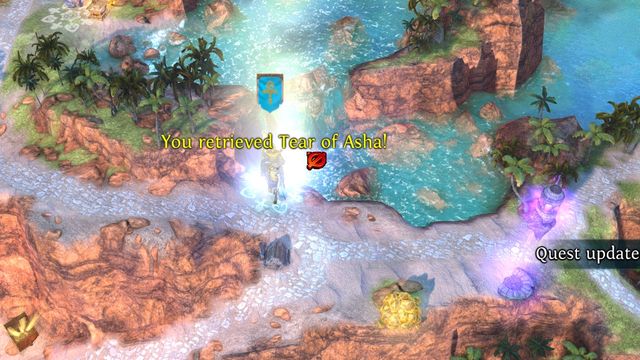 To acquire the Tear of Asha, you need to stand directly above the place where it is hidden.
After you have visited all obelisks, head for the location of the Tear of Asha (M24,6). Remember that you have to stand exactly in the place where the treasure is hidden. When you're there, use the Reveal Treasure spell. Now, you just have to return to the city and build the Arcane Portal.
As a reward, you will be given +2 to Spirit and +2 to Magic.
The quest will begin after the intro to the third mission in the Academy campaign and it requires you simply to complete all the other quests in less than 12 weeks.
The quest begins after the completion of The Cost of Water. You need to find Adar-Malik, talk to him and ask for help. Head to the city of Ashur-Ilum (M24,5) and talk to the hero there. The quest will be completed, and you will receive 50000 experience points.
The quest will begin after you have completed The Oasis of Kusai. Your task is to convince the Academy hero Ajit to your cause. Head to the city of Ahmar-Fahd (M24,3) and talk to him. As a reward you will receive 50000 experience points.
The quest will begin after you have completed the Find the Tear of Asha quest. Your objective is to find Yasir and talk to him. He can be found in the city of Dahabi (M24,8), located in the north-eastern part of the map. For completing the quest, you will receive 50000 experience points.
The quest will begin after you complete the quests: The Oasis of Kusai, The Cost of Water, and Find the Tear of Asha. It may take up to several days after you have completed them for this quest to begin.
Your task will be to destroy the recently built oasis and hinder the enemy attack. You must head to you city - Tiin-Hajar (M24,1) and click the banner in its vicinity. As soon as you do it, the dam will be destroyed, a portion of the map flooded with water, and the quest completed. As a reward, you will receive 100000 experience points.
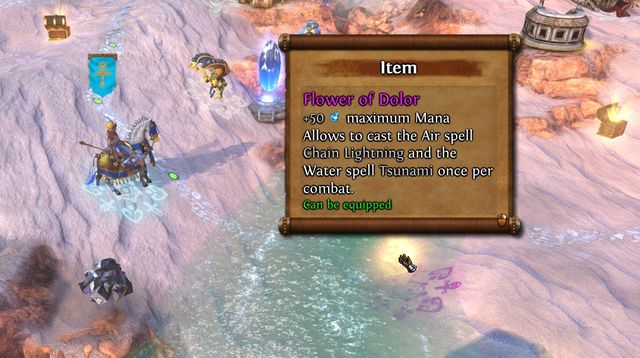 The chest containing the Flower of Dolor is easy to miss, as it is located underwater.
The quest begins after you have destroyed the dam and completed The Flood. Your objective is to pick up the Flower of Dolor. It is located South-East of your city (M24,9). Having picked up the flower, you will notice a teleport appearing in the South. (Passage number 2.) As soon as you enter it, you will be transported to another location. You will have to proceed forward. After a longer while, you will reach ruins defended by 200 Shantiri Golems and 10 Shantiri Titans. When you defeat them, the quest will be completed.
The map above shows the fourth, and final, mission in the Academy campaign. You have a vast map at your disposal, the entire eastern part of which is occupied by swamps that will significantly slow down your heroes. Fighting against you are cities belonging to Necropolis, Haven, and Academy. It would be a good idea to be swift, especially at the beginning, to prevent your enemies from growing too big and giving you a chance to capture at least one of enemy cities.
The quest begins automatically after the intro to the fourth campaign mission for the Academy. Your main objective is defeating the Orcs. Follow the path you begin on. After a while, you will reach a small troop of Orcs. Deal with them accordingly. After the battle, one of the other Academy heroes - Aali will enter a heated argument with your hero, leading eventually to another battle. Her army consists of 10 Cabirs, 5 Apprentices, and 3 Rakshasas, and defeating her should be no problem.
After the battle is won, a new quest - Turncoat - will begin. Proceed to the South until you reach the city of Kisasi (M25,2). There will be no fight this time, as the enemy hero will flee. The quest will be completed, and you will receive 10000 experience points.
The quest will begin after you have defeated Aali during the quest Pity the Hunter. Your objective will be to defeat her once more and to capture her city. Head for the south-western corner of the map. There, you will find the city of Ihmarra (M25,5). Aali herself should be somewhere close by.
As a reward for completing the quest, you will receive 10000 experience points and Magister's Robe, an artifact that gives you +2 to Spirit and +2 to Magic.
The quest will begin, after you have completed the quest Pity the Hunter. Your task is to locate the Flower of Dolor. You will find it in a small temple in the south-eastern part of the map (M25,3). The flower is protected by a very small group of Shantiri Titans and Golems.
As soon as you collect the artifact, the quest will be completed, and you will receive 10000 experience points, as well as +5 to Magic.
The quest begins as soon as you cross the bridge blocked by the Seal of Shalassa (M25,7). Your task is to find Luna, defeat her, and capture her city. You will find her in the south-western corner of the map, near the city of Eriba-Nadin (M25,8).
As a reward for completing the quest, you will receive 10000 experience points and +10 to Luck/Destiny.
The quest begins as soon as you cross the bridge blocked by the Seal of Shalassa (M25,7). This time, you need to find the hero Melisande. Defeat her and capture her city. Both Melisande and the city of Lightmarch can be found in the north-western part of the map (M25,9).
For completing the quest, you will receive 10000 experience points and +10 to Spirit.
The quest begins after you have completed Turncoat. Your objective will be to defeat someone called Qasim. First, you need to go to the western edge of the map and locate two Bridge Towers. First one is on the South-East (M25,11), near the enemy Necropolis. The second one, near a small river to the North (M25,12).
Activating both bridge towers will create a passage for you to cross.After you have activated the towers, a bridge (M25,13) will emerge, allowing you passage to the central island. Head to the middle of it and capture the city of Ahmar-Jaziira (M25,14). As a reward, you will receive 20000 experience points and +10 to Magic. You have just completed the quest and the whole Academy campaign.
The map above shows the first mission in the campaign of Prince Ivan. It can be started only after you have completed the campaigns of at least two other factions. The game will be played on a medium-sized map, albeit one full of enemies, buildings and quests, both main and additional. It is the most plot-driven mission in the whole game. The scenario focuses on narrative and tries to surprise the player with unexpected plot-twists. Our description is valid for playthrough after the completion of all the other faction campaigns. In case you started this campaign after completing only two of them, your playthrough can differ significantly from ours.
The quest begins automatically after the intro to the first mission in the final Campaign. You need to meet and talk to four heroes - Murazel (M26,5), Kente (M26,4), Anastasya (M26,2) and Lasir (M26,7).
After you have talked to them, the quest will be completed, and you will receive +2 to Morale as well as 10000 experience points.
The quest begins after you have collected one of the fragments of The Blade of Truth. All of the fragments have been marked on our map (M26,3). When you've got all of them, bring the pieces to the Falcon Memorial (M26,12). You just need to click the memorial, and the sword will be reforged automatically.
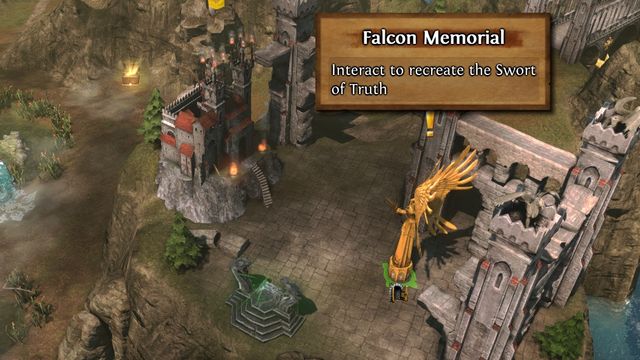 The pieces of the Sword of Truth can be reforged at the Falcon Memorial.
For completing the quest, you will receive +3 to Morale, 25000 experience pointy and The Blade of Truth, which gives you +8 to Spirit and +8 to Destiny.
The quest will be given to you by an army of Golden Dragons (M26,6). Your task will be to defeat the groups of enemies located on a small hill North from your location.
The enemy armies are:
After you have defeated them all, return to the Golden Dragons and talk to them. The quest will be completed, and you will receive Asha's Will, which add +3 to base damage and +2 to Health of allied creatures per hero's level.
The quest will begin after you have completed the quest Peace Offering. Your first objective is to meet up with Seamus on the Falcon Hill (M26,9). After you climb the hill, a short cut-scene and a dialogue will be triggered. From there, you will be automatically thrown into battle, but it should be no problem for you to defeat your adversary. The quest will be completed, and you will receive +3 to Defense as well as 5000 experience points.
The quest will begin after you have completed The Meeting. Your main objective will be to locate Nolwenn's Soul. You will find it in the Prison Tower in the north-western corner of the map (M26,15). The tower is defended by a medium-sized Dungeon army.
For completing the quest, you will be given 4 Seraphs to your army and 30000 experience points.
The quest will begin after you have completed The Meeting. You need to capture the cities of Caer Griobta (M26,11) and Baille Beanna (M26,13). Defeating enemy heroes is not required.
As a reward for completing the quest, you will receive 20000 experience points and 15 Griffins to add to your army.
The quest will begin after you have completed The Meeting. You will have to capture Ronan's Gate and defeat Amilcar. The gate can be found in the north-western corner of the map (M26,14). Enemy army has few creatures, and it should be no problem to defeat them.
As a reward for completing the quest, you will receive 50000 experience points. You have completed first mission in the Final Campaign.
The map above shows the second, and final, mission in the campaign of Prince Ivan. It is most likely the longest, most interesting, hardest, as well as one of the most complicated missions in the game. You will have to win several big-scale battles, with hundreds of creatures on both sides, complete several main and side quests, and control multiple heroes. The side quests are limited mostly to visiting several buildings of the same type scattered throughout the map. To locate them faster, we suggest closely reviewing the map above.
The quest will begin with the moment you start the second mission in the campaign of Prince Ivan. Your task is to find and defeat Seamus. First, you need to capture the city of Barr Abhainn (M27,10). As soon as you do it, you will see Seamus on the other side of the river. You need to go across and challenge him. Unfortunately, he will flee behind the city walls as soon as you approach him.
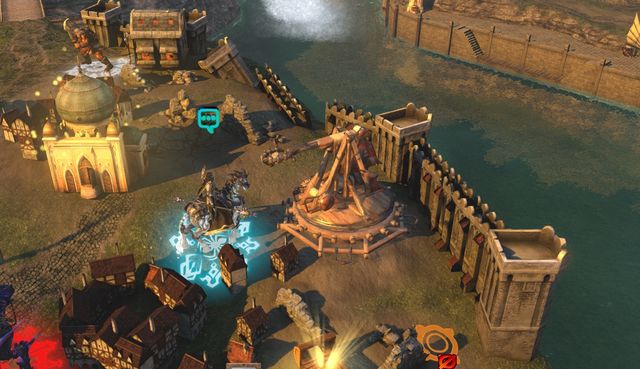 Make good use of the catapults. This will make defeating subsequent garrisons that much easier.
To make your job easier, use the Catapults (M27,15) located throughout the map. Rebuilding one will cost you 20 wood, 20 ore and will take 1 turn, but it will save many of your units. The next thing you have to do is to capture the city of Horncrest (M27,16), in the course of the Knight to Bishop quest. After the battle is won, a gate to the North will open.
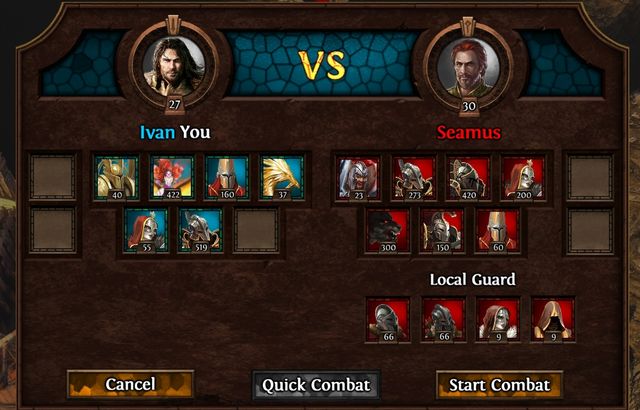 The final battle is one of the most interesting, as well as most difficult battles in the whole game.
Proceed North, until you reach the city of Feidh Caislean (M27,17). You will have to face an even more difficult enemy. Luckily, there's no need to hurry. Attack only when you have a truly powerful army at your disposal. As a reward for completing the quest, you will receive 500000 experience points, +5 to Attack and +15 to Morale. Here ends the final mission in the campaign of Prince Ivan.
The quest will begin with the moment you start the second mission in the campaign of Prince Ivan. Your task is to find and defeat Wilhelm. An additional objective requires you to capture his city - Horncrest (M27,16), located in the central part of the map, right in the middle of enemy kingdom. He can boast an impressive army, so make sure you have prepared yourself accordingly. Furthermore, the city is very heavily fortified. As a reward, you will receive 150000 experience points and +20 to Morale.
The quest will begin the moment you reach the bank of the biggest river on the map. Your objective is to cross it. This can be achieved in one of two ways.
The first one requires you to create a dam that will create a ford across the river. The ford will be located in the northern part of the map (M27,8). To get there, however, you will need a lot of time. For the simpler way, talk to Jorgen (M27,7) and head underground through the passage number 1. The quest will be completed as soon as you cross the first bridge, and you will receive 100000 experience points.
The quest will begin after you have spoken to Anastasya (M27,5). You will need to visit several Mass Graves scattered throughout the whole map, so she can revive some long-dead warriors. By your hands of course, as she will be under your control.
 To help your chances you should visit both Mass Graves as well as Obelisks.
All locations that need to be visited have been marked on our map with the number (M27,6). Every location will bolster your numbers with a significant group of warriors. They will be an indispensable aid in the battles to come.
As a reward for completing the quest, you will be given 500000 experience points, Rod of Torment, as well as 10 Grim Reapers to your army.
The quest will begin after you have taken control of the hero Andras. Your objective is to capture 10 mines located in the valley before you. They are so close to each other that on our map, they have been marked under a single number (M27,18).
Additionally, the quest requires your hero to capture a Catapult (M27,15). As a reward for completing the quest, you will receive +5 to Attack, +10 to Morale, and 50000 experience points.

 Medal of Honor: Warfighter Game Guide & Walkthrough
 Metal Gear Rising: Revengeance Game Guide & Walkthrough
 Metal Gear Solid V: Ground Zeroes Game Guide & Walkthrough
 Might & Magic: Duel of Champions Game Guide & Walkthrough
 Metro: Last Light Game Guide & Walkthrough