
This unofficial guide to Middle Earth: The Shadow of Mordor lists all of the key elements of the game in detail and also offers a comprehensive walkthrough for all of its quests (both main and side quests) . It should prove useful in finding all of the attractions in the game developed by the Monolith Productions, in dealing with the most demanding opponents and finding all of the best hidden treasures. The initial chapters of this walkthrough are devoted to the description of the most important issues connected with melee fight, ranged fight, acting from shadows and exploration of the game world. Next, you will learn about Sauron's Army (Nemesis system), i.e. one of the unique elements of the game. In that chapter, you can find information and hints, among others, concerned with discovering the members of the army, learning about their weak and strong points, their development and promotions, their activity independent of the player's activity, as well as on rewards that you are granted for their elimination highly-valuable runes). The next big chapter of this guide revolves around the protagonist. It goes into detail describing Talion's development. In there, you will learn how to unlock new abilities, attributes and how to upgrade weapons (sword, bow, dagger). Arguably, the most space in this guide has been devoted to the walkthrough for all of the missions available in the game. This means, first of all, the 20 storyline missions, although you can also find walkthroughs for side missions here. These are connected with civilians and various types of weapons. The final part of the guide has been devoted to finding collectibles. It has been enriched with maps of the available locations, which are going to be helpful while locating the treasures. The whole has been rounded up with pages connected with completing additional challenges and unlocking achievements. Middle Earth: The Shadow of Mordor is an action-adventure game in the world of The Lord Of the Rings. During the game, you control Talion, who returns to the world of the living, after his death, for reasons unknown to him. Now he is searching to exact revenge on the murderers of his family.
This guide for Middle Earth: The Shadow of Mordor:
Jacek "Stranger" Halas ()

Movement

Camera controls

Roll/dodge/run

Knock down/energy drain/brand/jump down

Attack

Counterattack

Activate the Branded
Murder the Branded

Wraith Mode

Aim the bow/throw dagger

Interaction/grab the opponent

Sneak

Map

Menu

Movement

Camera controls

Roll/dodge/run

Knock down/energy drain/brand/jump down

Attack

Counterattack

Activate the Branded

Murder the Branded

Wraith Mode

Aim the bow/throw dagger

Interaction/grab the opponent

Sneak

Map

Menu
 Attack time after time and counter attack
Melee fight, in Middle Earth: The Shadow of Mordor melee is the most obvious and the most frequently used way to attack opponents. The system is very similar to the Batman games, because it combines landing attacks and the necessity to dodge from attacks of the opponents. After you start a typical fight, start tapping the attack key/button which lands blows at the select opponent, or "jump" from one opponent to another after each successful attack. If possible, try to maintain the continuity of your attacks, i.e. raise the multiplier shown on the screen. This will allow you to gain more experience points and, as a result, develop your character faster. The good news is that the Shadow of Mordor is more forgiving than the Batman games and the chain is not broken immediately after a blow is not followed by another one. With a bit of training, you can obtain multipliers amounting to 50x and higher.
During each fight, you need to watch out for the moments, at which characteristic icons appear above the heads of the opponents. They symbolize the intent to attack your character, and you need to react quickly to this type of situations. What you do is press the counter attack key or button. If you time it well, you will avoid taking damage and you retain the current multiplier, which allows you to continue your combo.
Note - Later into the game, you can unlock abilities that improve on the counterattack, e.g. ones that allow you to stun the opponent whose attack you have just blocked.
 watch out for the powerful attacks of the more powerful enemies
Attacking an countering is, unfortunately, more difficult in some situations, or even blocked by the opponent. This is what you need to remember about and modify your style, depending on the situation at hand. Countering does not work against the opponents that use ranged weapons (e.g. Orc archers) to attack you. The same goes for the more elitist opponents, whose attacks cannot be, sometimes, countered. In such situations, you need to dodge, at the appropriate moment, i.e. either to roll to the side or jump over the opponent that is attempting to land a strong blow (unfortunately, also this is not always possible to do). While dealing with such opponents, it is a good idea to remain in constant movement and not let the opponent land their unique attacks.
Countering may be more difficult when the game does not display the icon that informs you of the possible attack of the opponent. This happens, among others, when Talion is poisoned, or a captain with a unique ability crosses his path. In such situations, you simply need to rely on what you can see on the screen and counter blindly, whenever you see that a given monster is attempting an attack.
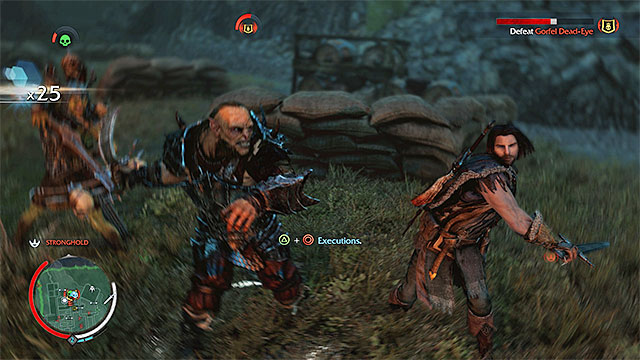
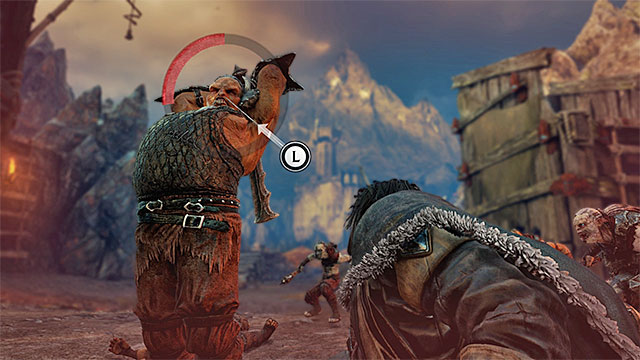
 It is a good idea to finish off the stunned opponents
Another interesting aspect of melee combat is the option to nudge and grab opponents. Depending on the situation, this may be aimed at eliminating the opponent, temporarily, from the fight, use him as a shield or interrogate him (this gas been described in the chapter entitled Sauron's Army). After you knock down an opponent, it is a good thing to finish him off, by taking advantage that he is weakened from the recent combo. There only are advantages to executing opponents - allows you to eliminate the opponent quickly and to retain the current multiplier.
 Special attacks allow you to perform an immediate execution
With time, Talion may gain access to new abilities and you can learn more about this in the chapter entitled Character Development. Here, I would like to bring it to your attention that there are special attacks available to be unlocked, which are very helpful while fighting in melee. They are very similar to the unique attacks in the Batman series. They become available after you have attained the appropriate multiplier (e.g. 5x or 8x) and you launch them, usually, by pressing two keys/buttons simultaneously. It is a good idea to use this type of attacks on a regular basis. In the majority of cases, they make battles easier, which allows you to perform an immediate execution on an opponent or, e.g. to stun the group of enemies that surround Talion.
 If possible, aim at the heads of the monsters, or at the explosive elements
The bow that the protagonist of Middle Earth: The Shadow of Mordor is armed with is not used, in combat, as often as the other elements of his weaponry. Still, this does not mean that ranged combat does not play any important role. Ranged weapon is, first of all, helpful in situations, in which you want to weaken, or kill, opponents that are harder to reach. This mainly means the enemy archers that often occupy ledges on height and watchtowers. It is much easier to eliminate such an opponent with the ranged weapon, than to get to his position and use melee the weapon.
There are several interesting issues, connected with the bow. After you stat aiming, time slows down and this effect remains active up until the concentration bar is depleted. You can make this bar longer by obtaining certain attributes (the chapter entitled Character Development), although in its initial form, it is sufficient to take a well-aimed shot. To ensure yourself with a more effective ranged attack, remember to aim at the enemies' heads and about waiting with the shot until the bowstring is fully drawn. This will allow to shoot the arrow with more power and, as a result, to deal more damage to the opponent (many opponents die after the first well-aimed attack).
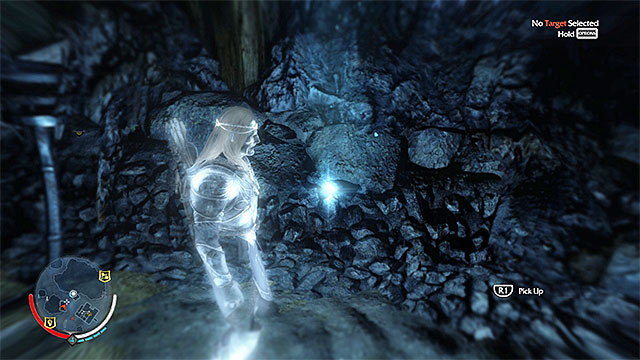
 Remember to replenish your supply of arrows
Unfortunately, you cannot use the bow infinitely. The supply of arrows that you carry is limited and you need to replenish it, on a regular basis. You can obtain arrows, e.g. by draining energy from the opponents that you defeat. To do that, try to search out single monsters because, by default, the draining process is long and it can be interrupted by the other opponents. An alternative way to replenish your supply, is to find them directly in the game world. The advantage of finding the arrows is that you do not need to become temporarily defenseless and you can use the bow again, right after you collect the arrows.
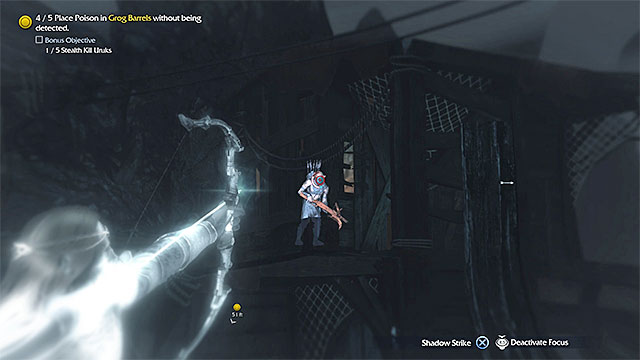
 The Shadow Strike attack allows you to teleport to another spot and wound, or kill, the enemy
Just like in the case of melee combat, you need to know that abilities connected with ranged weapons become available only later into the game. They may depend on your progress into the campaign mode, or on the purchases that you make in the main character window. To learn more, see the chapter entitled Character Development. Thanks to new abilities, you can access, among others, throwing knives that are a nice alternative for the bow, especially that it does not require you to aim (the knife is thrown towards the opponent currently observed by Talion).
An even more interesting thing is the Shadow Strike attack, which you can obtain while completing one of the main missions. This ability upgrades the bow by one additional function, which is the ability to teleport towards the enemy that you are currently aiming at. There are two upsides to that - you can move around the battlefield quickly and cut short the waiting time to resume melee combat. Later into the game, you can make this attack even more effective and make the weaker enemies be killed automatically after teleportation.
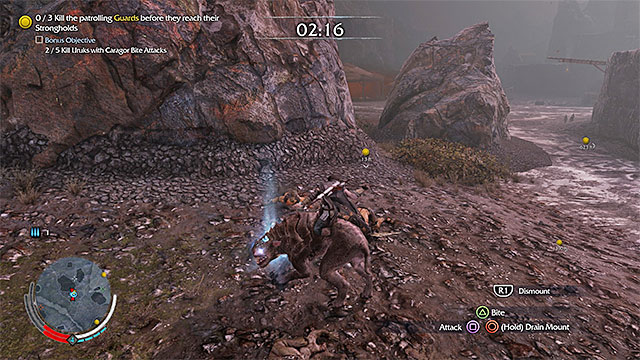 You can mount the beast and use it for the elimination of the enemies
Fighting the enemies directly, in the game, is not limited to choosing between melee and ranged weapon. You can, just as well, eliminate enemies in more creative ways and several of these have been presented below. (to learn more about the available attacks, see the chapter entitled Character Development).
A very interesting ability is the one that allows you to mount caragors, i.e. very strong and agile beasts. After you tame one, you can start attacking enemies with his help, which makes your attacks more effective. An additional upside is that caragor can heal itself, thanks to which this is not a short-lasting fun.
Later into the game, you also gain access to the ability that allows you to Brand the opponents. The Branded creature becomes Talion's ally and helps you eliminate the rest of the enemies. This option allows you to utilize many interesting tactical attacks because you can brand, e.g. an enemy archer and ensure yourself with additional backup of his ranged attacks.
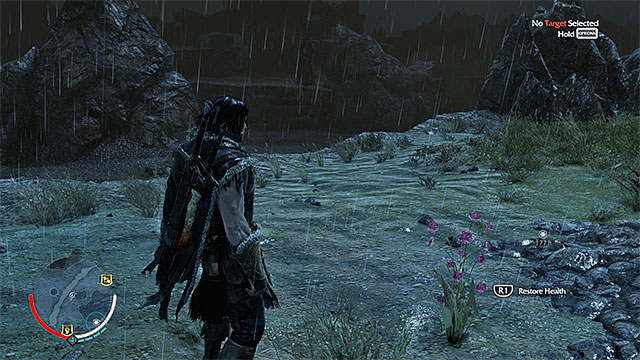
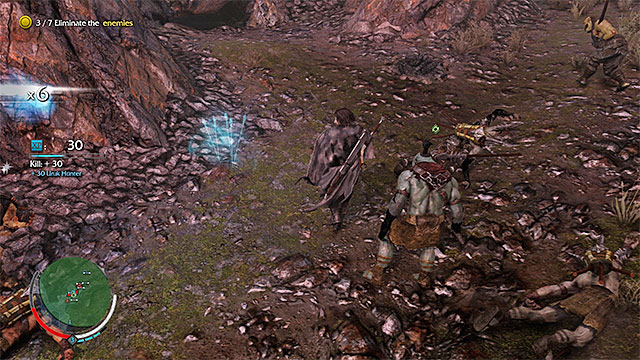
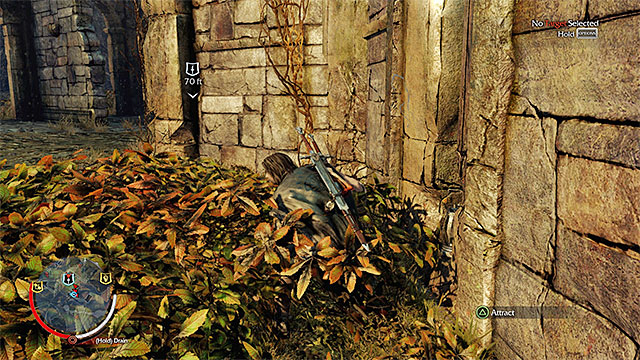
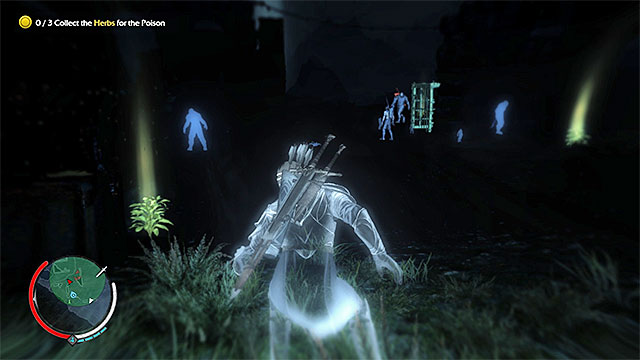
Health management, in Middle Earth: The Shadow of Mordor, is a bit different than in the case of the other games of this type so, I recommend that you take interest in the hints provided in this chapter. First of all, you need to know that your character's health bar cannot regenerate spontaneously when you are fighting. In this case, regeneration is possible only thanks to collecting small plants scattered throughout the game world. One of such plants has been shown in the above screenshot. It is possible to locate such plants, thanks to the readings of the minimap and it becomes even easier, after you activate the Wraith mode, when they become clearly visible against the surroundings.
Try to regenerate Talion's health each time before a battle and/or mission, thanks to which you will stand a greater chance of succeeding. Right after you start a fight, it may become more difficult to locate a plant, especially if you are dealing with agile monsters that do not let you get too far away from them. What is even more, in some missions, the mission is failed after you "escape" from the battlefield, because you cannot step outside of the predetermined fighting area.
Note - you can make the health bar permanently longer, thanks to obtaining attributes connected with it. To learn more, see the chapter entitled Character Development.
 You can escape death by completing a minigame
Being at the brink of dying does not necessarily mean that you lose, because you can avoid the ultimate failure. This can be obtained by completing a minigame, which you need to do, if you want to avoid death. You need to, in the predetermined time window, align the cursor with the circle that appears on the screen (before the red bar fills up) and press the specified key/button. Of course, after you do that, you need to make sure that you get away from the nearby enemies, quickly (including the one that dealt to Talion the most recent blow), because you can, otherwise, deplete the entire health bar again.
 After the death, Talion returns to the nearest forge tower
If you failed to escape death, Talion returns to the nearest forge tower that you unlocked. The important piece of information is that dying does not have any grave consequences, such as losing your equipment or of some of your experience points. The only exception may be the necessity to restart the battle against orcs that you were involved in, at the moment of dying.
Note - in some cases, you may even want to die, because this , may strengthen the member of Sauron's army that you were fighting with, before dying. After the monster becomes stronger, he progresses to a higher level, thanks to which he drops more valuable loot, after dying. To learn more about using the "impunity" of dying, to your advantage, see the chapter entitled Sauron's Army.
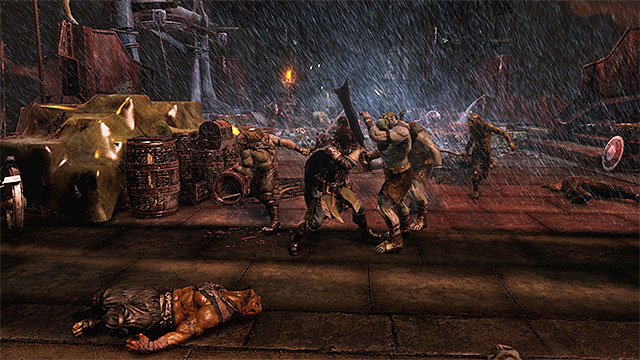
In Middle Earth: The Shadow of Mordor, you will be spending the majority of time murdering orcs, although this is not to say that the bestiary of the game is poor. The orcs themselves specialize in various fields and, apart from that, in many locations there also are completely different types of monsters. The below list presents the main enemy types that you deal with in the game
 You will be eliminating the regular orcs in multiple numbers
The standard orcs make up, nearly, every group of enemies that you encounter and their main aim is to attack Talion in melee. By themselves, or in small groups, they are no threat to you, but you need to be careful in the case of, e.g. larger groups, or when they are accompanied by enemies of the other types (e.g. Orc Captains or caragors). While at the orc fortresses, avoid raising alarms unnecessarily, because the arrival of reinforcements may, considerably, increase the numbers of the enemy forces and, at the same time, make it more difficult to prevail.
 You can either eliminate archers at a distance, or reach them and defeat them in direct fight
Archers are a frequent element of the landscape. I recommend that you locate them still before you enter a given location, using the Wraith mode. In my opinion, the best way to eliminate archers is using ranged the weapon, especially if you still have not raised the alarm. You can, just as well, approach their vantage points and deal with them directly or, silently execute them from behind.
 Defenders hide behind shields
By default, Defender orcs hide behind big shields and, for obvious reasons, this makes it more difficult to deal damage to them. Fortunately, you do not need to waste time on destroying the shields (although this is an option) A much better way to do is to jump over them and attack them from behind , before they can turn around and hide behind the shield again.
 The hunter orcs use pikes
Hunters is another type of orcs. In combat, they use pikes thanks to which they are capable of dealing damage to Talion effectively. If possible, try to avoid their attacks but, instead of on counterattacks, rely on dodging.
 Try to stun berserkers
Berserkers are yet another type of the stronger orcs. They are characteristic for their ability to counter the standard attacks launched at them. The solution to this is stunning them. Only after the beast becomes defenseless for several seconds, you can land your own attacks.
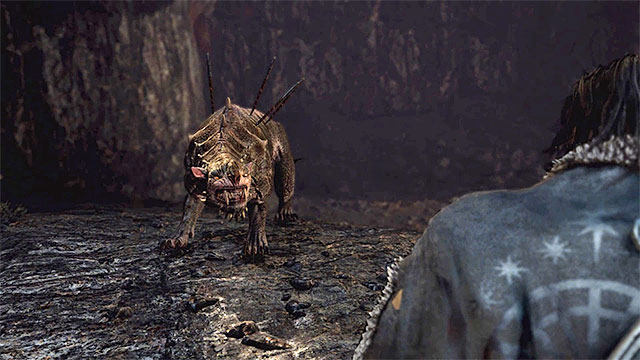 Caragors are very dangerous at close quarters
Caragors are large wild beasts that you can encounter throughout the game, or find in cages. IN the latter case, you can free them if, e.g. you want to gain additional experience, or if there is, around, a member of the Sauron's Army, whose weakness is the fear of caragors. These beasts are very dangerous at close quarters and, if you want to avoid taking (considerable) damage you need to tap, flawlessly, the dodging key/button.
Note - If you are knocked down by a caragor, you need to escape death by completing the minigame.
After you get an appropriate ability, you can tame caragors. You do that by jumping onto them from above (e.g. from a ledge or a rooftop), or by stopping their charge. In both case, you have to complete a simple minigame, where you need to operate with the analog stick and keys/buttons. Taming a caragor makes it much easier to fight, because the beast is very agile and can, additionally, feed on the opponents, which restores its health points.
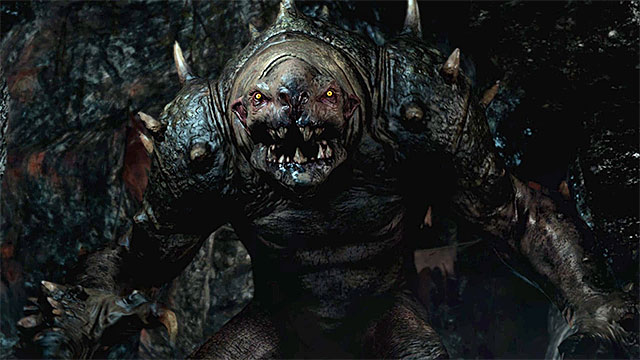 If you cannot mount graugs, it is better to keep clear of them
An even greater danger, than the caragors, are beasts called graugs. These large monsters pose a lethal threat for you and, if you are not pressed by the circumstances, it is best to stay away from them. However, you do not need to keep avoiding them throughout the entire game because, just like in the case of caragors, it is possible to unlock the ability that allows you to mount them. With the huge graug as your mount, you can easily decimate a big army of orc, or eliminate an elite member of Sauron's Army.
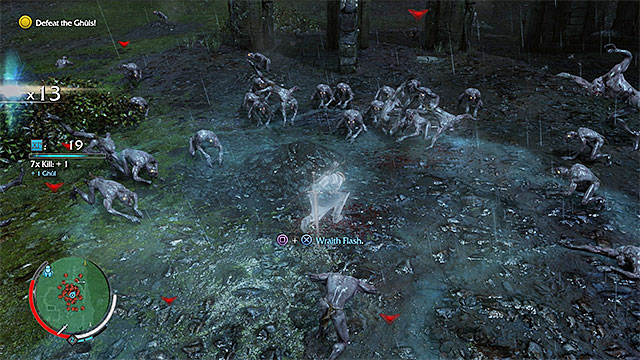 Ghuls come in groups, but they die quickly
Ghuls occupy only select locations of Mordor and their main advantage is that they usually act in big, or very big groups. Of course, this requires you to attack, in melee, again and again. Also, the special attack connected with ghuls is very useful, which you gain access to soon after the initial encounter with them, during the main storyline.
Note - some ghul variations may attempt to wound you by spitting venom, over distance. In such situations, try to shorten the distance between you and the opponent and attack in melee.
 Orc captains and Warchiefs can be dangerous, even by themselves. When they come in groups, things get really complicated.
Another group of opponents, are the ones connected with the Nemesis system, i.e. the ones that have been described in the chapter entitled Sauron's Army. You need to be the most vigilant while fighting Captains and Warchiefs. This is so, because they are much stronger than the above orc types. Apart from that, they have lots of strong points and, relatively, few weaknesses, which it is best to learn about.
Note - in extreme situations, in a single locations, there can be as many as two, or even three members of Sauron's Army. For the, quite, obvious reasons this CONSIDERABLY raises the difficulty of a possible battle. I recommend that you avoid such fights because otherwise, you would have to check out who you are attacking, on a regular basis (different weak and strong points) and avoid the strong attacks of those of the elite orcs that you aren't targeting at the moment.
 An example boss- Tower
The last category of enemies are bosses. Unlike Sauron's posse, which is randomly generated, these are predetermined and they appear at the specific moments of the game (e.g. after you start a main mission). To learn more, see the chapters devoted to the walkthrough of main and side missions of the game.
Middle Earth: The Shadow of Mordor places quite a stress on acting from shadows. There are some missions that can be completed only if Talion remains unspotted and even if this limitation does not apply, silent elimination of the enemies allows you to clear the battlefield of the enemy creatures in an easy and enjoyable way. Below, you can learn about the most important information connected with sneaking and avoiding detection.
Note - After you start each new mission, spend some time on learning additional objectives. Often, they concern sneaking and, meeting such requirements is additionally rewarded.
 The yellow and the red icons symbolize the level of alertness
The level of alertness of the enemies is represented, in the game, in a quite standard way, i.e. by means of color coding. Yellow means that the monster noted something that attracted his attention, but he does not yet suspect what this may be. Red means that the enemy is already aware of your presence and attempts to hunt you down. If the red icon fills up, the enemies will be alarmed to your presence and will try to approach you. You can then start fighting, or flee. In the case of the latter, just like in the case of, e.g. the Assassin's Creed franchise, you need to get out of the sight of the opponents and either lose them, or hide where you cannot be detected (more about this, below).
Thickets are a perfect hiding spotThe Shadow of Mordor offers a quite wide array of options, when it comes to remaining in hiding. First of all, you need to remember that you should hold down the Sneaking key/button. What is even more, in the sneaking mode, you can run and this is helpful, if you want to dash by the enemies, or approach a given monster before he manages to turn back.
Before you enter each new area, it is a good idea to learn about the current situation and, using the Wraith mode, get to know about the positions of the individual enemies. Of course, you need to keep in mind that some of the enemies are constantly patrolling the area and that, e.g. the wild caragors can sniff Talion up. I recommend that you use all the available elements of the environment, to your advantage. What I mean here is, mainly, bushes that are an ideal hiding place, if the enemies are actively searching for you. Apart from that, I recommend that you search for the opportunities to climb onto buildings and rocks.
Note - what harmonizes with the bushes is the option to whistle to distract monsters. You can whistle towards the orc that you lock on to, wait for him to approach Talion and eliminate him silently, without alarming the others.
 By default, silent kill does not alarm the other monsters
Of course, avoiding the monsters that you run into, is not the only function of acting from shadows because, you can just as well (or even, it is required, sometimes) plan surprise attacks this way. I recommend that you use silent executions on a regular basis. These can be executed after you get behind the back of the opponent. It is a good idea to make sure beforehand that the attacked monster is not within sight of another enemy. After you unlock one of the additional abilities, you will also be able to execute monsters from above, by jumping down onto them and this is a good ability if you do not mind climbing various structures.
I recommend that, apart from executions, you also use the bow on a regular basis. This weapon, even in its basic form, can be used to eliminate the inconvenient opponents (e.g. archers) After you unlock the Shadow Strike ability, it is also useful for shortening the distance between Talion and the enemy being targeted, or while escaping hot spots.
 Wraith mode is helpful for locating collectibles, among others
Middle Earth: The Shadow of Mordor is an open-world game and you can start the exploration of the first area (of the two available ones) (Udun valley) right after you complete the short prologue.
I recommend that you explore each area with utmost care, because many of the locations are being guarded by lots of monsters. Therefore, I recommend that you go on a reconnaissance, before you enter each new area. Here, you can use the Wraith mode, which highlights the enemies in the area, among others. The exploration itself is what I recommend because, between the main missions, you can take some time to complete side missions, to find collectibles or to interrogate the orcs that hold information on the members of Sauron's army.
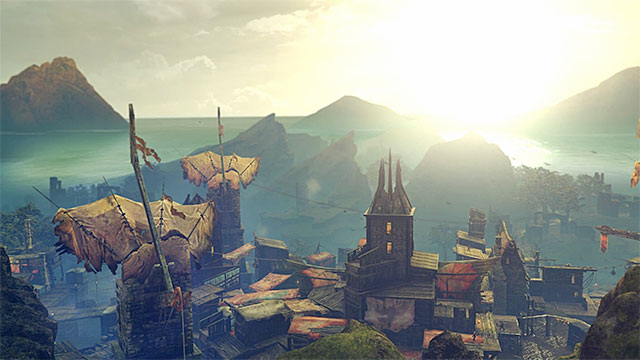
 An example orc fortress
What holds a special place on the world map are orc fortresses, because the abovementioned monsters stay there in large quantities. It is best to start visiting fortresses only after Talion becomes stronger. While in a fortress, try to stay in shadows. If, in spite of that, you are detected, try to get the monster that spotted you, as quickly as possible, before he manages to raise the alarm, because reinforcements will arrive in the fortress, otherwise, and things will get even more complicated.
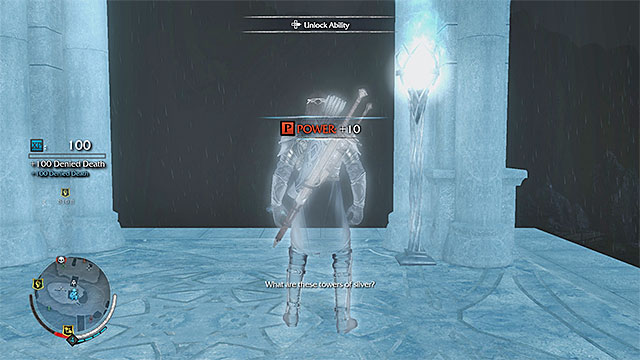
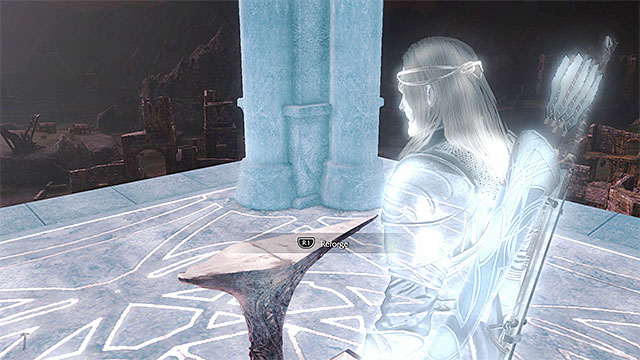
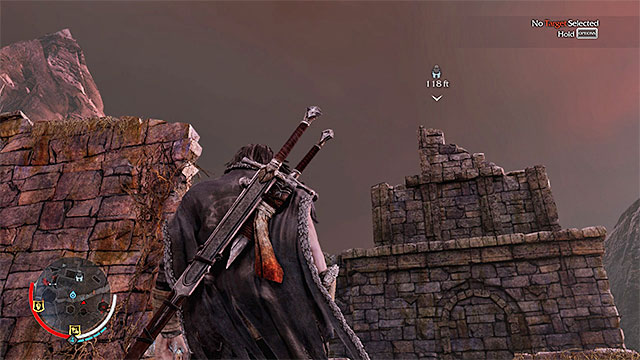 An example, inactive, forge tower
In the game, there are a dozen-or-so forge towers and they play the same role as, e.g. synchronization points in Assassin's Creed. After you reach an inactive tower, you can climb it to the very top. After you reach the top, you will be able to hit the anvil, which activates the tower.
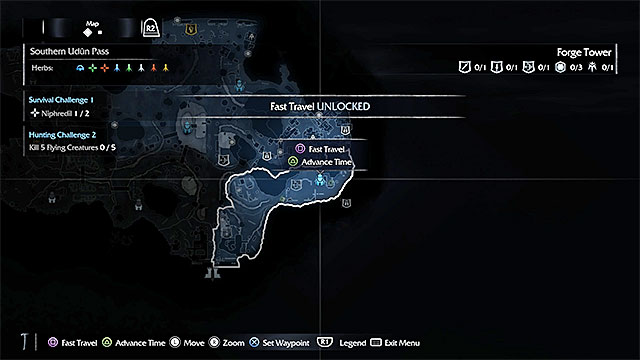 After you select an active tower, you can, e.g. teleport there or speed up time
There are several important consequences of activating a tower:
 Areas of Nurn become available only after you complete the 11th main mission
As I have mentioned above, the Udun valley is available from the very beginning of the game but, this is not the only location in the game. After you complete the eleventh main mission (defeating of boss Tower), you unlock the option to reach Nurn. This area is subject to the same rules so, it has its own forge towers, collectibles and mission starting points.
Note - changing locations to Nurn does not mean that you leave the Nurn valley once and for all. You can return to the valley, without any problems, assuming that you are not on a mission, at that moment.
Note - In each of the two locations, you are fighting against two different Sauron's Armies. Therefore, do not worry if, after you open the Nemesis window, it turns out that you need to start learning about, and eliminating, the members of the army.
Note - You do not need to postpone the missions until you complete the main storyline. After you complete them, Talion returns to Mordor, and will be able to handle the rest of the things.
In Middle Earth: The Shadow of Mordor missions are divided into four different groups:
 An example mission marker
Regardless of the mission that you select, you can activate it by reaching the marker on the world map. A quite useful bit of information is that you can start a given mission even if you are being chased by orcs. What is even more, after you activate one, the area resets, thanks to which you can simply start the mission.
Note - It is impossible to restart the already-completed missions. Therefore, before you start completing a mission, it is a good idea to learn about its optional requirements (if any), thanks to which you will not miss the opportunity to obtain more gold or experience.
Note - In extreme situations, you can start a mission only after you meet certain requirements. This limitation applies, mainly, in the case of main missions and you may have to eliminate several orc Warchiefs, or complete several other available missions, of this type, beforehand. To learn more, see the chapters concerned with mission walkthroughs.
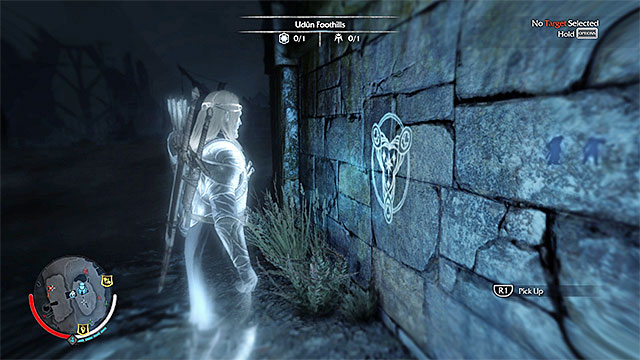 An example rune
Middle Earth: The Shadow of Mordor does not provide you with too many collectibles but, all in all, there are there are several tens of them in the game. Of course, it is a good idea to find them on a regular basis.
The first category are Ithildin runes, which come in the number of 32. To locate the runes, use the Wraith mode, because they are easier to be spotted then. A complete list of the runes has been provided later in this guide. For each rune, you receive gold.
 An example artifact
Another category are the Artifacts, and there are 42 of them in the game. Also in this case, it is recommended to use the Wraith mode, while exploring the area. A complete list of artifacts has been provided in another part of this guide. Finding each artifact is rewarded with gold. Apart from that, it is a good idea to view them in the inventory and locate the spot, where the memory connected with it can be viewed.
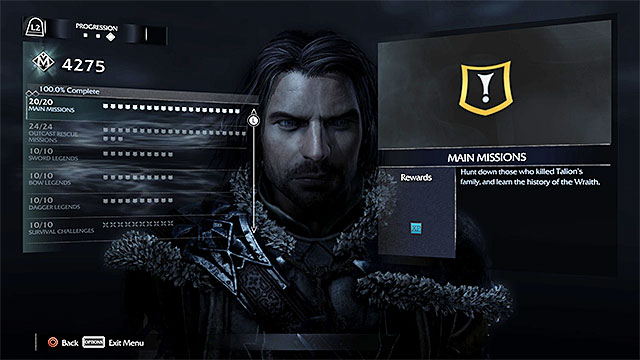 Progression window
Middle Earth: The Shadow of Mordor informs you about you progress, into the game, on a regular basis. If you want to complete the game in 100%, you need to make sure that you do the following:
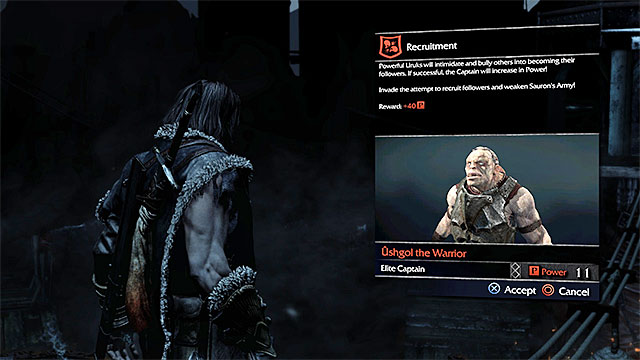
The Sauron's Army is one of the unique elements of the game, which is also called the Nemesis System. It is a group of several tens of unique orcs subject to Sauron, who influence the game to a lesser, or greater extent. You can, for example, run into Sauron's minions during free exploration of Mordor, or hunt them of your own accord. At first, the game does not require you to take interest in Sauron's army, but this gains in significance, as the game progresses. Personally, I recommend that you take interest in the Nemesis System as soon as possible because, thanks to interacting with the members of the army, you can obtain Power points or, in a long run, magic runes (upgrades for Talion's weapons), among others.
A very important piece of information is that the initial make-up of Sauron's Army is randomly generated at the beginning of the game. Each orc is generated with different looks and a different set of strong and weak points. Actually, this is not the only random element connected with the Nemesis System, because further enhancements in the Sauron's Army (with minor exceptions connected with progress into the game) also are non-linear in their character. For example, a given orc may, of his own accord, want to attack his superordinate and progress in the ranks of the army, as a result, or die as a result of the successful offensive by Talion. You will learn more, about this type of relationships, from this chapter. At this point, I only want to make it perfectly clear that what has been presented here, is not the only possible course of events. Therefore, the aim of this chapter is to provide you with hints and information on possible behaviors, rather than a standard pattern.
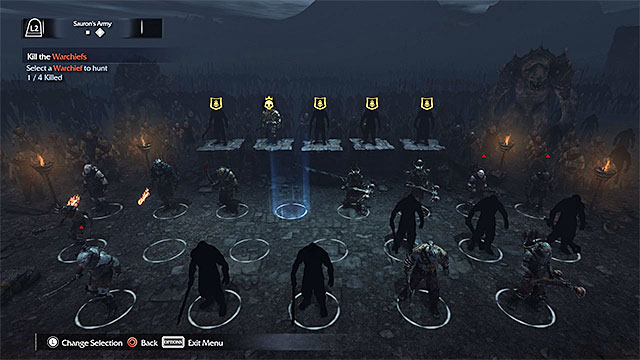 An example Sauron's Army
You can look up your current knowledge about the Sauron's Army at any point of the game - you simply need to pause it and select the appropriate item in the menu screen. At the very beginning of the game, virtually all orcs that make up the Army, are hidden and this is so, because you first need to obtain information about them (this has been described on the next page of this guide). As for the revealed orcs, you can freely examine them and scrutinize their statistics. Also, the game allows you to mark them as your targets (as long as you know their whereabouts), so as to make it easier to reach them, basing on the map.
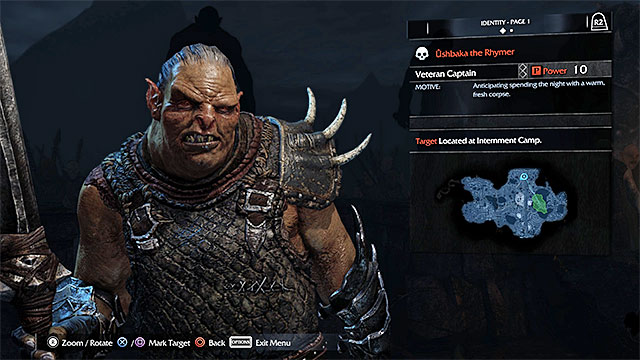 The window of an example member of Sauron's Army- you can learn his rank and power level
The members of Sauron's army have been divided into three categories:
It has been mentioned on the previous page that, at first, Talion knows virtually nothing about the members of Sauron's army. As a result, sooner or later, you need to perform certain actions that let you learn about them, as well as their strong and weak points.
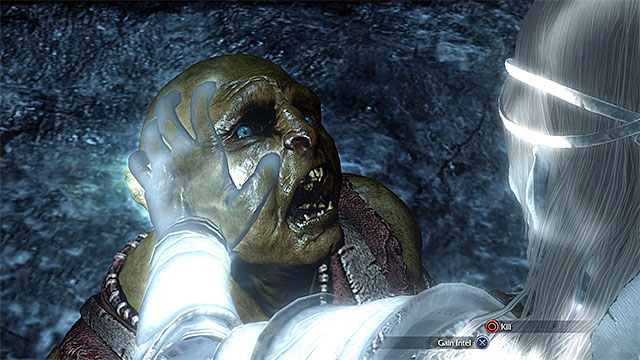
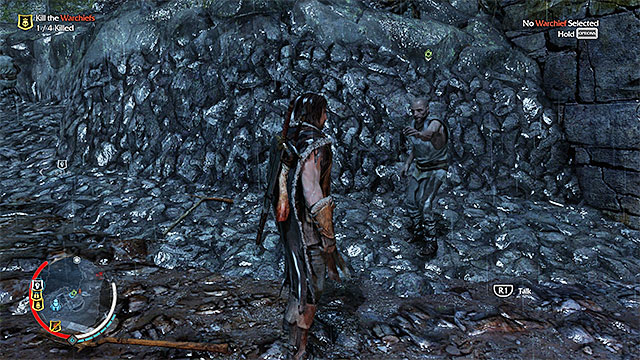
The most obvious way to obtain information is to interrogate the regular orcs. The game allows you to interrogate each orc that you run into. Unfortunately, most of them cannot provide you with advanced knowledge and, at best, you can learn what the orc in question looks like and what his name is. If you want to learn more (strong and weak points of Sauron's minions) you need to search out an orc with a green icon above his head. Enemies of this type are also marked on the world map and an example orc informant has been presented in the above screenshot.
Note - for more detail, you can also interrogate weakened Captains (you weaken them with your attacks). They can provide you with the same knowledge as the abovementioned informants.
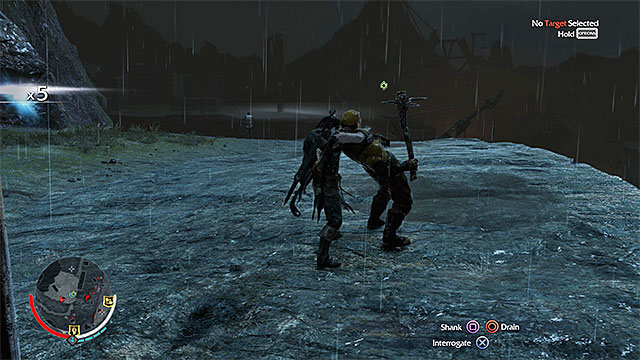
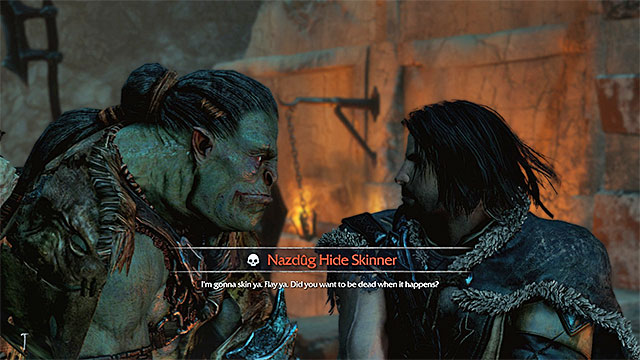
 You need to grab an orc and confirm that you want to interrogate him
In itself, it is not easy to interrogate an orc, because you need to make sure that you will not be interrupted, in the process. Therefore, it is best to kill the monsters around, in the first place, and do your bidding afterwards. You need to grab the orc and press the key/button that initiates the interrogation process.
After that, the window of the Sauron's army opens, which allow you to decide what to do. You can:
If you want to learn about all the members of the Sauron's Army, you need to perform a total of several tens of interrogations (this is not required). You can, just as well, focus on several Captains of Warchiefs of your choice and try to learn more about them. The game grants you lots of freedom, when it comes to that.
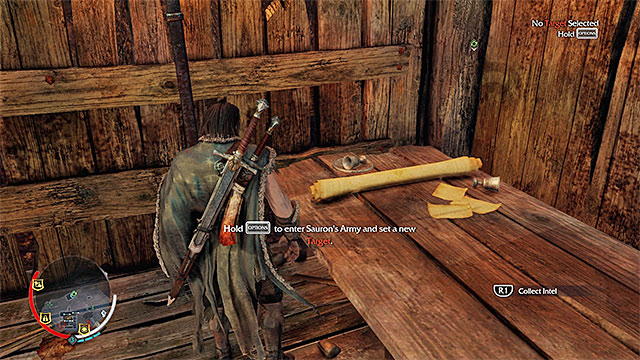
One of the alternative ways to learn about the members of Sauron's Army is to find interactive documents, like the one in the above screenshot. The main upside of this method is that you only need to collect such a document, without the necessity to fight battles, or risk Talion's life in any other way.
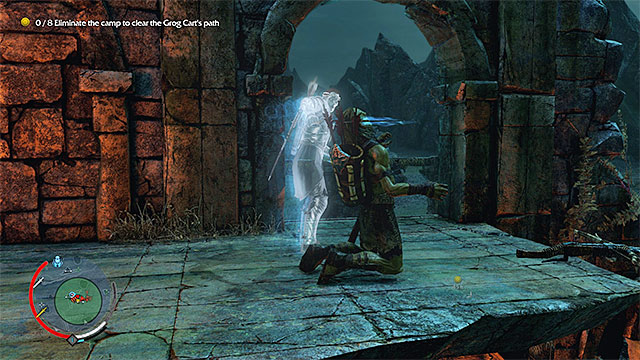
 You can see the Outcast and obtain intelligence data
Yet another method is to meet the Outcasts. At this point, I recommend that you learn about Outcast Rescue Missions, because this raises the odds of meeting a friendly character that has the knowledge that you require. Before you meet up with the marked Outcast, (the well-known green icon), you need to clear the area of monsters. The meeting itself is very short because it opens the Sauron's Army window immediately.
 You can either find the Army members on your own, or obtain information from the other orcs
There are two ways, in which you can find the lower rank orcs and Captains. If you managed to interrogate an orc and learn the identity of a specific Army member, the game automatically informs you of the whereabouts of such an orc. You can, then, add a new marker to the world map and reach the location. Another way is to meet the member of the Sauron's Army during free exploration of the game world and this also goes for those of the orcs that you have not managed to "identify" yet. Regardless of the circumstances, at the moment, at which you encounter an orc of a lower rank, or a Captain, the game initiates a short cutscene that will let you know who you are dealing with.
 It is much more difficult to reach the warchiefs, because you need to lure them out first
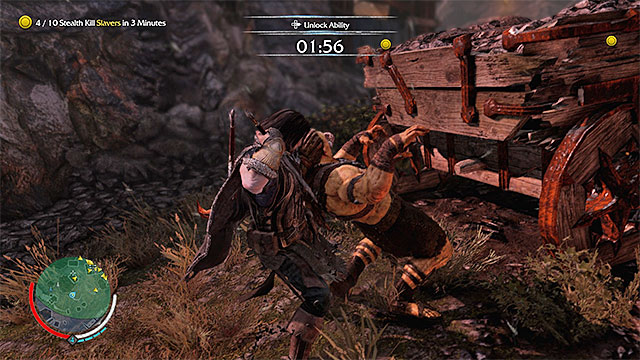
As for the Warchiefs or the Sauron's Army, the process is a bit different.. Just as I mentioned earlier, you first need to lure out the selected Warchief and you do that by completing one of the missions connected with him, which was marked in red, on the map. The objectives of these missions are randomly generated so, you may need to perform a series of assassinations, within the allotted time, or eliminate a group of regular orcs, without being detected. If you manage to complete the mission (you can repeat it as much as you want to, in the case of a failure). the Warchief appears around and only then, will you be able to plan on how to kill him.
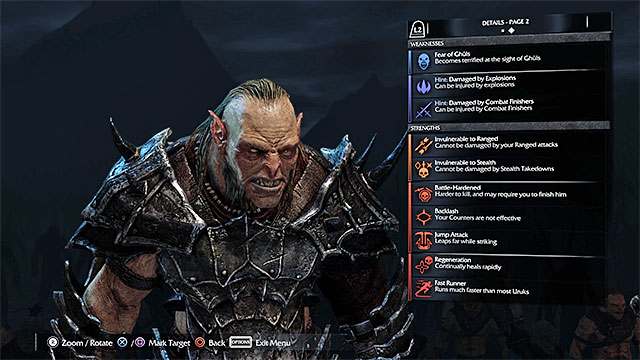 An example page with weak an strong points of a member of the Sauron's Army
Each member of the Sauron's Army has his weaknesses and strong points, which are generated at random, at the moment at which the game starts. By default, Talion does not know about them and the only way to learn about them is to attain additional information about a given orc (thanks to interrogating another monster, or thanks to finding a document with intelligence data).
As much as the regular orcs have an equal number of strong and weak points or even more of the former, Captains and Warchiefs have more strong points. Of course, it is a good idea to examine both in detail. This will allow you to figure out, which actions you should avoid and what you can do to get rid of the orc with ease.
Exploiting the weaknesses of the opponent, e.g. the fear of wild animals, allows you to eliminate them more easilyBoth the strong and the weak points of the members of the Sauron's Army are highly diverse. One of the weaknesses of the opponent may be, for example, the fear of caragors or ghuls, or the information that you can kill him with a successful surprise attack. When it comes to his strong points, he may be completely immune to ranged attacks, or have an unique special attack that increases his offensive capabilities.
Note - You do not need to learn the weak and the strong points by heart of the orcs, after you learn them from the intelligence data. You can stop the game even after you start the fight and have a look at both lists.
The below list presents example weaknesses of the members of the Sauron's Army:
THE WEAKNESS
HOW TO EXPLOIT?
Clumsy
Try to grapple the orc in melee - he cannot defend against this type of actions.
Damaged by Combat Finishers
Rely on special attacks in melee, while fighting such an orc.
Damaged by Explosions
Blow up the explosive elements of the surrounding, while fighting the orc.
Damaged by Ranged Attack s
Rely on the bow, throwing daggers and the Shadow Strike attack while fighting the orc.
Damaged by Stealth Finishers
Perform stealth finishers (surprise attacks from behind) while fighting the orc.
Fear of Betrayal
Try to cause a situation, in which the allied orcs start fighting with each other (e.g. thanks to branding one).
Fear of Burning
Search for opportunities to blow up the explosive elements of the surroundings (at best, by using the bow).
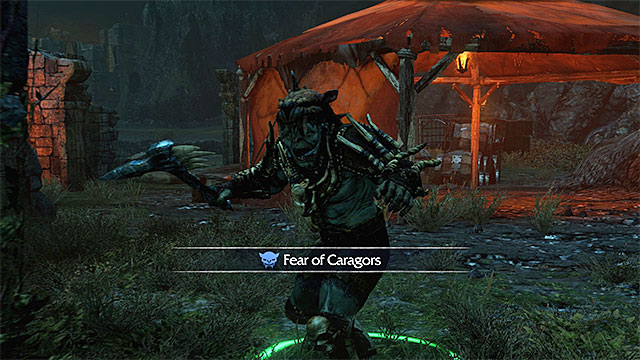
Fear of Caragors
Use caragors to your advantage, whether by riding one and attacking the orc in question, or by releasing them from cages.
Fear of Ghuls
Lure groups of ghuls near the orc.
Fear of Graugs
Lure the huge graugs near the orc.
Fear of Morgai Flies
Search for opportunities to destroy nests of flies, near the orc.
Fear of Rival
Try to lure the rivals of the orc near the orc. You can learn who the Captain or the Warchief is currently competing against, from the Sauron's Army window.
Fear of the Gravewalker
Attack the orc directly, so you stay within his sight for the whole time.
Branded
Try to grab the orc in melee - he will be unable to defend against this type of action.
Vulnerable to Combat Finishers
While fighting the orc, try to land special attacks because they may kill him.
Vulnerable to Mounted Beasts
Try to attack the orc, e.g. while riding a caragor. The special attack of the monster may kill the opponent instantly.
Vulnerable to Ranged Attacks
Try to eliminate the orc with a ranged attack, whether by aiming the bow at the head, or by performing the Shadow Strike attack (teleportation and a strike).
Vulnerable to Stealth Finishers
Try to get the orc from behind and perform a stealth finisher (a surprise attack). This type of action may kill him and you will not have to fight against him.
The below list presents example strong points of the members of the Sauron's Army:
THE STRONG POINT
HOW TO EXPLOIT?
Backlash
While fighting the orc, dodge from his attacks, thanks to rolling, because it is not possible to counter the attacks.
Battle-Hardened
Be prepared to perform an additional execution (the minigame) after you drain the orc's health bar entirely.
Blood Thirsty
Avoid taking damage from the orc's attacks, because the properly landed ones can heal him.
Body Slam
While fighting the orc, avoid his attempts to grapple you.
Boomerang Throw
Avoid the orc's ranged attacks.
Charge Attack
During the fight with the orc, be prepared to dodge to the side after he starts charging at you.
Combat Master
Do not land special attacks during melee fight.
Deflect and Counter
Be prepared to react to the attempts to counter your attacks.
Fast Runner
During the fight with this orc, keep in mind that he can move around the battlefield quickly.
Flaming Weapon
Avoid this orcs melee attacks because they deal lots of damage from fire.
Fury Attack
During the fight with the orc, avoid his strong attacks in the fury mode.
Gang Leader
Be prepared to face both the main opponent and his henchmen.
Grapple
While fighting this orc, avoid his attempts to grapple you.
Ground Pound
While fighting this orc, be prepared to jump away, as soon as he attempts a ground pound.
Hate of Bodyguard Suffering
Avoid attacking the Captain's or Warchief's bodyguards. Focus on the main opponent only.
Hate of Burns
Avoid destroying the explosive elements of the surroundings, to prevent the orc from taking damage from fire.
Hate of Caragors
Avoid using caragors around this orc and do not release them from cages.
Hate of Defeat
Try to kill this orc in one attack or, try to drain his health bar quickly, when he is at the brink of dying.
Hate of Ghuls
Avoid luring groups of ghuls near this orc.
Hate of Graugs
Avoid luring the huge graugs near the orc.
Hate of Morgai Flies
Avoid destroying the nests of the flies around the orc.
Hate of Rival
Avoid luring the rivals of the orc, near the orc. You can learn who the Captain or the Warchief is currently competing against, from the Sauron's Army window.
Heavy Attack
While fighting this orc, avoid hi strong attacks, because you cannot counter them.
Invulnerable to Ranged
Do not attempt using the bow or throwing daggers to weaken this orc.
Invulnerable to Stealth Finishers
Do not attempt eliminating this orc with the surprise attack from behind the back.
Jump Attack
Be prepared to dodge from the long jumps of the orc.
Monster Slayer
Do not rely on monsters for damage dealt to this orc.
No Chance
Do not let the orc drain Talion's entire health because you will not be able to escape death at the end (the minigame).
Poison Cloud
Be prepared to deal with the effects of poisoning.
Poison Weapon
Avoid melee attacks of this orc, because they can poison you.
Quick Shot
Avoid the orc's ranged attacks.
Quick Turn
Try not to attack the orc from behind, because he can turn back quickly and attack you.
Rapid Attack
Be prepared to react to attempts to land quick unique melee attacks.
Regeneration
Try to win the battle without greater interruptions, because the orc's health keeps regenerating. Also, try to land the strongest attacks to end the fight as quickly as possible.
Savage Weapon
Avoid the melee attacks of the orc, because they can make you bleed (gradual loss of health).
Skirmisher
Be prepared to run after the orc, if he flees after losing some health.
Sniffer
Do not try to hide from the orc, because he will locate you with ease.
Summoner
Try to lure this orc away from the other ones, to prevent him from summoning the others to his aid.
Throat Grab
While fighting this orc, avoid being grappled.
Tracker
Do not try to hide from the orc, because he will locate you with ease.
Vault Breaker
Do not try to jump over the orc, because you will fail.
Wraith mode Stun Block
DO not try to stun this orc in melee.
Wrecker
While fighting this orc, avoid his strong shield bashes and attacks with the blade.
 You can either defeat the member of the Sauron's Army...
I have stated at the beginning of this chapter that the actions and the events, involving the members of the Sauron's Army may be activated, as a result of the actions taken by your character, of without your direct intervention. At this page, we will take an look into the former. Each orc can be defeated, or killed, where in the case of Captains and Warchiefs this is not easy to do and often requires you to fight a demanding battle that would be devoid of major slipups. After the victorious battle, the member of the Sauron's Army always drops a rune (they have been presented on one of the following pages) and you receive Power points.
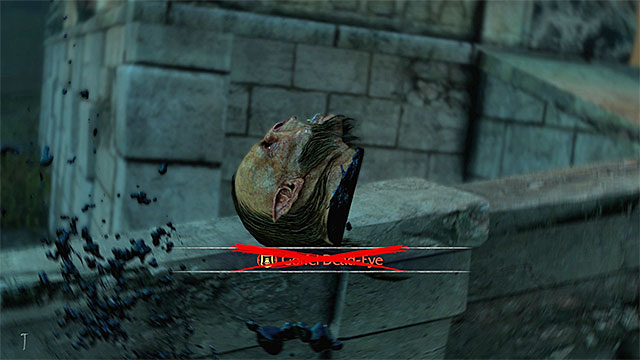
There are two categories of victories, against Captains and Warchiefs. If you have defeated the orc by draining his health bar, not necessarily does he have to die and you may have to meet him again, in the future. The only effective method to ensure the death of the orc is to perform the execution on him, as a result of which he is decapitated.
Note - do not hope to be able to kill all of the members of the Sauron's Army, because the killed ones will be replaced by new ones, with time. In spite of what it may seem, this is not an unwanted situation, because thanks to the new orcs, you get the opportunity to obtain new rewards for killing them.
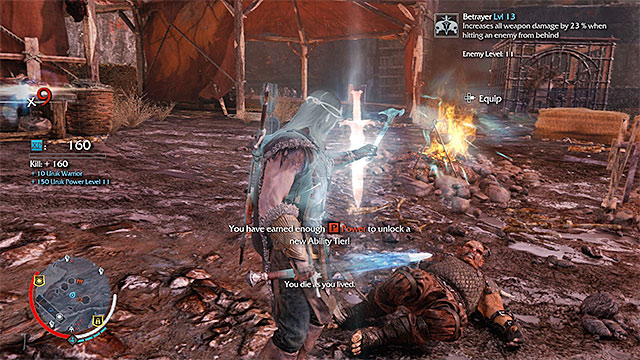
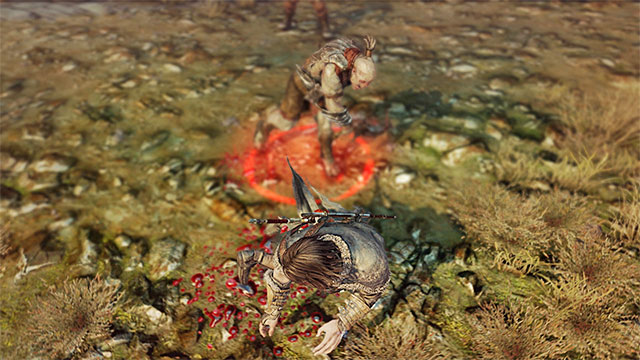 ...you may be defeated...
The enemy orc may also kill you, whether in the course of a flawed battle or... on your own accord. In one of the previous chapters, I have pointed out that there are no repercussions to Talion's death. Also, your character's death does not need to be a negative event. This is so because, the orc that kills you, gains in strength and is promoted in ranks, which in turn raises the value of the reward for defeating him later on. What I mean here are runes, which you will learn more about from the following pages of this chapter.
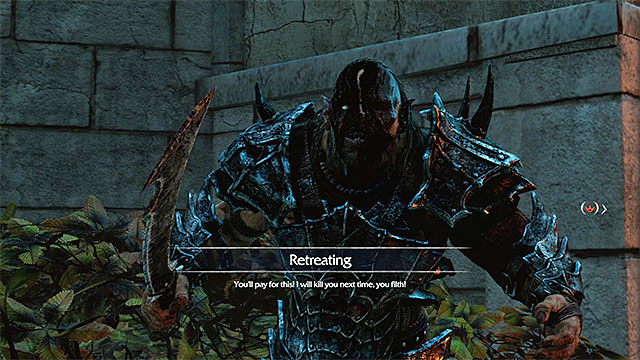 ...or he may flee
Yet another outcome of the battle with a member of the Sauron's Army may be his retreat from the battlefield, after he receives enough damage. Also in this case, you can do one of several things, i.e. try to catch up with him and kill him, allow him to flee and learn how this will affect his position in ranks. It may happen that the orc will be demoted and replaced with another one, or even murdered by his kin.
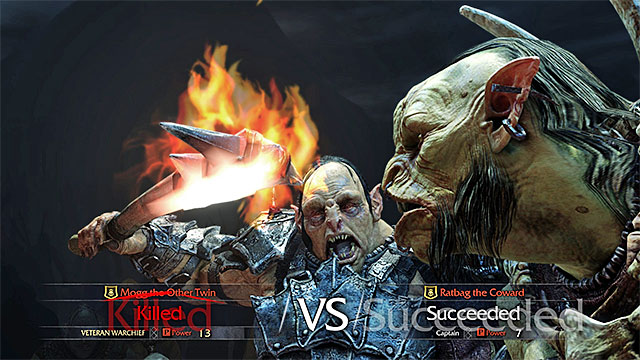 The members of the army may attack each other or perform different actions that result from their initiative
The game world evolves, not only as a result of the decisions taken by you, or the actions performed by you, but also independently of your actions. This usually happens when your character dies and some time elapses before you respawn, or when you decide to progress time, by interacting with a forge tower. All of the actions of this type are random and they may result, e.g. in the orcs' fighting for domination, or in the elimination of a Captain by one of the lower rank orc. This may result in the shifting of the power factor in an orc, or in the removing of one of the members of the Sauron's Army, as a result of his death.
 It is sometimes possible to join the battles between orcs, but you can skip it
Actions that are partially dependent on your actions include the so called Power Struggles. Also they are started by the members of the Sauron's Army, but the main difference here is that you can decide whether you want to join in, or you want no part in it. In the case of the former, you may need to reach one of the red points on time and start the optional mission. Also missions of this type are random in their course and they may, e.g. concern the feast organized by one of the Captains, or beast hunting organized by orcs.
 Each Captain or Warchief that you defeat drops a rune
The Nemesis System is not only about handicaps that require you to fight battles against the strong orcs. It also means various profits, such a experience points, power points or gold. The most valuable, however, are runes and you receive them as a reward for killing Captains and Warchiefs of the Sauron's Army. Each elite orc that you kill drops a random rune.
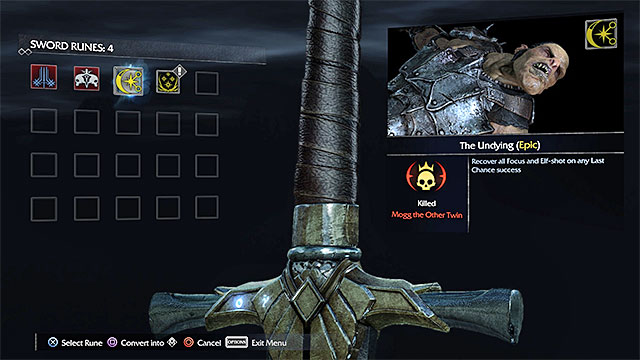 An example epic rune
There are several important relationships which it is good to know about:
Note - To learn more about how to upgrade weapons with runes, see the chapter entitled Character Development.
As you have probably noted already, the Nemesis System is a very complex game system, one that may make the game much more attractive, and influence the course of the game itself (e.g. thanks to obtaining runes of higher statistics). Below, I have listed the most important issues connected with the Sauron's Army:
You can develop the main character of the Middle Earth: The Shadow of Mordor in three different fields, which have been described in detail, on the following pages of this chapter. Each one of these fields is equally important but, they are very different from each other.
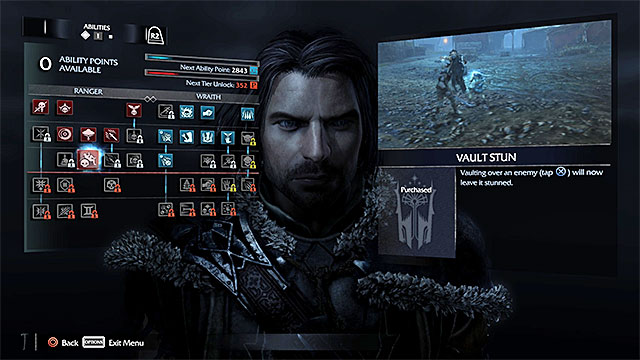 The abilities window
The first category are the new Abilities, which you gain access to as you progress in the game. The characteristic feature of the abilities is that they are passive in their character. This means that unlocking an ability gains you access to a new type of attack, or some other interesting action (e.g. poisoning of grog tanks) The abilities, themselves, can be divided into three categories:
 Completing missions is a good way to gain experience
You can buy abilities thanks to Ability Points. You receive n ability point each time that you gain enough experience. The best way to gain experience is to complete missions but, you can also receive it for performing other actions.
An additional restriction is that, the abilities of higher tiers are initially unavailable to you, even if you have one, or several, ability points. You first need to unlock abilities of the lower tiers and, to do that, you need to gain enough power points. The fastest way to obtain power points in to engage in the missions marked with red icons, on the map, i.e. ones connected with power struggles between the members of the Sauron's Army. These are point requirements for the successive ability tiers:
The bellow table presents all of the abilities available in the game. The most useful ones have been marked in bold. Green color has been used for the abilities that are unlocked automatically, with your progress into the story line.
THE NAME OF THE ABILITY
TIER
EFFECT AND COMMENTARY
Detonate
1
Allows you to blow up barrels and fires, thanks to shooting arrows at them. This is an excellent ability, whose additional asset is that you do not need to worry about taking damage from the explosions.
Elven Swiftness
1
Allows you to move faster and raise the multiplier, thanks to a successful landing, after the vault over an obstacle.
Execution
1
Allows you to kill the opponent with the special attack, which becomes available after you land a combo. This is a very useful ability, especially in fights against greater numbers of enemies.
Impact
1
The opponents, whose attacks you gave countered, can be stunned or repelled.
Ride Caragors
1
Allows you to harness a caragor after you jump onto its back. It is a very useful ability, especially if you want to eliminate a group of monsters, or the enemy Captain/Warchief with a fear of caragors. Note - Harnessing a caragor requires you to complete a simple minigame.
Strike from Above
1
Attacking an opponent from above kills him. This is a perfect ability but, it is worth noting that only works against the opponents that are not alerted (therefore, it may be used as an element of acting from shadows)
Wraith mode Stun
1
Allows you to stun the opponent and deal a combo. I strongly recommend that you use this one often, because it comes in handy in, nearly, every battle.
Brutalize
2
Upgrades the Strike from Above ability, which makes the execution from above strike fear in the hearts of the nearby opponents and makes them flee.
Caragor Hunter
2
Allows you to harness a caragor after you interrupt its charge. IT is a very useful ability, especially if you want to eliminate a group of monsters or an enemy Captain/Warchief with fear of caragors.
Critical Strike
2
Brings up the multiplier faster. I recommend that you buy this one, soon after you unlock the second tier of abilities, because it makes it much easier to score a higher multiplier.
Last Chance Finisher
2
After you complete a minigame, while at the brink of dying, you can kill the opponent that attacked you. This is a useful ability, because you will be able to eliminate the attacker immediately and you do not need to fear his attacks against the weakened you.
Pin in Place
2
Allows you to stop orcs, thanks to shooting arrows at their lower limbs.
Poison
2
You can poison barrels with grog. The orcs that drink the poisoned grog may either die immediately, or start fighting each other. During the regular game, it is not an ability that would be used too often, unless you do not mind waiting until the orcs drink the poisoned grog.
Shadow Strike
2
Uses two arrows to teleport to the targeted enemy and deal damage to him. This is one of the best and most useful abilities in the game. You can use it to move around the battlefield faster, or to reach the enemies that are difficult to reach and attack them by surprise.
Stealth Drain
2
Allows you to drain the opponents for energy, after you attack them by surprise. It is not too much of a facilitation, because you can drain the other opponents for energy, also the ones that are aware of your presence.
Throwing Daggers
2
Allows you to use throwing daggers. Their only advantage is that they can be used to stun enemies temporarily, because they deal minimal damage.
Wraith mode Flash
2
Allows you to blind opponents, thanks to special attack, after you land a combo. This ability is very useful, especially while fighting ghuls or big groups of orcs.
Brace of Daggers
3
Upgrades the Throwing Daggers ability, which allows you to throw three daggers at a time.
Combat Drain
3
Allows you to drain the opponents, for energy, during a fight. The action becomes available after you land a combo.
Graug Hunter
3
Allows you to harness a graug after you perform a surprise attack on it. I recommend that you hunt these on a regular basis, because thanks to graugs you can quickly eliminate a group of opponents or an enemy Captain/Warchief with fear of graugs.
Lethal Shadow Strike
3
Upgrades the Shadow Strike ability and allows you kill the targeted opponent after a successful teleportation. It is a very useful ability, especially if you do not want to alarm the rest of the opponents, with the teleportation.
Shoulder Charge
3
Upgrades the standard charge. After upgrading, it can be used to ram through the enemy shields and to tackle monsters down. This is a useful ability, because it makes many of the battles much easier.
Swift Finisher
3
Shortens down the time necessary to finish off the knocked down opponent. It is a very useful ability because, by default, your character requires quite a lot of time to kill the knocked down opponent and, as a result, this action is often interrupted by another opponent.
Vault Stun
3
Jumping above an opponent allows you to stun him. I recommend that you take interest in this one, especially that fighting some types of opponents requires you to perform vaults (e.g. against orcs with shields).
Wraith mode Finisher
3
The heads of the defeated opponents, or of the ones that you drained for energy, may explode. This may deal damage to the rest of the opponents and frighten them.
Blade Master
4
Upgrades the Critical Strike ability and allows you to land a special attack right after you obtain x5 multiplier (instead of the standard x8). It is imperative that you obtain this ability, because this will allow you to kill, or weaken enemies in a much easier way.
Brand
4
Allows you to brand the enemy, thanks to which he starts fighting for you. This is one of Talion's best abilities and I recommend that you use it on a regular basis, as soon as you obtain it. Remember always to pick allies that will be most helpful to you. survive in the battlefield the longest.
Death Threat
4
Allows you to send a threat to a selected Captain or Warchief of the Sauron's Army. It is a VERY interesting ability, because it raises the possibility of dropping an epic rune, by the opponent that you have threatened. I recommend that you use this ability each time that you intend to attack one of the stronger Captains or Warchiefs.
Fire Arrow
4
Allows you to set on fire the arrows that you shoot. This becomes available after you land a combo and can be helpful while, e.g. fighting the members of the Sauron's Army with low resistance to burning.
Resilience
4
Allows you to receive one blow from the enemy, without resetting the multiplier. I recommend that you buy it only later into the game, i.e. when the majority of the battles become more difficult. It is, then, easier to make a mistake and, thanks to this ability, not necessarily do you need to take the penalty.
Shadow Mount
4
Upgrades the Graug Hunter ability and allows you to mount a caragor or a graug without any additional obstacles. The only requirement is that you harness the monster using the Shadow Strike action (teleportation). I recommend that you take interest in this one, because it shortens time necessary to take control over the beast.
Wraith mode Blast
4
Allows you to cause an explosion that encompasses all the enemies around your character.
Critical Strike II
5
Speeds up the process of raising the multiplier even further, thanks to well landed blows. Just like in the case of the base version of this ability, I recommend that you do not wait for too long, before buying it.
Dispatch
5
Upgrades the Brand ability, thanks to which you can kill the branded enemies at will.
Double Charge
5
After you land a combo, you can perform two special attacks, instead of one. I recommend that you unlock this ability, because special attacks help with each battle that you fight.
Flame of Vengeance
5
Deal double the damage, starting with the moment of a properly landed combo. This ability is useful especially when you need to defeat the more demanding opponents.
Quick Draw
5
Shortens the time necessary to draw the bowstring, while using the bow.
Shadow Strike Chain
5
Allows you to combine Shadow Strike attacks, i.e. the ones connected with teleportation.
Wraith mode Burn
5
Allows you to use attacks that launch flames that either stun or kill the nearby, stunned opponents.
 The attributes window
The second category are the Attributes. The basic element that sets attributes apart from abilities is that they are passive. This means that, after you unlock them, they start taking effect automatically, and you do not need to take any additional action. New attributes, e.g. extend your health bar, allow you to apply more runes to your weapon or extend the time slowing, while you use the bow.
You gain access to new attributes by spending Mirian points on them, i.e. gold that you gather. The cheapest attributes are as cheap as several tens of gold pieces, whereas the most expensive ones may require you to spend, as much as, several hundred, or even several thousand gold pieces. You can gather gold in many ways - by completing missions (necessarily, along with side objectives), by completing optional challenges, or by finding collectibles.
The below table presents the cost of attributes:
THE NAME OF THE ATTRIBUTE
TIER
COST
Max Health Up
I
100
Max Health Up
II
320
Max Health Up
III
640
Max Health Up
IV
1050
Max Health Up
V
2100
Max Elf-Shot Up
I
130
Max Elf-Shot Up
II
370
Max Elf-Shot Up
III
870
Max Elf-Shot Up
IV
1750
Max Elf-Shot Up
V
2400
Max Focus Up
I
100
Max Focus Up
II
320
Max Focus Up
III
640
Max Focus Up
IV
1050
Max Focus Up
V
2100
Sword Rune Slot
I
60
Sword Rune Slot
II
180
Sword Rune Slot
III
380
Sword Rune Slot
IV
800
Bow Rune Slot
I
60
Bow Rune Slot
II
180
Bow Rune Slot
III
380
Bow Rune Slot
IV
800
Dagger Rune Slot
I
60
Dagger Rune Slot
II
180
Dagger Rune Slot
III
380
Dagger Rune Slot
IV
800
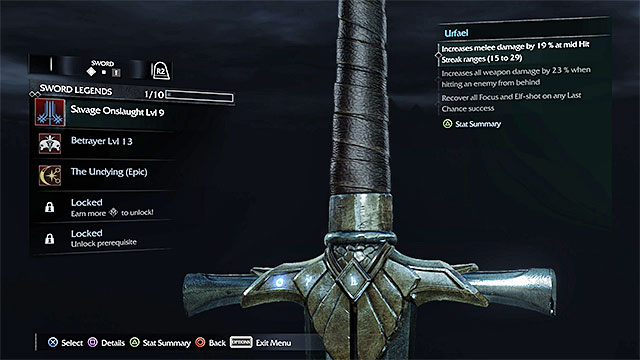
Storm of Urfael
-
2500
Flame of Azkar
-
2500
Shadow of Acharn
-
2500
The below list describes the available attributes:
 Each type of weapon can have a maximum of 5 rune slots
The last category are the upgrades for your weapons (the Upgrades tab) They are directly connected with eliminating Captains and Warchiefs of the Nemesis System, which you can learn more about from the chapter entitled Sauron's Army. Each Captain and Warchief that you defeat, drops a rune that you can apply to the sword, to the bow or to the dagger. The type of the dropped rune depends on the following:
By default, you can apply, to each of the weapons (sword, bow and dagger), only one rune(one selected from the runes currently owned by you). This limit can be raised, up to five runes and to do that, you need to buy new attributes connected with runes (to learn more, see the previous page of this chapter). Personally, I recommend that you unlock 2-3 slots, as soon as possible, because many of the runes are complementary for each other. Apart from that, it would be a pity if you could not use the epic runes straight away, to upgrade the weapon.
Note - applying a rune to a weapon is not irreversible. After you obtain better runes, you can easily replace the ones that you are no longer interested in.
The above map presents starting points for main missions available in the Udun valley, i.e. the location in which you start the game. The starting points for the individual missions have been predetermined. Some of them, however, become available only after you have met additional requirements and you can find these in the walkthroughs for the individual missions. Up until you meet the requirements, there will display a yellow padlock, next to the icon.
The above map presents starting points for main missions available in Nurn, i.e. the location in which you start the game. The starting points for the individual missions have been predetermined. Some of them, however, become available only after you have met additional requirements and you can find these in the walkthroughs for the individual missions. Up until you meet the requirements, there will display a yellow padlock, next to the icon.
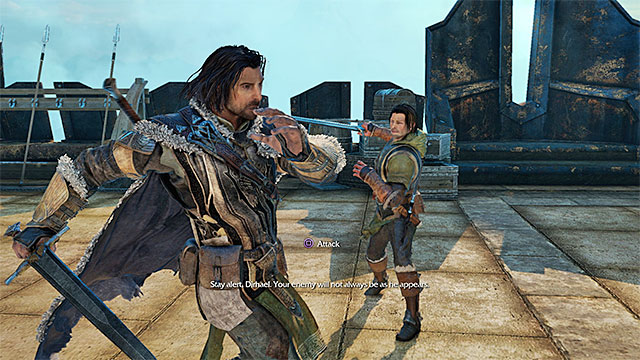 You need to practice the basics of melee combat
You take control of Talion, for the first time, during the sparring with his son Dirhael. Start practicing counters by pressing the displayed key/button, at the appropriate moment, when the characteristic icon appears above Dirhael's head. After you perform several counters properly, also focus on landing appropriate standard attacks in melee. You do that by tapping the main attack key/button.
Note - to learn more about the art of fighting, see the chapter entitled Melee Combat.
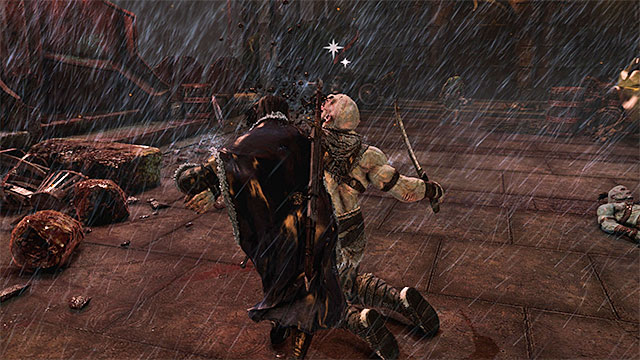 Execute the knocked down orc
After you see several cutscenes, you will have to practice another attack, out of the ones available to you. What is meant here is the execution of the knocked down opponent and to do that, you need to press two keys/buttons simultaneously.
Note - later into the game, you may be obstructed from finishing off the knocked down orcs, by other orcs. This time, however, there will be no obstructions to this action.
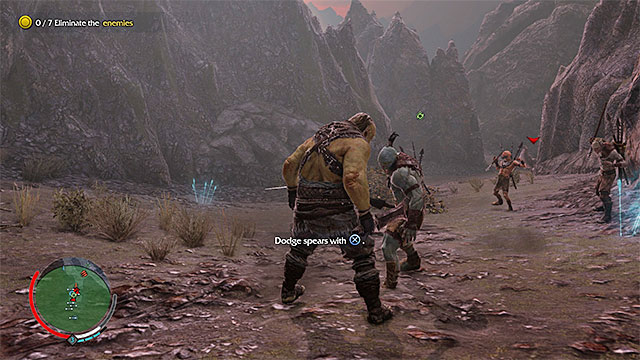
 Attack the successive monsters
Run up to the orcs up ahead (it is an opportunity to test sprint). Attack them and remember to counter the attacks and, if possible, to execute the orcs on the ground.
Note - Sprint towards a selected orc can be terminated by pressing the grapple key/button. Thanks to this, you will perform a strong nudge and, with a bit of luck, you knock the monster out of balance.
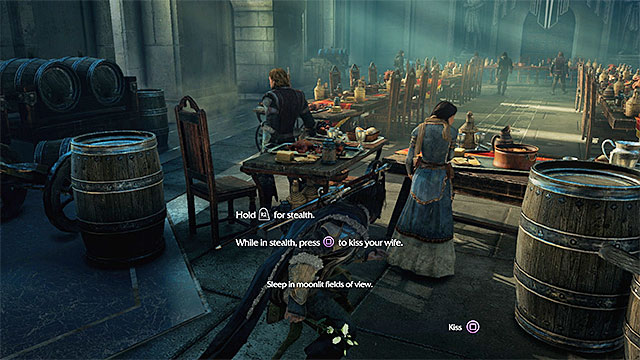 Sneak up to your character's wife
After you progress to the next scene of the prologue, hold down the sneaking key/button. Approach Ioreth (Talion's wife) and give her the flowers that you picked earlier.
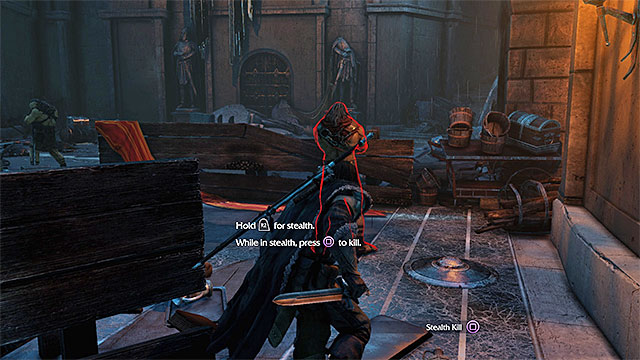 You get the opportunity to execute the opponent after you sneak behind his back
Also this time, you will learn about the sneaking mechanism. This time, you need to sneak up to three different orcs. Each time you get behind the opponent, press the stealth execution key/button. Eliminate all nearby monsters this way.
 You need to activate the first forge tower and jump down
After you get to the main map of the game world, start by learning about the principle on which forge towers operate - you can use them to fast-travel and to progress time. Each tower that you activate (you need to strike the anvil on the very top) also reveals the nearby missions and collectibles.
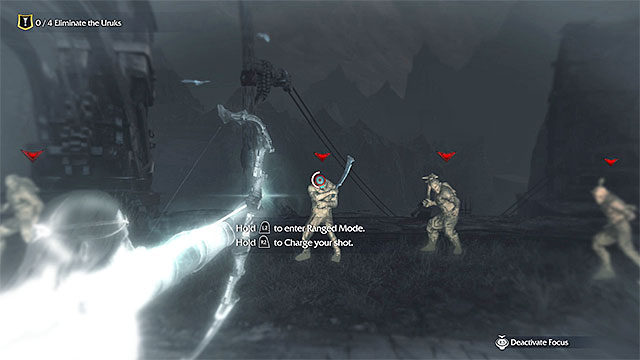 You can practice using the bow and stunning the enemies
Jump off the tower o access another tutorial. At first, you will be able to test the bow - target any of the orcs (at the head, at best), draw the bowstring and send an arrow towards the opponent. Now, start the fights proper while relying on counters, in order to avoid taking damage. Additionally, you can learn how to stun enemies. After you press the stunning key/button, the opponent becomes defenseless, for several seconds. You can use it to your advantage and attack the other enemies, or to attack the stunned one (with a combo of fast blows).
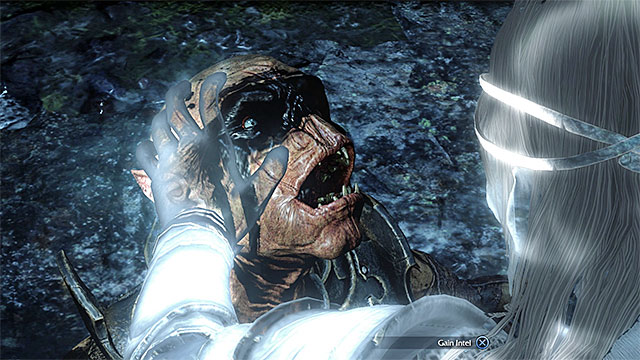 Interrogate the grabbed orc
Defeat all of the monsters, thanks to which there appears another one around. The last part of the tutorial assumes that you interrogate him, in order to obtain information. To do this, you need to grab the orc and press the interrogation key/button (Gain Intel).
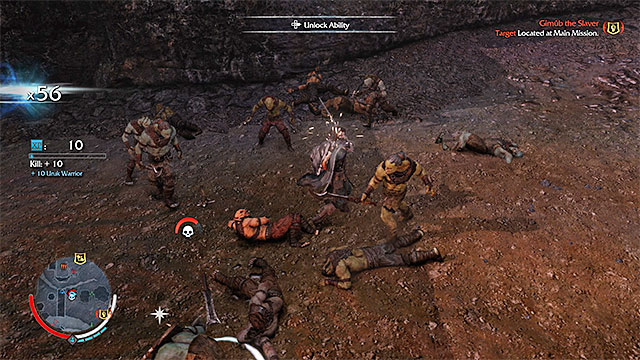
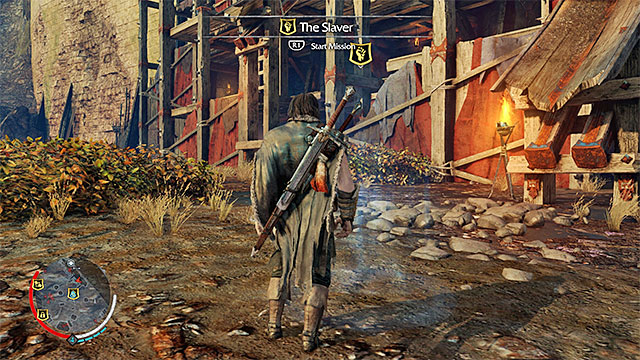
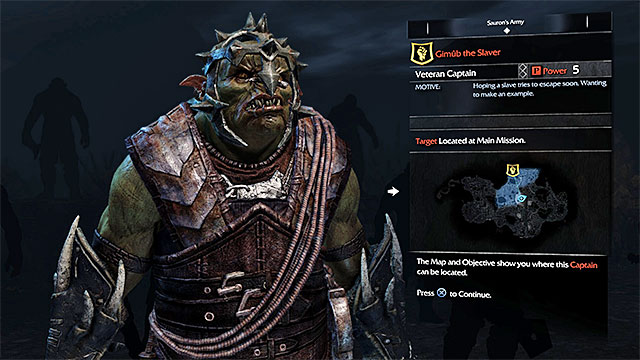 Gimub is a predefined member of the Sauron's Army
Thanks to the interrogation, you will learn the identity and the whereabouts of Gimub the Slaver. There is one of the missions, of the main storyline, connected with this orc.
Note - to learn more about the Nemesis System see the chapter entitled Sauron's Army.
Note - Gimub is a unique member of the Sauron's Army, because his identity and whereabouts are predetermined and they are connected with your progress in the storyline. As for the data concerning the rest of the orcs, they are randomly generated.
Note - you can now take to the exploration of the game world (side missions, collectibles, fighting with orcs, learning the identities of the other members of the Sauron's Army, etc.) or start the next main mission of the game. The game has unlocked two missions and the order in which you start them does not matter.
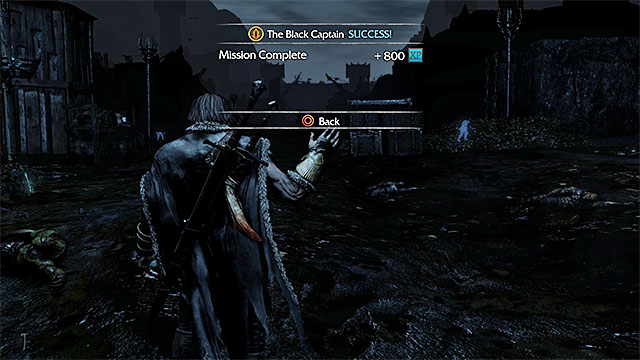
Rewards for completing the mission:
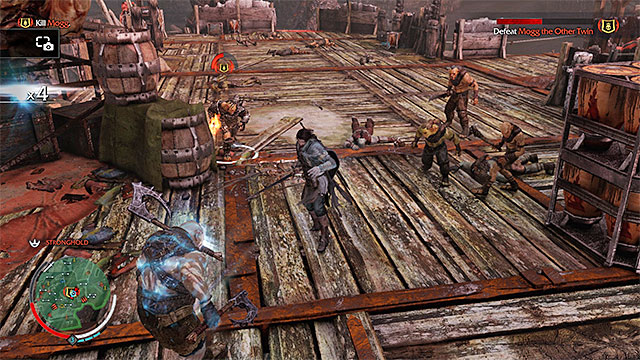
Requirements for starting the mission: You need to complete the first mission (the Prologue).
Secondary objectives: You need to eliminate the four archers, before you attack Gimub.
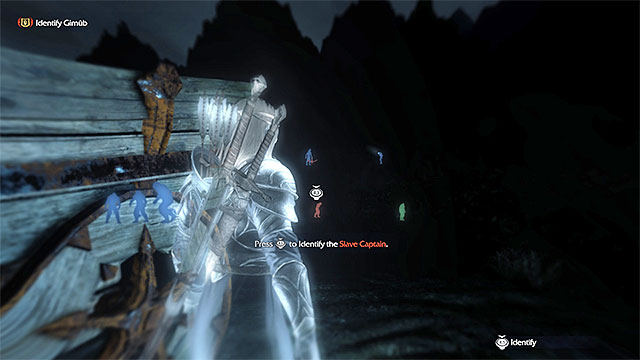 Gimub has been marked in red
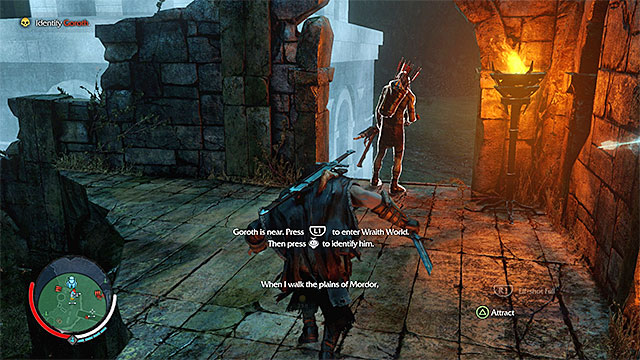
After you reach the yellow mission marker, stop next to it, press the appropriate key/button and confirm that you want to start this mission. First of all, you need to identify Gimub and this is the next part of the tutorial. Press the key/button for the Wraith mode, wait for one of the enemies to be highlighted in red and identify him as Gimub.
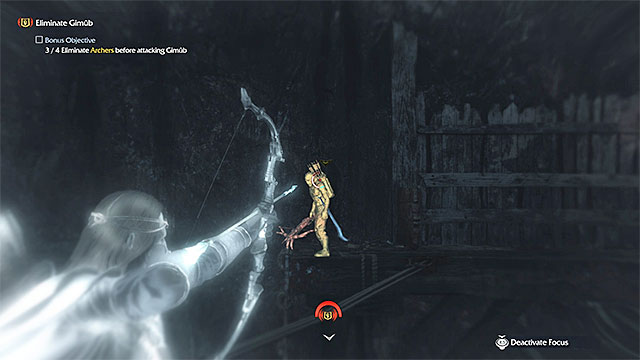
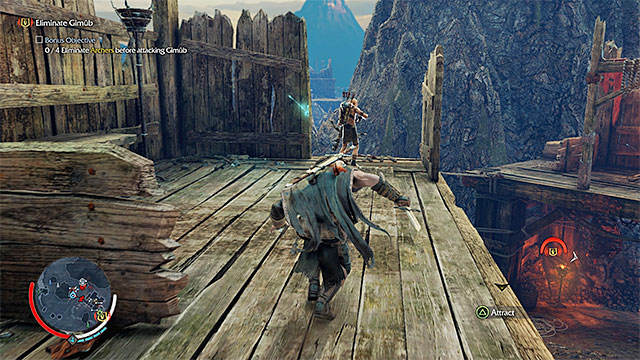 Get the archers from behind and kill them silently
Before you eliminate Gimub, it would be good if you eliminated the four orc archers in the camp, because this is required by the side objective of the mission. The archers are on the nearby wooden structures. Try to approach the nearest one without raising the alarm (sneak and do not approach the orc warriors). After you climb the scaffolding, get the archer from behind and perform a stealth execution.
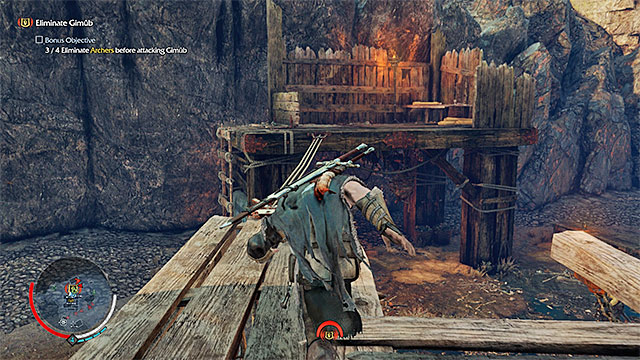
You now need to reach the other three archers. What is interesting, you do not need to jump off, because you can get to the ledges that the archers are on, over the ropes similar to the one in the above screenshot. Do not haste to attack each one of the archers, make sure that he is looking away (you can check out on their actions in the Wraith mode).
 You can start the fight with Gimub, e.g. by attacking at a range.
There are many ways to start the fight with Gimub. If you managed to discover his strong and weak points (e.g. thanks to interrogating the orc informants) you can now open the tab of this opponent and learn its contents (to learn more, see the chapter entitled Sauron's Army). In my case, one of Gimub's weaknesses was lowered resistance to ranged attacks so, I could attack with the bow).
Note - The strong and the weak points of the Captains and Warchiefs, of the Sauron's Army are always randomly generated so, in your case, Gimub does not need to be vulnerable to ranged attacks. The sets that occur, in the enemy orcs, most frequently, have been provided in the chapter that describes the Nemesis System. In that chapter, you will also learn how to handle the strong points of the members of the Sauron's Army and how to exploit their weaknesses.
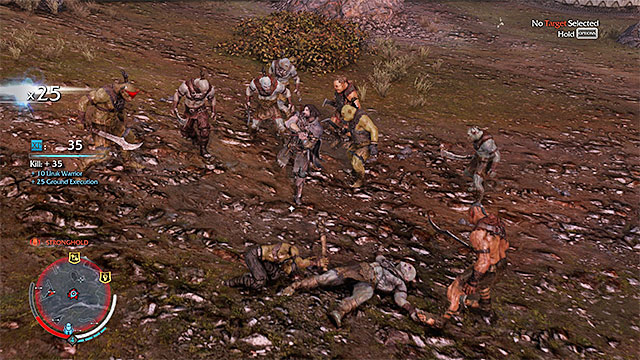
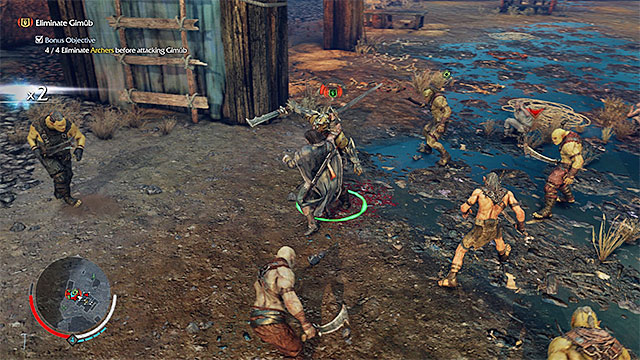 Watch out for the orcs that accompany Gimub and drain the Captain's entire health bar
After you start the fight proper, attack Gimub and watch out for his attacks, which you may not know everything about, yet. There is a high probability that the fights will be joined by the regular orcs. You can try to ignore them, or use them to continue the multiplier and to get the option to launch special attacks more often (e.g. the Execution ability). You need to deprive Gimub of the entire health bar, thanks to which you kill him.
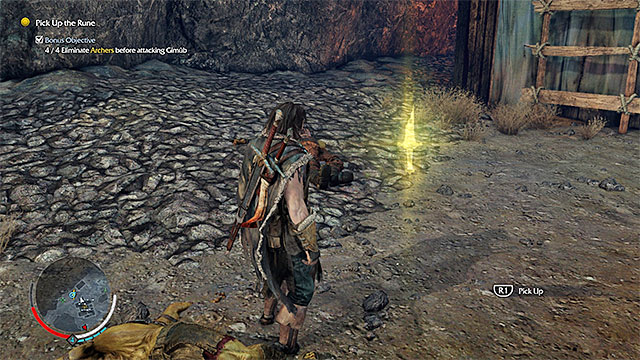
Gimub drops a runeThe defeated Gimub drops a rune. If you have already killed another Captain this is nothing new to you. Otherwise, see the chapter entitled Sauron's Army again, where you learn more about the types of runes and their functions. Of course, it is a good idea to apply the rune to the weapon that it fits into, especially that the one dropped by Gimub should be "epic".
Rewards for completing the mission:
Requirements for starting the mission: You need to complete the first mission (the Prologue).
Secondary objectives: You need to protect the Ratbag from losing more than a half of the health bar.
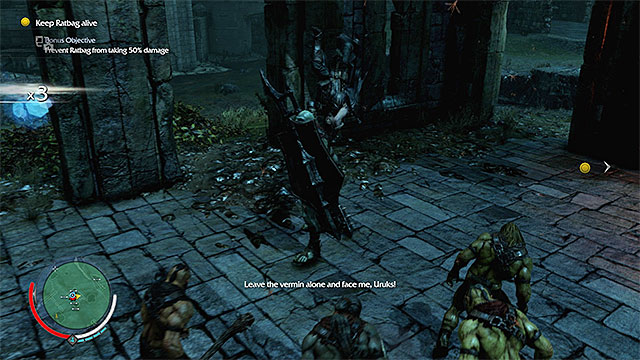 Vault over the defenders and attack them from behind
After you interrogate Ratbag and obtain information about Goroth, follow the orc. You will soon reach small ruins, where you are attacked by the hostile orcs. Among them, there is, at least, one Defender, which is an unique orc variation, who use long blades and shields. This is what will be the most problematic here, because the shield requires several strong blows, to be destroyed. Instead of trying to destroy the shield, it is much better if you jump over the defenders (press the jump button after you run up to the orc). Thanks to this, you will land behind his back and you will be able to deal damage to him. before he manages to turn back.
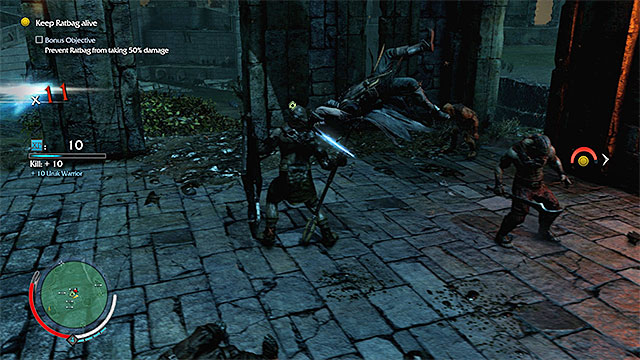
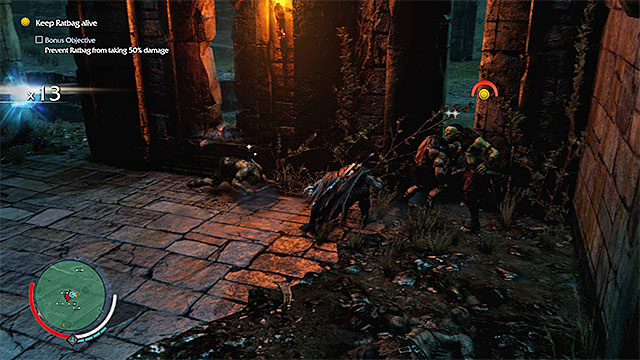 Try to protect Ratbag from the attacks of the other orcs
Jumping over the enemies, to distract them, is not the only thing that you should keep in mind, while fighting this battle. If you want to complete the secondary objective, you cannot let Ratbag lose more than a half of his health bar. Therefore, you should first deal with the opponents that try to attack Ratbag, instead of you. At the same time, watch out not to damage the ally yourself, because it is an option. After the victorious fight, reach the orc stronghold, with Ratbag.
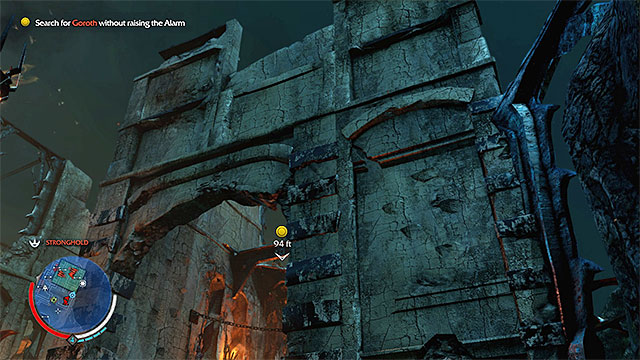 Sneak and hide in the bushes
Go East and start sneaking. You cannot be detected, because you would fail the mission immediately. This does not mean, however, that it is completely prohibited to attack the orcs. Try to eliminate one, or two orcs that are patrolling the area to the right of the stronghold's main entrance. You can do that, e.g. by sneaking up to them, from behind, or by hiding in the bushes and whistling, which will attract the attention of the given orc.
After you reach the wall, start climbingThe purpose of the actions described above is to clear the right side of the stronghold. Only when it is safe, go a bit to the East and climb the walls of the stronghold.
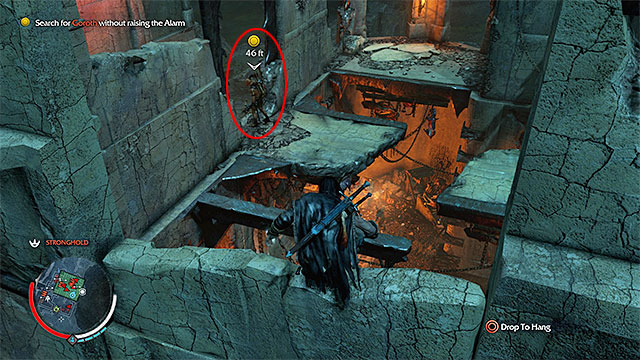
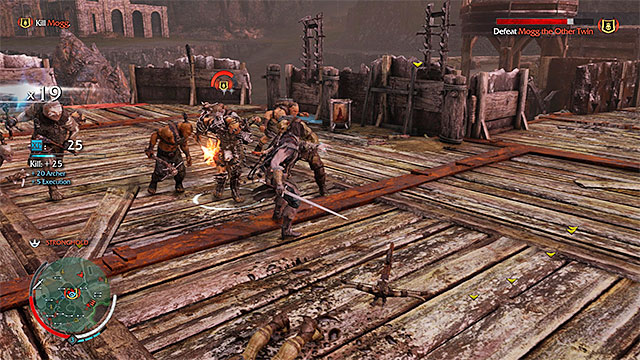
After you get to the upper levels, jump over from one spoiled plank, to another, thanks to which you will get around the monsters below. Your current objective is the orc archer shown in the above screenshot. Eliminate him, thanks to which you will see a short cutscene. You will find out that the Captain Goroth is at the hunting camp, to the East of here.
 Watch out for the orcs at the cages and the ones patrolling the bridge
You can now continue on your path Eastwards and leave the stronghold premises. Along your path to the hunting camp, do not approach the orcs patrolling the bridge on the left, nor the monsters near the cages on the right, with caragors inside. I recommend that you jump to a lower level, at the appropriate moment and sneak under the bridge.
 Eliminate the enemies in the ruins, including the archer
Take your time, while trying to approach Goroth, because the ruins that neighbor the hunting camp are being guarded by more monsters. Try to eliminate the single orc with the torch, who is patrolling the area, and the orc archer that is occupying one of the higher levels. In the case of the archer, A good method is to grab the edge and wait for him to stand at it. Then you throw him down.
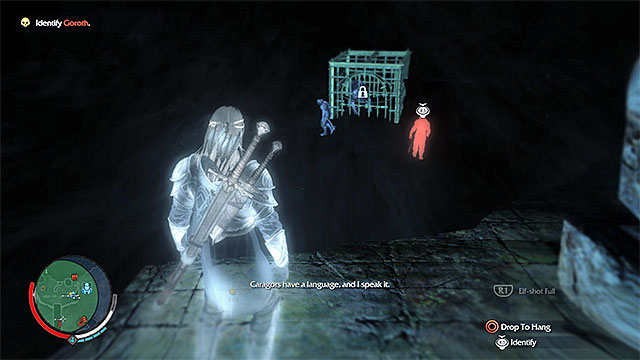 Goroth is standing next to the cage with the captive caragor
After you approach your destination, activate the Wraith mode and check the area for the red silhouette that symbolizes the enemy Captain. Scan him to identify him as Goroth.
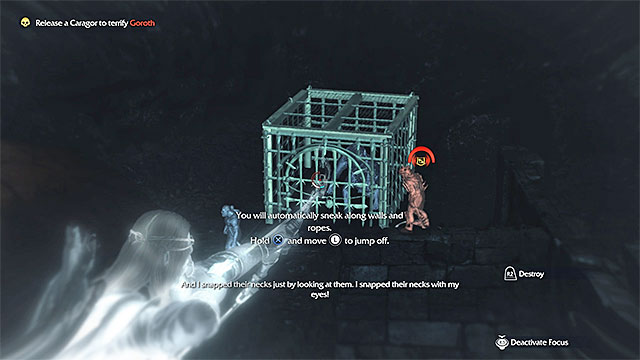
The game suggests that you can exploit Goroth's fear of caragors (quite unusually, because this is not a random feature and one that has been predetermined). The plan is that you release the captive caragor from the cage with Goroth at. Stand at the safe distance of the cage, equip the bow and aim at the padlock (the above screenshot). This will release the beast. This action strikes fear into Goroth's heart and he flees.
Note - If you do not have any arrows on you, you can find them on the ledge that used to be occupied by the archer, among others.
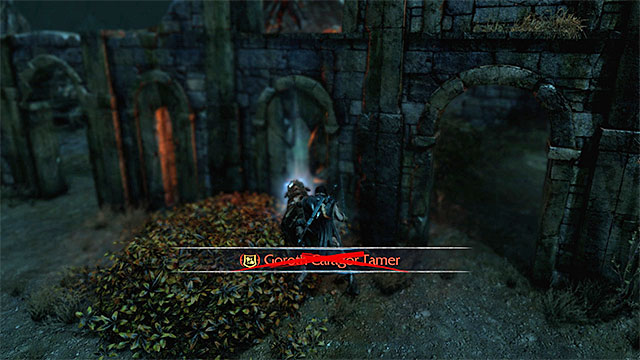 Try to catch up with Goroth, as quickly as possible
You can do, now, either of two things. If you have unlocked the Ride Caragors ability, I recommend that you mount the caragor that you have just freed. Catch up with Goroth and deal with him, by taking advantage of the fact that he cannot defend against the beast's attacks. If you do not have this ability, catch up with the Captain in the traditional way, before he reaches the orcs that you passed by earlier. In such a situation, you need to spend more time on draining Goroth's health bar. Regardless of the method, he mission ends after you see the report, right after you eliminate Goroth.
Rewards for completing the mission:
Requirements for starting the mission: You need to complete the second main mission (The Slaver).
Secondary objectives: You need to rescue four slaves.
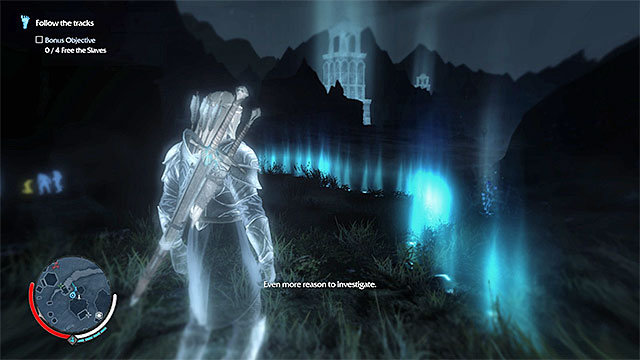 Wraith mode is very helpful for tracking Gollum
Make sure that you have the Wraith Mode activated and follow the footsteps left by Gollum. You do not need to keep using the alternative vision, although this will help you stay on track.
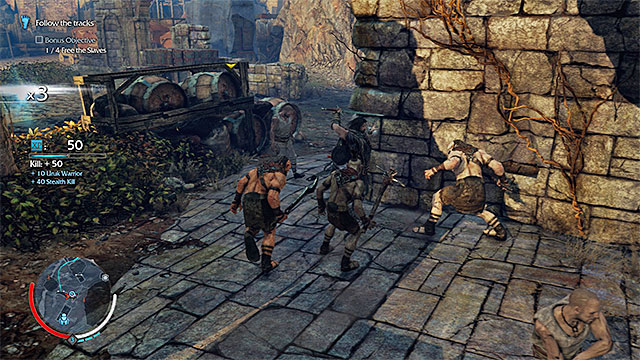 Deal with orcs in the two camps to free the prisoners
At the beginning of the mission, you will get the opportunity to complete the secondary objective, because you will be passing by two orc camps, where there are four slaves kept. Try to eliminate all of the orcs, in both of the camps, (fortunately, they are the weaker variations), thanks to which the slaves will be freed automatically.
Note - you can attack the orcs in any way you want, e.g. in melee, with ranged weapons or one-by-one by stealth killing.
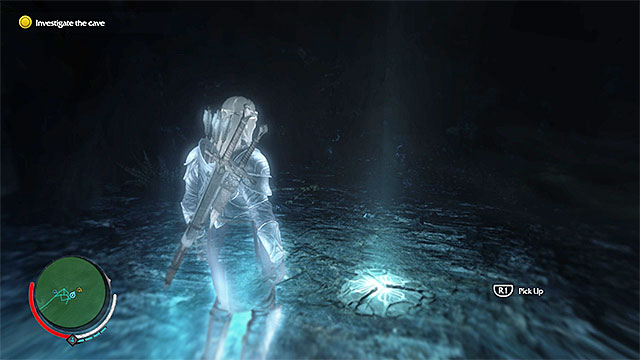 The spot where you find the medallion
Further along your path, watch out for the orc patrol on one of the paths - you can either walk around them or attack them. By following the footsteps, you will finally get into a cave. Enter and remain in the Wraith Mode. Reach the ledge above and find the interactive medallion here, which you need to collect from the ground.
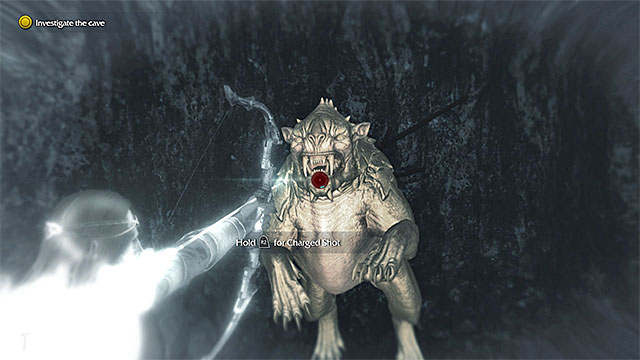 Kill the caragor before he mutilates you
Be prepared to use the bow quickly, because there is a caragor in the cave. Aim the bow, draw the bowstring as far as possible and release it, which kills the beast. You can now head towards the cave exit and replenish your arrows along your way.
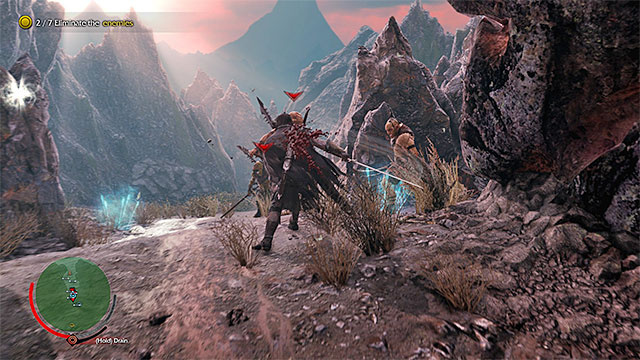 Dodge to the side when a hinter throws the spear
At the cave exit, you will be jumped by orcs and, this is the occasion on which you encounter Hunters. They are capable of throwing spears and you need to react to that, by dodging to the sides. I recommend that you start by attacking the monsters at a range and take advantage of the fact that your arrow supply is full. Only after the opponents come closer, or you deplete Focus, switch to melee.
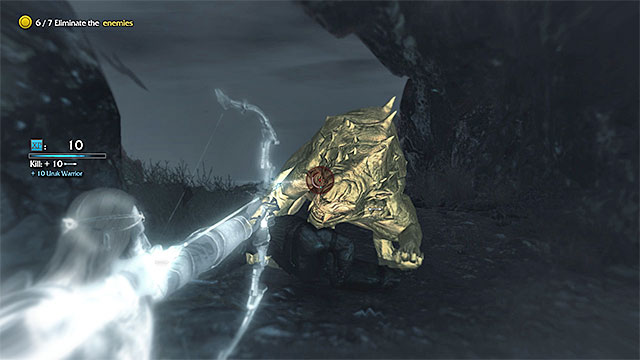 You can either attack the caragor at a distance or in melee (it then becomes highly dangerous)
The orcs are not the only problem, because there appears another caragor around. I recommend that you attack it, as soon as possible, i.e. before it kills all of the orcs, because it then focuses on you. You can kill the caragor, for example, with two arrows towards its head, or in melee. In the latter case, it is necessary that you perform dodges, thanks to which you will avoid taking heavy damage from the attacks. After the battle, walk away from the cave to meet up with Gollum and complete this mission.
Rewards for completing the mission:
Requirements to start the mission: You need to complete the third main mission (The Spirit of Mordor).
Secondary objectives: You need to take out four archers, while remaining undetected.
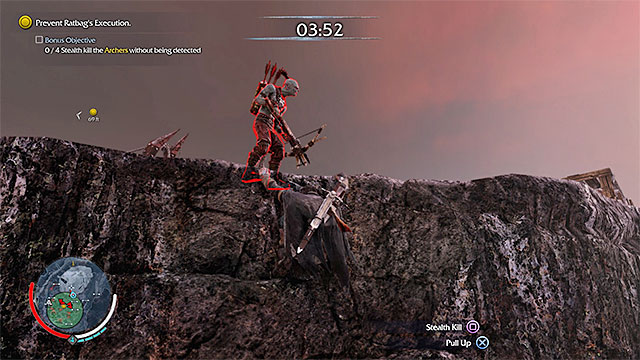 The first archer is close to the starting point
Start acting now, because there are archers around, who are connected with the secondary objective. You have four minutes to eliminate them and rescue Ratbag. I recommend that you start by climbing the nearby ruins on the right and eliminate the first archer there.
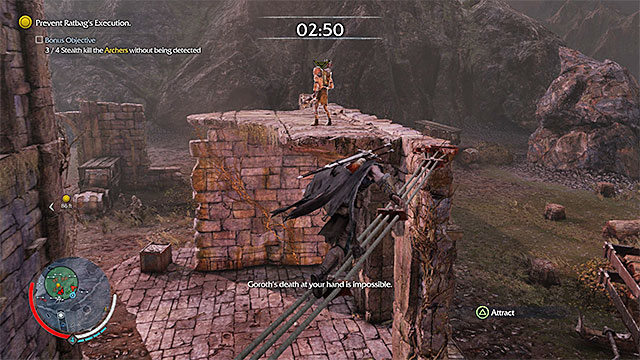 walk over the ropes and climb the ruins
You can reach the remaining three archers in the same way, as in one of the previous missions, i.e. by walking over the ropes and climbing. Make sure that you are not spotted, while on your path (neither by the archers, nor by the regular orcs below), because you will fail the secondary objective. Continue acting from shadows, up until you have eliminated all of the archers.
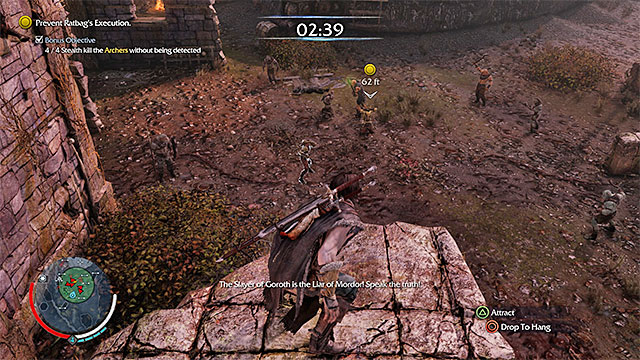 Approach the captured Ratbag
Only then, focus on rescuing Ratbag. You do not need to perform any special action here, because you simply need to approach the location in which he is being held (you can attack one of the nearby orcs, while you are here). Thanks to this, you will identify the enemy Captain Brogg the Twin, who captured him.
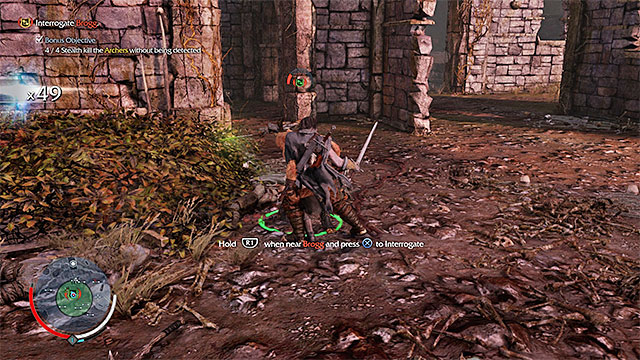
Just like in the case of the other fights with Captains, take a look at the tabs with Brogg's strong and weak points and plan on your actions basing on that. Apart from the Captain, you also need to watch out for his bodyguards but, this should not be too problematic. A very important piece of information is that you cannot kill Brogg. You only need to deal enough damage to him and you will be able to tell, when to stop, by the green icon (the above screenshot).
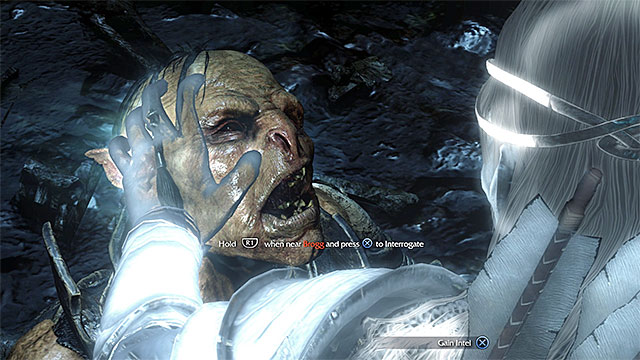 You need to interrogate Brogg
Eliminate all of Brogg's guards and only then, focus on the man. You need to press the grappling key/button to grab him. Then, interrogate him. This will let you find out that Brog is one of the guards to Warchief Mogg (Mogg the Other Twin). This mission ends after Ratbag progresses.
Rewards for completing the mission:
Requirements to start the mission: You need to complete the fourth main mission (An Interested Party).
Secondary objectives: You need to kill two archers with a shot to the head.
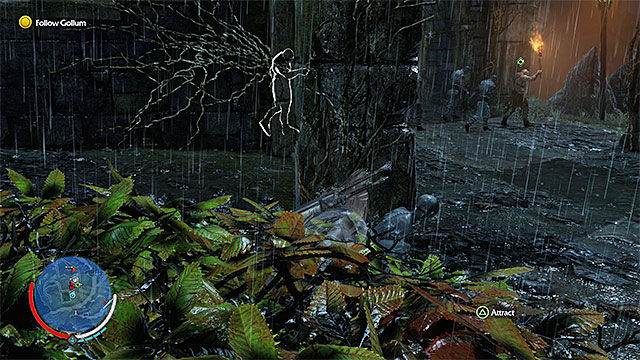 With Gollum, wait for the patrols to walk away
After the mission starts, follow Gollum. Stop wherever he stops. Do not try to attack the orcs around and wait until they walk away, each time, and for the Gollum to start move again.
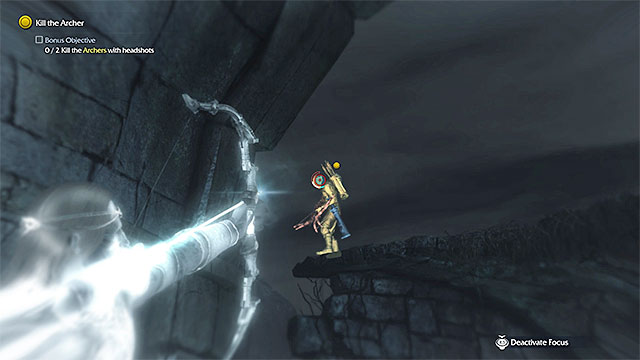 One of the archers - remember to aim at the head!
While crossing the ruins, you get the opportunity to complete the secondary objective. You need to use the bow to eliminate two orc archers, by shooting them through the head. Use the Wraith Mode to locate the archers and slow down time to take the shot (hitting any other body part cancels out the secondary objective).
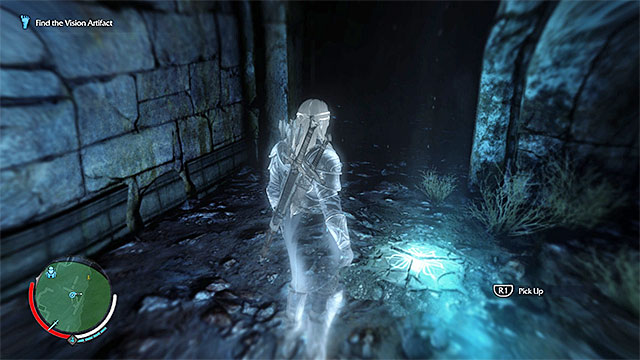
The next part of the mission is very simple. You simply need to use the Wraith Mode to locate a new artifact in the area marked in green, on the map. The item is in the Eastern part of the marked area (there are footprints leading up to it) and it has been shown in the above screenshot.
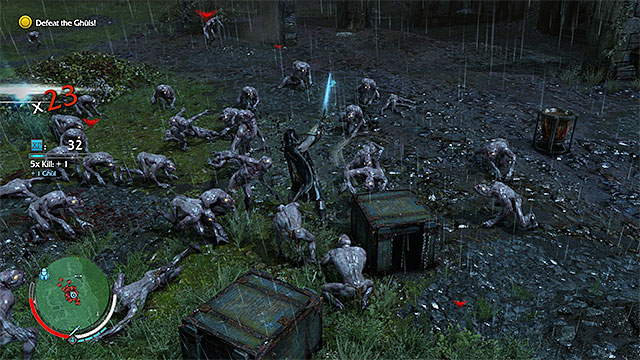 Fight the ghuls
Towards the end of this short mission, you are going to fight a new type of enemy - ghuls. Start with standard melee attacks and eliminate the ghuls one-by one, or vault above their heads. The most important thing is not to break the streak of attacks.
Note - If you have unlocked the Detonate ability, you can destroy the explosive barrels with your bow. Each explosion should kill several ghuls.
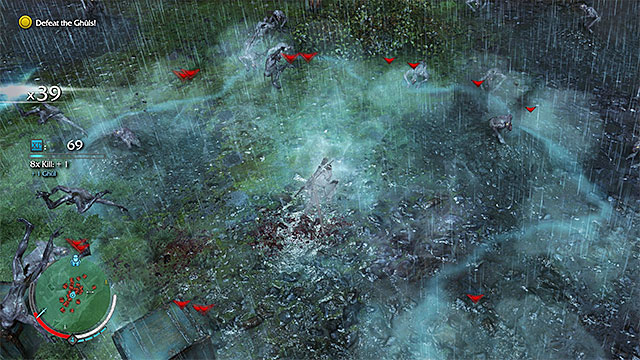 The Wraith Flash is a very potent attack
After several moments, you will gain access to a special ability - Wraith Flash. Since this is one of the special attacks, you can use it only after you have reached a certain value of the multiplier (by default, every 8x). Try to use this ability as often as possible, because it is highly effective against ghuls. To complete this mission, you need to kill all the ghuls.
Note - if you have problems keeping Talion alive, try to escape the ghuls for a moment and reach one of the nearby herbs. If you have enough gold, you can unlock one, or two, attributes that extend your character's health bar, still before the battle.
Rewards for completing the mission:
Requirements to start the mission: You need to complete the third main mission (The Spirit of Mordor) and the fourth main mission (An Interested Party).
Secondary objectives: You need to perform stealth executions on five orcs in the stronghold.
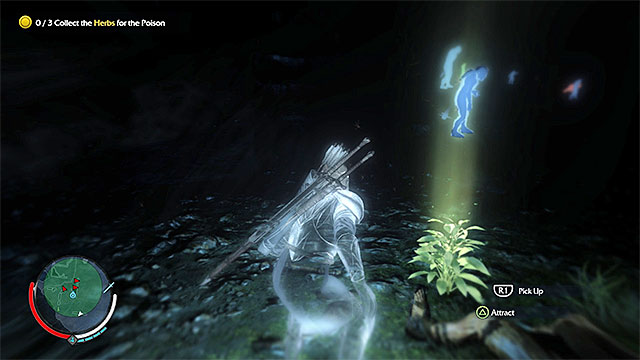 Wraith Mode is helpful for locating the herbs
The starting point for this mission (and of all the others connected with the outcasts) is over the rocks and you need to squeeze through to get there. After you start the mission, follow Hirgon. You need to reach the spot, where you obtain the first group of herbs that you need to brew a poison. The easiest way to find the herbs is in the Wraith Mode, because they then clearly stand out, against the surroundings.
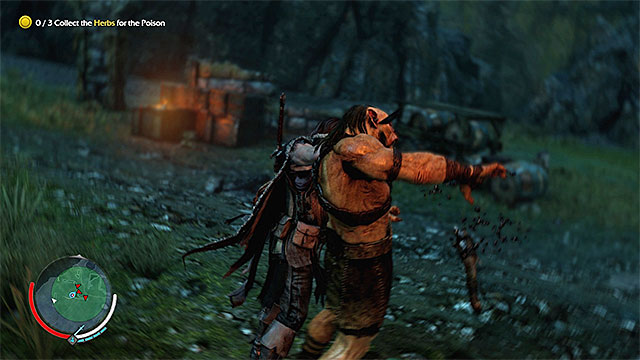 Eliminate the orcs or walk around them
At first, you need to collect three herbs but, the area where you need to harvest them is occupied by orcs. You can do several things about this - you can either eliminate them silently, kill them with the bow, defeat in melee or distract them, pick the herbs and let them be. After you have obtained the herbs, get back to following Hirgon.
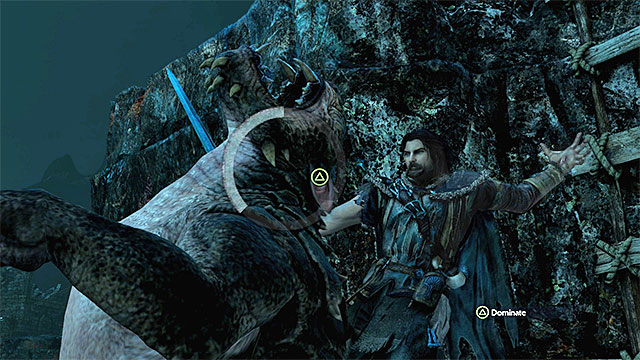 You can defeat the caragor e.g. in melee
In the next location, you run into quite a handicap, because there is a single caragor there. Of course, you can defeat it in melee or with the bow (two well-aimed shots), but you need to watch out, then, for its strong attacks and perform dodges. At the same time you can take advantage of the fact that the monster is also attacking Hirgon, but make sure that he does not drain his entire health bar.
Harnessing the caragor will allow you to avoid fighting itIf you have the Ride Caragors ability, I recommend that you climb the nearby rocks, right after you enter this location, and jump onto the caragor's back. After you have tamed the beast, you can leave it alone and pick the herbs. Soon, Hirgon will resume his march. You still need to visit one more mead with herbs but this time around, it is not guarded by anyone.
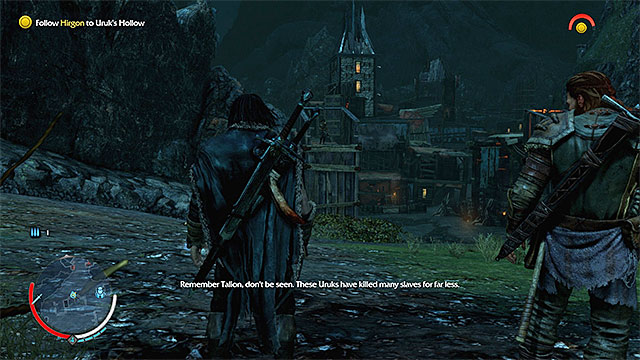 The orc stronghold
You still need to handle the last part of the journey - after several moments, Talion and Hirgon reach an orc stronghold. You receive more objectives here and you gain access to the Poison ability, which you will have to use to poison five barrels of grog. Head out alone and remember that you will have to sneak, from now on, because you will fail the mission if you are spotted.
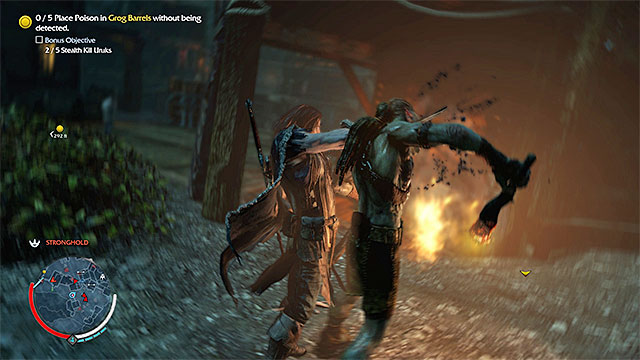 Perform stealth kills on, at least, five orcs
Before you take to the main objective, you had better complete the side one, because you may not have enough time to, afterwards. The plan is that you stealth-kill five orcs in the stronghold. Unfortunately, the kills with the bow do not count so, you need to sneak up to the orcs from behind, or throw them down from heights, after they approach the edge.
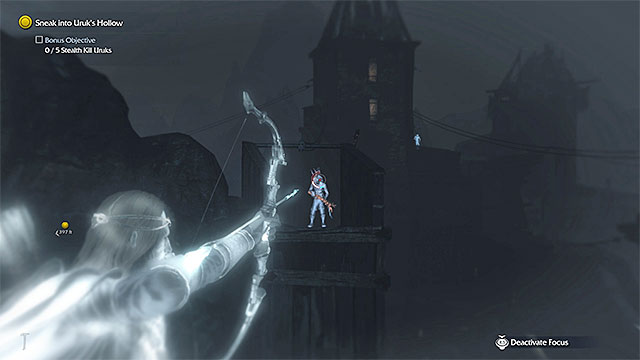 It is best to eliminate archers from afar
Along your path towards the grog barrels, you need to watch out, first of all, for the archers in the stronghold, because they may spot you from a longer distance. To eliminate them quickly, use the bow. Apart from that, use the Wraith Mode on a regular basis, to find monsters patrolling the stronghold, or standing near bonfires, and walk around them, at a safe distance.
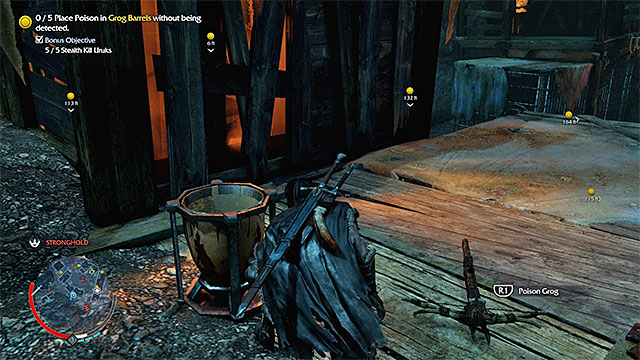 An example barrel
In the stronghold, there are five grog barrels and their locations display on the map, as soon as you gat sufficiently close, You can reach the barrels in any order that you want and this does not affect the course of this mission.
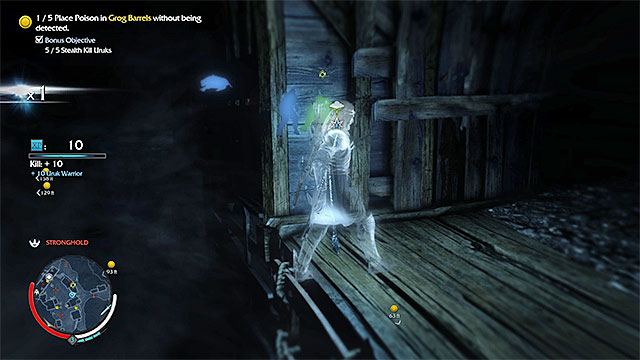 You need to walk away from each barrel right after you poison it
As quickly as possible, whenever you approach a grog barrel, poison it (by pressing the appropriate key/button) and AS FAST AS POSSIBLE walk away, because soon, there will appear a group of orcs near the barrel. The monsters either die on the spot, or start fighting each other (you do not need to react to this in any way). Repeat the above actions, up until you have poisoned all five grog barrels. Thanks to this, you will complete the mission.
Rewards for completing the mission:
Requirements to start the mission: You need to complete the sixth main mission (Shattered Memories).
Secondary objectives: You need to escape the graug's cave (right after you have obtained the artifact) within one minute.
 Follow the Gollum
The beginning of this mission is simple. Make sure that you have the Wraith Mode on and follow the footsteps of the Gollum again. Along your path, you should not run into any monsters, assuming that you do not go off the beaten tract. The footprints take you to the cave of the graug and you will see a short cutscene featuring this monster.
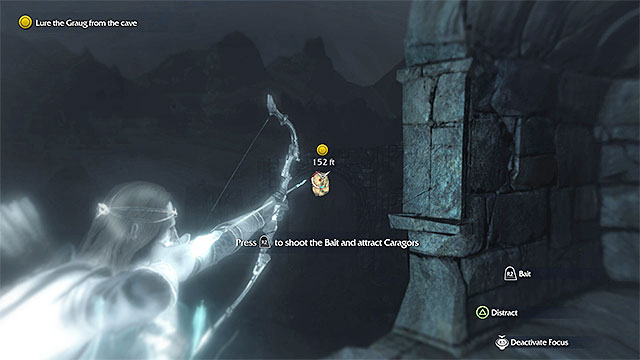 Target the bait and dash into the cave
Do not worry, because you will not have to fight the monster. Instead, aim the bow at the bait specified by the game, and shoot an arrow. AS SOON AS graug heads towards the bait, jump down and dash towards the cave entrance. You need to hurry, because you only have 20 seconds to reach your destination.
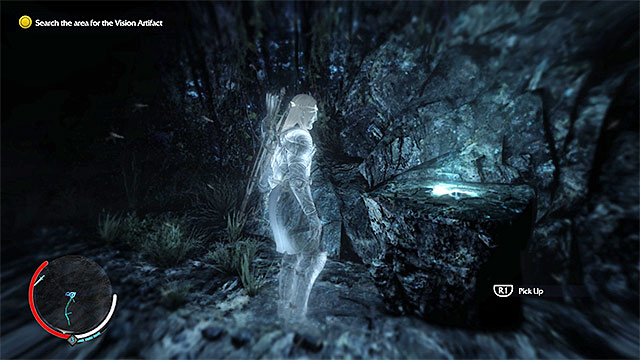
Follow the linear corridor and ignore all the ghuls that you run into, because they are not interested in attacking you. After you walk into a larger cave, initiate the Wraith Mode and locate the only ledge that the footprints lead to. It is there that you find the third artifact shown in the above screenshot.
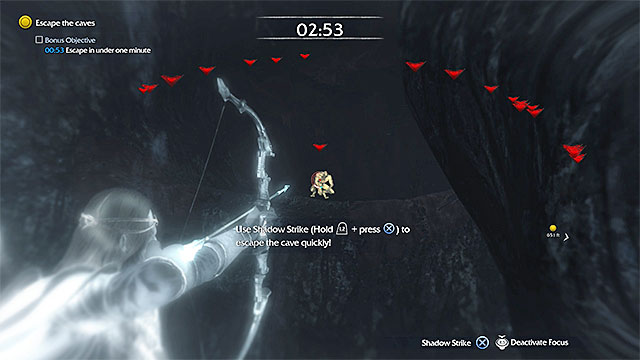
Note that you have gained access to the Shadow Strike attack and you are going to need it, already while escaping the cave. As quickly as possible, aim the bow at the ghul shown in the above screenshot that can spit poison. Do not shoot the bow and instead, press the Shadow Strike attack key/button. Thanks to this, you will teleport towards the targeted monster.
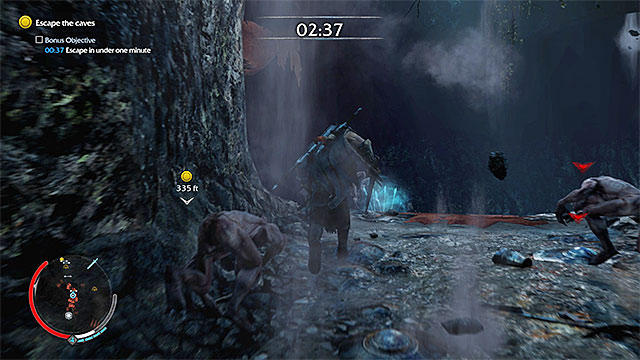 Aim at the successive monsters in the distance and collect arrows, as you go
The Shadow Strike attack is very helpful for reaching monsters and eliminating them, but in this case, you are going to use it to leave the cave quickly. You need to hurry, if you want to complete the secondary objective, because you need to leave the cave within one minute. Therefore, do not attack the ghuls and use the Shadow Strike ability only to get to the distant spots faster. By default, the Shadow Strike attack uses up two arrows but, along your path, you can replenish their supply easily If you have made no mistakes, you will leave the cave within 45-50 seconds, which completes the secondary objective and the mission.
Rewards for completing the mission:
Requirements to start the mission: You need to complete the fifth main mission (Climbing the Ranks).
Secondary objectives: You need to throw off the training platform one of the berserkers.
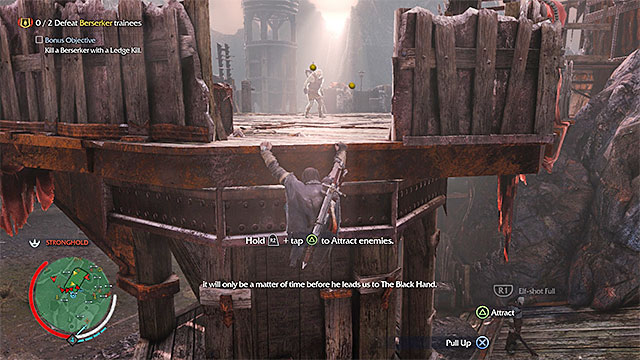
Head towards the training platform opposite the starting point. Climb the platform but, do not reach the very top, because you could first complete the secondary objective of this mission. You need to throw, one of the berserkers, off the platform and start this by hanging off the edge - an example position, in which to do that, has been shown in the above screenshot.
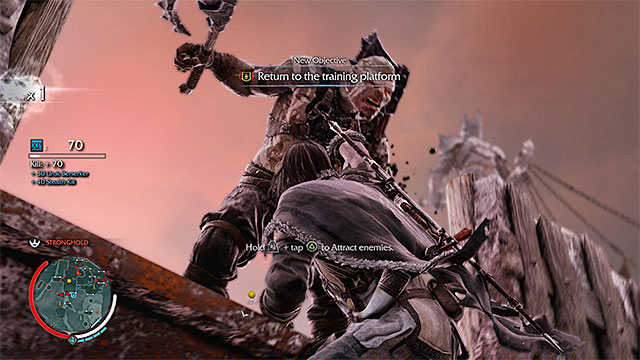 Wait for the berserker to stand near the edge and throw him off
Target one of the berserkers and press the whistling key/button. Wait for the berserker to approach and perform the stealth execution to throw him off. Although you have already completed the secondary objective, remain in this position and do the same with the other berserker.
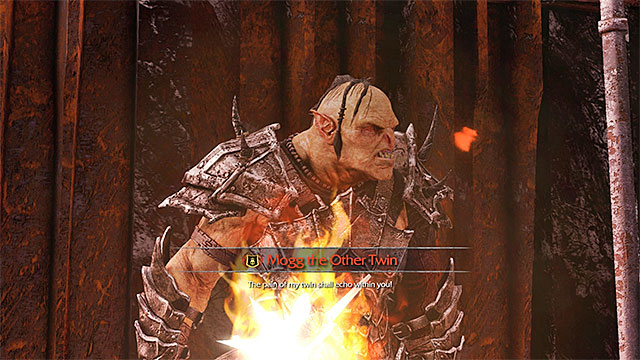 The orc Warchief
Only after you have eliminated both of the berserker, climb onto the platform and locate Mogg the Other Twin, who should appear around, in the meantime. Before you attack him, it is necessary that you open the Sauron's army window and take a look a Mogg's strong and weak points (they are randomly generated). Thanks to this, you will be able to plan on your tactic.
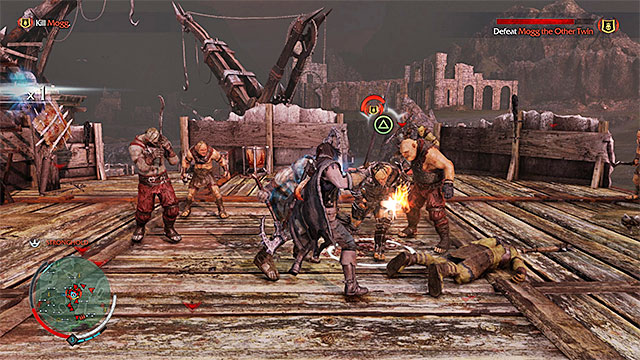 Stun berserkers and attack them afterwards
After you start fighting, do not attack Mogg immediately, because there appear berserkers, among others, on the platform. It would be a good thing to eliminate them quickly, because they can easily deal damage to you, otherwise. DO NOT perform any standard attacks, against the berserkers, because you will be blocked. Instead, stun each of the berserkers first (the Wraith Stun attack) and land regular attacks afterwards. After you eliminate the berserkers, start attacking Mogg.
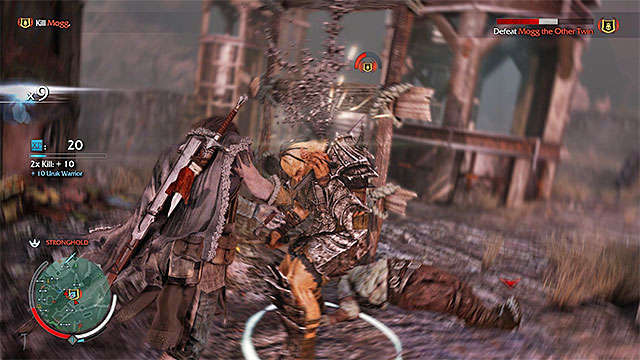 You need to eliminate the Warchief, thanks to which Ratbag takes his place in the Sauron's army
Use those of the attacks that Mogg is vulnerable to and avoid the ones that will gain him strength. It is worth adding that you do not need to play the entire battle on the training platform, because you can, e.g. jump off at any point (it is also a good idea if you need to heal yourself). Continue fighting, up until you have killed Mogg. Towards the end of the mission, you will get to know that Ratbag has been promoted and replaces Mogg as the Warchief.
Note - Killing Mogg counts as an action required by the "Kill the Warchiefs" mission. This means that, apart from Mogg, you "only" have to kill three Warchiefs more . TO learn more, see the walkthrough for that mission.
Rewards for completing the mission:
Requirements: You have to complete 5th main mission (Climbing the Ranks).
This mission is unique, because it does not start in a predetermined location. You can approach any of its stages as soon as you complete the 5th mission (Climbing the Ranks). Until you do all required activities, you are not able to unlock the 10th main mission (The Dark Monument). The mission objective is to eliminate 4 Warchiefs of Sauron's Army. One of them is killed in the 9th main mission (The Warchief). The other three you have to find on your own.
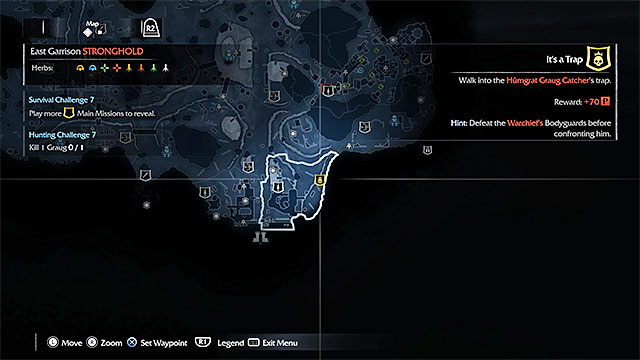 One of the Warchief Hunt missions marker
Warchief Hunt missions have randomly generated features. Namely, these are: each warchief's identity, their strengths and weaknesses, and the method to draw them out. To find out more about that, you are invited to read the guide's chapter Sauron's Army.
Once you complete the 5th main mission, there will appear yellow icons in random locations marking Warchief Hunt missions. Each yellow marker leads you to a starting location of a different Warchief mission. Since there are always more than three markers on the map (the number of Warchiefs you have to kill) you can select which one you want to do at the moment (or, e.g. after being defeated in one mission, leave it for now, instead of starting over right away).
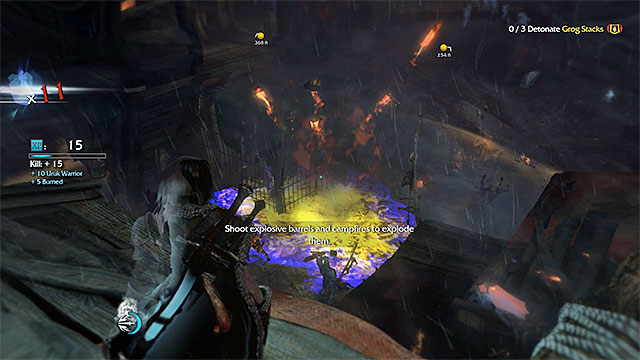 Detonating grog stacks is one of many actions that may draw a Warchief out
The missions in which you have to lure out orc Warchiefs are very diverse. They may e.g. involve freeing caragors from cages, destroying grog stacks, taking enemy captains hostage, eliminating a group of opponents, or getting to viewing points unnoticed. Always carefully study the mission details and try your best to avoid detection by orcs. This is especially important, when the mission is set in a stronghold, because then orcs may sound an alarm, and bring in reinforcements, which may make it difficult to defeat the Warchief when he is finally out.
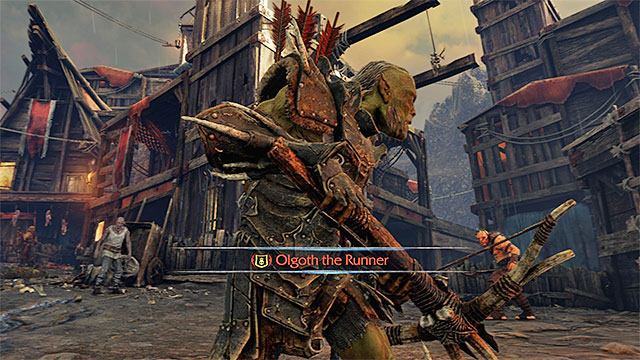 This is when a Warchief comes in
Completing mission objectives will cause an enemy Warchief to come, of which you will be informed by a short cut-scene.
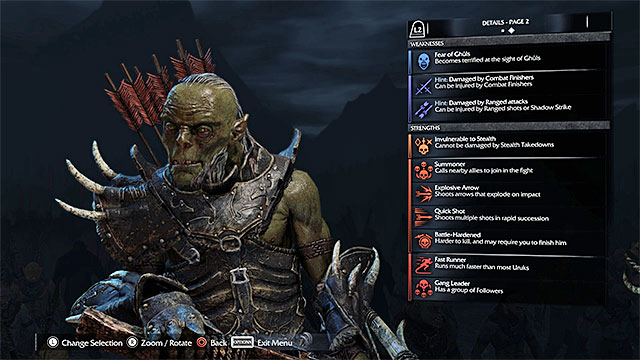 Make sure to study a Warchief's strengths and weaknesses
Once the Warchief appears, you can start planning how to defeat him. First of all, I recommend opening the tab with details about the Warchief and learn about his strengths and weaknesses. Prior to that, you may decide to eliminate his bodyguards, thus making it impossible for him to call them for help.
Note - if you have not yet learned a Warchief's strengths and weaknesses, consider interrogating an orc-informant or obtaining intel in some other way.
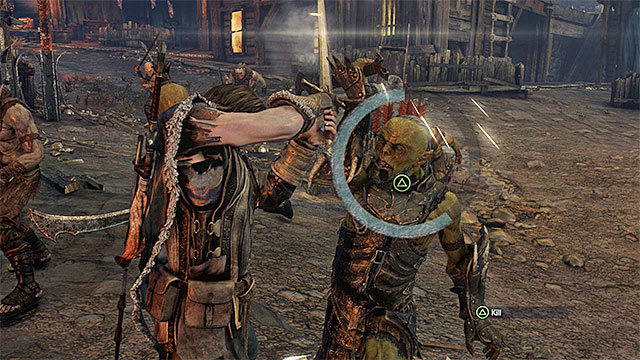 In order to finish off a Warchief it may be necessary to complete a mini-game
After starting the fight, proceed the same way you did in earlier clashes with captains. Try using abilities that take advantage of a Warchief's weaknesses, and avoid attacks that may make him stronger or enrage him. Remember that this stage of the mission will only be completed, if the Warchief dies. So if you see him running from the battlefield, try to catch him and finish him off.
Note - In some cases, at the end of the duel it may be necessary to complete a mini-game, the same one as when Talion is trying to escape death. Move the cursor inside the circle and quickly press the button as displayed on the screen.
Note - Remember to collect runes left by killed Warchiefs, especially that there is a big chance that they may drop epic runes.
Keep on doing missions and attacking Warchiefs, until you kill all four (one during the 9th main mission). You may now return to doing standard main missions, starting with "The Dark Monument".
Requirements for starting the mission: You need to complete the ninth main mission (The Warchief) and the Kill the Warchiefs side mission so, you need to kill a total of four different commanders of the Sauron's army.
Secondary objectives: While guarding the Grog Cart, you need to kill three orc archers with headshots.
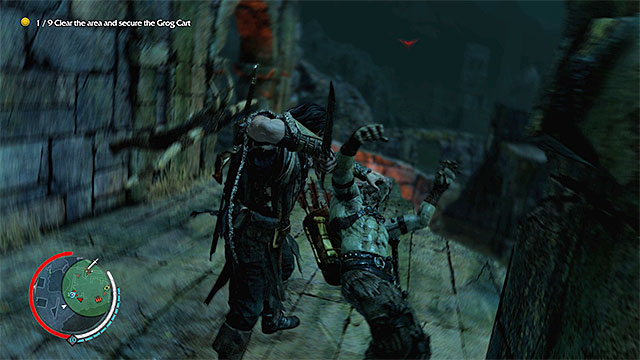 It is a good idea to eliminate the orcs, one after another, silently
The starting point for this mission is the same as for the seventh and you can start it only after you have eliminated four commanders of the Sauron's army (the walkthroughs for the ninth and the side missions can be found on the previous pages of this chapter). After you start the mission, start following Hirgon. Soon, you will approach a group of nine orcs that are guarding the Grog Cart. Your task is to eliminate the orcs and the best way to do that, is by acting from shadows (although this is not required). You can, e.g. sneak up to them from behind or use the bow.
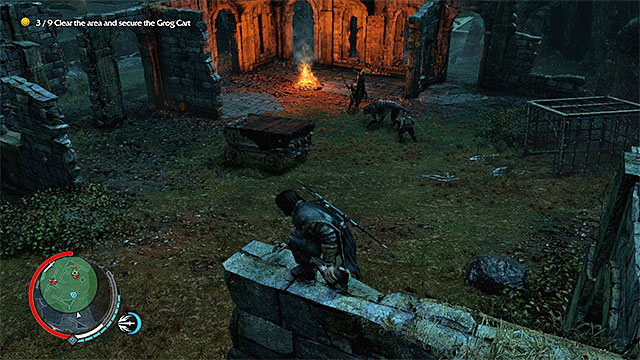 You can set the caragors on the orcs
A good way to eliminate the orcs is to set free the caragor that is being kept in one of the cages. I recommend that you do that only if you have the Ride Caragors ability unlocked, because the beast may turn at you . If you prefer a more direct approach, you can attack orcs and eliminate them in open combat. In such a situation, though, watch out for the more elite orcs (the shielded guards, among others).
 Ghuls should not be too much of a threat
After you have eliminated all the orcs, wait for Hirgon move ahead and follow him. Along your path to the next location with the orcs, you will be jumped by a small group of ghuls whose elimination should not be too problematic to you. If, however, you take more serious damage, consider collecting one of the herbs along your path.
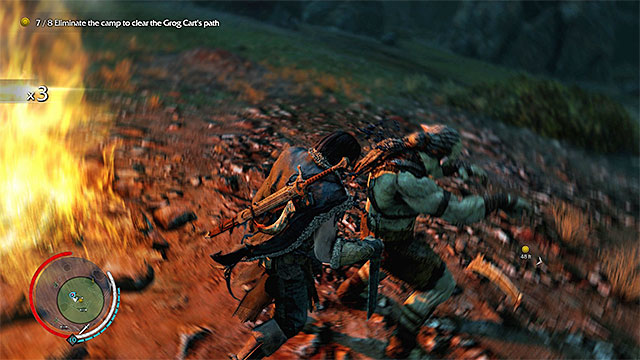 Clear the next encampment of the enemy forces
In the second orc camp, there are eight monsters. You need to repeat the pattern that you have implemented earlier so, eliminate all of the orcs. I recommend, again, that you act stealthily, thanks to which you will not expose yourself to damage, in the case of fights with the elite orcs.
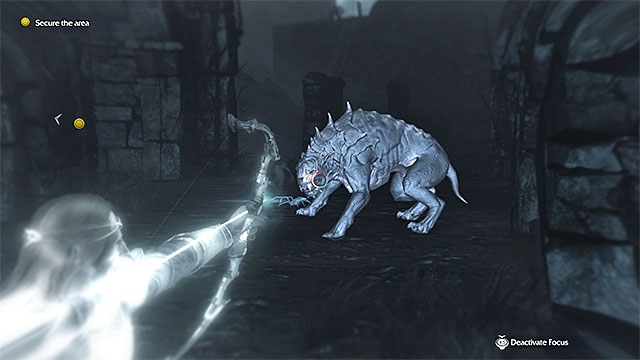 Watch out for, at least, one caragor
After you have killed the orcs, move on and be prepared to eliminate another group of ghuls that attack you on the bridge. Since this is a larger group, remember to use Wraith Flash often. Soon, ghuls attack once again However, attach more care to eliminating the caragor that appears around, or to taming it.
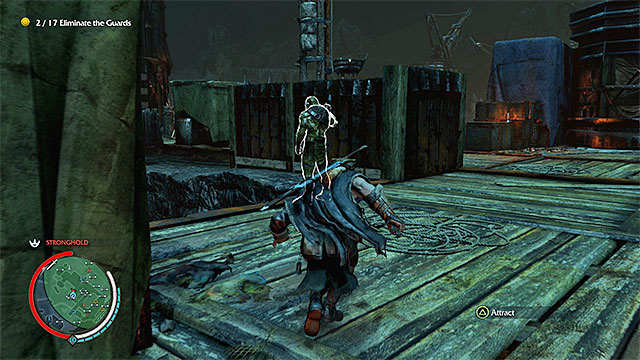 Clear the main orc camp
After several moments, you will go to the largest orc encampment and this time, you will have to secure the area again. Around, there are a many as 17 more orcs and, if you do not want to be surrounded, attack the orcs by surprise and eliminate them one-by-one. After you have cleared the area of the enemy forces, you will watch a short cutscene and you will progress to the main part of this mission.
Note - if, however, a bigger battle with the orcs ensues, you can count on the Outcasts for help, thanks to which it will be easier to win.
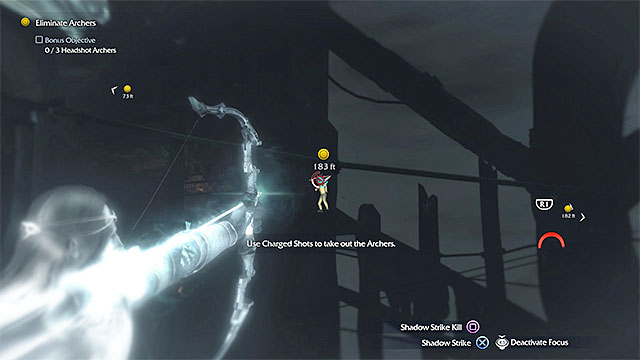 Try to kill all three archers with headshots
Your next objective is to protect the Grog Cart, which is pushed over towards the monument, slowly. First of all, try to eliminate the orc warriors marked by the game, and try to do that fast. Wait for the moment, at which there appear three orc archers around and attack them immediately. Try to hit them on the head, with arrows, because this is required for the completion of the mission's secondary objective. While using the bow, use concentration (which slows down time) to take precise shots.
Note - you can replenish arrow supply by draining the opponents for energy or by finding them in the area.
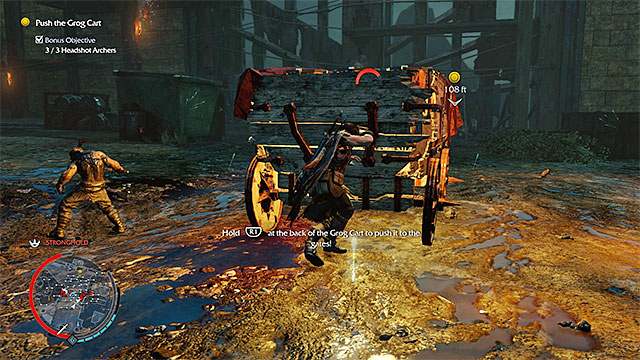 You need to keep pushing the Grog Cart
Talion will soon be asked to start pushing the cart over so, approach it and hold down the grabbing key/button.
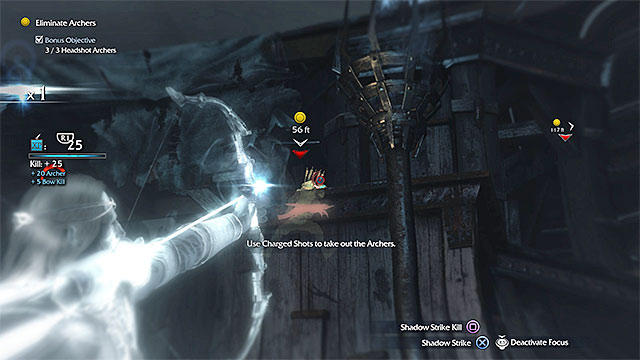 Stop pushing the cart, as soon as more archers arrive
While pushing the cart, ignore the orcs in the area and focus on the cart only. Only after orc archers arrive, stop and use your bow to eliminate them with ranged attacks. Resume pushing the cart and do not stop, until you reach the monument. Fortunately, if you have made no serious mistakes, along your path, there should be quite a lot of durability points left, on the cart's bar, towards the end of the mission. Therefore, you should not worry that it will be destroyed.
Rewards for completing the mission:
Requirements for starting the mission: You need to complete the tenth main mission (The Dark Monument).
Secondary objectives: You need to use the dagger, on the grabbed orcs, ten times.
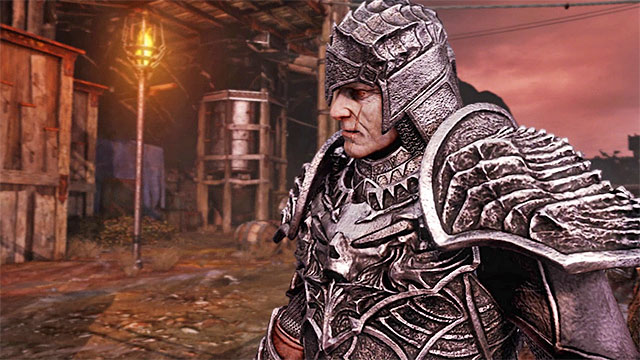 The Hammer is the first boss of the game
You start this mission in the same spot as the tenth one and its aim is to defeat one of the Black captains - The Hammer. This boss is not too demanding, although it is better if you learn the information below.
Note - You will not be able to take a look at the strong and weak points of the boss. Fortunately, they have been predetermined so, you can use the hints presented on this page.
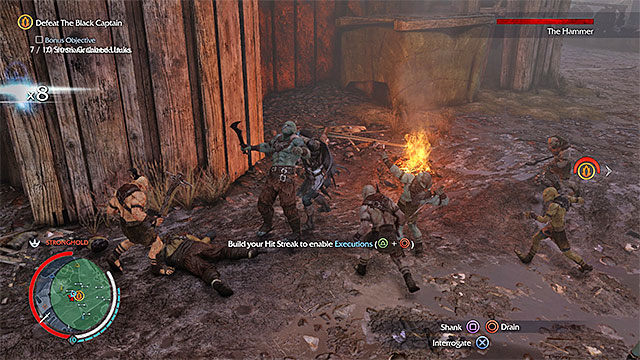 Use the dagger on, at least, two minor orcs to complete the secondary objective
I recommend that, right after the fighting starts, you complete the secondary objective of this mission. You need to grab the regular orcs and press the dagger key/button to deal damage to them (Shank).
Since you can stab an orc five times, before he dies, you can complete the secondary objective by killing, in total, two orcs this way (unless the attacks are interrupted in the process, by the rest opponents)
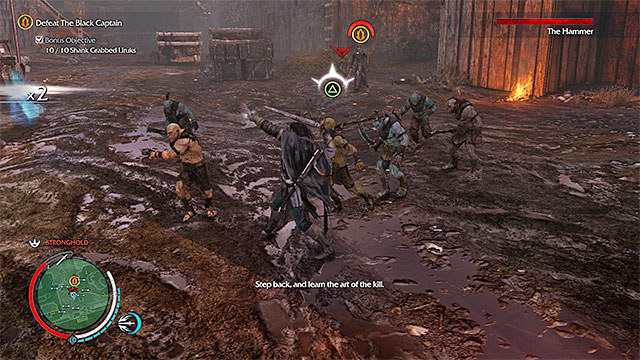 Use the regular orcs to bring the multiplier up
The abovementioned orcs are the boss's guards. You can attack them, but you need to know that this does not take you any closer to winning. What is even more, the main opponent will be summoning more orcs in the battlefield as he loses health. I recommend that you attack the regular orcs only to bring up the multiplier, which will ensure you with the option to use special attacks, such as Execution, Wraith Flash or Combat Drain.
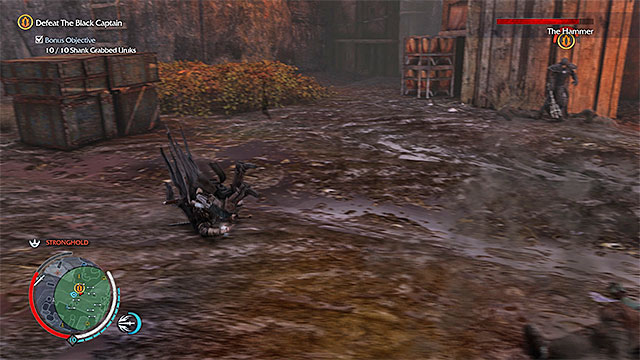
Since you know a thing, or two, about the regular orcs, let us focus on the main opponent. First of all, you need to be prepared to perform dodges, because The Hammer can perform ranged attacks and one of them has been presented in the above screenshot. In the majority of cases, however, you have plenty of time to dodge the attack.
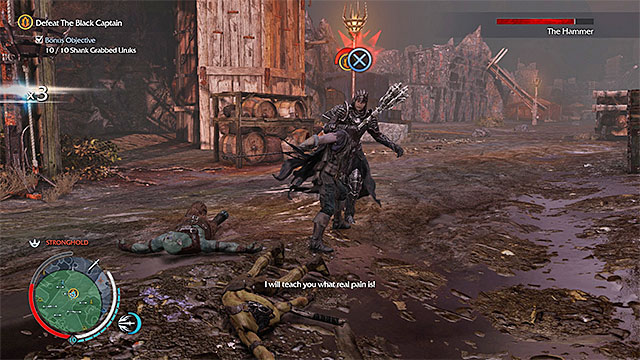 Dodge the boss's melee attacks
After you get within close range of The Hammer, you may try countering his standard attacks. Every now and then, he also lands a stronger blow (similar to the one that the shielded guards attack with). It is impossible to counter this attack, in any conventional way so, the only way to avoid damage is dodging.
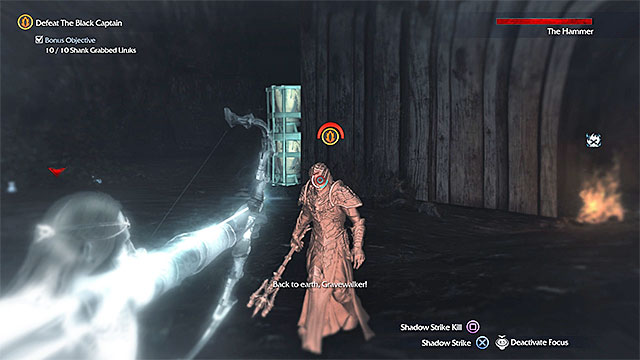 You can also attack The Hammer with your bow
A very good news is that you can deal damage to The Hammer in many different ways. If you prefer ranged combat, you can rely on the bow and throwing daggers. This type of attacks do not drain the boss for lots of health, but this does not mean that you should ignore them completely. It is worth adding here that The Hammer can parry some ranged attacks.
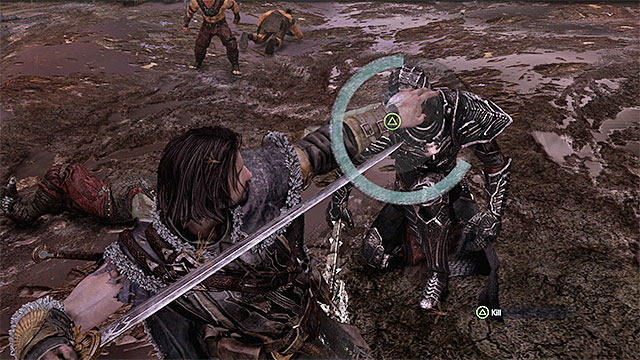 Executions are very effective, while fighting a boss
The best way to deprive The Hammer of health points quickly, is to attack him in melee. If you land standard blows with your sword, it is imperative that you dodge to the side, every three blows, because this is when the boss uses his strong attack. The best tactic, in my opinion, is to bring up the multiplier, thanks to attacking the regular orcs, and using special attacks (e.g. Execution) on the main boss.
Note - Do not attempt vaulting over The Hammer, because you will fail!
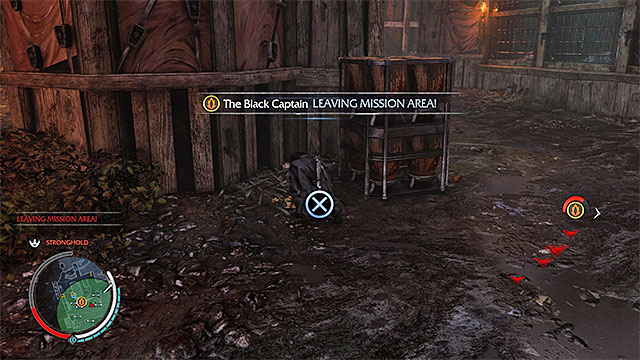 You can replenish your health thanks to, e.g. picking herbs
Since The Hammer's blows usually deal lots of damage, you can run out of health, at some point. The best thing to do, then, is walk away from the opponents and take a look around for a health-replenishing herb. Make sure, however, that at such a situation you do not wander outside of the green circle on the map, because you will fail the mission. If you have the Combat Drain skill unlocked, you can use this special attack on the opponents and regenerate your health partially this way.
Complete the minigame to defeat The Hammer ultimatelyKeep fighting. To win the fight, you "only" need to drain The Hammer's entire health (the health bar that you can see on the screen). At the same time, defeating all the orcs in his guard is optional. Get ready to complete the minigame - you need to move the pointer into the circle, within the allotted time limit, and press the key/button specified by the game.
Rewards for completing the mission:
Requirements to start the mission: You need to complete the eleventh main mission (The Black Captain).
Side objectives: While escaping from the cave, you need to kill 30 ghuls with fire.
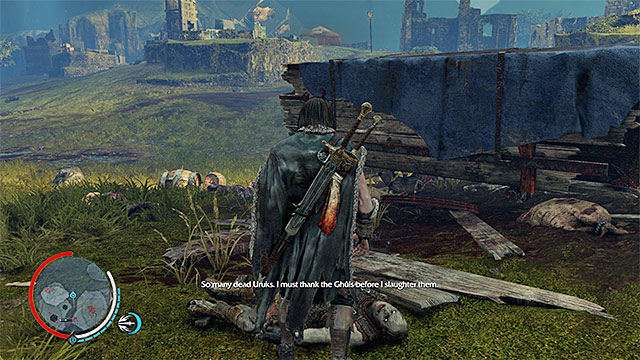 The caravan
You start this mission in the starting point of Udun although, after you watch several cutscenes, you will be automatically transferred to another big location - Nurn. Fortunately, this is not a one-way journey and after you complete this mission, you will be allowed to travel between the two regions freely. First, head Westwards. You need to reach the attacked caravan and listen to Talion's commentary on it.
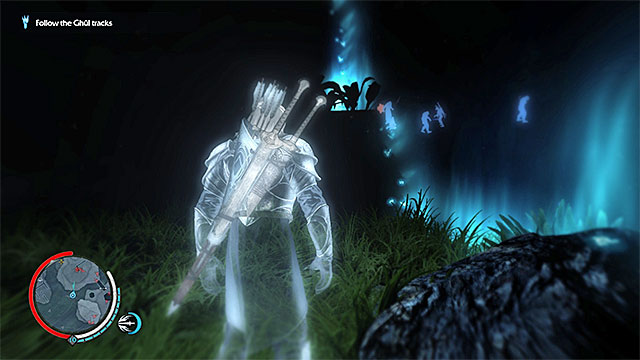 Follow the footprints and be prepared to either kill or avoid the monsters that you encounter.
After you examine the caravan, enter the Wraith mode and follow the footprints left by ghuls. Along your path, you need to watch out, because it is sure to cross some of the locations occupied by orcs and you may also run into some caragors. You need to try to avoid, or kill all of the monsters that you encounter. Regardless of your method, you need to keep following the footprints. This way, you will reach an entrance to a big cave.
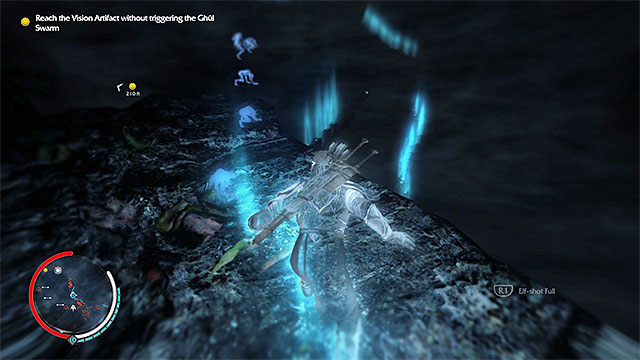 Follow the footprints, do not get too close to the ghuls that you walk around, nor attack them
Enter the cave and start sneaking, because you cannot be spotted by the ghuls here. Do not attack any of them and remain on the path of the footprints that you can see in the w Wraith mode. Additionally, it is a good idea to sprint across some of the locations (without deactivating the stealth mode), because you may be, partially, seen by single ghuls and you need to get away from them, before they are alarmed to your presence.
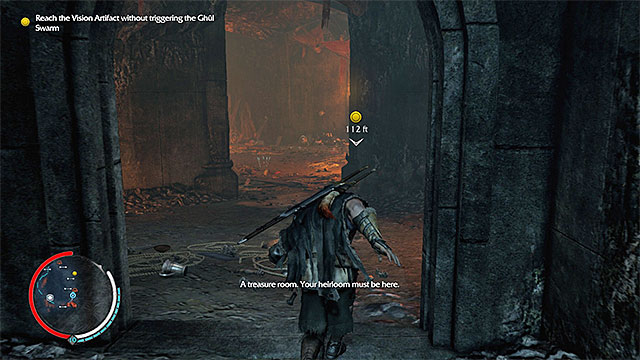 The treasure room entrance
While crossing the cave, you also need to be ready to take several simple jumps towards ledges and to walk over several ropes. The aim of this is to remain on the ledges, outside of the sight of the ghuls below. The footprints will, eventually, take you to the treasure room. Enter the Wraith again to locate the artifact.
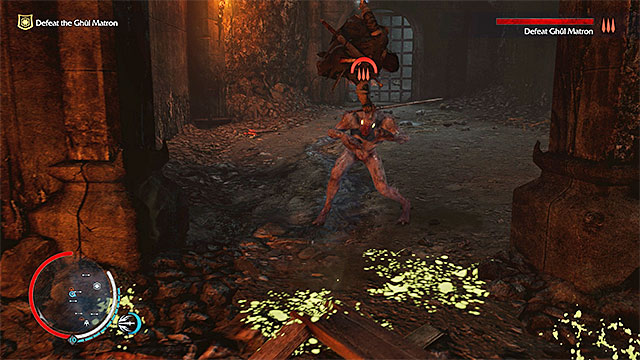 Dodge from the poisonous substance
Ahead, there is a mini-boss battle - the Ghul Matron. If you have never met this monsters, spend several moments on learning its attacks and practice dodges. At long range, the Matron will be trying to spit on you with a poisonous substance and, for obvious reasons, it is best to avoid coming into contact with the spits.
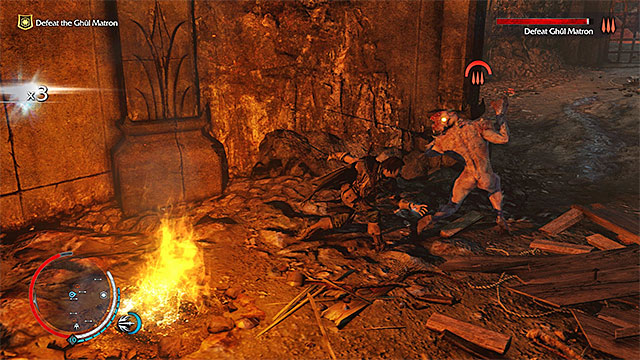 Vault over the Matron and land, at most, two swift blows
The best way to weaken the matron is to land two quick blows in melee and vault over it. Thanks to implementing it, you will eliminate the risk of taking damage. Additionally, thanks to the rising multiplier, you can land special attacks, from Execution. Of course, this is not the only way, in which you can behave, because you can weaken the monster with, e.g. the bow or throwing daggers (if you have the appropriate ability unlocked).
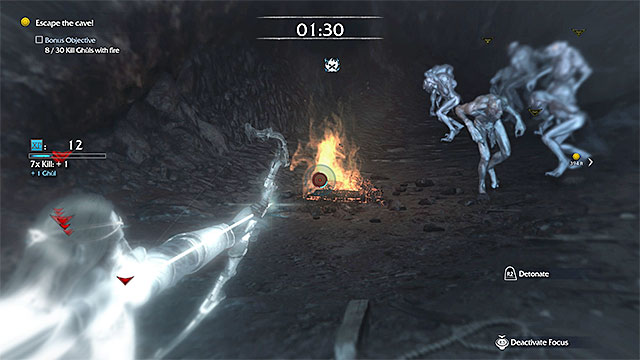
After you achieve victory, a countdown starts - you have 2 minutes to escape from the cave. Start running and, while escaping, take note of the new mission objective. To complete the objective, you need to kill, at least, 30 ghuls with fire. Fortunately, you do not need to try too hard, because you simply need to aim quickly at the bonfires that you pass by, and one of them has been shown in the above screenshot. Each explosion should kill 5-10 ghuls. Reaching the cave exit ends this mission.
Rewards for completing the mission:
Requirements to start the mission: You need to complete the twelfth main mission (The Messenger).
Side objectives: You need to Brand six archers, within 3 minutes.
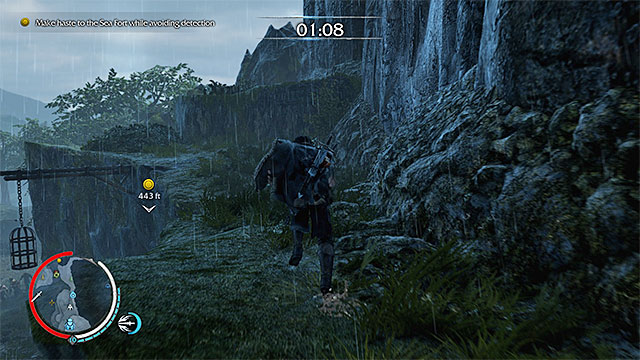 Use the ledges above
Right after this mission starts, you will have to take another time trail. Head towards the fort to the North-West of the starting point. You cannot be spotted in the process and you need to get there within 90 seconds. Use the minimap and the Wraith mode, for locating the opponents, and avoid them by sneaking by and jumping over the ledges above.
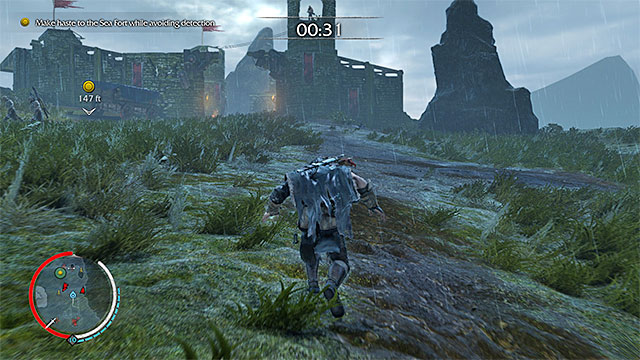 Avoid the orc patrols that you encounter, along your path to the fort
Towards the end of your path, you will walk out into the open so, it is going to be necessary to sneak here. Avoid the enemy patrols and do not approach them. You need to get near the cart near the fort. Here, you will gain access to a new ability - Brand. Thanks to this ability, you are able to gain control over the mind of an orc and make him fight on your side.
Note - there are three ways in which you can brand - by approaching the opponent, after you attack him from behind (e.g. while hanging down from a ledge or hiding in the bushes) and thanks to a special attack that you launch in combat. The last variant is not available in this part of the mission, because you still need to remain in hiding.
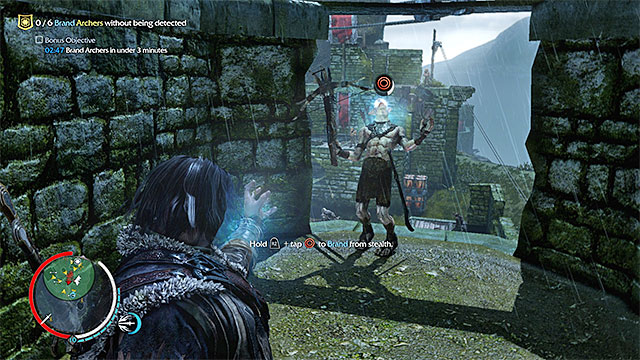 The first archer
Again, you need to race against time - this time, you have 3 minutes to brand all six of the archers and this is required by the secondary objective of the mission (if you fail to make it in time, the mission continues, but 3 minutes is more than enough). You cannot be spotted, because you will then fail the mission. I recommend that you start with climbing onto the tower to the right of the fort's entrance. Carefully, approach the first archer (note - he changes his positions occasionally!) and brand him.
 One of the archers is standing next to the fort entrance
Jump down now and approach the second archer, who is standing at the fort entrance, close to the bushes/ Definitely, this orc is the easiest to brand, but you still need to watch out, to prevent being spotted by the archer on the left.
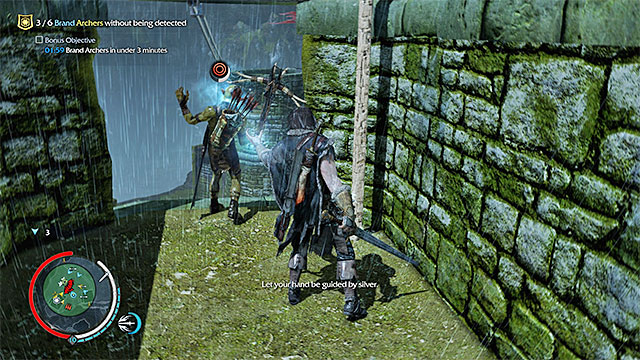 Reach the next archers
I recommend that you now go for the abovementioned archer, near the fort walls, to the left of the entrance. Just like earlier, you need you keep all precautions, because the archer changes his position occasionally. After you brand him, take a leap towards the neighboring tower. There also is an archer there that needs to be branded.
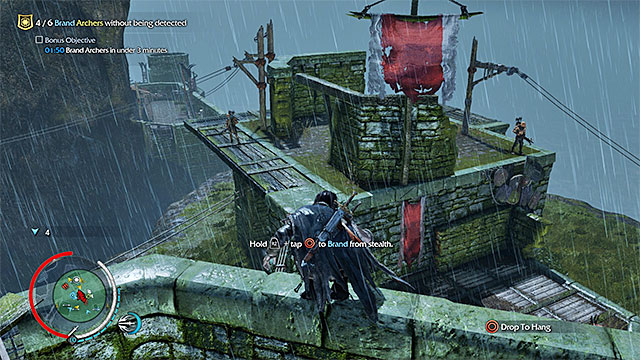
I recommend that you deal, in the end, with the two archers shown in the above screenshot. You need to watch out here, because their fields of vision overlap occasionally. Start acting when they are not watching each other. Apart from that, you can consider the option of branding one of them, while hanging down from the ledge, because this is a safer thing to do, thank to sneak up from behind.
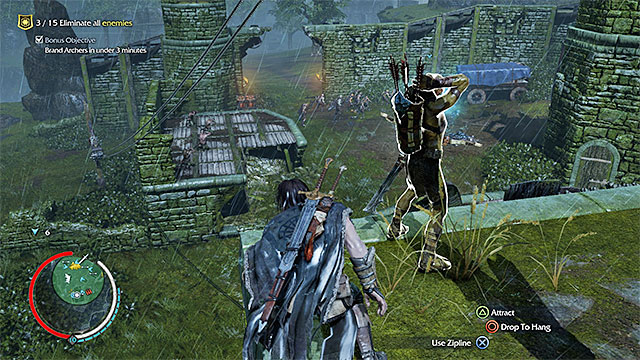 Have the archers attack the rest of the orcs
After you have branded all six of them (and completed the secondary objective) you need to "activate" them, thanks to which they will start fighting on your side. To do that, press the appropriate key/button (you can be in any point of the fort).
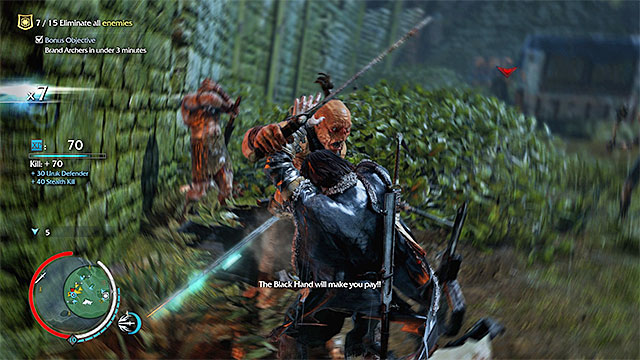 It is a good idea to help your "allies" eliminate the rest of the monsters
If everything went according to the plan, the branded archers start attacking the other orcs in the fort. In theory, you can watch the battle from afar, but I recommend that you join the fighting and help the archers. Thanks to this, you will achieve victory faster. Just like usually, while fighting, watch out for the elite orcs, especially defenders, berserkers and hunters.
 Deal with the reinforcements
After you watch another cutscene, there arrive reinforcements in the fort and this time, you will have to defeat 20 orcs. In this particular case, it is rather compulsory to join the fights, because some of your archers may have died, in the meantime. You can fight the battle in the standard way (melee combat or ranged combat) or try to land surprise attacks, use the bait on caragors, or brand several more orcs, after which you make them fight for you (in this case, remember only that you should pick single targets, thanks to which there will be nobody to interrupt you).
Rewards for completing the mission:
Requirements to start the mission: You need to complete the twelfth main mission (The Messenger).
Side objectives: After you harness a caragor, you need to kill more orcs than Torvin.
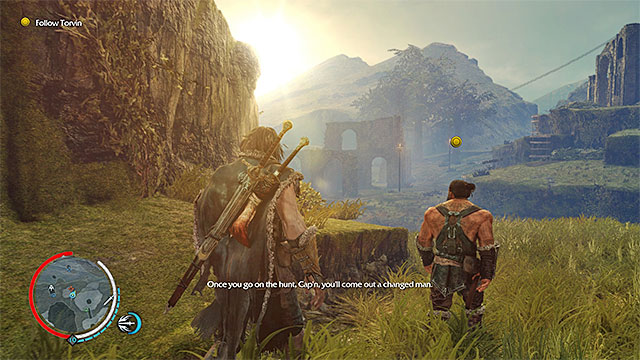 You need to reach the caragors' staying place
Follow Torvin and listen to the conversation with him. Your current destination is a big meadow, where there are caragors. Here, you will gain access to a new ability called Caragor Hunter. Its function is identical with that of the Ride Caragors ability, because it allows you to mount caragors. Its advantage is that you can tame the animal faster, than while trying to get to a ledge first and jumping down on it afterwards.
 Be prepared to counter and harness the stunned beast
Jump down and stand within short distance of a caragor. Wait for it to charge at you. Do not perform any dodges and wait for the moment, at which it is possible to press the counterattack key/button (right after the beast leaps at you). After you perform that correctly, you will stun the caragor. The end part of this process is what you have been already doing. You need to approach the beast, press the domination key/button and play the minigame (move quickly the pointer inside the circle and press the specified key/button).
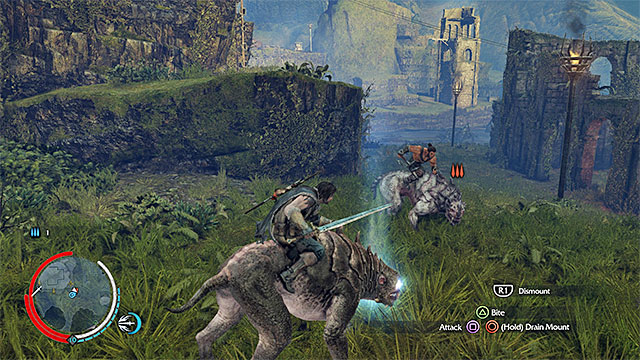 Reach the first group of orcs
After you take control over the caragor, wait for Torvin to harness another animal and follow him. Soon, you will reach the location of the first group of orcs and this is where you get the a secondary mission objective. In order to complete it, you need to kill more orcs than Torvin, during this mission. (in my case, he ended the mission with 12 kills, but everything depends on how you do killing monsters).
Attack the orcs with your sword and have the caragor bite to death the stunned opponentsThe secondary objective may be somewhat problematic, because Torvin is good at killing orcs. Therefore, try not to linger and fight everyone aggressively. The fastest way to kill orcs is to fight them with the sword and have the caragor bite them to death, after they are stunned. The additional advantage of this method is that your mount regenerates health points, each time you do that.
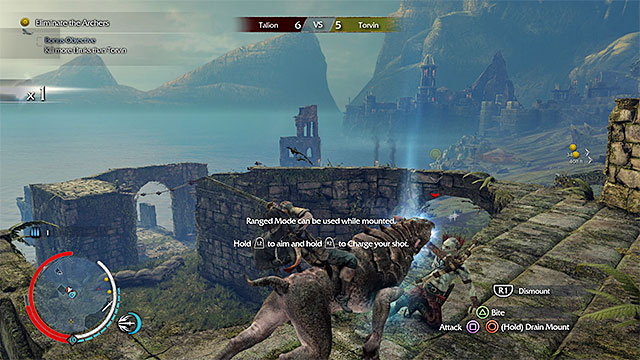 The caragor will have no problems reaching the ledge with the archer
After you have dealt with the first group of orcs, head towards the next area. Here, you will have to kill three archers, but you do not need to hurry to kill them. In the first place, it is best to eliminate several regular orcs, thanks to which your body count goes up. Deal with the archers later and rely on the fact that caragors can climb walls without problems (as an alternative, you can kill them at a long range, with the bow).
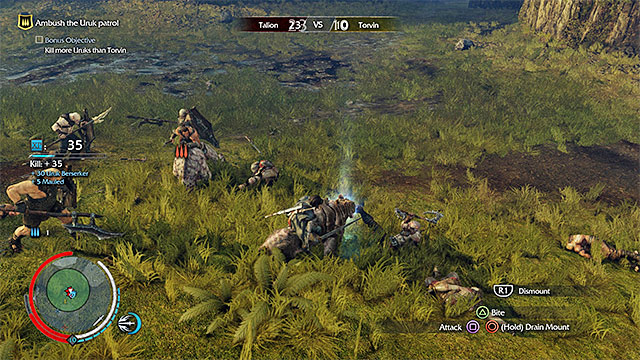 Attack the big enemy patrol
Again, you need to follow Torvin and this part of the mission ends after you run into a big enemy patrol. Attack the orcs and keep your guard, while fighting the elite ones (e.g. the guards). They are capable of weakening your caragor with ease and you cannot have the beast die. Again, exploit the opportunity to have the caragor bite the opponents to death and attack them with your sword/bow.
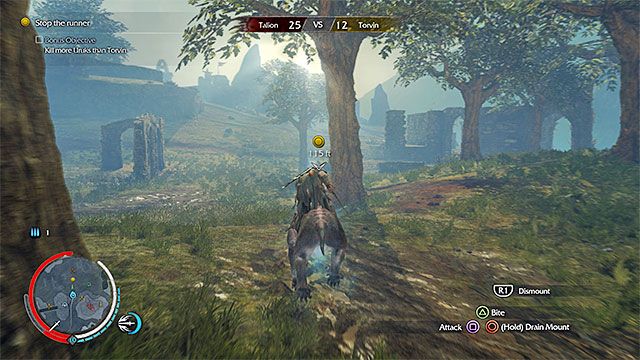 Catch up with the fleeing orc
After the fighting ends, one of the orcs will start fleeing. You need to catch up with him and kill him. Fortunately, taken the caragor's running, this is going to be exceptionally easy.
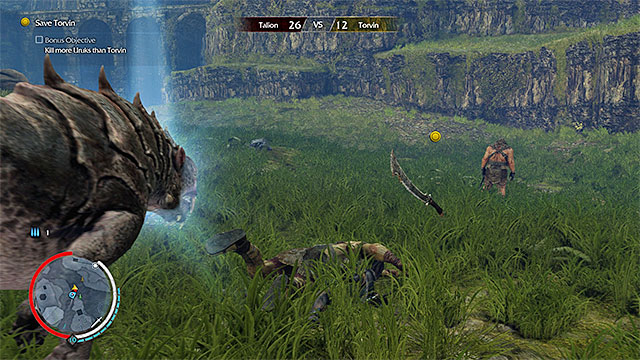 You need to save the wounded Torvin
After you handle the orc, return to the area, where you have just fought. You should note that Torvin has been knocked off his mount and that he is under attack, at the moment. Approach the orcs. You can attack them either in the standard way, or follow the suggestion of the game, dismount the caragor and deal with the orc this way. After you defeat the opponent, the mission ends.
Rewards for completing the mission:
Requirements to start the mission: You need to complete the fourteenth main mission (Big Game).
Side objectives: After you harness the graug, you need to have it devour three orcs.
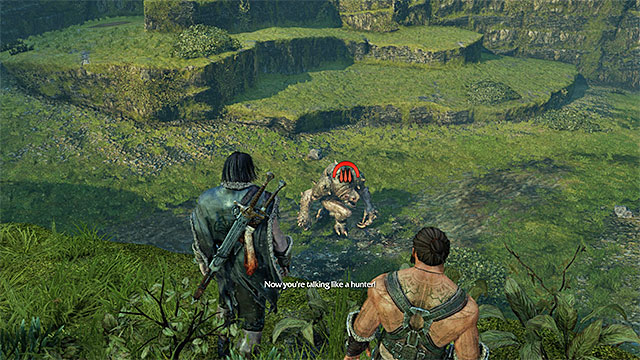 Graug, as seen from afar
Just like in the previous mission, follow Torvin. You need to reach the hunting grounds of the graug, i.e. the beast that you will be hunting in this mission. Listen to the dwarf's instructions and learn the information in the hints window. Jump down then and get into action.
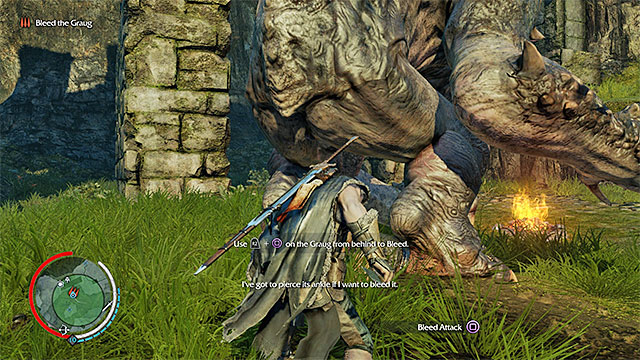
The process of defeating the graug comprises several steps, where each of the steps is thoroughly explained by your ally (and in this walkthrough also :)). Walk carefully towards the graug. Keep using the sneaking mode for the whole time and do not let Talion be spotted by the monster prematurely. You need to stand exactly behind the graug (the above screenshot) and press the melee key/button. Thanks to this, you will wound the beast that starts bleeding.
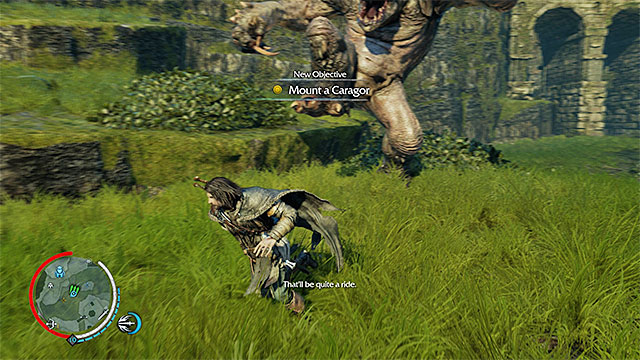 Do not let the graug catch up with Talion
Get away to the safe distance, quickly, because the beast will rush at you, with the intent to kill you. Avoid the graug's blows, mainly, with the option of sprint and thanks to dodges.
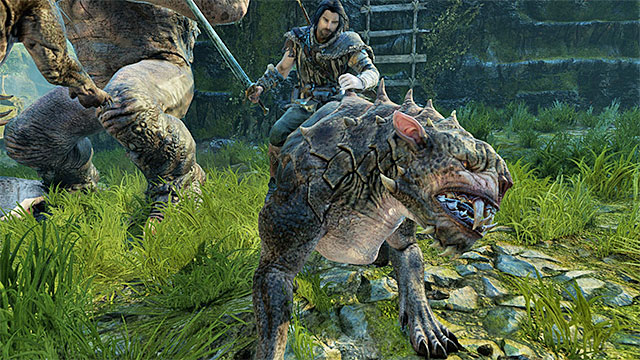 You need to harness one of the caragors
While escaping the graug, keep an eye on the map, for the icons that symbolize packs of caragors. You need to get yourself one, in the same way as in mission fourteen. Wait for the beast to launch at you and press the countering key/button, at the appropriate moment to play the minigame. After you harness the beast, head towards Torvin, while keeping away from the wounded graug.
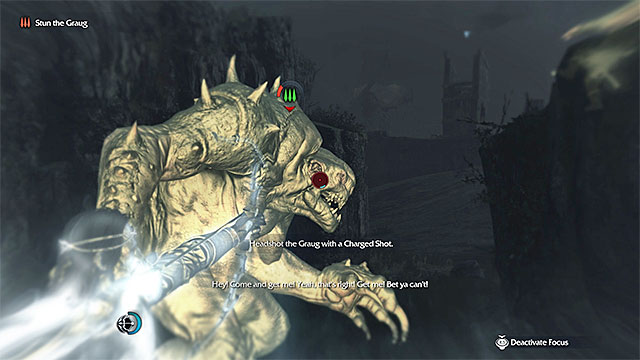
Listen to Torvin's another hint. He suggests that you aim the bow at the head of the graug (the above screenshot), thanks to which the beast will be stunned. Take that advice, approach the graug and land the standard attacks with the sword. Do not overdo, because the graug will soon return to full health. You then need to repeat the pattern - get away from the monster, stun it with an arrow and attack it when it is harmless.
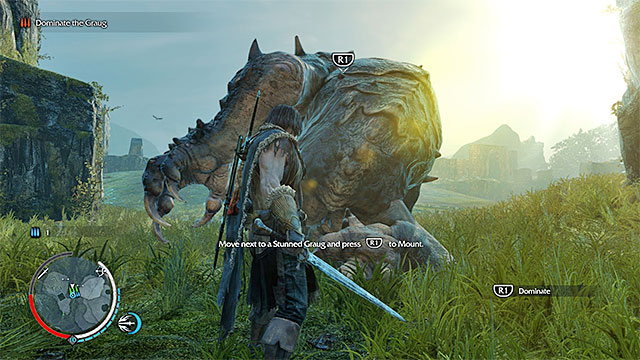 Try to dominate the graug
Keep repeating the above actions up until you deprive the beast of, nearly, entire health bar. This will start a cutscene and you will gain access to the Graug Hunter ability. Dismount the caragor and approach the graug. Press the domination key/button.
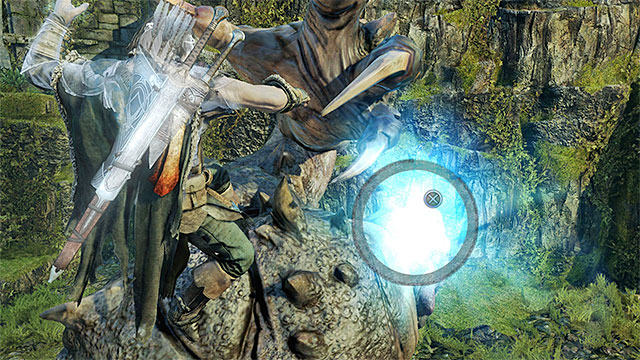 Complete the more complicated variety of the minigame
The minigame by which you are to dominate the graug is discernibly more difficult than the one you mount caragors with. First, you need to tap and hold down, in turns, the keys/buttons that appear on the screen (if you make a mistake or are not fast enough, Talion dies). Finally, move the pointer into the circle and press the required key/button.
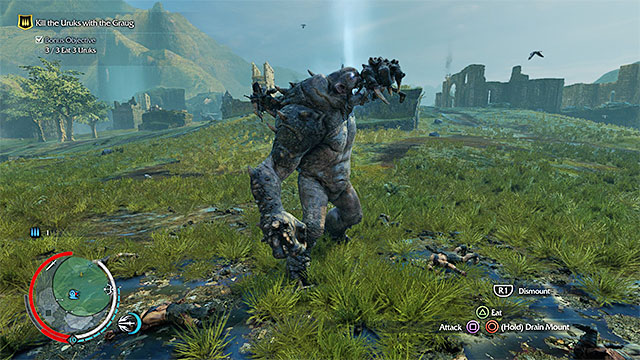 Have the graug devour, at least, 3 orcs
After you have harnessed the graug, approach the group of orcs and attack them. Note the new secondary objective - you need to have the graug devour, at least, 3 orcs. This should be easy, because this is also required to regenerate the monster's health. In between the individual feasting actions, have the graug land standard attacks.
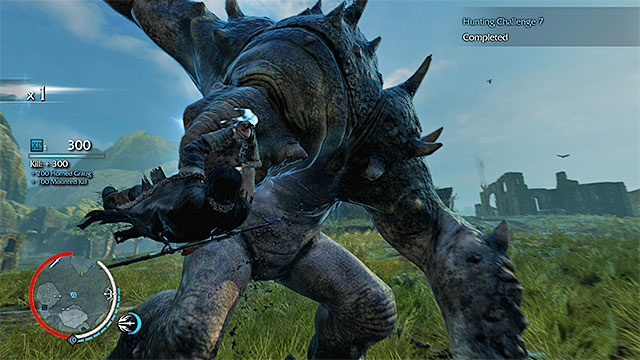 You need to kill the beast
Finally, you need to press the combination of keys/buttons that you execute with, to kill the graug. Killing the beast ends this mission.
Rewards for completing the mission:
Requirements to start the mission: You need to complete the twelfth main mission (The Messenger) and the thirteenth main mission (Queen of the Shore).
Secondary objectives: While following Grublik, you need to remain above him, for the whole time.
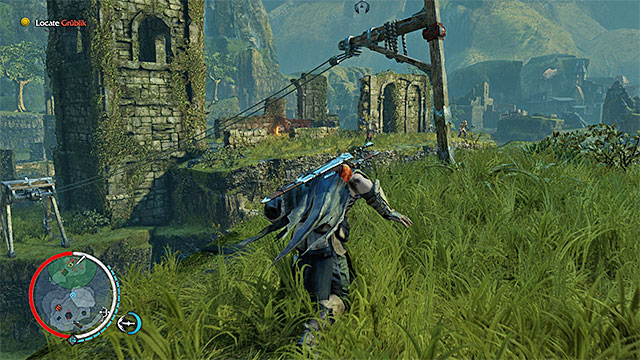 The area where Grublik is staying
Wait for information, on the location of one of the captains of the Sauron's army to be added to your map. to find Grublik (his identity has been predetermined), go West and, after several moments, you will reach an encampment. Apart from the captain, there also is quite a number of the regular orcs. Use the Wraith mode to locate Grublik (the red silhouette). At the same tie, you will gain access to a new ability - Command, thanks to which you will be able to command the dominated (branded) orcs of the Sauron's army.
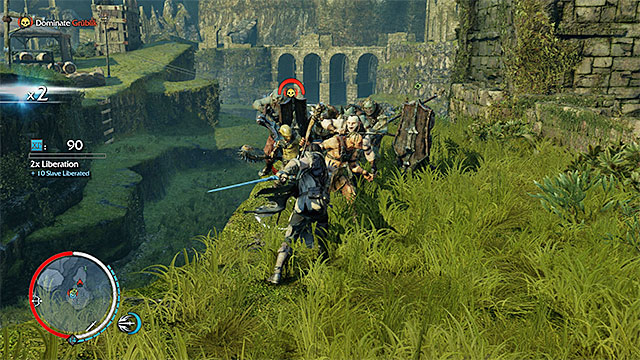 You can attack Grublik only, or all of the orcs
Depending on your preferences, you can first eliminate the regular orcs, or focus on Grublik straight away. If you go for the latter, try to launch a successive surprise attack . Regardless of what you did, you need to weaken Grublik (his weaknesses and strong points are randomly generated).
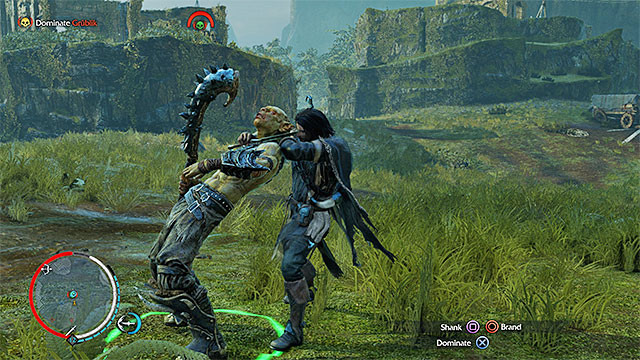 After you grab Grublik, select the option to dominate, and then to command
After Grublik's health bar turns green, try to grab him. From the list of the available actions, select Dominate and then Command. Wait for the Sauron's Army window to open. Since this is a sort of a tutorial, you need to perform all of the actions, as preplanned - select Tarz the Knife (his personality has been predetermined) and have Grublik become one of his bodyguards.
Note - later into the game,, you can issue more commands to the branded Captains, i.e. attacking the other Captains to eliminate them.
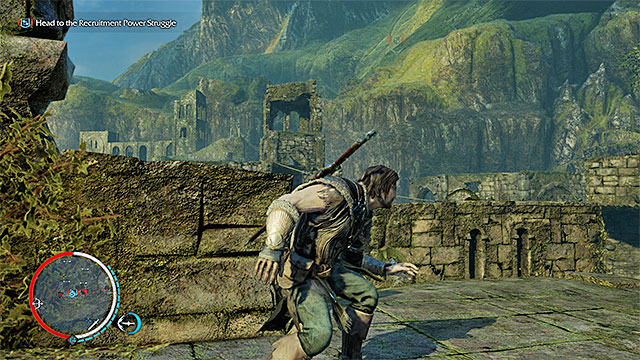 Reach the ruins, where the next part of the mission takes place
As you probably noticed, a marker of another mission, connected with Grublik and his plan to join Tarz's bodyguard, has appeared on the map. Go to that marker, to the ruins. After you approach the marker, you will watch a cutscene.
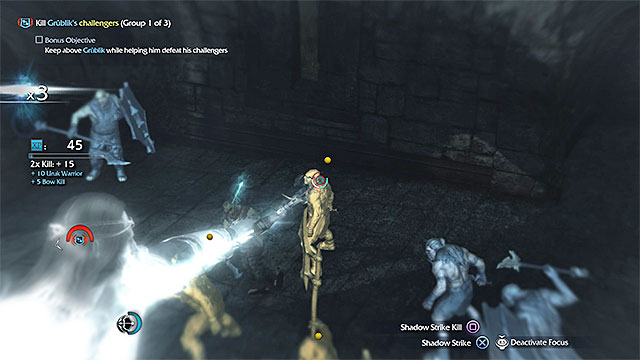 Use the bow to attack the marked orcs
From now on, you need to help Grublik complete his task, thanks to which he will be noted by Tarz and will join his bodyguards. Attack the orcs marked in yellow, with the bow (if you run out of arrows, there are more around). At the same time, note the secondary objective that has just been unlocked - you cannot jump down so, remain on the ledge, which you were on, after the cutscene ended.
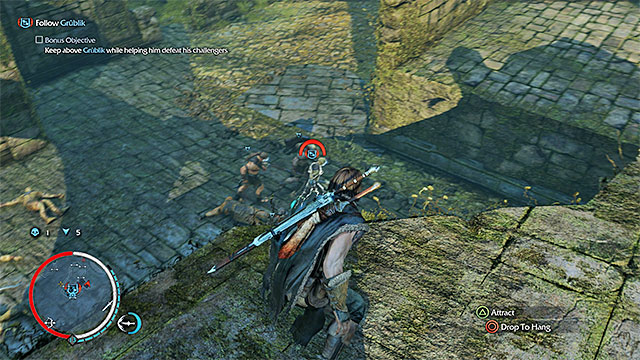 While following Grublik, move over the top ledges and edges
In here, you have to defeat three groups of orcs, hostile to Grublik. Since the groups are in various locations, you need to follow the branded orc towards the successive groups. Remember that you CANNOT JUMP OFF to lower ledges, because you will then fail the secondary objective. Instead, run over the narrow walls and ropes between platforms. Keep doing your job, up until the last group of orcs has been eliminated.
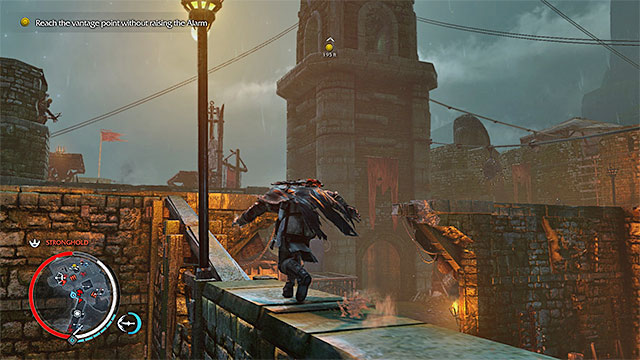 Use climbing, thanks to which it will be easier to avoid the orcs
After Grublik is promoted, you will find yourself near the orc stronghold. Head towards the marked vantage point. According to the information, you need to remain unspotted, along your path so, avoid main routes and, instead, climb over onto the walls, onto the rooftops and onto balconies above. Also, remember to use the Wraith mode e.g. to locate the archers that you pass by (of course, you can attack them by surprise).
 Wait for Tarz to arrive and command the branded Grublik to attack
After you reach the vantage point, you will watch a cutscene of Tarz's arrival in the stronghold. Follow the game's instructions again and press the appropriate key/button to activate the branded Grublik. Thanks to this, he starts attacking Tarz.
 Attack Tarz, according to his weaknesses
The final part of the mission assumes that you kill Tarz. If you Talion has his weak and strong points beforehand, you now need to take a look at them. Unfortunately, they are randomly generated so, it is up to you what tactic you assume. For example, if Tarz is vulnerable to explosions, aim your bow at the campfires or grog barrels. If he is afraid of caragors, release them from their cages. The most universal method is to jump down and fight Tarz, and the rest of the orcs, in the more direct way.
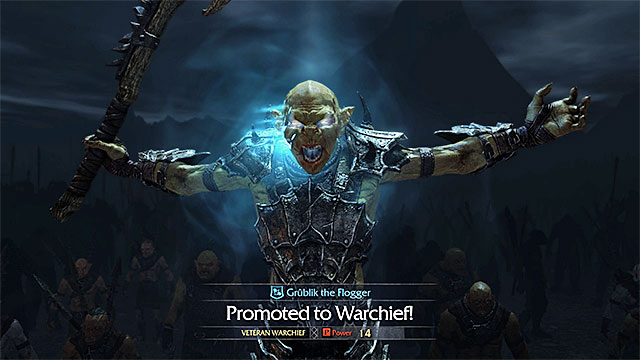 You need to have Tarz murdered, thanks to which Grublik will take his position
While fighting avoid, if possible, attacking at a long range and attacking Grublik by accident, because he must survive the battle. Continue fighting, until you deprive Tarz of his entire health bar. Finally, the game confirms Grublik's promotion to a new Warchief (the speech and changes in the Sauron's army window), which ends this mission.
Rewards for completing the mission:
Requirements to start the mission: You need to complete the fifteenth main mission (Hunting Partners).
Secondary objectives: You need to stop the horned Graug from feeding on the captive ghuls, with the bow, for three times.
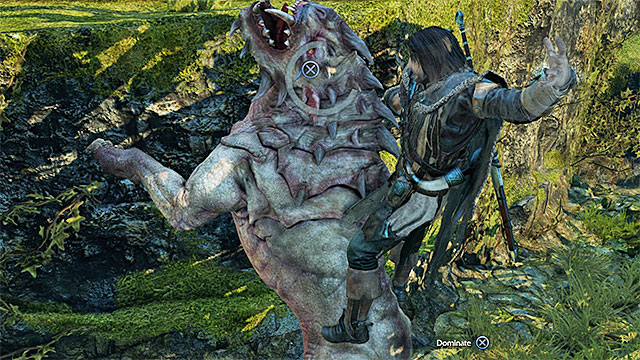 Dominate the Dire Caragor
The first thing that you need to do, in this mission, is dominate the Dire Caragor, i.e. the stronger variety of the caragor. Fortunately, the tactic remains unchanged. It is best to get away from the beast, wait for him to charge and press the countering key/button, at the appropriate moment. Optionally, you can also climb onto a ledge above and jump down onto the caragor. In both cases, you will still need to complete a minigame.
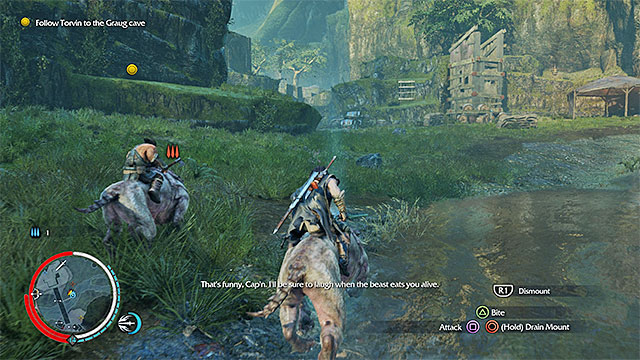 Reach the Graug's cave with Torvin
After you have dominated the Dire caragor, follow dwarf Torvin. He will take you to the cave, where an unique monster dwells - the Legendary Graug. You will now have to fight the huge creature.
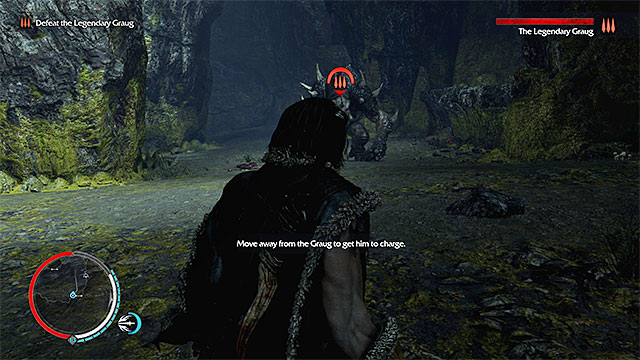 Stand as far from the graug as possible and wait for him to charge
To defeat the legendary graug, you need to follow the succession of actions tightly and in the predetermined way. Start by walking away from the graug, as far as possible. Face the beast and wait for it to charge.
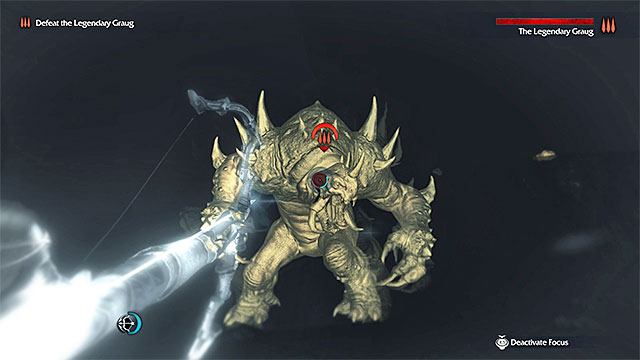 Aim the bow at the graug's head
After the graug comes closer to you, equip the bow and aim it at the head, in the focus mode (time slowing). The attack with the bow stuns the beast, temporarily. This is not it, though, because you still need to dash to the side, in order not to collide with the blindly charging beast.
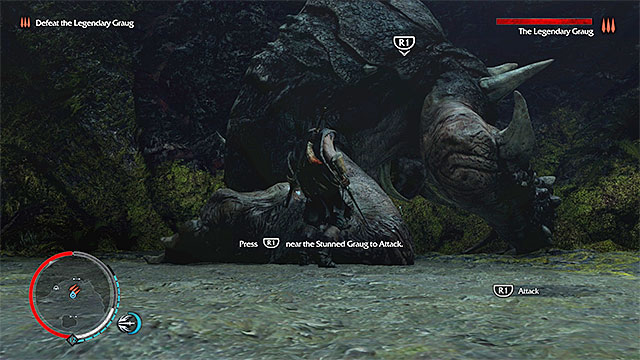 Run up to the defenseless graug and attack it
If you have followed the above steps, the legendary graug will be defenseless now, for a short moment. Use this to your advantage, run up to the beast and press the specified key/button, to deprive it of a third of its health.
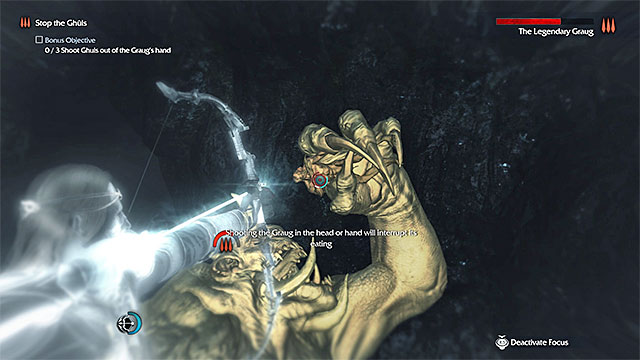
Now, there is an important part of the battle, ahead, because you need to prevent the graug from replenishing its health, which it does by feeding on the ghuls in the cave. Try to eliminate the ghuls, with the bow, right after the graug grabs them (an example in the above screenshot). Preventing the graug from eating the ghuls is connected with the secondary objective and you need to eliminate, at least, three ghuls this way. From the moment, at which you complete the secondary objective, you can start killing the ghuls in the standard manner, e.g. in melee and with AoE attack of the Wraith Flash.
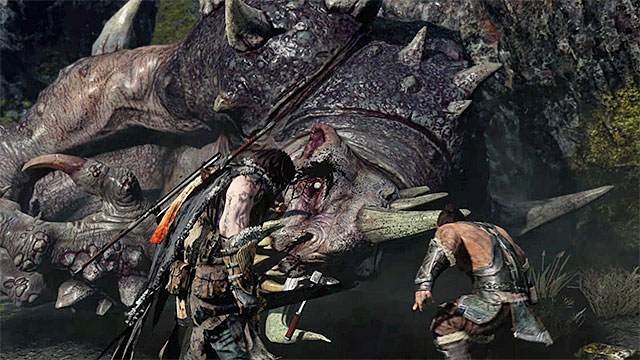 Deprive the graug of its entire health to kill it
Killing all the ghuls resumes the battle with the legendary graug. This means that you need to repeat all of the abovementioned actions. If you prevent the graug from eating too many ghuls, you will have to repeat the sequence twice. This will deprive the graug of the entire health bar and end the mission.
Rewards for completing the mission:
Requirements to start the mission: You need to complete the sixteenth main mission (The Power of the Wraith).
In many respects, this mission resembles "Kill the Warchiefs", which you have been completing towards the end of your stay in the Udun valley. What is unique about this mission is that you do not complete it in any location in particular. You can complete it ever since the moment that you have completed the sixteenth main mission (The Power of the Wraith). Up until the moment, in which you meet all of the requirements, you will not be able to progress to the final battles.
The plan is that you Brand a total of five Warchiefs of the Sauron's army (the ones from Nurn). You can score one of the Warchiefs automatically, thanks to completing the sixteenth main mission "The Power of the Wraith ". This means that you need to brand four more, on your own.
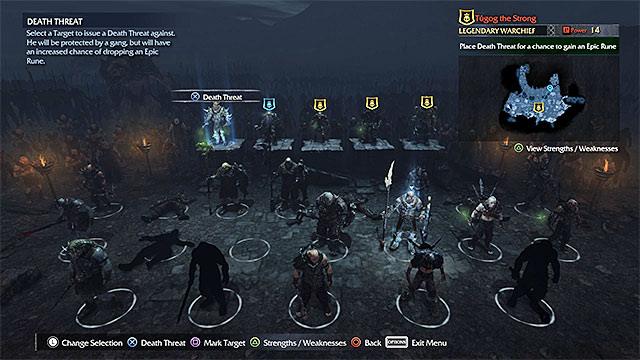 You can strengthen a Warchief thanks to, e.g. sending him a Death Threat
Before you take to this mission, it would be a good idea to make some preparations. Try to complete as many side missions as possible, thanks to which Talion gets stronger and gains access to new abilities and attributes. It is important, because battles with Warchiefs tend to be very demanding.
Regardless of which method you choose (they have been described above, also try to increase the Power parameter in the Warchief that you intend to attack, or the captain that you intend to help being promoted to the rank of the Warchief. What speaks for this is that the Warchiefs that you brand take part in the final battles of the storyline. With a powerful army on your side, it is going to be easier to be victorious. The Power factor in the orcs of the of the Sauron's army can be raised in two ways, which you should already know about. First of all, you can let them kill Talion. Secondly, you can send a Death Threat to the orc (you need to buy the ability first).
Note - if you still haven't learned the identities of the Warchiefs of the Sauron's army, nor their weak and the strong points, it is necessary that you make up for that. With additional knowledge about the individual Warchiefs, you are going to find it CONSIDERBLY easier to weaken and brand them.
Note - Battles with the Warchiefs of the Sauron's army can be made easier, by eliminating their bodyguards beforehand, who are marked in the Sauron's army window (the lines linking the Warchiefs with the Captains). Eliminating them beforehand means that the Warchief will be unable to summon them into battle.
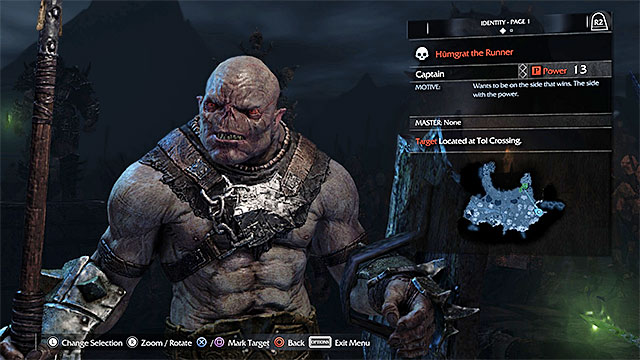 You can single out any Captain of the Sauron's army
There are two main methods to brand. The first one assumes that you repeat all of the steps that you have taken in the sixteenth main mission (The Power of the Wraith). Therefore, you need to dominate one of the Captains of the Sauron's army and play an additional mission connected with him, in order to provide him with backup, while eliminating one of the Warchiefs. As a result of that, he will be promoted to a Warchief (that is loyal to Talion).
If this is the variant that you choose, you need to picking a Captain that you want to see promoted to the Warchief. It may be a "regular" orc, as well as one of the bodyguards of a Warchief. The only difference is that you will have to play different missions after you dominate the Captain, after which he gets promoted to a Warchief.
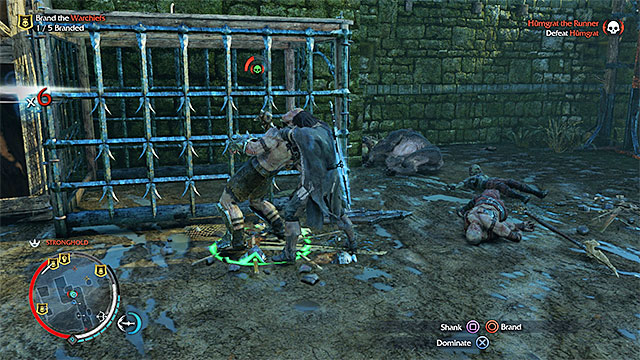 You need to grab the Captain and brand him
After you have selected the Captain, you need to reach him, attack him and deprive him of his health points. At the same time, it is a good idea to deal with his bodyguards (they should be the regular orcs). After the Captain's health bar turn green, you need to grab him and select the option to dominate. Then, you need to Command him. After the window of the army loads up, select one of the Warchiefs and have the dominated Captain start the actions that will get him promoted.
Note - since the regular orcs may obstruct you from grabbing the Captain, it is a good idea to kill them beforehand, lure the Captain away from the rest of the enemies or grab him only after he starts fleeing.
Note - do not risk with too strong attacks because you may kill the Captain by accident and you will be unable to dominate him.
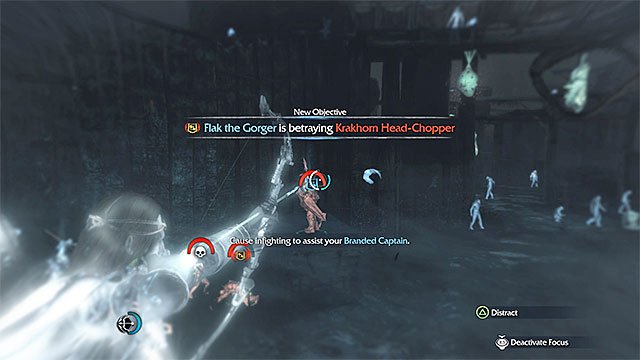 Help the Captain win
The next step is to reach the marker of the additional mission connected with the Captain that you have just dominated. The course of this mission is different, depending on whether you dominated a regular Captain or one of the bodyguards of one of the Warchiefs. The objective is always the same - you need to help the captain defeat the Warchief and keep him alive, at the same time. After you start the mission, always focus only on dealing damage to the Warchief and, whenever do not use AoE attacks (e.g. Wraith Flash, shooting arrows at grog barrels), which would wound the dominated Captain.
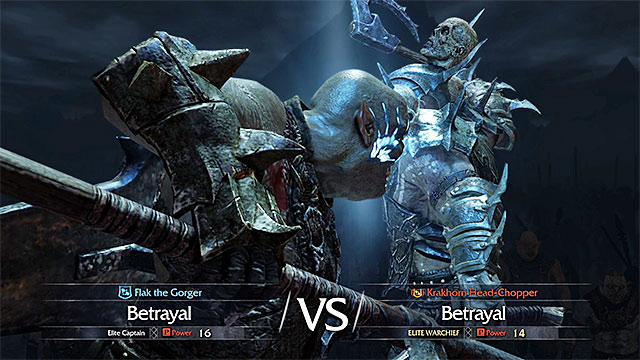 The dominated Captain gets promoted to a Warchief, as a reward
Defeating the Warchief will help you achieve your goal. After the Sauron's Army window pops up, the victory will be confirmed again and you will learn that the branded Captain has been promoted to a Warchief.
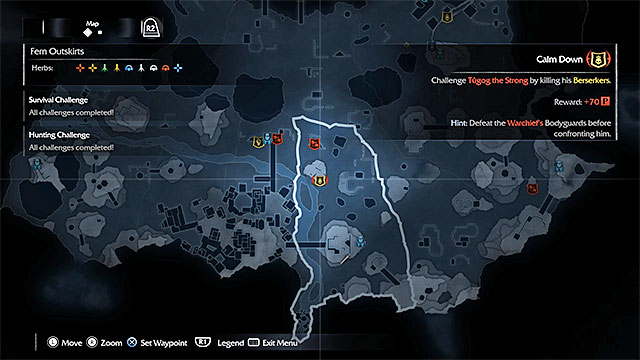 An example marker of a mission, where you need to lure the Warchief
The second method is much less troublesome, although you need to expect more complications, while trying to dominate the Warchief. The plan is that you attack the Warchiefs directly, in order to weaken them and brand them. Therefore, in this case, you do not need to dominate Captains.
If this is the variant that you choose, you need to start by reaching one of the yellow markers on the world map. Just to remind you, the yellow icons symbolize the starting points for the missions connected with luring Warchiefs out.
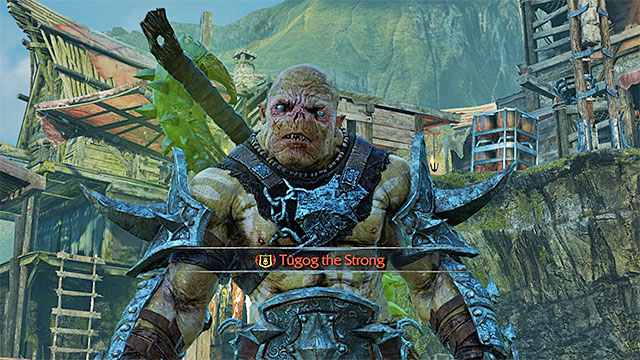 The Warchief appears around after you have met the requirements of the mission
As I have already stated in the walkthrough for the "Kill the Warchiefs" main mission, the missions connected with Warchiefs tend to vary. If you want to lure a given Warchief out, you may have to eliminate, stealthily, the selected orcs in the stronghold, or eliminate them in melee. Regardless of the conditions of the mission, you need to act up until the selected Warchief appears in the battlefield.
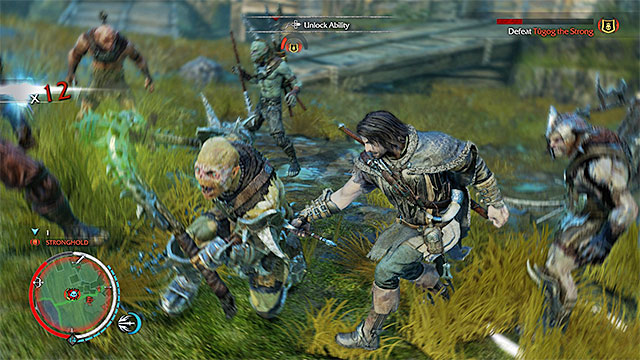 While fighting the Warchief, exploit his weaknesses and do not let him take advantage of his strong points.
The next step is the most troublesome. You need to attack the Warchief, BUT it is very important to remember about several things:
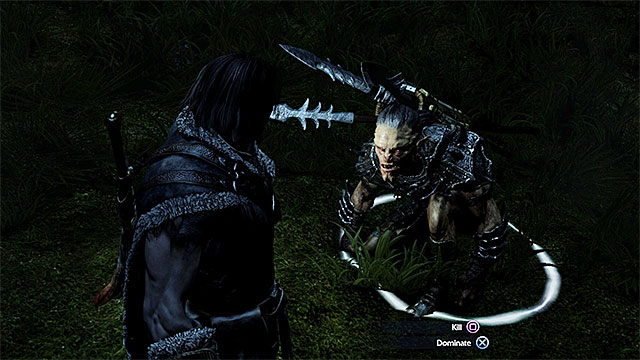 You need to weaken the Warchief
Continue fighting the Warchief. Your task is to bring about one of two situations. If the Warchief can be grabbed, you need to wait for his health bar to turn green and then try to grab him. If, however, the Warchief can block your grabs, you need to keep bringing his health bar down, and hope that you will be allowed to choose, towards the end of the battle, if you want to eliminate him or dominate him (of course, choose the latter).
Note - If, however, in spite of your attempts, the Warchief died, you need to wait for him to be replaced with one of the Captains. If you do to want to wait for the promotion, use a forge tower and speed up time, or leave Nurn for several moments (return to Udun).
Note - if the Warchief regenerates spontaneously (this may be one of his strong sides), you cannot allow yourself moments of rest, during the battle. He may, in the meantime, regenerate some of hi health points and it may be impossible to grab him.
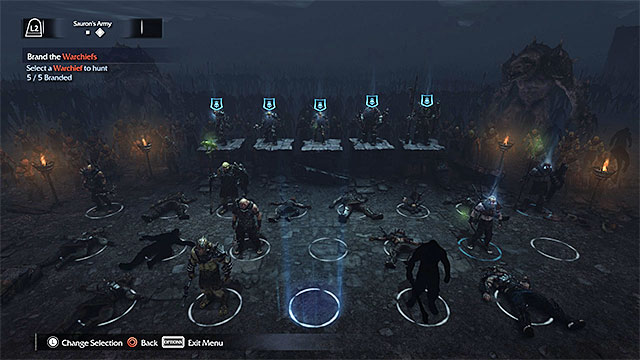
You need to keep performing the above steps up until Talion manages to dominate (brand) all of the five Warchiefs of the Sauron's army. Of course, you will be informed, by the game, that the mission has been completed and, in the army window, above all the Warchiefs there are blue icons (an example in the above screenshot).
Requirements to start the mission: You need to complete the sixteenth main mission (The Power of the Wraith).
Secondary objectives: You need to Brand stealthily five orcs.
Note - in this mission, you cannot raise the alarm, ALTHOUGH it is not tantamount to being spotted. Still, you should make sure that you are not detected, but if you are, this does not mean that you fail the mission. If, however, in spite of your endeavors, you are detected, you only need to pay attention to those of the enemies that are trying to raise the alarm. It will then become your priority to eliminate them. Only with the alarm raised, will the mission be failed.
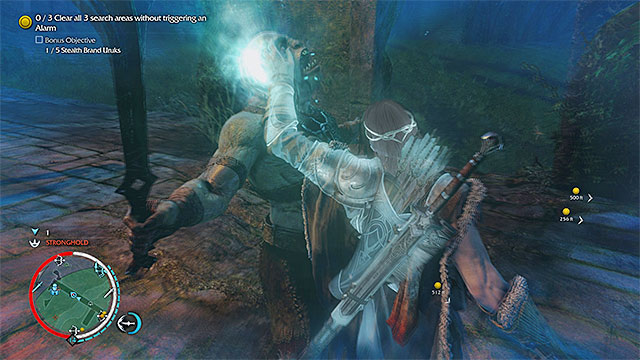 The easiest way to brand an orc stealthily is to get him from behind.
The main objective of the mission is to clear all of the areas, within the stronghold, of the enemy creatures. You can start doing it now, or complete the secondary objective in the first place. The plan is that you brand any five orcs, where you cannot be spotted by them, while doing this (otherwise, the action will not count for the overall result). Therefore, try to b rand them after you get the opponent from behind, by jumping onto him or while hanging off a ledge.
 Shooting at the campfire will kill, or main severely most of the orcs
You can visit the marked areas of the fort in any order. I recommend that you star by approaching the area located in the North-Eastern part of the stronghold. You should notice that the orcs are sitting at the campfire and, as a result, it is good idea to send an arrow towards the fire. Of course, this is not the only possible method, because you can kill the orcs with the bow, get them from behind or brand the other orcs in the area (preferably archers) and then command them to attack.
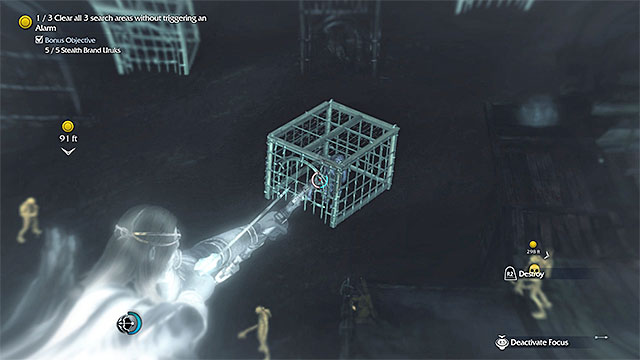 Try to free the caragor in the cage
The second area is a bit to the South. In this case, I recommend that you shoot an arrow at the cage with the caragor inside. Wait for the beast to handle the opponents and kill it (using the bow recommended), because killing it is also required for the area to be secured.
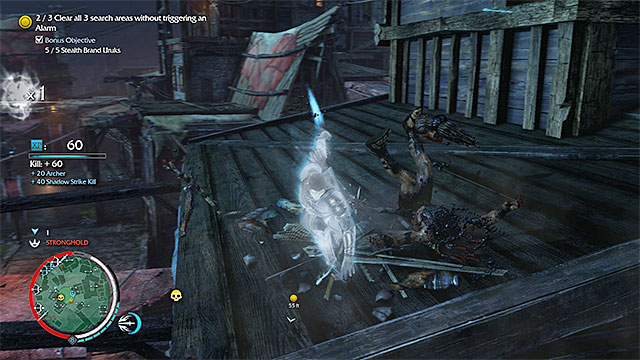 First of all, deal with the Captain's guards
Finally, go to the area in the Western part of the fort. You need to watch out here, because there is a random Captain of the Sauron's Army here. In the first place, try to kill all of the regular orcs that accompany the Captain. This will prevent accidental attempts to raise the alarm, later into the mission. Again, the best way of eliminating the regular orcs is to use the bow, especially that you can easily find additional arrows on rooftops and nearby ledges.
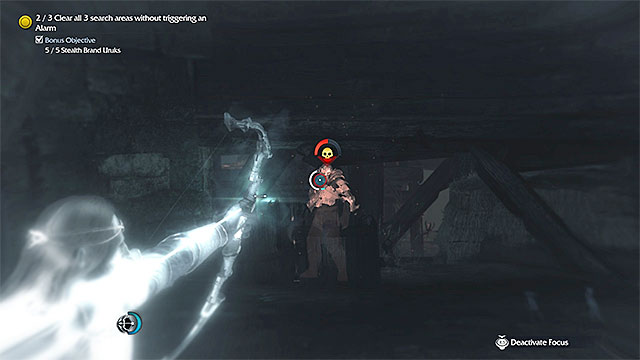 While fighting the Captain, make sure that the rest of the orcs are not alarmed
As for the Captain himself, leave him for the end. Before you attack him, have a look at the list of his weak and strong points. If the Captain can be killed with a single blow (e.g. by surprise), try to do that. Otherwise, make sure again that there are no other orcs around and attack the Captain in the customary way. While fighting him, keep an eye on the minimap readings and, if you notice that there is an orc trying to raise the alarm, focus on stopping him immediately. Defeating the Captain and securing the area ends this mission.
Rewards for completing the mission:
Requirements to start the mission: You need to complete the eighteenth main mission (The Cure).
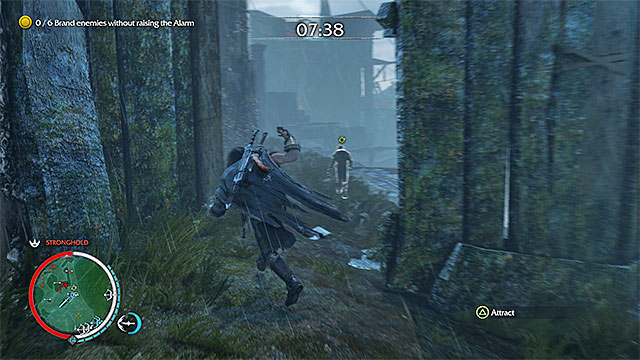 Search out single orcs and scan them
At the beginning of the mission, you need to race against time, because you only have 8 minutes to find Lithariel. Although it may seem otherwise, this is quite a lot of time and you can take all the steps within less than 3 minutes. Your first task is to brand any six orcs. If possible, pick single orcs, because you cannot raise the alarm. Just like in the case of the previous mission, this does not mean the you absolutely need to remain in hiding because, if you are spotted, you only need to make sure that none of the orcs raises the alarm.
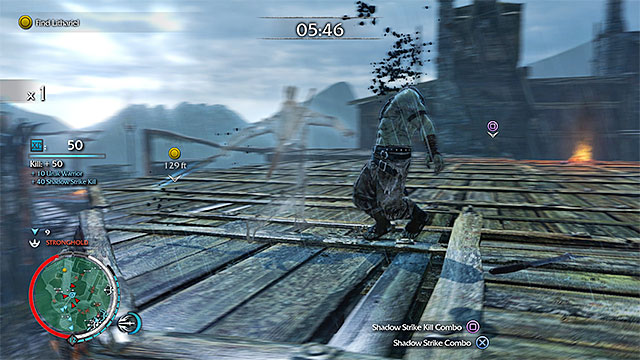 Head towards Lithariel
After you have branded the orcs (you are free to choose which ones), Lithariel's location is added to your map. You need to reach her and, from now on, you do not need to sneak anymore (although this is still an option). Finding the captive woman starts a cutscene.
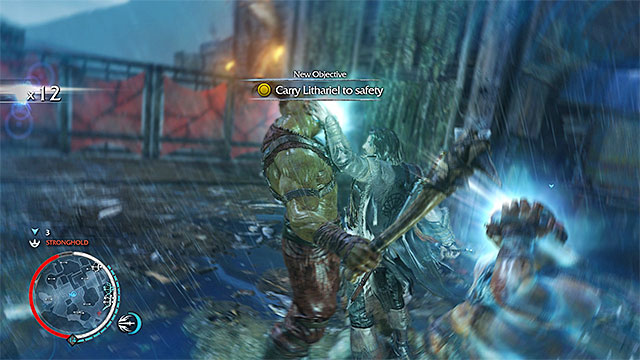 It is a good idea to brand a several more orcs
According to the information that you get, you need to decide whether you want to kill five more orcs or to brand them. Personally, I recommend that you do the latter, because you will soon need additional help. Therefore, try to brand the first one of the orcs, by attacking him by surprise, and at least two more, during direct battles (special abilities connected with branding).
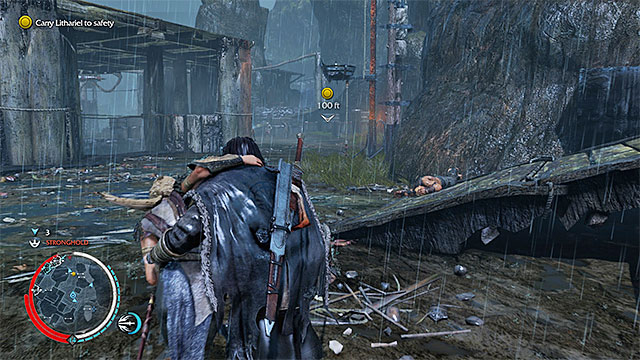 Help Lithariel...
The last part of this mission assumes that you take the wounded Lithariel to the stronghold exit. Approach her and hold down the grab key/button to pick her up. Do not release that key and head Southwards.
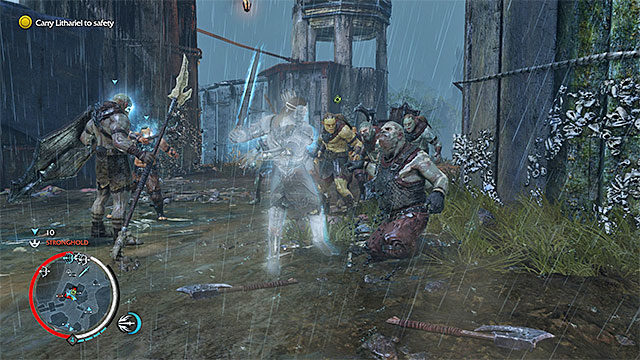 ...and eliminate the attacking monsters
As you have probably guessed, you will be obstructed from leaving the stronghold by orcs. At such points, release Lithariel and fight them. You can help yourself, by using the branded orcs and, on a regular basis, try to brand more "allies". Do not get away from Lithariel, while fighting, because she may be attacked by the orcs and she will be unable to fend them off. Later into the mission, take the two steps alternatively, i.e. carry Lithariel over to the successive locations and fight the orcs. The mission ends after you leave the stronghold.
Rewards for completing the mission:
Requirements to start the mission: You need to complete the nineteenth main mission (The Rescue) and the additional, Brand the Warchiefs mission so, you need to brand a total of five Warchiefs of the Sauron's Army.
Note - The final mission consists of two parts. On this page, you will find the walkthrough to the first one- "Lord of Mordor". Later into this walkthrough, you will find the description for "Mordor in Flames".
Note - this mission takes place in a separate location of the game world. After you complete it, however, you will be back to Nurn and you will be able to keep exploring both of the areas of Mordor.
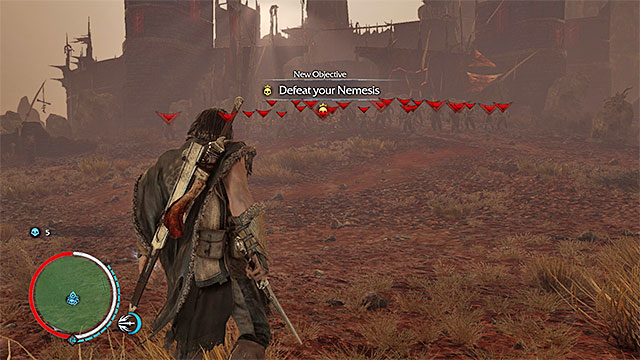 Get ready for a big battle
After you start this mission, you will be carried over to a small location - Ered Glamoth, where it takes place. You need to face a group of orcs. The monsters are commanded by the main opponent of your character, i.e. the Captain of the Sauron's Army that killed Talion most times and/or fought the most battles with him. The good news is that there are five Warchiefs on your side in this mission, who you branded while completing one of the additional missions.
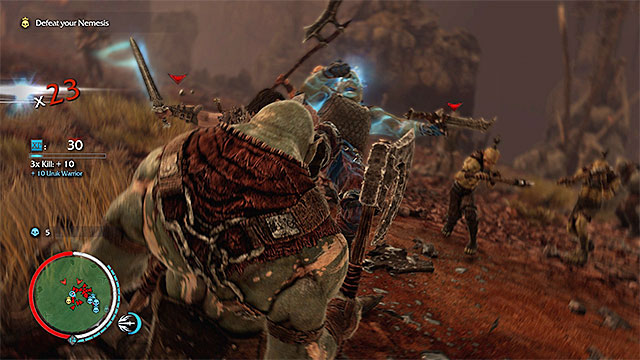 Attacking the regular orcs is a good way to unlock special attacks
Of course, you can start the battle by attacking the regular orcs, thanks to which you will easily bring the multiplier up. The main aim of the mission is the enemy Captain mentioned above. I recommend against leaving eliminating him until the very end, because one of the branded Warchiefs may die in the meantime. You do not fail the mission if any of them dies, but you really are going to need them, in the second part of the mission.
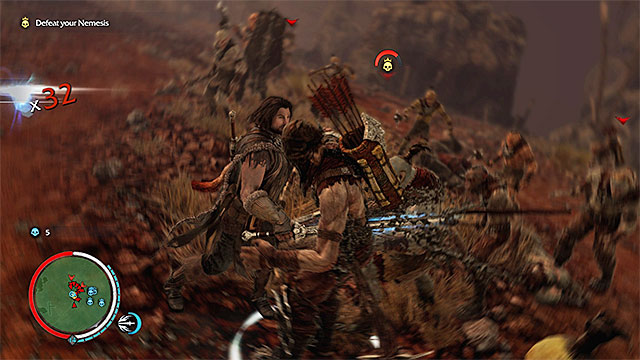 Attack the opponent and try to exploit his weaknesses.
The easiest way to attack the main opponent by exploiting his weaknesses, thanks to which it is going to be easier to deal damage to him. What is even more, the enemy Captain may also be attacked by the branded Warchiefs of Talion's army, which is going to make him even weaker. Avoid AoE attacks that would wound your army and fight up until you deprive the enemy of the entire health bar. Finally, you will also have to complete the minigame to execute the Captain, but you already know how to play it.
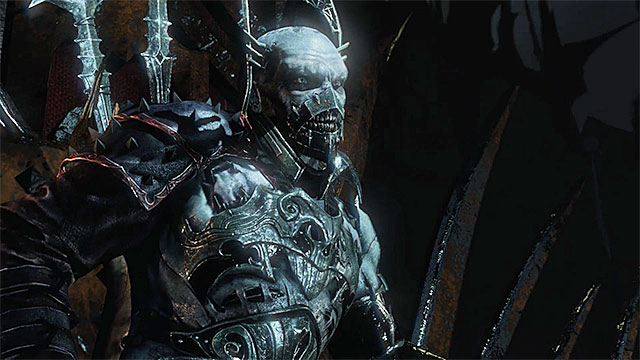 A new boss -The Tower
You can now go towards the ruins that you can see in the distance, where there is another one of the Black Captains - The Tower. Climb to reach the passage marked by the game. Ahead, there is another boss fight for you to handle and you have to win within 8 minutes (as usually, this is lots of time so, you do not need to hurry).
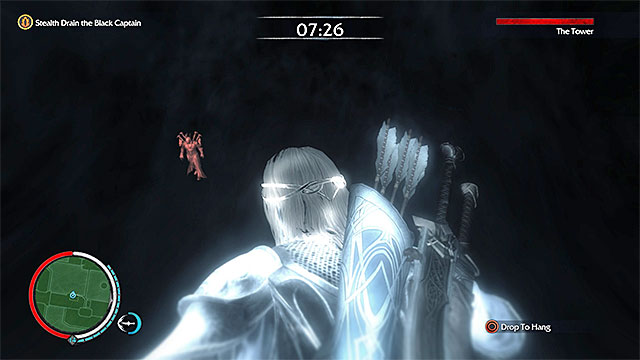 Use the Wraith mode to find the boss's incarnations
There are several unique aspects of the battle against the Tower. You do not fight him directly and instead, you need to find his incarnations around the area. By default, they are invisible, but you can change that thanks to the Wraith mode.
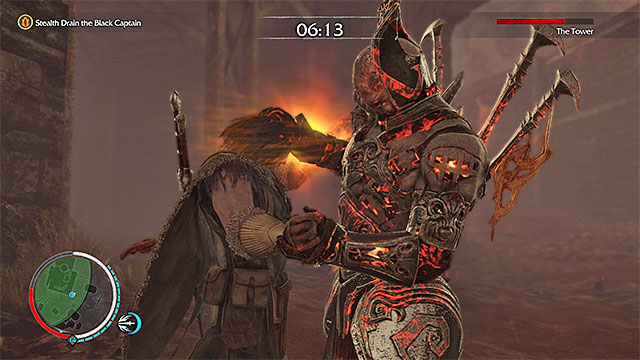 If you are spotted, you lose some of your health, as a result of the Tower's attacks
A very important matter is not to be spotted by an incarnation of the boss. Talion will then be attacked, automatically, and he loses some of his health, without the possibility of defending. Therefore, it is a good idea to sneak and move over the balconies, and walls.
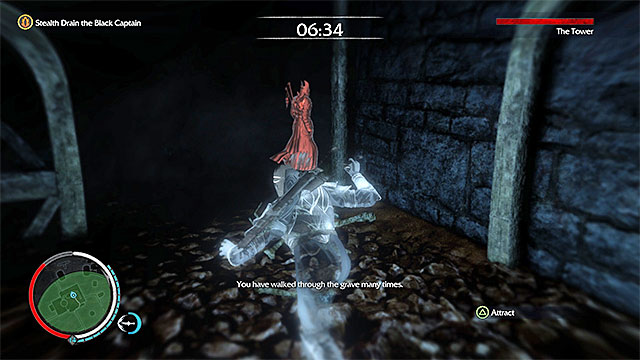 Attack the boss's incarnations by surprise and drain him for energy
To weaken the Tower, you need to Drain his incarnations for energy. Try to get the successive incarnations from behind, or jump onto them after they get directly under you. After you perform that for three times, you progress to the next part of the mission.
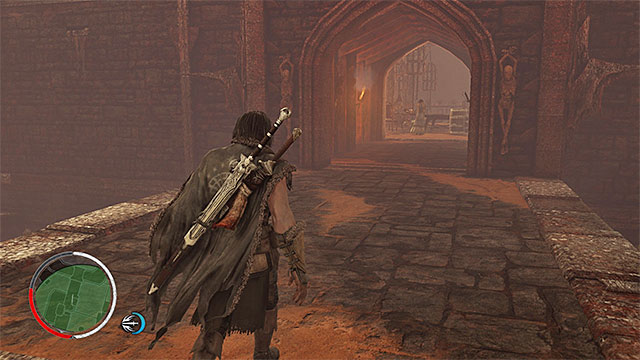 Head towards Ioreth
You can now head towards Ioreth. After you get there, watch the cutscene.
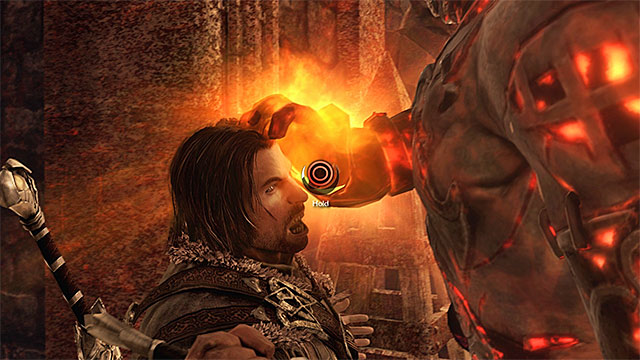 Hold down the Drain button
To achieve the ultimate victory over The Tower, you need to hold down the Drain key/button, at the appropriate moment. See more cutscenes and wait for the second part of the final mission to be unlocked.
Rewards for completing the mission:
Requirements to start the mission: You need to complete first part of the final mission - "Lord of Mordor"
Note - The final mission of the game consists of two parts. On this page, you can find the walkthrough for the second part - "Mordor in Flames". If you want to learn about the first part, see the page entitled "20a: Lord of Mordor ".
Note - You will be allowed to return to Mordor after you complete the game's storyline. Therefore, you do not need to complete all of the activities, before you start your final mission.
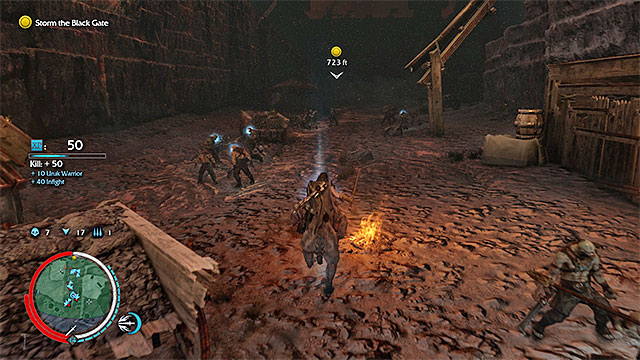 Head towards the Black Gate
You return to your mission after Talion returns to Udun and you start riding a caragor. Ignore the battles around you and head Northwards of the starting point, towards the Black Gate.
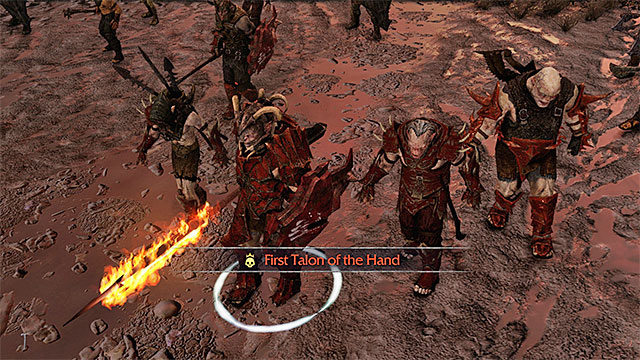 There are, as many as, five more Warchiefs to kill
After you get there, you will learn that you need to eliminate... five enemy Warchiefs subordinate directly to Sauron (Talon of the Hand). Fortunately, this is not a lost cause, because Talion is accompanied by the Warchiefs that he has branded. If, in the first part of the final mission, none of them has died, you will have five Warchiefs on your side.
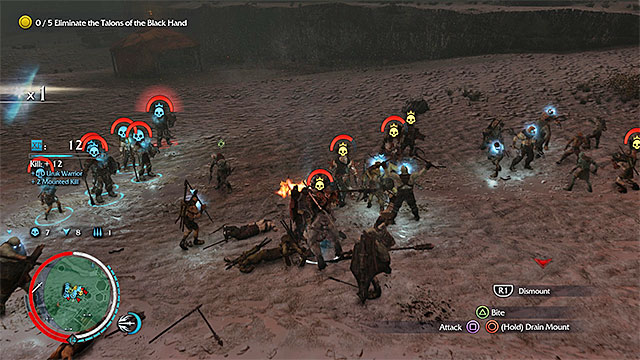 The caragor may help you fight the opponents
It is best to start the battle using the caragor to deal quick damage to the enemy orcs. You only need to stay away from those of the orcs that grow in strength while around a caragor and from the ones that can instantly kill the beasts.
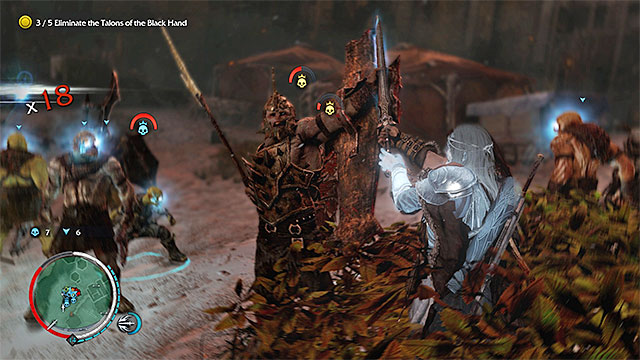 Attack the Warchiefs one-by-one
It is best to start the fights proper only after the caragor dies. I strongly recommend that you attack the Warchiefs one-by-one because, for the obvious reasons, they are very tough. I recommend that you, at the same time, deal with the regular orcs and bring up the multiplier, thanks to which you unlock special attacks. In the meantime, keep an eye on the branded Warchiefs. If you see the Warchief being attacked, help him.
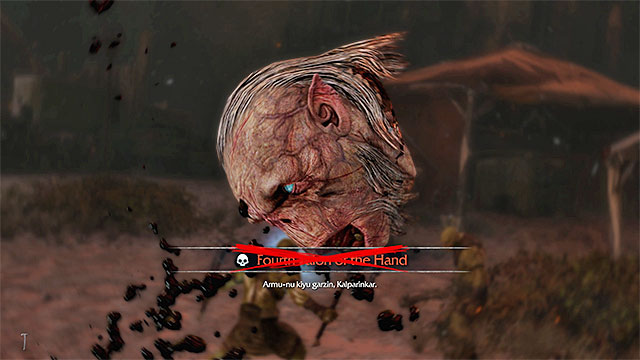 You need to kill all the Warchiefs sent by Sauron
Continue fighting and eliminate the Warchiefs subordinate to Sauron. Your Warchiefs may also die yet, if you have followed my suggestions, and branded them only after their Power level has gone up, the probability of this to happen is lower. What is even more, their death does not cause you to fail the mission and only make winning more difficult. After you kill all five Warchiefs, spend a moment o collecting the runes from them (high probability of epic runes).
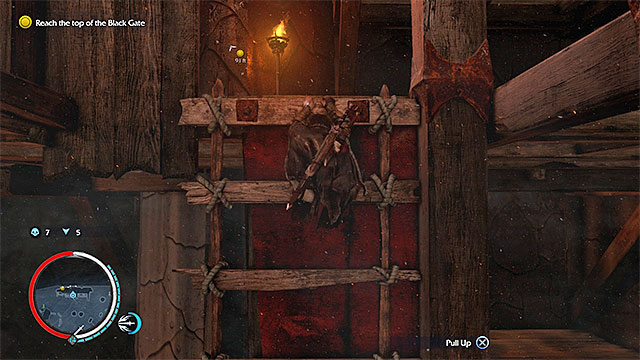
Head towards the Black Gate. You need to reach the very top of the scaffolding standing next to it and the best way to do that, is use the wooden ladders, just like the one in the above screenshot.
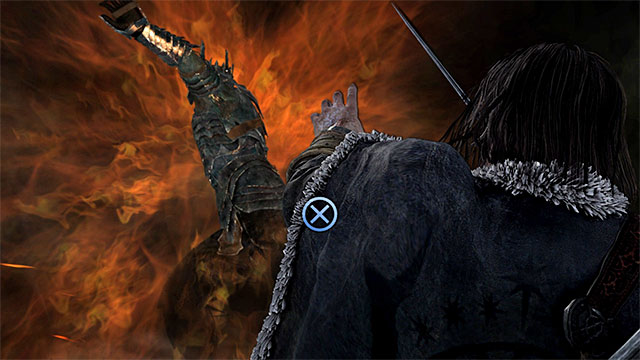
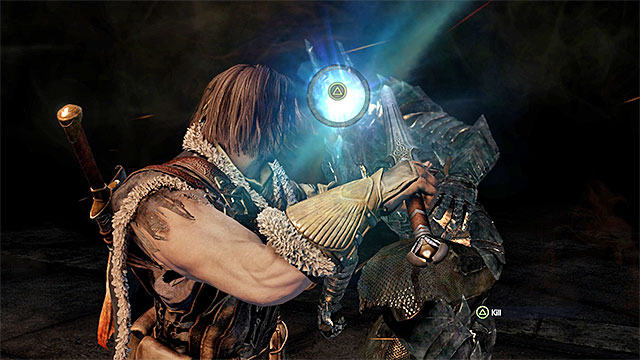
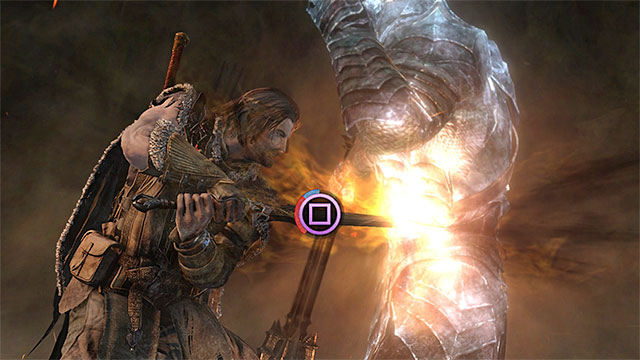
After the cutscene ends, you start the final battle against Sauron. It is not a battle, per se, and only a collection of not too demanding minigames. You need to:
After you have completed all of the minigames, you win and this completes the storyline! Congratulations!
Note - After you see the final credits, you return to Mordor, where you will be able to complete all of the additional activities (side missions, collectibles, attacking Captains and Warchiefs, etc.).
Rewards for completing the mission:
The above map presents starting points of Outcast Rescue Missions. These are only the ones available in the valley of Udun, where you started the game. The way to unlock the rescue missions is discussed on the page under General concept.
The above map presents starting points for side Outcast Rescue Missions. IT concerns only the missions available in Nurn. This area unlocks after you have progressed to the twelfth mission of the game's storyline. The ways to unlock successive missions have been presented on the page entitled General premises.
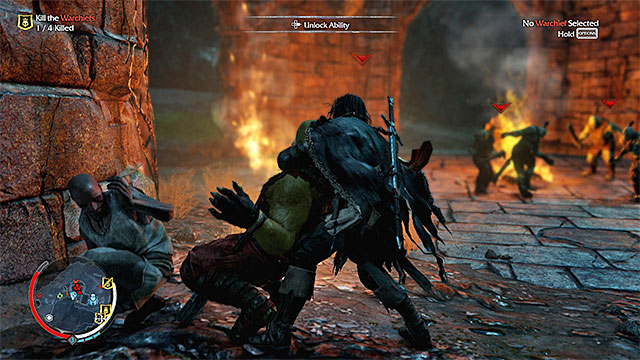 An exemplary outcast group that you may help
Rescue Missions starting points are predetermined, however, in order to unlock them you have to perform a certain action. While exploring the world, you should often check the map for a small fist icon. When you get to the location it marks, you will see one or two allies, being persecuted by orcs - you have to eliminate all the monsters nearby.
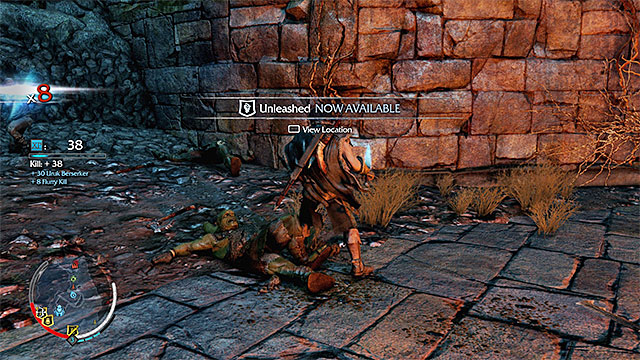 When you eliminate the orcs, you will be notified about unlocking a new Outcast Mission
As a reward for eliminating all the orcs, you gain access to a new Outcast Mission, and only then will you be able to complete it. Outcast Rescue Missions walkthroughs are on the following pages of this chapter.
Location: Barrows of Udun
Bonus Objective: Stealth Kill 5 Uruks.
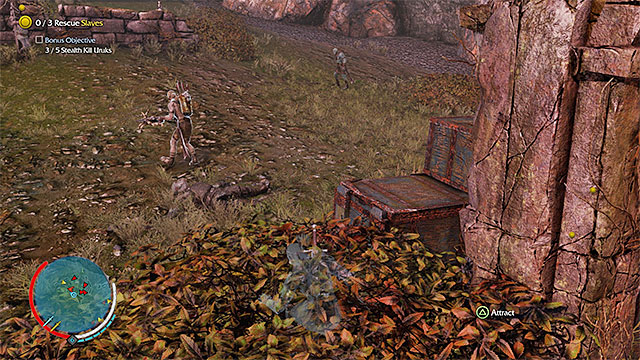 Stealth kill five orcs
Mission markers are on the top of the tower. Before you start rescuing the three outcasts, first focus on the bonus objective. Orcs can be stealth killed in many different ways - sneak behind their backs and execute, hide in bushes and attract them, or kill them from above. Only after completing the bonus objective, should you try to get to the captive outcasts. In the meantime, try not draw too much attention to yourself and avoid contact with Sauron's army, because extra fights may unnecessarily make the mission harder.
Mission rewards:
Location: Southern Black Road
Bonus Objective: Ledge Kill 2 Uruks
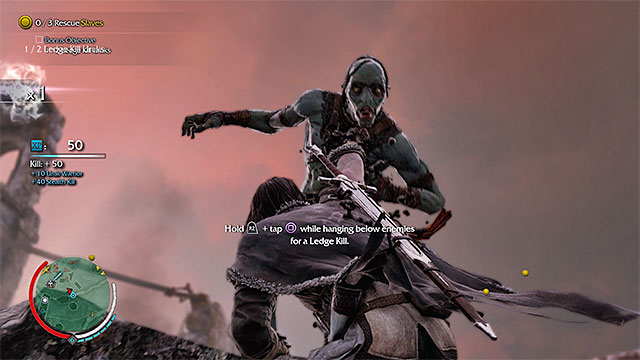 Wait until an orc comes near a ledge and grab him
Mission marker is on a bridge. Before you start rescuing the three outcasts, first focus on the bonus objective. Find a good spot near the bridge where you could hang down from a ledge. Stay in that position and try to attract orcs in order to draw their attention. Wait until an orc comes near the ledge and press the stealth kill button to grab and drag him down. Eliminate at least 2 opponents this way. Only after completing the bonus objective, should you try to get to the captive outcasts. In the meantime, try not to draw too much attention to yourself and avoid contact with Sauron's army, because extra fights may unnecessarily prolong the mission and make it harder.
Mission rewards:
Location: Uruk's Hollow
Bonus Objective: Kill 3 Uruks while they Investigate your Attract position
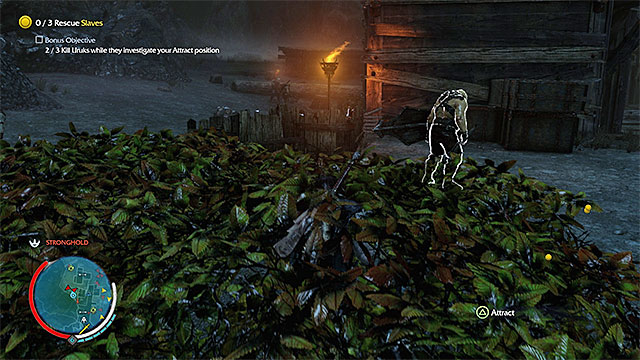 Attract ability is definitely safe when combined with hiding in bushes
Mission marker is in an orc stronghold, which means that you need to be extra careful all the time, because if Talion is discovered, he gets attacked by an entire horde of enemies. This also refers to members of Sauron's Army, whom you should definitely avoid. Before you start rescuing the three outcasts, first focus on the bonus objective. The plan is to draw orcs' attention by Attract ability and eliminate them while they are busy investigating the source of strange noises. The easiest way to complete that objective is to hide in bushes, so that killing an orc would not be easily noticed by others. Only after completing the bonus objective, should you try to get to the captive outcasts (if there are orcs nearby, lure them away or kill them, e.g. with a bow).
Mission rewards:
Location: Internment Camp
Bonus Objective: Kill 3 Uruks with Strike from Above (Strike from Above ability required)
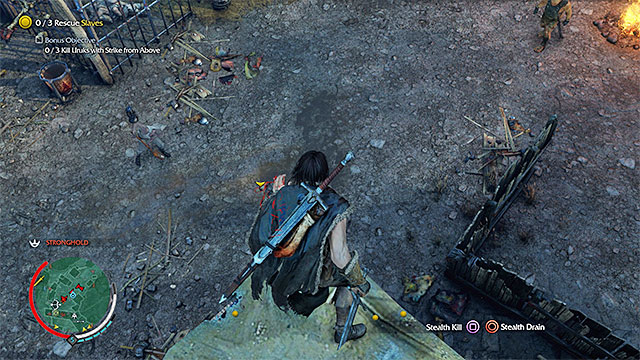 Pick your targets carefully
Mission marker is in an orc stronghold, which means that you need to be extra careful all the time, because if Talion is discovered, he gets attacked by an entire horde of enemies. This also refers to members of Sauron's Army, whom you should definitely avoid. Before you start rescuing the three outcasts, first focus on the bonus objective. This is not easy, because you must not be detected while performing a strike from above. Attack only when your target is separated from other orcs. Only after completing the bonus objective, should you try to get to the captive outcasts (if there are orcs nearby, lure them away or kill them, e.g. with a bow).
Mission rewards:
Location: Barrows of Udun
Bonus Objective: Use Caragors to kill 5 Uruks
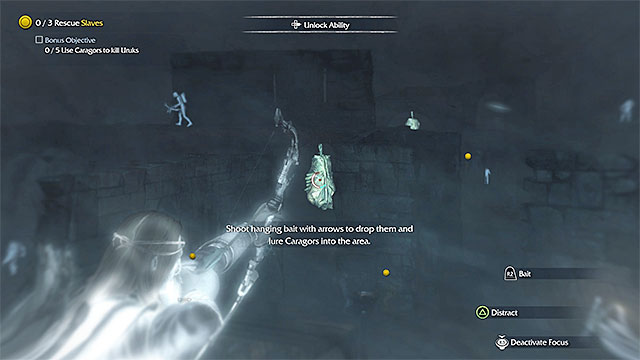
Mission marker is on the top of a tower. Before you start rescuing the three outcasts, first focus on the bonus objective. The easiest way to do that, is using a bow to shoot one of the baits, like the one in the picture above. This will lure one or more Caragors, which will start attacking orcs and complete the bonus objective for you, without your intervention. However, the presence of the beasts makes it harder to get to the captive outcasts. You can either kill all the beasts on your own (e.g. with a bow) or use Ride Caragors ability to tame one of them and kill the others from its back. Once you secure the area, get to the outcasts and rescue them.
Mission rewards:
Location: Durthang Wastes
Bonus Objective: Poison 3 Grog Barrels (Poison ability required)
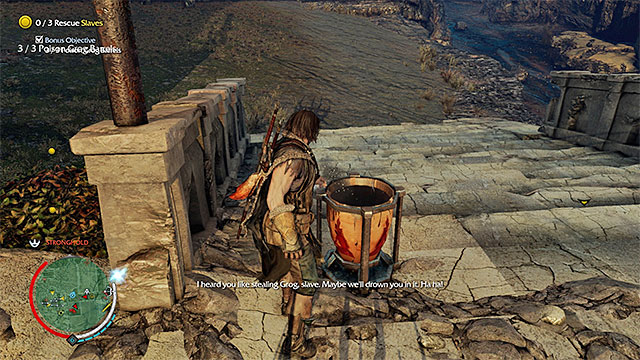 Once you poison a barrel, get away from it quickly
Mission marker is in an orc stronghold, which means that you need to be extra careful all the time, because if Talion is discovered, he gets attacked by an entire horde of enemies. This also refers to members of Sauron's Army, whom you should definitely avoid. Before you start rescuing the three outcasts, first focus on the bonus objective (note: you need to have Poison ability). Inside the stronghold there are several grog barrels, so always pick the ones that are not being guarded. Once you come near a barrel, poison grog and quickly get away from there, because several orcs are likely to head that way. After drinking the poisoned grog, they will immediately die or start fighting one another, so you do not have to do anything else. Only after completing the bonus objective, should you try to get to the captive outcasts (if there are orcs nearby, lure them away or kill them, e.g. with a bow).
Mission rewards:
Location: Southern Udun Pass
Bonus Objective: Stealth Kill 10 Uruks
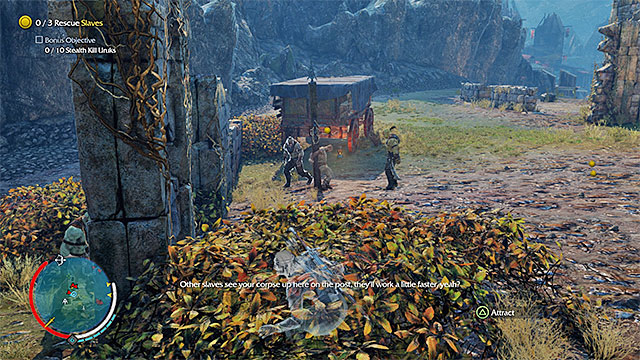 Stealth kill 10 orcs
Mission marker is on the top of a high wall. Before you start rescuing the three outcasts, first focus on the bonus objective. Orcs can be stealth killed in many different ways - sneak behind their backs and execute, hide in bushes and attract them, or kill them from above. In the meantime, try not draw too much attention to yourself and avoid contact with Sauron's army, because extra fights may unnecessarily make the mission harder.
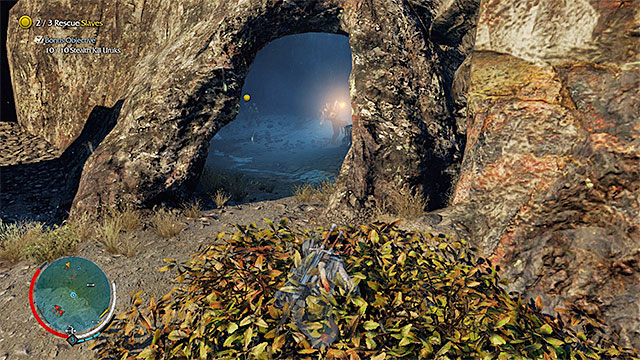
Only after completing the bonus objective, should you try to get to the captive outcasts. One of them is harder to spot, since he is inside a cave, as shown in the picture above. You can either get inside and simply kill the orcs, or use Attract ability or any other method to draw them outside.
Mission rewards:
Location: Barrows of Udun
Bonus Objective: Kill 3 Uruks with Brutalize (Brutalize ability required).
 You have to perform a brutal execution on 3 orcs
Mission marker is by ruins occupied by a large group of orcs. Before you start rescuing the three outcasts, first focus on the bonus objective. Seek out for opportunities to perform stealth kills, and then, instead of standard stealth kills, press the button that stands for brutal execution, available with Brutalize ability. It is of course noteworthy, that brutal executions are easily discovered by other orcs, so after a successful kill, run away from opponents and hide in some secure place, and only after things quiet down, resume your hunting. Only after completing the bonus objective, should you try to get to the captive outcasts (if there are orcs nearby, lure them away or kill them, e.g. with a bow). In the meantime, try not draw too much attention to yourself and avoid contact with Sauron's army, because extra fights may unnecessarily make the mission harder.
Mission rewards:
Location: The Black Gate
Bonus Objective: Poison 3 Grog Barrels (Poison ability required)
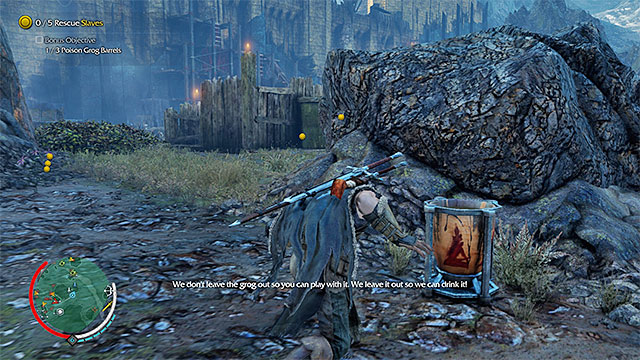 Once you poison a barrel, get away from it quickly
Mission marker is on the top of a very high scaffolding, next to the Black Gate - you can climb up there using ladders. Before you start rescuing the five outcasts, first focus on the bonus objective (note: you need to have Poison ability). Inside the stronghold there are several grog barrels, so always pick the ones that are not being guarded. Once you come near a barrel, poison grog and quickly get away from there, because several orcs are likely to head that way. After drinking the poisoned grog, they will immediately die or start fighting one another, so you do not have to do anything else. Only after completing the bonus objective, should you try to get to the 5 captive outcasts (if there are orcs nearby, lure them away or kill them, e.g. with a bow). In the meantime, try not draw too much attention to yourself and avoid contact with Sauron's army, because extra fights may unnecessarily make the mission harder.
Mission rewards:
Location: East Garrison
Bonus Objective: Kill 10 Uruks with Ranged attacks
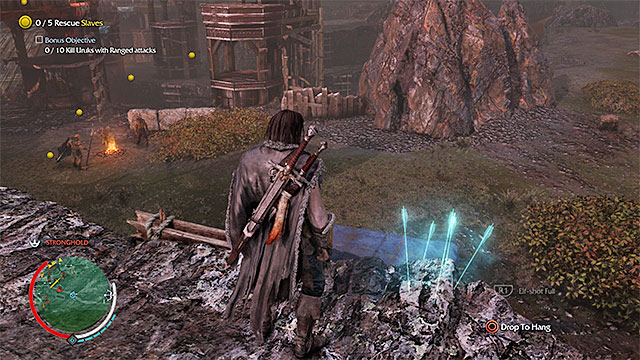 You can replenish your ammunition e.g. by finding arrows
Mission marker is in an orc stronghold, which means that you need to be extra careful all the time, because if Talion is discovered, he gets attacked by an entire horde of enemies. This also refers to members of Sauron's Army, whom you should definitely avoid. Before you start rescuing the five outcasts, first focus on the bonus objective. This is very simple, because eliminating orcs from a distance (preferably with a bow) is not difficult at all. Just remember to aim the orcs in the head and regularly replenish your arrow supply. Only after completing the bonus objective, should you try to get to the 5 captive outcasts (if there are orcs nearby, lure them away or kill them, e.g. with a bow).
Mission rewards:
Location: Durthang Outskirts
Bonus Objective: Kill 3 Uruks with Brutalize from Above (Brutalize ability required).
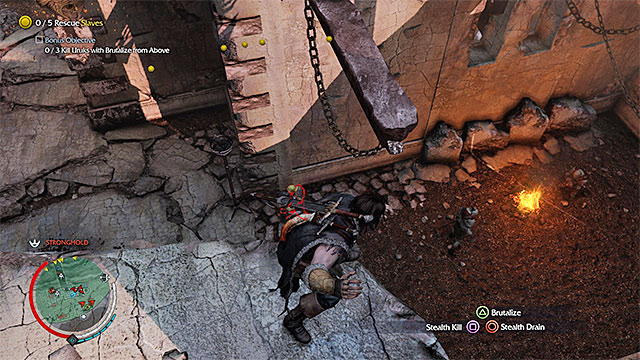 Wait until an orc stands right below Talion and press Brutalize button
Mission marker is in an orc stronghold, which means that you need to be extra careful all the time, because if Talion is discovered, he gets attacked by an entire horde of enemies. This also refers to members of Sauron's Army, whom you should definitely avoid. Before you start rescuing the 5 outcasts, first focus on the bonus objective. You have to attack three orcs from above (jump down from a ledge), but it is not supposed to be a standard kill. Instead, press the button that stands for Brutalize ability. It is of course noteworthy, that brutal executions are easily discovered by other orcs, so after a successful kill, run away from opponents and hide in some secure place, and only after things quiet down, resume your hunting.
Mission rewards:
Location: The Black Gate
Bonus Objective: Make 10 Uruks flee in terror
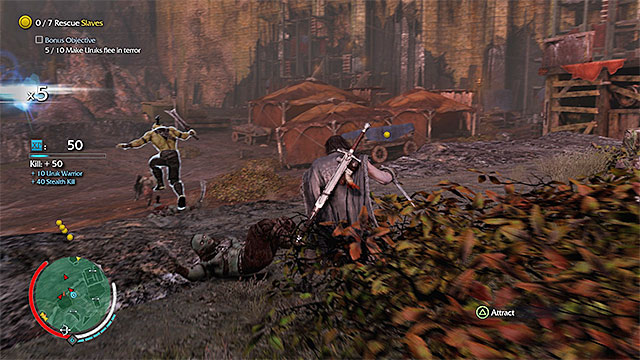 Brutalize kill effectively terrifies orcs
Mission marker is by the Black Gate - it should be unlocked as the last one in the valley of Udun. Before you start rescuing the seven outcasts, first focus on the bonus objective. The easiest way to make orcs flee in terror, is to perform brutal executions with Brutalize ability. Before Brutalizing a target, make sure that there are other opponents nearby, so they may notice the attack and react accordingly. Keep on Brutalizing opponents until you scare off 10 orcs.
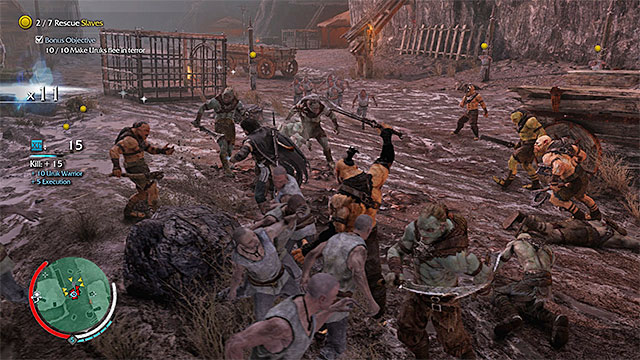 Other outcasts should help you fight orcs
Only after completing the bonus objective, should you try to get to the seven captive outcasts. Note that you do not have to sneak (although it is possible), because the outcasts freed in the previous missions should help you eliminate the orcs guarding captives. Thanks to that, liberating the last group will be much easier.
Mission rewards:
Location: Harad Basin (Nurn)
Side objectives: You need to throw three orcs off ledges.
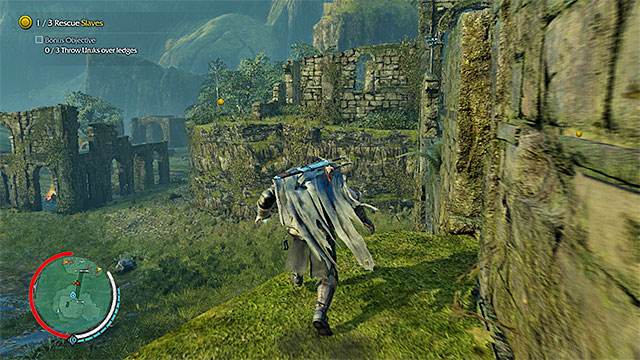 Look out for the opportunities to throw orcs off the ledges
Before you rescue the three outcasts, focus on completing the side objective. It is a bit problematic, because throwing the orcs off, while hanging down ledges, does not get the job done. Instead, you need to keep an eye out for the orcs near the edges of the ledges above and, either push them off, in melee, or grab them and throw them into the chasm. Only after you have completed the secondary objective, try to reach each of the three outcasts. In the meantime, try not to attract attention and avoid running into the members of the Sauron's army, because additional fights may make the mission longer and more difficult.
Rewards for completing the mission:
Location: Nurnen Peninsula (Nurn)
Side objectives: You need to kill five orcs, while they are busy checking out strange noises
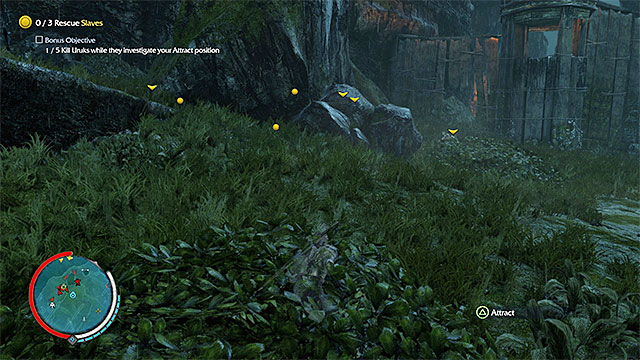 Whistle outside of the cave
The mission marker points you to the stronghold, which means that you need to be careful, throughout this mission, because Talion's being detected brings many opponents into the area. The same goes for the members of the Sauron's army, who you should be avoiding at all costs. Before you take to rescuing the three outcasts, focus on the secondary objective. The plan is that distract the orcs by whistling and eliminate them, while they are busy checking out the sound. Try to do that outside of the cave (try to lure them out), because there are no good hiding spots inside.
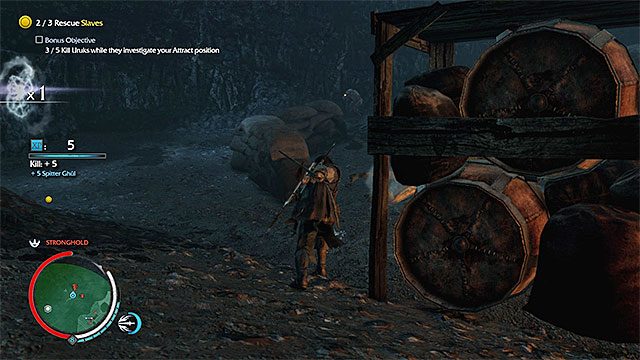 Watch out for the ghuls in the cave
After you have met the requirements of the side objective, you can turn to the main objective, i.e. saving the three outcasts. The outcasts are in various spots of the cave. As you try to reach the individual outcasts, watch out for ghuls that may appear around, suddenly. Depending on your preferences, you can defeat them in direct combat (watch out for the spitting varieties), escape or try to lure them near the orcs, thanks to which they will kill each other out.
Rewards for completing the mission:
Location: Cab-Gwanath Bluff (Nurn)
Side objectives: You need to kill five orcs with headshots.
 You can easily reach the prisoners, e.g. thanks to teleportation
The marker of this mission is on the meadow. Before you take to saving the three outcasts, focus on the secondary objective that is very easy. Aim the bow at the heads of any opponents (always remember to draw the bowstring to the fullest extent possible). Only after you have met this requirement, try to reach each one of the imprisoned. Since they are being kept near the edge, it is a good idea to teleport there (the Shadow Strike attack) and use the option to hang down from ledges. In the meantime, do not attract attention and avoid the members of the Sauron's army, because this may, unnecessarily, make the mission longer and more difficult.
Rewards for completing the mission:
Location: Cab-Gwanath Bluff (Nurn)
Side objectives: Grab three orcs standing at the edges and pull them into the void.
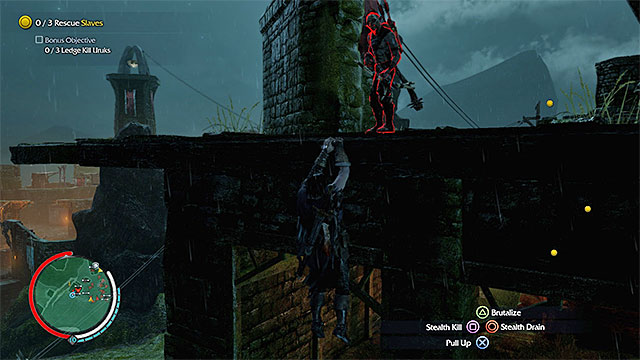 Wait for the orc to stand near the edge and pull him down
The marker is on the meadow. Before you rescue the three outcasts, focus on the secondary objective. Approach the ledge with an opponent and after you climb, hang down from the edge. Remain in this position and whistle to attract the attention of the orcs. wait for an orc to come close to the edge and press the stealth kill key/button, to grab him and pull him over the edge. Eliminate, at least, three orcs this way. Only after you have completed the secondary objective, focus on freeing the three outcasts. In the meantime, do not attract attention and avoid the members of the Sauron's army, because this may, unnecessarily, make the mission longer and more difficult.
Rewards for completing the mission:
Location: Celon Poros (Nurn)
Side objectives: Throw five orcs off ledges.
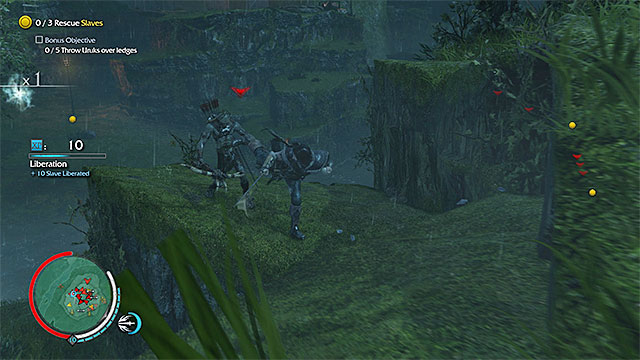 Keep an eye out for the opportunities to throw off the orcs, while on ledges
Before you rescue the three outcasts, focus on the secondary objective. It is a bit cumbersome, before pulling them off edges, while hanging down, does not do the job. Instead, you need to find the orcs standing near edges of ledges above and either push them over the edge, with successful attacks in melee, or grab them (while standing) and throw them over the edge. Kill, at least, five orcs this way. Only after you have completed this objective, reach each of the three imprisoned. In the meantime, do not attract attention and avoid the members of the Sauron's army, because this may, unnecessarily, make the mission longer and more difficult.
Rewards for completing the mission:
Location: Fern Outskirts (Nurn)
Side objectives: You cannot take damage.
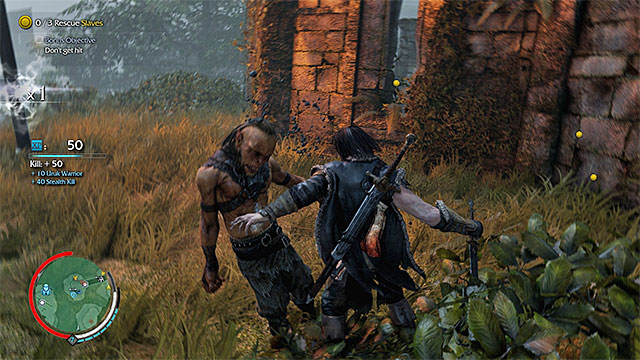 Avoid fighting completely, or eliminate the orcs stealthily
The marker for this mission is on the ledge above. Quite unusually, you can set out to free the three outcasts straight away. During this mission, it is even more important to remain unspotted, because each fight carries the risk of getting wounded, which would prevent you from completing the side objective. In the case of the larger groups that you cannot walk around, use the elements of the surroundings to your advantage (bonfires, fly nests, etc.). It is necessary that you keep clear of the elite orcs of the Sauron's army.
Rewards for completing the mission:
Location: Cab-Gwanath Bluff (Nurn)
Side objectives: Kill five orcs using caragors (requires the Ride Caragors ability).
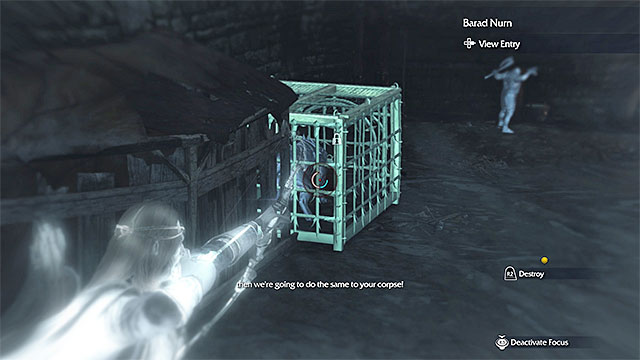
The marker for this mission is on a ledge, high above in the ruins. This mission is quite difficult, because you need to keep racing against time, all the way through. Before you take to this mission, it is also advisable that you learn the Ride Caragors ability. You need to reach the imprisoned (there are five of them) in the correct order and you have 2 minutes to save each one. Each time, start by using the arrow to free the captive caragor (an example in the above screenshot).
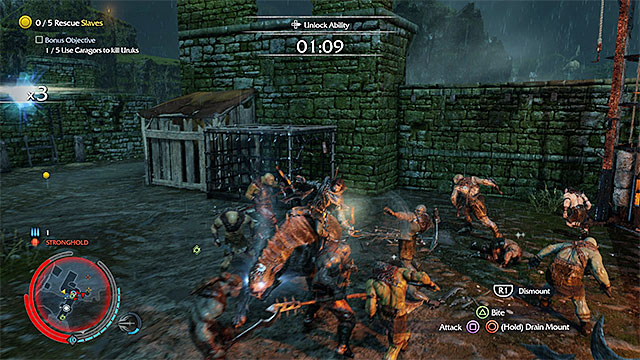 Start killing the orcs after you harness a caragor
After you free the caragor, stand on one of the ledges, above the raging beast and press the harnessing key/button. Complete the minigame to dominate the caragor. Then, fight to clear the area and, at the same time, complete the secondary objective. If you want to do that, you need to kill five orcs, while riding the beast, and do not worry if you fail the first time around. There still will be opportunities to do that. Still, try to care about the caragor. Avoid being attacked by the stronger orcs and feed on the knocked down enemies, thanks to which the beast regains some of its health.
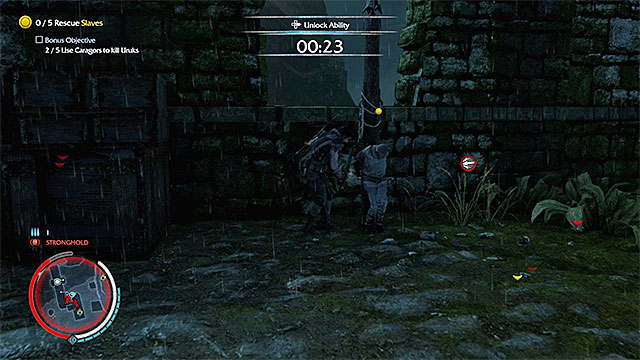 Do not leave the rescuing of the outcasts for the last moment, because you may be interrupted
Each time, keep fighting up until you have 40 seconds left. Depending on the surroundings, either dismount the caragor or (in the case of if it is dead) get away from the enemies and dash towards the prisoner. You need to have some spare time, in case that the orcs obstruct you from freeing the prisoner. The good news is that after you free an outcast, the countdown starts over . However, note that the individual outcasts are kept in distant encampments so, without the caragor, reaching them takes some time (on average, thirty seconds). This means that you need to hurry at all times and you should eliminate the enemies only when necessary for the completion of the main/secondary objective.
Rewards for completing the mission:
Location: Harad Basin (Nurn)
Side objectives: You need to brand five orcs (requires the Brand ability).
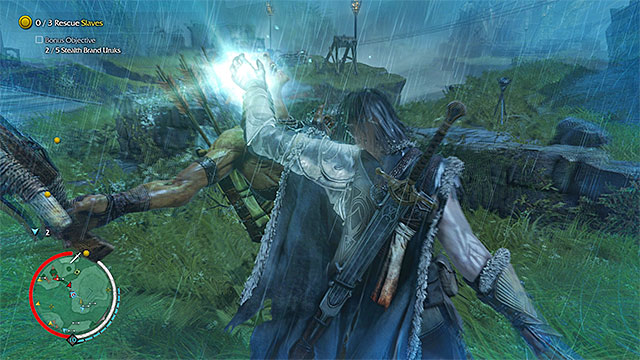 Before you brand an orc, make sure he is not being watched
The marker for this mission is on a ledge. Before you rescue the three outcasts, focus on the secondary objective, for which you need to brand any five orcs. If possible, search the single monsters, especially that the branding process takes several seconds. The important piece of information is that only stealth branding counts for this objective, i.e. you need to get behind the back of the specific orc, or right next to him, while hanging down a ledge. Only after you have completed the secondary objective, reach each one of the prisoners. In the meantime, do not attract attention and avoid getting into contact with the members of the Sauron's army, because additional fighting may make the mission longer and more difficult.
Rewards for completing the mission:
Location: Ethir Poros (Nurn)
Side objectives: Perform stealth executions on 20 orcs.
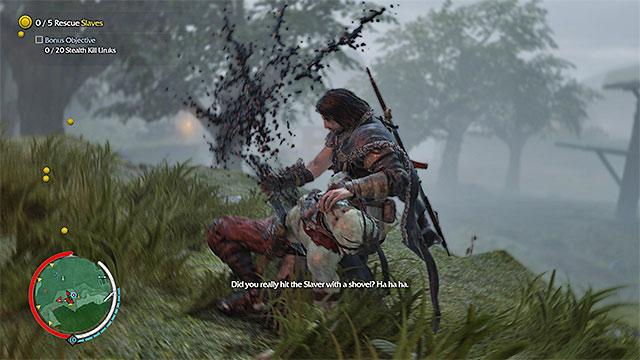 Search for opportunities to attack the orcs by surprise
The marker for this mission is near the orc stronghold, which means that you need to be very careful, throughout this mission, because you will have many enemies on your hands, after you are spotted. The same goes for the members of the Sauron's army, who you should avoid completely. You can eliminate the orcs in a number of ways - by getting them from behind and executing the stealth attack, by hanging down from ledges and attracting their attention with whistling, or by dropping onto them from ledges above. Only after you have completed the secondary objective, can you reach each one of the five captive outcasts (if there are any orcs near them, lure them away, or kill them with the bow).
Rewards for completing the mission:
Location: Nurnen Peninsula (Nurn)
Side objectives: You need to cause a situation, in which 20 orcs die killed by their comrades (requires the Brand ability).
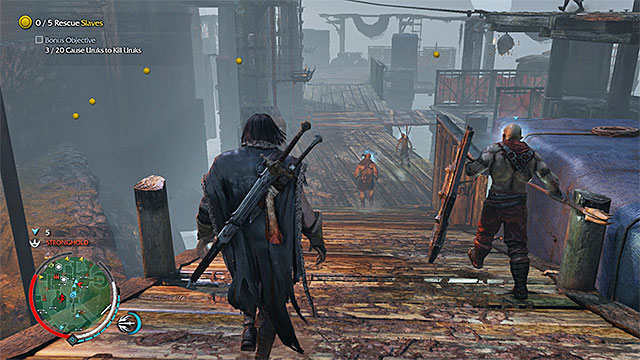 Brand the elite orcs, thanks to which your new allies do not die too fast
The marker for this mission is in the orc stronghold and you need to be especially wary of the members of the Sauron's army, in the stronghold, who it is better not to fight with. Before you rescue the five outcasts, focus on the secondary objective. Start by branding archers, guards, berserks and the other varieties of the stronger orcs. Activate new allies on a regular basis and have them attack the rest. Quite unusually, you do not need to worry about raising the alarm in the stronghold, because this will take you closer to completing the secondary objective. Only after you have met the requirements of the challenge, can you reach each of the five prisoners (if there are enemies near them, lure them away, brand them or kill them with the bow).
Rewards for completing the mission:
Location: Cab-Gwanath Bluff (Nurn)
Side objectives: You cannot take any damage.
 Avoid fighting completely or eliminate orcs by surprise
The marker for this mission is on a ledge, high in the ruins. Quite unusually,, you can take to rescuing the five outcasts straight away. It is even more important here not to draw attention of the enemy, because you can take damage from each fight with the orcs, and therefore fail the secondary objective. In the case of larger groups that you cannot walk around, use the elements of the surroundings to your advantage (bonfires, fly nests, etc.) and use abilities, such as Brand. It is imperative that you steer clear of the elite orcs of the Sauron's army.
Rewards for completing the mission:
Location: Fort Morn (Nurn)
Side objectives: You need to start an uprising.
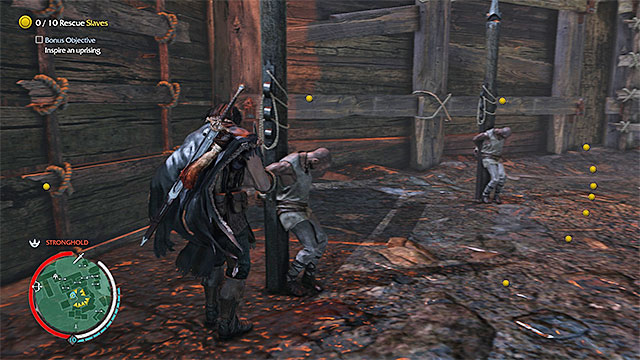 After you have freed the first outcast, orcs start arriving in the fort
The marker for this mission is near the Morn fort and it should unlock as the last one, in Nurn. Had towards the fort, where there are the last ten outcasts imprisoned. As you can figure out, this is a trap and after you free the first prisoner, orcs start arriving in the fort. Try to free, at least, one more outcast and start fighting the monsters only afterwards.
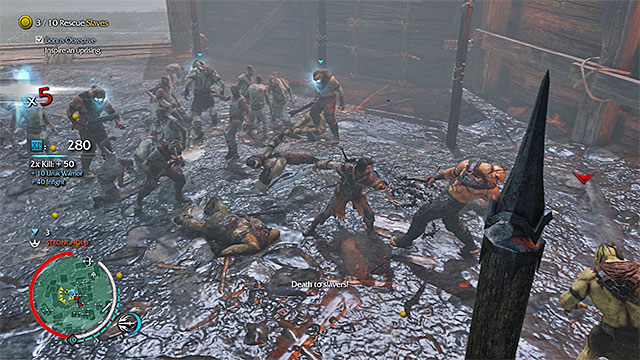 Land your best attacks and brand the orcs
While fighting, try to prevent the orcs from attacking the outcasts that you have just freed, as well as the new allies that soon reach the fort. Thanks to this, you will easily complete the secondary objective. As for the fight itself, remember to land your special attacks as often as possible, thanks to which you will be eliminating the opponents faster. Apart from that, it is a good idea to brand the elite orcs, thanks to which you gain new allies. The important piece of information is that you do not need to rescue the rest of the imprisoned, because they will be freed by the other outcasts.
Rewards for completing the mission:
The above map presents starting points of Weapon Missions. These are only the ones available in the valley of Udun, where you started the game. The red dots on the map mark sword missions (Sword Legends), the blue dots mark bow missions (Bow Legends), and the green dots stand for dagger missions (Dagger Legends).
The above map presents starting points for the optional Weapon Legends missions. It concerns only the missions that are available in the Nurn region This area unlocks after you have progressed to the twelfth storyline mission. Red dots have been used for the missions that require you to use the sword (Sword Legends), blue for the dagger missions (Bow Legends), and green for dagger missions (Dagger Legends).
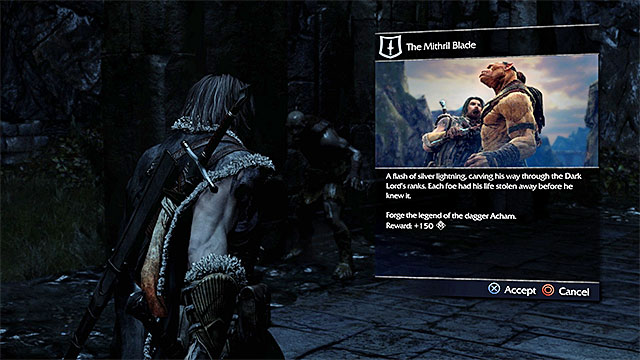 A starting point of a Sword Legends Mission
In Middle-earth: Shadow of Mordor there are 30 Weapon Missions in total. These are:
Consecutive missions from this category can be unlocked mainly by reforging Towers. Besides, they appear automatically on the map along with your progress in the game. It is also noteworthy that some of them will be marked with a padlock icon, which means you can complete them only after unlocking a certain ability.
You should do the simplest Weapon Missions as early as possible, because they are a quick source of experience and Mirian. It is better to hold on with the more advanced missions, as they will be much easier to complete after unlocking new abilities and attributes (especially the ones increasing health and the limit of arrows).
Note - if you fail a side mission (e.g. by dying or getting spotted), you can freely return to its starting point and start it over.
Location: The Black Gate
Bonus Objective: Avoid detection
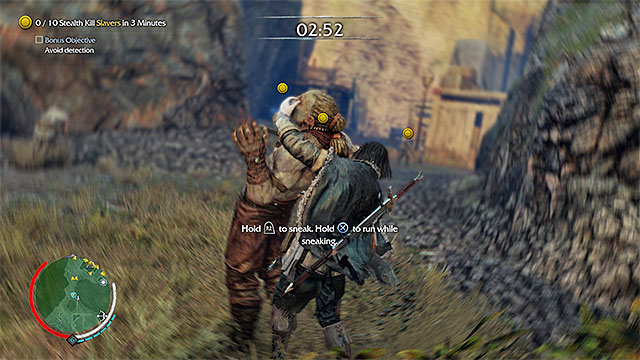 The easiest way to eliminate orcs is to perform stealth kills behind their back
The mission objective is to perform 10 stealth kills in 3 minutes. You should try to sneak behind orcs. You may also kill them from above or draw them toward bushes with Attract ability. Regardless of execution methods you choose, hunt only these opponents who are not being watched by others. This way you will avoid unwanted and untimely detection.
Note - killing orcs with a bow does not count toward stealth kills, so do not use this weapon - depend only on your dagger.
Mission rewards:
Location: Barrows of Udun
Bonus Objective: Kill 4 Uruks without leaving Focus Mode (slow motion).
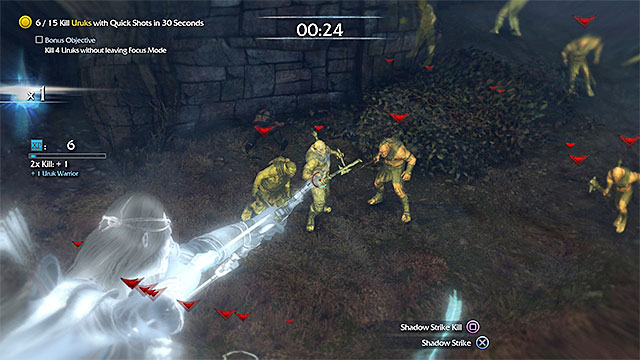 Shoot quickly with your bow aiming at any part of enemy body
The mission objective is to kill 15 orcs with your bow in 30 seconds. It is not as difficult as it may seem, because all orcs are very weak. This means that you can shoot them without fully charging the shot (tap the bow attack button, instead of holding it). Try to complete the bonus objective as soon as the mission starts, because then you will still have the Focus bar full.
 Quickly pick up new arrows between the attacks
Before starting this mission, it is good to purchase the attribute that increases the limit of arrows carried by Talion. Arrows supply can be replenished by interacting with the arrows stuck in the ground near the mission starting point (do not go away from there). If you do well, you can complete the main objective about 5 seconds before the time is up.
Mission rewards:
Location: Barrows of Udun
Bonus Objective: Kill 5 Uruks with Caragor Bite Attacks
Requirements: Ride Caragors ability
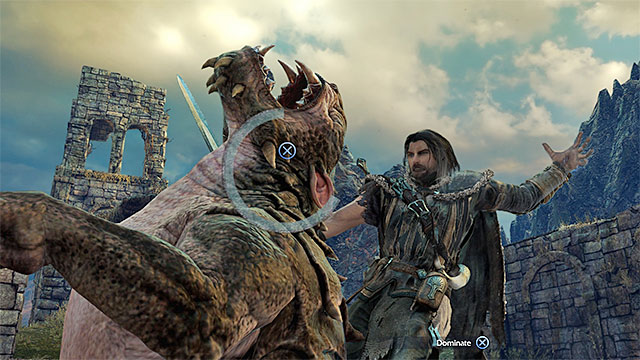 Complete a mini-game to tame a caragor
As soon as the mission starts, use Ride Caragors ability by pressing the respective button. At this moment the game will start a countdown - you have 3 minutes to catch and kill 3 orcs.
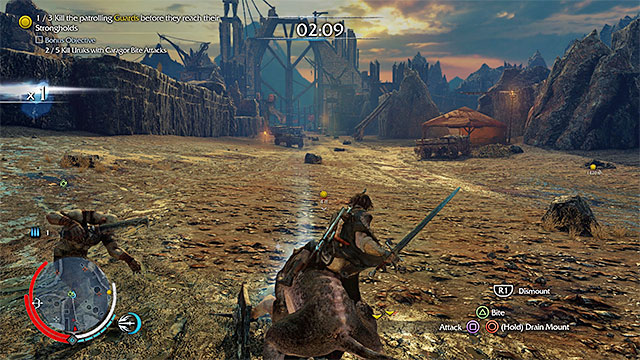 Have the caragor bite enemies, thus completing the bonus objective by the way
First, I suggest heading toward the orc who is the closest from the mission starting point. On your way, hold the run button, to make the caragor move much faster. After you catch up with an orc, try weakening him with sword attacks and then hold the bite button. Deal with other guards in the same way (the bonus objective is to have 5 opponents bitten).
Note - One of the targets may cause you a tad more troubles, as there is a big chance he is better-armored than others. Take more time on attacking him with a sword, and have him bitten only when he is on the verge of death. Before you kill the last of the three orcs, make sure you have completed the bonus objective.
Mission rewards:
Location: Durthang West
Bonus Objective: Melee Execute 5 Uruks
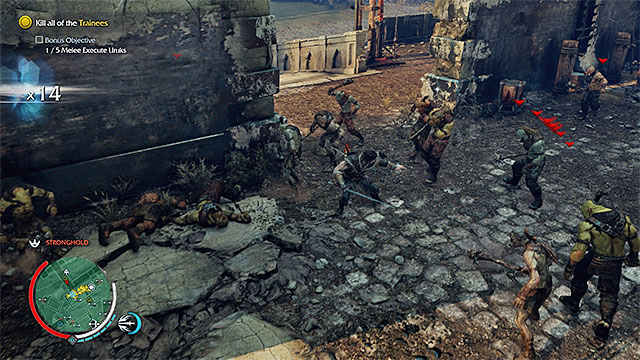 Try to attack only these orcs who are the mission targets
The mission objective is to kill all trainees in a stronghold, who are marked with yellow arrows. After you start a fight, try to kill only the orcs who are the mission targets, because unnecessary fights, e.g. with Sauron's Army Captains, may make it more difficult. Also, try to quickly eliminate enemies who are going to raise the alarm, because that would spawn much more orcs in the stronghold. If you find yourself in danger, retreat to a safe distance for a moment, hide in bushes, and only after things quiet down, resume your hunting.
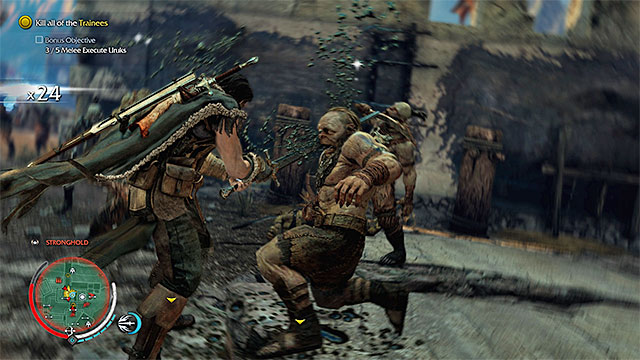 Executing your targets will help you complete the bonus objective
While fighting orcs, remember about the mission bonus objective. The easiest way to complete this, is with Execution ability, because then every eight blows you can launch a special attack that finishes off an orc.
Note - You may optionally make the fight easier by taming one of the caragors kept in the stronghold. However, you need to have Ride Caragors ability unlocked.
Mission rewards:
Location: Durthang West
Bonus Objective: Ledge Kill Uruks
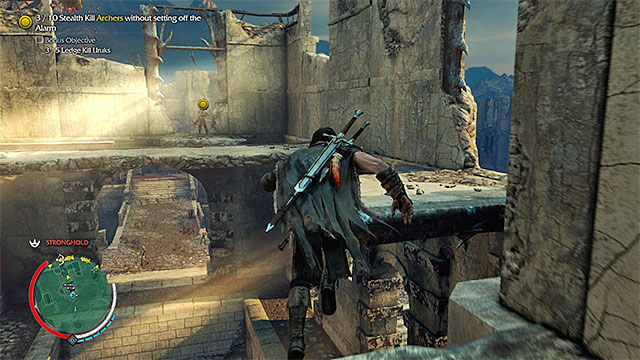 Sneak up to archers and make sure they are not being observed
The mission objective is to kill 10 archers. What makes it difficult, is the fact that you must not set off the alarm. I advise not to hurry. Carefully examine the environment in Wraith mode, locate sole archers, and hunt them down. The game will count only stealth kills with a dagger, so do not try to kill archers with a bow or anything else.
Note - If you are spotted, try to stop the opponent who is going to raise the alarm and immediately hide after that. There is a chance that this will prevent you from having to start the mission over.
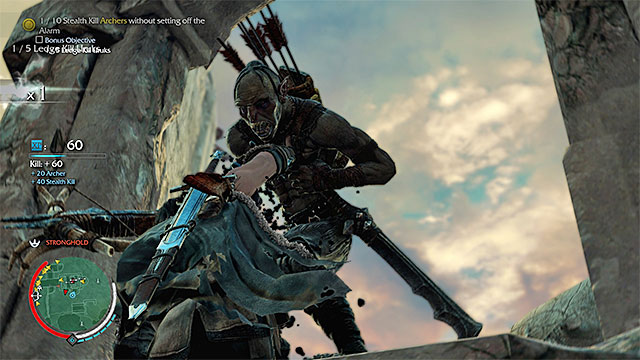 It is best to ledge kill archers, as it draws you closer to completing both mission objectives
As you get to archers, try to complete the bonus objective on the way. The easiest way is to grab only archers, when they come close to a ledge. As a reminder, you need to hang down from a ledge and use Attract ability to draw an orc's attention to you, then wait until the target comes close to Talion, and press stealth kill button in order to drag him down.
Mission rewards:
Location: Durthang Outskirts
Bonus Objective: Set 5 Uruks on fire
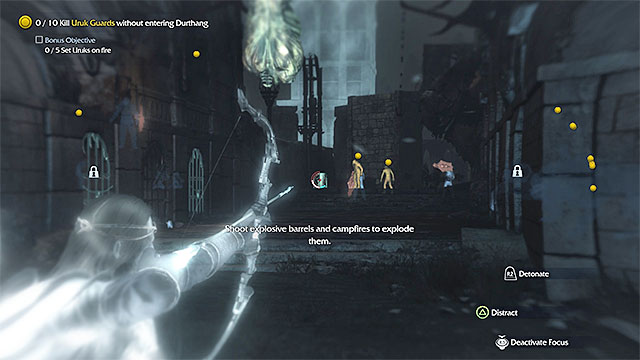
As soon as the mission starts, focus on completing the bonus objective. First of all, in Wraith mode locate exploding barrels as seen in the picture above, and blow them up with long distance shots. If you have Fire Arrows ability unlocked, you can use that, so the bonus objective is even easier to complete. Note that the game will count an attack toward the score, even if the orc set on fire does not die immediately.
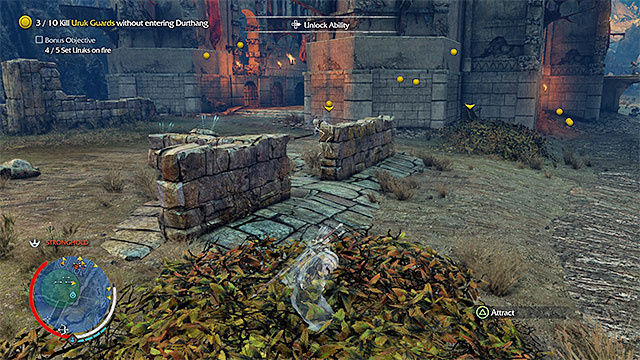 Try not to draw the attention of other orcs in the stronghold
Only after completing the bonus objective, focus on attacking the mission main targets. What makes it difficult, is the fact that you must not step outside the small green area marked on the map. Avoid detection by other orcs, because if you get into a direct combat, it will be easy to accidentally step outside the ring. It is best to hide in bushes after each guerilla attack (do the same, if other orcs come to investigate your whereabouts).
Mission rewards:
Location: Udun Crossing
Bonus Objective: Kill at least 10 Ghuls with a single Wraith Flash
Requirements: Wraith Flash ability
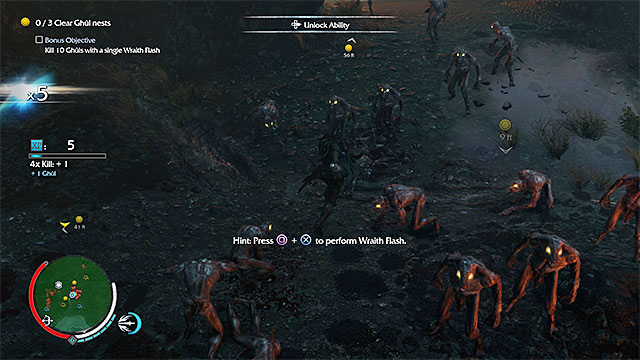 Launch a Wraith Flash when Talion is surrounded by a large group of Ghuls
In the first stage of this mission you have 3 ghul nests to clear off. While fighting Ghuls, try to reach combat multiplier x8 or more, so you could launch a Wraith Flash, which is extremely effective against Ghuls. Try to launch this attack at least once when Talion is surrounded by a large group of these monsters, because this will allow you to complete the bonus objective. Between the fights, pick up herbs found in the cave to quickly regenerate your health.
Note - As first, try to eliminate poison spitting Ghuls.
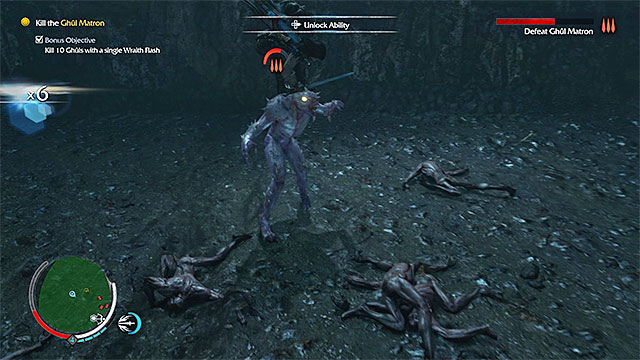 Interchangeably attack and jump over (or to the sides of) the Matron
At the end of the mission you have to defeat a Ghul Matron. If this is your first encounter with this monster, take a moment to learn its attacks and train dodging. You should weaken the Matron by performing two quick melee attacks and then jump over her. Repeating this sequence will minimize the risk of taking damage. Besides, increasing the multiplier will allow you to launch a special attack, e.g. an Execution.
Mission rewards:
Location: West Garrison
Secondary objectives: You need to kill three orcs with the Strike from Above ability.
Requirements: The Strike from Above ability
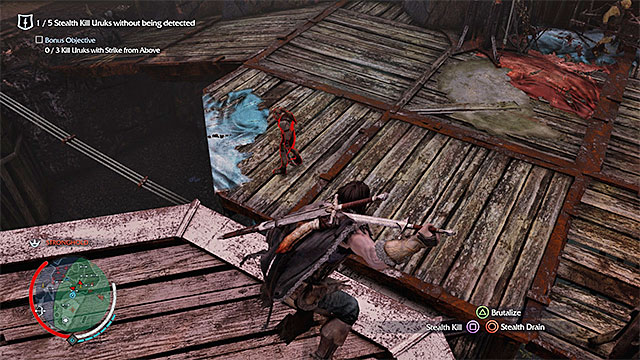 Stop above the single orcs and jump onto them
The aim of this mission is to perform stealthy executions on five orcs, while remaining unspotted. I recommend that you keep in mind the secondary objective, from the beginning of the mission. If you hurry too much with the regular attack, you may easily fail to complete it. Search for the opportunities to stop on ledges and rooftops, above single orcs in the stronghold and, only after you make sure that the monster is not being watched, execute the Attack from Above (Note - you execute it with a separate key/button!). As for the remaining two orcs, you can kill them in the customary way (attacks with the bow do not count as stealthy kills). Remember that you should not hurry and additionally, watch out for the orc archers, with greater range of vision.
Rewards for completing the mission:
Location: Southern Black Road
Secondary objectives: You need to complete the mission within 5 minutes.
Requirements: The Ride Caragors skill
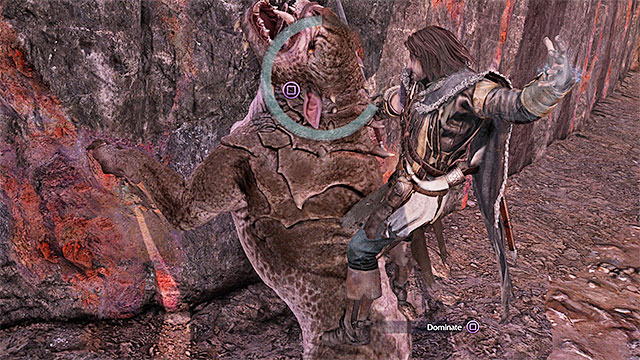 Complete the minigame to harness the caragor
Right after you start this mission, use the Ride Caragors ability, i.e. press the key/button that makes you mount the caragor. You need to complete the minigame, thanks to which you will harness the beast. You can now go hunting and, if you also want to complete the secondary objective, you will have to make it within 5 minutes. Fortunately, this is lots of time and, even if you make a mistake, you should easily make it.
 Attack the orcs with the bow and do not dismount the caragor
After you run into the first orc patrol, DO NOT USE the sword, nor have the caragor bite the enemies. Instead, use the bow (preferably, at a long distance), without dismounting the caragor. It would be a good thing, if your concentration bar was as long as possible, because you will then be able to eliminate the orc without disabling the concentration mode. You need to kill a total of 10 orcs, with the bow and since there is a lower number of opponents on each patrol, you will have to jump, at least, two patrol parties. Have the caragor run to reach them faster.
Note - Take care of the caragor's health, during the mission and, if it sustains heavier damage, have it to feed on the nearby, weaker orcs. Thanks to this, it will return to full health.
Rewards for completing the mission:
Location: East Garrison
Secondary objectives: You need to remain unspotted.
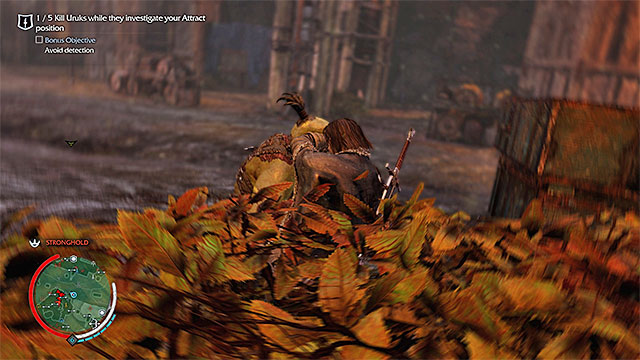
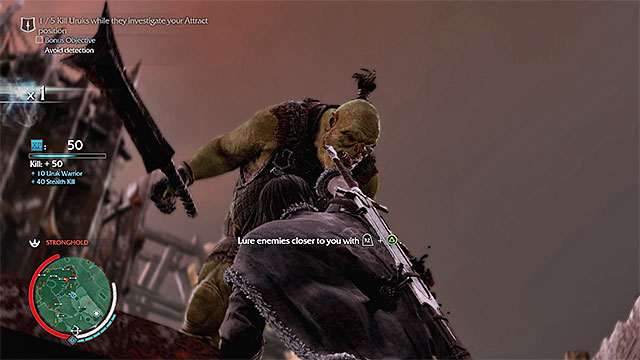 Attract the attention of orcs, after you hide in bushes, or while hanging down from a ledge.
This mission assumes that you kill five orcs, while they are busy checking out strange noises. In order to distract orcs, it is best to use whistling. I recommend that you take advantage of this ability, while hiding in the bushes, or hanging down from a ledge. Thanks to this, the moment at which you kill the orc should remain unnoticed by the rest. A very important thing is to pick single monsters to kill, which are not being watched by anyone (remember that the range of vision of the archers is greater!), because you cannot be detected, if you want to complete the secondary objective. Fortunately, the area in which you play the mission is vast so, you can easily pick easy targets.
Rewards for completing the mission:
Location: The Black Road
Secondary objectives: You need to kill 10 orcs with headshots.
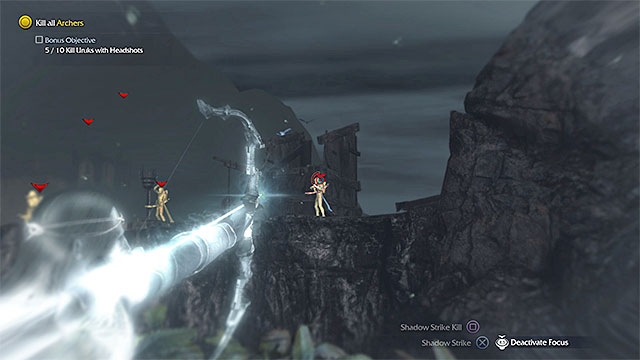 Aim at the heads of the opponents
This mission is quite dynamic because, right after you start it, you will attract the attention of all the enemy archers in the area. This means that you need to remain in constant movement and search for the opportunities to take cover behind obstacles, because this will save you constant losing of health points. While eliminating the enemy archers, you need to use the concentration mode (slows down time) and aim at their heads, because this is what the secondary objective requires you to do.
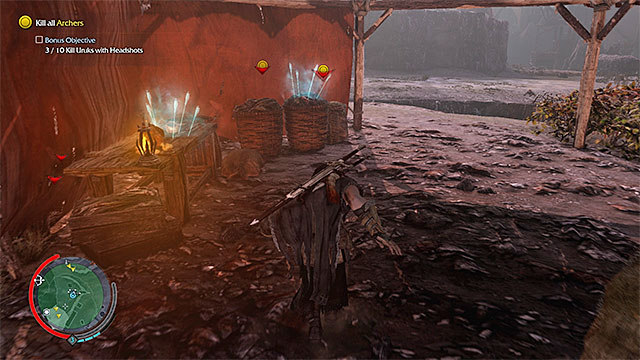 You can find more arrows, e.g. in the tent
While fighting, you cannot step outside of the delimited green area on the map. Fortunately, you do not need to worry about your arrows supply, because you can find them in the tent, among others. Continue fighting, up until you have eliminated all of the enemy archers marked by the game.
Note - If there is an archer to come closer to Talion, you can quickly deal with him, using the sword or the dagger.
Rewards for completing the mission:
Location: Internment Camp
Secondary objectives: You need to perform stealth kills on five orcs.
Requirements: The Brutalize ability
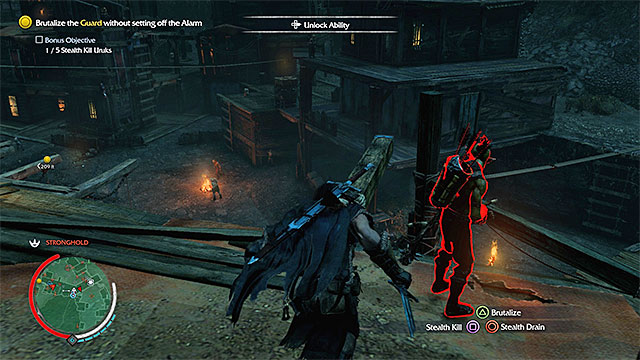 Execute stealth kills on the orcs along your path to the destination point
After you start this mission, head towards the opponent marked by the game. Along your path, avoid detection, because you will fail if the alarm is raised. I recommend that you use the ledges and rooftops above, to your advantage, and focus on completing the secondary objective, along your path. Perform stealth kills on the archers that you encounter and remember not to attack those of the orcs that are being watched by the others.
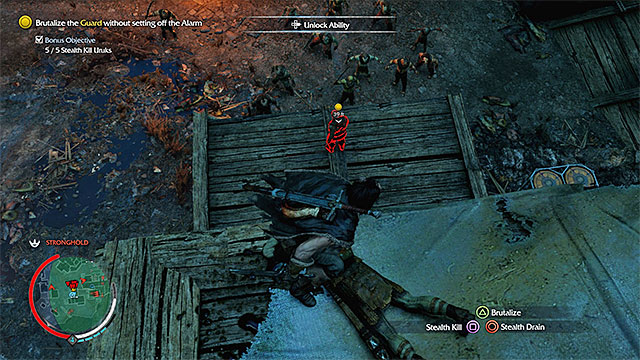
You need to stand on the small rooftop above your target. Kill the last archer here and stand as shown in the above screenshot. Target the marked orc and pres the Brutalize key/button. Thanks to this, Talion should land on the opponent and deal with him in a brutal way. This will end this mission.
Rewards for completing the mission:
Location: Uruk Proving Grounds
Secondary objectives: You need to attain the x100 multiplier.
 Attack orcs flawlessly and avoid longer stops, to prevent resetting the multiplier.
To all intents and purposes, this mission is one long fight. The good news is that you will have to face the weakest orcs that are the easiest to defeat. In spite of that, you need to do your best, if you want to attain the x100 multiplier, which you need to complete the secondary objective. Counterattack without flaws and search for opportunities to keep the multiplier high (e.g. with Wraith Flash or the Critical Strike). Also, avoid taking damage because, apart from resetting the multiplier, it will make it difficult for you to heal yourself. To complete this mission, you need to kill 50 orcs.
Rewards for completing the mission:
Location: Southern Udun Pass
Secondary objectives: You need to complete the mission within one minute.
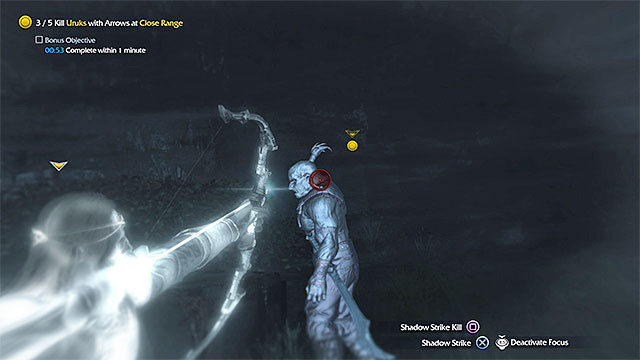
This mission assumes that you kill five orcs with the bow but, the difficult part is that you need to do that at short range. Fortunately, this is easier than it sounds,. I recommend that you sneak up on the individual orcs from the side, aim at their heads quickly and send the arrow each time, after you draw the bowstring (otherwise, you may only wound the orc). Between the individual executions, do not let yourself be spotted, because this will make things, unnecessarily, more complicated. Also, try to have, at least, 5 arrows on you, at the beginning, so you do not have to replenish your supplies. To complete the secondary objective, you need to complete the mission within 1 minute, but you should have no problems with that.
Rewards for completing the mission:
Location: Southern Udun Pass
Secondary objectives: You need to use the Combat Drain ability, at least, 5 times.
Requirements: The Combat Drain ability
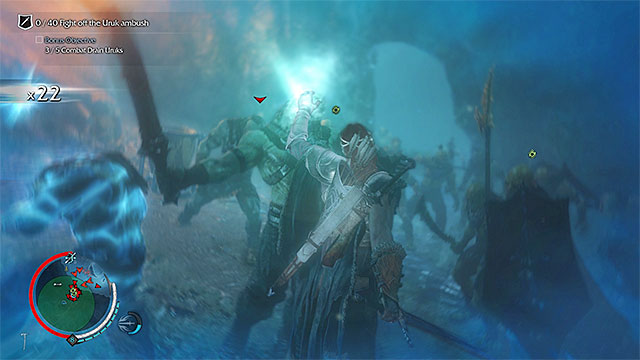 Drain in combat on a regular basis
As a matter of fact, this mission is one long battle, where you need to kill a total of 40 orcs. After you start the battle, keep raising the multiplier, thanks to which you will be able to launch the special attacks (every 8x, by default). In such situations, activate the Combat Drain ability, first of all. Thanks to this, you will get closer to completing the secondary objective and, additionally, you will be regenerating your health., which may deteriorate, as a result of fighting against the stronger orcs. Try to eliminate he more elite opponents, in the first place, and leave the weaker ones for later.
Note - While fighting, do not attempt entering the cave, because you will fail the mission. Since Talion can regenerate with the Combat Drain ability, this will not be necessary anyways.
Rewards for completing the mission:
Location: Nurnen Peninsula (Nurn)
Secondary objectives: You need to execute, at least two Defenders in melee.
Requirements: The Execution ability
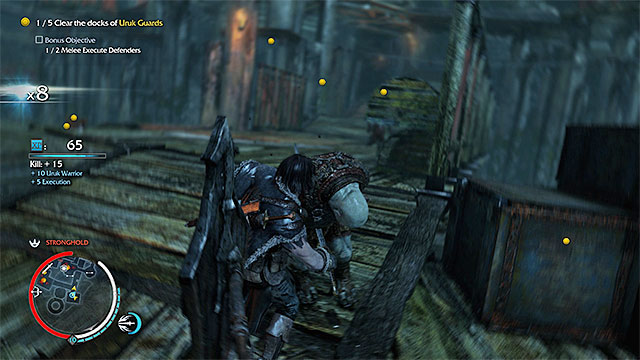 Execute, at least, two orcs with shields
The primary objective of this mission is to clear all five areas in the docks, of the enemy forces, where you could first focus on the secondary objective, before you take to the mission itself. While fighting the Defenders (the shielded orcs) search for opportunities to bring up the multiplier. After you reach the value that allows you to execute a special attack, (8x, by default), turn towards a defender and press the key combination that launches the Execution. Repeat for the second defender. Only then, focus on securing the docks - you can fight regular fights, sabotage the elements of the surroundings, attack the opponents at a long range or brand to make the elite opponents fight for you. After you have cleared the area, leave the village to end this mission.
Rewards for completing the mission:
Location: Nurnen Peninsula (Nurn)
Secondary objectives: Kill three orcs with the Strike from Above attack.
Requirements: The Strike from Above ability
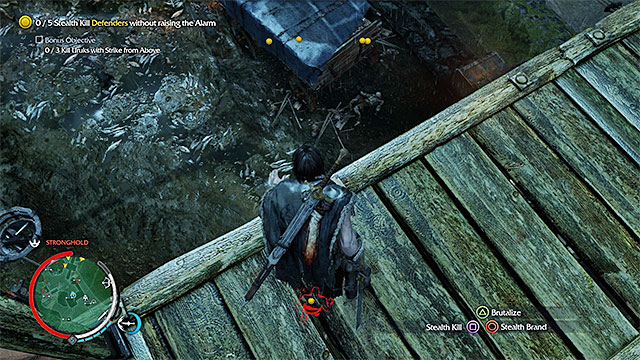 Search out the orcs that you can safely jump down onto
After this mission starts, focus on the secondary objective first, to get it off your head as quickly as possible. It is important because, during this mission, you cannot be spotted (you will fail the mission then). You may have some problems, while attacking the orcs, because the opponents mainly appear in groups. You can try to lure single orcs away, or search for the single ones (preferably in the Wraith mode). Sneak up to such orcs from behind and execute attacks from above. Eliminate three orcs, in this way.
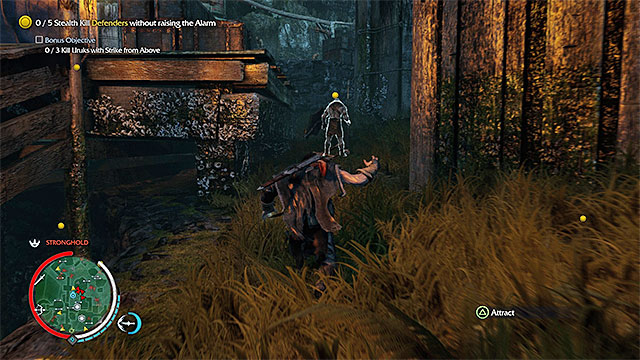 You can kill the Defenders with stealth attacks ONLY
You may also run into lots of trouble, while completing the primary objective. There are five Defenders to eliminate, BUT the main restriction is that you can kill them ONLY with stealth attacks (getting them from behind and using the dagger, jumping down on them or grabbing them near the ledges). The other types of attacks are forbidden and you gal the mission automatically, if you perform them. Therefore, do not try using the bow, caragors, explosive objects or branding. Before you approach each defender, plan on your attack carefully (preferably in the Wraith mode) and distract the accompanying regular orcs, whenever necessary. Also, try to use the platforms above bridges, ropes, etc. to move around. This brings down the risk of being spotted.
Rewards for completing the mission:
Location: Nurnen Peninsula (Nurn)
Secondary objectives: Have five orcs killed by caragors.
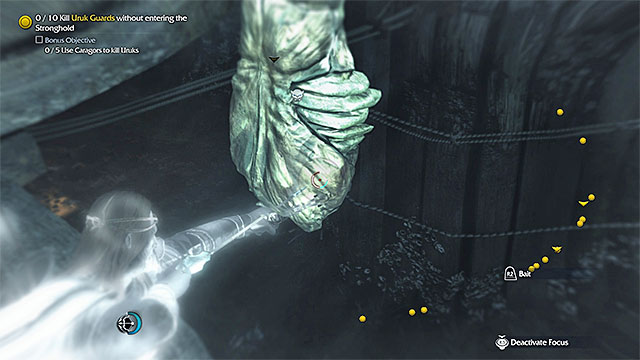 Caragors appear in the area after you deploy the bait
The main handicap in this mission is that you cannot walk outside of the small green circle on the map. Therefore, remain on the starting platform, where there are extra arrows for you, they replenish). Just like usually, take interest in the secondary objective, in the first place. It is very easy, because you simply need to hit one, or several, baits with arrows. After the bait drops to the ground, there should appear caragors, around. They will attack the orcs, thanks to which you will complete the secondary objective without any additional effort.
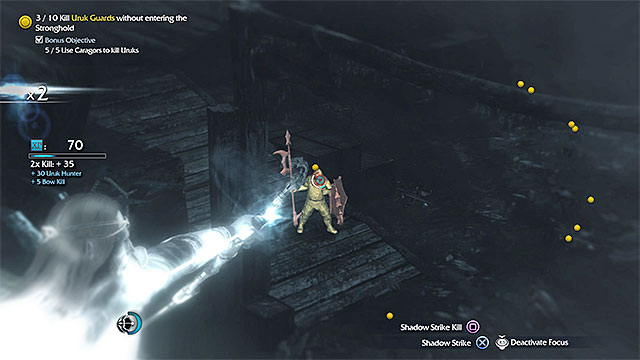 It is best to eliminate the orcs with the bow
To complete this mission, you need to eliminate ten of the orcs marked by the game. The easiest way to achieve it is, of course, using the bow, either by aiming at the opponents directly (preferably, at their heads) or the nearby explosive elements of the environment (grog barrels, campfires). It may happen that you are spotted in the process, to which you need to react immediately. It is not forbidden to engage in melee combat in this mission, but you can easily step outside of the green circle, which fails the mission.
Rewards for completing the mission:
Location: Celon Poros (Nurn)
Secondary objectives: You need to kill, at least, two orcs with the Lethal Shadow Strike.
Requirements: The Lethal Shadow Strike ability
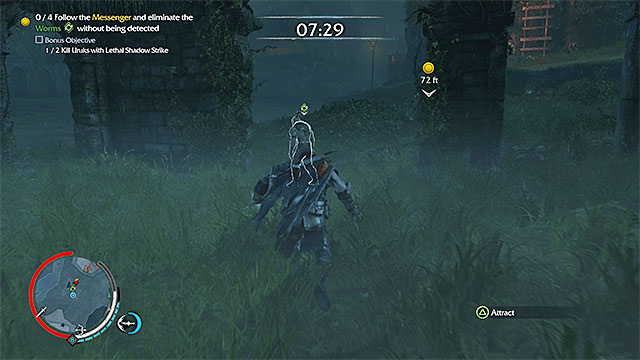 Follow the messenger and kill the informants that you identify
This mission is not as difficult as it may seem, at first, although you need to take successive steps carefully. The plan is that you follow the enemy messenger and kill the informants that he meets. You need to kill, a total of, four informants this way. An additional handicap is that you need to stay in shadows and complete the mission within 8 minutes. Fortunately, if you are not lagging behind, anywhere, you should have, around, 5 spare minutes, towards the end of the mission. The important piece of news is that the informants will not be automatically identifiable. After the messenger stops anywhere, you need to come sufficiently close. Only then, the informant will be marked with a green icon.
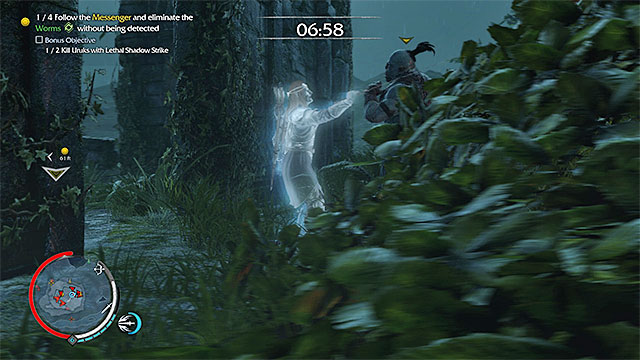 Eliminate, at least, two orcs, by teleporting
While following the messenger, you do not need to follow his path. As a matter of fact, this is recommended against, because you will be running into the other orcs, along your path. Of course, you can take advantage of such situations and complete the secondary objective of performing two Lethal Shadow Strikes, but it is best to steer clear of them, in general. It is also necessary that you use the Wraith mode to your advantage, because this will make it easier to locate the opponents that you pass by (some orcs on the lower ledges are well-hidden) and allow you to get around them safely.
 Later into the mission, climb onto the ledges above
As for the informants themselves, kill them only after they are done talking to the messenger and he walks sufficiently far away. Thanks to this, he will not notice the kill. You can eliminate the informants in a variety of ways - by getting them from behind, using the bow or by teleporting. In the case of the last two informants, it is a good idea to climb onto the upper ledges of the ruins. This will make it easier to plan on attacks and, at the same time, avoid the patrolling orcs.
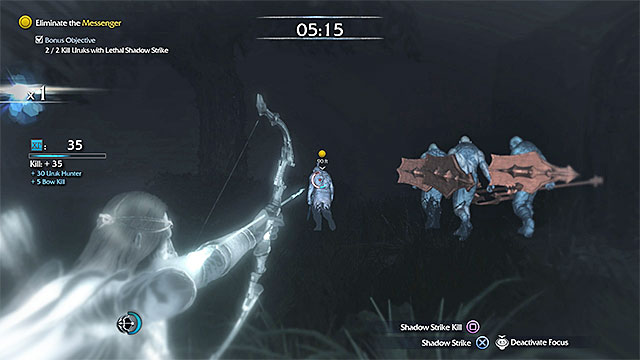 Finally, kill the messenger
To end the mission, you also need to kill the messenger, which is a piece of cake. Especially that you do not need to sneak anymore. Personally, I recommend that you eliminate the messenger with the bow, or with the Lethal Shadow Strike. Thanks to this, you will not need to deal with his guards in the first place.
Rewards for completing the mission:
Location: Celon Poros (Nurn)
Secondary objectives: You need to have the harnessed caragor bite five enemies to death.
Requirements: The Ride Caragors ability
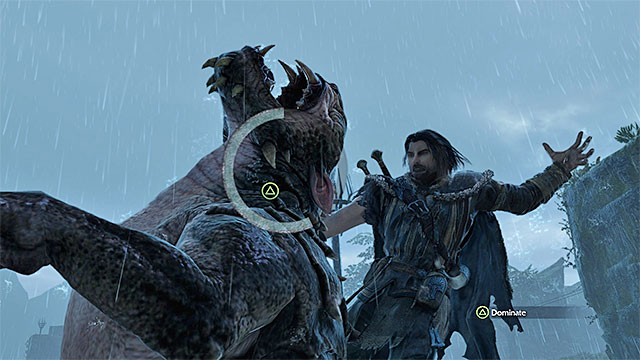 Complete the minigame to harness the caragor
Right after this mission starts, use the Ride Caragors ability, i.e. press the appropriate key/button. You need to complete the minigame that allows you to tame the beast. At this point, countdown starts and you have 3 minutes and 20 seconds to eliminate three groups of orcs. The time limit is tight so, you need to hurry.
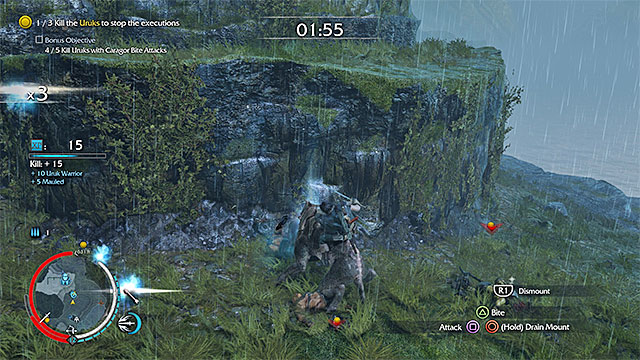 The caragor needs to bite to death, at least, five weakened orcs
I recommend that you start with the group that is stationed the closest to the starting point. As you ride, hold down the running key/button thanks to which you will get there faster. After you get there, you can use the sword, or the bow, to kill/ wound the orcs. Also, remember about the secondary objective so, after you have weakened an orc, hold down the appropriate key/button to have the caragor bite the orc to death (this also regenerates the beast's health). Kill, at least, five orcs this way. The mission ends after you have killed all of the marked orcs.
Note - The caragor's premature death does not end this mission in a failure, but it is much more difficult to complete the mission in time.
Rewards for completing the mission:
Location: Fern Outskirts (Nurn)
Secondary objectives: You need to Pin in Place, at least, three fleeing orcs.
Requirements: The Pin in Place ability.
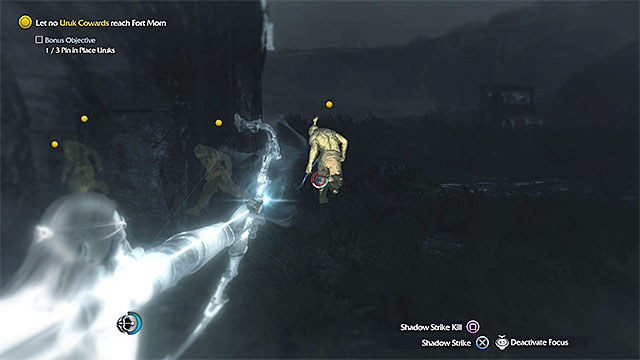
The primary objective of this mission is to kill the orcs fleeing from the graug. and you need to do that before they reach Fort Morn. I recommend that, after you start the mission, you jump off the ledge, approach the road leading up to the bridge. Do not approach too close, because the graug may turn on you, out of a sudden. In the first place, deal with the secondary objective . Target the orcs' lower limbs (just like in the above screenshot)and Pin them in place, thanks to the Pin in Place ability). You can then finish off each of the orcs, or wait for them to be finished off by the graug.
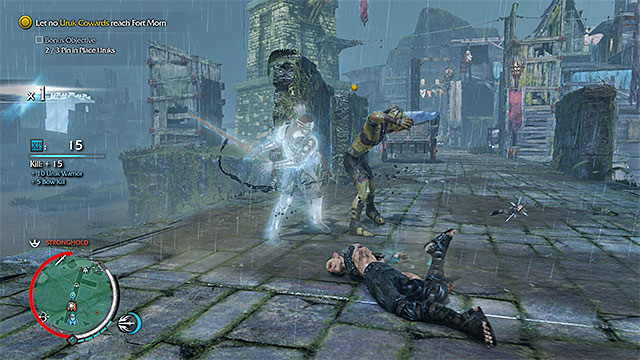 You can also pin down the orcs with teleportation attacks
You can keep using the option to pin down the orcs, still after you complete the side objective, but you can eliminate them in different ways. I recommend that you consider teleportation (Lethal Shadow Strike), or shoot grog barrels, on the bridge, with the bow. In the meantime, keep an eye on the graug and escape, whenever you notice that it turned its attention to you.
Rewards for completing the mission:
Location: Fort Morn (Nurn)
Secondary objectives: You need to distract, at least, five orcs, or attract their attention, and kill them.
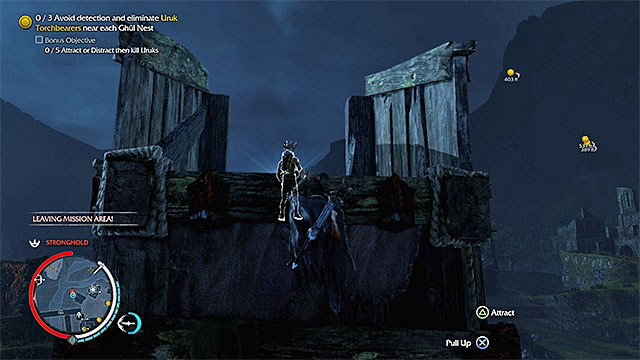 You can distract the enemies, e.g. while hanging down a ledge.
This is one of the more difficult missions. It requires you, first of all, to remain in shadows and it is very easy to be detected, by accident, which means failing the mission. As a result, you should not hurry too much and, before each major step that you take, you should learn about the surroundings (as usually, using the Wraith mode). First of all, take to completing the secondary objective. The easiest way to attract the orc attention is to whistle and hide in the bushes, or hang down a ledge. Distracting them is much more risky, and it is better not to attempt this type of actions.
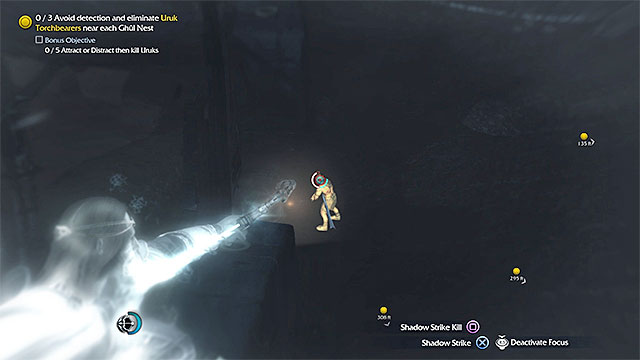 It is easier to eliminate the orcs with torches, with the bow
To complete this mission, you need to clear three areas in the fort, of all the orcs with torches (they are marked with yellow dots, after you approach them). Paradoxically, what may be more useful than the dagger, here, is the bow, because it will allow you to eliminate the majority of the enemies, without taking the risk of approaching them. While using the bow, keep the following in mind:
 Attack, in melee, those of the enemies that you cannot reach with the bow
During this mission, you should notice that some of the orcs, from one of the groups marked by the game, are under a roofing below. This makes things more complicated, because it is more difficult to eliminate them with the bow. In such a situation, you can search for the opportunities to surprise them with attacks from above, or by destroying the elements in the surroundings. If you have unlocked the Brand ability, you can seize control of some of the orcs in the fort (preferably archers and Defenders) and have them fight. This action, however, is quite risky because this may raise the alarm and more orcs will arrive in the fort.
Rewards for completing the mission:
Location: Fort Morn (Nurn)
Secondary objectives: While fighting, you need to use the Combat Drain ability, at least, 5 times.
Requirements: The Combat Drain ability and Brand.
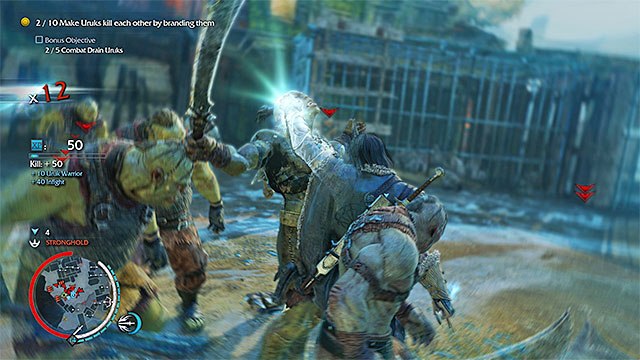 Use Combat Drain on, at least, five orcs and brand them, at the same time
After you start this mission, you can reach a kind of arena, straight away, where there are scores of orcs. Attack the monsters and, just like usually, focus on the gradual bringing up of the multiplier. Each time you have the option to perform a special attack, use the Combat Drain, connected with the secondary objective. Use this ability for five times and activate all of the orcs that you have branded. After that, you had better walk away from the battlefield and let the allies act. If necessary, you could also brand the archers shooting into the arena, but this is not required.
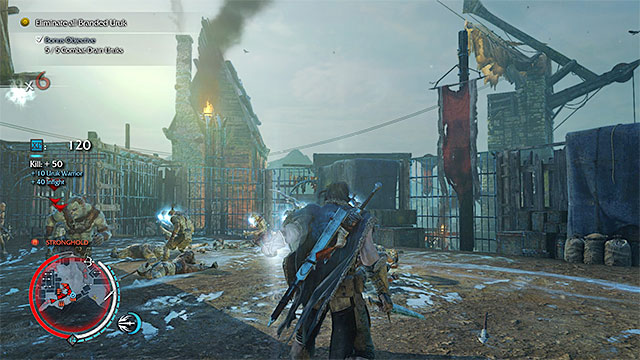 Press the button to dispatch the branded orcs
The battle needs to continue, up until the moment, at which the orcs branded by you have killed ten orcs. Finally, you still need to dispatch the branded orcs. What is meant here is command them to commit suicide and you do that by pressing the appropriate key/button.
Rewards for completing the mission:
Location: Fern Outskirts (Nurn)
Secondary objectives: You cannot take damage.
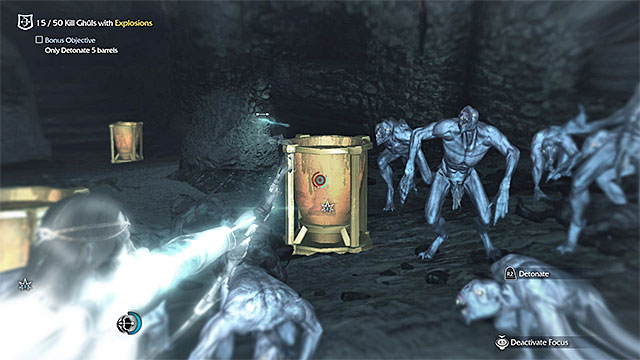
Right after this mission starts, you will have to defend yourself, because the small hill that you are standing on, will be attacked by the enemy archers. To complete this mission, you need to kill a total of 30 orcs and you need to do that by targeting the explosive grog barrels, just like the one shown in the above screenshot. The important piece of news is that while aiming at the barrels, you do not need to draw the bowstring to its fullest extent. Therefore, try to limit the times between the individual shots, thanks to which the concentration bar (slowing down of time) will last you for longer.
Note - Do not walk outside of the green circle on the map, because you will fail the mission this way!
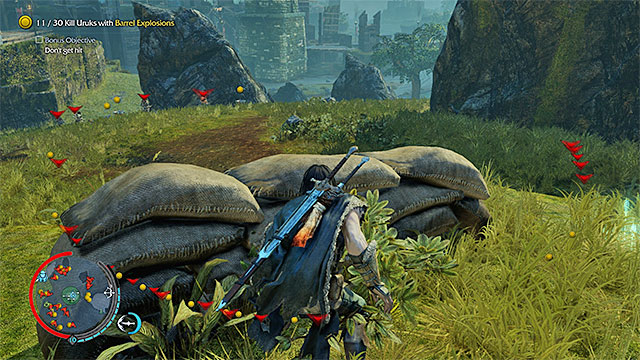 Hide behind sandbags
While fighting, also remember about the side objective. The only way to avoid taking damage is hide behind sandbags, between the individual attacks. Lean out from behind the bags only for short moments, only to take the shot in sol-down mode. Also, try not to go for new arrows too often, because you then risk taking damage (before this mission starts, it is a good idea to buy the attribute that increase the maximum of arrows that you can carry).
Rewards for completing the mission:
Location: Thang Talath (Nurn)
Secondary objectives: You need to Brand three Defenders, while remaining unspotted.
Requirements: The Brand ability
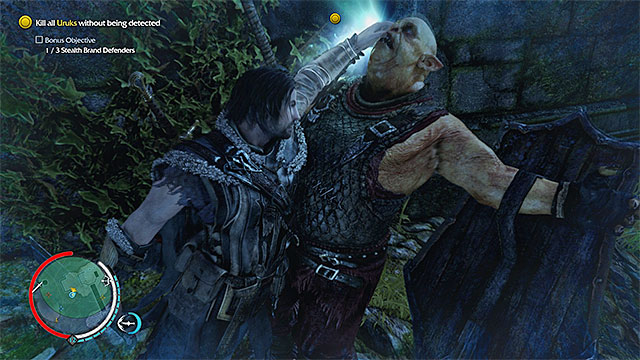 Brand the shielded orcs
This mission takes place in ruins and while completing it, it is a good idea to keep sneaking, for the whole time (fortunately, you do not fail the mission, if you are spotted). Search for opportunities to surprise single Defenders, i.e. the shielded orcs, whether by sneaking up to them from behind, or by whistling after you hide in the bushes. After you get near such a defender, you need to press the branding key/button and obtain, at least, three allies this way. Thanks to this, you will complete the secondary objective.
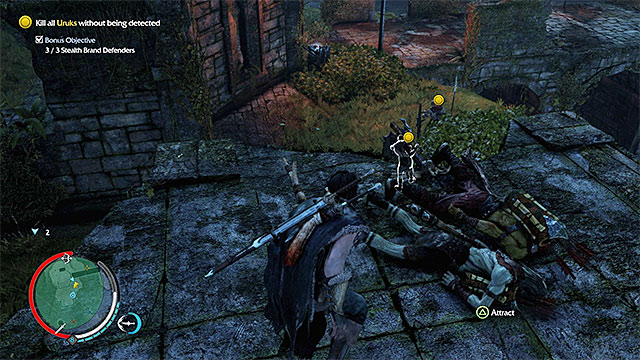 You can eliminate the orcs on your own, or have the branded ones eliminate them.
After you complete the secondary objective, you can start murdering all of the orcs in the ruins. It is not compulsory, though, because you can, just as well, take some vantage point, command the branded to attack and observe what is going on in the battlefield. Finally, at the end of the mission,, remember to command the branded to commit suicide (the Dispatch key/button).
Rewards for completing the mission:
Location: Thang Talath (Nurn)
Secondary objectives: You need to kill all of the ghuls, by blowing up, at most, five grog barrels.
After you start the mission, enter the cave. Head towards the last chamber and ignore the ghuls, for the time being. After you get there, the mission proper starts. each time, wait for all of the ghuls, of a given group, to appear in the cave and dodgem, in the meantime, to avoid taking damage. Only after all of the ghuls have arrived, aim the bow at a grog barrel (an example in the above screenshot). If you have timed it well, the explosion kills all 15 ghuls in the group. This means, that you only need to take 4 shots to kill all 50 ghuls so, you can make it within the limit set by the game. Just remember to use the bow only after the entire current group comes close to you.
Rewards for completing the mission:
Location: Tol Crossing (Nurn)
Secondary objectives: You need to push the orcs from the bridge.
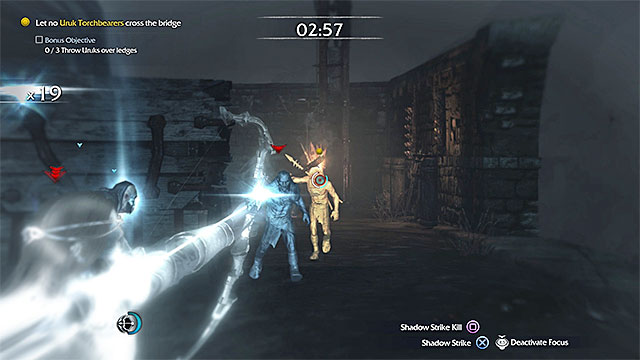
Quite unusually, there is a set time limit to complete this mission. You have four minutes to defend the bridge and prevent any of the orcs with torches, from reaching its other end (an example of such an opponent in the above screenshot - they are marked with yellow dots). You can eliminate the marked orcs in any way you want, but I recommend that you use the bow and headshots, or explode the barrels on the bridge.
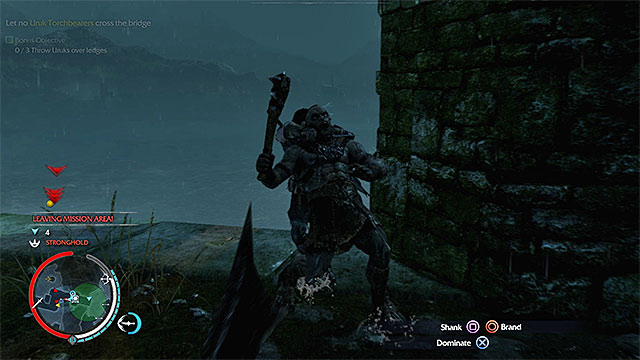 Take the grabbed orc over to the edge of the bridge and throw him off
The orcs with torches are not the only ones to appear on the bridge. You should also watch out for the other monsters that you can either eliminate or brand (if you have the Brand ability unlocked). Do not engage them in battle too much, because you can miss one of the orcs with torches and fail the mission. At the same time, make sure that you have completed the secondary objective, before the four minutes elapse. You can attack the orcs, whenever they come near one of the edges, or grab them, take them over to the edge and throw them off.
Rewards for completing the mission:
Location: Cab-Gwanath Bluff (Nurn)
Secondary objectives: You cannot kill any of the orcs, up until the moment that the trap is ready.
Requirements: The Brand ability.
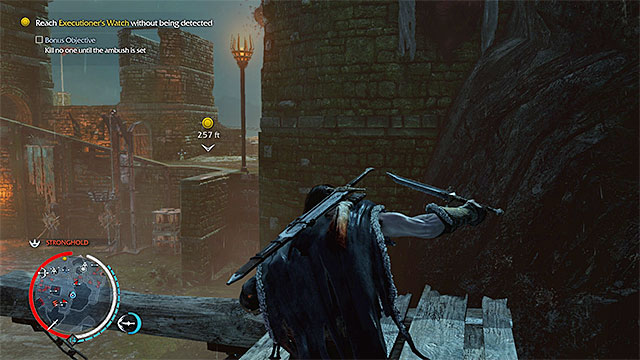 Sneak, while heading towards the spot, where you play the second part of the mission
This mission consists of two main parts and you first need to reach the Executioner's Watch location. Slide down the rope and start sneaking across the orc stronghold. You cannot be spotted, along your path so, use the ledges above, mainly and use the Wraith mode to locate the opponents. If you want to complete the side objective, you cannot kill anyone, up until the moment, at which the final battle takes place. Therefore, stay away from the opponents and ignore them.
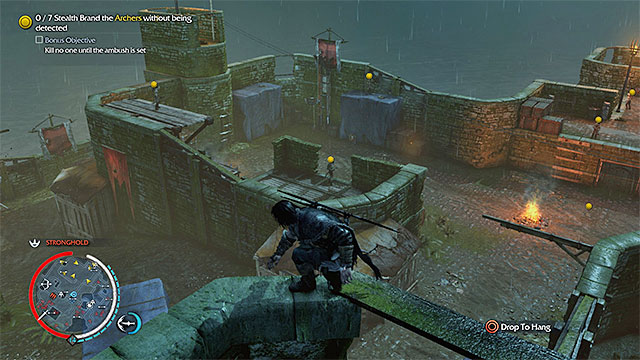 The area with seven archers
After you reach your destination, examine the current situation. There are seven orc archers here and remember that you cannot kill anyone, if you want to complete the secondary objective. Therefore, what is important here, is that you plan your route carefully.
 Surprise the archers and brand them
You can reach the archers in any order that you want. You can sneak up to them from behind or lure them away from the rest of the orcs, e.g. by whistling. Watch out where some of the archers may keep an eye on each other. Apart from that, there is an orc patrolling, between the two archers on the right. Brand each one of the archers, as soon as the patrolling orc walks away from him.
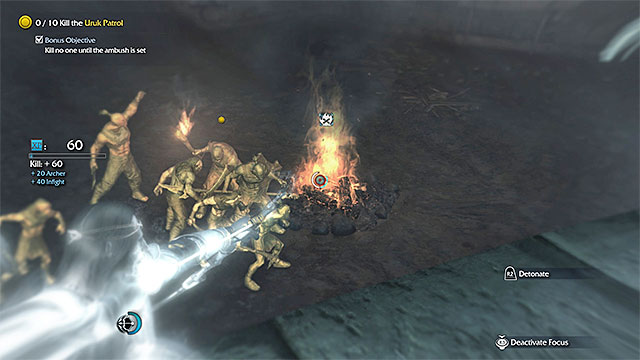 The patrolling orcs can be easily killed with an arrow to the campfire
The final part of this mission is, arguably, the most enjoyable. Activate all of the branded archers. Soon, there will arrive a bigger patrol. You can either wait for the archers to deal with the patrolling orcs, or help them. I recommend that, in the latter case, you shoot an arrow towards the campfire in the center, because the explosion will kill the majority of the orcs.
Rewards for completing the mission:
Location: Cab-Gwanath Bluff (Nurn)
Secondary objectives: You need to use Fire arrows to set three grog barrel stashes on fire.
Requirements: The Fire Arrow ability.
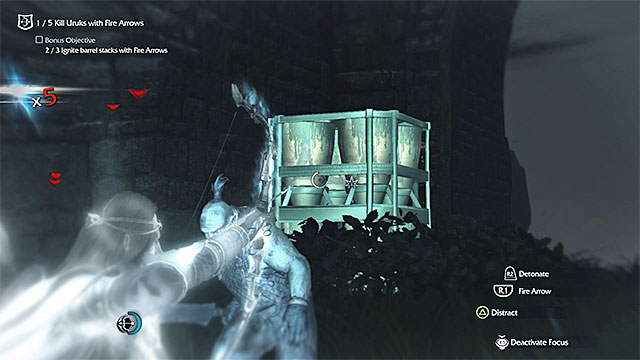 An example stash
The entire mission revolves around using fire arrows. Just to remind you, fire arrows are one of the special attacks so, they become available after you have reached the appropriate multiplier value (8x, by default). To shoot a fire arrow, after you enter the targeting mode, you need to press the key/button different from the standard one. I recommend that you, take interest in the side objective, in the first place. So, each time that you unlock special attacks, send a fire arrow towards one of the grog stashes. Make sure that you are within an appropriate distance of the stash, because the explosion is quite strong. Sabotage three stashes in this way.
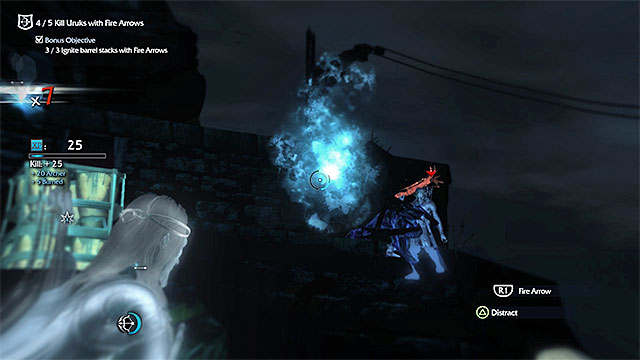 Use the fire arrows, also to eliminate the enemies
After you have dealt with the secondary objective, you can now turn towards completing the mission. To do that, you need to shoot the fire arrows towards the orcs, and kill at least five, this way., Personally, I recommend that you eliminate with the fire arrows, archers in the first place, even if there are other enemies around.
Rewards for completing the mission:
Location: Cab-Gwanath Bluff (Nurn)
Secondary objectives: Kill, at least, 25 orcs.
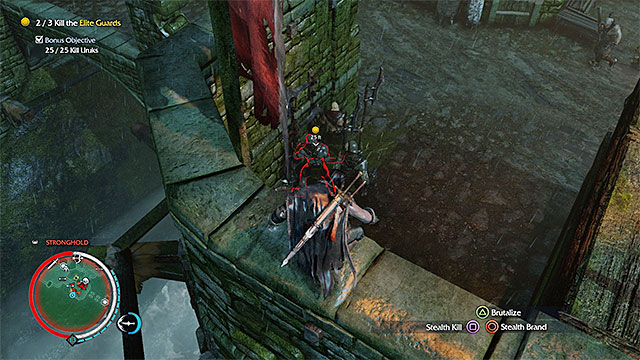 One of the elite orcs
You should not have too many problems completing this mission, because it only requires you to eliminate orcs, i.e. the regular and the elite ones. As for the standard opponents, you need to kill, at least, 25 of them (required for the secondary objective), and you also need to kill the three elite ones. The good news is that the elite orcs are not tougher. They only come with bodyguards that you can either eliminate or avoid around (e.g. by eliminating the mission target with the Strike from Above). While trying to reach the elite orcs, you need to watch out for the captains of the Sauron's Army and do not engage in fight with them. The best way to find the captains is to use the Wraith mode.
Rewards for completing the mission:
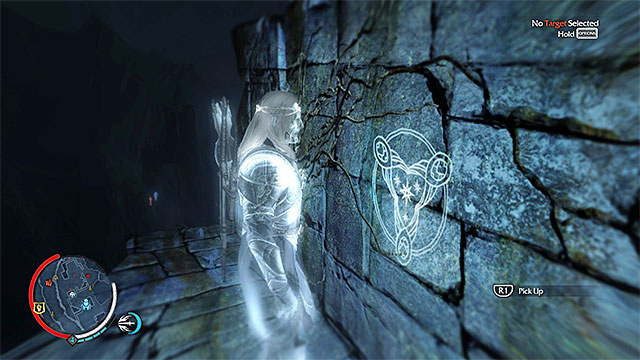 You can find the runes only after you activate the Wraith mode
Ithildin Runes are one of the two main collectibles categories in the game. There is a total of 32 runes to find- 16 in Udun and 16 in Nurn.
The maps further in this chapter present the whereabouts of the runes. You can search for them on your own, though, because the information on their locations are added to the map, as you activate the successive forge towers. After you come close to a rune, you need to activate the Wraith mode, because it is the only way, in which you will be able to locate the rune and interact with it. For finding the runes, you are rewarded with gold (Mirian). Therefore, I recommend that you take interest in them, if you want to unlock new attributes quickly (because you buy them for gold).
The above map presents locations of the Ithildin runes in the Udun valley, i.e. in the location that you start the game in. After you point to the red dot, you can learn additional information - the name and the possible hints on where to find it. Of course, you can reach the runes in any order that you want and obtain them both during the missions, as well as during the exploration of the game world.
The above map presents the whereabouts of Ithildin runes. It provides positions only of collectibles in Nurn. This area unlocks after you have progressed to the twelfth main mission. After you roll over the red dot, which symbolizes the location of the rune, you can learn additional info - the name and possible hints on where it has been hidden. Of course, you can find the runes in any order that you want and you can search for them both during missions and while exploring the game world.
 You find the artifacts in the Wraith mode, when they become perfectly visible
Artifacts are one of the two main categories of collectibles in the game. In total, there are 42 artifacts to be found. It is a good idea to examine EACH artifact that you obtain (the game accesses the inventory screen automatically) find the spot to activate the interactive memories, because this is required for one of the game's trophies/achievements. The interactive spots of each artifact have been presented on the following pages.
The maps in this chapter present the whereabouts of the individual artifacts, but you can also go searching for them on your own. The information on the locations are added to the map, as you activate the successive forge towers. After you come close to an artifact, you need to activate the Wraith mode, because it is the only way, in which you will be able to locate the it. For finding the runes, you are rewarded with gold (Mirian). Therefore, I recommend that you take interest in them, if you want to unlock new attributes quickly (because you buy them for gold).
The above map presents locations of the Artifacts in the Udun valley, i.e. in the location that you start the game in. Apart from learning about the points on the map, you also should visit the List of Artifacts: Udun page. You can find there additional information on where to find some of them and makes it easier to find the interactive spots in which you activate them. Of course, you can reach the runes in any order that you want and obtain them both during the missions, as well as during the exploration of the game world.
The above map presents locations of the Artifacts in Nurn. This area unlocks after you have progressed to the twelfth main mission. Apart from learning about the points on the map, you also should visit the List of Artifacts: Udun page. You can find there additional information on where to find some of them and makes it easier to find the interactive spots in which you activate them. Of course, you can reach the runes in any order that you want and obtain them both during the missions, as well as during the exploration of the game world.
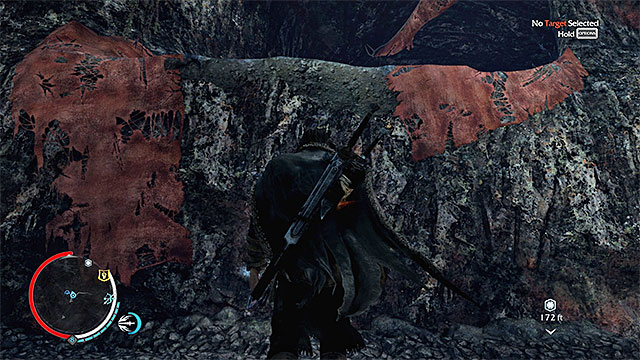 The ledge that you need to reach
This artifact is in the cave and the entrance is to the East of its location. While crossing the cave, be prepared to eliminate a group of orcs. Also, keep an eye out for a ledge that Talion can reach. Thanks to this, you will discover a new tunnel and reach a small cavity with the artifact.
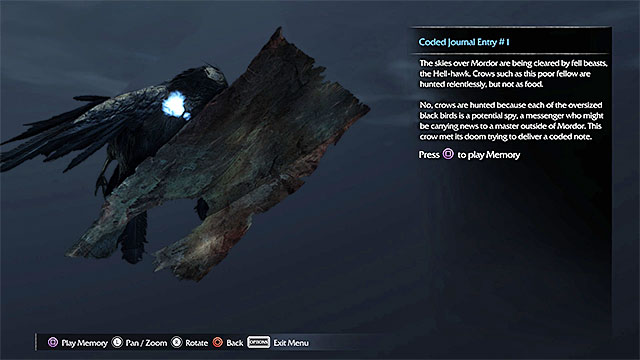
After you add the artifact to your inventory, locate the interactive spot shown in the above screenshot and play the memory.
This artifact is on one of the higher ledges in the ruins. After you add the artifact to your inventory, locate the interactive spot shown in the above screenshot and play the memory.
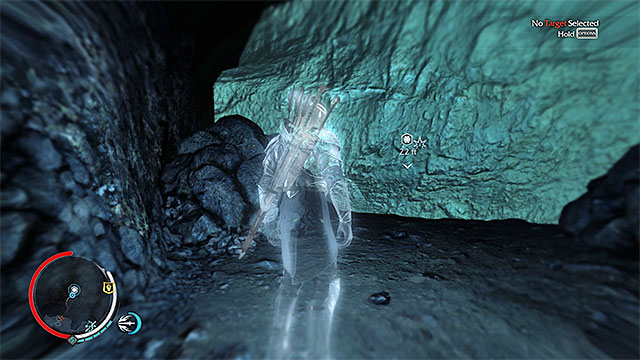 Bring down the wall with an arrow
This artifact is in a cave and the entrance is to the North-East of the actual location. After you enter the cave, activate the Wraith mode and find the weakened wall that you could smash. For that use an arrow.

After you add the artifact to your inventory, locate the interactive spot shown in the above screenshot and play the memory.
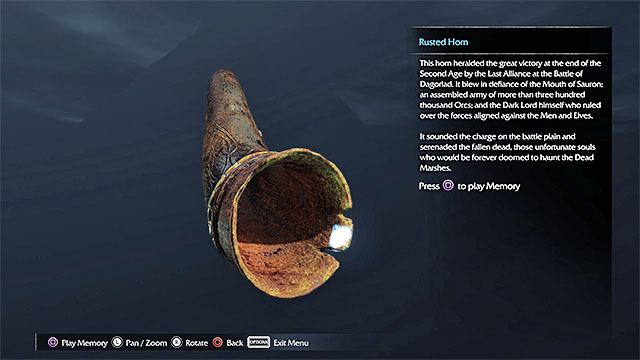
This artifact is in one of the cages in the stronghold. Squeeze through the bars and find the item. After you add the artifact to your inventory, locate the interactive spot shown in the above screenshot and play the memory.
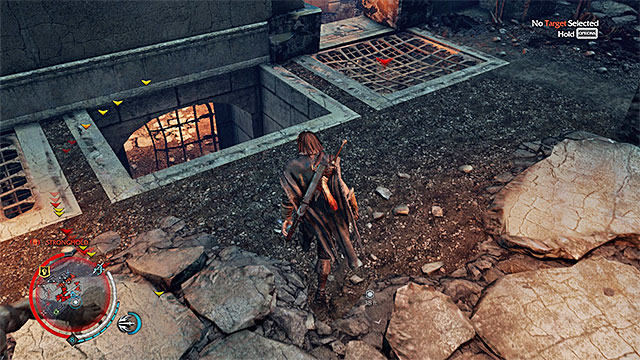 The spot, where you need to jump into the hole
This artifact has been, quite skillfully, hidden in the orc stronghold. As you come close to it, take a look around for a hole in the ground and jump into it. Follow the narrow tunnel and squeeze through the bars, thanks to which you will reach the area with the item.
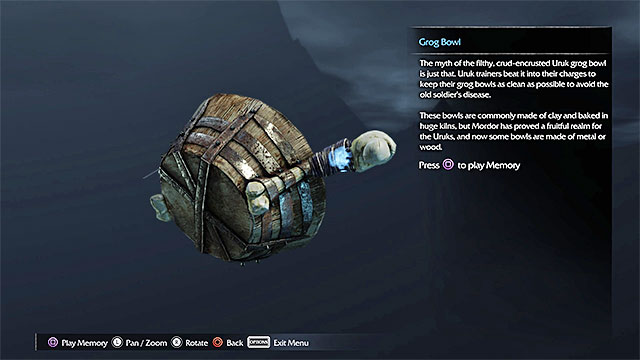
After you add the artifact to your inventory, locate the interactive spot shown in the above screenshot and play the memory.
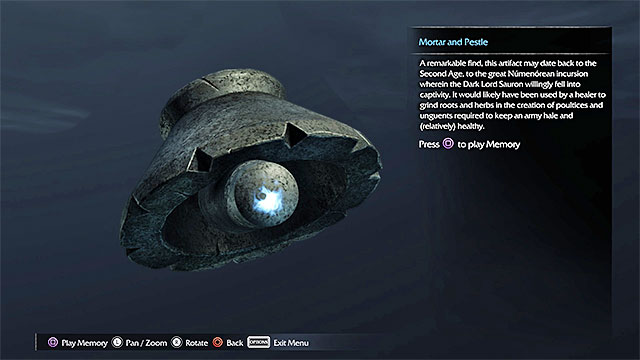
This artifact is in the orc encampment, under one of the big, wooden structures. After you add the artifact to your inventory, locate the interactive spot shown in the above screenshot and play the memory.
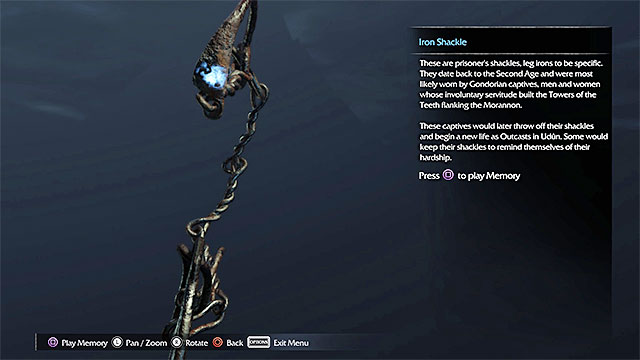
This artifact is in the orc encampment, under the big scaffolding neighboring the Black Gate. After you add the artifact to your inventory, locate the interactive spot shown in the above screenshot and play the memory.
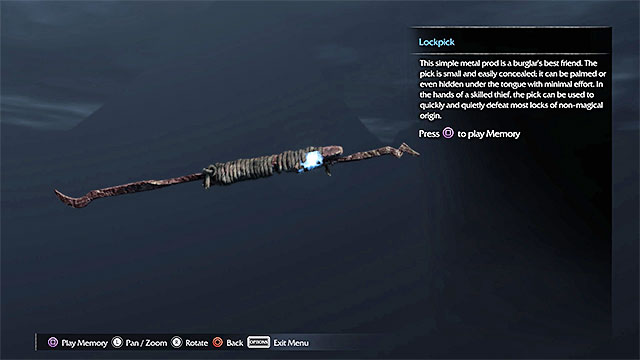
This artifact is in the orc encampment, on one of the ledges, of one of the wooden structures. After you add the artifact to your inventory, locate the interactive spot shown in the above screenshot and play the memory.
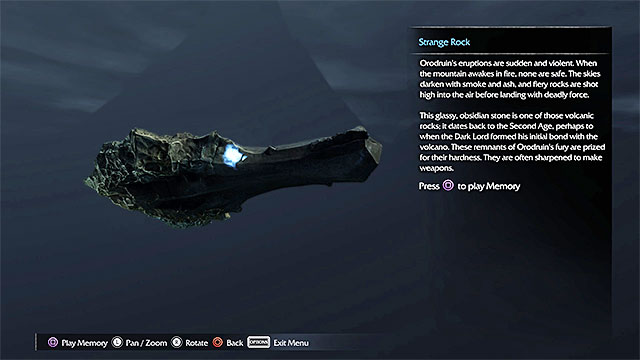
This artifact is in an exposed place, near the passage between the rocks. After you add the artifact to your inventory, locate the interactive spot shown in the above screenshot and play the memory.
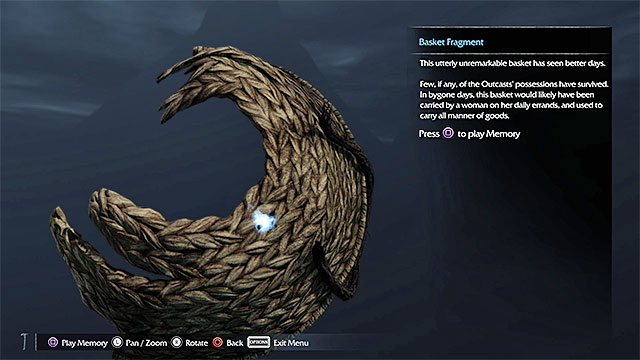
The artifact is on the ground, next to the bushes, under the bridge. After you add the artifact to your inventory, locate the interactive spot shown in the above screenshot and play the memory.
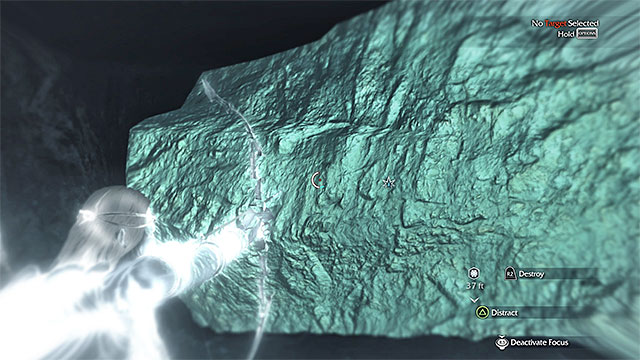 Bring down the wall with an arrow
The artifact is in the cave and the entrance is to the North of the actual location. After you enter the cave, be prepared for the encounter with one, or two, caragors. You can kill the beasts (preferably, with the bow and arrows into the head), or lure them outside and harness them. After you have cleared the area, activate the Wraith and find the weakened wall in the cave that you can smash. To do that, use an arrow.
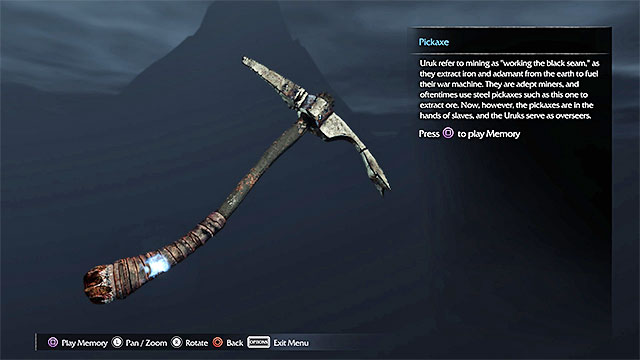
After you add the artifact to your inventory, locate the interactive spot shown in the above screenshot and play the memory.
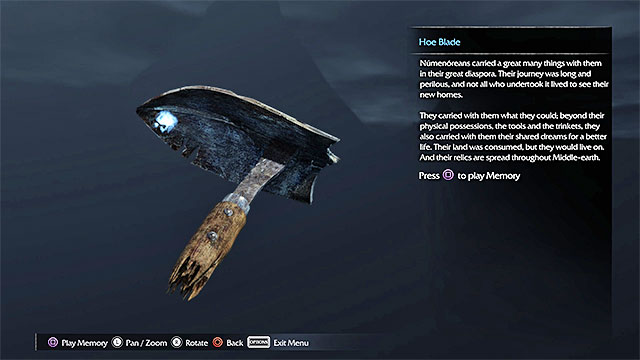
The artifact is on the ground, among the bushes, close to a big wooden structure. After you add the artifact to your inventory, locate the interactive spot shown in the above screenshot and play the memory.
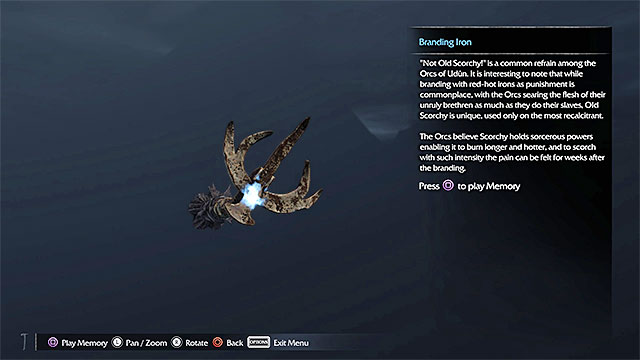
This artifact is in one of the cages in the stronghold. Squeeze through the bars and find the item. After you add the artifact to your inventory, locate the interactive spot shown in the above screenshot and play the memory.
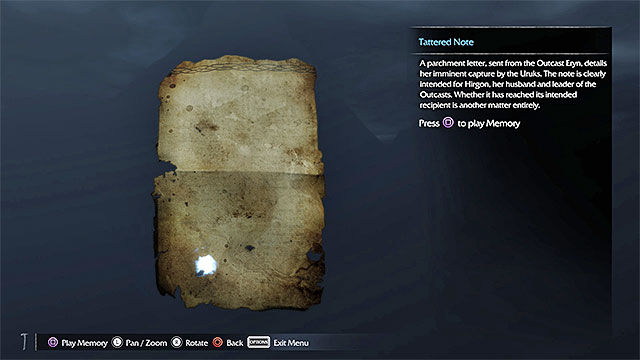
This artifact is on one of the ledges, of the wooden structure in the orc stronghold. After you add the artifact to your inventory, locate the interactive spot shown in the above screenshot and play the memory.
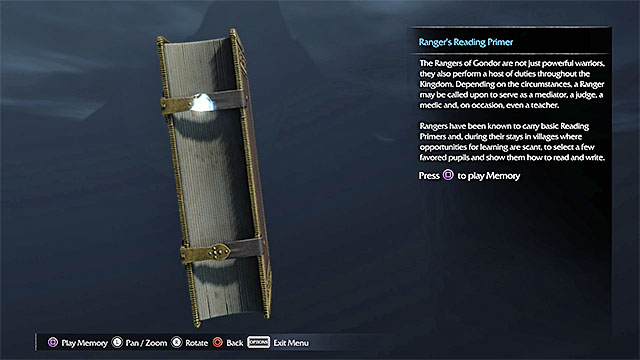
This artifact is in an exposed spot, behind one of the carts. After you add the artifact to your inventory, locate the interactive spot shown in the above screenshot and play the memory.
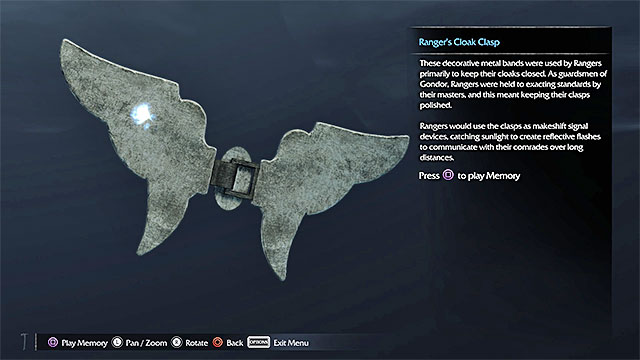
This artifact is on one of the higher ledges in the ruins. After you add the artifact to your inventory, locate the interactive spot shown in the above screenshot and play the memory.
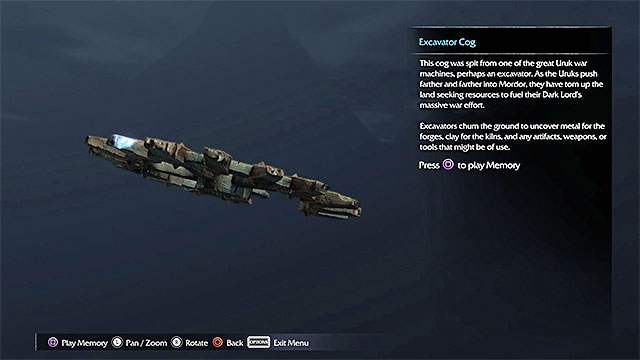
This artifact is on one of the higher ledges. After you add the artifact to your inventory, locate the interactive spot shown in the above screenshot and play the memory.
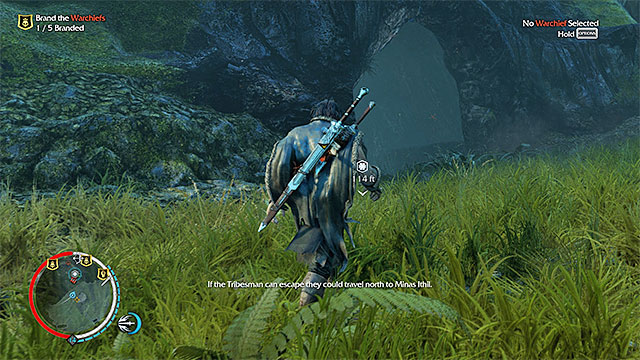
This artifact is on one of the higher ledges of the wooden structure, in the stronghold. After you add the artifact to your inventory, locate the interactive spot shown in the above screenshot and play the memory.

This artifact is on one of the higher ledges of the metal structure in the orc stronghold. After you add the artifact to your inventory, locate the interactive spot shown in the above screenshot and play the memory.
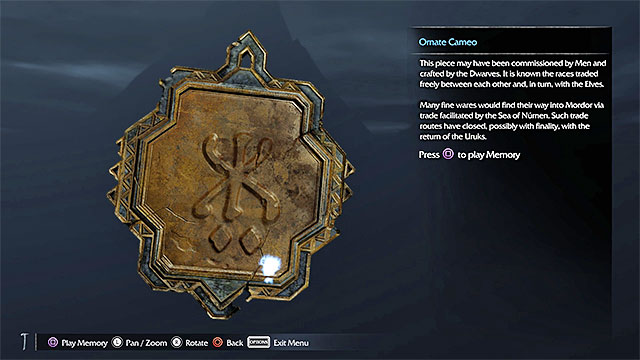
This artifact is in the ruins, that should not be guarded by anyone. After you add the artifact to your inventory, locate the interactive point shown in the above screenshot, which will play the memory.
The cave entranceThis artifact is in the cave which a small passage leads to. You need to be very careful, because there may be one, or several caragors inside. depending on which you prefer, you can either kill the beasts straight away (e.g. with the bow) or lure them outside and dominate them.
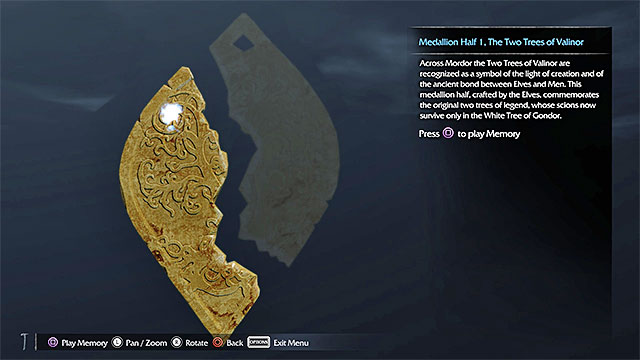
After you have secured the area, explore the cave. Add the artifact to your inventory, locate the interactive point shown in the above screenshot and play the memory.
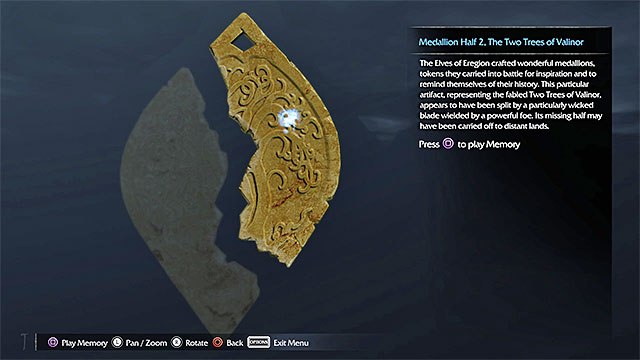
This artifact is in an exposed location, on a meadow. After you add the artifact to your inventory, locate the interactive point shown in the above screenshot and play the memory.
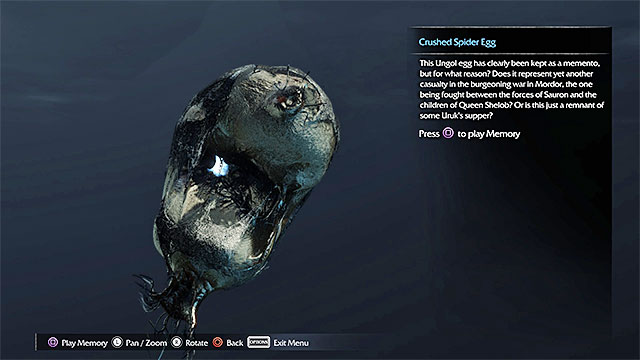
This artifact is on the ground, under a small wooden bridge. After you add the artifact to your inventory, locate the interactive point shown in the above screenshot and play the memory.
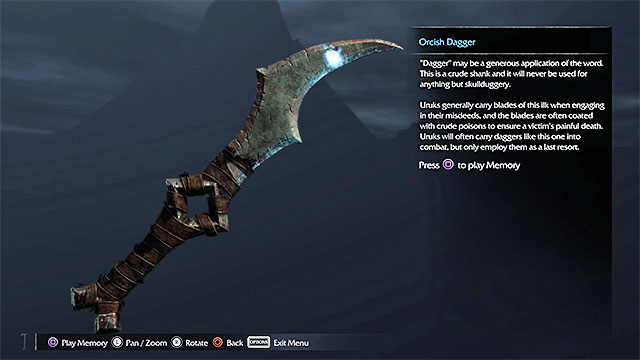 The cave entrance
This artifact is in a cave that you access through a very well-hidden passage. By default, there are orcs inside and you can either try to sneak past them, or eliminate them (watch out, in this situation, for the hunters, among others)).
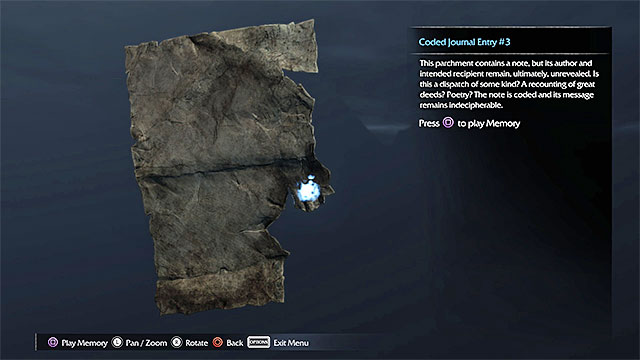
Regardless of what you did, examine the cave for the artifact. Add the artifact to your inventory, locate the interactive point shown in the above screenshot and play the memory.
This artifact is at the foot of one of the wooden structures near the cliff, in the orc stronghold. After you add the artifact to your inventory, locate the interactive point shown in the above screenshot and play the memory.
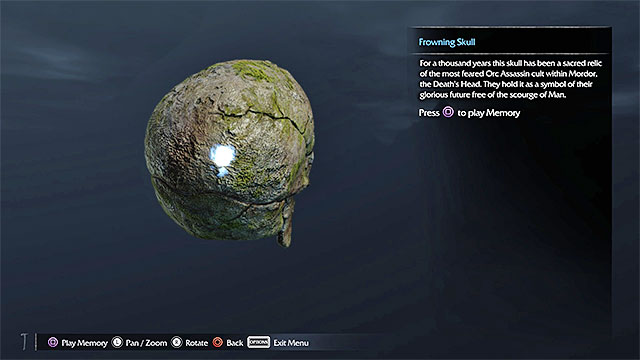
This artifact is inside one of the wooden structures at the orc stronghold. After you add the artifact to your inventory, locate the interactive point shown in the above screenshot and play the memory.
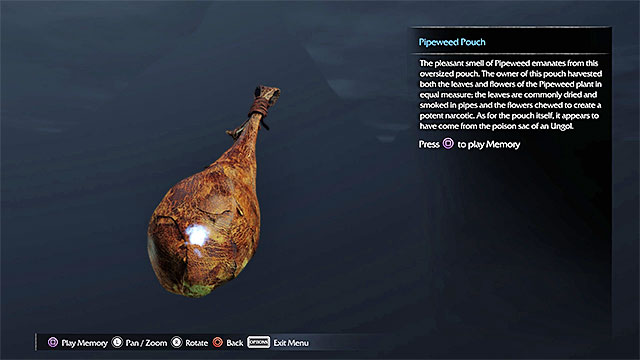
The artifact is on one of the rooftops at the orc stronghold. After you add the artifact to your inventory, locate the interactive point shown in the above screenshot and play the memory.
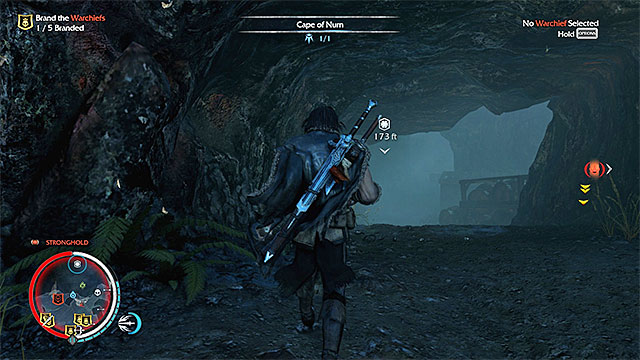 One of the entrances to the cave complex
This artifact is in the cave that neighbors the orc stronghold. You can access the cave through one of several passages and I recommend that you take the one outside of the stronghold. Thanks to this, you will minimize the risk of running into any orcs. It is a good idea to visit the cave in the daylight, because there may be ghuls inside, at night.
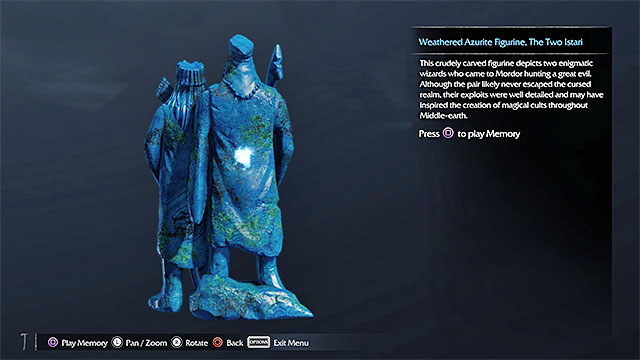
After you enter the cave, start exploring it. The collectible is on the top ledge in one of the chambers. After you add the artifact to your inventory, locate the interactive point shown in the above screenshot and play the memory.
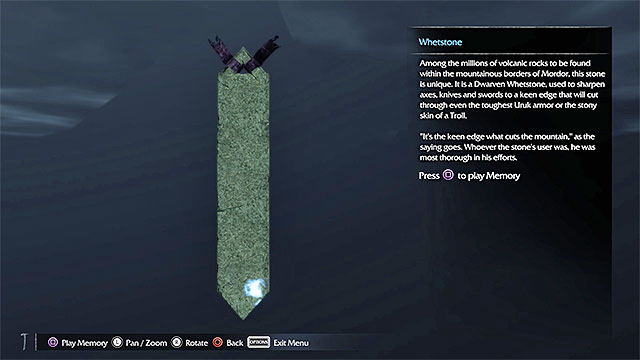
This artifact is on the ground, under a big bridge towards the fort. After you add the artifact to your inventory, locate the interactive point shown in the above screenshot and play the memory.
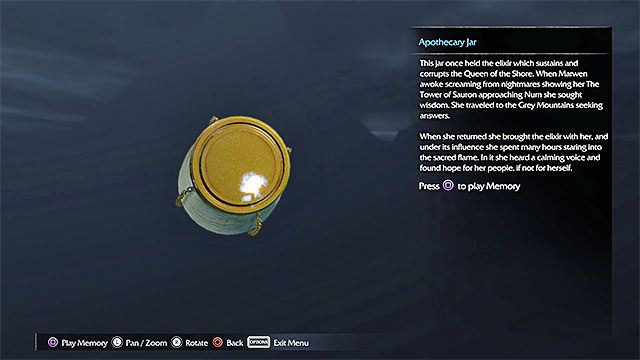
This artifact is on the ground, under the wooden buildings at the orc stronghold. After you add the artifact to your inventory, locate the interactive point shown in the above screenshot and play the memory.
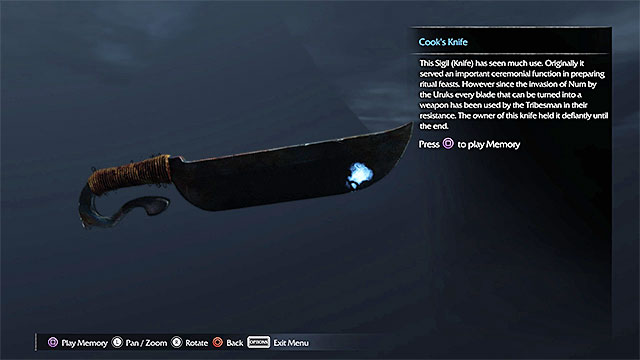
This artifact is in the grass at the orc stronghold. After you add the artifact to your inventory, locate the interactive point shown in the above screenshot and play the memory.
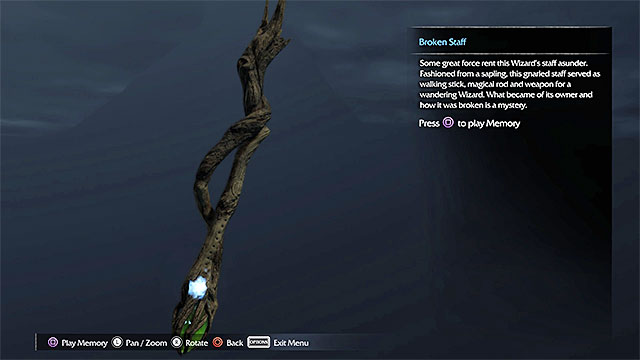
The artifact is on one of the largest ledges in the tower, at the orc stronghold and you need to take a longer climb to reach it. After you add the artifact to your inventory, locate the interactive point shown in the above screenshot and play the memory.
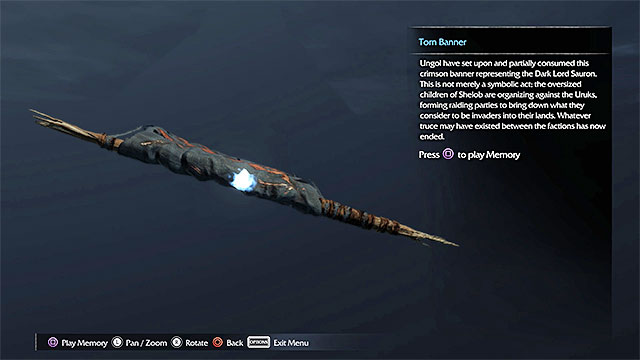
This artifact is on the ground, in the ruins that should not be guarded by anyone. After you add the artifact to your inventory, locate the interactive point shown in the above screenshot and play the memory.
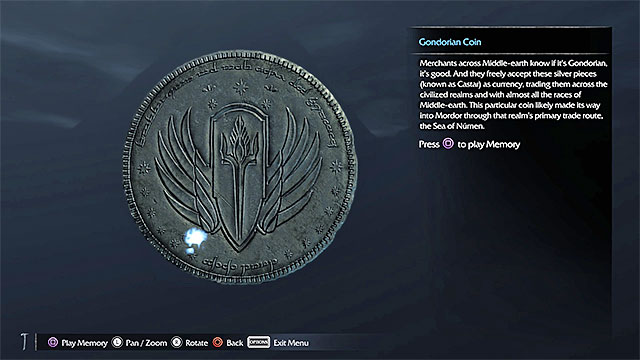
The artifact is on one of the higher ledges in the ruins. After you add the artifact to your inventory, locate the interactive point shown in the above screenshot and play the memory.
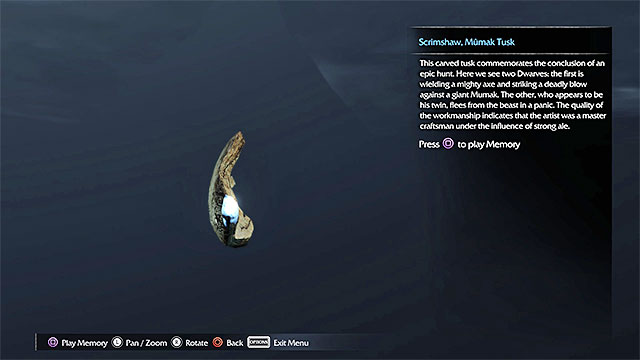
The artifact is on a small ledge under the stone bridge. After you add the artifact to your inventory, locate the interactive point shown in the above screenshot and play the memory.
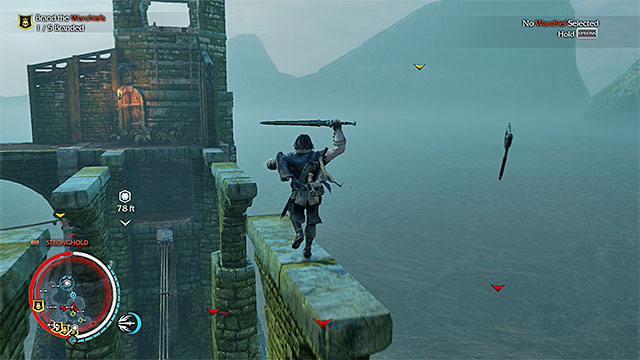 Reach the part of the fort, where the artifact is, by jumping over the stone blocks, or using ropes.
This artifact is in the North-Eastern part of the orc stronghold. To get there, it is best to walk over the rope or jump over the stone blocks. Additionally, it may be necessary to lower yourself at the appropriate spot, because the collectible is on one of the lower ledges.
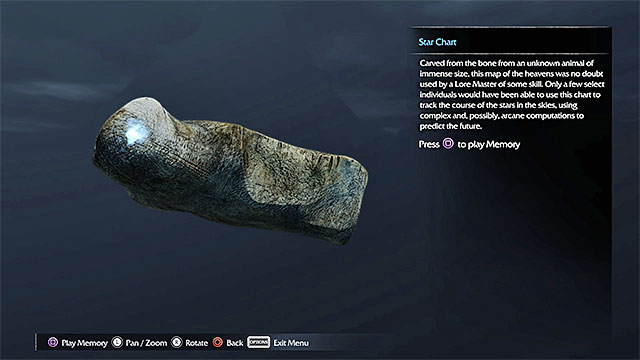
After you add the artifact to your inventory, locate the interactive point shown in the above screenshot and play the memory.
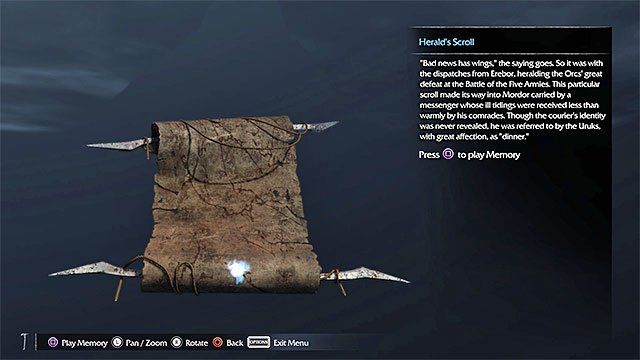
This artifact is inside one of the big tents at the orc stronghold and you need to watch out for the monsters in this area. After you add the artifact to your inventory, locate the interactive point shown in the above screenshot and play the memory.
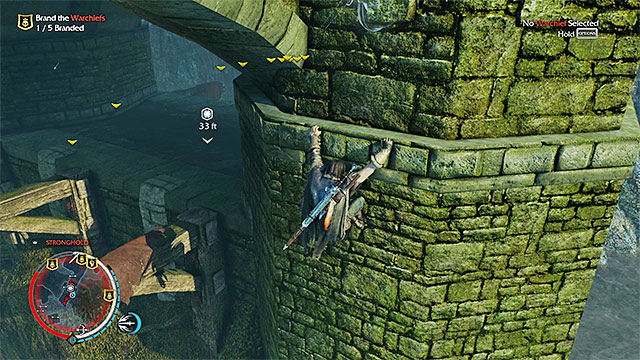 You need to walk under the big bridge
The artifact is under a big stone bridge towards the orc stronghold. To reach the artifact, drop off the edge and grab on to the edges below. In the meantime, try not to attract attention, because you would be an easy target for the orcs.
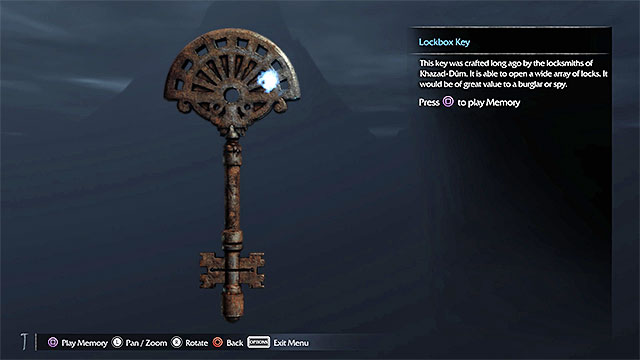
After you add the artifact to your inventory, locate the interactive point shown in the above screenshot and play the memory.
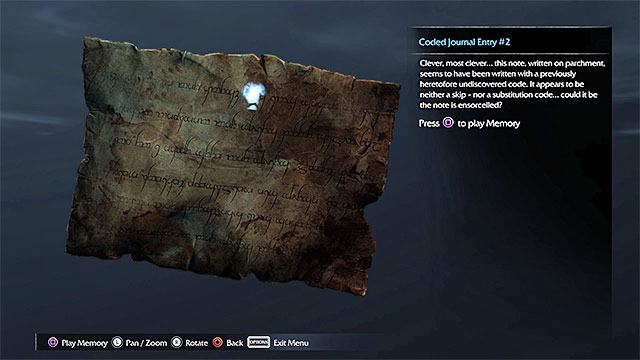
This artifact is on the ground, near the ruins and you need to watch out for the nearby orcs. After you add the artifact to your inventory, locate the interactive point shown in the above screenshot and play the memory.
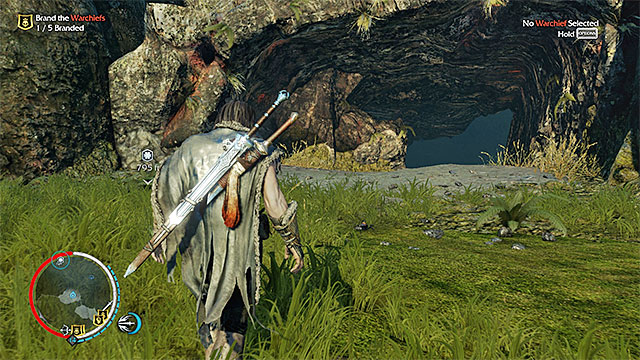 The entrance to the big cave
The artifact is in a big cave in the Eastern part of Nurn, i.e. the one that you visit during the twelfth mission of the game. If you visit the cave during the day, you should watch out for the orc patrols (walk around them or attack them) and, if you go there at night, expect to fight several groups of ghuls.
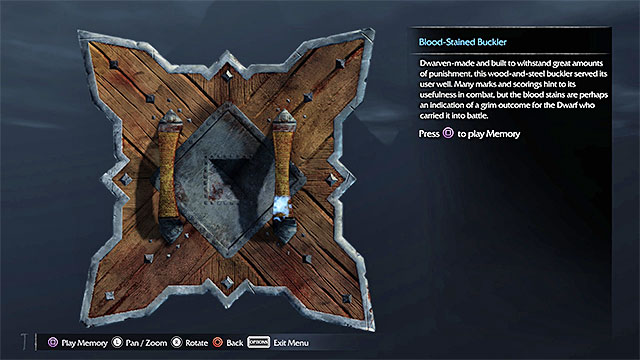
You need to reach the East-most part of the cave complex, because this is where the artifact is. After you add the artifact to your inventory, locate the interactive point shown in the above screenshot and play the memory.
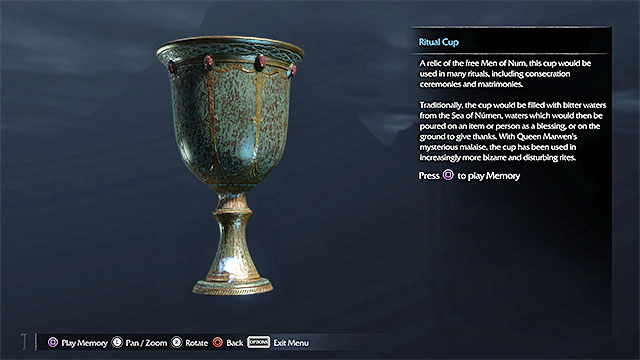
This artifact is on the ground, under a stone bridge. After you add the artifact to your inventory, locate the interactive point shown in the above screenshot and play the memory.
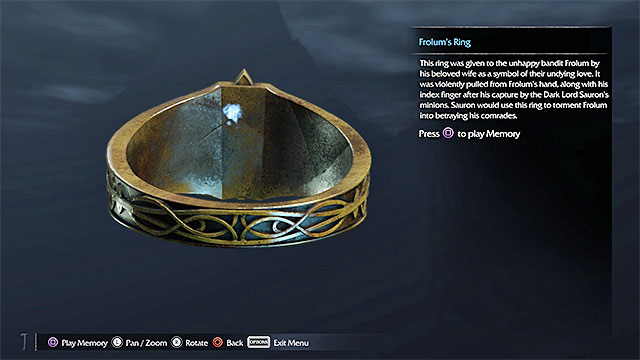
The artifact atop the tower in the ruins. After you add the artifact to your inventory, locate the interactive point shown in the above screenshot and play the memory.
In Middle Earth: The Shadow of Mordor you can try to complete ten different Survival Challenges. They are optional but, they grant you with a quick and quite easy way to earn gold (Mirian), thanks to which you will be able to unlock new attributes faster. The challenges need to be completed one after another in the predetermined order (they have been listed below). This means that, up until the moment, at which you meet all of the requirements of a challenge, the next one does not become available. Survival challenges are very easy and they only require you to find certain species of plants. The only thing that you need to do is keep an eye on the map and search for the herb icons.
Note - The game may also notify you of the plant, with a clue on the screen, after you come close to the plant that you are searching for.
You can review your progress, in the survival challenges, at any moment, after you bring up the world map - they then display on the left. The important piece of news is that you can complete challenges at any point in the game - while exploring the game world, or while completing the main and the side missions. Personally, I recommend that you take interest in them as soon as possible, thanks to which you will not have to return to them, after you have completed all of the missions in the game.
Note - there are situations, in which you will not have access to the successive survival challenges. In such situations, you need to make a sufficient progress into the storyline.
You need to find the following plants:
The reward: 100 gold pieces (Mirian)
You need to find the following plants:
The reward: 105 gold pieces (Mirian)
You need to find the following plants:
The reward: 115 gold pieces (Mirian)
You need to find the following plants:
The reward: 130 gold pieces (Mirian)
You need to find the following plants:
The reward: 150 gold pieces (Mirian)
You need to find the following plants:
The reward: 180 gold pieces (Mirian)
Note! This Challenge (as well as the three following ones) becomes available after you have gained access to the Nurn area, i.e. after you have progressed to the twelfth game mission (The Messenger).
You need to find the following plants:
The reward: 220 gold pieces (Mirian)
You need to find the following plants:
The reward: 270 gold pieces (Mirian)
You need to find the following plants:
The reward: 330 gold pieces (Mirian)
You need to find the following plants:
The reward: 400 gold pieces (Mirian)
In Middle Earth: Shadow of Mordor, you can complete ten different Hunting Challenges. They are optional but, they grant you with a quick and quite easy way to earn gold (Mirian), thanks to which you will be able to unlock new attributes faster. The challenges need to be completed one after another in the predetermined order (they have been listed below). This means that, up until the moment, at which you meet all of the requirements of a challenge, the next one does not become available. Hunting challenges assume that you hunt down various animals, both hostile and non-hostile. These challenges are discernibly more difficult than Survival challenges, because locating the beasts Ti be hunter May Take some time.
Note - The game may also notify you of the plant, with a clue on the screen, after you come close to the beast that you are searching for.
You can review your progress, in the hunting challenges, at any moment, after you bring up the world map - they then display on the left. The important piece of news is that you can complete challenges at any point in the game - while exploring the game world, or while completing the main and the side missions. Personally, I recommend that you take interest in them as soon as possible, thanks to which you will not have to return to them, after you have completed all of the missions in the game.
Note - there are situations, in which you will not have access to the successive survival challenges. In such situations, you need to make a sufficient progress into the storyline.
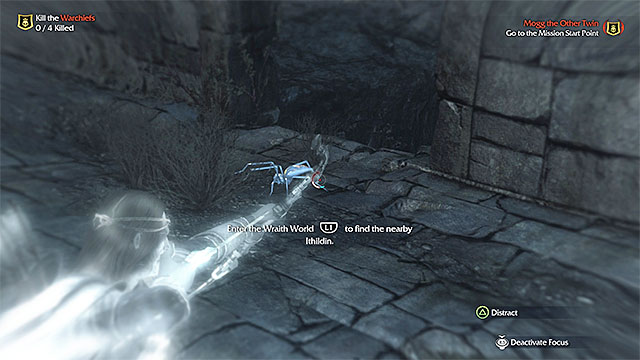 An example spider
To complete this challenge, you need to find, and kill, three small spiders. The spiders are not hostile towards you and stay near the3 forge tower that you activated, after you have completed the prologue. To locate the spiders, use the Wraith mode and eliminate them with, e.g. the bow.
The reward: 100 gold pieces (Mirian)
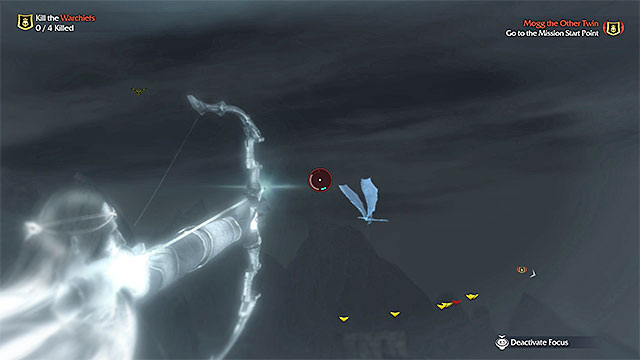 An example bird
To complete this challenge, you need to locate and kill five Flying Creatures. This means different species of birds, i.e. creatures that are not hostile towards you. The best time of the day, to search for the fowl, is the daylight and use the Wraith mode to locate the targets. Attack the birds with the bow, necessarily with time-slowing on (focus).
The reward: 105 gold pieces (Mirian)
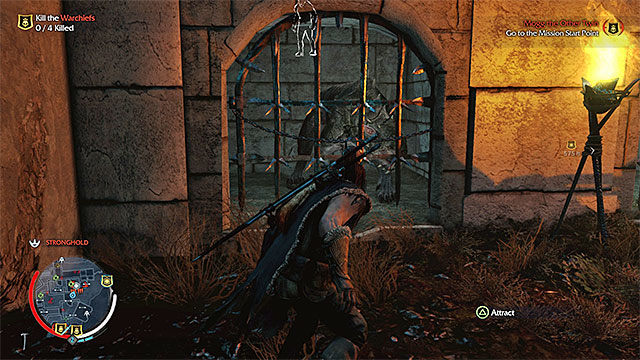 The most caragors are in the enemy strongholds
To complete this challenge, you need to find and kill three caragors. The beasts appear in some of the game's missions, but you can also find them during the free exploration of the game world. In this case, it is better to visit the orc strongholds and look around for the cages with caragors in. I recommend that you use the bow, for the elimination of caragors, although you can, just as well, defeat them in melee (perform flawless dodges then), or eliminate a monster after you have harnessed it (the caragor will not put up any fight, then).
The reward: 115 gold pieces (Mirian)
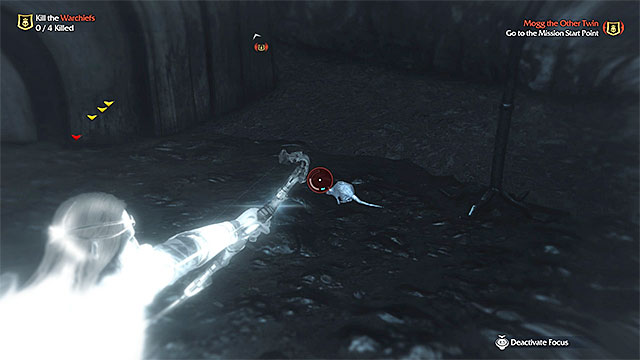 An example rat
To complete this challenge, you need to find and kill four rats. The rodents are not hostile towards you and it is most likely that you find them, while staying at an orc stronghold. To locate the animals, use the Wraith mode and eliminate them with the bow.
The reward: 130 gold pieces (Mirian)
 You get to defeat the most ghuls, while completing missions
To complete this challenge, you need to find and kill eight ghuls. You are the most likely to encounter them, while completing the main missions of the game, but you can run into them, while exploring the game world freely (visit caves at night). Definitely, the fastest way to kill ghuls is in melee, and by using the Wraith Flash.
The reward: 150 gold pieces (Mirian)
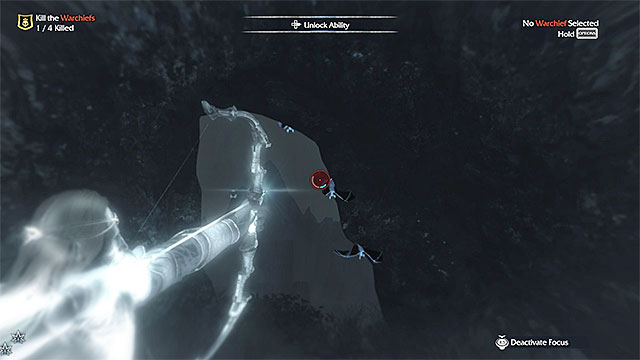 An example swarm of bats
To complete this challenge, you need to find and kill three Bats. I recommend that you look around for them in the caves 0 there is a high probability that they appear while you are entering, or leaving the cave (use the Wraith mode to locate them). Since bats can rise to flight as soon as you approach them, be prepared to whip out your bow and make sure that you have lots of focus (slowing down of time).
The reward: 180 gold pieces (Mirian)
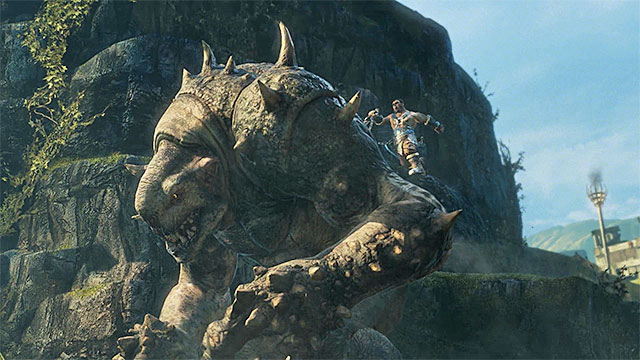 You can either wait for the appropriate mission, or find a graug yourself
To complete this challenge, you need to find and kill a Graug. These monsters sometimes appear on the map, in the free exploration, but my opinion is that it is better to wait until main mission fifteen, (Hunting Partners). What speaks for that is that this mission revolves entirely around hunting down the graug and it shows you the steps that you need to take, in order to defeat the monster: surprise attack that induces bleeding, harnessing a caragor, stunning the graug with an arrow to the head, dominating the graug performing an execution on it.
The reward: 220 gold pieces (Mirian)
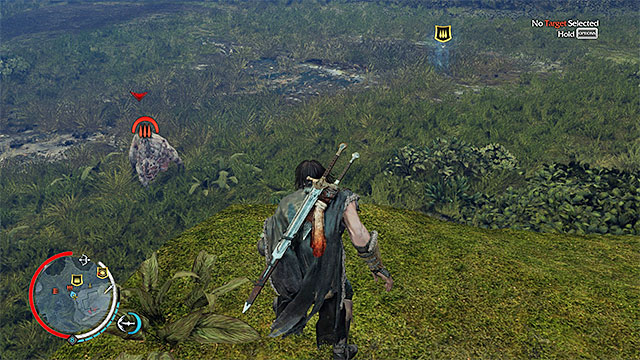 You can find a stronger caragor out in the wild
To complete this challenge, you need to find and kill a Dire Caragor. this is a stronger variety of the regular ones. You cannot find these captive in the stronghold cages. You can try to find the dire caragor on your own and, to do that, explore vast open areas. Use the Wraith mode to your advantage, thanks to which you can easily spot the caragors marked in red (instead of blue). Optionally, you can wait until you progress to The Great White Graug main mission, because killing the dire caragor is one of its parts. In theory, you can defeat the beast in direct fight (I recommend that you use the bow and dodge), but it is much easier to complete this challenge by harnessing the beast. After you mount the dire caragor, you simply need to confirm that you want to execute it and the monster will be incapable of fighting back.
The reward: 270 gold pieces (Mirian)
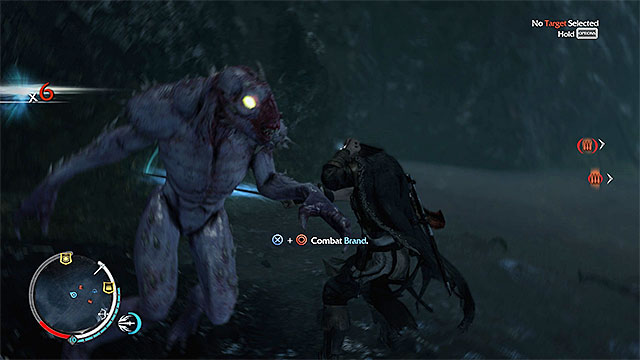 You can encounter the matron, while exploring the world, or during one of the missions
To complete this challenge, you need to find and kill a Ghul Matron. You confront the matrons, among others, during the Nameless Things side mission (Weapon Legends missions), and in the twelfth main mission (The Messenger). If you have missed the opportunity, try to visit the big cave in the Eastern part of Nurn (the second main area of the storyline), at night. After you defeat several groups of the regular ghuls, there will appear one, or several matrons in the cave. While fighting a matron, remember to dodge from its strong attacks, because the regular countering is ineffective. Also, use special attacks that the monster is vulnerable to.
The reward: 330 gold pieces (Mirian)
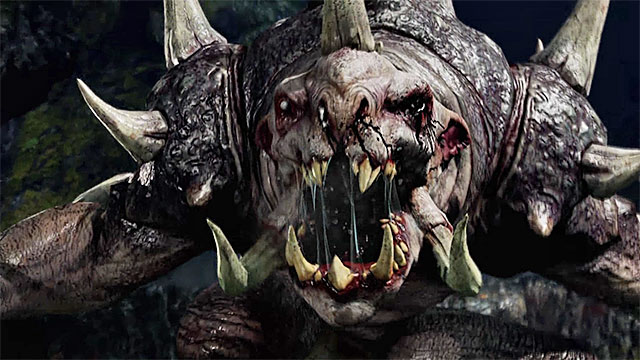 You can encounter the Horned Graug during free exploration, or during one of the main missions
To complete the last challenge, you need to find and kill a Horned Graug. It is a stronger version of the regular graug that you had to hunt down in the seventh hunting challenge. You can either set out to find the graug on your own, or wait for The Great White Graug main mission, because it is towards its end that you fight the Horned Graug. To learn details on how to defeat the monster, see the walkthrough for the abovementioned mission.
The reward: 400 gold pieces (Mirian)
Below, you can find a list of all the achievements, alongside descriptions of how to unlock them. Only the ones that are present in the basic version of the game, have been listed (new achievements become available after you have installed DLCs). The list is based on the achievements available in the PC version, and these are Steam achievements. They are the same as the ones available in the versions for Microsoft's consoles (Xbox 360, Xbox One) and trophies from the versions for Sony consoles (PlayStation 3, PlayStation 4).
Way to unlock: You need to unlock two bow rune slots.
Commentary: To obtain this achievement, you need to buy (for gold) an appropriate attribute and these have been described on the page entitled Attributes.
Way to unlock: You need to dominate an orc.
Commentary: You obtain this achievement as you progress in the main storyline as you progress in the main storyline and you cannot skip it.
Way to unlock: Lift the curse from Lady Marwen.
Commentary: You obtain this achievement as you progress in the game's main storyline and you cannot skip it.
Way to unlock: As you ride a caragor, free 30 slaves within 3 minutes.
Commentary: What is the most problematic is to find an area appropriate to complete this requirement. You can, for example, go to the Black Gate in Udun. Regardless of the area that you pick, ride the caragor to reach successive prisoners. Attack ONLY those of the orcs that are standing the closest to the outcasts and leave the area as soon as you notice that the prisoners have been freed (started escaping). You can reach the individual locations by using the caragor's sprint and locate them, using the Wraith mode.
Way to unlock: You need to witness the Ring of Power being crafted.
Commentary: You obtain this achievement as you progress in the main storyline and you cannot skip it.
Way to unlock: You need to find all the artifacts and watch all of the memories that they carry.
Commentary: You can learn how and where to find all of the 42 artifacts from the chapter entitled Collectibles - Artifacts. Also, you will find there screenshots that show the interactive points that play the memories.
Way to unlock: You need to brand five bodyguards of a Warchief and make them betray the Warchief.
Commentary: The important difficulty of this achievement lies in that you will not be able to meet the requirements until there are five guards accompanying a Warchief. Usually, Warchiefs are accompanied by 2-3 guards and this means that you need to make other orcs join his guard. You can use branding of Captains, to your advantage, here. After you brand the Captain, have him perform the mission that will allow him to join that Warchief's guard. You also need to brand those of the Captains that have already been on the Warchief's guard. In this case, you need to drag them over to your side. Ultimately, you should cause a situation where the selected Warchief has five guards and each one of them is branded by Talion. Attract the attention of that boss, attack him and, finally, make sure that you activate the five guards. They will then attack the Warchief and you will unlock the achievement.
Way to unlock: You need to start Riots, by having one Warchief attack another one.
Commentary: Start by Branding any of the Warchiefs and you can learn how to do that, among others, from the walkthrough for the Additional Mission: Brand the Warchiefs. After you brand him, open the window of the Sauron's Army, select the branded orc and command him to attack any other Warchief.
Way to unlock: You need to eliminate the guards of a total of two different Warchiefs then, lure each of them out and kill them.
Commentary: Start by bringing up Sauron's window to see who the guards, of the selected Warchief, are. Reach each of the guards of that Warchief and kill them. After the Warchief loses all of his guards, complete the side mission connected with luring him out. The last step that you need to take is defeat the Warchief that appears in the battlefield, thanks to the optional mission that you have just completed. To learn more, see the chapter entitled Sauron's Army.
Way to unlock: You need to have the monument destroyed.
Commentary: You obtain this achievement as you progress in the main storyline and you cannot skip it.
Way to unlock: You need to exploit one of the weaknesses of a Warchief.
Commentary: Warchiefs have various fears (e,g, from caragors) and you can learn about them from the windows with their weaknesses. Cause a situation, which causes fear in the Warchief (e.g. lure a caragor near him). To learn more about the orc weaknesses, see Sauron's Army.
Way to unlock: You need to defeat one of the bosses of the game - The Hammer.
Commentary: You obtain this achievement as you progress in the main storyline and you cannot skip it.
Way to unlock: You need to defeat the final boss of the game.
Commentary: You obtain this achievement as you progress in the main storyline and you cannot skip it.
Way to unlock: You need to learn the events from the past.
Commentary: You obtain this achievement as you progress in the main storyline and you cannot skip it.
Way to unlock: You need to unlock four slots for dagger runes.
Commentary: To meet this requirement, you need to buy (for gold) appropriate attributes and they have been presented in Attributes.
Way to unlock: You need to complete any Vendetta mission.
Commentary: Vendetta mission appear in random places and moments of the game (the red skull icons), ONLY if you are connected to the Internet. The aim of each mission is to avenge another player, who died killed by an orc. You need to reach the location and kill the monster.
Way to unlock: You need to kill 5 Warchiefs of the Sauron's Army, before any of them are replaced with another orc.
Commentary: The best moment to obtain this achievement is while completing the Additional Mission: Kill the Warchiefs.
Way to unlock: You need to complete one of the Dagger Legends missions.
Commentary: You can choose any of the Dagger Legends (there are 10 of them) and they have been described in chapter entitled Dagger Legends.
Way to unlock: You need to complete one of Bow Legends missions.
Commentary: You can choose any of the Bow Legends (there are 10 of them) and they have been described in chapter entitled Weapon Legends.
Way to unlock: You need to complete one of the Sword Legends missions.
Commentary: You can choose any of the Sword Legends (there are 10 of them) and they have been described in chapter entitled Weapon Legends.
Way to unlock: You need to complete four Hunting Challenges.
Commentary: The aims of Hunting Challenges have been described in the chapter entitled Hunting Challenges.
Way to unlock: You need to complete all 10 Bow Legends missions.
Commentary: The Bow Legends missions have been described in the chapter entitled Weapon Legends.
Way to unlock: You need to unlock three slots for sword runes.
Commentary: To meet this requirement, you need to buy (for gold) appropriate attributes and they have been presented on Attributes.
Way to unlock: Save Ithariel.
Commentary: You obtain this achievement as you progress in the main storyline and you cannot skip it.
Way to unlock: You need to Brand an enemy Captain in combat.
Commentary: You can try to meet this requirement only after you have gained access to the branding ability and after you have bought the Combat Drain ability. After the fighting starts, bring up the multiplier to the level that allows you to use one of the special attacks (8x by default). Face the Captain and press the combat draining key/button combination.
Way to unlock: You need to complete all 10 Dagger Legends.
Commentary: The Dagger Legends missions have been described in the chapter entitled Weapon Legends.
Way to unlock: You need to poison a Captain during his own feast.
Commentary: The first step is unlocking the Poison ability You then need to wait until there appears a yellow marker, on the map, connected with feast thrown by one of the Captains. After you start the mission, approach the grog barrel, without being seen and pour poison in. You then only need to wait for the Captain to have some grog.
Way to unlock: You need to complete all hunting challenges.
Commentary: The aims of Hunting Challenges have been described in the chapter entitled Hunting Challenges.
Way to unlock: You need to brand 5 Warchiefs.
Commentary: You can obtain this achievement at any moment, starting with the moment at which you obtain the branding ability. To learn more about effective branding of Warchiefs see the page entitled Additional Mission: Brand the Warchiefs, among others.
Way to unlock: You need to send a Death Threat to one of the members of the Sauron's army and kill him.
Commentary: Start by unlocking the Death Threat ability. Grab any of the informant orcs and select Threat from the list. It is best to send it to one of the Captain, because you may have problems defeating a stronger Warchief. Finally, reach the orc and kill him in combat.
Way to unlock: You need to execute a burning Berserker.
Commentary: After you have located one of the berserkers in the game world, you can set him on fire in any way you want - by causing an explosion (barrels, campfire), with fire arrows or by grabbing him and tossing him into a fire. The important thing is that the monster cannot die prematurely. Execute him in any way you want to obtain this achievement.
Way to unlock: You need to complete all 10 Sword Legends.
Commentary: The Sword Legends missions have been described in the chapter entitled Weapon Legends.
Way to unlock: You need to find all of the Ithildin runes.
Commentary: Information on how to find all 32 Ithildin runes has been provided in the chapter entitled Collectibles -Ithildin Runes.
Way to unlock: You need to complete all survival challenges (schools of survival).
Commentary: All of the Survival challenges have been described in the chapter entitled Survival Challenges.
Way to unlock: You need to help Ratbag being promoted to a Warchief.
Commentary: You obtain this achievement as you progress in the main storyline and you cannot skip it.
Way to unlock: You need to find 25% of the artifacts.
Commentary: You can learn how and where to find all of the 42 artifacts from the chapter entitled Collectibles - Artifacts.
Way to unlock: You need to use the Strike from Above attack, while at least 60 above your target.
Commentary: It is best to use the Strike from Above after you climb to the top of one of Forge Towers and wait for an orc to come by.
Way to unlock: You need to drive away 20 orcs by dropping Morgai Flies' nests on them.
Commentary: It is best to look for the nests at the orc strongholds with the Wraith mode. After you find one, make sure that there are monsters under it and use the bow to knock it off.
Way to unlock: You need to defeat one of the game's bosses -The Tower.
Commentary: You obtain this achievement as you progress in the main storyline and you cannot skip it.
Way to unlock: You need to set on fire, a total of 50 orcs with the Detonate ability.
Commentary: Start by unlocking the Detonate ability. Then, start searching for the opportunities to aim the bow at campfires and at grog barrels, where there are orcs nearby.
Way to unlock: You need to obtain a 25 tier rune.
Commentary: It is not easy to obtain a tier 25 rune and you need to rely on your luck. Cause a situation, in which any Warchief of the Sauron's Army is promoted to the highest, 20th level. You can help him, e.g. by letting him kill you several times in a row. Attack him and try to use his weaknesses, in combat (e.g. fear of fire). All this increases the odds of dropping the most valuable rune, after you kill that orc. If you receive an epic rune, instead of one of the 25th tier, try again with a different monster.
Way to unlock: You need to help a Captain survive recruitment and then kill him and all the new recruits.
Commentary: In general, this means that you perform all of the actions that you did in The Power of the Wraith. Start by attacking and branding any Captain. You then need to have the Captain join the guard of any of the Warchiefs and start his recruitment mission. While completing that mission, help your Captain eliminate more and more orcs. After he completes the mission, have him commit suicide and eliminate all of the new helpers.
Way to unlock: You need to complete one of the Outcast Rescue Missions.
Commentary: You can pick any of the Outcast Rescue Missions (there are 24 of them) and they have been described in the chapter entitled Outcast Rescue Missions.
Way to unlock: You need to activate all of the Forge Towers.
Commentary: You can try to meet this requirements only after you arrive in Nurn. You need to activate all of the towers in both of the main locations of the game.
Way to unlock: You need to complete all of the Outcast Rescue Missions.
Commentary: There are 24 of them and they have been described in the chapter entitled Outcast Rescue Missions.
Way to unlock: You need to let your character killed by an orc, after he becomes a Captain help him being promoted to a Warchief and kill him.
Commentary: This is not too difficult to achieve, but it is time-consuming. Start by approaching any of the orcs. Do not attack him and let him kill you. Thanks to this, he will be promoted to the Captain. It is best to brand him now. Attack the Captain in question, but do not kill him. Brand him only. The next step is to have the Captain attack a Warchief. Finally, you only need to command him to commit suicide If you want to learn more about the main part of the above process, see the walkthrough for The Power of the Wraith main mission.
Way to unlock: You need to find 50% of the Ithildin runes.
Commentary: Information on how to find all 32 Ithildin runes has been provided in the chapter entitled Collectibles -Ithildin Runes.
Way to unlock: You need to lure 5 caragors thanks to throwing off the bait.
Commentary: The place where it is the easiest to find the baits are orc strongholds. You can find them with the Wraith mode. After you locate the bait, aim the bow at it and have it drop.
Way to unlock: You need to defeat the legendary graug.
Commentary: You obtain this achievement as you progress in the main storyline and you cannot skip it.
Way to unlock: You need to free 5 caragors from cages.
Commentary: To free a captive caragor, aim the bow at the padlock of the cage. After you destroy it, the beast opens the gate by itself.
Way to unlock: You need to complete Survival Challenge (schools of survival).
Commentary: All of the Survival challenges have been described in the chapter entitled Survival Challenges.
The PC version of Middle-Earth: Shadow of Mordor has moderate system requirements. To start the PC version, you need an Intel Core i5-750 CPU, GeForce GTX 460 and a 64-bit operating system. If you want to set the details to the highest level, you are going to need a high-performance eight-core Intel Core i7 processor, 8 GB RAM and, at least GeForce GTX 660 graphics card. For this walkthrough, we have been using the PlayStation 4 version and the quality of graphics, on the console, is comparable with the highest setting on the PC. During the game, there appeared occasional chopping, especially during heated fights with the orcs and while launching AoE attacks. There is no multiplayer mode in the Middle-Earth: Shadow of Mordor and it concentrates on the single player campaign only. At this point, it is worth noting that it requires you to have access to the Internet, because it is required for one of the achievements in the game (avenging the death of another player).
Singleplayer: Yes
Offline co-op (split screen/hot seat): No
Co-op over the Internet: No
Multiplayer: No
Yes, it is possible to play Middle-Earth: Shadow of Mordor on laptop computers, but it needs to be a high-end model, i.e. with a processor and a graphics card of high performance and, at least, 3GB RAM.


 Mass Effect 2 Game Guide & Walkthrough
 Mortal Kombat X Game Guide & Walkthrough
 Men of War: Vietnam Game Guide & Walkthrough
 Metal Gear Rising: Revengeance Game Guide & Walkthrough
 Mortal Kombat Game Guide & Walkthrough