
This F.3.A.R (or Fear 3) walkthrough will help you complete the campaign and deal with the most difficult fights. Additionally here you have the chapter with the locations of the Alma Dolls.
F.3.A.R is an action game mixing the elements of FPS shooters and survival horror. It means you have to rely on your gun and skills which will be thoroughly tested in the environment full of terrifying paranormal activities going around and enemies behaving in very unusual way.
The first time is always the most important. In F.3.A.R the enemies are generated randomly. Unfortunately that means you will never experience the same things while playing again. To fully enjoy the game you need to be prepared for having fun with your own fear, so remember about the right surrounding. Play after dark, in silence (or with huge headphones) in a room where the only source of light is your monitor.
Description of used marks:
[1], [2] - numbers in brackets indicate the screens above the text. One means the left picture, two means the right one.
[#1.1], [#2.1], [#2.2] - numbers in brackets with # means that the Alma Doll is somewhere near. To find the exact place please check the chapter "Alma Dolls" and look for the description starting with the given numbers.
Requirements:
Component
Minimal requirements:
Recommended requirements:
OS
Windows XP
Windows 7
Processor
Intel Core 2 Duo 2.4 GHz
AMD Athlon x2 4800+ 2.5GHz
Intel Core 2 Duo 2.93 GHz
Intel Quad Core 2.66 GHz
AMD Phenom II x2550 3, 06GHz
Graphics
NVIDIA 8800 GT 512 MB RAM
ATI HD 3850 512MB RAM
NVIDIA 9800 GTX+ 512MB RAM
ATI HD 3850 512MB RAM
RAM
2GB
4GB
DirectX
9.0c
11

- The location of the corpses with which you can have a link is generated randomly.
- Each level contains one Alma Doll. Its location at the first level is always the same and random in next ones.
- Fight takes place in the same location but the enemies are generated party randomly. When you repeat the given stage of the game you may be attacked from other side.
- When you play as Point Man you can slow down the time by using the energy. That manipulation helps aiming at the enemies and control the battlefield.

- In solo campaign you can play as Fettel on one condition - you need to finish it first as Point Man.
- As Fettel you can use energy to overtake the enemies and blow them up. When you overtake someone you will lose energy till you run out of it which means the death of your host. To replenish the energy when you posses someone you need to pick the "souls" of the killed opponents.
- You should not blow up enemies when you are surrounded by many of them. That way of eliminating opponents costs a lot of energy which means you cannot posses another body until you regenerate.
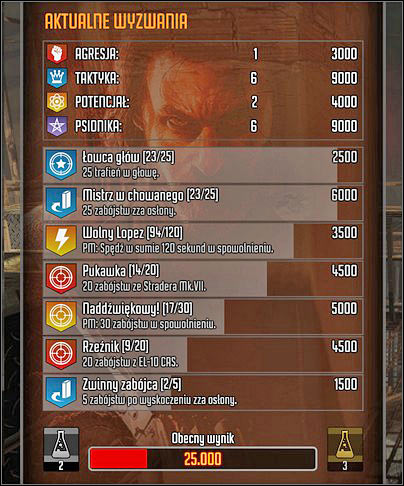
- During the missions you can try to complete the challenges. The reward is additional points which change your rank. When you get a new rank you get bonuses increasing the effectiveness of your hero.
- You can use the flashlight in the dark corridors but remember that the enemies can locate you faster because of that.
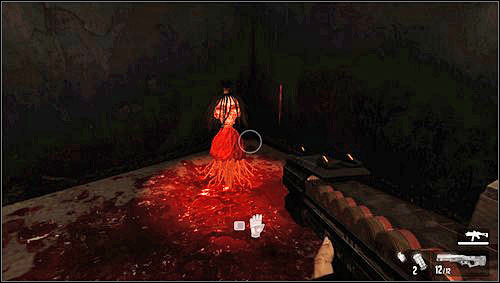
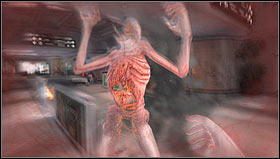
- Later in the game you will see the vanishing monster. You cannot kill it but you can scare it with few shots or hits.
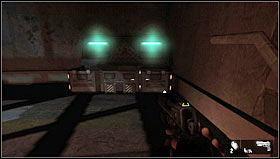
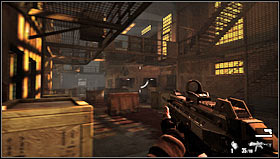
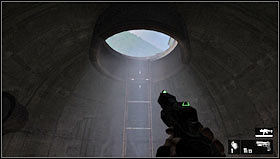
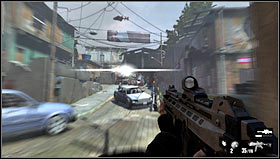
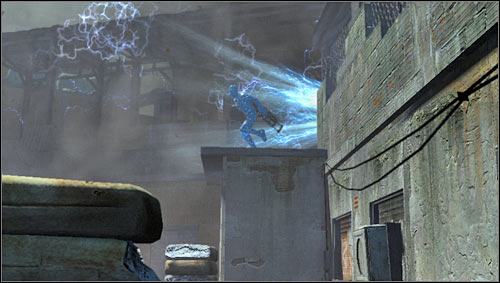
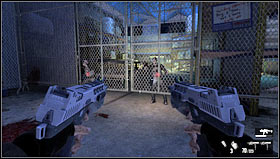
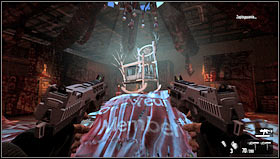
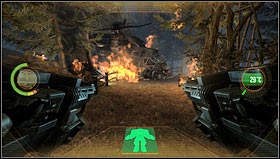
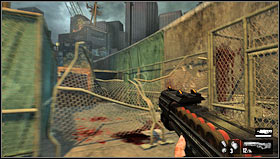
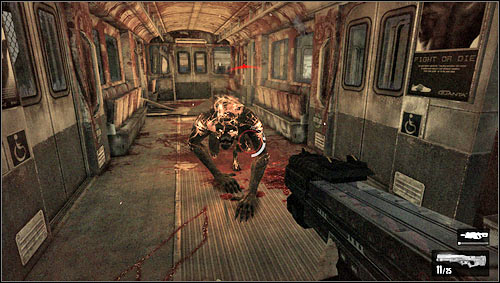
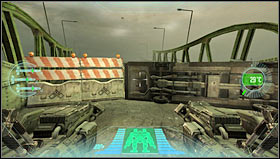
The game starts with a brief introduction. Fettel helps Point Man to kill two guards [1].
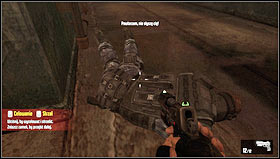
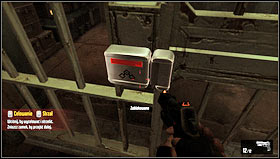
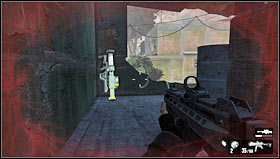
Your first task is to escape from the prison. Go down the corridors and you will see the soldier messing up with the lock. Kill him using the knife and take his gun [1]. You will get to the grille with electronic lock [2] destroy it and open the passage.
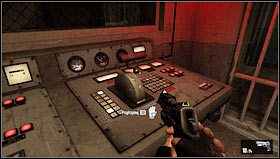
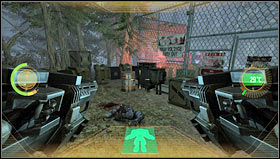
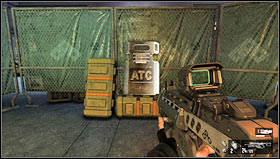
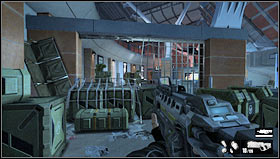
You will face another enemy. Take cover, kill him and enter the room with the consoles controlling the locks on the grilles. Move the bar [1] and go through the open grille. Fight the two soldiers and get through the double door to the staircase. You will find the chest [2] with grenades and pistol. Pick everything and go upstairs.
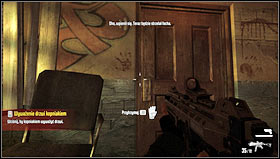
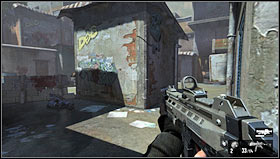
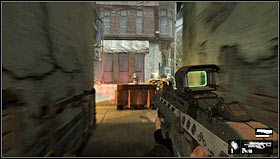
Eliminate the enemies by throwing grenades at them and take their weapon. You should go through the double door. On the right you will pass the room with the wooden door [1]. You can get inside through the window and find some guns and grenades inside. You will get to the room where you will hear the guards talking. To get to them you have to batter down the door [2]. Kill them. You can slow down the time for a moment. This can help you eliminate the opponents.
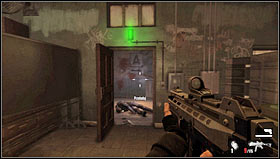
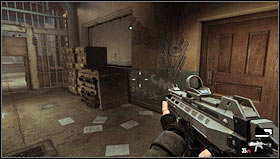
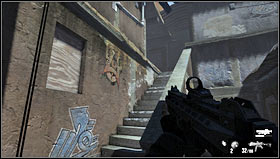
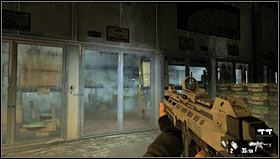
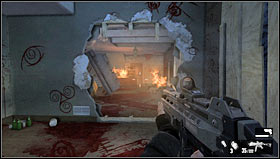
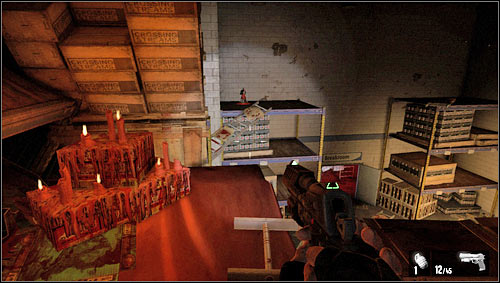
![After the fight collect the weapon and go through the door with the green light [1] - Level 01: Prison - Walkthrough - F.3.A.R. - Game Guide and Walkthrough](https://game.lhg100.com/Article/UploadFiles/201512/2015121518434444.jpg)
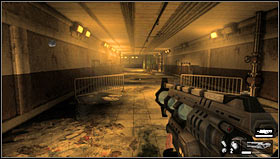
After the fight collect the weapon and go through the door with the green light [1]. You will end up in a dark corridor. At its end you will find corpse [2] with which you can establish "the mental link". In the dark you can use the flashlight. Turn it on or off by pressing the "F" button.
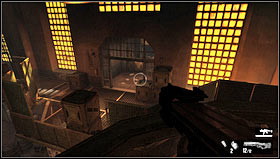
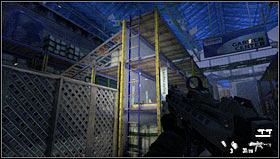
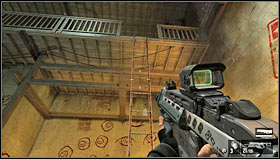
![Soon you will enter the three-level prison block [1] where you will fight several enemies - Level 01: Prison - Walkthrough - F.3.A.R. - Game Guide and Walkthrough](https://game.lhg100.com/Article/UploadFiles/201512/2015121518434435.jpg)
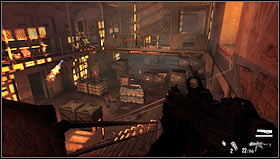
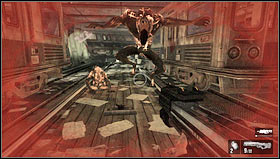
Soon you will enter the three-level prison block [1] where you will fight several enemies. Remember to use the covers and run away from the grenades. You will find many enemies on the upper floors where they have a good position to shoot at you. The shortest way up is to go on the right near the entrance. You need to shoot at the electronic lock on the grille. When you kill the enemies search the location to find some chests with weapon [2].
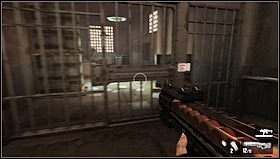
![On the first floor there is a passage [1] to the staircase - Level 01: Prison - Walkthrough - F.3.A.R. - Game Guide and Walkthrough](https://game.lhg100.com/Article/UploadFiles/201512/2015121518434442.jpg)
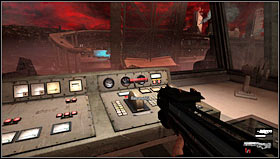
On the first floor there is a passage [1] to the staircase. It will lead you to the control room where the switch will open the grille. Few soldiers will run into. Kill them and use the exit [2].

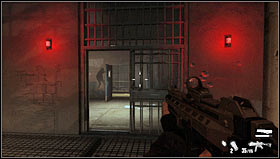
![The corridors will lead you to the wooden door [1] on the left - Level 01: Prison - Walkthrough - F.3.A.R. - Game Guide and Walkthrough](https://game.lhg100.com/Article/UploadFiles/201512/2015121518434411.jpg)
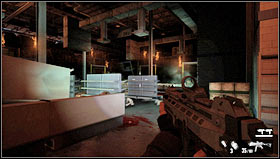
The corridors will lead you to the wooden door [1] on the left. Go through it and kill the enemies. In the canteen beware of a larger group of soldiers. On the left near the entrance you will find the chest with the weapon closed in the room. Go through the kitchen turn left and go upstairs [2].
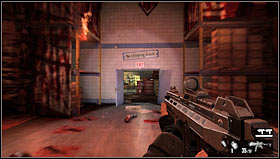
Kill the enemies on your way to the control room. You can leave it by moving the bar or smashing the electronic lock [1]. The second option is better because you will find the chest with weapon. Behind another grille a fight awaits you. Leave the level by going over the canteen through the door marked with red lamps [2].
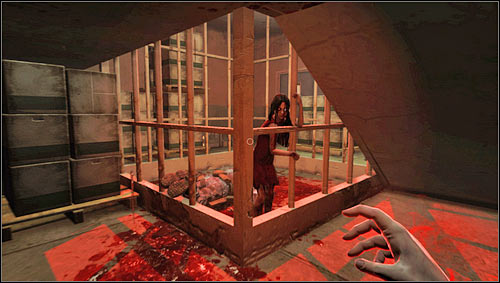
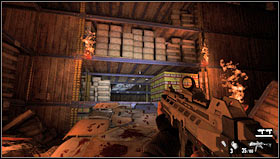
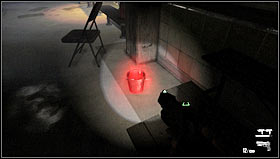
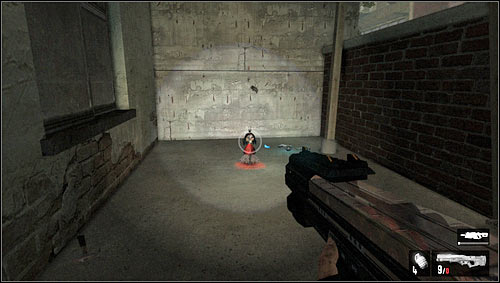
You will be at the staircase [#1.1] go down smashing the electronic lock. At the lower level under the stairs you will find the Alma Doll [1]. Pick it and leave the staircase through the double door.
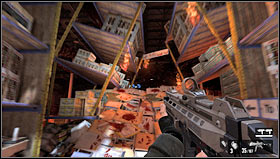
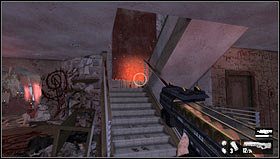
Go down the corridor and you will see some disturbing things. Then choose the right path and go through the grille to get to another staircase [1]. At its top open the double door through which you will get to the one of the prison's blocks [2].
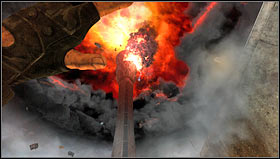
When you take care of the upper lever go downstairs and do not stop eliminating enemies. Gas explosion with block your way. To walk around it enter the open cell. You will find a hole in the wall [1]. You can get through it to a narrow passage which will help you walk around the fire. When you leave the other cell go downstairs to the lowest prison's block [2]. When you kill all the enemies a series of explosions will take place and you will see a short cut-scene. Then you will get to the sewers.
![When you wake up get to the end of the corridor and jump down to the tunnel on the right [1] - Level 02: Slums - Walkthrough - F.3.A.R. - Game Guide and Walkthrough](https://game.lhg100.com/Article/UploadFiles/201512/2015121518434542.jpg)
When you wake up get to the end of the corridor and jump down to the tunnel on the right [1]. After a short walk you will get to the end of the tunnel and you will have a short vision. You will find here the entrance to the maintenance corridors [2].
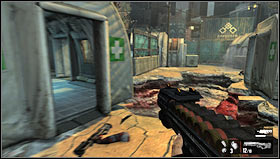
In the short passage leading to the next part of the tunnels you find a gun. When you enter the spacious room [1] take the main route. When you open the floodgate someone will hit you hard and then you will see the massacre of the soldiers [2] Pick the weapon they left and move on.
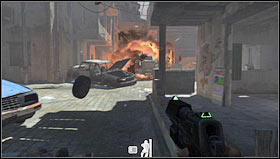
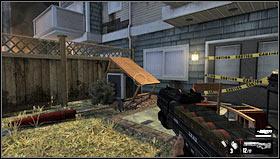
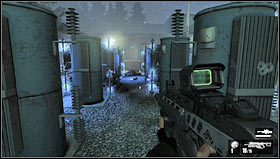
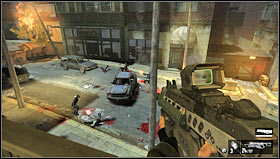
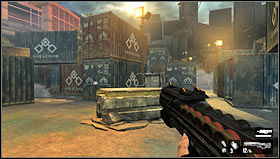
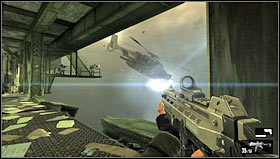
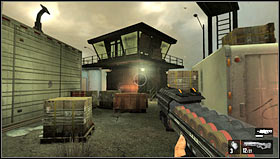
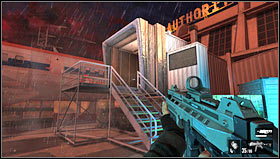
Next you will leave the maintenance passage. Jump over the barrier to get to the other sewer. You will have an easy walk to the ladder [1] leading straight to the surface. When you leave the sewers you will have to kill the enemies and search the map. Go through the small hut. When you do it you will see the arrival of the armored transporter full of soldiers [2] [#2.1]. Go behind the building on the right from the armored vehicle.
![You will enter the square with a statue [1] Prepare for a longer fight with the enemies popping out from different directions - Level 02: Slums - Walkthrough - F.3.A.R. - Game Guide and Walkthrough](https://game.lhg100.com/Article/UploadFiles/201512/2015121518434646.jpg)
You will enter the square with a statue [1] Prepare for a longer fight with the enemies popping out from different directions. To make the task easier you can walk into the building on the left. Upstairs you will find the chest with the sniper rifle.

After the fight search the map and find the ammo. When you are in the building another fight will start [1] near the burning car blocking the road. You will see a small square between some buildings. You can leave this area by taking the stairs [2].
![Enter the building with the hole in the floor [1] through which you can get to the lower floor - Level 02: Slums - Walkthrough - F.3.A.R. - Game Guide and Walkthrough](https://game.lhg100.com/Article/UploadFiles/201512/2015121518434623.jpg)
Enter the building with the hole in the floor [1] through which you can get to the lower floor. When you leave the building kill the enemies and take the stairs leading to a building. Search it. When you get through the wooden door the empty square will again be full with enemies. When you eliminate them go downstairs. After few steps you will be in a narrow alley [2] where you need to eliminate the opponents.
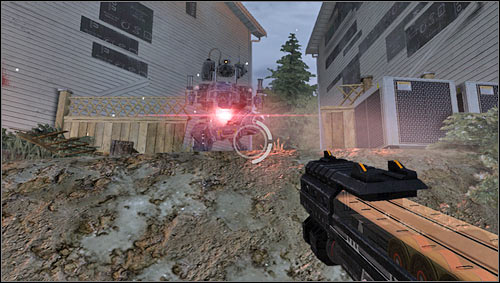
Soon you will get new energy grenades [#2.2] and enter the wider street. Go forward and you will see the arrival of the armored car and the mech [1]. Go immediately to the building on the right. On its top you will find the rocket launcher [2]. Use it to take down the mech. If you run out of rockets use the energy grenades or get to the next building where you will find another rocket launcher. When you are trying to eliminate the mech beware of the attacks of the regular soldiers. Especially pay attention to the grenades they throw.
After the fight search the area and go through the small gate. This leads to the square around the small building [1]. Fight with another Armacham's troops. When you win leave the area using the stairs at the end of the map [2].
You will get to the roofs and you have to steal the helicopter there. Go through the hole in the fence and fight the enemies. There is the "electric soldier" behind them [1].
![His main skill is the usage of the electric beam and teleporting enemies to the battlefield [1] - Level 02: Slums - Walkthrough - F.3.A.R. - Game Guide and Walkthrough](https://game.lhg100.com/Article/UploadFiles/201512/2015121518434726.jpg)
His main skill is the usage of the electric beam and teleporting enemies to the battlefield [1]. The easiest way would be to shoot down the regular soldiers and then take care of the boss. Unfortunately if you do so the extra troops will appear. You need to find a good cover and shoot at the boss. Use the sniper rifle [2]. Few bullets will take him down then you will eliminate the rest of the enemies and get to the helicopter.
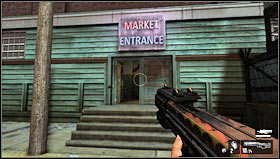
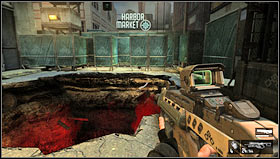
You start next to the entrance to the supermarket having only the pistol. The blood trail leads to the corpse [1] then move on inside the supermarket. Eventually you will get to the yellow stairs [2] which leads to the racks. After passing few horizontal ladders you will be able to jump down to the previously hidden part of the market.
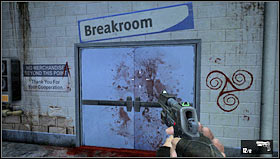
![After passing few more aisles you will get to the 'Breakroom' door [1] - Level 03: Store - Walkthrough - F.3.A.R. - Game Guide and Walkthrough](https://game.lhg100.com/Article/UploadFiles/201512/2015121518434745.jpg)
After passing few more aisles you will get to the 'Breakroom' door [1]. In front of it on the left you can see half lifted door where you can find some ammo. Take it and go through the double door. You will be in front of the toilets. Search the women's one then go to the men's one [2].
After going twice through the 'Exit' door you will enter another big room [#3.1] Inside find the stairs leading to the racks and go right to climb as high as you can. Get to the TV section [1].
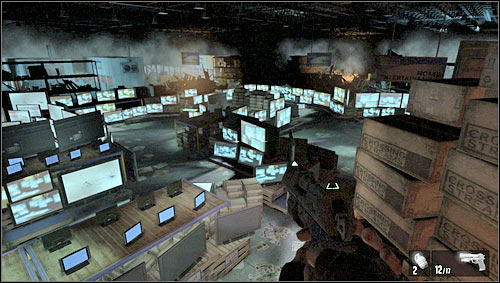
![Walk along the TV-sets and monitors till you find semicircle made of screens [1] - Level 03: Store - Walkthrough - F.3.A.R. - Game Guide and Walkthrough](https://game.lhg100.com/Article/UploadFiles/201512/2015121518434831.jpg)
Walk along the TV-sets and monitors till you find semicircle made of screens [1]. When you jump down cultists will attack you with bare hands and cold steel. After the fight go through the open passage.
![The corridor will lead you to the cold store [1] - Level 03: Store - Walkthrough - F.3.A.R. - Game Guide and Walkthrough](https://game.lhg100.com/Article/UploadFiles/201512/2015121518434811.jpg)
The corridor will lead you to the cold store [1]. The bodies lying there are not necessary corpses. When you leave it go left to the end of the aisle and then right. You will find the closed door to the middle row of the fridges [2] being on the left from the closed entrance. Two Uzi rifles are hidden there and you need to break the glass door to get them.
Take the new toys and go to the end of the aisle where the rack will fall down on you. You can run or move back and wait till it hit the floor [1] and move on. You will get to the spacious area where you will fight the enemies coming from every direction. Instead of looking for a safe shelter it is better to fight. After the fight search the area. You may find ammo or corpses and the passage through the row of the fridges [2].
![After passing few aisles you will get to the cold store with the exit [1] where you also will be attacked by the cultists pretending to be dead - Level 03: Store - Walkthrough - F.3.A.R. - Game Guide and Walkthrough](https://game.lhg100.com/Article/UploadFiles/201512/2015121518434834.jpg)
After passing few aisles you will get to the cold store with the exit [1] where you also will be attacked by the cultists pretending to be dead. When you leave the cold store section search the area behind the rolled door and go to the market's office [2].
Move along the narrow corridors and check every office where you can find some useful stuff. When you pass the rolled door you will get to the garden section [1] where you will meet a new type of the enemies [#3.2]. The suicides with the explosive belt should be eliminated from the distance or they will blow you up. In the second aisle you will find the ladder [2] leading to the racks. The ladder is near the wooden fence.
When you climb enemies will attack you. Eliminate the kamikaze first then the rest. When you walk above some of the aisles jump down and move on [1]. When you are between the racks with the potted plants the small group of enemies coming from every direction will attack you. The fight is close to its end when you see two kamikaze trying to force the closed gate [2]. Shoot at them and they will open you the way.
Go through the rolled door to the dark corridor and after a short vision follow the blood trail on the floor. Pass the section with frozen meat and you will get to another section [1] full of kamikaze and knife-throwing cultists. Kill them and find the way on the racks [2].
![Kill the enemies and get to the TV-set covered with blood [1] marking the passage to the further part of the warehouse - Level 03: Store - Walkthrough - F.3.A.R. - Game Guide and Walkthrough](https://game.lhg100.com/Article/UploadFiles/201512/2015121518434905.jpg)
Kill the enemies and get to the TV-set covered with blood [1] marking the passage to the further part of the warehouse.
Again you need to get through the racks to walk around the pile of garbage that blocks the way. You will get to the ramp [1] behind which you will see the square with a disturbing altar [2]. When you come closer you will be attacked by the cultists throwing knives at you, fighting with their bare hands or having the explosive belts. Try to run around the arena and eliminate those with explosives when you hear the particular ticking sound. That way you will be sure that everyone is behind you and will not surround you or block you. Unfortunately from time to time you will have to turn around to shoot at them. Those who throw knives are reluctant to join the chase so you have to eliminate them "on the run". The other way to deal with the horde is to jump on the cardboard pile and eliminate the enemies around. You will not be entirely safe but some attacks will be blocked. The main flaw of that strategy is that our character is so static, therefore he is the living target for those with knives. Whatever strategy you will choose remember that the kamikaze can hurt also your enemies.
![When you finish the fight the exit door [1] will be opened by some hostile soldiers - Level 03: Store - Walkthrough - F.3.A.R. - Game Guide and Walkthrough](https://game.lhg100.com/Article/UploadFiles/201512/2015121518434975.jpg)
When you finish the fight the exit door [1] will be opened by some hostile soldiers. There is a room behind them where the Armacham troops fight the cultists. When they will finish join in and eliminate the survivors then leave the store using the rolled door [2].
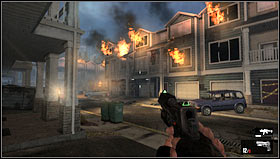
Start by eliminating few soldiers busy with the "clearing" operation [1]. Turn left behind the armored car, kill the enemies and enter the house through the garage door [2].
![Upstairs go through the kitchen to go around the barricade then through the hole in the wall [1] go to the next building - Level 04: Suburbs - Walkthrough - F.3.A.R. - Game Guide and Walkthrough](https://game.lhg100.com/Article/UploadFiles/201512/2015121518435066.jpg)
Upstairs go through the kitchen to go around the barricade then through the hole in the wall [1] go to the next building. Upstairs jump outside through the ruined wall. Eliminate smaller groups of the enemies and get to the slightly damaged house [2] which will lead you to the area with the soldiers.
![Use the table standing against the fence [1] to get to the tiny square with the arbor [2] - Level 04: Suburbs - Walkthrough - F.3.A.R. - Game Guide and Walkthrough](https://game.lhg100.com/Article/UploadFiles/201512/2015121518435029.jpg)
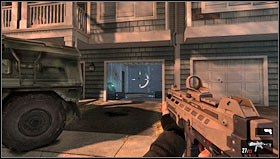
Use the table standing against the fence [1] to get to the tiny square with the arbor [2]. Check the area because soon the single soldiers will appear there.
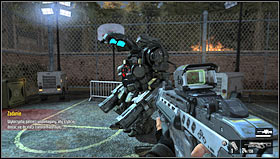
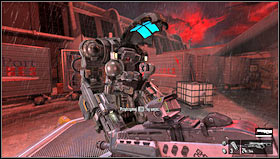
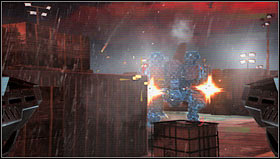
You will find few chests with rifles and grenades. Especially the electric ones will be useful because you will fight the mech [1]. Without the rocket launcher you will not defeat it so easy like it was before. The electric grenades will inactivate the mech for short period of time. Shoot at it, jump to another cover or replenish ammo. It is important to move and not to come to close to the opponent. After the fight go through the new hole in the fence and enter the building.

Cultists pretending to be corpses will attack you when you will move ahead. You will get to the stairs with the couch. Jump downstairs to go around it. Go through the kitchen and you will find the entrance to another building [1]. Find the stairs with the red curtain and go upstairs. [2] Then jump to the dark room. Some cultist will "watch TV" there. Throw a grenade at them and eliminate the survivors.

In the basement wait for the enemies to appear. Your position is quite good as the cultist may reach you only from two sides. After the fight you will have the vision in which you go towards the carousel [1]. After watching short cut-scene you will be in the center of the playground [2].
It is very disadvantageous position so you need to find quickly some cover. The building changed by the military will suite [1]. Beside a good position you will find the sniper rifle there. The fight is be over when the helicopter will have an emergency landing. Go to the fenced basketball court [#4.1]. You will find the mech waiting there for the pilot [2]. Make a good use of it .
![Shoot a the building in front of you and clear the way [1] - Level 04: Suburbs - Walkthrough - F.3.A.R. - Game Guide and Walkthrough](https://game.lhg100.com/Article/UploadFiles/201512/2015121518435184.jpg)
Shoot a the building in front of you and clear the way [1]. Kill the soldiers and continue your march destroying other walls. By the end of the path leading through the row of the houses you will see a hostile mech [2]. It should not be a major problem if you avoid the laser beam.
When you leave the buildings go right. Kill the enemies and get to the burning helicopter [1]. A vision will start and to finish it you need to get to Fettel sitting on the bed. You will be again behind the mech's steering and go to the transformers field. To move on [2] you need to blow up the barrel on the left from the entrance and leave the mech.
![When you kill the soldiers you will have to get on the other side of the field [1] - Level 04: Suburbs - Walkthrough - F.3.A.R. - Game Guide and Walkthrough](https://game.lhg100.com/Article/UploadFiles/201512/2015121518435106.jpg)
When you kill the soldiers you will have to get on the other side of the field [1]. Pick the places without the electric discharge. Get to the building [2] where you will fight the enemies [#4.2].
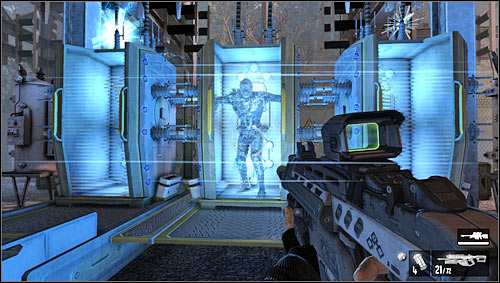
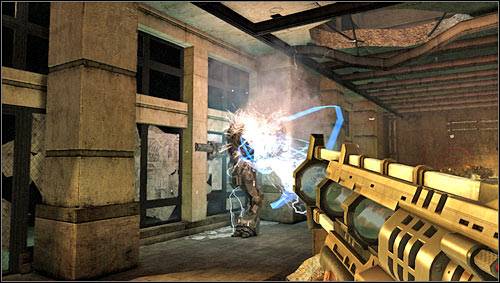
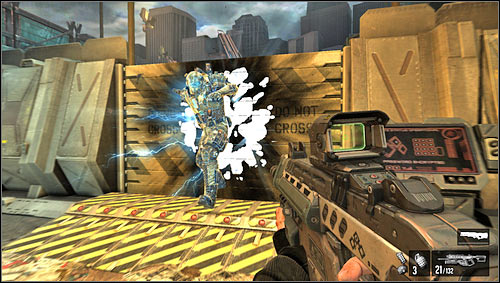
When you pass the lifted gate you will fight the electric soldier covered with the energy shield [1].

![You need to destroy the transformers [1] which give your opponent the power - Level 04: Suburbs - Walkthrough - F.3.A.R. - Game Guide and Walkthrough](https://game.lhg100.com/Article/UploadFiles/201512/2015121518435255.jpg)
You need to destroy the transformers [1] which give your opponent the power. The main obstacle are the minor enemies who appear one after another. When the last transformer blows up the boss will die and open the passage [2] to the next mission.
It starts with the kidnapping of Jin Sun-Kwan by the cultists. You have to find Becket and save Jin. Go down the street till you reach the barricade with the armored car where you can find few pieces of ammo. Then follow the cultists to the cul-de-sac [1] and enter the building. The narrow corridors will lead you to the street [2] where you will fight the soldiers.
When you kill the enemies go to the military checkpoint [#5.1]. Eliminate the enemies and enter the building on the left. Use the blue consol to open the door [1]. You will get to the small backyard between the buildings where you will find the ladder [2]. Use it to climb the fire stairs.
When you get to the roof go on the other side and jump down the balcony after balcony [#5.2]. When you jump down cultists and military will start fighting [1] and they will drag you into it. When you clear the area search it and use the console to open the door [2].

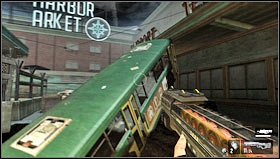
After a short march you will kill the soldiers and go through the rolled gate. When you enter the checkpoint kill more enemies and go to the big gate [1]. It opens for quite long time but you will not get bored. You will be attacked by both the military and the cultists. The fact they do not like each other will help you. When the fight is over go through the double gate and the corridor made of fence. You will get to the quiet street where new holes appear moment after moment. A bus will fall down into one. [2] That will help you to get to the roof of the building on the right. The roof will lead you to the other part of the street.
Continue your march and pass around the holes till you reach the ruined watch tower. Turn right and go through the door [1]. From time to time a monster will attack you [2]. It attacks frontally and you need to scare it with few shots. Eventually the beast will get you and you will leave the building after a short vision.
![Outside you will see the electric soldier [1] who as usual summons help on the battlefield - Level 05: Tower - Walkthrough - F.3.A.R. - Game Guide and Walkthrough](https://game.lhg100.com/Article/UploadFiles/201512/2015121518435369.jpg)
Outside you will see the electric soldier [1] who as usual summons help on the battlefield.
When you eliminate the blue opponent the mech will join the fight before you start eliminating the rest of the soldiers. On the opposites sides of the square there are two chests. The one contains electric grenades and the second rifles shooting with the electric beam [1]. Pick it and start fighting the mech. The most effective way is to use the electric rifle at inactivated by the grenades target. It is important not to stand too close to the enemy - you may by hit and die.
After the fight go through the building and fight more soldiers. Open the gate and enter the building. Just behind the gate pick the shield [1] and fight the enemies hiding behind the turrets. A passage to the underground tunnel will open behind them [2]. The tunnel will collapse and you will not have the way back.
![Start looking for the entrance to the burning high tower [1] - Level 05: Tower - Walkthrough - F.3.A.R. - Game Guide and Walkthrough](https://game.lhg100.com/Article/UploadFiles/201512/2015121518435347.jpg)
Start looking for the entrance to the burning high tower [1]. Go left and then go to the entrance upstairs. Inside move ahead till you see the 'Exit' door. Go through it and kill the enemies behind it. You will get to the street in front of the building [2].
You will reach the medical checkpoint. Kill the enemies and go around the holes in the ground going through the tents [1]. When you reach the burning wreck jump over the leaned fence [2] And go through the container with the corpses.
![Enter the container terminal [1] and fight the electric soldier [2] who will teleport himself on and on - Level 05: Tower - Walkthrough - F.3.A.R. - Game Guide and Walkthrough](https://game.lhg100.com/Article/UploadFiles/201512/2015121518435487.jpg)
Enter the container terminal [1] and fight the electric soldier [2] who will teleport himself on and on. Although he can easily attack you from behind he is rather easy opponent unless he comes close. Remember to step aside the moment before his explosive death.
After the fight go to the gate. Another teleporting soldier will attack you there [1]. To make your task easier eliminate the regular soldiers at the beginning and search the containers with electric lock. You can find some useful guns there. After the fight come to the gate where Jin will join you. Follow her to the rescue ships to finish the level.
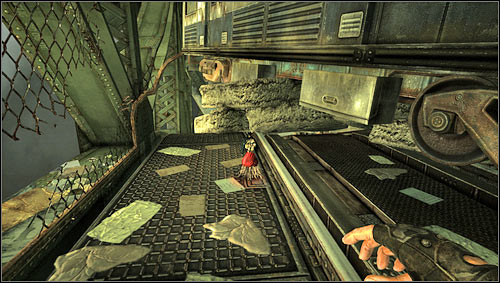
After the hard landing you will stand on the crumbling bridge [#6.1]. Go towards the tracks with wagons [1] and look for the gun. When you pass the wagons hanging above water turn right and jump into the broken wagon [2].
![You will see the cut-scene in which the helicopter is taken down by the burning beasts [1] - Level 06: Bridge - Walkthrough - F.3.A.R. - Game Guide and Walkthrough](https://game.lhg100.com/Article/UploadFiles/201512/2015121518435465.jpg)
You will see the cut-scene in which the helicopter is taken down by the burning beasts [1]. Go upstairs. Kill the soldiers and go back on the tracks jumping through the hole in the floor on the hanging train [2].
In the wagon you will be attacked by one of the numerous beasts [1] which you will have to kill while going through the bridge.
![The monsters are not very strong but they love to surprise by attacking from various directions [1] - Level 06: Bridge - Walkthrough - F.3.A.R. - Game Guide and Walkthrough](https://game.lhg100.com/Article/UploadFiles/201512/2015121518435410.jpg)
The monsters are not very strong but they love to surprise by attacking from various directions [1]. Attack them using the short-range weapon (like shotgun or Uzi). Eventually you will find stairs [2].
![You will fight with the electric soldier who summons help, then go to the tower [1] - Level 06: Bridge - Walkthrough - F.3.A.R. - Game Guide and Walkthrough](https://game.lhg100.com/Article/UploadFiles/201512/2015121518435546.jpg)
You will fight with the electric soldier who summons help, then go to the tower [1]. Then jump down at the square and fight once more with the electric soldier. When you kill him [#6.2] go to the small building where you will find the laptop [2]. Use it to lower the bridge and remove the force shield around the mech.
![Our new toy [1] is equipped with rotating machine guns and rocket launchers to take down the helicopters or other mechs - Level 06: Bridge - Walkthrough - F.3.A.R. - Game Guide and Walkthrough](https://game.lhg100.com/Article/UploadFiles/201512/2015121518435517.jpg)
Our new toy [1] is equipped with rotating machine guns and rocket launchers to take down the helicopters or other mechs. It also has the shield protecting you from the bullets. It also can regenerate unfortunately not as fast as your character.
![Use the mech to get to the bridge, destroy the barricade [1] [#6 - Level 06: Bridge - Walkthrough - F.3.A.R. - Game Guide and Walkthrough](https://game.lhg100.com/Article/UploadFiles/201512/2015121518435545.jpg)
Use the mech to get to the bridge, destroy the barricade [1] [#6.3] and start marching eliminating all the enemies. Remember to stop from time to time and let the machine to regenerate. If it gets seriously hit you can leave it, hide and wait till it recovers. You will also notice other mechs which you can use. When you reach the drawbridge [2] leave the machine for a moment.
Go to the tower on the left and find the switch [1] which will lower the bridge. Get inside the mech and move on. You will see the same mech model you use [2]. Shoot at it as hard as you can and be careful not to hit its shields. Use the guns and remember about your shield while being under fire. When you defeat it move on and watch the cut-scene.
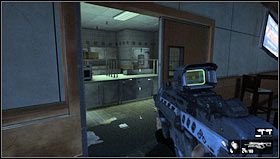
You start at the airport. Kill the beasts and go towards the terminals. Get to the tunnel-like sleeve [1] which leads to the building. When you pass the hall you will see the corridor with blood trails. At its end you will see the door with the traces of the beasts' claws [2].
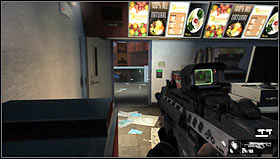
You will get to a room where soldiers fight the beasts. First you need to kill the soldiers and then a group of beasts is going to attack you. When you reach the bar go through the double door leading to the kitchen [1]. Continue and go upstairs and you will be directly above the hall. After a short fight with the soldiers pass the stand with food [2].
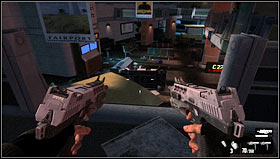
![When you kill all the enemies, find the balustrade [1] and jump down - Level 07: Port - Walkthrough - F.3.A.R. - Game Guide and Walkthrough](https://game.lhg100.com/Article/UploadFiles/201512/2015121518435666.jpg)
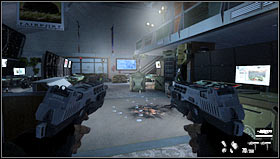
When you kill all the enemies, find the balustrade [1] and jump down. Kill the soldiers and few beasts. Then enter the corridor for the airport staff. It leads to the spacious and dark room where you can find the stairs. Pass the elevator full of tormented bodies. [#7.1] [#7.2] Turn left and pass the food stand [2].
![Move forward, pass Alma on the moving corridor [1] and follow the glowing beasts - Level 07: Port - Walkthrough - F.3.A.R. - Game Guide and Walkthrough](https://game.lhg100.com/Article/UploadFiles/201512/2015121518435658.jpg)
Move forward, pass Alma on the moving corridor [1] and follow the glowing beasts.
![In the room equipped with electronic devices [1] you will meet some soldiers and beasts - Level 07: Port - Walkthrough - F.3.A.R. - Game Guide and Walkthrough](https://game.lhg100.com/Article/UploadFiles/201512/2015121518435656.jpg)
In the room equipped with electronic devices [1] you will meet some soldiers and beasts. Go upstairs, kill the enemies and enter the narrow room where the teleporting soldier will attack you [2]. When he dies move on through the door opened by the two soldiers.

Eliminate the enemies running at the lower level when you enter the next hall. Then get through the destroyed fence [1]. Fight and get at the lower level. Go until you find stairs. At their top you will find the chest with the rockets you can use to take down the helicopter. [2].

![Look for the beast that will open you the way further [1] - Level 07: Port - Walkthrough - F.3.A.R. - Game Guide and Walkthrough](https://game.lhg100.com/Article/UploadFiles/201512/2015121518435664.jpg)
Look for the beast that will open you the way further [1]. After the short walk you will be in the baggage warehouse where you will fight the electric soldier summoning help. When you finish the fight enter the control room and move the bar. Then jump on the conveyor belt with the baggage and go through the passage [2].
Stop your ride in the place where the baggage is loaded onto the carts. Kill the beasts and look for the control room [1] which will unblock next conveyor belt leading to the customs. Move forward, pass the taken down helicopter and your walk will be disturbed by the invisible beast [2] appearing to bite you.
![With this company you will get to the passengers' custom place [1] - Level 07: Port - Walkthrough - F.3.A.R. - Game Guide and Walkthrough](https://game.lhg100.com/Article/UploadFiles/201512/2015121518435723.jpg)
With this company you will get to the passengers' custom place [1]. Be careful because it is the Armacham ambush. Two teleporting soldiers is waiting for you. Perhaps not the fastest but the most effective way to defeat them is to use the shield against the riots which gives you some protection.
![Leave the room after the fight [1] and get to the lowered gate [2] - Level 07: Port - Walkthrough - F.3.A.R. - Game Guide and Walkthrough](https://game.lhg100.com/Article/UploadFiles/201512/2015121518435717.jpg)
Leave the room after the fight [1] and get to the lowered gate [2]. It will take some time to open it but few beasts will entertain you. When the gate is up go to the next room and close the gate.
The staircase leads to the long, empty corridor which will take you away from the terminal. Outside you will have to fight. But you will find the mech [1]. Get inside the mech and move on. The only serious opponent is the quite powerful mech you will meet [2]. The same type you used for crossing the bridge. While fighting it avoid being too long in its range. It can hit you with rockets that are dangerous for you. After the fight kill the soldiers and get the "package" you have followed.
![You start in the basement of the facility [1] where brothers spent their childhood - Level 08: Ward - Walkthrough - F.3.A.R. - Game Guide and Walkthrough](https://game.lhg100.com/Article/UploadFiles/201512/2015121518435779.jpg)
You start in the basement of the facility [1] where brothers spent their childhood. After few steps go downstairs [#8.1] [#8.2] then go left and right. At the end of the corridor enter the changing room [2] on the right. You will get to the room from which "brothers" were observed.
After watching few scenes from the past go back to the main corridor. When you leave the changing room a beast will attack you. You can scare it by shooting at it. Turn right and on the right you will find a locked arsenal. Take some "fresh" supplies return to the stairs and go towards the corridor with the white glowing light [1]. Follow it to the next room where you will see another cut-scene from the past . Pick the red bucket [2] near the ring.
When you leave the room turn right and follow the glowing light. You will get to the room where the experiments were run. Search the room to find the red book with the tests. [1]. Destroy it, go back to the corridor and follow the light. It will lead to the room where Fettel have killed a man for the first time. You will find the toy gun nearby [2].
![When you destroy the gun leave the room and go towards the door with blinding light and a beast coming out [1] - Level 08: Ward - Walkthrough - F.3.A.R. - Game Guide and Walkthrough](https://game.lhg100.com/Article/UploadFiles/201512/2015121518435877.jpg)
When you destroy the gun leave the room and go towards the door with blinding light and a beast coming out [1].
![You will find yourself in the forest and after few steps you will fight with the gigantic form of the monster [1] - Level 08: Ward - Walkthrough - F.3.A.R. - Game Guide and Walkthrough](https://game.lhg100.com/Article/UploadFiles/201512/2015121518435824.jpg)
You will find yourself in the forest and after few steps you will fight with the gigantic form of the monster [1].
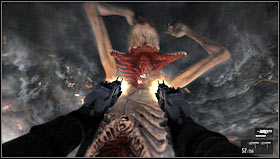
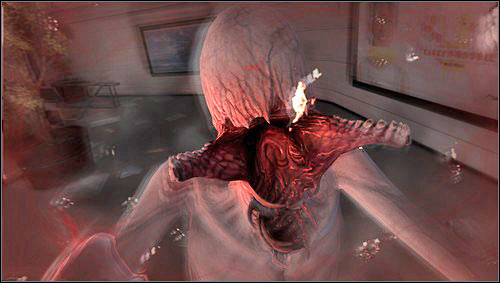
The fight with the boss is divided into two parts. The first one is shooting at the open throat [1] and avoiding its attacks till Alma's "cramp" will stunned it. The second part is killing the summoned soldiers' ghosts. It is also the moment when you can replenish ammo. When you fight the monster avoid its attacks. If the beast raises its right hand go left and vice versa. When the beast rises both hands run as far possible from the arena's center. From time to time the beast belches fire. This attack is signalized by swinging forward. Try to run aside and remember that fire shall remain at the arena for some time. After few repetitions the boss fill fall down and you can finish it [2].
![The ending of the single player campaign depends on the choice of the brother [1] to finish the last mission - Level 08: Ward - Walkthrough - F.3.A.R. - Game Guide and Walkthrough](https://game.lhg100.com/Article/UploadFiles/201512/2015121518435851.jpg)
The ending of the single player campaign depends on the choice of the brother [1] to finish the last mission. In co-op mode it is important which brother gained more points.
Here you have the description of the places where you can find those dolls. Remember that each level contains only one.
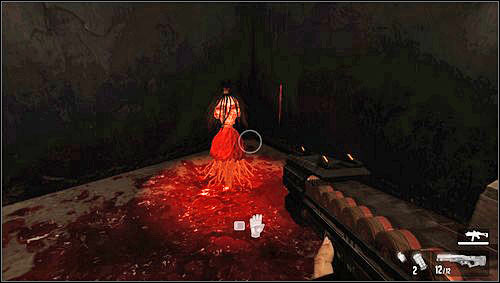
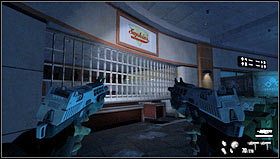
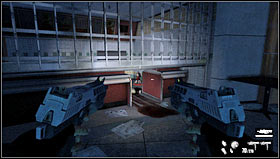
1.1. When you leave the canteen enter the staircase to get downstairs. Break the electric lock. The Alma Doll [1] is at the lowest level under the stairs.
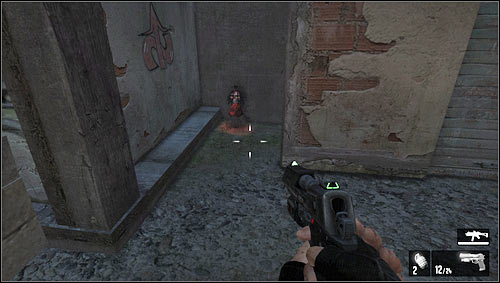
2.1. When you get through a small hut you will see the arrival of the armored vehicle with the soldiers. The Alma Doll [1] is in the small gap on the right next to the hut you have just left.
2.2. When you pick the first electric grenades but before you return on the street enter the room with the hole in the wall (the same you use to get the mech for the first time). The Alma Doll [1] is hidden on the right side of the room.
3.1. When you pass the men's toilet climb on the rack. The Alma Doll [1] is on the rack next to the door and to get to it you need to jump in full run.

3.2. When you enter the garden department and meet the kamikaze [1] search the shelves behind the red curtain to find the Alma Doll [2].
4.1. The Alma Doll [1] is on the basketball court next to the mech.
4.2. When you pass the transformers field enter the building and go to the garage. The Alma Doll [1] is in the corner in the back of the room.
5.1. Getting through the first military checkpoint you will see a big crater appearing in the ground. The Alma Doll is hidden in the small boxes created by the fence behind the crater.
5.2. When you get to the roof of the building jump down on the balconies watching the cultists fighting the Armacham soldiers. The Alma Doll in under the lowest balcony.
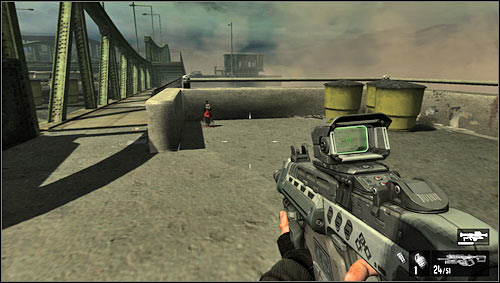
6.1. At the beginning of the level you can find a wagon balancing on the pieces of the concrete. To find the doll you need to walk around that wagon.
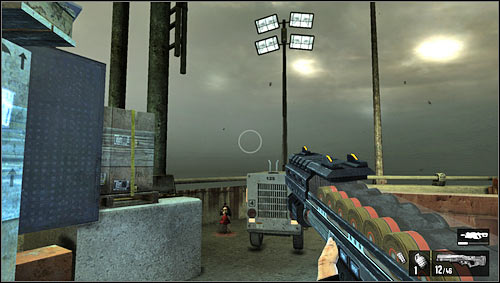
6.2. When you get to the square with the mech surrounded by the energetic shield go near the building with the laptop that controls the drawbridge. The Alma Doll is on the left side of the building near the portable spotlights.
6.3. When you control the mech go through the first drawbridge then turn left before the watch tower. The Alma Doll is on the left side near the end of that bridge.
7.1. When you pass the elevator with tormented corpses go downstairs and get through the door on the right between the telephone booths. The Alma Doll is in the corner.
7.2. When you pass the elevator with tormented bodies take the stairs and go right. The Alma Doll is in "Sophie's Pizza".
8.1 Go downstairs and turn right then left. At the end of the corridor you will see a metal cage with the Alma Doll inside.
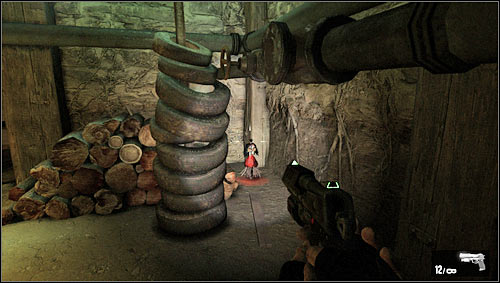
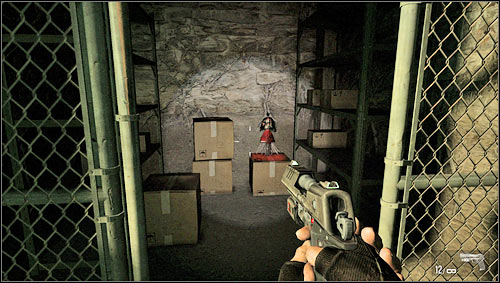
8.2 Go downstairs and left then again left. The Alma Doll is hidden behind the pile of wood and old tires.


 Final Fantasy XII Game Guide & WalkthroughFarming Simulator 2013 Game Guide & Walkthrough
 Far Cry 4 Game Guide & Walkthrough
 F.E.A.R. 2: Project Origin Game Guide & WalkthroughFallout 4 Game Guide & Walkthrough