This unofficial Dying Light game guide is a complete solution about how to survive while going through the city of Harran. The first chapters of this guide contain a game world atlas, explain the most important aspects of the game and also contain a lot of tips and strategies on how to act in particular situations. In these chapters, you will learn about moving around the city (parkour), fighting or avoiding fights, character development (how to pick the best skills from given categories), obtaining and upgrading your equipment, the types of enemies that you will encounter (both living and undead), crafting (repairing weapons, using schematics, etc.) and the rules of exploring the world (safe zones, the night and day cycle, vendors, etc.). The second large chapter is the walkthrough. Here, you will find descriptions of the missions in the main campaign, but you can also read about the side quests and the challenges available (clearing quarantine zones, time challenges and others). The next chapter contains information about the secrets (collectibles) that can be found in the game world, specifically Statues, Flags, Voice Mails, Notes and Marvin Zucker's Battle Journals. Many of the pages in this guide contain high quality maps of the main locations in Harran, which will make finding a given mission or Collectible easier. In the last part of the guide, you can find information about the Achievements and Trophies and also about system requirements. Dying Light, produced by Polish studio Techland, clearly refers to Dead Island game series. This time, we move to a fictional city called Harran, where a mysterious virus is spreading, turning people into monsters. The night and day cycle is an important aspect of the game, because at night, the most powerful mutants come out to hunt and the player must be very careful.
The Dying Light game guide contains:
& Kuba "Zaan" Zgierski ()
The table below shows the controls when playing as human (singleplayer or co-op).

Move

Look around
Crouch

Sprint

Jump

Use equipment

Use / Interact

Use / Interact

Survival instinct (scan the area)

Look Back

Attack

Kick

Use grappling hook

Aim

Reload / repair weapon

Flashlight

Use med kit

Switch weapon

Previous equipment element

Next equipment part

Weapon menu (hold)

Equipment menu (hold)

Quick equipment

Drop equipment

Inventory

Map

Quest journal

Character sheet

Track objectives

Select "yes" when completing a quest
Select "no" when completing a quest

Chat (co-op)

Vote to kick player (co-op)

Respawn in the waiting area (co-op)

Create a challenge (co-op)

Join the favourite game / show invitations for challenges (co-op)
The table below shows the controls when playing in the zombie mode. It is possible only in multiplayer.

Move

Look around

Sprint

Jump

Block UV light

Launch yourself at a target

Close attack

Howl

Horde Summoner Spit attack

Suppress UV

Main attack

Fast move

Spit Smash attack
Cancel ground smash

Spit

Use / Interact

Move
Sprint (press the button)

Look around
Aiming (press the button)

Survivor Sense (area scan)

Crouch

Reload / Interaction

Weapon repair / Looking back

Flashlight
Secondary weapon

Primary weapon

Healing
Kick

Use item from the inventory

Jump

Attack
Game menu

Pausing the game

Move
Sprint (press the button)

Look around
Aiming (press the button)

Survivor Sense (area scan)

Crouch

Reload / Interaction

Weapon repair / Looking back

Flashlight

Secondary weapon

Primary weapon

Healing

Kick

Use item from the inventory

Jump

Attack

Game menu

Pausing the game
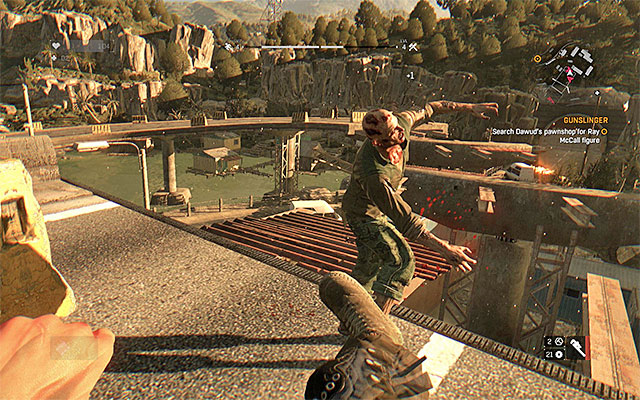
The presence of parkour elements is one of the most important aspects of Dying Light and it is also what makes it different from Dead Island series. The character that we control is very athletic and his agility is very helpful. Moreover, depending on parkour moves may turn out to be necessary, when you cannot defeat an enemy in battle. Below, you can find a list of the most important uses of parkour. Some of the moves described here is available from the beginning of the game, others have to be unlocked by making progress in the main campaign or selecting particular skills.
 Always face the edge or the platform that you want to jump on.
During the prologue, all the most important parkour actions will be introduced to you (running and avoiding obstacles, jumping onto far away platforms and climbing). It is necessary to always directly face the edge or platform that you want to jump on, or the wall that you want to climb. Only then will you have the chance to successfully perform the action.
The moves described above can be useful during a fight, for moving quickly and smoothly around the city. Thanks to parkour, you will be able to go past the barricades on the streets, reach higher places that are seemingly inaccessible, which will allow you to have a better view on the area and also to find some hidden treasures (a lot of chests and other boxes are located on the rooftops). Moreover, you can avoid the zombies walking around the streets of the city.
Note - Every action from the parkour category is rewarded with Agility points. More info about each attribute and the skills connected to them can be found in the Character development chapter.
 Always check potential landing spots.
Parkour provides a perfect opportunity to move around the city in a spectacular way, performing a lot of risky actions, but you must remember that the main hero is only human. Avoid falling down from high buildings, as it may take a large amount of your hp or even kill you right away.
Most of all, try to avoid jumping onto objects that are very far away, as you may end up not catching the edge and falling down. If you can, always check the area around you to calculate each jump well. You can also absorb the energy when landing on car roofs, bags, trash containers or directly on the infected (with additional skills, you can also eliminate them this way). It is good to keep your hp bar above 50% so that a minor mistake wouldn't mean your character getting killed.
 When running, you can look back.
Most of the time, you won't need to hurry and you will be able to perform all your parkour actions precisely. However, you may find yourself in a situation in which you will need to run faster, like for example during a mission in which you have to reach a given point on the map, or during an extra parkour challenge. In such situations, try to stay on the move all the time and plan your moves ahead. Also, try to avoid climbing high objects, which is quite slow. Instead, focus on jumping and running (use also the narrow objects, like planks or walls).
Running around the city also looks different when your are chased by the faster types of zombies. During the day, you can be attacked by running Infected and at night, by fast mutants. If you don't plan to fight a given enemy, the only way to escape is using parkour moves. When running away, try to make it harder for the monsters to reach you by performing long jumps and staying on the rooftops. The ability to look back when running is a useful thing in the game. Connected with the markers on your minimap, it will allow you to always know how far away your enemies are and whether you are close to losing them.
 Grappling hook helps you travel faster
After you have developed your character enough, you get the opportunity to obtain the Grappling Hook from the Survivor skill tree. This gadget needs to be activated manually each time and it requires several seconds of "cooldown". In spite of these limitations, you should take interest in the hook, because it allows you to reach ledges quickly (also the ones that are more difficult to access), or escape elite variations of the infected. The hook does not wear off, unlike standard weapons. If, for any reason, you lose it (e.g. throw it away from the inventory), you can receive a new one from any quartermaster.
In Dying Light, just like in Dead Island, melee weapons are the most common weapons to use, especially when you're fighting slow, weaker enemies. There are a few dozens types of melee weapons n the game and they can be divided into two main categories - blunt and sharp.
 An example of a blunt weapon.
Blunt weapons are all kinds of pipes, hammers and clubs. Items from this group are usually bigger than sharp weapons and can deal more damage. They are also very good when you plan to crush the bones of your enemies.
 An example of a sharp weapon.
Sharp weapons are various types of knives and axes. A lot of weapons from this category are small and allow you to perform your attacks quickly, but you can also find bigger, two-handed sharp weapons. This type works well when you want to chop of your enemies' limbs. This makes them a bit better than blunt weapons, as you can considerably weaken an enemy with just one strike (for example by cutting of his arm or leg), or even kill him instantly by decapitation.
 Weapons marked with orange color are very valuable.
Every weapon in the game is described with a few basic statistics, but you don't need to read all of them. A more important thing are the colors of the weapons' names, which represent the quality and value of a given item. At the beginning of the game, you will mostly find white weapons, but you will start to obtain more powerful ones with time. Try to look for items with purple and orange names. When you find such a weapon, save it for more difficult fights to not use them up too soon.
No matter of whether you use a blunt or a sharp weapon, you have to bear in mind that every attack costs you a given amount of stamina. The heavier the weapon, the more points are needed for performing an attack. For example, if you use one of the biggest two-handed weapons in the game, one attack may cost you even 2/3 of your stamina bar.
The stamina bar always appears in the screen in the moment when you perform an attack (it is marked in the screen above). Don't allow the bar to fall to zero, as your hero will then feel exhausted. Or a moment, he will not be able to perform any attacks and also will become and easy target for the enemies. After performing a strong attack or a few weaker ones, jump back and allow the stamina bar to regenerate (stay on the move all the time).
Note - kicking doesn't require stamina. You can depend on it, when you see that an enemy is approaching your weakened hero.
 Unfortunately, a lot of enemy mercenaries use guns.
Firearms in Dying Light are luxury items, at least during the beginning of the game (you will start to find or receive guns later). No matter whether you've found a gun or bought one (it is not a good idea, as it is better to spend your money on other things), you should use it for fighting usual zombies. You will only waste your ammo, of which there is never a lot in the game.
Try to use firearms when you face elite versions of Infected or armed and hostile human enemies. Remember also that you can often find good firearms near killed human mercenaries and those are weapons that are difficult to acquire when only exploring the city or completing quests.
Guns have one major flaw, which is the noise that they make. It spreads around the area, alarming the Infected. Remember that when you try to eliminate enemies using firearms, you may need to kill some extra enemies later. If you don't want to waste additional ammo for such battles, prepare yourself before using a gun, for example by standing near a safe zone or on top of a building that is difficult to reach.
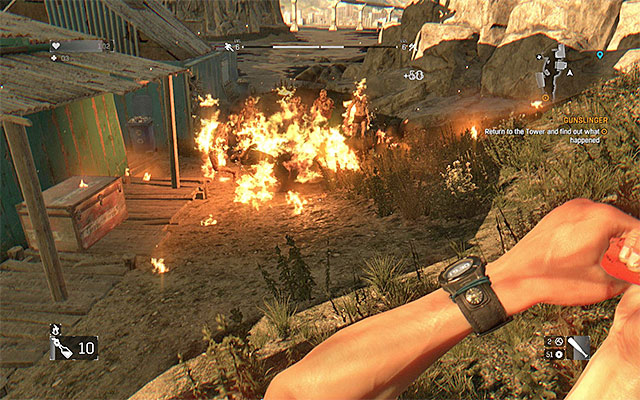 Using Molotov Cocktails, you can burn whole groups of Infected.
Throwable items in Dying Light is a supplement for melee weapons and firearms. You cannot depend solely on them, but they are perfect additional weapons. You should take special interest in Molotov Cocktails, which are quite common in the game world and also can be easily produced (more on that in the Crafting chapter). Cocktails are useful when a group of Infected or human enemies stands on your way. In both cases, you can be sure that the targets affected by fire will take some serious damage or die right away. Moreover, the flames can spread from one enemy onto another, which makes this weapon even more effective.
Besides Molotov Cocktails, it is also good to always have some other throwing weapons with you, like for example Throwing Stars or Throwing Hatchets. They are useful when you want to weaken or kill an enemy from distance and you don't have a gun or don't want to waste ammo. Unfortunately, the game doesn't allow you to reacquire the items that you've thrown from the bodies of your enemies. Aim carefully before every attack. Also, don't use a lot of resources for using new throwing weapons.
Note - Later in the game, you will start to find grenades. They are very powerful, so save them for difficult fights, i.e. use them only for eliminating groups of stronger enemies and only when it's necessary for completing a mission or saving your hero from getting killed.
Note - Throwing weapons are selected in a separate menu. You don't have to worry that for example a grenade will use up a slot reserved for melee weapons or firearms.
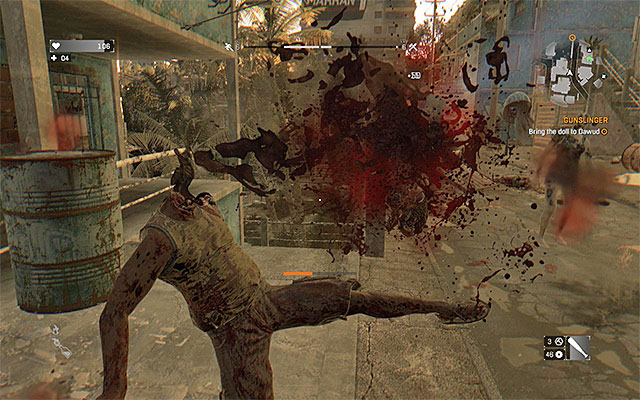
 Use your agility to slow down or kill the Infected.
Parkour, described in one of the previous chapters of the guide, not only allows you to quickly move from one place to another, but also for performing attacks and eliminating enemies in a spectacular way. To learn more, read about skills from the Agility category, described in the Character Development chapter (they provide a lot of new, interesting attacks). You can for example learn how to bounce from enemies, land on them and perform immediate execution or break their legs with slide attack. An extra advantage of this type of attacks is that they do not require stamina, as opposed to attacks with melee weapons.
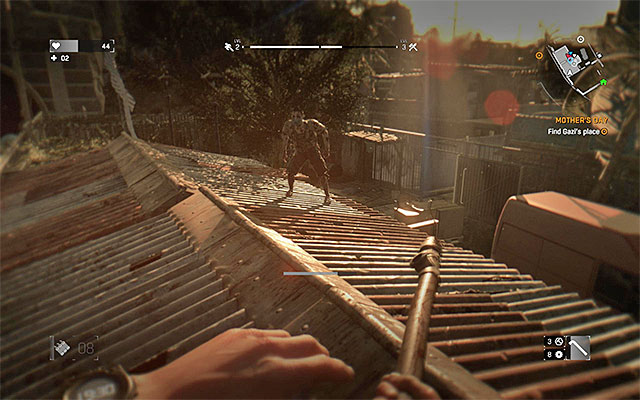
 A kick is a good way for throwing a zombie off the roof.
You don't need to rely only on complex actions, because there are simpler ways of interrupting your enemies. The kick is one of them (works the same as in Dead Island) and it can be used from the beginning of the game. It is very helpful, especially that it doesn't require any stamina. You can use kicking for pushing away your enemies, but also for throwing them off the roofs. There is a lot of chance that such an enemy will die from the fall, or break some of his limbs.
Note - If you notice a zombie standing on some high shelf, you can simply draw his attention and wait until he starts heading your way. This way, the monster will fall down and you won't have to climb the shelf to push him.
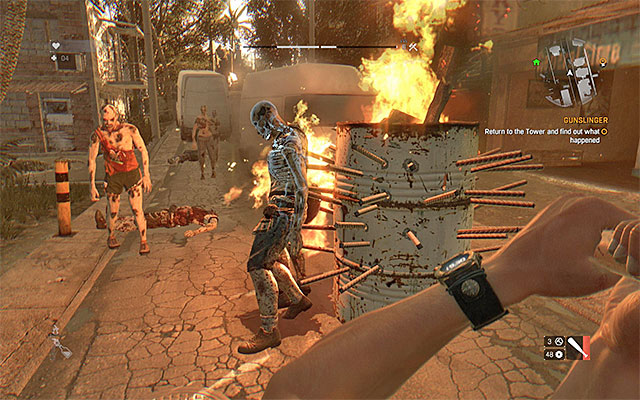 Sticking a monster on spikes makes him die immediately.
When eliminating enemies, you can use various objects from the environment. The most important are:
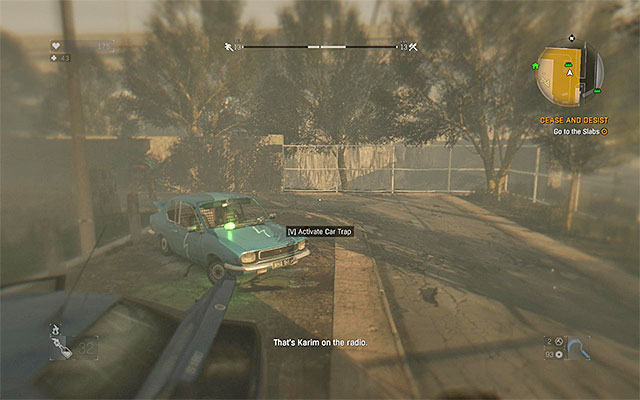 An example car trap
Special traps that you can activate remotely, after you get near them, deserve a separate mention. They are not available by default and to unlock them, you need to get appropriates kills from the Survivor tree. These are:
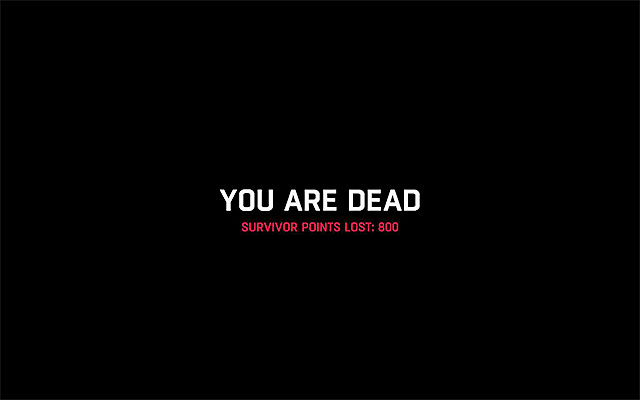 After dying, the game will inform you about the penalty you receive and you will be teleported to a safe zone.
Dying Light doesn't allow you to save the game whenever you want (only auto-save) and this mechanism is connected to the consequences of getting killed. When the main hero dies, you don't have to start from the latest auto-save points. Instead, you will be teleported to a safe zone (safe zones are described in the Game world chapter) and you can continue the game with the same equipment and game progress. Unfortunately, a price for this respawn is losing some (from a few hundreds to a few thousands) Survivor Points. These points are used for buying new skills (more on that in the Character Development chapter), so dying often will considerably slow the development of your hero. Therefore, it is good to keep your hp bar on high level and try to avoid getting killed.
 You can craft, buy or find med kits in the game world.
The hp bar in Dying light doesn't regenerate automatically. The only exception is when your hero is close to dying, i.e. he has less than 25 hp. You can regenerate health in three way:
There are quite a lot of various monsters in Dying Light and it's because the Harran virus has several stages of developments and each one can have a different influence on the human body. Below, you can find a list of all the most important types of monsters that you will encounter in the game. It is good to read the list and learn about the strong and weak sides of every enemy.
 Regular Infected are dangerous only when in group.
During most of the gameplay, you will encounter the weakest and the easiest to defeat Infected, which are called Virals. These enemies can be defeated without any trouble, because they are very slow. Moreover, you can take advantage of they near-to-nonexistent intelligence and draw their attention away from mission targets or make them fall of high shelves. Regular Infected are a challenge only when you face them in small rooms or when they are in group. Try not to allow a situation in which you are circled by zombies, without any way to escape.
 Try to liberate yourself after you are grabbed by a biting zombie
A thing that is just as often to be seen are the regular infected, who apart from attacking you with their upper limbs, also try to grab you in order to bite you. If this happens, you start losing your health points. Start tapping the interaction button quickly, to struggle out of the grapple and stop the process of losing health. If possible, avoid such close encounters. The attacks of the biting zombies can be avoided by, e.g. taking a quick dodge to the side, kinking at the appropriate moment or by using your additional skill that allows you to push the monster away.
 Watch out for Miner's strong attacks.
Miners are one of the types of Infected. They are less common than Virals and Biters, but you can be sure that you will regularly encounter them in places when there is mission objective to complete or some valuable treasure. Good news is that Miners are slow and not very intelligent. The basic problem when fighting them is their huge resistance to damage and the fact that they wield very large two-handed weapons. You must avoid their attacks, because a successful hit can knock you on the floor and stun you. If you don't have a gun or a throwing weapon, the best strategy is to approach a Miner, strike one or two times and immediately jump back, before the monster hits you.
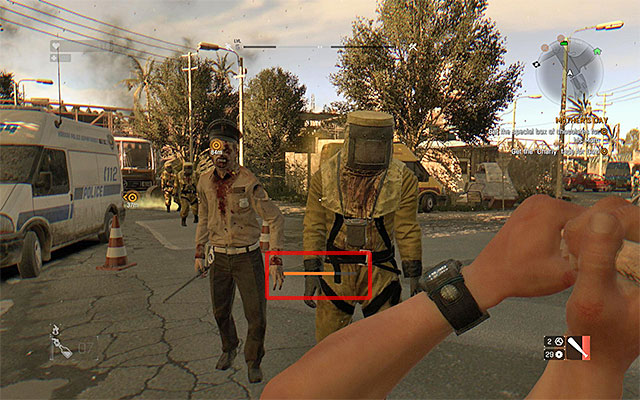
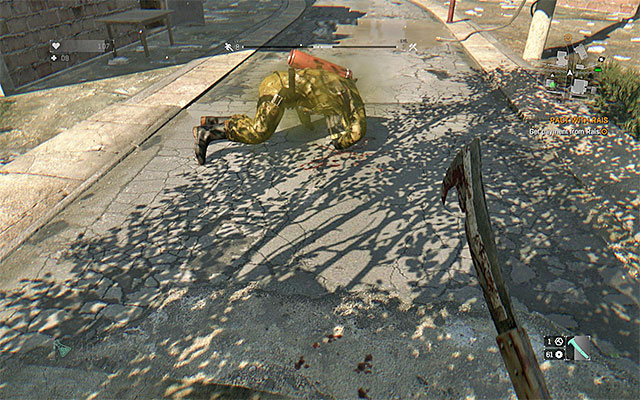 The easiest way to get rid of a Gas Tank is to damage the bottle on his back.
Gas Tanks are Infected in yellow protective suits. They are slow and cannot bite the hero, but their attacks are stronger than those of a Viral. When fighting Gas Tanks, you can use similar strategy as in the case of Miners (get close - attack quickly - jump back). However, a much easier way is to eliminate a Gas Tank by damaging the bottle on his back (use any gun or throwing weapon that you have). After shooting the bottle, stay back as the enemy will explode. Remember also that the explosion will be heard by elite Infected in the area.
 Stay on the move to be a difficult target for the Toad.
Toads are a rare view at the beginning of the game, but you will start meeting them more often as you make progress in the storyline. These monsters can spit acid and they do it with quite a lot of precision. The key to success is to stay on the move. Toads can be eliminated using ranged weapons, but as they are not very resistant to melee attacks, you can approach them (always zigzag!) and perform a few strikes.
 Runners are difficult to escape.
Runners are another less common type of monsters and just like in the case of Toads, you shouldn't disregard them. These zombies appear usually when you are too noisy, for example when you use a gun or blow up a car. They are very quick and agile, so melee combat can be difficult (use fast weapons). If you have a gun or some throwing weapon, it is good to use it. Moreover, you can try to climb some high building and wait for the enemy. When they try to reach you, you can kick them down and hope that they die from the fall. If it's necessary, us parkour moves to escape them.
 Do not let bombers approach Crane
Bombers are the type of zombies that appear only after you have made sufficient progress into the storyline. This type of the infected stands out thanks to their exploding internal organs. What is even more, bombers behave like suicides and they try approaching Crane to deal the highest damage explosion possible. It is very important that you prevent such situations because, in the majority of cases, a explosion of the bomber means instant death to you. It is a good idea to steer clear of bombers. If one suddenly appears before you, try, at least, hop back to minimize damage taken from the explosion. Also, you can use bombers to eliminate larger groups of zombies and detonate them at a distance, with firearms or throwing weapons (note- the explosion will attract other elite zombies).
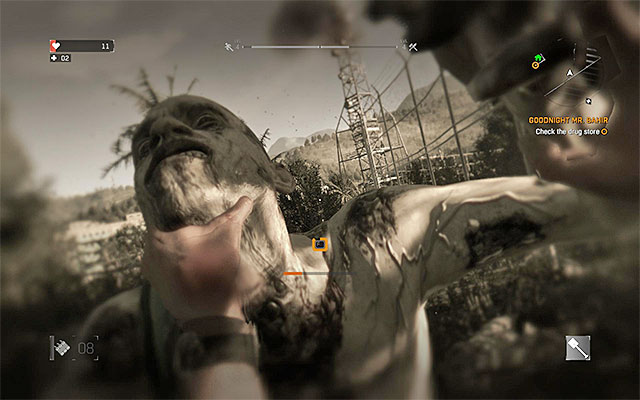
 You need to silence screamer as quickly as possible
Screamers are nothing else than children that have fallen victim to the virus. It is another specific variation of the infected, because they do not try attacking you in melee. Their only attack is the blood-chilling scream. It stuns you temporarily and summons all of the infected from the nearest areas. Of course, these effects are not too enjoyable so, try to eliminate screamers right after you spot one. The best method to eliminate a screamer is to run up to him and press the interaction button to "soothe him down". Alternatively, you can use firearms or grenades.
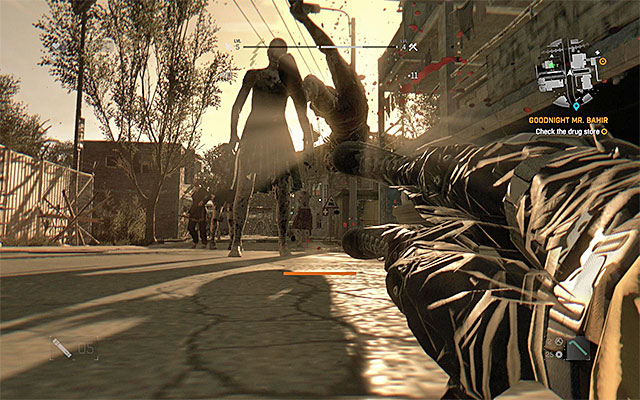
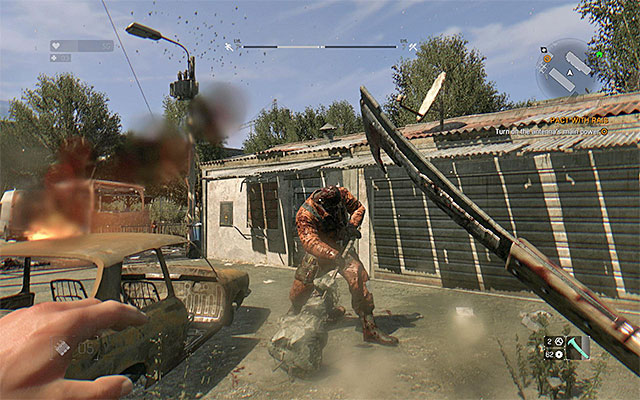
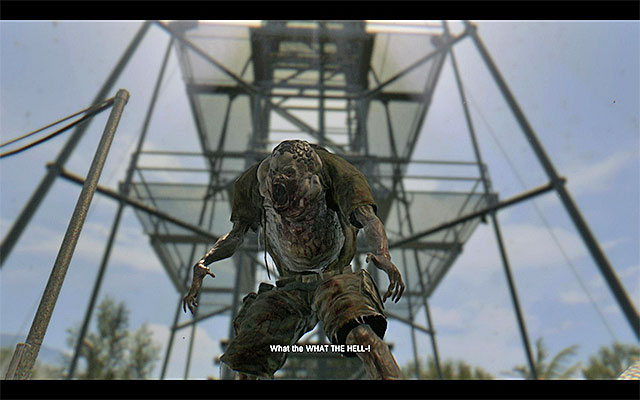
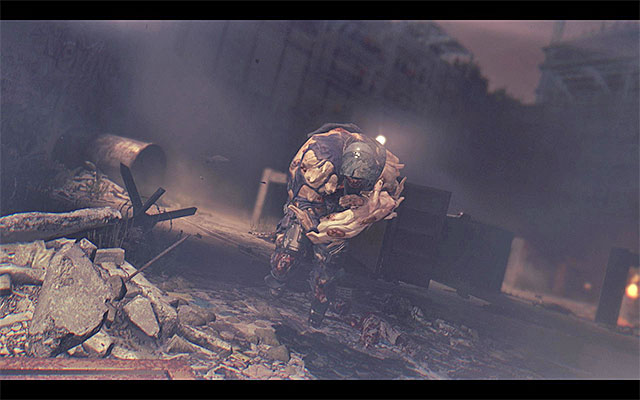 Mutants are quite a challenge
Mutants are the most dangerous type of the "daywalking infected". They are bigger and tougher than goons and it is best to avoid them, at the beginning of the game, because it may have grave consequences. Just like goons, Mutants can use two-handed melee weapons, nut they are more agile and smarter than them. One of the most frequent mutant attack is charge, which is capable of knocking you down and depleting lots of your health points. The key to success here is dodging to the sides. You can combine this with attacking the mutant, because he is vulnerable, shortly after the charge, and you can attack him from behind. Apart from that, mutants are capable of ranged attacks, i.e. they can hurl big chunks of concrete at you. Therefore, remember to stay in constant motion. Note - after you obtain a firearm (a machine gun, a shotgun, etc.) fighting mutants becomes easier. Therefore, you can kill them with long bursts of automatic fire into the head.
At night, even the weaker types of zombies can be a challenge for you and it's not because you can't see as well as during the day. When the night comes, a lot of monsters grow stronger and become more agile, which makes them much more difficult to defeat.
 At night, even regular zombies become stronger.
After dark, zombies called Biters, described earlier in the guide, turn into Lunatics. These monsters are seemingly identical, but when you provoke them, you will see that their attacks are stronger and faster. It is good to stay out of fighting at night until you develop your skills well and gather proper equipment.
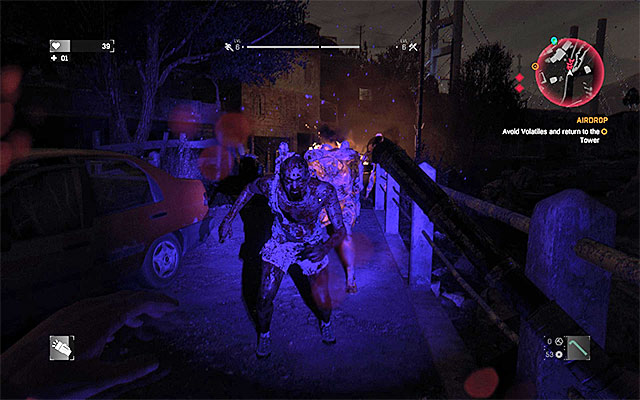
 Avoid the sight of volatiles and hunters and, if spotted, take it to the heels.
Two unique variations of the infected are the volatiles and hunters. Their looks themselves may be respect-invoking and it hints that their bodies have been subjected to advanced mutations. They are agile and they can easily summon the rest, after they spot you, and thy land strong blows. I recommend against fighting them, at the beginning of the game, because the chances of winning are slim. In spite of that, if you want to take on the challenge, get a decent weapon (firearms are best here).
The most important weakness of the night-crawling infected is that they have low toleration to light and it is a good idea to exploit that weakness. Also when to escape is the only think that you want. First of all, rely on the UV lamp that you should get during one of the initial quests. Using the UV lamp stops monsters from finishing their attacks. Flares are similar in their function, but they are disposable gadgets. Apart from that, keep an eye out for spots where you can activate light traps and restore power supply to nearby lampposts (interactive levers).
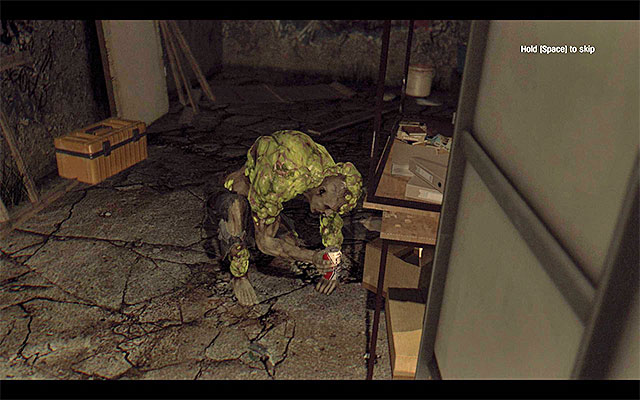 Sprinters are no threat to you, but you can use their tissue in crafting
The rarest type of the nocturnal infected are bolters. They are not, in the least, interested in attacking you and they start running immediately after they see you. The best method of eliminating bolters is sneaking up to them from behind. You find the Takedown skill useful here. If you do not have it, use a good melee weapon, or gun, to prevent the bolter from escaping.
You will rarely meet living enemies, but you shouldn't disregard them, because fighting intelligent and well-equipped opponents is more difficult than eliminating zombies. Most of the human enemies encountered in the game are the bandits subordinate to Rais, but you can also meet hostile lone survivors.
Note - when you see a group of human enemies, try to identify its leader (if there is one). Killing the leader first will lower the morale of the rest of the enemies.
 A lot of living enemies use not only melee weapons but also throwing weapons.
We can divide human enemies into two groups. The first one are the opponents without firearms. Instead, they can use melee weapons and throwing weapons (mainly starts and hatchets). Therefore, decide on melee fight only if you feel skilled enough and when you have prospered equipment (also the ability to perform slide attack will be very helpful). A much better idea is to use guns or throwing weapons and also try to set the enemies on fire with Molotov Cocktails.
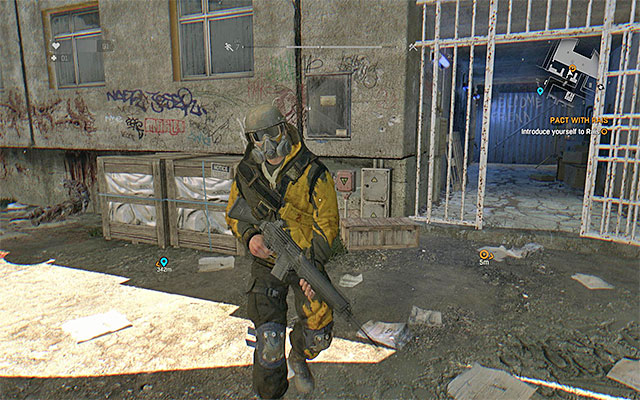
 Enemies with guns are a big threat to you.
The second group are the enemies with guns. You should stay away from them, unless you have very good firearms and you do not fear starting a serious shoot-out. Remember also that the nose from guns can draw the attention of Runner zombies, which will make the fight even more difficult.
Dying Light is not a game, in which hiding and avoiding direct combat is a good tactic for less stressful surviving till the end of the adventure. Of course, you can choose such gameplay style and utilize the fact that most of enemies are slow and stupid, but you will lose a lot of the game. It is especially worth mentioning that using weapons increase your Strength (one of your character perks) and unlock new abilities (more about them can be found in the Character development chapter), thanks to which your character becomes stronger. Furthermore, some killed enemies leave behind precious items (like rare melee weapon) or they guard access to areas with rare treasures. For that reasons, it is recommended to use stealth only in two circumstances:
 Utilize ledges that are unavailable for basic infected
One of the easiest ways to avoid combat and sneak behind enemy backs is to use building roofs and high ledges. Another advantage of utilizing such gameplay style is that thanks to high agility of your character staying away from the ground doesn't necessary have to slow him down, it can make getting to certain points even quicker.
Important note - Some elite types of infected (like night hunters) are lurking on the roofs and other high spots. You must keep that in mind and watch out for them when exploring harder to get places, otherwise you can be unpleasantly surprised. If you find yourself in dangerous situation, you can try to throw your enemy from the platform he occupies. Falling from great altitude can kill him or severely wound him.
 Help yourself during night with boosters and survival senses
As mentioned before, staying in hiding during night is highly recommended, because presence of stronger and more cautious enemies can kill you easily. Avoid lighting the road with flashlight, it is a quick way to be found. A solution to the problem of limited visibility during night is using Night Vision Booster, which temporary changes the way your character sees and he doesn't have so much trouble with navigation (more about boosters can be found in the Crafting chapter of this guide). Since boosters worn out quickly, you should have at least ten of them with you at any time, created during the day (finding the needed herbals might be very hard during the night).
Except for Night Vision Booster, you must depend on the Survivor Sense as well, which is available from the beginning of the game. During the day that sense can be use for scanning the neighborhood in search for interactive items, during the night it gains additional attribute. Activating the sense highlights stronger enemies that can be found nearby. It is extremely useful in avoiding getting into their sight. As usually, you can depend on the mini-map, where localization of the enemies and their sight radius is marked.
Caution - If you're sneaking during night, observe the eye icon that can show on the screen near an enemy. If the icon is filling, it means that enemy has spotted silhouette of your character and is trying to track you down. In that case, hide behind some cover as fast as possible or move away from the enemy.
 Firecrackers can get attention of the infected away from you
You can avoid detection and unneeded combat by successfully distracting your enemies. It is worth mentioning that it works only on the infected since living enemies can't be cheated with such primitive tricks. The easiest way to disorientate your enemies is using the firecrackers. They can be found very easily and are often given to you, so you can use them regularly. Interesting thing is, firecrackers can trick not only the regular infected, but their more developed types like hunters as well.
Caution - firecrackers can be used not only to drag enemies to other places (to make a safe passage for yourself or get access to guarded building), but as a trap as well. After zombies gather around the cracker, you can throw them a grenade or Molotov cocktail.
 UV traps can be armed during day
A slightly more complex way of acting than throwing firecrackers around is activating light traps constructed from lamps that emit UV light. Traps can be connected to electricity during the day and then used at night (you can remotely activate them when near). They have another advantage - they can be used to eliminate enemies, since infected have lower resistance to UV rays. So, after activating the trap you can use the fact that monsters are temporarily helpless and kill them easier.
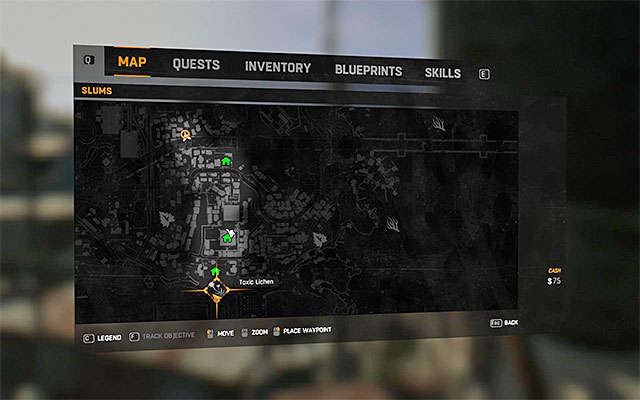
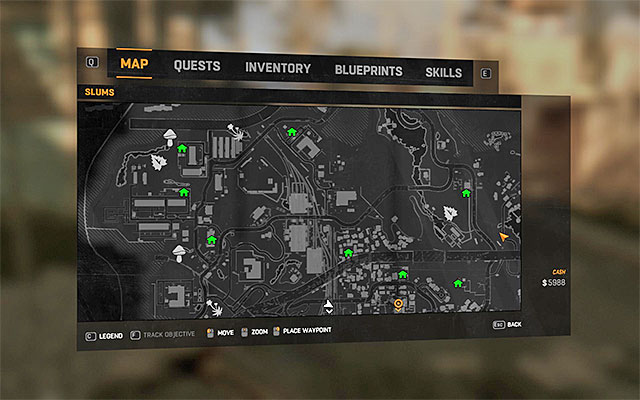 Frequently watch at the map, where many useful items are marked
As you probably know, Dying Light is set in fictional city of Harran. The game allows you to freely explore the streets of this city. Two large regions of the city are available during playing. The game begins in the slums and as you progress in the storyline the Old City becomes available (this takes place in The Saviors main quest). Each of those locations you can thoroughly explore, although the game won't allow you to walk outside a specific area of the map. The locations mentioned are surrounded by various fences and other impenetrable barriers. Additionally, if you decide to jump into the water, after swimming too far away from the land you will be teleported to the closest safe zone.
In moving through those districts of Harran map of the region can be useful. You will find spots where missions begins, potential safe zones and regions in which herbals used in crafting can found marked on that map. Some parts of the map are visible since beginning of the game, other are clouded and to see them you must first personally get to that place.
Note - In some additional smaller locations (like explored quarantine areas, severs or towers in which survivors hide) you can't use the "large" map, only the mini-map placed in the corner of the screen. Luckily, those areas are so small that you shouldn't be lost in them.
Note - You can travel around the main districts of Harran. I recommend that you postpone traveling until you have completed the Broadcast main quest. It is then that you discover a shortcut through the sewers, thanks to which you will not have to lose your time avoiding zombies and climbing (these are necessary, while traveling through the main parts of the sewers).
 Tower is one of the larger quarters of the survivors
In both two main locations of the game very important role serve survivors quarters. This is for example the Tower, in which civilians leaded by Brecken have their hideout (you start the game there), or Rais's Garrison. The most important function of those buildings is that they offer a safe haven. When you're inside, you don't have to worry that you will be attacked by zombies or unfriendly living people. But it is not their only functionality, there you can also:
It is recommended to regularly revisit hideouts. Thanks to that you will be able to rest, replenish your supplies and unlock yourself some optional challenges.
Caution - some rooms in survivors quarter are unavailable at the beginning. But don't lose your hope if your survivor sense shows you that there are valuable items on the other side. You can unlock access to those rooms while progressing in the game (for example, by completing a mission).
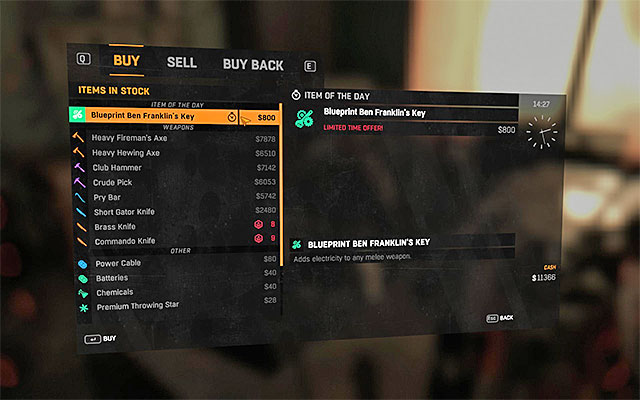
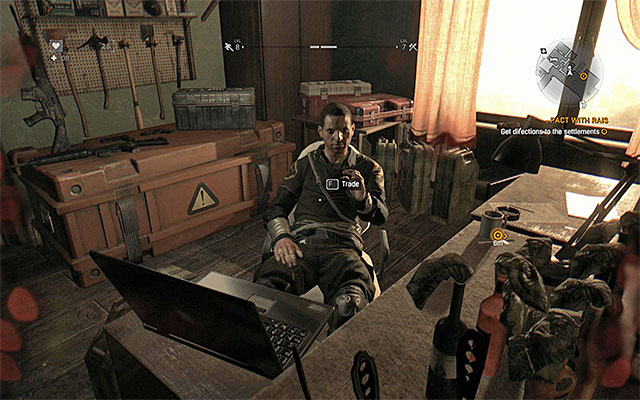 Example merchant
Merchants can be mostly found in survivor quarters described above, but you can find them as well in selected safe zones and while exploring the game world (look for dollar icon on the map). After interacting with a merchant you can start buying or sell unneeded items.
You should mostly buy unique blueprints from the merchants, their importance has been described in the Crafting chapter, especially since most of them aren't very expensive. You can look for some unique weapons as well, but do it only after spending few hours with the game and becoming significantly richer. You shouldn't buy common items (lock picks, health packs or firecrackers), for you can easily find them in the game or craft them yourself. As for the selling of your own goods, get rid mostly of cigarettes, coffee and purses, since they don't have any other use. You can also sell unneeded weapons which you have gathered too many. Definitely do not sell weapon upgrades and items useful in crafting.
Caution - It is a good idea to wait with your first serious purchases until you unlock at least one ability that lowers merchants prices. Items that take place in your inventory can be stored in player locker and get you can get rid of them after you secure yourself better prices at the shop.
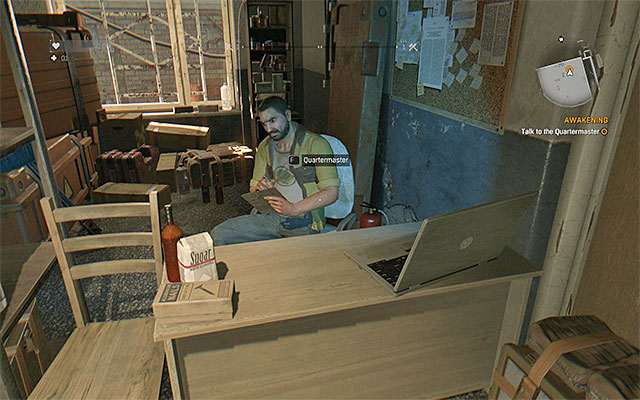 Tower quartermaster
Regularly visit not only the merchants, but quartermasters residing in the main shelters as well. Those meetings are very paying, since every day quartermaster can give you a set of FREE items. Usually he gives you 1-2 weapons and few one-time use items (like firecrackers or lock picks). It is a very valuable help, for otherwise you would have to spend money or supplies on getting those same items.
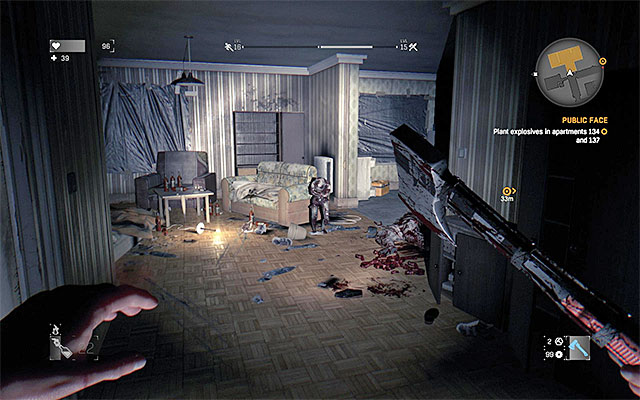
 An example zone that can be secured
Main quarters of the survivors are not the only places in the game world where you can feel safe. In each of two main parts of the Harran there are potential safe zones marked on the map with a red house icon. You can pick the challenge and try to take control of those safe zones. After succeeding, it will gain some of the characteristics of main hideout (possibility to use the bed, locker, in some cases meetings with other survivors). Safe zones can be also used when you want to quickly run away from enemies (it might be too far to the main hideout). It is especially important during the night, when you can shorter the potential chase of the infected.
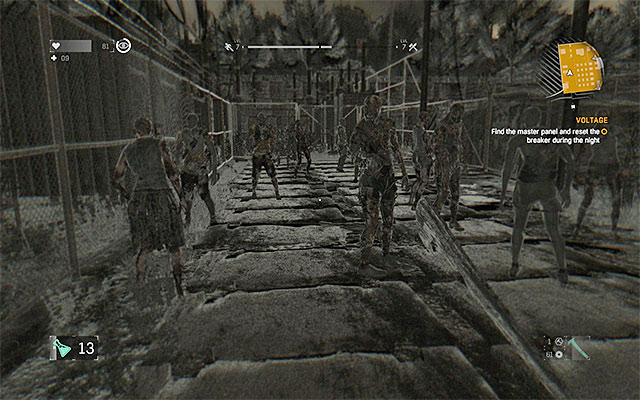
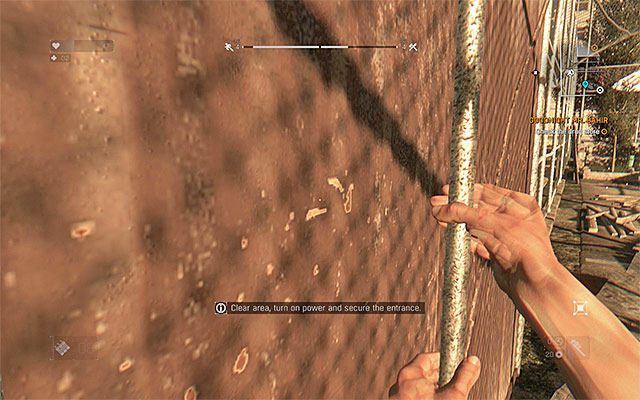 Block all entrances to the safe zone
Routine of work when taking control of new safe zones is always similar and looks like that:
1) Remove all enemies that reside in the uncontrolled zone - If they are common zombies then you can beat them in direct combat. If you have to deal with elite types of infected, then try to lure them away from the zone, this will allow you to save some supplies and not risk your life. You can, for example, show yourself to infected and count on it that they will run behind you or you can use firecrackers.
2) Close all entrances to the zone - Mostly the gates, that should be moved or lowered. It is important not to do it too fast and first focus on securing the area (or lurking the zombies away). You must know that securing a passage can sometimes take few seconds, so be sure you won't be attacked while at it.
3) Find one or more switches and reestablish the electricity - It's the easiest step. You shouldn't have trouble with localizing the lever.
Caution - some safe zones are located inside buildings. If you have trouble with getting to them, search for a hatch on the roof or an open window through which you can jump inside.
A complete day and night circle is one of the more important traits of Dead Light. How to behave after the twilight you can learn from the Combat chapter. In this section you will find general information about how the whole mechanism of time flow function in the game.
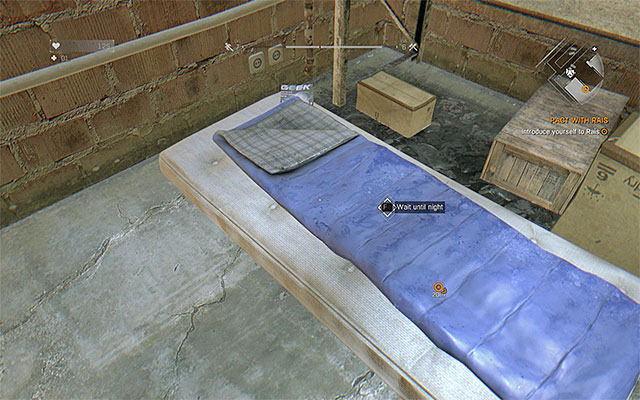 By using the bed you can quickly change the time of day
Time in Dying Light flows faster, thanks to that approximately every several minutes the time of day changes. Current time can be checked in the map window (the clock on the right side), but you can as well simply look at the watch that your character has from the beginning of the game. Very important thing is that you can change the time of day anytime you want by interacting with the bed. Beds can be found in all main survivors hideouts and in all safe zones. With them you can make it easier to survive the night and make the sunrise come faster. Of course, you can make the night come faster as well if you, for example, want to gain additional profits from working during the night (more about them below) or you want to take care of a task that is available only after the sun goes down.
IMPORTANT ADVICE: During the pretty long prologue of the game the current time of day is not changing. You can use it to your advantage and explore all areas of the slums during the day and secure all the safe zones. The game unlocks the flow of time after starting the main mission "Airdrop" - the one in which you must get to two crates with medicaments and run away from infected.
 Traveling through the night and surviving till dawn is rewarded with additional character development points
After reading all information on this page and in previous chapters you can think that traveling during the night is pointless. It is risky and forces you to use better weapons, but it's not like immediately after the sun goes down you should use the bed and skip the night. Staying in game world during the night is greatly rewarded. Those are the bonuses:
In summary, you should do some night trips. But always make sure that you have the right supplies (boosters, weapons, health kits etc.) and in case of any serious trouble be ready to quickly retreat to the closest safe zone.
 Survivor sense can be used for scanning the surroundings
Thorough exploration of your neighborhood is an important aspect of Dying Light, which you definitely shouldn't ignore, since it is a good way to easily get richer and gain precious equipment. Thanks to exploration you can find items like cash, weapons, crafting materials or one-use items. There are more valuable items to found as well, such as collectibles and blueprints required for creating new items.
In finding items to gather Survivor Sense is very helpful. After pressing the activation button the closest surroundings are being "scanned" and for a short while interactive items are marked with variously colored icons. You should use this very often, especially since its use is not limited in any way.
Caution - Most of the items are placed randomly. Only exception are unique items like blueprints or zombie statues. Information about the localization of those rare items can be found in the following chapters of this guide.
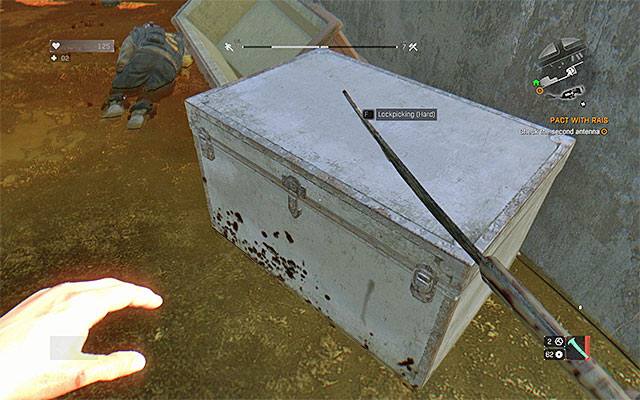 An example closed container
Most of the items in the game are well visible or in easily accessed chests, although sometimes you will find locked containers (chests, lockers, car trunk). To open such container you need to have at least one Lockpick and complete a mini-game. Lockpicks can be found in the game world, bought from merchants, received from quartermasters or crafted based on a specific blueprint (look to the Crafting chapter).
The rules of lockpicking mini-game aren't complicated, but they require you to be very precise, especially when you're facing a more complicated lock (the game shows difficulty level before you start the mini-game). Place the Lockpick in any position you want (with mouse or the analog stick of the gamepad) and then try to turn the lock with a screwdriver (hold the right button). If you have chosen the right position, the lock will open, otherwise it will block itself. It is VERY important not to overdo with number of tries to turn the lock, otherwise the Lockpick will break and you will lose it. If you see that your attempt have failed, quickly release the turning button, put the Lockpick in other position and try again.
Caution - in case of the simplest locks the game gives you a big margin of error. More complicated locks require you to perfectly position the lockpick. If you see that the lock doesn't turn to the end, try to minimally change position of the lockpick (slightly left or right).
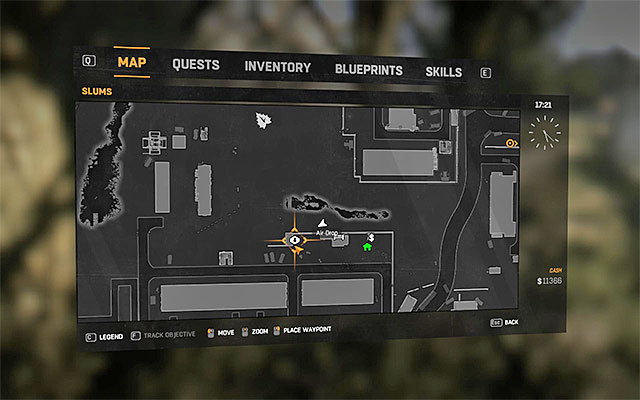
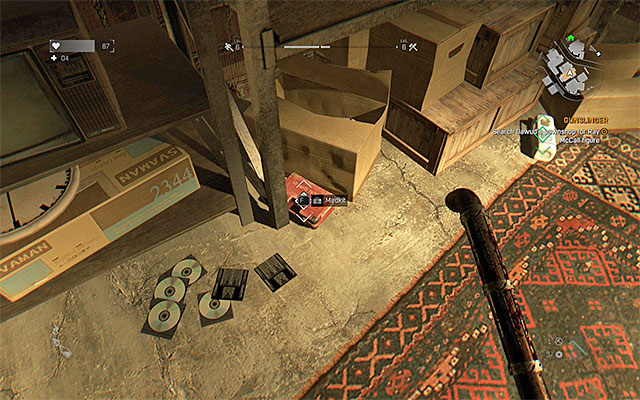
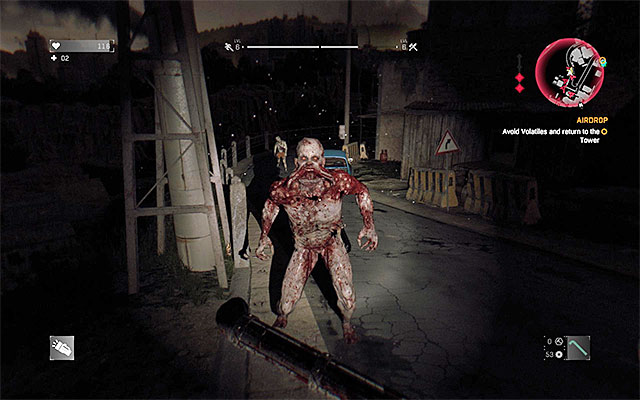
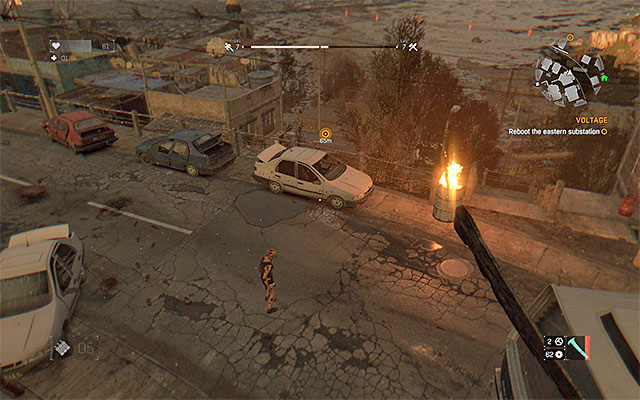
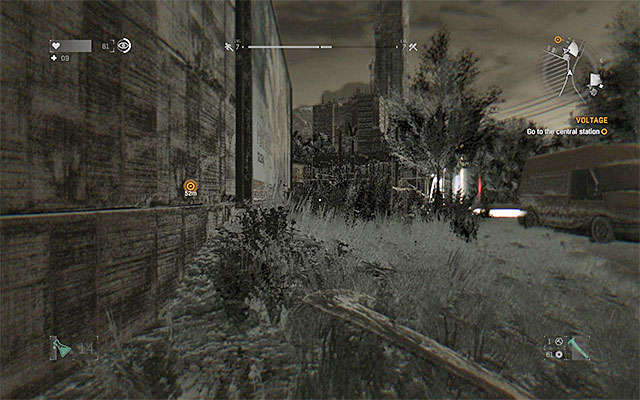
An alternative way to obtain supplies is to reach drop points and it is a bit different, in the case of each city district. In the case of the Slum, you do not need to wait for the plane to arrive and drop a supply crate. An example of the icon that symbolizes drop zone has been presented in the above screenshot. As soon as you note that there is a new airdrop available, try to reach it AS QUICKLY AS POSSIBLE. Along your path, keep an eye out for a parachute and burning flares, which should direct you towards the crate. The downside is that also the rest of the people I the area head towards the airdrop to get it first. So, if you hurry, you reach the spot first. Otherwise, you may encounter hostiles or you will not be able to obtain new supplies. If you have run into enemies, it is necessary that you defeat them, thanks to which you will be able to pick the items in the crate, without being bothered. An additional handicap is the fact that airdrops often land in inconvenient areas. Do not hurry to open the crate, if there are electrical discharges, or strong zombies around (it is better to kill them, or lure them away, first).
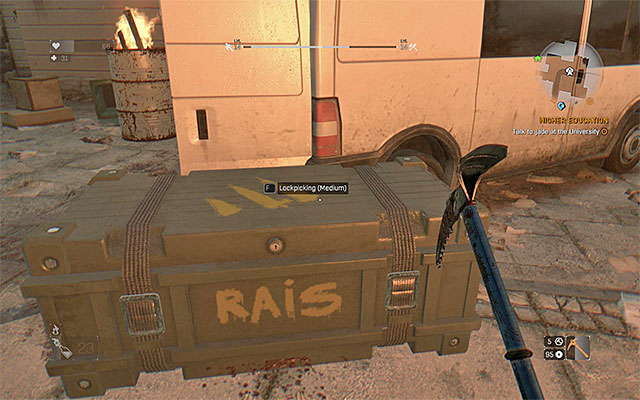 In the Old Town, airdrops are guarded by Rais's people or by strong monsters.
After you reach the Old Town, you will have to wait for the plane to arrive, because all of the drop points are already displayed on the map. You can get to them in any order and without haste (you do not need to worry that they disappear, as a result of your failing to take action) . Also, in this case, you need to expect enemies to be staying near the airdrop. In the majority of cases, these are Rais's men (watch pout if they use guns), but sometimes you also encounter monsters (usually, these are elite ones, such as mutants). Apart from defeating the opponents, nearly always it is required that you pick the lock on the crate so, make sure that you secure the area first.
I have already mentioned that in the crates, there is additional gear. These are DROPs, which you need to supply to one of the quartermasters, after you get them. Also, you may also obtain first-aid kits from them, flares or valuables, which you can sell to local traders.
Note - in exceptional situations, you find airdrops under the water. It is best to search for this one in two phases. First find the crate and after you resurface, hold your breath and return there to open and loot it.
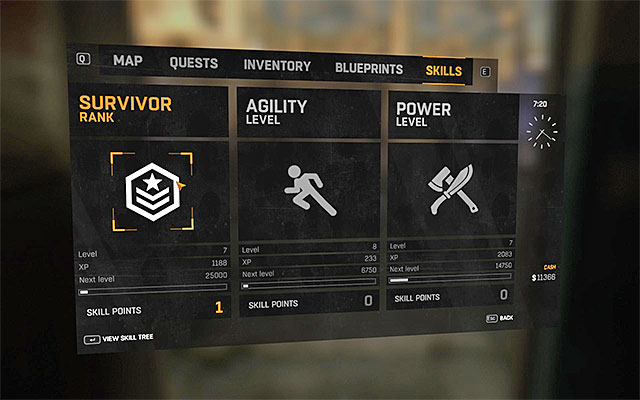
There are strong RPG accents in Dying Light. During the game, main character becomes stronger and he gains access to new better abilities. You can influence your surroundings as well, for example by lowering the prices at local merchants.
Character development in Dying Light mainly focuses on three main group of skills, that gradually increases. It happens in similar manner to games from The Elder Scrolls series, by repeating certain activities (like fighting or climbing) you gain experience points connected to that ability. Character development tree can be opened at any moment of the game and it is shown on the picture above. After gathering the required amount of points for a specific skill (they have been described on the following pages of this chapter) it levels up by one. You will be given one skill point, which you can spend on unlocking chosen ability from the development tree. It is worth mentioning that some abilities are connected to other ones, which means that they can be unlocked only of you already have other ones.
 Power increases mostly by killing enemies
Power is one of three skill groups available in the game. This are the main ways of gathering experience points required to develop it:
Important! You can improve the speed of gathering experience points by walking on night trips. After the dusk you will be given 2x more experience points in that group of skills.
Below you can find a list of most useful power abilities. You should get them as fast as it is possible (which means, after getting to the required power level).
Stun Kill - This ability allows you to eliminate enemies quicker. Remember to stop standard attacks after stunning an enemy, instead you should run towards him and quickly press the execution button.
Sturdiness - It increases your resistance for damage received, After unlocking you will die and use health kits less often.
Melee Throw - A great active ability for those that want to deal lots of damage to enemy. Don't forget to search and take again your weapon after throwing, since unlike with stars or hatchets you don't lose your weapon after the throw.
Combat Adept - Unlock this passive ability as fast as possible. It increases characters efficiency on combat, gives him more stamina and unlocks access to variety of new abilities.
Conserve Weapons - This passive ability becomes later in the game when you gain better weapons. It will allow you to use your favorite weapons longer before they become useless (more about recovery limit in the Crafting chapter).
Power Attack - This active ability is useful when you have a stronger enemy to kill, it allows you to make a single strong hit (which is loaded by holding the attack button). This ability works only for melee weapons, but is still worth owning.
Windmill - This active ability is similar to previous one since it too needs to be loaded. The difference is, this time all enemies surrounding your character are hurt. It works only with two-handed weapons and it is wise to have both them unlocked and choose them depending on circumstances.
Ground Pound - Another very useful ability from the Power tree. It works best when combined with freerunning actions, since it is activated in the air. You can bounce off from a roof or higher ledge and calmly aim during the flight into a group of enemies, which you want to weaken and/or knock over. Caution - you must have a double handed weapon for this ability to work.
Drop Attack - This ability too works very well when combined with quickly moving through the game world with freerunning techniques. Every time you find yourself above an enemy, you can use the opportunity to dispose of him with a surprise attack. Caution - you must use a one-hand weapon for this ability to work.
Stomp - It is definitely recommended to get this active ability. By stomping the skulls of fallen enemies (mostly regular zombies) you will be able to kill them MUCH quicker, you will save your time and supplies.
Combat Expert - Just as with the Combat Adept ability, you can make your character more efficient in eliminating enemies, increase his stamina and unlock new abilities on the Power tree.
Takedown - A very good active ability to remove enemies without alarming the whole neighborhood and to easy eliminate enemies who in a traditional combat could be troublesome (including monsters and alive enemies).
Ultimate Combatant - Last position in the Power tree. Try to get to it as fast as possible, since after getting it you won't have to worry about losing stamina when attacking.
 Agility improves mostly when you're traveling with the use of freerunning style
Agility is one of three group of skills available in the game. Those are the main ways of gathering experience required for developing it:
Important! You can improve the speed of gathering experience points by walking on night trips. After the dusk you will be given 2x more experience points in that group of skills.
Below you can find a list of most useful agility abilities. You should get them as fast as it is possible (which means, after getting to the required power level).
Grapple - Main use of this active ability is more effective protection from biting enemies that jump on your character. No matter what type of enemy you face, you can use his attack against him by counterattacking. You should train this move on weaker enemies so that you could easily use it against the stronger ones.
Slide - Slide itself isn't a groundbreaking ability, but it gains greatly thanks to the ability described below, to unlock which Slide is necessary anyway.
Leg Breaker - It is one of most useful abilities from the Agility tree, which activates after you begin sliding. A great advantage of this ability is its versatility. You can use it to stop basic zombies and the stronger ones as well. Enemy with his legs broken is an easy prey to finish off.
Dropkick - It is one of many active abilities connected with freerunning, which is used for offensive actions. After jumping you can press the attack button to hit enemy or enemies standing in front of you with both your legs. Depending on situation, you can stop their attacks temporarily or easily knock them over and after that finish them off.
Health Regen - Increasing the health bar is recommended early in the game. Unlocking this passive ability will reduce the amount of situations when you're on the brink of death.
Freerunning Adept - Unlock this passive ability as quickly as possible. It mostly upgrades character movement, thanks to what freerunning actions becomes easier. Except for that, it unlocks access to variety of new abilities.
Escape - Similarly to Grapple, you can use this ability when facing biting enemies. It allows you to quickly free yourself when a zombie catches you, thus reducing the amount of damage reduces by bites.
Light Drop - A very useful ability if you regularly use freerunning for traveling through the game world. It halves the damage received when falling from high places and will very often save you from serious damage or even death.
Forward Roll - An active ability with similar use to the one described above, it reduces the penalty for falling from high places. Main difference is this one is an active ability, you must press the crouch button when near the ground to make a roll and avoid damage.
Tackle - This ability has more than one useful applications. Most of all, you can use is while running through areas occupied by regular infected and you don't want to waste your time on avoiding them or jumping above them. You can use it to knock over stronger enemies and uncover their weakpoints as well.
Freerunning Expert - Similarly to the passive ability Freerunning Adept you can improve the process or traveling with the use of freerunning techniques. And you will guarantee yourself access to new abilities from the Agility tree.
Tic Tac - Having this active ability increases your character skills when it comes to freerunning, since he can run on walls and thus easier get to higher ledges. It is an active ability, so you must always press the right buttons for it to work.
Ultimate Runner - The last ability from the Agility tree. Try to get to it as quickly as possible, since it makes moving around the game world much easier. It will help you with running from zombies or completing running challenges.
 Survivor increases mostly by completing tasks
Survivor is one of three group of skills available in the game. Those are the main ways of gathering experience points required to develop it:
Warning! Every time you die your character loses some of Survivor points. Avoid unnecessary deaths, since it will make unlocking new abilities longer
Below you will find a list of most useful abilities from the Survivor tree. You should get them as fast as it is possible (which means after getting to the required level).
Backpacker - This ability gives you four additional slots to your equipment. It's invaluable help thanks to which you will have to return to lockers and merchants less regularly. And you can allow yourself for more variety of weapons, so that you will be able to fit to current situation on the battlefield.
Boosters - Try to get this ability as fast as possible since it will guarantee access to some main boosters. It is especially important to have the booster for traveling during the night, which allows you to see far more in the dark.
Barter - Unlocking this passive ability reduces prices at merchants by 10%. You will feel the difference at the beginning of the game, although you can gain the most later in the campaign when you will want to buy more expensive blueprints and unique weapons. Important - if you want to gain the most, unlock two further abilities connected to this one, thanks to what the prices will reduce for 30%.
Crafting Expertise - A very good passive ability. It allows you to craft more items while using the same amount of crafting materials. You will appreciate this when creating health kits, lock picks and other one-time use items. Aside from that, it unlocks access to many new abilities from the Survivor tree.
Electric Fences - This active ability becomes especially important after you progress to later missions, for that is when you will start meeting stronger monsters and traps like electric fences will help you to quicker and simpler eliminate them.
Exploding Cars - Just as above, ability to set new kind of traps can be useful when disposing of more persistent enemies. Remember to keep your distance from exploding cars and keep in mind that explosion can get attention of hunters and running infected.
Lucky Repair - Having this passive ability is especially important later in the game, when you start to gain better weapons. Unlocking this ability gives you chance to make more repairs before weapon becomes completely useless.
Camouflage - This is an unusual active ability, especially since you can't use it while moving. Nevertheless, you shouldn't skip it, since it can help you lose elite zombies types when they're trying to track you down or it can help you organize an ambush.
Shield Mastery - Try to get this ability after you progress in the main storyline. Using shield as an additional protection from attacks can be very helpful when fighting mutants or alive enemies.
Grappling Hook - Main property of this active ability is unlocking access to the named hook, which is useful when freerunning through the game world. You can craft the hook yourself or get it from the quartermasters. Buying this ability unlocks access to few others.
Ultimate Survivor - Last ability from the Survivor tree. Thanks to this ability you will maximally enlarge your health bar and improve the use of described above abilities connected to shields, camouflage and grappling hook.
Crafting in Dying Light has many similarities to the Dead Island series, although there are some new elements and important changes. Basically, it can be divided into three categories, that is actions focusing on creating items (blueprints and boosters), on upgrading the weapons already possessed and on repairing the used weapons. All of those branches have been thoroughly described in the following pages of this chapter.
Important - Don't forget about unlocking abilities connected to the crafting. You will find them in the Survivor tree and some of them are:
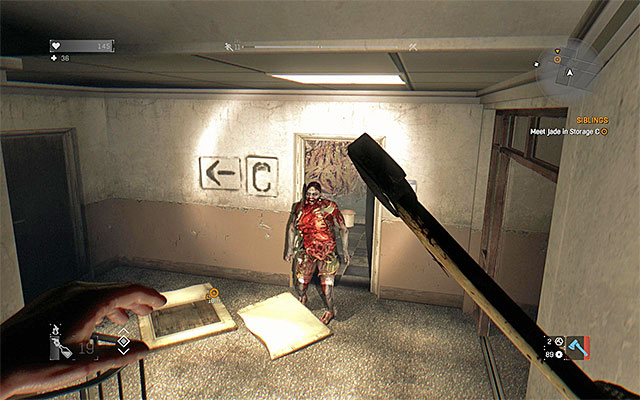
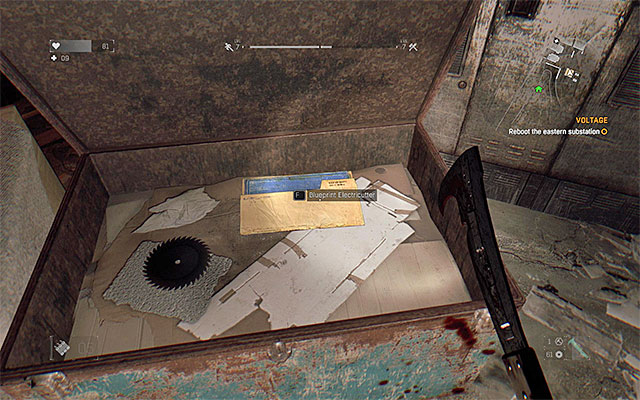 An example blueprint found in the game world
Blueprints are in my opinion most important branch of crafting in Dying Light, because they are used to create new items. You can mostly find them in the game world (they are usually well hidden, sometimes in locked containers), but they can also be found by merchants and you are awarded with them for completing some missions. You should definitely unlock the Survival Starter Kit ability that can be found in Survivor tree, thanks to which you will get a free set of basic blueprints.
Thanks to blueprints you can most of all create new weapons with unusual properties (like the ability to set enemy on fire or electroshock them). You can find blueprints for creating throwing items (like stars) and one-time use items as well. As for the last ones, you should be especially interested with health kits and lockpicks, which should be created whenever you have the opportunity. It is good to have reserve of those items all the time.
Sadly, the game won't allow you to create new items with no limits, since you must always have the materials shown after selecting a specific blueprint. Try to regularly gather all items that can be used in crafting, especially since they don't take slots in inventory. If you plan to create an unique weapon from a blueprint, you must have one specimen of standard version of that weapon as well.
Important - Crafting materials can be purchased from merchants, but it is unadvised to buy them until you become quite rich. You should simply remember to thoroughly (with the use of survivor sense) explore all locations visited.
Boosters is one of the items category that you can craft. They work similar to potions in role-playing games, after drinking them your character receives a temporary boost to his statistics or to way he interact with surroundings. Boosters are unavailable until you unlock the Boosters ability from the Survivor skill tree. It is recommended to unlock Boosters XL ability as well which makes the boosters effect last longer and reduces the amount you must drink.
Four main booster types are:
As in case of blueprints described on the previous page, before crafting boosters you must make sure that you have the materials required. Sadly, they are not commonly available. To create boosters you need herbals that must be found and gathered by yourself. Luckily, the game hints you where they can be found with markers on the map. An icon representing the herbals is shown on the picture above.
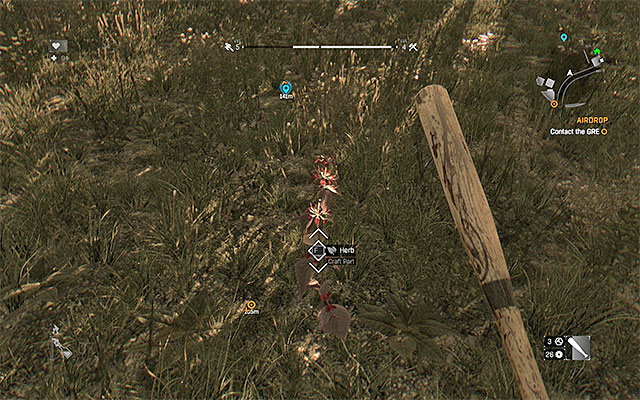 Collect all herbals from a specific neighborhood
After arriving at the are marked on the map help yourself with the Survivor Sense, locate the herbals and collect them. Most of them are visible, but some can be found under water and you must dive to get them.
Caution - Herbals, just as random generated loot, regenerates after a while. You can revisit the same locations many times and collect them again.
Caution - you should definitely purchase the Crafting Expertise ability from the Survivor skill tree, it will allow you to create two times more boosters.
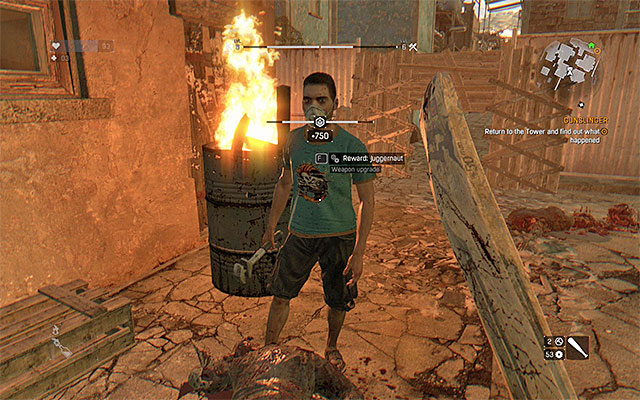 Upgrades can be collected by completing side and minor quests
Using the Weapon Upgrades is far less complicated than using blueprints or boosters described on previous pages of this chapter. After gaining a certain upgrade all you need to do is highlight the weapon you want to upgrade in the inventory and press the modification button. Since this operation cannot be undo, make sure that you are really interested in that weapon and that it will serve you for a long time.
Weapon Upgrades, just as blueprints, can be found in the game world, bought by merchants or be given for completing some tasks (mostly side quests or random meetings). As for their attributes, upgrades can allow you to deal more damage with a certain weapon or increase its durability. Try to select them wisely so that you will gain the most and actually feel the difference of the upgrades.
Caution - Common weapons can be connected with only one upgrade, although the unique ones can have more upgrade slots.
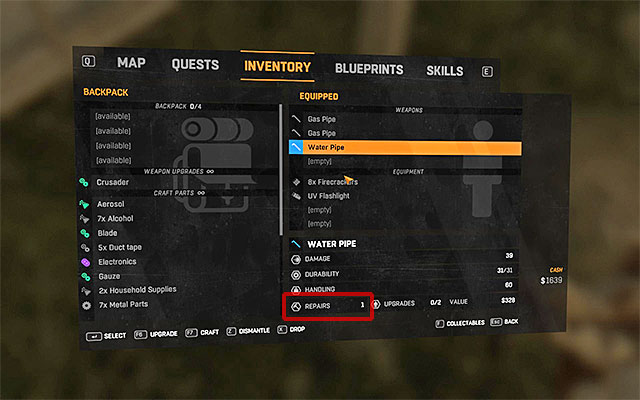
One of many similarities between Dead Island and Dying Light is the fact that weapons used by main character gradually worn off. Current weapon state is depicted in points and it can be checked after highlighting the item in the inventory. After all points are used weapon becomes useless and if you're in the middle of combat you should quickly swap to other weapon, thanks to which you will continue the battle with no slowdowns.
Worn off weapons can be repaired, although each of them have a limited amount of repairs possible. This parameter can be checked via inventory as well - the place where you can read it has been shown on the picture above (in this example there is only one remaining repair available). Good news about repairs is you can do them in any place in the game world (holding the right button). Bad news is, small amounts of items are required, so remember to have them in your inventory.
After you use all repairs and for the last time reduce its durability to zero you won't be able to use it anymore. In that case you should demolish it and get few materials from it. You can do the same with regular weapons found in the game, which you won't need and which you won't be able to sell with nice profits.
Caution - It is recommended to unlock the Lucky Repair from the Survivor skill tree. After purchasing it some repairs won't reduce the repair limit for a weapon and you will be able to use it longer.
Caution - If you have some valuable weapon, don't waste it on fighting with weakest enemies. Better leave it for fighting the elite enemies.
Main campaign of Dying Light consists of tens of missions which you must complete in the preset order (their thorough description can be found further in this guide). The game usually won't hustle you, which means that until you get to the marker on the map current mission won't continue. It is not recommended to be in hurry but focus on other activities anyway. For example, after completing the prologue try to upgrade all of skill groups for a few levels and find as much safe zones in the slums as possible.
 Look around for NPCs with whom you can talk
You must unlock side missions on your own since only few of them are given to you automatically. Look on the map for icons (like with exclamation mark) that symbolizes characters from whom you can get a mission. There are various rewards for completing those tasks - in addition to experience you can receive money, rare weapons, blueprints or weapon upgrades. The premises of such missions vary. You may have to free a civilian, who hid from zombies in a wardrobe, or help people defeat a big mutant. The most profitable, in my opinion, are the ones that assume escorting other NPCs, which you recognize by the shield icon on the map. They are longer and more difficult than standard quests, but for completing them, you are usually rewarded with rare weapons blueprints and weapon upgrades.
Caution - After receiving a mission check its briefing in character journal. There you will find, among other things, information about its difficulty level (at the beginning you should avoid hard tasks).
Caution - Some missions can only be played at a certain time of dime (like only during the night). If after arriving at the mission mark nothing happens check if you shouldn't be there at a different hour.
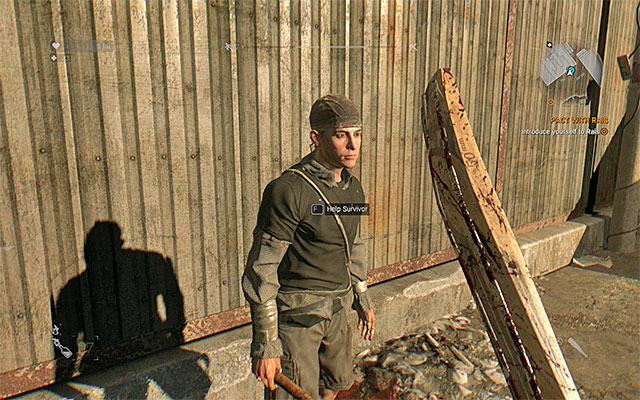 You should help survivors you meet
Small tasks in Dying Light are randomly generated and they can activate automatically after you reach a specific area of the map. Because of that, while exploring the world you should watch your mini-map not to miss them. Those quests don't show in your journal, but you shouldn't ignore them since completing them can be awarded with experience points and precious treasures. Those tasks has various objectives. You might need to escort a survivor or save a civilian, which hide from zombies in a closet.
Caution - if you fail a small task you won't be able to retry it. Don't worry though, since later in the game a similar one might activate.
Caution - Some of random meetings with survivors are just short talks. You should listen to them since you can find out about, for example, localization of a chest with valuable items.
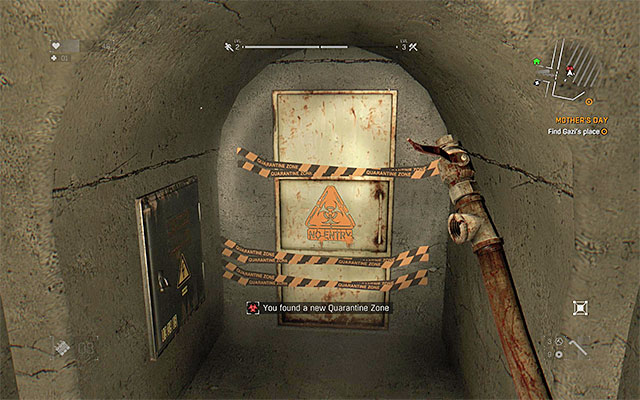 An example entrance to the location in which quarantine zone challenge starts
Challenges aren't available since the beginning of the game. You can activate them in two ways - by reaching the markers on the map (after they show there) or by finding places where you can complete them while traveling through the game world (like door that leads to quarantine zone). You get experience points for completing those challenges.
Challenges can be divided into four groups:
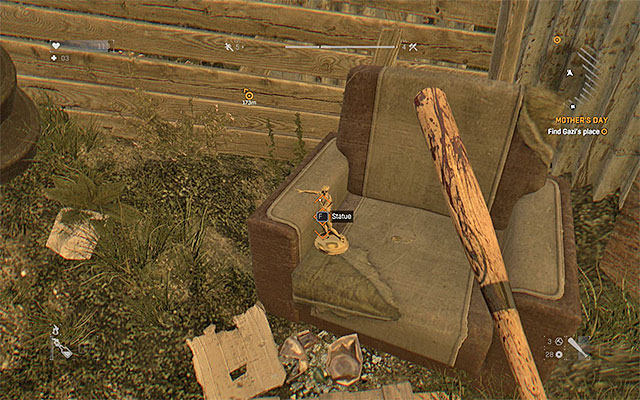 An example secret (zombie statue)
There is a lot of secrets to found in Dying Light. In most cases you can find them by exploring the game world. Sadly, some of secrets are hidden in locations visited or unlocked only while on a mission. Remember that survivor sense can be very helpful in finding the collectibles. Information about the location of collectibles can be found in the further part of this guide.
Secrets are divided into five main categories and, sadly, most of them have only collectors value - they have no influence on your characters development or his equipment. Secrets available are:
On this map, you can see all the places in the Slums that you will visit when completing main missions (they are done in a specific order). The Tower and Rais's Garrison are important locations in the Slums, because large groups of survivors hide in there. In these buildings, you can obtain a lot of new quests and also do many other things, like for example buy items, complete side quests, etc.
How to unlock: Unlocked right after beginning the game (Tower on the map).
Difficulty level: easy
Reward: 750 experience
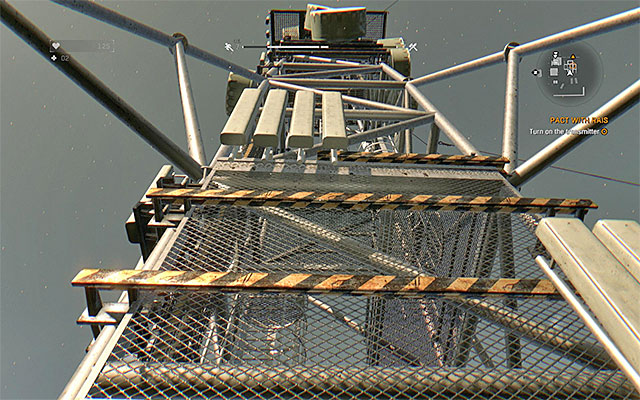
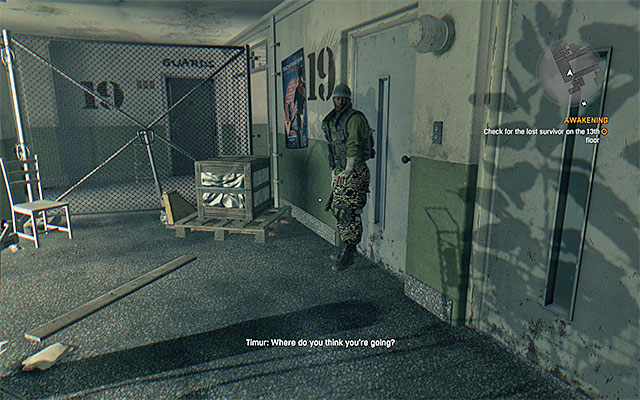 Use the elevator.
Exit the starting room and listen to a short conversation with a Guard. Head to room number 190 (the mini-map will help you). Next to the door, you will see another guard, Zafer. Enter room 190 and talk to Rahim, standing on a large balcony. After the conversation, leave the room and head to the elevator, next to which you will see Timur. Interact with the elevator to find yourself on the thirteenth floor of the building.
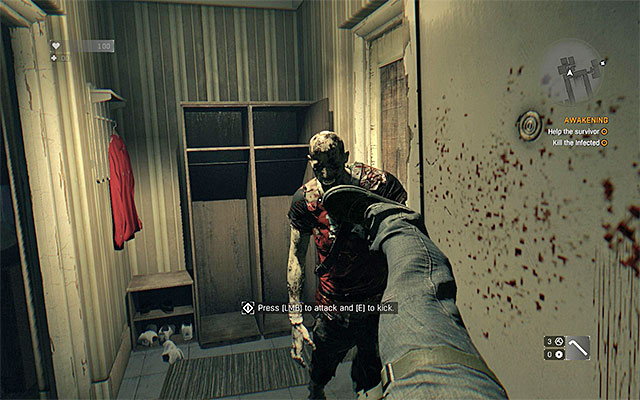 Kill the infected using kicks and melee weapon.
After Crane contacts the authorities from GRE, start to explore the thirteenth floor. Reach the room that the game is showing you and enter it. Inside, you will encounter your first infected. Use kicks and the melee weapon that you have to defeat the monster. After the fight is over, located the door leading to the bathroom and talk to Mark. You will learn that he needs help.
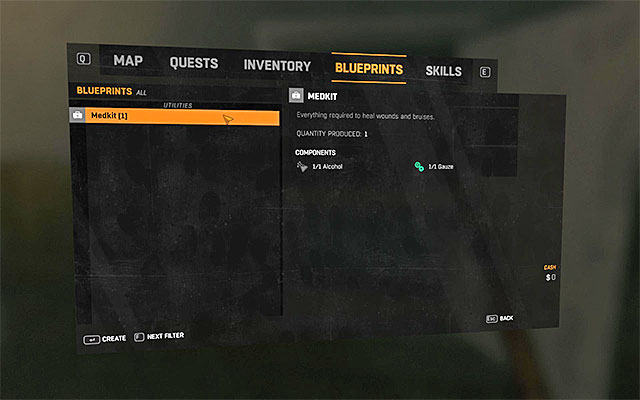
Talk to Mark and you will unlock the first Blueprint - Medkit. To craft a Medkit, you will need one piece of Gauze and one bottle of Alcohol. Look around the rest of the rooms and you will find all the ingredients. Open the inventory, go to the Blueprint tab and create a Medkit. Return to Mark. After you heal him, go back to the elevator. Return to the nineteenth floor and go talk to Rahim.
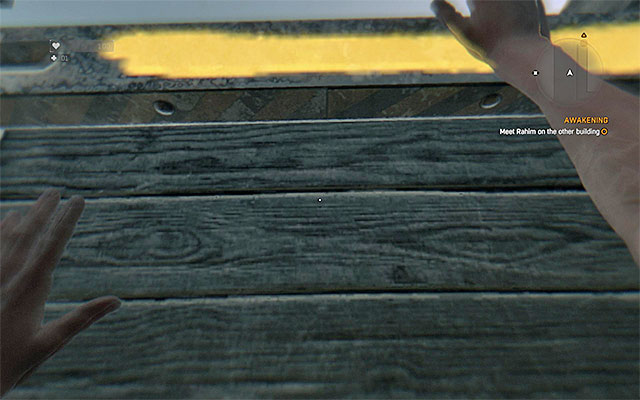 You have to grapple the interactive edges.
Locate room number 194 and interact with the bag (Player's Stash). Choose the Outfits tab and wear the Fresh Clothes received from Rahim. Now, find the stairs and go up. When you reach the rood of the Tower, you will learn something about using parkour techniques to move around. Face the first edge marked with yellow paint, run towards it and jump to catch it. Climb the crane and carefully reach the place where Rahim awaits you. Stand on the edge of the crane and jump into the hole to land safely on the bags and mattresses.
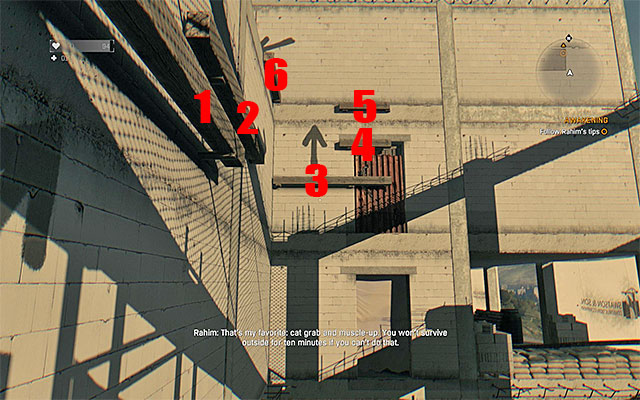
Start to climb the unfinished building. You will be forced to perform new moves very soon (look for edges marked with yellow paint). You might have some trouble in the section with wooden elements attached to the walls. You have to grab the edges in the order shown in the screen above. Every time you jump, face the edge first and then perform the action (otherwise it will be impossible). At the end, climb the shelf. Continue to jump and walk across the platforms.
 Jump into the hole in the lobby and exit the Tower.
Your target now is the crane, which you have to climb. When doing that, you will notice some screen glitches, which are the effects of the infection at the beginning of the game. Find Rahim and talk to him. You can now go off the roof. Return to the nineteenth floor and use the elevator again, this time, to go to the ground floor. When you're there, talk to the Quartermaster, who will give you a Table Leg, a Gas Pipe, a Lockpick, Medkit and some Metal Parts. Now you have to leave the Tower. The main door is blocked. You have to find a large hole with blue light and jump into it. You can now go outside.
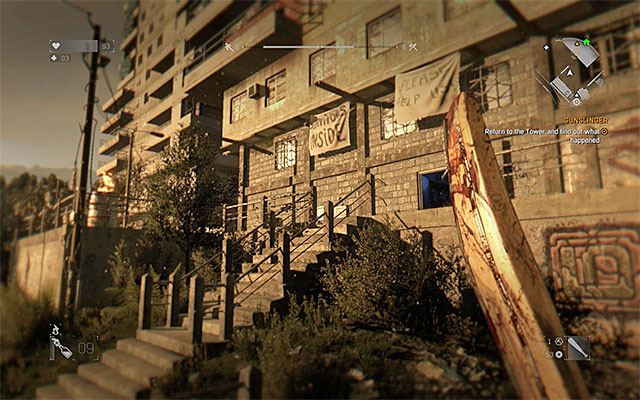
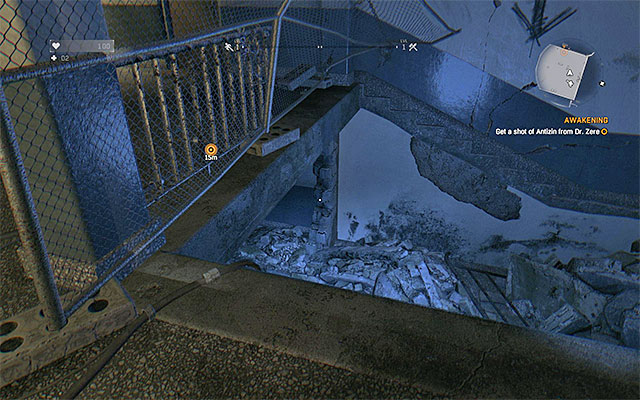
 Reach the safe zone.
After leaving the Tower, head south. Your destination is the nearby safe zone (number 1 on the map) and you can reach it in any way (for example by travelling on top of the buildings or sneaking through the streets). After arriving at the place, climb the damaged fence or go past it using one of the roofs. Go to the back of a large trailer, where Dr. Zere is conducting his research. Talk to him to receive Antizin and unlock a new main quest.
How to unlock: Complete main quest number 1 - Awakening (number 1 on the map).
Difficulty level: medium
Reward: 3250 experience
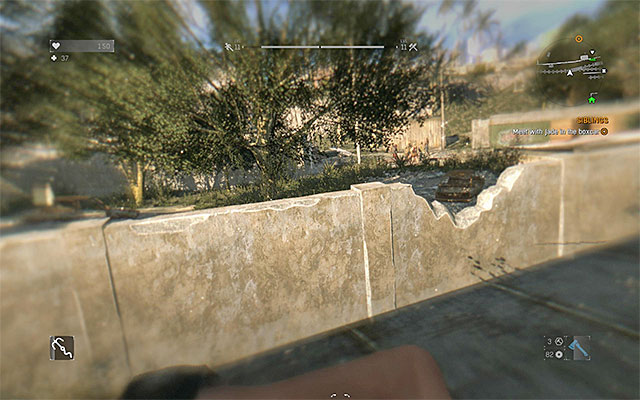
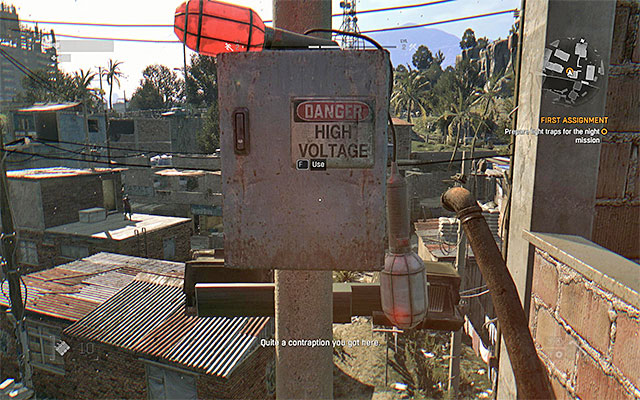
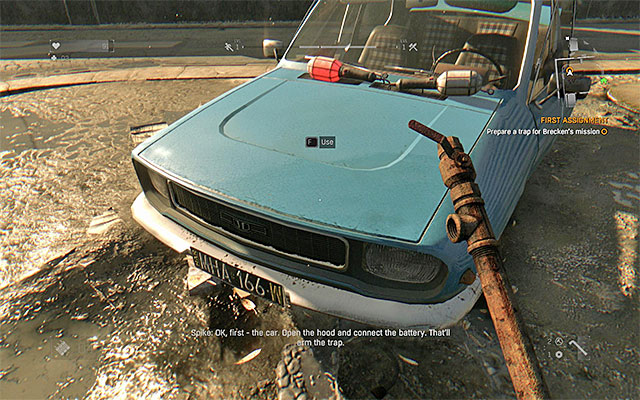 You have to prepare the trap.
Start this mission from talking to Spike, who can be found in a small cabin in the safe zone (number 2a on the map). After the conversation, take the Firecrackers. Now you have to head back towards the Tower, to a car parked to the west of the survivors' hideout (number 2b on the map). Activating the light trap here is very easy, because there are no zombies around. When the trap is ready, listen to a short conversation over the radio, with Jade.
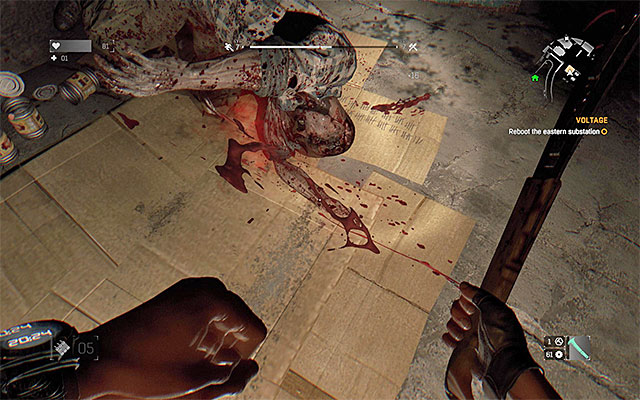
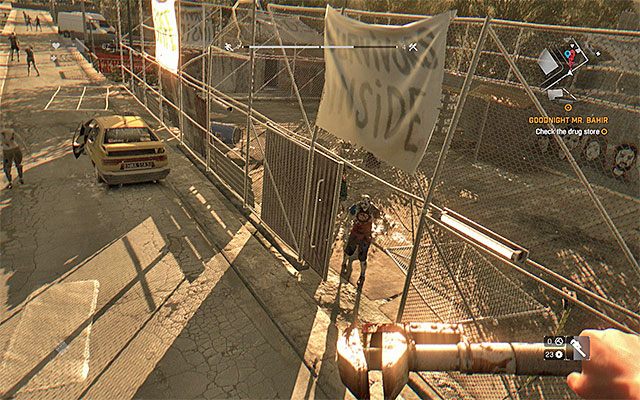
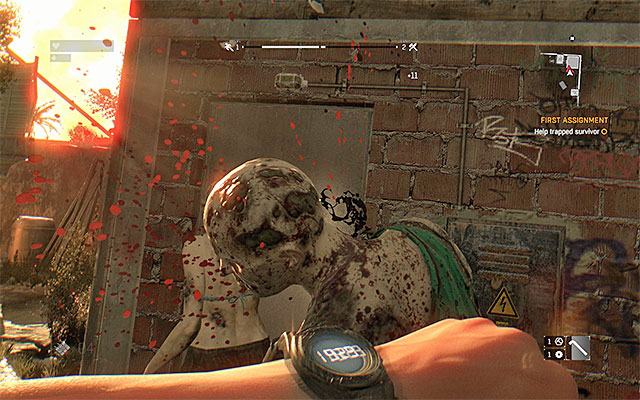 Kill the two zombies near the entrance to the building.
The person that you need to rescue is supposed to be in a safe zone (not active yet) north from your position (number 2c on the map). Reach the zone, for example by climbing the main gate. Attack the two Infected that try to enter a small building. When the fight is over, open the door. Unfortunately, it will turnout that the person you had to rescue is already a zombie and you will have to deal with the situation. After securing the area, find a fuse box (in the room where you killed the last Infected) and interact with it. It will allow you to unlock the safe zone.
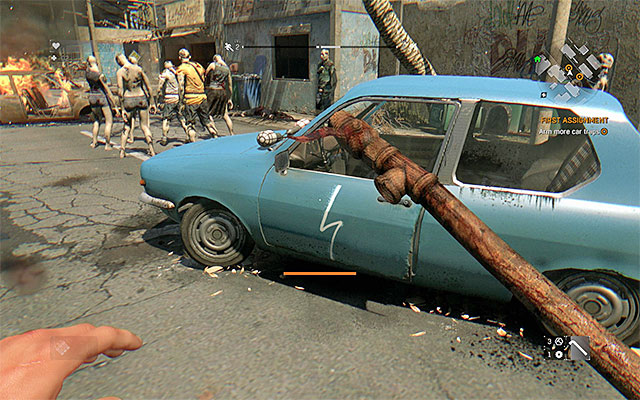 Kill all the Infected or distract them. Then, activate two traps.
Head to the roof of a nearby building (number 2d on the map) and allow Crane to contact GRE. Your next task is to activate two traps in the cars parked nearby (number 2e on the map). The problem is that there are a lot of zombies hanging around the cars. If you want to, you can kill them, but the battles will be difficult and they can easily circle you. A better idea is to try to distract the monsters with the Firecrackers obtained earlier, while standing on the roof or one of the balconies. No matter of which option you choose, you have to set up the traps (each one takes a few seconds).
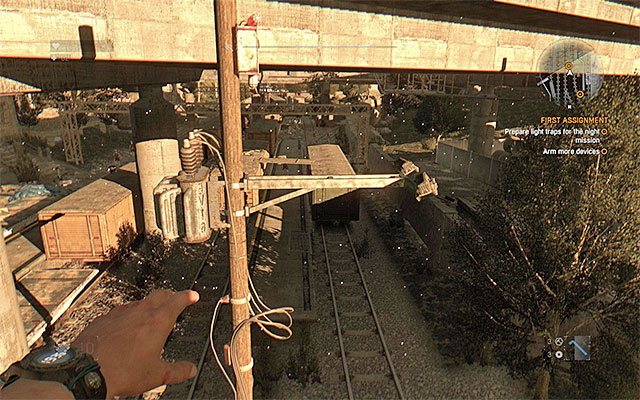
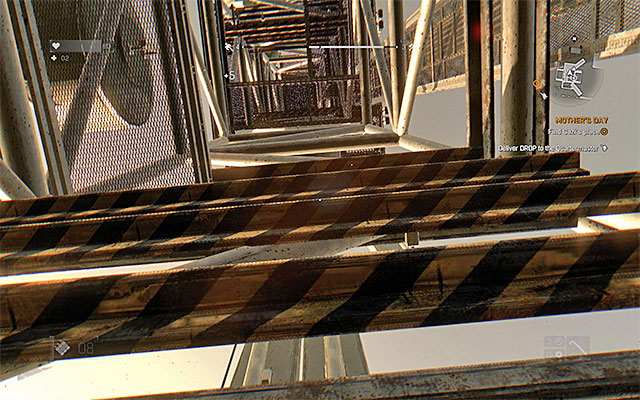
Now you have to reach four new light traps located north-west from here (numbers 2f on the map). You shouldn't have any trouble with activating the first trap (you can reach it from the roof, jumping down onto a small balcony). The most difficult trap is the one located southernmost on the map (near the tracks, next to the bridge). To reach it, you have to climb a pole nearby (hold the jump button). When you reach the position shown in the screen above, jump onto a small metal bar with a trap attached to it.
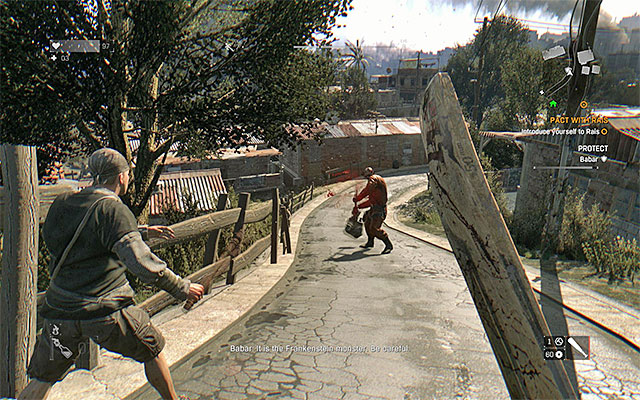
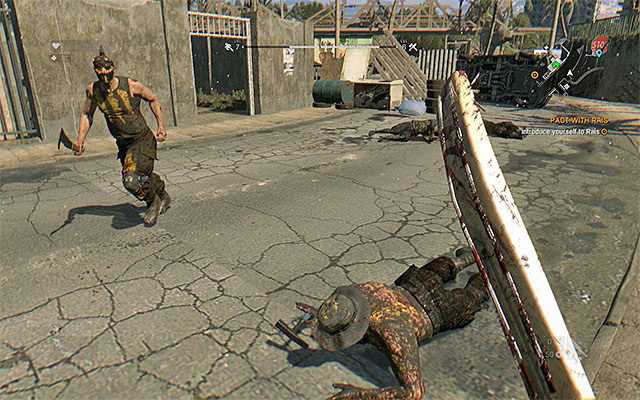
 You can use the gas bottle to defeat the Goon.
Now, head west, towards the energy terminal (number 2g on the map). When trying to bring back the energy, things will go wrong and moreover, Crane will be attacked by a giant zombie called Goon. Defeating him now can be really difficult. However, if you still want to try, quickly approach the monster, hit 1-2 times and jump back to avoid the strong attack. You can also take advantage of the gas bottles located nearby and detonate them using for example Throwing Stars of other throwing weapons.
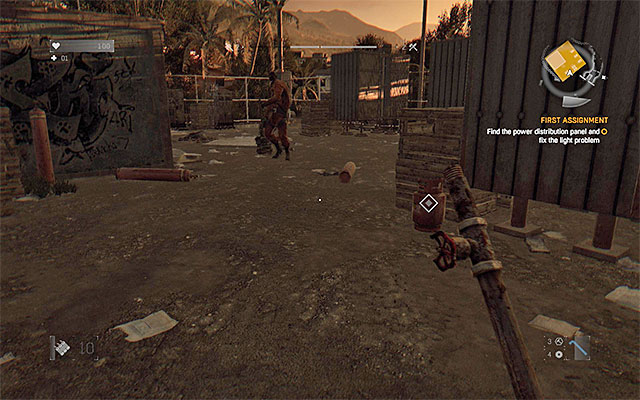
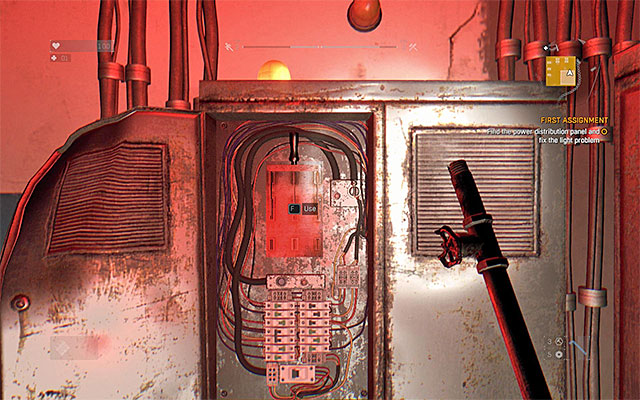 You have to check all the boxes to find the lever.
Killing the Goon is not obligatory. If you don't want to fight him, lure him away from the first box that you tried to open. You can use Firecrackers to draw his attention. No matter what you choose to do, you have to check three boxes - one located outside the building and two inside. Each time, you have to quickly press the action button to open the box. It takes few seconds, so there can be no enemies around you. In one of the boxes, you will find a lever which you need to pull.
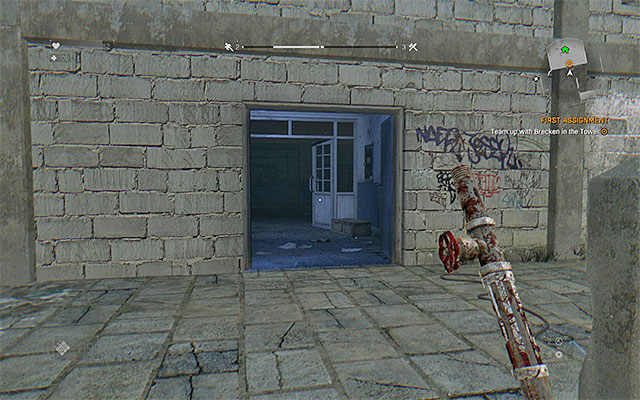 The entrance to the Tower.
Head east, towards the safe zone that you've secured earlier (number 2c on the map). After reaching it, ignore the monster from the cut-scene. Enter the small building and use the bed to wake up in the morning. Leave the zone and head south to meet Spike again (number 2b on the map). Spike will give you UV Flashlight, a kit for setting up traps and a Blueprint - Flares. After completing this mission, reach the nearby rooftop (number 2h on the map) and contact GRE. Then, head back to the Tower. Use the elevator and go to the room where Brecken is.
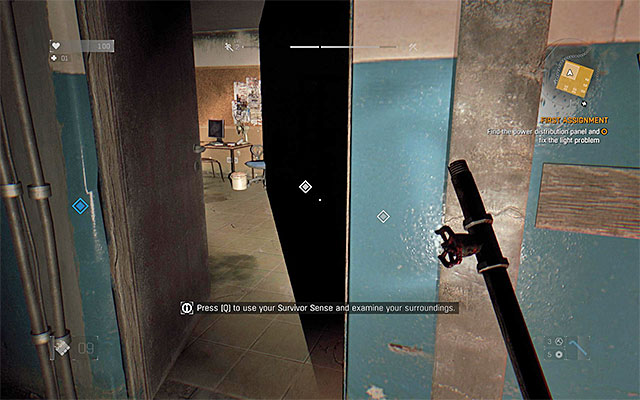
How to unlock: Complete main quest number 2 - First Assignment (Tower on the map).
Reward: 5000 experience
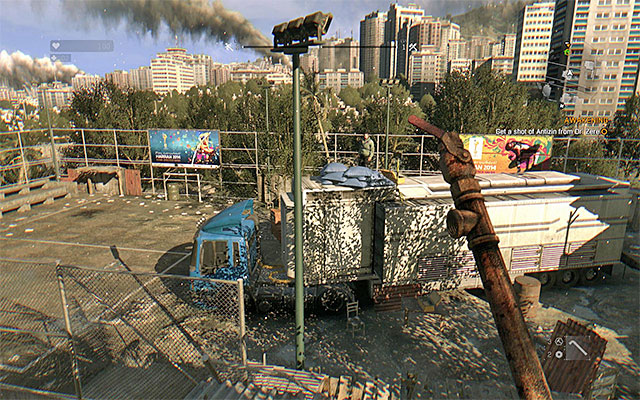
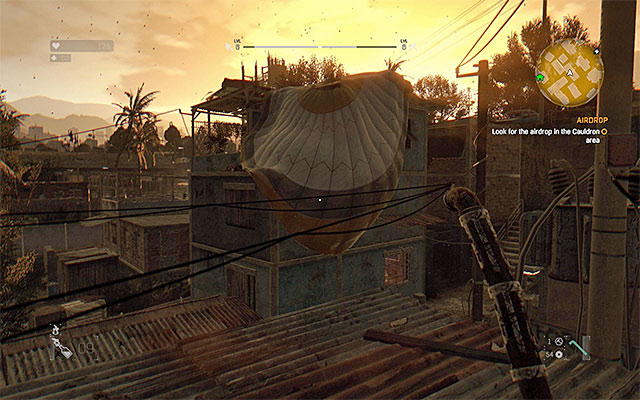 Look for the parachute.
Leave the Tower and enter the nearby vantage point so that Crane can contact GRE (number 3a on the map). Now you have to head north to reach the first drop point (number 3b on the map). It is best to travel across the rooftops to see more. Look around the area in order to find the parachute, near which you will see a box. Reach the box to notice that it's empty.
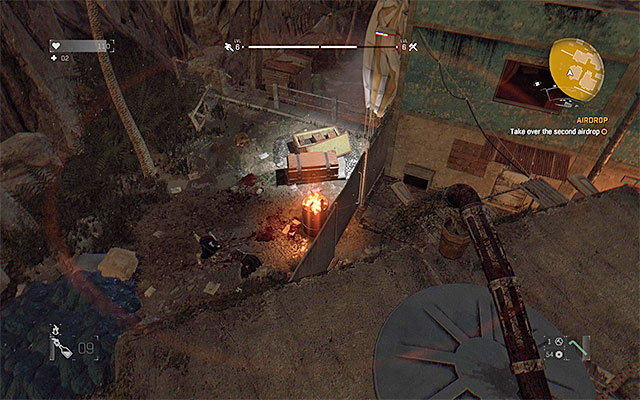 The box from the last airdrop.
Watch the short cut-scene about the airdrop and head towards the place where it happened (south-east, number 3c on the map). After arriving at the place (it is the safe zone that you've been to before), it will turn out that Rais's bandits are already there. Don't attack them, but go past them instead, as they are carrying firearms. Wait until the location of the next airdrop is added to your map (number 3d on the map) and head towards it. Before you approach the box, make sure that your hero is healed and craft some Night Vision Boosters.
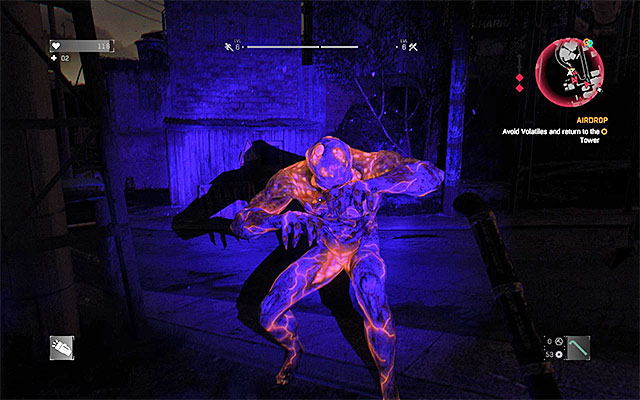 When in danger, flash UV towards the infected.
Start running immediately after you regain control over Crane, because you will be chased by very fast and agile night type of infected. If possible, head west and stay on the rooftops. Don't try to fight the monsters or other zombies, but you can slow the night type using UV Flashlight and look for light traps. Traps can be activated from distance by pressing the appropriate button, when an information shows up on the screen. The easiest way is to lose the chase by using parkour moves.
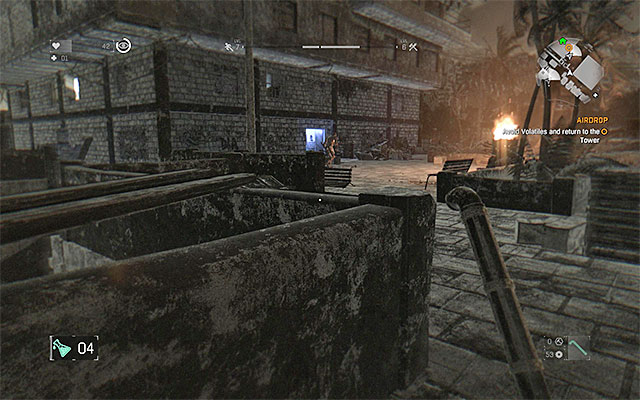 You can sneak towards the Tower or to one of the safe zones that you've unlocked earlier.
After losing the chase, check your current position. You have to reach the Tower or one of the safe zones that you've already unlocked (green house icons on the map). You must be in the stealth mode and also use Survivor Sense to highlight the nearby monsters. Using a Night Vision Booster may be very helpful. It is not advisable to use a Flashlight, because you can be easily spotted by the enemies. If you've chosen to go to a safe zone, use the bed located inside to make it till the morning. If you've gone to the Tower, you don't have to wait. Go inside and go to the nineteenth floor to talk to Brecken (you will also unlock the Runner's Suit).
How to unlock: Complete main quest number 3 (Tower on the map).
Reward: 22500 experience
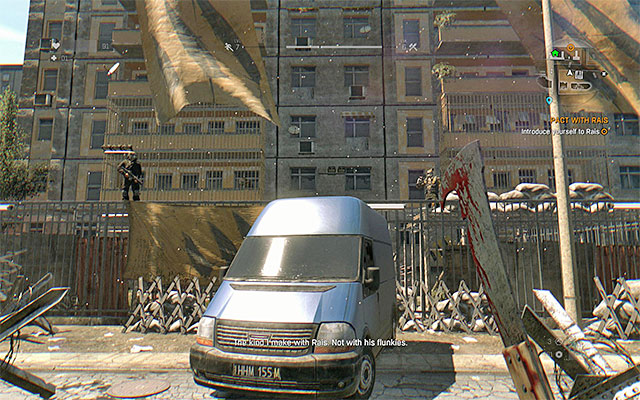 Go on the roof of the car to go past the fence.
Leave the Tower and head west. Your current destination is Rais's Garrison in the Slums (Rais's Garrison on the map). After arriving at the place, quickly go past the zombies and climb the car to make it across the fence. Go west again, knock on the door and watch a cut-scene in which you meet Rais. After the conversation, locate the door leading inside the Garrison. Here you have to talk to Karim and you will receive the first quest.
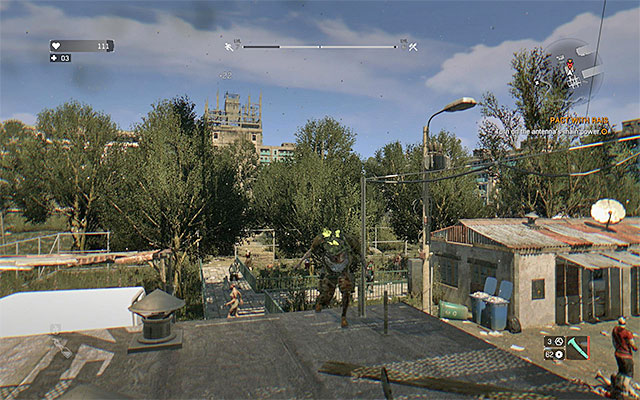 Kill the Toad as fast as you can.
Leave Rais's headquarters and go north. Reach the tracks, climb one of the wagons (number 4a on the map) and let Crane contact the authorities. Head north-west, towards the first radio tower (number 4b on the map). After reaching your destination, besides a Goon, you will be attacked by a Toad. This monster spits acid that can poison the hero (causes you to lose hp slowly). Jump to the side to dodge the acid attacks and try to kill the Toad fast, either using ranged weapons (for example Throwing Stars) or climbing the roof and fighting with a melee weapon (the monster is nearly defenseless in melee combat).
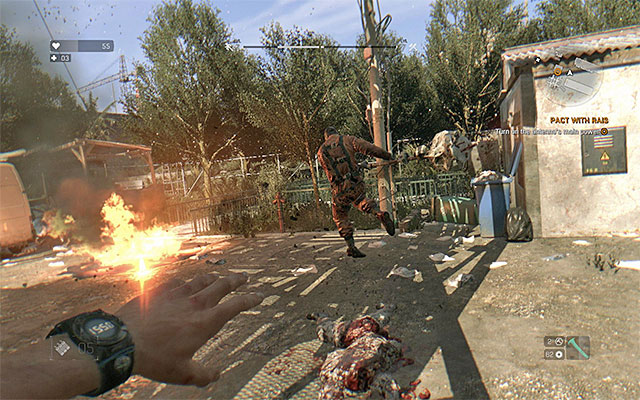 Kill the Goon or lure him away of the switch.
The Toad is not the only problem, because as it was mentioned before, there is also a Goon here. You can try to defeat this monster in melee combat (consider blowing up the nearby red barrels) or draw his attention away of your current mission objective using Firecrackers. No matter what variant you choose, interact with the gate and kill another zombie. Bring back the energy supply (the switch).
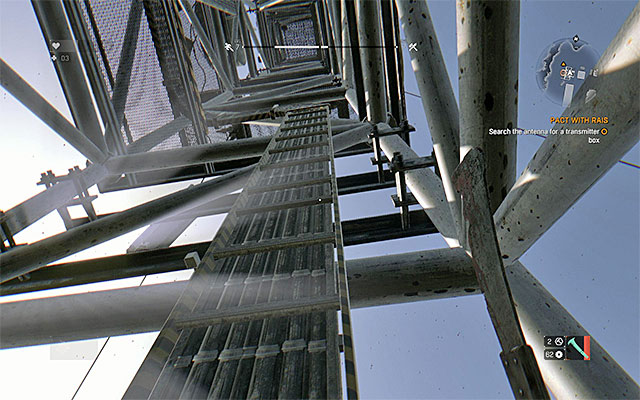 You have to reach the top of the tower.
You can now approach the first radio tower and start climbing to the top. Use the ladders and grab the interactive (yellow-black) edges (remember to always face a given edge before catching it). Don't hurry and carefully perform every move, because a mistake can cost you a long fall and death. Prepare for meeting a zombie on the top balcony (the best way is to push him down). Locate the box and open it. Listen to a conversation with Karim and grab the rope to go all the way down.
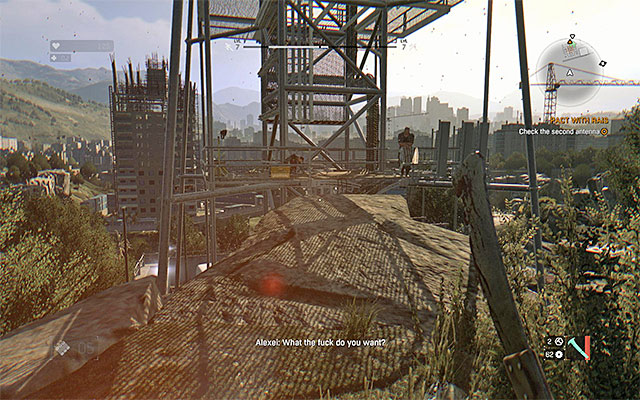
The second radio tower is located east from here (number 4c on the map). It is surrounded by an electric fence, but you can solve this problem quite easily. Climb the nearby rocks and stand in the place shown in the picture above. Run towards the edge and jump to reach one of the metal balconies. Here you can talk to Alexei or start climbing right away. Just like before, use the ladders and grab the interactive edges. Be careful when going across the narrow platforms. Open the next box and activate the radio tower. Use the rope to go down and head back to the Garrison to meet with Rais again and also to talk to Karim.
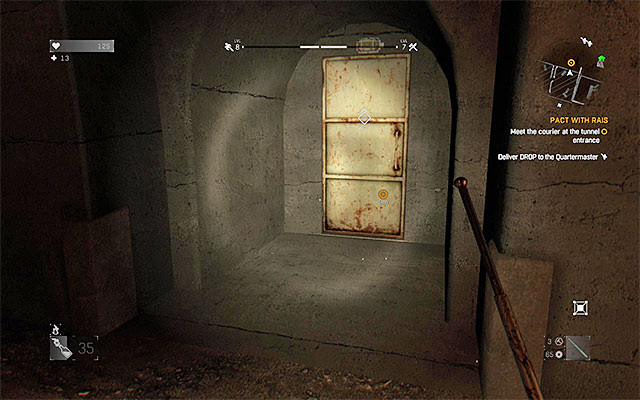 Locate the side passage in the tunnel.
Leave the Garrison and head east. Climb one of the wagons on the bridge (number 4d on the map) and allow Crane to contact GRE again. You can start running towards Jaffar's Wheelstation (number 4e on the map). After reaching the place, enter the small camp and find Jaffar. Talk to him to collect the payment. Your next destination is the entrance to the tunnel located north-east from your current position (number 4f on the map). After reaching it, go inside the tunnel (the one with the burning cars) and find the southern door. Explore the side corridors and open the red door. Watch a short cut-scene of you meeting a Bomber - an exploding infected.
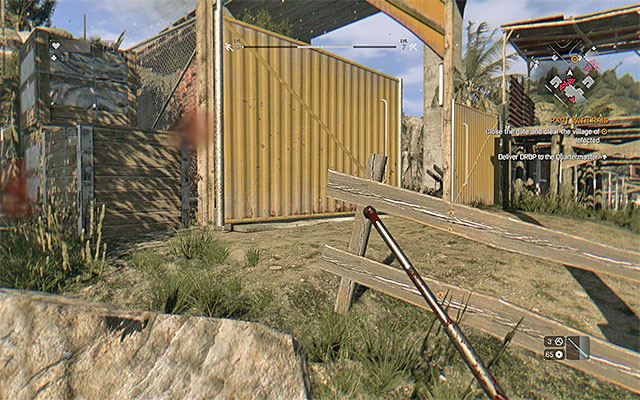 Close the main gate as quickly as you can
Your new destination is a fishing village located in the eastern part of the Slums (number 4g on the map). When you're there, you will have to kill all the monsters in the village. Start from closing the gate as fast as you can, as it will prevent new infected from entering. Now, start to eliminate the zombies. Watch out for the Runners especially (try to break their legs and push them off the rooftops) and new Bombers (try to "detonate" them using ranged weapons, for example stars or hatchets). After getting rid of all the enemies (you will also unlock a new sage zone), find Gursel's hut, which is marked on the map in the guide. Talk to him and collect the payment.
 Carefully approach the gas station.
Leave the fishing village and start heading towards the port, located north from your position (Ferry on the map). Go past the barricades using climbing and find Morgan in the port. After a short conversation, take the bag from the table. Now, head west. Your journey back to the Garrison will be interrupted by a radio connection with Karim. He will tell you to check the causes of loss of contract with one of the patrols. Head towards the gas station (number 4h on the map). Before you approach the station, makes sure that Crane has full hp and check if you can craft some throwing weapons and Resistance Boosters.
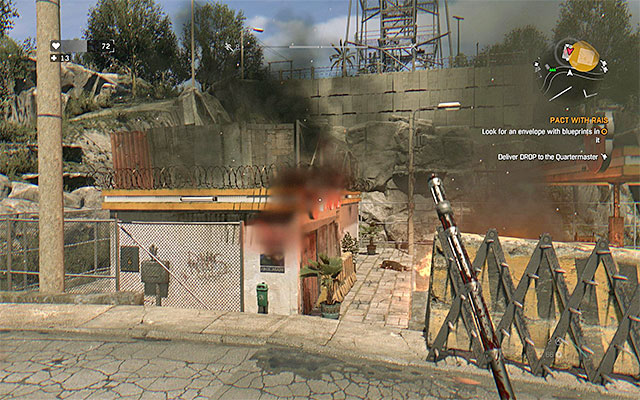 Get rid of the armed bandit, for example using grenades or throwing weapons (stars, hatchets).
Start from opening the back door of the yellow van and take all the DYI Grenades from inside. Quickly get back, because there is an armed enemy on the roof of the gas station building. You have to kill him to be able to explore the area in peace. The easiest way is to throw one of the grenades, but you have to aim carefully so that it flies over the fence and lands on the roof. You can also use some throwing weapon or firearms (if you have any), or climb the nearby shelf and jump onto the roof. It is good to reach the place where the bandit was, because you will obtain a Police Rifle. Besides, by opening the hatch on the rood, you will unlock a safe zone.
-
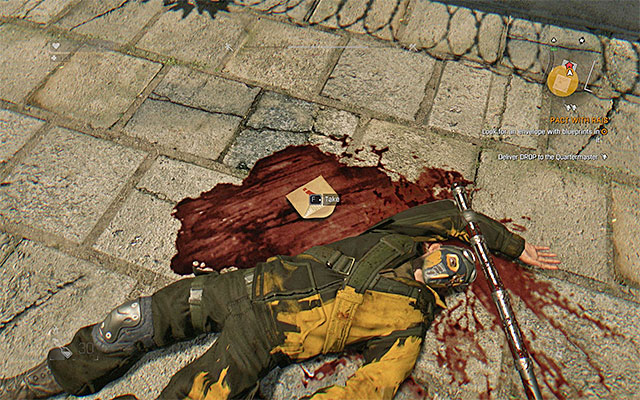 After turning the body of one of the dead soldiers, you will find a letter.
When the battle fight is over, search the bodies of the soldiers from the patrol, especially the dead mercenary lying the closest to the gas station building. After turning the body, you will find an envelope, which you have to take. You can now start heading back to the Garrison in the western part of the city (Garrison on the map). After arriving at your destination, first talk to Karim and then knock on the blue door to meet Rais.
Leave the building and reach the top of the wagon again (number 4a on the map) to contact GRE. Now, head back to the Tower (Tower on the map). Enter the hideout, use the elevator and listen to a conversation with Jane. You can now go to the room where Brecken is. Take the stairs to go to the roof and meet with Rahim. Climb to the higher part of the roof and stand in the place where Crane can contact the authorities. At the end, listen to a conversation with Jane.
How to unlock: Complete main quest number 4 - Pact with Rais (Tower on the map).
Reward: 40000 experience
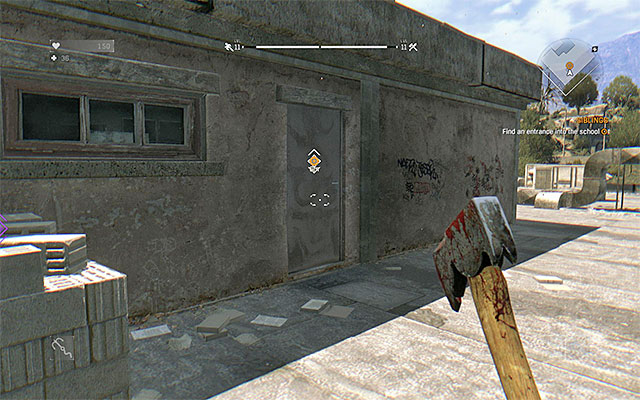 Find the door on the roof of the School building and watch out for the exploding zombie behind them.
Go to meet with Jade who can be found in the wagon near the School building (open the door to the wagon) (number 5 on the map). After watching a cut-scene, head to the School and start climbing it to get to the roof (number 5b on the map). Jump towards the balcony above a blocked entrance and use the ladder to get to the top. Watch out for the zombie on the roof, especially for the Toad and the Bomber. Killing him will cause infected Runners to appear in the area, which you should also eliminate (push them off the roof). Locate the door on the roof, but after opening it, immediately step back. Wait until the new elite infected explodes and then go inside. Use the hatch to get inside the School.
 You have to eliminate the Bandits.
Start the exploration of the School building. There is only one path leading to your objective, but you will have to move a few pieces of furniture to unlock the way. On one of the lower levels of the building, you will start encountering Bandits. Use Trap Bombs, Molotov Cocktails and throwing weapons/firearms. If you plan to use a melee weapon, do it in narrow corridors so that you won't risk being circled by the enemies. Moreover, use dodges, like jumping back and to the side, every time you see an enemy preparing to strike.
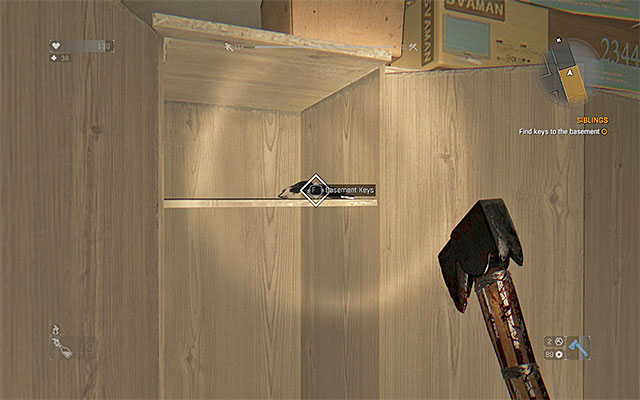 The location of the keys.
Continue walking and switch off the alarm (a switch on the wall). Besides fighting Bandits, be ready to kill a few infected. Explore the larger yellow area that you can see on the mini-map (after securing the rooms nearby). Locate a big chest and open it to see that there is no Antizin inside. Search the area to find Basement Keys. Unlock the passage by mowing the wardrobe and destroying the planks (you can use any weapon). When exploring the next part of the building, watch out for the exploding infected that you will meet on the stairwell. Short after the explosion, infected Runners will appear in the area so you have to be ready to face them.
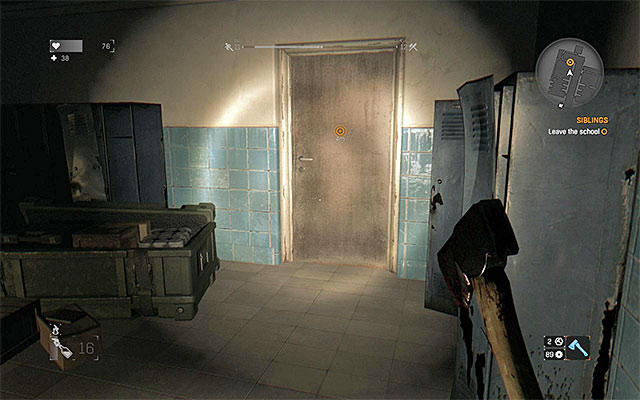 The exit.
Use the keys to open the basement and search the room to find the valve and turn it. Be careful when going further, because you will meet another exploding zombie. After watching a cut-scene about meeting Jade, start the last battle with the Bandits. Use Molotov Cocktails or grenades when they arrive. After you eliminate all of them, exit the School building. You can go back to the Tower (Tower on the map). When you're there, use the elevator and go up the stairs, all the way to the roof. Talk to Rahim. Now, you have to talk to two more persons in the Tower - Dr. Zere and the quartermaster (lobby), about the new type of infected that you've recently seen (Bolters).

Wait until the night comes and open the map of the Slums. Your next task is to reach one of the places marked on the map where you can find Bolters. You have to sneak to a place that you choose, so avoid any confrontation on the way and use Night Vision Boosters to light up the area. After locating a Bolter, make sure that there are no other zombies in the area. If you see any, distract them with Firecrackers or lure them away from the Bolter and go past them or kill them. Crouch and sneak up to the Bolter (like in the screen above). Use a good melee weapon to kill the monster without letting him run away. When the zombie is dead, search the body to obtain Bolter Tissue.
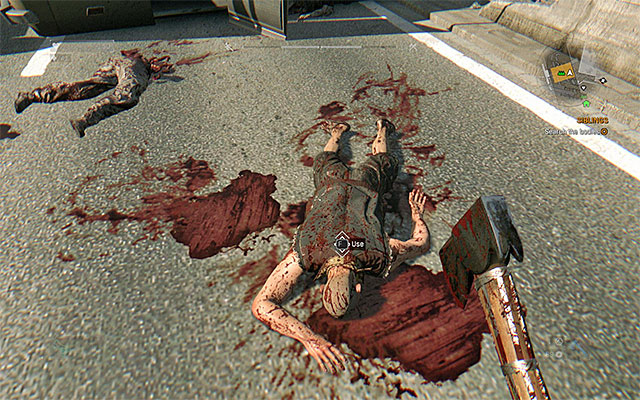 Examine all the bodies.
You can now go back to Zere, who is now in the safe zone south from the Tower (number 1 on the map). Give the sample to the doctor and listen to the conversation. You will obtain a Blueprint - Bolter Poison. After leaving the trailer, wait until Rahim contacts Crane over the radio. Head north. You have to check the overpass on the highway (number 5c on the map), specifically, the area where you can see a few dead bodies. Examine the bodies until you find Omar. Talk to Brecken over the radio.
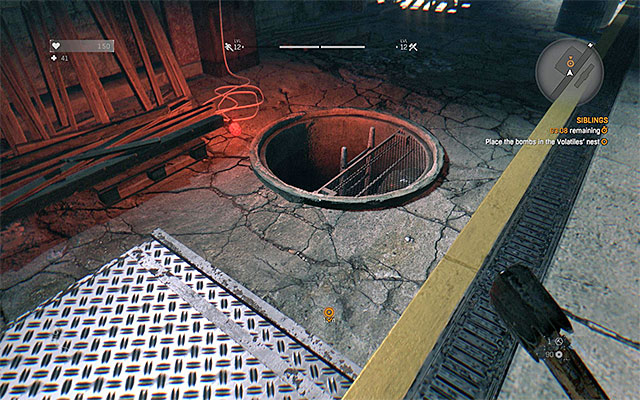 Jump down into the sewers.
Head north again. This time, you have to reach a warehouse near the tracks (number 5d on the map) and use the door leading inside (a new location will load). Attack the zombies surrounding Rahim's hideout, either using a melee weapon or for example Molotov Cocktails. When trying to open the door to the wagon, a Toad will appear in the warehouse. Defeat it as fast as you can, avoiding being hit by the acid. You can now talk to Rahim. Take the two bombs from him. Now, you have three minutes and a half to plant them and escape the nest. Don't wait until new objectives appear and immediately jump into the hole to get to the sewers.
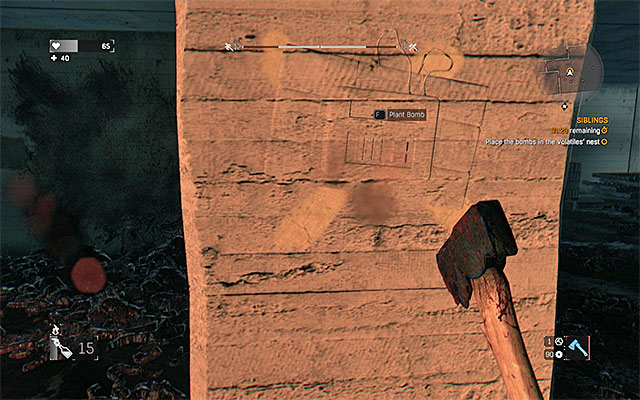 The place where you plant the first bomb.
Get out of the water and use the ladder to go to the surface. Start running towards the place where you have to plant the first bomb. Use parkour techniques to move faster and ignore normal zombies. Eliminate only the Runners and only if they are too close to Crane. Locate the pillar marked by the game and plant the bomb (make sure that nothing interrupts you).
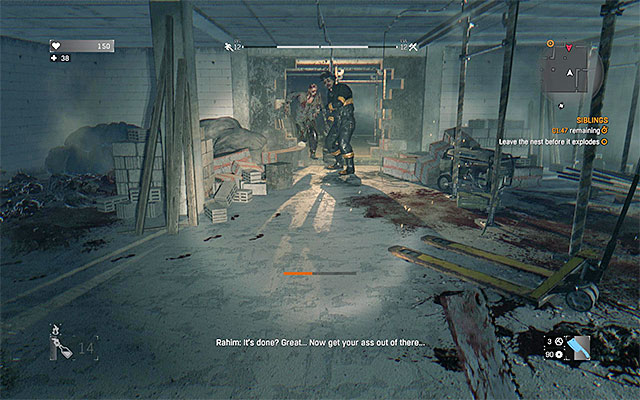 Go past the Goon and start moving away from the building.
Start running again and rely on parkour moves. Locate the place where you have to plant the second bomb and approach the wall. Wait until a Goon destroys it and go past him. Your new task is to leave this location before the time runs out. Reach the exit, jump all the way down and go across a few pipes. If you haven't stopped on the way, you will still have more the one minute. You can turn around and watch the show. Go down the ladder, to the sewers and swim to another ladder to co back to the warehouse. Approach the wagon to watch an interesting cut-scene. You can now leave the warehouse and head back to the Tower. When you're there, talk to Brecken on the ground floor.
How to unlock: Complete main quest number 5 - Siblings (Tower on the map).
Reward: 55000 experience
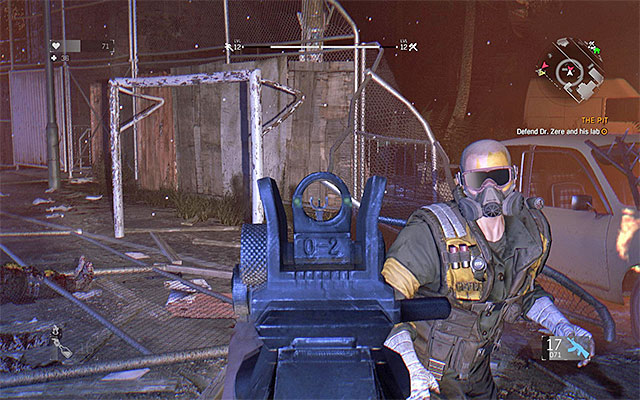 Kill the bandits occupying the safe zone.
When Rais people attack you, jump out of the Tower and head to the safe zone that you've been to before (number 1 on the map). You have to reach the place in less than 40 seconds, so do not engage in any fights on the way and rely on parkour moves. When you're in the devastated safe zone (good news is that the infected cannot enter it), attack the Bandits using firearms or throwing weapons. Don't go outside the safe zone, because the sound of fight may lure the Runners here. Moreover, watch out for the flames. When the battle is over, head to the trailer to find Malik, who is badly wounded. Wait for a new conversation with Brecken.

Head west, to the Garrison (Rais's Garrison on the map). Surprisingly, you won't have to fight the Bandits guarding the building, because they are all hiding inside. You can't use the main door, so go around the building and enter from the north. Find a red van, climb on top of it and start climbing the building in the place shown in the picture above. It will allow you to reach the roof of the building. It is good to attack the enemies standing here using a surprise element and also pushing them off the roof. Head to the southern part of the roof and locate the hatch leading inside the building.
 You can ambush some of the enemies.
Listen to a conversation with GRE and start exploring the Garrison. Reach the elevator, open the door and jump onto the rope to go to a lower level. Open the door again and head forward. Soon, you will start to encounter first enemies. You can ambush some of them, but some of them may ambush you as well. When fighting, use Molotov Cocktails and throwing weapons. Also, frequently use dodges. Head to lower levels of the building.
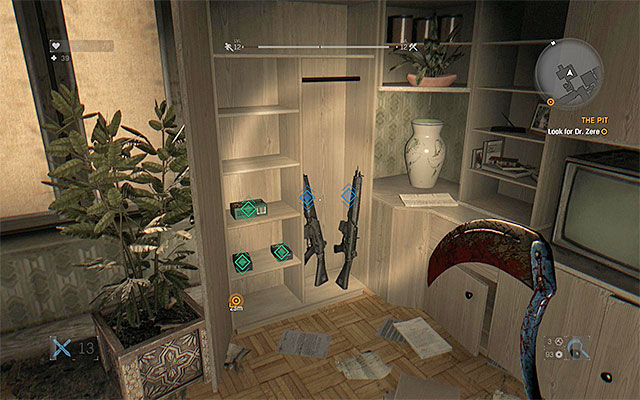 The armory.
When exploring the Garrison, search all the rooms that you see, because one of them will be an armory. Take at least one pistol and one assault rifle from there. It is good to use the rifle to eliminate the Bandits. Aim at the heads if possible and hide behind covers. Observe the mini-map to avoid being ambushed and look for an opportunity to shoot at the explosive barrels and gas bottles. Remember to gather ammo by standing near the killed enemies. Soon, you will reach Dr. Zere and a cut-scene will appear.
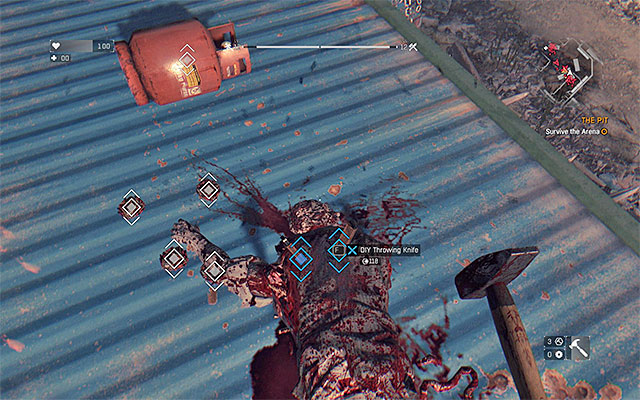 Weapons and firecrackers can be found on top of the containers.
You gain control over Crane on the arena and you will also lose all the equipment (you will regain it at the end of the mission). You have to survive two rounds in the Pit - the first challenge is eliminating a few dozens of normal infected. Start from obtaining a few melee weapons (for example a Rebar or a Hammer) and as much DYI Throwing Knives as you can. Locate them using Survivor Sense. Most of the weapons can be found on top of the containers and some of them are lying on the ground. It is good to get to know the arena, because you will be here for at least several minutes. Besides weapons, pick up also some Firecrackers that will help you avoid fighting too many monsters at once.
 Kill the Runners when they try to climb onto higher platforms.
Attack normal infected only when you have at least 2-3 melee weapons. Try to eliminate the zombies one by one and make use of the spikes around you, as well as of all your skills that you've unlocked. Unfortunately, Runners will appear on the arena once in a while and you will have to deal with them right away. It is good to place yourself on top of the containers or on the narrow concrete shelves. You can wait until the infected start climbing them and then attack (if you have an appropriate skill for that), or jump onto them and perform execution. During this battle, do not risk too much, because you don't have any Medkits.
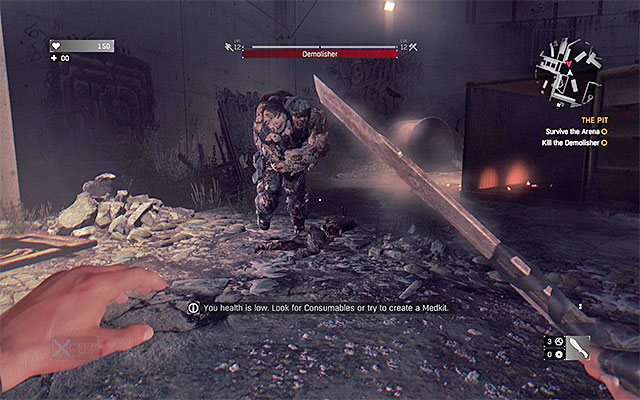 Watch out for the Demolisher's charges and blocks of concrete thrown by him.
After killing all the infected, you advance to the next round, in which you have to defeat a giant mutant - Demolisher (his hp is shown on the top of the screen). Take some time to study the monster's two special attacks. Because he performs charges, you have to run a lot to avoid them and jump to the side in the right moment. The second special attack is throwing large pieces of concrete at you. Here, you also have to depend on dodging, but you can also hide behind covers.
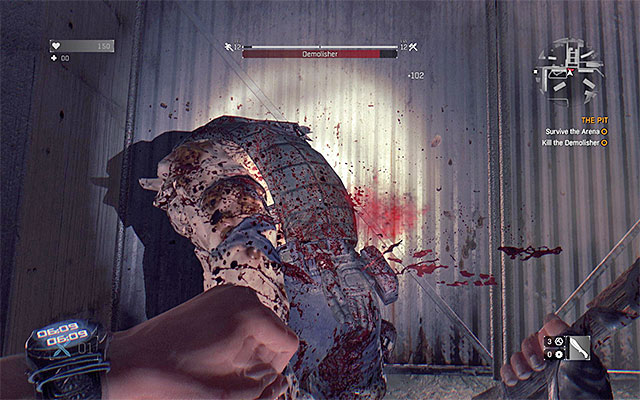 It is best to attack the mutant after he charges.
Use the machete that Rais thrown you to attack the boss (at least until it's broken). Stand near walls or other obstacles and wait for the Demolisher to charge. Jump to the side in the right moment and take advantage of the fact that the monster will be dazed for a few seconds. Attack the uncovered parts of his body. Step back from the boss when he's ready to charge again. Another interesting tactic is to use bottles of gas located on the arena. You can throw them at the monster and then detonate them.
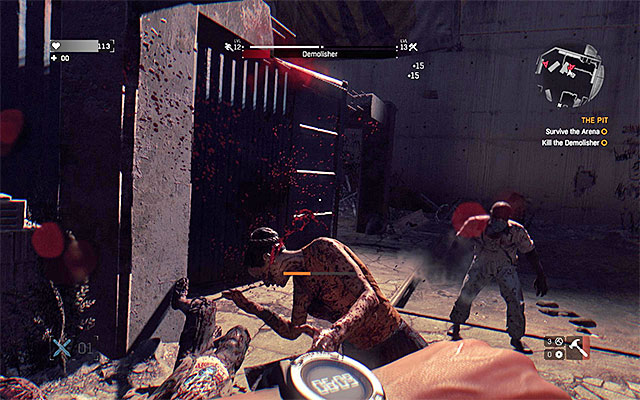 Kill the Runners far away from the boss.
Later in the battle, some complications will appear. You will notice Runners going onto the arena. Don't ignore them, because they will interrupt you in fighting the boss. As soon as you see them, get as far away from the mutant as you can. Climb onto a concrete shelf or a container and wait for the Runners to start climbing as well to attack them. You can also try to push them onto the spikes on the ground. Try using throwing knives to slow them down. Continue to fight until you kill the Demolisher and as before, avoid taking risk. After you win, pick up the Medkit from the ground. You will watch a cut-scene about Rais.
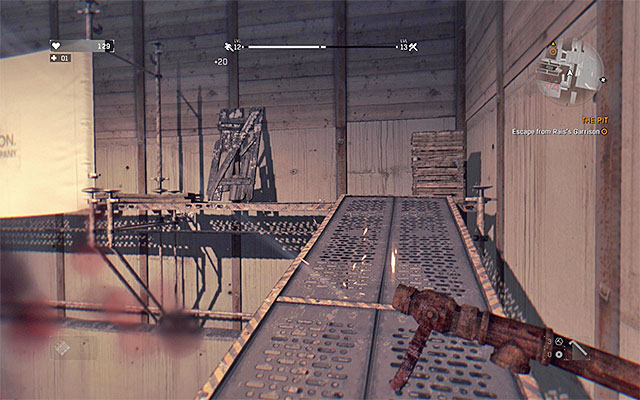 Run all the time, using parkour techniques to avoid the obstacles and climb quickly.
Start running as soon as you regain control over Crane. During this episode, you cannot stop, because the hero will be under all the time. Try to follow the path shown by the game without any mistakes and watch out when running on the narrow metal bars. Observe the hero's health bar and use a Medkit when you have 20-30 hp left. You will lose the chase shortly after reaching the parking lot. Watch out for single zombies here and head towards the exit. After leaving Rais's base, get far away from it. Avoid any contact with the infected and wait until the main hero loses consciousness. You will be transported to the Boat Launch (Boat Launch on the map). Listen to a conversation with Brecken and interact with the bag on the table to regain your equipment.
How to unlock: Complete main quest number 6 - The Pit (Boat Launch on the map).
Difficulty level: medium
Reward: 15000 experience
Note - before you start this mission, try to complete all the side quests in the Slums, because after this task ends, you will move to another part of Harran - the Old Town.
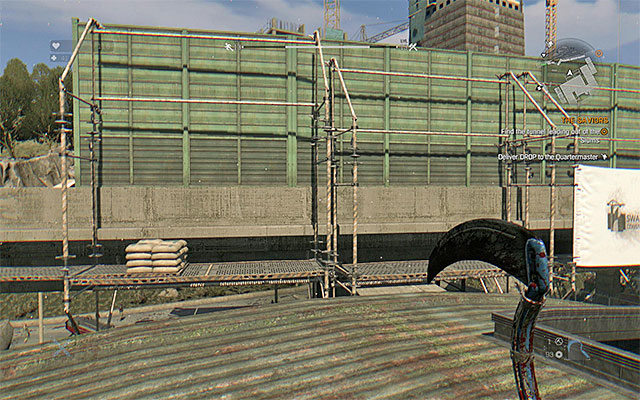
Head to the buildings located in the central part of the Slums (number 6a on the map). It is best to use of the roofs around to locate the right balcony. Knock on the door and talk to Cenk, who represents the Saviors, twice. You can start heading to the exit from this district - it's a tunnel located in the south-western part of the map (number 6b) on the map. The viaduct leading to the tunnel is destroyed, but you can use a lot of alternative passages. The best option is to climb one of the warehouses located to the west of the viaduct and stand in the place shown in the picture. Jump onto the scaffolding, go past the concrete barrier and head south.
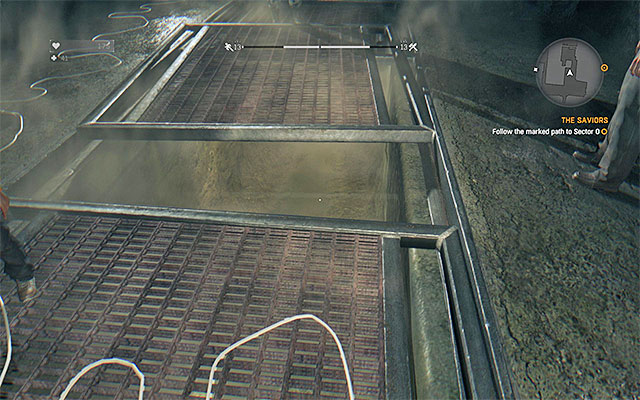 Jump into the water.
Avoid fighting the zombies (for example by jumping from one car onto another( and reach the collapsed tunnel. Locate the door on the right and get into the Sewers. Here, reach another door, which you have to knock on. Listen to what Hazan has to say and jump into a small hole in the ground. You have to use the underwater tunnel.
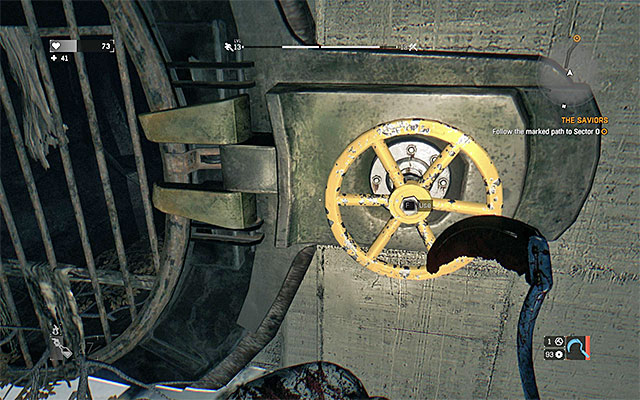 Turn the valve after dealing with the monsters.
After coming out on the other side of the large gate, grab the yellow pipe attached to one of the walls and start slowly moving to the side. You will have to perform a few difficult jumps - reach the smaller and than the bigger balcony. You can now enter another tunnel. Jump down and follow the white arrows. After leaving the tunnel, you will be in an area with a lot of infected. Use Molotov Cocktails, because the passage is narrow. Watch out for the Runners and for the Goon, which you should kill (approach - quick attack - jump back). When the area is clear, you will be able to turn the valve located nearby and unlock the next passage.
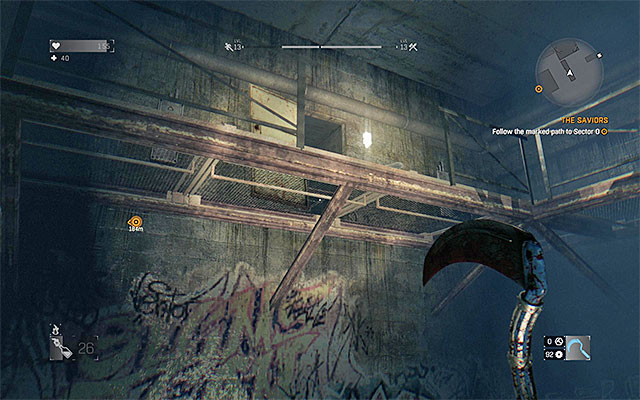 The balcony that you have to reach.
Carefully go into the next tunnel and watch out for the Bomber. You have to jump back in the right moment to avoid damage. Kill the Runners and head forward. Look for a gun and some ammo, because it will be useful in a while. To continue the journey, jump onto one of the balconies. In one of the rooms, you will see a Toad. You can quickly jump down and kill it in melee fight, or you can use a gun and hide behind covers. No matter what strategy you choose, continue moving by grabbing the yellow pipes.
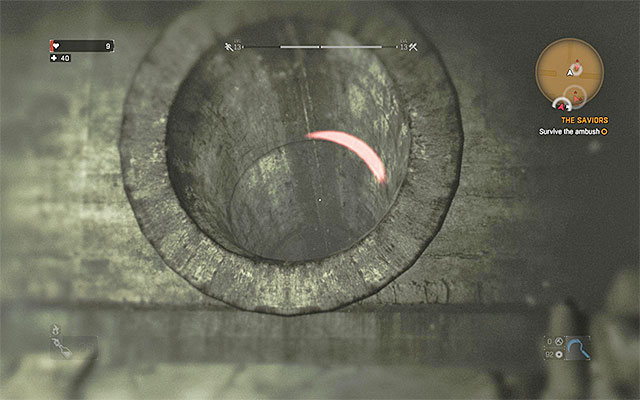 Reach the tunnel before Crane gets killed.
In the next corridor, jump towards the long yellow pipe located on the right wall. Move left to go past the bars. You can let it go and go inside another tunnel. Turn the valve, open the gate and jump into the water. The main hero will be ambushed by Rais's people sent by Hazan, who is a traitor. Do not swim to the surface, because it will only increase the risk of taking serious damage. Stay underwater and try to swim to the next area as fast as you can, which will make you safe. Now you can climb onto a metal platform. Before you continue going, heal yourself and select a gun from the inventory.
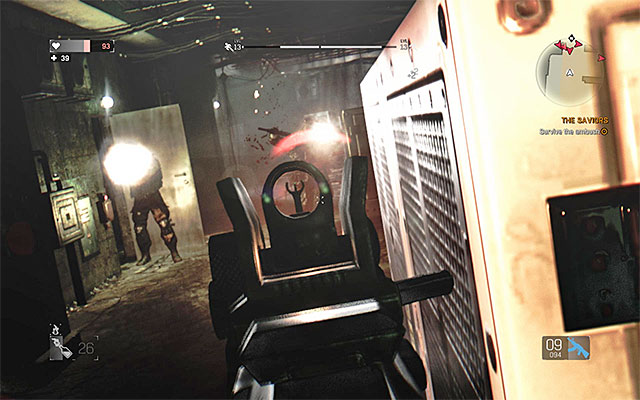 Kill the enemies using an assault rifle or a pistol.
Carefully step into the area with the Bandits and start shooting at them. Use covers to avoid damage. Check the mini-map often and do not hurry, because some of the enemies will jump out of the side rooms or get into the fighting area some other way. After dealing with the first group, head forward. You will soon reach the stairs and the courtyard. You can ambush the three Bandits standing here and they will have no chance to counterattack. Jump onto the balcony, find the stairs and reach the door leading to the Old Town. Listen to a conversation with Troy that will end this mission.
The above map presents all of the locations in the Old Town that you visit during the main storyline (you complete those missions in a predefined order). The Old Town is not available from the beginning of the game - you get there with your progress into the main storyline. The HQ of the survivors in the Old Town is the loft, i.e. the attic of a tall tower. Return here often (as well as to the rest of the unlocked safe zones), because you can receive side quests here.
Way to unlock: Automatically, after you reach The Old Town (point 1 on the map), after you complete the 7th main quest - The Saviors.
Difficulty level: medium
Reward: 5000 experience points
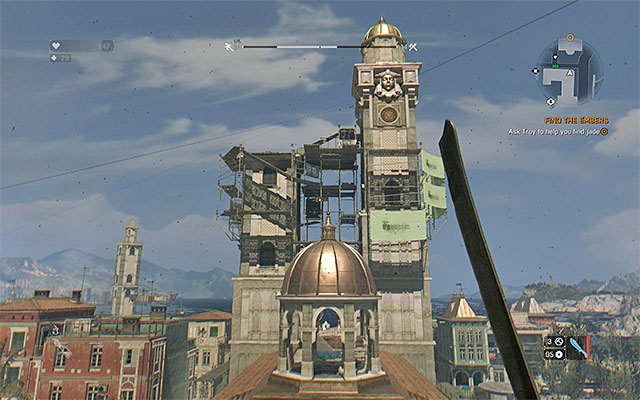 Head towards the two towers - the Ember's HQ is in the loft of the taller one
After you have listened to the preliminary conversations, head towards the Ember's HQ in the Old Town (Loft on the map). If possible, remain on rooftops (jump over from one to another and onto ledges, thanks to parkour techniques), because this will make your path shorter, towards the end of your journey. Your destination is the taller of the two towers.
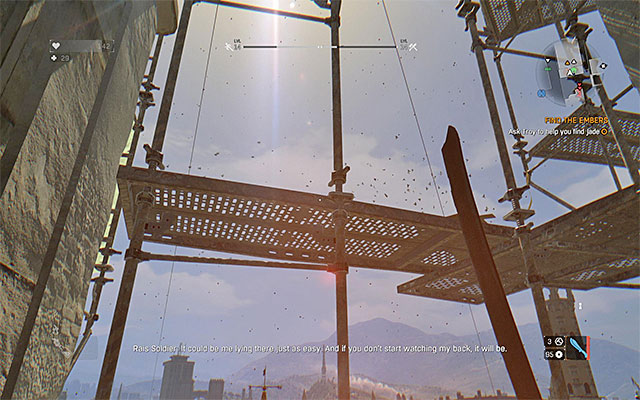 Climb to reach the top of the tower
After you come close to the tower, you need to start climbing. Jump towards bars and metal ledges, and move up. I recommend that you take our time here, because it is easy to make a mistake and fall down. After you reach the very top, talk to Michael and open the window to the loft. Here, you need to watch the final cutscene of your meeting with Savvy and Troy.
Way to unlock: You need to complete the 8th main quest - Find the Embers (Loft on the map).
Reward: 15000 experience points
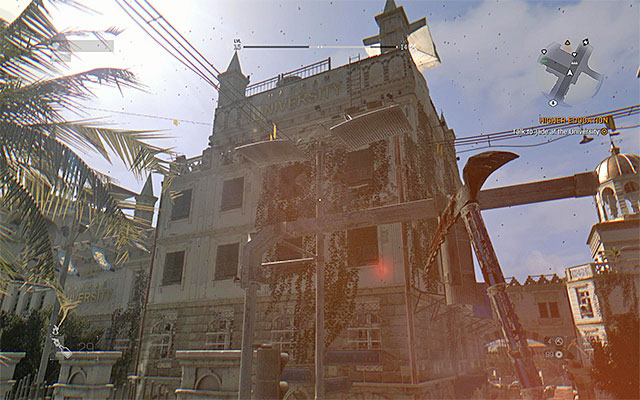 Enter the university through the rooftop door
Head towards the university building (University on the map), in the central part of the Old Town. All of the entrances on the ground are blocked off so, after you get there, climb to the rooftop. Talk to the Guard here and walk inside. Here, you need to meet with Fidan. After the conversation, exit the University and listen to the radio0 message from Troy. Follow Troy's request and return to the Embers HQ (Loft on the map), i.e. to the attic of the tall tower. See another cutscene here and this short quest will end.
Way to unlock: You need to complete main quest 9 - Higher Education (Loft on the map).
Reward: 20000 experience points
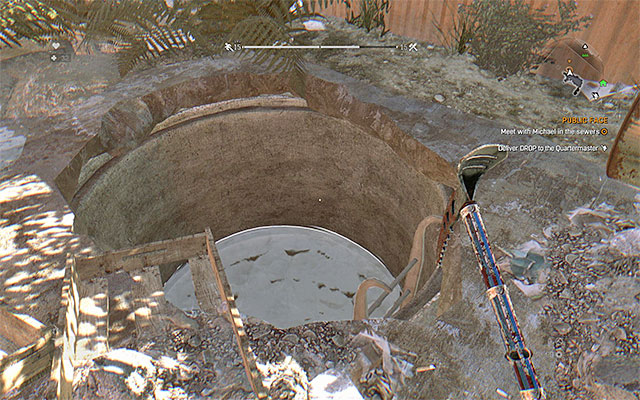 You need to jump into the hole here
Head towards the South of the Old Town (point 2a on the map) and watch out for the infected-toads here, who may be lurking around. Find a small hole and jump inside, then swim through the flooded tunnel. Thanks to this, you will reach the door to the sewers. Right after you walk into the sewers, find the broken part of the flooring. Jump into the water and reach the other end of the underwater tunnel. Enter the big hole here and follow the path of flares.
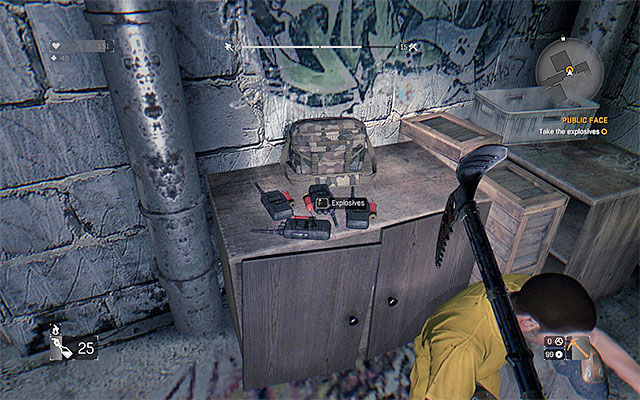 Collect explosives before you move ahead
Soon, you will run into zombies; you should especially watch out for the bombers and prevent them from approaching you. Soon after a new door opens, Crane will faint for a moment, but do not panic, this has been scripted and you can do nothing about it. Reach Michael here and talk to him. You will learn that you need to plant explosives in four different parts of the building. Collect four remotely controlled Explosives on the nearby shelf and open the red door to start your exploration of the skyscraper. First, you need to reach floor 10 so, climb up the stairs. After you get to the first floor, find the elevator and set it into motion.
 Your goal, while climbing the elevator shaft, is to get to floor 9
Unfortunately, the elevator stops before floor 10, halfway up the shaft. After it does, jump towards the manhole and climb onto the roof. Wait for the screen distortion to stop off a little and start climbing, by jumping towards black and yellow edges. You need to turn around to locate the ledges above. Finally, jump towards the opened door on floor 9. Start exploring this floor and especially note the ceilings of the individual rooms. One of the ceilings is completely destroyed and you can climb here to get to floor 10. Explore the area and watch out here, because you will be bumping into zombies on a regular basis and, among them, there are two bombers.
 You need to attach bombs to gas cookers
On floor 10, you need to reach apartments 105 and 106. In both of them, you will have to eliminate several zombies and to kill larger groups, use Molotovs. In each of the apartments, find the cooker and interact with it to plant a bomb. After you plant both, find a new staircase. Climb up the stairs to floor 12 and watch out for the bomber and the infected around. Just like before, you need to find a room with a big hole, where ceiling used to be. Jump to reach the ledge above and climb to floor 13.
 Run up to the screamer and press the interaction button to eliminate the threat.
On floor 13, check out apartments 134 and 137. In apartment 134, you find a new type of infected-children, called screamers. The first time around, you cannot avoid the deafening scream of the screamer, which stuns Crane and summons all of the nearby zombies. Use Molotovs to your aid and eliminate the incoming monsters. Watch out for the toad, among others, who should appear on this floor. After you have secured the area, approach apartment 134 again. You can try killing screamers, e.g. with guns, but it is better to follow the game's suggestion. Run up to the monster and press the interaction key/button to soothe down and kill the screamer, without letting him react in any way.
 You need to grab the ropes in the elevator shaft
After you have cleared apartment 134, find the cooker and plant the third explosive. Walk over to apartment 137, where you do not find any new surprises. After you listen to the radio conversation with Michael, head back towards the lower floors, by jumping into the big holes in the apartments that you have been to. You need to reach the elevator and slide the wings of the door apart. Jump towards the ropes in the shaft and abseil to the very bottom. Jump into the elevator, press the button to start it and wait until you get to another floor. Watch out because, right after you exit the elevator, you will be attacked by a larger group of the infected, with a goon among them (you do not need to kill him).
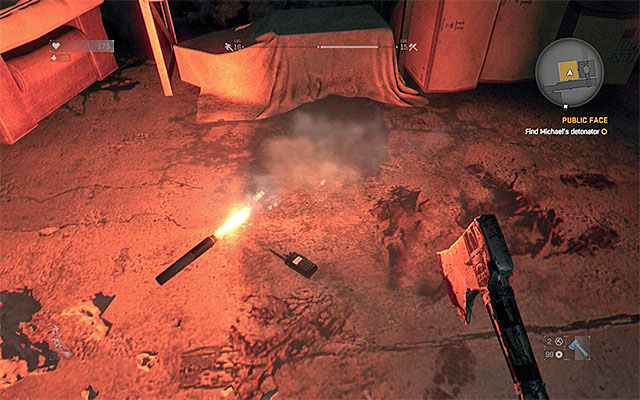 The spot where you find the detonator
Follow the linear corridors to the yellow area, in the basement, marked on the map. Find the detonator here (watch out for bombers!) and pick it up. Jump into the nearby tunnel, follow it to the end and move along. Soon, you will reach the area in sewers, where there is another goon. You can try to defeat him, or ignore him, by exploiting the fact that he is sluggish. Climb the ladder and jump over from a balcony to another (they need to be flawless) and reach a big pipe. Climb the last ladder and exit the sewers (point 2b on the map). Have Crane detonate the charges and listen to several conversations.
Way to unlock: You need to complete main quest 10 - Public Face (point 2b on the map).
Difficulty level: low
Reward: 5000 experience points
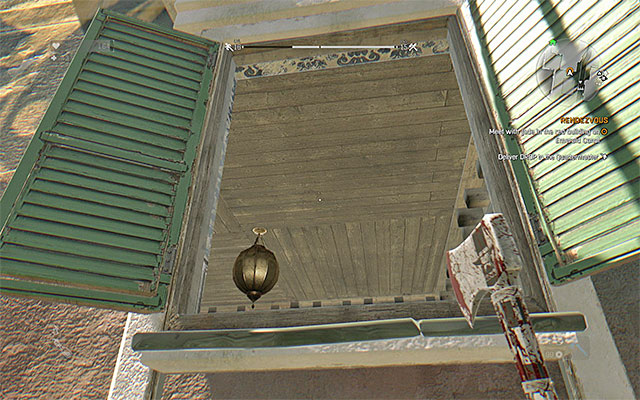 Enter the building through the window
You need to head towards the building, where you are to meet up with Jade and it is the one to the East of where you have exited the sewers in the previous main mission (point 3 on the map). After you get there, climb towards one of the opened windows. Open the door to the room with big inscription on the wall, thanks to which you figure out that Jade has been abducted by Rais.
Way to unlock: You need to complete main quest 11 - Rendezvous (point 3 on the map).
Reward: 20000 experience points
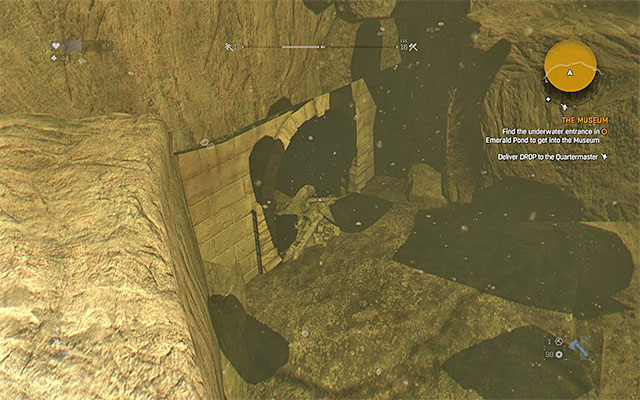
Listen to the radio conversation with Troy and exit the building. Your first task is to meet up with the curator of the museum that has been captured by Rais and his men. The curator is in the safe zone, in the Northern part of the city (point 4a on the map) and you can get there right after you climb to the roof (there is a big garden here). After you have talked to Tariq, head towards the museum and dive in the marked spot (point 4b on the map). You need to locate the underwater tunnel shown in the above screenshot and enter it. Try not to waste your time, too much, because you stay underwater for quite a time and you require enough air.
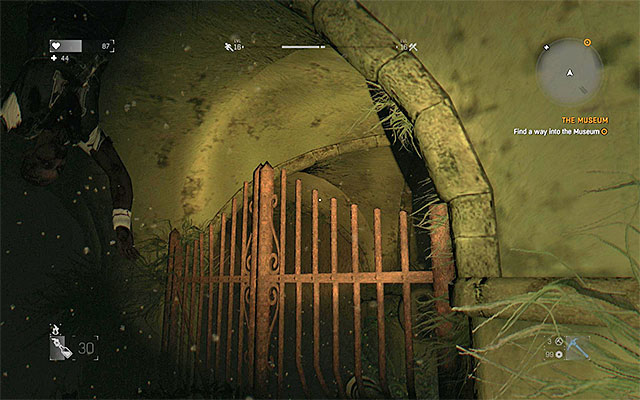
While exploring the underwater corridors, avoid bumping into obstacles unnecessarily and do not explore the surroundings. If you make no mistakes, along the way, you will make it to the place, where you can resurface near the grate and get some air. Soon, you reach stairs and you can exit the water. Take interest in the storage here (to open it, you require the key from the "Chasing Past" mission) and head towards the red door to get to a new location. Again, you need to enter the water and just like earlier, you cannot take any longer stops. You should be especially careful in the spot shown in the above screenshot - you need to squeeze through between the grate and the ceiling.
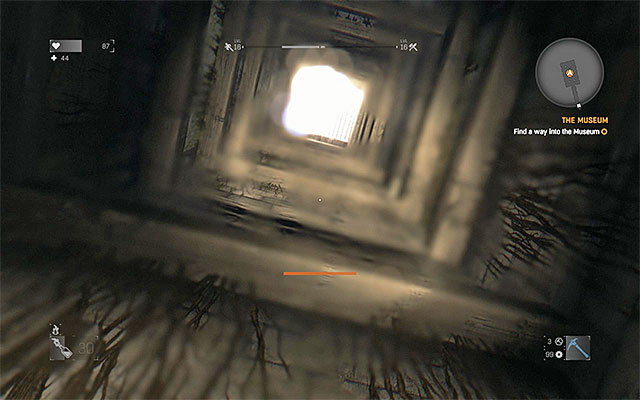 Climb out of the well
Along your path, search for opportunities to resurface and get some air. The underwater corridors get you to a well. Jump to reach the lowest interactive ledge and jump up to reach them one after another (turn around, if there are no ledges to jump to). After your character experiences vision problems, follow the narrow corridors. Use any melee weapon to destroy the small wooden barricades and avoid falling from greater heights, to prevent losing your health points. For the last time, jump into water and swim up to the big square by the museum.
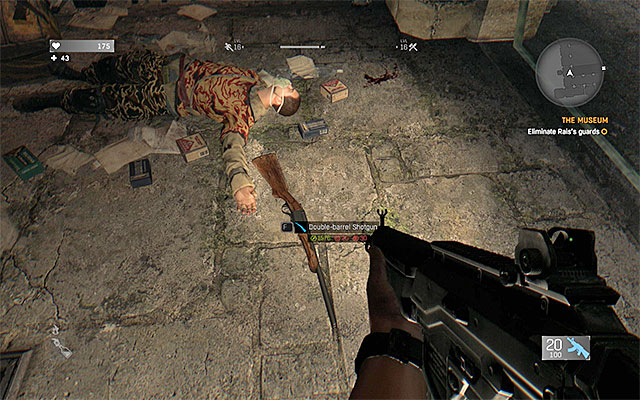 You can take the shotgun
Below, there are two opponents and it would be a good idea to shoot them quickly, because it will not take them too long to spot you. Walk over to the next area, where you start the first of the many battles, after you listen to Rais's speech. If you want to, you can explore the area to the left, after the battle starts, where apart from ammo, you find a Double-barrel Shotgun. Personally, however, I recommend that you use the machine gun, for elimination of opponents. For the whole time, rely on covers and the minimap readings, to locate enemies faster. Apart from that, watch out for the explosives the enemies throw, and get away from the spots where they fall.
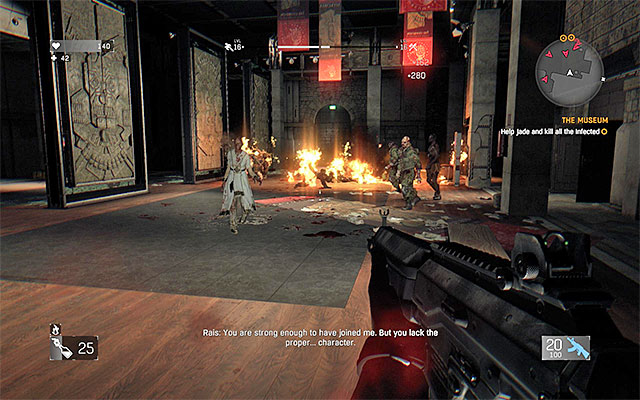 The entrance to the first big area in the museum
After you have eliminated the first group, there appear more enemies on the balconies above. You can remain on the lower level or climb up, beforehand, and fight them over a shorter distance. Regardless of what you did, you will have to reach the upper level anyways, after you have dealt with all the enemies. Find the door to the next area, here, which should be guarded by several mercenaries with guns. Lift the gate and go ahead, while ignoring distortions. You start bumping into more opponents after you walk out into the open and, just as usually, remember to hide behind the available covers. Keep pushing forward and kill all of the enemies that appear in your way.
Help Jade eliminate monstersSoon, you reach a room with a HUGE number of zombies. Do not attempt to kill the infected and start running. The skills that may prove useful here are Vault and Tackle, which will decrease the threat of taking damage from the zombies. In the next area, you need to kill the infected gathered around the door, behind which there is Jade. You can eliminate zombies from the balconies above, or jump down and deal with them in melee. After the battle, approach the big gate. Listen to Rais's another speech and start fighting again. Try to kill bolters in the first place, because they are the greatest threat here. Also, rely on Molotovs, but throw them in the directions, in which Jade is not present, at the moment.
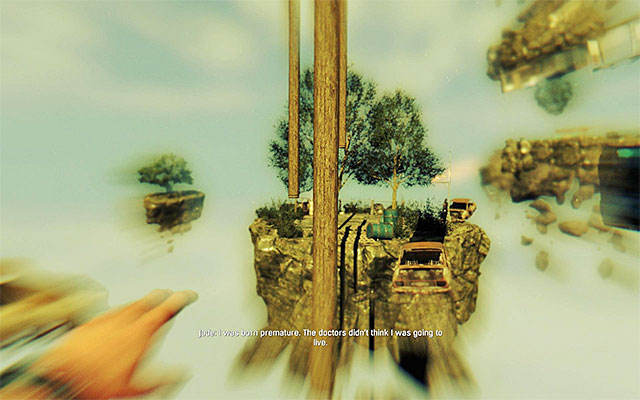 Jump over from pole to pole
You are going to see a peculiar sequence, which is your character's hallucinations. During the sequence, you need to reach places, in which Jade appears. Of course, avoid falling, although falling into a chasm is not punished with the loss of experience points. You should not have major problems with getting past obstacles and climbing. The only more difficult moment occurs at the end of this sequence, where you need to jump over from one vertical pole to another. Each time after you reach another pole, climb up to reach the top. Then, you need to turn towards the next pole and jump. Soon, the entire sequence ends and you see a very important cutscene.
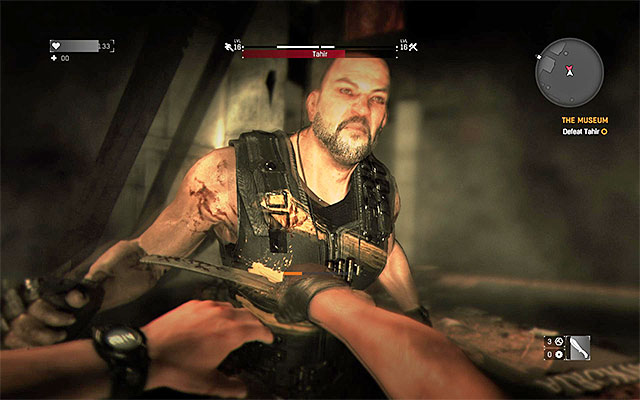 Attack with the machete quickly and often dodge to the sides and hop back
Now, you need to face Tahir, who is a boss here (he has his health bar at the top of the screen). During the battle, you will be able to use the machete only and you will not be allowed to access additional gear, including first-aid kit. Do the same as in the case of fighting other bandits, earlier. So, wait for opportunities to strike quickly with the machete, best after a failed attack by Tahir. If possible, do not get away from the boss, because he may then use a throwing weapon. To avoid taking damage, dodge to the sides and hop back, although you can try interrupting the boss's attack by kicking, if necessary.
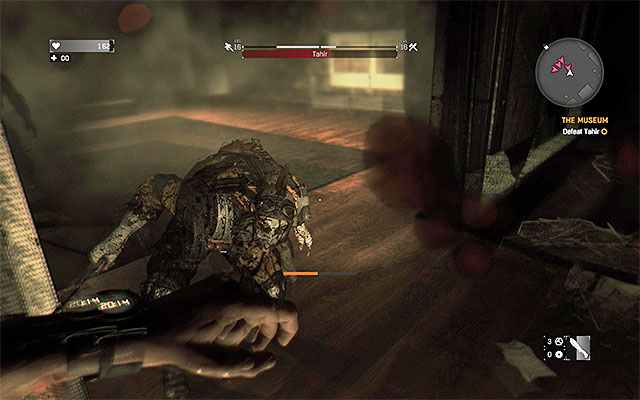 Eliminate Tahir's men before you take to the boss
After you have depleted, around a half of Tahir's health, there appears a group of regular bandits around and, for obvious reasons, this is going to make it more difficult for you, to win. Try to attack the regular bandits, after they get away from the boss. Also, you can use parkour techniques (e.g. sliding kicks or vaulting over enemies) to slow them down, stun them or weaken them in any other way. After you have dealt with the guards, return to Tahir. You need to drain his entire health.
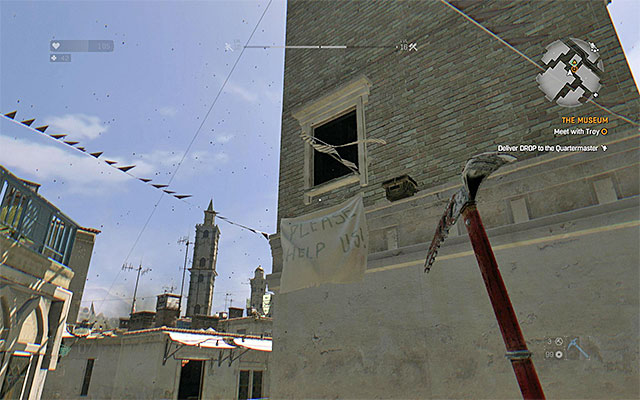
Head towards the marked museum exit in one of the previously explored areas. Watch out for some opponents hiding by the vans. It is a good idea to use against them the gun that you have taken from Tahir. After you have secured the area, find your character's bag and interact with it to retrieve all f the gear. You can now exit the museum (point 4c on the map) and listen to the radio conversation with Doctor Camden. Finally, head for the new location, where Troy is, which is the single tower (point 4d on the map). You may have some problems locating the tower entrance- simply find the window shown in the above screenshot. After you walk inside, grab on to successive ledges. You need to reach the very top, where you meet up with Troy.
Way to unlock: You need to complete main quest 12 - Museum (point 4d on the map).
Reward: 20000 experience points
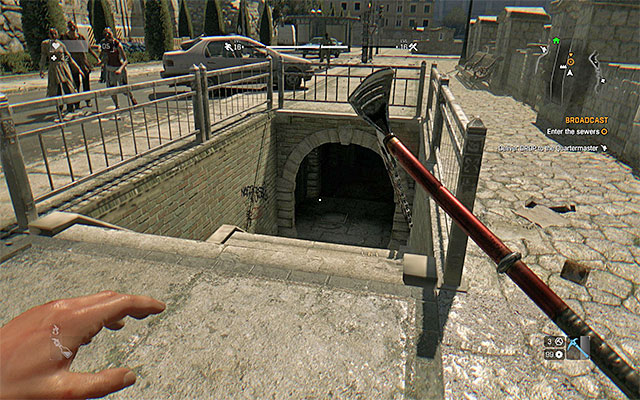 The descent into the sewers
Head towards the Northern part of the Old Town (point 5a on the map). Here, you need to find the stairs to the underground corridors. Open the left gate and reach the door to the sewers (point 5b on the map).
Note - A completely new area, which is the location of the Antenna, will load. From there, you will have to broadcast a message. Simply, see the chapter entitled "Main missions - Antenna", where you find the next part of the walkthrough.
The above map marks all of the locations in the additional area with a big communications antenna. You visit this part of the world during the thirteenth main quest - Broadcast. Also, you will be able to return here later into the campaign. It is a good thing to do, because there are several collectibles here, as well as many locked chests with valuable loot.
Way to unlock: You need to complete main quest 12 - Museum (Old Town).
Reward: 20000 experience points
Note - This quest appears in your journal while you are in the Old Town, i.e. as a result of one of the meetings with Troy. In order to complete its main part, you need to reach a separate location, within the game world, with big antenna on one of the hills.
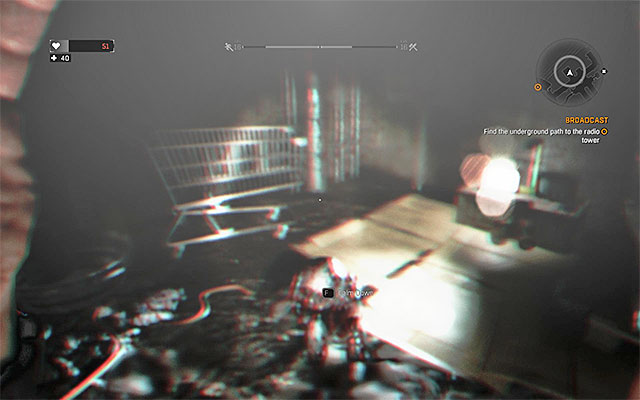 Eliminate the new screamer
After a new area has been loaded, you do not start on the antenna and you will have to cross the sewers first (point 1a on the map). In the course of that, you find a Double-barrel Shotgun and, if you missed it in the previous mission, you should get it now, because you are going to need it soon. In one of the rooms ahead, you stumble across a screamer. Just to remind you, you need to run up to the monster and press the interaction key/button quickly (before you lose too many health points).
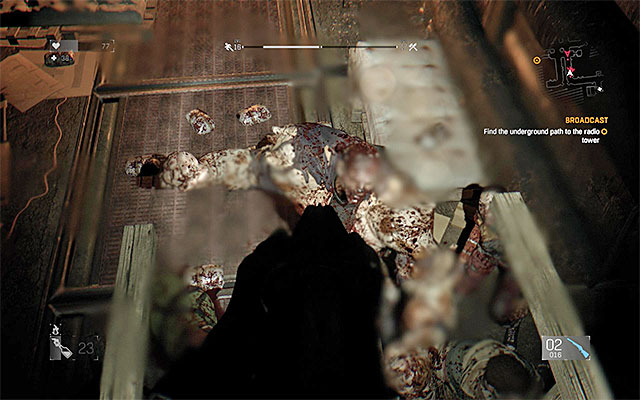 Retreat into the area, where you have obtained the shotgun and eliminate the threat
Right after you kill the screamer, approach the North-Western barricade, to have a mutant punch through it. QUICKLY, retreat into the location, where you found the shotgun. Climb onto the balcony here and wait for the mutant, and lots of bolters, to appear here. They have been summoned here by the shriek of the dying screamer. Take advantage of the fact that the enemies have problems climbing onto the platform and fire at them from the ledge. It is best to use the shotgun here, and aim to the heads of the zombies. First of all, deal with the mutant and try to eliminate most of the remaining monsters.
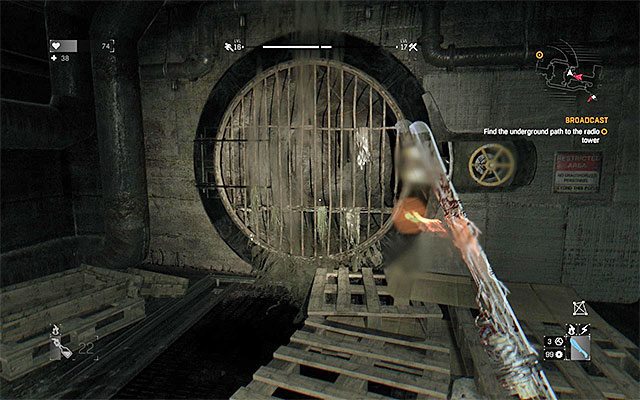 One of the two possible ways into the next part of the sewers
I recommend that you do not stay on the balcony for too long, because the killed infected will soon be replaced by new ones. Head towards the barricade, which the big mutant forced its way through and head North-West. You reach two grates to the next part of the sewers. Approach any of them and interact with the wheel. Do that only between two individual zombie attacks, because you require, at least, several seconds to spin the valve. Take the passage that opens and, after you walk into the next room, eliminate all of the toads here (it is a good idea to aim at the barrels).
 The ledge that you need to climb onto in the first place
Your next task is to reach the balconies above, which seem inaccessible, because this is the only way to leave this part of the sewers. Go North-West and locate the ledge that you can climb onto (point 1c on the map) to start climbing. Reach the metal balconies and jump over to the neighboring platform. You then need to walk over the blue pipe, which will allow you to reach a small balcony on height.

Look up and grab on to the yellow pipe shown in the above screenshot. Shimmy to the right, along the pipe and check your current situation often. Drop down from the pipe after you get above a small platform. Turn around and jump towards the balcony (to make sure, hold down the jump key/button). Head on. After several moments, you will have to shimmy along pipes again. This time, it is going to be the two blue pipes. Thanks to them, you will get to a platform. You can now turn towards the last balcony and take the last jump. Exit the room and take the stairs. In the next room, you will be bumping into the infected and, if only you have the Takedown skill, get them from behind and eliminate them stealthily. Try not to use any firearms, at first, or you will alarm all of the zombies.
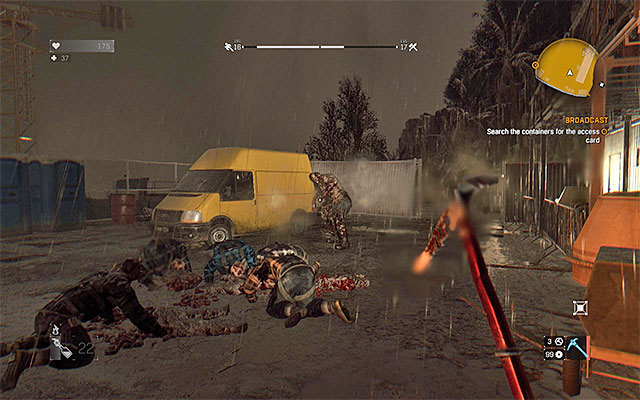 The first of the two areas to explore
Soon, you will reach the sewers exit (point 1d on the map). Stand on the ledge, turn towards the blue bags in the distance and try to jump onto them thanks to which you take no damage. Your next task is to find the key card and to do that, you need to explore the two marked areas. Start with the one closer to the starting point, i.e. to the North-East of it (point 1e on the map). You do not need to attack the zombies her, at all, although you should watch out for a goon, bombers and the toad. Examine the four blue containers - two of them are below and two are above. Thanks to this, you will find out that the key is not here.
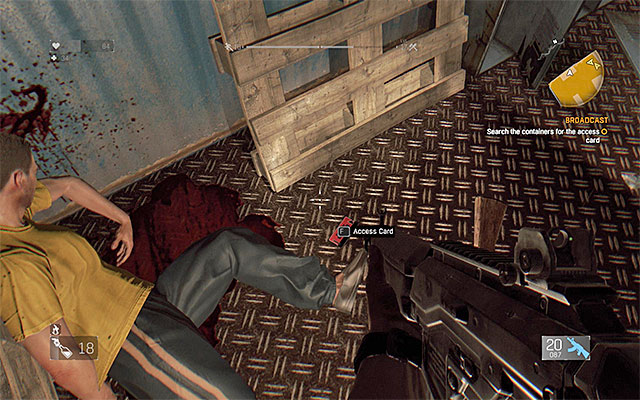 The keycard is in the Southern container
Now, head towards the other yellow area in the central part of the map (point 1f on the map). In here, you need to be even more careful. Try to eliminate, first of all, toads on the containers and avoid the concrete chunks thrown by mutants. As for the mutants themselves, you do not need to fight them and you can simply explore the area. Jump into the containers through the hole in the roof. The Access Card is on the corpse in the Southern container.
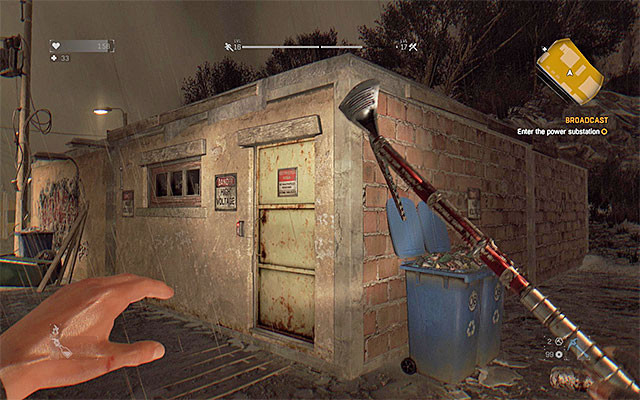 The location, where you need to use the access card
Your next destination is the substation in the North-Western part of the map. It is best to get there over the main road to the hill. Approach the enclosed area from the South (point 1g on the map) and hop over the fence, where there are no entanglements. Just like before, you need to take appropriate precautions here. Try to reach rooftops, of the nearby buildings, as quickly as possible and kill the toads. Also, deal with all the bombers. You can ignore mutants, although you should watch out for their attacks (chunks of concrete and charges). Use the access card to open the building in the middle (point 1h on the map). Enter the second room and find the fuse box.
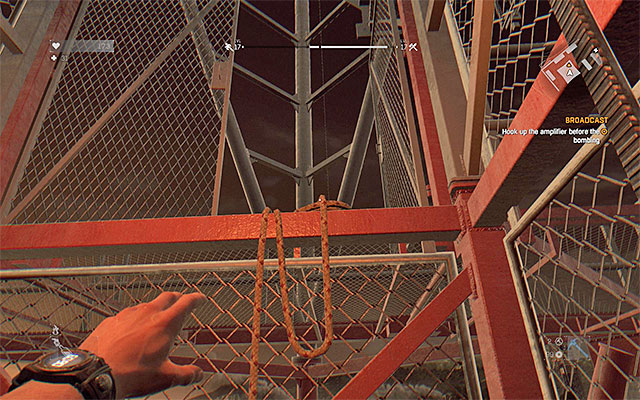
Leave the building and lure the zombies away, somewhere to the South. Then, approach the base of the antenna quickly (point 1i on the map). You need to interact with the control panel here. Get away and wait for the elevator to smash on the ground floor. Take the hole that was formed this way and get into the metal structure, to climb the ladder. Climb the ladder, to the very top, turn left and jump towards the platform shown in the above screenshot. You can climb up the stairs.
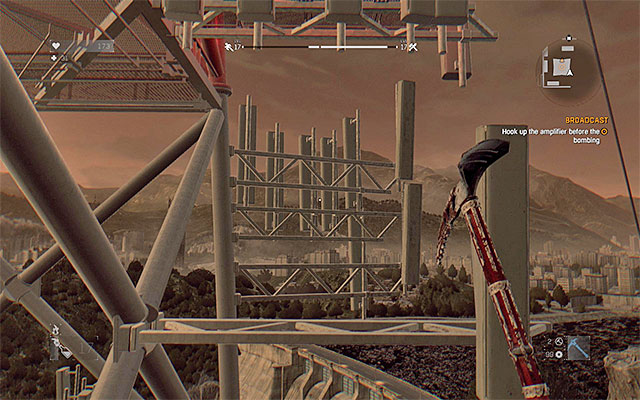 Carefully, jump to reach the tower fragments
Along your path to the top, you will have to deal with several more demanding moments. This mainly means situations, in which you will have to jump towards the red and the grey elements of the tower. Each time, take a precise jump and hold down the jump key/button, up until you land. Along your path, you will have to stand on one of the balconies to the side and only after you take a turn, will you notice interactive ledges above. On one of the platforms, you note several corpses and it is a good idea to attack the zombies before they get up (if you do not manage to do that, you can kick them off the ledge). Soon, you reach the marked area. Open the box here and broadcast the message. You will talk to the G.R.E. and Savvy, after which you receive new objectives.
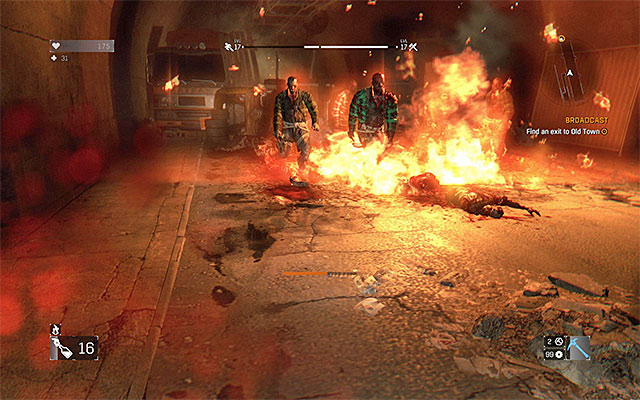 You can attack the infected in the tunnel or walk around them
You now need to reach the tunnel in the central part of the map (point 1j on the map). Start by grabbing on to the rope and, after you drop off it prematurely, resurface. After you get into the tunnel, locate the small white door to the left and open it. You start running into more zombies after you return into the main tunnel. It would be a good idea to eliminate some of them (especially, you should watch out for bombers!) and to do that, you can use Molotovs. Head Southwards.
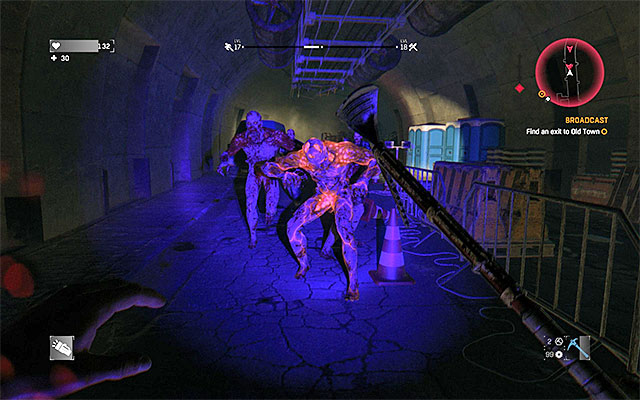 You can use the UV lamp to slow the enemies down
Towards the end of the tunnel, you will be attacked by a big group of volatiles, i.e. nocturnal infected. DO NOT ATTACK THEM because you would inevitably fail. Instead, take it to the heels. During the chase, use the UV lamp, thanks to which you slow the monsters down. The chase should be over soon after you climb onto the trailer of the truck and reach a door. Follow the corridor and swim across the underwater tunnel. Soon, you will note the door to the Old Town (point 1k on the map). After you listen to the conversation with Doctor Camden (after you get back to the Old Town) this quest will end.
Way to unlock: You need to complete main quest 13 - Broadcast (point 5b on the map).
Reward: 35000 experience points
Note - This quest appears in your journal after you return from the Antenna area, which you have visited in the thirteenth main mission (Broadcast). You only need to listen to the conversation with Doctor Camden, which takes place right after you leave the sewers.
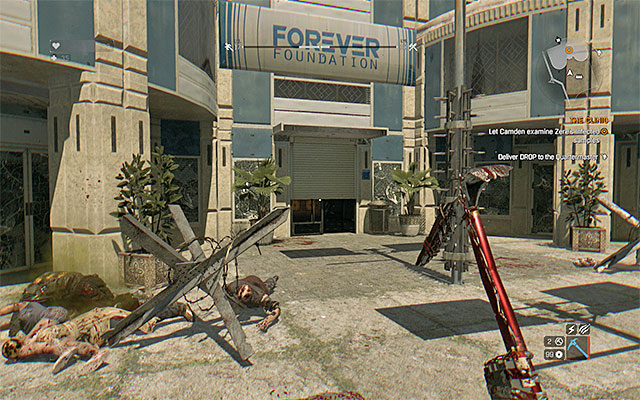 The clinic entrance is on the ground floor
The clinic is to the North-Western part of the Old Town (point 6a on the map) and it is there that you need to go now. On the clinic rooftop, there should be, at least, two armed mercenaries. You can defeat them, although this is not required by the game. This is so, because the clinic entrance is not on the rooftop, but on the ground floor. Walk around the zombies and walk under the partially raised gate. Watch out for more bandits that await you at the other side of the gate. They only use melee weapons so, eliminating them should prove to be much easier. After you have secured the area, approach the elevator and summon it with the button.
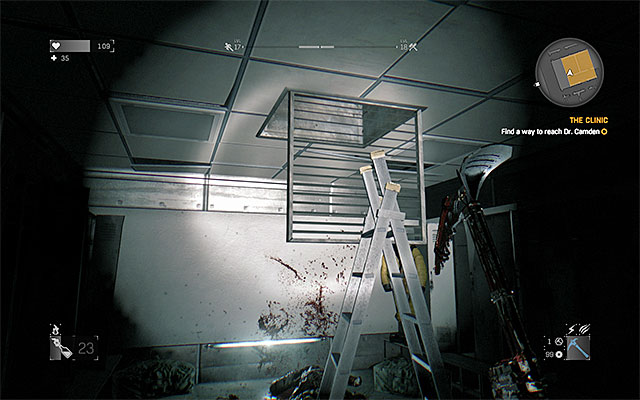 The entrance to the shaft is in the toiled
Wait for the elevator to take you to the underground complex. It does not go all the way down so, approach the door and start tapping the interaction key/button quickly, to slide the wings open. Kill the first infected, approach the door with the big pool of blood and listen to Camden's commentary. Walk over to the toilet, where you will have to use your weapons again. Locate the opened venting shaft, get inside and get, this way, into the security room. After you kill the security officer, do two things - collect the Key Card and use the terminal to open the door that you have just seen. Use the card to leave the room and take the new passage, while dealing with zombies, at the same time.
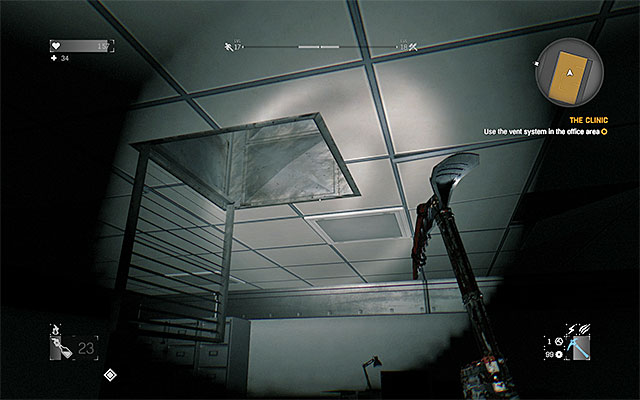 Another venting shaft
Follow the long corridor and take the tunnel to the right. Approach the locked decontamination chamber and listen to Camden's commentary again. You need to return to the main corridor and wait for the scientist to unlock one of the doors on the left (the one next to the Facilities inscription), where you need to go. During the exploration of the facility, watch out for a larger group of the infected and zombies lying on the ground. Walk around them or finish them off, before they bite you. Use the access card to enter offices and there, at a safe distance, kill the bomber. Again, you need to find a venting shaft here and get inside. Follow the shaft and, after you exit at the other side, walk over the catwalks between the yellow and the blue pipes.
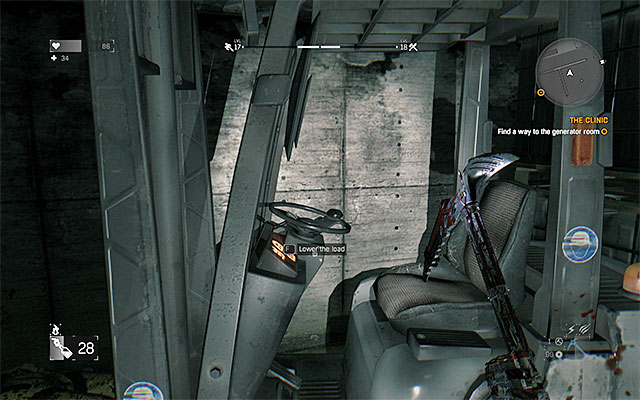 The forklift that you need to activate
The upper path leads you to the room with green toxic fumes. Stay away from them or you lose your health points quickly. I recommend that you climb to the ledges above, thanks to which you get around the infected here. You need to reach the forklift by one of the walls, and pull on one of levers there (it would be better to distract the zombies beforehand, e.g. with firecrackers). Note that lowering the forklift's load unblocked access to another venting shaft. Climb there and follow the shaft. In the next room, you need to reach another forklift but, watch out for the bandit here. After the load changes its position, walk under it to exit the room.
 Unlock passage after you dodge the mutant's charge
Take interest in the room at the other end of the main corridor, because this is where the generators are. Try to activate each one - two of the three generators go online and restore power supply to the underground complex. Return to the big corridor and head on. Attack the zombies in the distance with, e.g. Molotovs. You should be more careful with the mutant around here. You do not need to fight him, because you can dodge to the side, after he charges. While the mutant is busy regaining his strengths, after the failed charge, run up to the other end of the main corridor and use the access card to go ahead.
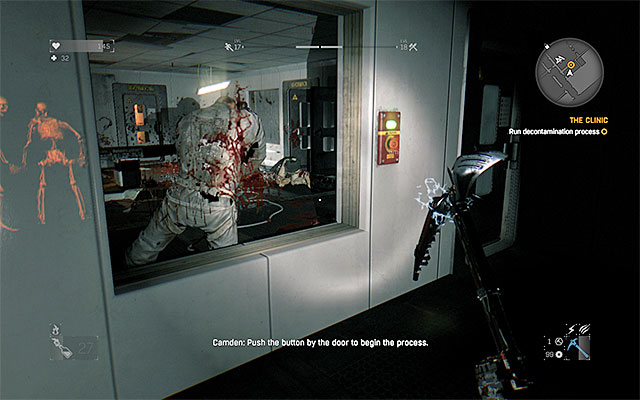 Press the button and wait for the decontamination procedure to end
You can now access the decontamination chamber that used to be inaccessible. After you get there, press the red button and wait for the procedure to end (at the same time, you eliminate several zombies). Walk over to the neighboring room to meet with doctor Camden. After the conversation backtrack towards the elevator (fortunately, you will not run into any monsters anymore).
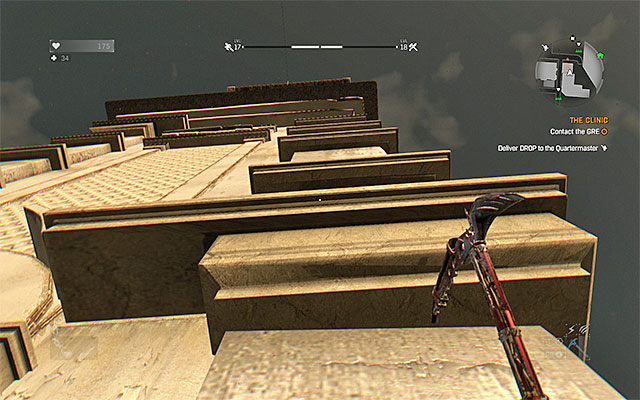 Jump towards the successive ledges of the tower
After you get back to the Old Town, head towards the new location, in the central Old Town, to contact the G.R.E. (point 6b on the map). It is one of the tallest towers in the district and unfortunately, you need to reach the ledge above. Grab on to the ledges of the tower and, if necessary, look around or shimmy to the left, or right. After you get to the very top, make Crane have a conversation with Rais.
Way to unlock: You need to complete main quest 14 - Clinic (point 6b on the map).
Difficulty level: high
Note - After you get to Rais's skyscraper (later into this mission) you will not be able to backtrack, nor to complete any other side quests or other activities. However, you do not need to make up for what you have missed, now, because you will be able to remain in Harran, after you complete the main storyline and keep playing, basing on the earlier game save.
Note - Before you start this quest, try to craft as many first-aid kits as possible. Also, it will come in handy to develop your parkour skills, because you will often have to move and perform risky stunts.
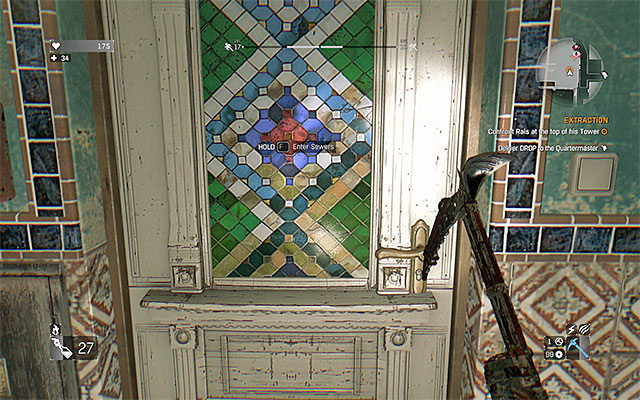 Sewers main entrance
Rais's skyscraper is in the Slum and this means that you will have to return there first. The game suggests that you take the main passage in the sewers (point 1 on the map), i.e. the one that you have been taking during the "The Saviors" main mission. Unfortunately, it is not a good suggestion, because it will take you a lot of time to get to the destination and, along your path, you will have to use your combat and climbing skills.
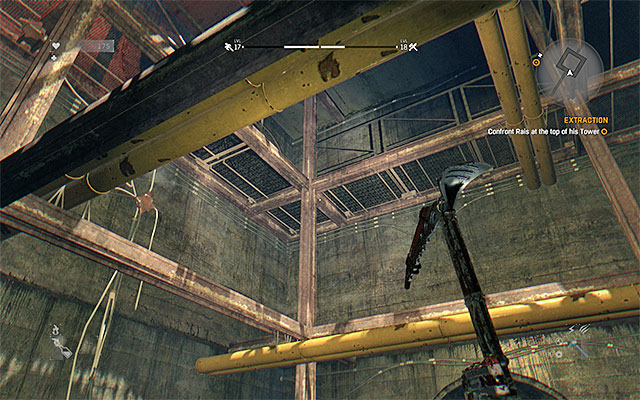 You need to fight and climb some more
If, in spite of that, you have taken the passage along the sewers, follow the linear path. Here and there, you run into numerous groups of zombies. If you do not want to fight them, consider using skills such as Tackle or Vault. Also, you can try running past, under or above them. As for the abovementioned handicaps, in connection with climbing, what is meant here is predominantly the chamber where you need to jump towards platforms above, and yellow pipes. Try to be precise with each jump that you take. Towards the end of the route, you will exit the sewers for a moment. Eliminate the toads around and spin the valve afterwards.
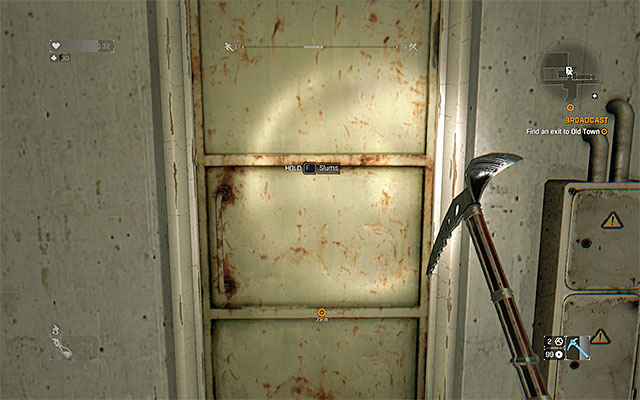 An alternative passage to the Slum is in the location with the antenna.
If you do not want to waste your time, you can get to the slum along an alternative route, i.e. return to the area of the tunnel, along which you escaped from the nocturnal zombies, towards the end of the Broadcast main quest. Just to remind you, the descent into the sewers is in the Southern part of the Old Town (point 5a on the map). After you get into the new area, you will only have to follow several corridors and swim along the flooded tunnel. Soon, you reach the door to the Slum.
Note - Regardless of which path you took, you get back to the Slum. See the chapter with the walkthrough for the main quests in this location, to find the walkthrough for this specific mission.
Way to unlock: You need to complete main quest 14 - Clinic (Old Town).
Difficulty level: high
Note - This quest has been added to your journal when you still were in the Old Town, i.e. after you left doctor Camden's clinic. To complete its main part, you need to return to the Slum, because this is where Rais's HQ is.
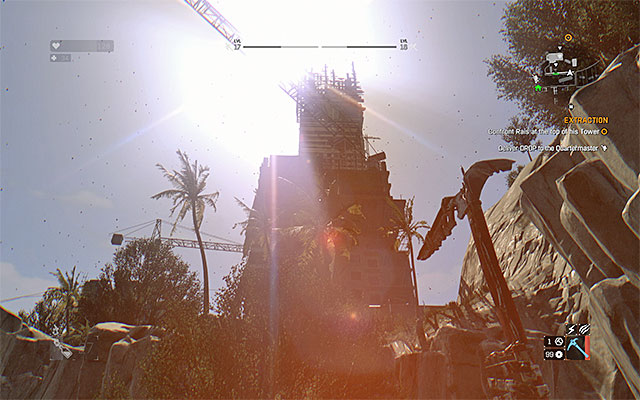 Rais's skyscraper
If you took the route along the sewers, you start in the tunnel that you have already been to (point 7a on the map) and, if took the alternative route suggested by me (the one neighboring the tunnel in the antenna area) you start in the safe zone in the Northern Slum (point 7b on the map). In both cases, your current destination remains the same, and you need to reach the skyscraper that serves as Rais's HQ (point 7c on the map). After you reach the skyscraper, find the red door and interact with it to get to a separate area.
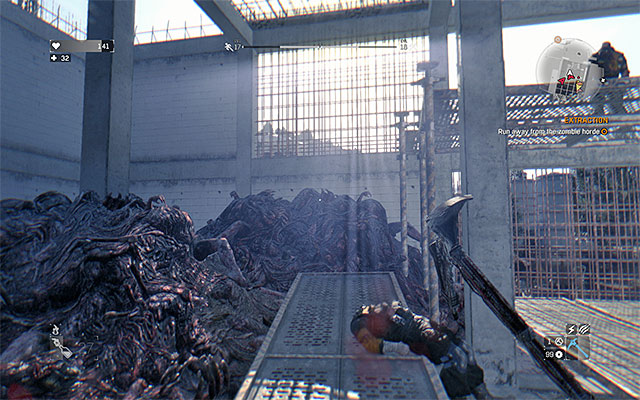 Jump to reach the scaffolding, to escape the area with the zombies
Climb towards the higher floors and ignore image distortion that your character experiences, because everything gets back to normal soon. After you reach a new, larger area, you watch a cutscene of the conversation with Rais, who sends a horde of zombies against Crane. Do not try fighting the infected, because they are replaced with more of them (in larger quantities). Instead, start escaping and start a long scene, where you will have to remain in constant movement. First, climb onto the metal scaffolding, which allows you to get out of an arena, of a kind.
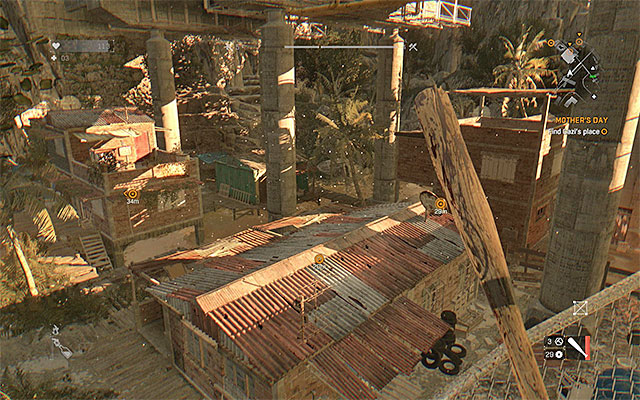 Kill the screamer quickly
While crossing the building site, watch out for the mutant and the other elite zombies (e.g. the bolters). Keep running until you reach a small tunnel, after a while. Follow the tunnel running and jump into the hole. After you get to the sewers, dart towards the screamer here and silence him quickly. Then, head on.
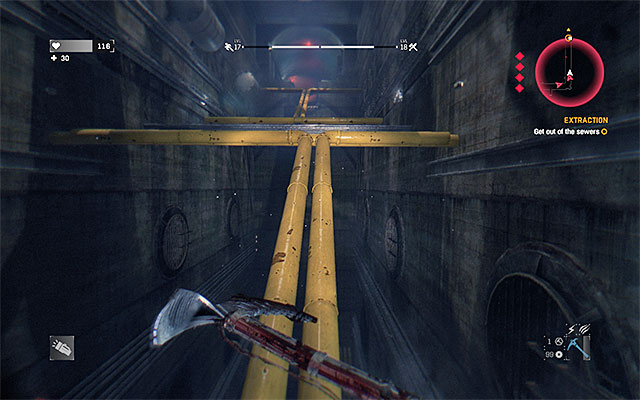 Jump towards the ledges
Starting with this point, there will start appearing zombies, around Crane. Just like before, do not waste your time, nor supplies, on eliminating them. However, you can use the UV light or UV flares to slow them down and decrease the risk of taking damage. The most important thing now is running away from them - along your path, jump over small platforms and grab on to the ledges above, as well as yellow pipes. After you reach the area with two extended ropes, it is a god idea to grab on to one of them, which will allow you to get around a larger group of zombies. Finally, take a long jump to the ladder a bit to the right. Climb up the ladder, to the very top.
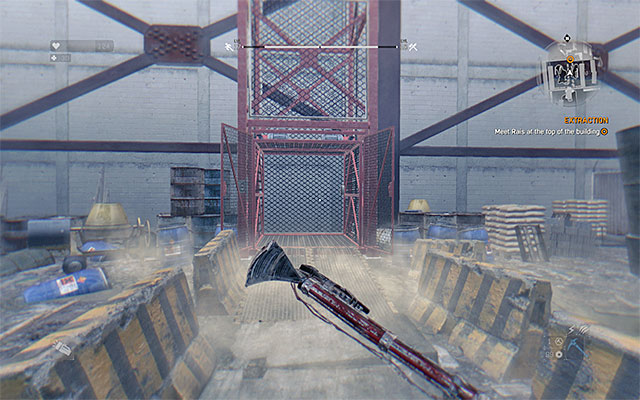 Use the elevator
After you leave the sewers, go straight ahead. Climb onto the flipped container and take the nearby scaffolding to continue climbing (if necessary, turn around to find interactive ledges). After you get to the ledge above, enter the red elevator, press the button and wait to go all the way up. Exit the elevator and head onwards. You do not need to escape anymore, but I recommend that you avoid engaging zombies, anyways. Locate stairs and after you stand at the destroyed part, jump towards the upper floor. Find the severely wounded Karim here and listen to the conversation.
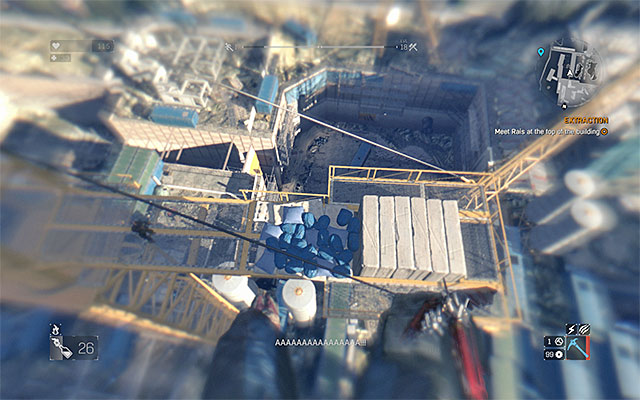 You need to fall onto the blue bags
Approach the edge and check out the nearby crane - you need to run up, jump and land on the blue bags. After you land, eliminate the zombie here, climb onto the crane and head on. Stop where you will be able to jump towards the scaffolding of the neighboring building. Eliminate the bomber here and head on, to find the destroyed stairs. Continue your exploration. Along your path, you will have to take several precise jumps onto concrete elements. It is a good idea to stop before each successive jump to recognize the distance.
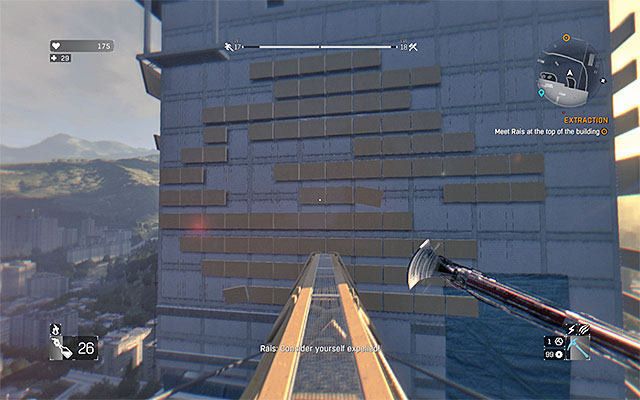 Take a jump, after you reach the end part of the crane
After you reach the vertical shaft, jump towards the metal elements and climb onto the balconies. Then, climb several ladders to the very top of another crane. Here, you need to start running, because Rais will target the crane. Your task is to reach the end, before the crane is destroyed. Jump towards the ledges at the wall of the neighboring building and use them to reach the upper floor. Now, you will have to handle a series of difficult stunts - walk over the narrow elements of the skyscraper and jump towards the neighboring ledges. Towards the end of the climbing, crouch to get under several metal elements, thanks to which you will not have to take unnecessary risk.
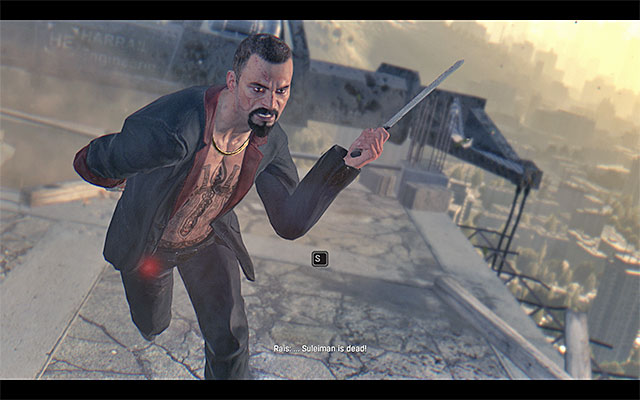 Tap the displayed buttons
Soon, you reach the rooftop of the skyscraper. Climb the last ladder here, to meet Rais. Prepare, because during the cutscene of the meeting, you will have to tap the keys/button displayed on the screen, to keep Crane alive. Finally, tap additionally the interaction key.
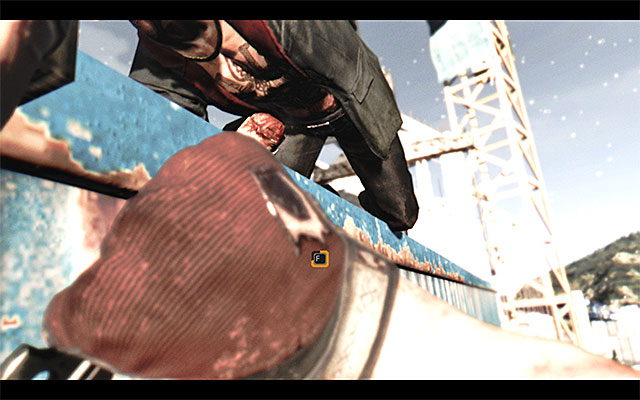 Complete the last QTE event to kill Rais
After you complete the QTE sequence, see the cutscene. This is not it, yet,. Because you still need to remove the dagger from Crane's body (tap the interaction button), and use it to eliminate Rais once and for all. Congratulations, this is the end!
On the map shown above, you can see all the places where you can start side quests in Slums and the locations that you will visit when completing them. Only a few side missions are unlocked automatically. The rest of them has to be acquired at friendly NPCs. Try to not leave the side quests for late, because you can obtain very good rewards for completing them.
How to unlock: Complete main quest number 2 - First Assignment (Tower on the map) and talk to Lena.
Difficulty level: medium
Reward: 3500 experience, 500 dollars, Weapon Upgrade (Champion)
Reach the isolated area.You will receive this mission automatically after completing the First Assignment main quest. Wait until Lena talks to you and you will learn about Brecken's wounds and the need to obtain appropriate medicine. Leave the Tower and head towards the buildings located in the south-western corner of the map (number 2a on the map). The game will add a few points on the map - Gazie's house is the westernmost building. Talk to the man and he will tell you that first you have to deliver him two presents for his mother.
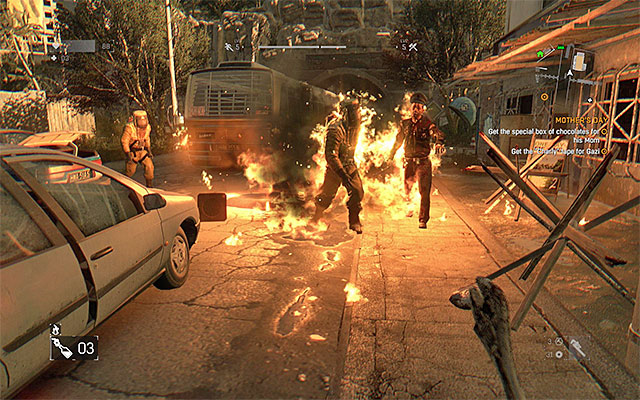 Kill the monsters near the movie store or distract them using Firecrackers.
First, go to the movie store (number 2b on the map). You will encounter several infected near the only available entrance to the building. You can try to kill them (it is good to use Molotov Cocktails), but don't go too far from the building not to lure more monsters. If you don't want to waste your time, use Firecrackers and sneak behind their backs. Approach the door and open it using a lockpick (you have to have at least few seconds of peace in order to successfully break in). Go inside, close the door behind you and turn on the alarm using the switch on the wall. You can now start looking for the movie. If the zombies start gathering near the main entrance, unlock the back door from inside.
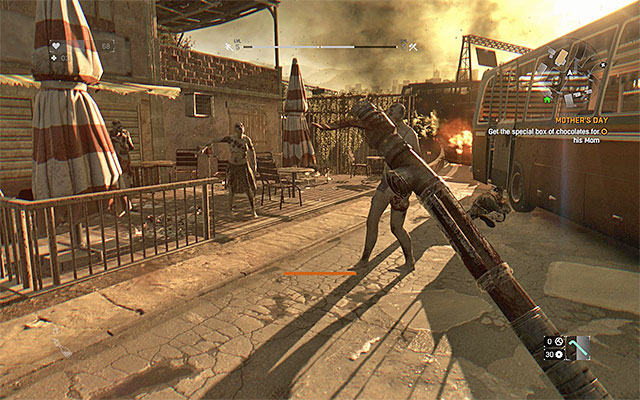 Clear the area around the entrance to the shop
Now, head towards the nearby shop (number 2c on the map). The strategy is very similar - kill all the zombies standing near the gate or distract them with Firecrackers. Approach the next gate and press the button shown by the game to open it. Go inside, kill the zombie and locate the Box of Chocolates on the floor.
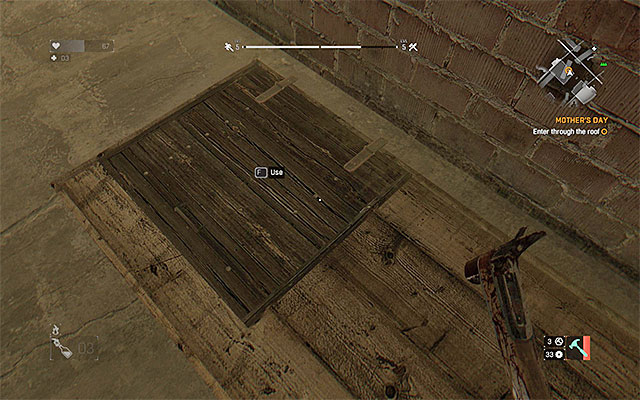 Enter Gazie's house through the roof.
You can go back to Gazie's house. The freak will take the presents, but won't let you in. You have to look for an alternative entrance. Go inside the house from the roof, by locating a brown hatch. Go to the ground floor and after listening to a short conversation, locate Tranquilizers in one of the rooms. Leave the house through the roof (jump towards the hatch) and go back to the Tower to give the medicine to Lena (you will find her on the eighteenth floor). You will receive a Weapon Upgrade (Champion).
How to unlock: Reach room number 202 in the Tower and talk to Brijesh (Tower on the map).
Difficulty level: medium
Reward: 3500 experience
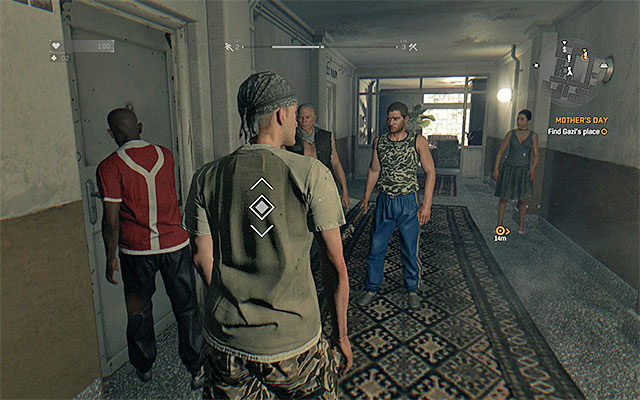 Room 202.
You can unlock this mission after completing the First Assignment main quest. Go to the twentieth floor and find room 202, near which you will see a few people. Talk to Brijesh, who will tell you that Bahir locked himself inside the room. You have to use a lockpick to open the door. Make sure that you have at least one lockpick (you can for example acquire it from the quartermaster, buy it from a vendor or craft it yourself) and complete the mini-game.
 The place where you can find Yusuf.
Go to the room where Bahir is and talk to him. Pick up the flask of Antizin from the floor and talk to the man again. After the conversation, go meet with Lena who can be found in the clinic, on the eighteenth floor of the building. Talk to her and then head towards the stairs. This time, you have to go to the roof of the Tower and find Yusuf - he will be sitting near one of the scaffoldings. Talk to Yusuf and you will learn where he has acquired the flask.
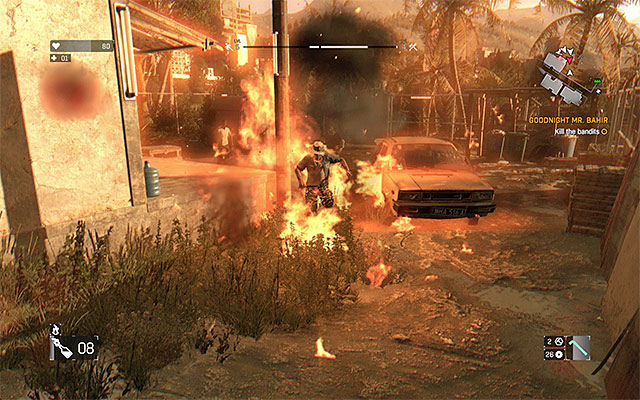 Get rid of all the bandits, for example using Molotov Cocktails and throwing weapons.
You can now leave the Tower and head towards the drugstore located to the north-west (number 1 on the map). After arriving at your destination, you can talk to Bento or attack the bandits right away, because you won't be able to solve the situation peacefully. To eliminate the enemies, you can use Molotov Cocktails and throwing weapons (for example stars). Be careful, because these enemies are better in melee combat than the infected and some of them can use throwing hatchets. Stay on the move and get back if necessary. As a reward for winning the battle, you will unlock a new safe spot. Listen to the last conversation with Lena.
How to unlock: Meet with Dawud (Tower on the map).
Difficulty level: medium
Reward: 3500 experience
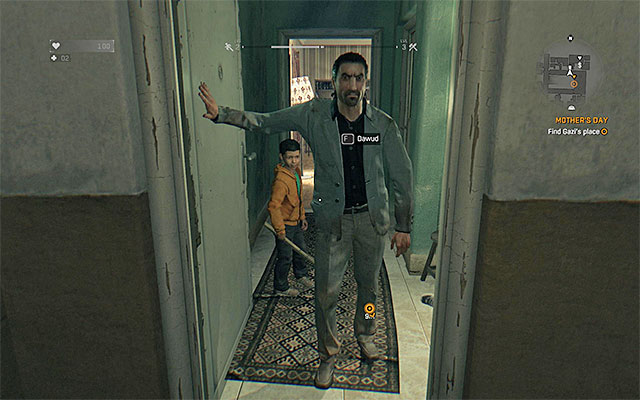 Dawud
DawudThis mission can be unlocked already when completing the First Assignment main quest. Head to the twentieth floor and find the room where Dawud lives. Talk to him to unlock the quest. You can obtain the gun for Dawud (no matter what type, for example a simple pistol) in many ways. It is good to look for firearms when exploring the game world, but you can also wait until you defeat an armed enemy when completing one of the quests. After obtaining the weapon, return to the Tower and give it to Dawud. As a reward, you will obtain the key to his pawn shop and another quest.
 Open the gate only after eliminating the zombies.
Head to Dawud's shop located to the east of the Tower (number 3 on the map). You can enter the shop only by opening the gate. Unfortunately, there are some zombies nearby, so you have to deal with them. It is good to kill the monsters (use Molotov Cocktails but watch out for exploding cars) or distract them with Firecrackers (throw them from one of the roofs). Opening the gate (you have to keep pressing the appropriate button for a while) takes a few seconds and you cannot be attacked during the process. Inside the shop, you will find plenty of free supplies. Make sure to take the Action Figure that Dawud asked you to bring.
When heading back to the Tower, listen to what Brecken has to say about Dawud. After reaching your destination, go to the twentieth floor and talk to Salma.
How to unlock: Meet with Alfie in the Tower lobby (Tower on the map).
Difficulty level: medium
Reward: 4500 experience, blueprint (Electricutter)
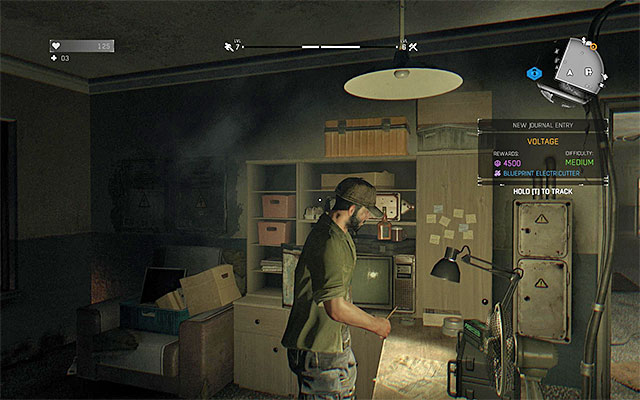 Alfie
AlfieYou can start this mission after completing the Airdrop main quest. Reach the lobby on the ground floor of the Tower and find Alfie. Talk to him and he will ask you to reset two substations. What's important, is that you can prepare the traps connected to the quest only at night. If you talk to Alfie during the day, you have to wait until the night comes. You can use the bed on the nineteenth floor in the Tower or one of the beds in the substations marked on your map. It is a better idea, because you won't need to travel to the place at night.
-
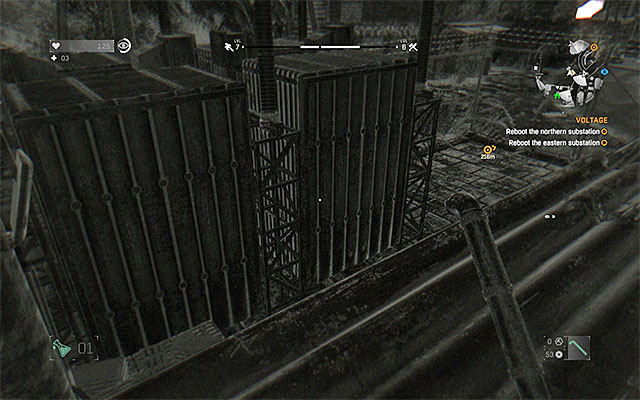 One of the substations.
You have to reach two substations - the one in the north (number 4a on the map) and the one in the east (number 4b on the map). When travelling, stay out of the sight of the infected (use Survivor Sense to locate them). It is a good idea to us a Night Vision Booster to see better and avoid the enemies. The only way to enter the small building in the northern substation is to break in using a lockpick, but the lock is not easy to break. Interact with the levers in both the substations and bring back the energy supply.
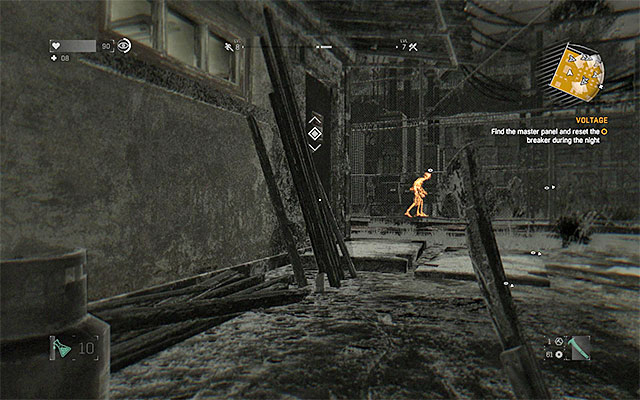 The entrance to the building with the main terminal.
Your next objective is to reach the central station located in the southern part of the Slums (number 4c on the map). Just like before, avoid being seen by the infected and by the "elite" zombies. The central station is occupied by a lot of usual infected and it is better to not get into any fights. Rely on climbing and try to go above the monsters. You have to locate the main terminal, which can be found in the building in the south, marked on the map in this guide. Interact with the terminal and you will unlock a new safe zone and complete the quest. Don't forget to go back to Alfie to collect a Blueprint (Electricutter).
How to unlock: Talk to Musa in the Fishermen's Village (Fishermen's Village on the map).
Difficulty level: medium
Reward: 5000 experience, Weapon Upgrade (Champion)
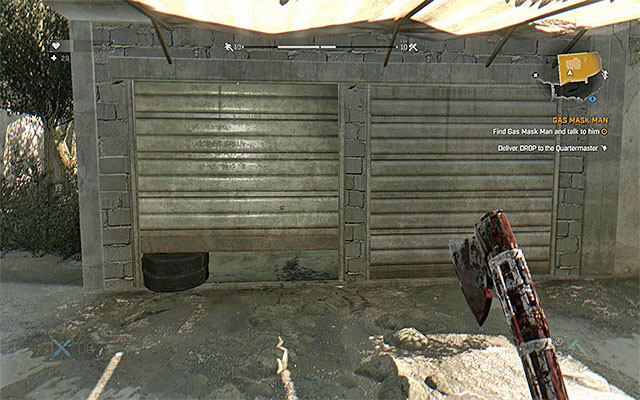 Open the gate and talk to the man in the gas mask.
You can unlock this side quest after securing the Fishermen's Village location when completing the Pact with Rais main quest. After clearing the area from the zombies, meet with Musa, who is standing near the main gate. He will ask you to find the Gas Mask Man, who is responsible for the recent sabotage. Head north-west (number 5a on the map). After arriving at your destination, open the gate and talk to Shakur (the man in the mask). Listen to his side of the story.
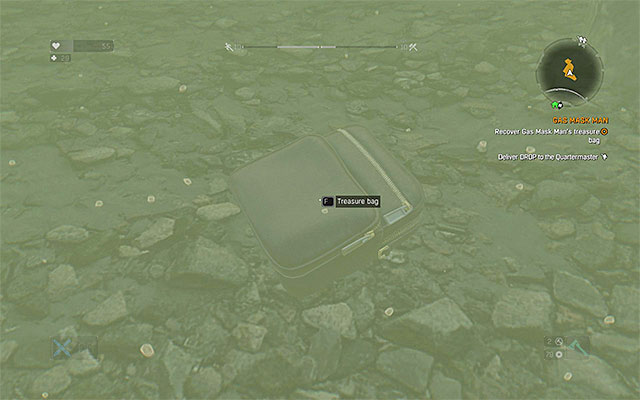 The location of the Treasure Bag.
Reach the lake located to the north from your position and jump into the water. You have to dive and search the bottom of the lake (don't stay underwater too long!) to find a Treasure Bag. You will find it near a flipped boat (number 5b on the map). Go out of the water and return to Shakur to listen to him again. You can now go back to the Fishermen's Village. Search Gursel's house to find the Gas Mask. Talk to the old man about that. At the end, return to Musa to receive a Weapon Upgrade (Champion) as a reward.
How to unlock: Talk to Alexei near the radio tower (number 6a on the map).
Difficulty level: medium
Reward: 5000 experience, Blueprint (Zombie Classic).
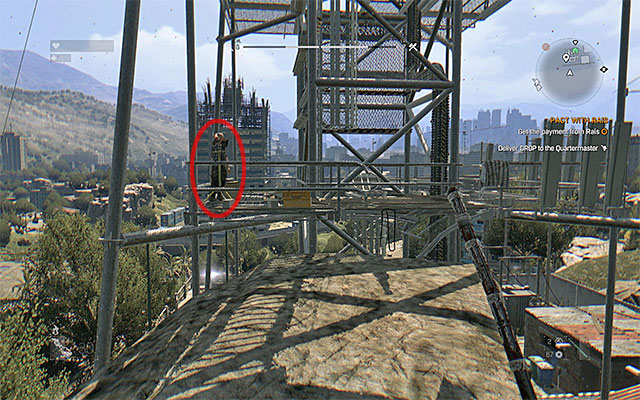 Jump onto the metal platform on the radio tower.
You can start this mission already when completing the Pact with Rais main quest. After dealing with the armed enemy near the gas station, you can jump onto a metal balcony on the nearby radio tower (number 6a on the map). You will find Alexei here. Talk to him and he will ask you to find his son Kristov in the Tower. Head to the right location (Tower on the map) and start asking about Kristov (ask for example Deniz). You will be sent to Ayo, who can be found on the nineteenth floor. You will learn that Kristov was seen near a newly built high rise. You can leave the Tower.
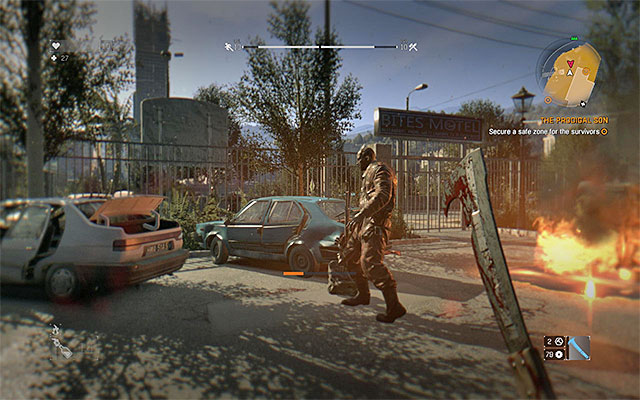 Kill all the zombie around the motel and close the only entrance to this location.
Wait until you here from Kristov over the radio. You will learn that he has locked himself inside a nearby motel. Head to this location (number 6b on the map). Ignore the bus full of infected and start securing the inner area of the motel. Watch out for the Toad on the balcony and the Goon on the main square (you can leave the Goon for the end). Also, close the gate as fast as you can, preventing other zombies from entering the area. After securing the motel, find the power switch (you will also unlock a safe zone) and meet with Kristov.
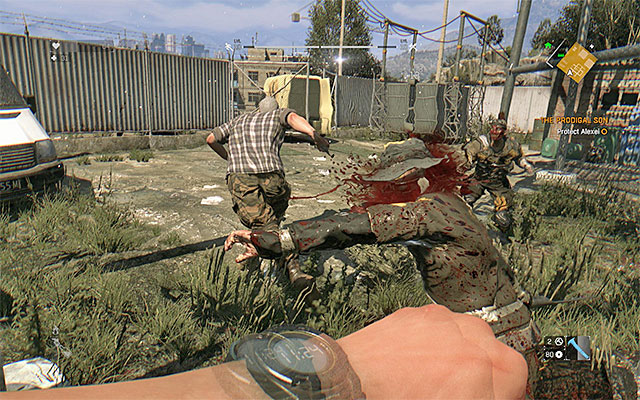 Defeat the Bandits using for example melee weapons, throwing weapons or firearms.
You can head back to the place where you talked to Alexei. Find the man in a small building under the radio tower. After the conversation, you will be attacked by a group of enemy mercenaries. During the battle, use melee weapons or throwing weapons/firearms. Avoid using area-over-effect attacks (like for example Molotov Cocktails), as they could hurt Alexei. Search for an opportunity to attack enemies focused on attacking your ally. After the fight, talk to Alexei one more time and you will receive a Blueprint (Zombie Classic).
How to unlock: Listen to Alfie over the radio while exploring the world.
Difficulty level: medium
Reward: 5000 experience
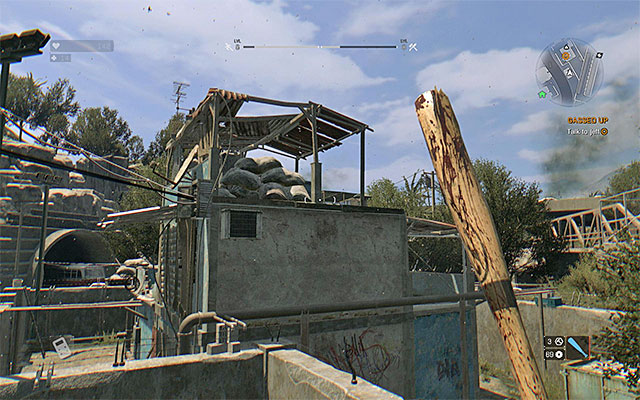 Jeff's fortress.
You can start this mission after completing the Voltage side quest. Listen to Alfie over the radio and he will ask you to find Jeff's fortress. It is located in the western part of the map (number 7a on the map). After arriving at your destination, you have to jump over the fortifications or climb the roof of the "fortress". Reach a small balcony, approach the half-open shutter and talk to Jeff to learn what to do in order to restore the gas supply. You can leave this area.
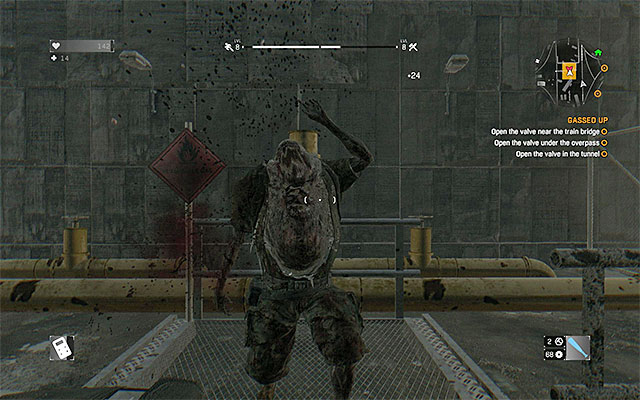 Quickly deal with the Toad.
Now, you have to find three valves. The first one is located under the viaduct (number 7b on the map). When you're there, watch out for the Toad right near the valve. It is best to defeat it in melee combat. Kill or distract (for example with Firecrackers) other zombies in this area, but be careful not to lure any Runners. Turn the valve (it will take you a few seconds) and head to the next one, located in a tunnel (number 7c on the map). After reaching the tunnel, locate the passage on the left, leading to a few narrow rooms. Before you go in, kill the zombies around so that you wouldn't get circled. Turn the second valve.
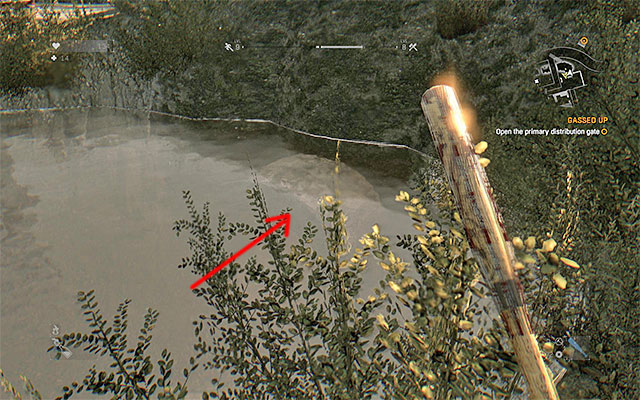
The next valve can be found north-east from here, near a railway bridge (number 7d on the map). It is a small, fenced off area inside which you can see a Goon. Climb the nearby bridge, get rid of the Toad and eliminate the Goon with ranged attacks (firearms, throwing weapons, Molotov Cocktails, etc.) before you jump in and turn the valve. You can now head to the main valve (number 7e on the map). Watch out for the Toad again, as well as for several Runners and at least one Goon. The main valve is well hidden - to reach it, you have to dive into the water in the place shown in the picture above. Swim to the tunnel and locate the valve. Defeat another Goon, turn the valve and escape through the tunnel as fast as you can.
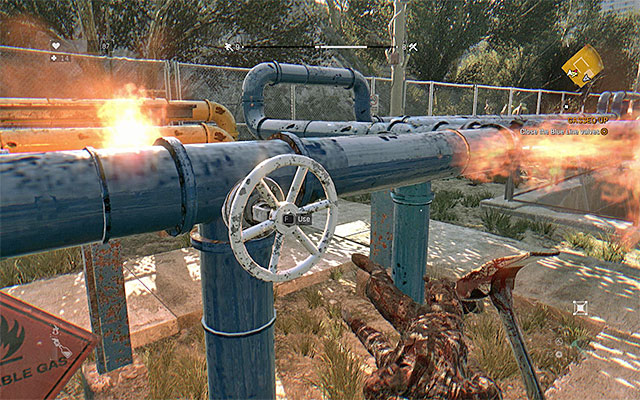 One of the three valves on the blue line.
This is not the end of the mission, because now you have to turn three valves on the blue line, located on the surface (look for blue pipes). Try to do it quickly, because more infected will start appearing in the area, Runners as well. Watch out for the flames (avoid them using parkour moves). After turning all the valves, you can head back to Jeff's fortress. Talk to Jeff and quickly escape the area, because a series of explosions will occur in front of the fortress.
How to unlock: Check the noticeboard in the Tower lobby (Tower on the map).
Difficulty level: low
Reward: 3500 experience, 1000 dollars
When you're in the Tower lobby, check the noticeboard to find a note about a mission. It consists in gathering some Lavender Herbs and it's very easy. Locate the icon of the Herbs on the map somewhere nearby (for example in the north-eastern part of the Slums), go there and start looking for the plants. After gathering six Lavender Herbs, go back to the Tower and give them to Toygar. You will receive 1000 dollars.
How to unlock: Check the noticeboard in the Tower lobby (Tower on the map).
Difficulty level: low
Reward: 3500 experience, 1000 dollars
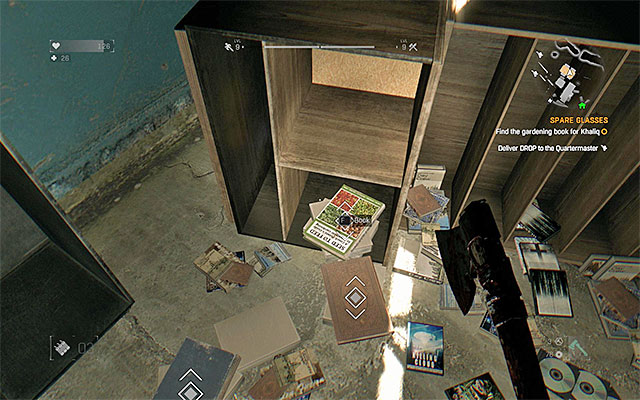 The gardening book is one of the two items that you need to find.
When you're in the Tower lobby, check the noticeboard to find a note about a quest. Find Khaliq on the ground floor. Talk to him about a pair of spare glasses and you will learn where his house is. Leave the Tower and head south, to Khaliq's house (number 12 on the map). You can enter the building only by reaching a door near one of the balconies on the top. Search the whole building carefully. You will find the Glasses in a briefcase on the floor. The Book that you're also searching for is in a room on the ground floor (you have to pick up a few books to find the right one). You can now go back to Khaliq and give him the items.
How to unlock: Talk to Alfie in the Tower lobby (Tower on the map).
Difficulty level: medium
Reward: 5000 experience
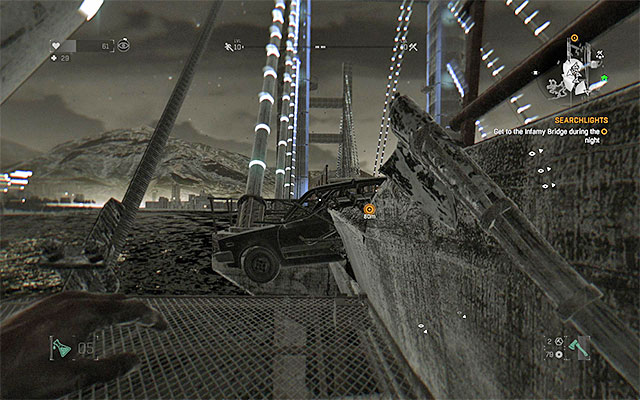 You can use the balconies on the side and stop every few steps or run across the whole bridge.
You can start this mission after some time from completing the Voltage side quest. Talk to Alfie again in the Tower lobby. This time, you will receive a task to reach the searchlights attached to a broken bridge (number 15 on the map) to take the light bulbs. The task is quite difficult, because you have to acquire the bulbs after dusk. However, don't go there too late, because you may not be able to reach the bridge before the morning. When going towards the searchlights, you can use the side balconies to hide from the Volatiles and other infected, but if you're not afraid to risk, you can run straight across the bridge and ignore the monsters chasing you (you can slow them down with UV Flashlight and traps). If you've chosen this variant, try to use the Vault skill to bounce from normal infected.
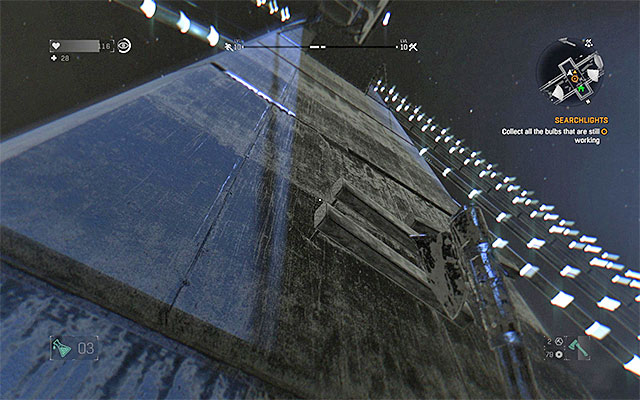
No matter of which way you choose, reach the lighten up area, located right below the bulbs. Good news is that Volatiles cannot get you here. Nevertheless, stand on the roof of the van and plan your next move from there. Face the southern pillar of the bridge and start climbing in the place shown in the picture above. You have to jump from one edge to another and catch them. It will allow you to reach a high balcony.
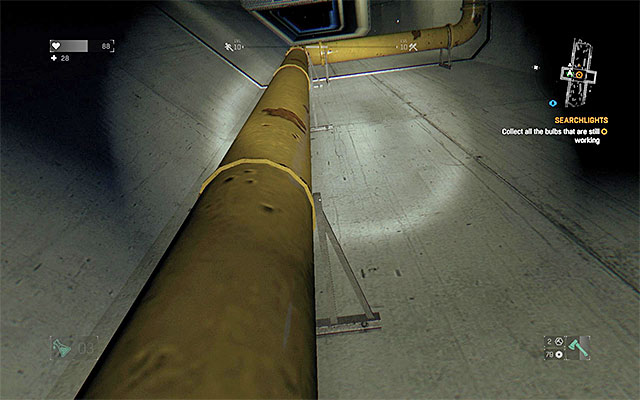 Climb the yellow pipe.
Locate the rope and grab it to reach the northern balcony. Be careful here, because the door will open and a few monsters will run out. It is best to kick the zombies off the edge, but watch out not to fall down yourself, as it would mean instant death. Enter the northern tower. You cannot use the ladder here, so grab the yellow pipe and climb it to the top. When you reach a place where the pipe turns right, be careful, because you may easily fall. Then, climb onto the balcony.
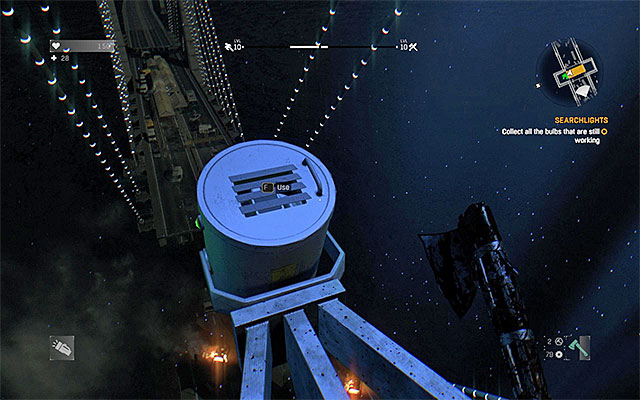 Remove the light bulbs.
Use the ladder and when you reach the end of it, face another balcony to jump. You can open the red door. Carefully start approaching the bulbs that are burning (green light) and interact with them to remove them. After you get all the light bulbs, locate new interactive edges on the south wall and use them to climb. Remove the bulbs located here. You can now enter a small safe zone and use the bed, or (if you're not afraid of travelling at night) grab the rope and go down. You just have to return to Alfie in the Tower and give him the bulbs.
How to unlock: Talk to the Messenger in the Tower (Tower on the map) and listen to Tolga and Fatin over the radio.
Difficulty level: medium
Reward: 1000 experience
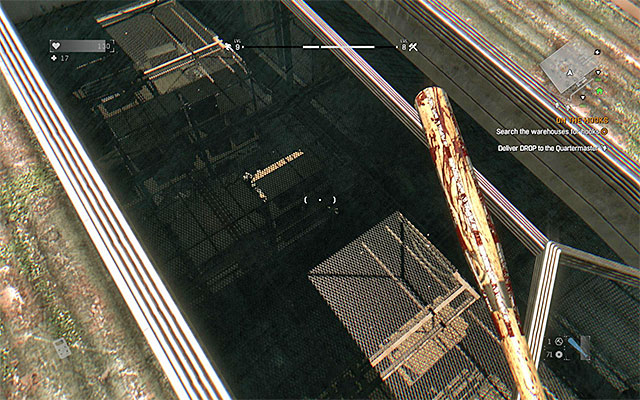 Break the glass part of the roof of the warehouse.
Start from talking to the Messenger in the Tower lobby. He will tell you about the tasks available from people working for Volkan Dal, the billionaire. Now, wait until Tolga and Fatin contact you when exploring the world. You have to meet these people in one of the safe zones (number 9a on the map). Head to the warehouse (number 9b on the map). When you're there, go to the roof and break one of the glass parts to jump inside. Watch out for the balconies that are not so stable (they can collapse and you will fall down).
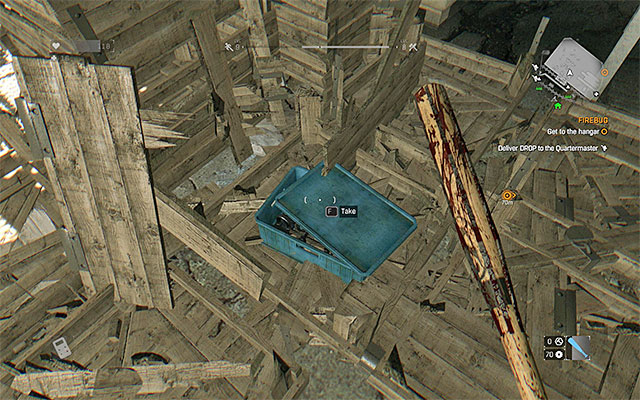 Destroy the pallets.
There are a lot of zombies in the warehouse (and at least one Goon) that you can fight or avoid. You will find the hooks in a few different places in the building - destroy the pallets behind which the hooks are hidden. After gathering at least one set of hooks, climb to the roof using the balconies and head back to Tolga and Fatin.
How to unlock: Talk to Blake in the Tower (Tower on the map) and reach the building with the red smoke getting out of it (number 8a on the map).
Difficulty level: medium
Reward: 5000 experience, 1000 dollars
 Ryan's house is on the junkyard and it is difficult to miss.
This quest will appear in your quest log after completing a few initial steps. Talk to Blake in the Tower and you will learn about a building with red light coming out of it. Head there (number 8a on the map), knock on the door and talk to Ryan, who will give you a Note. Wait until Crane talks to Aman over the radio. The main hero will be sent to talk to Aziz who is in the safe zone known as bazaar (number 8b on the map). When you're there, find Aziz and talk to him.
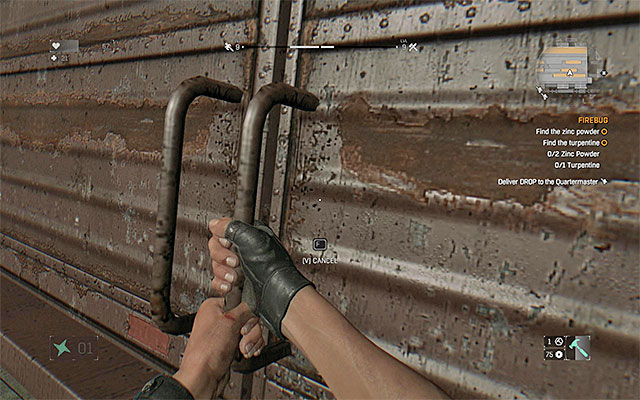 Find the car and search the trunk.
Head south-west. Search the southern tunnel (one from the two marked on your map). Open the trunks of the cars that you find. You will find the Package in a limo parked near the side door (number 8c on the map). After obtaining the delivery, head back to the Tower (Tower on the map). Use the elevator to go to the nineteenth floor and find Aman in one of the rooms.
Note - if you didn't find the package in the car described in the guide, check other cars (also the ones in the northern tunnel).
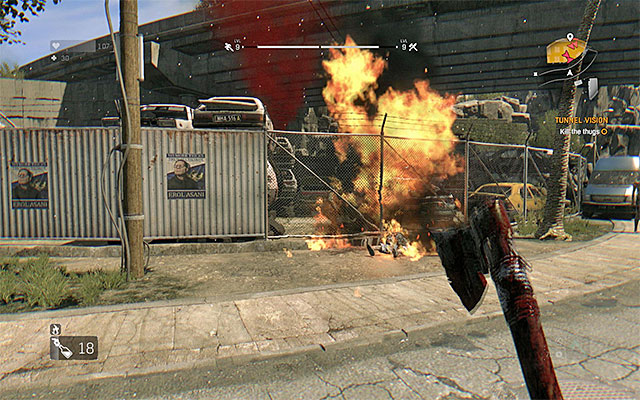 Kill all the bandits on the junkyard.
Leave the Tower and head back to the junkyard, where Ryan lives (number 8a on the map). When you're there, it will turn out that a large group of Bandits is occupying the area. Attack the enemies. When fighting, it is good to use Molotov Cocktails and throwing weapons. Also, use the fence to avoid direct confrontation. Stay on the move, because some of the enemies may have throwing weapons as well. When the battle is over, knock on the door and talk to Ryan again.
How to unlock: Meet with Zaid in the safe zone (number 10a on the map).
Difficulty level: high
Reward: 5000 experience, Blueprint (Zaid's Flares)
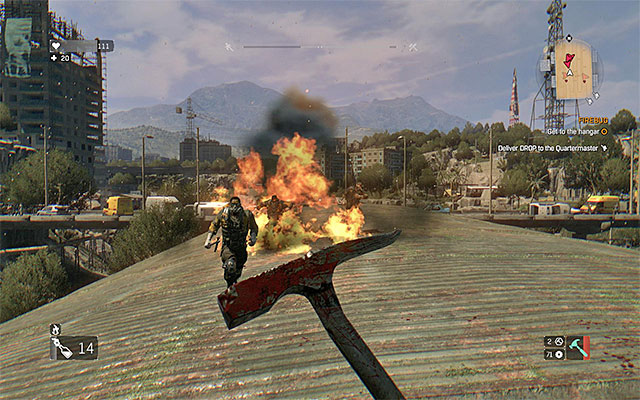 You can fight the mercenaries on the roof of the warehouse.
You will find Zaid in one of the safe zones (number 10a on the map) and during the conversation, you will learn about the items needed to produce UV flares. Head to the warehouse to look for them (number 10b on the map) and use climbing to get to the roof. Be careful here, because you will encounter a human enemy. Moreover, after you attack him, more of them will appear. Use Molotov Cocktails or throwing weapons to eliminate them (for example starts or hatchets), because you can be easily circled in melee combat. The Bandit with the gun will stay inside the warehouse and you have to deal with him too. You can try to use ranged attacks or quickly jump inside and approach him as fast as you can. After the fight, take the Police Rifle.
Open the wagons in the hall.You have to collect three items from the warehouse. First, locate the Zinc Powder. Unfortunately, there are a lot of zombies here and eliminating some of them will be unavoidable. Try to aim at the explosive barrels and use explosives, because you will be also fighting some Runners. Eliminate the monsters one by one so that you are not circled by a large group. After initially securing the warehouse, start opening the wagons. Jump inside each wagon and look for blue buckets with zinc.

After collecting two buckets of Zinc Powder, return to the balconies above. Locate the broken part, shown in the picture above. Carefully jump down to a small room. Start opening the door to another rooms and kill the zombies located there. You will find the Turpentine in the last room. When you have all the ingredients, return to Zaid and you will receive a Blueprint (Zaid's Flares).
How to unlock: Talk to Jaffar in the safe zone (number 11a on the map).
Difficulty level: medium
Reward: 5000 experience, 1000 dollars
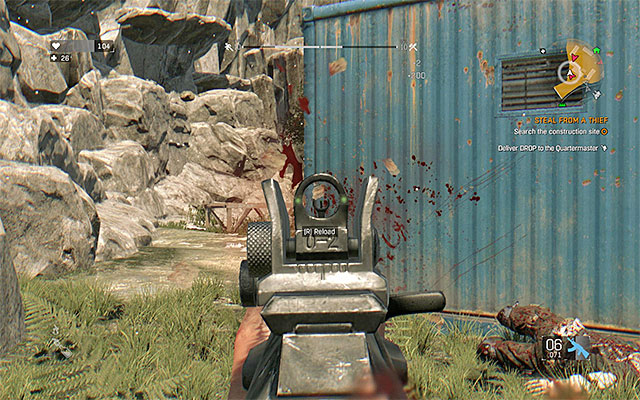 Use firearms to eliminate armed enemies.
You can find Jaffar in one of the safe zones (number 11a on the map) and during the conversation, you will learn about Rais's people strange activity on nearby construction site (number 11b on the map). Don't go there until you obtain a gun, because otherwise it will be very difficult for you to stay alive. There are a lot of Bandits in that area and at least three of them carrying firearms. Use a gun and hide behind covers to defeat them. When they are dead, deal with the rest of the enemies and be ready to fight infected Runners that may appear in the area when you start shooting.
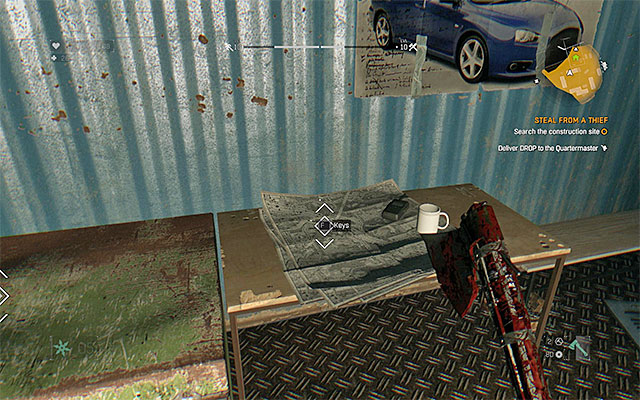 The location of the keys.
Secure the construction site and start looking around (collect the guns lying near dead enemies). In one of the eastern small buildings, you will find Keys. Use them to open the northern cabin. Locate a chest, open it and take three sticks of Dynamite. You can now go back to Jaffar and tell him about everything. You will receive 1000 dollars and you will get to keep the dynamite.
How to unlock: Check the noticeboard in the Fishermen's Village (Tower on the map).
Difficulty level: low
Reward: 2500 experience, Blueprint (Sophia's Healing Recipe)
When you're in the Fishermen's Village, check the noticeboard for a note about this quest. It consists in obtaining the dulse and it is very easy. Locate the dulse icon on the map (for example on the lake to the north of the village), go there and start looking for the plant (you have to dive, because most of them are on the bottom of the lake). After gathering five Dulse, return to the village and give them to Sophia, who will give you a Blueprint (Sophia's Healing Recipe) as a reward.
How to unlock: Check the noticeboard in the Fishermen's Village (Fishermen's Village on the map).
Difficulty level: low
Reward: 2500 experience, 1000 dollars
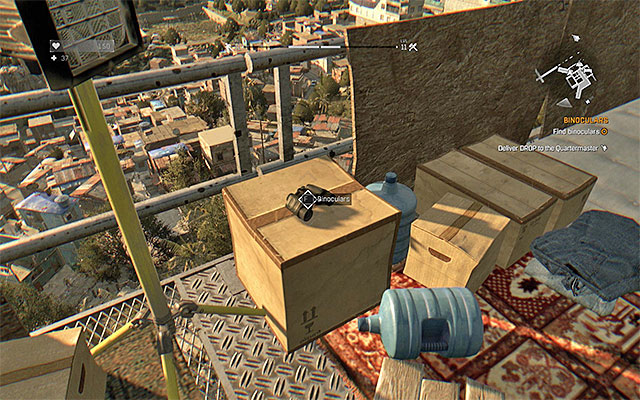 One of the places when you can find binoculars.
When you're in the Fishermen's Village, check the noticeboard to find a note about this quest. It consists in obtaining binoculars. The game suggest you to look on radio towers and roofs of high buildings. If you don't want to waster your time, you can visit the radio tower in the eastern part of the slums (number 18 on the map). You will find the Binoculars on one of the middle balconies. Return to the Fishermen's Village and give it to Santiago. You will receive 1000 dollars.
How to unlock: Talk to Meliha in the Fishermen's Village (Fishermen's Village on the map).
Difficulty level: medium
Reward: 5000 experience, 1000 dollars
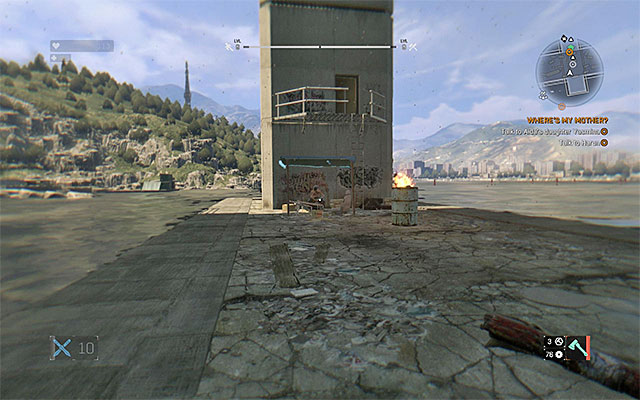 Swim to the place where Harun is.
When in the Fishermen's Village, find two women banging on the door of one of the huts and talk to Meliha. Use lockpicks to open the door (the lock is of medium difficulty), check all the rooms and tell the woman that you didn't find anybody. Ask any person from the village where to find Harun and you will learn that he stays under a broken bridge (number 13a on the map). Jump into the water, swim to the platform built around a large pillar and talk to Harun. You can now go back to the village. Go inside the hut where Yasmina is and talk to her to learn where her mother is.
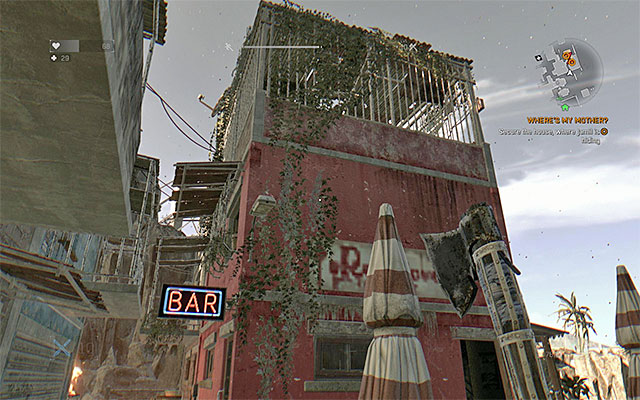 Look behind the red building.
Head south-west from the village and search the area marked by the game to find the building in which Jamil is (number 13b on the map). You will recognize it by the red paint. You can enter it from the street or from one of the balconies. Start from searching all the floors and killing all the zombies. Secure all the doors to the building by moving two wardrobes. At the end, interact with the third wardrobe in which a boy is sitting and talk to him.
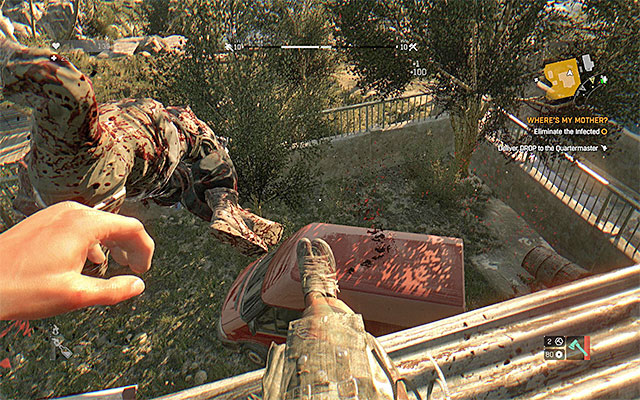 You can use the roof of Salim's house to defend against the Runners.
Now you have to reach Salim's house, which is located in the south-eastern part of the map (number 13c on the map). When you're there, knock on the door and after the conversation, prepare to defend yourself against the infected lured by the sound of alarm (you can't switch it off now). You will be fighting Runners, so you have to be careful, especially when there are 2-3 zombies around of this type around you. Try getting onto the roof of the building (look for an opportunity to push the monsters down) and use Molotov Cocktails and throwing weapons/firearms. You have to fight until all the zombies marked on the map are eliminated (ignore the monsters standing farther away).
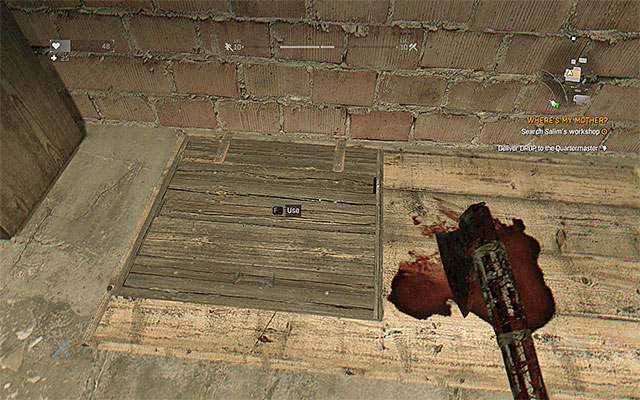 The entrance.
It's not the end, because now you have do defeat Salim. The man wants to fight you in melee combat, so try to use ranged attacks. You can use Molotov Cocktails or mines. After killing Salim, search his body and take the key. You can enter the building. Search the wardrobe and locate a hidden hatch, leading to the basement. Go down and rescue Aida. You can now go back to Fishermen's Village and take the reward from Meliha (1000 dollars).
How to unlock: Meet Neil in the boat launch (number 14a on the map).
Difficulty level: medium
Reward: 5000 experience, 2000 dollars
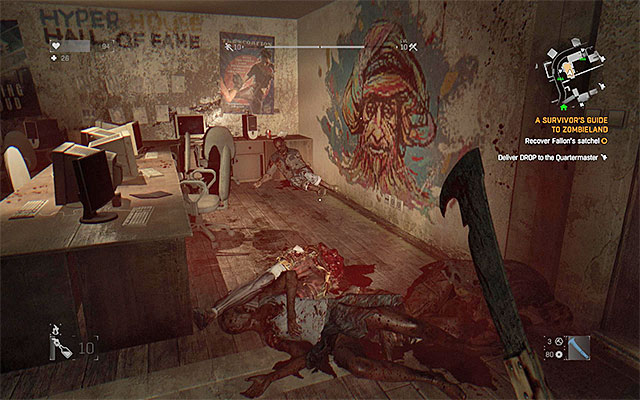 Watch out for the exploding zombie inside the internet caf.
You can find Neil in the boat launch, in the north-eastern part of the Slums. Talk to him and you will learn that he is a journalist and he needs help in reacquiring a lost satchel with materials for a reportage. Head to the internet caf located in the southern part of the Slums (number 14b on the map). There are zombies near the entrance, so you have to deal with them quickly to be able to use lockpicks. Right after opening the door, jump back because an exploding infected is inside. Moreover, be ready to kill some more Runners that will certainly come here. After the fights, enter the caf and find the Notes.
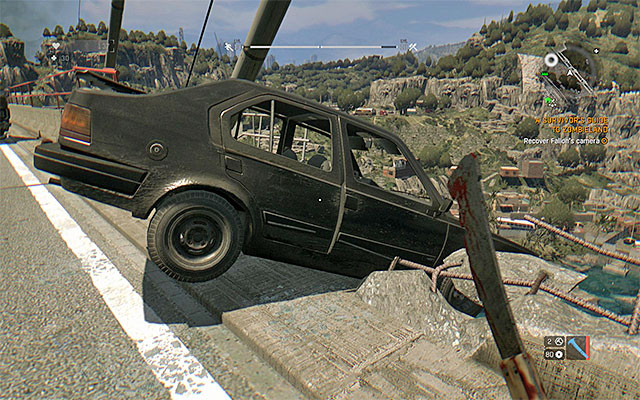
Now head to the broken bridge located in the eastern part of the city. When you're there, start bouncing from zombies and jumping from one car onto another to avoid receiving damage. You have to find the reporter's black car - it is shown in the picture above and you will know it by the fact that it is standing near destroyed barrier. Open the trunk - you will activate the alarm and the car will fall down. Run away from that place (the sound of alarm will lure elite infected) and carefully go down. You have to dive into the water and locate the car on the bottom. Take the Camera from the trunk, swim to the surface and go back to Neil. You will receive 2000 dollars.
How to unlock: Talk to Osman in the tunnel hideout (number 16a on the map).
Difficulty level: medium
Reward: 5000 experience, 1000 dollars
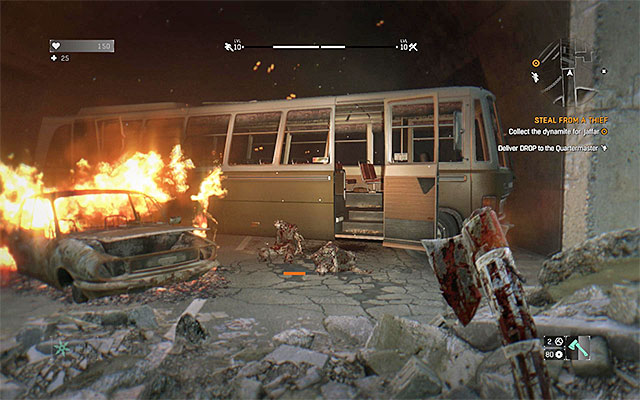 Search the tunnel to reach Osman's hideout.
You can start this quest when talking to one of the survivors that you meet. You will learn about a person living in a tunnel near the lake and you have to go there (number 16a on the map). After arriving at the tunnel, go inside an locate the northern door. Search this part of the corridors and you will find Osman's hideout. Talk to him to receive a task. You have to find Nazim. Head to the building marked on your map (number 16b on the map) and use the door that will take you to another location.
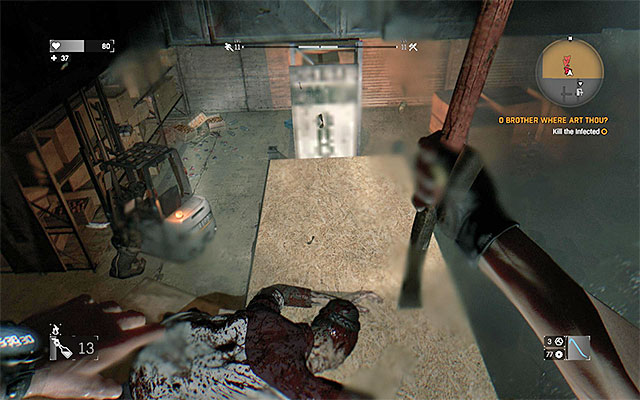 Defend yourself while standing on the high shelves.
Search the first rooms to find the Keys near some dead body and a ventilation shaft. Go through the shaft to a small room. Watch out for the exploding zombie that will detonate underneath you. Jump into the room and prepare for a difficult battle with Runners. Try to climb onto the high shelves and fight on them (either in melee combat or using ranged weapons), as this will prevent the zombies from circling you. When the fight is over, go to another room and talk to Nazim, who is badly wounded.
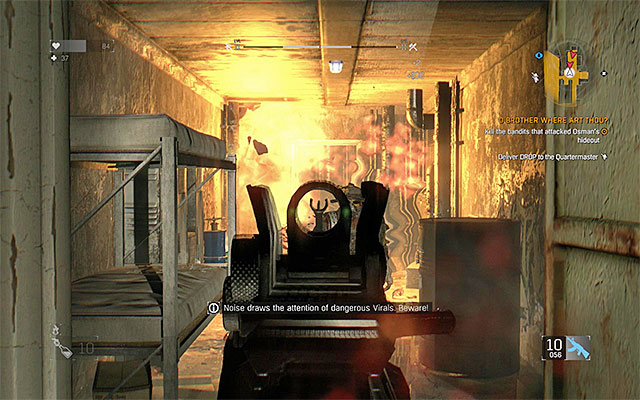 You can use for example firearms to kill the bandits.
You can now head back to the tunnel, to Osman's hideout. When you're there, you will see that the hideout is attacked by human enemies. Attack them (it is best to use firearms) and watch out for their ranged attacks. You can also set up traps in the narrow corridors near the hideout, easily eliminating the opponents. Get rid of all the enemies and talk to Osman. You will receive 1000 dollars and Keys to one of his three hidden chests, spread around the whole town (numbers 16c on the map). Visiting these hidden places is not obligatory, but you will find valuable crafting resources and good weapons in them.
How to unlock: Check the noticeboard in the Fishermen's Village (Fishermen's Village on the map).
Difficulty level: low
Reward: 2500 experience, 1000 dollars
When in the Fishermen's Village, check the noticeboard to find information about this quest. You have to find some Wolf's Bane, which is very easy. Find the icon of this plant on the map (for example to the south of the Tower), go there and start looking. After gathering 10 Wolf's Bane plants, return to the village and give them to Musa. He will give you 1000 dollars as a reward.
How to unlock: Check the noticeboard in the Fishermen's Village (Fishermen's Village on the map).
Difficulty level: low
Reward: 2500 experience, 1000 dollars
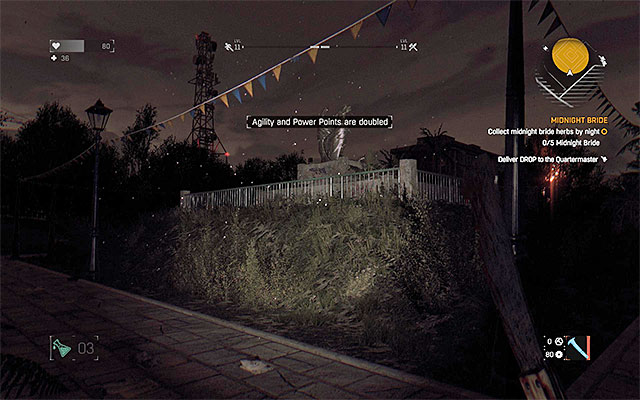 You have to search the area at night.
When in the Fishermen's Village, check the noticeboard to find information about this quest. You have to collect some plants, but this task is more difficult than other mission of this type. The herbs can be found on the western edge of the map (number 17 on the map) and you can gather them only at night. It is best to reach the place late in the evening and wait until 9 PM, which will "activate" the plants. Gather five Midnight Brides and deliver them to Gursel in the village. You will receive 1000 dollars.
How to unlock: Listen to Kurt over the radio.
Difficulty level: medium
Reward: 4500 experience, Blueprint (Kurt's Bombs)
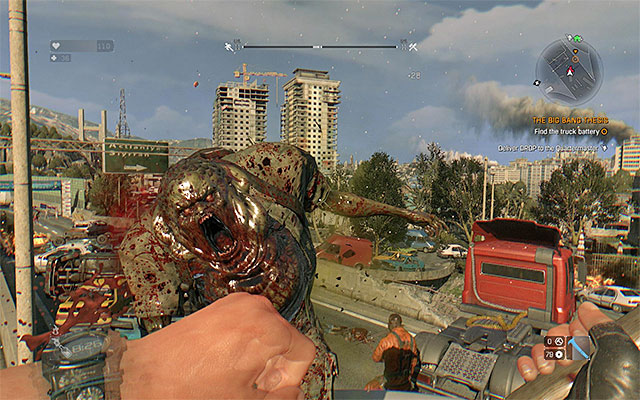 Get rid of the infected before you approach the truck.
You can unlock this mission after completing the Steal from a Thief side quest. Wait for Kurt to contact Crane over the radio. Go talk to Jaffar (number 11a on the map) and talk to Kurt himself (number 10a on the map). After the conversation, head to the highway and locate the truck with the battery (number 11c on the map). There are enemies near the truck (among them a Toad and a Goon), which you should eliminate or distract. Approach the truck and collect the Car Battery.
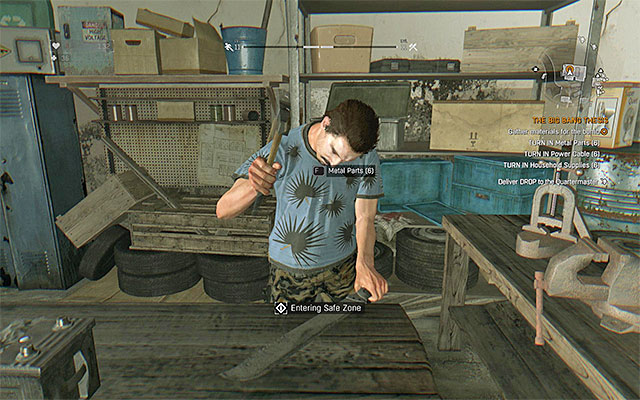 You can deliver the ingredients one by one or give them to Kurt all at once.
Return to Kurt with the battery. He will make a list of other resources that you need to obtain: 6 Metal Parts, 6 Power Cables and 6 Household Supplies. These objects can be found when exploring the world, receive from the quartermasters or buy from merchants. Give Kurt all the items and leave the place for now, as he will need some time to prepare the bomb. Return to the man after he contacts Crane over the radio. Take Kurt's Bomb from the table.
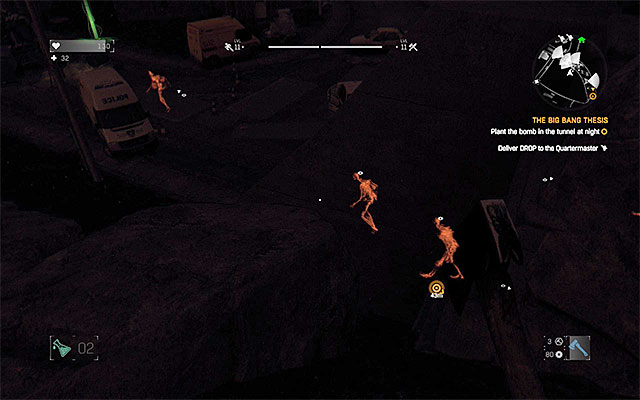 Wait for the infected to go out of the tunnel.
You have to plant the bomb in the nearby tunnel (number 11d on the map), but according to Kurt's warning, you cannot do this during the day, because Volatiles hide in there. Reach the tunnel in the evening, hide in a place that is far away from the main roads and wait until night comes. Observe the Volatiles going out of the tunnel and allow them to walk a bit farther.
Note - if you're noticed by the monsters, quickly run to the nearby light trap and activate it.
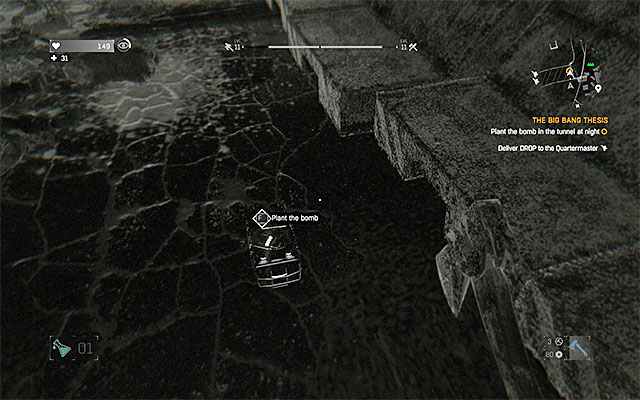 The place where you should plant the bomb.
You can now go inside the tunnel. Reach the end of it and plant the bomb in the place marked by the game. Don't hurry with your escape, because the bomb won't explode the first time. Listen to Kurt and go back to the bomb to fix it. Now, as quickly as you can, run away from the tunnel so that you don't get killed by the explosion or attacked by Volatiles. You can go back to Kurt to collect the Blueprint (Kurt's Bombs).
How to unlock: Talk to Jaffar in the safe zone (number 11a on the map).
Difficulty level: medium
Reward: 7500 experience, 1000 dollars
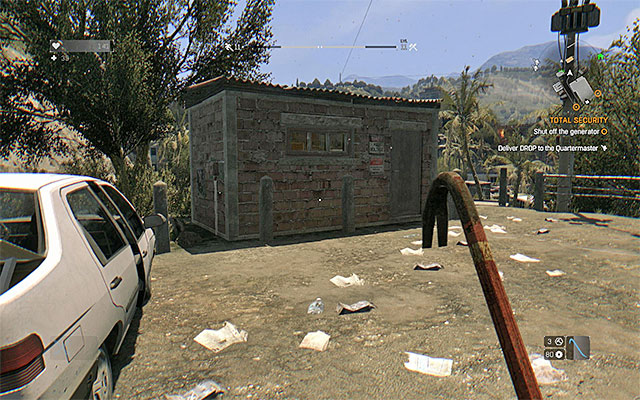 One of the cabins with the power switch.
You can start this mission after some time from completing the Steal from a Thief quest and starting The Big Bang Thesis quest. Meet with Jaffar to add this task to your journal. Head to the place when Hanson's group is supposed to be (number 11e on the map). When you're there, listen to a conversation with Jaffar. You have to switch of three generators located in this area. The problem is that there zombies around. Deal with the infected (watch out for Goons and Runners) and be especially careful when approaching a given switch, because you won't have a chance to retreat. Moreover, one of the generators is located behind a closed door and you will have to use a lockpick.
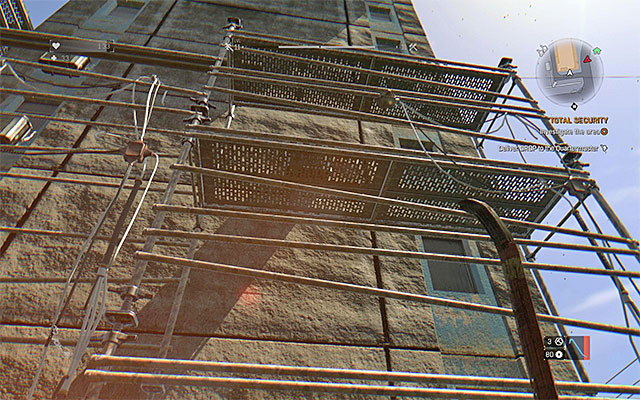
After switching off the power (you will find Hanson's body near one of the generators), you can start climbing the building marked on the map. Do it in the place shown in the picture above. When climbing, you have to grab the bars and jump onto the platforms (remember to always face the platform which you want to jump to). Don't hurry and plan your every move, because falling from such a height will kill you.
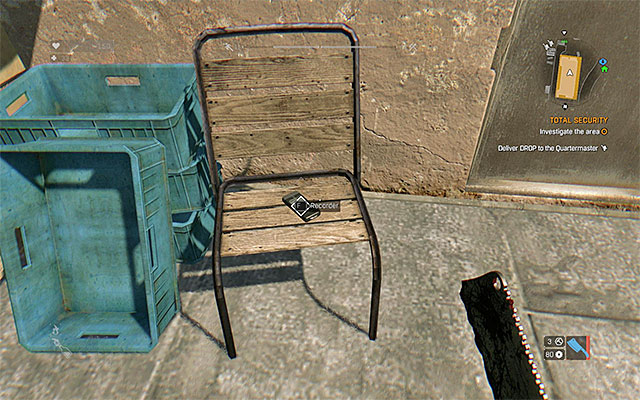 You will find the recorder on the chair.
After climbing to the roof, you will find a lot of dead bodies. You don't have to examine them - just locate the Recorder on the chair. Listen to the recording and wait until Crane contacts Jaffar. Carefully climb down and return to Jaffar to collect your reward (1000 dollars).
How to unlock: Check the noticeboard in the Tower lobby (Tower on the map).
Difficulty level: low
Reward: 2500 experience, 1200 dollars
When in the Tower lobby, check the noticeboard to find a note about this quest (it will appear not earlier than when visiting the Tower during the fifth main mission). You have to find six boxes of crayons. For that, you will have to go to the School building (School on the map). Use the Survivor Sense to locate Crayons more easily. Return to the Tower and go to the twentieth floor. Give the Crayons to Kate and you will receive 1200 dollars.
How to unlock: Check the noticeboard in the Tower lobby (Tower on the map).
Difficulty level: low
Reward: 2500 experience, Blueprint (Electrician)
When in the Tower lobby, check the noticeboard for information about this mission. You have to obtain two Electronic Parts, which are a rare crafting material. You can acquire them when exploring the world, but they also are sometimes sold by vendors. When you have two of them, give them to Toygar and you will receive a Blueprint (Electrician).
How to unlock: Talk to Macary after hearing somebody screaming inside the building (number 19 on the map).
Difficulty level: low
Reward: 5000 experience
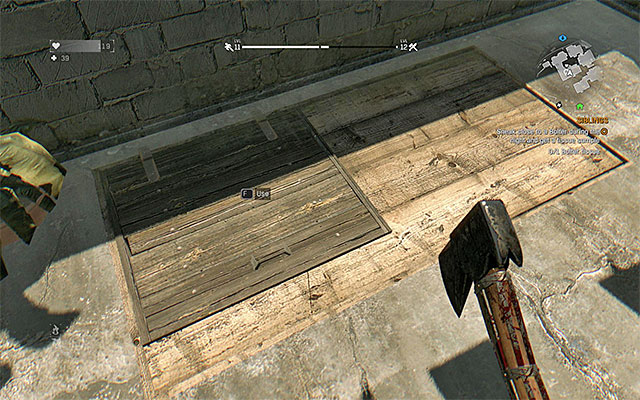 Enter the building through the hatch.
You can see the icon of this mission on the map after you hear someone screaming when running around the city (number 19 on the map). Search the building marked by the game by reaching one of the balconies and opening the hatch. Go to lower level and move a wardrobe to find another passage. Knock on the door and talk to Macary. The man will ask you to bring him three bottles of alcohol. You can find them when exploring the game world (mainly in fridges and cupboards in houses), receive from quartermasters or buy from merchants. After you bring him the alcohol, you will be sent to do this again two times. It means that you have to bring 9 bottles of alcohol to Macary. Now, you can enter the room and you will learn what really happened. You won't receive any rewards for this quest, except for some experience, but one of the game secrets is inside this room.
How to unlock: Talk to Dahlia in the safe zone (number 20a on the map).
Difficulty level: medium
Reward: 1500 experience, Blueprint (Dahlia's Shroom Potion)
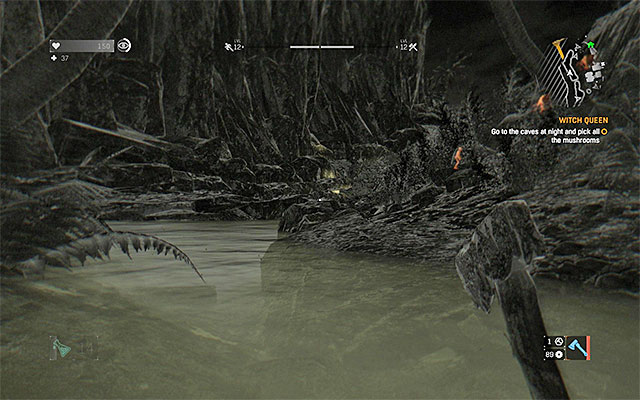
You can start this quest after visiting the School building in the fifth main quest - Siblings. Some survivors will tell you about a witch called Dahlia. Head to one of the safe zones (number 20a on the map) to meet her and ask how can she move between the infected without being noticed. Wait until the night comes and reach the caves located in the southern part of the map (number 20b on the map). You have to dive in the place shown in the picture above and swim to a cave that can be accessed only through the water.
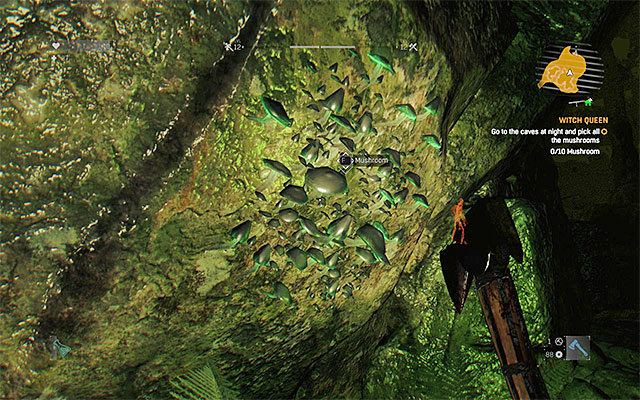 An example of a mushroom that can be found in the cave.
Start exploring the caves - you have to collect 10 Mushrooms. You will find them on the walls and on the ceiling. It is good to use Survivor Sense here. Also, be ready to fight some zombies. You won't meet Volatiles here, but you will have to deal with several Runners and Bombers. To reach the last two Mushrooms, you have to jump onto the shelves that are quite far away, so prepare yourself for the jump. When you have enough Mushrooms, go back to Dahlia and you will receive a Potion and a Blueprint (Dahlia's Shroom Potion).
How to unlock: Check the noticeboard in the tower lobby (Tower on the map).
Difficulty level: low
Reward: 2500 experience, Blueprint (Grill'em and Kill'em)
When in the Tower lobby, check the noticeboard to find information about this quest. It consists In collecting five bottles of Lighter Gas. It is a rare crafting material that you can find when exploring the game world (if you want to find materials faster, mark this mission in your log as active). You can also sometimes buy it from a merchant. When you have enough bottles, go back to the Tower and give them to Toygar. You will receive a Blueprint (Grill'em and Kill'em).
How to unlock: Check the noticeboard in the tower lobby (Tower on the map).
Difficulty level: low
Reward: 2500 experience, 1200 dollars
When in the Tower lobby, check the noticeboard to find information about this quest. You have to find 20 cans of Coffee. Look for it when exploring the world (especially in the houses). Moreover, You can sometimes buy it from merchants. When you have enough Coffee, go back to the Tower and give it to Toygar. You will receive 1200 dollars.
How to unlock: Check the noticeboard in the Tower lobby (Tower on the map).
Difficulty level: low
Reward: 2500 experience, 1500 dollars
When in the Tower lobby, check the noticeboard to find information about this quest. It consists in finding some crafting materials - three Syringes, three packs of Painkillers and three packs of Gause. If you want to find materials faster, mark this mission in your log as active. The fastest way to obtain medical supplies is by visiting drugstores in the game world and one of them is located Westwards of the Tower (point 23 on the map). When you have all the items from the list, go back to the Tower and give them to Toygar. You will receive 1500 dollars.
How to unlock: Listen to Tolga and Fatin when exploring over the radio when exploring the Slums.
Difficulty level: medium
Reward: 1000 experience
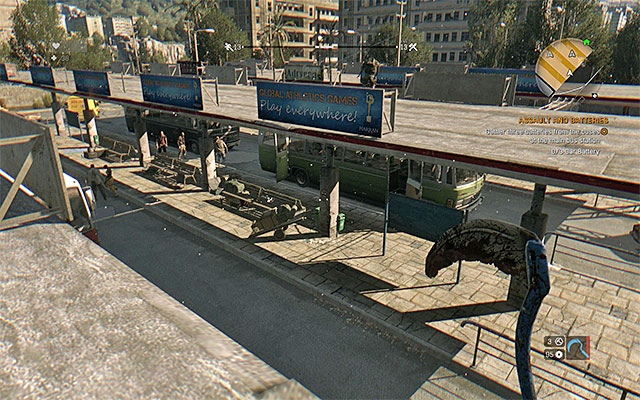 The bus station.
You can start this mission after completing the On the Hooks side quest. Wait until Tolga and Fatin contact you again when exploring the game world. Listen to the conversation and head to the School building (School on the map). Find the quest givers and talk to them. Now you need to head north to reach a bus station (number 21 on the map). When you're there, clear the area by dealing with the Toads on the roofs and most of the usual infected. You don't have to attack the Goons, because you can lure them away from your targets or sneak behind their backs.
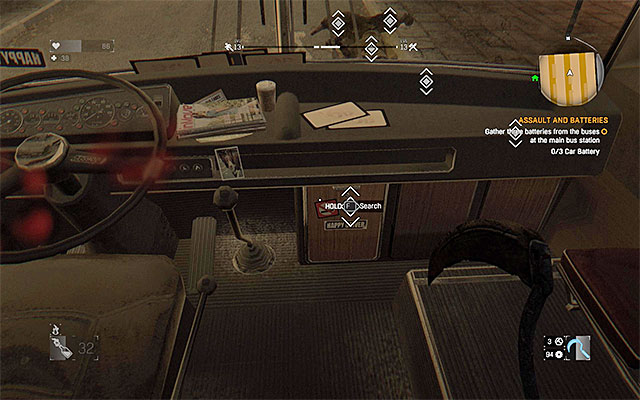
Your task is to steal three Car Batteries, so you have to search the buses. Some of them are locked and you will have to use lockpicks (be sure that the area is safe) or try to jump through the roof. Watch out for the zombies on top of the buses. Each time, check the element shown in the picture above to find out if there's a battery inside. When you have three Car Batteries, go back to Tolga and Fatin to complete the mission.
How to unlock: Talk to Edward and Erol in the School (School on the map).
Difficulty level: medium
Reward: 10000 experience
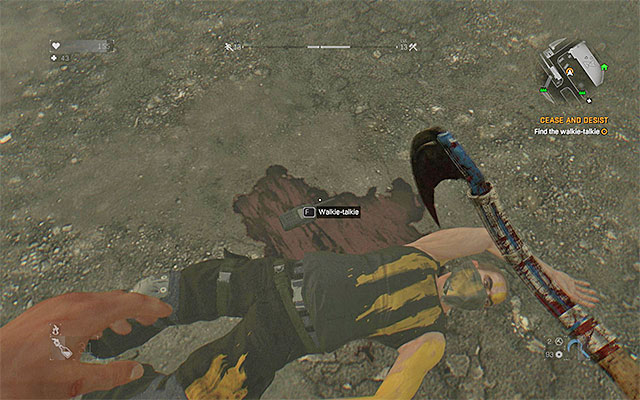 Search the body and pick up the Walkie-talkie.
You can start this quest after visiting the School during the fifth main mission - Siblings. Go back to the School and reach the entrance that was inaccessible before. Talk to Edward and with the ex-governor Erol. The man will ask Crane to help him get rid of the Rais's Bandits that try to kill him. Go to the area shown by Erol (number 22a on the map) and start searching it. You should here some voice coming out of a Walkie-talkie. Find the dead mercenary, search the body and take the radio.
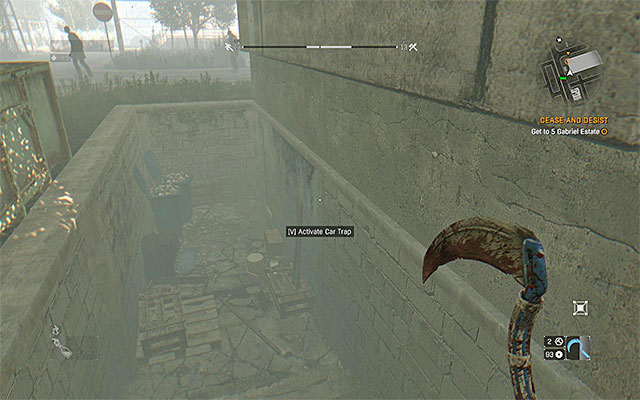 The entrance to the basement.
Now you have to go to a nearby block estate (number 22b on the map). Locate block number 5 and check the north-western corner of it. You will find a door leading to the basement. Go through the basement and locate the stairs to reach the ground floor. From now, you will have to fight some Bandits. You can use any kind of weapon, but the best choice will be Molotov Cocktails and other throwing weapons.
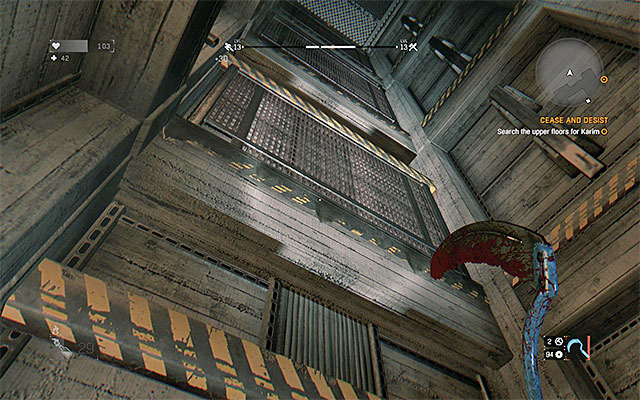 You have to do some climbing in the elevator shaft.
Search the building and reach a broken elevator. Open the door and start jumping from one edge onto another. Remember to always face a given edge before jumping. At the end, jump towards the open door and start exploring this floor. After a few whiles, you will reach the room in which Karim is. Talk to him and find the stairs leading to the roof. Leave the building and carefully go all the way down (jump onto the balconies and grab the edges).
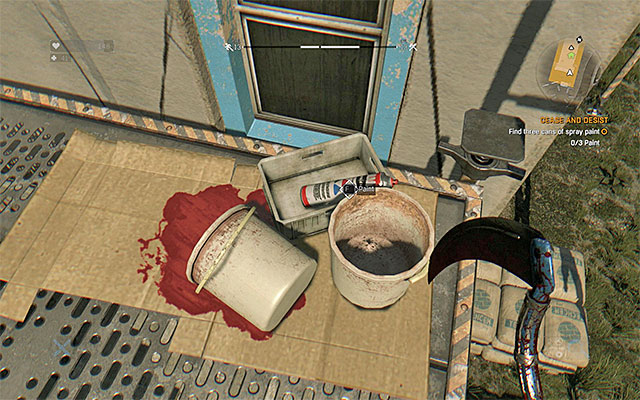 Some paint found on the scaffolding.
You can now go back to Erol (School on the map) and talk to him. Now, you will have to find some paint. Head west (number 22c on the map). And find three cans of Paint. Two can be found on the scaffoldings and the last can is on the roof of the building (you will have to climb a little). Go back to the School and reach the roof, for example by jumping onto the balcony over the main entrance and using the ladder. Use the paint to write HELP.
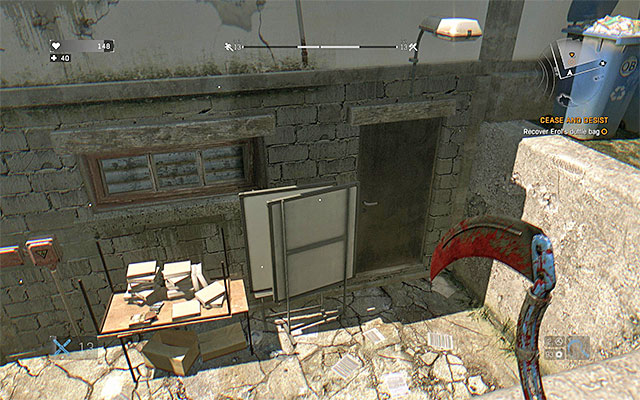 Side door to the School.
After completing the task, go down and talk to Erol again, who will tell you to go search for a bag full of cash. Go around the building and locate the side entrance. Search the lockers in the dressing room and wait for Erol to contact you over the radio. You will learn that you've been tricked. Start going through this part of the School and watch out for the zombies. Head to the upper levels and you will soon reach the hatch leading to the roof. Meet with Karim again. Now you can search the crates left by Erol and collect some valuable items.
How to unlock: Listen to Tolga and Fatin over the radio when exploring the Slums.
Difficulty level: medium
Reward: 1000 experience
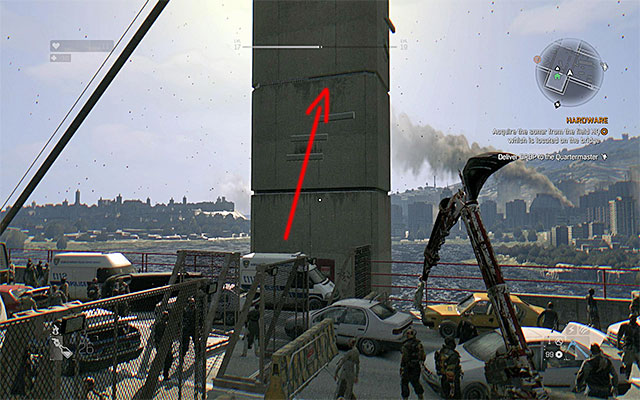 The place where you should start climbing.
You can unlock this side mission shortly after completing the Assault and Batteries quest. During free exploration, Tolga and Fatin will contact you over the radio. You have to meet them in Fisherman's Village (Fisherman's Village on the map). In the first part of the quest, you need to bring them some items used in crafting: 10 Power Cables and 10 Duct Tapes. They are not so frequently found in the game world, so it may take you some time to collect them. Look inside buildings, especially the ones that you visit during other mission.
After you bring the items, Tolga and Fatin will want you to go search for a sonar. This time, the objectives will be more specific - the object is located in a military camp on a bridge, near the east edge of the map (number 24 on the map). Some part of the bridge is broken, so you have to climb up and then slide on a rope. Start climbing in the place to the west from the mission objective (number 15 on the map).
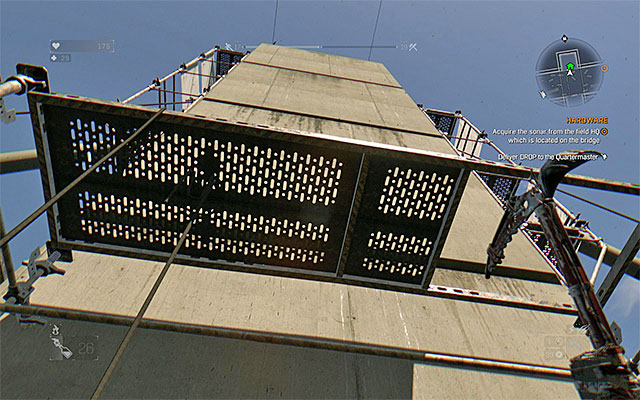 When you reach a safe zone, continue climbing.
The main part of the climbing is described in detail in the walkthrough to the Searchlights quest. Similarly, in this mission, you first have to reach almost the top of the bridge, specifically the place where the safe zone is. When you're there, look for metal balconies that will allow you to go higher. Continue climbing using the balconies.
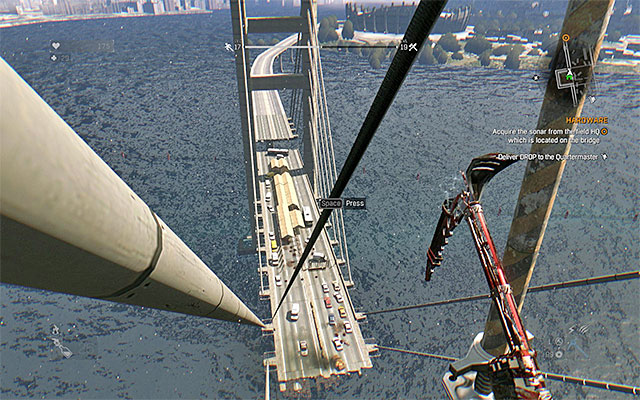
Your goal is to reach a metal balcony, from which you will be able to grab the rope shown in the picture above. Slide down the rope to reach the military camp (number 24 on the map). This way you will go past the broken part of the bridge.
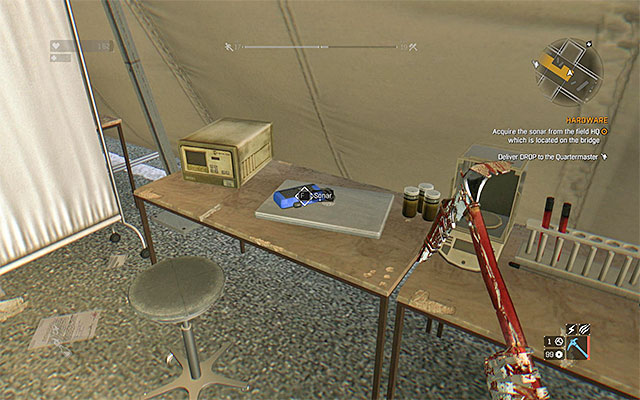 The location of the sonar.
Start exploring the military camp, but watch out for the zombies. The sonar that you're looking for should be located in the last tent (the easternmost one). After obtaining the item, listen to Tolga and Fatin over the radio.
Note - Wait until Tolga and Fatin's supervisor - Volkan Dal, contacts Crane. It will allow you to unlock another side quest called The Launch. This quest can be completed in the area where the Antenna is, so look for a walkthrough in the chapter called Side Quests - Antenna.
How to unlock: Meet Dahlia in the safe zone (number 20a on the map), after consuming her potion.
Difficulty level: medium
Reward: 1500 experience, Dahlia's Liver Potion Blueprint
You can unlock this quests only after completing the Witch Queen side quests, which consist of bringing Dahlia (number 20a on the map) some mushrooms that she needs to prepare a potion. As a reward for completing this mission, you should receive Dahlia's Shroom Potion, which you have to drink. Note - if you've sold or lost the potion, use the Blueprint received from Dahlia to make another one.
Drinking the potion will cause hallucinations. After they're gone, talk to Dahlia. She will tell you to obtain a new ingredient. Go search for an elite type of zombie called Goon (a big monster with two-handed melee weapon). When you meet one, defeat him and search his body to find Putrescent Liver. Return to Dahlia with the item. You will receive another potion and Dahlia's Liver Potion Blueprint.
How to unlock: Meet with Dahlia in the safe zone (number 20a on the map) after consuming the potion.
Difficulty level: medium
Reward: 2000 experience, Dahlia's Kidney Potion Blueprint.

This quest can be unlocked after completing the Hunting Goon side quest, which consists of bringing Dahlia (number 20a on the map) Putrescent Liver for a potion. As a reward for completing this mission, you should obtain Dahlia's Liver Potion, which you have to drink. Note - if you've sold or lost the potion, use the Blueprint received from Dahlia to make another one.
Drinking the potion will make you hallucinate. After the hallucinations are gone, talk to Dahlia. She will tell you to go search for a new ingredient. You have to find an elite type of zombie called the Bomber. It is an exploding monster, which can frequently be found when completing major missions. A good idea is to go to one of the zones marked on your map. One of the zones is shown in the picture above. Note - in these zones, you can find multiple infected, so don't hurry when trying to reach the body of a fallen Bomber. Search the body to obtain a Bomber Kidney. Return to Dahlia with the ingredient and you will receive a new potion and Dahlia's Kidney Potion Blueprint.
How to unlock: Talk to Dahlia in the safe zone (number 20a on the map) after consuming the potion.
Difficulty level: medium
Reward: 2000 experience, Cloak Potion Blueprint
You can unlock this quest after completing the Kidney Punch side quest, which consists of bringing Dahlia (number 20a on the map) a Bomber Kidney, required to prepare a potion. As a reward, you should receive Dahlia's Kidney Potion, which you have to drink. Note - if you've sold or lost the potion, use the Blueprint received from Dahlia to make another one.
Drinking the potion will cause hallucinations. After they're gone. Talk to Dahlia. You will have to go search for a new ingredient. Find an elite type of zombie called Bolter. All the steps of locating and killing this monster are described in the walkthrough to the Siblings quest. To remind - you need to go to one of the Bolter infested zones at night and ambush the enemy from behind to kill it before it runs away. When you succeed, collect some Bolter Tissue. Return to Dahlia with the item to receive a new potion and Cloak Potion Blueprint. Drink the potion, wait until the hallucinations are gone and talk to Dahlia for the last time.
The above map marks locations, where you start side quests in the Old Town as well as locations that you visit, while completing these quests. You receive automatically only several of the side quests and you need to obtain the rest of them on your own. Usually, you do that by talking to the friendly NPCs. Try to complete side missions on a regular basis, because they are very well rewarded in most cases.
Way to unlock: Meet with Savvy (Loft on the map).
Difficulty level: high
Reward: 10000 experience points

The earliest that you can obtain this quest is after you have completed the "Find the Embers" main quest. Find Savvy there (Loft on the map) and talk to him. You can now head towards the Radio Station (point 1 on the map). The entrance is on the ground floor and it is barred. Fortunately, you can walk around the barricade - explore the Southern side of the building and find the red wires shown in the screenshot. Follow them and you will soon reach the entrance.
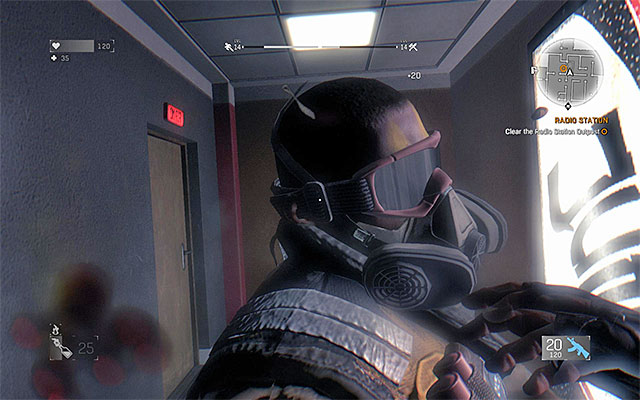 You can perform several takedowns
Your task is to eliminate all of the bandits led by Rais, who are staying inside the radio station building. You can take down the first few of them by surprise and this is especially recommended if you have the Takedown skill. You can activate it each time that you sneak up behind the opponent oblivious to the threat.
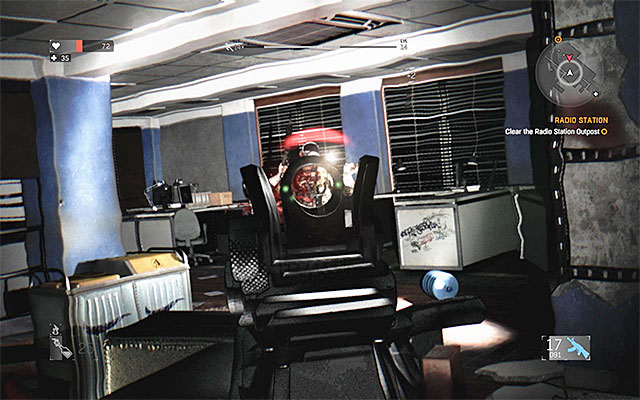 Use your assault rifle, or any other gun
Sooner or later, you will be spotted and from now on, rely on your firearms (an assault rifle would be best) to kill the hostile mercenaries. It is best to use the minimap to locate enemies, thanks to which, you will also prevent their attempts to flank you. While fighting, use covers and replenish your ammo, by approaching the corpses. You need to expect some of the opponents to arrive later so, do not let yourself be surprised by them. Securing the radio station ends this quest and to leave the building, reach a functioning elevator.
Way to unlock: Meet with Savvy (Loft on the map).
Difficulty level: high
Reward: 10000 experience points
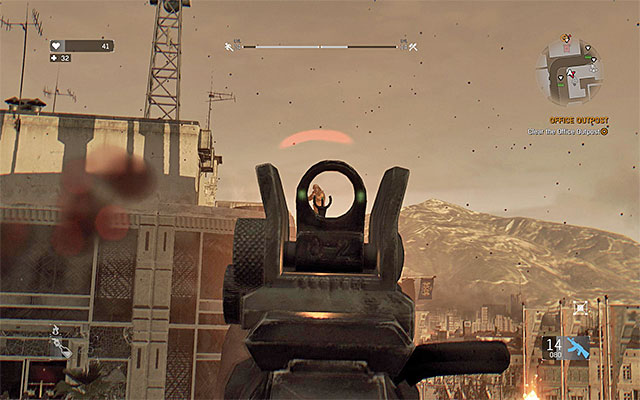 Rake from afar the enemies on the rooftop of the office building.
The earliest you receive this mission is after you have completed the "Find Embers" main mission. Find Savvy at the Embers HQ (Loft on the map) and talk to him. You can head towards the office building (point 2 on the map). Try to remain on rooftops and take your time to get to your destination. What speaks for this is the fact that there are opponents, armed with firearms, on the rooftop of the office building. Try to attack tem from as far as possible (I recommend that you use a good automatic weapon). During the exchange of fire, often take covers and be prepared to eliminate several of the infected running around, who may reach here. After you have secured the rooftop, head towards the building, best by reaching its Northern side (walk over the ropes). Locate the door into the building.
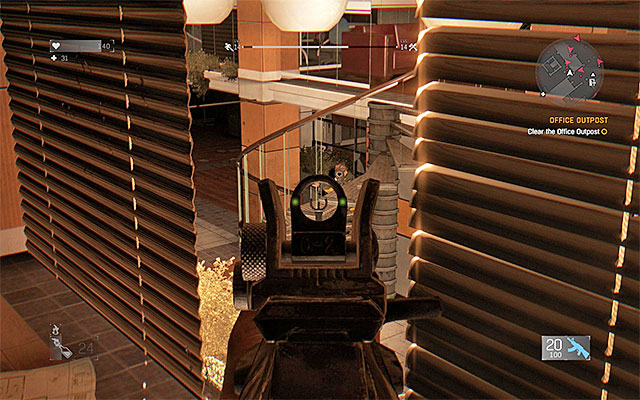 Exploit the advantage of height, whenever possible
Jump down, to a lower level and attack the first opponent, still before you exit the elevator shaft (e.g. by throwing Molotovs there). You can now start a long battle inside the office building, which is going to take place on two of its floors. Try to exploit the advantage of height and take covers. Apart from that, keep an eye on the minimap readings, thanks to which you will not be surprised. Apart from the first group, with time, there appear two more enemy groups around and you need to be prepared for that, to prevent them from surrounding you. Securing the office building ends this mission and to leave, reach the door on the lower floor.
Way to unlock: reach Sammy's hideout (point 3 on the map).
Difficulty level: low
Reward: 5000 experience points
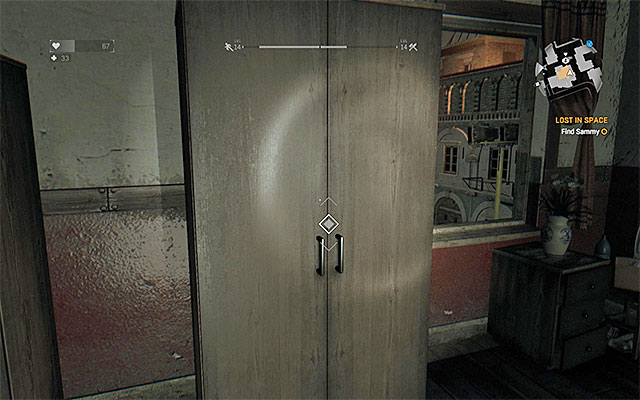 Loot the wardrobe
You get the opportunity to receive this mission only if, while at the slum, you have completed the Gunslinger side mission, which was about supplying weapons to David. Reach the building, where Sammy is hiding (point 3 on the map) to unlock this quest. It is about rescuing a boy, whose father has been infected. Climb to one of the windows in the building and eliminate all of the infected around. Now, finds the wardrobe with Sammy inside. You only need to talk to the boy, now, and then to Troy on the radio.
Way to unlock: Meet with Ihsan in the safe zone (point 4a on the map).
Difficulty level: medium
Reward: 10000 experience points
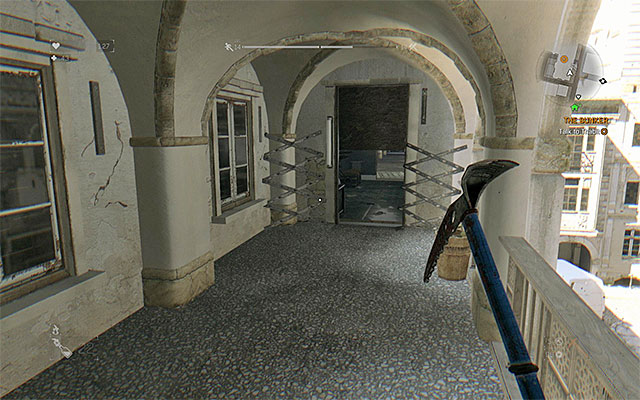 One of the accesses to Thabit's hideout
You can find Ihsan in the safe zone, in the Northern part of the Old Town (the rooftop of one of the buildings). During the meeting, you learn about the titular bunker with lots of supplies inside. As instructed by Ihsan, head for the meeting with Thabit in the central part of the map (point 4b on the map). There are several directions, from which you can enter Thabit's hideout, which is the middle level of the building/ During the conversation with Thabit, you learn that you will have to supply him with the mayor's seal as a bribe, before he tells you the bunker's location.
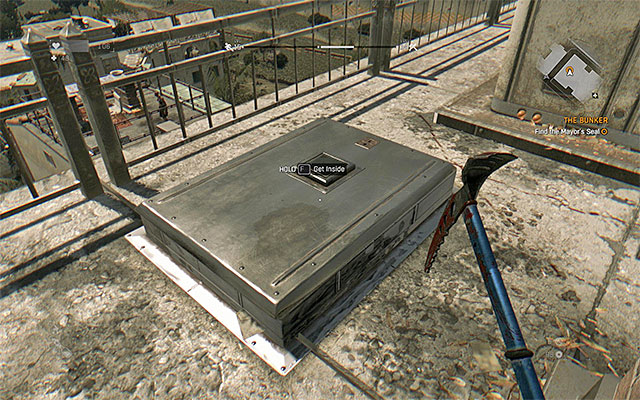 The manhole in the hotel rooftop
To find the seal, you need to head towards the hotel in the Western part of the Old Town (point 4c on the map). Try to move over rooftops, because you can access the hotel only through the rooftop. Locate the manhole on the roof and use it. Start the quite linear exploration the hotel (along your path, move the wardrobe). Watch out for the corpses that you pass by, because some of them are the infected lurking for their prey. With time, you will also stat bumping into the infected and it is a good idea to fight them in narrow corridors and use Molotovs and throwing weapons.
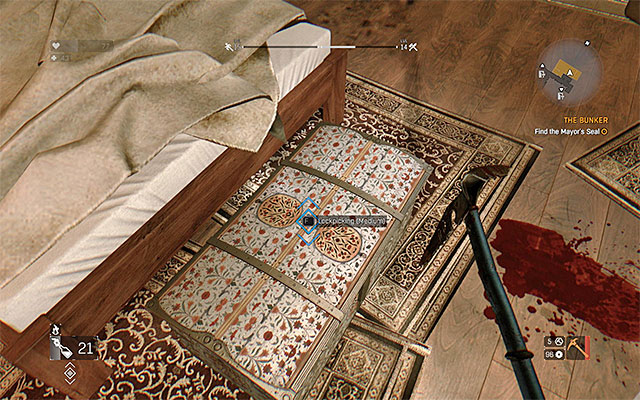
Your destination is the hotel vestibule on the ground floor of the building. Find the interactive terminal here and interact with it. You can now return to the first floor (jump towards one of the ledges) and head for the room marked in yellow, on the minimap. The Seal of the Mayor is in the chest shown in the above screenshot, at the foot of the bed, and to open it, you need to complete a minigame of lockpicking (a medium lock). You can leave the hotel by moving the wardrobe. Return to Thabit and give the seal to him, which will win you the whereabouts of the bunker.
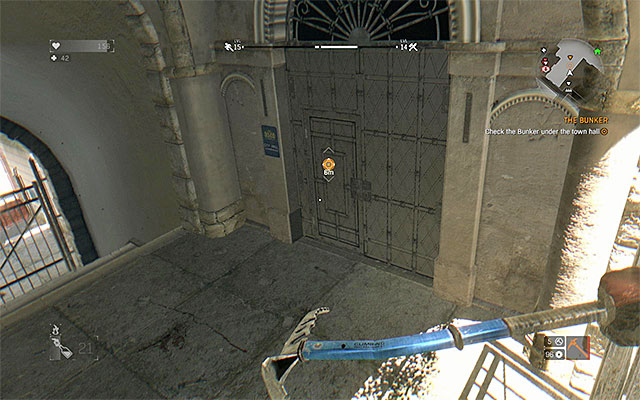 The town hall entrance
The town hall is near Thabit's hideout (point 4d on the map), but you need to watch out for all the zombies in the main square. You need to reach the main door behind a grate (you can climb onto it) and wait for the new area to load. Start eliminating the infected in the town hall and especially watch out for the two exploding zombies in the big room on the left (additionally, after the explosion, there appear running monsters here) Fight your way towards the staircase and climb down. After a while, you reach the locked door of the underground bunker. Listen to the radio conversation with Thabit and exit the town hall.
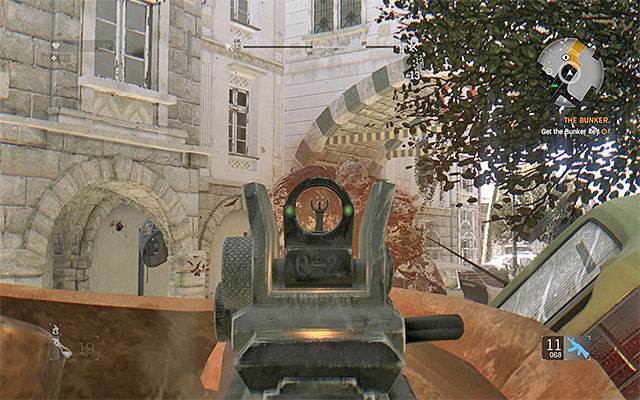 Defeat the Captain using, e.g. the machine gun
To find the key to the bunker go West (point 4e on the map). The key is in custody of the police captain Halim, who turned into a monstrous mutant. Before you take on him, deal with the rest of the mutants around, especially the runners. As for the captain himself, the easiest way to kill him is with the machine gun (aim at his head from behind a good cover and fire). Fighting a direct fight with the Captain is not a good idea but, if you have a good melee weapon on you, you can give it a try (dodge to the sides after the mutant starts his charge and attack when he is facing away). Regardless of your tactic, loot the corpse and take the Bunker key.
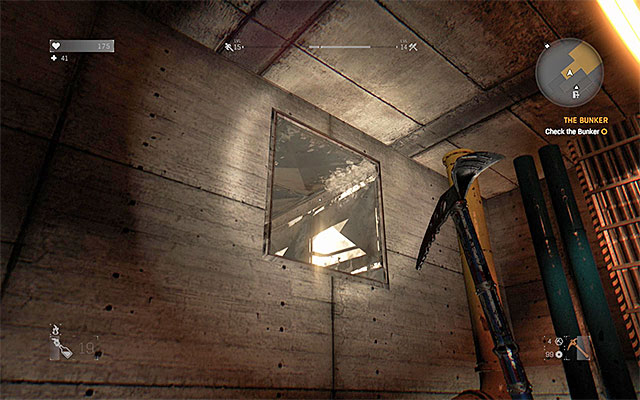 Jump into the venting shaft
Again, go to the town hall (point 4d on the map) and head towards the staircase, while watching out for the zombies. At the bunker entrance, you meet Thabit and, after a short conversation, he attacks you. DO NOT RETREAT into the staircase, because there probably is another explosive zombie there. Instead, defeat the official at the bunker entrance, at best with a melee weapon, and by dodging from his attacks. After you have secured the area, use the bunker key. Explore all of the rooms in the bunker and reach the locked Storage. Turn left and look up. Jump into the venting shaft and reach the Storage to end this quest. Of course, loot the Storage beforehand.
Way to unlock: Meet with Fidan in the university building (University on the map).
Difficulty level: low
Reward: 5000 experience points
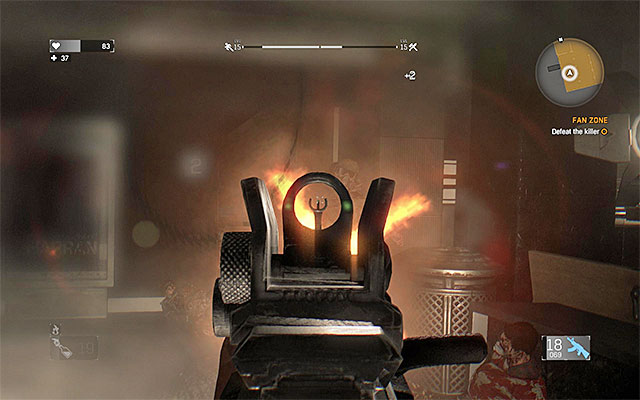 The entrance to the building, where Rupert lives
The earliest that you can receive this mission is while completing the Higher Education main quest. Talk to Fidan in the University building to learn about the titular gunsmith. You can now head towards the building, where the gunsmith lives (Rupert's Apartment on the map). As it is usually the case, you need to climb a bit here, because the entrance is on a balcony high above. After you get into a separate location, find the apartment and talk to Rupert in the room adapted for a kindergarten. It is a good idea to stay here for longer, because you will be able to receive several quests here (the first one is available right after you have a conversation with Rupert).
Way to unlock: Meet with Mufid in the university building (University on the map).
Difficulty level: medium
Reward: 10000 experience points, 1500 dollars
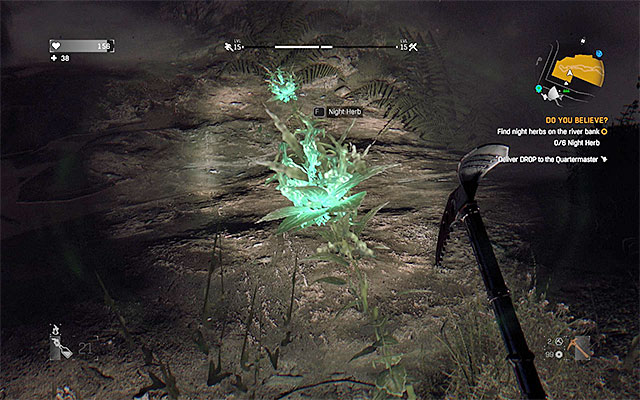 An example Night Herb
The earliest that you can receive this mission is during the Higher Education main quest. Find Mufid in the University building and talk to him to learn about a mysterious place that music comes from (point 7a on the map). After you get there, reach the balcony above, enter the building and talk to Ishaq. You need to wait from the nightfall (if you need it, the bed is right next to you) and head North-Eastwards (point 7b on the map). Avoid the infected and reach the marked area. You need to find Night Herbs here and you need to collect six of them. Return to Ishaq with the herbs and after you have another conversation, put them in the fire bowl. This way you complete this quest and unlock another one.
Way to unlock: Meet with Noah In the Embers HQ (Loft on the map).
Difficulty level: medium
Reward: 10000 experience points, 1500 dollars
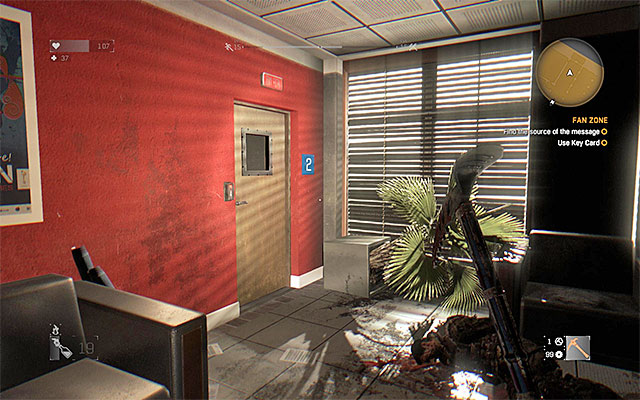 The door that you need to open with the key card
The earliest that you can receive this mission is during the Higher Education mission. Meet with Noah on the balcony, right next to the Embers HQ. You learn from him that the titular Fan Zone, broadcasts a distress call. After you get to your destination (point 9 on the map) walk around all of the zombies on the yard, because there is no need to fight them. Climb to get around the barricades safely and find the elevator that you can summon. Enter the elevator, start it and wait until you get to another floor. Take a look around to find the Key Card and a firearm. Go to the door in the corner, to the right of the spot, where you started exploring this floor. Reach the room with electronic stuff around and check out the laptop computer, thanks to which you learn that this is a trap.
Kill the enemy in the gas maskExit the studio and try using the elevator. You will fail to leave. Climb to the elevator's roof, across the hole, and follow venting shafts. Do not stop for anything, or you will expose yourself to the enemy fire. Right after you get out of the shaft, jump into one of the side rooms to escape the toxic fumes. Find and kill the enemy in a gas mask, with a machine gun or the pistol that you have found earlier. Reach the room with the fuse box and restore energy supplies. You can now return to the elevator and leave this location for good. Note - do not forget to meet up with Noah again and claim your reward (1500 dollars).
Way to unlock: Automatically, after you listen to Savvy's message, during the exploration of the Old Town.
Difficulty level: medium
Reward: 15000 experience points, unique weapon (Anti-Gadoid Gun)
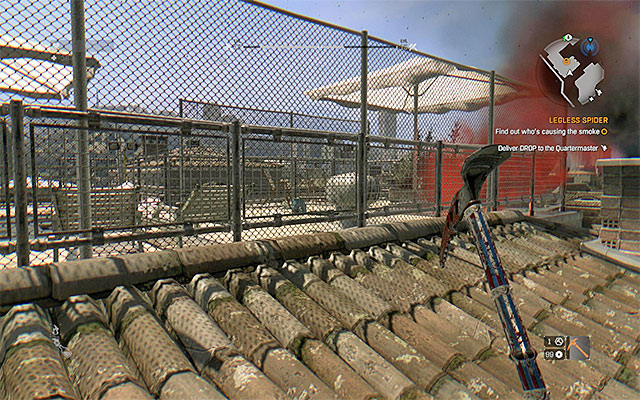 The wounded ally is on the roof
Wait for the moment, at which you are contacted by Savvy, while you are exploring the Old Town, and informs you of the signal flare that he noticed. It is in the South-Western part of the Old Town (point 9a on the map). If possible, get there over rooftops, because your destination is on one of the roofs. Talk to the wounded sprinter Spider and after you agree to take his quest, take his bag (Spider's Bag).
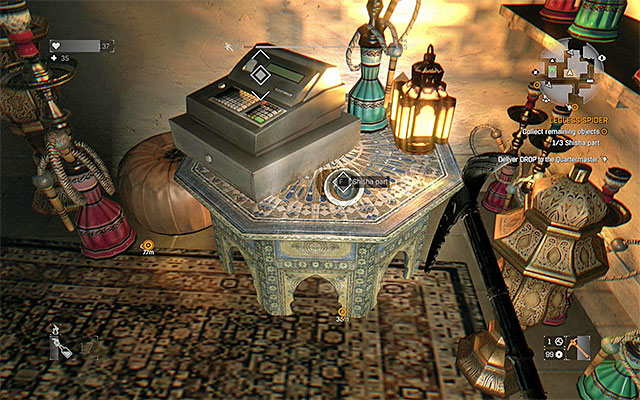 One of the three parts to collect
Your first mission is to find three Shisha part around the Old Town that Spider was supposed to collect (points 9b on the map). You can find the individual parts in any order and each time you need to be prepared to put up a fight with zombies. Just like usually, watch out for the elite variations, i.e. runners among others. If you want to, you can use explosives, or car bombs, to distract enemies, which will win you more time to find the parts.
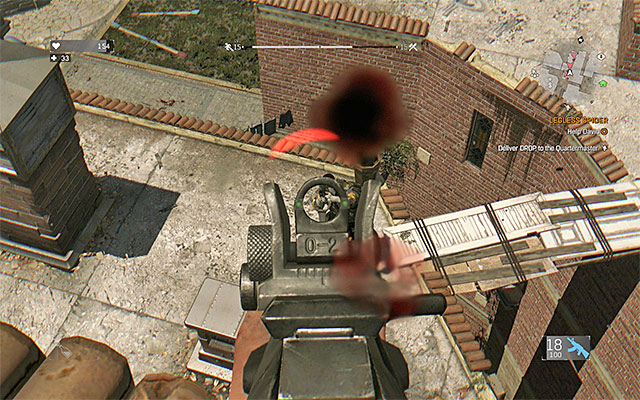 Kill the bandits that are holding David captive
After you obtain the parts, head towards David's location (point 9c on the map). Take your time and do not hurry, because David has been taken captive by the bandits led by Rais and you first need to kill them off. Since the opponents pack firearms, I recommend that you use your own weapons (I recommend any machine gun). It is best to fight them at a safe distance and use covers on a regular basis. After you have secured the area (and dealt with the possible zombies around) enter the building and free David. Listen to the conversation with him.
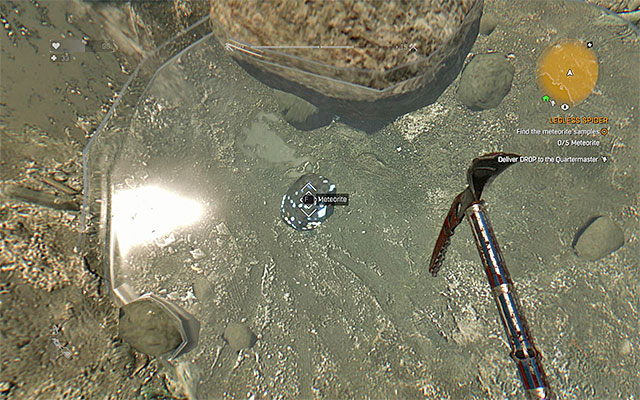 An example meteorite fragment
You now need to find meteorite fragments and you can find them near a small water reservoir, Northwards of David's location (point 9d on the map). You can search for the fragments on your own - three of them are stuck in the rocks, one of them is immersed into water, slightly. If you find it difficult to find the fragment, you can take interest in the generator here, although it makes it easier to find the fragments at night only, when they start to glow green. The downside of using the generator is the fact that the noise attracts the attention of zombies, including runners and toads. After you have found 5 fragments, return to David to claim your reward- an unique weapon (Anti-Gadoid Gun).
Way to unlock: You need to complete the "Gunsmith Rupert" side quest (Rupert's apartment on the map).
Difficulty level: medium
Reward: 10000 experience points
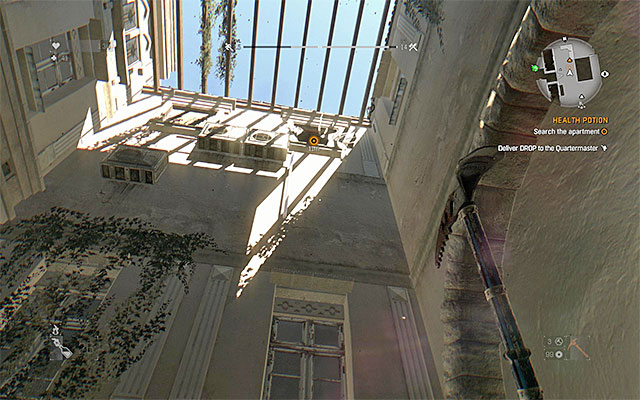 It is best to use a lockpick to open the pharmacy door
After the conversation with Rupert, exit the building. On the map of The Old Town, there are two drugstores marked (points 5a on the map) and you need to visit them both to find insulin. I recommend that you first go to the one to the North. After you come close, deal with all of the zombies (watch out for runners), or distract them, e.g. with a car bomb or a firecracker. The best way to get into the drugstore is by using lockpicks. I recommend against raising the grate at the back of the drugstore, because this starts the alarm, which attracts elite zombies. Search all of the rooms and containers at the drugstore to find out that there is no insulin here.
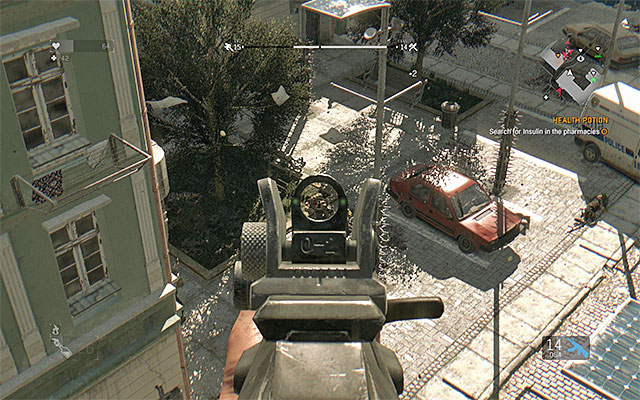 You need to kill off the mercenaries by the drugstore
Now, head towards the drugstore in the central part of the Old Town. By default, there are Rais's men around here and you need to watch out here, because they pack machine guns. A good idea is to attack the opponents from a rooftop, or another location on height, which would be difficult to access, thanks to which infected appear around and help you deal with the men. Try to secure the area and pick the lock on the entrance. Just like you did earlier, ransack the drugstore. After you fail to find insulin, listen to the conversation with Rupert and interact with the computer on the counter.
Over the wall, climb to the windowNow, you need to get to Ekrem's apartment (the father of the girl with diabetes), to the East of the central drugstore (point 5b on the map). It is not that obvious a matter to get into the building - you first need to find the window marked by the game and climb over the wall to reach it. While exploring the apartment, expect to find several infected here. Find the kitchen and collect Ekrem's Note. Listen to another conversation and leave.
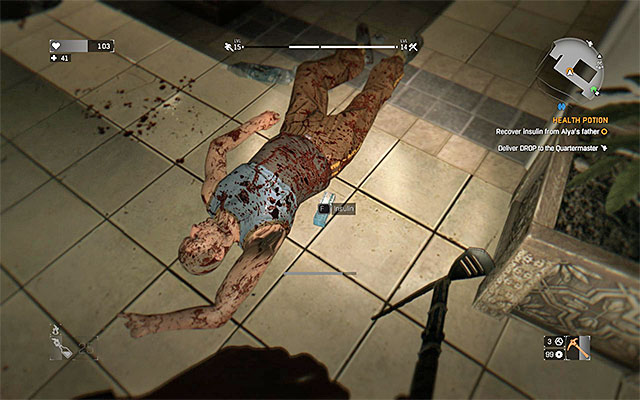 You find insulin next to Ekrem's corpse
The next one of the locations that you can visit is the pizzeria to the North of Ekrem's apartment (point 5c on the map). You need to watch out, because there are many monsters around the pizzeria. Try to distract them, e.g. with a car bomb and explore the restaurant quickly, before they find you. You need to find Ekrem's corpse and turn it to find insulin. You can return to where you have started this quest (Rupert's apartment on the map) and give it to Rupert.
Way to unlock: Meet with Kadim in the kindergarten room (Rupert's apartment on the map).
Difficulty level: low
Reward: 5000 experience points
This is an easy quest that you can unlock after you complete the Health Potion side quest. At the kindergarten, find boy named Kadim, who asks you to find the blocks that he lost. There are nine of them to find and you will be finding them as you explore the staircase. To find them, it is best to use the Survivor Sense, thanks to which you complete the set faster. Return the blocks to Kadim and talk to Rupert to end this quest.
Way to unlock: Meet with Rupert in the kindergarten room (Rupert's apartment on the map).
Difficulty level: low
Reward: 15000 experience points
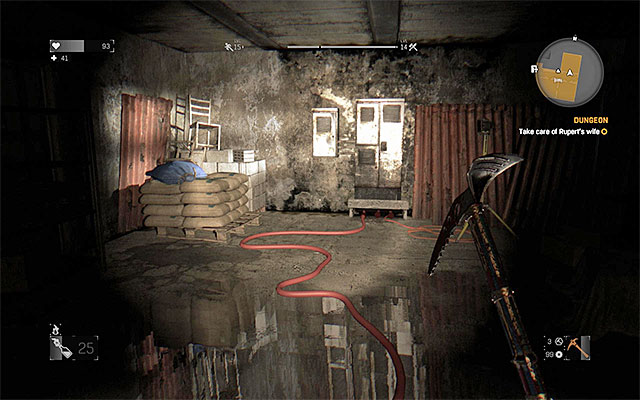 You need to cut off power supply to get rid of discharges in one of the basement's corridors.
This quest is quite easy and to unlock it, you need to complete the Blocks for the Boy side quest. Talk to Rupert in one of the kindergarten rooms and raise the topic of the noises from the basement. Receive basement keys from Rupert and climb down the stairs, to the very bottom. There are discharges in the corridor to the right of the basement entrance so, you first need to go left. Explore the rooms here and find the fuse box. After you have cut off the power supply, enter the other part of the basement. Open the red door and kill Rupert's wife. You can now return upstairs and report on the mission.
Way to unlock: Meet with the girl in the kindergarten room (Rupert's apartment on the map).
Difficulty level: high
Reward: 10000 experience points, blueprint (Angel Sword)
 Use the rope to get to the yard and eliminate the bandit
You can unlock this quest after you have completed the Dungeon side quest. In the kindergarten, find a girl and talk to her to learn about the titular troll that haunts the children at night. Exit the building and slide down the zipline, thanks to which you get to the yard to the North of Rupert's apartment (point 6a on the map). First of all, you are going to fight the infected thug. He is not too difficult to defeat, I recommend that you dash forward, land a combo of quick attacks and additionally, use molotovs, as well as throwing weapons.
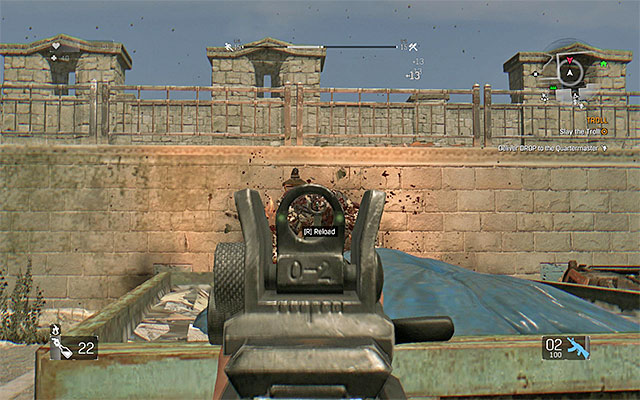 The easiest way to kill the mutant is with firearms
Killing the thug does not do the job, because the actual troll is the mutant that appears in the yard soon afterwards. If you want to, you can use similar tactics to the one that you did, while fighting the Demolisher boss, in the Pit main quest, i.e. wait for the mutant to start his charge, dodge to the side and attack him when he is turned back. Just as well, you can use firearms and grenades. It is safer, but the gunfire noise may attract runners (attack them immediately). After the fight, listen to the radio conversation with Rupert and reach his workshop to the South-West of here (point 6b on the map). Receive the blueprint (Angel Sword) and loot the nearby chests (you find various firearm types inside).
Way to unlock: You need to complete Do You Believe? side quest (point 7a on the map).
Difficulty level: low
Reward: 7500 experience points
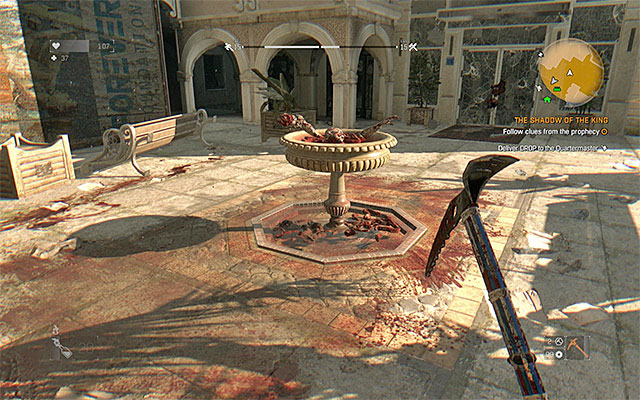
Stay where you have ended the "Do You Believe?" side quest and talk to Ishaq. You need to get to the South-Eastern part of The Old Town (point 8 on the map) and you can travel there in broad daylight. After you enter the area marked in yellow, search out the blood fountain shown in the above screenshot. Examine it. The bloodprints take you to the nearby hotel entrance and you need to cross it to get to a separate location. Start the linear exploration of the hotel, where you need to activate the inactive elevator. Slide the elevator door apart and climb to the roof, across the hole in the roof. Thanks to this, you get to the second floor.
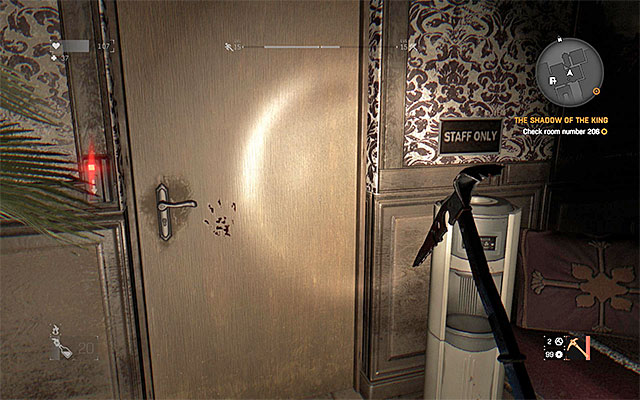 The location, where you need to use the first key card
Find room 206 (the last figure is skewered), and learn that it is locked. Return to the lower floor and find room 107, which you can access. In the room, find the key card for the Staff Rooms. Go to the vestibule on the ground floor and locate the door to the Staff Room (Staff Only). Use the card on the lock, enter and kill the zombies on the floor. Examine the shelf with keys and pick the one for room 206 (Room 206 Keycard).
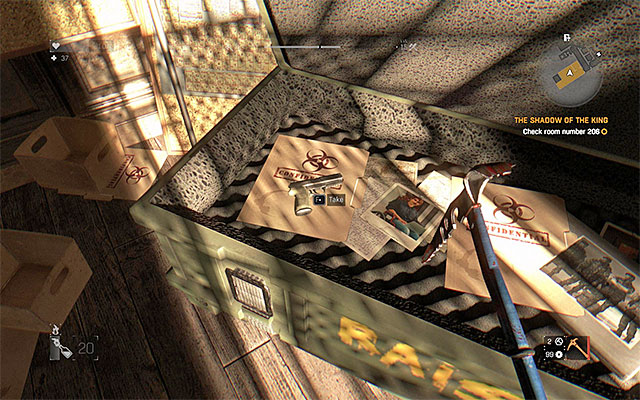 A crate with Rais's belongings
You can now get back to the second floor (climb onto the elevator) and gain access to room 206. Kill the zombie and explore the room, thanks to which you learn that Rais has been here. The most important thing to do is to pick the lock on the locked crate (the lock level is medium)to collect the unique Rais's Gun. Listen to Crane's commentary that ends this quest and, of course, it is a good idea to ransack the room to find some valuables.
Way to unlock: Meet Tariq in the safe zone (point 10a on the map).
Difficulty level: low
Reward: 10000 experience points, 2000 dollars
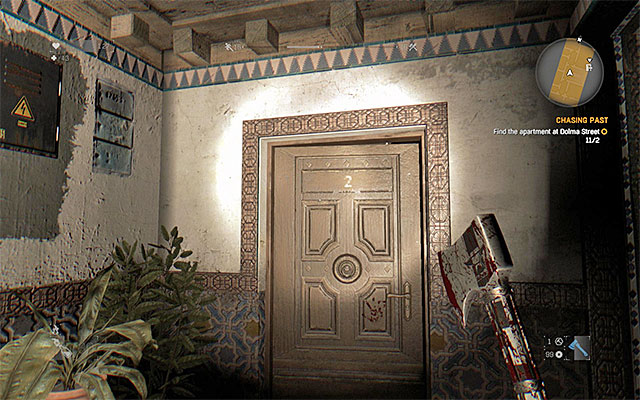 The entrance to the apartment that you need to search
The earliest that you get to unlock this quest is during the "Museum" main quest. You need to meet with Tariq in the safe zone, on the roof of one of the buildings (the one with the garden) (point 10a on the map) and receive the voice recorder from him. After the conversation, head towards the building, where Tariq used to live with the boy that he took in - it is in the Southern Old Town (point 10b on the map). What is interesting, you do not need to climb, because you can take the main entrance. After you get into the building, climb up the stairs, to the first floor, and enter apartment 2.
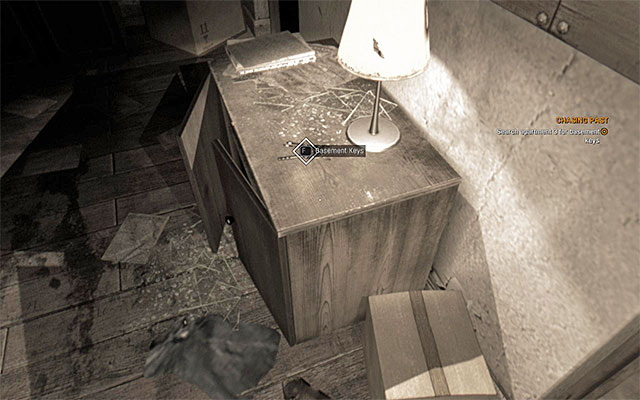 The keys
Search all of the rooms and take a look into the wardrobe, thanks to which Crane should equip the voice recorder and listen the first part of the recording made by the boy. Exit the apartment and take the stairs to the second floor. Enter apartment 3. Wait for the next part of the recording and head towards the basement. Search the entire basement and find the door, for which you require a key. Return to apartment 3 and in the main corridor, find Basement Keys.
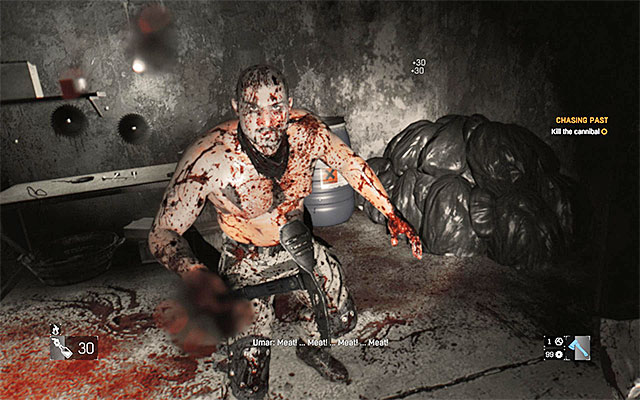 Kill the cannibal
Go back to the locked basement door. Use the keys to walk into a bloody room and a dog on the table. Examine the dog and collect Mike's Collar. Watch out because, as a result of the action, a cannibal will dart out of the neighboring room and you need to kill him. It is best to use guns, although you can also kill him in melee (dodge and kick). You can now exit the building and return to the safe zone, where there is Tariq. Report to him and give the collar to him. For this, you will be rewarded with 2000 dollars and a key to the storage in the museum.
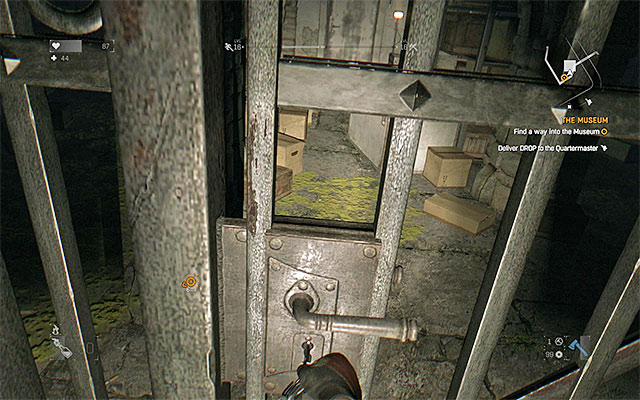 The storage in the museum
It is best to reach the storage (point 10c on the map) while completing The Museum main quest, because you get right next to it, after you swim along several underwater corridors. Make sure, however, that you have lockpicks on you, because by default, many of the crates in the room, are locked.
On the map above, you can see the places that you visit in the locations with a high Antenna. You can access this part of the world after completing the thirteenth quest in the main plot, called Broadcast. There is only one quest connect to this location and it is called The Launch. You can unlock it in the Slums. Completing this mission will not take you a lot of time, even though you have to go practically through the whole map.
How to unlock: Listen to Volkan Dal over the radio and reach the location with the Antenna.
Difficulty level: medium
Reward: 10000 experience.
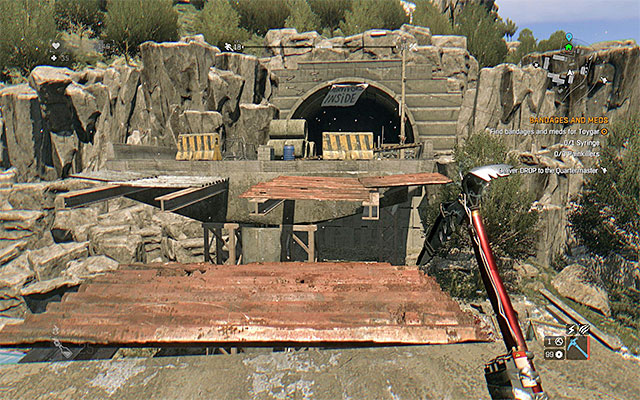 Reach the entrance to the tunnel, in the safe zone.
You can unlock this quest after completing the last side quest for Tolga and Fatin, in the slums. This quest is called Hardware and it consists of finding a sonar in the military camp on the bridge. Wait until Volkan Dal contacts Crane over the radio. You will not receive a quest yet, because you first have to reach the location with the Antenna.
The passage to this location can be found in the northern part of the Slums, namely in the safe zone near the construction site (number 25 on the map). After reaching this place, climb up to enter the higher tunnel. Ignore the fact that the tunnel collapses and look for a door on the left that will take you to another location.
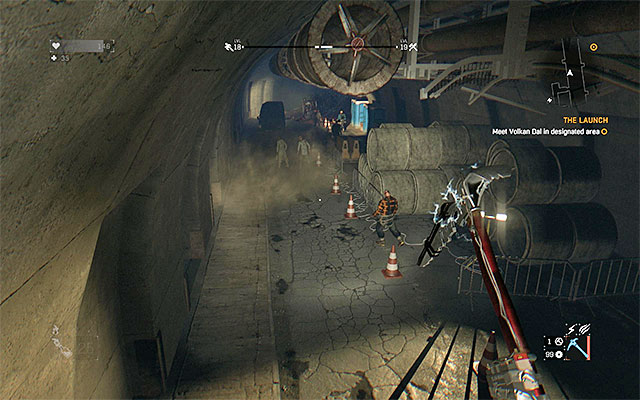 Carefully go through the tunnel.
You start the exploration of this location from the sewers (number 1a on the Antenna map). You have to go through the same tunnel where you were running away from the infected during one of the main quests. This time, you won't meet any night types of zombies (given you're traveling during the day). However, you can still encounter some Goons, Bombers and other elite monsters (the best strategy is to simply avoid fighting them).
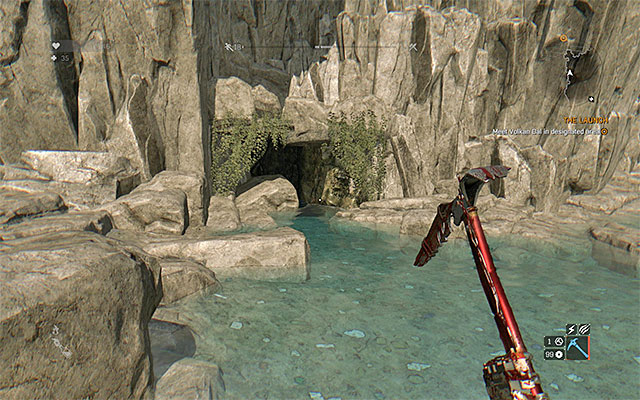 Find the entrance to the cave.
After leaving the tunnel, head towards the northern part of the map (number 1b on the Antenna map). The best way is to keep near the shore, because there you will find the entrance to the cave that serves as a base for Volkan Dal. You have to do two simple things here - talk to Volkan and attach the sonar to the rear part of the submarine. Watch as it emerges and wait for the quest to be finished.
On the map above, you can see the location of Blueprints in Slums. The map contains only those items that can be found during normal exploration of the world. Besides the items shown on the map, you can also obtain other Blueprints by completing quests and challenges, or you can buy them from vendors.
The above map marks locations of the individual blueprints that you can find in the Old Town. On the map, you can find only those of the blueprints that you find during the free exploration of the game world. Apart from the ones marked on the map, you can also obtain blueprints by completing quests and challenges, as well as by buying them from traders.
The above map presents the only unique Blueprint that you can obtain while near the Antenna. Just to remind you, you visit this area, for the first time, while completing the thirteenth main mission - Broadcast. Also, you can return here later into the game. Apart from the blueprint marked on the map, make sure to obtain several other unique collectibles in this location.
On the map above, you can see the location of Zombie Statues in Slums. To locate the Statues, it is good to use Survivor Sense, but you can find the secrets even without it. Read the description under every point, as they tell you how many secrets there are in a given place and where to look for the Statues.
The above map marks locations of zombie statuettes that you can find in the Old Town. It is a good idea to use the Survivor Sense to find them, but you can do without it also. It is necessary that you read the descriptions of the individual points, because they let you know how many collectibles of the type can be found there and where to look for them exactly.
The above map presents the locations of statuettes near the Antenna. Just to remind you, you visit this area, for the first time, while completing the thirteenth main mission - Broadcast. Also, you can return here later into the game. It is a good idea to use the Survivor Sense to find the statuettes, but you will be able to locate then without it.
On the map above, you can see the location of the Flags in Slums. To locate them, it is good to use Survivor Sense, but you can also do it without that skill (most of the Flags can be found on top of the radio towers). Read the description under every points, as they give you information about how many secrets can be found in a given place and where to look for the Flags.
The above map marks locations of flags that you can find in the Old Town. It is a good idea to use the Survivor Sense to find them, but you can do without it also (the majority of them are atop radio towers). It is necessary that you read the descriptions of the individual points, because they let you know how many collectibles of the type can be found there and where to look for them exactly.
The above map presents locations of flags near the Antenna. Just to remind you, you visit this area, for the first time, while completing the thirteenth main mission - Broadcast. Also, you can return here later into the game. It is a good idea to use the Survivor Sense to find the flags, but you will be able to locate then without it.
On the map above, you can see the location of the Notes that can be found in Slums. You can use Survivor Sense to locate them, but it is not necessary. Read the description under every point to learn how many secrets can be found in a given place and where to look for the Notes.
The above map marks locations where you find the notes, while in the Old Town. It is a good idea to use the Survivor Sense to find them, but you can do without it also. It is necessary that you read the descriptions of the individual points, because they let you know how many collectibles of the type can be found there and where to look for them exactly.
On the map above, you can see the location of the Marvin Zucker's Battle Journals that can be found in Slums. You can use Survivor Sense to locate them, but it is not necessary. Read the description under every point to learn how many secrets can be found in a given place and where to look for the Journals.
The above map marks locations, where you find Marvin Zucker's Battle journals, in the Old Town. It is a good idea to use the Survivor Sense to find them, but you can do without it also. It is necessary that you read the descriptions of the individual points, because they let you know how many collectibles of the type can be found there and where to look for them exactly.
The above map marks locations of Audio Logs, that you find in the Old Town. It is a good idea to use the Survivor Sense to find them, but you can do without it also. It is necessary that you read the descriptions of the individual points, because they let you know how many collectibles of the type can be found there and where to look for them exactly.
On the map above, you can see the places in which you can start running, fighting and quarantine zone challenges in the Slums. Challenges are unlocked automatically, with game progress. Every point on the map has a short description, from which you can learn what you have to do in a given challenge.
The above map marks locations, where you start parkour challenges, combat challenges and quarantine zone challenges that you can complete while in the Old Town. You unlock successive challenges with your progress into the game. Each point has been provided with a short description that you can learn from about the premises of the challenge and the requirements that you need to meet to complete it.
The below list of achievements is valid for Dying Light in the PC version and Steam, but they are the same as trophies for the PlayStation 4 version and achievements in the Xbox One version.
You need to kill a screamer. You do that by dashing towards the monster and pressing the interaction key/button (it results in soothing the screamer down). You obtain the achievement, most probably, automatically, during the Public Face main mission.
you need to complete a total of 15 agility or power challenges. You can find maps with the locations of the challenges in one of the previous chapters of the walkthrough.
You need to kill 50 enemies using firearms. It is best to complete this one later into the game, because you do not pack this type of weapons, at the beginning of the game.
Craft any item,. Not necessarily does it need to be a weapon. You can, just as well, craft a first-aid kit.
You need to save 15 random survivors from Rais's men. While exploring the world, look out for situations, in which bandits hold hostages. Attack the mercenaries but, remember not to kill a hostage, accidentally. The premises of random events have been described, in detail, in Mission Types chapter.
You need to kill your first infected, This is probably going to be your first achievement and you cannot skip it.
Electrify a total of 25 enemies. You need to have the Electric Fences skill and wait for the zombies to reach the electric trap.
You need to cover the marathon distance, in the game, i.e. a bit under 42 kilometers. The game keeps track of your results and, as a result, you should meet this requirement while completing the game.
You need to complete 10 challenges in the co-op mode with, at least one other player.
You need to skewer a burning infected on spikes. You can set the zombie on fire, e.g. by using the appropriate weapon or by throwing a Molotov at him. You can also shoot at a pool of gas. The best way to skewer the burning opponent is by kicking him.
You need to develop the Survival level to, at least, level 18. To learn how to do that, see the Character development chapter.
You obtain this achievement in the course of the game and you cannot skip it.
You need to kill 50 enemies with throwing weapon. It is best to use shurikens or throwing knives.
Basing on the appropriate blueprint, you need to endow a blade with the flaming effect. It is best to take interest in this achievement towards the end of the game, because you will then have many blueprints to choose from, and many resources to complete the modification.
You need to Grapple 50 enemies. This ability is in the Agility skill tree and you can learn about it from the Character Development chapter.
You need to craft a total of 100 items. Not necessarily does it need to be weapons. You can just as well craft first-aid kits, flares or Molotovs
You need to develop Strength to level 10. To learn how to do this, see the Character Development chapter.
You obtain this achievement in the course of the game and you cannot skip it.
You need to climb to the total height of 8848 meters. Remember to climb often and climb all of the towers that you find (at least to collect flags there) and you unlock this achievement, sooner or later.
You need to blind a total of 25 volatiles (nocturnal zombies) with a flare or the lamp. It is best to use the UV lamp that you have since the beginning of the game. Try doing this at night, and close to your hideout, at best, thanks to which you can retreat quickly (and repeat the activity).
You need to secure all of the quarantine zones. It has been marked on the maps, in one of the previous chapters of the walkthrough, where you can complete this requirement.
Kill 20 opponents in a row, without taking damage. You can do this with melee weapons (hop back, if necessary), but you can use firearms throwing weapons, if you have problems doing that.
Blind a total of 25 enemies with flash traps. Find the active traps in the game world and return there at night. Start a chase of zombies around and activate the traps when the monsters come close enough.
Find all Audio Logs, Lost Notes and Battle Journals. To learn the whereabouts of the collectibles, see maps in one of the previous chapters of this walkthrough.
You obtain this achievement in the course of the game and you cannot skip it.
You need to complete any mission in the co-op mode (with at least one more player).
Complete 5 tasks in co-op mode, with three other players, with the same make-up of the team (none of the player can leave prematurely).
You need to catch and kill five Bolters. Wait until the Siblings main mission, because you then learn how to find and eliminate bolters.
You need to get 15 DROPs from airdrops. To learn more see Exploration site, at the beginning of the guide.
You need to pick 10 locks. The premises of the minigame of lockpicking have been presented on the Exploration page at the beginning of the guide.
You need to rescue 15 survivors from zombies. While exploring the world, keep an eye out for opportunities to complete random events, which have been presented in the Mission Types chapter.
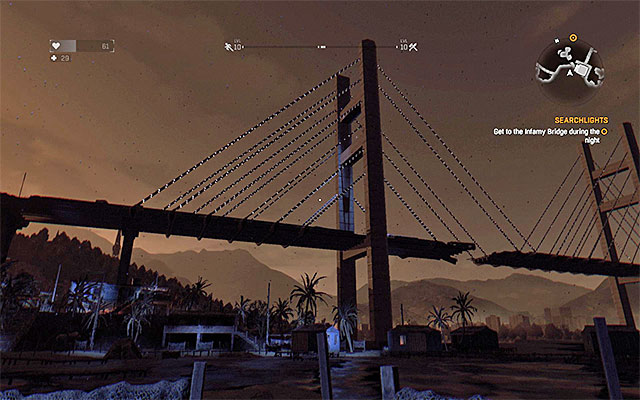
At night, you need to jump off the Infamy Bridge. The bridge is in the Eastern part of the Slum (the starting district) and it has been presented in the above screenshot. Watch out for the nocturnal zombies that patrol the bridge. Do not let them spot you, while you are getting prepared.
Complete the main storyline.
Sell items of the combined value of 10000 dollars. It is not difficult, considering the fact that items of higher quality are several thousand dollars a piece.
Win seven competitions in the co-op mode, against at least one other player.
Survive a night race of level 1 or higher. What is meant is a situation, in which you are chased by volatiles or hunters. Most probably, you will obtain it automatically, during the Airdrop main quest, because the chase is an integral part of the mission.
You need to electrify 5 infected at a time. Keep an eye out for the places, where you can restore power supply. Often there are cables in a puddle and you need to wait for a bigger group of zombies to enter the puddle.
You need to unlock all of the safe zones, which have been described in detail, on the Main Hideouts and Safe Zones page. You need to recapture some of the zones on your own (the red houses on the map of each district), whereas the other ones are unlocked with your progress into the game, or thanks to completing side quests.
You obtain this achievement in the course of the game and you cannot skip it.
Complete all of the side quests in the game.
Kill 100 opponents by kicking them off a rooftop or a high ledge. Keep an eye out for opportunities to kill, mainly the regular zombies, this way. They will be unable to fight back.
You obtain this achievement in the course of the game and you cannot skip it.
Kill a volatile, i.e. one of the zombie types. The easiest way to do it is with a firearm or a thrown weapon, reinforced with gadgets and UV traps.
You obtain this achievement in the course of the game and you cannot skip it.
Kill any opponent using a Wrench, in a certain way. First use the Vault skill and, while in mid air, use Drop Attack. To learn how to use the skills and how to unlock them, see the Character Development chapter.
Develop your Survival level to 12. To learn how to do this, see the Character Development chapter.
You obtain this achievement in the course of the game and you cannot skip it.
Kill 25 enemies with Ground Pound skill or Drop Attack. To learn about these skills, see the Character Development chapter.
You obtain this achievement in the course of the game and you cannot skip it.
Develop your agility to level 10. To learn how to do this, see the Character Development chapter.
Dying Light in the PC version, is a game whose requirements are above average. Throughout the majority of the game, you can enjoy a seamless game, although framerate drops also happen, also on computer with high specifications. The developer publishes patches on a regular basis to optimize the game so, soon this problem should be resolved. While preparing this guide, we have experienced no major issues with completing quests or saving the game. Still, the game froze several times, on startup.
Singleplayer: Yes
Offline co-op (split screen/hot seat): No
Co-op over the Internet: Yes
Multiplayer: Yes
This guide has been drawn up on a PC, of the below specs:
On the computer with the above specifications, resolution of 1920x1200 was possible. The graphic options were set to levels medium and high, in equal proportions, which ensured seamless framerate of 40-60.
Yes, playing Dying Light on laptop computers is possible.


 Deadfall Adventures Game Guide & Walkthrough
 Dreamfall: Chapters Game Guide & Walkthrough
 Darksiders II Game Guide & WalkthroughDead Space Game Guide & Walkthrough
 DayZ - ArmA 2 mod Game Guide & Walkthrough