
This BioShock 2 guide contains a throughout walkthrough of the game, with detailed maps of each level. I've also put many icons onto them, increasing their informational value. Apart from that, I've prepared a complete list of Plasmids, Gene Tonics and Audio Diaries. Each gun and enemy has been described, together with effective ways to research them.
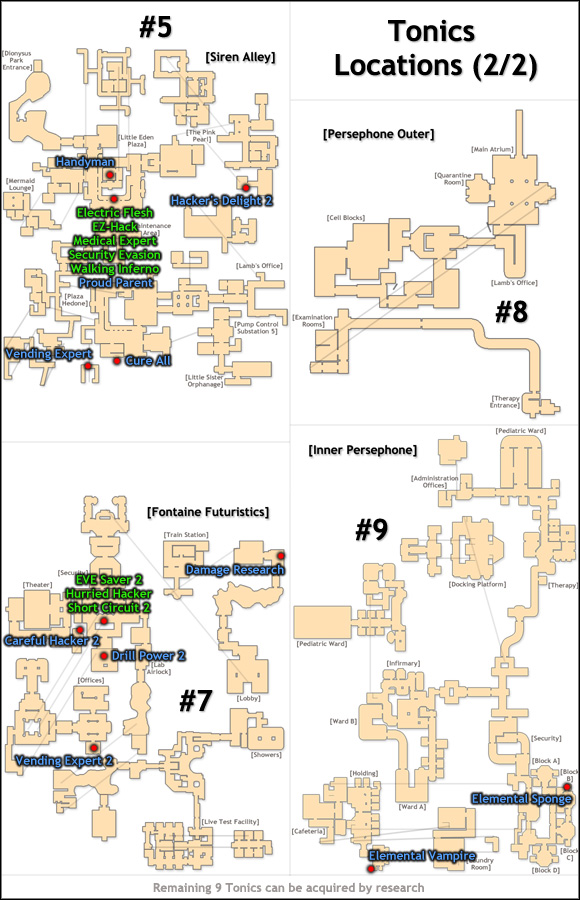
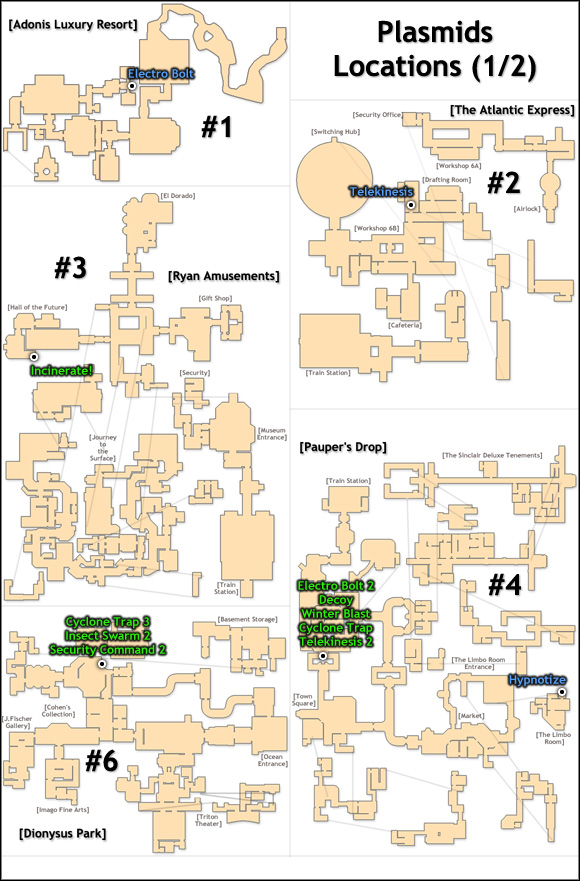
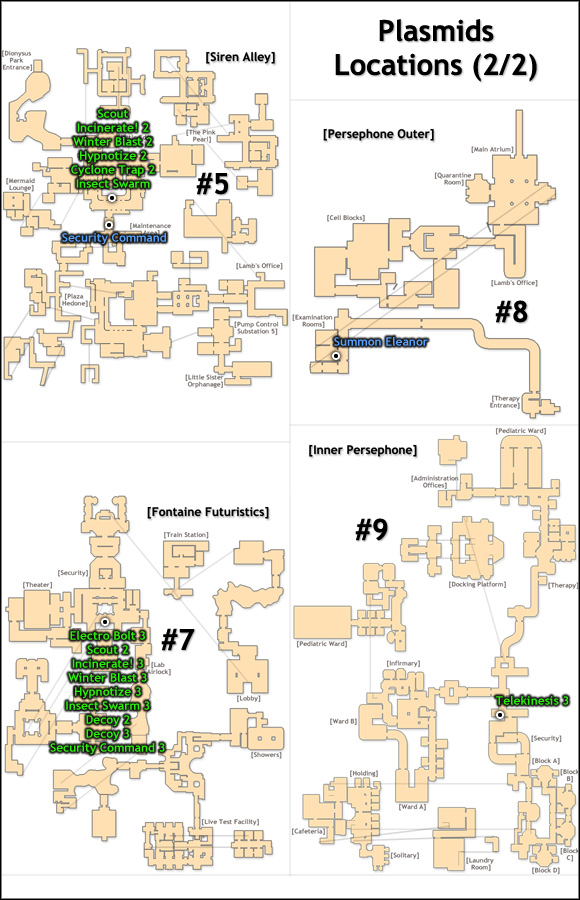
The names of important items (Plasmids, weapon, Tonics) which can be found (or received) on each level are marked with a blue font. Green represents a place corresponding to a given number on the map and also Plasmids and Tonics which can be bought. Red refers to audio diaries which can be found during the game.
Lukasz "Terrag" Znojek
Translated to English by Jakub "cilgan" Lasota
LEVEL DETAILS:
Audio Diaries: 7
New weapon types: [Drill], [Rivet Gun]
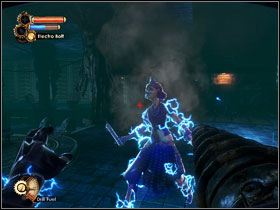
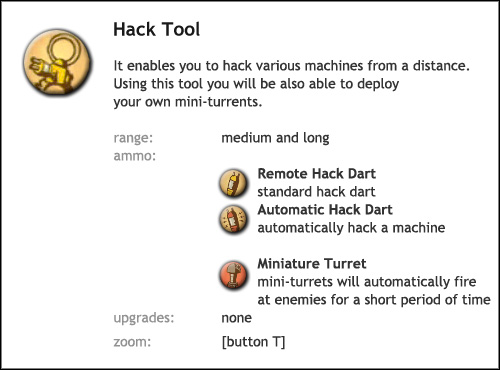
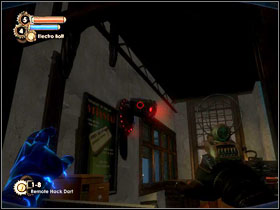
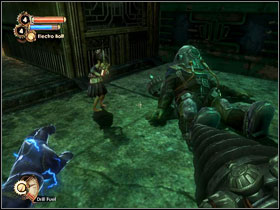
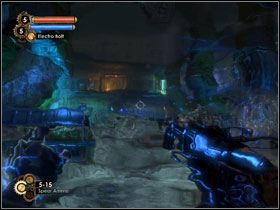
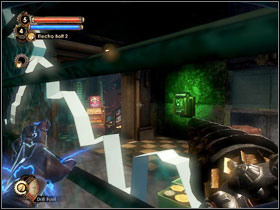
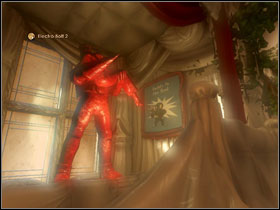
New Plasmids: [Electro Bolt]
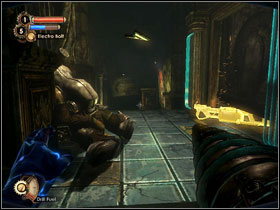
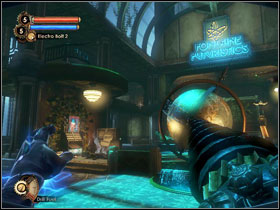
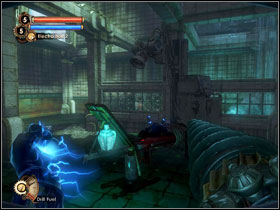
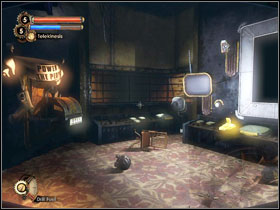
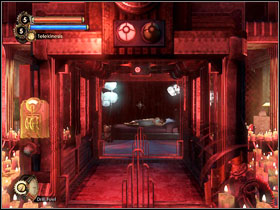
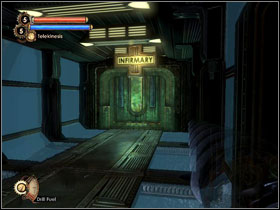
01 - You begin your adventure here. Take a look at your first weapon - the [Drill]. The stairs on the right will lead you upstairs.

02 - Use your drill in order to get through the corridor and get rid of the naughty flora.
NOTICE: The weapon you're wielding has two attacks - by holding down the [left mouse button], your drill will spin, using up fuel. A simple push of the button will result in a simple blow, which isn't quite as effective as drilling into an enemy's guts.
Further into the corridor you will have to crouch [C], to pass under a fallen column.
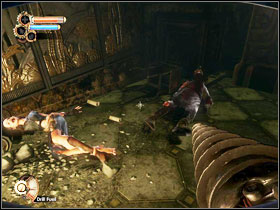
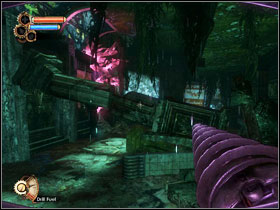
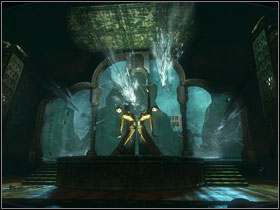
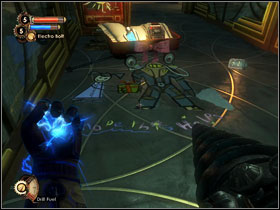
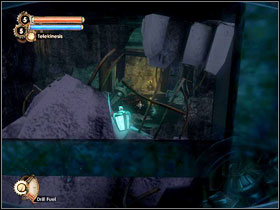
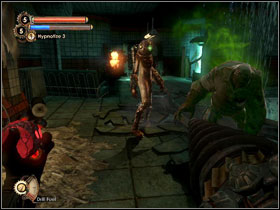
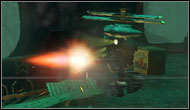
After reaching the big room, you will get to admire the Big Sister's stunts. Have a closer look at the room, and on the right you will find some [drill fuel] and food, which will increase a small part of your health. On the left, there's your first Audio Diary [L].
AUDIO DIARY: [Attention: Workers!] - "Big Kate" O'Malley.
03 - You will encounter an enemy. After a short cutscene, it will turn out that he's armed with a revolver. Rush and get rid of him, focusing naturally on his head.
NOTICE: If for any reasons you don't yet have the habit to search each body you come across, it's the right time to gain it. Your enemies often carry lots of precious stuff, from first aid kits and money to tonics.
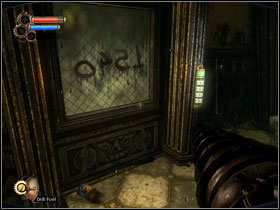
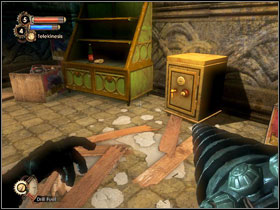
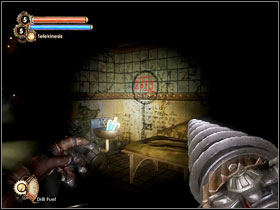
04 - Notice the code on the door - 1540 and use it on the mechanics on the door to the right. Inside you will find an Audio Diary, fuel and some food.
AUDIO DIARY: [Fitness] - Rachelle Jaques.
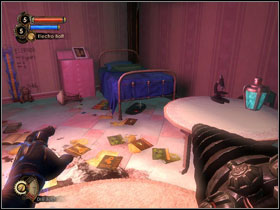
05 - Take you first Plasmid - [Electro Bolt] - from the Gatherer's Garden. You will find some minor stuff in the side rooms, like cigarettes (smoking them will give you some EVE, in exchange for health).
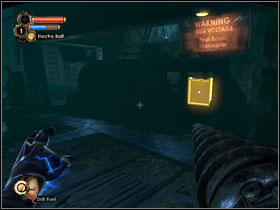
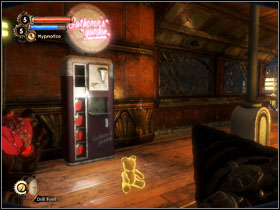
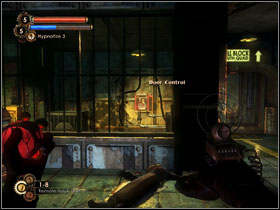
06 - Use Electro Bolt on the panel on the left side of the door. Take a look around the room (you can find some fuel, among other items) and check the wall on the right. There's an EVE Hypos vending machine, so you can refill on them.
07 - Get rid of the two enemies (using Electro Bolt and then the Drill will make things easy). Afterwards use your Plasmid on the generator on the right to restore the power, which will open the previously locked door.
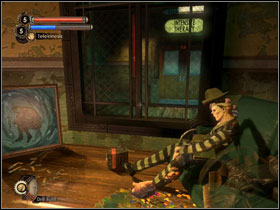
08 - On your way to the toilers you will come across an Audio Diary, fuel and some lockers which you can search. You can get into the second cabin by paying 5$. It's well worth it, as you will find some more money inside, among other stuff. After exiting the toilets you will get attacked by a woman wielding a pipe. You can wait for her to get into water and then use Electro Bolt to fry her.
AUDIO DIARY: [To My Daughter] - Sofia Lamb.
09 - Two enemies standing in the water - a great opportunity to fry them. Search the room to find an Audio Diary.
AUDIO DIARY: [Return] - Brigid Tenenbaum (on the rock bench by the wall).
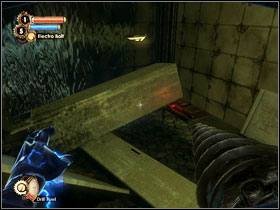
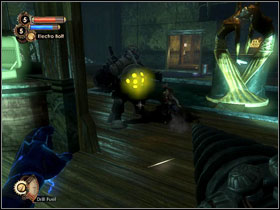
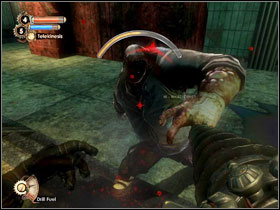
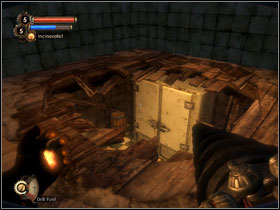
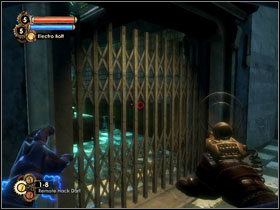
10 - You'll find the body of a Big Daddy and some [rivets] beside him. The door opposite is blocked by your new weapon - the [Rivet Gun].
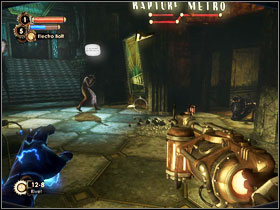
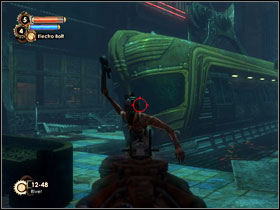
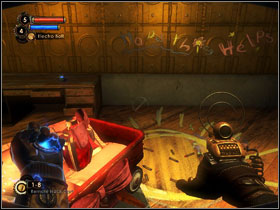
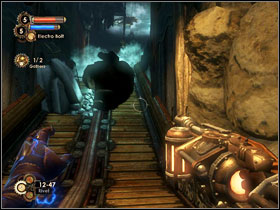
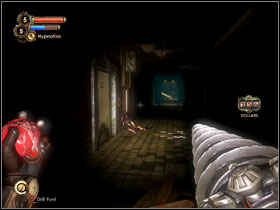
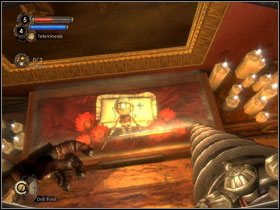
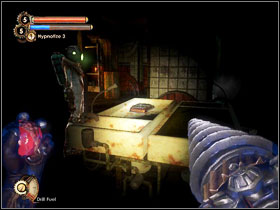
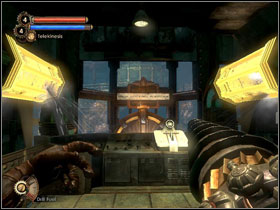
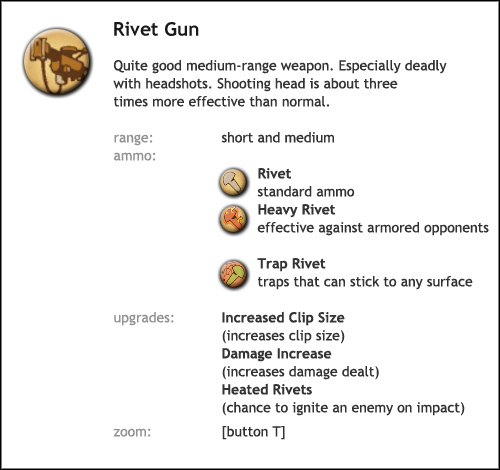
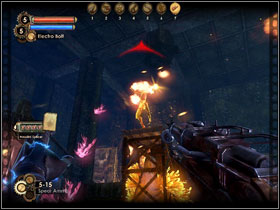
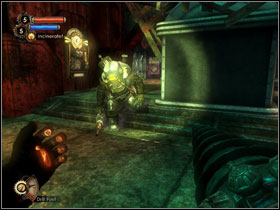
![NOTICE: The Rivet Gun works best if you accurately aim [T] before firing into an enemy's head - Walkthrough - Adonis Luxury Resort - Walkthrough - Bioshock 2 - Game Guide and Walkthrough](https://game.lhg100.com/Article/UploadFiles/201512/2015121216510708.jpg)
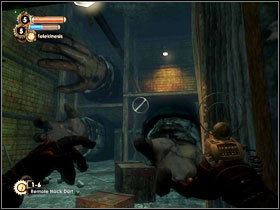
NOTICE: The Rivet Gun works best if you accurately aim [T] before firing into an enemy's head. Although remember, that zooming prevents you from using your plasmid (you have to return to the normal view first).
11 - A pair of foes and a great opportunity to test your new toy. Search the room to find some rivets.
12 - A new Audio Diary and deeper in the corridor (dead end) some bags which you can search. You can find water and cola, which both regenerate some of your EVE. On your way back you will come across an enemy searching a bag. Aim and shoot the exploding barrel.
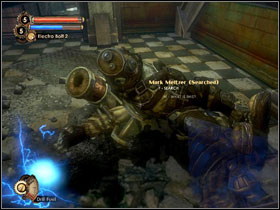
AUDIO DIARY: [They Called It Rapture] - Mark Meltzer (on the floor, next to a bag with a doll).
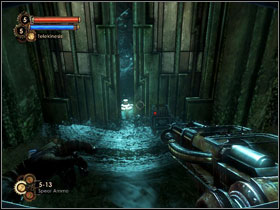
13 - A short cutscene involving a Little Sister, after which you will get attacked by the bigger one. Constantly keep moving while fighting her. She's agile and moves often, so don't lose her. The Drill won't do much good here, so use the River Gun (aim at the head) together with Electro Bolt. You can make this fight a little easier, by taking advantage of the pools of water in which the Sister often stands. Once her health bar drops to around 30%, the fight will come to an end.
NOTICE: A more accurate description of how to deal with Big Sisters can be found in the proper chapter of the guide.
There's an Audio Diary, fuel, rivets, first aid kits and EVE Hypos nearby.
AUDIO DIARY: [Generation] - Andrew Ryan (on the desk).
14 - A first aid kit in the corridor.
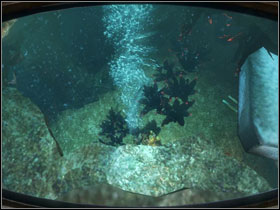
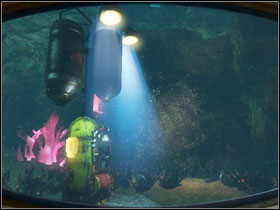
15 - A Big Sister will give you quite a show, which will end in an unexpected diving lesson. While underwater, you can't use your plasmids or weapons.
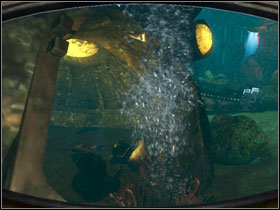
16 - Follow a pre-determined path. After a few steps you should find a bathyscaphe wreck with two bodies inside. You will find an Audio Diary by one of them.
AUDIO DIARY: [Escape From Rapture] - Sammy Fletcher (by one of the bodies found underwater).
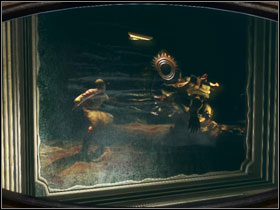
During your further trip, you will get a chance to watch another Daddy defending his Little Sister. You'll also find some rivets and an EVE Hypo.
17 - Use the lever to pump the water out of the room and go to the next level.

LEVEL DETAILS:
Audio Diaries: 8
New weapon types: [Hack Tool]
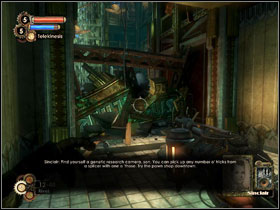
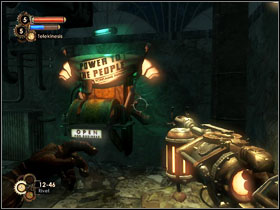
New Plasmids: [Telekinesis]
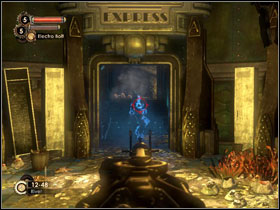
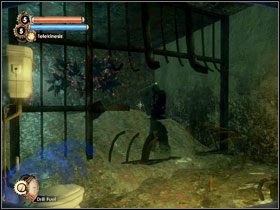
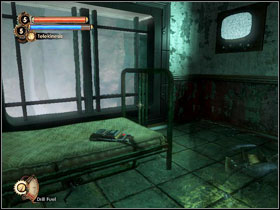
01 - Upon entering the room, you can quickly paralyse the running enemy. If you do it swiftly enough, he won't make it in time. Search the nearby lockers and move on.
02 - You will come across a new gadget - the [Hack Tool]. On the nearby wall there's a vending machine with darts to your new toy. Fill up and then shoot one of them through the broken window and into the control panel by the door and hack it. In the corridor you will find a deactivated Security Bot - hack it and you will gain an ally.
NOTICE: Hacking has been described in the proper chapter of the guide.
03 - You will encounter two Splicers by the train car. You will also find some fuel and rivets. Also don't forget about the Audio Diary.
AUDIO DIARY: [The Great Chain Rattles] - Andrew Ryan
04 - Pull the lever and watch the transmission. Afterwards you will get attacked by three enemies. Don't waste your ammo and focus on trying to avoid getting hit, because after a few seconds the floor beneath you will crumble.
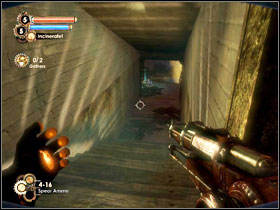
05 - Get through the flooded corridor and search the bodies on your way. You will also have to squeeze through a small canal. At the end, behind a big fan, you will see an Audio Diary. In order to get it, you must first gain the Telekinesis Plasmid, which waits for you a little further.
AUDIO DIARY: [Mr. Tape Recorder] - Eleanor Lamb (behind the vent, Telekinesis needed)
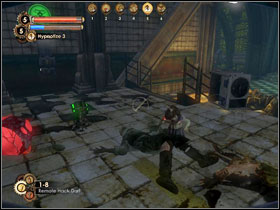
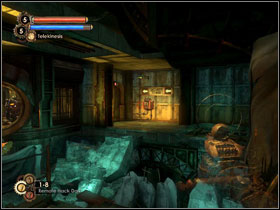
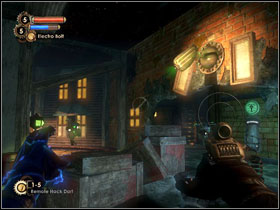
06 - You will find some money, first aid kits and fuel in the room. Turn left and you should see a camera - use the Hacking Tool to make it your ally. Once a Security Bot arrives, you can treat it with a Hack Dart. Hacked, it will follow and protect you.
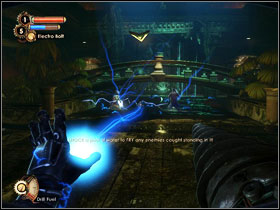
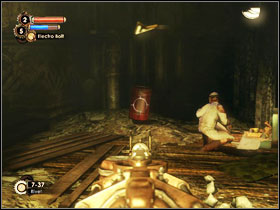
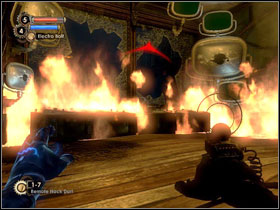
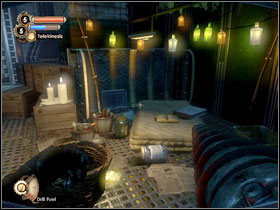
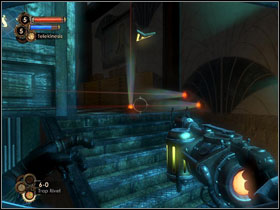
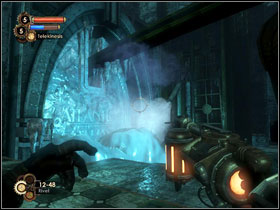
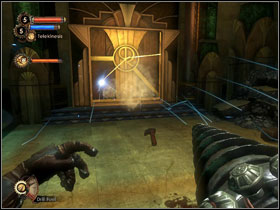
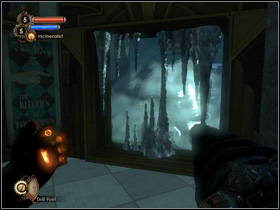
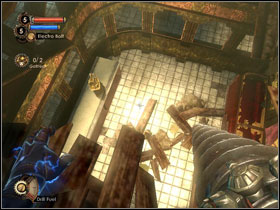
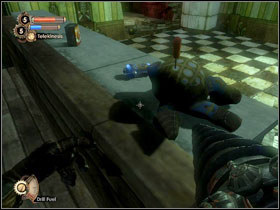
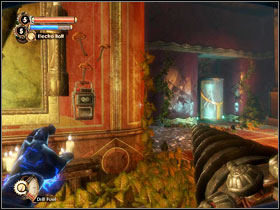
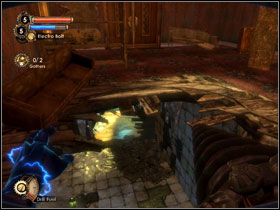
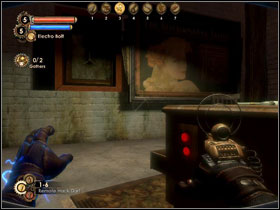
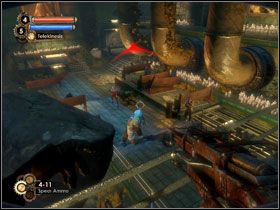
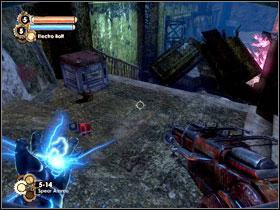
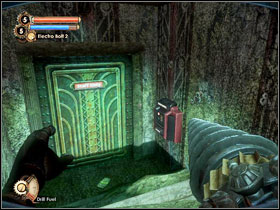
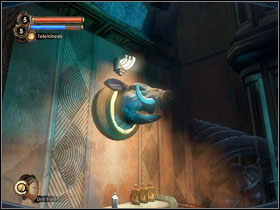
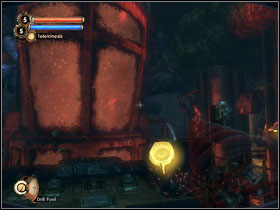
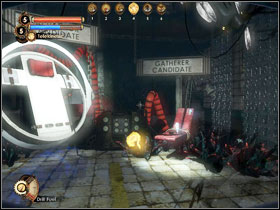
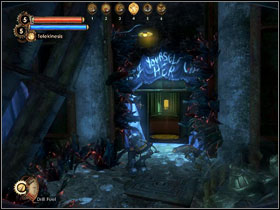
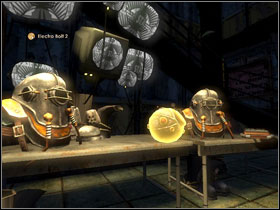
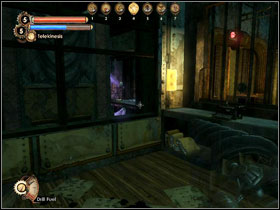
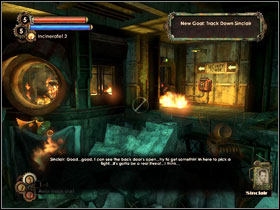
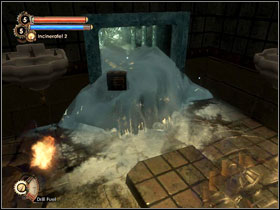
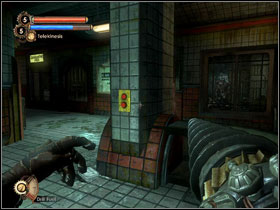
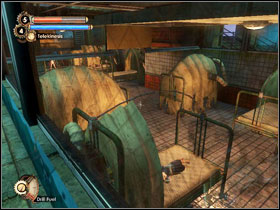
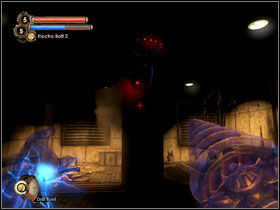
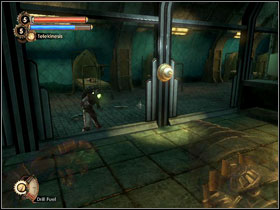
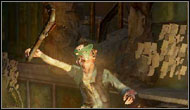
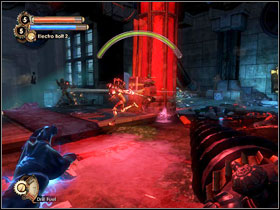
![07 - Eleanor has left you a present in the form [Telekinesis] Plasmid - Walkthrough - The Atlantic Express - Walkthrough - Bioshock 2 - Game Guide and Walkthrough](https://game.lhg100.com/Article/UploadFiles/201512/2015121216510968.jpg)
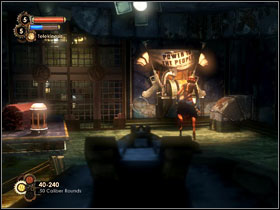
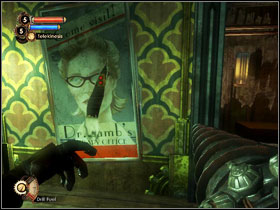
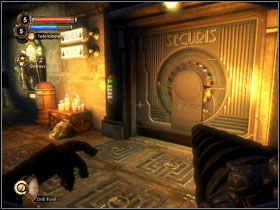
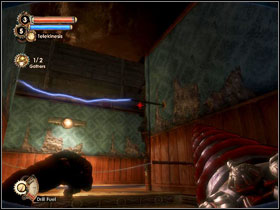
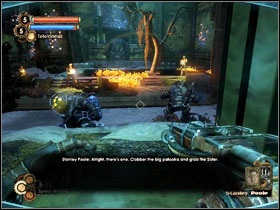
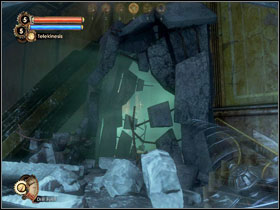
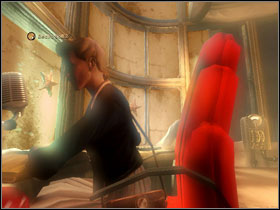
07 - Eleanor has left you a present in the form [Telekinesis] Plasmid. Press the button on the wall on the left and after a while you will get some more minor items.
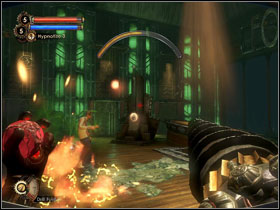
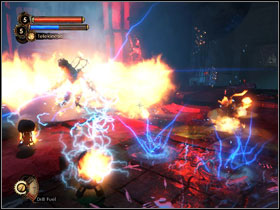
08 - After going upstairs, you will have to face a group of enemies. Use the gas canisters and throw them using your newly gained Plasmid. The enemies appear gradually, so hide after your first attack and attack again after a while. Before going down, collect the Audio Diary.
AUDIO DIARY: [Just a Fad] - Prentice Mill
09 - All the enemies should be long dead by now, so search the room. You will find a new Audio Diary.
AUDIO DIARY: [What Happened to the People?] - Mark Meltzer
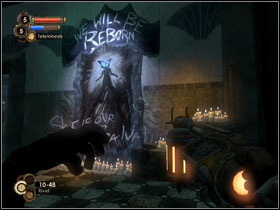
10 - Lots of food left on the shelves. There's also an Audio Diary in the back. On your way back, you'll get attacked by a nasty couple. You can make use of the explosive canisters lying around.
AUDIO DIARY: [Ryan vs Lamb: Reality] - Sofia Lamb
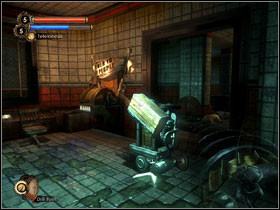
11 - In order to move forward, you have to use Telekinesis to take out the pipe blocking the mechanism. Use the hole in the wall to do it. You will also find some items if you search the nearby toilets out of curiosity.
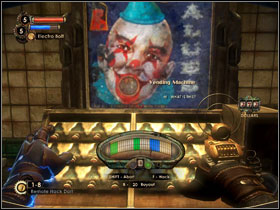
12 - If you hack the vending machine and stop the needle on the blue field, you will get a free, additional item. Go to the room where the blocked gears were and the Audio Diary on your way.
AUDIO DIARY: [Know the Beast] - Sofia Lamb
13 - You will encounter a Big Sister, but she won't attack you this time. Go right and hack the camera. You will be attacked by a group of enemies, so backup will be welcomed. Afterwards, use the elevator.
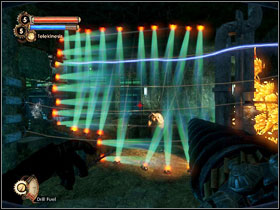
14 - A short cutscene will present a new rivet type, which set traps. This alternate ammo for the Rivet gun won't do you any harm, so you can cross the beams without any fear. Another advantage of this kind of ammo is that you can collect a previously set trap if it hasn't been activated. Use this fact and collect the rivets. You will find an Audio Diary in the small room.
AUDIO DIARY: [Improving on Suchong's Work] - Gil Alexander (in the drawer by the window)
15 - An unaware Splicer is facing the other direction. You can quickly get rid of him or turn his attention and draw him into a nearby trap.
16 - It's time for a bigger fight. There's a camera on the wall, which you can hack. Enemies will appear from the right and left side as well (bars on the wall). You can try and place traps here or retreat to the previous room and lure single enemies into a trap. Once the fight's over, pick up the Diary and pull the lever in the train car.
AUDIO DIARY: [The Situation] - Brigid Tenenbaum
LEVEL DETAILS:
Audio Diaries: 19
Power to the People stations: 2
Little Sisters: 1
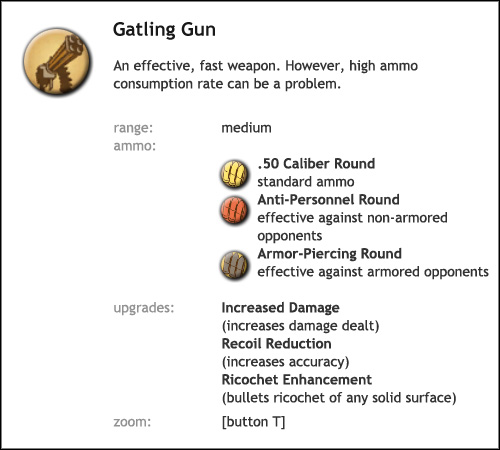
New weapon types: [Gatling Gun]
New Plasmids: [Incinerate!]
New Tonics: [Sports Boost], [Drill Power], [Booze Hound], [EVE Link], [Armored Shell], [Careful Hacker], [Extra Nutrition]
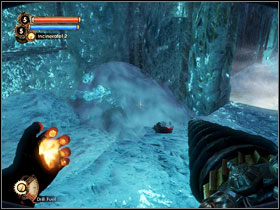
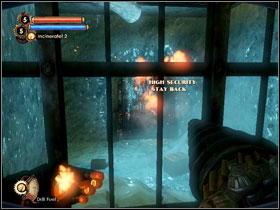
01 - You begin the level at the station. It turns out that you can't go any further without getting a Plasmid which will help you in melting the ice that's blocking the tunnel.
02 - There are two Diaries in the room, however you won't be able to get the frozen one at the moment. Never mind that, you'll collect it on your way back. There's an enemy waiting in the big room, on the way to the next point.
AUDIO DIARY: [Eleanor's Progress] - Sofia Lamb
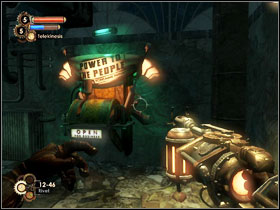
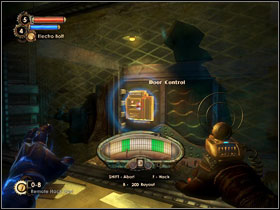
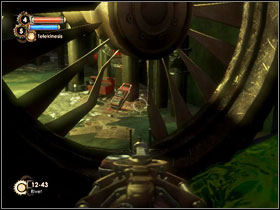
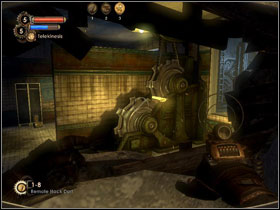
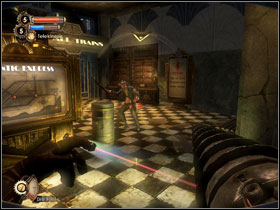
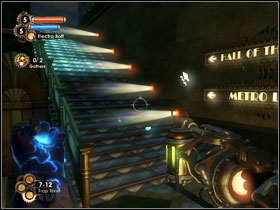
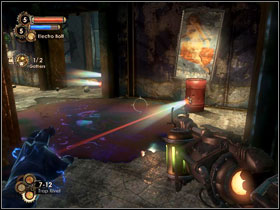
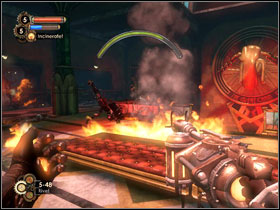
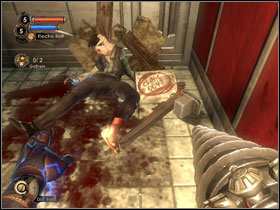
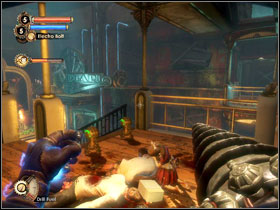
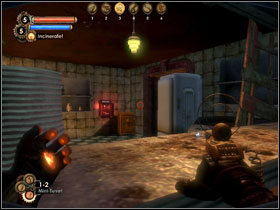
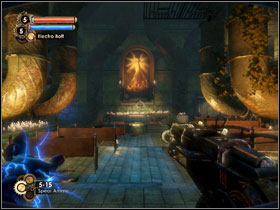
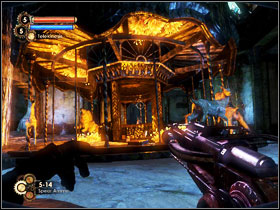
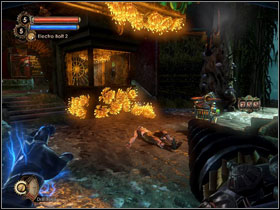
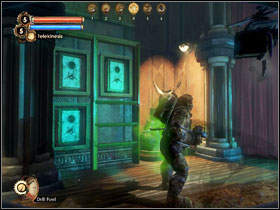
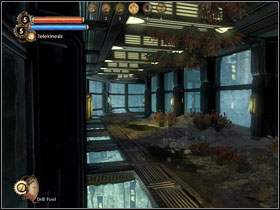
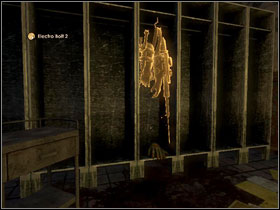
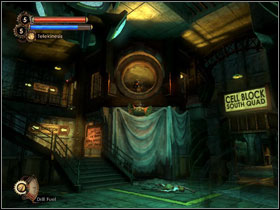
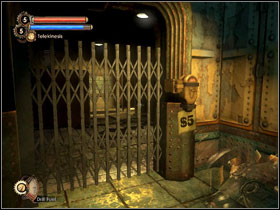
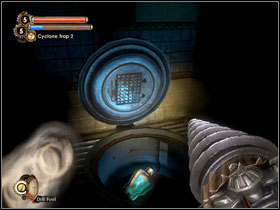
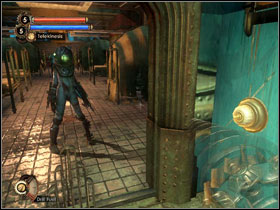
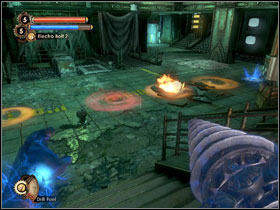
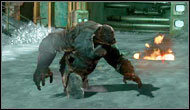
![03 - You will find the first [Power to the People] station - Walkthrough - Ryan Amusements - Walkthrough - Bioshock 2 - Game Guide and Walkthrough](https://game.lhg100.com/Article/UploadFiles/201512/2015121216511014.jpg)
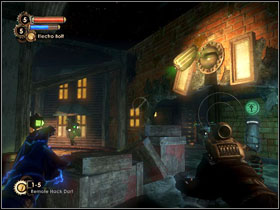
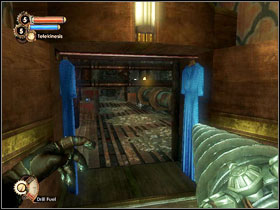
03 - You will find the first [Power to the People] station. In these machines, you can choose one free upgrade to a given gun. Unfortunately, each station can be used only once.
04 - Use a Hack Dart and open the door. Take the ticket from inside.
AUDIO DIARY: [The Old Sheepdog] - Carlson Fiddle
05 - You will find a new weapon type in the broken cabinet - the [Gatling Gun].

06 - In the big room you will have to fight a couple Splicers at the same time. Your new weapon will come in handy here and you can also test the upgrade you have bought. Use the ticket by the door and go inside the museum.
07 - Pick up your first Tonic - [Sports Boost], thanks to which you will move a little faster.
08 - Forget about the lower level for now. Focus on the Audio Diary.
AUDIO DIARY: [Volunteer] - Nina Carnegie
09 - In the surrounding of teddy bears, you will have to fight a couple enemies. It's worth to take a closer look at the Diary and the safe. Afterwards you should get attacked yet again.
AUDIO DIARY: [Cutting Corners] - Silas Bantam
Take another Audio Diary from the toilets (use Electro Bolt on the panel by the bars). While searching one of the cabins, you will get attacked from behind by a sneaking enemy.
AUDIO DIARY: [Rapture is Deliverance] - Sofia Lamb
10 - On your way to the Little Sister, you Eleanor will grant you with another gift. This time you will receive a Tonic - - [Drill Power].
AUDIO DIARY: [Eat Dog] - Eleanor Lamb
AUDIO DIARY: ["Child" and Guardian] - Mark Meltzer
It's time to fight a Big Daddy. Keeping in mind that he won't attack us first, take a look around the whole room. Hack what you can and notice the oil and an exploding barrel. Tame the bot by the entrance. Use all those elements during the fight and well - shoot from whatever you have.
NOTICE: A more thorough description of the fights and strategies involved can be found in the "Big Sisters and Daddies" chapter.
After searching the body - adopt the Little Sister and go collect some ADAM. Get back to the main hall and go down the stairs.
11 - Get ready to fight a massive amount of enemies who will keep appearing while the Little Sister collects ADAM. You can place some traps on the stairs and eventually some around the girl herself (attached to the floor). Also make sure that the Healing Station is hacked. Once you put down the Sister, action will begin. The enemies will keep coming down from both staircases and in the end two will enter through the door behind the Sister. Try to stay near the little one all the time. She cannot be harmed, but will stop gathering if interrupted, which will lengthen the process and increase the number of enemies you have to face
NOTICE: You can check out the chapter describing the problems that a Big Daddy can come across while defending a gathering Sister.
12 - You should notice a woman shooting at you with a machine gun. Treat her with the same. Below you will have to deal with some more enemies and in the office on the left you will find a Diary.
AUDIO DIARY: [You, Me, and 1959] - Nina Carnegie
13 - As you'll be going up, one of the round cabins will start falling down on you, fortunately slow enough for you to dodge it without any major problems - just strafe in either direction. It's time for a unique trip down a specially prepared track, during which exceptional, mechanical exhibitions will keep you amused.
14 - Before you go into the room with a dead body, you should collect the nearby Audio Diary.
AUDIO DIARY: [Lamb the Problem, Sinclair the Solution] - Andrew Ryan
15 - Hack the turret in the middle of the room and the Health Station too. You can place some traps (placing one on the exploding barrel is quite a decent idea). The task is made easier thanks to the turret, but nevertheless you won't have time to get bored while the Sister is collecting ADAM.
AUDIO DIARY: [Escape Plan] - Carlson Fiddle
16 - On the floor, apart from the Diary, you will find machine gun ammo and rivets.
AUDIO DIARY: [Truth is in the Body] - Sofia Lamb
17 - Another safe waiting to be opened. However before you start hacking it, it's worth to consider pulling off a little trick. A couple steps away from the safe there's a switch which deactivates Security Bots. It's worth to intentionally make a mistake during the hacking (stop the needle on a red field), which will summon the bots. Quickly run to the switch and turn them off. Now you can easily take over both machines and activate them.
18 - You will have to make your first moral choice. The deal is easy - you can either kill the girl and get more ADAM, or save her and get less, but receive gifts in the future.
NOTICE: The issue is quite important (it affects the ending), I would strongly recommend to familiarize with the chapter covering the Little Sisters.
19 - Climb up the big mechanical hand and search for the Diary.
AUDIO DIARY: [Deterioration] - Nina Carnegie
20 - Another [Power to the People] station and on the right - an Audio Diary.
AUDIO DIARY: [Working for Sinclair] - Stanley Poole
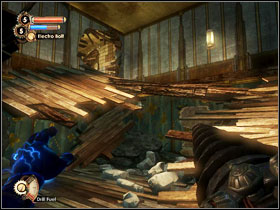
21 - One of the citizens has barricaded himself here with a machine gun. You can help yourself by taking over the camera. In the room at the back (behind the planks), there's a hidden room with an Audio Diary.
AUDIO DIARY: [Doctor Lamb] - Mike Novak
22 - Take the Audio Diary. You will come across a lever which will open all the metal doors which have been locked until now. Go up, kill a couple enemies and turn right.
AUDIO DIARY: [Efficacy] - Andrew Ryan
23 - In the small room you will find a new Tonic - [Booze Hound]. It works great once combined with the alcohol-filled warehouse in the back. Return to the museum's main hall.
AUDIO DIARY: [Dating Tip] - Devin LeMaster
24 - Hack the turret and if you want - back it up in the fight. Search the rooms and you will find and Audio Diary and a Gatherer's Garden. Buy yourself a new Plasmid - [Incinerate!]. Try not to spend the rest of your ADAM, you'll return here in just a moment.
AUDIO DIARY: [A Father's Love] - Gil Alexander
25 - Use your new power do get rid of the ice blocking the passage. It turns out that there's a second Gatherer's Garden and it has a completely different offer. Now you can make choices on what to buy. Despite the fact that in BioShock 2 you cannot go back to previously visited locations, there's nothing to worry about. In the machines you will come across later on, you can find most of the stuff which you haven't yet bought.
As you go back to the train station from the beginning of the mission, you'll get attacked by a Big Sister. Another chance to test out your new Plasmid. Remember to search her body and collect ADAM.
26 - You can get the previously unattainable Diary by melting the ice block.
AUDIO DIARY: [Disappeared] - Grace Holloway
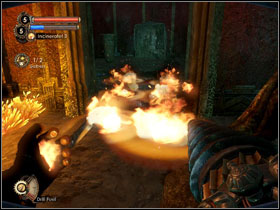
27 - Begin with melting the ice block blocking the way. Afterwards go to the control room and pull the lever. After a short cutscene, enemies will appear. Make use of the pool of oil by the entrance. Once you finish off the enemies, check out the newly opened room to find an Audio Diary.
AUDIO DIARY: [Wooden Nickels] - Augustus Sinclair
Step into the train and go to the next level.
LEVEL DETAILS:
Audio Diaries: 21
Power to the People stations: 3
Little Sisters: 2
New weapon types: [Double-Barrelled Shotgun], [Research Camera]
New Plasmids: [Hypnotize], [Electro Bolt 2], [Decoy], [Winter Blast], [Cyclone Trap], [Telekinesis 2]
New Tonics: [Hacker's Delight], [Shorten Alarms], [Fire Storm], [Freezing Drill], [Keen Observer], [EVE Saver], [Drill Lurker], [Machine Buster], [Short Circuit], [Headhunter]

01 - Before you can move forward, you have to hack the mechanism at the southern door.
02 - You will come across the first Gene Bank. These machines allow you to swap your Plasmids and Gene Tonics. Those which you won't equip will be stored in the Bank. A few steps ahead you will have to face three enemies
03 - Go round the building in the centre, you will find a camera and a Little Sister accompanied by her Daddy. Fight her guardian and adopt her. Even if you have decided to eliminate all the little ones, it's best to do it after collecting ADAM (you can decide to harvest the Sister while next to a vent). This way you will get more ADAM.
The map suggests that there are two Diaries in the area, but the one by the dead body won't be available now. Don't bother with it for now.
AUDIO DIARY: [Ryan vs Lamb: Religious Rights] - Sofia Lamb
04 - Climb up to the roof. Hack the turret (you don't necessarily have to use the Darts, you can as well electrocute it and then run to it and hack it). Move to the florist's roof and collect an Audio Diary and a Tonic - [Hacker's Delight].
AUDIO DIARY: [Better Times With Lamb] - Grace Holloway
05 - Check out the rooms on both sides of the blocked corridor. You will find a safe and an Audio Diary among others. Backtrack to the Town Square - you have to follow your steps, as the passage leading to the corridor with a nice sea view is blocked.
AUDIO DIARY: [Wrong Side of the Tracks] - Augustus Sinclair
06 - You will have to fight a Brute Splicer. Constantly move during the fight and make use of the surroundings. Take the Audio Diary from the north-east part of the square. It turns out that the building you're trying to get to is locked from the other side.
AUDIO DIARY: [The End of the Line] - Prentice Mill
The second Diary will lead you to the cafe on which's roof you have seen the turret. Go back there.
AUDIO DIARY: [Clinic Code at the Fishbowl] - Tobias Riefes
07 - Enter the building through the southern entrance. Search the body in the corner. After picking up his former gun - the [Double-Barrelled Shotgun] - you will have to fight a couple of enemies. Return to the locked Clinic door.

08 - Input the code - 0047 - and get into the building. Watch out for falling barrels while going up the stairs.
09 - You will come across a Diary, Power to the People station, camera, turret and a safe.
AUDIO DIARY: [Therapy with Grace 1] - Sofia Lamb
It's worth to check out the upper floor, where besides a nice place to defend during collecting ADAM, you will find two Audio Diaries and (in the northern room) the [Shorten Alarms] Tonic.
AUDIO DIARY: [Camera in Hock] - Rock Flanagan P.I.
AUDIO DIARY: [Arrangements] - Sofia Lamb
Jump down through the hole in the roof and into the locked building.
10 - You will find a new toy - a [Research Camera]. You will have to activate it by the entrance and record the Splicer's last moments. Head to the Market in the east.
NOTICE: It's a good moment to learn a new habit - whenever it's possible, try to activate the camera before fighting an enemy. If you will put some heart into it and use various methods to kill your enemies, you will quickly gain bonuses. If you want some details on it, head to the "Enemy research".
11 - You will see a fighting Big Daddy, which is a good occasion to stay behind and record the fighting Splicers. The Big Daddy will afterwards summon a Little Sister from the nearby vent. IF you have "accidentally" killed him, have no fear. After a couple minutes a new one will appear (you can use this fact to your advantage and conduct research on this enemy, assuming you're doing alright fighting him).
NOTICE: From now on, whenever you take care (in one way or another) of every Little Sister on a given level, the Bigger one will appear (you will hear her scream after dealing with the last Little one). Trying to run is pointless, as she will find you wherever you hide. You can only make preparations for the fight by moving to a narrow corridor or a small room. Your movements will be limited, but so will hers.
AUDIO DIARY: [Blood and Lamb] - Mark Meltzer
AUDIO DIARY: [Mole] - Stanley Poole
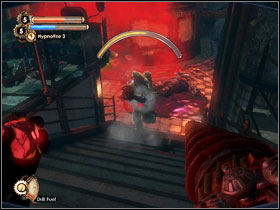
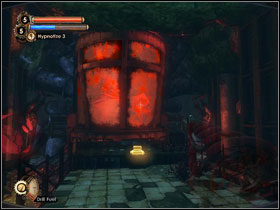
12 - You will come across another Brute Splicer. You have to record its death. In the room below you will find a gift from Eleanor - the [Hypnotize] Plasmid, a Power to the People station and an Audio Diary. On the upper floor - 2 Diaries and the [Fire Storm] Tonic. Return to the collapsed passage (you can use the glass tunnel).
AUDIO DIARY: [Closing the Limbo Room] - Grace Holloway
AUDIO DIARY: [Sunday Services] - Jackie Rodkins
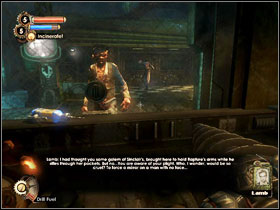
AUDIO DIARY: [Pauper's Drop] - Andrew Ryan
13 - Fill up on fuel from the machine on the wall and use your new attack on the rubble blocking the passage. Equip the drill, hold down the [left mouse button] and press [shift].
14 - Deal with three enemies and go up the stairs. As for now, you don't need to search room 106, you'll return to it eventually. Go along the dark corridor. In the room to the left there's a safe. The corridor is blocked at by the end, so enter the room on the right. There's a Power to the People station nearby (guarded by a turret). Nearby the vent there's a camera and the [Freezing Drill] Tonic. If you go up the stairs and jump left, over the missing floor fragment - you'll reach an Audio Diary.
AUDIO DIARY: [Profit Coming, Profit Going] - Augustus Sinclair
Go back down and look at the corridor while under the camera. It turns out that it has collapsed quite fortunately, so use it to reach the upper floor.
15 - Check the other rooms and you will find a safe, turret and an Audio Diary. You will find to the south, behind a Brute, with whom you will have to fight.
AUDIO DIARY: [Where has Harry Gone?] - Gloria Parson
AUDIO DIARY: [The Butterfly] - Gideon Wyborn
Go upstairs using the collapsed floor in one of the rooms.
16 - You will find three Diaries on the 3rd floor. On your way you will also come across a camera. Room 306 is closed at the moment. In Eleanor's room, you will find the [Keen Observer] Tonic.
AUDIO DIARY: [What a Snap] - Elliot Nelson
AUDIO DIARY: [Barbarism] - Eleanor Lamb
AUDIO DIARY: [Failing Lamb] - Grace Holloway
As you can see, nanny Grace is hiding. Behind the poster you will find a button which opens a secret passage in the closet. Find your target. Now it's time to make a choice. Take the key from the desk and decide whether to kill Grace or let her live.
NOTICE: this moment is one of the factors which will influence the ending. See more in the "Possible endings".
17 - Return to room 306 and jump through the hole in the floor.
18 - Use the next hole to quickly get to the 1st floor. Take the Diary and return to the hall. Fight the enemies who will exit the elevator. Now you have to return to the train station. Keep your eyes for enemy turrets and have the Electro Bolt equipped.
AUDIO DIARY: [A Gift from Lamb] - Grace Holloway
19 - At this point you will get attacked by a Brute; in his body you will find the last Audio Diary on this level.
AUDIO DIARY: [Field Trial #1] - Leo Hartwig
20 - Enter the booth by the train, insert the key and leave the place.

LEVEL DETAILS:
Audio Diaries: 20
Power to the People stations: 2
Little Sisters: 3
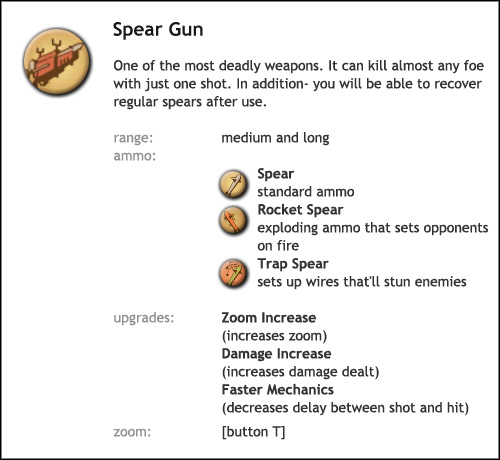
New weapon types: [Spear Gun]
New Plasmids: [Security Command], [Scout], [Incinerate! 2], [Winter Blast 2], [Hypnotize 2], [Cyclone Trap 2], [Insect Swarm]
New Tonics: [Handyman], [Proud Parent], [Hacker's Delight 2], [Cure All], [Vending Expert], [Electric Flesh], [EZ-Hack], [Medical Expert], [Security Evasion], [Walking Inferno]
01 - You wake up at the bottom of the ocean. Follow the path south, looking for snails (on the ground, wall and inside a pipe) that will give you some ADAM.
02 - Turn the lever and wait for the water to be pumped out. After going through the door, pick up the Audio Diary from the wall to the left.
AUDIO DIARY: [A Silent God] - Simon Wales
03 - You have the chance to see a new Big Daddy type - Rumbler - in action. This one uses mini turrets (an alternative ammo type for your [Hack Tool] and fires rockets. Despite the fact that you can try to avoid his attacks and hack his turrets, it's worth to take advantage of the fact that this particular type is quite lousy at close combat. You shouldn't use more than one health pack by equipping the Drill enhanced with proper Tonics and keeping the Daddy at close distance. Take over the first out of three Little Sisters. There's a lot of proper bodies in the area, so choose ones that are easy to defend and use the turrets.
NOTICE: You will receive a gift for rescuing four girls. By the nearest Gatherer's Garden you will find a teddy bear with the [Proud Parent] Tonic, 80 dollars and 80 ADAM.
04 - You will encounter Father Simon. He will quickly flee upon seeing you. Go up the stairs to the upper floor.
05 - Jump through the hole to the room in the middle of the square. Pick up the [Handyman] Tonic and an Audio Diary. Use Incinerate on the ice to get some more items. Exit by hacking the control panel by the door.
AUDIO DIARY: [Misbehaving] - Eleanor Lamb
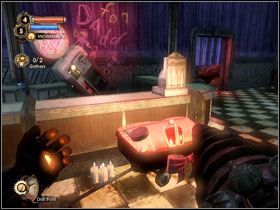
06 - Use incinerate in the toilet at the back - pick up the Audio Diary.
AUDIO DIARY: [The Rumbler] - Gil Alexander
You will find three rooms on the floor. Two are opened - the casino and a room in which you will be able to activate turrets, causing a small slaughter. Collect the Audio Diary.
AUDIO DIARY: [Plasmid Shipment] - Jamie Byass
Hack the lock visible through the window to get inside the room on the upper floor. Jump through the hole in the floor, into a room with a Power to the People station inside. Don't buy any upgrades for now, as you will find a new weapon soon. Then you will be able to decide which upgrade suits you the most. Pick up the Audio Diary.
AUDIO DIARY: [Farther to Fall] - Augustus Sinclair
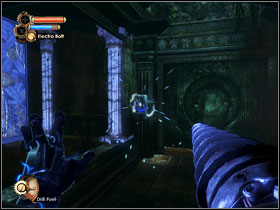
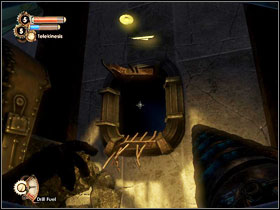
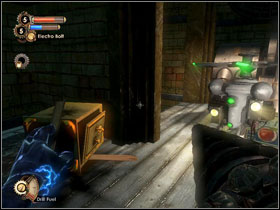
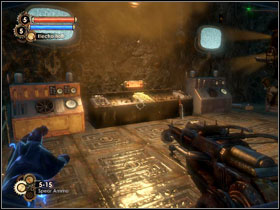
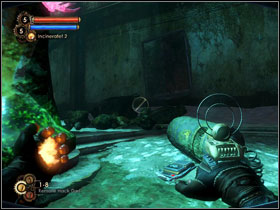
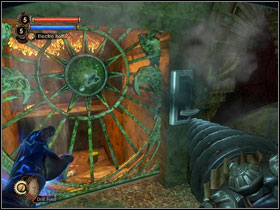
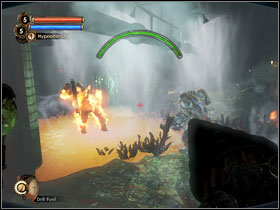
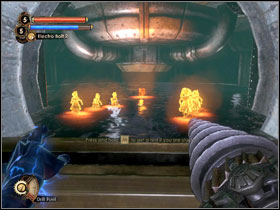
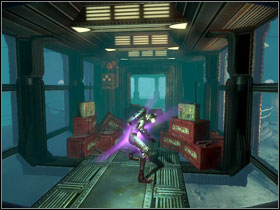
![07 - Another present from Eleanor - the [Security Command] Plasmid - Walkthrough - Siren Alley - Walkthrough - Bioshock 2 - Game Guide and Walkthrough](https://game.lhg100.com/Article/UploadFiles/201512/2015121216511605.jpg)
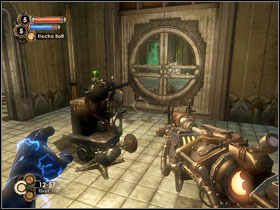
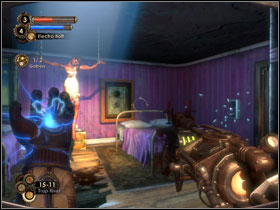
07 - Another present from Eleanor - the [Security Command] Plasmid. Activate the security bot and take control of the camera and turret which will help you in the fight. Go upstairs only to find out that the door is locked (you have to approach it). There's an Audio Diary next to the code lock.
AUDIO DIARY: [Lamb's Salvation] - Simon Wales
08 - Before you can reach the marked spot, you will have to defeat a Brute Splicer.
NOTICE: If you spared Grace, you will receive a package containing some alternative ammo for your Hack Tool, Machine Gun and Shotgun.
Upon entering the room, you will find a new weapon - the [Spear Gun].

Now you can return to the Power to the People station and choose an upgrade. It's worth mentioning that the Spear Gun not only effectively nails your enemies to walls, but you can also retrieve the ammo shot from it. Take the Audio Diary from the room to the right (you will find the second one marked on this floor later on, while searching Daniel's body... but he doesn't necessarily have to fall victim to you right here).
AUDIO DIARY: [Father Simon Wales] - Daniel Wales
On the upper floor, besides a turret and an ADAM-filled body, you will find another Audio Diary.
AUDIO DIARY: [Double Standard] - Dusky Donovan
09 - At the end of the stairs leading up, you will come across come trap spears. Neutralise them with Telekinesis (you can also pick up a body and throw it into the lines). There will be some agile Spider Splicers to take care of and a safe (you can get inside the room by using Electro Bolt on the lock). In one of the rooms you will see Daniel, who will run away through the hole in the floor.
AUDIO DIARY: [Wales an' Wales] - Daniel Wales
10 - In the dark room you will find a new Tonic - [Hacker's Delight 2] and two turrets. You will fight Daniel across the whole hotel and once he finally dies - pick up the Audio Diary from his body and return to the locked door. There's a Brute Splicer waiting for you at the exit.
AUDIO DIARY: [The Date is the Code] - Daniel Wales

11 - Upon using the discovered code - 1919 - it will get dark, the door will open a bit and Lamb will begin her speech. You will have to fight a large number of enemies (Spider Splicers and a Brute at the end). Check out the tube, in which you will find some mini turrets, among other items. It's worth to use them, as it won't be easy.
Once you survive and move on, search the whole floor. You should find two Diaries, a turret and a safe.
AUDIO DIARY: [Bury Her Memory] - Andrew Ryan
AUDIO DIARY: [Lamb's Operation] - Mark Meltzer
On the upper floor you won't find anything interesting besides a vent (and some rocket spears). Go down.
12 - There's an Audio Diary nearby the Gatherer's Garden.
AUDIO DIARY: [The Pair Bond Mechanism] - Gil Alexander
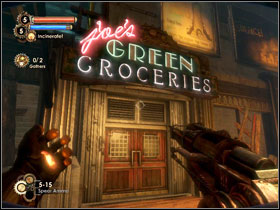

Enter the Green Groceries and look below the counter. Pressing the hidden switch will cause the secret door at the back to open.
You will encounter some normal enemies, a turret and a camera. In the flooded basement you will find the [Cure All] Tonic and an Audio Diary.
AUDIO DIARY: [An Empty Niche] - Frank Fontaine
In the room upstairs, at the side of the desk you will find a button which reveals a safe hidden behind a painting.

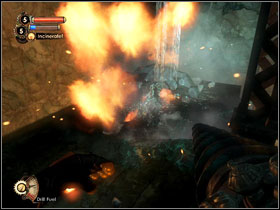
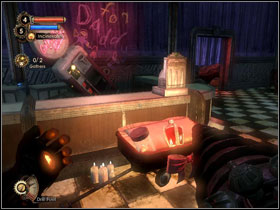
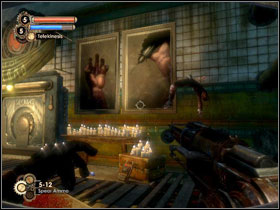
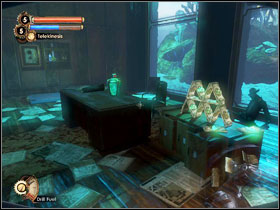
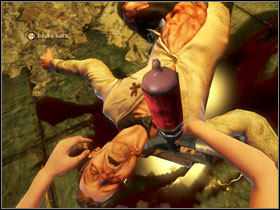
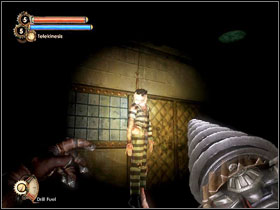
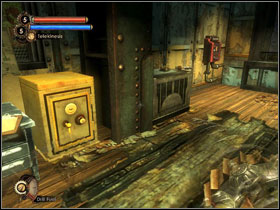
![13 - Take the [Vending Expert] Tonic, hanging from the string - Walkthrough - Siren Alley - Walkthrough - Bioshock 2 - Game Guide and Walkthrough](https://game.lhg100.com/Article/UploadFiles/201512/2015121216511789.jpg)
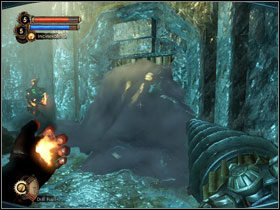
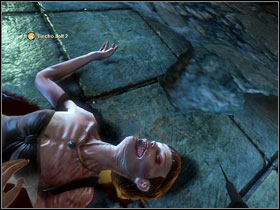
13 - Take the [Vending Expert] Tonic, hanging from the string. There's an Audio Diary at the end of the canal.
AUDIO DIARY: [The Requirements of Utopia] - Sofia Lamb
14 - Search the Orphanage to find Eleanor's Diary. Once you will want to exit, the door will close and you'll get attack by Spider Splicers. Afterwards a Brute will enter the room.
AUDIO DIARY: [My Name is Eleanor] - Eleanor Lamb
15 - Some Spider Splicers and an Audio Diary. Take the stairs up.
AUDIO DIARY: [Guidance of Lamb] - Simon Wales
16 - Hack the lock through the fence and the room will be opened. Inside there's an Audio Diary and a safe.
AUDIO DIARY: [Shackled to the Great Chain] - Sofia Lamb
17 - A Power to the People station, thanks to which you can upgrade your weapon, a safe and an Audio Diary.
AUDIO DIARY: [Therapy With Grace 2] - Sofia Lamb
There's a major fight here (don't forget to use the mini turrets), involving Spider Splicers, a Brute and Father Simon himself. Search his body and go downstairs.
18 - Pick up an Audio Diary from the altar. Afterwards push the lever and water will start pouring inside. Don't worry however, despite the looks, drowning isn't an option here.
AUDIO DIARY: [The Creed of the Faithful] - Simon Wales
19 - You have passed by this room earlier, but the door was shut. However now it's open, so you can have a look around. Return through the flooded city to the beginning of the level, you'll probably only have to fight two or three times on your way.
20 - Use the lever and proceed to the next level.
LEVEL DETAILS:
Audio Diaries: 15
Power to the People stations: 2
Little Sisters: 3
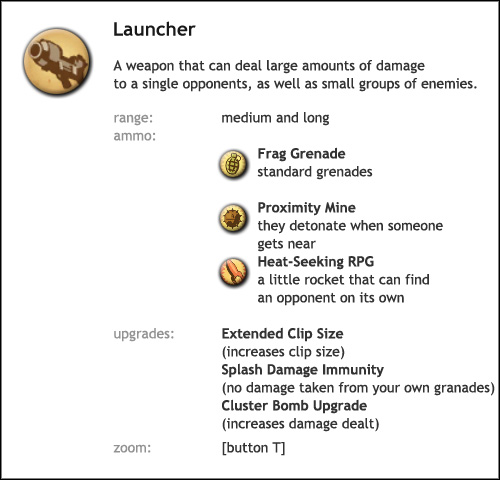
New weapon types: [Launcher]
New Plasmids: [Cyclone Trap 3], [Insect Swarm 2], [Security Command 2]
New Tonics: [EVE Expert], [Electrical Storm], [Extended Reel], [Hardy Machines], [Drill Specialist], [Demanding Father], [Ice Storm], [Keen Observer 2], [Quick-Hack], [Shorten Alarms 2]
01 - Level beginning.
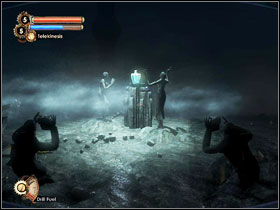
02 - As you continue deeper into the level, the rooms you pass by will get locked one after another. As you reach the room with "pillars", you will encounter a Houdini Splicer who's responsible for this. As you fight him, you should keep an eye for the red "mist", which indicated the place where he will appear.
AUDIO DIARY: [Patronage] - Stanley Poole
Go to the upper floor and pick up the Audio Diary lying on the crumbled stairs.
AUDIO DIARY: [A Gift from Billy] - Billy Parson
The last Diary is behind a door protected with a code - 1080 - which you could have heard while listening to the last recording. There's also a Power to the People station there, however it might be worth leaving it for now, as you will find a new weapon on this level and might want to upgrade it.
AUDIO DIARY: [Lamb's Time is Over] - Andrew Ryan - Lamb's Time is Over
03 - On your way to the room you will come across a camera. Inside there are three armed enemies and an Audio Diary by the base of the statue.
AUDIO DIARY: [Lamb's Idea of Art] - Andrew Ryan - Lamb's Idea of Art

04 - A Gatherer's Garden and an Audio Diary at the roundabout's booth.
AUDIO DIARY: [Lost and Found] - Mark Meltzer - Lost and Found
05 - On your way to the station you will have to deal with some enemies equipped with machine guns and shotguns. You will also find a safe and a Power to the People station. However the real joy comes with the new weapon, which you will receive from Eleanor - the [Launcher].

Once you get to the booth window, Stanley tells you to deal (no matter how) with the three Little Sisters that have appeared at this level. It's quite nice of him, as you probably would do it either way.
06 - Under the trash can, by the monuments, there's an Audio Diary.
AUDIO DIARY: [Lamb Flouts the System] - Stanley Poole
07 - There's a Houdini Splicer here. A pair of machine gun wielding Splicers will enter through the door to the north. Don't forget about the recording, found on the piano.
AUDIO DIARY: [The Voice of the Self] - Sofia Lamb
08 - Here you can find the [EVE Expert] Tonic and an Audio Diary.
AUDIO DIARY: [Dionysus Park's Weakness] - "Big Kate" O'Malley
Once you get to the Daddy (this time in a more tough Elite version), it will turn out that he is (or they are, if the second one is still alive) in the middle of a fight. You can use this to your advantage and use the Hypnotize Plasmid to gain an advantage. There are three girls and 11 bodies to choose from, so gather from those that are easy to defend.
09 - A Sister with her Daddy, a camera, the [Drill Specialist] Tonic and in the south-west part of the room - an Audio Diary.
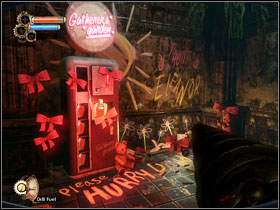
AUDIO DIARY: [Gotta Keep it Together] - Stanley Poole
If you are rescuing the little ones, by now (8 saved girls) you should receive another gift, so go check it out at the nearest Gatherer's Garden and collect 160 dollars, 120 ADAM and the [Demanding Father] Tonic, which will speed up the gathering process.
10 - Before you can get inside, you'll have to melt the ice. Before there's a real fortress, protected by four cameras, supported by turrets. All those machines can come in handy as you collect ADAM, so try not to destroy them. Just use the Hack Darts or electrocute the machines and quickly run to them and hack.
Melt the ice block below one of the cameras and take the Audio Diary. A little further you will find the [Hardy Machines] Tonic and a safe.
AUDIO DIARY: [Falling Into Place] - Frank Fontaine
11 - On your way you will find a rocket turret. Look inside the room to your right. There will be a pair of dancing Houdini Splicers. Hack the lock and you will gain access to a flooded basement with a safe and Diary inside. There's the [Electrical Storm] Tonic inside the toilets to the east.
AUDIO DIARY: [Learning Poker] - Sofia Lamb
12 - The last Sister. There's a Diary at the back of the room. There are two bodies in the area, but considering the size of the room and amount of doors nearby, it's not the best place to protect.
AUDIO DIARY: [A Secular Saint] - Gil Alexander
13 - You'll find a Diary on the balcony on the upper floor.
AUDIO DIARY: [A Spy] - Sofia Lamb
In the corridor leading to the projector, besides a pile of debris, there's a Diary. There's also a Tonic - [Extended Reel] - inside the projector room.
AUDIO DIARY: [Growing Up] - Gil Alexander
14 - Electrocute the lock and go inside small room, in which you will find some proximity mines. You can see it while fighting a Big Sister.
15 - It's time to choose if Stanley should live or die. After you're done, pick up the Diary and move on.
AUDIO DIARY: [A Plan] - Stanley Poole
LEVEL DETAILS:
Audio Diaries: 17
Power to the People stations: 2
Little Sisters: 3
New Plasmids: [Electro Bolt 3], [Scout 2], [Incinerate! 3], [Winter Blast 3], [Hypnotize 3], [Insect Swarm 3], [Decoy 2], [Decoy 3], [Security Command 3]
New Tonics: [Damage Research], [Careful Hacker 2], [Drill Power 2], [Vending Expert 2], [EVE Saver 2], [Hurried Hacker], [Short Circuit 2]
01 - You begin the level at the train station.
AUDIO DIARY: [Alone at Last] - Andrew Ryan
02 - Pick up the [Damage Research] tonic. Turn the valve and go through the water (remember about collecting the ADAM snails) to the other building.
03 - You'll have to fight a couple enemies, including Houdinis.
04 - Use the lever by the door. The flying weirdo will greet you with a speech. While patiently waiting for him to end, notice the hole near the ceiling, from where an Alpha series will soon appear. Fortunately, he's by far the weakest "big" enemy. There's a safe behind the counter and an Audio Diary in the cupboard, thanks to which you will open the next door.
AUDIO DIARY: [Agnus Dei] - Gil Alexander
05 - There's a couple of enemies waiting for you in the main hall. Take the Diary from the sofa to your right.
AUDIO DIARY: [Means of Control] - Sofia Lamb
06 - First out of four transmitters (green points on the map) placed on but shutdown panels. Destroy it.
07 - Hack the turret and look through the hole in the wall.
Deeper into the theatre, you will find a door locked with a code - type in 5254. Inside you will find a Diary and the [Careful Hacker 2] Tonic.
AUDIO DIARY: [Prototype] - Gil Alexander
08 - You'll have to play part in a stage show. Stand in the light and move round the scene a little. Afterwards you'll get attacked by three Houdinis and eventually by an Alpha series. Destroy another transmitter.
09 - Go upstairs and pick up the Audio Diary.
AUDIO DIARY: [Life After Sisterhood] - Eleanor Lamb
Go through the hole in the wall and take care of the turret. Jump through the hole in the floor into a locked room. Pick up the Diary and the [Drill Power 2] Tonic. Enemies should break the window and attack you.
AUDIO DIARY: [A New Cognitive Model] - Sofia Lamb
10 - You'll go past a turret. Inside the office there'll be an Alpha series. After taking care of him, turn the animal head on the wall, which will unveil a hidden locker. Take the Diary and open the 3 safes.
AUDIO DIARY: [Goodbye to Fontaine] - Frank Fontaine
11 - In the room to the north, use a Dart to hack the control panel visible in the distance in order to cut off the power. Look out for the nearby camera and collect the Diary.
AUDIO DIARY: [Source of Volunteers] - Gil Alexander

Open the room to the south by using Electro Bolt on the lock. Inside you will find the Unstable Teleportation Plasmid. Upon touching it, it will teleport to another location. Follow it (purple numbers on the map) and eventually it will teleport you to a room with the [Vending Expert 2] Tonic inside.
12 - After destroying 4 transmitters, you will get inside the security room. There's a Power to the People station inside, so make use of it. Push the lever and you'll get attacked by two Alpha series.
13 - Go through the previously locked door and pick up the Diary.
AUDIO DIARY: [Abort the Experiment] - Gil Alexander
Cross the underwater section (at some point you'll have to jump into a hole) and go inside the next building.
14 - You have to flip two switches in order to restore the power. They're marked with red dots on the map. After you're done with that, go back upstairs and flip the last switch. Pick up two Diaries.
AUDIO DIARY: [Gil's Place in the Plan] - Sofia Lamb
AUDIO DIARY: [Solving for X] - Gil Alexander
Your task is to collect 4 special flowers. They're marked with blue dots on the map. Once you pick up the first one, you'll get attacked by two Alphas.
15 - Take the Diary and flower. As you will try to exit, the room will get filled with mist and another Alpha will attack you.
AUDIO DIARY: [Outlived Usefulness] - Gil Alexander
16 - Look out for the turret hidden under the stairs. A little further you should find a Rumbler type Daddy, named Mark Meltzer. Take a Diary from his body.
AUDIO DIARY: [Meltzer's Choice] - Sofia Lamb
Pick up the flower from nearby the monitors.
17 - Pick up the Audio Diary lying by the vent.
AUDIO DIARY: [Goodbye, Dr. Alexander] - Eleanor Lamb
Hack the camera and shoot a dart at the lock visible through the window. Go to the room with the Power to the People station and pick up a Diary.
AUDIO DIARY: [Big Sister] - Gil Alexander
You can get another present for rescuing 12 girls, which you should have done around now. 160 dollars and 250 ADAM will be waiting for you by nearest Gatherer's Garden.
Jump through the hole in the floor to get into the cell complex below.
18 - Use the buttons to open all the doors. Look out for the turret (there's a buried safe next to it). Look for a hole in the wall, melt the ice blocking the door and enter the first room to the left. Inside you'll find a safe and a frozen Diary.
AUDIO DIARY: [Betrayal] - Andrew Ryan
Take the flower from the nearby cell.
19 - Flip the switch and be ready for a big fight (some Splicers and around 3 Alphas). Flip the switch once again and take the key. Now you can decide to either kill Gil Alexander or let him be. Pull the lever if you want him dead. If for any reason you don't want to end his miserable life, just walk away.
20 - Use the key at the gas station and go into the hidden building. Pull the lever to drain the water, pick up a Diary and use the elevator which will take you to the next level.
AUDIO DIARY: [The People's Daughter] - Sofia Lamb
LEVEL DETAILS:
Audio Diaries: 5
Power to the People stations: 1
New Plasmids: [Summon Eleanor]

01 - Beginning of the level.
02 - Calmly walk through the long corridor. You'll pass by a Power to the People station on your way.
03 - There's a Diary by the vent. A little further, in the corridor, there's a disabled Security Bot.
AUDIO DIARY: [Selling Ryan Short] - Augustus Sinclair
04 - In a moment you'll have to fight two Big Sisters at once. There's a Gene Back in case you want to swap your Plasmids and Tonics. Don't forget to place traps and mini turrets between the pillars. Flip the switch by the door to Eleanor's room and the fight will begin. After you're done with the Sisters, approach the glass door and watch the cutscene.

05 - After a small swap and landing in a sweet version of Rapture, climb up into the vent.

06 - Another vent will lead you straight into Lamb's office. You'll even have the chance to see her giving a speech.
07 - Flip the switch on the wall to open the cell where Delta and Eleanor are held. Take the Diary from the chair by the desk.
AUDIO DIARY: [Withholding Visitation] - Sofia Lamb

Go upstairs and check the room on the left. You can extract some ADAM (40) from the corpse.

08 - Take the Big Sister body suit.
09 - Go through the vent and take care of the body full of ADAM.
10 - Grab the Big Sister Helmet and the nearby Audio Diary.
AUDIO DIARY: [Behind Mother's Back] - Eleanor Lamb
11 - To the right you can find the last corpse from which you can harvest ADAM.
12 - The last element of the suit - Big Sister weapons.
13 - Before you go back to Eleanor, pick up the Audio Diary by the base of the statue.
AUDIO DIARY: [Blessing in Disguise] - Eleanor Lamb


14 - Go round the bed on which your daughters is lying and pick up the Diary from underneath. Afterwards give her new dress.
AUDIO DIARY: [Freeing Father] - Eleanor Lamb
After the cutscene, you will receive a new Plasmid - [Summon Eleanor]. Using it will cause Eleanor to appear and aid you in battle for a couple minutes. She's a really tough ally, so make use of her often.
15 - Combine your powers to defeat two Brute Splicers and some minor enemies and afterwards, after getting to the end of the long corridor - leave the level.
LEVEL DETAILS:
Audio Diaries: 17
Power to the People stations: 2
New Plasmids: [Telekinesis 3]
New Tonics: [Elemental Sponge], [Elemental Vampire],
01 - Follow Eleanor upstairs.
02 - Approach the window and watch the cutscene. Enemies will rush into the room and you should retreat to the upper floor. You will have to take care of a turret and a Brute, among others. Remember about the possibility to call Eleanor.
03 - Use the Hack Tool to hack the door lock behind the bars.
04 - Press the button in the room by the locked door. Sinclair in a slightly changed form will appear and you'll have to pursue him. Go down the stairs.
05 - Hack the camera at the cafeteria and take the Audio Diary from one of the tables. Go down the stairs.
AUDIO DIARY: [The Definition of Despair] - Thomas

06 - Take care of the Brute and afterwards melt the ice to acquire two mines. There will be some trap spears in the dark corridor. Eliminate three minor enemies and go upstairs. Go pass the showers and you'll reach a cell complex.
07 - It looks like Sinclair's locked. Never mind that for now and pick up the Audio Diary (go through the hole in the wall of one of the cells). Look out for the camera.
AUDIO DIARY: [Last Two Digits] - Connor
It looks like you've found the second part of the code as well. It's time to go upstairs.
08 - Check out the cells one by one, collecting the Audio Diaries. In block D you will find one from which you'll learn the first two numbers.
AUDIO DIARY: [A Trade] - Dodge
AUDIO DIARY: [First Two Digits] - Mattson
Go through block C into block B. Take a Diary from the hanged man and search the rooms to find the [Elemental Sponge] Tonic. Curiously - here the code has been carved onto the wall.
AUDIO DIARY: [No More Hope Left] - Parson
In Block A you will encounter a Brute and find another Diary.
AUDIO DIARY: [A Generous Offer] - Murphy
You've got the code (2673), so theoretically you can get inside the locked room from the front. However let's check out what the other options are. One of them is to hack the lock to the right, in the distance. Once the door opens, use Incinerate to set fire to the floor right under the box you hacked (by the way, opening the door wasn't needed to set the fire). It turns out that Sinclair has locked himself in a room full of oil, so you'll drive him out of the room quickly.
Another way of getting the code is to go to the toilets (the entrance is opposite to the door with the key lock, you'll have to pay 5$). Once inside, search the tank above the last toilet on the left.
While in the toilet, you can also find a hidden tunnel. Melt the ice in the corner of the room and enter the narrow corridor. The tunnel leads to your friend's hideout. Greet him by throwing a mini turret inside or hacking the nearby Security Bot. Of course you can as well set fire to the oil.
As you can see, there's quite a bit of possibilities. Choose one, kill the poor guy and take the key. Notice the Diary on the desk and a Power to the People station. Afterwards use the control panel in the middle of the room. You will have to fight a couple of enemies (two Alphas). Once you deal with the problem, backtrack following the arrow. On your way you will encounter three more Alphas.
AUDIO DIARY: [Magic Sauce] - Warden Nigel Weir
09 - Go down to the dark room and then even lower. Search the holes to find the [Elemental Vampire] Tonic.
10 - Search the safe and take the Audio Diary. A little closer to the main hall (with the boat) you should get attack by an Alpha.
AUDIO DIARY: [Out With the Old...] - Warden Nigel Weir
It looks like Eleanor will need help of the Little Sisters. Head out on a rescue mission. The order in which you do it doesn't matter really, you just have to travel through the whole map. Let's begin from the western part.
11 - Go into the corridor in front of the turret.
12 - Fight with a couple minor enemies and take care of the camera. Search the cells, you'll find a Diary in the last one.
AUDIO DIARY: [Such Freedom] - Wilson
Many of the patients that you will come across here won't be willing to fight. A little further you'll come across a Houdini Splicer and lots of bodies, waiting to be searched.
13 - Press the button to open the bars. Tame the turret, collect the Audio Diary and use the Power to the People station. Afterwards, go upstairs.
AUDIO DIARY: [My Prison] - Warden Nigel Weir
14 - Hack the cameras and search the area to find two Diaries and a safe (under the counter).
AUDIO DIARY: [They Feel Pain] - Dr. Edward Grimes
AUDIO DIARY: [Alleviating Pain] - Dr. Edward Grimes
15 - Once you reach the Pediatric Ward, the fight will begin. Besides normal enemies, you will have to face two Alphas. After the fun's over, find the bell (by the entrance to the room with the Sisters) and ring it. Go back to the Docking Bay, where an Alpha should be waiting for you.
16 - Go into the corridor leading north.
17 - Collect a Diary from the body lying by the window.
AUDIO DIARY: [Legs, Mouths, Arms, and Eyes] - Harold Darby
Take a closer look at the painting hanging from the walls and count the brown legs, red lips, blue hands and green eyes in this exact order. Input the received code (4146) and open the locked door to discover a room with items and a safe inside.
18 - Look out for the camera and collect the Diary hanging from the side of the locker.
AUDIO DIARY: [A Simple Question] - Dr. Edward Grimes
19 - You'll find an Audio Diary in the room at the right end of the corridor.
AUDIO DIARY: [Destructive Learning] - Eleanor Lamb
Before you pay a visit to the next Pediatric Ward, check the left side of the corridor to find another Diary. Nearby there's a door with a code lock which you can hack. The hack itself isn't easy (a Hack Dart can make things easier), but inside you'll find some ammo inside. Take the stairs down.
AUDIO DIARY: [Sacrifices] - Augustus Sinclair
20 - Splicer, Alpha and also a Diary. In fact it's the last Diary you will find in the game.
AUDIO DIARY: [A Stratagem for Sinclair] - Andrew Ryan
21 - Once you get near the turret, an Alpha will attack. Afterwards a group of Splicer will jump down from the balcony upstairs, followed by the appearance of a Brute and another Alpha. After you've dealt with them, go ring the bell. Return to the Docking Bay.
22 - Before you approach the window, place mini turrets, traps and whatever you have in your inventory in the main hall, as in a moment you will have to survive the last fight in the game. Once you approach the window, Eleanor will disappear and you won't be able to call her throughout a certain part of the fight. You'll be attacked from both sides by Alphas, Houdini type and normal Splicers and also by a group of Brutes. Around the moment the last ones appear, you'll be once more able to call Eleanor. Once she gives you the sign - go upstairs.
23 - During the chaotic fight, you'll have to flip a switch. The last thing you'll need to do is destroying two wide pipes on both sides. The enemies won't give up easily, so quickly take care of the glowing parts.
24 - Once the room gets flooded, head to the lift. Now you can sit back and enjoy the ending of this exceptional game... At least one of the possible endings :)
There are 14 Power to the People stations in total. You can choose one weapon upgrade in each of them. There are 18 upgrades in total, so you will have to choose which of them are most useful. That's why you should think over which weapons you prefer and focus on upgrading them.


You can buy up to 18 Tonic slots altogether (there are 55 Tonics in total) in the Gatherer's Garden.
If a Tonic is buyable, I've taken its first appearance on the Gatherer's Garden list. In case of [presents] from the Sisters, there's the earliest level during which you can attain it. If a Tonic is received as a bonus for research, its localization has been marked as [research] and detailed info about it placed in the "Enemy research" chapter.
TONIC NAME
DESCRIPTION
LOCATION
[Armored Shell]
Reduces all physical damage.
Ryan Amusements
[Armored Shell 2]
Further reduces physical damage taken.
[research]
[Arms Race]
You are able to salvage more ammunition from bodies and containers.
[research]
[Booze Hound]
Drinking alcohol restores a small amount of EVE, rather than draining it.
Ryan Amusements
[Careful Hacker]
The hacking needle moves slightly slower.
Ryan Amusements
[Careful Hacker 2]
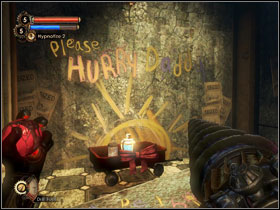
The hacking needle moves even slower.
Fontaine Futuristics
[Cure All]
Health Stations also refill your EVE.
Siren Alley
[Damage Research]
Increases research damage bonuses.
Fontaine Futuristics
[Deadly Machines]
Your hacked bots and turrets do more damage.
[research]
[Demanding Father]
Little Sisters gather ADAM more quickly.
Dionysus Park [present]
[Drill Lurker]
Quiets your footsteps, and increases damage from melee attacks on unaware opponents, especially with the drill swing.
Pauper's Drop
[Drill Power]
Increases damage dealt by the Drill.
Ryan Amusements
[Drill Power 2]
Further increases damage dealt by the Drill.
Fontaine Futuristics
[Drill Specialist]
Significantly decreases EVE cost of Plasmids, but limits weapon selection to the Drill, Hack Tool and Camera.
Dionysus Park
[Drill Vampire]
Gain health and eve when attacking with the drill.
[research]
[Electric Flesh]
Reduces electric damage received to zero and increases electrical damage done.
Siren Alley
[Electrical Storm]
Causes the user to emit a burst of electricity when struck by a melee attack.
Dionysus Park
[Elemental Sponge]
When you are damaged by elemental attacks, you gain a small amount of EVE.
Inner Persephone
[Elemental Storm]
You emit a random burst of fire, ice, or electricity when struck by melee attacks, damaging all around you.
[research]
[Elemental Vampire]
Your Level 3 element streams siphon off health from your enemies.
Inner Persephone
[EVE Expert]
Increases EVE Hypo carry capacity by 1.
Dionysus Park
[EVE Link]
First Aid Kits also give a small amount of EVE.
Ryan Amusements
[EVE Saver]
Reduces EVE consumption of all plasmids.
Pauper's Drop
[EVE Saver 2]
Further reduces EVE consumption of all plasmids.
Fontaine Futuristics
[Extended Reel]
Increases the time you have when researching.
Dionysus Park
[Extra Nutrition]
Gain a small increase in health from consumables.
Ryan Amusements
[EZ-Hack]
Hacking success zones become a little larger.
Siren Alley
[Fire Storm]
Causes the user to emit a burst of fire when struck by a melee attack.
Pauper's Drop
[Fountain of Youth]
Standing in water slowly restores HEALTH and EVE.
[research]
[Freezing Drill]
Increases the duration for which enemies are frozen, gives the Drill a chance to freeze the enemy upon impact.
Pauper's Drop
[Hacker's Delight]
Some health and EVE are gained after a successful hack.
Pauper's Drop
[Hacker's Delight 2]
More health and EVE are gained after a successful hack.
Siren Alley
[Handyman]
Repair damaged bots and turrets with a small eve cost. Also gives random names to friendly bots and turrets.
Siren Alley
[Hardy Machines]
Hacking a turret or bot raises its max health.
Dionysus Park
[Headhunter]
Your headshots do more damage.
Pauper's Drop
[Hurried Hacker]
Landing in a blue bonus zone completes a hack instantly.
Fontaine Futuristics
[Ice Storm]
You emit a burst of ice when struck by melee attacks, with a chance to freeze foes.
Dionysus Park
[Keen Observer]
Increases the research score gained by damaging enemies.
Pauper's Drop
[Keen Observer 2]
Further increases the research score gained by damaging enemies.
Dionysus Park
[Machine Buster]
Deals more damage to turrets, cameras and bots.
Pauper's Drop
[Medical Expert]
Increases First Aid Kit carry capacity by 1.
Siren Alley
[Natural Camouflage]
Grants invisibility when standing still for a period of time.
[research]
[Proud Parent]
Increases the amount of ADAM gained by 20 when accompanied little sister harvests a corpse. Amount of ADAM gained by harvesting a little sister remains unchanged.
Siren Alley [present]
[Quick-Hack]
Hacking has fewer stages.
Dionysus Park
[Scrounger]
Search corpses and containers a second time to get different loot.
[research]
[Security Evasion]
Security Cameras and Turrets take two seconds longer to track the player.
Siren Alley
[Short Circuit]
Security is disabled for longer when hit with electricity.
Pauper's Drop
[Short Circuit 2]
Security is disabled permanently when hit with electricity.
Fontaine Futuristics
[Shorten Alarms]
Reduces the length of hostile security alarms.
Pauper's Drop
[Shorten Alarms 2]
Further reduces the length of hostile security alarms.
Dionysus Park
[Sports Boost]
You move slightly faster.
Ryan Amusements
[Thrifty Hacker]
Hacked vending prices are cheaper.
[research]
[Vending Expert]
Provides a slight reduction to prices in vending machines.
Siren Alley
[Vending Expert 2]
Provides a substantial reduction to prices in vending machines.
Fontaine Futuristics
[Walking Inferno]
You take less damage from fire and inflict more damage when you use fire.
Siren Alley

During the game you can gain up to 8 Plasmid slots (with 11 different Plasmids available).
If a given Plasmid is buyable, I've taken its first appearance in the Gatherer's Garden.
Bear in mind that Plasmids drastically change with each level.
PLASMID NAME
DESCRIPTION
LOCATION
[Cyclone Trap]
Creates a tornado that launches enemies into the air. Works only with the "smaller" foes.
Pauper's Drop
[Cyclone Trap 2]
The tornado can be charged with another plasmid. This way you can create a useful trap (various combinations).
Siren Alley
[Cyclone Trap 3]
You can place traps on walls and ceilings.
Dionysus Park
[Decoy]
Creates an illusion which lures enemies away from you.
Pauper's Drop
[Decoy 2]
The illusion damages back the attacker.
Fontaine Futuristics
[Decoy 3]
Your illusion not only returns damage but also cures you (proportionally to the damage received).
Fontaine Futuristics
[Electro Bolt]
Lightning useful for stopping machines, opening doors and stunning enemies.
Adonis Luxury Resort
[Electro Bolt 2]
A charged attack will stun the enemies standing nearby the target.
Pauper's Drop
[Electro Bolt 3]
You can fire as constant stream of electricity.
Fontaine Futuristics
[Incinerate!]
Useful for lightning up enemies, oil on the ground and melting ice.
Ryan Amusements
[Incinerate! 2]
Lets you charge the attack to let out a ball of flame, causing big damage to the enemy.
Siren Alley
[Incinerate! 3]
You can summon a constant stream of flame.
Fontaine Futuristics
[Insect Swarm]
Summons a swarm of insects that attacks and distracts a nearby enemy. Small, but constant damage.
Siren Alley
[Insect Swarm 2]
The swarm attacks a couple enemies at once.
Dionysus Park
[Insect Swarm 3]
An enemy killed by this Plasmid turns into a nest which attacks anyone who approaches it.
Fontaine Futuristics
[Scout]
Allows you to leave your body as a ghost. You can use Plasmids while in this form.
Siren Alley
[Scout 2]
Adds a possibility to hack machines while in ghost form.
Fontaine Futuristics
[Security Command]
Turns all nearby machine against the targeted enemy.
Siren Alley
[Security Command 2]
Charging the Plasmid summon a Security Bot. Maximally two at once.
Dionysus Park
[Security Command 3]
Upgrades the summoned Bots.
Fontaine Futuristics
[Summon Eleanor]
Summons an invincible Eleanor, who will help you fight for a quite long time. Uses lots of EVE.
Persephone Outer
[Telekinesis]
Allows you to pick up small objects and throw them.
The Atlantic Express
[Telekinesis 2]
You can pick up bigger objects and throw them with greater force.
Pauper's Drop
[Telekinesis 3]
You can pick up even live Splicers. Smaller enemies will learn to fly thanks to you.
Inner Persephone
[Hypnotize]
The targeted Splicer will attack the nearest enemy. If no one's around, he'll attack you.
Pauper's Drop
[Hypnotize 2]
Makes an enemy fight for you for a limited (but quite long) amount of time. The bigger enemies aren't vulnerable.
Siren Alley
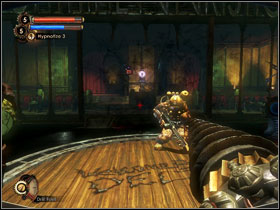
[Hypnotize 3]
Works on the bigger enemies too. Unfortunately, the Big Sisters won't fall for this. A highly useful Plasmid.
Fontaine Futuristics
[Winter Blast]
Lets you freeze an enemy.
Pauper's Drop
[Winter Blast 2]
Your enemies are turned into an ice block. You can move it with Telekinesis. Freezes on touch.
Siren Alley
[Winter Blast 3]
You can shoot a constant stream of ice.
Fontaine Futuristics
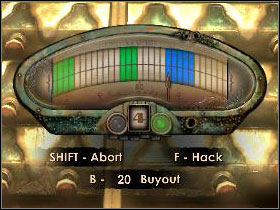

Hacking is a small mini-game launched by approaching a given machine or remotely, by using the Hack Tool. The first noticeable difference from the first game is that hacking doesn't pause the game. Because of that, you will have to split your attention between the moving needle and enemies, if there are any nearby.
There are four different fields (with various results of stopping the needle on them) through which the needle moves:
No colour - the mini-game will be stopped and you'll receive some damage. It's not very harmful, but you better check out your health after failing a couple times.
Red colour - stops the hack and additionally starts an alarm. If there's a Bot Shutdown panel anywhere near, use it to easily get rid of them.
Green colour - the hack will end in success (which additionally end the alarm started by the machine) or move to the next level.
Blue colour - you also succeed (or move on) and additionally receive a small bonus. Check out the table at the end of the chapter for more info.
The last element worth mentioning is the window with numbers at the bottom of the hack panel. Each time the needle bounces off a wall, the number will lower by one. Once it reaches zero - the hacking will be stopped and you will have to start again from the beginning.
Hacking cameras isn't very complicated. Try to stay undetected (use Electro Bolt in case of emergency) and stand directly under the device. If you cannot reach the camera, just jump. Try not to waste Darts on hacking cameras, it's best to keep them for turrets surrounded by enemies. As the difficulty of the hack probably won't be too high, the camera should be friendly after a couple seconds.
While hacking turrets, make use of the Electro Bolt Plasmid, which will stun the device, giving you time to hack it. Alternatively you can use a Hack Dart but keep in mind that you will probably have to hide from the turret's fire, as hacking doesn't stop it from shooting.
HACKED OBJECT
SUCCEEDING WITH A BLUE FIELD
Health Station
A free First Aid Kit.
Security Bot
The Security Bot will inflict higher damage.
Security Camera
An enemy-triggered alarm will last longer.
Safe
Opening the safe will give you additional cash.
Turret
Increases the damage done by the turret.
Vending Machine
A free random item.
You will obtain the Research Camera during your stay at Pauper's Drop.
Each time you begin to record, a counter will appear on the left side of the screen, telling you how much points you have gained. The amount of point you gain fills up the research progress bar of each enemy. You can check you progress by accessing one of the cards on the map screen. The camera also allows you to take photos of dead bodies, but the small amount of experience gained makes this option practically useless.
Quoting Sinclair - recording a move with the camera is like telling a joke - the more times you hear it, the less funny it becomes - that's because you should always try to record various fights. If you have already recorded a movie on which you kill a certain enemy with the Drill, use the Rivet Gun the next time and so on. You can also mix in some Plasmids, set traps and charged cyclones, send hypnotized enemies into a fight, set some mini turrets and so on. The possibilities are large, so use your imagination and invention.

Researching each enemy type can result in maximally four bonuses, unlocked as you make progress in the research. Below I've placed detailed descriptions of each enemy, a list of bonuses and some tips which will let you finish the research faster.
1. Increased damage +
2. Increases your wallet capacity from 600 to 800 dollars
3. Increased damage ++
4. Tonic [Scrounger]
The most common enemy in the game. Uses only melee weapons, which makes his attacks predictable and easy to avoid.
How to speed up the research:
- Electrocute him before hitting with the Drill.
- Use Telekinesis to throw exploding barrels at them.
- Set fire onto the poor guy and electrocute him once he jumps into a pool of water.
- Freeze and hit with the Drill.
- Hack the Health Stations. If the enemy will want to patch up, he'll get damaged.

1. Increased damage +
2. Cameras and turrets take longer to notice you
3. Increased damage ++
4. Tonic [Thrifty Hacker]
Equipped use revolvers, machine guns, shotguns or grenades. They try to keep at distance and can be quite a pain in larger groups (especially on higher difficulty settings), so try to eliminate them first.
How to speed up the research:
- Use Incinerate on alcohol bottles to create Molotov cocktails.
- Use Telekinesis to throw the cocktails at them to set them on fire.
- Lure an enemy to a friendly camera/turret.

1. Increased damage +
2. Makes it easier to determine where he's going to teleport
3. Increased damage ++
4. Tonic [Natural Camouflage]
A teleporting enemy, using a fire Plasmid. He shoots some projectiles in your direction and then disappears. You should then look for red mist, which indicates where he's going to appear next. Completing the second stage of research makes the fight easier. It's worth to mention that even using the camera makes the fight easier, as the currently researched target is highlighted
How to speed up the research:
- Use Telekinesis to catch his projectiles and throw them back at him.
- Freeze him before he manages to escape and shatter him.
- Draw his attention my creating a Decoy and then attack.
- Charge with the Drill to quickly approach him and deal damage.
1. New Ability: Drill Dash
2. Increases melee damage
3. Increased damage +
4. Tonic [Armored Shell 2]
A big, agile and unpleasant enemy. He's got more health than an Alpha series, but fortunately he's also easier to hit in the head because of the size. On bigger distances he'll try to toss the nearest object at you. Dodge or use Telekinesis to grab and throw them back. In melee combat, focus on using your Drill (mainly the fuel-eating attack), trying to sense when he's going to attack.
How to speed up the research:
- Throw back the items he's tossing at you.
- Stop his charged attacked by using a Plasmid.
- Kill him before he gets to a Health Station.
- In a multiple enemy fight - use Hypnosis on him.

1. Increased movement speed +
2. Spider Splicer Organs can be used like first aid kits.
3. Increased movement speed ++
4. Tonic [Fountain of Youth]
Spider Splicers love to move along ceilings and walls. Their fast, agile and throws hooks at you. Use the Machine Gun with anti-personal ammo and at closer distances - the Shotgun.
How to speed up the research:
- Try to hit him while he's in the air.
- Send an Insect Swarm on him.
- Shoot traps at an exploding barrel and then throw it with Telekinesis.
- Freeze or electrocute him while he's in the air, which will interrupt his jump.

1. Increased damage +
2. Increased ammo carry capacity.
3. Increased damage ++
4. Tonic [Elemental Storm]
A Daddy which in fact can hardly be called a Daddy at all, so his description is placed here. He attacks you on sight and doesn't search or care for Little Sisters. Faster and more agile than the other types of Big Daddies, he is capable of wielding a number of different weapons. Additionally his suit emits waves of electricity, fire or ice from time to time. His armour isn't as sturdy as a normal Daddy's, but he's still resistant to attacks than a normal Splicer.
How to speed up the research:
- Use Hypnosis to make two Alphas fight (you'll often meet them in pairs).
- Catch the grenades he's throwing at you with Telekinesis and throw them back at him.
- Place mines on an exploding barrel and throw it at him with Telekinesis.

1. Increased damage +
2. Permanent 50% increase to drill damage.
3. Increased damage ++
4. Tonic [Arms Race]
A detailed description of each of the three types of Daddies is placed in the proper chapter of the guide. Here I've only listed the bonuses and tips on how to speed up the research. Remember that Daddies respawn after some time, which will make your research easier.
How to speed up the research:
- If a Drill-equipped Daddy readies to charge, interrupt it with Drill Dash.
- If a Rumbler sets a mini-turret, hack it and turn it to your side.
- Catch the mines thrown at you with Telekinesis and return them.
- Lure the enemies with Decoy to traps or hacked devices.
- Connect mines and traps with exploding barrels to create bombs which you can throw with Telekinesis.

1. Increased Max Eve +
2. Your Little Sister restores your health after Gathering ADAM.
3. Increased Max Eve ++
4. Tonic [Drill Vampire]
A detailed description of the behaviour and tactics involved with fighting the Big Sisters can be found in the proper chapter of the guide. Here I've only listed the bonuses and tips on how to speed up the research.
How to speed up the research:
- Use Telekinesis to throw back everything the Sister tries to hit you with.
- Once she's in the air - electrocute her.
- Interrupt her charge with the Drill Dash.
- Fight alongside friendly turrets and hypnotized Splicer.
- Use the surroundings - set fire to oil, detonate barrels etc.
1. Increased Damage +
2. You find double ammo on destroyed machines.
3. Increased Damage ++
4. Tonic [Deadly Machines]
There are three types of security machines - cameras, bots and turrets. If a camera notices you, it will turn on an alarm and two Bots will appear. Take a look at the map, find a But Shutdown panel (shield icon) and use it to shut them down. Once you've hacked them (in fact turning them off isn't necessary, it just makes things easier), they will fight alongside you. To take care of a turret, use the Hack Tool, stun it with Electro Bolt or just destroy it.
How to speed up the research:
- Hacking a machine will end the recording and give you a small bonus.
- Freeze the machine to make things easier and then hack it.
- Stun bots and turrets with Electro Bolt and then turn them to your side.

Big Daddies and Sisters are two most powerful enemies in the game. The first ones always accompany a Little Sister and you will have to get rid of them before adopting the Sister. Meanwhile Big Sisters appear once Daddies fail and you save/harvest each Sister on a given level.
Despite some minor similarities (like the charged attacked which you can break with the Drill Dash) and the mighty armour they both wear, the two are very different from each other and require different strategies. Let's take a closer look at them.
Since the Big Sister won't appear until all the Little ones from a given level are gone, plan before you rescue/harvest the last one - set traps and choose where you want to fight. During the fight itself, constantly move and try to guess your enemy's next move. Take advantage of the surroundings (oil, water etc.) and keep her at distance. Fighting alongside friendly Bots always makes things easier. You deal more damage by shooting the tank on her back.
Machine gun with anti-armour rounds, shotgun with phosphorus bucks or the rocket launcher with its high damage are all very useful against the Big Sister. Use Plasmids to decrease the amount of ammo used (especially since you will probably be using the more rare types). Practically every offensive Plasmid might come in handy (creating a Decoy is also useful). You could try and point out the best ones, like Electro Bolt or Winter Blast which will stun the Sister or the Insect Swarm which distract her for a while, but Telekinesis is also useful, since you can throw back items and the same goes for Hypnosis, if there are more enemies around (or you're fighting two Sisters at once).
The conclusion is easy - use whichever Plasmids you're comfortable with and try to watch your supplies. There aren't many less pleasant things than an empty clip or no EVE left in the middle of a fight.
During the fight with a Daddy, throw back his missiles and grenades with Telekinesis. Use the machine gun with anti-armour round on bigger distances and the shotgun with phosphorus bucks at closer. Don't forget about Plasmids, so that the Daddy is constantly under fire, distracted by insects, illusions or security bots. Also try to hit the tank on his back.

Rumbler is a newly introduced Big Daddy type. He throws mini-turrets and shoots rockets at you. You can approach him in two ways. You can throw back his missiles with Telekinesis and hack/throw away/destroy the turrets, but that doesn't change one crucial fact - the Rumbler series are pretty lame when it comes to melee combat. No matter the difficulty setting, if you have enough space to run around him with the Drill - do it. His only way of defence it this situation is hitting you back (which doesn't hurt that much), but if you try to constantly be behind his back (use Electro Bolt to make it easier), he shouldn't even be able to hit you too many times.


You already know the Little Sisters from the first BioShock. They are practically invincible little girls, with ADAM slugs placed inside their bodies. They see the world in a different, more colourful way and their only task is to collect the precious substance. Each Sister is protected by a Big Daddy, who's only goal is to defend his little companion. Locations of some of the girls may differ from the ones marked on the map. The reason for that is the fact that they move around the city and appear randomly. However, if there are 3 Sisters on a level, you will meet all of them sooner or later, in one place or another.
The substance they are collecting is the main "currency" in Rapture - the key to gain new Tonics, Plasmids or increase health of EVE. There are various ways of obtaining ADAM:
1. After getting rid of a Daddy, you can adopt the Sister, or harvest her on the spot (160 ADAM). Doing so is highly inadvisable, as each of them can collect additional ADAM from two bodies marked on the map (you get 40 for each or 60 if you have the [Proud Parent] Tonic equipped). After harvesting both bodies, head to a vent, where once again you will have to decide about the Sister's faith - rescuing her will give you 80 ADAM, while harvesting is worth 160. As you can see, you waste 120 ADAM by harvesting the Sister immediately.
2. Each time you take care (in one way or another) of every Sister on a level, the Big Sister will appear. Search her body to find 40 ADAM.
3. At some moments in the game, you will get to move around the depth of the ocean. While you're there, search for slimes, as each gives you 10 ADAM.
NOTICE: A throughout description of Big Sister and Daddy behaviours and fighting tactics can be found in the proper chapter of this guide.
NOTICE 2: The ways you treat the girls has a decisive influence of the ending of the game. Hack out the "Possible endings" chapter for more info.

If you decide to rescue the girls, you'll receive a present for each 4 Sisters - there will be a teddy bear by the nearest Gatherer's Garden. There are 12 Sisters in total, so you can receive 3 presents:
- [Proud Parent] Tonic, 80$, 80 ADAM
- [Demanding Father] Tonic, 160$, 120 ADAM
- 160$, 250 ADAM
If you decide to adopt a Sister, she can guide you to the nearest body (and then a vent) if you press and hold [R]. It will cause a white stream to appear and guide you to and Angel. You can also use the included level maps, on which I've marked each body and vent.
During the harvest, you'll be constantly attacked by enemies, who will appear from every possible direction. That's why you should choose those bodies, which are the easiest to defend. The room shouldn't have many entrances and, if it's possible - no balconies, so enemies can't appear from above. Below I've pointed out the things which will make your fight easier. Of course you don't have to fulfill all of them, but each one makes the fight lighter.
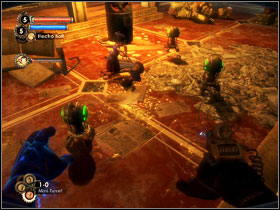
1. If there is a Bot Shutdown panel nearby, cause an alarm and hack 2 bots.
2. Stock up on ammo, hack all nearby machines.
3. Place traps by each entrance (trap rivets and spears, mines, [Cyclone Trap] - level two or above works best).
4. Set mini-turrets and traps around the girl herself.
5. Use Hypnosis during the fight.
6. You can freely use the more powerful weapons like the [Gatling Gun] and [Launcher], you won't harm the girl anyway.
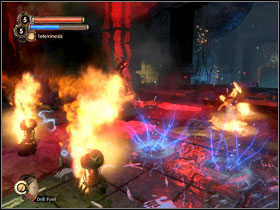
Playing on the highest difficulty setting will allow you to unlock an achievement. Additionally, you can choose to disable the Vita-Chambers (it can be done from the main menu and will grant you with yet another achievement). You can also promise yourself not to use saves and rely on auto-saves at the end of each level. All of the above can be done and even bring lots of fun. For starters, read the chapter below :)
What does the high difficulty setting involve? The enemies are more resistant and deal higher damage. In consequence, you'll need more ammo, better Plasmids, proper Tonics and weapons upgrades. This all causes a higher need for cash and ADAM. Summing up, each of your decisions should be well thought out, because there's not much place for error.
The difficulty affects the style of gameplay. On Easy you can jump into a room and take on everyone without worrying about enemy fire, while on Hard such behaviour will lead to a certain death.
Often you will have to rely on cleverness. Sneak onto enemies (the [Drill Lurker] tonic will come in handy), slowly analysing each room and avoiding (when it's possible) fights with multiple enemies at once. Of course try to aim at the heads - the quicker you kill, the less the chance that the fight will cost you your health or life. The enemies often move in groups and loudly talk, so hearing voices can indicate that there are some foes in the area. Using the Hypnosis Plasmid on such a group will make things much easier.
Don't forget about traps. Even if the proper ammo (traps rivets and spears, mines) isn't very common and cheap, you always have the [Cyclone Trap] Plasmid, which on level 2 and above allows you to charge it with almost any Plasmid. Additionally, if you stock up on Tonics which lower EVE usage, you will be able to secure the whole room with traps and the only thing left will be to lure the enemies into them. And all of that thank to one or two cheap EVE Hypos.
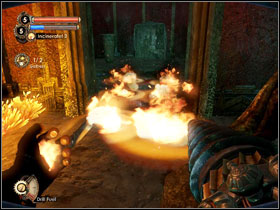
From the moment you obtain the camera, always use it before a fight to fully take advantage of the bonuses it brings. The quicker you finish research on a given Splicer type, the easier fighting him will become. I encourage you to take a look at the chapter covering researches, thanks to which you will be able to finish them quicker.
In a way, hacking all vending machines and other stuff is a natural thing to do upon entering a new room. However it's worth to leave some of them for later, if you don't really need to use them. If you equip a proper set of Tonics (for example - [Hacker's Delight]), you will regain health and EVE each time you hack something. This also relates to chocolate bars and each other type of food which refills your health and EVE. Additionally, if you have the [Booze Hound] Tonic equipped, alcohol will do the same thing.
In BioShock 2 you don't have to possibility to return to previously visited locations, but nothing stand in your way to visit rooms in the current level multiple times. The items in boxes and corpses and even those lying on the ground don't disappear, so you can collect them later. You can print the maps found in the walkthrough and then mark on them the spots where you've killed an enemy and didn't get all the items from his corpse, safes with items left inside etc. Making such notes takes time, but it's well worth it.
Yet another strategy connects with the above tip and that's using different types of weapons. The reason for that is easy - various ammo types can be found on the map, so you should make use of it and cut the costs. Personally I like to focus on one favourite weapon (if possible of course).
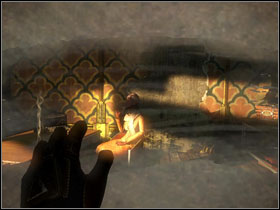
BioShock 2 offers 4 different endings in total.
However, unlike the first game, where the only decisive criteria was how you've treated the Little Sisters, there is another condition - killing or not the important persons met during the game.
Those lucky people, whose life depends on your choice, are: Grace Holloway (Pauper's Drop), Stanley Poole (Dionysus Park) and Gilbert Alexander (Fontaine Futuristics). As for Mr Gilbert - if you're in a hurry, it's easy to simply miss the opportunity to kill him. After receiving the key allowing you to open the secret passage to Persephone, you have to wait for a moment by the control panel. Only afterwards the "old" Alexander will unveil a special button with which you will get rid of his current self.
One of the possible paths will allow you to choose your own faith. Curiously, you will be given the option at the very end, when you least expect it. If during the game you rescued and killed some Sisters as well - you will be able to choose if you want to sacrifice or save yourself (however it hardly can be called a proper existence). If you don't want to sacrifice yourself, you'll a variation of the bad ending. The dialogues are almost the same here, only the first part if different.

The mentioned difference is the faith of Sofia Lamb. The cutscene showing her last (or not) moments is a part of each ending and what will happen during it depends only on your choices regarding the three important characters.
The diagram below presents the connections between your choices and their consequences:


 Batman: Arkham Asylum Game Guide & Walkthrough
 Battlefield 4 Game Guide & Walkthrough
 Beyond: Two Souls Game Guide & Walkthrough
 Battlestations: Midway Game Guide & WalkthroughBorderlands: The Pre-Sequel! Game Guide & Walkthrough