The ArcheAge in 10 easy steps includes all you need to start playing this vast and complex MMORPG. In the first chapter, you will find a detailed description of the character creation process. You will learn about the available races, factions and classes. The second step has been fully devoted to the skillsets prepared by the developers. This guide describes the active and the passive abilities of each, as well as the most popular combinations of the available skillsets, which work best during the game. The third chapter concerns combat and the fourth one concerns guilds, parties and raids. In the fifth one you can find everything concerned with the forms of transport available in the game, i.e. mounts, gliders, transport carts, blimps, ships and teleporters. The sixth chapter concerns trade, which is a very important elements of this MMO. In this part, you will find hints useful for the beginner traders, as well as information on dangers and profits yield by trade. Step seven helps you start the career of the crafter. You will learn about the available skillsets and how to get about developing them. Chapter eight describes houses and arable fields, whereas the ninth describes PvP play. The final, tenth part of this guide is concerned with the final stage of the game, which becomes available after you reach the 50th experience level. There, you will get the basic information on arenas, gladiators, dungeons and rifts. ArcheAge is an MMORPG developed by the Korean-based XL Games. It draws on the most widely known games of the genre, such as Ultima Online, Lineage II or World of Warcraft. The story has been based on the traditional motif of the conflict between two feuding factions.
Michal Marian (www.gry-online.pl)
From this chapter, you will learn, among others, about the character creation process and which races, and factions, are available in the game. Then, you will learn about the difference between them, as well as several interesting facts that will prove useful, while picking the right one.
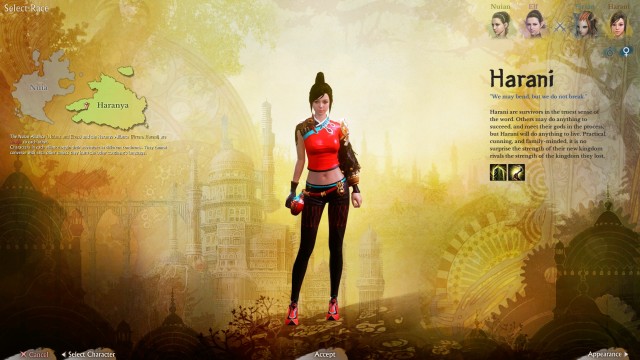 Race selection.
You start in a traditional way - by picking one of the four races. The available ones are Nuian, Elves, Firran and Harani. Apart from their looks, they also differ in terms of their passive abilities:
Nuian:
Elves:
Firran:
Harani:
It is worth pointing out that the individual race abilities do not have much impact on the course of action itself. That is why, while selecting the race, you should keep in mind the faction that you want to choose, because this will have an immense effect on the game. In ArcheAge, there are two factions - the Western (Nuian and Elves) and the Eastern (Firran and Harani). Both parties remain in an open conflict and, after you reach the appropriate experience level, you will be able to attack any of the representatives of the opposing faction (with minor exceptions).
Representatives of the factions speak different languages, due to which you will be unable to communicate with the representatives of the opposing faction, at the beginning of the game. The expressions uttered by them will take on the form of random symbols (e.g. $)#@(#(!!!(#@). Only later into the game, will you be able to take the services of special teachers and, at the same time, learn the language of the opposing faction. If you are going to play ArcheAge with a group of friends, make sure that all of you have picked the same faction. Otherwise, it will be impossible to play. Also, you need to remember that each race starts in a different location and their paths cross only later into the game.
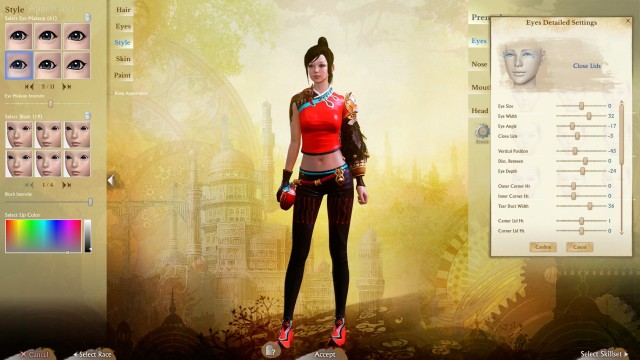 Character creation.
Once you have picked the race and the faction, you need to adjust the looks of your character. In nearly unrestricted way, can you modify the hair, eyes, skin and the shape of the face of your character. The good news, for all the aesthetes, is that you can disable the displaying of the helmet, thanks to which your perfected countenance can be seen, even as you are wearing the heaviest of armors.
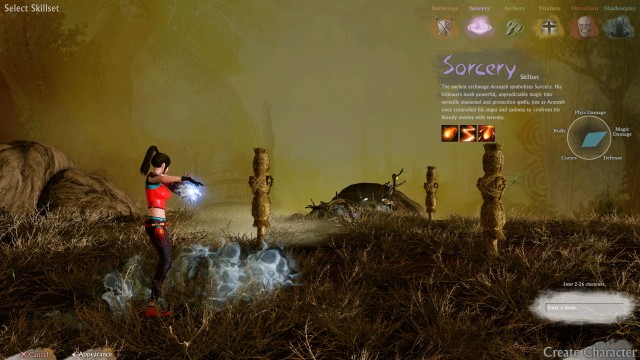 Skillset selection.
Now you have to select one of the 6 starting skillsets (all in all, there are many more in the game). All of them have combat skills so, you do not need to worry, whether you will be able to handle the enemies at the beginning. The skillsets have been described, in detail, in the next step and, as of now, I only name the options available at the beginning:
After you have selected one of the above, you now only need to pick the name for your character. It needs to be 2-26 letters long, include no special symbols, spaces, digits and upper case letters in the middle, and at the end. Unless you meet all of the above requirements, the Create Character button remains inactive.
This chapter introduces you to classes in ArcheAge. Here, you will learn a bit more about the available skillsets, learn about differences between them and about the most effective combinations.
In ArcheAge, there are as many as 120 different classes available. Each one has 3 component skillsets, which you pick from among the 10 available ones. These are:
You make your first choice (from the abbreviated list) while creating your character and the second one, after you reach the 5th experience level. You make the last choice at level 10. Then, your class receives an unique name.
During the game, you can change the skillset for a small fee but, you need to remember that each one needs to be leveled up separately. Your base skillset (as long as you do not change it) will level up alongside you, level after level, until you reach level 50. If you decide to change, then the new skillset will have to "catch up" with the rest of the skillsets. This is why, it is recommended that you make your starting choice with consideration and change only after you have reached the maximum experience level, when perfecting new trees is much easier and faster.
The individual skillsets combine with each other and allow you to introduce special combinations (more about this in the next step), which allows you to eliminate enemies easier. The synergy of the individual skillsets is the key to victory and that is what you should attach the most care to, while designing your character.
Within the initial skillset, you can find both active and passive skills. You unlock the former by obtaining successive levels, whereas the former are unlocked in exchange for skillpoints. For example, to learn a passive skill that requires, at least, 4 skillpoints, you first need to distribute those 4 points within that tree (including the points that you spent on the other passive skills) At the 50th experience level, you will have a total of 23 skillpoints to distribute among 3 skillsets.
Thanks to the complete freedom of choice in ArcheAge, you can create any class combination. However, it needs to be pointed out that some of the classes are much weaker than their "well-thought out" alternatives. To make the start easier for you, we have prepared a list of the most popular combinations that always win their way into guilds or raids. The whole has been divided into several categories, so that everyone can find something for themselves.
 Darkrunner in action.
Classes that deal damage shine in the battlefield the most. It is them that decide the effectiveness of a given group and they are the most feared by the opponents. Playing as this type of character is easier and much more enjoyable - you do not need to worry about anything else than extermination of enemies. They are perfect for solo games - you can deal with all of the quests and defend yourself from opponents, if necessary.
The tough characters that always stand in the first line, during the battle. Indispensable in instances, they take on the attention of monsters and buy damage dealers the time necessary to kill them. They are perfect in PvP, they are tough to kill, they are capable of incapacitating the enemy and eliminate him from further combat. They deal excellently in solo games.
A healer is a key element of each party. It is him that keeps the allies alive, makes sure that debuffs do not exact toll on them and, if necessary, can revive. He is indispensable during high-level activities. Playing solo, as such a character, may be tedious, due to low damage dealt.
The supporting characters stay in shadows, where they keep backing up their allies from. A word of warning - playing them may be tedious, because it grinds to performing the same actions, over and over again. It is possible to play solo as this class, although there is not much point to that, because they are designed to act in groups.
Battlerage is a skillset that is entirely based on battle at close range . The skills of this class focus on dealing damage and incapacitating the enemy. Also, it offers a vast array of, the so called gap closer's, i.e. all sorts of charges and leaps that allow you to cut short the distance between you and the enemy, immediately.
Sorcery is a skillset that revolves around both dealing AoE damage and quick elimination of single enemies. The spells that you find here weaken the opponent on impact, but it requires a moment to cast them, which exposes them to attacks.
As the name suggests Archery is entirely based on ranged combat. The skills within this class deal much more damage, if you are within an appropriate range of the opponent - the closer you are, the weaker your attacks.
A school of magic that, apart from spells that deal damage, also has a vast array of various debuffs. This skillset focuses, mainly, on enabling the character to survive for as long as possible.
A skillset of assassins. In here, you can find attacks that temporarily stun the enemy, disarm him and also deal lots of damage to them. Allows you to speed up your movement, temporarily, and to become invisible.
The only healing skillset. The skills here will let you keep your allies alive, or even revive them, in the event of sudden death.
This is a typically defensive skillset that uses shield and buffs that increase the number of health points, chances to block or the user's physical defense. Also, allows you to control aggression and to attract the attention of the enemy to you.
Songcraft is a skillset that revolves, mainly, around strengthening the nearby allies. The abilities here increase both damage dealt and defensive statistics, as well as movement speed.
Auramancy is a support skillset, where you can find all sorts of various buffs that provide you with temporary resistance to all debuffs, disarmament, silencing and stunning. Apart from that, it provides you with additional mobility, thanks to the teleportation skill.
Witchcraft is a school of magic that focuses on debuffs. The spells here allow you to disable the opponent, temporarily, which buys you some time to regenerate or to cast the most destructive of attacks. Some of the skills also provide temporary buffs to the caster and his allies.
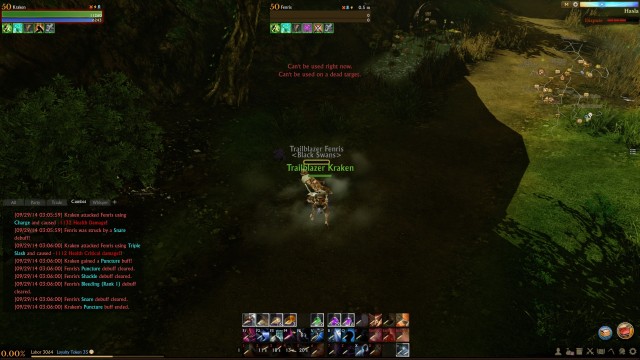
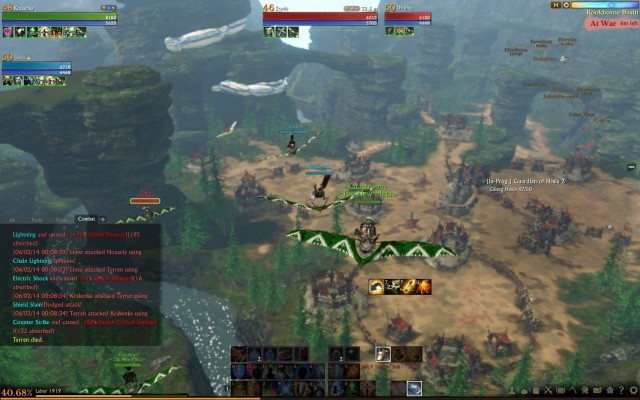
The below step is the introduction to the key element of the game - combat. It is going to be with you, throughout the majority of the game so, it is best to learn its mechanics beforehand and learn how to read the interface's readings properly.
 The game interface.
1 - the skill bar of your character. You can decide for yourself, what it should look like. The options in the game ensure much freedom. On the bar, you can see the attacks and spells that are available at the moment, or how long you need to wait, before they will be ready to use again. The skills that are highlighted, and in the orange frame, can be used in a given moment to launch a combination. More about this, in a moment.
2 - aim status bar. Informs you what your aim, at the moment, is (e.g. healing). You learn here, about the name and number of health points and the amount of mana, of the selected ally or enemy.
3 - buff and debuff bar. You learn here which buffs your target is currently using, or what debuffs are active on him.
4 - target attack bar. Informs you who is your target's current target.
5 - character status bar. Displays your nickname, the number of health points, mana, active buffs and debuffs.
6 - party status bar. Just like above, but the information concerns the members of your party.
7 - system information. You can adjust it as much as you want. They can display system messages, chat, private messages, global messages, information on damage, buffs, debuffs.
8 - current location map. You can see there the members of your party, but also important places, important NPCs or the route towards the quest that you are completing right now. Right above, there is a clock that displays the current in-game time and the time of the day.
 An example combination.
Proper use of the available skills is the key to success, during a battle. Combinations are additional effects caused by the selected attacks or spells, after they are used in a given order. Most usually, they boil down to dealing additional damage, or extending buffs and debuffs. A great majority of them occur as a result of relationships, between skills of various skillsets, which makes some of the skillset combinations imposed by the game mechanics. The other ones, on the other hand, are rarely used. Each of the initiating skills, or one that starts a combination, often has an additional paragraph in the description, which informs you of that. Combinations may also occur as a result of combining two characters - as long as they are attacking the same target.
In this chapter, you will learn the basic information on the guild system in ArcheAge. Apart from that, you will learn about the mechanics of parties and raids.
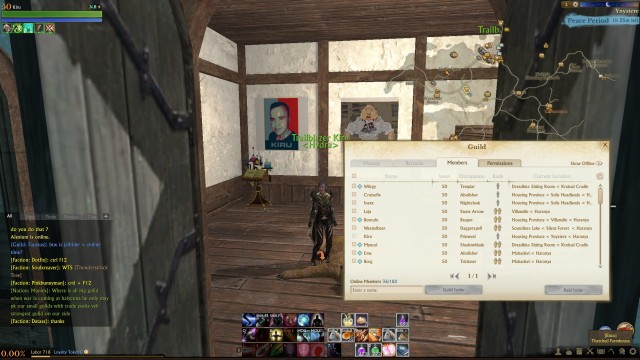 The guild panel.
It is very simple to start a new guild in ArcheAge- you simply need a 5-member party, where each player has, at least, the 5th level of experience, and pay the fee of 1 gold piece. You can do that in each major city, with the Guild Manager NPC. The membership in a guild allows you use its dedicated chat window, where you can easily communicate with the other guild members. Depending on the rank allotted to you, you will receive various profits, including the option to add and dispatch remove members.
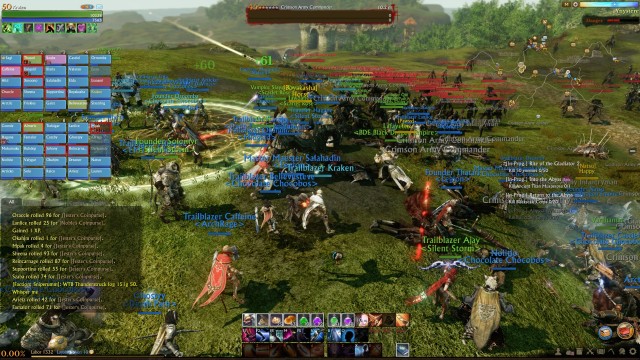
Later into the game, guilds may fight battles between each other, for territories and power, over the Auroria isle. The strongest ones will be able to build their castles, which ensure them with income from taxes, as well as ensure a number of other profits. Still they will require you to defend them, in the course of numerous and regular sieges.
Guilds group members of the same faction only. There is an exception, though, i.e. pirate guilds. To become a pirate is possible for everyone who turned to the dark side of the force and killed, or robbed, the members of his own faction. Such pirate guilds may consists on the representatives of all four races.
The party is a group of 5 players. It is the most frequently seen form of cooperation between players, because it allows you to hunt freely in the instance dungeons. Health points, mana points and the list of buffs and debuffs, of the members of a party is always on display, thanks to which the healer may react to threats immediately.
 A raid in ArcheAge.
Raid is nothing else but a combination of several, or several tens of parties. In practice, this form is used during battles against elite monsters in the open world. Unlike in the party, information about all the members of the raid are displayed in the form of small squares, which may make it difficult to figure things out and slow down the reaction of healers.
From this chapter, you will learn about the available means of transport, around the vast world of ArcheAge. You will learn what the basic means of transport are and where you look for them.
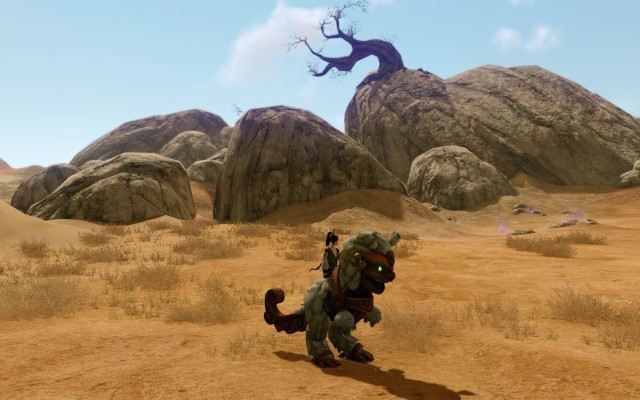 Harani mount.
You obtain the first mount in the course of the optional mission, still before you reach level 10. IT is the mount, and the alike, are going to be your most important company in travel. Thanks to them, it is going to be easier to cover long distances and often escape from danger. Each of the races has a different mount type. These differ not only in terms of looks, but also with special abilities. Apart from that, as you progress, you gain access to even faster counterparts of these, whose obtaining is going to require time and gold. However, it is good to remember that you can use the mount that you obtained at the beginning of the game, for the whole time - apart from extreme situation, you will not suffer from that greatly, even if the mount is slow.
Apart from mounts, there also are donkeys that are used to transport trade packs (more about this in the next step). Although they are a bit slower than the bigger counterparts, unlike them, they can carry the load, which makes traveling, along trading routes, faster.
 Gliders
Apart from mounts, gliders are the basic means of transport that you are going to use throughout the game. They allow you to cover short and medium distances, in the air, away from dangers. There are several types of gliders and they differ, from each other, in terms of speed, maneuverability and sometimes, the speed of descent. The initial models, only allow you to cover short distances, whereas the more advanced ones, with favorable winds, allow you to cross the entire map. It is worth pointing out that, if you take damage while in mid-air, the flight is immediately interrupted. It also is limited in time - one flight may last up to 3 minutes.
 A transport cart.
Transport carts are means of transport controlled by NPCs, and they are common in ArcheAge. They connect all of the major cities in the game and they frequent some of the most popular trading routes. They are free of charge, as long as you manage to find room on one. Each cart follows the same route, uninterrupted, and it only stops in predetermined spots. Each stop is equipped with a scope, thanks to which you can find out where the cart currently is.
Just like transport carts, blimps are free means of public transport. They move a bit faster than the carts, but their range is much longer. Just like in the case of carts, you mount the blimps on stops that are equipped with a scope.
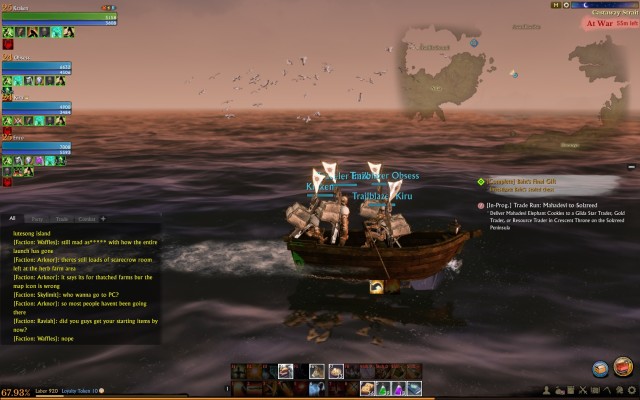 The journey on a boat.
Unlike in the case of land and airborne transport, to cross a sea, you first need to own a boat. Unfortunately, there are no public means of transport in this case. You receive the basic boat during one of the missions, still before you reach level 20. Later on, you will be able to become the captain of a trading vessel, an armed galley, a fishing boat or the swift and maneuverable sailing boat.
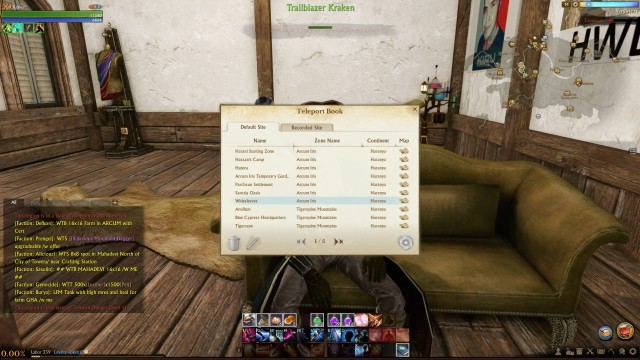 The book of teleporters.
As you visit the individual locations, they are immediately recorded in your teleporter book. Thanks to this, you will be able to return to a location, without the necessity to take the journey again. Each use of a teleporter costs you 1 Hereafter Stone (or 3 if you want to get to another continent), which are quite cheap, fortunately. Apart from that, you will be able to choose a location as your Recall Point, where you will be able to get, one per 30 minutes (or 21 in the case of Harani). The teleporters that you open can be freely used by the other players (just as much as you can use theirs). Each one remain open for 30 seconds.
From this chapter, you will learn the basic information on trade in ArcheAge. You will learn the basic mechanics of the system that governs this element of the game and you will learn how to earn gold, thanks to it.
 Crafting of trade packs.
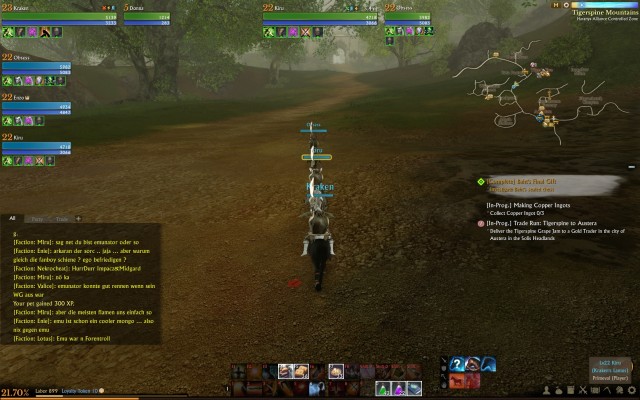
To start trading in ArcheAge in the first place, you need to craft a trade pack You can do that thanks to the special machines that are located in all of the major locations, on both continents. You craft the pack off the special materials, characteristic for a given region. Then, you need to transport it to another location far away, where you can sell it to a special NPC, in exchange for one of three materials - gold, supplies or Gilda Stars. The longer and the more dangerous the route, the higher the pay. In the case of short trading routes between the neighboring locations, you can only receive your pay in gold. You will profit the most from long overseas journeys.
Remember that, with a trade pack, you move much slower and you cannot use gliders or teleporters.
 On the trading route.
If your route crosses the territories, where it is possible to attack the other players, it is highly possible that you will encounter many opponents that will want to take your merchandise away from you. Therefore, it always pays off to travel in a group and, secondly, to plan your movements and always make sure that the risk will pay off. It may be that instead of taking the risk of a long and lonely overseas journey, where the chances to fail are low, it is a more sound idea to make several smaller deals in protected areas.
 The enemy guild supplying packs in peace time.
The main advantage of trading travels is that your supplies of Gilda Stars rise fast. For these, you can buy, eg. several of the fastest ships in the game. A well organized guild is capable of obtaining an armada of galleys fast, which will ensure it with long reign over the seas. Also, what is worth the effort are the special resources that you can obtain only by trading. Their prices can be really high which is why, in each harbor that ends overseas trading routes, you can expect to encounter many members of an enemy faction that dream of making quick cash.
It is worth adding that, even if you fail to deliver the pack that you have crafted (e.g. your killer, or a party member does that instead) you still receive some of the profits from that pack. The deliverer receives 80% of the income, whereas the crafter receives the remaining 20%. It is not too much, although it is some sort of a consolation. Just enough, when you are attacked by someone, after a long journey, right before you reach your destination.
Thanks to this chapter, you will learn all of the most important information about crafting in ArcheAge. You will learn about its mechanics and how to start crafting.
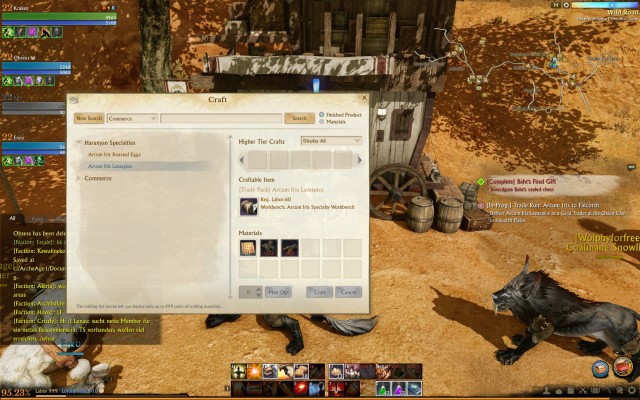
 The crafting screen.
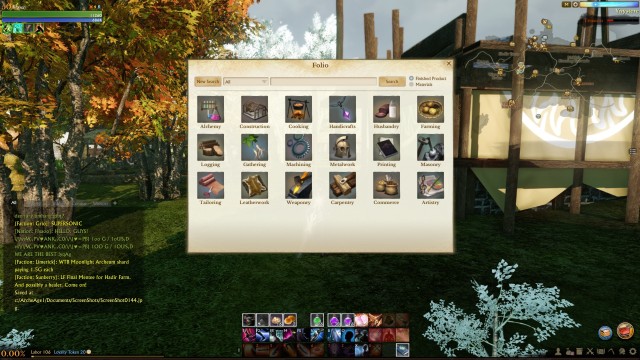
In ArcheAge there are 21 different crafts to specialize in. These are:
Each one offers 6 levels of mastery - Novice, Veteran, Expert, Master, Authority and Champion. To progress to each new level, you need to perform enough work, within the constraints of that craft. With the growth of master, the time to craft an item and the amount of required work, will plummet.
 Metal smelting.
You start your work at the special stations, which are spread all around the game world. You can find them in, nearly, each inhabited settlement. They are free to use and there are no restrictions on them. They can only be used to manufacture basic goods - you can craft the more advanced items on special stations, which you need to craft yourself and then, place them at your home.
The crafting mechanics, in itself, is very simple - you need to select a given product from the list and specify how many copies of that item you want to craft. Of course, to do that, you require materials, which you need to obtain on your own (more about this in the next step), or buy from the other players. Each component can be examined thoroughly, thanks to which you will determine if this is the raw material or a processed product. If it is the latter, you can immediately learn what you need to craft it.
Crafting is time-consuming. To be able to craft high-end products, you will first have to invest lots of your work. Using it up, apart from the profits that you cut, after you sell the item, provides you with lots of experience points, which may be a ice alternative to monotonous completing of quests.
It is worth pointing out that, some of the crafts, apart from crafting various items, can also be developed by, e.g. cutting down trees, working in the mine, fishing, trade or gathering. Still, you need to remember that the abovementioned also use up the available supplies of work.
This chapter introduces you into the system of housing and agriculture in ArcheAge. You will learn about the profits of owning your own house and about the options that cultivation of soil provides.
 A Farmhouse.
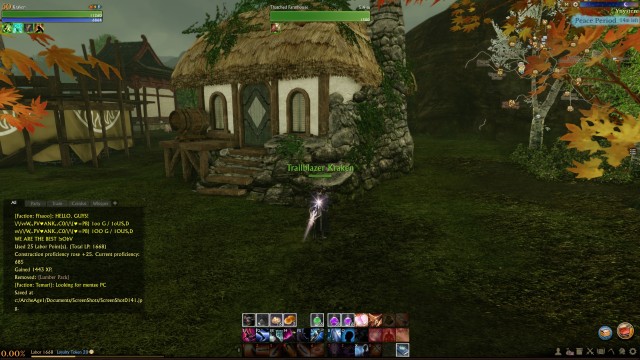
Owning a house, in ArcheAge, is inseparably bound to the system of crafting. It is the private houses of the players that serve as workshops, where the most valuable items in the game are crafted. If you do not own a house and the crafting stations that you would put there, it is going to be difficult to reach the higher levels of your craft. Even impossible, in some cases.
Apart from that, thanks to houses, you can create your own teleporting spot, which you can then record in your teleporter book. Houses can be freely decorated. You can hang pictures on the walls, place furniture, fly flags, etc. Also, there is a space for bed, where you can replenish your work supplies, every now and then.
If your house is located in an open PvP, you can also use it as shelter - you simply need to close the door and all the windows to be completely safe. After you fit the house with a mailbox, a equipment chest and the portable set that summons the most important traders, your house becomes, nearly, a self-sufficient stronghold.
Remember that, if you have a house, you need to pay a weekly fee. Neglecting to do that may result in losing both the house and the stretch of land that it is on.
 Chopping down of trees.
Thanks to arable fields, you can grow crops and breed animals. This process is exceptionally easy - you only need to buy a sapling, from the trader, or an animal, and place it within your farm. This starts a countdown, up until the moment at which your crop is mature. In some cases, you can speed this up, by e.g. watering the plant, or feeding your animals. After the time elapses, it is time for gathering your crops - cutting down trees, picking flowers, milking, shearing, or killing the animals. And the process starts over.
Everything that you place on your farm takes up space. Depending on their size there can be several or, a dozen-or-so cultivated goods. Also their maturing process varies, some of them are ready just after several minutes, whereas you need to wait, for the others, as long as 2 days. Also the climate is what has the effect on that. Some plants and animals prefer hot areas, where they grow faster than in other conditions.
At the arable fields, you create basic materials necessary to craft the more advanced gods. Nearly the entire crafting system is based on farming. That is why it is a quite profitable profession and you have plenty of customers.
You should also remember that, as much as placing "goods" on the fields does not require too many work points, gathering crops does. Also, remember that owning a field also requires you to effect weekly payments.
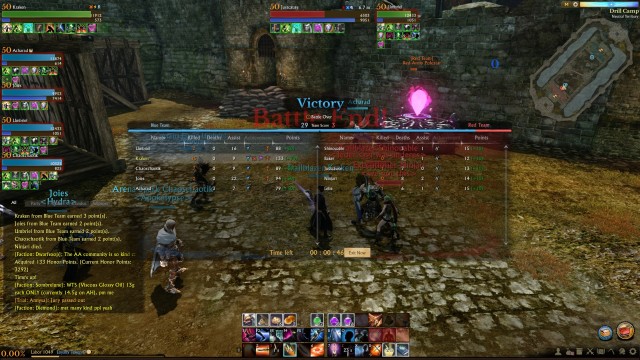
This chapter lets you know about the mechanism of the PvP system in ArcheAge. Thanks to it, you will lean the most important information, about fighting against the other players.
 A PvP zone.
You make it into a PvP zone around the 30th experience level. From now on, you should be prepared to be attacked from any side. As much as you are at the grounds of your own faction, at the very beginning, later into the game you will get over the sea, to complete quests in the enemy territories.
Each PvP zone has 5 stages that change automatically, every now and then, as a result of fights. Then, there is a short phase of conflict, which is followed by the phase of warm during which you can obtain honor points, for killing the members of the enemy faction. It is worth adding that, after you die, you lose some of your honor points.
The phase of war is followed by the phase of peace, in which the members of the opposing factions cannot attack each other. This allows the beginner players complete quests without any pressure.
The most important thing is that, after you are killed by an enemy, you lose absolutely nothing (save the honor points). After you die, you respawn at the nearby chapel and, nearly immediately, you are ready to continue.
Also, the existence of neutral guards should be mentioned. If you hit an enemy player in their presence, they will take to his defense and kill you quite quickly. They are near camps, usually motionless, or they patrol the area. Of course, you can also use their help, if attacked.
 Bloodlust mode.
The Bloodlust mode can be activated with the default CTRL+F hotkey. It allows you to attack, as long as you are not in a PvP zone of your faction. Each such attack leaves a stain of blood on the ground, thanks to which the other players can report your crime, for which you are punished with crime points. Excessive number of these may lead to your imprisonment, and in extreme situation to expelling you from the faction and becoming a pirate. You can activate and deactivate this mode freely, after you wait for a short moment.
Remember that in the Bloodlust mode, you are targeted by all the other players - they will be able to attack you without any limitations.
 A duel.
You can duel with the other players virtually everywhere and in all conditions. You only need to click the right mouse button on the aim status bar and select Request Duel. After a moment, the a countdown starts. The duel ends after health points of any of the players drop to 0. Health and mana points do not regenerate after the duel ends. Also, cooldown time does not reset. You cannot die during a duel.
 Arenas.
After you reach, at least, level 40. you will be allowed to fight in instanced arenas 5 on5. You join them by talking to the specific NPC in each major city. For participating, regardless of the results, you are rewarded with honor points. There are two ways, in which you can win - by destroying the crystal of the opposing party, or by killing the opponents before time elapses. With successive kills, you gain access to new skills, which help you fight. In the arenas, you can make it into the party of the opposing faction, which may hinder communications.
From this chapter, you learn what else there is to do, in ArcheAge, after you reach the top experience level. Remember that the chapter only mentions the things that have not yet been mentioned in this guide. All of the activities mentioned above can, or even should be continued, even after you reach the maximum level.
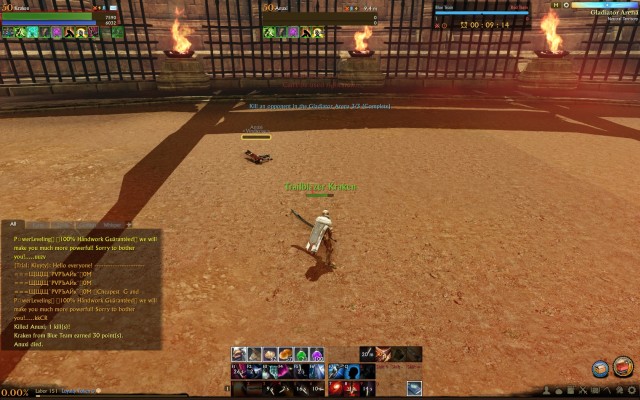 The gladiator arena.
You gain access to the arena after you reach the 50th experience level. You will be transferred here by a special NPC that you can find in every major city. Your task is to defeat another player in a duel. The fight lasts until 2 wins and, after each round, the entire supply of health and mana is regenerated. Also, cooldown of all the skills resets. For participating, you are rewarded with honor points.
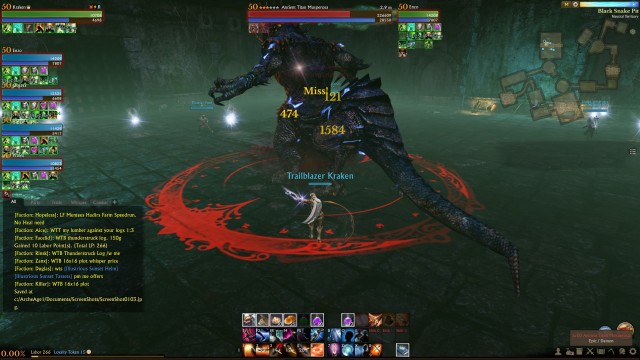 A Dungeon.
Dungeons are a perfect way to obtain new equipment that you are going to use for a longer time. To take part, you need to gather a party of 5 and go into the specific location, where the entrance to the instance is. The important element that affects success, or failure, is the make-up of your party. There should be, at least, 1 healer, and 1 tank. A big advantage is having someone with Songcraft. As for the rest, pick damage dealers.
In the dungeons, it is a good idea to look around, because you can use some of the elements of the surroundings, such as e.g. barrels or torches, while fighting hordes of enemies. Apart from that, each elite monster that you encounter, has a pattern of attacks, whose learning may help you fight.
 Rift.
Rift.Rifts are daily quests that you are rewarded with lots of honor points for, after you complete them. They take part on a regular basis, at the same times of the day (of the in-game time) and they require larger groups of players to participate. They are played in waves, where the players are attacked by stronger and stronger enemies. The aim is to eliminate them although some occasions require prior preparations, before the battle. After the fighting ends, you can go to a specific NPC to end the mission and claim the honor that you earned. On the next day, everything starts over.

 Amnesia A Machine For Pigs Walkthrough Chapter 1: Waking the Dolls House
 Alan Wake Walkthrough Alan Wake Game Guide
 Assassins Creed Revelations Walkthrough Sequence 1- A Sort of Homecoming
 Assassins Creed Chronicles: China Game Guide & Walkthrough
 Assassins Creed II Game Guide & Walkthrough