NOTICE: Link has already met two unique animals who have helped him on his quest: Moosh the flying bear, and Ricky the boxing kangaroo. In Chapter 4, he will meet the a third special animal, as well as be given the choice which of the three will accompany him for the duration of his quest. In order to get either Ricky or Dimitri as an animal companion, Link must obtain one of two “Strange Flutes” that will later become one or the other animal’s signature flute. Moosh becomes Link’s animal companion if neither of these two flutes are obtained. Though there are some changes that occur depending on which animal Link ends up with, all of the same items and locations can be accessed regardless. Lastly, if Link continues his adventure in Oracle of Seasons once his duties in Labrynna are complete, whatever animal companion is chosen in this quest will carry over.
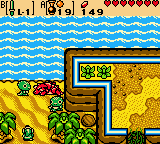
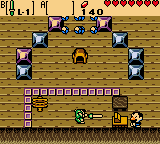
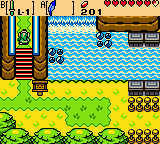
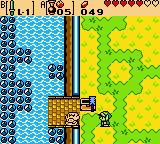
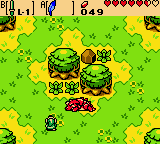
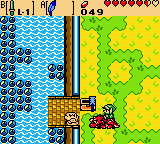
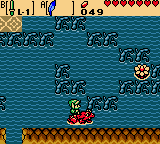
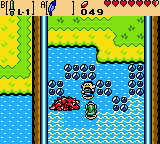
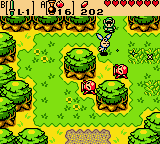
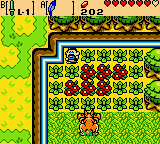
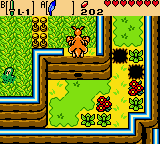
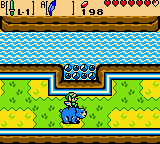
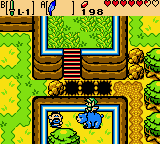
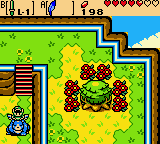
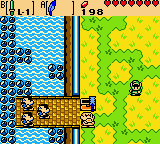
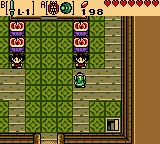
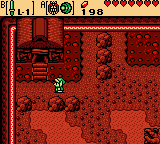
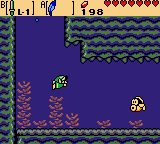
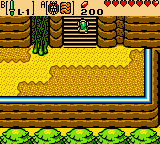
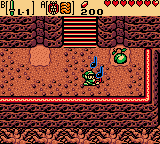
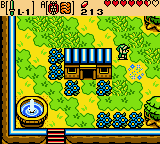
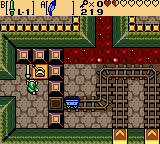
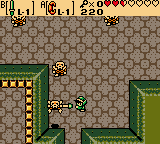
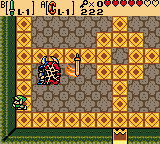
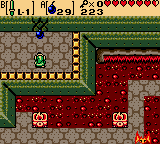
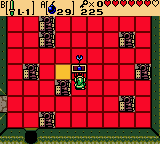
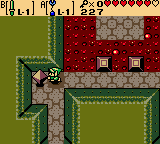
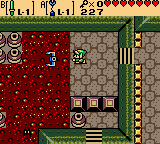
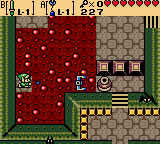
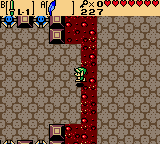
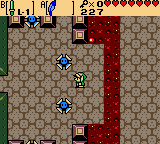
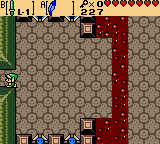
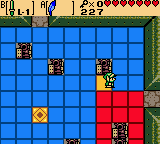
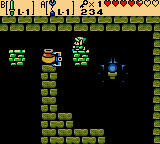
~ Present ~From the entrance of the Moonlit Grotto, head down one screen, then back up one screen via the leftmost path. Continue up another screen to the northern coast of Crescent Island, where two Tokay have discovered a strange red creature. Walk up and speak with the Tokay on the left and instead of eating the creature, they will notice Link’s Ember Seeds and ask for some. Give the Tokay some seeds to see them run off with their mouths aflame, giving Link the chance to speak with the red creature who introduces himself as Dimitri the swimming dodongo.

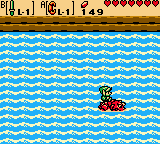
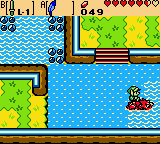
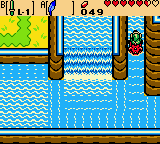
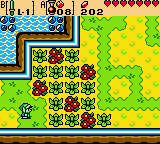
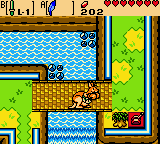
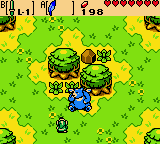
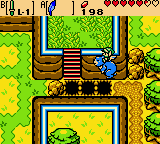
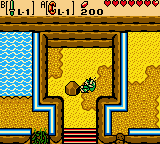
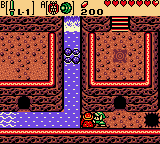
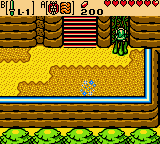
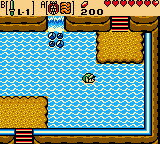
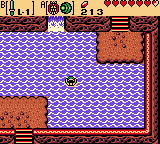
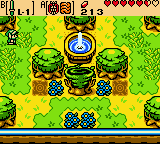
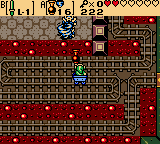
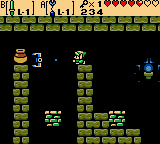
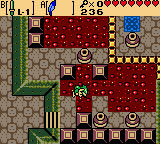
Hop on Dimitri and enter the water, then head up one screen, right three screens, and down one screen. Chop away the bushes, the bottom-left one hiding a Soil Patch underneath. Hop back on Dimitri and swim up one and left four screens. Ride ashore and Dimitri will be on his way, leaving Link to his duties.
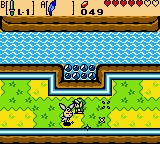
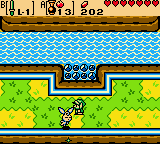
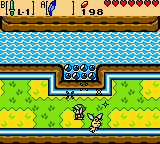
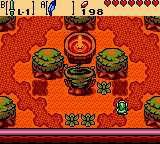
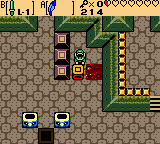
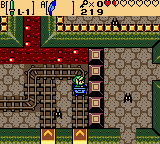
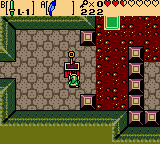
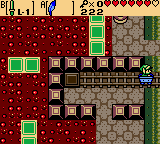
Head up the steps above up one screen and enter the cave. Shoot a seed diagonally against the upper wall to have it bounce off and connect with the blue switch in the corner, connecting a bridge over to the staircase on the left. If needed, Link can climb this staircase and speak with Tingle at any time to have his seed satchel completely refilled.
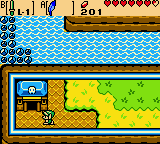
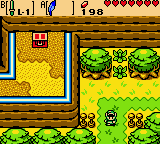
Exit the cave when finished, then head down one, left one, and up three screens into Lynna City.
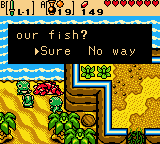
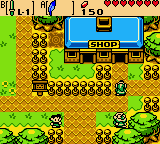
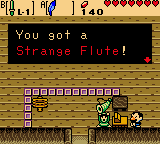
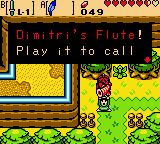
~ Getting Dimitri’s Flute ~If Link wants to have Dimitri as his permanent animal companion, enter the Shop and purchase the Strange Flute for a hefty 150 Rupees. Exit the Shop when finished and head up two screens.
 ~ Getting Ricky’s Flute ~
To acquire Ricky as Link’s permanent animal companion, head up three screens into the Maku Tree’s area, then exit via the opening in the upper-right. Play the Tune of Echoes to activate the time portal here and enter it to travel to the past.
~ Past ~Head down one and left one screen into Lynna Village. Continue down another screen and enter the Target Practice building. Win the game with 50 points or more to obtain the Strange Flute. Exit the practice building when finished.
Head up one screen and activate the time portal by playing the Tune of Echoes. Enter the portal to return to the present.
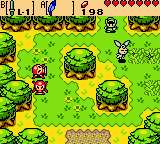
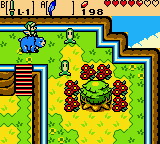
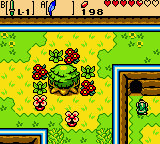
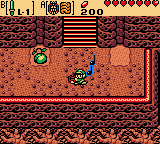
~ Present ~Head left three screens and down two. Continue left two screens and down one to enter the Fairies’ Woods. In the woods, head right, down, left, and down one screen each. Continue right one and up one screen, then use the Roc’s Feather to clear the gaps and access a chest containing 50 Rupees! Clear the pits to the upper-left of the chest by performing a diagonal jump over them, then head up one, left one, and up one more screen to exit the Fairies’ Woods.

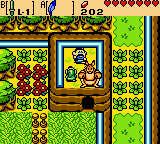
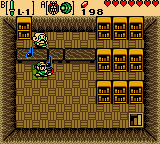
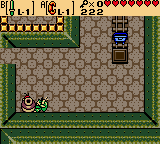
Head right one screen and climb the stairs to the ledge, then continue up one and left one screen. Enter the Happy Mask Shop and speak with the Salesman, who Link finds is very hungry. Give the Salesman the Tasty Meat and, reluctantly, he will trade Link a Doggie Mask in return.
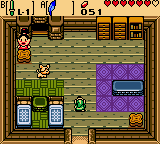
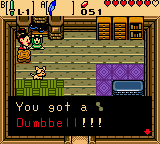
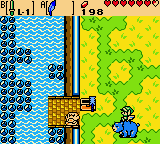
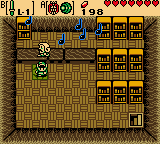
Exit the Happy Mask Shop and head right one and down one screen. Continue right two more screens into Lynna City and enter the house beside the river. Speak with Madam Meow Meow who will notice Link’s newly acquired Doggie Mask and request it for her shy dog. Give her the mask and in exchange she will trade Link a Dumbbell.
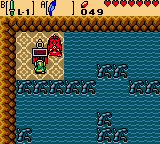
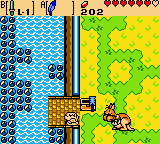
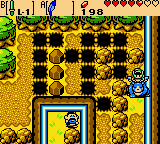
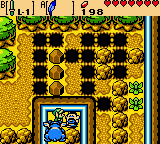
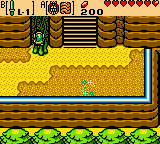
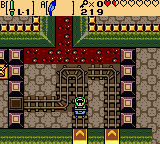
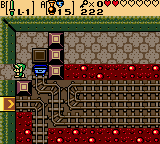
Leave Madam Meow Meow’s house and head left two screens. Climb the stairs and head up one screen, then equip the Seed Shooter with Ember Seeds. Shoot the bush blocking the red lever on the right to burn it down, then shoot the lever once the way is clear. This will cause the bridge to connect, giving access to the Nuun Highlands region of Labrynna.

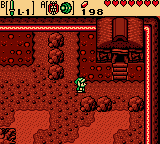
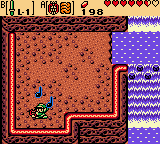
** Depending on which animal companion Link chose previously by acquiring their respective Strange Flute, the Nuun Highlands’ landscape will be altered to fit the abilities of that animal. If Ricky was chosen, the Nuun Highlands will take on a very grassy, mountainous terrain. If Dimitri was chosen, the area will be filled with water and currents which only he can swim through. Lastly, if no flute was acquired, resulting in Moosh being Link’s animal companion, the Highlands will be filled with groups of bottomless pits scattered about.
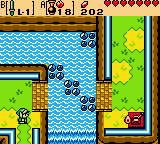
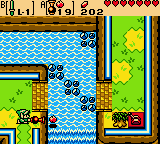
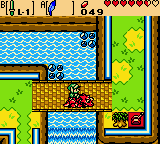
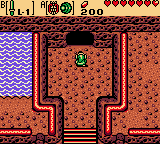
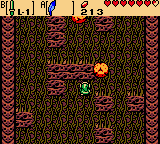
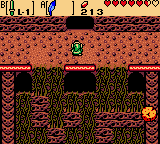
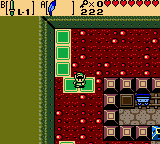
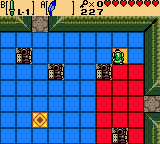
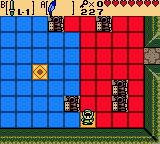
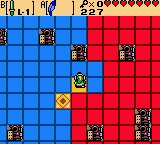
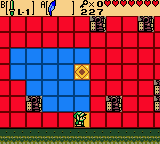
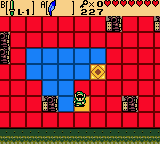
~ Navigating the Nuun Highlands w/ Dimitri ~Head across the bridge and up one screen into the Nuun Highlands. Continue left one screen, up the steps and up one screen, then right two more screens. Walk up the steps and head up one screen to an unfinished bridge. Speak with the Carpenter Boss here to learn that his workers are off somewhere on break while the bridge to Symmetry City goes unfinished. Since Link cannot navigate the terrain of the Nuun Highlands, head down and left one screen as if to leave the region. As Link passes halfway through the screen, one of the Forest Fairies will appear, telling Link that a strange red animal has become lost in their woods and ask if he will come help.
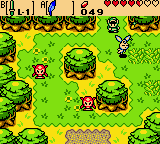
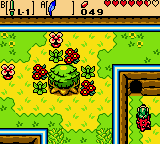
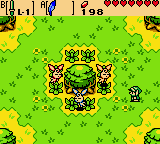
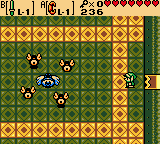
Choose to help the Fairies, then head left, down, right, and down one screen each to exit the Nuun Highlands. Cross the bridge and continue down, left, and down one screen each to enter the Fairies’ Woods. Follow the Forest Fairy down one and left one screen to come to the central location with all three Fairies present. The forest will become mixed up as before at this point.

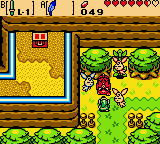
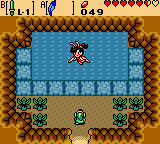
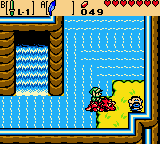
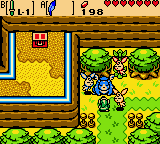
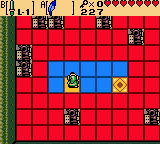
Simply head up, down, then up one screen each to find the lost animal, Dimitri the dodongo Link met earlier on Crescent Island. Speak to Dimitri, who will recognize Link from their encounter before. The Fairies will then put the forest back in order and take Link and Dimitri out. After a few words, the Strange Flute which Link obtained earlier will become Dimitri’s Flute, allowing Link to call for his assistance whenever he wishes.
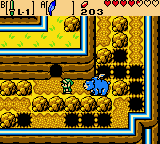
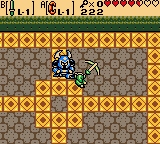
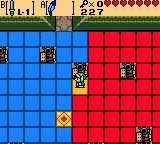
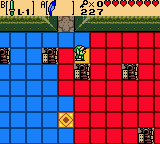
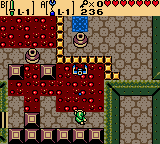
Ride the Dimitri right and up one screen each. Cross the bridge and continue up, left, and up one screen each. Head right two screens into the Nuun Highlands, then climb the stairs again and go up one screen. Speak with the Carpenter Boss again and he will ask Link to find his missing workers. Accept the Boss’ request, then head down one screen.
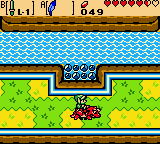
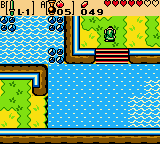
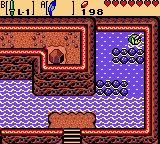
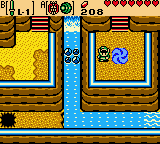
Enter the water and head right one screen, then swim up the waterfall here and continue up one screen. Speak with the Carpenter here, letting him know the Boss is expecting him and he will run back to work, then swim back down one screen.
** By swimming up the narrow path here three screens, Link can find a Great Fairy Fountain inside of a cave if needed.
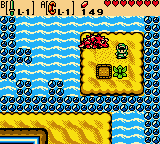
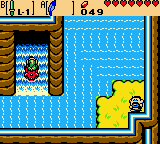
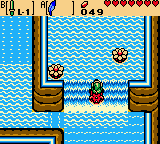
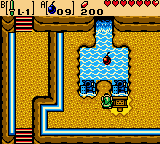
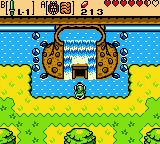
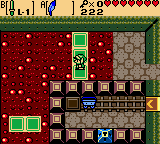
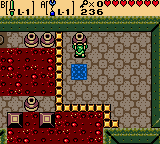
Continue right one screen and swim up the next waterfall, entering the cave at the top. Swim counter-clockwise around the edges of the room to reach a chest in the upper-left corner. Open the chest to recieve a Magical Ring, then exit the cave. This ring will later appraise as the Light Ring L-1, which allows Link to shoot sword beams when he has less than two hearts.
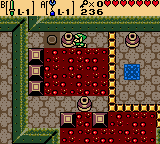
Speak with the Carpenter on the bottom-right patch of land to have him head back to work. Hop back on Dimitri and head up one screen. Climb the waterfall, being careful to avoid the Gopanga Plant’s fireballs, and continue up one screen to find the final Carpenter. Speak to him so he will head back to work on the bridge and Link will be sent back with them as well.
 ~ Navigating the Nuun Highlands w/ Ricky ~
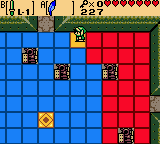
Head across the bridge and up one screen into the Nuun Highlands. Continue left one screen, up the steps and up one screen, then right two more screens. Walk up the steps and head up one screen to an unfinished bridge. Speak with the Carpenter Boss here to learn that his workers are off somewhere on break while the bridge to Symmetry City goes unfinished. Since Link cannot navigate the terrain of the Nuun Highlands, head down and left one screen as if to leave the region. As Link passes halfway through the screen, one of the Forest Fairies will appear, telling Link that a strange animal wearing gloves has become lost in their woods and ask if he will come help.

Choose to help the Fairies, then head left, down, right, and down one screen each to exit the Nuun Highlands. Cross the bridge and continue down, left, and down one screen each to enter the Fairies’ Woods. Follow the Forest Fairy down one and left one screen to come to the central location with all three Fairies present. The forest will become mixed up as before at this point.
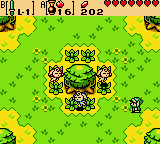
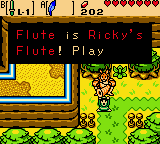
Simply head up, down, then up one screen each to find the lost animal, Ricky the kangaroo Link met earlier in the Forest of Time. Speak to Ricky, who will recognize Link from their encounter before. The Fairies will then put the forest back in order and take Link and Ricky out. After a few words, the Strange Flute which Link obtained earlier will become Ricky’s Flute, allowing Link to call for his assistance whenever he wishes.

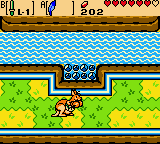
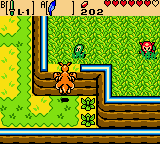
Ride the Ricky right and up one screen each. Cross the bridge and continue up, left, and up one screen each. Head right two screens into the Nuun Highlands, then punch through the bushes and continue up one screen. Speak with the Carpenter Boss again and he will ask Link to find his missing workers. Accept the Boss’ request, then head down one screen and right one screen.
Jump onto the ledge above and head up one screen. Slash away the bushes here and speak to the first Carpenter, sending him back to work on the bridge.

Head back down one screen and jump off the ledge, then continue left one and up three screens. Jump onto the ledge above and head right and down one screen each, then speak with the second Carpenter here to send him back to work. Hop back inside Ricky’s pouch and head up one and right one screen.

** If needed, a Great Fairy Fountain can be found down the steps and left one screen inside a cave.
Continue down three screens. Use Ricky’s tornado-punch to clear the bushes on the other side of the holes so he can jump across, then jump onto the ledge and head up one screen. Dismount Ricky and enter the cave. Open the chest inside to obtain a Magical Ring, then exit the cave and hop back into Ricky’s pouch. This ring will later appraise as the Light Ring L-1, which allows Link to shoot sword beams when he has less than two hearts. Use Ricky to hop onto the ledge and speak with the final Carpenter. Once he hops off to work, Link will automatically be taken to the location of the unfinished bridge.
 ~ Navigating the Nuun Highlands w/ Moosh ~
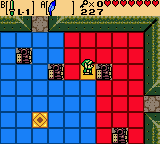
Head across the bridge and up one screen into the Nuun Highlands. Continue left one screen, up the steps and up one screen, then right two more screens. Walk up the steps and head up one screen to an unfinished bridge. Speak with the Carpenter Boss here to learn that his workers are off somewhere on break while the bridge to Symmetry City goes unfinished. Since Link cannot navigate the terrain of the Nuun Highlands, head back right, down, and left through the lower path one screen each. Keep heading left as if to leave the current screen. As Link passes halfway through the screen, one of the Forest Fairies will appear, telling Link that a winged bear-like animal has become lost in their woods and ask if he will come help.
Choose to help the Fairies, then head left, down, right, and down one screen each to exit the Nuun Highlands. Cross the bridge and continue down, left, and down one screen each to enter the Fairies’ Woods. Follow the Forest Fairy down one and left one screen to come to the central location with all three Fairies present. The forest will become mixed up as before at this point.
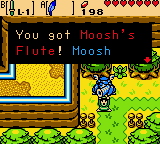
Simply head up, down, then up one screen each to find the lost animal, Moosh the flying bear Link met earlier in Yoll Graveyard. Speak to Moosh, who will recognize Link from their encounter before. The Fairies will then put the forest back in order and take Link and Moosh out. After a few words, Moosh will thank Link for all he has done by giving him Moosh’s Flute! This allows Link to call Moosh whenever he needs throughout the rest of his adventure.
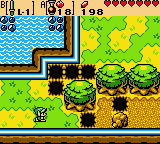
Ride the Moosh right and up one screen each. Cross the bridge and continue up, left, and up one screen each. Head right two screens into the Nuun Highlands and fly over the four uppermost pits, then continue up one screen.. Speak with the Carpenter Boss again and he will ask Link to find his missing workers. Accept the Boss’ request, then head right one screen.
Slash the bush blocking the way passed the holes and use Moosh to fly over them and up the steps to the ledge. Fly over the next set of holes on the left and head up one screen. Speak to the Carpenter and he will run off back to work on the bridge to Symmetry City. Hop back on Moosh and head down one screen, then fly over the series of holes below and continue up one screen along the narrow path.
Fly over the pits above to access the steps and take them up one screen, then continue right one screen.
** If needed, a Great Fairy Fountain can be found left one screen inside a cave.
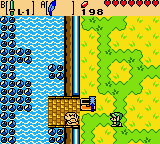
Head down one screen to the location of the second Carpenter. Fly over the pits all the way over to the right side of the Carpenter, then speak with him to have him head back to work. Slash away the bushes for an easier route out of this area, then hop back on Moosh and head up one screen.
Continue left one and down two screens, then head right one screen. Use Moosh to fly over the holes and onto the rightmost path with two bushes blocking the way. Slash down the bushes and continue riding Moosh down one screen. Fly over the pits to the cave on the left and enter. Open the chest inside to obtain a Magical Ring, then exit the cave. This ring will later appraise as the Light Ring L-1, which allows Link to shoot sword beams when he has less than two hearts.
Fly over the pits again to the path at the bottom of the screen, then continue left one screen. Climb the steps and head right one and up one screen to reach the final Carpenter. Speak to him to have him return to his duties. Link will be transported back to the location of the bridge along with the Carpenter.

The Carpenters will finish the bridge in record time and the crew will be on their way. Head left one screen across the bridge, where Link runs into a new enemy, the Red Darknut. Defeat or avoid the Darknuts and walk up the steps up one screen into Symmetry City, which Link finds full of broken houses and monsters with no inhabitants in sight.
Walk left one screen and swipe the Gale Seeds down from the tree. Using the power of these seeds, Link can warp to other Seed Trees he has discovered throughout Labrynna. When shot from the Seed Shooter, Gale Seeds will engulf enemies in a whirlwind and send them offscreen. Slash the far bushes to the right and left of the Gale Tree to uncover two time portals. Play the Tune of Echoes to activate them and enter one to be sent to the past.
 ~ Past ~
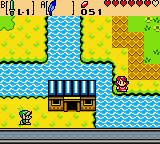
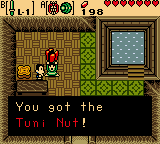
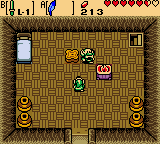
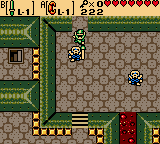
Like Lynna, Symmetry City was also known as a “Village” in the past. Enter the Middle House here and head down one of the staircases to the lower level of the house. Speak with the Tall Man who seems to have a problem swaying side-to-side because of him being so skinny. Give the Tall Man the Dumbbell, completing his set as he already had one, and he will rip off his fake Cheesy Mustache and trade it to Link.
Walk back upstairs and speak with either of the two girls above. She will explain that a special item known as the Tuni Nut, which keeps the balance of Symmetry City, has been broken, causing the volcano in the city to violently erupt. She will also reveal that the Tuni Nut can be repaired at Restoration Wall, so the next step is finding the broken Tuni Nut.
Exit the Middle House and head right and up one screen each. Enter the house here and speak with the man inside, who tells Link to see his brother on the other side of town about the Tuni Nut. Leave the house and head left two screens, then enter the house here. Speak with the brother who reveals he cannot leave Symmetry City to fix the Tuni nut as it would leave the town in further imbalance. Agree to take the Broken Tuni Nut to Restoration Wall to be fixed and the brother will give it to Link.
Exit the house and head down two screens, leaving Symmetry City via the western exit. Head left one screen, then climb the series of steps above up two screens. Swim to the deep square of water in the upper-right corner of this screen and dive down to an underwater area below. Swim right one screen, then up the ladder and out to resurface in Tokkey’s House. Speak with Tokkey, then play the Tune of Echoes while standing on the green tile. Hearing this tune, Tokkey will be able to finish his own song and will also teach it to Link. With the Tune of Currents, Link will be able to travel from past to present from any location without the use of a time portal. When Link is sent through time, a different-looking time portal will be created in the place Link stands. When stepped in, this portal will take Link back to the past.

Leave Tokkey’s House and head back through the underwater path. After resurfacing, head down one and left one screen. Walk all the way to the bottom-left corner of this screen and play the Tune of Currents to travel to the present. Head across the bridge right one screen and grab Piece of Heart #5! Now, head back left one screen and enter the time portal to return to the past.

Head right one screen, then walk down the steps on the right down one screen. Continue left one screen, then stand in the bottom-left corner of the screen and play the Tune of Currents to travel to the present.
 ~ Present ~
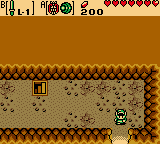
Walk down the steps and head down one screen. Continue right, down, left, and down one screen each, clearing the enemies out of Link’s path on the way. Head down the sets of steps down two screens, then continue right one screen. Walk up the steps and head up one screen, then lift the boulder here to uncover an unactivated time portal. Play the Tune of Echoes to activate the portal and enter it, sending Link to the past.
 ~ Past ~
Enter the cave above and climb the staircase inside to the upper-level. Exit this cave via the rightmost exit. Outside, push the red pyramid “left”, causing it to slide to the left a bit and somehow change the orientation of the water to the right side of the mountain. Enter the cave again and descend the staircase, then exit the cave from the lower-level.
Head down the steps and down one screen, then play the Tune of Currents to travel to the present.
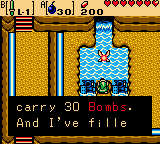
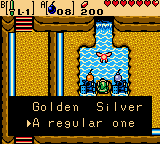
~ Present ~Climb the vines growing up the wall on the left and head left one screen. A sign here warns not to toss anything into the water, but of course Link being the rebel he is is going to do just the opposite. Toss a bomb into the water and a fairy will appear, asking Link what type of bomb he threw. The best option here is honesty, as choosing “Golden Bomb” causes the fairy to drop four bombs around Link, dropping his health to one heart, while choosing “Silver Bomb” causes the fairy to rob Link of the rest of his bombs. Select “A regular one” and the fairy, respecting Link’s honesty, will increase the capacity of bombs Link can carry to 30!
Head back right one screen and climb the vines down one screen. Enter the time portal created by playing the Tune of Currents earlier to return to the past.
~ Past ~Push the vine sprout “right” five times into the opposite bare spot, then play the Tune of Currents to travel back to the present.
 ~ Present ~
Climb the vines up one screen then head right one screen. Swim across the water to the stairs in the upper-right and follow them up one screen. Continue up one and left one screen, defeating or avoiding the enemies along the way, then walk down the steps down one screen. Play the Tune of Echoes to activate the time portal here and step into it to travel to the past.
 ~ Past ~
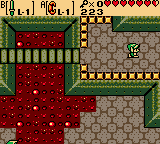
Head up the steps up one screen, then continue right one and down two screens. Swim across the water south, then take the steps down one screen. Continue right one and up one screen to reach the bottom of Restoration Wall, where many vines can be seen growing up the side of the mountain.
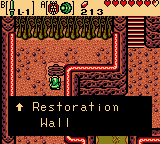
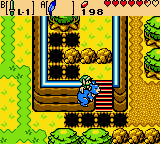
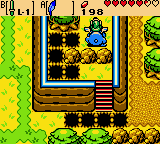
Climb the vines from the middle and head up three screens. Try to stay in the center while avoiding the falling rocks as Link can only climb onto the top of Restoration Wall from the center of the vines. Once at the top, head into the cave which is actually the home of Patch, the “restoration guru”.
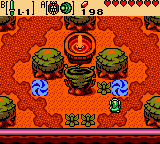
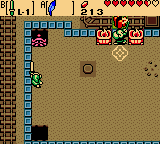
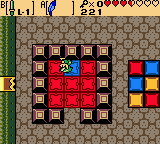
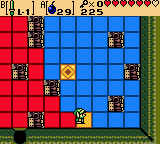
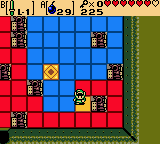
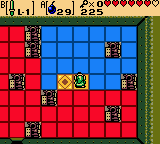
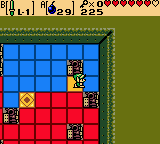
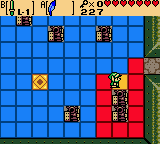
Speak to Patch and select “Yes” to show him the broken Tuni Nut. Patch will not simply fix the nut straight-up as he will require Link to complete his “Restoration Ceremony” first. Choose to participate in the ceremony and follow Patch down the staircase. Speak to Patch again in this lower level to begin the ceremony. During this, Link must step on the button, making four Hardhat Beetles appear which must all be knocked into holes before the cart runs into the Tuni Nut. Equip the Roc’s Feather and have the purple Beetles follow Link towards one of the four holes so they all gather together. When they are close to the hole, jump over them to their opposite side and knock them all in. When Link successfully completes the ceremony, Patch will reward him with a restored Tuni Nut!
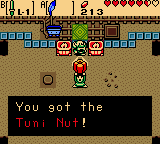
Head up the staircase that appears and exit Patch’s House. Continue right one screen and jump off the ledge, then climb the stairs up one screen into Symmetry Village. Head left one screen and enter the Middle House, then walk up and place the Tuni Nut on the altar. Exit the Middle House to find the volcanic eruptions have now stopped. Play the Tune of Currents to return to the present.
 ~ Present ~
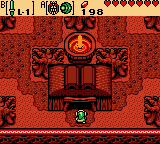
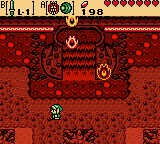
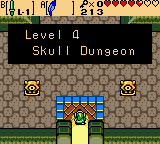
Because of Link’s efforts in the past, the present Symmetry City will now be vastly different. No longer is the town in shambles, but instead seems peaceful with flowers and trees growing about, as well as citizens living within the houses. Head up one screen, where the volcano which was erupting before now appears to serve as a waterfall with an entrance leading inside. This volcano is actually the location of the fourth dungeon on Link’s quest, so when ready, enter the opening in the waterfall into the Skull Dungeon.
~ First Floor ~
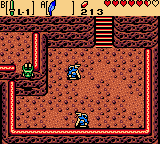
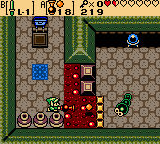
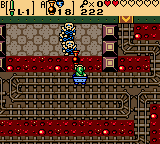
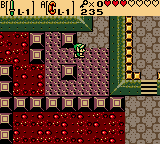
Link enters the dungeon in room G4 on the first floor. Be careful not to fall in the lava throughout this dungeon as it will heavily damage Link, as well as send him back to whichever entrance he came into the room. Start by heading up one and left one screen to 1F-F3. Defeat the Shrouded Stalfos and two Blue Stalfos in this room to unlock the doorway on the left, then continue left one room to 1F-F2.
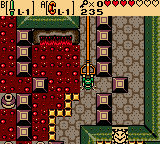
Hop across the platforms over the lava heading north and head up one screen to 1F-E2. Navigate the path to the left side of the room and exit down one screen to 1F-F2 from there. Of the blocks surrounding the chest on the left, push the one sticking out “up”, then open the chest to obtain the Compass for this dungeon. Continue down one screen to 1F-G2.

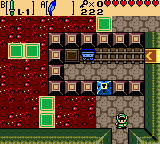
Defeat the enemies in this room to get them out of the way, then head over towards the puzzle block on the right. Jump over the lava to get behind the puzzle block, then push it “down” four times. Continue pushing the block “right”, “up”, “left”, and “down” one time each, then push it “left” twice onto the black tile which should light the torches blue. A chest will appear on the blue tile in front of the puzzle block. Open it to obtain a Small Key, then head to the right side of the room. Climb the steps and head up one screen back to 1F-F2, then jump from the ledge and head right two screens to 1F-F4.
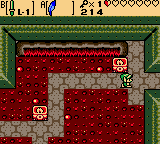
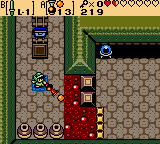
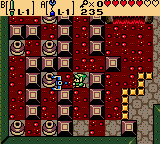
Navigate the narrow path in this lava-filled room right one screen to 1F-F5. Jump over the lava heading towards the path at the bottom of the room, then walk along it to the right. Continue across the platforms until Link can reach the middle platform, where five horizontal blocks set with two above them. Of those two blocks, push the one on the right “left”, then jump over the lava from where it was positioned up towards the blocks at the top of the room. Push the block on the right of Link now “right”, allowing access to the locked door above. Head through it up one screen to room 1F-E5.


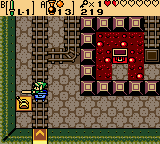
Defeat the three Blue Stalfos in this room and navigate it right one screen to 1F-E6. Swipe the yellow lever to change the arrangement of the tracks and hop inside the mine cart. It will take Link down one room to 1F-F6, in the central portion surrounded by blocks. Hop across the lava and open the chest here to obtain the Dungeon Map, then ride the mine cart back up to room 1F-E6.
Swipe the yellow lever again to put the tracks back as they were before and hop back inside the mine cart, which will now take Link down two rooms to 1F-G6. Walk to the bottom of this room and use the Seed Shooter to defeat the Mini-Moldorm across the lava on the right so it doesn’t interfere with the path of the next seed shot which will need to hit the moving blue switch. Stand on the blue tile and aim the Seed Shooter diagonally down and right, then shoot. The seed will bounce off a few walls until it heads up towards the blue switch. With the right timing, the seed should make contact with the switch, causing a chest to appear on the blue tile. Open the chest to obtain a Small Key.
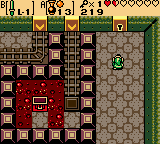
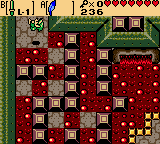
Hop back inside the mine cart and when it rides up to the room above, swipe the yellow switch on the left. If successful, the tracks will shift and Link will be dropped off in this room. Head to the right side of the room and up through the locked door one screen, then immediately right one screen to room 1F-E7. Be careful not to get hit by the Blue Blade Traps waiting just before the lava stream in this room. Jump over the lava and head up one screen to 1F-D7.
Walk all the way to the top of this room to find a handle sticking out of the wall. Using the Power Bracelet, pull the handle down as far as it will go, stopping the flow of lava and solidifying the area where the lava had spilled. Quickly run across the solidified floor to the left and then head up through the opening one screen to room 1F-C7.
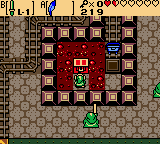
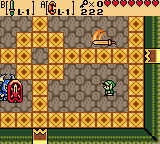
Four Yellow Stalfos guard this room’s locked doorway. These enemies will jump when swiped at while also throwing bones at Link. They can be defeated by either cornering them and continuously swiping, or by charging a spin-attack which they will not jump away from. Once all four are defeated, head left one screen to room 1F-C6.

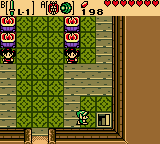
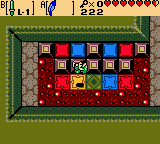
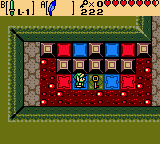
Jump across the lava to the path on the left, being careful not to run into any of the three Hardhat Beetles in this room as they might knock Link into the surrounding lava, then up one screen to room 1F-B6. Change the section of red tiles on the left by using the Roc’s Feather to jump over each tile so that they match the colored blocks on the right. Once the doorway on the left is unlocked, head left one screen through it to room 1F-B5.
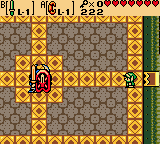
Two Blue Blade Traps will come towards Link upon entering the room, so keep moving to avoid contact. Defeat the Shrouded Stalfos to get them out of the way, then head back over towards the puzzle block in the upper-right corner of the room. Inch close to the path of the Blade Traps to have them shoot out, then quickly get behind the puzzle block and push it “down” twice. Lure the Blade Traps out again and as they retract, quickly push the puzzle block “left” five times. Finally, push the puzzle block “down” twice onto the black tile to have the gate blocking the mine cart’s path.
Hop into the mine cart and it will take Link left and up one room each to 1F-A4. Here, multiple Ropes will be crawling about the room, so defeat them and head right one screen to 1F-A5. Jump onto the moving green platform on the right and equip the Seed Shooter. Aim down and to the right when the platform rides up and shoot so that the seed bounces off the right wall and hits the blue switch in the corner. A chest will appear containing a Small Key, so grab it and head back left one screen to 1F-A4.

Head left one screen through the passage in the upper-left corner of the room to 1F-A3. Two Yellow Stalfos and Green Zols will be swarming the room, so defeat them and unlock the blue block guarding a switch-tile. Jump over the tile until it turns blue, unlocking the gate blocking the track, then head back right one screen. Hop inside the mine cart just below where Link enters the room and it will carry him left and down one screen each to 1F-B3.

While the cart rides across the track, Link must use the Seed Shooter to defeat the Blue Stalfos swarming at the top of the room. Gale Seeds will take care of each in one shot, thus unlocking the doorway where the cart drops Link off. Head left one screen to 1F-B2.
Timing is important in this room, as Link must jump across each moving green platform to the next overtop a pool of lava. Take the passage down one screen out of this room to 1F-C2.
The chime of Link’s compass will let him know a key is present. Jump over the switch-tiles in this room so they match the colored blocks above them. A Small Key will fall onto the green tile in the middle, so grab it and head back up one screen to 1F-B2.
Unlock the blue block and ride the mine cart right and down two screens each before dropping him off in 1F-D4. There will be a Fairy hidden beneath one of the vases in the lower-left corner of the room, so make sure to grab before heading left one screen to 1F-D3, the lair of the mini-boss.

* Mini-Boss: Armos Warrior *
Armos Warrior will throw his sword at Link and begin moving throughout the room. The sword will come towards Link wherever he is before pausing and flying towards him again. Run along the outter edges of the room while staying on the other side of Armos Warrior until the sword comes towards, hitting Armos Warrior in the process and breaking his shield a little. After three hits, Warrior’s sword and shield will break and he will begin charging at Link, running into and bouncing off of whichever wall is in his path. This is the perfect time to strike the mini-boss, but time it so that Link can jump out of the way of the boss’ charge. When Armos Warrior is defeated, head down one screen through the newly unlocked doorway to 1F-E3.


Defeat the enemies and head up the steps below, then continue down one screen. Walk across the bridge on the right and head right one screen to the upper-left corner of 1F-F4. Bomb the cracked portion of wall above and head up one screen to 1F-E4, where a rather tedious puzzle awaits.
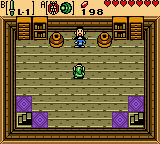
Start by walking “left” one tile, then all the way “up” to the wall. Walk “right” one and “down” two tiles to the statue, “right” one and “down” two ending up beside a statue, then “left”, “down”, and “right” one tile each. Continue “right” one and “down” one tile, then head “right” all the way to the eastern wall. Head “up” two, “left” two, and “down” one tile, ending up to the left of one of the statues, then continue “left” two, “up” one, and “right” one tile each. Walk up one and right two tiles against the statue, then up one, right one, and up two tiles to the wall. Continue left two and down two tiles, left one and up two tiles, then left two tiles against the statue. Finally, walk down, right, down, left, and down one tile each to have a chest appear on the yellow tile. Open it to obtain the Switch Hook! This weapon can be used to switch places objects such as vases, but can also damage many enemies. Exit this room left one screen to 1F-E3.
Equip the Switch Hook and use it to grab the diamond on the opposite ledge, magically trading places with Link. Head down the steps and up one screen, then head right one screen and climb the steps above. Continue up one screen to 1F-C4 and use the Switch Hook on the diamond to the right, then head down one and right one screen to room 1F-D5.

Switch places with the diamond across the lava and head along the path, defeating the enemies along the way until Link reaches a button. While standing on the button, switch places with the diamond to the right to have it rest in Link’s place and hold the doorway to the south open. Head up the steps and through this doorway down one and right two screens, then continue up two and left one screen to reach a stairwell at 1F-C6. Enter it to reach the basement level of the dungeon, room C6.

~ Basement First Floor ~
Head up one screen to B1F-B6, then defeat the two Ropes in this room. Standing on the other side of the lava below the diamond stone, use the Switch Hook to exchange places with it, then switch hook to the vase on the right to get back on the other side of the lava. Walk against the diamond stone and switch hook to it, then walk left a couple of spaces and switch onto the diamond again. Walk against the stone again and switch hook to it, switching places so Link can reach the button on the left and having the diamond relatively close to the button. Stand just to the left of the button and switch hook to the diamond stone, then walk back and stand on the button and switch places with the diamond again. The stone will keep the button held down, opening the doorway to the south. Head through it down one and left one screen to B1F-C5.

Defeat the Mini-Moldorm and head down the steps. Switch hook to the vases on the platform to the left, then continue with the vase below and then next to another set of steps on the right. Climb the steps and head down one screen to B1F-D5. Use the Roc’s Feather to jump over the central tile in this room, changing the color of the other tiles and momentarily revealing the mini-zols throughout the room. Strike the Mini-Zols when visible to defeat them and head through the unlocked doorway on the left to room B1F-D4.
Head left and jump over the lava, then keep moving left so Link avoids the attack of the Blue Blade Traps. Continue left one screen through the passage to room B1F-D3 where yet another puzzle where an accurate path must be taken. Before attempting the puzzle, it is suggested that the two Mini-Moldorms in this room be defeated as they will not respawn, then exit and re-enter the room to complete the puzzle.
To solve, head “down” all the way against the southern wall, then “left” two tiles and “up” three tiles. Go “right”, “up”, “left”, and “up” one tile each, then “right” two, “up” one, and “left” one tile against the statue. Continue “up”, “right”, and “up” one tile each, then “left” two, “down” one, and “left” one tile. Walk “up” and “left” one tile each, then “down” two and “right” one tile against the statue.
Walk “down” all the way to the southern wall, then head “left” two and “up” two tiles passed the statue on the right. Head “right”, “up”, and “left” one tile each next to the central yellow tile, then continue “up”, “right”, “up”, and “left” one tile each in front of the statue. Head “left” one and “up” two tiles, then “right” and “up” one tile each. Walk “left” three tiles, then “down”, “left”, and “up” one each. Continue “left” three tiles to the wall, then head “down” two tiles and “right” five. Go “down” one tile and left” four against the statue pair, then head “down” two and “left” one tile in front of the statue pair. Continue “down” three tiles, “right” one, “up” two, “right” one, and “down” two more tiles. Next, walk “right” four tiles and “up” two against the central yellow tile. Head “left”, “down”, “left”, and “up” one tile each, then continue “left”, “up”, “left”, and “up” again one tile each. Lastly, head “right” two and “down”, “right”, “up”, and “right” one tile each to complete the puzzle. A chest will appear on the central yellow tile containing a Small Key, so grab it and head up one screen to B1F-C3.


Use the Roc’s Feather to jump onto the first moving green platform Link comes to, then equip the Switch Hook and latch onto the diamond stone above. Ride the single green tile to the left down and jump off at the break in the blocks to the left. The vase in the top-left corner has a Fairy hidden inside, so grab it if needed and head up the staircase to a 2-D dungeon area.
Equip the Roc’s Feather and jump onto the ledges until Link can reach the rising green platforms. When they rise up, hit the vases on the left with the Switch Hook, travelling across two green pillars. Jump from the last pillar to the ladder on the left and head up to the first floor, room E3.
~First Floor~
Unlock the blue block and head left one screen, then use the Switch Hook to transfer Link across the lava to the leftmost ledge and continue left another screen to 1F-E1. Walk down the steps below and use the Power Bracelet to pull the handle from the wall, stopping the flow of lava in this room. Quickly run to the left and follow the path until Link reaches an exit at the top of the room. Head through it up one screen to 1F-D1.
Follow the narrow path up to another handle. The path of lava in this room is blocked by many vases, so after pulling the handle out enough to stop the lava flow, equip to Switch Hook and use it to move from tile to tile safely amidst the lava. At the end of the path, diagonally jump to land safely on the floor at the upper-left corner of the room and head up one screen to 1F-C1.
Climb the steps on the right and jump across the lava in front of the vase. Use the Switch Hook to change places with the vase and do the same for the one to the right. Shoot the Switch Hook to the vase above now, transfering Link to the top of this room, then push the vase above the blue tile “up”. Switch onto the rightmost vase in the pair at the top of the room, then push the one beside it over and onto the button on the left, revealing a chest on the blue tile. Hook back onto the vase on the right side of the small yellow blocks to access the chest and obtain the Boss Key!
Jump off the ledge to the lower-right and head down two and right two screens to 1F-E3, then head back down the staircase to the 2-D dungeon area. Use the Switch Hook to navigate back through this passage and exit via the ladder in the lower-right corner, then head left one screen to face the boss of the Skull Dungeon.
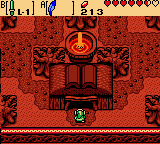
** Dungeon Boss: Eyesoar**
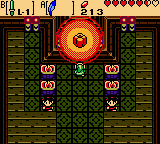
Keep a good distance from Eyesoar as it will spread the smaller Eyesoar’s which surround it and attempt to make contact with Link. The goal is to hit Eyesoar with the Switch Hook, thus trading places with Link and disorienting the boss. The Mini-Eyesoars will randomly move about the room at this point, so either defeat them or be careful to avoid much contact. While disoriented, strike Eyesoar with a few swings of Link’s sword until it starts to move again, then quickly hit it again with the Switch Hook and slash the boss some more. The process is really quite simple once Link can land the first Switch Hook to Eyesoar’s body, though the smaller ones may get in the way of this.


Once defeated, grab the Heart Container from the center of the room and head up one screen. Climb the steps to claim the fourth Essence of Time, the Burning Flame! Before being sent outside of the Skull Dungeon, a message from the Maku Tree will point Link in the direction of the ridge north of Nayru’s House…

 Feature: Advanced Tactics In Spirit Hunters Inc.
 Assassin’s Creed IV: Black Flag – Warehouse Guide
 The Wind Waker Walkthrough – The Triforce –
  Oddworld: Abes Odyssey – New n Tasty – Starter Guide
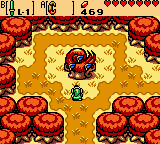 Oracle of Seasons Walkthrough – Dancing Dragon Dungeon – Zelda Dungeon