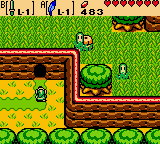
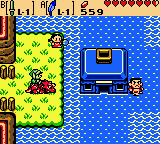
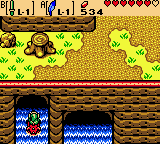
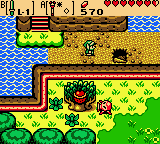
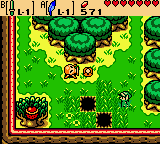
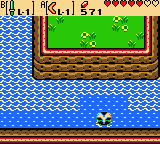
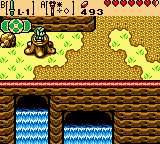
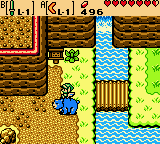
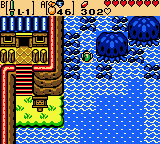
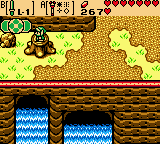
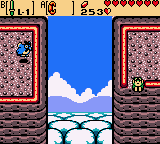
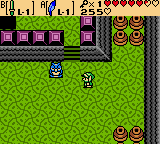
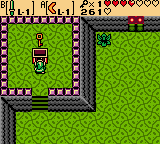
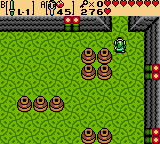
You want to exit Spool Swamp, from Level 3, by heading right one screen and walk up the steps. Follow the path to the right down two screens, then continue right one and up one screen to the Pegasus Tree’s location. Continue right another screen, at which point Link will likely run into Maple.
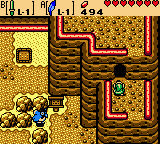
Continue down three screens and right one through the Holodrum Plain. Then up four screens, using Roc’s Feather to leap over the holes. You could stop at the nearby Soft Soil location if you previously planted a Gasha Seed. Head right two screens to re-enter the North Horon region. Walk down along the rightmost path and then head right one screen. Continue down two screens and the season will turn to winter Winter.
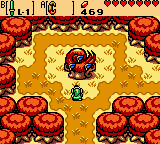
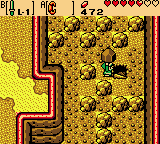
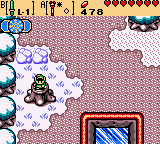
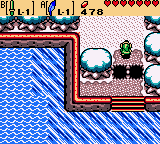
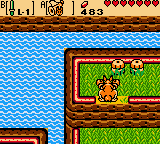
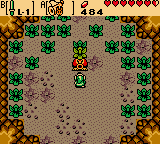
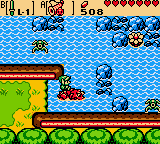
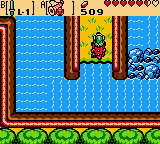
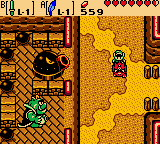
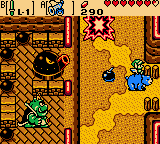
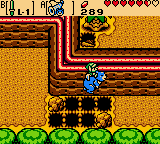
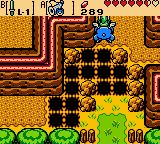
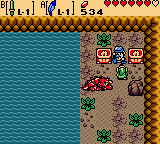
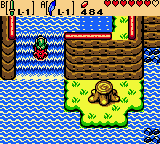
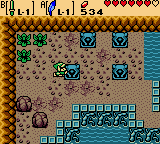
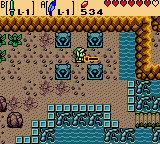
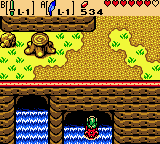
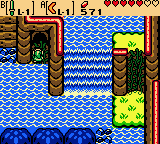
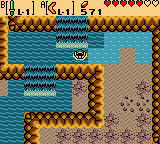
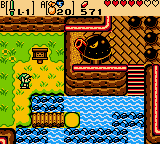
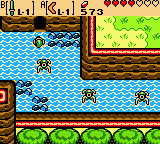
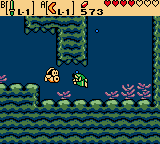
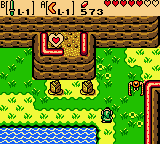
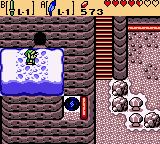
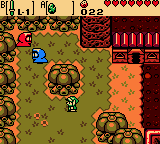
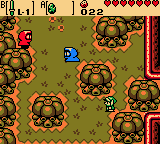
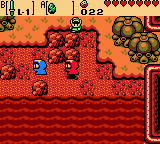
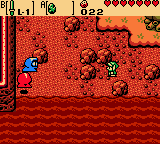
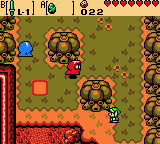
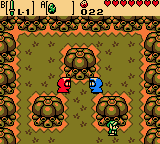
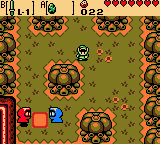
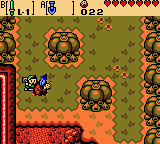
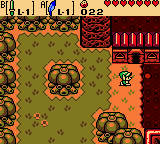
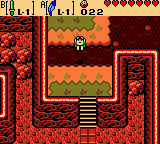
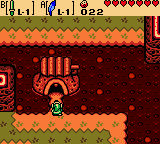
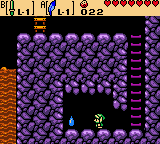
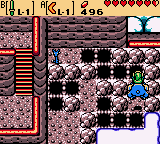
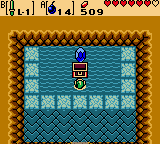
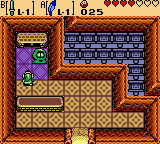
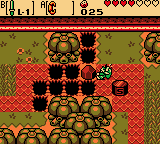
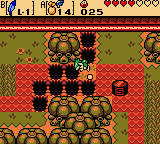
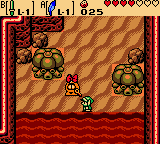
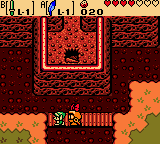
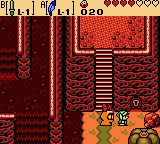
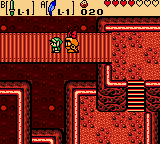
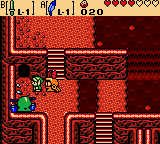
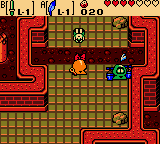
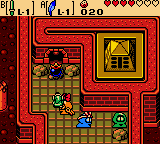
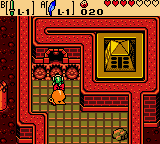
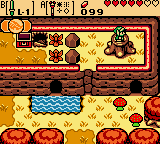
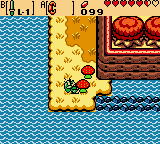
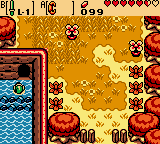
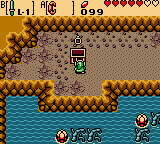
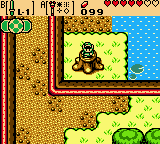
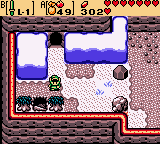
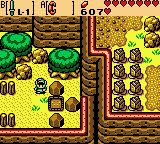
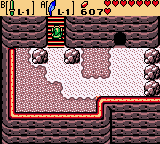
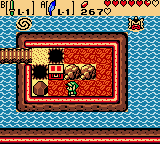
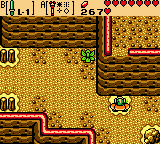
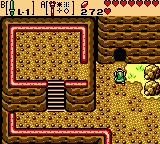
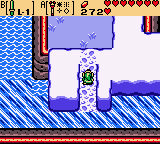
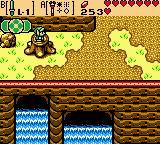
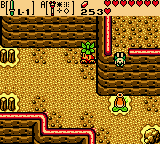
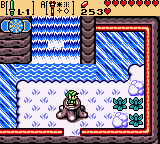
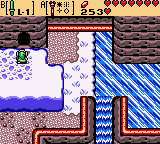
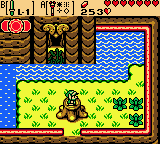
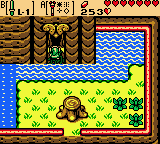
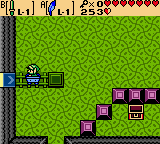
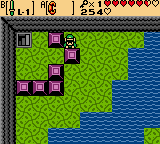
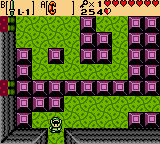
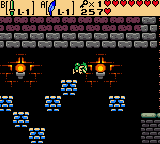
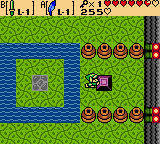
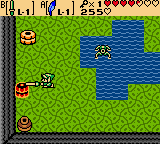
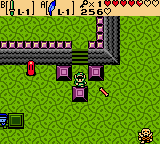
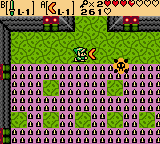
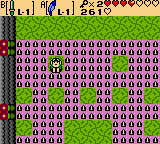
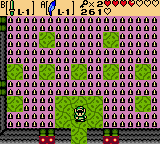
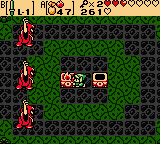
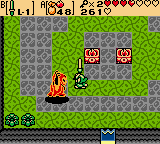
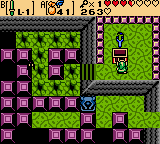
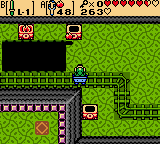
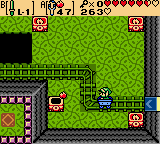
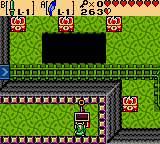
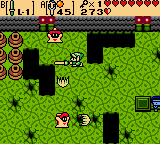
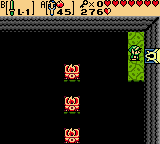
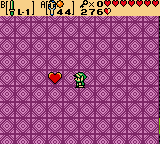
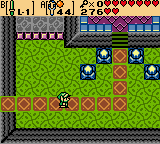
Toss the boulder aside and head right one and south one screen. Jump over the hole and walk down the steps. While walking along the frozen lake, walk right a screen, then up the steps and up one more screen. Hop on the stump here and change the season to Summer, then hop off and continue right one screen and down two screens. Follow the steps onto the dried-up lake and continue up one screen. Lift the lone boulder here to reveal a staircase and head down it.

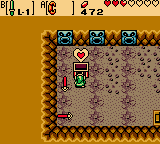
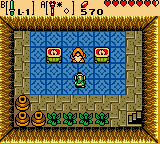
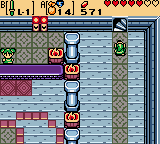
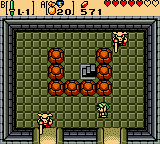
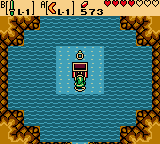
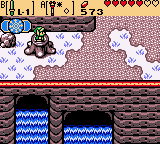
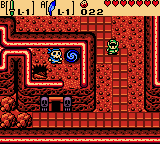
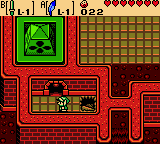
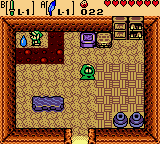
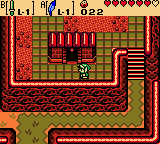
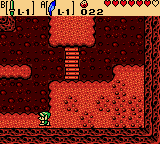
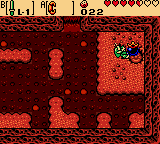
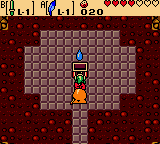
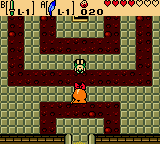
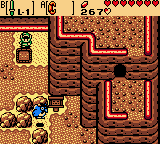
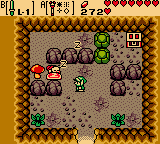
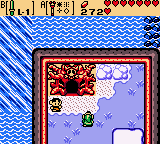
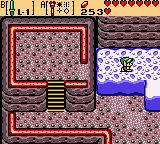
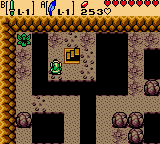
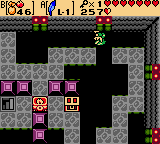
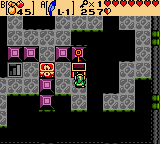
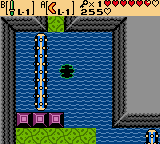
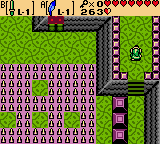
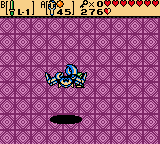
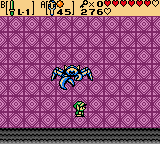
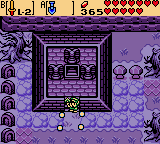
Follow the shallow path of water down, then head to the left side of the room to find another staircase. Head down this staircase, then advance to the lower-right corner of this room to find yet another staircase to descend. Do so, then quickly walk over to have Link directly below the chest in the room to avoid being hit by the arrows shooting at him from the walls. Open the chest here to recieve Heart Piece #5!
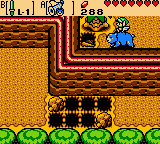
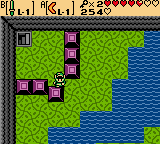
Exit this underground area entirely the same way you came in, then head back to the season-changing stump by going down one screen, up the steps and out of the dried lake, then up two screens via the path on the left. Continue left one screen to find the stump and use it to change the season to Winter.
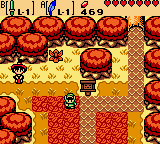
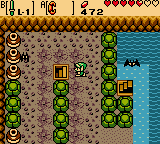
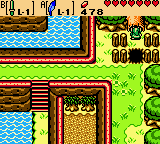
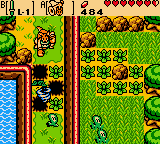
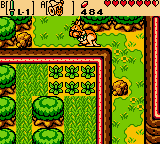
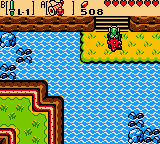
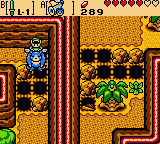
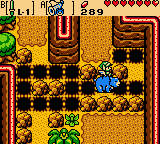
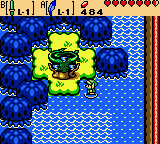
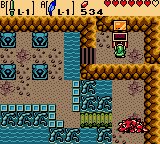
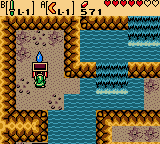
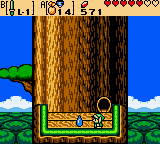
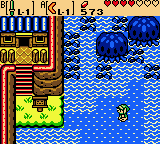
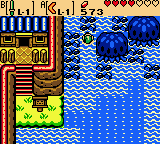
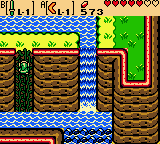
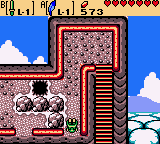
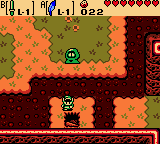
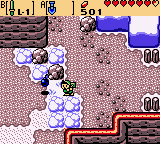
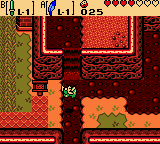
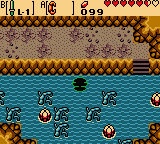
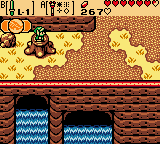
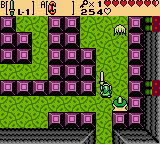
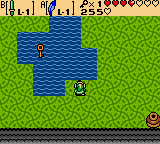
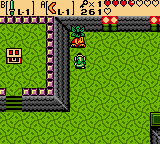
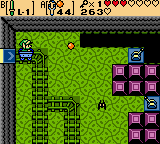
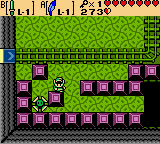
Continue down one screen and back across the frozen lake left one and up one more screen. Head left one screen, then toss one of the boulders aside and continue up two screens. Head left one and up one more screen. Use the Roc’s Feather to jump over the pit at the top of the screen and continue up one screen through the log here. The entire landscape of the Natzu area will change in both name and layout depending on which animal companion you have at this point.
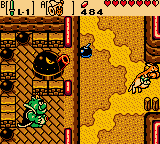
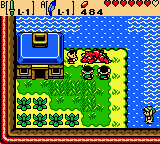
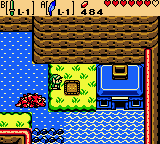
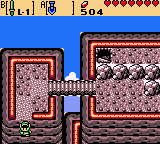
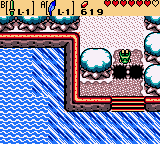
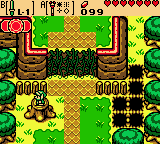
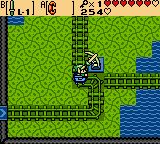
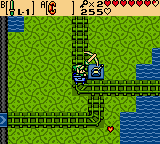
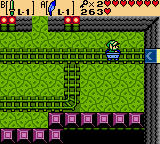
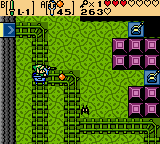
Use your sword to flip the red switch thus connecting the bridge on the left. If you head right one screen, you will find a cave containing a Great Fairy Fountain to refill your health. From the bridge Link just connected, head up the steps and up one screen, then use Ricky’s Flute to call him. Hop in Ricky’s pouch and use his abilities to scale the edge of the cliff here, then continue right for three screens, knocking down all the bushes and enemies in your way as you go.
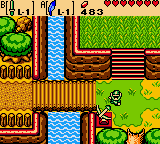
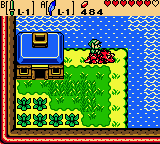
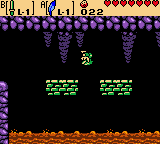
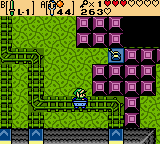
Head down one screen and hop off the ledge, then continue down another screen. Use Ricky’s Whirlwind Punch to clear the bushes across the pits, then jump over them and continue down one more screen. Scale the ledge on the right here and head up one screen.
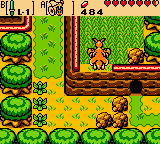
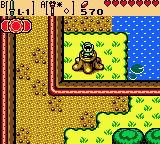
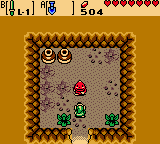
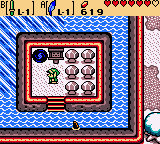
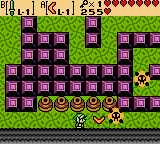
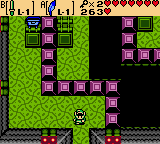
Clear the bushes and follow the path right one, up one, and down two screens. Hop off the ledge and head left here where you will discover a cave. Inside, a Deku Scrub will sing a song about “loving seeds” and, when Link agrees that he too loves this song, the Deku Scrub will refill Link’s seed satchel completely! You can use this Deku Scrub any time you would like to refill your seed satchel. Exit this cave when finished and head right one screen.
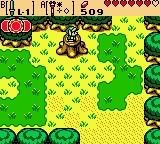
Tear through the bushes here and continue on the path up three screens. Continue right two and down one more screen where the Moblin King will yell at Link and start to shoot bombs at him. Ignore the Moblin King and instead continue right into the Sunken City. At this point, Ricky will bail out, saying the the city “smells like medicine” too much for him to stand.
 ~ Crossing the Natzu River (using Dimitri) ~
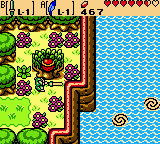
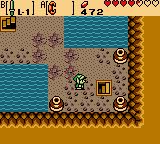
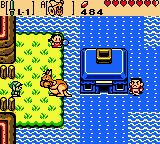
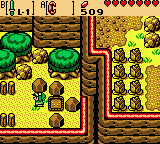
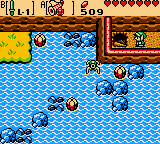
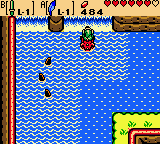
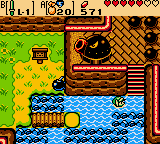
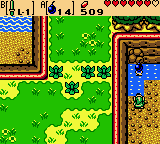
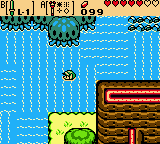
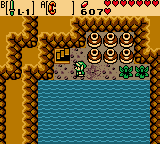
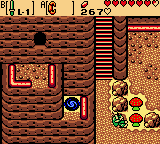
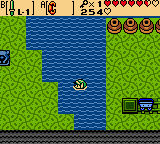
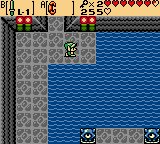
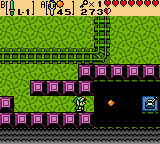
Head right one screen and use Dimitri’s Flute to call him. Hop on him and enter the water, then swim right one screen. Stay in the water and head up two more screens into the lower Goron Mountain area. Dismount Dimitri and head right three screens. Lift the middle boulder to discover a Soil Patch, then backtrack left three screens, walk down the steps and down one screen.
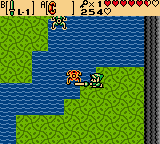
Use Dimitri’s Flute to call him again if necessary, then enter the water and head down one, right one, and down two more screens. Walk onto the piece of land and head up one screen, then head down the staircase to reach a Great Fairy Fountain. Use it if needed, then exit, get back on Dimitri, and head down one screen.
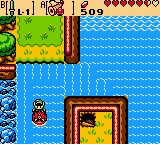
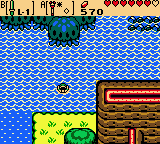
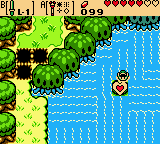
Enter the water again and swim right one and up one screen to reach a waterfall. Scale the waterfall up one screen and into the cave. Inside is a singing Deku Scrub who will refill Link’s seed satchel completely each time he comes in and speaks with him. Exit the cave and head back down the waterfall down one screen.
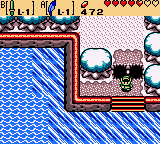
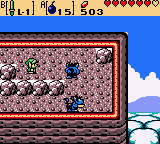
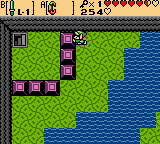
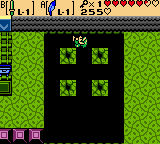
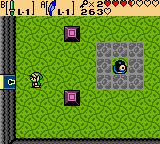
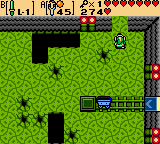
Head up two screens on either side of the waterfall, then continue right one screen. Walk up the steps here and dismount Dimitri, then head left two screens along this path to reach a staircase. Head down and into the underground area, then make your way across the moving platforms to the right side of this room. Open the chest here to recieve 50 Rupees! Exit this underground area and head right two screens, then hop back on Dimitri and enter the water at the bottom of the steps.
Swim down to the area of land on the right and dismount Dimitri. Continue on right one screen, hop over the pits and go down one screen. Ignore the Moblin King’s threats for now and go straight into Sunken City via the opening on the right.
 ~ Crossing the Natzu Wasteland (using Moosh) ~
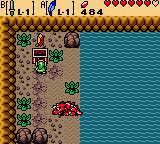
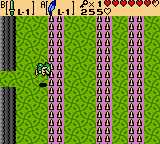
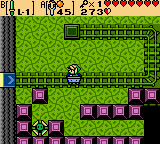
Use your sword to flip the red switch and connect the bridge on the left. Cross the bridge and continue left one screen and equip Moosh’s Flute to call him. Hop on Moosh and head back right one screen to the bridge.

There is a Great Fairy Fountain located down a staircase up one, right one, and down one screen from the bridge. Use it if you wish, then make your way back to the screen with the bridge. Head right one screen and use Moosh’s flying abilities to cross over the pits and continue to the next screen. Again, there are pits to fly over, so do so and head right a screen.
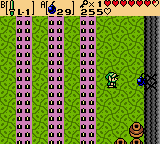
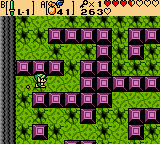
Fly over the pits and head down a screen. Here, you want to fly across the pits to the lone piece of land on the right to make it safely without running out of flying power. Make your way across the pits on the upper-right and head up one screen. Here, you will find a staircase leading down to a Deku Scrub who will sing Link a song about his love for seeds. If Link agrees that he too loves the song, the Deku Scrub will refill Link’s seed satched fully! Link can return to this Deku Scrub at any time to refill his seed satchel.
After refilling your seed satchel, exit this area and slash the bush on the right. Continue using Moosh to fly across the pits and head right one, up one, then right two screens. Jump over the pits here and continue down one screen. The Moblin King will have a short few words for Link before attempting to shoot bombs at him, but ignore him for now and simply head through the path on the right, right one screen, to the Sunken City.
Because Moosh’s weakness is his lack of an ability to swim, Sunken City will frighten him off, leaving Link to continue on alone…
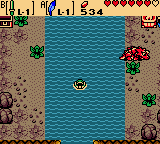
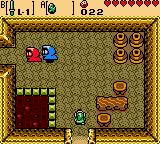
There are a few goodies Link can obtain from Sunken City, most importantly a very special item that will allow him to finally swim! To start, hop across the deep water onto the more shallow area and head down one screen. Continue right two screens and up one to reach a new seed tree containing the Gale Seeds! Using these seeds make traveling great distances across Holodrum much easier, as they will teleport Link to any seed tree location he has visited and obtained seeds from.
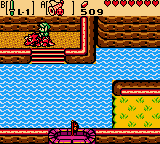
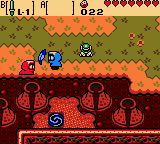
Head back down one and left two screens where Link will find Dimitri the Dodongo being mistaken for a monster by three kids. Speak with the kid wearing green on the left who will request some bombs from Link. Give him the bombs and speak with Dimitri, who will thank you for saving him and provide his services to you for a while.
** If you have obtained Dimitri’s Flute, this cutscene will not take place. Instead, call Dimitri when you reach this screen and continue on below.
Dimitri has the ability to swim and scale waterfalls, which is just what Link needs in a city such as this. While riding Dimitri, head up two and right one screen. Scale the waterfall here and continue up one and right one screen. Cut down the bush next to the house to reveal a Soil Patch, then head back left one screen.
Head up the rightmost waterfall up one screen and enter the cave. Open the chest on the left side of this cave to obtain 50 Rupees! Over on the right side, Link will find the Master Diver. Speak with him and he will request that Link complete a puzzle in the next cave over. Exit this cave and head down one screen. Scale the leftmost waterfall this time up one screen and into the cave.
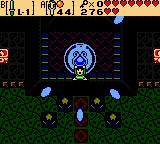
Dismount Dimitri on the piece of land at the right side of this room. Head across the bridge over to the left side of the room where there are four blue statues laid out in a random order. From left to right, we will number these statues “1-4” accordingly. To solve this puzzle, move Statue #3 “right” once, then move Statue #2 “up” once and “right” once. Finally, push Statue #1 “up” once and “right” twice. Stand in the middle of the statues and unleash a Spin Attack, causing Link to hit all statues fast enough to open a set of stairs on the right. Jump across the deep waters and climb the stairs and access a chest containing the Master’s Plaque! Hop off the ledge and back on Dimitri to exit this cave, then head on over and up the rightmost waterfall back to the cave where the Master Diver is located.
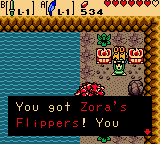
Show the Master Diver the plaque you just recieved and he will reward Link with the Zora’s Flippers! Finally, Link can enter deep waters and swim on his own, as well as dive underwater by pressing the “B” button, effectively swimming under enemies such as Tektites. The Master Diver will also reveal a secret route to Mt. Cucco which Link will use in just a little bit. You still will need to use Dimitri to exit this cave. The waterfall will take you down one screen. Walk over to the right onto the shallow water and equip the Gale Seeds.
Now the Link has the flippers, he can explore many previously unaccessible areas throughout Holodrum. Use a Gale Seed to warp to the middle of Holodrum in the North Horon area. Head down three screens, toss the boulder here aside and continue right one screen. Hop on the stump and change the season to Summer, then head left two screens across the bridge and walk down the steps on the left. Walk down the uncovered staircase here and speak with the wise old man.
This particular wise man has a distinctive orange color that separates him from the rest, as well as the quest which he asks Link to complete. He explains that he can give Link “true power” if he is to slay the four golden beasts that roam Holodrum. Exit the wise man’s house and equip the Gale Seeds.
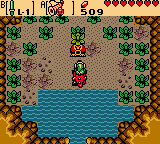
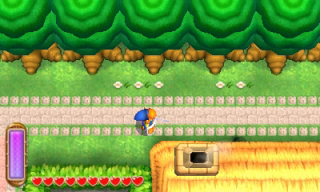
The location of the first Golden Beast is Spool Swamp, so use a Gale Seed to warp there. Head down one, left one, and up one screen. Jump off the ledge to the left and continue left one screen to the location of the season-changing stump. Hop on it and change the season to Summer, then head right one and down three screens.
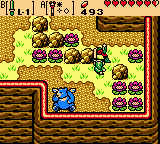
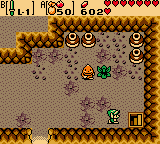
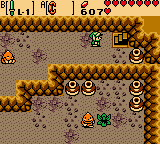
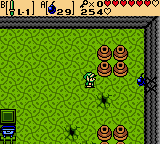
Continue right one and down two more screens. You will remember this path from earlier with the many Pincers that attempt to grab Link. Continue on left two screens along this path to reach the area with the Soil Patch from before, where you will also run into the first of the four golden beasts, an Octorok. All of the beasts are more aggressive than their other, more common counterparts, and will also take more damage before they die. Be careful not to knock the Octorok into the pits here as it will not count as defeating it, and you will have to leave and return to this screen with the Octorok respawned and renewed of health.
After defeating the first Golden Beast, use a Gale Seed to warp back to Sunken City. Head up one screen. If the season is not already Summer, continue left one screen and use the stump to change it, then head back right one screen. Climb the leftmost set of vines leading to the cave. Inside, Link can obtain a Gasha Seed from the chest. Exit the cave and head back down one screen to the location of the Gale Seed tree.
Continue down one and left one screen. Along the path of shallow water is a one-squared section of deep water that the path goes around. Dive underneath this section of deep water to reach a hidden cave area below. Make your way to the left side of this cave to find another chest containing a Gasha Seed, then exit the cave to the south.
Use a Gale Seed to warp to Horon Village. Head up one, right one, and up two screens into the Maku Tree’s area. Enter the Maku Tree and follow the path to the top of the room and up the staircase until your reach his branches above. Grab the Gasha Seed here, then exit the Maku Tree’s area back to Horon Village.

Use a Gale Seed to warp to Sunken City. Exit the city through the western entrance, down one, left two, up one, and left one screen from the seed tree’s location. This area will be different, depending on which Animal Companion Link has. Continue up one and left two screens along the path, then head down three screens and right one. Cross the bridge and swim across to the steps. Walk up them and continue up two screens and enter the Moblin’s Keep.

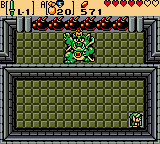
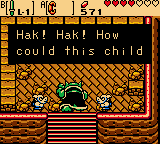
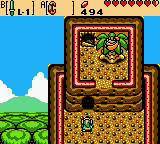
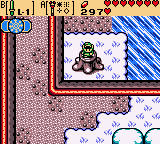
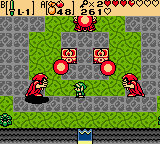
Defeat or avoid the two Moblins in this room and head up the staircase to reach the chamber of the Moblin King. After a cutscene, the Moblin King will being throwing large bombs at Link. You must equip the Power Bracelet to lift and toss the bombs back at the Moblin King, but timing is very important here. If you throw them back too soon, the Moblin King can run over and pick them up, tossing them back at Link. The idea is to time the bombs just right so that they explode on the Moblin King when thrown back. After landing six successful bombs on him, the Moblin King will be defeated and the Moblin’s Keep will come crumbling to the ground. Left behind will be a chest containing Piece of Heart #6!

Use a Gale Seed to warp to North Horon. From the Mystical Tree head down one, left one, and up one screen. Climb down the stairs on the left, enter the water, and swim left one and down one screen to reach an island. Beneath the second bush from the left on the bottom row lies a Soil Patch for planting Gasha Seeds. You may have already discovered this earlier if you have Dimitri’s Flute.

When leaving the island, swim down four and left two screens. Enter the opening in the side of the left wall here, leading to a cave. Inside is a chest containing a Magical Ring that will later appraise into the Octo Ring! When worn, this ring will change Link’s shape into that of a green Octorok. However, like many other “novelty” rings in the game, Link will not gain any of the monster’s abilities and will actually lose the option to use items while in this form.
Exit the cave and use a Gale Seed to warp back to Sunken City. Head up one screen and left two screens. Follow the path of deep water to the north that goes between the rocks and the blue tree. Use the Flippers to dive down underwater. Navigate the underwater passage right one screen, then swim up and out. Link will resurface one screen north of where he originally dove down, now technically in the Mt. Cucco area. Climb the vines growing up the side of the wall here and head up one and right one screen to reach a season-changing stump.
Use the stump to change the season to Winter, then head up one screen. Walk up the long flight of stairs up another screen, then circle around to the left. You will notice that there are two indentions in the cliff here. The leftmost indention will drop Link one screen down to a patch of snow leading to a cave containing a Great Fairy Fountain. You may use this if needed, but when finished, jump off the rightmost indention to land inside a portal leading to Subrosia.
Jump across the river of lava in front of the portal. Two Subrosians, one red and one blue, will come running from the east and bump into Link, causing him to drop the Roc’s Feather. The Subrosians will then pick up the feather and, without asking, “trade” Link a piece of Fool’s Ore in return. These thieving Subrosians will then run off to the west. Follow them left one screen and enter the house here. The two Subrosians will be inside talking about hiding their new treasure. Follow them left one screen and exit the house from that side.

This next sequence is very similar to the one from before with Rosa. Link must use the objects (trees, rocks, etc.) within each screen to keep the Subrosians from seeing him. This time will prove more difficult as there are two Subrosians searching each area to make sure no one is following them. Follow the Subrosians throughout this course until, finally, they will head down one screen to bury the feather in a rather obvious spot. Simply use the shovel to dig the feather back up, replacing the Fool’s Ore, then exit this area back through the house and out the other side. Link can return to this house at any time and repeat the sequence, either ending up with a Golden Ore Chunk (worth 50 chunks), or a Gasha Seed each time.
After leaving the house, head down two screens. You will find a house which belongs to a group of pirates with one seen standing on the roof. Enter and head up the flight of stairs to the second floor. Speak with the pirate on the right and he will show Link a secret password with the shelves in the room that he will use at a later time. Afterwards, head on up the next staircase in this room to reach the roof. Enter the portal here to momentarily return to Holodrum.
Link will emerge within a small room containing an unconnected bridge. This room is actually located underground in Horon Village and can be used as a shortcut from there to Subrosia via this portal. Hit the blue switch to connect the bridge. This would be a good time to head up to Horon Village and take care of all those unappraised rings Link may be carrying. Head back to Subrosia via this same portal when finished.
Jump off the roof of the House of Pirates and head up two screens. Continue right two more screens and up one and enter the house here. Hop across the lava inside to retrieve a Gasha Seed! Exit this house and head down two screens. Jump the lava surrounding the staircase leading underground and enter it.
Navigate this area by heading right one screen across the moving platforms. Once you reach the far right side of the next room, head down the purple ladder to discover another Gasha Seed. Head back up this ladder and then use the yellow one to exit the underground area. Link will resurface at the Temple of Seasons, this one with a green roof and a symbol which represents the Spring season. Go ahead and enter the temple.
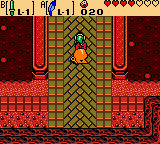
Hop across the lava going straight ahead and use the staircase to reach the next level. Follow this hallway to another staircase leading to the chamber of the season spirit. Walk up to the altar and the spirit will grant Link’s Rod of Seasons with a third season, the Power of Spring! Now, exit the Temple of Seasons and backtrack through the underground passage until exiting where Link originally entered.
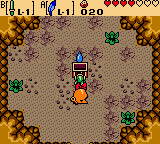
Jump the lava to the area of land north of where the underground passage is and head left one screen. Jump the lava again to reach and enter the portal which takes Link back to Mt. Cucco. Hop off the ledge, going down one screen, and use the stump to change the season to Spring.
** If you already have Moosh’s Flute, you will not need to obtain the Spring Bananas in this next part. You may still want to reach the mountaintop and obtain the Magical Ring.
Walk right one screen and speak to the flying blue bear known as Moosh. He will mention smelling a Spring Banana at the peak of the mountain to the north but cannot reach it. Chop down the flowers on the right and take the path north one screen. Use the Power Bracelet to lift the Flying Cucco into the air and continue tapping the “A” button very fast to have him fly as high as possible. When the Cucco drops Link onto the ledge, head up one screen and enter the cave.
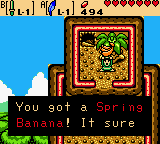
Hop onto the first platform directly ahead of the one Link enters on. From there, head right two platforms, then up two platforms. Continue hoping across to the left until you reach a staircase leading up and take it. Link will come out on the very top of the mountain next to a banana tree. Use Link’s sword to swipe down the Spring Bananas from the tree, then hop off the ledge and head down one screen.

Hop of this next ledge and enter the cave here. Inside, a green platform quickly circles a section of land in the center, while the rest of the room is a blank, bottomless pit. Link must ride the green platform to the left side of the central land mass and step on the switch to reveal a Magical Ring on the right side. Four Keese will make this even more difficult than it already is and can easily knock Link into the abyss if he makes contact with them, therefore it is worth your time to dispose of the Keese before attempting to complete the puzzle. The ring which Link obtains here will later appraise as the Green Joy Ring, doubling all Ore Chunks dug up from the grounds of Subrosia.
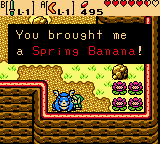
Exit the cave and hop off the next ledge, going down one screen, then walk over and talk to Moosh. Link will give him the Spring Bananas and, as a thank-you, Moosh will lend his services for a brief period. Take Moosh left five screens into the Goron Mountain area, then head up one more screen. Use Moosh to fly and hover over the pits by pressing the “A” button very fast. Follow the path until you reach the Dragon Key on the other side. This key is Link’s ticket into the next dungeon, though getting there is still a little ways off. Use Moosh to leave this area back down one screen.
Use Moosh’s “ground-pound” attack, or use the Shovel, to clear the piles of snow on the left and head left one screen. Bomb the cracked wall in the side of the mountain to reveal a cave and enter it. Inside, follow the path all the way to the upper-right side of the room and head up the staircase. This will take Link to a higher point on Goron Mountain. Now, head right one screen, climb the steps, then head back left one screen and enter through the opening here.

The third bush up from the three at the bottom, and the first bush of the three above in this room, are both disguised Spiny Beetles waiting for Link to cross their path. On the other side of this room, head up the staircase to reach the peak of Goron Mountain, then head right one screen.
Here, you will encounter the Blue Lynel for the first time during this quest. These enemies do more damage than any other regular enemy and are also harder to kill. Link must avoid being seen by the Lynel or it will charge and throw arrows at him. It will take 6 L-1 Sword strikes to bring down one of the Blue Lynels. Afterwards, head around to the path on the underside of the rocks and go left one screen. Cross the bridge and jump off the cliff on the far left, taking Link down one screen onto another ledge with a cave entrance. Head inside and speak with the red Goron who will grant Link the L-2 Ring Box for coming such a great distance to visit him! While the L-1 Ring Box only allows Link to carry one ring at a time, the L-2 version allows three rings to be carried at once, although you can still only use one at a time. Exit the cave and jump off this cliff, falling down one screen back to where Link blew up the wall and first entered the mountain.
Use a Gale Seed to warp back to North Horon, then head down three screens. Toss the boulder aside and continue right one more screen, then use the stump to change the season to Summer. Head down another screen, jump over the pits, then head left one screen. Bomb the cracked wall and enter the cave seen here to access a chest containing 100 Rupees! Exit this cave when finished and backtrack to the season-changing stump.
Use the stump to change the season to Winter. Head south one screen, jump across the pits again, and walk down onto the iced-over portion of the lake. Walk down one screen from here and right one. Swim over to the island and enter the portal to Subrosia.

Once in Subrosia, head down one screen to find the Sign Loving Subrosian’s house. Once Link has broken 100 signs on his quest, the Sign Loving Subrosian, although disgruntled, will give Link another “novelty” Magical Ring that appraises as the Sign Ring. This ring only shows that Link has broken at least 100 signs.
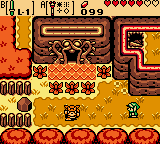
From the Sign Loving Subrosian’s house, head down the steps on the right and continue down two more screens. Next, head left one screen along the path at the bottom of this screen. Use the Roc’s Feather to jump across the patches of ground throughout the pool of lava and continue left another screen. Finally, head up one and right one screen and make your way over to the strange-looking item on the far right. Use the Power Bracelet to lift this item and it will be revealed as a Bomb Flower! This item is essential to obtaining the last season power.

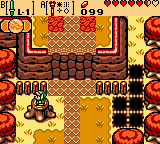
Exit this area the same way you came in and head all the way back to the screen with the Sign Loving Subrosian’s house, but do not head back up the steps. Instead, take the lower path going west left one screen. Hop across the lava and continue left one and up one screen. Here, use the Power Bracelet to toss aside the boulder, then equip both the Pegasus Seeds and the Roc’s Feather. Link can gain enough speed by using a Pegasus Seed that he can jump over two pits at a time, so do that for the two pits which the boulder was in front of and continue left two screens.
Go down two screens, right one, then down one more to find Rosa in the same spot as before. Speak with her again to have her tag along and exit this area by heading up one, left one, then up two more screens. Head directly left one more screen and enter the Subrosian Market. Go ahead and purchase the Member’s Card here for the cost of 5 Ore Chunks. This card will allow Link to enter the door behind the counter of Horon Village Shop which leads to a super-secret shop selling rare items.

Leave the Subrosian Market, head up one screen, then walk through the passage Rosa helped to unlock earlier and out the opposite side. Continue up one and left one screen, then cross the bridge here and head left another screen. Hop over the lava and head up the steps on the left for two screens, then head left one screen, down the stairs here and down one screen. Walk down the steps here and use Rosa’s key to unlock the door at the bottom. Enter to find a chest containing a Gasha Seed!
Exit the cave and head back up the steps one screen up. Take the bridge at the top left one screen, then walk down the steps and continue down one screen. Walk down this next flight of steps and enter the cave just to the left of them. Inside, Link will find a chest containing another Gasha Seed!
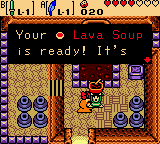
Exit this cave and continue down another screen. Jump off the ledge and head right one screen. Enter the house here and speak with the Subrosian living inside to trade him the Iron Pot for some Lava Soup! Our next stop is the Temple of Seasons, so exit this house and head down one screen. Hop across the river of lava and continue right one, then up one screen. Jump over this next river of lava to the right and continue going right for four more screens. Walk down one screen, then head down the steps here and continue right two more screens.
Continue up two screens into the temple area, then head right one screen. Jump the stream of lava and continue up another screen. Speak with the blue Subrosian wearing the headband here and he will use the Bomb Flower Link obtained earlier to clear the rubble blocking the entrance to this section of the Temple of Seasons. Once the path is clear, step inside of the temple.
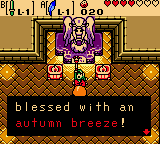
Hop across the areas of lava and go straight ahead to reach a staircase. Take it up one floor, head to the opposite side of this hallway and take the stairs here to the third floor. Walk up to the altar to have the season spirit awaken and grant the Power of Autumn to the Rod of Seasons. With this, Link will have finally acquired all four season powers! Head all the way back out to the temple’s entrance, then go down one and left one screen. Continue down two and left two more screens, then head up three screens to reach a portal. Enter it to return to the Woods of Winter.

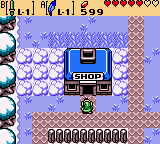
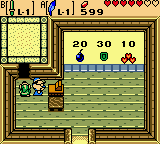
Use a Gale Seed to warp to Horon Village and head up one screen. Appraise any rings if necessary, then leave the Ring Shop and head left two screens. Enter the Horon Village Shop and walk behind the counter. Instead of usually stopping Link, the Shop Keeper will notice his new Member’s Card and allow him to enter the secret shop in the basement. The following items are sold at the “Member’s Only Shop”:
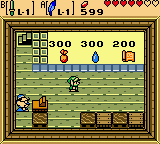
-Seed Satchel Upgrade (300 Rupees) – Total capacity for each seed carried becomes 50.
-Gasha Seed (300 Rupees) – Once purchased, will be replaced with another for 500 Rupees.
-Treasure Map (200 Rupees) – Shows the locations of the four Jewels needed to access Level 6 later in Link’s quest.
** After purchasing all the items, as well as the 500 rupee Gasha Seed, the secret shop will become a “guessing game”. The object of this game is to guess which of two chests contains a big rupee inside. Three to five consecutive correct guesses will win Link a Magical Ring that will later appraise randomly.
When finished at the Shop, use a Gale Seed and warp back to the Woods of Winter. Head up one scren and climb the vines to reach the stump and change the season to Autumn. Hop off the ledge and head left one screen to find the second golden beast, a Golden Moblin. After defeating it, use a Gale Seed to warp to Spool Swamp.
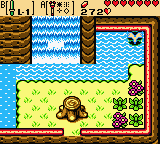
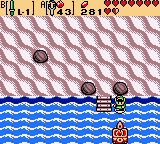
Head right one and down two screens into the North Horon region, then jump off the ledge and use the stump to change the season to Autumn. Afterwards, head down one, right one, and up four screens. Continue right two more screens and head down the steps, then go down two more screens. Toss the mushrooms aside and swim the path of water they were blocking right one screen. Enter the cave here and swim right one screen, diving to avoid the fireballs shot by the many Goponga Flowers along the way. Once you reach the steps at the far right side of the cave, head up and walk back left one screen along the upper ledge. Link will come to a chest containing a Magical Ring which later appraises as the Quicksand Ring. This ring will prevent Link from sinking in quicksand when worn.
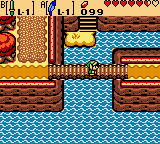
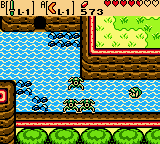
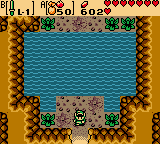
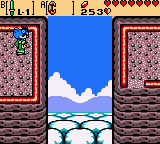
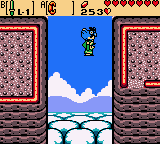
Head straight down, jump off the ledge and swim out of the cave. Without stepping into the water, use a Gale Seed and warp to Spool Swamp again. From the tree, head down one, left one, and up one screen. Hop off the ledge on the left and continue left one screen to the stump. Use it to change the season to Spring, then go right one and south three screens. Continue swimming right one and down one screen into the River Rapids. The rapids will automatically take Link left one screen, where he will find Piece of Heart #7 on a lone patch of earth in the water.
Use a Gale Seed to, once again, warp to Spool Swamp. Head right one and down two screens, then jump off the ledge and use the stump to change the season to Summer. Continue down one more screen, then right one and up four screens. Head right two more screens, take the steps down and walk along the path down one screen. Climb the vines here and walk up one screen along the ledge. Use an Ember Seed to burn down the tree on the right to reveal a stairwell leading undergound. Inside, speak with the Nice Old Man who will give Link 200 Rupees!
Leave the old man’s hideout and warp back to Spool Swamp again. Head down one, left one, and up one screen. Jump off the ledge and go left another screen to access the stump. Change the season to Winter, then head right one, down three, and right one more screen. Enter the deep water at the bottom-right and swim down one screen, then walk along the ice on the left and walk down another screen. Shovel the piles of snow and use a bomb to open the broken wall at the top-right. Enter this cave and open the chest to retrieve the Square Jewel!
Exit the cave and use a Gale Seed to warp to Sunken City, then head up one and left two screens. Enter the hidden underwater path again and resurface on the other side. Climb the vines here and head up one screen. Then, head left five screens into the lower Goron Mountain area. Toss the boulders aside and use an Ember Seed to burn the middle of the three trees, revealing a stairwell. Inside, a Nice Old Man will give Link 300 Rupees! Once you exit, head up and enter the inner Goron Mountains.
Walk right and head down the stairwell. Swim across the water south and exit this cave, then head right two screens. Lift the middle boulder to reveal a Soil Patch and plant a Gasha Seed, then head back left two screens and re-enter the cave.
Swim back across the water and head up the stairs, then walk to the left side of this room. Head up the steps and walk along this ledge right until reaching a staircase going up. Go up the staircase to the next level and navigate to the bottom-right of this lava-filled room to exit the cave.
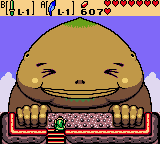
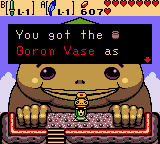
Follow the steps to the left up one screen to reach Biggoron. Upon speaking with him, Biggoron reveals that he is sick with a cold and needs something to warm his body up. He will then ask for the Lava Soup which Link obtained earlier and offer the Goron Vase in exchange. After making the trade, use a Gale Seed to warp back to Sunken City.
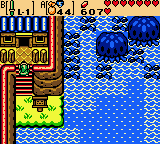
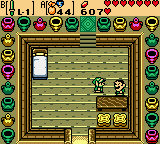
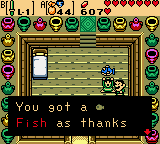
Head up one and left two screens and enter the house up the steps. Here resides Ingo, a vase collector wh, upon speaking with, will notice Link’s newly obtained Goron Vase. Trade Ingo the Goron Vase for a Fish, then leave his house and warp to North Horon.
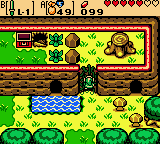
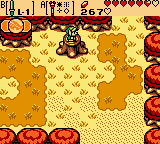
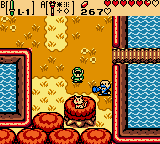
Head down three screens, move the boulder blocking the way and continue right one more screen. Use the stump to change the season to Autumn and head back left one screen then down two. Speak with the man here who is trying to get his cat “Mittens” to come down from the tree. The man will offer to trade Link a Megaphone in exchange for his Fish in hopes of having better success with this task. Do so, and Mittens will finally come down. Cross the bridge on the right one screen over, then walk along the path of leaves without stopping as certain portions will fall into bottomless pits. Link will eventually reach a chest containing a Gasha Seed.
Next, use a Gale Seed and warp to Sunken City. Go up one and left two screens and take the underwater route again to Mt. Cucco. Climb the vines and head up one screen, then walk right one screen and use the stump to change the season to Autumn. Continue up one screen, toss the mushrooms aside and head right one screen through this pathway. Here will be a Soil Patch to plant that Gasha Seed Link just obtained.
Afterwards, head back to the tree stump and change the season to Spring. Walk left three screens and step onto the flower to have it propell Link up onto the ledge above. Continue up one screen and enter the cave here.
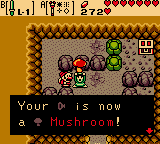
Inside the cave is Talon who is, as he has been known to do, sleeping on the job. Link will wake Talon using the Megaphone, who then will take the Megaphone from Link and give him a Mushroom in return. Once Talon heads home, continue around the upper path and push the green block Link comes to to the right. Push the green block below it down once to gain access to the chest in this room which contains a Magical Ring! This ring will later appraise as the Subrosian Ring which will act in the same way as the Octo or Moblin ring and change Link’s shape when worn to that of a Subrosian.
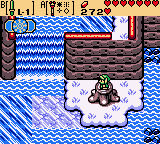
Exit the cave and continue on right two screens. Swim to the upper-right corner of the water here and dive down into an underwater cavern. Swim one screen to the right, then to the far right of this room to discover and obtain the Pyramid Jewel! Leave this underwater cavern back to Mt. Cucco and jump off the ledge below the stump. Link will land on the smaller ledge you may have noticed before containing Piece of Heart #8!


After grabbing the Heart Piece, use a Gale Seed and warp back to Sunken City. Head up one and left one screen and use the stump to change the season to Winter. Continue down two screens from here and head through the path of snow up one screen to reach Syrup’s Potion Shop. Enter the shop and speak with Syrup, who will trade Link the Mushroom for a Wooden Bird. Now that Syrup has a Mushroom, she can make Magic Potions which Link can re-enter this shop and purchase for 300 rupees. Syrup will also sell Gasha Seeds for 300 rupees a piece that never run out of stock, unlike most other shops that sell them throughout Holodrum.
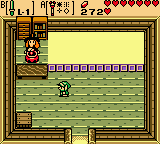
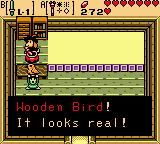

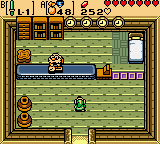
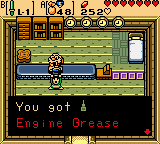
Exit Syrup’s shop and warp to Horon Village. Head up one screen, appraise any rings if needed, then continue left one and up one more screen to the Clock Shop. Enter and speak with the shop owner who reveals his desire to make a Cucco Clock, only if he had a Wooden Bird. Trade the shop owner the Wooden Bird and he will give Link the Engine Grease in exchange.

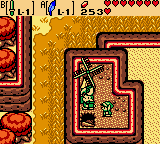
Leave the Clock Shop and head down one and right three screens into the Eastern Suburbs region. Go inside the opening in the mountain at the top of the screen which actually leads underneath the Windmill. Head right along the path, circling around to the upper-left section of the room and go up the staircase. Head up the staircase in this next room as well to come out on top of the hill. Speak with the man here, named Guru Guru, who will offer to trade Link his Phonograph in exchange for the Engine Grease needed to make the windmill spin faster.

After obtaining the Phonograph, use a Gale Seed and warp to Sunken City once more. Head up one and left two screens and take the underwater path yet again to Mt. Cucco. When you resurface, head up the vines and go up one and right one screen to the stump. Change the season to Spring, then head left three screens and use the flower to once again propell Link onto the ledge above. Continue up one and right two screens and use the stump here to change the season to Winter
Backtrack left two screens, climb the steps, and head across the path of snow right one screen. Enter the cave here and take path on the upper side of the rocks left one screen. Continue hopping across the pits heading left until you reach the staircase and take it up one level. Circle around the gap in the middle of this room to the staircase on the other side and take it up and out onto the peaks of Mt. Cucco.
Head right one screen and use the Power Bracelet to lift the Flying Cucco once again. Rapidly press the “A” button as before to have the Cucco drop Link onto the opposite ledge, then continue right another screen. Walk up to and press against the boulder with a key hole and Link will insert the Dragon Key, stopping the waterfall below from flowing and thus, revealing the entrance to Level 4.

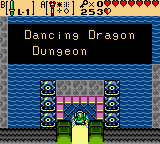
Walk left one screen and jump off the ledge down one screen. Head right one screen and use the stump to change the season to Summer. This will cause vines to grow into the entrance of the dungeon giving Link access. When you are ready, swim across and climb the vines to enter Level 4: Dancing Dragon Dungeon.
~Second Floor~
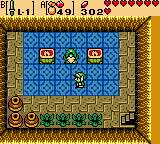
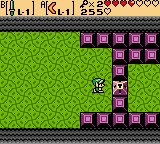
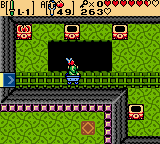
Link enters this dungeon on the second floor, room D3. Swim across the water and take the path in the upper-left corner of the room up one screen to room 2F-C3. Defeat the two Shrouded Stalfos in this room, then push the second block from the right on the far right side of the room “right” or “down” to access a chest containing 10 Bombs.

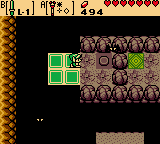
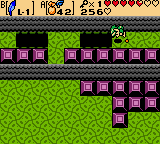
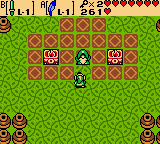
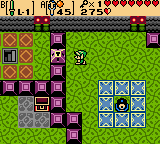
Hop inside the mine car on the left which takes Link all the way to room 2F-B2. Defeat the enemies in this room and bomb the cracked portion of the rightmost wall, then enter right one room to 2F-B3. All switches in this room must be pushed down in order to complete the puzzle. Toss aside the top and bottom vases in the middle row, then push the remaining ones onto the switches. Stand on the last switch and a Small Key will fall from the ceiling. Grab it and head back left one screen to 2F-B2.
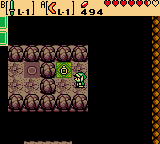
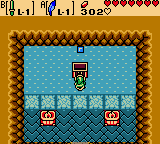
Hop back into the mine cart and when it takes you into the next room down, hit the blue switch with Link’s sword to change the track’s path. The cart should now take Link to room 2F-C1. Swim over to the statue on the left side of the room and push it on top of the switch in the top-left corner. This will unlock the door at the top of the room, so enter up one screen to room 2F-B1.
Make your way to the rows of purple blocks in the upper-left of the room. Push the topmost block in the vertical row “left”, then push the bottom block in this row “left”. Push the middle block “down” or “up” and enter the staircase going down to the first floor, room B1.
~First Floor~
Be careful not to get hit by the Green Wizrobes that emerge in this room. Time it so when they appear, Link can get at least a couple sword slashes in and they will be defeated. Continue along this path, passing up the first opening going down and head through the one on the lower-left side of the room to 1F-C1.
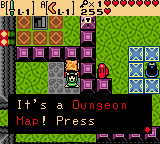
Circle around to the right side of this room and head through the opening right one screen to 1F-C2. Defeat the two Green Gels that spawn when Link nears the chest, then open it to obtain the Dungeon Map! Head back left one room to 1F-C1 and head down the staircase at the lower-left corner of the room to a dungeon area below.
Hop across the green moving platforms and go right one screen. This next passage contains blue platforms that will periodically appear and disappear. Jump on the first one Link comes to when it appears, then on over to the next that also appears at the same time. Hop onto the one that appears directly behind Link next, then wait for one to appear to the right and up a little and jump onto it. Wait for the next one to the right appear, then hop across and then onto the final one that appears closest to the ledge with a ladder. Hop over onto the ledge and head up the ladder to room 1F-C6.
The torch in this room can be lit to see better, but the path of solid floor is already visible. Follow it clockwise until you reach a chest and open it to recieve a Small Key. Circle back around the path, head back into the underground area.

To navigate back across the magic blue platforms, jump on the platform that appears right in front of you. Drop down to the one that appears below and left of this one next. Drop onto the next one that appears below and left again, then jump on the one that appears slightly up and to the left of this one. Jump on the one that appears below and left of this one when it appears, then hop onto the ledge. Continue left one screen across the platforms and out of the dungeon area to 1F-C1.
Head directly up one screen to room 1F-B1, then make your way around the path again and head back up the staircase to the second floor, room B1.
~Second Floor~
Push the third block from the left on the horizontal row “down”, then swim across to the other side. Defeat the water tektites to open the door and then head down one screen to 2F-C1. Hop inside the mine cart, striking the blue switch as you pass to room 2F-B2. Get back in the mine cart and let it take you to room 2F-C3. Head down one screen from here to 2F-D3, the first room of the dungeon.
Swim across to the right side of the room and open the locked door using a Small Key. Head through right one screen to room 2F-D4. Jump over the spiked floors and make your way to the right side of the room. Bomb the cracked portion of the rightmost wall and enter through to 2F-D5. Defeat all the enemies in this room and push the purple block on the right in any direction to make a chest appear in the middle. Open it to obtain this dungeon’s Compass! Leave this room back left one to 2F-D4, then continue up one screen to 2F-C4.
Swim through this passage, diving under the spiked rollers to avoid contact, and make your way up through the opening above one room to 2F-B4. Circle around this room counter-clockwise and use the Roc’s Feather to quickly jump across the cracked pieces of floor to the left side of the room. Hop inside the mine cart here and be prepared to swipe the blue switch in the next room to switch the track layout. When the cart stops, hop back in it and let it take you to room 2F-A3.
Defeat all the enemies in this room and a Small Key will fall into the water. Dive down where it fell to obtain it, then hop back in the mine cart and ride to 2F-A5. Use a small key to unlock the purple block on the right and continue through right one screen to 2F-A6.
Defeat all the enemies in this room to have steps appear next to the Owl Statue. Walk up them and use combination of Pegasus Seed and Roc’s Feather to hop across the pit, then head right one screen. Continue hopping across the pits while Link’s speed is still up to reach a staircase going down. Enter it down to the first floor, room A5.
~First Floor~
Walk down the steps on the right, then push the middle block “down” and hop into the mine cart on the left. It will ride to room 1F-A3. A Business Scrub will in this room will offer Link 10 Ember Seeds at the cost of 20 Rupees. Go ahead and buy some if you do not have any, then head up the steps on the left to reach a chest containing a Small Key. Now, head down one screen to room 1F-B3.
Hop over the spiked portions of floor onto the safe spots and make your way south. Go down another screen to the location of the dungeon’s mini-boss, room 1F-C3.
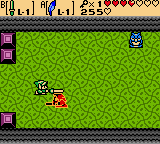
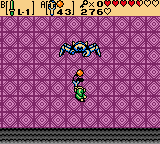
* Mini-Boss: Agahnim *
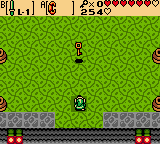
Agahnim will split into three clones that will wander around the room. They will charge power orbs and shoot them at Link. To defeat him, light the torches using Ember Seeds. The real Agahnim is the one with a shadow under him. Slash him with your sword while avoiding avoiding the fireballs and eventually, Agahnim will be defeated.
A portal will open as a shortcut to the dungeon’s first room 2F-D3. Grab the Fairy for defeating Agahnim and head right one screen. A Wise Old Man will tell Link, “What you seek is in the eye”. Head back left one and down one screen to room 1F-D3. Ride the mine cart to room 1F-E4, then continue down one screen from here to 1F-F4.
Use a Small Key to unlock the door on the leftmost wall and head through to room 1F-F3. Equip the Pegasus Seeds, then push the blue statue onto the switch next to it. Use a Pegasus Seed and run all the way through the path of cracked floors until you reach a set of steps. Head up the steps and open the chest to obtain the Slingshot! This weapon allows Link to shoot any one of his seeds at enemies or objects with varying effects. Hop off the ledge and head back right one screen, then up one screen to room 1F-E4.
Equip the Slingshot with the any type of seed and hop into the mine cart. While the cart rides along in the next room up, Link must shoot the two blue switches once with his Slingshot to change the tracks appropriately. Hop back into the mine cart and, if you hit the switches correctly, it should take you to the far right side of room 1F-E4. Head up one screen, then immediately right one screen through the opening to room 1F-D5.
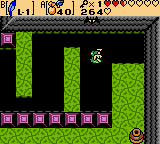
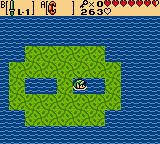
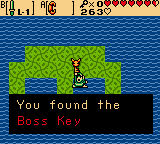
Circle around this room counter-clockwise, then use a Pegasus Seed and the Roc’s Feather to long-jump across the pits, making your way to the upper-left portion of this room. Use a Small Key to unlock the purple block and head through up one screen to room 1F-C5. The floor in the middle of this room will resemble a skull. Dive down into the skull’s right eye to obtain the Boss Key! Exit this room down one screen and push one of the vases into the pit, then jump across and continue left one and down one screen back to room 1F-E4.
Ride the mine cart back to room 1F-D3, then head up three screens to room 1F-A3 with the Business Scrub from before. Have the Slingshot equipped with Ember Seeds and hop into the mine cart. After dropping Link off two screens over, hop back in the mine cart and ride it back left one screen. Shoot an Ember seed left and light the torch. Do the same for the two at the top of the screen and a chest will appear on the ledge. The mine cart will continue left another screen and let you out back in room 1F-A3.
Head down one screen to the room with the spiked floors, 1F-B3. Make your way to the right side of this room and walk up the steps, then continue up one and right one screen. Open the chest that appears to obtain a Small Key, then backtrack left one and down one screen back to 1F-B3. Head down two screens from here to reach room 1F-D3.
At the bottom of this room, push the third block from the left “down” to block the path of the Green Blade Trap, then follow the path beside it to be standing across from a switch. Use the Slingshot to hit the switch, changing the direction of the tracks above, then walk up and hop inside the mine cart. It will ride to room 1F-D2.
Defeat the Red Wizzrobes in this room which, unlike their Green brothers, will change the location they appear each time. This will unlock the door at the top of the room. Head through it up one screen to 1F-C2. Avoid the Beamos and defeat the Red Gels in this room, then make your way to the upper-left. Unlock the purple block using a Small Key, then head down the staircase to the basement level, room B2.
~Basement First Floor~
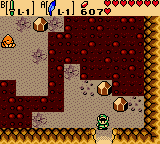
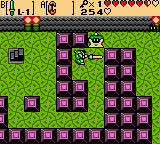
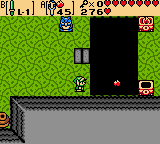
Equip the Slingshot with Ember Seeds and shoot the torches on the other side of the pit to connect a bridge. Walk across it to the right side of this room and continue right one room to B1F-A2, then head up one more screen to B1F-A3. Step onto the green platform and begin slashing your sword to defeat the Keese and avoid falling off as the platform moves around the room. When it stops in front of the locked boss door, step off and head through right one screen to room B1F-A4 where Link will face this dungeon’s boss: Gohma.
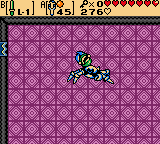
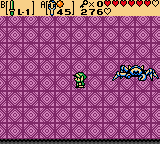
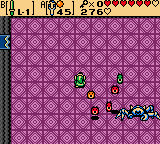
** Dungeon Boss: Ghoma **
Gohma’s shadow will trail Link in this room until it is right above him. Avoid having her land on you by moving out of the way as she comes down. Gohma will then walk about the room, often charging quickly in Link’s direction and also trying to grab and slam him into the ground before tossing him aside. Attack her big claw with your sword until you knock it off, at which point Gohma will begin spitting out small, multi-colored enemies that will follow Link. The red ones will hop on you and slow you down much like a Gel while the others will hurt you if you run into them. These small enemies will sometimes drop hearts when defeated. To damage Gohma at this point, shoot her eye with the Slingshot when it is open. Eventually, Gohma will fall.
Grab the Heart Container and head right one room to the altar containing the next essence. Walk up and obtain the fourth Essence of Natrue, the Soothing Rain!
 Fallout 4 Trailer Breakdown: 13 Things You Need To Know
 Feature: Mastering The Basics Of Spirit Hunters Inc.
 Call of Duty: Ghosts – Rorke Files Guide
 Mario Kart 8 – Unlockables Guide
 5th Cell details Anchors in the Drift