NOTICE: In Chapter 3, Link will meet and help three special animals: Moosh the flying bear, Ricky the boxing kangaroo, and Dimitri the swimming dodongo. Each animal has unique abilities that can be used to navigate certain areas of the overworld. Link will get to meet and experience all three animal companions but will also be given the option of choosing which animal he keeps for the rest of his journey. Ricky’s flute can be obtained by continuing on without completing any special side-quest. However, in order to get either Moosh or Dimitri’s flute instead, you must complete a side-quest corresponding to that animal companion. Though there are some changes that occur depending on which animal Link ends up with, all the same items and locations can be accessed regardless. Lastly, if you are to continue your adventure in Oracle of Ages by using a linked game password, whatever animal companion you chose in this game will carry over.
To best organize Chapter 3.1, sub-sections will be used to separate the routes taken to whatever animal companion flute which you, the player, chooses to obtain. Certain sub-sections will be listed as “optional” and can be skipped according to the path appropriate of your choice of animal companion.
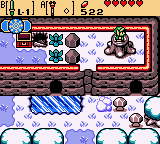
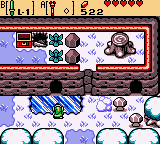
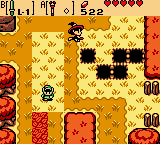
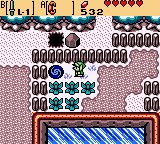
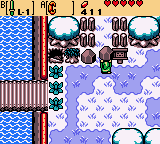
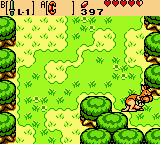
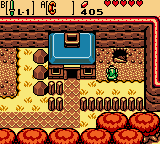
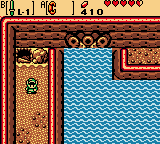
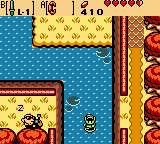
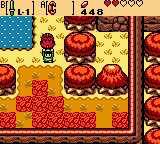
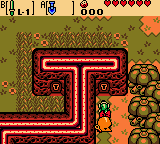
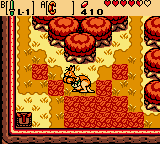
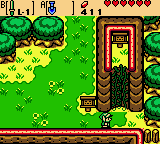
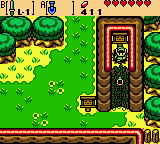
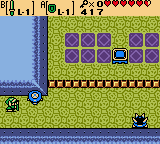
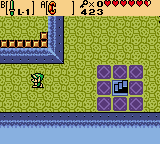
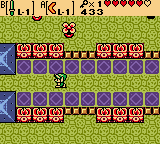
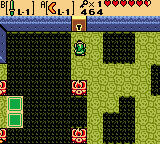
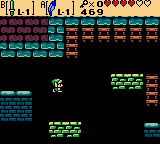
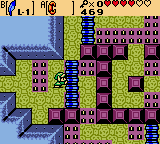
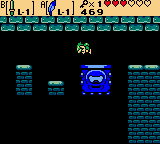
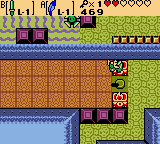
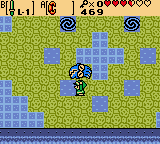
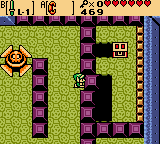
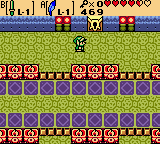
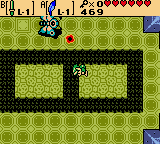
~ Mystery of the Strange Flutes ~After exiting Level 2, head right one screen and climb the vines growing up the wall. Hop on the stump and change the season to Winter. The cave on the left below will now be accessible by crossing the ice in front of it. Inside, the bush directly in front of Link contains a stray fairy that will respawn each time he leaves and re-enters the cave. Head back left one screen from here to the entrance of the Snake’s Remains.
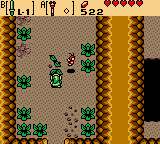
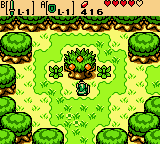
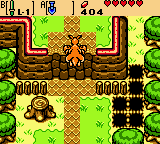
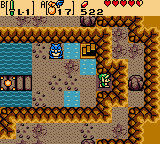
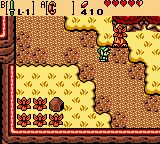
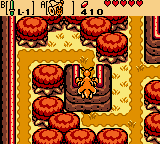
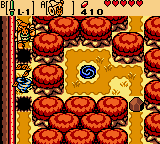
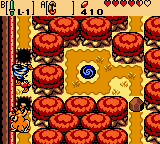
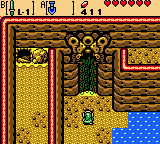
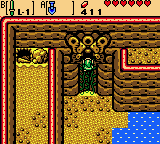
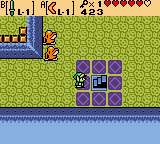
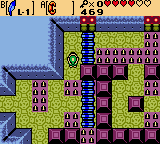
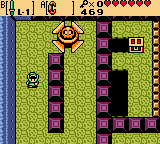
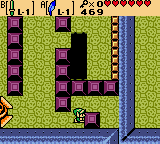
Toss the boulder to the left aside and head left one screen through the path. The season will automatically change to Autumn and you will likely encounter Maple on this screen, so bump into her and collect any goodies. Continue up one screen and equip the Rod of Seasons. Hop on the stump and change the season to Winter.
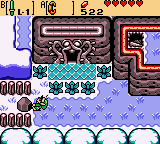
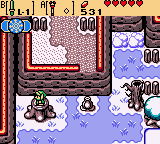
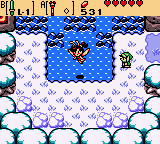
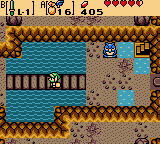
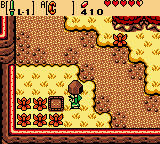
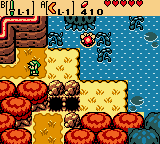
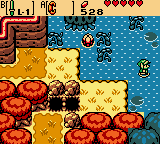
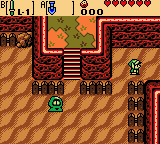
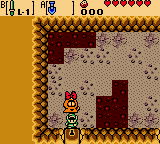
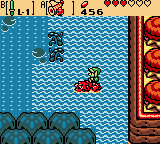
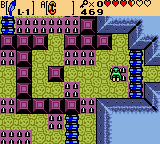
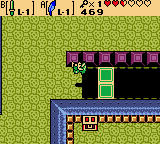
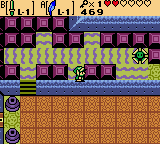
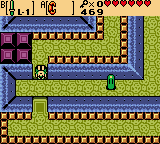
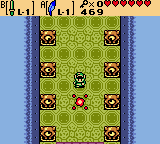
Hop off the stump and head down one screen (you may choose to head left one screen from here to find a Great Fairy Fountain), then continue down another screen and right one. Walk down a screen and avoid the Red Moblins here. Continue right two more screens and follow the path of snow to the boulder, which we can now toss out of the way using the Power Bracelet, thus gaining access to Piece of Heart #3!
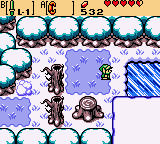

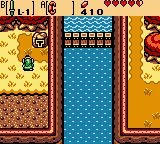
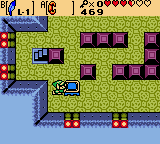
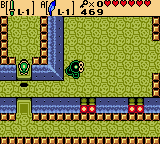
Exit this area by going left two, up one, and left two more screens. You should now be in the area with the stump, just right of where Link discovers the first entrance to Subrosia.
~ Getting Dimitri’s Flute ~If you would like to have Dimitri the dodongo as Link’s permanent animal companion, head left one screen, slash down the bushes, and re-enter the portal to Subrosia. Remember that if you obtain the flute in this section, you will not be able to change which animal companion you recieve permanently.
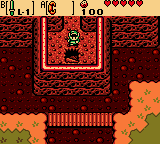
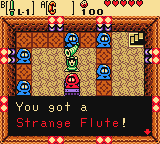
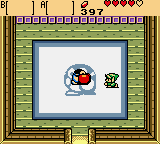
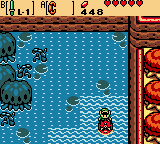
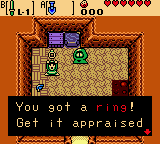
Once in Subrosia, walk down the leftmost set of steps and down one screen. Continue left one and down one more to reach the Subrosian Dance Hall. As before, Link must complete a near-flawless practice session to be awarded a prize. You may need to dance several sessions to obtain the Strange Flute that will later become Dimitri’s Flute. Prior to obtaining the flute, prizes will either be 50 Ore Chunks or a Gasha Seed each time.
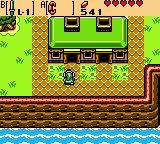
Once you have the strange flute, backtrack all the way to the portal and return to the Woods of Winter, then head right one screen.
~ Back to Horon Village ~Continue down three, left one, down two (passing the Windmill), and left one screen to enter Horon Village.
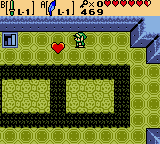
Let’s check back in on Bipin and Blossom’s son by heading left three and down one screen to their house. Speak with Blossom, who will inform Link of the baby’s sickness and request rupees to fund a doctor visit. This is the first time where Link will be asked to assist in the boy’s growth in some form or fashion, each decision being crucial to what kind of kid he grows up to be. (See our full Bipin and Blossom Guide).
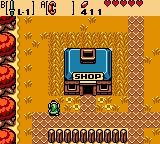
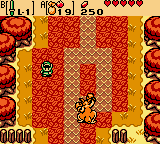
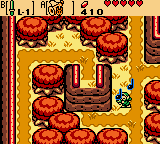
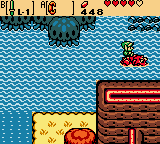
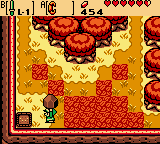
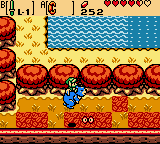
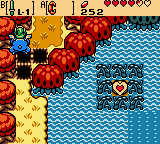
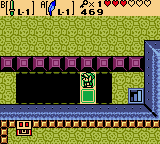
Once you are finished here, exit the house. Re-enter and exit until the season becomes Autumn, then head left one screen. Use the Power Bracelet to lift the red mushrooms and toss them out of the way, gaining access to a chest containing 20 Rupees! Now, head back right one screen and up one screen to where Horon Village Shop is located.
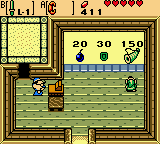
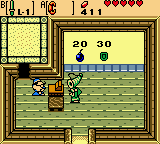
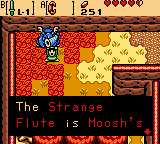
~ Getting Moosh’s Flute ~If you chose not to obtain the strange flute in Subrosia, you may now get a different flute of the same name from Horon Village Shop, as long as you have 150 rupees to spare. This flute will later become Moosh’s Flute, making him your permanent animal companion later on. If you want Moosh as your animal companion, go ahead and enter the shop and purchase the Strange Flute. Now exit the shop.
 ~ To North Horon ~
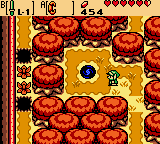
From the shop, head up two more screens, leaving Horon Village to the North Horon area. Continue on up a screen, right one, then up one more screen. Toss the boulders aside with the Power Bracelet and head up one screen through the path.
Keep going up two more screens and swipe the Scent Seeds from the tree. These special seeds can be used to lure surrounding enemies to their aroma. Head right one and down one screen from here to reach Blaino’s Gym.
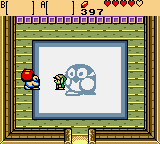
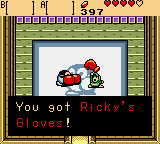
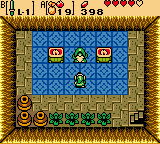
Enter the gym and talk with Blaino, who will challenge Link to a match for the price of 10 rupees. Link will be relieved of all his weapons and be left only with his fists to face Blaino, with the goal of knocking one’s opponent outside of the “ring” (the square, blue area in the center of the room) to win. Often times, Blaino will raise his hands in the air preparing for a strong hit, giving Link a prime opportunity to get in a few punches of his own. Carefully avoid Blaino’s punches while using the B and A buttons to attack until you successfully knock him outside of the ring. If you fail to defeat Blaino, you may challenge him to a rematch at the cost of 20 rupees. Once defeated, Blaino will surrender Ricky’s Gloves to Link.
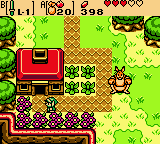
Exit the gym and head up one, left one, and down one screen. Now go left one screen, up one, and left one more screen. Cross the bridge over the water and continue left one and up one more screen to find Ricky the boxing kangaroo.
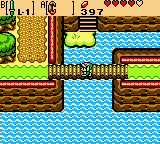
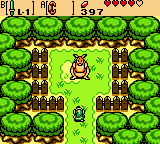
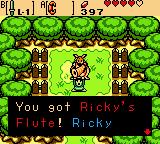
Speak with Ricky, who will thank you for returning his gloves to him and (if you haven’t obtained one of the other two strange flutes from before) also give you Ricky’s Flute! Ricky will then allow you to hop inside his pouch and agree to take you to Spool Swamp. While controlling him, Ricky will make take large leaps in whatever direction he is going, making travel with him faster than simply walking. He will also jump over open pits in the ground simply by walking “through” them, but can only jump over one pit at a time. By pressing the A button, Ricky will punch with his fists to attack enemies or slash away bushes. Holding in the A button for a moment will charge Ricky’s second attack which, when A is released, results in a tornado literally being punched from his fist. When this tornado comes into contact with an enemy, it will sweep them up and send them flying to parts unknown.
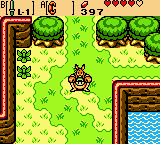
After taking control of Ricky, head down two screens and jump across the pits by walking into them. The Buzz Blobs can be attacked while using Ricky without them shocking you. Continue down one screen (right one screen from here contains a lone, flowerless bush hiding a stray fairy if needed), crossing the pits down one more screen.

Take the path to the lower-right one screen over and hop out of Ricky’s pouch using the B button. Have Link equip his Shovel and dig the area in the center of the four bushes here to reveal a Soil Patch for planting Gasha Seeds.
Hop back into Ricky’s pouch and head left one and down one screen. There are three trees here lined up vertically along the side of the wall, but its safe to avoid them as the third one from the top leads to a Bad Old Man who will take 100 rupees from Link if spoken to.
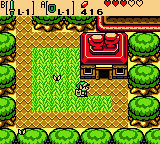
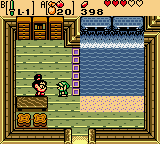
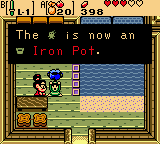
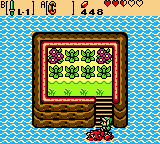
Continue on left one screen and you will come to Mrs. Ruul’s Villa. Walk in and speak with Mrs. Ruul, who will complain that it is too hot and request something that would send chills down her spine and hopefully cool her off. Link will present the Ghastly Doll to Mrs. Ruul, who will offer the Iron Pot in exchange.
Exit Mrs. Ruul’s Villa. Head up one screen and have Ricky scale the cliff here, then continue up another screen. If you have either of the two Strange Flutes and not Ricky’s, this is where he will bid farewell. Continue on up one and left one screen to officially be in the Spool Swamp region, marked by a tree contraining Pegasus Seeds. This third type of seed Link obtains gives him the ability to run at increased speeds when used, so swipe them from the tree to increase your collection.
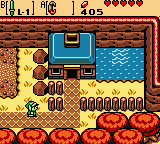
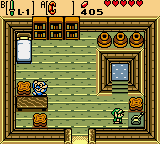
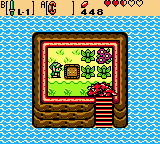
Continue down one, left one, up two, and right one screen to reach the Floodgate Keeper’s House. Enter the house and speak with the Floodgate Keeper who will inform Link that he has lost the Floodgate Key. Swipe the switch in the bottom-right of the house with Link’s sword, draining the water from the small pool inside and revealing the lost Floodgate Key!

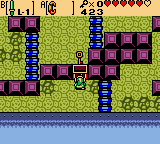
Walk back outside and you will notice that the water that was previously outside of the house has also been drained, revealing a staircase. Take the staircase down to an underground area and equip the newly-obtained Pegasus Seeds. Use one of the seeds before stepping onto the switch, then quickly run across to the other side and head left one screen.
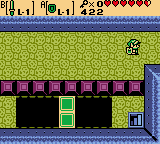
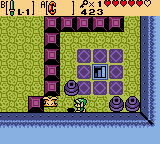
Start by pushing the green block nearest to Link “up”, then push the one directle left and below it “down”. Toss aside the boulder on the other side of this green block and push the bottom in the set of two to the “left”, and finally push the one that was above it “up”. Head down the staircase you now have access to and you will come to another underground area.
This time, you merely need to make your way up and around (counter-clockwise), left one screen then back right one screen on the outside edge of the water, eventually arriving at a staircase going up. Ascend the stairs and you will come to a hall with a few bushes. The lower-right bush, as well as the upper-left one in the set of two, are both actually hiding a Spiny Beetle under them, so be careful. Simply navigate this path until reaching another staircase and ascend it to return outside.
Walk down two screens. Avoid or kill the enemies here, then you may speak with the Business Scrub posing as a lone bush at the top of the screen to get some useful information about the Subrosian portal you need to find, then offer to sell you a Shield for 50 rupees. The single boulder in this screen hides a Soil Patch beneath, but be careful as the bush directly below it hides a Spiny Beetle. Plant a Gasha Seed if you have one, then continue on right one screen to access the floodgates. Walk up to the keyhole to use the Floodgate Key, draining the water to a more shallow level.
Head back left and up one screen, then head right one screen and speak with Sokra. He will inform Link that a new season is needed to progress, and that he would need to discover a new portal to Subrosia to access this section of the Temple of Seasons. After speaking with Sokra, hop off the ledge here and head down three screens, actually entering the “swamp” portion of Spool Swamp.

** The next part will vary slightly depending on which animal companion’s flute you have obtained.
Head left one screen along the path above the pits, then pull out Ricky’s Flute and call him. Using Ricky, jump onto the ledge here and head along the path left and down one screen.
Charge Ricky’s tornado-punch attack to clear the bushes on the other side of the pit here and continue down another screen. The boulder in the bottom-left of this screen hides a Soil Patch, so plant a Gasha Seed if you have one, then continue along the path on the right side of the trees up one screen.

Lift the boulder here to gain access to, and enter, the portal to Subrosia.
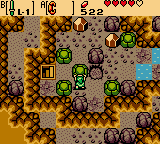
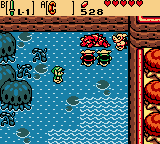
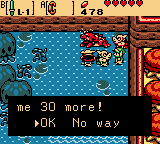
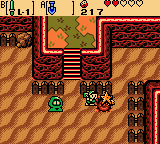
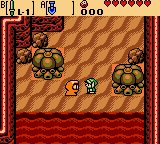
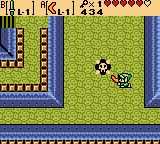
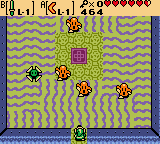
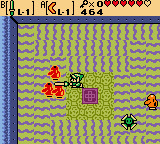
~ Navigating Using Dimitri ~Head right one and up one screen to find Dimitri the dodongo surrounded by three Moblins. Speak with the Green Moblin, who will try to have Link let Dimitri go at the cost of 80 rupees total. You must pay them in order to continue on as the next part requires Dimitri’s assistance, so gather the rupees and pay up.
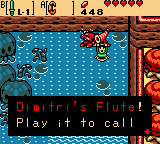
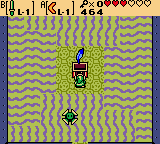
After the Moblins run away, speak with Dimitri to have him change your Strange Flute into Dimitri’s Flute! With it, you can call for Dimitri’s assistance from wherever you are on the overworld map.
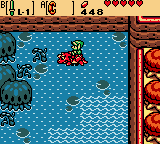
Dimitri can chomp enemies up using the A button. As far as travel, Dimitri is pretty slow on land yet quick in the water, however the most important factor to having him now rather than a little later is that Link has still not yet acquired a swimming aparatus, therefore the only way to travel by deep water at this point would be using Dimitri. Link can also use the Power Bracelet to lift and pack Dimitri around, making for a slightly quicker way to navigate the overworld with him.
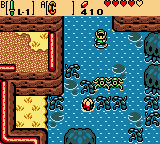
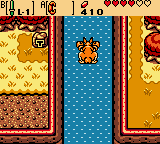
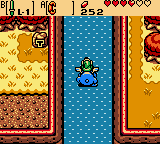
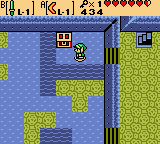
Hop on Dimitri’s back and head into the deep waters down two screens, then right one screen. This will bring you back into the Holodrum Plain region of the map. Continue on right two screens and up four screens until you come to an island. Slash the second bush from the left on the bottom row to reveal a Soil Patch and plant a Gasha Seed if you wish.
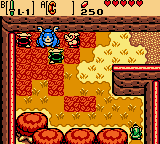
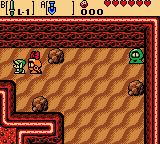
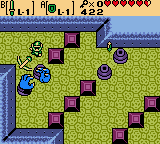
Now, backtrack down four screens and left two screens back into Spool Swamp. Continue down one screen and dismount Dimitri. This area has many Pincers hiding under the patches of leaves, so be cautious where you step! Keeping your distance and using the spin attack, however, these guys shouldn’t be too much of a problem.
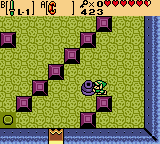
Simply head left two screens via the path of leaves at the bottom, dodging the Pincers as you go. You may encounter Maple along the way if you have defeated enough enemies. The boulder in the lower-left of this screen hides a Soil Patch underneath. Head up one screen along the rightmost path beside the trees, then use the Power Bracelet to throw aside the boulder blocking your way to the portal to Subrosia and enter it.
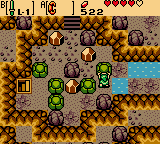
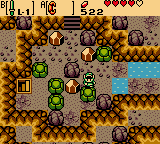
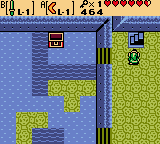
~ Navigating Using Moosh ~Head left one screen via the path just above the two pits seen here, then head up one screen. Here, Moosh the flying bear is shown being harassed by a group of three Moblins who wish to take his spring bananas and offer them as a gift to the Great Moblin. Moosh will quickly eat the bananas, causing the Moblins to attack before he sends them flying off-screen with an attack of his own. Walk up and speak with Moosh, causing the Moblins to return and attack. Defeat the three Moblins to have a short cutscene with the green-clad Moblin ordering them to retreat, then speak with Moosh again. He will thank you for helping him and turn your Strange Flute into Moosh’s Flute!

Moosh the flying bear can walk at normal speeds on land, but will sink if taken into deep water. He can fly/hover for a short period of time by pressing the A button to jump, then repeatedly tapping A to lengthen Moosh’s air time. Pressing and holding the A button will cause Moosh to jump into the air and charge himself for a ground-pound attack, crushing any enemies in the attack’s viscinity.
While on Moosh, head back down and right one screen to the area with the two pits. Use Moosh to fly over the pits and continue on this path down two screens, then right one more screen. Moosh will inform you of his ground-pound attack, just in time for the Pincers that await Link hidden beneath the patches of leaves in the path at the bottom of the screen.
Along this leafy path, head left two screens. There will be a boulder here in the bottom-left of the screen hiding a Soil Patch beneath it if you wish to plant a Gasha Seed. Continue up one screen via the rightmost path, lift the boulder and toss it aside using the Power Bracelet, then enter the portal to Subrosia.
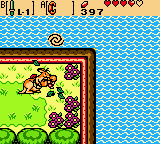
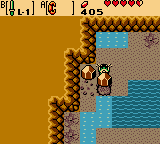
This portal will send Link to Subrosia in an area with an active volcano. From here, head left one and down one screen. Follow the staircase down to the Subrosia Seaside beach.
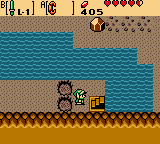
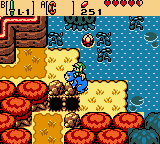
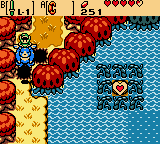
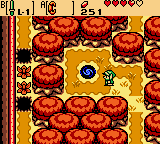
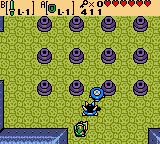
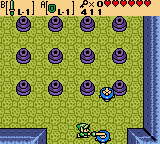
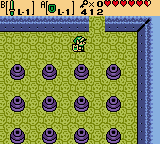
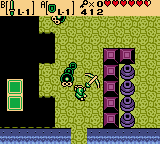
The item of interest here is the Star Shaped Ore, which will be hidden in this or any of the next three screens going counter-clockwise. Equip the Shovel, then refer to the screens below to find out which specific location the Star Shaped Ore might be in.

There are four set locations as to where the Star Shaped Ore will be located. Its particular location will only change if you leave the Subrosian Seaside area.
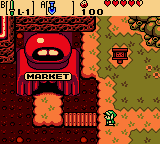
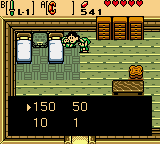
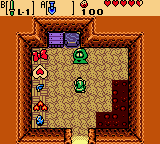
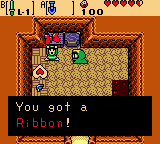
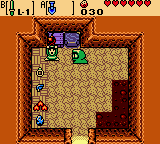
Once you have the Star Shaped Ore, leave the Subrosian Seaside by heading back up the steps and up one screen. Continue up another screen, then left one to reach the Subrosian Market. Enter the market and select the ribbon from the items on the left. The market worker will accept the Star Shaped Ore you found in exchange for the Ribbon. There are other items present in the shop that may be of use for Link, especially the fourth Piece of Heart. The items you can obtain and what they cost is as follows:

** Ore Chunks can be obtained by digging in random places, much like Rupees in the overworld of Holodrum. Additionally, the Subrosian Dance Hall will reward you 50 Ore Chunks (or a Gasha Seed) as you complete their training sessions.

If Link has the spare change, its best to go ahead and stock up on the four Magical Rings he can get from the shop.
Now, head back to the beach by going right one and down two screens from the shop. Walk down the steps, but this time head right one screen and then down one. Here, Link meets the only known female Subrosian in the game: Rosa. Certain doors throughout Subrosia are locked and can only be opened by the key which Rosa wears around her neck.
Speak with Rosa, who will offer to go on a date to the “temple” with Link in exchange for his Ribbon. Rosa will begin to follow Link wherever he goes, but will not follow him back to Holodrum. If Link takes a portal back to Holodrum, then returns to Subrosia, he will have to go back to the spot where he met Rosa and accept another date.
Perhaps the most significant door Rosa’s key can unlock is that which opens the next section of the Temple of Seasons Link must visit. Leave the Subrosian Seaside area with Rosa by heading up one, left one, and up one more screen. Continue left one screen, then up two more, passing Subrosian Market along the way. Link will come to one of those specially locked doors that he can now freely go through with Rosa by his side. Do so, then walk to the left side and out.
Go directly right two screens and head down the steps. Continue right for another two screens, then up two, coming into the Temple of Seasons area. Now head left one and up one screen, arriving at the yellow-roofed section of the Temple of Seasons. With Rosa, Link can unlock this door as well. Enter the Temple of Seasons, to which Rosa will follow.

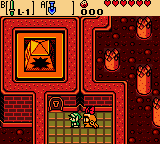
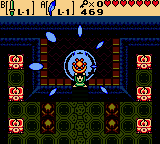
Equip the Power Bracelet and take the path that goes straight up. The other boulders in this room lead to nothing special and are only there to confuse you, although many do contain Ore Chunks underneath. Once you reach the stairs, head up. Cross to the other side and up the opposite stairs then walk up to the altar as before, though this time Link is greeted by the Spirit of Summer.

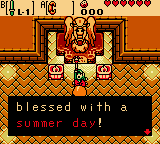
After a few words, the Spirit of Summer will empower the Rod of Seasons with the Power of Summer! You can now exit the temple the way you came in. Once outside of the temple, leave the entire Temple of Seasons area by going down two screens, right one screen, then down one more screen.
The next destination is Spool Swamp, so head left two screens and climb the stairs, then continue left two more screens and back through the previously locked hallway. Once on the other side, continue down two and right two screens. Enter the portal here to return to Spool Swamp, then toss the boulder aside and head down one screen.
** The next part will vary slightly depending on which animal companion you have.
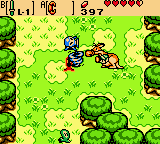
~ Navigating Using Ricky ~Call Ricky and hop in his pouch, then head up one screen through the opposite, leftmost path. Hold the A button to charge a whirlwind punch and clear the bushes then head up one screen. Continue up the path and hop off the ledge to the right, then continue up one screen.
Follow along the path right one screen, then jump off the next ledge Link comes to. Continue along the shallow water up two and left one screen.
~ Navigating Using Dimitri ~Walk down a screen and right two screens, defeating or avoidng the Pincers along the way. Equip Dimitri’s Flute and call him. Hop on Dimitri now if you already haven’t and continue up two screens

Hop off of Dimitri and then head left a screen. Continue up three screens and left a screen to reach the Tree Stump.
~ Navigating Using Moosh ~Walk down a screen and right two screens, defeating or avoidng the Pincers along the way. Equip Moosh’s Flute and call him over. Walk back left a screen along the top pathway. Now use Moosh to jump over a series of holes as you head up five screens and left one screen to reach the Tree Stump.
 ~ Heading to Level 3 ~
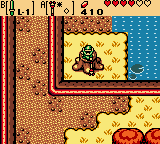
Hop on the stump and change the season to Summer, then head right one and up one screen. Climb the stairs and continue around the eastern path down two screens. Walk right one more screen and defeat the enemies here, then head up the vines and read the sign for a special message from Vasu. Dig in the space in front of the sign to unearth a Magical Ring. This ring later appraises as the Red Luck Ring.
Go back left one and up one screen and jump off the ledge to the left. Continue left one and up one final screen to reach the entrance to Level 3: Poison Moth’s Lair.

** While not requied a Shield is recommended in order to defeat certain enemies in this dungeon to open locked doors. If you do not have a Shield at this point, you can head back to Horon Village Shop and purchase one.
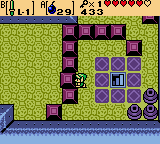
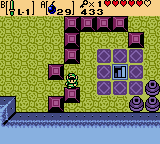
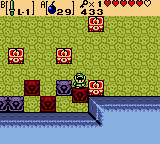
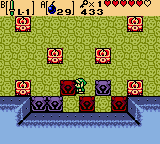
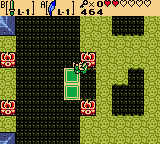
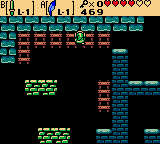
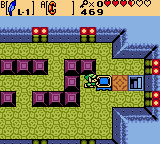
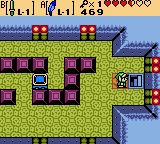
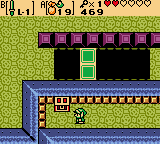
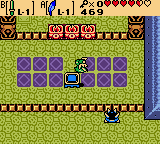
Link will enter the dungeon at room B1F-E2 on the map. Head up one screen to B1F-D2. Use your Shield to overturn the Spiked Beetles and defeat them to unlock the passageway at the top of this room. If you don’t have the shield, you can use your Shovel, but it a bit more dangerous. The pots arranged within the room will have an assortment of hearts, bombs, seeds, and rupees in them, and will respawn a new assortment each time the room is re-entered. Head up through the unlocked passage one screen to room B1F-C2.
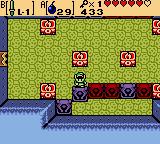
Defeat the Mini Moldorms and continue along the path to the right and head right one screen to B1F-C3 (be warry of the two Spiked Beetles in this room). Continue on to B1F-C4. Follow the uppermost path east and continue right another room to B1F-C5.
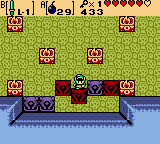
Go ahead and defeat the Floormasters here to avoid dealing with them for the duration of this section, then make your way to the far right side of this room. You will pass a switch along the way which must be held down to open the lower passageway. Of the two final pots Link comes to, lift and toss aside the top one, then push the lower one to the left three spaces. Follow up by pushing the pot down once, left once, then down again until it is in front of the blocked passage. Finish pushing the pot to the left three more spaces onto the switch and the passageway will be unlocked. Head through it down one screen to room B1F-D5.

Ignore the stairs here for now and continue left one room to B1F-D4, then follow the path down one screen to room B1F-E4. Link will need to equip the Power Bracelet to push the “rollers” out of his way here, but be careful not to push from a side that will have you standing on a broken section of the floor. Use this method, continue along the path until you reach a chest. Open it to recieve a Small Key, then continue along the path, pushing the square block you come to near the top of the room “up” to take a shortcut out of this room and back to B1F-D4.
Head right one room back to B1F-D5 and take the stairs up one level to 1F-D5. There will be two Pols Voice in this room as soon as you enter, but you can toss bombs or the nearby pots to kill them. Walk up and push the out-of-place square block “up” to get out of the blocked-in area and continue up one screen to room 1F-C5.
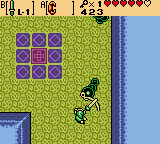
Defeat both Mini Moldorms in this room and a chest will appear. Open it to recieve 10 Bombs, one of which we will use on the northern wall of this room. The pattern on the floor in front of the northern wall is noticably different than the rest of the room. Toss a bomb into the middle of the circular tiles to destroy the weak wall here, revealing a passage. Enter it up one room to 1F-B5, which contains only a chest and a few pots. Open the chest to recieve the Dungeon Map, then leave this room down two screens to B1F-D5.

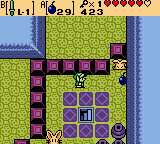
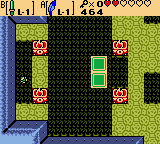
Push the square block next to the out-of-place one “down”, then head over to the other row of blocks on the left. To get through, push the third block up from the bottom “left”, then push the one directly below it “down”. Head left one screen to 1F-D3.
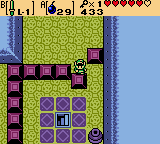
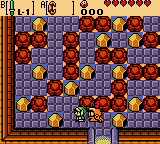
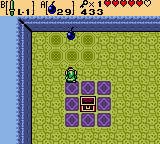
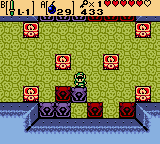
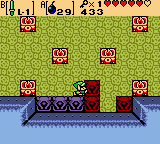
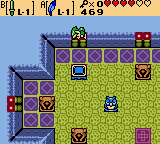
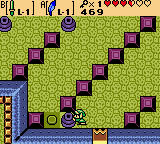
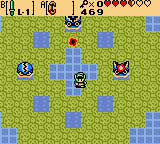
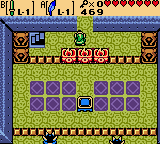
Here, you must match the statues on the bottom with the ones on top. Start by pushing the two gray statues on the far left “down”. Next, of the two red statues in the middle, push the right one “down”, as well as the last red statue on the far right. Now push the remaining red statue to the left once. Then push the remaining gray statue left twice and down once. Now push the only remaining red statue right three times and down once. This will unlock the door on the left side of the room so head through it to reach 1F-D3.
Avoid the Peahats through this passage and continue left another room to 1F-D2. Defeat or avoid the Mini-Moldorms in this room and head left again one screen room to 1F-D1. Watch out for the two Anti-Fairies in this room and head directly up and into the next room (1F-C1). For now simply jump down one of the pits to fall into room B1F-C1 below.

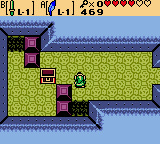
Walk up the lower set of steps near the bottom of the room and then back down the ones above to reach a chest containing 30 Rupees. Head back up the steps then up the staircase back to room 1F-C1. Head left to the locked door and walk through to room 1F-B1.
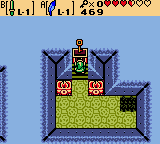
This room, full of Mimics, sliding floors, and a very fast blade trap spinning around, can be intimidating at first glance. The best way to tackle it is to run straight for the non-moving portion of floor in the center of the room. Slash at the Mimics as they come close to this calm section of floor until they are all dead. A chest will then appear in the center of the room. Open it to obtain the Roc’s Feather! With it equipped, Link gains the ability to jump with the press of a button. Leave this room down one screen to room 1F-C1.
Equip the Roc’s Feather and hop onto the moving green platform on the left of the room. Ride on over and hop off on the opposite side, then jump down the pit to land on a ledge below in room B1F-C1. Head down the staircase on the other end of the ledge to a dungeon area below.
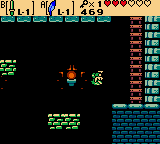
Using the Roc’s Feather, and avoiding the Keese in this room, hop across the platforms on the right and head to the next half of this room. Fall down onto the lower of the two moving green platforms and ride over to the ladder on the right. Climb the ladder to get up to the higher green platform which will take you left to a long ladder you can climb. Head right across the ladders and finally up and out of this dungeon area in room B1F-A2.
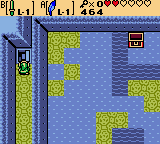
Use the Roc’s Feather to jump onto the blue trampoline in this room and hold “DOWN” after jumping to safely resurface above in room above. Walking over to the chest will cause two Green Zols to spawn, though only one can reach you. Open the chest here to get the Compass, then head back down the same pit you came up through. Push the trampoline over to the purple square on the bottom-right of the room and jump on it again, this time holding “UP” to land on the ledge above, the head right one screen to room 1F-A3.

Equip the Power Bracelet and the Roc’s Feather to both push the rollers in this room and jump over the spiked floors. Navigate this room via the upper path and right one screen and down the staircase to room B1F-A4.
Move the trampoline in this room “left”(3x), “down”(2x), then all the way “right” agaist the wall. From there, push the trampoline “up” twice and “right” once overtop the brown square tile. Jump onto the trampoline and hold “DOWN” or “LEFT” to land on the floor above. A Green Zol will spawn when Link walks close to the chest. Open the chest here to recieve a Small Key, then head back down the pit to B1F-A4 and down the staircase on the right to a dungeon area below.
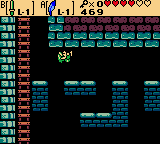
Cross the platforms using the Roc’s Feather left one screen. There are Thwomps in this room that will pound into the ground below when Link walks underneath or steps on top of them. Walk onto the first Thwomp’s head and wait for it to rise to continue across the platforms until you reach the ladder on the far left. Head up the ladder to room B1F-C4.
Ride the green platform to the left and hop across the gap. Head up and right, following the path to room B1F-C5. Just as before, you’ll want to get rid of the Floormasters in this room before trying to push around the vases. Activate the switch again using a vase and continue down one screen, then left one screen to reach room B1F-D4.
Link can now cross the bridge in this room by using the Roc’s Feather to jump over the button which causes it to fall when pressed. Do so and walk up the steps at the end near the locked door. Barely walk into the path of the Green Blade Trap to have it shoot out at Link, but move out of the way to not get hit. Walk back into the path of the Blade Trap and you will have enough time to get about halfway across the moving floor before he’ll reach the other side and shoot out again, though you can simply jump over him with the Roc’s Feather to avoid damage. Continue around this path right one, up one, then left one screen to reach a chest containing a Gasha Seed. Now, head back down one screen, jump off the ledge, and continue left another screen back to the room with the bridge and cross to the other side as before. There will be extra hearts in the vases here if needed. Head through the locked door on the other end to reach room B1F-D3, the location of this dungeon’s mini-boss.
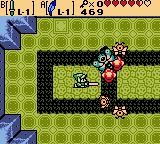
Calamarye are actually three squid-like creatures that will emerge from one of the eight pools of water in this room and attempt to shoot fireballs at Link. When one pokes its head out of the water, use the Power Bracelet to pick it up and toss it away from the pools then slash it with your sword as many times as you can before it makes it back to the water. Repeat this process until each Calamarye is defeated. Leave this room via the staircase that appears in the lower-right section of the room to 1F-D3.
Head left two screens until you reach a dead end. Walk “into” the altered portion of the ledge here to have Link automatically jump across the gap and on to the other side. Continue around and fall down the hole at the end of this path to room B1F-D1.

Walk counter-clockwise around the blocks in the center to avoid being hit by the Orange Giant Blade Trap. The second vertical row of blocks guard a chest that can be accessed by quickly pushing the fifth block from the bottom to the right. The block will fall into the pit below, providing a space for Link to jump across and access the chest containing the Boss Key! Now, push the out-of-place block at the bottom “right” and jump off the ledge. Continue right one and down one screen to room 1F-E2, then enter the portal which sends Link back to the mini-boss room B1F-D3.
Climb the staircase in the lower-right portion of the room to reach 1F-D3. Now, go left one screen, walk up the steps, and left until you reach one of those jump platforms. Walk into it to reach the other side, then continue on up and right around the path. Walk down the stairs at the end and continue right one screen, where we find the locked door to the dungeon’s boss. When ready, enter the boss’ lair.
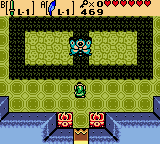
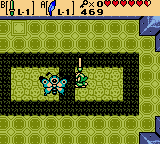
MAIN BOSS: MOTHULA – Mothula will begin the battle by throwing smaller moth enemies at Link and then it will begin to fly around the outter-circle of the room. Be prepared to slash these baby moths as they will come straight for Link and can also reward him with items such as hearts. You must use the Roc’s Feather to hop onto one of the platforms in the middle of the room and back to avoid Mothula as she flies about and shoots fireballs at Link. You also need to especially avoid falling into the pits in this room as they will send Link to room B1F-B3. If this does happen, you will need to use the trampoline to return to the boss’ lair above. The worst part is this will restart the battle, sending Mothula’s health back to 100%. Slash Mothula when she slows down or is within Link’s sword range until she is defeated.

Collect the Heart Container from the room then head down the staircase which appears on the left. This takes you down to the upper portion of room B1F-B3, where a doorway now opens. Head through it up one screen and claim the third Essence of Nature, the Bright Sun.


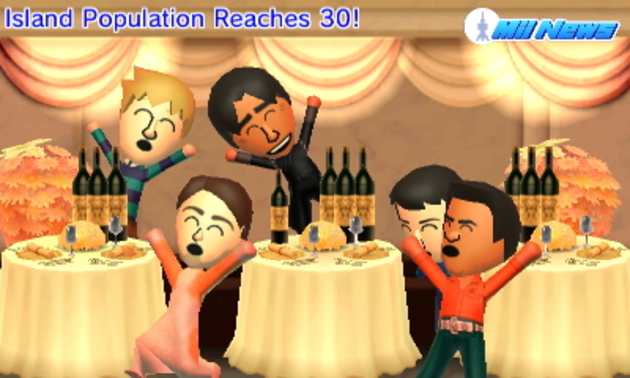 Guide: How To Import Miis Into Tomodachi Life Like A Pro
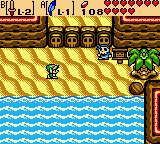 Oracle of Seasons Walkthrough – Explorer’s Crypt – Zelda Dungeon
 Batman: Arkham Origins – Anarky Tags Locations Guide
 Assassins Creed III Maps - Feathers, Viewpoints, Fast Travel, Almanac Pages, Trinkets, Treasure Locations, and more
 LEGO Marvel Super Heroes – Vehicles Guide