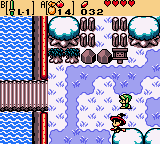
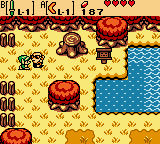
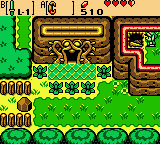
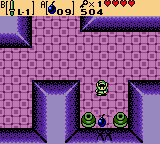
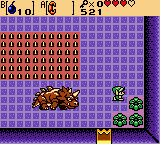
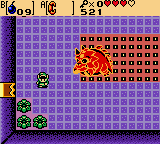
Link’s next destination is the underworld of Subrosia. But first, there are a few items you’ll want to gather in Horon Village. After coming out of the Gnarled Root Dungeon, head right one screen, where you will almost certainly encounter Maple for the first time.
Maple encounters occur in many areas of the overworld once Link has defeated 30 enemies. With each encounter, Maple will fly around the screen for a few seconds in various patterns before flying offscreen. Bumping into Maple will cause random items to go flying about the screen, not all of which belong exclusively to Maple. Link will lose some of his inventory in the encounter as well.
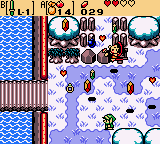
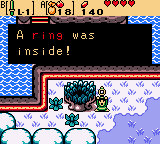
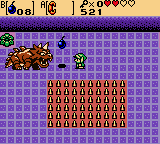
The goal is simply to gather up more items than Maple can. At first, this won’t be too difficult. However, later in the game, Maple will improve her means of travel and become much faster. While most of the items dropped in the encounter will be simple, such as Rupees, Bombs, or Seeds, Maple may also drop more rare items, such as one of the many Pieces of Heart that can be obtained during Link’s quest, Magic Potions that may really come in handy through the harder dungeons, and Magic Rings that can only be obtained with a Maple encounter or grown in Gasha Seeds. You may or may not choose to encounter Maple, but for the purposes of this guide, we’ll go ahead and list the Piece of Heart from Maple as obtained.
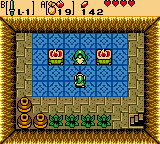
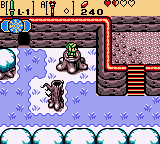
On this same screen, burn the left tree above the bushes to reveal a staircase leading to an Old Man’s hideout. Oracle of Seasons contains many Old Man characters, so to differentiate between them, this guide will name them according to their role. In this case, since the Old Man gives Link rupees, we’re going to name him a Good Old Man. Likewise, some hideouts contain Bad Old Men who will steal Link’s rupees. Enter the hideout and talk with the Good Old Man who will give Link 100 Rupees, then exit.
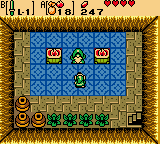
Continue down one screen and left one screen. If you planted a Gasha Seed here before the first dungeon, it should have sprouted by now into a large Tree with a Gasha Nut. Slash at it with your sword to get the goody that is found inside.
Walk down two more screens to enter Horon Village. If the season is not Winter when you enter the village, exit and re-enter until it becomes Winter. Walk right two screems and Enter Mayor Ruul’s Residence. Bomb the cracked wall on the right and head through to find a Gasha Seed. Grab it and leave the house. If you previously planted a Gasha Seed outside the Mayor’s Hut, you can grab the Gasha Nut and replant another seed.
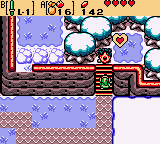
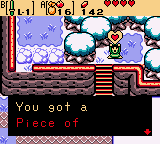
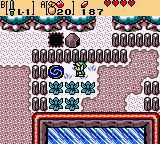
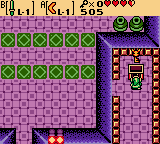
Head left one screen and walk down the staircase. Continue down one more and right one screen. Head up the staircase and burn the tree with an Ember Seed to grab Piece of Heart #1.
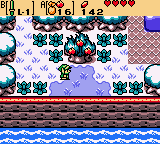
Head back down the staircase and go down two more screens to find an Ember Seed Tree. Slash at the seeds with Link’s sword to gather them and head right one screen.
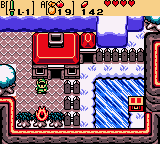
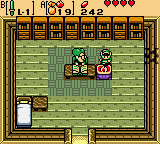
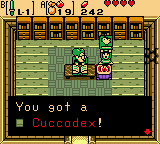
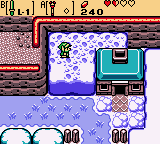
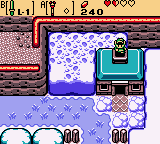
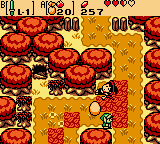
Burn the middle tree in the row of three at the bottom to reveal steps leading to a Good Old Man hideout. The Old Man here will give Link 100 Rupees. Exit the hideout and enter the house belonging to Mr. Write, who is having a hard time reading his book due to a lack of lighting. Light the torch with an Ember Seed and Mr. Write will give Link the first item in the trading sequence, the Cuccodex. Bomb the cracked wall on the right and head through, where we can exit the house’s back door. Outside, Link can cross the path of ice to a chest containing 20 Rupees. There’s nothing more here, so navigate back through the house and head left one screen to the Ember Seed tree.
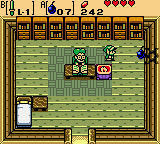
You’ll now need to exit Horon Village via the northern entrance back to North Horon where Impa’s house is. From there, go right one, up two, right one, and up one more screen to reach Talon and Malon’s house. Enter and speak with Malon, who will be trade Link his Cuccodex for a Lon Lon Egg. Exit the house and head south back to Horon Village again.

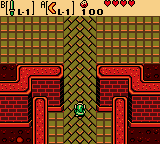
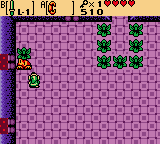
Once back in the village, head down two and right three screens. Walk over to the trees blocking the path on the right and Sokra will awaken with a message for Link. Burn one of the trees and head right one screen into the Eastern Suburbs. Go up two and right a screen to find Rosa complaining about the Temple of Seasons falling into her homeland of Subrosia. Rosa will then head north into the Woods of Winter, so head up one screen after her.
This next part requires Link to never be seen by Rosa or else you will have to start all over. It is important to note that moving any screen other than those Rosa takes after following her will start over the pursuit as well. When you are ready, head up one screen to begin.
Hide behind the trees as Rosa walks around so that she never faces Link directly. If you are successful, Rosa will progress up another screen. Follow her and repeat the same process, following her up one screen for a third time. You want to continue avoiding being seen by Rosa here, but before following her left a screen, continue hiding. Rosa will come back and make sure no one is following her before truly exiting this screen to the left. After this, you can follow Rosa left one screen where we see her disappear into the first bush in the top row of three. Chop down this bush and walk onto the hidden portal leading to Subrosia.
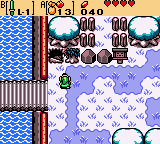
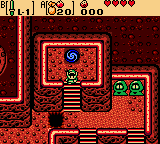
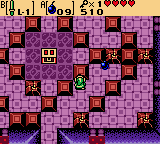
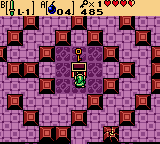
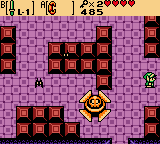
The underworld of Subrosia is mostly covered in red earth with pools and streams of lava everywhere, the latter of which you will want to avoid falling into through Link’s travels here. Subrosia also uses a different currency than the Rupees of the overworld: Ore Chunks. These can be obtained by various means, including simply digging around for them.
From the portal where you first entered Subrosia, head down the first staircase, then down one screen via the leftmost staircase of the two below. Continue left one and down one more screen, then head down the steps here to enter the Subrosian Dance Hall.
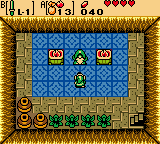
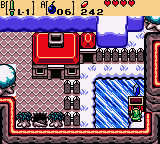
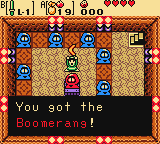
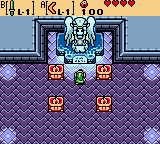
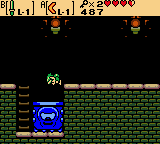
Speak with the red Subrosian and agree to dance with the group. You will also want to hear the instructions on how to dance if this is your first time doing so. Even if you have played the Oracle of Ages, which also involves a similar dance recital with the Gorons, you will still need to hear instructions as the Subrosian dance involves different buttons. If you can successfully complete a dance with the Subrosians, you will be awarded the L-1 Boomerang!
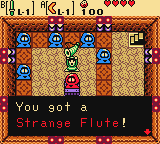
You may or may not choose to continue dancing with the Subrosians. Link will be rewarded with either a Gasha Seed or 50 Ore Chunks with each successful dance. If Link continues to play and win the Subrosian Dance Hall game, he can be rewarded with the Strange Flute. If Link acquires this particular Flute, this will mean that he will have Dimitri as his animal companion later on in the quest.
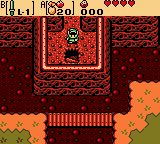
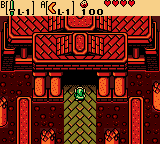
Exit the Subrosian Dance Hall and backtrack to the screen with the vortex portal. This time, head down one screen via the rightmost staircase of the bottom two. Continue down two and right two more screens. Head down the staircase and continue right two more screens and finally up one into the Temple of Seasons area. After a brief message from the four Season Spirits, continue up two screens and enter the temple.
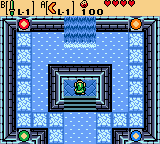
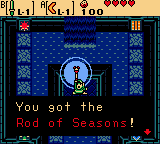
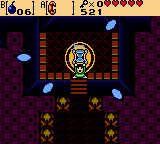
Go up one screen and stand on the platform to recieve the Rod of Seasons! This is the most important item in the game, as Link can alter the seasons in an area once the rod has been powered by that respective seasons spirit. This first season you need to obtain is Winter, so head down one screen and exit the temple.
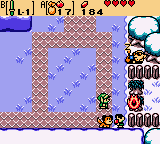
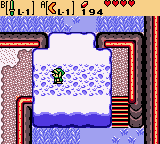
Continue down two screens and right one. You will notice the purple roof sticking out of the temple along with an indentation of the symbol for the winter season. Enter the temple and use the Boomerang to hit the switch across the lava stream, creating a bridge to cross. Walk north and head up the steps at the back of this room, then walk south and climb the second set of steps leading to the Winter Season Spirit’s chamber. Walk up to the blue statue, where Link will be greeted by the Winter Season Spirit who will empower the Rod of Seasons the Power of Winter!
Backtrack through the temple and exit. The Maku Tree will have a brief message for Link, informing him that the next Essence of Nature can be found in the Woods of Winter. We can reach this area simply by leaving Subrosia the way we came. To get to the portal from the entrance to the Winter temple, head left one screen, down one, and left two more screens. Climb the stairs and continue left two screens and up three. Walk back up the staircases and enter the portal to return to Labrynna.
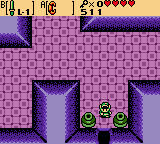
Clear a path through the bushes and head right one screen. A short cutscene will play where Sokra tells Link how to use the Rod of Seasons. After Sokra leaves, hop onto the stump here simply by walking into it and swing the Rod of Seasons to change the season to Winter.

Hop off the stump and head down one and right one screen. The third bush on the second row from the top will be hiding a Soil Patch underneath, so you may want to plant a Gasha Seed now before we tackle the second dungeon in a few moments.
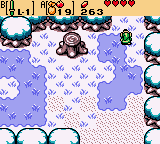
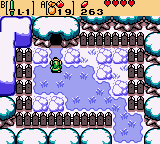
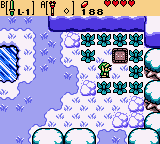
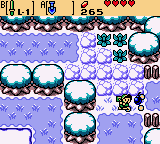
Now, head left one and down three screens. Continue left one, down one, right one, and up one more screen. Climb the staircase, cross the path of snow, and continue left one and down one screen. Enter the cave and walk up to grab Piece of Heart #2! Jump off the ledge to the left and head down the staircase into the Windmill. Follow the path down and left to exit this building.
Head north until you reach the screen with the season changing stump. Hop on it and change the season to Winter if it isn’t already. Then, head right one, up two, and right one more screen. The season will automatically change to Summer once you enter this section of the woods.
Toss a bomb at the cracked wall above and enter the cave. At the upper-right section of this cave, you will find a chest containing 30 Rupees! There’s nothing more here, so exit the cave.
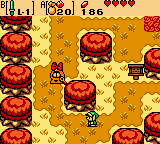
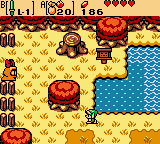
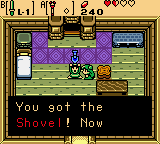
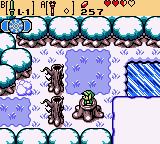
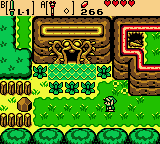
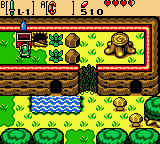
Continue on right one screen and use the stump here to change the season to Winter. Walk up the steps to the east and head right one screen. Cross the path of snow and jump down the chimney from the ledge. Link will be sent rolling into Holly’s house, who mistakens Link’s arrival for Santa. Once Holly realizes that Link is not Santa, she will give him the Shovel and instruct him to clear the snow from her front yard. Exit the house.
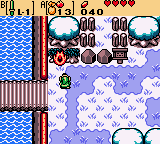
Shovel away the snow in front of the house and head down onescreen. There are some trees on the left that can be burned, the lone one in the back hiding a Bad Old Man’s hideout. You’ll want to avoid him as he will take 50 of Link’s rupees.
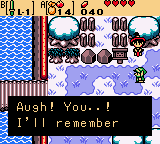
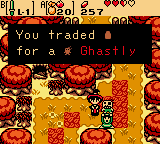
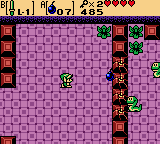
This screen is also one of the many screens where Link will encounter Maple. At this point, since we have the Lon Lon Egg, we do want to bump into her to progress in the Trading Sequence. Bumping into Maple will cause the Lon Lon Egg to drop out and Maple will run to pick it up. In exchange for the Lon Lon Egg, Maple will give Link the Ghastly Doll.
Continue on down one screen via the leftmost path. Keep going down one more and left one screen to find another season changing stump. Use it to change the season to Winter.
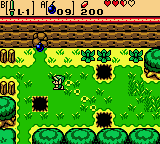
Head left one screen, then head up one along the right side of the big trees. Use the Shovel to clear a path and continue right one screen, where the season will change to Summer. Use your sword to swipe the seeds from the Mystery Seed Tree. These seeds have many uses. They can be used on blue owls, such as the one on this screen, to recieve hints throughout Link’s quest. They also can be used on certain enemies to achieve various effects.

From the seed tree, head up one and left one screen. Chop away the bushes to clear the entrance to Level 2: Snake’s Remains, and enter.
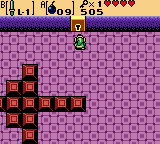
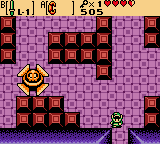
Link enter’s this dungeon in room C8. Head left one screen to room B8. Keep moving after switching screens to avoid the Blue Blade Traps that will come towards Link. Navigate to the left side of this room to find a chest containing 5 Rupees! Continue up one screen to roop B7.

Defeat all the Ropes in this room and a Small Key will fall from the ceiling onto the middle tile. Grab it and backtrack down one and right one screen to the dungeon entrance, C8. Now, you can light the torches in this room, unlocking a door to the north. Do so, and head through the door up one screen and immediately right one screen to D7.
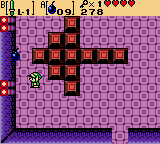
Head directly right one screen to room D7. Defeat all the Ropes, then push the rightmost block in the second row to the right to reveal a chest containing the Compass! Grab it and exit this room left one screen back to C7.
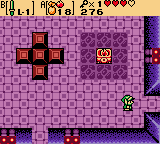
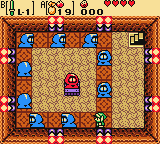
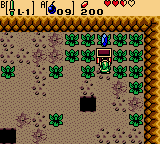
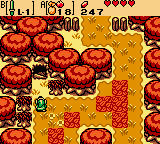
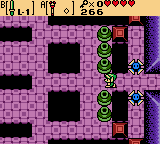
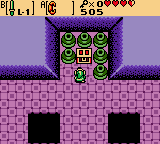
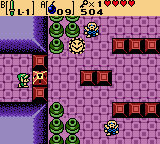
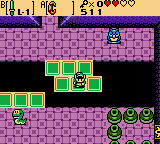
Now, head up one screen room C6. Go ahead and defeat the enemies in this room to unlock the door on the right wall of this room, but do not enter it just yet. There are blocks in this room resembling and arrow shape. Bomb the section of the left wall this arrow is pointing to and enter to room B6, where there are a random number of Rupees (the amount can very, but will be at least 100 and no more than 250) scattered on the floor. Pick them all up and go right one screen back to room C6. Continue up one screen through the locked door to room C5.
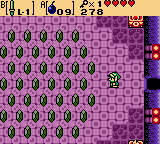
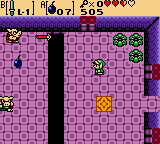
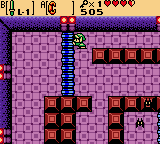
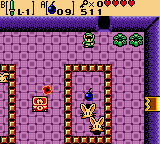
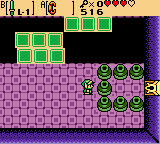
Use your sword to knock the Hardhat Beetles down either of the pits to unlock the doorway on the west. Enter through it left one screen to room B5. Defeat the Moblins on the left side across the pit by tossing bombs at them and a chest will appear. If you run out of bombs, there are respawning bushes in this room that will give you more. Open the chest to obtain the Power Bracelet!
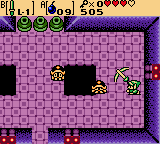

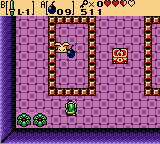
Head right one screen back to room C5. The Hardhat Beetles from before will respawn, so knock them down a pit to get them out of the way. Use the Power Bracelet to move the pots blocking the chest and open it to recieve the Dungeon Map. Exit this room down one screen, then head right one screen to room D6.
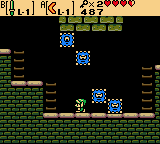
Once you defeat all the Ropes and Zols here, push the rightmost block to the right and the door at the upper-right of the room will open. Head through it right one screen to room E6. Keep walking right after you enter to avoid the Giant Red Blade, then walk down and back left to where the chest is located. Open it to recieve a Small Key, then continue on the path towards the lower-right section of the room, avoiding the Giant Yellow Blade Trap as you go, and head down one screen to room E7.
Equip Link with the Power Bracelet and hold down the button it is equipped to while walking against the rollers to move them. Push the first roller left, then follow the path just below and to the right. Move the next set of rollers out of the way and head up the staircase, exiting the dungeon to the outside. Open the chest here to recieve a Gasha Seed!
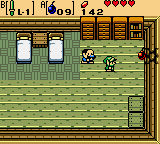
Continue on left one screen and head down the staircase here to return to the dungeon, now in room F5. Along with two Rope enemies, this room also contains a Business Scrub who will offer to sell Link 10 Bombs at the cost of 30 Rupees. Link will need at least 6 bombs in the next room, so if you don’t have that many or just want to take precaution, you may want to purchase some here if you can. Chop the bushes blocking the path to the north and head up one screen to room F4.
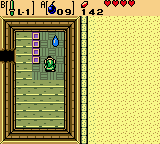
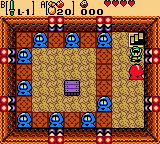
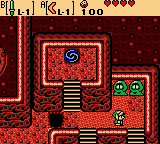
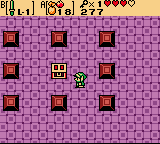
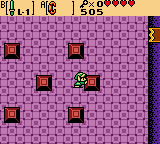
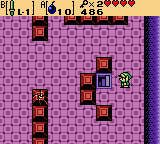
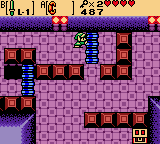
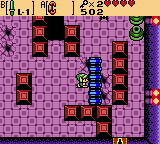
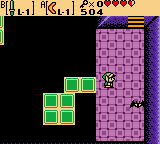
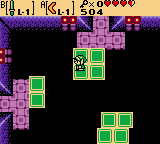
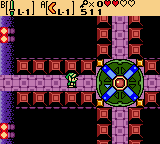
This room contains a central chest along with a swirling pattern of blocks forming a path around it. The key is to bomb the cracked blocks you come to, all while taking the correct path so no time is lost, before time runs out and the chest disappears. If this happens, you will have to exit and re-enter the room, where any blocks you bombed before will respawn.
***Head up and right along the path and bomb the first cracked block you come to, then continue along the path up and left and bomb the next block. Bomb the block directly left, then ]head down and to the left and toss a bomb at the block on the far left, which should blow up both blocks there. Bomb the block just below these next, then continue right through the opened path and bomb the last cracked block. Hurry and open the chest to get a SMALL KEY.
Navigate back through this room and exit down one screen back to room F5, then head up the staircase at the bottom left to exit the dungeon again. Continue right one screen and re-enter the dungeon in room E7.
Since we exited and re-entered the dungeon, the Keese here from before will respawn. Push the rollers out of the way and head up one screen, then immediately right one screen to room F6 to avoid the Giant Yellow Blade Trap in room E6. If you need some bombs, you can find some in the bushes at the top of this room. Bomb the cracked blocks in the middle to clear a path to the right side of the room and head down the staircase to a basement area.
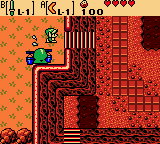
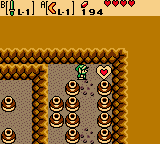
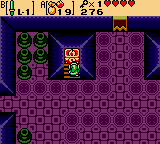
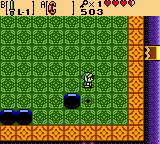
Jump down the ladder and head left, avoiding or killing the Keese that fly about, and walk close to the edge below the big blue stone creature, called Thwomp, to make him crash down in front of Link. When the Thwomp hits the floor, hop off the ledge and walk across his head to get passed and continue left one screen. Climb down the ladder and walk right all the way to the opposite ladder and the Thwimps should fall behind Link instead of on top of him. Head up the series of ladders to exit the basement area and resurface in room B1.
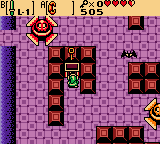
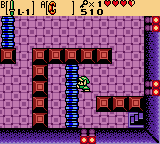
Push the roller directly to the right all the way against the blocks and walk south through the opened path towards the chest. Open this chest to recieve 10 Rupees, then head up along the path and right one screen to room C1.
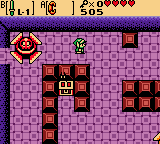
Push the first roller right once, then quickly move down to its bottom and continue pushing to avoid standing on the weakened floors. Continue south along the path to the next roller and push it from its middle section, avoiding the weakened floors again, until you can head up along the path between the blocks. Follow the path the the bottom of the room and head down one screen through the locked door to room C2, the location of this dungeon’s mini-boss.
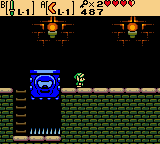
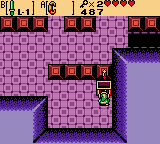
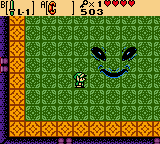
Veteran Zelda fans may recognize this boss as the same one seen in Link’s Awakening. Like that version, this Facade is also defeated by bombing his face while it appears on the floor. While trying to do this, Facade will periodically disappear and attack in one of three ways before reappearing again for a brief time. Facade’s attacks include dropping Beetles (small spiders) from the ceiling that will crawl about until defeated, shooting flames out of his mouth that will crash down in random spots around the room, and causing random pits to appear that chase and attempt to swallow Link. As long as you keep moving, you should be able to avoid all of Facade’s attacks. The Beetles Facade drops can be defeated to obtain hearts or more bombs. After blowing up 5 bombs on Facade’s exposed face, he will be defeated.


Grab the Fairy that Facade drops and continue on right one screen to room D2. At the far right side of the room there are pots blocking a cracked wall. Move the pots and bomb the wall but do not enter through it. Instead, continue right one screen to room E2. Use a small key to move through the locked block and continue right one screen to room F2. Avoid the Blue Blade Traps when you come into this room and defeat the Ropes, then continue on down one screen to room F3.
Step on the moving platforms, navigating counter-clockwise until you reach the right side of the room. Walk up the steps and head up one screen to room F2 again, this time on the ledge with a chest. Open the chest to recieve the Boss Key, then hop off the ledge to the left and head left two screens to room D2.
You now need to move the pots and enter the opening you bombed from before, going down one screen to room D3. There are Pols Voice trapped in blocked areas to the left and right of this room, as well as a central lantern that will shoot fireballs towards Link. Toss bombs at the Pols Voice to defeat them, unlocking the door on the right. Head through this doorway right one screen to room E3.
Step into the rotating platform to have it turn clockwise and point Link in the direction of the lower pathway. Continue down one screen to room E4. Walk south across the moving platforms to bypass the gap, then move the pots at the lower-right portion of this room to clear a path to the dungeon boss’ lair. Use the boss key to unlock the door and head through to room F4, where we will tackle the dungeon’s main boss.
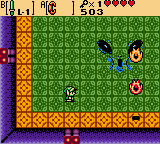
You’ll need to equip both the Bombs and Power Bracelet for this fight. Though King Dodongo moves rather slowly about the room for the majority of the fight, he does have a couple of attacks that will prove fatal if you do not keep an appropriate distance. Occasionally, King Dodongo will open his mouth for a couple of seconds before shooting fireballs out in the direction he’s facing. He may also charge in the direction he is facing, which is usually towards Link, so you’ll want to keep Link far enough away to move out of the his path in time.
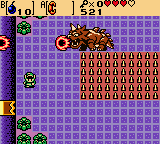
The key is to toss a bomb into King Dodongo’s mouth when he opens it, followed up by lifting him with the Power Bracelet and tossing him onto the spiked floor in the middle of the room. Once you successfuly fill King Dodongo with a bomb and toss him onto the spiked floor 4 times, he will be defeated.
Collect the Heart Container King Dodongo drops and head down one screen through the doorway at the lower-right section of the room to F5. Walk up the mantle steps to claim the second Essence of Nature, the Gift of Time!


 Guide: Everything You Need To Know About Pokémon Omega Ruby & Alpha Sapphires Secret Bases
 Skyward Sword Walkthrough – Thunderhead –
  Guides: How to Get Your Wii Online
 Majora’s Mask Walkthrough – Collection –
  Guide: Getting The Most Out of Monster Hunter 4 Ultimate