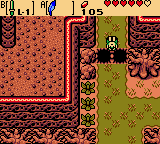
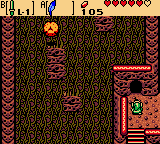
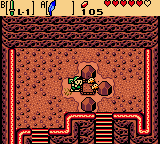
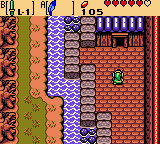
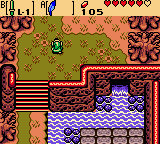
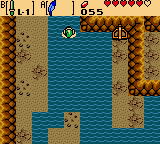
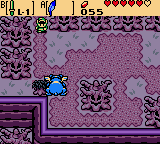
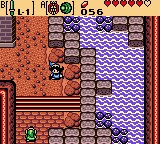
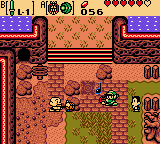
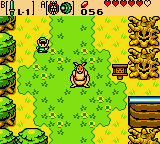
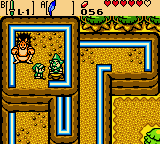
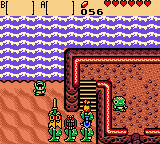
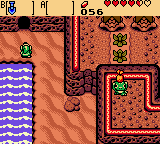
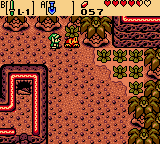
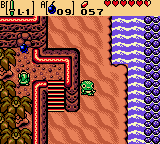
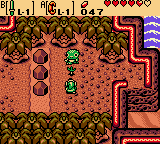
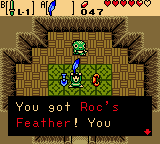
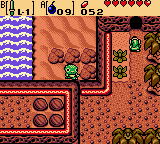
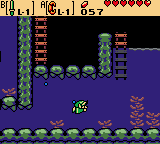
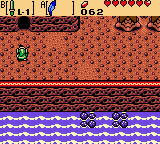
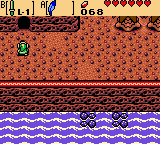
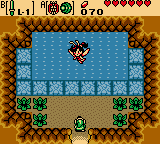
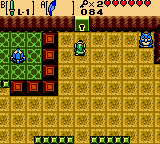
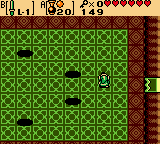
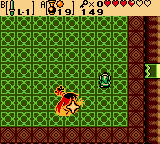
After leaving the Wing Dungeon, head right one, up one, left one, then up one more screen to exit the Deku Woods. Use your newly acquired Roc’s Feather and jump over the gap found here. Continue up two screens and enter the cave located here. Use a combination of Roc’s Feather and the Power Bracelet to make your way over to Piece of Heart #5! Grab it and exit the cave.
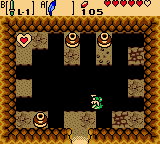
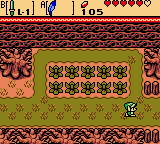
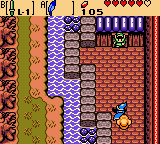
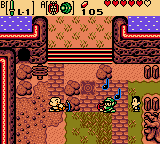
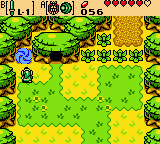
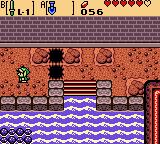
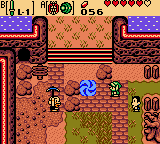
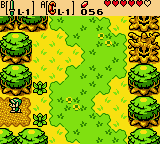
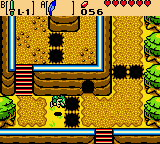
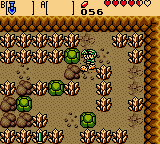
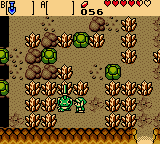
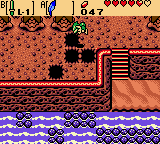
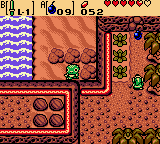
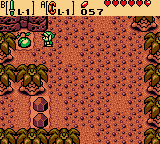
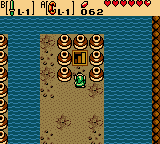
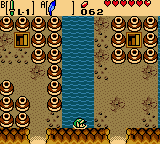
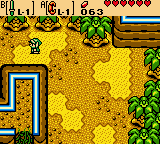
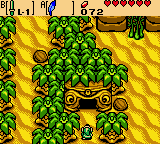
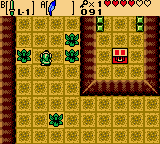
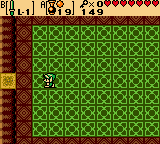
Walk right a screen and up a screen and you’ll find a series series of rocks. Lift one of them up with your Power Bracelet and then dig up the dirt using your shovel to reveal a soft soil location. Link can plant a Gasha Seed here if he has one.
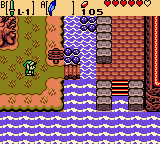
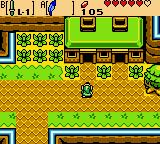
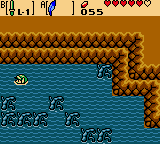
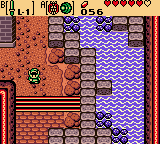
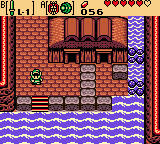
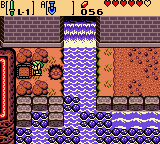
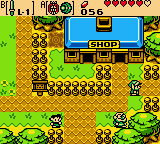
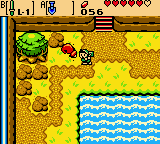
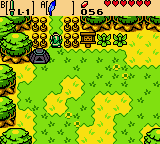
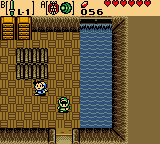
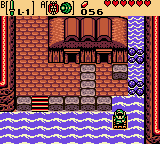
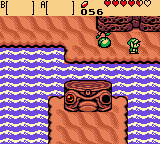
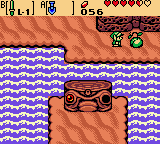
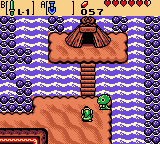
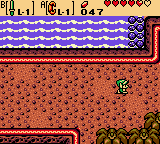
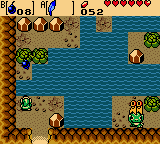
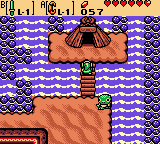
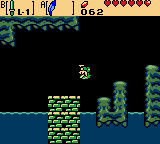
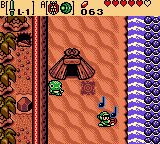
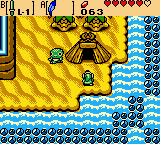
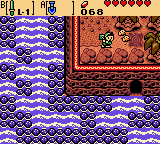
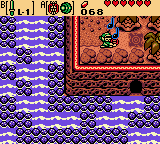
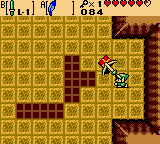
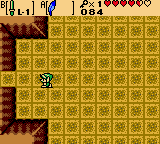
Walk down down two screens, left a screen, and down a screen. Continue right for three screens, up one and then across the bridge, then right two more screens. Head down three screens, passing the Ember Seed tree along the way, then head right one screen once Link hits the coast. Use the Roc’s Feather to jump from the bridge across the water and onto the brick floor to the right, then head up one screen and enter Cheval’s House.
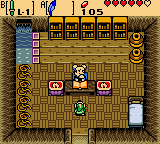
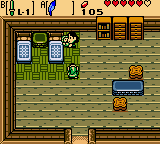
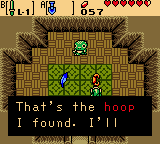
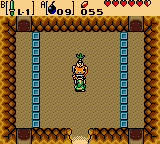
Speak with Cheval, who reveals to Link his desire to invent flippers for swimming and rope that won’t decay in water before he dies. Cheval doesn’t give Link anything at the moment, so go ahead and leave his house after speaking to him. Outside, Ralph will run up to Link and exclaim that he heard of the name “Cheval” on a grave in the present time, then run off as he usually does.
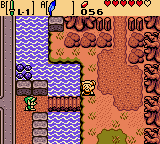
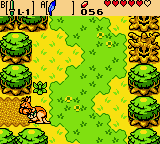
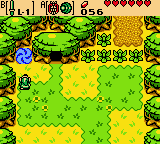
Head down one screen and jump back over to the bridge, then head up four screens from this side. Continue left one more screen, entering Lynna Village from the east, and use the Harp of Ages to activate the portal here in front of the Maku Tree’s area. Enter the portal and travel to the present.
 ~ Present ~
Head left one screen and enter Bipin and Blossom’s House, then walk to the left side of the house and speak with Blossom. She will tell Link that her baby has been acting strange and she wishes to take him to a doctor but she has no rupees. Link will be given the choice of offering some of his rupees for the baby’s doctor visit. This is the first time that Link must make a choice that will affect the baby’s overall growth by the end of Link’s adventure. Refer to the Bipin and Blossom’s Son guide for more info on the results of those choices.
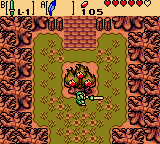
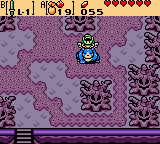
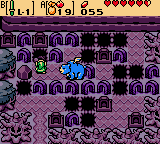
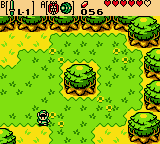
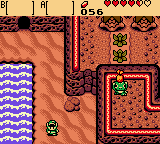
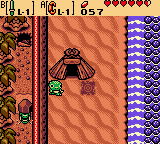
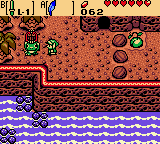
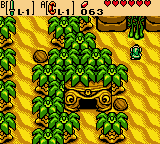
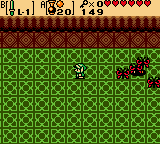
Exit Bipin and Blossom’s House and head right one and up one screen into the Maku Tree’s area. Exit this area via the opening in the upper-right corner of the screen, then jump off the ledge and head down two screens. Continue right one screen, down one, then right again into Yoll Graveyard. After burning the shrub and clearing the way, head right one more screen to find a blue bear being pestered by ghosts.
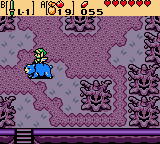
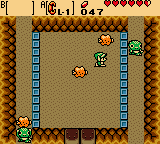
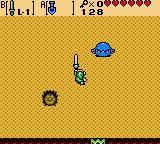
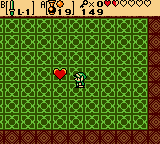
Once the ghosts notice Link, they will turn their attention to him and begin moving about the screen. Defeat all three ghosts and speak to the blue bear who will reveal his name to be Moosh and offer his abilities to Link. Moosh can fly for a short period of time when the “A” button is pressed repeatedly and any direction is held. When the “A” button is held, Moosh will leap into the air and charge himself up; Releasing the button causes Moosh to crash into the ground, destroying surrounding perishible objects including enemies. The one thing Moosh cannot do is swim, so be careful not to take him into any deep water.

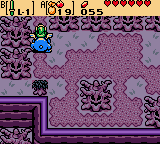
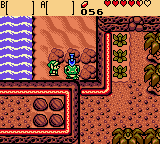
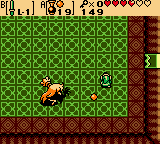
Ride Moosh left one and up one screen. Using his flying abilities, have Moosh take Link over the many pits in this screen until reaching the grave just above the boulder. Jump off Moosh and push the headstone “up” to unveil a stairwell leading to a cave below.
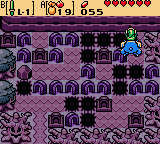
Defeat or avoid the two Bumpers and Red Zols in this screen and head up one. Continue along the path right one and down one screen, then walk to the very end of the path and use the Roc’s Feather to jump over the water and onto the land on the right. Now, jump onto the strip of land going alongside the ledge holding what appears to be flippers on it and walk up. Equip the Power Bracelet and use it to pull the device sticking out of the wall as far down as it will go, separating the two blocks preventing access to the ledge. Release the lever and jump over towards the steps, quickly heading up them to bypass the two blocks which will start to come back together. Walk up and grab Zora’s Flippers, allowing Link to now be able to swim in deep water!
** Now that Link can swim, Syrup’s Shop, located in the northeast corner of Yoll Graveyard, can be accessed. Here, Link can buy Magic Potions and Gasha Seeds for 300 Rupees each.
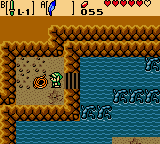
Hop back over to the path on the left side of the screen and head up one screen. Enter the water and swim clockwise around the vines growing in it, so that Link is on the upper side of them, then swim left one screen. At the end of this passage, climb the steps and retrieve Cheval’s Rope from the ledge. Now jump off this ledge to the south, swim down one screen and all the way to the bottom of that screen, then exit the cave via the staircase on the right.
Toss the boulder on the left aside and jump over the pit in front of it, then head down one screen. Moosh will be here to say bye to Link as his services are no longer needed for the moment. Exit Yoll Graveyard be heading left one screen back to the Forest of Time. Head to the portal outside of Nayru’s House by heading up, left, up, right, and up one screen each, then play the Tune of Echoes to activate the time portal and use it to travel to the past.
Head left, down, and left one screen each to enter Lynna Village. Continue down one, left one, and down two more screens, then cross the bridge on the left and head down another three screens. Enter Rafton’s House and speak with him. He will notice the Cheval’s Rope which Link has obtained and ask for it to finish building his raft. Give Rafton the rope, to which he encourags Link look for a “chart” while the raft is being built.

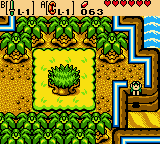
Exit Rafton’s House and head up one screen, where Link is greeted yet again by Ralph. This time, Ralph only mentions a “weird guy” who makes sea charts but doesn’t really provide much information on where to find him. Once again, Ralph will run off into parts unknown frantically searching for Nayru. Afterwards, head left two screens. Notice the five dirt patches on the left that surround a bare spot. Have Link dig this bare spot to unearth a soft Soil Patch and plant a Gasha Seed if you wish, then head back right two screens.
Head up two screens and cross the bridge on the right. Continue up two, right one, and up one screen and activate the time portal using the Tune of Echoes. Enter it and return to the present Lynna City.
 ~ Present ~
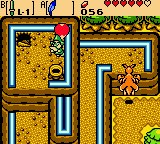
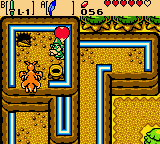
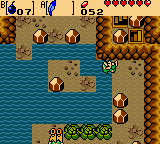
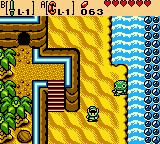
Head down two screens to the area with the Shop, then exit Lynna City right one screen. Head up one, right one, and down one screen, where Link will run upon a second special animal character, this one a kangaroo named Ricky. Speak with Ricky, who will reveal he has lost his gloves somewhere near the tree on the beach.
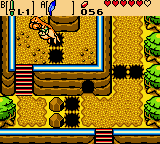
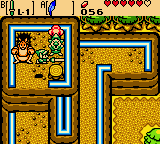
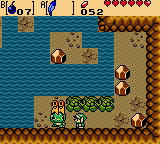
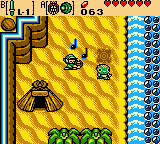
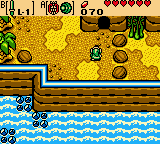
Head down one screen, then clear the bushes on the left and continue left one and down two screens to the coast. Walk left one screen here and equip the Shovel. Use it to dig the patch of dirt closest to Link where Ricky’s Gloves can be found underneath. Now to return the gloves to Ricky, backtrack right one, up two, right one more and up one final screen. Speak to Ricky to give his gloves back and he will, as Moosh did before, offer his special abilities to Link for a moment. These abilities will be used on the mountainous location he just passed to reach the beach area.

Take Ricky down one and left one screen, then use him to jump onto the cliff here. Continue down one screen along the middle path, then jump across the holes on the left and head back up one screen along the leftmost path. Jump onto the last ledge here where a floating fairy-looking man is shown hovering above a stump. Hop out of Ricky’s pouch and use a combination of Roc’s Feather and Sword to jump and swipe down the balloon of the floating man, then speak with him.
The man reveals his name to be Tingle and believes that he is a true fairy. Truthfully, Tingle is merely a 35 year-old citizen of Labrynna, but his passion for fairies leads him to believe, and live his life as if, he is a reincarnation of a fairy. Tingle’s true specialty is sea charts, to which he will give Link one of if he agrees to be his friend. With the Island Chart in hand, Ricky will grow annoyed of Tingle and be on his way. Now its time to get back to Rafton’s place in the past and put this sea chart to use.
Jump from the cliff and head down one screen. Walk down the steps and toss aside one of the boulders on the right, then continue over the series of pits on the right and head up one and right one screen. Slash the bushes away and head up two, left and up one screen each, then right and up one screen each to reach Nayru’s House. Play the Tune of Echoes to activate the time portal outside and travel to the past.
Head left, down, and left one screen each to enter Lynna Village. To reach Rafton’s House, continue down two and left one screen, then down one, cross the bridge to the left, and down three more screens. Enter Rafton’s House and he will tell Link the raft is ready. Follow Rafton to the right side of the house and then exit, where a raft will now be floating atop the sea waters, those which even Link’s flippers cannot help him swim in.

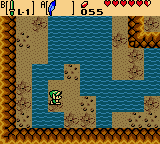
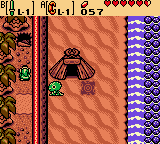
Get on the raft and sail down two, right one, and up two screens. A storm will brew up with Link being caught in the middle, to which a flash of light will see him awakening on a mysterious island. Five green, lizard-like creatures will be shown surrounding Link before running off with his items. These “Tokay” will have completely cleaned out Link’s inventory, so the next step is getting it all back.
Walk down one screen, right one screen, and down a screen to find one of the creatures holding Link’s shovel. Speak with the Tokay who will admit to nabbing this item off a “tokay with no tail” from the beach before realizing it belongs to Link and returning it.
Head up one screen next and enter the cave at the top. Walk all the way up and push the farthest green boulder “left”. Use the Shovel to clear the patches of thick dirt below this and head all the way down to where the Tokay holding the sword is. Talk to the Tokay to have Link’s Sword returned to him, then exit the cave.
Head left one screen and push the vine sprout “right” twice so that it lines up with the indention in the wall, then continue up, right, and down one screen each. Chop away the bushes on the right and head right one screen. Here, a Business Scrub will be selling Shields for 50 Rupees each. Continue down two screens, then walk down the steps and head right one and up three screens. Cross the bridge here and enter the hut.
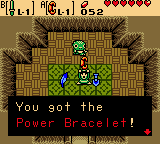
Inside, Link’s Roc’s Feather and Power Bracelet can be found, but the Tokay who has found them will only offer one or the other in a trade. Pick the Power Bracelet first, to which the Tokay will trade for Link’s Shovel. With the Power Bracelet now in hand, exit the hut and head down three screens. Continue left one screen, walk up the steps, and back right and up one screen along the path. Use the Power Bracelet to toss aside the boulder here and descend the stairwell above.
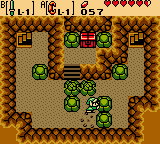
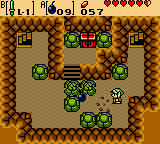
In this small cave area, push the very bottom green boulder “right”, then the one that is now above it “right” as well, clearing a path to the staircase on the upper-right. Head up this staircase into the rear of the Cucco House and grab the Bombs, then head back down into the underground area. Use the Bombs to destroy the cracked green boulders in the cave and open the chest above to obtain a Gasha Seed, then exit this cave via the staircase in the upper-left.
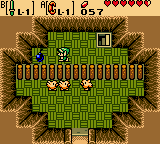
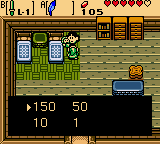
Head down one and left one screen, then walk down the steps and head back right one screen along the coast. Continue up two more screens and use a Bomb to blow open the cracked cave entrance at the top of the steps on the right. Enter the cave and speak with the yellow Tokay, apparent owner of this “game room” to which the winner will recieve a Scent Seedling. The object of this game is to throw the meat that falls in the center of the room to each Tokay walking along the left and right sides. Link must not miss even one Tokay to win the seedling, but more attempts can be made at the cost of 10 Rupees.
** Link can keep playing this game to recieve more prizes increasing in value each time he wins. The game will be much more difficult than the first time playing and increase in difficulty as more prizes are won. First prize is 20 Rupees, second is 50 Rupees, and third and every time thereafter is a Gasha Seed.
Exit the game room once finished and head down two and left one screen. Climb the stairs and head up two screens, then continue left one, slash the bushes away and up another screen. Finally, head right one screen and speak to the Tokay on the other side of the boulders. He will take the Scent Seedling from Link and plant it in this location, though it will take hundreds of years before a fruitful tree will spawn from it. Jump down off the ledge to the right and head right one screen, then enter the hut of the trading Tokay and get back Link’s Roc’s Feather.
Leave the hut and head down three screens. Continue left one screen and climb the steps, then jump across the holes on the left and head left and up one screen each. Bomb the cracked portion of wall to the north and enter the cave.
Equip the Roc’s Feather and Bombs, then toss a Bomb at the two cracked green boulders just ahead. Use the Roc’s Feather to jump over to where the boulders were and continue along the path clockwise. Link will eventually make his way over to the Tokay holding a pair of flippers. Speak with the Tokay to obtain the Zora’s Flippers back, then exit this cave.
Head down one and right one screen, then walk down the steps and continue right another screen along the coast. Head up three screens and enter the trading Tokay’s hut again and get back the Power Bracelet. Exit the hut and head down three and left one screen, walk back up the steps, and continue up another screen. Toss aside the boulders on the left and head left one screen, then enter the cave at the top of the screen again.
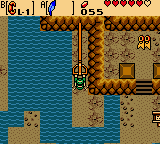
Swim north to where three boulders block access to a small section of water. Toss the boulders aside and dive down in the deep square of this section to an underwater area below. Navigate this passage all the way to the opposite side, where a series of ladders will lead Link out of this underwater area and onto a crowded ledge in the cave. Toss aside the boulders here and head up the staircase, leading onto a central ledge on Crescent Island. Along this narrow path, head left one screen and speak with the Tokay here to retrieve Link’s Seed Satchel.

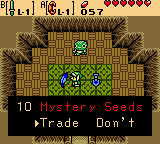
Walk back right one screen and jump off the ledge, taking Link down one screen in the process. Push the vine sprout in this screen “up” twice and “left” four times, then continue on down one screen. Walk down the steps and head right one screen along the coast, then continue up three screens into the hut again. Now that Link has his seed satchel back, he can obtain all of his items in the hut by trading seeds instead of other items. Keep the Power Bracelet in favor of the Shovel for now and buy back the Roc’s Feather for 10 Mystery Seeds, then leave the hut.
Head down three and left one screen, then climb the steps and scale the pits to the left. Continue on left another screen and enter the cave here. Throw aside one of the vases blocking the stairwell and enter it to a lagoon-type cave area below. Swim to the left side of the cave, then use the Roc’s Feather to jump from platform-platform until Link reaches the ladder leading out. Head up this ladder to be in the cave again, this time on the left side, and head down one screen exiting the cave.
Speak with the Tokay on the left to finally retrieve the Harp of Ages back. Now, head back inside the cave and push one of the vases on the right into the water. This gives access to the other side of the cave without having to trek back through the underwater area, so exit the cave from the right side now and head right one screen. Jump over the pits and continue right another screen along the coast, then head up one screen. Activate the time portal here by playing the Tune of Echoes and enter it, traveling to Crescent Island’s present for the first time.
 ~ Present ~
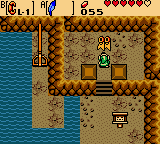
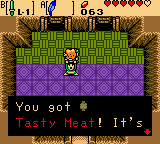
Head down one screen and enter the hut here. Speak with the Tokay Cook, who because of a stuffy nose cannot smell and therefore cannot cook. Give him the Stink Bag and the pungeant smell will clear the Tokay’s nostrils. As thanks, he will give Link the Tasty Meat, “the chef’s specialty”.
Exit the chef’s hut, then head left and up one screen each. Climb the vines in the upper-left up one screen, then head left one screen and walk down the steps down one screen. Continue down and left one screen each, then climb the vines here up one screen and walk right one final screen. Lift the boulder on the bottom-left to uncover a Soil Patch for planting Gasha Seeds. Now, backtrack left, down, and right one screen each, then head up two screens and right one. Climb down the vines down one screen, then head up one screen along the ground to the right.
Head left one screen and climb down the vines, then head left another screen and climb up one screen along the vines here. Continue right two screens to reach the tree nursery, no with a fully-grown Scent Tree in its center. Swipe the Scent Seeds down from the tree to add them to Link’s collection. Scent Seeds can be used to lure enemies to their smell wherever they are placed.

Jump off the ledge on the far right and head right one and down two screens. Play the Tune of Echoes to activate the time portal and use it to go back to the past.
 ~ Past ~
Head up two screens and enter the trading Tokay’s hut. Trade back the Power Bracelet for the Shovel, then buy the Power Bracelet with 10 Scent Seeds. With this, Link will have reacquired all of his items! Exit the hut and head down three and left one screens. Walk up the steps and head over the pits left one screen, then enter the cave.


As before, head through the lagoon passage to reach the left side of the cave and exit. Head up, left, and down one screen each from the cave’s leftmost exit to reach a hidden time portal tile. Dig the piles of dirt away to access it, then play the Harp of Ages and return to the present.

 ~ Present ~
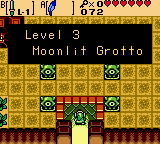
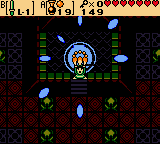
Head up one screen. A Great Fairy Fountain can be found inside of a cave, located one screen right and down. Continue by heading up two more screens, right one, and down two. Take the path on the right up one screen from here to be at the third dungeon of Link’s quest. When ready, enter the Moonlit Grotto.
~First Floor~
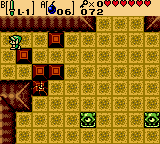
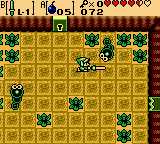
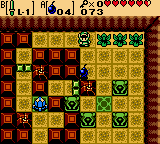
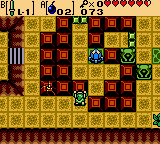
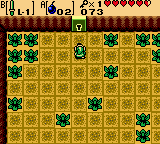
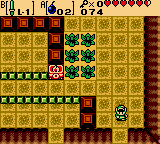
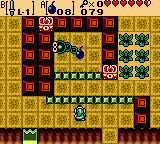
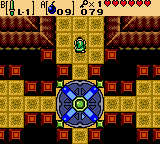
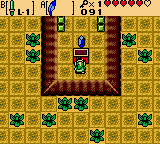
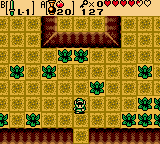
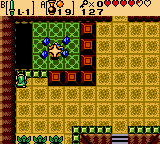
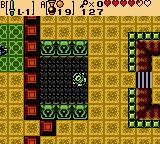
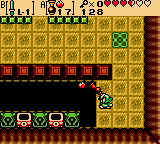
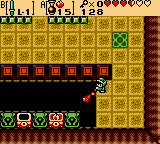
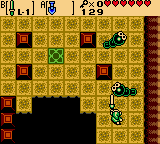
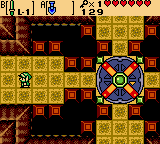
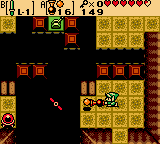
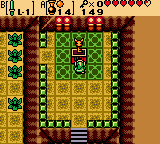
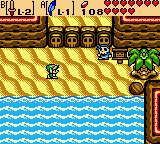
Link enters this dungeon at room F3 on the first floor. At the upper-left corner of this room, toss a bomb at the uppermost cracked block, landing close enough so the explosion destroys it. Push the red block that was directly beneath the cracked one to the “left” and head left one screen to room 1F-F2.
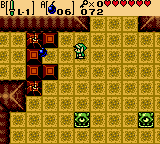
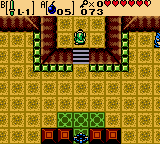
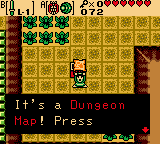
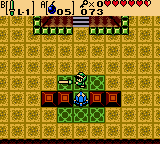
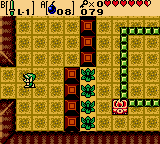
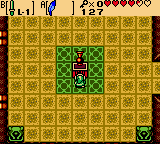
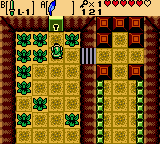
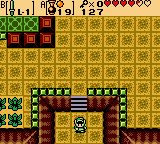
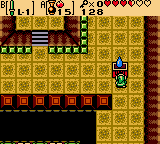
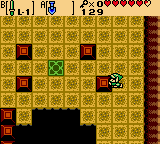
Play the Harp of Ages to defeat the the two Pols Voice in this room and a chest will appear. Open it to obtain the Dungeon Map, then head back right one room. Bomb the same cracked block again and push the red block beside it “right” to get through, then head up one screen to room 1F-E3.
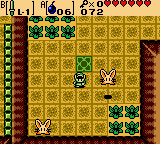
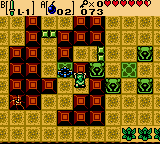
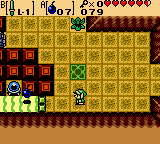
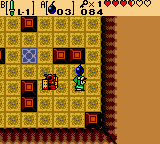
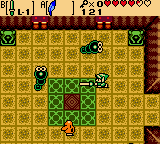
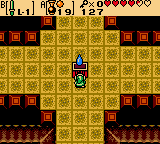
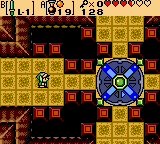
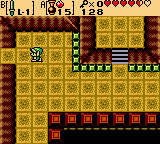
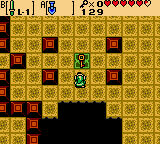
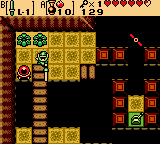
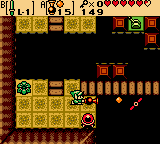
Defeat the two Mini Moldorms in this room to unlock a doorway on the right, then head right one screen through it to room 1F-E4. Here, a new enemy is present known as an Iron Mask. These little guys can only be attacked from the rear as it is the only part of their body not protected by their mask. Defeating them is not a necessity, though Link needs to slash the blue crystal in this room apart to cause a reaction elsewhere in the dungeon. When done, head up one screen to 1F-D4.
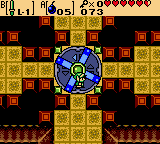
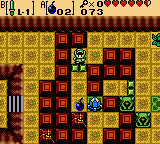
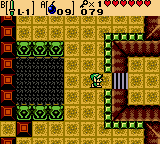
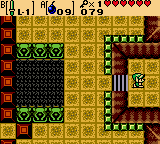
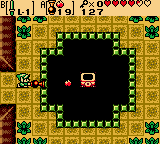
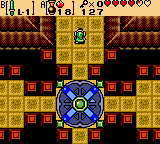
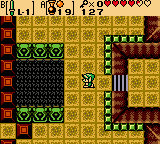
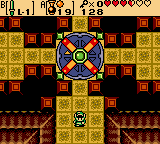
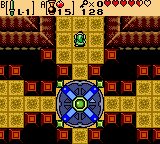
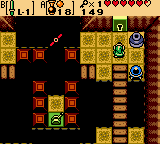
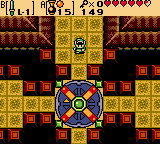
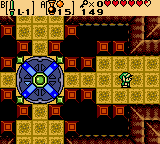
Step onto the rotating platform and it will turn Link towards the rightmost path. Each time one of these platforms are used, the direction in which it will turn when stepped on will alternate. Head right one screen along the path to room 1F-D5.

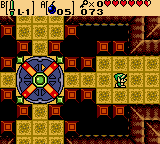
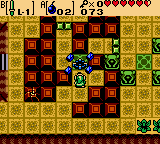
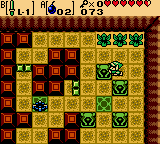
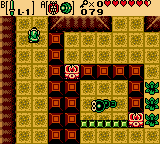
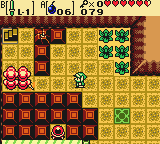
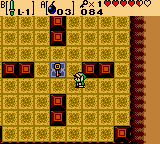
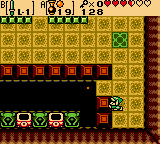
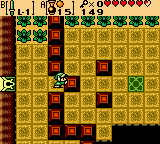
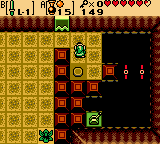
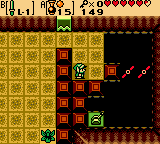
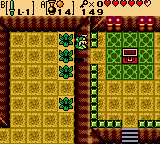
Over on the right side of this room, bomb the cracked red block in the square arrangement of green statues. Toss a bomb passed the gate which the block was setting beside to blow up the cracked block above the crystal on the left. Walk up to the top of the room and left as far as Link can go, then push the red block directly below him “down”. Toss another bomb passed the next, horizontal green gate to blow up the cracked block just beside the crystal, then walk all the way around to the red block that was under it and push it “up”. Slash the crystal with Link’s sword to cause another reaction somewhere in the dungeon/
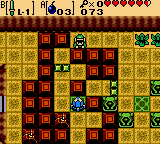
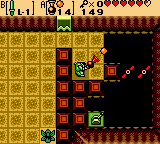
Next, push the red block beside the crystal “up”. Push the lone green statue “right” twice, “up” twice, “left” once, and finally “down” once to have a Small Key fall onto the green tile. Pick up the key and head left one screen back to room 1F-D4.
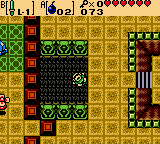
Step onto the rotating platform to get onto the southern path and follow it down one screen. Continue left one screen from there, back to room 1F-E3, and head through the locked door at the top of this room. Fall into the pits straight ahead down to the basement level.
~Basement First Floor~
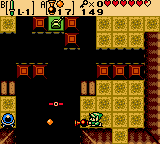
Defeat or avoid the enemies in this room and head down one screen to B1F-E3. Defeat the Mini-Moldorm by slashing him when he comes near the green gate on the bottom of his enclosed space. When the doorways below open, head down one screen through the opening on the bottom-right side of the room to B1F-F3.
Play the Harp of Ages to defeat the enclosed Pols Voice in this room. Head back up one screen through the doorway that unlocks, back to B1F-E3, then walk along the path on the left up one screen to B1F-D3. Head up the staircase here to 1F-D3, now on the other side of the red blocks with the blue crystal. Slash the crystal with Link’s sword, then head back down the staircase to the basement level again and continue down one screen to B1F-E3.

Toss bombs over the green gates towards the Mini-Moldorm until he is defeated. Now, head through the unlocked doorway on the left, down one screen back to B1F-F3 again, then continue left one screen to B1F-F2.
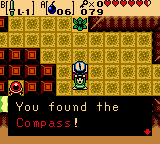
Toss a bomb towards the blue switch at the bottom of this room so that it explodes and turns the switch red, activating the Armos Statue above. Defeat the Armos Statue using bombs and a chest will appear containing the Compass. Grab it and head through the passage which the statue was blocking, then climb the staircase at the upper-left corner of the room back to the first floor, room F2.
~First Floor~
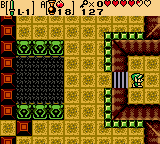
Walk south along the ledge and head left one screen at the bottom to room 1F-F1. Of the three red blocks arranged closely together at the top of the room, push the left one “left”, the right one “right”, and the middle one “up” so that they match the red blocks at the bottom of the room. Grab the Small Key which falls onto the blue tile and head back right one screen to 1F-F2.
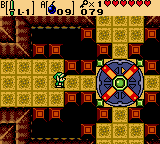
Jump off the ledge and head right one screen to 1F-F3, the entrance of the dungeon. Bomb the cracked blocks to get by as before and continue up two screens to 1F-D3. Head down the steps on the right and continue right one screen to 1F-D4, then step onto the rotating platform to have it turn Link towards the southern path. Make a circle back to 1F-D4 by heading down, left, up, and right one screen each, then step onto the rotating platform again. This time, it will turn Link towards the northern path, so head up one screen from there to 1F-C4.
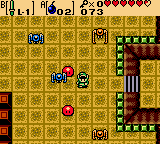
Be careful not to get sucked up by the Like-Likes here as they will eat Link’s shield and head right one screen to 1F-C5. Step on the switch in the upper-right corner of this room to activate the four Armos Statues, then defeat them all to have a Small Key fall onto the blue tile in the center. Additional Bombs can be found in the bushes just outside of this room’s entrance in the previous room if needed. Grab the key and head back left one screen, then continue up one screen through the locked door to room 1F-B4.
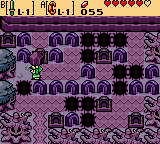
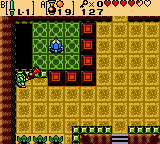
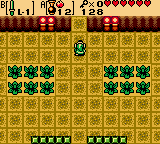
The dark red tiles in this room will lift off the floor and fly towards Link, all the while three Red Zols will also prove to be a burden. Defeat the Red Zols and when all the tiles are done lifting from the floor, both doorways to the bottom and left will open. Head left one screen to room 1F-B3.
Some of the bushes in this and the next room are disguised Beetles, so pay close attention to which ones do not have a full yellow square beneath to pick them out. Head down one screen to 1F-C3, then over to the left side of this room and back up one screen so Link is now on the left side of 1F-B3. Walk to the top part of this room and climb the steps on the right to the ledge, then head back down one screen along the ledge to find a chest containing 30 Rupees. Still on the ledge, head back up one screen and through the locked door at the top-left of the room to 1F-A3.
Continue left one screen to 1F-A2. Defeat both Mini-Moldorms and Mimics to have a chest appear in the center of the room. Open it to obtain the Seed Shooter! This weapon/tool can be used to shoot the various types of seeds Link obtains at objects or enemies, having varying affects depending on which seed is shot. Head back right one screen to 1F-A3 and use the Ember Seeds in the Seed Shooter to light the torch in the center of the room, unlocking the doorway to the south. Head through it down one screen back to 1F-B3.
Continue down two more screens to 1F-D3. Peahats can be shot with an Ember Seed while flying, making ones like those in this room much easier to defeat than before. Head right one screen to 1F-D4 and step onto the rotating platform, turning Link towards the southern path. Make a circle back to this room by heading down, left, up, and right one screen each, and again step onto the platform to turn Link towards the northern path this time. Head up one screen to 1F-C4.
Walk over to the far left side of the green gate on the left and aim the Seed Shooter at the blue crystal. Once shot, the crystal will break, causing yet another reaction somewhere in the dungeon. As this is the last blue crystal that needs broken, a loud noise far off will sound as if something heavy fell in the levels below.
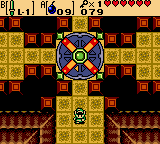
Head back down one screen to 1F-D4, where the rotating platform is now replaced by a solid floor with a chest in the middle. Open the chest to recieve a Gasha Seed. As for the platform, those reactions Link caused throughout the dungeon has made it fall to the lower levels, allowing access to new rooms now. Head left one screen to 1F-D3 and fall down the pit to the basement level again.
~Basement First Floor~
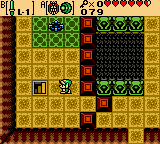
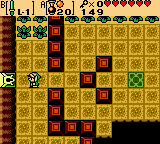
Walk right one screen and step onto the rotating platform, turning Link towards the southern path. Head down one screen from here to B1F-E4. Over on the right side of the red blocks, push the first three in the vertical row “left” so that they fall into the holes. Equip the Seed Shooter with Ember Seeds and stand on the middle yellow tile of the three closest to the bottomless pit, then aim diagonally up and left and shoot to ignite the closest torch. Now, stand on the tile just above this one and aim diagonally down and left, then shoot. The seed should ricochette off the first green statue, bounce from the red blocks, and light the farthest of the two torches. A chest will appear above Link in this room containing a Gasha Seed, so grab it and head left one screen to B1F-E3.
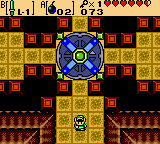
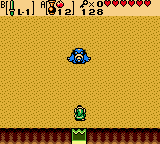
Continue up one and right one screen to B1F-D4 again and step onto the rotating platform, turning Link towards the northern path. Head up two screens to B1F-B4, where Link must face the dungeon’s mini-boss.
* Mini-Boss: Subterror *
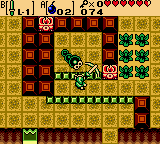
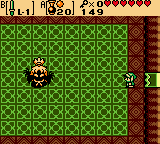
Subterror will burrow underground and often shoot his drill-tail from the ground at Link. Because he is rather slow, Subterror shouldn’t be too hard to avoid. Equip the Shovel and dig when Subterror comes close, then follow up with slashes from Link’s sword until the mini-boss is defeated.
Head left one screen, then immediately up one screen to B1F-A3. There are two Mini-Moldorms that must be defeated before pushing the out-of-place red block here, so leave and come back to this room if the Moldorms are not on this side of the red blocks. Once defeated, push the out-of-place red block “left”, making a rectangle out of the four arranged blocks and having a Small Key fall onto the green tile in the center. Pick up the key and head back down one and right one screen to B1F-B4.
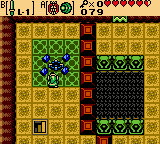
Continue down two screens to B1F-D4 and step onto the rotating platform again, turning Link towards the western path. Head left one and up one screen to B1F-C3. Walk along the vertical bridge above and strike the blue switch so that it turns red, also slightly turning a red bar to the right. Shoot the red bar with any seed from the Seed Shooter to have it ricochette down and flip the green level below, altering the arrangement of the bridges in the room. Head across the bridge that connects to the right side of the room, then strike the switch on this side twice, moving the red bar to another diagonal angle. Shoot the red bar, causing the seed to again bounce off and strike the green lever, to connect the vertical bridge on the right side of the room, then head down and open the chest to obtain 20 Rupees. Head up one screen through the locked door above to room B1F-B3.

Shoot the blue switch on the left, turning it red, then shoot the red bar in the center which turns diagonally as a result. The seed will ricochette and hit the green lever above, connecting the horizontal bridge in this room. Head across the bridge to the left side and hit the red switch twice, turning the red bar again now at a different diagonal angle. Shoot the bar again to have the seed strike the green lever, changing the arrangement of the bridges and connecting the one above Link. Head up along this bridge to the top half of the room, then continue up one screen to the left side of B1F-A3.
Push the out-of-place red block in front of the boss’ door “right” and head over to the ride side of the room. Continue down one and right one screen to B1F-B4, then down two more screens to B1F-D4. Step onto the rotating platform which should now turn Link towards the eastern path, then head right one screen to B1F-D5.
Walk over to the button on the right side of the room and step on and off of it, turning the red bars on the right both vertical. Now stand back on top of the button so that the bars are diagonal and shoot a seed diagonally up and right. The seed should bounce off the walls and fly straight through the red bars, hitting the green lever below and unlocking the doorway above. Head through it up one screen to B1F-C5.
Climb up the steps and grab the Boss Key from the chest, then jump off the ledge to the left and head left one screen to B1F-C4. Continue up one screen, left a screen, and up a screen. The block should still be pushed out of the way, so walk to the left and use the boss key and head one screen to room B1F-A2, where Link will meet the dungeon’s boss, Shadow Hag.
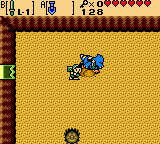
** Dungeon Boss: Shadow Hag **
Shadow Hag will disperse into four shadows that chase Link around the room. When Shadow Hag stops, she will often release butterflies that provide a good source of extra health or seeds if needed. Shadowhag will then emerge from the shadow, running towards Link. Run from the shadows as they chase Link about and when Shadow Hag emerges to come at Link, continue running from her as she will disappear if Link looks in her direction. Instead of turning to face Shadowhag, shoot a Scent Seed towards the wall Link is facing so that it bounces off and hits Shadow Hag behind him. As long as Link keeps moving, he should avoid any damage from this boss. As the battle progresses, Shadow Hag will pick up some speed. Once the boss has been defeated, pick up the Heart Container released and head left one screen to the altar room. Walk up the steps and claim the third Essence of Time, the Echoing Howl!
After claiming the third Essence, a cutscene will show Queen Ambi and Veran talking about the Black Tower, referring to it as Ambi’s Tower, nearing completion. Shortly after, a message from the Maku Tree will encourage Link to search the peaks northwest of Lynna City for the next Essence of Time…

 A Link Between Worlds Walkthrough – Skull Woods –
  Guides: How to Get Your Musical Creations Off Your DS
 Lego Batman 3 – Vehicles Guide
 Oracle of Ages Walkthrough – Spirit’s Grave –
  Guide: Getting The Most Out of Monster Hunter 4 Ultimate