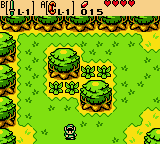
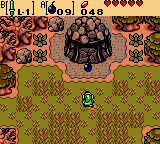
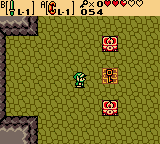
Having obtained the first Essence of Time, some of the Maku Tree’s power will have returned to her. This is evident by visiting the Maku Tree and climbing to the top, where one of the many large bushes now has an entrance to a Great Fairy Fountain inside.
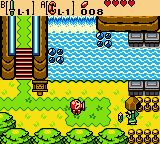
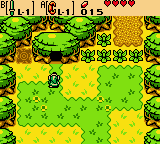
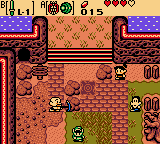
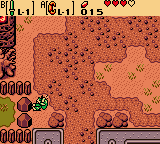
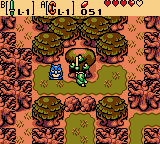
From outside the Spirit’s Grave, head up one screen along the bridge, where Link will likely encounter Maple for the first time. Maple is a witch who, when encountered, will fly around the screen in various patterns. Coming into contact with Maple during this will cause both her and some of Link’s items to scatter about the screen. The key is to gather as many items as possible, or at least more than Maple does, so as to not lose anything significant during the exchange. The rate of Maple encounters depends on the number of enemies Link has defeated. Also, Maple can appear in most, but not all, screens of Labrynna’s overworld. The entire encounter can be avoided by either leaving the screen Maple is flying around in or by simply avoiding contact with her. However, Maple will sometimes drop very rare items, such as Potions and Magical Rings. The most rare, one of the Pieces of Heart, can also be obtained from Maple.


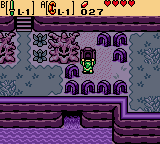
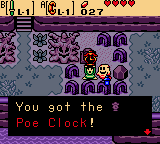
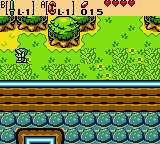
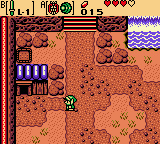
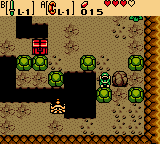
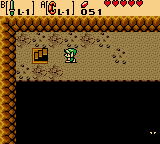
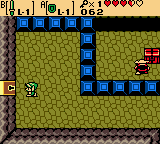
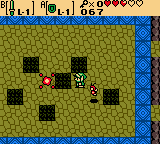
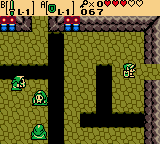
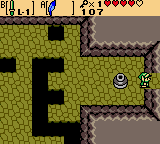
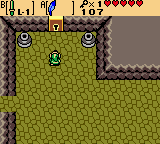
After dealing with Maple, head left one screen and use the Power Bracelet to lift the boulder beside the ghost. Speak with the ghost who will be relieved someone has finally come to help him, then disappear. Push the headstone “up”, revealing a stairwell leading underground, then enter it. Speak with the ghost again who will thank Link for moving his headstone, thus allowing him to move on to the afterlife. Follow the ghost out of the grave and speak with him one last time to recieve the Poe Clock!

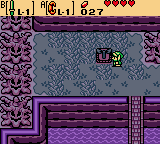
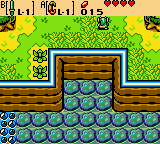
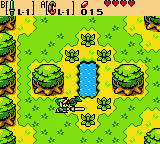
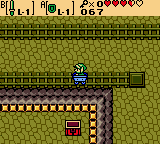
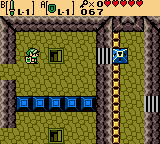
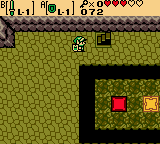
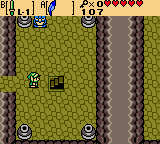
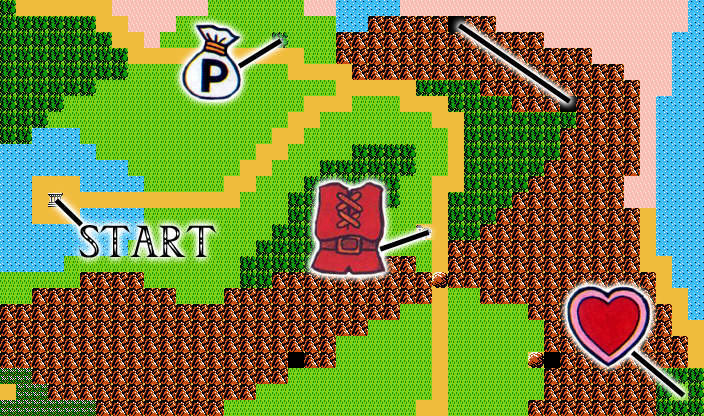
After the ghost vanishes, toss the boulder aside and head right one screen. Continue up two and left one screen, then down two and right one more screen from there. Link can now plant a Gasha Seed in the Soil Patch in this screen. Next, head down one screen across the bridge and walk over towards the Piece of Heart on the left. Toss the boulder blocking it aside and grab Piece of Heart #3, then backtrack up one, right one, and up one more screen. Exit Yoll Graveyard from here by heading left two screens, having to burn down the shrub again, into the Forest of Time.


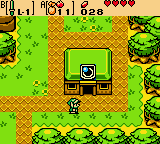
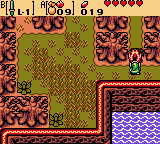
Continue up one, left one, and down one screen. Slash the bushes on the left and head left one screen into Lynna City. Walk up one screen, where you may go ahead and appraise any Magical Rings obtained thus far at the Ring Shop. When finished, head left three and down one screen. Cross the bridge and head left one screen, where Link will come to a boulder blocking his path. Toss this boulder aside using the Power Bracelet, then continue left one and down one screen into the Western Woods.

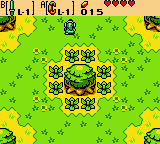
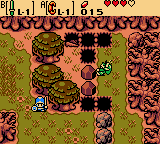
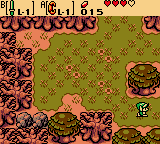
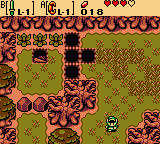
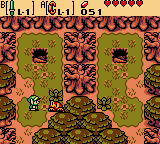
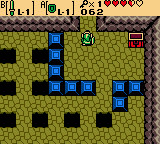
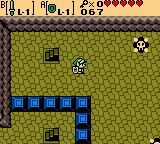
Head right one, down one, left one, and down one screen to reach the bottom of the woods. Continue left one and up one more screen to reach a grove where three Forest Fairies will appear, stating the forest is their “playground” and ask Link to try and find all three of them. Using their magic, the fairies will turn the forest into a maze as they each hide in a specific spot.

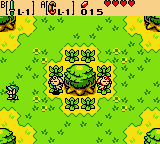
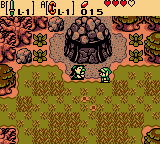
To solve the puzzle of the forest, first head up one, down one, and up one screen. Toss the lone boulder here aside to discover the first Forest Fairy. Head right one screen to get back to the central area.

Now walk left two screens. Slash the leftmost bush of the bottom three to find the second Forest Fairy. Walk right one screen back to the central area again.


Go to the left one and then down one screen. Slash the bottom of the two bushes on the left to find the final Forest Fairy. Having found them all, the fairies will put the Western Woods back in order.


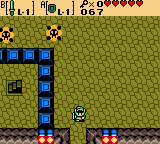
Head right one screen afterwards and lift the lone boulder. Somehow, this causes the dungeon to crumble into a pile of rocks. The Maku Tree will tell Link to head to Nayru’s House, where he may find an item that can aid him further.

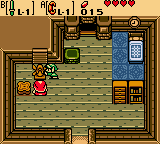

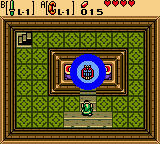
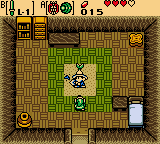
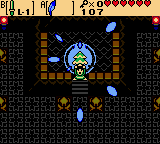
Head up passed the dungeon ruins up one screen, then continue up another screen to exit the Western Woods. Continue right two screens, then head across the bridge up one and right three screens to the Ring Shop. Head down one and right one screen from here to exit Lynna City into the Forest of Time again. Head up two, right two, and up one screen to reach Nayru’s House and enter. Speaking to Impa inside reveals that she believes there to be a hidden entrance somewhere in the house. Push the angel statue to the “left” and head into this hidden room, then take the staircase down what is seemingly the basement of Nayru’s House. Here, climb the steps to the altar where the Harp of Ages lies waiting for Link.
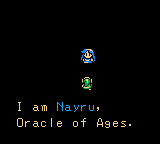
After obtaining the harp, Nayru will appear seemingly by some pre-recorded magic infused within the instrument. After some words from Nayru, Link will be taught the Tune of Echoes, allowing him to activate the various time portals throughout Labrynna!


Exit Nayru’s House and a brief message from the Maku Tree will encourage Link to explore the recently crumbled dungeon in the past using the power of his newly obtained instrument. Take out the Harp and play the Tune of Echoes to activate the portal beside Nayru’s House, then enter it to travel back in time.


 ~ Past ~
Head left one, down one, and left one more screen to enter Lynna Village. Continue down one and left one screen, then enter the house here which is actually Lynna’s Post Office. Speak with the Postman, who reveals he cannot deliver the mail on time seeing as how time itself has literally stopped. Give the Postman the Poe Clock in exchange for a Stationery, then leave the Post Office.

Continue left two screens and enter the small building on the left which is apparently the only “Toilet” in Lynna Village. A single hand coming from a hole in the floor asks Link for paper, which he now has to give considering he just obtained the Stationery. Trade the unknown entity the Stationery for a Stink Bag! It doesn’t take long to realize why the mysterious being needed the paper and what he apparently gave back to you in return, but it will prove useful later on, so go ahead and exit this house. You may plant a Gasha Seed in the Soil Patch just above this house if you wish.

From the Toilet, head up the steps above and up one screen. Enter the house here, belonging to Pippin, who is apparently a descendant of new father Bipin in Lynna City’s present. Speak with him and he will give Link a Gasha Seed. Exit Pippin’s house and head down two screens. Use the Power Bracelet to toss aside the boulders on the left, then head through this path left two screens and down one into the area known as the Deku Forest in the past.

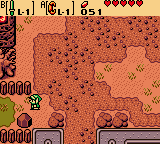
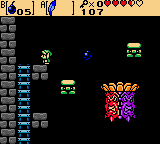
Head right one screen along the path below the large tree on the right, then continue down one and left one more screen to reach the dungeon again. A man standing outside the dungeon believes there to be treasure inside, though he has nothing to blast the wall open to get in there. Continue left one screen, then take the rightmost path (on the right side of the gray rocks) up one screen. Toss the boulders here aside and descend the stairwell to a cave area below.
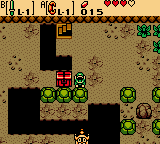
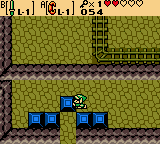
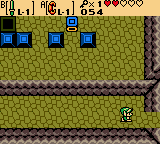
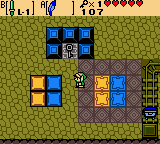
There are many Keese in this room, as well as Green Zols and Bumpers that can be defeated to avoid contact while attempting to access the chest in here. Of the three green rocks below the chest, push the right one “down”, then head over to the four green blocks on the right side of the room. Push the upper-left one “left” and the one below it “down” to access the path at the bottom of the cave. Knock the Bumpers into the pit to dispose of them and continue along this path to reach the leftmost green block in front of the chest. Push this block “down”, then the center one to the “right” and open the chest to obtain a Gasha Seed!

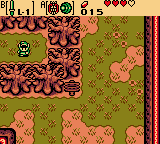
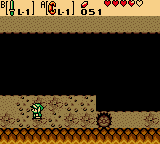
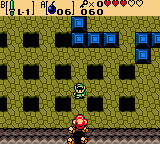
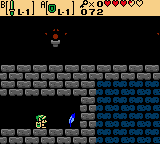
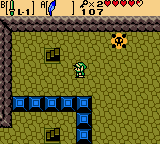
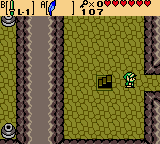
Exit the cave and head down one screen, then head back up one screen through the path on the left side of the gray rocks. Continue on left another screen where Link will run into a Red Moblin. Defeat or avoid it and continue down two screens to the bottom of the forest. Use an Ember Seed to burn the lone shrub in this screen and descend the stairwell to a cave area below. Walk directly “right”, down the steps and right one screen. Head up the next set of steps to obtain Piece of Heart #4, which should give Link a fifth, full Heart Container!


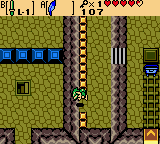
Head back left one screen and exit the cave via the staircase, then continue left one screen. The bush on the far left is actually a Business Scrub selling Shields for 50 Rupees a pop. Burn the lone shrub on the right side of this screen and head up one screen along this pathway. Continue right one screen along this path to come to another Business Scrub selling Shields for 30 Rupees a piece, making the first guy seem like a true ripoff artist. Head up one more screen and toss the boulders aside to access the stairwell leading to another cave area below.


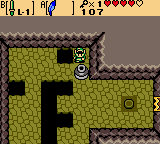
Walk to the left and toss the boulder in front of the chest aside to gain access to it. Open the chest to obtain 30 Rupees, then walk back to the right and take the narrow path clockwise around to the lower part of the cave. Along this path, head left one screen and up the staircase at the end to resurface in the forest again.

Head down one screen and swipe the Mystery Seeds from the tree, then head back up one screen and down the stairwell again. Walk right one screen and all the way back around the path. If Link takes the upper path to the left, he will reach a staircase leading to the opposite side of the one he just came up moments before above the Mystery Seed tree. On this opposite side, down one screen, a Business Scrub will be selling Shields for only 10 Rupees a piece, cheaper than anywhere else in Labrynna, past or present. When finished, exit the underground cave the original way Link entered, toss the boulders below aside, and head down one screen.
Upon walking by the Business Scrub here, one of Queen Ambi’s guards will walk up to Link, noticing he has Mystery Seeds which the Queen has apparently been demanding. The screen will cut away as Link is taken to Ambi’s Palace. A long dialogue will take place where Link meets Queen Ambi and learns through her that Nayru was the one really wanting the Mystery Seeds. As a reward, one of the guards will give Link some Bombs and see him out of the Palace. The scene will continue as Nayru, who is really Veran in Nayru’s body, is seen coming down and speaking negatively of the Mystery Seeds as if she only wanted them to get rid of them. The relationship between the disguised Veran and Queen Ambi is revealed here, as Ambi believes Nayru to be doing her a favor in creating an endless day so that the Black Tower can be completed as soon as possible.


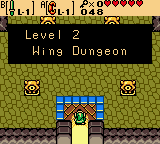
Once outside of Ambi’s Palace, head left one and down two screens. Continue left two more and down one screen to return to the Deku Forest. Head right one screen along the lower path below the big tree, then down one and left one screen back to the location of the dungeon. Have Link toss a bomb at the cracked entrance to the dungeon to blow it apart. When ready, enter the second dungeon of Link’s quest, the Wing Dungeon.
~First Floor~
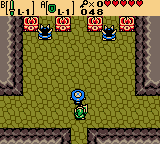
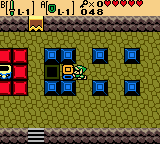
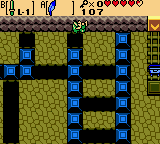
Link enters this dungeon at room 1F-E4. Head up one screen to room 1F-D4, where three Spiked Beetles will rush towards Link if he intersects their path. Using the Shield, Link can deflect the oncoming attack of a Spiked Beetle, effectively turning it on its top and making it vulnerable to attack. This can also be done with the Shovel if Link can get close enough to the Spiked Beetle to flip it over. Once all three enemies are defeated, a doorway will open to the left. Head through it to room 1F-D3 .

Walk up the steps on the far left side of this room, then head over to the puzzle block on the right. Pushing the block “down” twice, “right” twice, then “up” twice. Now push the block “right” once, “down” once, “left” once, and “up” once, then push it all the way “left” and onto the black tile, lighting the special torch red and opening the doorway above. Head up one screen through this doorway to room 1F-C3.


Push the rightmost of the three horizontal blue blocks “up” and head right along the ledge. Toss a bomb at the cracked portion of wall at the end of this ledge and head through to the bottom-left ledge in room 1F-C4. Here, a chest containing the Dungeon Map can be found. Grab the map and head back left one screen to room 1F-C3.

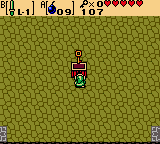
Defeat the Ropes that will attempt to charge at Link in this room, then head down the steps and up one screen via the open path at the top-left of this room to 1F-B3. Continue along this path left one screen to room 1F-B2, avoiding the Sparkys in here, then left another screen to 1F-B1. In this room, defeat both Blue Pig Moblins and Keese to have a Small Key fall onto the red tile in the center. Grab the key and backtrack right two and down one screen to room 1F-C3.

Walk back up the steps onto the ledge below and over to the blue blocks on the left. Push the left and right blocks “down” and the middle one either “left” or “right” to clear a path, then head down one screen to room 1F-D3. Along the lower path here, head right one screen back to room 1F-D4 with the Spiked Beetles from before. Defeat or avoid the Beetles and head through the locked door on the right side of this room to 1F-D5.
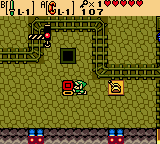
Defeat all five Ropes in this room and head over to the upper-right corner to the blue blocks. Push the out-of-place blue block to the “right” to gain access to a chest containing the Compass! After obtaining it, head towards the bottom of the room and bomb the cracked portion of the lower wall. Head through this opening down one screen to room 1F-E5. Avoid or defeat the Red Pig Moblins and Red Zols in here and down the stairwell to a dungeon area below.
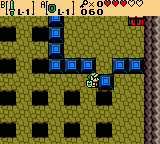
Climb along the blue ladders towards the right and drop off onto the ledge. Ride the green platform moving side-to-side over to the rightmost ledge and head right one screen. In this next section of the dungeon area, ride the first moving green platform down and barely move under the Thwomp to have him crash down towards Link. As the Thwomp is rising, walk under him and to the right where another green platform will lift Link up to a blue ladder. Climb this ladder out of the dungeon area and into room 1F-F6.


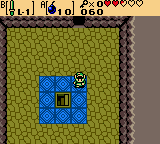
Defeat the five Ropes in this room and a chest will appear on the red tile in the center. Open the chest to obtain a Small Key, then head back down the stairwell and into the dungeon area again. Navigate this area the same as before, heading left one screen and up the blue ladders back to room 1F-E5 from which Link originally came. Head up one screen to room 1F-D5, defeat the Ropes again, and push the out-of-place blue block again to the “right”. Head up one screen through the opened path above to room 1F-C5.

Defeat the Blue Pig Moblins here, then head left one screen through the locked door to room 1F-C6 and hop inside the blue mine cart. It will take Link all the way to the upper portion of 1F-B2, where an opening above can now be accessed to room 1F-A2, the location of this dungeon’s mini-boss.

* Mini-Boss: Swoop*
Swoop will fly around the room and periodically crash into the floor wherever Link is standing. This can be avoided easily as Swoop will begin flapping his wings more quickly just before dropping. It is best to charge a Spin Attack as Link has plenty of time to do so, and just move out of the way when Swoop comes crashing down, unleashing the Spin Attack on him while he’s on the ground. The holes which Swoop creates when crashing into the floor are not bottomless, though Link will end up in room B1F-A1 if he falls into one. If that happens, Link can simply head right one screen and climb the staircase to the first floor, then head back left one room to 1F-A2 again. This will, however, start the battle over with Swoop returning to full-health. After hitting Swoop with about three Spin Attacks, he will become faster and bounce towards Link upon crashing into the floor instead of staying in one spot, making hitting him a bit more difficult. Two more Spin Attacks, for a total of five, will defeat Swoop.


Head right one screen through the upper-most open doorway and descend the stairwell to the basement first floor, room B1F-A3.

~Basement First Floor~
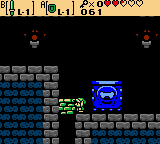
Head down one screen to B1F-B3 where Link must follow a narrow path clockwise to reach the right side of the room. The three Shrouded Stalfos located on the middle platform in this room will throw arrows at Link and can be defeated by tossing bombs across the bottomless pit over to them. At the end of the path, head right one screen to room B1F-B4, then head up the staircase at the top of this room to a dungeon area.
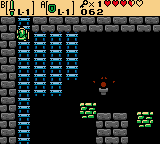
Head to the right and trick the Thwomp into crashing towards Link, then continue right as he rises. Walk right one screen to find the Roc’s Feather! This item allows Link to jump, mainly across bottomless pits, though it is also useful in avoiding enemies or other obstructions that may harm Link. Equip the feather and head back left one screen. Have Thwomp fall again, then head up the ledges on the left but do not leave the dungeon area yet. Instead, have Thwomp fall again and use the Roc’s Feather to jump onto its head. When Thwomp rises, jump from his head to the narrow space on the left and follow it to obtain 30 Rupees. Fall off the left side of this narrow space and climb down the blue ladder to return to B1F-B4.

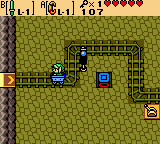
Hop over the yellow tile twice, being careful not to stand on the surrounding weak floor too long as it will cave in, and the tile will change to red, opening the doorway on the right. Head through it right one screen to room B1F-B5. Using the Roc’s Feather to clear the gaps, navigate towards the right side of this room and hop into the blue mine cart. The cart will ride up one room to B1F-A5. Let the cart hit the gate blocking the track’s path so that it starts to go back and swipe the yellow switch as you pass it. This will alter the arrangement of the tracks and allow the cart to drop Link off in this room. Toss a bomb at the cracked portion of wall on the right and head through to room B1F-A6. Defeat the two Shrouded Stalfos in here, as well as the two Keese, and a chest will appear on the tile in the center of the room. Open the chest to obtain a Small Key, then head back left one screen to B1F-A5 again.


Push the puzzle block “left” once, “up” once, “right” once, then “up” once. Its top will be blue, unlocking the gate over the track. Hop back into the mine cart and it will take Link left one room to B1F-A4. The red tiles must end up matching the yellow and blue ones to the left in order to solve the puzzle, so use the Roc’s Feather to jump over the tiles until they match. A Small Key will fall in the center of the blue blocks above. Grab it and head left one screen to B1F-A3, then walk up the staircase in the upper-left of the room back to the first floor, room A3.


~First Floor~
Walk up the steps to the right and unlock the block using a Small Key, then walk down along the ledge and hop off via the open space on the left. Head down one screen through the opening here to 1F-B3. Using the Roc’s Feather, hop across the gaps onto the platforms to the right and then down to the red tile. Jump over the tile until it turns blue, opening the gate over the track to the right. Navigate back across the gaps and up one and left one screen to room 1F-A2. Take the uppermost path on the right wall right one screen again to 1F-A3 and climb the steps again, but this time descend the steps on the right side and hop into the mine cart. It will drop Link off in room 1F-C5.


Jump across the gap over to the chest surrounded by Red Pig Moblins and open it to obtain a Gasha Seed. Now, hop back across the gap and head up one screen to 1F-B5. Toss aside all of the gray vases except for the upper-right one, then push it “up” five times and “right” three times. Hop across the gap above so Link is behind the gray vase now and continue pushing it “down” twice. From the left side of the room, hop across the gap so Link is standing on the left side of the vase now, then push it “right” three times onto the switch. Head right one screen through the opened doorway to room 1F-B6, then down one screen to 1F-C6.


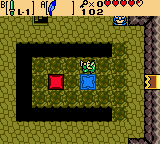
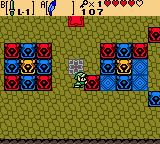
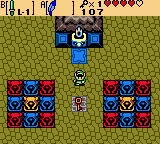
Notice the color pattern of the statues on the left side of this room. The blue tiles to the right must be filled with all the statues surrounding them in the exact same order. The catch is, the only statues that can be moved are the ones which correspond in color to the special torch at the top. To change the color of the torch, jump over the tile in front of it.
To solve this puzzle, jump over the tile and change the flame to blue. Of the row of blue statues, from the left, push the first one “up” twice, the second one “up” three times, and the third one “up” once and “left” once. Jump over the tile again and change the flame to yellow, then push the yellow block “left” twice. Change the flame to red, then push the first and third red statues “down” once each, the second one “left” twice, “down” three times, and “right” once. Push the final red statue “down” three times and “left” once. Change the flame back to blue now and push the final blue block into place to have a Small Key fall onto the gray tile between the two statue arrangements. Grab the key and head back up one screen to 1F-B6.


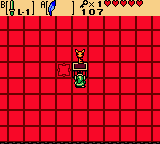
Unlock the door on the right side of the room and head through to 1F-B7. Using the Roc’s Feather, Link can jump over the center tile in this room, changing the other tiles to whatever color the central one becomes and briefly allowing visibility of the Mini Zols throughout the room. These enemies can only be damaged while they are visible, so Link must be quick to defeat them and continuously change the color of the tiles. Once they area all defeated, a chest will appear to the right of the center tile. Open it to obtain the Boss Key! Now, head back left one room to 1F-B6, then up one room through the locked door on the upper-left side of the room to 1F-A6.


Walk to the upper-right corner of this room to find the door leading to the boss’ lair. Head through the locked door and instead of entering a boss room as usual, 1F-A7 will contain a blue owl statue and a staircase leading up. When ready, head up the staircase to face the dungeon’s boss.

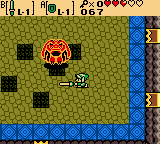
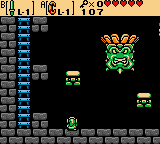
** Dungeon Boss: Head Thwomp**
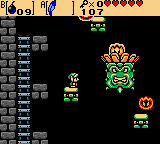
Have Link equip his bombs to one of the buttons and climb either blue ladder on the right or left. Head Thwomp will shoot fireballs from its head towards Link at times. The key to defeating this boss is to throw a bomb into the opening on its head when its face is Red. This will cause damage to the boss, while landing a bomb on one of the other colors will cause the boss to unleash a specific attack. After four successful hits, Head Thwomp will be defeated. Walk down to where Head Thwomp fell to obtain a Heart Container, then descend the blue ladder on the right side of the room down to the right side of 1F-A7. Head right one screen to 1F-A8, where the second Essence of Time, the Ancient Wood, is held. Walk up the steps to claim the Ancient Wood.


After obtaining the second Essence of Time, a message from the Maku Tree will inform Link of another essence in the South Sea on Crescent Island and suggest he find a way there from the town’s coast…


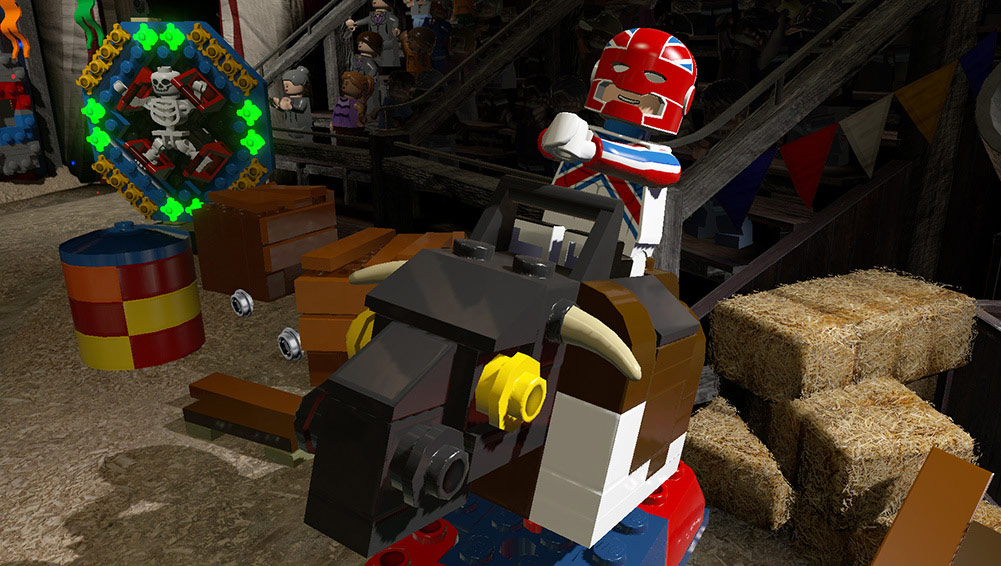 LEGO Marvel Super Heroes – Vehicles Guide
 Oracle of Seasons Walkthrough – Unicorn’s Cave – Zelda Dungeon
 The Wind Waker Walkthrough – Forbidden Woods –
  Feature: Tending and Feeding Your Japanese WiiGuide: Everything You Need To Know About Pokémon Omega Ruby & Alpha Sapphires Secret Bases