Windows 10 has several hidden features and settings that reside within the operating system, but can’t be accessed through any normal means. Yet, while some of these tweaks are insignificant, several of them are quite useful.
And because they’re hidden out of sight, the only way to access them is by means of the Windows registry editor.
For the most part, we only break out the registry editor when we need to fix various system errors or when we want to clean out registry junk — but we’ll make an exception here because these tweaks are that hard to pass up.
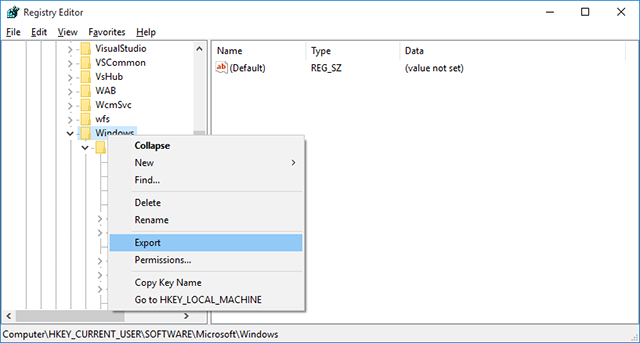
Before you edit any part of your system registry, always make a backup of all keys that you intend to edit. You can do this in the editor by right-clicking on any key and selecting Export, which saves into a .reg file that can be run to re-apply the old value of that key.
But the easier method is to make a System Restore point, which saves the state of your system, including a snapshot of the registry. In Windows 10, you can enable restore points. Go to Start, type restore, select Create a restore point, select a drive, click Configure…, then pick Turn on system protection, set the Max Usage space, and click OK. If something goes wrong, you can just revert to the System Restore point. And if that fails, you can always Windows Refresh.
As for launching the registry editor, all you have to do is open the Run prompt with Windows Key + R, then type in regedit and hit Enter. (This is just one of many useful Windows Key tricks.)
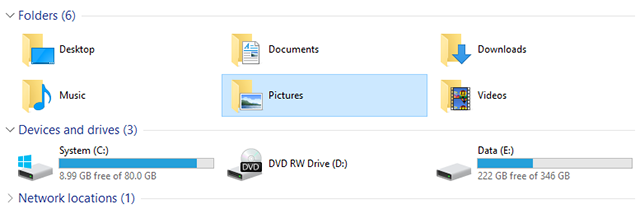
Dark themes can reduce eye strain and Windows 10 offers several ways to turn to the dark side. Although, what you actually do is to turn off the light theme. Navigate to HKEY_LOCAL_MACHINE \ SOFTWARE \ Microsoft \ Windows \ CurrentVersion \ Themes in the registry. Right-click on the Themes key, select New > Key, then name the new key as Personalize. Then right-click on the Personalize key, select New > DWORD (32-bit), which creates a new value under this key. Name the new DWORD as AppsUseLightTheme and make sure its value is set to 0. Now, navigate to HKEY_CURRENT_USER \ SOFTWARE \ Microsoft \ Windows \ CurrentVersion \ Themes \ Personalize. (The Personalize key should already exist for this one, but if it doesn’t, just repeat the steps above.) Create another DWORD (32-bit) named AppsUseLightTheme and make sure its value is 0. Log out of Windows and log back in to see the new theme in action. In Windows 10, notifications are now shown as toasts rather than bubbles. There’s nothing inherently wrong with the toast notifications, but some users just don’t like the look of them. Plus, some notifications don’t show up as toasts when they do show up as balloons. So, if you’d like to go back to balloons, here’s how you do it. Navigate to the HKEY_CURRENT_USER \ SOFTWARE \ Policies \ Microsoft \ Windows \ Explorer registry key. If you don’t have a Policies key, then you’ll have to create one manually, followed by the Microsoft, Windows, and Explorer keys. Then right-click on the Explorer key, select New > DWORD (32-bit), and name the new DWORD as EnableLegacyBalloonNotifications. Right-click the EnableLegacyBalloonNotifications value, select Modify, and enter 1 as its value. Restart your PC and you should now see balloon notifications again. A lot of people find the new Action Center to be convenient and useful, but if you’re one who finds it intrusive and unnecessary, then this quick tweak will disable it altogether. Navigate to the HKEY_CURRENT_USER \ SOFTWARE \ Policies \ Microsoft \ Windows \ Explorer registry key. If you don’t have a Policies key, then you’ll have to create one manually, followed by the Microsoft, Windows, and Explorer keys. Then right-click on the Explorer key, select New > DWORD (32-bit), and name the new DWORD as DisableNotificationCenter. Right-click the DisableNotificationCenter value, select Modify, and enter 1 as its value. Restart your PC and the Action Center should no longer bother you. Do note, however, that this also disables notifications in general, so you’ll need to factor that into whether or not you go through with this tweak. The This PC location has been a part of Windows since 8.1, but the annoying thing is that there’s no easy way to remove the default folders — Desktop, Documents, Downloads, Music, Pictures, Videos. For people who don’t use these folders, this is an unnecessary inconvenience. To disable these, you’ll have to navigate to six different registry keys, each one corresponding to one of the six folders in This PC. The locations are at HKEY_LOCAL_MACHINE \ SOFTWARE \ Microsoft \ Windows \ CurrentVersion \ Explorer \ FolderDescriptions \ <FOLDER-GUID> \ PropertyBag. Substitute the <FOLDER-GUID> above with one of these: Under each one’s PropertyBag key, you’ll see a string value named ThisPCPolicy. (The Desktop folder is the only one that doesn’t have this value by default, so you’ll need to create it manually.) If ThisPCPolicy is set to Show, then the folder is visible. If you change it to Hide, then the folder will be invisible. That’s all! When your computer doesn’t have enough physical RAM, it uses a portion of your hard drive as virtual memory in the form of a pagefile. The thing is, this pagefile still remains on your hard drive after you shut down, and that leaves it prone to tampering. It’s possible to set Windows to delete the pagefile whenever the system shuts down, but this can increase the time it takes to shut down by several minutes, depending on how big your pagefile actually is (anywhere from 2 GB to 16 GB). Only you can decide if the security trade-off is worth it. But here’s how you can enable this setting. Navigate to HKEY_LOCAL_MACHINE \ SYSTEM \ CurrentControlSet \ Control \ Session Manager \ Memory Management in the registry and make sure you have the Memory Management key selected. Right-click on the ClearPageFileAtShutDown value, select Modify, and set its value to 1. Restart your PC and now Windows will wipe the pagefile every time you shut down. Windows has always been full of these small-but-neat tricks, and Windows 10 brings several more to the table. For example, you’ve got the updated File Explorer address bar, the secret navigator in the taskbar, and an improved Start Menu. It’s just a shame that the settings in this post are stuck behind the scary-but-not-really registry editor. A few registry tweaks is all it takes to solve a lot of small inconveniences. Got any registry tweaks of your own to share? What’s the best tip you know that’ll improve Windows 10 for anyone? Share with us in the comments below! Image Credit: red cubes by nomadFra via Shutterstock, Hard Disk Drive by Elya Vatel via Shutterstock1. Switch to the Dark Theme
2. Enable Balloon Notifications
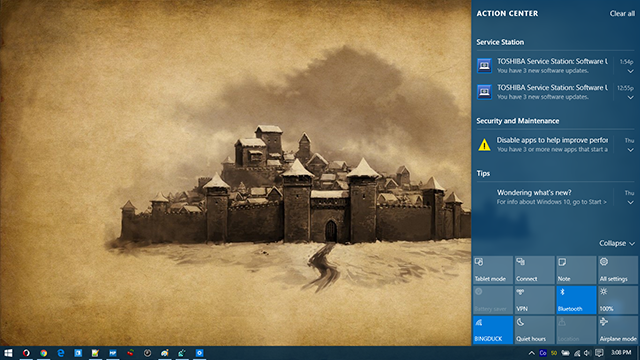
3. Disable the Action Center
4. Hide Folders From This PC
5. Boost Security of Virtual Memory

Registry Tweaks Are Risky but Effective


 9 Ways Evernote Can Help Develop Your Creativity
 Review: Corsair K70 RGB and M65 RGB
 7 Days To Die – Choosing a Play Style that Suits You
 Fallout 4 Guide: How To Follow The Freedom Trail
 Easy Way To Kill First Deathclaw In Fallout 4