
Sony's Playstation VITA is off to a flying start in Japan, owners are enjoying each and every seconds of their gameplay on the handheld. I am very much sure there must have been lots of breathtaking scene and moment during gameplay that PS VITA owner want to preserve. Well there's a simple solution to this all PS VITA owners need to do is take a screenshot of their best moments of gameplay with handheld.
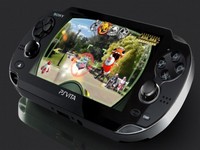 Now the question arise here, how to take screenshots with PS VITA?, its very simple we have detailed the steps below. Check it out.
To take screenshots on Playstation VITA all gamers need to do is press "Playstation" button and "Start" button simultaneously (i.e at the same time). The handheld will take anywhere between 3-12 seconds to complete screenshot process.
As soon as gamers press the two buttons, "SAVING" logo will pop up in the middle of the screen. One important thing to note, the game of which screenshots is being taken will continue to play in the background after "SAVING" logo appear. At this time most of the command input will get disable including "PAUSE" option.
Now you can copy the screenshots taken on PS VITA to your PC. All you need to do is connect the handheld to PC and transfer the screenshot to your computer with the help of "Content Manager Assistant".
Steps to transfer Screenshots are given below.
