

The Witcher 3: Wild Hunt for PC offers many options to customize players' visual experience, mainly based on the machines they own. Since they are so many, it is interesting to analyze what they actually mean and see which is their impact on the overall performance. Let's start with graphics options, then we will take a look at post-processing.
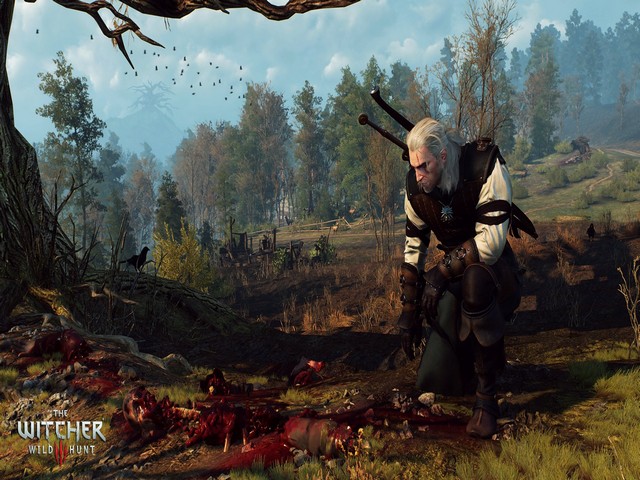
Shadow quality – It's a global setting which affect more than ten other smaller parameters (shadow visibility over great distances, cascade shadow maps, etc.). As usual, you can work on this if you want to save a couple of frames per second. Quality level: Low, Medium (2-3fps hit), High (4-5fps hit), Ultra (6-8fps hit)
Terrain Quality – This setting allows you to activate tessellation and choose among Low, Medium, High and Ultra the degree of its quality.
Water Quality – This one allows you to determine the rendering and appearance of in-game water. You can decide whether enable or not the simulation of water, which activates only with High and Ultra settings. Quality level: Low, Medium (0.5-1fps hit), High (1-2fps hit), Ultra (2-3fps hit)
Grass Density – It's the setting that works on the density of the grass and, we have to admit it, you might not notice any difference in terms of graphics quality while lowering it. Frame-rate, instead, will benefit from a “downgrade”. Quality level: Low, Medium (1-2fps hit), High (2-3fps hit), Ultra (3-4ps hit)
Texture quality – This setting is very important when talking about graphics quality, since it determines the resolution of textures. If you have a 2GB GPU, feel free to go up until High; if you have more than 2GB at your disposal, Ultra must be your choice. Quality levels: Low, Medium (0.5-1fps hit), High (1-2fps hit), Ultra (2-3fps hit).
Foliage Visibility Range – Since The Witcher 3: Wild Hunt is a game mainly located in forests and rural environment, this option has a huge impact at the higher settings. It governs how far ahead foliage (grass and trees) are loaded. Each quality level doubles the number of on-screen trees, grass and shrubbery are rendered farther ahead and their level of detail is also increased. Quality levels: Low, Medium (2-3fps hit), High (5-7fps hit), Ultra (10-15fps hit).
Detail level – Detail level is a setting that allows you to determine the distance at which decals (i.e.: blood spatter during combats) can be seen from.
Blur and Motion Blur – You will see them mostly during fights, when you will see a sort of air turbulence when firing magical effects. 3-5fps hit.
Antialiasing – This will cost you about 5-10fps. CD Projekt RED has worked on a proprietary solution which is a low impact combination of FXAA (fast approximate antialiasing) and temporal antialiasing.
Bloom – CD Projekt RED has managed to implement this, an option that allows you to have better in-game lighting, at a minimal fps cost (about 1-2fps when activated).
Sharpening – This give a sharper look to texture. Low and High settings have both a maximum of 0.5fps impact on performances.
Ambient occlusion – AO adds extra shadows where objects in the game environment or block the light from reaching other elements in the scene. So its impact on performances highly depends on the scenes displayed (5fps hit for SSAO, 10fps hit for HBAO+ on average).
Depth of Field – This post-processing technique simulates the real-world blurring of details over vast distances. The advantages of using DoF is minimizing the impact of low-detail distant objects. With it off, you will save just 1-2fps.
Chromatic aberration – At the cost of only 1-2fps, this post-processing effect is a visual artifact commonly associated with old cameras and used by recent games for artistic purposes.
Vignetting – For 0.5fps, you will obtain soft black corners on your monitor.
Light shafts – Also known as God Rays, this technique enables light projection between foliage or into dark rooms from the outside. It costs only 1-2fps, so we suggest you to take it on.

 Destiny: The Taken King Guide - How to Farm Exotics With Three of Coins
 FIFA 16 - Best Dribbling technique in the game tutorial
 The Walled City of Gaming: World of Warcraft
 Review: Armikrog
 How To Get Silent Scream Emblem and Ultra Knight Location In Destiny: The Taken King