Dead Rising 2: Off the Record Walkthrough
What if Dead Rising 2 was about Frank West instead of Chuck Greene? Apparently Capcom and Dead Rising fans (Me included.) just had to know the answer. With all new weapons, a new area, and a totally overhauled story at a budget price, Off the Record sounds like an enticing time for hungry Dead Rising lovers. Frank West makes an incredible return, with his camera in tow. Learn to love Fortune City all over again, this time with Frank West.
It won’t be easy, let Game Front’s zombie-herders help with a full walkthrough below. For extra information, check out our achievements, trophies, and cheats.
Check back after release for new updates!
KILL ZOMBIES! WIN MONEY!
As you start off in the handicap wrestling match, press the Square button to attack the three zombies and wiggle the left toggle stick if they sink their teeth into you in order to break free. Once the next group of zombies enter the ring, feel free to pick up an object (the foam finger is fun) to use as a weapon.
Once the sides of the ring drop, jump up on one of the corner posts to lure the zombies through the grinders. Go around and jump on top of all four, but then quickly jump off to avoid getting burned. After you jump on the fourth one, wait an extra couple seconds before jumping off because there will be flames that shoot across the ring.
Beat up the burnt zombies, then once the four corner posts reset, jump back on all four to reactivate the grinders. You can also earn some extra cash by taking out a few zombies in the audience as well before the timer runs out.
Following the cutscene, exit through the locker room door and head straight down the hallway. Head into the bathroom on the left to save your game, then continue to follow the arrow down the hallway for a cutscene.
Follow the onscreen instructions to take picture of TK and Brandon. Wait till they move to the left, then when you see TK hand over the card key and the “PP” circles appear above their heads, press X to zoom in and then Square to take the picture.
Quickly walk along the catwalk and turn left up the steps to follow them. Then take two more pictures when you see the “PP” circles above them again. Follow them when they walk under you and snap a few more pics when TK hands him a briefcase (note: you can still earn points without the “PP” circles appearing).
Following the cutscene, snap a quick pic of the three body guards to earn some points, then beat them up. Work on the guy with the weapon first. Once he drops it, pick it up and use it to your advantage.
Following the next cutscene, pick up some of the nearby items and follow the arrow down the zombie-filled hallway (snap a pick to earn a bunch of Horror points). Once you get to the lobby, snap a pic to get some Brutality points, then go and try to save Dale and other civilians you can.
Continue to follow the arrow and exit through the glass doors of the lobby. Following the cutscene, turn right out of the control room and save your game in the bathroom on the left. Exit, head down the stairs and examine the door to the vent on the right.
Proceed forward and pick up the shovel on the floor (great for zombie bashing!). Turn left and head up the stairs. Pick up the money on the hallway floor, then head through the double doors into the Royal Flush Plaza.
Return to the Main Walkthrough Page
Survivor: Denyce
Whack some zombies as you make your way through the Plaza. Turn left through the glass doors on the left when you reach Roy’s Mart.
Following the cutscene, take out the three looters. After you acquire the Pharmacy key, hop over the counter and enter through the door on the right. Pick up the Zombrex on the counter in front of you.
Press the Triangle button to call Denyce (the pharmacist) to follow you out the other door. Exit Roy’s Mart, stick to the right wall and book it through the Plaza to get back to the hallway leading to the basement of the Safe House. Wait for Denyce to join you, then head through the vent door.
Return to the Main Walkthrough Page
Survivor: LaShawndra and Gordon
Back in the Plaza, head for LaShawndra, who will be standing up on the counter of The Dark Bean. After you talk to her, run directly across to Casual Gals with her to reunite her with Gordon (snap a pic of them hugging to get extra points).
Once Gordon decides to join, lead them down the hallway and through the vent to the Safe House.
Following the cutscene, check your watch. If it’s not quite 8:00 a.m. yet, you can head back into the mall to explore a bit and do some zombie-killing to maybe raise your stats. Or shop a little.
At 8:00, give yourself the Zombrex shot, then head back to the Safe House.
Return to the Main Walkthrough Page
CASE 1
Big News
Once you get to the ventilation room, answer your blue tooth to talk to Stacey. Head through the vent door for a cutscene.
Return to the Main Walkthrough Page
Alive on Location
Exit the cafeteria and head downstairs to talk to Sullivan before heading through the vent and acquiring the maintenance room key. Head up the stairs and through the double doors for a cutscene.
Pull out your camera and take a picture of the camera icon on the work bench. Grab the box of nail on the shelves and place them on the work bench. Pick up the bat on the floor and combine the two on the work bench by pressing the Square button. (From here on out, you can combine weapons for some pretty awesome combinations.)
Exit through the double doors and test out your new weapon on the group of zombies to the right. Head into the Royal Flush Plaza and answer your blue tooth to talk with Stacey.
She will present you with a couple missions to escort survivors back to the Safe House. These side missions do not need to be completed to beat the game; however, completing them will earn you, cash, points, skills and health.
Sticking just to the case mission, follow the arrow and head for the Americana Casino. Make your way through the Casino and then head for the doors to lead you to the Platinum Strip. From there, head for the Fortune City Hotel for a cutscene with Rebecca.
Return to the Main Walkthrough Page
Insecurity
Have Rebecca follow you through the double doors (pick up the Security Box). Follow the arrow to the South Plaza. Continue to follow the arrow to the gate of the Fortune City Arena.
From there, continue on with Rebecca toward the security room for a scene.
Return to the Main Walkthrough Page
Alliance
Head back through the American Casino, then make your way to the Royal Flush Plaza. Head through the double doors to the right of Casual Gals to lead you to the vent to take you back to the Safe House.
Head for the security room to meet back up with Stacey and complete the first case. Your next case won’t begin until 6:30 p.m., giving you time to roam around (or complete side missions). Grab the orange juice and milk on the counter in front of the microwave if you need the health.
Return to the Main Walkthrough Page
CASE 2
CURE-ious Information
Once you get orders from Stacey, return to the Security Room for a scene.
Return to the Main Walkthrough Page
A Familiar Face
Head through the Plaza and then into Fortune Park. From there, go to Uranus zone. Make you have some weapons before you walk down the hallway leading to the bathrooms. Walk inside the Men’s bathroom for a cutscene.
Using your weapon, kill Brandon. A couple of zombies will jump out from behind the stalls halfway through the fight, but they shouldn’t be too much of a hindrance on you.
Return to the Main Walkthrough Page
CASE 3
Confronting CURE
Head back to the Safe House to meet up with Stacey in the security room for a cutscene.
Return to the Main Walkthrough Page
Sign of Life
Head to the Plaza. Right around this time, Frank will need some more Zombrex. You can find some in several locations (just one place is the Just in Time Payday Loans upstairs)
Follow the arrow to the Atlantica Casino and then to the Palisades Mall. Follow the arrow to the other end of the mall before turning right and heading through the door that will lead to the Underground.
Head down the stairs and turn right for a cutscene. Whip out your camera and take pictures of the guys in the orange jumpsuits when the “PP” icons appear above their heads.
After you take your two to three pictures, there will be another cutscene. Following that, pull out some type of firearm if you have one (if not, get out a weapon you can use to throw) and take out TK’s men.
After you take out the first one, pick up his gun and use it to take out the others as you make your way down the train. Get to the front of the train and open the door for a scene.
Now stuck in the Underground, head up onto the platform to the right of the train car. Access the maintenance room to the right to build some weapons if you feel so inclined, or just proceed forward.
When you get to the huge group of zombies to the right, hack through them to get into the tunnel. Hop in the janitor’s cart and use it to quickly make your way down the tunnel.
Once you get to the other side, hop off and head through the hallway to the right that will lead you to an exit. Head up the stairs and into the food court. From here you’ll have plenty of time to do more side missions and explore.
Return to the Main Walkthrough Page
CASE 4
Boom Town
Head back to the Safe House to meet up with Stacey in the security room for a cutscene.
Return to the Main Walkthrough Page
Run for the Money
Head for the doors leading to the Plaza. Following the bizarre cutscene with the bug and the zombies, head through the Plaza to the Americana Casino. Grab a weapon and take out TK’s two men to the left.
Pick up one of their guns and use it to take out the next enemy in the doorway of the cashier room. Head inside and take out two more enemies. Pick up another gun and use it to destroy the power drill.
Pick up the loose money and the money in the briefcase to the right of the drill. Head for the door, but before you exit, grab the security box and and the money around the perimeter of the closed cashier windows.
Head back to the Plaza, then make your way to the Slot Ranch Casino. Head to the back of the casino where the cashier room will be. Take out TK’s men along the way.
Kill TK’s men outside of the cashier room, then take out the two down the hallway to the left. Grab the pizza in the room to the left for some health, then head down the hallway and destroy the drill.
Pick up the money and the briefcase to the left of the drill. Exit the cashier room and follow the arrow to the Silver Strip. From there, head for the Plaza and then onto the Palisades Mall and finally the Yucatan Casino.
Like the other two, head to the back of the casino and take out TK’s men in front of the cashier room on the right. Pick up one of their guns (if you need it), then head through the open door and take out the enemy to the right.
Turn left and take out the last guy behind the desk before destroying the drill. Pick up the money and suitcase in front of the wall, then follow the arrow to the Atlantica Casino.
In order to get their quickly, follow the arrow to the Silver Strip. Following the load scene, turn right and head inside of the parked trailer to find a dirt bike. Use this to fly through the scores of Zombies to arrive at Fortune Park.
When you see TK’s men around the armored van, hop off, kill his men and destroy the van for a cutscene.
More downtime here. Complete side missions for money, combo cards, points, ect.
Return to the Main Walkthrough Page
CASE 5
The Source
Once you hear from Stacey, follow the arrow and head for Bennie Jack’s at the Americana. Make your way up the stairs for a scene.
Return to the Main Walkthrough Page
Kidnapped
Around this time, Frank will need some more Zombrex. Head to the Royal Plaza from the Americana. Go left and examine the red, white and blue golf cart for a scene.
After the crazy mail man tries to kill you, you have to fight him to earn some Zombrex. He’ll use a shotgun on you and he’ll also throw the occasional exploding package. Grab a weapon and hunt him down, because he’ll move around quite a bit, too.
Once you acquire the Zombrex, just make sure Frank gets it before 8:00 a.m.
With Frank good to go, follow the arrow and get to the Yucatan Casino. Follow the arrow to the right and take the escalator up to the Shoal Nightclub for a scene.
Return to the Main Walkthrough Page
Two Girls, One Club
After you learn that it was those two slutty girls who set up CURE, pull out a weapon (or grab a barstool off to the side and kill Crystal and Amber to save Rebecca.
Crystal and Amber have samurai swords and some moves, but as long as you don’t get cornered by both of them, they shouldn’t be a problem.
Return to the Main Walkthrough Page
CASE 6
The Getaway
Follow the area and head for the Fortune City Hotel. Go right and take out one of TK’s men walking up the hallway. Pick up his gun and use it to kill TK’s three other guards down the hallway.
Head into the elevator on the left for a cutscene.
Step off of the helicopter pad and take cover behind the air conditioning vent in the back right corner. After the helicopter’s first round of fire, head for the blue crane and when you get close to it, press the Square button to winch it.
This will bring the helicopter down to eye level. Quickly turn around and pick up one of the lights from the landing pad and chuck it at the helicopter.
Repeat this process several times, using the lights and cones (or any other weapons you may have) to chuck at the helicopter. However, watch out for the crane when you go back to winch it—if it whips around, make sure you roll to duck out of the way.
After you take down TK and following the cutscene, you’ll have time to complete more side missions. Also, head over to Just in Time Payday Loans and buy some Zombrex for Frank before 8:00 a.m.
Return to the Main Walkthrough Page
CASE 7
Help Arrives
Once you hear from Stacey, get to the roof of the Royal Flush for a cutscene.
Return to the Main Walkthrough Page
Last Stand
Head down the ladder next to the cone toward the Silver Strip. If you don’t have some sort of semi-automatic weapon, get one. Follow the arrow through the maze of zombies to the Underground.
Head under the partially raised bay door on the left for a scene. Pull out your gun and take cover behind a nearby pillar, then unload on Sgt. Boykin.
He’s a bit of a badass, so try to avoid getting in a fist fight with him. Just use the pillars as cover and attack him from afar to defeat him.
Return to the Main Walkthrough Page
Lean on Me
Following the cutscene, pick up the injured Rebecca and head up the tunnel toward the Silver Strip.
After you exit the Underground, talk to Sgt. Woo and Pvt. Kuss to convince them to follow you to the Safe House. Not only will you earn points and cash for bringing back survivors, but they will help clear the way, too.
Follow the arrow through the maze of zombies to the Royal Flush Plaza. From there, follow the arrow to the vent that will lead to the Safe House.
Return to the Main Walkthrough Page
Breach
Head downstairs and fight your way through the group of zombies to get to the storage room. Pick up the generator on the floor, carry it back upstairs and press the Square button to place it in the broken panel on the wall.
Head down the hallway (past the security room) and turn right. Head past the lockers and turn right down the stairs through the group of zombies.
Hack and slash your way through another large group of zombies, then grab the spool of wire down the steps to the left. Pick it up and take it up to the panel.
Head back past the lockers and pick up the red gas barrel in the left corner of this hallway and take it back to the panel.
With all three items in place, press the Square button on the panel to hack it. Press X repeatedly to get the meter in the red in order to close the door to prevent more zombies from coming in.
Return to the Main Walkthrough Page
CASE 8
Bad to Worse
Enjoy the cutscene!
The Only Lead
Head for the Royal Flush Plaza, then make your way down to the Underground. Get inside the janitor’s truck and use it to drive down the train tracks.
Continue to follow the arrow down the tunnel until you reach the military barricade on the right (pick up their guns if you don’t already have any). Take out the two soldiers, then examine the keypad on the wall for a scene.
Quickly cross over to the platform on the other side. Grab the onion rings if you need some health. Pull out your gun and use the computers as cover while you take out the military men across the way.
Move around to the left and take out the four soldiers that will be waiting for you up the steps. Pick up the pizza on the floor next to the last computer, then head up the steps.
Follow the arrow that will lead you down a tunnel. Examine the keypad on the wall at the end for a cutscene.
Quickly pull out your gun (or any other weapon)and kill the two doctors for another scene.
Return to the Main Walkthrough Page
What Lies Beneath
Pick up the Blast Frequency Gun to the left of the door. There will be food on the table to left, which you can grab before heading down the tunnel. Swipe the key card and hop inside the elevator.
Now in the Palisades Mall, follow the arrow to get back to the Safe House. Once you arrive, head up to the security room for a scene.
Return to the Main Walkthrough Page
THE FACTS
Follow the arrow to the Plaza, then make your way to Fortune Park for a scene.
Go left. Take out the two soldiers, then destroy the Harvester. Proceed forward and destroy the next Harvester out in front of Uranus zone.
Cut across to the right and take out another group of soldiers who will be guarding the next Harvester in front of the Fortune City Hotel.
Advance and take out the next Harvester near the Royal Flush Plaza.
Next, follow the arrow to destroy the fifth Harvester in Platinum Strip in front of Moe’s Maginations. Head into Dining at Davey’s across the way and grab some food lying around for some extra health.
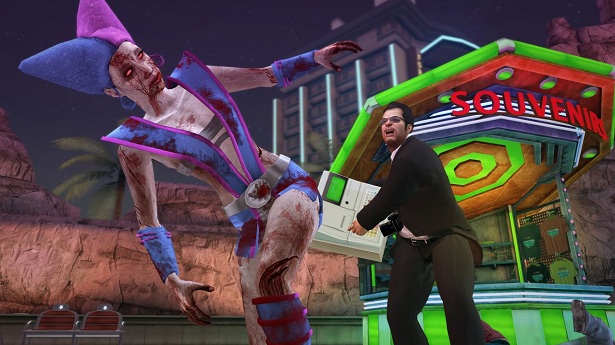
Follow the arrow to the next Harvester, which will be near the Souvenier Kiosk.
After you destroy that one, take out the next one across the way from the Peep Hole.
The next and final one will be just up the way in front of Juggz. Pick up a rifle (you’ll need it later), then destroy the final Harvester.
Following the cutscene, turn left in through Uranus zone. Follow the arrow toward the theme park for an awesome final battle with Stacey.
To start off, dart for the open container to the left. If you don’t have a rifle, there will be one on the floor, along with some health. Peek out from the container and aim for the red “eye” of the contraption and unload on it.
Stacey’s toy, however, will unload heat-seeking missiles toward you, which will get old fast. If ever you need more health, go all the way through the other side of the container and grab some fish from the pond to the left. There will also be a maintenance room nearby to build weapons.
However, the best weapon of choice to take down Stacey’s toy would be something you can hack and slash with, preferably a samurai sword. Take that and get close to it, but watch out for the steam it randomly shoots out from its base.
When you see either of its claws go up, perform a roll to get out of the way. Once one of them gets lodged in the ground, quickly hack it break off the armor around its pinchers.
Repeat this process several times. Keep in mind that once some of the armor begins to fall of, his health will begin to drain quicker.
Once you get it down to one star the real fun begins. Move quickly to doge the containers it will hurl at you, and watch out when it tries to grab you with its pinchers.
Similar to before, the best way to inflict damage on it is after it gets one of its pinchers stuck in the ground, run up to it and hack the exposed circuity.
Once you get it down it down to its final bar of health, walk on the nearby pincher on the floor and use to jump up on the platform. Press the Square button once on top to activate the rack.
Hop down, carefully avoid the missiles and the flames and do the same thing on the adjacent platform.
This will cause the part the Stacey is controlling to collapse. After it does, run up it and press the Square button to fight Stacey. From there, follow the onscreen button combinations to combat her. Repeat this process two more times to defeat her and beat the game.
Return to the Main Walkthrough Page
OVERTIME
After finding out that TK has taken Rebecca, follow the arrow through the Plaza and then the Americana Casino to lead you to the Underground.
Once you get to the platform in front of the railroad tracks, hop inside the orange janitor’s cart and follow the arrow down the tracks.
When you spot the train cars on the left, hop on them and pick up the Zombrex stash inside.
Continue down the tracks until the arrow turns left. Then make your way up onto the narrow platform and use the ladder to get to Silver Strip.
From there, head for Pub O’ Gold. Head behind the backside of the bar and pick up the expensive champagne for TK.
Now it’s off to Uranus Zone. From there, follow the arrow to the back of the First Aid room to pick up some sutures on the back counter
Make your way through Fortune Park and then the Atlantica Casino to get to the Palisades Mall. Follow the arrow upstairs and head into KokoNutz Sports Town. Pick up the men’s silk thong on the floor in front of the right side of the center rack.
Head back downstairs, go through the Yucatan Casino and the Food Court to get to the Slot Ranch Casino. Follow the arrow back to the Cashier room. Make the first left down the hallway and grab the gauze on the table.
Next, make your way back to the Royal Flush Plaza. Make a right into Roy’s Mart. Head to the back room and pick up the painkillers on the shelf.
Head back to Fortune Park and then to the arena for a scene. Before you do, though, make sure you have health items stored up.
Just like the opening part of the game, you’ll have to wrestle zombies again. Just like before, jump up on one of the corner posts to lure the zombies through the grinders. Go around and jump on top of all four, but then quickly jump off to avoid getting burned.
Continue to fight zombies until TK decides enough is enough, at which point there will be another scene.
You’ll now have to fight TK. His only attacks will be hitting you with his pimp cane and spearing you into the railing. Once he does the latter, rotate the left toggle stick back and forth and follow the button commands to break free.
Pull out a weapon (if you don’t have on, there will be come on the railings around the perimeter of the area) and use it to beat up TK. The best method is to take a single whack, then perform a roll, whack him, roll, ect.
Rebecca’s health won’t deplete too fast, but if you take too long, stand by her and press X repeatedly to help stop the bleeding. Finishing taking care of TK to officially complete the game.
Return to the Main Walkthrough Page





 Uncharted 3 Treasure Locations Guide
 Murdered: Soul Suspect Walkthrough
 Deathwatch is XCOM with Space Marines: An Interview With Ben Murch
 Max Payne 3 Walkthrough
 Clever Ways to Make Software Available to any Windows Account