


Solve your own murder with the master detectives of GameFront as we take you through every crime scene in Murdered: Soul Suspect.
Ronan O’Connor has a big problem — he’s dead. After a deadly encounter with a serial killer, Ronan must use his new ghostly status to investigate his own murder. Otherworldly forces are at work, and you’ll have to use supernatural abilities to solve the case while fighting off demonic creatures from beyond. We’ll provide every solution right here, with screenshots to help make each challenge just a little bit easier.
Find more info with our Murdered: Soul Suspect preview, or watch the trailer.
For even more help uncovering the truth, get artifact info on our Murdered: Soul Suspect cheats page. Or, if you’re looking to complete even more extra investigations, try browsing through GameFront’s LA Noire walkthrough and become a crime-stopping machine.

When you gain control walk up toward the door of the apartment complex. Follow the prompts to open it, which will trigger a brief cutscene. When it ends, again follow the prompts to align your spirit with your body. Once that’s done another cutscene will begin.
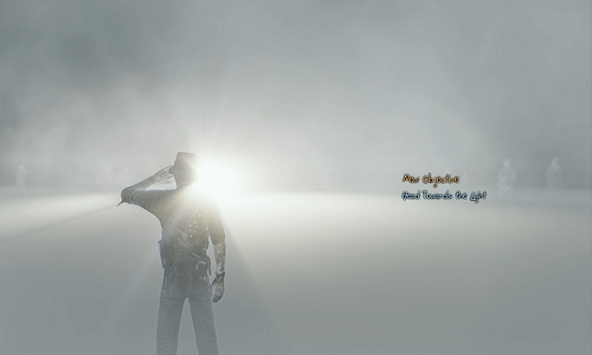
Wait for to end and when you regain control you’ll be given a new objective: Head Toward the Light. Ahead of you, you’ll see the aforementioned light walk toward it until yet another story sequence launches.

After you regain control you’ll be given a new objective: Follow the Ghost Girl. There will be an alleyway directly ahead of you. Head down it and you’ll come to a wooden fence. Seeing as you’re a ghost now, you can walk straight through it. Do so and continue following the alley until a cutscene triggers.
After it ends you’ll be able to question her. Do so until you run out of dialogue choices and another cutscene will start up. Once it ends work your back through alley and head back to the Town when the option appears.

Doing so will trigger another cutscene. After it finishes you’ll find yourself back at the scene of Ronan’s murder where you’ll be tasked with completing your first investigation.
While you won’t need to grab all of them to continue, there are eight clues total to find. You’ll be able to find a cluster of them (Shell Casings, Shattered Glass, My Death, My Gun, Cigarette) lying right on the ground near. The rest can be acquired by possessing some of the police and bystanders.

Approach the woman being questioned by a police officer. If you possess her you’ll be able to use your Influence ability to pick her brain. When you do this you’ll be asked to pick out a piece of evidence to match the question “What would make her tell who she really saw?” Reply by selecting “Bell Killer.”
Once you’ve done this approach the lone police officer looking at a notebook. Possess him and use the Peek option to look at it from a first person perspective. There will be three options to pick from out of the officer’s notes. You’ll need to pick the one that best matches “What did he find out about my killer?”
Choose “Only weapons found at scene belong to Ronan.” This will unlock the last clue. With that done you can conclude the investigation. A cutscene will trigger after which you can continue into the apartment building.
Return to the Main PageMain Walkthrough Page


When you regain control inside the apartment building you’ll immediately be approached by a ghost who will walk through a wall to your right.
When he passes back through follow him and you’ll enter the bedroom of an apartment occupied by an elderly couple. Talk to the ghost and then return through the wall back into the hallway. Spend a little time exploring.

There isn’t a ton of interest on the first floor but there is, notably, a Side Case you can take on. Walking around you should find a room containing a female ghost leaning up against a wall lined with water heaters.
You’ll have the option to Help her. Doing so will activate the game’s first Side Case: A Mysterious Murder. Head to our Side Case guide for clues on solving it.

Once that’s done, you can head to the stairs at the end of the hallway. Climbing them will trigger a cutscene. When it ends you can take a bit of time to explore the second floor. In one apartment you’ll find a ghost haunting a young girl. You can talk to him if you want.
In another apartment you’ll find an ongoing poker game. Once you’ve seen these thrilling sights you can continue through the second floor. When you reach the stairs to the third floor however, a cutscene will trigger. After it ends you’ll be under attack by a Demon.
You can’t fight it directly so you’ll need to hide. Thankfully, this isn’t all that hard. There are ghostly hiding spots scattered all over the place that you can hop into with the press of a button. Shoot between these to escape the Demon. In turn, once you’ve lost it, you can sneak up on it yourself to perform an execution. With the Demon defeated, continue up to the third floor.

When you reach the third floor, you’ll discover it’s already being patrolled by a pair of Demons. You need to dispatch them, of course, before you can continue. Head through the walls and use the apartments to skirt around and get behind the demons.
If they spot you there are plenty of hiding places to take advantage of. Once you’ve finished them off, feel free to explore the area a little before heading up to the fourth floor.
In the various apartments on this floor you’ll find a few more ghosts you can chat with and a TV you can Poltergeist. When you’re ready head up the stairs at the end of the hallways to the fourth floor.

When you reach the fourth floor you’ll come to a police line which, of course, you can walk straight through. The only apartment on this floor is the one you need so head into it to trigger a brief cutscene. After it ends, you’ll begin an investigation.
There are 14 clues to find in this apartment but you don’t need to find all of them. You’ll find several of them right in this initial room. For instance, just to the right of the entrance is a closet where you’ll receive a reveal option.
Using this will create a shade of the Bell Killer which you can analyze to unlock The Searching Killer clue. Head across the room and you should a section of broken wall. Inspecting it will yield the Damaged Wall clue. To the left of that will be a window blocked off by police tape. Examine it to snag the Shattered Window clue.

Once that’s done search the floor of the apartment to find the Mom’s Gift (the gun) and Signs of a Struggle clues. If you head into the bedroom you can Reveal the shade of a young woman who you can analyze to collect the Hiding Witness clue. Just outside the bedroom, in turn, is a counter where you’ll find the Book About Ghosts clue.
You can also head into the kitchen to find the Missing Persons Request siting on the counter. Once that’s done you can head into a side room near the Bell Killer shade to find the Packed Luggage and Mysterios Sketches clues. With those in tow, possess the police officer standing in the kitchen and use the Influence option to unlock his clue. Once you’ve done that you can probably feel free to just solve the investigation. Doing so will unlock the remainder of the clues. Once the investigation’s over, exit the apartments through the window in the bedroom.
Return to the Main Walkthrough Page

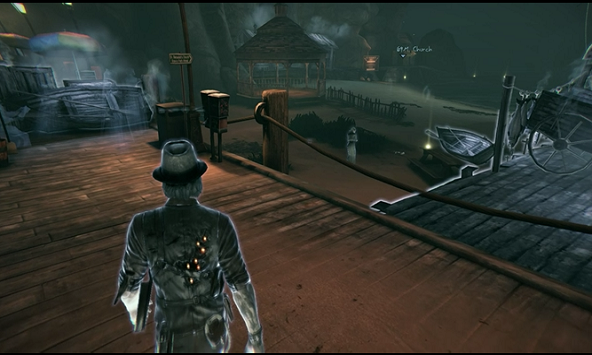
When the level begins you’ll be standing in an alleyway. The game will prompt you with a new objective: Find Your Way to the Church. Exit the alley and head toward the objective marker. You should see a pair of police officers. Possess one and eavesdrop to trigger a brief cutscenes containing some story details.
After that continue toward the marker. You’ll be led to a beach where you’ll discover a ghost crying. Speak to her and you’ll unlock a Side Case. Be sure to use our Side Case guide if you find yourself having any difficulties. After you solve it, continue across the beach and continue up into the church.

When you enter the church your objective will change, directing you to Investigate the Church to Find the Witness. While still standing in the entrance, turn toward the right and in-between the pews and a pillar you’ll find a spot with a Reveal prompt.
Do so and you’ll reveal a shade of the witness that you can analyze. You’ll be asked to select a clue connected to the potential location of the witness inside the church. Pick “The Church.” Doing so will fulfill your objective.

Once that’s done you’ll be given a new objective: Find a Way to the Attic. Head to the back of the church, to the left and right of the altar are doors. Head through the one of the left and you’ll come to a hallway blocked by a demon portal.
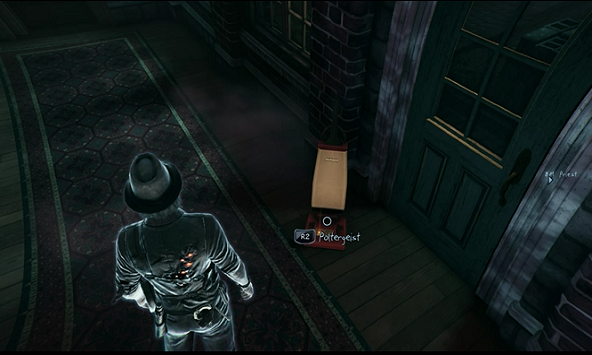
Luckily there’s a priest vacuuming up and down the hall. When he gets near possess him and hitch a ride across the portal. After you cross the portal, exit the priest to trigger a cutscene. After it ends you’ll have completed the Find a Way to the Attic objective.

Your new objective will be ‘Find the Cat’. To do this head back into the hallway (you’ll now be outside) where you left the priest and pass through the door at its end labeled “Rectory.” You’ll enter another hallway near the end of which you’ll find the cat sleeping near an open door. Possess the cat and you’ll be able to directly control its movements. Now that you’ve gone all feline, you’ll need to find your way up to the attic. Head back out to courtyard where you regained control after the last cutscene.
Be careful of the demon lurking in the dining room. You don’t necessarily have to confront it, but if you’re intent on exploring at all, its demise comes in handy. Once you’re outside look for a stack of cinder blocks. You can jump on them to reach a path of wooden planks that will eventually lead to you a vine covered wall you can scale. When you reach the top of that you can hop onto a nearby tree and follow its branches to a roof that you can cross to reach more vines that will lead you into an attic window. Once you’re in the attic you can abandon your cat host.
Pass through a door at the end of the room and a cutscene will trigger after which you’ll be in a room with the witness: Joy Foster. Possess her and use your Influence ability. You’ll be asked to select a clue that will “make her think about the Bell Killer.” Doing this trigger another cutscene, ending in a question sequence with Joy. Ask her all the available questions and you’ll trigger another cutscene. After which you’ll be tasked with a new objective: Track Down the Witness.
First you need to get out of the attic. To do this possess your feline friend who you’ll find waiting on the floor of the attic. Once you’re back in its body make your way back to the hallway where you possessed the priest earlier.
When you arrive it’ll trigger another cutscene after which you’ll need to cross the demon portal from earlier. Unfortunately, our friend the priest isn’t in reach anymore. Luckily, he’s left his vacuum in the hallways which you can Poltergeist to get his attention. When he comes to shut it off, possess him and ride him across the portal.

With that done, your last task in this area is to exit the church. This is a task easier said than done thanks to a pair of demons that have taken up residence in the building’s main hall. It’s at this point that the game decides to introduce its Distract mechanic. At two spots in the church you’ll see spectral crows.
Pop into a hiding place near said crows and trigger them with your new Distract skills. One of the nearby demons will immediately rush over to them where they should be occupied long enough for you to execute them. Do this to both demons and exit the building to move on to the next area.
Return to the Main Walkthrough Page


After you exit the Church a cutscene will trigger. When it ends follow the objective marker back across the beach and toward the Police Station. When you reach the station, head inside and another cutscene will start up. After it ends you’ll be inside the Bell Killer investigation room. Ronan will want to update himself on the progress of the case, which means you’ll need to find some clues. Eleven, to be specific.
Once you regain control of Ronan, immediately turn toward the right hand side of the room (with the door as reference point). First you’ll see Rex. If you possess him and Eavesdrop you’ll gain the Rex’s Frustration clue. Near Rex will also be a table. On it will be two haphazard stacks of paper. Inspect them both to collect Symbol Similarity and Crime Scene Signature clue. With that done, turn toward the wall behind the table and Inspect the map on it. This will net you the Map of the Bell Killer Murders.

From there head toward the other side of the room. On the rear wall will be a cork board sporting the pictures of three women. Inspect it to earn the Links Between Murders clue. Right next to that will be a computer desk with a missing persons poster on it. Take a look at that and you’ll collect the Missing Person’s Flyer clue.
On the wall behind that is another cork board covered in the suspect photos. Examine it to snag the Bell Killer Suspects clue. From there turn around and head over to the desk with the fan on it. If you Poltergeist the fan it will blow away a stack of papers revealing a folder. Check it out to grab the Pattern of Victim Deaths.

After you grab this clue another officer will enter the room and sit down at the computer. Head over to him, possess him and use the Peek option. Your view will change to a first person perspective of his clipboard. Use your cursor to click on the Preliminary Forensics section of the document. This will unlock the Police Didn’t Find Lead Clue. Leave the police officer and then immediately re-possess him.
This time use your Influence ability. You’ll be asked to pick a clue that make him “remember what he should be doing.” Pick Missing Person’s Flyer. This will update the Missing Person’s file you saw earlier. Re-possess him again and this time pick Peek. While looking at his screen you’ll be asked to identify what he updated “about the missing tenants.” Scroll down and select “Amber Alert for Joy Foster canceled. IN CUSTODY.” This will give you the Witness in Custody clue, which should be the last one you need to conclude the investigation.

With your knowledge of the Bell Killer now up to date you’ll receive a new objective: Find the Witness in the Holding Cell. Exit the room and run past the station’s entrance to the station. You should turn left and find yourself walking toward an office area filled with cubicles.
All of this is on the first floor, by the way, so if you find a set of stairs leading up don’t use it. Run to the opposite end of the room full of cubicles and you’ll find an open doorway. Inside on the right hand wall there should be lettering directing you to go right to the 1st Floor Offices and 2nd Floor Detective Offices and left toward the Morgue. Directly across from that wall is a doorway leading to the holding cells.

When you enter the room a cutscene will trigger. After it ends, walk into Joy’s cell and talk to her. After the conversation closes, you’ll receive a new objective: Free the Witness from the Holding Cell. Before Joy can leave her cell, you’ll need to disable the security camera in the corner of the room. Walk over to it and use Poltergesit to shut it down. Once that’s done Joy will automatically get up and exit her cell.
From here you need to help her get through the room full of cubicles you passed through earlier. As daunting as this might sound considering the volume of police officers in the room, this section is incredibly easy. Whenever Joy stops all you need to do is talk to her and then Poltergeist a nearby machine (coffee maker, vending machine, printer) to distract the marked police officer. She’ll then move on to another point in the room where you can talk to her again and distract the next set of cops. Rinse and repeat until she reaches the stairwell across the room.
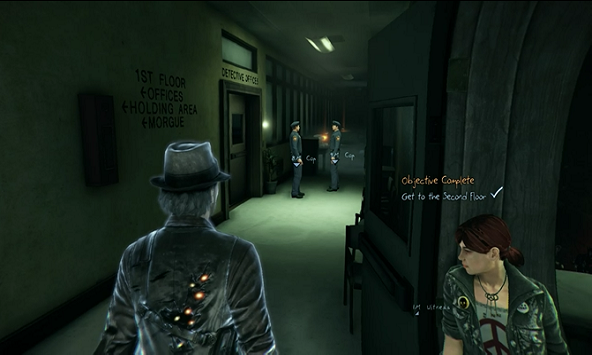
Once you’re in the stairwell a cutscene will trigger. When it ends you’ll receive a new objective: Get to the Second Floor. Unfortunately, there’s a demon portal in your way. Possess Joy and let her carry you across it.
Once it’s safe, vacate her body and continue up the stairs. When you reach the second floor you’ll see another pair of police officers in the adjoining hallway. Run up ahead and use your Poltergeist ability to distract them. Once they’re out of the way Joy will enter the hallway and enter a pair of double doors leading to Baxter’s office.
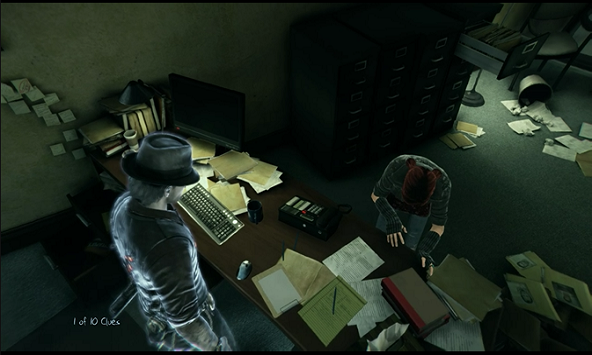
When you enter Baxter’s office a cutscene will trigger. After it ends you’ll be tasked with picking between three folders that have fallen on the floor. Pick Mug Shot and the cutscene will continue for another moment. When it ends you’ll receive a new objective: Find the Witness’s Mother’s Book. To do this you’ll need to complete an investigation. This one involves 11 clues.
After gaining control you’ll automatically have access to the Criminal Record clue. After that head over to Baxter’s desk and inspect his phone. This will earn you the Phone Message clue. On an end table across the room you’ll find the Salem History Buff clue and to the left of that the Bowling Champion clue is resting on top of a filing cabinet. Just to the left of this on a book shelf is the Baxter’s Ticket clue.
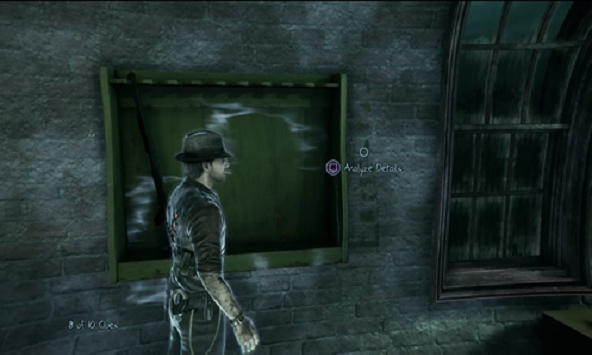
Continuing you’ll find the Baxter’s Promotion and Academy Class Photo clues hanging across the room near the desk. With all of these found, talk to Joy and she’ll check the answering machine. This will net you the Baxter Hid the Book clue.
With that done, head over to the gun case on the left hand wall (entrance way as a reference point). Inspect it and you’ll be asked “What caused that mark on the wall?” Select “Matches Gun Rack,” “Imprinted” and “Stain” and you’ll earn the Gun Rack Clue. Inspect the left side of the clue Select “Matches Gun Rack,” “Imprinted” and “Stain” and you’ll earn the Gun Rack Clue. Inspect the left side of that same gun rack and you’ll snag the Latch clue. Joy will also come over and open the secret door up, snagging you the Gala Invitation clue and ending the investigation.

After you’re done in the office you’ll need to help Joy escape the police station. This section is pretty much the same thing as the sneaking portion you played through earlier. Just distract the cops to help Joy slip past. Eventually you’ll trigger a cutscene during which Joy escapes out a window. Follow her out the station’s front door.
Return to the Main Walkthrough Page


A cutscene will trigger after you leave the Police Station. At one point you’ll need to convince Joy to help you. When prompted to pick a convincing clue, select Witness’s other’s Note. The cutscene will continue for another moment. After it ends follow the objective marker to Ashford Hills Cemetery. When you arrive another cutscene will trigger in which you’ll run into an especially creepy looking ghost.
When the cutscene ends cross you’ll be inside the cemetery. Cross the bridge directly in front of you and you’ll find Joy examining the grounds. After another brief story sequence, you’ll enter into an investigation. Your goal here us to “determine if there is a link to the Bell Killer murders” at this location.
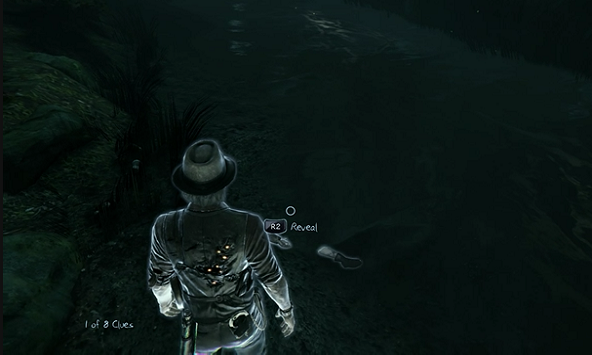
Start examining the area. To the right there should be a tree with some police tape tied to it. Inspect this to earn the Police Tape clue. Leaning against one of the nearby headstones is a shovel. Examine it to receive the Gravedigger’s Shovels.
From there head out to the edge of the river. There will be something you Reveal. Do so and you’ll uncover the shade of a body that you Analyze. When you do so you’ll be asked “What can I learn from observing this?” Select “Deceased,” “Washed Up” and “Tattered.” This will net you the Ghost Man Saw Body clue. Turn around and you’ll see the said Ghost Man standing near a tombstone. Talk to him to gain the Hidden in the Bushes clue.
Head back to the area Joy’s searching and check out the bushes near the edge of the river. Inspecting them will yield the Hard to See Clue. Go and talk to Joy. She’ll walk over and illuminate them with her flashlight and pull out a length of rope that you can examine. Doing so will trigger a question: “Where have I seen this before?” Select the Pattern of Victim Deaths Clue. Doing so will unlock the Bell Killer Victim Similarity clue.
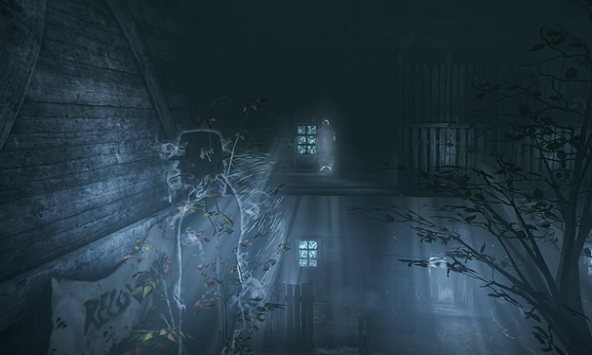
Talk to Joy to trigger a cutscene. When it ends you’ll receive a new objective: Chase Sophia’s Ghost. Complicating this however, is the arrival of three demons. Head into the graveyard using the hiding spots to work your way toward the demons and execute them one by one. Once they’re defeated, continue forward into the graveyard.
You’ll eventually enter a spectral hospital. When you come to a room filled with hospital beds. Look for a staircase on the left hand side of the room. Run up the stairs and you’ll trigger a cutscene. After it ends you’ll run through a quick tutorial teaching you how to use Ronan’s teleportation ability.
You can use it now to teleport to the rafters on the opposite end of the room. Once you’ve done that you’ll come to a gap. Teleport across to the other side where you’ll find a doorway blocked by boxes. You can, again, use your teleport ability to get past this.
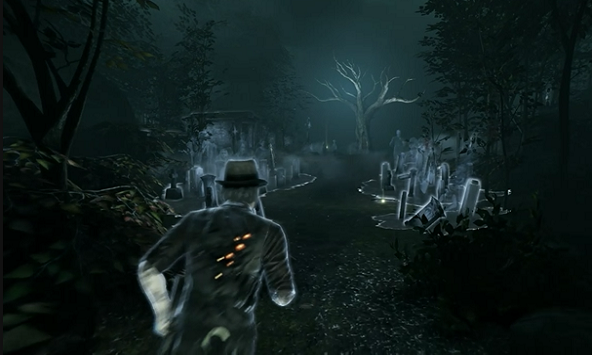
This will take you into another room you run through to head outside. Once out there continue moving through the area to further your pursuit of Sophie’s Ghost. You’ll come to a news crew. When you do, keep toward the left and climb the stairs. This will take you to another spectral wall. Teleport through it and you’ll come to a section of cemetery populated by another demon trio. Take them out and continue deeper into the level.
Just past the area where you finished off the demons you’ll come to a chain link fence. Pass through it, and follow the adjoining path until you reach a tree near the riverbank with a rope wrapped around it. When you reach the tree a cutscene will trigger.
After it ends you’ll receive a new objective: Check Out What Sophia’s Ghost is Pointing At. Approach the tree and a Focus prompt will appear. Use it and select the Crack. Doing this will cause another cutscene to trigger, after it ends make your way back to the entrance of the graveyard to trigger another cutscene and end the story portion of this area.
Return to the Main Walkthrough Page


You’ll receive a new objective: Get to Lux Aeterna Mental Hospital. Follow the objective marker through the streets of Salem. When you arrive enter to trigger a cutscene. When it ends you’ll be at the front desk of the Mental Hospital. Joy will need help convincing the receptionist to let her in to see Iris. You’ll be given instructions to find something that “would make the receptionist help Joy.”
This will start an investigation where you need to find four clues. On her desk is a paper. Inspect it to earn the Visiting Hours Schedule. Also on her desk is a photo. Examine it and you’ll receive the Photo of Boy clue. To the right of the desk is a dinosaur. Check it out to unlock the Get-Well Gift clue.
Finally on the office’s left hand wall is a photo of a cat. Look it over to receive the Inspirational Poster. Once you have all of the clues possess the receptionist and use your Influence ability. Once you do that select the Photo of Boy to successfully influence her.
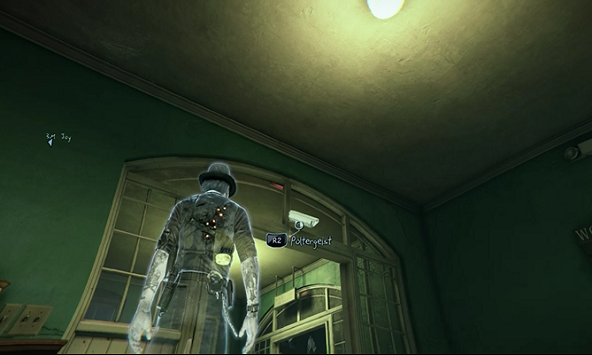
Doing this will trigger a brief cutscene, after which you’ll need to use your Peek ability to look at the receptionist’s computer. You’ll need to figure out “where Iris is being held?” To do this just highlight and select the top portion listing her room number: 216. Once that’s done you’ll receive a new objective: Get to Room 216 in the High Security Ward.
Leaving the receptionist behind, head up the stairs and toward the right. This should lead you toward the Women’s Ward where Iris is being held. As you enter the Ward however, you’ll notice that Joy stops. There’s a security camera just inside the door that you’ll need to disable with a Poltergeist.
Once that’s done Joy will start moving forward. Periodically she’ll stop again and need you to disable a door, camera (sometimes more than one) before she can proceed. As in the Police Station, you pretty much can’t fail at this as she’ll never step out into the open until you’ve successfully cleared her path.

You’ll eventually come to a demon portal. Possess Joy and she’ll carry you across it into the adjoining hallway where you’ll soon encounter a spectral door blocking Ronan’s way. Joy will continue on while Ronan will need to find a side route to make his way to Room 216. Luckily, this route can be found right next to the blocked pathway, marked by a paper reading “Sealed.”
Head through the door and follow the adjoining corridor. You’ll shortly come to a dilapidated cafeteria containing several demon portal’s. Avoid them and make your way to the other side where you’ll find an open gate leading to a hole that drops into the room below.
Head down and you should almost immediately find a cat. Possess it and exit the room the way you entered. On the wall just opposite of the gate you passed through prior to finding the hole, you should see a vent. Climb inside and follow the air duct until you drop into a small room.
Exit this room and you’ll cone to a group of connected hallways patrolled by a trio of demons. You should know the score for these guys at this point. Use the hiding spots to maneuver around them. Use the nearby spectra crow to distract them as possible and pick them off one by one until they’re defeated.

With the demons gone, you can continue forward. This area is fairly linear so don’t worry about getting lost. In no time at all you’ll link back up with Joy. Once you do the name of the game is, again, helping Joy sneak forward through the ward. This requires the same process of waiting for her to stop and Poltergeisting cameras and distractions that you had to use earlier.
You’re not far from Room 216 and when you arrive a cutscene will trigger. When it ends you’ll an investigation will trigger in which you’ll need to “determine what Iris knows about the Bell Killer.” This will involve locating seven total clues around Iris’s room. When you regain control head search the wall close to where Iris is standing. Inspect the drawing there and you’ll gain the Deranged Drawing clue. You can also Analyze the drawing Iris is working on. Doing so will lead to a prompt directing you to figure out what “Iris is trying to communicate.” Select the
“Tormented” and “Chased” answers. Doing this will net you the Iris Captured clue.
From here turn around and approach the large drawing with a bell at its center on the other side of the room (to the left of Joy). Analyze this and you’ll again be asked to figure out what “Iris is trying to communicate with this drawing.” Select “Bell” and “Burned at the Stake” to unlock the Symbol in the Sand clue. With that done, inspect Iris’s overturned bed to receive the Flipped Bed clue and the crayons to the left of that for the Crayons clue. With that done you can head back over to Iris and Analyze the last drawing in the room. It will be all black and feature her and a similar looking girl holding hands. Select the “Two Girls” and “Linked” options to receive the Bound Twins clue. Once that’s done Iris will say something and you’ll automatically receive the Blue Eyes clue.

A cutscene will trigger, after which the investigation will end and you’ll receive a new objective: Help Iris and Joy Escape the Hospital. Exit Iris’s Room and follow Joy and Iris. They’ll come to an orderly and stop. Distract the orderly by Poltergeisting a nearby walky-talky and then open the gate he was guarding.
With that done the two will run through the area and exit the asylum. Follow them and a cutscene will start up. In the middle of the cutscene you’ll be asked to remember where you’ve “seen this take before.” Select the “Gala Invitation” to proceed. This will end the story portion of this area.
Return to the Main Walkthrough Page

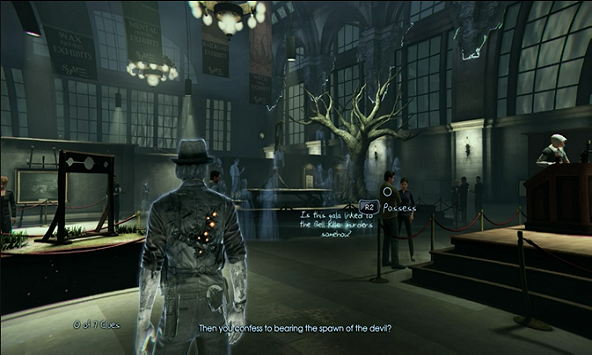
After you leave the police station you’ll be directed to make your way to the Salem History Museum. Follow the objective marker to make your way through the streets of Salem. Once you reach your destination, enter the museum and make your way to the Main Hall. This will trigger a cutscene, after which you’ll start an investigation with the goal of discovering if “this gala [is] linked to the Bell Killer murders somehow.”
There are seven clues to find, most of them centered around the various exhibits in the hall. Head to the displayed stockade and inspect it to earn the Pillary clue. From there you should be able to see a painting nearby. Go take a look at it to snag the Judgment House clue. From there you should be able to see a pile of rocks. Check that out and you’ll be prompted to Focus on it. Do so and select the Stain option to unlock the Demonic Contract clue. From here head over to the nearby gallows. This will again prompt you to Focus. Choose the Trap Door option and you’ll snag yourself the Actual Puritan Era Gallows clue.
From there make your way over to the mock trial. You should see table there with some papers. Inspect them to earn the Witch Trial Records clue. From there work you toward the rear of the room where you’ll find a witch burning stake. Inspect this and you’ll be asked if the Bell Killer used “something like this” in one of his murders. Choose “Burned to Death,” “Rose,” and “Torture” to unlock the Burned at the Stake clue. Finally, just next to the stake is a crane with a chair attached to it. Inspect this and you’ll again be asked if the Bell Killer used anything like this in a murder. Select “Water,” “Sophia,” and “Drown” to earn yourself the Dunking Torture Device clue. With all the clues found you can finish the investigation.

A cutscene will trigger. After it ends you’ll be given a new objective: Get to the Restoration Room. Toward the rear of the Main Hall you should find a door with a placard describing the contents Floors 1-3. Head into it and you’ll encounter some spectral train tracks. Be careful, if you get to close to the tracks a train will show up and pulverize you. That being said, when you reach the tracks you’ll need to work your way up them to reach the Restoration Room.
Wait for the train to pass by. In the few seconds before it comes back look down the tracks. You should see a small nook you can run into where you’ll be safe. There’s a series of these nooks that you can use to work your way up the tracks. When you reach the end of the tracks you’ll find a set of stairs.
Climb them and you’ll pass a pair of police officers guarding a pair of double doors. Pass through the doors and you’ll enter a large filled with demon portals. Make your way through it and you should find another set of doors with one of them cracked open. Head through the doors and you’ll see another staircase.

Approach it and a cutscene will start up. After it ends climb the stairs to find the Restoration Room. Enter it and yet another cutscene will trigger. Once it’s finished an investigation will start up. You’ll be asked to search through the artifacts to find any that “relate to the Bell Killer case.” There are 14 clues to find here.
Start searching the room. You should stumble across a navigation device for a ship. Examine it and you’ll receive the Ship’s Binnacle. A few steps to the right of this you’ll find a painting of a judge. Inspect it to unlock the Witch Trial Authority clue.
Just behind this you should find another painting resting on the floor, pushed partially behind a set of shelves. Examine it to receive the Baxter in Museum clue. From here turn toward the right and follow along the wall, keeping your eyes turned toward the right. You should find a barrel. Inspect it to unlock the Wine clue.

Keep searching the room and you should come to a naval device (it looks like a switch) illuminated by a lamp. Inspect it to receive the Ship’s Telegraph clue. At another point in the room there should be some work tables pushed up against the wall. Hanging up near one of them is a board labeled “Salem’s Psychic History.”
Examine it to unlock the Bell Killer Targets are Mediums clue. Not too far from this you should also find a pair of pushed together tables. Sitting on them are two clues: the Witch Trial Notebook and Judge’s Gavel. On a table pressed against the wall immediately to the left of this is a scroll. Examine it to unlock the Witch Trial Public Summons clue.
On yet another table nearby is a picture of a stockade. Examine it for the Witch Trial Painting clue. Once you’ve found that keep looking around. On that same table is a case containing a pair of necklaces. Examine it and you’ll be given a choice between the two necklaces in the case: a Crystal Necklace and a Locket Necklace. Select the Crystal Necklace to receive the Puritan Mediums Were “Witches” clue. After that continue looking around the room. You should find an old cannon. Inspect it to earn the Antique Cannon clue.
With that done you should have all 14 clues and everything you need to wrap up the investigation. Click Find an Answer and select “Bell Killer Targets are Mediums,” “Puritan Mediums Were ‘Witches’” and “Symbol on Painting.” Doing this will lead you to another question asking you about “suspicious behavior” Baxter has “exhibited during this case.” Select “Baxter in Museum,” “Baxter Looking for the Girl” and “Baxter Hid the Book.” Once this is done the investigation will end.

You’ll receive a new objective: Exit the Museum. Leave the restoration room and head back down the stairs. When you reach the floor below however demons will appear in the leading to the exit. There are three in total.
Taking them out in turn is fairly easy thanks to a conveniently positioned spectral crow and an abundance of hiding spots. Execute the demons and then make your back down to the main hall and then the museum’s entrance. You can then exit the museum to continue the game.
Return to the Main Walkthrough Page


Upon leaving the Museum a cutscene will trigger. After it ends follow the objective marker back to the church. When you arrive another cutscene will start up. After it ends head into the church. You’ll need to pass through the main chamber. Unfortunately you’ll find it currently occupied by a trio of demons. Eliminate them and then head back to the right hand door at the rear of the room.
Pass through the door and you’ll immediately come to a demon portal. Luckily here’s a police officer nearby that you can possess to cross it. He’s standing on the other side of the portal, so you’ll need to draw him over to you again by poltergeisting the walky-talky on the counter on the right hand side of the hall. Once you’re safely across the portal, run to the end of the hallway and pass through the door into the courtyard outside.

A cutscene will trigger. After it comes to a close you’ll be standing in Iris’s murder site and an investigation will trigger. You’ll be asked if you can “find my killer’s trail” using the clues at Iris’s murder site. You’ll need to find six clues. Take a look at the rubble of the toppled statue.
This will give you the Toppled Over clue. Once that’s done you can Analyze Iris’s body. You’ll be asked how she died. Select “Statue Stones,” “Crushed to Death” and “Improvised Weapon.” This will net you the Bell Killer Chasing Iris. You’ll also notice a spectral version of the statue that killed Iris, inspect it to receive the Statue’s Original Position clue.
On the ground next to Iris and the rubble of the statue, you should notice a few numbered markers. Inspect these to earn the Iris’s Blood and Fallen Glass clues. After that’s done you can c conclude the investigation. This will trigger a cutscene, after which you’ll need to head back inside and make your way up to the room overlooking the courtyard. When you reach it a cutscene will trigger, after which another investigation will initiate.
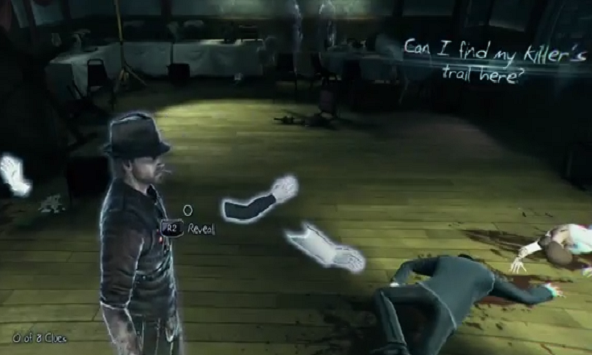
You’ll again be looking for the killer’s trail which, in this case time, means finding eight clues. Immediately after you gain control you should see hints of a Reveal clue. Approach an activate it to reveal the shade of Iris knocking over several party guests. Analyze it. You’ll be asked what Iris is doing.
Select “Scared,” “Falling” and “Needs Help.” This will unlock the Iris Fleeing clue. On the opposite end of the room you’ll find a body resting on a table. Inspect it to receive the Thrown Victim clue. Head over to the nearby windows one of them will be open and adorned with a police marker. Inspect it to collect the Footprint on the Window clue. On the floor beneath the window next will be a bunch of shattered glass. Inspect it to receive the Broken Glass clue.
Right next to the glass you’ll see a pair of bodies. Inspect them to receive the Beaten Victim and Twisted Victim clues. Standing nearby will be a woman talking to a police officer, possess her and use Influence. Once you do that you’ll be asked what “would make her think about why the killer murdered them?” Pick “Iris Fleeing” to jolt her memory and receive the Massacre clue. This will trigger a flashback to the attack which will, in turn, yield the Random Casualties clue. This will end the investigation.

With that done you’ll need to make your way up to the attic of the church to check out Joy’s room for more leads. When you reach the attic a cutscene will trigger. When it ends and you regain control you’ll find yourself in yet another investigation. The question this time is “What did the killer do up here?” There are five corresponding clues. The first one can be found by inspecting the priest’s body. Doing this will prompt another question: “What is making those sounds?” Select “Wound” to unlock the Father McCauley’s Death clue.
With that done, walk into the next room. Next to the desk in you’ll be able to Reveal a shade of the Bell Killer looking at photo. Analyze it and you’ll be asked to figure out what the killer was doing. Select “Discovered” and “Staring” to unlock the Killer Interrupted clue. Sitting on the floor right next to this shade will be a photo. Inspect it to be receive the Dropped Photo clue.
Just behind that you should see the beginnings of another shade near the window. Reveal and inspect it receive the Hissing Cat Residue clue. When you find these four clues, select the find an answer option and select “Killer Interrupted,” “Father McCauley’s Death” and “Dropped Photo.” This will serve to both unlock the clue (Original Target Joy) and end the investigation.
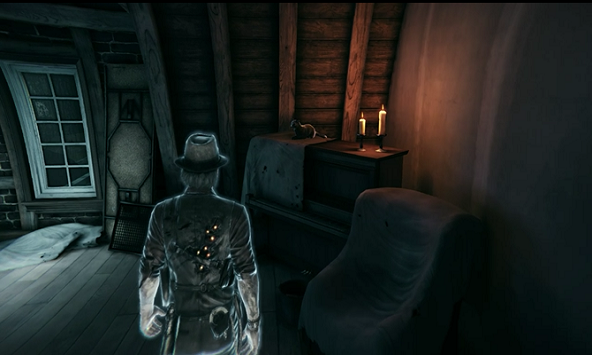
You’ll receive a new objective: Find Out what the Cat Saw. Head into the back room of the attic. You’ll find the cat sitting on top of a piano in a corner on the right hand side of the room (from the doorway). When you approach the cat a brief cutscene will trigger.
When it ends possess the cat and hop down into the air duct on the floor next to the piano. Follow the duct and you’ll shortly fall through a grate. A key will fall on the floor beneath your feet. Focus on it and you’ll be presented with a vision of the Judgment House. After that’s done, exit the Church.
Return to the Main Walkthrough Page

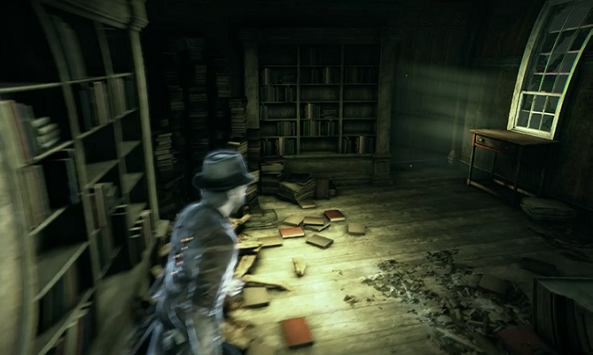
After you exit the Church a lengthy cutscene will trigger. When it’s done follow the objective marker through the streets of Salem and to the Judgment House. When you arrive another cutscene will start up. After it ends you’ll be inside in the Judgment House. You’ll receive a new objective: Find the Upstairs Room With the Light On. You’ll see a set of stairs directly ahead of you.
Climb them and then make your way through the second floor. There are a lot of rooms here and no obvious destination to head to so it can be easy to get lost. Look for a room with a bookcase on the left and a bare wall on the right. If you approach the bookcase you’ll note a small gap in the wall.
Pass through the wall and a cutscene will trigger. When it ends an investigation will start up. You’ll be asked to “scour the room for information about the Bell Killer.” This will be accompanied by a new objective: Find Out if the Killer is Still in Judgment House. There are six clues to find in this room. On a small round table you’ll find newspaper. Examine it to receive the Old Salem Murders clue.
There’s another newspaper on a rectangular table on the other side of the room. Inspect it to receive the Witch Trial Similarity clue. To the left of this is a wall full of pictures. Take a look at it to unlock the Execution Devices clue. Directly to the left that is a map. Look it over to receive the Map of Previous Killings. Just below that is a table full of toys. Inspect it to receive the Trophies clue After that you can conclude the investigation.

A cutscene will play after which you’ll find yourself on the first floor. Before you can proceed however you’ll need to eliminate four demons. These guys are probably the trickiest to take down in the entire game thanks to a lack of hiding places and a pattern of grouping that’s just positions them generally close together.
To get rid of them you need to take the demons down in pairs. Also be sure to memorize the locations of the nearest hiding places as you’ll need to book it back to them quickly if you’re spotted.
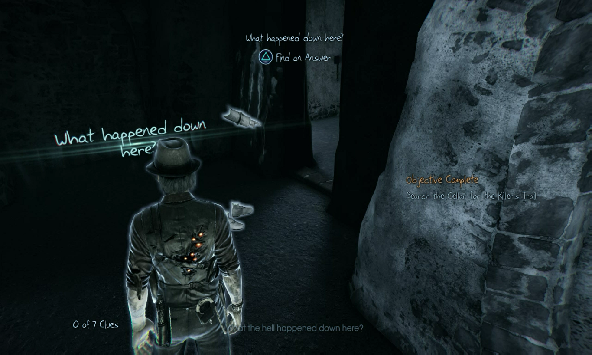
With the demons defeated you can continue down into the basement where a cutscene will initiate. When it ends you’ll receive a new objective: Search the Cellar for the Killer’s Trail. Head deeper into the basement and you’ll shortly come to hallway leading to a dungeon area.
Once you reach it another investigation will launch. You’ll be asked to figure out “what happened down here?” There are seven clues to find. Immediately in front of you will be a shade you can Reveal. Do so and Analyze it. Select “Accusing,” “Judging” and “Stern” and you’ll unlock the Righteous Man clue.
From here head into the room on your left. You’ll find a cage that you can inspect to earn the Cage clue. Right next to the cage is a bed. Examine it to receive the Prison Bed clue. In the room to the right there will be another shade you can Reveal. Analyze it and select the “Pleading” and “Imprisoned” options to unlock the Imprisoned Abigail clue. On the ground next to that is a bell symbol. Examine it to snag the Symbol in the Cell clue.
On the wall you should also see some shackles. Look them over to receive the Prison Shackles clue. To the left of that is a barrel. Approach and use the Reveal prompt to unveil some candles you can inspect for the Candles clue. Once that’s done you can use the Find an Answer prompt.
Select “Imprisoned Abigail,” “Righteous Man” and “Symbol in the Cell.” A cutscene will follow, after which you’ll be asked to figure out where Abigail would take Joy. Select “Actual Puritan Gallows,” “Is Abigail the Bell Killer” and “Killer’s Instrument of Death.” With that done exit the Judgment House.
Return to the Main Walkthrough Page


After leaving the Judgment House follow the objective marker back to the Salem History Museum. Once there head inside. A cutscene will trigger. After it ends you’ll be in a hallway with a couple of demon portals. Avoid them and move forward into the Main Hall. You’ll receive a new objective: Save Joy.
Once in the Main Hall another cutscene will trigger. Once it ends you’ll have 20 seconds to run up to Joy and possess Joy. Once in her body use Influence. You’ll be asked “what can stop Abigail.” Select “Powerful Scream.”
Doing so will trigger another brief cutscene at the end of which you’ll again only have a few seconds to rescue Joy before she hangs to death. Run up to Abigail and when the prompt appears Gran her. You’ll run through an extended dialogue sequence with Abigail, after which the game will end.
Return to the Main Walkthrough Page



 Titan Quest 2: A Titanic List For A Game We Wish Existed
 20 Most Successful Music World Tours in 2014
 La Parka nominated for Academy Award for Best Documentary Short Subject
 2 Cool Ways/Tips To Fast Travel In Metal Gear Solid V: The Phantom Pain and Mother Base
 Destiny: The Taken King Tricks to Get Ir Anuk & Ir Halak Grimoire Cards