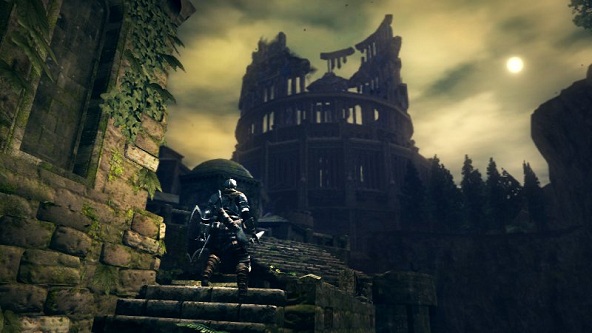
Dark Souls: Prepare to Die Edition Walkthrough
Find Game Front’s extensive library of Dark Souls cheats and guides on our free mobile apps where you’ll find the latest high-quality gaming videos.
Ready for more Dark Souls? The hardcore action-RPG dungeon crawler is back with all new areas, enemies, and bosses with the “Artorias of the Abyss” DLC pack. Here, we’ll cover all the new content that’ll maim, smash, slice, melt, and murder you and try to get you through the game safely. It’ll take a whole lot of patience, but take it slow and use our tips — you might make it through to the end.
Looking for secrets? Check out everything we’ve got on the Dark Souls: Prepare to Die Edition cheats page.
There’s more! If you’re interested in our massive video walkthrough for regular Dark Souls (Minus the new DLC content!) check out the full thing on Youtube here, or read our full text walkthrough here. First time playing Dark Souls, ever? Take a trip to our vanilla Dark Souls cheats page while you’re at it for lots of secret strategies.
More to come!
Video Walkthrough
Part 1:
Part 2:
Part 3:
Part 4:
Part 5:
Part 6:
Part 7:
Part 8:
Part 9:
Part 10:
Part 11:
Part 12:
Part 13:
Part 14:
Sanctuary
Traverse the white light to enter the sanctuary. Unfortunately your first introduction to this new content will be via the infamous Sanctuary monster.
This boss fight is tough. In order to give yourself a good chance, you will have to be patient and learn the rhythm and timing of the enemies’ attacks. The key to this battle is knowing when to dodge- it is going to be most of the time. You cannot afford to be hit by this enemy’s attacks more than a few times.
The best times to deal damage to the Sanctuary boss is the instant after you dodge one of its attacks. It will usually be stunned for a few seconds and allow you an opportunity to get close to it and hit it without being hit in return. Again, you do NOT want to trade blows in this battle or you won’t last very long. This thing is STRONG.
Proceed to the Oolacile Sanctuary and light the bonfire.
Talk to the thing that looks like a giant mushroom. It’s the guardian of the Sanctuary… and her name is Elizabeth. You can buy items from her if you wish (and have the money..)
Scarecrows and Stone Giants: Road to the Coliseum
Cross the bridge and read the “Be Wary of Hollow” message on the ground.
Head down the path until you reach Royal Wood and take out the enemies with the pitchforks.
When you get ambushed by the next wave of pitchfork enemies, be sure to be constantly in motion in order to keep creating space between you and your enemies. If you get cornered, it will be very hard to get away.
The stone giants you run into in this area are very slow and telegraph their attacks. As with the pitchfork enemies, keep your distance from these guys and use your long range attacks (such as lightning) when you can to avoid getting close to them. Unfortunately if you thought the boss’s attacks were strong, you don’t know the half of it. These guys will destroy you in just a couple of hits if you allow yourself to be attacked.
Once you are approaching the coliseum, go around the dilapidated stone structure to pick up a Soul of a Proud Knight.
Go through the opening and get on the moving platform to go up.
Continue down the path and cross the bridge to talk to the stranger. Enjoy the Heinlein reference. You can buy items from him if you need.
Go up the sets of stairs to pick up the Guardian Gauntlets, and once you feel like you’re ready, head into the Coliseum for the next boss fight. If you were listening to what the man by the bridge was saying earlier, you’ve probably already guessed who you’ll be fighting.
Knight Artorias
The first thing you need to know about this battle is that Artorias lunges forward at you before using his sword strike. Do NOT miscalculate the distance he can cover with this step. You aren’t really ever out of reach of his sword, so be prepared to do a lot of moving and dodging.
Once you take away half of this boss’s health, he will start to move much more quickly. Yeah, he’s pissed. Be extra careful here. as he frequently puts his attacks together in combinations.
When the boss has little health left, he will start slowing down either way. At this point, the battle is yours.
Light the bonfire in the next area and dispose of the impish new enemies. These guys’ attacks aren’t all that devastating- they’re the first enemies in this DLC where I would recommend aggressively approaching them and using close ranged physical attacks to quickly take them out. No need to keep your distance here.
Go down the sets of stairs and continue along the path. Cross the bridge (be careful, you will be shot at from the other side) and go down the next hallway.
Keep following the path further and further down the stairs. You will have a sparse amount of enemies to go through until you come up to a message. “Happiness ahead”. Just past this point, you will be able to step on a floating platform to go down and reach the next area.
Proceed through the opening and light the bonfire. Take this chance to rest and recover.
Head up along the ledge and into the next circular area. This place is dark and you will have enemies attacking you. Having the volume up on your T.V. on this part will give you an edge on reacting in time when you do get blindly ambushed.
Take the next platform down to reach the Chasm of the Abyss.
The Abyss and the Dragon
Head to the left and across the ledge. Follow the path all the way down until you reach the white light. You will bump into a cutscene here.
This next boss fight against Manus is tough, but also a little easier than the first two. When you start the battle, he will turn to the side in increments. He will do this rhythmically. As soon as you see him stutter for a second, move out of the way- a quick lunge and strike with his paw is soon to follow. This boss’s other moves are telegraphed in much the same way. The trick is to anticipate the attack and to begin dodging before he gets into the motion.
The more you wear the boss down, the more his frequency of attacks rises. Once you take about half of his health away, he will start attacking in frantic combinations. Stick to your strategy and try to watch his body movement and anticipate when he is going to attack. Take your openings when you have them, but keep in mind that this is mostly a defensive battle. His attacks hurt a lot more than yours.. trust me!
Once you dispose of the abyss boss, use the bonfire to warp to the Oolacile Township.
Give up the Soul of Artorias and you will receive a little something in return.
Climb the stairs and talk to the giant merchant to buy some weapons. At this point, it should also be noted that you can visit Domhnall of Zena to get the Armor of Artorias. It’s quite worth it and I definitely suggest grabbing it.
Head down the path and through the enemies until you see a huge dragon in the sky. If he hits you with his breath, he will kill you. Okay, so that’s no good right?
Head back to where you went up the stairs to buy the weapons. The giant merchant will ask you if you’re having trouble with the dragon. Answer yes and let the conversation carry from there.
The next cutscene is pretty epic. I won’t give it away, but once it is over, go back to where the dragon is.
Kalameet is no longer able to fly, but he is still very formidable. If you haven’t got the Artorias armor yet, I would really suggest doing it before this fight.
Kalameet is going to hit you with everything you can imagine. His physical attacks are very similar to those of the abyss guardian. They are often telegraphed.
Kalameet’s flame attack is extremely devastating. If you do not use your shield, it will drain your health in a heartbeat.
Despite all of the dragon’s powerful attacks, the best way to fight this battle is to STAY AGGRESSIVE. This will do 2 things: a) Keep you moving and make it harder on Kalameet to hit you and 2) Increase the rate at which you deal damage to him and, conversely, decreasing the amount of time the dragon is able to stay alive and attack you.
Heal OFTEN. Keep your health at least 3/4 of the way up the entire time.
After the fight, head towards the waterfall and climb the ladder. Head back the way you came from and report your victory over Kalameet. Congrats! Once you are done, head to the bonfire at Oolacile Sanctuary and continue on your way.


 How to Create Windows Desktop Shortcuts the Easy Way
 Produce panoramic photos using a GoPro Hero 3
 100 Floors Walkthrough (Levels 1 – 20)
 Top 9 Ageless Adventure Games from the 90s
 Have The Coolest Home On The Block With These Gadgets