Back at home base, it’s time to find Irish! Turn left down the end of the hall and exit out onto the catwalks. Take the steps and open the door back inside. Keep going through the narrow halls until encountering Pac, who will lead you into the medbay.
Eventually, Pac will lead you down to the refugee area, who will in turn lead Tombstone upstairs and toward Garrison. But things aren’t looking good for the fleet. Meet up with Garrison and Kovic to plan boarding the ruined aircraft carrier.
Grab weapons in the briefing room, and Kovic will lead you to the boat. Jump in and go toward the burning ship in the distance.
To board, look for a hole in the back left corner. Circle behind the ship to find a hull breach and get in. Out of the boat, climb out and crawl through the narrow passage with the squad. In the USS Titan, continue down to the stairs up, then turn right to find an open door.
The hatch is just up ahead. Grab it and swim down the linear path.
Interact with the white circle at the end to pull yourself back out of the water. Ahead, the squad will encounter two doomed Navy men. There’s nothing to do but move one after the scene plays out.
The DCC is just up about. Look at the computer terminals on the left to find the white circle.
Combat begins through the next door. The long chamber is filled with enemy troops – use the Tactical Visor to quickly spot enemy, and use Engage to easily mark unseen enemies if you’re moving forward.
Shotguns and PDWs are a good choice for this section, but any automatic weapon is good enough. Slog through the ops room.
Escaping through the hall, the ship shakes violently before tearing itself apart. Jumping out onto the deck as it crashes below, the combat moves outside.
While the enemy soldiers are still reeling, use the Tactical Visor to get a good idea of their positions. The closest soldiers are dead first – a plane will splatter the two.
Across the first wave, the second series of troops is hunkered around loads of explosive barrels. Watch out for the big bombs on wheels – one will roll toward a pile of bombs at the center of the enemy position.
Past the group, drop down into the water to board a smaller enemy patrol boat.
Sail your new ship toward the blue waypoint. More enemy patrol boats will appear in the distance – take each wave out as quickly as possible.
The missile weapons are only effective at long-range. The main cannon will do during the chase. Keep moving and don’t ease off the engine to avoid eating more enemy bullets. They aren’t about to stop coming.
Drive into the back of the Valkyrie, but the fight will continue in the lower decks. Watch out for enemy reinforcements as they rush down the stairs on the left.
A well-aimed grenade at the base of the stairs can wipe out all or most of the incoming troops. When the area is clear, a door will open on the right.
Outside, a flight of choppers fly by. Run upstairs and use the Gadget Crate to arm yourself with a Stinger and a Rocket Launcher. Both are plenty effective against the helos.
Blast the helo and continue through the door ahead. The helicopter bay ahead is, once again, full of troops.
Stick to the cover on the right side, as more reinforcements will rush out through the entrance on the left. Don’t let them surround you.
Pushing upstairs, you’ll encounter Hannah, but she has no problem defending herself. Work upstairs to take on swarms of bad guys on the flight deck.
Ahead of the ladder, soldiers will take cover – a few grenades will work these chumps out. Wipe out the soldiers, then help Kovic move the crashed helicopter blade.
Things don’t go well for Kovic. After the fly-by, another chopper will appear. Take cover immediately to the right and prepare a Stinger.
Lots more choppers will arrive. Use the Stinger and the launcher to wipe out incoming choppers to save yourself having to deal with the soldiers that drop out. If you keep a full compliment of gadgets for this sequence, it should be no problem shooting the choppers down.
Shoot down all four choppers, then regroup around Kovic. The mission is just about over – climb the ladder and shoot down the handful of troops in the bridge. With Garrison rescued, the mission is complete.
Singapore
Actions starts after a quick speech from Garrison. Your boat will drop into the choppy waters, forcing you to navigate the bad weather to reach the hot beachhead.
It’s hard to spot the beach from the water. Look on the minimap and follow the big blue pointer. Crash land onto land and quickly get out of the vehicle [Hold X / Square / Exit Key] before it’s destroyed.
Like always, whip out the Tactical Visor to get a good look at what you’re facing. Don’t worry about the turrets on the hill to the right. Tanks will drive in from the left, use them for cover to cross the empty spaces.
Watch out for the gun turret on the left. Just over the slope, watch out for an entire squad behind the rocks. The tank, once again, provides good cover.
Reaching the road, an armored car full of troops will arrive. Engage it and the tank will blow the car away – even a few grenades will do.
On the highway, don’t rush ahead too far. Wait for your squad, and the tank, to move forward to the skywalk and trigger enemy reinforcements. They’ll appear on the walkway, and jump down from the embankment on the right.
Past the burning fuel truck, use the Tactical Visor to spot a medium tank. Safe an Engage for it, and your helpful allied tank will take it out. It’s up to you to mop up the rest of the troops.
Yet another tank will come rolling down the highway. Use your tank as cover and wait for it to destroy the incoming enemy vehicle before trying to move forward.
Underneath the bridge, there are more troops waiting in and around the struts. Use the Tactical Visor to spot them, then engage them at close range, using the construction site as cover.
This is when things get tricky. At the gate, an explosion will rattle your allied tank, shaking up the drivers and leaving it empty. Hop on! You’ll have to make it to the airfield alone, now.
In the plaza ahead, watch out for the tank driving forward, behind the bus stop. Your massive tank can drive through almost any cover or obstacle, so use that mobility to your advantage. The Main Cannon is the only weapon you’ll want to use against armor.
Try to hit enemy tanks on the sides, or back. Their front armor is strongest. Shooting the treads can knock out their mobility, making them easier to hit.
Your tank will automatically repair itself after a short amount of time. Make sure to let your tank repair before entering another engagement. Don’t forget, you can also always leave the tank in an emergency to avoid dying.
The plaza is home to a Gadget Crate full of Anti-Armor rocket launchers. At your first opportunity, stock up on launchers in case you need to dump your tank.
Around the building ahead, another tank is waiting in ambush. Inch along the side and shoot at the exposed section to easily weaken it up for the kill.
Yet another tank is waiting outside the underground parking garage. That’s your destination – there’s another Gadget Crate and a spare enemy tank to steal inside.
To leave the parking lot, you’ll need to push a big button to the left of the exit to lower the raised barricade. Pick off the soldiers outside before hopping into a tank, many of them are armed with AT rockets.
Things get really dangerous past the mall, guarded by another tank, when you enter the park. There are two large tanks patrolling this area, with only the hills to hide behind.
Stay back, and try to get the first tank’s attention without waking up the second tank. Pick them off one at a time, with full health, to make this section much more manageable. Because of the lack of cover, we don’t advise trying to handle the tanks on foot.
Keep going to the restaurant, but don’t get too close. Scan the concrete landing to spot another tank, and a squad of AT soldiers.
Going in close is a death sentence, thanks to all those soldiers with rocket launchers. Pick off the tank, then start taking down the soldiers. Once the tank is down, going on foot isn’t a bad choice – the enemy won’t bother firing AT at your squad on foot.
Disembark at the barrier and fight up the stairs into the restaurant. It looks like there’s only one way to go – across the main bridge to the airport. Thanks to the weather, it isn’t an ideal option. After a conversation, help Irish move the wooden boards to exit outside.
The bridge is pretty windy. Take cover through the open side doors of the bus, and watch out because there’s a full squad waiting in the traffic.
Deal with this small encounter, and continue across the bridge toward the next bus – until your hero, Recker, gets himself pinned thanks to a car pushing into the railing by the wind. After the cutscene plays out, you’ll reappear with your squad on the beach with only default weapons.
The sewers are guarded by two guys. Pick them off, and resupply at the Weapons Crate to the right of the door.
The sewers are uneventful, just follow your team to the ladder to reach the door into the first hangar. This place is swarming with troops. Don’t open fire until you can enter the storage rooms on the left, they provide good cover.
If you can, try to work your way to the back left corner. Reinforcements actually arrive from the second floor, right above the sewer entrance door.
Clear the room, and follow the squad upstairs. The next hangar is where the real fight is. Restock at the Weapons Crate, and grab a Rocket Launcher and a Grenade Launcher. Also bring an Assault Rifle or Carbine, with a Sniper Rifle or DMR secondary weapon. This is all about ranged combat.
Use the Tactical Visor to get a look at the first group of patrolling guards. Watch out for the guys on your left. Start picking soldiers off with DMR, Sniper Rifle, or any medium-to-long range weaponry. Go ahead and unload from the catwalks with Grenade Launcher rounds, too. You can always restock at this point.
Clear the area left first, then sweep right before returning to the left side. Use the superior cover there to work your way forward.
Beyond the passenger liner, reinforcements will arrive from trucks. Snipers will also take perches on the high catwalks on the left and on the right. Use Engage to take them down, use a Sniper Rifle, or use a good ol’ untargeted rocket to get rid of those problems.
At the end of the hangar, interact with the white circle at the door. Your squad will board a car, with you in the gunner’s seat. Wait for the enemy truck to pull up, and save those bullets for the troops as the jump out the back.
Rockets rain down on the airfield as your squad escapes. The exfiltration doesn’t go well, and the mission ends with you captured, transitioned into the next chapter of the campaign.
Kunlun Mountains
Torture! After the cutscene plays out, your Russian cellmate Dima will provide you with a shank and an escape path. Follow his instructions to get out of the cell, up the exterior and to a pipe leading into the prison proper.
Dima will take care of the first guard and enter the large guarded area through the steps below. This is when things get difficult. The goal here is to sneak up to the tower and open the cells.
Each guard is armed with a shotgun, and all you’ve got is a knife. Sneak right and circle the exterior, hiding behind the pillars as the light passes by and shivving any guards in your path.
If you’re caught, the guards don’t keep enough ammo to make fighting a good option. Try to get at least one or two guards to arm up with a shotgun with about six shots. Then, when you’re spotted, dash for the stairs around the back of the tower and shoot down the two guards inside the tower.
Inside the red-lit tower, there’s an extra SMG. Grab it, and then pull the three switches to the left of the computer monitor, freeing the prisoners and getting the guards off your back.
Below the green gate, guards will begin to pour into the room. Shoot them down with the PDW, and stay away from the windows – the wood will break away under enemy fire and leave you exposed.
Leave through the green door and Dima will lead you down the halls to another gate where Irish is in a scuffle with one of the guards. Shoot the bad guy in the back to save Irish, and he’ll join up in the escape.
Two more prisoners will ally themselves with you in the next room, while groups of soldiers shoot from the side rooms on the left and right down the hall.
Clear the side rooms and work your way forward. You might not have the Tactical Visor, but you will have Engage available to quickly target and mark three enemies.
The elevator leads up into a garage, with a massive storage warehouse down the road to the left. This is where most of the fighting will take place, with guards swarming behind crates and sniping from the catwalks above.
There’s a Weapon Crate near the elevator exit. Grab medium-to-long range weapons for this encounter, and play it safe. Slog through, clearing and sweeping each area to avoid getting shot in the back. There are stairs leading up to the catwalks to the left of the road.
After working through to the security room at the end, Dima will hack the gate controls. Grab a Grenade Launcher and mines at the Gadget Crate in the computer room.
There’s nothing you can do about the helicopters, but you can defend Dima by planting claymore mines, place them over the narrow places. At the base or at the top of the stairs, around the boxes and on the concrete.
When the reinforcements are clear, the gate will lift. Hannah is ahead, but it looks like she wasn’t a traitor after all. She’ll give Recker the Tactical Visor back as the reunited squad continues outside into the snowy mountain range.
Fight up the hill to the guard tower, and keep the grenade launcher handy. Step into the tower, there’s a gadget crate below, and fire grenades down into the checkpoint bridge below.
The building to the left of the bridge contains another Weapon Crate. Grab a Sniper Rifle – it’ll be very helpful for the tough section ahead.
Watch out for the armored car on the bridge. Put it down with the grenade launcher.
Across the bridge; soldiers on the towers ahead are armed with grenade launchers. They’ll rain explosives down on you.
Destroy the guard tower to the right of the metal catwalks, then clear the tram tower – spot the bad guys with the Visor before putting them all down with a DMR or Sniper Rifle.
Up the path, a chopper will arrive with reinforcements. They’ll move down the rocks to the right of the dirt road. Don’t let them flank you, then use their path to circle around the tram tower – which is also guarded by more troops.
Below the tower, run up the bridge to the tram – which will also drop off more soldiers. Blast the squad with a grenade launcher as they get out, then clear them out and board the tram yourself.
Tashgar
Get ready for the hardest mission in the campaign. Meeting up with more American soldiers, your squad will leave to find their commanding officer, but the road to her HQ is guarded by soldiers, tanks, and turrets.
In the first enemy encounter, the tank is the deadliest threat. You only have access to C4, mines, and a few rocket turrets. Ignore the turrets – instead, drop all your mines on the road to the left of the tallest building.
The tank will drive down the road to the main gate, before turning around and always patrolling down the street to the left. Mining that street will make easy work of it, and make the rest of the area much easier to deal with.
With the tank gone, climb up onto the roof and mark soldiers surrounding the exit gate. Scan the area with the Tactical Visor. To the left of the gate, you’ll find an Anti-Aircraft Tank. Watch out for the rocket emplacements if you plan on using this thing.
Continue through the empty streets to the next set of gates, across the fields. The next enemy encounter isn’t until your squad reaches the bridge leading into Old Town.
The soldiers and vehicles outside the bridge are already embroiled in combat with Americans on the bridge. Many of the enemy are hiding in a tall building overlooking the bridge. Start here – collect a rocket launcher as soon as possible from a dead soldier, or from the roof.
Use the launchers on the roof to take out the tank sitting on the main road. These launchers can be good for clearing out the two story building full of soldiers across the street, too – one rocket through a door or window will kill or leave the bad guys exposed.
Fight onto the bridge and clear the rest of the troops to enter Old Town. The streets are filled with exhausted soldiers – work up to the command HQ to get your next objective. It’s time to blow up a dam.
After she opens the door out back, board the armored car to arrive at the dam entrance.
The weapons crate is on a ruin on the hills ahead. Once again, a DMR or a Sniper Rifle will do wonders for this area – contacts will appear at long range, and come at you with snipers of their own.
Recon the area ahead. A guard patrols near the watch tower. Melee him and the guy in the tower to keep from alerting the soldiers below, then you can easily ambush them.
The white buildings, with sandbags, contain machine gun emplacements. A Sniper Rifle will make dealing with those a cinch. The enemy AI loves getting on these guns – they’ll continue to use it and make themselves a very easy target.
Use the Grenade Launchers or Rocket Launchers you gathered in the previous section to blast through the concrete fence below for an easy shortcut into the dam.
Save a few rockets or grenades for the enemy chopper that arrives as you near the two-story building on the dam itself. Just beyond the shipping crates, climb up the steps to the catwalk and drop down to continue deeper across the top of the dam.
Across the shipping crate barrier, there are two paths to take. Go up the left path to get a good overlook of the bad guys below.
Enter the elevator at the end of the lower road to ride into the dam. When the doors open, resupply at the crate and move down the hall. Soldiers will arrive in single-file, making them easy targets.
Around the corner, look down to find the white circle, signifying where you’ll place a charge.
Outside, things get a lot trickier. Follow the narrow scaffolding path and watch the concrete ridges where enemy soldiers are taking cover. Past these, guards will appear on the tall scaffolding ahead.
Mark the targets, pick them off with accurate rifle fire, then move to follow the ramps upwards. Finally, the path will cease when there’s a long gap in the platforms.
No, don’t try to jump it. Wait for the squad, then you’ll pull out the C4 trigger. Set it off, and wait – the dam will come crashing down.
Suez
The final mission puts the fate of a country in your hands. The Valkyrie is under attack and the VIP is in danger. Jumping out of the cargo plane, you’ll land on a catwalk at the very back edge of the ship.
Stock up on weaponry – grab a dumb-fire rocket or Grenade Launcher and a Stinger or any other Anti-Air rockets. Helicopters will become a problem ahead, go prepared.
Watch out for snipers on the command tower. Getting close, soldiers armed with grenade launchers will spawn above. A chopper will arrive as well to strafe your location.
Use the fallen helicopter to climb onto the tower. There’s another Weapon Crate to restock – and lots of soldiers armed with launchers. Wipe them out and clear the tower, then destroy any remaining enemies on the deck below.
Once the troops are gone, the debris on the deck will slide out of the way. Return to the flight deck and push forward. Watch the area to the right of the burning chopper. Watch out for a flying chopper that appears down the deck.
Follow the squad to the catwalks leading down on the right. Irish will open the door at the lowest catwalk level. Ahead, you’ll meet up with Pac again!
Follow the squad through the narrow passages of the ship. It should be an uneventful trip, until your squad finds the VIP in the Medbay. Things get dramatic, and the cutscene leads into the final mission objective.
To defeat the evil Admiral, Tombstone leads the charge against his battleship with a gunboat full of explosives. Hop on and drive straight toward the ship.
After planting the charge, the team will fire grappling hooks and pull themselves up to overlook the battle below.
The detonator doesn’t work. You now have three choices – pick Hannah to go down, or pick Irish to go down. Whoever does it will die in the explosion.
The third choice? Do nothing. Wait long enough, and Chang’s ship will destroy the Valkyrie, killing the VIP.
Make your choice. Whichever it is, the ending follows. Congratulations! You’ve finished the singleplayer campaign of Battlefield 4, and you should be ready to head online for some chaotic multiplayer.


 PS4 YouTube App: How To Skip Ads Playing On YouTube Videos Instantly
 Until Dawn Guide – How to Get the Best Ending and Save Everyone
 Batman: Arkham City Trophies List
 Can't Wait for Civilization Beyond Earth? Play These Space Games Now
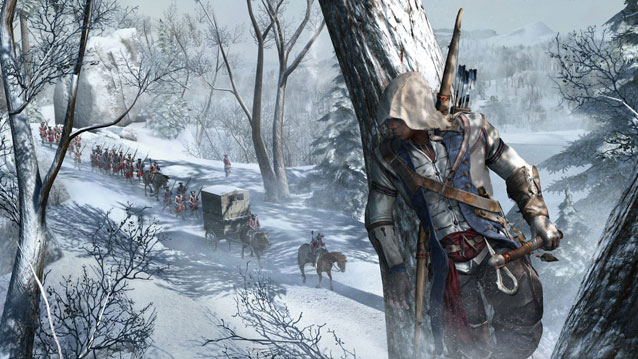 A History of Violence: The Hyperreality of Assassin’s Creed