

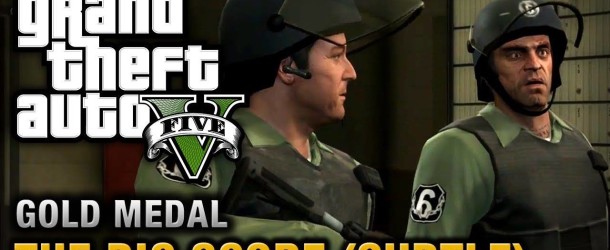
Get to the tunnel entrance before 8:00 a.m.
When the cutscene ends, you control Michael and a clock appears in the lower-right corner. This displays the in-game time, starting at 7:00 a.m.
Each in-game minute is about a second in real time, so you have roughly 60 seconds to reach the tunnel entrance-plenty of time. Drive carefully and avoid accidents as you follow the yellow route to the destination marker in the tunnel . Soon after you arrive, Michael spots the targeted vans approaching the tunnel entrance behind you.
Drop the stinger in the tunnel.
Press the button indicated onscreen to drop the police stinger, a spike strip for puncturing tires. Then drive forward several feet to give security vans room to run over the stinger. Wait until both vans hit the spikes and skid to a halt.
Exit your vehicle and approach the driver’s side of the nearest van. March the driver at gunpoint over to the others gathered nearby. Then watch the cutscene: the repair crew arrives to replace the punctured tires and Michael orders one of the Gruppe 6 guards, a fellow named Casey, into the armored van with him.
Go to the depository.
When the scene ends, you control Michael again as he drives one of the Gruppe 6 vans. Follow the yellow route through the tunnel and left onto Alta Street. Then turn left into the nearby underground entrance to the Union Depository. Pulling into the destination marker at the entrance triggers another tense cutscene: the gate guard waves the team through, thanks to Casey’s ID. Then a bank manager meets the team for another ID check.
Follow the manager.
Walk behind the manager into a heavy-duty freight elevator and ride to the underground vault level. When you arrive, the manager leads you to the main vault door and Casey opens it. Continue down the corridor to the rooms with the gold bars. Follow Trevor and Casey as they each push a cad loaded with gold out of the vault and back to the freight elevator. After the ride back up to garage level, follow the cads out to the armored vans. When the gold is loaded aboard, Trevor and Casey get in one van. Direct Michael to the other van and get in.
Follow Trevor.
Trevor drives the first van. Follow him as he exits the garage to the parking lot. then onto Power Street. As he turns right on San Andreas Avenue, Lester reports via radio that numerous law enforcement units are heading your way. But your team has hacked the traffic grid and Franklin can use it to route trouble away from you. Here you’re prompted to switch to Franklin.
Keep the roads clear for the vans.
Franklin is set up under the Olympic Freeway overpass with a laptop connected to the city’s traffic light controls. On the overhead map that appears, you see the lights at each intersection-red in one direction, green in the other. The vans driven by Michael and Trevor are the two blue arrows in the upper-left corner, halted at a red light. Their Destination (marked in yellow) at the map’s bottom is just a few blocks away, where Franklin waits under the freeway with the modded getaway Gauntlets.
Move the yellow selector box over the intersection where Trevor and Michael sit, then switch the signals so they can proceed south. A Merryweather van then appears four blocks to the east, the first of several that will enter the grid. These hostiles are marked as red arrows. Your goal is simple: Keep your gold filled vans (the blue arrows) moving toward their destination. Meanwhile, you want to either halt the Merryweather vehicles (the red arrows) or route them out of your blue team’s path.
As the blue arrows move, keep switching the traffic lights from red to green in the direction they’re traveling at each intersection. Scout ahead, though: If Michael and Trevor pass through an intersection where a Merryweather van is halted by a red light in the other direction, the bad guys will spot them.
So if you see Merryweather units stopped at an intersection on your team,s route, switch the lights there to let the hostiles pass through before your guys get there, and then switch them back so your guys can pass through.
When the vans finally arrive safely at the destination point, watch the cutscene: Franklin joins Michael, Trevor, and the other crew members in loading gold bars from the vans into the modded Gauntlets. But suddenly, Merryweather gunmen arrive! The hired crew members.keep loading gold into the Gauntlets while Michael, Trevor, and Franklin deploy to fight the-mercenaries.
Defend the crew from Merryweather.
Switch between all three of your main characters to get the best shots in this fight. Use Trevor’s rage and Michael’s-time-slowing abilities to tear through the mercenaries, and try tossing Grenades or Sticky Bombs to detonate arriving Merryweather vehicles. You can eliminate entire carloads of attackers by blowing up a Merryweather car before its gunmen hop out (or even shortly thereafter). Also look for gas cans to target.
Follow the other Gauntlets.
It’s a long, tough battle, but clearing the Merryweaiher gunmen from the debris-clogged area under the freeway triggers another cutscene: Finally, the four Gauntlet trunks get fully loaded with gold, two tons apiece. The three main characters each hop in a Gauntlet with the hired driver in the fourth, then all four cars take off down Strawberry Avenue… where a ferocious five-star Wanted Level has been triggered.
You automatically control Franklin for this chase, so his special driving ability is available. But this isn’t like other police pursuits where you can freelance and lose the cops. Here you must keep pace with your partners in their Gauntlets, and follow their pre-planned route. If you lose track of the other cars, you fail the mission. (Check out the route, marked as the red line on our mission map.)
Watch out for certain events unleashed along the route. After a few blocks, your crew cuts across the high-rise construction site between Power and Alta. A couple blocks later, you dash underneath the Rockford Plaza mall, where you make a spectacular stunt jump off the overpass and land in the intersection of San Vitus and Cancer Way where you land the jump, get ready to swerve left to avoid an exploding Ron gasoline tanker truck. Then the route veers down to the Del Perro’Freeway with LSPD choppers joining the pursuit.
Drive the Gauntlet onto the truck.
Inside the long tunnel on the Del Perro, look for two semi trucks hauling Big G Goods trailers. The trailers’ rear doors hang open with the ramps dragging, so you can drive inside. Your partners drive into the trailer on the left; drive your Gauntlet into the trailer on the right. The ramps close, hiding the cars.
This triggers a cutscene: A short time later, after dropping off the gold at a lockup in Blaine County, the three main characters hop in a car to go meet Lester.
Go to Michael’s house.
Follow the yellow route down to Michael’s house ? in Rockford Hills where Lester is waiting. It’s a long drive, and Trevor still has much grievance to air with Michael. Can the friendship ever be repaired? When you arrive, even the sweet smell of gold is soured by Trevor’s anger and paranoia. The confrontation nearly gets out of hand as even Franklin and Lester get sucked into the blame game and recriminations. Finally, Franklin decides to clear his head and makes a tactical retreat, ending the mission.
Gameplay:
Be Sociable, Share!


 5 Tips for Beginners in Heroes of the Storm
 Company of Heroes 2 Walkthrough
 Guacamelee! Review
 8 Steam Features You Didn't Know You Had
 Easiest Way To Defeat The Witcher 3: Wild Hunt Noonwraith Monster