Can you hear it? Grown-ass adults all over the world are weeping like babies thanks to Dark Souls' grueling difficulty. Innocent controllers are being snapped in half. Divorce rates are skyrocketing. And that gurgling sound? That's just Dark Souls force feeding everyone their own tears. If you can't cut it on your own, don't fret. We've peeled through Dark Souls' most daunting layers, boss by boss. Below is an archive of our journey—may it help you maintain some semblance of sanity while exploring From Software's most sadistic of creations.

Observation is key. We know, this seems obvious—but when you get killed by a boss for the eighth time, remember to be patient. Learn its attacks, know when to dodge, when to block, and when to strike. One mistake can easily mean death. There’s no shame in dying as long as you’re learning something from the death.
Choose your stats carefully. When it comes to leveling up, consider what you're pumping points into. Vitality and Endurance are critical early on, as health and stamina are your two most important resources. Depending on what kind of character you're building, some attributes are only useful for meeting equipment requirements.
Circle strafe. Many of the game's melee monsters aren't as scary as they seem once you get up close. Unless you're fighting a monster that can grab you, try hugging their bodies as you strafe in a counter-clockwise circle around them. Most enemies will miss you entirely if you're constantly circling them, giving you ample time to land a backstab. You can usually roll between the big guys’ legs as well if you time it right.
Cut off the tail! Fighting a monster or boss that has a tail? Try cutting it off. Chances are you can get a sweet weapon as a result. Seriously, give it a shot.

Humanity is used to reverse hollow status and kindle bonfires. Resting at a bonfire replenishes your healing flasks (known as Estus Flasks). By default, you have five of these. If you have any humanity, you can reverse your hollow status at a fire to become human. Doing so allows you to spend additional humanity to kindle a fire. Any fire that has been kindled provides ten flasks instead of five.
This is not an all-encompassing list of secrets. Below are some items and locations we came across during our time with Dark Souls.
Best farming route - If you're anxious to snag more souls, we found the best place to farm them. In the Darkroot Forest, there is a door that is locked by a circular device. First, save up 20,000 souls (now's a good time to use all those soul items in your inventory). Next, visit the blacksmith in the tower leading to the Darkroot Forest and buy the crest from him. Head back to the locked door in the forest (note: there is a hidden bonfire right next to it behind a fake wall). Once unlocked, you can use the strategy in the video below to farm up over 12,000 souls in roughly 2 minutes. Note that the ghost enemies can easily be tricked into jumping off the ledge if you bait them up the stairs.
It takes a little practice, but try and position yourself so that when the ghost walks off the stairs that he’ll fall directly on your head, this will bounce him off of you and into the void.
Drake Sword – This one-handed sword has a base damage of 200 and can be obtained early in the game. Snag the Longbow from the passage between the Darkroot Forest and the Valley of Drakes, buy some arrows, and head back to the bridge in the Undead Burg with the dragon on it. Head under the bridge and shoot 30-40 arrows at the dragon's tail and the sword will automatically appear in your inventory. This sword has a very low stat requirement, making it an excellent fit for almost every class. It can also be upgraded with dragon scales, and each upgrade adds an additional 20 attack damage to the already absurdly high 200.
Havel's Ring – Substantially increases equipment weight capacity. Obtained by defeating Havel, who rests at the bottom of the tower leading up to the Taurus Demon. Havel weilds an enormous dragon tooth mace that can easily one shot you, but don’t be scared, he’s slow as molasses. Hug his body and circle strafe to avoid his attacks, and backstab until he's dead. He has an enormous amount of health, especially if you’re still early in the game, so don’t be surprised if this one takes you 10-15 minutes. Patience wins the day here
Havel's Armor – Obtained in Anor Londo. Once you reach the second bonfire (the one inside the actual castle), explore the nearby side rooms. There is a hidden passage behind a fireplace in one of them, leading down into a storage area with multiple chests. There’s a mimic or 2 in here, so make sure to whack each chest with your sword before opening them. Which you should be doing anyway.

Ash Lake – This hidden area can be found by traversing through the swamp in Blight Town. Locate the giant hollowed out tree. There’s seemingly only a plank shield inside, but attack the walls to find a hidden passage, which leads to a treasure chest. Directly behind the chest is another fake wall. Travel down through The Great Hollow to reach Ash Lake. Here, you will find another Hydra and several Dragon Scale drops, as well as the Path of the Dragon covenant.
Painted World of Ariamis – After obtaining to the Peculiar Doll in Anor Londo, head to the lower level of the cathedral in which you fought the white-clad ninja dudes. There is a painting of a snow-covered bridge in the back of the cathedral. Examine it, and you will get sucked into the Painted World of Aramis, a secret zone definitely worth exploring.
We've posted the guides for each of Dark Souls' bosses in alphabetical order, as progression can differ from player to player. These videos are primarily for learning and understanding how to avoid the bosses attacks, where possible. Many bosses simply amount to “kill it until it's dead", but knowing when to clear out when an AoE attack is on the way is important.
One of the Lord Demons, Bed of Chaos is a pretty straightforward fight. There are two glowing orbs in his chamber, one on each side of the room. Sprint over to each one (while avoiding / blocking his hand swipes), break through the branches, and attack the core. Once both orbs have been activated (this persists through death, as per the video), a chunk of the ground in front of the boss collapses. Do a running jump onto the large limb in the center of the hole, cut through the branches, and hit the little bastard. He dies after one hit.
Essentially Maneaters 2.0, this fight is ripped straight from Demon's Souls. Dodge the Gargoyles’ swipes and aerial attacks, and punish when they whiff. During the fight, a second Gargoyle will enter the fray. At this point, the pair gains fire-breathing attacks in addition to melee abilities.
First, kill those damned dogs. Once you can focus on the boss, dodge his attacks and get some hits in of your own. Additionally, there's a stairway leading up to a thin ledge in the back of the room. For a quick win, lure him below the ledge and do a plunging attack.
Step one: see a doctor. Step two: try not to get your face smashed by this fiery jerkwad's tentacles. Stay close to the ledge near his body, or he'll ceaselessly discharge fire all over the place. Sprint from side to side along the ledge to avoid his tentacle slams, and then get a few hits in. Rinse and repeat.
This monster's pretty straightforward. You only have a narrow ledge to fight on, so the first step is luring him onto your platform. He'll try to punch you with his Stretch Armstrong fists, but you can avoid his attacks by sprinting the length of the platform. Once he's in your turf, get under him, swing a few times, and back off.
We don't recommend locking on to him, as the camera can be sporadic when under his body. When he launches in the air, get away from him until he lands to avoid getting smashed. Finally, when he only has about one-third of his health left, he'll start dropping bombs from the ceiling when he jumps. Wait till those blow up before you rush in to attack.
Half spider, half sexy lady, Chaos Witch Quelaag will quickly end you if you stare for too long at those sick nasty spider legs. Actually, the fight is fairly simple. Don't stand in fire. Roll dodge her sword attacks. The biggest thing you'll want to watch out for is her brutal AoE ability. When the human portion of her body bows down, that's your signal to get the f*ck out of there.
Excuse us for the first minute of this boss video. We ran around a circle in panic because we never fought an invisible boss before. Watch for Priscilla's footprints in the snow—that will give away her location. Be sure to keep that shield up in case you lose track of her. Get a few attacks in, then roll away. This fight is for babies.
The Demon Firesage bears a striking resemblance to the Asylum Demon from the tutorial area, but he has a few more attacks. The two most annoying abilities in his arsenal are some fire spells. When he plants his spear in the ground, run. This signifies that he's about to use a rather powerful AoE explosion. He does another fire attack that does damage in a frontal cone. Dodging this attack is rather difficult. When he does a leaping axe attack, roll toward his body and get some hits in. Occasionally he'll fly up into the air and body slam the ground. Use this opportunity to score some free attacks.
This is the first boss encounter where Dark Souls proudly presents its giant middle finger. Two bosses at once, both of which are powerful. Yay! Dragon Slayer Ornstein is agile and does both lightning and physical damage. Executioner Smough, on the other hand, is a bit slower and hits super hard. There's no real easy way to approach this fight. You have to decide which boss to kill first—as soon as one dies, the other gets even stronger. Killing Ornstein first adds lightning damage to all of Smough's attacks. Killing Smough first means Ornstein grows bigger in size and strength. Either way, expect to get your skull caved in a time or two. Take advantage of the pillars to line of sight attacks. Chip away when the opportunity arises, but expect a lengthy fight.
If you’ve got some humanity to spare, you can summon Solaire of Astora to come help you if you’re alive. His summon symbol is at the top of the short staircase beside the entrance to the boss area. He makes this fight much much easier as he will essentially tank one of the bosses, allowing you to focus on the other. If you prefer real players to AI bots, this is a great fight to try summoning some help from other players.
Another Lord Demon encounter, the Four Kings are intimidating at first. You must have the Covenant of Artorias ring equipped to access the Abyss, which is where these bosses are housed. At the beginning of the fight, only one of the kings will be active. Eventually, all four will be out at once, and they share a health pool. We recommend equipping your most defensive armor (probably the Havel's set from Anor Londo), as the Four Kings don't hit terribly hard.
Their magic abilities are what hurt the most, and they typically only cast them if you're at a distance. Get up close, attack a king until it dies, then move onto the next. They will respawn shortly after being killed, but managing one or two at a time is far easier than all four. Occasionally, the one you're attacking will charge up a spell, emanating a purple aura in the process. Quickly get your shield out, as this magic AoE ability will do far less damage when you're blocking. Keep your health up as often as you can, too—they will sometimes use a grab attack that can easily drain half your health.
The easiest way to take on the Gaping Dragon is to try and stick close to the right side of his body, between his two legs. This location allows you to easily dodge his side swipes, and gives you ample time to avoid his stomps. When he flies into the air, move away as to not get crushed. Be prepared to turn and run, as he occasionally vomits a large pool of acid.
A Lord Demon encounter, Nito is pretty brutal. First of all, the dude's entire body and his sword are made of skeletons. Secondly, one of his main abilities is to spew death from his mouth. Within his chamber are several skeletons, some of which are the big brutes that knocked us off ledges in the Tomb of Giants a billion times. So, when you arrive in Nito's chamber, lure him toward the entrance. Try rolling around until he reaches you, as he can use a magic sword attack from anywhere in his room that pops up through the floor. Luring him over should let you avoid having to deal with the giant skeletons, though you'll still have to put up with a few of the small fries.
Nito himself is fairly easy. He has a few standard sword attacks that hit pretty hard, but aren't difficult to avoid. The problem is that while you're trying to damage him, you'll be taking hits from the skeletons nearby. Oh, and you can get poisoned during the encounter. Get a few hits on Nito. Eventually he'll spray death all over, temporarily destroying the skeletons. Quickly get some more hits in before they respawn. Just heal up whenever the opportunity arises, and he'll be dead in no time.
Ah, yes. One of our favorite fights in the game. Sif (who somewhat resembles Okami's Amaterasu) is kind of a dick. His attacks are strong and are sometimes tricky to dodge. You'll want to play it safe. Wait till he finishes a set of attacks, sprint under his body, get a few attacks in, and get out.
You'll especially want to look out for his two-part spin attack. Even if you block the first swing in the attack, it will drain most of your stamina. The second strike is sure to knock out at least half of your health. You can tell he’s about to do this when he switches his grip on the sword in his mouth, even if you can’t avoid it entirely, taking one hit is way better than taking two. This fight is all about patience. Once Sif is below 25% health you’ll notice he starts limping, there’s a way to end the fight without killing him.
Here it is—the final battle. Take a moment to appreciate the piano music in the background. Everything you've done has led up to this point. Gwyn is tough. He attacks fast. He hits hard. You'll have to roll to avoid many of his attacks. We found the easiest way to approach him is to constantly be walking backwards with your shield raised. Equip any stamina regeneration gear you might have, because you'll be rolling and blocking a lot. Whenever Gwyn tries to kick or grab you, use that opportunity to get a few hits in, then start backing away. Don't get greedy—trying to land too many hits too soon can easily result in death. When you need to heal up, try and line of sight him around one of the pillars in the cavern.
The Iron Golem isn't all that hard. Note that you can fall off of the platform you're fighting on, so try to keep the boss in the center of the tower. Circle strafe to avoid most of his attacks, and back away when he tries to pick you up. Also, be wary of his stomp attacks. Note that even if you block his attacks, you’ll slide back quite a ways, so make damn sure you’re not blocking near the edge of the platform. After he takes a bit of damage, he'll be stunned for a substantial amount of time. That’s when you casually end his life.
This fight can be a pain early on. If you don't have access to any spells, we recommend snagging the Longbow from the area between the Darkroot Forest and the Valley of Drakes. Chip away at the creature's health while it's airborne, but pay attention to its magic attacks. It's best to roll dodge its magic when possible, as blocking does little to nullify the damage. At times, the Moonlight Butterfly will land on the ledge. Start slashing away until it charges up a magic spell—when you see it start to glow, get away.
If you’re alive, you can summon an AI companion witch whose long distance spells can be extremely helpful here, especially if you’re a melee character. Her summon symbol is hidden in some grass at the bottom of the tower leading up to the boss’s room.
Pinwheel throws spells at you while creating mirror images of himself. He's not terribly difficult, just rather annoying.
Reasons why Seath the Scaleless didn't have any dragon friends: He hangs out in a room that can only be reached by traversing a maze of invisible paths; he sprays friggin' crystals from his mouth; those crystals can curse you. The trick to this battle is to get to the rear of Seath's room and destroy his magical crystal thing. Otherwise, he regenerates his health. Once that's down, bait him into using his crystal laser beams, then run up close and hit him in the dragon jewels. Be careful, though, as he does have one crystal AoE that can quickly destroy you. When he bows down and starts groaning, run.
Your first real boss fight! The Taurus Demon is pretty simple. Once he jumps down from his tower, run back toward the light gate you walked through to reach the ramparts. Next to the door is a ladder. Climb up and do a plunging attack on the boss. Lure him away from the ladder, dodge his attacks, then run back up the ladder and repeat. You can also avoid virtually all his attacks by simply rolling between his legs every time he winds up to swing at you.


 Endless War: How Shooting Games Perpetuate War as the New Normal
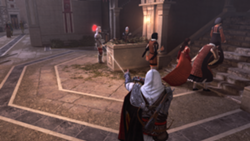 Assassin’s Creed 3 – Combat Item Guide
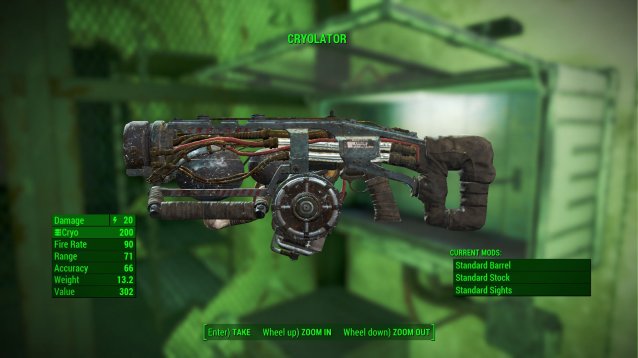
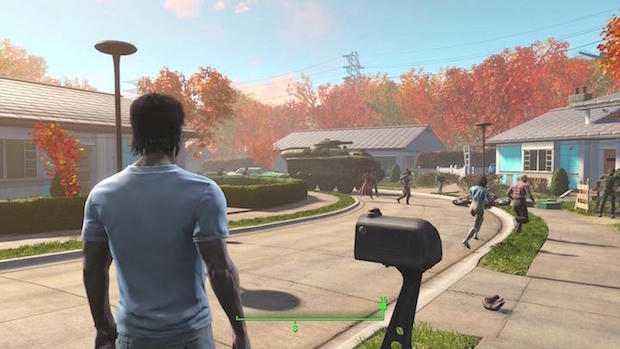
 Fallout 4: How to Kill Animals and Bugs
 CoD: Black Ops III Beta Error Guide: Fix For Paint job Customization, Installation, BestBuy Code Issues & More
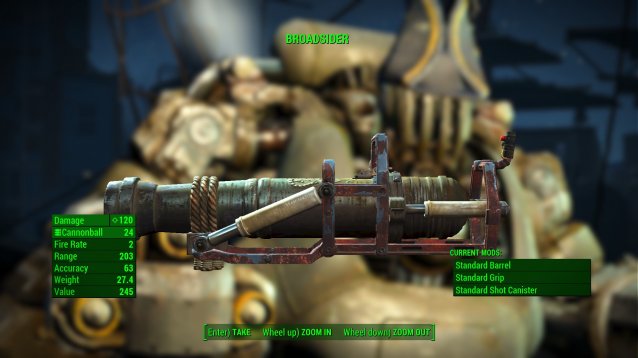 Fallout 4 Guide: How To Find The Broadsider