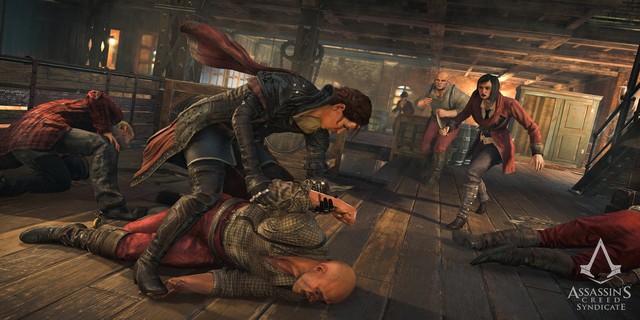
If you’re like us, you’ll spend a lot of time using your digitally enhanced neural abilities to turn your enemies into gun-wielding puppets of destruction. But there’s more work to do if you’re looking to get everything you can out of Syndicate’s campaign.

Over the game’s 20 milestones (aka chapters), there are a total of 30 business cards and 60 pieces of propaganda. The cards are usually easy to spot, as each one emits a prominent orange hologram. The propaganda, on the other hand, can only be revealed if you’re using the DART overlay. The videos and screens below show the most efficient way to find both the cards and propaganda simultaneously, without having to do any replaying or backtracking.
Milestone 1: Wakeup Call
Milestone 2: Assault on Aspari
Milestone 3: Aspari Extraction
Milestone 4: A Train to Catch
Milestone 5: Escape from LA
Milestone 6: EuroCorp
Milestone 7: Voyeur Central
Milestone 8: Cayman Global
Milestone 9: The Floating City
Milestone 10: Behind the Scenes
Milestone 11: Ramon
Milestone 12: Downzone
Milestone 13: Betrayed
Milestone 14: The Wall
Milestone 15: Kris
Milestone 16: Human Resources
Milestone 17: Corporate War
Milestone 18: Spire Access
Milestone 19: Burning Tower
Milestone 20: Jack Denham
Above: All collectibles from Milestone 1

Card 1: Immediately after falling down the stairwell, turn around and check the top of the staircase for the game’s first card.

Propaganda 1: You’ll spot the first propaganda piece on a bulletin board in front of you. The game will tell you to use RB to search for it. Killing the hobo is not necessary.

Card 2: Through the door to the right of the first propaganda poster you’ll find a card on the table.

Propaganda 2: After picking up the assault rifle, continue until you reach some stairs leading down. The poster is on the wall at the bottom of the stairs.

Propaganda 3: This third poster is found very soon after the second. Head through the door and kill the two enemies. Before heading up the stairs in this area, check the wall nearby for a poster.
Above: All collectibles from Milestone 2

Propaganda 1: As soon as you hop out of the dropship, pull a 180 and run up to the wall. Use your Dart Overlay on the Aspari logo displayed against a red background.

Card 1: After Merit executes the two guards, turn left and check the sofa for a card.

Card 2: Upon entering the storage room via the security hatch, you may notice a card on one of the high shelves. Climb the nearby ladder and circle around, jumping across the shelves to reach the card.

Propaganda 2: Soon after using the Gauss Rifle on the chilled glass, you’ll enter a large room with many enemies. Clear the area, then look for this room to your right. Use your Dart Overlay on the Aspari logo displayed against a grey background.

Propaganda 3: In the same room as propaganda 2, look through the glass double door at the Aspari logo with the Dart Overlay on.
Above: All collectibles from Milestone 3

Propaganda 1: As soon as the level begins, jump across the gap in front of you, turn around, and look at the Aspari symbol on the far wall. Turn on your overlay to find the propaganda.

Card 1: In the bar area, a set of shield-carrying enemies will burst through a locked door. Take them out and go through the door. Instead of heading up the stairs, turn left to find a card on the counter.

Propaganda 2: From where you find the business card, go up the stairs and through the next set of doors. Head straight ahead to the glass double doors at the other end of the room, taking out the two guards as you go. Use your overlay while looking at the Aspari symbol.

Propaganda 3: From propaganda 2, turn around and head down the escalator. On the left side of the room’s central red structure you’ll see another set of glass double doors. Look through them at the Aspari symbol with your overlay activated.
Above: All collectibles from Milestone 4

Propaganda 1: Right off the bat, open the door to the security booth, take out the two guards, then look at the Aspari logo on the wall to your right.

Propaganda 2: Just after the point where you find propaganda 1, you’ll enter a safety deposit locker room. Once inside, turn around and look above the doors you used to enter.

Card 1: From the entrance to the locker room, look at the second row on the left for a card.

Propaganda 3: In the train platform area, take out the waves of baddies, then look at the glass-enclosed staircase at the center of the area. There is an Aspari logo on the wall just above where the staircase ends down below.
Above: All collectibles from Milestone 5

Card 1: Once the level begins you’ll have to make your way through several passenger cars. Look to the left to find a card on one of the tables.

Propaganda 1: Right after you grab the minigun and exit the train, look for the Aspari logo on the far wall.
Above: All collectibles from Milestone 6

Propaganda 1: At the beginning of the level, you’ll find yourself in an ascending elevator. Turn on overlay and look at the EuroCorp logo on the building across the street.

Card 1: Upon exiting the elevator, turn right. This card is on an end table next to some black leather chairs.
Above: All collectibles from Milestone 7

Propaganda 1: After leaping from the dropship, enter the building and immediately look to your right to find a EuroCorp logo on the wall.

Propaganda 2: Soon after overriding the gate controls and stepping outside again, you’ll reach some stairs on the catwalk that lead down. Instead of taking them all the way, jump onto the left railing and up into the area with the AC units. Look up at the wall to see a EuroCorp logo.

Card 1: Right after using the zip line to get into Drawl’s apartment, check the kitchen for a card.

Propaganda 3: Near the end of the level, you’ll have to charge through a weakened wall then exit the apartments. Look up at the wall for a EuroCorp logo.
Above: All collectibles from Milestone 8

Propaganda 1: Pass through the very first door of the level. Inside the next room, you’ll be ambushed by a lot of enemies. You can run to the left wall and use your overlay on the EuroCorp symbol before the battle, or wait until things quiet down and do it afterwards.

Card 1: From the first propaganda, head right and look for a business card on the ground near one of the small tables. If you imagine where you entered the room as being the south end, this card is in the northwest corner.

Propaganda 2: From where you may have used the elevator to chop an enemy in half, head up the stairs to your right and through the door labeled “staff only.” Immediately turn around and look up to find another EuroCorp logo. If you’ve entered the art gallery, you’ve gone too far.

Propaganda 3: After grabbing the minigun, you’ll have to ride in an elevator. Upon exitin, look to your immediate left. Use your overlay on the tv screen against the wall. You may want to clear the area of enemies first.
Above: All collectibles from Milestone 9

Propaganda 1: Stay sharp as you’re coming in for a landing because there is a Cayman Global logo just above one of the buildings’ main entrances, to your right. Turn on your overlay so that you don’t miss your chance.

Propaganda 2: Just after leaping through the window from the dropship, walk forward a bit up the short staircase and look at the wall on your right. There’s a Cayman Global logo.

Card 1: There’s an air traffic controller standing in the same room as propaganda 2. From just behind him, do a 180 and look to your left. There’s a card sitting on the desk.

Propaganda 3: As soon as you enter the main lobby, look up and to the left at the glass elevator shaft. Use overlay on the Cayman Global logo to reveal propaganda.

Propaganda 4: Revealing this propaganda requires you to repeatedly breach the hologram in the main lobby until it disappears. Every time you breach it, you will have to listen to the recording until the hologram returns to normal (blue). Eventually, breaching the hologram will cause it to turn off. Turn on your overlay to find some propaganda.
Above: All collectibles from Milestone 10

Card 1: As soon as the level begins, take out the two enemies then look for a card on the desk to the right. It’s next to the rifle rack.

Propaganda 1: After your encounter with the enemy who wields a missile launcher, look just above the door through which he entered the area. Use your overlay on the Cayman Global logo.

Card 2: Soon after destroying the locks on the door and entering the building, you’ll walk down some stairs. In the next room, the card is right in front of you, near a UAV control panel.

Propaganda 2: You’ll reach a point where you have to turn in your Swarm weapon in order to proceed. Soon after, look for a Cayman Global logo on the wall to your right as you descend a staircase.

Propaganda 3: After using the landing platform to proceed, go around the left side of the building you’re facing and check the wall for a Cayman Global logo.
Above: All collectibles from Milestone 11

Propaganda 1: After stepping off the elevator at the beginning of the level walk straight ahead and up to the window. Turn to your left and look down a bit to find a Cayman Global logo on the side of the building. You will first have to take out the nearby enemy since he carries a jammer.

Card 1: This card can be found at the bottom of this winding set of staircases, in the same area as the standalone jammer.

Card 2: After hopping off the ladder, head down the corridor. At the end, near the hatch, you’ll see a card.

Propaganda 2: Once you’ve kicked through the hatch and dropped onto the catwalk, immediately look up and to your left. The Cayman Global logo is another piece of propaganda.
Above: All collectibles from Milestone 12

Propaganda 1: After giving Drawl a boost, she’ll open a door for you. Inside the garage, look for a door on the left. Head through it and into the small alley. Here you’ll find a poster.

Propaganda 2: Soon after climbing a ladder you’ll enter a small warehouse with a control room. To the right of that room is a shelf pulled away from the wall. Behind that shelf you can see a poster.

Card 1: After ripping the lock off the gate in that same warehouse, pass through it and look to your right. On the shelf you’ll find a card.

Propaganda 3: Soon after you’re told that Drawl’s chip signal has been lost you’ll be heading down some stairs past a few hobos. On the wall nearby is a line of text. Use your overlay to spot the propaganda.

Card 2: You’ll reach another point where you must break a lock to proceed. Do so, and head down into the basement area. Proceed along, all the time following the wall on your right. Eventually there will be a door you can open, and inside the room, next to a hobo, is this card.

Propaganda 4: In the same room as card 2, look for the wall on which there is some writing. Activate your overlay to scan the propaganda.

Propaganda 5: Upon exiting to the street, walk straight ahead and look for a propaganda poster on a red background.

Propaganda 6: Just across the street from where you find propaganda 5 you’ll spot number 6 on the door to the bar.

Card 3: From propaganda 6, head down the street and look for an alley on your right. Walk down it to find a card.

Propaganda 7: Leave the alley in which you found card 3 and turn right. Next to the flaming barrel on the other end of the street is a poster.

Propaganda 8: Enter the store called “Rich Jayden’s” and turn left immediately. On the wall you’ll find some propaganda text if you activate your overlay.

Card 4: Still inside the same building as propaganda 8, look for the cashier’s booth. Walk around to enter from the rear and grab the card off the desk.

Propaganda 9: From the cashier’s booth, walk down the hall into the next room and look for a EuroCorp logo on the wall.

Propaganda 10: From propaganda 10, go up the stairs and to the next room. Behind the EuroCorp hologram, on the wall, you’ll find a poster.
Above: All collectibles from Milestone 13

Propaganda 1: Just after you pry open the door there will be a poster on the wall to your right. It’s near the small set of stairs.

Card 1: This card is on a crate in the room with the red explosive barrels.

Propaganda 2: After climbing out of the elevator, kill any baddies in the room then head for the small control room. Inside you’ll find a propaganda poster on the wall, right next to the power switch.

Propaganda 3: You’ll reach a point where you must climb through a floor grate and clear out a room of bad guys (one of which will have a shield). After doing so, check the high wall for a EuroCorp logo. It’s also propaganda.
Above: All collectibles from Milestone 14

Propaganda 1: After you flip on the power, reboot the system, and extract the chip from the dead agent, go through the next door and drop through the hole in the floor. Turn to your right to find a poster on the wall.

Card 1: From propaganda 1, head through the door in front of you and immediately look left. Hop over the railing onto the pipes and follow them around until you find a card.

Propaganda 2: If you go forego hopping the railing for card 1 and take the long way around on the catwalk, you’ll spot this poster on the wall. If you do drop down from card 1’s location, just backtrack to this spot.

Propaganda 3: On the same wall as propaganda 2.

Card 2: As soon as you see your first EMP mine, turn left and hop over the railing. The second card should be right in front of you.

Propaganda 4: After you’ve made your way through the yard and pried the door open, drop down off the ledge in front of you and turn around to find a poster.

Propaganda 5: Just after finding the Thermite Gun you’ll come upon a grate with a door to its left. Before using that door to step outside, use your overlay on the EuroCorp logo seen on the wall just past the grate.

Card 3: As you go through the entrance marked “checkpoint,” hopefully you’ll notice this card right in front of your face.

Propaganda 6: From card 3, turn left and go down the hall. There’s a poster on the wall to your left when you reach the end.

Propaganda 7: You’ll eventually find yourself in another outside area fighting a big group of baddies (you can also find the rocket launcher here). Mop them up then look for the door leading in. Once inside, you’ll see a grate in front of you that can be opened. Leave it alone, turn left, and head down the hall to find the last poster.
Above: All collectibles from Milestone 15

Propaganda 1: As soon as the level begins, kick open the grate in front of you and drop down. Immediately turn around to find a propaganda poster on the door.

Card 1: From propaganda 1, clear out the enemies in the area and continue on into the control room just ahead. Inside on the console you’ll find a card.

Propaganda 2: In the same room where you power off the jamming device, check the concrete walls for a poster.

Propaganda 3: You’ll reach a computer with green text on its monitor that can be breached. Do so, then go through the door next to the desk and into the room just across the hall. Turn right once inside to find a poster on the wall.

Propaganda 4: Face propaganda 3 and turn around. Walk through the room while keeping your eyes on the right wall. There will be another poster not too far away.
Card 2: Just after passing through the room with the three data transfer opportunities, you’ll come upon an elevator. Before entering, turn around to find a card on the ground nearby.

Propaganda 5: After defeating Kris, take the elevator up. Upon exiting, enter the room straight ahead and look for a poster on the wall to your right.

Propaganda 1: After hopping out of the Vitruvian, walk straight ahead and use your overlay on the large EuroCorp logo.
Above: All collectibles from Milestone 17

Card 1: Step out of the elevator at the start of the level and head right. There’s a card on the counter.

Card 2: Check this large, circular counter. This is in a room where you’ll have to fight several waves of enemies, so it may be best to take them all out first.

Propaganda 1: On the wall near card 2 there will be a EuroCorp logo. Look at it with overlay activated to find some propaganda.
Above: All collectibles from Milestone 18

Card 1: Soon after defeating Crane, you’ll find yourself in a room full of bodies. Check behind the overturned bench for a card.

Propaganda 1: Near the end of the level, you’ll have to breach some controls in order to extend a bridge. Walk onto the bridge, turn around to your left, and look at the side of the building. There should be a EuroCorp logo just below.
Above: All collectibles from Milestone 19

Card 1: Soon after the level’s first firefight, you’ll pass through a small hallway and enter an observation room. The card is to your left.

Propaganda 1: After the elevator ride, proceed through the are killing enemies until you see this large EuroCorp logo on the wall in front of you.

Propaganda 2: After clearing the long hallway of enemies, walk to the end and look for some stairs on your right. At the top of these stairs you’ll find a EuroCorp logo on the wall.

Card 2: Now on the second floor, continue forward, killing enemies as you go. You’ll come upon another staircase to your right, but make sure to check near the corpse underneath for the last card of the game.

Propaganda 1: The final propaganda of the game will reveal itself if you look at the EuroCorp logo on these glass doors while your overlay is activated.

 Witcher 3 Deadly Delights Contract Guide
 Dark Souls 2 Ashen Mist Heart and Memories of the Ancients
 Shadowrun: Hong Kong Hidden Achievements Guide
 Retrospective: Batman: Arkham City
 Fallout 4 Guide: What You Need To Know To Be A Proper Cannibal