
Skylanders: Swap Force is absolutely packed with collectibles. Levels are hiding Legendary Treasures, Winged Sapphires, Story Scrolls, and unique items. With 17 levels to explore, that's a mountain of goodies to track find. Lucky for you, we've tracked them all down! Check out our Skylanders: Swap Force review, then follow along to collect them all.
Note: Some items require Skylanders of a certain element. If you do not have one available, you will not be able to collect them.
Table of Contents
Want to find all the Soul Gems, Bonus Mission maps, or hats in Skylanders: Swap Force? Check out our Soul Gems locations guide, bonus missions locations guide, and hats locations guide!
Many treasures are collected through Swap Zones; however, not every Swap Force character has been released yet. Until we can get our hands on every figurine, this guide will remain "in progress." Check back for updates!

Climb the Mushroom Stairway in the center of the hub world. When you reach Treetrunk Peak at the top of the tree, you'll see this.

Tibbet will give you this after completing Iron Jaw Gulch.

After completing Motleyville, you'll have access to The Under-Hollow. Head inside to find this by a fountain.

After Flynn's crash, turn around to see this just behind the level start.

After defeating the Greeble Screwball, go left around the rock face to find this.

Continue down the path until you reach the Water/Fire Dual Element Gate. Use a Swap Force character that matches this (or, if you're playing co-op, one of each type) to open the way.

After learning how to push blocks in Old Treetop Terrace, hang right before crossing the bridge to find another goodie.

Just beyond said bridge is a series of ledges to the right. Hop up them to collect your first Story Scroll.

After taking out your first Chompy Pod, look to your left for some descending ledges. Head down to enter a hidden area, Honey Trove. After pushing the block to cross the bridge, push it back across, then north. Once it falls into place, you can jump onto it to reach the ledge where the collectible sits.

Return to the main area above Honey Trove and bear left after the bridge. Use and Air Skylander to open the Elemntal Gate here. Complete the shooting minigame at the end of the area to receive this is a reward.

A little later, you'll have to push more blocks in Long Worn Hollow. After dropping the lower one off of the rock bridge, head to where it fell. You'll be able to reach the last piece of Flynn's Missing Stuff by jumping on it.

After fighting the Evilized Greebles, use a Fire Skylander to open the Elemental Gate to the left. Make your way across the moving platforms to reach this.

After battling the Greeble Blunderbuss, take a right at the next fork. Follow the path to reach a secret area where you can ascend some stepping stones to reach these.

Back at the fork, head left and you'll soon reach this block puzzle. Push block A up, right, and up three times to fill a gap. Now push block A right four times. Now you can ascend the ledges and reach the scroll.

After freeing the Gobblepods in the Gobblepod Sanctuary, make a left at the intersection. Bust up the wagons over here and enter the hidden area. Inside, ride the stone on the upper path to reach these.

After exiting Honeybadger Hollow, look down for a ledge you can drop to. Do so to find more of these.

When you reach the next intersection in the Gobblepod Sanctuary, take right to reach a dual Tech/Earth Elemental Gate. Use a Swap Force character with these elements (or two appropriate Skylanders, if you're playing co-op) to open the path. Inside, push the blocks to either side to collect the gears and open the door in this secret area. You'll find this on the other side.

Upon entering Overlook Heights, bear right and follow the ledge as it wraps south to find this.

Proceed through Shadow Spelunk until the path splits. Head left and follow the series of ledges and moving rocks to reach these.

This one can't be missed. As you approach the Grumblebum Thrasher, you'll see it on a hill to your left.

This one's hard to miss too. Continue forward to spot it down the path.

Before leaving Snagglescale Swamp, you'll pass this Elemental Gate. Use a Life Skylander to open the way, then complete the fishing minigame inside to win a great prize.

After riding the tube the first time, make a right just past the missing gear. Follow this narrow path to find another preserver.

Hang right upon entering Broken Bog Bay to approach an Elemental Gate. Use a Magic Skylander to open the way, then complete the platforming segment within. The treasure awaits you at the end of the course.

Once you grab the gear inside Big Gill Water Mill, don't exit. Instead, hop across the nearby gear to reach this little alcove. You'll find another preserver inside.

When you reach Muddy Marsh Village, move right and hop along the boards behind the houses to reach this.

In the north end of the village, a Boghog (one of those green boar things) is asleep. Bounce on it a few times, and it will burrow away, digging up a collectible in the process.

In the same section of the village is a dual Water/Undead Elemental Gate. Use a Swap Force character with these elements (or two appropriate Skylanders, if you're playing co-op) to open the way forward. Complete the battles inside to earn this.

While destroying the crystals that have imprisoned the Flashfin, look to your right after using the first launch pad.

Very shortly into the level, you'll reach a dual Magic/Fire Elemental Gate. Make a Swap Force character with these qualities (or use two appropriate Skylanders, if you're playing co-op) to open it. Move through the course and defeat the giant enemy to obtain this.

After battling the Chompy Rustbuds, you'll find this on the stump in the same area.

After battling the Arkeyan Rip-Rotors, walk across the arch to the right of the Battle Gate to grab this.

Take a left after battling the Arkeyan Slamshocks to find this on a short path.

When you reach the Simian Throne Room, look to the right wall. Hop across the hands there to reach another totem.

Soon after, you'll reach an area where Evil Glumshanks throws missiles at you. Approach the blocks and push blocks A and B forward, then push block C to the left. Push block D forward, then push blocks A and B left and right off the edges. Push block C forward and left to stack it atop block A. Finally, push block D down twice and left once. Now you can jump from block C to D and reach the last totem.

Just after the block puzzle, there will be a Water Elemental Gate on your left. Use a Water Skylander to enter, then make your way through the course to collect this.

Once you've taken the launch pad to Monkey Monk's Path, turn around to spot this across a short bridge.

As soon as the level begins, turn around to spot this under a wooden water tower. Destroy the water tower to reach it.

After defeating the Pirate Powderkeg, you'll activate a bridge. Cross and use the blue bounce pad to reach another plushy.

Upon entering Cactus Pass, you'll see a Swap Zone. Use a character with the Rocket ability to complete the course and earn this reward.

After taking out the first airship, you'll be near the entrance to Hucksters Hutch. Before entering, use the bounce pad outside to reach the roof and grab the next plushy.

You'll enter Cuddy's Cottage while retrieving the second handle. Jump onto the northwest bed, and after five bounces, the bed will break, revealing the fourth plushy.

After taking out the second airship, you'll land in the 10,000 Galloon Hat, right near a Tech Elemental Gate. Use a Tech Skylander to open the path, and complete the course to earn this.

After retrieving the handle from the Kangarat Groove Hut, activate the bridge. This will also activate a set of steps next to the bridge. Hop up to grab the scroll.

Just before exiting 10,000 Gallon Hat, you can spot this bounce pad. Hit it to reach the final plushy.

When moving past the crane hooks in Soggy Fields, look for this little inlet. Follow the path to the first train.

After grabbing the dynamite from Sandy Shoppe, quickly backtrack through Lester's Lane and blow up the earlier gate. Follow the new path to another train.

Before grabbing the cannon, enter the nearby building, Lester's Storage Shed. In the back left is another train.

After taking the cannon up the tracks, clear the debris and push the cannon backwards. Fire it from its new position to clear another path that leads to a scroll.

As you move through The Secret Way, you'll spot this on a high ledge. Continue up the hill to the mine cart. Make sure the track switcher is facing south, then push the cart down the hill. This will help you reach the train.

Upon returning to the Stack O' Trains, you'll come across a Swap Zone. Use a character with the Climb ability to complete the course and earn this prize.

After grinding the third rail (not that kind), you'll wind up in Fixin' Station. Hang right to reach a Tech Elemental Gate. Use a Tech Skylander to open it, and complete the course inside to earn this.

When you reach the whirlpool a little further ahead, jump up the ramshackle buildings to the left to reach the last train.

When you reach Perilous Plateau, took a right from Sharpfin and head up the slope to find this scroll.

After encountering the Boom Bosses, bust up the boxes in the back of the area. Follow this hidden path to find the first ducky.

You'll spot this as you approach the second platform with a rotating electrical rod. Proceed through, then take a left at the next platform to reach it.

Take a left before exiting Arid Cave to grab this off of a ledge.

Before destroying the second crystal, continue up the platforms past the screws. You'll find this a little higher up.

When you land in Underground Lake, you'll be near a dual Undead/Earth Elemental Gate. Use a Swap Force character with these elements (or use appropriate Skylanders, if you're playing co-op) to open the way. Complete the challenge inside to earn this.

Take a left after crossing the long green bridge in Serene Walkway. This leads to the last duck.

After opening the second gate, take the little path to the left. This leads to the first souvenir.

At the top of Gift Boat Row is a dual Magic/Life Elemental Gate. Create a Swap Force character with these properties (or use appropriate Skylanders, if you're playing co-op) to open it. Complete the course inside to obtain this.

Once you encounter the Loose Cannons, look to your right. You can hop onto some ice back here, then hop across a series of platforms to reach the second souvenir.

After exiting the Ticket Taker to the upper level up Paleo Pass, move toward the pair of rocks. Destroy the crate and follow the short path to grab this.

A little further ahead, you'll encounter two huts. Cross the bridge into the smaller hut. Inside, you are tasked with defeating all the enemies in one minute. If you do so, you'll open the Battle Gate and reveal this.

When you reach Glacial Galley, take a left by the flaming bridge. Head south near the Earth Elemental Gate to spot some platforms you can jump to. Cross them to find this on any icy ledge.

Hop back across the platforms to the Earth Elemental Gate. Use an Earth Skylander to open the way, and head inside. Rotate the center platform to access either Battle Gate. Take out the baddies to unlock both, and grab the keys inside. With both keys in hand, you can open the gate in the middle of the area and claim this.

When you reach the Battle Gate in The Blizzard Bridges, peak behind the platform to find this.

Take a left from the second Battle Gate with the Twistpick Cyclopes. Head up the slope to find a Fire Elemental Gate and some crates. Destroy the crates to discover this.

Now use a Fire Skylander to enter the nearby Fire Elemental Gate. Complete the challenge inside by grabbing all three keys, and you'll receive this as a reward.

Shortly into The Frozen Curtain, you'll spot these above a pile of snow. Continue forward just a bit, and after the cut scene, you'll find a shovel frozen in ice. Thaw the ice, grab the shovel, and return here. Dig out the snow to reveal a Snowroller, whom you can bounce on to reach the mittens above.

Make a left from the same snow pile to find an Undead Elemental Gate. Use an Undead Skylander to enter the area and find more buried Snowrollers. Move through the course and free them all to receive this.

Once you enter Hibernal Harbor, make a right. Destroy the crates here to reach another pair of mittens.

After freeing the final pair of snowmen from the ice, rotate the laser a bit more to melt the additional ice in the area. This will allow you to scale the hill and reach the last pair of mittens.

From the very start of the level, head south from the lamppost to find a hidden path. Follow it to the first balloon animal.

When you enter Hooplaberg, this will be dead ahead of you.

Soon after entering The Glacier Hills, you'll have to cross this icy river. Hop across the ice chunks to the far right to find another balloon animal.

Just across the icy river, you'll spot a Magic Elemental Gate to your left. Use a Magic Skylander to open the way, and complete the minigame inside to earn this prize.

After taking out the Evilized Chillydogs, take a left from the Battle Gate. Hop over the spinning blades to grab another balloon animal tucked away back here.

When you enter The Tempest Maze, make a left. Carefully make your way through the crowd of exploding robot snowmen, and you'll eventually reach this.

When you reach the locked gate at the end of The Tempest Maze, turn around and look for a break in the fence. Drop down and follow the short path to grab the last balloon animal.

Near the lantern at the end of The Tempest Maze is a dual Tech/Fire Elemental Gate. Make a Swap Force character combination (or use appropriate Skylanders, if you're playing co-op) to open the way. Inside, take out the enemies to open the battle gate and reveal this treasure.

After speaking to Nolan on Troll Toll Bridge, drop down to the lower ledge. From here, you can jump onto some floating platforms that lead to the first dalmatian.

Just before exiting Troll Toll Bridge, you'll pass another burning gate. Once you acquire water balloons in the next area, Fantasm Beach, backtrack and douse this gate to reach the collectible beyond.

When you hop across the wooden platforms in the same area, keep to the right. Hop to this walkway to reach another dalmatian.

You'll encounter Evilized Screechers by the two Battle Gates in Water Way Retreat. After the fight, head to the right to approach a dual Undead/Life Elemental Gate. Create a Swap Force character with these elements (or choose two appropriate Skylanders, if you're playing co-op), to open it. Complete the course inside to earn this.

Inside 'Notso Lost' Lost Cavern, you'll use a water balloon to pass a burning gate. Grab a second water balloon to douse the flames just a bit beyond the gate to reach this.

When you enter Fantasm Village, dodge the barrels as you make your way up the hill, then go right. Hop up the ledges to find a fire hydrant. Turn it to douse the flaming gate on the left side of the hill you just climbed. Now you can reach the dalmatian over there.

The last dalmatian is a little tricky to acquire. Once you turned on the water inside Birchberg Resevoir, head south. Follow this hose to exit back to Birchberg, and remember the cellar door you used. Grab a water balloon, and quickly return to the same cellar door to return to the southern part of the reservoir. If you're quick enough, you can reach the flaming gate and douse the flames with your water balloon, allowing you to reach the last dalamatian.

Before exiting the Contraption Lab via Softpaw's surfboard, take a left from the board itself. Hop across this small gap into Top Secret Storage, then climb the stairs to find the first sweater.

When you land in Sheep Tower, hang right and break through the crates along the path to reach another sweater.

As you hop across the spinning blades in Chompie Churners, take a left at the second blade. Follow this path to the Secret Testing Grounds. Defeat the enemies here to open the battle gate and grab another sweater.

You'll come to a fork in the path just shortly after the same blades. Take a left and follow the stairs down to another spinning blade. Hop across it to reach this.

You can jump from the same blade to a short path leading to an Earth Elemental Gate. Use an Earth Skylander to open it, then complete the challenge inside to receive this.

When you reach The Gauntlet, keep left at the fork to reach the Goo Pit of Doom. The goo here continually drains and refills, so move quickly and carefully to grab the sweater at the bottom.

Shortly into Sheeplight Checkpoint, you'll see a dual Magic/Earth Elemental Gate to your right. Create a Swap Force character with these elements (or use the appropriate Skylanders, if you're playing co-op) to open the way. Complete the fishing minigame inside to receive this.


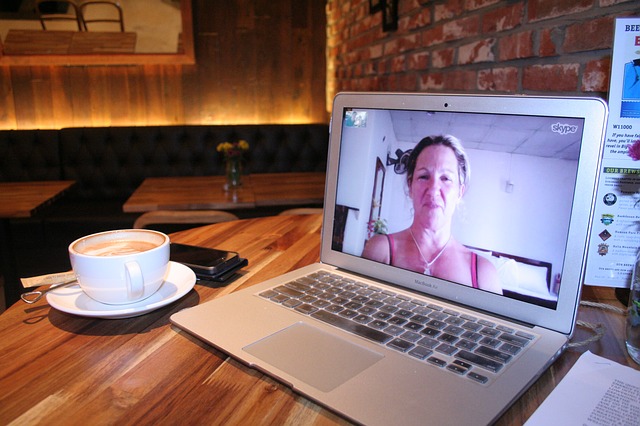 7 Skype Bugs That Microsoft Could Have Avoided
 The Best Star Wars Books All Fans Need to Read
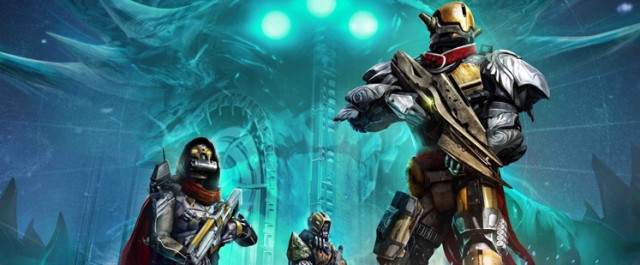 How to complete Destiny The Dark Below Story Mission The Undying Mind for PlayStation
 Dark Souls 2 Enemies Guide - Part 2
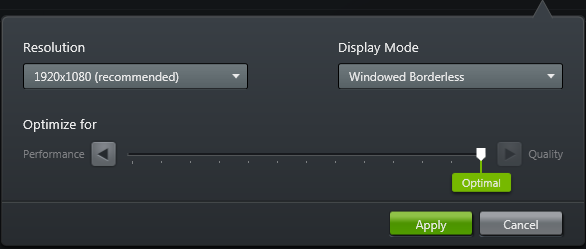 NVIDIA Updates GeForce Experience With Improved Customization