Unofficial The Elder Scrolls V: Skyrim - Dawnguard Guide by CM Boots-Faubert for
When I sat down last year to write the Intro to my walkthrough/guide for The Elder Scrolls V: Skyrim I opened it with the observation that the rush to rate the game as a perfect 10 out of 10 game review score even before it had been released was more than a bit premature. Even the reviewers who moved as quickly as they could to get their reviews online did so at the expense of a thorough play-through and, as a result, failed to take note of the bugs that they did not see because they did not play the game with the usual measure of intensity and completeness that the process normally receives. While you can theoretically begin this expansion in any of the major cities, you are best off starting out in Riften at the Thieves Guild, where you will find Golothid in the bar in the Thieves Guild. Golothid is the NPC you need to talk to (and pay 1000 Gold to) in order to change your face -- which also happens to be one of the new Achievements in the expansion -- "A New You (20 GP) Change your face" -- and due to a minor issue with the game this is ideally your first action even before starting the main set of quests for the Dawnguard expansion.
It turns out that as writers -- and humans -- lessons are learned from the past; this time around there was very little rush to review and the scores that The Elder Scrolls V: Skyrim Dawnguard received were more in keeping with what it deserves. And yes, there are bugs, and yes, the reviewers took note of them this time around. But despite the bugs -- and there really are more than a few -- Dawnguard managed to secure very high rating scores because bugs and all it is one amazing expansion!
Depending upon your play style there is anywhere from around 22 hours to as many as 40 hours (or much much more if your character is below Level 50 considering that you will need to get it to at least Level 78 and that takes some major time to do) of solid entertaining play.
The underlying theme in Dawnguard goes well beyond what most gamers expect in an expansion to the point that it perpetrates significant -- one might even say life-altering -- changes in your characters, and indeed that is an accurate assessment as it essentially requires each gamer to make what is under ordinary circumstances a horrible decision... They must choose to either allow their character to be turned into a Vampire, or allow their character to be turned into a Werewolf.
While it is true that there is a light at the end of the tunnel -- regardless of which mythical beastie you decide to go with, when the story and quests in the Dawnguard expansion are over you can seek out and obtain a cure that will turn your character back into a human (or whatever passes for species for them)... If you want to. I suspect that many gamers will not want to, because both the Vampire and the Werewolf each come with some pretty amazing perks as well as formidable powers, and bear in mind that unlike with the Vampire, the Werewolf form has very little actual or intrusive impact on play as a human (or whatever you are).
With respect to the game, game play, and the story to be found here, history repeats itself again as, just like with the base game, the folks at Bethesda brought gamers a lot more bang for their buck and an intense, immersive, and very addictive story, with a unique set of challenges to boot! Sadly I cannot tell you about the things I would change if I could, because 99% of those wants would constitute a spoiler if I did... Bearing in mind that there are only around ten things I would change, and most of those relate to interpersonal relationships between the characters in the game, and not any major game-changing issues, but still... My respect for you is so great that I simply will not risk spoiling any of this for you because -- and I am sincere when I say it -- this is one awesome adventure and you should savor every second of it!
When you consider that this expansion arrived just as the worse part of the annual Summer Doldrums was setting in -- that period each year when so few new games are released that it often leaves gamers struggling with boredom and nothing to play -- and clearly here was something to play! I can say that in many ways I envy the gamers who had not played the base game until this summer, as I can easily imagine their pleasure in playing through that prior to starting the expansion, and the satisfaction that the experience certainly delivered!
So, as I wrap this up, I offer a hearty "Well Done!" to Bethesda and specifically to Todd Howard, the lead designer and man with the iron fist who shaped the game and its expansion. While there is no official word on the matter, a quiet word at this year's E3 from someone who would know suggested that there will be at least three more DLC offerings for TESV -- and possibly more than that. And if they are only half as big -- and half as good -- as Dawnguard, we are in for a treat!
I very much enjoyed writing this guide, and I hope that you will enjoy using it!
CMBF
This and That
The reason that it is your best first action is simply that if you delay doing this until after you become a vampire, you will be unable to do it, since Golothid freaks when you approach her as a vampire. Since becoming one of those is essential to part of the quest line, it would be an idea to deal with this now and get it out of the way, plus it gains you 20 GP to add to your Gamer Score! So hey, well done mates!
Bear in mind that during this expansion you will become a vampire and a werewolf and, as each, complete a specific set of tasks (and in order to unlock all of the Achievements for the expansion you will also need to obtain 11 vampire perks and 11 werewolf perks respectively as each). Note that you can change your face with her as a werewolf, just not as a vampire. If you do the vampire route first and you want to then change back into a werewolf and you are a member of the Companions, you can ask Aela the Huntress to cure your vampirism immediately and turn you back into a werewolf. Otherwise you will have to do the Rise of Dawn quest in order to change back into a human, which requires quite a bit more effort. Remember though that before you cure your vampirism you should complete all of the vampire-related activities including the Achievement.
Locating Golothid in the Thieves Guild
Now with that out of the way, there is something important that you need to bear in mind:
First, while you must be at least Level 10 to complete most of the expansion and all of its quests -- you must be at least Level 78 to acquire all of the Achievements -- though honestly you should be near to or at Level 60 by the time the expansion was released, so that should be a non-issue for you thanks to the power-leveling section of this guide.
Second, the Dawnguards cannot make you a werewolf -- you can only obtain that transformation from the Companions, but assuming that you have completed the main game, you should be a member of the Companions already, so that is also a non-issue. This being the case, the ideal path to take with this is to do all of the vampire stuff first, and THEN see Aela, get cured and turned back into a werewolf, and complete that side last.
Third, the Dawnguard expansion was actually created for high-level characters, so if you are not high-level (for instance you stopped playing after you finished the main story, which if you are anything like me would put you at around Level 58 to 60), your play-through will take a bit longer to complete than it would if your level was already near the cap because the Legendary Dragon (that you need to defeat for the Achievement) will NOT appear until you are at least Level 78. Since you only gain XP in Skyrim by increasing your skills in the various abilities -- that means that you will be spending some time working those abilities to gain levels.
It would probably be an idea to touch a bit deeper on that subject for a moment -- basically most of the leveling you did for your character level took place as you played because you increased your various abilities. For example by the time I reached level 58 I had capped to 100 the abilities Enchanting, Smithing, One-Handed, Light Armor, Sneak, and Speech. The rest of the abilities were at various levels with some north of 50, but there was still a lot of room for gaining XP obviously. There are two basic approaches that you can use for this -- either let the XP come naturally as you use skills or intentionally begin working those skills to gain levels.
While this is purely a personal decision, you may actually want to grind yourself into the 70's to make it more likely that you will reach the level range you want to be at towards the end of the expansion... Just saying. Another thing that you may want to consider is that there may be a reason for the requirement to be Level 78 to encounter the Legendary Dragon -- a source inside Bethesda has suggested that gamers will need to be high level for the DLC that will follow Dawnguard.
So to cap-off the This and That you are about to embark upon the first expansion to the Skyrim saga and you will find that this is not really a difficult adventure, just a long one depending upon your level when you begin it... So bear in mind that if you are not near Level 78 at the start you will want to do things that provide you with XP.
After you purchase and download the expansion when you start the game by continuing your last save you will note that the expansion is automatically part of the game -- and you will flag the Dawnguard Quest (it is called DAWNGUARD and instructs you to speak to the leader of the Dawnguard). So activate that quest so it is the only pointer and head to Riften (if you are not already there) and exit the city.
Follow the marker through the woods/down the road to the entrance to the Dayspring Canyon -- follow the path after you enter the Canyon and you will meet Agmoer, who tells you that he is a new Vampire Hunter and asks to join you. You both head to Fort Dawnguard ahead which is the Dawnguard HQ, and when you arrive you head inside to meet Isran, the leader of the Dawnguard.
There are three chat options -- for giggles tell him that you were just looking around and ask what is this place? Next ask What is the Dawnguard? He tells you -- with attitude -- and then you can ask him What can I do to help? He briefs you and you then learn from Tolon about a vampire artifact that may or may not be in a cave. Getting the briefing completes the quest DAWNGUARD and flags the quest AWAKENING.
A Chance Meeting on the Path
Isran gives you a crossbow and invites you to help yourself to supplies... Tolon and Isran argue and trade insults, and then Agmoer gets his interview -- and then Isran gives him a crossbow and starts training him right then and there in its use.
If you take the time to explore the fort you will find a bookshelf with the book The Aetherium Wars by Taron Dreth on it -- read that book to flag the Misc Quest "Investigate the Ruins of Arkagthomg." Bear in mind that while these side-quests do not really contribute to the expansion, they do provide you with opportunities to gain ability levels and thus XP by using your skills, and they are a fun and interesting addition that expands the story and intensifies your immersion in the world of Skyrim, so why not do them?
Searching barrels and crates as well as sacks is a good idea as you may find some useful resources you do not have a lot of -- and be sure to grab the 10 steel bolts off of the table in the practice range -- as having extra ammo does not hurt. Once you are sure you have looted everything that you want you may want to head back to your house in Whiterun to drop off the stuff you are carrying that you do not necessarily need at the moment, take the time to make potions there if you need to, and otherwise see to your kit.
As touched upon above, the Dawnguard expansion basically consists of two parts -- the first part that you do as a Vampire, and the second as a Werewolf. Becoming a werewolf (if you are not already one) is accomplished in one of two ways; either through the assistance of the Companions of the Circle, or by playing through the Dawnguard faction side of the expansion, as you are given the opportunity to become a werewolf as part of that.
Bear in mind that the Companions of the Circle will offer to turn you into a werewolf as part of their questline, and should you have either cured that condition or been turned into a vampire, Aela of the Companions will turn you back into a werewolf ONE TIME. After that, you are SOL, and that is something you need to bear in mind... Ideally then if you are already a werewolf you may want to go ahead and level the ability and gain all 11 werewolf perks before you even begin the proper Dawnguard story line just so that is out of the way.
If you are not a werewolf at the start of Dawnguard AND you have not completed the Companions quest line (Lycanthropy is contracted as part of the blood ritual that occurs during The Companions quest, The Silver Hand), you are better off simply playing through the expansion and being turned into one that way, as then you can complete everything and eventually do the Companions quests as well, which will leave you the option later of having Aela turn you back should you need to... Being turned back into a werewolf WILL cure vampirism.
To recap, becoming a Werewolf is only accomplished via the Circle of Companions in Whiterun or through the Dawnguard faction quests.
-- Becoming a Vampire --
At the cusp where you have to choose which faction you will join the Vampire Lord will turn you into a vampire if you choose his faction. Otherwise when you battle with vampires there is a very high chance that you will be infected by Sanguinare Vampiris, the disease that will eventually turn you into a full-blown vampire (but not a Vampire Lord).
Basically when you are in combat with a vampire, every time the vampire hits you with a spell OR a weapon, there is a 10% chance of you contracting this disease. This disease progresses to full Vampirism after 72 in-game hours (three days), but during this time you will receive notifications by the game that you have this disase in the form of hints about feeling strange when the sun goes down, or feeling thirsty when the sun goes down...
It is important to note that it is impossible to become a Vampire while you are already a werewolf, so if you are a werewolf you do not need to worry about combat with vampires infecting you. You also do not need to worry about using Cure Disease potions in that case as well.
In the process of writing this guide I was very active on the Dawnguard chat boards discussing different aspects of the game and expansion with other players, and one of the questions that cropped up quite a bit was that if being a vampire AND a werewolf at the same time... The reality is that you cannot be both at once time from an infected point of view, but you CAN be both a vampire and a werewolf if you are a full-blown vampire and you use the Ring of Hircine -- since the ring will temporarily turn you into a werewolf even if you are not one, because that is its special power. That being the case, if you are a vampire and you use the ring you essentially can use Beast Form while being a Vampire, which sort of makes you a hybrid of both beasts...
-- Curing Vampirism --
Vampirism can be contracted and cured an unlimited number of times -- but the cures are not what you would call instant or easy... Vampirism has four unique stages of severity, each of which is pregressed to the longer you go without drinking blood. Drinking blood will revert you to the next lowest of these stages, and if you do not want to get negative notoriety or bounty, your best tactic is to feed on sleeping humans. The reason you want to do this is simply to avoid Stage Four of the affliction, because the lower the stage the less likely your condition is to be detected by humans, but if you are Stage Four it is a certainty that you will be identified as a vampire and attacked on sight.
Method 1: If you are already a member of the Circle you can speak with Aela to have her change you directly into a Werewolf, which will instantly clear you of your Vampire affliction.
Method 2: Use the Shrine to Talos outside Whiterun or Dragonsreach; activating the shrine will cure you of all diseases.
Method 3: Complete the Rise of Dawn Quest
-- Speak with any Inn Keeper or Bartender about Rumors -- they will tell you about a man named Fallon in Morthal who is studying vampires;
-- Go to Morthal (East of Fort Snowhawk) and speak with Fallon and he will tell you about the cure for Vampirism;
-- Fallon instructs you to obtain a Black Soul Gem (the Black Star will not work for this) -- if you do not already have one, he will sell you one, but either way you need to use Soul Trap to fill that Black Soul Gem in order to advance this quest so do that next by killing a human and casting Soul Trap or using a Soul Trap weapon to kill one;
-- Take your filled Black Soul Gem and return to Fallon and talk to him to complete the ritual. Voila! You are!
So basically the one difference between werewolves and vampires is that it is a lot easier to become a vampire, and a lot easier to cure (remove) that affliction.
-- Curing Lycanthropy --
The condition of being a werewolf was, up until the release of the Dawnguard expansion, largely a function of the quest system of the Circle. Once cured via the Companions quest series, until the release of Dawnguard the only way to get it again was the one-time re-infection that Aela would do...
At the end of the Companions quest line the player can get themselves cured by completing the quest -- but that cure requires the severed heads of two Glenmoril Witches. With the head in hand, the player visits Ysgramor's Tomb, where they draw the spirit of the wolf from their body and defeat it.
Lycanthropy is overwritten by the Vampire Lord when you choose to join the Vampire Lord faction, so technically that is a cure that the player can undertake when they do not have access to the witch head -- by basically getting turned into a vampire and then curing the vampire affliction.
Before we get started on the quests and the adventure in the Dawnguard expansion we need to deal with one significant issue that can cause problems for gamers who prefer not to create alternate saves, and who are purists in the sense that they want to experience one linear adventure using their main character -- the two beast Achievements that are ruled by the fork in the story.
Veteran players will already be familiar with the faction system, which kicked in at the very start of the game when you escaped your own execution -- a system that is used in the Dawnguard story to great effect by basically forcing you to choose the good or the bad side... Either side with the Dawnguard and fight the vampires and their insidious plan, or join with them as a vampire yourself and battle the Dawnguard to extinction -- the choice is yours... But not if you want to obtain all of the Achievements, because then it becomes a very complicated choice indeed.
Even if you are not a purist in this sense, there are two Achievements that may give you trouble -- the two for mastering the perks for the werewolf and the vampire -- which are called "Vampire Mastered" (20 GP) and "Werewolf Mastered" (20 GP), each of which are unlocked by obtaining all of the 11 Perks that are part of the ability trees for each beast form.
The rub is that you gain the ability levels that are required to unlock each perk by killing and then feeding with the appropriate skill. You cannot be a vampire AND a werewolf at the same time, you have to choose one or the other, and you are forced to make that choice only a short way into the story.
Unlocking 11 Werewolf Perks
If you choose to align with the vampire faction you are turned into a vampire, and your story plays out one way, and if you choose to oppose the vampire faction you are not, and you join the Dawnguard in their struggle to slay the vampires -- either as a human or as a werewolf.
So basically there are a few strategies you can take in dealing with this:
(1) You can make a save just before you are forced to decide which faction you will align with, and then play out one to complete its missions and then revert to the save and play out the other;
(2) Assuming you are already a werewolf, you can make a save, then rotate among the cities at night triggering your werewolf form and killing pretty much everything in sight to obtain all 11 perks and thus the Achievement, and then revert back and play through the game aligned with the vampire;
(3) You can play through your choice of alignments and to hell with the Achievements!
One thing you need to bear in mind if you decide to play as a vampire and then have Aela change you back to werewolf in order to get out from under the vampire curse is that she will only do that change ONCE. So use it wisely.
-- The Werewolf --
Basically you change to Beast Form and kill humans -- if you have advanced the perks on the right-hand path you can actually kill animals as well so that should be a priority for you -- and then you feed (using the 'A' button) on the people/beasts you have killed. After you feed a certain number of times -- when you are feeding basically you are eating their hearts -- you gain a perk point.
To speed this up, once you finish killing all the people in the area revert back to human form and then cast Soul Trap on each body to gain another heart. Note that you MUST wait for the message to go away that says you obtained the heart BEFORE casting Soup Trap again.
When you are obtaining the perks with your perk point in order to unlock the Achievement bear in mind that the first choice in the tree requires you to spend four points in it to cap it off.
This Achievement is awarded for defeating a Legendary Dragon -- but those do not begin to appear with any reliability until you have leveled your character to a minimum of Level 78 -- so if you are not at or near that level yet, you will want to back up and read the Ability/Level Grinding Section of this guide and partake of its time-saving goodness.
Once you have reached Level 78 finding the Legendary Dragon is not as hard as you might think... One way to do it is to head to the Dragon Markers on the map where you previously fought dragons to clear them, as they have a higher chance for a random encounter. Another is to simply let it happen when it happens...
Either way when it does happen you will have something of a battle on your hands, because these Legendary Dragon are not push-overs! Be prepared to heal, be prepared to dish out as much damage as you can, and it may be an idea to have more than a few potions on hand just in case!
Battling with a Legendary Dragon
As far as tactics go battling these guys is really pretty much the same as any of the other higher-level dragons -- the trick is to get them on the ground where you can get at them with melee weapons... As you can see from the video here, while it was attacking from the air I was at a significant disadvantage and I needed to find a place wide enough for it to land. Once I did that, heading in to hack-n-slash was the way to go, and I quickly had it dead and the Achievement unlocked.
My advice about bringing potions with you was not casual (I was serious) and as you can see from the video I ended up needing a few myself.
Rumor has it that these guys can drop some fairly desirable loot -- that was not the case with the one I killed but I suppose anything is possible, right? Bearing in mind that it is not like you will only ever battle one of them -- they become the top tier of dragon that you will encounter in your random encounters with dragons, so I would imagine that you will see more than a few as you play through the expansion.
On several of the bookshelves in Fort Dawnguard you will find a book called "The Aetherium Wars" that, when you read it flags the quest LOST TO THE AGES. While this quest is part of the Dawnguard expansion (it was added by it of course) it is not actually part of the Dawnguard story line! What that means is that it is basically unconnected to the main story line so you can do it whenever you like -- and now is a good time since we are already talking about it...
So head to Fort Dawnguard (if you are not already there) and hit the bookshelves to read the book and flag the quest, and then open your quest log and select Miscellaneous > Investigate the ruins of Arkngthomz (make sure both are selected and no other quests are so you only have the appropriate markers on the map to guide you).
Check the map to locate your destination -- Arkngthamz -- and pick a nearby point that you have been to (Dushnikh Val is closest) and fast travel there, then run the rest of the way or ride your demon horse. When you arrive you will encounter a ghostly voice that warns you to turn back -- this is actually a Nord woman named Katria who died in an earthquake while on a quest to find the mythical Aetherium Forge.
As you move closer she will reveal herself to you and tell part of her story -- a story of betrayal and need -- and then directs you to her journal. She will assist you in the quest to locate the four Aetherium Shards required to craft the key that will unlock the Forge, and at this point the quest LOST TO THE AGES officially begins!
Asking her to accompany you is the way to go as she really can help you in reaching the summit -- as you head down the ramp/pillar thing to the first landing you will find her body and, she willingly invites you to loot it, also her journal. Take a moment now to read the journal...
Obtaining Katria's Bow Called Zephyr
-- Deciphering The Journal --
The first thing that you need to do is carefully read her journal, as it provides you with a lot of the information that you need to do this quest, and specifically clues to the locations you need to find.
The first two pages basically re-tell the betrayal of her elven apprentice, who took her notes and published them under his own name, mocking her by making the dedication to her... The following pages offer clues as to the locations of the fragments that are required to make the key to the forge -- and talks about the tonal lock that you will need to solve to get in.
There are diagrams in here that will be important soon, but for now read the journal and then put it away.
Follow the path and you will have to battle a bunch of Dwarven mechanical monsters -- be sure to loot them as they do have both useful and valuable loot on them! Follow the pipes up to the right and drop down onto the path below and continue through the door that is opening and closing -- you can talk to her to get more background on the place, and you can get the story of her death from her.
Continue up the stairs and along the path to battle Falmer Elves, bugs, and mechs and eventually you will emerge on the top of the path and she will spot her bow -- this is apparently where she fell! You can get her bow (it is not a bad one) by casting Telekinesis on it -- or you can walk out onto the fallen log and grab it (which is what I did).
The bow is called Zephyr, and it has a base damage of 18, weighs 10, and has a value of 670. It also has an enchantment that lets it fire 30% faster than a standard bow...
Continue to follow the path until you reach the large chamber with the Falmer corpses in it, and the tonal lock...
The order that the segments are found in may be different for you -- if so, then look to the appropriate section below...
Discovering the Key Segments
-- The Quest for the Key --
When you reach the marker in the large chamber Katria stops you to tell you about the danger ahead -- the tonal lock and its defenses... This is what got her killed it seems, and according to her there may be a plethora of traps, so getting this right the first time is sort of a good plan!
In her journal are the first two in their proper order -- and it is theoretically possible for you to examine the clues here to learn the third by searching the bodies to find the scrap of paper that includes the marking for the third order of the pattern... Or you could just use the information below :)
The lock pattern can be triggered by arrow/bolt or by destructive magic (fireball) and is accomplished by shooting first the bottom left, then the bottom right, followed by the top left, then the top right, and finally the bottom center. After that is shot, the door will unlock and you can continue... If on the other hand you shoot them in the wrong order the trap will spawn Spiders, Spheres, and a Centurion for you to battle, so hey, try not to do that!
Once you open the doors head in and grab the shard -- then talk to Katria. She fills you in on what the thing is that you found -- a segment of a key -- and explains that you have to locate the other three pieces to the key in order to assemble it, and then reminds you of the map in her journal!
There is some decent loot here -- ingots and scrap and a chest with loot in it -- so you may as well grab that stuff since you will want to head home before you begin the next phase to resupply and drop stuff off anyway, right? She has gone out to look for the locations and reminds you to check her journal... But note that if the locations you need are not ones you have already discovered, their arrows on the map may be concealed until you get close enough to reveal the area on the map!
Discovering the Second Key Segment
-- The Key Part II: Raldbthar --
A check of the map shows that the next stage of the quest (for me anyway) is located at Raldbthar, a set of Dwarven Ruins that played a role in a previous quest, so it is possible to fast travel directly to them! Excellent! On the off chance that you have not, for whatever reason, found this location, you are looking for a ruin that is directly east of Irknghand, or directly west and a little north of Uttering Hills Cave.
You may have to fight more than a few enemy as you work your way through the main areas to the lift that leads down to the Deep Market inside, and as you follow the marker you end up in a room with machinery that is clogged up with bones and bits of other things -- your task is to unclog it by removing the objects that keep it from moving!
To do that you need to head into the water in front of the machine and remove the piece of Dwarven scrap metal that is jammed in just below the surface of the water, and then on the far left remove the human skull. To the right away from the water is a gear blocked by a leg bone, and on the far right a gear blocked by a spine.
With those now unjammed use the button on the bridge to lower the other side and battle the Centurion waiting for you there -- and with that defeated, head through the door to the next area where you pull the lever to open the gate and head inside, where you find Katria battling some mechs. Once they are dead (you should help) she leads you to the next key segment and, once you take it, she thanks you again and vanishes to look for the next segment.
Well done! Now backtrack out of the ruins and check your map for the next location!
Discovering the Third Key Segment
-- The Key Part III: Mzulft --
This is another Dwarven Ruin that should be on your map assuming that you have completed the main game and story, since several of the quests took you here... But if not, look on the map to the far east and then either head directly north from Shar's Stone or directly south from Refugees' Rest to locate it. If you are confused watch the video above as it shows the location on the map.
When you arrive all that you need to do is enter the Storage Room which is the door in the small building on the right (you do not go into the main ruins), and inside you will quickly find the key segment -- Katria thanks you and leaves again!
Well done mates! You have three of the four segments, and the fourth is next!
Discovering the Fourth Key Segment
-- The Key Part IV: Deep Folk Crossing --
This is probably not on your map -- which means you have no arrow pointer... If you need help locating the starting point, watch the video above as it shows the location on the map... Move to the far northwest part of the map and locate the marker for Bthardamz and fast travel to that, and then head to the north and west from here until you reveal the marker for Deep Folk Crossing (again shown on the map in the video).
When you cross the bridge and head up the hill you will find a sort of alter thingy on which there is a sword, a helmet, and on the other side, the final key segment! No battles, no hassles, nothing but key!
Katria appears, thanks you and tells you that she will meet you at the forge and hey, well done again mates!
-- The Key to the Forge --
This is another location that is not going to be on your map -- you can read Katria's journal for the clues, or you can simply fast travel to the village of Ivarstead and then head south and east until you see the black marker on the compass bar for an undiscovered location -- Ruins of Bthalft -- follow that marker and you will reveal Aetherium Forge.
When you arrive you will find that Bandits are occupying the ruins -- after you defeat them talk to Katria and then follow her to the globe device and insert the shards, and then well, nothing happens... Talk to Katria again and she suggests removing the key -- and when you do that something happens... The ground begins to shake. She yells for you to back away and you follow her down the stairs to the wooden platform below, and the globe device becomes the roof of a huge structure that pops out of the ground!
At this point you may run into a minor bug in that Katria does not enter like she should -- the thing is you need her to enter the building before you trigger the lift so try nudging her a little to get her started and then she will follow you in. Once she is on the lift, throw the switch and the lift will descend into the Forge.
Once Katria enters the Forge Lobby (basically the area just off of the lift) chat with her to use both chat options, and then you will need to open the door by pulling the lever on its right side. As you follow the path the lights on either side light as you approach until you reach a large locked door and Katria comments that nobody has been here in thousands of years before pointing out the resonators to you that are above the door. Basically you need to trigger both of them to unlock the door!
Using either your bow or crossbow, trigger both resonators and then head through the now open door to the Forge Room, where you need to turn off the steam. Once you do that the defenses of the room are triggered and you must defeat the Forge Guardians -- which consist of waves of mechs followed by a large Centurion. Once you have them dead head over to the valves and turn the steam off again if you like...
Forging a Rare Aetherial Item on the Forge
Talk to Katria and she asks you to use the forge. There are materials in the chests in the alcoves on either side of the room -- you place the key into the forge and are given a choice of three items to make:
-- Aetherial Crown (Retains the last Standing Stone ability you held allowing you to effectively have two of them active at one time).
-- Aetherial Shield (Turns enemies struck by the shield ethereal for 15 seconds).
-- Aetherial Staff (Summons a Dwarven Spider Sphere for 60 seconds).
Personally I chose the Crown as it seems the most useful, but YMMV.
After you make your choice and forge the item Katria talks to you and then you have the chance to ask her a few questions -- and once you have exhausted the chat options, Katria tells you that she can rest, you complete the quest LOST TO THE AGES, and you unlock the Achievement "Lost to the Ages" (30 GP) as your reward.
All that is left now is to backtrack to the surface outside and head home to store your loot or craft or what have you, and then begin the proper Dawnguard questline!
"I've met Isran, the leader of a group of vampire hunters known as the Dawnguard. The vampires that attacked the Hall of the Vigilants may have been after something in a place called Dimhollow Crypt. Isran has asked me to find out what the vampires are looking for."
Before we get too far into this you should be aware that the first part of the quest line is the same regardless of what faction you will be joining -- basically you will be completing the quest AWAKENING and then you will start the quest the follows -- BLOODLINE -- at which point you will be required to decide which faction you will be supporting.
The story for each is substantially different, and so if you do want to experience both I recommend that you create a save and be sure not to overwrite or delete it just before you are to make the choice. That way you can do the faction you do NOT want to do first, then revert to that save and do the faction that you want to complete the expansion with, as that way when you complete it, you are good to go for the next expansion when it is released. Fair enough? Naturally!
So with that in mind this guide will cover both faction lines, and at the appropriate point you simply need to jump to the correct one for your game to proceed. And now, with that out of the way, let us get started on the first official quest of the expansion: AWAKENING. Before you head out for this quest, assuming you do NOT wish to be turned into a vampire until you are ready to choose to be, you should bring a supply of Cure Disease potions with you just in case you get bitten/slashed as you can easily get infected that way. When you are ready, head for the marker...
-- Before You Begin Your Journey --
Prior to setting off for Dimhollow Crypt there are a few minor things you should look to, starting with your kit. Obviously you should be wearing your best armor, and have your best weapon with you. You can take the Crossbow that the Dawguard gave you and, at the Smithy, use the grindstone to make it a Legendary Weapon. Then hit the Enchantment Table in the castle to Enchant it -- adding damage multipliers is always a good idea -- for example I added fire and shock to mine -- as that will make it even more effective.
Before leaving home you should dip into your ingredients chest for the following items:
-- Charred Skeever Hide
-- Hawk Feathers
-- Mudcrab Chitin
-- Vampire Dust
Using those, mix a batch of Cure Disease potions... Bearing in mind that while Cure Disease potions will NOT cure Vampirism, they WILL cure Sanguinare Vampiris, which is the disease that leads to Vampirism and that you will catch while fighting vampires. For that reason these are important since if the infection is allowed to remain beyond two in-game days, it becomes full-blown vampirism.
If for some reason you do not have those or want to take the trouble, hit your local potion merchants and buy some Cure Disease potions for the adventure. I would think that 12 or so potions should be enough...
From your Smith supply chest grab some Dragon Bone, Steel Ingots, and Firewood, and then use the Smithy to make a supply of Steel Arrows and Dragon Bone Arrows for your bow -- ideally you would be better off making Bolts, but the ability to do that as well as make better Crossbows is part of the perks you get for siding with the Dawnguard so you will not be able to do that until later.
You should have some of the bolts you got from the Dawnguard still in your inventory as well as more than a few Dwarven Bolts assuming you were looting all along in the ruins we have been adventuring in -- I sure hope that you have!
Check your supply of Soul Gems -- which you will need to recharge the enchantments on your weapons -- and check your weapons now to see if they need to be recharged and do that. If you are low on filled Gems you may want to grab your Soul Sword and some empty gems and go fill them now...
Completing the Brazier Puzzle to Unlock Serana
-- A Journey to Dimhollow Crypt --
Following the instructions of the leader of the Dawnguard we need to head to Dimhollow Crypt -- if you have completed the main game story you should be able to fast travel to Frostmere Crypt or Mzinchaleft (those are the closest spots you should be able to fast travel to), and then head to the marker in order to "discover" the crypt.
When you arrive and enter the Crypt you will be confronted by a Death Hound and some Vampire -- Vigilant Tolan is dead, he lost his life in his battle with the Vampire -- so you need to take them out as quickly and as efficiently as you can manage. There is a gate here but it is closed and there are no controls to open it near it -- exploring the cavern reveals a set of stairs and some loot and -- coolness -- a pull-chain that opens the gate!
At this point you will proceed up into the tower, battling the odd Vampire and undead skeleton or three, and eventually you will battle your way through a tunnel to a fight with a Boss Vampire -- at this point all things being equal you may want to go ahead and drink a Cure Disease potion since the odds are very good that you have been infected... Just saying.
Opening the last gate to the end area you listen to a conversation between the Vampire Lokil and Vigilant Adalvald before Lokil slays Adalvald, at which point you will battle and kill Lokil yourself. Now, before you do anything else go loot the body of Adalvald and read the book he has, Notes on Dimhollow Crypt, Vol. 3, because it will offer you a clue you need to proceed.
Once you read the book you now have a better informed notion of what this place actually is -- and once you have killed the interloping vampires and their Thrall, you can begin unlocking its secrets for yourself!
Start by sacrificing a little of your own blood to activate the tomb, pressing the button on the pedestal that pierces your hand and powers the glowing field. A close examination of the layout should clue you in that you need to move the Braziers in order to light up the lines and trigger the raising of the tomb! Opening it reveals a mysterious woman who turns out to be Serana -- a vampire who wants you to help her get back to her family!
Once you complete the first part of the dialogue options you complete the quest AWAKENING and trigger the quest BLOODLINE. This also unlocks the Achievement "Awakening" (20 GP) for finishing the quest.
There is an abundance of additional dialogue for you to complete with her, though to be honest Serana does not appear to be very forthcoming with actual information, so you will have to glean what you can from the little that she does say...
At this point you need to depart on your new quest to help her reach home -- but instead of backtracking the way that you came to get to the outside, use the path that is on the opposite side from the one you entered by when you arrived here. On the way you will find that the tomb was built with its own special defenses, and clearly someone does not want this particular vampire wench leaving without first putting up an effort to stop her! After you defeat the Gargoyles and then go up the dirt ramp to the right and through the door, which will lead you to another crypt area.
After you defeat the Draugr that spawn when you pull the lever at the top of the stairs, look around and you will pass down a hall into what looks like an arena, and have some more battles. If you look around this area (and you brought a pick) there are some Malachite Ore Veins -- seriously if you have the pick why not? There are four veins here just so you know.
As you explore the area you will discover a Word Wall from which you learn the first word of power for the Shout Drain Vitality -- you may as well activate that now, you should have plenty of Dragon Souls.
Remember to loot the chests here and, when you feel like you have everything that you want, continue on to the exit door and back to Skyrim.
-- The Shout Drain Vitality --
You have learned the first word to the Shout but there are two other words that you need to learn in order to complete it. The first of those can be found in The Forgotten Vale, and the second in Arcwind Point. While The Forgotten Vale can only be accessed during the upcoming quest Touching the Sky, the wall at Arcwind Point is accessible now.
To reach it, fast travel to Haemar's Shame in the mountains near Ivarstead (to the southwest), and then follow the path south until you see the icon (a black temple outline) on your compass (assuming you have never been here before) and, when you see a medium-sloping wide area of snow to the south head up it to reach Arcwind Point.
Unlocking the Second Word of Drain Vitality
When I arrived in addition to having to battle some Dragon Priests I had to battle a Legendary Dragon -- and once they were managed, the word wall is found to the right of the shrine up some steps. Simply head up and absorb the second word in the shout, which basically gets this out of the way -- yeah, I know, getting things out of the way is not what you usually think of in playing but there you have it.
With the second word to the shout known you will pick up the third word, thus mastering this shout, during an upcoming quest -- the reason that we did this now is simply that having this Shout at full power will come in handy later in our adventures!
Note: this is NOT the Shout that is referenced in the Achievement for learning all three words of a shout -- that one is part of the quests.
-- Stage 2: Heading Home --
You are a long way from Serana's home but of course you can fast travel, so pick one of the locations nearby that you have already revealed -- either Rimrock Burrow or Pinefrost Tower -- and head there now. Once you arrive you can go the rest of the way on foot, at which point you will now be approaching the point where you have to make a choice as far as factions go -- so you may want to make a save before you enter the castle -- actually you really should make a save and note down the time so you know which one to come back to for your permanent play-through.
When you arrive at the castle Serana stops you to fill you in on a few facts -- and after that you will notice two basic situations -- some of the people here are happy to see her, and while her father -- Lord Harkon -- appears happy to see her sort of, he also appears to be more happy to see the Elder Scroll that she possesses...
The situation quickly focuses upon you -- as Harkon begins asking her questions about you, and his daughter reveals that it was you who rescued her, to which her father basically offers you a reward for that service -- you can either become a Vampire Lord and join their faction, or just this once he will let you live, and you will be allowed to leave un-punctured and still in the form that you arrived in.
This is where you have a tough decision to make -- and hopefully you took my advice earlier and made a save that you can come back to later. If you do not care about playing through both faction stories just pick the side you want to play through on. If you do care about being able to experience both stories, your best approach here (assuming you made the save earlier -- if not save NOW) is to pick the path you actually do not want to have as the one you will complete the expansion under, so you can play through that, and then once you have experienced the story revert to the save and play through on the side you actually want to complete the expansion with.
For me the choice was obvious -- while it may be fun to be a vampire for a little while, I am a hero at heart, so siding with the Dawnguard is the way I prefer to go -- and that means that I picked the Vampire side at my first meeting with Harkon so I can experience that before getting through my "real" play-through. YMMV but once you make your choice, simply jump to the next section that applies.
Well you have made your choice, and your choice is to be a nearly omnipotent blood-sucking fiend who had better fear the blonde cheerleader from Sunnyvale High, I am just saying... Actually in the world of vampire lore I have always preferred the movie My Best Friend is a Vampire over Buffy the Vampire Slayer, because I like the warm fuzzy vampire not the sinister violent death-dealing type, so of course I will be slightly disappointed as it is the latter and not the former we have here!
After accepting the "gift" Harkon wastes no time and lunges at you, grabbing you and sinking his fangs into your neck, and the transformation commences as you black out! When you come to in a wobbly I-have-just-had-the-most-intense-pub-crawl-of-my-life morning after, you find that there is a bit of learning to go with this gift, but fortunately for you, Harkon feels in the mood to teach you!
You can ask him what happened and how you got there and learn the story behind how he became a Vampire Lord and the relationship that one of the Gods had in the process -- and then you can tell him you are ready to be trained -- after which he does just that!
First he directs you to assume your Vampire form -- I suggest that you go ahead and mark that as a Favorite now so you can use the D-Pad Menu later to make it easier to select -- and you may want to mark as Favorite some of the Vampire Abilities that are also available to you, though to be honest the one that you will likely use the most is Vampire Servant... Anyway once you have done that go ahead and assume the form.
Becoming a Master Vampire Lord
Harkon then tells you about your powers -- right hand is drain, left hand is raise a dead body as your servant -- and then he asks you to land on the ground (push down on the left joystick) and he explains why being ground-bound makes you more vulnerable and your powers weaker.
Your next lesson is how to feed -- and what that process does for you -- you can ask him about the things you should know about being a Vampire and you should really ask these questions. After all you would not buy a car without asking questions about it, so why would you suffer a life-altering event and not ask questions?
Once you are happy with the lessons and chat, go ahead and tell him you are ready to accept a mission from him now, and he will direct you to deliver a message for him. This completes the quest BLOODLINES and starts the quest THE BLOODSTONE CHALICE.
On your way out of the chamber you will notice a human "Thrall" -- a human that the vampire use as feeding cattle -- who you can feed upon by reverting to human form, moving behind her, and then going into Sneak-Mode and selecting her, choosing Feed in place of Pickpocket -- and voila! You feed!
On your way to deliver the message you can explore the castle for a bit if you like -- in addition to some limited looting opportunities there are Alchemy ingredients to be found -- and of course the joy of exploration! On thing you should do as you explore is speak with Rargal Thrallmaster, who will fill you in on the rules as far as feeding on the Thrall goes.
You will find an Alchemy room with some display cases you can pick for some Lockpicking gains, and fairly well-stocked bookshelves that includes a copy of the Legend of Red Eagle (so you can flag that quest here if you have not already done so).
In one of the display cases is a recipe for Frenzy Poison (Blisterwort Falmer Ear) you should read, though remember that almost all of the stuff in the castle belongs to someone else so you do not want to go stealing it and getting caught! Feran Sadri can be found in the Alchemy Lab and he is a merchant, so you can buy and sell with him. There is another merchant named Ronthil here who can train you in Speech if you still need some leveling there as well as buy and sell -- he has two spells you will really want to have for this stage of play that you should buy: Heal Undead and Necromantic Healing.
On the other side of the main room you will find a smithy in which you can talk to Hestla (a former member of the Circle) who is also a merchant who sells Smith-related items. You should spend some time talking to the other members of the faction in the main room as they sometimes offer you useful bits of information... Once you have scratched that itch follow the marker to Garan Marethi to deliver the message.
Once you deliver the message you learn about the Bloodstone Chalice -- telling him you have never heard of it leads to more information about the item, and then he instructs you to follow him. He pulls a bit of political nose-thumbing on the way to show you the Chalice but you eventually receive it along with some cryptic instructions.
You need to take it to the Redwater Den, fill it there from the source, then add the blood of a powerful vampire...
Completing the Final Step for the Chalice
-- Redwater Den --
Darkwater Crossing is the closest fast travel point to the Den and one that you should already have available to you -- so head there and then walk or ride the rest of the way... When you arrive you find that there are a couple of lookouts posted and they are somewhat abrupt in telling you what they expect. No matter, head inside and down to the basement.
When you talk to the Dealer at the counter inside she tells you what the place is, and you can talk her out of a sample of the product using Speech. Get the secret behind their version of Skooma from her if you like.
It seems that the Den has been turned into a Skooma manufacturing plant -- bear in mind that this is a very rare potion and is ONLY available during this quest, so you should stock up if you like since you cannot get it elsewhere... If you don't know it, Skooma is what passes for recreational drugs in this world, and it has an effect that is an exaggerated idea of what people used to think opium did. Why not grab a few just for shits and giggles?
Once you are inside the Den you will need to pick the lock on the door and enter the cavern, fight your way through and lower the bridge by pulling the lever. Cross the bridge and head deeper into the mine -- note that there is a gold vein and an iron vein you can mine here if you brought a pick -- if not there are picks on the workbench nearby.
In the lower mine area is a table with some potions and a satchel on it that you can loot, and on the wall there is a chain that opens the secret door that leads to the Source. After you enter the Spring area, where you will battle with Draugr. vampires, and eventually Venarus Vulpin, who is a powerful vampire and also happens to be the leader of the Skooma operation here -- so he has a vested interest in making you dead. You will need to kill him and his Thralls before you continue to The Source.
As you are about to fill the Chalice two new named vampire appear -- Stalf ?and Salonia Caelia -- who mostly do not consider you any threat at all and who happen to serve the Vampire Lord Volkihar -- who also wants the Chalice. They argue about who will be claiming the credit for finding and returning the Chalice as if you are not even there, after which point they attack you.
That works out really great for you since you can kill them, and then by looting one of them fill the Chalice in order to add one of their blood to the water, thus completing the trial! Now simply return to the Castle and report in, relating the events you experienced and you learn that things were not really as it seemed... You were expected to face treachery on this mission -- call it bird-dogging the unfaithful if you like.
That completes the quest BLOODSTONE CHALICE and starts the quest PROPHET.
While the role that the Chalice will be playing in the ongoing process is not clear at this point, the return of his daughter for Harkon also marks the return of the Elder Scroll that she carries -- but the problem with that is that the vampires do not have anyone in their ranks who can actually read it -- and that means you will be tasked with helping to correct that temporary deficiency. It just so happens that while the vampires do not have a scholar who is proficient in the language of the Elder Scrolls, the Dawnguard do! You know what that means, right?
He tells you about the Elder Scroll and the prophecy that he learned of, and provides you a bit more of the background and then Harkon addresses his people, telling them:
"Scions of the night! Hear my words! The prophesied time is at last upon us. Soon we will claim dominion over the sun itself, and forge a new realm of eternal darkness.
"Now that I have reclaimed one of my Elder Scrolls, we must find a moth priest to read it. I have spread false rumors about the discovery of an Elder Scroll in Skyrim to lure a Moth Priest here.
"Now it is time to see if those efforts have borne fruit. Go forth, and search the land for rumors of a Moth Priest within our borders. Look to the cities. Speak to innkeepers, carriage drivers, anyone who would meet a traveler. Go now, and carry out this task. This is my command!"
An En-Thralled Moth Priest
-- The Quest to find a Moth Priest --
It works out that Serana chooses to accompany you and tells you so -- go ahead and exhaust the chat options that she presents you with as that will allow you to obtain more background information about her and her family and how they became what they are. As odd as it sounds and as friendly as she is with you (meaning as non-suck your blood kill you now as she was when you first met her) she really does not view being a vampire as a bad thing.
Assuming that you are ready, and you have everything that you think you need for adventuring, it is time to depart the castle. Note that as you head out you get the warning that your vampire blood is boiling -- you may want to feed on a Thrall before you leave, since you could easily be at Stage Three and at least Stage Two by now... Just saying... The human cattle are in pens in the cellar below the kitchen right off of the main dining room so head there and feed before leaving to make your life less exciting, right?
It is suggested that you begin the search at the Mages College -- but you do not have to do that, you can cut to the chase and head for Dragon Bridge where you will talk with either a guard to learn that you just missed him -- he left town across the Dragon Bridge. So chase after him!
Following the road south you will come upon a wagon that has been attacked and knocked on its side. Search the bodies here to find the Vampire's Note -- which instructs the vampires to attack the wagon and take the Moth Priest to Forebears' Holdout. Right then, we now know where the bugger is!
Check the map and you will see that the destination is not too far away - head there and you will find as you approach that there is evidence of a battle outside -- blood trails and kill spots marked by blood! Clearly something is not right here.
When you reach the back section you are attacked by Dawnguard soldiers - what are they doing here?! A more complete search reveals that the Moth Priest is gone and up top you find a vampire named Malkus -- or rather the corpse of a vampire named Malkus -- and when you search him he has a key item called a Weystone Focus that you need to loot.
In the center of the chamber is a whirling force field and inside of it, partly concealed is the Moth Priest! Excellent! Place the Weystone on the altar at the top of the stairs to deactivate the force field and you will then need to subdue the Moth Priest -- who it seems does not much care for vampires -- which remember you are!
It turns out that the Moth Priest has a name -- and it is not Moth Priest! It is Dexion Evicus, and with him subdued you need to cast Vampire Seduction on him (make sure you aim well because that power can only be used once a day) and then bite him (feed on him like you would a Thrall - you know, go into Sneak and bite from behind) to turn him into your Thrall, at which point he will do anything that you tell him.
So tell him to walk to Castle Volkihar and then go there yourself and report in to Harkon, who is very pleased with your success. It seems like you are turning out to be a most excellent member of his crew -- why, he is as happy as Tony Soprano after his HUD scam!
Harkon orders you to command your new Thrall Dexion to read the Elder Scroll and reveal all that it says -- and he does -- but it appears that this is not all of the information that is required to make use of the knowledge that Harkon already has and blot out the sun...
The Moth Priest tells you about Ariels Bow and a story-puzzle of sorts, but he needs all three of the Elder Scrolls in order to complete the prophecy! When you speak to Harkon you learn what he knows about the other two scrolls -- well, his missing wife has one, but we know where the other one is, don't we!
That completes the quest PROPHET and triggers the quests CHASING ECHOES, SEEKING DISCLOSURE, and SCROLL SCOUTING. Well done mates!
If you completed the main game then you either possess the Dragon Elder Scroll or you sold it to Urag gro-Shub at the Mages College of Winterhold -- either way you need to get that Elder Scroll so either grab it from your house or head to the College and buy it back from him. If you already have it, great, if not go buy it back now.
Urog tries to rip you off by charging you 4K but if you are the Arch Mage you can get it for 2K and hey, every gold piece counts. Success in buying the scroll completes the quest SCROLL SCOUTING and updates the quest SEEKING DISCLOSURE adding a tick to the Dragon Scroll requirement.
Now open your Quest List and flag the CHASING ECHOES quest as that is the next one we need to do in order to update SEEKING DISCLOSURE and then complete it! With it flagged talk to Serana -- work your way through the conversation with her to learn that she has an idea of where her mother might be... Sort of. In the process of helping her realize where to look you learn a bit about her father and her.
So now that she thinks that she knows where to look, head back to the Castle and go around to the inlet and tunnel and go in. Wow is this quest moving along fast or what?
Identifying the correct entrance to the secret passage
-- The Castle Gardens --
Once you go around back and up the stairs you will find a door that leads into the castle -- you will battle your way along the path and including a Feral Vampire with a Journal Fragment on him that reveals that he was denied membership in the group and has been playing the subversive. Wow.
In the back of the area is a chamber with an Alchemy crafting station and a level -- pull the lever to raise the gate giving you access to the next area. Head there and to the back and pull the lever that you find to lower the bridge, then backtack to the room with all the bones in it and head into the courtyard.
When you arrive here there is a large sundial in the center and Serana tells you how bad it looks compared to what it used to look like. She figures out that it has to have something to do with the dial -- and your new job is to find themissing tiles to complete the set. There are three missing pieces and when you place them back a stairs opens up going below the sundial!
Head down and you will enter the lower ruins where you will battle your way through Skeletons and Gargoyles until you reach a large room in which Serana tells you there should be a secret passage -- this is the room in which you are attacked by three Garglyles. At the end of the room in a small alcove is a small fireplace -- activate the candles on the left side of the fireplace and you reveal the entrance to the passage -- which leads to Valerica's Laboratory.
Note: based on the conversations that I had with other gamers while playing Dawnguard for this guide this part was the most annoying and frustrating for most players because they had a very hard time finding the correct room and then the secret passage. I suspect that at least part of the reason for that is that all of the fireplaces previously seen on this quest were both larger and had fires burning in them...
So even knowing that they were looking for a room with a fireplace the small size and the fact that it has no fire actually burning in it served to confuse. So in a nutshell, when you reach the room in which you are attacked by three Gargoyles AND Serana comments that there should be a secret passage here -- THAT is the correct room. So just head to the back (opposite from the side you entered from) and look into the shallow alcove that is up three steps (or so) and look for the firewood -- that is the fireplace. Twist the left-hand candle and voila! You are in to the passage. Hope that helps mates...
Opening the Soul Cairn Portal
-- Valerica's Laboratory --
When you arrive in the lab Serana gives you a basic briefing of sorts and you have a chat with her -- and she tells you that she needs her mother's journal -- that it will likely offer the clue that you both clearly need to progress from here. You will find the journal on a bookshelf (it has a red cover), and even though technically Serana has to read it for the the quest to advance you can (and should) read it anyway since in addition to telling you the ingrediants you need it also provides you with some interesting background information as well, so bonus!
After you read it Serana asks if you found it -- and you tell her yes -- and she insists on reading it herself, after which she tells you the three ingredients that are required to open something called the Soul Cairn. They are:
(1) Finely Ground Bone Meal - On the table with the skulls near the entrance, in a large silver bowl.
(2) Purified Void Salts - On the last shelf on the balcony, in a large silver bowl.
(3) Soul Gem Shards - Atop a wardrobe just past the stairs on the right, in a large silver bowl.
You will find all three Alchemy ingredients in the room across all of the levels -- all of which are in special larger containers -- and after you collect these and place them in the chalice on the balcony overlooking the portal, Serana will add some of her blood to the mixture causing the portal to open thus allowing access to the Soul Cairn.
After the animation for the opening completes a set of stairs will appear linking the balcony to the portal, at which point you can just head down the stairs and enter it to zone in to the Soul Cairn, completing the quest CHASING ECHOES, and starting the quest BEYOND DEATH.
In addition to being the realm to which Serana's mother escaped to live in peace away from her estranged husband this is also an interesting zone in its own right, so after you open the portal and enter and complete the basic elements of this quest but BEFORE you leave, take the time to carefully explore this area and talk to the different entities here -- some will give quests that can be completed within -- but bear in mind that there is a bug that is known to exist in the game that can prevent you from returning here after you leave to finish the story/quests -- nobody knows what causes it, and while we hope that there will be a patch soon that fixes it, for now you should treat this as if you can only come here the once time (now) and do as much as you can just in case you get hit by that bug!
So embrace it and take as much fun and adventure as you can now because this is absolutely a Carpe Diem sort of place!
Now let's see to the elements of this quest first by seeking out and speaking to Serana's mum Valerica. On the way to her following the marker you run across a male soul and have a forced conversation in which he demands that you help him to locate his friend Arvak -- which flags the Misc Quest FIND ARVAK'S SKULL (which requires you to Find Arvak's Skull in the Soul Cairn).
Now continue to follow the marker to Valerica and you will eventually reach the fortress in the distance and meet with her mum! As the conversation ensues you pick up a few more details and then her mum starts freaking out... She interrogates you and then explains more of the backstory to you... Never saw that coming, how about you?
Well that could have gone better but considering the usual route that family arguments take this was actually pretty tame really -- but in the end she comes around and gives us the information that we need, which begins with killing the trio of Boneyard Keepers who are guarding the fortress -- oh yeah, and there is a nasty dragon in the hood as well she warns us. Go ahead and exhaust the chat options as you see fit and then head off to take care of the Keepers now.
During your travels to the three Keepers you will run across a Soul named Jiub who has a problem that he could use your help with -- he is a composer and writer and he is having trouble with writing his book, specifically once he understands that he is dead he asks you to help get his book out of the Cairn and back to Skyrim! You agree to help him and that flags the quest THE IMPATIENCE OF A SAINT -- which involves locating the scattered pages of his research notes; ten pages that you need to find. If you work through the chat options that he has available you learn a bit about him, his story, and events you should know about if you played Elder Scrolls IV: Oblivion.
When you are following the markers for the Keepers you should come across a lit shrine with a pedestal upon which is sitting Arvak's Skull! The game makes this a bit easier for you by popping a notice on screen if you get within a certain distance of it so when that happens go to the lit shrine and grab the skull, right?
One of the Keepers is actually on top of a tall tower and the marker leads you to a teleporter that will take you to the top -- use that, kill the Keeper, and then use the second teleporter at the top to come back down to ground level!
Once you kill the third and last Keeper set the quest marker to the Misc quest FIND ARVAK'S SKULL and return the skull to the Soul. Now flag the quest IMPATIENCE OF A SAINT and proceed to collect them. Watch the video below as I show on the map where I am when collecting each page, with notes below for anything that you may want to be aware of...
Finding the ten pages for a Saint
Page 1 -- From where we entered the zone follow the path to the wall but do not climb the stairs and pass through it. Instead turn right and follow the wall in an easterly direction to the next set of stairs, climb it and take the page.
Page 2 --Facing the stairs that lead up to Valerica turn left and head through the first opening on the right and inside is a chest with the page on the ground before it.
Page 3 --From the far west where we entered the zone head east but not through the wall -- when you reach the wall turn north until you reach the small building with the gem on top. Go to the roof and the page is on the roof in front of a treasure chest here.
Page 4 -- Facing the stairs where Valerica is head right and follow the wall around, to up the stairs on the other side and into the passage on the left at the top. The page is near a chest at the end of the passage.
Page 5 --South of the cold campfire spot of the quest giver is a purple well in a stone square. The page is beside the well.
Page 6 -- Head back to the opening in the wall where the main path passes through but still on the west side (the side we entered the zone from) and turn to the southwest and enter the first building you come to -- the page is on the floor to the right in front of a treasure chest.
Page 7 -- at the base of a pedestal on top of a low structure. There is a spell book for Conjure Mistmen on the pedestal so be sure to grab that too.
Page 8 -- Inside a locked building with a pair of blue light/locks that look sort of like eyes to the right of where we entered the zone to the far west. The page is in the floor inside in front of a chest. Shoot the two lights with arrows to unlock and open the door.
Page 9 -- From the stairs leading to Valerica head west until you hit the glowing border wall then turn left and follow it to the first tower on the left close to the wall. Go between the tower and the building then turn right and go into the building -- find the teleport pad and teleport to the roof -- the page is behind the treasure chest up the nearby stairs. Be aware that the gem up here is draining your life so you will want to be quick about grabbing the page :)
Page 10 -- From the west side of the wall (the side we originally entered the zone on) on the main path at the opening go up the stairs through the wall and down the stairs on the other side and then turn east. Go east until you see Marvin the Soul Merchant by a cart -- the page is on a nearby barrel.
The Soul Merchant named Marven Stroud was a merchant in Skyrim before he was Soul Captured and while he has no interest in gold, he will allow you to trade 25 Soul Husks each to him for a sword, a battleaxe, light armor, heavy armor, or a spell tome. Basically you get a random item of that type form him for each 25 husks you trade...
-- Wrapping up the IMPATIENCE --
After you gather all ten pages and return them to Jiub the pages are removed from your inventory and you receive the Locket of Saint Jiub -- the stats of which are Armor = 12 / Weight = .5 / Value = 2422 / 50 Stamina / 50 Carrying Capacity. Not a bad reward!
In addition to the locket you also receive a copy of his book -- St. Jiub's Opus. Considering the hassle you went through to get the pages you should probably read the book :) This completes the quest IMPATIENCE OF A SAINT.
A Meeting with Durnehviir
-- Return to Valerica --
Now that those two side-quests are completed return to Valerica and speak to her and she is impressed by your success in defeating the three Keepers. Follow her into the Boneyard as she is taking you to the Scroll... But wait! As we enter the Boneyard who should show up but the deadly Dragon called Durnehviir!
Right, so you know you have to defeat him -- but once you take him out Valerica fills you in on his capabilities and the fact that he was no ordinary Dragon! Follow her to the Scroll's hiding place to complete that part of the quest, so take the Scroll and then talk to Valerica.
Once you depart the Boneyard and return to the Soul Cairn you are confronted by Durnehviir! It seems that his temporary death was really temporary!!
Work your way through the chat options and he tells you about his situation and the respect that he holds for you now that you have bested him in battle. After the mutual chest bumping he asks you for a favor -- he wants to gift you with the word of power that allows you to summon him in the overworld, so that he might return there even if temporarily whenever you have need of his assistance.
As you stand in awe of the gift, he teaches you the first word in the Shout Summon Durnehviir. Be sure to activate the Shout by using a Dragon Soul... Be aware that this is not the Shout that is related to the Achievement -- you get all three of the words right then so go ahead and activate them with Dragon Souls now. Once you return to Skyrim target the ground and do that Shout to summon him, and he will teach you the first word to the new Shout called Soul Tear -- which IS the Shout that is associated with the Achievement. Activate that new Shout and then when he departs, summon him again with his Shout to learn the second word, and then after he departs summon him a third time to learn the third and final word of the Shout, unlocking the Achievement "Soul Tear" (20 GP) which is unlocked when you learn the third word of the Shout.
Exiting the Soul Cairn completes the quest BEYOND DEATH and unlocks the Achievement "Beyond Death" (20 GP) for completing the quest.
Now that our adventures in the Soul Cairn have come to a conclusion and we have called Durnehviir three times to learn all three words to Soul Tear we have pretty much wrapped up all of the loose ends of this quest line save for one: turning the Elder Scrolls over to Harkon! So head into the castle and find your Thrall Dexion only to discover that he has damaged his eyes reading the first Elder Scroll! D'oh!
Dexion tells you that there are locations scattered over the lands are glades that you can perform a ritual in which you use Ancestor Moths to empower you to read the Scrolls -- but of course this requires another quest! Completing this conversation completes the quest SEEKING DISCLOSURE and flags the quest UNSEEN VISIONS.
Receiving some bad news from your Thrall
Talk to him to learn more about the relationship between the Elder Scrolls and the Moths -- and the whole Moth Priest cult. He explains how the Moths help in the deciphering, and he explains to you that your past successes suggest that you are able to complete the challenge.
You should complete the different chat options with him to learn a bit more background, and once you are done now would be a good time to feed on your Thrall to lower your Vampire condition since it is very likely at level four now, and as you will be leaving the castle getting it back to level one would be a really good idea.
Before we set out on another adventure in the main story line we have reached a point in our relationship with the Vampires that allows us to get side quests from some of the other supporting members -- the thing is once you advance the story to the point that you will come at odds with the collective it may not be possible to do some of those. In the interest of completely covering the game in this guide, I thought that now would be a good time to manage some of this and have a little fun in the process, so why not join me?
For the time being leave the quest UNSEEN VISIONS unflagged, and let's flag some of the other quests and do them!
To begin completing the side-quests go to the Alchemy Room and speak with Feran Sadri, selecting the chat option "I heard you might need help" to learn that the Dawnguard have been causing problems for the collective and a setup to draw negative attention to the Dawnguard -- and this flags the quest DECEIVING THE HERD.
You need to select a notable target, murder them in a high profile way, and plant evidence that points to the Dawnguard. To help facilitate this, he provides you with Dawnguard armor to wear when you do it!
Killing a prominent member of the Herd and planting the note
The target needs to be in Whiterun (or whatever city ended up being the capital), and optionally it can be an important person... Wearing the uniform is optional as well but hey, why take half measures?? Note that "important" can mean merchant, bard, or official, but you do need to be sure that there are witnesses to the killing and that you plant the note by using the loot window and "storing" it on the body.
I chose Anoriath, the merchant with the stand by the Inn -- but you can pretty much pick any prominent person in the city. The really strange thing is that as I was making my escape I was stopped by a guard (as you usually are when you have a bounty) and given the opportunity to pay it off. Paying it off did not mess up the quest, how strange is that??
Head back to Feran and report your success -- I changed out of the Dawnguard uniform so as not to freak anyone out before going into the castle heh -- and when you report in he basically gives you an after-action assessment in which he notes what conditions you complied with and then rewards you based on the level of your success in doing what he asked you to.
The reward that I received for completing all of the criteria was a Necklace of Disease Immunity -- which gives 100% Disease Resistance. That completes the quest DECEIVING THE HERD.
Talking to Feran again causes him to direct you to speak with Fura Bloodmouth, who it seems has something for us. In fact if you try to help any of the other merchants in the Castle they say the same thing -- so we should speak with Fura Bloodmouth eh?
You will very likely find her near the Smithy practicing her weapons skills -- and when you talk to her she begins by giving a long discourse on, well, her. She has some chat options you can explore, and she can train you in Two-Handed if you still need it... When you ask her about helping out she tells you that there is a beast that needs killing -- specifically a Master Vampire at some random location -- and this flags the quest CULLING THE BEAST.
Culling the Beast and Assassinating a Master Vampire
Since this quest involves killing a Master Vampire and we will not be interacting with the Herd we don't have to concern ourselves with what stage we are presently at, though you will want to make sure your kit is in order. When you are ready to go depart the Castle and fast travel to the location that was specified (or as close as you can get). The location varies as this is a repeatable quest that can actually be given by other members of the collective than Fura -- just so you know.
When you arrive you should know what to do -- kill! Weather you do that with your sword or with your vampire powers is your call -- I find it a lot faster to use the sword myself. Depending upon which location you get sent to you may face dogs, wolves, vampires of different types, and thrall, and then the Master Vampire you came to kill. When you are done head back and report in!
Your reward is three bottles of Potions of Blood and the knowledge that you have once again performed a service for the collective. Well done!
Speak with Fura again and ask about helping and she instructs you to speak with Feran again -- when you talk to him he tells you that he needs the petrified remains of an Elder Vampire and this flags the quest ANCIENT POWER.
This is another quest that sends you to a different location each time, and it can be repeated a total of seven times -- in order to obtain all seven body parts, which are the head, ribcage, arms (2), hands, and legs (2).
Recovering the parts of an Elder Vampire for Research
It is basically a series of fetch quests that you have to get through as part of the quests in order to get to the other main side-quests, but fortunately they do not take long and for the most part they are in places you can fast travel to assuming you have done a reasonable level of exploration of the map.
You should expect some resistance by the spirit of the Elder Vampire and other undead minions so it will not be a walk in the park, but it should not be too much trouble, especially since Serana will be with you... The reward is another three Potions of Blood, and a well done to you!
Feran now tells you to speak with Vingalmo for your next assignment.
Note: There is a bug that can crop up in which you end up getting assigned the same person twice, or assigned to a person who is actually dead, both bugs make this and other random quests broken. To protect yourself against these always save before you turn in a quest, that way if you get a bugged assignment you can reload and then get a different one. Just saying.
Vingalmo tells you that he has found a new candidate for the collective -- and he wants you to go and use Vampiric Seduction and turn the target into a vampire! Considering that we have already done this to get the Moth Priest into the fold you would think that we would already know how but it seems that the game wants to teach us again... And this flags the quest NEW ALLEGIANCES.
Recruiting new Vampire for the Collective
So yeah, we need to turn whoever it is that he has named into a vampire, and we need to do it discretely -- no witnesses -- and we need to do it now while the stars are right. So it is time to head to the town that he specified and see to this task, but before you go if you are in state three or four of vampirism you really should feed before you go as otherwise the guards may attack you in sight!
To complete this locate the target and when no one is looking stand behind them and cast Vampire's Seduction on them, then go into Sneak mode and feed on them. Once you do that they will tell you that something has happened and they are not feeling well and need to lay down... At this point you have fulfilled the requirements of the quest and can return to report in.
When you report in Vingalmo rewards you with either a random item with a random enchantment or with three Potions of Blood. Well done again!
When you talk to Vingalmo again he tells you that he has learned that you are married -- and he wants you to turn her into a vampire! This flags the quest THE GIFT.
Turning your spouse into a Vampire for their protection
This is basically the same quest as the one you just did, except your wife is the target and not some unknown character. So when you are ready head home and cast Vamipre's Seduction on her, then feed and you will have completed the required steps for this quest.
After you turn your wife return to report your success and he is pleased. I did not receive a reward for this quest so perhaps there is not one -- either way reporting in ends the quest THE GIFT.
You are next directed to speak with Fura again -- and when you do she tells you that you need to kill a Dawnguard Spy -- flagging the quest THE HUNT.
For this assignment you need to be discrete and take the target out ninja-style, not getting caught in the process. As she says, the corpse is the message this time, not the attack, and as with the previous quests this one is sort of random, with different targets in different locations.
The Hunt for the Dawnguard Spy
The target will be disguised as either a Traveling Merchant, Traveling Bard, or a Traveling Pilgrim, and will be found in one of the towns, so you will need to take care when carrying out this assignment starting with being sure to feed before you go to ensure that your stage is reset.
I never actually got to carry out the mission in this case -- I arrived in Rifken and began to follow the marker but the "Pilgrim" recognized Serana and attacked her and she killed him before I could even realize what was happening and head back to help! So basically I arrived, I walked into an alley, and I got the message that the quest had been completed and that the optional discrete requirement had been met even though I did not have any part in the doing of it!
Head back and report the success and she seems pleased. She then tells you to speak with Garan Marethi, as he has something for us... This completes the quest THE HUNT.
When you talk to Garan Marethi -- the elf -- he tells you that one of the brood has joined with necromancers, and this is simply not a good thing. He orders you to destroy what amounts to a boss-level vampire (it will either be a Master Vampire or a Nighmaster Vampire), and they will appear in some random location -- usually a camp, cave, or ruin.
This was one of the quests that was located at a place I had not visited before -- kind of cool that -- so I had to fast travel nearby and hoof it in. The world of Skyrim is so huge that it really is not all that surprising that there are places we have yet to visit.
Disposing of a Traitorous Vampire Necromancer
You end up battling more than a few of the necromancers as well as the target, but the challenge should not be too daunting, and it brings you one quest closer to resuming the story line, so cool that!
When you return and report your success you are rewarded with a random item that has a random enchantment, and when you talk to Garan and ask about helping out he tells you to return to Feran, who has something for you. This ends the quest PROTECTING THE BLOODLINE.
When you speak with Feran he tells you that he has discovered a pair of ancient rings of Blood Magic -- and this flags the RINGS OF BLOOD MAGIC quest. You should go ahead and go through the chat options to learn about the rings, it is an interesting story, and once you are done and ready, go ahead and hit the door!
The objectives for this quest are the Ring of the Beast and the Ring of the Erudite, both of which are powerful rings that augment a Vampire Lord's special abilities while transformed and also increase their attributes while in humanoid form -- so if the vampire side is the side of the expansion you have chosen for your main play-through these would be very good to have.
Now is a good time to buy some ingredients and replace any potions you used up -- in particular health potions -- and you should see to your other kit so you are well prepared.
The actual quest part of the quest was, for the most part, a pretty standard attack and loot type of experience -- though there was a Frost Dragon there that attacked when I arrived at the location -- you go to the locations, kill the bad guys, and take the rings, and once you have done so you just head back to chat with Feran to report your success and he congratulates you and confirms that you do indeed get to keep the rings! This ends the quest RINGS OF BLOOD MAGIC
Important Note: You have now reached the point where there are two unique side-quests left in the series that are part of the vampire faction but to get to them you will have to complete a large number of the repeating quests noted above... The reason for this is that there is one quest -- Ancient Power -- that requires you to complete it seven times to get all of the body parts. But to get to it those six more times after the first, you have to complete a sort of circle of the other quests, because you do not get all six follow-up quests in a row. What that means is you will need to be patient and keep your sense of humor intact.
Obtaining two Legendary Vampire Rings
While it is really no big deal to do these quests over and over, what is a big deal is that you are almost certain to fall victim to one of several bugs that exist in the game in which the game will assign you the same target more than once for some of the quests. This is a problem, for example, if you are doing the quest to turn a new vampire and you have already turned that person -- which means you cannot complete that quest. I know that I mentioned before that you should save before turning in a quest, but now that needs to be amended to you should ALWAYS save before turning in a quest.
To put this in perspective for you, the order in which the circle-of-quests played out after I did all of the repeatable quests once was as follows:
(01) Ancient Power (first)
(02) New Allegiances
(03) Deceiving the Herd
(04) New Allegiances
(05) Protecting the Bloodline
(06) Ancient Power (second)
(07) The Hunt
(08) Culling the Beast
(09) New Allegiances
(10) The Hunt
(11) Deceiving the Herd
(12) Culling the Beast
(13) Protecting the Bloodline
(14) Ancient Power (third)
You get the idea here -- there is an average of anywhere from four to seven repeats between the Ancient Power quests and you have to complete it a total of seven times, so as you can see the process is a long one...
Another point that should be made is that once you do the quests for the first time -- and do them right -- you can get away with doing a half-assed job on the repeats. That means you can just go for a sloppy kill even when they say it needs to be ninja, because bluntly you just need to get the quest done to move on to the next... That is my take anyway.
Back on the main story path now, we are taking the advice of our Thrall the former Moth Priest and heading for the Ancestor Glade -- but first we have to locate the special knife that is required to peel the bark from the tree... Fortunately this is also found in the Ancestor Glade so our first step is to head straight there!
The easiest way to get there -- if you have not already discovered the location on one of the side-quests -- is to head to Falkreath and then head east and a little south from there and you will find the entrance in the rocks on the side of the mounting up a steep mountain path that you will find by following the stream that crosses the highway.
Inside the cavern you need to follow the upper path -- jump up on to the start at a low ledge and then work your way up and cross the fallen tree, then follow the marker out of the cavern into what must be the glade itself -- a huge and impressive open area -- follow the marker to get the Drow knife from the rock thingy and then step over to the tree with the pink flowers and have at it!
Deciphering the Elder Scrolls
Basically all you need to do is walk around the area of the springs and the hills above and collect seven groups of the moths -- you will have no trouble spotting them and you just have to walk into them to collect them. Once you have seven of these special moths head back to the bottom of the glade and step into the pillar of light and then select the Blood Scroll to start the process -- you will automatically read the others and the image that they ontain will appear before you -- then you go blind (just kidding).
After you read the Scrolls talk to Serana to progress the story and complete the quest UNSEEN VISIONS. This also flags the quest TOUCHING THE SUN. You have a long conversation with Serana and then you are attacked (or at least I was) by the Dawnguard. After you take them out talk to Serana to finish the conversation.
This is probably the most complicated quest in the series and the one that I like the best -- but it is a long one so you should definitely head either home or to the Castle and sell off any loot, maintain your kit to be sure you have everything that you think you will need, and otherwise prepare for a reasonably long quest. When you are ready open your map and find the nearest fast travel spot to the marker, then head there and hoof it (or ride your demon horse) to Darkfall Cave.
Inside the cave you will encounter more than a few Frost Spiders - following the right-hand path will take you to a pair of Moonstone Ore veins you may as well mine on the far side of a bridge. If you did not bring a pick with you that is no big deal there is one on a table to the right -- just look for the lantern.
When you try to return to the main path though, the bridge will collapse (it is OK you were meant to do this) and you will fall into the rapids and be pushed down through a tunnel and land in a spider nest -- kill all of the spiders -- there is a spider den here down a round passage that has a skeleton and a treasure chest at the end that is worth looting -- and then just follow the path from here until you reach an abandoned camp where you will find a body with a note on it you should read... Bummer huh?
You should loot the camp and body as there are some useful items to be had, and then you should look to the wall behind the lean-to shelter for a chain to pull that opens the secret door and go through that and follow the path that will bring you to a shrine at which there is an elf praying. He tells you that this is the Great Chantry of Aerial. Work through the conversation options with you -- he knows why you are here and will help!
-- Auriel's Chantry --
The elf is Knight-Paladin Gelebor, who explains that he is among the last of his species, which is Snow Elves. He tells you his story and agrees to help you if you help him -- and what he needs you to do is help him kill his brother, Arch-Curate Vrythur, who has become corrupted by the Falmer.
After you agree to help he gives you an Initiate's Ewer and then explains that in order to reach his brother you must follow the path of an initiate of the Chanty of Auri-El, a challenge that requires you to pass through five Wayshrines like the one that he just summoned for you -- and by doing so you will eventually reach the Inner Sanctum where his brother and Auriel's Bow are located. Well that's great mates! We kill two birds with one stone! Or we kill one brother and get the bow we came here to get with one stone... Err... No... I am close, hold on! We get the bow and kill a brother with umm, one arrow? Bugger!
Anyway when you are done talking to him head into the Wayshrine and enter Darkfall Passage, then follow the path dealing with the many Falmer and Chaurus Hunters that pop up to do mischief to you -- when you reach the next camp kill the enemy here and loot the camp then head past the large blue crystal to another passage and follow that to the waterfall.
There is a room on the leftt down a passage and inside is a skeleton with a note you should read that warns you of traps (but then you already triggered a few of those didn't you? So no surprise for you!) and, near it are two ropes. The left-hand one opens a secret door, the right-hand one will give you a surprise! (I did not say a good surprise, now did I?).
Kill the big cat and then follow the path until you encounter Prelate Sidanyis who is waiting at the Wayshrine of Illumination ahead. He opens the shrine for you and you go inside, draw water from the basin and then enter the portal.
Obtaining Uber Rare Shellbug Chitin
-- Forgotten Vale --
Now before we do anything else, in addition to being part of the journey you are on this area also has some extra stuff in it that you will want, so a little exploring as you go is in order! You will find here some Unknown Books that are used in another quest and this is the only opportunity you will have to obtain them, so I would do it if I were you...
Follow the path to the vale, where you need to find the other four shrines and fill your Ewer at each. Explore the area and you will find the Wayshrine of Sight, and Prelate Athring, the Wayshrine of Learning and Prelate Celegriath. You should find the Unknown Book, Vol. I along the way (in any event you want to do that before completing this part). The next Wayshrine is across the river, and it is the Wayshrine of Resolution with Prelate Nirilor in attendance.
Now this next bit is really important! The third word of power for Drain Vitality is learned just to the south of the Wayshrine of Resolution, where you will find its word wall. Now we already went to the trouble of learning the first two words, we may as well learn the bloody third word right? Seriously, be sure you do this and get the book BEFORE you continue to the fourth shrine, alright then?
If you follow the path along the ridge instead of turning to go down the slope when you first arrive in the Vale there is a cat to kill and a Silver Vein you can mine before heading down into the Vale... I recommend doing your exploring during the daytime so if darkness falls make camp until dawn. There are additional Silver veins along the upper ridge so if you are low on that metal you can get a few here, and if you continue along the upper ridge you will also find a Gold vein bear the path leading up into the area above (that you do not want to go up just yet as you still need to explore the bottom of the Vale first).
As you circle the outer edge Serana will spot the shrine just as you find the third Gold vein -- mine that and as you continue along the edge (ignoring the shrine) you will find the entrance to the Fogotten Vale Cave! Go in and clear out the targets and then head up the ramp to the left and pull the rope release there to open the secret door -- inside the secret chamber is a Shellbug that you can mine to obtain both gems AND Shellbug Chitin, which is an uber rare crafting ingredient required to make special armor.
Once you have mined the Shellbug backtrack to the Vale and continue exploring, and once you complete the circuit of the Vale bowl, hit the center to loot the Gleamblossoms to be had there and finally head to the Wayshrine and talk to the keeper to fill your container. When you have done that head along the nearby path (through the arches) and on the other side of this cut just before you reach the river you will find a skeleton next to a treasure chest -- on the ground next to the chest is a coin purse and the first of the Forgotten Books so be sure to loot those!
Noe head south along the river to reach the Wayshrine of Learning and speak with Prelate Celegrioth and fill the container. Backtrack to the northwest following the river and you will encounter a Frost Giant -- kill it and loot the body to recover an Amethyst Paragon and some other stuff. Hold on to the Paragon. On the other side of the river is a path leading up so climb that and you will see the next shrine. Make your way along the path and over the stone bridge to the Wayshrine of Resolution and talk to Prelate Nirilor to fill your container.
If it is getting dark (it probably is) go ahead and camp until dawn.
Unlocking the third word of the Drain Vitality Shout
-- Word of Power --
From the shrine head south to the center of the frozen lake where you will find a word wall and the third word for the Shout Drain Vitality! Now, I do not have to tell you to collect that, right?
Did I mention that you have to battle a pair of Dragons? One is named Naaslaarum, the other Voslaarum. Yeah and they are freaking deadly so be careful right? In fact now would be a good time to save your game, I am just saying... They don't stay on the ground for very long so get your licks in while you can and make sure you use Fire Protection potions because their breath does a lot of damage!
After you kill them be sure to head up to the word wall and collect the word -- go ahead and activate it now as that gives you Drain Vitality at full strength!
So at this point you should head back to the shrine and then backtrack over the bridge and down the path to the river again. Heading west will take you to a Falmer camp -- clear that and then head above to the Falmer village and clear that -- simply follow the path up and through Sharpslope Cave and then make your way over the bridges to the house that is closest to the entrance of the Glacial Cave and grab the book, some healing potions and pearls from the table.
After you have looted everything you want, head up the path and walk into the Glacial Crevice here and you will enter the path that takes you to the final area of the Vale -- just follow the path and stick in an easterly direction, killing anything that attacks you along the way. You pass through some tunnels and the path itself can be a bit dangerous, so go easy on the edges of it, but you will eventually arrive at the exit to the Forgotten Vale. Well done!
Follow the path to the hut with a mammoth skull above it (there are more than one) and, inside you will find Unknown Book, Vol. IV and well done mates! Good on ya! Nice one! There are several veins of Quicksilver here if you need that...
Now head north through the cave and down to the Wayshrine of Radiance and Prelate Edhelbor where you make the last fill and complete the challenge. Now you need to head northeast until you reach the Inner Sanctum and go in!
Unlocking the Achievement Auriel's Bow
-- The Inner Sanctum and Auriel's Chapel --
Inside go up the steps past the statue and pour the Ewer into the basin in order to unlock the seal on the main door to gain admittance. Go inside and activate the alter and then standing behind it grab the Ewer and duck through the closing door, following the path to the next alter using it to activate another alter, and loot the potions and treasure inside! There is a Frost Giant is here with a Ruby Paragon BTW.
Now backtrack and open the way back to the main hall and follow the path through the Inner Sanctum and ruins past all of the frozen Falmer until you reach the throne chamber, where you will find the man you have come looking for.
That is when your problems begin because the first thing that he does is unfreeze all of those Falmer! You will fight waves of them and then the Ancient Frost Atronach that he summons -- pursue him and continue to battle the summons and eventually he will retreat up the stairs and continue to battle you -- on the balcony you learn some key information...
Once you defeat him the Wayshrine here will raise and Gelebor will emerge -- chat with him and then go into the Wayshrine and obtain the bow -- Auriel's Bow to be exact -- the bow we have been searching for! Well done! Now ask Gelebor for some arrows -- he gives you however many (up to 20) of Elven Arrows you have, converted into Sunhallowed Elven Arrows.
Talk to Serana to decide how you will deal with the situation with her father -- clearly you will have to kill him before he kills you both...
Now before you leave head back to the balcony, arm the bow and one of the special arrows, and aim it at the sun and release the arrow to unlock the Achievement "Auriel's Bow" (20 GP) for shooting a special arrow into the sun with it.
You have now completed the quest TOUCHING THE SUN and flagged the quest KINDRED JUDGEMENT. Well done!
When you return to the castle you are confronted by Harkon who demands you make a choice to either give him the bow or refuse -- you refuse and the battle ensues! For his part Harkon will fight in Vampire Lord form, you do as you like.
Whenever he is weakened badly he will go to the blood fountain to heal -- and during these healings he is invulnerable unless you use the bow and the special arrows to smash the force field around him, at which point he can be attacked, but expect him to summon Gargoyles to defend him. This process will repeat until you kill him, so it would be an idea not to dawdle and kill him as quick as you can, right?
The Boss Battle with Harkon
After the battle ends you can loot his Vampire Royal Armor and Harkon's Sword -- and if you plan on remaining a vampire you probably should do that?
After you win Serana asks if she can be your companion -- and the Castle is now your home. Everything in it pretty much belongs to you. There are two additional quests left for you to do after your victory -- talk to the usual quest givers in order to get them (you may have to do some of the random quests before you get them).
You have made your choice -- and your choice is to follow the Dawnguard! Harkon throws you out on your arse and you head back to the Dawnguard HQ to report in. When you arrive you get attacked by a group of vampire -- hey no worries, just kill them!
After you report in to Isran he fills you in on what he thinks will help -- describing the people he wants to recruit to join the Order. You can talk to him about vampire hunting to see if there is anything that he can teach you, and if you still need training in Heavy Armor he can do that too. You can ask him to tell you what the Dawnguard is, and ask him about Fort Dawnguard -- he will fill you in on the history -- and you can ask where the Dawnguard came from?
Finally you can ask Isran what he has against the Vigilant -- and he tells you! It seems that while they may be an element in the defence of the realm, they are not a very useful one as far as he is concerned!
This basically completes the quest BLOODLINE and flags the quest A NEW ORDER. You should bear a few things in mind before you continue if this is the path you are choosing as your permanent one, starting with the question of being a werewolf. If you already are one that is fine, and if you are not that is fine too since you will be given the opportunity deep into the faction quest line to become one -- and you can always go do the Companions of the Circle quests if you have not already done so since they will turn you into a werewolf... But being a werewolf is actually a really good idea. Let me explain...
Reporting in on your chat with Harkon
As a human every time you do combat against a vampire there is a good chance you will get infected and, if you do not hit a shrine or quaff a Cure Disease potion, in three days you will end up being a full-blown vampire! That is not good, since it will cause you all kinds of problems with the Dawnguard. Getting cured once the disease advances is something of a pain in the arse, so it is better not to get infected at all -- and that is where being a werewolf will help!
Unlike humans, werewolves can NOT be infected when battling vampires -- they cannot catch that disease, they are immune to it. That being the case, it is a serious benefit and in case you are worried that being a werewolf will change the way you are used to playing, it will not. Once you are infected with lycanthropy you can continue to play the game as if you were not -- there is no downside that I could find. On the other hand if you are willing to use that power and unlock its perks it can be a majorly useful tool to you in combat... I am just saying.
So if you are human and do not want to become a werewolf straight away I seriously suggest you lay in a supply of Cure Disease potions and check yourself after every vampire fight (just open the menu and select MAGIC > ACTIVE EFFECTS and then look for a red line that lists the vampire disease). If you are infected, drink a potion or visit a healing shrine. If you are a werewolf then hey, no worries mates!
Finally there is the matter of being prepared... You should check your kit, you should be using the best armor and weapons you can manage. If you have yet to level Smithing and Enchantment mates, I seriously suggest that you do so now, before you start this adventure or at least before you go any further. Once you have those capped off make yourself a good set of Dragon Armor, using Blacksmith gear and potions to make as fine a set as you can and then improving it to Legendary Status, then Enchant it with useful Enchantments. Do the same for your weapon -- a Dragon Bone Sword and Bow are top notch weapons mates, and well worth the effort, I am just saying.
As a member of the Dawguard once you get a bit into the quest line you get the skill to make your own Crossbows and ammo -- and you can already make your own arrows -- so again, make the very best one you can and then Enchant it!
Well, that pretty much covers what needs covering. Good on ya for choosing the Dawnguard -- that was my choice as well -- and have a great game mates. I certainly did!
Now that the Order knows what is going on -- or at least part of it -- they have to plan their strategy... And it is complicated by the new vampire attacks against the HQ. To help them in dealing with this they need you to go out and recruit two new members: a Nord named Gunmar and a Breton named Sorine Jurard.
Recruiting Sorine Jurard
Sorine can be found to the west of Bruces Leap and east of Deep Fork Crossing (which is easy to get to her from), so fast travel to as close a location as you can to her marker and then hoof it or ride the rest of the way! When you speak to her she tells you that she and the leader are not exactly on friendly terms... But she has lost a satchel of Dwemer Gyros and needs one of them before she will agree to leave, so it is on you to find the bag.
Recruiting Two Powerful Allies for the Dawnguard
The large satchel of Dwemer Gyros is found near the river bank, a short distance to the south -- look near tree roots in the rock near the river. You could also use persuasion to immediately get her to go to Fort Dawnguard, but hey, why not find her Gyro?
Recruiting Gunmar
Gunmar will be found at whatever random location it was that was specified, and when you talk to him he tells you that he has been hunting a bear for two weeks and first he wants to kill it in order to prevent it from terrorizing the people in the area. You need to help him kill the bear to recruit him -- but after you help him kill it, he will head to Fort Dawnguard to see what Isran needs.
At the fort everyone gets tested to see if they are vampires -- if you are one you will need to get that cured like now, so follow the curing vampirism section if you need to... Otherwise you go in and Isran briefs the crew (sort of) and asks you to come up for a private chat... This completes the quest A NEW ORDER and flags the quest PROPHET.
It seems that while we were away doing the last quest Serana showed up at the fort looking for us, and this has Isran's shorts in a knot! Head upstairs and meet with Isran; you can ask for more information about the history of the Order, and then ask if you can help... He tells you who you can go to for side-quests. After that follow him to the chamber in the back where he has Serana waiting.
Talk to Serana and she tells you about herself and the Scroll -- work through the chat options and you learn more about her father and you learn why she was sealed in the tomb you found her in. It seems that she wants to join the Dawnguard -- Isran is a hard sell, he really does not like vampires... He reluctantly allows Serana to stay but makes you responsible for any mistakes she makes.
Finding and Rescuing the Moth Priest
Serana points out that she has the Elder Scroll with her and that nobody here can read it. She tells you about Moth Priests, and Isran points out that a Moth Priest may be closer than the other side of the world. He does not know where the Priest is, but tells us to look for him in the big cities...
Talk to Serana and she offers some advice -- starting with the College of Winterhold -- and she tells you she wants to come with. She has some chat options you can work through -- and you should -- but once you have exhausted them head for the door!
Now we could follow the hints and run all over looking for clues -- but we can also simply head directly to Dragons Bridge and ask a guard there if they have seen the Moth Priest -- and learn that we just missed them! Their wagon just crossed over the bridge -- but even if we hurry all we will find is the ambush spot and no priest... Ah, but a search of the bodies reveals where he was taken -- so head to the Forebear's Holdout.
Take out all of the enemies and then loot the Weystone Focus from the body of the leader, then use it to shut off the force field by inserting it into the controller at the top of the stairs. The Moth Priest is Dexion Evicus and he is still partly under the influence of the vampire that enthralled him so you have to fight him until he regains mental control over himself, after which he will agree to help you.
Return to the fort and report your success to Isran, and then you must talk to the Priest who will read the Scroll and tell you what little he can about what it says. It seems that this but one of three Scrolls and you need the other two before he can decipher the whole story -- you either have one of them or you sold it to the College -- if you have it, cool, but I am assuming you sold it, which means you need to go back and buy it from them!
This completes the quest PROPHET and flags the quests SCROLL SCOUTING, CHASING ECHOES, and SEEKING DISCLOSURE.
The first thing that we need to do is to retrieve the Elder Scroll we already found -- which is either (A) in storage at your house, (B) already on yoru person, or (C) sold to College, in which case we need to go there and buy it back. Whatever the case is, see to it that the Scroll is in your inventory before you continue with these quests!
We begin by flagging the quest CHASING ECHOES and then talk to Serana to stimulate her memory and help her see where her mother is. Before you set off on this long adventure see to your kit, make sure you have all that you need, are not carrying extra weight and are good to adventure because we are about to set out on a long romp during which there will be lots of good loot!
Identifying the correct entrance to the secret passage
Head to the Castle then around the back to the old entrance and go in -- battle your way through the undead and dogs (take out the Feral Vampire) and make your way to the old garden. To do that you will need to find the lever to lower the bridge and then enter the garden where you will discover a sundial in its center that is missing pieces around its base.
Search the garden for the Half Moon Crest which is in the pond, the Crescent Moon Crest, which is on the balcony, and the Full Moon Crest which is in the fenced off area. Once you have them place them back around the sun dial and then activate it to open the stairway to the passage that leads into the blocked-off old section of the Castle!
This is something of a maze and there are a lot of enemy to fight here, but eventually you will arrive in a chamber in which you are attacked by three Gargoyle -- and that is decorated by Gargoyle. Serana will mention that there should be a secret door. In the right back end of the room is a shallow alcove with a fireplace that has wood in it. Turn the candle on its left side to open the secret door and go in!
-- Valerica's Laboratory --
Follow this passage to Valerica's Laboratory and listen to what Serana says, then search the shelves for a red book that is her mothers journal.
After you read it Serana asks if you found it -- and you tell her yes -- and she insists on reading it herself, after which she tells you the three ingredients that are required to open something called the Soul Cairn. They are:
(1) Finely Ground Bone Meal - On the table with the skulls near the entrance, in a large silver bowl.
(2) Purified Void Salts - On the last shelf on the balcony, in a large silver bowl.
(3) Soul Gem Shards - Atop a wardrobe just past the stairs on the right, in a large silver bowl.
Now head down the stairs and into the portal!
Opening the Soul Cairn Portal
You will find all three Alchemy ingredients in the room across all of the levels -- all of which are in special larger containers -- and after you collect these and place them in the chalice on the balcony overlooking the portal, Serana will add some of her blood to the mixture causing the portal to open thus allowing access to the Soul Cairn.
After the animation for the opening completes a set of stairs will appear linking the balcony to the portal, at which point you can try to just head down the stairs and enter it to zone in to the Soul Cairn, but you will find that it will not allow you to enter -- in fact it hurts you when you try. The reason for that is that you are supposed to be undead to enter and you, well, you are not.
You have to make a choice here -- she can turn you into a Vampire (but that means you are going to have to do the cure when you get out AND you will no longer be a Werewolf) or you can elect an alternative -- you have to give it your soul... Well, not really all of your soul, just part of it -- Serana says she can partially Soul Trap you and offer that as your passage fee... What that means is that you will be a bit weaker than usual while in the Soul Cairn, but you can manage that, right?
Your alternative again is to allow her to turn you into a Vampire -- I did not want to do that but you make your own call on that. If you have any doubts about the decision now would be the time to save your game before you make it. Bear in mind that there is a food item thingy in the Soul Cairn you can gather and eat that will reduce the impact being there has on you.
Whatever your choice, entering the Sould Cairn completes the quest CHASING ECHOES, and starts the quest BEYOND DEATH.
In addition to being the realm to which Serana's mother escaped to live in peace away from her estranged husband this is also an interesting zone in its own right, so after you open the portal and enter and complete the basic elements of this quest but BEFORE you leave, take the time to carefully explore this area and talk to the different entities here -- some will give quests that can be completed within -- but bear in mind that there is a bug that is known to exist in the game that can prevent you from returning here after you leave to finish the story/quests -- nobody knows what causes it, and while we hope that there will be a patch soon that fixes it, for now you should treat this as if you can only come here the once time (now) and do as much as you can just in case you get hit by that bug!
So embrace it and take as much fun and adventure as you can now because this is absolutely a Carpe Diem sort of place!
Now let's see to the elements of this quest first by seeking out and speaking to Serana's mum Valerica. On the way to her following the marker you run across a male soul and have a forced conversation in which he demands that you help him to locate his friend Arvak -- which flags the Misc Quest FIND ARVAK'S SKULL (which requires you to Find Arvak's Skull in the Soul Cairn).
Now continue to follow the marker to Valerica and you will eventually reach the fortress in the distance and meet with her mum! As the conversation ensues you pick up a few more details and then her mum starts freaking out... She interrogates you and then explains more of the backstory to you... Never saw that coming, how about you?
Well that could have gone better but considering the usual route that family arguments take this was actually pretty tame really -- but in the end she comes around and gives us the information that we need, which begins with killing the trio of Boneyard Keepers who are guarding the fortress -- oh yeah, and there is a nasty dragon in the hood as well she warns us. Go ahead and exhaust the chat options as you see fit and then head off to take care of the Keepers now.
During your travels to the three Keepers you will run across a Soul named Jiub who has a problem that he could use your help with -- he is a composer and writer and he is having trouble with writing his book, specifically once he understands that he is dead he asks you to help get his book out of the Cairn and back to Skyrim! You agree to help him and that flags the quest THE IMPATIENCE OF A SAINT -- which involves locating the scattered pages of his research notes; ten pages that you need to find. If you work through the chat options that he has available you learn a bit about him, his story, and events you should know about if you played Elder Scrolls IV: Oblivion.
When you are following the markers for the Keepers you should come across a lit shrine with a pedestal upon which is sitting Arvak's Skull! The game makes this a bit easier for you by popping a notice on screen if you get within a certain distance of it so when that happens go to the lit shrine and grab the skull, right?
One of the Keepers is actually on top of a tall tower and the marker leads you to a teleporter that will take you to the top -- use that, kill the Keeper, and then use the second teleporter at the top to come back down to ground level!
Once you kill the third and last Keeper set the quest marker to the Misc quest FIND ARVAK'S SKULL and return the skull to the Soul. Now flag the quest IMPATIENCE OF A SAINT and proceed to collect them. Watch the video below as I show on the map where I am when collecting each page, with notes below for anything that you may want to be aware of...
Finding the ten pages for a Saint
Page 1 -- From where we entered the zone follow the path to the wall but do not climb the stairs and pass through it. Instead turn right and follow the wall in an easterly direction to the next set of stairs, climb it and take the page.
Page 2 --Facing the stairs that lead up to Valerica turn left and head through the first opening on the right and inside is a chest with the page on the ground before it.
Page 3 --From the far west where we entered the zone head east but not through the wall -- when you reach the wall turn north until you reach the small building with the gem on top. Go to the roof and the page is on the roof in front of a treasure chest here.
Page 4 -- Facing the stairs where Valerica is head right and follow the wall around, to up the stairs on the other side and into the passage on the left at the top. The page is near a chest at the end of the passage.
Page 5 --South of the cold campfire spot of the quest giver is a purple well in a stone square. The page is beside the well.
Page 6 -- Head back to the opening in the wall where the main path passes through but still on the west side (the side we entered the zone from) and turn to the southwest and enter the first building you come to -- the page is on the floor to the right in front of a treasure chest.
Page 7 -- From where you grabbed Page 4 go down the stairs and head east to a dias with a pedestal on top of its low structure. There is a spell book for Conjure Mistmen on the pedestal so be sure to grab that too.
Page 8 -- Inside a locked building with a pair of blue light/locks that look sort of like eyes to the right of where we entered the zone to the far west. The page is in the floor inside in front of a chest. Shoot the two lights with arrows to unlock and open the door.
Page 9 -- From the stairs leading to Valerica head west until you hit the glowing border wall then turn left and follow it to the first tower on the left close to the wall. Go between the tower and the building then turn right and go into the building -- find the teleport pad and teleport to the roof -- the page is behind the treasure chest up the nearby stairs. Be aware that the gem up here is draining your life so you will want to be quick about grabbing the page :)
Page 10 -- From the west side of the wall (the side we originally entered the zone on) on the main path at the opening go up the stairs through the wall and down the stairs on the other side and then turn east. Go east until you see Marvin the Soul Merchant by a cart -- the page is on a nearby barrel.
The Soul Merchant named Marven Stroud was a merchant in Skyrim before he was Soul Captured and while he has no interest in gold, he will allow you to trade 25 Soul Husks each to him for a sword, a battleaxe, light armor, heavy armor, or a spell tome. Basically you get a random item of that type form him for each 25 husks you trade...
-- Wrapping up the IMPATIENCE --
After you gather all ten pages and return them to Jiub the pages are removed from your inventory and you receive the Locket of Saint Jiub -- the stats of which are Armor = 12 / Weight = .5 / Value = 2422 / 50 Stamina / 50 Carrying Capacity. Not a bad reward!
In addition to the locket you also receive a copy of his book -- St. Jiub's Opus. Considering the hassle you went through to get the pages you should probably read the book :) This completes the quest IMPATIENCE OF A SAINT.
A Meeting with Durnehviir
-- Return to Valerica --
Now that those two side-quests are completed return to Valerica and speak to her and she is impressed by your success in defeating the three Keepers. Follow her into the Boneyard as she is taking you to the Scroll... But wait! As we enter the Boneyard who should show up but the deadly Dragon called Durnehviir!
Right, so you know you have to defeat him -- but once you take him out Valerica fills you in on his capabilities and the fact that he was no ordinary Dragon! Follow her to the Scroll's hiding place to complete that part of the quest, so take the Scroll and then talk to Valerica.
Once you depart the Boneyard and return to the Soul Cairn you are confronted by Durnehviir! It seems that his temporary death was really temporary!!
Work your way through the chat options and he tells you about his situation and the respect that he holds for you now that you have bested him in battle. After the mutual chest bumping he asks you for a favor -- he wants to gift you with the word of power that allows you to summon him in the overworld, so that he might return there even if temporarily whenever you have need of his assistance.
As you stand in awe of the gift, he teaches you the first word in the Shout Summon Durnehviir. Be sure to activate the Shout by using a Dragon Soul... Be aware that this is not the Shout that is related to the Achievement -- you get all three of the words right then so go ahead and activate them with Dragon Souls now.
The last thing that we need to do before we leave is recover our soul -- Serana's Mom points us in the right direction after giving us the Elder Scroll -- remember the building to the northwest that was a maze and that we used the teleporter to obtain a page of the opus? Well in the chest on top is our soul in a Soul Essence Gem (Full)! Head back there, open the chest and reclaim your soul now! With that done we can now return to the real world!
Once you return to Skyrim target the ground and do that Shout to summon him, and he will teach you the first word to the new Shout called Soul Tear -- which IS the Shout that is associated with the Achievement.
Activate that new Shout and then when he departs, summon him again with his Shout to learn the second word, and then after he departs summon him a third time to learn the third and final word of the Shout, unlocking the Achievement "Soul Tear" (20 GP) which is unlocked when you learn the third word of the Shout.
Exiting the Soul Cairn completes the quest BEYOND DEATH and unlocks the Achievement "Beyond Death" (20 GP) for completing the quest.
Now that our adventures in the Soul Cairn have come to a conclusion -- after you are back in Skyrim be sure to go someplace safe and call Durnehviir three times to learn all three words to Soul Tear -- and then we have pretty much wrapped up all of the loose ends of this quest line save for one: turning the Elder Scrolls over to the Moth Priest! So head back to the fort and find Dexion... Oh no! When you find him you learn that in reading the first Scroll he has damaged his eyes and is now permanently blind!
Dexion tells you that there are locations scattered over the lands are glades that you can perform a ritual in which you use Ancestor Moths to empower you to read the Scrolls -- but of course this requires another quest! Completing this conversation completes the quest SEEKING DISCLOSURE and flags the quest UNSEEN VISIONS.
Receiving some bad news from Dexion
Talk to him to learn more about the relationship between the Elder Scrolls and the Moths -- and the whole Moth Priest cult. He explains how the Moths help in the deciphering, and he explains to you that your past successes suggest that you are able to complete the challenge.
You should complete the different chat options with him to learn a bit more background, and once you are done now is a good time for you to see to your kit and store any resources that you picked up in your house.
Before we set out on another adventure in the main story line we have reached a point in our relationship with the Dawnguard that allows us to get side quests from some of the supporting members -- and as now is a good time to address these in the interest of completely covering the game in this guide, I thought that now would be a good time to manage some of this and have a little fun in the process, so why not join me?
For the time being leave the quest UNSEEN VISIONS unflagged, and let's flag some of the other quests and do them!
Gunmar has located a den with a Master Vampire in it -- this is a repeatable quest so it will be at a random location -- and he needs you to go there and kill the Master Vampire. The important think about this quest is that the vampire must be killed before he turns his allies into vampires.
Completing a Preemptive Strike Side-Quest
If you got the idea that this is a basic hunter-killer quest, well then you got the right idea. Bearing in mind that killing undead as a Werewolf and feeding on them does not count towards perks, killing his followers (who are human) DOES. Also bearing in mind that finding a convenient group of humans to kill that will not have a potentially detrimental effect on your reputation or the game is not as easy as it sounds, so using these quests as a means for leveling your Werewolf Perks is actually a really good idea!
It is always a good idea to save before turning in a quest in case you end up getting one that is bugged for your next side-quest -- just saying -- and note that the reward for this quest is a random leveled apparel item... And the satisfaction of a job well done!
Gunmar has located a den with a Master Vampire in it -- this is a repeatable quest so it will be at a random location -- and he needs you to go there and kill the Master Vampire. While this is similar to the previous quest, this time the target is a Leveled Master Vampire, which means they are much more dangerous than the usual Master Vampire...
Completing a Cleansing Light Side-Quest
One significant difference between this quest and the last is that the Master Vampire in this one has an army of undead defending it, including Vampires, Thrall, and Gargoyle as well as those demon dogs, so wow!
The location will be random, and the reward is a random but of leveled apparel with a random enchantment.
Gunmar has identified a vampire masquerading as a Traveling Pilgrim, Traveling Merchant or Traveling Bard at a random location and he wants you to go and kill them. He warns you that you have to be discrete, since the local law is not aware of the deception so they will think you are just committing murder rather than a public service.
Completing a Hide and Seek Side-Quest
How you take them out is pretty much up to you -- if you are a member of the Thieves Guild you can just kill them where you find them and then pay the fine to the guard and get off without being detained. If your Speech skill is high enough you can talk to the target and convince them to follow you, then lead them to a private place and kill them. You can also do a ninja-style kill either from hiding or sneaking up when they are alone...
Personally since I am the master of the Thieves Guild and have re-established its rule in the lands I just go for the straight-in kill them on sight approach, but YMMV.
The reward for this is a random piece of kit with a random enchantment...
Gunmar has located a Master Vampire -- this is a repeatable quest so it will be at a random location -- and he needs you to go there and kill the Master Vampire. It is similar to the previous quests but this time you have to seek out information about the targets location by asking around... You head to the marker and ask the marked person -- you may need to persuade them to help you.
They will give you a clue to locating them -- the new location is updated to the quest so simply follow the marker -- note that some of the locations are newly added to the game so you will not always be able to fast travel to them...
Completing a Hunting the Monster Side-Quest
The skill level of the target seems to be different each time, and sometimes they are not alone but have other undead or human companions that you will have to battle as well, but you should not have much trouble with this anyway... The location will be random, and the reward is a random but of leveled apparel with a random enchantment.
When you talk to Sorine Jurard she tells you about the great concern they feel over the situation and the fact that Isran is very worried. Him being worried worries them, so she asks you to ask Isran about recruiting Florentius Banius. When you do so Isran is reluctant at first, but eventually agrees, and tells you that Florentius lives in Ruunvald, which is an excavation site located in the mountains east of Shor's Stone and north of Riften.
The Rescue and Recruitment of Florentius
When you arrive at the site it is obvious that something is wrong. You should read Volk's Journal in the tent outside... The Vigilant have been enthralled and they attack you pretty much on-sight. Battle your way through the caves until you reach the end where you find Florentius locked in a cage and under attack! Kill off the enemy and then talk to him to recruit him -- he is something of a nutter he is.
Interestingly enough once you recruit him that completes the quest BOLSTERING THE RANKS so you have nothing to do but head back to the fort!
This is actually a series of quests and they are rather special in that they improve your weapons capabilities with respect to the Crossbow so they are very much worth the effort! To start these you speak to Sorine Jurad after your rescue and recruitment of Florentius and she will explain that she has located a Dwarven schematic that can provide a new upgrade or ammunition type for the crossbow.
Recovering the Dwarven Schematics for Sorine
She asks you to fetch it for her -- these are basically random location quests but they are for specific items: Enhanced Crossbow Schematics, Dwemer Exploding Fire Bolt Schematics, Dwemer Exploding Ice Bolt Schematics, Dwemer Exploding Shock Bolt Schematics, Dwarven Crossbow Schematics, and Enhanced Dwarven Crossbow Schematics. Obviously these are worth the effort!
Each schematic is located inside of a boss-level chest at the location specified, and they are usually well guarded. After you deliver the schematic to Sorine you will receive a leveled piece of enchanted armor or weapon as your reward. In addition to that she will teach you how to craft the item, provided the corresponding Smithing skills have been unlocked that is...
This quest repeats a total of six times, and each iteration will grant a single upgrade or ammunition type, so bonus! After you finish this the first time just rinse and repeat :)
Back on the main story path now, we are taking the advice of the Moth Priest Dexion and heading for the Ancestor Glade -- but first we have to locate the special knife that is required to peel the bark from the tree... Fortunately this is also found in the Ancestor Glade so our first step is to head straight there!
The easiest way to get there -- if you have not already discovered the location on one of the side-quests -- is to head to Falkreath and then head east and a little south from there and you will find the entrance in the rocks on the side of the mounting up a steep mountain path that you will find by following the stream that crosses the highway.
Inside the cavern you need to follow the upper path -- jump up on to the start at a low ledge and then work your way up and cross the fallen tree, then follow the marker out of the cavern into what must be the glade itself -- a huge and impressive open area -- follow the marker to get the Drow knife from the rock thingy and then step over to the tree with the pink flowers and have at it!
Deciphering the Elder Scrolls
Basically all you need to do is walk around the area of the springs and the hills above and collect seven groups of the moths -- you will have no trouble spotting them and you just have to walk into them to collect them. Once you have seven of these special moths head back to the bottom of the glade and step into the pillar of light and then select the Blood Scroll to start the process -- you will automatically read the others and the image that they contain will appear before you -- then you go blind (just kidding).
After you read the Scrolls talk to Serana to progress the story and complete the quest UNSEEN VISIONS. This also flags the quest TOUCHING THE SUN. You have a long conversation with Serana and then you are attacked (or at least I was) by the a squad of vampires. After you take them out talk to Serana to finish the conversation.
This is probably the most complicated quest in the series and the one that I like the best -- but it is a long one so you should definitely head either home or to the Fort and sell off any loot, maintain your kit to be sure you have everything that you think you will need, and otherwise prepare for a reasonably long quest. When you are ready open your map and find the nearest fast travel spot to the marker, then head there and hoof it (or ride your demon horse) to Darkfall Cave.
Inside the cave you will encounter more than a few Frost Spiders - following the right-hand path will take you to a pair of Moonstone Ore veins you may as well mine on the far side of a bridge. If you did not bring a pick with you that is no big deal there is one on a table to the right -- just look for the lantern.
Note: You may want to save now -- there is a very small chance that when you fall down the big drop into the pool below from the rapids that you will hit a rock that juts up from the bottom on the sides and die... If that happens and you have saved here it makes it less painful to have to load to your last save, right? Just saying...
When you try to return to the main path though, the bridge will collapse (it is OK you were meant to do this) and you will fall into the rapids and be pushed down through a tunnel and land in a spider nest -- kill all of the spiders -- there is a spider den here down a round passage that has a skeleton and a treasure chest at the end that is worth looting -- and then just follow the path from here until you reach an abandoned camp where you will find a body with a note on it you should read... Bummer huh?
You should loot the camp and body as there are some useful items to be had, and then you should look to the wall behind the lean-to shelter for a chain to pull that opens the secret door and go through that and follow the path that will bring you to a shrine at which there is an elf praying. He tells you that this is the Great Chantry of Aerial. Work through the conversation options with you -- he knows why you are here and will help!
-- Auriel's Chantry --
The elf is Knight-Paladin Gelebor, who explains that he is among the last of his species, which is Snow Elves. He tells you his story and agrees to help you if you help him -- and what he needs you to do is help him kill his brother, Arch-Curate Vrythur, who has become corrupted by the Falmer.
After you agree to help he gives you an Initiate's Ewer and then explains that in order to reach his brother you must follow the path of an initiate of the Chanty of Auri-El, a challenge that requires you to pass through five Wayshrines like the one that he just summoned for you -- and by doing so you will eventually reach the Inner Sanctum where his brother and Auriel's Bow are located. Well that's great mates! We kill two birds with one stone! Or we kill one brother and get the bow we came here to get with one stone... Err... No... I am close, hold on! We get the bow and kill a brother with umm, one arrow? Bugger!
Anyway when you are done talking to him head into the Wayshrine and enter Darkfall Passage, then follow the path dealing with the many Falmer and Chaurus Hunters that pop up to do mischief to you -- when you reach the next camp kill the enemy here and loot the camp then head past the large blue crystal to another passage and follow that to the waterfall.
There is a room on the right down a passage and inside is a skeleton with a note you should read that warns you of traps (but then you already triggered a few of those didn't you? So no surprise for you!) and, near it are two ropes. The left-hand one opens a secret door, the right-hand one will give you a surprise! (I did not say a good surprise, now did I?).
Kill the big cat and then follow the path until you encounter Prelate Sidanyis who is waiting at the Wayshrine of Illumination ahead. He opens the shrine for you and you go inside, draw water from the basin and then enter the portal.
Obtaining Uber Rare Shellbug Chitin
-- Forgotten Vale --
Now before we do anything else, in addition to being part of the journey you are on this area also has some extra stuff in it that you will want, so a little exploring as you go is in order! You will find here some Unknown Books that are used in another quest and this is the only opportunity you will have to obtain them, so I would do it if I were you...
Follow the path to the vale, where you need to find the other four shrines and fill your Ewer at each. Explore the area and you will find the Wayshrine of Sight, and Prelate Athring, the Wayshrine of Learning and Prelate Celegriath. You should find the Unknown Book, Vol. I along the way (in any event you want to do that before completing this part). The next Wayshrine is across the river, and it is the Wayshrine of Resolution with Prelate Nirilor in attendance.
Now this next bit is really important! The third word of power for Drain Vitality is learned just to the south of the Wayshrine of Resolution, where you will find its word wall. Now we already went to the trouble of learning the first two words, we may as well learn the bloody third word right? Seriously, be sure you do this and get the book BEFORE you continue to the fourth shrine, alright then?
If you follow the path along the ridge instead of turning to go down the slope when you first arrive in the Vale there is a cat to kill and a Silver Vein you can mine before heading down into the Vale... I recommend doing your exploring during the daytime so if darkness falls make camp until dawn. There are additional Silver veins along the upper ridge so if you are low on that metal you can get a few here, and if you continue along the upper ridge you will also find a Gold vein bear the path leading up into the area above (that you do not want to go up just yet as you still need to explore the bottom of the Vale first).
As you circle the outer edge Serana will spot the shrine just as you find the third Gold vein -- mine that and as you continue along the edge (ignoring the shrine) you will find the entrance to the Fogotten Vale Cave! Go in and clear out the targets and then head up the ramp to the left and pull the rope release there to open the secret door -- inside the secret chamber is a Shellbug that you can mine to obtain both gems AND Shellbug Chitin, which is an uber rare crafting ingredient required to make a special armor helmet.
Once you have mined the Shellbug backtrack to the Vale and continue exploring, and once you complete the circuit of the Vale bowl, hit the center to loot the Gleamblossoms to be had there and finally head to the Wayshrine and talk to the keeper to fill your container. When you have done that head along the nearby path (through the arches) and on the other side of this cut just before you reach the river you will find a skeleton next to a treasure chest -- on the ground next to the chest is a coin purse and the first of the Forgotten Books so be sure to loot those!
Noe head south along the river to reach the Wayshrine of Learning and speak with Prelate Celegrioth and fill the container. Backtrack to the northwest following the river and you will encounter a Frost Giant -- kill it and loot the body to recover an Amethyst Paragon and some other stuff. Hold on to the Paragon. On the other side of the river is a path leading up so climb that and you will see the next shrine. Make your way along the path and over the stone bridge to the Wayshrine of Resolution and talk to Prelate Nirilor to fill your container.
If it is getting dark (it probably is) go ahead and camp until dawn.
Unlocking the third word of the Drain Vitality Shout
-- Word of Power --
From the shrine head south to the center of the frozen lake where you will find a word wall and the third word for the Shout Drain Vitality! Now, I do not have to tell you to collect that, right?
Did I mention that you have to battle a pair of Dragons? One is named Naaslaarum, the other Voslaarum. Yeah and they are freaking deadly so be careful right? In fact now would be a good time to save your game, I am just saying... They don't stay on the ground for very long so get your licks in while you can and make sure you use Fire Protection potions because their breath does a lot of damage!
After you kill them be sure to head up to the word wall and collect the word -- go ahead and activate it now as that gives you Drain Vitality at full strength!
So at this point you should head back to the shrine and then backtrack over the bridge and down the path to the river again. Heading west will take you to a Falmer camp -- clear that and then head above to the Falmer village and clear that -- simply follow the path up and through Sharpslope Cave and then make your way over the bridges to the house that is closest to the entrance of the Glacial Cave and grab the book, some healing potions and pearls from the table.
After you have looted everything you want, head up the path and walk into the Glacial Crevice here and you will enter the path that takes you to the final area of the Vale -- just follow the path and stick in an easterly direction, killing anything that attacks you along the way. You pass through some tunnels and the path itself can be a bit dangerous, so go easy on the edges of it, but you will eventually arrive at the exit to the Forgotten Vale. Well done!
Follow the path to the hut with a mammoth skull above it (there are more than one) and, inside you will find Unknown Book, Vol. IV and well done mates! Good on ya! Nice one! There are several veins of Quicksilver here if you need that...
Now head north through the cave and down to the Wayshrine of Radiance and Prelate Edhelbor where you make the last fill and complete the challenge. Now you need to head northeast until you reach the Inner Sanctum and go in!
Unlocking the Achievement Auriel's Bow
-- The Inner Sanctum and Auriel's Chapel --
Inside go up the steps past the statue and pour the Ewer into the basin in order to unlock the seal on the main door to gain admittance. Go inside and activate the alter and then standing behind it grab the Ewer and duck through the closing door, following the path to the next alter using it to activate another alter, and loot the potions and treasure inside! There is a Frost Giant is here with a Ruby Paragon BTW.
Now backtrack and open the way back to the main hall and follow the path through the Inner Sanctum and ruins past all of the frozen Falmer until you reach the throne chamber, where you will find the man you have come looking for.
That is when your problems begin because the first thing that he does is unfreeze all of those Falmer! You will fight waves of them and then the Ancient Frost Atronach that he summons -- pursue him and continue to battle the summons and eventually he will retreat up the stairs and continue to battle you -- on the balcony you learn some key information...
Once you defeat him the Wayshrine here will raise and Gelebor will emerge -- chat with him and then go into the Wayshrine and obtain the bow -- Auriel's Bow to be exact -- the bow we have been searching for! Well done! Now ask Gelebor for some arrows -- he gives you however many (up to 20) of Elven Arrows you have, converted into Sunhallowed Elven Arrows.
Talk to Serana to decide how you will deal with the situation with her father -- clearly you will have to kill him before he kills you both...
Now before you leave head back to the balcony, arm the bow and one of the special arrows, and aim it at the sun and release the arrow to unlock the Achievement "Auriel's Bow" (20 GP) for shooting a special arrow into the sun with it.
You have now completed the quest TOUCHING THE SUN and flagged the quest KINDRED JUDGEMENT. Well done!
After the conversations conclude following the wrapping up of the previous quest Serana tells you that you should return to Isran and report in -- which you should do! Following your report Isran makes a rousing speech and then the crew heads for Harkon's Castle -- note that if you follow them (stay with them) there will be a LOT of random vampire battles and attacks so you are better off fast traveling to the Castle as they will collect there when you arrive...
Harkon is waiting inside Castle Volkihar with his crew and, when you arrive and the battle begins you face a wave of vampires spewing from the Castle and, once you eliminate them, another group inside that you have to battle through. Once they are managed you will find yourself entering the Castle Cathedral for the final confrontation with Harkon!
Basically he will fight you until he is low on health and then retreat to the Blood Fountain where he will cast a protective shield while he heals -- you cannot hurt him while the shield is up but the good news is that all you need to do is fire a Sunhallowed arrow using Auriel's Bow at the shield and it will implode, halting Harkon's efforts to heal himself. Immediately resume the fight with him, dishing out as much damage as you can, then rinse and repeat until he is dead.
A Final Showdown with The Vampire Lord Harkon
After he dies Serana has a few choice words to say about her father and her expectations for the future, then she asks you if she can accompany you on your future adventures -- you say yes of course! Hey, a Werewolf with a Vampire sidekick? Stranger things have happened, seriously... I mean Buffy was a Vampire Slayer and her BF was a Vampire! I am just saying...
This wraps up the Dawnguard expansion so well done mates! Good on ya! Of course you can still do the Dawnguard side-quests at the HQ if you have not done some of them, and you still benefit from the various elements of the expansion -- like crafting Crossbows and their ammo... Bear in mind that there will be at least three more (and possibly more than three more) expansions to follow this one, so keeping your character in top shape is a good idea!
That wraps things up for the walkthrough/guide part, save for the usual bits at the end, so again, well done mates! Well done indeed!
There are 10 Achievement worth a total of 250 GP for this DLC/Expansion. These are dealt with in depth in the various pages of our guide.
-- A New You (20 GP) Change your face
-- Auriel's Bow (20 GP) Use the special power of Auriel's Bow
-- Awakening (20 GP) Complete Awakening
-- Beyond Death (20 GP) Complete Beyond Death
-- Kindred Judgement (40 GP) Complete Kindred Judgment
-- Legend (40 GP) Defeat a Legendary Dragon
-- Lost to the Ages (30 GP) Complete Lost to the Ages
-- Soul Tear (20 GP) Learn all three words of Soul Tear
-- Vampire Mastered (20 GP) Acquire 11 vampire perks
-- Werewolf Mastered (20 GP) Acquire 11 werewolf perks
The Unofficial SuperCheats Guide to The Elder Scrolls V: Skyrim Dawnguard Expansion and its text content (not videos or images) are Copyright © 2012 Web Media Network Ltd. All rights reserved.
SuperCheats, www.SuperCheats.com, and its associated websites and their content is Copyright © 2012 Web Media Network Ltd. All rights reserved.
The SuperCheats Unofficial Guide to Guide to The Elder Scrolls V: Skyrim Dawnguard Expansion (hereinafter referred to as the "Guide") was written by CM Boots-Faubert as a work-for-hire for Web Media Network, Ltd. The Guide is licensed to appear exclusively upon the website SuperCheats.com and other websites licensed to display the Guide under agreement with Web Media Network Ltd.
Attribution: Acknowledgment is hereby officially extended to www.xbox360achievements.org, SuperCheats.com, www.elderscrolls.com, www.bethsoft.com.
-- Shout Outs --
There are specific people who need to be both acknowledged and heartily and sincerely thanked and who should be thanked in a more profound manner than is possible using only the written word... The following individuals therefore should consider themselves vigorously thanked, slapped on the back, hugged, in some cases kissed, their hand being shaken with great force and emotion, while large mugs of imaginary ice-cold beer is placed on the table in front of them along with heaping baskets of hot and steaming but very tasty onion rings or their favorite pub food, while words of thanks overflow from the mouth of the author, including:
Rich -- to whom many thanks are offered and given for your incredible patience and willingness to tolerate both the extra time and the technical issues that crop-up from time to time in the often exciting process of guide creation in general and this guide in particular... Muchos y gracias sinceras por ser un redactor y un editor más excelentes! In the end what we ended up with is a better guide thanks to your patience and your willingness to be pleased. Thanks mate!
Swash01 (Peter) -- The bloke who in addition to constantly looking up crafting recipes for me on the Skyrim Wiki also served as "Notes Wrangler" for this guide, keeping track of my volumes of notes and post-its and instantly laying his hands on the ones I needed, when I needed them; I do not pretend to understand your filing system mate but I am happy it works for you.
YvonneBF -- Who in addition to magically appearing at my elbow with a cup of tea and a biscuit and a few kind words (which helped immensely) at just the right moments, and for the awesome job that you did in formatting and editing this guide, making us look good (and better than we should have considering all the typos we left in this bloody thing) you are thanked profusely!
Finally we need to thank YOU -- because without YOU this guide would never have been commissioned. Thanks mates! ¡Gracias amigo! Dank u vriend! Merci ami! Danke Freund! Grazie amico! Obrigado amigo! Thank YOU!


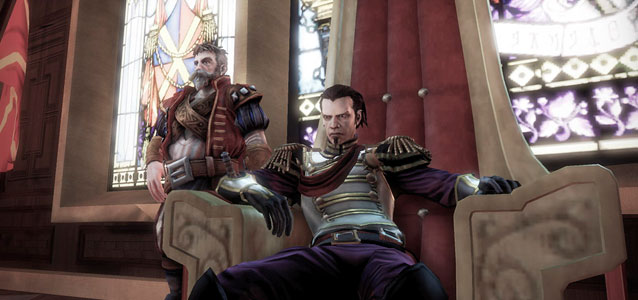 Fable III Walkthrough Video Guide in HD
 Pokemon Red/Blue/Yellow Video Game Cheat
 Fallout 4: Road to Freedom walkthrough
 RPG Anxiety - Where It Comes From and Why Skyrim Doesnt Cure It
 How to Disable the Microsoft Office Upload Center