Unofficial The Elder Scrolls V: Skyrim Guide by CM Boots-Faubert for
The massive popularity of Skyrim with the critics in its first days of release and the massive number of perfect 10 scores it received made it seem as if another perfect game had arrived. But like the Fallout series and, if we are being candid, some of the previous games in the Elder Scrolls series, the shining praise was a bit premature... Even though the game had been declared Gold weeks before launch, the reality is anything but that. To put it simply, this is one of the most bug-filled releases every to emerge from Bethesda Studios. It was clearly not fully tested before it was release -- or it was fully tested and released in what can only kindly be called a late-beta stage simply to get it in stores in time for the holidays. If I make that sound bad well, in a way it is. Don't take this wrong -- the game is playable -- there are only a few really game-breaking bugs and if you are lucky those can be avoided or at least you can revert to a save before the bug messed everything up and then not do the thing that triggers it. I learned these lessons the hard way, being forced to restart twice and revert the game countless times and that, combined with personal life issues, made this guide two weeks late. That is never a good thing. But it is here now, and that is a good thing, because you are going to need it.
Even though I found Skyrim to be perhaps the most buggy major title release I have ever seen, I also found it to be an intense and interesting adventure that in every way lives up to the reputation and the entertainment levels that have long been part of this series. In an even-handed way I would even go so far as to say that this is the best Elder Scrolls game... Ever. One of the major points in its favor is that it was built with the same engine that the Fallout games used, which means that anyone who has played those has a zero learning curve for the controls and the play style of this one! Lockpicking is just like it was in Fallout, and having the ability to fast travel is simply awesome. Magic and Shouts in the game are intuitive, interesting, and strategically critical, but where this game really shines is in its crafting system, which if you gather the correct materials allows you to craft weapons and armor that are far superior to ANYTHING you can get as loot, including the Daedric Artifacts! It is always a good thing when a game developer puts the focus upon the player, and they do that in Skyrim to the Nth degree! I very much enjoyed writing this guide, and I hope that you will enjoy using it! Merry Christmas! CMBF The following information technically constitutes a spoiler of sorts, because it covers information about the game that you have yet to experience -- assuming you have not yet started the game. Sadly if you have already started and you are deep into the game and you failed to do what we are about to discuss, then it is too late anyway. But you will still want to read this in case you are not so far in to the game that you can get it still... Note that this is all covered in the guide, but I am emphasizing it here and now because it is very very important that you not accidentally miss this one small easy to miss part that will make the game very very easy for you to succeed in. I cannot underscore this enough. You really want to do this. After the Prologue plays out and you are on the run following the guardsman Hadvar, you eventually make it out into the lands of Skyrim. From that point you can go in several directions -- and the game will push you towards the first town -- which will set you on a path that will lead to the city of Whiterun, which is where we want to be, because that is the first location that the book "The Legend of Red Eagle" can be found. Specifically you want to enter Dragonsreach then go upstairs and enter the Jarl's Quarters, and then go upstairs again, to find the bedroom with the book.
The Jarl owns a copy -- it is upstairs in one of the rooms of the Dragonsreach Palace on a table on top of another book and next to a silver ingot. The important thing here is you need to read that book in order to flag its quest. Note: This book can also be found at the College of Winterhold, The Lost Knife Hideout, and Fellglow Keep, but the soonest you can obtain it is Dragonsreach, the Jarl's Palace in Whiterun , and sooner is better than later in this instance. Also note that some of those locations require you to be at a higher level as you have to battle enemies there -- particularly Fellglow Keep -- in order to gain access to the dungeon and the book within. Completing the quest from the book called 'The Legend of Red Eagle' -- gives you a quest for Red Eagle's magical sword and as that is perhaps the best weapon you can get straight away in the game it is worth the effort! It has stats of 17 points of physical damage, 15 points of Fire Damage. Use the specific section on this quest as your guide as it covers additional information you will need. The next thing you need to be aware of is that life in the game is so much easier when you have 60 points of Smithing Skill. --== Oblivion Walker Achievement ==-- As far as I know this is the only Achievement in the game that you can actually miss and be unable to go back and unlock due to its dependance upon quests in the game. So I hope you will forgive me for telling you about this as it is something of a spoiler but it needs to be said... You unlock Oblivion Walker by obtaining 15 Daedric Artifacts in the process of playing the game -- and these are ONLY available -- and thus are miss-able -- in each of the 16 quests during which you need to obtain the artifact for that quest. While this is part of the story in some of the quests, in some of them you can actually complete the quest and leave without it. The Daedric Artifacts Quests are: (01) A Daedra's Best Friend One of the quests does not count towards this Achievement -- you only need 15 artifacts -- and it does not appear to matter which, but you may as well get all of the artifacts anyway... You need to keep your eyes out for these artifacts which will be found around areas that involve shrines (like in the last game) or other-worldly spirit powers. While there are actually a few of those that appear in the game that do not have an artifact connected to them, you need to be careful not to miss the ones that do! Fail to grab even one of the artifacts and you cannot complete the Achievement. The guide includes these in it so if you are following it, you should not have any trouble getting this, but if you are not following the guide section by section and you missed any of these and wonder why you have not unlocked this one, well, now you know! --== Basic Play Strategy ==-- This guide is broken up into logical sections -- there is the Main Story Guide that constitutes its heart -- and then there are additional grouped sections to cover the major and minor additional quests that are part of the game. It is really important that you remember that this game will NOT present only the challenges that you can handle at your level as you proceed along the main path. You will find yourself facing enemies that clearly outclass and will kill you. After you defeat the first dragon you will encounter other dragons in the wilds as you travel. Something to be aware of -- if you encounter a dragon in the wild there is a shrine nearby with a power word. So if you do kill the dragon, you should search for the shrine to find the word and spend the soul you just acquired to unlock it. To make travel easier look for the wagon outside of Whiterun and spend the money to have it carry you to every city it can -- that way you can fast travel to them without having to walk or ride there first. That flies in the face of the traditional process for games like this -- but that is the way it is. Because of this the best advice that you can be given is SAVE. Save OFTEN. Save BEFORE you try to battle, SAVE AFTER you battle. Save every 20 seconds if that is what it takes, but SAVE. As you wake up you discover you have been bound and are in the back of a wagon, on your way to your execution! You were captured in an Imperial trap at the border, along with a thief and a pair of rebels, and are being executed as a spy. Nice way to begin an adventure, eh? When you reach the execution site you climb out of the wagon and are treated to the execution of the thief -- by archer -- because he bolts, not wanting to have his head chopped off! You are then called forward by the bloke with the lists who, it seems, does not actually have your name down as a condemned prisoner! But no worries mate, that will not actually stop them from killing you, they just want you to tell them your name so they know who they are killing! Actually this is the spot where you get to create your character, so your race, your appearance, and your name. Once you have completed that process to your satisfaction the list keeper turns to the female Captain of the Guard and asks what should be done with you, as your name is not on the list. The Captain -- a firm believer in the philosophy Kill 'em all, let God sort 'em out!" says execution! And so you continue on your trip to meet the headsman. One of the rebels is executed as you wait your turn, and they you are next! Ah, but when you get to the block, drop to your knees, and watch the headsman approach with his honking huge head-lopping implement of destruction, you find yourself spotting a dragon in the sky behind the tower! First thing you need to grasp is that dragons are only common in this world in legend -- none of these people have ever seen one before, and neither have you for that matter! Not content to simply fly around doing dragon-things, it decides to attack! Which as it turns out is good for you, because in the confusion one of the guardsmen -- Hadvar -- orders you to follow him, and you do! --== Quest: Unbound ==-- Your hands are still bound, but Hadvar leads you on a merry path into the nearby Keep -- which as it happens is being attacked by the dragon -- down around and through the dungeons. Actually this is rather important -- after he frees you from your bindings you should search the area and grab the set of Imperial Armor and the weapon of your choice -- I prefer sword and shield myself, but as I chose Breton as my race, I can also do magic, so often my shield hand will have a spell assigned to it.
As you work your way through the Keep you want to keep an eye out for potions on tables and crates and barrels you can search as some will also contain potions. The rule of thumb here is you want to take any potions you find, but as for other kit, to be honest you have to be careful not to go overweight, so as long as you have a main weapon and shield and a backup weapon, your armor, and any really valuable items you come across like gold, pieces of armor and weapons you should take, but you should pretty much ignore the rest of the stuff like buckets, tankards and the like.
The rule of thumb is to take only what is worth carrying so you can sell it later -- but do NOT leave this first dungeon empty handed! --== Some Wealth and Experience ==-- After your bonds are cut you are instructed to arm yourself -- take all of the armor and weapons from this area, being sure to equip a set and arm a sword. There is gold on the table to the right as you enter the room -- not much but hey, every little bit helps, so take it. Note that the one thing that can be said for this part of the game is that it is packed with opportunity that you can miss... In the first and second chambers after you are armed there will be combat encounters -- be sure to strop the bodies of the dead clean as you can sell their kit when you get to Riverwood. In addition starting with the second area, look around for things to loot like potions and bottles of wine worth 12 or more gold. Search the cupboard and take the gold, as well as the potion on its shelf, then empty the nearby barrel of potions! On a table will be a Salt Pile - and in one of the sacks in the room are 4 more Salt Piles. These will be useful to have later, weigh practically nothing, so go ahead and take them and hold on to them to use later in crafting. Grab the potion and Salt Pile from the table, then follow Hadvar to the Torture Room for another brief battle. When you reach the torture chambers you will find on a small table here is a pouch, a dagger, and a book -- The Book of the Dragonborn -- which you should grab because it gives you some important background information on the world that you will really want to know after certain developments... Later when you get out of the Keep you will want to read it.
After you strip the dead bodies of their stuff and grab the weapon and shield off the rack, you can put the lockpicks you got from the bag on the table to good use! Go pick the locks on the cages in this room -- one will have nothing but one will have a mage in it and some gold and a potion on the floor along with a spell tome for the spell Sparks. Take those then strip the mage of his gold and potions, as well as his clothing! Watch the video embedded above to learn how to pick locks - basically you want to gently probe the lock changing the position of the tension bar (the left Joystick) until the lock gives using the lever (right Joystick). Apply too much pressure -- as you see that I did in the video -- and you will break your pick. Gentle is the word here! Each lock that you pick gains you a little experience and increases your skill, so it really is worth picking these. When you succeed save the game so that if you fail you can reload and not lose that pick! In the hallway leaving this area there are more locked doors to be picked -- so go ahead and open those and you will find a skeleton with some gold and bonemeal with a coin purse on the ground near him in the last one. You should pick up skill as well! There are a few skeletons ahead with some gold on them so take that as you pass right? The first anecdote that I was prepared to offer is that this entry in the Elder Scrolls series had not started out in the traditional way... After all where are the sewers? Where are the tunnels? Where are the giant spiders and large animals that we have to kill to escape? So of course I was gobsmacked when Hadvar lead me down into some tunnels after we took out a bunch of rebels, and THERE were the giant spiders! And not too long after that, a nice sized bear for us to slay! In the process of all that battling and slaying we got to learn how to use potions -- good for us! And at the end of the tunnel -- and the end of the Prologue -- we find ourselves having escaped the village into the sunny and mostly dragon-free plateau in the mountains! Talk to Hadvar to complete the quest Unbound, and flag the quest Before the Storm. Making it out of the caves and in to the lands of Skyrim unlocks your first Achievement -- Unbound (10 GS) -- so good on ya mates! Well done! Quest Givers Note: The list of Quest Givers for each town only includes the important or interesting quests -- there are many more basic quests to be had that I leave for you to find on your own -- I only include the quests that either lead to another more important quest, or that take you somewhere it is good to go. There are inevitable paths in any game that must be followed until, when it is time, the path branches, and that is when free will kicks in. For us, the path right now leads to the town of Riverwood, and our path begins with a run down the mountain... Err... Path. Whatever. During the trip down the road to Riverwood Hadvar will talk to you and, eventually will flag the Miscellaneous Quest Join the Imperial Legion for you. We need to talk about quests now... -== Flagging Quests ==-- When you arrive in the town you can speak with the different townsfolk to obtain information -- but the conversations that you have with them can also flag quests -- in fact any NPC has the capability of giving you a quest if they have one to give and you talk to them -- so before we do any of that we need to talk about these quests. The main story line has a set of quests, and these are covered as part of the main walk-through because you have to do them to progress the game. Each of the factions have their own set of quests, and in each town there are quests you can flag from NPC's that list under Miscellaneous in the Quest Lists. The important thing for you to know is that each and every type has its own section with a primary number in this guide. All of the quests that are part of that class of quest are included under the same section number, with different alpha-designations. We do this so that IF you decide to do a quest, you can jump right to its section and have the information you need for help in completing it if you do need help. The reason that these are not included in the main guide other than references to the quest givers is simply because not all players will flag all of the quests that they can, and even when they do, may not want to complete them if they are focused upon the main story. For that reason this is all fully compartmentalized. This is for your benefit. --== To Riverwood ==-- Where the path meets the river you will have the opportunity to pick up your first crafting agents -- Thistle Branch -- and you will discover your first location -- The Guardian Stones -- discovering locations adds a small amount of XP and also can serve as a fast travel spot on the map, so it is a good idea to discover as many as you can! -- The Guardian Stones -- There are three stones here, and each one can apply its sign to you but you can only choose one. The first stone is called The Warrior Stone, and it will give you the ability to learn Combat Skills 20% faster. The second stone is The Mage Stone, which will let you learn all magical skills 20% faster, and the third and last stone is the Thief Stone, which will give you all stealth skills 20% faster. I chose the Mage Stone for myself, because I suspect that Magic Skills will be important down the road -- and the choosing of one of the stones also happens to unlock the Achievement "Blessed" (10 GS)! So bonus! After choosing your stone continue along the path and you will discover the Embershard Mine, which has another ingredient -- Purple Mountain Flower near it. We will be discussing crafting and ingredients later in the guide, so you may just want to note that this is here and not take it for now as ingredients do weigh a little and can add up... You can find Mountain Flower further along the path so remember that, and on fallen logs you can find Mora Tapinella mushrooms as well. You want to speak with the Blacksmith, Alvor. He has some items you can take -- go ahead and take anything you think you can use. Finally you tell him about the dragon, and the attack. He asks you to deliver a message to the Jarl beyond Whitereach. You can do that, right? Take the time now to chat with Alvor and learn what you can about the area, and what has been going on. He has some useful background information, and you will be glad to know it. Some of the things he tells you will add additional options for yet more information, so do not be shy about asking questions. The last question that you should ask is if you can use his smithy -- he says yes of course!
The smithy is to your left, and you will find iron and steel ingots there, and you should take them. You do not have enough of any other materials that you need to make items, but you can improve the items you have -- for instance the Steel Shield that we picked up in the armory? You can use the workbench to improve it using the steel ingots that we just picked up. Do that and you gain a small amount of Smithing Skill -- that is very important!
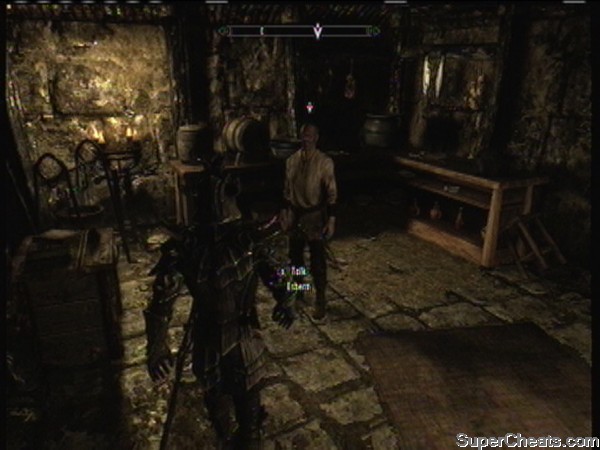
You want to improve your Smithing Skill as much as you can, to get it to 60 as fast as you can, because that will allow you to make and improve your own weapons and armor as well as improve magical weapons and kit. That may not feel like that big a deal right now, but having the ability will be like the American Express Double Platinum Card in this game, trust me on that! Hadvar is in the Smith's house and you can talk to him there for more background including details about the war and who you were briefly prisoners with. The Riverwood Trader is across the street -- head over there to sell off the extra stuff you picked up for some pocket money, and make sure to ask them if something happened as that will flag the quest The Golden Claw -- and as that will nicely fit in with another quest you will flag soon go ahead and flag it since the XP and reward will be good to have. The Trader has crafting supplies but as we are rather low on funds at the moment now is not the time to trade money for skills. Later we will do that though... If you flagged any of the quests that can be completed in town you should complete them before you leave -- and you should talk to the Inn Keeper to flag the ones he can offer by choosing all of the conversation options with him since some of them are in the Whiterun area! When you have finished with the Trader take the time to chat with the townfolk, Camilla will show you the bridge that will take you out of town to Whiterun, so if you have taken care of the above mentioned tasks now is a good time to hit the road! If it is dark you may want to use the Wait button to wait until morning, since night on the trail is not a good time to be traveling! Quest Givers Book Quests When you are challenged by the guard, tell him that Riverwood seeks the Jarl's aid and you will then be admitted, so head through the gates and into town! Once inside, take your first left and follow this path to the stairs that lead up to the Dragonsreach -- which you discover upon arriving at its doors! When you step through the gates the first building on the right is the smithy -- you can do a short Smith Training Quest that starts with making a Dagger by talking to Adrianne outside of the shop. You can sell any armor and weapons you have picked up to the counterman inside the Smithy -- and you should do that before you move along! -- Visit the Bannered Mare Inn -- At the Inn you can flag a number of quests and even complete one you flag from Carlotta. Look for a female warrior named Uthgerd the Unbroken -- who has a story to tell you -- and who will fight a bar brawl with you for a 100 gold coin purse! You can easily beat her, and that makes it an easy 100 gold coins, so why not? If you beat her she will be willing to be your companion, and battle at your side out of respect for your skills as a warrior. To add her as your companion simply tell her to Follow you -- consider doing that because having a fighting companion can really help you a lot! If you flagged the Miscellaneous Quest "Kill the Bandit Leader at Halted Stream Camp" when you were in Riverwood, you may want to complete that before you head back to Riverwood to do the Bleak Falls Barrow Quest, since it is on the area of Whiterun... Also note that inside the Bandit Camp are some Mammoth Tusks that will allow you to complete the quest for Ysolda as well! Your call, but because of the massive gains it represents I chose to do it...
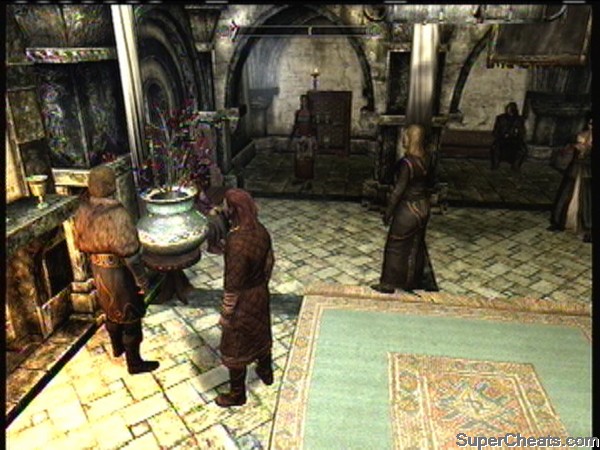
-- Wizards and Enchantments -- Go inside Dragonsreach and seek out the Jarl, and once you tell him what you came to tell him you will complete the quest "Before the Storm" and flag a new quest, "Bleak Falls Barrow" in the process. Follow the Jarl to his wizard when he asks you to, and you will get a briefing from the wizard Farengar! After you get your briefing take the time to ask him about enchantments, and for any other information that you think you want to know. Information is what you lack right now, so asking questions not only gets you that but you can also flag new quests in the process of asking questions -- like the Miscellaneous Quest to deliver frost salts to Arcadia and using the Arcane Enchanter to learn an enchantment from a weapon or other enchanted item (doing that destroys the item though). -- Flagging Additional Quests and an Important Read -- Now BEFORE you do anything else, you need to head upstairs in the Jarl's Dragonsreach Palace and, making damn sure you do NOT draw your weapon, begin searching the bookshelves in the upper rooms. Note that I said READ, not STEAL. (1) Find a book in a bookshelf called "Lost Legends" and read it to flag the Quest Forbidden Legend. (2) On a table in a bedroom on the second floor of the Jarl's Quarters is a stack of two books - the top of which is called "The Legend of Red Eagle" -- read it to flag the Miscellaneous Quest to find Red Eagle's Sword. This is an IMPORTANT Quest even if it does say Miscellaneous! -- Onward Through the Fog! -- Open the quests menu and select the quest for the frost salt from the Miscellaneous list, making it your active Miscellaneous Quest, and then remove the flag from the Main Quest and put it on Miscellaneous so that you can now follow the marker to the Alchemist, who rewards you with a few potions. You can get training in Alchemy here later if you want, and use her kit to make potions, but right now you lack the ingredients and the money, so it will have to wait! You can now head down into the city and talk to people to flag Miscellaneous Quests if you would like to pick up some easy XP -- note that the Companions Circle series can be very rewarding and you can complete it before you head off to resume the story quests to boost your levels to 5 or above if you want to. When you are ready go ahead and leave town to begin our next little adventure to obtain the Stone for the Wizard -- because we are going to need to level up a bit before we can go after the Red Eagle's sword. Fast travel to Riverwood -- open your map, select it and then hit the fast travel button -- and if you need to go ahead and sell off the extra stuff you are carrying to the Trader here. Bear in mind that until you get enough money to buy a house -- and thus have someplace to store things -- picking up items you actually want to keep is not such a good idea... Follow the pointer out of the town and up to the Black Falls Barrow which will get flagged on the map as a location you can fast travel to -- you will likely be attacked by bandits outside, so take them out and loot them, then head inside the first area and take out and loot the bandits there. You will need to leave and fast travel back to town to sell off the loot since you are close to being overburdened now. Return and head inside, and make yoru way to the back, where you will battle another brigand and find a puzzle you need to solve -- three pillars that can be turned to show specific images and a level. If you look above the images for the first two are mounted on the wall - the middle one has fallen off but you can find it below near the lever, so you learn that the key is Snake - Snake - Fish. Put anything else in and pull the lever and you get a rain of poison arrows, so don't do that. Put the correct ones in and the door in the wall opens. Inside there is a table you can grab some stuff from and read a book called Thief -- and to the left of it is a soul gem you should grab as it will come in handy later. There are also potions to be had on shelves as you progress through the area so be sure to grab those! To your left is a corckscrew stairs that leads to the level below, and you should see three or so Skeevers (wild animals) come out of that and attack you -- so kill them! Now head down and you will find a table with a Fireball Scroll and a Weak Paralysis Potion -- grab those and you will hear someone yelling.
Work your way to the blocked passage and smash it down to find a very large Frostbite Spider that you must kill -- be sure to grab the two bottles of venom from it, and then go have a look at what was going to be its dinner -- Arvel the Swift. You ask him where the Golden Claw is -- remember the Golden Claw? -- he promises to tell you all about that, if you cut him down that is. Of course he runs and you have to chase him down and kill him as well as some undead. Loot them all then backtrack to loot the corpses in the spider room and grab a Common Soul Gem in the chamber he ran through. Do not forget to search any urns that are not marked as being empty -- you can get some good stuff from them! As you continue along the path past where you dealt with the thief and the undead, mind the bloody spike trap yeah? You battle more undead and get past a swinging ax trap, then more undead and some lootables. When you get to the end chamber kill the tougher undead and then pull the chain to open the gate, and continue on. There is a chest you can loot in here just prior to dropping down into the next lower area. -- The Sanctum -- Head to the left and you will find the entrance to the Sanctum -- go inside and work your way around, up, and over the bridge to reach another passage that will take you to a puzzle door. You will be glad that you got the claw from the thief earlier because it is the key to this door! Check the golden claw to see the correct sequence -- they are engraved on it -- it is (top to bottom) bear, hummingbird, owl. Then use the claw to unlock and open the door! Now head all the way to the top of the dias and the back to absorb the Power Word -- and learn that YOU are a Dragonborn! Remember that book in the first Keep I said you should grab? Now you know why! After you absorb the Word of Power the Undead Boss climbs out of the crypt on the dias -- slay him and loot the tablet from his body! Now head up the stairs nearby and use the lever to leave -- fast travel to Riverwood to both to sell your loot and to complete the quest "The Golden Claw" for some XP and gold. Good on ya! Now sell the loot to him to lighten your load! Be sure to level-up your skills if you have yet to do that -- you should be at Level 5 at this point, which is a good thing, as we needed to level to do the Sword Quest! Now that we have wrapped things up in Riverwood, it is time to return to Whiterun and score some points with a certain Wizard... So fast travel directly to Dragonsreach and head inside to revisit with Farengar, who is very pleased with your success -- and introduces you to his colleague who it seems was the source of the location for the stone. Things now move quickly -- a guard comes in to report that a dragon has been seen and is attacking the city -- and you are asked to come with the Wizard to see the Jarl, who after being briefed rewards you (and the reward includes permission to purchase a home in the city! Nice!) and then asked you to accompany his Guard Captain to the gates and help with dealing with the dragon. His logic is you are the only one present with experience with dragons, so it sort of makes sense, right? You unlock the Achievement "Bleak Falls Barrow" (10 GS) along with getting your reward, so good on ya! When you reach the Western Watchtower you find Irileth near the gate where she is firing up her troops before heading to the Tower where she orders you all to spread out and search for survivors. As you search the dragon reappears and attacks -- and you join the guards in attacking it!
As it starts to die its soul rushes into your body -- revealing to those present that you are a Dragonborn! Equip your shout and use it! You now unlock the Achievement "Dragon Soul" (10 GS) for absorbing the dragon's soul -- and you have proven that you are one of the chosen -- far out!
Head back to Dragonsreach and report in to the Jarl, letting him know what has happened. As you explain it the Jarl is very pleased to learn what you are -- and tells you about the Greybeards -- and you learn that they are summoning you to meet with them. It seems that you will need to do that, but before you do we should wrap up something here... Head to the Wizard's Chamber and use the enchanting machine to disenchant. You should have the Axe of Cold from the Barrow, and a fire-resistant shield as well as the Axe of Whiterun in your inventory -- I chose to hold on to the Axe but to learn the enchantments from the other two, which of course destroyed them... Now talk to Farengar -- wake him up if you need to -- and learn what he can tell you. --== Purchasing Your First Home ==-- If you have been following the guide and looting every valuable thing that you can, you should have nearly 10,000 gold by now -- and as you have permission to buy a home in the city, and as you have the money, it is time that we take care of that small task because it really is a major advantage in the game to have a place you can store your stuff! After the Jarl declares you hero of the city, speak with Proventus Avenicci to learn what he knows about the Dragonborn and the Grey Beards and then pay him the 5,000 gold to buy a house in the city. This will unlock the Achievement "Citizen" (10 GS) and get you the key to your house. Next you should tell him you want to decorate your home -- there are a bunch of options including: -- Alchemy Laboratory (500 gold) After you buy the furnishings change the active quest in your list to Miscellaneous and Visit Breezehome, your new house, and then go there! On the way out you meet your Housecarl Lydia -- ask her a few questions to learn what she knows -- if you have never seen the concept before, a Housecarl is sort of like a personal majordomo who keeps an eye on all your stuff but also serves as a shield-brother when needed. If you already have a companion you do not have to select Lydia to be it -- I kept the one that I have, Uthgerd the Unbroken. Lydia will be at your house whenever you want or need her -- and there is a bookshelf in your Alchemy workroom you can store your books on as well as other containers for you to store stuff in. Now would be a good time to store your ingredients in the Alchemy room -- and now that you have a place to store them, collecting any you find makes sense! You should be at Level 7 or so at the moment -- and taking this opportunity to clear away as many of the Miscellaneous Quests as you can would be a good idea... I am just saying. The journey you are about to take is long and dangerous so having the levels and best kit you can would be good! It is now time to see these Greybeards and see what it is that they can teach us -- so activate that quest and make it your flagged quest and head for their home. This is a very long journey and the wagon service does not go here, so make sure you stock up on any potions you think you will need, upgrade your armor and weapons, and then go careful as there are some battles you will want to avoid or run away from -- like with the giants! Once you reach the long fallen tree that makes a bridge over the falls -- and defeat the archer in the center -- there is a path on the other side that takes you all the way up the mountain and cross another river -- the path continues on the other side, but mind the trolls, right? -- Ivarstead -- Quest Givers
When you arrive at Ivarstead that will be something of a relief -- like I said, long journey... Pause at the bridge and chat up Klimmek to see what he knows, and flag a quest from him to deliver the food up the 7000 steps. Talk to Gwilin to hear what he knows. A little way up you run into Barknar -- see what he knows. Karita is farther up the path -- she warns you about the wolves but you know that danger well by now! What she does not tell you is that there is a troll ahead and he is wicked dangerous!
Honestly your best bet is to sneak past if you can, otherwise you will likely find this a tough battle... I used an Invisibility Potion myself, and that worked nicely. As you approach the entrance you will notice the offering chest -- make sure you put the supplies Klimmek gave you into that chest, right? Now head inside and speak to Angeir who asks you to shout... Go ahead, shout! You can now ask him what questions that you want to -- and then he explains how the shouts work, and you get taught another word -- Master Einorth then teaches you the more but first you must use your shout on the three phantom targets that the brothers summon for you. Now follow Master Borri to the Courtyard for your next trial -- writing out the word for Whirlwind Sprint for you to learn and then testing you! You can ask Arngeir more questions after he assigns you the quest "The Horn of Jurgen Windcaller" which will take you farther to the northwest than you have ever been. You will have unlocked the Achievement "The Way of the Voice" (20 GS) when you complete the trials. Before you do ANYTHING else, there is an excellent opportunity here for you to level your Restoration Skill -- see those stairs going up from here past the fire pit? That is the way to the top of the mountain -- which you already know you are not allowed to pass through yet. There wind that is whipping past will hurt you, which believe it or not is what you want! Basically here is how this works -- you can only level Restoration by healing actual damage -- meaning you have to be restoring either health or stamina. Just step into the wind to get hurt (but not dead) and then step back and heal yourself. Rinse and repeat to cap your Restoration Skill. This can take time as you have to recharge your Magicka. Getting your skill to around 50 allows you to unlock some good perks -- in particular fast travel to the point nearest Ustengrav that you can reach, you should fast travel back to Ivarstead and talk to Klimmek to complete his quest... At this point in the game there are several things that we need to cover -- things that will make your life a LOT easier if you are aware of them... We will start with the four skills that will, if you power level them, make your life so much easier! == Speech Skill --> This is the first skill you should be serious about leveling because it is the key to your financial success in the world of Skyrim. Once you have mastered Speech you will need -- at a MINUMUM -- to unlock the perks Haggling (to Level 5), Allure, Merchant, and Investor. Basically the Haggling improves the prices you get when selling and buying by 30% -- Allure is on the path to Merchant, which allows you to sell any type of goods to ANY merchant, and finally Investor allows you to invest in a merchant thus permanently raising the amount of money they have to buy your stuff! The good news is that you can very quickly level your Speech Skill -- though technically you will be exploiting a mistake in the game when you do it... But it was not YOUR mistake, so hey, bonus! First, head over to Riften and visit the Black Briar Meadery. Speak with the bloke at the counter (not Indaryn, you want to talk to Ungrien) and ask him to tell you about Maven Black-Briar... Use the Persuade option if you already have Speech to at least 26 -- otherwise bribe him until you get Speech to 26. Once you have done it once you can just sit there hitting 'A' over and over again to speed through the process. Every 4th of 5th iteration you gain a level! Just rinse and repeat and about half an hour later you are you are level 100 Speech! A most excellent side-effect is you also gain character levels -- bearing in mind that this is a good thing. The mastery of Speech makes all that follows wicked easy... You already know that your life will be a lot easier if you have a minimum of 60 Smithing -- actually you are better off at 100 Smithing because then you can make Legendary Armor and Weapons, and craft with Dragon Bones and Scales but that is a personal call. What you probably have figured out by now though is that in addition to Smithing you also need to have Enchantment and Alchemy pretty far developed and a few other skills will not hurt - we covered Restoration, but then there is Destruction, and the other mage-skills. The point to this is that now is a really good time to take a break from the story and level some skills at least to useable levels -- 60 or so is the most common goal. You can actually combine the process of leveling Smithing and Enchanting -- and here is how: first you need to visit the Blacksmith in Whiterun and check the weapons that he has for sale. If he has a weapon with the Soul Trap Enchantment then bonus! Buy it, take it to the Jarl's Palace, disenchant it to learn that enchantment, and then put it on a good weapon you can use to kill small animals. If he does not have that type of weapon in stock go outside and wait for 48 hours (2 days) using the Wait Button (Back) and then check again. Keep doing that until he has the weapon you need. Once you have a weapon with Soul Trap make the rounds of the vendors buying every empty Petty, Lesser, and Common Soul Gem you can get. Do not forget the Jarl's Wizard, he is a good source for them. When you have a fair number -- a couple dozen of each would work -- head out to the wilderness, arm your Soul Trap weapon, and start filling gems! When you have them all filled, head back to the Smith and use his gear to make a bunch of Iron Daggers, then take the Iron Daggers to the Palace and enchant each one, then sell them to the Smith, and rinse and repeat, and you will very quickly cap off both skills with a lot more ease than you might think! If you have already capped off Smithing but not Enchanting, a very easy method to do it is to go out soul trapping being sure to loot all the bandits you battle, then Enchanting all your loot and selling it, which in addition to gaining you mastery of Enchanting will also make you filthy rich! Why is that important? Because it will not only gain your character levels, it will give you the two most important skills in the game for kitting yourself and your companions out! Right so that was the first thing you needed to know.
== Alchemy --> The second thing is Alchemy -- the Appendix that covers that in this guide shows you precisely which ingredients make which potions -- and as soon as you own your first house you should be routinely picking up every ingredient you come upon, and storing it in your chest in top of the bookshelf in your Alchemy Workshop so that, when you have a fair amount, you can run through all of the potions one by one to add them to the potion menu that you get when you use an Alchemy Bench. The only way to get it leveled is to do it, so make as many potions as you have the stuff for, selling the ones you will not use, keeping the ones you will! You will want to focus on specific potions and so specific ingredients. These potions give the best gains: Damage Magicka Regen Damage Stamina Regen Invisibility Paralysis Slow You can actually combine this process with leveling the other skills as well, since you can pick up ingredients as you go about filling Soul Gems, right? The 7000 Steps are a great place to pick up souls -- and as long as you have a companion with you a great place for Dragon encounters where you can bank a few of their souls as well! Considering that there is an Achievement for collecting 20 Dragon Souls, and you will need more than that to activate all of the Shouts, well, why not?
--== Armor Skills ==-- Unlike in the previous games your kit in Skyrim does not get damaged and does not need to be repaired, which is good because when you factor in that the benefits you get from armor are also Skill dependent it would really suck if it could get damaged because the only way to level your chosen armor skill is to get hit! Well, that and Skill Books and Skill Levelers. But still... The benefits that your armor provides is directly related to your skill in that armor type -- and since you have mastered Smithing and Enchantment you are going to want to make a Legendary set of the armor of your choice, right? I went with Dragon Scale Armor (which is light armor) but regardless of your choice, you need to level the skill for your preferred armor. The easiest and fastest way to do that is to head down to the river outside of Whiterun and find some Mudcrabs. Kill all but one of them -- if you have a companion have them wait far enough away so that they will not attack the Mudcrab you will use for this training... Equip jewelry that is enchanted with Magicka Regeneration and set Fast Heal as your spell, then let the crab attack you over and over and over again, gaining skill in both your armor class AND in Restoration Magic the whole time! You can also level Block with the crab! Remember, encounters in the game scale to your level, so if you level up your character a lot but fail to level the skills like armor and weapons, you are going to have a really hard time playing the game! Take a half-hour here and there and level your armor skill, you will be glad you did! The following are not really mandatory but power leveling them will help you out later in the game, and the skills you leveled above will also make some of this easier... == Pickpocket Skill --> You say you are playing a Warrior or Mage, not a Thief? Well you still need to invest some time in raising this skill! Why? Because there are quests in the game that require you to either pick a pocket or to plant something on a person (the opposite of picking a pocket in other words) so you NEED this skill to be around 50 or so just to be safe! The good news is that you can easily level it up for free! Here is how: Now that you have leveled Enchanting you can put a high level of Pickpocket on your kit -- do that and it is nearly impossible to get caught! All that you need to once you have your Pickpocket Gear on is go to any town and start picking pockets -- just power on mates! There are items in the game that you will acquire that are fairly rare and some are elements for quests. In particular this includes flawless gems and fire salt -- two things you should NEVER sell! You may also want to hold on to the Dragon Bones and Scales you acquire in slaying dragons because as you acquire new enchantments you will want to update your armor and that means making new pieces to enchant... Ninroot is not as rare in this game as in the last, but it and Wheat are two very powerful ingredients for Alchemy, so you should not sell them. Iron Ore should never be sold, and should never be made into ingots unless you actually NEED them. The reason for that is that you can use the Transmute Alteration Spell to convert the ore first to Silver Ore, and then to Gold Ore. Do that with every piece of Iron Ore you do not need, then turn the Gold Ore into ingots, and make jewelry -- rings and necklaces -- out of the ingots. Use the less powerful types of soul gems you get with your Soul Capture weapon to enchant them, and then sell them for a very fast and low-impact revenue stream. You can easily and quickly unlock the Achievement "Golden Touch" (30 GS) for having 100,000 gold on you at one time this way! As we begin the next stage of the story we will be visiting the town of Morthal -- as this gets us in the general area of the quest location. If you have not already used the wagon to visit each city then use it to go to either Morthal (which is closer) or Dawnstar. If you have, fast travel to one of the other. There are basically two route you can choose from, east or west, and I recommend you go the western route through Morthal for two reasons -- the first is that it is closer, and the second is that there is a greater risk of being attacked by some harry mobs from the east. But we are not actually headed directly to the quest location -- first we need to explore Morthor and some of the other sites in the area, and maybe wrap up a few minor quests! --== Welcome to Morthal ==-- Quest Givers Do some shopping -- there is an alchemist here -- rest, save your game. You can flag a pretty cool quest at the Inn to investigate a set of suspicious deaths -- and one from the bard to investigate the Bard's College in Solitude if you have not flagged it already from another bard... Since we are here this is a good time to do the quest Laid to Rest -- which is loosely an homage to the book Interview with a Vampire -- so jump to that quest and complete it now!
Back? Well what did you think? Tough kill at the end, right? When you report back to the Jarl if you ask if there is anything else you can do, she offers you the chance to earn the title of Thane for her town if you like -- it basically means doing a three-part Miscellaneous Quest so why not? Go ahead and jump to the Miscellaneous Quest Assist the people of Hjaalmarch and wrap that up now -- I will wait for you but hurry up! Welcome back! If you flagged the Miscellaneous Quest Kill the Dragon located at Eldersblood Peak you are in luck because that is the peak that the town sits under! Simply head along the path near to the top to engage the Dragon, kill it and then head to the top of the peak to learn the Dragon Shout Weapon Disarm! Yes, that Dragon was guarding a Shout Wall... That wraps up the quests for this section, and it is time to jump back on the Story Path. From Morthal, with the quest flagged, head towards the pointer and you will find the entrance below and you may or may not be attacked by a group of bandits with magic users as you descend. Entering Ustengrav you will find another group of bandits in the first chamber and a mixture of Draugr and Mages doing battle -- let one side kill the other off before you engage the winners and take them out, and then you may want to save just to be on the safe side, right? If you get overloaded you may want to back out and hit a shop to sell off your loot before going deeper in... As you work your way deeper into the caverns you will find the entrance to the Ustengrav Depths -- and here is where you will encounter a few traps and some minor resistance as you work your way through to the other side, following the quest marker. When you reach the overlook for the odd underground glade go ahead and take that shortcut down the side of the cliff here, and work your way to the back of the cave, killing the Skeletons here so that you absorb the new Dragon Shout called Face from the wall there. Once you have that, turn back and follow the marker to the other side of the glade above where you will find a puzzle of sorts. Basically there are three gates and three stones that trigger them -- to get past this you need to run past the stones and then use your Shout Whirlwind Sprint to get through the gates before they close.
--== FRUSTRATION WARNING... OK, if you are having trouble with this please watch the video... This is ALL timing. You need to LB Sprint past the stones and then roughly 3/4 of the way to the opening (NOT AT IT) you need to use the Shout to whip through. If you fail to engage the Shout when you are 3/4 of the way from the last stone to the opening, you hit an invisible wall, the gates close, and you wait for your shout to recharge. Simple as that. Stack the deck in your favor by having your companion wait for you out of the way, and then just do as I did in the video. It may take a few tries but this is not bugged (unlike some other parts of the game)...
--== The End? ==-- Do NOT tell your companion to follow you into this new area after you get past the gates -- the whole path is fire traps and while you can easily keep yourself alive, keeping them alive might be an issue... Work your way past the traps into the next chamber and slay the trio of Large, Medium, and Small Frost Spiders -- I hate spiders -- and then hack your way through the webs blocking the path to trigger this impressive statue salute -- and head to the alter to claim... Your... Prize? Argh! The Horn has been stolen and a note left telling us to rent the attic room at the Sleeping Giant Inn in Riverwood. Really?! Grab your companion and exit the cavern being sure to grab the gold and loot the chest on the way out! --== Back to Riverwood ==-- Exit the dungeon and fast travel to Riverwood, and do just as the note instructs. After you fall asleep the Innkeeper wakes you up and gives you the horn, and you flag the next quest in the series, A Blade in the Dark. After you flag that quest and hear her out, return to the Greybeards with the Horn and give it to them, you are taught the third word of the Shout Unrelenting Force, and you unlock the Achievement "Words of Power" (10 GS) for the doing of it! There is now a short ceremony as you are welcomed as a full fledged member, so good on ya! Well done! Now we have a Dragon to slay! Delphine tells you that you cannot talk in the Inn room, so follow her into her room and close the door, at which point she opens what appears to be a clothes wardrobe to reveal a secret set of stairs leading to the cellar. Down there she tells you what her thing is... After you exhaust the conversation options -- and you really should hear them all -- because what she tells you is fantastical and hard to believe... She tells you the plan -- you need to kill a Dragon for her -- and you learn who she really is! She is the Jarl's Wizard's buddy we got the Dragonstone for!
After you agree to help tell her you are not ready to go just now -- she will tell you to meet her at Kynesgrove -- let her make her own way while you return the horn to the Greybeards and wrap that little bit of work up, right? Now travel to Kynesgrove and head to the mound -- it is to the east. What you encounter is a Dragon raising a Dragon! The raised Dragon -- Sohloknir -- must be killed now, so do that, and then after the battle you talk to Delphine and learn that she is a member of the Blades -- remember the Blades? Yeah! Once you exhaust the chat options you will now know a lot more than you did before you killed that Dragon, eh? She sets up the plan for the next Quest -- and flags it for you! Your first step is to meet Delphine in Riverwood again, where you find her playing her role as Innkeeper at the Sleeping Giant. You follow her back into her secret lair -- and by the way, you can take a lot of the stuff that is in this room, so if there is anything you see you think is useful, like potions and such -- and it is not marked with red, go ahead and take it! Talking to Delphine reveals that she actually does have a plan of sorts -- evidently the Embassy is Party Central, and she can get you an invite -- so it is time to head to Solitude! We need to meet her contact at the Winking Skeever Tavern in Solitude, and then meet Delphine later. Once you have exhausted the speech options with her and taken what you want, fast travel to Solitude. In addition to being the seat of higher learning for the region, Solitude is actually a pretty cool town if maybe a little too cold! Before we continue on with the story, we should check on the different quests you can get here since adding money and levels to your character is never a bad idea... Quest Givers Many of these quests are easy and quick, so if you want to pick up extra XP go ahead and do them now... Note: If you do the quest given by Sybille Stentor to clear out the Vampires in the cave make certain to check that you were not infected by one of the Vampire. If you were, use a Cure Potion right away to get rid of the infection before it sets in, because if it takes hold the process of getting rid of it is long and involved.

Welcome to Skyrim
Before You Begin
Flagging the Red Eagle Quest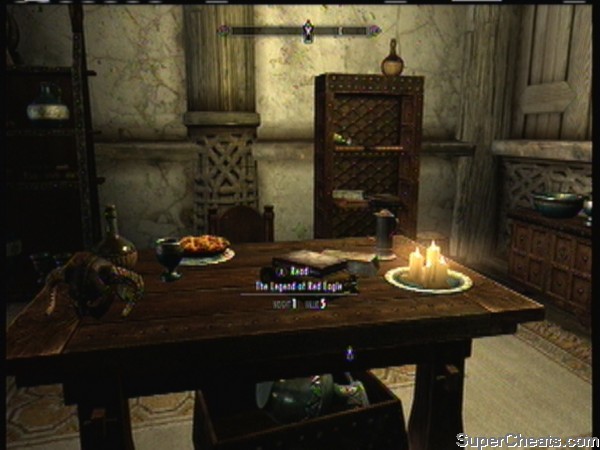
The Book to Read for Red Eagle's Quest
(02) A Night to Remember
(03) The Black Star
(04) Boethiah's Calling
(05) Break of Dawn
(06) The Cursed Tribe
(07) Darkness Returns
(08) Discerning the Transmundane
(09) The House of Horrors
(10) Ill Met by Moonlight
(11) The Mind of Madness
(12) The Only Cure
(13) Pieces of the Past
(14) The Taste of Death
(15) Waking Nightmare
(16) The Whispering Door
Prologue
Having You an Escape!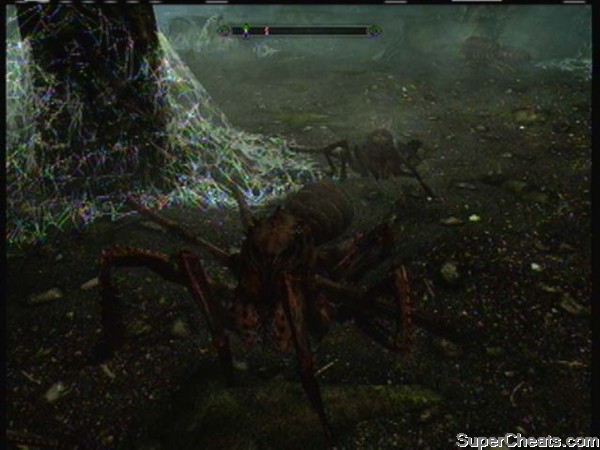
Giant Spiders make you feel right at Home!
Picking Your First Locks
The Town of Riverwood
-- Lucan: Main Story Quest -- The Golden Claw
-- Lucan: Miscellaneous Quest -- Visit the College of Winterhold
-- Orgnar: Miscellaneous Quest -- Craft a Potion
-- Orgnar: Miscellaneous Quest -- Kill the Bandit Leader at the Halted Stream Camp
-- Orgnar: Miscellaneous Quest -- Talk to Aventus Arentino
-- Sven: Miscellaneous Quest -- Deliver Sven's Letter to Camilla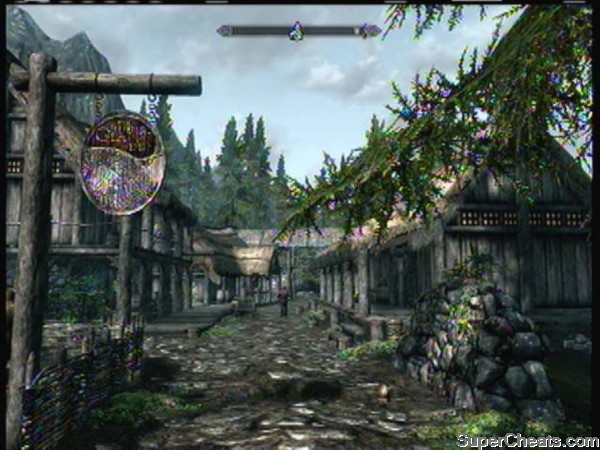
Welcome to Riverwood
Obtaining Your First Smithy Skill-Up
Introducing Whiterun
-- Adrianne Avenicci: Miscellaneous Quest -- Craft an Iron Dagger
-- Adrianne Avenicci: Miscellaneous Quest -- Deliver the Sword to Preventus Avenicci
-- Aela or Ria of the Companions: Miscellaneous Quest -- Speak with the Leader of the Companions
-- Alik'r Warrior: Story Line Quest -- In My Time of Need
-- Amren the Redguard: Miscellaneous Quest -- Fine Amren's Family Sword inside White River Watch
-- Carlotta Valentia: Miscellaneous Quest -- Talk to Mikael about Carlotta
-- Danica Pure-Spring: Story Line Quest -- The Blessings of Nature
-- Farengar Secret-Fire: Miscellaneous Quest -- Give the Frost Salts to Arcadia
-- Farengar Secret-Fire: Miscellaneous Quest -- Use the Arcane Enchanter
-- Hulda the Innkeeper: Miscellaneous Quest -- Visit the Shrine of Azura
-- Jan Battle-Born: Miscellaneous Quest -- Speak with the Leader of the Companions
-- Mikael the Bard: Miscellaneous Quest -- Investigate the Bard's College
-- Proventus Avenicci: Miscellaneous Quest -- Kill the Bandit Leader located at Silent Moons Camp
-- Ysolda: Miscellaneous Quest -- Bring one Mammoth Tusk to Ysolda
-- Dragonsreach - The Legend of Red Eagle: Find Red Eagle's Sword (Miscellaneous)
-- Dragonsreach - Lost Legends of Skyrim: Forbidden Legend (Story Line Quest)
After you cross the bridge turn right and follow the road along the river until you reach another set of bridges, and you can see the city on the hill to the left in the distance. Find the road leading up to the city and follow it to discover the Whiterun Stables and, further on this winding path, the entrance gate to the city, which is presently closed.
Meeting Your First Wizard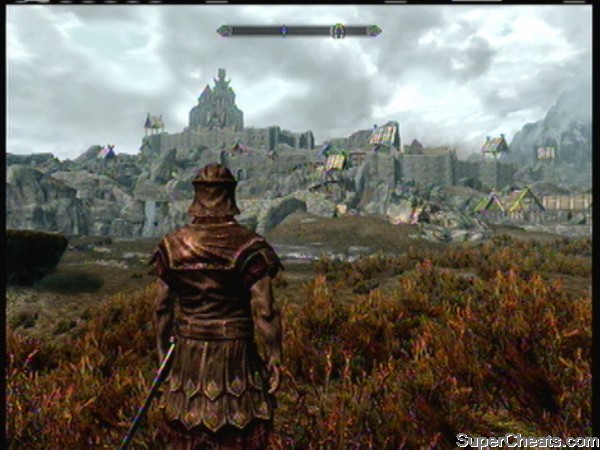
Welcome to Whiterun
Retrieving the Dragonstone
Obtaining the Dragonstone and Revealing a Secret
The Black Falls Burrow
Getting in Good with a Wizard
Your First Dragon Battle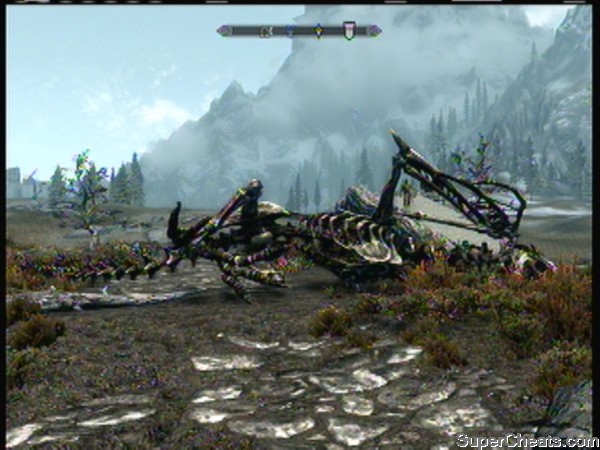
The Only Good Dragon
-- Bedroom Furnishings (300 gold)
-- Loft Decorations (200 gold)
-- Dining Room Decorations (250 gold)
-- Living Room Furnishings (250 gold)
-- Kitchen Furnishings (300 gold)
Ivarstead / The Way of the Voice
-- Klimmek: Miscellaneous Quest -- Bring the Supplies to High Hrothgar
-- Wilhelm the Innkeeper: Miscellaneous Quest -- Investigate Shroud Hearth Barrow
-- Wilhelm the Innkeeper: Miscellaneous Quest -- Kill the Dragon located at Northwind Summit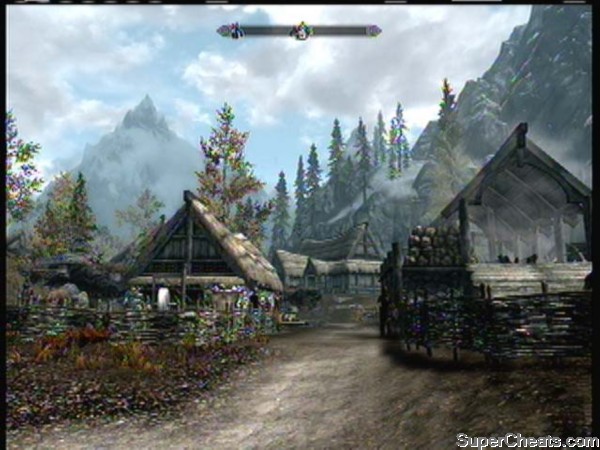
Welcome to Ivarstead
Taking Instruction from the Greybeards
P02B: Reality Check - Things You Should Power Level Now
== Smithing and Enchantment -->
Gathering the Incredible Diversity of Resources
Take every resource you can find
Bear Claws, Blue Butterfly Wing, Blue Mountain Flower, Chicken Egg, Glow Dust, Hanging Moss, Nightshade, Spriggan Sap, Spider Egg
Creep Cluster, Frost Mirriam, Giants Toe, Histcarp, Juniper Berries, Large Antlers, Silverside Perch, Skeever Tail, Wheat
Chaurus Eggs, Ice Wraith Teeth, Luna Moth Wing, Nirnroot, Vampire Dust
Briar Heart, Canis Root, Imp Stool, Swamp Fungal Pod
Deathbell, Large Antlers, River Betty, Salt Pile
Leveling Skills with your Mudcrab
--== Strictly Voluntary Skill Leveling ==--
--== Things You Should Never Sell ==--
The Journey to Morthal
-- Idgrod the Younger: Misc Quest -- Deliver Idgrod's Note to Danica
-- Jarl Idgrod Ravencrone: Misc Quest -- Assist the people of Hjaalmarch
-- Jonno the Innkeeper: Misc Quest -- Kill the Dragon located at Eldersblood Peak
-- Jonno the Innkeeper: Side Quest -- Laid to Rest.
-- Lami the Alchemist: Misc Quest -- Bring the Song of the Alchemist to Lami
Solving the Mystery of the House Fire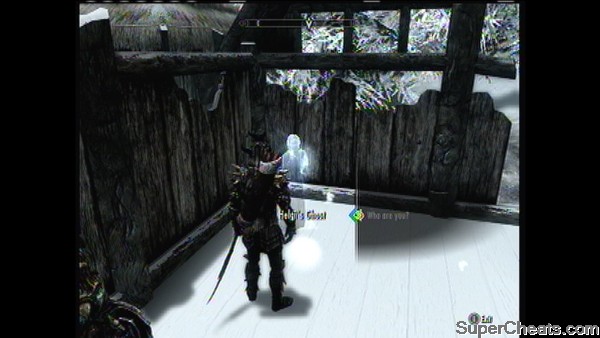
Ghost Whispering
P02D: The Path Horn of Jurgen Windcaller
Finding the Horn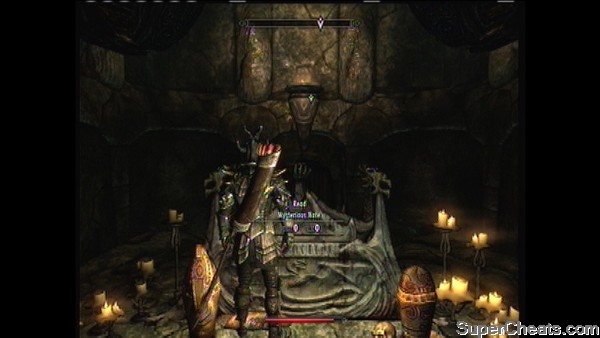
The Horn is Gone!
P03A: A Blade in the Dark
Secrets are Revealed!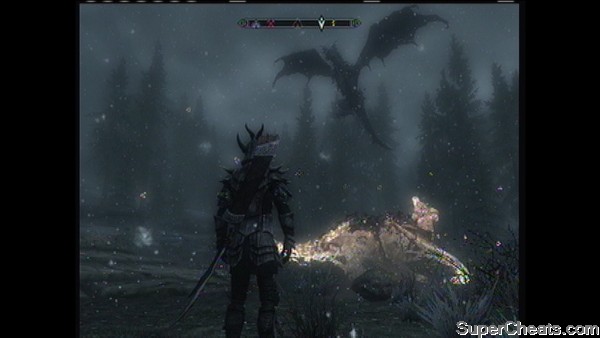
The Master Dragon
Diplomatic Immunity
--== Welcome to Solitude ==--
-- Angeline Morrard: Misc Quest -- Ask Aldis for information about Angeline's daughter
-- Captain Aldis: Misc Quest -- Bring one The Mirror to Aldis
-- Corpulus Vinius: Misc Quest -- Head to the Solitude Court
-- Corpulus Vinius: Misc Quest -- Investigate the man wandering the streets near the Bards College
-- Corpulus Vinius: Misc Quest -- Talk to Jaree-Ra about possible employment
-- Dervenin: Side Quest -- The Mind of Madness
-- Evette San: Misc Quest -- Convince Vittoria Vici to release the Spiced Wine shipment
-- Falk Firebeard: Side Quest -- The Man Who Cried Wolf
-- Greta: Misc Quest -- Retrieve Amulet of Talos off of Raggvir
-- Jaree-Ra: Side Quest -- Lights Out!
-- Noster Eagle-Eye: Misc Quest -- Find Noster's Helmet inside Steepfall Burrow
-- Octieve San: Misc Quest -- Talk to Irnskar about Octieve
-- Sorex Vinius: Misc Quest -- Deliver the Stros M'Kai Rum to Falk Firebeard
-- Svari: Misc Quest -- Speak to Greta about going to the Temple of the Divines
-- Sybille Stentor: Misc Quest -- Kill the leader at the Pinemoon Cave
-- Taarie: Misc Quest -- Speak to to Elisif with Taarie's outfit on
Uncovering what the Thalmor Know
Uncovering what the Thalmor Know
--== Back on the Story ==--
The Winking Skeever Inn is the first building on the left when you enter Solitude through the main gates, and your contact is waiting inside. He tells you he can smuggle in some kit for you -- what I suggest you give him is a good weapon, some Healing Potions, some Invisibility Potions, and some lock picks -- you really should not need more than that...
Before he leaves he tells you to meet him at the party -- so why not head on over to the embassy now and meet up with him? You do that by meeting Delphine at the stables outside of town, where she will trade you your party clothes and the invitation for EVERYTHING you have. I hope you picked a good weapon to give to Malborn.
After she gives you the kit wear it and talk to her again, all your stuff is removed, and you get into the wagon that takes you to the party. When you arrive you will be stopped to show your invitation -- one thing you may want to know is that that sword I told you to get early on, Red Eagles blade? Yeah, THAT you get to keep going in!
--== At the Party ==--
When you enter you meet Elenwen the Ambassador and make small talk. Take some time to chat up the other guests as you can hear some interesting information in the process -- but when you are ready your next step is to make a distraction. The easy way to do that is seek out and talk to Erikur the Merchant. Exhaust his first set of chat options then talk to someone else until you hear him comment about the serving girl, at which point you should chat with him again.
Tell him you noticed his attention in her direction and offer to be his wingman. Talk to her, then tell him she really wants him and he should sneak up to her room. He immediately goes to put the moves on her and creates the distraction that you need -- head over to Malborn now!
After you get your kit out of the chest go through the door in this room and you are now on your own, as Malborn has returned to his duties. Kill the two guards and the mage in the next room and take their kit for your own! Armor up and then loot the place -- why not? It is not like they cannot afford to donate to your relief fund!
Now exit the building into the courtyard outside and take out the mage and two guards out here. The mage is a Conjurer, and he will summon some nasty beasts so you need to make him your first and primary target and kill him quickly, and only then take out the guards. The logic is that killing the Conjurer eliminates his summoned mobs.
Go inside and hide to hear the conversation and if you are lucky -- I was not -- you will hear it all before the guard finds you and it is time to do battle! Kill the guard, the wizard and his informant, and then loot the place, being certain to read and take the following documents:
-- Dragon Investigation Report
-- Thalmor Dossier: Delphine
-- Thalmor Dossier: Ulfric Stormcloud
Go ahead and read all three now, as they tell you a lot about what the enemy knows, and maybe some things you do not know...
Now head down to the Interrogation Room and kill the Soldier there, then search the nearby chest for another document:
Thalmor Dossier: Esbern
Now before you head to the Interrogation Chamber you have the option of freeing some of the prisoners but when you do you will be attacked by guards and Malborn's cover is blown. It seems that his getting blown may not be entirely your fault since they brought him down here with them and told you that they caught your spy... Not sure who they actually think we are, but there is nothing for it but to kill them and have your escape, right?
Your exit is the trapdoor on the other side of the room -- but be warned that once you go through that door you do NOT want to try to go back into the dungeon because there is a bug that will lock up your game and that can mess up the last save. So do everything you need to do in the dungeon before you use the trap door, right?
Inside the passage you will battle a Frost Troll on the way to the exit -- look for a Skill Book here that will add a level to your Illusion Skill and read it before you leave. Once you reach the exit you will be presented with no real option to save the prisoner or Malborn as they simply run off. For your part you should fast travel to Riverwood to meet with Delphone and report in -- once you have done that get all your stuff out of the chest in her secret lair and equip it -- yeah, it is good to be back in our armor after wearing that borrowed stuff!
Delphine is clear on one thing: you have to get to Esbern before the Thalmor do! Well, now you know what your next mission is!
You now unlock the Achievement "Diplomatic Immunity" (20 GS) for completing this run of the story line.
After you sell off the loot you picked up in the Embassy, and take care of replacing any supplies you may need, it is time to travel to Riften and the next adventure on this mystery tour!
--== Welcome to Riften ==--
Quest Givers:
-- Balimund: Misc Quest -- Bring 10 Fire Salts to Balimund
-- Hofgrir Horse-Crusher: Misc Quest -- Strongest
-- Madesi: Misc Quest -- Materials for the Ringmaker
-- Maramal: Misc Quest -- Marriage in Skyrim
-- Marise Aravel: Misc Quest -- Find 5 Ice Wrath Teeth for Marise
-- Mjoll the Lioness: Misc Quest -- Locate Grimsever
-- Shadr: Misc Quest -- Speak to Sapphire about Shadr's debt
-- Svana Far-Shield: Misc Quest -- Obtain a Mark of Dibella
Finding Esbern
Finding Esbern
--== Back to the Story ==--
Chances are you will need to complete at least one Side Quest for Brynjolf before you can advance this quest, but once you can you will need to search the Ratway for Esben's hideout. Simply follow the marker for the quest to the entrance to the Ratway, which is in the trench below the square, and go inside.
Expect to have to battle a few of the residents of this den of thieves as you work your way along, until you reach the Ragged Flagon -- which you have to go to anyway for the entry mission for the Thieves Guild. You can talk to the bartender or Brynjold to get the information you are seeking -- either way once you have it, continue the mission and your search!
Head into the Vaults and watch out for the unit of Thalmor that were sent to exact revenge on you -- kill them when they appear and then work your way deeper into the Warrens, until you find the door and Esbern!
Talk to him to learn what he knows -- that black dragon that is raising the others is named Alduin and according to Esbern this marks the end of the world. You reveal that you are Dragonborn and Esbern asks you to take him to Delphine, flagging the next quest in the story, Alduin's Wall.
Getting Esbern to Delphine will be a challenge -- keep your weapon ready as there are more Thalmor patrols out and clearly they are searching for Esbern! Retrace your steps back through the Ratway, through the Ragged Flagon, and out to Riften.
Once you emerge fast travel to Riverwood and meet with Delphine at the Inn, where you will lead the way to the lair and Delphine and Esbern will begin dialogue. Esbern puts the book Annals of the Dragonguard on the table -- read that to learn more of the story of the events of the war and Alduin's Wall.
Esbern now schools us on Alduin's Wall and the lore of it, and its location which is Skyhaven Temple. The wall may hold the secret to killing the Master Dragon Alduin! Your smartest move is to travel separately so you can go get your regular companion to join you... But when you exit the Inn you exit into an Ancient Dragon Attack!
This is a really rough battle because the Dragon is strong and rarely lands -- so if you cannot do ranged damage you need to find cover and try not to die until you can get it on the ground! Once you do get it on the ground be sure that you have your Resist Fire Potions and Health Potions ready -- best not to use those until you can really hurt this thing, stay under cover until then.
This was a nasty attack and people in town died... That sucks, but on the other hand you just killed an Ancient Dragon! Good on ya mates!
Deciphering the Wall

Alduin's Wall
--== Karthspire ==--
When you arrive you will need meet up with Esbern and Delphine -- lead them to the Temple and take out the Forsworn who are guarding the place -- including some nasty mages, so go careful here.
When you reach the bridge turn the pillars so that they all have the bug-face and it will drop down, then try to keep up with Esbern as he is in a hurry to show you the trap floor ahead. Basically you want to only step on the tiles with the bug-face on them -- and then pull the chain to turn off the traps on the other side. Now it is safe for everyone else to pass, so head into the Temple and empty the chest on the alter, then Esbern will tell you about the Blood Seal.
Activate the Seal and you will open the secret door, gaining access to the main temple area and, once your team gets the lights on, Esbern interprets the wall for you. It is a good thing you have him on your team -- he knows a lot about Dragon Lore.
Delphine concludes that there is nothing for it but to consult the Greybeards -- she does not like it but there does not appear to be a choice. She tells you her reasons for distrusting them... You have pretty much wrapped up what you can do here now -- so it is time to head back to the Greybeards to see what they know.
You unlock the Achievement "Alduin's Wall" (20 GS) and flag the next stage, The Throat of the World.
Before we do the next stage in our main quest we need to make a short side-trip to Shearpoint -- one of the Dragon Walls marked on the map. If it is not on your map yet, go to Tumble Arch Pass and you will see it on your compass radar.
When you arrive you will immediately battle a Dragon, and when you approach the wall you will trigger the spawn of an undead mage named Krosis who can be a bit to handle because he sort of floats around casting spell after spell and using his boss staff to hurt you. Yeah, but you are good, you can take him! Just heal up and keep whacking at him until he is dead... Again?
With the final obstacle cleared away, loot his body and grab his three-enchantment mask, then head over to the wall and learn the Shout Voice, Throw Voice. Yeah, it is not a sexy Shout but still, it is a new one. You will need to spend a Dragon Soul to unlock it -- do that now so it is done.
After you have your new Shout fast travel back to Hrothgar you do the sensible thing and ask Arngeir -- but the conversation does not go quite the way I was expecting... It seems he really does not like the Blades at all! No matter what you say you are not going to please him, but if you are honest with him at least he will not go postal on you.
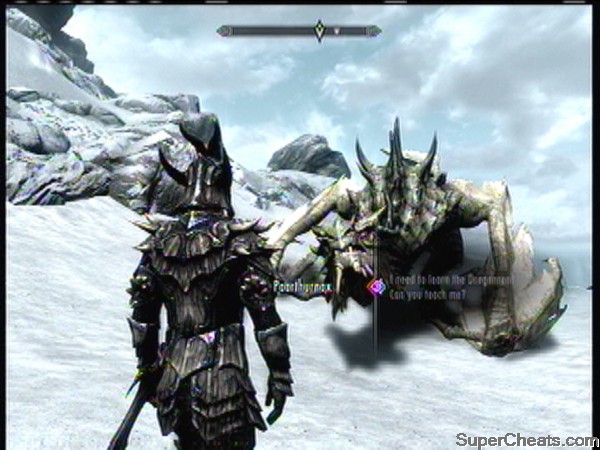
While he cannot teach you the Shout -- he does not know it -- but he suggests that maybe it is time for you to chat with the Master of the Order, Paarthurnax -- you know, the guy on top of the mountain that you cannot reach? It is time to learn the shout to reach the Master!
Follow him to the Courtyard where the other members will assemble and learn all three words of the Shout Clear Skies. Now head up the steps and use the Shout to clear the path and head to the top of the mountain!
Master of the Greybeards
Master of the Greybeards
--== Meeting with the Master ==--
You will need to defeat a few Ice Wraith and a Frost Troll on the way up, and you will need to use that Shout more than a few times, but once you get to the top you meet... Whhhaaaaaat?! The Master is a Dragon?! But... But... We KILL Dragons!
Chatting with him you learn about him, but first you have to learn his Shout and then demonstrate it for him - so go do that now. You actually have to use that Shout on him -- and once you do he seems very pleased to meet you!
Now the real conversation begins, and so do the revelations! The Shout that you need is not his to teach it seems, because it was not created by the Dragons, but by the Dragonborn! This is a problem, because they are long dead -- and are actually responsible for the problems that we are now having it seems -- the Throat of the World was the location that Alduin was at when he was defeated last time, and as you listen you learn that he was never actually defeated at all, he was sent forward in time to become YOUR problem! They did it with the Elder Scroll -- remember the Elder Scroll? This is an adventure about the Elder Scroll, I am just saying...
It appears that the Master knew the futility of the gesture that the ancient Nords made, and has been patiently waiting for Alduin to return. As you listen you learn that obtaining the Elder Scroll just may be the solution to the problem! And now it all comes full circle! We not only need to find a bloody myth, we need to use that myth to travel back in time to learn the Shout we need... Sure, no problem!
--== Before You Depart ==--
You have now flagged the next quest in the series, Elder Knowledge.
First listen to everything that he has to say -- it is all important -- then when you are given the option, ask him to tell you about meditation on the words of power... Ask him to teach you Fus, Feim, and Yol now -- Fus is Force (Unrelenting Force Word 1), Feim is Fade (Become Ethereal Word 1), and Yol means Fire (Fire Breach Word 1). Each of these words can now give you additional benefits when you use them, adding strength to your Shouts.
When you are done fast travel back to High Hrothgar.
At High Hrothgar speak with Arngeir and he will tell you that they have never really concerned themselves with the Elder Scroll, saying that the Mages at Winterhold would be the place to start...
As you talk to him he reveals that the other words of power are out there for you to find -- we already know about some of them, but he can show you others starting with the Word of Power at Skyborn Altar. Knowing these words is going to be important, so making the effort now is not a bad idea -- so let's head there and learn that one now!
As there are twenty Shouts and each has three words, minus the ones you learned by being given them you are going to need a Dragon Soul for each word, so I would not avoid battling Dragons if I were you, I am just saying...
It is very close to Stonehills, so head there and then follow the compass and marker to the Alter, where you will take on an Elder Dragon and then learn the Word of Power for Frost Breath!
When you return to Arngeir and ask him if he knows of another word, he will tell you the location of the next word -- at Autumnwatch Tower, which is not that far away to the south! Heading there gets you a battle with an Elder Dragon of the Frost persuasion. Taking him out should be cake to you by now!
With the Dragon dispatched head over to the wall to learn the Shout Kill, Marked for Death! You have to go on top of the tower to get to it so do not forget to loot that chest, right?
Back to Arngeir again, and this time he sends you to Silverdrift Lair. The Nightgate in is probably the closest fast travel point to the location, so head there and then to the Lair where you will find some bandits and some undead. Be sure to read the book on the alter -- Words of Philosophy -- for a skill point, and then when you get past the swinging gate traps use pull the ring in the stone to raise the bars and follow this winding path to the Dragon Wall, where you will face the Deathlord and his minion who are guarding it. Kill them both, and then learn the Word of Power Hand for the Shout Disarm -- your second word for that one!
Back to Arngeir again and we learn that the next Word of Power is located at Greywater Gorge -- you gotta love this guy! He is just full of information!
Our destination is near Sunderstone Gorge, which you should already have found, so just fast travel there and then a short trip to the marker and you learn the Word of Power for Inferno, Fire Breath! That is the second word for this one, which should add to its strength!
Back to Arngeir again to learn that our next destination is High Gate Ruins, which if you have been exploring should be on your map -- if not it is near to Ustengrav (north of it) so head there and then north!
Giving Anska a Hand
Giving Anska a Hand
Here you will encounter Anska, an explorer who can use your help finding the Scroll of Vokun -- This starts the Side Mission A Scroll for Anska -- so why not complete that now?
When you reach the Level Puzzle what you want to do is activate them in this order: Eagle, Fish, Fox, Snake. That opens the gate in the floor, leading to the entrance to the Crypt -- follow that to the Throne Room and you will face Vokun himself -- and loot a mask that boosts Conjuration, Alteration, and Illusion as well as a nice staff!
Both the scroll and the Wall are behind the Throne Room -- you get the scroll to give to Anska and you learn the Shout Storm Call!
Head back to Arngeir and he will tell you that the next Word is located in the Lost Tongue Overlook, which is located near the Crystaldrift Cave south of Riften. Heading there means finding the path up the mountain, and once you do, mind the bloody traps on the path -- at the top of the second flight is a trap powered by a soul gem - you have to destroy the gem to disable it.
At the top you battle an Elder Dragon of the Fire Type, then learn the words to the Shout Fear, Dismay -- that is a new one for us! Be sure to loot the chest before heading back to get the next location.
Arngeir tells us that the next Word is located in the Ancients Ascent -- which is near Helgen -- so head there and make your way to the marker to find an Elder Dragon guarding the Word Wall -- after you dispatch this fire-breather you learn the Word of Power Animal, Animal Allegiance.
Back to Arngeir and the next location is the Forsaken Cave -- working your way past Frost Trolls and some Wights to the Crypt below, where you will discover that the Word is Leech, Marked for Death, and it is protected by a master Wight Mage!
In the rear beneath there is a special chamber with the White Phial in it for the Side Quest The White Phial -- you can grab that now as well as some ingredients and a Skill Book. Once you have dealt with him, gotten the word, you know what to do -- head back for the next location!
Our next destination is Dragontooth Crater, which is near Karthwasten. When we arrive we do battle with a Frost Dragon who is guarding the Wall -- any flame or shock weapon will work nicely -- and after dispatching him we learn the Word of Power Air, Elemental Fury -- another new word! That should make 14 words, leaving just 6 to go!
Arngeir tells us that the next location is Volkskygge -- well actually near it, not at it, but still -- the Wall is protected by the Undead Wizard Volsung -- who we quickly make Totally Dead, and then we learn the Word Fury, the second word from Whirlwind Sprint!
Obtaining the Amulet Fragment
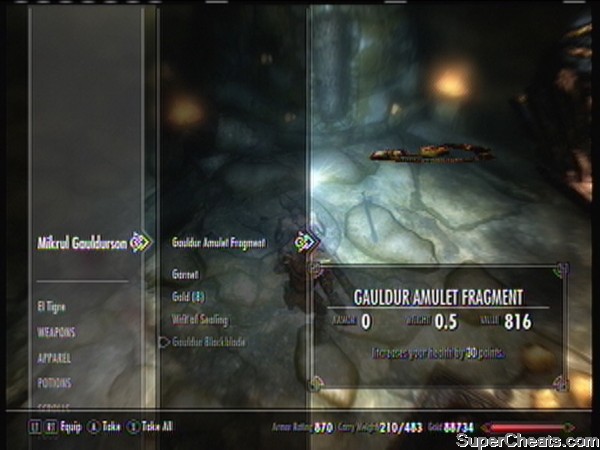
The Amulet Fragment
The next location is in Folgunthur, another dungeon location. Inside we find the body of Daynos Valen on the platform above which has the Ivory Claw and his journal on it. This is part of the Side Quest Forbidden Legend and we may as well complete it while we are about this!
Use the Claw to open the lock and head across the bridge now. In the room behind the thrones set the stones to Snake, Fish, Eagle. Note that there is a known bug in the game that causes the pillars not to turn even though you get the prompt to turn them... If you experience this you must leave the dungeon completely and then go back in to fix it.
Also note that while the first key slot for the claw near the start of the dungeon is not required to complete either of the quests, it does get you some nice loot - I am just saying...
After you open the gate and go down use the combination Eagle, Eagle, Dragon on the lock to open the door and enter the Crypt, where you will battle Mikrul Gauldurson and obtain the Amulet Fragment from his body.
Use the right-side lock with the claw to access the Wall and learn the Word Cold, Frost Breath, which is the second word for Frost Breath. Now make your way out of the dungeon. Since we will eventually be visiting the places in the Side Quest Forbidden Legend anyway go ahead and continue getting words instead of pursuing that quest for now!
Arngeir sends us to the Lost Valley Redoubt this time, where we find the Forsworn guarding the area, including a fairly dangerous mage! Once you clear the lower area head up and to the left to take out a few Conjurers and then score the Word Spirit, Become Ethereal, which is the second word in the Shout.
The next location is Valthume, where we find yet another dungeon! Inside we find the ghost of Caldar, who tells us that there is evil here -- he tells you that he needs three vessels that are located below and you agree to get them, flagging the quest Evil in Waiting.
Jump to the quest for help if you need it, and before the end of it you will also have learned the Word Seek, Aura Whisper, the second word for that Shout. Head back to Hrothgar now.
The next destination and Word is located in Ironbind Barrow -- which is just north of the Nightgate Inn... When we arrive we find that there is a party of treasure hunters outside and, no surprise, they insist on coming with us! Well, the more the merrier!
The treasure hunters are rather amusing, but you do have to help them stay alive -- and finally when you reach Warlord Gathrik you need to do the killing on him. Bonus though, he has several empty Black Soul Gems on him! Loot loot loot!
Now the mage that was with the treasure hunter turns out to have his own agenda -- as in killing you to use you as a blood sacrifice so that he can absorb the powers of the undead Warlord we just killed, err, made dead-dead. Whatever. Soooo you have to kill Beem-Ja, and after you do make sure you loot him because he has an interesting note on him as well as some other loot.
After you kill the Warlord for a second time -- apparently killing the mage raised it -- you learn the Word Bind, Become Ethereal, the third word in that Shout. Good on ya!
Arngeir tells us that the next location is Shriekwind Bastion -- and mates this one is a bit of a barney! Not so much combat, though there are a fair number of undead and the odd vampire to contend with, but more the bloody maze that you have to navigate to get through it along with the traps!
The Word Wall at the end of the maze worked out to be Battle, Elemental Fury which is the second word for that Shout. Thankfully we do not have to go back through this maze as we can exit to the Overlook and then fast travel back to Hrothgar from there! Whew!
The next location is Hag's End -- and that is a new location for me as I have not see that before... The path turned out to be through Deepwood Redoubt, which was guarded by some Forsworn, which was an excellent opportunity to fill the Black Soul Gems I have collected -- you may want to as well, since those would be useful in making a new set of better armor later...
The path leads through the exit to Deepwood Vale and after battling more Forsworn and entering Hag's End the path to the Wall was gaurded by witches and hags for the most part, which meant dealing with a lot of spells, but finally reaching the Wall to learn an new Shout -- Time, Slow Time!
Thankfully there was a door to the outside in the final room so it makes fast travel to get the next location a snap!
Arngier sends us to Mount Anthor this time, which turn out to be one of the more traditional Walls that is guarded by a Dragon! I don't know about you but I like those better... On the way up there is a sacrifice alter with a book on it -- The Doors of Oblivion -- which is also a Skill book and worth reading, so grab it if you are interested in the backstory...
I am not sure if this is normal, but when I reached the stairs to the Wall I was attacked by TWO Dragons -- an Ancient and a Blood Dragon. Of course I killed both, no worries! I expect you did too?
The Word of Power is Ice, Ice Form, which is a new word for us -- and considering it required the slaying of two Dragons I suppose it was well won! Now back to Arngier and our next location!
The next location is Kilkreath Ruins -- which was the easiest of the Words so far since there was no Dragon or other guardian all that I needed to do was walk over to the Wall and absorb Grace, Elemental Fury which is the third word for that Shout!
Back to Hrothgar and the next location is Volunruud -- one of the dungeons with the round hole in the ground entrances... To gain access to the area where the wall is you first must obtain two ceremonial weapons in the dungeon -- this is the Side Quest Silenced Tongues -- so head to that section now to follow it if you need to...
Welcome back! You now have the Shout Hunt, Aura Whisper added to your repertoire, and that is word three for that Shout, which means we should have 16 Shouts, of which 6 have all three words!
King Olaf's Verse
King Olaf's Verse
The next location is Dead Men's Respite, which is located near Robber's Gorge. When we arrive we find a Dragon has been revived nearby -- killing it is technically optional but I say do it! It is a Blood Dragon and we can always use the extra Soul for unlocking Words of Power!
Inside the Respite there is a Ruby Dragon Claw key and a ghost who seems to be leading us in. Taking the key opens the way and, as we follow the ghost we reach a maze of doors that are controlled by a pull chain in one of the side chambers. The trick is to use the chain once to gain access to the room with the two round grates in the floor, then use the chain in that room to open the grates and drop down the second one into the water.
From here simply follow the ghost and you will to his bones -- his name was Svaknir it seems -- and in his hands is the book we are looking for -- King Olaf's Verse! This is for the Side Quest "Tending the Flames" in which we need to find King Olaf's Verse for the Headmaster of the Bard's College so he can try to convince the Queen to allow the Bard's College to hold its annual festival.
Now that we have that, head towards the marker for the Word Wall and the ghost will remove the spell sealing the door -- the combination for the lock is Wolf, Eagle, Wolf. The ghost leads the way into the main chamber, where we get rat-packed by a bunch of undead and, amazingly he helps us defeat them!
Finally King Olaf One-Eye himself arises and we do battle, with the ghost helping, and having defeated him be sure to loot his body as there are several things including the treasury key worth taking!
Behind his coffin is the Word Wall that teaches us Tempest, Whirlwind Spring, which is the third word in the Shout. Now use the key to open the Treasury door, loot it, then use the secret passage by pulling the lever to get right to the exit!
The next Word of Power location is Ragnvold, in the far west. This is a large Temple that is guarded by undead, so technically it is another dungeon. Sigh. Fortunately it has a very obvious path, and enemies we know how to handle.
To get to the Wall we need to unlock the sarcophagi, and to do that we need to follow the markers to the two items -- Torsten's Skull Key and Saerek's Skull Key. Once you have those, head back to the sarcophagi and open it to release the bars -- the Word Wall is just inside this next area and teaches us Kyne, Kyne's Peace, a new Shout!
The next location is Angorvunde -- another knew location for us -- the closest I could get was the Rift Watchtower and that was a good distance away! When we enter the dungeon we encounter a woman named Medresi Dron who has a sob story for us... You know, we have not had really good luck with the people we meet going into dungeons. I am just saying...
It seems that she is a treasure hunter and her team freed a large number of undead. She needs help making them actually dead, and if we decide to help her we just have to clear the undead we would have to anyway, so why not?
Once we eliminate the three undead she comes into the main chamber and gives us a key then orders us to look for a way to open the bars. We do that by going through the two side doors and locating the switches to open the gates.
When the second gate is opened the treasure hunter rushes in and gets herself killed -- then we head down the stairs revealed by the trap she died from and locate the Word Wall, learning Allegience, Animal Allegiance, the second word for that Shout. With that accomplished it is time to return to Hrothgar for the next location.
Arngeir tells us that the next location is Rannveig's Fast -- a dungeon that is protected by ghosts. Inside there are a series of traps -- so when you approach the Word Wall do NOT go in through the center! Jump on one of the side stones so you do not end up falling into the trap.
The Wall teaches you Peace, Kyne's Peace, the second word in the Shout.
Well that is the final word that we can get from Arngeir! If you go back to ask he will tell you that there is only silence, so for now anyway we have all that we can get this way, so it is time to resume the story!
Our task is to learn the location of the Elder Scroll, and that path begins with the Mages at Winterhold, but before we go there head back to Sky Haven Temple and speak with Esbern about this quest --
When you arrive at the College follow the marker to Urag gro-Shub and talk to him -- he threatens you and then asks what you want -- when you tell him he treats you like an idiot... You get some background on the Elder Scroll, at least what Urag knows about it anyway, and once you tell him you are the Dragonborn he fetches the books that he actually has. When you read Ruminations on the Elder Scrolls you flag the quest Discerning the Transmundane, while the book Effects of the Elder Scrolls just gives you some background on them.
Talk to Urag again to advance the quest we just flagged, telling him that the book is incomprehensible. You learn that there is an expert still alive who might be able to help you -- Septimus Signus! It is time to leave and go in search of this scholar...
The Outpost is not far away, and when we reach it he is there -- but before he will help us he wants us to do something for him -- he is a bit hard to follow but basically what he wants us to do is go to a Dwarven facility and use a machine there to translate the Elder Scroll into a book. You can ask what to do with the things he gives you but what he says does not make that much sense. We are going to have to wing it.
Follow the coast until you reach the marker and then head inside -- you will need to be careful as you work your way through this facility since there are lots of mechs and other things to deal with -- but work your way through following the marker to the end. When you start to encounter Falmer you are getting close.
The Elder Scroll
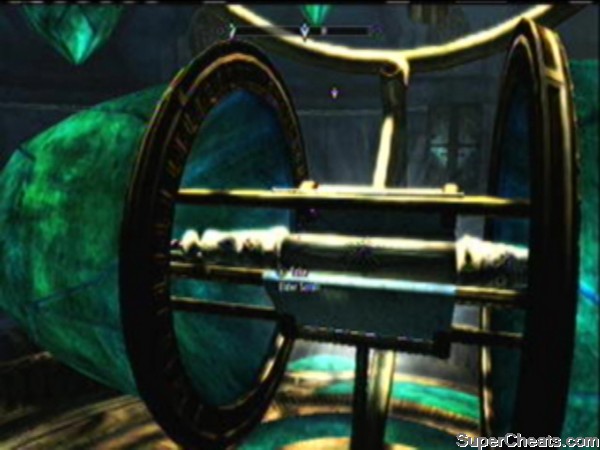
The Elder Scroll
-- Alftand Cathedral --
Once you reach this area you are nearly there -- inside your way will be barred by, well, bars! Head up the stairs here and use the lever to raise them and then go in and kill the Centurion, making sure to loot the lift key off of him.
Activate the mechanism and then head down the stairs it reveals next to it and enter Blackreach! There are some mechs and Flamer to be killed here, and the Field Laboratory to explore. Inside in addition to Alchemy ingredients you can grab is a Crimson Ninroot that triggers a Side Quest called Back to Your Roots. You can do that if you want to but it is not a central quest...
When you are happy that you have taken what you want from the Laboratory, leave and continue to follow the marker to the building over a pair of bridges and go inside, where you will find a lift to the Tower of Mzark. Go on up!
There is some good looting up here -- do that until you are happy with what you have -- and then be sure that you read the book Armorer's Challenge as it will give you a point (if you are not maxed already).
At the very top of the machine are the controls -- place the book that the old man gave you into the slot and then hit button three four times so that it unlocks button two -- then hit button two two times so that button one is unlocked, and then hit button one and the machine will release the Elder Scroll! Go take it from the now open pod!
This completes the quest and unlocks the Achievement "Elder Knowledge" (20 GS) so good on ya! Well done! Make sure that you grab the Lexicon Book from the machine before you use the lift to leave the area and return to Skyrim! We are now headed back to speak with the Greybeard's Master and use the Elder Scroll to go back in time! No worries, we will come back to the Lexicon Quest later...
Before you head to the Throat of the World please be sure that you are prepared for a major boss battle by stocking up on the potions you think you will need. You will not have the opportunity once you set the following into motion, so do it first, right?
Standing on the Throat of the World when you are ready, listen to the Master, and then head to the marker and read the Elder Scroll -- the hold on to your socks and underwear mates! You now get to watch as the Shout you need is used against Alduin -- and you learn it in the process.
A Time Travel Solution
We have learned the Shout that we need and we are confronted by Alduin immediately upon our return! Your best tactic is to wait until he hovers to attack and then hit him with the Shout -- when he drops to the ground attack him from the side.
Once you have his health to zero he will make a long speech and then fly off -- it is only a partial victory -- but the Master has an idea -- so hear him out.
A Time Travel Solution
Head to talk with the Jarl of Whiterun now... He is not very wild about the idea but with a little persuading you can get him to agree. You reveal that Alduin is back, and the Jarl freaks a little -- and then you get to the nitty-gritty: the Jarl wants something from you -- he wants insurance that his enemies will not attack while Whiterun is dealing with the Dragon. This flags the Side Quest Season Unending. Clearly we need to return to speak with the Greybeards.
When you tell Arngeir what you need he agrees to help, dispatching you to invite the opposing Generals to High Hrothgar for the peace conference. Head out to the markers and make the invitations now.
First to The Palace of Kings to talk with Ulfric, then to Solitude to speak with Tullius, who also agrees to attend the peace conference. Now return to Hrothgar and tell Arngeir the good news! The problem is he does not see it as good news -- in fact he seems to be having second thoughts.
Springing the Trap
Take your seat at the table and wait for the others to arrive and be seated, and then proceed with negotiating a peace. You will have to make some concessions to make this happen, and they have to be acceptable to each party -- I gave the Empire Winterhold, and Markarth to the Rebels. Nobody was really happy with the decisions that I made -- I refused to allow the Empire to push for more than the straight-forward trade, and eventually they both agreed.
The agreement completes the Side Quest Seasons Ending. Now we need to resume the main story line. Esbern jumps to our aid, explaining the best way to lure the Dragon in, and you learn the Shout Call Dragon as the result.

Springing the Trap
Just when everything seems to be going well Delphine demands that you kill the Master of the Greybeards, claiming that it is a basic moral imperative that he be slain. That will have to wait -- right now we need to head to Dragonsreach and tell the Jarl we are ready to proceed.
-- Trapping a Dragon --
The Jarl will show you where the Dragon was kept -- and you should head to the open section at the end before you summon the target. When he arrives use the Dragonrend Shout to cause him to fall, then back further into the covered area, luring the Dragon in -- do NOT battle it! As soon as it gets far enough inside it is trapped, and you have succeeded!
At this point you need to interrogate the Dragon -- he agrees to tell you all -- and to take you to Alduin! The thing is, he has to TAKE you there, you cannot get there on your own... That means you will have to release him. Make sure you have stocked up on pots, then tell the guard to release him. You will be taken by the Dragon to the Dragon Stronghold -- good luck!
This ends the quest and unlocks the Achievement "The Fallen" (20 GS) and flags the next quest in the series, The World-Eater's Eyrie.
After you stock up on potions and are ready for this one-way ride, you should speak with the guard on the second floor of the palace to have him order the release of the Dragon -- he will do it, but he is not really happy about the idea... Once you have done that and told your companion to go home, talk to the Dragon to make the trip!
I was actually hoping to get a the whole flying experience but no, fade to black and we arrived...
So, head in and start by taking out the undead guards in the area -- then your first Dragon! Personally the only loot I took was Scales and gold, because there is no point in getting overloaded here... Your second Dragon battle should happen after you pass into the large yard beyond the ramparts. As you work your way towards the Temple doors you will take out more Deathlords, and then finally you will go in!
When you reach the back and take out the undead there, stand by the switch and look back at the pillars with the carvings of animals on them. Facing them with your back to the switch change them all to Eagle, Eagle, Eagle, then throw the switch to open the right-side bars. Go in and check the chest in there for any loot you want, then come back and close the bars by throwing the switch. Now change the middle pillar to Snake, throw the switch, and continue on through the left-side gate.
The Beginning of the End
Fight through the undead, some spiders, and more undead, and you come to another pillar puzzle. The solution for this is to turn the bottom pillar to Snake, the top left pillar to Fish, and the top right pillar to Eagle. Throwing the switch lowers the bridge and you can now zone to the next area!
Go up the corkscrew stairs in the next chamber, kill the undead here, then use the lever in the rear area to open the gate. Pass through and then battle the Overlord ahead -- when he is dead loot the Diamond Dragon Claw from his body -- you will need it to unlock the door ahead.
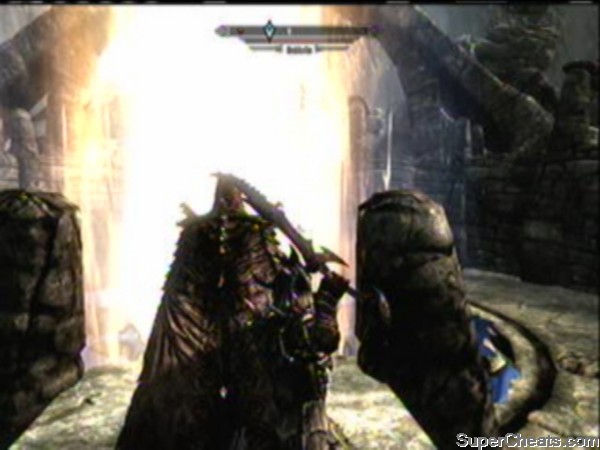
The Beginning of the End
The combination -- from top to bottom -- is Wolf, Moth, Dragon. Open the door and pass through,
Ahead of you is a Word Wall that teaches you the Shout Wrath, Storm Call (the second word for this Shout). Now continue to follow the marker and zone into the next area, where you immediately battle a trio of undead. Go down through the ruins of the tower ahead of you and loot the chest below -- it has an Amulet of Mara in it, which you need to get married in the game, so if you did not get one from the monk get this one!
Now return to the area above and do battle with a powerful Wizard named Nahkriin -- who you kill!
Go up on the pedestal and use the Staff to open the portal again, then walk into it to officially end this story quest and start the next one!
Follow the path through the mist north and a bit west until you reach the water, then head west and up the steps to talk to Tsum, the Gatekeeper -- whose butt you have to kick. After you beat him head into the Hall of Valor, where you will talk to Ysgromor -- who will tell you that there are three warriors here waiting for you!
The Hall of Valor
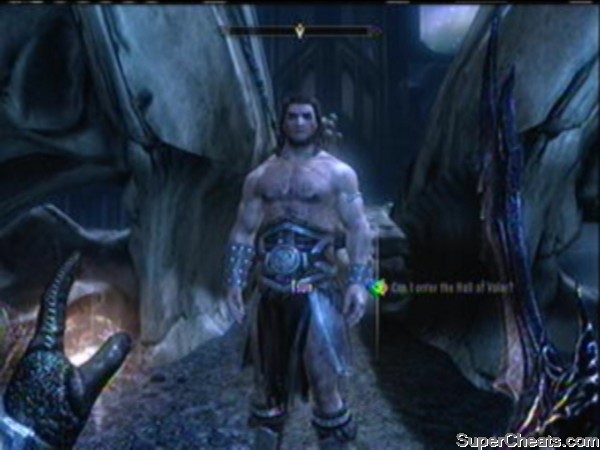
The Gatekeeper Tsun
Remember the trio of warriors you saw back in time? The ones that taught you the Dragonrend Shout? Well this is them! Hokon One-Eye, Felldir the Old, and Gormloith Golden Hilt! After chatting with you they rush out to do battle with Alduin -- and you have to run to keep up.
This ends this quest.
With your new crew you head out into the mist to find Alduin -- and you Shout Clear Skies to remove the mist!
Your basic strategy is to hit him with Dragonrend whenever he hovers, and when he is on the ground, beat on him until he is dead! His death is more dramatic than that of the usual Dragon, and after he is dead the others hail you the hero! Well good on ya mates! You ARE the hero!
Killing Alduin ends this quest and unlocks the Achievement "Dagonslayer" (50 GS).
The Final Battle with Alduin
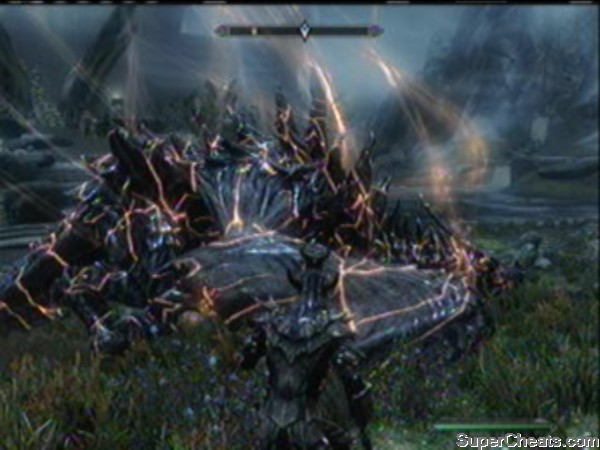
The Final Battle with Alduin
When you are ready to return to Skyrim talk to Tsun -- he will teach you the Shout Hero, Call of Valor as his reward to you for winning the battle, and this will unlock the Achievement "
When you return the Dragons will assemble and fly around the Throat of the World, and Paarthurnax will talk to you as the Dragons mourn? He agrees that your actions were necessary, but he does not take pleasure in them. Still, he praises you and your victory -- which is cool -- and then he takes off, flying away. I guess we do not have to kill him after all!
Odahwiing lands next and has his say -- accepting you as a brother, and that, as they say, is that... Well, no, not really! That is the end of the story quests, true, but there is so much more left to do in the game! A hundred hours more if you want it!
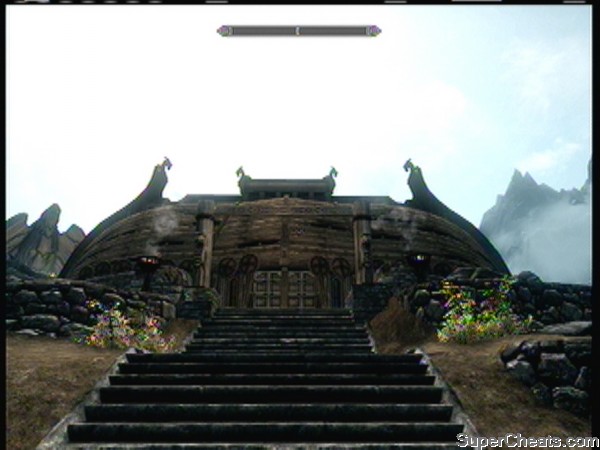
The Companion House
The initial introduction to the Companions is made through a Miscellaneous Quest that takes you to talk to their leader and then complete a series of small stages before you are inducted as a member. Following that the quests are all covered under this section of the guide.
Something that you should probably remember is that, like most things in Skyrim, there is often more happening behind the scenes than you realize or is obvious....
You can scroll down this page of the guide to find all the quests in section or use the links below to jump to the specific quest you are interested in.
Trouble in Skyrim
Hired Muscle
Proving Honor
Rescue Mission
The Silver Hand
Striking the Heart
Stealing Plans
Blood's Honor
Purity of Revenge
Glory of the Dead
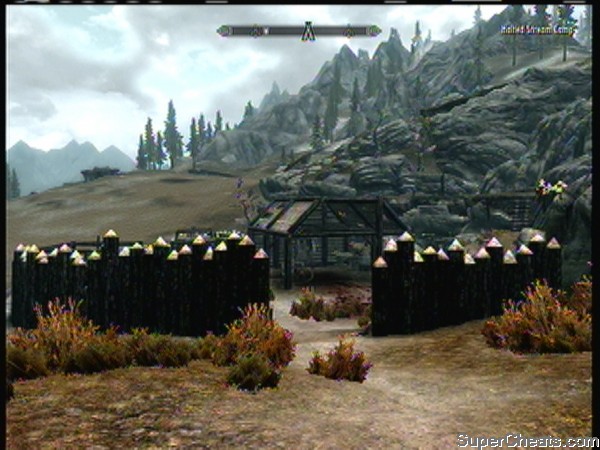
The Halted Stream Camp
Kill the Leader of the Halted Stream Camp is the order of the day -- but if you have already done this for the Bounty Quest you will be happy to learn that the game resets the mine portion so that you can kill the leader a second time! If you have not already done this, you will be doing it for the first time, but it is still a straight-forward proposition -- go into the camp and clear out the bandits and then kill the leader.
With the deed done fast travel back to Whiterun and report in to let the Circle know that you have dispatched that evil doer, and you will end the quest.
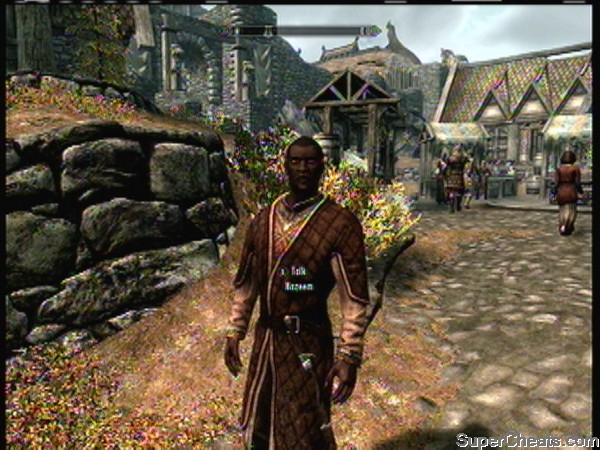
A Little Intimidation
Your next task from Farkos is to intimidate the target designated by the client -- it seems we do all sorts of odd jobs these days!
Find Nazeem and you will discover that he cannot be intimidated, so you end up having to put a beat-down on him (brawl) so give it your best shot and put that bad boy down in the dirt!
Once you have completed the beating, return to Farkos to report your success, and get your reward and the next quest.
The first step in this one is to go talk to Skjar -- and you learn that this is your final challenge before being admitted as a full member. Your task is to retrieve a fragment of a special blade that is important to the Circle -- and Farkos is to be your buddy on the mission. You are admonished to do well, and not get Farkos killed...
Talk to Farkos and ask him about the mission, the weapon, and whatever else you want to know... Tell him to meet you at Dustman's Cairn and then get going in that direction yourself!
When you enter the dungeon with Farkos you will work your way through killing undead until you reach the very end of the dungeon -- the way ahead seems blocked so you look for a lever and find one in one of the alcoves -- but it locks you in!
Stuck behind the steel bar gate you watch as Farkos is attacked by a large number of foes -- with you unable to help -- and just when things look dim Farkos turns into a werewolf and kills all of them! Whoa! Did not see that coming!
The path that was blocked by a gate is now open so follow it deeper into the dungeon, taking out Silver Hand and Undead as you go, and eventually you will reach the doors to Dustman's Crypt and go inside, and ultimately you will arrive at the chamber outside of the main crypt, where you will find the key to the main crypt in a chest.

Dustman's Cairn
Opening the door leads to an area with an Alchemy Bench -- if you have ingredients by all means go ahead and make some potions! Go through the door to the right of the Bench and kill a few spiders and some more undead as you cross the double bridge over the water and in to another narrow passage that leads to an iron door and your destination -- the actual crypt.
On a table in the back is the blade fragment you are seeking as well as some potions and soul gems, and after you take them you are attacked by several waves of undead -- simply help in defeating them and then exit by the side exit that the undead opened, working your way up and out of the dungeon!
All that remains is to return to the Circle House and report your success -- and find that Vikas is waiting for you. He instructs you to follow him and you do, to discover the members of the Circle are waiting for you in the back yard...
You are made a full member of the Companions, as this is your induction ceremony! Good on ya! Well done!
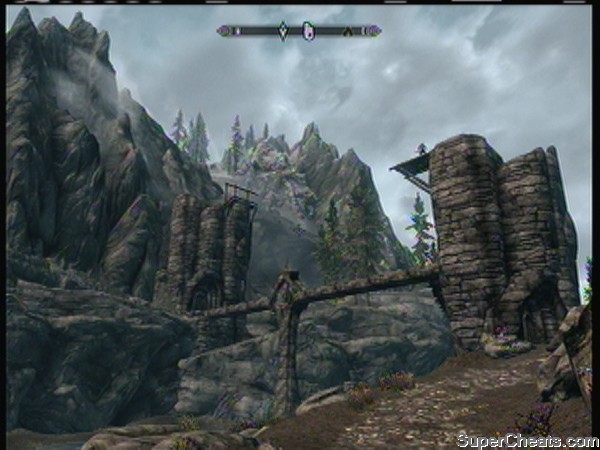
Valtheim Keep
This quest is obtained from one of the officers at the Companion House -- it has at least three variations but essentially it is a rescue mission. You are told who needs to be rescued and where they are, and then told to hurry!
The mission that I received was to head to Valtheim Keep to rescue Skulver Sable-Hilt, who has been kidnapped by bandits! The other variations of this mission are pretty much the same -- go to the place, kill the bandits, rescue the client, get them to safety.
Once you have rescued the victim you can fast travel back to town -- part ways and turn the quest in!
Talk to one of the officers to flag this quest -- and once you do you will be sent to speak with Skjor who will ask you to meet him at the Underforge -- ask him where it is and he will show you the way! Follow him and he will show you the secret door on the side of the cliff. Come back at night to meet him to learn about the mission.
The first part of this requires you to drink of the blood of the Companions and be turned into a werewolf! You black out and, when you awake you are a werewolf! Woot! You can run around for a bit but eventually you will black out again and, when you wake up Aela the Huntress is with you. She will answer your questions --
You unlock the Achievement "Blood Oath" (10 GS)
It seems there was a purpose to this transformation - you are going to help the pack attack the Silver Hand -- a band of werewolf hunters! Take out the guards outside and then go inside the lower section of the ruined keep and
Taking out the leader and the rest of the Silver Hand in the Keep ends the quest. Talking to Aela flags the next quest.
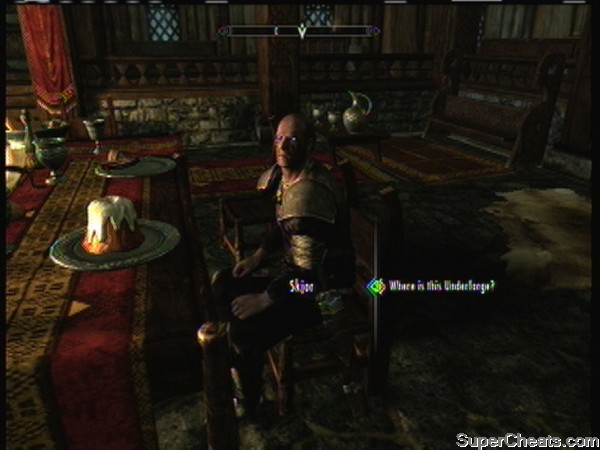
Beginning the Long Questline
Aela send you out to assassinate the Leader of the Silver Hand -- he is hiding at the Lost Knife Hideout -- so head in that direction and be prepared to start wiping out the Silver Hand! As you approach you find werewolf heads and impaled werewolves -- head inside and start the slaghter because mates, we are in the Silver Hand Killing Business, and Business is Good!
Once you take out the leader you are to return to Aela, who is waiting for you at the Companions HQ. When you arrive and report your success, she is very pleased with you.
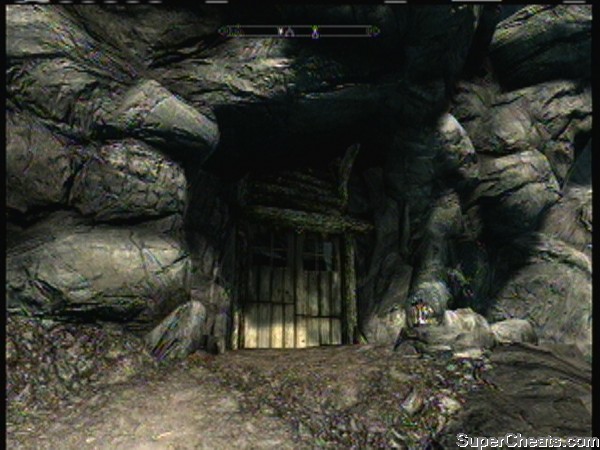
Helm Hollow
The next job is to break into the Silver Hand Camp at Helm Hollow and steal their plans -- the location is in the far southeast, so head there now. You have a few options - you can go all stealthy, or you can go all postal -- I went postal because hey, that's how I roll!
The plans -- a book -- are in the back of the cave, guarded by the leader... So taking him out is a bonus! Once you do that, loot the chest, grab the plans, and return to Aela -- who thanks you. The quest ends. You can ask her for work again -- and flag the next quest.
The Man-Wolf Seeking a Cure
It seems that Kodiak Whitemane has learned of the missions we have been doing for Aela and he wants a chat -- when you do chat with him you learn that he feels you two have gone a tad too far in the revenge business. He then asks if you know the story about how the Companions became werewolves? Let him tell you so you know...
After you hear the story you get your mission -- find the witches, kill them, bring him their heads! Hey, this is not revenge mates, he wants to umm, yeah... Yeah it is. And it is solo mission too -- he wants us to do it alone!
The witches are located at Glenmoril Coven -- and you have two choices here depending on your level... You can either sneak in and do it all ninja-like, or make a full-on frontal approach seeking a high body count. You know what I did, right? Nuh Uh you don't! I went ninja, took out just the one I needed, and left!
The first thing you should be aware of is these witches like to blast fire-based spells -- so if you are lower level you may want to drink a fire protection potion, right?
When we get back we discover that the Silver Hand attacked while we were gone -- Kodiak is dead, and the Silver Hand have won a minor victory... And so ends this quest.
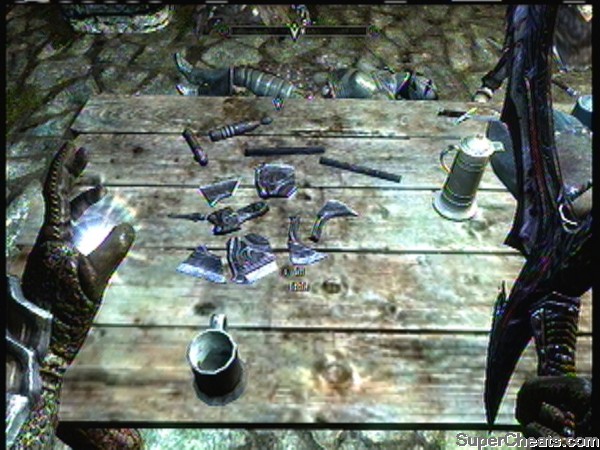
Recovering the Fragments of Wuuthrad
The Silver Hand attacked the HQ and stole all the Wuuthrad Fragments -- we have to get them back! Or at least that is what we have been told to do anyway. Right, don't question the officers, get on the mission!
We are headed to Driftshade Refuge and we have the option of taking out all of the Silver Hand if that is what we want to do. The important thing though is to recover what they took. This is a bit of a trip as chances are you do not have any fast travel spots in close -- and this time we are not alone as Vilkas is with us!
The battle rages throughout the building until we reach their bastion, where we kill the officers and take back the fragments of the special blade that is the honor of the Circle! After that we just have to return to the HQ and the quest ends!
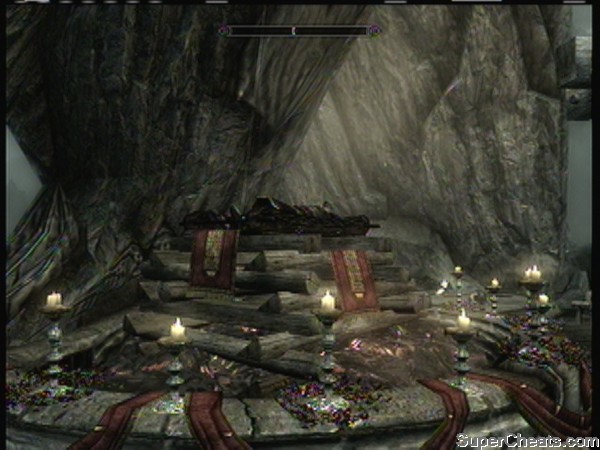
Rest in Peace Kodiak
After we returned to Whiterun the last quest ended and this one automatically begins, as it is the funeral of Kodiak -- who is laid out in state on the Skyforge. His body is laid out on a wooden cairn and, after honorable words were said, the body is burned.
Eorlund Gray-Mane asks you for the fragments of the blade -- and then asks you to retrieve some other bits form the HQ -- so head on in and go to Kodiak's room, where you will find not only the fragment but also Kodiak's personal journal... Hey, that may tell us how to cure our condition! We should take it that and read it...
After we deliver the fragment he tells us that everyone is in the Underforge and they are waiting for us -- and we walk into a conversation in which the discussion of obtaining a cure is the topic... And then Eorlund comes in with the now repaired axe!
Follow the Circle out the main gate of town and to the tomb, where you will follow them for a while, and then realize that the place they are running to is halfway across the bloody Kingdom! Fast travel is your mate, that is all I am saying...
At the tomb you join the Circle, and you place the axe on the statue which opens a secret door. After battling through ghosts, spiders, more ghosts, and finding the switch, we end up in the tomb and whoa! It is Kodiak!
After you tell him about the idea to free him, he has you throw the witches head into the flames, and the released magic releases his Wolf Spirit -- which you kill -- thus freeing his soul! This unlocks the Achievement "Glory of the Dead" (30 GS) and ends the quest.
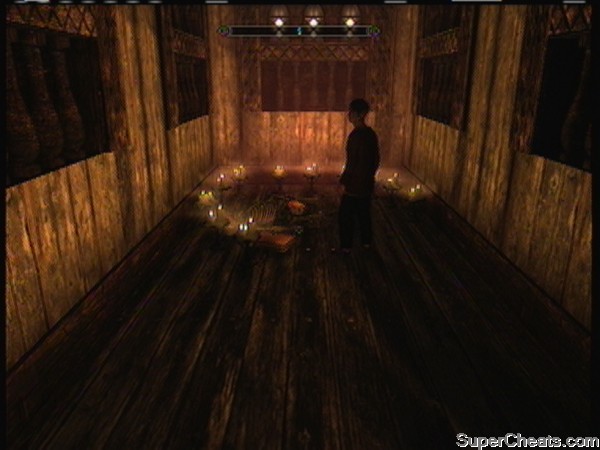
Summoning the Brotherhood
This Faction Questline is started by completing the Miscellaneous Quest "Talk to Aventus Aretino."
You will find the young boy Aventus in his home trying to cast the Black Sacrament as he is seeking an Assassin from the Dark Brotherhood?!
He wants you to accept a contract -- he was orphaned you see, and he was placed in an orphanage -- and he wants you to kill the woman running the orphanage, Grelad the Kind. Concluding the conversation results in flagging the Side Quest Innocence Lost.
You can scroll down this page of the guide to find all the quests in section or use the links below to jump to the specific quest you are interested in.
Innocence Lost
With Friends Like These
The First Three Assassination Contracts
Mourning Never Comes
Whispers in the Dark
The Second Contracts
The Silence Has Been Broken
Bound Until Death
Breaching Security
The Cure for Madness
Recipe for Disaster
To Kill an Empire
Death Incarnate
Hail Sithis
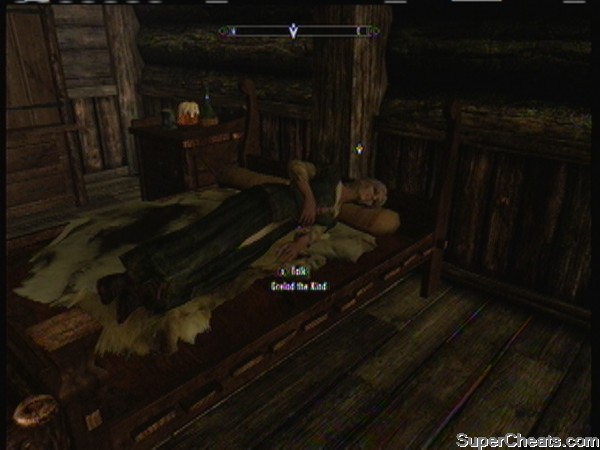
She Needed Killing
Basically the woman is a total wanker -- no socially redeeming qualities whatsoever. When you kill her no one will report it... If you do it in front of the children they cheer -- though to be honest I did it when she was asleep in her bed, I just felt better about it that way...
Once you have dispatched the shrew report that news to your "Client" in Windhelm, and then find an Inn and rent a room. Go to sleep and you will be paid a visit by the Dark Brotherhood!
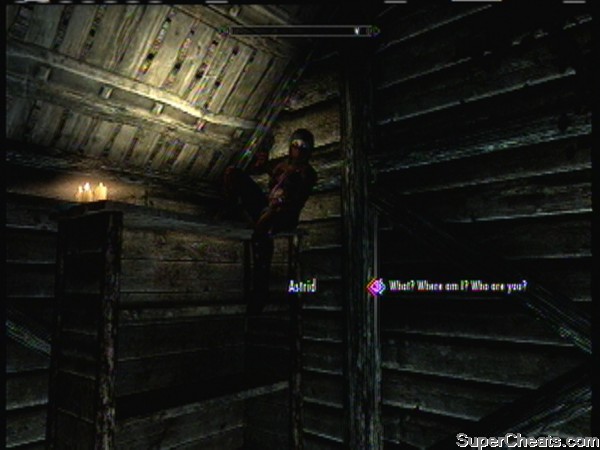
A Visit from the Brotherhood
After you rent your Inn room and go to bed the Dark Brotherhood will pay you a visit -- because that is what they do... The problem is you took a contract that was really theirs, and you completed it, which means you owe them a killing...
Astrid has three people hooded in the shack -- one has a contract on their life and you are told to figure out which one it is and kill them. It really does not matter which one you kill, the point is that you kill one, so just pick the one that irritates you the most and kill them. Simple as that.
After you do the deed Astrid invites you to join the Brotherhood, gives you the key, and instructions on how to find the headquarters. All you have to do is show up! Go ahead and go to the Sanctuary now, approach the door, give the code, and enter... You have to in order to complete the quest you know...
Talk to Astrid to get the skinny -- she has a job coming up for you but for now she tells you to talk to Nazir to get smaller jobs now. You now unlock the Achievement "With Friends Like These" (10 GS) for your efforts! You can continue to ask her questions if you like, and she will give you useful information.
Ideally you will be completing these contracts without being caught -- but if you are caught you can pay the fine or try to talk your way out of it, right?
-- Contract: Kill Narfi
A beggar living in ruins outside of Ivarstead. He is a very easy target to do a sneak attack on at night because he likes to walk by the river after dark.
-- Contract: Kill Ennodius Papius
Previously the Village Miller, this paranoid recluse believes that someone has it in for him -- and they do. Considering that he lives in a tent outside of town this should not pose a problem for you at all, just wait for dark, and use your favorite dagger!
-- Contract: Kill Beitild
The woman left her husband and started a competing mining operation near Dawnstar -- and now she needs to be dealt with. Head over to Dawnstar and look her up. Note that she walks around alone at night and that may well be a good time to do her in!
Talk to Astrid to learn that there is a contract in Markarth -- we need to speak Muiri to get the job details on who she wants dead.
When you arrive you learn that there are two people that she wants dead, not one, but the second one is optional. The primary target is a bandit named Alain Dufont, who is hiding out in the Dwarven Ruins. The optional target is Nilsine Shatter-Shield, who can be found in Windhelm.
The bandit is easy enough -- wipe him and his entire crew out, loot their loot, and be done with it. Nilsine on the other hand, well, that is more complicated, because she seems like a nice enough girl and she is a solid citizen who will be missed. Sad she has to die...
Astrid needs you to deal with a member of the family -- Cicero -- the caretaker of the Nightmother. She thinks he might be turning others against her -- and she wants you to listen in on his conversations by hiding inside the Nightmother's coffin. Eww. But yeah, whatever.
He is quite mad you know... Or so I thought, until the Nightmother started talking! Actually is she talking to us? Err... I think she is! You pop out and confront Cicero and tell him that you are the chosen one!
Astrid bursts in and Cicero spills the beans -- and Astrid is a bit freaked -- you ask if you should talk to the man that the Nightmother asked you to talk to, and she says no. She sends you to Nazir to do more small jobs.
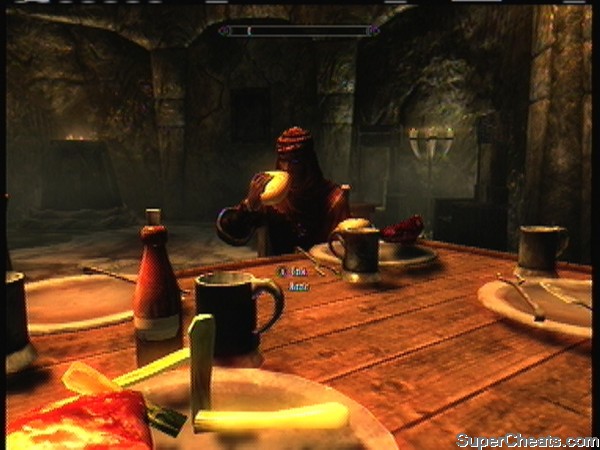
Nazir the Assassin Assigner
With Astrid on edge maybe it would be an idea to get out of the Sanctuary for a while, and Nazir has some jobs for you...
- Contract: Kill Lurbuk
A really bad bard who has annoyed so many people that he just needs to be put down. You may have to wait around to do him discretely -- as in lots of hours -- or you could just outright kill him and pay the fine... Quicker that way really.
- Contract: Kill Hern.
A vampire who is passing as human and needs killing. Based out of the Half-Moon Mill, this is an easy in-and-out job! Just pick the lock, go in, take him out (and her if necessary) and then leave!
When you arrive back at the Sanctuary you will need to talk to Astrid when you arrive, before you can turn in these hits. She will flag the next quest, then you can talk to Nazir.
Amound Montierre is in the Crypt at Volunruud -- head there and chat him up to learn that he did the Black Rite to call for the Brotherhood, and he wants several people killed. He wants the Emporer of Tomriel Assassinated. He gives you an amulet and a letter to take to Astrid, and that ends the conversation.
When you show the letter and amulet to her Astrid's reaction is to take the job! She thinks that if everything lines up it will be good for the Brotherhood; but she wants you to show the amulet to the fence Delvin Mallory first to find out what can be found out about it. You are to take it to him.
Mallory ID's it as one of the rare amulets custom made for the councilors of the Emperor's Elder Council -- he buys it, providing a letter of credit to be taken to Astrid -- but the implications could not be more clear...
Astrid interprets the facts and decides that the operation will move forward -- specifically that WE will move it forward... But for now this part of the story is complete, and the quest is done.
Vittoria Vici is getting married in Solitude -- and as cousin of the Empreror she is a good leverage point to use to draw the Emperor in it seems. Astrid wants her murdered in a very public way, in the hopes that the murder will be mistaken for a military move.
Basically you need to head to Solitude, crash the wedding reception, and kill the girl -- while she is actually talking to her guests (not practicing her speech mind you). If you do it in front of the crowd you get a bonus, if you do not, then no bonus but you still get paid.
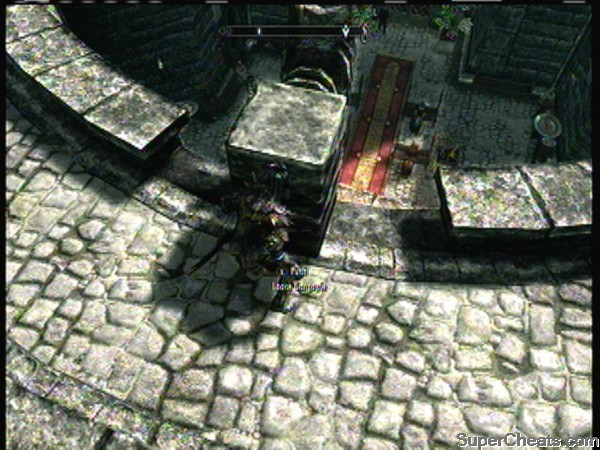
Death by Gargoyle
There are several ways that this can be done, use a bow or a blade -- but both of those will get the guards after you. There is a better way -- an accidental way. Above the balcony that the happy couple will stand on in order for Vittoria to make her public address there is a loose gargoyle. If you position yourself hidden behind it you can then push it on to them when she is talking! Assassination by Gargoyle!
And best of all, you do not have to run -- all you have to do is stay hidden behind the block that the Gargoyle was on and then fast travel as soon as the game will let you ( around 20 seconds after the murder if you are not detected) and voila! No bounty, no ID, no hoo hoo!
When you get back to the Sanctuary a very happy Astrid chortles over your success, confident that you are on track to restore the reputation of the Brotherhood to heights it has not seen in hundreds of years.
That wraps up the quest!
Astrid tells you to go speak with Gabriella, who has been working with her on the planning of the operation. Gabriella briefs you on the security of the Emperor. You are to do a strategic assassination and then plant damning evidence on the body in order to discredit the man who is handing security for the Emperor. To earn your bonus you cannot kill the target in Dragons Bridge or on the road. Evidently you need to do the deed in a town.
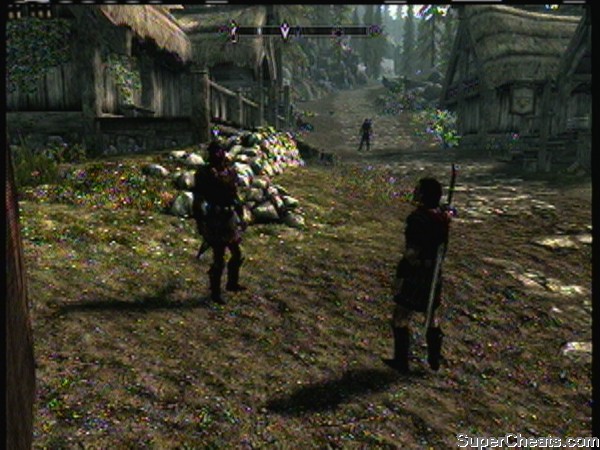
That Target and His Father the Mark
The target is Gaius Maro, son of Commander Maro -- you do not have his schedule for travel, so optionally you can steal his schedule. When we arrive in Dragon Bridge we see the son and father parting company, with Dad giving Son some good advice.
Inside the nearby Command Post is the Son's schedule sitting on the table - just ease in and take it when no one is looking.
Once you have it simply fast travel to Whiterun, wait in the Bannered Mare for him to show up and, when he goes to his room, give him time to fall asleep then go in, shut the door to you will not be disturbed, and kill him! Plant the incriminating letter.
Now return to the Sanctuary for your rewards.
When we arrived and turned in the last mission Gabriella told us that Astrid has decided something has to be done about Cicero -- there was an "incident" it seems -- so we talk to Astrid and she tells us that she wants us to kill Cicero, but first we have to find her husband, who disappeared when he chased after Cicero.
Our first step is to search his room -- read his journal then head back to chat with Astrid and share what you know. It seems that Astrid herself may be the catalyst that set off the explosion, and she is not interested in making peace.
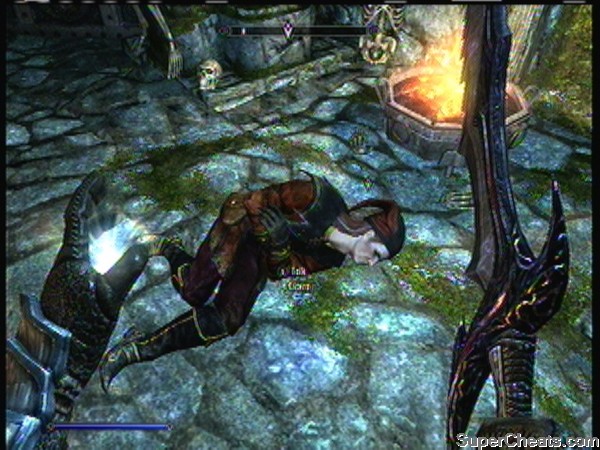
Alas, Poor Cicero
Cicero is headed for the Dawnstar Sanctuary -- she tells you to take her horse and go! So you go!
Astrid's horse is actually a magical shadow horse -- but having a horse really does not help us -- fast travel on the other hand does! When we arrive in Dawnstar we find Arnbjorn outside and he is injured. He tells you that they tangled and he gave as good as he got. You convince him to head back home, promising you will go in and take care of Cicero.
The pass-phrase is Innocence My Brother... And inside is the madman. There are also two Skill Books on a table downstairs so be sure to read them, right? When you reach him he appears to by nearly dead -- he argues that you should let him live; tell Astrid that you killed him. Lie, because he wants to live.
Kill him or don't, it is up to you -- either way ride home and report in, completing the quest. Astrid rewards you by letting you keep her horse for a while...
Before you hit the emperor there is one more target -- The Gourmet -- we need to kill him, assume his role, and be the Master Chef! Report to Festus for your orders! Festus is not a fan it seems -- he reviews the plan, and then tells you he had a copy of the Gourmet's Cookbook. Festus things that Anton Virane knows who the Gourmet is and you are to interrogate and then kill him. Then you kill the Gourmet, hide the body, and become them!
This is pretty simple really -- you cannot interrogate or kill him during the daytime as there are people around, so wait until he is in bed, then go in and interrogate him. Once you learn what he knows, make him think that was all you wanted so he goes back to bed, then kill him in bed from hiding so as not to wake the house -- or rather the Understone Keep, since that is where he is the chef.
What he reveals is a little unexpected -- the Gourmet is an Orc! He is staying at the Nightgate Inn. Good! After you lie to him and he goes to sleep, sneak and one-hit kill him nice and quiet so you can leave the Keep without being chased. Outside fast travel to the Inn for your appointment with the Orc!
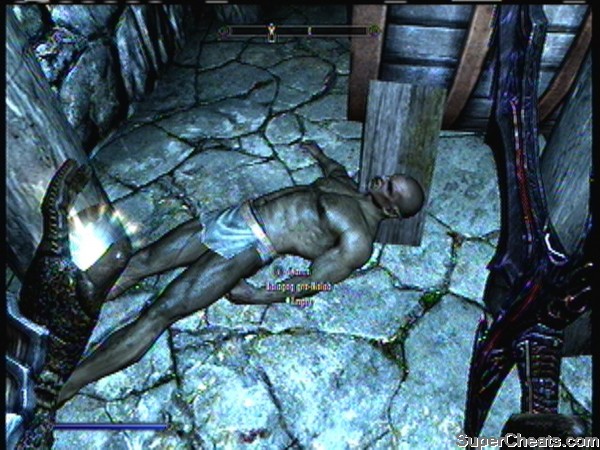
Be Sure to Hide the Body
--== Nightgate Inn ==--
His name is Balagog gto-Nolob, and he sleeps in the basement, so go at night, dispatch him and drag his body behind some crates or barrels to hide it (drag holding the A button). Make certain you loot him if only to get his pass, and make sure you read the Skill Book in his room.
Now head back and report your success to Festus to get rewarded and end the quest!
Report to Astrid to learn you will be playing the role of the Gourmet. Meet with Commander Maro and show him your pass, gaining access to the secure area so that you can poison the Emperor's meal. Yeah sounds a bit out there even to me!
Astrid gives you the poison -- Jarrin Root -- Astrid has arranged your escape route so all you have to do is, well, all the risky work! Well we have it to do so we may as well get started, right? Fast Travel to Solitude and show the Commander your pass, the follow the marker to the kitchen where you will be told to speak with Gianna.
Before you report to the Castle Chef you may want to look around for anything you might like to make your own -- and there is a Skill Book upstairs too.
After you introduce yourself she gushes all over you, and then she insists you wear the chef's hat on the shelf. Put it on and then start picking the ingredients for our dish -- it really doesn't matter what you say, she will accept it. Once it is done give her the poison and she adds it to the soup.
She is going to serve it now -- and you need to follow her into the dining room -- when you enter move to the door opposite the one you entered from so that you are good and close when it comes time to run... And when the alarm sounds bail through that door -- right into a trap! Yeah, you have been ratted out...
Well, it is time to fight -- there is no way you are getting out of here without a bounty on your head but that is no reason to let them kill you! Take out the agents then escape the town and run like hell into the wilderness -- as soon as you can fast travel as close as you can get to the Sanctuary and help them defend it! You may have to kill a few guards to escape but hey, you can afford the fines, right?
Escaping ends this very epic fail of a quest...
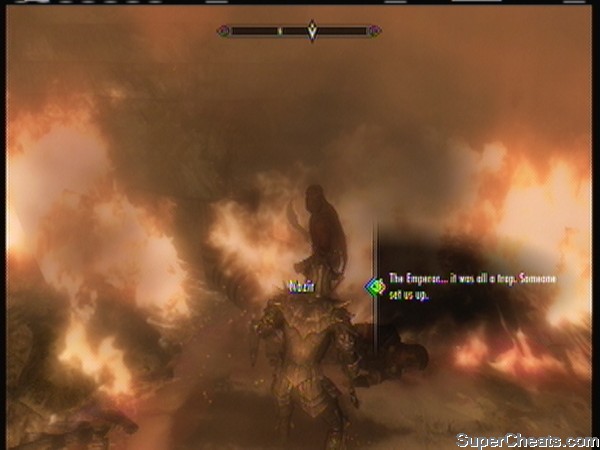
Saving Nazir
Once you have taken out the agents outside you flag this quest, so head into the Sanctuary and you will find more agents to kill as you search for survivors. You find Nazir and talk to him, learning that he might have thought ill of you earlier, but saving him changed his mind.
As you are trying to have your escape the Night Mother calls to you -- she orders you to embrace her so head to her coffin and climb inside and you get saved. Icky, but saved. After a brief period of blackness the Night Mother tells you to speak with Astrid, and then you are released.
Astrid is dying -- but she tells you that she is sorry and that she allowed the betrayal. She betrayed you because of the Night Mother. Everything has gone off the rails for the Brotherhood it seems, but she wants you to start over and rebuild the Brotherhood.
After you put Astrid out of her misery return to the Night Mother and get your assignment. That ends this quest.
Basically the Night Mother wants the contract to be completed -- the real Emperor must die for that to happen. She makes that as plain to you as she can -- so your next move is to talk to Nazir and relate what she said. Nazir agrees to move the Night Mother and Babette to the Dawnstar Sactuary -- you know Babette is the little girl vampire from the Anne Rice books, right?
Now that the main concerns of the Brotherhood have been dealt with or are being dealt with by Nazir, we need to head over and have a chat with Amound Motierre now, and since he is in the Bannered Mare in Whiterun we can stop by the house and drop some stuff off... Oh and speaking of cities, it would be a REALLY good idea for you to be sure that you pay off your bounty before you start this mission...
At the Inn you find Amound who happily tells you where the Emperor is! Ask about the Commander to get an optional addition to the mission -- remember I said go pay off your bounty? This is why.
Basically this is not as complex a mission as it may seem -- but the first order of business is to deal with that bastard Commander Maro -- so head down to the docks in Solitude and let him see you -- hell! Talk to him! He will attack YOU and once he does can be killed in self-defense without earning you a bounty!
Actually there is another way to do this optional bit -- talk to him on the docks, let him attack you and then do not resist. The Guards will kill him for you and you can just sit there and watch as he gets his. That is what I did ;)
Once you have done that little chore, it is time to do the big job!
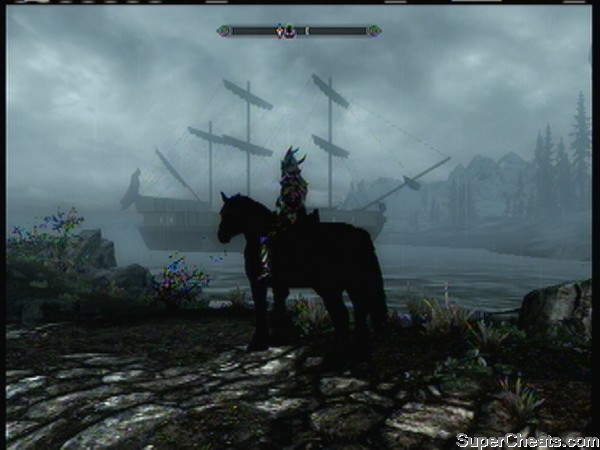
The Emperor's Ship Awaits
The Emperor's ship is in the harbor near the palace -- simply swim out to it and climb up using the anchor chains. You can then deal with the crew and guards however you like -- kill them, sneak past them, buy them sweetrolls, it is your call!
You know this ship has no rudder? How do they steer it?? Seriously I swam under and checked! But it does have anchor chains we can use to get on board, and once we are on board, it has a crew to be killed and an Emperor to talk with -- and kill!
Once the deed has been done it is time to return to Amound and have a chat -- I did not kill him because a deal is a deal -- and get the location of the payment -- 20,000 gold baby!
Now that we have that it is time to head back to the Brotherhood and talk to Nazir, who has relocated the crew to the new sanctuary.
This unlocks the Achievement "Hail Sithis!" and completes the main Faction Questline. Three are still a few minor quests left to do but nothing like what we have just completed. Do them, don't do them, it is your call.
The Mage Guild Quests are flagged by completing the Miscellaneous Quest Visit the College of Winterhold.
When you arrive in Winterhold head to the College where you will encounter Feralda blocking your way over the bridge. Speak with her and answer her question honestly -- in other words do not admit to selfish motives... This triggers the first quest in this Faction Line.
Why does this place remind me of Hogwarts?
You can scroll down this page of the guide to find all the quests in section or use the links below to jump to the specific quest you are interested in.
First Lessons
Under Saarthal
Hitting the Books
Good Intentions
Revealing the Unseen
Containment
The Staff of Magnus
The Eye of Magnus
Feralda demands that you cast the spell Healing Hands on her -- if you have it, cast it, if you do not, you need to buy a copy and read it so that you have the spell and can cast it!
Successfully casting the spell on her gains you admittance to the College and unlocks the Achievement "Gatekeeper" (10 GS). Feralda then leads you across the bridge and into the College, where you speak with Headmaster Mirabelle Ervine, who welcomes you to the College. She gives you your school uniform, and a tour of the College, on the way to your first class which is really just an abbreviated bull session.
Tolfdir asks a few questions of you to see what your magical position is -- just answer them honestly. You get to practice blocking spells with wards -- this part easily bugs so you need to not skip any dialogue, and do precisely what Tolfdir tells you to do.
Using the Ward Spell to take a few Fireballs from him completes this quest and flags the next.
This quest begins with meeting Professor Tolfdir outside of town at Saarthal -- so head over there now to hook up with him and the other students and follow him into the excavations, where you will be asked to find Arniel Gane.
You are basically serving as free labor at the dig -- if you find anything useful you are supposed to turn it over to him. There are three rings and an amulet -- but when you take the amulet you end up trapped in the chamber. To get out simply wear the amulet and then destroy the wall it was on with a Destruction Spell.
Tolfdir will show up and you will see a message from the long dead Nord mage. Tolfdir did not see it but we tell him what we saw, and Tolfdir decides we should search the coffins. Yeah, good idea...
So he opens a coffin and out pop three undead -- about what I was expecting -- and then we go into a secret room and battle more undead, before zoning deeper inside. As you work your way in you will find an area of three small chambers with animal pillars on each side -- look above and behind them to see what they need to be set to, then set them and pull the lever to open the gate.
Go through the iron door and kill the Deathlord inside, and then look around to spot four more animal pillars with the correct animal above and behind -- but you need to take care with these as moving some causes the others to rotate -- before you pull the lever make sure they are all set right and, if any have been reset, change them back. When you have all four set the way they are supposed to pull the lever and raise the gate!
Inside this area is an Alchemy Lab -- and the Professor finally joins us now too -- and when you move into the next chamber you encounter a large glowing sphere and the undead remains of Jyrik Gauldurson -- who you need to kill because he is one bad ass undead dood but you have to wait until the Professor drains the orbs power before you can actually damage him. Make sure that you loot his body as it has an item from another quest on it -- a part of the Gauldur Amulet.
With that managed, go through the door behind the sphere and into the chamber beyond to find a Word Wall with a Shout Word we need to collect -- Flesh, Ice Form -- and be sure to loot the chest here as well before heading back to the other chamber and talk to the Professor, who asks you to run back to the College and get the Archmage. Do that now.
Head out through the Word Wall Chamber and take the exit there, and then exit the ruins and fast travel to the College where you will find the Archmage in his quarters. Savos Aren introduces himself, and goes on and on, and then you tell him your message.
The Archmage instructs you to speak with Urog gro-Shub, and the quest ends by flagging the next quest.
You will find Urog gro-Shub in the Arcaneum -- the Library basically -- and once you ask he will then ask you to help to recover some stolen books. Speak with Othorn, an ex-apprentice at the College who is at Fellglow Keep. Now that we know what we can learn from him, it is time to head there to speak with Othorn.
On the way out you are stopped by Arcano who demands answers! He is something of a jerk and I do not blame you if you get evasive with him. When he is done with us we should get going!
--== Fellglow Keep ==--
The first order of business is to speak with Othorn -- who we will find inside of the Dungeon -- which you have to battle your way through killing mages and undead in order to reach the actual entrance to the Keep. In here you will find more mages to kill and the odd Storm Atronach -- and more mages until you reach the chamber above in this miserable little quest.
When you finally reach The Caller (a female mage) you let her know your reason for being there -- persuade her to give up the three books, and leave.
When you get back to the school (check out that sphere in the Atrium) and turn in the quest to the Librarian you are rewarded with a stack of Skill Books. This ends the quest and flags the next one.
Now we need to speak with Tolfdir again, and are treated to a lecture from him which we are obligated to follow him around and listen to... Ancano interrupts, telling the Professor to get stuffed, and tells you to come with him. It seems that a representative from the Order is below -- and Ancano demands you cooperate with him.
When you get to the chambers of the Archmage this meddler goes in too -- but when Quaranir talks to you he has frozen time so that the others cannot listen in. He reveals that the object (the Eye of Magnus) is a danger -- and he expects that you will deal with it.
He tells you to seek out the Augur of Dunlain -- that is all that he has to tell you -- ask the Archmage about the Augur and you get shut down... Tolfdir is who you need to chat with, he will tell you where you need to go -- the Midden. You know, a Midden is a garbage dump.
Thankfully the Midden is easy to reach -- just use the trap door in the courtyard.
When you reach the door -- it is locked and you do not have the key -- the Augur opens the door for you. It tells you that the event you are trying to prevent has already begun -- exhaust the conversation options and you learn that Arcano is a Thalmor!
You learn that you need to obtain the Staff of Magnus -- and tells you to take the word to the Archmage. We had best do that now, and quickly!
When we brief the Archmage he is not exactly supportive or receptive -- but he does tell you to speak with Mirobelle which ends this quest and starts the next! Well done!
When you speak with Mirobelle she tells you what she knows about the Staff, and the Synod who is also looking for it. She confirms that nobody at the College knows the location -- but the Synod did mention the Dwarven Ruins... And that is our next destination -- but before you go I have to warn you, this is a long and involved quest... Be sure to ask if she knows anything else about the Staff then hit the road!
When you head into the main area of the ruins you will be battling the Dwarven mechs so be prepared. Search the dead body on the entry hall for the key and a journal -- read the journal to get something of a clue... Then head inside!
Among other things, there are veins of Moonstone in the ruins, and if you enjoy Smithing or have yet to master it, these are worth mining... I did mention that this is a long and involved quest right? This facility is HUGE, and if you are a loot whore you will be going in and out several times.
The researchers actually made it pretty deep into the ruins -- well, judging by the trail of bodies I mean -- but not far enough it seems. When you get into the Aedrome one of the Fulmer will have a focusing crystal on them... Curious.
When you reach the last chamber and you do not have the key for the door do not panic. Go through the door on the right (the locked one is the center one) to the and of that path and get the key from the chest then head back and open the door. A little ways further is another locked door you do not have a key for but no worries because the sole surviving researcher opens it from the other side!
You have to break the bad news to him -- his buds are dead -- and the researcher Parotus Decimius is really bummed out. We have good news for him though, because we have the crystal he needs! He explains everything as you follow him to the machine and, after you place the focus crystal in it, asks you to work the controls. No matter how you work them though, it does not work!
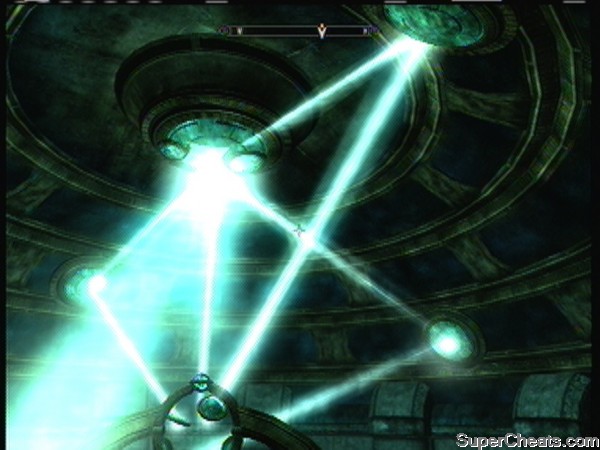
The Focus of the Focusing Crystal
Look behind you on the table and you will find two spell books for spells you probably already have... Now why would those be here? Hmmm. What if we cast those spells on the crystals? It is worth a try!
Use the two spells Fire and Frost to gently nudge the beams so that they are each in the center of one of the rings, and THEN rotate the rings and voila! The beams now reveal a map displayed on the wall of below the controls! Take a look!
Talk to the researcher again -- he is freaking out -- he wants to blame you. Seriously. You tell him about the Eye of Magnus and ask him to help you find the Staff. He does not believe us -- but he does reveal the location of the Staff. We need to head back to the school and report in to Savos now.
As we are leaving one of the Order appears to us and tells us to get back to the school quickly -- there is a quick exit through the doors on the right-side of the hall just past that researcher's camp -- so hit those and fast travel back to the school now!
When you report in you find that a disaster is unfolding -- the Tholan Spy has sealed himself in with the Eye and is using it. You help them blow down his force field using frost but then the world explodes ending the quest and unlock the Achievement "Revealing the Unseen" (10 GS)
The Tholan Spy has spawned magical creatures in the town and you need to help defend it from them! Talk to Tolfdir and then head to the town and begin hunting down and killing the magical beings that Ancano has summoned.
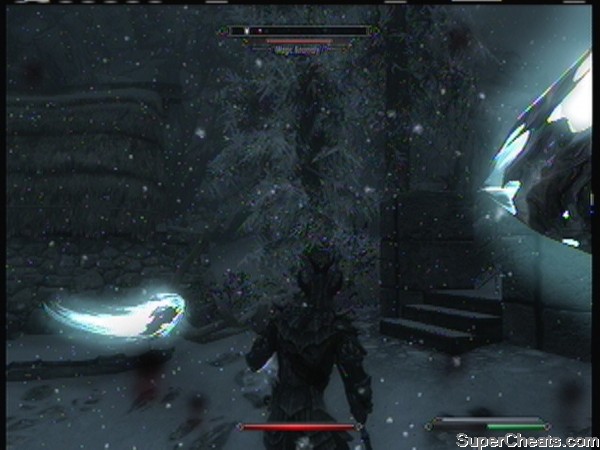
Defending the Town
You will meet Faralda and Arniel on the way -- they will come with you to help -- each of the summoned creatures bodies has a filled soul gem on it so be sure to grab those... And once you have killed all 10 -- and they take some killing -- head back to report what has happened!
Mirabelle seems pleased to learn that the town is safe, but what she wants is the Staff of Magnus. Now!
The Archmage gave her a pendant and mentioned the Labyrinthian to her when he gave it to her, so she gives it to you in the hopes that it will help your quest. This ends the current quest and flags the next.
After you dump the stuff you want to keep at home, and re-supply, head for the Labyrinthian and equip the Pendant that she gave us, and go in. Inside we find the spectral form of Savos and some of the other mages! Listen to their conversation and it becomes obvious that we are seeing the past.
Inside after you raise the bars using the lever and go inside a large chamber you are confronted by a few skeletons and a skeletal dragon -- kill them and then you will find a carved tablet -- read it, and then listen to the spectral forms tell their tale. Their foray into the dungeon did not go well it seems.
Head down the slope and through the door and work your way into the hall where another spectral attacks. Use Flame to melt the ice blocking the door he came through then go inside and kill three undead before you follow the tunnels and find a room with an Alchemy and Enchanting Table in it.
Basically you want to reach the water below (without dying) and then follow the flow drop down and enter go through the tunnel to the chamber with the Frost Troll and kill it, and you will hear the voice and have your Magicka drained again.
Kill the undead and use the lever to raise the bars, then go inside the chamber and kill the summoned beasties before you battle the Wispmother (loot her she has Wisp Wrappings). Another spectral will emerge and the door ahead will be blocked by fire -- kill him then cast Frostbite to open the door, entering the tunnel and opening the gate on the left for another episode of the history of what not to do...
As you enter the next area you hear the voice and your Magicka is drained again, then you face a Spectral Warhound, a few more spectrals, and then you zone into the Labrynthian itself. There are some trap columns ahead -- you need to either remove or shoot the Soul Gems from them to disable them.
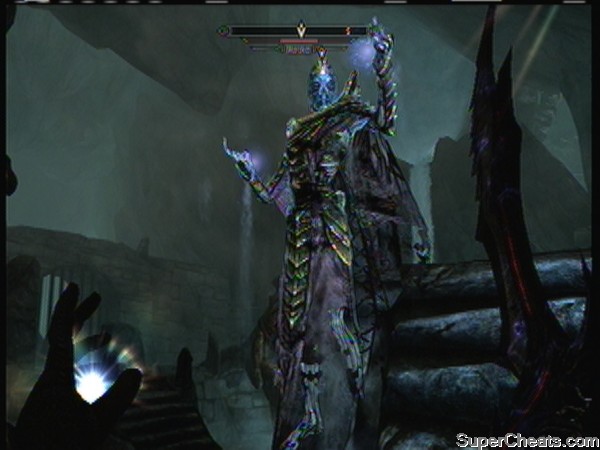
Obtaining the Staff of Magnus
A few more spectrals will attack you and your Magicka will be drained again as you reach a set of wooden doors -- go through and face more of the same. You finally reach a Word Wall and learn the Word Sand, Slow Time. Good on ya!
Continue along the path here and you will get your Magicka drained yet again before being ratpacked by some spectrals and skellies. In the next chamber you get another episode of the Savos Show -- and then we go through the door and encounter a spectral enthralled wizard -- and kill it. Head upstairs and do that again so that you release the spirit of Morokei -- and then kill HIM to loot the Staff of Magnus.
Have I said well done? Good on ya! You have done it!
Loot his mask while you are at it -- it has a good enchantment... Now leave the chamber through the door in the back left for another episode in which you learn why it was so hard to get in here! That pendant was the key because the Archmage sealed the dungeon off after his party was wiped on an expedition it seems.
Right, there is a shortcut out of here - the barred door - so use that and you encounter Estormo -- Ancano's mate -- go ahead and take pleasure in killing him, I know I did. Now use the last barred door, go up the ladder, and fast travel back to the school to find them battling another summoned beastie. Help out then talk to Tolfdir to learn that Mirobelle is dead.
Tolfdir shows you that the situation is dire, and the quest ends, starting the next one and last one.
Use the Staff of Magnus to remove the barrier and then head into the school, where Ancano is and engage him. Basically the is this: he is drawing power from and being made invincible by the open eye. You can use the Staff to close the eye, thus rendering him vulnerable to attack. With the Eye closed, kill him quickly and anything he summoned!
After the battle talk to Tolfdir -- then speak with Quaronir -- then the Order takes the Eye and departs!
You unlock the Achievement "The Eye of Magnus" (30 GS) and Tolfdir makes you the Archmage -- Whaaaattt? Well, it looks like we have a new home!
Well done on the Mage Faction Questline! You have wrapped it up nicely!
If you have played the previous games you should well understand and appreciate the guild system that is used in Skyrim -- and the faction quests that are used by each guild to rise in their ranks, though really this was used less intensely in Skyrim than in the previous games. The secret to success in each of the guilds and their faction quests is leveling the respective skills for each, and in this case they consist of Lockpicking, Sneak, and Pickpocket...
The first Faction Quest that gets you into the guild is called Taking Care of Business, and you flag it from Brynjolf in Riften after completing a Side Quest for him called A Chance Arrangement.
You can scroll down this page of the guide to find all the quests in section or use the links below to jump to the specific quest you are interested in.
Taking Care of Business
Thieves Guild Miscellaneous Quest Set 1
Loud and Clear
Dampened Spirits
Scoundrel's Folly
Speaking with Silence
Hard Answers
The Pursuit
Trinity Restored
Blindsighted
Darkness Returns
After you complete the Side Quest A Chance Arrangement, Brynjolf instructs you to find him at the Ragged Flagon -- the home pub for the guild, which is deep in the Ratway under the city.
When you find him he will give you further information on the quest, which is to collect what is owed to the guild by some unsavory types who refuse to pay -- but you cannot kill them! Ask him for the details on each and exhaust the chat options.
Basically you need to collect from three people -- Haelga, Bersi, and Keerava -- with some optional steps to complete if you want to. Basically with your high Speech Skill you can persuade them all to pay up.
The Protection Racket
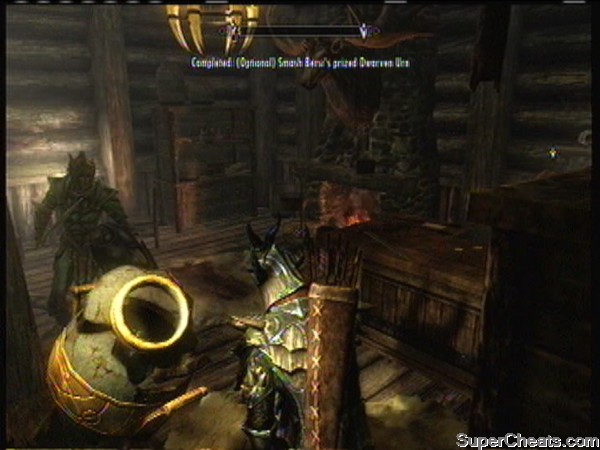
The Protection Racket
Do them in this order:
Haelga tells you to get stuffed -- so go take her statue and threaten to break it and she pays up.
Bersi tells you to get stuffed as well -- these people have stones! Smash his pot (it is marked) and he will pay up!
Keerava is behind the counter in the Inn, and clearly she has heard of our other collections because she pays up immediately!
Head back to Brynjolf now to turn over the money and you not only complete the quest and get your reward, but you also unlock the Achievement "Taking Care of Business" (10 GS)!
Brynjolf asks you to follow him and you get introduced to the Guild Leader Mercer Frey.
You need to Retrieve your Thieves Guild Armor from Tonila the Fence;
You need to talk to Delvin to learn more about the Guild;
You need to talk to Vex to learn more about the Guild.
These are all dead easy -- get the armor on the way out, then talk to Vex, who tells you which way up is! She tells you that what the Guild needs is to re-establish its rep -- and you should help. Talk to Delvin next, and he will offer you his advice.
If you did not notice these two can give you jobs -- the idea being that completing them will help get the Guild rep back where it was. Take them, don't take them, it all depends on what you need to do at the moment...
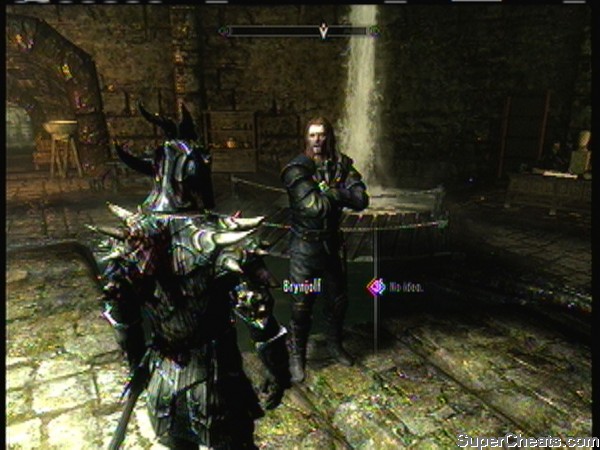
Dealing with the Boss
The Guild Leader Mercer Frey wants you to put the muscle on and convince the owner of the Goldenglow Estate to learn his place -- your task is to burn three hives and rob his safe.
The safe is in the basement of the basement, and the beehives are at the far end of the estate. Basically you are facing some mercenary help and the owner -- but try to avoid the owner, right? Sneak in and rob the safe to get the bill of sale for the estate, then torch three of the hives and return to the guild to report in. That ends this quest and flags the next.
Now you knew she was a witch except you spell it with a B right? She tells you what she wants -- her competition put out of business. This job takes us to the Inn in Whiterun where we meet our contact, Mallus Maccius.
Honningbrew Meadery is the target, and he wants us to poison the mead that will be used for the tasting there. He lays out the plan for you -- simple enough. Head to the meadery and speak with Sabjorn to get the poison, then poison the nest before you head to the vats and dump it in!
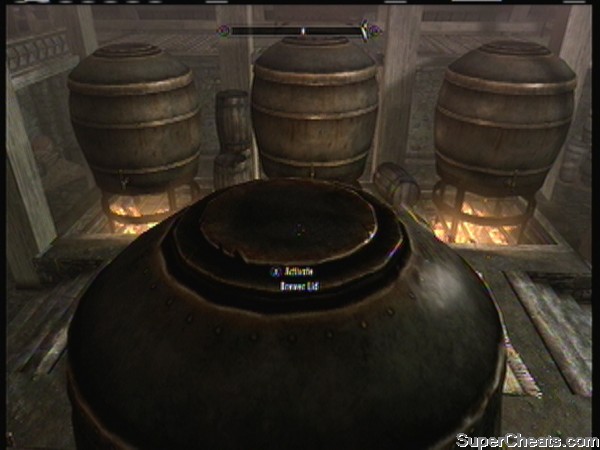
Poisoning the Brew
As you approach the nest -- you are battling rats and spiders on the way -- you run into a pretty powerful mage named Hamelyn who can command the rats. Hamelyn... The Pied Piper? Get it?
There is a shortcut back to the meadery from the nest room so take that and that puts you right in the room with the vats -- so head up the stairs and poison the marked vat!
Now return to Sabjorn to collect your pay only to learn that he will not pay you until after the tasting. We watch the tasting and the Captain go nuts and arrests the owner. Mallus lets you have access to the office so you can ID the silent partner -- his quarters are upstairs and the note you want is in his dresser.
When you get back to Riften and meet with Maven Black-Briar she tells you to report the information to the Guild. And that is where we go next!
When you report back to Brynjolf he already knows we have something to report. This completes the quest and flags the next one.
When we meet with Mercer we learn that the adversary has been around for years -- and it seems that he has found a mistake that was in one of the documents that reveals the identity of someone that he knows. It looks like we are headed to Solitude and the East Empire Company!
Brynjolf suggest we try to buy him off, and if that does not work follow him to see what he is doing. They do not want Gulum-Ei dead, just talking. Fast travel to Solitude and seek out Gulum-Ei -- the first conversation you have with him will be successful if you persuade him. He tells you what he knows, and now it is time to follow him!
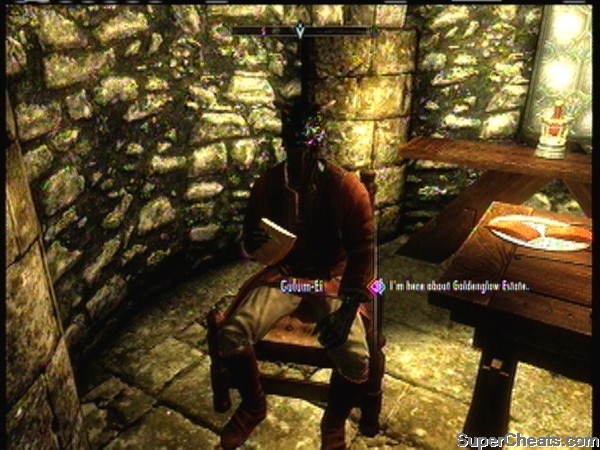
The Go-Between With the Information
He heads out the main gates and down to the docks -- and we follow -- to the warhouse at the docks where he goes inside. We have to pick the Expert Lock to get in, and when we do we find that there are guards patrolling inside. You need to avoid them like the plague!
Swim to the other side and hide and wait for him to reach that side, then sneak and use Invisibility Potions to follow him -- after you overhear his meeting confront him -- he reveals that the woman is Karliah and tells you about her history with the Guild. You need to report this!
When you tell the boss he is not happy -- Mercer does not seem afraid of her so much as in dread -- so he wants your help to catch and deal with her. This ends the current quest and spawns the next.
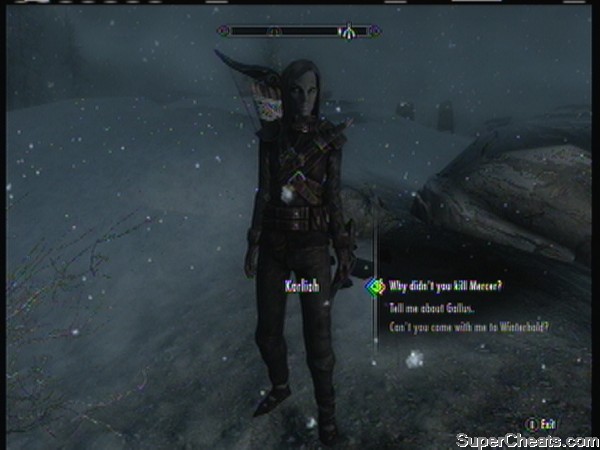
Karliah ends up being the Good Girl
You need to meet Mercer outside of the Snow Veil Sanctum -- which is in the wilds southeast of town. When you arrive Mercer tells his story and then lets you into the Sanctum. We work our way through the dungeon killing undead left and right, being manly men, but then as we finally reach our goal we end up getting hit with an arrow that has some strange poison that knocks us out.
When we start to recover we overhear the conversation and that it was Mercer that betrayed the guild! After they talk he draws is sword and attacks us -- and we cannot defend ourselves! All hope looks lost, but then just when it looks like we will die it is a Hitman Bloodmoney situation! Karliah has saved us!
It turns out that she saved us two ways -- the poison slowed our heart rate so that we did not bleed to death from his attack, and she came back and bandaged us to carried us to the surface. She tells us her story -- she was betrayed by Mercer and he has been hunting her to silence her.
You basically have to help her decipher the diary -- taking it to Winterhold thus ending this quest and starting the next!
We need to head to Winterhold and talk to Enthir -- if anyone can decipher the diary it is he according to Karliah -- so to Winterhold we go!
When we arrive we find Enthir in The Frozen Hearth where he is eating and drinking. When we tell him who sent us he knows precisely what it is about! He looks the diary over and he knows the language -- but he cannot translate it. The good thing is he knows someone who can do the translation -- the Court Wizard of Markarth!
Well we have our next destination... Here is the thing -- if you happen to already have the key to the Museum here from the previous quests in the town, you can go directly there to get the translation, you do not have to talk to the Wizard. If you do not, you can go to the Wizard, but you will have to do some tasks for him to get him to help. Since we already have the key, I just went right to the Museum and grabbed the key to translate the text.
In the Museum Laboratory you will find the Puzzle Cube, err Guide Cube... No, it is a Puzzle Cube -- shades of Portal...
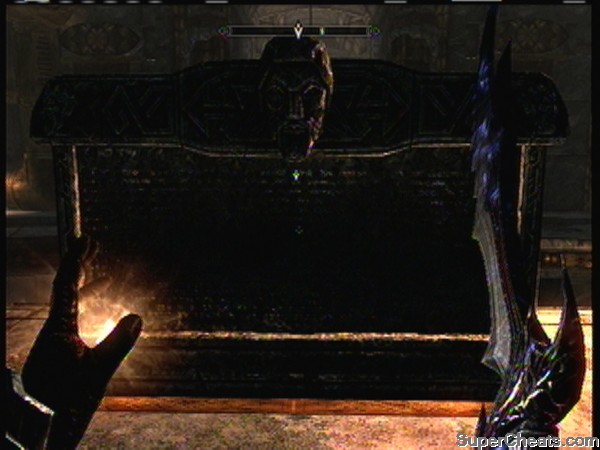
The Rosetta Stone
Head out onto the Wizard's Balcony and then to the right up the stairs and into the Tower... Follow the path around and through a door where you can take a piece of charcoal and a roll of paper from a desk here, then loot the room -- there is a Black Soul Gem, and a Skill Book on the desk.
Through the door is a Stone panel that you need to use the charcoal and paper on to make an etching -- after you do this some people enter below so duck down behind the panel and after they move through the room make a break for the door!
Outside the door turn and then right again and follow the path, and jump down into the water below the waterfall. Swim to the surface and fast travel back to Winterhold to speak with Enthir, who amazingly is still at the Inn! Man he takes Union Lunches!
Enthir tells you that the rubbing will work -- Karliah is with him in the basement of the Inn as well.
The diary reveals much -- much of Mercer's betrayal that is! As Karliah prompts him Enthir answers what he can. Talk to Enthir again and he will tell you what he wants. We can do that! And it turns out that he is something of a fence and offers his services to us!
Now we talk to Karliah and learn the true depth of Mercer's betrayal and what it means. We must deal with this! She gives you a present and the quest ends, flagging the next one!
Note: If the game bugs on your way out and part of the wall and floor disappear DO NOT step into that area.
We need to meet Karliah at the Ragged Flaggon -- so head there now and meet with Karliah and you go together to face the Guild. When you enter the Cistern -- which is really the proper Guild area, not the Pub -- she tells all, and the Guild listens...
The Guild goes to check the vault to verify the diary information -- and the vault is as empty as Al Capone's Vault! They begin to talk among each other, planning for the short-term, and then you chat with Brynjolf and he asks to debrief you. Go ahead, it is sharing time!

Confronting the Guild
Brynjolf tells you to break into Mercer's house and search it for clues -- so head there now with your 007 license and search the place! To get there exit through the crypt entrance and then go around back to the first gate -- kill the guard and take the house key from him, then go stand by the door on the right on the ground, arm your bow and arrow and shoot the mechanism of the ramp above to cause it to deploy.
Head up the stairs, up the ramp, and into the house! Kill the other guards inside then go to the basement -- grab the statue off of the shelf -- and then go into the room there, open the wardrobe and then open the false back panel! Carefully go through the passage beyond being careful not to set off the many traps, and you will head down deep underground.
There is a Skill Book on the table so read that -- by the way, you do know that even if you do not actually get the Skill Point from the book reading it still counts for the Achievement. Take the plans and the note, then loot anything else you want from here...
The door down the last stairs leads into the Ratway, so use that and make your way to the Guild to report in -- Brynjolf tells you they had no luck locating him -- you share what you know and now you know what he is after and how to stop him!
This completes the quest and flags the next one!
First you need to talk to Karliah -- who asks you to continue to trust her. She says that the time has come to decide Mercer's fate -- Brynjolf decides that he needs to die -- and Karliah warns that they must be very careful in the doing of it. You get the meet-up location and she tells you to prepare for the coming task and then meet her there.
If you are ready head there now -- when you arrive at the Shadow Stone you need to go down below to meet up at the Nightingale HQ. Follow her in and listen -- then head to the Armor Stone and get a set of Nightingale Armor, and put it on so you can be sworn in!
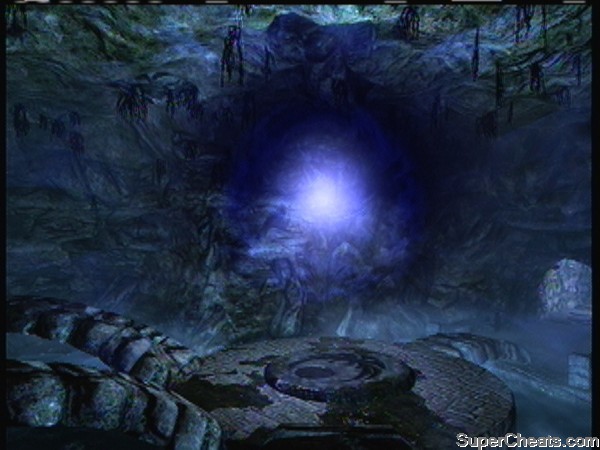
The Face of A God?
Brynjolf has a long conversation with Karliah about the price to becoming a Nightingale -- and we have to agree too -- so stand where the arrow says to and take the oath and then go though the initiation in which you actually get to see this God.
Talk to Karliah again to learn the truth behind Mercer's real crime -- stealing the Skeleton Key! And the Key needs to be recovered and put back where it belongs. I suspect we will end up getting that assignment, yeah?
Before you leave Brynjolf wants to talk about who will be the new Guild Leader -- he says that he wants you to be the leader... Wow, we keep getting put in charge of every faction! Amazing... Err... Just accept so we can get on to the mission, right?
Oh God more Dwarven Ruins! That ends the quest and flags the next one!
Check your supplies, make sure you have the potions you need, arrows, whatever, and when you are ready head to the marker on the map to begin the quest in earnest. The spot we are headed to is sort of in the middle of nowhere -- that figures -- so get as close as you can and hoof it!
When you arrive take out the bandits outside and then head up the ramps to the rooftop entrance and go inside -- battle the mechs and, in the room with the fire traps use the gate on the right side to get to the lift and go down, talk to Karliah and then she spots him below after you enter through the door. There does not appear to be a way to get down to him -- go through the door and follow the path, pick open the gate and use the lever, and then run all the way around the upper area to the left and pull the lever there, then all the way around to the right and pull the third level and it will lower the gate that was blocking the path.
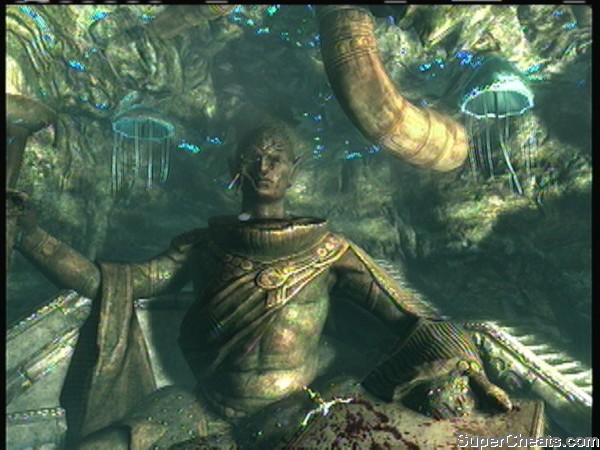
The Final Confrontation with Mercer
Head down the stairs, take out the enemy being sure to loot the Shamin's Key, and proceed along the now open path to the door above. You will then fight some Falmer and a Leviathan Mech -- and some Frost Spiders. This area is very buggy so you will want to save more often... If the frame rates go wonky here you may want to save and quit and reload the game to fix that.
If the game bugs at some point along the path and you cannot cast spells you will need to save and restart the game to fix that.
Eventually you will reach the Sanctuary and confront Mercer -- you demand the Key and he tries to bullshit you -- save and then kill him. Seriously, he needs killing. After you do that be sure to loot his body to get the Key and some cool kit.
At this point the chamber begins to flood -- basically you need to tread water until seismic action breaks open the escape tunnel -- then head through it and out of the Sanctuary! Talk to Korliah to learn what needs to be done with the Key -- walking the Pilgrim's Path -- but you promise to return the Key just the same. She gives you another piece of kit and the quest ends.
Get as much information as you can from her before you part ways though.
Well this is the last quest in the main Faction Line for the Guild -- and it is ALSO one of the Daedra Artifact Quests but it does not actually count towards the Achievement.
As soon as you are ready the Twilight Sepulcher awaits -- fast travel there if you already found it, otherwise get as close as you can and then hoof it -- when you arrive after you enter you will speak to the Nightingale Sentinel -- talk to him, you will learn a lot -- like the fact that he turns out to be Gallus!
After this very long conversation you should ask what you will face -- he mentions a journal and, as it is nearby, go ahead and do that optional quest item and then please READ the journal. It will tell you some of what is ahead and make this a little less confusing. When you have finished reading the journal it is time to proceed.
Follow the path and in the next chamber kill the spectral sentinels and go through the iron door. Beyond that is a room of light in which you must stay in the shadows to avoid being damaged by the light. This room has a lot of traps so try to disarm any you see before tripping them, right?
At the far end of the path is another iron door for you to go through, and then you will arrive at the statue of Nocturnal... What you need to do is pull the chain on the side of each sconce to turn it off, giving her what she seeks -- darkness -- and that will open the door behind the statue allowing you to pass.

Nocturnal Face-to-Face
Stay to the side of the passage to avoid most of the traps -- there are plenty -- and go through the door at the end to enter the main area. Continue along until you fall into a pit with the bones of a thief named Anders. Loot his body -- read the note -- and just wait here for a surprise. Seriously, just stand there being patient. You will see why.
Replacing the Key causes Nocturnal herself to appear -- hear her out and then do as she says. Karliah is right here! Talk to her -- she explains the reward choices to you so decide which circle you want to choose and then choose it.
Step on the circle you want and you unlock the Achievement "Darkness Returns" (10 GS) and you get to see the two lovers reunite -- sort of. The quest is complete, you have mastered the Thief Faction Questline or at least the main one, there is still the matter of the last Achievement in this Faction but that my friends will take you massive work, as you need to do a lot of Miscellaneous Quests for the Guild to unlock it!
Use the glowing portal in the wall to leave, and you will find yourself near the exit so go ahead and leave!
As you wold expect this one splits into two factions -- the Stormcloaks and the Imperials. You have to decide which you want to do -- you cannot do both and it is your call which you do -- though to be honest I thought that the Imperial side was a bit more fun.
These quests do not require a guide -- they are very straight-forward do this, do that types of quests. If you want to experience both, make a save to keep before you flag the first one and then reload.
The Daedric Artifact Quests are a series of quests -- some story related most not -- that include an artifact in them that you can collect and by doing so (as long as you do not miss any) you will unlock an Achievement that is associated with them -- "Oblivion Walker" (30 GS).
You should have already completed A Night to Remember and Darkness Returns so they are not included in this section -- A Night to Remember will be in the Miscellaneous and Side Quests Section, and Darkness Returns was covered under the Thief Faction Section (Darkness Returns does not count for the total of 15 Artifacts for the purposes of this Achievement).
So without further comment here are the remaining quests for you to complete!
You can scroll down this page of the guide to find all the quests in section or use the links below to jump to the specific quest you are interested in.
A Daedra's Best Friend
The Black Star
Boethiah's Calling
Break of Dawn
The Cursed Tribe
Discerning the Transmutation
The House of Horrors
Ill Met By Moonlight
The Mind of Madness
The Only Cure
Pieces of the Past
The Taste of Death
Waking Nightmare
The Whispering Door
You flag this Side Quest after speaking with the talking dog Barbos on the road outside of Falkreach. You need to journey with him to the shrine of Clavicus Vile in order to help him reconcile with his former master, or so he says...
When you are ready to do the quest you need to follow Barbos to the Shrine. If you flagged it and did not immediately follow him, he will be in the Shame at the Alter waiting for you.
You need to get to the Shame, and to do that you need to go through the mine -- so head through and fight your way past the Vampires that occupy the mine, emerging out the other side and you come to a large chamber in which there are several powerful Vampire -- and if you got separated from Barbos he will be here fighting them! Take them out.
Activate the Shrine and Clavicus Vile will talk to you -- he asks you what you want and, when you tell him you are here to unite him with his dog he gets rather cross with you... He wants an axe -- a specific and powerful one -- and he wants you to bring it to him. If we do that, we get our wish -- no questions asked. He says Barbos can lead us right to it.
Talk to Barbos to learn about the Axe and then head to the marker to obtain it. There is an exit above and behind the Shrine -- use that and fast travel to the marker, or as close to it as you can get since you probably do not have it discovered already -- then hoof it the rest of the way!
When you reach the cave you go inside and battle a powerful mage and his Fire Atronachs -- and then take the Axe from the table in the back and then exit the cave and fast travel back to the Shrine.
Basically we need to get him to take the dog back -- so we have to insist upon his taking the dog and the axe together -- and once he does, you should ask for Masque of Clavicus Vile (that is the actual artifact not the axe). After he takes the axe and the dog they become part of the Shrine!
The quest ends with you receiving the Mask.
This Side Quest is flagged by talking to the mage at the top of Azura's Shrine when you are doing the Miscellaneous Quest of that name. You encounter Aranea Ienith, who claims that the Gods predicted your coming -- you are the Chosen One! That's right, Azura has picked you to be Her Champion.
After you agree to this, you flag this quest, and are instructed to find the Elven Mage in Winterhold.
When you inquire at the College you eventually learn that the person you should speak with is Nelacor -- and when you track him down you learn the big secret after you bribe him with some coin... So it is a Soul Gem that is reusable! Interesting!
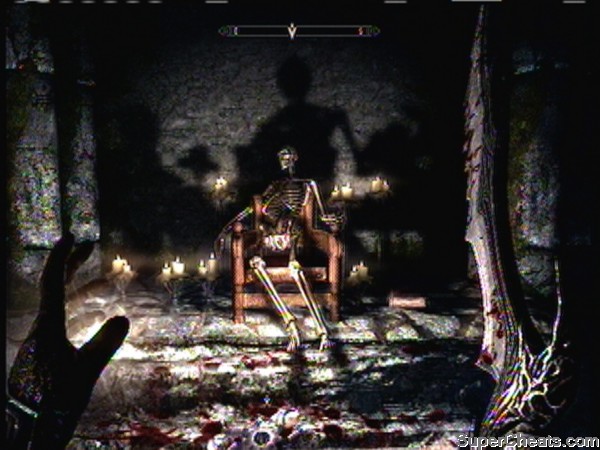
The Mystery of Varen Solved
Ilinolta's Deep is our next destination -- which is just north of The Lady Stone. When we get there we find it is a flooded Keep with a trapdoor on top. Heading inside we discover that it is occupied by evil mages -- so we need to kill them.
Eventually we reach a barred door, raise the bar and go in, and shortly zone. and then work your way along the obvious path until you arrive at the last chamber with a ladder leading up to Skyrim. In this chamber you will find ashes and skeletons scattered around and the bones of Malyn Varen -- remember Malyn Varen? This is a quest about Malyn Varen -- sitting in the chair.
The Broken Star of Azura is on the floor at the foot of the chair by the ashes -- take that and return to Nelacor now!
There are actually two possible special Soul Gems you can get, Azura's Star (from the Mage at the Shrine) or the Black Star (from Nelacor) -- basically you want the Black Star because it is a reusable Black Soul Gem.
After he examines the Star he tells you that we need to deal with Varen, who is still inside the Star... He wants to Soul Trap US?! Ah well, you cannot live forever, right? When you are ready let him Soul Trap you -- and when we get inside take him out!
Thankfully he pulls our soul back out of the gem -- he finishes the repair and then gives you the Star, ending the quest. Good on ya! Well done!
Reading the book Boethiah's Proving flags this Side Quest, and sets you on the path to yet another Daedric Artifact. The thing is, you really should read the book -- it is not only interesting but it makes this quest make a lot more sense. I am just saying...
Our task is to locate and reach the Sacellum of Boethiah -- which is in the far east -- so get as close as you can and hoof it in. When you arrive you encounter a Priestess of Boethiah who challenges you -- letting you know how low you are in the pecking order of life according to her God. You need to exhaust the conversation options with this woman in order to build rapport, and then you learn that the price of admission here is bringing a sacrifice to the Shrine and, well, sacrificing them... And if you did not figure this out it has to be a follower.
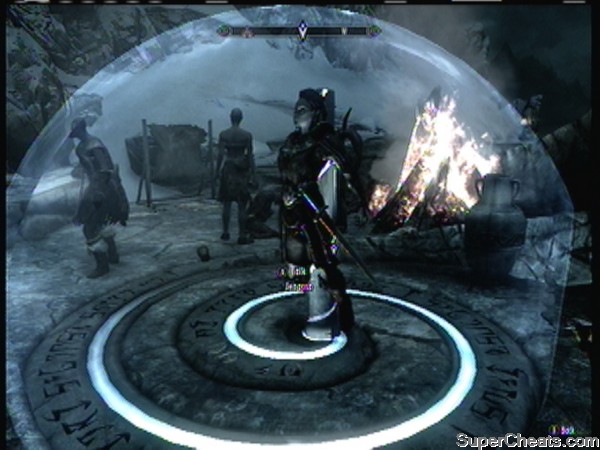
A Sacrifice Most Vile
Since I did not want to kill anyone I know, I went to the Drunken Huntsman in Whiterun and hired a Mercenary follower, and then fast traveled back to the Shrine and took them up to the top of the Shrine and tell them to use the pillar, and they will become trapped. Now just kill them and the God will appear all angry and annoyed. A ballsy approach is best -- and once you tell the Conduit that you are not afraid the quest advances, and the Conduit tells you all that whoever is left alive is The Man!
Basically you need to kill all of the cultists and once you do the Conduit will address you again. Say what you know you have to and the Conduit will order you to take out her current representative -- him and his band -- and it has to be all stealth kills mind you... Hope you leveled Sneak... If you did not look at the Power Leveling Section for how to do that in half an hour.
When you arrive at the Ridge the outside people do not count so kill them as efficiently as you can, but the people inside the mine DO count. So stealth kill them right? Just move slow and stay in the shadows, and once you kill the last one loot the set of Ebony Mail and equip it, and the God talks to you, telling you that you can keep the armor. The armor IS the Artifact, so carry it or go stash it in your house, just do not sell it, right? This ends the quest!
Fast travel to Dragon Bridge and head north -- you are looking for a honking huge Statue to Meridia! No worries here mate, you will know when you have found it! When you approach the Statue talks to you -- obviously this is another Daedric Lord. Listen as it explains what it wants from you...
The quest item is called Meridia's Beacon -- here is the thing, it can spawn practically anywhere, so I cannot tell you where it will be for YOU. Wherever it is, go there and obtain the Beacon; it will not be that hard it is really. There will be protectors and likely a puzzle to get past.
Once you have the item she will talk to you again telling you to return to the Statue and that your job is not quite done! Fast travel back and when you replace the Beacon on the Shrine you are summoned above to meet with the Daedric Lord -- who tells you that she wants you to go to her Temple, kill the Wizard, retrieving her Artifact (Dawnbreaker) and restoring justice in the world, Hoo-Rah!
After you agree you are returned to the world and you should drop down below to the Temple, go in and kill the Wizard, and then (don't you just LOVE "and then?") you will have fulfilled your duty to the Daedric Lord!

The Face of a Daedric Lord
But there is always more to it than that, right? Halfway down the hall is a locked door -- pick it and throw the lever inside, then continue along the marked path to the light you just let in with the Lever and activate the first pedestal. Now continue along the path, free the three Captured Souls by slaying them, and activate the second pedestal.
Head out the side exit to this chamber and follow the path to the next large chamber, free some more Souls then jump across the gap and activate the next pedestal. You are doing really well mates! Hop back across and go through the door to zone to the Balcony, and then follow the path and zone back into the Ruins and free some more souls then activate the next pedestal above!
Make your way to the other side above and hop to the platform to activate the next to last pedestal, and then look up -- see the last pedestal? You need to get to it. You accomplish this by going through the door in the back and up the ramp, then through that area to the pedestal and activating it! That opens the door for which there is no key -- so head back below and zone into the Catacombs through the now open door!
--== The Catacombs ==--
In the first chamber you activate another pedestal to open the door and follow the path, and you finally encounter the Wizard! He will use Frost-based attacks so quaff a Resist Frost Potion and be sure to stay healed as you struggle to him and kill him. When he dies his Shade is summoned -- kill THAT and you have completed this part of the quest!
The Daedric Lord instructs you that it is done, and to take Dawnbreaker from the pedestal -- do that -- and it is added to your inventory and you immediately zone out to the sky above where you have been summoned once again by the Lord -- she has her final say and gifts you with the Daedric Artifact Dawnbreaker! Good on ya mates! That is one more Artifact acquired!
Now I don't know about you but the first Deadric Heart I acquired was used to craft a Daedric Sword which I then upgraded to Legendary and Enchanted with 28 Fire, 28 Shock... That gives it a Damage of 163 plus the magic effects, and while Dawnbreaker is cool and all, it is nothing close to my personal weapon, so I am sticking with that!
This ends the quest!
BEFORE you go to flag this quest make sure you have Troll Fat and a Deadra Heart in your inventory.
To flag this quest head to the Orc camp of Largashbur (it is below Riften and to the west of Darklight Tower if you have yet to locate it) and you will encounter a battle in progress: Orcs Vs. Giant. Help them out and kill the Giant and one of two things will happen -- either you will have arrived in time to save the pair of Orcs battling the Giant and then be asked to help them break the curse that has been placed on their camp (this is good) -- or the two Orcs are dead, and there will be NO Orcs to ask you this and you will have to go into the longhouse and talk to the Chief and do a fetch quest. Hopefully you will get the shorter version -- but if not...
I am assuming that you saved the Orcs -- if not you may want to reload your last autosave and approach the Camp again and this time actually save them... After the conversation you are asked to help, and the Orc tells you what is needed.
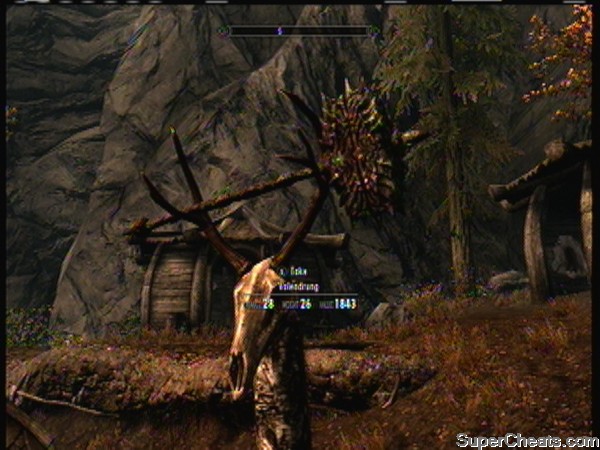
The Transformed Artifact
Hand over the required ingredients and the ritual will commence but things do not go quite as planned, because Their Personal Daedric Lord is pissed. He is angry about the Giants and until the Orcs deal with that problem he will be withholding his love. The Chief blames all of this on you and demands that you accompany him on the quest and serve him. Fine! We can do that, we don't even need a reason, but this was clearly NOT our fault!
Instead of following him to the cave you may want to just head straight there yourself -- it is northeast of Riften -- since he takes a very long walk down the garden path on his way, including through Riften! If you go straight there just wait for him to arrive to begin this part.
Basically we need to follow the Orc Chief to the Giant's Lair and keep him alive until we reach the designated chamber with the Giant Leader in it, at which point the coward tries to weasel out by paying YOU to do the killing. Here is the thing, this is a plot split-point. You CAN accept his offer, but if you do you will kill the Giant Leader and he will get the glory. You do NOT want to do that because YOU want this Artifact to be YOURS. So instead tell him no, a deal is a deal, the Lord told him to do it, and it is his to do. He will promptly get himself killed and then you can kill the Giant Leader, take the Club, and return to the Camp.
When you get there place the Club on the alter and it will transform into the Daedric Artifact Volendrung -- and the Lord will declare you his new champion and gift it to you! There ya go mates, that was the outcome we desired!
With that the quest ends and you have acquired yet another Artifact!
In the process of completing the Elder Knowledge Quest from the main story we flag this Side Quest -- and we go about finding Septimus Signus and the Elder Scroll, head to High Hrothgar, and have our battle with the World Eater. But now that we have saved the world, won the day, and managed to do it without falling ill with the ego disease Lindsay Lohanitus, it is time to embark upon the rest of the story with old Signus!
So, Lexicon in hand, return to his lair in the frozen north and present him with it, whereupon he becomes very happy but then you he decides you need to collect a bunch of blood samples for him... Now as you leave you have to talk to the Wretched Abyss which is blocking the exit -- the Daedric Lord who Septimus is working with. It seems that the Daedric Lord is only interested in getting the box open -- and he wants you to kill him once the deed is done so that you can replace him! Tell him what he wants to hear, and then go on your way!
Basically that means harvesting the following:
-- Orc Blood
-- Falmer Blood
-- Dark Elf Blood
-- Wood Elf Blood
-- High Elf Blood
You can easiily find the following at Alfrand:
Any Fulmer will work.
The body of Yag gro-Gortwog will give you Orc Blood.

Making an Important Choice
The Elf Blood can be obtained in Liar's Retreat with is southwest of Solitude and directly west of Chillwind Depths. Head there and take the blood samples from the bodies of the dead bandits -- you can get all of it here except High Elf. Basically their bodies will be in the main room along with some Falmer who killed them.
Last but certainly not least is the High Elf, which we can find in the Thalmer Embassy! So head there and kill one -- I just picked the gate lock and attacked the guard outside the entrance myself -- harvest its blood and return to the Lair and talk to Septimus to have him complete the preparation and open the box.
Inside is a book called the Oghma Infinium -- this is the objective and the Artifact -- talk to the Wretched Abyss at the exit to the box and you will hear his praise. He explains what the book is, and tells you how to read it. After he finishes talking to you and vanishes the quest ends but you are not quite done.
Open the book and read it and you have to pick from three paths or not read it. These paths are:
Might: 5 in Archery, Block, Heavy Armor, One-Handed, Smithing, and Two-Handed.
Shadow: 5 in Alchemy, Light Armor, Lockpicking, Pickpocket, Sneak, and Speech.
Magic: 5 in Alteration, Conjuration, Destruction, Enchanting, Illusion, and Restoration.
Just choose the one that works best for you! Reading the book and making your choice removes it from you but no worries, you still get credit for getting it... Now the quest is really done, so good on ya!
Note: The Quest Giver for this quest can be killed. IF he is killed and you cannot flag this quest. You can try to go to the bartender in the Silver-Blood Inn here in town and ask the bartender about rumors. If he does not tell you about the rumor of the investigator, try leaving and go back in, and keep doing that until he does flag the quest or you have done it enough to know it is not going to happen. If this does not work, then you cannot do the quest on your current save, sorry... The town can also be bugged by the quest that sends you into the mines as a prisoner, and he can die during the aftermath of that quest. Again, if he is killed, you cannot do this quest, you cannot complete the Achievement.
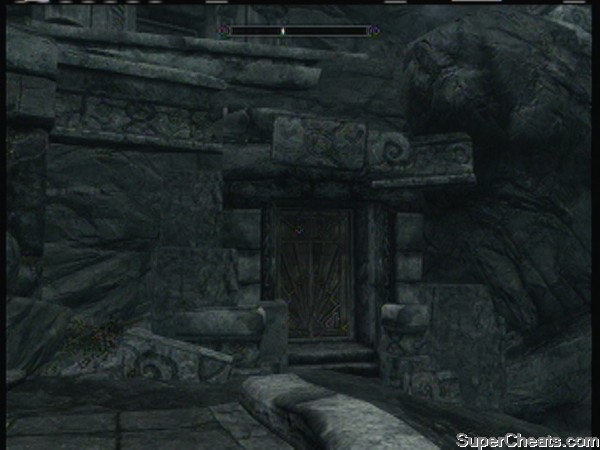
The Abandoned House in Markarth
To flag this quest head to the town of Markarth and look for the Abandoned House there -- outside you will find Vigilant Tyranus who will ask you if you know anything about the house -- you see it has been used for Daedric Worship. After you flag this quest follow the investigator into the house and the story plays out until you have to kill him when he attacks you.
After that you speak with the Daedric Prince, Molag Bal, and do as he says (you really have no choice here) and you will be told what he wants you to do. Head to whatever Forsworn camp he marks on the map and clear out the Forsworn to rescue Logrolf the Willful and then return to the Abandoned House.
Kill Logrolf will end up downstairs and trapped, then you are told to put the beat-down on him! DO that and then again and finally you will be told to kill him -- your reward is the Daedric Artifact Tge Mace of Molag Bal -- well done! That is one more Artifact down!
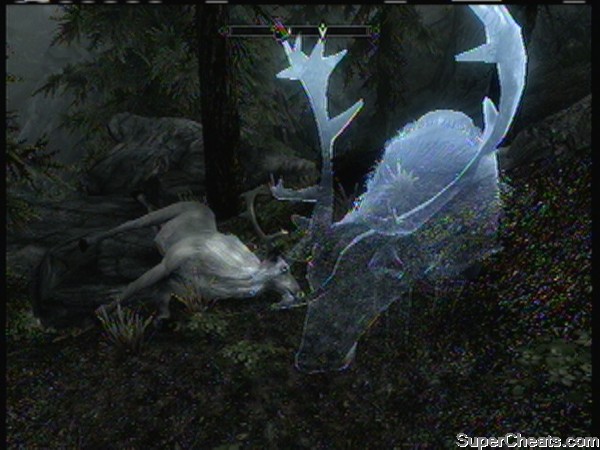
The Daedric Lord Hircine
Speak with Mathies at the graveyard in Falkreath and ask him who died then for the details -- then talk to Sinding the Prisoner in the barracks to learn his version of what happened -- starting with the Cursed Ring of Hircine. You agree to take the ring back to the Daedric Lord for him and then he escapes.
What you need to do now is track down the White Stag and kill it, and Hircine will appear as its spirit form and talk to you. He tells you that he wants you to hunt down and kill Sinding in order to please him.
Track Sinding to the location on the map (not sure if it is random or not but for me it was The Bloated Man's Grotto) and kill him -- actually you have the choice to either kill him or the hunters but you were asked to kill him so...
Talk to the wounded hunter and then talk to Sinding -- then kill and skin hom and Hircine appears again. The skin is actually called The Savior's Hide and it is Light Armor you can wear if you want and also the Daedric Artifact for this quest!
This ends the quest and you now have another Artifact.
This Side Quest is flagged by speaking with Dervenin the disturbed man wandering near the Bard's College who is the target for the Miscellaneous Quest Investigate the man wandering the streets near the Bards College.
The first step in this quest is speaking with the maid Erdi in the Blue Palace -- she has the key to the wing and will give it to you if you tell her that Falk asked you to check it out. The entrance is the door to the right of where you speak with Erdi. Head through the door, up the stairs and along the hall and suddenly we zone to a tea party in which we meet a character from Oblivion and an homage to Lewis Carol!
Talk to Sheogoroth and tell him you are there to deliver a message and then deliver the message. The conversation goes a little sideways and then he introduces himself as the Daedric Prince of Madness. He agrees to leave -- and you ask what the catch is. The catch is you are being manipulated!
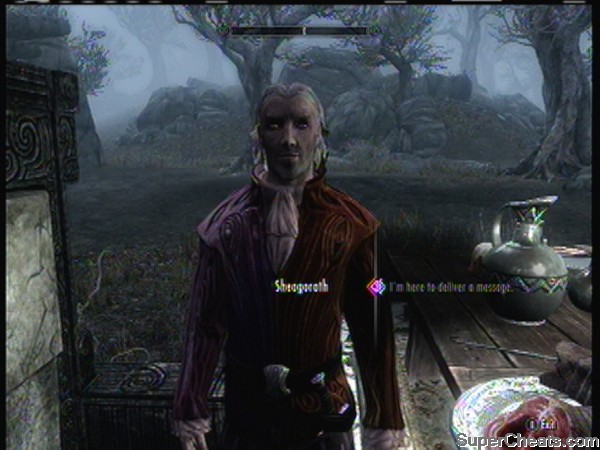
The Daedric Prince of Madness
He then gives you the Daedric Artifact called The Wabbajack -- which you automatically equip -- and now you need to find the way out! Basically there are three arches with paths beyond them -- pick the closest one and go to the end where you will see a battle. He says to use the weapon on the monsters but instead target the guy on the throne on the left across from you, and that solves this puzzle.
Now head back and take the first arch on the left -- that leads to the path of Dreams -- well, specifically Night Terrors but still. Target the bloke on the bed with the Wabbajack and then target whatever gets summoned -- rinse and repeat that process until the quest ends.
Now for the final arch -- head back and to the arch on your left and you see a really small version of the man and a large version -- use the Wabbajack to first make the one big then the other small to complete this part of the quest!
Now head back and chat with Sheogoroth again and and after you exhaust all the chat options you are back in Skyrim and you got to keep this Daedric Artifact! Nice one, this has to be the best weapon in the game!
Go to the Shrine of Peryite northwest of Karthwasten and you will talk to Kesh the Clean, who will tell you about Peryite. and then about the incense. He needs you to fetch the following items:
-- A Flawless Ruby
-- Deathbell Flower
-- A Silver Ingot
-- Vampire Dust
If you have been hording resources you may have all this at home -- if not go collect or buy it now. It is quests like this one that are why you should never sell flawless stones...
Once you have the items return to him and talk to hand over the ingredients, and you will then inhale the fumes and have your audience with Peryite. Exhaust the chat options and learn that he wants you to kill Orchendor -- his former acolyte.
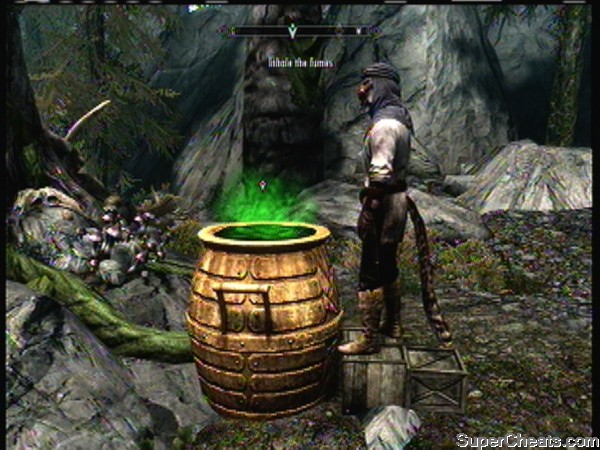
Incense to call a Daedric Lord
Simple enough really, get as close as you can to the marker on the map and then hoof it the rest of the way, track this Orchendor down and kill him.
Of course there is more to it than that... You have to work your way through the maze of another Dwarven dungeon and, oh yeah, battle an army of the Afflicted along the way! By the time you actually get to him you are going to be very eager to make him dead!
I have to admit that this was the quest that pretty much soured me on the entire game. From this point on it was no longer fun, because they got lazy and instead of making this interesting they made it tedious... They buried this guy so deep in a pointless dungeon through zone after zone after zone so that you can mindlessly kill Afflicted and mechs with nothing to explain WHY you are doing it.
After you kill him loot him to get the lift key and a skill book, then use the lift above to leave this tedious place and return to the shrine and use the incense pot again to talk to the Lord -- and your reward for doing his bidding is the Daedric Artifact Spellbreaker, a shield. It is actually sort of cool but not really worth what we had to tolerate doing this quest...
This Side Quest is flagged from Silus Vesuius, the Museum curator in Dawnstar during the Miscellaneous Quest to visit the museum. After you follow him inside and exhaust all of the chat options you learn more than you probably wanted to know about the Order -- and you advance this quest getting your immediate goals added to it!
You need to retrieve the three broken pieces of Mehrunes' Razor, so head to the first marker at Cracked Tusk Keep -- fight your way to and into the Keep until you battle Ghunzul -- loot his body for the Vault Key and then go to the door to the Vault and go in to get the blade shard from the rear. Lots of traps so haul your butt out of here fast!
Next marker on the map is at Dead Crone Rock which is near Markarth. So fast travel there and then run along the path to the road leading to Hag Rock Redoubt, which you have to travel through to get to Dead Crone Rock. Go through Dead Crone Rock all the way to the top and you will find a named Hagraven named Drascua with the Pommel Fragment on him. After you kill him and take it, head to the nearby Word Wall to learn Run, Dismay.
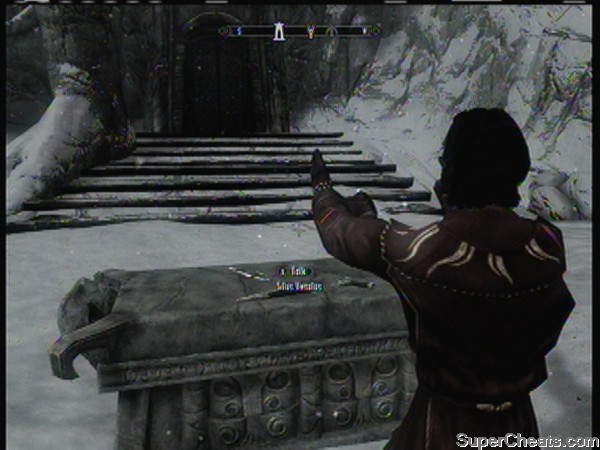
Calling Upon a God to Repair the Artifact
Now for the third and final piece is in Morthal, so head there now and speak to Jorgen at the Mill -- he denies knowing anything about it. Persuade him to give you the hilt and he gives you his keys and tells you where the fragment is. The house is directly across from the Mill so head in and grab the Hilt then return to Silus in Dawnstar.
Now here is the thing -- he will admit that he knows how to put the weapon back together -- he has the fourth and final piece and he knows that Dagon at his Shrine can fix it. Meet him at the Shrine and watch as he puts the pieces on the alter but for some reason the God will not talk to him. He asks you to try and yes, he will talk to you!
Dagon demands that you kill Silus -- and you do have to kill him because you cannot get the Artifact any other way. Sorry. Talk to him then touch the alter and the artifact is repaired!
Before he lets you leave though, he summons a pair of Daedra for you to battle! After you kill them be sure to loot them and take the Shrine Key and their hearts! You need one of the hearts for another of the quests so do not use it. Inside the Shrine are two more Daedra you can kill for their hearts and some nice loot including a Skill Book, gold ingots, enchanted kit and some Glow Dust (you need that for another of the quests) -- so your call!
Journey to the Silver-Blood Inn in Markarth and speak with the bartender to get the Hall of the Dead quest. Speak with Brother Verulus and persuade him to tell you what is going on. He tells you that some of the dead are being eaten -- they do not know what is doing it but the mystery needs to be solved. He gives you his key and admonishes you to be careful.
Inside the Hall of the Dead you will hear a voice -- when it is done speaking Eola runs up to you and starts talking to you -- she thinks you are one of her kind, eaters of human flesh... Find out the location of the lair and then you flag the quest. Return to let the brother know that the Halls are safe again, and then leave town and fast travel to the Reachcilff Cave.
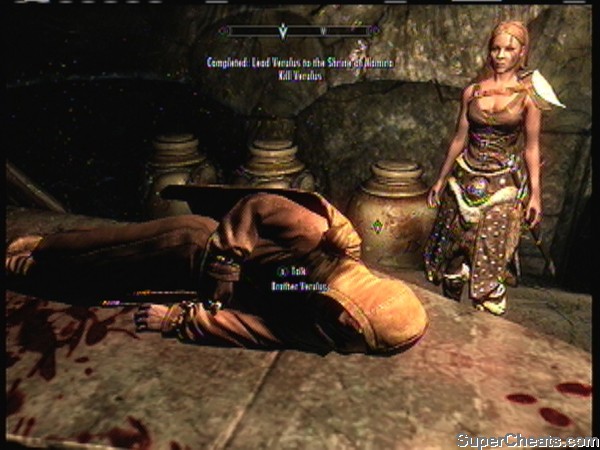
Dinner is on the Table
When you arrive Eola meets you outside and tells you that the enemy is within... You should leave her outside and do this yourself -- tell her that and go inside and clear out the undead. Once you have done that return to Eola and tell her, and she will ask you to help prepare a feast...
She wants you to lure Brother Varius to the Shrine and gives you gold to pay him to come and help explore the cave (your cover story). So go do that and bring him back, and when you get to the feast area the feasting umm... Yeah...
If you are wondering, yes, you have to eat some in order to get the Artifact... So dig in and the Daedra Lord will then talk to you -- she is pleased with your gesture and gives you her ring -- The Ring of Namira -- which is the Artifact for this quest!
That completes the quest... Now you should go home and brush your teeth.
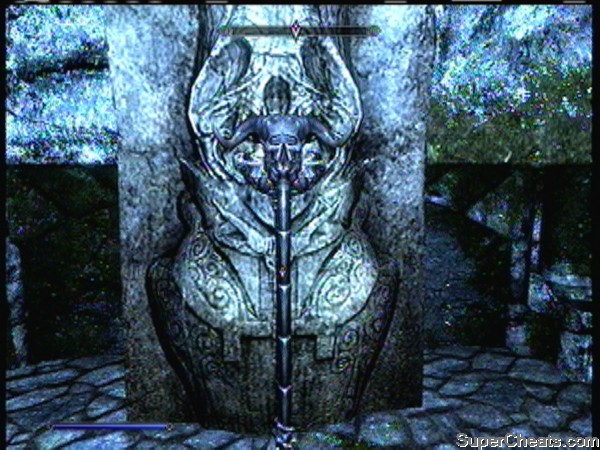
The Skull of Corruption
Head to Dawnstar and speak with Erandur at the Inn about the nightmares that the people of Dawnstar are having and he explains that the dreams are the acts of a Daedric Lord. Offer to help him and then you will follow him to the Nightcaller Temple in the Tower of the Dawn. You may want to run ahead and kill the pair of Frost Trolls that are sometimes outside...
Talk to him outside to get the rest of the story and then head inside and battle your way to the library where you need to find the book The Dreamstride. Now you need to find Vaermina's Torpor in the laboratory in order to enter Dreamwalk, at which point your goal is to find and activate the chain that will release the Miasma.
You need to remove the soul gem to stop the force field, after that and then make your way to the sanctum and kill Veren and Thorek -- you then need to kill Erandur so that you receive the Skull of Corruption (if you choose not to kill him then he will travel with you as a companion but you do not get the Artifact).
Wait for him to remove the barrier and then the Daedra talks to you -- Kill him and then take the Staff thus completing this quest and scoring another Artifact! Well done!
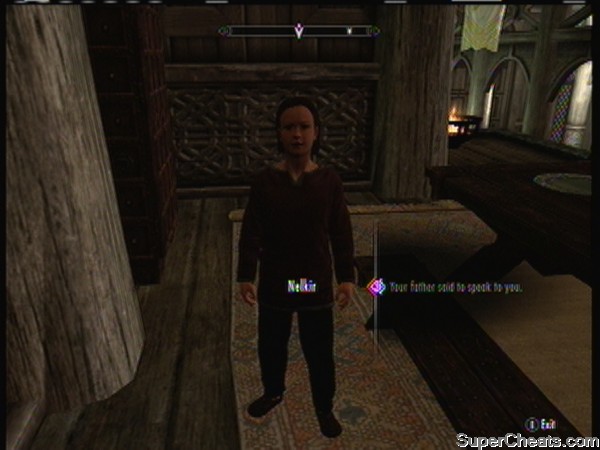
The Bad Little Prince
Head to Whiterun and speak with the bartender at the Bannered Mare to hear the rumors and you will learn that some of the Jarl's children are acting oddly -- head to Dragonsreach and speak with the Jarl and ask about it. The Jarl tells you that his youngest son is a dark child and has changed, going silent.
The Jarl asks us to speak with the child, and when we do we find a very disagreeable and calculating if indiscreet young man. Further questioning reveals that he has been listening to the Whispering Lady at a door in the palace basement. You learn where the door is from the boy and head there, listening at the door.
The voice you hear is clearly a Deadric Lord! Work through the conversation options and then talk to the boy again to learn how to open the door. Unfortunately the key and the door are closely held secrets and talking to the Wizard or the Jarl will not get us the key no matter what, so we are going to have to steal it. I hope you have leveled sneak and pickpocket!
You might think that the Wizard would be the easy mark here but he is evidently very aware of his body because 9 times out of 10 you get caught by him -- of course there is the 10th time... You might have better luck waiting until he is asleep since you have easy access to his quarters -- once you have the key go in and open the door.
On the table is a sword and a book -- READ the book!
To complete this quest simply pick up the sword and listen to the Daedra Lord make her impassioned pitch to you -- and the quest ends! Well done! That is your last Artifact and you unlock the Achievement "Oblivion Walker" (30 GS) for your effort!
The quests in this section of the guide are all of the type known as Miscellaneous. Some have proper names while others are named after their intent or description. Each of these is included here mostly in case you forget the details and to help in completing them.
These quests are NOT part of the main story line, rather they are optional quests that you can do -- or not -- as it pleases you. The thing about them is that though they are of varying degrees of comlexity and length, they can give you great rewards both in XP, coin, and skills.
Note that the quests contained here do NOT include every quest in the game. Most of the simple fetch and item quests are not included because they are dead easy and do not require guidance. The quests that are included either have an element that will help in character or skill development or take you someplace we though you needed to go....
You can scroll down this page of the guide to find all the quests in section or use the links below to jump to the specific quest you are interested in.
A Night to Remember (Daedrix Artifact Quest)
A Chance Arrangement
Evil in Waiting
Silenced Tongues
Ask Aldis for information about Angeline's daughter
Assist the people of Hjaalmarch
Bring 10 Fire Salts to Balimund
Bring one Mammoth Tusk to Ysolda
Bring one The Mirror to Aldis
Bring the Song of the Alchemist to Lami
Bring the Supplies to High Hrothgar
Clear the Foresworn from Kolskeggr Mine
Convince Vittoria Vici to release the Spiced Wine shipment
Craft a Potion
Craft an Iron Dagger -- Smith Training Quest
Deliver Idgrod's Note to Danica
Deliver Sven's Letter to Camilla
Deliver the Stros M'Kai Rum to Falk Firebeard
Deliver the Sword to Preventus Avenicci
Find Amren's Family Sword inside White River Watch
Find 5 Ice Wrath Teeth for Marise
Find Noster's Helmet inside Steepfall Burrow
Forbidden Legend
Give the Frost Salts to Arcadia
Head to the Solitude Court
In My Time of Need
Investigate the Bard's College
Investigate the man wandering the streets near the Bards College
Investigate Shroud Hearth Barrow
Kill the Bandit Leader at the Halted Stream Camp
Kill the Bandit Leader at the Rift Watchtower
Kill the Bandit Leader located at Silent Moons Camp
Kill the Dragon located at Eldersblood Peak
Kill the Dragon located at Northwind Summit
Kill the Giant located at the Bleakwind Basin
Kill the Leader at the Pinemoon Cave
Laid to Rest
Lights Out!
Listen to Brynjolf's scheme
Locate Grimsever
The Man Who Cried Wolf
Marriage in Skyrim
Materials for the Ringmaker
Missing in Action
Obtain a Mark of Dibella
Participate in a Drinking Contest with Sam Guenvere
Red Eagle's Sword
Retrieve Amulet of Talos off of Raggvir
Speak to Elisif with Taarie's outfit on
Speak to Greta about going to the Temple of the Divines
Speak to Sapphire about Shadr's Debt
Speak with the Leader of the Companions
Strongest Arm
Talk to Aventus Aretino
Talk to Irnskar about Octieve
Talk to Jaree-Ra about possible employment
Talk to Lod
Talk to Mikael about Carlotta
Tending the Flames
Use the Arcane Enchanter
Visit the College of Winterhold
Visit the Museum in Dawnstar
Visit the Shrine of Azura
The White Phial
Repairing the Phial
This Side-Quest is flagged by completing the Miscellaneous Quest Participate in a Drinking Contest with Sam Guenvere.
You will find Sam in Whiterun at the Bannered Mare Inn -- when you talk to him and agree to his contest he stands and you take turns pounding down the brew! After three glasses of his special brew you find yourself waking up in a strange place -- after asking a few questions -- like where in the hell is Sam?! You learn that you two did some bad things last night... Clearly this is an homage to a certain movie... Nuff said about that.
So, you begin with three goals -- Help clean up the Temple, Find the Staff, and Find Sam!
Among the items you pick up is a note that tells you what is needed to repair the Staff -- pick up the rest of the items and then apologize to Senna, and she mentions Rorikstead, our next destination! We will go ahead and fast travel there and find that Ennis is mad at us! Before you talk to him go ahead and harvest his Wheat -- it is a strong ingredient in healing potions among other things. Then we have to answer his question -- just what DO we have to say for ourselves??
It seems you stole his goat and gave it to a Giant! If I were you I would bribe him -- I did -- because getting a goat back from a Giant? Naahh!
Claiming Your First Daedric Artifact
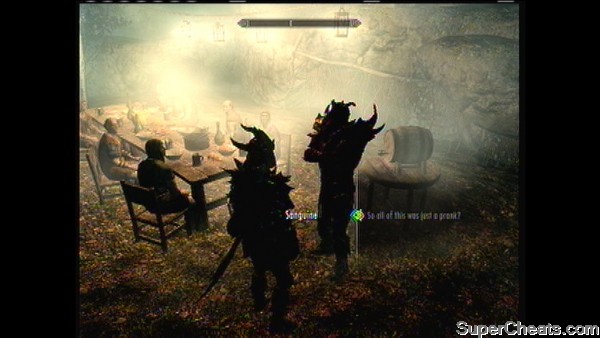
Meeting a Daedric Lord
Paying him off gets you the next clue -- we need to talk to Ysolda in Whiterun! Wow we were all over the place last night!
It seems we owe her for a ring -- for our fiance? Whhaaaatt?! I did the Persuade choice -- you should be able to as well... And that gets us the next location: Morvunskar and the wedding!
Windhelm is the closest point you likely have fast travel access to -- at least it was for me -- so head there and then overland to the tower where you find some Conjurers defending it. Kill them and head inside, working your way down into the dungeon where you find more and even more powerful opponents! Take them out as best you can and make your way to the marked spot, where you trigger a teleport gate!
And find yourself in a misty glade -- follow the lit path and you find Sam! Talk to him and let him know you have the items to repair the staff, whereupon he turns into a Daedric Lord named Sanguine who tells you that you were very entertaining!
After you exhaust the chat options with him, he teleports you back to the Inn, and he places a Sanguine Rose (Weapon) which is your first Daedric Artifact (1 of 15) for the related Achievement. You also unlock the Achievement "Daedric Influence" (10 GS) for obtaining that first artifact!
I have to admit that was a trip!
When you arrive in Riften you will find Brynjolf in the market -- he wants you to steal the silver ring from the strongbox nearby when he causes a distraction, and then place it in Brand-Shei's pocket without him noticing.
Putting in the Frame
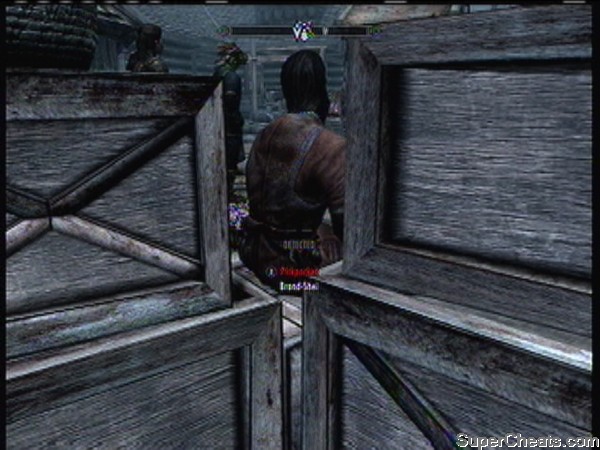
Putting in the Frame
When you are ready tell him, and when he creates the distraction go to Madesi's stall and pick the strongbox open, grab the ring and then sneak behind Brand-Shei's stall and pickpocket him between the crates to plant the ring.
Once you do that simply chat with Brynjolf again to end the quest, and then you flag the Thieves Guild Quest Taking Care of Business.
As we are collecting the Words of Power we arrive at the dungeon Valthume, where we encounter a ghost named Valdar who requires our assistance in containing a great evil sorcerer who is entombed therein. We agree to help, and our first task is to obtain three vessels from the dungeon below.
Entering Valthume through the large doors ahead, we find ourselves facing mostly undead and some spiders in here. As you work your way down into the dungeon you will find what appears to be a dead-end as there is a gate you cannot open. In the wall directly opposite the gate there is a switch that opens an secret door -- inside is a Deathlord and the first of the containers we are seeking. Taking the container opens the gate that was closed, so head through the now open gate and into the next area!
We eventually reach the door to the Catacombs, our next target area, after fighting more undead including a Deathlord! As you progress through the area -- following the marker and really the only way you can proceed -- you will reach an iron door behind which in addition to more Deathlords is the Iron Claw that you need to open the door in this chamber!
The combination for the rings is Dragon, Eagle, Wolf.
Eliminating a Major Evil
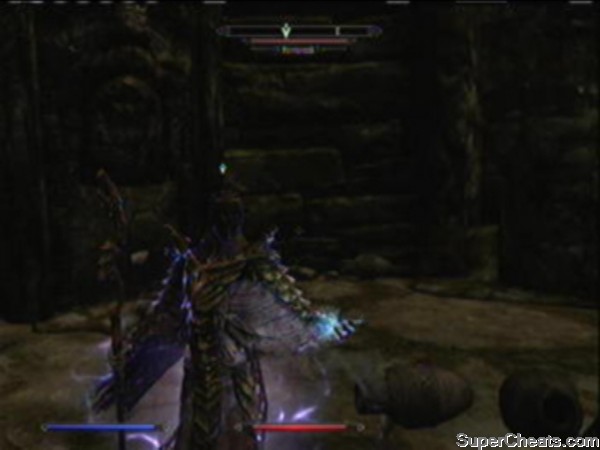
Putting Down Evil
When you enter the next chamber it is really important that you kill all of the enemy in here before you take the vessel, because there is a known bug that can cause it to be impossible to get the Word of Power if you take the vessel BEFORE you kill the four enemy in this chamber. So you know, kill them first, right?
After they are dead, taking the vessel lowers the bars on the Wall, where you learn the Word Seek, Aura Whisper. You now have two of the three vessels and you have obtained the Word of Power for this dungeon, so good on ya mates! One more vessel to go!
The last one is actually on the way back -- as it is really the second one not the third -- so if you already grabbed it you are good to go, if not, fined the nearby chain and open the gate, go in , kill the Deathlord, and grab that last container then backtrack to our friend Valdar -- who is waiting for us in the Throne Room...
He instructs us to empty the containers into the bowl here -- and when we do that we are supposed to sit on the Throne while he unbinds the Liche Hevonraak... I would save if I were you...
Actually not as hard to kill as I had anticipated, so it really must have been in a weakened state! There is a very cool mask and staff on the body so be sure to loot those! Then talk to Valdar again to learn that he can finally rest. This completes the quest.
Once you flag the quest you should set it as active as it makes finding the location of the weapons a little easier... The first is in a coffin, and not too hard to get, but the second is above a throne guarded by a pair of Deathlords and another undead, so go careful on that one, right?
With the two weapons in your inventory you can now open the door and enter the next area, where you will find a ghost named Kvenel the Tongue -- who is the Tongue you need to silence! Killing him was a little more of a challenge than any ghost has the right to make, but once you do the quest is completed!
Silencing the Tongue
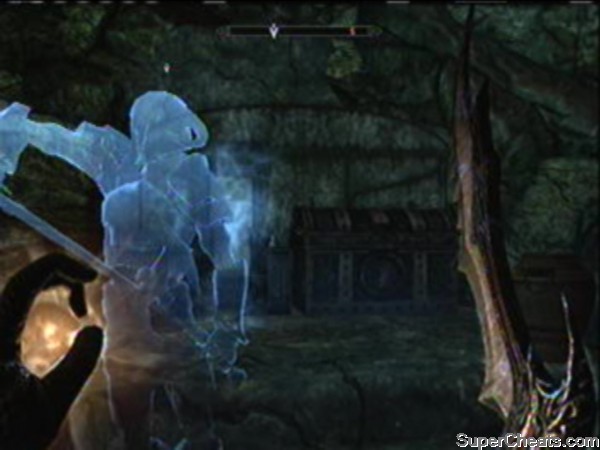
Silencing the Tongue
When you loot his ashes you find a sword called Eduj that does Frost Damage and some other weapons, as well as gold. Nearby is the Word Wall with the Shout Hunt, Aura Whisper on it, the third word for that Shout.
Once you have that you are pretty much done here, so head back to the main guide now!
This Miscellaneous Quest is flagged from talking to Angeline Morrard, the owner of Angeline's Aromatics Shop in Solitude. Aldis is the Captain of the Guard and can be found in the military section of the town -- speaking to him also flags another Miscellaneous Quest for a book, which you will want to do.
Talking to him about the daughter will require you to persuade him -- and you learn the sad truth about what really happened...
I wish it was good news, but sadly not. She takes it better than expected really...
This Miscellaneous Quest is flagged by the Jarl Idgrod Ravencrone following your completing the Side Quest Laid to Rest. It is basically a three-part helper quest and earns you the title of Thane for the Jarl's holdings. Why not?
You have already completed the first task, which is Laid to Rest, so there are two more quests you need to do:
Your next task is to complete the quest for Deliver Idgrod's Note to Danica (Idgrod the Younger is the daughter of the Jarl if you did not notice).
Your last task is to complete the quest Bring the Song of the Alchemist to Lami.
You are now prompted to return to the Jarl and talk to her -- doing so earns you the title of Thane!
This Miscellaneous Quest is flagged from Balimund the Smith in Riften.
This is a simple fetch quest -- find or buy 10 Fire Salts and give them to him to complete the quest and collect your reward. You can obtain them in several different ways -- buy them from Alchemist Shops, steal them from the shops, find them as loot, find them in dungeons, and kill the Fire Elementals for them.
The fastest way in my experience was to simply camp out at the Alchemist in Whiterun and wait 2 days for the inventory to change, buying any Fire Salts if there were any, rinse and repeat!
Ysolda can be found in the Whiterun Inn or walking around the city. She wants to be a merchant, and as a Caravan Leader offered to teach her better skills if she could bring him a Mammoth Tusk, she offers the same basic deal to her. Bring her a Tusk, she will teach you what she knows about bargaining, buying, and selling.
If you flagged the quest "Kill the Bandit Leader at the Halted Stream Camp" you can obtain the Tusk you need from the mine that the bandit leader is using as his HQ. If you have not, then you will have to kill a Mammoth to get their Tusk -- bring help, because those are a tough to kill mob!
Aldis is the Captain of the Guard in Solitude, and when you speak with him about the fate of one of the merchant's daughters you have the option to flag this Miscellaneous Quest to bring him a book he wants -- The Mirror -- a simple fetch and deliver quest.
The book can be found in Windhelm at the Palace of the Kings, in the upstairs section in one of the bedrooms at the far end of the building. This is a Skill Book and adds a level to Block -- but you must steal it to take it, so even if you are not seen there may eventually be an attack upon you as a result. Bear that in mind!
Once you have the book return to the Captain and give it to him for the reward.
This Miscellaneous Quest is flagged by speaking with Lami the Alchemist in the Thaumaturgist's Hut in Morthal. She enjoyed reading the book when she first began to train in the arts and would love to own a copy of it for herself -- and asks that you bring her one if you find it.
The place to obtain a copy of this book is the Bard's College at Solitude -- and a bonus if that this is also a Skill Book, so read it then steal it and take it to Lami for your reward!
This Miscellaneous Quest is flagged by Klimmek on the bridge leading to the steps that go up to High Hrothgar -- it is a straight forward task-quest. He gives you the supplies and, when you reach the landing just before the entrance you will find an offering chest sitting there. Simply open the chest and deposit the supplies, and then meet up with Klimmek again after you finish up on the mountain to collect your reward!
This is a straight-forward clearing quest much like the slay the bandit leader sort, except this time you are dealing not with bandits but Foresworn, and they have a mage that can do some hurt to you...
There will be two or three outside for you to deal with, and then you need to head inside the mine which is behind the house above -- if you have not leveled your armor and defensive skills this could be a tough one.
One of the Foresworn that you kill will have a Black Soul Gem (Grand) that is filled! This is likely your first of these gems and you may want to save that to use when you remake your main armor once you have Enchantments that you really like...
With the Mine now cleared, return to Pavo at the Left Hand Mine to let him know the good news! He will reward you with 1500 gold for your efforts.
This Miscellaneous Quest is flagged by speaking to the merchant Evette San in the market stalls in Solitude. It is a persuasion mission whose goal is getting her shipment released.
The docks and the warehouse are actually outside of town down by the harbor -- if you have not visited there before make sure to flag the warehouse as it is a fast travel location.
When you speak with Vittoria you learn that there is a 2000 gold tariff on the spices that needs to be paid -- you can either pay it, try to bribe her, or better yet, persuade her to release it without the tariff being paid! Yeah, free is good!
Now that the matter is settled, return to Evette and give her the good news!
You can flag this quest from any Alchemist but the first chance is in the Inn in Riverwood. The quest giver will give you a simple recipe for a healing potion, and mention that they sell the ingredients. Simply purchase Wheat and Blisterwort and then use the Alchemy Workbench to craft some healing potions!
You want to remember that recipe and gather as much of the ingredients as you can -- check the full potion recipe in the Appendix as there are other ingredients that will work as well. You just need two.
The Whiterun Blacksmith Adrianne Avenicci will give you this quest when you ask if there is any work available. She gives you the quest and the materials, and waits for you to craft the item. When you bring it to her, she tells you it is not bad but is a little dull, and asks you to sharpen it on the nearby Grindstone.
Sharpen the dagger and return to Adrianne and she then gives you a hide and asks you to tan some leather. Take the hide to the Tanning Rack and use it to make it into leather -- and she then asks you to make a Hide Helmet, giving you the additional materials that are required!
Use the Forge to make the Helmet and then give it to her, and she asks you to improve it on the Workbench nearby. Using the Workbench turn the Hide Helmet into a Hide Helmet (Fine) and return it to her.
Impressed by your skills she gives you both the Dagger and the Helmet as your reward, telling you that you have the makings of a fine smith if you keep working at it!
This Miscellaneous Quest is flagged during conversation with Idgrod the Younger in the Highmoon Hall in Morthal after you encounter her and her brother -- who clearly is afflicted with ADHD. She tells you about him, and the treatment that they had been getting him, and then asks if you would be so kind as to deliver a letter to the Temple in Whiterun for her?
This is a straight-forward delivery quest, so next time you are in Whiterun deliver the note!
You will find Danica in the Temple of Kynareth in Whiterun -- just head inside and deliver the note for a 600 gold reward.
Sven and Faendal are vying for the affections of the Trader's daughter Camilla, and Sven has hatched a plan to swing things in his favor. He has written a letter that he asks you to give to Camilla and say it is from Faendal that will poison her against him, ensuring that Sven ends up with the girl.
You have a choice to make - you can do as he asks, or you can give her the letter and tell her the truth.
If you do as he asks you can collect your reward from Sven.
If you tell Camilla the truth, you can collect your reward from Faendal.
This Miscellaneous Quest is flagged by talking to Sorex Vinius in the Winking Skeever Inn in Solitude. He needs to deliver a special bottle of rum to a client -- this is a straight-forward delivery job.
Falk is found in the Blue Palace, and once you deliver the Rum to him, there are other chat options that you will want to explore.
When you arrive in Whiterun the first building on the right is the Blacksmith -- and if you talk to the woman smith there -- Adrianne Avenicci -- she will ask you to deliver the sword that she has made to her father in the Palace. Since you are going that way anyway, why not do that?
Flagged from Amren the Redguard who patrols the market area, this Miscellaneous Quest is a simple retrieval quest. The White River Watch may at one time have been an officially manned outpost, but it is now held by bandits -- so you will need to clear them out in the process of doing this quest.
Follow the marker down the road past the meadery and cross the bridge then climb the path up the hill and deal with the bandits. There are some loot items below including a pickable chest with a nice item and some gold in it. When you head inside the Watch above, you will encoutner Ulfr the Blind -- you will need to deal with him and a few other bandits before you continue deeper into the Watch, where you will find additional enemies to battle on your way to the exit to the White River Overwatch.
Outside you will encounter -- and kill -- the leader of the bandits Hajvarr Iron-Hand, who has some good loot items! Inside the chest nearby is the sword you are looking for. Take that and return to Amren to give it to him and be rewarded with some free lessons in one-handed battle!
Note that there is a lot of good lootables here, you may want to return to grab what seems prudent after you complete the quest.
This Miscellaneous Quest is flagged form Marise Aravel in Riften.
It is a simple fetch quest -- either hunt down and kill Ice Wrath or buy the Teeth from Alchemists and deliver them to her for your reward.
This Miscellaneous Quest is flagged by speaking with the old man Noster Eagle-Eye in Solitude. He can be found on the street near the Inn and the clothing shop.
The Burrow is a ways from town, but following the marker also reveals other locations so it is a worthwhile trip. Actually the real challenge in this quest is getting there, since once you arrive all that remains is killing a few Frost Trolls and then emptying the chest that has the helmet in it. Mischief Managed!
Now head back to give Noster his helmet and be rewarded with training in one level of Sneak!
Reading the book teaches you about the Gauldur Legend and flags this quest. You need to find the 3 parts of the amulet in Saarthal, Geirmund's Hall and Folgunthur -- but as you will be going to two of those places anyway for other quests and the story line you do not need to focus upon this quest at all until the end when you are clearing up unfinished quests!
You will have obtained the Fulgunthur and Saarhtal fragments as part of the story line quests or the Daedric Quests -- the Gerimund fragment you will have to actively seek out but that is not all that complicated! Simply head to Ivarstead and then east to the dungeon and go in!
Fall down the shaft and then climb out of the water and go through the door, killing spiders and undead. There are animal pillars inside -- set them to Eagle, Whale, Snake, Whale -- and then pick the lock on the door and go up. When you reach the raised bridge do NOT use the lever on the right near the edge as it triggers a trap! Instead turn around and look left, and use THAT lever to lower the bridge!
Battle your way across and through the trapped corridor doing your best to avoid the axes and then you will find the coffin of Sigdis Gauldursun in an alcove in the side of the flooded room ahead. Notice the two raised areas in the water? When you awaken his undead form he will go to those and alternate between them each time you hit him, shooting arrows at you. Simply pursue and kill him, then loot his body for the last fragment!
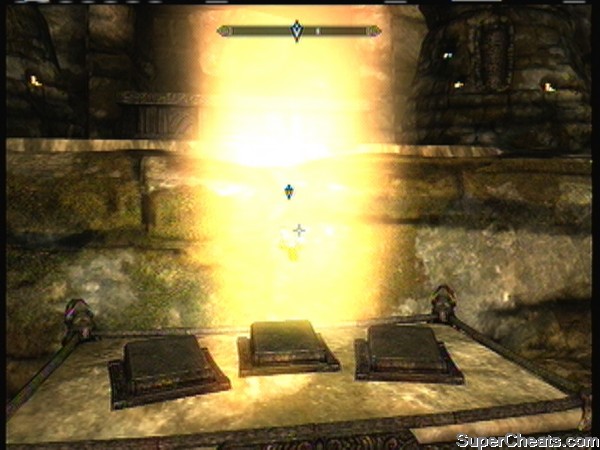
The Reforged Amulet
Now that you have that it is time to assemble and repair the pieces -- so head out of the dungeon and head to Reachwater Rock where you will finally get a chance to use some of the Dragon Claw Keys you have been carrying around!
The Emerald Claw on the pedestal unlocks the first lock (Bear, Whale, Snake top to bottom), and then the Ivory Claw unlocks the next lock (Eagle, Eagle, Dragon from top to bottom). Activate the pedestals on the table ahead three times to place the fragments and summon the spirits of the three brothers, then defeat them again to advance the quest.
WARNING: Do NOT jump up on the ledge behind the table to attack the two spirits there as you cannot kill them and, once on the ledge, you cannot get back down.
After you defeat the trio their father appears and repairs the amulet, you take it and the quest ends! Good on ya!
This is a simple delivery quest -- take the Frost Salts that the Court Wizard Farengar gave to you and deliver them to the Alchemist Arcadia at her shop in the town square.
After you deliver them she will pay you as your reward.
This Miscellaneous Quest is flagged from Corpulus Vinius, the Innkeeper at the Winking Skeever in Solitude when you ask if he has heard any rumors.
This is not so much a quest as it is directions to a location for you to discover -- the Blue Palace -- so simply head there and go inside to the throne room (Court) and this quest is completed.
On your way in or out of Whiterun you will run into Alik'r Warriors who are seeking a Redguard Woman who apparently has a bounty on her head... That flags this Side Quest, and the woman in question is actually Saadia in the Bannered Mare. If you go there and talk to her you get the option to warn her that the warriors are looking for her. She asks you to follow her so she can talk to you privately -- do that and she pulls a dagger on you! Instead of killing her just talk to her, and you will learn that she is a noble on the run with a death sentence. She needs you to get rid of the warriors -- drive them away before they locate her.
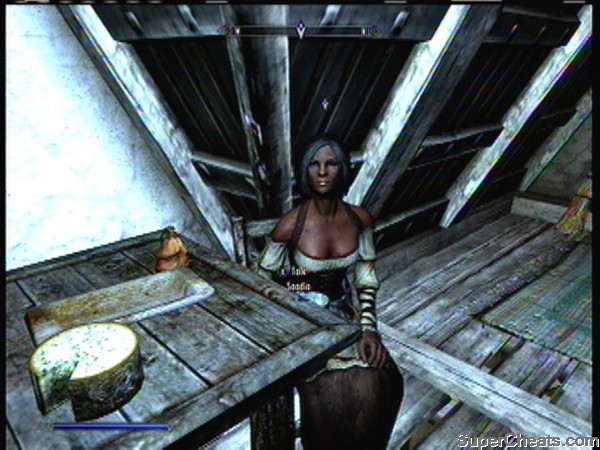
The Noble Traitor Saadia
One of the warriors is in the dungeon at the palace (to get there you need to go through the palace and through a door below the throne room), so that is the logical starting point. When you find him you have a choice to make -- you can rat her out, or you can help her.
The prisoner explains that he failed in his duties and is now an outcast -- but if you pay his fines he will give you the information you seek. So pay the fines already! Once you pay the fine he gives you the location -- so head to the cave and you will find that the reception there is a mixed one.
The bandits out front will try to kill you but the warriors will be willing to chat, and you learn that she is not the innocent in all this like she said. She betrayed her city and Jarl. You have a choice -- on the one hand you promised to help her, and killing these guys will do that. On the other, she is a traitor. It is your call.
As far as I am concerned a deal is a deal so I killed them. Either way kill them and head back or agree to do their bidding and head back, then deliver her to the stables as they said. Once you get your reward the quest is complete.
This can be flagged from Mikael the Bard in the Whiterun Inn before doing the quest for Carlotta with him... Or you can flag it from any bard you find in the lands through dialogue.
Travel to Solitude -- hopefully fast travel if you did the wagon rounds, otherwise catch a wagon there now!
Head through town to the College and go inside, where you will find Viarmo, the Headmaster. Talk to him to enroll, and that conversation flags the Side Quest Tending the Flames.
This Miscellaneous Quest is flagged from Corpulus Vinius, the Innkeeper at the Winking Skeever in Solitude when you ask if he has heard any rumors.
When you speak with him you flag the Side Quest The Mind of Madness.
This Miscellaneous Quest is flagged from Wilhelm the Innkeeper in Ivarstead.
Enter the Barrow to find a ghost warning you to leave. He is behind a closed gate -- to open it head to the opposite side of the champer and raise the left switch on the set on the right (when facing where the ghost was) and the left switch on the left. Now head into the now open other room. On the right as you enter is a door you can pick open -- to access a chest in a room with multiple boobytraps. You will probably get hit, I am just saying...
Across from the pickable door is a gate that you can open by pulling a chain -- at the end of that path you encounter the ghost -- Wyndelius Gotharion -- and kill him (? how do you kill a ghost ?). Well, end his existence anyway...
When you loot him you discover a potion called Philter of the Phantom that allows you to appear like a ghost -- so now you know that he was not a ghost at all! There is another potion on the table and there is his journal -- which when you read it you will learn that he came here searching for "The Claw" which, if I had to bet, I would have said it was the Golden Claw we used earlier. Obviously it was not however, as we end up finding the Sapphire Dragon Claw that is similar to to the Golden Claw -- I wonder what it unlocks?
The treasure hunter went a little nuts -- the journal proves that -- do grab the journal and take it back to Wilhelm to collect your reward!
When you arrive at the camp you will find a few Bandits outside defending it, and after you take them out head inside the mine that is inside the camp to go after the Bandit Leader -- taking out the other Bandits who are trying to prevent you from getting to him.
A significant find you may want to remember is that there are several Iron Ore mining spots inside here!
Inside there is a Bandit Mage you need to quickly kill, and then be careful not to allow the Leader to get a good swing of his Battleaxe or you will end up quickly dead! Keep your distance from him and use magic then dart in to hit him but do not let him hit you!
After you kill and loot the leader and the Bandit Mage, loot the table of the potions and ore, and the spell book Transmute Mineral Ore and. There is so much stuff here you may need to fast travel to town and sell off your loot so you can come back and loot some more!
In addition to regular loot there are also Mammoth Tusks and Snouts, and you will find a pickaxe that you can use to mine the ore that is here -- if you have also chopped wood (there is a wood chopping block outside in the camp) and cooked food, you will unlock the Achievement "Hard Worker" (10 GS) for Chopping Wood, Mining Ore, and Cooking Food!
After you mine the ore you can use the spell from the book you got here to transmute some or all into Silver and Gold Ore if you like -- the Blacksmith back in Whiterun has a Smelter you can use to make ingots out of it!
Head to Dragonsreach and claim your reward from the Seneschal Proventus before you do anything else, and be happy for a job well done and well rewarded!
This is a straight-forward kill the bandit leader quest with nothing exceptional that stands out. Simply head to the Watchtower and take out the bandits!
The Jarl's Seneschal Proventus Avenicci awards this Miscellaneous Quest when you ask him for work.
As you approach the Camp expect to be attacked -- your task is to clear it and that means taking out all of the bandits in the outer area, and then take out the leader and one or two bandits inside of the Camp. The biggest threat are the outside bandits, several of which know magic and use it against you!
After taking out the leader, return to Dragonsreach and turn in the quest for your reward!
This Misc Quest can be flagged from Jonno the Innkeeper in Morthal (technically it can be flagged from any Innkeeper in any city as it is a random job) and is a simple track and kill quest.
Northwid Summit is far to the east of Ivarstead north of Shar's Stone -- when you arrive you basically have to jump up the rocks to the summit to trigger the spawn and, once the dragon attacks you need to head down the summit to a relatively flat area as otherwise it will NOT land for you to kill it! So unless you can do air damage really well, head down to a flatter area. Note that there are bears and wolves in the area so bring extra potions just in case you have to deal with them AND the dragon!
Once you kill it you are instructed to collect the bounty from Anuriel -- who can be found in Riften which is not that far away. Though if you did the wagon circuit to flag all of the cities and towns you should be able to fast travel directly there!
When you arrive in town you will find her in the Keep, and she happily pays you the 500 gold bounty.
In my experience Giants are tough - but this one seems to be a weaker type because as long as you have your companion with you to draw his wrath you should be able to take him down with very little trouble. Once you have, simply turn the quest in by reporting to Prventis at Dragonsreach to collect your rward -- 100 gold.
This Miscellaneous Quest is flagged by speaking with the Court Wizard Sybille Stentor at the Blue Palace in Solitude. It is a simple kill mission, though you probably have not actually been to this cave at is a bit out of the way, so you will have to hoof it...
As you enter you will encounter some wolves -- easy kills -- and then deeper into the cave the Master Vampire and his Vampire Minions -- some of which are mages so go easy here, be sure you are ready to heal, and you should have little trouble with them! Be sure to empty the chest on the alter before you leave.
When you return to Sybille she the insufferable wench, she rewards us with a Gold Diamond Ring and a point of Destruction Magic for our troubles.
First, fair warning, this is going to be challenging...
This Side Quest can be flagged from Jonno the Innkeeper in Morthal, and involves looking into the deaths of the family of Hrogger -- a resident of the town who is suspected of setting the fire that burned his house and killed his family. Jonno mentions that he moved in with his lover only days after the fire, which is why everyone is suspicious...
Our first task is to speak with the Jarl -- who can be found in her home which is not a palace by any stretch of the imagination! Go through the conversation options and then learn her take on the situation... The Jarl charges you with the investigation, and you are now Inspector Detector!
At the house speak with the ghost of Hroggor's daughter and you will learn what she saw -- but she wants you to play hide and seek with her first, then she will tell you all. You agree but you also learn that something is not quite right here, as she speaks of the "Other One" but refuses to reveal who -- or what -- they are!
You have to wait until nighttime to play the game with her. After dark you will find her in her grave up the path behind the house, and you will find the Other -- Laelette the Vampire! It turns out that a Vampire tried to make the little girl a creature of the night, and she tells you to speak to Thonnir, one of the villagers.
From him you learn that his wife is missing -- he thinks dead -- and fears secretly that his wife was turned into a vampire as well! You need to investigate Alvo's House to learn the truth -- which you find in her cellar!
Read the journal before you take it -- it fills in all of the details and adds to the story. Take the journal with you when you leave and show it to the Jarl to reveal all and solve the mystery of the fire, the deaths, and a potential Vampire Invasion!
Before you can be rewarded however you need to perform one more task - slay the Master Vampire to end the threat! The Jarl organizes the town to assist you so lead them to the Lair and head inside, where you will find the Vampires. Save first, right?
As you make your way through the caverns you will encounter relatively weak Vampires and kill them, but save before you enter the final chamber as there are several stronger enemy there, and you may be glad you did... Because they do not follow Vampire Lore in this game and taking out the Master does not cause the minions to die.
Oh, by the way, the army of townsfolk? They chicken out.
The biggest problem that I had with this quest was keeping my companion alive -- I had to reload a dozen times before I was able to do it without Lydia doing something stupid and getting herself killed. Gah!
After you kill the Master Vampire and his minions you will see the little girl on the way out of the Lair -- she lets you know she is now at rest, which is a good thing. What a sad quest... Anyway head back to the Jarl and report your success! You get 1000 gold for your troubles -- not bad! She offers you the title of Thane if you are willing to help her people -- flagging the Miscellaneous Quest Assist the people of Hjaalmarch (a three-parter). Well done!
This Side Quest is flagged by speaking with Jaree-Ra in Solitude, and is started by speaking with the Innkeeper there about rumors to learn that Jaree-Ra may be hiring.
It develops that Jaree-Ra is a thief and ship-breaker, and he wants you to put out the fire in the lighthouse to cause a ship that is arriving to end up on the rocks, where he can loot it. For doing this, he explains, you will be properly rewarded.
When you arrive in Riften you will find Brynjolf in the market -- he wants you to steal the silver ring from the strongbox nearby when he causes a distraction, and then place it in Brand-Shei's pocket without him noticing. This flags the Side Quest A Chance Arrangement.
This Miscellaneous Quest is flagged from Mjoll the Lioness in the pub in Riften. She lost her favorite sword long ago and wants you to find it. It is located in the Mzinchofelt which is a large fortification and underground Dwarven labyrinth up to the northwest.
You have to battle your way through several groups of bandits both outside and inside, then some Dwarven mechs, and finally work out the puzzle of the switches to gain access to the valve that opens all of the gates inside!
Then you use the lever behind the door that they give access to to enter the Mineshaft, where you will then face a group of Falmer until you eventually reach the very heart of the facility -- the Gatehouse -- where you do battle with the biggest Dwarven Mech ever!
The sword is on a table where you defeat the huge mech -- so grab it and return to deliver it to Mjoll -- and then come back and loot the heck out of this place!
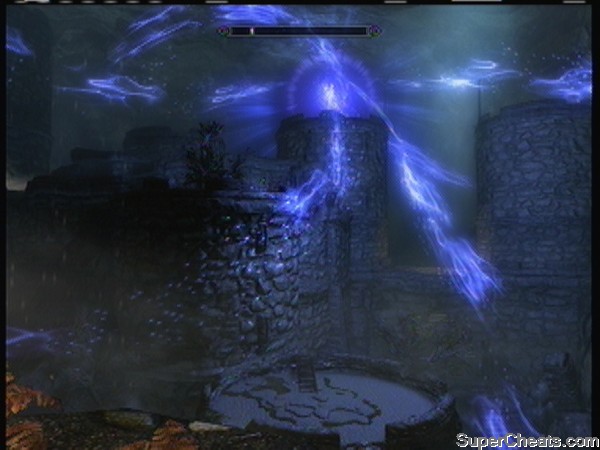
The Summoning Ritual
This Side Quest is flagged after speaking with Falk Firebeard in the Court at the Blue Palace in Solitude. You meet him in the process of delivering a bottle of Rum for the Innkeeper, and get the chat option to flag this Side Quest.
It is a straight-forward clearing quest -- you encounter some undead outside and, when you go inside you find that the cave has more of the same plus Necromancers inside. Once you drop down the hole at the back of the cave and zone into the next area you find a pretty amazing scene -- the Necromancers have a bloody fortress underground here and they are doing something major at its peak. Time to slay!
After you take out the head Necromancer on top of the left tower, use the lever to lower the bridge and exit through the middle of the right tower, then into the cave and out to Skyrim. Now return to the Blue Palace and talk to Falk to report what the Summoners were doing there -- and our success is stopping them from completing the rite. That wraps up this quest.
This is not really a Miscellaneous Quest since it does not appear in that list but it is included here so that you know how marriage works in the game... Maramal the Monk is in the Inn in Riften and if you talk to him you can obtain the special necklace that you need -- the Amulet of Mara -- in order to attract a mate and begin the process of getting married.
Pay him 200 gold for the Amulet of Mara and, when you find someone you want to marry wear it and if they are interested you can begin chat about it.
When you find the person you want to marry simply wear the Amulet and then talk to them -- they will ask if you are interested you say yes, they are interested, so you set a date. All you need to do then is return to Riften and talk to the Brother and the ceremony will commence the next morning.
This Miscellaneous Quest is flagged from Madesi in Riften Market. He needs a short list of supplies for this simple fetch quest.
Bring him a Gold Ore, 2 Flawless Sapphires, and a Mammoth Tusk and collect your reward!
This Side Quest is flagged by talking to Fralia Grey-Mane, a merchant at the stalls in Whiterun. After talking to her and flagging the quest she asks you to follow her home where she can tell you the entire story about her missing son. After you follow her to her house, her son freaks out and draws his weapon -- ignore that.
Talk to Fralia and learn what she has to tell you, and then talk to her son Avulstein Gray-Mane to learn the rest of what they think the story is... The conversation with him progresses the quest to the next stage,
You flag this Miscellaneous Quest from Svana Far-Shield at the Bunkhouse in Riften -- she wants to embarrass her tyrant of a boss by having you obtain the Marks from Indoryn, Hofgrir, and Bolli.
Simply follow the markers to each and talk to them, use persuade to convince them to give it to you, and then return to confront Haelga -- which gives you leverage over her. Speak to Svana to complete the quest and receive your reward.
You will find Sam in Whiterun at the Bannered Mare Inn -- when you talk to him and agree to his contest he stands and you take turns pounding down the brew! After three glasses of his special brew you find yourself waking up in a strange place -- triggering the Side-Quest A Night to Remember.
Head over to that Quest now to continue!
It's finally time -- this should be high enough level (with a handful of potions of course) to get to the sword and complete its quest!
Make sure that you have gone into the Miscellaneous Quests and flagged the one to find Red Eagle's Sword, then flag Miscellaneous and make sure none of the others are flagged so that you don't have multiple pointers on the compass.
With the quest set as your active one to follow the pointer. When you get outside check your map and you will see that we have a long and dangerous journey ahead of us! Hopefully you stocked up on everything you will need -- potions, that sort of thing -- right? It would also be an idea to make a save in case you run into trouble so you do not have to go back and re-flag the quest and all that.
Battle with Red Eagle
The most direct route means heading overland and not by road, but you will get to discover some new locations, including Fort Greymoor and Rorikstead. As you work your way closer to the destination be prepared to deal with Forsworn bandits -- there will be resistance!
As you work your way up the stairs you will face a committed band of defenders and, once you reach the top of the Sundered Towers there will be one leader that is marked -- he is who has the sword! Take him out and loot his body to recover the sword and trigger the second part of the quest!
-- Unlock the Secret of Red Eagle's Tomb --
Before you begin this stage make sure that you have a good weapon with you to use as you cannot use Red Eagle's Blade for this!
Now it is time to head for Rebel's Cairn and the next stage in this quest -- head inside and you will find a slotted stone inside into which you must stick the sword to begin unlocking its secrets (and upgrading it) so do that, and then continue into the cave.
Inserting the sword opens the way ahead, and when you approach the crypt inside a very powerful undead warrior -- Red Eagle himself -- will emerge with some summoned friends! You need to NOT attack him melee, as he will disarm you. You need to make use of your magic to really weaken him and then you can attack directly.
This quest is flagged from Greta -- the sister of Raggvir who was hung when you first entered Solitude -- in the process of completing the quest to chat with her that was given by her daughter. You hoped to convince her to return to Temple, but before she feels she can do that, she needs you to retrieve the amulet from her dead brother.
You need to go to the graveyard in town and enter the Catacombs, where you will find the Amulet of Talos -- actually the second we have found in the game -- but you have to steal it to take it and remember, no good deed goes unpunished! Anyway, take the Amulet back to Greta and you learn that she will now start going to Temple again. Well done!
This Miscellaneous Quest is flagged by speaking with Taarie, the owner of the Radiant Raiment Shop in Solitude. When you go through her chat options you will learn that she would pay to have you appear in the Blue Court wearing one of her outfits if you would just speak to the noble Elisif and ask for her opinion of the outfit...
Elisif is of course the new Jarl -- and when you speak with her she is favorably impressed with the outfit and asks you to pass on her compliments and plan to buy some dresses. Success!
Now head back to the shop to get your reward!
You will find the little girl Svari playing with a mate on the streets of Solitude -- it was her uncle who was being executed when we first entered the town, and you learn from her through chat that the event has had profound impact upon her parents. She wants her mother to attend the Temple -- and you to convince her to do so.
When you talk to her you learn that the issue is not as cut and dry as the daughter thought -- she needs you to retrieve an amulet from her brother's body... Flagging that quest completes this one.
This Miscellaneous Quest is flagged from Shadr in Riften. He has run into trouble with his horse business and needs to get out from under the debt that is crushing him -- you offer to help.
When you speak to her you learn she is a member of the Guild! Threaten to talk to the boss about her and she gives in immediately, agreeing to cancel the debt. Score!
Outside of Whiterun on the Pelagia Farm when you first arrive you can encounter a group of the Companions slaying a Giant. Talk to them to flag this quest.
The Leader is located in Jorrvaskr Building which is in the upper east section of Whiterun (turn east at the circle that leads to Dragonsreach). Enter the building and seek out the Leader, Kodlak Whitemane, who is sitting at a table downstairs in the building.
You can ask him a few questions first, then ask to join the Circle -- which triggers an argument between the Whitemane and his companion. Whitemane asks you how you are in battle - a little humility in your answer will not be far off base here -- and should trigger the next phase of this quest called "Take Up Arms" as a result.
Follow Vilkis outside and train with him -- but that only amounts to taking a few swings at him before he tells you to have his sword sharpened and gives it to you. Sheesh! Grunt work already?!
Take the sword to Eorlund Gray-Mane at the top of the path -- you can ask him a question that branches into other questions, and when you try to leave he asks you to do him a favor and deliver his shield. Hey, you are being tested, so cheerfully agree to do it, and then go do it!
Aela sends you to follow Farkas, who will show you to your quarters, completing the quest! You will now unlock the Achievement "Take Up Arms" (10 GS) for joining the Companions. Farkas will mention that there is work to be done -- ask what and accept the job to flag the first quest in the Companions Faction, Trouble in Skyrim.
See the Companions Faction Quest Section for the rest of their quests.
You will find Hofgrir Horse-Crusher in the Riften Stables. Talk to him and ask about how he feels living outside of the walls, which will lead you to a bet with him and a brawl. Make sure you leave your companion OUTSIDE because if you do not and you start to brawl with him, your companion will kill him, the guards will come, and everyone has a bad day!
After you beat him until he drops to his knees you win. Good on ya!
You will find the young boy Aventus in his home trying to cast the Black Sacrament as he is seeking an Assassin from the Dark Brotherhood?!
He wants you to accept a contract -- he was orphaned you see, and he was placed in an orphanage -- and he wants you to kill the woman running the orphanage, Grelad the Kind. Concluding the conversation results in flagging the Side Quest Innocence Lost, the first quest in the Dark Brotherhood Questline.
This Miscellaneous Quest is flagged from Octieve San, a Mendicant wandering the streets of Solitude. When you talk to him he tells you of his woes.
Irnskar Iron Hand is a bit of a hardass -- you basically have three options here, either pay the debt, persuade him, or intimidate him. Now your Speech should be capped, so persuade sounds like a good option and what do you know! It works!
Head back to Octieve to tell him the good news.
This Miscellaneous Quest is flagged from Corpulus Vinius, the Innkeeper at the Winking Skeever in Solitude when you ask if he has heard any rumors.
Simply seek out Jaree-Ra and talk to him.
This Miscellaneous Quest takes you to Falkreach to speak with the Blacksmith there, Lod. This is actually an important quest so you should do it -- and speaking to him reveals that he needs you to capture the stray dog that is outside of town.
Easy enough, right? But when you find the dog it talks! It not only talks, it actually is the NPC you need to talk to in order to flag the Side Quest A Daedra's Best Friend!
This quest is flagged by speaking to Carlotta Valentia in the Inn in Whiterun. Mikael the Bard has been trash talking her with his mates and you volunteer to deal with the matter.
Mikael is the bard playing in the same Inn that you meet Carlotta. When you talk to him you have several choices -- you can try bribing if you like, but really Persuading him is better and it gives more XP. Once you have persuaded him to leave her alone, return to Carlotta to give her the good news and collect your reward.
King Olaf's Verse
This Side Quest is flagged from Headmaster Viarmo at the Bard's College in Solitude as you complete the Miscellaneous Quest Investigate the Bard's College.
The basic facts are that the recent death of the King has caused the Queen to withdraw permission for the College to hold its annual festival, and the Headmaster thinks if you recover the long-lost copy of King Olaf's Verse and he can read it to the Queen that she will change her mind!
You do not need to actively pursue this quest because you will locate the verse as part of the process of completing the Words of Power in the main guide. When you have obtained the Book during the Words of Power Section you can then deliver it to the Headmaster, who will then ask you to help him fill in the missing sections. Once you do that, you go with him to the Jarl, he reads it, and the festival is back on!
Now you need to speak with Jorn letting him know that it is back on -- he tells you to return after dark so that you can get the festival started -- so wait till dark and talk to him again and then gather outside to watch the ceremony. Considering that the attendees are mostly the bards this was something of a disappointment... Viarmo gives you credit, and then lights the king up, and you are now a full member of the college! Good on ya!
When you talk to the Whiterun Court Wizard Farengar Secret-Fire and ask about Enchanting you will flag this quest -- simply find a weapon that has a magical property that you do not mind destroying and take it with you back to the Wizard's chamber in the palace.
Use the Arcane Enchanter that is behind his desk and you will have the option of learning the enchantment that is on the weapon -- be aware that doing so will destroy the weapon! Obviously you should not do this to any of the good weapons in the game -- but finding relatively worthless enchated weapons will be easy enough, in fact you will find one or two when you do the Dragontablet Quest, so wait until after that to complete this quest by learning the enchantment from one of the weapons you obtained on that quest.
Be sure to not accidentally use it on the ax that the Jarl gives you or one of the more valuable weapons like Red Eagles Sword, as that really would suck...
This quest can be flagged by asking any NPC who has the hook "Where can I learn more about Magic?" as a conversation option.
When you arrive in Winterhold head to the College where you will encounter Feralda blocking your way over the bridge. Speak with her and answer her question honestly -- in other words do not admit to selfish motives...
This starts the Mage Guild Questline.
At some point in your adventures a Courier will show up and hand you an invitation to the opening of a new museum in the town of Dawnstar. Thank him for flagging this quest for you!
When you arrive in town you will find Silus Vesuius, the Museum curator and founder, standing in front to greet you! Speaking to him flags the Side Quest Pieces of the Past.
Follow him inside and check out the "museum" and then speak with him -- if you played the previous game in the series (Oblivion) you will recognize the name of this organization -- they were the bloody enemy!
Speak to Hulda the Whiterun Innkeeper and ask her about rumors to flag this quest. The Shrine is in the far north near Winterhold, and getting there can be a bit of a trial...
The Shrine is on top of a mountain and can be a bit tricky to reach -- look for the valley with the arch over it and head through there, following the mountain around until you reach the Sightless Pit, then head up the path from there and you will have an easy time of it.
At the top when you reach the Shrine you will encounter Aranea Ienith, who claims that the Gods predicted your coming -- you are the Chosen One! That's right, Azura has picked you to be Her Champion.
After you agree to this, you flag the Side Quest The Black Star.
When you enter the Alchemist Shop in Windhelm you are not able to buy anything at first -- instead when you talk to Nurelion he asks you to help him in locating and retrieving the White Phial from the Forsaken Cave. He explains that he is in the last stages of a fatal illness but that he has tracked down a legendary artifact that may be able to save him -- The White Phial.
This is a straight forward retrieval quest -- just head to the cave fight your way in, grab the Phial and return to him. When you do return the phial to Nurelion it turns out to be cracked -- we did not do that it was like that when we found it -- and he is upset. He pays us 5 gold pieces (whaaaat?!) and tells us to leave. On the way out talk to his assistant, Quintus Navale, for your actual reward.
A few days after you complete the Side Quest "A White Phial" you are approached by a messenger with a Letter from Quintus Navale. Reading the letter flags this Side Quest, and you need to head back to Windhelm to speak with him to learn that there may be a way to repair the Phial. He needs you to bring him some quest items -- Unmelting Snow, Mammoth Tusk Powder and one Forsworn Briar Heart.
The other two items require you to get them from specific locations.
Unmelting Snow can be found on the Throat of The World, and the Mammoth Tusk Powder is in a large vat beside the giants at Stonehill Bluff -- so after you speak with him head there to grab them.
WARNING: If you have been dealing with the Forsworn you may already have a Briarheart in which case the guides online will tell you that you cannot complete the quest because it is now bugged. It is supposed to be fixed in a future update. This is NOT true.
It is true that you cannot remove the Briarhearts by dropping or selling them, BUT there is a forge in the Midden at the Mage's College (you access it via a trap door in the courtyard outside) that you CAN place the Briarhearts in. So if you have some in your inventory and cannot complete the quest, head to the Midden and put them in the offering box of the forge and THEN you can complete the quest!
If you do not have a Briarheart, you get that from the body of a dead Forsworn so go make some dead!
After he repairs the Phial he goes upstairs to show it to Nurelion, who then promptly dies. Whhaattt?!
Your reward is the Phial itself, however Quintus Navale is NOT an expert or a master at the craft, and as a result, he is not skilled enough to recalibrate the phial, so it will only be able to regenerate one kind of liquid. You have to decide which:
-- Healing. ( 100 health)
-- Magic. ( 20 magicka for 300 seconds)
-- Magic Resist. (20% magic resist for 60 seconds)
-- One-Handed. ( 50% to one handed damage for 60 seconds)
-- Sneak. (20% harder to detect for 60 seconds)
-- Stamina. ( 20 stamina for 300 seconds)
Once you make the choice this remains in your inventory. You can use it, and then it will refill after a day on its own. Well done! That is another Side-Quest done!
The craft of Alchemy requires that you gather the ingrediants that are required for a given potion, and learning what you can use and then making them will save you a LOT of gold in this game, so do not overlook this craft!
Below are the Ingredients and the Recipes that you can make from them...
Each alchemical ingredient has four basic effects; you can discover the first simply by tasting that ingredient. You find the remaining three effects of the ingredient by testing and experimenting with these ingredients, or you just read the list below...
- A -
Abecean Longfin
- B -
Bear Claws -- From bear bodies
Bee
Beehive Husk
Berit’s Ashes
Bleeding Crown -- Inside of Halted Stream Camp / White River Watch
Blisterwort
Blue Butterfly Wing
Blue Dartwing
Blue Mountain Flower
Bone Meal
Briar Heart
Butterfly Wing
- C -
Canis Root
Charred Skeever Hide
Chaurus Eggs
Chicken’s Egg
Creep Cluster
Crimson Nirnroot
Cyrodilic Spadetail
- D -
Daedra Heart
Deathbell
Dragon’s Tongue
Dwarven Oil
- E -
Ectoplasm
Elves Ear
Eye of Sabre Cat
- F -
Falmer Ear
Fire Salts
Fly Amanita -- Inside of Halted Stream Camp / White River Watch
Frost Mirriam -- White River Watch
Frost Salts
- G -
Garlic
Giant Lichen
Giant’s Toe
Glow Dust
Glowing Mushroom
Grass Pod
- H -
Hagraven Claw
Hagraven Feathers
Hanging Moss
Hawk Beak
Hawk Feathers
Histcarp
Honeycomb -- White River Watch
Human Flesh
Human Heart
- I -
Ice Wraith Teeth
Imp Stool -- White River Watch
- J -
Jarrin Root
Jazbay Grapes
Juniper Berries
- L -
Large Antlers
Lavender
Luna Moth Wing
- M -
Moon Sugar
Mora Tapinella -- On fallen logs
Mudcrab Chitin
- N -
Namira’s Rot -- White River Watch
Nightshade
Nirnroot
Nordic Barnacle
- O -
Orange Dartwing
- P -
Pearl
Pine Thrush Egg
Powdered Mammoth Tusk
Purple Mountain Flower
- R -
Red Mountain Flower
River Betty
Rock Warbler Egg
- S -
Sabre Cat Tooth
Salt Pile -- Looted / White River Watch
Scaly Pholiota
Silverside Perch
Skeever Tail
Slaughterfish Egg
Slaughterfish Scales
Small Antlers
Small Pearl
Snowberries
Spider Egg
Spriggan Sap
Swamp Fungal Pod
- T -
Taproot
Thistle Branch
Torchbug Thorax
Troll Fat
Tundra Cotton
- V -
Vampire Dust
Void Salts
- W -
Wheat
White Cap -- Inside of Halted Stream Camp / White River Watch
Wisp Wrappings
Each of the Recipes has specific ingredients that are required, and these are listed and followed by their position in the recipe -- marked with a number in brackets -- which indicates the ingredient effect, being (1) primary, (2) secondary, (3) tertiary, or (4) quaternary. If you look at the ingredients list above for the specific entry you will see that each has known effects, and by examining all of the ingredients required for a recipe you will better understand the synergy that goes into making that recipe!
There are two basic forms of recipes -- potions, which are positive effects, and poisons, which are negative -- so when you combine the two positive ingredients you create a potion, and the negative ingredients create a poison. Potions can be used to heal or correct conditions, while poisons can be applied to your weapons to make them more lethal.
Arcadia’s Shop in Whiterun.
Dustman’s Cairn
Inside Rannveig’s Fast’s Dungeon.
Riverwood: Sleeping Giant Inn
Cure Disease
Charred Skeever Hide (2)
Hawk Feathers (1)
Mudcrab Chitin (2)
Vampire Dust (4)
Damage Health
Crimson Nirnroot (1)
Deathbell (1)
Ectoplasm (4)
Falmer Ear (1)
Human Flesh (1)
Human Heart (1)
Imp Stool (1)
Jarrin Root (1)
Nightshade (1)
Nirnroot (1)
Red Mountain Flower (4)
River Betty (1)
Skeever Tail (3)
Small Antlers (4)
Troll Fat (4)
Void Salts (3)
Damage Magicka
Butterfly Wing (4)
Chaurus Eggs (3)
Daedra Heart (3)
Eye of Sabre Cat (3)
Glow Dust (1)
Hagraven Feathers (1)
Hanging Moss (1)
Human Heart (2)
Jarrin Root (2)
Luna Moth Wing (1)
Namira’s Rot (1)
Nordic Barnacle (1)
Damage Magicka Regen
Bear Claws (4)
Blue Butterfly Wing (3)
Blue Mountain Flower (4)
Chicken’s Egg (2)
Glow Dust (2)
Hanging Moss (3)
Human Heart (3)
Jarrin Root (4)
Nightshade (2)
Spider Egg (2)
Spriggan Sap (1)
Damage Stamina
Berit’s Ashes (1)
Blisterwort (1)
Blue Butterfly Wing (1)
Bone Meal (1)
Canis Root (1)
Crimson Nirnroot (2)
Cyrodilic Spadetail (1)
Giant’s Toe (1)
Jarrin Root (3)
Nirnroot (2)
Rock Warbler Egg (3)
Spider Egg (1)
Damage Stamina Regen
Creep Cluster (2)
Daedra Heart (2)
Frost Mirriam (4)
Giant’s Toe (4)
Histcarp (3)
Juniper Berries (4)
Large Antlers (4)
Silverside Perch (2)
Skeever Tail (1)
Wheat (3)
Fear
Blue Dartwing (4)
Cyrodilic Spadetail (3)
Daedra Heart (4)
Namira’s Rot (3)
Powdered Mammoth Tusk (4)
Fortify Alteration
Grass Pod (3)
River Betty (2)
Spriggan Sap (4)
Fortify Barter
Butterfly Wing (2)
Dragon’s Tongue (2)
Hagraven Claw (4)
Tundra Cotton (4)
Fortify Block
Bleeding Crown (2)
Briar Heart (2)
Honeycomb (2)
Pearl (2)
Slaughterfish Scales (4)
Tundra Cotton (3)
Fortify Carry Weight
Creep Cluster (3)
Giant’s Toe (3)
Hawk Beak (3)
River Betty (4)
Scaly Pholiota (4)
Wisp Wrappings (3)
Fortify Conjuration
Berit’s Ashes (3)
Blue Butterfly Wing (2)
Blue Mountain Flower (2)
Bone Meal (3)
Frost Salts (4)
Hagraven Feathers (2)
Lavender (4)
Fortify Destruction
Beehive Husk (4)
Ectoplasm (2)
Glow Dust (3)
Glowing Mushroom (2)
Nightshade (4)
Wisp Wrappings (2)
Fortify Enchanting
Blue Butterfly Wing (4)
Hagraven Claw (3)
Snowberries (2)
Spriggan Sap (2)
Fortify Health
Bear Claws (2)
Blue Mountain Flower (3)
Giant’s Toe (2)
Glowing Mushroom (4)
Hanging Moss (2)
Wheat (2)
Fortify Heavy Armor
Ice Wraith Teeth (2)
Sabre Cat Tooth (2)
Slaughterfish Scales (3)
Thistle Branch (4)
White Cap (2
Fortify Illusion
Beehive Husk (2)
Hawk Feathers (2)
Honeycomb (3)
Luna Moth Wing (2)
Skeever Tail (4)
Fortify Light Armor
Beehive Husk (2)
Hawk Feathers (2)
Honeycomb (3)
Luna Moth Wing (2)
Skeever Tail (4)
Fortify Lockpicking
Falmer Ear (4)
Namira’s Rot (2)
Pine Thrush Egg (2)
Spider Egg (3)
Fortify Magicka
Briar Heart (4)
Ectoplasm (3)
Histcarp (2)
Jazbay Grapes (2)
Red Mountain Flower (3)
Tundra Cotton (2)
Void Salts (4)
Fortify Marksman
Canis Root (3)
Elves Ear (2)
Juniper Berries (2)
Spider Egg (4)
Fortify One-handed
Bear Claws (3)
Canis Root (2)
Hanging Moss (4)
Hawk Feathers (3)
Rock Warbler Egg (2)
Small Pearl (2)
Fortify Pickpocket
Blue Dartwing (2)
Nordic Barnacle (4)
Orange Dartwing (3)
Slaughterfish Egg (2)
Fortify Restoration
Abecean Longfin (4)
Cyrodilic Spadetail (2)
Salt Pile (2)
Small Antlers (2)
Small Pearl (3)
Fortify Smithing
Blisterwort (4)
Glowing Mushroom (3)
Sabre Cat Tooth (3)
Spriggan Sap (3)
Fortify Sneak
Abecean Longfin (2)
Beehive Husk (3)
Frost Mirriam (2)
Hawk Feathers (4)
Human Flesh (4)
Powdered Mammoth Tusk (2)
Purple Mountain Flower (2)
Fortify Stamina
Chaurus Eggs (2)
Garlic (2)
Large Antlers (2)
Lavender (2)
Slaughterfish Egg (4)
Torchbug Thorax (4)
Fortify Two-handed
Dragon’s Tongue (4)
Fly Amanita (2)
Troll Fat (2)
Frenzy
Blisterwort (2)
Falmer Ear (2)
Fly Amanita (3)
Hagraven Feathers (3)
Human Heart (4)
Troll Fat (3
Invisibility
Chaurus Eggs (4)
Crimson Nirnroot (3)
Ice Wraith Teeth (3)
Luna Moth Wing (4)
Nirnroot (3)
Vampire Dust (1)
Lingering Damage Health
Imp Stool (2)
Mora Tapinella (2)
Orange Dartwing (4)
Slaughterfish Egg (3)
Slaughterfish Scales (2)
Lingering Damage Magicka
Hagraven Claw (2)
Purple Mountain Flower (3)
Swamp Fungal Pod (2)
Torchbug Thorax (2)
Wheat (4)
Lingering Damage Stamina
Butterfly Wing (3)
Chicken’s Egg (4)
Nightshade (3)
Small Antlers (3)
Paralysis
Briar Heart (3)
Canis Root (4)
Human Flesh (2)
Imp Stool (3)
Swamp Fungal Pod (3)
Ravage Health
Cyrodilic Spadetail (4)
Eye of Sabre Cat (2)
Giant Lichen (2)
Jazbay Grapes (4)
Silverside Perch (3)
Skeever Tail (2)
Ravage Magicka
Frost Mirriam (3)
Grass Pod (2)
Lavender (3)
Orange Dartwing (2)
Red Mountain Flower (2)
White Cap (4)
Ravage Stamina
Bee (2)
Berit’s Ashes (4)
Bone Meal (4)
Deathbell (2)
Honeycomb (4)
Thistle Branch (2)
Regenerate Health
Garlic (4)
Juniper Berries (3)
Luna Moth Wing (3)
Namira’s Rot (4)
Nordic Barnacle (3)
Vampire Dust (3)
Regenerate Magicka
Dwarven Oil (3)
Fire Salts (4)
Garlic (3)
Jazbay Grapes (3)
Moon Sugar (4)
Salt Pile (4)
Taproot (3)
Regenerate Stamina
Bee (3)
Fly Amanita (4)
Mora Tapinella (3)
Scaly Pholiota (3)
Resist Fire
Berit’s Ashes (2)
Bone Meal (2)
Dragon’s Tongue (1)
Elves Ear (4)
Fire Salts (2)
Fly Amanita (1)
Mudcrab Chitin (4)
Snowberries (1)
Resist Frost
Frost Mirriam (1)
Frost Salts (2)
Hawk Beak (2)
Moon Sugar (2)
Purple Mountain Flower (4)
Silverside Perch (4)
Slaughterfish Scales (1)
Small Pearl (4)
Snowberries (3)
Thistle Branch (1)
Resist Magic
Bleeding Crown (4)
Chicken’s Egg (1)
Crimson Nirnroot (4)
Hagraven Claw (1)
Lavender (1)
Nirnroot (4)
Tundra Cotton (1)
Void Salts (2)
Wisp Wrappings (4)
Resist Poison
Beehive Husk (1)
Charred Skeever Hide (3)
Falmer Ear (3)
Garlic (1)
Grass Pod (1)
Mudcrab Chitin (3)
Slaughterfish Egg (1)
Thistle Branch (3)
Troll Fat (1)
Resist Shock
Blue Dartwing (1)
Glow Dust (4)
Glowing Mushroom (1)
Hawk Beak (4)
Pearl (4)
Pine Thrush Egg (4)
Snowberries (4)
Swamp Fungal Pod (1)
Restore Health
Blisterwort (3)
Blue Dartwing (3)
Blue Mountain Flower (1)
Butterfly Wing (1)
Charred Skeever Hide (4)
Daedra Heart (1)
Eye of Sabre Cat (4)
Imp Stool (4)
Rock Warbler Egg (1)
Swamp Fungal Pod (4)
Wheat (1)
Restore Magicka
Briar Heart (1)
Creep Cluster (1)
Dwarven Oil (4)
Ectoplasm (1)
Elves Ear (1)
Fire Salts (3)
Frost Salts (3)
Giant Lichen (4)
Grass Pod (4)
Human Flesh (3)
Moon Sugar (3)
Mora Tapinella (1)
Pearl (3)
Red Mountain Flower (1)
Taproot (4)
Vampire Dust (2)
White Cap (3)
Restore Stamina
Bear Claws (1)
Bee (1)
Charred Skeever Hide (1)
Eye of Sabre Cat (1)
Hawk Beak (1)
Histcarp (1)
Honeycomb (1)
Large Antlers (1)
Mudcrab Chitin (1)
Orange Dartwing (1)
Pearl (1)
Pine Thrush Egg (1)
Powdered Mammoth Tusk (1)
Purple Mountain Flower (1)
Sabre Cat Tooth (1)
Silverside Perch (1)
Small Pearl (1)
Torchbug Thorax (1)
Wisp Wrappings (1)
Slow
Deathbell (3)
Large Antlers (3)
River Betty (3)
Salt Pile (3)
Waterbreathing
Chicken’s Egg (3)
Histcarp (4)
Nordic Barnacle (2)
Weakness to Fire
Bleeding Crown (1)
Frost Salts (1)
Ice Wraith Teeth (4)
Juniper Berries (1)
Moon Sugar (1)
Powdered Mammoth Tusk
Weakness to Frost
Abecean Longfin (1)
Elves Ear (3)
Fire Salts (1)
Ice Wraith Teeth (1)
White Cap (1)
Weakness to Magic
Creep Cluster (4)
Dwarven Oil (1)
Jazbay Grapes (1)
Rock Warbler Egg (4)
Salt Pile (1)
Scaly Pholiota (1)
Taproot (1)
Torchbug Thorax (3)
Weakness to Poison
Abecean Longfin (3)
Bleeding Crown (3)
Chaurus Eggs (1)
Deathbell (4)
Giant Lichen (3)
Pine Thrush Egg (3)
Sabre Cat Tooth (4)
Small Antlers (1)
Weakness to Shock
Bee (4)
Giant Lichen (1)
Hagraven Feathers (4)
Void Salts (1)
Generally speaking the fastest way to raise this skill is to make things. Iron Ore is easy to obtain and Iron Daggers will rapidly level you, so focusing upon those to start is a good idea. As you Level you want to add additional skills to your Smithing -- Elven and Dwarven Smithing are a given -- but your main goal is to get Smithing to 60 so you can improve Enchanted items!
Obtaining ore is key to leveling your Smithing Skill, but the ore veins have fairly long re-spawn times to them, so you will need to alternate this into your game play -- every two months in the game you should make the ore circuit, since that pretty much guarantees that the veins will be available again. At least it did for me...
The following are reliable sources for the different ore:
Corundum Ore
-- Halted Stream Camp (1 Vein)
Ebony Ore
-- Gloombound Mine (15 Veins)
-- Redbelly Mine (3 Veins)
Iron Ore
-- Mountain Areas (it is common everywhere)
-- Embershard Mine (8 Veins)
-- Gloombound Mine (5 Veins)
-- Halted Stream Camp (15 Veins)
Quicksilver Ore
-- Quicksilver Mine (5 Veins)
Moonstone Ore
-- Soljund's Sinkhole (5 Veins)
Orichalcum Ore
-- Dushnikh Mine (7 Veins)
Silver Ore
-- Sanuarach Mine (7 Veins)
Gold Ore
-- Kolskeggr Mine (20 Veins)
Malachite Ore
-- Steamscorch Mine (7 Veins)
There are a total of 50 Achievements that are worth 1000 GS in the game. For the most part they are unlocked through normal game play, with the exception of the Achievement for collecting 15 Daedric Artifacts which you need to be careful with in not missing any. Those quests are covered in detail in the guide.
Adept (10 GS) Reach Level 10
Alduin's Wall (20 GS) Complete "Alduin's Wall"
Apprentice (5 GS) Reach Level 5
Artificer (10 GS) Make a smithed item, an enchanted item, and a potion
Bleak Falls Barrow (10 GS) Complete "Bleak Falls Barrow"
Blessed (10 GS) Select a Standing Stone blessing
Blood Oath (10 GS) Become a member of the Circle
Bound Until Death (10 GS) Complete "Bound Until Death"
Citizen (10 GS) Buy a house
Daedric Influence (10 GS) Acquire a Daedric Artifact
Darkness Returns (10 GS) Complete "Darkness Returns"
Delver (40 GS) Clear 50 dungeons
Diplomatic Immunity (20 GS) Complete "Diplomatic Immunity"
Dragon Hunter (20 GS) Absorb 20 dragon souls
Dragon Soul (10 GS) Absorb a dragon soul
Dragonslayer (50 GS) Complete "Dragonslayer"
Elder Knowledge (20 GS) Complete "Elder Knowledge"
Expert (25 GS) Reach Level 25
Explorer (40 GS) Discover 100 Locations
The Eye of Magnus (30 GS) Complete "The Eye of Magnus"
The Fallen (20 GS) Complete "The Fallen"
Gatekeeper (10 GS) Join the College of Winterhold
Glory of the Dead (30 GS) Complete "Glory of the Dead"
Golden Touch (30 GS) Have 100,000 gold
Hail Sithis! (30 GS) Complete "Hail Sithis!"
Hard Worker (10 GS) Chop wood, mine ore, and cook food
Hero of Skyrim (30 GS) Capture Solitude or Windhelm
Hero of the People (30 GS) Complete 50 Misc Objectives
Married (10 GS) Get married
Master (50 GS) Reach Level 50
Master Criminal (20 GS) Bounty of 1000 gold in all nine holds
Oblivion Walker (30 GS) Collect 15 Daedric Artifacts
One with the Shadows (30 GS) Returned the Thieves Guild to its former glory
Reader (20 GS) Read 50 Skill Books
Revealing the Unseen (10 GS) Complete "Revealing the Unseen"
Sideways (20 GS) Complete 10 side quests
Skill Master (40 GS) Get a skill to 100
Snake Tongue (10 GS) Successfully persuade, bribe, and intimidate
Standing Stones (30 GS) Find 13 Standing Stones
Take Up Arms (10 GS) Join the Companions
Taking Care of Business (10 GS) Join the Thieves Guild
Taking Sides (10 GS) Join the Stormcloaks or the Imperial Army
Thief (30 GS) Pick 50 locks and 50 pockets
Thu'um Master (40 GS) Learn 20 shouts
Unbound (10 GS) Complete "Unbound"
Wanted (10 GS) Escape from jail
War Hero (10 GS) Capture Fort Sungard or Fort Greenwall
The Way of the Voice (20 GS) Complete "The Way of the Voice"
With Friends Like These… (10 GS) Join the Dark Brotherhood
Words of Power (10 GS) Learn all three words of a shout


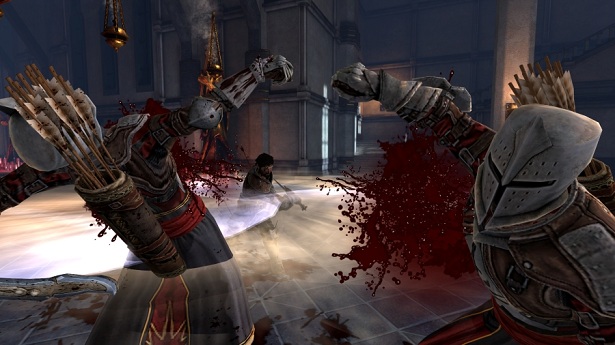 Dragon Age 2 Demo Walkthrough
 Check out Fabolous She Wildin ft. Chris Brown
 Top 15 Best Medieval Games
 Smoke Detector Battle: Roost Smart Battery Vs Nest Protect
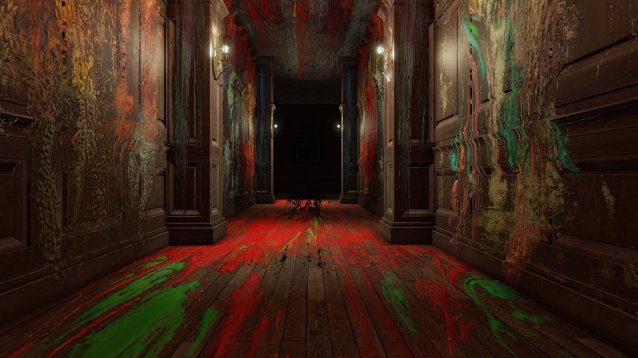 Review: Layers of Fear - Satisfyingly Scary