
The Elder Scrolls IV is an open-ended first-person role playing game developed by Bethesda Softworks and published by 2K Games. First released in March of 2006, the game features a staggering amount of content that remains unmatched by nearly every other single player experience released since. Oblivion takes players to the province of Cyrodiil, which is currently under siege by the Daedric Lord Mehrunes Dagon. It's up to you to find the Emperor's lost heir and shut the Oblivion Gates that have been popping up all over Cyrodiil.
This is your complete guide to The Elder Scrolls IV. Every quest is covered in great detail, including all of the add-ons, the Knights of the Nine questline, and the Shivering Isles expansion pack.
Note: This guide was written based on the Xbox 360 version of the game. Nevertheless, this guide can still be used in conjunction with the PC or PlayStation 3 version, as the only major difference between the three versions of the original game is the control scheme.
Xbox 360 Controls
Left Bumper - Grab objects (press and hold while cursor is over an object).
Left Trigger - Hold to switch to camera.
Right Bumper - Cast selected spell.
Right Trigger - Attack with equipped weapon.
Left Stick - Move your character.
Right Stick - Look left, right, up, or down.
Left Thumbstick Button - Toggle Sneak Mode on and off.
Right Thumbstick Button - Press to switch between first and third person viewpoints. Hold down to enter Vanity Mode. While in Vanity Mode, use the left and right triggers to zoom the camera in and out.
Y Button - Jump.
B Button - View Journal.
A Button - Context-sensitive activation.
X Button - Ready Weapon/Torch.
D-pad Buttons - Activate set hotkeys. Set hotkeys through the character inventory menu.
Back Button - Open the wait menu.
Start Button - Pause the game and open the start menu.
PlayStation 3 Controls
L1 Button - Grab objects (press and hold while cursor is over an object).
L2 Button - Hold to switch to camera.
R1 Button - Cast selected spell.
R2 Button - Attack with equipped weapon.
Left Stick - Move your character.
Right Stick - Look left, right, up, or down.
L3 Button - Toggle Sneak Mode on and off.
R3 Button - Press to switch between first and third person viewpoints. Hold down to enter Vanity Mode. While in Vanity Mode, use the left and right triggers to zoom the camera in and out.
Triangle Button - Jump.
Circle Button - View Journal.
X Button - Context-sensitive activation.
Square Button - Ready Weapon/Torch.
D-pad Buttons - Activate set hotkeys. Set hotkeys through the character inventory menu.
Select Button - Open the wait menu.
Start Button - Pause the game and open the start menu.
PC Controls
To view a full list of controls while playing the PC version of The Elder Scrolls IV: Oblivion, press the Esc button to pause the game, and select the Controls option at the bottom of the list. On the Controls menu, click the Controls button in the bottom-right corner of the box.
There are different types of weapons in Oblivion: Blade, Blunt, and Ranged. The Blade classification encompasses daggers, short swords, long swords, claymores, and so on. The Blunt encompasses anything from maces and hammers to one-handed and two-handed axes. Weapons are also further classed as either one-handed or two-handed. With two-handed weapons, while you have the benefit of a slightly more powerful weapon, you lose the extra defence of a shield that could be used in conjunction with a one-handed weapon.
The amount of damage a weapon will deal is dependent on several factors. The strength of a melee weapon is dependent on your character's weapon skill level, the condition of the weapon, and the weapon itself. For example, if your character's Blade skill level is higher than their Blunt skill level, the damage dealt using a Blade weapon would be much higher than the damage dealt with a Blunt weapon. The damage dealt using a Ranged weapon is dependent on your character's Marksman skill level, the bow itself, as well as your character's Agility attribute.
There are two different types of melee attacks: basic attacks and power attacks. To perform a power attack, hold down RT/R2 and push the Right Stick in a certain direction. Level up your skills to reach new mastery levels. Each time a new mastery level is reached, a new power attack will be unlocked. A Novice in Blade or Blunt can perform a basic power attack by holding down RT/R2 and pushing the Right Stick in any direction. An Apprentice of Blade or Blunt can perform a more powerful power attack by holding RT/R2 without moving the Right Stick. A Journeyman of Blade or Blunt can perform an additional power attack by holding down RT/R2 and moving the Right Thumbstick to the left or right. Experts gain another power attack (hold RT/R2 and pull back on the Right Stick) that has a chance of knocking an opponent back. Finally, a Master of Blade or Blunt gains a forward power attack (hold RT/R2 and push up on the Right Stick) that has a chance of paralyzing the target.
When using a Ranged weapon, hold down RT/R2 to pull the bowstring to its full extension, and then release RT/R2 to release the arrow. Aim upward to adjust the distance. When your character reaches the Journeyman mastery, you can then zoom in by holding down LT/L2. To learn about the perks unlocked at higher mastery levels, refer to the “Skills” section of this guide.
Blocking is an important part of combat. You can block with a weapon, but a shield is more effective, and you won't damage your weapon with one. A shield can only be equipped with a one-handed weapon.
Weapons deteriorate with regular use. When the condition of the weapon drops to zero, it becomes unusable. A damaged weapon won't deal as much damage as it normally would, and damaged pieces of armour are less effective at absorbing damage. Use a Repair Hammer to repair damaged equipment. With a higher Armorer skill level there is less of a chance of a Repair Hammer breaking while being used. Enchanted equipment cannot be repaired until the Journeyman mastery level. You can, however, bring your damaged equipment to just about any weapon and armour store and have the shopkeeper fix it for a price.
There are six different colleges of magic. Each school has different types of spells associated with it.
Destruction: Cast spells to inflict magical Fire, Frost, and Shock damage or lower resistances to magic attacks.
Alteration: Cast spells to increase underwater breathing capacity, walk on water, open locks, shield yourself from physical or magical attacks, and alter encumbrance.
Illusion: Cast spells to charm, conceal, create light, silence, paralyze, command, and affect morale or aggressiveness.
Conjuration: Cast spells to summon demonic creatures, magical weapons and armour, and turn the undead.
Mysticism: Cast spells to absorb, reflect, and dispel magic. Move objects, sense life, and bind souls.
Restoration: Cast spells to restore, fortify or absorb physical and magic attributes, cure diseases and resist magic attacks.
Characters geared toward stealth focus on avoiding detection and surprising the enemy. The heart of stealth is Sneak Mode. To toggle Sneak Mode simply click the Left Stick. While in Sneak Mode, an eye icon will appear in the middle of the display. If the icon is faded, your character is effectively hidden. If the icon is bright and solid, your character has been detected.
Several factors affect your chance of being detected by an NPC; the weight of your character's boots, the amount of light in a location, and movement speed all have an effect. It's a good idea to avoid casting spells while sneaking, as doing so is sure to generate light. As your character's Sneak skill level increases and you reach new mastery levels, the role that the above factors play in determining the chance that your character will be detected are diminished. To learn about the perks unlocked at higher mastery levels, refer to the “Skills” section of this guide.
While in Sneak Mode, one can perform a sneak attack for bonus damage on unwitting enemies. With ranged weapons, the damage dealt is multiplied by three, and with one-handed weapons the damage is multiplied by six. A sneak attack cannot be performed with a two-handed weapon.
With each level your character gains you can allocate points to three attributes. Each attribute has an effect on your character; raising an attribute will enhance that effect. Below is a listing of each attribute and how they affect your character.
Strength: How much you can carry, your Fatigue, and damage dealt with melee weapons. Governs Blunt, Blade, and Hand to Hand.
Intelligence: Total Magicka. Governs Alchemy, Conjuration, and Mysticism.
Willpower: Magicka regeneration rate and amount of Fatigue. Governs Destruction, Alteration, and Restoration.
Agility: Reduces the likelihood of losing balance when struck by an enemy. Affects how much damage is dealt with Ranged weapons. Governs Security, Sneak, and Marksman.
Speed: Determines movement speed. Governs Athletics, Light Armor, and Acrobatics.
Endurance: Affects total Fatigue, Health, and how much total Health increases with each level gained (one-tenth of Endurance attribute). Governs Block, Armorer and Heavy Armor.
Personality: Affects NPCs default disposition. Governs Speechcraft, Mercantile, and Illusion.
Luck: Has an effect on everything you do. For example, the probability of receiving rare items from random drops increases with the Luck attribute.
The levelling system in Oblivion is quite different from that of most RPGs. You do not gain experience points by killing monsters. Instead, character levels are gained by levelling up major skills. Thus, the seven major skills chosen during the character creation process are very important. To gain one level, you must raise any combination of your seven major skills ten times.
There are three different ways to raise skill levels. The simplest way is to use the skill over and over; the lower the skill level, the easier it is to increase. It takes more time to level up a skill with each level gained. Alternatively, you can pay an NPC to train your character in a specific skill. First, you must find a trainer that has a mastery level higher than yours in the skill you wish to increase. There is a limit of five trained levels per character level. You may also come across Skill Books; when read, you will gain one level in the skill tied to that book.
When a level is gained, a message will appear in the top-left corner of the screen instructing you to find a bed to sleep in. You do not need to sleep right away, however; you can stack levels and sleep several times in a row to catch up. Sleep in a bed after gaining a level, and you can then allocate points to three of your character's attributes. Certain attributes may receive a bonus modifier, which is based on the skills increased since the last raised level.
Attributes that receive bonus modifiers are determined by the governing attribute of the skills raised to reach that level. For each two levels gained in a skill, a 1 bonus modifier is added to the governing attribute. Whether the skill is a major skill or minor skill does not matter. For example, if you gain four levels in Armorer (governing attribute of Endurance) and ten levels in a minor skill such as Destruction (governing attribute of Willpower), you would be able to increase your character's Endurance by three points and Willpower by five points when moving on to the next level. The bonus modifier has a limit of 5, so don't bother raising a skill by more than ten levels per character level.
Designing a character is the first thing you'll do in Oblivion. You must choose from one of the ten races, define your character's facial features, select a Birthsign, and pick a class. The following sections offer an in-depth look at the choices you must make.
The following pages breakdown this section on charter creation into the following four sections:
- Races
- Birthsigns
- Skills
- Classes
There are a total of ten races to choose from. Each race has its own strengths and weaknesses, and receives certain skill bonuses and special abilities unique to that race. While deciding on a race, keep in mind the type of character you wish to create and ensure that your choice is well-suited for the desired role. It's important to note, however, that starting stats and skill bonuses really won't matter much when your character reaches higher levels.
Argonian
“This reptilian race, well-suited for the treacherous swamps of its homeland, has developed natural immunities to diseases and poisons. They can breathe underwater and are good at picking locks.”
Skill Bonuses: Alchemy 5, Athletics 10, Blade 5, Hand to Hand 5, Illusion 5, Mysticism 5, Security 10
Race Specials: Resist Disease, Immune to Poison, Water Breathing.
Male Argonian Starting Stats
Strength: 40
Intelligence: 40
Willpower: 30
Agility: 50
Speed: 50
Endurance: 30
Persuasion: 30
Luck: 50
Female Argonian Starting Stats
Strength: 40
Intelligence: 50
Willpower: 40
Agility: 40
Speed: 40
Endurance: 30
Persuasion: 30
Luck: 50
Breton
“In addition to their quick and perceptive grasp of spellcraft, even the humblest of Bretons can boast a resistance to magic energies. They are particularly skilled at summoning and healing magic.”
Skill Bonuses: Alchemy 5, Alteration 5, Conjuration 10, Illusion 5, Mysticism 10, Restoration 10
Race Specials: Fortified Magicka, Dragon Skin, Resist Magicka.
Male Breton Starting Stats
Strength: 40
Intelligence: 50
Willpower: 50
Agility: 30
Speed: 30
Endurance: 30
Persuasion: 40
Luck: 50
Female Breton Starting Stats
Strength: 30
Intelligence: 50
Willpower: 50
Agility: 30
Speed: 40
Endurance: 30
Persuasion: 40
Luck: 50
Dark Elf
“Also known as ‘Dunmer' in their homeland of Morrowind, the Dark Elves are noted for their skilled and balanced integration of the sword, the bow and destruction magic. They are resistant to fire and can summon an ancestral ghost for aid.”
Skill Bonuses: Athletics 5, Blade 10, Blunt 5, Destruction 10, Light Armor 5, Marksman 5, Mysticism 5
Race Specials: Ancestor Guardian, Resist Fire.
Male Dark Elf Starting Stats
Strength: 40
Intelligence: 40
Willpower: 30
Agility: 40
Speed: 50
Endurance: 40
Persuasion: 30
Luck: 50
Female Dark Elf Starting Stats
Strength: 40
Intelligence: 40
Willpower: 30
Agility: 40
Speed: 50
Endurance: 30
Persuasion: 40
Luck: 50
High Elf
“Also known as ‘Altmer' in their homeland of Summerset Isle, the High Elves are the most strongly gifted in the arcane arts of all the races. However, they are also somewhat vulnerable to fire, frost and shock.”
Skill Bonuses: Alchemy 5, Alteration 10, Conjuration 5, Destruction 10, Illusion 5, Mysticism 10
Race Specials: Weakness to Fire, Frost and Shock, Resist Disease, Fortified, Magicka.
Male High Elf Starting Stats
Strength: 30
Intelligence: 50
Willpower: 40
Agility: 40
Speed: 30
Endurance: 40
Persuasion: 40
Luck: 50
Female High Elf Starting Stats
Strength: 30
Intelligence: 50
Willpower: 40
Agility: 40
Speed: 40
Endurance: 30
Persuasion: 40
Luck: 50
Imperial
“Natives of the civilized, cosmopolitan province of Cyrodiil, they have proved to be shrewd diplomats and traders. They are skilled with heavy armour and in the social skills. They tend to favor the warrior classes.”
Skill Bonuses: Blade 5, Blunt 5, Hand to Hand 5, Heavy Armor 10, Mercantile 10, Speechcraft 10
Race Specials: Star of the West, Voice of the Emperor.
Male Imperial Starting Stats
Strength: 40
Intelligence: 40
Willpower: 30
Agility: 30
Speed: 40
Endurance: 40
Persuasion: 50
Luck: 50
Female Imperial Starting Stats
Strength: 40
Intelligence: 40
Willpower: 40
Agility: 30
Speed: 30
Endurance: 40
Persuasion: 50
Luck: 50
Khajiit
“Hailing from the province of Elsweyr, they are intelligent, quick, and agile. They make excellent thieves due to their natural agility and unmatched acrobatics skill. All Khajiit can see in the dark.”
Skill Bonuses: Acrobatics 10, Athletics 5, Blade 5, Hand to Hand 10, Light Armor 5, Security 5, Sneak 5
Race Specials: Eye of Fear, Eye of Night.
Male Khajiit Starting Stats
Strength: 40
Intelligence: 40
Willpower: 30
Agility: 50
Speed: 40
Endurance: 30
Persuasion: 40
Luck: 50
Female Khajiit Starting Stats
Strength: 30
Intelligence: 40
Willpower: 30
Agility: 50
Speed: 40
Endurance: 40
Persuasion: 40
Luck: 50
Nord
“Citizens of Skyrim, they are a tall and fair-haired people. Strong and hardy, Nords are famous for their resistance to cold. They are highly talented warriors.”
Skill Bonuses: Armorer 5, Blade 10, Block 5, Blunt 10, Heavy Armor 10, Restoration 5.
Race Specials: Nordic Frost, Woad, Resist Frost.
Male Nord Starting Stats
Strength: 50
Intelligence: 30
Willpower: 30
Agility: 40
Speed: 50
Endurance: 50
Persuasion: 30
Luck: 50
Female Nord Starting Stats
Strength: 50
Intelligence: 30
Willpower: 40
Agility: 40
Speed: 40
Endurance: 40
Persuasion: 30
Luck: 50
Orc
“The people of the Wrothgarian and Dragontail Mountains, Orcish armourers are prized for their craftsmanship. Orc troops in heavy armor are among the finest in the Empire, and are fearsome when using their berserker rage.”
Skill Bonuses: Armorer 10, Block 10, Blunt 10, Hand to Hand 5, Heavy Armor 10
Race Specials: Berserk, Resist Magicka.
Male Orc Starting Stats
Strength: 45
Intelligence: 30
Willpower: 50
Agility: 35
Speed: 30
Endurance: 50
Persuasion: 30
Luck: 50
Female Orc Starting Stats
Strength: 45
Intelligence: 40
Willpower: 45
Agility: 35
Speed: 30
Endurance: 50
Persuasion: 25
Luck: 50
Redguard
“The most naturally talented warriors in Tamriel. In addition to their cultural affinities for many weapons and armour styles, they also have a hardy constitution and natural resistance to disease and poison.”
Skill Bonuses: Athletics 10, Blade 10, Blunt 10, Light Armor 5, Heavy Armor 5, Mercantile 5.
Race Specials: Adrenaline Rush, Resist Poison, Resist Disease.
Male Redguard Starting Stats
Strength: 50
Intelligence: 30
Willpower: 30
Agility: 40
Speed: 40
Endurance: 50
Persuasion: 30
Luck: 50
Female Redguard Starting Stats
Strength: 40
Intelligence: 30
Willpower: 30
Agility: 40
Speed: 40
Endurance: 50
Persuasion: 40
Luck: 50
Wood Elf
“The clanfolk of the Western Valenwood forests, also known as ‘Bosmer.' Wood Elves are nimble and quick, making them good scouts and thieves, and there are no finer archers in all of Tamriel. Their ability to command simple creatures is well-known.”
Skill Bonuses: Acrobatics 5, Alchemy 10, Alteration 5, Light Armor 5, Marksman 10, Sneak 10
Race Specials: Beast Tongue, Resist Disease.
Male Wood Elf Starting Stats
Strength: 30
Intelligence: 40
Willpower: 30
Agility: 50
Speed: 50
Endurance: 40
Persuasion: 30
Luck: 50
Female Wood Elf Starting Stats
Strength: 30
Intelligence: 40
Willpower: 30
Agility: 50
Speed: 50
Endurance: 30
Persuasion: 40
Luck: 50
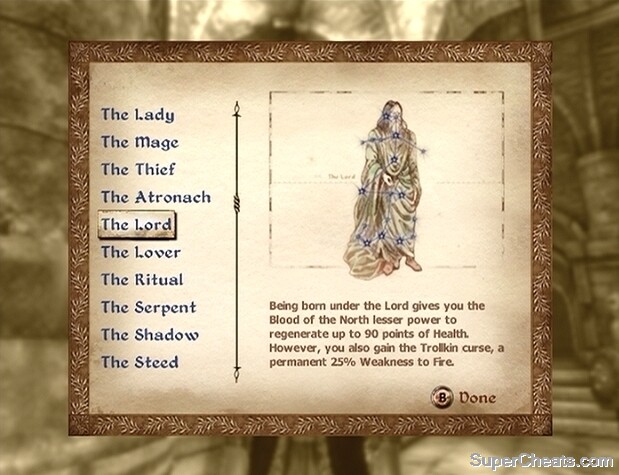
Part of the character creation process entails choosing one of the thirteen birthsigns to mark your character's birth. Birthsigns grant special powers, with some more useful than others. Some Birthsigns yield unique spells; Lesser Powers usually cost little magicka and can be cast as long as magicka is available, while Greater Powers have no magicka cost but can only be cast once per day. Below is a listing of each birthsign and the effects they have.
The Apprentice: Grants a 100 point bonus to character's Magicka. 100% Weakness to
Magicka.
The Lady: Grants a 10 point bonus to character's Willpower and Endurance attributes.
The Mage: Grants a permanent bonus of 50 points to character's Magicka.
The Thief: Grants a 10 point bonus to character's Speed, Agility, and Luck attributes.
The Atronach: Character does not regain Magicka over time. Instead, character is given 50% Spell Absorption. Base Magicka increased by 150 points.
The Lord: Blood of the North - Lesser Power: Regenerates up to 90 points of Health. Permanent 25% weakness to Fire.
The Lover: Lover's Kiss - Greater Power: Paralyze an enemy for 10 seconds at the cost of 120 points of Fatigue.
The Ritual: Mara's Gift - Greater Power: Restore health spell. Blessed Word - Turn the Undead.
The Serpent: Slow but potent poison on touch. Also cures and dispels magic at the cost of 100 points of Fatigue.
The Shadow: Moonshadow - Greater Power: Become Invisible for 60 seconds.
The Steed: Grants a bonus of 20 to character's speed attribute.
The Tower: Tower Key - Greater Power: Open an Average or lower quality lock once a day. Tower Warden reflects 5 point of damage for 120 seconds a day.
The Warrior: Grants a bonus of 10 points to character's Strength and Endurance attributes.
There are 21 skills in total. The seven skills your character class is composed of are referred to as “Major Skills” and the rest as “Minor Skills.” There are set points considered as “Mastery Levels”. When you reach a new mastery level, you'll gain a new perk for that skill. Major skills start off at the Apprentice mastery level (25). Below is a list of the level ranges of each mastery.
Novice: 0-24
Apprentice: 25-49
Journeyman: 50-74
Expert: 75-99
Master: 100
Block
Governing Attribute: Endurance
Parry melee attacks with shields and weapons. Successful blocks reduce damage received.
Novice: A Novice of Block is fatigued when blocking. Also, hand-to-hand blocking against weapons has no effect.
Apprentice: An Apprentice is no longer fatigued when blocking.
Journeyman: A Journeyman's shield or weapon is no longer damaged when he/she blocks. Opponents may recoil when blocking with hand-to-hand.
Expert: An Expert blocking with a shield has a chance to do a knockback counter attack, staggering the enemy if the shield blow connects.
Master: A Master blocking with a shield has a chance of disarming an enemy with a successful knockback counterattack.
Armorer
Governing Attribute: Endurance
Repair damaged weapons and armour. Damaged pieces of equipment are less effective.
Novice: A Novice cannot repair magic items.
Apprentice: Repair hammers last twice as long. Magic items still cannot be repaired by an Apprentice.
Journeyman: A Journeyman of Armorer can repair magic items.
Expert: An Expert can repair items beyond their highest condition (to 125%). Expert-improved weapons do more damage and Expert-improved armour offers better protection.
Master: Repair Hammers never break when used by a Master.
Heavy Armor
Governing Attribute: Endurance
Make more effective use of armours classed as Heavy Armor. The Heavy Armor category includes Iron, Steel, Dwarven, Orcish, Ebony, and Daedric.
Novice: Heavy Armor degrades rapidly with use (150% of normal rate).
Apprentice: Heavy Armor worn by an Apprentice degrades at a normal rate.
Journeyman: Heavy Armor degrades at a 50% slower rate.
Expert: Worn Heavy Armor only encumbers by 50%.
Master: Equipped Heavy Armor does not encumber at all.
Blunt
Governing Attribute: Strength
Use weapons categorized as Blunt more effectively. The Blunt category encompasses maces, hammers, and axes.
Novice: A Novice performs a basic power attack with a damage bonus in all directions.
Apprentice: Gain damage bonuses with a Mastery Standing Power Attack (hold RT/R2).
Journeyman: Gain damage bonuses with the Mastery Left and Right Power Attacks (push Right Stick left or right and hold RT/R2). Has a chance of disarming the opponent.
Expert: Gain Mastery Backwards Power Attack (pull back Right Stick and hold RT/R2). Also gains a chance of a knockdown.
Master: Mastery Forward Power Attack (push up on Right Stick and hold RT/R2) with a chance to paralyze.
Blade
Governing Attribute: Strength
Use weapons categorized as Blade more effectively. The Blade category encompasses daggers and swords.
Novice: A Novice performs a basic power attack with a damage bonus in all directions.
Apprentice: Gain damage bonuses with a Mastery Standing Power Attack (hold RT/R2).
Journeyman: Gain damage bonuses with the Mastery Left and Right Power Attacks (push Right Stick left or right and hold RT/R2). Has a chance of disarming the opponent.
Expert: Gain Mastery Backwards Power Attack (pull back Right Stick and hold RT/R2). Also gains a chance of a knockdown.
Master: Mastery Forward Power Attack (push up on Right Stick and hold RT/R2) with a chance to paralyze.
Athletics
Governing Attribute: Speed
Run and swim faster. Also affects rate of lost Fatigue recovery.
Novice: A Novice regenerates Fatigue slowly when running.
Apprentice: An Apprentice regenerates Fatigue 25% faster when running.
Journeyman: A Journeyman regenerates Fatigue 50% faster when running.
Expert: An Expert regenerates Fatigue 75% faster when running.
Master: A Master's Fatigue regeneration rate is never reduced while running.
Hand To Hand
Governing Attribute: Strength
Attack without weapons using your fists to damage and fatigue opponents.
Novice: A Novice performs a basic power attack with a damage bonus in all directions.
Apprentice: Gain damage bonuses with a Mastery Standing Power Attack (hold RT/R2).
Journeyman: Gain damage bonuses with the Mastery Left and Right Power Attacks (push Right Stick left or right and hold RT/R2). Has a chance of disarming the opponent.
Expert: Gain Mastery Backwards Power Attack (pull back Right Stick and hold RT/R2). Gains a chance of a knockdown. Also gains a chance of a knockback attack when blocking.
Master: Mastery Forward Power Attack (push up on the Right Stick and hold RT/R2) with a chance to paralyze. While blocking, gains a chance of to disarm on a knockback attack.
Destruction
Governing Attribute: Willpower
Cast spells to inflict magical fire, frost, and shock damage or lower resistances to magic attacks.
Novice: Cast Novice level Destruction spells.
Apprentice: Cast Apprentice level Destruction spells.
Journeyman: Cast Journeyman level Destruction spells.
Expert: Cast Expert level Destruction spells.
Master: Cast Master level Destruction spells.
Alteration
Governing Attribute: Willpower
Cast spells to breathe or walk on water, open lock, shield from physical or magical attacks, and alter encumbrance.
Novice: Cast Novice level Alteration spells.
Apprentice: Cast Apprentice level Alteration spells.
Journeyman: Cast Journeyman level Alteration spells.
Expert: Cast Expert level Alteration spells.
Master: Cast Master level Alteration spells.
Illusion
Governing Attribute: Personality
Cast spells to charm, conceal, create light, silence, paralyze, command, and affect morale or aggressiveness.
Novice: Cast Novice level Illusion spells.
Apprentice: Cast Apprentice level Illusion spells.
Journeyman: Cast Journeyman level Illusion spells.
Expert: Cast Expert level Illusion spells.
Master: Cast Master level Illusion spells.
Conjuration
Governing Attribute: Intelligence
Cast spells to summon demonic creatures, magical weapons, armour, and turn the undead.
Novice: Cast Novice level Conjuration spells.
Apprentice: Cast Apprentice level Conjuration spells.
Journeyman: Cast Journeyman level Conjuration spells.
Expert: Cast Expert level Conjuration spells.
Master: Cast Master level Conjuration spells.
Mysticism
Governing Attribute: Intelligence
Cast spells to absorb, reflect, and dispel magic. Move objects, sense life, and bind souls.
Novice: Cast Novice level Mysticism spells.
Apprentice: Cast Apprentice level Mysticism spells.
Journeyman: Cast Journeyman level Mysticism spells.
Expert: Cast Expert level Mysticism spells.
Master: Cast Master level Mysticism spells.
Restoration
Governing Attribute: Willpower
Cast spells to restore, fortify or absorb physical and magic attributes, cure disease, and resist magic attacks.
Novice: Cast Novice level Restoration spells.
Apprentice: Cast Apprentice level Restoration spells.
Journeyman: Cast Journeyman level Restoration spells.
Expert: Cast Expert level Restoration spells.
Master: Cast Master level Restoration spells.
Alchemy
Governing Attribute: Intelligence
Create potions and gain benefits from alchemical ingredients more effectively.
Novice: Recognize only the first of four potential alchemical properties of a substance.
Apprentice: Recognize the first two of four potential alchemical properties of a substance.
Journeyman: Recognize the first three of four potential alchemical properties of a substance.
Expert: Recognize all four potential alchemical properties of a substance.
Master: Create potions from a single ingredient.
Security
Governing Attribute: Agility
Utilize lockpicks to open locked doors, chests, containers, and so on.
Novice: As many as four tumblers will fall a pick is broken due to being unsuccessful.
Apprentice: As many as three tumblers will fall a pick is broken due to being unsuccessful.
Journeyman: As many as two tumblers will fall when a pick is broken due to being unsuccessful.
Expert: Only one tumbler will fall when unsuccessful.
Master: No tumblers will fall when a pick is broken due to being unsuccessful.
Sneak
Governing Attribute: Agility
Become harder to detect when moving through the shadows. Pick pockets more effectively (click the Left Stick to toggle Sneak Mode).
Novice: Gains a 4x damage bonus for one-handed and hand-to-hand, and a 2x damage bonus for ranged attacks, when undetected.
Apprentice: Gains a 6x damage bonus for one-handed and hand-to-hand, and a 3x damage bonus for ranged attacks, when undetected.
Journeyman: Receives no penalty to his/her chance of detection while sneaking for the weight of his/her equipped boots.
Expert: Receives no penalty to his/her chance of being detected while sneaking for moving faster rather than slower.
Master: An undetected sneak attack made by a master will ignore the target's armour rating.
Acrobatics
Governing Attribute: Speed
Jump higher and farther. Avoid damage when falling great distances.
Novice: Cannot attack while jumping or falling.
Apprentice: Perform normal attacks while jumping or falling.
Journeyman: Gain the dodge ability, hold block and jump in a direction to roll. Hold RT, Right Stick left or right, and press Y/Triangle or hold RT/R2 and down on the Right Stick to perform a backflip!
Expert: Fatigue loss for jumping is reduced by 50%.
Master: Gains the Water Jump ability. With good timing, a master can jump off the surface of water.
Light Armor
Governing Attribute: Speed
Make more effective use of armours classified as Light Armor. The Light Armor category includes Fur, Leather, Chain, Mithril, Elven, and Glass.
Novice: Light Armor degrades rapidly with use (150% of normal rate).
Apprentice: Light Armor worn by an Apprentice degrades at a normal rate.
Journeyman: Light Armor degrades at a 50% slower rate.
Expert: Equipped Light Armor does not encumber the user at all.
Master: While wearing only Light Armor, the Master gains a bonus of 50% to the rating of that armour.
Marksman
Governing Attribute: Agility
Make more effective use of bow and arrow weapons.
Novice: A Novice is fatigued while holding a bow drawn back.
Apprentice: No fatigue cost for holding a bow drawn back.
Journeyman: User can zoom in using LT/L2 while the bow is drawn.
Expert: Arrow attacks have a chance of knocking the target down.
Master: Arrow attacks have a chance of paralyzing the target.
Mercantile
Governing Attribute: Personality
Get better deals when buying or selling items.
Novice: Value of item is reduced by worn condition of the item.
Apprentice: Value of item that is being sold is not reduced by the worn condition of the item.
Journeyman: Can buy and sell any object to any vendor, even if he or she does not usually deal in that type of wares.
Expert: Has the ability to invest in a shop, giving the merchant money to permanently increase his or her shop's available gold by 500.
Master: All shops in the world always have 500 more gold available.
Speechcraft
Governing Attribute: Personality
Use speech to persuade listeners to like and trust you.
Novice: Can offer bribes to increase disposition of certain people.
Apprentice: Gains a free rotation wedge in the persuasion menu.
Journeyman: Falling disposition timer in the persuasion mini-game is 50% slower.
Expert: Disposition loss from negative results in the mini-game are reduced from -150% to -100%.
Master: Bribes cast half as much as they normally do.
A class is composed of seven major skills, two favoured attributes, and a specialization. After the tutorial, you can choose a predefined class or create your own custom class. The seven major skills chosen will determine how your character levels up. By using these skills and levelling them up, your character will gain levels. The two attributes set as favoured attributes receive a 5 bonus. There are three specializations: Combat, Magic, and Stealth. Each skill in the category selected gains a 10 bonus.
Depending on which House you decided to take over, either a Dark Seducer or a Golden Saint Messenger will arrive at New Sheoth Palace after you have spoken to him. The two quests are a bit different: if you chose Mania, you're headed for Pinnacle Rock to assist the Dark Seducers, and if you chose Dementia, you're headed to Brellach to aid the Golden Saints.
Duke of Mania
Make your way to Pinnacle Rock, which is at the end of the Madgod's Boot at the south end of the island. Fast travel to Xedilian and travel south down the road to join the Mazkens. Adeo tells you that the Knights of Order have captured the Dark Seducer commander and are holding here somewhere in Pinnacle Rock. With that, enter the Hall of Honor.

Meet the Mazkens at Pinnacle Rock, or the Aureals at Brellach, and help them rescue their commander.
There are plenty of Knights of Order in the opening area. Start cutting them down—taking care not to accidently slash one of your allies—and then continue through the Metal Door at the bottom of the steps. Once in the next area, start following the arrow on your compass. Take to attacking any Knights of Order encountered along the way, and continue following the arrow to the door to the Halls of Reverence. You'll encounter more Knights of Order in this area, so remain vigilant. Continue following the arrow on your compass and you'll come to a remote locked gate. Head up the steps across from the gate and turn left when you reach the circular rug along the walkway. Hit the Push Button on the pedestal here and then head back down the steps and through the now open Metal Gate.
Once through the Metal Gate, continue following the arrow on your compass. When you reach Dylora's prison, activate the Chime at the top the steps on the west side of the room to shatter the walls. After freeing Dylora, chat with her, and then proceed through the Metal Door on the south side of the room. Enter the Hall of Devotion to trigger an event. Afterwards, activate the Chime on the right to shatter the crystal wall blocking your path. Then, follow the arrow on your compass until you reach a locked Metal Gate. Activate the Push Button next to the gate to open it, and then push on through the Knights of Order to reach the door to the Font of Rebirth.
In the Font of Rebirth, walk along to the other end of the corridor and hit the Push Button by the Metal Gate to open it. Cross the stone bridge and follow the arrow on your compass to another locked Metal Gate. Activate the Push Block next to the gate and proceed through the Wellspring of the Mazken.
Dylora is being held in the Halls of Reverence.
The Wellspring is guarded by a number of Knights of Order; you'll have to kill them all before you can continue. There is a chime in each of the four corners of this room. Your goal is to ring them all, which you must do fairly quickly. Start in one corner, activate the chime there, and then run from chime to chime until you have activated all four.
With the Wellspring of Mazken restored, find and speak to Dylora. You'll be given the Summon Dark Seducer greater power, as well a set of Dark Seducer armour. No need to travel through all of Pinnacle Rock again; exit the Font of Rebirth through the west passage in the room with the Wellspring of Mazken, activate the Push Button by the Metal Gate in the Hall of Honor, and follow the arrow on your compass back to the entrance.
Duke of Dementia
Brellach has been marked on your map, so make your way there. A trail through the hills can be taken directly up to Brellach, so if you are being misled by the compass, ignore it and instead walk along the hillside until you find an opening. Up the steps you'll find Issmi, one of the Golden Saints. According to Issmi, Staada, the Golden Saint captain, has been imprisoned within Brellach. Issmi believes that Staada can be found by following the Wellspring inside of Brellach. The few remaining Golden Saints will soon join you. Up the steps, enter the door marked 'Brellach, Hall of Honor.'
The Knights of Order have taken Brellach.
You'll meet some resistance in Brellach in the form of Knights of Order. As always, try your best not to hurt your allies while fighting, though this can be difficult. Ignore the remote door on the initial level and instead take the stairs down to the lower level. There are many Knights of Order in the Hall of Honor, so you'll likely have to take on more than one at a time on several occasions. Fortunately the Golden Saints will be by your side to help. Move through the Halls of Honor and enter the 'Brellach, Hall of Reverence' area.
Plow through the Knights of Order in the Hall of Reverence. You will soon reach a door that must be opened remotely, though the Push Button that will open it is quite far from the actual door. While facing the door, turn around, run to the end of this area, and then climb up the stairs to your left. At the top of the stairs, turn left, and then left again into a small area with a couple of urns. The switch is on the side of the pedestal in the top right corner of this area. Activate the Push Button, and press on.
Through the door, wipe out the Knights of Order in this room and then speak to Staada who is locked in the crystal cell. Staada tells you to ring the nearby chime, which should shatter the crystal. The chime is in the area directly behind the crystal prism. Climb down the stairs, approach the shrine, and activate it. The ringing of the chime will indeed shatter the crystal prison, freeing Staada.

Activate Chimes to shatter the crystal walls in Pinnacle Rock or Brellach.
Staada explains that you must get to the Wellspring of the Aureal next. If the Order is permitted to destroy the Wellspring unhindered, the Golden Saints will be banished from Sheogorath's Realm. The previously locked door can now be opened, so proceed into the 'Brellach, Hall of Devotion' area. A crystal barrier blocks your path here, but it can be destroyed. While facing the barrier, turn right to spot is another chime. There are more Order Knights and Priests in these halls, but the Golden Saints should still be with you. Continue through the Hall of Devotion and into the 'Brellach, Font of Rebirth' area.
Follow the arrow on your compass to the Wellspring of Aureal. The Wellspring is being guarded by a number of Knights of Order; and you'll have to kill them all before you can continue. There is a chime in each of the four corners of this room. Your goal is to ring them all, which you must do fairly quickly. Start in one corner, activate the chime there, and then run from chime to chime until you have activated all four.
With the Wellspring of Aureal restored, find and speak to Staada. You'll be given the Summon Golden Saint greater power, as well a set of Golden Saint armour. No need to travel through all of Brellach again; exit the Font of Rebirth through the west passage in the room with the Wellspring of Aureal, and a series of remotely opened gates in the Hall of Honor will permit you to return to Sheogorath's Realm easily.
Once the opening video has concluded, the game begins with your character in the Imperial Prison. Your first task here is to develop your onscreen persona. At this point, you are only able to define your character's physical features, race, and gender, and then name him or her. You will, however, be permitted to alter other aspects of your character at fixed points in the tutorial.
Due to the expansiveness of the character creator, you may want to avoid spending too much time perfecting your character's appearance at this point. You'll have another opportunity to tweak your character's final appearance at the end of the tutorial. If you are having difficulty deciding which race to choose for your character, refer to the “Character Creation” section of this guide for information on each race, as well as information on every other decision that must be made during the character creation process. Once you have named and designed your character, exit the character creation menu to begin.
Your character's story begins in a cold, dank cell in the Imperial City Prison. There isn't much in this cell, aside from some bones and a couple of jugs. Don't bother picking any of these items up, as they are virtually useless and serve as nothing more than deadweight in your inventory. Your character is not alone in this prison, as is evident by the rather belligerent Dark Elf who occupies the cell across the way. This rather detestable fellow immediately begins to hurl insults at your character shortly after you take control.
Clear the way for the Emperor and his guards.
Just as you are becoming acquainted with you new friend, a group of guards enter the cell block. They're headed your way, and accompanied by the Emperor no less! One of the guards commands you to go and stand over by the cell window, with the assurance that you will not be harmed provided you follow their orders. Go and stand over by the window and the guards will proceed to unlock the door and enter the cell.
Emperor Uriel Septim apparently recognizes your character from a dream. A short dialogue sequence with the Emperor will ensue. Select whichever dialogue options you wish. The Emperor explains that his sons have been murdered by assassins, and he therefore must escape through a secret passage as it is believed that he is next on the chopping block. When your conversation with the Emperor comes to an end, one of the guards will activate a Press Block to reveal a secret passage in the cell. Follow the Emperor and his guards through this passage. The party eventually comes to a halt, and a group of assassins will then appear and attempt to take down the Emperor. Captain Renault is slain during this attack, so feel free to arm your character with the Steel Sword or Akaviri Katana she was carrying.
The Emperor and the two remaining guards will head through a door that leads into the Imperial Subterrane. You are not able to follow them through here, but luckily a new passage opens up just to the right of this door. There are some rats in this next area, so be sure to have a weapon equipped before venturing forth.
Notifications explaining the basic controls of Oblivion will pop-up throughout the tutorial. If you are confused at all about any of the mechanics that have been explained thus far, you can press the B button to call up the Journal menu and re-read any of the notifications from there. From the Journal menu, press RT or LT to move over to the Map/Quest section (the tab on the far right) to view the tips that have been displayed on screen so far.
In the proceeding area, search the Goblin corpse to find an Iron Key. Approach the door at the end of this area and attempt to open the door to the Imperial Substructure. It is locked, but can be opened using the Iron Key you just picked up.
Loot the Goblin's corpse for an Iron Key to gain easy access to the Imperial Substructure.
Upon entering the Imperial Substructure area, head straight and turn left when you reach the opening. Follow this path until you reach some enemies. You'll most likely be facing a few rats, and perhaps a Zombie. If the rats and the Zombie are fighting each other when you encounter them, allow them to finish their fight, and then move in to take out the winner. The remainder of this area is quite straightforward. If you feel lost, press the B button to bring up the Journal menu and use RT or LT to go to the Quest/Map section (the tab on the far right). From this menu, use the Left Thumbstick to switch to the area map.
At the end of the Imperial Substructure is a wooden door to the Natural Caverns. Enter the Natural Caverns when you come to this door. Upon entering this area, move forward and you will eventually receive a quest update, which will explain the mechanics of sneaking. If you have a Torch equipped, be sure to put it away before proceeding, as the Goblin will definitely spot you otherwise. Once the Goblin has been dealt with, scour the small encampment to find a Chest behind some rocks. Attempt to open this chest to get a lesson on lockpicking.
Up ahead are more goblins, as well as some traps. As you exit the area with the first Goblin you encountered, keep an eye out for some hanging spike traps. Further ahead, there is a trip wire and a Goblin. Get the Goblin's attention and he should approach and trip the wire, which will most likely result in him being killed by the trap.
When the goblins have been dealt with, leave this area and head straight. You'll come to some logs that can be set loose to crush the goblins below. Run over to the logs and hit the A/X button when the prompt appears to activate the trap. Afterwards, press on and you will find yourself in a large, open room. There are rats, several goblins, and a Goblin Witch in this area, so be cautious as you move through.

Use the Push Log trap to crush the goblins below.
When you're ready to move on, head through the door to the Imperial Subterrane to regroup with the Emperor and his guards. You will witness the group being attacked by more assassins. When the fight is over, the Emperor will approach your character and another conversation will begin. At this point, you must choose one of the thirteen birthsigns to mark your character's birth. Each birthsign yields a different bonus. You will be able to finalize your character's birthsign at the end of the tutorial, so no need to put too much thought in selecting one right at this moment.
Once you've made your choice Baurus, one of the Blades tasked with escorting the Emperor, will initiate a conversation with your character. From him you can learn more about the Blades, as well as the Emperor if you wish. He'll also hand you a torch, though you more than likely acquired a few during your trek through the Imperial Substructure. The Emperor and his guards then proceed to move forward. Follow them.
Each of the thirteen birthsigns offer a unique bonus.
The group is soon attacked by another batch of assassins. When the attackers have been dealt with, continue following the group until yet another batch of assassins attack. Afterwards, the Emperor and his guards will head through a door to the Sanctum, so follow suit. Eventually, the group will reach a dead end. The guards go on ahead, leaving you with the task of defending Septim. The Emperor feels that this is the end of the line for him, and hands over the Amulet of Kings, entrusting you with the task of delivering it to Jauffre at Weynon Priory.
Following the exchange, an assassin enters the room and slays the Emperor where he stands. There is nothing you can do. After the battle with the remaining assassins, Baurus will initiate a conversation with your character. He describes a secret path through the sewers that can be used to escape the Imperial Prison. You are then given a key that will unlock the door to the sewers.
Now you are tasked with selecting a character class. There are twenty-one pre-made classes, but you can also choose to create your own class if you wish. One of the pre-made classes is suggested based on your performance in the tutorial. Refer to the “Character Creation” section of this walkthrough for some useful information to help guide you through this process.
As with your character's appearance and birthsign, you'll have one more chance to edit your character class at the end of the tutorial. Once you have decided on a class, Baurus stresses the importance of delivering the Amulet to Jauffre as soon as possible. If you happened to pick up Captain Renault's Akaviri Katana after she was slain, Baurus will take it from you.
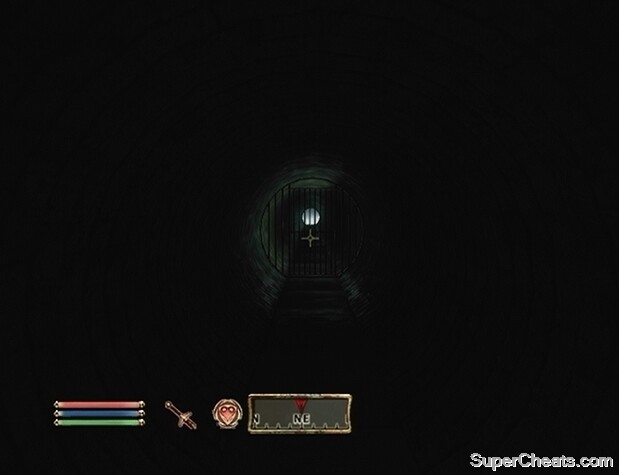
To reach the sewers, proceed through the passage used by the assassin to enter the room. Locate the locked door and open it with Baurus' key to reveal the entrance to the sewers. As far as enemies go, you will most likely encounter some rats and a goblin or two inside. Since it is rather dark in the sewers, equip a torch if you haven't already, or cast the Nighteye spell if your character is a Khajiit.
From the starting point, head down the stairs and through the passage below. Cross the bridge furthest to the right. Be cautious as you proceed, because there are likely rats or goblins through this tunnel. At the end of the tunnel, climb up the stairs, cross the bridge to the other side of this area, and open the gate. Now just continue moving forward until you reach the gate to the City Isle and your freedom.
Freedom!
This is it; the light at the end of the tunnel. At this point, pressing the A/X button when prompted at the grate opens up a menu. This is your only chance to revise your character. Once you step through that grate, you won't be able to edit your character at any other point in time.
It would be a good idea to create a separate save file just before exiting the sewers. This save file would serve several purposes. For one, if you progress a few hours into the game and your character just isn't working for you, you can load up this save file and tweak your character accordingly, without having to go through the entire character creation process and the tutorial again. Furthermore, if in the future you wish to start a new character, you can simply load up this save file and create character without having to go through the beginning tutorial sequence again.
From this menu, you can edit every aspect of your character, so take the time to make sure that you are completely satisfied with your creation before proceeding. Once you open the grate and set foot outside, you're free! Nothing is forcing you to proceed with the main questline, so feel free to go off and complete some side quests, join a guild or two, scour dungeons in search of new equipment, or embark on any other activity.

A nice change of scenery.
The Amulet of Kings must be delivered to a man named Jauffre at Weynon Priory. Weynon Priory is located near the city of Chorrol, which is just west of the Imperial City.
To view the World Map, first press the B/Circle button to bring up the character menu. Once on the character menu, select the Quests/Maps tab using the shoulder buttons, and then from there use the Left Thumbstick/Analog Stick to select the second tab in the row. Use the Right Thumbstick to scroll through the map.
There are two different ways to get to Weynon Priory. The most obvious way is by simply walking there; you can set “Deliver the Amulet” as your active quest. Doing so causes a quest marker to appear on the compass at the bottom of the screen.
Alternatively, you can fast travel to any of the locations that you have visited so far (though cities are available from the get-go). To fast travel to a location, on the World Map screen, move the cursor over the icon of the location you wish to travel to, and press the A/X button while hovering over it. Since Jauffre resides in Weynon Priory, that's where you should be headed next. So, to quickly travel there, call up the World Map and locate Chorrol; move the cursor down to hover over the Weynon Priory icon, and then press the A/X button and confirm that you want to travel there. It's as simple as that.
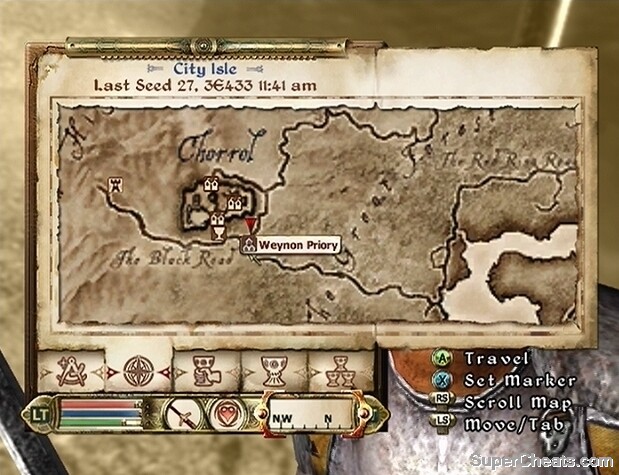
Fast travelling is a quick and easy way to cover a lot of ground in the expansive province of Cyrodiil.
Note that you cannot fast travel if there are enemies nearby. So, if you receive a message restricting you from fast travelling, scour the area for enemies, clear them out, and try again.
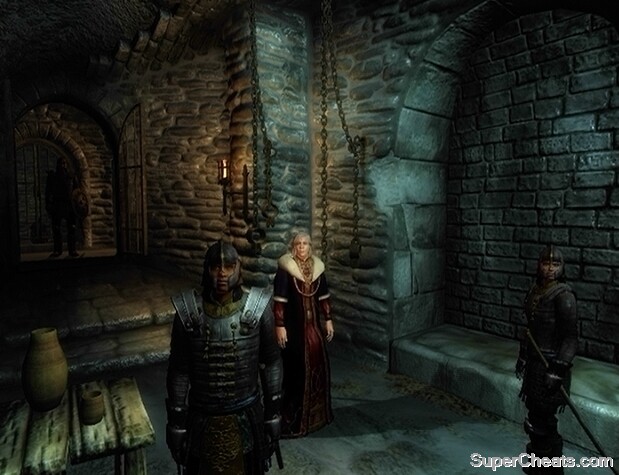
At Weynon Priory, you must locate Jauffre and hand over the Amulet of Kings. Upon reaching Weynon Priory, look over to the right to spot a large house. This is Weynon House, where Jauffre can most likely be found. NPCs have their own schedules and routines, and therefore don't tend to stay in one place. Jauffre should be in Weynon House during the day, along with Prior Maborel.
When you enter Weynon House, head up the stairs and turn right. Jauffre should be sitting at his desk here. If he isn't and you don't feel like looking elsewhere for him, press the Back/Select button and wait for a few hours, after which you will mostly likely return to find him sitting at the desk.
Once you have located Jauffre, speak to him and inform him that you have the Amulet of Kings. Jauffre is surprised to receive the Emperor's amulet, and goes on to discuss Mehrunes Dagon and the realm of Oblivion. Without an Emperor on the throne, Jauffre believes that the Daedra from the Oblivion realm may have a shot at invading Cyrodiil. After handing over the Amulet to Jauffre, he entrusts you with another task. It turns out that the Emperor has an illegitimate son named Martin. Your next task is to locate this man and deliver him to the safety of Weynon Priory.

Speak to Jauffre in Weynon House at Weynon Priory.
Before setting out on your quest, speak to Jauffre and select the “Assistance” option. Jauffre will unlock the chest in Weynon House, which holds some basic equipment. If you speak to Prior Maborel, he offers to give you his horse. Furthermore, if you can find Brother Piner in Weynon House, speak to him and select the “Assistance” dialogue option to receive the “Warp in the West” skill book, which increases the Block skill by one level when read. Eronor, a Dark Elf that can most likely be found walking around outside, will give you a Repair Hammer if you speak to him and ask for assistance.
Your journey takes you to the city of Kvatch where you must search for Martin, Uriel Septim's illegitimate son. Through your conversation with Jauffre, you learned that Martin is serving as a priest in the Chapel of Akatosh.
Kvatch is located far southwest of the Imperial City. If you choose to walk there, set “Find the Heir” as your active quest to have a red quest marker appear on your map and compass. However you decide to get there, once you reach Kvatch, a man named Hirtel will approach and initiate a conversation with you. Hirtel brings grave news; the city of Kvatch is now in ruins. He explains that a swarm of Daedra poured out from an open Oblivion Gate and immediately took to destroying the city.
Up the road you'll find what's left of the people of Kvatch. The townspeople in the small encampment at the foot of the ruined city offer little help in regards to locating Septim's heir. You need to make your way up the hill and enter what is left of the city of Kvatch. A linear path just north of the fire in the middle of the encampment leads right up to the city gates.
The sky shifts to an ominous crimson as you ascend. Once you reach the top, you will find what is left of the Kvatch guard. Savlian Matius will approach, ordering you to turn back. Select “Help” from the dialogue options to offer your assistance. This adds the quest, “Breaking the Siege of Kvatch” to your journal.

The Oblivion Gate outside of the Kvatch.
Proceed to ask Savlian Matius about Martin; he explains that Martin is likely still alive, as he is probably with the group that barricaded themselves inside of the Chapel of Akatosh deeper in the city. Before you can speak to Martin in Kvatch, you must first progress in the “Breaking the Siege of Kvatch” quest.
When you have completed the “Breaking the Siege of Kvatch” quest, speak with Martin and have him follow you to Weynon Priory. If you choose to fast travel to Weynon Priory, Martin will travel there with you. Upon your arrival it becomes evident that trouble is brewing. Eronor, a Dark Elf, will initiate a conversation with you and explain what is going on. He tells you that Prior Maborel has fallen, but Jauffre may still be alive inside the chapel.
Savlian Matius asks you to shut the Oblivion Gate that has opened up outside of the ruins of Kvatch. Savlian is willing to lead his men into the ruined city and attempt to reach the survivors that are holed up in the Chapel of Akatosh, provided the Oblivion Gate that is halting their progress is closed.
Closing an Oblivion Gate is a rather arduous task. You must first fight your way to the top of a tower inside of the realm, and then remove the Sigil Stone there. Since this is your first Oblivion Gate, be sure to stock up on supplies—such as repair hammers, health potions, magic potions, and arrows—before heading through. Things are going to be rough once you're through that portal, so it would be a good idea to save your game before stepping inside.
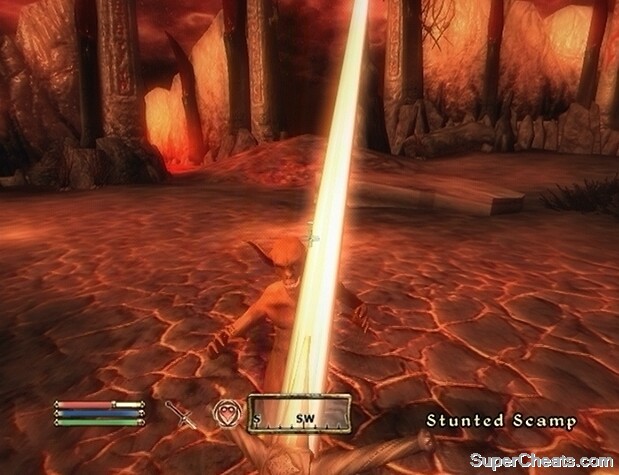
The nature of the enemies encountered once through the Oblivion Gate is dependent on your character's level.
Some minor Daedra will emerge as you approach the gate. Take them out and proceed through the gate. You'll spot some enemies up ahead once you're through the portal. You also may run into a guard named Ilend Vonius; he tells you that one of the survivors of the failed assault on the Oblivion Gate has been taken to one of the towers in this part of the realm. At this point, you can tell Ilend Vonius to leave Oblivion and assist Captain Matius outside, or you can ask him for assistance. It's best to just send him back to Kvatch, since it is almost certain that he will die fairly quickly.
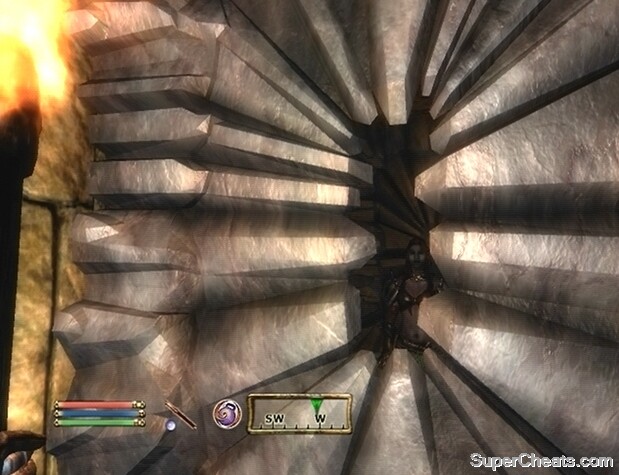
A rather long and treacherous path awaits you. Start by heading down the northwest road from the portal. This path is very straightforward, but remain vigilant all the while. There are several enemies ahead, and some falling boulders to watch out for.
Be on the lookout for Harrada Roots as well. These are plants that will swipe at you as you walk by. As you move along the path, you should eventually be able to see three tall towers in the distance. Make your way over to them and start toward the middle tower. To locate the entrance, head east and keep an eye out for some steps leading up to a door. Head through the door marked 'The Blood Feast.'
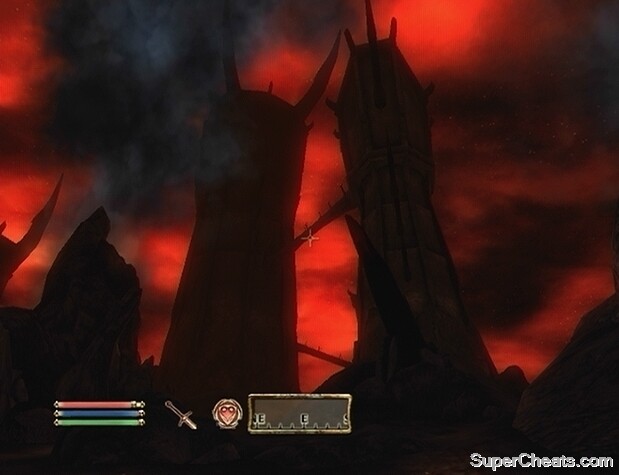
The towers of Oblivion.
Be on guard as you enter, because there is at least one enemy on the lower level. Look around for a door marked 'Rending Halls' and head through. Upon entering this area, climb up the ramp and open the door. Most likely an enemy waits on the other side of this door, so be careful. A Blood Fountain lies off to the left; activate it to replenish lost health if need be. There are likely several enemies packed in this room, so remain vigilant. Once the area at the top of the ramp is clear, head through one of the doors here to reach the second level of The Blood Feast.
Follow the ramp up—keeping an eye out for enemies all the while—and open one of the doors that lead into the 'Corridors of Dark Salvation.' As always, remain vigilant, as there are likely several enemies waiting for you here. Head up the ramp and head through the door to the 'Planes of Oblivion.'
Once you're through this door, you'll find yourself on a bridge outside. This bridge is connected to one of the other towers. Walk to the end of this bridge enter 'Reapers Sprawl.' A man's calls for help can likely be heard upon entering this area. Ascend the ramp with caution, as a Dremora Sigil Keeper lies above, guarding the caged man. Take out the Sigil Keeper and loot the Sigil Keep Key from his corpse. Speak to Menien Goneld afterwards. Unfortunately there is nothing you can do to release the imprisoned man.
Head back down the ramp and exit through the door you entered from. Cross the bridge and return to the 'Corridors of Dark Salvation' area. Locate the locked Citadel Hall door at the top of this room. The Sigil Keep Key unlocks this door. Head up the ramp, but be very careful of the wall spike traps along the way. Exit this room through the door at the top of the ramp to reach the upper level of The Blood Feast.

Slay the Dremora Sigil Keeper to obtain the Sigil Keep Key.
Climb up either the ramp to your left or the ramp to your right and open the 'Ruined Portal to The Blood Feast' to reach an even higher level of the tower. Cross the bridge and follow the ramp up. At the top of the ramp is a door to the 'Sigilum Sanguis' area. It is an Easy quality lock, but can be opened effortlessly with the Sigil Keep Key. It would be a good idea to save your game at this point, as you will likely be attacked by several enemies at once upon entering the Sigil Keep. Take note of the Blood Fountain near the entrance in case things get hectic and you are forced to retreat.
Head up the spiral ramp to the second level of the keep. Kill any enemies on this level, and then proceed up the ramp here as well. The Sigil Stone should be right in front of you once you reach the top of this ramp. Approach the Sigil Stone and hit the A/X button to activate it while the prompt is on-screen.
The keep erupts into flames with a bright flash and you are instantly teleported out of Oblivion. Head back to the group and inform the captain of your success. When ready, tell Matius to proceed with the assault.

Activate the Sigil Stone to shut the Gate!
As with Oblivion, make sure you are prepared as things may get hectic once you step foot in Kvatch. Charge toward the gate and follow the guards into the ruined city. The southern plaza is crawling with enemies, but it must be cleared before you can rescue the survivors inside the chapel. Once all of the Daedra in the plaza have been dealt with, speak with Matius for further instructions.
It is now safe for the survivors to leave the safety of the chapel and join the remaining townspeople in the encampment south of Kvatch. Head toward the chapel, which is just north of the plaza, and proceed inside. Inside, you'll find the survivors still in one piece. Martin is in the main area of the chapel, likely near the shrine. Tell him of his relation to the Emperor and why he must travel to Weynon Priory. Afterwards, speak to Matius to complete the quest.
A new quest is added to your journal at this point, called 'The Battle for Castle Kvatch.' You don't need to complete this quest; at this point you can simply take Martin back to Weynon Priory to carry on with the main questline. This is, in a sense, a side quest. Refer to 'The Battle for Castle Kvatch' under the Side Quests section of this guide for instructions; otherwise continue on with 'Find the Heir.'
Mythic Dawn agents are attacking Weynon Priory. Be careful, as they will likely make a beeline for you when they spot you. Enter the chapel, which is just east of Weynon House, and head inside. You'll find Jauffre being attacked by a pair of Mythic Dawn agents. Assist him, and then speak to him to learn what happened.
Follow Jauffre out of the chapel and into Weynon House. Jauffre discovers that the Amulet of Kings has been taken. When Jauffre learns of Martin's arrival, he decides that the best option is to bring him to Cloud Ruler Temple, which is located high in the mountains north of Bruma. You must travel to the Cloud Ruler Temple with Jauffre and Martin to complete this quest.

Escort Jauffre and Martin to Cloud Ruler Temple.
Fast traveling there is the quickest and safest option. Cloud Ruler Temple is quite a ways away from Weynon Priory, and on top of that, you have currently two NPCs to look after. Jauffre and Martin will instantly travel there as well if you go the fast travel route, so it's definitely the best option.
Once you've made it to Cloud Ruler Temple, approach the gates and open them to gain access to the fortress. A man named Cyrus welcomes the group. Martin and Jauffre are then led inside. Follow them up the steps to listen to Martin's speech. Once the speech has concluded, speak to Martin and then Jauffre to discuss the best course of action.
If you speak to Jauffre once at Cloud Ruler Temple, he asks if you'd like to join the Blades, the group of warriors tasked with defending the Emperor at all costs. Joining the Blades is not necessary in order to progress in the main storyline. If you do join, however, Jauffre will give you an Akaviri Katana. Furthermore, Blades armour can be found in the Cloud Ruler Temple West Wing.
When you've made your choice, select the 'Amulet of Kings' dialogue option while speaking to Jauffre. He wants you to contact Baurus, who can be found in Luther Broad's Boarding House in Imperial City. Jauffre believes that Baurus may have information regarding the assassin group that swiped the Amulet of Kings from Weynon Priory. Luther Broad's Boarding House is located in the Imperial City's Elven Gardens district. Unless you're up for walking, just fast travel there from the exterior of Cloud Ruler Temple.
After fast travelling to the Elven Gardens District, head straight until you reach a junction, at which point turn left to spot Luther Broad's Boarding House. Head inside and locate Baurus, who should be sitting on one of the barstools in front of the counter. Sit down and speak to Baurus. He explains that in a moment, he is going to stand up and leave the boarding house, and the man seated in the corner is going to get up as well and follow. Baurus wants you to follow this man. Just select 'I'm ready when you are' from the dialogue options, as Baurus is unwilling to discuss anything else at this time.

Retrieve the Mythic Dawn Commentaries 1 volume from Astav Wirich's corpse.
Wait until the man stands up and begins following Baurus before getting up yourself. Follow the man into the basement and wait until he attacks Baurus, and then take him out. When the man is dead, search his corpse and retrieve the Mythic Dawn Commentaries 1. When you have the book, speak to Baurus once more. Ask him what should be done next, and he'll tell you to see Tar-Meena at the Arcane University. Tar-Meena is the Imperial City's resident Daedric cult expert, so she may be able to interpret the Mythic Dawn volume you've acquired.
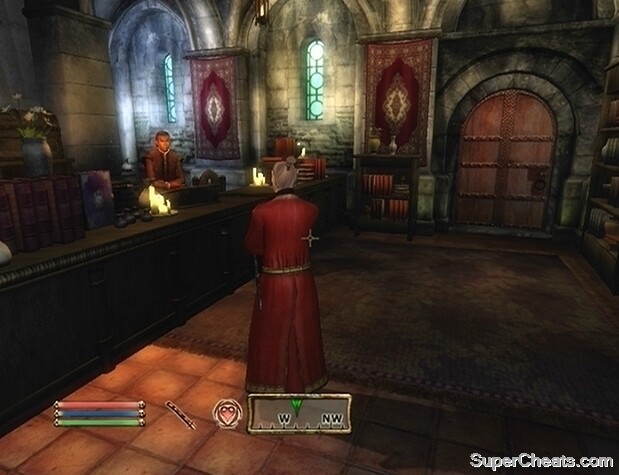
Make your way to Arcane University, which is located in the southeast corner of Imperial City. Once you're there, walk up to the door and step inside. Tar-Meena is a female Argonian who can likely be found in the Arch-Mage's Lobby. Speak to her and select 'Mythic Dawn' from the dialogue options to learn a bit about the cult. Afterwards, tell her about the book in your possession. Tar-Meena explains that there are four Mythic Dawn Commentaries. She has the second volume in her possession, and is willing to part with it. The First Edition bookstore in the Imperial City's Market District apparently carries the third.

Speak to Tar-Meena in the Arch-Mage's Lobby at Arcane University to acquire the second volume.
Leave Arcane University once you have the second volume and fast travel to the Market District. Once you're there, just head straight, past the junction, and look for the bookstore along the left side of the road. Head inside and speak to Phintias, who is the proprietor of the First Edition. Select the 'Mysterium Xarxes' dialogue option; he tells that while he has a copy of the third volume on hand, it has already been paid for by another customer. Ask him about Gwinas, the man who has purchased the book, and Phintias will explain that he is late for the pickup, but should be arriving shortly.
Stand off to the side and wait for Gwinas to arrive. When he arrives, allow him to walk up to the counter and obtain the book from Phintias. Once he has the book, speak to him and ask about it. Gwinas explains that he was unaware that the Mythic Dawn group assassinated the Emperor and his sons. Upon realizing this, he wants nothing to do with the Mythic Dawn cult and is happy to part with the book. He'll then tell you of the fourth volume, which can be obtained by speaking directly to a member of the Mythic Dawn cult. Gwinas explains that he had an appointment set up to meet with a man known as the Sponsor to obtain the fourth book; he'll then give you a note with directions to the meeting place.
The note instructs the reader to enter the Sunken Sewers beneath the Imperial City and sit at the table there. But first, make your way to the Elven Gardens District and speak to Baurus to tell him what you've learned.
Intercept Gwinas after he picks up the third volume from the First Edition bookstore and inform him of the royal assassination connected to the Mythic Dawn group to receive the book.
Enter Luther Broad's Boarding House and Baurus will automatically initiate a conversation with you. He insists on coming along to the meeting, as he claims to know his way around the Sunken Sewers. Follow Baurus out of the boarding house and he will eventually lead you to a grate to the Elven Garden Sewers.
It is quite dark in the sewers, so bringing along a Torch or casting the Nighteye spell would be a good idea. To get to the meeting place, follow Baurus and help him fight enemies encountered along the way. Don't run ahead, as Baurus will not follow you and just freeze in place until you fall back behind him.
When you reach the stop, Baurus will stop and initiate a conversation with you. He wants to sit for the meeting while you keep watch. At this point, Baurus is no longer immune to death; if his health falls to zero, he's dead. If you keep Baurus alive and speak to him after the quest, he can raise your Blade and Heavy Armor skills by one point. So, if you want to keep him alive, tell him that you will meet the Sponsor while he keeps watch.
Afterward, head through the door and enter the Sunken Sewers. Approach the table and sit down in the chair. The Sponsor will enter the room and begin speaking to you. A little ways into his briefing, he discovers that you did not come to the meeting alone as instructed.
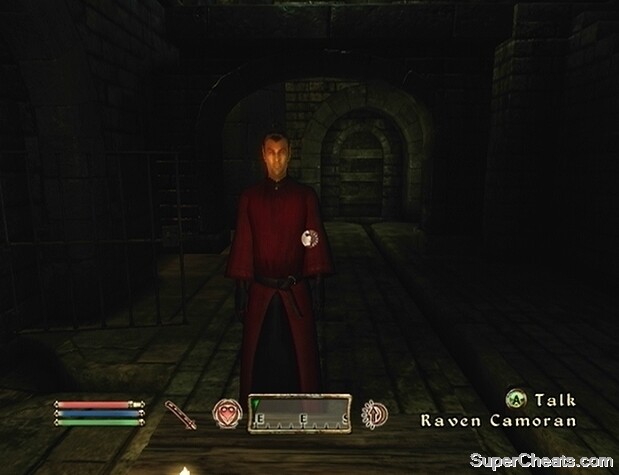
Meet with the Sponsor in the Sunken Sewers. Kill him and loot his corpse to find the fourth volume.
You have to act fast if you want to keep Baurus alive, as several Mythic Dawn agents will appear and attack to aid Cameron. Raven Camoran holds the Mythic Dawn Commentaries 4 volume; locate his corpse and retrieve the book once the battle is over. Be sure to take the Sunken Sewers Key as well.
Only follow these next directions if you have a good amount of lockpicks. If you do not have any lockpicks, follow the quest marker on the compass at the bottom of the screen to find your way out. Just be sure to have 'The Path of Dawn' set as your active quest.
Head through the gate used by Raven to enter the sewers and climb up the steps there. Make your way through this area until you reach the Talos Plaza Sewers entrance. The Sunken Sewers Key will unlock the door here.
There are likely enemies in this next area, so be cautious. Look for the Turn Wheel by the fire and activate it to open the door on the west side of this room. Head through the door and up the steps to the left. In this next room, follow the passage on the east side. Move straight through this room, open the gate and then continue moving south down the next large area.
Next, head through the passage at the end of the way and use the door at the south end of this room to reach the South West Tunnel area. In this room, head straight to the door to the Temple Sewers across the way. Activate the Turn Wheel off to the right once you're through the tunnel and proceed through the gate that the wheel opens
Move through the room northeast of your current location. Cross the bridge and follow the series of rooms that you come to until you reach the end. Look for a Turn Wheel at the bottom of the stairs and activate it to open the gate in the circular room. Move down to the bottom level of the circular room and start down the newly accessible tunnel. Look for another Turn Wheel on the west side of the room at the end of the tunnel and activate it.
Head through the gate that the Turn Wheel opens and follow the tunnel. Move down to the lower level of this area, and follow the path up. Head through the open gate here, and take a right in the next room. Follow the path here and climb up the stairs to find a ladder leading into Amantius Allectus' Basement. The way to Amantius Allectus' Basement may be locked. If it is and you don't have any lockpicks, unfortunately you're out of luck unless you can scrounge some in the sewers. If you do have a limited number of lockpicks, be sure to save your game before attempting to unlock the ladder. Once you're through, get out of the basement and exit out to the Imperial City's Temple District.
Return to Arcane University and speak to Tar-Meena. She explains that Mankar Camoran hid a message within his writings that provide directions to the Mythic Dawn shrine. By deciphering the hidden message and locating the shrine, one would be considered worthy of joining the Mythic Dawn cult. Tar-Meena needs time to study the texts; if you return and speak to her a day later, she'll have deciphered the message. You can study the books and try to decipher the hidden message yourself, however.
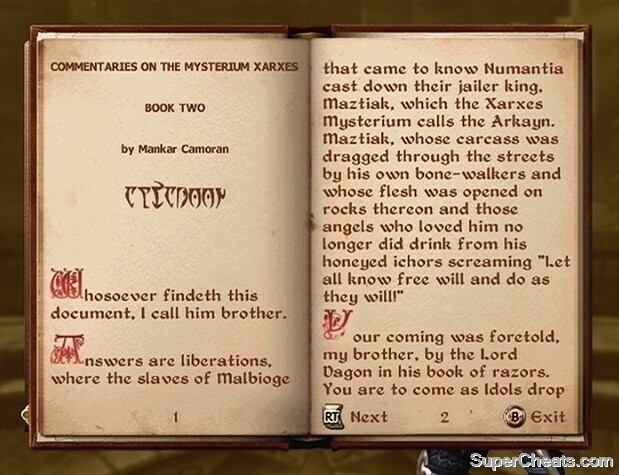
Combine the first letter of each paragraph in the order they appear across the four Mythic Dawn Commentaries volumes to discover Mankar Camoran's secret message.
Each Mythic Dawn Commentaries volume is also a skill book, so each one to gain a skill level for each school of magic.
To decipher the hidden message, all you have to do is take the first letter of each paragraph and put them all together. Pretty simple, isn't it? Mankar Camoran's expectations of those he considers worthy must be fairly low. By taking the first letter of every paragraph across the four volumes and putting them together, you would get the following string of text: GREENEMPERORWAYWHERETOWERTOUCHESMIDDAYSUN. This string of text with spaces added is 'Green Emperor Way Where Tower Touches Midday Sun.'
Leave Arcane University and travel to the Imperial City's Palace District, which is the Green Emperor Way mentioned in the message. While standing at the bottom of the steps that lead up to the entrance of the palace, turn right and to spot a small tomb. This is the 'Tomb of Prince Camarril.' If the time is not near 12:00PM, press the Back/Select button and wait the amount of hours needed to advance to midday.
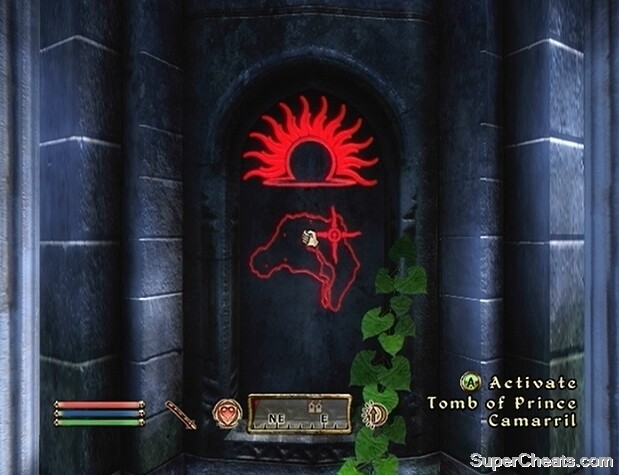
A map of Cyrodiil revealing the location of the Mythic Dawn shrine appears on the side of Prince Camarril's tomb in the Imperial City's Palace District from 11:30AM to 12:30PM each day.
Stand by the front of the shrine (the side with the vine hanging from it) and wait until the path is revealed. The symbol should light up at around 11:50AM, and disappear at 12:30PM. When the symbol appears, approach the shrine and press the A/X button when prompted. It is a map of Cyrodiil that shows the location of the Mythic Dawn shrine. Not the best place to put a map with directions to your top secret cult hideout, now is it?
The Shrine of Dagon is located in the Lake Arrius Caverns, which is west of the Imperial City and north of Cheydinhal. You cannot fast travel directly to the cavern if you have not been there before. The shrine is marked on your map. Start by fast traveling to the Black Waterside Stables outside of Cheydinhal, since the caverns are just north of here.
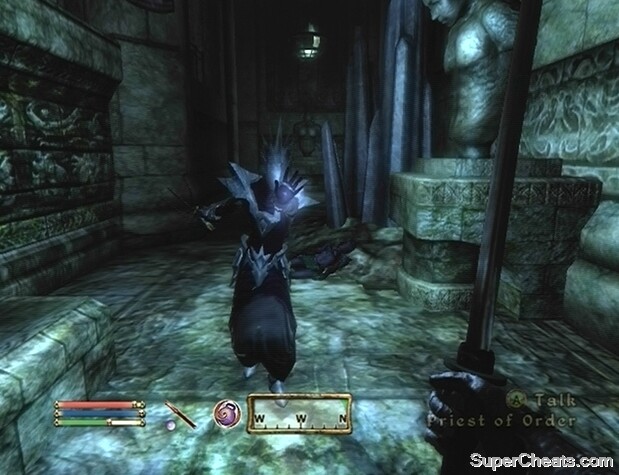
Now it's just a short trek north to the caverns. When reach the caverns, use the wooden door to enter. Proceed further into the caverns until you reach a door that is sided by a pair of red Mythic Dawn banners. Approach the Doorkeeper to speak to him.

Speak to the Doorkeeper to gain access to the Mythic Dawn shrine in Lake Arrius Caverns.
Your goal once in this shrine is to retrieve the Amulet of Kings. There are essentially two ways to go about completing this quest. You can either convince the disciples that you are genuinely interested in joining the Mythic Dawn cult, or you can run into the shrine and bash some heads in. Going with the former is likely the better option, as there numerous cultists occupy the shrine. Unless your character is at a rather high level, you likely won't be able to handle all of them at the same time.
If you wish to go about doing things the violent way, doing so doesn't require much instruction. Just run in, kill everything that moves, grab the book, and be on your way.
Provided you wish to take the cautious route, read on. After speaking to the Doorkeeper, he will proceed to open the doors to the shrine. You'll encounter a Dark Elf named Harrow inside; he'll order you to hand over every item in your inventory. Harrow provides you with initiate Mythic Dawn robes.
Alternatively, before speaking to Harrow, you can drop all of your possessions outside, and then run over and retrieve them once you have the robes. It would be a good idea to at least drop your weapon and armour outside for combat purposes, but you will eventually get the other items in your inventory back.
If you refuse to hand over the contents of your inventory, Harrow will attack you, so it's best to comply. Follow Harrow into the Shrine Antechamber; continue following him and he will lead you to the Dagon Shrine. Once in the shrine, you will witness Mankar Camoran giving a speech to the cultists. The legendary Mysterium Xarxes lies on the pulpit in front of him! Do not touch this book just yet; sit back and allow Camoran to finish his speech.

Allow Mankar Camoran to finish his speech, and then speak to Ruma Camoran for further instructions.
When Camoran's speech concludes, he'll open up a portal and disappears into the Paradise realm. Unfortunately he takes the Amulet of Kings along with him. Don't worry, however, as there is nothing that you can do at this point. Camoran does leave behind the Mysterium Xarxes; this is your ticket to Paradise.
Once Camoran has left the shrine, Ruma Camoran will approach and initiate a conversation with you. She explains Mythic Dawn initiates are required to spill the blood of Lord Dagon's enemies upon the shrine. Agree to slay the sacrifice, even if you intend not to. If you refuse, the cult will attack. Grab the Silver Dagger that lies next to Mysterium Xarxes. Whether you kill the sacrifice or not does not matter, as the cultists will attack you as soon as you snatch the Mysterium Xarxes from the pulpit.
You can choose to free the prisoner; doing so could serve as a distraction, but the Mythic Dawn will likely ignore him and make a beeline for you instead. Have a healing spell or some other means of healing yourself ready before you make your move. It would be a good idea to save your game before doing anything else.
If you didn't drop your equipment outside before speaking Harrow, now is a good time to retrieve your belongings, as you'll surely need them to get through the brawl to ensue. Rather than killing or freeing the prisoner, it would probably be best to locate Harrow instead and quickly attack him with the Silver Dagger equipped. Retrieve your gear from his corpse, run up to the pulpit, grab the Mysterium Xarxes, and high-tail it out of there.

Locate Harrow, quickly kill him with the Silver Dagger and then loot his corpse to retrieve your gear.
You're going to have to run like a madman to make it out this one alive, unless you think you can take them all on at once. The path used to enter the shrine has been blocked off, so you have no choice but to find another way out. There happens to be another exit through the Living Quarters. The entrance to the Living Quarters is up on the hill to the left of the shrine. Head up the steps in the southwest corner of the shrine, turn right at the top, run past the red banners, and follow this path until you reach the door to the Living Quarters. You've got to move fast, as the cultists will surely follow you through the door.
Once in the Living Quarters, head straight and turn right as soon as you can. There are several Mythic Dawn Acolytes up ahead; pay them no heed and run past. Take a left, and then a right when you can; be sure not to head left instead, as doing so will lead you to dead end. Continue heading this way until you reach a large, open room.
Immediately run left and hop up the rocks to the reach higher ground. There are a couple of Acolytes up ahead, but they won't be able to jump up after you. Run along the upper level and head through the passage that you come to. There are several more cultists up ahead. Just continue running and casting healing spells.
Keep heading in this direction until you reach another room. Here, you can either keep running, or try to take out the cultists on your tail. If you don't have an adequate number of healing and/or magicka potions, run past the cultists and head through the passage to the right. Exit to the Shrine Antechamber, and make your stand here. The Acolytes will surely follow you, and if you quickly strike when they first appear, you should be able to kill each one. Once they've been taken care of exit back to the Living Quarters, head up the slope and exit to the Lake Arrius Caverns via the door at the top.
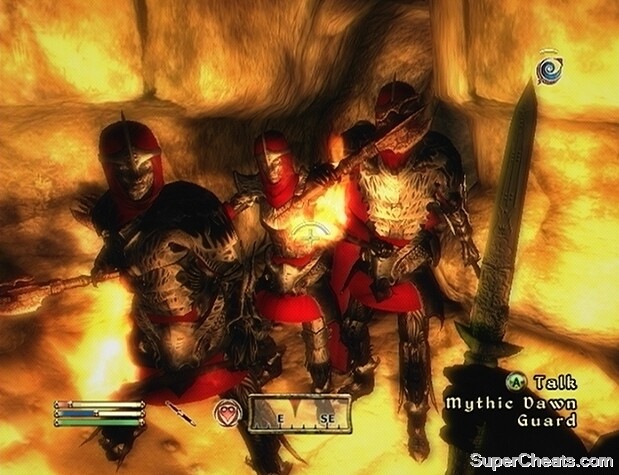
Taking on the cultists all at once is no easy task, so your best bet is to high-tail it out of there.
There's a Handle on the wall off to the left of this area. Use the Handle to lower the rock wall. Run past the rock wall, head down the middle of the area here, and exit the caverns through the same way you came in. If there are cultists still pursuing you, they will most likely follow you outside. It is easy enough to deal, provided they are not attacking you all at once.
The way out of the Shrine of Dagon
Now you must deliver the Mysterium Xarxes to Martin at Cloud Ruler Temple. Fast travel to Cloud Ruler Temple to speak to Jauffre. Afterwards, make your way to the Great Hall and bring present the book to Martin. He believes that the key to opening a portal to the Paradise realm lies within the pages of the Mysterium Xarxes, but he requires some time to study it.
After speaking to Martin about the Mysterium Xarxes, he tells you to speak with Jauffre about the Mythic Dawn agents spying on Cloud Ruler Temple. Set 'Spies' as your active quest, and follow the active quest marker on your compass to locate Jauffre. Select 'Spies' from the list of dialogue options while speaking to Jauffre. He tells you that strangers have been sighted near Cloud Ruler Temple. He suspects they are Mythic Dawn spies, based in Bruma. Jauffre suggests speaking to Captain Burd in Bruma about any strangers in town.
Captain Steffan has additional information regarding the spies. Follow the active quest marker on your compass to locate Captain Steffan and speak to him. He tells you that the spies have been spotted on the road to Cloud Ruler Temple, usually near the rune stone at dusk.
Leave Cloud Ruler Temple and follow the green marker on your compass to reach the Hestra Rune Stone. According to Captain Steffan, the spies have been spotted near the rune stone at dusk. They should turn up at around 10:00PM, so press the Back/Select button and wait the number of hours required for it be that time.
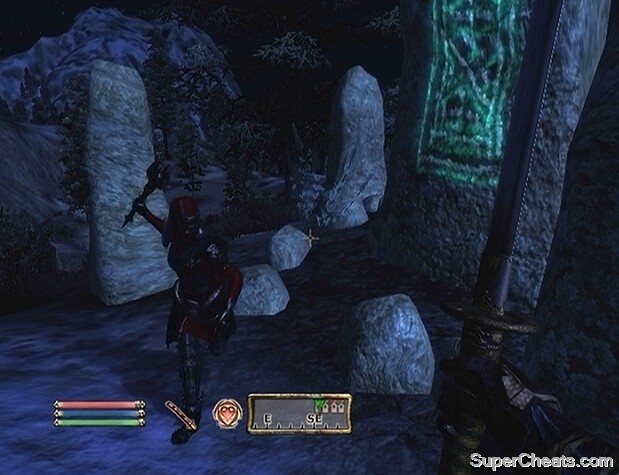
Look for the Mythic Dawn spies at the Hestra Rune Stone southeast of Cloud Ruler Temple at around 10:00PM.
The spies will immediately cast a spell to summon armour and attack upon spotting you. Take out the spies, and then search Jearl's corpse and remove Jearl's Key and the Basement Key from his inventory. The next person you need to see is Captain Burd in Bruma. Fast travel to Bruma and follow the active quest marker on your compass to locate him. He is most likely in Castle Bruma. Select the 'Spies' dialogue option while speaking to Captain Burd. Inform him that Jearl was a spy to receive permission to search her house to look for clues.
Locate Jearl's house, which is marked by the red active quest marker on your compass, and head inside to investigate. There isn't any apparent evidence upstairs, but there is a trap door by the table that leads down to the basement. Scour the basement for a document entitled 'Jearl's Orders,' as well as copies of the first two volumes of the Mythic Dawn Commentaries. Once you have the document, head back upstairs. Exit Jearl's house and fast travel back to Cloud Ruler Temple.
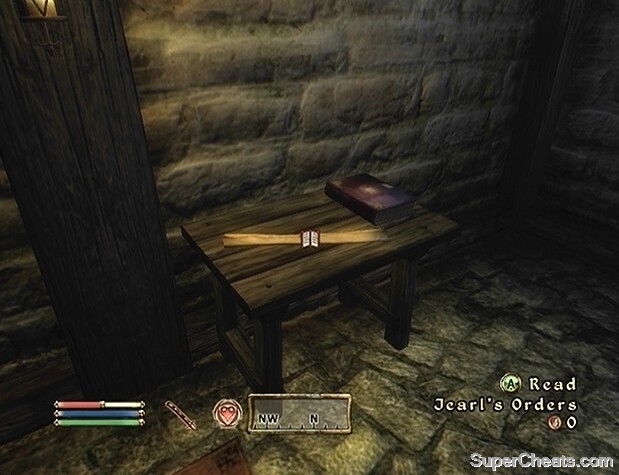
Retrieve the Jearl's Orders document from Jearl's home in Bruma.
Present the document to Jauffre to complete the quest.
Speak to Martin about his progress deciphering the Mysterium Xarxes. He explains that four items are required to open a portal to Camoran's Paradise. So far, he has only managed to identify one of these items, which is the 'Blood of a Daedra Lord.' This, Martin goes on to explain, refers to a Daedric artifact.
In total, there are fourteen different Daedric artifacts in Cyrodiil. Several of these artifacts are incredibly useful items. To obtain one of these artifacts, you first must locate a Daedric Lord's shrine, and then present a specific offering or meet a certain condition. Fulfill the requirements to converse with that Daedric Lord. You will be given a quest; complete this quest to attain the Daedric artifact as a reward.
Reading the 'Modern Heretics' book on Martin's desk will mark the Shrine of Azura on your map. Keep in mind, however, that any one of the fourteen Daedric artifacts are sufficient as a means of opening portal. The artifact received for completing Azura's quest happens to be the incredibly useful Star of Azura, which acts as a reusable Grand Soul Gem. Giving an artifact Martin essentially means destroying it. You won't want to give up the Star of Azura, as it is arguably one of the best items in game.
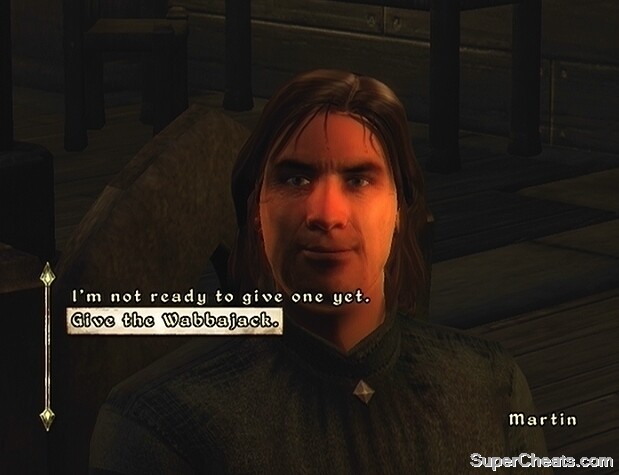
Give Martin an expendable Daedric artifact, such as Sheogorath's Wabbajack.
Refer to the Daedric Shrine Quests section of this guide for a listing of each and every Daedric Shrine quest. A couple of the Daedric artifacts are not nearly as useful as the others, so look over the rewards as outlined in the Daedric Shrine Quests section of this guide and decide which of the fourteen you would be willing to part with.
The Mace of Molag Bal is a good choice, especially if your character does not use blunt weapons. The problem here, however, is that your character must be at least level seventeen to be accepted by Molag Bal. So, depending on your level, you may not be able acquire the Mace of Molag Bal at this time. Whereas Azura's quest has a level requirement of only two, the reward gained for completing the quest is much too useful to give up.
If your character is below level ten, Sheogorath's reward is a good choice. Complete Sheogorath's quest to receive a weapon called 'Wabbajack' for a reward. The Wabbajack, while a fun weapon, is essentially useless. As with Azura, Sheogorath's level requirement is only two.
Once you have acquired an expendable Daedric artifact, return to Cloud Ruler Temple and hand it over to Martin to complete the quest.
Once you've delivered the Daedric artifact to Martin, locate and speak to Jauffre. Use the active quest marker to find him, as he tends to move around a bit. He explains that an Oblivion Gate has opened up near Bruma, and the guardsmen need help shutting it. Since you have already successfully closed one of these gates before, Jauffre wants you to assist them. Once the guards see how it's done, they should be able to better handle opened gates in the future.
You need to travel to Bruma and meet Captain Burd outside the city walls. Simply fast travel to the Wildeye Stables outside of Bruma; you should be able to see the gate in the distance if you turn around.
Approach the troop of guards gathered by the gate. When Captain Burd approaches, tell him that you are prepared to enter the Oblivion Gate. Remember that things are rough in Oblivion, so be sure to have a supply of repair hammers, arrows, potions, and the like before stepping through.
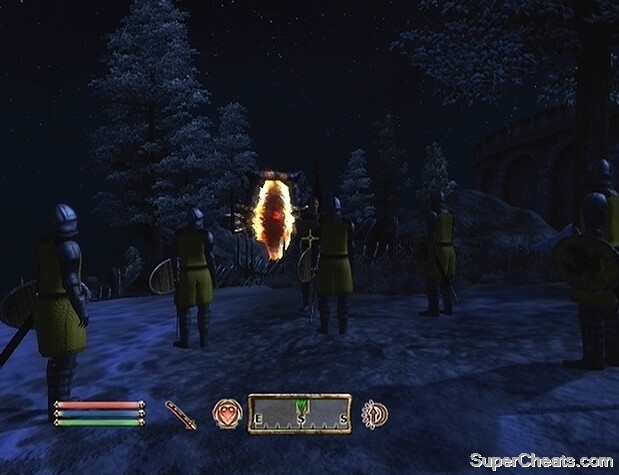
Meet Captain Burd and the Bruma guardsmen by the open Oblivion Gate outside the city walls.
Captain Burd is an 'important' character, and as such is marked by a crown icon when the crosshair hovers over him. This status means that when his health falls to zero, he will not die, but only knocked unconscious and rendered incapacitated for a short period of time. Burd is the only character who needs to witness the closing of the gate, so whether the other guards that accompany you live or die is unimportant. The nature of the Daedra encountered while in Oblivion is dependent on your character's level. If your character is currently at a higher level, you will likely face some nasty Daedra that can wipe out the guards in the opening stages.
The path to the tower is rather straightforward. Just follow the path until you reach a Magicka Essence and Blood Fountain. There are no splits in the road, but be careful, as there are Daedra and traps along the way. Mind the Fire Towers especially; there are several huddled in one area, and together they can deal a fair amount of fire damage.
Once you reach the area Magicka Essence and Blood Fountain, look for a path leading south. Check your map to confirm that you are traveling south on the right path. Keep following this path and you will eventually reach the entrance to the tower dubbed 'The Fury Spike.' Head inside.
There are likely one or two Dremora in the opening area, so be cautious as you enter. When the bottom floor is clear, locate the door to the Rending Halls and head through. Once in the Rending Halls, locate and open the Citadel Hall Door, head up the ramp, clear this room of enemies, and then follow the eastern path. Continue following this path to reach the second level of the tower.

Fight your way to the top of the Fury Spike!
Clear out any Daedra in the area, and then head up the ramp to your left. Proceed through the door to the 'Corridors of Dark Salvation.' Upon entering this area, head up the ramp to your right and make your way up to the door to the third level of the tower. The Sigil Keeper is on this level; kill him and retrieve the Sigil Keep Key from his corpse. Proceed to the entrance of the 'Sigillum Sanguis' area; the Sigil Keep Key will unlock the door.
Fight your way up the ramp and to the very top of the tower. Take the Sigil Stone here to teleport out of there, closing the gate in the process. Burd and the guardsmen (dead or alive) will be teleported back outside with you. Speak to Burd, and then travel back to Cloud Ruler Temple. Once there, speak to Jauffre to complete the quest.
After giving Martin some time to figure out the next item needed to open a portal to Cameron's Paradise, speak to him to learn of the second item on the list, the blood of a Divine. Though Martin is unable to discern what exactly this refers to, Jauffre is able to figure it out, so speak to him. He'll tell you that the Armor of Tiber Septim, a holy relic of the Blades, would be adequate. The armour, Jauffre explains, is buried deep within the catacombs of Sancre Tor, to which he provides you a key.
Sancre Tor is located west of Bruma; Jauffre has marked the location on your map. It is a relatively long trek to Sancre Tor, so to make things easier on yourself, be sure to set 'Blood of the Divines' as your active quest. This way, you can simply follow the active quest marker on your compass. Alternatively, if you have discovered any locations on the map that are near Sancre Tor, you can fast travel there to shorten the journey. Otherwise, Weynon Priory might make a good starting point.
Once there, walk along the walls of the fort and locate the entrance. Be careful, as there is likely some variation of skeleton warrior beyond the walls. You'll encounter a multitude of undead creatures in the catacombs of Sancre Tor. Depending on your character's level, you may or may not encounter ghosts. Be sure to bring along a silver or a magic weapon so you can damage ghosts in the event that you do encounter one.
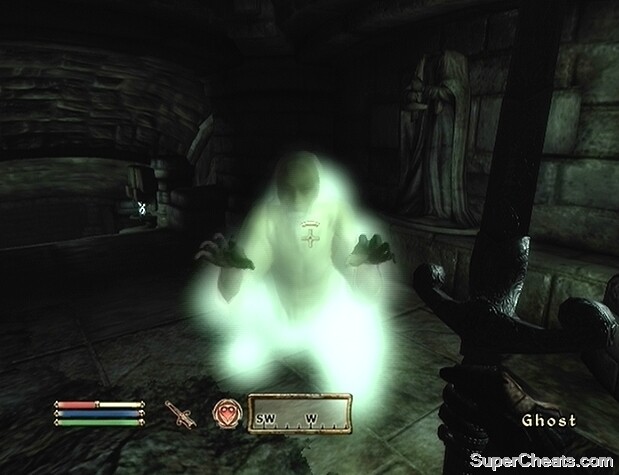
Only Silver or Magic weapons can damage ghosts.
When you come to the closed gate in the first area of Sancre Tor, activate the Pull Lever at the bottom of the stairs to raise it. Enter the large room beyond the gate, locate the steps at the end of the corridor, and take them up to higher ground. The undead Blades encountered in Sancre Tor are likely to carry some pretty sweet magical items, so be sure to loot their remains after defeating one.
Once the undead Blade has been defeated, speak to the Ghost of Rielus that appears over the remains. He'll thank you for freeing him, and request his brothers be freed as well. With his brothers freed, together they can dispel the Underking's evil enchantment on the Shrine of Tiber Septim.
After conversing with Rielus, cross the bridge on this level and start down the passage on the other side. Follow the path and head through the door to the 'Sancre Tor, Entry Hall' area at the end of the way. Each area that branches off from the Entry Hall leads to one of Rielus' undead comrades. For the sake of following this walkthrough, head through the door marked 'Sancre Tor Prison' first.
You are likely to encounter several ghosts in this area depending on your character's level, so remain vigilant while passing through. Look to the left of the gate that you reach to spot a Pull Lever; Activate the Pull Lever to raise the gate. To open the locked door, you'll have to kill Warden Kastav to get his key. Kill Warden Kastav, remove the key from his remains, and use it to unlock the door.
Head through the door and keep heading straight; don't turn when you first have the chance. When you have a chance to turn a second time, take this turn right and head straight down the path here. At the end of the path, start downs the passage to your right. Make your way to the end of the passage and head up into the large, open area. Defeat the undead Blade here to free Valdemar's soul. With that done, backtrack to the Entry Hall.

Defeat the undead Blades to free the benevolent souls trapped inside.
Next, locate the door to the 'Sancre Tor, Hall of Judgement' area and head through. This is a small area; just head right and continue heading in this direction until you reach a large room. Take the stairs that you come to down to the blood-stained floor. Defeat the undead Blade here to free the spirit of Casnar.
With that done, make your way to the entrance to the 'Sancre Tor, Catacombs' area. If you head back up the steps that you came down to reach this floor and proceed through the south passage, you should come to the door leading to this area. If necessary, refer to the local area map and for the beginning of the path. Enter the catacombs to encounter the final undead Blade; defeat him to free the soul of Alain.
Backtrack to the Entry Hall and locate the giant door leading to the 'Sancre Tor, Tomb of the Reman Emperors' area. Head through this door to encounter the four spirits you freed. Now united, they will dispel the evil enchantment over Tiber Septim's shrine. When the way is clear, move onwards to until you reach the pedestal that holds the Armor of Tiber Septim.
The Armor of Tiber Septim is in the Tomb of the Reman Emperors, beyond the enchantment cast by the Underking many years before.
With the relic in your possession, return to the Cloud Ruler Temple and present it to Martin to complete the quest.
The third item needed for the ritual is one Great Welkynd Stone, which is a particularly rare Ayleid artifact. Miscarcand, an Ayleid ruin located about halfway between the cities of Kvatch and Skingrad, holds one of these stones. Fast travel to the Grateful Pass Stables outside of Skingrad, as it won't be too long of a trek from there.
Miscarcand is primarily occupied by Bitterfish goblins and various types of undead creatures. These two forces are hostile to each other. If you encounter a group of fighting enemies, stand back and let them duke it out, and then pick off the winner(s).

Goblins and the undead occupy the ruins of Miscarcand.
Upon entering Miscarcand, descend and turn right as soon as you can. Continue heading straight without jumping down to the lower level, and turn left when you can. You will come to a stone bridge with an Iron Gate on the opposite side. You'll need to find and activate a Press Block to open the gate. The Press Block is not near the gate, so jump down from the bridge to the lower level, and start down the northwest path here. Activate the Press Block in the small room that you come to. Doing so will open the Iron Gate.
Head through the doorway next the Press Block, make your way back to the bridge, and enter the 'Miscarcand, Sel Vanua' area. In the top-right corner of this area, there is a Press Block on the wall that will raise the Varla Stone cage in the middle of the room, allowing you to take the Varla Stone inside.
The passage in the top-right corner of this room is blocked by an Iron Gate, so you'll have to find another way around. Start down the path in the bottom-right corner of this room to reach a large area with several goblins and undead creatures fighting each other on the lower level. Don't jump down, but instead follow the bridge to the other end and continue through the passage there
Activate the Press Block at the end of this route to open the way to the next area. Exit to the lower level of and proceed through the door at the north end of this area. The Great Welkynd Stone is within the 'Miscarcand, Morimath' area, which is where you're headed next.
Remain vigilant, as there is likely to be some variation of zombie on the way to the stone. Follow the linear path and you should soon be able to see a glowing stone in the distance. Approach the Great Welkynd Stone and take it into your inventory. As soon as the stone is removed from its pedestal, the King of Miscarcand will spawn. This unique Lich has a highly damaging projectile attack, so you'll have to keep moving to avoid getting blasted. Two zombies accompany him as well. These zombies can be used as meat shields; they are likely to run straight for you, and the Lich's projectiles will hit the zombies if they are between you and him.
The Great Welkynd Stone is on the platform at the center of the Miscarcand, Morimath area.
Once the King of Miscarcand has been defeated, search his remains for the Miscarcand Key. Enter the room at the north end of this area and step on the push panel here. Head through the opening on the west side of this room and make your way to the end of the series of corridors beyond to return to the Miscarcand entrance area.
Return to Cloud Ruler Temple with the Great Welkynd Stone and hand it over to Martin to complete the quest.
Though this quest is optional, completing it entirely serves several benefits. Primarily, the allies gained here can be a great aid during the 'Defense of Bruma' quest. Perhaps more importantly, the skill levels and equipment that you are sure to gain while completing this quest would likely be a benefit as well.
This quest entails traveling to each of the major cities to request aid for the city of Bruma, which is currently under threat of a full-scale attack. Of course, acquiring this help is not as simple as just asking politely. In every case, you'll have to close an Oblivion Gate that has opened up near the walls of the city before the count or countess will agree to lend a hand.
In some cases, you may find that there is more than one Oblivion Gate that could be considered a direct threat to the city. If this is ever the case, you need only enter and shut the gate that is marked by the active quest marker for the count or countess to agree to spare some soldiers.
You'll need to visit the Imperial City, Kvatch, Anvil, Skingrad, Chorrol, Leyawiin, Bravil and Cheydinhal. Travel to each city in any order you like, as order has no effect on the outcome of this quest.

See the count or countess of each major city about assisting Bruma.
High Chancellor Ocato of the Imperial City is unwilling to spare his troops for the sake of Bruma, but you'll have better luck with the other cities. Provided you have completed the 'Battle for Castle Kvatch' side quest, Savlian Matius in Castle Kvatch will be more than willing to enlist a few of his men for the cause.
Speak to Countess Millona Umbranox in Anvil about aid for Bruma. You'll need to shut the Oblivion Gate that has opened up outside of the city before the countess will agree to spare some soldiers to help Bruma. You know the drill; get to the top of the tower and grab the Sigil Stone there to seal the gate. With the gate outside of Anvil closed, speak to Umbranox again; ask for aid again and this time, she'll be happy to oblige.
In Chorrol, you'll need to see Countess Arriana Valga about aid for Bruma. Shut the Oblivion Gate outside of Chorrol and ask the countess again for support to strengthen the garrison. Count Marius Caro is the one to see in Leyawiin. Shut the Oblivion Gate outside the city and request aid for Bruma from Marius Caro again to garner more support for Bruma.
Travel to Castle Skingrad to speak with the count there. You'll need to speak to one of his stewards in the County Hall about seeing him. Find Mercator Hosidus and ask him about aiding Bruma. If you Mercator Hosidus is not in the hall, speak to Hal-Liurz instead. The steward will then leave to fetch Janus Hassildor, who is the count of Skingrad. Before he will send aid to Bruma, he asks that you close the Oblivion Gate that has opened up outside of Skingrad. Speak to him again with the gate closed to gain his support.

Speak to one of the stewards in the Castle Skingrad County Hall about aid for Bruma to meet with the count.
Speak to Count Regulus Terentius in Bravil. As with the others, he too requests the open Oblivion Gate outside his city be closed. Speak to Regulus again after completing the task to gain the support of his guard captain, Viera Leruso.
You'll need to speak to Count Andel Indarys in Cheydinhal. There is a side quest attached to this Oblivion Gate in which you must find Farwil, the count's son. This quest is called 'The Wayward Knight.' Look for detailed walkthrough of this quest under the 'Side Quests' section of this guide. Once the gate has been closed, speak to Count Indarys again to have him send his soldiers to Bruma.
Give the Great Welkynd Stone to Martin to learn about the Great Sigil Stone, which is the last item required to open a portal to Camoran's Paradise. Unfortunately, the Sigil Stone found in a run-of-the-mill Oblivion Gate will not suffice. As such, Martin has come up with a potentially dangerous plan to acquire a Great Sigil Stone. He explains that the Mythic Dawn plan to open a Great Gate outside of Bruma, not unlike the one that led to the destruction of Kvatch. The plan is to allow the Mythic Dawn to open this gate, followed by you entering to fetch the Great Sigil Stone inside.
Before proceeding with this quest, it would be worth your while to complete 'Allies for Bruma' quest first. Garnering support for Bruma will make the time spent waiting for the Great Gate to open much less of a challenge. Completing Allies for Bruma is completely option, so if you don't care to, that's your choice. The equipment and skill levels you are sure to gain by doing so might be of help as well.
When you're ready to accept this quest, you'll need to speak to Narina Carvain, the countess of Bruma. Select the 'Battle Plans' dialogue option while speaking to her. The countess agrees to meet Martin at the Chapel of Talos to discuss his plan, so follow her there. After the meeting, you'll just need to speak to the countess when you are ready.
Speak to the countess in the Chapel of Talos once you are prepared for battle.
Speak to Martin first for more thorough instructions. He explains that before a Great Gate can be opened, the Mythic Dawn must be allowed to open three lesser Oblivion gates. The power output from these lesser gates will permit them to open a Great Gate, which will then be used to bring out a siege machine from within Oblivion to blast through Bruma's walls. As such, time is of the essence here; you'll have to move fast once you step through that gate. If the siege machine makes it through the gate, all hope is lost. Speak to the countess once you're ready to get started.
Follow Martin and the others down to the battlefield. If you didn't garner enough support for Bruma through the 'Allies for Bruma' quest, the city will be forced to send its militia out to the fight. The militia, of course, won't stand much of a chance against the armies of Oblivion.
There is initially one lesser Oblivion gate open on the battlefield. A Great Gate will open shortly after two additional lesser gates have. You will need to enter the Great Gate when it opens to acquire the Great Sigil Stone within. Martin must be protected until you're through the Great Gate. If Martin falls during the battle, the game is over. Depending on your character's level, different Daedra will emerge from the Oblivion gates; the higher your character's level, the nastier the Daedra.
You must stave off the Daedra that come through the gates until all three have opened. Soon after, the Great Gate will appear. Martin must survive until then, so prioritize protecting him. It would be wise to create a separate save file just before entering the Great Gate.

Fight off the Daedra until the Great Gate opens and then charge into Oblivion!
Once you're through the gate, you should be able to spot the Daedric siege engine inching toward the portal. You have fifteen minutes to acquire the Great Sigil Stone before it's too late. Start by entering the World Breaker Guard tower off to the right of the fiery lake. Step on the elevator inside, move about halfway up the ramp, and exit through the door that leads back outside. Cross the bridge here and enter the other tower. Kill the Dremora in this room, and exit through the door adjacent to the door you used to enter.
Cross the bridge and enter the tower at its end. Climb up to the top of the ramp and exit through the door at the top. Cross this next bridge and enter the tower at the other end. Use the Blood Fountain across from the entrance to replenish lost health if need be, and then start down the ramp. Continue heading down the ramp until reach a circular opening. Don't drop down, but instead head through door that leads outside. Once outside, there should be broken stone bridge in front of you. To make it over the gap, you'll need to get a running start and jump across. Your character doesn't need to have a very high Acrobatics level to make it to the other side; one of at least 25 is definitely sufficient. Just be sure to sheath your weapon before running and leaping over to the other side.
When you have made it across the gap, look to your right and jump to the trail there. You should be able to see a stone bridge leading to a giant tower in the middle of the fiery lake. A closed gate blocks the way to this tower. Enter the 'World Breaker Guard' tower in front of the stone bridge and make your way up to the top. Once at the top of the tower, hit the Gate Control switch to clear the way.
Run back down the tower and cross the bridge. There are likely several Dremora on the bridge leading to the main tower. If you're running low on time, just run past them. The Great Sigil Stone is in the World Breaker tower along the north side of the bridge. Kill the Sigil Keeper once inside and remove the Sigil Keep Key from his corpse. Locate the entrance to the 'Vault of End Times' area and enter.
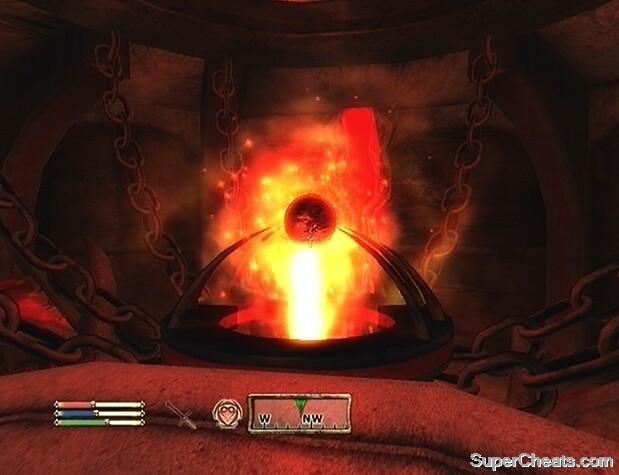
Get to the top of the World Breaker tower and retrieve the Great Sigil Store before it's too late!
Watch out for the falling blade traps and make your way to the top of the ramp. Proceed through the door on the south side of this room. Follow the linear path here to reach a small room. Open the Citadel Hall Door on the south side of the room and follow the ramp up to a door to the second level of the World Breaker. Head up to the top of the ramp; there should be another Sigil Keeper here, in case you missed the one on the first level. Enter the 'Sigillum Sanguis' area next. If you're really low on time, just make a mad dash to the top of this area. Activate the Great Sigil Stone to be teleported safely outside.
Closing the Great Gate.
Back outside you will witness the infernal machine crumbling before you. After the spectacle, scour the surrounding area for a Sigil Stone. Activate the stone to add it to your inventory. Jauffre may have died during the battle, but he isn't needed to progress further in the main questline.
Speak to Martin when the smoke clears. You now have everything required to open a portal to Camoran's Paradise. Sometime after this battle, if you check by Bruma's north gate, you will see that a statue of your character has been erected by the people of Bruma. The statue will be wearing the most powerful armour and wielding the most expensive weapon that was in your character's inventory during the Battle of Bruma.
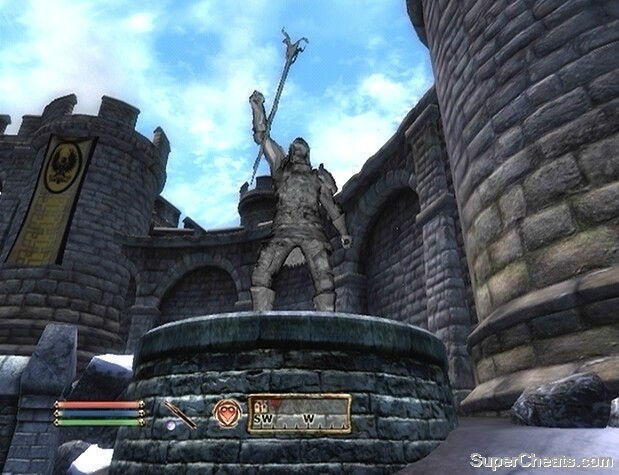
Look for the commemorative statue of your character near Bruma's north gate sometime after the battle.
Now that every item contained in the Mysterium Xarxes has been gathered, a portal to Mankar Camoran's Paradise may be opened. Once you step through the portal to Paradise, you will not be able to return to Cyrodiil until you complete this quest. A heavy dose of combat awaits you through the portal, so before stepping in, be sure that you have an adequate supply of repair hammers, arrows, potions, and whatever else you might need.
Once in Paradise, you'll need to kill Mankar Camoran to dissolve the realm and return to Cyrodiil. Speak to Martin at Cloud Ruler Temple when you're ready to depart. Step through the portal when it manifests to enter the realm. Initially, Paradise appears to be rather nice place, but delve deeper and you are sure to find Daedra lurking about. Not such a nice place after all.
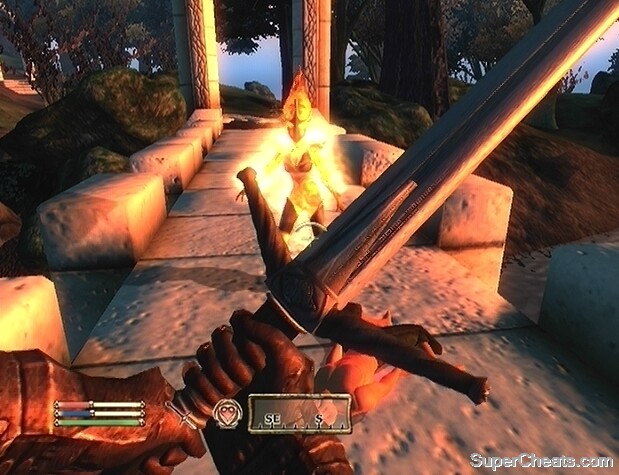
Whatever paradise may be, this certainly isn't it.
Start down the slated path and speak to the Ascended Immortal that you encounter to learn more about this realm. Right now, you are in the 'Savage Garden' area. The Ascended Immortal explains that the only way to leave the garden is through the 'Forbidden Grotto.' In order to exit through this way, however, one must be wearing the Bands of the Chosen. The 'Terrace of Dawn' leads to Mankar Camoran's palace, 'Carac Agaialor.' The only route to the Terrace of Dawn area is through the Forbidden Grotto, so you'll need to get your hands on the Bands of the Chosen to reach Camoran's palace.
Continue following the slated path until you come to a fork in the road. At the fork, head down the right-hand path. Continue following this path until you encounter a Dremora named Kathutet.
Tell him that you seek Mankar Camoran; he's willing to help, but you'll first have to complete a task for him. You can either complete his task or simply battle him instead. Kathutet just so happens to be wearing the Bands of the Chosen. If you agree to the task, Kathutet instructs you to free a Xivilai named Anaxes. Anaxes is a malevolent creature that has been trapped in a cave by the Ascended Immortals. It is much faster to just battle Kathutet here, but if you choose to complete the task, you will need to enter cave that the active quest marker points to and remove the boulder that has Anaxes trapped.
As for fighting Kathutet, he is rather tough, as he is likely to be wielding an enchanted weapon. Furthermore, depending on your character's level, he may be able to best you in a few hits. If you feel confident that you can take him, battle him. You'll be able to nab his after the fight, too. If you have a bow and a supply of arrows, you can hop up onto the nearby boulder and hit him with arrows until he falls.
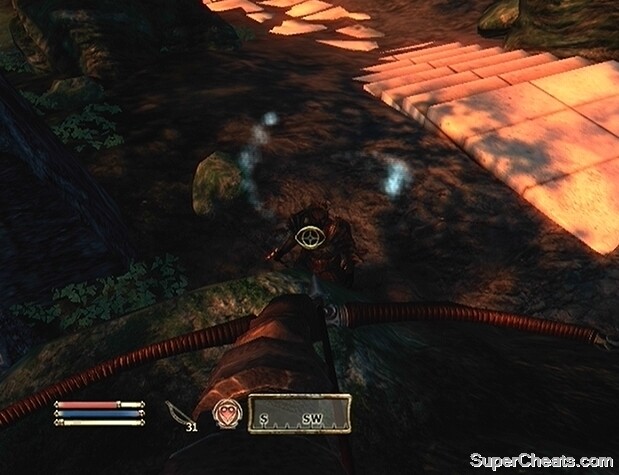
Perch on the large boulder near the grotto entrance and use a bow to safely defeat Kathutet.
Once you have acquired the Bands of the Chosen, enter the Flooded Grotto. The entrance to the Forbidden Grotto is located at the end of this area. There are sure to be Daedra lurking in this area, so remain vigilant. When you reach the door to the Forbidden Grotto, equip the Bands of the Chosen to open it. With the Bands equipped, your character has a 50% weakness to fire, so hopefully you won't encounter a Flame Atronach through here.
Inside the Forbidden Grotto, cross the bridge to encounter a man named Eldamil. He offers to help you; he explains that while wearing the Bands of the Chosen, one cannot leave the grotto. Eldamil can remove the Bands, but he asks that you first pose as prisoner but must pretend you until the Dremora Overseer Orthe leaves. You cannot remove the Bands yourself, so you have no choice but to accept his help. Agree to play along for the time being and get into the cage
When the cage has been completely raised back up, walk down the ramp to other side of the crevice. You don't need to enter the cage at all if you think you can take Orthe. Either way, it does matter if Eldamil is killed, as he is immortal and will still be able to remove the Bands at a later time. Locate the door to the Forbidden Grotto on this side of the crevice. Head through to meet with Eldamil and have him remove the Bands. You may as well agree to bring him along to face Mankar Camoran.
There are plenty of Daedra in this area, so be ready for a fight. Head down the path and turn left as soon as you are able to. Continue moving in this direction until you reach a large room. Cross the bridge in this room and exit through the tunnel on the left. Move through the next area, turn right when you can, and continue heading straight until you can no longer. At this point, start down the tunnel to your left. Hop up the rocks here and follow this route to the end of the Forbidden Grotto.
Follow the stone path up to Carac Agaialor. You'll meet Ruma and Raven Camoran outside the palace. Inside is Mankar Camoran, seated upon his throne. Cue long, drawn out monologue. You don't have to listen to him drone on; jump up and attack him whenever you please. You may be able to kill both his children during his speech without provoking him. Try to quickly kill Ruma and Raven, and then immediately attack Camoran. If you aren't quick enough, both of the dead Camorans will reappear by Mankar's throne.

Face Mankar Camoran in Carac Agaialor.
If you allow Mankar to finish his speech, you'll be facing all three Camorans at once upon its conclusion. Their powerful magic spells may make them quite the challenge. Focus on killing Raven and Ruma first, as you can then take on Mankar without any distractions. Ruma and Raven are likely to reappear at some point during the battle, however. When Mankar falls, remove the Amulet of Kings and any enchanted gear from his corpse.
The palace will begin to crumble as you are teleported back to Cloud Ruler Temple. Speak to Martin and hand over the Amulet of Kings to complete the quest.
First, you must escort Martin to the Elder Council Chambers in the Imperial City Palace. Fast travel to the Imperial City Palace and speak to High Chancellor Ocato inside. A guard interrupts with the news that Oblivion gates are opening up all over the city! Mehrunes Dagon's invasion will continue until Martin lights the Dragonfires in the Temple of the One.
Things are looking pretty grim in the city streets. Fortunately, the Palace guards will aid you in escorting Martin. Defeat the first batch of Daedra outside and proceed out to the Imperial City Temple District.
The situation is even more hectic in the Temple District. Daedra line the street, and eventually Mehrunes Dagon himself will appear. Mehrunes Dagon is a hulking, multi-limbed, cherry red monster. A quick size comparison between your character and this giant may lead you to believe that Tamriel is pretty much doomed. Luckily Martin has a plan, so speak to him.
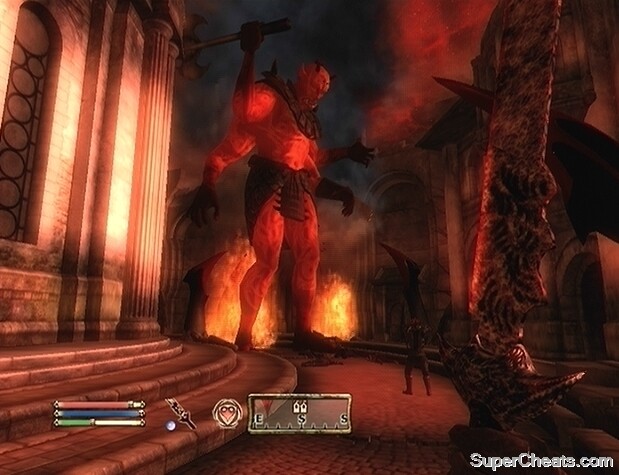
Mehrunes Dagon is huge, but don't fret; Martin has a plan.
You have to get Martin to the Temple of the One so he can use the Amulet of Kings to unleash the power of Akatosh, since mortal weapons cannot harm Mehrunes Dagon. Run straight past the giant and into the Temple of the One. Once inside the temple, you will witness the ending sequence; just sit back and enjoy the show.
That's it — you've saved Cyrodiil and completed the main questline! Congratulations on a job well done.
Champion of Cyrodiil, achieved!
Completing the main questline is far from the only thing to do in Oblivion. There are many more side quests to complete including four joinable guilds, each with its own unique storyline. There are fourteen Daedric shrines interspersed across the land, each yielding a powerful Daedric artifact as a reward. This guide covers each and every side quest, guild, and downloadable content as well, so you can continue to use it in conjunction with your game. The province of Cyrodiil is relatively safe now that there are no more Oblivion gates, so get out there and explore!
The Fighters Guild is one of the four joinable guilds in Oblivion. Your character must have a relatively clean criminal record (meaning, a good fame/infamy ratio, and no current bounty) to join. First, you'll need to speak to either Azzan in Anvil, Vilena Donton in Chorrol, or Burz gro-Khash in Cheydinhal. Each of these NPCs can be found in the Fighters Guild hall of their respective city. To advance in rank within the Fighters Guild, you must complete jobs.
To get started, travel to one of the aforementioned cities, enter the Fighters Guild hall there, and speak to the leader about joining the Fighters Guild.
This section is broken down into the following chapters...
A Rat Problem
The Desolate Mine
The Unfortunate Shopkeeper
Unfinished Business
Drunk and Disorderly
Den of Thieves
Amelion's Debt
The Master's Son
More Unfinished Business
Azani Blackheart
The Wandering Scholar
The Fugitives
Trolls of Forsaken Mine
The Stone of St. Alessia
The Noble's Daughter
Mystery at Harlun's Watch
Information Gathering
Infiltration
The Hist
Speak to Azzan in the Anvil Fighters Guild hall. He should be in the Guild Hall starting at 11:00AM, and remain there until dark. Select the 'Contract' dialogue option to take on a job.
Arvena Thelas, a woman who resides in Anvil, is experiencing a rat problem. You'll have to travel to her house and speak to her to learn more. Don't let this seemingly mundane contract deter you from the Fighters Guilds; you'll be tasked with killing bigger things soon enough. Set 'A Rat Problem' as your active quest and follow the quest marker to Arvena Thelas.
Perhaps Arvena's rat problem is not quite what one would expect. Arvena keeps several rats as pets, but something has been killing them. She requests that you go down to the basement where she keeps the rats to investigate. Head down to the basement, and it becomes readily apparent what has been happening to Arvena's pet rats; a Mountain Lion has found its way inside! You have to act fast, because if the Mountain Lion is able to kill every one of the rats in the basement, Arvena will not push the contract any further.

Slay the Mountain Lion in Arvena's basement before it kills her pet rats!
Once you have dealt with the Mountain Lion in the basement, head back upstairs and share your discovery with Arvena. She'll point you towards Pinarus Inventius, a hunter who lives in Anvil. With his help, you should be able to determine if there are more mountain lions lurking about. Follow the active quest marker to Pinarus' location and speak to him about the mountain lions. He quickly agrees to help, so start following him out of the city.
You won't have to travel far before coming across the lions' den. When Pinarus comes to a stop outside the city gate, turn to your left to spot a small clearing where several mountain lions should be standing. Kill each and every Mountain Lion here, then return to Anvil and speak to Arvena to tell her of your success.
Just when you thought your work was done, it turns out that another Mountain Lion has found its way into Arvena's basement! Fantastic. Head down to the basement, kill the thing, and then speak to Arvena once more. Arvena is convinced that her neighbour, Quill-Weave, is to blame for these incidents. She insists that she has seen her outside at night, sneaking around behind her house. You'll need to observe Quill-Weave starting at around dusk to determine if she is truly the one behind this. You must not be seen, otherwise Quill-Weave is likely to become suspicious.
Wait outside Arvena's house starting at around 7:00PM, as Quill-Weave should appear at this time. The active quest marker now points to Quill-Weave, so you can keep track of her by checking the local area map. Wait in the backyard of the house next to Arvena's for Quill-Weave to appear. Remain in Sneak Mode, and out of Quill-Weave's view. When you notice her slip behind Arvena's house, keep an eye on her while still in Sneak Mode.
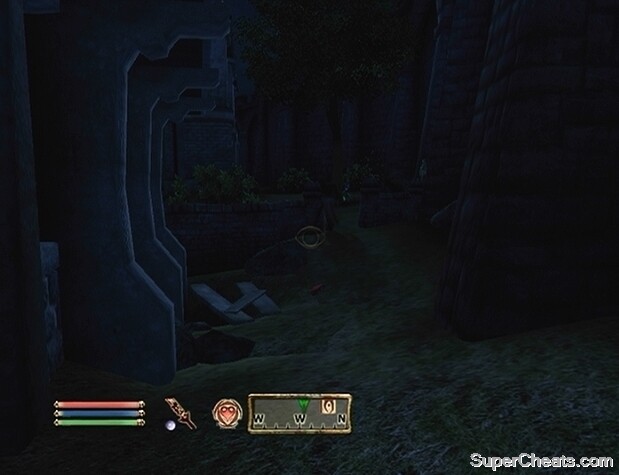
Wait for Quill-Weave to appear outside of Arvena's house after nightfall.
You'll witness her leaving a slab of meat outside of Arvena's house. After catching Quill-Weave leaving the meat, run up and confront her. If you agree to not tell Arvena what you saw, Quill-Weave will grant your character one Acrobatics skill level. If you do tell Arvena, she will grant your character one level of Speechcraft. Decide which skill level you would rather have your character gain, and act accordingly. If you decide to lie and tell Arvena that Quill-Weave had nothing to do with it, after receiving your payment, speak to Quill-Weave to earn the skill level
Return to the guild hall and speak to Azzan about your advancement to be promoted to the Apprentice rank.
Speak to Burz gro-Khash in the Cheydinhal Fighter's Guild hall. Select the 'Contract' dialogue option to get started. You need to travel to the Desolate Mine outside of Cheydinhal and deliver some supplies to the Fighters Guild members there.
Leave Cheydinhal and make your way to the Desolate Mine, which is just northwest from the city. Enter the mine, and head straight down toward the fire to find the Fighters Guild members gathered there. Speak to Rienna and give her the bow, give Brag gro-Bharg the hammer, and give Elidor the sword. Once they have the supplies, you'll have to help them clear the mine of goblins. It would be wise to save your game at this point because if the event that one or more of your allies die, the gold reward you receive at the end of the quest will be a bit lighter.
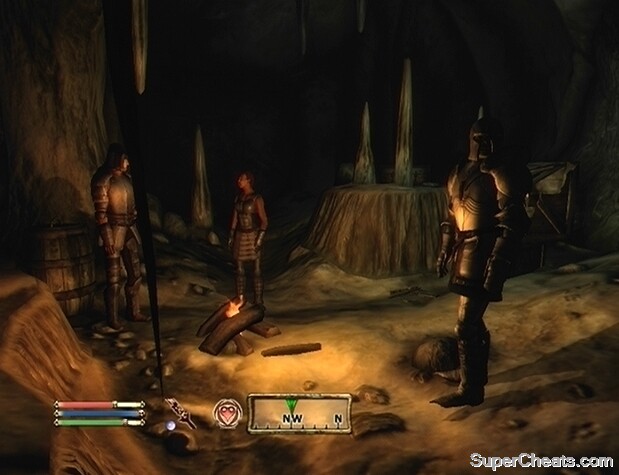
Outfit the guild members in the Desolate Mine based on their preferences.
Run through the tunnel and kill any goblins in your path. Be sure to keep an eye on your allies, as they are quite dense and will simply run at anything that catches their eye, which makes them prone to becoming outnumbered.
It is quite dark in the Desolate Mine, so hopefully you have some way of creating light. There are a couple of traps to watch out for, especially the falling logs, which are likely to crush your allies if they're following behind you.
Once the mine has been completely cleared, the quest completed notification will pop-up on the screen. Return to Cheydinhal and speak to Burz gro-Khash to receive your reward. If you have not completed the 'A Rat Problem' quest yet, speak to Burz gro-Khash about your advancement to be promoted to the Apprentice rank in the guild.
Speak to Azzan in the Anvil Fighters Guild hall after completing 'A Rat Problem' and ask him for another contract. Norbert Lelles, the proprietor of Lelle's Quality Merchandise, has hired the Fighters Guild to put a stop to the thieves who have been breaking into his shop at night.
Make your way to Lelle's Quality Merchandise, which is along the Anvil City docks, and speak to Norbert Lelles. Select the 'Break-ins' dialogue option to learn more. Norbert wants you to wait in his shop at night to catch the thieves when they break in to steal more merchandise.
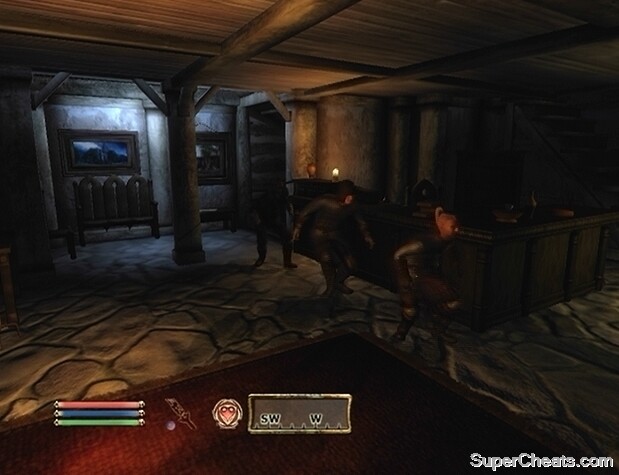
Wait for the burglars to enter Lelle's Quality Merchandise. They should appear at around 1:00AM.
The burglars will enter the store at some time between 1:00AM and 2:00AM. Press the Back/Select button to bring up the wait menu and wait as many hours as needed until it is around that time. There are three of them, and you must kill each one. Three against one may be tough, so if you are having a difficult time, leave the shop. Outside, the city guards and other passersby should help you fight them off.
When all three thieves are dead, enter the Flowing Bowl, which is the inn near Lelle's Quality Merchandise, and speak to Norbert there. He'll thank you for dealing with the burglars, and give you a monetary reward. Return to the Anvil Fighters Guild hall and speak to Azzan about your advancement to gain the Journeyman rank, provided you have completed 'The Desolate Mine' quest from the Cheydinhal Fighters Guild as well.
Speak to Vilena Donton in the Chorrol Fighters Guild hall. She should be there from 6:00AM until nightfall. Select the 'Duties' dialogue option while speaking to Vilena to get started. She points you to a Dark Elf named Modryn Oreyn, who can also be found in the Chorrol Fighters Guild hall, likely from 10:00AM until dark. Select the 'Duties' dialogue option while speaking to Modryn Oreyn to receive your task. Maglir, who is a member of the Fighters Guild, has defaulted on a contract. You'll need to travel to Skingrad, located Maglir, and find out what happened.
Locate the West Weald Inn in Skingrad and head inside. Maglir should be standing by the counter; approach him and start a conversation. Select the 'Defaulted' dialogue option and Maglir will tell you of his task to find Brenus Astis' Journal, which is somewhere in Fallen Rock Cave.
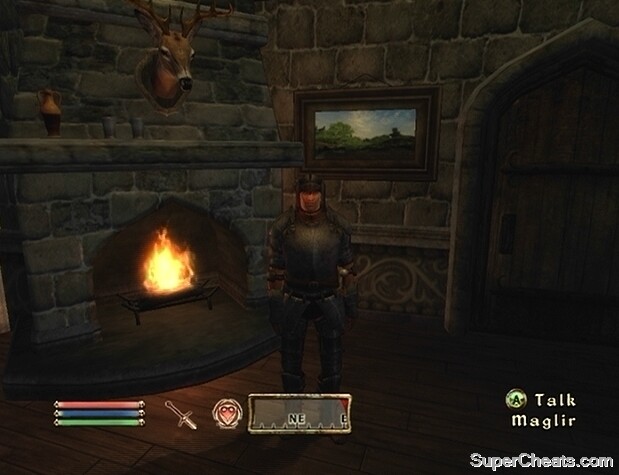
Speak to Maglir at the West Weald Inn in Skingrad about the defaulted contract.
Since Maglir refuses to carry out the contract, the responsibility is now yours. The Fallen Rock Cave is located northwest of Skingrad; it's just a short trek from the Grateful Pass Stables outside the city. When you reach the cave, locate the entrance and head inside. Have 'Unfinished Business' set as your active quest and follow the quest marker on your compass to find the journal. If you get lost, press the B/Circle button and look to the local area map to see where you are.
Fallen Rock Cave is occupied by a variety of undead creatures, so remain vigilant as your make your way through. If your character is a high enough level, you are likely to encounter several ghosts. You'll need a silver or enchanted weapon to damage ghosts. When you kill a ghost, be sure to collect the Ectoplasm from its remains, as Ectoplasm is needed to complete the next Fighters Guild duty.
You'll have to drop down to a stream in the large area at the north end of the cave and follow it north to get to the journal. When you reach the room that contains the journal, look next to the chest here to spot Brenus Astis' Journal. Pick up the journal, and make your way out of Fallen Rock Cave.

Brenus Astis' Journal is in the room at the north end of Fallen Rock Cave.
Return to the West Weald Inn in Skingrad and speak to Maglir there. Tell him of your success, then return to Chorrol and speak to Modryn Oreyn. Whether you tell Modryn Oreyn the truth about who completed the task or not doesn't seem to matter, as going with either option yields the same amount of gold.
Speak to Modryn Oreyn after 'Unfinished Business' and select the 'Duties' dialogue option for another job. He explains that some Fighters Guild members have been causing trouble in Leyawiin, making the Fighters Guild as a whole look bad. You need to find Dubok gro-Shagk, Rellian, and Vantus, and find out why they are causing trouble.
Travel to the Leyawiin West Gate, and enter the local tavern, the Five Claws Lodge, which should be straight ahead. This is where the three guild members have reportedly been causing trouble. Inside, locate and speak to Vantus Prelius, who appears to be the leader of the crew. Vantus explains that there has been a lack of work in Leyawiin ever since a new guild, known as the Blackwood Company, moved into town. You need to find Vantus and crew some work to keep them busy, preventing them from causing further trouble in Leyawiin.
Speak to the inn keeper, Witseidutsei, and ask about 'Fighters Guild Jobs.' She won't discuss this topic unless her disposition is at 70. Raise her disposition to at least 70 if necessary, and ask again about any jobs. Witseidutsei tells you that a woman named Margarte in Leyawiin may have work for the Fighters Guild.

Speak to the guild members in the Five Claws Lodge in Leyawiin to find out why they have been causing trouble.
Follow the active quest marker to Margarte and ask her about a possible job. Margarte does indeed have work for the Fighters Guild, but you must first bring her five portions of Ectoplasm before she'll agree to employ them. Undead creatures such as wraiths and ghosts drop Ectoplasm, but unless you know of any dungeons in particular, these creatures can be difficult to find. You may be able to find Ectoplasm in stock at an alchemy store such as All Things Alchemical in Skingrad, or The Main Ingredient in the Imperial City's Market District.
Once you have acquired five portions of Ectoplasm, return to Margarte in Leyawiin and select the 'Fighters Guild Jobs' dialogue option once more. She will now be willing to pay the Fighters Guild for Minotaur Horns and Ogre Teeth, effectively giving the three drunkards in the Five Claws Lodge plenty of work to keep them busy.
Return to the Five Claws Lodge and speak to Vantus. Then, return to the Fighters Guild in Chorrol, and tell Oreyn of your success. After receiving payment, speak to Modryn Oreyn about your advancement within the guild to be promoted to Swordsman.
Speak to Azzan in the Anvil Fighters Guild hall once you have attained the Swordsman rank. Ask him for a contract, and then inquire further into the thief situation in Anvil. Azzan wants you to locate the hideout of a band of thieves somewhere on the outskirts of the city. Unfortunately Azzan is unable to provide the exact location of the thieves' hideout. The only information he can provide is its close proximity to Anvil. You'll need to hit the streets to find someone who knows of the thieves.
The Wood Elf Maglir will accompany you on this quest. Maglir is an 'important' character, which is denoted by the crown icon that appears when the crosshair hovers over him. As an important character, if Maglir's health falls to zero, he will not die, but instead be knocked unconscious and rendered incapacitated for a short period of time. Due to this status, you won't have to worry about him dying on you.
Speaking to practically anyone in Anvil and selecting the 'Thieves' dialogue option will have you pointed in the right direction. Whoever you end up asking, they will point you to Newheim the Portly, a Nord who resides by the Anvil docks. Newheim moves around quite a bit, so follow the active quest marker to locate him. Ask Newheim about the thieves to learn of their hideout. The thieves are hiding out in Hrota Cave, which is just a short walk north from Anvil. Newheim will also mention an heirloom; inquire further to add 'Newheim's Flagon' to your journal.

The band of thieves is hiding out in Hrota Cave, which is just a short walk north from Anvil.
You'll have to do some fighting once inside the cave, so make sure you have the necessary supplies before heading in. To complete the quest, you must kill each and every thief in Hrota cave. Be sure to have 'Den of Thieves' set as your active quest, because this way there will be a green marker pointing to every one of the thieves in the cave.
Before charging into a new area of the cave, be sure to check the local area map to see how many thieves you'll be dealing with at once. Start by clearing out the thieves in the tunnels beyond the rock wall, and then enter the large area at the northeast end of the map to find three more thieves. As you make your way to this area, watch for the trip wire trap that Maglir is sure to set off.
When the thieves in the large area have been dealt with, hop down into the small pit in the middle of the area and look on the wooden table to spot Newheim's Heirloom. Grab the heirloom and make your way back to the cave entrance.
Return to the Fighters Guild hall and tell Azzan of your success to receive payment. If you have also completed 'Amelion's Debt,' speak to Azzan about your advancement within the guild to be promoted to Protector.
Speak to Burz gro-Khash in the Cheydinhal Fighters Guild hall after advancing to the Swordsman rank and select the 'Contract' dialogue option. He points you to Biene Amelion, a woman living in the Water's Edge settlement due north of Leyawiin. Travel to Water's Edge settlement and speak to Biene Amelion there. Have 'Amelion's Debt' set as your active quest to more easily locate here.
Biene Amelion needs help repaying her father's gambling debt. Her father was taken from his home due to his inability to pay back the debt, and so the responsibility transferred over to his daughter. Biene lacks the funds necessary to cover the debt as well, so she asks that you retrieve her grandfather's armour and sword, which should be able to fetch a pretty penny.
Retrieve Brusef Amelion's sword and cuirass for Biene to sell so she can cover her debt, or pay the debt yourself and keep her grandfather's equipment for yourself.
You have two options here: agree to retrieve the relics so that Biene may sell them pay off the debt, or give her the 1000 septims she needs to cover the debt from your own pocket. If you do give Biene the 1000 gold, you can retrieve her grandfather's equipment and keep it for yourself. Brusef Amelion's equipment is a unique, white variant of run-of-the-mill Ebony armour, and is classed as light armour rather than heavy. So, if you're a collector, you'll want to pay off Biene's debt and collect the armour for yourself.
Though in her request, Biene mentions only needing her grandfather's cuirass and sword to cover the debt, the other pieces of the armour set can be found in his tomb as well. The helmet, gauntlets, grieves, boots, and shield are all in less-obvious locations, however. If you choose to pay off Biene's debt yourself, report back to Burz gro-Khash in the Cheydinhal Fighters Guild and inform him of your completion of the contract.
If you choose to retrieve her grandfather's armour (either for her or for your own character), you'll need to travel to Amelion Tomb northeast of Leyawiin. There are sure to be plenty of undead creatures in the tomb, so be sure to bring along a silver or magic weapon in case you happen to encounter a ghost. If you plan to search for the entire set of armour, you will need some method of creating light, as it is very dark in the tomb and the armour pieces are not readily noticeable. A torch will suffice, though Nighteye or a similar spell would be even better.
Also note that Brusef's armour is only light in class, as each piece actually weighs 21 pounds! As such, be sure to empty out your inventory before entering Amelion Tomb.
Brusef Amelion's Boots: From entrance of the tomb, follow the linear path and start down the middle path when you come to the fork. Keep heading in this direction until you reach a coffin. Look behind the coffin to spot the boots.

Brusef Amelion's Gauntlets: Backtrack to the fork, and turn down the path to your left; the gauntlets are lying on the ground at the start of this tunnel. Be careful here, as you could inadvertently trigger some falling rocks when moving forward.

Brusef Amelion's Shield: Turn back from where the gauntlets were found and start down the path parallel to the one that leads to the coffin that the boots were found behind. Activate the Pull Rope to lower the rock wall blocking your progression, and make your way to the Z-shaped room. Look behind the broken box in the bottom-right corner of this area to find the shield.

Brusef Amelion's Greaves: Exit to the 'Sarcophagus Chamber' area via the door in the room where the shield was found. Head straight to the end of this room and continue down this path until you reach a room that contains several coffins. You are likely to encounter a powerful undead creature in this room, so be careful. The greaves are in the upper right corner of this area.
Brusef Amelion's Sword and Cuirass: The sword and cuirass should be in plain sight. They are both on a bier between two coffins.

Brusef Amelion's Helmet: After retrieving the sword, cuirass, and grieves, exit back to the Amelion Tomb area via door at the north end of this room. Before dropping down the hole here, look to the left of the Wisp Stalks to spot the helmet.

Once you have collected every piece of Brusef Amelion's armour set, drop down the hole and make your way back to the entrance of the tomb. Now either return to Biene Amelion in Water's Edge and hand over the cuirass and sword if her debt hasn't been paid off, or keep them for yourself.
If you have also completed the 'Den of Thieves' quest, speak to Burz gro-Khash about your advancement to gain the rank of Protector.
Speak to Oreyn in the Chorrol Fighters Guild hall after attaining the Protector rank and select the 'Duties' dialogue option. Viranus Donton, the Guildmaster's son, lacks confidence, so you are to set out on a quest with him to ensure his success. Vilena Donton, mother of Viranus, is quite protective of her son, so you mustn't tell her what you are up to. Viranus' quest is to investigate what has become of Galtus Previa, whose last known location is Nonwyll Cavern northwest of Chorrol.
Make your way over to Vilena Donton's house, which is right across from the Fighters Guild hall. Initiate a conversation with Viranus and select the 'Galtus Previa' dialogue option. When Viranus is onboard, leave the house and make your way to Nonwyll Cavern. Viranus Donton is an 'important' character, denoted by the crown icon that appears when the crosshair hovers over him. This status means that if his health falls to zero, he will not die, but only be knocked unconscious and rendered incapacitated for a short period of time.
Trolls, Ogres, and minotaur will occupy Nonwyll Cavern, depending on your character's level. There are quite a few enemies in the cave, so you'll have to progress slowly to avoid being outnumbered. Like any other NPC, Viranus will simply charge and attack any enemy that catches his eye. His important status is his saving grace, however, so you needn't worry about him dying at this point.

Help Viranus Donton locate Galtus Previa in Nonwyll Cavern.
Move through Nonwyll Cavern and exit to the 'Nonwyll Chamber of the Titans' area. You are sure to encounter Ogres here, regardless of your character's level, so remain cautious. With 'The Master's Son' set as your active quest, the active quest marker on your compass will point to the corpse of Galtus Previa. Upon entering the Chamber of the Titans, remain on the upper level and make your way to the north end of the room. Be ready for a fight as you enter the room that contains the corpse, as you are likely to encounter several enemies there.
A notification will pop-up onscreen when you locate the corpse of Galtus Previa, informing you to return to Oreyn and speak to him. To exit the caver, follow the path along the southwest side of the large room. You will eventually reach a door back out to the Colovian Highlands. Once you're outside, travel back to Chorrol, speak to Oreyn, and tell him of your discovery.
Speak to Modryn Oreyn after completing 'The Master's Son' and select the 'Duties' dialogue option. He explains that Maglir has defaulted on another contract; once again, you're tasked with finding out why.
Make your way to Bravil and speak to anyone there about Maglir to be pointed in the right direction. Whoever you ask about Maglir, you will be directed to Lonely Suitors Lodge. Enter the lodge and head to the area behind the counter. Maglir should be standing there, decked out in a new set of armour. Speak to him to learn that he defaulted on the contract because he no longer wishes to be a member of the Fighters Guild, and has instead joined the Black Wood Company.
Since Maglir defaulted, it is your responsibility to complete the unfinished contract. If you lied to Oreyn at the end of the 'Unfinished Business' quest, telling him that Maglir did in fact complete the contract assigned to him, Maglir will readily give you information on the current unfinished contract. If you chose to rat him out, you will have to return to Oreyn to get the information.
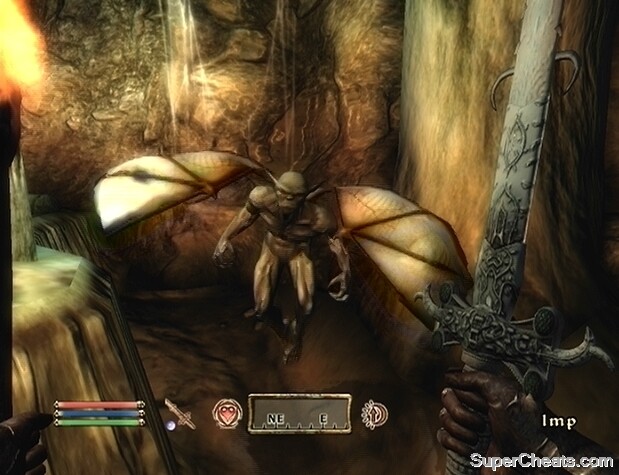
Collect 10 Imp Gall from the imps in Robber's Glen Cave and deliver them to Aryarie of the Bravil Mages Guild to complete the contract.
Once you have acquired the necessary information, make your way to the Bravil Mages Guild hall and speak to Aryarie there. She wants you to collect ten portions of Imp Gall and bring them back to her. She mentions a 'Robber's Glen Cave,' which apparently is known to be home to many imps. Robber's Glen Cave is situated along the north road to Bravil; just follow this road and you will eventually come to it.
Inside, all you must do is kill as many imps necessary to collect ten portions of Imp Gall from their remains. Imps are very weak creatures and require few hits to kill, regardless of your character's level. Robber's Glen Cave is full of imps throughout, so it doesn't matter which path you head down. Obtain the ten Imp Gall needed and present them to Aryarie in the Bravil Mages Guild hall. You are rewarded one Ring of Aegis for completing the task.
Next, speak to Oreyn in Chorrol and tell him of your success. Select the 'Advancement' dialogue option to be promoted to the Defender rank.
When you have reach the Defender rank within the guild, speak to Modryn Oreyn in Chorrol and select the 'Duties' dialogue option. He doesn't wish to discuss this next task in public, so he asks you to meet him at his home after dark. Oreyn will likely be in his home, which is located in the southwest quarter of Chorrol, from 4:00 PM on. With 'Azani Blackheart' set as your active quest, simply follow the compass if you are having difficulty locating Oreyn's home.
When you speak to Oreyn, ask him about the Blackwood Company. He'll inform you of Vitellus Donton's death, who died while pursuing a contract that entailed acquiring an artifact from one Azani Blackheart. After the Fighters Guild members all fell, the Blackwood Company moved in and finished the job. Inquire further about Azani Blackheart, and then agree to aid Oreyn in his quest to uncover the truth. You are travel to the Fighters Guild hall in Leyawiin to meet with Oreyn there, and then set out to Arpenia. Once in Arpenia, you must seek Azani Blackheart to find out what went down.
Travel to the Leyawiin Fighters Guild hall and speak to Oreyn to get started. The ruins of Arpenia are northwest of Leyawiin, so make your way there. Once inside, head straight and turn left when you can. Make your way to the exit in the northeast corner of this room and proceed into the giant, cavernous area. When it has been confirmed that there is nothing of interest in the ruin, Oreyn will lead you to Atatar, which is another Ayleid ruin northeast of Arpenia.

Azani Blackheart is nowhere to be found in the ruins of Arpenia, so follow Modryn Oreyn to Atatar to continue the investigation.
Upon entering Atatar, head down the spiral ramp and then the hallway at its end. Try your best to avoid the swinging traps here. Modryn Oreyn is an 'important' character, denoted by the crown icon that is visible when the crosshair hovers over him. This status means that if his health falls to zero, he will not die, but only be knocked unconscious and rendered incapacitated for a short period of time. Because of this status, you needn't worry about protecting him.
Delve deeper into the ruin and you will encounter some bandits. Just continue heading straight and up the stairs at the end of the large room to reach a door to the 'Atatar Haelia Dagon' area. Move through this area until you come to a locked Iron Gate. There is a Press Block behind an unlocked Iron Gate along the adjacent wall; locate the Press Block and activate it to open the Iron Gate blocking your progression.
Proceed through the Iron Gate and follow the path beyond it to reach a bridge that has falling blade traps across its span. Run across the bridge quickly while trying to avoid the lethal falling blades. Once you're safely to the other end, head through the door to the 'Atatar Haelia Anga' area.
In Atatar Haelia Anga, cross the bridge end and Activate the Press Block next to the Iron Gate at its end. There are likely a few bandits in this next area, so remain vigilant. Head up the steps at the end of the way to reach the entrance to 'Atatar Loria.' It would be wise to save your game at this point.
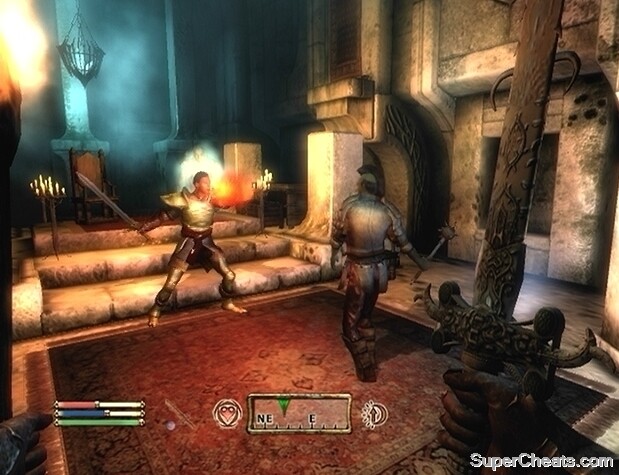
Enter Atatar Loria to find Azani Blackheart, alive and well.
Azani Blackheart is hiding out in Atatar Loria. He is, evidently, unwilling to talk, so attack him immediately. Once you have defeated Azani Blackheart, search his corpse and retrieve Blackheart's Ring. This ring can be used to prove the Blackwood Company did not defeat him.
Afterwards, speak to Modryn Oreyn about your advancement within the guild to attain the Warder rank.
Speak to Azzan in the Anvil Fighters Guild hall once you have reached the Warder rank and select the 'Contract' dialogue option. Elante of Alinor, a scholar who has an interest in Daedra, needs to be escorted through Brittlerock Cave, which is located far northeast of Anvil. You are to accompany Elante to Brittlerock Cave, and then protect her while she explores its depths.
It is rather dark in Brittlerock Cave, so be sure to have some way of creating light before setting out. The cave is quite a ways away from Anvil, so you may want to acquire a horse and take it along for the journey. When you reach the cave, head inside to find Elante eagerly waiting inside. Elante of Alinor is not considered an important character, so if her health happens to fall to zero, she will die permanently, and you will then have to inform Azzan of your failure.
Purportedly, a Daedric shrine lies within this cave. Since Elante is not an important character and can indeed die during this expedition, rather than following her and fighting off the Daedra as she moves through the cave, it would be wise to first run ahead of her and completely clear the cave of Daedra to ensure her survival.

The Daedric altar Elante is searching for is in the southwest corner of Brittlerock Cave.
There are quite a few Daedra in the cave, so clearing the way before allowing Elante to explore is likely the best way to avoid her being killed. Since Elante insists on leading the expedition, she will simply cease movement if you are not close to her. So, if you have already talked to Elante, you can just run ahead and she will stay where she is.
When you've completely cleared Brittlerock Cave of Daedra, return to the entrance and speak to Elante to have her lead the way. You will eventually come to an area that contains an altar, as well as a large, broken statue. This is the shrine Elante seeks. Once Elante has safely arrived at the Daedric shrine, she'll give you the '2920, Morning Star (v1)' skill book, which yields one Blade skill level when read.
Return to Azzan and tell him of your success to receive payment. If you have also completed 'The Fugitives,' speak to Azzan about your advancement to be promoted to Guardian.
Speak to Burz gro-Khash in Cheydinhal once you have attained the Warder rank and select the 'Contract' dialogue option. There has been a prison break in Bravil, and you're tasked with finding and killing the fugitives.
Travel to Bravil and hit the streets to investigate. You can speak to almost anyone in Bravil to be pointed in the right direction. Whoever you ask, that character will need a disposition of at least 70 before they will share the information. You learn that the four fugitives are hiding in Bloodmayne Cave west of Bravil.
When you have the information you need, leave the city and make your way to Bloodmayne Cave. With 'The Fugitives' set as your active quest, markers pointing to each of the fugitives will appear on your compass while inside Bloodmayne Cave. Fortunately, the fugitives are not located near each other, so you won't have to face all four of them at once.

The fugitives are hiding out in Bloodmayne Cave west of Bravil.
Hlogar and Ashanta are in the first area of the Bloodmayne cave, so kill both of them before moving on. They're beyond the rock wall that can be lowered using one of the pull ropes hanging from the ceiling. The two remaining fugitives are in the 'Bloodmayne Cave Labyrinth' area. Locate the door to the labyrinth and head through. Dreet-Lai, who is found nearest to the entrance, is an archer, so be careful. Enrion, a magic user, is in the cavernous area in the southeast corner of the labyrinth.
When all four fugitives have been dealt with you can then exit Bloodmayne Cave. To quickly exit, after killing Enrion, follow the path at the south end of the large room to reach a door that leads right back out to the Great Forest. Return to Burz gro-Khash in Cheydinhal and inform him that the contract has been completed. If you have also completed 'The Wandering Scholar,' speak to Burz gro-Khash about your advancement to be promoted to Guardian.
Speak to Modryn Oreyn in Chorrol once you have attained the Guardian rank and select the 'Duties' dialogue option. Oreyn wants you to travel to the Forsaken Mine to find out what happened to the guild members who had been sent there to pursue a contract. Viranus, the Guildmaster's son, was among them.
The Forsaken Mine is directly south of Leyawiin, so fast travel to Leyawiin and make your way to the mine. The Forsaken Mine was to be cleared of Trolls, so be ready to face some Trolls once inside. Enter and you'll spot the grisly remains of Ariente just a few steps from the threshold; definitely not a good sign. Continue moving forward to come across two more dead Fighters Guild members. From this room, head down the passage parallel to the one that leads back to the entrance and follow it to reach the entrance to the 'Forsaken Mine Lost Passages' area.
Be ready for a fight, as there are undoubtedly Trolls lurking in this area. Start by moving through the first room to reach a larger area. Here, hug the wall to your left until you come across a Rock Wall; press the A button to lower the wall when the prompt appears onscreen. Head to the end of the lengthy path beyond the Rock Wall to reach a large, cavernous area.

Search the Forsaken Mines for Viranus Donton's remains.
The remains of Eduard Hodge and Viranus Donton are in this area. Examine Viranus Donton's corpse and remove the Bloody Journal. Once you have the journal, return to Modryn Oreyn in Chorrol and present it to him to complete the quest.
Speak to Azzan after completing the 'Trolls of Forsaken Mine' quest and select the 'Contract' dialogue option. The Stone of St. Alessia has been stolen from the Bruma chapel and it's your job to get it back.
Travel to the Chapel of Talos in Bruma and speak to Cirroc there. He explains that a group of bandits snuck into the chapel, snatched the stone, and are currently heading east from Bruma. Exit the chapel and leave Bruma. Follow the active quest marker to a Khajiit bandit named K'Sharr. Ask him about the Stone of St. Alessia. He tells you that the group of bandits were attacked by Ogres. The Ogres swiped the stone from the group of bandits leaving only K'Sharr alive. Select the 'Sedor' dialogue option to have the ruins marked on your map.
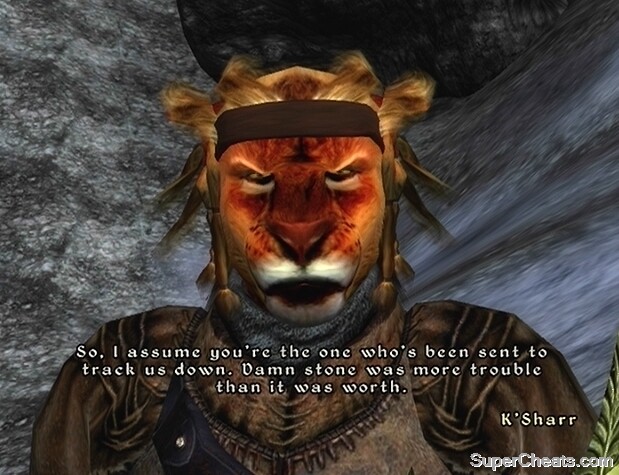
Intercept K'Sharr east of Bruma to learn the whereabouts of the Stone of St. Alessia.
Sedor is located far east of Bruma, so follow your compass to these ruins and head inside. Ogres occupy Sedor, so be ready for a fight. You'll want to take your time here, as being attacked by multiple Ogres at once can prove deadly.
Upon entering Sedor, follow the linear path until you come to a split. Keep heading straight at the split and go down the steps to reach a large area. Enter the small area at the north end of the room and step on the floor panel there to lower a door nearby. Return to the previous room exit via the passage along the west wall. Turn right at the T-junction, continue along, and turn right again when you can.
Follow this path to reach a short bridge. Activate the Press Block at the end of the bridge, then jump down to the lower level and proceed through the Iron Gate along the north wall. The Stone of St. Alessia is on the pedestal in the middle of this area, so grab it and backtrack to the entrance.
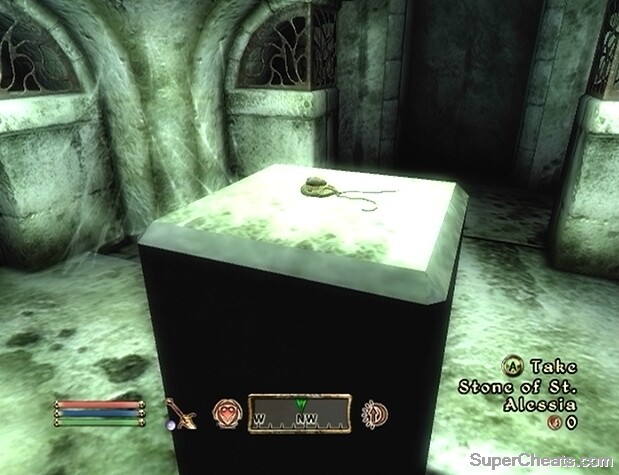
The Stone of St. Alessia has been brought to the Ogre-infested ruins of Sedor.
Return to the Chapel of Talos in Bruma and give the stone to Cirroc. He'll give you some potions as thanks. Return to Anvil and tell Azzan that you have completed the contract. If you have completed 'The Noble's Daughter' quest as well, speak to Azzan about your advancement to be promoted back to Guardian.
Speak to Burz gro-Khash after completing the 'Trolls of Forsaken Mine' quest and select the 'Contract' dialogue option. Lady Rogbut, Lord Rugdumph daughter, is missing, and it's your job to find her.
Lord Rugdumph's estate is due north of Cheydinhal. Ask Rugdumph about his daughter; he tells you that he suspects she has been taken a by a band of Ogres that live east of the estate. Exit Lord Rugdumph's estate and start heading east. You will eventually encounter the three Ogres. Taking on three Ogres at once is no easy task; take advantage of the large expanse of land behind you by backing away and hitting the approaching Ogres with arrows or spells.
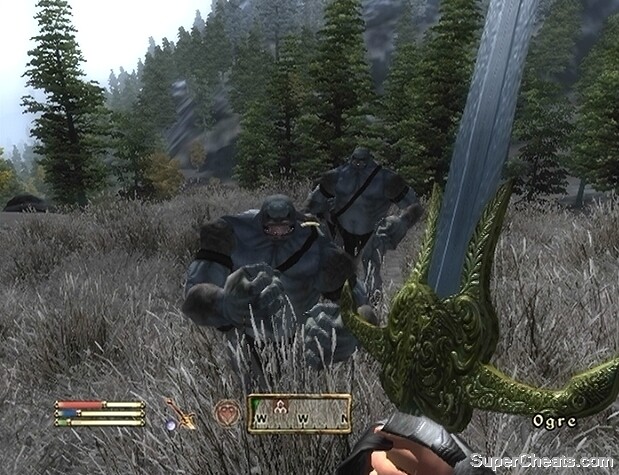
Kill the three Ogres and escort Lady Rogbut back to Lord Rugdumph's estate to fulfill the contract.
Once the Ogres have been dealt with, locate Lady Rogbut and escort her back to Lord Rugdumph's estate. Speak to Rugdumph to be rewarded Rugdumph's Sword. Return to Cheydinhal and inform Burz gro-Khash of your success. If you have completed 'The Stone of St. Alessia' quest as well, speak to Burz gro-Khash about your advancement to be promoted back to Guardian.
Once you have worked your way back up to the Guardian rank, speak to Burz gro-Khash and select the 'Contract' dialogue option. This time, you are to investigate a series of mysterious disappearances at a place called Harlun's Watch. A woman named Drarana Thelis at the settlement has the details.
Harlun's Watch is directly south of Cheydinhal. With 'Mystery at Harlun's Watch' set as your active quest, use your compass to locate Drarana Thelis. Initiate a conversation with her and ask about the disappearances. She explains that strange, flickering lights have been spotted in the swamps outside of Harlun's Watch; whenever someone has been sent to investigate, they haven't returned.
Follow your compass to Swampy Cave, which is located southeast of the settlement. You'll encounter some Will-o-the-wisps outside. These are the 'strange lights' that the people of Harlun's Watch have been seeing. These enemies are quite powerful, especially if your character isn't at a high level. Normal physical strikes are not particularly effective, but any type of magic damage (i.e., fire, ice, or electric) should make short work of them. As with other ghost-type creatures, only a magic, silver, or Daedric weapon can damage a Will-o-the-wisp. Ranged attacks work best, since the Will-o-the-wisp can cast a number of draining spells that will quickly deplete your character's health, magicka, and fatigue meters. Kill the Will-o-the-wisps outside before entering the cave to investigate further.
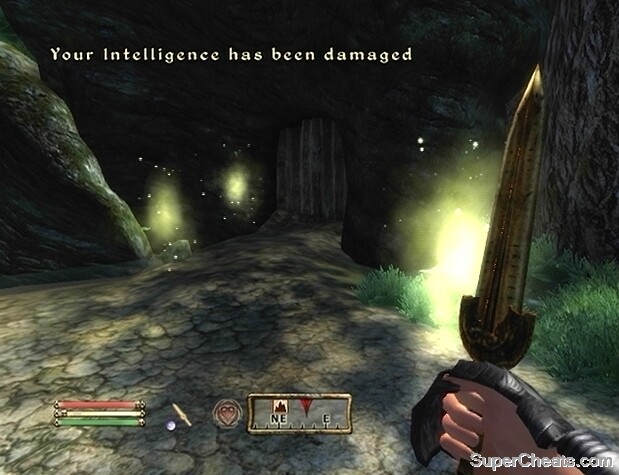
Keep your distance when facing the Will-o-the-wisps outside of Swampy Cave, as they can quickly drain your character's health, magicka, and fatigue meters.
Trolls occupy Swampy Cave, so remain cautious as you make your way through. Upon entering, start through the cave and turn right at the split. Follow this path to reach a large area. Exit this area via the passage in the southwest corner. Follow this path until you reach another split; at this point, turn left. Here, you'll find the grisly remains of the villagers that were sent to investigate the lights.
Before leaving the cave to report back to Drarana, you must first clear the cave of the Trolls that remain. To do this, you'll have to sweep through the 'Swampy Cave Dry Rock Run' area as well. The entrance to the Dry Rock Run area in is at the northwest end of the cave. Once you have managed to clear the cave of Trolls, you'll be notified of this fact. A door at the very north end of the Dry Rock Run area will take you straight back to the Nibenay Basin.
With the job done, leave Swampy Cave and return to Harlun's Watch to tell Drarana Thelis of your discovery. Drarana will give you a Mind and Body Ring as thanks. Return to Burz gro-Khash in Cheydinhal and inform him of the completion of the contract. Afterwards, ask Burz gro-Khash about your advancement within the guild to be promoted to Champion.
Azzan and Burz gro-Khash do not anymore contracts to offer, so you'll have to speak to Modryn Oreyn at his home in Chorrol. When you arrive, step inside and speak to Oreyn. Select the 'Blackwood Company' dialogue option while speaking to Oreyn to learn more. He explains that the Blackwood Company have established a camp in Glademist Cave. Oreyn wants you to travel to the new camp to capture Ajum-Kajin, one of the company leaders. Then, he wants Ajum-Kajin brought back to Chorrol for a friendly interrogation session.
Glademist Cave is situated along the northeast road out of Chorrol. With 'Information Gathering' set as your active quest, fast travel to Weynon Priory and follow your compass to this location.
The Blackwood Company members inside Glademist Cave will attack on sight, so be on guard as you search for Ajum-Kajin. Be sure to loot the dead afterwards, as they occupants of Glademist Cave are likely to be carrying some pretty sweet enchanted items. You need to kill every guard in Glademist Cave before Ajum-Kajin will agree to go with you, so do not sneak past any of the guards you encounter.
Kill the Blackwood Company guards in Glademist Cave, and then confront Ajum-Kajin and order him to follow.
Ajum-Kajin is marked on the map whilst 'Information Gathering' is set as your active quest, so be sure to occasionally glance at the local area map to confirm that you are headed in the right direction. When you reach Ajum-Kajin's room, speak to him to have him follow you out of the cave.
Return to Chorrol with Ajum-Kajin in tow and lead him to Modryn Oreyn's house. Speak to Oreyn, and then command Ajum-Kajin to sit down once inside. It's your job to get him to talk. You have two options here: beat the tar out of the Argonian to get him to talk, or take the more civil approach and raise his disposition to at least 70 by playing the persuasion mini-game. When Ajum-Kajin is willing to talk, a notification will pop-up onscreen to inform you of this fact.
First, ask Ajum-Kajin about how large the Blackwood Company once you have his raised his disposition to at least 70, or once you have roughed him up enough. Raise his disposition to at least 80 to get more information, or beat him further until he agrees to talk. Then, ask him about the company leader; he'll identify one Ri'Zakar. If you ask him about the secret to the Blackwood Company's strength, he will choose to kill himself rather than divulge that information.

Persuade Ajum-Kajin to talk with your fists or by playing the persuasion mini-game.
Speak to Oreyn after Ajum-Kajin's death to receive the Greater Amulet of Interrogation as a reward.
Speak to Modryn Oreyn and select the 'Duties' dialogue option. Your next task is to infiltrate the Blackwood Company. Make your way to Leyawiin, enter the Blackwood Company, which is right across from the Fighters Guild hall. Inside, locate and speak to Jeetum-Ze about joining the Blackwood Company ranks.
Once you're a member, Jeetum-Ze will lead you down to the training hall. Your first contract as a Blackwood Company member entails traveling to the Water's Edge and clearing the settlement of goblins. After the briefing, Jeetum-Ze will hand you a concoction called Hist Sap. Open your inventory and drink the thing. After drinking the Hist Sap, you will be transported to the Water's Edge settlement, where you are tasked with killing each and every goblin in the vicinity.
When the outside area of the settlement is clear of goblins, enter each house and kill the goblins inside. When every goblin in the settlement has been dealt with, you will be transported back to Modryn Oreyn's house in Chorrol. Speak to Oreyn, and tell him what you've learned. Oreyn asks that you return to the Water's Edge settlement and speak to the residents there to make sure that everything is alright.
Arriving at the settlement, it seems that the every sheep and settler has dropped dead. It appears that, while in a Hist Sap-induced stupor, the Blackwood Company slaughtered the entire settlement, mistaking them for goblins! Speak to Marcel Amelion before returning to Chorrol, and then speak to Modryn Oreyn to complete the quest.
Speak to Modryn Oreyn after the Water's Edge incident; he concludes that the only way to stop the Blackwood Company is to destroy the Hist Tree, the very source of their power. You need to travel to Leyawiin, enter the Blackwood Company building, locate the Hist Tree and destroy it. Oreyn warns that leader of the company, Ri'Zakar, will have the tree well-guarded, so don't expect a warm welcome. Prepare well before entering the Blackwood Company hall, as you will be attacked by the guild members in the hall almost instantly.
First, you'll need to kill Ja'Fazir and retrieve Jeetum-Ze's Room Key from him. Jeetum-Ze holds the key to the Ri'Zakar's room, so you'll have to kill him first. Jeetum-Ze's room is on the second floor of the main hall. Kill Jeetum-Ze and remove Ri'Zakar's Key from his corpse. Ri'Zakar's room is on the top level of the hall. Make your way up to Ri'Zakar's room, kill him, and remove the 'Blackwood Co. Basement Key' from his corpse.

Kill Ri'Zakar, as he holds the Blackwood Co. Basement Key.
When you have this key, head back down to the main floor and locate the door marked 'Blackwood Company Hall Basement.' The Hist Tree is through here. It would be wise to save your game before heading through the door.
Once in the basement, you'll need to destroy the machinery surrounding the Hist Tree. First, kill the two Blackwood Company members in this room. Then, head to the side of the room opposite the door used to enter the basement. Pick up the two loose pipes on the table here. Then, approach the nearby Sap Pump and press the A/X button when prompted to jam one of the pipes between the cogs, effectively breaking the machine. Approach the Sap Pump on the opposite side of the tree and do the same.
Destroying both of the sap pumps will cause the Hist Tree to go up in flames. With that done, head back up the stairs and start toward the front entrance. You'll run into one more enemy before leaving guild hall. It's Maglir; you have no choice but to kill him.
Sabotage the two sap pumps by the Hist Tree to set it aflame.
Return to Chorrol, speak to Modryn Oreyn and tell him of your success. He'll give you the Helm of Oreyn Bearclaw as a reward. Next, head to the Fighters Guild hall in Chorrol and speak to Vilena Donton there. Once you've explained what has happened, speak to her about your advancement to be promoted to Master of the Fighters Guild!
Select the 'Duties' dialogue option and appoint Modryn Oreyn as your second-in-command. Speak to Modryn Oreyn, who is unconvincingly reluctant to rejoin the Fighters Guild as your second-in-command.
As the Master of the Fighters Guild, you are able to assign duties to the guild once a month. Speak to Modryn Oreyn, and you can choose to have the guild focus on recruitment, contracts, or both. Choosing to focus on recruitment yields a better chance of having items delivered to the Guildmaster's chest on the top floor of the Fighters Guild hall in Chorrol. Choosing to focus on completing contracts will have money delivered to the chest instead, while focusing on both yields will yield items and a small amount of gold.
The Mages Guild is one of the four joinable guilds in Oblivion. To join, visit the Mages guild hall in Anvil, Bravil, Bruma, Cheydinhal, Chorrol, Leyawiin or Skingrad, and speak to the guild member in charge of recruitment. Speak to anyone other than this character about joining the Mages Guild to be directed to the right person.
Becoming a member of the Mages Guild yields several benefits. Most importantly, after completing the string of recommendation quests needed to become a full member of the guild, you'll then be able to access Arcane University in the Imperial City. The enchantment altars in the university can be used to create new spells and imbue weapons with magic properties.
To become a full member of the guild, you'll first have to complete the 'Join the Mages Guild' quest. To complete this quest, you must visit each Mages Guild hall in Cyrodiil, speak to the hall leader there, and select the 'Recommendation' dialogue option. Then, complete the small quest given to you by the leader to receive a recommendation from that hall. The seven recommendation quests do not need to be completed in a certain order.
This section is broken down into the following chapters:
Anvil Recommendation
Bravil Recommendation
Bruma Recommendation
Cheydinhal Recommendation
Chorrol Recommendation
Leyawiin Recommendation
Skingrad Recommendation
A Mage's Staff
Ulterior Motives
Vahtacen's Secret
Necromancer's Moon
Liberation or Apprehension
Information at a Price
A Plot Revealed
The Bloodworm Helm
The Necromancer's Amulet
Ambush
Confront the King
Alchemy Acquisitions
In the Anvil Mages Guild hall, locate and speak to Carahil; she should be behind the counter in the main hall. Select the 'Recommendation' dialogue option to get started. Carahil explains that there have been several cases of merchants being found dead along the Gold Road near Brina Cross Inn. Frost burns on the victims suggest that a mage is behind the murders. It's your job to investigate the matter.
Before heading off, select the 'Rogue Mage' dialogue option while speaking to Carahil to receive three scrolls of Frost Shell. When you're ready to set out, make your way to Brina Cross Inn north of Anvil and speak to Arielle Jurard inside. After speaking to her, approach the inn keeper and ask for a room. Then, head up the stairs, walk down to the end of the hall, and enter the room there.

Travel along the Gold Road after speaking to Arielle Jurard and sleeping at the Brina Cross Inn to encounter Caminalda.
Wait in your room until Arielle Jurard enters; she instructs you to sleep at Brina Cross Inn, and then travel along the Gold Road toward the ruined city of Kvatch after awakening. Use the bed to sleep for at least one hour, and then exit Brina Cross Inn. Travel along the Gold Road and you will eventually be stopped by Caminalda.
Caminalda is the mage behind these attacks, so you're going to have to take her down. Arielle and her battlemage friend will show up to assist in the fight, however, so besting Caminalda shouldn't be too difficult. If you were given Frost Shell scrolls by Carahil, use them now to take the punch out the rouge mage's ice-based spells. When the job is done, return to Anvil and inform Carahil of your success.
In the Bravil Mages Guild hall, locate and speak to Kud-Ei to get started. A Dark Elf named Varon Vamori has been harassing Ardaline, a Mages Guild member, and has taken her Mage's Staff. Select the 'Mage's Staff' dialogue options while speaking to Kud-Ei to receive a Beguile scroll, which will raise the target's disposition when cast.
First things first; to find this Varon Vamori fellow and confront him. He is likely somewhere in the guild hall. With 'Bravil Recommendation' set as your active quest, follow the active quest marker on your compass to locate him. If he is not currently in the guild hall, use the wait feature to wait as many hours needed until the marker on your compass turns green. He should be there from 9:00AM to sometime after nightfall.

Locate Varon Vamori and ask him about Ardaline.
Once you have located Varon Vamori, speak to him and ask about Ardaline. Afterwards, inquire about the Mage's Staff. If he refuses to discuss the matter, use the Beguile scroll to raise his disposition, or play the persuasion mini-game. When his disposition is at least 70, he'll admit to taking Adraline's staff, and explain that he sold it to a friend in the Imperial City.
Speak to Kud-Ei about Varon Vamori before heading to the Imperial City to receive three more Beguile scrolls. When you're ready to set out, leave the Bravil Mages Guild hall and fast travel to the Imperial City's Talos Plaza District. Once there, locate Soris Arenim's house and let yourself in. Speak to Soris and ask about the Mage's Staff. Provided his disposition is high enough, Soris will offer to sell the staff back to you for a portion of the gold he paid for it.
With Ardaline's Staff in your possession, return to the Bravil Mages Guild hall and speak to Kud-Ei there to complete the quest. She'll teach you the Captivate spell, which will raise the target's disposition when cast.
In the Bruma Mages Guild hall, speak to Jeanne Frasorie, who should be behind the counter across from the entrance. If she isn't there, use the wait feature to pass time to 9:00AM. Select the 'Recommendation' dialogue option while speaking to Jeanne Frasorie to get started. Jeanne wants you to locate J'skar, a Khajiit who has recently gone missing.
Select the 'J'skar' dialogue option while speaking to Jeanne; she'll point you to a man named Volanaro. Volanaro knows where J'skar is, but he asks that you mention nothing of the situation to Jeanne. He asks that you help him play a small prank on Jeanne, only then will he reveal J'skar's location. This prank consists of you entering Jeanne Frasorie's room and removing the Manual of Spellcraft from her desk. Volanaro teaches you the Minor Latch Crack spell, which will automatically open a lock of Very Easy to Easy quality.

Use Minor Latch Crack or a similar spell to unlock the desk in Jeanne Frasorie's room.
Jeanne's room is on the second floor of the guild hall. While facing the counter on the first floor of the guild hall, turn left and head up the stairs here; the door to Jeanne's room is at the top. Enter her room and approach the desk. Use a lockpick or the Minor Latch Crack spell to open the desk, and remove the Manual of Spellcraft
Once you have the book, return to Volanaro and hand it over. He instructs you to meet him in the Living Quarters after 10:00PM. When the time comes, enter the Living Quarters and head through the first door to your left to find Volarano. Talk to him and he will make J'skar reappear. Speak to J'skar, and then to Jeanne to complete the quest.
In the Cheydinhal Mages Guild hall, speak to Falcar and select the 'Recommendation' dialogue option. Falcar could be anywhere in the guild hall, even the basement. If he is nowhere to be found, wait as many hours need to pass the time to around 11:00AM. Falcar wants you to retrieve the Ring of Burden, which was thrown down a well by another Mages Guild associate. Be careful here, as the Ring of Burden weighs 150 lbs! You may not be able take the ring without becoming over-encumbered, so store the non-essential items in your inventory somewhere for the time being.
The Ring of Burden is down the well behind the Mages Guild hall. Deetsan, a Mages Guild member, holds the key. Speak to Deetsan the Argonian, who should be somewhere in the Mages Guild hall, and select the 'Recommendation' dialogue option. Deetsan will discuss the matter only if Falcar is out of earshot. She believes that Falcar's task is an attempt to get you killed, explaining that the exact same task was given to a Mages Guild Associate named Vidkun, who hasn't been heard from since.
Deetsan gives you the Well Key and teaches you the Buoyancy spell, which grants the caster the Water Breathing and Feather effects for a short duration of time. This spell will prove useful, provided your Alteration skill level is high enough to cast it. If your Alteration skill level is inadequate for the casting of Buoyancy, consider dropping some heavy items before entering the well. Of course, save your game beforehand, just to be safe.
Quickly locate Vidkun's corpse inside the well behind the Mages Guild hall and remove the Ring of Burden. Make sure you have at least 150 lbs of inventory space free!
When you're ready to get started, exit the guild hall and make your way over to the well behind the building. Enter the well and swim to the left to spot the Vidkun's lifeless body. The Water Breathing effect gained from casting Buoyancy isn't entirely necessary here, as the well is quite small. Search Vidkun's corpse and remove the Ring of Burden.
When you have the ring, exit the well and return to the Mages Guild hall. Speak to Deetsan inside; she explains that she confronted Falcar about Vidkun, which caused him to fly into a rage and storm out. Real mature. Tell Deetsan of Vidkun's fate, then head down to the basement and enter Falcar's room. Approach the locked drawer next to his desk and cast a spell or use a lockpick to open it. Remove the two Black Soul Gems inside and present them to Deetsan to complete the quest.
In the Chorrol Mages Guild hall, locate Teekeeus the Argonian and select the 'Recommendation' dialogue option while speaking to him. Teekeeus wants you to see a woman named Earana, who he apparently has a bad history with. He has spotted her in town and is sure she is up to something.
Leave the guild hall and look around for Earana the High Elf; you should be able to spot her rather quickly. There is matter she would like to involve you in, but she'd rather the Mages Guild not know about it; she wants you to retrieve a book, entitled 'Fingers of the Mountain.' Despite Earana's wises, return to the Guild Hall and inform Teekeeus of Earana's request. Teekeeus asks that you retrieve the book and immediately return to the guild hall and hand it over to him.
Speak to Earana outside the Mages Guild hall.
There are two ways you can go about completing this quest: either retrieve the book and give it Earana to learn the 'Fingers of the Mountain' spell, or retrieve the book and give it to Teekeeus, who will hide it away to ensure that it does not fall into the wrong hands. Either way, you'll still get the recommendation.
The Fingers of the Mountain book is on Cloud Top, which is a small hill northwest of Chorrol. The hill may seem too steep to climb, but walking over the grass on the sides of the hill, you should be able to ascend to the top. Once you've made it to the top, look for the book among someone's charred remains. Lovely.
Earana is waiting at The Grey Mare tavern in Chorrol, and Teekeeus in the Chorrol Mages Guild hall. If you choose to give the book to Teekeeus, he will take it, lock it away, and give you your recommendation.

Search the Charred Remains on the Cloud Top landmark northwest of Chorrol to find the Fingers of the Mountain book.
If you choose to give the book to Earana, the 'Fingers of the Mountain, Part II' quest will be added to your journal. You'll need to complete this quest first, and then inform Teekeeus that you gave the book to Earana. Then, you must steal the book back from Earana and bring it to Teekeeus to earn the recommendation. To steal the book back, return to The Grey Mare and take the stairs up to the second floor. Use a spell or lockpick to open the door at the end of the hall, and then the chest inside the room to find the book.
The Finger of the Mountain spell learned by giving the book to Earana may cost an insane amount of magicka to cast, as the strength and magicka cost of the spell is dependent on the level your character is when the spell is learned. As such, you may not be able to cast the spell unless your character has an amount of magicka attainable only by glitching.
In the Leyawiin Mages Guild hall, locate Dagail and speak to her. She explains that she has lost an amulet, and claims she cannot help you until it is found. She points you to a woman named Agata. Locate Agata and speak to her to learn more about the Seer's Stone. Next, locate and speak to Kalthar and ask him about the Seer's Stone. Afterwards, speak to Agata concerning your conversation with Kalthar.
Finally, speak to Dagail again to learn where you must travel in order to find the Seer's Stone. She mentions a Fort Blueblood, which is in Blackwood southeast of Leyawiin. Travel to Fort Blueblood and head inside. Marauders occupy the fort, so remain vigilant and try not to move through too quickly to avoid becoming outnumbered.
With 'Leyawiin Recommendation' set as your active quest, follow the arrow on your compass and occasionally glance at the local area map to ensure you're headed in the right direction. As you get closer to the amulet, you will come to a room that contains several marauders and a Marauder Warlord. The Marauder Warlord holds the Fort Blueblood Key, so you'll have to kill him before you can progress any further.
The Marauder Warlord holds the Fort Blueblood Key, which is needed to enter the area that contains Manduin's Coffin.
Use the Fort Blueblood Key to unlock the door to the next area. A Will-o-the-wisp, a Trolls, and perhaps Minotaur, will be beyond this door, depending on your character's level. Locate Manduin's Coffin in this area, examine it, and remove Manduin's Amulet. Kalthar will show up and attempt to prevent you from giving the amulet back to Dagail. He is quite weak, however, so just slash away until he falls. Remove the key from Kalthar's corpse and use it to unlock the door back to the previous area.
With the Manduin's Amulet in hand, leave the Fort Blueblood and return to the Leyawiin Mages Guild hall. Present the Seer's Stone to Dagail to complete the quest.
In the Skingrad Mages Guild hall, locate Adrienne Berene and select the 'Recommendation' dialogue option while speaking to her. Adrienne asks that you find a Wood Elf named Erthor. Speak to Vigge the Cautious, who should somewhere in the guild hall, and ask him about Erthor; he tells you that Erthor can likely be found in a place called Bleak Flats Cave.
Vigge doesn't remember where Bleak Flats Cave is, but he points you to Druja the Argonian, who should be able to remember the location. Ask Druja about Bleak Flats Cave to have the location marked on your map. Before heading out, speak to Adrienne Berene about Bleak Flats Cave to learn the 'Weak Fireball' spell.
Bleak Flats Cave is northwest of Skingrad. Zombies occupy the cave, and Erthor is trapped inside. Erthor will not agree to follow you out of the cave until every Zombie inside has been dealt with, so be sure to eliminate any that you come across once inside.

Look for Erthor in the zombie-infested Bleak Flats Cave northwest of Skingrad.
Upon entering the cave, move forward until you come to a large room, and then exit through the passage off to the left. At the end of the passage, make your way to the other end of this room and turn right. When you reach the next room, exit through the bottom passage, and continue moving in this direction until you are able to turn left. Head to the end of this passage to find Erthor. He won't follow you out of the cave until every Zombie in Bleak Flats Cave has been eliminated.
Speak to Erthor again when the cave is clear and he will agree to follow you out. Lead Erthor out of Bleak Flats Cave and back to the Skingrad Mages Guild hall. As soon as you enter the guild hall, Erthor will stop following you to talk to Adrienne. Speak to Adrienne afterwards to complete the quest.
Once you have attained a recommendation from all seven Mages Guild halls in Cyrodiil, you will be permitted entry to Arcane University in the Imperial City. Travel to the Imperial City and enter the Arch-Mage's Chambers and speak to Raminus Polus there. Select the 'Recommendations' dialogue option and that's it—you now have full access to Arcane University and all of its facilities! Well, except for the Orrery; you have to pay for that one.
Along with the rank up to Apprentice, Raminus Polus will also give you a Robe of the Apprentice.
The primary benefit to having access to Arcane University is that of being able to make use of the Altar of Enchanting in the Chironasium, and the Altar of Spellmaking in the Praxographical Center. With the Altar of Enchanting, one can imbue unenchanted items with magic properties using filled Soul Gems. The list of effects available to choose from is dependent on the nature of the spells in your character's spell book. In other words, you can only apply an attribute to an item if your character has a spell of the same effect in his or her spell book.
With the Altar of Spellmaking, the possibilities are nearly endless.
The Altar of Spellmaking, as its name implies, allows one to create unique spells. As far as available effects go, the same limitation applies to the Altar of Spellmaking as it does to the Altar of Enchanting.
To progress through the ranks in the Mages Guild, you have to complete specified tasks. For the most part, each time you complete a task, you'll just need to speak to Raminus Polus about your advancement to be promoted to the next highest rank.
Speak to Raminus Polus and select the 'Tasks' dialogue option to get started. As you're now a member of Arcane University and thus considered a mage (even if your character has never cast a spell), you need a Mage's Staff. Your first task is to acquire the wood needed to construct such a staff. Raminus tells you of a grove near Wellspring Cave northeast of the Imperial City where the necessary material can be found.
Leave Arcane University and travel to Wellspring Cave. Enter the cave; inside you'll find Zahrasha, the Khajiit who Raminus instructed you to converse with upon your arrival. Unfortunately, she's dead—not a good sign! There is a Necromancer in the cave as well. Kill the Necromancer, then examine Zahrasha's corpse and remove the Wellspring Cave Key.
The path through the cave is very straightforward; just find your way to the end of the cave, and use the Wellspring Cave Key to unlock the door there. Necromancers occupy the cave, however, so remain vigilant. Upon exiting the cave, you will be greeted by Noveni Othran. Kill her, and then open the Stone Chest up ahead to find the Unfinished Staff within. There are two more necromancers in the grove; kill them and you're free to leave unobstructed.

Defeat the necromancers in the grove and retrieve the Unfinished Staff.
Return to Arcane University and speak to Raminus there. He directs you to the Chironasium, where you are to speak to Delmar. The first choice is of which magic school most appeals to you. You're choices are Destruction, Illusion and Mysticism. Destruction magic encompasses spells that deal damage or drain attributes; Illusion magic encompasses spells that affect your enemy in some way, and Mysticism magic affects the environment.
If your character is a magic class that uses staves as his or her primary weapon, you'll want to take your time in creating a new, powerful staff to use. If your character does not use magic or doesn't use staves, you might want to consider creating something like a staff of telekinesis; in other words, something fun that you will probably never use.
Delmar needs one day to prepare the staff; wait for at least 24 hours, and then speak to him again. Acquire the finished staff to complete the quest. Speak to Raminus about your advancement to be promoted to Journeyman.
After completing 'A Mage's Staff,' speak to Raminus and ask for another task. For your second task, Raminus requires that you retrieve a book from Janus Hassildor, the count of Skingrad.
Exit Arcane University, fast travel to Castle Skingrad, and enter the County Hall. Janus Hassildor is an exceedingly private person, so you won't find him in the County Hall; you'll need to speak to one of his stewards about seeing him. Look for Mercator Hosidus, who can most likely be found in the main hall. He tells you to return tomorrow, as Count Hassildor is not open to granting you an audience at this juncture. Wait for at least 24 hours, and then speak to Mercator Hosidus in the County Hall once more.
Hosidus explains that while the count is willing to see you, he doesn't want the meeting to take place in Castle Skingrad. As such, you are to meet Count Hassildor outside of the Cursed Mine west of Skingrad after 2:00AM. Sounds fishy, but if you wish to see the count, you have no choice but to oblige.
When you're ready to set out, have 'Ulterior Motives' set as your active quest and follow the marker on your compass to the meeting spot. Wait until the time is past 2:00AM and you will soon be approached by Mercator Hosidus who, alarmingly, does not have the count with him. He is instead accompanied by two necromancers, so it's evident whose side he's on.

Be at the meeting point outside of Skingrad at 2:00AM to encounter Mercator Hosidus and, curiously enough, a couple of necromancers.
Waste no time in attacking him. Things can quickly turn hectic during this bout as it is quite dark outside, and you will no doubt have several people attacking you at once. Count Hassildor will appear partway through the battle; he is not hostile toward you, so avoid attacking him. If you strike the count enough times out of confusion, he will quickly turn on you. If this happens, simply hold LT/L2 and press LB/L1 while facing him to yield.
When Mercator and the necromancers have been dealt with, Count Hassildor will initiate a conversation with you. By speaking to the count, you learn that you were actually sent to spy on him, and as such, there is no book to retrieve. Return to Arcane University and speak to Raminus about the task. Afterwards, ask Raminus about your advancement within the guild to be promoted to Evoker. You'll also be given a Spelldrinker Amulet.
A research project is underway in Vahtacen, an Ayleid ruin south of Cheydinhal Irlav Jarol is the man in charge of the project. Look for Irlav Jarol in the Arch-Mage's Chambers and speak to him. He'll give you a rundown of the situation, as well as the key to Vahtacen.
Before setting out, make sure your character has an inexpensive frost spell in his or her spell book. You can purchase the cheap 'Snowball' spell from Edgar's Discount Spells in the Market District of the Imperial City.
After speaking to Irlav Jarol, fast travel to Cheydinhal and make your way south to the ruins of Vahtacen. Once there, you must speak to Skaleel, who is currently over-seeing the project. Skaleel is a bit deeper into the ruins, but the path to the expedition area is very straightforward. Speak to Skaleel; she explains that the research team has come to a pillar that appears to be immovable through normal means. Apparently, this pillar does not react well to magic, as several guild members have already been injured by it.
The mysterious pillar in the ruins of Vahtacen is actually an elaborate puzzle.
The pillar is actually an elaborate puzzle, which you are tasked with solving. To reach the pillar, locate the locked gate and use the Vahtacen Ruins Key to open it. Speak to Denel outside of the pillar room to learn of the strange Ayleid markings that are embedded on the walls surrounding the pillar. Denel thinks that Skaleel may have a book that can be used to decipher the text. Return to Skaleel and inquire about the book. Skaleel will give you the Ayleid Reference Text; with this in hand, you can solve the puzzle that has had the Mages Guild research team stumped for weeks.
By translating the inscriptions, it becomes evident that specific spells must be cast on certain parts of the giant pillar. There is a chest behind the table in the area where Denel can be found. The chest contains a scroll of each of the spells needed to solve this puzzle. Remove the scrolls from the chest and proceed into the pillar room. It would be wise to save your game at this point, just in case you make a mistake.
You have to compare the inscriptions on the walls of this room to determine which spell must be cast on each section of the pillar. Each tablet on the wall refers to a different spell: Av molag anyammis refers to Fire, av mafre nagaia refers to Frost, magicka loria refers to Damage Magicka, and magicka sila refers to Fortify Magicka.
Each spell must be cast on the sections of the pillar that are whole. Some parts of the pillar have a small rectangle on the bottom; do not target these.

Match up the inscriptions on the tablets with the translations in the Ayleid Reference Text.
The spells must be cast in a certain order. First is the 'av molag anyammis' inscription. This refers to Fire, so aim your fire spell toward the whole rectangle portion of the pillar diagonal from the tablet and hit it. Next is the 'av mafre nagaia' inscription, which refers to Ice. Move on to the 'magicka loria' inscription, which refers to Damage Magicka. Lastly, move down to the 'magicka sila' inscription, which refers to Fortify Magicka. If at any point you are hit by a spell, you did something incorrectly.
So, the order that the spells must be cast on the pillar is Fire, Ice, Damage Magicka, and then Fortify Magicka. If done correctly, the pillar will open and a notification will pop-up onscreen, informing you of your success in solving the puzzle. Climb down the stairs and enter the 'Vahtacen Lorsel' area.
Solving the puzzle in the Vahtacen ruins
Upon entering Vahtacen Lorsel, Follow the path ahead to reach a large room. Do not step on the middle panel here, as doing so will trigger a trap. To avoid the trap, move through this room by walking along the sides of the panel and jump diagonally across to the other side. In the next area, you have to step on the floor panel here to open two passages to your left and right. Kill the two ghosts, and then proceed through the opening straight ahead. There is a trap in the middle of this room as well, as the blood stains effectively indicate. Avoid this trap in the same fashion as the last and proceed through the passage at the end of this room.
Continue to the end of the path to reach a large room. Head up the stairs at the other end of the room, turn left, and activate the Switch on the pillar there. The Switch triggers the stairs surrounding the platform in the middle of the room to rise. Make your way over to these steps and take them up to the platform. Look for a Press Block on one of the pillars up here and activate it; doing so will raise the cage in the middle of the platform to reveal an Ancient Elven Helm. Take the relic and leave the Vahtacen Lorsel area.

Retrieve the Ancient Elven Helm before leaving the Vahtacen Lorsel area.
Speak to Skaleel before leaving Vahtacen, and then return to Irlav Jarol in the Imperial City. Once you have given the helmet to Irlav Jarol, speak to Raminus about your advancement to be promoted to Conjurer. You'll also be given a Robe of the Conjurer as reward.
You need to speak to Tar-Meena in the Mystic Archives to learn about Black Soul Gems and their power. The Mystic Archives are located on the grounds of Arcane University. Inside, ask Tar-Meena about Black Soul Gems to learn of a book called 'Necromancer's Moon.' This book, Tar-Meena explains, contains the information you are looking for.
Look for a blue book on the table behind the desk that is to your right upon entering the Mystic Archives. This is Necromancer's Moon, so take it into your inventory and then speak to Tar-Meena again. Return to Raminus Polus in the Arch-Mage's Lobby and tell him of the book. He points you to Bothiel, who will surely know something about the 'Shade of the Revenant' mentioned in the text.
Locate this Bothiel and ask her about the Shade of the Revenant. Bothiel gives you a note that Falcar dropped when he himself visited the university to ask about the Shade of the Revenant. Speak to Raminus once more and select the 'Shade of the Revenant' dialogue option to have him mark Dark Fissure on your map. Now to travel there to see what you can discover.

Make your way to Dark Fissure, which is located far east of the Imperial City.
The Dark Fissure cave is far east of the Imperial City, southeast of Cheydinhal. The hill that the altar sits upon may seem a little steep hill, but use the patches of grass along the side to help you ascend. Once you've made it to the top, enter the cave to spot a Worm Anchorite.
Kill the Necromancer inside the Dark Fissure cave and remove the note from his corpse. The note describes the process that the necromancers use to acquire Black Soul Gems. Once you have this note, there is no reason to venture further into the cave. Return to Arcane University and speak to Raminus Polus there. Afterwards, ask him about your advancement within the guild to be promoted to Magician.