The Darkness 2 Unofficial Guide by vhayste for
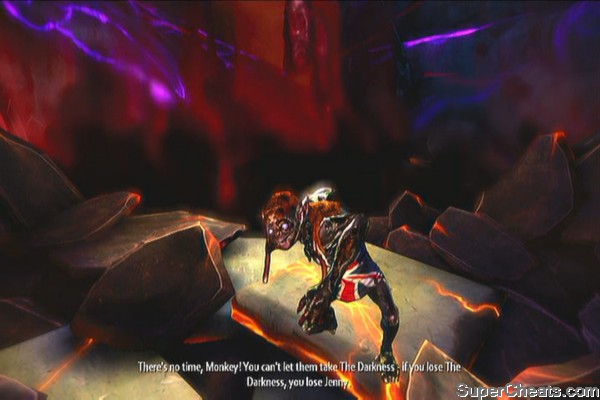
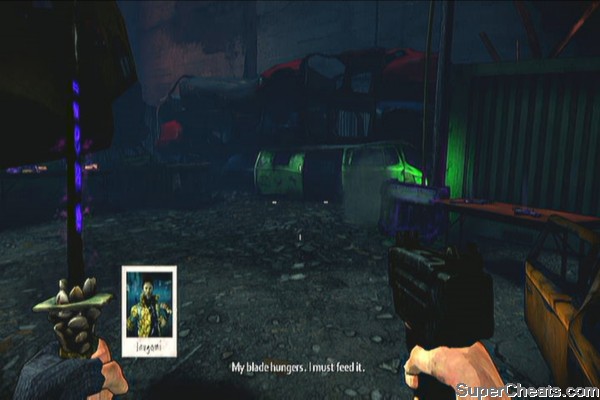
The Darkness II takes place two years after the events of the first game. Jackie Estacado, the wielder of the Darkness from the first game, is now the head of the Franchetti crime family. He used his powers to rise his way to the top but since then, he has somehow contained The Darkness with the help of the eccentric occultist, Johnny Powell. Just let the game take its course until you reach the table with the twins. After a few seconds, enemies will attempt a hit on you and you'll have to survive it while your boys drag you out of the firefight. If you have played other shooters before, the controls will be very familiar. If not, the game will offer you hints about the basics.

The game is presented using cel-shading technique which should appeal to most returning players. The controls are responsive and easy to remember, allowing Jackie to become a brutal, demon arm-wielding gunman. Unlike the first game, you'll only have one “core” darkling, which will play a major role in your gameplay and with the story. The game also offers an various skills or talents which can be purchased by spending “essences”. Essences are collected by executing/ mutilating enemies in creative ways.
This guide will assist you in finding all the relics in the game, as well as an comprehensive walkthrough for both the single player campaign and Vendettas and of course an achievement guide.
Dinner Out
For the first part, you have to keep shooting the hitmen off your back. Take note that there's an aim-assist in the game, which allows you to auto-lock a target by holding down your sights (LT). You can quickly switch between targets by releasing your aim, pointing your crosshair to the next target and holding down LT again. This will help a lot in killing enemies quickly, thereby minimizing the damage you receive. Killing 25 enemies without dying or restarting a checkpoint will unlock the the “One Man Army” achievement. See the achievements section for more details.
Keep killing enemies until Vinnie successfully drags you back to the kitchen. Cutscene will follow and chapter ends.
Dinner Out
Relics: 2
Crawl towards the thug and release the darkness when prompted. After slaughtering the thugs, talk to Vinnie. You have the darkness unleashed already. If you haven't played the first one yet, you should avoid the light sources at this hurts the darkness. You can consult the controls layout as well.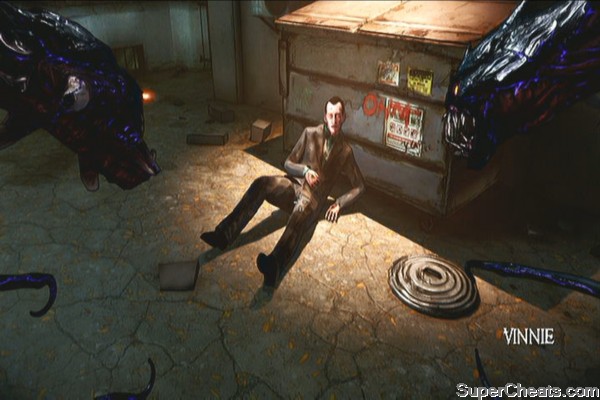
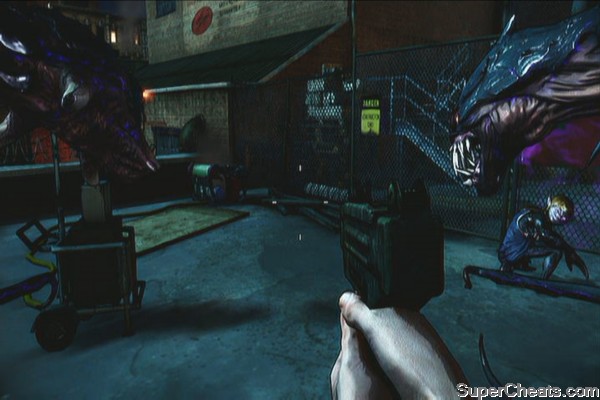
Head to the alley and tap LB to pick up glowing objects. For starters, grab the obvious pile of junk to get a metal rod, aim it to the target and throw it to impale them. Press RB to use the demon arm slash and destroy the wooden fence ahead. 0
Move to the second fence and follow the instruction to perform a vertical slash and horizontal slash respectively. Kill the two thugs and continue forth. After reaching the locked door, follow the instructions again to open the electrical box and destroy it to unlock the door.

Once inside, grab the target and execute him. Head to the next room, grab an object as instructed then throw it to the thug to stun him. Then, execute him. Head to the door and pick up the M1911 on the table.

Head outside and start killing. You can grab the vehicle doors and throw them to enemies to slice them or use it as shield. Use this to conserve bullets. Don't forget that you can take out the lights as well. Continue forth until the building beside you blows up and you get thrown in the adjacent building.

After the darkling saves you, grab the UZI from it and open the door. You'll find the very first Relic in the game. There are 29 in total. These give you bonus essences, as well as the chance to unlock two achievements. Grab it by pressing LB. Head to the where the darkling is to find a Talent Shrine. Access it to upgrade your skills by spending essences you earn by killing enemies. The more creative you kill, the higher the essence. You should have not less than 500 essences at this point, so purchase the first one (Eat Hearts). There are four talent trees to choose from as well. For now, I suggest buying Health Executions for 400 essence.


Once done, continue forth and fight your way through several enemies. The darkling will prove as a useful decoy and ally. Take time also to consume the hearts of fallen enemies to earn health and extra essence. Fight your way to the streets until you meet up with your crew. Take out the next few enemies then destroy the lights leading to the subway.


Once in the subway, destroy the lights first then destroy the gate. Continue destroying the lights and enemies as you make your way to the platform. Go downstairs and check the fire exit behind the stairs to find another relic.

Continue killing enemies ahead. There's a talent shrine halfway so use it as necessary. Head to the next platform and continue heading to your objective. Kill a few more enemies until you finally see Jenny. Walk along the corridor and talk to the two guys then continue forth to return to reality. Meet up with Tony and talk to him to complete the chapter.
Relic: 1
Before heading to your bedroom, go upstairs and check the master bedroom to the left corridor to find a relic on the table.
True Revelation
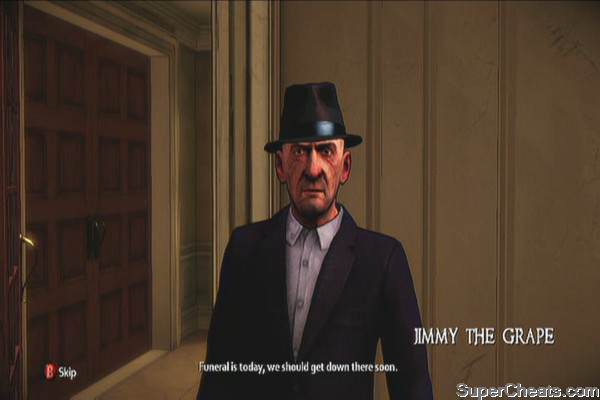
Head to Jackie's bedroom and light a candle for Jenny. Talk to Aunt Sarah next. After talking to her, find Vinnie in the atrium and talk to him. Next, go to your office and and talk to Jimmy. After talking to him, head to the elevator when ready and talk to Vinnie to head out.
Look for Dolfo outside the mansion veranda and accept his challenges. Purchasing weapon talents like quick reload, increased ammo clip, etc will help. Impressing him on both challenges will unlock the “That's Why I'm the Boss” achievement.
Challenges:
- Shoot at least 20 out of 24 pigeons within 1:30 minutes
- Shoot all bottles within 10 seconds.
Relics: 5
Talk to Jimmy and follow him. Continue forth until your demon arms appear. There's also a talent shrine nearby so use it if you want. Break the door open, quickly grab the pool stick by the dumpster then wait for the two enemies ahead to align before throwing it to them. If you successfully impaled the two of them using one javelin throw, you'll unlock the achievement “2 Guys 1 Pole”. You just need to reload the checkpoint if you failed the attempt.
You can then proceed and kill everyone inside. Before heading upstairs, check the arcade room to find another relic on the floor.
Sister of Light
Continue upstairs and destroy the door. Kill the enemies inside then head out to the junkyard. Kill the enemies there and continue forth until you reach an talent shrine. Before using it, head left to find another relic. Use the shrine if you want, then follow your darkling to the right.
The Dark Man
Move along and clear the area. Once done, head to the alley and take out the lights. Break the gates, destroy one more lamp and go up the ramp to proceed to the next area.
Next, you'll have to defeat Swifty's crane. You can shoot it but it will take minor damage. Your darkling will bring you some propane tanks. Grab it and throw it to the crane to deal great damage. Be careful as Switfy will swing the wrecking ball about, not to mention some of his thugs will come to his aid as well. The crane has its own light source so you have to stay behind the shadows as well. Having the health execution and eat hearts upgrade will help keep your HP up. Keep lobbing propane tanks to the crane until it is destroyed.
Crane bossfight
The Trinity
Head inside the warehouse and kill all enemies inside. Once done, go upstairs and destroy the electrical box to open the door to the conveyor room. Kill all enemies inside then search the backroom in the ground floor, in the middle behind the conveyor to find another relic.
The Graven Image
Head to the control room and activate the panel to open the door. There's a talent shrine here as well. Head down and clear the next room of enemies and lights. Head to the next control room and open the doors there as well. Go through the newly opened door then head to the loading bay. Kill the enemies then break open the door in the small office to your left. You should find the last relic in this mission there.
Chime of Deliverance
Continue heading forth and kill all enemies. You have to take out the last generator to take out the lights protecting the door leading to Swifty. Don't worry about the light; only your demon arms are affected – not you. Just run inside the small office to find the last generator and destroy it. Finally, destroy the electrical panel to open the door and reach your target.
More Questions Than Answers
Relic: 1 (If you missed getting the same one during “The Family”)
Follow Vinnie then talk to Johnny Powell. After talking Johnny, talk to Chief then talk to Jimmy in your office. When you're ready to head out, talk to Vinnie by the elevator.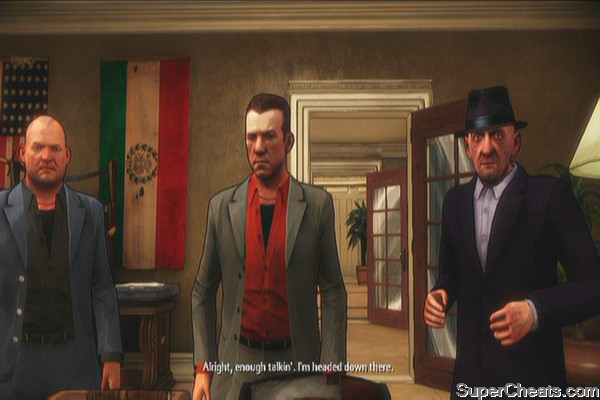
Relics: 2
As soon as you get off the car, check the back of the truck in the corner to find the first relic of the mission.
The Brothers of Men
Go inside the club and search for Venus. Just follow the path and she'll come to you eventually. Continue following her until you reach her room.
Follow the path and kill the guards until you reach the objective point. Ask your darkling to climb up the vent and you'll be able to see what he sees. Continue moving forth until you reach an empty room. Approach the guard and execute him then continue head to the next corridor. Since you have to avoid the light, climb the pipe and move through the ceiling until you reach another room. Kill the guard and destroy the electrical panel.
A day in the life of a darkling
You'll be back in Jackie's control so destroy the panel to completely open the door. Check the first room to find some weapons, ammo and a talent shrine. Use it as necessary.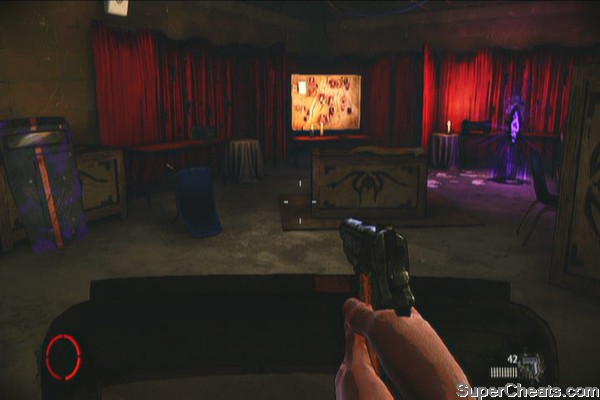
Approach the closed door and enemies will barge in. Kill them then grab the last relic in this mission.
The Key of Mictlan
Open the locked door and continue upstairs while taking out the lights. Once you reached the upper floor, continue killing the enemies. Follow the path until you reach a suspicious room with several generators. You won't have any choice but to get captured. Chapter ends.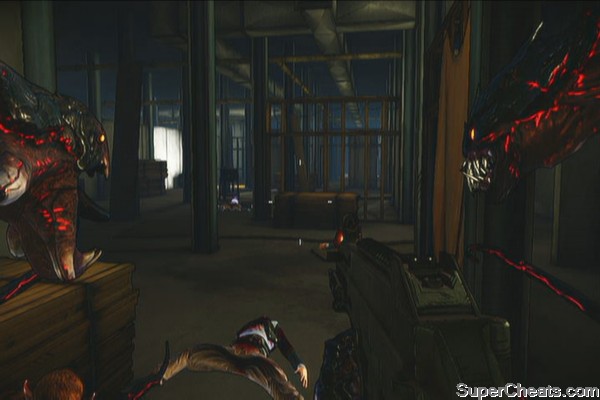
Relics: 2
Just go along with the interrogation. When you're asked to choose between Frank and Eddie, don't do anything. The secret achievement “Decisions, decisions” will appear shortly after.
After breaking free, turn around to find the first relic of the mission. Use the talent shrine as necessary.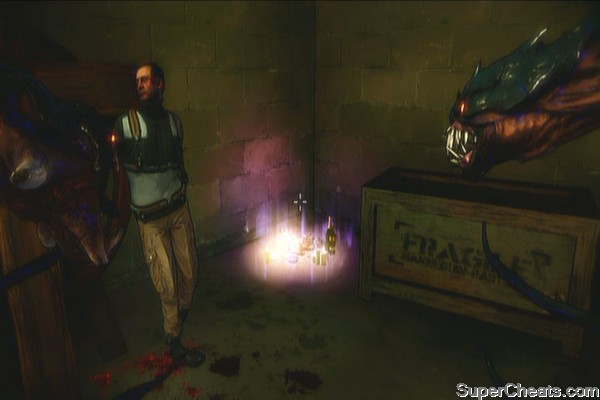
Thumb Screws
Exit the room then follow the straightforward path to the broken elevator. Climb the stairs quickly and continue forth. Be careful since as you enter the room, armored enemies will charge in. You don't have any guns so you have to slash like crazy or if you have the Swarm upgrade, it will help stopping the enemies on their tracks.

Continue to the next room and kill the enemies. Go upstairs and follow the walkway leading outside. Once you're out, jump down then follow the path. Upon reaching a set of blue stairs going down, look to your right and you should immediately see the relic.
The Fool's Phylactery
Continue moving forth until you get ambushed by armed enemies. Use the ventilation fan blades to kill them from a distance. Continue fighting your way through more enemies until you finally reach the warehouse. Your allies will then arrive. Ride the car to complete the chapter.

Relics: 2
Go down the ramp and kill the guy that has the lights on. Kill the other two enemies then break the nearby door open. Head inside and destroy the electrical panel to take out the lights in the parking lot. Kill the next wave of enemies. Be careful as you approach the next ramp since there's a van with its headlights on that will stop ahead. Take out the headlights using your gun then get rid of the remaining enemies.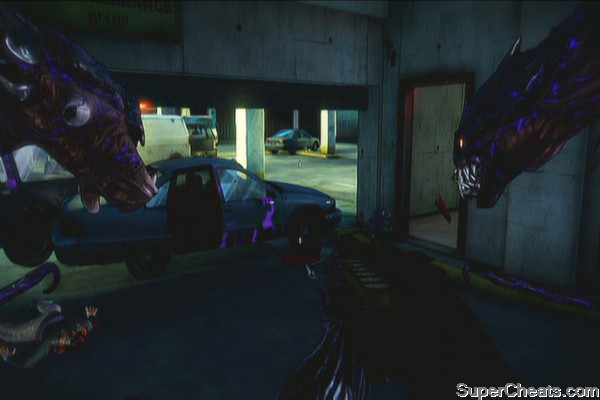
Continue forth and a car will attempt to run you over. To unlock the “The Bird is the Word (5G)” achievement, you have to prevent yourself from getting run over by shooting at the car. Dual-wielding submachine guns and using Gun Channeling will help. If you're not successful, you can simply restart the checkpoint.
Keep moving on. More enemies with a couple of them have flashlights will engage you. Take them out and enter the building. As soon as you enter, look to your left to find a breakable door with the “Employee Entrance” only sign. Break it open to find a relic inside.

Winged Demon
Talk to the wounded Dolfo then enter the elevator with Vinnie to start the second part of this chapter. Head out the elevator and resupply. When ready, talk to Johnny Powell. After the conversation, head to the exit.
Once outside, you have to fight your way back to the mansion. You'll first encounter a shielded enemy upstairs. First, you have to tear away the extra armor coating on the shield by shooting it. When you get the prompt, grab the shield, shoot a few more rounds on the body of the target and throw the shield to slice him. Doing this will unlock the “Karma's a Bitch” achievement. If you failed, just restart the checkpoint. The Swarm skill is still very effective against them.

Continue fighting your way until you reach the mansion. Move your way from room to room while clearing the enemies. After reaching the kitchen, turn right to the dining room to find another relic.
The Blinding Sun
Continue forth until you meet up with Jimmy. Move along and clear all the enemies in the atrium. Continue upstairs and head to your room. Chapter complete.
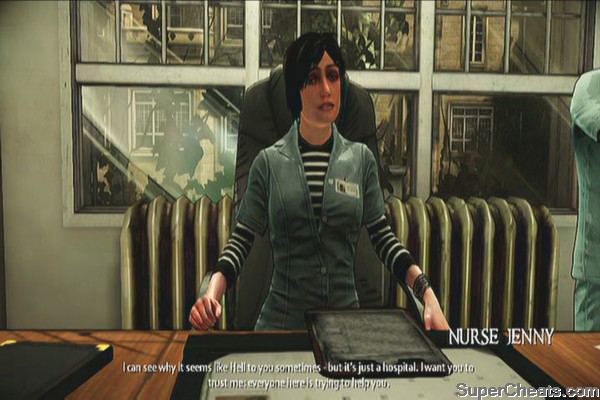
Head to the dispensary as instructed and talk to the people there. Talk to Frank then head to Dr. James' office. Sit down and let him talk. Next head to Nurse Jenny's office and sit down. After a few scenes, make your way to the exit.
Use the talent shrine if needed then head out. Talk to Jimmy next. Finally, head to the elevator.
Relics: 2
As soon as you enter the cemetery but before talking to Jimmy, check the planter behind the statue to find a relic. You can still get his after talking to Jimmy and after Bragg appears but you must do so before going upstairs and pursuing him.
Cain
Talk to Jimmy and land a few shots at Bragg. Kill his reinforcements then pursue him. Kill more enemies and he'll make another appearance. Make sure to take out the light posts as well.
One tough guy
This is pretty much straightforward so just keep following the path until you reach the part where you need to destroy a generator in order to push forward.
Keep heading straight until you reach mausoleum. Check the back of the building to find another relic.
Engraved Skull
Keep fighting forth until you reach a talent shrine. Reset your points if you want and concentrate on a specific skill tree so you can access the highest talent. When ready, continue forth for a boss battle.
You'll be in a real showdown against the bastard, Bragg. He will teleport from place to place while lobbing projectiles at you or shoot you. He will also appear in the battlefield and attack you from behind or just simply charge towards you.
Keep moving. If he's shooting from a distance, zoom in and fire back with your weapons. If he floats in mid-air, anticipate that he's going to charge. Evading this charge successfully will leave him open from behind so just slash away with your right demon arm. His minions will also appear, providing much needed nourishment to restore your health. They'll only come in 2-3 waves so don't rely on them to get healed.
Dish best served cold
Talk to Vinnie by the door then go downstairs and talk to Johnny. You could stick for a couple more dialogues with Johnny to learn more about the angelus. Once done, head to Atrium and talk to Vinnie and Jimmy. Finally, head to the elevator when you're ready.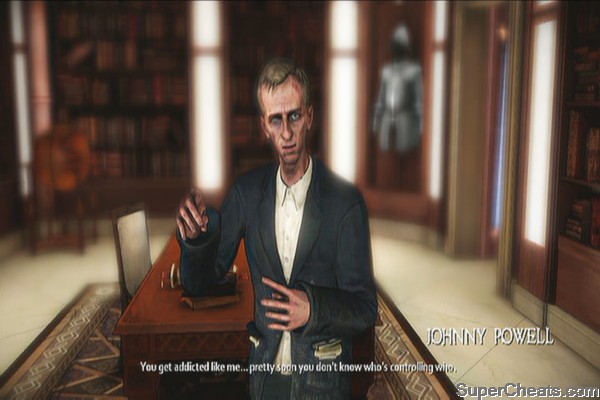
Relics: 6
Move along and sneak into the carnival. As soon as you exit the bumper car building, go to the left then turn right as soon as you see the Ring Toss stall. You should find the first relic there.
The Lantern of St. Anthony
After getting the relic, explore the area until a flashback with Jenny occurs. Try to shoot as many targets as possible and get at least 1000 points. The fast targets in the top tier are worth 100 points while the middle tier is worth 50 points. Shoot as many of them as possible within the time limit. If ever you hear the countdown and you still don't have enough points, restart the checkpoint. This is necessary for an achievement later on. After the flashback, the enemies will appear. Take them out and carefully make your way back to the starting point. More enemies will appear along the way. Shoot the van's headlight and take out the remaining enemies.
Enter the newly opened tunnel and immediately run to the right to escape the blinding light. Destroy the generator inside the room, then destroy the electrical panel in the tunnel to open the grates. Exit to start the second part of the mission.
As soon as you start the this section, shoot the lamps to your right first. Before following the enemies heading left, turn right to find another relic.
Af and Hemah
Continue forth and whittle down enemy forces. Once clear, continue ahead and climb the ladder. You'll find a talent shrine inside so use it as necessary. After using the shrine, jump out the window and jump to the other side of the carnival. Continue to the shooting range to start another flashback. You have to shoot the pop-up black-clad bandits and not the friendly targets as you'll lose points instead. You can also shoot the furnitures and other decors for extra points. If ever you hear the countdown and you still don't have enough points, restart the checkpoint. If you managed to score 1000 points in both games, you'll unlock the “Carnie Kid” achievement.
Winning the grumpy blue one
As soon as the flashback ends, more enemies will ambush you. Watch out for the tougher and faster enemies. Slashing them when they're up close or using Swarm should be enough to break their armors and make them vulnerable for executions. Don't hesitate to use your guns as well since there's only a handful of throwable objects lying around.
Before moving forward, check out the open room to the left of the saloon shooting range. You should find another relic there. Follow the objective marker then exit to the next area.
The Abyssmal Maw
Follow the path and take out the enemies who will ambush you. After dealing with the initial wave of enemies, continue to the large, clown gate and face more enemies. After taking them all out, head to the gate. Wait for your darkling to get a propane tank then lob it to the door.
After the initial hit, you have to get to the roof to access more explosives. Kill the enemies on the ground then go left of the clown gate. Continue to the end of the alley and destroy the light to enter the building. There is another relic that can be grabbed from inside the room.
Crescent of the Sun
Continue forth and run forward to escape the light. The generator powering it should be immediately visible in the middle. Destroy it quickly since more enemies will appear. Take them all out then destroy the exit door. Head out and use the ladder to get to the roof. There's a talent shrine there so use it as necessary.
Head inside the building again and take out the guards. Once clear, go outside and find the generator powering up the lights. As you move in, more enemies will appear so fall back to the shadows and deal with them. Once done, run past the light and enter the next door and circle around to find the generator. Take it out.
Head out and more enemies will appear in the adjacent building. You can deal with them from a distance or just get up close and personal. Take them out and enter the building. Make your way upstairs then continue to the roof of the next building. Use the talent shrine as needed, then kill the two guards before jumping down.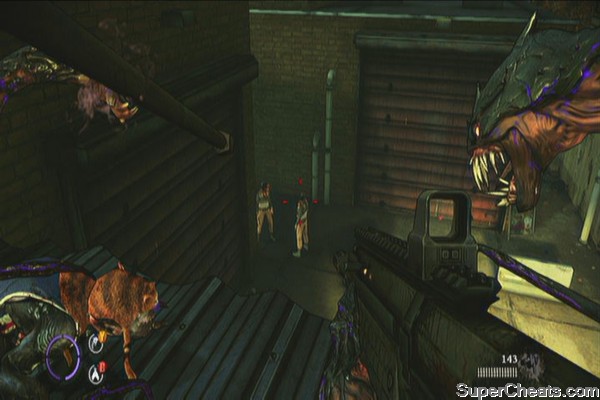
Quickly destroy the light first to give you more space to move then kill all enemies. Once inside, check the right side of the truck to find yet another relic.

Siddhartha's Tears
Destroy the exit door to the left and you'll find a control panel. Activate it to open the garage door and watch the fireworks. Once done, head out and go through the gate. Continue forth to the Castle of Horrors. Once inside the castle, go around the ticket booth to find the last relic in the mission.

Mark of Cain
Continue moving forth and Jenny will appear again. Just sit back, keep your weapons ready since enemies will also appear along the way. After the ride approach the iron maiden and open it to complete this chapter.
Follow the path and approach Jenny. After getting shooed away, you'll be instructed to find a weapon next. Head back to your room and find Dolf outside. Talk to him and he'll tell you to get into the janitor's closet.
Go there and you'll encounter someone familiar. Once done, continue along the straightforward path until you get the chance to move on.
Relics: 2
You'll be controlling the darkling for now. Take note that as a darkling, you're practically immortal so you don't have to worry about restarting a checkpoint when dying. Just kill every enemy you find during in this chapter to unlock the achievement “Impish Delight”. You have to find a way to cellar and reach Jackie. Like before, you have to avoid the light. However, the enemies can still see you so be careful not to engage them carelessly. If you have to fight them, bring them to the shadows and find a cover. Take them out one by one as necessary. Don't worry since if you die, you'll just respawn.
Make your way to the fireplace in the middle then destroy the wooden lock. Go through the tunnel to reach the cellar. Once in there, you have to navigate your way around avoiding lights and sneaking/killing guards. I suggest killing them for some extra essence.
Just navigate your way until you find a gate and a fading lamp post. You have to destroy the electric box while the light is out before finally destroying the wooden bar on the gate.
After destroying the gate, climb up the pipe and follow the path until you reach Jackie. Follow the path again and you'll find two guards in the main hallway. Take them out then find a room to the side. You'll find a relic there.
Pope John XII
You have to follow the power cable on the ceiling while avoiding lights. This leads you to another room with guards in it. Dispose of them, then find a pipe leading to the electric box. Destroy it to power off the iron maiden.
After the scene, you'll have to make your way back to Jackie to rescue him. Be wary since there are guards as well. Take them all out for some extra essence. Destroy the wooden planks covering a small tunnel then make your way back to Jackie. Kill the guard and free him.
You'll be playing as Jackie once more. Just follow the straightforward path until you reach Jackie's Father's office. You'll find another relic there.
Reliquary of the Blessed Blood
Take the Model 1887 shotgun from the wall then fight your way out of the cellar. You don't have to worry about the light for now since you still don't have the Darkness back yet. Take the guards' guns as you proceed. The only drawback is that you don't have a way to recover health bars since you can't eat the enemies' hearts. Just play like what you normally do in a normal shooter and move from cover to cover.
Continue following the path until you reach the cellar. Here, you'll have to fight Peevish. He'll summon some annoying darklings himself but you'll be able to kill them with a few rounds. Having a submachine gun will help a lot, especially when dual-wielding. Just run around, kill the darklings while tracking Peevish down. Grab the ammo crates scattered around to restore your ammo. After killing him, regain a bit of the darkness.
Peevish bossfight
Just follow the path, destroy the gate and exit to complete the chapter.
Relics: 2
Continue forth and fight a few more enemies. Run past the broken window and go upstairs. Destroy the wall to create a bridge. Go right to the broken wall and turn around to find a relic.

The Silent Night
Just follow the path and kill more enemies until you reach a talent shrine. Use it then continue forth. Head to the hall and examine the picture on the piano for a scene.
After the scene, you'll have to survive several waves of enemies before you can proceed. Run towards the door and continue until you find a talent shrine. Continue upstairs but don't fall down yet. Go across the wooden plank and peek to the other room to find another relic.
The Deceiver's Grasp
After grabbing the relic, kill the unknowing guards below and continue forth. Fight your way through the hall then to the second floor and kill more enemies. After clearing the area, destroy the light then break the door then continue following the path to complete this chapter.
Relic: 1
Follow the path and pursue Victor. Once you reached the narrow hallway and when he sends out projectiles. Slash your demon arm horizontally as you move forward to avoid getting damaged. Continue along and grab the weapons and ammo, and use the talent shrine as well.
Continue until you reach the attic and while Victor is talking, to your right and find the only relic in this mission.

The First
This battle shouldn't be that hard, especially if you found all the relics along the way and was able to accumulate way more essences and bought more talents. Victor will teleport from place to place while shooting projectiles at you. Just keep shooting at him. If he's near, use the swarm to disrupt him and slash away with your demon arm. If you have Gun Channeling, using it will also help to conserve ammo.
If he summons his minions, you can use this chance to perform various executions to recover health, speed up the recovery time of your powers (Gun Channeling and Swarm) or gain ammo. Just repeat what you're doing until he's defeated. You can watch the video below for more details.
Sweet, sweet revenge – Part 2
This is an intermission before the last chapter of the game. Just follow the doctor until the janitor tells you to follow him. Go to the rooftop and after a brief conversation, you'll have to make a choice whether to stay with Jenny or reject the asylum.
If you chose to stay with Jenny, the credits will roll and you'll have the false ending. Rejecting the asylum will enable you to continue the fight to real, last chapter of the game.
Relics: 2
Walk straight up and once you see Jenny, turn right to find a relic.
Prism of the Brothers
Approach Jenny and more enemies will appear. Take them out and a new path will be opened. Pick up the weapons and continue forth. Use the talent shrine as necessary. Move along and take out the enemies as they come. You'll finally reach a point where there are spikes blocking your path. Before destroying them and pushing on, look to your right to find the last relic of the game.

Ashes of the Unnamed
Destroy the spikes and continue forward. Kill more enemies until you reach Jenny. Kill all enemies then grab one of her bindings to destroy it. She'll be taken away once more and a new path will appear.
Destroy the obstacles holding a talent shrine then use it as necessary. Continue fighting your way until you reach Jenny. Destroy her last binding to complete the chapter.
The Vendetta campaign takes place with the concurrent events in the main story campaign. You can select one of the four unique characters, each with their own set of skills and special weapons. All characters can use firearms though they can't dual-wield generic weapons. They all follow the same 8 missions available in this mode. This can be played offline or cooperatively online. (There's no split screen)
You can only keep one save per character so starting a new Vendetta campaign will overwrite your existing campaign. However, the earned essences and purchased talents of the characters are permanently saved so even if you start campaigns and switch between characters, their character progress won't be lost. If you're after the achievements, there are individual achievements awarded by finishing at least one mission for each character so you'll have the chance to try them all out and decide which one you'll use to complete the campaign.
Also, there are a total of four relics scattered in certain Vendetta missions. This guide will help you locate them as well. (These doesn't count to the 29 relics achievement)
Inugami
Unique Weapon: Kusanagi
Darkness Power: Swarm
Innate Talent: Sprint Endurance
Inugami excels in melee combat. His weapon, Kusanagi can deliver fatal blows to enemies with just one or two slashes. His power, Swarm allows him to stagger and render multiple enemies vulnerable which will make it easier for him to get up close and execute them. This skill can be further improved via its own talent tree.
When playing as Inugami, a player will need to use sprint often to close the distance to his targets. One of his talents significantly mitigates damage when he's sprinting and even temporary invincibility after each executions. You can also control his slashes by holding RB and controlling the right analog stick. This is a bit weaker but can effectively stop enemies on their feet. This is also effective against those more heavily armored enemies in the later missions. 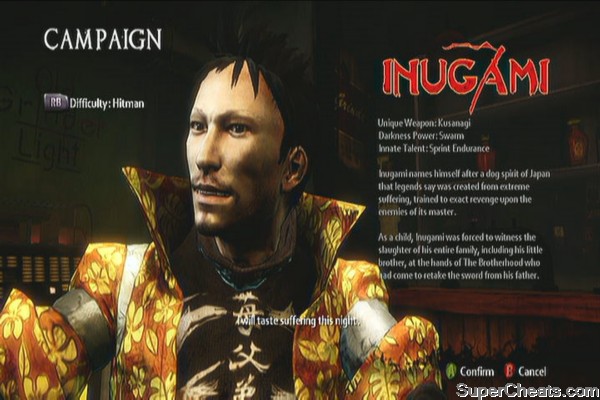
JP Dumond
Unique Weapon: Midnight Stick
Darkness Power: Black Hole
Innate Talent: Heart Destroy Healer
JP's power is probably the most powerful in all four characters. His black hole ability can effectively take care of multiple enemies within its range. Though there are enemies capable of resisting it (if they're not too close to it), JP can knock them off their feet and send them hurling to the swirling dark hole of death by using the Midnight Stick's “lift” attack or just simply shoot them. The black hole's duration and size can be increased through JP's talent tree. You can even increase the number of enemies that can be sucked.
JP's weapon, the Midnight Stick can also lift enemies for a few seconds, making them vulnerable to gunfire or executions. When playing as him, you should consider moving from cover to cover and not rushing towards enemies since he doesn't have any skills to mitigate damage. 
ShoShanna
Unique Weapon: Arm of the Night
Darkness Power: Gun Channeling
Innate Talent: Quick Weapon Reloads
Shoshanna's probably the most easiest character to play as. No other gimmicks; just shoot, shoot and shoot. Her special weapon is a sawed-off shotgun which regenerates ammo and can also release a very powerful charged shot. Upgrades can also increase her special weapon's ammo and spread.
Her ability, Gun Channeling, works the same way as Jackie's. Her guns' damage increases and her ammo is unlimited while this ability is active. Further upgrades can also enable her to shoot through walls and auto-target enemies. 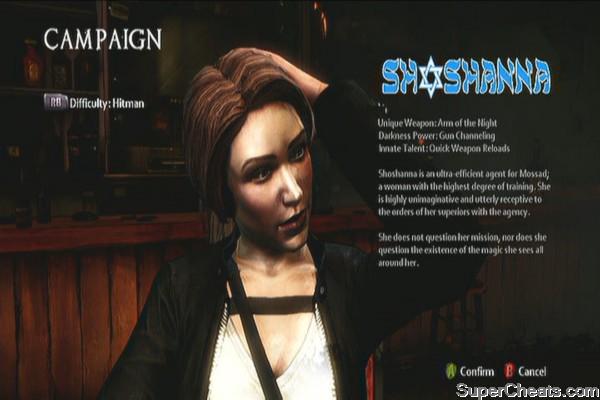
Jimmy Wilson
Unique Weapon: Dark Axe
Darkness Power: Darklings
Innate Talent: Damage Resistance
Jimmy's special weapon is the Dark Axe which can be thrown and recovered instantly. His axe can also pass through multiple enemies. Though it doesn't kill enemies in one throw, it deals additional damage if the same enemy is hit while it is on its way back to Jimmy's hand.
His power enables him to call darklings which seeks out enemies and detonate at them. Further upgrades will enable him to summon more darklings and give their detonation additional effects. Jimmy's innate ability will also help him resist most attacks but that doesn't mean that he's invincible. 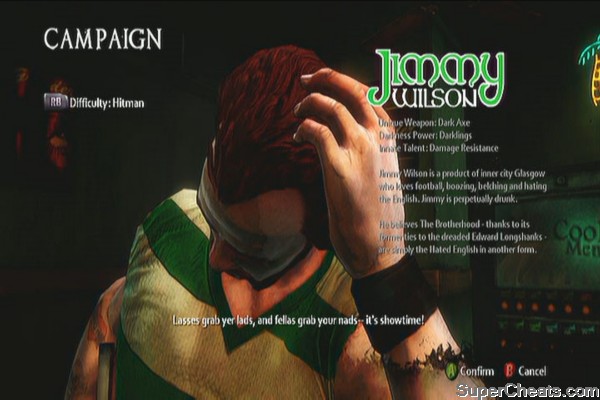
Here's Johnny
There's a talent shrine nearby but you won't be able to purchase anything for now. To recover health, you must destroy the hearts of enemies. You still need to stay away from direct lights. Executing enemies works the same way; they yield more essence but you won't be able to gather hearts.
Continue forth and clear the area. Take out the generator by checking the small room just across the lights. (Or just simply trace the cable from the lights) Move from cover to cover as it will be suicide to just carelessly jump into the fray. After clearing the area continue forth and turn right when you get to a crane. You'll find a generator powering the lights ahead; destroy it. There are a couple of ammo cache and Kalashnikovs there as well.

Move up and destroy the electronic lock to reach the next area. You have to clear this area of enemies as well. The generator is hidden among the rubble just ahead of you so it may be a good idea to destroy it quickly. Wipe out the enemies then head to the gate. Destroy the electronic lock as well. 
Once you reached the next area, take the ramp to your right to find the generator. Destroy it. 

Clear out the area and before heading to the garage, take out the generator near the fences behind the car crushing machine so you can waltz in to the objective point without problems. Break the lock to open the garage where Johnny is held. This time, more enemies will arrive. You have to survive their attack. Just remember to move from cover to cover and avoid rushing towards a lot of them (obviously). You can fire a short burst from your firearm then sprint to deliver the executing blow to make your job easier. Once they're all dealt with, cut Johnny free to complete the mission. 
Stop the Press
Use the talent shrine since you have saved up a few essences from the last mission. Continue forth and take out the couple of enemies then use the stairs until you find an elevator. Destroy the panel and ride the elevator down. Just follow the straightforward path until you reach a large warehouse. Carefully clear all enemies then overload the circuit breaker. Just press Back to locate it. After overloading it, activate the power panel to reroute the power. 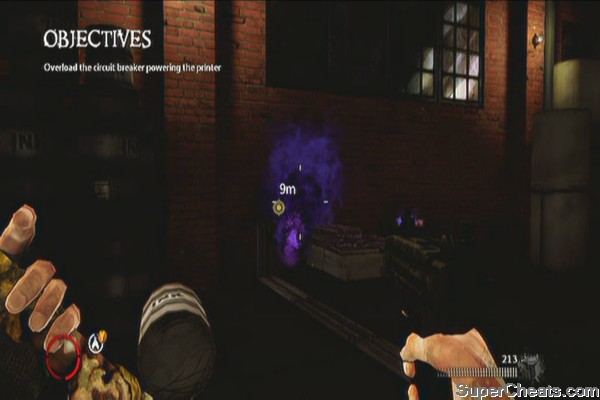
More enemies will arrive. Some will appear from the catwalks overhead so it may be a good idea to use the nearby room as cover as you take them all out. Using your rifles should allow you to land more accurate shots. Take out all enemies then find the second circuit breaker and do the same thing. 
The machine in the lower floor will break down, revealing an artifact. Pick it up and survive another wave of enemies that will come pouring in. Kill them all to complete the mission.
Dead-End Job
Use the talent shrine to get some new abilities. If you're playing alone, it will be helpful to concentrate on getting your character's specialty skills first. When ready, carefully approach the enemies and take them out. Make sure to take out the lights before moving forth. 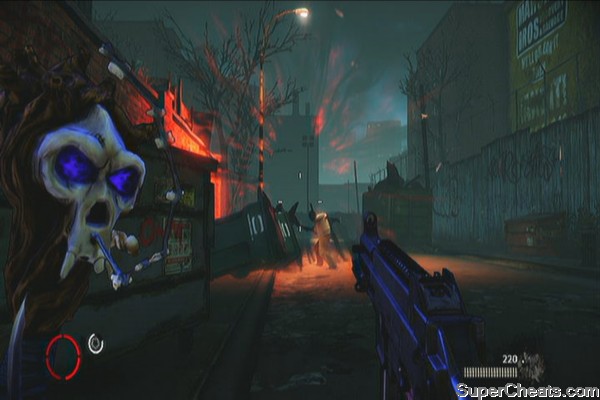
Go left to the open lot and continue clearing up Luigi's men. Once done, go through the open container van to reach the next street. Follow the path ahead and continue destroying the lights along the way. More enemies will appear as soon as you reach the checkpoint. After clearing the enemies, continue ahead until you reach another open lot.
You may destroy the generator if you like, then head to the playground. More enemies will appear; just continue taking them all out as you make your way to the rear gate. Meet up with Dolfo and take the package. 
Backtrack to the trailer where you saw a panicking guy earlier and kill all enemies to update your objective. Next, plant the bomb on the trailer's door, quickly step aside and watch it explode. Finish Luigi and pick up the artifact. You'll have to survive yet another wave of demonic enemies to complete the mission. 

No Brothers of Mine
Start by destroying the lights and using the talent shrine nearby. Head inside and start clearing the warehouse. Take out the ceiling lamps as you move forth. After clearing the warehouse, go upstairs first and check the room with the conveyor. A relic should be there. 
Moon Rock
When you're ready, head to the elevator and enter it to reach the roof. Clear the enemies there then make your way to street level. As soon as you reach the checkpoint, more enemies will appear. Take cover and take out the guards on the watchtowers.
After clearing the area, approach Cedro and fight him. Avoid the lights and keep firing at him until his armor wears off. Once his armor is removed, you can now use your Black Hole to stagger him as long as the hole is active while unloading all your bullets. Keep doing this until he goes down.
The Coward
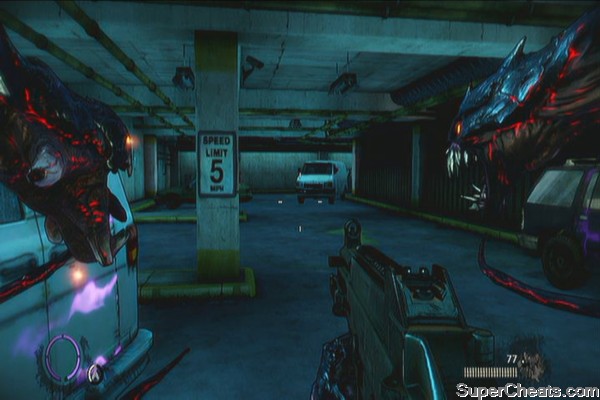
Hostile Takeover
Continue to the parking lot and confront the enemies there. There are spots here where you can't destroy the lights on the ceilings so just concentrate in finding the generators for lights in the ground level. As you continue forth, heavily armored enemies will appear. Just keep shooting at them to remove their armors and make them vulnerable for executions. 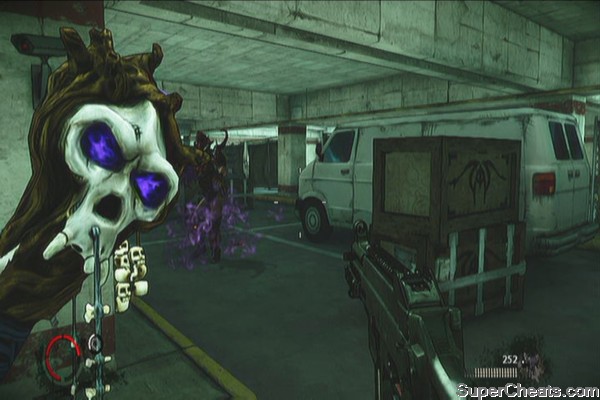
Continue forth. If you encounter vehicles with blinding lights, you have no choice but to run towards them and avoid too much light exposure. Continue to the lower parking lot and approach the exit to find Graves. More of his specialized troops will attack you. Take cover and use your firearms to whittle them down. Once done, enter the opened door and kill the two enemies who will appear from a nearby elevator. Ride the next one.
Once the elevator door opens, a flashlight-wielding enemy will beam you with light. Shoot him immediately to avoid too much exposure. 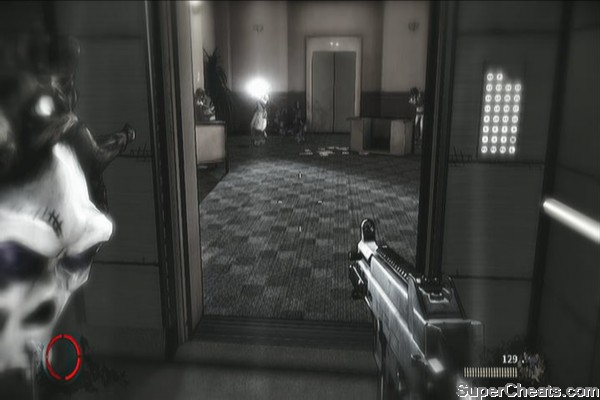
Follow the hallway and clear the path. As you reach the lobby, a shield enemy will appear as well. Keep shooting at him to weaken the armor of the shield. Don't hesitate to run back and use the corners for cover. 
Keep moving until you reach the newsroom. After Graves finishes his speech, check out the cubicle to the right, nearest to the large screen to find a relic.
Mummified Cat
Continue ahead and clear out the next room. Take out the lights as well. Be careful since there will be aggressive teleporting, melee and shield-wielding enemies. Shotguns will be effective in stopping them in their tracks. Once cleared, take the stairs and shoot the door open to reach the roof.
There will enemies waiting there as well so take cover and take them all out. Take the stairs to the left and jump to the other side of the roof. You also need to clear it of hostiles. 
Start off by shooting at the helicopter's headlight. For the first wave, you have to move from cover to cover as enemies will also appear from the rear. Rifles are pretty accurate in landing some much needed headshots from a distance. Later on, the gate on the right will open so you can storm in and kill the pesky enemies from the high ground. There are scattered ammo caches as well so make sure to use both your main firearm and SMG/pistols. After taking out all of the first wave, a few more heavily armored specialized troops will appear. Take them out and avoid rushing towards them. Their assault rifles will tear you a new one. Continue doing this until the mission is complete. 
A Real Rain Has Come
Pick up your desired weapons and loot the ammo caches. Purchase some talents as well before heading out. Head to the docks and destroy the generators first. The area here is tight so you may have to use melee attack often as you move along. 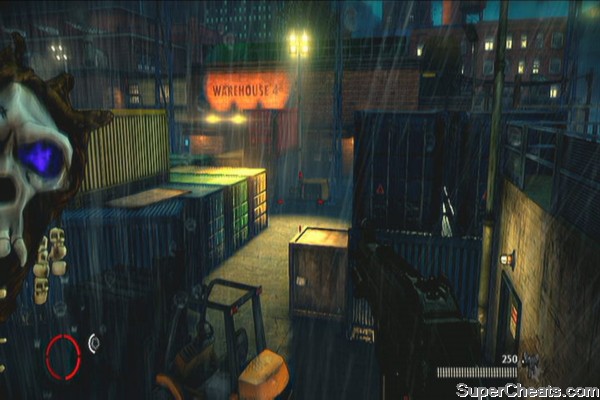
Continue clearing the enemies until your objective is updated. Head to the container yard and fight the annoying siblings. For the first part of the mission, you just need take cover and shoot them as they move alternately between the adjacent roofs. They'll move out. Pursue them and move from cover to cover while shooting at them. Don't let yourself get caught in the open. The best places to hide are the open container vans where you can simply move back and forth to take cover. You can also simply camp there and wait for them to appear since their movement patterns are just the same anyway.
Trolling, at its best
Keep dealing damage to them while minimizing the damage you receive. Your objective will soon be updated and you'll be instructed to follow them to the boathouse. Before taking the stairs, you can go downstairs first and check the wooden walkway underneath. A relic should be lying there. 
Two-Headed Dragon
Continue upstairs to fight the two bosses. They are still quick and annoying. They'll start armored so you don't have any choice but to keep shooting at them to take out their armors. Once done, concentrate on one target at a time. If ever the other boss teleports near you, land a few hits on him/her to force him/her to teleport again. Also, make use of the covers. Don't be carelessly aggressive. Keep doing this until both of them goes down.
Justice, served
After the enemies are taken care off, break open the marked shipping crates and pick up the manifest when you find it to complete the mission. 
Forced Entry
Clear all the enemies in the train platform them meetup with Dolfo. He'll be fighting alongside you so you have to take out enemies quickly and efficiently to escort him safely out of the subway. 
Continue fighting your through various enemies until you finally reach the exit. Continue escorting Dolfo to the bank entrance. 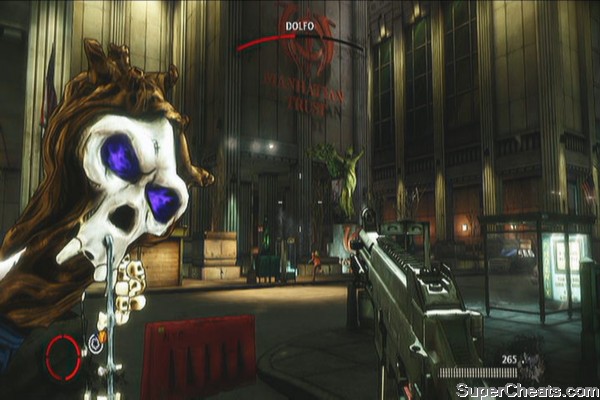
Once you both reach the bank entrance, protect him as he sets up the bomb. Kill all approaching enemies, then quickly get out of the way once Dolfo starts running and you hear some beeping. The mission is completed as soon as the entrance is blown up.
Sins of the Brothers
Continue killing enemies until you reach the vault. Go to the control panel to the right and unlock the door. More enemies are waiting inside. Kill all of them until Vinnie tells you to find the VIP elevator. Plant the C4 on the wall and stand back before it blows. 

After blowing the wall, you should find a relic on the left side, beside the fallen painting. 

Ouroboros
After getting the relic, pick some ammo caches until your ammo is full then take the elevator up. Once there, start clearing the last of Graves' men then continue upstairs to find him. After a short dialogue, you'll have to face the final boss of this series of campaign. 

Killing the hellbeast
Use the pillars for cover. Keep shooting at its eyes to weaken it then while its open, shoot the glowing part on its chest to deal more damage. It will summon various enemies as well so just take that time to kill them and recover your health. Just protect yourself from the hellbeast's damaging flames and continue shooting bullets at it until it dies.
Hit List
This guide will cover the offline hit list missions (since I don't have XBL). The other Hit List missions are also replayable Vendetta campaign missions so its up to you if you want to finish them or not. Almost all Hit List missions will just require you to kill enemies then survive their attacks. That said, I won't be writing individual walkthroughs for them.
There are 29 relics in the main campaign, 4 in the Vendetta campaign and 2 in the Hit List missions. Only the 29 main campaign relics are counted towards the two related achievements. However, you can still earn extra essences by collecting relics in other modes so it will help collecting them while you're at it.
Payback
Roanoke's Bane
After the darkling saves you and after destroying the door, you'll find it immediately on the ground in front of you.

Yhwh's Lament
After reaching the train platform, go behind the stairs to find this relic.
The Family
True Revelation
Before heading to your bedroom, go upstairs and check the master bedroom to the left corridor to find a relic on the table.
True Revelation
Q & A
Sister of Light
After clearing the bar and before going upstairs, check the arcade room to find the relic.
Sister of Light
The Dark Man
After killing the enemies in the junkyard, you'll find a fork in the path and a talent shrine in the middle. Check the path to the left to find this relic.
The Dark Man
The Trinity
After defeating Swifty's crane, use it as a ramp to reach the next area. The relic is inside the container van behind the crane. Just destroy the light shining over the adjacent gate first before getting it.
The Trinity
The Graven Image
After clearing the warehouse, you'll reach the conveyor room instead. Clear the enemies and search the backroom in the ground floor, in the middle behind the conveyor to find this relic.
The Graven Image
Chime of Deliverance
After reaching the loading bay, kill the enemies then break open the door in the small office to your left. You should find the relic there.
Chime of Deliverance
Strong Silent Type
The Brothers of Men
As soon as you get off the car, check the back of the truck in the corner to find the first relic of the mission.
The Brothers of Men
The Key of Mitclan
After controlling the darkling and returning to your body, you'll be able to open the door and enter the room with weapons, ammo and talent shrine. Approach the closed door and enemies will barge in. Kill them then grab the relic which should be obviously visible.
The Key of Mictlan
Deal with the Devil
Thumb Screws
After breaking free, turn around to find the relic on the floor, in the corner.
Thumb Screws
The Fool's Phylactery
As soon as the second part of the mission starts, jump down then follow the path. Upon reaching a set of blue stairs going down, look to your right and you should immediately see the relic.
The Fool's Phylactery
Home Invasion
Winged Demon
After clearing the parking lot and as soon as you enter the building, look to your left to find a breakable door with the “Employee Entrance” only sign. Break it open to find a relic inside.
Winged Demon
The Blinding Sun
After entering the mansion, continue until you reach the kitchen. Turn right to the dining room to find another relic.
The Blinding Sun
Saying Goodbye
Cain
As soon as you enter the cemetery but before talking to Jimmy, check the planter behind the statue to find a relic. You can still get his after talking to Jimmy and after Bragg appears but you must do so before going upstairs and pursuing him.
Cain
Engraved Skull
Continue pursuing Bragg and fighting your way along the straightforward path. You'll finally reach a gate with a generator-powered light pointed on it. Find the generator, destroy it to power off the light then destroy the gate. Keep heading straight until you reach mausoleum. Check the back of the building to find another relic.
Engraved Skull
Fun and Games
The Lantern of St. Anthony
As soon as you exit the bumper car building, go to the left then turn right as soon as you see the Ring Toss stall. You should find the first relic there.
The Lantern of St. Anthony
Af and Hemah
As soon as you start the this section, shoot the lamps to your right first. Before following the enemies heading left, turn right to find another relic.
Af and Hemah
The Abyssmal Maw
After the second flashback with Jenny in the shooting range, enemies will start to ambush you. Enter the open room to the left of the shooting range to find this relic.
The Abyssmal Maw
Crescent of the Sun
After lobbing a propane tank to the clown gate, enemies will appear and you'll have to get to the roof to get more explosives. Kill the enemies on the ground then go left of the clown gate. Continue to the end of the alley and destroy the light to enter the building. You should immediately see the relic from behind the iron gates inside a room.
Pope John XII
Reliquary of the Blessed Blood
After reaching Jackie's Father's office, look in the corner right to the right to find the relic.
Reliquary of the Blessed Blood
Homecoming
The Silent Night
After destroying the wall to create a bridge, go right to the broken wall and turn around to find a relic.
The Silent Night
The Deceiver's Grasp
After the firefight in the large hall, follow the path past the talent shrine and go upstairs. Before doing anything else, cross the plank and peek to the broken wall to find the relic there.
The Deceiver's Grasp
Last Stand
The First
As soon as you reach the attic, turn to the right and find the relic. It should be on the floor in front of the throwable sign “Hellgate Field”
The First
Heart of Darkness
Prism of the Brothers
As soon as you start the chapter, keeping walking until you see Jenny. Before going to her, immediately look to the right and you'll find the relic there.
Prism of the Brothers
Ashes of the Unnamed
You'll finally reach a point where there are spikes blocking your path. Before destroying them and pushing on, look to your right to find the last relic of the game.
Ashes of the Unnamed
Moon Rock
No Brothers of Mine
After clearing all enemies in the warehouse, go upstairs and check the room with the conveyor. The relic should be there.
Moon Rock
Mummified Cat
Hostile Takeover
Continue through the mission until you finally reach the newsroom with a bunch of cubicles and a large screen. After Graves finishes his speech, check out the cubicle to the right, nearest to the large screen to find a relic.
Mummified Cat
Two-Headed Dragon
A Real Rain Has Come
When you reach the part of the mission where you need to follow the two teleporting bosses, continue pursuing them until you reach the boathouse. Check the walkways below deck before going upstairs to find the relic.
Ouroboros
Sins of the Brothers
After clearing the vault and blowing off the wall, you should find a relic on the left side, beside the fallen painting. You should get this before taking the VIP elevator.
[VR_Ouroboros1.jpg');
// -->
Horned Skull
Enter the Gauntlet
After exiting the large garage, you'll find a white van. There's a room beside it which has the relic.
Horned Skull
Some achievements such as those which require you to rack a certain number of kills using specific talents/skills will be easier to complete by playing in New Game where you can keep the collected talents, essences and relics from the first playthrough. New Game also allows players to select specific chapters to play on, making it easier for achievement hunters to try unlocking chapter-specific cheevos.
Free the Mind (25G)
Finish the game on any difficulty
Don of Darkness (100G)
Finish the game on Don difficulty
At Home in the Dark (50G)
Finish all chapters in New Game on any difficulty
New Game becomes available immediately after completing the single player campaign. It retains your acquired relics, essences and talents which will make your second run easier.
One Man Army (10G)
Kill 25 enemies while being dragged from the restaurant, without dying or restarting checkpoint
This is actually recommended in Thug (Easy) mode since enemies die in one shot. If you missed this the first time around, you'll have to finish your current playthrough to unlock the New Game option which will retain your relics, essences and talents and enable you to select specific chapters to play. Just remember that the game has aim-assist by default so you just have to aim-fire-release-aim quickly to kill as many guys as possible.
One Man Army
The Bird is the Word (5G)
Avoid being run over in the parking garage
You can get this achievement in the chapter “Home Invasion” while you're fighting in the underground parking lot. On your way to the other side of the parking lot, a car will appear and will attempt to run you over. Time will slow down for a few seconds. Quickly activate your Gun Channeling skill then fire at will at the car's windshield. It is better to dual-wield submachine guns when attempting this. If you're not successful, simply reload the checkpoint and try again.
The Bird is the Word
Carnie Kid (20G)
Earn a score of over 1000 in each of the carnival games
This can be achieved during the chapter “Fun and Games”. You have to score 1000 points on both “flashback” shooting range games. For the first one, the fast targets in the top tier are worth 100 points while the middle tier is worth 50 points. Shoot as many of them as possible within the time limit. For the second game, you have to shoot the pop-up black-clad bandits and not the friendly targets as you'll lose points instead. You can also shoot the furnitures and other decors for extra points. If ever you hear the buzzer and you still don't have enough points, restart the checkpoint.
Shoot 'em fowls
Bandit shooting range
Impish Delight (10G)
Kill 15 enemies while playing as the Darkling
There are only two times you'll play as the darkling. The first one will only let you kill two guards while the majority of your kills will be during the chapter “Rat in a Maze”. Take note that as a darkling, you're practically immortal so you don't have to worry about restarting a checkpoint when dying. Just kill every enemy you find during the chapter.
Executioner (10G)
Kill 50 enemies with Executions while playing as Jackie
There are four executions in the game which can be triggered after grabbing a vulnerable enemy and pressing the corresponding button. Just keep performing this whenever you have the chance and you should unlock this achievement without any problems.
The Swarm King (10G)
Kill 50 enemies who are swarmed while playing as Jackie
You first have to unlock Jackie's Swarm ability by spending essence. You can further upgrade the Swarm's damage, stun time, cooldown and even the number of targets it can reach by purchasing the related skills.
The Old Gibber (10G)
Kill 100 enemies with Gun Channeling while playing as Jackie
You must purchase the Gun Channeling skill first and further enhance it by purchasing related talents by spending essences. Use it whenever you have the chance until you get the achievement.
Suck It Up (10G)
Kill 50 enemies with Black Hole while playing as Jackie
You have to purchase the ability for the killed enemies to randomly produce black holes. You can only increase the black hole's size as an upgrade. Use them whenever you have the chance. The only drawback is that you'll have no hearts to eat afterward.
Cut and Run (10G)
Kill 50 enemies with the Demon Arm Slash attack
Ready for the Big Leagues (10G)
Kill 50 enemies with thrown objects
Dark Akimbo (10G)
Kill 100 enemies while dual wielding 2 different guns while playing as Jackie
That's Why I'm the Boss (15G)
Impress Dolfo in two different ways
You need to complete two optional challenges presented by Dolfo during the “intermission” chapters in your mansion. Look for Dolfo outside the mansion veranda and accept his challenges. Purchasing weapon talents like quick reload, increased ammo clip, etc will help. Impressing him on both challenges will unlock the “That's Why I'm the Boss” achievement.
Challenges:
• Shoot at least 20 out of 24 pigeons within 1:30 minutes
• Shoot all bottles within 10 seconds.
Karma's a Bitch (10G)
Kill a shielded enemy with his own shield
You'll first encounter a shielded enemy during the chapter “Home Invasion” when you're making your way back to the mansion. First, you have to tear away the extra armor coating on the shield by shooting it. When you get the prompt, grab the shield, shoot a few more rounds on the body of the target and throw the shield to slice him. If you failed, just restart the checkpoint.
Karma's a Bitch
2 Guys 1 Pole (25G)
Kill 2 enemies with one javelin
You can do this during the mission “Q & A”. Talk to Jimmy and follow him. Continue forth until your demon arms appear. There's also a talent shrine nearby so use it if you want. Break the door open, quickly grab the pool stick by the dumpster then wait for the two enemies ahead to align before throwing it to them. If you successfully impaled the two of them using one javelin throw, you'll unlock the achievement “2 Guys 1 Pole”. You just need to reload the checkpoint if you failed the attempt.
2 Guys, 1 Pole
Versatile Killer (20G)
Kill enemies in 5 different ways within 30 seconds
Skeet Shoot (10G)
Throw an enemy into the air and kill him with gunfire before he lands
Having Gun Channeling and its upgrades will be helpful in acquiring this achievement. It is easier to do this anywhere outside. Grab an enemy, throw him up in the air then unload your bullets until you kill him. Again, easier done in Thug (easy) mode.
Skeet Shoot
Jackie's Got Talent(5G)
Purchase a Talent in the single player campaign
This Kid's Got Potential (10G)
Max out 1 of Jackie's Talent Trees
Truly Talented (25G)
Max out 3 of Jackie's Talent Trees
You'll most likely be able to afford all the other talents by playing in New Game
Talent Show (50G)
Max out all of Jackie's Talent Trees
You'll most likely be able to afford all the other talents by playing in New Game
Mmmm Essence! (10G)
Pick up 5 Relics in the single player campaign
Check this guide's Relics List for the complete list of relics and their locations.
Relic Hunter (50G)
Find all 29 Relics in the single player campaign
Check this guide's Relics List for the complete list of relics and their locations.
Romantic (5G)
Real guys know how to dance
During the mission Q&A, you'll eventually reach a diner. During the scene, sit first with Jenny. When you get the prompt to press X to kiss her, don't do it. The achievement will appear automatically by not doing anything.
Romantic
Burned His Mansion (20G)
Kill Luigi Palladino. Complete the Vendetta mission 'Dead-End Job'.
Coward (20G)
Kill Cedro Valdez. Complete the Vendetta mission 'No Brothers of Mine'
Whipping Boy (20G)
Kill Frank Marshall. Complete the Hitlist mission 'Enter the Gauntlet'
Bonnie & Clyde Wannabes (20G)
Kill Jean-Luc Lambert and Amelie Dubois. Complete the Vendetta mission 'A Real Rain Has Come'
Technical Difficulties (20G)
Kill the NewsWatch 6 team of Tom Dawson, Bud Langley and Sara Stephens. Complete the Hit List mission 'We Interrupt This Program'
The Brotherhood Crumbles (50G)
Complete Vendettas Campaign. See the Vendettas section for the individual walkthrough for each mission. Hit List missions are optional and thus don't count towards this achievement.
Dark Ninjutsu (10G)
Complete a mission as Inugami. Refer to the Vendetta section for the first mission walkthrough. If ever you decide to play as another character, your campaign progress will be lost if you start a new one but your earned essences and bought talents will remain.
Hell Hath No Fury... (10G)
Complete a mission as Shoshanna. Refer to the Vendetta section for the first mission walkthrough. If ever you decide to play as another character, your campaign progress will be lost if you start a new one but your earned essences and bought talents will remain.
It's 12pm Somewhere! (10G)
Complete a mission as Jimmy. Refer to the Vendetta section for the first mission walkthrough. If ever you decide to play as another character, your campaign progress will be lost if you start a new one but your earned essences and bought talents will remain.
Voodoo is More Than Dolls (10G)
Complete a mission as JP. Refer to the Vendetta section for the first mission walkthrough. If ever you decide to play as another character, your campaign progress will be lost if you start a new one but your earned essences and bought talents will remain.
Embraced the Darkness (25G)
In Vendettas, acquire all the talents for one character. By sticking with one character and gathering all relics, you should be able to purchase all skills before the last mission ends.
You've Made My Hit List (25G)
Complete 6 Hit List exclusive missions
Secret Achievements
Cheque Please! (10G)
Survive the hit
I'm Just Getting Started (25G)
Find and interrogate Swifty
Escape the Brotherhood (25G)
Survive the interrogation
Storm the Mansion (25G)
Take back your mansion
One Flew Over... (20G)
Return to reality...?
Sweet Revenge (25G)
Avenge your Aunt Sarah
Date Night (25G)
Protect Jenny
Allies in Strange Places (20G)
Escape the asylum with help from the inside
Back in the Saddle (20G)
Rescue Jackie from the Iron Maiden
Step into Hell... (25G)
Defeat Victor
Decisions, Decisions (5G)
Refuse to cooperate with Victor in the Interrogation
During the mission “Deal with the Devil”, you'll be asked to choose between Eddie and Frank. Just don't do anything and you'll get this achievement shortly.
Should Have Called 555-2368… (10G)
Survive the battle against the Hell Beast. Use the pillars for cover. Keep shooting at its eyes to weaken it then while its open, shoot the glowing part on its chest to deal more damage. It will summon various enemies as well so just take that time to kill them and recover your health. Just protect yourself from the hellbeast's damaging flames and continue shooting bullets at it until it dies.
Killing the Hell Beast


 The Best Gaming Podcast Ever: Episode 8
 MGS V: The Phantom Pain - Where to find D-Dog, It's Special Abilities and How to use it on field
 How to get the 4 Best Destiny Chest Armor for Titan Class
 Birds Room Walkthrough
 Ratchet & Clank: A Crack In Time Guide