


The next instalment of the Resident Evil series takes us to Africa where the origins of the virus are to be discovered. You will take control of a returning character from the series, Chris Redfield. Being a huge fan of the series I could not resist the urge to present you with a complete Guide to enhance your own experience. I hope you enjoy the Guide, which will be as spoiler free as possible, and hopefully the game will bring you tons of entertainment.
Key features of the Guide:
- No spoiler scenes described
- For Xbox 360 and PS3 both
- Covers all items and collectibles
- Do optional things as soon as possible
- Optional things integrated into the walkthrough
Absolute Steve
It's been a long wait since the official return of the long running Resident Evil series, but the fifth instalment has finally arrived. Does it live up the hype, and more importantly, does it feel like a Resident Evil game? Keep reading and you may find this review to answer those questions. Friends and gamers that are acquainted to me know that I'm famous for my criticism and that I don't often hand out high grades for games unless they deserve it.
Graphics: 10/10
The graphics are beautiful, there's no other way to put it. The movement of the characters was created by real time actors in suits with movement trackers and the results are stunning. The realism is incredible and everything looks as if it could happen in real life. The graphics themselves look better than ever - it's almost as if the pre-rendered backgrounds from the Gamecube came to live in an ever interactive environment in which many things can be destroyed or used.
Story: 9/10
There will be absolutely no spoilers here. The story naturally continues from where Resident Evil 4 ended. The Ganados were pretty much taken care of, but Albert Wesker (the series' main antagonist - with his characteristic black coat, permanent black sunshades, a botox face and a classical horrible villainous accent) got a hold of the virus. Africa is the new setting of the series and it's up to Chris Redfield, one of the series' returning main protagonists, to stop Wesker at all costs.
Chris is accompanied by a female partner called Sheva Alomar, who is a surprisingly interesting (read: so hot, I wanna take my clothes off) character as you traverse deeper in the game. There is chemistry between Chris and Sheva, and this game might as well be called quite righteously a 'buddy game' (compared to 'buddy movies'). As I don't want to spoil anything more about the story, it suffices to say that the story is one of the better told scripts in the gaming world, and the most interesting of the series since Resident Evil 2.
The Gameplay: 10/10
If you've played Resident Evil 4 you know what to expect. The controls and gameplay are kept true to the revolutionary fourth part of the series, and with it the added element of co-op play online.
No, you can't move and shoot at the same time, but I'm of the opinion that this isn't a bad thing at all. In fact the complaints seem to come from a so called priming effect. Let me elaborate. If you've been playing games such as Left 4 Dead, Dead Space or Fallout 3 and you've been playing in 3rd person, you've gotten used to strifing/running and shooting at the same time. These games have similar gameplay mechanics and the enemies are not like the enemies in RE5. Not being able to move and shoot at the same time will feel a little weird in RE5. Funny thing is, would you have been playing Resident Evil 5 (or similar games with similar controls - if they would exist), and you would then start playing one of the games mentioned before, you might find yourself wanting to perform a quick turn and getting smacked by a creature because of your spasm movement that you wanted to be a quick turn. Resident Evil 5's controls suit the game. The enemies are adjusted to the principles of Resident Evil, and if you remove these very elements of the series, you'd end up with (even) less 'RE feel' than you would now.
There are 4 different control schemes you can choose from, which is plenty for anyone, and you can adjust your aiming speed as well.
As for the gameplay itself, like the story this too continues where RE4 left us. The enemies are smarter, can climb buildings, use weapons, ride in vehicles and can always pose a threat to you and your partner. Co-op is therefore a major part of the game, and you'll need to help or be helped by your partner countless amounts of times. Whenever your partner is in need, a button input will display onscreen and if you're closeby and press it, your character will automatically perform a melee attack, freeing your partner. Speaking of melee attack, this type of combat is particularly useful throughout the entire game. Whenever an enemy is out of balance and you are close, it's possible to cause havoc by pressing the melee button that displays on screen. This saves you a lot of ammo and the whole sequence feels incredibly smooth and natural.
If you're not playing with someone else, Sheva is controlled by an AI. This is probably one of the smartest AI's created in a game and she'll be a great help. While she's infinitely better than a new player as partner, the AI obviously cannot compete with a veteran player who can think for themselves and perhaps even communicate with you though the use of a headset.
Even if you don't have a headset you can communicate with your partner through a few basic commands such as "Come On", "Go", "I need ammo", "I need help!", "Thanks", and "Wait". While a headset is neat, it's far from an essential purchase. The mentioned commands will help you tremendously already. On the other hand, if you don't already have one (presumably on PS3) and you can find a USB headset for PS3 for 15 bucks, this is worth the money.
As for the inventory, each character has a 9 slot inventory similar to the pre-RE4 instalments. The game will not go on pause if you enter the menu, so you'll have to learn how to quickly get around the menu. Fortunately the menu is shaded so you can see everything else on screen, and the D-pad buttons can be assigned to 4 quick-equips, such as your Handgun, Rifle/Shotgun and/or Herbs. If you're close to your partner, handing them some ammo or a herb is done fairly quickly, and they will automatically receive the item without having to accept.
The areas are diverse and their design looks good. While this isn't a sandbox game, it still feels as if you have a certain degree of freedom - even while you don't - and that's a great feat.
The bosses are almost all unique in their own way and have you sitting on the very edge of your seat, being the adrenalin boosting fights they are. At the higher difficulties, bosses are tough and you'll find yourself replaying some of them several times - a good thing for the ever easier mainstream game world we're starting to find ourselves in. Some fights are epic - no other word comes close. If you're a skilled player, you'll find anything below Veteran somewhat disappointing in terms of a challenge.
As for the replayability, well, it suffices to say that there's not only the online possibility of teaming up with a partner, but the game keeps track of the fastest times of all stages, and there are leaderboards. I'll also reveal that there is in fact a Mercenaries Mode .. and online Co-Op should be perfectly possible despite rumors that you can't.
Sound/Music: 9/10
Capcom did it again, they've created an excellent soundtrack once more. The power of the soundtrack is that it adds to the atmosphere of the game. Just like other RE titles, the music of the background varies from creepy to action pumping tracks where appropriate. Speaking of which, all tracks are right in place - everything feels, rather sounds right.
The sound effects are great as well, and the developers haven't been re-using many sounds from the series like they have done before, but the sounds all seem newly recorded. Perhaps the chainsaw sound was re-used again ..
As for the voice actors, this may very well be the best voice acting of the entire series, perhaps even one of the best voice overs in a game ever. It's as if you're watching small scenes of a movie when a cutscene starts - it's just that good. Although Wesker still has his annoying accent, that was most likely done on purpose just so you'll grow an even longer than everlasting hate on him. In short, the music, sound effects and voice acting are all splendid.
"Does it still feel like Resident Evil?"
Resident Evil has evolved from the start. The first game established the basics, and Resident Evil 2, 3, and Veronica (X), as well as the Outbreak series have been adding elements of gameplay and story to the series. As we all know, Resident Evil 4 made a leap forwards and it was to be expected some liked it and some didn't. Logically, Resident Evil 5 continues to evolve the series having RE4 as a basis now. The gameplay feels similar to RE4 and the atmosphere will still give you a shiver here and there. It would be unfair to *not* grant Resident Evil 5 the title it has acquired, because it is not only a true closing chapter of a grand series, it also has its moments where you feel the same of suspense as you did in the earlier parts- just never quite as much of it.
Are you curious as to what happened to Jill, what happens to Chris, Sheva, Wesker and a whole lot of other important characters in the Resident Evil universe? Or are you looking to kick some ass with a co-op player? Be sure to get this game, because it's already going to be one of the five best games of 2009.
Summary:
Graphics: 10/10
The Story: 9/10
Gameplay: 10/10
Sound: 9/10
The game breathes awesomeness.
- Fear you *can* forget. There are only a few little creepy moments, but the continuous suspense of the earlier games is never achieved.
- If you're a RE veteran you'll find that many scenes have been recycled, and after a while you may get the feeling that you've seen that by now.
- Sometimes, scenes as well as gameplay are a little over the top. Often this is a great thing, but every now and then it just pushes your limits over the edge as to what is still acceptable as realistic in a Resident Evil game.
- Only two puzzles while generously counting.
Set aside these points, the game is still awesome and a must buy for everyone who owns an Xbox 360 or Playstation 3.
OVERALL: 9/10
Resident Evil 5 is a modern classic (but yes, it's a little over the top).
Absolute Steve
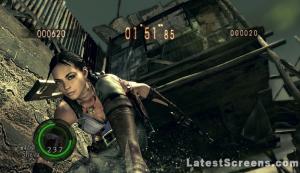
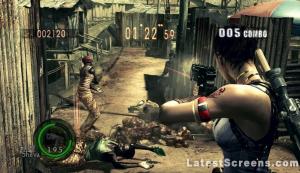
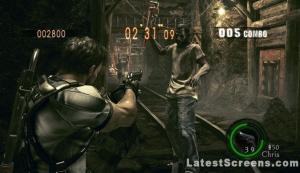
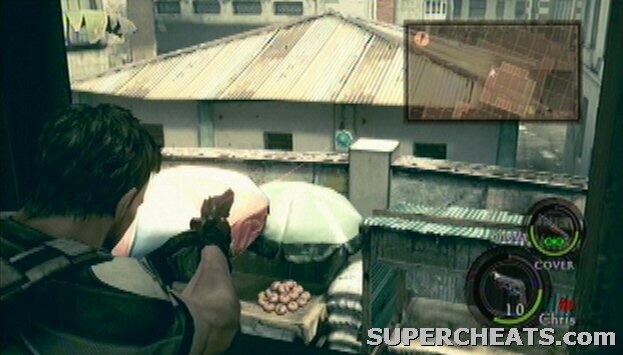
Here are a selection of screenshots from Resident Evil 5. Just click the thumbnails for a larger version.
More screenshots for this game can be found on our sister site, LatestScreens.com (PS3 Screenshots, Xbox 360 Screenshots)
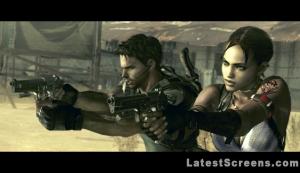


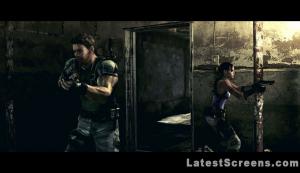

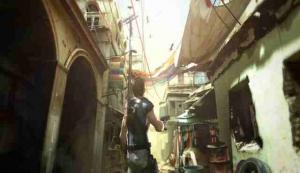
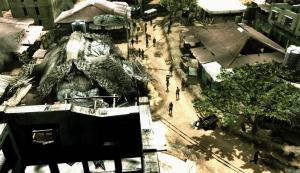


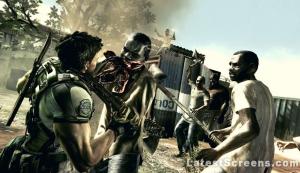
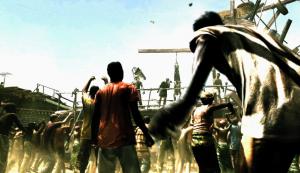


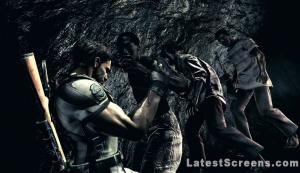
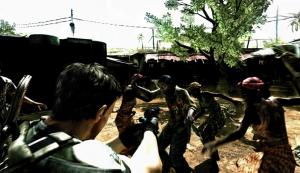


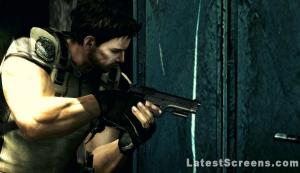

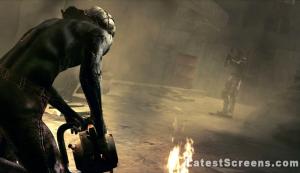









Our Resident Evil 5 Wallpapers can be downloaded by clicking the image you are interested in, this will take you to our sister site, latestscreens.com where you can download the full size version. There is no registration etc.. required.




                               General Controls:
                               =================
                               Back:  Skip Cutscenes
                               Start: Pause Menu
                               D-pad: Fast Equip
                              Gameplay controls:
                              ==================
      Type A:                                Type B:
      -------                                -------
      Left Stick: ... Walk                   Left Stick: ... Walk
      Left Stick   A: Run                    Left Stick   A: Run
      LT   X: ....... Swing Knife            LB   RT: ...... Swing Knife
      RT   X: ....... Fire/Throw             LT   RT: ...... Fire/Throw
      RT   A: ....... Reload                 LT   A: ....... Reload
      Y: ............ Open inventory         Y: ............ Open inventory
      Right Stick: .. Adjust viewpoint       Right Stick: .. Adjust viewpoint
      RB: ........... Map                    RB: ........... Map
      LB: ........... Locate Partner         RT: ........... Locate Partner
      B: ............ Partner Action         B: ............ Partner Action
      Type C:                                Type D:
      -------                                -------
      Left Stick: .... Walk                  Left Stick: ... Walk
      Left Stick   A:  Run                   Left Stick   A: Run
      LT   X: ........ Swing Knife           LB   RT: ...... Swing Knife
      RT   X: ........ Fire/Throw            LT   RT: ...... Fire/Throw
      RT   A: ........ Reload                LT   A: ....... Reload
      Y: ............. Open inventory        Y: ............ Open inventory
      Right Stick: ... Adjust viewpoint      Right Stick: .. Adjust viewpoint
      RB: ............ Map                   RB: ........... Map
      LB: ............ Locate Partner        RT: ........... Locate Partner
      B: ............. Partner Action        B: ............ Partner Action
                               General Controls:
                               =================
                               Select: Skip Cutscenes
                               Start:  Pause Menu
                               D-pad:  Fast Equip
                              Gameplay controls:
                              ==================
     Type A:                                Type B:
     -------                               -------
     Left Stick: ... Walk                  Left Stick: ... Walk
     Left Stick   X: Run                   Left Stick   X: Run
     L1   []: ...... Swing Knife           L2   R1: ...... Swing Knife
     R1   []: ...... Fire/Throw            L1   R1: ...... Fire/Throw
     R1   X: ....... Reload                L1   X: ....... Reload
     Triangle: ..... Open inventory        Triangle: ..... Open inventory
     Right Stick: .. Adjust viewpoint      Right Stick: .. Adjust viewpoint
     R2: ........... Map                   R2: ........... Map
     L2: ........... Locate Partner        R1: ........... Locate Partner
     O: ............ Partner Action        O: ............ Partner Action
     Type C:                               Type D:
     -------                               -------
     Left Stick: ... Walk                  Left Stick: ..... Walk
     Left Stick   X: Run                   Right Stick: .... Rotate
     L1   []: ...... Swing Knife           Left Stick   X:   Run
     R1   O: ....... Fire/Throw            L2   R1: ........ Swing Knife
     R1   X: ....... Reload                L1   R1: ........ Fire/Throw
     Triangle: ..... Open inventory        L1   X: ......... Reload
     Right Stick: .. Adjust viewpoint      Triangle: ....... Open inventory
     R2: ........... Map                   R2: ............. Map
     L2: ........... Locate Partner        R1: ............. Locate Partner
     O: ............ Partner Action        O: .............. Partner Action
o Quick Turn: [Left A], if you press Left to the back and press A at the same time, your character will quickly turn around. This is extremely useful, and one of the reasons why Resident Evil 1 and 2 are harder; They did not have this function yet.
o Interaction: This is extremely straightforward and requires little explanation but whenever the game promts you to press a button on screen, you can either jump over or off something, use a special move, push a cabinet, open doors (press X twice to kick it in).
o ‘Window Knifing': This can be useful at times to conserve ammo. Stand in front of a window and you'll be able to hit any Majinis that try to come through the window, while they're having trouble hitting you and getting through the window.
RECORDS:
Unavailable.
.-----------------------------------.-------------.----------------------------.
|Controls:                          |Co-op Effect:|Availability Single Player: |
|===================================|=============|============================|
|Press Assist Button                |"Come On"    |            YES             |
|Assist Button   Hold Up on D-pad   |"Go"         |            YES             |
|Assist Button   Hold Left on D-pad |"Thanks"     |             NO             |
|Assist Button   Hold Right on D-pad|"Wait"       |             NO             |
|Press L3 R3 (Left   Right Stick)   |"Lure/Taunt" |            YES             |
'-----------------------------------'-------------'----------------------------'
LEADERBOARDS:
Leaderboards menu.
RECORDS:
Contains records about your personal gameplay.
o Files:
--------
No. 01 History of RESIDENT EVIL
No. 02 BSAA
No. 03 Majini
No. 04 Chris Redfield
No. 05 Sheva Alomar
No. 06 Ricardo Irving
No. 07 Ndipaya Tribe
No. 08 U-8
No. 09 Tricell
No. 10 Jill Valentine
No. 11 Excella Gione
No. 12 Albert Wesker
Figures:
----------
You can collect 46 Figures here. Specifics coming soon.
Cutscenes:
------------
You can replay the game's 53 cutscenes here, worth over 80 minutes.
o Controller Settings
You can turn Vibration On/Off, always a .. nice .. thing.
Aiming Controls can be Inverted [Default/X-Axis/Y-Axix/Both].
Aiming Speed: [Slowest - Slow - Default - Fast - Fastest].
Control Type: See Above.
o Game Settings
Tutorial [On/Off].
Subtitles [On/Off]
Language [Japanese/English/Deutsch/Francais/Español/Italiano]
o Audio Settings
BGM Volume (Music)
SFX Volume (Sound Effects)
o Screen Settings
Brightness (BSAA letters should be barely visible. If you play at a darker or lighter setting it will either be hard to see anything at all, or aiming may become more difficult due to not being able to see your aiming laser well.
o Default
Restores all options to their default setting.
CREDITS MENU
Unavailable.
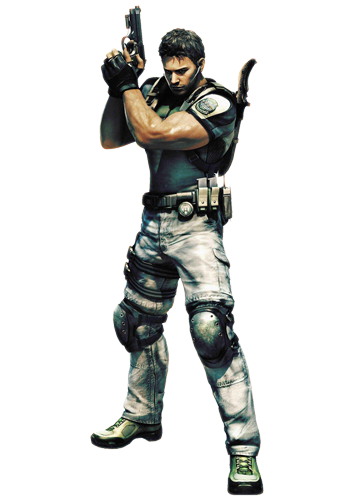
Chris Redfield
Age: 35
Height: 185cm
Weight: 98kg
Sex: Male
Affiliation: BSAA North American Branch

Sheva Alomar
Age: 23
Height: 165cm
Weight: 52kg
Sex: Female
Affiliation: BSAA West African Branch
Top Tips in brief...
o Use hazardous objects around you
o Order your Inventory!
o Use healing items with your partner nearby
o Keep track of your partner's ammo
o Grab everything and look for items
o Dying Status requires immediate action
o Try to stun your enemies and use Melee attacks
o Upgrade Weapon Capacity when clips are empty
o Checkpoint allows you to organize the inventory by using restart
o Set aiming speed to fastest
o Press Start on 2nd controller for Split Screen Co-Op
There are various objects which you can use to your advantage to harm your enemies in RE5. These objects often also cause a stun to the enemy, which you can use to your advantage by using melee attacks. Below is a list of these objects.
Transformer Box
These are the electricity boxes hanging at wooden poles - they look sparky, and they actually are. If you shoot them off when an enemy is standing/running underneath it, you’ll have harmed the enemy effectively.
Explosive Barrel
These red barrels are a returning object and explode when shot. Especially useful for groups of Majinis or Mini-Bosses, but you’ll want to be a few meters away from the blast, and so does your partner. Mind your fire!
Oil Barrel Stacks
These look like a few smaller barrels stacked onto each other. When shot they ignite fire in a fair radius, burning the surrounding enemies.
Gas Cylinder
You won’t see these as often, but they’re extremely useful during certain boss fights. Shoot the cylinder to blow it up.
Gas Tanks
These are large tanks which will generate a blast with an incredible radius. Fortunately for you, they’re mostly far away from you either way, catching only the bad guys in the explosion.
Keep track of your partner’s ammo
The amount of ammo for your partner’s ammo is displayed twice: Once for the clip which is displayed in green next to the weapon. The rest of your partners ammo for their equipped weapon is listed next to the small bullet icon, either above or under their name. If your partner runs out of ammo and you have some that you can’t use, it’s better to let them have it.
Use healing items with your partner nearby
Whenever you use a Herb or First Aid Spray, make sure that your partner is standing right next to you. Healing sprays will always heal both partners when they are close together, and there are no penalties. There’s only one reason to use a Herb when your partner is far away, and that is if you’re in caution and an inevitable death will overcome you unless you quickly heal yourself.
Order your Inventory
[EXAMPLE 1] [EXAMPLE 2]
               .-----.-----.-----.          .-----.-----.-----.
               |     |     |     |          |     |  ^  |     |
               |  1  |  2  |  3  |          |  1  |  |  |  3  |
               |     |     |     |          |     |  |  |     |
               |-----|-----|-----|          |-----|-----|-----|
               |     |     |     |          |     |     |     |
               |  4  |  5  |  6  |          | <-- |  5  | --> |
               |     |     |     |          |     |     |     |
               |-----|-----|-----|          |-----|-----|-----|
               |     |     |     |          |     |  |  |     |
               |  7  |  8  |  9  |          |  7  |  |  |  9  |
               |     |     |     |          |     |  v  |     |
               '-----'-----'-----'          '-----'-----'-----'
Your inventory consists of 9 slots, which I have ordered as in example 1. You can expect everyone to orden the inventory like this. You have four “Quick Spots” in your inventory. What’s so quick about them is that the items in these locations, namely 2, 4, 6, and 8 (see example 2) are automatically assigned to your D-pad. If you press left on the D-pad, you’ll equip the item that you have in slot 4. This can save you enormous amounts of time. A recommended setup is to have your two primary weapons assigned to two slots, a Herb/First Aid Spray in an other slot, and the last slot with whatever you prefer. Grenades work well for me at the start of the game, and later I swap a third weapon in it, such as the Magnum, Grenade Launcher or Machine Gun (besides Handgun and Shotgun as primary weapons in this case).
Random Items
Wooden Crates, Wooder Barrels, Fruit; These are the kinds of things you’ll want to destroy with you knife to grab the loot that’s inside. This kind of loot is random and will therefore be displayed in the guide as either [CRATE], [BARREL], [FRUIT]. Fixed items are exactly pinpointed in the walkthrough section, and some items are fixed even in Barrels, etc. This will be pointed out as well.
Dropped Items
Enemies can randomly drop items you can pick up.
Loot Type
There are various types of loot which you can recognize by the color. The following colors represent these types of loot:
                       .-----.-------------------------.
                       |Color|Type of Loot:            |
                       |=====|=========================|
                       |Blue |Valuable Gems, Gold, etc.|
                       |Green|Restorative Items (Herbs)|
                       |Red  |Ammunition               |
                       |White|Key Items                |
                       '-----'-------------------------'
Upgrade Weapon Capacity when clips are empty:
If you upgrade a weapon’s capacity, the clip will automatically be completely filled. That means that if you’re upgrading a magnum with no bullets left in it, you’ll get a whole free clip of magnum rounds! Not only should you upgrade weapon capacity as much as possible whenever clips are almost empty, but you should also keep them empty if you know a chapter is soon coming to an end.
Checkpoint allows you to organize the inventory by using restart
Whenever you reach a checkpoint you can simply go into the pause menu and select restart to enter your main inventory. You can now organize and swap any items you don’t need for the upcoming part. The sooner you realize this, the better you get at the game!
Set aiming speed to fastest
You’ll get used to this setting in no time, and it really helps with killing enemies just a little faster, often on crucial moments.
Press Start on 2nd controller for Split Screen Co-Op
This sounds obvious, but I didn’t quite find it obvious and the way of playing a split screen Co-Op match differs from the demo. So here you have it, simply press Start in the game on a second controller and the other player will be able to double your fun! Well, hopefully..
Dying Status means: Take Action .. NOW!
If you or your partner fall into the Dying Status it will not be possible for them to heal themselves. The only thing they can do is slowly drag themselves away from the danger. Partner help is immediately required, otherwise you may soon view the game over screen. You can do one of the following:
1. Heal your partner with a Herb/First Aid Spray - this is the preferred option.
2. Heal your partner with an adrenalin shot. These will be used if you don’t have any herbs in your inventory and their healing power is small. However, these shots are infinite in supply, so they can be quite .. a life saver!
Stunning Enemies:
This isn’t about the graphical detail of the Majinis - which indeed looks quite stunning to me - but more so about how to stagger your foes and taking advantage of this. Headshots often stagger a Majini, but so can a shot to the legs or arms. When an enemie is staggered and you’re standing nearby (or when you get nearby) you can hit the interaction button to perform a melee attack.
You can stun a Majini in the following ways:
.------------.-----------------------------------------------------------------.
|Target Area:|Stun effects:                                                    |
|============|=================================================================|
|   Head     |1. Majini will grab his face and put a few steps for/backward.   |
|            |2. Majini will look downward.                                    |
|------------|-----------------------------------------------------------------|
|   Arms     |1. Majini will grab his shot arm.                                |
|            |2. Majini will grab his shot arm and leans forward.              |
|------------|-----------------------------------------------------------------|
|   Legs     |1. When shot in lower leg, Majini will fall to his knees.        |
|            |2. When shot in upper leg, Majini will grab their shot leg.      |
|            |3. When shot in legs while running, the Majini will fall.        |
'------------'-----------------------------------------------------------------'
All stuns can be used to your advantage by using a melee attack. These are covered in this section.
.--------------.---------------------------------------------------------------.
|Melee Name:   |How to initiate:                                               |
|==============|===============================================================|
|     Hook     |Get the arm-grab stun animation.                               |
|     Kick     |Get the arm-grab stun animation; Chris must be behind Majini.  |
|Straight Punch|Shoot a Majini in the head.                                    |
|   Uppercut   |Shoot a Majini in the leg.                                     |
|  Neck Break  |Shoot a Majini in the leg; Chris must be behind Majini.        |
|   Haymaker   |Use after your partner has stunned Majini with melee.          |
|  Back Hand   |Use after your partner has stunned Majini with melee; Chris    |
|              |must be behind Majini.                                         |
|    Stomp     |Majini must be lying on the ground.                            |
|    Stomp     |Majini must be lying on the ground, Chris faces/destroys head. |
'--------------'---------------------------------------------------------------'
Most melee attacks will stagger the surrounding enemies, giving you time to recover from the animation yourself.
.--------------.---------------------------------------------------------------.
|Melee Name:   |How to initiate:                                               |
|==============|===============================================================|
|  Twist Kick  |Get the arm-grab stun animation.                               |
|     Knee     |Get the arm-grab stun animation; Sheva must be behind Majini.  |
|  Roundhouse  |Shoot a Majini in the head.                                    |
|  Somersault  |Shoot a Majini in the leg.                                     |
|  Throat Slit |Shoot a Majini in the leg; Sheva must be behind Majini.        |
| Skull Crusher|Use after your partner has stunned Majini with melee.          |
| Spinning Back|Use after your partner has stunned Majini with melee; Sheva    |
|     Kick     |must be behind Majini.                                         |
|    Impale    |Majini must be lying on the ground.                            |
|    Impale    |Majini must be lying on the ground, Sheva faces/destroys head. |
'--------------'---------------------------------------------------------------'
 ______________________________________________________________________________
| ______|¯¯¯¯¯¯¯¯¯¯¯¯¯¯¯¯¯¯¯¯¯¯¯¯¯¯¯¯¯¯¯¯¯¯¯¯¯¯¯¯¯¯¯¯¯¯¯¯¯¯¯¯¯¯¯¯¯¯¯¯¯¯¯¯¯¯¯¯¯¯|
|| ____/|          [C1-1] Chapter 1-1: Civilian Checkpoint                     |
|| |__  |______________________________________________________________________|
||___ \ |¯¯¯¯¯¯¯¯¯¯¯¯¯¯¯¯¯¯¯¯¯¯¯¯¯¯¯¯¯¯¯¯¯¯¯¯¯¯¯¯¯¯¯¯¯¯¯¯¯¯¯¯¯¯¯¯¯¯¯¯¯¯¯¯¯¯¯¯¯¯|
| ___) ||Chris Redfield has just arrived in Africa.  He's currently headed to  |
||____/ |meet up with his partner, after which they are to retrieve equipment. |
|-------|----------------------------------------------------------------------|
|ITEMS  |[] M92F x2, [] Wooden Crate, [] Wooden Barrel, [] Green Herb,         |
|       |[] Handgun Bullets x10, [] Red Herb, [] Hand Grenade, [] Handgun      |
|       |Bullets x10, [] Wooden Barrel x3, [] Handgun Bullets x10, [] Green    |
|       |Herb.                                                                 |
|-------|----------------------------------------------------------------------|
|EMBLEMS|NONE.                                                                 |
|-------|----------------------------------------------------------------------|
|ENEMIES|1. Majini (Town)                                                      |
|       |                                                                      |
 ¯¯¯¯¯¯¯¯¯¯¯¯¯¯¯¯¯¯¯¯¯¯¯¯¯¯¯¯¯¯¯¯¯¯¯¯¯¯¯¯¯¯¯¯¯¯¯¯¯¯¯¯¯¯¯¯¯¯¯¯¯¯¯¯¯¯¯¯¯¯¯¯¯¯¯¯¯¯
After the introductory scenes, make your way through the streets and head for the destination marker on the west. You can activate your map with R1/RT, and an arrow in the upper-left corner of the map points to the north. The path is straightforward and you can’t collect any supplies yet, so proceed to the checkpoint, also known as your destination marker on your map.
Go inside the building and talk to the man. A scene will play after which you are given two handguns, the [M92F]. Equip your gun and you’ll automatically change in your combat gear. When the scene is over, search the room. Check the animal flesh to get an impression of your surroundings. A [WOODEN CRATE] in the corner can be smashed by using your knife. Items in these crates or barrels are mostly random and will often hold gold or ammo, but never weapons or First Aid Sprays. Read the two documents on the Control Types and the Dying Status (how uplifting!), then go outside when you’re ready.
Break the nearby [WOODEN BARREL], then go down the path and inspect the dead body of the dog.. Someone must’ve killed it not too long ago.. Go through the room on your right and exit through the door. This room contains another animal carcass, but it also holds two [WOODEN CRATES] and a [WOODEN BARREL]. One of the crates often holds a Green Herb, which is used to heal your wounds. The document on the counter doesn’t predict much good. Go to the back of the room and snatch the [GREEN HERB] from the shelves before going outside.
As you hear a person scream, run up the stairs ahead and go inside the building. When the scene is over, you’ll have your first hostile encounter. This is no longer a person, these people are now called Majini (‘Evil Spirits’ in swahili). The door behind you has been locked, so quickly kill the Majini by gunning him down. Inside the adjacent room, [HANDGUN BULLETS x10] can be found in the cabinet. To exit the building, jump out of the window.
Run down the streets and you’ll be chased by a very large group of Majini’s. Do NOT waste your ammo on them, as you are no match for them, no items are dropped at this point, and they’ll keep spawning infinitely. Quickly rush over to the building and block the blue door. Check the western side of the room to find a [RED HERB] and a [HAND GRENADE]. The red herb can be mixed with a green herb to create a healing spray that fully restores the health bar.
Knock down the door on the northeast with the help of your partner and search this room for [HANDGUN BULLETS x10] lying on the Ronics boxes. Smack the three [WOODEN BARRELS] in the southern corner and loot their contents, usually ammo and gold. Hop down through the hole, make your way through the short tunnel and climb back out at the end. In this small room, grab the the two packs of [HANDGUN BULLETS x10] from the cabinet and the [GREEN HERB] from the counter.
 ______________________________________________________________________________
| ______|¯¯¯¯¯¯¯¯¯¯¯¯¯¯¯¯¯¯¯¯¯¯¯¯¯¯¯¯¯¯¯¯¯¯¯¯¯¯¯¯¯¯¯¯¯¯¯¯¯¯¯¯¯¯¯¯¯¯¯¯¯¯¯¯¯¯¯¯¯¯|
|| ____/|          [C1-1] Chapter 1-1: Public Assembly Area                    |
|| |__  |______________________________________________________________________|
||___ \ |¯¯¯¯¯¯¯¯¯¯¯¯¯¯¯¯¯¯¯¯¯¯¯¯¯¯¯¯¯¯¯¯¯¯¯¯¯¯¯¯¯¯¯¯¯¯¯¯¯¯¯¯¯¯¯¯¯¯¯¯¯¯¯¯¯¯¯¯¯¯|
| ___) ||Chris and Sheva have encountered hostiles.  They now make their way to|
||____/ |a public assembly place where they stumble on an acqaintance.         |
|-------|----------------------------------------------------------------------|
|ITEMS  |[] Handgun Bullets x10, [] Green Herb, [] Handgun Bullets x10,        |
|       |[] Handgun Bullets x10, [] Crate, [] Fruit, [] Hand Grenade, [] Barrel|
|       |[] Crate, [] Handgun Ammo x10, [] Green Herb, [] Hand Grenade x3,     |
|       |[] Barrel x2, [] 3x Handgun Ammo x10, [] Barrel x2, [] Green Herb,    |
|       |[] Machine Gun Ammo x30, [] Hand Grenade, [] Incendiary Grenade,      |
|       |[] Handgun Ammo x10, [] Machine Gun Ammo x30, [] Crate, [] VZ61 SMG,  |
|       |[] Hand Grenade, [] Handgun Ammo x10, [] Barrel, [] Green Herb,       |
|       |[] Crate, [] Gold Ring (from the Executioner).                        |
|-------|----------------------------------------------------------------------|
|EMBLEMS|NONE.                                                                 |
|-------|----------------------------------------------------------------------|
|ENEMIES|1. Majini (Town).                                                     |
|       |2. Executioner Majini [Semi-Boss].                                    |
|       |                                                                      |
 ¯¯¯¯¯¯¯¯¯¯¯¯¯¯¯¯¯¯¯¯¯¯¯¯¯¯¯¯¯¯¯¯¯¯¯¯¯¯¯¯¯¯¯¯¯¯¯¯¯¯¯¯¯¯¯¯¯¯¯¯¯¯¯¯¯¯¯¯¯¯¯¯¯¯¯¯¯¯
Walk down the linear path and drop down. Grab the [HANDGUN BULLETS x10] and a [GREEN HERB] before you go inside the building. As soon as you enter the building a cutscene will play and shortly after it’s go time, many Majini’s will quickly be headed for the house.
Act fast! Grab the [HANDGUN BULLETS x10] lying in the corner, and examine the drawer under the television for another pack of [HANDGUN BULLETS x10]. Destroy the [CRATE] and [FRUIT] in the other corner by using your knife to find more items. Push the two cabinets so that they block the larger window and the door (or you can order your partner to push one of them - this is even faster). Lastly, grab a [HAND GRENADE] by slashing the fruit near the window. Now it’s time to take the Majini’s one by one, shoot through the smaller windows.
Note: Majini’s will drop items now that you’ll want to collect.
Trivia: The guy with the megaphone is saying the following to the Majini’s:
• “People, think of what awaits us! The paradise! It, Uroboros, is a gift - we are lucky presentees!”
• “He here is an infidel, a fiend. So we now will make an example of him.”
• “Intruders! There in the house!”
• “No one shall find out what happened here! They shall die! GET THEM!”
Things will get rough soon, so you’ll want to make extremely good use of your scarce ammunition, shooting only the heads of the Majini’s. It’s only a matter of time before they break through the roof and the cabinets, as well as the gate outside: The executioner will slam through it. He’s the one to be extremely wary of as one slash of his axe means an almost-instant death.
He has several attacks you want to be careful of:
1. Overhead swing: Commonly used, when hit this results in the dying status so be extremely careful. He holds the axe behind him if he plans on doing this.
2. Horizontal swing: He can swing the axe horizontally, giving him quite an attack range.
3. Horizontal Rage swings: When he gets low on health he will swing the axe repeatedly. Back away if he does this.
4. Grab-Choke: He can grab one of your characters and choke them. Help your partner or ask for help whenever this happens. You can also attempt to break free, but it’ll cost more time and is harder to do.
He’s got a fair amount of health so you’ll want to use everything on him that you’ve possibly got at this point. Grenades works best, followed by explosive barrels, and lastly Shotgun blasts to his head followed by a melee attack. Alternatively you can empty the Machine Gun in his head and once again use melee attacks. Resort to the handgun only when you’re out of options.
There are three locations where the executioner will not bother you:
1. Climb the top of the first building.
2. Move inside the bus and stay in the middle.
3. On top of the bus, and on the platform to the left of the bus.
Get out of the house and you should hear something from Kirk, the chopper pilot.
Basically your goal is to survive until he can clear the way for you up north. You’ll hear one more time from him before he finally arrives, which sort of tells you that you’re about 2/3rd through. In total you’ll have to wait around 8 minutes or so, keep this in mind.
Here are some exploration suggestions:
o You can actually get to the second floor and on top of the building you start out in. Head through the gate that the Executioner has slammed open, and move left. You can climb a ladder if you jump over the wooden fence or walk around this. Follow the path back to the house.
You’ll find a [WOODEN BARREL], [WOODEN CRATE], more [HANDGUN AMMO x10] and a [GREEN HERB]. Don’t jump down just yet, instead climb the ladder to the top of the building to find [HAND GRENADES x3]. From this position you can take out the Executioner fairly easy by using the Rifle (aim for his head) or by throwing grenades at him. You won’t be bothered by many Majini up here, but expect a few to drop by and say hi.
o You can enter the bus and loot the two [BARRELS].
o The house to the left, located behind the bus holds [HANDGUN AMMO x3], two [BARRELS] and a [GREEN HERB]. An other item to search for is the [MACHINE GUN AMMO x30] in the drawer.
o There is a house on the northeast/right area which contains a [HAND GRENADE] and a [INCENDIARY GRENADE] on the shelves. You can also find [HANDGUN AMMO x10] if you search the blue cabinet on the right of these shelves, and [MACHINE GUN AMMO x30] can be found in the corner. There’s also a [WOODEN CRATE] here.
Note: Breakable stands throughout the area will reveal a [RANDOM ITEM] when they are destroyed.
Head to the north of the area and note the inflammable stack of barrels that you can greatly use to your advantage. With the horde behind you, make a quick turn and shoot when most are close the the barrels. This will disable a good few of them. Go inside the bus and destroy the barrels if you hadn’t already done so.
Continue to the northeast of the area and open the suitcase in the corner. This holds the [VZ61 SMG] which you can give to Sheva so you don’t have to worry about her ammo for a while. The executioner will probably be on your tails once again, so it’s time to move to the west from here. The fruit contains a [HAND GRENADE] but more importantly you can move to higher ground from here. If you need it, grab the [HANDGUN AMMO x10] from the corner and loot the [WOODEN BARREL] while you’re at it.
Do so and jump over to the platform past the barrel. Shake off a large portion of the horde by blowing up the barrel. Grab the [GREEN HERB] on this platform and keep the Majini’s at a distance. The good thing is that the executioner can not get to you as long as you’re here. You can also jump on the bus for a somewhat larger movement area, and there’s a [CRATE] on the barrel at the end. You should be able to hold out a long time from here, long enough until the chopper arrives.
Note: If you want to kill the executioner, your best bet is to use a few grenades on him. Whenever he crouches, run toward him to sort out an uppercut. When you run out of grenades, resort to the Shotgun and deliver two shots at his head to make him kneel. Keep this up and you’ll down him soon enough. It’s possible to knock a transformer box off one of the shacks near the southern gate, you can use this to your advantage. If you manage to kill the executioner, grab the [GOLD RING] from his body. This can be sold for 5000 gold, making it one of the most precious treasures in the game!
Chapter 1-1 comes to an end.
| ______|¯¯¯¯¯¯¯¯¯¯¯¯¯¯¯¯¯¯¯¯¯¯¯¯¯¯¯¯¯¯¯¯¯¯¯¯¯¯¯¯¯¯¯¯¯¯¯¯¯¯¯¯¯¯¯¯¯¯¯¯¯¯¯¯¯¯¯¯¯¯|
|| ____/|             [C1-2] Chapter 1-2: Public Assembly                      |
|| |__  |______________________________________________________________________|
||___ \ |¯¯¯¯¯¯¯¯¯¯¯¯¯¯¯¯¯¯¯¯¯¯¯¯¯¯¯¯¯¯¯¯¯¯¯¯¯¯¯¯¯¯¯¯¯¯¯¯¯¯¯¯¯¯¯¯¯¯¯¯¯¯¯¯¯¯¯¯¯¯|
| ___) ||After experiencing a terrifying assault, Chris and Sheva are helped   |
||____/ |by air support under command of chopper pilot Kirk Mathison.          |
|-------|----------------------------------------------------------------------|
|ITEMS  |[] Hand Grenade x2, [] Barrel, [] Barrel, [] Barrel, [] Barrel,       |
|       |[] Tomatoes, [] Crate, [] Old Building Key, [] Crate, [] Barrel,      |
|       |[] Tomatoes, [] Barrel, [] Shotgun Shells x5, [] Crate x2, [] First   |
|       |   Aid Spray, [] Barrel, [] Antique Clock, [] Crate, [] Ithaca M37,   |
|       |[] Barrel, [] Ivory Relief (from Cephalo), [] Crate, [] Barrel x2,    |
|       |[] Crate, [] Gold (300) x2, [] Gold (400), [] Barrel x2, [] Handgun   |
|       |   Bullets x10, [] Crate x2, [] Barrel, [] Barrel x3, [] Barrel x3,   |
|       |[] Barrel x2, 3x Handgun Bullets.                                     |
|-------|----------------------------------------------------------------------|
|EMBLEMS|3x.                                                                   |
|-------|----------------------------------------------------------------------|
|ENEMIES|1. Majini (Town).                                                     |
|       |2. Cephalo [Semi-Boss].                                               |
|       |3. Uroboros [Boss].                                                   |
|       |                                                                      |
 ¯¯¯¯¯¯¯¯¯¯¯¯¯¯¯¯¯¯¯¯¯¯¯¯¯¯¯¯¯¯¯¯¯¯¯¯¯¯¯¯¯¯¯¯¯¯¯¯¯¯¯¯¯¯¯¯¯¯¯¯¯¯¯¯¯¯¯¯¯¯¯¯¯¯¯¯¯¯
All items will have vanished from the previous stage .. That rocket launcher must’ve gotten an enormous burst range. The only items that can be gotten now are two [HAND GRENADES] on the very top of the building you started out in. I don’t know if it matters if you grabbed the three grenades earlier, perhaps someone can confirm this.
Head north and loot the [WOODEN BARREL] in the small cabin up ahead. Drop down the sewers and smash an other [WOODEN BARREL] to the west end. You can grab the loot behind the bars without any problems. Climb the ladder back up and proceed to the western double doors. There’s also a hole leading to the wooden barrel you just looted already, so you can safely ignore that.
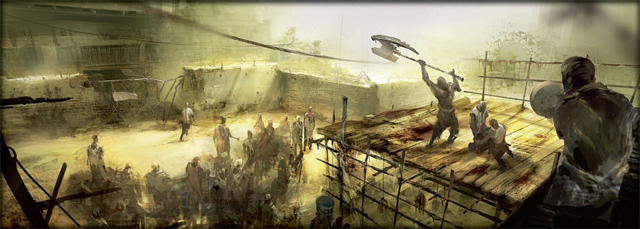
Public Assembly Artwork
In the next area, head inside the house and grab the [HANDGUN BULLETS x10] from the table. Loot the [WOODEN BARREL] next to it and inspect the drawer cabinet nearby. Chris is so awesome, he doesn’t even have to open it to know that there is nothing useful inside! Head outside and inspect the broken ladder. Give Sheva a boost and she’ll spot a shiny item. However, it’s not possible to get inside, so she hops back down.
Continue down the streets to the west and you’ll encounter a handful Majini’s. Kill them and grab the supplies from the two [WOODEN BARRELS] to the north, of which one is placed somewhat out of sight. Head south a slash the [TOMATOES] to find an item. Go inside, kill the Majini that drops from above and loot the [WOODEN CRATE]. Back on the streets, check the southeast dead end to find an other [WOODEN CRATE], and stand near the broken ladder to give Sheva a boost.
SHEVA GAMEPLAY
Proceed to the northern building to find the [•OLD BUILDING KEY] you spotted earlier. Three Majini will assault you, so kill them and have your partner cover you.
Continue through the building on the southwest and jump through the window of the other house to find a [WOODEN CRATE]. Head back outside and follow the path to find a [WOODEN BARREL] around the corner. As you proceed down the alley, a Majini will jump from behind several boxes. Up ahead, some [TOMATOES] can be slashed for an item.
The door upstairs is locked from the inside, so follow the streets and locate the other door under the stairs. Before you enter, loot the [WOODEN BARREL] first. Inside, grab [SHOTGUN SHELLS x5] from the cabinet and check the other room for two [WOODEN CRATES]. Head upstairs and search the western room for a [FIRST AID SPRAY]. A [WOODEN BARREL] can be looted on the balcony. At this balcony, check the building on the opposite street to the south thoroughly and look for a shiny [BSAA EMBLEM] and shoot it. The eastern balcony houses two Majini’s, but there’s also an [ANTIQUE CLOCK] in a treasure chest there. Drop down and kick the door in with your partner.
BSAA Emblem
After the scene, don’t rush to the stairs up ahead, instead unlock the blue door to the west with the Old Building Key. Inside you can find a [WOODEN CRATE], but a much more important find is the [ITHACA M37] Shotgun. Now head for the stairs, and loot the [WOODEN BARREL] under the stairs first. After the scene you’ll face a new enemy type, a quite powerful one this early in the game.
This is a video showing how to deal with the upcoming Cephalo and Majini's.
Empty your shotgun on it, especially on the mutated parasite when she is lying on the ground, and kill the other Majini’s that join the party. If you defeat the Cephalo, you’ll be rewarded with an [IVORY RELIEF]. A [WOODEN CRATE] can be found in the other room. If you proceed to the southeast area (with the parked car), four more Majini’s will enter the stage. The gate can only be opened from the other side by kicking/shooting the lock three times. Grab the loot from the two [WOODEN BARRELS] here and exit through the western door.
You can move through the building with a relatively fast pace, as there aren’t any items on the ground floor. As you move upstairs, inspect the black goo that is dripping from above. It’s even possible to take a shower...
Up ahead you’ll spot an Alpha Team casualty and a [WOODEN CRATE]. In the next room, more dead team members are hopefully resting in peace. Loot the [WOODEN BARREL] in the corner and climb the ladder. Go around the room and check the treasure chest in the southwest corner to find [GOLD (300) x2] and [GOLD (400)]. Jump back over to the door and look at the water tank up above on the west.
Shoot the [BSAA EMBLEM] that’s right underneath it. Loot the two [WOODEN BARRELS] to the northern side of the room and proceed to the destination marker by kicking in the door with the help of your partner.
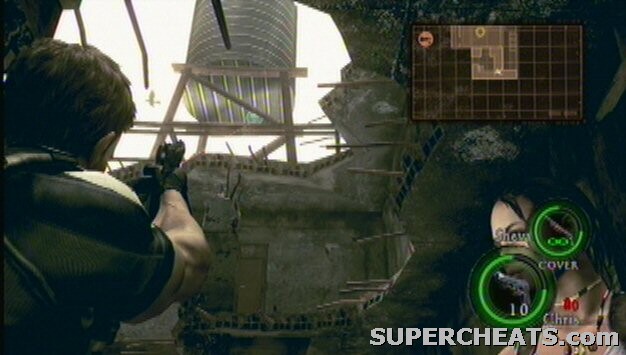
BSAA Emblem
Things have gone horribly bad. After the scene, check the body for [HANDGUN BULLETS x10] (he didn’t even have a Magnum? Tssk..) and loot the two [WOODEN CRATES] in this room. Exit the room and go down with the elevator at the end of the hall.
There’s a [WOODEN BARREL] right in front of you when you get to the next area. Head down the hall until you get to a room with three [WOODEN BARRELS] and a locked door. The path to the south leads to an incineration room, and there are three more [WOODEN BARRELS] along the way. Move towards the body and loot two more [WOODEN BARRELS]. Grab the [FURNACE KEY] and head back to the locked door.
This is a video demonstration on how to defeat the first boss in Resident Evil 5; Uroboros. Use the gas cylinders to your advantage and lure the boss into the incineration chamber.
It’s boss time! The B.O.W. that killed Alpha Team is now chasing you. Knock over one of the gas cylinders and have the boss swallow it. One of you should lure the boss inside the incineration chamber while the other activates the mechanism (or order Sheva to do this). If you blow the swallowed canister while the boss is inside the chamber, it’ll splatter to bits for a short period, allowing you to easily get out. If you don’t have any more cylinders, simply lure the boss in and stand next to one of the doors while trying to keep the boss at a distance with gunfire. Jump underneath the door when it’s between 1/4th and halfway down, and the boss should be trapped. On Veteran Mode you’ll need to incinerate the boss twice, on lower difficulties only once.
Head back to the locked door and exit the area. Grab the three [HANDGUN BULLETS] as you exit. Before you hop on the elevator, check the right of the corridor and spot a [BSAA EMBLEM] through a fence. It’s located next to a ventilator in the background.
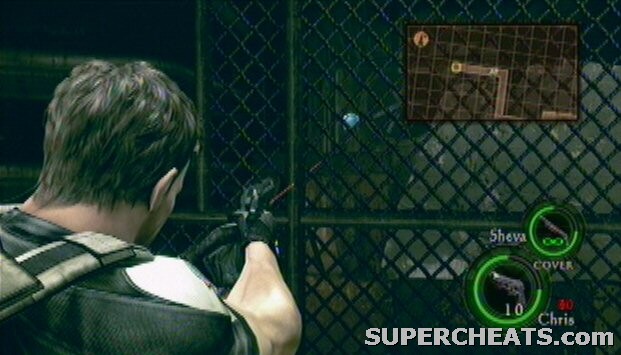
BSAA Emblem
| ______|¯¯¯¯¯¯¯¯¯¯¯¯¯¯¯¯¯¯¯¯¯¯¯¯¯¯¯¯¯¯¯¯¯¯¯¯¯¯¯¯¯¯¯¯¯¯¯¯¯¯¯¯¯¯¯¯¯¯¯¯¯¯¯¯¯¯¯¯¯¯|
|| ____/|            [C2-1] Chapter 2-1: Storage Facility                      |
|| |__  |______________________________________________________________________|
||___ \ |¯¯¯¯¯¯¯¯¯¯¯¯¯¯¯¯¯¯¯¯¯¯¯¯¯¯¯¯¯¯¯¯¯¯¯¯¯¯¯¯¯¯¯¯¯¯¯¯¯¯¯¯¯¯¯¯¯¯¯¯¯¯¯¯¯¯¯¯¯¯|
| ___) ||A ferocious B.O.W. has been encountered by Chris and Sheva.  In order |
||____/ |to continue, they must traverse the docks area.                       |
|-------|----------------------------------------------------------------------|
|ITEMS  |[] H&K MP5, [] Barrel x3, [] Crate x2, [] Barrel, [] Crate,           |
|       |[] Barrel x2, [] Barrel, [] Barrel x2, Crate x2, [] Barrel, [] Crate, |
|       |[] Barrel, [] Crate x2, [] Sapphire (Pear), [] Green Herb, [] Barrel, |
|       |[] Crate, [] Green Herb, [] Gold (100), [] Topaz (Pear), [] Fruit x2, |
|       |[] Ruby (Marquise), [] Emerald (Square), [] Tomatoes, [] Port Key,    |
|       |[] Barrel, [] Barrel x2, [] Gold (Large), [] Crate, [] Green Herb,    |
|       |[] Green Herb, [] Rifle Ammo, [] Barrel.                              |
|-------|----------------------------------------------------------------------|
|EMBLEMS|5x. (4 on this page, see Shanty Town page for the other               |
|-------|----------------------------------------------------------------------|
|ENEMIES|1. Majini (Town).                                                     |
|       |2. Kipepeo.                                                           |
|       |3. Adjule.                                                            |
|       |4. Big man Majini.                                                    |
|       |5. Chainsaw Majini [Semi-Boss].                                       |
|       |                                                                      |
 ¯¯¯¯¯¯¯¯¯¯¯¯¯¯¯¯¯¯¯¯¯¯¯¯¯¯¯¯¯¯¯¯¯¯¯¯¯¯¯¯¯¯¯¯¯¯¯¯¯¯¯¯¯¯¯¯¯¯¯¯¯¯¯¯¯¯¯¯¯¯¯¯¯¯¯¯¯¯
The suitcase contains a [H&K MP5] machine gun that you migth want to grab. Besides that, there are three [WOODEN BARRELS] and two [WOODEN CRATES] in the hall. Two documents can be read, one about the inventory, the other about directions for your partner. Above the latter, shoot the shiny turquase [BSAA EMBLEM] on the wall and exit the area.
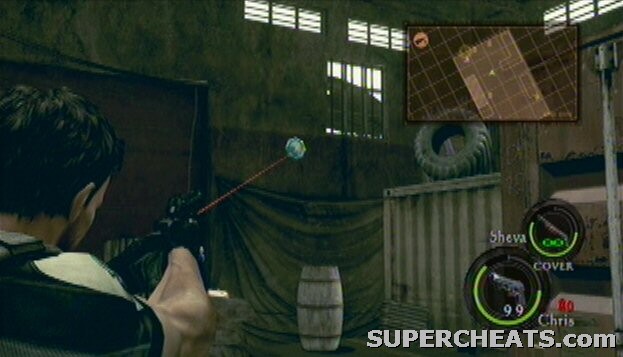
BSAA Emblem
You're now at the docks. Make your way through the container area but be very careful around the tripwire with an explosive attached to it. Shoot it from a distance to blow it up. Proceed and kill a few Majini's. The SE container holds a [WOODEN BARREL] and the NW region houses a [WOODEN CRATE] and two [WOODEN BARRELS], but you can't just walk up to them due to an explosive trap that's blocking the way. Instead, climb the ladder of the container (the ladder is on the other side) and drop down. You can now disarm the trap by shooting it down.
As you proceed northeast you'll encounter Adjule's, in other words mutated dogs. They are among the fastest enemies in the game, so stick together and use your shotgun to get rid of them. The Majini's are easily taken care of. Look to the north for a [WOODEN BARREL] placed out of sight. Shoot the explosive trap and proceed southeast. Another Majini attacks you, so lay him to rest. Climb and move over the containers up ahead, drop down and you'll reach an area with a group of nasty Majini's, including a stronger Big man Majini. His punches can be dodged fairly easily and he'll drop a Jewel Bangle as treasure.
Having trouble with the docks? This video shows how to handle obese Majini's, mutated dogs and drunken truck drivers, along with much more.
The area also contains two [WOODEN BARRELS]. With the enemies gone, head over to the slidable gate to the east and combine powers with your partner to open it. Two [WOODEN CRATES] are nearby, so get their contents before hopping over the gap at the bridge.
When you're crossing the bridge, a truck will appear and try to run you over. Either shoot the driver or aim for the explosive barrels. When it flips over, many more Majini's will make their appearance. Use the barrels to wipe out entire groups at once, which saves considerable amounts of ammunition. In the room up ahead you can find a [WOODEN BARREL] and a [WOODEN CRATE]. I also found Handgun Bullets here, but they may or may not be from an enemy, can anyone confirm this?
Another [WOODEN BARREL] can be found before you head downstairs. When you've made your way down, turn around and check the middle bridge support of the large bridge to spot a [BSAA EMBLEM]. Equip your shotgun and enter the sewer tunnel. Shortly after you enter a few Adjule assault you, and you'll encounter several more as you continue. When you get to the maintenance room, loot the contents of the two [WOODEN CRATES] and open exit the area.
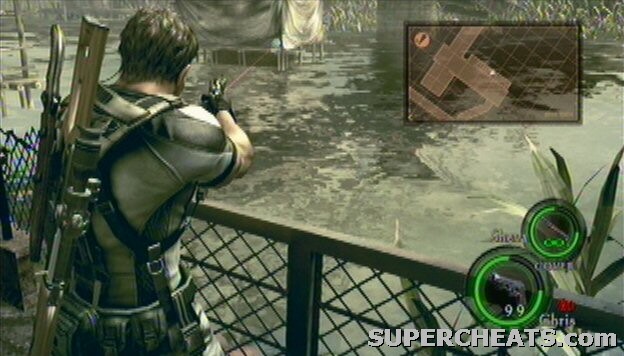
BSAA Emblem
Tip
Back in the open air, check your left for a shiny object that turns out to be a [SAPPHIRE (PEAR)]. As you approach the seemingly dead Majini's, several Kipepeo will mutate from their bodies. These flying parasites aren't very strong, but they can occasionally dodge bullets and they're fairly fast. When they're dead, remove the lock from the door and go up the ladder at the end of the tunnel.
Back outside, grab the [GREEN HERB] nearby the canoe and go inside the house to your right (east). There's a [WOODEN BARREL], [WOODEN CRATE] and a [GREEN HERB] in here. Head to the beach and walk into the sea. You can find [GOLD (100)] in the left (south) region, and a [TOPAZ (PEAR)] can be found in the upper right (northwest) corner near the boat.
From the locked gate, check the small green hut nearby and look under the roof to spot a quite well hidden [BSAA EMBLEM].
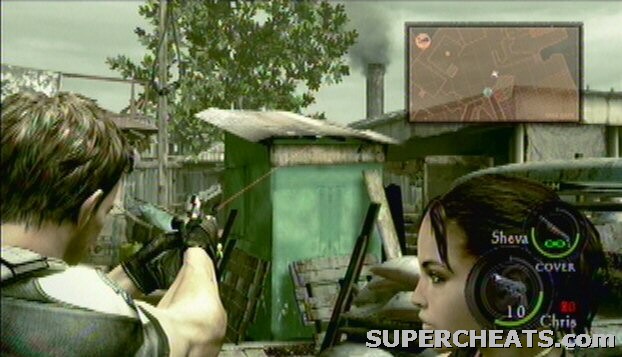
BSAA Emblem
Go to the center of the area and slash the [FRUIT x2] for items, usually also a Hand Grenade. That's a good thing, because if you toss that grenade in the center or nearby the stand, it'll fall apart, allowing you to not only grab two random items but also treasure from the chest: [RUBY (MARQUISE)]. There's one other thing to do. Head southeast and climb the ladder so you can walk over the roof of the building. The north corner contains an [EMERALD (SQUARE)].
Drop down and enter the building through the green double doors. Slash the [TOMATOES] for an item, then shoot the [PORT KEY] from the body and take it. All hell breaks loose and you'll face several Majini and a Big man Majini. It's up to you to choose between fight or flight, but you'll have to go to the dock either way in order to continue. Use the Port Key to unlock the door and head for the ship.
The nose of the ship contains one [WOODEN BARREL], the rear contains two [WOODEN BARRELS]. Move over the dock and jump in the water again. Search the side near the ship to find [GOLD (LARGE)]. Go back ashore and Kirk will arrive with the chopper to lend a hand from above. His support consists of several useful rockets at groups of Majini's. When he has done that, head in for the rest, usually bowmen on the roofs.
The northwest building contains a [WOODEN CRATE], and you can find a [GREEN HERB] on top of the eastern building with bowmen. At this very spot where the herb lies you can also look to the northeast and see a [BSAA EMBLEM] inside the building in front of you. Shoot it and drop back down.
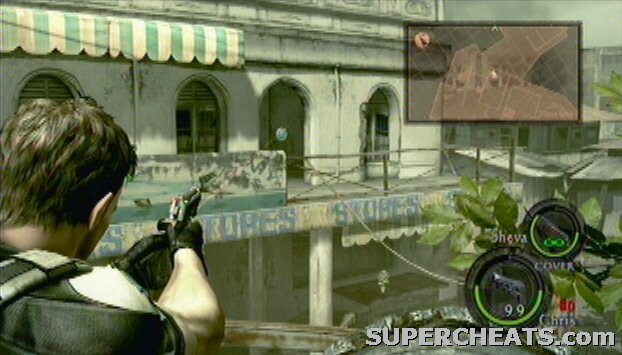
BSAA Emblem
Up ahead, locate a [GREEN HERB] on a table nearby the roadsign. More Majini rush out of a building and they all want to party with you. Let's. When you're done dancing, search the area for [RIFLE AMMO] and a [WOODEN BARREL] in the southeastern alley. The eastern building houses the [S75] rifle and another [WOODEN BARREL]. It's quite a small room, isn't it? I wonder what all those Majini were doing in here.. and I don't even want to know. Exit the stage by the red double doors and you might find yourself in a whole lot more comfortable stage called .. Shanty Town!
______________________________________________________________________________
| ______|¯¯¯¯¯¯¯¯¯¯¯¯¯¯¯¯¯¯¯¯¯¯¯¯¯¯¯¯¯¯¯¯¯¯¯¯¯¯¯¯¯¯¯¯¯¯¯¯¯¯¯¯¯¯¯¯¯¯¯¯¯¯¯¯¯¯¯¯¯¯|
|| ____/|               [C2-1] Chapter 2-1: Shanty Town                        |
|| |__  |______________________________________________________________________|
||___ \ |¯¯¯¯¯¯¯¯¯¯¯¯¯¯¯¯¯¯¯¯¯¯¯¯¯¯¯¯¯¯¯¯¯¯¯¯¯¯¯¯¯¯¯¯¯¯¯¯¯¯¯¯¯¯¯¯¯¯¯¯¯¯¯¯¯¯¯¯¯¯|
| ___) ||After making their way through the docks, sewer drainage tunnels and  |
||____/ |numerous hordes of horrifying Majini hordes, can things get worse?    |
|-------|----------------------------------------------------------------------|
|ITEMS  |[] Crate, [] Handgun Bullets, [] Green Herb, [] Crate x2, [] Barrel,  |
|       |[] Handgun Bullets, [] Barrel, [] Red Herb, [] Barrel, [] Hand        |
|       |   Grenade x2, [] Barrel x2, [] Handgun Bullets, [] Green Herb,       |
|       |[] Crate, [] Barrel, [] Crate, [] Crate x2, [] Barrel, [] Barrel,     |
|       |[] Hand Grenade, [] Green Herb, [] Guard's Key, [] Barrel, [] Ruby    |
|       |   (Square), [] Gold Bars (3000), [] Topaz (Pear), [] Sapphire        |
|       |  (Square), [] Emerald (Pear).                                        |
|       |                                                                      |
|EMBLEMS|1x.                                                                   |
 ¯¯¯¯¯¯¯¯¯¯¯¯¯¯¯¯¯¯¯¯¯¯¯¯¯¯¯¯¯¯¯¯¯¯¯¯¯¯¯¯¯¯¯¯¯¯¯¯¯¯¯¯¯¯¯¯¯¯¯¯¯¯¯¯¯¯¯¯¯¯¯¯¯¯¯¯¯¯
Straight in front of you lies a note that explains how the inventory works and how you can swap items. Head into the left (north) alley and kill the majini near the window. Two more majini's reside in the building. Before hopping in, check the [WOODEN CRATE] at the end of the alley.
The building must house an awful smell, especially seeing how you can inspect a chainsaw and a rotten animal corpse that have been lying there for a while. Collect the [HANDGUN BULLETS] from the shelves and head outside. Grab the [GREEN HERB] and turn left to find two [WOODEN CRATES].
Proceed northeast and encounter Kipepeo that are causing havoc to the chopper. After disposing of them, lend Sheva a hand near the ladder for her to collect the items on top of the building.
Shanty Town Artwork
=-=-=- SHEVA GAMEPLAY: -=-=-=-=-=-=-=-=-=-=-=-=-=-=-=-=-=-=-=-=-=-=-=-=-=-=-=-=-
You can find [•RIFLE AMMO], [•MACHINE GUN AMMO], [•HANDGUN AMMO], a [•WOODEN BARREL] and [•WOODEN CRATE] up here. She can also provide excellent cover from here as you proceed to take down a group of Majini's.
=-=-=-=-=-=-=-=-=-=-=-=-=-=-=-=-=-=-=-=-=-=-=-=-=-=-=-=-=-=-=-=-=-=-=-=-=-=-=-=-
Don't miss the [WOODEN BARREL] while exploring the ground level.
Once inside the building, check out the restroom to your left and kill the lurking majini. Grab [HANDGUN BULLETS] from where he was standing and loot the [WOODEN BARREL]. Make your way to the next room, in which you'll find another majini in the shadows as you are tempted to grab the [RED HERB]. There's also a [WOODEN BARREL] nearby.
Apparently the double doors are locked from the outside, so you'll have to make your way upstairs. Kill a total of three majinis here and search around for two [HAND GRENADES]. Head to the second floor and loot the [2 BARRELS], grab the [HANDGUN BULLETS] from the shelves and a [GREEN HERB] from the floor.
Before you lend Sheva a hand to jump over to the building across the street, make sure she has at least one herb and a decent amount of ammunition. Also turn around and look up and check out the right part of the ledge. Aim at the glowing [BSAA EMBLEM] and shoot it (these will unlock things in the full game).
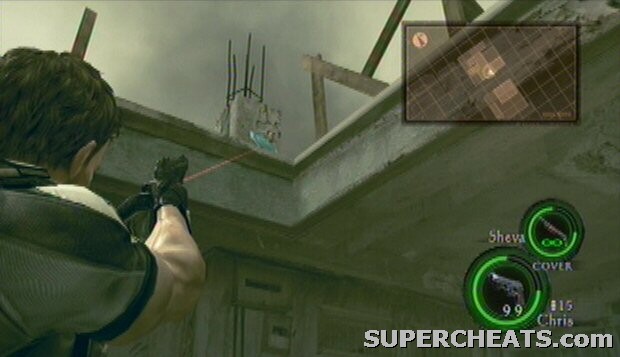
BSAA Emblem
=-=-=- SHEVA GAMEPLAY: -=-=-=-=-=-=-=-=-=-=-=-=-=-=-=-=-=-=-=-=-=-=-=-=-=-=-=-=-
If you are playing with two players, don't miss the [•WOODEN BARREL] before you have Sheva jump down. As Sheva, quickly make your way downstairs and unlock the double doors of the other building, allowing Chris to join the fun. It's also possible to shoot the lock from a distance - even from the building.
=-=-=-=-=-=-=-=-=-=-=-=-=-=-=-=-=-=-=-=-=-=-=-=-=-=-=-=-=-=-=-=-=-=-=-=-=-=-=-=-
As Sheva is making her way downstairs to unlock the door from outside she is ambushed by a large group of majinis. Drop down and keep them off her as much as possible so she can make her way downstairs to unlock the door. Now you can clean the place out, but I suggest you do not use too many explosive barrels just yet - you'll need those soon enough.
A second wave will climb over the walls and cars, but this only consists out of 5 or 6 majinis. With the place cleaned out, start exploring for items. There's a [CRATE] in the street, a [BARREL] in the southwest corner behind the building, and at the end of this alley another small [CRATE] can be found. Inside the building are two more [CRATES], as well as a [BARREL] upstairs.
Head back outside and check behind the bus to find another [BARREL]. A [HAND GRENADE] can be found near the former driver's seat. Before you head up the eastern stairs, grab the [GREEN HERB] at the bottom. Prepare yourself for a mini boss fight as you head upstairs, and take note of the transformer box attached to the electricity rod near the bottom of the stairs. Next up is .. Chainsaw Majini!
Like most mini-bosses he also has a fair amount of health, and downing him won't go as fast as you'd like it to go. He has one main attack:
1. Chainsaw: This means instant death as it separates your head from your body.
2. Chainsaw swing: This attack will not separate your characters head from the body but will instead put the character in an understandable Dying status.
Veteran/Professional Mode Only:
3. Chainsaw Madness: After downing him once AND grabbing the Guard's Key he'll get back up and start going in a frenzy, swinging his chainsaw around him. Do NOT, I repeat do NOT get even close to him or he'll instantly send you into dying status! At this point he doesn't have a lot of health, so pump a little more lead in him and he'll stay down forever.
Needless to say it's best to not get close to him, and if you do, try not to get stuck in front of him or you'll be dead meat. He can take a lot of damage and is backed up with a new wave of 10 majinis. Use the explosive barrels to your advantage and aim for his head with your rifle whenever you get the chance;
However, be extremely careful with using the rifle as it has a reload time of nearly a second. He isn't slow and if he manages to get a hit on you or Sheva it'll be game over, so it's better to be safe than sorry. Use grenades as well to make things easier.
When you've downed him and the Majini's, grab the [GUARD'S KEY] off him and continue down the eastern alley to find a [BARREL] and a locked door that can be opened with the aquired Guard's Key. Loot the treasure box for [GOLD BARS (3000)], [RUBY (SQUARE)], [TOPAZ (PEAR)], [SAPPHIRE (SQUARE)], and an [EMERALD (PEAR)]. Enter the next stage through the double doors.
Open the nearby door and grab the [GREEN HERB]. Head for the slidable gate and with the help of Sheva, slide it open. What follows is an impressive interactive cutscene in which you'll have to press [A], [A] [LT RT], or [X], [X], [R1 R2]. If variations exist, feel free to let me know.. Thanks!
| ______|¯¯¯¯¯¯¯¯¯¯¯¯¯¯¯¯¯¯¯¯¯¯¯¯¯¯¯¯¯¯¯¯¯¯¯¯¯¯¯¯¯¯¯¯¯¯¯¯¯¯¯¯¯¯¯¯¯¯¯¯¯¯¯¯¯¯¯¯¯¯|
|| ____/|              [C2-2] Chapter 2-2: Train Station                       |
|| |__  |______________________________________________________________________|
||___ \ |¯¯¯¯¯¯¯¯¯¯¯¯¯¯¯¯¯¯¯¯¯¯¯¯¯¯¯¯¯¯¯¯¯¯¯¯¯¯¯¯¯¯¯¯¯¯¯¯¯¯¯¯¯¯¯¯¯¯¯¯¯¯¯¯¯¯¯¯¯¯|
| ___) ||Chris and Sheva are still chasing Irving.  They'll have to make their |
||____/ |way through the train station and the dark mines first..              |
|-------|----------------------------------------------------------------------|
|ITEMS  |[] Green Herb, [] Handgun Bullets x10, [] Jewel Beetle, [] Machine Gun|
|       |   Ammo x30, [] Gold (400), [] Gold (400), [] Lantern, [] Green Herb, |
|       |[] Red Herb, [] Barrel x2, [] Crate x2, [] Barrel, [] Crate x2,       |
|       |[] Barrel, [] Crate, [] Barrel x2, [] Barrel, [] Diamond (Oval),      |
|       |[] Crate, [] Barrel x2, [] Green Herb, [] Barrel x2, [] Crate,[] Rifle|
|       |   Ammo, [] Green Herb, [] Dragunov SVD, [] Green Herb, [] Handgun    |
|       |   Bullets, [] Diamond (Brilliant), [] Red Herb, [] Grenade,          |
|       |[] Diamond (Pear), [] Diamond (Square), [] Grenade, [] Green Herb,    |
|       |[] Shotgun Shells x5, [] Barrel x2, Barrel x8, [] 2x Handgun Ammo x10,|
|       |[] Green Herb, [] Proximity Bomb.                                     |
|-------|----------------------------------------------------------------------|
|EMBLEMS|3x.                                                                   |
|-------|----------------------------------------------------------------------|
|ENEMIES|1. Majini (Town).                                                     |
|       |2. Kipepeo.                                                           |
|       |3. Adjule.                                                            |
|       |4. Cephalo.                                                           |
|       |5. Popokarimu [BOSS].                                                 |
|       |                                                                      |
 ¯¯¯¯¯¯¯¯¯¯¯¯¯¯¯¯¯¯¯¯¯¯¯¯¯¯¯¯¯¯¯¯¯¯¯¯¯¯¯¯¯¯¯¯¯¯¯¯¯¯¯¯¯¯¯¯¯¯¯¯¯¯¯¯¯¯¯¯¯¯¯¯¯¯¯¯¯¯
The train station is another dangerous place, as are the dark mines that lie ahead. This video shows you the way.
Check the room for a [GREEN HERB] and [HANDGUN BULLETS x10], then go outside and move between the trains. A group of Adjule assaults you, and a few Majini with bowguns will shoot flaming arrows from off the trains. You can rush over to some planks nearby which will grant you a slight advantage over the Adjule. The planks also serve as steps to get to the train roof, but before you do, face north and grab a [JEWEL BEETLE] attached to one of the planks. Also check out the eastern area to find [MACHINE GUN AMMO x30] lying on the barricade.
Climb the trains and grab the [GOLD (400)] from the end of the right train. Check out the pylon to the west and spot a very distant [BSAA EMBLEM] on the very top of it. It's best shot with a rifle, but it is quite possible with a handgun too. Hop over to the left train and disarm the explosive tripwire. Before you drop down, do the same with a tripwire in the distance, and as you ride the mine cart, hit one up ahead in advance. Get off and backtrack to a flipped cart to find [GOLD (400)]. Ride the elevator down to the mines.
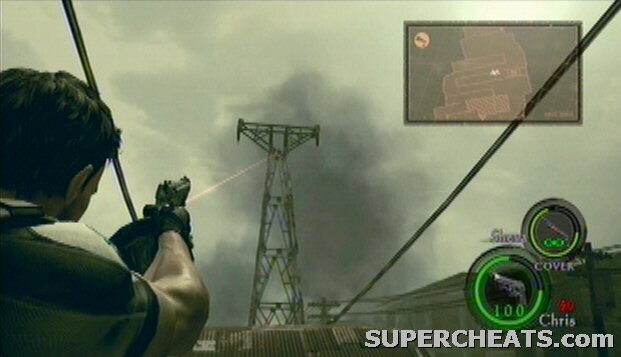
BSAA Emblem
The Mines:
It's completely dark in the mines and you don't have a Map due to connectivity issues with your GPS. I'm sure Riddick would love this area, but we're playing a different game here, so have your partner pick up the [LANTERN] to shine a little light on you - and the enemies, rather. Grab the [GREEN HERB] near the entrance and be on your way.
At the first junction, the right path leads to a dead end but it does net you a [RED HERB]. Now go down the left tunnel until you stumble upon the first few enemies, namely a few Majini and two Cephalos (joy!). At the next junction you can find two [WOODEN BARRELS] and two [WOODEN CRATES]. The left tunnel leads to a bridge with a waterfall. Turn to your right side, look up, adjust your view slightly to the left and try to spot the [BSAA EMBLEM].
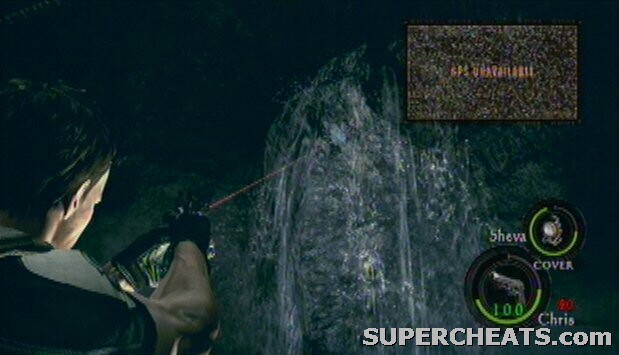
BSAA Emblem
When you continue you'll face another group of Majini, of which one transforms into another lovely Cephalo. As for the junction up ahead, it doesn't really matter which path you take since it's more like a roundabout and the two paths join together quickly. The right path houses a [WOODEN BARREL] and two [WOODEN CRATES] (one which holds a Snake, watch out!), and the left path contains a [WOODEN BARREL] and you can shoot a [WOODEN CRATE] through the crack in the wall which also holds a snake (this crate is actually in an area you'll soon get to).
Up ahead is another Majini, as well as two [WOODEN BARRELS]. Continue down the tunnels and when you can see the exit lights in the distance, check your left to find a rather hidden passage to the earlier mentioned wooden crate with a snake, but also an other [WOODEN BARREL] and a chest with a [DIAMOND (OVAL)].
Head for the exit and have Sheva turn the crank while you head onward. Three Majini will ambush Sheva, so quickly run for the other crank (marked by the red glow) and turn it as fast as you can. Once you are rejoined, fight off the large group of Majini, of which two will transform into Cephalos. You can find one [WOODEN CRATE] on the ground level, two [WOODEN BARRELS] at the end of the first ring, and a [GREEN HERB], [WOODEN BARREL x2] and a [WOODEN CRATE] in total at the second ring. Be extremely careful of the dynamite that some of the Majini's on the 2nd floor are throwing - these explosions really hurt. After you've controlled the crowd, continue down the tunnels from the 2nd ring and encounter another Cephalo.
You'll encounter a few more bowmen at the end of the tunnels, along with a dynamite throwing sucker. Toss in a grenade and be done with it, or kill them regularly. Head inside the elevator and ride it up. Back outside, don't go upstairs right away but grab the [RIFLE AMMO] and [GREEN HERB] first. When you enter the building, a scene will play.
Mining Area:
After the scene, grab the [DRAGUNOV SVD] rifle from the locker and take cover under the window. Aim for the Majini behind the gatling gun, as he's the most prominent danger right now. Grab the [GREEN HERB] and [HANDGUN BULLETS] in this room, then go downstairs and deal with a few Majini. At this point, if you hear the gatling gun firing again, this means a second Majini has taken over. Go back upstairs again, take cover under the window and kill the gunner.
With the gunner out of the way, run outside and take cover. It should be noted that it depends on the difficulty if other Majini will place themselves behind the gatling gun. Head over to the southern ledge and grab a [DIAMOND (BRILLIANT)] from the chest, and a [RED HERB] a little further away.
You can hop behind the gatling gun yourself to kill any remaining Majini's, but it only steers about 240 degrees, making it less useful in this situation. Seach behind the vehicle to find a [GRENADE]. Proceed to the large ladder and shoot the shiny object to the right of the ladder, near the top. This is a [DIAMOND (PEAR)]. Climb up and kill the Majini's. There are, however, a LOT of Majini's with dynamite around here, and you'll want to kill them ASAP without getting caught in the blast. If you look to the left and equip a rifle you should be able to spot a [BSAA EMBLEM] on the large factory building.
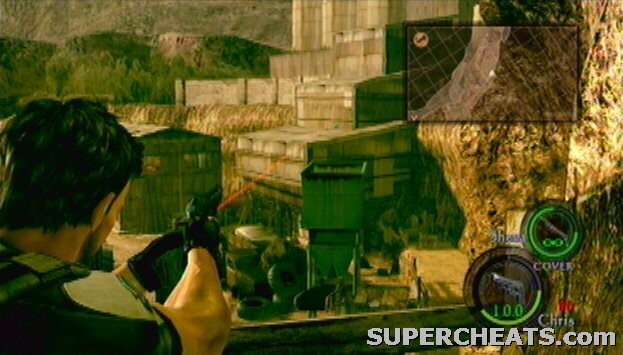
BSAA Emblem
Climb down a set of ladders at the end of the cliff, and give Sheva a boost at the broken ladder. The shiny object at the second ladder is a [DIAMOND (SQUARE)] which your partner should grab (or you can grab it yourself after dealing with all the enemies).
Many more Majini's with dynamite are testing out their new fireworks. Quickly rush over to Sheva and make your way through the enemies. A green container is blocking the road up ahead, but with teamwork you can easily push it in the ravine. Grab the [GRENADE], [GREEN HERB], [SHOTGUN SHELLS x5] and the contents of the two [WOODEN BARRELS], then drop down the ledge.
It appears this boss is completely invulnerable to your bullets, or is it? This video reveals all weaknesses of Popokarimu.
This creature requires a special strategy to defeat. You'll soon find that its armor is too tough to crack with regular gunfire. It's weak spot is the pink flesh at the bottom of it's tail. With the natural cflow of things, this will be revealed when it's in the air or when it has just performed a leap attack.
However, you'll want to get a longer time span for targetting this weak spot. There are sets of 3, 2, and 3 [WOODEN BARRELS] in the area, and one of the cabins houses [2x HANDGUN AMMO x10], a [GREEN HERB] and a [PROXIMITY BOMB]. Those bombs can also be found in many of the crates, and they're the key to an easy victory.
Get a fair distance between you and the boss, ideally so that you are on one side of the rock in the center and he on the other side. Place a Proximity Bomb in the middle of the road and lure the boss towards it. While the boss is heading towards the bomb, be sure that your best weapon(s) are fully loaded. The blast will knock the boss on its side, revealing the weak spot located under its tail. Walk over to a convenient spot, usually right next to the weak spot and empty your shotgun/machine gun/favorite weapon. Repeat this process a few times and the boss will be a goner.
If the boss stays in the air for a little while, try to shoot it down so you can place another proximity bomb and lure it towards the bomb.
 ______________________________________________________________________________
| ______|¯¯¯¯¯¯¯¯¯¯¯¯¯¯¯¯¯¯¯¯¯¯¯¯¯¯¯¯¯¯¯¯¯¯¯¯¯¯¯¯¯¯¯¯¯¯¯¯¯¯¯¯¯¯¯¯¯¯¯¯¯¯¯¯¯¯¯¯¯¯|
|| ____/|                [C2-3] Chapter 2-3: Savannah                          |
|| |__  |______________________________________________________________________|
||___ \ |¯¯¯¯¯¯¯¯¯¯¯¯¯¯¯¯¯¯¯¯¯¯¯¯¯¯¯¯¯¯¯¯¯¯¯¯¯¯¯¯¯¯¯¯¯¯¯¯¯¯¯¯¯¯¯¯¯¯¯¯¯¯¯¯¯¯¯¯¯¯|
| ___) ||After Chris and Sheva have finally found Irving, a mysterious woman   |
||____/ |quickly comes in between.  In this chapter, prepare for a big chase.  |
|-------|----------------------------------------------------------------------|
|ITEMS  |NONE.                                                                 |
|-------|----------------------------------------------------------------------|
|EMBLEMS|NONE.                                                                 |
|-------|----------------------------------------------------------------------|
|ENEMIES|1. Motorcycle Majini.                                                 |
|       |2. Majini (Town).                                                     |
|       |3. Ndesu [Boss].                                                      |
|       |                                                                      |
 ¯¯¯¯¯¯¯¯¯¯¯¯¯¯¯¯¯¯¯¯¯¯¯¯¯¯¯¯¯¯¯¯¯¯¯¯¯¯¯¯¯¯¯¯¯¯¯¯¯¯¯¯¯¯¯¯¯¯¯¯¯¯¯¯¯¯¯¯¯¯¯¯¯¯¯¯¯¯
Isn't that a first, zombies on motorcycles!? This video deals with these fast little annoyances.
Lock and load! You'll be chased by numerous Majini on motorcycles, and a few trucks every now and then. Don't continuously fire with the gatling gun or it will overheat. Instead, shoot for like five seconds (and make sure that you hit your targets, mind you!), then keep your finger off the trigger for a second.
A great way to measure the level of overheat is by checking the circle in which the gatling gun is displayed. As you're firing, the circle will fill with a red color. If the circle becomes completely red, your gun will overheat and you'll need to wait until the circle is depleted, which costs you unnecessary time, and can cause dangerous situations as well. In short, keep an eye on that circle and try not to overheat your gatling gun!
The trucks can be quite annoying, if only because the gatling gun won't always be able to turn all the way to a truck that is driving very close by the jeep. Nonetheless you should still be able to hit the majority of the Majini. The chase is fairly straightforward, and you'll get to a road block after about 3/4th down the chase. Aim for the explosive barrels, then focus on the truck. When it's out of the way, survive only a little longer.
TIP:
When a truck is on fire, don't blow it up when it's driving right beside you!
After a few more scenes, another boss appears! Get on your boots, because this one's another tough cookie to crumble.
Ndesu is one tough goliath, but has he ever heard of David.. err Chris and Sheva? This video shows how to defeat this boss giant.
Majini's need love too:
Immediately initiate fire and aim for his head. An important piece of info for winning this fight is that you're not just fighting Ndesu. You're not? No, there are also three Majini with bowguns in the background, and these can be just as dangerous. Well, almost as dangerous. They might not be there during the first few seconds of the fight, but two Majini's are on the right side, one on ground level, the other on the platform above the other. They are close to an explosive barrel, so you can use that to kill them, but they will keep respawning - so that's only a one time help. The other Majini is on your right side, on a building. In order to maintain a healthy .. health bar, it is essential to take a second every now and then to kill these Majini's. Only do so when Ndesu doesn't require your immediate attention, and he usually does.
Gatling Gun & Overheating:
As with previous instances where you could use gatling guns, this one can also overheat. Keep track of the circle in which the gatling gun is displayed. When you hold the trigger, the cicle will fill up with a red color. When the circle is completely filled, the gatling gun will be overheated and the circle needs to be empty again - resulting in a nasty waiting time. Try to avoid this by all means.
Phase 1:
Ndesu will approach the jeep and try to punch you. These punches can be dodged, which you should - at all costs - try to do as best as possible. He'll also try to smack you with both his hands, or deliver a blow with his feet. In the last two cases, fire at his head until he ceases the attack (but still, don't try to overheat your gatling gun).
He'll pull back soon enough and grab huge boulders and smack these at you. Aim for any explosive barrels that he's standing close to and blow them up to deal with this threat. Soon, when there are no more barrels left you'll need to crack the rocks with your gatling gun, so fire at the boulders only from the moment he grabs them. Ndesu will also attempt to attack you by delivering a tremendous punch to the ground. You can dodge this attack as well.
As you keep up the pace, parasites will crawl out of his body. At first there will be two parasites at a time - one in his chest, the other on his arm - but soon enough as much as four parasites pop out. These are his weak spots, so kill them one at a time. If you've been doing things correctly - and I'm assuming you have if you're reading this - then a larger parasite will crawl out of his back. That's your main chance: You need to destroy that sucker to win this fight. The smaller parasites will respawn, so repeat the cycle until the larger parasite shows itself again.
Phase 2:
The only difference here is that Ndesu will pull out the two (well, one at a time that is) electricity poles and tries to hit you with them. These can be dodged in a similar fashion how you dodged his punches. If you shoot the main parasite with three solid bursts whenever it pops out, then that should do Ndesu in (measured on Veteran mode).
______________________________________________________________________________
| ______|¯¯¯¯¯¯¯¯¯¯¯¯¯¯¯¯¯¯¯¯¯¯¯¯¯¯¯¯¯¯¯¯¯¯¯¯¯¯¯¯¯¯¯¯¯¯¯¯¯¯¯¯¯¯¯¯¯¯¯¯¯¯¯¯¯¯¯¯¯¯|
|| ____/|               [C3-1] Chapter 3-1: Marshlands                         |
|| |__  |______________________________________________________________________|
||___ \ |¯¯¯¯¯¯¯¯¯¯¯¯¯¯¯¯¯¯¯¯¯¯¯¯¯¯¯¯¯¯¯¯¯¯¯¯¯¯¯¯¯¯¯¯¯¯¯¯¯¯¯¯¯¯¯¯¯¯¯¯¯¯¯¯¯¯¯¯¯¯|
| ___) ||What a chase that was!  Enormous creatures had to be dealt with, and  |
||____/ |the choice between destination and freedom came up. Destination waits.|
|-------|----------------------------------------------------------------------|
|ITEMS  |[] Beast Slate, [] Ruby (Pear), [] Vase x2, [] Slate Map, [] Vase,    |
|       |[] Beetle (Brown), [] Chalice (Silver), [] Beetle (Brown), [] Vase,   |
|       |[] Rocket Launcher, [] Vase, [] Chalice (Silver), [] Egg (White) x2,  |
|       |[] Beetle (Brown), [] Pot, [] Vase, [] Vase x2, [] Pot, [] Emerald    |
|       |   (Pear), [] Vase, [] Vase, [] Pot, [] Vase, [] Vase x2, [] Idol     |
|       |   (Silver), [] Shaman Slate, [] Red Herb, [] Egg (White), [] Vase,   |
|       |[] Vase, [] Raptor Slate, [] Green Herb, [] Beetle (Brown), [] Pot,   |
|       |[] Green Herb, [] Pot, [] Vase, [] Idol (Silver), [] Vase, [] Vase,   |
|       |[] Warrior Slate, [] Vase, [] Vase x2, [] Green Herb, [] Red Herb,    |
|       |[] Vase, [] Pot, [] Red Herb, [] Magnum Ammo, [] Handgun Ammo,        |
|       |[] Vase x2, [] Vase x2, [] S&W M29, [] Vase x3, [] Vase x2, [] Pot x2,|
|       |[] Vase, [] Vase, [] Green Herb, [] Gold (Large), [] Rifle Ammo,      |
|       |[] Vase, [] Vase, [] Ceremonial Mask, [] Vase x2.                     |
|-------|----------------------------------------------------------------------|
|EMBLEMS|4x.                                                                   |
|-------|----------------------------------------------------------------------|
|ENEMIES|1. Majini (Wetlands).                                                 |
|       |2. Alligator.                                                         |
|       |3. Giant Majini.                                                      |
|       |                                                                      |
 ¯¯¯¯¯¯¯¯¯¯¯¯¯¯¯¯¯¯¯¯¯¯¯¯¯¯¯¯¯¯¯¯¯¯¯¯¯¯¯¯¯¯¯¯¯¯¯¯¯¯¯¯¯¯¯¯¯¯¯¯¯¯¯¯¯¯¯¯¯¯¯¯¯¯¯¯¯¯
Grab the [BEAST SLATE] nearby the corpse and slash the glowing animal skill to find a [RUBY (PEAR)]. The two [VASES] nearby are now the new medium for supplying you with items, so keep your eye out for them. You can't enter through the door here, so hop on the boat and get moving.
.-----------------------------.
|Boat Controls:               | The lake is fairly large, and we're going to
|=============================| look for three more slates similar to the one
|Left Stick:  Steer           | you already found just now, making four in total
|Right Stick: Adjust viewpoint| to be found.  Head for the destination marker on
|RT/R1: ..... Accelerate      | the west of your map, hop off board, grab the
|LT/L1: ..... Brake/Reverse   | [SLATE MAP], inspect the door that requires the
|RT/R1   A/X: Turbo Accelerate| four slates, and be on your way again.
|X/Square:    Get off         |
'-----------------------------'
Optional Exploration:
First, this guide will cover a few optional exploration possibilities. Feel free to skip ahead to the next paragraph that interests you.
First of all, from where you start out, check out the wired pole in the distance to the northwest. There's a [BSAA EMBLEM] attached to it. You can try to shoot it from here with a Rifle, or (if you're playing with someone) you can have your partner steer the boat towards it, allowing you to spot it from close by.
BSAA Emblem
Head to the isolated settlement in the northwest corner of the lake and get off the boat. There's a [BSAA EMBLEM] under the middle of the roof - shoot it - and there's a [VASE] here as well. You can jump inside the shallow water where the fish are hanging, and if you check the edges for a shiny object you'll be rewarded with a [BEETLE (BROWN)]. The outpost contains a chest with a [CHALICE (SILVER)]. Get back on the boat and we'll continue exploring.
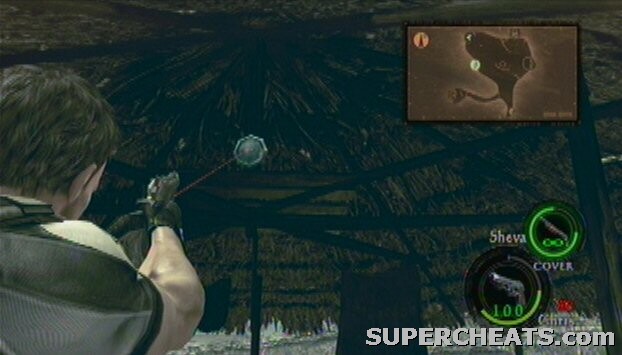
BSAA Emblem
Also located in the northeast region is a half-sunken ship. It should display as a small dot on your map. You can find a [BEETLE (BROWN)] and a [VASE] here, but also a [ROCKET LAUNCHER] in the suitcase! You'll have to walk up the ramp to get it.
Next, explore the central island that is populated by the most horrific creatures in the RE universe. Head inside the hut to find a [VASE] and a [CHALICE (SILVER)] in the chest. The shelves outside of the hut (on the right side) contain two [EGGS (WHITE)]. The totem pole to the left of your boat has a [BEETLE (BROWN)] attached to it, and a small [POT] can be broken behind the chicken fence. There's a [VASE] on top of the outpost, and lastly you can shoot a [BSAA EMBLEM] hidden under the hut by standing on the dock. You may want to use a rifle to see it better.
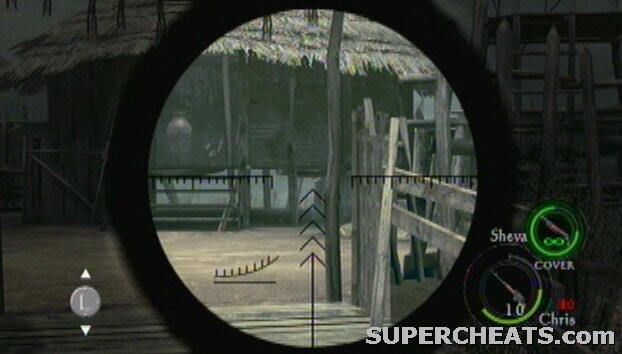
BSAA Emblem
The Slates:
This video instructs on how to acquire the Shaman Slate, and how to best fight the opposing Majini's.
Let's go slate hunting. Head to the northeast cross on your map and get ashore. Destroy two [VASES] and a [POT] here and shoot the shiny animal skull to find an [EMERALD (PEAR)]. Break another [VASE] next to the fireplace to the east, then go inside the hut and break another [VASE]. A [POT] can be found on some shelves next to the hut, and yet another [VASE] can be found in the hut to the left.
The settlement itself contains two more [VASES] along with two outposts. Give Sheva a hand at the left outpost first which holds an [IDOL (SILVER)]. The second outpost contains the [SHAMAN SLATE]. After you've gotten it, several tribal Majini's will get angry at you (I mean, you did just rob their treasure, didn't you?), which means you'll have to deal with them.
This new type of Majini is tougher than regular Majini and they get much faster back up their feet by jumping. They also use different weapons, mainly spears with which they leap in the air to spike you. You'll be prompted to press a button (X for Xbox, Square for PS3 I believe) in order to dodge this attack. Some others are equipped with wooden, spiky shields. These can be annoying to take down, but in fact they're not that hard if you know how to handle them. Speaking of taking down, aim for their feet (which is pretty much the only body part that you can aim at anyway), then move in for the uppercut (or somersault with Sheva) melee attack. This will destroy most - if not all - of their shield and conserves considerable amounts of ammo.
The Raptor Slate is not only guarded by Majini's, you'll have to wade through a pool that is roaming with Alligators! This video shows how you can tackle this challenge best.
After you've killed the unfortunate tribal Majini's, head back to your boat and continue to the eastern cross on your map. You'll have to wade through shallow water that is swarming with huge alligators. What can I say? If they bite you, it's game over. When you get near one it'll emerge to the surface. Whenever this happens, immediately back away from the alligator (and you should already have checked that there wasn't one behind you, or you're a goner).
Make your way to the eastern building and (quickly) climb the ladder. Enter the house through the window and around four Majini will jump you. Kill them, then search the room for a [RED HERB], an [EGG (WHITE)], and a [VASE]. Proceed to the next hut to find a [VASE] and the [RAPTOR SLATE] inside a chest.
The final slate resides at the southwestern end of a waterway. Inspect the gate near the left to find a [GREEN HERB] nearby, then move around the structure and keep your eyes open for a [BEETLE (BROWN)] near a tree with flowers. Get off the boat at the end.
The last slate won't be the easiest to get. Expect heavy resistance from the local tribal Majini's. This video shows how to make your getaway in one of the best possible ways.
The first building contains a single [POT], after which you should head to the jetty on the east. Grab the [GREEN HERB], loot the contents of the [POT] and [VASE], then open the chest to find an [IDOL (SILVER)] inside. As you approach the north you'll be assaulted by a large group of Majini's. Take care of them, then loot the NE building for a [VASE] and the NW building for a [VASE] and the [WARRIOR SLATE].
Head back to the lake and the way will be blocked. Have your partner kill the 4 bowmen Majini, while you steer the boat around any dangerous bombs. Up ahead are two more Majini who throw bombs at you; they're located in the two outposts. With the gate open, speed out of the waterway - but beware of more Majini. You can steer over them but it might be smarter to avoid them altogether as you might suffer from explosive damage as you move over them.
Go to the destination marker to the western side of the lake and insert all four slates. Exit to the next area. Drop down in the water and turn around. Spot a [BSAA EMBLEM] inside the hold under the walkway. Proceed to the village and deal with a bowgun Majini in the outpost on your way.
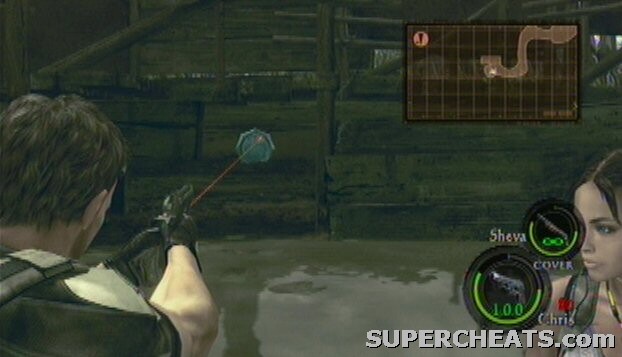
BSAA Emblem
The hut to your left (south) has a [VASE] nearby, and houses two more [VASES] inside. To the west of the hut you can find a [GREEN HERB] and a [RED HERB].
Head north from here. This building (on the western side of the village) contains a [VASE], [POT], [RED HERB], [MAGNUM AMMO] and [HANDGUN AMMO]. Climb the ladder to find two more [VASES]. Explore the northwest of the village, but don't grab the gold near the holes in the ground. This is actually a trap, and you'll get spiked. Needless to say, this causes a lot of unnecessary damage. There are two [VASES] in the corner of the northwest area.
Around now, the villagers start getting pissed off at you grabbing their treasure. Included are two Giant Majini who are particularly strong and dangerous. You'll want to grab the [S&W M29] Magnum from the BSAA soldier on the right (east) of the village to use it against them. There are three more [VASES] around here. The Giant Majini's are best killed with a combination of using the magnum, shotgun, machine guns and melee attacks - give them everything you got and stick together.
When they're dealt with, go to the northeast side of the village and loot two [VASES]. Proceed to the crank up ahead and either turn it yourself or have your partner do this.
Go over the bridge and break the two [POTS] inside the room - these hold two snakes. There's a [VASE] to the west of this room. You can find a [VASE], [GREEN HERB], [GOLD (LARGE)], [RIFLE AMMO] and a document upstairs. Another [VASE] can be found outside. Unlock the door for your partner by removing the beam and head west.
Loot the contents of the [VASE] nearby the tunnel, and grab the [CEREMONIAL MASK] from the chest at the end of this tunnel. Jump over the gap and loot two more [VASES]. Exit the area by the ropeway.
 ______________________________________________________________________________
| ______|¯¯¯¯¯¯¯¯¯¯¯¯¯¯¯¯¯¯¯¯¯¯¯¯¯¯¯¯¯¯¯¯¯¯¯¯¯¯¯¯¯¯¯¯¯¯¯¯¯¯¯¯¯¯¯¯¯¯¯¯¯¯¯¯¯¯¯¯¯¯|
|| ____/|            [C3-2] Chapter 3-2: Execution Ground                      |
|| |__  |______________________________________________________________________|
||___ \ |¯¯¯¯¯¯¯¯¯¯¯¯¯¯¯¯¯¯¯¯¯¯¯¯¯¯¯¯¯¯¯¯¯¯¯¯¯¯¯¯¯¯¯¯¯¯¯¯¯¯¯¯¯¯¯¯¯¯¯¯¯¯¯¯¯¯¯¯¯¯|
| ___) ||Every corner of the lake had to be explored to find four traditional  |
||____/ |RE puzzle pieces, namely four slates.  Tribal Warriors were defeated. |
|-------|----------------------------------------------------------------------|
|ITEMS  |[] Vase, [] Pot x2, [] Vase, [] Vase x2, [] Sapphire (Square),        |
|       |[] Gold (Small) x2, [] First Aid Spray, [] Barrel x2, [] Jewel Beetle,|
|       |[] Gold (Small), [] Incendiary Grenade, [] Barrel x2, [] Barrel,      |
|       |[] Barrel, [] Barrel x2, [] Barrel x2, [] Barrel, [] Barrel, [] Barrel|
|       |[] Barrel, [] Barrel x2, [] Barrel x4, [] Barrel x2, [] Barrel x3,    |
|       |[] Barrel x2, [] Barrel x2, [] Barrel, [] Barrel x2.                  |
|-------|----------------------------------------------------------------------|
|EMBLEMS|2x.                                                                   |
|-------|----------------------------------------------------------------------|
|ENEMIES|1. Majini (Wetlands).                                                 |
|       |2. Alligator.                                                         |
|       |3. Giant Majini.                                                      |
|       |4. Majini (Town).                                                     |
|       |5. Kipepeo.                                                           |
|       |6. Cephalo.                                                           |
|       |7. Big man Majini.                                                    |
|       |8. Adjule.                                                            |
|       |                                                                      |
 ¯¯¯¯¯¯¯¯¯¯¯¯¯¯¯¯¯¯¯¯¯¯¯¯¯¯¯¯¯¯¯¯¯¯¯¯¯¯¯¯¯¯¯¯¯¯¯¯¯¯¯¯¯¯¯¯¯¯¯¯¯¯¯¯¯¯¯¯¯¯¯¯¯¯¯¯¯¯
Execution Ground
Go around the corner and loot the [VASE] and two [POTS]. A short scene will play, starring Mr. Alligator. Proceed over the jetty and loot the contents of a [VASE]. Two more [VASES] can be found at the end of another jetty, and another two are at the east end of the jetty. A group of Majini's will attack you, including bowmen that fire arrows with explosives attached to them at you. One of them is in the left (northeast) outpost. Kill the Majini's and head to the right (south) side of the area.
More Majini's assault you, including a few more bowmen. Kill them, then have one of you stand next to crank. The other should go to the raft at the south-east of the area. Your partner should rotate the crank as fast as possible, while the other dodges several bites of the alligator while on the raft.
Quickly get off and kick the button, unlock the door, and exit the area by going over the lowered bridge. Go through the cave tunnel, and slash the torch in order to find a [SAPPHIRE (SQUARE)].
Back outside, search the grass on both sides for two [GOLD (SMALL)], but beware of snakes. The left tent houses a [FIRST AID SPRAY], and you can find two [WOODEN BARRELS] behind the tents. There's also a [BSAA EMBLEM] between the tents. Inspect the oil barrels to find a [JEWEL BEETLE], and search the grass north of it for more [GOLD (SMALL)]. An [INCENDIARY GRENADE] lies near the entrance of one of the tents.
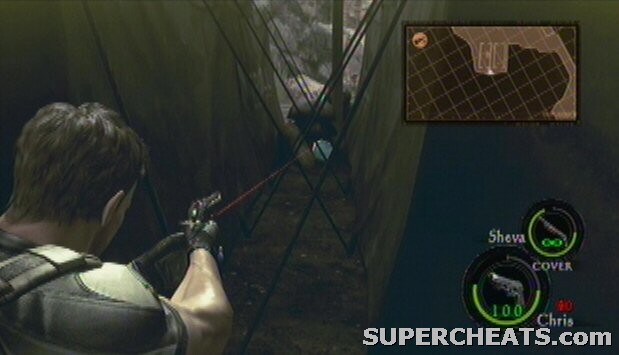
BSAA Emblem
Continue north and loot two [WOODEN BARRELS] from the cabin, then make your way inside the refinery.
Refinery
You may find the refinery uncomforting not only because of it's confusing layout, but certainly not in the least place due to hordes Majini's – among which two Chainsaw Majini's! This video helps you get through this stage in one piece.
Drop down, loot a [WOODEN BARREL] at the base of the stairs and another [WOODEN BARREL] on the stairs. A group of Majini's will attack you, of which one transforms into a Cephalo. Deal with the bowmen and don't proceed to far in the area, or more Majini's will appear.
Climb the ladder and loot the contents of the two [WOODEN BARRELS]. Turn the valve and the incineration flame will cease to the north. Directly after this, a handful of Majini's appear, so kill them. The bowmen on the upper platform to the northeast is particularly annoying, as well as the one with dynamite.
Explore the area they came from, which contains two [WOODEN BARRELS]. Climb the ladder, then use the lever to summon the zip line. Only one person can use this at a time, and as soon as the first one lands on the other side, a Chainsaw Majini makes his appearance. Joy! The other should get over there ASAP. Jump down to lower ground as there's much more space over there, and take him out;
He'll drop a Venom fang. Head back to the platform with the valve (use the zip line again), and loot the [WOODEN BARREL]. Turn the valve to cease one of the two incineration flame leaks to the east (namely, the right one).
Explore the southeastern part of the area to find a [WOODEN BARREL], and you can use another zip line here after calling it with the lever. At the other end lies a [WOODEN BARREL], and most importantly, the last valve which turns off the last flame leak to the east (the one coming from the left).
As soon as you unlock the door, another Chainsaw Majini spawns, so you may want to wait for your partner to arrive. Exit the small area and deal with the Chainsaw Majini downstairs. With him taken care of, exit the area and more regular Majini's will spawn. Kill them, and loot a [WOODEN BARREL] on the walkway to the exit. Hop down, smash the last two [WOODEN BARRELS] and exit to the next area.
After the scene, provide cover for Josh and kill the large group of Majini's that enter the area. There are about 4 [WOODEN BARRELS] that you can loot. Some Majini will try to enter through windows - you can use the window slashing technique with your knife while your partner covers you to keep them away. When the elevator arrives, hop on board.
In the next area, make your way to the end. The pathway is linear and you'll come across 2 [WOODEN BARRELS], plus another 3 [WOODEN BARRELS] at the end. The door appears to be locked down again! Cover Josh again as he tries to open it. Since there are quite a few enemies up ahead - including a Cephalo and a Chainsaw Majini - you may want to backtrack slightly to keep them away from Josh. When the door is open, quickly make a run for it. Don't bother trying to kill all enemies as they keep respawning.
Go downstairs and hop through the window to your right to get inside the room that the Majini's were in first. Loot the two [WOODEN BARRELS], hop back out and proceed to the next area, the docks.
The Docks
There are two [WOODEN BARRELS] closeby. Make your way over to the ship, and find another [WOODEN BARREL] on the lower passage. Two more [WOODEN BARRELS] are housed in the hut. When you make it to the boat, a scene plays.
Not only are you assaulted by large groups of Majini's, Big man Majini's and mutated dogs, you are also confronted with a timer of 2 minutes and nasty explosive traps. This video shows a method of dealing with this pressure.
Quickly move into the cabin behind you (at the end of the jetty) and shoot the [BSAA EMBLEM] inside. Now make a rush to the other side of the dock. Kick in the door, disarm TWO explosive tripwires right before you move onto the jetty and follow Josh to the boat. You have exactly two minutes to accomplish this, and you'll be bugged by a large horde of Majini's. After kicking in the door you'll also encounter a Big man Majini and several dogs.
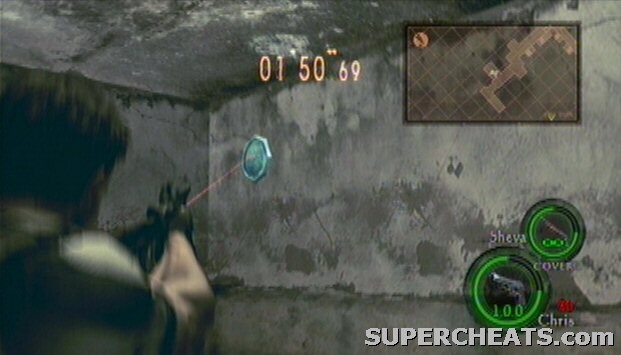
BSAA Emblem
| ______|¯¯¯¯¯¯¯¯¯¯¯¯¯¯¯¯¯¯¯¯¯¯¯¯¯¯¯¯¯¯¯¯¯¯¯¯¯¯¯¯¯¯¯¯¯¯¯¯¯¯¯¯¯¯¯¯¯¯¯¯¯¯¯¯¯¯¯¯¯¯|
|| ____/|     [C3-3] Chapter 3-3: Oil Field - Drilling Facilities              |
|| |__  |______________________________________________________________________|
||___ \ |¯¯¯¯¯¯¯¯¯¯¯¯¯¯¯¯¯¯¯¯¯¯¯¯¯¯¯¯¯¯¯¯¯¯¯¯¯¯¯¯¯¯¯¯¯¯¯¯¯¯¯¯¯¯¯¯¯¯¯¯¯¯¯¯¯¯¯¯¯¯|
| ___) ||Chris and Sheva are still in the process of tracking Irving down.     |
||____/ |Will they finally achieve their mission objective in this chapter?    |
|-------|----------------------------------------------------------------------|
|ITEMS  |[] Barrel x4, [] Emerald (Marquise), [] Barrel, [] XX Barrels.        |
|-------|----------------------------------------------------------------------|
|EMBLEMS|1x.                                                                   |
|-------|----------------------------------------------------------------------|
|ENEMIES|1. Majini (Wetlands).                                                 |
|       |2. Kipepeo.                                                           |
|       |3. ?????? [BOSS].                                                     |
|       |                                                                      |
 ¯¯¯¯¯¯¯¯¯¯¯¯¯¯¯¯¯¯¯¯¯¯¯¯¯¯¯¯¯¯¯¯¯¯¯¯¯¯¯¯¯¯¯¯¯¯¯¯¯¯¯¯¯¯¯¯¯¯¯¯¯¯¯¯¯¯¯¯¯¯¯¯¯¯¯¯¯¯
Shake off the two boats by killing the Majini's. Quickly turn around and start shooting the explosive barrels and large gas cylinders to deal with the many Majini's. As you arrive at the first gate, a [BSAA EMBLEM] will be barely visible above the gate that you entered through (but you can also try to shoot it as you move under the gate). You'll get to a closed gate, and it's up to you to open it. The lever for this is on the other side: Make your way through several Majini's and loot a total of four [WOODEN BARRELS]. Shoot the gas cylinders to speed things up. With the gate open, hop back on board and get going.
BSAA Emblem
As the boat speeds onward, keep firing at the explosive barrels and gas cylinders in the distance. When the boat gets close to cruising under two pipes, be sure to duck. Soon enough you'll get to another enclosed dock area.
This time the area is swarming again with Majini's, including two that will control the gatling guns on top of the closed gate. These are extremely dangerous, so rush over to them and take them out. Other Majini's will sometimes take the place of their fallen brothers, so try and keep them away from the gatling guns. When arrive there yourself, use the gatlings yourself and destroy the Majini crowd by blowing up all gas cylinders you see.
The cabin in between the gatling guns has a cabinet that contains an [EMERALD (MARQUISE)] and a [WOODEN BARREL]. Many other [WOODEN BARRELS] can be found throughout this area. These will be covered in-depth in a later version.
Also take your time to explore the other side of the jettys to the south. A [SAPPHIRE (PEAR)] can be found on the left side, as well as a [WOODEN BARREL] that usually has magnum rounds in it. The right side has a suitcase with the [M3] shotgun inside, and the cabin houses [SHOTGUN SHELLS], [MACHINE GUN AMMO], a [WOODEN BARREL], [HANDGUN AMMO] and a [FIRST AID SPRAY].
Open the gate by simultaneously flipping the levers on each side of the gate, and continue your boat trip. After the scenes, it's time for a boss fight.
“I've become greater than you'll ever be!” If by greater he meant bigger, then he certainly wasn't kidding. This is probably one of the biggest foes you've ever come across. Here's how to down it.
Phase 1:
The boat is equipped with four guns: The two at the rear are gatling guns and the two on front are grenade launchers. He'll swim on either side of the boat, and his tentacles will try to crush you when you're controlling a one of the guns.
Shoot the tentacles one by one and dodge the attacks. Irving will occasionally try to bite you and your partner, but this attack is also dodgeable. When he's swimming in the distance, target the orange bulb right around what you could call his head.
Phase 2:
Irving will now grab on the rear and expose himself. Shoot him with full force and dodge both his tentacle and bite attacks. He'll retreat and show up soon after. Repeat the cycle and he'll go down in no time.
______________________________________________________________________________
| ______|¯¯¯¯¯¯¯¯¯¯¯¯¯¯¯¯¯¯¯¯¯¯¯¯¯¯¯¯¯¯¯¯¯¯¯¯¯¯¯¯¯¯¯¯¯¯¯¯¯¯¯¯¯¯¯¯¯¯¯¯¯¯¯¯¯¯¯¯¯¯|
|| ____/|                  [C4-1] Chapter 4-1: Caves                           |
|| |__  |______________________________________________________________________|
||___ \ |¯¯¯¯¯¯¯¯¯¯¯¯¯¯¯¯¯¯¯¯¯¯¯¯¯¯¯¯¯¯¯¯¯¯¯¯¯¯¯¯¯¯¯¯¯¯¯¯¯¯¯¯¯¯¯¯¯¯¯¯¯¯¯¯¯¯¯¯¯¯|
| ___) ||"The answer lies in the caves up ahead".  And so Chris and Sheva find |
||____/ |themselves traversing ancient ruins of a forgotten civilization.      |
|-------|----------------------------------------------------------------------|
|ITEMS  |[] Pot x2, [] Vase, [] Topaz (Trilliant), [] Emerald (Pear),          |
|       |[] Sapphire (Square), [] Sapphire (Pear), [] Topaz (Pear), [] Ruby    |
|       |   (Pear), [] Vase x2, [] Topaz (Square), Gold (Large) x7, [] Emerald |
|       |   (Pear), [] Vase x2, [] Green Herb, [] Topaz (Pear), [] Sapphire    |
|       |   (Square), [] Sapphire (Pear), [] Gold (Large) x6, [] Sapphire(Pear)|
|       |[] Ruby (Pear), [] Vase, [] Green Herb, [] Emerald (Trilliant),       |
|       |[] Sapphire (Trilliant), Ruby (Trilliant), [] Vase,[] Grenade Launcher|
|       |[] Sapphire (Square), [] Emerald (Square), [] Idol (Gold), [] Topaz   |
|       |   (Square), [] Vase x2, [] Topaz (Square), [] 2x Flash Rounds x3,    |
|       |[] Ruby (Pear), Sapphire (Pear), [] Vase x3, [] Ruby (Oval),          |
|       |[] Soul Gem.                                                          |
|-------|----------------------------------------------------------------------|
|EMBLEMS|3x.                                                                   |
|-------|----------------------------------------------------------------------|
|ENEMIES|1. Bui kichwa.                                                        |
|       |2. Majini (Wetlands).                                                 |
|       |                                                                      |
 ¯¯¯¯¯¯¯¯¯¯¯¯¯¯¯¯¯¯¯¯¯¯¯¯¯¯¯¯¯¯¯¯¯¯¯¯¯¯¯¯¯¯¯¯¯¯¯¯¯¯¯¯¯¯¯¯¯¯¯¯¯¯¯¯¯¯¯¯¯¯¯¯¯¯¯¯¯¯
Explore the hut for two breakable [POTS] and smash the [VASE] on the jetty.
Head down the caves and you'll encounter a new type of enemy called Bui kichwa. They can only take a few handgun bullets, but they're fairly agile and always come in groups of around five.
Move towards the eastern side of the area and loot the contents of the [VASE]. The ledge up ahead contains a [TOPAZ (TRILLIANT)]. Head back to the ladder you passed just now and climb up. The bridge contains two vases, and if you to the right you can spot a [BSAA EMBLEM] on the lower right of the ravine.
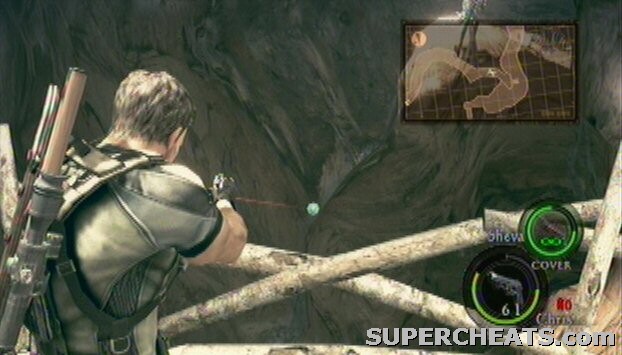
BSAA Emblem
The shiny torch up ahead contains an [EMERALD (PEAR)]. As you walk down the tunnel, more Bui kichwa bug you (get it?). There's another shiny torch which contains a [SAPPHIRE (SQUARE)]. At the end of the tunnel, break the two animal skulls on the ground, and slash the torch to get a [SAPPHIRE (PEAR)], [TOPAZ (PEAR)] and a [RUBY (PEAR)]. Go through the door.
You'll now be in an ancient village. First thing you should do is grab out a rifle and aim at the structure that is holding the up the lens. It may require several shots to shoot the [BSAA EMBLEM] about halfway down the structure. With that out of the way, drop down the ledge and loot the two [VASES]. Shoot the shiny sparkly from the doorway that turns out to be a [TOPAZ (SQUARE)] and drop down.
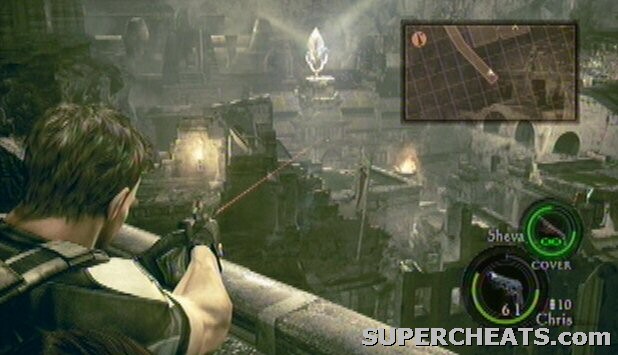
BSAA Emblem
Break the vase and move into the room with the hanging corpses. With the help of your partner, open the sarcophagus and grab the [GOLD (LARGE) x7]. The torch in the next room contains an [EMERALD (PEAR)], and the room after that contains two [VASES]. Cross the bridge and you'll get temporarily split up. Depending on who crossed the bridge first will find themselves already at the other side, while the other needs to take the lower route.
=-=-=- UPPER GAMEPLAY: -=-=-=-=-=-=-=-=-=-=-=-=-=-=-=-=-=-=-=-=-=-=-=-=-=-=-=-=-
Break the two [VASES] and provide cover for your partner who is located directly below you. As your partner proceeds, head east yourself so you can be of better help.
=-=-=- LOWER GAMEPLAY: -=-=-=-=-=-=-=-=-=-=-=-=-=-=-=-=-=-=-=-=-=-=-=-=-=-=-=-=-
You'll be the one facing the Majini's. Hopefully your partner will cover you well from above. Grab the [GREEN HERB] and the [TOPAZ (PEAR)] (from the torch) as you make your way up.
=-=-=-=-=-=-=-=-=-=-=-=-=-=-=-=-=-=-=-=-=-=-=-=-=-=-=-=-=-=-=-=-=-=-=-=-=-=-=-=-
When reunited, head inside the tomb and open the sarcophagus to find a [SAPPHIRE (SQUARE)], [SAPPHIRE (PEAR)], and [GOLD (LARGE) x6]. The other tomb contains a [SAPPHIRE (PEAR)] from the torch and the corpse in the sarcophagus is holding a [RUBY (PEAR)]. There's also a [VASE] here, and you can grab a [GREEN HERB] from the open sarcophagus.
Head towards the final sarcophagus by going over the bridge and prepare to make a landing. Several Bui kichwa and Majini will enter the tomb. One of them has torches, so you'll want to kill him first. The chest on the west contains a [EMERALD (TRILLIANT)], the chest to the east contains a [SAPHHIRE (TRILLIANT), and the chest on the north holds a [RUBY (TRILLIANT)]. Exit south.
There will be several Majini's down in the room to the south. You can shoot them from a distance. When you've dealt with them, start looting the vases and giant burning boulders will start rolling all over the floor. To get out of this death trap, turn the large crank in the center of the area to open up a doorway. Have one of you make a very fast run for it - as it'll be closed again in only a matter of seconds. When one of you has made it, the mechanism that kept the boulders rolling will stop, and the doorway stays open.
Quickly collect any items from the broken vases and continue through the corridor up ahead. An interactive cutscene follows in which you'll have to make a run for the end. You need to jump over several gaps (for which the buttons can sometimes alternate) and at the last gap a special grab command needs to be performed.
A gigantic labyrinth lies ahead. This big video shows you exactly where to go, what to do, and how to defeat the foes that lurk in the corners of darkness.
Jump down and have you and your partner pull a chain to activate a large stairwell. You'll now be in a very large room with several statues - you could even go as far as calling this a puzzle. There's a [VASE] to your left as you enter the area.
Go downstairs, turn west at the center of the room and open the suitcase on the SW dead-end; It holds a [GRENADE LAUNCHER]. Head north and have one of you pull the chain. The other needs to go back to the center of the room, head north, then go west to the other chain of this turquoise statue. This will uplift a set of chairs to the eastern statue. A [SAPPHIRE (SQUARE)] is also revealed.
From the center of the room, proceed to the jade statue on the east side of the area. Pull the chains and a combination of stairs will be altered. This time, an [EMERALD (SQUARE)] is revealed. The southern ledge can be leapt over, and the chest contains an [IDOL (GOLD)].
Go back to the center again and a group of Majini's will spawn when you take a few more steps. One of them has torches again, two have shields. Deal with them, then jump over to a platform (a torch marks the way). Go to the eastern side of the area where you can shoot a shiny [TOPAZ (SQUARE)] from the ceiling (nearby a hole), and the upper path houses two [VASES]. From here, aim at the ruins above the jade statue and you should be able to spot another [BSAA EMBLEM].
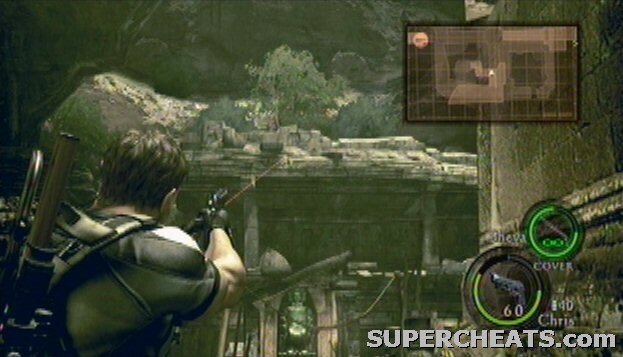
BSAA Emblem
Head to the center of the room by hugging the outer wall, and go to the gold colored statue. A [TOPAZ (SQUARE)] will be revealed. Go towards the purple statue in the northeast corner (or grab [FLASH ROUNDS] for the Grenade Launcher in a chest on the path to the right first). One person can already pull the chain, but the other one needs to go back downstairs to pull the chain below.
Majini's and Bui kichwa will appear before you can effectively pull both chains, so take care of them first. When you're done with them, pull the chains and the southern stairs will lower. Grab the [RUBY (PEAR)] from the ground level, and a [SAPPHIRE (PEAR)] from the upper level (notice how blue and red makes purple, the color of the statue - just like with the other statues, the stones you got from there were the same color as the statue too).
On the lower ground, head to the SE corner of the area and loot three [VASES]. Continue your way to the final statue, a red one, which is in the SW corner of the room. A [RUBY (OVAL)] is revealed, and the stairwells are finally raised towards the final destination of the area.
You'll remember this creature, and the same strategy still applies. The only thing that has changed are the surroundings. If you have any grenades or proximity bombs, now is the time to use them, but you can also resort to the grenade launcher with explosive rounds to flip the boss over to its side.
As usual, target its weak flesh at the bottom of his tail when on flipped over and give it everything you got. The fight can be over surprisingly fast. Grab the [SOUL GEM] after defeating Popokarimu: This gem is worth 10000 gold!
 ______________________________________________________________________________
| ______|¯¯¯¯¯¯¯¯¯¯¯¯¯¯¯¯¯¯¯¯¯¯¯¯¯¯¯¯¯¯¯¯¯¯¯¯¯¯¯¯¯¯¯¯¯¯¯¯¯¯¯¯¯¯¯¯¯¯¯¯¯¯¯¯¯¯¯¯¯¯|
|| ____/|              [C4-2] Chapter 4-2: Worship Area                        |
|| |__  |______________________________________________________________________|
||___ \ |¯¯¯¯¯¯¯¯¯¯¯¯¯¯¯¯¯¯¯¯¯¯¯¯¯¯¯¯¯¯¯¯¯¯¯¯¯¯¯¯¯¯¯¯¯¯¯¯¯¯¯¯¯¯¯¯¯¯¯¯¯¯¯¯¯¯¯¯¯¯|
| ___) ||The ruins are not without danger, and many traps had to be overcome.  |
||____/ |Will there be more lying ahead?                                       |
|-------|----------------------------------------------------------------------|
|ITEMS  |[] Vase x2, [] Sapphire (Square), [] Earth Emblem, [] Green Herb,     |
|       |[] Vase x2, [] Vase x2, [] Sea Emblem, [] Vase, [] Vase x2, [] Topaz  |
|       |   (Square), [] Sky Emblem, [] Ruby (Pear), [] Emerald (Pear),        |
|       |[] Diamond (Trilliant), [] Beetle (Gold), [] Pot x6, [] Vase x9,      |
|       |[] Idol (Gold), [] Emerald (Pear), [] Ruby (Pear).                    |
|-------|----------------------------------------------------------------------|
|EMBLEMS|1x.                                                                   |
|-------|----------------------------------------------------------------------|
|ENEMIES|1. Majini (Wetlands).                                                 |
|       |2. Giant Majini.                                                      |
|       |3. Cephalo.                                                           |
|       |                                                                      |
 ¯¯¯¯¯¯¯¯¯¯¯¯¯¯¯¯¯¯¯¯¯¯¯¯¯¯¯¯¯¯¯¯¯¯¯¯¯¯¯¯¯¯¯¯¯¯¯¯¯¯¯¯¯¯¯¯¯¯¯¯¯¯¯¯¯¯¯¯¯¯¯¯¯¯¯¯¯¯
Head upstairs and loot the two [VASES] on your way. Make your way to the center of the area and turn right (east). You'll notice that the lens sets the upcoming pathway on fire with a concentrated sun laser. Move between the alcoves to avoid getting hit. One of the alcoves contains a torch which contains a [SAPPHIRE (SQUARE)].
You need three emblems to continue your way. This video shows how to get the Earth emblem.
Head over to the corridor to the east and kill more Majini's (and a Cephalo). Continue upstairs and you'll have to face another big group of Majini's. Beware of a bowmen on higher ground (to the southwest). Collect the [EARTH EMBLEM] along with a [GREEN HERB] here, then return to the center of the area and grab the contents of two more [VASES].
You can insert the Earth Emblem to initiate a checkpoint. Head west and carefully cross the pathway on which the sun laser regularly bursts. Loot two [VASES] to the south, then proceed to a larger hall on the west. Several Majini will be guarding the [SEA EMBLEM] at the altar, including bowmen. A [VASE] can also be looted near the altar. When you attempt to head back, another group of Majini attacks - including a Giant Majini. Waste them (easier said than done, I know), and return to the center of the area to insert the Sea Emblem. One more to go!
The last emblem is up north. Move between the passages and beware of the laser as usual. At the end of the first passageway you can find two [VASES]. A torch in an alcove of the other passage contains a [TOPAZ (SQUARE)].
At the passage to the south, go west and lend Sheva a hand so she can move to the altar that contains the [SKY EMBLEM]. A bunch of Majini's while she's going there, including a Giant Majini. Take care of them and cross the passage with the laser. You can also (optionally) go east and collect the [RUBY (PEAR)] which is attached to the ceiling of a doorway. This one may be tricky to get, so move in between the laser bursts. Around the east corner you can find an [EMERALD (PEAR)].
Head back to the center of the room and insert the Air Emblem. You can now leave the area. Shoot the [DIAMOND (TRILLIANT)] above the doorway.
Are you finding yourself stuck at Resident Evil 5’s only ‘official’ puzzle?. This video tells you everything you need to know about it.
Head downstairs and you'll get to a room with a puzzle. Walk around the laser beams and turn the mirror in the northwest corner to the left. Step 1 solved! Ride the elevator down and you'll have to solve another one.
There are two pillars in this room which you should know down. These would otherwise block the laserbeam. Turn the mirror in the center of the room one time to the right: This'll align it with the adjacent mirrors. Now turn the mirror in the northeast corner to the left and the next elevator will be activated.
In this area, turn the mirror in the southwest corner to the right, the one in the northwest corner to the right as well, and lastly the one on the northeast to the right again. This setup will open all treasure chambers.
The treasure chamber to the west houses a [BEETLE (GOLD)], the one to the north spawns two Bui kichwa but it also contains a [BSAA EMBLEM]. Enter the chamber, turn around and look up to spot it. Last, the treasure chamber to the east contains six [POTS], nine [VASES], an [IDOL (GOLD)], and you can smash the animal skulls for a [EMERALD (PEAR)] and a [RUBY (PEAR)].
After getting all the treasure, turn the mirror in the southwest corner to the right (so that the laser beams aren't aligned anymore). Now turn the center mirror to the left, and turn the mirror you just flipped (in the southwest corner) to the LEFT. This will solve the puzzle, and you can now use the last elevator to the south. A scene will play, closing chapter 4.
 ______________________________________________________________________________
| ______|¯¯¯¯¯¯¯¯¯¯¯¯¯¯¯¯¯¯¯¯¯¯¯¯¯¯¯¯¯¯¯¯¯¯¯¯¯¯¯¯¯¯¯¯¯¯¯¯¯¯¯¯¯¯¯¯¯¯¯¯¯¯¯¯¯¯¯¯¯¯|
|| ____/|           [C5-1] Chapter 5-1: Underground Garden                     |
|| |__  |______________________________________________________________________|
||___ \ |¯¯¯¯¯¯¯¯¯¯¯¯¯¯¯¯¯¯¯¯¯¯¯¯¯¯¯¯¯¯¯¯¯¯¯¯¯¯¯¯¯¯¯¯¯¯¯¯¯¯¯¯¯¯¯¯¯¯¯¯¯¯¯¯¯¯¯¯¯¯|
| ___) ||The ruins appear to be adjacent to a large facility.  Perhaps the     |
||____/ |answers Chris and Sheva seek can be found inside?                     |
|-------|----------------------------------------------------------------------|
|ITEMS  |[] Jewel Beetle, [] Box x2, [] Machine Gun Ammo, [] Incendiary Grenade|
|       |[] Handgun Ammo, [] Green Herb, [] Shotgun Shells, [] Box, [] Green   |
|       |   Herb, [] Box, [] Red Herb, [] Gold Bars (3000), [] Ak-74,[] Handgun|
|       |   Bullets, [] Box, [] Green Herb, [] Box, [] Red Herb, [] Gold Bars  |
|       |   (3000), [] Ak-74, [] Handgun Bullets, [] Box, [] Box x3, [] Hand   |
|       |   Grenade, [] 2x Handgun Ammo x20, [] Machine Gun Ammo x120,         |
|       |[] Shotgun Shells x15.                                                |
|-------|----------------------------------------------------------------------|
|EMBLEMS|1x.                                                                   |
|-------|----------------------------------------------------------------------|
|ENEMIES|1. Licker Beta.                                                       |
|       |2. U-8 [BOSS].                                                        |
|       |                                                                      |
 ¯¯¯¯¯¯¯¯¯¯¯¯¯¯¯¯¯¯¯¯¯¯¯¯¯¯¯¯¯¯¯¯¯¯¯¯¯¯¯¯¯¯¯¯¯¯¯¯¯¯¯¯¯¯¯¯¯¯¯¯¯¯¯¯¯¯¯¯¯¯¯¯¯¯¯¯¯¯
If you have any proximity mines, put them in your inventory now - they might come in handy soon. Also take your grenade launcher with explosive rounds along. When you gain control over your character again, check out the eastern side of the area and check for a [BSAA EMBLEM] under the bridge at the end. At the end of the western side you should be able to find a [JEWEL BEETLE]. Exit the area by heading north, and glance at the document before leaving.
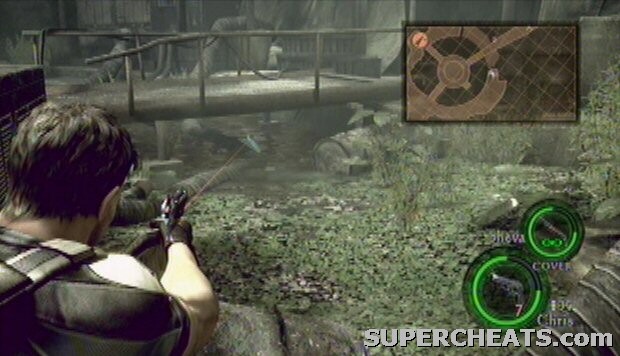
BSAA Emblem
The next area gives you a glimpse of my favorite enemy in the resident evil universe, the Licker. Explore the room to your left and loot the two [BOXES] and grab the [MACHINE GUN AMMO]. There's also an [INCENDIARY GRENADE] and [HANDGUN AMMO] in the cabinet, and the room contains two documents.
Continue down the corridor, read another document and grab the [GREEN HERB] before going through the nearby door. In the next room, take a good look at the flowers and collect [SHOTGUN SHELLS] from the desk. You can power on the terminal to read an email message.
The next halls give you a good impression of the status the facility is currently in. You'll come across a [BOX] before you get to a door with a valve. Turn it, head inside the room, flip the lever and break the glass to continue. In the next hall, run past the caged animals. Don't worry, those won't do you any harm... Grab the [GREEN HERB] from the northwest corner, then take a left and prepare for combat.
A classic scene from Resident Evil 2 repeats itself as two Licker Beta's swing through the glass windows. They have a couple of nasty attacks, so quickly take care of them, preferable with a shotgun, or, if they're far away, a grenade launcher. Open the door in the room where the lickers came out of and go down the corridor. Loot another [BOX] and explore the monitor room to your right for a [RED HERB], [GOLD BARS (3000)] in the safe, and an [AK-74] from the suitcase.
Lickers are formidable foes, and you’re about to encounter a dozen. This video shows you how to specifically deal with such a situation. Damn right!
Continue down the hall and grab the [HANDGUN BULLETS] lying on the ground before you head upstairs. Loot the [BOX] and pull the lever to get a glimpse of what's waiting ahead. Open the door and quietly WALK in the center of the corridor to prevent the lickers from hearing you. Gently open the door, make your way to the other door and, well, kick it in with the help of your partner. Most of the time the lickers will hear you by now, so make a run for the end of the corridor and press the elevator button. There are three [BOXES] here that you can loot while waiting for the elevator. As the lickers come around the corner, use your grenade launcher to keep them at a distance (or grenades, perhaps). When the elevator arrives, quickly hop on and get out of there.
There's a large stack of ammo right in front of you upon exiting the elevator.
Grab the [HAND GRENADE], [2x HANDGUN AMMO x20], [MACHINE GUN AMMO x120] and [SHOTGUN SHELLS x15], then make your way to the large circular area. After a few scenes it's boss time, but you'll have to dodge the first attack during a cutscene (LT RT or R1 R2).
Is your big friend the eight-legged ultimate creature not really your friend at all? This video shows you how to own it...
This B.O.W. can be very tough on harder difficulties, but even on amateur it can prove a challenge. In short, to defeat the boss you'll need to crack his shell and aim for his head when it has cracked.
To accomplish this, fire at his head/mouth whenever it is open. If it's not open, don't even bother firing as your bullets will bounce off its thick armor. After damaging the boss enough, it will temporarily fall down. You can now toss a Hand Grenade into the boss' mouth by running up to it and pressing the prompted button. This action causes the shell to crack.
In between this performance you'll have to dodge various attacks of the boss, some of which are very vicious. He has a swing attack - for which the dodge button will not always appear, it has a ram attack that you can see coming if the boss moves slightly backwards first. The most deadly attack of all has to be its pincer attack, and if he manages to grab you it'll be instant death.
You'll be needing hand grenades in this fight, and there's a fairly fortunate solution to this problem. U-8 will occasionally spit out little flying henchmen to bug you quite literally. When killed they'll drop items, mostly ammunition and hand grenades. You can also find a few green herbs on the ground.
Keep at it and don't get unnecessary close to the boss when its mouth is shut.
All the above will eventually down this tough-armored B.O.W.
 ______________________________________________________________________________
| ______|¯¯¯¯¯¯¯¯¯¯¯¯¯¯¯¯¯¯¯¯¯¯¯¯¯¯¯¯¯¯¯¯¯¯¯¯¯¯¯¯¯¯¯¯¯¯¯¯¯¯¯¯¯¯¯¯¯¯¯¯¯¯¯¯¯¯¯¯¯¯|
|| ____/|          [C5-2] Chapter 5-2: Experimental Facility                   |
|| |__  |______________________________________________________________________|
||___ \ |¯¯¯¯¯¯¯¯¯¯¯¯¯¯¯¯¯¯¯¯¯¯¯¯¯¯¯¯¯¯¯¯¯¯¯¯¯¯¯¯¯¯¯¯¯¯¯¯¯¯¯¯¯¯¯¯¯¯¯¯¯¯¯¯¯¯¯¯¯¯|
| ___) ||Experimental creatures are roaming the facility, and trespassers are  |
||____/ |wholeheartedly welcomed by an enormous B.O.W named Ultimate 8.        |
|-------|----------------------------------------------------------------------|
|ITEMS  |[] Box x4, [] Box, [] Machine Gun Ammo, [] Red Herb, [] Box, [] Box x2|
|       |[] Box, [] Box, [] Green Herb, [] Box, [] Box x2, [] Red Herb, [] Box,|
|       |[] Box x3, [] Box, [] Green Herb, [] Handgun Ammo, [] Box, [] Box x2, |
|       |[] Incendiary Grenade, [] SIG 556, [] Red Herb, [] Crate x2, [] Dead  |
|       |   Bride's Necklace x2?, [] Box x4, [] Handgun Bullets, [] Box x2,    |
|       |[] Green Herb, [] First Aid Spray, [] Machine Gun Ammo, [] Machine Gun|
|       |   Ammo, [] First Aid Spray, [] Incendiary Grenade x2, [] Handgun Ammo|
|       |[] Machine Gun Ammo, [] Rifle Ammo.                                   |
|-------|----------------------------------------------------------------------|
|EMBLEMS|1x.                                                                   |
|-------|----------------------------------------------------------------------|
|ENEMIES|1. Majini (Base).                                                     |
|       |2. Licker Beta.                                                       |
|       |3. Reaper.                                                            |
|       |4. Uroboros Mkono [BOSS].                                             |
|       |                                                                      |
 ¯¯¯¯¯¯¯¯¯¯¯¯¯¯¯¯¯¯¯¯¯¯¯¯¯¯¯¯¯¯¯¯¯¯¯¯¯¯¯¯¯¯¯¯¯¯¯¯¯¯¯¯¯¯¯¯¯¯¯¯¯¯¯¯¯¯¯¯¯¯¯¯¯¯¯¯¯¯
You'll want to have a handgun or machine gun in your inventory during this stage. Just the heavy weapons (shotgun/grenade launcher/magnum) won't do you much good during many parts of this stage.
Exit the area by going north and break the four [BOXES] in the room up ahead. The next few halls and corridors feature Majini's with weapons. They either have Stun Rods (who have to get close to you), machine guns (who will aim at you with a green laser pinpointer) and rocket launchers, dynamite or bows. You can take (and should take!) cover behind crates and walls to prevent getting hit.
Proceed through the two rooms and clean them from the Majini's. The second room houses a [BOX]. The next area can be tough on harder difficulties. Take cover by the wall and kill the first Majini. Move over to the crates and hide once more. Take out the rest of the Majini's one by one, and be sure to keep the ones with stun rods at a distance at all costs. When the area is cleared, check out the southwestern area and one last Majini will appear above the destroyed stairwell. You can find [MACHINE GUN AMMO] and a [RED HERB] here.
Go through the door and break another [BOX] before moving to the next area. There will be numerous Majini here, including one with a stun rod that turns into a Cephalo. Lure it to the small corridor and kill it here, you'll be a sitting duck otherwise.
With the first wave of Majini's killed, check the lower area for two [BOXES] on each side before going upstairs. When you do go upstairs, do so very slowly. Another fairly large group of Majini's are waiting for you. Try to lure as many back downstairs by firing a few times - then take out the remaining ones by aiming for the gas cylinders in the background. There's a set of gas cylinders at the far end of the area, but there are also two cylinders - one on each side that are hidden slightly out of view when you enter.
Just because Licker Beta’s are such lovely creatures, this video will show you how to deal with them in narrow corridors.
With the Majini's dead, loot a [BOX] on the left and ride the elevator at the end of the stage. You'll now be in a long corridor. Grab the contents of the nearby [BOX] and the [GREEN HERB] next to it, and find another [BOX] right around the corner. The other corner doesn't reveal treasure, but it does reveal a pathway with several lickers.. You can place proximity bombs, use grenades, equip the grenade launcher, but try to keep them at a distance. Alternatively you can use a rifle, handgun or machine gun and take them from a distance. If all fails - or if they get too close for comfort - resort to the shotgun and combat them from up close.
The next corridor spawns a few more of these lovely creatures. Proceed through it and head towards the door to enter a new area. This looks like a missile fabrication hall with several conveyor belts and tons of gas cylinders. Head right and loot the two [BOXES]. Jump down and grab a [RED HERB] and the item from the [BOX] to your right.
You'll spot two Majini's with stun rods to your left. Kill them ASAP and a whole lot more Majini's will enter the area. They have machine guns but they'll also use flash grenades to blind you. Immediately take cover and do NOT proceed at this moment. One of the grenade-throwing Majini's is located on the upper platform right above the conveyor belt. There's a pack of gas cylinders right next to him, so kill him with the explosion. Another Majini is located on a platform in the background. The others are all on the other side of the hall. Take cover behind the conveyor belt and kill them one by one. When you've downed them all, proceed east.
Climb the ladder and hop down to kill another Majini. Head left (east), break the three [BOXES] and kill the Majini on the upper level to the north. Head west, break another [BOX] and move on the conveyor belt when the containers have just passed. Walk in between the conveyor belts to speed things up and get off the right side at the eastern end. Go upstairs and kick in the door with the help of your partner.
Grab the [GREEN HERB], [HANDGUN AMMO] and the contents of the [BOX] on this platform, then slightly move towards the coveyor belt - act like you're going to get on it, but don't do this yet - and kill the Majini that spawns on the catwalk above the conveyor belt. He can be quite a pest, throwing grenades at you while on the belt, causing the gas canisters to blow up as well.
Before you actually move on the conveyor belt, shoot a few gas canisters in the distance to clear the way a little and make a run for it. The best way to get through this part is to keep the conveyor belts fairly clean of gas cylinders, killing the endlessly spawning Majini's in the distance, and making a run for the end as fast as possible. When you get off, quickly flip the lever to stop the production process and shoot the two grenade throwing suckers on the higher catwalk. When you kill them you'll be safe again .. for now.
Head downstairs and spot two [BOXES] to your left. Check the open dumpster to find a [BSAA EMBLEM]. There's an [INCENDIARY GRENADE] on a table that also holds a file on creatures called Reapers, and the suitcase contains a [SIG 556] machine gun. The lever for the conveyor belt is not yet powered, and we need to get it running due to our characters absolutely uncapable of, well, climbing a small little crate that's standing in the way.
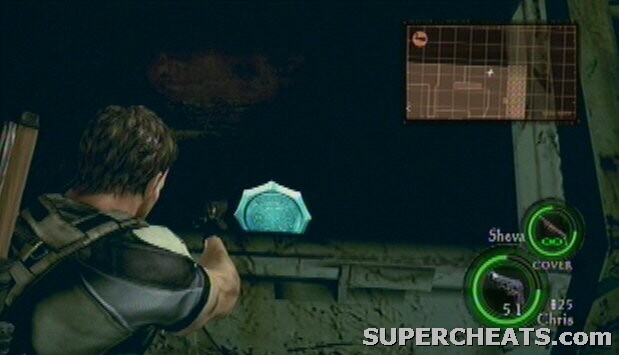
BSAA Emblem
Either way, head north and make your way to the power box, ignoring the cocoons hanging from the ceiling. The power box is marked by your destination marker. After flipping both levers, search the area for a [RED HERB] and two [WOODEN CRATES]. Return to the conveyor belt and you'll encounter the first Reaper.
These beasts are dangerously ferocious and you should never get too close to them as they have an instant death attack. The only spots that matter are the beige/whitish bulbs that are exposed after shooting it several times. Be sure to target these areas and you'll find they go down much faster than if you're randomly shooting around. On Veteran and Professional these beasts are tough and can drain a lot of your ammo supply. Fortunately, there are only a few of them in the entire game.
With the conveyor belt turned on, make your way over to the other side. You'll first have to backtrack so you can get to the other side of the conveyor belt. Those dead bridge corpses may be dead, but they can still grab you. If you're interested you can look around for two [DEAD BRIDE'S NECKLACE'S] (or are there more, do you know?). Exit the area to the west. In the next room, loot the four [BOXES] and grab [HANDGUN BULLETS] from the corner.
The toughest Uroboros creature you’ve faced thus far has one major weakness for fire. This video gratefully abuses this weakness.
This guy can be one tough enemy to down. His only weakness is fire, so you'll be using your grenade launcher's Flame Rounds, any Incendiary Grenades, Gas Cylinders and the Flamethrower in this area. Whenever Mkono is weakened by fire, a couple of appendixes with orange bulbs will reveal themselves - these are his weak spots, and you can only effectively hit them at this time.
Grenade Launcher's Flame Rounds:
You've probably found a couple of flame rounds just before you entered the boss area. Load them up your Grenade Launcher and fire them - one at a time - at the Mkono. This will temporarily reveal his weak spots, allowing you to switch to a different gun, preferably a machine gun and target them, as should your partner.
Gas Cylinders:
The area also contains three Gas Containers that you can use in a similar manner like you did with the first Uroboros boss. They have the same effect as a Flame Round from your Grenade Launcher.
Incendiary Grenades:
If you have any of these, throw them at the boss to get a similar effect as described in the previous two cases, except the incendiary grenades appear to be somewhat weaker, and thus their effect (or to initiate effect) seems shorter. Should you not have any Incendiary Grenades at all, pick them up from around the area (see ‘Collecting Items').
Flamethrower Usage:
When you run out of options, resort to using the flamethrower. The red lights indicate how full the tank of the flamethrower is when it is recharging. Green lights indicate that it is ready for usage. The downside of the flamethrower is that it requires one of you to get up quite close to the boss - which is very dangerous at all times. The boss' arm is the main problem here, and as long as that remains it is going to be difficult not getting hit when near the boss. Regardless, the brighter side is that you can always refill the flamethrower, and when the boss is on fire the other can target the weak spots of the boss with the most powerful weapons - including the arm of the boss.
Collecting Items:
With your back against the flamethrower, there are two [BOXES] on the right. To the left is a [GREEN HERB] and a [FIRST AID SPRAY] in the cabinet (slash the glass to grab it). The cabinet up ahead from this point contains [MACHINE GUN AMMO] and a [FIRST AID SPRAY], and the other corner houses another cabinet with [INCENDIARY GRENADE x2], [HANDGUN AMMO], [MACHINE GUN AMMO] and [RIFLE AMMO].
Boss Attacks:
The boss moves around fairly quickly, and it can disappear and reappear through-out the area. It's arm swing attack can cause a lot of damage (especially on the higher difficulties), and his swallow/grab attack is just as dangerous. His arm attack can be dodged; try to do this as effectively as possible.
Killing the Boss:
Using the above methods to weaken the boss, preferably use long range weapons such as the machine gun to target any orange bulbs. Make haste with destroying the arm, as it'll make things a whole lot easier when you have to resort to using the flamethrower.
 ______________________________________________________________________________
| ______|¯¯¯¯¯¯¯¯¯¯¯¯¯¯¯¯¯¯¯¯¯¯¯¯¯¯¯¯¯¯¯¯¯¯¯¯¯¯¯¯¯¯¯¯¯¯¯¯¯¯¯¯¯¯¯¯¯¯¯¯¯¯¯¯¯¯¯¯¯¯|
|| ____/|       [C5-3] Chapter 5-3: Uroboros Research Facility                 |
|| |__  |______________________________________________________________________|
||___ \ |¯¯¯¯¯¯¯¯¯¯¯¯¯¯¯¯¯¯¯¯¯¯¯¯¯¯¯¯¯¯¯¯¯¯¯¯¯¯¯¯¯¯¯¯¯¯¯¯¯¯¯¯¯¯¯¯¯¯¯¯¯¯¯¯¯¯¯¯¯¯|
| ___) ||It seems that Chris' arch-enemy is still alive.  It looks like there  |
||____/ |is no other way but to take him on and defeat him.  But how..?        |
|-------|----------------------------------------------------------------------|
|ITEMS  |[] Shotgun Shells, [] Machine Gun Ammo, [] Sapphire (Marquise),       |
|       |[] Machine Gun Ammo, [] Crate x3, [] Box, [] Box x2, Box x5, [] Box x4|
|       |[] Crate, [] Rifle Ammo, [] Hand Grenade, [] Red Herb, [] H&K PSG-1,  |
|       |[] Green Herb, [] Royal Necklace, [] Box x6, [] Box x2, [] Rifle Ammo,|
|       |[] Box, [] Green Herb, [] Box, [] Magnum Ammo, [] First Aid Spray,    |
|       |[] Chalice (Gold), [] Topaz (Brilliant), [] Green Herb x2, [] Vases xx|
|-------|----------------------------------------------------------------------|
|EMBLEMS|3x.                                                                   |
|-------|----------------------------------------------------------------------|
|ENEMIES|1. Majini (Base).                                                     |
|       |2. Licker Beta.                                                       |
|       |3. Reaper.                                                            |
|       |4. Big man Majini.                                                    |
|       |5. ????  ?????? [BOSS].                                               |
|       |                                                                      |
 ¯¯¯¯¯¯¯¯¯¯¯¯¯¯¯¯¯¯¯¯¯¯¯¯¯¯¯¯¯¯¯¯¯¯¯¯¯¯¯¯¯¯¯¯¯¯¯¯¯¯¯¯¯¯¯¯¯¯¯¯¯¯¯¯¯¯¯¯¯¯¯¯¯¯¯¯¯¯
Exit the area to the north and look behind the large fan to the right to spot an elusive [BSAA EMBLEM] behind it.
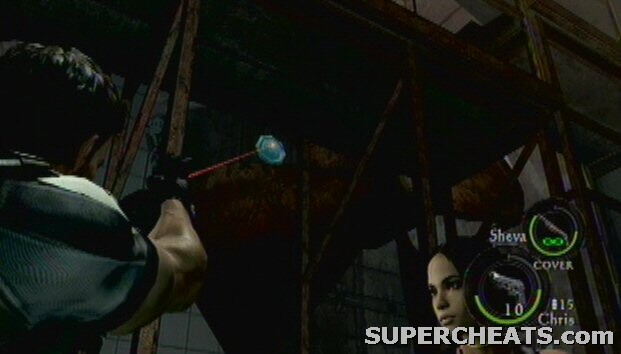
BSAA Emblem
The room to the west contains [SHOTGUN SHELLS], [MACHINE GUN AMMO] and a [SAPPHIRE MARQUISE] in the safe. Head down the corridor and grab more [MACHINE GUN AMMO] that's lying on top of a generator near the exit. In the next room, loot the three [WOODEN CRATES] and a [BOX], then proceed to the research facility hall.
Reapers and Majini’s with machine guns, just watch this video and reach the other side of this enormous hall.
Check the right side of the catwalk to spot two [BOXES], and continue to the east. Five more [BOXES] can be found in a generator room to your left, and it will be around this time that several Majini's make their appearance. Kill the ones coming over to you and take cover behind the metal plating on the railing of the catwalk. Kill the two Majini's on the other side of the catwalk and continue.
Proceed just a little further and you'll encounter a reaper. Target its weak spots to kill it faster, then take cover behind the metal plate up ahead. Be SURE to kill any Majini's with stun rods coming your direction; there should be two coming in total. When you've killed the other Majini's in the distance, continue over the catwalk and enter small room with a powering maching to the east. Use it to restore power to a lever we'll get to shortly, and loot the four [BOXES], [WOODEN CRATE], and grab the [RIFLE AMMO], [HAND GRENADE], [RED HERB], and the [H&K PSG-1] rifle from the suitcase.
Return to the lever on the south and two Majini's, joined by a Big man Majini are coming over from the platform lift. Kill the two regular ones first, as they can throw dynamite. After dealing with them, have one person stand on the platform and have the other use the lever. If you're playing alone, I suggest you go by yourself. A few Majini will attack you, two of them have metal shields which don't make things easier, and on top of things they also transform into Cephalo. There's an other Majini on the east side.
Flip the lever, dodge the Majini and try to kill them asap.
When you're both on the other side, get moving and things start to get rough. Two Majini's in the distance as armed with rocket launchers, and you don't want to get hit by those! Other Majini's with stun rods and machine guns will also storm you rather sooner than later, so you're in a tight spot. Take cover and try to kill the two Majini's with the rocket launchers ASAP with a rifle. Rush over to that building, killing all Majini's (including several Cephalo) in your way, and deal with another bunch in the control room. When they're dead, grab the [GREEN HERB] and [ROYAL NECKLACE] here and continue to the next area.
Smash the six [BOXES] here and two more in the circular chamber. Go down and turn to the green monitor under the stairs to start the elevator. Several Majini's will stop the elevator by holding down a lever. If you kill this Majini (use a rifle to zoom in on him), the elevator will start moving again, but it might be tricky to get a steady aim. Try the following trick: When you know they're going to come in sight soon, aim slightly left of where they will appear and slightly move your scope to the left as well. This will result in your scope moving slowly to the right due to the elevator's movement, allowing you to adjust your aim more precisely.
It is also worth mentioning that you can shoot another [BSAA EMBLEM] on the first balcony floor, when the rotating elevator stops for the first time. Use the above trick to shoot it.
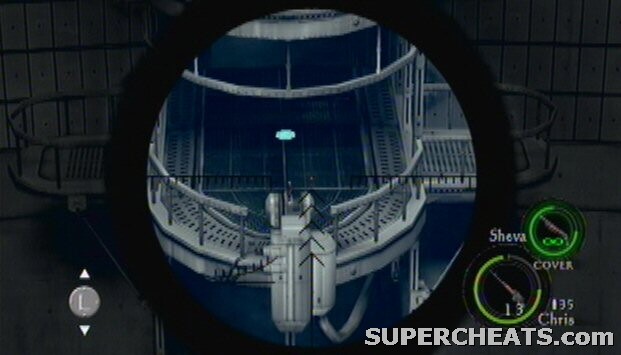
BSAA Emblem
When you've taken care of the Majini's, more will assault you from the upper catwalk. Quickly kill them as you don't have all that much place for cover, and exit the area by following the catwalk that leads to a door.
In this area, loot the two [BOXES] to your right and to your left. Run around the elevator shaft to find [RIFLE AMMO x5], and aim down at the elevator shaft from this spot to shoot a [BSAA EMBLEM]. There's another [BOX] next to the raised bridge, and the power generator is closeby to your right from here. Call the lift and head up yourself (I can't recommend the AI).
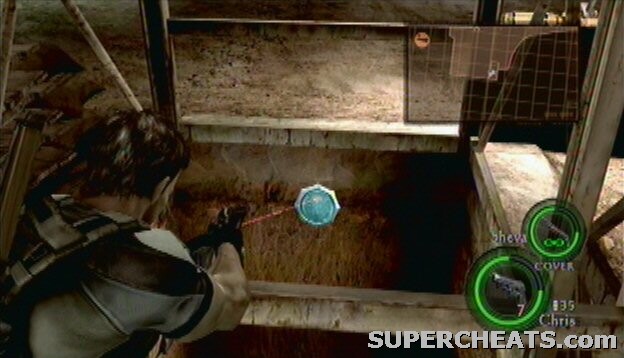
BSAA Emblem
Two lickers appear. You can handle them, right? Keep them at a distance with your grenade launcher or any other long range weapon, and continue your way on the corridor. Whoops, looks like you have some more company! Again, do your best to keep these suckers away from you. As you're likely to run out of explosive rounds, resort to your handgun and empty it from a distance. There's a [BOX] up ahead that usually contains Acid Rounds, so load them in your grenade launcher. Another box can be found in the distance, but you'll want to quickly run past it as a licker or 10 start chasing you. Push the container when you get to it and use the Acid Rounds to keep the lickers at a distance. If you run out, resort to whatever you have left, such as a shotgun.
With those out of the way, drop down on the cabin and look for a useful [GREEN HERB] and a [BOX]. Jump down in the cabin and unlock the door. The lockers contain [MAGNUM AMMO], a [FIRST AID SPRAY] and a [CHALICE (GOLD)]. Pull the lever to lower the bridge, and exit the area. The shiny gem above the exit is a [TOPAZ (BRILLIANT)]. After a few scenes, it's boss time!
This video shows you how to deal with two very powerful foes.
You can get through this fight without firing a single shot, and perhaps that is the best way to go indeed. You don't want to hurt Jill, and Wesker is basically invincible and you can't kill him. The goal here is to hold out for seven minutes, like Wesker explicitly mentions at the start of the fight. You may want to take note of the two [GREEN HERBS] behind each of the stairs so that whenever you need them, at least you know where they are.
Note: If you damage Wesker enough, it is possible to make him retreat. You'll find a [HEART OF AFRICA] treasure between the stairs as reward.
Run around and stay away from both Wesker and Jill. Avoid getting hit by their gunfire (hide behind the pillars, for example), and after a short while Wesker kicks Chris through a door. This allows you to hide from Wesker, making things much easier while hiding. There are about 15 [VASES] around here (if you have specifics on the treasure here, feel free to submit it - otherwise I'll look into it later), so there's plenty to loot. When the seven minutes are over, a scene will play and the next phase of the battle begins.
In order to save someone special, you’ll want to rely on other tactics besides shooting. This video shows exactly what you should do.
You need to remove the red device from Jill's chest. Get near Jill and press the prompted button to talk to her. Don't get too close or she'll kick you in the nuts, though. Have one of you (or Sheva's AI) hold her down when Jill is confused by the talk and tap - as FAST as you can - the prompted button to remove the device.
Jill has a few close quarters attacks, but she also uses a machine gun every now and then. If she does, hide behind the pillars to avoid the gunfire. Depending on how fast you tap, it will take several attempts to remove the device. For an indication, it took me 7 times on veteran.
Many people tap with their fingers, and while it does work every now and then, there is a method that allows you to tap buttons much, MUCH faster. I learnt that from Konami's International Track & Field for the PSOne, in case you were wondering. :p
Tapping with your wrist:
Instead of tapping with your finger, tap with your wrist. How does that work? Well, you obviously don't literally tap with your wrist, but you hold your thumb still on the button you want to tap, and you shake/vibrate your controller so your thumb touches the button. Try and perfect this method, and hold the controller however you like. I personally place it against my body with one side, it helps me tap faster.
With the device removed, more scenes play and the chapter will be over.
 ______________________________________________________________________________
| ______|¯¯¯¯¯¯¯¯¯¯¯¯¯¯¯¯¯¯¯¯¯¯¯¯¯¯¯¯¯¯¯¯¯¯¯¯¯¯¯¯¯¯¯¯¯¯¯¯¯¯¯¯¯¯¯¯¯¯¯¯¯¯¯¯¯¯¯¯¯¯|
|| ____/|                [C6-1] Chapter 6-1: Ship Deck                         |
|| |__  |______________________________________________________________________|
||___ \ |¯¯¯¯¯¯¯¯¯¯¯¯¯¯¯¯¯¯¯¯¯¯¯¯¯¯¯¯¯¯¯¯¯¯¯¯¯¯¯¯¯¯¯¯¯¯¯¯¯¯¯¯¯¯¯¯¯¯¯¯¯¯¯¯¯¯¯¯¯¯|
| ___) ||After seeing on old face and a face-off with Chris' arch-villain, our |
||____/ |BSAA heroes make their way on the tanker of the enemy.                |
|-------|----------------------------------------------------------------------|
|ITEMS  |[] Box x2, [] Box x5, [] Green Herb, [] Box x2, [] Box, [] Box x2,    |
|       |[] Crane Keycard, [] Box, [] Green Herb, [] Gold Bars (3000),[] Box x3|
|       |[] Boxes, [] Gold Bars (3000), [] Hand Grenade, [] Green Herb,        |
|       |[] Machine Gun Ammo, [] Box x2, [] Box x3, [] Jail Breaker, [] Green  |
|       |   Herb, [] Rifle Ammo x2, [] Shotgun Shells, [] Red Herb,            |
|       |[] Incendiary Grenade x2, [] Green Herb, [] Proximity Bomb,           |
|       |[] Proximity Bomb, [] Wooden Crate, [] Tanker Keycard A, [] Tanker    |
|       |   Keycard B, [] Crate x2, [] Green Herb, [] Crate.                   |
|-------|----------------------------------------------------------------------|
|EMBLEMS|3x.                                                                   |
|-------|----------------------------------------------------------------------|
|ENEMIES|1. Majini (Base).                                                     |
|       |2. Adjule.                                                            |
|       |3. Duvalia.                                                           |
|       |4. Big man Majini.                                                    |
|       |                                                                      |
 ¯¯¯¯¯¯¯¯¯¯¯¯¯¯¯¯¯¯¯¯¯¯¯¯¯¯¯¯¯¯¯¯¯¯¯¯¯¯¯¯¯¯¯¯¯¯¯¯¯¯¯¯¯¯¯¯¯¯¯¯¯¯¯¯¯¯¯¯¯¯¯¯¯¯¯¯¯¯
Jump down and loot the two [BOXES], then continue up the small stairs and you'll encounter several Majini's. Take care of the dynamite throwing ones on the higher levels first, but don't let the ones with the stun rods get to you either. Climb the ladder and look at the other side of the ship. The radio mast in the far, far distance has a [BSAA EMBLEM] on top of it. You can only hit it with a rifle (or rocket launcher), and even then it's tough to hit. Hop down to the other side. On the front of the ship, collect the contents of the five [BOXES] and grab the [GREEN HERB].
BSAA Emblem
When you continue, two Adjule jump out of a container, and you'll be ambushed by several other Majini's as well. Quickly kill the Adjule with your shotgun so you can focus on the Majini's. With them taken care of, proceed south and down the stairs.
A Big man Majini will be waiting for you on the left, and a few more Adjule and Majini's will back him up in his quest for killing you. After he has failed, continue and a last Majini transforms into a new type of enemy called a Duvalia. It might be the ugliest thing you've ever seen, even if you've seen alot of ugly things. It's .. ‘head' can be opened or closed, and if it's closed you better aim for the legs since you won't be doing any damage to the head. If you check the crates around here you should be able to locate a [RED HERB] and a [FLASH GRENADE].
After taking care of the enemies, drop down and loot the two [BOXES]. Continue to the east and find another [BOX] on your left (between containers). At the and of the corridor, push the lever and go underneath the raised container.
Your partner has been trapped! What to do? This video shows all.
Here, go past the locked door, loot two [BOXES], climb up and push the container with rubbish out of the way to drop down below. As Sheva (or your partner) tries to continue, a cage will be dropped from above by a crane, and several Majini's make their appearance. Kill them all, especially the final Duvalia that holds the [CRANE KEYCARD].
When you've taken care of the enemies, look for a [BSAA EMBLEM] in the empty container to the north. You may need to blow up a Majini inside to get it, or you can throw a grenade inside to get it.
BSAA Emblem
Shoot the green light on the northern side to raise a container and unlock the door to your left. Make your way to the crane and kill a Majini on your way there. Climb the crane and deal with another Majini at the top. Flip the lever to free your partner and backtrack until you're back together. There's a [BOX] and a [GREEN HERB] there.
First, explore the northern path and leap over the gaps between the containers. A few Majini's won't like you for stealing their [GOLD BARS (3000)] in the safe at the end, so deal with them and return to the junction. Go east and kill the two Big man Majini that assault you. Loot the three [BOXES] on the opposite side and stand on one of the containers while Sheva stands on the other. Shoot the green light of the container to raise it, while she does the same with your container.
Both should make their way to the east. You'll come across a few more [BOXES] and several Adjule. Raise the container to the north to reveal another Adjule. There is also a safe with [GOLD BARS (3000)] at the end, or I wouldn't have told you to raise the container! Exit the area by the door to the south.
In this room, grab a [HAND GRENADE], [GREEN HERB] and [MACHINE GUN AMMO] from a cabinet and go downstairs. You can find two [BOXES] next to the stairs. Head down the large stairwell up ahead and loot three [BOXES] at the ground level. The suitcase here contains a [JAIL BREAKER] shotgun.
A scene will play after you move through the door. Search the room for a [GREEN HERB] and [RIFLE AMMO x2], one pack on a desk, one in a cabinet (behind glass). The final [BSAA EMBLEM] is located behind the spotlight that is shining on the flowers . It's in a cabinet behind glass, which is located on the north wall.
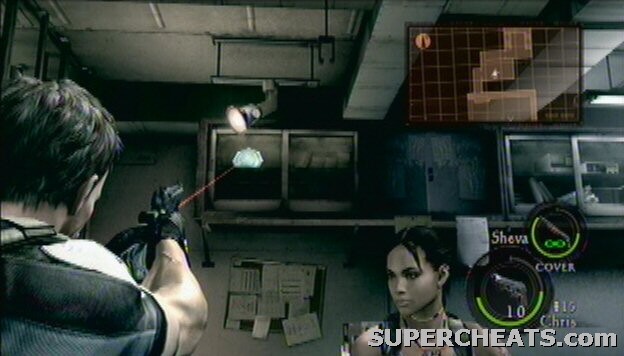
BSAA Emblem
Exit the room and enter a large hall. You can snipe up to three Majini's before they notice you (one straight ahead, one on higher ground, and one on lower ground, more to the left). Either way, the alarm soon sounds and you'll have to make your way to the end of the catwalk. Take cover behind the metal plates and deal with the Majini's below, along with the Majini's that try to mess you up with stun rods.
Hop down and kill the remaining Majini's. As you approach the ladder that leads down to a tunnel, more Majini's will attack, and even MORE Majini's will attack, and even .. Well, I could go on, but it suffices to say that these guys don't easily give up. Take cover, kill them all, and hop down the tunnel. A few more Majini will be inside, and the last one transforms into a Duvalia.
You’re facing a walking gatling gun, never a good thing. This video annihilates the gatling gun and the strings attached.p>
When you're back out, immediately turn right and collect [SHOTGUN SHELLS], a [RED HERB] and two [INCENDIARY GRENADES] nearby the gas cylinders. Climb the ladder and a miniboss will appear: Gatling gun Majini. This guy really packs a punch and he's got a ton of life. Grab the [GREEN HERB] and take cover. If he throws a grenade, back away. Lure him to the higher catwalk and blow the gas cylinder to the east as he walks past it. Go back to the ladder and lure him towards you again.
When he drops down, blow up the nearby gas cylinders here as well. And you've guessed it, lure him to the other gas cylinder too and repeat the same trick. There's also a [PROXIMITY BOMB] to be found on the ground level - use this too. Another [PROXIMITY BOMB] resides nearby the exit to the southeast, as well as a [WOODEN CRATE] you can loot. When you've finally downed him, grab the [TANKER KEYCARD A] that he was holding. You can find the [TANKER KEYCARD B] in a safe to the southwest, together with two [WOODEN CRATES].
With the two keycards in hand, proceed to the next area. Things are about to get a little over the top here as you're attacked by a group of Majini's (Dead Brides to be precise) with rocket launchers. Even worse, the crates you're hiding behind aren't made of metal, meaning they won't last against the rocket explosions. Quickly grab the [GREEN HERB], loot the [WOODEN CRATE] and jump down. Kill the Kui bichwa here, along with any Majini that dares to interfere, then carefully head up and kill the remaining people. Exit the area by the elevator down the corridor.
 ______________________________________________________________________________
| ______|¯¯¯¯¯¯¯¯¯¯¯¯¯¯¯¯¯¯¯¯¯¯¯¯¯¯¯¯¯¯¯¯¯¯¯¯¯¯¯¯¯¯¯¯¯¯¯¯¯¯¯¯¯¯¯¯¯¯¯¯¯¯¯¯¯¯¯¯¯¯|
|| ____/|                [C6-2] Chapter 6-2: Main Deck                         |
|| |__  |______________________________________________________________________|
||___ \ |¯¯¯¯¯¯¯¯¯¯¯¯¯¯¯¯¯¯¯¯¯¯¯¯¯¯¯¯¯¯¯¯¯¯¯¯¯¯¯¯¯¯¯¯¯¯¯¯¯¯¯¯¯¯¯¯¯¯¯¯¯¯¯¯¯¯¯¯¯¯|
| ___) ||The ship is enormous and a whole army of Base Majini's has been       |
||____/ |deployed to keep you from proceeding. But you're not about to give up.|
|-------|----------------------------------------------------------------------|
|ITEMS  |[] Green Herb, [] Handgun Bullets, [] Chalice (Gold), [] Rifle Ammo,  |
|       |[] Handgun Ammo, [] Proximity Bomb, [] Shotgun Shells, [] Green Herb, |
|       |[] Chalice (Gold), [] Bridge Keycard, [] Handgun Bullets, [] Machine  |
|       |   Gun Ammo, [] Red Herb, [] Shotgun Shells.                          |
|-------|----------------------------------------------------------------------|
|EMBLEMS|NONE.                                                                 |
|-------|----------------------------------------------------------------------|
|ENEMIES|1. Majini (Base).                                                     |
|       |2. Duvalia.                                                           |
|       |3. Uroboros Tentacles.                                                |
|       |4. Uroboros Aheri [BOSS].                                             |
|       |                                                                      |
 ¯¯¯¯¯¯¯¯¯¯¯¯¯¯¯¯¯¯¯¯¯¯¯¯¯¯¯¯¯¯¯¯¯¯¯¯¯¯¯¯¯¯¯¯¯¯¯¯¯¯¯¯¯¯¯¯¯¯¯¯¯¯¯¯¯¯¯¯¯¯¯¯¯¯¯¯¯¯
Walk to the enormous pile of bodies (the more enemies you've killed in the game, the large it'll be! ..... Nah, I made that up, actually, but it'd be neat!). A scene, followed by an interactive scene will play. After that, you'll be inside the ship.
Head down the corridor and dodge the tentacle attack that appears right before the [GREEN HERB]. Expect more from these sudden tentacle attacks, always at a gap in the ceiling.
A tentacle is blocking your way around the corner. You can make it go away at the expense of a fair amount of bullets, or you can walk around it by going inside the room. The lockers contain [HANDGUN BULLETS] and a [CHALICE (GOLD)]. When you exit the room, prepare for another sudden tentacle attack.
As you continue west, another tentacle will be blocking the way so head into the room to your left. One of the lockers here holds [RIFLE AMMO]. The next room has more lockers, of which one contains [HANDGUN AMMO]. A [PROXIMITY BOMB] can be found next to the corpse, and the room houses some [SHOTGUN SHELLS] as well.
Right before you head upstairs, prepare to dodge another sudden tentacle attack. Upstairs, head through the door and explore the room to find a [GREEN HERB] on a desk, and a [CHALICE (GOLD)] in one of the lockers. Head back to the corridor and go around the corner to find a bunch of dead Majini corpses. Well, dead is only relative and a few will attack you when passing by. One of them turns into a Duvalia, and it wouldn't be Resident Evil if he didn't hold the mandatory [BRIDGE KEYCARD]. When you've grabbed this, continue through the slide door on the slide door on the east.
In this room, look for a document and open the locked door with the keycard. This also unlocks the case with Spencer's Notebook, which makes for a very interesting read, and a possible hint at names of characters that might make their appearance in Resident Evil 6 (namely: those that aren't deceased..).
Continue upstairs and you'll have made it to the bridge. Grab the [HANDGUN BULLETS] to your right (east), then explore the upper area for [MACHINE GUN AMMO] and a [RED HERB] nearby some control panels. Some [SHOTGUN SHELLS] are lying next to the stairs to the west of the higher bridge, and lastly, read the document on a L.T.D (Laser Targetting Device) to the left. Head upstairs, loot the two [BOXES] nearby and proceed through the door to initiate the boss fight. Not like you didn't know it was coming anyway!
I bet you’ve seen enough of Uroboros by now, right? Let’s punch it in the face with a kick-ass laser cannon, shall we? This video shows exactly that during the boss fight with Uroboros Aheri.
As large as this creature is, it doens't make the battle much harder than anything you've faced before. As usual, the orange bulbs at the end of the tentacles are the weak spots of the boss. Grab the L.T.D. from the wall and aim it at one of the tentacles. Wait for it to assemble the target locations, keeping it aimed at the bulb as it moves around. Your partner can shoot that tentacle to slow its movement down. FIRE! The tentacle bulb will be destroyed, and a few Projectile Uroboros enemies are spit around the area.
Much like with the U-8 boss fight, your partner can kill these enemies (which are very weak and only take a few Handgun bullets) to collect herbs and ammo. Target the second tentacle a when the L.T.D. has recharged and a large bulb will show itself. After shooting that one, it'll split into two more tentacles, kind of like a ‘Hydra effect'.
The attacks of the boss are all dodgeable, even when you're aiming with the L.T.D., but you'll want to be careful with grabbing ammo when the boss is about the attack. You might now have enough time to press the prompted button when you get back up from the grab animation.
The four tentacles will be raised up high in the air at this moment, and it's in your best interest if your partner tries to shoot one tentacle as much as possible. When the L.T.D. has recharged, quickly fire it at one of the bulbs. When all four tentacles are aligned and emit a red glow like just now, they can perform a devastating move that crushes pretty much everything on the upper platform.
Speaking of that, you can also move there. You'll find four [BOXES] there and it might be easier to aim for the large bulb and higher tentacles from up there.
Take down the tentacles again and repeat the process by shooting the large bulb. After shooting it the third time it reveals itself (perhaps sooner, if your partner has emptied several magnum clips in it!) the creature will die.
 ______________________________________________________________________________
| ______|¯¯¯¯¯¯¯¯¯¯¯¯¯¯¯¯¯¯¯¯¯¯¯¯¯¯¯¯¯¯¯¯¯¯¯¯¯¯¯¯¯¯¯¯¯¯¯¯¯¯¯¯¯¯¯¯¯¯¯¯¯¯¯¯¯¯¯¯¯¯|
|| ____/|               [C6-3] Chapter 6-3: Bridge Deck                        |
|| |__  |______________________________________________________________________|
||___ \ |¯¯¯¯¯¯¯¯¯¯¯¯¯¯¯¯¯¯¯¯¯¯¯¯¯¯¯¯¯¯¯¯¯¯¯¯¯¯¯¯¯¯¯¯¯¯¯¯¯¯¯¯¯¯¯¯¯¯¯¯¯¯¯¯¯¯¯¯¯¯|
| ___) ||One of the B.O.W. has nearly wrecked the tanker.  Chris and Sheva have|
||____/ |to make their way over to the primary bulkhead before all is too late.|
|-------|----------------------------------------------------------------------|
|ITEMS  |[] Green Herb, [] Handgun Bullets, [] Chalice (Gold), [] Rifle Ammo,  |
|       |[] Handgun Ammo, [] Proximity Bomb, [] Shotgun Shells, [] Green Herb, |
|       |[] Chalice (Gold), [] Bridge Keycard, [] Handgun Bullets, [] Machine  |
|       |   Gun Ammo, [] Red Herb, [] Shotgun Shells.                          |
|-------|----------------------------------------------------------------------|
|EMBLEMS|NONE.                                                                 |
|-------|----------------------------------------------------------------------|
|ENEMIES|1. Majini (Base).                                                     |
|       |2. Reaper.                                                            |
|       |3. Gatling gun Majini [Semi-Boss].                                    |
|       |                                                                      |
 ¯¯¯¯¯¯¯¯¯¯¯¯¯¯¯¯¯¯¯¯¯¯¯¯¯¯¯¯¯¯¯¯¯¯¯¯¯¯¯¯¯¯¯¯¯¯¯¯¯¯¯¯¯¯¯¯¯¯¯¯¯¯¯¯¯¯¯¯¯¯¯¯¯¯¯¯¯¯
Head back to the bridge and a scene will play. Go to the elevator and you'll be in the final stage. Expect things to .. heat up a little.
Kill the Majini on the catwalk as well as one down below. You'll want to dodge the fire up ahead, although you can find a [GREEN HERB] near the broken pipe. Grab it when the fire has just had a burst, then drop down at the ladder on the other side.
Jump down again, kill another Majini, and climb the ladder. The gate of the secondary bulkhead has been closed, so you'll need to open it with the nearby lever. You can find a [GREEN HERB] on the catwalk that leads to it. When you flip the lever, you'll immediately be ambushed by a group Majini's with stun rods, so it's best to have a shotgun locked and loaded. After dealing with this group, head down the stairs and more Majini's will appear. Kill them, then take cover behind something as a large group of Majini's in the secondary bulkhead will soon start firing at you. Take them out one by one, and try to kill the one in the background with a rocker launcher quickly (with a rifle, or with a handgun if you're good).
After taking care of this wave, enter the secondary bulkhead and kill the Majini's that appear from the sides. There will be about three waves. Explore the right (west) catwalk to find a [GREEN HERB], and follow the path underneath the main area to find another two [GREEN HERBS] in total. At the upper left (southeast) corner, head into the room to find a [FIRST AID SPRAY] and two [PROXIMITY BOMBS] that may prove useful soon. Check the room to the other side to find [NITROGEN ROUNDS] and a [RED HERB].
Go back to the ground level and place two proximity bombs somewhat in the middle of the area, say, a few meters away from the gate. Now flip both switches at the primary bulkhead gate to proceed. Once you've done so, two Reapers will appear behind you. Lure them into the proximity bombs and give it all you got to kill them as quickly as you can by shooting their white/beige weak spots.
There's no time for a breather as two mini-boss Gatling gun Majini's appear from the primary bulkhead area, all backed up with a small Majini army with machine guns and stun rods. It's time to make a run for it. Drop down to the left (east) and make your way over to the other side (west) by the long over-head catwalk. Make sure the crowd follows, especially the two mini-bosses. You might encounter a few Majini along the way, but things should go fairly smooth.
At the other side, quickly drop down and proceed into the primary bulkhead. Go left (east), downstairs, and climb the ladder to your right (east) to reach your destination, namely .. a Gatling Gun! Now it's only a matter of time before the Majini's show up, and you can mow them down however you please. If one of the Gatling gun Majini's jumps on your platform, be sure to hold the trigger until he shakes a little from pain, or he might smash you with his gun.
At any rate, you've pretty much won the fight when you reach the Gatling Gun. With the enemies killed, loot the two mini bosses from their [HANGAR KEYCARD A B] and drop down from the platform with the Gatling Gun. You can find three [FLASH GRENADES] next to the stairs, should you be interested for whatever reason. If you check out the platform on the other side of the area (which does not hold a Gatling Gun), you can find [ACID ROUNDS x12] and a [FIRST AID SPRAY], still great treasures. You can find a [GREEN HERB] to the left of the stairs when you jump down.
With the keycards in hand, unlock the door to the south, go through the short hall and prepare for the final battles.
You VS your Arch Rival. Here’s how to take care of business. WARNING: THIS VIDEO CONTAINS SPOILERS!
There's not much point in shooting Wesker regularly with your guns. Even if you hit him, it won't do much good. Instead, grab the [ROCKET LAUNCHER] from the case in the northwest corner (break the glass first).
Wesker's Attacks:
Being the final boss, Wesker as a fair amount of tricks up his sleeve. First of all he uses powerful close quarters moves, varying from punches to karate kicks. You can avoid getting hurt by staying the hell away from him. As for his other attacks, he'll occasionally grab out his gun and fire three rounds. These hurt pretty good, but you can dodge with a button command.
Lastly, he's got a devastating attack which is always preceded by a short animation in which he'll grab a rocket and throw it at you. Make sure you're standing behind something, or it can very well mean Game Over.
Defeating Wesker:
Make your way over to the eastern side of the area and flip the switches here to turn of the spotlights. This will make things more difficult to see for Wesker.
When he's looking around for you, clearly not knowing where you are, fire the rocket at him. Quickly switch to a different weapon and shoot the rocket, or better yet, have your partner do this. Quickly restrain him while he's recovering from the blast so your partner can inject him with the overdose of the Uroboros Virus.
The first attempt will always fail, so you'll need another rocket. One can be found in a crate at the northeast corner. Either load the warhead for your partner or do things the other way around and repeat the process. The second time your partner should be able to inject the virus, and a series of scenes will play.
This video shows how to destroy the final boss. WARNING: THIS VIDEO CONTAINS SPOILERS!p>
Before the next phase starts, you'll get an epic interactive cutscene in between which - of course - requires you to press several buttons. Especially the last moment is particularly grandiose, and might very well be one of the best moments in the entire game. Enjoy the scenes and prepare yourself for battle when you gain control of your character again.
Loot the four boxes, sort your inventory, heal your wounds and take a few more steps to initiate the final boss fight.
Make your way to the bridge nearby - which will collapse. If you're playing by yourself, Chris needs to make it to higher ground and Sheva will fire from a ledge in the background. If you're playing with two people, it will also be Chris who falls down.
Wesker will get pissed off at Sheva for shooting him, and he'll jump over. As Sheva makes her way to another bridge (which also collapses - this requires the player that controls Sheva to tap a button really fast for quite a while to climb up), delay Wesker by shooting him. He'll throw some stuff at you which you should dodge. Then, as Chris, jump down to the large boulder and knock it over in the lava (this must've been the reason why Chris is so buffed).
Make your way to the higher ground and the actual fight will start. Wesker has a few attacks that he can use. First of all, if you get too close to him, he'll grab you. It's very hard to break free, so you'll need the help of your partner here. His other attacks consist od a sweep attack, an attack in which he smashes the ground - causing tentacles to grab your character from out of the ground, and an attack that is preceded by Wesker lifting his arm in the air.
There are two stragtegies here. 1. Rocket Launcher (if you have it with you). The other strategy is what most people will want to rely on. Try to shoot his orange bulb in his back (which can be very tricky). He'll first perform a whirlwind tentacle attack, but when that's over, appoach him from the back as Chris and restrain him. Tap the button to keep him restrained, so your partner can stab the front bulb. Succeed in this and you've finished the game .. almost! There will be one last input you need to perform; then you can enjoy the ending.
Now that you've beaten the game, you'll unlock The Mercenaries game, Sheva's costume, and if you upgrade any weapon fully you can unlock the infinite ammo option for it under bonus features.
|¯¯¯¯¯¯¯¯¯¯¯¯¯¯¯¯¯¯¯¯¯¯¯¯¯¯¯¯¯¯¯¯¯¯¯¯¯¯¯¯¯¯¯¯¯¯¯¯¯¯¯¯¯¯¯¯¯¯¯¯¯¯¯¯¯¯¯¯¯¯¯¯¯¯¯¯¯¯|
|ITEMS: [] Handgun Bullets, [] Handgun Bullets, [] Crate, [] Fruit, [] Hand    |
|          Grenade, [] Hand Grenade, [] Incendiary Grenade, [] Barrel x2,      |
|       [] VZ61 SMG, [] Hand Grenade, [] Green Herb, [] Crate, [] Gold Ring.   |
|                                                                              |
|ENEMIES: o Majini     o Executioner                                           |
|                                                                              |
 ¯¯¯¯¯¯¯¯¯¯¯¯¯¯¯¯¯¯¯¯¯¯¯¯¯¯¯¯¯¯¯¯¯¯¯¯¯¯¯¯¯¯¯¯¯¯¯¯¯¯¯¯¯¯¯¯¯¯¯¯¯¯¯¯¯¯¯¯¯¯¯¯¯¯¯¯¯¯
You start out with the M92F Handgun, 20 bullets in total, a Green Herb and the Ithaca M37 Shotgun. Sheva has the same inventory except instead of a Shotgun she has the S75 Rifle. Keep this in mind when picking up ammo; It's best to automatically command Sheva to pick up this type of ammo, unless you snatch or swap her rifle. You can exchange items, but keep in mind that she'll be backing you up so she needs the ammo just as much as you do.
Make sure that you grab all ammunition from this room, as you'll more than need it in the minutes to come. Use your ammo sparingly, and conserve the grenades for groups of majinis or the executioner. Try to shoot the majinis in the head; you might get a headshot. When a majini flinches to the side (or when you down one and they're still alive) it's best to quickly approach and hit them with a Melee attack.
Walk down the linear path and drop down. Investigate the notification on the crate, which explains how dying works. Such a lovely subject. As soon as you enter the building a cutscene will play and shortly after it's go time, many majinis will quickly be headed for the house.
Act fast! Grab the [HANDGUN BULLETS] lying in the corner, and examine the drawers under the television for another pack of [HANDGUN BULLETS]. Destroy the [CRATE] and [FRUIT] in the other corner by using your knife to find more items. Push the two cabinets so that they block the larger window and the door (or you can order your partner to push one of them - this is even faster). Lastly, grab a [HAND GRENADE] by slashing the fruit near the window. Now it's time to take the majinis one by one, shoot through the smaller windows.
Note: Majini's will drop items that you'll want to collect.
Things will get rough soon, so you'll want to make extremely good use of your scarce ammunition, shooting only the heads of the majinis. It's only a matter of time before they break through the roof and the cabinets, as well as the gate outside: The executioner will slam through it. He's the one to be extremely wary of as one slash of his axe means an almost-instant death.
He has several attacks you want to be careful of:
1. Overhead swing: Commonly used, when hit this results in the dying status so be extremely careful. He holds the axe behind him if he plans on doing this.
2. Horizontal swing: He can swing the axe horizontally, giving him quite an attack range.
3. Horizontal Rage swings: When he gets low on health he will swing the axe repeatedly. Back away if he does this.
4. Grab-Choke: He can grab one of your characters and choke them. Help your partner or ask for help whenever this happens. You can also attempt to break free, but it'll cost more time and is harder to do.
>Use melee attacks to your advantage versus regular majini and against the Executioner.
He's got a fair amount of health so you'll want to use everything on him that you've possibly got at this point. Grenades works best, followed by explosive barrels, and lastly Shotgun blasts to his head followed by a melee attack. Alternatively you can empty the Machine Gun in his head and once again use melee attacks. Resort to the handgun only when you're out of options.
Get out of the house and you should hear something from Kirk, the chopper pilot.
Basically your goal is to survive until he can clear the way for you up north. You'll hear one more time from him before he finally arrives, which sort of tells you that you're about 2/3rd through. In total you'll have to wait around 8 minutes or so, keep this in mind.
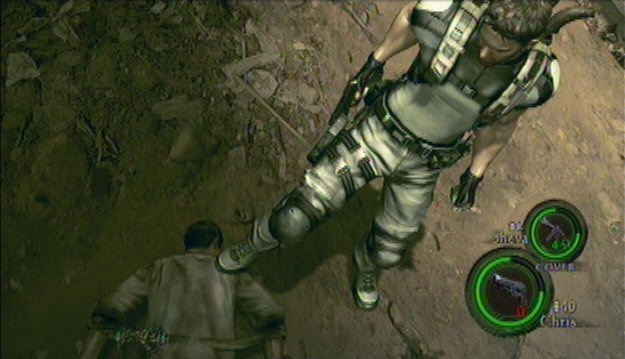
‘American History X' comes to mind for a good reason.
Here are some exploration suggestions:
o There is a house on the northeast/right area which contains a [HAND GRENADE] and a [INCENDIARY GRENADE] on the shelves.
o You can enter the bus and loot the two [BARRELS].
Head to the north of the area and note the inflammable stack of barrels that you can greatly use to your advantage. With the horde behind you, make a quick turn and shoot when most are close the the barrels. This will disable a good few of them. Go inside the bus and destroy the [WOODEN BARRELS].
Continue to the northeast of the area and open the suitcase in the corner. This holds the [VZ61 SMG] which you can give to Sheva so you don't have to worry about her ammo for a while. The executioner will probably be on your tails once again, so it's time to move to the west from here. The fruit contains a [HAND GRENADE] but more importantly you can move to higher ground from here.
Do so and jump over to the platform past the barrel. Shake off a large portion of the horde by blowing up the barrel. Grab the [GREEN HERB] on this platform and keep the majinis at a distance. The good thing is that the executioner can not get to you as long as you're here. You can also jump on the bus for a somewhat larger movement area, and there's a [CRATE] on the barrel at the end. You should be able to hold out a long time from here, long enough until the chopper arrives.
Note: If you want to kill the executioner, your best bet is to use a few grenades on him. Whenever he crouches, run toward him to sort out an uppercut. When you run out of grenades, resort to the Shotgun and deliver two shots at his head to make him kneel. Keep this up and you'll down him soon enough. It's possible to knock a transformer box off one of the shacks near the southern gate, you can use this to your advantage. If you manage to kill the executioner, grab the [GOLD RING] from his body. This can be sold for money.
|¯¯¯¯¯¯¯¯¯¯¯¯¯¯¯¯¯¯¯¯¯¯¯¯¯¯¯¯¯¯¯¯¯¯¯¯¯¯¯¯¯¯¯¯¯¯¯¯¯¯¯¯¯¯¯¯¯¯¯¯¯¯¯¯¯¯¯¯¯¯¯¯¯¯¯¯¯¯|
|ITEMS: [] Crate, [] Handgun Bullets, [] Green Herb, [] Crate x2, [] Barrel,   |
|       [] Handgun Bullets, [] Barrel, [] Red Herb, [] Barrel, [] Hand         |
|          Grenade x2, [] Barrel x2, [] Handgun Bullets, [] Green Herb,        |
|       [] Crate, [] Barrel, [] Crate, [] Crate x2, [] Barrel, [] Barrel,      |
|       [] Hand Grenade, [] Green Herb, [] Guard's Key, [] Barrel, [] Ruby     |
|          (Square), [] Gold Bars, [] Topaz (Pear), [] Sapphire (Square),      |
|       [] Emerald (Pear).                                                     |
|                                                                              |
|•2 PLAYER  [] Rifle Ammo, [] Machine Gun Ammo, [] Handgun Ammo,               |
|   ITEMS:  [] Wooden Barrel, [] Wooden Crate, [] Wooden Barrel.               |
|                                                                              |
|ENEMIES: o Majini's      o Flying Parasite      o Chainsaw Majini             |
|                                                                              |
 ¯¯¯¯¯¯¯¯¯¯¯¯¯¯¯¯¯¯¯¯¯¯¯¯¯¯¯¯¯¯¯¯¯¯¯¯¯¯¯¯¯¯¯¯¯¯¯¯¯¯¯¯¯¯¯¯¯¯¯¯¯¯¯¯¯¯¯¯¯¯¯¯¯¯¯¯¯¯
Make your way through the first part of the level, try out some 'window knifing' and collect the items in crates
Straight in front of you lies a note that explains how the inventory works and how you can swap items. Head into the left (north) alley and kill the majini near the window. Two more majini's reside in the building. Before hopping in, check the [WOODEN CRATE] at the end of the alley.
The building must house an awful smell, especially seeing how you can inspect a chainsaw and a rotten animal corpse that have been lying there for a while. Collect the [HANDGUN BULLETS] from the shelves and head outside. Grab the [GREEN HERB] and turn left to find two [WOODEN CRATES].
Proceed northeast and encounter flying creatures that are causing havoc to the chopper. After disposing of them, lend Sheva a hand near the ladder for her to collect the items on top of the building.
2ND PLAYER:
You can find [•RIFLE AMMO], [•MACHINE GUN AMMO], [•HANDGUN AMMO], a [•WOODEN
BARREL] and [•WOODEN CRATE] up here. She can also provide excellent cover from here as you proceed to take down a group of majinis.
Don't miss the [WOODEN BARREL] while exploring the ground level.
Once inside the building, check out the restroom to your left and kill the lurking majini. Grab [HANDGUN BULLETS] from where he was standing and loot the [WOODEN BARREL]. Make your way to the next room, in which you'll find another majini in the shadows as you are tempted to grab the [RED HERB]. There's also a [WOODEN BARREL] nearby.
Apparently the double doors are locked from the outside, so you'll have to make your way upstairs. Kill a total of three majinis here and search around for two [HAND GRENADES]. Head to the second floor and loot the [2 BARRELS], grab the [HANDGUN BULLETS] from the shelves and a [GREEN HERB] from the floor.
Before you lend Sheva a hand to jump over to the building across the street, make sure she has at least one herb and a decent amount of ammunition.
If you are playing with two players, don't miss the [•WOODEN BARREL] before you have Sheva jump down. As Sheva, quickly make your way downstairs and unlock the double doors of the other building, allowing Chris to join the fun.
As Sheva is making her way downstairs to unlock the door from outside she is ambushed by a large group of majinis. Drop down and keep them off her as much as possible so she can make her way downstairs to unlock the door. Now you can clean the place out, but I suggest you do not use too many explosive barrels just yet - you'll need those soon enough.
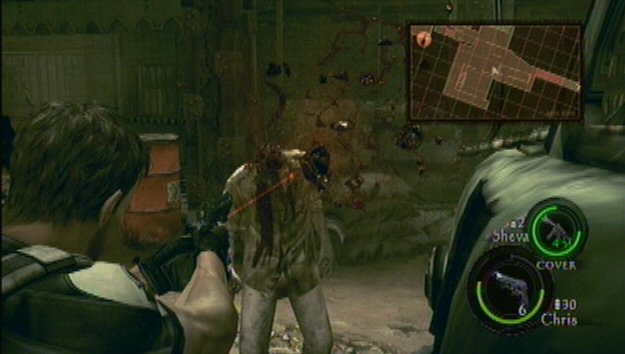
Besides the explosive barrels you'll want to rely on headshots.
A second wave will climb over the walls and cars, but this only consists out of 5 or 6 majinis. With the place cleaned out, start exploring for items. There's a [CRATE] in the street, a [BARREL] in the southwest corner behind the building, and at the end of this alley another small [CRATE] can be found. Inside the building are two more [CRATES], as well as a [BARREL] upstairs.
Head back outside and check behind the bus to find another [BARREL]. A [HAND GRENADE] can be found near the former driver's seat. Before you head up the eastern stairs, grab the [GREEN HERB] at the bottom. Prepare yourself for a mini boss fight as you head upstairs, and take note of the transformer box attached to the electricity rod near the bottom of the stairs. Next up is .. Chainsaw Majini!
ike most mini-bosses he also has a fair amount of health, and downing him won't go as fast as you'd like it to go. He has one main attack:
1. Chainsaw: This means instant death as it separates your head from your body.
Needless to say it's best to not get close to him, and if you do, try not to get stuck in front of him or you'll be dead meat. He can take a lot of damage and is backed up with a new wave of 10 majinis. Use the explosive barrels to your advantage and aim for his head with your rifle whenever you get the chance;
However, be extremely careful with using the rifle as it has a reload time of nearly a second. He isn't slow and if he manages to get a hit on you or Sheva it'll be game over, so it's better to be safe than sorry. Use grenades as well to make things easier.
The transformer box can give you a head start in the upcoming combat.
When you've downed him and the majinis, grab the [GUARD'S KEY] off him and continue down the eastern alley to find a [BARREL] and a locked door that can be opened with the aquired Guard's Key. Loot the treasure box for [GOLD BARS], [RUBY (SQUARE)], [TOPAZ (PEAR)], [SAPPHIRE (SQUARE)], and an [EMERALD (PEAR)]. The demo sadly ends as you enter through the doors up ahead.
Definitely to be continued.
This section goes over the various enemies in Resident Evil 5. The threat level is an indication of how dangerous the particular enemy is on a scale of 1-10. If an enemy has a move that can instantly put your character into Dying status this will pose a much bigger threat than a loss of a quarter of your health bar.
.---------------.-------.------------------------------------------------------.
|Enemy Name:    |Threat:|Attacks:                                              |
|===============|=======|======================================================|
|Majini (Town)  |   2   |1. Grab: Majini can run to you and try to severely    |
|               |       |   hurt you by attempting to infect you with some sort|
|               |       |   of a parasite.                                     |
|               |       |2. Weapon swing: Majini will use a variety of weapons |
|               |       |   to hurt you, such as axes, bottles and clubs.      |
|               |       |3. Weapon throw: Majini can throw their weapons at you|
|---------------|-------|------------------------------------------------------|
|Kipepeo        |   2   |1. Grab: The Parasite will grab you.  Partner action  |
|               |       |   is very useful here.                               |
|---------------|-------|------------------------------------------------------|
|Executioner    |   5   |1. Overhead swing: Commonly used, when hit this       |
|Majini         |       |   results in the dying status so be extremely        |
|[Mini-Boss]    |       |   careful.  He holds the axe behind him if he plans  |
|               |       |   on doing this.                                     |
|               |       |2. Horizontal swing: He can swing the axe horizontally|
|               |       |   giving him quite an attack range.                  |
|               |       |3. Horizontal Rage swings: When he gets low on health |
|               |       |   he will swing the axe repeatedly.  Back away if he |
|               |       |   does this.                                         |
|               |       |4. Grab-Choke: He can grab one of your characters and |
|               |       |   choke them.  Help your partner or ask for help     |
|               |       |   whenever this happens.  You can also attempt to    |
|               |       |   break free, but it'll cost more time and is harder |
|               |       |   to do.                                             |
|---------------|-------|------------------------------------------------------|
|Chainsaw Majini|   5   |1. Chainsaw: This means instant death as it separates |
|[Mini-Boss]    |       |   your head from your body.                          |
|               |       |2. Chainsaw swing: This attack will not separate your |
|               |       |   characters head from the body but will instead put |
|               |       |   the character in an understandable Dying status.   |
'---------------'-------'------------------------------------------------------'
This list is a work in progress. 'Various' will be specified soon.
.---------------------.-------.------------------------------------------------.
|Treasure Name:       |Worth: |How to obtain:                                  |
|=====================|=======|================================================|
|Jewel bangle         |  1000 |Dropped by Big man Majini's                     |
|Ivory Relief         |  2000 |Dropped by the first Cephalo you encounter      |
|Gold Ring            |  5000 |Dropped by Executioner Majini/Chainsaw Majini's |
|Antique clock        |  2000 |In a building in Chapter 2-1                    |
|Diamond (Square)     |  2000 |Various                                         |
|Diamond (Pear)       |  2000 |Various                                         |
|Diamond (Oval)       |  4000 |Various                                         |
|Diamond (Brilliant)  |  4000 |Various                                         |
|Diamond (Trilliant)  |  4000 |Various                                         |
|Emerald (Square)     |  1000 |Various                                         |
|Emerald (Pear)       |  1000 |Various                                         |
|Emerald (Trilliant)  |  2000 |Various                                         |
|Emerald (Marquise)   |  3000 |Various                                         |
|Sapphire (Square)    |  1000 |Various                                         |
|Sapphire (Pear)      |  1000 |Various                                         |
|Sapphire (Trilliant) |  2000 |Various                                         |
|Sapphire (Marquise)  |  3000 |Various                                         |
|Ruby (Square)        |  1000 |Various                                         |
|Ruby (Pear)          |  1000 |Various                                         |
|Ruby (Oval)          |  2000 |Various                                         |
|Ruby (Trilliant)     |  2000 |Various                                         |
|Ruby (Marquise)      |  3000 |Various                                         |
|Topaz (Pear)         |  1000 |Various                                         |
|Topaz (Square)       |  1000 |Various                                         |
|Topaz (Brilliant)    |  2500 |Various                                         |
|Lion heart           |  2500 |Possible drop from Licker Beta's                |
|Blue enigma          |  3000 |Possible drop from Giant Majini's               |
|Power stone          |  5000 |Possible drop from Reapers                      |
|Soul Gem             | 10000 |Dropped by Popokarimu after the 2nd battle      |
|Jewel Beetle         |  2000 |Various                                         |
|Chalice (silver)     |  2000 |Various                                         |
|Chalice (Gold)       |  3000 |Various                                         |
|Idol (silver)        |  2000 |Various                                         |
|Idol (Gold)          |  3000 |Various                                         |
|Beetle (Brown)       |  1000 |Various                                         |
|Beetle (Gold)        |  3000 |Various                                         |
|Ceremonial Mask      |  4000 |Various                                         |
|Venom fang           |  3000 |Dropped by Chainsaw Majini's                    |
|Dead bride's necklace|  2000 |Found on the conveyor belt with Dead Brides     |
|Royal necklace       |  5000 |C5-3:Found in a cabin after R. Launcher Majini's|
'---------------------'-------'------------------------------------------------'
Legend:
Firepower = The attack power of the weapon.
Reload Speed = Measured in seconds, the amount of time reloading costs.
Capacity = The amount of ammunition that fits into one clip.
Critical X = The higher your Critical X, the more chance you have at getting an instant headshot when targeting an enemy’s head.
Piercing = The ability to shoot through wooden shields or armored parts.
3-round burst = The ability to fire three rounds at a time.
Attack Range = The ability to increase the attack range of the weapon.Semi-auto = The ability to fire without having to reload after each shot.
Scope = Refers to the possibility to increase scope magnification.
M92F (Handgun):
===============
.---------.-------------.-----------------------------------------.
|Cost: |Special: |How to obtain:
|=========|=============|=========================================|
| 2000 |Critical X |1. Initial equip. |
| | |2. Buy for 2000 Gold. |
'---------'-------------'-----------------------------------------'
.----------.-------------.-----------.-------------.
|Firepower:|Reload Speed:|Capacity: |Critical X: |
|==========|=============|===========|=============|
|150 (Base)| 1.70 (Base) |10x (Base)|None (Base)|
|170 (2000)| 1.62 (1500) |13x (500)|One (3000)|
|190 (2000)| 1.53 (2000) |16x (500)|Two (8000)|
|210 (4000)| 1.36 (2500) |20x (500)|Three (13000)|
|230 (5000)|-------------|25x (500)|-------------|
|250 (6000)|-------------|30x (1000)|-------------|
|----------|-------------|33x (1000)|-------------|
|----------|-------------|37x (1000)|-------------|
|----------|-------------|40x (2000)|-------------|
|----------|-------------|45x (2000)|-------------|
|----------|-------------|50x (2000)|-------------|
|----------|-------------|60x (5000)|-------------|
|----------|-------------|70x (5000)|-------------|
|----------|-------------|100x(12000)|-------------|
'----------'-------------'-----------'-------------'
H&K P8 (Handgun):
=================
.---------.-------------.-----------------------------------------.
|Cost: |Special: |How to obtain: |
|=========|=============|=========================================|
| 4000 |Piercing |1. Buyable when you reach Chapter 3-1. |
'---------'-------------'-----------------------------------------'
.----------.-------------.-----------.-------------.
|Firepower:|Reload Speed:|Capacity: |Piercing: |
|==========|=============|===========|=============|
|140 (Base)| 1.53 (Base) | 9x (Base)|None (Base)|
|160 (2000)| 1.36 (2000) |11x (500)|One (5000)|
|180 (2000)| 1.19 (3000) |13x (500)|Two (9000)|
|200 (3000)| 1.11 (3000) |15x (1000)|Three (12000)|
|220 (4000)| 1.02 (3000) |17x (2000)|-------------|
|240 (4000)| 0.85 (7000) |19x (2000)|-------------|
|260 (5000)|-------------|21x (3000)|-------------|
|300 (6000)|-------------|25x (5000)|-------------|
'----------'-------------'-----------'-------------'
SIG P226 (Handgun):
===================
.---------.-------------.-----------------------------------------.
|Cost: |Special: |How to obtain: |
|=========|=============|=========================================|
| 4000 | --- |1. Buyable when you reach Chapter 5-1. |
'---------'-------------'-----------------------------------------'
.-----------.-------------.-----------.
|Firepower: |Reload Speed:|Capacity: |
|===========|=============|===========|
|180 (Base)| 1.70 (Base) | 8x (Base)|
|220 (1000)| 1.62 (2000) |10x (1000)|
|240 (2000)|-------------|12x (1000)|
|260 (2000)|-------------|13x (2000)|
|280 (3000)|-------------|14x (3000)|
|300 (3000)|-------------|16x (4000)|
|320 (4000)|-------------|-----------|
|340 (4000)|-------------|-----------|
|350 (5000)|-------------|-----------|
|370 (5000)|-------------|-----------|
|390 (7000)|-------------|-----------|
|410 (7000)|-------------|-----------|
|430 (10000)|-------------|-----------|
|480 (15000)|-------------|-----------|
'-----------'-------------'-----------'
M93R (Handgun):
===============
.---------.-------------.---------------------------------------------.
|Cost: |Special: |How to obtain: |
|=========|=============|=============================================|
| 30000 |3-round burst|1. Buyable for 30000 Gold after fully |
| | |upgrading the M92F Handgun. |
'---------'-------------'---------------------------------------------'
.-----------.-------------.-----------.
|Firepower: |Reload Speed:|Capacity: |
|===========|=============|===========|
|170 (Base)| 1.70 (Base) |10x (Base)|
|190 (2000)| 1.62 (1000) |12x (500)|
|230 (3000)| 1.53 (2000) |14x (1000)|
|250 (3000)| 1.36 (3000) |16x (1500)|
|270 (4000)|-------------|18x (1500)|
|290 (4000)|-------------|20x (2000)|
|310 (5000)|-------------|22x (2000)|
|330 (5000)|-------------|24x (2500)|
|350 (7000)|-------------|26x (3000)|
|370 (8000)|-------------|30x (8000)|
|400 (15000)|-------------|-----------|
'-----------'-------------'-----------'
Ithaca M37 (Shotgun):
=====================
.---------.-------------.-----------------------------------------.
|Cost: |Special: |How to obtain: |
|=========|=============|=========================================|
| 2000 |Critical X |1. Found in Chapter 1-2. |
| | |2. Buy for 2000 Gold. |
'---------'-------------'-----------------------------------------'
.----------.-------------.-----------.-------------.
|Firepower:|Reload Speed:|Capacity: |Critical X: |
|==========|=============|===========|=============|
|200 (Base)| 3.00 (Base) | 6x (Base)|None (Base)|
|230 (2000)| 2.85 (500) | 7x (500)|One (5000)|
|260 (2000)| 1.70 (1000) | 8x (500)|-------------|
|300 (3000)| 1.40 (3000) | 9x (500)|-------------|
|330 (3000)|-------------|10x (500)|-------------|
|360 (5000)|-------------|12x (1000)|-------------|
|400 (9000)|-------------|13x (1000)|-------------|
|----------|-------------|15x (1500)|-------------|
|----------|-------------|16x (2000)|-------------|
|----------|-------------|17x (3000)|-------------|
|----------|-------------|18x (4000)|-------------|
|----------|-------------|20x (5000)|-------------|
|----------|-------------|22x (7000)|-------------|
|----------|-------------|25x (10000)|-------------|
'----------'-------------'-----------'-------------'
M3 (Shotgun):
=============
.---------.-------------.-----------------------------------------.
|Cost: |Special: |How to obtain: |
|=========|=============|=========================================|
| 4000 | --- |1. Found in Chapter 3-3. |
| | |2. Buy for 4000 Gold. |
'---------'-------------'-----------------------------------------'
.-----------.-------------.-----------.
|Firepower: |Reload Speed:|Capacity: |
|===========|=============|===========|
|300 (Base)| 3.00 (Base) | 5x (Base)|
|320 (1000)| 2.70 (3000) | 6x (1000)|
|350 (1000)|-------------| 7x (1500)|
|370 (2000)|-------------| 8x (2000)|
|400 (2000)|-------------| 9x (2500)|
|420 (3000)|-------------|10x (3000)|
|450 (3000)|-------------|-----------|
|480 (4000)|-------------|-----------|
|500 (4000)|-------------|-----------|
|550 (5000)|-------------|-----------|
|600 (5000)|-------------|-----------|
|650 (8000)|-------------|-----------|
|700 (10000)|-------------|-----------|
|900 (12000)|-------------|-----------|
'-----------'-------------'-----------'
Jail Breaker (Shotgun):
=======================
.---------.-------------.-----------------------------------------.
|Cost: |Special: |How to obtain: |
|=========|=============|=========================================|
| 4000 |Attack Range |1. Found in Chapter 6-1. |
| | |2. Buy for 4000 Gold. |
'---------'-------------'-----------------------------------------'
.-----------.-------------.-----------.-------------.
|Firepower: |Reload Speed:|Capacity: |Attack Range:|
|===========|=============|===========|=============|
|180 (Base)| 2.52 (Base) | 5x (Base)|None (Base)|
|200 (2000)| 2.38 (500) | 6x (1000)|One (6000)|
|220 (3000)| 2.24 (1500) | 7x (1000)|Two (15000)|
|250 (4000)| 2.10 (2000) | 8x (1500)|-------------|
|300 (7000)| 1.96 (5000) | 9x (1500)|-------------|
|350 (10000)| 1.82 (7000) |10x (2000)|-------------|
|-----------|-------------|11x (2000)|-------------|
|-----------|-------------|12x (3000)|-------------|
|-----------|-------------|13x (4000)|-------------|
|-----------|-------------|15x (6000)|-------------|
'-----------'-------------'-----------'-------------'
Hydra (Shotgun):
================
.---------.-------------.-----------------------------------------.
|Cost: |Special: |How to obtain: |
|=========|=============|=========================================|
| 30000 |Attack Range |1. Fully upgrade the Ithaca M37 to unlock|
| | |in the shop for 30000 Gold. |
'---------'-------------'-----------------------------------------'
.-----------.-------------.-----------.-------------.
|Firepower: |Reload Speed:|Capacity: |Attack Range:|
|===========|=============|===========|=============|
|280 (Base)| 3.67 (Base) | 4x (Base)|None (Base)|
|290 (2000)| 3.30 (2000) | 5x (1000)|One (6000)|
|310 (3000)|-------------| 6x (1000)|Two (15000)|
|330 (3000)|-------------| 7x (1000)|-------------|
|350 (4000)|-------------| 8x (1500)|-------------|
|380 (4000)|-------------| 9x (1500)|-------------|
|400 (5000)|-------------|10x (2000)|-------------|
|420 (5000)|-------------|-----------|-------------|
|440 (7000)|-------------|-----------|-------------|
|460 (7000)|-------------|-----------|-------------|
|500 (10000)|-------------|-----------|-------------|
|550 (13000)|-------------|-----------|-------------|
'-----------'-------------'-----------'-------------'
VZ61 (Machine Gun):
===================
.---------.-------------.-----------------------------------------.
|Cost: |Special: |How to obtain: |
|=========|=============|=========================================|
| 2000 |Critical X |1. Find in Chapter 1-1. |
| | |2. Buy for 2000 Gold. |
'---------'-------------'-----------------------------------------'
.----------.-------------.------------.-------------.
|Firepower:|Reload Speed:|Capacity: |Critical X: |
|==========|=============|============|=============|
| 50 (Base)| 2.83 (Base) | 50x (Base)|None (Base)|
| 60 (2000)| 2.69 (1000) | 60x (500)|One (5000)|
| 80 (2000)| 2.55 (1000) | 80x (500)|Two (15000)|
|100 (4000)| 2.27 (2000) |100x (1000)|-------------|
|330 (3000)|-------------|120x (1000)|-------------|
|360 (5000)|-------------|140x (1500)|-------------|
|400 (9000)|-------------|160x (1500)|-------------|
|----------|-------------|180x (2000)|-------------|
|----------|-------------|200x (3000)|-------------|
|----------|-------------|220x (4000)|-------------|
|----------|-------------|240x (5000)|-------------|
|----------|-------------|260x (6000)|-------------|
|----------|-------------|280x (7000)|-------------|
|----------|-------------|300x (10000)|
'----------'-------------'------------'-------------'
AK74 (Machine Gun):
===================
.---------.-------------.-----------------------------------------.
|Cost: |Special: |How to obtain: |
|=========|=============|=========================================|
| 4000 | --- |1. Find in Chapter 5-1. |
| | |2. Buy for 4000 Gold. |
'---------'-------------'-----------------------------------------'
.-----------.-------------.-----------.
|Firepower: |Reload Speed:|Capacity: |
|===========|=============|===========|
| 90 (Base)| 2.83 (Base) |30x (Base)|
|100 (2000)| 2.55 (3000) |35x (500)|
|110 (2000)|-------------|40x (1000)|
|120 (3000)|-------------|45x (1500)|
|130 (3000)|-------------|50x (3000)|
|140 (3000)|-------------|-----------|
|150 (3000)|-------------|-----------|
|160 (4000)|-------------|-----------|
|170 (5000)|-------------|-----------|
|180 (5000)|-------------|-----------|
|190 (6000)|-------------|-----------|
|200 (8000)|-------------|-----------|
|220 (10000)|-------------|-----------|
|250 (10000)|-------------|-----------|
'-----------'-------------'-----------'
H&K MP5 (Machine Gun):
======================
.---------.-------------.-----------------------------------------.
|Cost: |Special: |How to obtain: |
|=========|=============|=========================================|
| 2000 |Piercing |1. Buyable upon reaching Chapter 2-1. |
'---------'-------------'-----------------------------------------'
.----------.-------------.-----------.-------------.
|Firepower:|Reload Speed:|Capacity: |Piercing: |
|==========|=============|===========|=============|
| 60 (Base)| 2.70 (Base) | 45x (Base)|None (Base)|
| 70 (2000)| 2.55 (1000) | 55x (500)|One (3000)|
| 80 (3000)| 2.40 (2000) | 65x (500)|Two (8000)|
| 90 (4000)| 2.10 (3000) | 80x (1000)|-------------|
|100 (6000)|-------------| 90x (2000)|-------------|
|120 (8000)|-------------|100x (2000)|-------------|
|----------|-------------|110x (3000)|-------------|
|----------|-------------|120x (4000)|-------------|
|----------|-------------|130x (4000)|-------------|
|----------|-------------|150x (6000)|-------------|
'----------'-------------'-----------'-------------'
SIG 556 (Machine Gun):
======================
.---------.-------------.-----------------------------------------.
|Cost: |Special: |How to obtain: |
|=========|=============|=========================================|
| 4000 | --- |1. Find in Chapter 5-2. |
| | |2. Buy for 4000 Gold. |
'---------'-------------'-----------------------------------------'
.-----------.-------------.-----------.
|Firepower: |Reload Speed:|Capacity: |
|===========|=============|===========|
| 80 (Base)| 2.55 (Base) |40x (Base)|
| 90 (2000)| 2.41 (1000) |45x (500)|
|100 (2000)| 2.27 (2000) |50x (500)|
|110 (3000)| 1.98 (2000) |55x (1000)|
|120 (3000)| 1.70 (3000) |60x (1000)|
|130 (4000)| 1.42 (4000) |65x (2000)|
|140 (4000)|-------------|70x (4000)|
|150 (6000)|-------------|80x (6000)|
|160 (8000)|-------------|-----------|
|180 (12000)|-------------|-----------|
|190 (6000)|-------------|-----------|
|200 (8000)|-------------|-----------|
|220 (10000)|-------------|-----------|
|250 (10000)|-------------|-----------|
'-----------'-------------'-----------'
S75 (Rifle):
============
.---------.-------------.-----------------------------------------.
|Cost: |Special: |How to obtain: |
|=========|=============|=========================================|
| 2000 | --- |1. Find in Chapter 2-1. |
| | |2. Buy for 2000 Gold. |
'---------'-------------'-----------------------------------------'
.------------.-------------.-----------.
|Firepower: |Reload Speed:|Capacity: |
|============|=============|===========|
| 750 (Base)| 3.67 (Base) | 6x (Base)|
| 800 (1000)| 3.30 (3000) | 7x (500)|
| 850 (1000)|-------------| 8x (500)|
| 900 (2000)|-------------|10x (1000)|
|1050 (2000)|-------------|12x (1000)|
|1120 (3000)|-------------|15x (2000)|
|1200 (3000)|-------------|17x (2000)|
|1270 (3000)|-------------|20x (3000)|
|1350 (4000)|-------------|22x (4000)|
|1420 (5000)|-------------|25x (4000)|
|1500 (5000)|-------------|40x (8000)|
|1700 (8000)|-------------|50x (10000)|
|2000 (12000)|-------------|-----------|
'------------'-------------'-----------'
Dragunov SVD (Rifle):
=====================
.---------.-------------.-----------------------------------------.
|Cost: |Special: |How to obtain: |
|=========|=============|=========================================|
| 4000 |Semi-auto |1. Find in Chapter 2-2. |
| | |2. Buy for 4000 Gold. |
'---------'-------------'-----------------------------------------'
.------------.-------------.-----------.
|Firepower: |Reload Speed:|Capacity: |
|============|=============|===========|
| 650 (Base)| 2.83 (Base) | 7x (Base)|
| 700 (2000)| 2.69 (500) | 9x (500)|
| 750 (2000)| 2.55 (1000) |10x (500)|
| 800 (3000)| 2.41 (1500) |12x (1000)|
| 850 (3000)|-------------|13x (2000)|
| 900 (4000)|-------------|15x (2000)|
| 950 (5000)|-------------|16x (3000)|
|1000 (5000)|-------------|18x (6000)|
|1100 (8000)|-------------|-----------|
|1300 (12000)|-------------|-----------|
'------------'-------------'-----------'
H&K PSG-1 (Rifle):
==================
.---------.-------------.-----------------------------------------.
|Cost: |Special: |How to obtain: |
|=========|=============|=========================================|
| 4000 |Semi-auto |1. Find in Chapter 5-3. |
| | |2. Buy for 2000 Gold. |
'---------'-------------'-----------------------------------------'
.------------.-------------.-----------.-----------.
|Firepower: |Reload Speed:|Capacity: |Scope: |
|============|=============|===========|===========|
| 600 (Base)| 2.55 (Base) | 5x (Base)|None (Base)|
| 700 (2000)| 2.41 (1000) | 6x (1000)|One (3000)|
| 750 (2000)| 2.27 (2000) | 7x (2000)|Two (8000)|
| 800 (3000)| 2.13 (2000) | 9x (3000)|-----------|
| 850 (3000)| 1.98 (3000) |11x (4000)|-----------|
| 900 (4000)| 1.70 (5000) |15x (5000)|-----------|
| 950 (5000)|-------------|16x (3000)|-----------|
|1000 (5000)|-------------|18x (6000)|-----------|
|1100 (8000)|-------------|-----------|-----------|
|1300 (12000)|-------------|-----------|-----------|
'------------'-------------'-----------'-----------'
S&W M29 (Magnum):
=================
.---------.-------------.-----------------------------------------.
|Cost: |Special: |How to obtain: |
|=========|=============|=========================================|
| 4000 |Piercing |1. Find in Chapter 3-1. |
| | |2. Buy for 4000 Gold. |
'---------'-------------'-----------------------------------------'
.------------.-------------.-----------.-----------.
|Firepower: |Reload Speed:|Capacity: |Piercing: |
|============|=============|===========|===========|
|1500 (Base)| 3.53 (Base) | 6x (Base)|None (Base)|
|1700 (2000)| 3.36 (1000) | 7x (3000)|One (3000)|
|1900 (3000)| 3.18 (2000) | 8x (4000)|-----------|
|2100 (4000)| 2.83 (3000) | 9x (6000)|-----------|
|2400 (6000)|-------------|10x (6000)|-----------|
|2700 (8000)|-------------|11x (7000)|-----------|
|3200 (10000)|-------------|12x (10000)|-----------|
'------------'-------------'-----------'-----------'
L. Hawk (Magnum):
=================
.---------.-------------.-----------------------------------------.
|Cost: |Special: |How to obtain: |
|=========|=============|=========================================|
| 5000 |Piercing |1. Find in Chapter 5-3. |
| | |2. Buy for 5000 Gold. |
'---------'-------------'-----------------------------------------'
.------------.-------------.-----------.-----------.
|Firepower: |Reload Speed:|Capacity: |Piercing: |
|============|=============|===========|===========|
|1400 (Base)| 1.70 (Base) | 5x (Base)|None (Base)|
|1600 (2000)| 1.62 (2000) | 6x (1000)|One (5000)|
|1800 (3000)| 1.53 (3000) | 7x (1000)|Two (10000)|
|2000 (4000)| 1.36 (6000) | 8x (3000)|-----------|
|2300 (6000)|-------------|10x (6000)|-----------|
|2600 (8000)|-------------|11x (7000)|-----------|
|3000 (12000)|-------------|12x (10000)|-----------|
'------------'-------------'-----------'-----------'
S&W M500 (Magnum):
==================
.---------.-------------.-----------------------------------------.
|Cost: |Special: |How to obtain: |
|=========|=============|=========================================|
| 30000 |Piercing |1. Fully upgrade the S&W M29 to unlock |
| | | this in the shop for 30000 Gold. |
'---------'-------------'-----------------------------------------'
.------------.-------------.-----------.-----------.
|Firepower: |Reload Speed:|Capacity: |Piercing: |
|============|=============|===========|===========|
|2100 (Base)| 3.53 (Base) | 5x (Base)|None (Base)|
|2300 (2000)| 3.18 (2000) | 6x (2000)|One (2000)|
|2500 (2000)|-------------|-----------|-----------|
|2700 (3000)|-------------|-----------|-----------|
|2900 (4000)|-------------|-----------|-----------|
|3100 (4000)|-------------|-----------|-----------|
|3300 (5000)|-------------|-----------|-----------|
|3500 (6000)|-------------|-----------|-----------|
|3700 (6000)|-------------|-----------|-----------|
|3900 (8000)|-------------|-----------|-----------|
|4100 (8000)|-------------|-----------|-----------|
|4300 (10000)|-------------|-----------|-----------|
|4500 (10000)|-------------|-----------|-----------|
|5000 (15000)|-------------|-----------|-----------|
'------------'-------------'-----------'-----------'
Grenade Launcher:
=================
.---------.-------------.-----------------------------------------.
|Cost: |Special: |How to obtain: |
|=========|=============|=========================================|
| 10000 |Varies |1. Found in Chapter 4-2. |
| | |2. Buy for 10000 Gold. |
'---------'-------------'-----------------------------------------'
.----------------.-------------------------------------------------------------.
|Explosive Rounds|Causes an explosion similar to a Hand Grenade. |
|Acid Rounds: |Loaded with acid. Effective against Licker Beta's. |
|Nitrogen Rounds |Will freeze an enemy. Melee attacks can be used as finisher.|
|Flame Rounds |Inflammable rounds. Similar effect as Incendiary Grenade. |
|Flash Rounds |Has a similar effect as a Flash Grenade. |
|Electric Rounds |Effective against Reapers. Sparks electricity. |
'----------------'-------------------------------------------------------------'
Rocket Launcher:
================
.---------.-------------.-----------------------------------------.
|Cost: |Special: |How to obtain: |
|=========|=============|=========================================|
| 10000 | --- |1. Found in Chapter 3-1. |
| | |2. Buy for 10000 Gold. |
'---------'-------------'-----------------------------------------'
The Rocket Launcher is a one-time disposable device which destroys pretty much
everything in the entire game with one shot. You can find it in Chapter 3-1 on
a sunken ship, and during the first stage of the Final Boss fight you can find
a reloadable Rocket Launcher with a Night Vision scope. This version, however,
will not appear in your inventory and is similar to a weapon such as the
flamethrower. You won't be able to use anything else when equipped with it.
To unlock the Rocket Launcher with infinite ammo, beat the game under 5 hours
on any difficulty, and turn infinite ammo on under bonus features.
Stun Rod:
=========
.---------.-------------.-----------------------------------------.
|Cost: |Special: |How to obtain: |
|=========|=============|=========================================|
| 3000 | --- |1. Buyable after clearing Chapter 2-3. |
'---------'-------------'-----------------------------------------'
Gatling Gun:
============
.---------.-------------.--------------------------------------------.
|Cost: |Special: |How to obtain: |
|=========|=============|============================================|
| 50000 |Infinite Ammo|1. Unlocked after fully upgrading the VZ61 |
| | |Machine Gun. This weapon is only for Chris.|
'---------'-------------'--------------------------------------------'
Long Bow:
=========
.---------.-------------.--------------------------------------------.
|Cost: |Special: |How to obtain: |
|=========|=============|============================================|
| 50000 |Infinite Ammo|1. Unlocked after fully upgrading the S75 |
| | |Rifle. This weapon is only for Sheva, has |
| | |no laser sight, and is a one-hit kill for |
| | |most enemies in the game. |
'---------'-------------'--------------------------------------------'
Proximity Bomb:
===============
.---------.-------------.-----------------------------------------.
|Cost: |Special: |How to obtain: |
|=========|=============|=========================================|
| 3000 | --- |1. Found in Chapter 2-3 and onwards. |
| | |2. Buyable after clearing Chapter 2-3. |
'---------'-------------'-----------------------------------------'
Hand Grenade:
=============
.---------.-------------.-----------------------------------------.
|Cost: |Special: |How to obtain: |
|=========|=============|=========================================|
| --- | --- |1. Found throughout the entire game. |
'---------'-------------'-----------------------------------------'
Incendiary Grenade:
===================
.---------.-------------.-----------------------------------------.
|Cost: |Special: |How to obtain: |
|=========|=============|=========================================|
| --- | --- |1. Found throughout the entire game. |
'---------'-------------'-----------------------------------------'
Flash Grenade:
==============
.---------.-------------.-----------------------------------------.
|Cost: |Special: |How to obtain: |
|=========|=============|=========================================|
| --- | --- |1. Found in Chapter 2-2 and onwards. |
'---------'-------------'-----------------------------------------'
BSAA stands for Bioterrorism Security Assesment Alliance, and they have their own emblems. Throughout the game, as easter eggs, these turquoise colored emblems can be found attached on walls, on top of poles in the distance, hidden between cracks in walls, you name it. It'll be very difficult finding them all on your own, and while it's certainly a noble attempt to try and find as many as you can by yourself, you might want to find the ones you looking for so badly that you just can't take it anymore. Well, you're in luck!
This is a list with all BSAA Emblems you can find in the game. Not all chapters actually have BSAA Emblems, and some have a lot where others have only one. I hope you'll find this list useful in spotting them. Needless to say, some of the Emblems are practically impossible to shoot without the aid of a Rifle, so if you go out hunting for BSAA Emblems, be sure to take a Rifle with you. Good luck, you might need it!
- Absolute Steve
Chapter 1-1: Civilian Checkpoint
================================
NONE.
Chapter 1-2: Public Assembly
============================
EMBLEM #01:
Go inside the building with the stairs that has a balcony. Check the western room that also contains a First Aid Spray. Head up the balcony and check the building across the street to the south to spot the Emblem.

EMBLEM #02:
When you've entered the building with the black goo, right before you jump over the gap to a chest with Gold Bars, look up and find the Emblem right under a water tank.

EMBLEM #03:
Before you end the chapter by using the elevator, check behind the fence to your right and spot the Emblem next to a ventilator in the background.

Chapter 2-1: Storage Facility
============================
EMBLEM #04:
Check the southern wall of the storage hall you start in. The Emblem is attached to this wall, somewhere up there.

EMBLEM #05:
When you've crossed the bridge and are about the enter the sewers, turn around and closely inspect the large bridge's support. The Emblem is located here.

EMBLEM #06:
At the docks area, locate the small green hut near the closed door at the jetty, and look at the back of this hut. Spot the Emblem in a gap under the roof.

EMBLEM #07:
When Kirk has arrived to provide backup at the docks area, climb the building to the right (northwest) and get over to the spot with the Green Herb. Spot the Emblem through a window in the building across the street.

EMBLEM #08:
In Shanty Town, right before you perform the Assist Jump with Sheva, turn around and spot the Emblem on the roof ledge up, a little to the right.

Chapter 2-2: Train Station
==========================
EMBLEM #09:
Climb the trains and inspect the pylon in the distance to the west. Spot the Emblem on top of it.

EMBLEM #10:
In the mines you'll have to make your way over a bridge with a waterfall. The Emblem is to your right high up in the waterfall.

EMBLEM #11:
In the mining area you'll have to climb a very long ladder at some point. Instead of moving on, turn around and equip your rifle. Turn around and inspect the factory building in the distance.

Chapter 2-3: Savannah
=====================
NONE.
Chapter 3-1: Marshlands
=======================
EMBLEM #12:
You'll start on an island. From here, check out the wired pole in the distance to the northwest. The Emblem is attached to it. If you're playing with someone else you can sail nearby it and have them shoot it, or shoot it yourself when they're sailing.

EMBLEM #13:
Go to the settlement in the northwest corner and spot the Emblem under the roof of the hut.

EMBLEM #14:
Head to the center island (where horrific creatures roam), and spot the Emblem under the hut by standing on the jetty near the boat.

EMBLEM #15:
When you've opened up the door by placing the slates, drop down in the marshes, turn around and find the Emblem under the wooden walkway.

Chapter 3-2: Execution Ground
=============================
EMBLEM #16:
After making your way out of the execution ground through a tunnel, you'll get to some Tricell tents. Go behind the tents and spot the Emblem between the tents.

EMBLEM #17:
At the harbor, when the timer starts running, inspect the cabin at the end of the jetty. The Emblem will be inside.

Chapter 3-3: Oil Field - Drilling Facilities
============================================
EMBLEM #18:
This one is located in the middle/on top of the first gate you cross under. If you miss it while boating under it, you can still shoot the lower half from the other side.

Chapter 4-1: Caves
==================
EMBLEM #19:
Make your way through the caves and climb a short ladder. Head over the bridge and spot the Emblem in the ravine to your right, on the lower side.

EMBLEM #20:
This one requires a rifle. When you enter the ancient civilization, check the shiny lens in the distance and spot the Emblem at the base of the lens.

EMBLEM #21:
In the labyrinth area with the several colored statues, make your way to the top by jumping over a gap near a torch, located to the right (east) from where you enter. The Emblem is located above the jade/green statue.

Chapter 4-2: Worship Area
=========================
EMBLEM #22:
When you make it to the bottom floor of the laser/mirror puzzle, the Emblem will be located in the northern room, right above the doorway.
Chapter 5-1: Underground Garden
===============================
EMBLEM #23:
At the flower cave you start out in, make your way over to the right (eastern) side of the area and spot the Emblem underneath the catwalk that leads to the labs.

Chapter 5-2: Experimental Facility
==================================
EMBLEM #24:
After you've made your way over the conveyor belt with the gas cylinder packages, check the open dumpster to find the Emblem inside of it.

Chapter 5-3: Uroboros Research Facility
=======================================
EMBLEM #25:
Exit the area in which you fought the boss in the previous chapter, and check behind the large fan to the right.

EMBLEM #26:
When you reach the rotating platform, have it move and wait for it to stop for the first time. When it does, look for the emblem on floor of the balcony on which the Majini is standing, holding down the lever to stop the rotating elevator.

EMBLEM #27:
Inside the ruins area, before summoning the elevator, move around the shaft and spot the Emblem down the shaft.

Chapter 6-1: Ship Deck
======================
EMBLEM #28:
This one's impossible without a rifle. Aim for the top of the radar mast at the very far end of the ship deck. The Emblem is pinned on top of it, and will most likely require several shots. Try to shoot it when you've made yourself to a higher area, possibly the crane.

EMBLEM #29:
When Sheva gets trapped in a cage, the BSAA Emblem will be located in the northern contained out of which Majini's spawn. It's quite possible to get it by blowing up a Majini holding a dynamite stick, or by throwing a grenade inside, but you can't aim at it with guns.

EMBLEM #30:
In the room in which you meet Excella, spot this final emblem behind the spotlight that is shining on the flowers. It's in a cabinet behind glass, which is located on the wall to the north.

Chapter 6-2: Main Deck
======================
NONE.
Chapter 6-3: Bridge Deck
========================
NONE.
There are a total of 50 Achievements, please see the tables below for details.
                            15 Achievement Points:
                            ======================
   .-------------------------------.---------------------------------------.
   |Achievement Name:              |How to unlock:                         |
   |===============================|=======================================|
   |Completed Chapter 1-1          |Complete Chapter 1-1 (any difficulty)  |
   |Completed Chapter 1-2          |Complete Chapter 1-2 (any difficulty)  |
   |Completed Chapter 2-1          |Complete Chapter 2-1 (any difficulty)  |
   |Completed Chapter 2-2          |Complete Chapter 2-2 (any difficulty)  |
   |Completed Chapter 2-3          |Complete Chapter 2-3 (any difficulty)  |
   |Completed Chapter 3-1          |Complete Chapter 3-1 (any difficulty)  |
   |Completed Chapter 3-2          |Complete Chapter 3-2 (any difficulty)  |
   |Completed Chapter 3-3          |Complete Chapter 3-3 (any difficulty)  |
   |Completed Chapter 4-1          |Complete Chapter 4-1 (any difficulty)  |
   |Completed Chapter 4-2          |Complete Chapter 4-2 (any difficulty)  |
   |Completed Chapter 5-1          |Complete Chapter 5-1 (any difficulty)  |
   |Completed Chapter 5-2          |Complete Chapter 5-2 (any difficulty)  |
   |Completed Chapter 5-3          |Complete Chapter 5-3 (any difficulty)  |
   |Completed Chapter 6-1          |Complete Chapter 6-1 (any difficulty)  |
   |Completed Chapter 6-2          |Complete Chapter 6-2 (any difficulty)  |
   |Completed Chapter 6-3          |Complete Chapter 6-3 (any difficulty)  |
   |Recruit                        |Complete all Chapters on Amateur       |
   |Soldier                        |Complete all Chapters on Normal        |
   |Egg Hunt                       |Find all 4 types of eggs               |
   |A Friend in Need               |Save your partner 10 times during HELP |
   |Lifeguard                      |Save your partner 10 times during DYING|
   |Exploding Heads                |Get 20 headshots                       |
   |A Cut Above                    |Defeat 5 enemies with your Knife       |
   |Cattle Prod                    |Defeat 30 enemies with the Stun Rod    |
   |Crowd Control                  |Defeat 30 enemies with the Gatling Gun |
   |Bull's-eye                     |Defeat 30 enemies with the Longbow     |
   |Get Physical                   |Defeat 20 enemies with melee attacks   |
   |The Works                      |Chain a maximum melee combo            |
   |Fireworks                      |Shoot enemy's Molotov/Dynamite/Grenade |
   |Meat Shower                    |Kill 3 Majini's with 1 Grenade/Bomb    |
   |Go Into the Light              |Defeat 2 enemies with 1 Flash Grenade  |
   |Ride the Lightning             |Kill a Majini with an Electricity Box  |
   |Stop, Drop, & Roll             |Kill 3 Majini at once with oil barrels |
   |Baptism by Fire                |Kill 3 Majini with drum/gas tanks      |
   |Masters of Removing            |Work together to save someone special  |
   |Egg on Your Face               |Kill a Majini with a rotten egg        |
   |Heart Stopper                  |Kill a certain enemy by stabbing heart |
   |Bad Blood                      |Damage the 1st Final Boss several times|
   '-------------------------------'---------------------------------------'
                            30 Achievement Points:
                            ======================
 .-----------------------.---------------------------------------------------.
 |Veteran                |Complete all Chapters on Veteran                   |
 |All Dressed Up         |Purchase all alternative costumes                  |
 |Stockpile              |Obtain all available weapons                       |
 |Take It to the Max     |Completely upgrade all weapons                     |
 |They Belong in a Museum|Obtain all treasures in the game                   |
 |Badge of Honor         |Find all BSAA Emblems                              |
 |They're ACTION Figures!|Collect all figurines                              |
 |Lead Aspirin           |Kill a Majini with headshot while it's jumping     |
 |Be the Knife           |Deflect a bow gun arrow with your knife            |
 |Drive By               |Stop an armored truck by killing the driver        |
 |Who Do You Trust?      |Build up a certain level of trust with your partner|
 '-----------------------'---------------------------------------------------'
                            70 Achievement Points:
                            ======================
   .-------------------------------.---------------------------------------.
   |War Hero                       |Complete all Chapters on Professional  |
   '-------------------------------'---------------------------------------'
                            Bronze Trophies (38):
                             =====================
   .-------------------------------.---------------------------------------.
   |Achievement Name:              |How to unlock:                         |
   |===============================|=======================================|
   |Completed Chapter 1-1          |Complete Chapter 1-1 (any difficulty)  |
   |Completed Chapter 1-2          |Complete Chapter 1-2 (any difficulty)  |
   |Completed Chapter 2-1          |Complete Chapter 2-1 (any difficulty)  |
   |Completed Chapter 2-2          |Complete Chapter 2-2 (any difficulty)  |
   |Completed Chapter 2-3          |Complete Chapter 2-3 (any difficulty)  |
   |Completed Chapter 3-1          |Complete Chapter 3-1 (any difficulty)  |
   |Completed Chapter 3-2          |Complete Chapter 3-2 (any difficulty)  |
   |Completed Chapter 3-3          |Complete Chapter 3-3 (any difficulty)  |
   |Completed Chapter 4-1          |Complete Chapter 4-1 (any difficulty)  |
   |Completed Chapter 4-2          |Complete Chapter 4-2 (any difficulty)  |
   |Completed Chapter 5-1          |Complete Chapter 5-1 (any difficulty)  |
   |Completed Chapter 5-2          |Complete Chapter 5-2 (any difficulty)  |
   |Completed Chapter 5-3          |Complete Chapter 5-3 (any difficulty)  |
   |Completed Chapter 6-1          |Complete Chapter 6-1 (any difficulty)  |
   |Completed Chapter 6-2          |Complete Chapter 6-2 (any difficulty)  |
   |Completed Chapter 6-3          |Complete Chapter 6-3 (any difficulty)  |
   |Recruit                        |Complete all Chapters on Amateur       |
   |Soldier                        |Complete all Chapters on Normal        |
   |Egg Hunt                       |Find all 4 types of eggs               |
   |A Friend in Need               |Save your partner 10 times during HELP |
   |Lifeguard                      |Save your partner 10 times during DYING|
   |Exploding Heads                |Get 20 headshots                       |
   |A Cut Above                    |Defeat 5 enemies with your Knife       |
   |Cattle Prod                    |Defeat 30 enemies with the Stun Rod    |
   |Crowd Control                  |Defeat 30 enemies with the Gatling Gun |
   |Bull's-eye                     |Defeat 30 enemies with the Longbow     |
   |Get Physical                   |Defeat 20 enemies with melee attacks   |
   |The Works                      |Chain a maximum melee combo            |
   |Fireworks                      |Shoot enemy's Molotov/Dynamite/Grenade |
   |Meat Shower                    |Kill 3 Majini's with 1 Grenade/Bomb    |
   |Go Into the Light              |Defeat 2 enemies with 1 Flash Grenade  |
   |Ride the Lightning             |Kill a Majini with an Electricity Box  |
   |Stop, Drop, & Roll             |Kill 3 Majini at once with oil barrels |
   |Baptism by Fire                |Kill 3 Majini with drum/gas tanks      |
   |Masters of Removing            |Work together to save someone special  |
   |Egg on Your Face               |Kill a Majini with a rotten egg        |
   |Heart Stopper                  |Kill a certain enemy by stabbing heart |
   |*Bad Blood                     |Damage the 1st Final Boss several times|
   '-------------------------------'---------------------------------------'
    * Denotes a secret trophy. Highlight to show.
                             Silver Trophies (11):
                             =====================
 .-----------------------.---------------------------------------------------.
 |Veteran                |Complete all Chapters on Veteran                   |
 |All Dressed Up         |Purchase all alternative costumes                  |
 |Stockpile              |Obtain all available weapons                       |
 |Take It to the Max     |Completely upgrade all weapons                     |
 |They Belong in a Museum|Obtain all treasures in the game                   |
 |Badge of Honor         |Find all BSAA Emblems                              |
 |They're ACTION Figures!|Collect all figurines                              |
 |Lead Aspirin           |Kill a Majini with headshot while it's jumping     |
 |Be the Knife           |Deflect a bow gun arrow with your knife            |
 |Drive By               |Stop an armored truck by killing the driver        |
 |Who Do You Trust?      |Build up a certain level of trust with your partner|
 '-----------------------'---------------------------------------------------'
                              Gold Trophies (1):
                              ==================
   .-------------------------------.---------------------------------------.
   |*War Hero                      |Complete all Chapters on Professional  |
   '-------------------------------'---------------------------------------'
    * Denotes a secret trophy. Highlight to show.
                             Platinum Trophy (1):
                             ====================

                         o Get all other 50 Trophies.
1. What difficulties are there?
Amateur (Easy), Normal, Veteran (Hard), and Professional (Very Hard). You can unlock Professional by finishing the game on Veteran.
2. How do I get Infinite Ammo for weapons?
There are several requirements. First of all, beat the game once on any difficulty. Second, you’ll need to max out all upgrades for that one gun. You’ll now have unlocked the possibility to use infinite ammo, but you’ll first need to go to the menu: Play Game --> Bonus Features, and use points to buy free the infinite ammo options. And even after this you’re not quite there. Go to the menu again: Play Game --> Special Settings --> Infinite Ammo, and turn it ‘ON’. You’ll now be able to use the infinite ammo for the weapons you’ve unlocked it it. Obviously, if you play online, the other needs to allow for the usage of infinite ammo, or it will not be possible.
On a related note, in order to get a Rocket Launcher with infinite ammo, you’ll need to beat the game under 5 hours on any difficulty (so I heard).
3. How do I start a split-screen Co-Op section?
Yes, I too throught this was tricky to find. Start a game regularly and press Start on a second controller to have a player join in Split Screen. There are no menu options to select this way of Co-Op, this is the only way.
[POSSIBLE SPOILERS UP AHEAD]
.
.
.
[POSSIBLE SPOILERS UP AHEAD]
.
.
.
[POSSIBLE SPOILERS UP AHEAD]
.
.
.
[POSSIBLE SPOILERS UP AHEAD]
.
.
.
[POSSIBLE SPOILERS UP AHEAD]
4. How do I kill the final boss?
Get behind him and target the weak orange bulb on its back. A whirlwind attack of tentacles will first be performed by him. After this, (as Chris) quickly get behind the final boss and restrain it. Your partner can now stab the boss from the front, ending the battle.
5. Does the final boss really die?
I’ve already seen this question several times, so I’d better address it here. The argument is that the rockets “miss” the final boss. While it’s true that they don’t hit him in the eye, it’s quite obvious that the blast radius, along with, well, all other circumstances should kill any organic being in the universe. Evidence that supports this is that there is no sign of the final boss after the blast. Where would he go? Swimming?
Consider this: If Capcom brought the final boss back, wouldn’t they lose all credibility? The company themselves has stated that this part would be the end of the series as we all knew it. I’d personally say that this is one of the things that has finally come to an end.
6. What do you unlock for getting an A or S ranking on all chapters?
You might be dissapointed, but for getting an A on every chapter you’ll unlock the Jill (Rare) figurine, and scoring an S-rank on all chapters will net you a Wesker figurine.

 iDea Pico Portable Wireless Projector Review and Giveaway
 4 Simple Fixes for Google Play Store Problems
 Destiny Guide: How to Prepare for Crota's End
 Dead Island 2 E3 2014 Preview
 How to get tremendous rewards for Destiny through Cheat Codes for PlayStation and Xbox