Unofficial Red Dead Redemption Guide by Michael Monette for
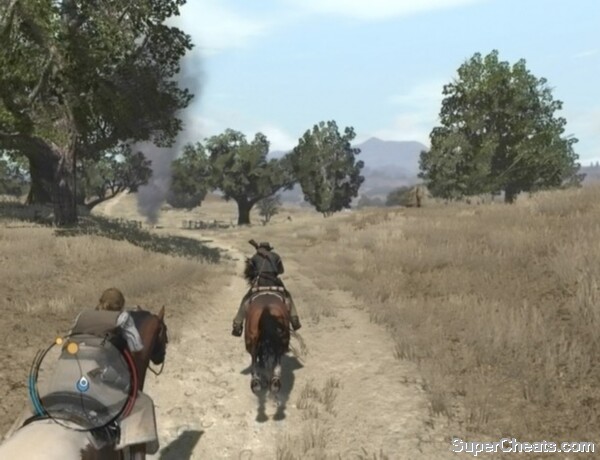
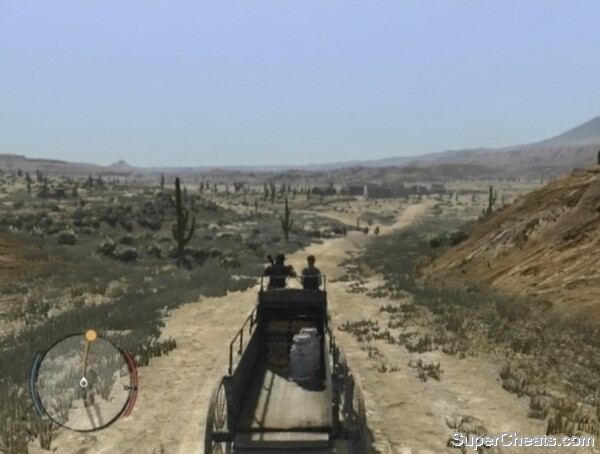
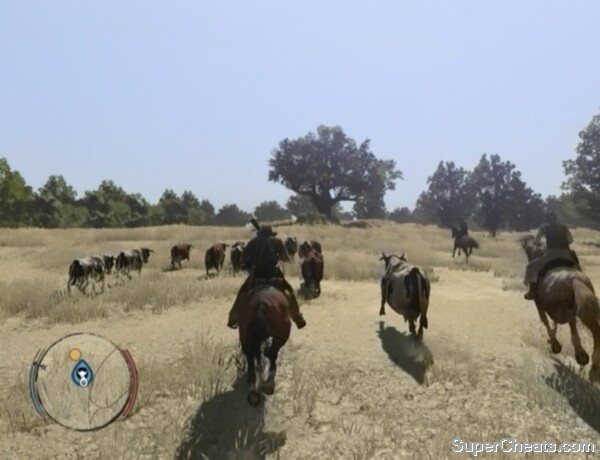
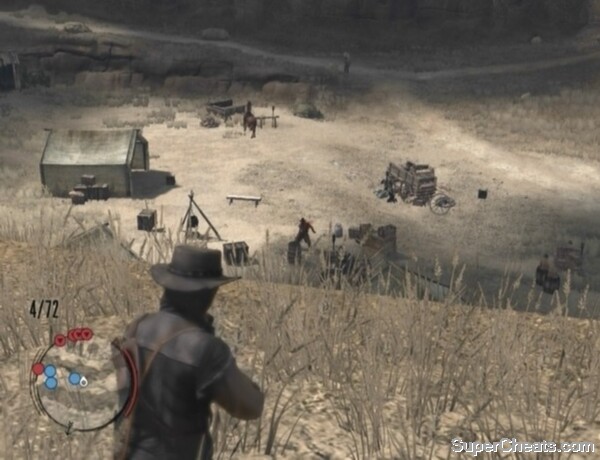
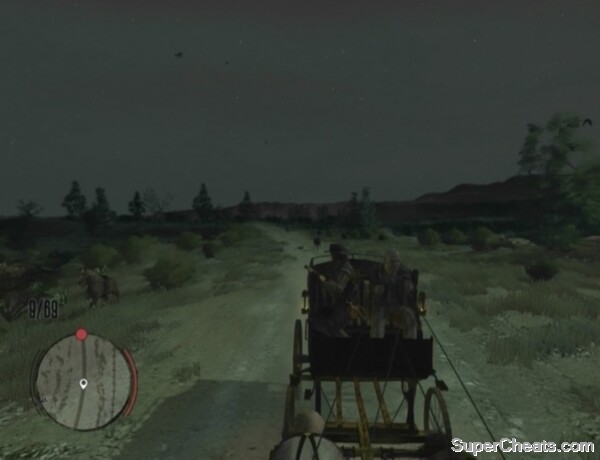
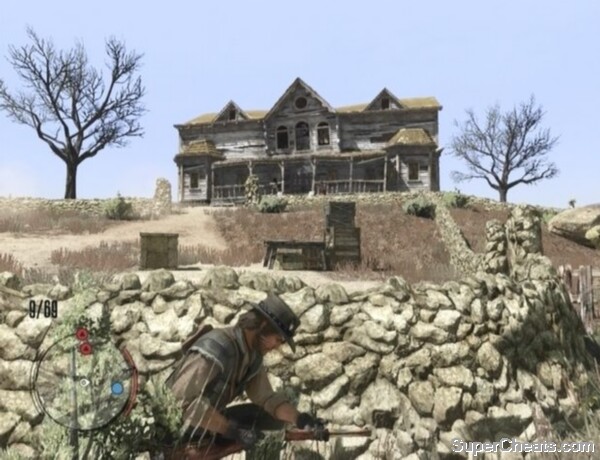
Set in 1911 in the dying Old West, Red Dead Redemption is the latest offering from Rockstar Games. With a gripping storyline, memorable characters, beautiful landscapes and quality gameplay to boot, this Western epic is nothing short of a masterpiece. In Red Dead Redemption, you play as John Marston, a former outlaw who seeks to leave his violent past behind. But when his family is taken from him, Marston must hunt the criminals he used to run with to redeem himself and return to his new life. This guide covers all 57 story missions and everything else needed to attain the coveted 100% completion stat. Note: This guide was written based on the Xbox 360 version of the game, but effort has been made to include PlayStation 3 controls where applicable. Xbox 360 Controls Left Bumper - (Tap) Draw/Holster Weapon, (Hold) Weapon Wheel Left Stick - Move, (Click) Crouch Y Button - Mount Horse/Enter Vehicle, (When Prompted) Interact D-pad UP - Whistle for Horse Back Button - Access Satchel PlayStation 3 Controls L1 Button - (Tap) Draw/Holster Weapon, (Hold) Weapon Wheel Left Stick - Move, (Click) Crouch Triangle Button - Mount Horse/Enter Vehicle, (When Prompted) Interact D-pad UP - Whistle for Horse Select Button - Access Satchel (New Austin Walkthrough) When you gain control over John Marston after the opening video, walk through Armadillo Station and cross the street to the saloon. Enter the saloon and watch the cutscene that ensues. After the cutscene, follow Jake outside and then approach the Painted Quarter Horse hitched to the hitch post along the side of the saloon. Press the Y/Triangle button to mount the horse and start following Jake toward Fort Mercer. The horse controls in Red Dead Redemption are simple: use the Left Stick to direct the horse, hold the A/X button to trot, tap the A/X button to spur the horse and tap the RB/R1 button to slow the horse (hold the RB/R1 button to stop completely). When spurring the horse to increase your speed, keep an eye on the horse's stamina meter on the left side of the Mini Map. Continuing to spur the horse when its stamina is depleted will slow it down; continue spurring the horse thereafter and it will eventually buck you off. While traveling with an AI companion who is also on horseback, you can hold the A/X button to match their speed. Hold the A/X button to match Jake's speed as you follow him to Fort Mercer. Once you've reached the place, touch the yellow marker outside to trigger a cutscene. (New Austin Walkthrough) When you regain control over Marston after the cutscene, follow the blue marker on your Mini Map to meet with Bonnie MacFarlane. Follow her to the two horses hitched to the hitching post next to the Stockade on the other side of the road. Mount the chestnut horse and start following Bonnie. Hold the A/X button to match Bonnie's speed as she shows you around MacFarlane's Ranch. Hold the B/Circle button to look at the various amenities Bonnie points out as you ride along. You don't need to use the Left Stick to direct your horse when holding the A/X button and the B/Circle button at the same time. Hitch your horse at the end of the tour and touch the yellow marker outside of Bonnie's house to trigger a cutscene. Bonnie gives John a Repeater Carbine rifle. You must use the Repeater Carbine while patrolling the farm on the lookout for bandits and pests. Mount your horse and accompany Bonnie to the first crop field. The crop field is infested with rabbits. Dismount your horse and use your Repeater Carbine to kill all of the rabbits in the field. Each rabbit is marked on the Mini Map by a red blip. The weapon targeting style in Red Dead Redemption is set to Expert by default. In the Expert targeting mode, you receive no aim assistance. Combat can be made much easier if you set the targeting mode to Normal. You can change the targeting mode in the Config sub-section of the Options section of the pause menu. Aim your rifle with the LT/L2 button and then press RT/R2 to fire. You can tweak your aim with the Right Stick once you've locked on to a target (using the Normal targeting mode). Once you've taken care of the rabbits, hop back on your Horse and follow Bonnie to the Corral. A pack of coyotes are after the chickens. You'll have to kill these coyotes from horseback. You can use Dead Eye here to make things a bit easier. Hold LT/L2 and click the Right Stick to activate Dead Eye, which will slow time and make it easier to hit the coyotes. You can't use Dead Eye indefinitely; time will revert back to its normal speed once the Dead Eye meter on the right side of the Mini Map is depleted. The Dead Eye meter will fill back up automatically, but killing enemies and scoring headshots will replenish the meter faster. Kill all of the coyotes in the Corral and then follow Bonnie back to the hitching post. Hitch your horse to complete the mission. It doesn't matter if you win or lose this horse race against Bonnie MacFarlane; you'll complete the mission and earn 20 Fame either way. You must follow the plumes of smoke around the track and make it back to the starting line at MacFarlane's Ranch to finish the race. Bonnie's horse is fast, so this will likely be a close race the entire way through. Tap the A/X button to spur your horse. When spurring the horse to increase your speed, keep an eye on the horse's stamina meter on the left side of the Mini Map. Continuing to spur the horse when its stamina is depleted will slow it down; continue spurring the horse thereafter and it will eventually buck you off. Cease spurring the horse when its stamina meter is in the red and wait for the meter to replenish to at least halfway before spurring again. Each waypoint is detonated by a yellow blip on the Mini Map, so keep an eye on the map as you make your way around. Try your best to stick to the road so your horse can gallop faster, although staying on the road can be difficult because the road is quite narrow. You can likely catch up to Bonnie even if she manages to get quite far ahead, so don't give up! Make it back to the starting line at MacFarlane's Ranch to complete the mission and earn 20 Fame, regardless of the race's outcome. Approach the driver's seat of the wagon and press the Y/Triangle button to hop in. Controlling a wagon is just like controlling a horse. The horses attached to the wagon have a stamina meter as well; continuing to accelerate when the meter is spent will slow the horses and prevent their stamina from replenishing. Follow the yellow line on the Mini Map to make it to Armadillo. Once in Armadillo, enter the doctor's office and purchase one thing of Medicine from the Doctor. You can use Medicine to restore your health in a pinch. Once you have the Medicine, head back outside and follow the blue marker on the Mini Map to meet Bonnie outside the General Store to complete the mission. As is explained in game, you can use a stagecoach to travel back to locations you've previously visited. Stagecoaches are detonated by an exclamation mark icon on the Mini Map. Visit Bonnie at her house between 5 a.m. and 6 p.m. to accept this mission. Hop on your horse and follow Bonnie into the cattle pen. You must help Bonnie herd these cattle to pasture. Trot behind the cattle to drive them out of the pen. Once out of the pen, get behind the group to guide them forward. Press up on the D-Pad to drive the herd faster toward the gate. When you come to the fork in the road beyond the gate, move to the right side of the herd to steer them to the left. Stay behind the herd and drive them forward toward the pasture, which is denoted by the yellow blip on the Mini Map. When the two groups of cattle have merged, you then must herd the larger group to the old oak tree, which is marked on the Mini Map by a yellow blip. Sweep behind the herd to keep them together and press up on the D-pad to drive them forward. Finish herding the cattle to the oak tree to complete the mission. Get on your horse and follow Mr. MacFarlane to the herd of wild horses. Bonnie has given you a Lasso, which you must use to catch and break a couple of the wild horses. To lasso a horse, gallop alongside it, aim with LT/L2 and press the RT/R2 button to throw the Lasso. Once you've lassoed a horse, hold RB/R1 to stop the lassoed horse and then dismount. With that, walk toward the lassoed horse and mount it to begin horsebreaking. To break a wild horse, you must keep Marston centred while it tries to buck him off. Tap the Left Stick to the left or right to keep balance. Marston will lean to one side and flail his arms when he's about to be thrown by the horse; tap the Left Stick in the direction opposite the direction Marston leans to keep balance. Keep this up and Marston will eventually take control. Dismount once you've tamed the first wild horse and get back on your horse. When Mr. MacFarlane departs, follow Bonnie back to the herd to catch and break another. Do the same as you did before to break a second horse and then follow Bonnie back to the ranch. After the cutscene, ride with Bonnie to meet with the ranch hands near where the second band of wild horses was spotted. You must guide this herd into the canyon to box them in. Do the same to guide these horses as you did to guide the cattle in the previous mission. Sweep behind the herd, pressing up on the D-pad to drive them forward when they're all together, and guide them to the yellow blip on the Mini Map. The Kentucky Saddler, the fastest horse of the lot, manages to buck off the ranch hand and takes off. You must chase after the stallion and horsebreak him. This horse is fast, but keep after him and he will eventually tire, allowing you to lasso him. Chase after the horse until he begins to trot, then press LT/L2 to take aim and then RT/R2 to throw the Lasso. When the horse is caught, hold RB/R1 to slow him down, then dismount and get on the lassoed horse to begin breaking him. Keep balance until Marston takes control. Once you've tamed the stallion, ride him to Bonnie to trigger a cutscene and complete the mission. The Kentucky Saddler is yours now. This is the fastest horse in New Austin, so hold on to it.
Controls
Left Trigger - Draw Weapon/Target
Right Bumper - Enter Cover, (While holding Left Trigger) Melee Block
Right Trigger - (While holding Left Trigger) Fire Weapon/Punch, (With weapon holstered) Push
Right Stick - Rotate Camera, (Casual Mode) Change Targets, (Click) Toggle Dead Eye
B Button - Perform Greeting, (When Prompted) Focus on Important Event, (With Weapon Drawn) Reload Weapon
A Button - (Hold) Run, (Tap) Sprint
X Button - Jump, Climb, (With Left Trigger) Roll, (With Left Trigger, in Melee) Dodge
D-pad DOWN - Zoom Out Mini-Map
D-pad LEFT - Left Shoulder Aim
D-pad RIGHT - Right Shoulder Aim
Start Button - Pause Menu
L2 Button - Draw Weapon/Target
R1 Button - Enter Cover, (While holding Left Trigger) Melee Block
R2 Button - (While holding Left Trigger) Fire Weapon/Punch, (With weapon holstered) Push
Right Stick - Rotate Camera, (Casual Mode) Change Targets, (Click) Toggle Dead Eye
Circle Button - Perform Greeting, (When Prompted) Focus on Important Event, (With Weapon Drawn) Reload Weapon
X Button - (Hold) Run, (Tap) Sprint
Square Button - Jump, Climb, (With Left Trigger) Roll, (With Left Trigger, in Melee) Dodge
D-pad DOWN - Zoom Out Mini-Map
D-pad LEFT - Left Shoulder Aim
D-pad RIGHT - Right Shoulder Aim
Start Button - Pause Menu
Prelude
Exodus in America
Ride with Jake to Fort Mercer.
Bonnie MacFarlane's Missions
New Friends, Old Problems
Hold the A/X button while traveling with an AI companion who is also on horseback to match their speed.
Exterminate the coyotes in the Corral.Obstacles in Our Path
Race Bonnie back to the ranch.This is Armadillo, USA
Drive Bonnie to Armadillo.Women and Cattle
Drive the merged herds to the old oak tree.Wild Horses, Tamed Passions

Horsebreaking is a three step process: lasso, mount and break.
Taming the Kentucky Saddler
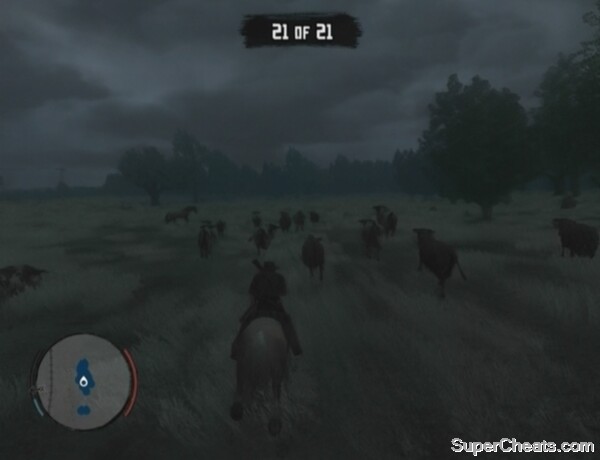
As a violent storm brews, you must help Bonnie and Amos herd the spooked cattle back to the ranch. Follow Bonnie to the first herd of cattle outside the ranch and start guiding them toward the old oak tree, which is marked on the Mini Map by a yellow blip. Press up on the D-pad to drive the group forward when they're all together.
There may be stragglers as you drive the herd forward. Any stragglers will appear as a dark blue, tear-shaped icon on the Mini Map. When a straggler appears, gallop toward it to turn the icon on the Mini Map light blue. The cow will then rejoin the herd, but don't stray too far from it, as it will become a straggler again if you do.
Gallop to the front of the herd to prevent the spooked cattle from running off the cliff.
Once you've merged the cattle with the second group by the old oak tree, a bolt of lightning will strike the tree and spook them. The herd is headed straight for a cliff and will plummet to their deaths if you don't stop them. You must get in front of the stampeding cattle to prevent them from running off the cliff. Gallop straight through the herd, tapping the A/X button to spur your horse while keeping an eye on the horse's stamina meter, and sweep in front of the herd to slow them. It's OK if a few of the cattle go over the cliff, but lose too many and you'll have to retry from the last checkpoint (which is, conveniently, right before the last cutscene).
When the cattle have calmed down, gather the stragglers to reform the herd and start guiding them back toward the ranch. Amos will help you here, so keep to the left side of the herd while he keeps to the right. Hang back a bit so you can spot any stragglers and catch them early.
Saving the cows
Complete 'Spare the Rod, Spoil the Bandit' in Marshal Johnson's mission line to unlock this mission. Once you've done that, touch the marker at MacFarlane Ranch to get started.
Mount your horse and follow Bonnie to the ranch's outskirts to look for Mr. MacFarlane. Bonnie will eventually go off-road; continue following her to trigger a cutscene. After the cutscene, follow Bonnie back to the ranch. The barn is on fire! Spur your horse and make your way to the yellow blip on the Mini Map.
When you regain control over Marston after the cutscene, head to the yellow marker on the left side of the barn and press the X/Square button to jump and grab hold of the wooden awning. Press up on the Left Stick to climb onto the awning, then turn right and climb onto the higher awning there. From here, climb onto the windmill and walk around to the other end of the platform. Jump and grab hold of the wooden beam along the barn wall and inch your way to the left to reach the upper barn platform.
Find a way into the burning barn and rescue the horses trapped inside.
Walk along the platform to the back of the barn and enter through the doorway there. Climb down the first ladder and then either drop down from the lower platform or climb down the second later to reach ground floor. When you've made it to the ground floor, immediately sprint to the barn doors and press the Y/Triangle button to remove the pitchfork that's preventing the doors from being opened.
Once you've opened the barn doors, you then must save the three frightened horses inside the barn. Approach one of the horses and press the Y/Triangle button to slap its rump, which will cause the horse to run out of the barn. Slap a second horse and then approach the final one. Some flaming rubble will fall from above and block the barn doors, trapping you inside. A horse can jump over this rubble. Mount the last horse in the barn, line yourself up with the rubble, then continuously spur the horse toward the rubble and the horse will jump over.
Outside, ride the horse to the corral and meet Bonnie by the pen to complete the mission.
Saving the horses inside the burning barn
(New Austin Walkthrough)
You can first accept a mission from Marshal Johnson in Armadillo after completing 'Obstacles in Our Path' in Bonnie MacFarlane's mission line. Bonnie's second mission has you accompanying her to Armadillo, so you might as well complete that one first.
When you're ready to travel to Armadillo, meet Marshal Johnson at the Sherriff's office in town to accept your first mission from him.
Walk with Johnson to the saloon at the other end of town. After the cutscene, press up on the D-Pad to whistle for your horse. Hop on your horse when it comes and start after the red blip on the Mini Map.
Walton and his gang have fled to their hideout -- a small cabin outside of Armadillo. A cutscene will ensue when you reach the place, at which point Marston and Johnson will dismount their horses. After the cutscene, press the RB/R1 button to move out from cover and then sprint to the marker in front of the wagon further up. Press RB/R1 to take cover behind the wagon. Take aim with LT/L2 and blast the outlaw behind the sandbags in front of you.
Walton is holed up in Pleasance House.
With the first outlaw down, move out from cover and sprint to the marker by the crate further up the hill. Kill the outlaw behind the rock when he pops out from cover, then move up and take cover behind the rock. Gun down the outlaw behind the outhouse up ahead and then the one along the side of the cabin when he peeks his head out from around the corner.
Once you've killed the first batch of outlaws, take cover behind the outhouse and kill the last member of Walton's gang behind the cabin. Walton is inside. Move around to the front door and be ready to cap him when he emerges. Use Dead Eye to slow him if necessary. Shoot Walton in the legs once to capture him, which will earn you 200 Honor and allow you to claim his bounty ($20). Shoot him dead and you'll earn -200 Honor.
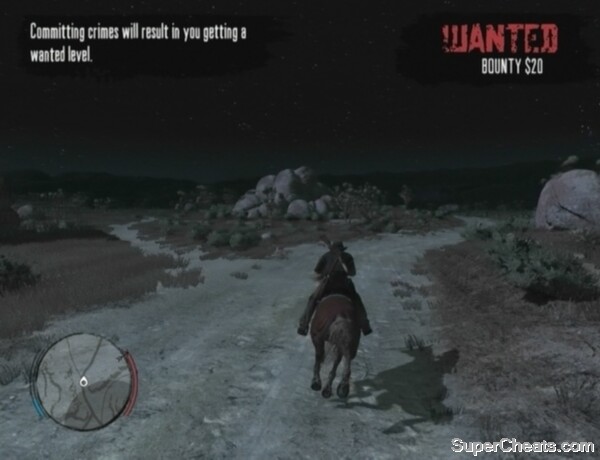
Honor is influenced by the good deeds you do, the crimes you commit and the way you handle the choices you are faced with, such as whether you capture or kill a bounty target. Honor affects how NPCs interact with you. A player with high Honor will earn store discounts in most towns and receive more money for completing jobs and bounties. Bonuses bestowed upon a player with low Honor include being able to bribe witnesses for less and discounts when buying from shopkeepers in Thieves' Landing.
Shoot Walton dead or once in the legs to capture him.
When the mission is complete, loot the corpses of your fallen enemies for ammo and money by standing over them and pressing the Y/Triangle button. Be sure to open the lockbox in Pleasance House as well.
You can fast travel back to Armadillo or MacFarlane's Ranch if you set up camp. To set up camp, press the Back/Select button to open your Satchel, then press RB/R1 to select the Kit section of the inventory and use the Basic Campsite item. When the campsite is set, move down to the 'Travel to Destination' option and use the Left Stick to select one of the locations you've previously visited.
Capturing Walton
One of Marshal Johnson's deputies has spotted the cattle-rustling Bollard Gang in Pike's Basin. You must accompany the Marshal there and clear them out.
Hop on your horse and start following Johnson toward Pike's Basin. When you reach the place, move forward while keeping an eye on the Mini Map. When the path curves to the left, you should notice several red blips appear on the map. Immediately take cover behind the boulder to your left (approach the boulder and press RB/R1 to enter cover) and start picking off the first few outlaws with your Repeater Carbine. Four outlaws are hiding behind the boulders up ahead and a fifth is perched on the large rock formation. The rifles in Red Dead Redemption boast considerable range, so you should be able to take all of these guys out from your current position.
When the first batch of outlaws has been dealt with, you can either take the left path to assist the two deputies or the right path to assist Johnson. It doesn't matter which path you take, as both lead to the same place. If only for the sake of following this walkthrough, go with Johnson.
Fight your way to the Bollard Gang's hideout.
Take cover behind the boulder a few steps up the ridge and blast the two gang members when they pop out from cover further up. Take the time to loot one of these fallen enemies by approaching one of their corpses and pressing the Y/Triangle button when prompted. Do this to discover the Bollard Twins outfit. You can't don this outfit until you've collected all of the scraps needed to craft it. You can view a list of the items needed to craft any of the outfits you've discovered by interacting with the wardrobe in one of your safe houses. Refer to the 'Outfits' section of this guide for a complete listing of outfits and where to find everything needed to craft them.
Continue forward, taking cover behind one of the boulders along the ridge to protect yourself from enemy gunfire, and you will soon come to a small camp. Kill the three enemies at the camp, then move in, collect the fallen enemies' Repeater Ammo and open the two containers to find some cash.
Regroup with Johnson and press on. Johnson will call out a couple of snipers; they're both on the ridge across the bridge. These guys are deadly accurate, so sprint to one of the boulders further up and take out both of them with your Repeater Carbine.
Cross the first bridge and take cover behind the boulders between the two bridges. There are two outlaws across the second bridge, so kill them both from behind cover before sprinting across. Wait to regroup with Johnson and the deputies once across the second bridge. Crouch (click the Left Stick) and follow Johnson toward the Bollard Gang's main encampment.
Fire down at the outlaws from the ridge.
Each of the gang members below is marked on the Mini Map by a red blip. Kill as many of the outlaws as you can from the ridge before moving down to clear the rest out.
Wipe out all of the Bollard Gang members marked on the Mini Map to complete the mission. Be sure to collect all of the fallen enemies' ammo, loot each corpse and open the container in each of the three tents to earn some cash.
Get on your horse and go with Johnson and his deputies to search for a group of bandits. Follow Johnson and you will soon come to a campsite, which will be marked on the Mini Map with a yellow blip. Approach the camp to trigger a cutscene, during which Marston will pick up a Winchester Repeater.
After the cutscene, get back on your horse and continue following Johnson. You'll come to a second campsite before heading to Ridgewood Farm. When you reach Ridgewood Farm, search the shed and outhouse, which will both be marked on the Mini Map by a yellow blip. You'll have to dismount your horse to search the outhouse. With that, join Johnson at the barn and shoot the four boards on the door to trigger another cutscene.
You must fight your way into the house and rescue the two hostages on the second floor. Start by switching back to your Winchester Repeater after the cutscene and sprint toward the house. There is an outlaw posted on the outer walkway on the second floor of the house, so take him out as you approach. Once he's down, sprint to the left side of the house and take cover by the logs stacked there. Blast the outlaws from behind cover as they step onto the porch.
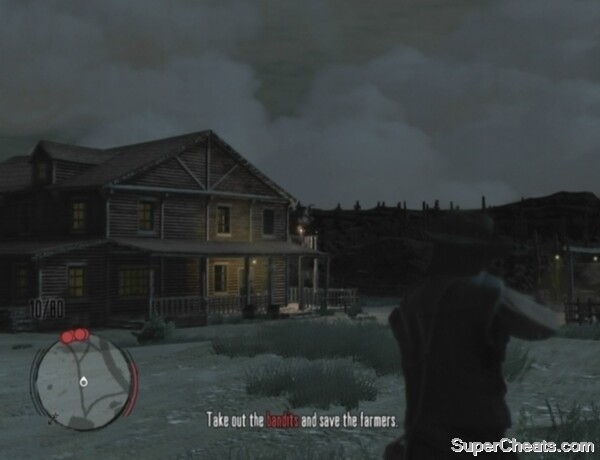
Rescue the farmers being held hostage inside the house.
Move out from cover and enter the house when there are only four blips left on the Mini Map. The two red blips with black arrows on them denote enemies that are upstairs. Both of these enemies have a hostage, but leave them be for now and focus on taking down the two enemies in the kitchen. One of the enemies will take cover by the doorway into the kitchen and occasionally peek his head out; headshot him when you can and then enter the kitchen. Charge the Revolver-wielding outlaw in the kitchen and perform an execution kill by pressing RT/R2 while close to him.
When the downstairs is clear, head upstairs and take cover by the first door on your right. Peek into the room and blast the outlaw when he turns around. The hostage is on her knees by the window at the back of the room, so be careful not to shoot her.
The second hostage is through the closed door two doors down the walkway. Be careful here, as the hostage-taker will execute his hostage if you don't kill him quickly enough. You'll fail the mission if a hostage is killed, so take it slow. Hold LT/L2 to free aim and move into the door to push it open. As soon as the door is open and you see the outlaw and hostage, click the Right Stick to activate Dead Eye and then shoot the hostage-taker in the head.
Once you've rescued both hostages, exit the house and join Johnson and the deputies by the shed.
Rescuing the hostages
Mount your horse after the cutscene and start following Johnson. You'll trigger another cutscene when you reach Mercer Station. You'll face two waves of bandits here, each first arriving on horseback. Remain behind cover and try to kill as many bandits as you can while they're riding in. Shoot the remaining bandits as they pop out from cover to fire. Release the LT/L2 button if you're taking too much damage and stay down until your health is restored.
Kill all of the bandits in the onslaught to complete the mission.
Complete 'The Burning' in Bonnie's mission line to unlock this mission. Williamson's men have captured Bonnie and want to trade her for Norman Deek, the man you took prisoner at the end your previous mission with Johnson.
The trade will take place in Tumbleweed, which is quite a ways from Armadillo, so get on your horse and start following Johnson. Tumbleweed is across the bridge you'll come to soon after entering Gaptooth Ridge.
Move Norman Deek into town to make the trade.
When you regain control over Marston in Tumbleweed, walk behind Deek to move him into town. The deal goes bad, as these things so often do, and the outlaws in the town open fire. Kill one of the three outlaws standing in front of you and then back up and take cover behind the boulder to your left. Equip your Winchester Repeater and start picking off enemies as they scramble for cover. Take down the enemy posted on top of the church to your right first.
Once you've killed the first batch of outlaws, move to one of the boulders further up and take cover to protect yourself from enemy gunfire. Take out as many enemies from behind this cover as you can before moving up to a boulder closer to town.
Move from cover to cover to get closer to the blue blip on the Mini Map, which denotes Bonnie's location. When you're about halfway to Bonnie a cutscene will trigger, showing Bonnie with a noose around her neck and a man kicking a stool out from under her. You must cut Bonnie free before she suffocates.
If you have Dead Eye Level 2 (unlocked by completing 'You Shall Not Give False Testimony, Except for Profit' in Nigel West Dickens' mission line), you can free Bonnie by activating Dead Eye, moving the cursor over the rope she is hanging from to tag it and then pressing RT/R2 to shoot it. You can shoot the rope without Dead Eye Level 2, but it will be more difficult to do so.
You can free Bonnie just as well without using Dead Eye. When you regain control over Marston, ignore the remaining enemies and sprint to Bonnie. Don't just make a beeline toward her, but rather run in a wide arc to the right to avoid the outlaws in the middle of town. Marston will automatically free Bonnie when you reach her.
Take cover in the house south of Bonnie and help your allies kill the remaining outlaws. When the town is clear, approach Bonnie to cut her hands free and complete the mission.
Rescuing Bonnie from the outlaws
To unlock this mission, you must complete 'The Sport of Kings, and Liars' in Nigel West Dickens' mission line, 'Let the Dead Bury Their Dead' in Seth Briars' mission line, and 'On Shaky's Ground' in Irish's mission line.
Be sure to purchase a couple of things of Medicine before setting out on this one. You can buy Medicine at the Doctor's office in Armadillo. Meet Marshal Johnson and the others at the 'M' marker outside of Fort Mercer when you're ready to get started.
In the first stage of the assault, Nigel will drive his wagon into the fort and put on a show to distract the outlaws inside. When Nigel gives the cue, Marston will then surprise the outlaws by opening up the back of the wagon to reveal himself and the Gatling gun. You'll retake control over Marston at this point, putting you in control of the very powerful Gatling gun.
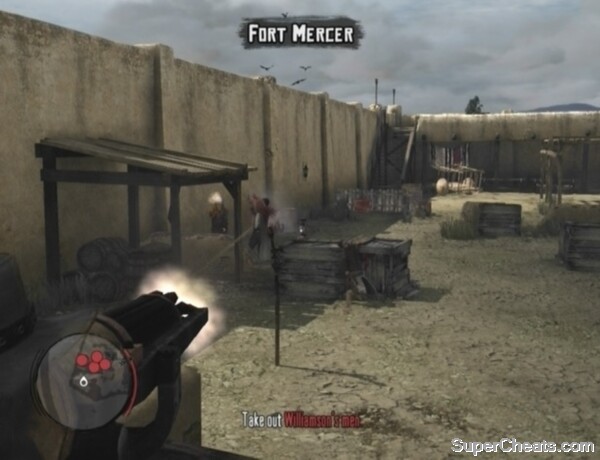
Use the Gatling gun to decimate Williamson's army.
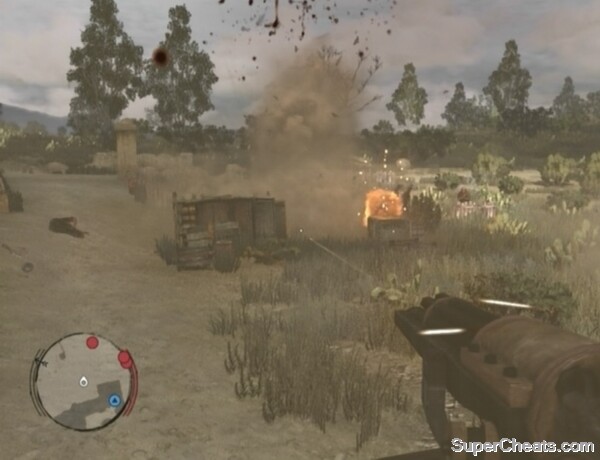
The Gatling gun has infinite ammo and doesn't need reloading, allowing you to easily decimate Bill Williamson's army. Take advantage of the various TNT crates scattered about the area; shoot a crate when there are enemies near it and you'll likely kill them. Each red blip on the Mini Map denotes an outlaw, so look to the Mini Map to determine where enemies are coming from. Kill as many of the outlaws as you can while they're scrambling for cover. It's easiest to kill these enemies as they are entering the area, so turn to face incoming enemies when you notice red blips appear on the Mini Map or spot enemies moving along the fort wall to get to the stairs.
Though the Gatling gun is very powerful, using it does leave you vulnerable because you are unable to move around while doing so. As such, if you're taking a lot of damage and are close to death, use Medicine to instantly restore your health. To use Medicine, open your satchel (by pressing the Back/Select button) and then select the Medicine in the Consumables section by pressing the A/X button.
Once you've cleared all of the enemies in the courtyard, follow Johnson and the others up the steps at the other end of the yard to reach the fort walls. Equip your Winchester Repeater and take out any outlaws marked on the Mini Map. There are plenty of crates and barrels scattered along the wall, so enter cover if need be.
When you've made it to the other end of the wall and have killed all of the enemies on the Mini Map, regroup with Johnson and the others, who will be marked on the Mini Map by a blue blip. After the cutscene, you'll once again be in control of the Gatling gun, which has been mounted on the fort wall to fend off the approaching enemy reinforcements.
Make use of TNT crates near enemies.
Most of the enemy reinforcements will come in on foot, but there will be some on horseback and a couple on wagons. There are several crates of TNT scattered about the area, so take advantage of this when enemies are near them. Both of the enemy wagons is equipped with a Gatling gun is carrying a TNT crate, so just keep spraying these wagons with bullets until they explode. Restore your health with Medicine if you're taking a lot of damage and are close to death.
Defend Fort Mercer against the enemy reinforcements to complete the mission.
(New Austin Walkthrough)
Complete 'Justice in Pike's Basin' in Marshal Johnson's mission line and a 'W' icon will appear on the map, marking the location of Nigel West Dickens. You can fast travel to Nigel's location if you set a waypoint on your map. To set a waypoint, select the Map option at the top of the pause menu, then use the Left Stick to move the cursor next to the 'W' marker and press the A/X button to set the waypoint. You can take a stagecoach or travel there from your campsite.
Nigel is wounded. You must take him to Armadillo and get him to a doctor. Nigel's health bar is visible at the top of the screen; if the bar is depleted, Nigel will die and you'll fail the mission, so make haste. After the cutscene, start following the yellow line on the Mini Map toward Armadillo.
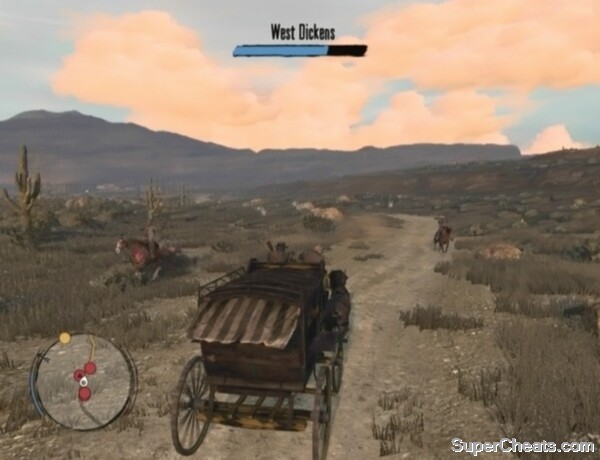
Get Nigel to Armadillo before he expires.
Stick to the road, as the unsteadiness of off-road driving will aggravate Nigel's wounds. To make matters worse, a group of men Nigel conned in a nearby town want him dead. They'll trail after the wagon on horseback and take shots at both you and Nigel. You can aim and shoot your weapon while driving while still controlling the wagon, but don't bother, as taking the time to aim will just slow you down. Keep your weapon holstered and press on toward Armadillo. If you're a careful enough driver, you'll be able to make it there before you or Nigel is killed.
It's OK to drive off-road occasionally, such as to avoid having to turn a corner. You can drive the horses faster by tapping the A/X button, but remember to stop when the horses' stamina is in the red, as subsequent presses will only serve to slow them.
The bandits will back off as you near Armadillo. Drive to the marker in town to get Nigel to the doctor's office and complete the mission.
Driving Nigel to Armadillo
Visit Nigel at the doctor's office between 5 a.m. and 10 p.m. to accept another mission from him. This time, you must drive Nigel to Ridgewood Farm and help him con the residents there into buying his special tonic. Get in the driver's seat of the wagon and follow the yellow line on the Mini Map to Ridgewood. Nigel will leave you outside of town so the two of you can show up separately.
Make your way to the yellow blip on the Mini Map to start the show. You must first demonstrate the remarkable eyesight Nigel's tonic has given you by shooting the cow skull hanging on the porch in the distance. The skull is gleaming, allowing you to easily spot it. Take aim and shoot the skull to complete the first challenge.
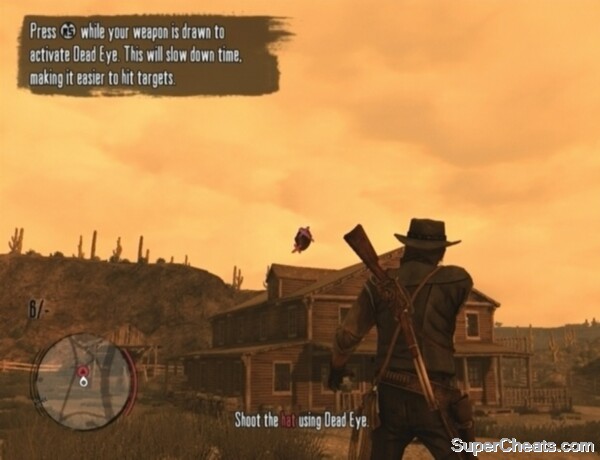
Your next challenge is to shoot the man's hat when he throws it up into the air. You must shoot the hat before it hits the ground to pass. This can be easily accomplished with Dead Eye. Take aim with LT/L2 and click the Right Stick to activate Dead Eye when the man throws his hat up into the air. Move the target reticule over the hat to tag it and then press RT/R2 to shoot it while it's still in the air.
Perform amazing feats to help Nigel con the residents of Ridgewood Farm.
After the cutscene, you must then demonstrate the extraordinary strength Nigel's special tonic has given you by beating Aquila in a fistfight. Keep your gun holstered and tap the RT/R2 button to throw punches at Aquila. Use the RB/R1 button to block, though you most likely won't need to during this fight. You can tackle Aquila to the ground following a punch combo by pressing Y/Triangle when the Ground Tackle prompt appears in the bottom-right corner of the screen. Tap the RT/R2 button to continue punching Aquila while he's down.
Once you've bested Aquila in fisticuffs, he'll draw his weapon. Take aim, click the Right Stick to activate Dead Eye and shoot Aquila in the hand to disarm him. Don't kill him; you just need to disarm him to complete the mission.
Meet Nigel at Ridgewood Farm between 5 a.m. and 10 p.m. after completing 'Exhuming and Other Fine Hobbies' in Seth Briars' mission line to accept this mission.
There's a chariot race on at Gaptooth Breach. You must travel to Gaptooth Breach with Nigel, take the reins and win the race to earn the cash prize. Ride shotgun with Nigel and he will drive you to the starting line. Press the A/X button to skip the journey there if you don't care to hear the dialogue between Marston and Nigel.
When you reach Gaptooth Breach, get in the empty cart at the back to take the reins. Coming in first in this race is very easy; you just need to drive carefully once you have the lead to maintain your position. Do not draw your weapon at any point during this race, as doing so will just slow you down. As well, shooting at another racer or spectator will get you disqualified.
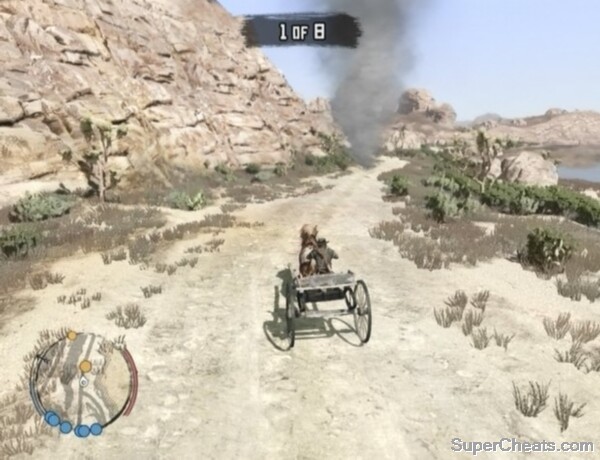
Follow the smoke plumes and keep your lead to win the race.
The smoke plumes mark the route you must take to the finish line. Each waypoint will appear on the Mini Map as a yellow blip. Two waypoints will appear on the Mini Map at once, giving you ample time to prepare for turns and make sure you're headed in the right direction. The final waypoint will be marked on the Mini Map by a chequered flag icon, so give it your all when you see it.
As per usual, stick to the road so your horse can gallop faster. Do not whip your horse when turning a corner; just release the A/X button and use the Left Stick to guide the horse around. Only whip the horse to drive it faster when moving down a straight section of the track. Keep an eye on the stamina meter on the left side of the Mini Map and stop whipping your horse if the meter is in the red, as doing so will just slow the horse down.
If you crash during the race, you have the option of either being placed back on the track or retrying the race from the start. Since the other participants are quite slow, picking up where you left off might best. The track isn't a long one, so it's not a big deal if you feel you need to restart.
Make it to the finish line at the head of the pack to win the race. Afterward, get in the wagon with Nigel and he will drop you off in Benedict Point.
Winning the chariot race at Gaptooth Breach
Nigel is in Plainview, so either take a stagecoach or fast travel there from your campsite. Nigel wants you to help him sell more of his special tonic by participating in another one of his fraudulent shows. Hit the yellow marker in Plainview to get started.
A group of men from a neighbouring town interrupt the show and accuse Nigel of being a con. Nigel is once again in danger, so it's time to high-tail it out of there. Hop in the passenger seat of the wagon to start the getaway. You must defend the wagon from the angry men while Nigel drives to Cueva Seca.
It's quite a long way to Cueva Seca and there are many, many riders after Nigel. Make sure you have your Winchester Repeater equipped and start picking off the first few riders. Auto-aim will help you greatly here; you just need to wait until an enemy is close enough before pressing LT/L2 to lock on. Auto-aim will always lock on to your target's chest, but you can score a headshot quite easily by using the Right Stick to move the reticule up a bit right after locking on to an enemy. Two body shots with the Winchester Repeater are enough to kill an enemy, but a shot to the head will end him immediately.
Defend the wagon from Nigel's unsatisfied customers.
The first wave of enemies will come at the wagon from behind, so turn around and take them out as they near. You'll encounter a roadblock when you reach Solomon's Folly. There is one enemy perched on top of the large rock along the side of the road and two wagons filled with TNT crates blocking the way. You know what to do. Put a bullet in the TNT crates to set them off and shoot the man on the rock as you pass by.
Once you're passed the road block, you'll encounter more men on horseback, as well as a couple of wagons. You must kill both the passenger and the driver on each wagon. If you kill the driver first, the passenger will take the reins, so be sure to kill them both.
Continue defending the train until Nigel reaches Cueva Seca.
Hit the marker in Cueva Seca to accept another mission from Nigel. There's another race happening; this time it's a horse race at Rathskeller Fork. Mount your horse and follow the yellow line on the Mini Map to the starting line. Match Nigel's speed if you wish to hear the dialogue between Nigel and Marston on the way there.
Like before, there are eight participants. The rules are the same: no shooting at spectators or other participants. This race is a bit more challenging than the chariot race, but as long as you stick to the road and keep an eye on your horse's stamina meter, you'll be able to win it without much difficulty.
Beat out the competition at Rathskeller Fork.
As per usual, plumes of smoke act as waypoints and appear on the Mini Map as yellow blips. Two waypoints will appear on the Mini Map at one time, giving you ample time to prepare for turns and make sure you're headed in the right direction.
Keep an eye on your horse's stamina meter; cease spurring when the meter is in the red, as doing so will slow the horse and may get you bucked off. Tap the A/X button to spur the horse until its stamina is low and then wait until the meter is at least halfway full before spurring the horse again.
This track is a long one, which can make it difficult to maintain your first place position the entire time. Try your best to stay in at least the top three for the whole race. If you remain in the top three, you can easily pull through to first during the home stretch. The final waypoint will be marked on the Mini Map by a chequered flag icon, so give it your all when you see it.
Winning the race at Rathskeller Fork
(New Austin Walkthrough)
Complete 'You Shall Not Give False Testimony, Except for Profit' in Nigel West Dickens' mission line, then travel to the 'S' that appears on the map southeast of Armadillo and touch the marker there to accept a mission from Seth Briar.
Moses, Seth Briars' former treasure hunting partner, was caught exhuming and is now locked up somewhere in Benedict Point. Seth wants the treasure map Moses has with him. You'll have to help Seth get his map back before he'll help you.
Mount your horse and start following Seth toward Benedict Point. When you reach the spot, Seth asks you to distract the two deputies near the cabin so he can speak to Moses. You'll have to commit a crime to distract the deputies, but don't worry; Seth will help you clear your name once he has what he wants.
Make off with a deputy's horse to lead the two deputies away from their post.
When you regain control over Marston after the cutscene, hop on one of the deputies' horses, which are marked on the Mini Map with blue markers, and start east. To lose your wanted level, you must get out of the red circle visible on the Mini Map and remain outside of it until the text in the top-right corner of the screen is completely grey.
Spur your horse until the stamina meter on the left side of the Mini Map is in the red, at which point hold the A/X button and wait until some of the meter is replenished before spurring the horse again. Spurring a horse when its stamina meter is in the red will only slow the horse; continuing to spur it thereafter will get you bucked off.
Once you've lost the deputies, return to Seth by following the blue marker on the Mini Map. Moses manages to break free from the cabin and makes a break for it. You must stop Moses from getting away -- without killing him.
You can use your Lasso to capture and hogtie Moses. As soon as you regain control over Marston, press up on the D-pad to call your horse and hop on. Take aim while trotting next to Moses and throw the Lasso to stop him. When you've managed to lasso your target, dismount your horse, approach Moses and press the Y/Triangle button to hogtie him. With that, press the Y/Triangle button to pick him up, then walk over to your horse and press the Y/Triangle button again to place him on the horse's rear. Bring Moses back to Seth to get Moses talking.
Lassoing Moses
Once Seth knows what he needs to know, it's time to clear your name. Seth will give you a Pardon Letter, which you can use at a telegraph office to clear your bounty. There's a telegraph office right along the tracks here, so walk in and approach the man behind the counter. The bounty for horse theft is only $20, so you may want to save the Pardon Letter for later and pay the bounty out of your pocket.
Meet Seth at Coot's Chapel to accept this mission. You may want to purchase a couple of things of Medicine from the doctor's office in Armadillo before getting started.
Seth is still in search of his lost treasure map. He has loaded several corpses onto the back of his wagon with plans of searching them for the map. Seth needs you to drive him to a secluded area first, as there are other treasure hunters after the same map.
Get in the driver's seat of the wagon and start following the yellow line on the Mini Map. Three treasure hunters on horseback will soon appear and surround the wagon. It is best to take the time to kill them all with your Winchester Repeater, as you probably cannot outrun them. It might help if you tap the RB/R1 button to slow the horses so you can properly take aim. A couple of the enemies are carrying Fire Bottles, so you definitely don't want to come to a complete stop to fight them off.
Protect the wagon from the treasure hunters.
If you're taking a lot of damage while trying to fend off the treasure hunters, you can use Medicine to instantly restore your health. To use Medicine if you have some, press the Back/Select button to open your inventory, then select the Medicine in the Consumables section and press the A/X button to use it.
When the first three treasure hunters are dead, press the LB/L1 button to put away your weapon and continue following the yellow line on the Mini Map. You will soon encounter four more horse-riding treasure hunters. Take them out with your Winchester Repeater before continuing on.
You'll face a group of four more treasure hunters before the end of this mission. You might be able to make it to Tumbleweed without having to kill this last batch, but you might as well kill them just to be sure. Hit the marker in Tumbleweed once you get there to complete the mission.
Travel to Tumbleweed and look for Seth in the graveyard behind the chapel. Seth is still searching for that treasure, which he has learned is in a chest somewhere inside the abandoned mansion at the west end of town.
Start toward the mansion, denoted by the yellow blip on the Mini Map, and you will soon encounter a band of treasure hunters. There are plenty of wagons, crates and barrels to use for cover, and these guys are terrible shots, so you shouldn't have any trouble clearing them out.
The treasure Seth is after is somewhere inside the abandoned mansion in Tumbleweed.
Take the time to loot the corpse of a fallen treasure hunter by approaching his corpse and pressing the Y/Triangle button when prompted. Do this to discover the Treasure Hunter outfit. You can't don this outfit until you've collected all of the scraps needed to craft it. You can view a list of the items needed to craft any of the outfits you've discovered by interacting with the wardrobe in one of your safe houses. Refer to the 'Outfits' section of this guide for a complete listing of outfits and where to find everything needed to craft them.
Kill all six treasure hunters marked on the Mini Map and then move up and take cover in front of the rock wall surrounding the mansion. There are two more treasure hunters to deal with here: one on the porch and one in the left-most window on the second story of the mansion. Take out both of these treasure hunters with your Winchester Repeater before approaching the front doors.
The front doors of the mansion are locked. You'll have to go through the basement, which is accessible through the cellar door along the left side of the mansion. The treasure chest is upstairs in one of the rooms on the second floor. Though there aren't any enemies marked on the Mini Map, you will face some treasure hunters inside the mansion. The enemies in this area will only appear on the Mini Map when you spot them, so be extra careful.
Search the mansion for Seth's treasure.
Two treasure hunters will enter the basement from the first floor, so blast them both before heading upstairs. Turn through the doorway to your right once up the stairs and take cover below the opening in the wall. There are two enemies on the first floor and two on the second-floor walkway. Kill these enemies before taking the stairs up to the second-floor walkway. There are two more enemies in the room with the treasure; gun down the first, enter the room and then immediately turn right to spot the second enemy through the doorway there. Kill both of these enemies and then move in to claim the treasure for Seth.
(New Austin Walkthrough)
Complete 'Liars, Cheats and Other Proud Americans' in Nigel West Dickens' mission line to unlock Irish's missions. Travel to the 'I' symbol in Armadillo to get started.
When you regain control over Marston, shoot the enemy on the left in the head, then take aim at the man with the knife and press the RT/R2 button when he's close to perform an execution kill. After the ensuing cutscene, mount your horse and start following Irish. He'll lead you to a cliff overlooking a small cabin.
The enemies surrounding the cabin will open fire as soon as you come into view, so waste no time. You can likely kill them all from horseback with your Winchester Repeater without taking too much damage. If not, hop off your horse, enter and take out the enemies as they pop out to shoot.
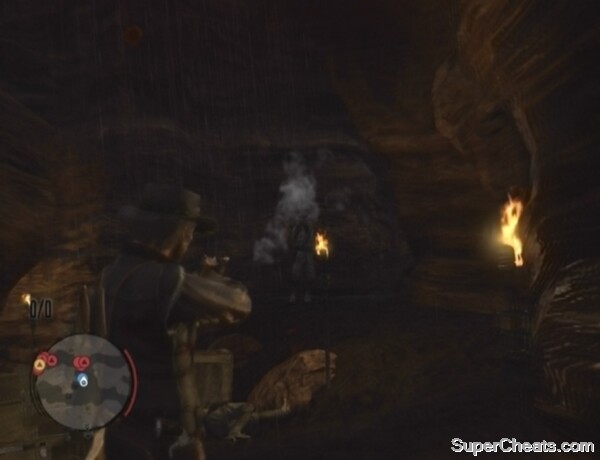
Kill all of the enemies outside and then search the cabin for the Gatling gun.
There is one last enemy inside the cabin. He won't appear on the Mini Map and he's wielding a Double-barreled Shotgun, so be careful. Keep your distance from the front door and blast him from afar when he appears. Pick up the Double-barreled Shotgun for your own use and enter the cabin to complete the mission.
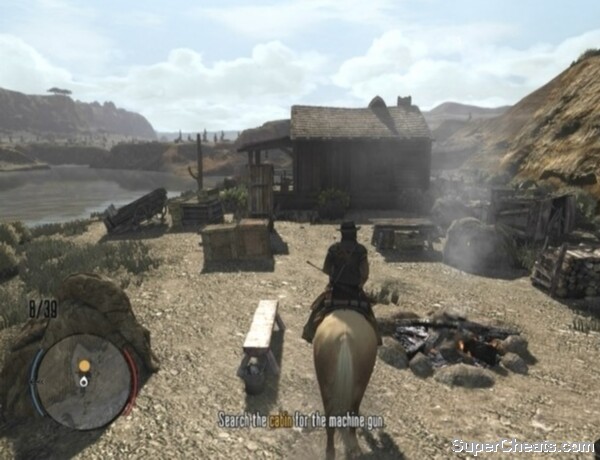
Irish is now in Benedict Point, so make your way there and approach the marker to get started. The machine gun you're after is being held by a group of miners in Gaptooth Breach. Hop on your horse and follow Irish there.
At Gaptooth Breach, when Irish leaves with the horses and the two guards approach you, take out your weapon, click the Right Stick to activate Dead Eye, sweep the target reticule over the two guards and then press RT/R2 to shoot both of them.
You must get inside the mine. The mine entrance is marked with a yellow blip on the Mini Map. There are eight or so armed miners protecting the entrance. The miners are spread out and there are plenty of objects to use as cover, so this should be an easy fight. You can likely clear the place by simply walking toward the mine entrance and shooting the miners when they appear.
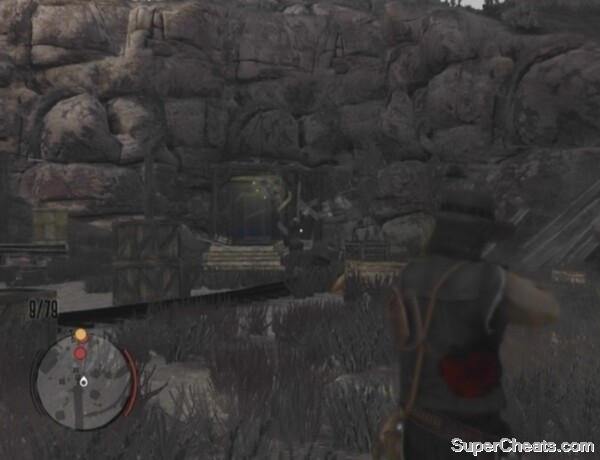
Fight your way to the mine entrance.
Enter the mine once the outside area is clear. There are two enemies at the start. Blast the first with your Winchester Repeater, then turn the corner and look for a TNT crate next to the cover there. Shoot the TNT to kill the miner hiding behind the crates. You'll encounter more TNT crates and TNT barrels as you move through the mine, so use them to your advantage.
Continue down the tracks and turn left when you reach the fork. Shoot the TNT barrel beyond the crate to kill the miner that appears. There are two more enemies up ahead. You can take out one or both of them by shooting the TNT crates next to their cover. Continue following the tracks once you've dealt with both enemies,
You're almost at the Gatling gun, which is marked on the Mini Map by a yellow blip. Continue following the tracks, killing any miners you encounter, and you will soon find yourself at the core of the mine. There are four miners guarding the machine gun. There's one TNT barrel here you can shoot to kill at least one of these miners.
Once you've downed the miners guarding the Gatling gun, move in and inspect the mine cart. The gun is inside. It's very heavy, so you'll push it in the mine cart. Stand behind the cart, press the Y/Triangle button to take hold and then start pushing the cart toward the shaft room.
Take advantage of the TNT crates and barrels inside the mine.
A cutscene will ensue once you've made it to the shaft room. After the cutscene, grab onto the mine cart once more and start pushing it down the tracks. There are some more miners to deal with here; pick them off with your revolver as they come into view. Keep pushing the cart and Marston will automatically jump on the cart when you gain enough speed.
As you near a downward slope, you will see a miner placing a TNT barrel in the middle of the tracks. Take aim and shoot the TNT barrel to kill the miner and clear the tracks. With that, ride the cart down to the yellow marker to complete the mission.
Irish is in Thieves' Landing, which is just west of MacFarlane's Ranch. If you haven't visited this location before, you can fast travel there by setting a waypoint on your map and travelling to that waypoint via a stagecoach or your campsite.
Follow Irish to the shipping yard at the south end of town. The gate is closed, so follow Irish around back. A cutscene will ensue when you head up the steps there. Shaky is being held captive inside the warehouse; you must rescue him so he can provide you with ammo for the Gatling gun.
When you regain control over Marston after the cutscene, climb the ladder across from the stairs to reach the walkway and then climb the second ladder to reach the roof. Click the Left Stick to crouch once on the roof and walk to the top of the peek. There's an open window on the other side of the peek you can use to enter the building. Slide down the side of the peek to reach the open window. Don't touch the Left Stick while sliding, as doing so might cause you to accidentally overshoot the platform below.
Save Shaky from the bandits in the warehouse.
Make sure you're crouching before entering the warehouse through the window. Don't tap the A/X button to move faster once inside the warehouse, as doing so will alert the patrolling guard. Look down at the patrolling guard on the walkway; wait until he walks over and stands at the top of the stairs at the far end of the walkway before dropping from the platform.
After dropping onto the walkway, turn around and enter the room where Shaky is being beaten. The three bandits here are occupied, so move in and kill them swiftly. Take aim, click the Right Stick to activate Dead Eye, sweep the target reticule over the three men and press RT/R2 to clear the room. The guard patrolling on the walkway will have heard the commotion, so blast him through the doorway when he comes close.
Approach Shaky when the warehouse is clear to cut him free. A group of five bandits will then enter the warehouse, so you'll have to fight your way out. Exit the room and take cover behind the crates along the railing. Kill the enemy by the barrels to your right first, then target the TNT crate on the walkway on the other side of the warehouse and shoot it. Finish off the remaining enemies and then take the stairs down to the ground floor. Approach the wooden gate on the ground floor and press Y/Triangle to open it.
You'll encounter four more enemies as soon as you're through the warehouse door. Take cover behind the crates just beyond the door and clear the enemies here. Then, follow Shaky deeper into the yard and you will encounter four more bandits. Kill these last few bandits and Shaky will come through with the machine gun ammo.
Rescuing Shaky
Bandits on horseback will attack the wagon as you're leaving with the ammo. All of the enemy riders will attack the wagon from behind, so turn around and be ready with your Winchester Repeater. Auto-aim will help you greatly here, as you'll just need to wait until a rider is close before pressing LT/L2 to lock on. Auto-aim will always lock on to your target's chest, but you can score a headshot quite easily by using the Right Stick to move the reticule up a bit right after locking on to an enemy. Two body shots with the Winchester Repeater are enough to kill an enemy, but a shot to the head will end him immediately.
Irish will at one point call out an enemy on the bridge; when you hear this, turn around and shoot the bandit to knock him down. This enemy will appear on the Mini Map as a red blip with a black arrow, so keep an eye on the Mini Map.
Defend the wagon until Irish makes it to MacFarlane's Ranch to complete the mission.
Complete 'The Assault on Fort Mercer' in Marshal Johnson's mission line to unlock this mission. Irish is by the waterside south of MacFarlane's Ranch. You're leaving for Mexico, so you'll have to take a ferry there.
Once on the ferry, pick up the Springfield Rifle on the crate to your left. This is a great weapon and definitely a step up from your Winchester Repeater. However, the Springfield Rifle can only hold four shells at once, which means you'll have to reload it twice as often. As well, ammo for the Springfield Rifle is not as easy to come by, so you'll likely still be getting use out of your Winchester Repeater. Enemies will soon start appearing along the coastline, so it's a good thing you have this new weapon.
The Springfield Rifle will aid you greatly on the ferry ride to Mexico.
There is a crate of ammo at the back of the ferry you can use to refill your weapons. You can only take ammo from this crate when your current weapon is low on ammo, at which point Irish will point out the crate and it will appear on the Mini Map as a green blip.
Take cover next to the crates along the side of the ferry and pop up to shoot the enemies along the coast as you pass by them. Duck down if you're taking a lot of damage and remain down until your health is restored. You'll be attacked by enemies on horseback as well as enemies on foot. Most of the enemies on foot will be hiding behind boulders, so stay down until they pop out to shoot, at which point take aim and blast them.
The ferry will soon come to a hill. There is an enemy on this hill with a crate of TNT. This enemy will throw TNT at the ferry, so you must kill him before he manages to throw one onboard. If a stick of TNT lands on the ferry, you're done for, so immediately target the crate of TNT on top of the hill and shoot it to kill the enemy there.
More enemies will appear alongside the river once you're beyond the hill, so continue gunning them down with your Springfield Rifle. You'll get a short reprieve afterward.
Shoot the TNT crate to send the TNT-throwing enemy flying.
Shortly after reaching the second wave of enemies, you'll come to another TNT-throwing enemy on a hill. The TNT crate next to this guy is a bit hard to see, so quickly take him down with your Springfield Rifle when you're close enough. You'll encounter yet another TNT thrower when the ferry reaches Greenhollow (text reading 'Greenhollow' will appear at the top of the screen). This guy's TNT crate is sitting on the boulder atop the hill, so shoot the crate to send him into the drink.
There is still one more TNT-throwing enemy to look out for, but you'll pass by some enemies on foot and horseback first. Keep an eye out for a TNT crate along the ridge as well as the smoke arc created when a stick of TNT is thrown.
Once you're past the last TNT crate, there's just a short ways left to go. Kill the remaining enemies and the raft will then stop on a beach. There are two horses on this beach; you can use one to get out here.
You already have a safe house in Mexico. The safe house is along the coast northeast of Escalera; just look for a green house icon on your map. You can set a waypoint next to the safe house and fast travel there from your campsite or ride your horse there and enjoy the scenery.
(Nuevo Paraiso Walkthrough)
You can accept a mission from De Santa as soon as you get to Mexico. Make your way to the 'D' marker in Escalera to accept a mission from him.
At the start of the mission, you can either follow De Santa's wagon on horseback or ride shotgun with De Santa. It doesn't matter which means of transport you choose. You can skip the journey to Chuparosa if you go by wagon, so go that route if you don't care to hear the dialogue between Marston and De Santa on the way there.
When you reach your destination, mount your horse and follow De Santa to the train. You must defend the train while it travels to Casa Madrugada. Rebels will attack the train on its way there. If the 'Train Engine' meter at the top of the screen is depleted, the train will explode and you'll fail the mission, so quickly take out attacking rebels to minimize damage to the train.
Defend the train from the rebels.
The first wave consists of six rebels. The rebels will appear on both sides of the tracks, so you might have to switch over to the other side to take care of the enemies there. To move to the other side of the tracks, ride a bit ahead of the train and cross in front of it. Make sure you give yourself enough time to pass in front of the train, as getting hit will cost you your horse.
It helps to ride a bit ahead of the train so you can kill the rebels on the other side of the tracks before the train blocks your view.
After three more waves of enemies, the train will come to a tunnel. More rebels will spawn at the end of this tunnel; five out of the six of these rebels will be on the right side of the tracks -- one of them with TNT -- so make sure you're on the right side of the tracks when you reach the tunnel so you can quickly dispatch this group.
The remaining rebels will attack the train from the right, so keep to the right side of the tracks until the train reaches the station at Casa Madrugada. Join De Santa in Casa Madrugada by following the yellow blip on the Mini Map.
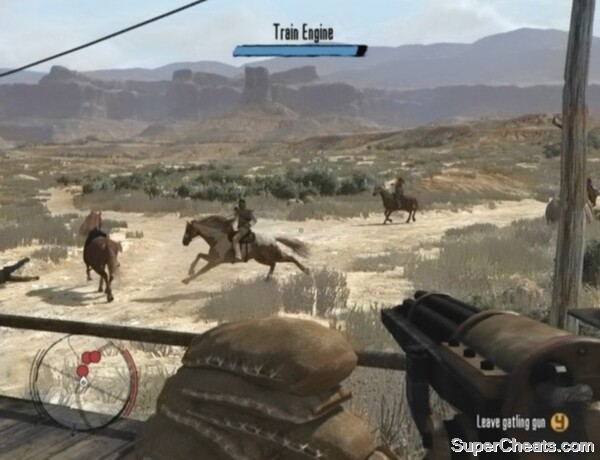
After the cutscene, you must catch up to the commandeered train, kill the five rebels onboard, then jump on and stop the train before it reaches the bridge rigged with dynamite. Mount your horse and start after the train. Remain on the road along the right side of the tracks. Shoot the rebel at the back of the train and then move up alongside the caboose. There is on rebel on top of the caboose, so move to the right just a bit so you can target and kill him. Once he's down, shoot the two rebels on the flatbed train car and then the rebel on top of the train car in front of them. Press LB/L1 to put away your weapon once you're done with it, as keeping it out will slow you down.
Get to the front of the train and jump onboard before the train reaches the bridge rigged with dynamite.
When all five rebels on the train are dead, you must then ride to the front of the train and jump onboard to put on the brakes. Shortly after reaching Mesa Del Sol, the train will go up an incline. When the road on the right side of the tracks ends, switch over to the left side so you can use the road there. Your horse won't be able to gallop fast enough to catch up with the train if you aren't on the road, so wait for the caboose to pass and then cross the tracks.
You must get to the front of the train before the train reaches the bridge. Spur your horse while keeping an eye on the horse's stamina meter, as continuing to spur the horse when its stamina is in the red will only slow it down.
Once you've made it to the front of the train, get alongside the door on the engine and press the A/X button when prompted to hop on and complete the mission.
Taking back the train
Get on your horse and start following De Santa to Tesoro Azul. You can race him there when the yellow blip appears on the Mini Map, although it doesn't matter if you win or lose.
At Tesoro Azul, wait until the gates are open and then sprint to the stack of crates along the left side of the road. Take cover behind these crates, equip your Springfield Rifle or Schofield Revolver and start picking off the rebels around the town. There is a rebel on top of the church along the right side of the road, so try to headshot him when he pops out from cover to fire.
Once you've dealt with the first wave of rebels, move further into town to trigger a second wave. Kill this second wave of rebels and then join De Santa at the centre of town.
Take cover and clear out the rebels.
After the cutscene, make your way to the green blip on the Mini Map and take some Fire Bottles from the boxes by approaching the boxes and pressing the Y/Triangle button. Select the Fire Bottles from the radial menu and take to torching the three rebel hideouts marked on the Mini Map. All it takes is a single Fire Bottle to burn down one of these hideouts. It doesn't seem to matter how the bottle hits the building, either. Take aim with LT/L2 by pointing the arc where you want the Fire Bottle to hit and then press RT/R2 to throw a bottle. Burn down all three rebel hideouts to complete the mission.
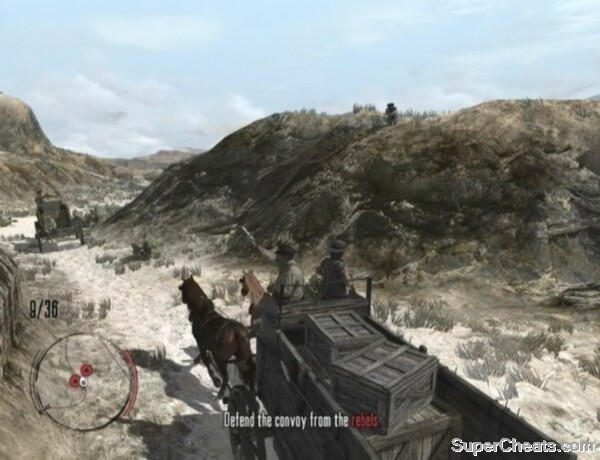
Meet De Santa outside of Escalera between 7 a.m. and 10 p.m. to accept this mission. You must accompany De Santa to Torquemada and help the Mexican Army fight the rebels. Torquemada is quite a ways from Escalera, but fortunately you can skip the trip there by pressing the A/X button while riding shotgun with De Santa.
Rebels will attack the convoy after De Santa wakes Marston near Torquemada. Take them down with your Winchester Repeater or Springfield Rifle as you pass by them. Three rebels on horseback will engage you before you reach the camp.

Defend yourself against the rebels.
When you reach the camp, follow De Santa to Captain Espinoza to trigger a cutscene. After the cutscene, pick up the Rolling Block sniper rifle on the table (the green blip on the Mini Map) and start picking off the rebels perched on the ridge to the north. One body shot is enough to kill a rebel. Kill all of the marked rebels with your Rolling Block and then move up to help the army defend the blockade.
At the blockade, take cover behind one of the sandbags at the front and put down the incoming rebels with your Winchester Repeater or Springfield Rifle. The rebels have low-powered weapons and don't have much health, but there are a lot of them, and you'll face many more before this mission's end.
Auto-aim will always lock on to your target's chest, but you can score a headshot quite easily by using the Right Stick to move the reticule up a bit right after locking on to an enemy.
Once you've defended the blockade, make your way to the valley to face another wave of rebels. There is plenty of cover in the valley, so find a good spot and clear out the marked targets from there. You will face many more rebels in the valley, so remain behind cover to protect yourself from enemy fire. If there is more than one enemy hiding behind a piece of cover, toss a Fire Bottle over the cover to force them out.
The rebels aren't very powerful, but there sure are a lot of them.
When the valley is clear of rebels, follow the army to stage the final assault at the ruins. There are even more rebels here, so quickly take cover behind one of the boulders outside the ruins and start picking them off. If you're taking a lot of damage, use Medicine or duck down and remain behind cover until your health is restored. Defeat the last batch of rebels here to complete the mission.
If you're having trouble getting to the starting point of this mission, place a waypoint on the 'D' symbol on the map to highlight the way to De Santa with a red line on the Mini Map. Purchase some Medicine if you don't already have some before setting out on this one.
The train you must escort is at the station in Chuparosa. Get in the passenger's seat of the wagon and you can skip some of the trip there by pressing the A/X button. Rebels on horseback will attack the convoy shortly after Captain Espinoza wakes Marston. Equip your Winchester Repeater or Springfield Rifle and start killing the attacking rebels. Though Auto-aim will always lock on to your target's chest, you can score a headshot quite easily by using the Right Stick to move the reticule up a bit right after locking on to an enemy.
Yup, another rebel ambush.
You'll be attacked by several groups of rebels on your way to the train, so keep an eye on the Mini Map. Once you've made it to Chuparosa, dismount and follow Captain Espinoza onto the train.
You must use the Gatling gun on the flatbed train car to defend the train against the rebels. If the rebels damage the train enough to deplete the 'Train Engine' meter at the top of the screen, the train will explode and you'll fail the mission, so work quickly to minimize damage to the train. The Gatling gun has infinite ammo and doesn't need reloading, so you should have a fairly easy time gunning down the rebels once they appear.
It's a long way to the army camp and rebels will continue to swarm the train for the entire trip. The rebels will attack from both sides, so keep an eye on the Mini Map and prioritize the enemies closest to the train engine. Use Medicine to restore your health if you're taking a lot of damage and are close to death.
Rebels will eventually begin jumping from their horses onto the train. Put them down with the Gatling gun when they pop up from behind the sandbags to shoot at you. You'll hit a checkpoint when you reach this part of the mission, so if the rebels do manage to destroy the train engine, you can retry from this point with the train in perfect condition.
The Gatling gun has infinite ammo and doesn't need reloading, so keep firing!
Continue defending the train until it reaches the camp. Hop off the train and hit the yellow marker in the middle of the camp to complete the mission.
You must complete 'Must a Savior Die?' in Luisa Fortuna's mission line before you can take on this mission. Meet De Santa in Escalera between 7 a.m. and 10 p.m. once you've done that to accept this mission.
The Mexican Army has captured Bill Williamson and Javier Escuella and are holding them inside the church in Chuparosa. Hop in the wagon with De Santa to start the journey to Chuparosa. Once you're riding Shotgun with De Santa, you can skip ahead to your destination by pressing the A/X button, but you might want to sit through this one.
De Santa will hold three sharpshooting competitions on the way to Chuparosa. Whoever kills the most birds in five shots will win $25. The Mexican soldiers accompanying the wagon are your competition. Auto-aim makes winning these a breeze. You can nab an easy $75 by winning all three.

You can make easy money shooting birds on the way to Chuparosa.
When you arrive at Chuparosa, hop off the wagon and make your way to the church, which is marked on the Mini Map by a yellow blip. Enter the church to trigger a cutscene.
After the cutscene, you must get to Reyes so he can cut you free. When you regain control over Marston, make a mad dash toward the yellow building in the distance. Run around to the back of the building and head up the stairs there to meet with Reyes. Once Reyes has cut Marston's hands free, head back down the stairs and make a beeline to the crate that holds your weapons (the green marker on the Mini Map). Open the crate to get your weapons and ammo back and then take cover along the wall.
The Mexican soldiers are at the front of the El Alcalde de Chuparosa building at the east end of town. You can take out these soldiers from behind the wall surrounding the fountain or sprint over to the low wall surrounding the entrance of the building and clear the soldiers out from there. There aren't very many of them, so you won't take much damage, if any.
Your target is Captain Espinoza. He is inside the El Alcalde De Chuparosa building, on the second floor. To reach the second floor, climb to the top of the crates along the left side of the building and then onto the awning from there. Espinoza will soon open the door here and fire at you, so aim your weapon at the door as soon as you're on the walkway. Activate Dead Eye when Espinoza opens the door, tag his head and then press RT/R2 to finish him and complete the mission.
Killing Captain Espinoza
(Nuevo Paraiso Walkthrough)
You can accept a mission from Landon Ricketts as soon as you get to Mexico. Make your way to Chuparosa to accept a mission from Ricketts.
Landon Ricketts gives you a Schofield Revolver, which is more powerful than your current revolver. He'll also bump up your Dead Eye to level three. This allows you to tag targets while in Dead Eye by pressing the RB/R1 button while the person or object is in your crosshairs. Use this new ability to destroy three bottles on the crate in front of you. Take aim, activate Dead Eye, tag all three bottles with RB/R1 and then press RT/R2 to fire off the three shots.
Once you've completed the first task, follow Ricketts over to some buzzards. When Ricketts startles the buzzards with a gunshot, take aim, activate Dead Eye, tag at least two of the four buzzards that take flight and press RT/R2 to shoot them down. You need only kill two of these birds to pass, but there's nothing stopping you from shooting down all four.
Dead Eye Level 3 lets you tag targets with the RB/R1 button.
When you've completed both tasks, follow Ricketts into town to trigger a cutscene. After the cutscene, get on your horse and follow Ricketts to the hijacked wagon. There are three banditos here and one of them is holding the driver captive. The hostage taker will execute his hostage if you get too close, so only move as close as Ricketts is.
Kill the other two banditos before turning your attention to the hostage taker. You must use Dead Eye to kill him and free the hostage. Activate Dead Eye, tag the hostage taker anywhere and then fire to free his captive. You don't have to worry about accidentally tagging the hostage, so any tags you place will definitely hit the bandito.
Now you must escort the wagon back to Chuparosa. You'll encounter a chuckwagon and a couple of banditos on your way there. There are two gas lanterns on the chuckwagon you can target to set the wagon aflame. When you reach the chuckwagon, activate Dead Eye, tag both lanterns and then shoot to set fire to the wagon.
Kill the remaining banditos and then follow the wagon into town to complete the mission.
Saving the wagon
Meet Ricketts at the saloon in Chuparosa between 7 a.m. and 10 p.m. to accept this mission. A woman named Luisa Fortuna is being held by the Mexican Army in a cave in El Matadero. You must go there with Ricketts and help him bust her out.
To get to El Matadero, you can either take the train or ride there yourself. El Matadero is quite far from Chuparosa and you can skip the journey there if you go by train, so taking the train is clearly the better option.
When you reach the station in Casa Madrugada, mount your horse and follow Ricketts to El Matadero. At El Matadero, dismount and follow Ricketts to meet Carlos. Carlos will distract the two soldiers guarding the cave entrance, allowing you to slip inside. Take cover behind the marked boulder and wait until Carlos lures the two guards away before walking down the ridge and entering the cave.
Fight your way through the cave to Luisa's cell.
There are plenty of barrels and crates you can use as cover as you fight your way through the cave, but you could just as well run-and-gun it with your Springfield Rifle or Schofield Revolver. Ricketts is there to help too, and he's a pretty good shot. There are quite a few enemies though, so do duck behind cover if you're taking a lot of damage and remain behind cover until your health is restored.
Once you've made it to the cell, you then must defend Ricketts while he works to blast open the prison door. You'll only have to defend against four enemies, so keep an eye on the Mini Map and take them down when they appear. Ricketts is using TNT to destroy the lock on the prison door, so take cover behind the table when he tells you to.
Ricketts can't use his weapon while carrying Luisa out of the cave, so you'll have to lead the way. You'll face more soldiers on your way out, so do as you did before to take them down. Outside, get on one of the horses (or whistle for your own) and start down the trail. The trail is lined with enemies, so equip your Springfield Rifle (or whichever weapon you have ammo for) and blast the soldiers as you come to them.
The escape route is lined with enemy soldiers.
Get to the end of the trail and then wait for Carlos to appear to complete the mission.
This mission starts with a poker game. Don't worry if you don't know how to play poker, as you can't lose against these guys; they'll all fold no matter what. The game should only last for a few rounds as long as you place bets. You can read the instructions that appear in the top-left corner of the screen if you're interested, otherwise you can press RB/R1 to skip to your turn, place a bet and then press RB/R1 again to claim your winnings.
After the poker game, you must defeat Muller in a duel. Duelling is quite simple: draw your gun and tag your opponent in the right places (your opponent's head and chest) to fill the blue bar in the bottom-right corner of the screen. You can draw your gun by pressing LT/L2 or by pulling back on the Right Stick and then pushing the stick forward. Once you have your gun out, use the Right Stick to aim and press RT/R2 to mark your opponent.
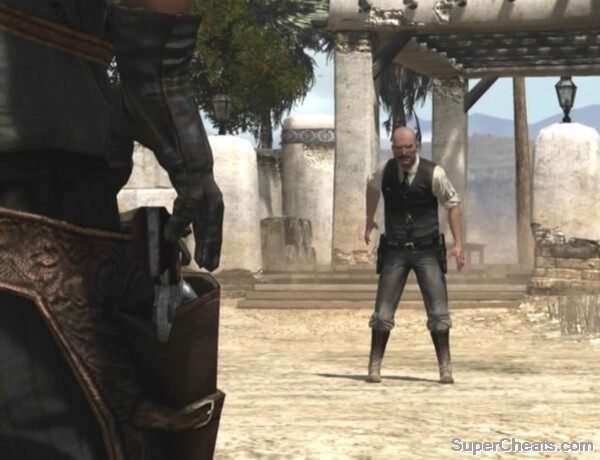
The longer you wait to draw your weapon, the more accurate your shots will be.
You must place six marks on your opponent to end the duel. Each mark you place will fill the blue bar in the bottom-right corner of the screen. The blue bar is yours and the red bar is your opponent's, so the marks your opponent places on you will fill the red bar. Whoever's bar is the fullest when all six marks are placed will win the duel. Targeting your opponent's head and chest will fill the bar the most. Place the marker when the target reticule is white and contracted for more accurate shots.
Draw when Muller grabs his revolver and mark his head and chest to win out. After the cutscene, you must defeat the stranger in a duel without killing his hostage. You just need to place one mark here. Wait until the stranger has his gun out before drawing your revolver and tagging the stranger once in the head.
As soon as the stranger is dead, turn right and sprint over to the low wall around the fountain. Take cover here and kill the four marked enemies on the other side to complete the mission.
Winning the duels
Some prisoners are about to be executed without trial. You must go with Landon and rescue the prisoners by intercepting the wagons that are transporting them.
When you regain control over Marston after the cutscene, get on your horse and follow Landon to the two wagons. Each wagon is accompanied by a convey of three soldiers on horseback, making for a total of six soldiers and two drivers to deal with. The soldiers' weapons are powerful, so you have to be very careful when taking them on.
Wait until the second wagon passes by before starting after it. Dead Eye will help you greatly here. The soldiers won't attack you until you fire, so ride a bit behind the first three with your Winchester Repeater equipped and activate Dead Eye. Use the Right Stick and RB/R1 to place two tags on each of the soldiers on horseback and then place a single tag on the back of the wagon driver's head. If done correctly, you'll take all of them out just like that.
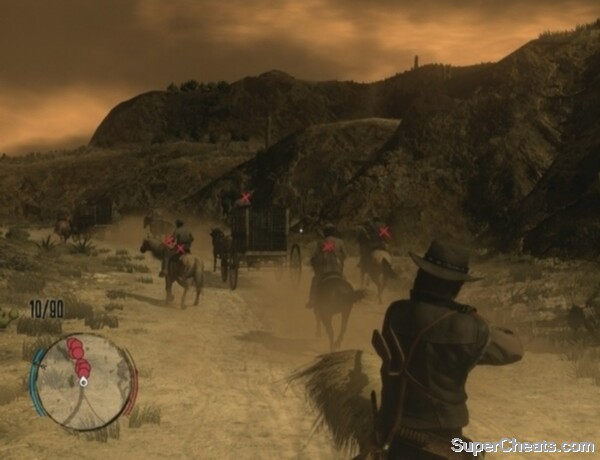
Use Dead Eye to waste the convoy and wagon driver.
Once you've killed the first driver, you can either continue on your horse or get out and ride shotgun with Landon in the prison wagon. When you reach the second wagon, use Dead Eye to clear them out as you did before. With that, get in the driver's seat of the second wagon and start following the yellow line on the Mini Map.
You must get the prisoners to America. You'll encounter more soldiers along the way, but ignore them and just speed by. You can shoot at them if you wish, but be sure to put your weapon away when you're done with it. There are a couple of enemies with Fire Bottles on the first bridge you come to, so try your best to avoid the flames created by the thrown bottles.
Reach the yellow marker at the end of the second bridge to complete the mission.
Saving the prisoners
(Nuevo Paraiso Walkthrough)
You must complete 'Landon Ricketts Rides Again' in Landon Ricketts' mission line before you can accept a mission from Luisa Fortuna. Once you've done that, meet Luisa at Camp Mirada between 5 a.m. and 2 p.m. to get started.
The clock at the top of the screen is counting down to sundown; you must get Luisa's sister to the docks far northwest of camp Mirada to complete the mission. You'll use the Fortuna's stagecoach to get her there, so hop in the driver's seat and start following the yellow line on the Mini Map.
Because this is likely your first time driving a stagecoach with four horses attached to it, you may find it a bit difficult to control at first. You need to be especially careful when making turns. Do not whip the horses when you're coming up on a corner and if you're moving quite fast, slow the horses down with RB/R1 so you can turn the corner without going off road.
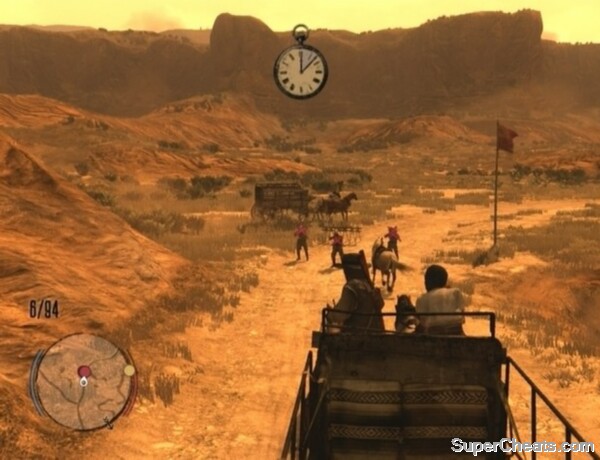
Use Dead Eye to clear the three soldiers at the first roadblock.
Some Mexican soldiers will stop you just outside of Camp Mirada. After the cutscene, with your Winchester Repeater equipped, take aim, activate Dead Eye, mark each soldier twice and press RT/R2 to waste the three soldiers. With that, ignore any other enemies in the area and continue following the yellow line on the Mini Map.
You will encounter frequent military roadblocks on your way to the docks, which will force you to quickly change routes. As such, it is very important to keep an eye on the Mini Map and listen to Miranda when she calls out a change of direction. The yellow line on the Mini Map will change to reflect the altered route.
Don't bother shooting any of the soldiers as you continue toward the docks. You will need to kill the three cavalry that tail you shortly after you drive down a slope and pass under a bridge. At this point, turn around, activate Dead Eye, mark all three soldiers twice and pull the trigger to take them down.
Once you've dealt with the cavalry, press on to the docks, speeding by any other soldiers you encounter along the way, and hit the yellow marker there to complete the mission.
Getting Miranda to the docks
Luisa's lover, Abraham Reyes, is scheduled for execution at the El Presidio prison. You must go with Luisa to El Presidio, find a way into the fort and bust Reyes out of there.
El Presidio is quite far from Camp Mirada, but you can skip the trip there while riding shotgun with Luisa. When you reach El Presidio, go to the yellow marker on the Mini Map and climb over the broken wall there to get into the fort. Walk over to the sniping position directly in front of you, pick up the Rolling Block sniper rifle there and look down at the yard through your scope. It seems you made it just in the nick of time; the executioner is dealing with Reyes right now.
Reyes is tied to a post at the back of the yard. Take aim with your sniper rifle and shoot the marked executioner in the head to put him out. With the executioner down, immediately take cover by the wall and equip your Winchester Repeater or Springfield Rifle.
Snipe the executioner to save Reyes.
You must kill the eight marked soldiers next. These soldiers are toting high-powered weaponry, so you really need to be careful here. Take them out one at a time; kill just one soldier before ducking back down and waiting for your health to completely replenish. Aim for their heads too; though auto-aim will always lock on to an target's chest, you can score a headshot by moving the reticule up just a bit and firing once you've locked on.
Take out the soldier on the stairs to your right first; just hit him with a headshot and then drop back down behind cover. Next, kill the soldier on the walkway below the stairs by shooting the TNT crate in the corner. When you lock on to this soldier, use the Right Stick to move the target reticule over to the TNT and shoot it once.
Eliminate the remaining soldiers one by one, then climb down the ladder to your left and sprint to the other end of the walkway toward Reyes. Get down from the walkway and approach Reyes to untie him. After the cutscene, a getaway horse will be marked on the Mini Map by a blue blip, but you can whistle for your own horse if you wish. Once you're on a horse, approach Reyes and he will get on.

The soldiers in El Presidio are armed with heavy weapons, so take your time killing them off.
Make your way out of the fort with Reyes in tow and start following the guide. You will be attacked by the Mexican Army on your way to Luisa, but it's best to try and outrun them rather than engaging them. The guide travels quite fast, so you should be able to avoid the army by matching his speed. If Reyes is shot, he may fall off the back of the horse. If Reyes does fall off the horse, backtrack to him, kill any soldiers nearby, then approach Reyes and he will get back on. Be sure to put away your weapon once you're done with it, as keeping it out will just slow you down.
Continue following the guide until you near Luisa by the river in Perdido. Luisa will appear on the Mini Map as a blue blip, so stop following the guide once you see her and take Reyes to her to complete the mission.
Busting Abraham Reyes out of El Presidio
Complete 'Cowards Die Many Times' in De Santa's mission line to unlock this mission. Some rebels have spotted a convoy transporting munitions for the Mexican Army. Your task here is to help the rebels ambush the army convoy at Frontera Bridge.
Get in the passenger seat of the wagon and Luisa will start toward the ambush point. You can skip the trip there or sit through it to listen to the dialogue between Luisa and Marston.
When you reach the spot, you must show the rebels where to set the explosives on the road. Use the Y/Triangle button to show them where to plant each dynamite charge. The rebels have five dynamite charges, but you only really need one. Tell the dynamite riggers to plant one charge right in the middle of the road. It doesn't matter how far down the road the charge is planted, just that it's between the two sets of tire tracks visible on the dirt road.
Have the dynamite riggers set a least one charge in the middle of the road.
Spread out the remaining charges before and beyond the charge you've set in the middle of the road. Just make sure the charges aren't too close to each other, although it won't really matter.
When all five charges have been planted, make your way up to the detonator on the hill (the yellow blip on the Mini Map). Approach the detonator and press the Y/Triangle button to get started.
Use the Left Stick to select the charge you've planted in the middle of the road (the active dynamite icon on the Mini Map will blink) and wait until the first wagon rolls over the charge before pushing the detonator with RT/R2. This means letting the cavalry at the front of the convoy walk over the dynamite. As soon as you see the sparkle of the active dynamite on the wagon, push the detonator to blow it.
You'll only really need to destroy the first wagon that rolls over the charge you've planted in the middle of the road. The rebels will kill off the cavalry and the soldiers on the second wagon. You can switch to your Winchester Repeater or Springfield Rifle at this point and pick off the few remaining soldiers if you wish. You can try using the other charges you've planted to kill the cavalry and second wagon, but doing so isn't necessary.
Set off the first charge when the first wagon in the convoy rolls over it.
Some rebels are on their way to Sepulcro to kill De Santa. Get on your horse and ride with them to the cemetery. Six soldiers accompany De Santa in Sepulcro. You must kill the six soldiers, but leave De Santa alive. You'll need to lasso and hogtie De Santa to learn where Javier Escuella is hiding.
Use cover to protect yourself from enemy gunfire and pick off the six marked soldiers in the cemetery. De Santa is marked on the Mini Map by a skull icon, so steer clear of him until the soldiers have been taken care of.
Once the cemetery is clear, whistle for your horse, hop on and start after De Santa. Equip your Lasso, take aim while riding behind your target and throw the Lasso to rope him in. Get off your horse when De Santa is down and then move in and hogtie him. Pick him up, put him on the back of your horse and bring him to the cemetery entrance.
Kill the soldiers in Sepulcro, but leave De Santa alive.
After the cutscene, you have the choice of killing De Santa or walking away and letting the rebels kill him. Whether you kill him or not won't impact the story in any way (aside from some dialogue), but you might earn a bit more Honor at the end of the mission by walking away.
Once De Santa is dead, mount your horse and start following the yellow line on the Mini Map to Casa Madrugada. When you reach Casa Madrugada, approach the motel and six more Mexican soldiers will appear. Fallback and take cover behind the crates on the left. Use your Winchester Repeater or Springfield Rifle to put down the soldiers in front of the motel and on the second-floor walkway. Kill them all to complete the mission.
(Nuevo Paraiso Walkthrough)
You must complete 'Cowards Die Many Times' in De Santa's mission line before you can accept a mission from Abraham Reyes. Once you've done that, meet Reyes in Agave Veijo to get started.
Reyes' first job for you is to rob a Mexican Army supply train. The train is heavily guarded, so you'll have to sneak onboard. The train is nearing the station in Chuparosa, so get on your horse and accompany Reyes there.
Reyes has given you 20 Throwing Knives to use to take down the soldiers around the train. With these, you can silently kill the soldiers without alerting the others. If you are detected, you'll have to face a ridiculous amount of soldiers head on, so it's in your best interest to use stealth.
When you regain control over Marston after the cutscene, wait for Reyes to lure away the two soldiers standing guard in front of the station. Move up to the station entrance once the two guards are out of the way and click the Left Stick to crouch.
Use the Throwing Knives to silently kill the soldiers without alerting the others.
There are six soldiers to kill. The first is standing with his back turned to the station entrance, so lock on and throw a knife at his back to put him down. Just one throwing knife is enough to kill these guys. A second soldier is standing by the post in the corner of the wall to your left. Knife him and then move up to the pillar closest to the train.
Three more soldiers are sitting on the flatbed train car by the yellow X. Lock on to the first soldier, hit him with a knife, then immediately target the second soldier and put him down to avoid being detected. With those two soldiers dead, start east down the platform. Look for a soldier on top of the building here and take him down with a throwing knife. Then, kill the third soldier on the flatbed train car and head back to the yellow X.
Once you're onboard the train, walk to the couple at the other end and press the Y/Triangle to detach the train cars. Your task now is to take control of the Gatling gun on the next car. Sneak up behind the soldier manning the Gatling gun and hit him with a throwing knife. Use the Gatling gun to waste the soldiers in the camp next to the train. There are a couple of explosives you can target: the gas lantern on the crate to the right and the TNT crate between the two sandbags to the left.
Take control of the Gatling gun and waste the soldiers in the camp.
When the enemies stop coming, leave the Gatling gun and climb the ladder at the other end of the car. There are three soldiers on the next car. Equip your Winchester Repeater or Springfield Rifle at this point and gun them down. With that, make your way to the train engine and pull the brake lever to steal the train.
After the cutscene, you must use dynamite to blow open the hatch on the armoured car. Climb on top of the armoured car, approach the hatch and press the Y/Triangle button to set the dynamite. When the dynamite has been set, run to a safe distance and it will explode. With the hatch open, climb back on top of the armoured car and climb down the ladder to get inside.
There's a locked safe inside the armoured car. Approach the safe and press the Y/Triangle button to start cracking. To crack the safe, you must use the Left Stick to turn the dial and find all three numbers to the combination. You must turn the dial to the right to find the first number, to the left to find the second, and to the right again to find the third.
You'll have to crack the safe inside the armoured car to get your plunder.
Look to the locks at the top of the screen to know whether you've landed on the right number while turning the dial. If your controller has a rumble feature, you'll feel your controller rumble when the dial stops on the right number. If your controller can't rumble, use the lock icons at the top of the screen: the icon will shake when the dial stops on the right number.
Push the Left Stick just slightly when turning the dial to avoid overshooting the right number. If you're turning the dial one way and you skip past the number, moving the dial back will force you to reset the dial by rolling it to zero.
Unless it's determined randomly, the combination is 50-75-35. Inside the safe are $200, some explosives, revolver ammo and a mysterious envelope.
Once you've looted the safe, climb out of the armoured car and return to Reyes to end the mission.
Sneaking onboard and robbing the train
You must complete 'Captain De Santa's Downfall' in Luisa Fortuna's mission line before you can take on this mission. Javier Escuella, one of the men Marston is after, is holed up in El Presidio. You must accompany Reyes there, find Escuella and either capture or kill him.
While riding shotgun with Reyes, you can skip the trip to El Presidio or sit through it and listen to the dialogue between Marston and Reyes.
When you're down the road from El Presidio, Reyes will light the fuse to the TNT in the back of the wagon. You must drive the wagon down to El Presidio and crash it into the front gates. Maintain your speed and follow the road to the front gates. As soon as you hear Reyes tell you to jump (or you see the text appear at the bottom of the screen), press the Y/Triangle button to jump out and save yourself from a messy death.
When you regain control over Marston, you must then search for Escuella inside the fort. The three question mark icons on the Mini Map denote possible hiding spots for Escuella. He's hiding in the barracks, which is marked by the icon on the Mini Map nearest to you.
To get to Escuella, turn left once through the front gate and move through the archways there. Head up the stairs at the other end and turn right. Blast the soldier covering in front of the door and then move through the door to enter the barracks. Proceed up the stairs across from the door and enter the room at the top to confront Escuella.
Finding Escuella in El Presidio
Escuella is trying to escape. At this point, you can either kill him or capture him alive. Aside from a bit of dialogue, whether you kill or capture Escuella won't affect the story, but you might earn a bit more Honor at the end of the mission by keeping him alive.
Killing Escuella is the easier of the two options. Just climb out the window after him, drop onto the walkway, head down the stairs, then turn around to face the gate, activate Dead Eye and tag Escuella before he can get away on his horse.
Capturing Escuella is a bit more work. As soon as you regain control over Marston after the cutscene, press up on the D-pad to call your horse and then climb out the window after Escuella. Drop down onto the walkway, head down the stairs and turn around to face the gate there. Your horse should be arriving by now. There's a horse right outside the gate you can use, but it's rather slow, so it would be best to wait for your own.
Hop on your horse and start after Escuella. He'll shoot at you while you pursue him, but he's a terrible shot. Swerve to avoid his fire and use Medicine if need be. Escuella's horse is very fast, so it's unlikely you can catch up to him. You can use Dead Eye to kill his horse, then move in with your Lasso and capture him. Alternatively, continue following Escuella and he will dismount once he reaches Roca de Madera, allowing you to then lasso and hogtie him.
Once you've hogtied Escuella, pick him up, put him on your horse and return to El Presidio. At El Presidio, remove Escuella from the back of your horse and carry him to the yellow marker to put him in the cell.
Capturing Escuella
Whether you killed or captured Escuella, you will then have to defend El Presidio from the Mexican Army's reinforcements. Fortunately, there aren't very many of them. As well, you're able to use the cannon marked on the Mini Map to defend the fort. When you regain control over Marston, head up the stairs in front of you, walk past the second set of steps and turn right. Move through the tunnel here and climb the ladder at the other end to reach the cannon.
The cannon's blast radius is quite large, but the cannon ball will take some time to reach the target. To compensate for this, aim a bit in front of your target -- where they will soon pass -- and then fire. The wagons are easy targets, but cavalry may take a couple of cannon balls to kill completely. Aim the cannon at the horse in the middle of the formation and the blast should kill that soldier as well as the soldier on either side of him.
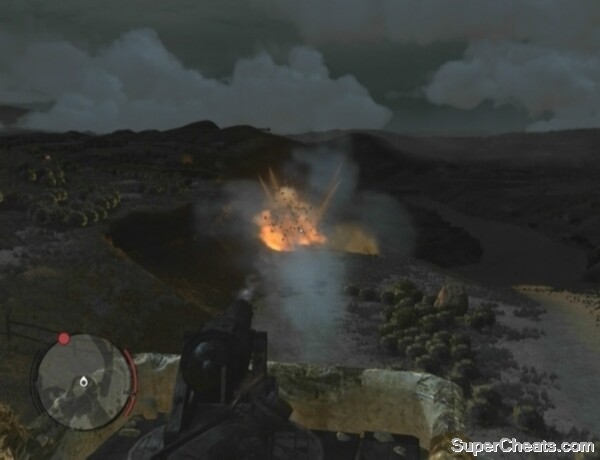
Use the marked cannon to decimate the reinforcements.
Once you've decimated the reinforcements, make your way back down to ground level and pick up Escuella in his cell to complete the mission.
Find Reyes in Escalera to get started. First, you must defeat Raul Zubieta in a duel. Take out your gun when 'Draw!' disappears from the screen and place five marks on Zubieta's head to win out. Cut Reyes free once Zubieta is down.
Next, you must free the rebels being held in the Escalera jail. Follow the yellow blip on your Mini Map. When you pass through the archway, be ready with your Winchester Repeater. Three soldiers will come running through the door to the cellblock. Activate Dead Eye and tag each soldier's head to take them out. With that, enter the jail and open all three of the cells by shooting the lock on each door.
Once you've freed the rebels, follow the blue blip on the Mini Map to join Reyes. You must eliminate the soldiers at the barricade. Activate Dead Eye and tag some heads to thin their ranks. These soldiers are using powerful weapons, so take cover. When aiming your weapon, don't stay up for too long; just take a shot, then drop back down and remain down until your health is completely restored.
Fight your way to the front gate of Allende's villa.
Move from cover to cover as you fight your way up the slope to Allende's villa. There's a Gatling gun by the front gate at the top of the slope. Kill the gunner with Dead Eye or take him down while he's focused on one of the rebels.
When the barricade is clear, one of Reyes' men will set down a powder keg in front of the villa's front gate. Man the Gatling gun and shoot the powder keg when the area is clear to blow open the gate. Remain on the Gatling gun and shred the soldiers that appear. When you've dealt with the first batch of soldiers, move in and take cover behind the sandbags just through the gate. Kill the soldiers outside the villa and then approach the front door.
While Reyes' men work to break open the door, you must defend them from incoming soldiers. You can use the Gatling gun to fend off the soldiers, but you'll be very vulnerable while using it. As such, leave the Gatling gun if you're taking a lot of damage and take cover behind the sandbags. Continue killing the soldiers until Reyes' men gain access to the villa. Join Reyes at this point to trigger a cutscene.
Use Dead Eye to disable the stagecoach.
After the cutscene, follow Reyes through the villa and to the backyard. You must catch up to Williamsons' stagecoach and disable it. Kill the three soldiers in the yard, then hop on one of the horses by the back gate and start after the skull icon on the Mini Map.
Williamson's stagecoach is accompanied by three soldiers on horseback. As well, there is a Gatling gun mounted on the back of the stagecoach and the driver and passenger each have a revolver. Once you're trailing behind the stagecoach, take out the cavalry and then move up. Take out the gunner from afar if you can, but if he's firing at Reyes instead, move in closer, activate Dead Eye and tag the gunner, driver and passenger in the head. Kill all three to disable the wagon.
Catching Bill Williamson
Shoot Williamson after the cutscene. Reyes will take care of Allende.
You'll unlock the Reyes' Rebels outfit for completing this mission.
(West Elizabeth Walkthrough)
Complete 'An Appointed Time' in Abraham Reyes' mission line and then meet Agent Ross in Blackwater to get started.
Dutch van der Linde is hiding out at the Wreck of the Serendipity in West Elizabeth, according to a U.S. government informant. You must go there with agents Ross and Fordham and bring Dutch to justice.
You can skip the trip to the Serendipity or sit through it and listen to the dialogue between the three characters. When you reach the wreck, get out of the car and follow Agent Fordham down to the pier. You'll hear a man calling for help from the top deck of the ship along the pier. To get to the top deck, step onboard, walk around the front of the ship, head up the stairs on the other side to reach mid-deck, then walk to the other end of the deck and proceed up the stairs there.
You can still wield your new High Power Pistol while carrying Nastas.
Approach the bound man to trigger a cutscene. You must carry Nastas back to the car while fighting off Dutch's men. Nastas' health meter is visible at the top of the screen. If the meter is completely depleted, you'll fail the mission, though Dutch's men are more likely to target you than Nastas.
You can only wield a handgun while carrying Nastas and you can't enter cover or crouch. Fortunately, the High Power Pistol Agent Ross gave Marston during the cutscene shoots fast and deals plenty of damage. If you're low on health, hang back and wait for your health to replenish or use Medicine to restore your health instantly.
Kill all of the enemies marked on the Mini Map and then follow Agent Fordham back to the car. The car will break down on the way to Blackwater and another wave of Dutch's men will appear. You must defend the car from these enemies.
As soon as you regain control over Marston after the cutscene, take cover with Fordham behind the short boulder along the left side of the road and use your High Power Pistol to pick off the enemies as they approach. The High Power Pistol should be able to kill most of these enemies with one or two body shots. You can activate Dead Eye and tag their heads if they're getting too close.
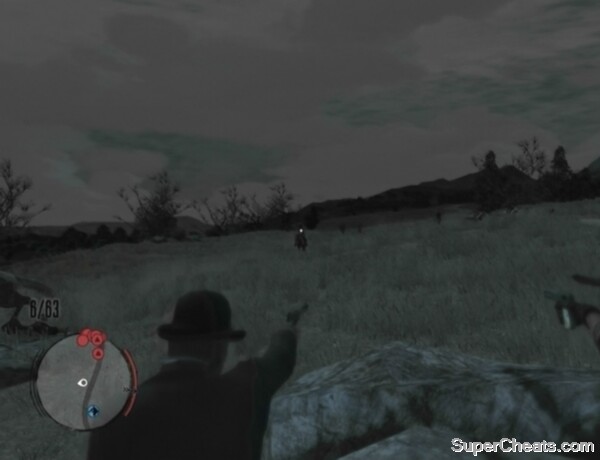
Defend the car from Dutch's men.
Kill all of the enemies marked on the Mini Map and then either skip or sit through the rest of the way to Blackwater to complete the mission.
Climb up the ladder to reach the roof and pick up the sniper rifle ammo by the chimney next to the yellow marker. Hit the yellow marker to get started.
Dutch is holed up in the bank at the other end of the street. One of Dutch's men will soon come through the front doors with a hostage. Look through your scope, but don't take a shot until the hostage taker pushes his hostage outside. Shoot the hostage taker in the head and another of Dutch's men will run outside.
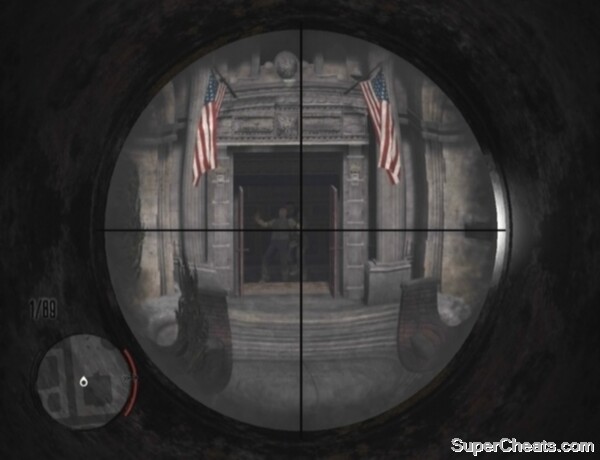
Don't shoot until the hostage taker pushes his hostage outside.
You must prevent Dutch's men from escaping. They'll make a run for their horses, which are hitched to the hitching post across the street from the bank. Use Dead Eye to take out the fleeing outlaws. You don't need to tag your targets when looking through the scope of a sniper rifle.
Activate Dead Eye just long enough to slow your target down. As soon as you've shot him in the head or body, click the Right Stick to deactivate Dead Eye to conserve your meter. Two of Dutch's men will run out of the bank after you kill the hostage taker; take them down before they can escape.
If you have Chewing Tobacco, you can consume it to instantly replenish your Dead Eye meter. Chewing Tobacco shouldn't be necessary here if you switch Dead Eye off as soon as you've killed your target.
There are three snipers visible through the bank windows. There are snipers in the middle and right-side windows on the upper floor and one in the left-side window on the bottom floor.
Five more outlaws will eventually run out of the bank and attempt to escape. These guys will run off to the right, so activate Dead Eye and cap them before they get away. Eliminate any remaining outlaws marked on the Mini Map to move on.
Sniping Dutch's men
After the cutscene, sprint toward the bank and equip your High Power Pistol. When you reach the bank, aim and shoot between the two door knobs to open the front doors. With that, sprint through the front doors and take cover behind the counter in the lobby. There are four outlaws to deal with here -- one of them holding a hostage.
The guy to watch out for is the outlaw coming down the stairs to your left, as he can get a bead on you when he takes cover below the window at the bottom of the stairs. Blast him as soon as he comes down the stairs and appears in the glass window behind the bench to your left. Take out the two outlaws visible through the bars in front of you when they emerge from cover to shoot.
When you've killed the first three outlaws on the first floor of the bank, leave cover and proceed through the doorway to your left. Once through the doorway, turn right and look down to spot the hostage taker in the doorway at the other end of the room. He'll kill his hostage if you get too close, so stay in the doorway, activate Dead Eye, tag his head and fire to kill him and free the hostage.
Proceed up the stairs to the second floor after rescuing the hostage. Take cover behind the desk at the top of the stairs and use your High Power Pistol to take out the three outlaws here. With that, hit the yellow marker in front of the door at the other end of the room to confront Dutch.
Finding Dutch
Dutch is getting away. Exit the bank, hop on your horse and start following the agents. You'll soon reach a forest. Dutch's men are here as well. You can stay on your horse and pick them off with your High Power Pistol or dismount and get behind cover.
Kill all of the outlaws marked on the Mini Map and then join the agents at the cabin to complete the mission.
You must complete 'The Prodigal Son Returns (To Yale)' in Harold MacDougal's mission line before you can undertake this mission. The army is readying an assault on Cochinay, Dutch's mountain hideout. They want Marston to come along.
During this mission, you'll be in control of the turret that's mounted on the back of agents Ross and Fordham's armoured car. The agents will drive to the army camp outside of Blackwater and then to Tall Trees. The plains on the way to Tall Trees are swarming with Dutch's men, so put that turret to good use. The machine gun has infinite ammo and doesn't need reloading, but you are left vulnerable to enemy gunfire while manning it. Use Medicine to restore your health if you're close to death.
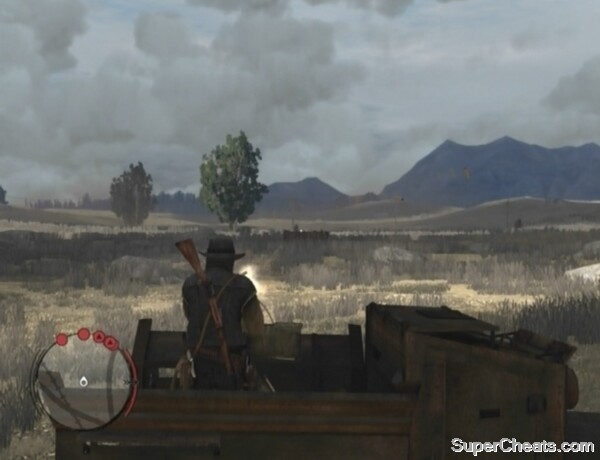
The turret will make short work of Dutch's men.
As you're nearing the forest, a wagon filled with explosives will come careening toward the armoured car. A 'Look at wagon' prompt will appear in the bottom-right corner of the screen while this is happening. Target the wagon with the machine gun and blow it up before it reaches the car. Continue gunning down Dutch's men until you reach a cutscene.
This mission immediately follows 'And You Will Know The Truth.' The armoured car is trashed, so you have no choice but to go the rest of the way on horseback. The trip through the forest is long and uneventful, but there's at least enough dialogue between the characters to keep the journey somewhat engaging. You can ride ahead of the group if you prefer and get to Cochinay by following the yellow line on the Mini Map, but you're still in for a long trek.
Continue following the agents and soldiers through the forest and you'll eventually reach Cochinay's front gate. After the army blows open the gate, run through and start picking off the enemies that are marked on the Mini Map. You have some allies with you, so Dutch's men have more targets than just you. As such, you can likely run-and-gun your way through the first area of the camp with your Bolt Action Rifle or High Power Pistol. If you're taking a lot of damage, use Medicine or duck behind cover and wait for your health to replenish to get back into fighting shape.
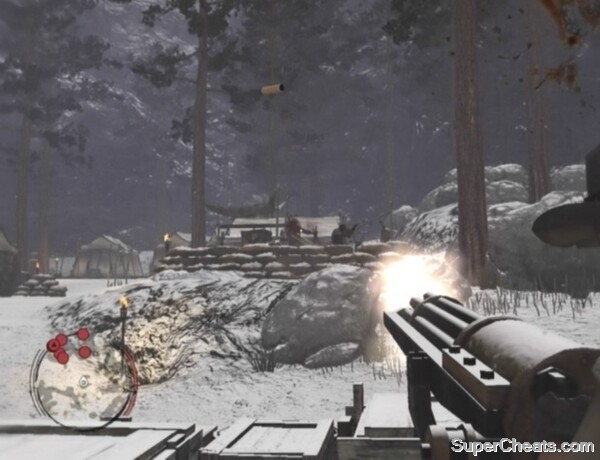
Use the Gatling gun to waste the enemies in the camp.
Once through the first area, you'll come to a camp with an unmanned Gatling gun by the gate. Hop on the Gatling gun and start mowing down the enemies around the camp. There are several red crates of TNT scattered about the camp; target these crates when there are enemies covering nearby to blow the enemies away. Though the Gatling gun has infinite ammo and doesn't need reloading, you are left vulnerable to enemy gunfire while using it. As such, use Medicine if you're low on health or leave the Gatling gun and take cover behind the boxes surrounding it until your health is replenished.
When the camp is clear of enemies, make your way to the yellow blip on the Mini Map to meet with the army captain. Two soldiers are planting dynamite at the gate here to blow it open. You must defend them while they do this. Enemies will appear on the elevated walkways on either side of the gate. Take out these enemies as they appear on the walkways to protect the two soldiers fixing the dynamite.
After the cutscene, target the gas lantern hanging on the post next to the shielded turret Dutch is using to force him off. You can activate Dead Eye to slow down Dutch's fire and then use your Rolling Block sniper rifle to shoot the gas lantern if you're having trouble making it out.
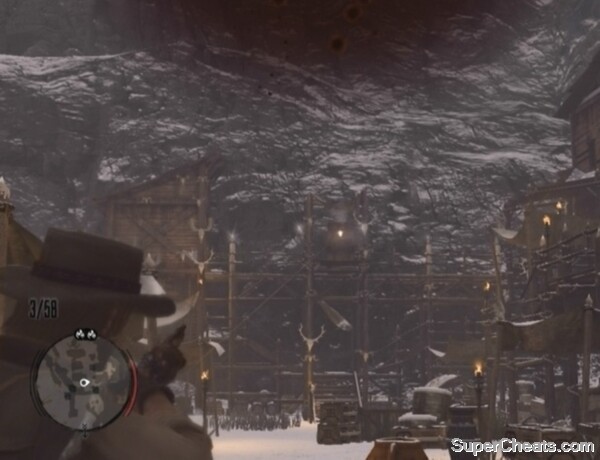
Shoot the gas lantern hanging on the post next to Dutch's turret to force him off.
When Dutch runs off, proceed up the steps and turn left. Head up the stairs here and go through the doorway at the top. Climb the ladder to trigger another cutscene. After the cutscene, sprint to the other end of the walkway, enter the building there, then head up the stairs and enter the cave.
Continue chasing Dutch (the red skull icon on the Mini Map) through the cave and you will soon trigger the end-mission cutscene.
Catching Dutch
(West Elizabeth Walkthrough)
Complete 'Bear One Another's Burdens' in Agent Ross's mission line and then visit Harold MacDougal at his office in Blackwater to accept a mission from him.
Dutch's hideout is on a mountain near Tall Trees up north. Get on your horse and ride with Nastas and MacDougal. When you reach the place, approach Nastas and he'll give Marston a boost. After the cutscene, climb onto the ridge to the left of the barricade, then jump to grab hold of the ledge and inch yourself across the gap.
Climb the ledge at the other end of the ridge and join Nastas. Follow him into the mine. Continue following Nastas and you'll soon come to a dead end. The miners outside will push a cart filled with lit dynamite into the mine. Sprint out of the mine before the dynamite goes off and dispatch the three miners outside.
Beware the grizzly on your climb up.
Join Nastas at the mine entrance once the miners are dead. Nastas is too wounded to make the climb, so you must continue on your own.
Make your way to the yellow blip on the Mini Map. Climb the first few ledges and you will encounter a grizzly bear. This beast is powerful, so kill it from a distance before it gets close enough to maul you. The Springfield or Bolt-Action Rifle will do the trick. If the bear is moving in, activate Dead Eye, tag its head several times and then fire to kill it. Skin the grizzly after killing it, as doing so will count toward the 'Bearly Legal' achievement/trophy, which requires you to kill and skin 18 grizzlies.
Once you've made it past the grizzly, continue climbing the ledges and walk along the ridge to reach the other side of the broken tracks. There might be a cougar up here, so be careful. Climb all the way up to the yellow marker and hit the marker to trigger a brief cutscene.
You must neutralize the scout without alerting Dutch and his men. You can accomplish this with the Lasso or Throwing Knives. The scout has his back turned to you, so click the Left Stick to crouch and sneak up behind him. Hit the scout with a Throwing Knife or lasso and hogtie him.
Use your Lasso or Throwing Knives to neutralize the scout.
When you've neutralized the scout, touch the glowing binoculars on the ground to pick them up. With the binoculars in your possession, look over at the tent in the top-left corner of the camp to trigger a cutscene and complete the mission.
Visit MacDougal at his office in Blackwater between 7 a.m. and 10 p.m. to get started. Nastas has arranged a meeting with some of Dutch's men at Bearclaw Camp. You must accompany Nastas and MacDougal there.
Mount your horse and start following Nastas to the place. You'll encounter a bear on your way there. Use your Springfield or Bolt-Action Rifle to kill the bear, then dismount your horse and take the time to skin the bear, as doing so will count toward the 'Bearly Legal' achievement/trophy, which requires you to kill and skin 18 grizzlies. MacDougal will urge you onwards, but he and Nastas will wait for you regardless.
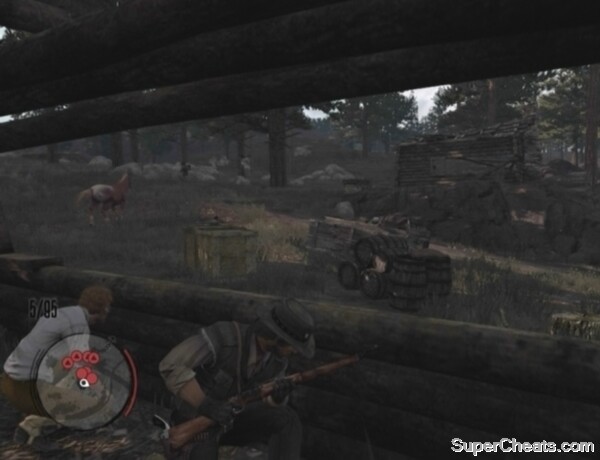
As if you didn't see this one coming.
When you reach Bearclaw Camp, dismount your horse and head to the cabin marked on the Mini Map. A cutscene will ensue when you enter the cabin. Afterward, start picking off the gang members marked on the Mini Map. There are seven of them. If you're taking a lot of damage, drop down behind cover and remain there until your health is completely restored before emerging to fire again.
Once you've cleared the camp, get back on your horse and start following MacDougal. More of Dutch's men will intercept you on your way back to Blackwater. Shoot down the gang members with your rifle while keeping up with MacDougal. If there are several gang members close together, you can activate Dead Eye, tag their heads and fire to clear them out.
You'll encounter two waves of three enemies on horseback on your way back to Blackwater. Fight them off and then follow MacDougal to his office to complete the mission.
Visit MacDougal at the Blackwater Hotel between 6 p.m. and 5 a.m. to start. Dutch and his men are back in Blackwater and want the professor dead. You must help MacDougal escape from Blackwater and get him to the train station so he can return to Connecticut.
When you regain control over Marston, climb up the ladder after MacDougal to reach the rooftops. One of Dutch's men is on the roof of the hotel and has taken MacDougal hostage. Activate Dead Eye, tag the gang member's head and shoot to take him out and free the professor.
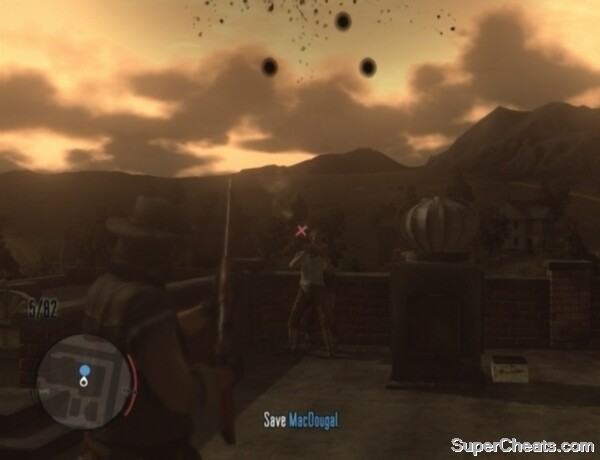
Use Dead Eye to save the professor.
Once you've saved MacDougal, snipers will appear on the rooftops to the north, west and south. There is an ammo crate in the northwest corner of the hotel rooftop that contains sniper rifle ammo. You can use a sniper rifle to take out Dutch's snipers on the rooftops, but you'll be quite vulnerable while looking through the scope. It might be better to just take cover along the rooftop and use your High Power Pistol or Bolt Action Rifle to kill the snipers when they move out from cover.
Kill all of the snipers marked on the Mini Map, then follow MacDougal across the rooftops and to the alley where the horses await. Mount your horse and follow MacDougal out of Blackwater.
Dutch's men will intercept you on your way to the train station. Match MacDougal's speed and you should be able to outrun them. They'll stop following you eventually, so it isn't worth slowing down to kill them. Use Medicine to restore your health if you're taking a lot of damage and are close to death. It might be worth using Dead Eye to kill a couple of the riders when they first appear; just be sure to put away your weapon once you're done with it, as keeping it out will slow you down.
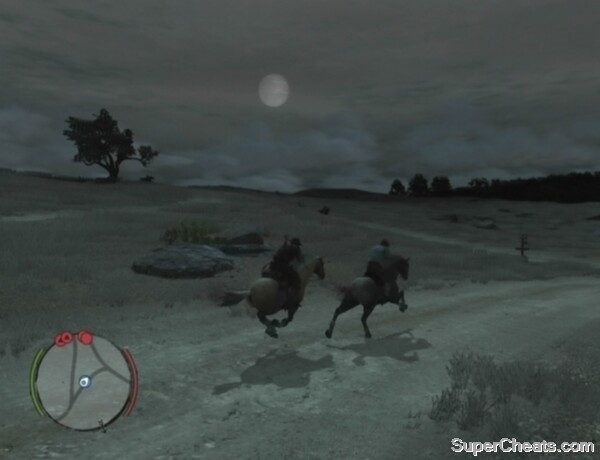
Match MacDougal's speed to outrun Dutch's men.
Escort MacDougal to the train station at Manzanita Post and hit the yellow marker there to complete the mission.
(West Elizabeth Walkthrough)
Complete 'And the Truth Will Set You Free' in Agent Ross's mission line and then make your way to Marston's ranch in Beecher's Hope.
All of the cattle have died while Marston was out, so you'll have to visit the MacFarlane's at their ranch to purchase some more.
Get on your horse and start following the yellow line on the Mini Map toward MacFarlane's Ranch. When you reach the ranch, meet Bonnie in the corral to start herding your new cattle. Herd the cattle out of the pen and then drive them to the river. Remember that you can press up on the D-pad when behind the herd to drive them faster.
The river is shallow enough for your horses and cattle to cross. Drive the herd across the river and then continue toward Beecher's Hope. Keep an eye on your Mini Map for stragglers on the way there.
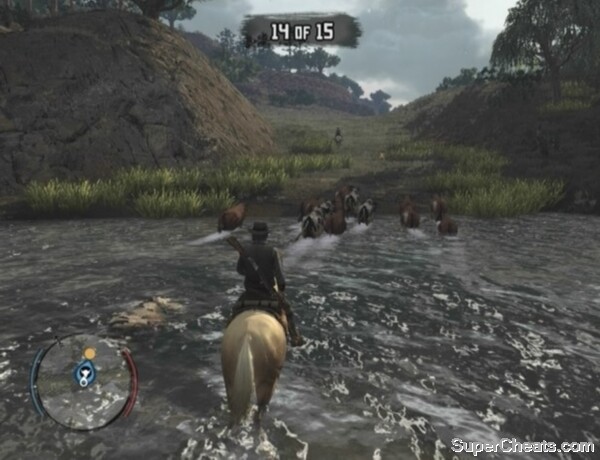
The river is shallow enough for your horses and cattle to cross.
You'll encounter some cattle rustlers on horseback just outside of Beecher's Hope. You'll fail the mission if most of the cattle are killed, so work quickly. Take out the cattle rustlers with your Bolt Action or Springfield Rifle, then gather any stragglers and continue driving the herd toward the ranch.
Herd all of the remaining cattle into the pen and then hitch your horse to the hitching post to complete the mission.
The crows are after your corn! Scare them away from the silo to preserve your supply. 'Scaring them away' entails continuously shooting down crows until the rest of the flock flies away to bother someone else.
You must keep the crows from completely depleting the 'Corn Remaining' meter at the top of the screen, otherwise you'll fail the mission.
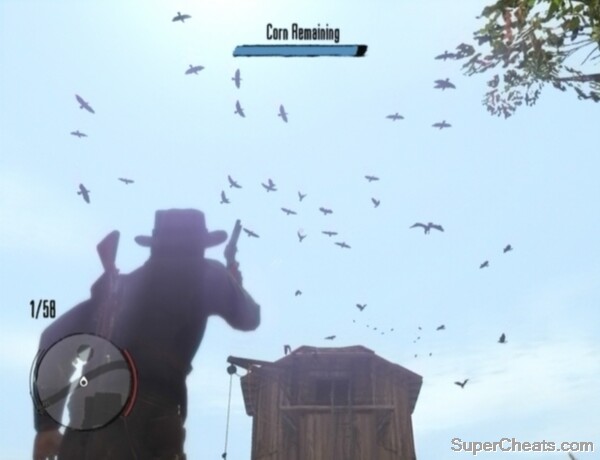
Shoot down crows to protect the supply of corn.
Fire at the silo once and the crows perched on it will take flight. The Bolt Action Rifle and Cattleman Revolver are good weapons for this task. Auto-aim is a huge help here; just keeping tapping LT/L2 and then RT/R2 to lock on and shoot down crows. For overkill, you can activate Dead Eye and tag a bunch of crows to shoot them all down.
This mission consists of a trip to MacFarlane's Ranch and back. There's a timer at the top of the screen on the way there, but MacFarlane's Ranch is not far and you are given plenty of time. Once you've watched the cutscene at MacFarlane's Ranch, drive the wagon back to Beecher's Hope to complete the mission.
(West Elizabeth Walkthrough)
Complete 'The Outlaw's Return' in Abigail Marston's mission line and then meet Uncle at the 'U' symbol to start.
Yup, another herding mission. This time, you're herding your cattle out to pasture. You know what to do: sweep behind the cattle to keep the herd tight and drive them toward the yellow marker on the Mini Map.
A train robbery in progress will interrupt your herding. When the cattle take off, get in front of the herd to slow them down and prevent them from getting hit by the train. Take out the outlaws and then ride to the front of the train to speak to the engineer.
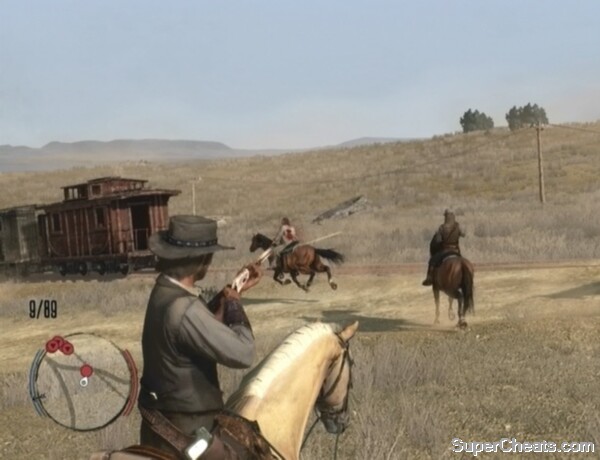
Take out the outlaws attempting to rob the train.
When the train is safe, gather up the stragglers and continue herding the cattle out to pasture. Herd all of the remaining cattle to the yellow marker on the Mini Map to complete the mission.
You must go with Uncle and break three wild horses. There's a pack of wild horses just outside of Beecher's Hope. Each horse is marked on the Mini Map by a horse head icon.
If you've forgotten how to break horses, you first need to lasso one. Once you've done that, dismount your horse and get on the lassoed horse to start the horsebreaking mini game. You must keep balance while the horse tries to buck Marston off. Tap the Left Stick to the left or right to keep Marston centred. Tap the Left Stick to the right when Marston is falling to the horse's right and tap it to the left when he's falling to the horse's left. Keep this up and the horse will eventually rear, giving you control over it.
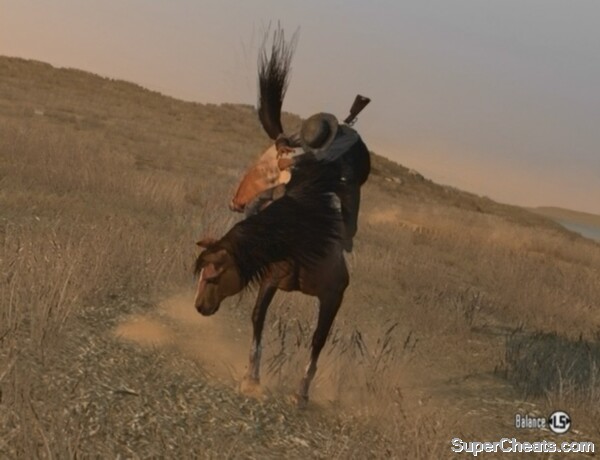
Keep Marston centred while the wild horse tries to buck him off.
When you've broken one horse, dismount, hop back on your horse and go after another of the wild horses marked on the Mini Map. Break three of these horses, then get back on your horse and follow Uncle back to the ranch to complete the mission.
(West Elizabeth Walkthrough)
Complete 'The Outlaw's Return' in Abigail Marston's mission line and then meet Jack at the 'J' symbol sometime between 5 a.m. and 6 p.m. to start.
Marston is taking Jack elk hunting. Rufus the dog will sniff out some elk, so follow him into Tall Trees. Continue following Rufus and you will soon encounter an elk. The elk will appear on the Mini Map as a red blip, so move in when the red blip appears. The elk is fast, but you can slow it down with Dead Eye and tag its head to make the kill.
After killing the first elk, dismount your horse and skin the dead animal to get some meat. With that, get back on your horse and continue following Rufus through the forest. Rufus will eventually lead you to three more elk. It isn't necessary for Jack to make a kill, so activate Dead Eye and tag each elk's head to finish the hunt.

Use Dead Eye to slow the elk and then tag its head to make the kill.
When you've killed three more elk, Jack will then skin one of them for more meat. Once you have the elk meat, you then must travel to Manzanita Post and sell it to the shopkeeper there. Follow the yellow line on the Mini Map to reach Manzanita.
Once you reach Manzanita, dismount your horse, enter Manzanita Trading Co. and speak to the shopkeeper. Sell him all of the Elk skin and meat you have in your inventory. With that, get back on your horse and follow the yellow line on the Mini Map back to Beecher's Hope to complete the mission.
A pack of wolves has been terrorizing the livestock. You must go into the forest with Jack and exterminate them.
Rufus the dog will again lead the way. You will first encounter a pack of four wolves. Try to take out the wolves with Dead Eye while they're all together. If any of the wolves start charging toward you, kill them before they get too close. If the wolves manage to get close they will spook your horse, causing the horse to buck you off. Activate Dead Eye if any wolves are closing in you and tag their heads to put them down.
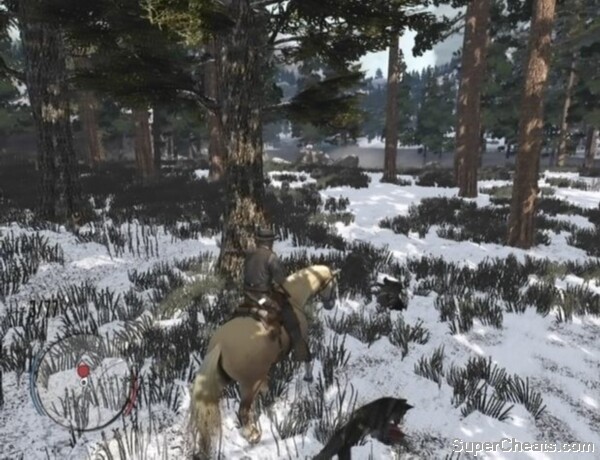
Quickly Kill the wolves before something bigger shows up.
Once you've killed the first pack, continue following Rufus to reach a second pack, this one of six wolves. You'll meet this pack head on, so do as you did before to prevent the wolves from getting too close.
There are grizzly bears this deep into forest, so kill the second pack of wolves quickly and then head on home. A bear can kill your horse with a single swipe, so if you do encounter one, either ride away or activate Dead Eye and tag its head several times to kill it.
Jack has gone off to Nekoti Rock to hunt a grizzly on his own. Get on your horse and start following Rufus. Rufus will lead you up to Nekoti Rock where Jack is facing the grizzly. The bear will come charging toward you after the cutscene. Activate Dead Eye and tag the bear's head several times to kill it. With that, take Jack back to the ranch to complete the mission.

Take down the grizzly as it's charging toward you.
(Nuevo Paraiso Walkthrough)
You must complete 'Spare the Love, Spoil the Child' in Jack's mission line, 'A Continual Feast' in Uncle's mission line and 'Old Friends, New Problems' in Abigail's mission line to unlock the final mission in the game.
Make your way to the 'J' icon on the Mini Map sometime between 5 a.m. and 6 p.m. to get started.
The US Army has come for Marston! Take cover behind the wagon with Uncle and start firing at the approaching soldiers. Use your Bolt Action or Springfield Rifle and aim for their heads. Auto-aim will always lock on to your target's chest, but you can score a headshot quite easily by using the Right Stick to move the reticule up a bit right after locking on to an enemy.
The soldiers are using powerful weapons and there are a lot of them, so be careful. If you're taking a lot of damage and are close to death, either use Medicine to instantly restore your health or remain behind cover until your health is restored.
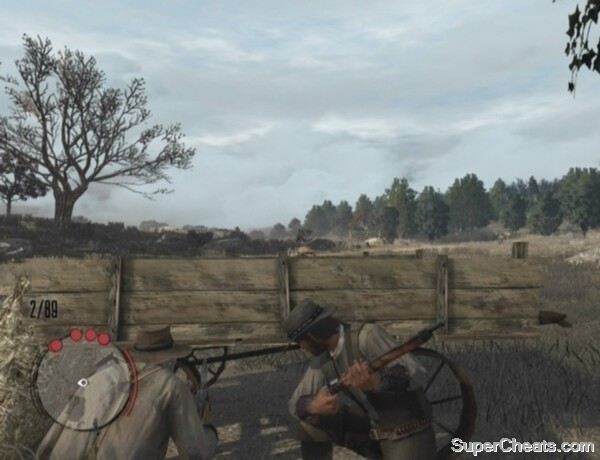
Defend your home from the army.
Continue taking out soldiers until Uncle instructs you to head inside. It's not over yet; another wave of soldiers will soon appear. Take cover behind the porch railing and start killing the approaching soldiers as you did before. Keep this up until another cutscene is triggered.
When you regain control over Marston, take cover behind the boulder with Abigail and Jack. Eliminate the first batch of soldiers and cavalry as they come in. You then must cover Abigail and Jack as they run to the barn. You can cover them from the ground or from atop the silo. Both locations are marked on the Mini Map by a yellow blip; make your way to one of these locations to trigger the next wave of soldiers. It might be safest to cover them from the silo, but you can just as well cover them from the ground. This next wave of soldiers doesn't seem all that interested in you, so just run-and-gun and take cover if need be.
Once you've cleared the soldiers, join Jack and Abigail in the barn to trigger another cutscene. When you regain control over Marston, tag as many of the soldiers in the head as you can while Dead Eye is active.
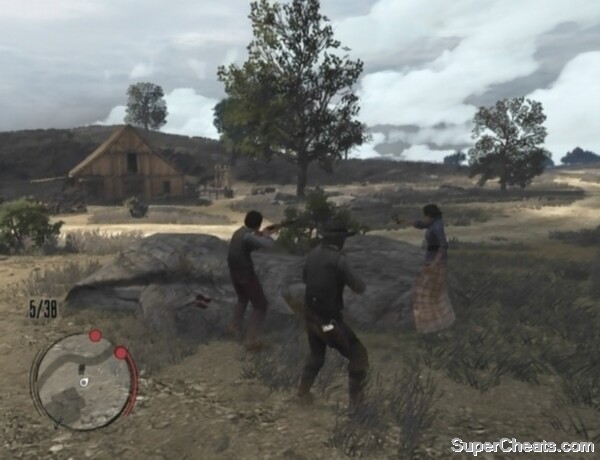
Help Jack and Abigail escape.
When you gain control over Jack, turn around and follow the yellow line back to farm to trigger a cutscene and complete the mission.
To see the game's ending and the credits roll, you must complete the 'Remember My Family' Stranger task, which is unique to Jack Marston. The stranger to talk to is in Blackwater. Travel to Blackwater and speak to the bowler hat wearing-man at the train station (the question mark icon on the Mini Map) to begin.
The stranger tells you Edgar Ross has retired and that he and his wife share a cabin on Lake Don Julio. Open your map and set a waypoint on the purple circle now on your map. The circle is just east of Fort Mercer. Make your way to Lake Don Julio and approach the purple question mark icon on the Mini Map to speak to Mrs. Ross.
According to Mrs. Ross, Ross and his brother are out hunting near Rio Del Toro in Mexico. Open your map and place a waypoint on the purple circle just north of Chuparosa. Go to this circle and then to the purple question mark icon on the Mini Map to meet Ross's brother. He tells you Ross is currently hunting downriver.
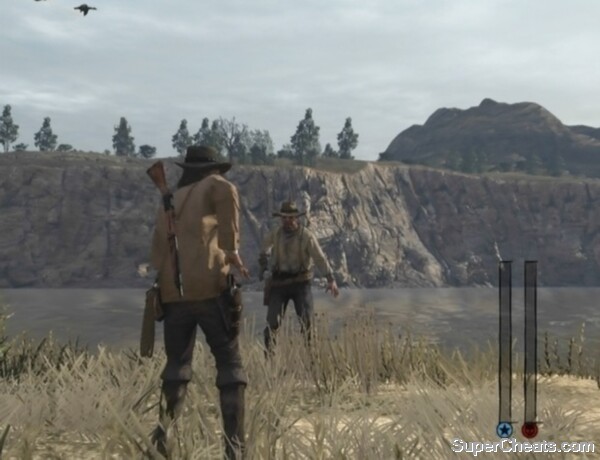
Defeat Edgar Ross in a duel.
Head to the purple circle northwest of Chuparosa and then to the purple question mark icon on the Mini Map to confront Ross. You must defeat him in a duel. Take out your gun when 'Draw!' disappears from the screen and tag Ross's chest and head to win out.
Flowers for a Lady
Unlock: Complete “New Friends, Old Problems” in Bonnie MacFarlane’s mission line.

Part 1: Find Billy by the pond along the side of the road between MacFarlane’s Ranch and Thieves’ Landing. Billy wants to make a bouquet of flowers for his wife. He asks Marston to gather three Wild Feverfew, three Desert Sage and three Red Sage plants.
Wild Feverfew grow around Hennigan’s Stead, Red Sage near Rio Bravo and Desert Sage near Gaptooth Ridge. Finding these plants can be made easy with the use of a Survivalist Map. This item can be bought at any general store for around $25. Nearby herbs will appear on the Mini Map when the Survivalist Map is used. The effect lasts for about 20 minutes. You can press down on the D-pad to zoom out the Mini Map so you can see more of the herbs around you.
Travel to a location where one of the requested herbs grows and use a Survivalist Map to easily find them. You can only hold one Survivalist Map in your inventory at a time, so once you’ve used one, before setting out to find the next type of plant for Billy, stop by a general store and purchase another.
The three herbs you must collect for Billy match the herbs needed for the first three levels of the Survivalist ambient challenge. As such, you might as well collect enough herbs to complete the first three levels of the challenge while you’re out foraging them for Billy’s bouquet. Thus, you’ll need to collect six Wild Feverfew, six Desert Sage and four Red Sage -- in that order.
Part 2: Once you’ve collected at least three Wild Feverfew, three Desert Sage and three Red Sage for Billy, visit him at his cabin by the pond along the side of the road between MacFarlane’s Ranch and Thieves’ Landing to deliver them.
Let No Man Put Asunder
Unlock: Complete “Obstacles in Our Path” in Bonnie MacFarlane’s mission line.

Part 1: Speak with the old woman up the road from Coot’s Chapel, which is just southeast of Armadillo. Her husband, Peter, is missing. She asks you to meet with a musician in the Armadillo Saloon and ask him about Peter.
Enter the Armadillo Saloon and approach the man sitting alone at one of the tables on the first floor (the purple question mark icon on the Mini Map). To get the information you need, you can either pay the musician $5 or go to the train station across the street and convince his wife to forgive him and take him back.
Needless to say, it’s easiest to just pay the musician the $5. His wife, Rose, cannot be convinced. You would have to threaten Rose by either pulling your gun on her or hogtying her, both of which will earn you -100 Honor.
Once you’ve given the musician $5 or coerced Rose into going back to him, he’ll point you to Odd Fellow’s Rest west of Armadillo. Make your way to Odd Fellow’s Rest, dismount your horse and approach the purple question mark icon on the Mini Map to trigger a cutscene and complete the task.
Jenny’s Faith
Unlock: Complete “This is Armadillo, USA” in Bonnie MacFarlane’s mission line.

Part 1: Look for Jenny along the side of the road east of Ridgewood Farm (west of Armadillo). Jenny has a bad cough. Bring her some Medicine to complete the task. If you don’t already have Medicine in your inventory, you can purchase some at the doctor’s office in nearby Armadillo.
California
Unlock: Complete “Woman and Cattle” in Bonnie MacFarlane’s mission line.

Part 1: Look for a man playing harmonica along the side of the road south of Gaptooth Breach. Sam Odessa is trying to find his way to California. This particular task consists of nothing but cutscenes. You’ll be able to find Sam again sometime after you first encounter him.
Part 2: You can find Sam west of Gaptooth Ridge a few days after you first encounter him.
Part 3: When this mission becomes active again a few days after your second encounter with Sam, look for him in Gaptooth Ridge.
Part 4: A few days after your third encounter with Sam, look for him south of Tumbleweed.
Water and Honesty
Unlock: Complete “Political Realities in Armadillo” in Marshal Johnson’s mission line.

Part 1: Look for a man sitting at the camp along the eastern road out of Armadillo. Using his trusty dowsing rod, Andrew McAllister believes he has discovered water underneath Pleasance House northwest of Armadillo. McAllister asks Marston to visit Clyde Evans, the owner of Pleasance House, and convince him to sell the deed to the land.
Travel to Pleasance House to speak with Evans. He’ll agree to sell the deed for $200. You have a choice: give Evans $200 for the deed, shoot him dead and loot his corpse, or hogtie him to intimidate him into giving you the deed. Killing or intimidating Evans to get the deed will earn you -100 Honor. You’ll have to spend your own money if you choose to buy the deed from Evans, but know that McAllister will give you $220 when you bring the deed to him. If you kill or intimidate Evans, McAllister will reward you with only $15 when you give him the deed.
Once you’ve obtained the deed to Pleasance House, return to the McAllister’s camp and hand the deed over to him to complete the task.
American Appetites
Unlock: Complete “Political Realities in Armadillo” in Marshal Johnson’s mission line.

Part 1: Speak to the crying woman outside of the Sheriff’s office in Armadillo. Her son is missing. According to the woman, her son was last seen in the hills near Hanging Rock.
Travel north from Armadillo to the purple circle on the map near Hanging Rock. Once in the circle, make your way to the purple question mark icon that appears on the Mini Map to find a puddle of blood and some human remains. Search for clues by pressing the Y/Triangle button to complete the first part of this task.
Part 2: A couple of in-game days after finishing the first part of this task, look for a crying man in front of the Sheriff’s office in Armadillo. As with the woman you spoke to before, this man has lost a loved one. Like the woman’s husband, this man’s wife was last seen in the hills near Hanging Rock.
Make your way to the purple circle north of Armadillo to investigate. Once there, approach the purple question mark icon on the Mini Map to find another puddle of blood and more human remains. Search for clues here to complete the second part of the task.

Search the marked location in the hills near Hanging Rock to find human remains.
Part 3: Wait a couple more days and then look for another crying woman in front of the Sheriff’s office in Armadillo. She too has lost a loved one, who, curiously enough, was also last seen in the hills near Hanging Rock. Something’s definitely up.
You need the Lasso for this part of the task, so if you don’t have the Lasso yet, complete “Wild Horses, Tamed Passions” in Bonnie MacFarlane’s mission line before setting out.
Travel back to the purple circle near Hanging Rock and you will encounter a wounded man there. He claims to have been attacked, and his supposed attacker is getting away. You must lasso and hogtie the fleeing man and bring him back to the injured man. Get on your horse and start after the running man, who is marked on the Mini Map by a blue blip. Once you’ve caught up, equip your Lasso, target the man and throw the Lasso to stop him. With that, move in, hogtie him, then pick him up and put him on the back of your horse.
Return to the injured man and drop the hogtied assailant in front of him. It seems the injured man is actually cannibal and is preparing to feast on his supposed attacker. At this point, you can walk away and leave the man to be eaten or shoot the cannibal dead. Saving the man by killing the cannibal and cutting him free will net you 100 Honor and 50 Fame, while allowing the cannibal to eat him will earn you nothing.
Funny Man
Unlock: Complete “Exhuming and Other Fine Hobbies” in Seth Briars’ mission line.

Part 1: Talk to Jimmy Saint at the train station in Benedict Point.
Part 2: Two or three days after you first encounter Jimmy, you can then find him hogtied inside the mines in Gaptooth Breach. He’s the purple question mark icon on the map. Gaptooth Breach is a gang hideout occupied by Treasure Hunters, so you might as well clear them out before moving in to cut Jimmy free.
Jimmy is deep inside the mine. The mine is full of Treasure Hunters, so you’ll have to fight your way to him. Once you reach Jimmy, cut his hands free to complete this part.
Part 3: A day or two after you’ve rescued Jimmy from Gaptooth Breech, you can then find him hogtied in Pike’s Basin. Pike’s Basin is another gang hideout -- this one occupied by the Bollard Gang.

You’ll have to rescue Jimmy from three different gang hideouts to complete this Stranger mission.
Once this task becomes active again, travel to the purple circle in Pike’s Basin. You can clear out the Bollard Gang members before rescuing Jimmy, although doing so isn’t necessary. Once at Pike’s Basin, make your way to the purple question mark icon on the Mini Map and cut Jimmy’s hand free.
Part 4: When you reach Mexico after the “We Shall Be Together in Paradise” mission, you can then find Jimmy in the Tesoro Azul gang hideout between Chuparosa and Escalera. Clear out the banditos in Tesoro Azul and then head for the purple question mark icon on the Mini Map. Climb the ladder on the side of the building there to reach Jimmy. Cut Jimmy free once again to complete the mission.
Who Are You to Judge?
Unlock: Complete “Liars, Cheats and Other Proud Americans” in Nigel West Dickens’ mission line.

Part 1: Speak to the stranger at the stables in Rathskeller Fork (north of Gaptooth Ridge). Jeb tells Marston that his love, Lucy, is missing. According to the man, Lucy is somewhere in Tumbleweed.
Make your way to Tumbleweed, enter the purple circle on the map and then approach the purple question mark icon that appears Mini Map to trigger a cutscene.
After the cutscene, hop on your horse and start toward Rathskeller Fork. If you are separated from the woman, she will meet you at the entrance to Rathskeller Fork with Lucy, so there’s no need to wait for her to catch up.
Reunite Jeb with Lucy to complete the mission.
Lights, Camera, Action
Unlock: Complete “The Sport of Liars, and Kings” in Nigel West Dickens’ mission line.

Part 1: Talk to the man inside the house at the southeast end of Armadillo. He wants you to play Liar’s Dice at the Thieves’ Landing saloon and win him a deed to some land in Tall Trees so he can build a movie studio there.
Travel to Thieves’ Landing, enter the saloon and sit down at the Liar’s Dice table (the purple question mark icon on the Mini Map). You must win one game of Liar’s Dice in Thieves’ Landing to complete the first part of this task. Liar’s Dice is a simple game and it’s easy to beat the AI. If you don’t know how to play, read the instructions as they appear in the top-left corner of the screen.
After giving MacKenna the deed to the land in Tall Trees, you then must visit his actor friend, Spatchcock, in Benedict Point and convince him that he isn’t a true gunslinger.
Meet Spatchcock at Benedict Point (he’s the purple question mark icon on the Mini Map) and Marston will challenge him to a duel. You must not kill Spatchcock in this duel, but merely disarm him by targeting his right arm. Pull out your gun after “Draw!” appears onscreen and move the cursor onto Spatchcock’s right arm. Tag his arm when the cursor is white and contracted to disarm him and win out.

Target Spatchcock’s right arm during the duel to disarm him.
Once you’ve won the deed and bested Spatchcock, return to MacKenna where you first met him in Armadillo to complete the first part of this task.
Part 2: Once you are in West Elizabeth after completing “An Appointed Time” in Abraham Reyes’ mission line in Nuevo Paraiso, look for MacKenna at the Pacific Union Railroad Camp (south of Manzanita Post) to complete the task.
I Know You
Unlock: Complete “A Tempest Looms” in Bonnie MacFarlane’s mission line.
Note: This Stranger task cannot be completed once you’ve beaten the “The Last Enemy That Shall Be Destroyed” mission. Furthermore, this task does not contribute any percentage to the overall game completion stat, so you can miss this task and still complete the game 100%.

Part 1: Look for the Strange Man on the hill along the side of the road between Armadillo and MacFarlane’s Ranch. The Strange Man tells you of his friend in Thieves’ Landing who is about to cheat on his wife.
Make your way to Thieves’ Landing and approach the man (the purple question mark icon on the Mini Map) and prostitute outside the saloon. You can either discourage the man or encourage him to cheat on his wife by giving him $15. You will lose Honour if you encourage the man to cheat. Make a choice and proceed accordingly to complete this part of the mission.
Part 2: Once you’ve completed “We Shall Be Together in Paradise,” you can encounter the Strange Man on a hill near El Matadero southeast of Casa Madrugada. When this task becomes active again, the Strange Man will appear on your map as a purple question mark icon. Speak with the Strange Man and he will tell you about an old nun outside Las Hermanas.
You can encounter the Strange Man in all three territories.
Travel to Las Hermanas southwest of Casa Madrugada, dismount your horse and head for the purple question mark icon on the Mini Map. Donate $10 to the old nun to complete the second part of this mission.
Part 3: You can meet the Strange Man again in Beecher’s Hope once you get to West Elizabeth after completing “An Appointed Time” in Abraham Reyes’ mission line. Your final encounter with him is just a cutscene.
Deadalus and Son
Unlock: Complete “We Shall Be Together in Paradise” in Irish’s mission line.

Part 1: Look for Charles Kinnear by the cliff along the western road out of Casa Madrugada in Nuevo Paraiso. Charles is building a flying machine and needs materials to make glue. He asks Marston to bring him five Beaver Furs, 10 Red Sage plants and 20 feathers.
You must hunt and skin five Beavers to get the Beaver Fur for Charles. Beavers are most commonly found near Aurora Basin in Tall Trees or along the river north of Beecher’s Hope. Beavers are uncommon animals, so it might take awhile to collect the five Beaver Furs needed to complete this task.
Red Sage grows in Rio Bravo. Finding the 10 Red Sage plants can be made easy with the use of a Survivalist Map. This item can be bought from any general store for around $25. Nearby herbs will appear on the Mini Map when the Survivalist Map is used. The effect lasts for about 20 minutes. You can press down on the D-pad to zoom out the Mini Map so you can see more of the herbs around you.
The 20 feathers can be a combination of feathers from any types of bird. Birds are found all over the world. Shoot a bird down, approach its corpse and press the Y/Triangle button to pluck two or three of its feathers. Do this until you have 20 feathers.
Once you’ve collected all of the ingredients Charles requested, return to where you first met him and speak with him to hand over the materials and watch his maiden flight.
Poppycock
Unlock: Complete “Civilization, at Any Price” in De Santa’s mission line.

Part 1: Start this task by talking to the man inside the El Alcalde de Chuparosa building in Chuparosa. Uriah Tollets asks Marston to pick up a package in Nosalida and deliver it to the railroad workers in El Matedero.
Nosalida is a gang hideout occupied by rebels. The package is inside a chest on the docks at the west end of the village, so you’ll have to fight your way to it. The chest containing the package will be marked on the Mini Map by a purple question mark icon.
When you have the Nosalida package, travel to the purple circle outside of El Matadero and give the package to the foreman. With that, return to Chuparosa and speak with Tollets.
After speaking with Tollets in Chuparosa, you have a choice: give Tollets the $1000 or kill him and keep the money for yourself. Giving him the money will net you 100 Honor while killing him will earn you -100 Honor. If you’d like to keep the money but want to preserve your Honor, equip a Bandana before killing Tollets. You could also give Tollets the money to complete the mission and earn positive Honor, then equip the Bandana, kill Tollets and loot his corpse to find the $1000 you just gave him.
Love is the Opiate
Unlock: Complete “Empty Promises” in De Santa’s mission line and the “Poppycock” Stranger’s task.

Part 1: Enter the slaughter house near El Matedero (near the purchasable property just east of El Matedero) and speak to the worker inside. Zhuo is a slave. For his freedom, Zhuo’s owner wants “a white stallion like a real cowboy rides.”
The “white stallion” the man is referring to is the Hungarian Half-bred. This breed of horse can be found in the wild just outside of Escalera.
If you’ve already tamed a Hungarian Half-bred and have money burning a hole in your pocket, you can purchase a Hungarian Half-bred Deed from any general store and then use this item to switch your current horse to one of this breed. The deed is reusable, so if your Hungarian Half-bred dies, you can use the deed again to acquire another one.
If you haven’t tamed a Hungarian Half-bred or don’t have the deed and want to save your money, open your map, set a waypoint on the area with the picture of three horses southeast of Escalera and make your way there to begin your search. Hungarian Half-breds are quite common here, so just circle around until you spot a white horse with a white mane and a black face.

Wild Hungarian Half-breds can be found just outside of Escalera.
To break a wild horse, you must keep Marston centred while it tries to buck him off. Tap the Left Stick to the left or right to keep balance. Marston will lean to one side and flail his arms when he’s about to be thrown by the horse; tap the Left Stick in the direction opposite the direction Marston leans to keep balance. Keep this up and Marston will eventually take control.
Once you’ve tamed the Hungarian Half-bred, quickly hitch it to a hitching post so you can call it if you lose it. Hitching posts can be found in most towns, usually outside of the saloon or purchasable safe house. With that, take the Hungarian Half-bred to Zhou’s owner to free Zhou.
Part 2: Sometime after you’ve freed Zhou (up to one or two in-game weeks after) you can find him at the train station in Chuparosa. Speak to Zhou to trigger a cutscene and complete the mission.
Eva in Peril
Unlock: Complete “Lucky in Love” in Landon Ricketts’ mission line.

Part 1: Look for a man and woman fighting in the northwest corner of Casa Madrugada. Press the B/Circle button to break up the fight and trigger a cutscene. The man wants $200 for the woman’s freedom. Pay Mario $200 to free Eva and complete the first part of this mission.
Part 2: A few days after freeing Eva, visit the convent in Las Hermanas southwest of Casa Madrugada. Enter the church and approach the nun at the altar to trigger a cutscene. She tells you Eva went with a man to Sepulcro.
Travel to Sepulcro and enter the purple circle on the Mini Map. Then, head for the purple question mark icon that appears on the Mini Map to confront Mario. You must defeat Mario in a duel. Draw your gun after “Draw!” appears on screen and tag Mario’s head and chest to win out. With that, loot Mario’s corpse for the $200 and be on your way.
Aztec Gold
Unlock: Complete “Must a Savior Die?” in Luisa Fortuna’s mission line.

Part 1: A man named Basilio can be found in Sidewinder Gulch searching for the pieces of a map to his family’s lost treasure. He asks Marston to help him out.
The first piece of the map is within the purple circle on the map just east of where you met Basilio. Enter the purple circle and a purple question mark icon will appear on the Mini Map, pointing to the treasure. Get onto the cliffside and inspect the pile of rocks there to uncover a chest containing the first piece of the map.
The second map piece is in Primera Quebrada at the south end of Nuevo Paraiso (look for a purple circle far south of the Agave Viejo text on the map). Travel to Primera Quebrada and head for the purple question mark icon when it appears on the Mini Map. Inspect the pile of rocks inside the ruined building to uncover a chest containing the second piece of Basilio’s treasure map.
Help Basilio find the missing pieces of the map to his family’s lost treasure.
The last piece of the treasure map is in the purple circle west of El Matadero. Travel to the purple circle and look for another pile of rocks there. Inspect the rocks to uncover a chest containing the third map piece.
Once you have all three map pieces, meet Basilio outside the cave in El Matadero. After the cutscene, walk down the ridge and enter the cave Basilio ran into. Make your way to the end of the cave to find Basilio (the purple question mark icon on the Mini Map) to trigger a cutscene and complete the mission.
American Lobbyist
Unlock: Complete “An Appointed Time” in Abraham Reyes’ mission line.

Part 1: Speak to the man inside the gazebo at the north end of Blackwater to get started. The man asks Marston to blackmail another man who has been speaking out against Nate Johns, the governor of West Elizabeth. For this task, he gives Marston some photographs of the man with a prostitute.
The man you are to blackmail is inside the Blackwater Bank, which is just west of the gazebo you met the stranger in. Enter the bank when it’s open (between 7 a.m. and 6 p.m.) and approach the man sitting on the bench next to the door to your left to trigger a cutscene.
After the cutscene, return to the man in the gazebo for a modest cash reward.
The Wronged Woman
Unlock: Complete “An Appointed Time” in Abraham Reyes’ mission line.

Part 1: Speak to the praying woman inside the chapel at the northwest end of Blackwater. According to Clara LaGuerta, she was impregnated by a man named Harold Thornton while employed by him. Harold is a married man, so his wife fired Clara when she started to show signs of pregnancy, leaving her with no money. Clara asks Marston to speak with Harold in the Blackwater Saloon and convince him to provide some financial support.
Enter the Blackwater Saloon and approach Harold at the counter. After the cutscene, exit the saloon to duel Harold. Draw your gun after “Draw!” appears on screen and tag Harold’s face and chest to win out.
Once you’ve won the duel, loot Harold’s corpse for the $200, then return to the chapel in Blackwater to deliver the money to Clara.
Part 2: A few days after completing the first part of this mission, you can visit Harold’s grave at Blackwater Cemetery, which is just behind the chapel where you first met Clara. Speak with the woman standing at Harold’s grave to complete the mission.
The Prohibitionist
Unlock: Complete “An Appointed Time” in Abraham Reyes’ mission line and “The Wronged Woman” Stranger’s task.

Part 1: Speak to the man preaching temperance outside of the Blackwater Saloon to get started. Abner Forsyth is trying to convince the people of Blackwater to stay away from alcohol. After speaking with Abner, head to the “seedier side” of Blackwater denoted on the map by a purple circle. Once there, approach the man the purple question mark icon on the Mini Map is pointing to and watch the cutscene that ensues. Oliver Phillips, a bar owner, asks Marston to kill Abner because his preaching is bad for business.
To complete this mission, you can either kill Abner as Phillips requested or warn Abner that people in town want him dead. For sparing his life, Abner will give Marston a modest cash reward and you’ll earn 100 Honor.
Phillips won’t be happy if you let Abner live. If you do let Abner live, Phillips will spread slander about Marston’s actions. As a result, alcohol and room prices will double across the land. If you’ve already bought all of the houses in the game and your Fame and Honor are high enough, this won’t affect you. On the flipside, if you do kill Abner, alcohol and room prices will be halved. You’ll earn negative Honor if you kill Abner, but you can get around this by putting on a Bandana before shooting him.
Remember My Family
Unlock: Complete “The Last Enemy That Shall Be Destroyed.”

See the “Finale” section of this guide once you’ve completed “The Last Enemy That Shall Be Destroyed” for the walkthrough for this Stranger mission.
Gaptooth Breach

Unlock: Complete “Man is Born Unto Trouble” in Irish’s mission line.
Gang: Treasure Hunters
Location: New Austin
Reward: Springfield Rifle
Tumbleweed

Unlock: Complete “Let the Dead Bury Their Dead” in Seth Briars’ mission line.
Gang: Criminals
Location: New Austin
Reward: Winchester Repeater
Solomon’s Folly
Unlock: Complete “Justice in Pike’s Basin” in Marshal Johnson’s mission line.
Note: This gang hideout is exclusive to the PlayStation 3 version of Red Dead Redemption.
Gang: Walton’s Gang
Location: New Austin
Reward: Honor
Fort Mercer
Unlock: Complete “The Assault on Fort Mercer” in Marshal Johnson’s mission line.
Gang: Banditos
Location: New Austin
Reward: Semi-Automatic Pistol
Twin Rocks

Unlock: Complete “Justice in Pike’s Basin” in Marshal Johnson’s mission line.
Gang: Walton’s Gang
Location: New Austin
Reward: Volcanic Pistol
Pike’s Basin

Unlock: Complete “Justice in Pike’s Basin” in Marshal Johnson’s mission line.
Gang: Bollard Gang
Location: New Austin
Reward: Sawed-off Shotgun
Nosalida

Unlock: Complete “We Shall Be Together in Paradise” in Irish’s mission line.
Gang: Rebels
Location: Nuevo Paraiso
Reward: Henry Repeater
Tesoro Azul
Unlock: Complete “We Shall Be Together in Paradise” in Irish’s mission line.

Gang: Criminals
Location: Nuevo Paraiso
Reward: Double-action Revolver
A wanted poster is put up each morning in certain towns. You can collect on the bounty listed on the poster by accepting the bounty and then either killing or capturing the target.
The wanted poster will be marked on the Mini Map by a white skull icon. You can get this icon to appear by sleeping in your safe house (by viewing the save menu – you don’t actually have to save your game) to pass enough times to make it morning. Each view of the save menu advances in-game time by six hours. When morning comes, the foreman will post the wanted poster soon after Marston awakes.
New Austin bounties are posted in Armadillo, Rathskeller Fork and MacFarlane’s Ranch; the Nuevo Paraiso bounties in Escalera, Chuparosa and El Presidio, and the West Elizabeth bounties in Blackwater and Manzanita Post.

A wanted poster is put up each morning in certain towns.
Several scraps of outfits require capturing alive a wanted member of a specific gang. Bounties for Treasure Hunter gang members are most often posted in Rathskeller Fork, bounties for Bollard Gang members at MacFarlane’s Ranch, Walton’s Gang members in Armadillo and Banditos in Chuparosa.
When you accept a bounty, the bounty target will be marked on the map as a red skull icon. Make your way to this location to take them on. You can fast travel there via a stagecoach or your camp if you wish.
When you reach the bounty target, you can either kill them or use your Lasso to capture them alive. Capturing the target and turning them in to the nearest jail will earn you double the reward, so doing so is worth your while if you’re strapped for cash.
Each bounty target will be surrounded by their posse. If you want to capture the target alive, be careful not to accidentally shoot the bounty target when taking down their posse. Needless to say, clearing these bounties is much easier if you’re fine with killing your target.
To capture the target, first clear out their posse members (the red blips on the Mini Map), then lasso the target and hogtie them. When the target is hogtied, pick him up, put him on the back of your horse and start toward the nearest jail. If you kill the target, you’ll just need to loot his corpse to collect proof of his death.

Use your Lasso to capture bounty targets and turn them earn alive to earn double the payment.
Once you have the target or proof of their death, you must then turn in to the nearest jail, which will be marked on the map by a yellow blip. You can’t fast travel and you will be attacked by the target’s posse on your way to the jail, so have your guns ready. Open your map and set a waypoint at the jail if it helps.
There are a total of 20 bounty locations. Each bounty location cleared counts toward 100% completion. The identities of the individual criminals do not matter. You must have eight New Austin bounty locations, eight Nuevo Paraiso bounty locations and four West Elizabeth bounty locations accounted for in the stats section of the pause menu to complete the game 100%.
There are eight New Austin bounty locations: Hanging Rock, Rattlesnake Hollow, Mercer Station, Rio del Lobo, Silent Stead, Repentance Rock, Brittlebrush Trawl and Mescalero.
There are eight Nuevo Paraiso bounty locations: Planta Grande, Sepulcro, Barranca, Ojo del Diablo, Rancho Polvo, Primera Quebrada, Laguna Borrego and Hendidura Grande.
There are four West Elizabeth bounty locations: Aurora Basin, Bearclaw Camp, Nekoti Rock, Tanner’s Reach.
Nightwatch
Nightwatch is a job that can be taken on only during the night hours. To do a Nightwatch job, travel to the crescent moon icon in MacFarlane’s Ranch, Chuparosa or Blackwater and hit the yellow marker there. Completing all three of these Nightwatch jobs at least once is a requirement for 100% completion.
Your job is to patrol the streets and capture or kill any criminals you encounter. Follow the dog (denoted on the Mini Map by a blue blip) and it will lead you to ongoing crimes. There are several different Nightwatch scenarios. For example, on any given night, you may have to break up a fight, stop a horse thief or save a woman from a gang. You can put a stop to these crimes non-lethally or with your weapons. You’ll earn more money at the end of the night if you capture the criminals with your Lasso.

The dog will lead you to ongoing crimes.
Whether it is best to capture or kill a criminal depends on the crime taking place. For some crimes, such as a gang harassing a woman, using your gun is the better choice, as taking the time to lasso and hogtie all of them would not be a good idea. When stopping a crime where the perpetrator is unarmed, such as when breaking up a fight or stopping a horse thief, you can capture those involved if you act quickly with your Lasso.
Nightwatch sessions do not last long. You’ll only have to stop one to four crimes to complete the job for the night.
Horsebreaking
The Horsebreaking job involves stepping into a pen with a wild horse and using your lasso and ranching skills to tame it. This job is only available during the daytime hours. To take on a Horsebreaking job, travel to the horse head icon in Ridgewood Farm or Chuparosa and hit the yellow marker there. Completing both horsebreaking jobs at least once is a requirement for 100% completion.
Horsebreaking is a three step process: lasso, mount and break. First, you must lasso the horse. Aim with LT/L2 and press the RT/R2 button to throw the Lasso. Once you’ve lassoed the horse, hold RB/R1 to stop the horse and then move in and get on.


To tame the horse, you must keep Marston centred while it tries to buck him off. Tap the Left Stick to the left or right to keep balance. Marston will lean to one side and flail his arms when he’s about to be thrown by the horse; tap the Left Stick in the direction opposite the direction Marston leans to keep balance. Keep this up and Marston will eventually take control. Once you’ve gained control, guide the horse into the stables to complete the job.
You only need to break a single horse to complete this job. The pay is abysmal, but if you’re going for 100%, the money isn’t the point.
Cowboy Outfit
Discover: Default Outfit
Bonus: None
Gentleman’s Attire
Discover/Complete Outfit: Link your Xbox Live Gamertag or PlayStation Network ID to your Rockstar Games Social Club account via the “Social Club” option in the pause menu and then save your game at a camp or safe house.
Bonus: Allows you to participate in high stakes Poker games in Blackwater. The high stakes Poker table is through the door on the second floor of the Blackwater Hotel.
Deadly Assassin
Discover: Use the Rockstar Games code included in the Red Dead Redemption Special Edition given to those who preordered the game at Gamestop/EB Games.
Bonus: Dead Eye meter regenerates twice as fast.
Scrap 1: Search Coot’s Chapel
Scrap 2: Complete Twin Rocks Hideout
Scrap 3: Capture or Kill Mo van Barr
Scrap 4: Win a duel in Armadillo
Scrap 5: Complete “American Appetites” Stranger’s task
Elegant Suit
Discover: Enter Thieves’ Landing.
Complete Outfit: Purchase from the tailor in Thieves’ Landing (the tailor is on the first floor of the same building the doctor’s office is in).
Bonus: Allows you to cheat at Poker.
Bollard Twins Outfit
Discover: Kill and loot a Bollard Twins gang member.
Bonus: Members of the Bollard Twins gang will treat you as one of their own. They will only become hostile if you attack them.
Scrap 1: Search Thieves’ Landing


Scrap 2: Complete a Nightwatch job in MacFarlane’s Ranch
Scrap 3: Win at Horsehoes in MacFarlane’s Ranch
Scrap 4: Claim a Bollard Twins Gang bounty alive
Scrap 5: Defend residents of Hennigan’s Stead from the Bollard Twins Gang
Scrap 6: Purchase at the tailor in Thieves’ Landing
Treasure Hunter Outfit
Discover: Kill and loot a Treasure Hunter.
Bonus: Treasure Hunters will treat you as one of their own. They will only become hostile if you attack them.
Scrap 1: Search Silent Stead


Scrap 2: Complete “California” Stranger’s task
Scrap 3: Make a profit playing Blackjack at Rathskeller Fork
Scrap 4: Claim a Treasure Hunter bounty alive
Scrap 5: Complete Gaptooth Breach Hideout
Scrap 6: Purchase at the tailor in Thieves’ Landing
Bandito Outfit
Discover: Kill and loot a Bandito gang member
Bonus: Members of the Los Banditos gang will treat you as one of their own. They will only become hostile if you attack them.
Scrap 1: Search Sidewinder Gulch


Scrap 2: Complete a Nightwatch job in Chuparosa
Scrap 3: Defeat all players in a round of Liar’s Dice in Casa Madrugada
Scrap 4: Claim a Bandito bounty alive
Scrap 5: Defend the residents of Mexico from Bandito attacks
Scrap 6: Purchase at the general store in Chuparosa
Reyes’ Rebels Outfit
Discover: Complete “An Appointed Time” in Abraham Reyes’ mission line.
Bonus: The law will treat you kindly in Mexico (posses and bounty hunters will not pursue you when you have a bounty).
Scrap 1: Search Sepulcro


Scrap 2: Complete the “Poppycock” Stranger’s task
Scrap 3: Complete a Horsebreaking job in Chuparosa
Scrap 4: Complete the “Love is the Opiate” Stranger’s task
Scrap 5: Win at Five Finger Fillet in Torquemada
Scrap 6: Purchase at the general store in Escalera
US Army Outfit
Discover: Progress through the story (it’ll pop up eventually).
Bonus: None
Scrap 1: Search Aurora Basin


Scrap 2: Win at Arm Wrestling in Pacific Union Railroad Camp
Scrap 3: Eliminate all other players in a game of Poker in Blackwater
Scrap 4: Complete the “Lights, Camera, Action” Stranger’s task
Scrap 5: Complete Nightwatch in Blackwater
Scrap 6: Purchase at the tailor in Blackwater. This scrap will become available for purchase once you’ve completed all 57 story missions.
US Marshal Uniform
Discover: Complete “The Last Enemy That Shall Be Destroyed.”
Bonus: American Lawmen won’t pursue you.
Complete Outfit: Complete all 5 US Gang Hideouts (Gaptooth Breach, Tumbleweed, Fort Mercer, Twin Rocks and Pike’s Basin) within 24 in-game hours.
Acquiring this outfit is much easier than it sounds. You must clear the five US hideouts in 24 in-game hours, which is more than enough time. Gather plenty of Medicine, Horse Pills and Repeater/Rifle ammunition before setting out. The clock starts as soon as you trigger the first hideout.
Start at Gaptooth Breach. Move on to Tumbleweed next, then to Fort Mercer, Twin Rocks and finally Pike’s Basin. Don’t bother setting up camp and fast travelling to these areas; just set a waypoint on your map near the next hideout and ride your horse there. You can use Horse Pills to temporarily increase your horse’s stamina, but doing so isn’t necessary.
If you die during this run, you’ll revert back to the point the game last auto-saved, which would be just after the last hideout you completed. So, if you do die at some point, just make your way back to the hideout you died at and try again.
You do have to be quick when clearing each hideout. Don’t bother taking cover unless you’re low on health and about to die. Use Medicine if you can so you can get right back into the action. Run-and-gun your way through each hideout with a repeater or rifle (the Evans Repeater is ideal) and then move right on to the next one.
Also, it does not matter if any friendly NPCs are killed. You can complete all of the hideouts whether you lose the NPCs there or not.
Legend of the West
Discover: Attain Rank Six in an ambient challenge for the first time.
Bonus: None (but your Dead Eye meter will increase when you unlock this outfit).
Complete Outfit: Attain Rank 10 in all four ambient challenges.
Bureau Uniform
Discover: Attain 75% game completion.
Bonus: Immune to the law.
Complete Outfit: Attain 100% game completion.
Duster Coat
Discover/Complete Outfit: Reach the “Peacemaker” Honor rank.
Bonus: None
Mexican Poncho
Discover/Complete Outfit: Purchase a safe house in Mexico
Bonus: None
Rancher Clothing
Discover/Complete Outfit: Take on “The Outlaw’s Return” in Abigail Marston’s mission line
Bonus: None
Master Hunter
Rank 1: Collect five Coyote Pelts.
- Coyotes are most common in New Austin (around Hanging Rock).
Rank 2: Collect five Deer Pelts.
Rank 3: Collect five Wolf Pelts and kill five Wolves with your melee knife.
- You don’t have to kill five wolves all at once, so if you encounter a pack of them, kill off two or three of them before going at the remaining ones with your knife.
- You can weaken a wolf with bullets before trying to kill it with your knife. Just make sure the gun you use isn’t too powerful.
- The five Wolf Pelts don’t have to come from the wolves you killed with your melee knife.
Rank 4: Collect five Boar Tusks and three Armadillo Carapaces.
- Armadillo are common around Armadillo and Escalera.
- Boars are common around the boar picture on the map north of MacFarlane’s Ranch and the boar picture on the map at the southeast end of West Elizabeth.
Rank 5: Kill two Cougars with your melee knife and collect two Cougar Pelts.
- Cougars are common around Rio Bravo and the boar picture on the map north of MacFarlane’s Ranch.
- Weaken a Cougar with bullets before trying to kill it with your knife.
- The two Cougar Pelts don’t have to come from the cougars you killed with your melee knife.
- You can roll to the side while wielding your melee knife by holding LT/L2 and pressing the X/Square button.
Rank 6: Collect five Racoon Furs, five Skunk Furs and five Fox Furs.
- Raccoons can only be found at night. Look for them in the Great Plains.
- Look for skunks in Rio Del Toro or Cholla Springs.
- Foxes are most common around the fox picture on the map south of Beecher’s Hope.
Rank 7: Collect five Elk Meat and five Bighorn Skins.
- Look for Elks in Tall Trees.
- Bighorns (rams) are most common in southern tall trees (around the bighorn picture on the map.
Rank 8: Kill one Bear with your melee knife and collect one Bear Pelt.
- You can weaken a wolf with bullets before trying to kill it with your knife. Just make sure the gun you use isn’t too powerful.
- The Bear Pelt doesn’t have to come from the Bear you kill with your melee knife.
Rank 9: Search Ojo del Diablo for “Khan” the legendary jaguar and collect his pelt.
- Travel to Ojo del Diablo. Walk around the area and Khan should soon appear. He will be marked on the Mini Map by a red blip.


Rank 10: Search Aurora Basin, Stillwater Creek and Nekoti Rock for “Lobo” the legendary wolf, “Gordo” the legendary boar and “Brumas” the legendary bear and collect their pelts.
- Travel to Aurora Basin, Stillwater Creek or Nekoti Rock, walk around the area and one of these animals will soon appear. The animal will be marked on the Mini Map by a red blip.
Lobo the wolf can be found by Aurora Basin.
Gordo the boar can be found by Stillwater Creek.


Brumas the bear can be found near the cave at the top of the winding path near Nekoti Rock.


Master Hunter (Rank 5) Reward: Unlock Buffalo Rifle. You can purchase this weapon from a gunsmith.
Legendary Hunter (Rank 10) Reward: Obtain Vittles when skinning most animals. This item will restore Marston’s health when consumed.
Sharpshooter
Rank 1: Kill five flying Birds.
Rank 2: Kill five Rabbits.
Rank 3: Kill five Coyotes without taking any damage from them.
- Coyotes are most common in New Austin.
Rank 4: Kill five flying Birds from a moving train.
- To get onto a train, you can either wait until the train stops at a station and climb onboard or ride your horse up next to it and press the X/Square button when the prompt appears to jump over to it.
- Look to your map to determine where the trains are. There will be two trains if you are far enough in the story.
Rank 5: Kill two different species of animal in one Dead Eye burst.
Rank 6: Shoot the hats off of two people’s heads (without killing them).
- Target the sombreros worn by Los Banditos in Nuevo Paraiso (or the Los Banditos that occupy the Fort Mercer gang hideout) or the top hat-wearing Walton’s Gang members.
Rank 7: Kill three Bears each with a single shot.
- Use a Shotgun (the Semi-auto Shotgun is ideal). Wait until the bear is close, then trigger Dead Eye and tag the bear in the head once.
- Bears are very common in Tall Trees (especially near the bear picture on the world map).
Rank 8: Shoot the hats off of two people’s heads (without killing them) and disarm two people.
- You must shoot the weapon, not the person’s right arm. If you see blood, it doesn’t count as a disarm.
- You can disarm the same person more than once. Disarmed enemies will most likely pick up their weapon or pull out another.
- Thieves’ Landing is a good place to do this. Take cover behind the bar in the Thieves’ Landing Saloon, point your gun at someone, then activate Dead Eye when he draws and shoot the weapon out of his hand.
Rank 9: Kill six animals without reloading or changing weapons.
- Use a weapon with a large ammo capacity, such as the Evans Repeater or the Mauser Pistol. The Mauser Pistol can fire 15 times before reloading, and activating Dead Eye will reload the weapon without penalizing you.
- This is easiest during the “Pestilence” mission in Abigail Marston’s mission line. If you’ve passed this mission already, you can often find large packs of animals on Marston’s property in Beecher’s Hope. Another good opportunity is right after clearing the Fort Mercer gang hideout, as a group of more than six buzzards will appear overhead once you do.
Rank 10: Disarm six different people without reloading or changing weapons.
- This is easiest with the Mauser Pistol. The Mauser Pistol can fire 15 times before reloading, and activating Dead Eye will reload the weapon without penalizing you.
- You must shoot the weapon, not the person’s right arm. If you see blood, it doesn’t count as a disarm.
- You can disarm the same person more than once. Disarmed enemies will most likely pick up their weapon or pull out another.
- The best place to do this is in Thieves’ Landing. Bring plenty of Chewing Tobacco and Moonshine with you. Wear the Deadly Assassin outfit if you have it (although doing so is in no way necessary).
- Take cover behind the bar in the Thieves’ Landing Saloon, point your gun at someone, then activate Dead Eye when he draws and carefully shoot the weapon out of his hand. If you move out from cover, keep tapping the LT/L2 button to prevent Marston from holstering the weapon and automatically reloading it.
Master Sharpshooter (Rank 5) Reward: Receive more ammo for your guns when you open the chest in your safe houses.
Legendary Sharpshooter (Rank 5) Reward: Killing enemies and scoring headshots refills more of the Dead Eye meter.
Survivalist
The Survivalist challenge can be made easy (albeit still very time-consuming) with the use of the Survivalist Map. This item can be bought at any general store for around $25. Nearby herbs will appear on the Mini Map when the Survivalist Map is used. The effect lasts for about 20 minutes. You can press down on the D-pad to zoom out the Mini Map so you can see more of the herbs around you.
Travel to the location where the plant you’re after grows and use a Survivalist Map to mark nearby herbs on your Mini Map. You can only hold one Survivalist Map in your inventory at a time, so once you’ve used one, before setting out to find the next type of plant, stop by a general store and purchase another.

A Survivalist Map can be purchased at any general store.
For each rank, you must collect the number of the plant listed in addition to any you may already have. So, if you go into Rank 3 with two Red Sages already in your inventory, you’ll still have to collect four Red Sages to move on to Rank 4.
Rank 1: Collect six Wild Feverfew. They are found in Hennigan’s Stead and Cholla Springs.
Rank 2: Collect six Desert Sages. They are found in and around Gaptooth Ridge.
Rank 3: Collect four Red Sages. They are found in and around Rio Bravo.
Rank 4: Collect eight Prickly Pears. They are found in and around Punta Orgullo.
Rank 5: Collect seven Woolly Blue Curls. They are found in and around Perdido.
Rank 6: Collect eight Butterfly Weeds. They are found in and around Diez Coronas.
Rank 7: Collect 10 Hummingbird Sages. They are found in and around Tall Trees (mostly in the southern part).
Rank 8: Collect 12 Prairie Poppies. They are found in the Great Plains (mostly in the southern part).
Rank 9: Collect 15 Golden Currents. They are found in the Great Plains (mostly in the northern part).
Rank 10: Collect 10 Violet Snowdrop (found in Tall Trees, mostly in the northern end) as well as two of every other herb available (i.e., two more of every herb required to reach Rank 9 of this challenge).
Master Survivalist (Rank 5) Reward: Survivalist Map effect lasts for twice as long (from 20 minutes to 40 minutes).
Legendary Survivalist (Rank 10) Reward: Ability to brew Tonics, a consumable item that restores Marston’s Dead-Eye meter when used. Marston will automatically brew a Tonic whenever you gather a herb.
Treasure Hunter
The Treasure Hunter challenge involves using maps to uncover treasure chests. To start this challenge you must first recue a treasure hunter NPC during a random event. If you rescue him, the treasure hunter will show his appreciation by giving you a Treasure Map. If you weren’t able to rescue him, loot his corpse to acquire the map all the same.
You can view the Treasure Map from your inventory once you have it. It can be difficult to match up the picture on the map to the landscape feature it depicts. Fortunately for you, doing so isn’t necessary as long as you’re using this guide.

Each chest you open will contain the map to the next chest and a bar of gold. You can sell the gold in town for a considerable amount of money. The value of the gold in the chest increases as you move up the ranks.
Rank 1: Acquire a Treasure Map by rescuing a friendly NPC (or looting his corpse) during a random event.
Rank 2: Find the treasure in Hanging Rock.


Rank 3: Find the treasure on the southern face of Del Lobo Rock.


Rank 4: Find the treasure in the basement of the old mansion in Tumbleweed.


Rank 5: Find the treasure along the Rio Del Toro.


Rank 6: Find the treasure near Crooked Toes. The treasure is on top of the rock formation pictured below.


Rank 7: Find the treasure under the Ojo del Diablo rock formation.


Rank 8: Find the treasure on the mountain path along the river north of Agave Viejo.


Rank 9: Find the treasure along the stone wall in eastern Beecher’s Hope.


Rank 10: Find the treasure inside the cave in Neokti Rock.


Master Treasure Hunter (Rank 5) Reward: Ride stagecoaches for free.
Legendary Treasure Hunter (Rank 10) Reward: Acquire the Treasure Hunter’s satchel, which allows you to hold double the amount of each consumable item.

Red Dead Redemption Map
A larger version can be seen by clicking here
The map above includes all 94 map locations. If you have a Rockstar Games Social Club account (you can sign up for one at http://socialclub.rockstargames.com) and have linked it to your Xbox Live Gamertag or PlayStation Network ID, you can view a map of your own progress on the following page:
http://socialclub.rockstargames.com/games/rdr/checklist.html
To unlock map areas, you can either travel to each location or simply purchase area maps from general stores around the world and use these maps to uncover all 94 locations. Each map costs between $15 and $25. Once you have a map in your inventory, use it to uncover the areas in that locale.
Buy and use all of the maps listed below to discover every location without having to travel to each one.
- Hennigan’s Stead map from the MacFarlane’s Ranch general store
- Cholla Springs and Gaptooth Ridge maps from the Armadillo general store
- Rio Bravo map from the Thieves’ Landing general store
- Perdido and Diez Coronas maps from the Chuparosa general store
- Punta Orgullo map from the Escalera general store
- Great Plains map from the Blackwater general store
- Tall Trees map from the Manzanita Post general store
If you have a Rockstar Games Social Club account (you can sign up for one at http://socialclub.rockstargames.com) and have linked it to your Xbox Live Gamertag or PlayStation Network ID, you can view a handy map of your completion progress by visiting the following page:
http://socialclub.rockstargames.com/games/rdr/checklist.html
Complete all 57 story missions.
Complete all 18 Stranger tasks (excluding “I Know You”).
Clear all seven non-exclusive Gang Hideouts: Gaptooth Breach, Tumbleweed, Fort Mercer, Twin Rocks, Pike’s Basin, Nosalida, Tesoro Azul.
Obtain the following nine outfits: Elegant Suit, Bollard Twins Outfit, Treasure Hunter Outfit, Bandito Outfit, Reyes’ Rebels Outfit, US Marshal Uniform, US Army Outfit, Mexican Poncho and Rancher Clothing.
Obtain all rare weapons: LeMat Revolver, Mauser Pistol, Carcano Rifle, Evans Repeater and Semi-auto Shotgun.
- Mauser Pistol, Carcano Rifle and Evans Repeater will eventually all be sold by the Blackwater gunsmith.
- The LeMat Revolver and Semi-auto Shotgun will eventually be sold by the Escalera gunsmith.
Discover all 94 map locations (by either traveling to each location or by buying and using maps).
Complete all five jobs at least once (Horsebreaking jobs at Ridgewood Farm and Chuparosa; Nightwatch jobs at MacFarlane’s Ranch, Chuparosa and Blackwater).
Win all six Minigames at least once: Arm Wrestling, Blackjack, Five Finger Fillet, Horseshoes, Liar’s Dice and Poker.
Attain Rank 10 in all four ambient challenges: Sharpshooter, Survivalist, Master Hunter and Treasure Hunter challenges.
Own all 13 safe houses: the MacFarlane’s Ranch, Armadillo, Rathskeller Fork and Thieves’ Landing safe houses in New Austin; the Irish’s Shack, Escalera, Chuparosa, Casa Madrugada and El Matedero safe houses in Nuevo Paraiso; the Blackwater, Manzanita Post and both Beecher’s Hope rooms (complete all 57 story missions to earn the second one) in West Elizabeth.
Capture or kill a bounty target at all eight bounty locations in New Austin (posted at Armadillo, Rathskeller Fork and MacFarlane’s Ranch): The Hanging Rock, Rattlesnake Hollow, Mercer Station, Rio del Lobo, Silent Stead, Repentance Rock, Brittlebrush Trawl and Mescalero.
Capture or kill a bounty target at all eight bounty locations in Nuevo Paraiso (posted at Escalera, Chuparosa and El Presidio): Planta Grande, Sepulcro, Barranca, Ojo del Diablo, Rancho Polvo, Primera Quebrada, Laguna Borrego, Hendidura Grande.
Capture or kill a bounty target at all four bounty locations in West Elizabeth (posted at Blackwater and Manzanita Post): Aurora Basin, Bearclaw Camp, Nekoti Rock, Tanner’s Reach).
Select “Cheats” in the Options section of the pause menu and press the Y/Triangle button to enter a cheat. Input a cheat phrase to add that cheat to the cheat menu. To activate the cheat, open the cheats menu and toggle it on. Press the Y/Triangle button on the cheat menu to enter another cheat phrase.
Always save your game before activating a cheat, as doing so will disable saving and achievements/trophies. Reload your previous save to restore the ability to save the game and unlock achievements/trophies.
Below is a list of cheat phrases and their effects.
Infinite Horse Stamina - make hay while the sun shines
Gang Chic (Unlock Outfits) - you think you tough, mister?
Sharp Dressed Man (Unlock Outfits) - don’t you look fine and dandy
Man in Uniform (unlock outfits) - i love a man in uniform
(Must beat the game for this one to work.)
Spawn Horse - beats and man together
Spawn Coach - now who put that there?
Famous (Max Fame) - i am one of those famous fellas
Who? (Zero Fame) - humility before the lord
Good Guy (Max Honor) - it aint pride. it’s honor
Hic (Always Drunk) - i’m drunk as a skunk and twice as smelly
Gun Set 1 - it’s my constitutional right
(Volcanic Pistol, Double-barrelled Shotgun, Springfield Rifle)
Gun Set 2 - i’m an american. i need guns
(Semi-auto Pistol, Winchester Repeater, Buffalo Rifle, Sawed-off Shotgun, three Fire Bottles)
Infinite Ammo - abundance is everywhere
Jack Attack (Play as Jack) - oh my son, my blessed son
Money ($500) - the root of all evil, we thank you!
Old School (Sepia Filter) - the old ways is the best ways
Invincibility - he gives strength to the weak
Decrease Bounty - they sell souls cheap here
Diplomatic Immunity (Crimes are Ignored) - i wish i worked for uncle sam
Infinite Dead Eye - i don’t understand imnfinity
Lewis and Clark (unlock all areas) - you got yourself a fine pair of eyes
Rockstar Games Social Club Unlockable Cheats
You must have a Rockstar Games Social Club account to unlock these cheats. If you don’t have an account, you can sign up for one at http://socialclub.rockstargames.com.
While logged into your Social Club account, visit the Community page (http://socialclub.rockstargames.com/games/rdr/community.html) and click the “Claim Your Unlocks” box in the bottom-left corner of the page. Read the instructions in the pop-up window to add these cheats to your game.
Increase Bounty - Raise bounty
Bad Guy - Lowest Honor
So-so Guy - Neutral Honor
Change Weather - Cycle through weather
Donkey Rider - Spawn a Donkey
Dead-Eye Level 1 - Reset Dead Eye to level 1
Dead-Eye Level 2 - Reset Dead Eye to level 2
Additional cheats can be unlocked by taking on Social Club challenges and earning medals. Active Social Club challenges can be viewed in the “Social Club” section of the pause menu. You can view the active challenges and their rewards online at http://socialclub.rockstargames.com/games/rdr/challenges.html
You can unlock clothes for your Xbox 360 avatar or PlayStation Home character by playing Red Dead Redemption. The Posse T-Shirt, Gentleman’s Attire and Lady’s Finery awards are not unlockable at the time of writing.
Sombrero: Shoot the hat off of any person’s head without killing them.
Red RDR Logo T-Shirt: Open the chest in the ruined cabin in the Riley’s Charge area of New Austin. Riley’s Charge is south of Armadillo. The cabin itself is visible on the map northwest of the “R” in the “Riley’s Charge” text on the map when completely zoomed in.


Yellow Rockstar Logo T-Shirt: Open the chest in the attic in John Marston’s home in Beecher’s Hope. Climb the ladder through the doorway in the kitchen to reach the attic.


Posse T-Shirt: Unlocked when the community earns an unspecified amount of money in the upcoming “Strike It Rich!” Social Club challenge. This item is unavailable at the time of writing, but will be unlocked in the future.
Gentleman’s Attire/Lady’s Finery: Unknown at the time of writing, but may involve completing an upcoming Social Club challenge.
Red Dead Redemption features a total of 48 different achievements. Each achievement unlocked contributes a certain number of points to your overall Gamerscore. The free “Outlaws to the End” downloadable content adds an additional 10 achievements worth 100 gamer points. At the time of writing, you can acquire a grand total of 1100 gamer points by playing Red Dead Redemption.
 1. High Roller
 2. No Dice
 3. What About Hand Grenades?
 4. Austin Overpowered
 5. Evil Spirits
 6. Instinto Asesino
 7. Fightin' Around the World
 8. Strange Things are Afoot
 9. People are Still Strange
 10. Buckin' Awesome
 11. Clemency Pays
 12. Exquisite Taste
 13. Bearly Legal
 14. He Cleans Up Well!
 15. More than a Fistful
 16. Frontiersman
 17. The Gunslinger
 18. Man of Honor / Chivalry's Dead
 19. Gold Medal
 20. On the Trail of de Vaca
 21. Friends in High Places
 22. Redeemed
 23. Mowing Them Down
 24. In a Hail of Bullets
 25. Long Arm of Marston
 26. Bullseye
 27. Unnatural Selection
 28. Have Gun Will Travel
 29. Slow on the Draw
 30. Hit the Trail
 31. Posse Up!
 32. The Quick and Everyone Else...
 33. How the West Was Won
 34. Go Team!
 35. Most Wanted
 36. Red Dead Rockstar
 38. Land of Opportunity (Secret)
 39. Sons of Mexico (Secret)
 40. No More Fancy Words (Secret)
 41. A Savage Soul (Secret)
 42. The Benefits of Civilization (Secret)
 43. Into the Sunset (Secret)
 44. Nurture or Nature? (Secret)
 45. Dastardly (Secret)
 46. Spurred to Victory (Secret)
 47. Heading South on a White Bronco (Secret)
48. Manifest Destiny (Secret)
Kill the last buffalo in the Great Plains in Single Player.
5 points

Outlaws to the End DLC Achievements
49. Well done
Complete a Co-Op mission.
5 points
 50. Have posse, will travel
 51. 2 guys, 1 Coop
 52. Stake a claim
 53. Struck gold
 54. Friends indeed
 55. You rule!
 56. The mother lode
 57. Dodge this
 58. Bulletproof
Red Dead Redemption features a total of 49 unlockable trophies. There are 35 Bronze trophies, 12 Silver trophies, one Gold trophy, and a Platinum trophy unlocked by earning every other trophy available in Red Dead Redemption.
The free “Outlaws to the End” downloadable content adds 10 Bronze trophies.
1. High Roller
Win over 2000 chips in a hand of Poker.
Bronze
2. No Dice
Complete a game of Liar's Dice without losing a single die.
Bronze
3. What About Hand Grenades?
Get a ringer in a game of Horseshoes.
Bronze
4. Austin Overpowered
Complete Twin Rocks, Pike's Basin, and Gaptooth Breach Hideouts in Single Player.
Silver
5. Evil Spirits
Complete Tumbleweed and Tesoro Azul Hideouts in Single Player.
Silver
6. Instinto Asesino
Complete Fort Mercer and Nosalida Hideouts in Single Player.
Silver
7. Fightin' Around the World
Knock someone out in melee in every saloon in the game in Single Player.
Bronze
8. Strange Things are Afoot
Complete a task for a Stranger.
Bronze
9. People are Still Strange
Complete 15 tasks for Strangers.
Silver
10. Buckin' Awesome
Break the Kentucky Saddler, the American Standardbred, and the Hungarian Half-bred.
Bronze
11. Clemency Pays
Capture a bounty alive.
Bronze
12. Exquisite Taste
Purchase a rare weapon from a gunsmith.
Bronze
13. Bearly Legal
Kill and skin 18 grizzly bears.
Bronze
14. He Cleans Up Well!
Obtain the Elegant Suit.
Bronze
15. More than a Fistful
Earn $10,000 in Single Player.
Bronze
16. Frontiersman
Obtain Legendary rank in any Single Player Ambient Challenge.
Bronze
17. The Gunslinger
Score a headshot on any enemy using Expert targeting mode.
Silver
18. Man of Honor / Chivalry's Dead
Attain highest Fame rank and either highest Honor rank or lowest Honor rank.
Bronze
19. Gold Medal
Earn a Gold Medal Rank for a combat mission in Single Player.
Bronze
20. On the Trail of de Vaca
Uncover every location on the map in Single Player.
Bronze
21. Friends in High Places
Use a pardon letter with more than $5000 bounty in Single Player.
Bronze
22. Redeemed
Attain 100% in the Single Player Game Completion stat.
Gold
23. Mowing Them Down
Kill 500 enemies with a mounted weapon in any game mode.
Silver
24. In a Hail of Bullets
Kill 500 enemies with any pistol or revolver in any game mode.
Silver
25. Long Arm of Marston
Kill 500 enemies with any rifle, repeater, or shotgun in any game mode.
Silver
26. Bullseye
Get 250 headshots in any game mode.
Bronze
27. Unnatural Selection
Kill one of every animal species in the game in any game mode.
Bronze
28. Have Gun Will Travel
Complete all Hideouts in a single public Free Roam session.
Silver
29. Slow on the Draw
Get 10 assists in a single Hideout in a public Free Roam session.
Bronze
30. Hit the Trail
Get from Blackwater to Escalera before sundown in a public Free Roam session.
Bronze
31. Posse Up!
Create a posse and get the maximum number of members.
Bronze
32. The Quick and Everyone Else...
Be the top scoring player in any three consecutive FFA games in public matches.
Silver
33. How the West Was Won
Reach the top rank for multiplayer experience.
Silver
34. Go Team!
Be on the winning team for four consecutive victories in any team based game in public matches.
Silver
35. Most Wanted
Become a Public Enemy for 10 minutes and escape alive in a public Free Roam session.
Bronze
36. Red Dead Rockstar
Kill a Rockstar or someone with this achievement in a public multiplayer match.
Bronze
37. That Government Boy (Secret)
Complete "Exodus in America".
Bronze
38. Land of Opportunity (Secret)
Complete "The Assault on Fort Mercer."
Bronze
39. Sons of Mexico (Secret)
Complete "The Gates of El Presidio."
Bronze
40. No More Fancy Words (Secret)
Complete "An Appointed Time."
Bronze
41. A Savage Soul (Secret)
Complete "At Home with Dutch."
Bronze
42. The Benefits of Civilization (Secret)
Complete "And the Truth Will Set You Free."
Bronze
43. Into the Sunset (Secret)
Complete "The Last Enemy That Shall Be Destroyed."
Bronze
44. Nurture or Nature? (Secret)
Complete "Remember My Family."
Bronze
45. Dastardly (Secret)
Place a hogtied woman on the train tracks, and witness her death by train.5
Bronze
46. Spurred to Victory (Secret)
Complete 20 story missions without switching to a new horse at a hitching post.
Bronze
47. Heading South on a White Bronco (Secret)
Evade the US Marshals while riding the Hungarian Half-Bred horse in Single Player.
Bronze
48. Manifest Destiny (Secret)
Kill the last buffalo in the Great Plains in Single Player.
Bronze
49. Legend of the West
Unlock all 48 trophies in the standalone game.
Platinum
Outlaws to the End DLC Achievements
50. Well done
Complete a Co-Op mission.
Bronze
51. Have posse, will travel
Complete all Co-Op missions.
Bronze
52. 2 guys, 1 Coop
Complete a Co-Op mission with just 2 people.
Bronze
53. Stake a claim
Gold medal any Co-Op mission.
Bronze
54. Struck gold
Gold medal all Co-Ops missions.
Bronze
55. Friends indeed
Complete a Co-Op mission without anyone dying.
Bronze
56. You rule!
Complete all Advanced Co-Op missions.
Bronze
57. The mother lode
Gold medal all Advanced Co-Op missions.
Bronze
58. Dodge this
Achieve a kill chain of 10 or more in any Advanced Co-Op mission.
Bronze
59. Bulletproof
Complete a Co-Op mission without dying.
Bronze


 H1Z1 (PC) Battle Royale - survival guide
 Pillars of Eternity - Encampment - Quest overview
 NBA Live 14 Review: A Missed Opportunity for a Solid Comeback
 How to get all the Dragon Age Inquisition DLC Weapons
 Assassin’s Creed: Rogue Walkthrough