Unofficial Resident Evil 6 Guide by vhayste for
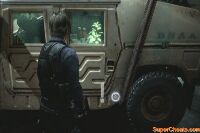
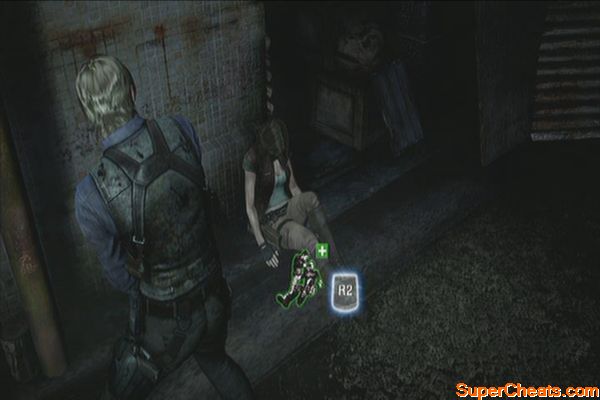
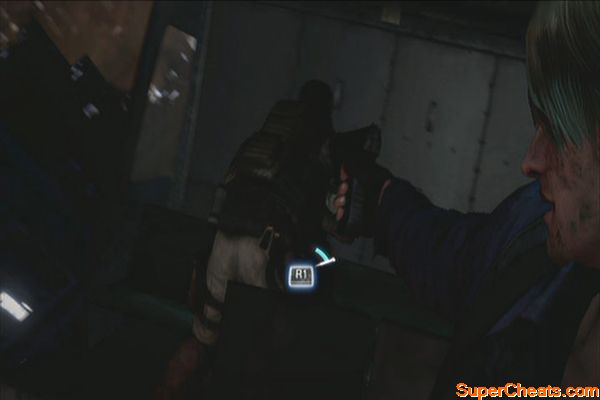
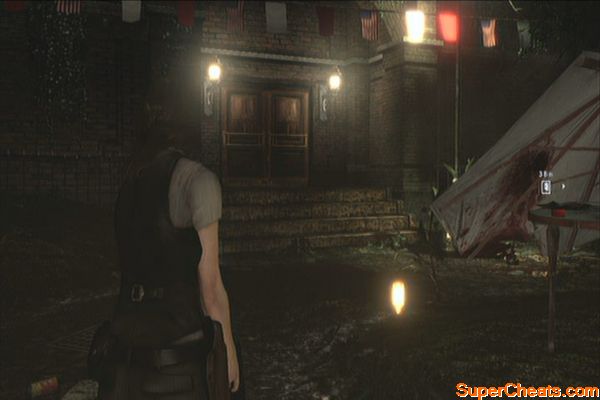
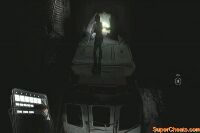
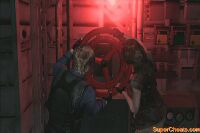
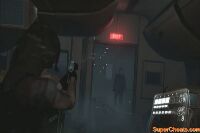
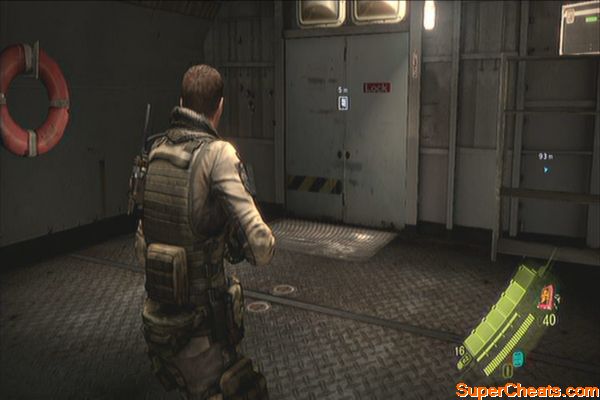
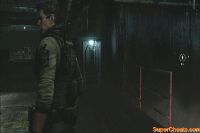
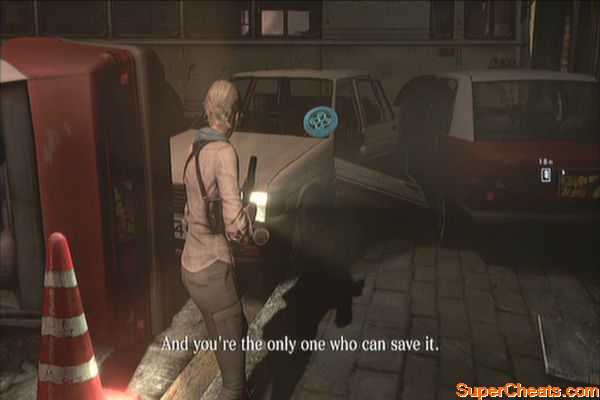
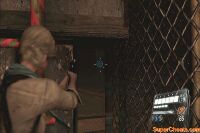
Welcome to our Resident Evil 6 Guide! After the scene, drag Helena along. Pull her up and continue to the door. Attempt to kick it open then pressing the X button again for another action. Time the reticule so you hit the lighted area in the action circle. Continue to the next room then examine a soldier's corpse by the window. Continue outside then once in control again, have Leon look through the window of the crashed Humvee to find an herb inside. Get it follow the instructions to open up the menu, mix the herbs and put it in tablet form. Give it to Helena afterward. A zombie will attack afterward. Attempt to shoot it but since you don't have enough ammo, you'll be forced in an action sequence to wrestle your way out of getting bitten. Follow the onscreen prompts. Return to Helena again and give him the medicine. Continue forth to the next door and follow the corridor to the next door. Exit then kill the zombies below. Don't forget to collect the ammo along the way. Also, make sure to switch to your melee weapon when they're too close to shoot. Continue to along the way until a scene triggers. Keep running until you reach the helicopter. During this sequence, keep an eye to the action buttons that will appear.
Prelude


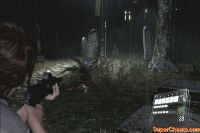
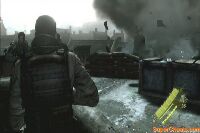
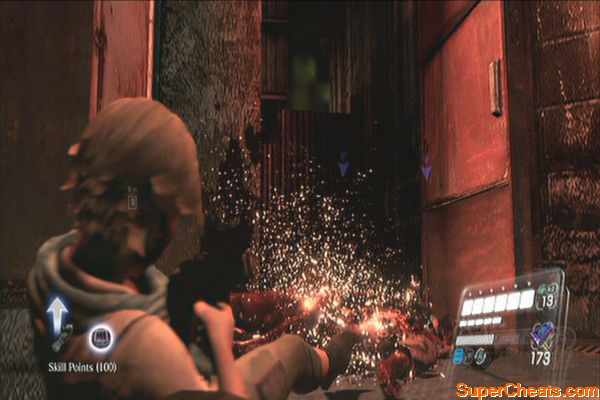
Running away from explosion
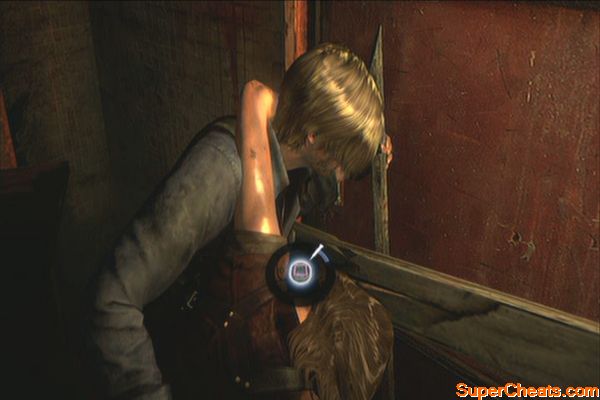
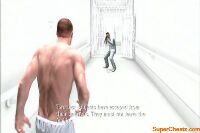
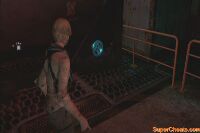
Once you're inside the building, open the door and vault over the railing. Continue forth to complete this sequence.
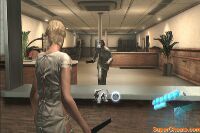
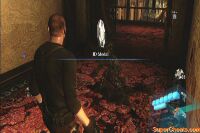
Exit the room and follow the hallway to the next door. Continue to the reception area and go downstairs. After seeing the shadow, give chase to it until you reach the kitchen. Continue following the corridors until you reach the next door. Open it for a scene. 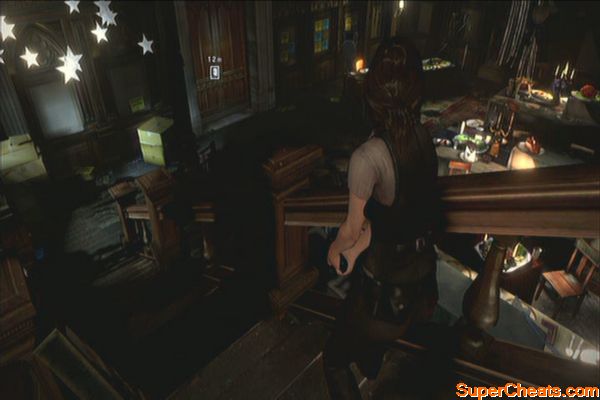
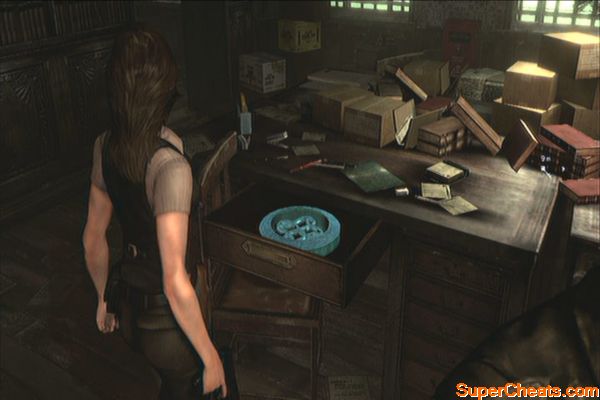
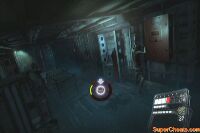
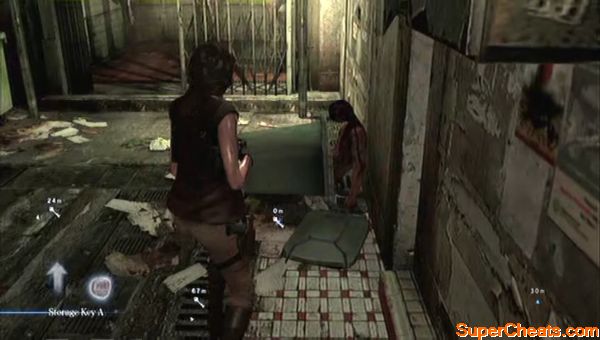
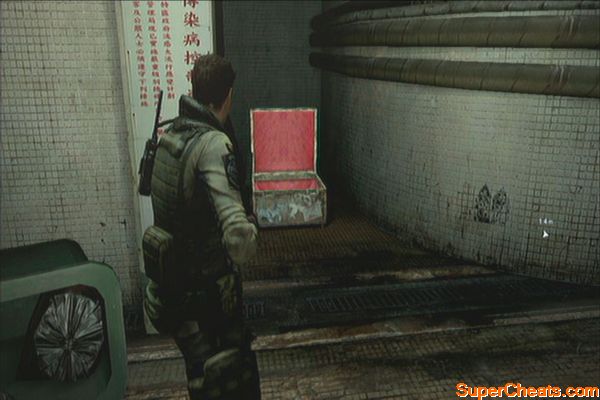
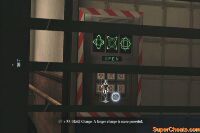
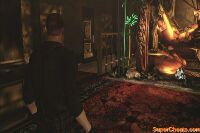
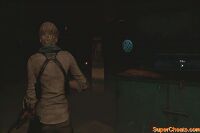
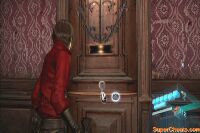
Before leaving, search the storage room to find first serpent emblem in the game. 
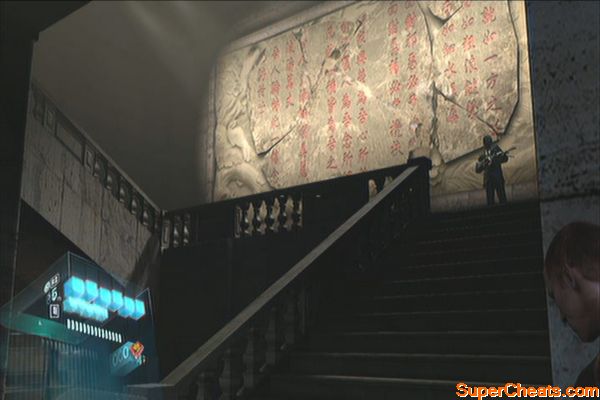
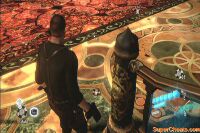
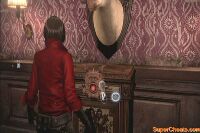
Head back to the reception hall and continue following the man. Open the reception hall's main door and proceed to the next area. Before opening the next door, continue upstairs to find a first aid spray. 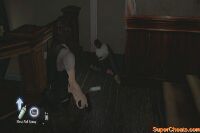
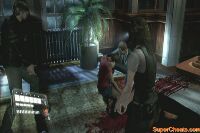
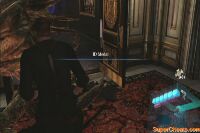
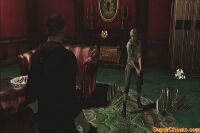
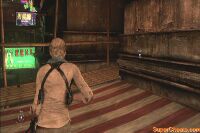
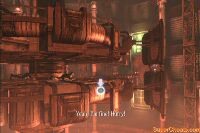
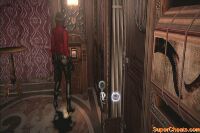
Head to the next room and wait for the man to open the door for you. Continue following the man along the corridor and open the door at the end of the corridor. Continue inside the piano room to find Liz. 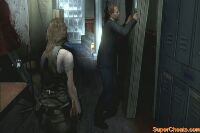
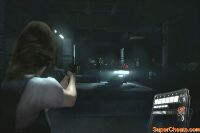
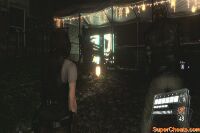
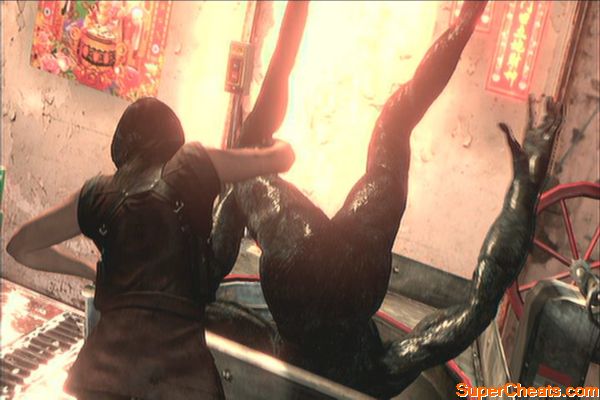
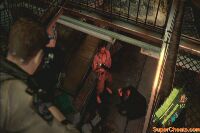
Backtrack again and remove the obstacles along the way. Continue forth until the next scene. Next, shoot the girl and survive the action sequence. Open the elevator door and take out the zombies in the underground parking lot. 
In the next area, grab the 9mm ammo then continue upstairs. Follow the corridor until you reach a classroom. Kill the zombies there, including the one behind the table. There's also a herb upstairs, beside the blocked aisle. Exit the classroom through the only door there.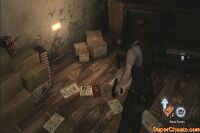
Follow the corridor to the next door and open it. A zombie will jump at you so quickly shove it off and kill it. There's another one behind the table to take it out as well. Don't forget to grab the ammo and the herb on the floor before leaving the room. Continue to the next set of doors then go downstairs. There are a couple more zombies there. Kill them and grab the ammo and herb.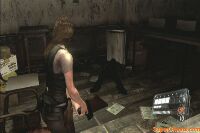

Exit through the door and enter the classroom to the left. Check the corner of the room to find a red herb. Carefully head to where the table is and kill the zombies there. Grab the incendiary grenades as well. Exit the room and take out more zombies then open the door that leads outside. 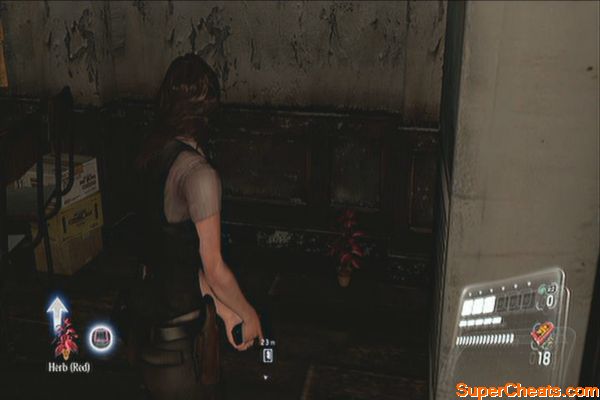
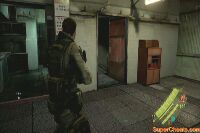
Once outside, turn to the left and vault over the food stand to find two ammo boxes in front of the vending machines. When near the security gate, turn left again to the food stands to find some red and green herbs. Examine the security gate then enter the staff building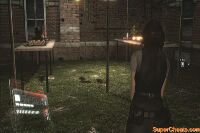
In the next corridor, grab the ammo on the floor and the herb before the near door. Attempt to open the door and prepare to survive the next onslaught. Avoid getting pummeled in the middle. You may want to use your shotgun to blow away a few of them then switch to your handgun to kill them. Remember to evade often and avoid getting knocked down. Keep surviving a few more rounds until the sequence is complete. 
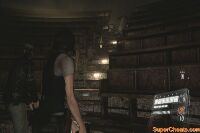
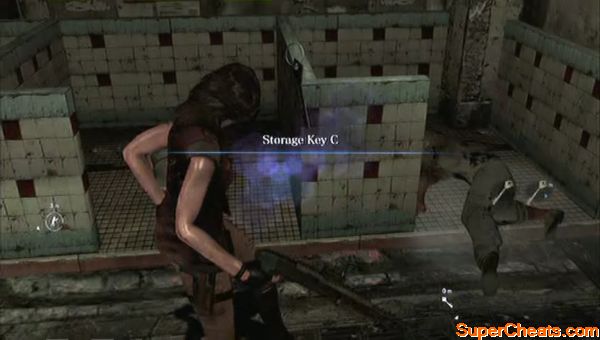
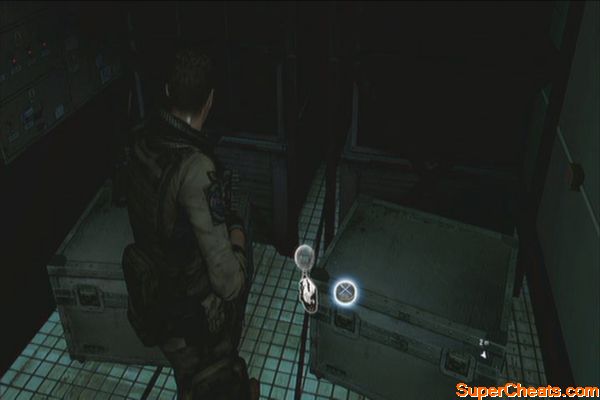
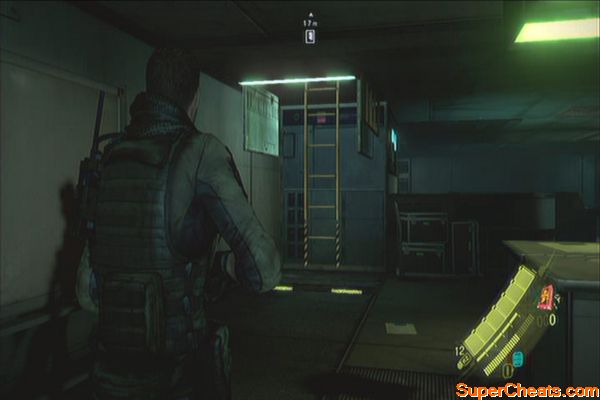
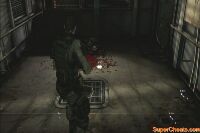
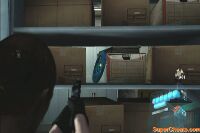
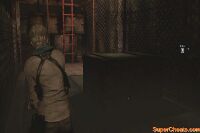
Check the drawers in the next two rooms for some ammo. In the second room, there's an emblem in one of the drawers too. Continue to the next room to find the campus keycard. 
Head outside and place the keycard on the security door. Once inside, kill the zombies inside and continue to the next door. There's a ton of zombies outside so don't bother killing them all. Just run towards the cop car. After the scene, continue to the sewers. 

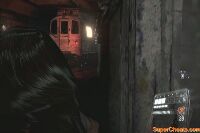
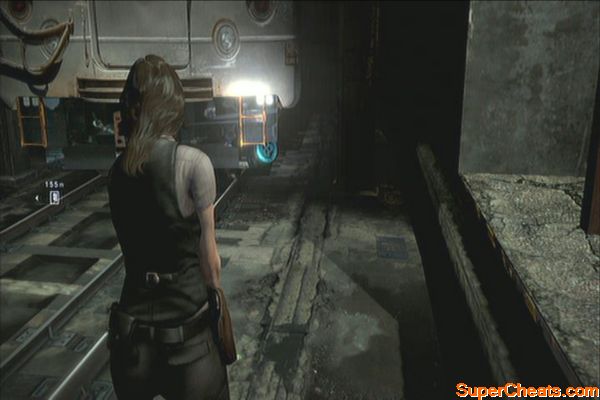
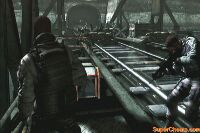
Once inside the sewers, destroy the crates along the way to get some ammo. Jump to the railway and avoid the live wire to avoid electrocution. Continue following the railway and take out the zombies. When you hear the train coming, follow the prompt and press X to avoid it. 
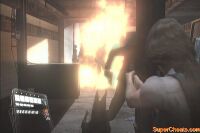
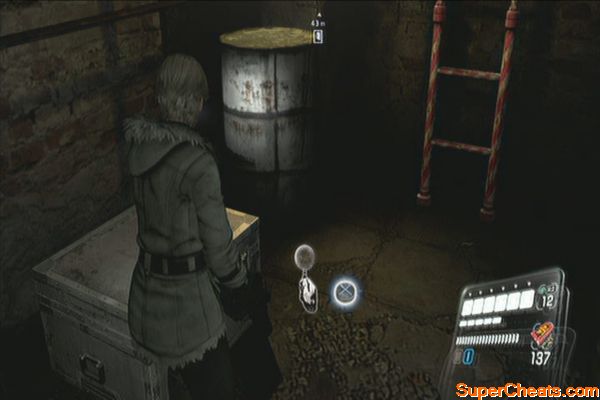
Continue until you reach the burning barrel and encounter some undead dogs along the way. Destroy the crates to the left for some random loot and continue forth until you reach the other electrified end of the tunnel. Climb up the ledge and open the door afterward. Carefully continue downstairs until your flashlights give out a bit. Kill the zombies and destroy the crates. Continue to the next door. Open it and disembark to the railway. Turn immediately to the right to find another emblem. 
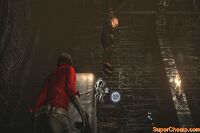
Continue along the train tracks and fend off the hordes of zombies coming your way. Keep on the left for the meantime since there's a train coming in from behind. Continue until you reach a deadend. Climb up the ledge then attempt to open the door. Once done, jump back down to the track and have Leon boost you up. 
Once inside, a zombie will jump towards you. Kill it then open the door. Continue to the next door and to the next two cars and defeat the zombies inside. Exit the train car and continue to the next stop. Destroy the crates along the way and make your way to the objective point. 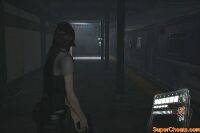
Push the button then open the train door to free a woman. Let the course of events run and have her get eaten then clear the path. Continue upstairs and examine the gate to reach the street level. 
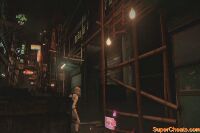
Kill the zombies along the way and approach the civilian trapped under the car. Attempt to help him up until an accident happens. Leave the street and enter the alley. Climb up the ladder and follow the catwalk above. 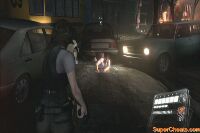
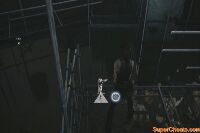
Jump down at the end of the catwalk and kick the door open with your partner. Continue to the street again and take out the initial wave of the undead in front of you. Continue to the next alley and kill more undead. Make sure to kick the barrels for some loot before taking the ladder. 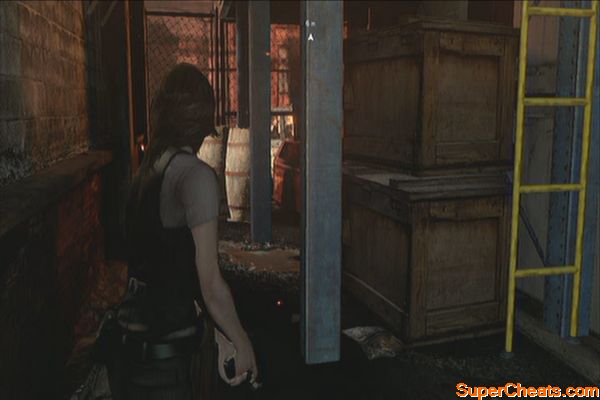
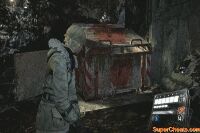
Push the dumpster off the catwalk then jump on the school bus. Drop down to street level again and continue to the Modern Red building entrance. 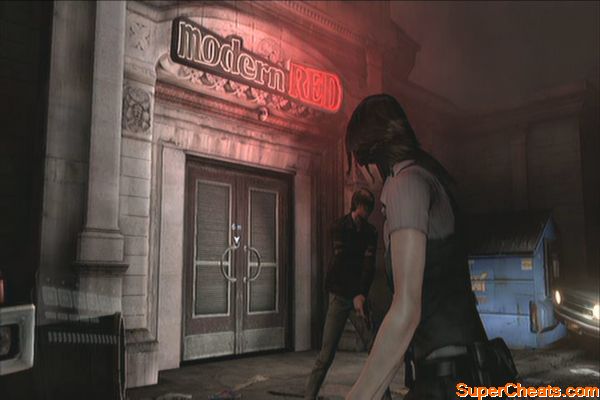
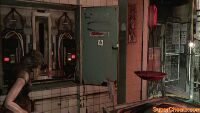
Head to the bar's backdoor and continue to the next door. Continue to the apartment and attempt to open the next door, only to discover that it's locked. Return to the living room and take the key from the woman on the couch. Kill the newly-infected undead then proceed to unlock the backdoor. 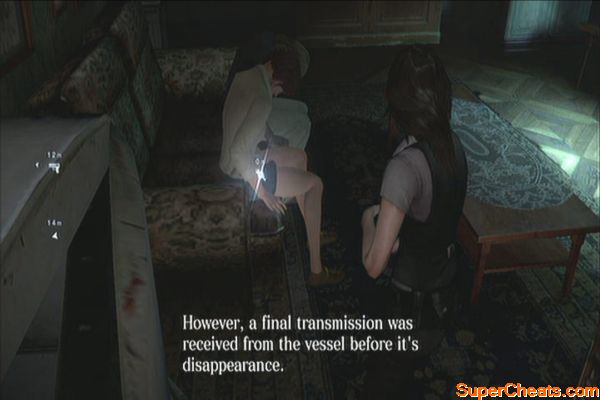
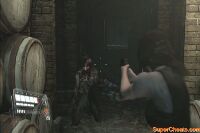
Grab the shotgun from the soldier outside then move along, destroying barrels along the way. Kick the door door down to reach the new area and find a new enemy. Continue along the winery and kill the shrieker and more undead along the way. Once you exit, climb the stairs and jump across to the next ledge. Push the obstacle away then drop down to the ground. Open the gate from the other side to let your partner in. 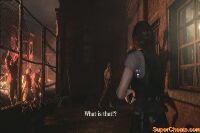

Continue to the diner and look around beside the counter to find a serpent emblem. 
Exit the diner afterward. Help the group of survivors and be careful not to stay in the corner as a police truck will crash in. Kill as many undead as you can for extra loot and skill points then finally, shoot the oozing gas to trigger the next event. Follow where the survivors have gone then open the gate. 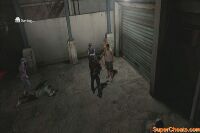
Enter the gun store and pick up all items and ammo around. Stay put and kill the undead as they come. Continue killing them until the store shuts down completely and the old geezer lets you in. 
While in the second floor, collect more items then fend yourself against more undead. Keep doing this until the windows are completely shut off. Head to the next room afterward. 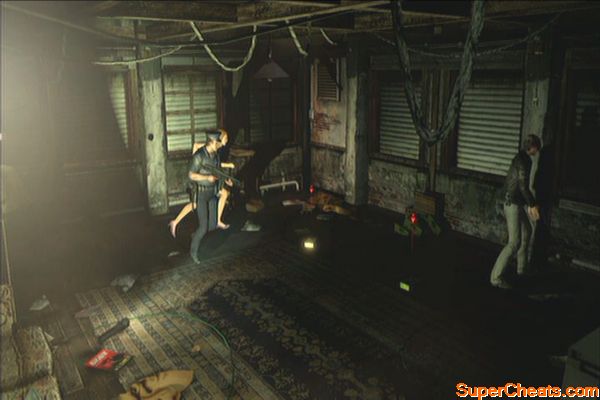
A large zombie will break through. Keep evading and shooting at it, preferably with your shotgun. Keep going at it until you defeat it. Collect more loot then continue upstairs to the rooftop. Kill more enemies until the bus arrives. Jump down to the alley to ride it. 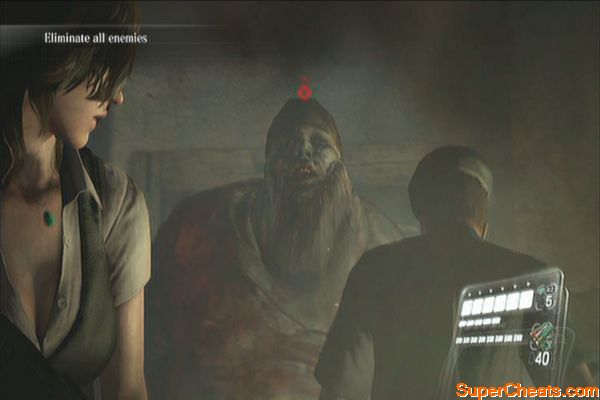
Finally, kill the obese undead to let the bus go and end this chapter. 
At the start of this chapter, keep shooting until the next scene is finished. Head to the cemetery afterward. 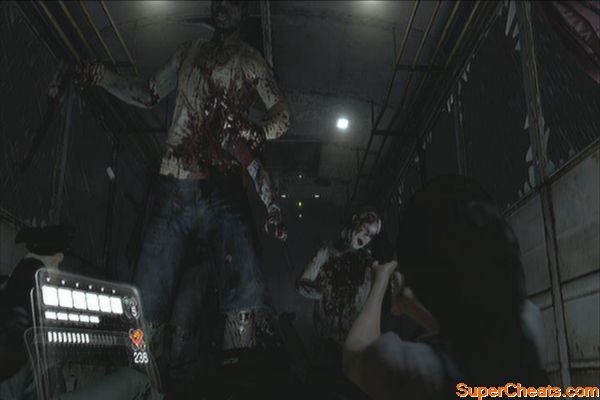
Be careful of the open pits here; always assume that there's a zombie waiting in it. Kill it to get some skill points then follow the trail until you reach the Oaks Cathedral sign. Check behind the tombstone nearby to find a serpent emblem.
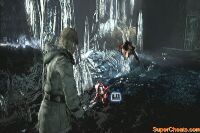
Cemetery surprise
Examine the cathedral gate only to discover it is locked. Enter the shed nearby and open the bathroom door. Give chase to the dog and kill it to retrieve the key. Once done, head back the cathedral and open the gate. 
After the scene, you'll be alone for now. Follow the path until you regroup with Leon. If you're playing alone, backtrack from where he came from to grab any uncollected loot the enemies he killed dropped. 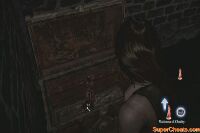
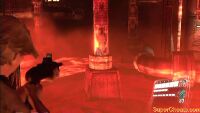
Continue following the objective marker until you reach the cathedral. Attempt to open the door then fend yourself against the continuous undead horde pouring in from the fences. Once they tell you to come inside, kill the remaining enemies if you want then grab the skill points. Once done, enter the cathedral. 
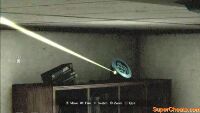
Once inside the cathedral, head towards the altar and turn around. Look up to find a serpent emblem by the window. 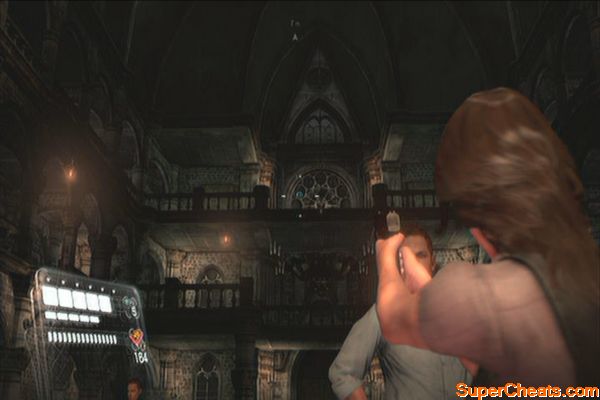
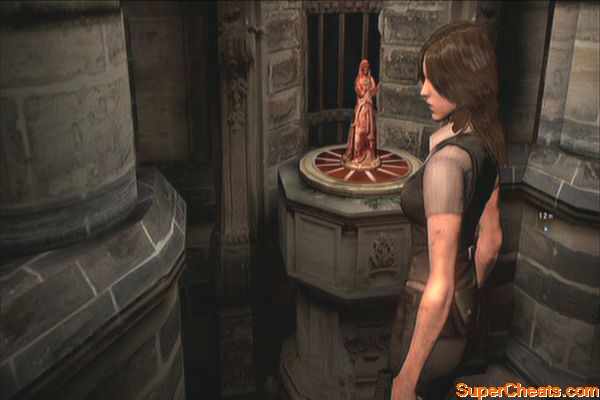
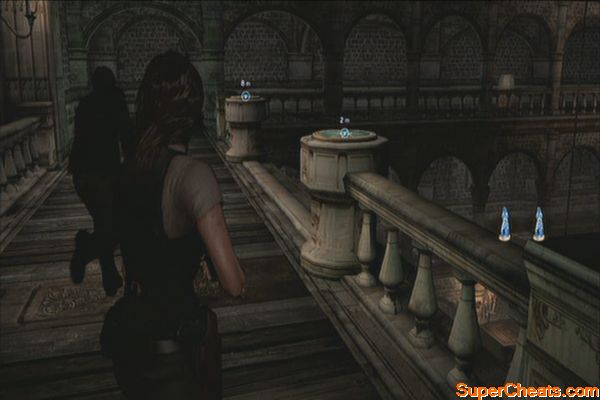
Head to the altar and get the Madonna of Happiness. Boost yourself to the second floor and kick the ladder so Leon can join you. Find a chest as marked in your hud and open it to find the Madonna of Charity. Once you have the two statues, place one on the pedestal in the corner and wait for your partner to do the same. 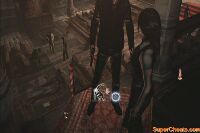
Enter the newly opened room then pull the lever. Push the switch at the base of the statue to disable the trap. Head to the next room and pull the lever again. This time, multiple statue traps will appear. Move quickly and disable them. Make sure to time your evasion to avoid taking in too much damage. 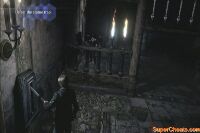
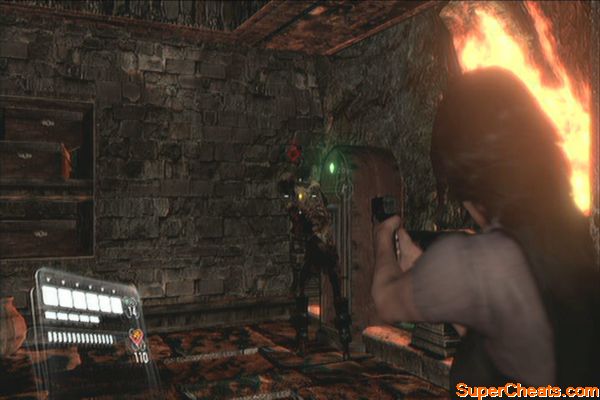
In the next room, light the statue to the right using your gun's laser sight. This will open the door. Continue upstairs and follow the corridor. Continue upstairs until you find a locked door. Find a similar statue outside beside the stairs then light it up. 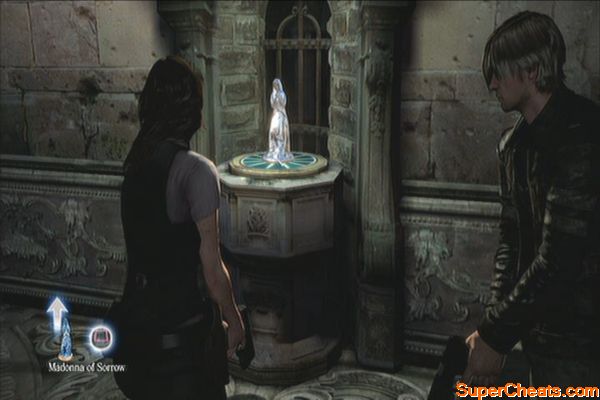
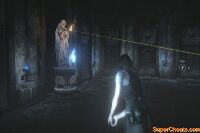
Enter the room then look to the upper right to find another statue you need to light up. Enter the next room this time then look up to find a mirror ceiling. Simply aim for the statue's reflection and your laser sight should bounce to it, opening the door ahead. Grab the Madonna of Sorrow from the pedestal. 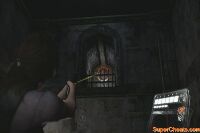
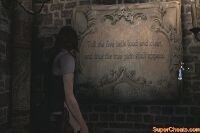
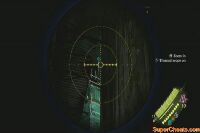
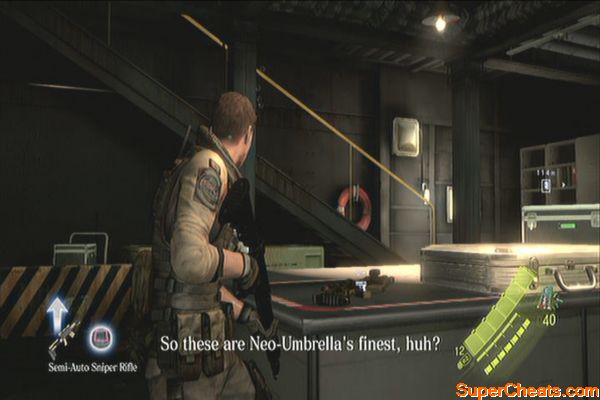
Continue upstairs and grab the Semi-Auto Sniper Rifle from the corpse. Examine the message on the wall to the left to update your objectives. 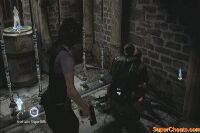
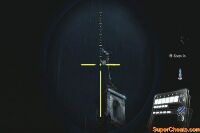
Go outside and shoot the bells to make them ring. There are three large bells and two smaller ones with the metal rooster on them. After shooting them, the barrier should be raised and you'll now be able to get the Madonna of Grief. 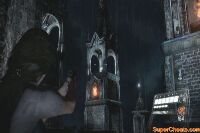
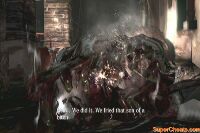
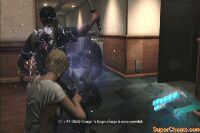
Continue downstairs and exit through the door to return to the main hall. Place the two statues on the marked pedestals and watch the next scene. You'll now be fighting a boss. This special undead will turn anyone caught in its gas blast into zombies. Aim for it's head until it is dazed and reveals its weak part. Keep hitting it until it is defeated. If you kill it quickly, you should be able to unlock a trophy. (I Prefer Them Alive)
Don't inhale!
Pick the underground keycard from it then collect the recovery items around and heal yourself. Continue to underground afterward. Before exiting the door, destroy the barrels and open the chest nearby to get some bonus skill points.
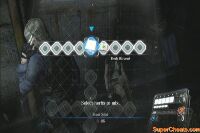
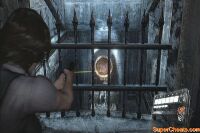
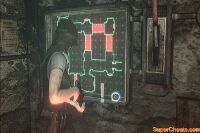
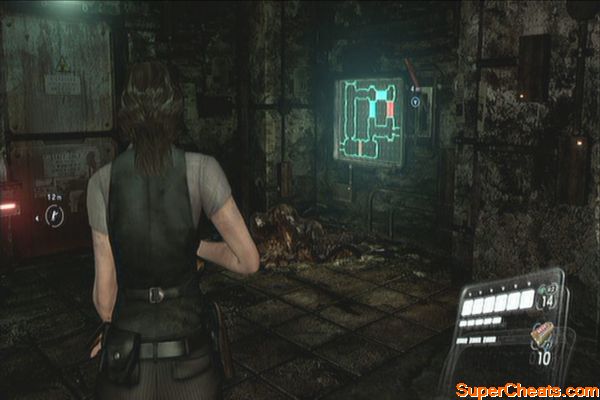
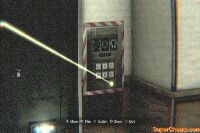
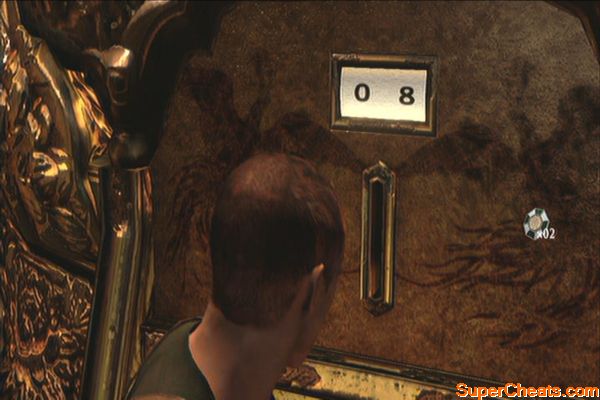
In the underground lab, there's a panel behind that has three numbers: 0, 1 and 2. Entering the number sequence will open the corresponding door. The codes 012, 102 and 201 opens the individual cells containing loot and undead. Entering the code 210 opens the gate ahead. 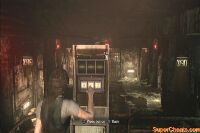
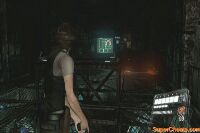
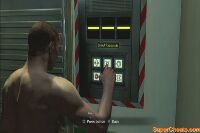
Head to the next room and operate the terminal as well. Code 021 opens the main gate. 102 has a shrieker inside that drops 1000 SP once killed. 012 and 201 opens up the initial room containing two normal undead and a secondary room containing a chest with First Aid Spray and 5000 SP. Room 120 contains a single normal undead. 
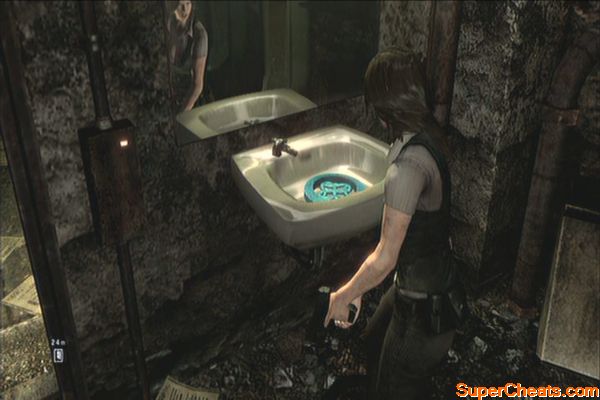
Proceed to the next corridor and enter the next room for another scene. Continue forth past the corpse by the operating table. Continue along the corridor and check each room. Once you find the toilet, examine the sink to drain its water and reveal a serpent emblem. 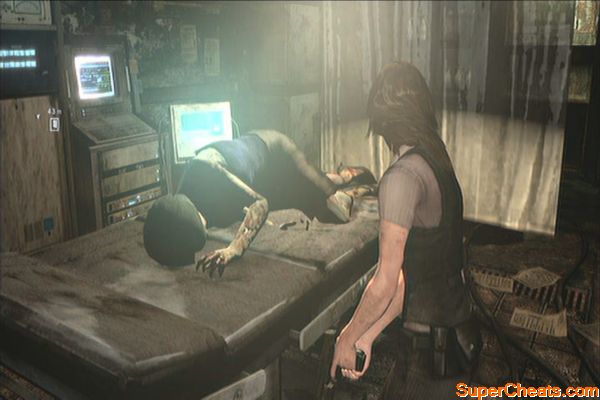
Continue forth and kill the zombies in the next examination room. Continue to the next door and open the room with test subjects in capsules for a scene. After that, examine the terminal beside the broken capsule and enter the code 201. 
Head to the next area where you need to activate the passageways. Follow the path until you find the first lever. Pull it to remove the barricade in the previous passage. Backtrack there and pull the lever. The barricade will go down again, separating you and your partner. Jump down the opening on the floor then make your way to the other end to use the ladder.
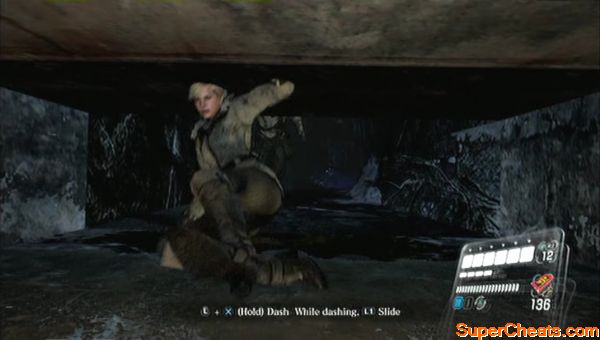
After regrouping with your partner, proceed to the third lever and pull it. After lowering the lift, clear the zombies on the top then boost yourself there. Jump down and kill the enemies then pull the last lever. Kill the last few enemies then open the door. Follow the corridor until you reach the end where you can open the vent and slide down to reach the cavern. 
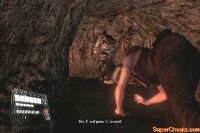
Follow the path and after crawling twice, look to your left to find another serpent emblem. 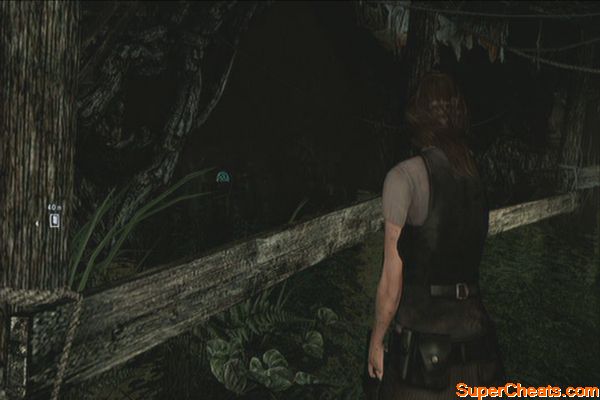
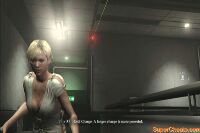
Continue along the way and destroy vases as well to get some loot. Continue until you find Deborah. If you're controlling Leon, you'll have to take care of the hostiles. As Helena, you can't fight back so you just have to rely on Leon in clearing the path. 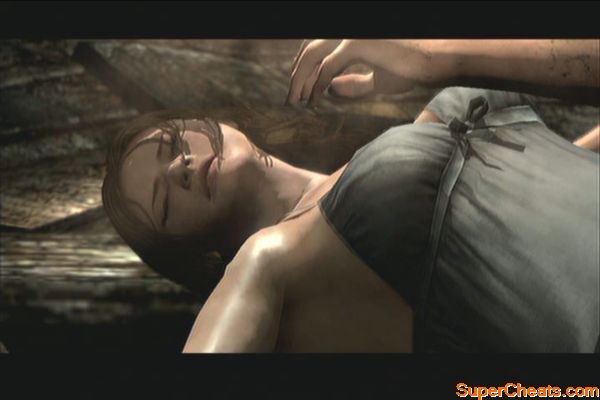
Just follow the straightforward path and destroy all vases along the way to earn some bonus loot. Continue down until you reach the objective point. Watch the next scenes. 
After the scenes, you'll have to find your way down alone again. Continue following the path and hopping down as necessary. Pull the next lever you'll find and continue forth until you face Deborah.
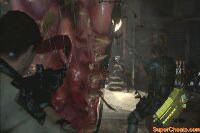
For this sequence, you have to aim for the glowing parts of her tentacles and evade her when she leaps towards you. Use your pistol at long range and switch to your shotgun at close range. There are also TNT barrels nearby that you can shoot to deal fire damage to Deborah.
After the battle, as Leon, make your way down the ramp. As Helena, you'll be riding the lift so provide fire support to your partner. After reaching the bottom, Leon will be able to regroup.
For this sequence you have to shoot the glowing parts of her tentacle. Prepare to evade when you see her about to swing her arms. Be careful of the obstacles as well. Make sure you're ready to press X to evade. Refer to the video below for more information.
No More Tears
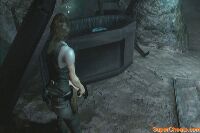
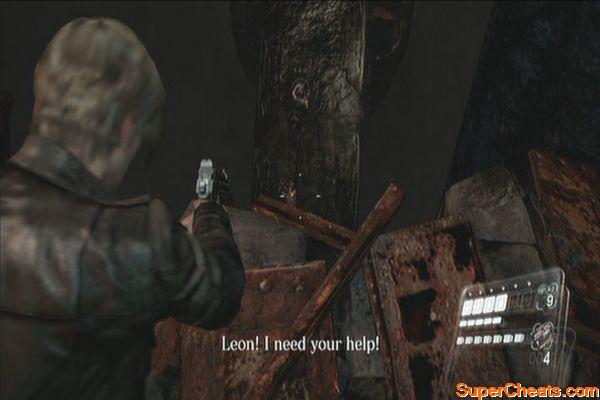
After the scene, head to the door but don't pull the lever yet. Look to your left to find another serpent emblem. Pull the lever afterward. 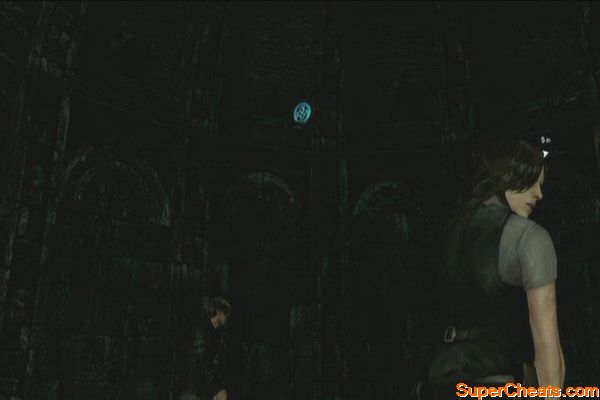
Aside from the jars, make sure to search the coffins as well for more loot. (When playing as Leon, you'll find the Assault Rifle RN from one of the coffins before the trap) Follow the corridor until you trigger a trap. Dash underneath them to get past. 
After passing the first set of traps, continue until you find flames blocking your path. Have your partner boost you up the broken ladder nearby. Crawl through the tunnel then jump down to the other side. Kill the zombie that's operating the lever to stop the flames. 
Examine the large door to trigger it to open then survive the following zombie attack. Head to the next area afterward. 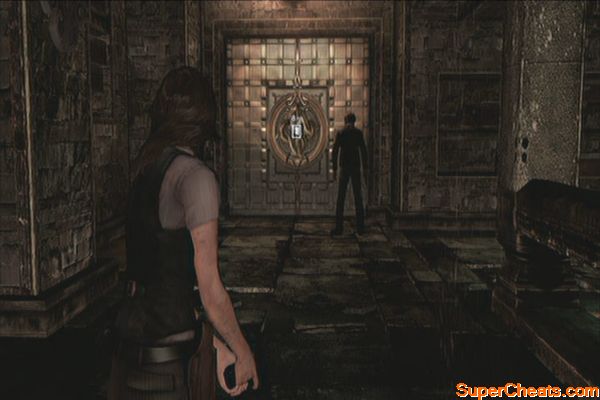
You'll have to wade through the water and follow the path until you find a dry path. Check one of the closed coffins there to find a serpent emblem. 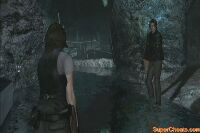
Follow the path until you reach a gate. Leon will boost Helena up again then crawl into the tunnel. Jump off to the other side and rotate the crank to open the gate for Leon to enter. After the scene, kill a few more zombies then rotate the lever afterward. When playing as Leon, you have to recover a crank which is dropped by one of the attacking zombies. 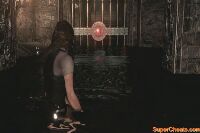
Continue forth and check the coffins along the way to find more loot. Continue moving and operating the cranks along the way until you finally reunite with your partner. Pull the two levers on the next door afterward. 
In the next area, grab the assault rifle from the stone pillar nearby then continue along the path until you reach the drawbridge. Operate the crank nearby to lower it and proceed forth. Continue following this path and be careful with the obese undead you'll encounter along the way. If possible, don't fight them while you're in the hanging bridge. 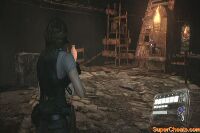
Once you've reached the checkpoint, have your partner boost you to reach the next ledge. This will keel and fall. Crawl up away from the clutches of the undead (as Helena) while your partner (Leon) tears them apart from a distance. 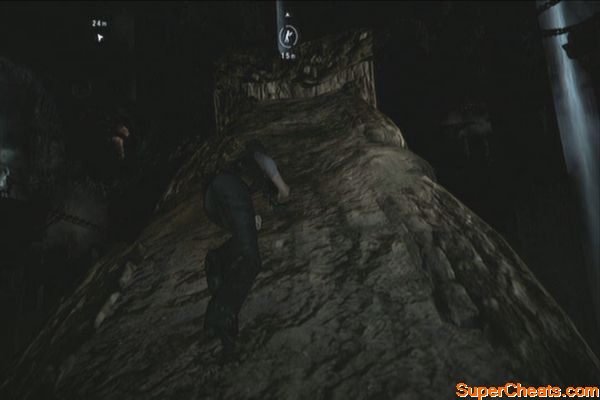
Keep going and fight your way through more enemies until you reach another crank. Operate it to regroup with your partner. Push the large boulder afterward. 
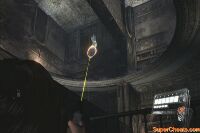
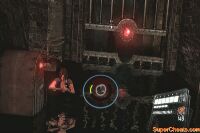
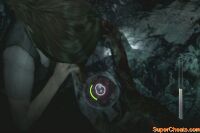
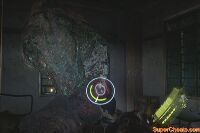
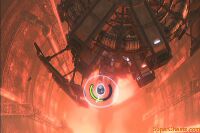
Continue along the path and after vaulting over the first obstacle, look to the right to see a familiar blue-green circle. Shoot it to claim another Serpent Emblem. 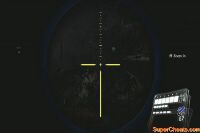
Continue until you reach two cranks. Operate them to trigger a scene. Continue running and jumping along the crumbling passage. Once you reach a stable part of the passage with zombies waiting, unload your guns and take them out. Continue running until you reach the end. Push the boulder away for another scene and to reach the next area.
Crumbling passageway
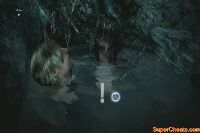
In the underwater area, look for an exit while swimming. Your oxygen is limited so you may want to look for air pockets to breath. Continue along and grab the skill point near an opening to the left. More zombies will grab you so break free as soon as you can. Once you've reached the end of the tunnel, pull the grill to breath and trigger the next scene. 
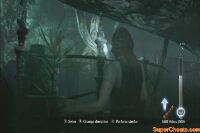
During this sequence, you have to follow the onscreen prompts to avoid dying. Once done, you'll be back in dry land (as Helena) and Leon will have to find a place to climb up. Work your way to regroup.
Dragged underneath
Follow the old corridor until you find a 5.56 NATO ammo along the way. Another serpent emblem should be beside it. (Helena) For Leon, you may have to backtrack to this location by taking the ladder next to the broken iron gate. 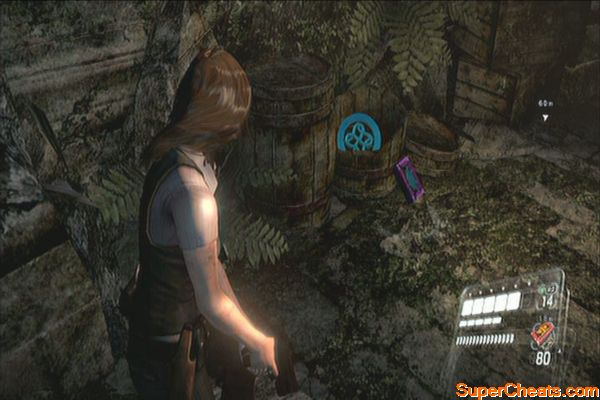
Continue along the hanging bridge to find the gate blocking Leon's path (Helena). Point your gun's laser pointer at the circular mirror to open it. As Helena, you have to provide cover to Leon by shooting at the shark's glowing tongue. Continue doing this until he reaches safety. Destroy the vases nearby then push the gate open to trigger the next scene. 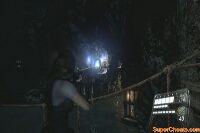

During this sequence you have to aim for its tongue. Continue blasting it until you have the chance to blow it away using the TNT barrel.
One ugly mother-f.....
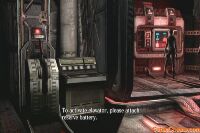
At the start of the chapter, you'll have to confront the enemy. With this narrow space, you have to evade often to avoid getting cornered. Keep shooting until it leaves. Head to the cockpit and pick up the Lightning Hawk from the corpse.
You don't suppose it can fly a plane, can you?
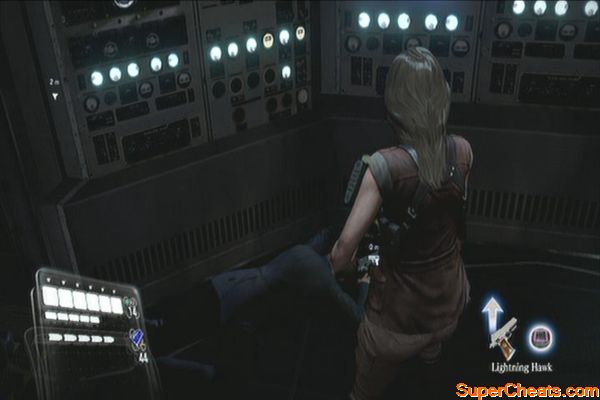
Examine the panel in the side to update your objective. Go downstairs and turn to the right immediately. Peek under the opening to find a serpent emblem. 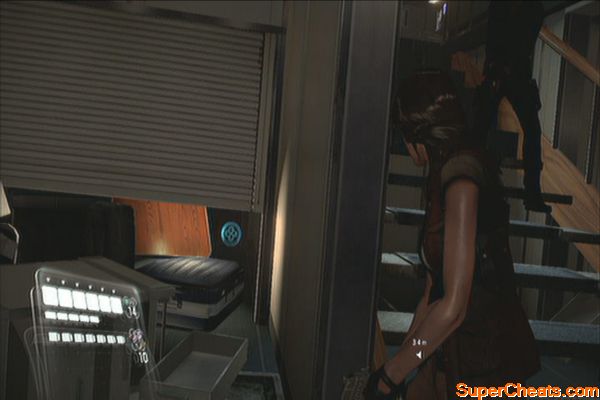
Make your way to the cargo bay of the plane. Check the executive rooms to find green herbs inside. After going downstairs to the cargo bay, take a look to the emblem inside the cooler to the right. 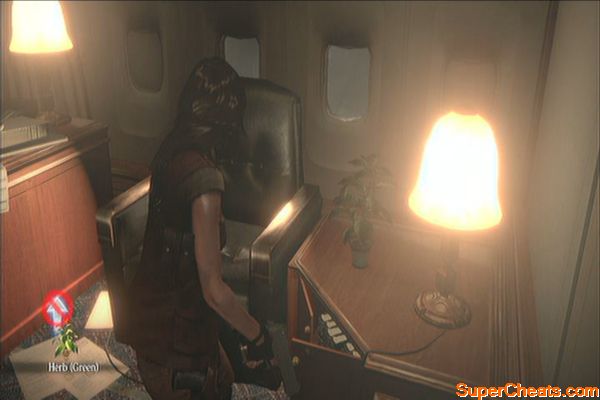
There's also a chest containing 5000 SP nearby so don't forget to loot it. Head to the bulkhead and turn the valve to sound off the alarm. The spore zombie will appear again. Shoot the gas tanks to quickly weaken it. Then once you get the prompt, open the hatch control cover. 
After throwing the enemy off the hatch, climb back up then make your way to the cockpit. The civilians were all infected now so fight your way through them until you reach the cockpit. 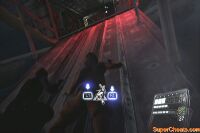
Leon will take control of the plane so you have to fend off the horde of the undead coming your way. Continue doing so until the next scene triggers. 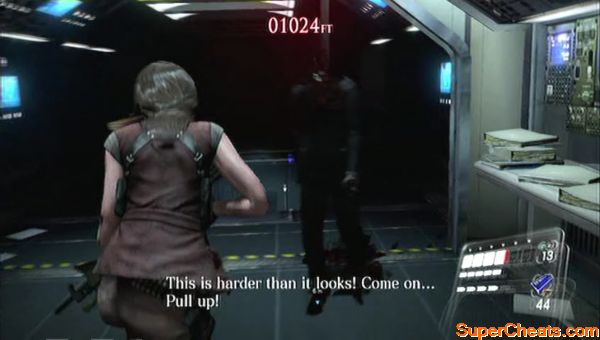
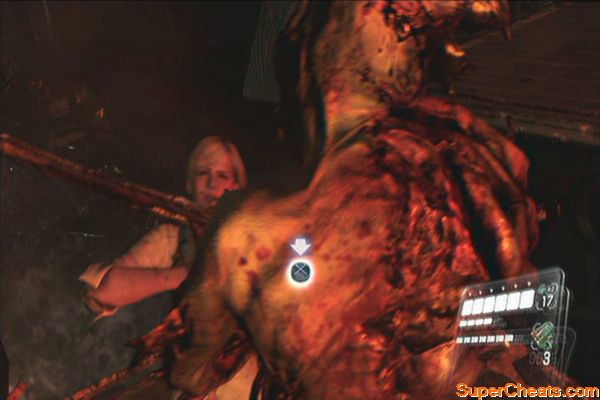
After a brief reunion with Sherry, you'll have to face a brute undead. Its attacks are slow so time your evasion to avoid getting caught. If one of your teammates gets captured, get up close and press circle to free him/her. Concentrate your fire; you can even climb up the container vans nearby so you can push over some gas tanks.
More like an ex-girlfriend.
After a brief scene, the brute will be back again. There's four of you so you don't have to worry about taking the heat often. Keep shooting at it and evading its attacks, especially after it changes its shotgun arm to an extending claw.
... this guy doesn't know when to quit
Once you've reached the marketplace, find the next serpent emblem. Watch the video below for more information.
Marketplace Emblem
Head to the storage door and attempt to open it, only to discover that it has three separate locks. You'll also encounter a new undying zombie. First, go past the trash pile where the monster emerged and enter the room behind the fish store ahead to find a chest containing some skill points. Continue to where the first key is only to discover that its behind an electrified gate. Turn off the power using the lever near it then open the gate to get the key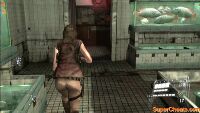
Unbar the door and head to the other side of the market. Make your way around the alley to the right of the storage room entrance and you should find the second key on the floor. A second enemy will appear as well. Find a ladder nearby to reach the rooftop. 
Follow the path until you reach gap. Before calling your partner to boost your across, switch to your sniper rifle and look at the billboard at the far distance to find a faintly visible serpent emblem. 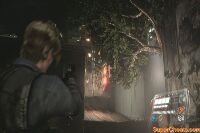
Boost across the rooftops and find the ladder down. After reaching the ground level, continue to one of the locked gates and open it from your side so Leon can join you. Find the entrance to the bathroom and call in your partner to break it open. Grab the last key from the floor then head towards the storage room to unlock it using the three keys. 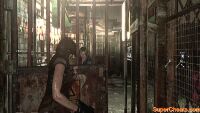
Upon reaching the storage room, move along until one of those monsters appear. Break free then press the action buttons correctly to feed it to the grinder. Exit through the red door afterward.
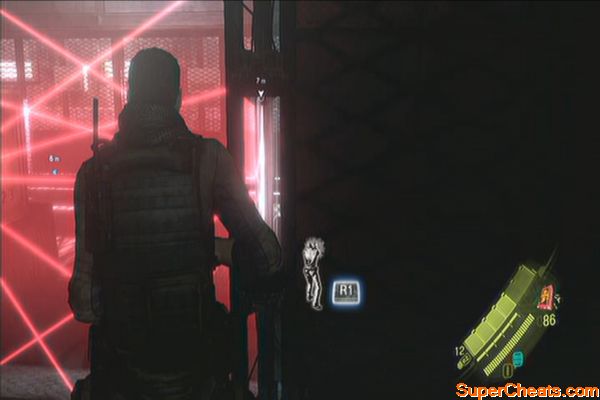
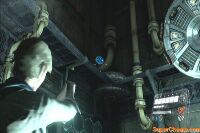
After the scene, go downstairs and enter the next room. Dash under the laser fence then destroy the capsules near the elevator doorway to disable them. After the another scene, go past the elevator and take the stairs. Continue upstairs and open the next door. Destroy the crates to get some loot then continue to the next room. 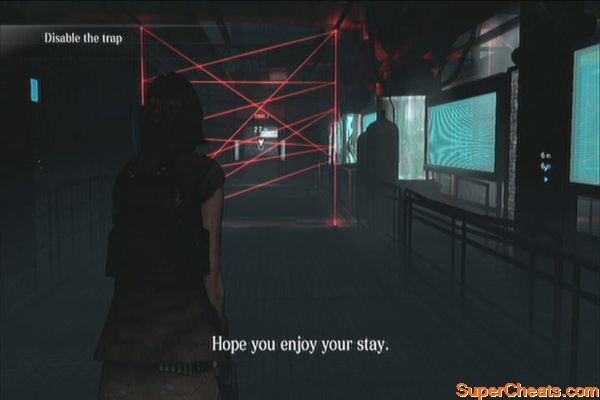
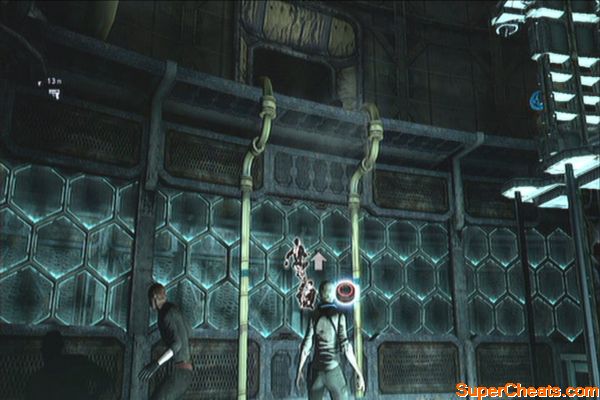
Ada will release some explosive-rigged automatons. Destroy them as your partner attempts to override the door locks. Once unlocked, the prototypes will go at it one more time before you can finally leave the place. Kick the vent open and crawl out. Give chase to Ada until you trigger the next scene. 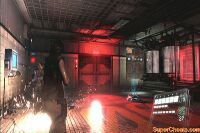
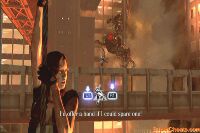
Once in control, go downstairs and destroy the crates for some loot. Exit the compound through the only gate and watch the following scenes.
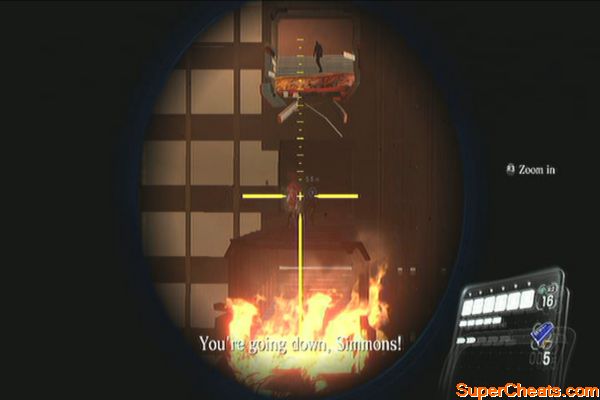
Get inside the train and boost yourself up when you have the chance. Confront Simmons for a scene. Once he transforms, keep shooting at him until he regresses back to humanoid form. Return inside the train and continue shooting at him. Time your evasion when he leaps to avoid getting damaged. Keep doing this until he's becomes weakened. Get close to him and execute a melee combo attack to deal further damage. Continue doing this until he further mutates into large and fast predator.
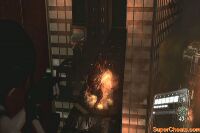
Keep shooting at him. As Helena, you have to provide fire support. As Leon, you have to escape his clutches and jump back to the original train you're in. Once the enemy starts shooting projectiles, take cover behind the seats and keep firing at him. He will eventually remove all walls, including the seats so work quickly and deal as much damage to him as possible.
After the battle, climb the stairs for another scene. This will complete the mission.
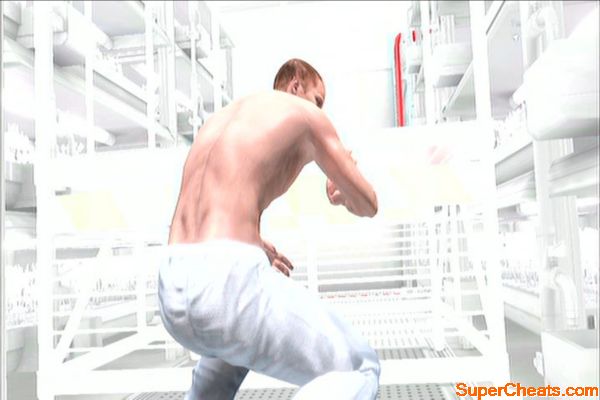
Follow the BSAA trooper and avoid the gas. Continue upstairs to the right and open the gate. After opening the gate, stay on the right side and immediately enter the building to avoid getting caught in the gas. After entering the building, you'll find another serpent emblem in one of the shelves there. You must shoot it and collect the items quickly as the glass window will break and the gas will seep inside. 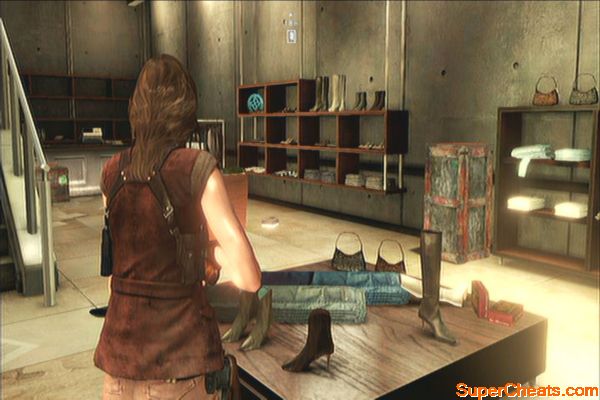
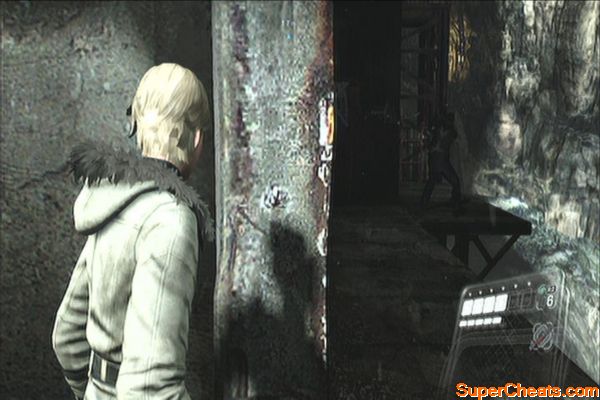
Continue upstairs and destroy the crates along the way. Open the elevator and kill any zombies that will appear. Continue along the corridor and fend off a few more zombie waves then open the door. If you want, you can stick around this area for a bit to kill more zombies and earn more loot. Open the door and continue to the humvee outside. After reaching your destination, boost yourself up over the truck to reach the next area. 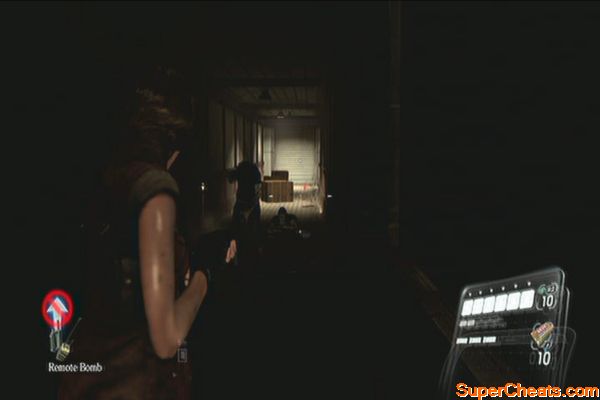
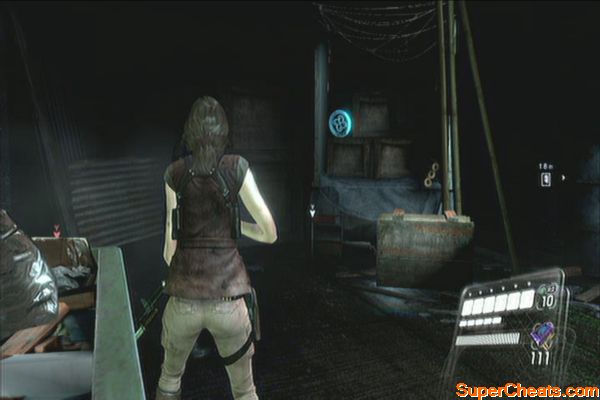
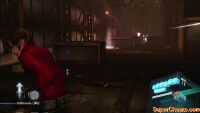
After meeting with Ada, head inside the alley and follow the familiar path until you crawl outside. Kill the zombies then check the open container truck behind the humvee to find another serpent emblem.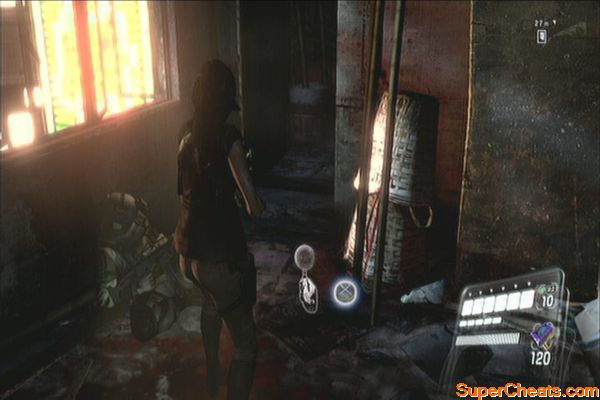
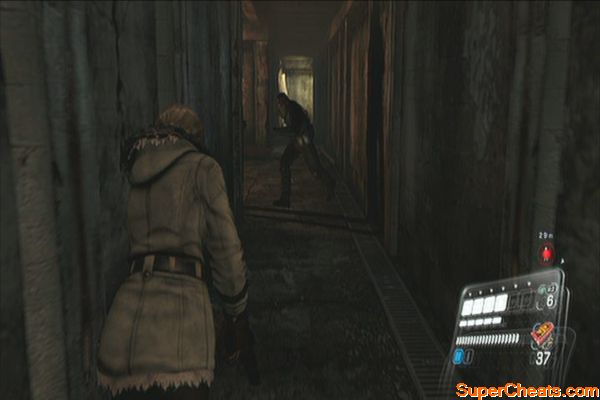
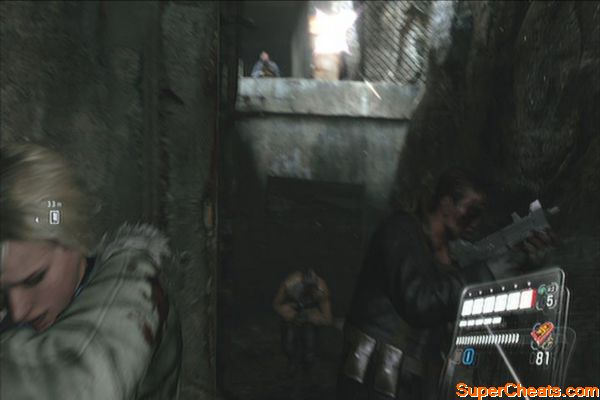
Continue to the next door and go along the narrow corridor. Don't run downstairs since there's a zombie horde that will rush towards you. Throw a grenade to save some ammo. 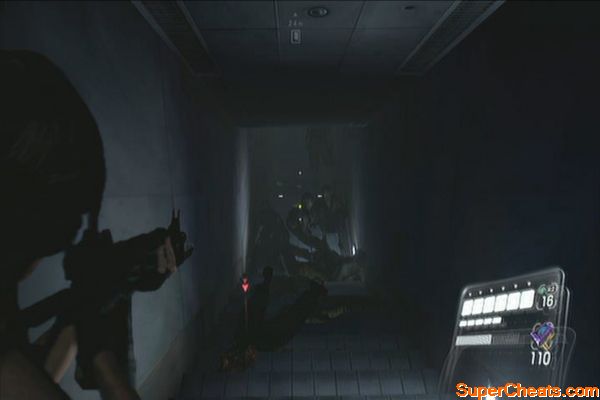
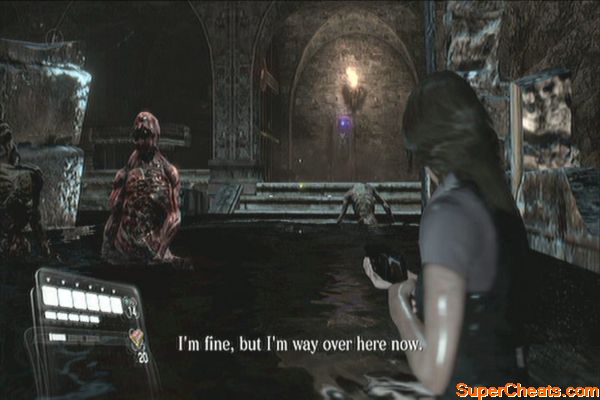
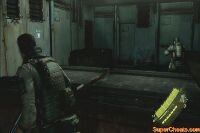
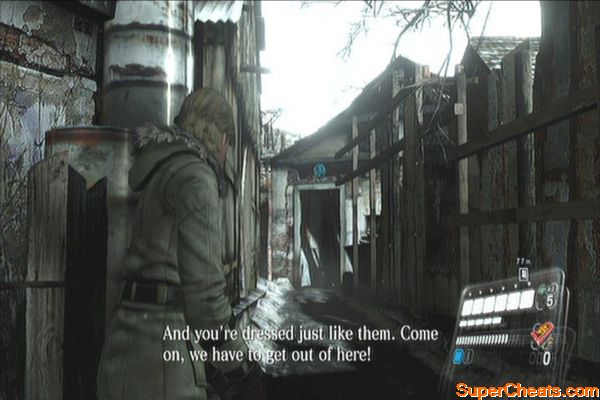
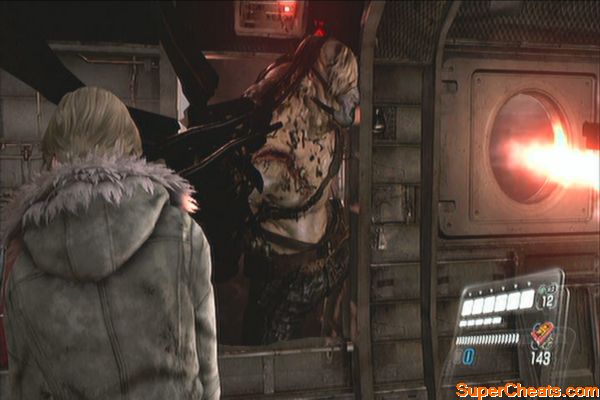
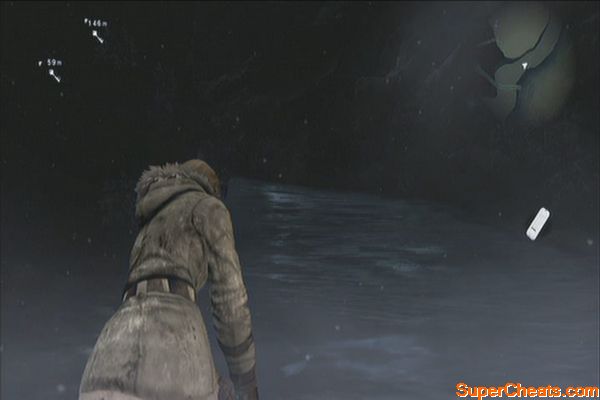
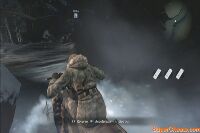
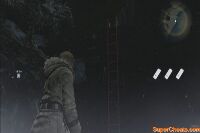
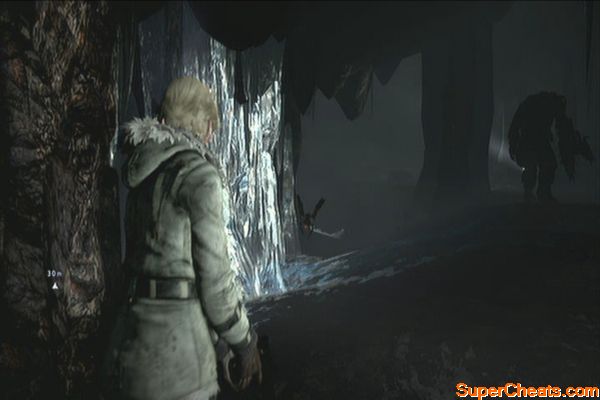
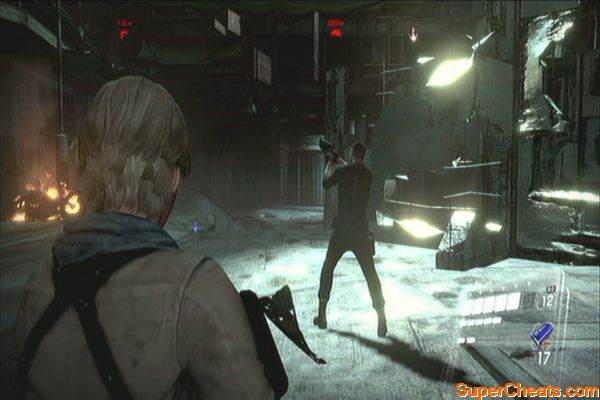
Head outside and follow the path until the same scene as the prelude triggers. Just do the same and run towards the helicopter.
Dejavu
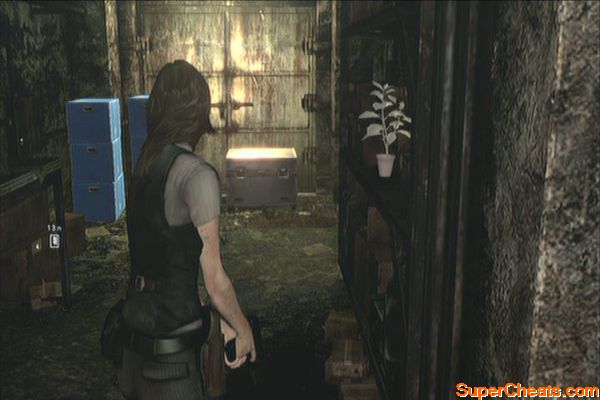
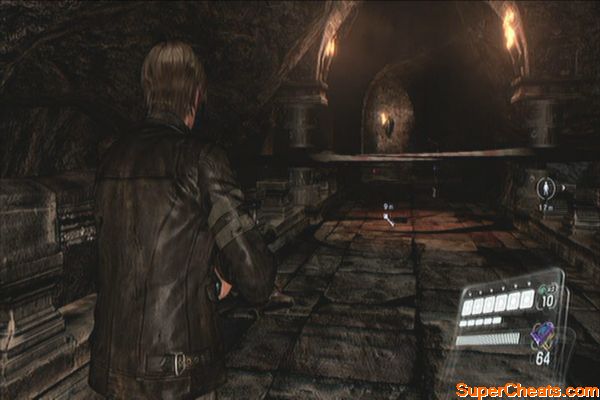
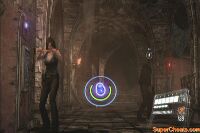
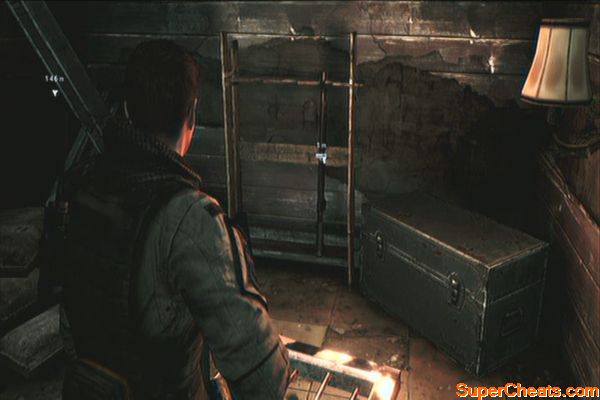
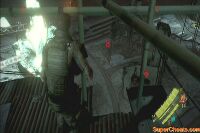
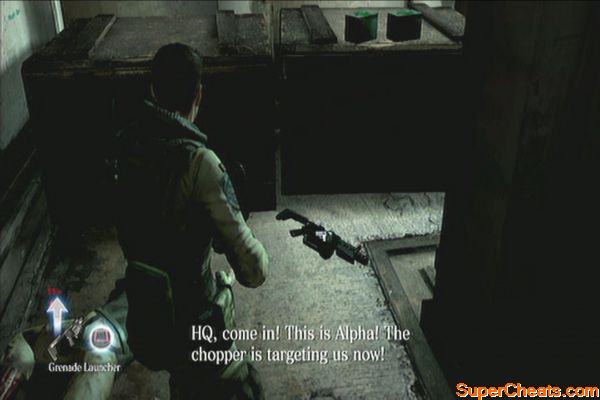
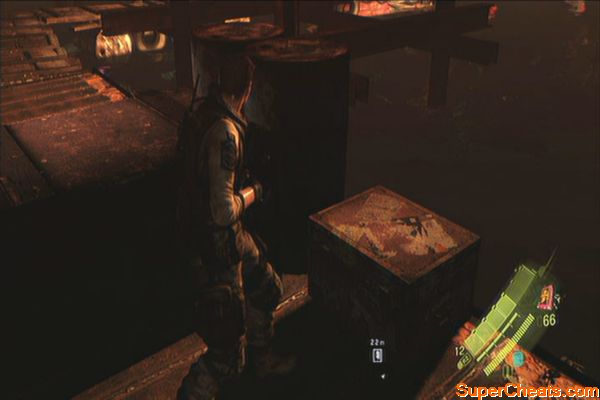
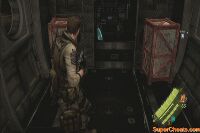
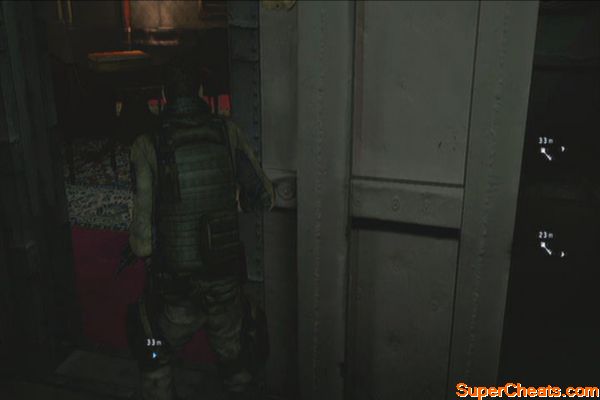
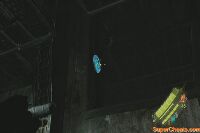
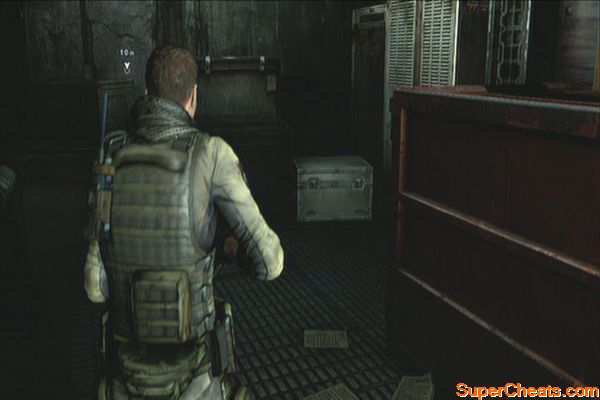
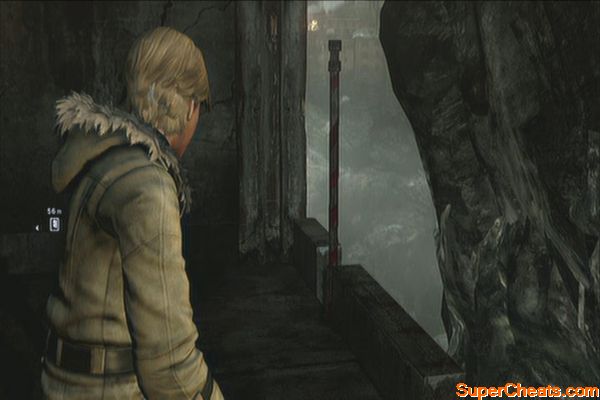
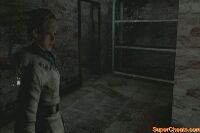
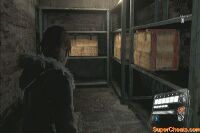
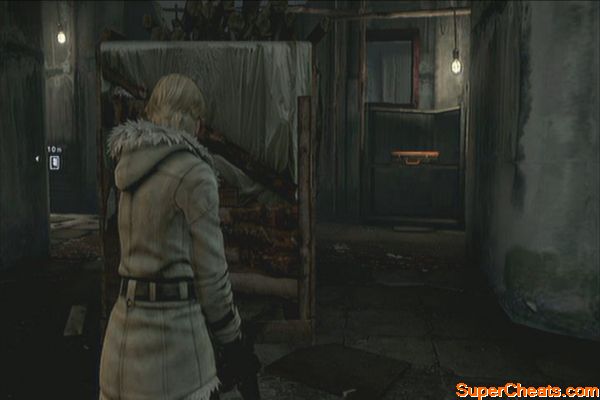
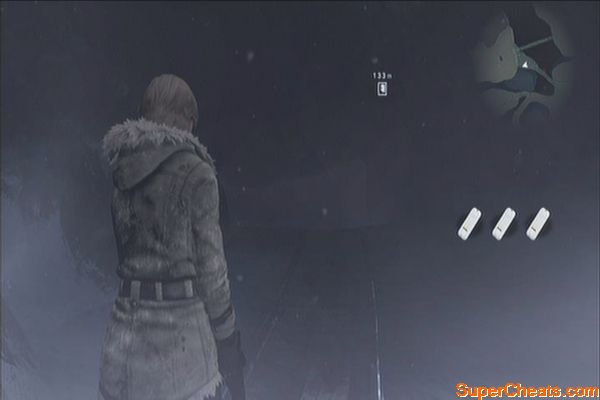
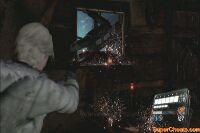
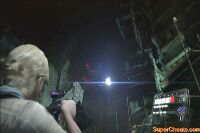
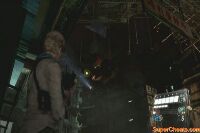
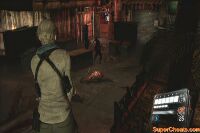
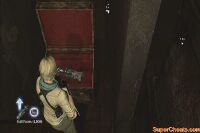
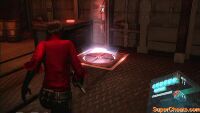
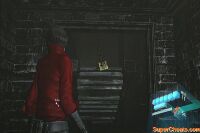
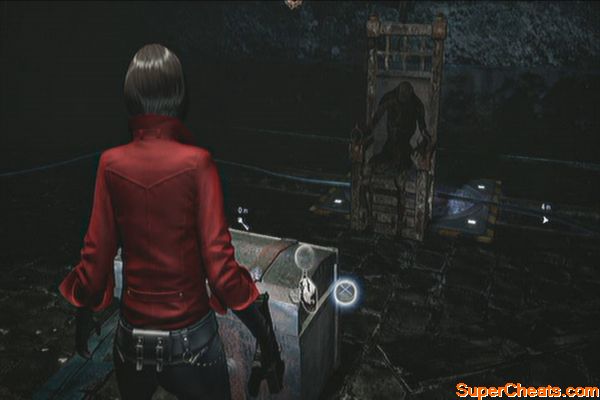
After surviving the helicopter crash and before moving to the next door, look at the shelf to the right to find this emblem. Open the door afterward. Vault over the railing to continue to the next section of the chapter. 
For this battle, you have to utilize the explosive barrels to significantly weaken this enemy. There are a lot of crates so don't hesitate firing at this enemy. Like before, get up close when he regresses back to human form and beat him up. Once he transforms back to his massive monster form, keep distance and try to lure him towards the explosive barrels. Keep shooting at him until the next sequence takes place.
Simmons Rex
Concentrate on firing at its eye while you're the gunner. After successfully repelling its attacks, you'll be back on foot. Just repeat the same process until he finally goes down.
Simmons Rex
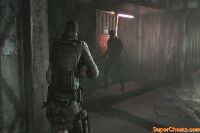
After the scene, climb up the cable until you reach a ledge. From there, protect Ada by shooting off Simmons and some zombies from a distance. 
Continue climbing up until you reach the window. As Helena, you should provide cover from the distance. As Leon, you have to stick with Ada and fight Simmons up close. 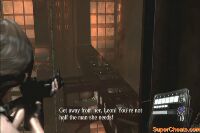
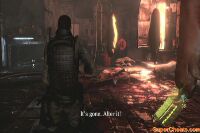
In the next area, Simmons will still show up. Keep distance and shoot him until he's weakened and the normal zombies swarm him.
Zombie feed
Once inside the gate and before climbing the stairs, go under it and peek through the fence to find the last emblem of the chapter.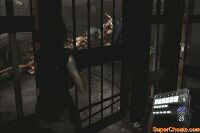
Continue upstairs and make your way to the helicopter. As you reach the crane, Leon will be knocked over the gondola. As Helena, make your way to the crane controls and activate it. Fend off against more enemies then reactivate the controls once it stops. Wait until Leon makes it through then open the gate together. 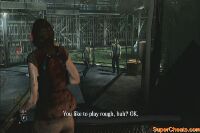
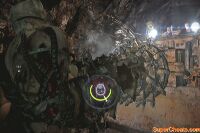
Continue moving on and vault over the railing to fight the large fly-monster. Aim for its legs to destroy it and force it grab any nearby zombie. Make sure to shoot the legs only when they're glowing. One of the zombies there as a lightning rod so clear all zombies in the area so the monster grabs it and gets damaged by the lightning. Keep shooting at its legs until it is weakened and falls down to the ground. Grab the lightning rod and run towards the monster to nail it.
The Fly
After the battle, continue heading to the helipad until you reach the helicopter. Grab the rocket launcher and shoot the bastard in the face. Approach the helicopter again for another scene and to complete the campaign.
After dropping off the roof, make your way down and destroy the crates along the way. Open the main door outside. Continue along the main street until the two humvees explode. Enter the door to the left afterward. Continue upstairs then look to the left to find the first emblem of this campaign. 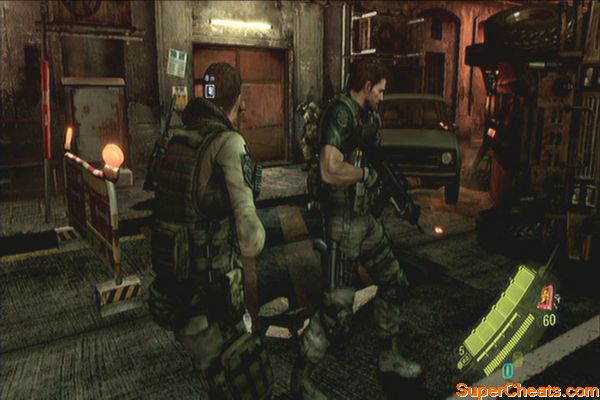
Building Emblem
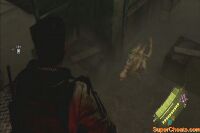
Exit the building and make your way to the street. Kill the enemy there and follow the streets until a helicopter gets shot down. Continue forth until you reach the next door. Once there, follow the alley to the next building. Here you'll find some crazed, machete-wielding enemies. Kill them then proceed forth .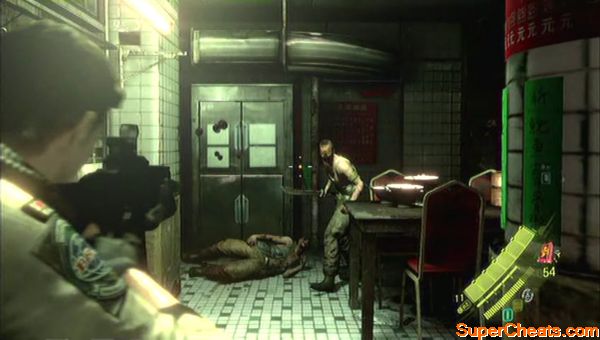
Continue following the path until you reach another slaughterhouse where you'll encounter a mutated J'avo. Aim for its arm to kill it then proceed outside.
Javo Arm
Continue along the alley and kill the armed J'avo's along the way. Once you enter the next room, destroy the crate in the corner near the stairs to find the chapter's second emblem. 

Continue upstairs and clear the rooms. You'll be in the stairwell next. There's an unaware enemy here which you can exploit to unlock a trophy. Just sneak behind him and wait for the melee icon to appear. Press this to push the enemy off the railing. Repeat five times to unlock the Silent Killer trophy then repeat it ten times to unlock the Give it a Little Push trophy.
Two Trophies in one Checkpoint
Before leaving, peek through between the buildings to the right, before the first flight of stairs and look up. The emblem is found perched at the top of the building. 
Continue upstairs for a scene. Kill all the hostiles then make your way to the roof. Jump to the other rooftop for another sequence. Make your way to the objective point while providing cover to Chris. 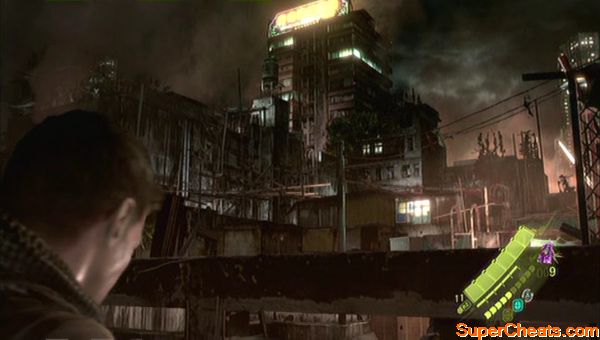
Continue fighting your way through the straightforward path and clear all hostiles. Proceed until you reach the target building. You'll be ambushed here so fend yourself against several enemies. Use the explosive barrels to your advantage.
B.O.W Ambush
Enter through the door afterward. Clear the indoor marketplace and find the door leading to the lower floors. Head to the 7th floor and clear the area. Make your way to the door where the hostages are kept then open the door. Shoot the crawling javo to free the hostage. If you missed it, follow it and wait for it to return. Kill more hostiles as they appear. Go upstairs again to the 8th floor to rescue the other hostage.
You have to make your way to the 1st floor to find the last hostage. Continue downstairs to the 6th floor. Search one of the stalls there to find the emblem. There's also a box here that contains 2000 SP so don't miss it.
6th floor Emblem
Find the elevator and ride it down. After the elevator stops, boost Piers up to escape the elevator. Open the elevator door then lob a grenade to the waiting enemies outside to get rid of them. Clear the floor then find the door leading downstairs. 
Once you've reached the second floor, don't take the ladders yet. Check the chest in the other side to loot 5000 skill points. Peek through the opening then kill the guard. Kill the remaining guards to save the hostage. Open the door to meet up with the others. 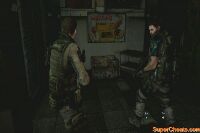
Head to the elevator shaft and climb up. Make your way to the third floor and run around the cracks on the floor to reach the balcony. The mission will be complete afterward. 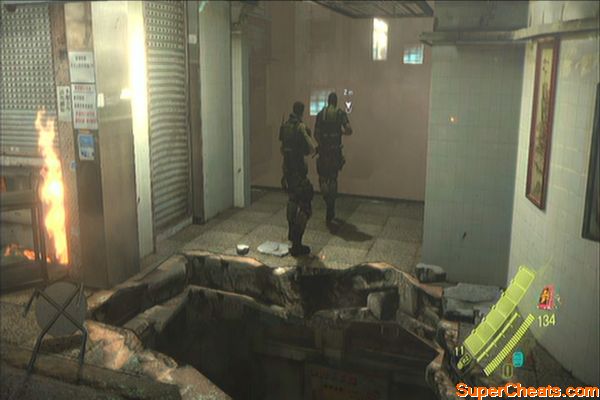
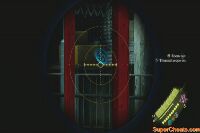
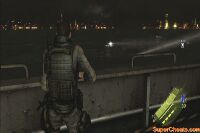
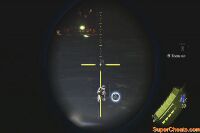
In this stage when playing as Piers, you can attempt to unlock the trophy called “Bring the Heat”. This will require you to headshot an enemy at 50m away while the Anti-Materiel Rifle's thermal scope. See the video below for more details. Take out all enemies in the balcony and the one manning the turret.
Thermal sniping
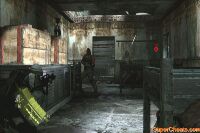
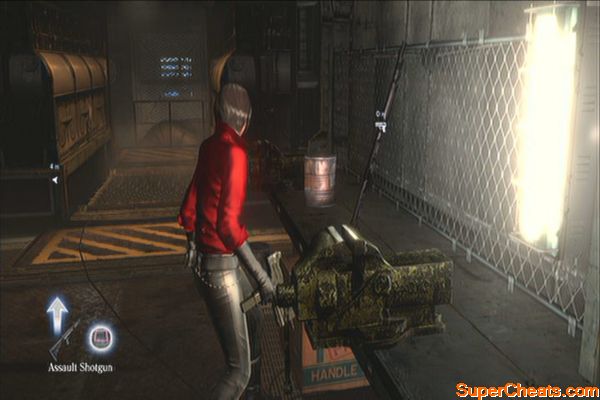
Continue inside the building and clear it off enemies. Destroy the crates inside then attempt to open the door for a scene. You need to hold out until your armored vehicle arrives. Just from a distance and shoot its back. After driving it away, return to door you're trying to open earlier to get an Assault Shotgun.
A giant freakshow
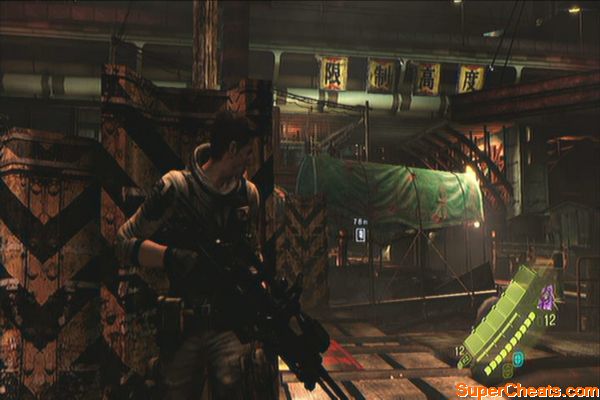
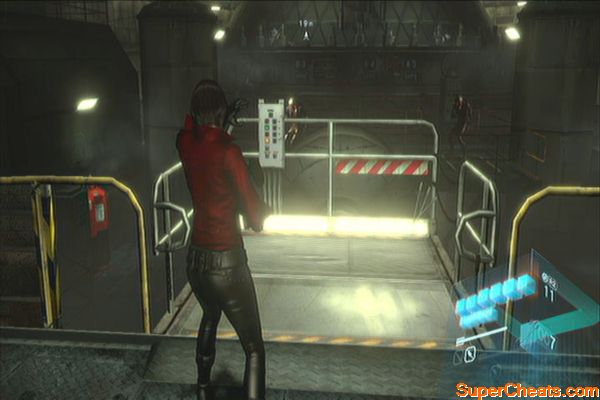
Follow the APC and clear out the road. Continue until you reach an open area with a large number of J'avos waiting. Take out the snipers first and find high ground if you're using Piers. After clearing the area, head to the fence and have Finn blow it open. 
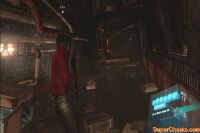
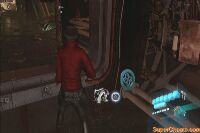
Jump down and protect Finn as he is setting up the charges. Prioritize taking out the RPG Javos first as they can deal massive damage. Find this chapter's first emblem by peeking through the window of the container van ahead.
Trainyard emblem
When on the bridge, start by getting the herb nearby and destroying some crates. Go downstairs to trigger the next scene and head to the bridge next. 
As Piers, you have to jump across the gap and continue inside the building. Kill the Javos inside and continue upstairs. Once you're in the vantage point, look at the upper part of the bridge to the right to find this emblem. If you're playing as Chris at this moment, you can't get the emblem yet so you'll have to replay the chapter later as Piers.
Bridge emblem
Provide cover fire and wait until the tank moves out of its position. Shoot for the fuel tank behind it to destroy the tank. Leave your position and continue along the walkway leading upstairs. Fight your way to the train track. Go through the wreck train car and find the ladder going down the walkway. Kill the enemy waiting there and loot the crates then head to the end of the catwalk so Chris can lower the ladder for you. 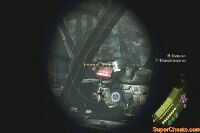
Continue up and kill more enemies then push the dumpster out of the way. You can also go down the walkway below to find more crates and to take out the sniper on the ledge. Hold off the enemies while Finn secures the injured. Once you get the prompt to fall back, do so so Finn can blow up the bridge.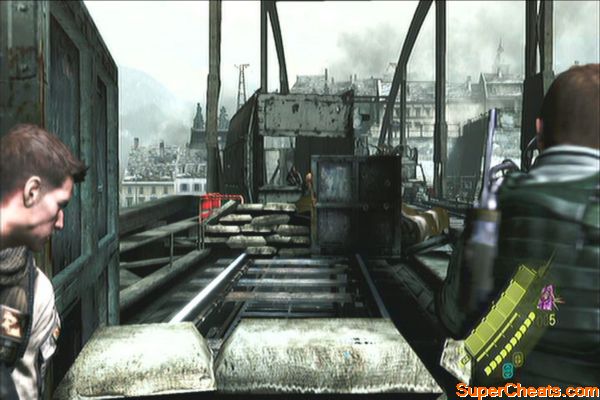
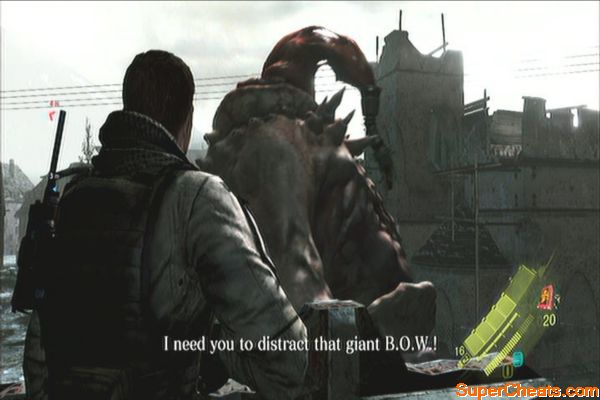
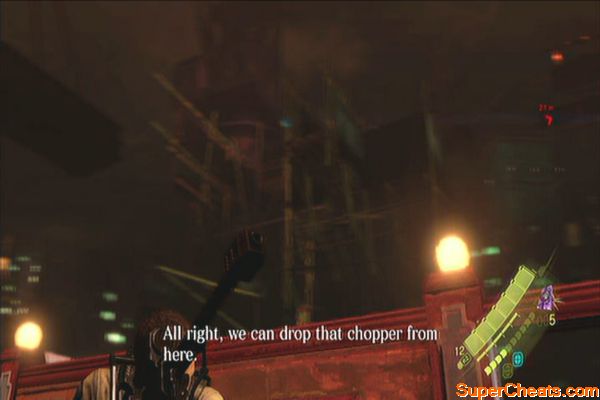
In the next area, run away from the BOW then enter the nearest building. Clear it so Finn can start setting up charges in the anti-air artillery. More enemies will keep pouring in so do your best in fending them off. Once Finn reaches the artillery gun, take the giant B.O.W's attention so Finn can concentrate in setting up the charges.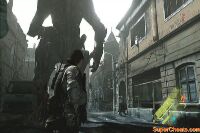
Enter the next tower and clear it out. Like before, you have to get its attention to draw it away from Finn. You may want to do this on street level. Be careful when the B.O.W grabs a vehicle; it will throw it at you and can instantly kill your character. 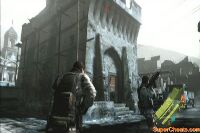
You can also climb the adjacent building to mount the turret and use it to kill the giant B.O.W. Doing so will award you with 4000 SP. Regroup with Finn and fend off the javos engaging him. Once he gets to work on the explosives again, stick with him until he's finished. 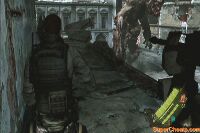
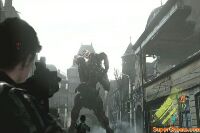
Another large B.O.W will appear. Man the same turret and attempt to take it down to make your job easier and to get more SP. To defeat this one, you have to weaken it then jump on its back to pull the extension and open its wound. Keep attacking that hanging membrane to defeat it.
Ogre Again
After taking it out, enter the building where you destroyed the second turret then take the ladder down. Enter the underground passage and kill all enemies along the way. Continue until you find the first ladder. This leads directly the artillery. The second ladder to the right leads inside the ruined building where the second turret is located. Defend Finn until he successfully arms the charges. 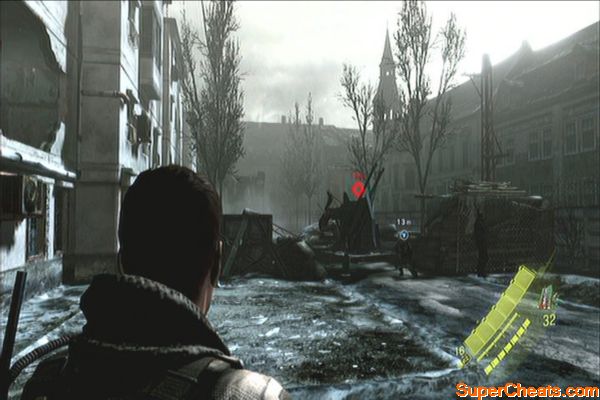
You'll be in the city hall next. You'll find another emblem here by taking the narrow corridor to the left of the hall and following it to the right. The emblem shouldn't be hard to miss.
City hall emblem
Head to the second floor of the building and open the marked door. Continue following the corridor and destroying crates along the way until you reach another hall. Here, you'll have to fight armored B.O.Ws. Keep distance and destroy their armor to expose their soft tissues.
Armored B.O.Ws
After defeating them all, follow the path to the next door. Clear the enemies here then open another door to trigger a scene. After the scene, don't leave the room yet. Check the small room behind to find another emblem. 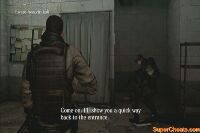

Follow Ada then open the door leading back to the foyer. More armored BOWs will appear. Fight them off if you want for some extra SP. Continue upstairs then open the door. 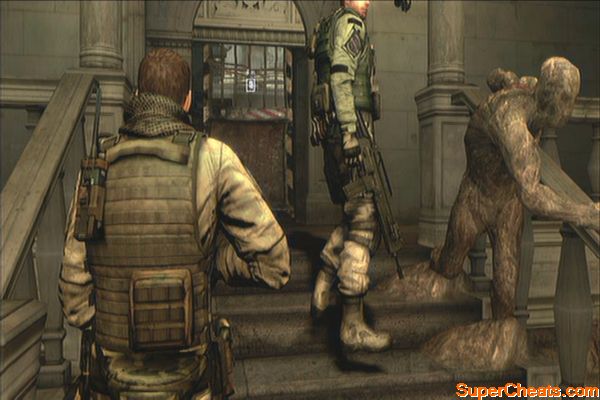
In the next area, a new type of enemy will appear. Kill them all to proceed to the warehouse. More enemies will appear. Take them all out so you can easily gather considerable SP gain. Continue downstairs to trigger another scene. This completes the mission. 
Climb down the pit and move along for a scene. Follow your team until you reach the red gate. Look to the left to find another emblem on a box. Open the gate afterward. 
Once you're out in the street, climb the ladder then drop down to the alley. From there, continue forth and kill a couple of enemies. Climb up the ladder again. Climb the second ladder and a couple more enemies will appear. Take them out and continue up. Clear the following rooms until you cooperatively open a door that triggers the next scene. 
Engage the Javo and kill all hostiles. These enemies can jump at incredible heights and latch themselves in the chopper. Just engage and take them out until the last few enemies get marked in the hud. 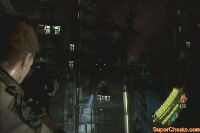
After taking them all out, head to the marker and wait for your team to blast the door open. Continue upstairs until you reach a ladder. Loot the crates then jump off to the next building. Open the door and grab the grenade launcher from the dead javo near the ladder. Climb the ladder to engage the chopper.
Evade often and carefully place your shots as the grenade launcher's ammo is very limited. Take cover whenever you can and don't waste your shots by shooting blindly. Take note that the launcher has an arc and delay so make the necessary adjustments so your shots land the target. Open the next door afterward.
Helicopter
After saving the checkpoint, follow your team until they kick open a door. Check the rooms to the left to find an emblem on the bed.
Apartment emblem
Exit the room then continue along the corridor. Open the next door and proceed to the next corridor for a scene. Continue following the straightforward path as your teammates get taken out one by one. Once outside, push the rubble away for another scene. 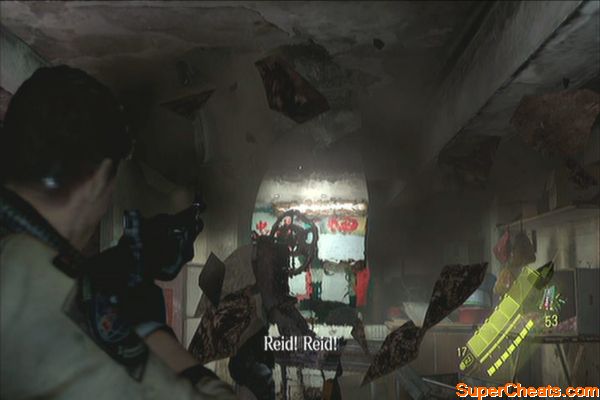
As Piers, you'll start in the third floor. Proceed and enter the next room. Destroy the crates along the way then drop down to the second floor. The target will slither away so just unbar the door and open it. Continue to regroup with your partner. 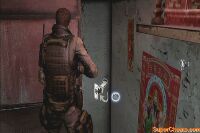
Open the door then drop down to the lower floor. Open the next door and proceed forth for a scene. For this battle, look out for the shimmer in the background then quickly shoot the enemy once it opens its mouth. If ever it coils itself around you, quickly break free to avoid getting killed. Continue shooting at its mouth whenever you can then follow it in the vent. Follow it to the next room and attempt to damage it there.
Once you dealt enough damage, it will move to the next room. Head there and do the same thing until it leaves. Follow it to reach a square area. Make your way to the next ladder and activate the controls to damage the snake. After Marco reactivates the power, time your activation as the snak passes through to electrocute it. Continue doing this until it is fried. Leave the area and open the next door.
Once there, you have to defeat the mutated Marco. You don't have to fully attack the humanoid form of the insects; just attack the large bee continuously until it is defeated. Pick up Marco's C4 explosive afterward. Destroy the boxes nearby to get more loot.
Opened Beehive
Continue downstairs and open the door. Fight your way across the barges and boats until you reach a gate. Open to trigger a scene. You have to make your way to the seafood restaurant as fast as you can. Don't stop to engage any enemy here; just keep running until you reach the next building.
Helicopter chase
After reaching and before heading forth, take cover and look immediately to your upper left to find an emblem from a distance, high above the bamboo poles across.
Take the ladder up and check the rooms. Smash the vases for some explosive ammo then use your grenade launcher to defeat the helicopter outside.
Run away and jump off from the ledge. Head to the ladder and defeat more enemies along the way. Before going up the ladder though, don't forget to get the 4,000 SP from the chest behind crate and drums nearby. Climb the ladder up and follow the path. Destroy the crates along the way then open the gate for the next scene.
Open the next door and run towards the elevator. Slider under the laser net then destroy the glass capsules to disable it. Enter the next door and continue upstairs. Helena and Leon are on the other side. Though not mentioned, this is a contest who opens the door faster. Your partner will work on the panel. Your job is to keep the prototypes getting near him. Just shoot at them to change their course. If you managed to open the doors faster than the other pair, you can loot the chests outside containing thousands of SP.
Keep pursuing Ada until you eventually catch up on her. Watch the following scene.
You'll be in a car chase after her. As Piers, you'll be driving the Humvee. Just keep holding on the accelerator and boost as necessary to close the distance. As Chris, you'll be the gunner; keep shooting the hostiles as they appear.
BSAA's best driver
Continue following her until you reach a parking lot. Find the way to the upper level to find yourself in an ambush. Before destroying them all, shoot the chapter's last emblem inside the bus ahead. Find your way to the upper parking level again until you see a hole in the wall. Approach it to trigger the next part of the chase. Continue tracking her until you reach an aircraft carrier. This will complete the mission.
BSAA's best gunner
A woman worth chasing
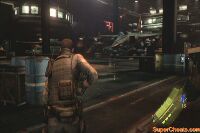
Take cover and take out the enemies in the hangar. Enter the room to the left to find a Semi-Auto Sniper Rifle. Head to the right side of the hanger to find a helicopter. Get inside and check the cockpit to find an emblem.
Head towards the stairs ahead until the enemy raises it. Continue forth and climb the stairs in the left side to take out a couple of snipers. Follow the catwalk then jump over to the other side (as Piers). Head to the missile and activate the lever. As Chris, you have to grab on the wire and make your way to regroup with Piers. Once reunited, Piers should take out the snipers and enemies while Chris rewires the missile.
After destroying the bulkhead, climb down and make your way outside through the marked door. Before moving anywhere else, look at the smaller ship's tower to find another emblem.
Move forth along the path until you reach another double-door. Open it with your partner and pull the lever to lower the stairs again. Kick the nearby ladder down and descend. Take out the pilot of the harrier by sniping him from a safe location. Fight your way through more enemies and kick the marked door open.
Fight your way to the stairs then head to the damaged bulkhead and kick open the door there. Head inside for a scene. Open the next door then take the elevator. Enter the next room then open the next bulkdoor. Clear the briefing room afterward.

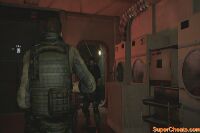
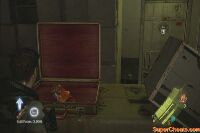
Go around the corner then check the bathroom for a green herb then open the next double-door. Check the laundromat for loot then go upstairs and take out more enemies along the way. Open the next bulkdoor. Head inside and open the red chest for 2000 SP.
Head to the barracks and take out more enemies. Pursuit Ada only to be ambushed by enemies breaking in from the windows. Kill them then continue your pursuit. Open the next double-door. Proceed through the command center then vault over the window. Take the stairs up then open another double-door.
Head inside the control room and proceed carefully. More enemies will break in from the windows. Take them out then turn the valve to open a path on the ceiling. Go up the ladder afterward.
After climbing up the ladder and before taking the stairs, look under it to find another emblem. Continue upstairs until you find another ladder. Climb up then loot the shelves then open the door for a scene.
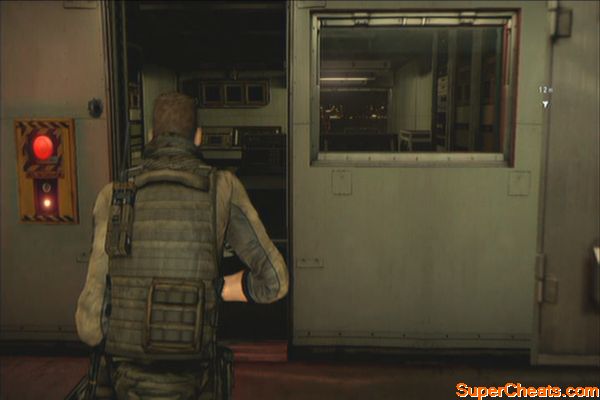
After the scene, examine the console by the door to update your objective. You'll have to find three passcodes to open the door. The first one is found on the floor nearby, beside a corpse. Open the door next to him for a short scene. Don't bother wasting ammo on this enemy as it can't die by normal means. You can still shoot it however, to stop from its tracks and to push it out of the way.
Kick open the door to the kitchen to trigger a scene. Survive the attack until the security gates open. Kick the damaged bulkdoor to reach the mess/ dining hall. Open the door near the crates since it leads to the officers' quarters. Check all the rooms there since they contain chests with SP and other loot as well.
Once you reached the infirmary, open the double-door only for Chris to be trapped inside. Once the enemy inside is taken care of, open the door and grab the second passcode.
Continue forth and go past the small blue room with vending machines then open the bulkdoor leading to a flooded hallway. This leads to the crew cabins. One of them has the third passcode. Scour the cabins for more loot then open the new bulkdoor leading back to the mess hall. Backtrack to the locked console and open it. Head past the door and open the next double-door afterward.
Move along the catwalk for a short action sequence. Kill the B.O.W before it reaches you then continue to another double-door that leads to the rear hanger. Approach the VTOL to start the next portion of the chapter.
There's another emblem that can be found here but will only be accessible by using Piers. As Piers, you'll be the VTOL's weapons control. It is simple; just aim the targeting reticule on the target, wait for the lockon and press fire to launch a missile. You must keep the targeting circle steady as you make a lockon. Keep destroying the anti-aircraft guns around the carrier so that you can land.
Weapons specialist
Upon landing, have to remove the obstacles along the way by planting explosives. You have to press the action sequences correctly to properly set up the explosives. After destroying the first trailer, vault over two obstacles then turn to the right. Before vaulting over the third obstacle, look at the tire in the corner to find another emblem.
Aircraft Carrier Emblem
Open the double-door for another scene. Crawl under the nearby vent. Once in the other room, go down the ladder to the left and peek through the large ventilation fan to an emblem on the far side.
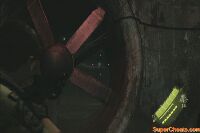
As Piers, vault over to the other side and pull the lever to stop the fan. Next, dig in and take out the RPG-wielding enemies and those manning the turrets. Pull the second lever when you have the chance and wait for Chris to restore power to the elevator. Destroy the remaining enemies then ride the elevator.
Open the next double-door kill all enemies. Before leaving the room, look in the ceiling to the left of the door where you came from to find another emblem.
Exit the room and before entering the next examination room, check the box in the corner to the left to find some grenade rounds. Go through the examination room then activate the next lever. Push the elevator button and exit to a large room.
You need to survive the lockdown by killing the cocoon B.O.Ws and the mutated soldiers. Pulling the green levers will release two cocoons. These cocoons are worth some good skill points so it will be worth your while killing them all if you're able. You need to take out the snipers on the ledge above as well. Once done, open the door to meet up with Sherry and Jake.
TIP: After clearing this area, exit and wait for the game to save. You can start again from the beginning and farm through this area to get thousands of skill points in a short span of time.
Research block
Examine the nearby console then activate one of the marked lifts. While making your way up to the top, fend off the enemies that will drop to your platform.
You have to keep running until you reach the safety of an elevator. This is pretty trivial except for one particular part in the platform where you need to slide. (See the video below, at 1:00:27). When boosting your partner, make sure to keep hitting circle during the entire process. Also while running and jumping over obstacles, you can keep holding the X button (PS3).
That's one angry sonuva...
After the elevator, you'll have to face the giant B.O.W. Keep hitting it with everything you got until it goes down.
The thing that just won't die
After the short battle, grab the ammo then run ahead. The thing you fought earlier isn't quite dead yet so you have to make it to safe before the bulkheads close before you. Refer to the video below. After reaching the double-doors, look at the floor to your left to find one of the last two emblems in this chapter.
Underwater Tunnel Emblem
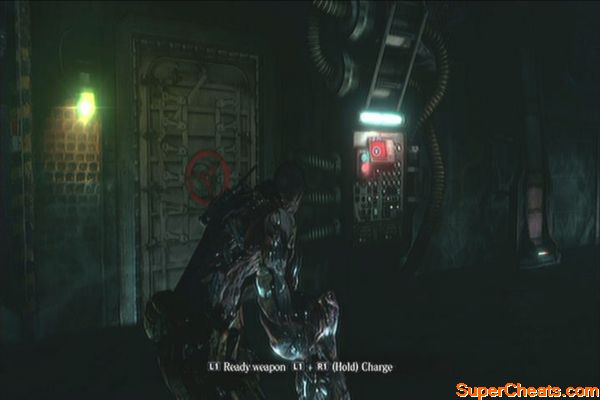
Open the next double-doors for the next sequence. Keep running away to trigger the next scene. As Piers, you have to crawl to the injector and inject yourself with it. Aim to ready your arm then hold the fire button at the same time to charge it. Use it to release Chris then continue firing to defeat the BOW.
The thing that just won't die
As Piers, you won't be able to use conventional weapons now so all crates and boxes you destroy will contain skill points instead. Destroy the boxes in the room then activate the console. This will trigger another battle with the BOW.
This battle has three phases. The idea is to destroy all three “hearts” of the BOW. You have to manually aim and destroy the soft exposed tissue at the back to force the BOW to enclose itself in a cocoon. Destroy the cocoon then stand near the BOW to perform a melee attack that will destroy its heart. Repeat it twice and for the last heart, you have to perform two quick action sequences to completely defeat it.
The thing that just won't die
The thing that just won't die
Open the door and keep running. Destroy the fleshy walls using Pier's charged attacks. When you reach the third wall, peek over to the right to find the last emblem of the campaign. Head to the exit and watch the following scenes.
Underwater Facility Emblem
Climb up the ladders and make your way outside. After the helicopter clears the path, go around the corner to find a doorway. Shoot the emblem on top of it.
Continue outside and run to the left to vault inside a small house. Just ignore the enemies and make your way to the marked door to avoid getting caught in the explosions. After the scene, head outside and follow the walkway to the next building. As you turn around the corner of the building, you'll find the next emblem on top of a metal pole ahead. You can also get it before crossing the hanging bridge. 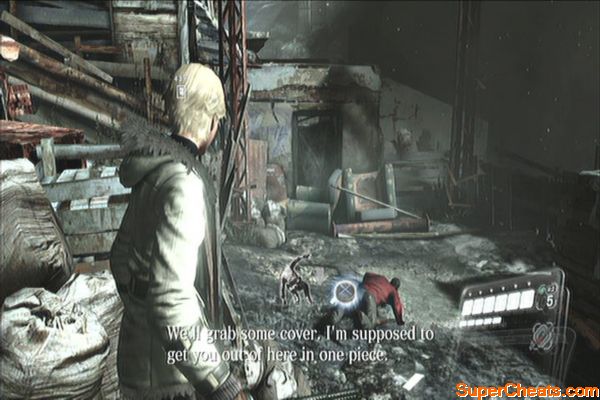
Mountain Emblem
As Jake, you can just jump across the gap. For Sherry, you have to take a longer route. Get inside the room and climb downstairs. Go around the walkway outside and have Jake pull you up.
Jump to the next crumbling ledge and quickly use the ladder. Don't stay there too long as it will give way under your feet. Climb the next ladder and kick the ladder in the upper ledge for Jake to get across. Get across the hanging bridge then kick the other door open.

Continue around the cavern and kill the javo along the way. Continue to the ladder and have Jake boost Sherry up. Sherry needs to kick the pole above which Jake can use to swing to the other ledge.
As Sherry, continue along the corridor and kill more enemies. Follow the corridor until you find the gate outside. Jake will reunite with her at this point so kick it open and move forth.
The next path is heavily guarded. Don't bother fighting the enemies here; just keep running until you reach the red gate. Open it for a scene.
Keep running from Ustanak until you reach the next building. Enter the bathroom to the left and grab the herb in the corner. Have your partner boost you up from that side to find a secret room above containing crates, a red herb, a treasure chest with 2000 SP and an emblem as well. See the video below.
Bathroom Emblem
Jump down and go around the corner. Before taking the marked door, check the other door in the corner to find a small storage room. Take the ladder down to find an isolated room with more crates. Backtrack to the next door and kick it open with your partner.
Jump down from this ledge and continue forth. Don't forget to open the case containing some explosives in the shelf ahead. Kick the next door open and kill the enemy reinforcements. There's also a new gun that can be found here, on the second floor. See the video below for more details.
The Elephant Killer
After getting the Elephant Killer, attempt to open the door until Ustanak appears. Here, you have to take him out. Don't bother wasting your bullets on him. You'll have to use the explosive barrels nearby to damage him. Just stand near one and shoot him a few times to get his attention. Evade away once he charges in then quickly shoot the barrel. There are barrels in the upper ledges as well so just in case you need additional explosives.
Ustanak
In the next area, destroy the crates ahead then head to the dark corridor. Follow the path and loot/destroy the boxes along the way. Don't forget to get the 2000 SP from the chest beside the ladder. Climb up then continue outside.
You should see the next emblem as you exit the ruins. It's right above the building ahead. Kill the guards then open the gate to the left.
After the scene, you'll have to help the BSAA taking out the large BOW and the anti-aircraft artillery. If you've played Chris's campaign, this phase should be familiar to you. Otherwise, read on.
One of the BSAA guys named Finn needs to set up charges on the artillery guns and you have to keep the BOW away from him. Shoot it to get its attention; keep doing it until the charges are successfully set and the gun exploded. Head to the building beside the one that has the second gun on the rooftop. This building should have a turret that you can use to easily weaken the BOW. Once it is weakened, approach it and press the melee button to ride its back and damage its weak point.
Helping the BSAA, one BOW at a time
Head to the second gun and help clear the area. Keep the enemies from distracting Finn. After successfully destroying the second gun, another giant BOW will appear this time. You can concentrate on taking out the large BOW. This time, the weak point on its back is not exposed yet. You have to weaken it first then move in to pull the membrane on its back. Once done, repeat the same process until it is defeated.
Taking out BOWs with style
Once you're in the helicopter, Ustanak will attempt to take Jake. Keep shooting him at the head to release Jake. Keep doing this until you get the prompt to jump to the next helicopter. After jumping to the next chopper, head to the rear turrets and shoot the helicopters. Shoot the enemy missiles down when fired, then concentrate taking out the helicopters to prevent Ustanak from switching rides. Once all the choppers are down, shoot the gas tank to blow him away then press X to grab the parachute.
Taking out BOWs with style
Move away from the wreckage and climb up the ladder. Before finding the three data chips, aim at the top of the electric tower to find a faint blue circle there. Shoot it to get this chapter's first emblem.
You have to refer to your minimap as well to help you guide to the data chips' locations. Go downstairs to the right then head to the northeast path. Continue until you find a couple of cocoon Javo. Kill them then continue past the bridge. Continue to the south west to find memory device B.

Jump back from where you came from then make your way to the northeastern route. Don't attempt to slide here as you'll slide back to the base of the slope. After reaching the top of the slope, you'll find the memory device A beside a tractor. There's also an emblem in the driver seat.
Head to the southwest and cross the hanging bridge. Continue uphil to the north to find the last memory device beside a shed. There's a chest inside containing 4000 SP, as well as crates that can give you skill points or ammo. Loot them then pick up the memory device. Now you have to make your way back to the cabin.
Backtrack to the slippery slope to the east then climb the ladder up nearby. Follow the mine cart rail as it leads you to a small hole you can crawl into. Get inside and while sliding, grab the items along the way. You'll exit near the starting position. Just head to the northwest this time to reach the cabin. Kill the cocoon javo along the way then open the gate.
After the scene, take out the attackers as they come. Don't forget to grab the sniper rifle in one side of the cabin. Keep fending them off until the attackers blow the door open. Kill the remaining enemies then ride the snowmobiles.
Keep your speed up and avoid the edges as you can fall over. For the first few distance there are some skill points so keep hitting the square button (PS3) or X (Xbox 360) to collect them. Concentrate on your driving and wait until you start hitting several ramps. Keep to the right to find an emblem before entering the cavern.
Avalanche Emblem
There are more skill points to pickup as soon as you enter the cavern. After reaching outside, maneuver your snowmobile carefully then press the action button as soon as you're launched in the air.
Eat that, avalanche
Follow the cavern until you reach a door. Open it for a scene. For this part, you have to avoid getting spotted by Ustanak. I suggest killing the bugs then hide inside the nearby trash bin to make things easier. Don't fire at the bugs; you can sneak behind them and stealth kill them to avoid detection.
Jump down to the lower path and do the same thing. Continue along the path and climb the ladder first to find a chest containing 2000 SP. There's another chest in the far end of the chamber where Ustanak and another of his bugs is located but the time and risk to get it makes it inconvenient. There are a lot of other methods of farming SP points so if you don't like sneaking around, you can just avoid the trouble.
After getting the SP from the chest above the ladder, drop down the ledge and push the obstacle out of the way. Continue to the next area where more of those bugs are located. First, go straight to the left and follow the stairs down to find a chest containing 5000 SP.

Carefully sneak behind the bugs to stealth kill them. Once done, head to the door. Don't open it yet; turn around to find another emblem by the frozen tank. Take note that Ustanak will come as soon as he hears the gunshot so unlock the door once then shoot the emblem, then cooperatively open the door afterward.

Continue forth and run away from Ustanak. Prepare to do a slide near the end of the path. Climb two ladders next and head to the door for another scene.
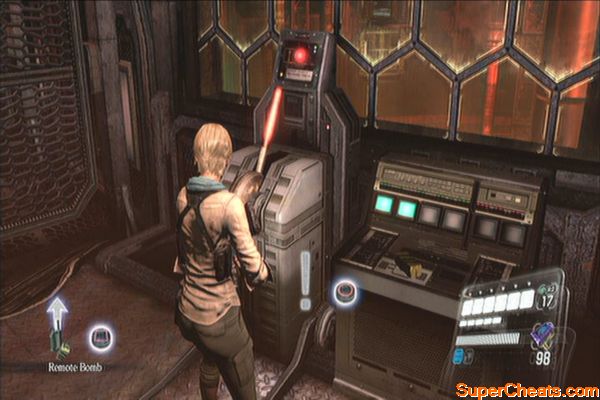
Grab the remote bombs to the right if you want then regroup with your partner. Boost Sherry up and have her sneak behind the ruins. Jake will place a remote bomb in the other side of the room then trigger it to get Ustanak's attention. Sherry will then check the body and retrieve the card. Backtrack and open the door with it.
Getting the mine card
After that you have to get through a series of heavy bulk doors. Open them quickly as Ustanak will start breaking them one by one. You'll eventually reach a drill tractor. For this sequence, you have to do the action prompts correctly to push back Ustanak. Continue to the exit and watch the following scene. The chapter ends afterward.
To get one of the emblems in this chapter, you have to play as Jake. If you prefer playing as Sherry, you can quit the game then start the chapter as Jake then finish it as Sherry later.
(Jake) Kill the enemies to get the switchboard key. Open it to start the scene. Jake's a very good melee fighter but still, avoid engaging too many enemies. Use counterattacks whenever you can to ensure that your combat gauge is not depleted easily. Make your way to the exit point which is obviously marked with red pipes. Push the stand near the pipes and use it to enter the vent.

In the next room, operate the camera and switch it two times. Shoot the emblem located on top of the shelf. Now zoom in to the panel which Sherry opened to learn the correct passcode to open the door in your end. Continue forth and crawl under the vent. Climb up the ladder and continue moving forth until you meet up with Sherry.
(Sherry) Walk around the room until the power goes out. Open the door and continue along the corridor, killing guards along the way. Head to the dimly lighted corridor so Jake can provide fire support using the armed security camera. Head to the security exit to find a locker room.
Hide in the locker in front of the door console to learn the passcode. Open the door and head to the next room. Jake will provide cover again so let him take care most of the enemies. Exit to the locker room and sit down the bench to call Jake. Watch the following scenes and you'll get your equipment back.
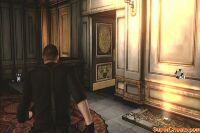
After the scene, you'll be reunited with your partner and get your equipment back. Go along the corridor and take out the guards in the stairs to get an ID medal. Before continuing forth, check out the room downstairs past the blue door. Check the shelf there to find an emblem.
Continue upstairs and clear the corridors. Enter the room to the right and check the drawer in the bedroom to find another ID medal.
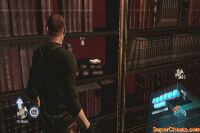
Next, head inside the library and kill all enemies inside. One of the reinforcements will drop an ID medal, and you'll find another one in one of the bookshelves in the upper level.
Continue along the corridor and kill the enemies to get another ID and go downstairs in the next room. One of the enemies there carries an ID medal as well.
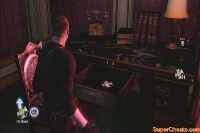
Examine the buddha in the large hall then place three ID medals to open a secret room in the upper floor. Head there and enter the small room to the right to find an ID medal by the fireplace.
Next, go to the bar and kill more enemies for one of them to drop another ID medal. Play the piano piece as well to reveal another one. Before leaving the bar, continue killing the enemies to get another ID medal.
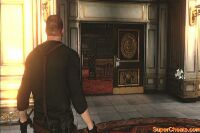
Now return to the buddha statue and place all the medals there. Once the door opens, go inside and open the door to find the comm room. After the scene, exit and you'll find more enemies.
Approach the door and a tank will bust through. Take cover behind the buddha and wait for it to get destroyed. Among the debris, you'll find another emblem. Boost Sherry in the corner where an altar is located then have Jake take the stairs and cross the gap using an armbar. Head to the double-door next.
Buddha emblem
After the checkpoint, run along the corridor to escape the pursuing tank. After reaching the dead end, jump through the window, loot the crates and kick the door open. There's another emblem found in the next area so refer to the video below for more information:
Pond emblem
Take the stairs then enter the room to the right to find some crates. Pull the lever afterward to have Jake swing over to the other side. As Jake, you have to lure the tank towards you so it turns the statue along the way. Once the angle is correct, swing to the other ledge and kill all enemies. As Sherry, you have to hold off until Jake makes it to the other side.
There are also two chests on the tables so don't forget to loot them before taking the bike. Ride the bike to complete the mission.
During this chapter, another emblem is only accessible by playing as Sherry.
As Jake, you'll be the driver and will take care of the overall maneuvering of the bike. You have to avoid collisions and the molotovs the enemies will throw on the road. The overall sequence is very trivial so you can just watch the videos below for reference.
Ride fast, ride hard
Ride fast, ride hard
As Sherry, you'll be the shooter. You just need to shoot your pursuers and let Jake take care of the driving.
Shoot fast, shoot hard
After a while, you'll be hanging on to the helicopter. Keep pressing square (PS3) or X (Xbox 360) to hold on. After Jake catches you, you'll enter a slow-motion mode so you can blow up the tanker. Before doing so, shoot the emblem on top of the billboard as shown in the video below.
Billboard emblem
For the remainder of the sequence, you just have to keep the enemies away until you successfully evade your pursuers.
Shoot fast, shoot hard
After the chase, find cover immediately and eliminate your attackers. The attack helicopter will be your main problem here but concentrate first in taking out the ground forces. Avoid facing the helicopter since you don't have any means of destroying it. Once it starts beaming its light to you, find cover or keep moving to avoid getting pummeled. Transformed J'avos with grasshopper legs will attach themselves in the chopper leave them for last then attack them when the chopper is not doing its attack run.
After the battle, have Jake swing on the armbar and kick the ladder down for Sherry to climb. Kick the next door open to enter the apartment. Drop down to ground level then make your way up. Destroy the crates to get more explosive rounds. Equip the Bear Commander and equip its explosive rounds. Wait for the chopper to get into clear view then shoot it down.
Continue to the alley and after vaulting over the second obstacle, examine the chest in the corner to find 2000 SP. There's another similar chest containing 5000 SP this time near the truck in the street. While crossing the street, check the cars to the left to find another emblem. Continue along the alley until you reach a door. Open it to continue to the next area.
Kill the enemies next and proceed to the alley. Open the door afterward and continue forth to the marketplace. More enemies will flood in so take them out. Attempt to open the door but quickly jump back to since there are enemies waiting there as well. Once done, kick the next door open.

Continue upstairs and open the chest along the way containing 4000 SP. Once you've reached the top floor, check the cabinet to the left to find a Shotgun.
Climb over the ledge then jump to the scaffolding. After falling down, check the area behind to find another emblem. Fight your way along the street then try to open the next gate.
Next, boost Sherry up where the small flashing sign is and follow the bamboo walkway up. Jump across to the other side then drop down behind the bolted door. Open it to let your partner inside.
Follow the alley until you find the next ladder. Before going up, peek through the opening to find another emblem. Continue along the walkway then kick the next door open.
Continue towards the bus for a scene. Defeat the B.O.W by using high powered weapons. Just remember to keep your distance and evade as necessary.
Chainsaw BOW
Once done, go inside the new opening and proceed until you make it to the double-door. Destroy the crates and open the door for as scene. You'll have to fight Ustanak afterward. If you finished Leon's campaign, then you should know how to deal with this guy. You can climb up the container vans and push the gas tanks then lure him in. Keep doing this and firing at him until he goes down.
Not so indestructible after all
Drop down to the underground corridor and destroy the crates along the way to replenish ammo and skill points. After the scene, you have to take out your pursuers. Shoot them down until you reach the seafood restaurant's fiery ruins. You'll need to fight the chainsaw BOW again this time. Like before, keep your distance and take out the enemies as they come.


Once defeated, go down the ramp and take the other boat. Start the engine and follow the prompts to evade the fallen towers. Eventually, you'll have to face the chainsaw BOW again. After reaching the rendezvous point, Sherry will still be in danger. If you're playing as her, you have to resist the BOW's attack until you're saved by a familiar face. Climb up the ladder then open the next double-door for another scene and to complete the chapter.
Chainsaw BOW part 2
Once you get released, boost Sherry up and crawl under the vent. Let the enemy grab you so you'll fall from the vent. Quickly retrieve your weapons and shoot the lock to open the door and free Jake.
Before leaving, head inside the chamber and shoot the emblem on the ceiling, near the vent where you crawled in. Open the next door and continue along the tunnnel.
After reaching the next room, examine the console in the middle to learn that you need to get some reserve batteries. Activate the lever then wait for the door to be charged. Open it and jump on the platform. Jump to the upper level and pull the lever. Continue to the tunnel afterward.
When you reach an intersection, turn to the right to find a laboratory. Another emblem is located inside the glass cabinet. Follow the path to reach the opening and wait for the platform to reach your level. Jump on it then immediately jump on the next floor once near.
Lab Emblem
Kill more enemies then pull the lever again to activate the third reserve battery.
Jump on the platform again and wait until you can jump back to the previous doorway you came from. Backtrack again to the main control room then wait for the second platform to reach you. Jump on it and get off on the upper floor. Follow the path and pull the lever to activate the fourth battery. A BOW will appear so take it out and help your partner.

Backtrack to other doorway then pull the lever to lower to crane down. Jump to the platform and disable the BOW. After the scene, press the action buttons correctly to complete the sequence successfully. Continue inside and activate the console afterward.
After meeting up with Chris and Piers, examine the marked console to power up the lifts. While riding the lifts, fight off a few enemies that will crash to your lift.
After escaping the lift, follow the corridor then open the next door. Jump down to the catwalk below to trigger a scene. For the first part of the battle, just run away from Ustanak until you find a box blocking your way. Push it over and run along the walkway to the right. You should find an emblem in the corner, sitting in a support pillar.
Continue damaging him until you're forced to fight in one of the solid lava beds. Evade his attacks and continue firing at him. If you have saved up some explosive rounds for your Bear Commander, a few solid hits should significantly weaken him.
During the final phase of the battle, Jake will have to fight Ustanak mano-a-mano while Sherry can operate the container controls and use it to support Jake. Just foresee where Ustanak will be going and rotate the direction of the containers and launch them so the boss gets hit instead. After the battle, head to the next door to leave the area.
After passing the doorway, look to the right to find the chapter's last emblem. Just kick it to get it. Proceed to the next door afterward.
Activate the lever to start the chapter's final sequence. This won't require any explanation since the entire thing will just require button sequences.
You can sneak around if you want to make things a bit easier. It is okay to be seen by one guard – as long as you kill him fast enough not to trigger the alarm. Mutated guards won't trigger the alarm as well but will take more effort to take out.
A cat in a tub
After reaching the part where there are two guards, you can get past them by pushing the gas containers out of the way to reveal a vent underneath. Moving on, Ada will notice more guards and one near an alarm. Get behind cover and take out the two guards in the corridor, then the other one inside the room with the alarm. Going past that corridor and as soon as you take the stairs, you should find this campaign's first emblem.
Submarine Emblem
Follow the path until you reach a locked, decorated room. Try to open the door to update your objective. First, head to the other room and examine the hole in the side. The view's gonna be blocked so check the other side to activate it. Peek through the hole again to see the painting transform.
To open the door, you have to turn the pedestals to make the snake in the painting. Activate the console on the door then exit. Step on the lighted panel so the armed camera gets activated and attacks your enemies.
Continue to the room and loot the items. Activate the projector to get the secret information. The whole sub will be alerted at this point so there's no use going discreet now. Fight your way through more enemies until you reach the cargo hold.
Step on the glowing panels there to activate the security cams and help you take out more enemies. There is a mounted turret in the other side of the hold. You can easily take out the enemy manning the turret by activating the floor panel. Continue past the door and operate the console to unlock the next door that leads to the next area.
Open the door then continue forth. Check behind the pillar as you turn around the corner to find another emblem. Go down to the room below and grab the Assault Shotgun by the workbench. Continue following the path and taking out enemies until you reach the ladder going to the Engine Room.
Submarine Emblem 2
Fight your way through more enemies until one of them accidentally hits a gas tank which will cause a shitstorm of problems. The next sequence is just a straightforward one; you don't have to kill all enemies along the way; just run and make your way to the escape pod.
The hull has been compromised
After this sequence, walk around a bit then use the grappling hook to pull yourself up. Water will start to fill in fast so you have to move quickly. There's another emblem that you can grab during this sequence and it's not hard to miss. Continue until you encounter an enemy. (That's the only enemy you'll encounter in this sequence) The emblem should be beside the stairs.
Submarine Emblem 3
After reaching the temporary safety of the bulkdoor, jump down then continue forth. Destroy the special BOW along the way then vault over the next doorway. Before moving forth, turn around and look in the corner behind to find this emblem. Destroy the crates here as well then backtrack to reach the ladder in the other end of the hallway.
Once there, operate the console to update your objective. You have to restore power by reaching the controls. You can explore the areas and kill more of those insect-type BOWs for more skill points but still, you'll be forced to go underwater to reach the console.
Pull the lever then dive in the water again. Don't backtrack; instead follow the vent until you surface to the other side. Dive down again and surface to reach the jammed doors. Open it up and go through another vent to reach the console.
Restoring power to a disabled sub
After activating, you'll have to answer several questions to authorize your access. During this point, more enemies will attack. Fend yourself and press the buttons as soon as available to give your answers. Once done, use your grappling hook to trigger the next scenes and to complete this chapter.
Authorizing your escape
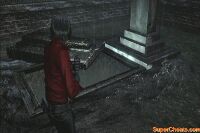
Once you're in ground level, destroy the barrels behind to get more loot. Continue to the opened tombstone but before going down, look behind it to find an emblem. Go down the hole afterward.
Make your way to the sewers and follow the path to find a locked chest. Shoot the lock the open it to get the Simmons Family Crest A. After getting it, you'll be locked inside and zombies will appear. Take them out then proceed forth. Use your grappling hook to reach the upper floor then climb up the ladder.
Use your grappling hook to reach the upper floor then climb up the ladder. Once outside, examine the iron door ahead twice to place the crest piece you have found earlier. Now you have to find the other pieces. Head to the newly opened door and climb down the ladder afterward.

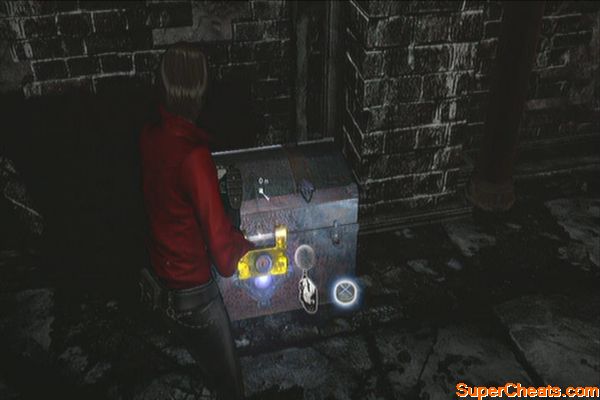
Once back underground, continue forth until you find a room. Ignore the lever and the door for now; just continue upstairs and shoot the handle to create a walkway for you. Open the chest then get the Amber Key.
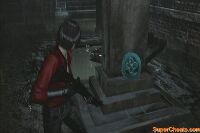
Go downstairs and use the key to open the amber door. Approach the chest only to be denied by the nearby undead. Kill it and grab the Sniper Rifle by the lever. You can also shoot the yellow locks holding the hanged bodies above for some extra ammo as well.
Get to the side of the lever and push it. Make sure it is aligned to the nearest hanged body. This way, when you shoot the lock, the body falls down to the lever, opening the trapdoor where the chest fell down earlier. Jump down and get the Family Crest B from the chest afterward.
Next, push the two sitting zombies to the panels to start the circuit. Another zombie will appear. You have to shoot its leg when it's near the panel to complete the circuit and open the gate. This should power up the gate in the floor above.
Climb up the ladder and pull the lever. The floor will open if there is is too much weight so you have to do something about the zombies first. Shoot them with the arrows until all of them are pinned in the wall. Get the Simmons Family Ring from the chest afterward.
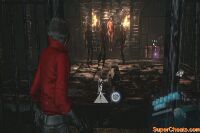
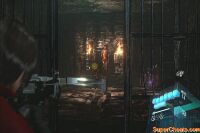
Head back to the gallows and open the door there then make your way to the exit. Once outside, just use your grappling hook when prompted until you reach the next underground area. Examine the skull to discover that the other pieces are taken by some zombies. It doesn't matter which one you should give chase first.
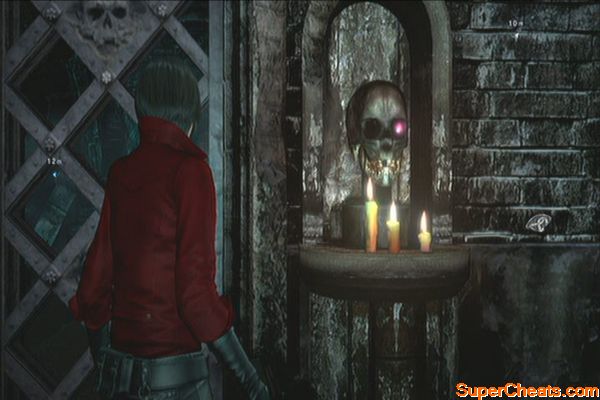
To get the golden tooth, you just have to follow the zombie across two undead-filled hallways until you reach it. Destroy it to get the tooth and follow the path to the starting area. To get the red eye, grapple to the next corridor until the floor gives way. Quickly crawl to avoid the blade trap then quickly kill the zombies along the path. A whooper will appear at the end of the shaft so kill it quickly and exit. Dispose of the zombie to get the red eye then place the two items in the skull to open the path. Grab the family crest from the chest then leave the area.
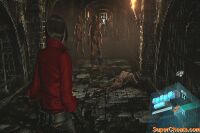
Place the two crests in the door to open it. Once inside, don't head to the next door yet; turn around and you should find the chapter's second emblem in the corner near the ceiling. Open the door to proceed to the next area.
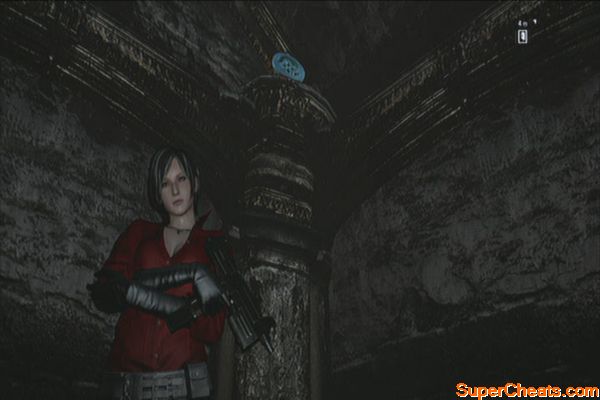
Help Leon and Helena damage Deborah until the next scene triggers. Follow the walkways with Leon until you face Deborah. Since you have finished Leon's campaign already, you should already know how to defeat her. Destroy the glowing parts and avoid getting damaged too much.
Putting her down
Jump to the lift then provide covering fire to Leon. Continue doing this until he reunites with you. You'll be in a minecart sequence again. Defeat Deborah like how you did before. Once you fall from the cart, help Helena by shooting Deborah's weakpoint. After the scene, you'll be alone again. Continue along the path then take the elevator to reach the next area.
Ride to hell
Enter the door and to the cell cages. There are Super Whoopers in the area which you can take down for additional skill points. Take the laboratory key from the corpse of a scientist. Before heading to the door, head to the canal and destroy the crates there. There should be another emblem by the edge of the railing.
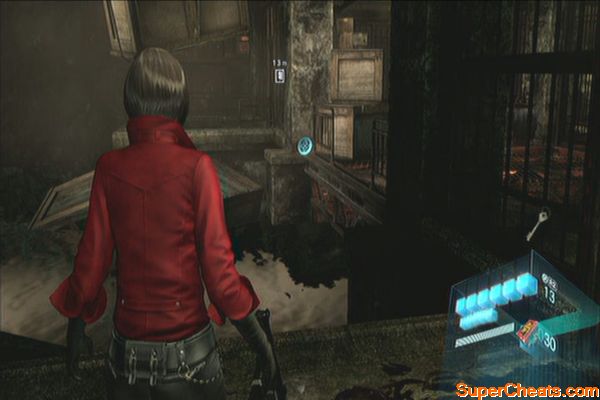
Open the door then use the grappling hook to reach the upper ledge. A whooper will appear behind so kill immediately. Proceed forth another enemy will come bursting through the wall. Loot the chest for some skill points then follow the path and another armored BOW will burst out and charge towards you. Kill it then jump down the opening.


After landing in the sewers, turn around to find this emblem. Destroy the crates then move on. Pull yourself to the previous area where Leon and Helena cleared and destroy the crates for more valuable ammo. Head to the door only to be locked down.
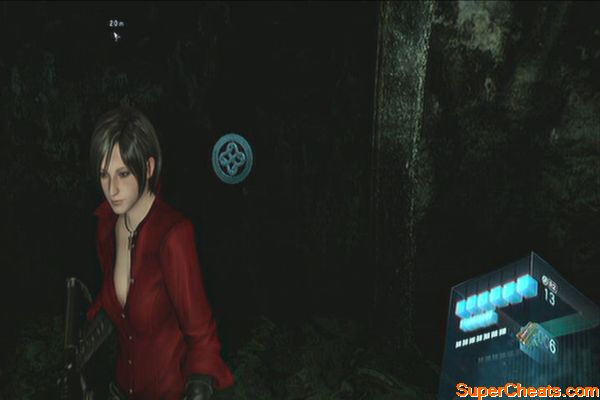
All the cocoon enemies will break free one by one and you have to clear them all out to disable the lockdown. Once done, head to the door and enter the lab to play a scene and complete the chapter.
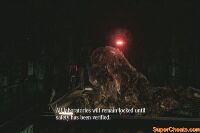
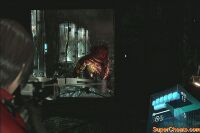
Head to the playground and climb up the box there. Grapple to the next area and proceed along the streets until you finally encounter some enemies near the marketplace. Kill them then check the stalls for some free skill points. There's also another emblem in the accessories stall.
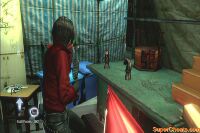
Make your way around the stalls and open the next door. Clear the enemies inside then exit to the streets again. Kill the enemy there then go around by the burning stall. You should see another emblem ahead, past a breakable crate.
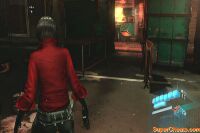
Go through the stalls and check them for some ammo. Kill the remaining enemies then vault over the road barricade. Use the grappling hook to reach the next area and trigger the next scene.
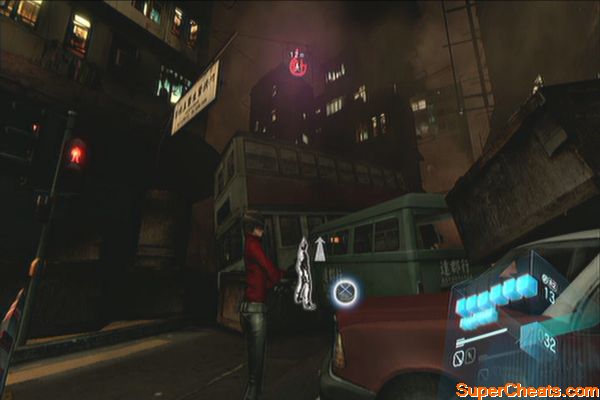
After meeting the chainsaw BOW, run across the bamboo walkways and signboards to escape it.
Chainsaw escape
Follow the path until you reach a plaza. You can sneak around the group of undead here or you can waste them if you want. You can also find a chest containing 2000 SP in the corner.
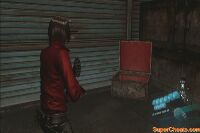
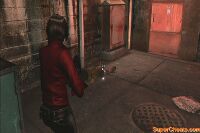
Get the key from corpse and attempt to open the door. The chainsaw BOW will appear again. Keep shooting at it until it is disabled. Be careful too since the zombies around will crawl and attempt to grab you. Once done, recover the key and open the back street gate.
Taking back what's yours
Continue along the path and head to the objective point. Ada will jump on the bus and you'll have to face the undead BOW again. You have to evade by swinging around the bus. Don't let the BOW knock you off or you'll get ripped to pieces by the waiting undead below. After the bus stops for the first time, look in the front of the bus to find an emblem. Continue shooting the BOW and evading as necessary until the next scene kicks in.
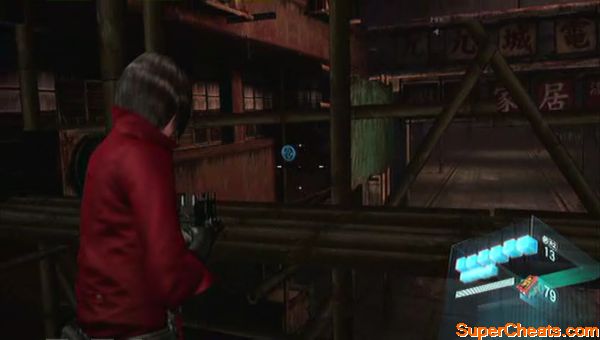
The fight will continue on the rail. You have to do the same thing but this time, you have to be careful of the multiple QTE (quick time events) that will trigger when the fight nears its end.
Bus Ride
After the battle, get to the top of the train. After the airliner crashes, just continue forth and wait for Ada to use her grappling hook to get off the train. Before going upstairs, look at the bottom of the stairs to the right to find an emblem.
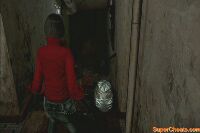
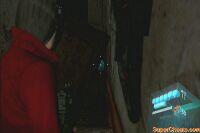
Go inside the room and open the drawer beside the fridge to find some skill points. Exit the door afterward.

You'll find Sherry and Jake afterward. You have to provide covering fire for them. Head to the vantage point and take out as many enemies as you can. Keep shooting at the chainsaw BOW to weaken it. As soon as the duo leaves the destroyed restaurant head to the next vantage point and shoot at the BOW until you get the prompt to blow up the suspended iron bars below.
Sniper Support
Get off the crane and head to the next location. This time, you have to wait for the prompt to save Sherry. Do so and continue along the walkways until you reach the jetski. This completes the chapter.
Kill the guard nearby then head to the next door. Examine the console to update your mission objective. You have to collect three separate passcodes.
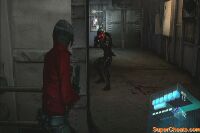
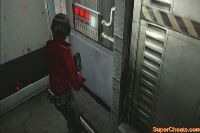
Kill the nearby enemy to get the first passcode. Next, open the door and continue to the kitchen. Open the nearby bulk door and continue to the infirmary. Kill the second soldier there to drop the passcode; however, the regenerating slimy BOW will eat it before you can collect it. Wait for it to appear completely and kill it to collect the second passcode.
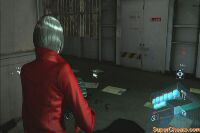
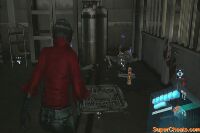
Aside from the objective marker, you should see a weapon marker nearby. Make your way to the captain's quarter to find a chest with 5000 SP and a Bear Commander.
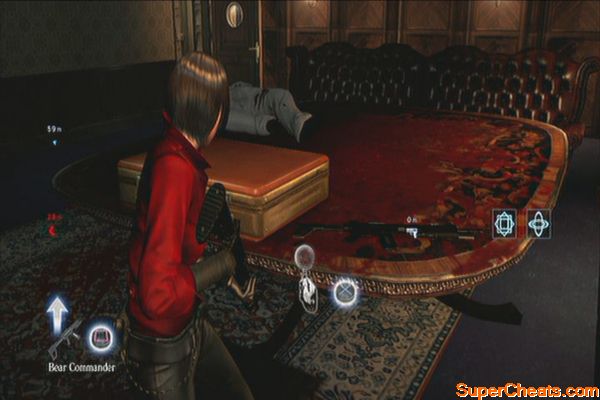
Make your way to the living quarters / cabins and the pipe will burst. Disable the other enemy and wait for the fire to be suppressed. Enter the room where the last passcode is then kill the carrier. Backtrack to the door earlier and use the passcodes to open it. Kill two more enemies then open the next door.
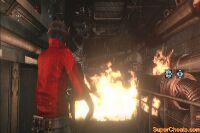
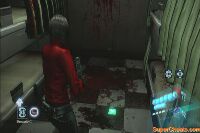
Once you're outside, use the grappling hook to reach the next ledge then open the bulk door. Quickly slide under the closing hatch to reach the laundromat. Continue upstairs and examine the window in the next room. There's a trophy you can get by not causing an alarm and killing targets fast and efficiently. Ada's primary weapon is the crossbow, which can silently take out enemies. For this part, you must run around the balcony before the spotlight catches you. Use your grappling hook to reach the upper balcony. Look to the left to find another emblem.
Aircraft Carrier Balcony Emblem
Enter the vent and crawl in the vent. Continue until you reach the end of the vent. Jump down and continue upstairs. There's a room with crates to the left. You can kill the guard there and collect the loot. Otherwise, you can just continue until you reach the bridge. Here, you have to walk behind the enemy and open the door without alerting it. Just move slowly and press the switch when the distance is safe.
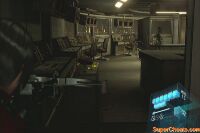
Continue outside and jump down. In this section, you have to avoid the searchlights as you make your way to the next point where you can pull yourself up with your grappling hook.
Sneaking around
Once in the balcony, carefully stick with the walls and kill the guard with a headshot otherwise he'll trigger the alarm. Once clear, climb up the ladder.
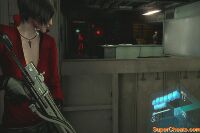
Next, you have to enter the vent and carefully take out the crawling enemies with your crossbow. There are only two of them so just continue forth after getting rid of them.
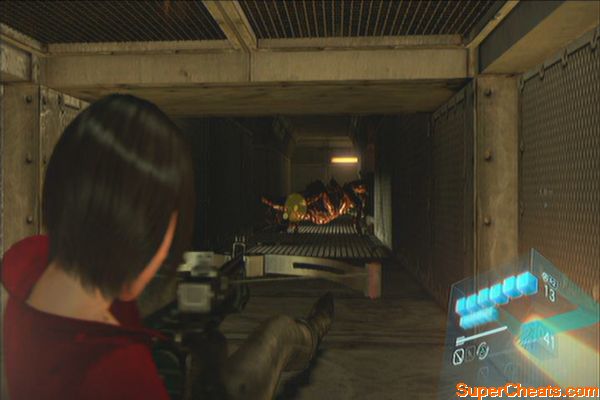
Exit the vents and continue forth until you reach the next room. Approach the table for a scene. After that, you'll be outside again. Enter the next doorway then drop down to the lower level. Be careful since there's an enemy here. Take it out and before riding the elevator, check the locker to the left to find another emblem. Ride the elevator afterward. Head outside for another scene. At this point, if you successfully evaded the guards and searchlights without triggering the alarm, the “Sneaking Around” trophy should be unlocked.
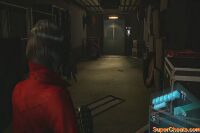
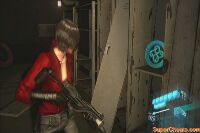
After the scene and before jumping down, the emblem should be obviously visible in the corner to the left.
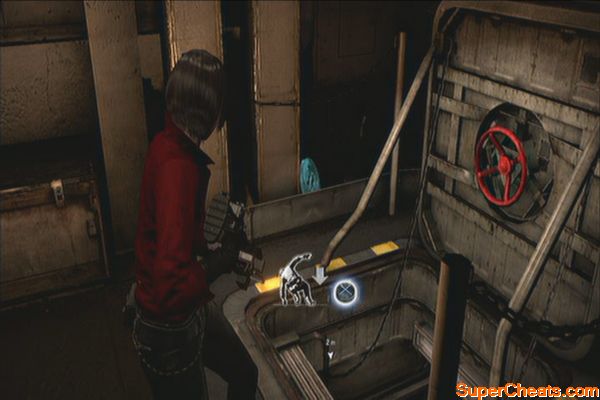
As soon as you jump down, quickly run towards the door then go downstairs to the right. Keep running and opening doors to avoid getting crushed. Once you've reached the part where Ada closes a heavy bulkdoor and there's a large face that will appear by the next doorway, shoot it to disable it temporarily then shoot the emblem behind the boxes.
Goo emblem
Continue running until you reach the part where you get chased by a massive head. Avoid the hands and once you reached the doorway, aim for the liquid nitrogen canisters to flash-freeze and destroy the head. Continue until you reach the lift. Carla's massive disfigured face will appear again. Keep shooting at it until the membranes retract and expose a hole. Shoot any of the canisters behind to defeat this grotesque BOW. Ride the lift for more scenes and to complete this mission.
The want to destroy the world
Provide fire support to Leon and Helena. Before dropping all the zombies, shoot the emblem at the back of the truck to the left. Continue killing zombies until the duo escapes in the alley.
Helicopter emblem
Once done, you'll be flying along the streets. Destroy the enemy helicopters and avoid their missiles as necessary.
They want to destroy the world
After reaching the checkpoint, you'll have to fight a more advanced gunship. Before taking it out, look below to the right to find another emblem on top of a signboard.
Signboard emblem
Next, you'll have to battle the mutated Simmons. Keep firing at it and evade as necessary. You only have a limited supply of missiles so make sure they all count.
This is what you get for playing with C-Virus
After the battle, you'll have to protect some civilians on the rooftop. In the second building lies another emblem, to the left. Keep destroying the targets then shoot the one carrying some explosives. On the third building, simply clear the landing pad.
Rooftop emblem
After landing, use the grappling gun to reach the hanging platform. Before moving forth, peek to the right to find the last emblem of the game. Swing to the next building and open the door to reach the next area.
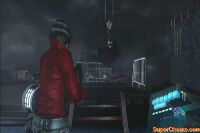
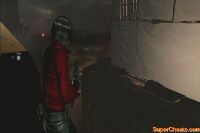
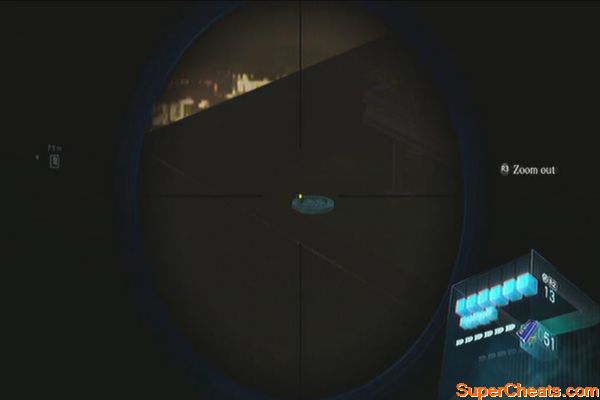
Continue forth until you face Simmons again. For the first part of the battle, just keep shooting at him the roll to the side once he charges. Keep doing this until the next phase of the battle. Leon and Helena will provide backup fire from behind so you just have to focus on evading his attacks. Once he regresses, get up close and personal then beat him up with your fists.
Simmons will then pursue the duo while they're climbing up the elevator cables. Shoot him to keep him from catching up with the two. Be careful since there will also be undead around you. Leon will then join and help you in battle. Keep repeating the same pattern against Simmons, until a scene plays. Approach him from behind to trigger the last scene finishing him up.
Let's call this... closure
Once you reached the lab simply examine the console first then approach the capsule for the ending scene.
This part of our guide to Resident Evil 6 deals with all the Emblems in the game. Although you can also find emblem location details as you work thorugh the main walkthrough for this guide, we've also collated all the emblem locations onto this page for easy reference. Some are accompanied with screenshots, and some are with video. Good luck getting all the emblems!
Chapter 1
#1: After catching up with the man and before leaving the room to search for his daughter, Liz, search the storage room to find first serpent emblem in the game.
#2: After the event where you need to fend off hordes of zombies in the hallway, head to the second room and check the drawer there to find this emblem.
#3: In the railway stage and after the corridor where your flashlights go out for a few seconds, continue until you reach the next railway. Turn to the right immediately to find this emblem under the train.
#4: After opening the iron gate for Leon and after entering a diner with debris burning outside, the emblem should be beside the counter, by the wall. 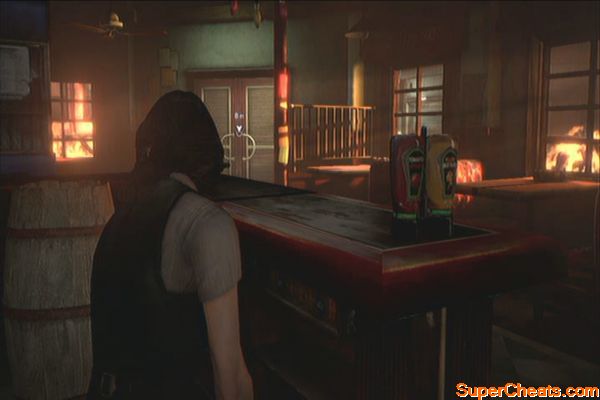
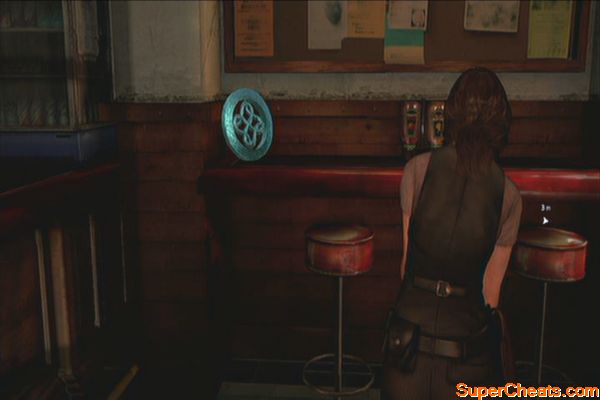
Chapter 2:
#5: From the bus' fiery wreck, follow the trail until you reach the Oaks Cathedral sign. Check behind the tombstone nearby to find a serpent emblem.
Cemetery surprise
#6: Once inside the cathedral, head towards the altar and turn around. Look up to find a serpent emblem by the window.
#7: When looking for Deborah in the underground lab, check the rooms until you find the toilet. Examine the sink to drain its water and reveal a serpent emblem.
#8: After sliding down the vent, you'll find yourself in a cavern. Follow the path and crawl twice. You'll find the serpent emblem to the left, half-soaked in water.
Chapter 3:
#9: As soon as the chapter starts, head to the door but don't pull the lever yet. Look to your left to find another serpent emblem.
#10: After opening the large metal door using Ada's ring and after surviving the zombie horder, wade through the next flooded room and follow the path until you find a dry path. Check one of the closed coffins there to find a serpent emblem.
#11: In the cave with the elaborate bridges and narrow passages, continue until you and your partner pushes a boulder out of the way. After vaulting over the first obstacle, look to the right to see a familiar blue-green circle. Shoot it to claim another Serpent Emblem.
#12: After getting dragged down by the mutated shark and reaching dry land (Helena), follow the old corridor until you find a 5.56 NATO ammo along the way. Another serpent emblem should be beside it.For Leon, you may have to backtrack to this location by taking the ladder next to the broken iron gate. Just follow the bridges until you reach the corridor.
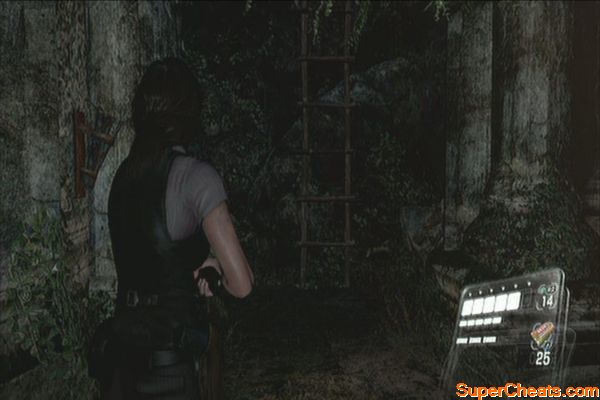
Chapter 4
#13: After driving off the spore zombie and updating your objective, go downstairs and turn to the right immediately. Peek under the opening to find a serpent emblem.
#14: After going downstairs to the cargo bay, take a look to the emblem inside the cooler to the right.
#15: As soon as you reach the marketplace, follow the path until you see a civilian getting attacked. Turn right in the first alley and search one of the rooms there to find this emblem.
Marketplace Emblem
#16: This is found in the marketplace as well. After finding the second key, you have to climb the ladder to reach the rooftop. Before calling your partner to boost you across the gap, switch to your sniper rifle and look at the billboard at the far distance to find a faintly visible serpent emblem.
Chapter 5
#17: Near the start of the chapter as soon as you enter the building to avoid the viral cloud, look at the shelves to the right to find a serpent emblem.
#18: After going through the same alley during the prelude, you'll finally crawl outside with an open truck and humvee behind it. Check the back of the truck to find this emblem.
#19: After surviving the helicopter crash and before moving to the next door, look at the shelf to the right to find this emblem.
#20: After defeating Simmons in the rooftop and the zombies swarm at him, you'll be inside a gate. Before climbing the stairs, go under it and peek through the fence to find the last emblem of the chapter.
Chapter 1
#1: After reaching the street and your path blocked by two humvees, you'll have to enter the door. Continue upstairs then look to the left to find this emblem.
Building Emblem
#2: After defeating the mutated J'avo and clearing the alley of gun-wielding J'avos, you'll have to enter another room. Destroy the crate in the corner near the stairs to find the chapter's second emblem.
#3: After reaching the fire exit, peek through between the buildings to the right, before the first flight of stairs and look up. The emblem is found perched at the top of the building.
#4: After rescuing the first two hostages in the 7th and 8th floors, you have to make your way to the 1st floor to find the last hostage. Continue downstairs to the 6th floor. Search one of the stalls there to find the emblem.
6th floor Emblem
Chapter 2
#5: While Finn is setting up charges to blow the train car that's blocking the path, head to white container van where the Javos are coming from then look through the window to the right.
Trainyard emblem
#6: (You must play as Piers to get this!) From the starting point, head to the bridge and jump across the gap to get inside the building. Kill the Javos inside and continue upstairs. Once you're in the vantage point, look at the upper part of the bridge to the right to find this emblem. If you're playing as Chris at this moment, you can't get the emblem yet so you'll have to replay the chapter later as Piers.
Bridge emblem
#7: After reaching the city hall, head to the left and follow the corridor to find this along the way.
Bridge emblem
#8: After meeting Ada, don't leave the room yet. Check the small room behind to find another emblem.
Chapter 3
#9: At the start of the mission, follow your team until you reach the red gate. Look to the left to find another emblem on a box.
#10: After defeating the helicopter and , follow your team until they kick open a door. Check the rooms to the left to find an emblem on the bed.
Apartment emblem
#11: After the helicopter chase sequence in the river, take cover and look immediately to your upper left to find an emblem from a distance, high above the bamboo poles across.
#12: During the car chase scene, you'll eventually run into an ambush inside a parking lot. Before destroying all enemies, shoot the chapter's last emblem inside the bus ahead.
Bus emblem
Chapter 4
#13: Head to the right side of the hanger to find a helicopter. Get inside and check the cockpit to find an emblem.
#14: After damaging the bulkhead and going through the white double-door, look over the deck to find one patrol boat nearby. There's another emblem on its antenna.
#15: After climbing up the ladder and before taking the stairs, look under it to find another emblem. 
#16: This is found during the aircraft carrier sequence and you have to play as Piers to get this. Upon landing, have to remove the obstacles along the way by planting explosives. You have to press the action sequences correctly to properly set up the explosives. After destroying the first trailer, vault over two obstacles then turn to the right. Before vaulting over the third obstacle, look at the tire in the corner to find another emblem.
Aircraft Carrier Emblem
Chapter 5
#17: At the start of the chapter, after triggering the alarm, crawl under the nearby vent. Once in the other room, go down the ladder to the left and peek through the large ventilation fan to an emblem on the far side.
#18: After powering the elevator and riding it down, open the next double-door kill all enemies. Before leaving the room, look in the ceiling to the left of the door where you came from to find another emblem.
#19: After battling the large B.O.W earlier, run ahead the tunnel. The thing you fought earlier isn't quite dead yet so you have to make it to safe before the bulkheads close before you. Refer to the video below. After reaching the double-doors, look at the floor to your left to find one of the last two emblems in this chapter.
Underwater Tunnel Emblem
#20: During the last sequence where you need to escape from the facility, destroy the fleshy walls using Pier's charged attacks. When you reach the third wall, peek over to the right to find the last emblem of the campaign. Head to the exit and watch the following scenes.
Underwater Facility Emblem
Chapter 1
#1: At the start of the mission, as soon as you reach outside, let the helicopter clear the path. Go around the corner to find a doorway. Shoot the emblem on top of it.
#2: Once you're outside by the mountain walkway, follow it to the next building. Go around the corner and look ahead to find this on a metal pole.
Mountain Emblem
#3: After getting chased by Ustanak and landing inside another building, enter the bathroom to the left and grab the herb in the corner. Have your partner boost you up from that side to find a secret room above containing crates, a red herb, a treasure chest with 2000 SP and an emblem as well. See the video below.
Bathroom Emblem
#4: You should see the next emblem as you exit the ruins (with mannequins). It's right above the building ahead.
Chapter 2
#5: At the start of the chapter, move away from the wreckage and climb up the ladder. Before finding the three data chips, aim at the top of the electric tower to find a faint blue circle there. Shoot it to get this chapter's first emblem.
#6: You'll find this emblem in the driver seat of the tractor beside the FOS Memory Device A.
#7: During the sequence where you need to escape the avalanche via snowmobiles, keep to the right when the slope starts to have several ramps. The emblem should be to the right of the cavern entrance.
Avalanche Emblem
#8: After taking out the bugs in the maze-like area and before opening the door, look behind to find this emblem on a tank.
Chapter 3
#9: (You must be playing as Jake to get this) After escaping the white room, you'll be in a security room. Operate the camera and switch twice. You should find the emblem on top of the shelf in the corner of the room.
#10: After meeting up with your partner and getting your equipment back, open the blue door past the stairs and check one of the shelves there.
#11: After downloading the data in the comm room, attempt to exit through the main door. A tank will bust through. Take cover behind the buddha statue until it is destroyed. You'll find the emblem among the debris.
Buddha emblem
#12: After reaching the pond, run to the stairs and the tank will burst through the walls again. Find the emblem behind the stairs.
Pond emblem
Chapter 4
#13: (You must be playing as Sherry to get this) During the bike chase sequence at the start of the chapter and after Jake catches you, you'll enter a slow-motion mode so you can blow up the tanker. Before doing so, shoot the emblem on top of the billboard as shown in the video below.
Billboard emblem
#14: After shooting down the helicopter, you'll be walking in the alley afterward. After a short walk you'll see some J'avo running away. Once you've reached that street, look to the left to find the emblem.
#15: After climbing over the ledge and falling down, check the area behind where you fell to find this emblem.
#16: After opening the bolted door, follow the alley until you find the next ladder. Before going up, peek through the opening to find another emblem.
Chapter 5
#17: After freeing Jake, head inside the chamber and shoot the emblem on the ceiling, near the vent where Sherry crawled in.
#18: After activating one of the reserve batteries and follow the tunnel afterward. When you reach an intersection, turn to the right to find a laboratory. Another emblem is located inside the glass cabinet.
Lab Emblem
#19: During the fight with Ustanak, just run away from him until you find a box blocking your way. Push it over and run along the walkway to the right. You should find an emblem in the corner, sitting in a support pillar. 
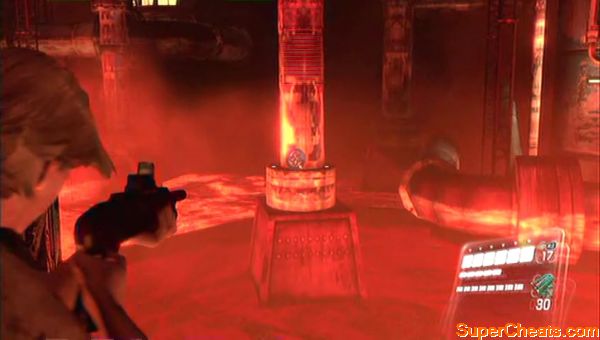
#20: After defeating Ustanak, get past the doorway and look on the floor to the right to find this emblem.
Chapter 1
#1: After taking out the guards in the alarm room, you should find this emblem on a cabinet to the right past the stairs.
Submarine Emblem
#2: After starting the checkpoint where you need to find the rescue sub, check behind the pillar as you turn around the corner to find another emblem.
Submarine Emblem 2
#3: This is acquired during the sequence where you have to keep going up the ship as the water fills the other compartments. Continue until you encounter an enemy. (That's the only enemy you'll encounter in this sequence) The emblem should be beside the stairs.
Submarine Emblem 3
#4: After reaching the temporary safety of the bulkdoor, jump down then continue forth. Destroy the special BOW along the way then vault over the next doorway. Before moving forth, turn around and look in the corner behind to find this emblem. Destroy the crates here as well then backtrack to reach the ladder in the other end of the hallway.
Chapter 2
#5: As soon as the chapter starts, continue to the opened tombstone but before going down, look behind it to find an emblem.
#6: After opening the door using the Simmons Family Crests, don't head to the next door yet; turn around and you should find the chapter's second emblem in the corner near the ceiling.
#7: After helping Leon and Helena, you'll eventually reach several holding cells with whoopers. Head to the canal and destroy the crates there. There should be another emblem by the edge of the railing.
#8: Right after leaving the holding cell, follow the narrow path until you go around a corner and reach a short corridor. Here, a second armored BOW will burst and charge towards you. Kill it then jump down to the sewers. The emblem should be right behind you. 
Chapter 3
#9: Once you reached the marketplace, check the accessories stall to find this emblem hanging on the wall. 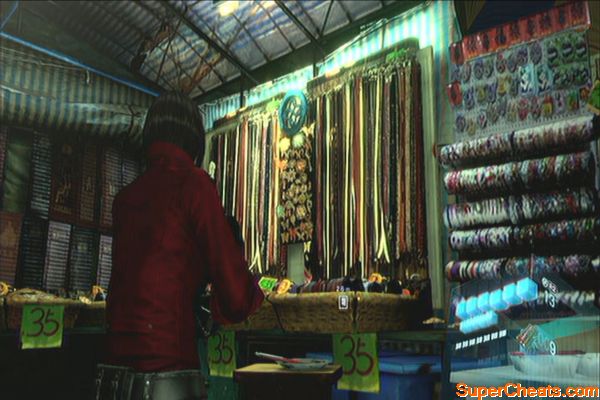
#10: Shortly after getting emblem #9, you'll have to go through a building and to the streets again. After killing the enemy who gunned down the civilians, go around where he came from and you should see the emblem far ahead.
#11: After the bus stops for the first time during your fight with the chainsaw BOW on the roof of the bus, look in the front of the bus to find an emblem.
Bus Ride
#12: After the battle with the chainsaw BOW, get to the top of the train. After the airliner crashes, just continue forth and wait for Ada to use her grappling hook to get off the train. Before going upstairs, look at the bottom of the stairs to the right to find an emblem.
Chapter 4
#13: Once you reached the part where you need to avoid the spotlight, you must run around the balcony before the spotlight catches you. Use your grappling hook to reach the upper balcony. Look to the left to find another emblem.
Aircraft Carrier Balcony Emblem
#14: After getting the information, you'll be outside the balcony again. Enter the next doorway then drop down to the lower level. Take the enemy out and before riding the elevator, check the locker to the left to find another emblem.
#15: After seeing the scene where Carla transforms into a live goo, you'll be inside the ship. Before jumping down, the emblem should be obviously visible in the corner to the left.
#16: As soon as you jump down, quickly run towards the door then go downstairs to the right. Keep running and opening doors to avoid getting crushed. Once you've reached the part where Ada closes a heavy bulkdoor and there's a large face that will appear by the next doorway, shoot it to disable it temporarily then shoot the emblem behind the boxes.
Goo emblem
Chapter 5
#17: At the start of the chapter while providing fire support to Leon and Helena. Before dropping all the zombies, shoot the emblem at the back of the truck to the left.
Helicopter emblem
#18: After reaching the checkpoint, you'll have to fight a more advanced gunship. Before taking it out, look below to the right to find another emblem on top of a signboard.
Signboard emblem
#19: After the battle with the dinosaur-like Simmons, you'll have to protect some civilians on the rooftop. In the second building lies another emblem, to the left.
Rooftop emblem
#20: After landing the helicopter, use the grappling gun to reach the hanging platform. Before moving forth, peek to the right to find the last emblem of the game. Swing to the next building and open the door to reach the next area.
Here is our trophy guide for Resident Evil 6. Some of the trophies and achievements are dealt with within the main walkthrough of this guide. We have collated them all on one page so you can check through and easily see how to complete eah one... Good luck!
The Longest Night (Bronze)
Complete the tutorial.
Gone to Hell (Bronze)
Complete Chapter 1 in Leon's campaign.
Buried Secrets (Bronze)
Complete Chapter 2 in Leon's campaign.
Get on the Plane (Bronze)
Complete Chapter 3 in Leon's campaign.
Big Trouble in China (Bronze)
Complete Chapter 4 in Leon's campaign.
The Trouble with Women (Bronze)
Complete Chapter 5 in Leon's campaign.
Rescue the Hostages (Bronze)
Complete Chapter 1 in Chris' campaign.
Tragedy in Europe (Bronze)
Complete Chapter 2 in Chris' campaign.
After Her! (Bronze)
Complete Chapter 3 in Chris' campaign.
There's Always Hope (Bronze)
Complete Chapter 4 in Chris' campaign.
Duty Calls (Bronze)
Complete Chapter 5 in Chris' campaign.
Money Talks (Bronze)
Complete Chapter 1 in Jake's campaign.
A Revolting Development (Bronze)
Complete Chapter 2 in Jake's campaign.
Let's Blow This Joint (Bronze)
Complete Chapter 3 in Jake's campaign.
Still on the Run (Bronze)
Complete Chapter 4 in Jake's campaign.
See You Around (Bronze)
Complete Chapter 5 in Jake's campaign.
Green around the Ears (Bronze)
Complete the entire game on Amateur.
Normal Is Good (Silver)
Complete the entire game on Normal.
Back in My Day (Silver)
Complete the entire game on Veteran.
Leave It to the Pro (Gold)
Complete the entire game on Professional.
Check Out My Dogs (Bronze)
Customize your dog tags.
This can be done from the Play Game menu before starting a campaign. Simply play around with any of the options and exit to save your dog tag. 
Titular Achievement (Bronze)
Earn 10 different titles.
Titles are acquired by doing various things in the game, like killing enemies with various weapons, melee attacks, follow up attacks, sneak kills and more. 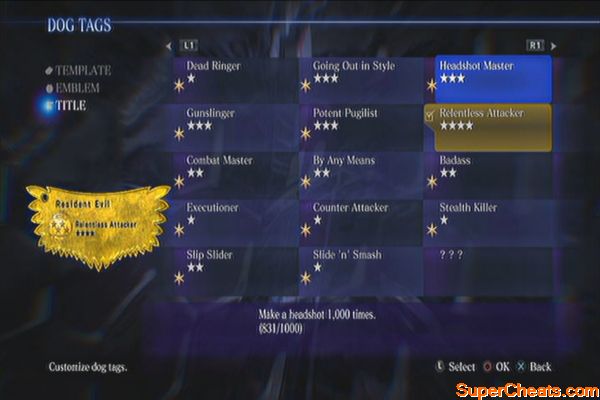
One Is Better Than None (Bronze)
Purchase one skill.
You can earn skill points by collecting them from chests, crates and enemy drops. You can buy skills from the Skill Settings menu in the Campaign. Just purchase any skill you can afford.

Mad Skillz (Gold)
Max out all the skills that allow you to level up.
You have to max out all skills that has different levels. They are as follows:
Firearm
Melee
Defense
Lock on
Rock steady
Critical hit
Piercing
J`avo killer
Zombie Hunter
Combat Gauge Booster
Recovery
Field Medic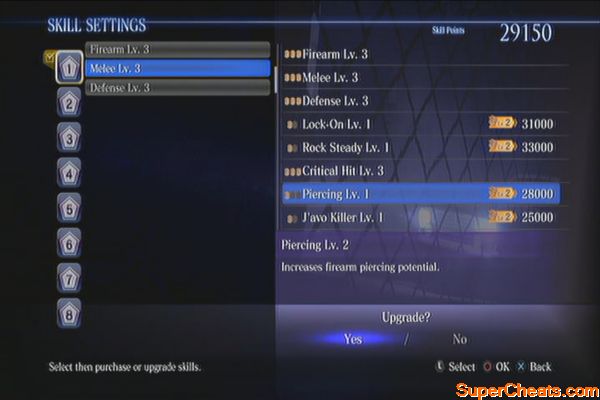
Silent Killer (Bronze)
Use a stealth attack to take down five enemies.
Carefully sneak behind enemies then take them down by pressing R2 (PS3) or RT (XBOX 360) once you get up close. See the video below for more information.
Silent Killer
Finish What You Start (Bronze)
Perform a coup de grâce on ten enemies.
This is performed by pressing the action button when your partner is grabbed by a zombie. If you successfully kill the zombie, it is considered a successful coup de grace.
Bob and Weave (Bronze)
Counter an enemy's attack three times in row.
You can counter various enemies but the timing is a bit different for each. To do this, wait for the enemy to attack then press R2 (PS3) or RT (XBOX 360) at the right moment to successfully counterattack. Since you have to do this three times in a row, you have to attempt this against the slow zombies, preferably in the earlier chapters of Leon's campaign.
Down, Not Out (Bronze)
Defeat an enemy while dying, then recover without any help.
Once you enter dying state (red screen), kill an enemy then survive until your gauge replenishes. Don't call for help to unlock this trophy.
Lifesaver (Bronze)
Help or rescue your partner ten times.
This is self-explanatory; just aid your partner whenever they're grabbed or pinned down by enemies.
Weapons Master (Silver)
Use all the weapons in the game and kill ten enemies with each of them.
Some weapons are unique to a certain character only so you have to play as them in campaigns and kill 10 enemies at most.
Handgun
Nine-Oh-Nine (909) – Chris/Jake
Picador – Helena
Wing Shooter – Leon
Triple Shot – Sherry
Magnums
Lightning Hawk – Leon/Helena
Elephant Killer - Jake/Sherry
Shotguns
Shotgun – Leon/Helena/Jake/Sherry
Assault Shotgun – Chris/Piers/Ada
Hydra - Helena
Sniper Rifles
Sniper Rifle – Jake/Sherry/Ada
Semi-Automatic SR – Leon/Helena/Chris/Piers
Anti-Materiel Rifle - Piers
Machine Pistol / SMG
Ammo Box 50 – Ada
MP-AF (Machine Pistol - Accurate Fire) - Piers
Assault Rifles
Assault Rifle for Special Tactics – Chris
Bear Commander – Jake/Sherry/Ada
Assault Rifle RN - Leon/Helena
Explosives
Grenade Launcher – Chris/Piers
Rocket Launcher - Leon/Helena
Hand Grenade
Incendiary Grenade
Remote Bomb
Melee
Survival Knife – Leon
Combat Knife – Chris
Stun Rod
Others
Crossbow
Gun Turret
Give a Little Push (Bronze)
Knock ten enemies off a high place.
You can do this along with Silent Killer as you sneak behind enemies near ledges or railings and throw them off. See the video below for more details. Remember that these kills are counted towards the achievement even if you restart the checkpoint so once you find an ideal spot to repeat the steps, do so at your convenience.
Little Push Trophy
Rising Up (Silver)
Earn a level-four title.
Keep doing challenges until you level up titles. You can see the titles in the Dog Tags menu and the requirements to level them up.
They're ACTION Figures! (Bronze)
Collect 3 figures.
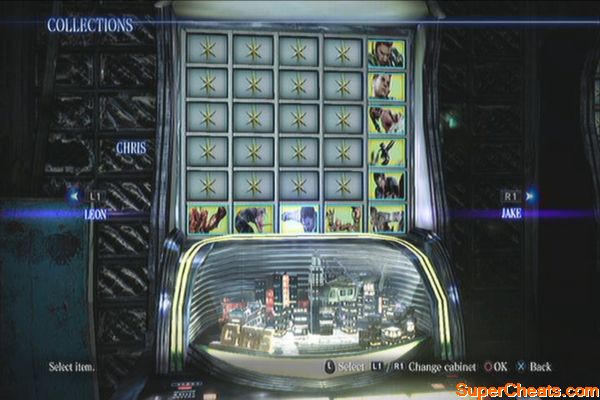
Stuntman (Bronze)
Defeat 20 enemies with the Hydra using a quick shot.
As Helena, you have to press L1 R1 (PS3) or LB RB (Xbox 360) to perform a quick shot. Kill 20 enemies using this method to unlock this achievement.
Stuntwoman
Bring the Heat (Bronze)
Take down an enemy from 50 meters away with a headshot using the thermal scope.
At the start of Chris' campaign Chapter 2, you can attempt to unlock the trophy called “Bring the Heat”. This will require you to headshot an enemy at 50m away while the Anti-Materiel Rifle's thermal scope. See the video below for more details. Take out all enemies in the balcony and the one manning the turret.
Thermal sniping
High Voltage (Bronze)
Defeat ten enemies with a stun rod charge attack.
This is done using Sherry's default weapon. Press the aim button and hold the attack button to charge the stun rod. Kill 10 enemies using this to unlock the trophy.
Zombie Massacre (Bronze)
Defeat 500 zombies.
J'avo Genocide (Bronze)
Defeat 500 J'avo.
B.O.W.s Are Ugly (Silver)
Defeat 100 enemies that have come out of a chrysalid.
You'll find more of these enemies as you go through the entire campaign. If you want to kill more of these cocoon-type enemies while farming a lof SP at the same time, you can do it in the research block section of Chris's campaign, Chapter 5. See the video below:
Research block
Covered in Brass (Silver)
Earn 150 different medals.
Heirlooms (Silver)
Collect all the serpent emblems.
See the Emblems section of this guide to learn the location of each emblem.
RESIDENT EVIL 6 Platinum Trophy (Platinum)
Congratulations! You've overcome all your fears in RESIDENT EVIL 6!
I Spy (Bronze)
Complete Chapter 1 in Ada's campaign.
Counterintelligence (Bronze)
Complete Chapter 2 in Ada's campaign.
This Takes Me Back (Bronze)
Complete Chapter 3 in Ada's campaign.
Ada's Demise (Bronze)
Complete Chapter 4 in Ada's campaign.
What's Next? (Bronze)
Complete Chapter 5 in Ada's campaign.
I Prefer Them Alive (Bronze)
Rescue two female survivors at the cathedral.
This is near the end of Chapter 2 of Leon's campaign. You have to kill this boss quickly to avoid further infection and save the two female survivors. This can be done in Amateur difficulty.
Don't inhale!
Flying Ace (Bronze)
Pilot the VTOL without getting a scratch on it.
This can be done using either Chris or Piers. As Chris, you have full control of the aircraft including countermeasures. This will make it a bit harder as Chris since you have to look out for enemy missiles. Unlike with Piers, you just have to concentrate on taking out the enemy's anti-aircraft guns.
Weapons specialist
Aircraft Carrier Emblem
Hard Choice (Bronze)
Shoot the helicopter pilot with a Magnum at point-blank range.
In Chapter 4 in Jake's campaign, you have to play as Jake to get this. You have to equip the Elephant Killer or Jake's default weapon, the 909. Once you get assaulted by a helicopter for the second time, make your way to the rooftop where it drops reinforcements and grab on the rope. Take note that it will only drop reinforcements after you clear out all enemies on the ground.
When you see it dropping down reinforcements, promptly kill at least two of them so they won't keep shooting you and make you lose your grip. Climb up to get on the cockpit. Aim for the pilot then press the FIRE button when available. If you're equipping any other weapon, switch to your Elephant Killer or 909 before pressing the FIRE button and execute the pilot. See the video below for further information.
Hard Choice Trophy
Sneaking Around (Bronze)
Get through the aircraft carrier's bridge area without being noticed.
Tip: You can restart the checkpoint if you get spotted!
After finding the passcodes to open the door and making it outside, use the grappling hook to reach the next ledge then open the bulk door. Quickly slide under the closing hatch to reach the laundromat. Continue upstairs and examine the window in the next room. There's a trophy you can get by not causing an alarm and killing targets fast and efficiently. Ada's primary weapon is the crossbow, which can silently take out enemies. For this part, you must run around the balcony before the spotlight catches you. Use your grappling hook to reach the upper balcony. Look to the left to find another emblem.
Aircraft Carrier Balcony Emblem
Enter the vent and crawl in the vent. Continue until you reach the end of the vent. Jump down and continue upstairs. There's a room with crates to the left. You can kill the guard there and collect the loot. Otherwise, you can just continue until you reach the bridge. Here, you have to walk behind the enemy and open the door without alerting it. Just move slowly and press the switch when the distance is safe.
Continue outside and jump down. In this section, you have to avoid the searchlights as you make your way to the next point where you can pull yourself up with your grappling hook.
Sneaking around
Once in the balcony, carefully stick with the walls and kill the guard with a headshot otherwise he'll trigger the alarm. Once clear, climb up the ladder.
Next, you have to enter the vent and carefully take out the crawling enemies with your crossbow. There are only two of them so just continue forth after getting rid of them.
Exit the vents and continue forth until you reach the next room. Approach the table for a scene. After that, you'll be outside again. Enter the next doorway then drop down to the lower level. Be careful since there's an enemy here. Take it out and before riding the elevator, check the locker to the left to find another emblem. Ride the elevator afterward. Head outside for another scene. At this point, if you successfully evaded the guards and searchlights without triggering the alarm, the “Sneaking Around” trophy should be unlocked.
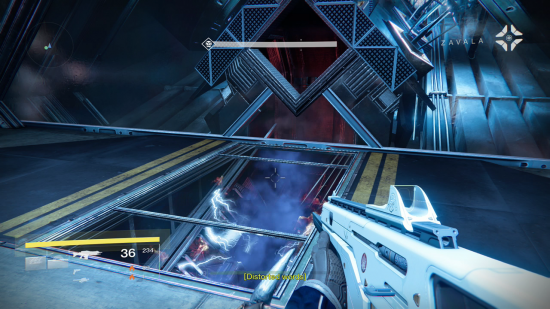
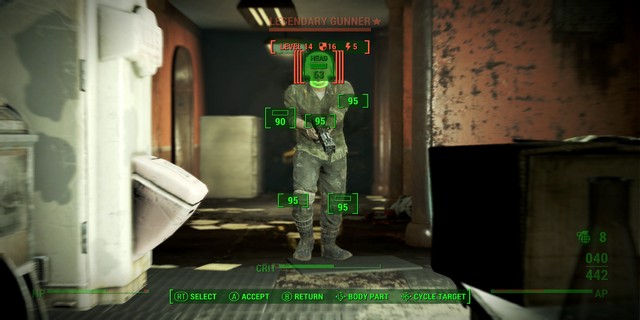


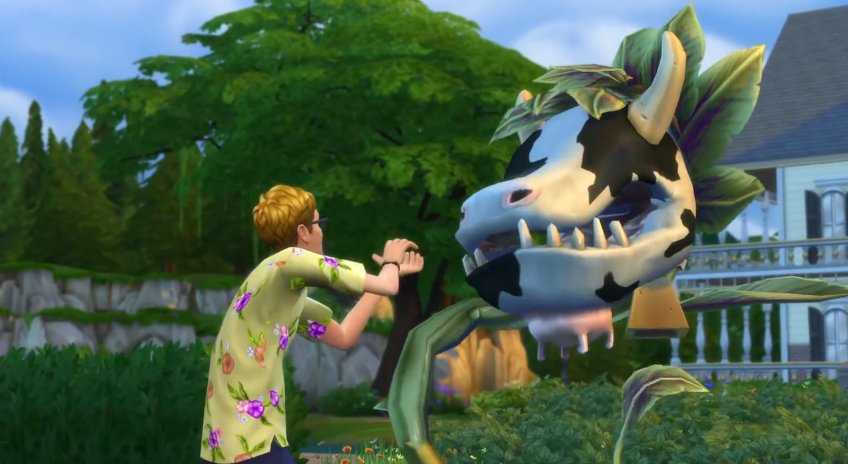 How to Get a Cow Plant in The Sims 4 & Grow It in Your Garden
 Top 5 Best Free-to-Play MMORPGs
 Skyrim: The Gameranx Review
 Travelling Without Moving: Escapism and Wanderlust in Gaming
 4 Reasons The Elder Scrolls Online May Annoy Fans