Unofficial Portal 2 Guide by swaggers for
Portal is back with a full release for Xbox 360, PC, and PS3. Work your way through tons of puzzles utilizing new and exciting methods like the Propulsion Gel. GLaDOS is joined by a new voices Wheatley and Cave Johnson. Our walkthrough will get you through all the puzzles and get you ALL the achievements.
The game will open with you in your room and you'll be greeted to a quick introduction to the very basics of moving and looking and then put right back to sleep. You'll quickly be re-awakened to a destroyed room and introduced to your guide in Portal 2, Wheatley. I just want to say this right away, do yourself a favor and listen to everything Wheatley says. He is HILARIOUS. Wheatley will move your room to a new area and you'll be on your way to starting the game. ACHIEVEMENT TIME: You'll get Wake Up Call just for getting started in the game. Work your way into the first puzzle area. This is a very basic intro area. Simply push the button on the right, then go back through the ORANGE portal to enter the room with the Cube. Pick up the Cube and move back through the BLUE portal to get back into the main room. Drop the Cube and press the left switch. Now grab your Cube again and re-enter the ORANGE portal. This will move you through the BLUE portal that is now on the left side. Place the Cube on the switch and then back to the main middle area one more time. Now click the far back middle button and through the ORANGE portal one final time and you are at the exit. 1 Puzzle down.
You'll head through the area until you reach the your first Portal Gun. This one only fire BLUE portals but luckily someones already placed all the ORANGE portals you need. Only certain walls can have a portal placed on them, namely the cream colored walls that are right below you. So fire a BLUE portal on the wall and jump through. Head up the broken down walkway and you'll come to a large open area. You can see the ORANGE portal already placed on the far side so just place your BLUE on your side and you're past the gap. Now you can see the Exit on the side over another gap. This time throw your BLUE to the far side with the Exit and then walk through the ORANGE to get to the exit. ACHIEVEMENT TIME: As you come through the door to the next area RUN forward to the pit on the right and aim straight down and throw a BLUE portal down ASAP. As the Cube falls it will go right through your hole and onto the button getting you the achievement. If you miss it, reload and try again. This is the BEST place to get this achievement period. Then just walk out the next Exit.
First throw out a BLUE portal and walk through to get on the top small platform. Then throw a new BLUE portal to the far small platform with the Cube. Walk through the ORANGE to get over to that side. Grab the Cube and drop down and place it on one of the switches. Now look down the far back pit. Throw a BLUE portal under the cube and it will drop through the ORANGE. Place a new BLUE on your level and walk through to get the Cube and place it on the final switch and move on. In the Exit room drop a BLUE portal on the ground and it will drop you from the ceiling and onto the glass lowering it down. At the top of the glass ramp take a hard right to see the first of Rattmann's dens. No achievements yet but its a nice hidden area to look over. Then continue on to the next room.
Just to get into the room place a BLUE portal on the ground and you'll drop into the main room. Hit the switch and then move towards the water. Look to the far right and there is a small platform that now has a Cube on it. Place a BLUE underneath it to get it to drop back behind you in the main room. Go grab the Cube and place it on the switch. This raises the ramp near the exit. Walk up there to the next set of switches. The left switch drops another Cube. The problem is it gets thrown into the water and destroyed immediately. So right after hitting the left switch, you need to hit the right to get the wall to raise to stop the Cube in the main area. You can do this as often as you need until you get it right. Then back down the ramp and grab the Cube and place it on the second switch to open the door.
Place a BLUE portal on the wall to get into the room. Then go to the edge of the pit and look down. Place a BLUE portal at the bottom and fall into it flinging you to the far exit side. Now peak into the glass enclosure and place a BLUE portal underneath it and it will fall into the pit. It may launch to you automatically. If you have to go get it just grab and fling it with you to the exit. Place it on the switch and that's the end of room.
In the next room place a BLUE portal on the angle wall section to the left and then jump through the pre-placed ORANGE portal that is on the bottom of the pit and fling yourself to the far side. Grab the Cube and drop down 2 levels and place it on the far platform by the door. Now move the BLUE portal to the far top left on the opposite of the angled wall. Then drop once again through the ORANGE portal in the pit and that will fling you to the exit. Pick up the Cube and place it on the switch around the broken glass. Drop through the ORANGE one last time to fling yourself to the high exit.
Wheatley is back. Throw a BLUE portal on the far wall and drop into the ORANGE to get into the back room. Wheatley will drop off the stick and you'll have to pick him up and place him in the terminal. He'll open a door and you can move on.
Carry Wheatley through the inner workings of the Test Chambers until you reach the next terminal. Place Weatley in and you'll rise out of the lower chambers to see GLaDOS. GLaDOS decides you need more testing and drops you down a tube. ACHIEVEMENT TIME: You'll get this achievement automatically as you drop down the tube. As you work your way through this junked out area you'll get the ORANGE/BLUE gun and now it's go time. From here on out you can use any color combo you want but I'm going to stick with what I use in the videos. Drop and ORANGE up high past where you get the gun then a BLUE on your side to move on. This whole area is placing a portal near you and one higher and farther along. Just keep working your way forward and you'll come to the elevator and then end of the first chapter.

CHAPTER 1: The Courtesy Call
Opening & Puzzle 01
Opening of the Game and Puzzle 01
Wake Up Call -- 5 -- Survive the manual overridePuzzle 02 & 03
Puzzle 02 & 03
Drop Box -- 20 -- Place a cube on a button without touching the cubePuzzle 04
Puzzle 04Puzzle 05
Puzzle 05Puzzle 06
Puzzle 06 - Part 1
Puzzle 06 - Part 2Puzzle 07
Puzzle 07Off The Grid
Off The Grid
You Monster -- 5 -- Reunite with GLaDOS
CHAPTER 2: The Cold Boot
Puzzle 1
Puzzle 1
Super easy first puzzle. A real quick room teaching you that if there is a Thermal Discouragement Beam, that you need to point it at the receptacle. So ORANGE at the base where the beam hits the floor and then BLUE on the ceiling above the receptacle while you are standing on the platform below the Exit and the room is done.
ACHIEVEMENT TIME:
Undiscouraged -- 10 -- Complete the first Thermal Discouragement Beam test.
You'll get this achievement on completing the room.
Puzzle 2
Jump over the beam and head to the back left to a broken up room with a Cube in it. Place a ORANGE beneath the Cube and a BLUE out in the main area to get the Redirection Cube accessible. Pick up the Redirection Cube and place it in the beam so that the beam is redirected to the receptacle. Then take the ramp to the Exit.
Place a BLUE up on the surface and a ORANGE underneath the Cube to bring it up to you. Place the Cube on the switch and move on.
Puzzle 3
Place the ORANGE down with you and the BLUE up on the platform with the Redirect Cube. Walk through the ORANGE and grab the Cube. Place a BLUE on the right where the beam hit the wall and then the ORANGE on the ground where you are to send the beam up to the receptacle in the ceiling. Now grab the Cube and jump over to the high platform and redirect the beam to the next receptacle.
There is a Rattmann den down and to the left if you want to see it. You'll have to replace all the portals to move on but it is a unique hidden item in the game.
Puzzle 4
ORANGE at where the beam hits the wall and then BLUE in the middle of the back to get the platform moving. When it reaches the far left with the switch, move the ORANGE to kill the beam and place it with the switch. Walk through the BLUE to get to activate the switch and get the Cube and place it on the movable platform and get on there yourself.
Place the ORANGE back with the beam at the wall and ride the platform to the opposite side. Place the Cube on the switch and move on to the next puzzle.
Puzzle 5
Hit the switch and the Cube will drop on the middle of the level and bounce up and down. Now stand on the Faith Plate and launch yourself through the middle, grabbing the Cube as you go. Place it on the switch and move on.
Puzzle 6
Place the ORANGE on the back right angle wall, then the BLUE on the other one. Step on the Faith Plate and get flung all over the level until you get to the far platform with the switch.
ACHIEVEMENT TIME:
Final Transmission -- 20 -- Find the hidden signal in one of the Rat Man's dens
Press the switch and the first load of items sent to you is trash. What we need to do is grab the Radio from this stream of trash. It's the Half Circle White object. Press the button again and get the Cube.
Now place a ORANGE on the back right wall where you came in and a BLUE right besides you. Grab the Radio and head on through. Place a BLUE on the right angled wall and the ORANGE on the top left wall in the angled wall area. Now back on the Faith Plates and you'll be flung through that ORANGE into a hidden Rattmann area. Take the Radio to the back of the room for the achievement.
Work your way back to the platform where the Cube is. Place a ORANGE portal on the top of the ceiling on the corner where the switch it. On place a BLUE on the wall in your area and take the Cube through and place on the switch. Back once again to the main platform by jumping over to the Faith Plate with the switch and Exit the puzzle.
Puzzle 7
After GLaDOS has her fun and destroys the first few Cubes, pick the final one up and block the beam. Stand on the platform that lowers and then put a BLUE under the Cube and a ORANGE on the wall somewhere to clear the beam and raise the platform.
Now put a ORANGE on the first angled wall and a BLUE beneath the Cube to bring it up to this top level. Now place a ORANGE on the far of the 2 angled walls and then drop down into the BLUE you already placed on the floor and fling yourself to the far side and place the Cube on the switch. Now place a ORANGE on the left angled from your current point of view and fall through the BLUE again to get to the absolute top of the puzzle.
ACHIEVEMENT TIME:
Preservation of Mass -- 20 -- Break the rules in Test Chamber 07
Walk into the Exit area but DON'T exit. Put a ORANGE portal inside the area. Go back to the main puzzle area and grab the Cube and then drop back into the BLUE again. Achievement unlocked and move to the elevator.
Puzzle 8
Look through the small hole in the glass and place a ORANGE portal. Then a BLUE where you are and walk on through. Jump over the beam and hit the switch to drop a Cube. Back through the portals to the starting room and grab the Cube and then back to the room. Take it back through and redirect the beam to the wall unit. Back through to the main room and Exit.
Puzzle 9
Stand on the Faith Plate and you'll get scolded by GLaDOS for being so fat. Eventually she'll lower the roof and you can place a ORANGE on the ceiling above the platform and a BLUE on the ceiling above the Faith Plate and launch yourself up.
The back area with the Beam place a ORANGE on the right angled wall. The color that is NOT above the Faith Plate. Jump through, down to the Faith Plate and get sprung back up through the BLUE to the new platform. Hit the button there to drop a Cube across the way.
Now put a BLUE on the angled wall facing the Cube and fling yourself up there with help from the Faith Plate. Grab the Cube and drop down. Redirect the Beam to the Portalable Wall.
Now use a BLUE on the angled wall near the Exit to fling yourself up there. Now simply put a BLUE on one side of the wall blocking the beam and a ORANGE on the other. Exit open.
Puzzle 10
ACHIEVEMENT TIME:
Overclocker -- 30 -- Complete Test Chamber 10 in 70 seconds
Save right as you get off the elevator if you want to go for Overclocker. 70 Seconds is very fast on this level and you have to get everything perfect so you'll be re-loading once you've got it figured out to go for your best time.
Immediately place a BLUE on the ground in front of you and then a ORANGE on the high wall behind you as you come in. Drop through the BLUE and out the ORANGE and then back into the BLUE to fling yourself across to the Cube.
Drop a ORANGE on the bottom of the pit and grab the Cube and drop down and through. Then hit the Faith Plate and launch to the left ledge. Use the Cube on the far right to block the beam.
Place a BLUE on the wall near the Faith Plate and then drop down and launch yourself with the Plate. You'll go farther this time because of the beam being blocked. Hit the switch and then place a ORANGE on the wall. Look back the way you came and grab the Redirection Cube out of the air. Drop down to the first ledge and place the Redirection so that it goes through the BLUE and out the ORANGE on top to get the receptacle.
Now grab the original cube and drop down for yet another trip on the Faith Plate. This one gets you to the exit and drop the cube on the switch and get your achievement.
If you missed it reload your save and try until it pops.
Puzzle 11
Light Bridges! You can walk on them and you can portal them from one wall to the other. Let's get started.
Put your BLUE at the end of the bridge and then the ORANGE at the far side across the gap. You can walk but it's easier to get go through BLUE to get to ORANGE. Hit the button and that starts a never ending stream of Cube falling so we need to get below the chute to grab one.
Walk out on the bridge and put a ORANGE portal in the middle of the 4 squares to the right. This will drop you down to the next bridge. Go inside and put a ORANGE portal to the left, dropping you down again. Finally put another ORANGE portal to the right at the end to drop you down a final time and grab the Cube. Then walk through the ORANGE to get back to the begining.
Place the ORANGE high and to the right to make a bridge to the left platform. Go through the BLUE and walk over to the platform. Drop down and place the Cube on the switch.
Place an ORANGE below you and walk through to the starting area again. Now just make a ORANGE on the far side and walk to the Exit.
ACHIEVEMENT TIME:
Bridge Over Troubling Water -- 10 -- Complete the first Hard Light Bridge test
You'll get this achievement for completing the Puzzle.
Puzzle 12
Start by throwing a BLUE portal right in front of you. Then the ORANGE in the upper left corner over the Light Bridge so you can get on the bridge. Move the BLUE to the opposite end of the Bridge and then the ORANGE on the far left in the middle. Go through the BLUE to get down to the button. Hit it and a Cube will fall. If you placed the ORANGE right there will be a Cube on the Bridge. Go back through the portal and back on top move the ORANGE to the lower front so that you can walk over to the switch and you are done.
Puzzle 13
Turrets! You start off with a Turret facing away from you. Simply pick it up and drop it to destroy it. Creep around the corner and fire a ORANGE portal behind the next turret before it has time to lock onto you. Then put a BLUE on the wall at the start and safely walk through behind the turret.
Move around the next corner and fire a ORANGE portal below the turret on the ground to send him back to the starting area.
The next area has several Cubes and 2 turrets facing each other. Put a ORANGE portal on the ceiling above 1 of the turrets and then a BLUE underneath one of the Cubes to get it to fall and destroy the turret. Repeat for the second turret.
Finally head around to the next area and put a ORANGE under the one turret on portable flooring and then grab a Cube and just ram the other 2. Place the Cube on the switch and move on to the next puzzle.
Puzzle 14
Very simple room to introduce you to relays. You need to redirect the beam so that it lights up all 3 relays.
Grab the Cube and redirect the beam so that it paces through 2 of the relays. Then place a ORANGE portal at the end of the beam and a BLUE portal so that the beam comes out and passes through the 3rd and final relay. Easy peasy.
Puzzle 15
Start by placing a ORANGE portal to the far right of this sideways light bridge. Then go around the corner and place a BLUE on the wall so that the light bridge comes out and blocks the next turret.
ACHIEVEMENT TIME:
Pturretdactyl -- 5 -- Use an Aerial Faith Plate to launch a turret
Walk through the ORANGE and pick up the Turret. DON'T DROP IT. Carry it quickly past the next line of turrets to the far end of the room and drop it on the Faith Plate. Achievement unlocked.
Now place a BLUE portal on the high left 4 squares so the bridge extends out. Now step on the Faith Plate and the bridge will stop you and leave you on the top platform. Now carefully move back to the right where the 4 turrets surround a Cube. Drop down and eliminate the 4 turrets and grab the Cube. Place it on the switch in the middle of the floor.
Move left quickly as a set of turrets will now appears as the walls move. Fire a ORANGE portal behind the turrets and a BLUE near you and walk through to move on.
Puzzle 16
Walk into the room and step on the switch to activate the beam. A BLUE under the beam and a ORANGE on the far right wall behind the glass so that the beam hits and destroys the 3 turrets back there. Then pass through to get the standard Cube. Place it on the switch so the beam is on and then use the Redirection Cube to destroy the next set of turrets. Finally aim it at the receptacle to make a path to exit the area.
Puzzle 17
Place a ORANGE at the end of the bridge and then a BLUE down with you so you can walk through and get the Cube. Place the BLUE now on the far right so that the bridge extends under the receptacle. Block the beam with the Cube making sure that it is above the switch and then drop down and get on the movable platform. Now move the BLUE so the Cube drops and your platform rises. Done and Done.
Puzzle 18
When you come out into the puzzle chamber you'll be looking at a light bridge pointing to the ceiling. Put a ORANGE portal on the far back right and a BLUE underneath yourself so that you can jump over there. Now we need to place a ORANGE on the top of the Light Bridge and a BLUE on the top of the far left ceiling. This is to create a wall for when the Cube falls. Now hit the button and if you placed the portals right the Cube will hit the wall and land into the main area somewhere.
Place a ORANGE on the far wall by the cubes and a BLUE near you and travel back to the starting side. Watch out for the turret and grab one of the cubes. If its traveled too far to get safely simply put a portal underneath it and one near you to bring it you you. With the cube in hand go to the far back side near the entrance. Again, use portals to move if you have to stay away from the turret. First use the Cube to redirect the beam into the turret and destroy it and then redirect the beam through the two right relays.
Now go grab the other Cube and place it at the far end to redirect the beam one last time into the last relay. Finally put a ORANGE on the top of the bridge and a BLUE to get you over to the Exit.
Puzzle 19
So we have a LOT of relays to light up in this puzzle. Start by looking to the high right and you'll see a Cube up on a single platform with a portalable ceiling. Throw an ORANGE up there and the drop down and put a BLUE on the floor and drop through getting the Cube.
Now we need to take the the Cube to the back right from the perspective of starting the level. So place a ORANGE up there and drop through the BLUE with the Cube. Now line up the beam to the first relay across the way.
Now we have to fling the next Cube, which is located right on the ground floor, over to this first relay area. Leave the BLUE on the ground and place the ORANGE in the far straight middle above a Faith Plate. Drop the Cube into the BLUE and then look hard right and place a ORANGE so that the Cube will fling over to the first relay area. Repeat the process to get yourself over there also. Now line up the Cube with the next relay which is located in the starting area.
Drop down again and we are going to do another double move fling to get the final Cube which is high to the right of the starting area from our current point of view. So leave the BLUE and again place the ORANGE over the Faith Plate. As you come back through the BLUE place a new ORANGE on the top right corner so that it flings you into the Cube.
Put a ORANGE on the ceiling at the starting area and take the Cube with you to and redirect it to blow up all the turrets at the Exit and then aim it at the receptacle.
Now one final fling from the ORANGE above the Faith Plate to a ORANGE on the top right wall and you'll be at the Exit.
Puzzle 20
This is a small room where you need to use Redirection Cube and Portals to light up 3 receptacles from 3 beams.
Start by placing a ORANGE portal on the wall where the far left beam hits the wall. Now place the BLUE on the small column in front of the 3 receptacles and that will light up number 1.
Go grab the Cube that is currently reflecting a beam and place it in the stream of the next beam to go through the ORANGE and hit another receptacle.
Finally grab the last CUBE and redirect the stream that is going down from the ceiling to the ORANGE and that will hit the last receptacle.
Puzzle 21
Place a BLUE at the end of the Light Bridge and then an ORANGE on the top left by the button. Walk through the BLUE to get up there and hit the button. A Cube will fall, but so will you as the test chamber is shut down. Wheatley will come out and open a panel so that you can escape the room.
ACHIEVEMENT TIME:
SaBOTour -- 10 -- Make a break for it
You'll get this achievement for starting to escape.
ACHIEVEMENT TIME:
Good Listener -- 5 -- Take GLaDOS' escape advice
As you are running through the interior of the building GLaDOS will tell you to come back to one final test chamber. It will be a wide open area on the left. Go over there and frankly she will kill you but you'll get the achievement and will respawn just before this area so no problems.
After doing that follow Wheatley to a small room with some turrets. Take them out and then portal your way past the room by using a small opening on the panels to see a far portable wall. Then just follow the walkway to end the chapter.
Turret Lines
The door won't quite open all the way at the start of the area so portal on your side and portal on the far side equals moving on.
Continue along the path listening to Wheatley until you get to a turret construction line. Don't go down the stairs, instead go left and jump over the to the construction line.
Continue along the line dodging some moving panels and the lasers that are creating new turrets to shoot bullets at you.
You'll get to a series of tubes that are moving Cubes. At this point look up and there will be a portalable area behind a railing. So ORANGE and BLUE your way up there. Now you are going to be going back and forth across the gap as Wheatley shows you where the next portables walls area.
Finally you'll come to a lighted area with a big tube in the middle. Simply drop down box to box until you land on the tube and then walk that around in circles until you get to the bottom.
The Scanning Area
When you get to the next turret conveyor area put a ORANGE above in and a BLUE right behind you to jump onto the line. At the other end hop on to the vents until you get back to the next conveyor line.
ACHIEVEMENT TIME:
No Hard Feelings -- 10 -- Save a turret from redemption
This second line will have a good cream colored turret in with all the junk. Just pick it up to get the achievements.
Now at the end of the line jump down the series of boxes on the left to get to another walkway.
Continue around to a turret test area. Put a ORANGE at the end of the hall and then a BLUE inside the room to drop in behind the protective wall. Wait for a defective turret to come by and then place a new ORANGE on the far safe area and a BLUE on the wall the turrets are aiming at (which is why we wait for a defective one to come) and walk through to safety.
ACHIEVEMENT TIME:
Scanned Alone -- 5 -- Stand in a defective turret detector
You'll work your way around to a control room and Wheatley will tell you to remove the current turret. Once you do, take it's place and you'll get the achievement.
Now go back out into the main area and catch one of the bad turrets being throw from the line. Take that back to the scan area and then Wheatley will open the door and you can move on.
End Section
Big Door
Walk through the area until you come to a mesh fence. Throw a ORANGE up high and a BLUE by you and walk through to the other side. Just drop down from this walkway and follow the path. You'll come to a series of door. Throw a ORANGE in your area and then the BLUE high up to the right under a large 09 and walk on through. Keep following the path and you'll come to a lever you need to throw.
Now you need to use both security stations one right after the other. So stand in the left most station and put a ORANGE portal by you and a BLUE at the other station. Then hit the button, walk through the portal, and hit the other button. The door will open and you can continue on.
Welcome Center
Keep heading over the ground until you get to a door that is a jar. You can put a ORANGE inside and a BLUE by you outside to move on. Pull the lever to open the door and move on.
After you go through the welcome center move to the far back right and place a portal high on the back right and then one low by you and walk through to get to the top area. Move out on the grid and pace a BLUE on the angled piece below you and then drop and place a ORANGE on the flat ground at your feet. This will fling you through the sign and into the next set of offices.
ACHIEVEMENT TIME (PART 1):
Door Prize -- 20 -- Examine all the vitrified test chamber doors
Continue along until you get to a elevator shaft. Place a BLUE on the wall near you at the top of the elevator and an ORANGE at the set of doors in the distance. Listen to all 3 intercom conversations for Part one of the Door Prize Achievement. Then BLUE the wall and get yourself back to the elevator shaft.
Now place a ORANGE on the angled piece above the 3 doors and walk down a level to the open elevator shaft. Jump in and BLUE the floor before you hit to fling you over to the next area.
Pull the lever and come out to the stairs. Throw a ORANGE way up high at the top catwalk and a BLUE down the stairs and walk through. Walk down the pipe to the elevator.
Alpha - Puzzle 1
Time for fun with Repulsion Gel. Repulsion Gel is a bouncy substance and it will allow you to get to higher places then you normally can. First off bounce to the other side. Then look up right and place a ORANGE, with a BLUE down on your level and walk through.
Now make an angled bounce to get to the far side. Hit the button then jump down and retrieve the cube. Use the last two portal to get the Cube up to the switch and then jump over to the far side again and exit.
Once out of the chamber you need to throw a portal high up to get to the next area.
Alpha - Puzzle 2
Start by place a ORANGE back behind the Repulsion Gel. Then the BLUE on the ceiling in the right hand corner. Then jump through when the platform in underneath. Grab the Cube and then drop down to the main floor. Place a BLUE behind and to the back of the high platform with the switch and then jump through the Repulsion Gel again and put the Cube on the switch.
Place the next BLUE in the single portalable area in the high right. Then jump through landing on the Repulsion Gel and get to the high left area with the field.
Bounce back and forth left to right and get the cube up here. Then jump back and place it on the switch before going back to the first room.
Place a BLUE in the high left and a ORANGE on the small wall across the area. Bounce through the ORANGE and fling out the BLUE onto the Replusion a second time to get to the Exit.
Alpha - Puzzle 3
Drop down and go across the small girders in the water to the area with the tall columns. Look up high to a small area that is lighted and place a ORANGE portal up there. Then there is a small wall at the base area for the BLUE. Look into a small area to the side and portal over there to the next puzzle.
Place a ORANGE on the X on the floor where the Gel is going to fall. Press the button and then place a BLUE on the second floor, then a second BLUE on the ground floor to create a series of Repulsion jumps.
Then jump over to the opposite side. Create a new BLUE on the floor and then has a ball of Gel pops through, move the BLUE so the Gel coats the floor and jump up another level. Now put a BLUE on the angled wall to send some GEL over the the right side. Now move the ORANGE to drop to the floor and fling out angled and hit the Gel and get to the Exit.
ACHIEVEMENT TIME:
Vertically Unchallenged -- 15 -- Master the Repulsion Gel
You'll get this when you finish the puzzle.
Alpha - Puzzle 4
Put a ORANGE where the Propulsion is dropping and a BLUE under the button. Once some Gel comes out move the BLUE so that the Gel coats the area. Now put the ORANGE on the back little wall. Use the Gel to jump and hit the button. With the water off you can bounce up to the Exit. Easy.
Alpha - Puzzle 5
Start by simply portaling yourself to the high area in the rafters. Now looking back down at the main area put a ORANGE on the angled piece and a BLUE under the Gel. This will coat the opposite wall. Now drop off and place a BLUE beneath you to fling out the angled piece into the Gel and back up higher.
Go up the stairs and out on the small catwalk looking back at the main starting area. Put a BLUE under the Gel again and then a ORANGE in the high far out left side. Then drop off and use the ORANGE to fling into the other Gel again.
Go around and put a portal on your level and one directly above to get to the high catwalk. Then leave on the elevator.
Alpha - Puzzle 6
ACHIEVEMENT TIME:
Schrodinger's Catch -- 20 -- Catch a blue-painted box before it touches the ground
Save right away in case you miss this achievement. Put a BLUE under the Gel and then a ORANGE above the Cube. The Cube will will start busting around and eventually break the glass. Try to grab it before it hits the ground for the achievement.
Wash it off in the water and then place it on the switch.
Move the ORANGE to the floor under the elevator and create enough Gel to bounce up to the elevator. Then ORANGE over the Cube to get the Cube to bounce off so the elevator rises up and you can exit.
On The Way To Beta
Place a portal at the far right under the 1971 and then back into the hall to place another and move through. Push the door open and another place the a high portal on a catwalk and one on your level to move on. We seem to be doing that alot.
Place a BLUE below you and then a ORANGE on the other floor area and jump in. You'll bounce back and forth between the two. Keep track of which color you are coming out of and place the opposite on the high single wall to fling into the next area. Pull the two levers and the next door will open.
Elevator To Beta
Continue on until you get to a wide open area. Drop a BLUE on the floor and a ORANGE very high up on the catwalks. Head into the small office and get to the back left door that is slightly hidden.
ACHIEVEMENT TIME:
Door Prize -- 20 -- Examine all the vitrified test chamber doors
The final three doors are back here. Listen to all 3 doors.
ACHIEVEMENT TIME:
Ship Overboard -- 10 -- Discover the missing experiment
Then continue on to the next hall and check out the life preserver.
Then work your way back to the main open area. Place a BLUE on the first angled wall to the left and then drop and place a ORANGE on the floor to fling over to the next office.
ACHIEVEMENT TIME:
Tater Tote -- 15 -- Carry science forward
Go inside and get GLaDOS and then back to the high catwalk. Put a BLUE high above your current spot in the back and then drop and place the ORANGE and fling to the elevator. Chapter complete.
Beta Puzzle 1
As we come into the room we want to get to the high left. So place a ORANGE on the ceiling above it and a BLUE on the ground floor and walk on trough. BEFORE hitting the button place a BLUE beneath the pipe and a ORANGE to the starting area low so that when you push the button the Propulsion Gel makes a long path. Now just drop down and run forward on the Gel to get to the far side.
Place a BLUE on the next target just around the corner to the left. Now place a ORANGE above the button area. Walk through and move the ORANGE to below the pipe again and push the button. Now the far area will be coated. Run over the both tracks of Gel.
Now place a BLUE inside with the Cube and a ORANGE on the outside and walk in and get the Cube. Now move the BLUE to the previous section and walk through with the Cube to get back there. Now one more BLUE all the way back and take the portal and place it on the switch. That will raise the ramp and now you can run to the Exit area.
Place a ORANGE so that it is across from the button. Now back to the start and run from the top of the ramp through the BLUE and hit the Button up high. Now you can exit.
ACHIEVEMENT TIME:
Portrait of a Lady -- 10 -- Find a hidden portrait
Before enter the next area look for a portalable wall up high and throw a portal in there. Use one on the ground level to get up and and then check out the picture on the wall for the achievement.
Now you can move on.
Beta Puzzle 2
Look out and place a BLUE on the middle of the column. Then a ORANGE under where the gel will fall. Hit the button and coat the area in Propulsion Gel. Now look up and move the BLUE to the one ceiling tile, place a the ORANGE under the Repulsion and hit that button. Now run jump to the center column.
Go around the other side and place a BLUE down low and a ORANGE up high and move out onto the top catwalk. Place a BLUE as high as you can on here and then a BLUE back at the start and go through. Now move the BLUE to the center of the column so that when you hit it you will fling out the far side.
Beta Puzzle 3
Move through the area until you get to the main puzzle area. ORANGE under the Blue Gel and then place the BLUE on the far top right angled piece. Now move the BLUE to the Propulsion Gel and move the ORANGE to the below the angle to coat the flat part. Now move through.
Keep the ORANGE on the flat bottom but put the BLUE on the top angled and run through from the far side to fling over to a new area.
You can just see it from here but put a ORANGE on the floor of the far left area and a BLUE under the Repulsion Gel. Pick up the Cube and drop down a level and then portal over the that left area and place the Cube on the switch to rotate the plate. Now portal back to the main area and look to the high left. Place a ORANGE portal up there behind the angled piece and then the BLUE on the Propulsion Gel to coat the ramp. Now get yourself back to the Propulsion Runway you made at the beginning. Look up to the left and replace the BLUE up by the angled piece and a ORANGE down below and run through to the Exit.
ACHIEVEMENT TIME:
Stranger Than Friction -- 15 -- Master the Propulsion Gel
You get this achievement for finishing the puzzle.
Gamma Entrance
Just keep moving through the areas using some very basic portals to get from your low location to some high locations until you get to a control room. Throw all 3 switches and then to keep from getting smashed throw a portal after the catwalk and one by you to get through.
So this new White Gel that is covering everything allows you to place portals on previously non-portal walls. Start by placing a BLUE on the ground in the white and the ORANGE up high on the broken catwalk. Now jump into the Repulsion Gel to get to the other side.
Now this top room is covered in Propulsion Gel is run past the smashing bits to get to the other side and move on to the Exit.
Gamma Puzzle 1
So there is a stream of White Gel spewing everywhere. Where you want to get it is past the mesh fence area on the right. Put a BLUE under the Gel and a ORANGE just everywhere until that side is covered and move your way over there. OK now that you are on the other side you need to get the White Gel to move up between the two columns by moving the ORANGE portal back and forth until it coats the right top. Then portal yourself up to the top.
Place a BLUE on the angled piece to your bottom left and then fall off the top and ORANGE beneath you to fling over to the Exit.
ACHIEVEMENT TIME:
White Out -- 15 -- Complete the first Conversion Gel test
Elevator Shaft
So this is a large elevator shaft filled with white walls. We want to cut off as much as we can so zoom into the highest point you can see and place your portal. Then one by you and walk on through. Keep moving up until you reach the actual elevator car. Place a BLUE inside the elevator car and then fall off to place a ORANGE before you go splat. This will fling you up to the top point. Place a BLUE on the angled piece and drop back down to the ORANGE below to get to the Exit.
Open Spaces
First off place a ORANGE up high on one of the columns and a BLUE on the floor and drop on up. Look up to the top right and fire a ORANGE on the angled piece above the door and then drop BLUE into the floor to fling over.
Now we need to keep the one on the angled piece and put a BLUE under the Repulsion Gel to coat the top angled piece and do another drop from distance to the floor and through a quickly placed BLUE to launch into the Gel and back higher.
Now place a ORANGE on the ground at this new high area and do another drop. As you come out this top ORANGE straight up, fling a BLUE into the even higher area to land in there. From here you can just walk over into the Exit.
Gamma Puzzle 2
First up a BLUE under the While (Conversion) Gel and then the ORANGE on the ceiling at the far side to cover that wall in Gel. Then put the BLUE on the bottom of the column and the ORANGE under the Propulsion Gel. Move the BLUE back to the top angled part and run, then jump into the ORANGE and up out of the BLUE.
At the back of this top area put a BLUE on the bottom and the ORANGE under the White Gel to get the top pipe coated. Then Move the ORANGE to the top and the BLUE to the Repulsion Gel to make a Blue floor and run through the runway again.
The Pipe Area
As you come to a area with White Gel falling down throw a ORANGE put through the mesh to where the Gel is coming from and the BLUE on the ground and walk on through. Walk into the central pipe area and throw the ORANGE up on the angled piece behind the mesh. This will start coating the area with White Gel. Now that the whole place is coated throw a ORANGE up to the highest area you can and go through. The top is covered but of course there is a white area to drop a portal on so you can go through.
In this large area there is a white wall below a light high up. Then of course there is a place down below for you to go through. Go to the opening on the catwalk and look down. White flooring. Time for a fling. Look to the top right and place a BLUE there, then drop down and put a ORANGE underneath you. Hit the hatch override button and a platform will lower. Simply drop down and go up the stairs to exit the area.
Puzzle 0
You'll come to a small office overlooking the “first” puzzle. There is a broken vent that you can look through to place a portal to the next area. Just follow the catwalk and pick up the Turret Cube and place it on the switch. Easiest puzzle ever.
Puzzle 1
ACHIEVEMENT TIME:
You Made Your Point -- 10 -- Refuse to solve the first test in Chapter 8
When you get to the button don't do anything for awhile. Just listen to Wheatley and eventually you will get the achievement.
All you have to do is press the button and portal over. Easy.
ACHIEVEMENT TIME:
Dual Pit Experiment -- 15 -- Do the same test twice
Wheatley will want you to do it again so do back and press the button and portal over. Done and done achievement unlocked.
Puzzle 1.5
ACHIEVEMENT TIME:
Smash TV -- 75 -- Break 11 test chamber monitors
There are one or two monitors in each of the Wheatley levels from here on out. You need to smash ALL of them. If you die or restart make sure that the TV is smashed still or you won't get the achievement.
TV #1 - Put a BLUE at the top of the rising spiral and a ORANGE on the ground floor near the Monitor and rise until you are on the ceiling on the main room. Place the BLUE on the wall high and opposite the Monitor. It will drop you through and fling you into the Monitor. Listen to all the Wheatley conversations as they are hilarious.
Now back to the puzzle. Put a BLUE on top of the tunnel again and then a ORANGE to the left so it takes you over to the Turret Cube. Grab the Cube and take it down to the floor. Now place a ORANGE portal on the checkered part on the floor and then drop the Cube into the tunnel and it will rise through to the switch and open the Exit.
Puzzle 2
Drop into the tunnel and place a BLUE at the end and a ORANGE at the far right. As you come to the next wall move the ORANGE to drop you into this new tunnel which will take you the end. Look down and place a new ORANGE and that will rise you to a high platform that you need to walk out of.
TV #2 - Place the ORANGE on the across section of wall and hit the button. That will bring the Cube to you, but you still need a ORANGE on the floor to rise it up to you. Now place the BLUE on the top right across from the Monitor and the Cube will be flung into it.
OK. Get yourself a new Cube and pull it from the stream. Place the ORANGE on the floor here with the Cube and it will rise up and hit the switch and you can Exit.
Puzzle 3
TV #3 - Drop yourself into the stream again. Place BLUE at the end and ORANGE at the top right. This will move you along the roof. Place the BLUE above and across from the Monitor and then the ORANGE quickly on the floor as you fall and you'll get flung into the Monitor.
Place a ORANGE on the back right corner and then BLUE on the end of the stream so you can travel to the far side.
Put a ORANGE on the left side wall and hit the button. The Cube will drop into the stream and take it to the left. Now place the ORANGE on the far right again to bring the Cube to you.
Place a ORANGE on the far back left and then Faith Plate into the stream with the Cube in hand and then drop out into the main area. Place the ORANGE on the floor and then move the ORANGE to the lower middle area across from the Exit again, with the Cube. It will hit the switch and you can move on.
Puzzle 4
TV #4 - You have to get behind the Turret and grab it. Then move it out in front of the Monitor and carefully put it down so it stays up. It will shot the monitor and then you can drop it off into the void.
Now place a BLUE to the left of the far cube and the ORANGE on the opposite of the tunnel. Then step on the switch and stay there until the Cube is at the far left and let it get all the way to the start. Move the BLUE to the far wall and the Cube will comes to you. Place it on the switch and drift back to the opposite side. Place the ORANGE behind the cube so that it pushes the cube off the switch. Now place the ORANGE on the floor in front of the Exit and climb up to the Exit.
Puzzle 5
Put a BLUE at the end of the tunnel and then a ORANGE on the middle so the stream is going straight up. Then use the Faith Plate to fling yourself into the stream. Move the BLUE to the far angled wall and you'll drop down and fling to the right.
TV #5 - Now that you are by the button restart the stream in the middle of the chamber. Hit the button to drop the Cube into the stream and then move the BLUE to the far right angled wall again and the Cube will fling into the TV.
Then just place the the Cube on the switch and move on to the next area.
Puzzle 6
TV #6 - Just step onto the Faith Plate and it will fling you into the Monitor. Easy peasy.
Put a BLUE on the end of the Force Field and then the ORANGE on the left wall about halfway down so that it faces you. Hit the button and the cube will be flung into field and hopefully drop to safety. Portal down to get it. Don't just drop down as there are Turrets covering that area.
Now put the Force Field across the face of the Monitor so and Fling yourself with the Cube up hitting the field so that you land on the catwalk. Now move the BLUE down into the Turret area to cover yourself. Drop down the back area with the Cube, careful not to hit the field or the Cube goes bye bye, and place it on the switch. Then portal out.
Place the field across the monitor again and Faith Plate up there and Exit.
Puzzle 11
As always with the Wheatley puzzles you need to fire a BLUE at the stream. Now fire an ORANGE at the floor square and rise yourself to the ceiling. Look for a small square on the wall and fire the BLUE there so you drop into the ORANGE and are flung across to the Cube.
Drop down with the Cube and take it all the way to the lowest level and use the Cube to block the beam. Then portla your way back to the main level.
Now place a ORANGE on the angled piece by the Monitor and the BLUE on the angled piece in front of the Faith Plate and launch yourself through.
TV #7 - Grab the redirection Cube and take it all the way down to the lowest level with the beam. Redirect the beam to the wall and then put a BLUE portal at the beam's end. Now get back to the main floor and put the ORANGE put at the Monitor's level. You may need to tweak positioning at the lowest level until it hits the Monitor and destroys it.
Once the Monitor is destroyed move the Cube onto the square below the switch on the main floor area and then put the BLUE opposite the receptacle on the ground in the back and redirect the beam so that it hits the receptacle. Go stand on the platform below the Exit and move the BLUE so the beam doesn't hit the target anymore. Then put the BLUE under the redirect so that it falls out and the stream starts again. Then put the BLUE under the stream and the ORANGE under the Cube so it raises and hits the switch.
Move to the back platform and cut the stream to drop the Cube and raise yourself to the Exit.
Puzzle 12
So this puzzle is all about starting and stopping the beam. Put a ORANGE at the place the beam hits the wall. Then put the BLUE on the wall in the starting area across from the receptacle. This will move the platform. When the platform is at the far left side, remove a portal so the platform stops. Then portal yourself over to the platform.
Re-establish the link until you hit the wall and part of the platform is through. Then move the ORANGE to the top middle to hit the other receptacle that opens the wall. Now move over the the other half past the wall and connect the lower receptacle again by moving the ORANGE.
At the end drop down and move the platform all the way back to the other side and hit the button to drop a Cube. Now portal yourself over to the platform with the Cube.
TV #8 - Move the Cube and yourself back above the button. Move the ORANGE to the square that is on your level on the left so that a beam is coming at you and you can use the redirect to hit the Monitor.
Then angle the beam to the receptacle on the opening area wall. Portal over and re-establish the beam so the the Exit opens. Jump into the tunnel and Wheatley will give you a quick tour.
Puzzle 15
Hit the button and a Cube will fall on the the glass ledge. Step on the Switch and the tunnel will start flowing. ORANGE on the top and then BLUE on the left to push the Cube to the right. Move the BLUE to under the platform on the far side so the Cube falls into the tunnel and comes back to you. Now replace yourself on the switch with the Cube.
TV #9 - Time for another fling. Put the BLUE on the ceiling and the ORANGE on the floor in front of the Monitor. When you get to the height of the ceiling, move the BLUE to across the Monitor and drop back into the ORANGE and fling across to destroy the Monitor.
Grab the Cube and move to the small hole on the back wall. Portal in and place the Cube on this new switch and then leave back to the main area.
In the main area again step on the switch to make the tunnel work. BLUE on the roof and ORANGE on the back square so that the Propulsion Gel is brought into the tunnel. Wait until it is over the entire area step off the switch so that it falls down and covers the entire path and the ramp.
Then back into the small area to get the Cube and place it back on the main outside switch. Place a ORANGE on the ceiling and then look past the ramp to the far right and place a BLUE so that the tunnel moves from right to left across the middle. Now run up the full length of the ramp and into the tunnel and to the Exit.
ACHIEVEMENT TIME:
Tunnel of Funnel -- 15 -- Master the Excursion Funnel
Puzzle 16
So Wheatley has lost it. The chamber is ripped apart in front of you but there is White Gel on your floor and the far ceiling so portal over to the entrance.
Move yourself to the far side with the button. Put a ORANGE at the end of the tunnel, then the BLUE in the back behind the pipe. Hit the button and Repulsion Gel will fill the tube. Move the BLUE right away so that the Repulsion falls on the small front area on the bottom where you are.
Redo the whole thing again only this time use the Repulsion Gel to jump into the stream ahead of the Repulsion Gel. Now drop out at the starting area and get on the Switch. This will reverse the stream. Wait for it to get back to the main section of the tunnel.
Now get off the switch and quickly move the BLUE to the back section where the turrets are. Now SAVE! You need to move the BLUE so that the Gel falls and hits 2 of the 3 turrets. We need one left to destroy the Monitor.
TV #10 - This is a little tricky. Place the ORANGE at the end of the tunnel but do it to one side so that the tunnel doesn't actually go through. Put the BLUE on the ground and drop into the tunnel. Now look to the far right and put the BLUE over there, then move the ORANGE to the middle so that you actually move on now. Then drop out the tunnel and quickly grab the Turret. Take it out to the main area and put it down to fire on the Monitor.
ACHIEVEMENT TIME:
Smash TV -- 75 -- Break 11 test chamber monitors
If you've done them all correctly the achievement will pop.
Now hit the button it will angle a wall piece in the main area. Put the BLUE on the end of the tunnel and a ORANGE beneath you to rise you to the ceiling. Then move the BLUE to the angled wall piece and it will fling you over to the Exit.
Big Time Danger
Hit the Faith Plate and SURPRISE. A couple Plates later you'll be in a tunnel and finally in front of Wheatley.
ACHIEVEMENT TIME:
The Part Where He Kills You -- 20 -- That is this part
You'll get this achievement automatically.
Put a BLUE on the small leak of White Gel at the top and then a ORANGE on the angle. Your platform will be coated so quickly move the ORANGE to get out of the trap.
ACHIEVEMENT TIME:
Pit Boss -- 30 -- Show that pit who's boss
As you start to move away Wheatley will call you back. Listen to him and come back. He'll be surprised and ask you to just jump into the pit so go ahead. You'll get the achievement and then be loaded back into the trap to try again.
Continue along the path until you get to the end of the catwalk. Move a BLUE portal to the top highest wall square and then jump off and place the ORANGE on the ground to fling on over.
Wheatley will miss you with another trap so just portal around it and move on.
Lots of Turrets
With all the damage Wheatley has done you can't even get into the next puzzle on the catwalk. So Portal in and you'll fall right into the middle of a large number of defective turrets. Just walk out the door and drop on to the catwalk below.
Continue forward and you will come to a large group of turrets. Creep forward and place a ORANGE at the end of the tunnel. Then place BLUE one after the other behind the turrets to push them out into oblivion. Then jump into the stream to take you to the far area. Jump out before going into the grinder FYI.
Place the portals in this next room so that you can ride the stream out the door. Then when Wheatley tries to smash you move the portal to the lower white to travel backwards away from the smashing.
When you get to the big area with all the turrets throw a ORANGE up to the ceiling to your left and a BLUE on the column right behind you. Stand on the switch and turn around and place a BLUE under the Gel. Then place one high on the right to coat and destroy all the turrets. Then portal over to the Faith Plate by the pipe top finish the are.
Bombs
When you get to the room with the button and the broken glass put a BLUE portal under the pipe and a ORANGE on the room on the wall with the glass. Hit the button and bombs will fall through the BLUE, out the ORANGE, and hit the White Gel pipe. Move the ORANGE to the floor and drop out to the catwalk.
Walk out onto the conveyor belt. Wheatley will start it up going the wrong direction so jump to the next catwalk. Drop a ORANGE beneath the pipes to the right and the BLUE under the Propulsion Pipe and hit the button for some more bomb action. Now move the ORANGE to the back of the conveyor belt to coat the belt and then run the length of the conveyor to get to the far side.
In the next room simply place the ORANGE at the back of the hallway to coat the area in Propulsion Gel. Then put the BLUE under the stream and run down the hall and get propelled into the stream. Drop out of the stream at the end and it's time to end this.
Wheatley
This final battle is actually very easy.
STAGE 1: First off run over to the White Conversion Gel pipe and wait for Wheatley to throw a bomb and blow the pipe open. Now place a BLUE on any of the high wall pieces and a ORANGE right at your feet. Wheatley will throw a bomb and it will hit him in the head. Now move the BLUE to the right wall piece by the catwalk. Portal up and grab the new Core and drop down and insert in into Wheatley.
STAGE 2: Now place the BLUE under Wheatley and a ORANGE at your feet. You'll hit him from the bottom. You'll then need to portal back to the catwalk and jump and use the Repulsion Gel to leap up and grab the next core. Then use the small spot of Repulsion Gel on the ground to place it on Wheatley.
STAGE 3: This time to need to make sure that the high ORANGE portal is behind Wheatley as he has protected his top and bottom at the front. Some Propulsion Gel will spew out all over the floor. Place the ORANGE at the back of the wall and the BLUE on the floor right next to it. Run through the ORANGE and into the air to get the final core.
A small fence area will open. Place a ORANGE in there on the ceiling and a BLUE under Wheatley and portal through. The ceiling will fall open and place the ORANGE ON THE MOON. Yes you heard me. Then just watch and enjoy the ending.
ACHIEVEMENT TIME:
Lunacy -- 20 -- That just happened
Credits Song


 10 Best Survival on Tatooine Tips and Ticks for Star Wars Battlefront Beta
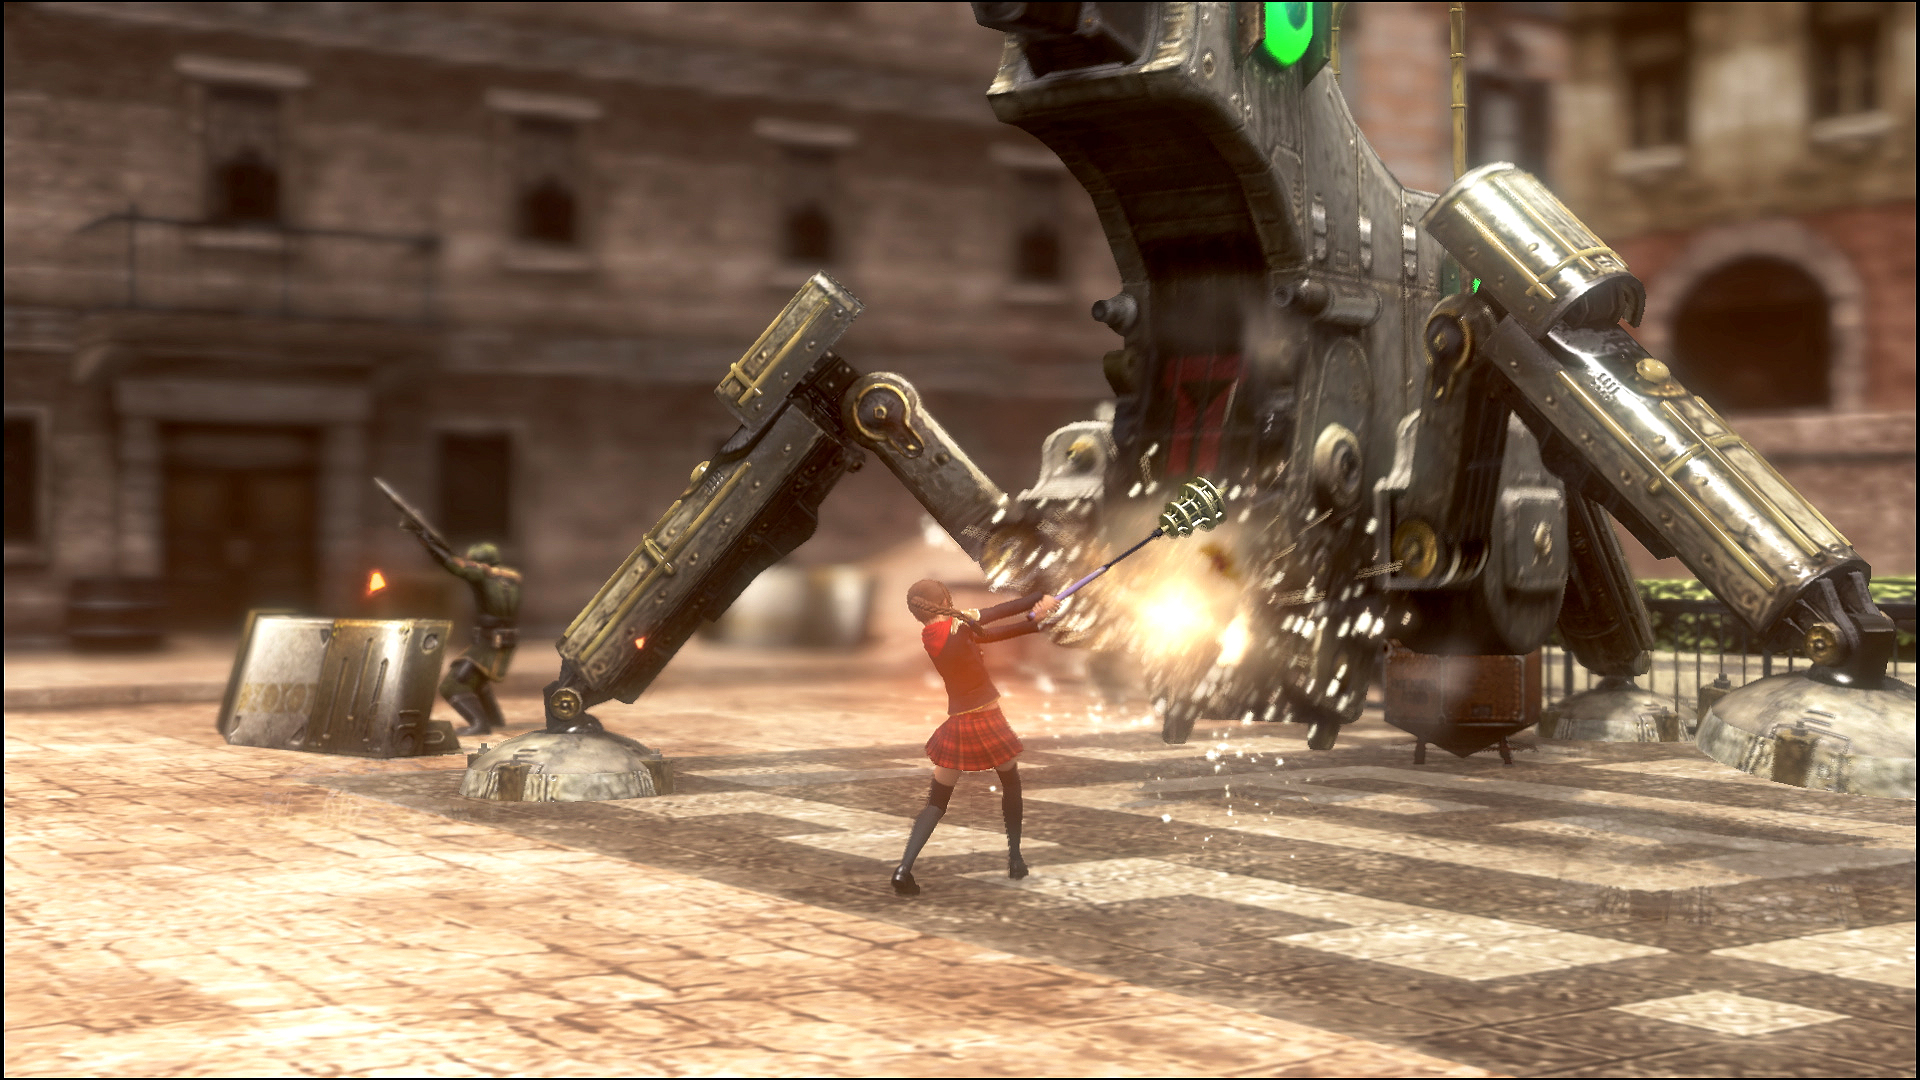
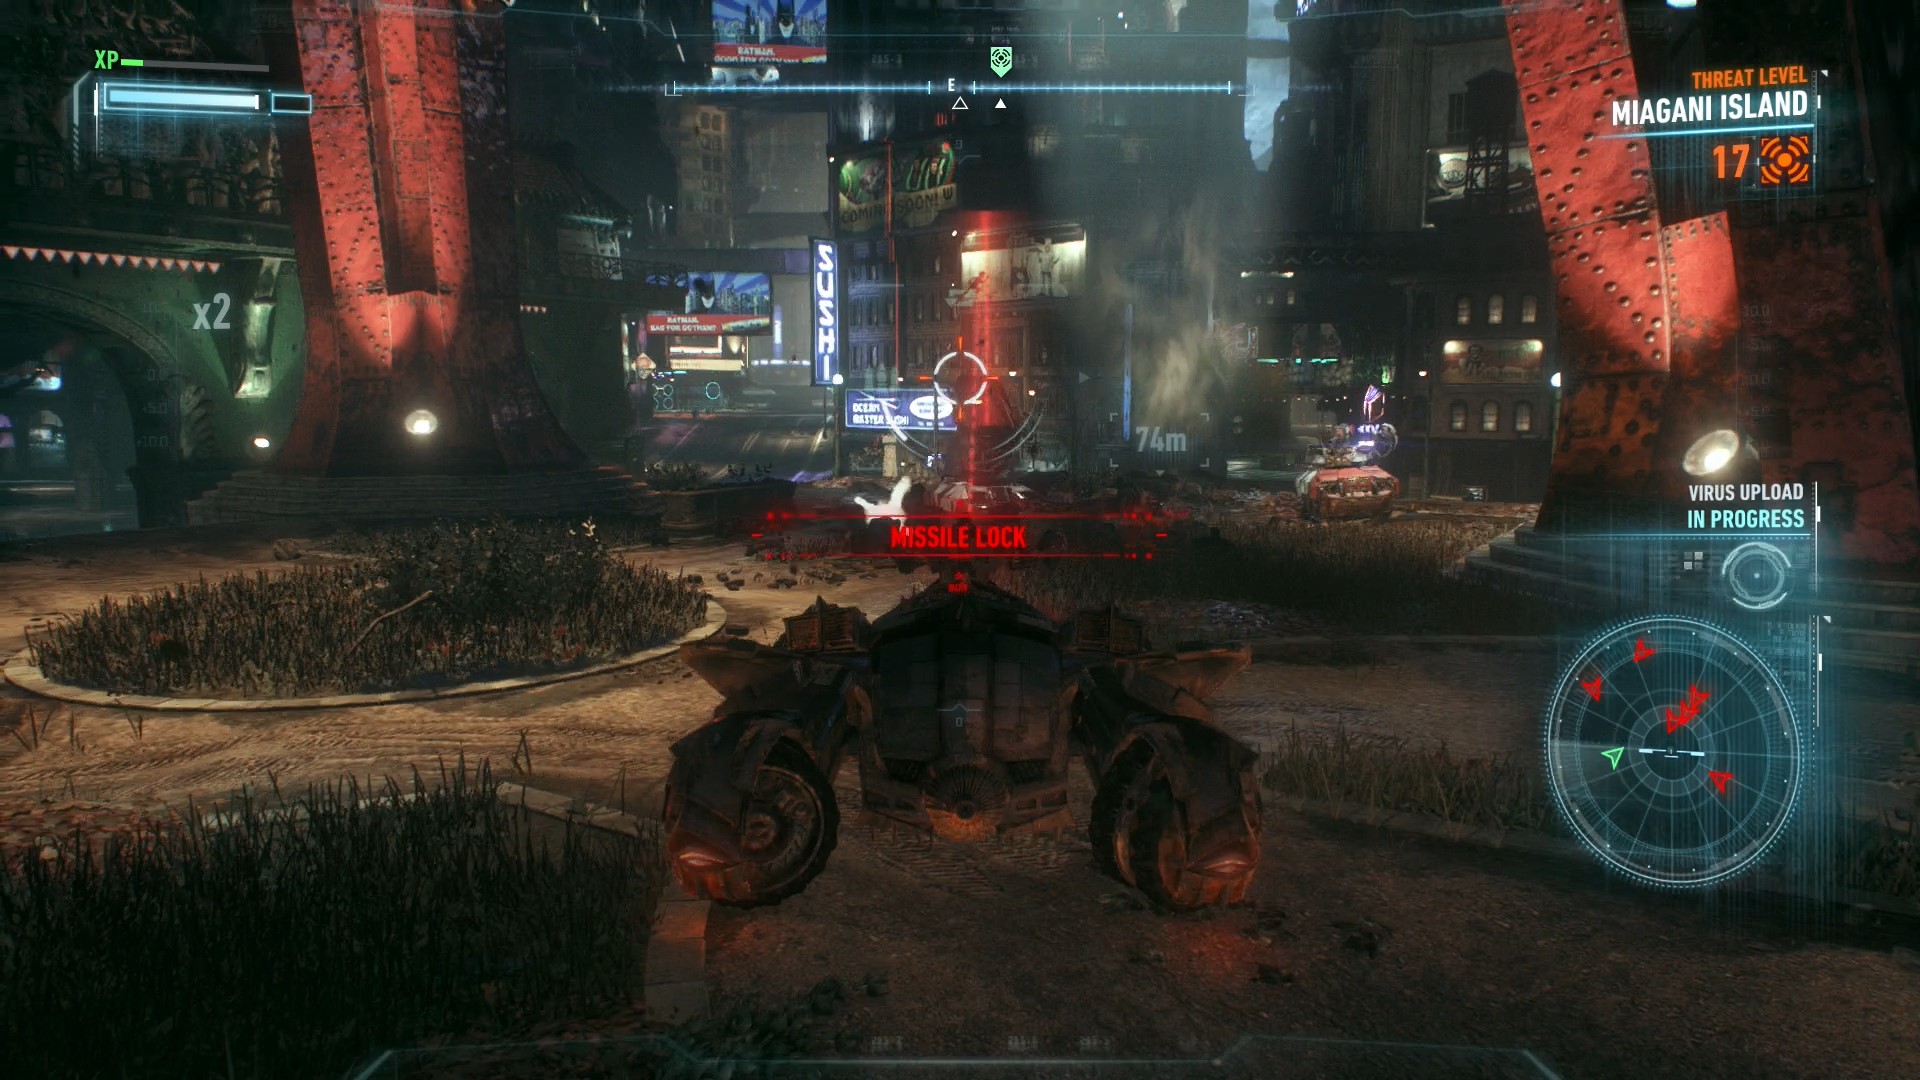 Batman: Arkham Knight - Gotham on Fire Locations and Walkthrough
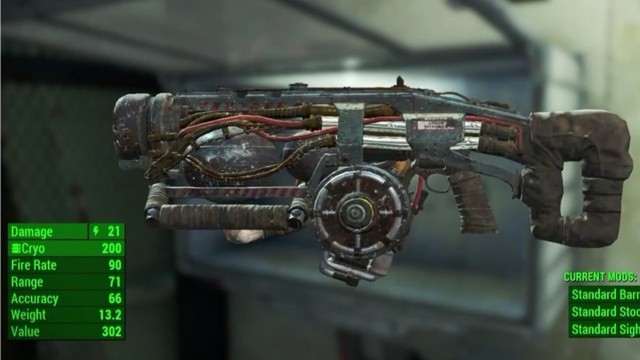 How to Unlock the Cryolator in Fallout 4
 Shovel Knight Review
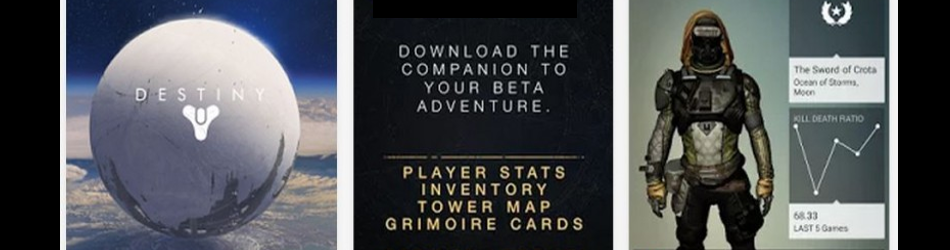 Destiny: Mobile Companion App Guide