Unofficial Monster Hunter Tri Guide by Michael Monette for
A terrifying sea monster threatens the very existence of Moga Village, a small, idyllic fishing town. As the only one in the village capable of accomplishing such a feat, you're tasked with ridding the waters of this terror. Before you can set out on a quest, you must speak to the Guild Sweetheart at the quest counter in the top-left corner of Moga Village. There are five tiers of quests in the offline mode, ranging from one- to five-stars. You must complete certain key quests in one tier and then an urgent quest to move up to the next highest tier. A quest will end as soon as you complete the main quest. You can complete subquests (if there are any) to earn additional rewards on the post-quest reward screen and additional supplies during the quest. If you're interested in completing subquests, be sure to do so before completing the main quest. There are three types of quests: hunting, gathering and capture. Egg carry quests are a bit different. Though a monster egg is placed in your inventory when collected, your hunter must literally carry the egg from the monster's nest back to Base Camp and deposit it in the Delivery Box. Your hunter is left very vulnerable while holding an egg. If an enemy hits you or your hunter's stamina reaches zero, your hunter will drop and break the egg. As such, you'll have to sprint past the monsters in each area on your way back to camp and avoid getting hit -- all while keeping an eye on your hunter's stamina bar. The Supply Box for any capture quest will hold an EZ Shock Trap, but it's always a good idea to bring an extra trap with you to avoid blowing the whole thing by setting your one and only trap at the wrong time. You can make a basic Pitfall Trap by combining a Spider Web and Ivy to make a Net and then combining the Net with a Trap Tool (buyable at the market) to make the trap. You can make a Shock Trap by combining a Thunderbug with a Trap Tool. There are six weapon types: Sword & Shield, Great Sword, Lance, Hammer, Long Sword, Switch Axe and Bowgun. The Lance is the easiest weapon type to use underwater, so definitely opt for one if you're having trouble beating Royal Ludroth, Gobul or Lagiacrus. Use a Whetstone to sharpen a dulled weapon. Be careful when using a Whetstone because the weapon sharpening animation is quite lengthy. This can become a big problem when there's a huge, scaly wyvern breathing down your neck. There are Mini Whetstones included in the Supply Box for each quest, but it's best to carry your own stock of Whetstones in your inventory at all times. Whetstones can be bought for cheap at the market in Moga Village. There are two classes of armour: Blademaster and Gunner. As you might expect, Blademaster armour is used by hunters who wield melee weapons (i.e., Sword & Shield, Great Sword, Lance, Hammer, etc.) and Gunner armour sets are worn by hunters equipped with Bowguns. Elemental resistances come into play when a monster uses one or more attacks that inflict elemental damage of a certain type. Most complete armour sets have one or more positive elemental resistance and one or more negative resistances. Take note of this when facing certain monsters, as wearing an armour set with a negative elemental resistance can make fighting certain monsters dangerous (e.g., facing Rathalos while wearing a full set of Gigginox Armor, which carries -20 Fire elemental resistance). There are positive and negative skill points. All of the skill points on the armour pieces your hunter is wearing are added up on a skill tree, which can be viewed in the Status section of the Info menu (third pane). There are many different skill trees (e.g., Health, Attack, Rec Speed, Expert, etc.) and each skill tree can activate one or more skills. These skills can be beneficial (e.g., Health 50) or detrimental (e.g., Defense Down (Small)). Decorations (see the Wyvern Artisan in Moga Village) can be slotted into individual armour pieces to increase the skill points gained from that armour piece when equipped. Not all armour pieces have empty slots, but some have one or more. As long as you're aware of the skill point thresholds, you can use Charms and Decorations to your advantage. Whenever you equip your hunter with a brand new set of armour, check your hunter's skill tree via “Status” on the Info menu and note the skill points and active skills displayed there. If there are negative skills (red) in the Active Skills box, determine the amount of negative points in that skill tree and see if you can't deactivate the skill by equipping a Charm or slotting one or more Decorations in the empty slots on your hunter's armour set. Stamina is represented by the yellow bar below your hunter's green health bar at the top of the screen. You use up stamina gradually as you sprint and each time you block or use an evasive manoeuvre. It's important to keep your hunter's stamina bar at its maximum length. A small stamina bar could lead to a disastrous outcome, such as your hunter being unable to sprint away from a charging monster, or a monster breaking through your hunter's guard. A hunter whose stamina bar depletes completely when sprinting will stop to catch his or her breath for a few seconds. This animation leaves your hunter completely vulnerable, so cease sprinting whenever your stamina bar is in the red and your hunter is stumbling about. To cook a Well-done Steak, you must press the A button while the steak is golden brown to take it off the spit. The meat will turn golden brown about two seconds after the tune stops. You'll get a Rare Steak if you're too quick and a Burnt Steak if you're too slow. It may take a few attempts to get the timing down, but with a little practice you'll be able to cook Well-done Steaks consistently and with ease.
This guide will take you from a wet-behind-the-ears hunter to an Elder Dragon-slaying legend. You'll find a complete walkthrough covering the offline mode, packed with tips for taking down even the most ferocious of monsters you'll encounter in the field. Also included is a guide to fulfilling every villager request, unlocking all of Cha-Cha's masks and a complete list of item combinations. If you're new to the series, you'll surely find the primer section a big help.
Note: Any controls mentioned in this guide refer to the Classic Style 1 and Classic Style 2 controller patterns using the Classic Controller or Classic Controller Pro. Monster Hunter Tri is playable with the Wii Remote and Nunchuk combo, but if you plan on following this guide (and reaching a higher level of play) it is crucial you use either a Classic Controller or Classic Controller Pro.
The Basics
Questing
After speaking to the Guild Sweetheart, enter a tier and select one of the quests listed to bring up an information pane. Look at the top of the pane to determine the main quest objective and the bottom of the pane to determine the objective of any subquests. You'll also find listed the map the quest takes place on, the amount of time allotted for the quest, the monetary reward for completion, the quest fee for accepting the quest and the condition of the quest environment.
Once you've accepted a quest, you can set out by heading to the end of the pier through the gate to the left of the quest counter.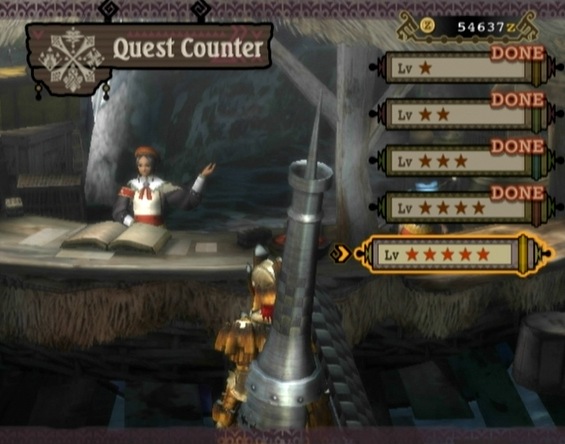
There are five quest tiers in the offline mode.
Your reward pool is reduced each time you fall in combat while on a quest. Fall three times and you'll fail the quest. Fail a quest and you'll lose all of the items you used during that quest, but keep any items you picked up. You can abandon a quest by selecting “Abandon Quest” from the Hunter menu. Abandon a quest and any items you used while on that quest will be returned to you and any items you picked up will be lost.Quest Types
The goal of a hunting quest is to kill a set number of small numbers or fell one large monster. When you're hunting a large monster, you can either kill or capture your target to complete the quest. Killing a monster allows you to carve it three or four times. Capturing a monster during a hunting quest will yield a better chance of obtaining rare items on the post-reward screen. If you're hunting online, be sure your group agrees on whether the target is to be captured or killed.
There are three types of gathering quests: item gathering, egg carry quests and Powderstone delivery quests. Item gathering quests are the most straightforward. Your goal is to simply gather a certain number of an item at gather or mining spots and then deposit them into the red Delivery Box at base camp.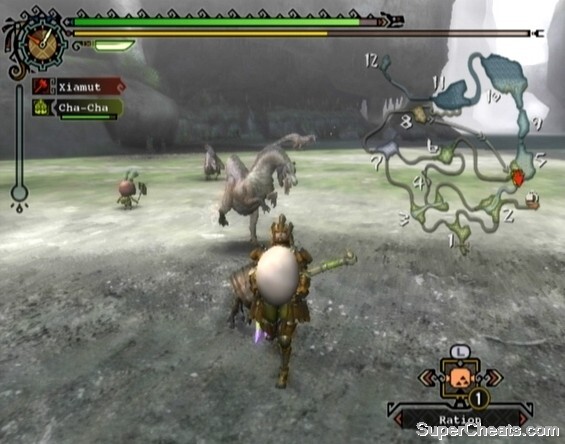
Egg carry quests require you to literally carry each monster egg back to camp.
Powderstone quests are essentially a hardcore version of the egg carry quest. As with the eggs in the egg hunt quests, your hunter must carry the Powderstone back to Base Camp without taking a hit or running out of stamina. Powderstones are hot, so your hunter will continuously take a small amount of damage while carrying one. As a result, there is more to worry about than just dodging monsters: you have to make it back to Base Camp before the extremely hot Powderstone completely drains your hunter's life bar!
To make matters worse, Powderstones explode when dropped, dealing a large amount of damage to anything caught in the blast. So, if the extremely hot Powderstone is about to kill your hunter, dropping it certainly won't do you any good.
The goal of a capture quest is not to kill the target monster, but to weaken it until it's limping and then use a trap and Tranq Bombs to capture it.
Use Shock Traps or Pitfall Traps and Tranq Bombs to catch weakened monsters.Weapons
It is best to stick with melee weapons offline. If you do wish to use a Bowgun, note that you won't find any Bowgun discussion in this walkthrough.
The Sword & Shield, Lance and Great Sword are excellent weapon types for beginners. If you plan on following this walkthrough, it is recommended you acquaint yourself with these three weapon types in particular – especially the Lance. All three of these weapon types can block, which is helpful when you're first learning a monster's move set.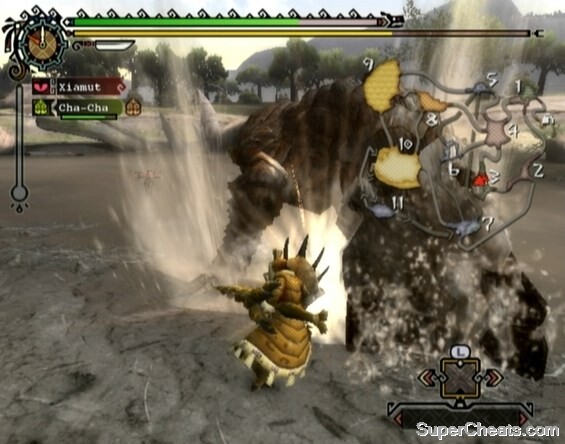
The strong defence of the Lance makes it a good weapon type for beginners.
Every weapon has an attack score and a sharpness gauge. Note that attack scores cannot be used to compare the effectiveness of two weapons of different weapon types. For example, you couldn't look at a Great Sword that has 528 raw attack and say it is better than a Lance that has 368 raw attack. In fact, the damage the Lance with 368 raw attack is capable of dealing overtime makes it a more effective weapon than the Great Sword with 528 raw power.
The sharpness of a weapon is indicated by the sharpness gauge, which is capable of displaying seven different colours. From dullest to sharpest, these colours are: red, orange, yellow, green, blue, white and purple. You won't encounter anything higher than green level sharpness in offline play, but that's nothing to worry about. Weapons with blue, white and purple sharpness are only available in high-ranks quests in the online mode and only on very rare weapons with hard to find materials.
A weapon's sharpness is one of the determinants of how much damage the weapon deals with each swing. In the field, the sharpness of your weapon is indicated by the sword icon next to the clock and below your hunter's health and stamina meters at the top of the screen. If your weapon has green sharpness, ensure that sword icon is always glowing green, as this indicates your weapon is performing at its full potential. The sharpness also determines what a weapon can cut through. For example, while a weapon with green sharpness can slice through the leg of a Qurupeco uninterrupted, a weapon with yellow sharpness will bounce off. 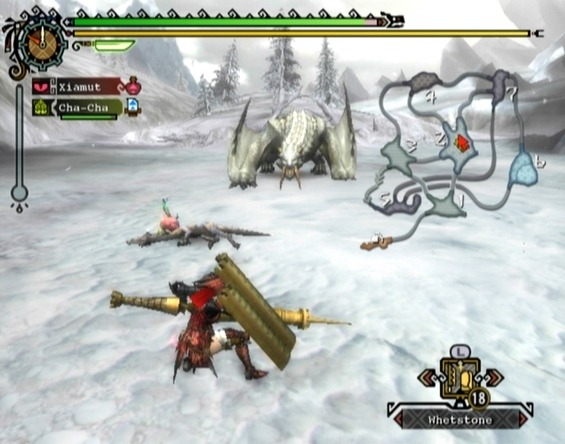
Whetstones sharpen dulled weapons.
Some weapons also boast elemental damage. Each monster is weaker to certain elements than to others, so using a weapon that deals elemental damage of the type a monster is weakest to can significantly shorten the length of a battle.
Affinity determines your hunter's chance of scoring a critical hit with each strike. There is positive Affinity, which increases your hunter's chance of scoring a critical hit with each strike, and negative Affinity, which increases the chance of your hunter's strike dealing less than 100 per cent of the damage it normally would. Armour
Each piece of armour has a defence stat, elemental resistances and skill points. The defence stat of an equipped piece of armour contributes to your hunter's overall defence, which determines how much damage a monster's attack will deal.
You can increase the defence of a piece of armour using Armor Spheres. Armor Spheres can be mined or received on the post-quest reward screen. Speak to the Wyvern Artisan and select “Upgrade Armor” under the Armorcraft section. Upgrading a piece of armour requires spheres and a bit of zenni. The upgrade requirements for a piece of armour will increase each time you upgrade it.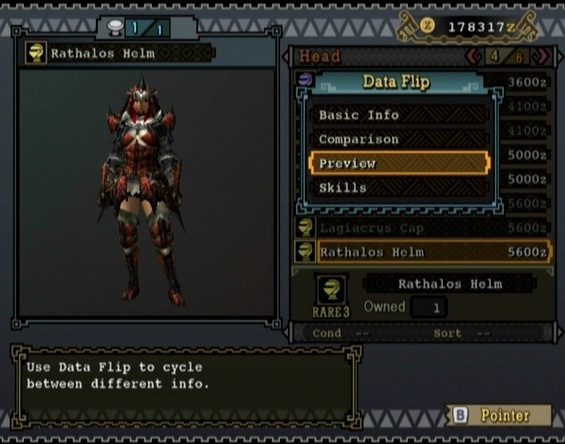
Armour reduces the damage your hunter takes.Armour Skills
A skill is activated when its skill point threshold is reached. For example, the Attack Up (M) skill is activated when the combined Attack skill points on the equipment your hunter is wearing is equal to 15 or more. Due to this, the Attack Up (M) skill would be active on a hunter who is equipped with a full set of Rathalos armour, as the combined Attack skill points of each armour piece is 17. 
Equipped armour pieces, Decorations and Charms all contribute skill points.
A hunter can also equip a Charm, which is an accessory separate from other armour pieces. Equipped Charms only offer additional skill points. Together, Decorations and Charms can be used to reach a higher skill point threshold. For example, the hunter wearing a full set of Rathalos armour could slot two Attack Jewel decorations, which each carry a 1 Attack skill point, and a Rook Talisman with 2 Attack skill points to bump the Attack Up (M) skill to Attack Up (L).
Charms and Decorations can also be used to remove negative skills. For example, a Hunter wearing a full set of Barroth armour set will activate the Critical Eye -1 skill, which reduces Affinity by five per cent. This is because the Expert skill points on each piece of the Barroth armour set when combined is equal to -10. Because this active skill is so close to the skill point threshold, it can be easily removed by simply slotting an Expert Jewel (which carries one positive Expert skill point) on one of the armour pieces, thereby bringing the Expert skill point total for the armour set to -9 (one short of the -10 required to activate the Critical Eye -1 skill).
The Armour Skill system can be difficult to grasp at first. For casual use, all you really need to understand is that the skill point thresholds that activate skills start at 10 and move up in increments of five. That is, having 10, 15 and 20 skill points on certain skill trees will activate a positive skill; the higher the threshold, the more effective the skill. Likewise, having -10, -15 and -20 skill points on certain skill trees will activate a negative skill; the lower the threshold, the more detrimental the skill.
See the Wyverian Artisan about forging and attaching Decorations.
Note that not all skill trees have three positive thresholds and three negative thresholds. Some simply have one, such as the Tremor Res skill tree, which activates the Tremor-Proof skill at 10 Tremor Res skill points. Others have only one positive skill and one negative skill, such as the Oxygen skill tree (Oxygen Up and Oxygen Down). Every other variation exists and there are a huge amount of skills and skills trees, so your best bet is to refer to an external source.
You won't find a complete list of armour skills in this guide, but you can over at the Monster Hunter Wiki: http://monsterhunter.wikia.com/wiki/MH3:_Armor_Skill_ListStamina
The length of a hunter's stamina bar will decrease at a fixed rate over time. Rations and cooked meat (Rare Steak or Well-Done Steak) can be used to increase the length of your hunter's stamina bar. A hunter's stamina is set to the same length as his or her default health bar at the beginning of each quest, but can be increased in length twice with Rations and/or cooked meat.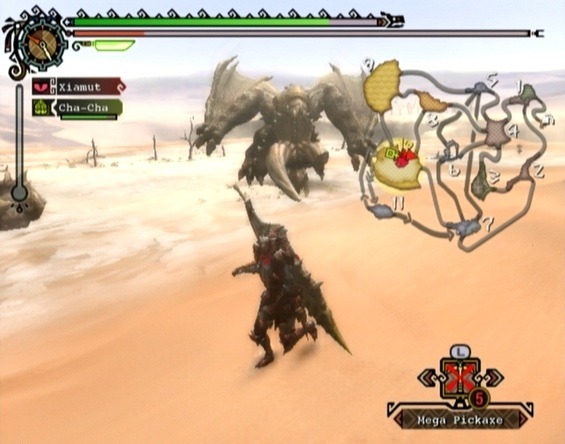
Sprinting, evasive manoeuvres and blocking all use up Stamina.
Large Herbivores such as Aptonoth tend to yield Raw Meat when carved. Raw Meat must be cooked before it can be consumed. Cooking requires a BBQ Spit or a Double BBQ Spit.
Cooking meat is simple. First, you'll need at least one piece of Raw Meat in your inventory. Then, with the BBQ Spit selected in your inventory, press the A button to start cooking. Keep an eye on the colour of the meat while it cooks. There are four different colours: the default (Raw Meat), light brown (Rare Steak), golden brown (Well-done Steak), and black (Burnt Steak). The meat will be light brown after the tune and will turn golden brown for a split second before turning black.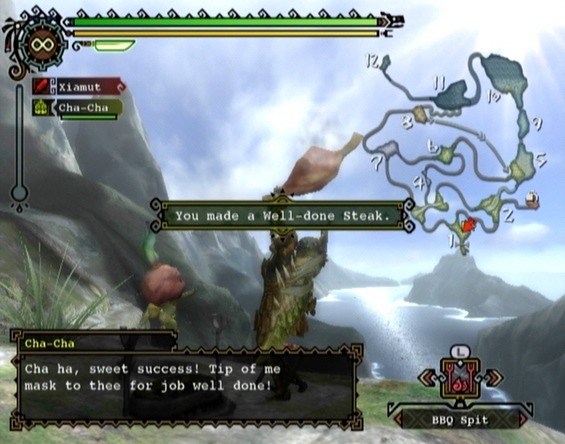
Cooking Well-done Steaks consistently is easy once you get the timing down.
The Double BBQ Spit is a one-star Rare Commodity offered by the Argosy Captain when he's in Moga Village (as long as you've requested he visit the Farmer Realm). You can obtain tradeable Rare Commodity items by killing boss monsters in Moga Woods and then reporting back to the Chief's Son for reward. The Giant Skull commodity is a common reward for killing a Great Jaggi in Moga Woods. Once you have a one-star or greater Rare Commodity, you can trade it to the Argosy Captain for a Double BBQ Spit.
Cooking with the Double BBQ Spit is different from cooking with a standard BBQ Spit. For one, you're cooking two Raw Meats simultaneously when using a Double BBQ Spit. The controls are a bit different as a result. You can use the Double BBQ Spit to cook a single piece of meat, like the standard BBQ Spit, or you can keep the R button held down to cook multiple Raw Meats in a row. Keep the R button held down and press the A button about one second after the jingle stops (when the first piece of meat turns golden brown). Your hunter will continue putting Raw Meat on the spit until your inventory is spent or you release the R button.
Cooking Raw Meat with the BBQ Spit and Double BBQ Spit
Some monster's attacks are capable of afflicting your hunter with a status ailment. These ailments cause one or more negative effects that will persist until the ailment runs its course or you use a cure. Each status ailment is listed below along with one or more cures (if a cure exists).
Poison
Effect: Gradually reduces health. Effects last for a set period of time.
Cure: Antidote, Bitterbug (50% chance), Antidote Herbs (50% chance), Herbal Medicine
Stun
Effect: Disables movement for a set period of time.
Cure: Spin the Left Stick and tap the A button (Classic Controller)
Snowman
Effect: Makes movement sluggish and disables weapons and items.
Cure: The effect lasts for a set period of time, or until your hunter is attacked. Rapidly rotate the Left Stick to break free or use a Cleanser.
Paralysis
Effect: Numbs your hunter, making movement impossible.
Cure: The effect lasts for a set period of time, or until your hunter is attacked.
Sleep
Effect: Makes your hunter drowsy and eventually fall asleep.
Cure: The effect lasts for a set period of time, or until your hunter is attacked. Sleep can be prevented if you use an Energy Drink while your hunter is still drowsy (just before he or she falls asleep).
Muddy
Effect: Makes movement sluggish and disables weapons and items.
Cure: The effect lasts for a set period of time, or until your hunter is attacked. Rapidly rotate the Left Stick to break free or use a Cleanser.
Life Drain
Effect: Giggi suck your hunter's blood, gradually sapping your health.
Cure: Roll
Felvine-Scented
Effect: Makes your hunter more susceptible to Felyne and Melynx attacks. Effects last for a set period of time.
Cure: None
Light/Severe Fireblight
Effect: Gradually reduces health.
Cure: Roll once while in water or repeat evasive manoeuvres to recover.
Light/Severe Iceblight:
Effect: Dramatically reduces your hunter's body temperature and greatly increases stamina expenditure.
Cure: Icethaw Pellet
Light/Severe Waterblight
Effect: Inhibits recovery of stamina.
Cure: Waterblock Seed
Light/Severe Thunderblight:
Effect: Increases your chances of being stunned when a monster attacks.
Cure: Stormsender Seed
Light/Severe Dragonblight
Effect: Saps your hunter's strength and lowers Affinity.
Cure: Dragonfell Berry
The primary way to obtain weapons and armour in Monster Hunter is by crafting. To craft a weapon or a piece of armour, you must provide the necessary materials (and pay a set amount of zenni) to a blacksmith who will use it to create the weapon or armour piece.
Much of the materials used to craft weapons and armour can be obtained by hunting and carving monsters. The types of materials used in crafting are monster bones and minerals (e.g., Iron Ore and Machalite Ore) mined at mining spots. Some materials are quite rare, such as the Deep Dragongem needed to craft the chest piece in Ceadeus's armour set. As a result, obtaining some of these materials will require you to “farm” the monster that drops the item you desire until you obtain one.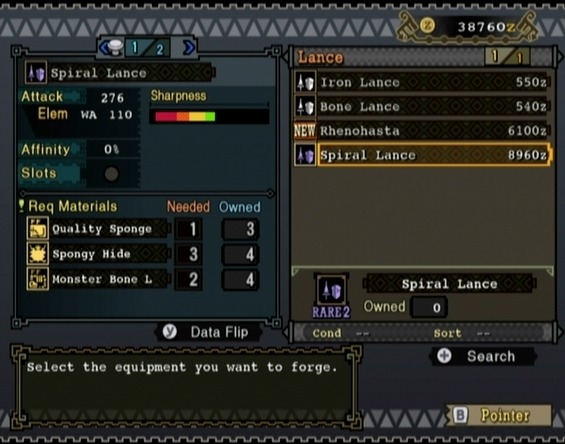
Forging equipment requires material and zenni.
You can upgrade a piece of armour with an Armor Sphere to increase the defence stat of that armour. Upgrading weapons requires additional materials and more zenni. There is a huge amount of weapon lines in the game and many branch at points.
Note that materials with names that end with a plus symbol (e.g., Spongy Hide ) can only be obtained from monsters in the high-rank quests in the online mode.
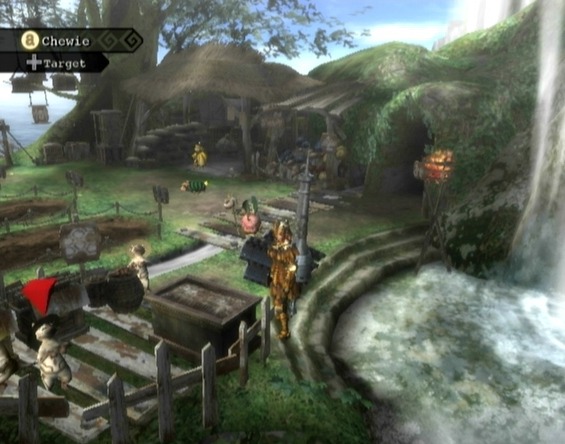
Monster Hunter Tri's offline mode takes place in Moga Village, a small, peaceful fishing town. Read below for information on all of the amenities you have access to.
Hunter's House
Your hunter's house is accessible through the curtained doorway to the right of where the Village Chief sits and at the bottom of the steps that lead up to the Wyverian Artisan. Inside you'll find a bed and your Item Box.
Use your bed to save your game or shift night into day. The Item Box is where you can store all of your equipment and items. Your hunter's Item Pouch only holds 24 items, so it's a good idea to store away unnecessary items between quests. Via the Item Box menu, you can also change your hunter's appearance (limited to hair colour, hair style, clothing and clothes colour), as well as register and switch between sets of equipment.
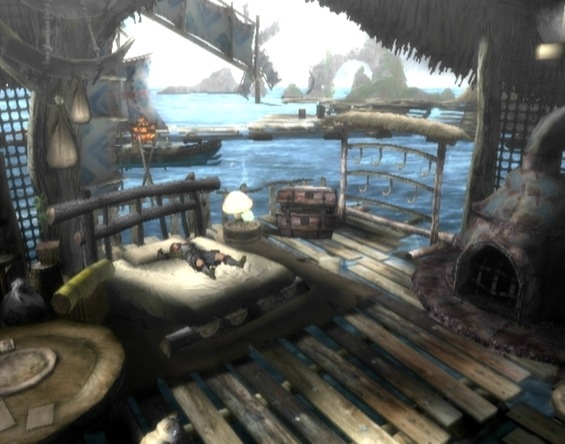
The Hunter's House is your space in Moga Village.
Chamberlyne is your Felyne helper. Speak to Chamberlyne to place or remove furnishings in your hunter's house or get data for the Arena mode stored on your Wii console or Wii Remote.
Quest Counter
Before you can set out on a quest, you must speak to the Guild Sweetheart at the quest counter in the top-left corner of Moga Village. There are five tiers of quests in the offline mode, ranging from one- to six-stars. You must complete certain key quests in one tier and then an urgent quest to move up to the next highest tier.
Enter a tier and select one of the quests listed to bring up an information pane. Look at the top of the pane to determine the main quest objective and the bottom of the pane to determine the objective of any subquests. You'll also find listed the map the quest takes place on, the amount of time allotted for the quest, the monetary reward for completion, the fee for accepting the quest and the condition of the quest environment.
You can undertake quests by speaking with the Guild Sweetheart at the quest counter.
Once you've accepted a quest, set out by heading to the end of the pier through the gate to the left of the quest counter.
Moga Woods
Cross the bridge to the right of the Wyverian Artisan to access Moga Woods.
Moga Woods is a changing instance of the Deserted Islands map. There is no time limit in Moga Woods, making it an ideal place to gather certain materials or try out a new weapon type. Kill monsters in Moga Woods and you'll earn Resource Points, which are required to upgrade Moga Farm and unlock new masks for Cha-Cha through villager requests. You may also be rewarded with tradeable Commodity items and other valuables when you report back to the Chief's Son.
Along with smaller monsters such as Kelbi, Aptonoth and Jaggi, large monsters such as Qurupeco and Royal Ludroth also inhabit Moga Woods. Kill a boss monster while in Moga Woods and you'll be rewarded with a large amount of Resource Points and the possibility of receiving a rare Commodity when you report back to the Chief's Son. You can trade these commodities to the Argosy Captain for various hard to find items.

Hunt large monsters in Moga Woods to earn rare commodities and tons of Resource Points.
Because Moga Woods is a changing instance, you may not encounter the same monsters on different days. To determine the large monsters inhabiting Moga Woods on a particular day, speak to the Chief's Son and select “Moga Forecast” from the Stockpile menu. You can see which large monsters inhabit Moga Woods on the current day as well as look ahead to tomorrow and the day after.
Great Jaggi, Qurupeco, Royal Ludroth, Rathian, Rathalos and Lagiacrus are the only boss monsters that will appear in Moga Woods. The possibility of these monsters appearing in Moga Woods will be unlocked as you complete more quests.
Stockpile
The Stockpile is where you can report your kills in Moga Woods, convert items into Resource Points and fulfill villager requests. Fulfilling villager requests requires Resource Points and specific items. More villager requests will become available as you complete more quests. Fulfill villager requests to upgrade Moga Farm and unlock new masks for Cha-Cha.
Killing monsters in Moga Woods is one way to amass Resource Points, but you can also convert items to generate resources via the Stockpile menu.
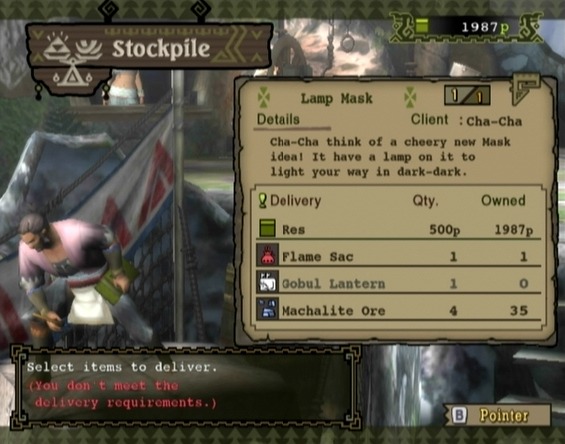
Fulfill Villager Requests to upgrade Moga Farm and unlock new masks for Cha-Cha.
Fishery
Speak to the Fishmongress in the bottom-left corner of Moga Village to bring up the Fishery menu. You can spend Resource Points to dispatch one to three boats in pursuit of fish and/or treasure. There are several different regions you can the Hunting Fleet to. You'll unlock more regions as you complete more quests
You can equip a boat with a tackle before dispatch to improve its catch or reduce the length of its voyage. For a tackle to have an effect, it must match the region you're sending the boat to. For example, equipping a Treasure Tracker tackle to a boat headed to the Dark Waters, Moga Strait or Abyssal Volcano region will have the desired effect, as these are all treasure hunting regions. The same tackle would not have any effect if you sent the boat to the Moga Coast, Moga Shallows or Moga Deep region, as these are all fishing regions (use Fish Finder for fishing regions).
Each boat in the fleet – the Captain, Redspear and Blackspear – can be upgraded twice. The upgrades for each ship are available for trade from the Argosy Captain. Upgraded boats will bring in a larger haul and complete trips in less time.
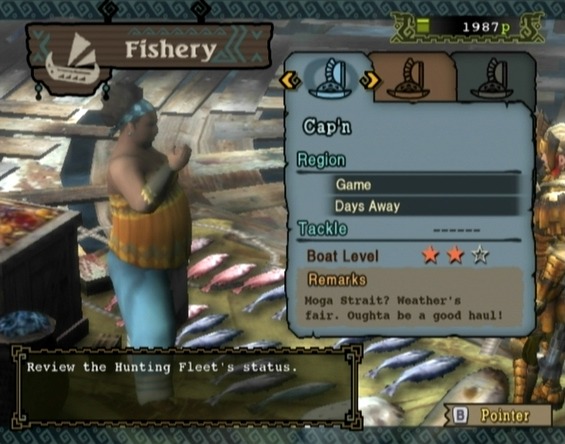
Dispatch boats at the Fishery in search of fish and treasure.
When the fleet returns to Moga Village, speak to the Fishmongress and select “Check Haul Box” from the menu to collect. You can determine if the fleet has returned by checking for the men and their boats south of the Fishmongress or by selecting “Moga Village” in the Info menu to view the fleet's status.
Argosy
The Argosy Captain will appear in Moga Village after you complete the two-star urgent quest “No Love For Ludroth.” You can trade with the Argosy Captain using the Commodity items you receive as reward for hunting in Moga Woods. The captain has a variety of uncommon and rare goods up for trade, many which you can't find anywhere else.
You can barter for two different kinds of trade goods with the Argosy Captain: uncommon trade goods and rare commodities. Uncommon trade goods tend to be ingredients and items you can use in the field, while rare commodities are things like furnishings for your hunter's house and ability tomes for Cha-Cha
Select the “Trade” option to barter for uncommon trade goods. On the trade menu, you must choose the goods you want to trade for and make an offer. Each Commodity has a trade value represented by a green bar for your offer and a yellow bar for the goods you want to trade for. To make a trade with the captain, the combined trade value of the items you offer must be greater than or equal to the trade value of the goods you're trading for.
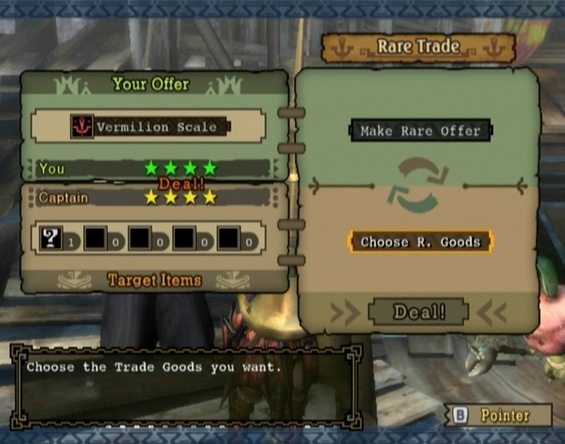
You can trade commodities with the Argosy Captain for a variety of goods.
You can stack commodities, offer several different types of commodities and choose more than one item to trade for, so long as the total combined value of your offer is greater than or equal to the value of the captain's items. “Deal!” will appear between the green and yellow bars on the trade screen when you've offered items of an appropriate value for the goods you've selected.
When trading for rare commodities, you can only put a single rare Commodity up for trade. Each rare commodity has a star rating ranging from one to four stars. To trade a Rare Commodity with the captain, you must offer an item that has a star rating greater than or equal to the rare item you choose. You can choose more Rare Commodity to trade for, so long as the single rare Commodity you're offering has a star rating greater than or equal to the combined number of stars of each rare good you choose.
Choose the “Request Stopover” option and you can request the Argosy Captain visit or bypass certain destinations on his next trip. The trade goods the captain brings back when he returns from a voyage depend on the destinations he visited. The more destinations you request the captain visit, the longer his next journey will take. There are three destinations total (Farmer Realm, Hunter Realm and Wyverian Hub), which are unlocked as you complete more quests. You can give the captain a voyage aid (a Power Paddle or a Perfect Paddle) while he's in Moga Village to shorten the duration of his next trip
Canteen
The Itinerant Cook will appear in Moga Village along with the Argosy Captain after you complete the two-star quest “No Love For Ludroth.” From then on, you can find the Itinerant Cook next to the Guild Sweetheart at the quest counter.
You can use zenni or Resource Points to order a meal at the Canteen to change your hunter's stats and acquire Food Skills. Food Skills will remain active for one quest but will wear off if your hunter falls in combat. The ingredients and preparation method you choose when ordering the meal will determine the effects. Ingredients marked as fresh raise the likelihood that several skills will activate.
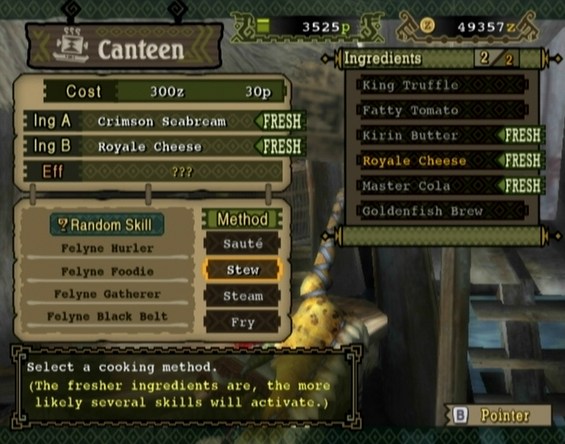
Order a meal at the Canteen before a quest to activate (beneficial or detrimental) Food Skills.
Select two ingredients and a list of four cooking methods will appear. To the left the list of cooking methods is a list of the possible Food Skills the meal will activate if you match the highlighted method with the ingredients you selected.
Food Skills can have a beneficial or detrimental effect. Needless to say, if you're experimenting and you end up saddled with crippling skills, get rid of them before departing. You can do so by selecting “Quit Game” from the Hunter menu, saving your game and then reloading your hunter. You can try another recipe if you'd like or cut your losses and set out.
There are many Food Skills and all have different effects. The Monster Hunter Wiki has a complete list of Food Skills and their effects, as well as a list of food type combinations and their effects. You can view those lists here: http://monsterhunter.wikia.com/wiki/MH3:_Kitchen_Skills
Market
Speak to the Gal with the Goods behind the table in the bottom-left corner of the village to view her wares. There are a number of items you'll find useful in your questing, namely Potions, Whetstones, Iron Pickaxes and Trap Tools. She also carries the first three volumes of the Book of Combos, which will improve your chance of success when combining two items. You'll also find an Organizer Guide and a Pack Rat Guide, which will increase the size of your hunter's Item Box.
There are sales on certain days. On such days, all items save for the combo and storage books cost half as much zenni. Take advantage of sale days; you can select the “Buy, Send to Box” option from the Market menu to purchase large quantities of items without having to run back and forth between the merchant and your Item Box.
Smithy
The Wyverian Artisan is by the bridge to Moga Woods at the top of the stairs in the top-right corner of the village. Speak to the artisan to forge weapons, armour or decorations, or upgrade weapons and armour to stronger forms. See “Equipment Forging” under “The Basics” section to learn more.

The Wyverian Artisan can craft and upgrade weapons and armour.
Moga Farm
Cross the bridge in the bottom-right corner of Moga Village to access Moga Farm. You can spend Resource Points at Moga Farm to put your Felyne helpers to work farming plants, mushrooms, insects or honey.
You'll have one Felyne worker to start, but will gain a couple more as you complete more quests. To set your helpers to work, speak to the Head Farmer to bring up the Farm menu and select “Cultivate.” You can assign each Felyne to harvest a particular item. You must own at least one of the item you want the Felyne to produce.
After selecting a source, you can select a fertilizer to enrich the crop. Choosing a fertilizer will increase the number of the source item the Felyne worker is able to cultivate during each cycle.
All harvestable items fall under one of four categories: Fields, Shrooms, Insects or Honey. Not all items can be harvested (e.g., Thunderbugs). If you possess an item and it doesn't appear on the list when you're selecting a source, this means that item can't be harvested.
The Felyne farmers can cultivate Fields, Shrooms, Insects and Honey.
Select “View Farm Status” on the main Farm menu to view the level of each of the four facilities. The higher the level of a facility, the more cycles of an item you can assign a Felyne to cultivate. Complete villager requests via the Stockpile to upgrade your facilities (refer to the “Villager Requests” section for help with that). With a fully upgraded facility, you can assign a Felyne to a maximum of ten cycles. One cycle passes each time day changes to night and vice versa.
Farming requires Resource Points, but not very many. As such, it's good to always have your workers assigned to cultivate something, with you checking in every now and then to harvest the crop. Select “Check Crop Box” from the main Farm menu to see what the Felynes have produced.
Cha-Cha
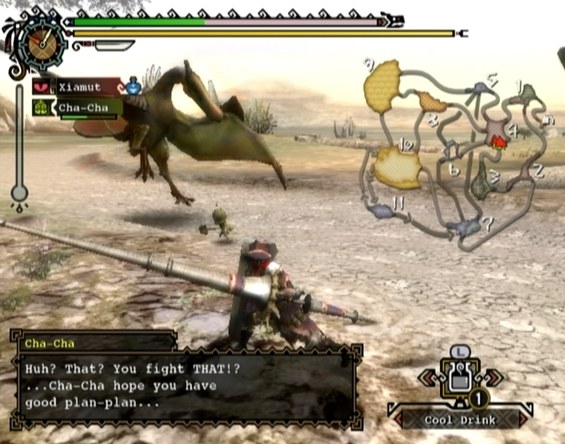
Cha-Cha is your Shakalaka companion. He'll join you after you complete the “Shakalaka Savior” urgent quest at the end of the two-star quest tier.
You can set Cha-Cha to accompany you on quests by speaking to him in Moga Village and selecting “Invite on Quest” at the top of the menu. Likewise, select “Leave in Village” while Cha-Cha is at your side if you don't want him to follow you when you depart.
Cha-Cha can attack enemies, gather from gather spots and carve additional materials for you. He'll also dance to boost your hunter's Attack, Defence, or Health.
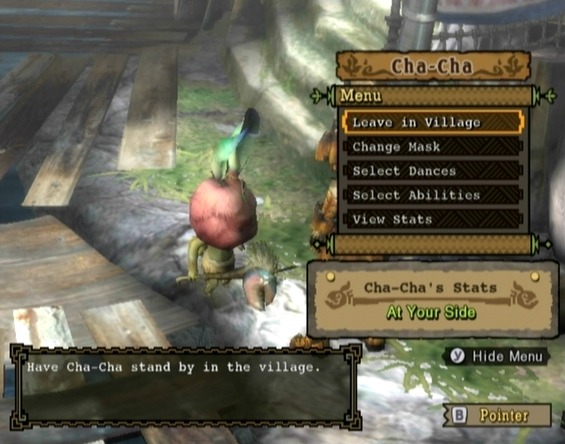
Interact with Cha-Cha while in Moga Village to access the Cha-Cha menu.
You can change the dances Cha-Cha uses to create different dance effects. Cha-Cha has four different dances: Rah-Rah Dance and Ooga-Boo Dance he has by default, and Wakka-Wakka Dance and Boom-Boom Dance he can learn if you by trade rare commodities to the Argosy Captain for the tomes. You can set two of Cha-Cha's dances using the “Select Dances” option in Cha-Cha's menu to create different dance effects.
Cha-Cha wears the Acorn Mask when you first meet him. There are seven different masks in the game, each with its own special ability and effects. You can unlock additional masks for Cha-Cha by completing villager requests via the Stockpile menu. More of these villager requests will become available as you progress through the offline mode. Refer to the “Cha-Cha Masks” section of this guide for more information.
Each mask has one, two or three ability slots, which you can set using the “Select Ability” option in Cha-Cha' menu. The number of ability slots available to you depends on the mask selected as well as Cha-Cha's mastery level of that mask. Cha-Cha's mastery of a mask will increase the more he wears it.
Cha-Cha can attack enemies, gather from gather spots and carve additional materials for you. He'll also dance to boost your hunter's Attack, Defence, or Health.
You can signal Cha-Cha by first pressing the Select button to bring up the Hunter menu and then pressing the Start button. This is how you can trigger the abilities of certain masks, such as the ever-useful Fluffy Mask.
Some mask abilities require you give an item to Cha-Cha. To do so, open your hunter's Item Pouch, select the item you want to give to Cha-Cha and select the “Give” option at the bottom. Not all items can be given to Cha-Cha, so this option may be greyed out. As well, giving Cha-Cha healing items and meat will restore his health and stamina respectively.
After creating your hunter and watching the opening video sequence you will find yourself in the idyllic Moga Village. Everything is fine and dandy in this little fishing village, save for the frequent earthquakes and the close proximity of the Lagiacrus, a massive sea monster. You'll learn about all of this and more during your chat with the Village Chief, but don't worry about any of that now; you've got quite a ways to go before even thinking about saving the day.
Buying some armour would be a good start. After all, you won't get very far without pants. The Village Chief will give you 1500z after his talk. Head up the steps to the right of the Village Chief and speak to the Outfitter about purchasing some armour. You have enough zenni for a full set of Leather armour, or you can spring for the slightly more impressive Chainmail, though you won't be able to purchase the full set just yet. Since the early quests are appropriately easy (and because you'll be getting some more free cash soon), it would be wise to buy three pieces of Chainmail and save up for the other two pieces. Better start with some pants.
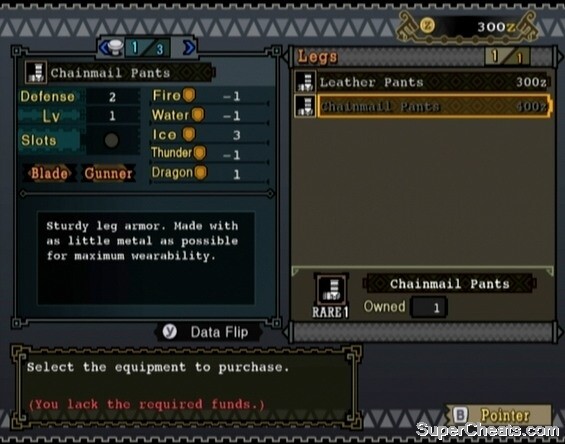
Use the money the Village Chief gives you to purchase armour from the Outfitter.
Your hunter is equipped with the Hunter's Knife, which is a Sword & Shield type weapon. There is an Iron Sword Great Sword in the Equipment Box in your room (through the open curtains just to the right of the Village Chief). If you're new to the Monster Hunter series, sticking to the Sword & Shield is your best bet. The Sword & Shield weapon type is perfect for the beginner: it's quick and you can roll, block and use items while your weapon is unsheathed. The Sword & Shield, however, is lacking in damage output compared to the other weapon types -- even in the later weapon lines. Stick to it, though; once you feel you've mastered the Sword & Shield, you can graduate to something a bit heftier.
Once you're all set with a weapon and armour, head up the steps at the east end of the village and speak to the Carefree Lad. The kid hands you a Whetstone, which is used to sharpen dull weapons. Cross the bridge and exit to Moga Woods once you're prepared.
Read through the Village Chief's instructions and then make your way to Area 2. To get to Area 2, simply exit via the route at the north end of Area 1 (check the map on the right side of the screen). The first creatures to taste your steel are some poor, (mostly) defenceless herbivores. You must kill the Aptonoth in Area 2 and then carve their corpses for Raw Meat. Attack using the face buttons or Right Stick (depending on your control settings) and bring down at least one Aptonoth. Each Aptonoth is good for two carves. To carve a dead monster, stand on or next to its corpse and press the A button.
Hunt and carve Aptonoth for Raw Meat.
When you have at least one piece of Raw Meat, exit Area 2 via the path at the west end to reach the Base Camp. Junior, the Chief's Son, is here. Speak to Junior once and then again to give him one piece of Raw Meat. Once you've done that, return to Area 1 and cross the bridge at the south end of the area back to Moga Village.
Back at the village, speak to the Chief's Son and he will give you a BBQ Spit. With this, you can cook Raw Meat and consume the cooked meat to increase the length of your character's stamina bar. When cooking a piece of meat, you can end up with a Well-done Steak, Rare Steak, or Burnt Steak. A Well-done Steak will give your character the most stamina when consumed -- enough to extend the bar to its maximum length when consumed at default stamina. A Rare Steak will increase your character's stamina by half of what a Well-done Steak does, and a Burnt Steak will decrease your character's stamina (so don't eat those).
Cooking meat is simple. First, get at least one piece of Raw Meat in your inventory and select the BBQ Spit. Then, press the A button to start cooking. Keep an eye on the colour of the meat while it cooks. There are four different colours: the default (Raw Meat), light brown (Rare Steak), golden brown (Well-Done Steak), and black (Burnt Steak). After the short tune, the meat will be light brown and will turn golden brown for a split second before turning black. To cook a Well-done Steak, you must press the A button again while the steak is golden brown to take it off the spit. The meat will turn golden brown about two seconds after the tune. If you're too quick, you'll get a Rare Steak, and if you're too slow you'll get a Burnt Steak. It may take a few tries to get the timing down, but with a little practice you'll be able to cook Well-Done Steaks consistently and with ease. Check out “The Basics” section for a video demonstration.
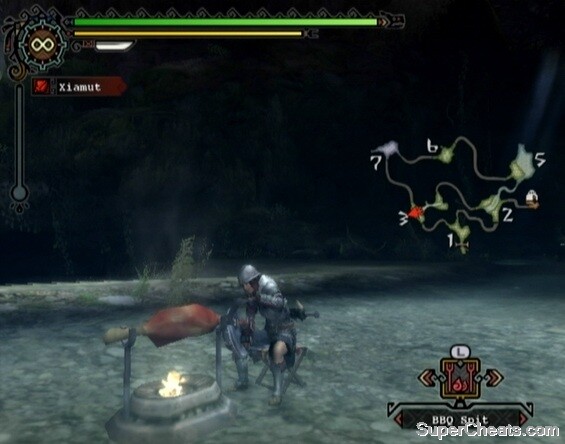
Take the Raw Meat off the BBQ when the meat turns golden brown to produce a Well-done Steak.
Fix Up the Camp!
You can fulfill Villager Requests from the Stockpile menu that appears when you speak to Junior in Moga Village. These are not part of the game's main quest, but completing these requests is required to upgrade Moga Farm and obtain certain items. Before you can embark on an actual quest, you must complete the “Fix Up the Camp!” Villager Request. Before setting out, talk to the Village Chief at the west end of the village and he will give you 1000z.
Speak to the Wyverian Artisan at the bridge to Moga Woods to learn about weapon craft. To craft a weapon or a piece of armour, you'll need materials. The required materials for a piece of equipment is listed in the bottom-left box on the forge equipment screen. The box in the top-right lists the stats of the weapon or piece of armour. Refer to “The Basics” section for a more in-depth look at equipment forging.
After speaking to the Artisan, cross the bridge and exit to Moga Woods. In Area 1, search the gather spot by the rocks in the northwest corner of the area to find Whetstones. Continue gathering Whetstones here until the gather spot disappears. Herbs can be found at the gather spot under the naked tree at the southeast end of the area. Continue gathering Herbs here until the gather spot disappears.
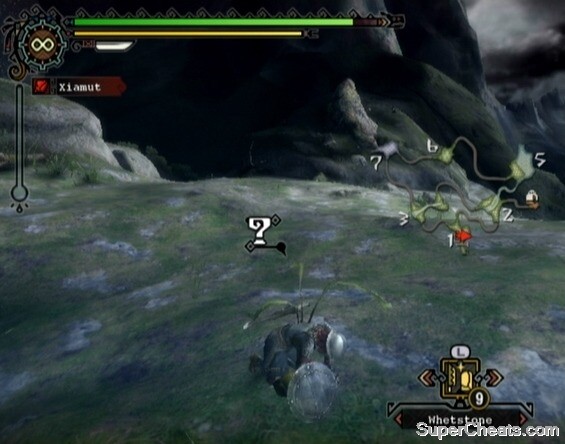
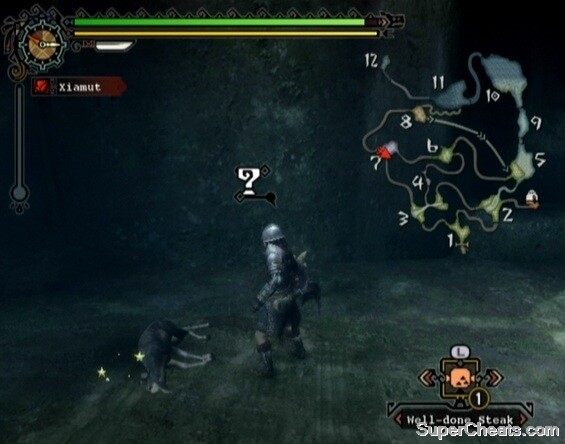
When a question mark appears above your hunter's head, press the A button to gather an item.
Consume a Herb after taking damage and your character will regain a small amount of health. You can combine a Herb with a Blue Mushroom to make a Potion, which replenishes a bit more health. To combine two items, press the Select button to bring up the Hunter menu and select the second option on the list, Combine. Select the first item and press the A button to add it to the recipe, then select the second item and hit the A button again to combine them. If you don't have any Blue Mushrooms in your inventory now, you can find some by searching the gather spots in Area 2 (north end of the area) and Area 3 (centre and west end of the area). Gather spots that yield Blue Mushrooms and other types of mushrooms look like mushrooms.
There are many more item combinations. Refer to the “Item Combination List” section of this guide for a list of every single combination.
When you enter Area 2, Junior will tell you how to register monsters in your Monsters List. Registering a monster requires the Wii Remote. Even if you aren't controlling your character with the Wii Remote and Nunchuck combo, your Classic Controller or Classic Controller Pro is still tethered to a Wii Remote, so you can use it to add monsters to your Monster List in the way the Junior describes. First, hit the Select button to bring up the Hunter menu. Then, enter the “Hunter's Notes” section and press and hold the B A buttons on the Wii Remote to bring up a pointer. Move this pointer onto a monster, press and hold the A button and then drag the monster name with your Wii Remote to the “Register” icon in the bottom-right corner of the screen.

Trigger the Pointing option while viewing the Hunter's Notes section of the Select menu and use the Wii Remote to register new species.
Once you have that down, make your way to Area 6 ready for a fight. Unlike the peaceful Aptonoth, the Jaggi in this area are carnivores and will attack on sight. These guys are small fries; soon enough, you'll be able to kill them with a single blow. In the interim, you must kill enough of Jaggi to earn 30 Resource Points.
Killing one Jaggi yields 5 Resource Points, so you must kill six to earn 30 Resource Points total. There are four Jaggi in Area 6 to start, but kill one and another will spawn. Look to the bottom-left corner of the screen to see how many Resource Points you have earned so far. Jaggi don't hit hard, but consume a Herb or Potion if you're really getting pushed around and are low on health.
After killing at least six Jaggi and earning 30 Resource Points, make your way back to Area 1 and cross the bridge to Moga Village. Report back to the Chief's Son once in the village. In the Stockpile menu, enter “Hunt Report” and press the A button once and then again to convert your kills into Resources. As well as the Resource Points, you will receive a small reward. Send the commodities to your Item Box, then enter the “Villager's Request” section and turn in the 30 Resource Points to complete the request.
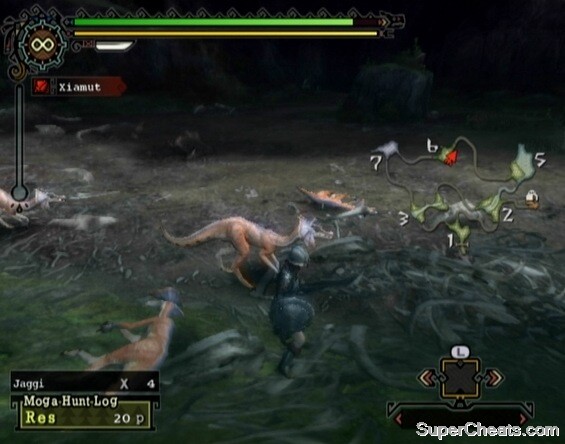
Kill the Jaggi in Area 6 to rack up Resource Points.
Talk to the Wyverian Artisan. He wants you to bring him some Iron Ore so he can upgrade your weapon. He gives you one Mega Pickaxe and sends you on your way. It would be a good idea to purchase some Iron Pickaxes from the vendor at the west end of the village, as that Mega Pickaxe will eventually break from use. When you're ready to set out, cross the bridge and return to Moga Woods to get started.
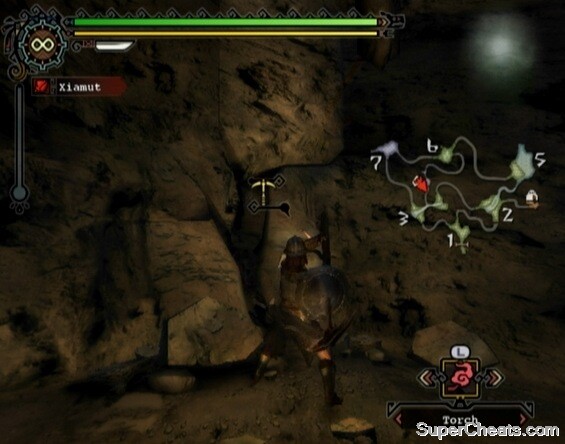
At the start, approach the brazier on the left side of the wooden gate and gather near it to obtain a Torch. Equip the Torch to light up dark areas and potentially scare off cave-dwelling monsters that would otherwise cause you nothing but aggravation.
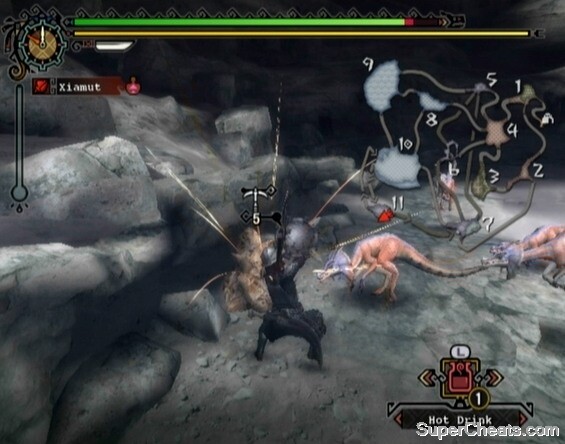
There are ore deposits in Area 4, so make your way there. Equip your Torch to light the way once in Area 4 and hop down from the ledge. There are some Felyne (the white catlike creatures) and Melynx (the black catlike creatures) at the start of the area. The Felyne are peaceful, unless one of their own takes damage. Avoid the Melynx, as they will steal an item from your inventory if they hit you. If a Melynx does manage to steal one of your items, simply hit him to get it back. There are also the small, slug-like Giggi here in Area 4. These things are annoying, however with a Torch equipped you won't be bothered. If a Giggi does manage to latch on to your character, simply roll with the B button to shake it off.
Look for the mining spot in Area 4.
The mining spot you are looking for in Area 4 is a large crack in the wall at about the middle of the area. Approach the crack in the cave wall and a Pickaxe icon will appear above your character's head. You don't have to put away your Torch to mine; to mine ore with your Torch equipped, simply hold the R button and press the A button while at a mining spot. You just need one piece of Iron Ore, but continue mining until the deposit is spent or all of your pickaxes break before returning to Moga Village.
Speak to Junior back at the village. Then, speak to the Wyverian Artisan to bring up the Smithy menu and enter the Villager Requests section. Press the A button twice to deliver the one piece of Iron Ore.
You can use the Iron Ore you collected to upgrade your weapon. Select “Weaponcraft” from the Smithy menu and then “Upgrade Weapons.” Select the Hunter's Knife and press the A button to see its upgrades. You can upgrade the Hunter's Knife to the Hunter's Knife for 1560z and two pieces of Iron Ore. You probably don't have enough zenni to afford the upgrade at this point, so store those Iron Ore in your Item Box (and any other non-essential items) so they don't take up precious space in your inventory.
After completing the Wyverian Artisan's quest, speak to the Village Chief and then cross the bridge and exit to Moga Woods.
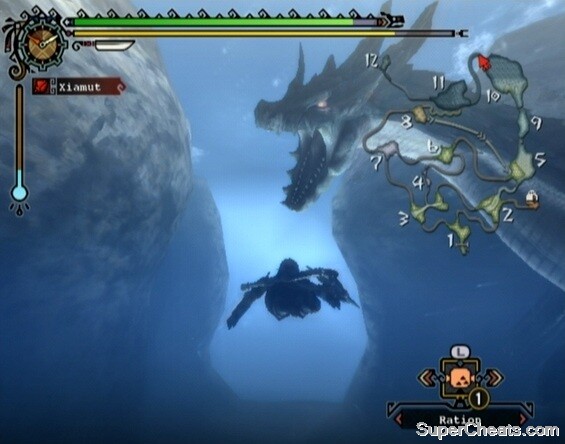
You must hunt one Molid to complete this quest. Molid are large, harmless fish. You can find these creatures in Area 11. You must swim through Area 10 to get to Area 11. Time for some swimming lessons.
Monster Hunter Tri adds swimming and underwater combat to the series.
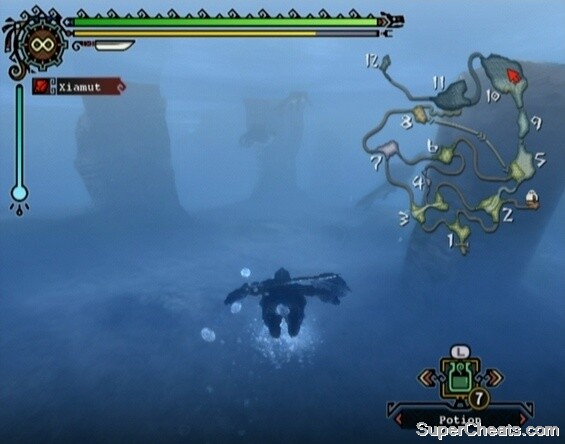
Combat underwater is much like combat on land, except underwater you can move vertically as well. Swimming underwater requires using the Left Stick and the camera controls together. To swim, you simply point the camera in the direction you wish to travel and push the Left Stick forward to swim there. This takes some getting used to, especially if you tend to use the L button to centre the camera behind your hunter rather than controlling the camera manually. You can also press the ZL button to ascend and the ZR button to descend, but only while you're not moving.
The Oxygen Gauge on the left side of the screen will steadily decrease as you remain underwater. To refill it, return to the surface or find an Air Supply Point, which appear as a stream of bubbles on the seafloor. There are also some items that can restore the Oxygen Gauge. That said, your hunter can hold his or her breath for a ridiculously long amount of time, so there's little need to worry about drowning, provided you keep an eye on the Oxygen Gauge.
Swim through Area 10 to Area 11. A video sequence will point out the Molid. You have been given three Fishing Harpoons; killing a Molid with a Fishing Harpoon rather than your weapon will allow you to carve the dead fish.
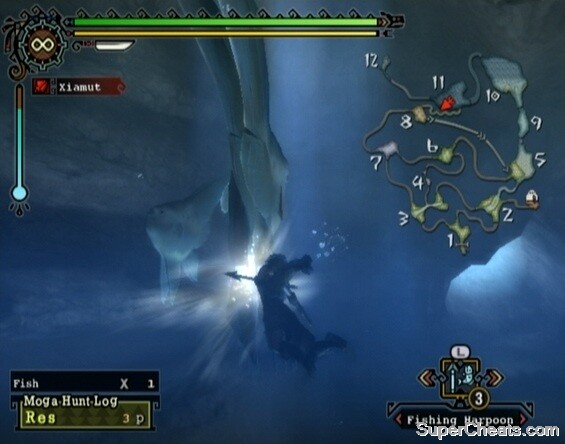
Kill at least one of the Molid in Area 11.
You just need to kill one Molid to complete the quest, so once you've done that, if there aren't any additional materials you'd like to gather while you're out here, press Start and select the “Return to Village” option from the Hunter menu to warp back to Moga Village.
Back at the village, speak to the Wyverian Artisan and he will give you some Armor Spheres, which you can use to upgrade one piece of armour. Speak to the Village Chief and he will give you 1500z, which you can use to upgrade your Hunter's Knife if you wish.
Before getting started with the One-star Quests, you might want to check out Moga Farm across the bridge on the southeast end of the village. Speak to Chicory the Felyne and he'll give you three Sushifish. The Head Farmer will give you a Blue Mushroom, which you can combine with an Herb to make a Potion. You can spend Resource Points at Moga Farm to cultivate crops. Refer to the “Moga Village” section of this guide for more info.
Return to the Village Center after inspecting the farm and talk to the Guild Sweetheart behind the Quest Counter at the northwest end of town about embarking on your very first quest!
These first few quests aren't particularly exciting, but don't let that turn you off! Keep at it and you'll soon be battling ferocious monsters, chopping tails, dodging fireballs and all of that fun stuff.
In addition to a main quest, many quests have one or more subquests. Complete these subquests to earn additional rewards. This guide covers the main quests and all subquests.
Speak to the Guild Sweetheart behind the Quest Counter and sign up for the only available quest, “Harvest ‘Shroom.”
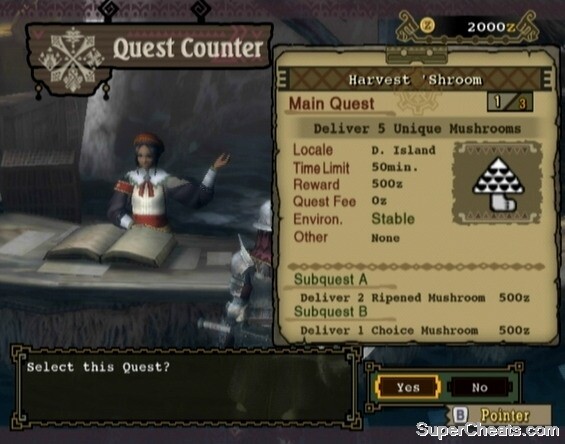
Speak to the Guild Sweetheart at the west end of the village to accept quests.
Gathering Quest: Deliver 5 Unique Mushrooms
Reward: 500z
Contract: 0z
Area: Deserted Island
Time: 50 min.
Subquest A: Deliver 2 Ripened Mushrooms
Reward: 500z
Subquest B: Deliver 1 Choice Mushroom
Reward: 500z
As the Guild Sweetheart explains, there are three objects of interest at Base Camp: the red Delivery Box, the blue Supply Box and the bed. The blue Supply Box holds supply items you can keep with you until the end of the quest, such as a Map and Rations. It's always a good idea to grab the Map, Rations and First-aid Meds at the least. Grab the Torch too if you anticipate doing any spelunking while out in the field.
You can deliver requested items to the red Delivery Box. For this quest, you can deliver Unique Mushrooms, Ripened Mushrooms, and one Choice Mushroom. Deliver five Unique Mushrooms to the Delivery Box to complete the quest. If you're interested in completing the two subquests, hold off on delivering the Unique Mushrooms until you've delivered the other mushrooms
Nap on the bed to restore lost health. You can also use the bed to return to Moga Village after completing one or more subquests.
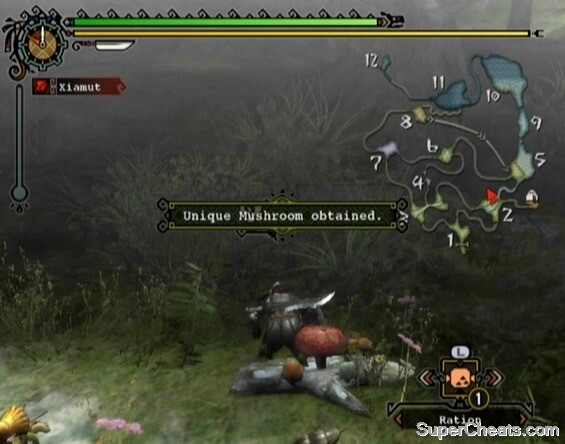
Gather at mushroom gather spots for a chance to find a Unique Mushroom.
There are at least two mushroom gathering spots at the north end of Area 2. That's certainly a good place to start. You'll likely have at least five Unique Mushrooms after gathering at these spots. If you want to go on to complete the subquests, you'll have to venture a bit further into the area. There are one or two more mushroom gather spots in Area 3, both at the west end of the area. The more Unique Mushrooms the better, as any extra you have will be turned in for extra zenni at the end of the quest.
Choice Mushrooms are quite uncommon. These mushrooms can be found at common mushroom gather spots, but come more easily from gather spots that look like a patch of white toadstools. Spent gather spots will reappear eventually, so just keep checking Areas 2, 3 and 7 for them.
As for Ripened Mushrooms, there's a chance Altaroth that have a large, blue abdomen will drop one when killed. The abdomen of Altaroth swell when they feed at a gather spot. Hang around Area 2 long enough and you may see these Altaroth. After killing an Altaroth that has a large, coloured abdomen, gather at the glittering spot that appears on the ground to collect the item the Altaroth dropped.
Completing these subquests yields only an additional 500z per quest and some minor loot, so don't fret if you're unable to find these rare mushrooms.
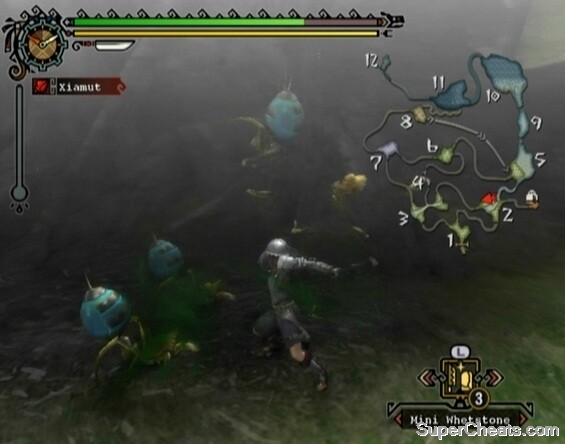
Altaroth that have a large, blue abdomen will sometime drop a Ripened Mushroom when killed.
Return to Base Camp when you're satisfied with your mushroom haul. Always deliver any subquest items first, because delivering the main quest items first will end the quest.
Gathering Quest: Deliver 2 Kelbi Horns
Reward: 600z
Contract: 100z
Area: Deserted Island
Time: 50 min.
Subquest A: Slay 5 Kelbi
Reward: 500z
Kelbi are relatively harmless deer-like herbivores. Most Kelbi will only attack hunters if the hunter strikes one of their kin. Male Kelbi are territorial and tend to charge at random, though they do little damage.
You're after two Kelbi Horns here. When carving a Kelbi, you actually have a much higher chance of carving a Kelbi Horn if the Kelbi is stunned as opposed to dead when you carve it. You go from having a 5 per cent chance of carving a Kelbi Horn from a dead Kelbi to a 58 per cent chance of carving one from a stunned Kelbi. As an added bonus, a stunned Kelbi won't be dead when you carve it, so you get out of having to murder a group of poor, defenceless creatures. Although you'll probably be leaving them with some head trauma, at the least.
Carve stunned Kelbi for a greater chance of obtaining a Kelbi Horn.
Only certain attacks carry the potential to stun, so you'll need to bring along a weapon capable of stunning. The Hammer is the stun weapon, as most of its attacks are capable of stunning. Bring a low-end Hammer, such as the Iron Hammer, so you won't kill the Kelbi while trying to stun them.
To stun a monster, you must attack its head. Hit a Kelbi in the head with the Hammer's Ground Smash attack (press the X button or push up on the Right Stick, depending on the control pattern you have set) and stars should appear above its head, indicating that it is stunned. Hit the Kelbi with another Ground Smash if the initial hit failed to stun it. Carve the Kelbi while it is on its side with stars over its head and the Kelbi will then get up and run off.
There are a few Kelbi at the west end of Area 3, and a lot more in Area 7. The Kelbi in Area 7 respawn indefinitely, so just keep going after them until you've carved at least two Kelbi Horns. To complete Subquest A you must slay (or stun and carve) five Kelbi, so make sure you've done so before heading back to camp.
Return to Base Camp once you have two Kelbi Horns and deposit the horns into the Delivery Box to complete the quest.
Gathering Quest: Deliver 3 Goldenfish
Reward: 1500z
Contract: 150z
Area: Deserted Island
Time: 50 min.
Subquest A: Deliver 2 Small Goldenfish
Reward: 600z
You must catch and deliver three Goldenfish to complete this quest. The aptly named Goldenfish Bait, produced by combining a Firefly and Snakebee Larva, is the best bait for catching Goldenfish. Speak to the Carefree Lad by the bridge to Moga Woods and the Future Alpha Male by the steps that lead up to the bridge to gather these ingredients. The Carefree Lad will give you two Snakebee Larva and the Future Alpha Male will give you two Fireflies.
If your hunter is wearing the full Chainmail set, you'll have the Fishing Expert skill. This skill causes fish to take bait on the first bite, making the Chainmail armour set ideal for this quest.
Goldenfish can be fished along the shoreline in Area 10. There is a secret passage at Base Camp you can use to skip right to Area 9. Collect the Map and five Worms from the Supply Chest first, then To find it, walk down the steps straight across from the red Delivery Box and dive into the water. Continue swimming north through the underwater passage to reach Area 9.
Move through Area 9 and enter Area 10. There is a fishing spot at the east end of the shoreline in this area. The Goldenfish's golden colour makes it easy to distinguish from the other fish in the water. If you don't like the current selection of fish in the water, simply dive in to scatter the fish and different fish will spawn in their place shortly after you hop back out.
Combine a Firefly with Snakebee Larva to make Goldenfish Bait.
Fishing is simple: throw in a piece of bait on the line and wait for a fish to tug the bait underwater, then press the A button to pull it in. You have to be quick; wait too long and you'll be left with no fish and no bait. Press the A button as soon as the bait dips underwater to catch the fish.
Only Goldenfish will go after Goldenfish Bait. Don't fret if you run out of Goldenfish Bait, as Worms are suited to complete this quest. The only problem with using Worms is that the Goldenfish will have to compete against the other fish at the fishing spot. You can control which fish takes the bait by pulling the line out of the water when a non-golden fish is nearing or nudging the bait. You can continue doing this until the Worm catches a Goldenfish's attention and the Goldenfish is close enough to get to the bait before the other fish.
If you run out of Worms, there is a gathering spot in Area 10 that yields an unlimited number of Worms and Frogs. The gather spot is by the large log in the southeast end of the area (near the fishing spot).
Completing the subquest requires you to deliver two Small Goldenfish, which spawn at the same spot as the larger Goldenfish in Area 10. Small Goldenfish are somewhat rarer than the standard Goldenfish. Small Goldenfish look like Sushifish and Whetfish but are gold, so they're quite easy to spot.
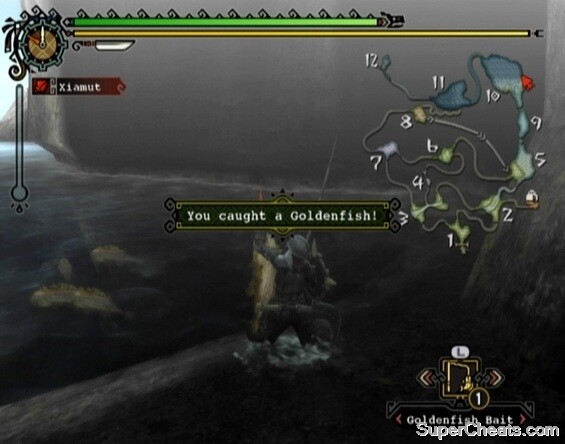
Once you've caught three Goldenfish, continue fishing until you're satisfied with your haul (or until the quest time is almost up). Excess Goldenfish will be sold and added to your quest rewards. They go for 500z a piece, so it's definitely worth sticking around and catching more than three.
Catching three Goldenfish
Make your way back to Base Camp when you have at least three Goldenfish and deposit them in the Delivery Box (remember: subquest items first!) to complete the quest.
Hunting Quest: Slay 5 Jaggia
Reward: 800z
Contract: 100z
Area: Deserted Island
Time: 50 min.
Subquest A: Slay 10 Jaggi
Reward: 600z
Jaggia are the female version of the Jaggi. They are much bulkier and slower than the Jaggi and can often be found lounging about. You must slay five Jaggia to complete the quest and 10 Jaggi to complete the subquest. You must kill the 10 Jaggi before killing the fifth Jaggia, as the quest will end as soon as you make the last kill.
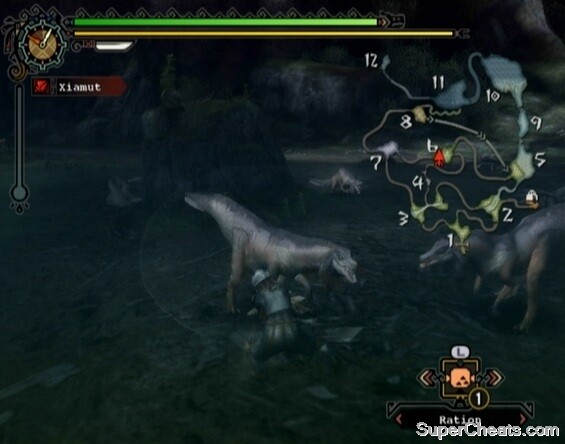
Slay five Jaggia to complete this quest.
Start by killing the two Jaggi in Area 2. There are two more Jaggi and one Jaggia in Area 7. Move from Area 7 to Area 6 and kill the three Jaggia and the three Jaggi there. More Jaggi will spawn after you've killed the first set, so remain in Area 6 and continue killing the Jaggi that spawn until you reach 10. Exit to Area 5 and kill the one Jaggia there to complete the quest.
Gathering Quest: Deliver 3 Monster Guts
Reward: 800z
Contract: 100z
Area: Deserted Island
Time: 50 min.
You need to gather and deliver three Monster Guts to complete this quest. Carve Epioth to find Monster Guts. Epioth are peaceful, aquatic herbivores -- the Aptonoth of the sea. You can find them in Areas 10 and 11.
Kill and carve Epioth for a chance to obtain Monster Guts.
There is a secret passage at Base Camp you can use to skip right to Area 9. To find it, walk down the steps straight across from the red Delivery Box and dive into the water. Continue swimming north through the underwater passage to reach Area 9.
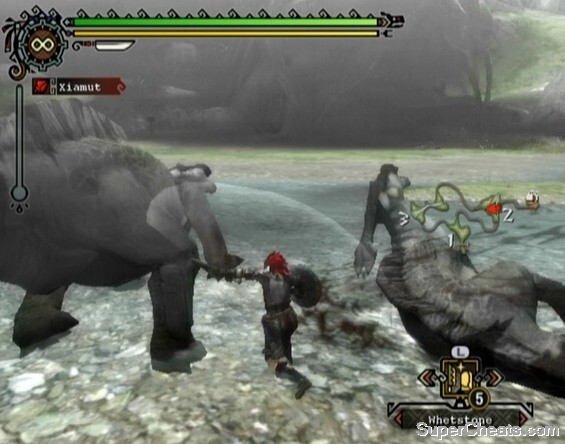
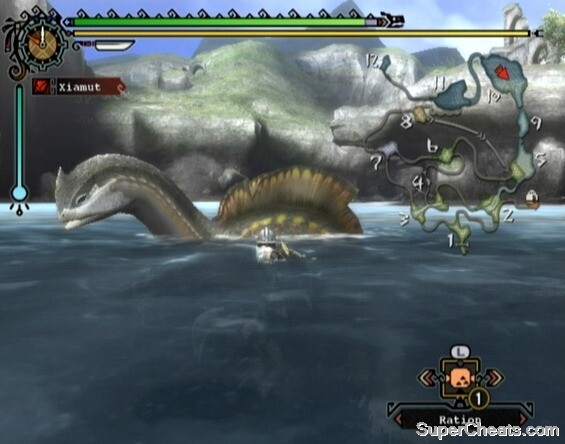
Make your way to Area 10 and kill the Epioth there. Like the Aptonoth, an Epioth corpse can be carved twice. When Area 10 is clear of Epioth, swim through to Area 11. You're definitely not ready to face the Lagiacrus at this point, so swim back to Area 10 to find some fresh Epioth. If Lagiacrus enters Area 10, immediately start toward the exit to Area 11 and enter that area. You'll find another batch of Epioth here and, most importantly, no Lagiacrus.
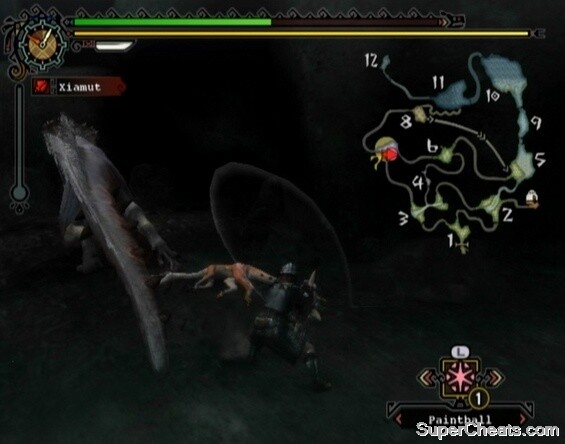
The Lagiacrus will swim back and forth between Areas 10 and 11, so continue avoiding him by swimming into the next area. You'll know he's in the area when music starts and an eye icon appears next your hunter's name in the top-left corner of the screen. Try your best to avoid being swiped by Lagiacrus as you swim past him to enter the next area.
Needless to say, you're not quite ready for him yet.
Keep this up until you have the three Monster Guts. Return to Base Camp and deposit the requested items into the Delivery Box to complete the quest.
Gathering Quest: Deliver 8 Red Coral Stones
Reward: 600z
Contract: 100z
Time: 50 min.
Area: Deserted Island
Subquest A: Slay 3 Sharq
Reward: 600z
Collect and deliver eight Red Coral Stones to complete this quest. Red Coral Stones are found at the underwater gather spots in Areas 10 and 11.
There is a secret passage at Base Camp you can use to skip right to Area 9. To find it, walk down the steps straight across from the red Delivery Box and dive into the water. Continue swimming north through the underwater passage to reach Area 9.
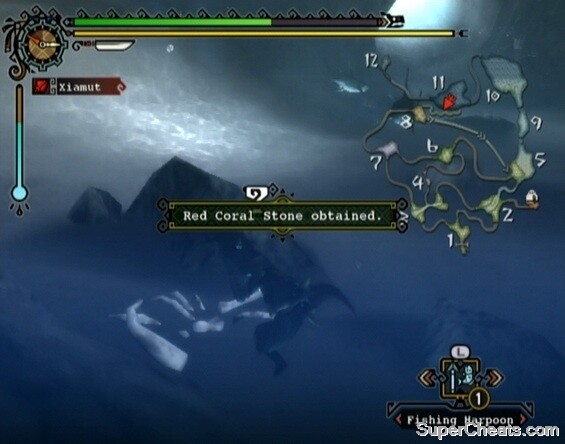
Red Choral Stone can be gathered underwater in Areas 10 and 11.
Move through Area 9 and into Area 10. The subquest for this quest is to slay three Sharqs. Sharqs are aquatic creatures that, oddly enough, resemble sharks. There are several Sharqs near the seafloor in Area 10. Sharqs are aggressive creatures, but not very powerful. They will attempt to swim away when low on health; dash after them by pressing the B button and continue attacking. When a Sharq dies, it will either disappear on the spot or swim off and disappear. Rest assured, this counts as a kill. If you want to carve the Sharq, you'll have to make the killing blow with a Fishing Harpoon.
Underwater gather spots in Areas 10 and 11 appear as a pile of bones on the seafloor. Collect eight Red Coral Stones and then return to Base Camp and deposit them in the Delivery Box to complete the quest.
Two-star Hunting Quest: Slay 6 Ludroth
Unlock: Complete “Harvest 'Shroom,” “Farm Aid,” and “Guts: It's What's for Dinner.”
Reward: 700z
Contract: 100z
Time: 50 min.
Area: Deserted Island
Kill six Ludroth to complete this quest and unlock the two-star quest tier. There are Ludroth in Areas 10 and 11.
There is a secret passage at Base Camp you can use to skip right to Area 9. To find it, walk down the steps straight across from the red Delivery Box and dive into the water. Continue swimming north through the underwater passage to reach Area 9.
Ludroth are not difficult to take down if you've upgraded your Sword & Shield. They do hit a bit harder than Jaggi, but their attacks are slow and easy enough to dodge. The Ludroth's projectile attack will inflict an annoying status ailment called Light Waterblight if it hits. While suffering from Waterblight, your hunter will recover stamina at a reduced rate. To avoid this, don't stand directly in front of a Ludroth for too long; attack from the side instead to avoid being caught off guard by its projectile attack.
Look for Ludroth in Areas 10 and 11.
There are three Ludroth along the shoreline in Area 10 and one underwater. Kill these four Ludroth and then swim to Area 11. Ludroth are in their element underwater, so you may have a tougher time fighting them underwater than you did fighting them on land. Nevertheless, just keep at it, down a First-aid Med if need be and continue killing Ludroth until you've slain six.
There are a couple of new faces in Moga Village. Start by speaking to the Argosy Captain to learn about trading. The captain has some useful items for trade, such as the Mega Pickaxe and Mega Bugnet. He also carries rare goods, such as the Double BBQ Spit. You'll need rare items to trade for rare goods, though. You won't find the captain in town all the time; he periodically takes the Argosy on a voyage and may bring back rare items to trade.
You can order meals from the Itinerant Cook once he's behind the Quest Counter. To order a meal, you first pick two ingredients from a list and then specify the preparation method. Different dishes offer the possibility of different bonuses, such as a boost to Attack, Defence, or Health. The boost will last for the duration of one quest. There is also the potential for negative effects, such as decreased stamina or health, so it's a bit of a gamble.
Speak to the Argosy Captain after speaking to the Itinerant Cook and the captain will give you a Voucher for one free meal.
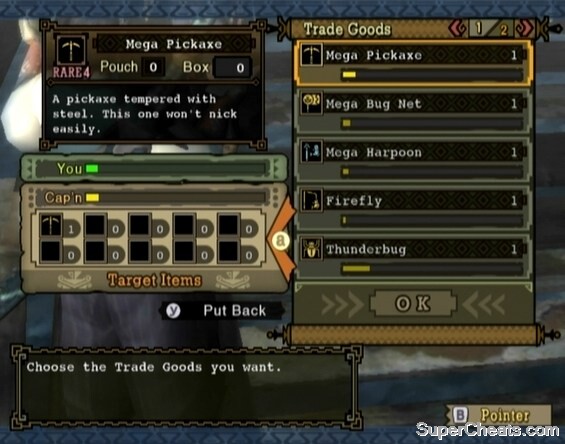
Trade with the Argosy Captain to obtain rare goods.
Talk to the Wyverian Artisan and he'll give you a Pawn Talisman. This item is a Charm, which you can equip to your character to gain the Skill Points it offers. You can equip Charms via the Item Box in your room in Moga Village.
Hunting Quest: Slay 12 Altaroth
Reward: 600z
Contract: 100z
Time: 50 min.
Area: Deserted Island
Subquest A: Deliver 2 Ripened Mushroom
Reward: 550z
Subquest B: Deliver 1 Choice Mushroom
Reward: 550z
Altaroths can be found in Areas 2, 3 and 7. Since you're only up against bugs here (albeit big ones), completing this quest should be a cinch. Completing the two subquests might not be as easy, as doing so requires a bit of luck.
Choice Mushrooms are quite uncommon. These mushrooms can be found at common mushroom gather spots, but come more easily from gather spots that appear as a patch of white toadstools. Spent gather spots will reappear eventually, so just keep checking Areas 2, 3 and 7 for them.
As for Ripened Mushrooms, there's a chance Altaroth that have a large, blue abdomen will drop one when killed. The abdomen of Altaroth swell when they feed at a gather spot. Hang around Area 2 long enough and you may see these Altaroth. After killing an Altaroth that has a large, coloured abdomen, gather at the glittering spot that appears on the ground to collect the item the Altaroth dropped.
Altaroth that have a large, blue abdomen will sometime drop a Ripened Mushroom when killed.
Completing these subquests yields only an additional 500z per quest and some minor loot, so don't fret if you're unable to find these rare mushrooms.
Be sure to deposit any subquest items in the Delivery Box at Base Camp before killing a twelfth Altaroth, as the quest will end as soon as you do.
Gathering Quest: Deliver 4 Crystal Bones
Reward: 600z
Contract: 100z
Time: 50 min.
Area: Sandy Plains
Subquest A: Slay 4 Giggi
Reward: 200z
Buy five Iron Pickaxes from the market before setting out on this one. Crystal Bones can be mined from the ore deposits in Areas 6 and 11. Remember to grab the Torch along with the Map and Rations from the Supply Box.
The only way to get to Area 11 is to drop down from the cliff along the west end of Area 10. When in the desert areas -- Areas 8, 9 and 10 -- you'll need to drink either a Cool Drink or a Hot Drink to counteract the negative effect caused by the extreme heat or extreme cold. If it's night, drink a Hot Drink to keep warm. A cold hunter's stamina bar deteriorates more rapidly than default. If it's day, drink a Cool Drink. Overheated hunters gradually lose health.
Mine for Crystal Bones in Areas 6 and 11.
Completing the subquest requires killing four Giggi. Giggi are the small, slug-like creatures that will latch onto you and sap your health if you give them the chance. There are Giggi in Areas 7 and 6.
Return to Base Camp once you've mined four Crystal Bones and deposit them in the Delivery Box to complete the quest.
Gathering Quest: Deliver 3 Monster Guts
Reward: 800z
Contract: 100z
Time: 50 min.
Area: Sandy Plains
Subquest A: Slay 8 Delex
Reward: 200z
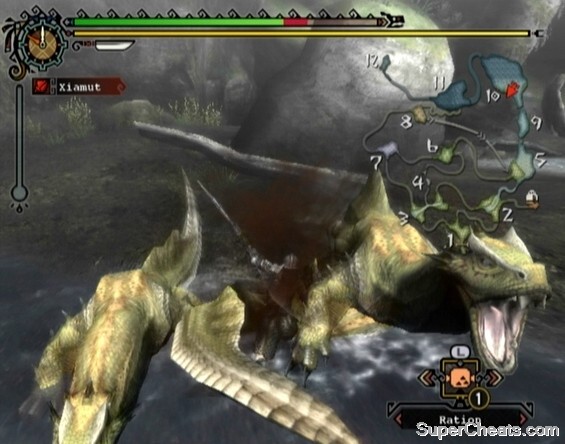
You can obtain Monster Guts by killing and carving the Delex in Areas 9 and 10. Delex are carnivorous creatures and aggressive, but they do not deal much damage. They swim through the sand in packs and look like a cross between a shark and a crocodile.
The Sword & Shield weapon type is a good choice for this task, as it will allow you to leap in (by pressing the X A buttons or by pushing down on the Left Stick) and lock a Delex into a combo. If you're using an upgraded Sword & Shield such as the Hunter's Dagger, you can likely kill a Delex with a single combo.
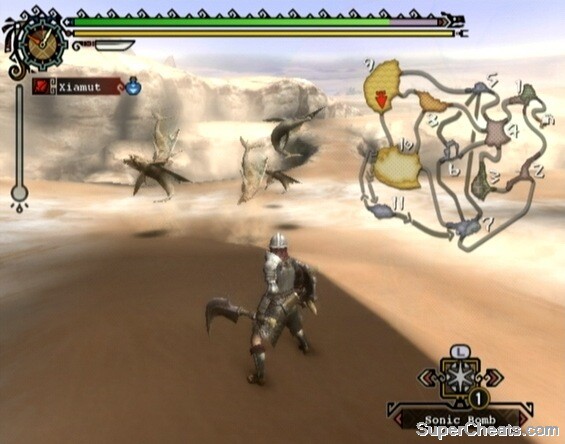
Throw a Sonic Bomb to turn up swimming Delex.
Included in the Supply Chest for this quest are two Sonic Bombs. Throw a Sonic Bomb near swimming Delex to root them up and temporarily stun them.
Although Delex do not hit hard, they can inflict an annoying status ailment called Light Waterblight with their projectile attack. While suffering from Waterblight, your hunter will recover stamina at a reduced rate. When you see a Delex hunched over with its head and torso up out of the sand, it's readying an attack. The Delex will spit a sandy projectile a few feet directly in front of it. Your hunter will suffer from temporary Waterblight if hit by this attack, so get out of the way when you notice a Delex hunched over with its head and torso up out of the sand
Completing the subquest requires killing eight Delex. You will likely achieve this in the course of gathering three Monster Guts, as they are uncommon carves. Return to Base Camp once you have at least three Monster Guts and deposit them in the Supply Box to complete the quest.
Hunting Quest: Hunt a Great Jaggi
Reward: 1000z
Contract: 100z
Time: 50 min.
Area: Deserted Island
Subquest A: Wound Great Jaggi's head
Reward: 200z
Subquest B: Stun Great Jaggi
Reward: 300z
Slaying the Great Jaggi will be your first real challenge. The Sword & Shield is a good choice here, because with it you can block, move quickly and use items without having to sheathe your weapon. You might want to purchase a few Potions from the market for this quest, as the Great Jaggi is hits harder than you're used to.
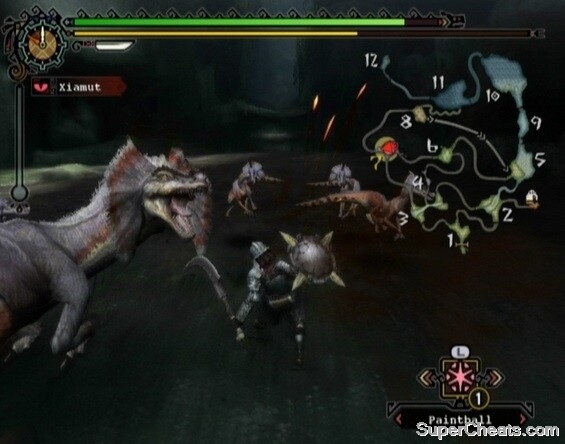
Take the Map, First-aid Meds, the EZ Flash Bomb, Paintballs and Rations from the Supply Box before setting out. The Great Jaggi is in Area 6 to start. He might venture into Area 5 or Area 7 if this is not your first time attempting this quest.
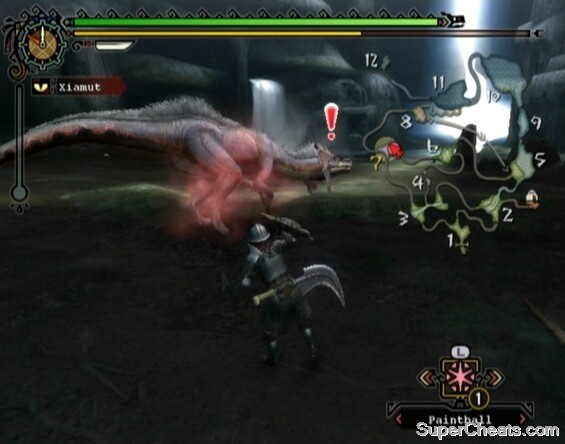
Hit the Great Jaggi with a Paintball to mark his location on the map.
Area 6 is chaotic. With Jaggi and Jaggia occupying the area, taking down the Great Jaggi won't be easy. Hit the Great Jaggi with a Paintball when you first encounter him to mark him on your map. Paintballs are useful for tracking monsters that move between areas often. The Great Jaggi will limp into one of the adjacent areas when he is low on health (usually Area 7 or Area 5, or back to Area 6), so hitting him with a Paintball is good start.
Don't bother attacking the Jaggi or Jaggia. They'll get in your way, but try your best to concentrate on attacking the Great Jaggi. The trick here is proper evasion. Roll away from your target after performing a combo to avoid being struck by a quick attack. Learn the cues for the Great Jaggi's attacks so you'll know what's coming and can act accordingly. And if you're using a Sword & Shield, you have a shield, so use it! Hold R to block an attack if rolling won't get you out of harm's way.
Always be on the lookout for an opening. When the Great Jaggi stops and howls, leap in with a Jumping Slash (by pressing the X A buttons, or by pushing down on the Left Stick) and follow up with a combo. Attack when he attacks and misses, when he stands on the spot and growls, when he scratches at the dirt with his hind legs and roars, or while he is feeding to recover stamina.
Controlling the camera during combat takes some getting used to. If you're using Classic Style 1, you can control the camera manually using the Right Stick. If you're using Classic Style 2, the D-pad controls the camera. Pressing the L button will snap the camera behind your hunter. It's best to manually adjust the camera while your hunter is finishing an attack animation, or while you're moving around the area but not attacking.
You have a shield, so use it!
Try to keep the camera centred on the Great Jaggi at all times. If you're trying to get some distance from your enemy so you can use a First-aid Med or Potion, manually control the camera so you know where the Great Jaggi and any other enemies are and what they're doing.
Before using a healing item or a Whetstone, you have to take into account the time it takes for the accompanying animation to finish. Sprinting a few paces and using a healing item is unwise, as doing so will leave you vulnerable. Any health gained will be lost if you're hit, and you might even end up in a worse state. If possible, temporarily move to an adjacent area and use a healing item there. Use a Whetstone as well if your weapon is dull (or even if it's not).
A good time to use Whetstones in particular is when your target flees to another area. You may also want to use a Flash Bomb to temporarily stun the Great Jaggi and hopefully any smaller monsters around him. Doing so will give you time sharpen your weapon and heal. To use a Flash Bomb effectively, face away from the monster and throw the bomb in front of you while the monster is facing your hunter's back. While stunned, the Great Jaggi will continuously swing his tail until the stun wears off, so using a Flash Bomb as a way of getting some hits in isn't the best idea.
The Great Jaggi is slow and lumbering but has a handful of damaging attacks. The least damaging is his bite; to avoid this one, just don't stand directly in front of him for too long. When the Jaggi is about to bite, he will rear his head back and to the side. His bite comes out fast, but you can dodge it with a roll if you're quick enough. He can also bite you while you're next to him. This side bite is a bit harder to avoid, so be on the ready.
Another of the Great Jaggi's attacks is his tail swing. He swings his tail twice in a clockwise direction. Keep to his right side if possible, otherwise you can block the tail swing with your shield or dodge it with a roll.
The most damaging attack in the Great Jaggi's arsenal is his hip check. This attack is the easiest to spot, however. Take note of the sound the Great Jaggi makes just before hip checking. Evading the attack isn't as easy. The Great Jaggi's body is of considerable length, so if he's coming at you with a hip check and it doesn't look like you'll be able to roll to the side to avoid it, hold up your shield and block the attack instead. The Great Jaggi lunges when he hip checks, so avoid underestimating the reach of this attack.
The Great Jaggi will limp to another area when near death.
When close to death, the Great Jaggi will limp away to another area. If you need to heal or sharpen your weapon, do so first before following him. When he uses one of the tunnels only accessible to monsters to travel to another area, the Great Jaggi will leave behind a glittering spot on the ground; gather at this spot to obtain an item.
The Great Jaggi will attempt to restore health by sleeping if you don't keep up with him. He regains health at a slow rate, so it's not a big deal if he manages to catch a bit of shut-eye before you can get to him. If you spot him sleeping, you can wake him up with a Jumping Slash and a Chop combo.
Completing Subquest A requires you wound the Great Jaggi's head. How to go about doing this should be fairly obvious. Direct your attacks at the Great Jaggi's head and his frill will soon become frayed, signifying that his head is wounded. Avoid attempting to attack his head with a combo, as doing so leaves you vulnerable to his bite. It doesn't take much to wound the Great Jaggi's head, so just hit him with a Jumping Slash or attack his head from the side and you should have this subquest done in no time. Wound the Great Jaggi's head in this way and you'll get some additional loot on the reward screen.
Subquest B, which requires you to stun the Great Jaggi, is not as easy. To stun a monster, you must attack its head quite a bit. When stunned, stars will appear above the monster's head and it will be incapacitated for a short while. Only certain attacks carry the potential to stun, and some weapon types are better capable of stunning than others. It is possible to stun a monster with the Sword & Shield using the Shield Attack move, but the Hammer is by far the best weapon type for stunning.
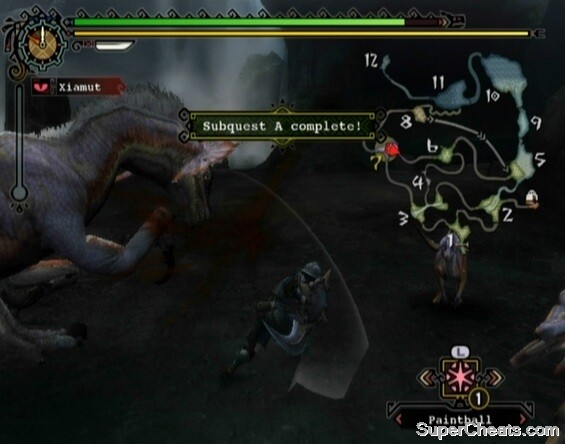
Hit the Great Jaggi's head enough and you'll wound it.
This is a tough fight for the beginner, but just keep at it. If your hunter falls, he or she will be returned to Base Camp and your reward will be halved. You have three lives; die three times and you will fail the quest.
When the Great Jaggi is dead you can carve him three times.
Hunting a Great Jaggi

 How to get experience, gold and items fast in Diablo 3: Reaper of Souls Ultimate Evil Edition
 Gerard Way plays two new songs Don’t Try / Kid Nothing in concert
 Torchlight 2 Quest Guide: Robot Part Locations
 Destiny: The Taken King Dreadnaught Chests Map
 Metal Gear Solid V: Ground Zeroes: Guide on How to collect Cassette Tapes