Mass Effect 3 Unofficial Guide by vhayste for
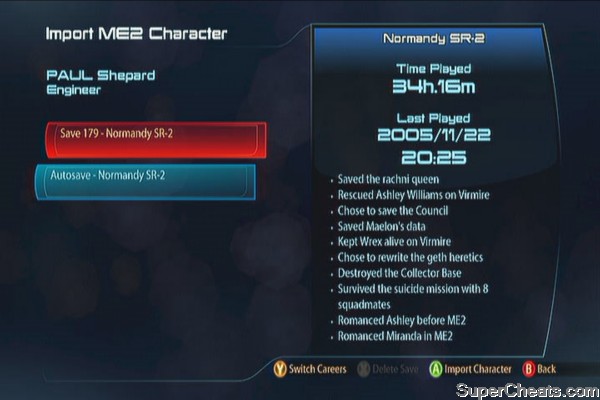
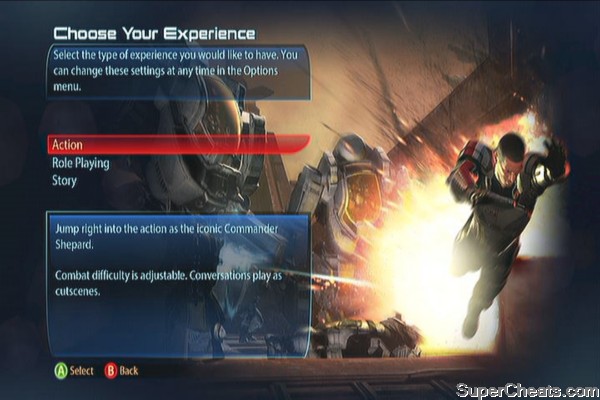
As the gameplay for ME may be unique for each player due to a myriad of different choices, character background, etc, this walkthrough will cover the main storyline and sidequests. Should there be any different situations that may arise from your gameplay while using this guide, kindly take the aforementioned reasons into consideration. You can import your completed ME2 data or start a new game. Should you choose to import, you'll be able to see the summary of the key elements in your previous game(s), based on the decisions you've made. If you're starting fresh, you can select either a Male or Female commander Shepard. Next, you'll have to choose your experience. There are three options to choose from which can be adjusted any time in the Options menu. Character Customization (New Player) The next set of options will make up your character's background and will play a great role in the overall storyline.

Priority missions are main missions that will move the storyline. To further increase your chances of acquiring more experience and resources, I suggest tackling all available non-priority missions and sidequests first before taking priority missions.
Getting Started
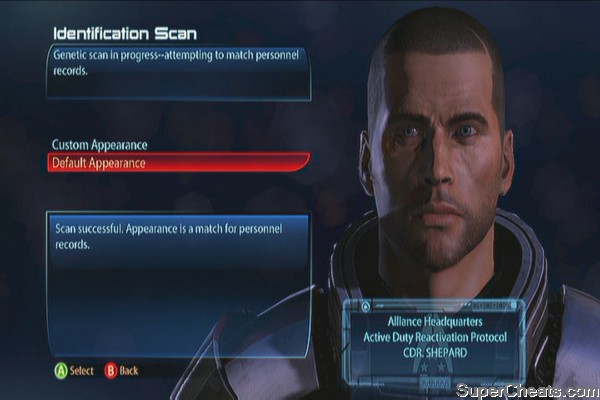
After choosing your Experience, you'll be taken to the next set of screens. Here, you can select your character's first name, appearance and combat class. 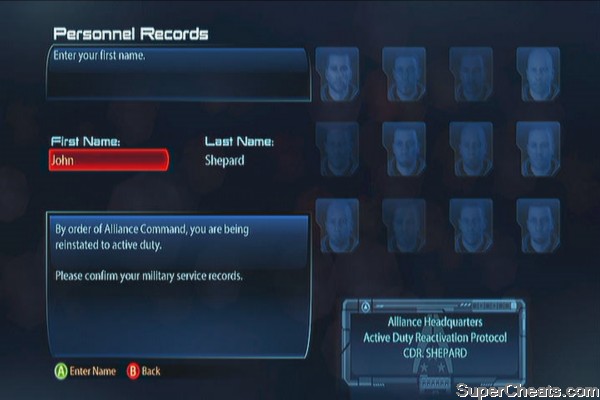
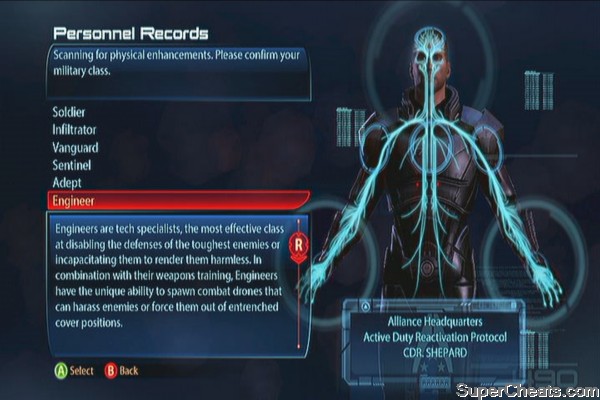
Character Background
Character Customization (Imported Character)
You'll have to undergo a few adjustments with your imported character. If ever the imported appearance doesn't get imported successfully, you'll have to manually customize it again. You can also select your preferred class. You can try out a different class or just simply select the same class again if you're content with it. Your character background will also be retained, as part of the overall story in your long career. Take note that you should make your final decisions with your character customization as you won't be able to make any further changes anymore.
Save the game if you want then use some level up points you may have stored (for imported characters). Continue forth until you encounter some husks. Shoot them all then continue forth. 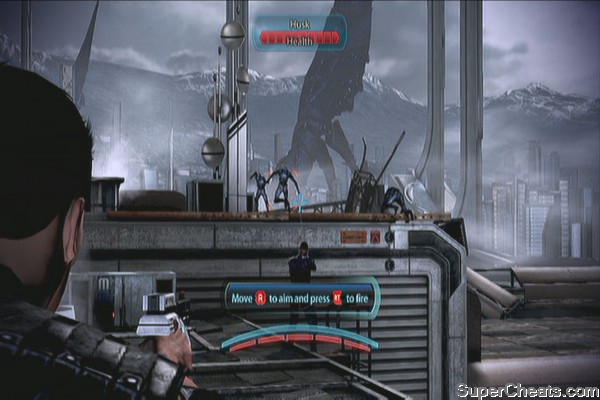
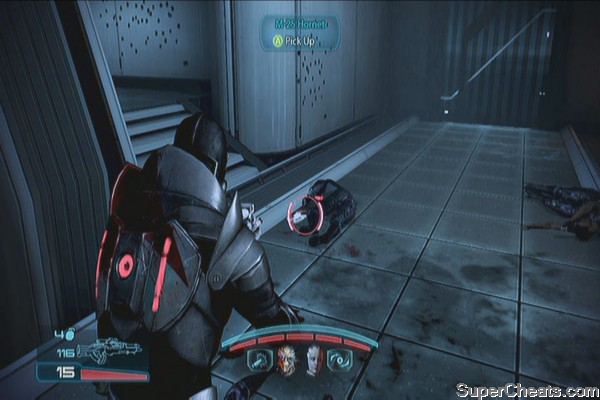
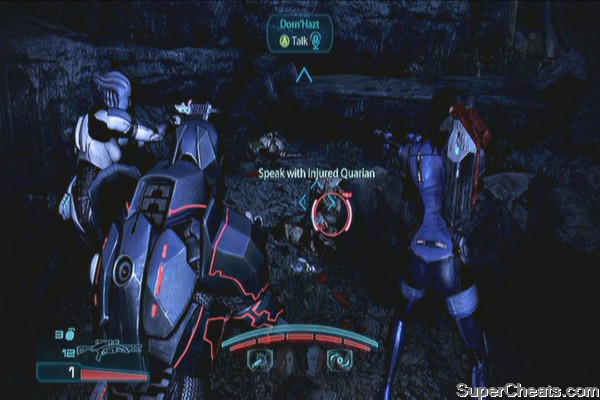
Next, climb down the ladder and melee the husks. Continue inside the building for a scene. Once you're back in control, pick up some ammo on the floor then head out. Continue following the path until you encounter a couple of injured soldiers on the ground. Kill the Cannibals on the other side then talk to them again to open the path to the next area. 
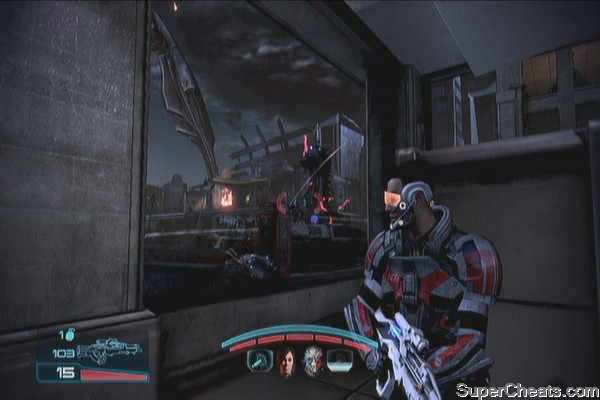
Continue forth and grab the medi-gel along the first corner. Kill the first group of Cannibals then move along. You should be able to see the gunship wreckage ahead. Go there and pick up the M8 Avenger assault rifle before activating the radio. More enemies will appear; dig in and kill them all until your cavalry arrives. 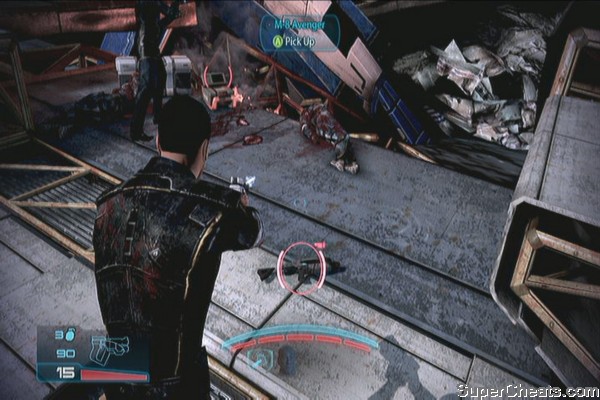
Unlockable Weapons and Equipment:
M-92 Mantis (sniper rifle)
Ariake Technologies Gauntlet
M-4 Shuriken (sub-machine gun)
Kassa Fabrication Chestplate
M-23 Katana (shotgun)
M-15 Vindicator (assault rifle)
Weapon Upgrades
SMG Scope
SMG Ultralight Materials
Shotgun High Caliber Barrel
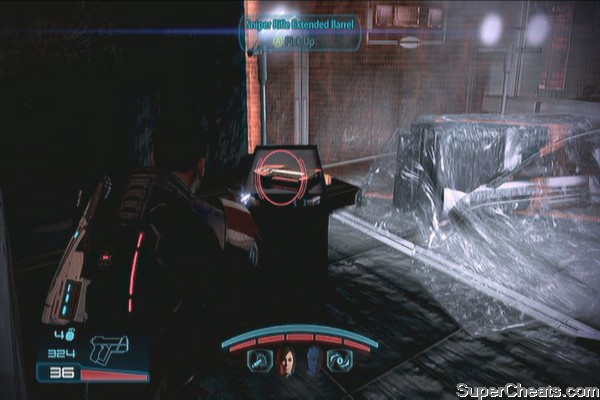
Sniper Rifle Extended Barrel
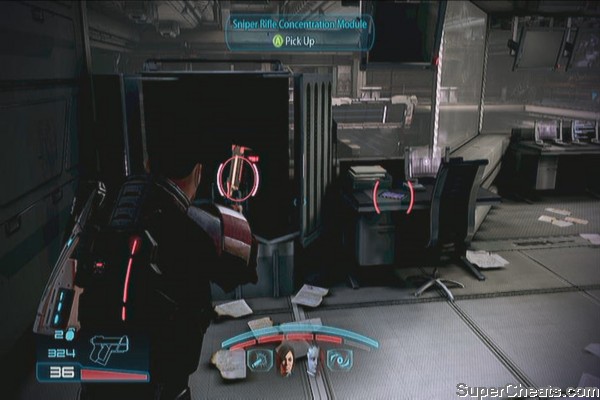
Sniper Rifle Concentration Module
Shotgun Shredder Mod
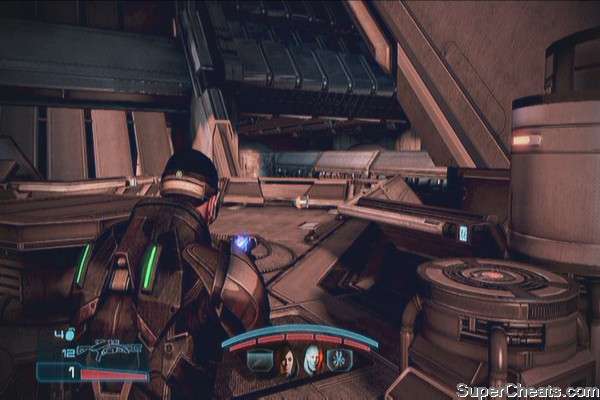
Upon landing in Mars, level up your squad. Head to the first objective point then jump down. Grab the M-92 Mantis nearby. Continue forth and you should see a group of enemies ahead. Take them all out. Continue forth to the base then activate the elevator. 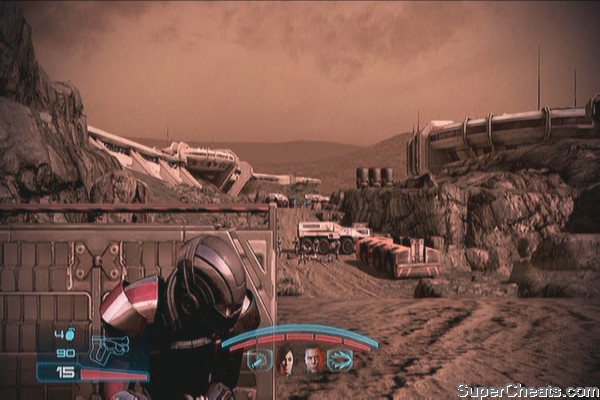
After the scene, more Cerberus assault troopers will appear. Take them all out. Level up Liara and save your game. Grab the medi-gel behind you then find the vehicle lift controls nearby. The elevator is sabotaged so it won't work; just ignore it. After lifting the vehicle, take the ramp and climb up the crates then jump over to the other side. 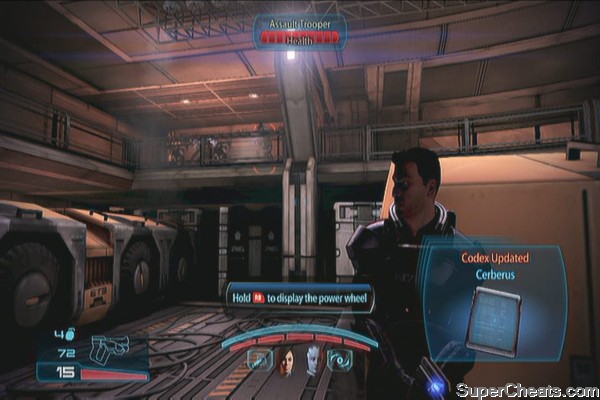
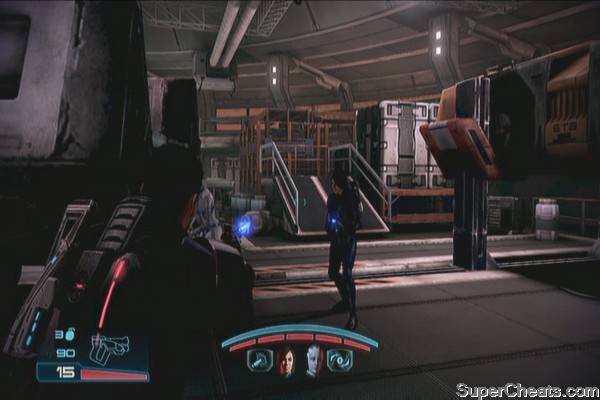
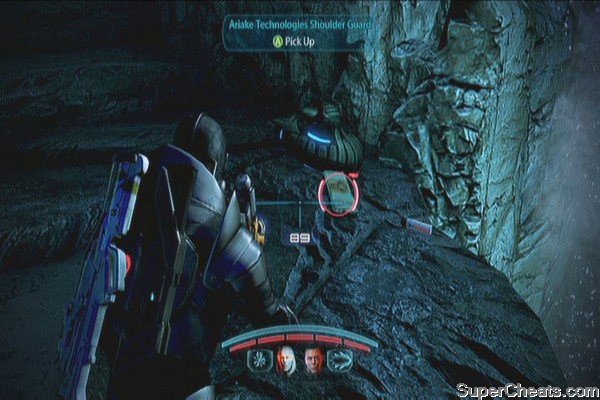
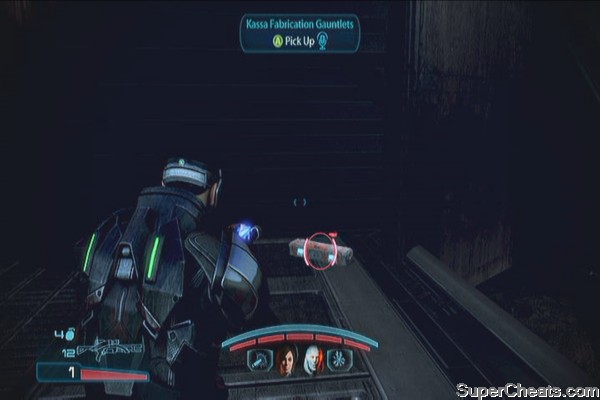
Open the door then take out the enemies inside the room. Continue forth then enter the control room. Grab the Ariake Technology Gauntlets, M4-Shuriken and medi-gel. Activate the security console nearby afterward. 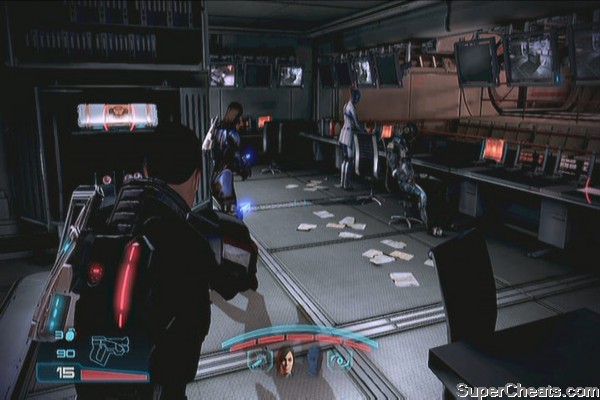
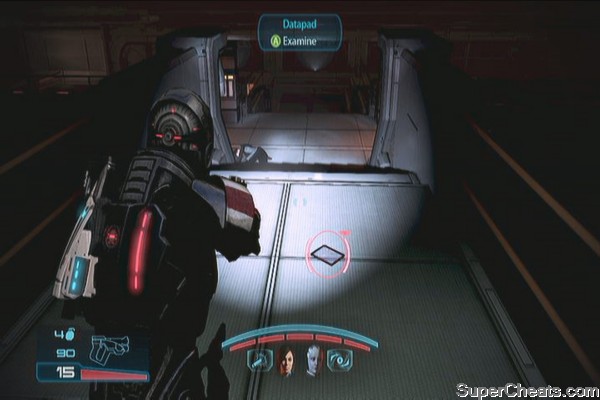
Exit through the door then climb down the ladder. Grab the Kassa Fabrication Chestplate beside the ladder. Climb up. Continue inside the cafeteria and examine the datapad on the floor, right before the stairs for some extra exp. 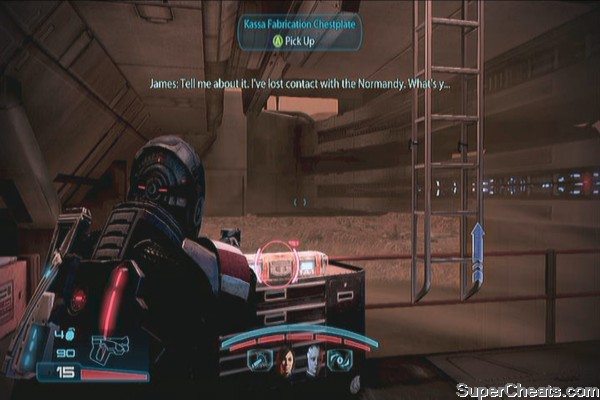
Assault troopers will peek through the window. Take cover and take them all out. After clearing them, check the food counter beside the stairs to find an SMG Scope. 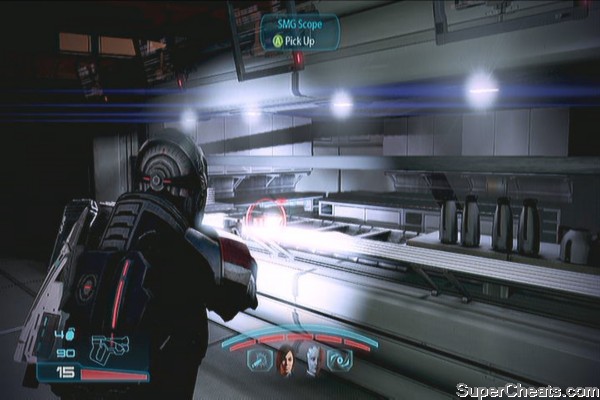
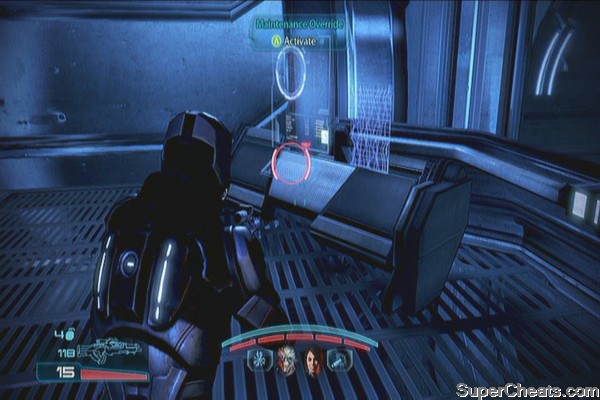
Vault over the broken window and check the small control room. Grab the medi-gel and restock some grenades and ammo then activate the Environmental Controls. 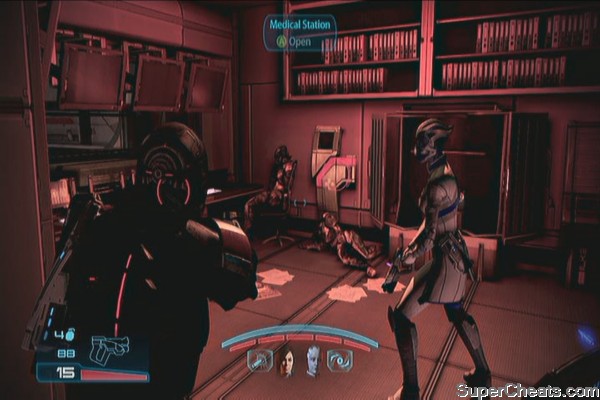
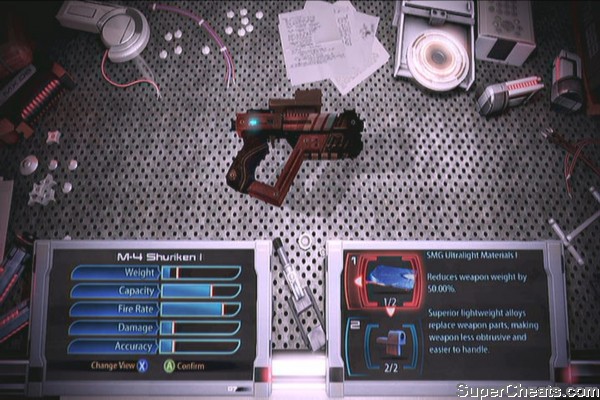
After the scene head out through the door and pick up the SMG Ultralight Materials beside the dead soldier. There's also another datapad on the bottom of the stairs. Examine it for some extra EXP. There's a work bench nearby which you can use to upgrade your weapons. For now, both of the upgrade components you got so far are for SMGs so put them on the M-4 Shuriken I if you want. 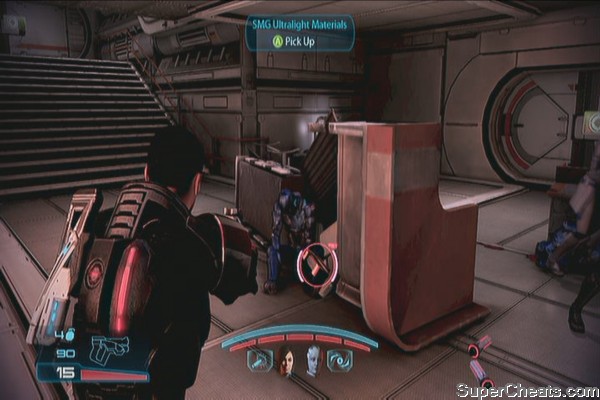
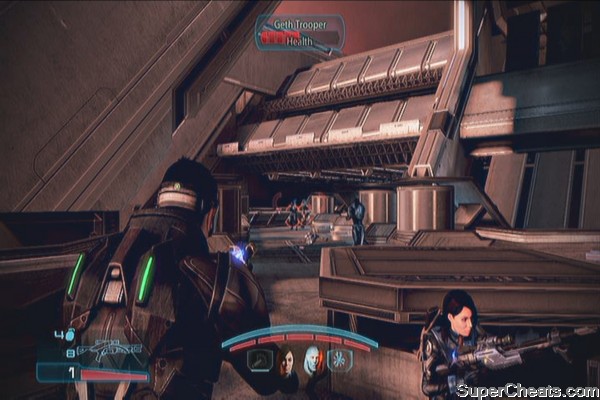
Continue upstairs and open the door. There are unwary enemy troops ahead so you can just lob a grenade at them to maximize damage. New shielded troops called Guardians will also appear. Take cover and just shoot their exposed legs and feet to deal extra damage. 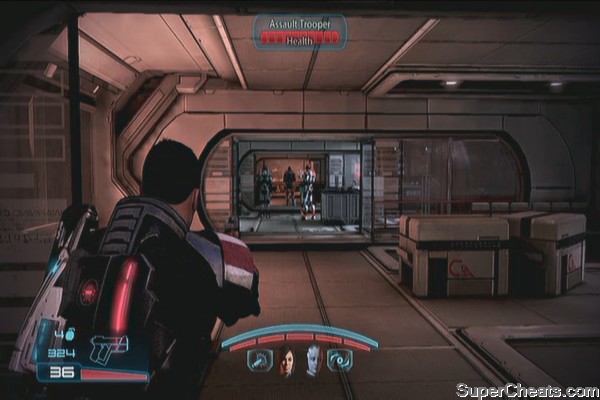
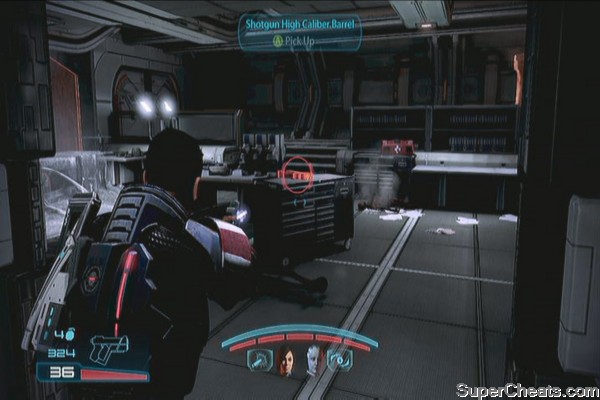
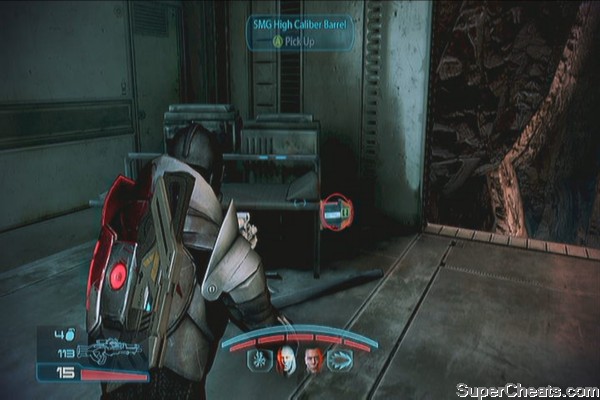
Fight your way through the narrow corridor until you reach the decontamination room. Activate the sterilizer controls to make them stop when they're in the corners then grab the Shotgun High Caliber Barrel, Sniper Rifle Extended Barrel and medi-gel inside. There's also a datapad you can examine. Exit through the door then follow the path. 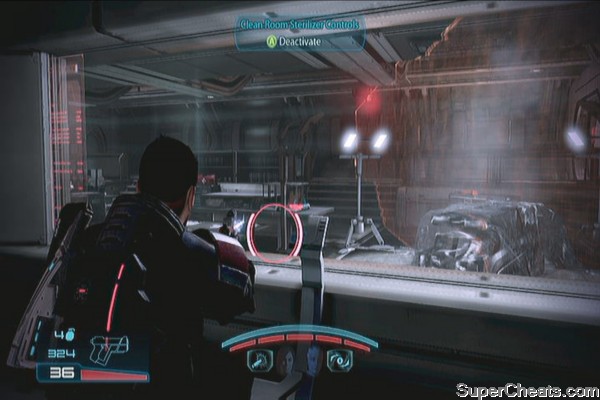
Grab the M-23 Katana on the floor beside another dead soldier. There's an auto-turret ahead. You have to run and move from cover to cover to avoid getting shredded to pieces. Once you've reached the turret's blind spot, enter the control room and clear it of enemies. 
Auto-Turret Obstacle Course
Grab the medi-gel and Sniper Rifle Concentration Module inside. Activate the auto-turret controls to trigger the next scenes.
Once back in control, order your team mates to take cover on different locations, preferably flank the entrance of the tram. Wait for the enemies to disembark then take them out. Once cleared, ride the tram and activate the controls. 
Halfway through, a bomb will stop the tram. Another tram filled with enemies will intercept you. Clear them out then hop to the other tram and continue forth. More enemies will be waiting ahead. Engage and kill them all. Order your team to spread out as the enemies can easily corner you if you stay inside the tram. Guardians will eventually appear and will press forward so take them out quickly using biotic powers and grenades. 
Once the area is cleared, check lockers in the far end of the room to find the M-15 Vindicator and Shotgun Shredder Mod. Check the booth as well to find a Medi-gel. Open the door for another scene. 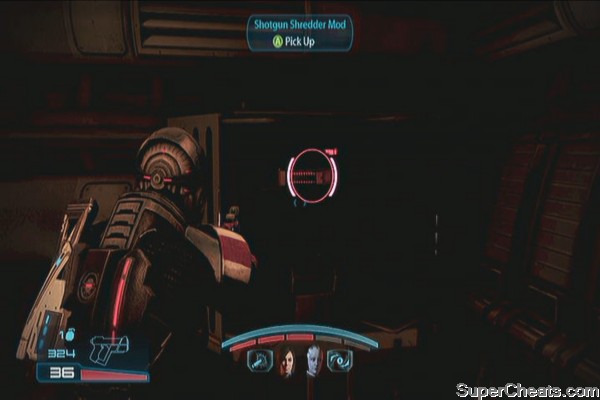
After the scene, you'll have to chase the enemy. Don't bother shooting her as you won't be able to kill her anyway. Just keep the distance until another scene is triggered. Mission complete.
Auto-Turret Obstacle Course - Chase
Once you're back in the Citadel, look around the lounge to find Diana Allers. You can have her onboard the Normandy as an correspondent. (She's even a possible romance partner as well)

Should you visit the hospital, you'll find Dr. Chakwas there. You have the option to invite her back to the Normandy or let her stay in the labs. 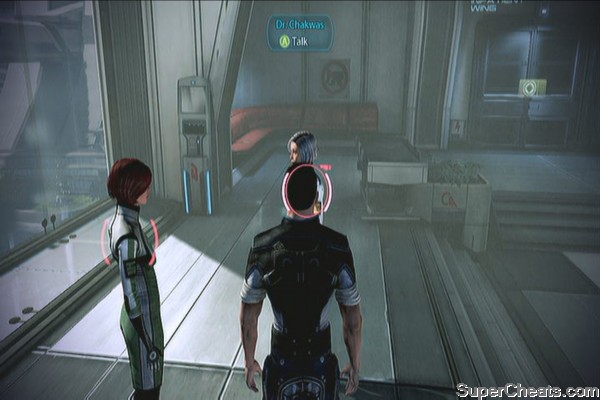
When ready, head to the Citadel Embassies. Enter the Earth Embassy and you'll be taken to the council session. Once in control, you can visit the C-SEC and spectre offices, and even meet Ms. Al-Jilani. Talk to her to get a chance to perform Paragon or Renegade actions. (Paragon action will make her a war asset) Aside from those, there's really nothing much you can do so return to the Normandy for now.
Normandy
During the flashback sequence, just approach the child until you wake up. You'll also be able to explore the ship now. After talking to the Admiral, you can examine the pedestal in the middle to view your War Assets. Here you'll find the people, weapons, armies and fleets you've accumulated which will ultimately affect the performance of the alliance in the final war. Check it regularly. 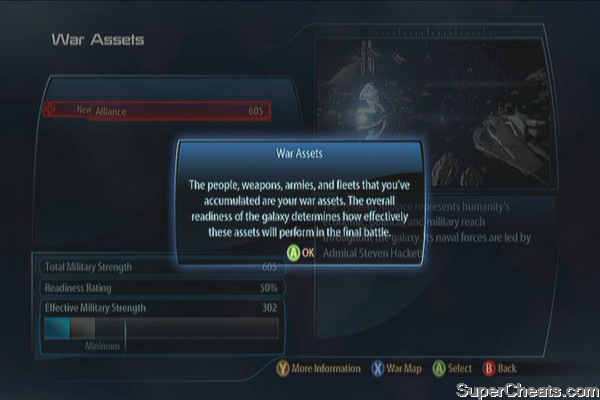
From here on, you'll be free to visit various star systems. Before doing that, you may also want to check the interior of your ship. Talking to some NPCs and squadmates here will increase your reputation. Here's a brief list of what you can find.
LV1 Captain's Quarters
Private Terminal: In addition to the normal functions of a terminal, you can also review your squad and change their armors. Take note that these aren't just aesthetic changes. Their armors give different bonuses so review them before deciding what they'll wear. 
The ship models you collected will also be displayed here.
LV2 Combat Information Center
You can check your private terminal here as well as access the War Room.
LV3 Crew Deck
Model – Ascension inside Life Support
As soon as you enter Liara's office, you'll encounter Glyph, her personal VI assistant. You'll be able to use the Intel Terminal to research upgrades once you find the appropriate intel. You can also talk to Liara for some additional dialogue. 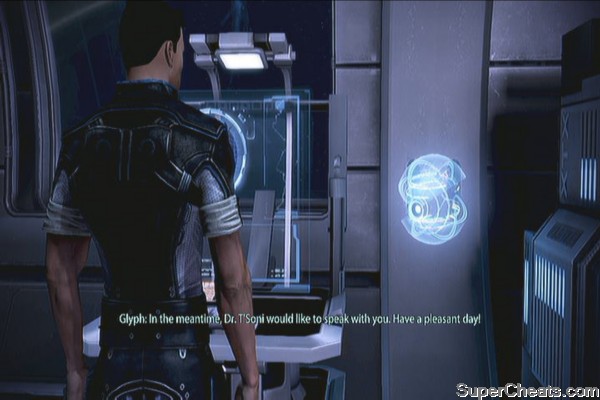
Medical Bay – If you talked to Dr. Chakwas and invited her back to the ship when you were in Citadel, you'll find her here. You can also use two of the beds to Reassign Powers and Reassign Power Bonuses. 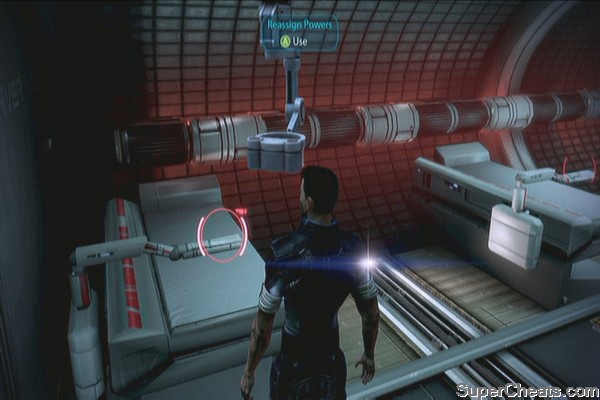
LV4 Engineering Bay
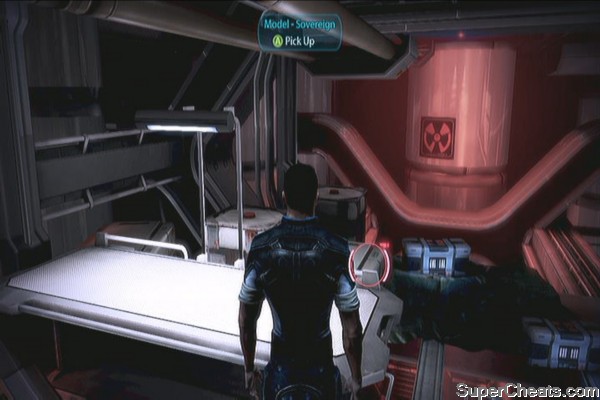
Model – Sovereign: Found in the lower level of the reactor room.
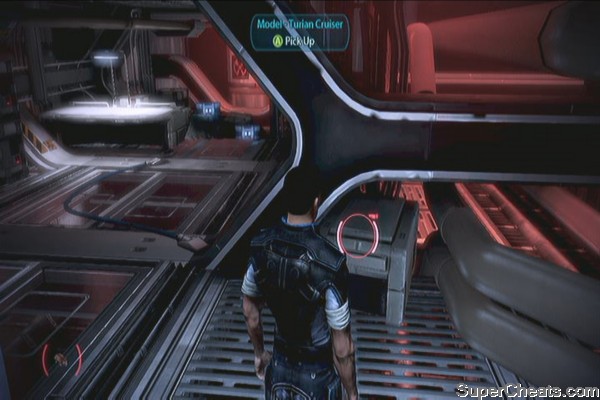
Model – Turian Cruiser: Found in the lower level of the reactor room.
Space Hamster: If you stay in the lower level of the reactor room, this critter will appear.
Dianna Allers: She's found in the Starboard Cargo Hold, if you talked to her in Citadel and allowed her to board the ship. 
LV5 Shuttle Bay
Work Bench: Use this to customize your weapons
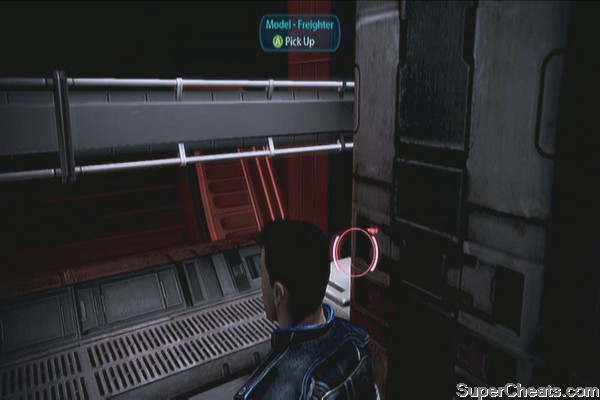
Model- Freighter: Found in the crate near the work bench
Model: Alliance Cruiser
Model: Geth Cruiser
These two models are found near each other in the crate behind the armor locker.

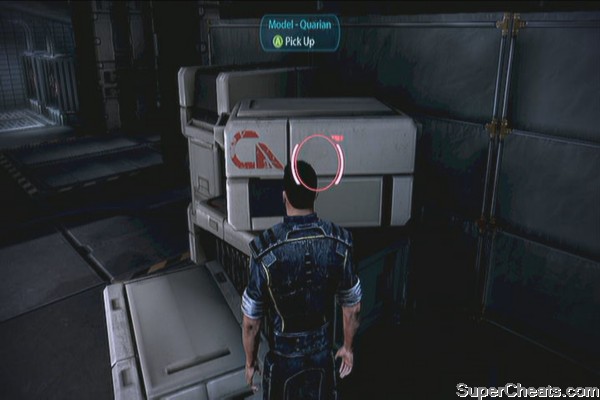
Model: Quarian:
In the crate near James' personal space.
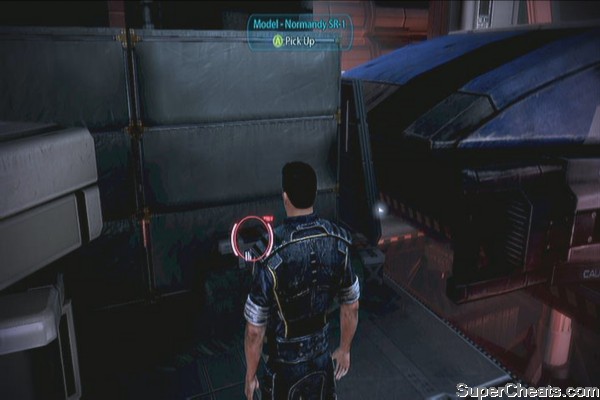
Model: Normandy SR1
Found near the Kodiak shuttle
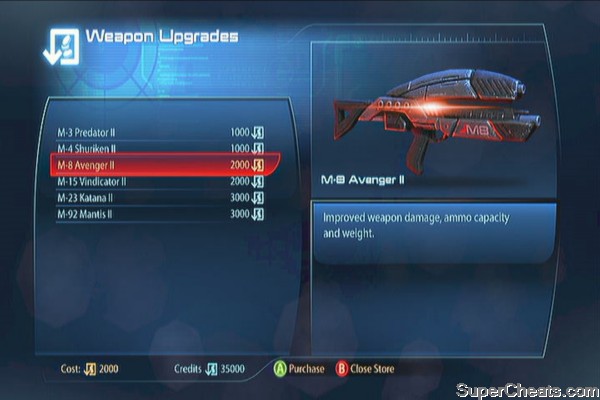
Weapon Upgrades Console: Spend credits to upgrade your weapons. Upgrading weapons improves their damage, ammo capacity and lowers their weight.
Procurement Interface: This is an online shop where you can buy weapon mods and armors.
Armor Locker: Use this console to change your gear and appearance.
Have a talk with James and have sparring session with him. Perform at least two successful quick event triggers (paragon or renegade) to unlock the Fortification. This can be bought for 5000 credits in the Bonus Powers bed in the Medical Bay.
After checking the ship, you're free to explore the various areas in your star map. Unlike in ME2, you don't have to manually scan each planet to collect resources. You can now scan the star systems and once an object of interest appears, head there and examine it. If its a wreckage, you can immediately obtain its lost supplies (usually fuel). If its located in a planet, you'll have to enter its orbit and manually scan the planet until you find the object. Scanning is a lot easier since you'll have a white reticule that will point you to the correct spot.


When exploring Reaper controlled systems, there are high chances that they'll be alerted when you're exploring. When that happens, elude them then return later when you completed a mission. You can evade them by leaving the star system and entering back again. This will allow you to play cat-and-mouse while you gather the assets available in the area. Also, manually moving from system to system costs fuel. You can buy some from the Fuel Depot in the Annos Basin or find some in scattered wreckages.

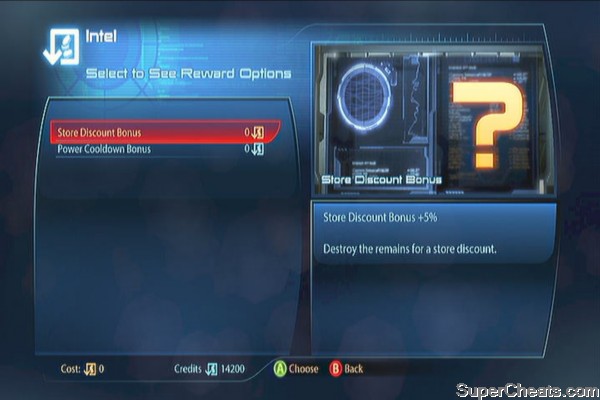
From time to time, you'll also find curious assets which will unlock rewards that can be claimed in Liara's office. You can only select one so choose the one which you think will benefit you the most in the long run. 
The War Assets in each location will be listed on a different section of this guide for your convenience.
Sidequest Items:
Failed Medi-gel experiment
Weapon Upgrades
Sniper Rifle Enhanced Scope
You'll arrive in Skepsis. There is a wreckage somewhere north which has fuel and you can find the Javelin Missile Launchers (War Asset). Head out to Decoris and scan the small system to find some credits and fuel. When ready, enter Sanctum's orbit and land there. Set up your squad and gear. You'll be asked to enter Disc 2. 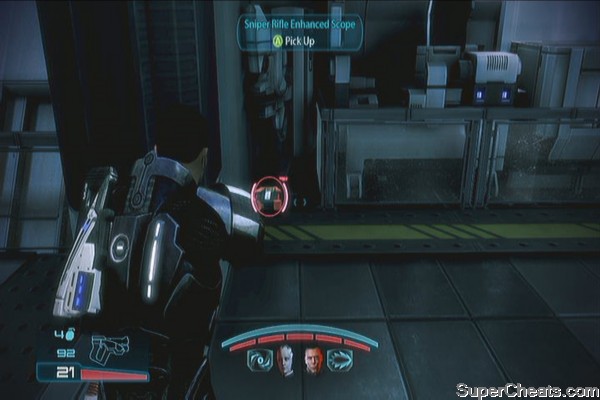
Start by taking the stairs to the left then check the floor to your left as soon as you enter the room to find the Sniper Rifle Enhanced Scope mod. There's also a medi-gel a short walk away from it.
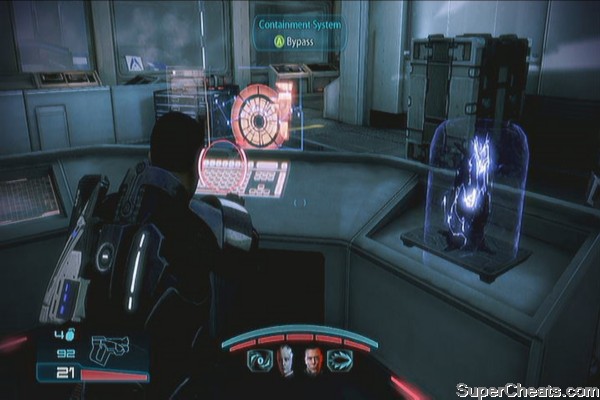
Kill the guards then bypass the containment system to grab the Reaper artifact. Before going back to the drop ship, check out the small room beside the stairs to the left to find an active console. Examine the Failed Medi-gel experiment to enable a side-mission. (Citadel: Alien Medi-Gel Formula)
Bring it back to the dropship then locate and fight your way to the second artifact. There's a console near the dropship that will give you credits once activated. Examine it first then go to the console where the second artifact is sitting. Bypass it and kill the enemies who will appear.
You'll need to return to the drop point but your shuttle will need to leave due to heavy fire. You have to clear the area of hostiles before your shuttle can land again. Head inside the lab first, through the left stairs. Another console containing credits should be there. Take cover and take them all out; watch out for the enemies who will arrive from the drop off point as well. Once cleared, your shuttle will finally arrive. Head there and activate it to complete the mission.
Unlockable Weapons and Equipment:
M-97 Viper (sniper)
Armax Arsenal Shoulder Guard
Hahne-Kedar Greaves
M-27 Scimitar (Shotgun)
Weapon Upgrades
Pistol Magazine Upgrade
Pistol Piercing Rounds
Assault Rifle Piercing Mod
Assault Rifle Magazine Upgrade
Sniper Rifle Spare Ammo
Sniper Rifle Enhanced Scope
The Turian Primarch is located in Menae, Palaven's moon. Don't worry since the star system, Trebia, doesn't have any Reaper activity nor war assets. Its two neighboring star systems, Gemmae and Castellus however, both have War Assets which you can easily recover. (Check the War Assets section of this guide for the list of war assets you can find on each star system.) Once ready, upgrade your gears or purchase new weapon mods then land there. You'll have to insert Disc 1 to continue.
Once you've reached the LZ, help the Turian soldiers clear out the enemies. Once done, continue to the camp. 
Once you've reached the command outpost, grab the Medi-Gel near the entrance and the M-97 Viper I. There are also some datapads here that you can examine for extra exp and credits. You'll find the commanding officer a few steps away from the Viper weapon. 
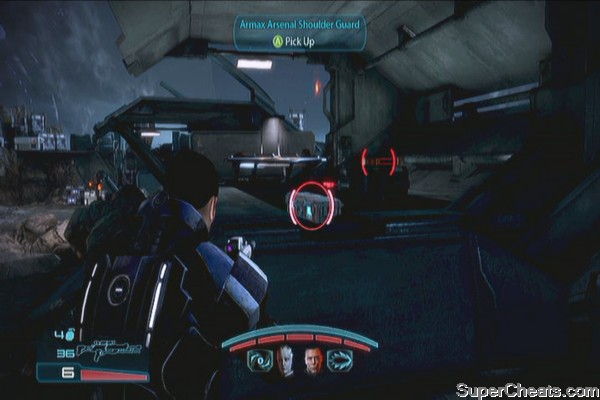
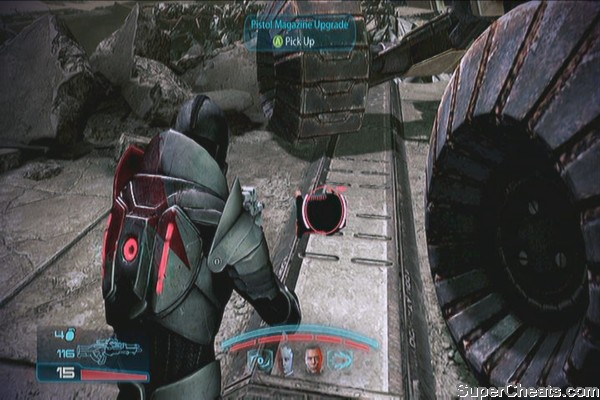
After the conversation, check out the crates to your right to find another datapad and Pistol Magazine Upgrade. In the station beside that you'll find Armax Arsenal Shoulder Guard and Pistol Piercing Mod. There's also a work bench on the same station that will allow you to enhance your weapons on the fly. 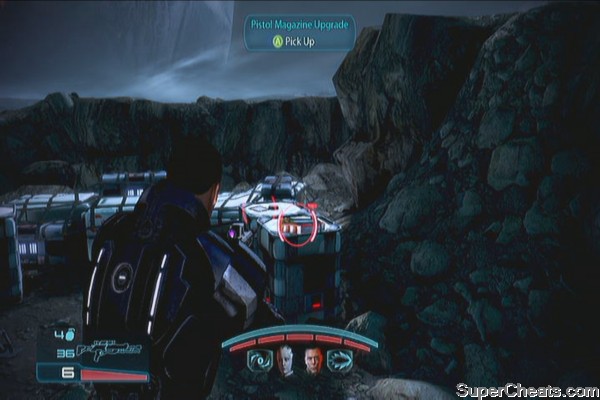
Continue forth and you'll find the barricade leading to the Comm tower to your left. Before moving out, check the station nearby to find Hahne-Kedar Greaves, a datapad and a Med Kit. Just across it, on the ground beside the metal barricade are the M-27 Scimitar and Assault Rifle Piercing Mod. 
Once done, exit the command post and head to the tower. Destroy all the husks that will appear and examine the communications tower. You'll then have to choose which team member should repair the tower. Defend the tower against a swarm of husks that will pour in. After the tower is repaired, hold your ground and keep killing the husks. Once the general advises you to return head back to the outpost.
After the scene, head to the airfield and defend it against waves of husks and marauders. Once done, don't forget to pick up the Assault Rifle Magazine Upgrade. There's also some scrap you can salvage to the right for some extra credits. 
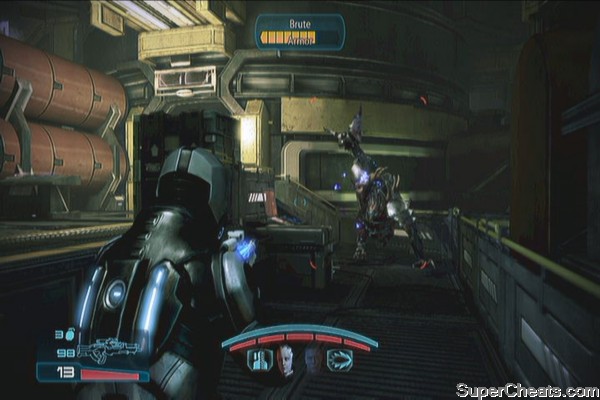
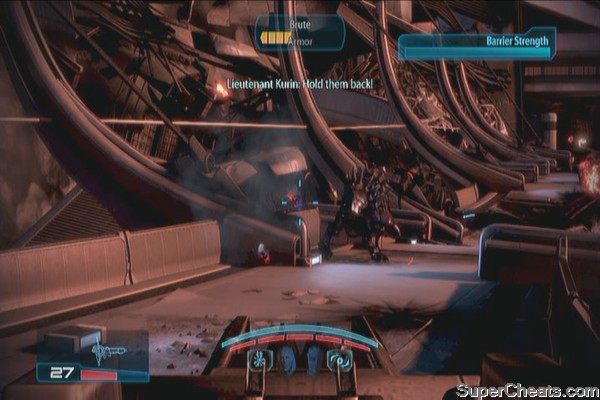
Return to the outpost then head to the main barricade. Use the mounted turret to take out the enemies. Hold your ground until a new enemy appears. This heavily armored enemy is slow and its attacks are predictable so you shouldn't have problems taking it down. Just remember to evade while its charging and order your team mates to concentrate their powers on it. 
Enter, the Brute
Continue along the path and you should find a datapad on the ground as well. Take out enemies along the way until you reach some friendlies. There is a Med-Kit, datapad and Sniper Rifle Spare Ammo on the ground. Grab them as necessary. 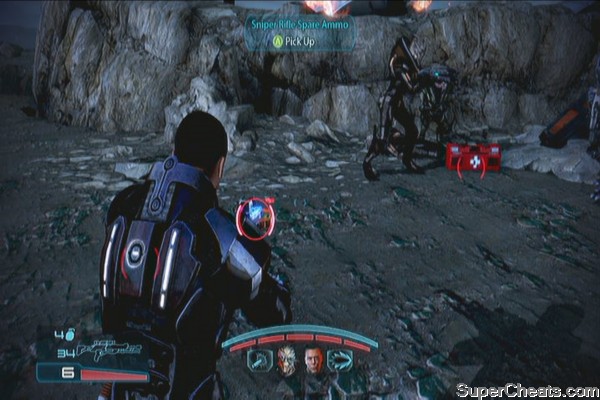
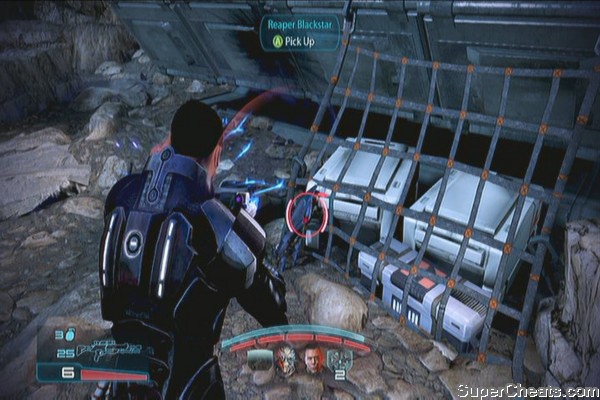
Continue running until you reach the camp. Kill the initial flock of enemies then grab the Sniper Rifle Enhanced Scope on the ground to the left, beside a Med-Kit. There's also a Reaper Blackstar weapon beside an ammo cache to the right.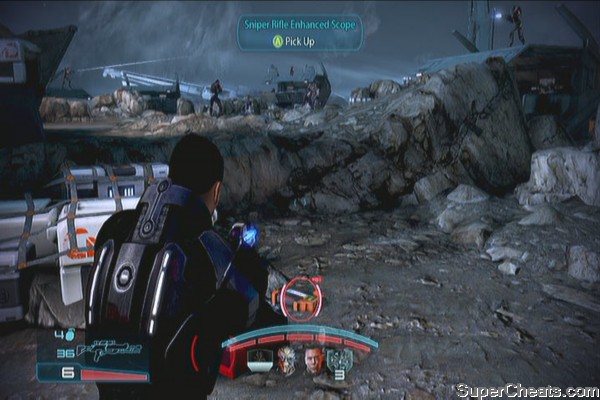
More enemies will appear, including marauders, cannibals and brutes. Clear them all out then approach General Victus to move on with the story. 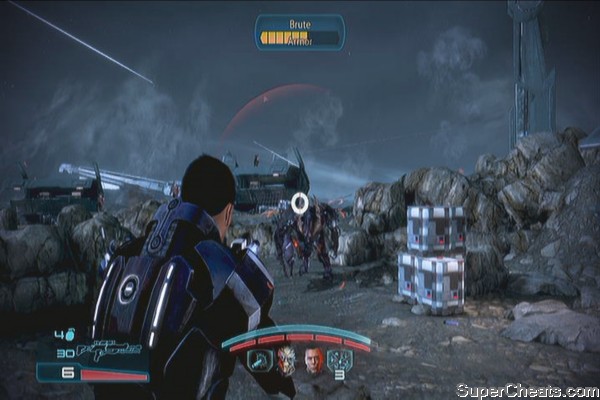

Normandy
After the talk with the Asari councilor, you may link up with Admiral Hackett to report. Exit to the CIC and read your new messages. All of people you need to meet are in the Citadel so you should head there next. However, since EDI has gone offline, you have to go to Deck 3 first. Head to the clinic then open the AI Core. After watching EDI take on a new body (she is now available as a squadmate), you're free to check out the ship, modify/upgrade your weapons and gear and purchase other mods/armor. You can also have a talk with Garrus to unlock the Armor-Piercing Ammo upgrade in the Medical Bay. 
Once done, head back to the CIC. Talk to Specialist Traynor to learn about a request for assistance from Grissom Academy. There are new star systems to discover added to your galaxy map so make sure to visit them and scan them to gather more war assets. You can also head to the Citadel for now to meet up with the people who sent you messages to your private terminal and start up new sidequests. 
Citadel
During your stay here, there's a whole lot of extra/optional work to do but will help you in your campaign in the long run. This section of will list all the optional stuff you can do and trigger at this point of the game. If the arrangement of the information below is somewhat confusing, you can check out the Sidequests section of this guide to see the convenient list of steps to complete the missions.
You can unlock more stores by checking the Sirta Supplies kiosk in the Hospital and the Spectre Requisition inside the Spectre center in the Embassies. New areas in the Citadel are now accessible via elevator.
Docking Bay
You can find a refugee and docking officer arguing. Support one of them to increase your reputation. 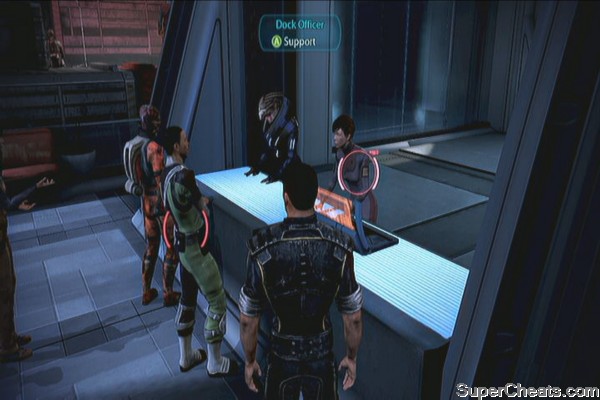
You can find a Preacher here. Recover the Pillars of Strength from the Kite's Nest star system. (Refer to the War Assets list of this guide for more information)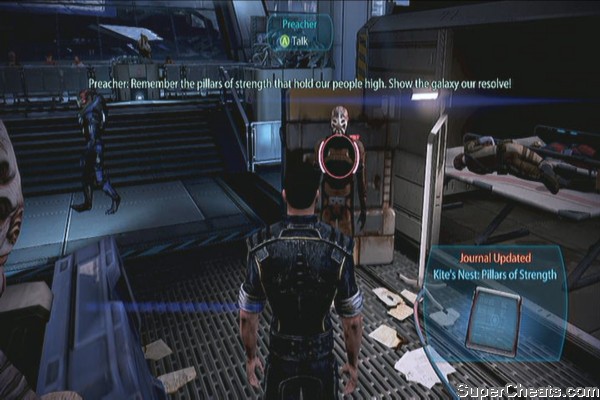
Beside the preacher, you'll find a Batarian State Arms kiosk.
You can find Darner Vosque of the Blue Suns in the far corner of the docks. He'll need you to find a way to deal with a turian general named Oraka. 
You can find Garrus here as well.
Embassies
Talk to Ambassador Dominic Osoba near the elevator to unlock the sidequest (Benning: Evidence)
Head to the Spectre office and talk to Jondum Bau to start the sidequest (Citadel: Hanar Diplomat)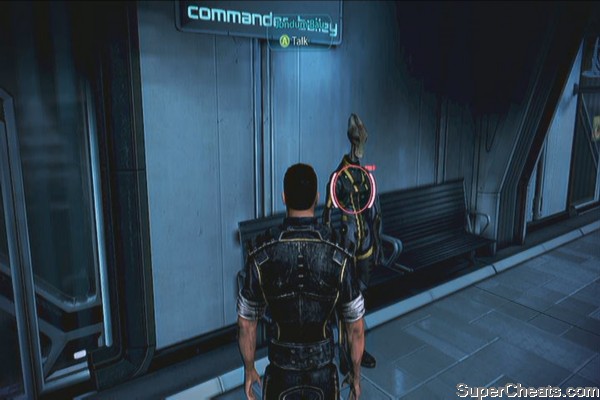
If you have received Aria T'Loak's request to help her unite Omega's mercenary bands, then you can enter the C-SEC HQ and talk to Bailey. He will then ask you to visit the C-SEC outpost in the Presidium Commons. 
Enter the Spectre headquaters and examine the terminal. From here, you can authorize full pardons for the two engineers that first served the Normandy SR2 (in ME2) as well as enabling tracking of Hanar Embassy. 
Hospital
You can now find Dr. Ravin in the hospital, where you can deliver the advanced medi-gel you acquired from the Cerberus Lab earlier. (Citadel: Alien Medi-Gel Formula)
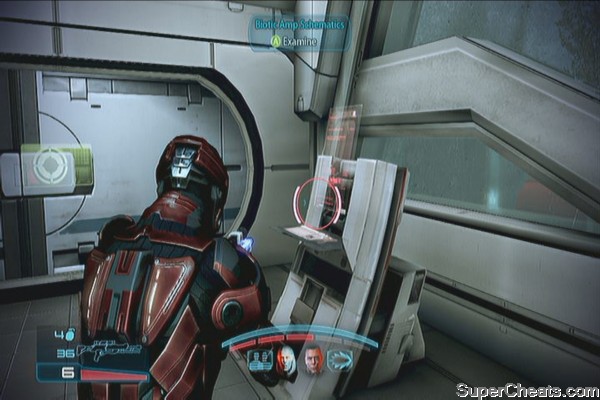
As you enter the hospital wards, you'll encounter an asari looking for improved biotic amp interfaces. This sidequest will be automatically added to your journal. (Citadel: Biotic Amp Interfaces)
You can also start another sidequest by overhearing a scientist looking for Prototype Components inside the room across the medical wards. (Ismar Frontier: Prototype Components)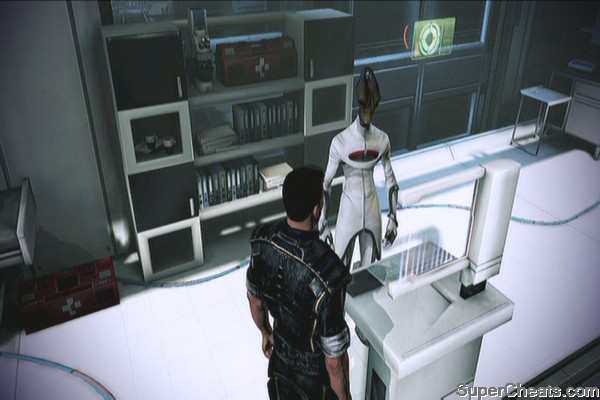
You'll find a visitor and receptionist having a discussion. Talking to one of them will increase your Paragon or Renegade status.
Purgatory
On your way to the purgatory, you'll overhear a technician mentioning something about an improved power grid. This will automatically add a sidequest in your journal. (Citadel: Improved Power Grid)
Head inside to find Aria. Approach her to start a conversation. She'll offer help by asking your assistance in uniting the three mercenary bands in Omega under her rule. This will prove a considerable help for your crusade against the Reapers so might as well do it.
Aria: Blood Pack
Aria: Blue Suns
Aria: Eclipse
James is also hanging out there. Talk to him to increase your reputation.
Presidium Commons
The bank counter has the Elkoss Combine Arsenal Supplies kiosk. There's also a Kanala Exports kiosk nearby. Examine it to add it to your ship's procurement list. 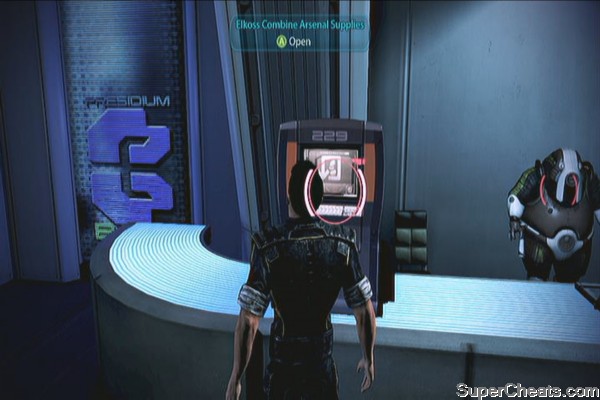
There are a couple of civilians near the bank which you can give advice to. Doing so will increase your reputation. 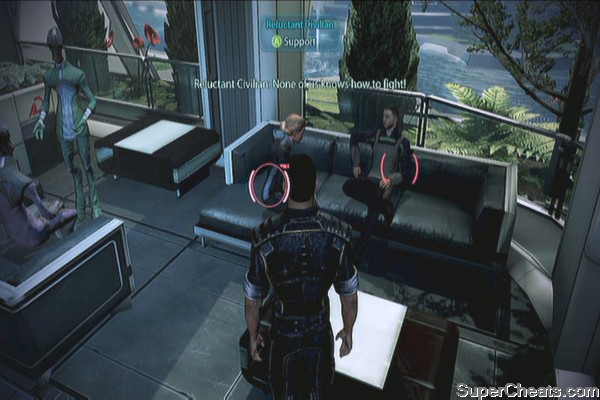
Approach the volus near the bank counter to overhear his conversation. This will open up another sidequest. (Irune: Book of Plenix)
You'll find a salarian and turian businessmen discussing. Warn them about Palaven to earn reputation and update your war asset. 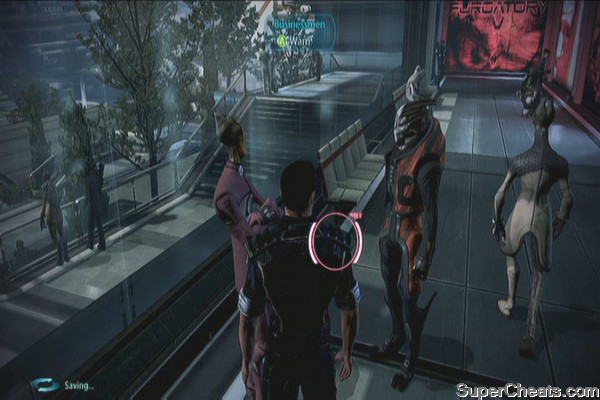
Near the Meridian Place Market, you'll find a salarian talking over the phone. Just overhearing him will start a sidequest. (Citadel: Heating Unit Stabilizers )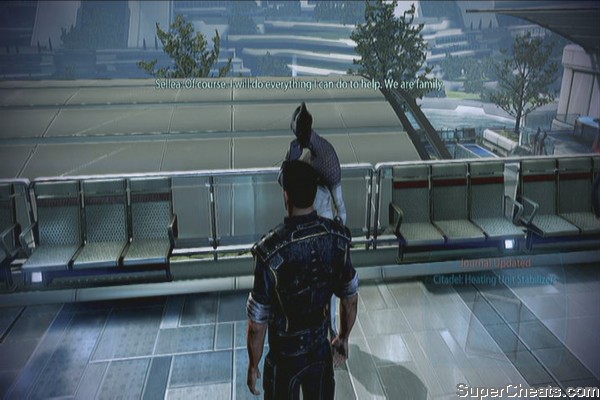
In the Meridian Place Market, you'll find a customer bugging a store clerk for a refund. Mediate to increase your reputation. 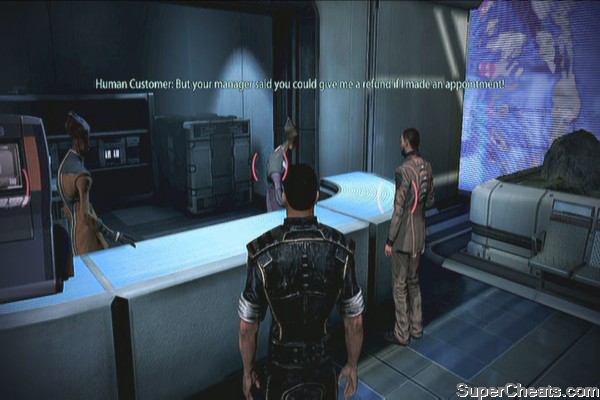
Aegohr Munitions, Cipritine Armory, Nos Astra Sporting Goods kiosks are available. Interact with them once to add them to your ship's procurement list. 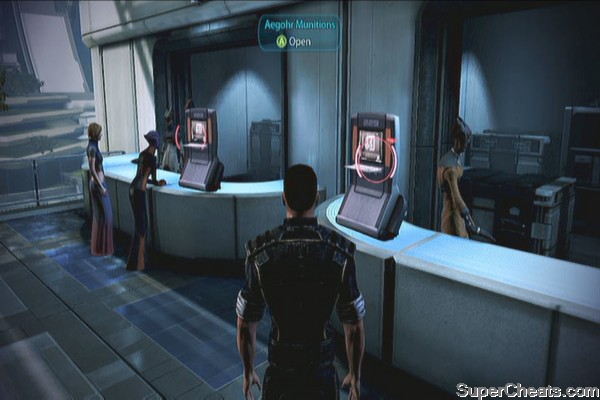
Liara, Joker and EDI are hanging around by the market area. Talk to them to increase your reputation. Liara will also tell you to talk to Barla Von in the bank area. 
After talking to Liara, talk to Barla Von. He will ask you to rescue the Shadow Broker forces trapped in the Dranek System.
Head to the apartment area and enter Narl's room. Cooperate with him and you'll earn the allegiance of the Blood Pack after a short scene. 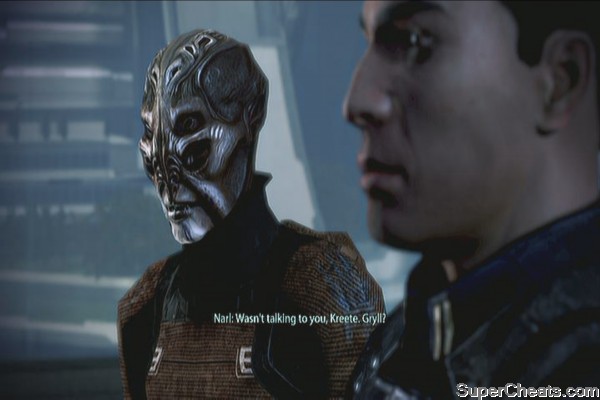
Once you're done in the Citadel, you can now leave and pursue the next available missions.
Unlockable Weapons and Equipment:
M-22 Eviscerator
M-96 Mattock
Mnemonic Visor
Serrice Council Chestplate
Quest Item
Biotic Amp Schematics - Citadel: Biotic Amp Interfaces
Weapon Upgrades
Assault Rifle Stability Damper
Assault Rifle Precision Scope
Continue forth and clear the corridor of enemies to meet up with Sanders. On your way to Orion Hall, you'll find stairs to your right. You'll find the Assault Rifle Stability Damper on the stairs. Grab it and continue forth. 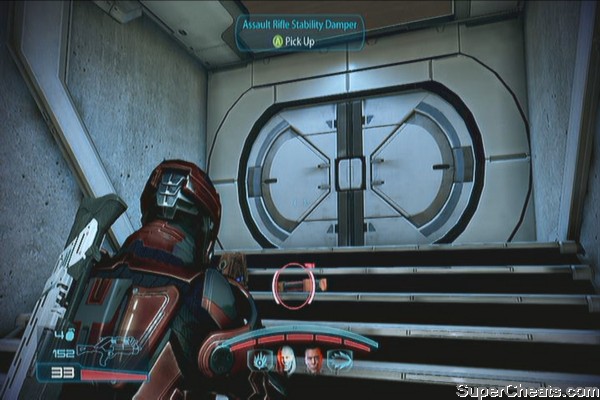
Move along and rescue a student by killing his guards. Move into the classroom and read the analysis review and log on the table to earn a bit of exp. Head to the second classroom and defeat the enemies. Check the corridor to the left and pick up the M-22 Eviscerator on the bench. 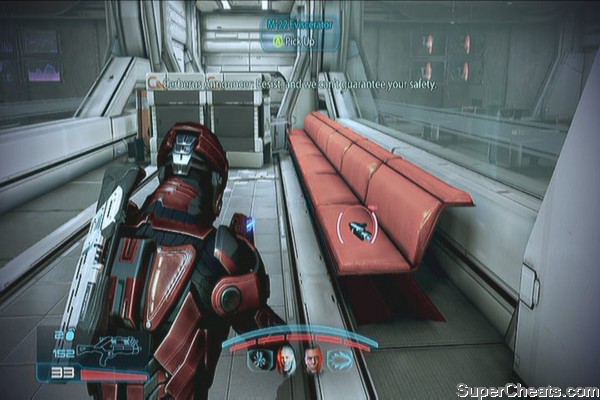
Exit to the next hallway and find the M-96 Mattock on the bench as well. Don't go to Orion Hall yet; check out the dead end past where the Mattock is found to find Seanne, the sister of the guy you rescued earlier. Examine her to get her back to her feet. There's also a Mnemonic Visor and a locker containing some credits nearby.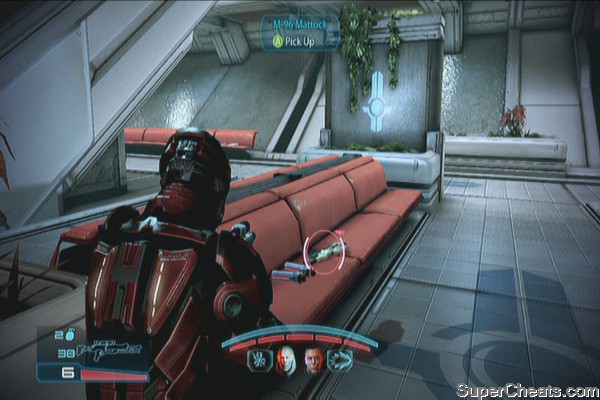
Continue to the Orion Hall and fight off an enemy mech. Defeat all enemies to move on the story.
The bigger they are...
Go upstairs to find an Assault Rifle Precision Scope and a datapad with credits. You'll find the laptop on a bench near the door where you came from. There's a data log beside it as well. 
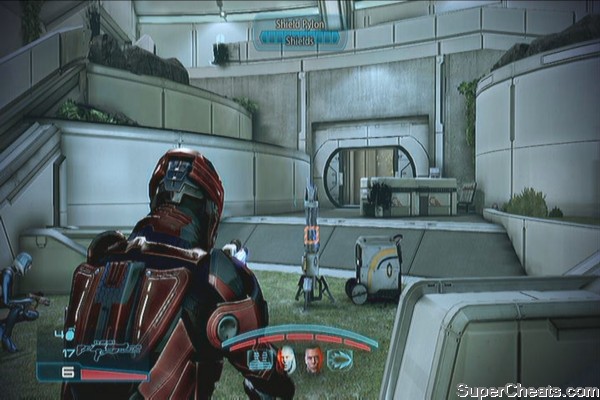
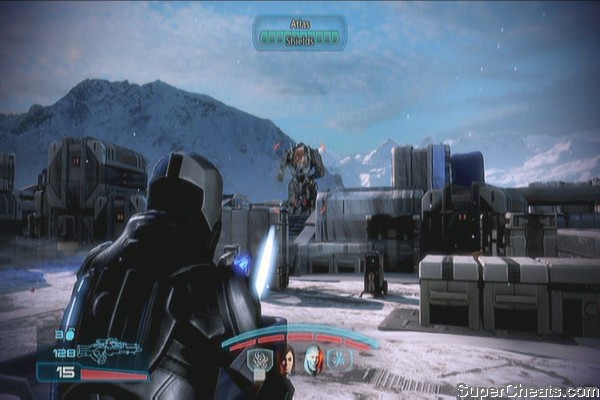
Next, you'll have to find the manual override on the second floor room. Force the door open and continue forth. Clear the enemies and the Atlas then move in to the center of the area. There's a small corridor past the shield pylon where you can find a Med-Kit, a datapad and computer. Continue clearing the area and push forward.
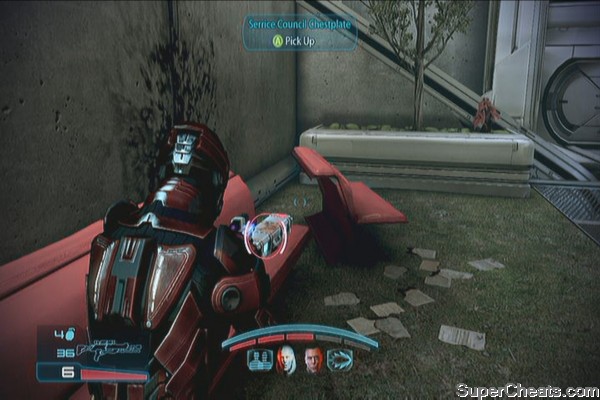
Continue through the newly opened door at the end of the lower ramp then kill two guards in the next hallway. Examine the terminal behind you to get some credits then approach the two students. Continue along the straightforward path leading to the docks. On your way, examine one terminal that contains the Biotic Amp Schematics. Exit to the next room and grab the Serrice Council Chestplate on the bench to your left.
Exit to the next room and kill the engineer. Ride the empty Atlas and use it to cover the students' escape. Keep defending them until the shuttle is ready and the door is open. Exit and watch the following scenes. Mission complete.
Protector
Unlockable Weapons and Equipment:
Armax Arsenal Greaves
Sentry Interface
M-13 Raptor (Sniper)
Scorpion (Heavy Pistol)
Weapon Upgrades
Assault Rifle Extended Barrel
Shotgun Blade Attachment
Shotgun Spare Ammo
Pistol High Caliber Barrel
Pistol Scope
Head to the location and dock with the ship to meet with the diplomats. After a brief meeting, you'll be on your way to Sur'Kesh to retrieve the immune krogan females.
After landing you can investigate the area and talk to Padok Wiks when ready. Go through a few more scenes, until you finally have control. Check out the shelves past the stairs to find an Assault Rifle Extended Barrel. 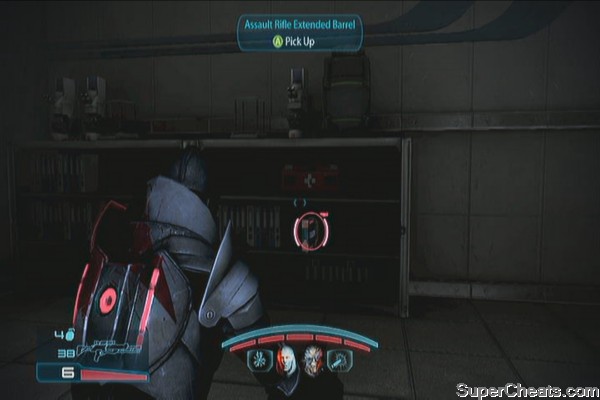
After grabbing the part, approach the elevator. Once it gets blown, head to the emergency exit. Climb the ladder out and clear the area. There's a Shotgun Blade Attachment from a shelf inside the room to the right. 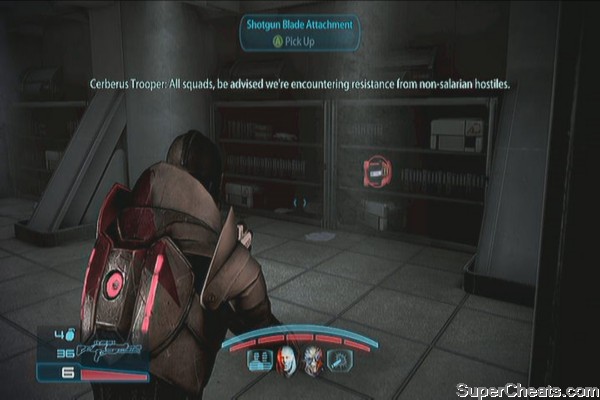
Continue forth and clear the enemies. There's a med-kit near the Yahg containment capsule as well. Open the door in the far end of the hallway and watch the Yahg escape. Vault over to the left and jump over the broken floor to find a Shotgun Spare Ammo upgrade. 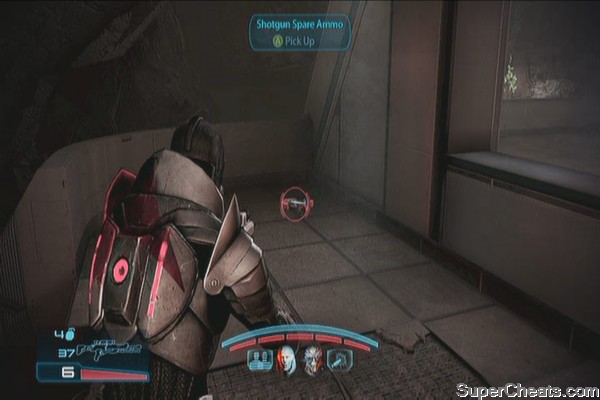
Continue upstairs and kill the enemies there. Examine the terminal near the varren specimens to earn some credits. Activate the quarantine checkpoint then kill the two enemies on the Cerberus shuttle. Head out through the broken wall. Grab the Pistol High Caliber Barrel on the shelf inside the room ahead then push forward. 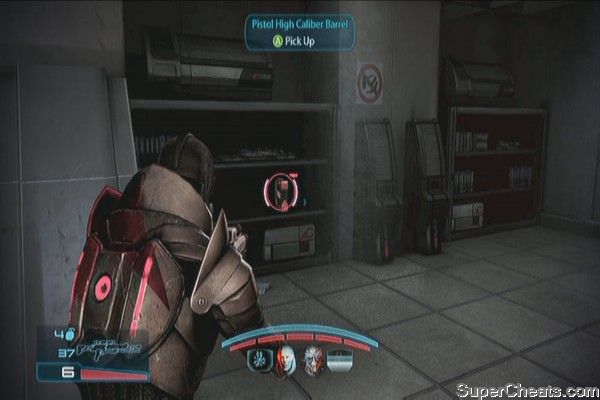
Continue upstairs and more enemy forces will appear. An enemy engineer will erect a turret ahead. You can order your allies to take cover and provide covering fire as you move it for a flanking maneuver or just take them all out from a distance. Once clear, activate the scanner and stand still to authorize your entry.
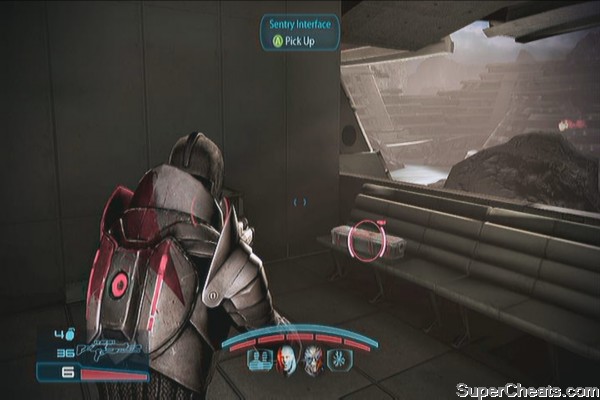
Grab the medi-gel along the way then fight through the office area. There's an Armax Arsenal Greaves on top of the table in the middle so grab it when you can. Continue to the far end of that room then turn left to find salvage (worth credits) and a Sentry Interface. Climb up to the upper floor when ready. 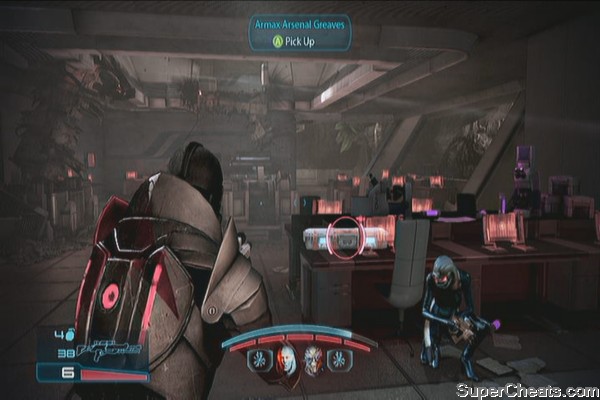
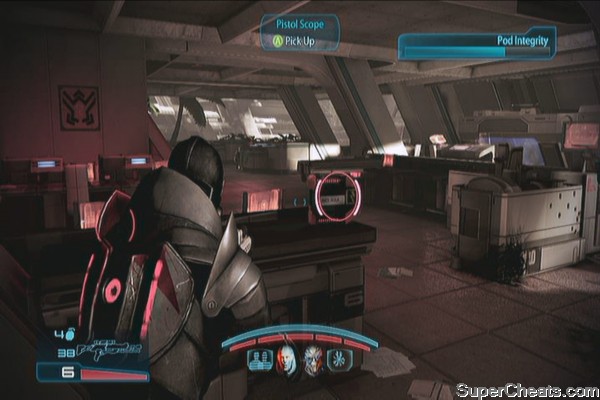
Bypass the door and immediately find the M-13 Raptor on the bench beside a corpse. The pod is getting hit heavily so quickly push forth and take out the enemies as fast as you can. Grab the Pistol Scope beside a Research Terminal as well. 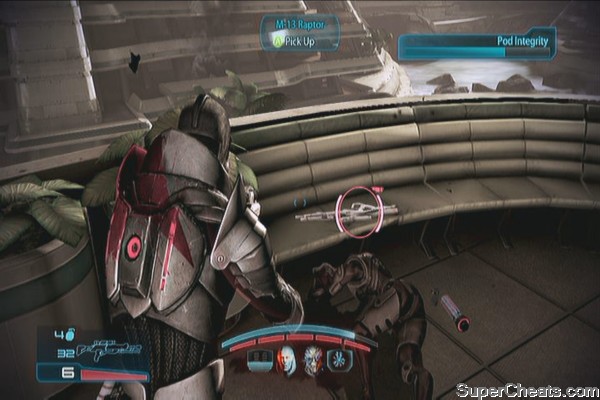
You'll have to activate power terminal next. There's another weapon on the floor in front of it. Grab the Scorpion and activate the power terminal. 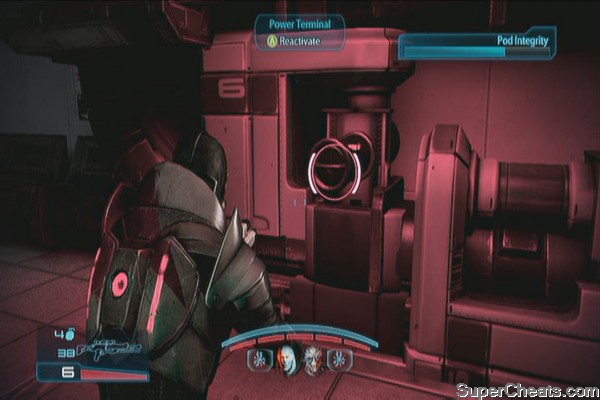
Return back to the pod and take out the enemies. Activate second checkpoint once clear. More enemies will appear so take them all out as well. Once done, go through the door and jump across to use the ladder up. Clear more enemies then authorize the third checkpoint. Finally, an Atlas will appear. You have to destroy it quickly before the female krogan gets killed. Once its dealt with, clean up the remaining foot soldiers.
Clearing the LZ
The mission is completed after the scene.
Additional missions will be added to your journal. More locations will be unlocked as well. Take time to visit these new star systems and gather as much War Assets as you can. Talk to both to the Primarch and Wrex to update your journal. You're free to choose what missions you want to tackle; however I suggest completing the non-priority ones first.
Unlockable Weapons and Equipment:
M-3000 Claymore
Ariake Technologies Shoulder Guard
Quest Item:
Krogan message - Citadel: Krogan's Dying Message
Weapon Upgrades
Pistol High Caliber Barrel
SMG High Caliber Barrel
Shotgun Shredder Mod
Shotgun Spare Ammo
Pistol Piercing Mod
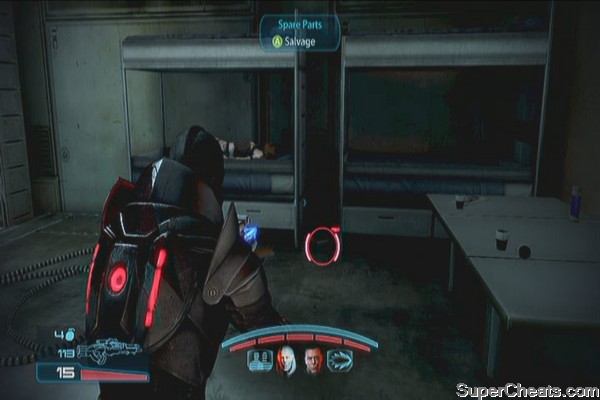
Check the living quarters beside you to find the M-3000 Claymore, Pistol High Caliber Barrel and Spare Parts (credits). Continue forth to the scout camp ahead and enter the first room to find an SMG High Caliber Barrel and a work bench. There is also some spare parts you can salvage outside for credits. 
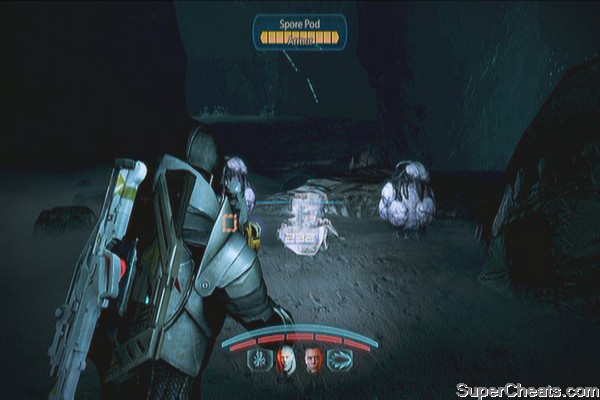
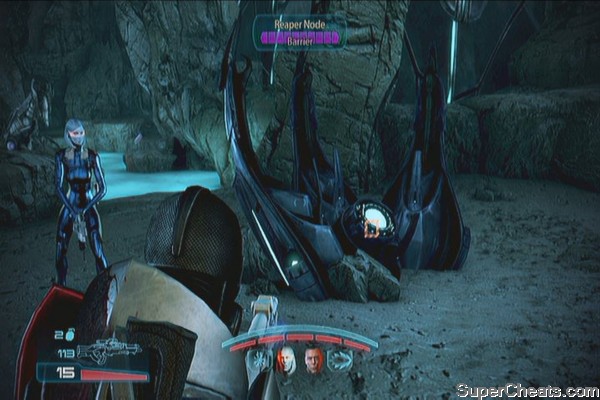
Continue along the path until you find a dead body. Grab the M-451 Firestorm from him. Use it to clear out the webbing in the tunnel. Continue inside. Destroy the spore pods from a distance since they'll explode if you get near. Continue clearing your way until you reach a large cavern. Kill all enemies there. 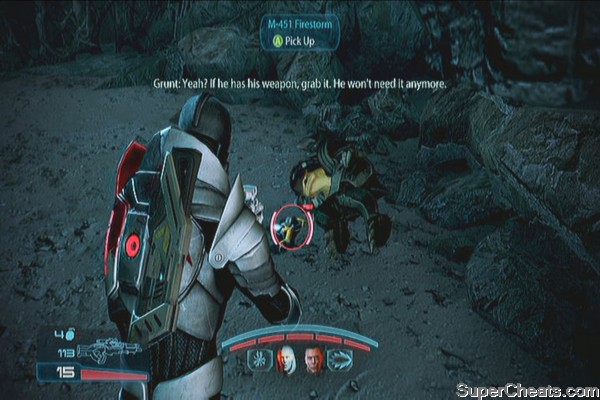
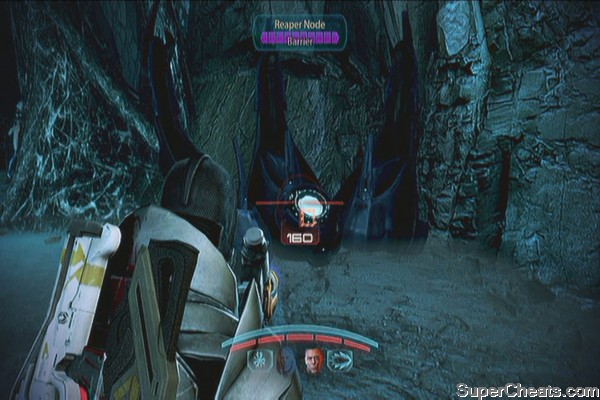
Once clear, check out the left side of the cavern to find a Shotgun Shredder Mod beside a dead krogan. Continue ahead and clear the path of webbings and spore pods. Continue until you reached a barrier. Destroy the barrier node then clear the webbing to trigger a scene. 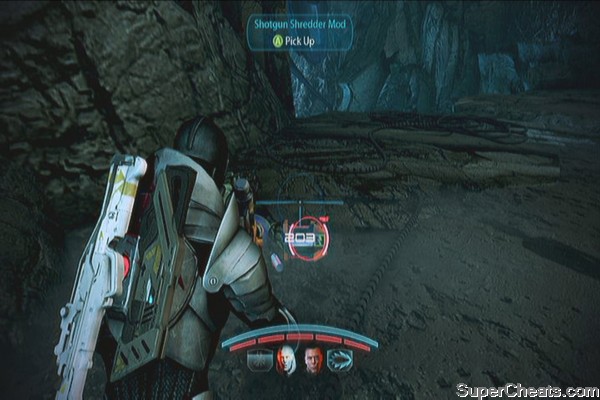
Clear your path and move forth. Clear the webbing to your left to find some reaper tech. Continue ahead until you reach a larger room with more pods. There's a corpse to the left which you can examine. You'll have to deliver his message to Ereba in Citadel later on. 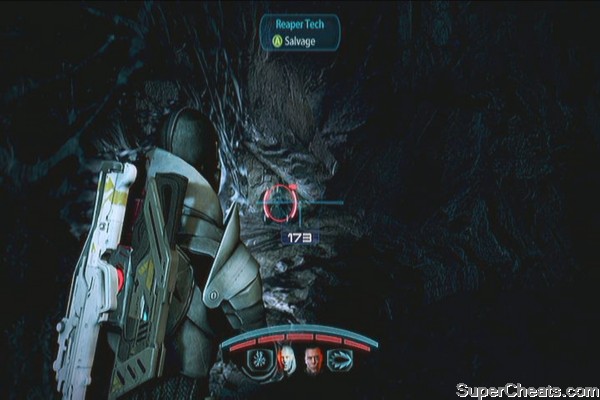
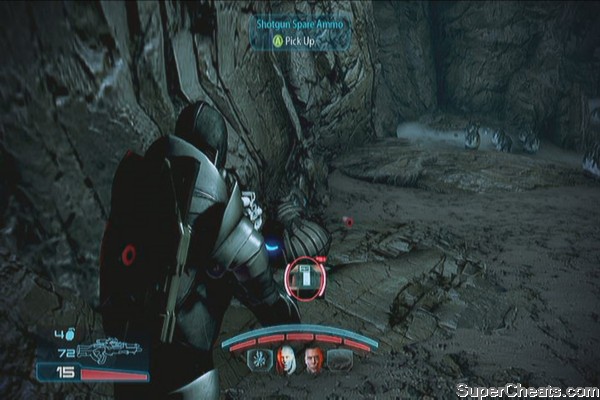
Continue to the next hall and clear all enemies. Move along and pick up the Shotgun Spare Ammo upgrade on the ground before the ramp. Grab the Firestorm to make it easier for you to clear the pods out of the way. 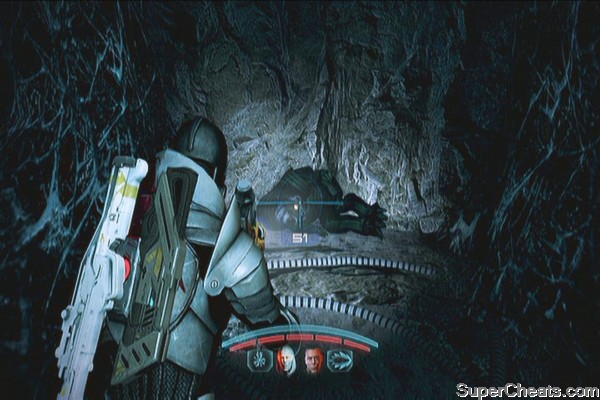
After jumping to the other side, continue clearing the path then grab the Ariake Technologies Shoulder Pad from a corpse along the way. 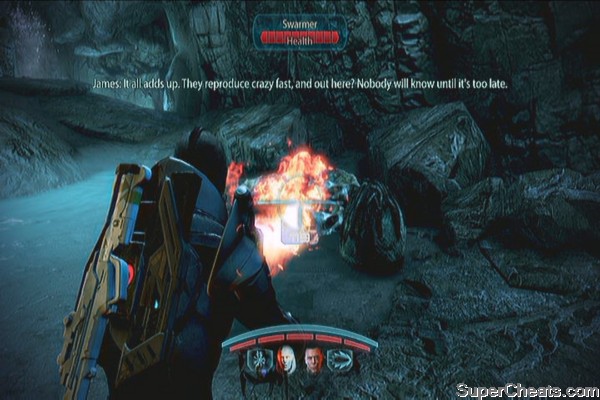
Continue following the path until you spot Grunt and his men. Clear the path again until you reach the switch. There's also a Firestorm, Med-Gel and Pistol Piercing Mod nearby. 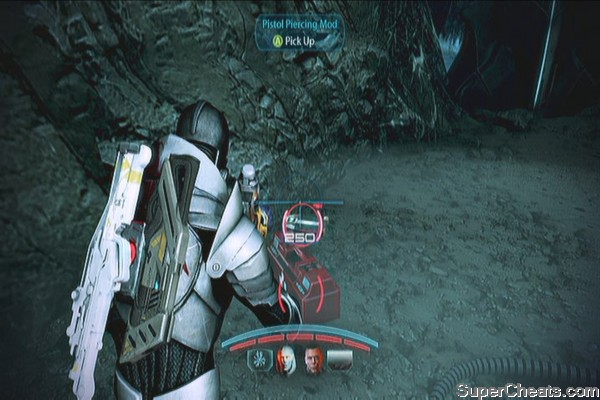
Destroy the barrier and continue forth. Examine the narrow passage. After the scene, you'll be trapped. Look up and destroy the barrier node to lower the lower the barrier to the left. Destroy the enemies there, move in and destroy another node to lower the other barrier. Continue ahead and destroy the last node and kill the last batch of enemies and watch the next scene. Here you'll have the option let the rachni queen to die or help her escape. 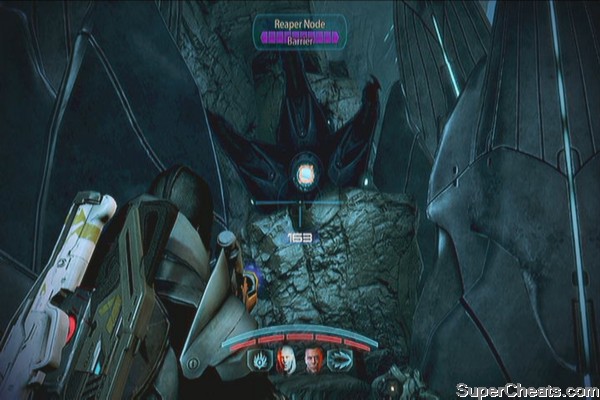
Unlockable Weapons and Equipment:
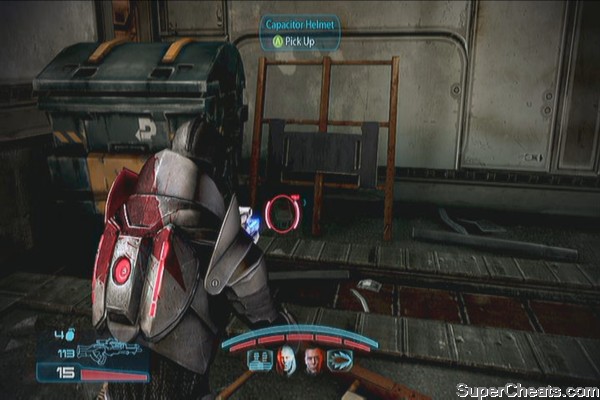
Capacitor Helmet
Quest Items:
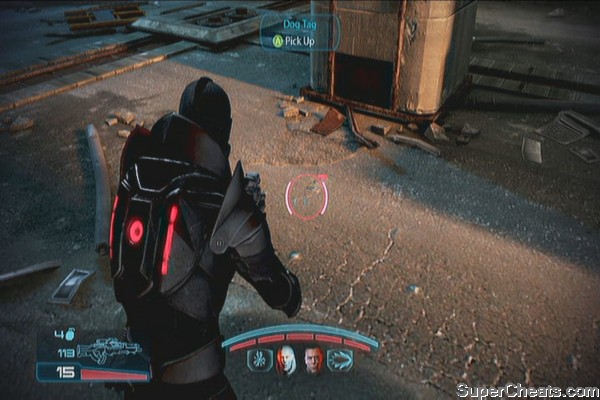
Dog Tag (“Benning: Evidence”)
The only notable war asset you can get in this system is the battle intel from the Arcturus Station. The other assets you can find are both fuel depot wreckages. When you land in Benning, take note that you can also search for evidence regarding what happened to Ambassador Dominic Osoba's son as part of the sidequest “Benning: Evidence”.
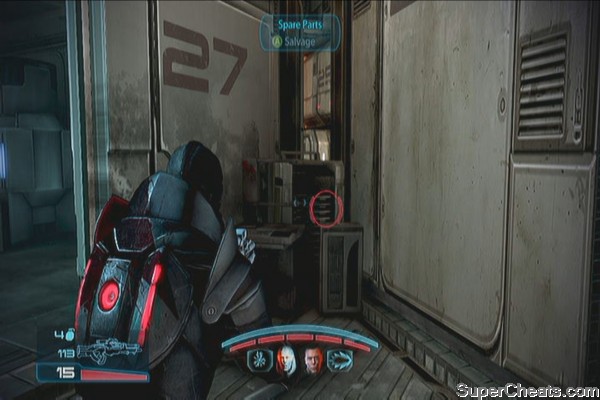
After landing, continue ahead and enter the house (96) to find a med-kit on the wall to the right and some spare parts in the cupboard in the kitchen. Next, climb the ladder to the adjacent house (25) to find some spare parts in the middle. Continue to the next house (building 27) to find another med station and ammo crate. 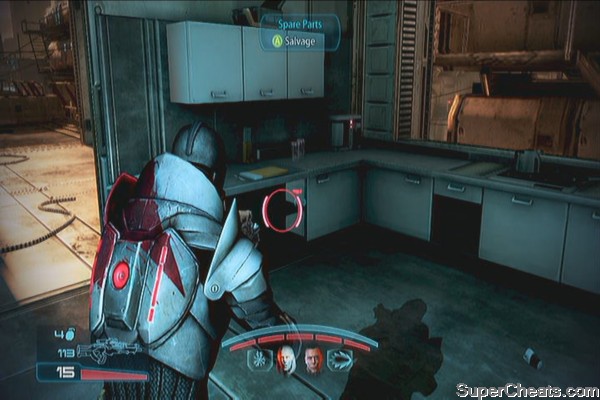
Clear out the enemies in the open space with the turret. There's also a Capacitor Helmet stuck beside the dumpster near the turret. Check the ground between buildings 22 and 25, by the concrete pillar to find a Dog Tag. There are also some spare parts in between some beds inside building 9 in the far end where the turret is pointed. 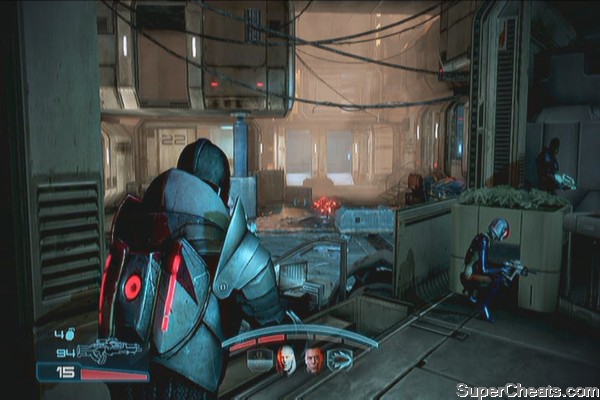
After taking out all hostile targets, head to the next point and kill all enemy forces who are pursuing the civilians. Take them out then talk to the civilians. More enemies will appear. Keep killing them to defend the civilians. Once clear, take the shuttle out of the planet to complete the mission.
Unlockable Weapons and Equipment:
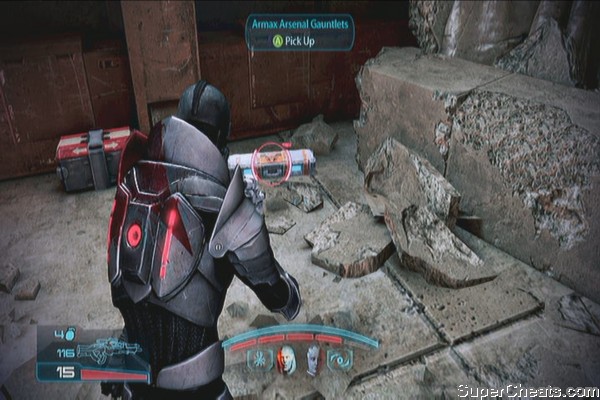
Armax Arsenal Gauntlets
Quest Item
Old Grid Schematics - Citadel: Improved Power Grid
Clear the area and make your way to the control console. Clear the upper ground and keep right until you find a ladder with some ammo/grenade cache beside it. Salvage the junk beside it for some credits. Climb the ladder and clear whatever is left. Don't activate the console yet; grab the medi-gel beside the console then go down the ramp to find the Armax Arsenal Gauntlets. 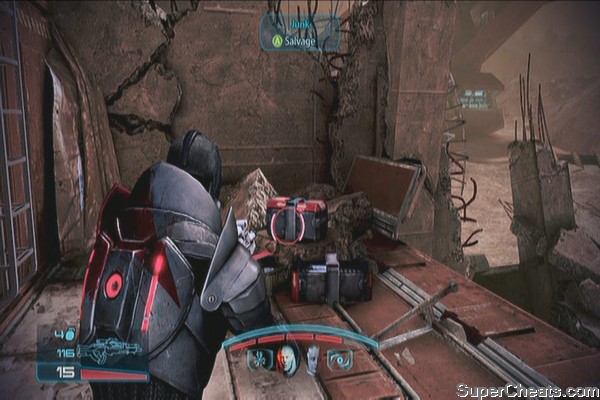
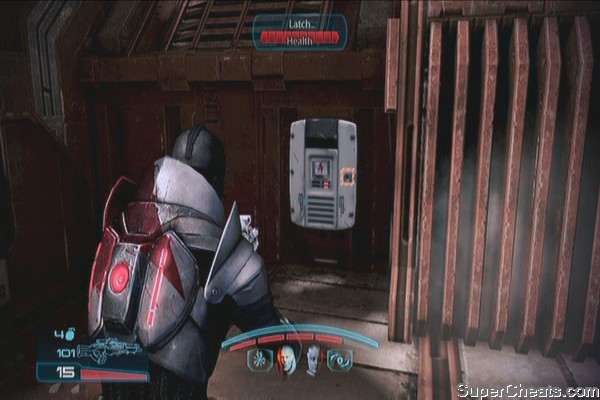
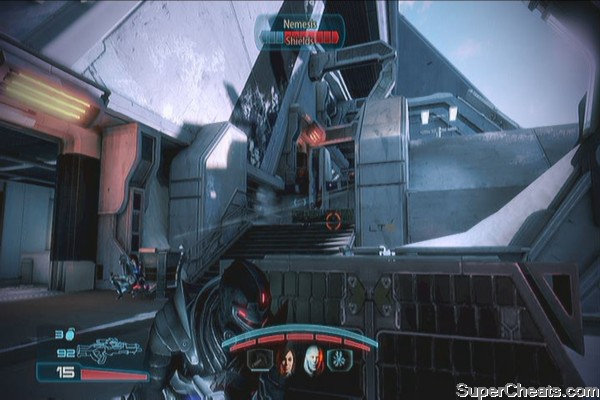
Grab the Old Grid Schematics from the other console near the main console. Activate the console then wait until the power goes out. More enemies will appear, including a new type, the Nemesis. Fight your way to the power modules near your landing point. Shoot the latches to open the modules then activate them both. 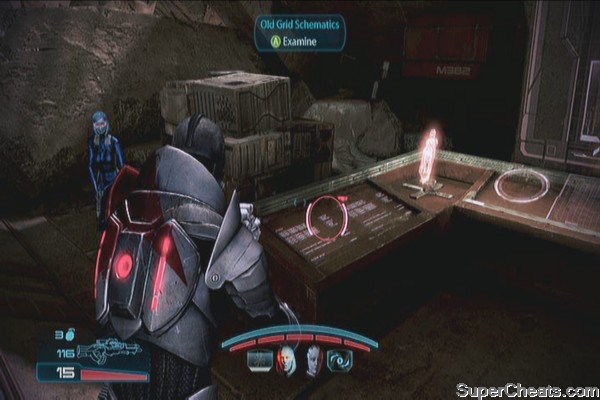
Fight your way back to the console and activate it to complete the mission.
Unlockable Weapons and Equipment:
M-9 Tempest (SMG)
Phaeston (Assault Rifle)
Hahne-Kedar Chestplate
Weapon Upgrades:
SMG Magazine Upgrade
Sniper Rifle Spare Ammo
SMG Ultralight Materials
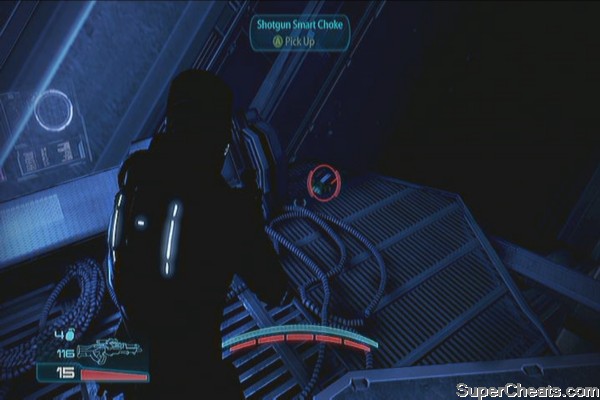
Shotgun Smart Choke
Sniper Rifle Extended Barrel
Enter the planet's orbit and select the appropriate landing zone to start this mission. After landing walk a bit then look to your left to find an SMG Magazine Upgrade. Climb the ladder, take out the husks along the way and pick up the spare parts in the debris along the way. Climb another ladder up. Don't forget to grab the M-9 Tempest along the way as well. 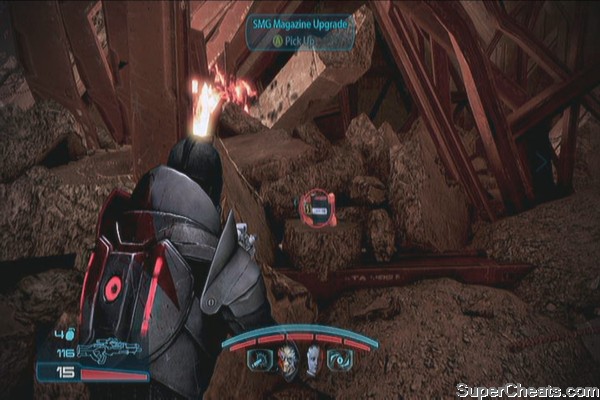
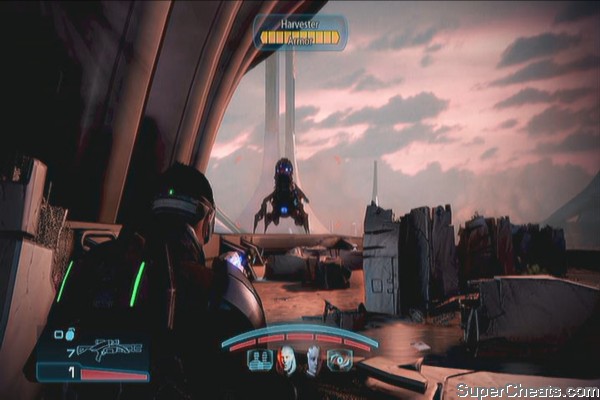
Continue forth until you find some survivors. Take out the enemies then keep attacking the harvester until it leaves.
Rescue mission
Once done, climb the ladder then look back to find a Sniper Rifle Spare Ammo. Continue ahead then grab the spare parts past the turian corpse. Follow the main path next. 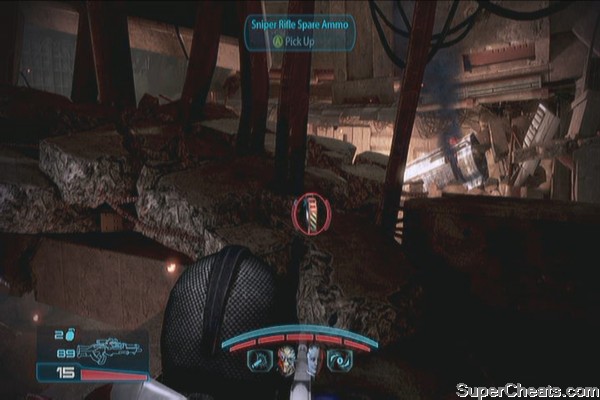
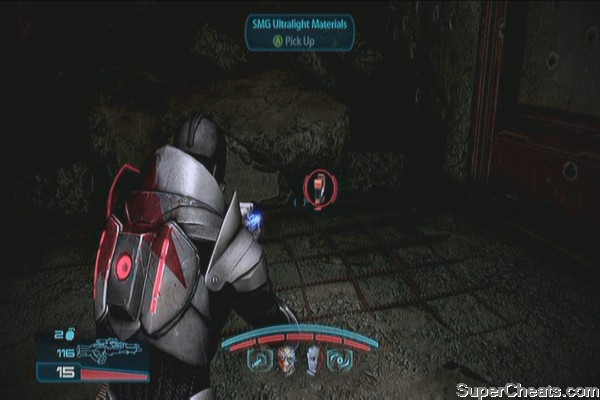
You'll find another turian corpse with a Phaeston weapon beside it. Check the alcove beside him to find SMG Ultralight Materials. 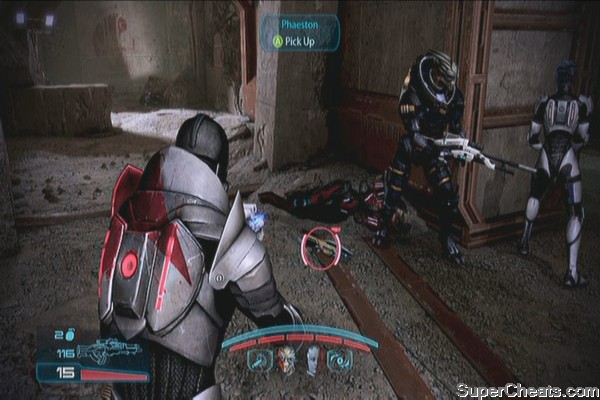
Continue forth and jump down the opening. Grab the med-kit along the way then continue to the next battlefield. You'll find more survivors. Take out the cannibals and marauder. A harvester will appear once again with some husks on the ground so kill them quickly then deal damage to the harvester as quickly as possible to force it to leave.
Follow your team mates then jump down the hallway. Grab the Hahne-Kedar Chestplate along the way, then jump down again. As the path turns, you'll find another upgrade. (Shotgun Smart Choke). Continue ahead and a few husks will appear. Kill them, salvage the junk from a turian corpse for some credits then slide using the ladder down. 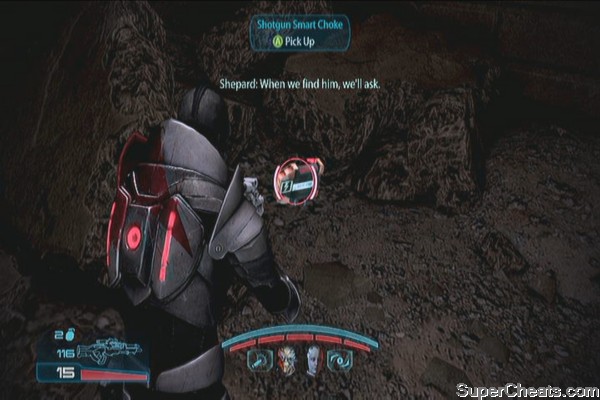
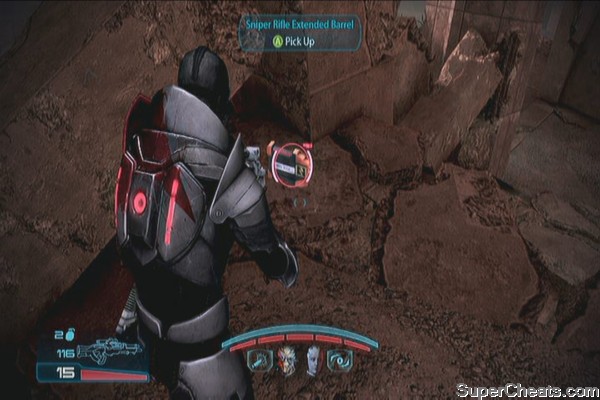
Continue forth and kill the cannibals. Move ahead and kill more heavy enemies. Keep shooting at the harvester as well until it's destroyed. Pick up some thermal clips then continue moving forward. Grab the medi-gel along the way, then jump down the debris to find a Sniper Rifle Extended Barrel. 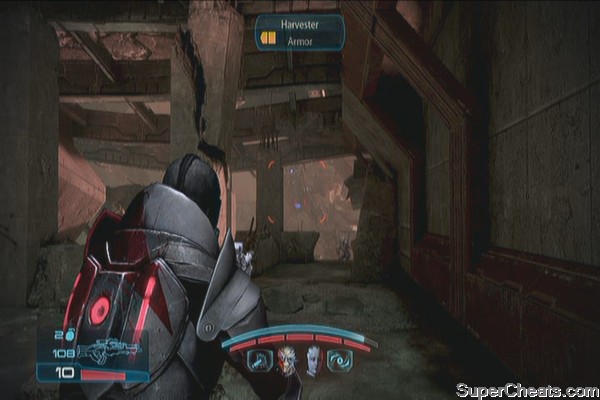
Continue to the next large area and prepare to take on several marauders and cannibals. Take cover and don't hesitate to use your grenades and powers to get rid of them. There's a Reaper Blackstar weapon in the middle right of the battlefield but if its too risky, don't bother getting it. Another harvester will appear dig in, kill the enemies or shoot it between its powerful barrage of explosive projectiles until the area's clear. Continue forth until you reach Lt. Victus. This mission is completed but will open up a follow up side-mission.
Unlockable Weapons and Equipment:
M-29 Incisor (Sniper Rifle)
Rosenkov Materials Gauntlets
Quest Item:
Auto-turret Schematics - Citadel: Cerberus Automated Turret Schematics
Weapon Upgrades
Shotgun Blade Attachment
SMG Heat Sink
Pistol Scope
Sniper Rifle Concentration Module
Pistol Melee Stunner
After landing, take cover and start fighting your way through enemy waves and bombardment. Just move from cover to cover until the landing area's clear. Go up the ramp and pick up the M-29 Incisor on the wall to the left as well as the Shotgun Blade Attachment at the end of the ramp. 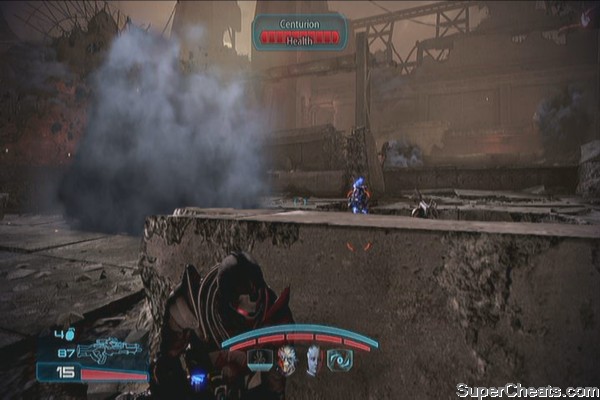
Clear the second area. Continue up past the shield generators to find a case containing a Rosenkov Materials Gauntlets in the dark corner. Continue forth and examine the console along the way to get some credits. Continue up the ramp and vault over to the next floor. You should also find a SMG Heat Sink on the floor just ahead. 
Continue ahead and take out a few more enemies. You'll reach another ramp going down. Make sure to grab the med-kit and Pistol Scope along the way as well. Jump down the ramp then continue to the barricaded position ahead. Salvage the datapad for some credits then continue moving forth. 
Kill a few more enemies then continue ahead the main road until you can see the enormous digging machine. Once ready, take the ladder to your right and grab the Sniper Rifle Concentration Module. Continue to the next room. Look for the Pistol Melee Stunner behind the metal crate to the right.

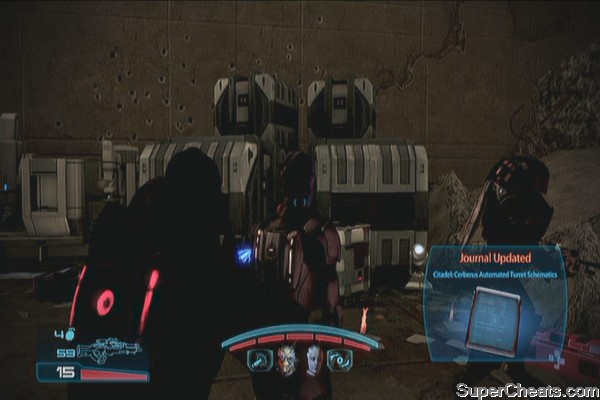
Continue down the ramp and salvage the Turian Technology from the machine to the left. Continue ahead to the next position to find a med-kit and Auto-turret Schematics. This will start the sidequest “Citadel: Cerberus Automated Turret Schematics”. Continue down the ladder to start the next part of this mission. 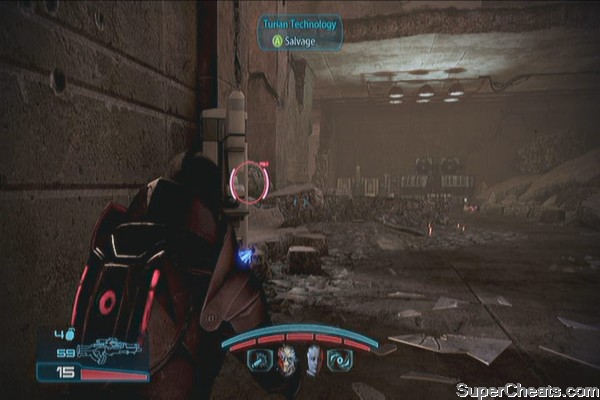
Defend the position from waves of enemy forces. Keep killing enemies as they come until the Lieutenant completes the bypass.
Victory at any cost
Unlockable Weapons and Equipment:
Death Mask
Graal Spike Thrower (Shotgun)
M-5 Phalanx
Weapon Upgrades
Pistol Melee Stunner
Shotgun Smart Choke
Pistol Magazine Upgrade
Once you're ready, land on the shroud. During the scene, your options will be known to you. Select your best team and move out. Upon landing, kill all husks and watch the next scenes.
After the convoy stops and you hit the ground. Grab the med-kits, Death Mask, Pistol Magazine Upgrade, Pistol Melee Stunner, Shotgun Smart Choke and the Graal Spike Thrower scattered about. 

Once you're finished grabbing the items, talk to the scout to start the mission. You have to navigate your way through the ruins. It will be a challenge to give directions in this place so I'll do my best to lay them out for you.
Continue down until you reach the first hall. You should see two krogan statues in the far left. This hall has two exits. Enter through the left first to find a room with ancient krogan painting. Examine it to get a considerable amount of credits. 
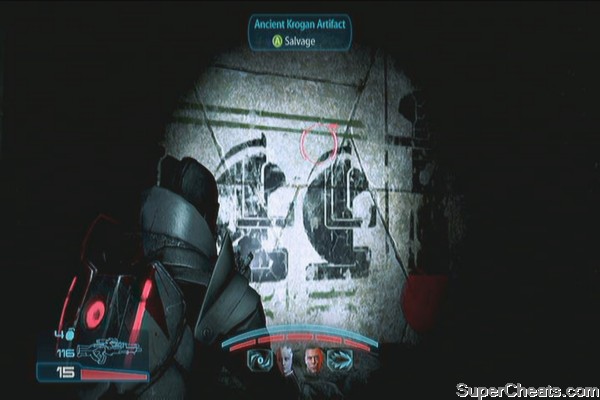
Exit the room and take the other exit. Go downstairs to the next hall. There's only one exit here so continue forth. You'll find another ancient krogan artifact along the hallway. Continue forth until you encounter a rachni remains. Examine it then continue upstairs until you reach outside. 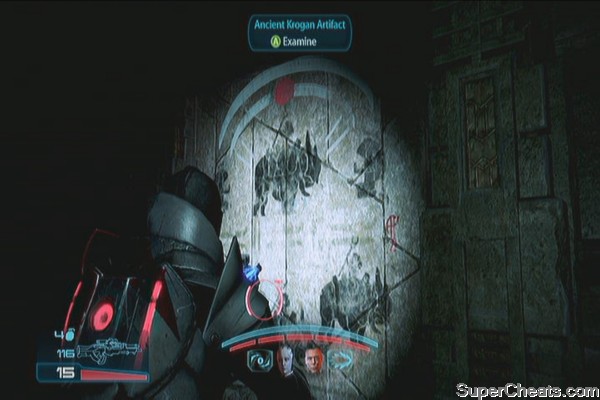
Continue forth as more enemies appear. After getting rid of them, cross the bridge and kill more enemies. Continue forth as you make your way deeper in the ruins. You should encounter more enemies and Ravagers. Cross the bridge and you'll see the trucks and the thresher maw pass by. 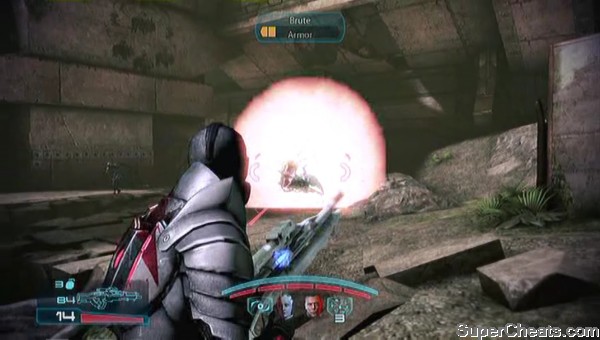
Jump to the other side and continue to the ruins. More husks and marauders will appear. Take them out and continue upstairs. Check your right and you should find the Assault Rifle Extended Barrel. Continue to the dunes to trigger the next scene and start the next part of the mission. 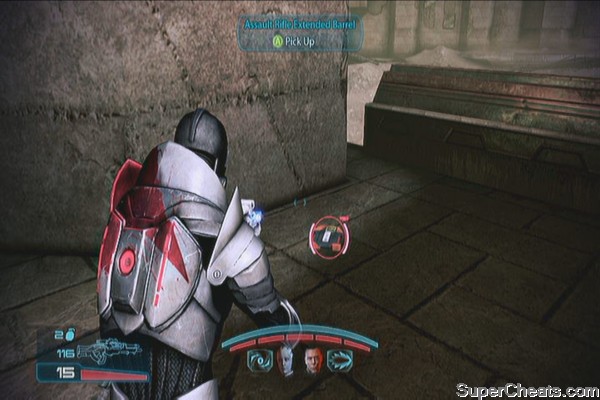
Clear out the starting area then go upstairs. You should find the M-5 Phalanx along the stairs as you turn around to the left. Try to cross the bridge but you'll be forced to go down. Now you have to run ahead while avoiding the Reaper's giant laser. Just keep moving and move from cover to cover until the Turian fighter wing arrives. Continue forth and defeat several brutes who will attack you. Activate the two hammers and watch the scenes. Mission complete.
Reaper target practice
After the long, exhausting missions in Tuchanka, you'll have two new star systems to explore. You may also want to check the Engineering bay and talk to Engineer Adams to start a sidequest. (Citadel: GX12 Thermal Pipe). You can also talk to Liara to increase your reputation and unlock the Warp skill you can purchase in the Med Bay.
Unlockable Weapons and Equipment:
Recon Hood
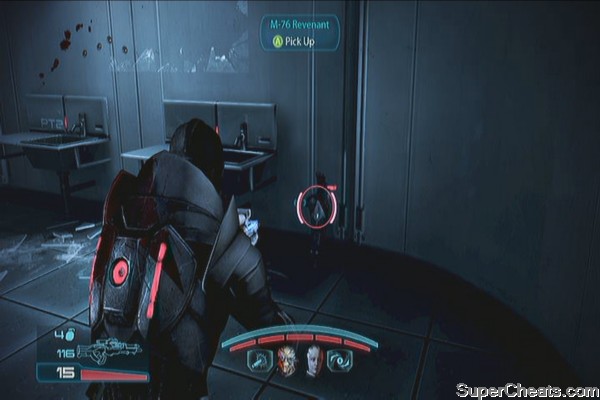
M-76 Revenant (Assault Rifle)
M-358 Talon (Heavy Pistol)
M-25 Hornet (SMG)
Securitel Helmet
Weapon Upgrades
Assault Rifle Piercing Mod
Sniper Rifle Extended Barrel
Pistol Piercing Mod
Pistol High Caliber Barrel
Sniper Rifle Piercing Mod
As soon as you land, kill all enemies then talk to Bailey. Head inside and make your way to the lobby. After clearing it out, grab the med-kit and the Assault Rifle Piercing Mod. Bypass the door ahead and enter the locker room. Clear it as well and grab the Recon Hood, then open the door to your left to enter the bathroom. Inside, you'll find the M-76 Revenant. Examine the locker as well for some extra credits. 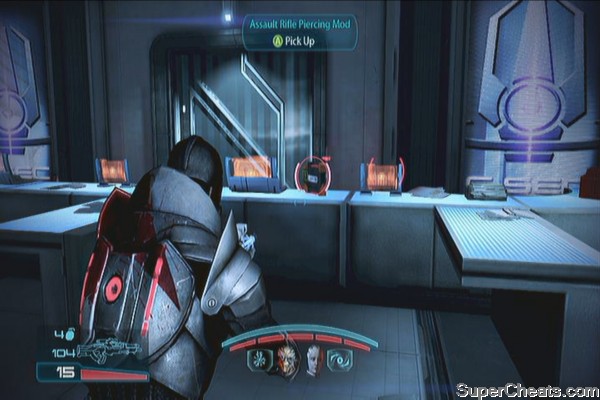
Continue to the hallway and kill the engineer to the left. Open the latch and activate the power. There's also a Sniper Rifle Extended Barrel on the shelf there, as well as a work bench. Activate the panel to open the door. Take the elevator up. 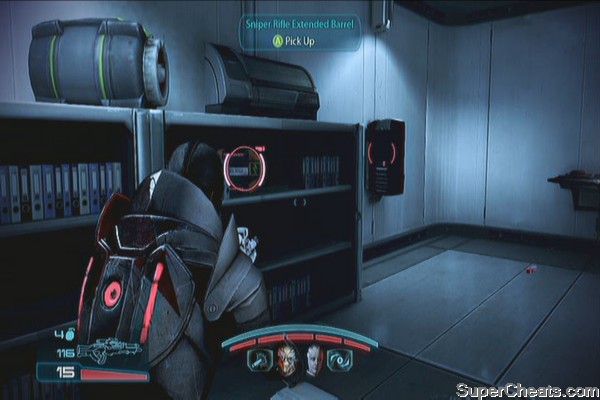
Exit the elevator and enter the room to the right. Grab the Pistol Piercing Mod on the table. Exit to the hallway and grab the M-25 Hornet from the corpse near the stairs. 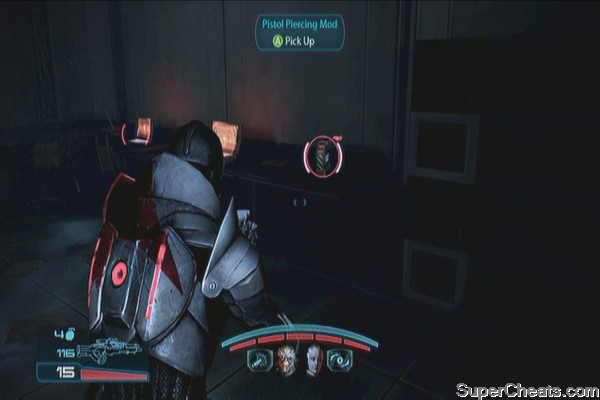
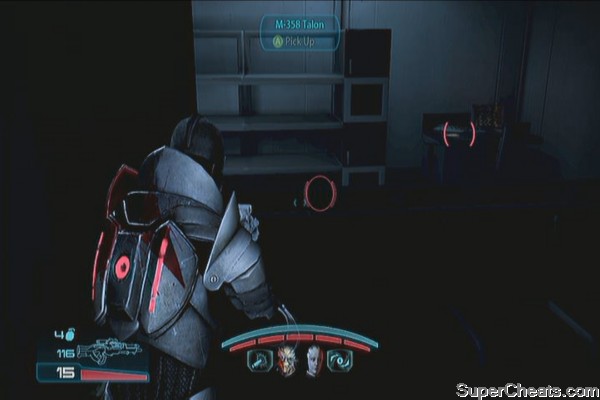
From that corpse, take the stairs to the left and enter the room there. Grab the Pistol High Caliber Barrel and Security Helmet on the shelves. There's also a locked room beside it containing the M-358 Talon but ignore it for now.
Enter the office to the right, before the malfunctioning door and look for the active terminal named “Door Control”. Activate it then go back to the previously locked door so you can grab the weapon inside. Once done, continue forth and examine the terminal “Account Details” in the same line of the Door Control terminal to earn some credits. 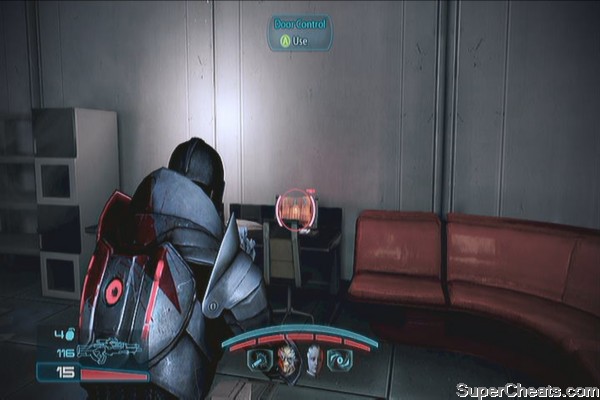
Exit through the door and kill the two guards in the hallway. Exit to the next door, then vault over to the kitchen to find some credits inside as well as a medical station. More enemies will appear so take cover and take them all out. Once clear, go to the dining area where the enemies landed to find another medical station and Sniper Rifle Piercing Mod. After grabbing the items, head to the executor's office and watch the following scenes. 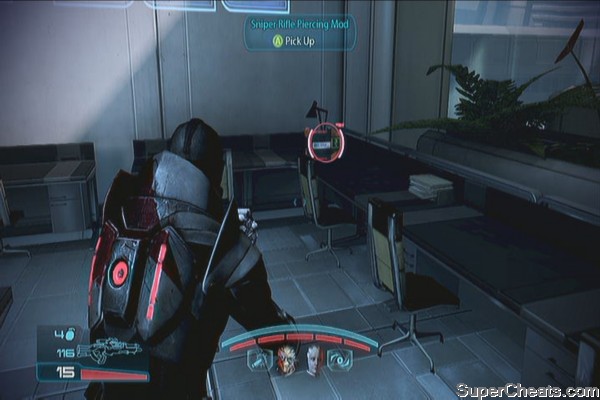
After landing, move on and kill the enemies. A new enemy type, called the Phantom will appear. Take them all out and continue forth. After jumping across the other side, more enemies will appear. Take cover and if possible, manually order your allies to use their powers to take out the shields of Nemesis and Phantoms.
As you continue forth, the enemies will seal the door so you have no choice but to take the alternate path. Follow the walkway until you reach a generator. There's some credits you can salvage there then continue along the narrow corridor. 
Exit to the other side and take out the remaining enemy forces. When done, just activate the elevator.
During this sequence, you have to shoot the other elevators' power conduits. Enemies will appear as well so dig in and get rid of them. Watch the video below should you need more information.
Elevator action
After this sequence, there will be more scenes. Mission complete.
After the commotion, you can now check out the Citadel normally. If you have pending side-quests, you may try completing them now. There are also new sidequests to open.
Embassies
After exiting the C-SEC office, approach the turian talking to a console past the human embassy to unlock the quest “Citadel: Cerberus Ciphers”
Head to the main lobby and approach the Asari War Strategist to start the sidequest “Citadel: Reaper Code Fragments”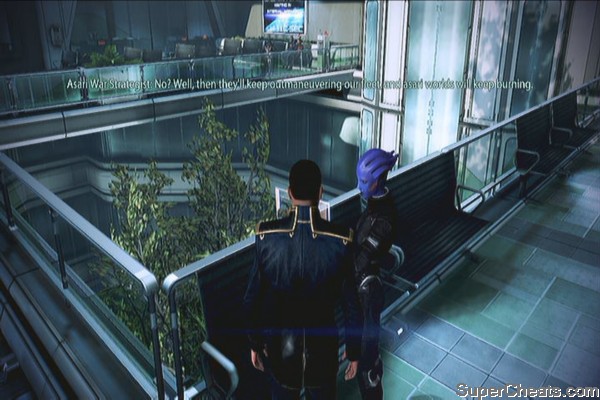
Presidium Commons
Head to the bank area and overhear an asari's conversation to open the quest “Athena Nebula: Hesperia-Period Statue”
Continue along the hallway and overhear a turian and human talking. This will unlock the sidequest “Citadel: Wounded Batarian” and will also update your Spectre terminal. 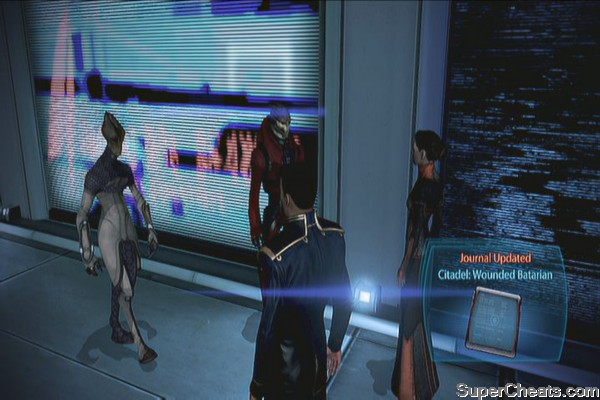
Head to the apartment area to find a salarian scientist. Stick a bit to update your journal and open the sidequest “Citadel: Kakliosaur Fossil”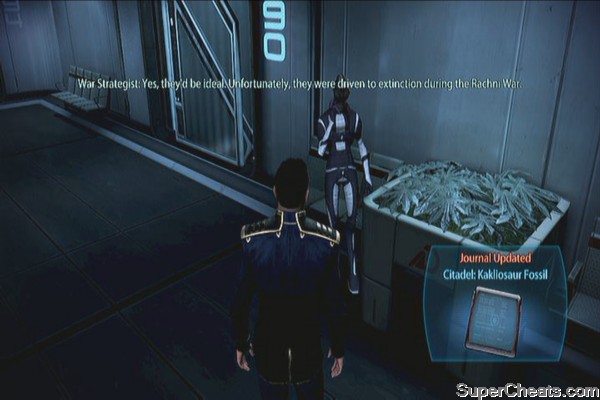
Approach the turian C-SEC officer talking to the console near Apollo's Cafe to unlock the quest “Target Jamming Technology”
Approach the arguing C-Sec officer and store owner. You can resolve their argument to increase your reputation a bit. (You can authorize the option to enable surveillance through your Spectre terminal)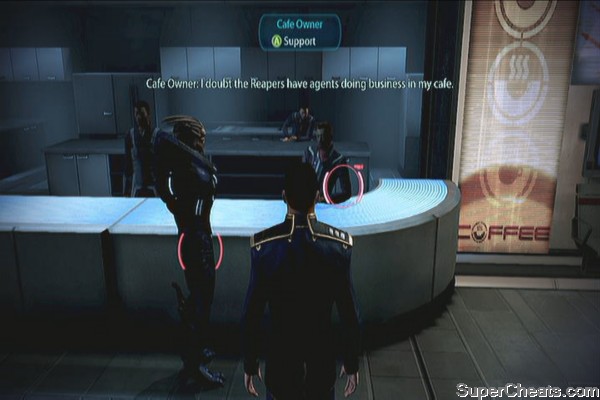
Approach the researcher sitting in the long bench in the courtyard to start the quest “Hades Nexus: Obelisk of Karza”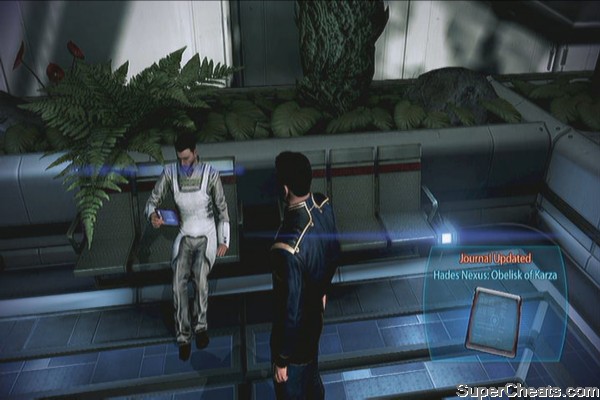
You can find arguing merchants in the marketplace. Like before, give your piece of thoughts to shut them up and increase your reputation. (You can authorize the option to train civilian militia through your Spectre terminal)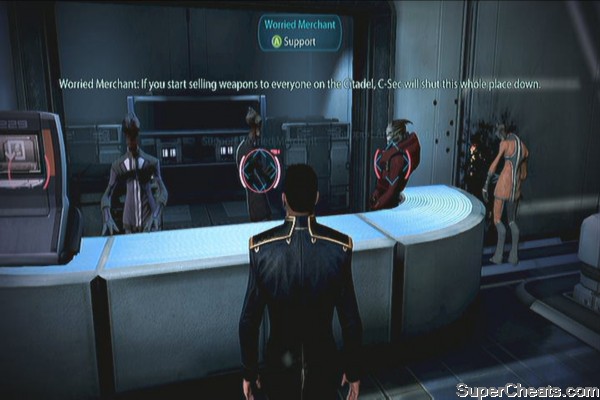
Talk to Officer Noles just outside the C-Sec outpost. This will start the quest “Batarian Codes”. Check the sidequest section of this guide for more details in completing this task. 
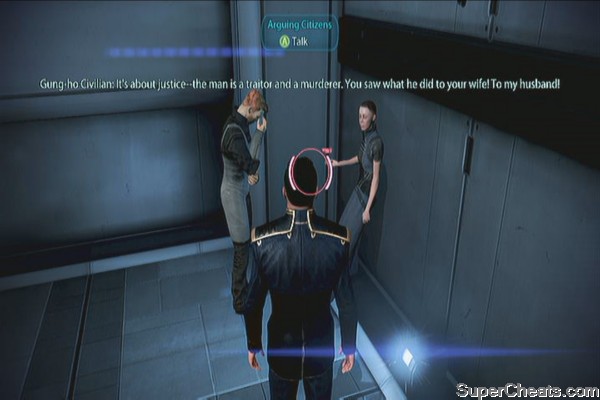
Find arguing C-Sec officers inside the outpost and barge in to increase your reputation. 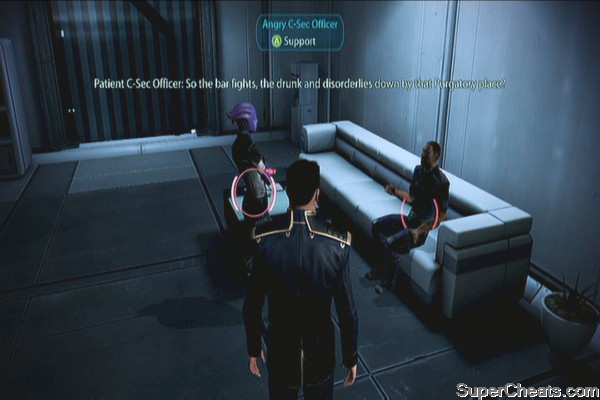
Head to the stairs beside the C-Sec outpost and talk to the angry civilians. This will start the quest “Citadel: Cerberus Retribution”. Check the sidequest section of this guide for more details in completing this task.
Purgatory
Approach the elcor and asari near the elevator to start this quest. (Dekuuna: Code of the Ancients)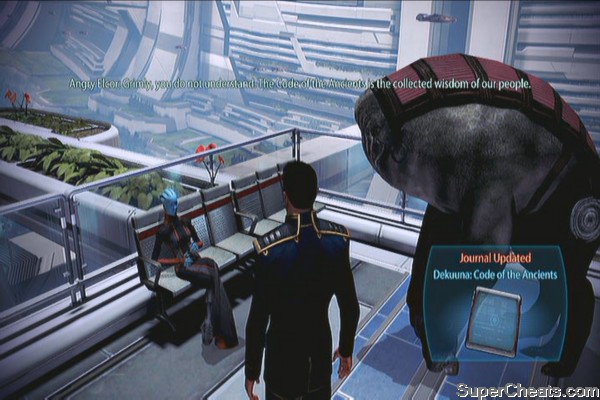
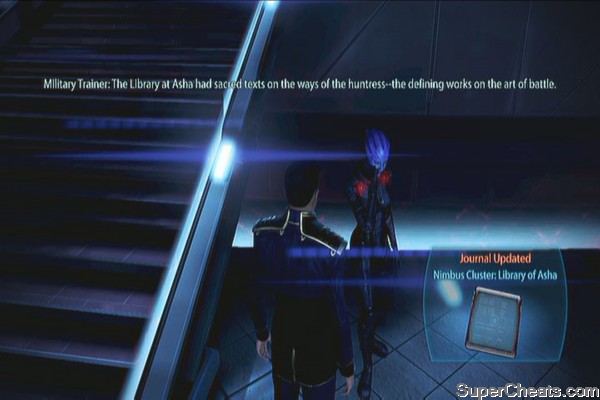
Approach the asari military trainer near Aria's location inside the bar to start this quest. (Nimbus Cluster: Library of Asha)
Docks: Holding Area
You'll find Solik Vass in the security checkpoint. Talk to him and agree to find footage for his documentary to start the quest “Citadel: Inspirational Stories”. All the spots are located in the docks so you won't have problems completing this quest. Check the Sidequests section for the individual locations of the photo opportunities. 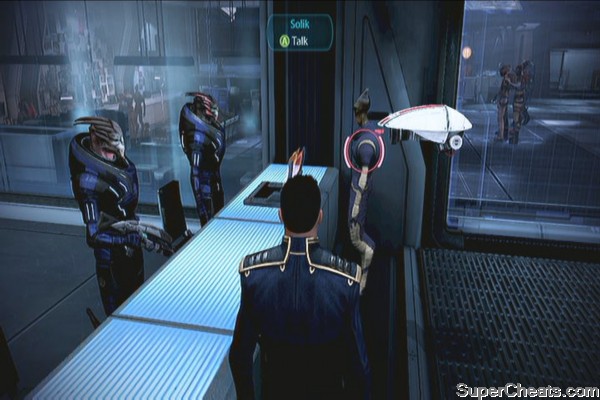
Head to the far end of the docks to find a refugee talking to an officer. This will open the sidequest “Hades Nexus: Prothean Sphere”.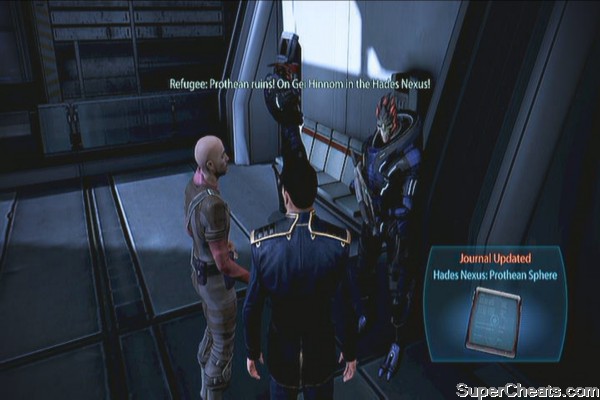
Docking Bay D24
On the way to the hatch leading to Normandy, you'll overhear a soldier's conversation with his superior. This will open this quest. (Valhallan Threshold: Prothean Data Drives)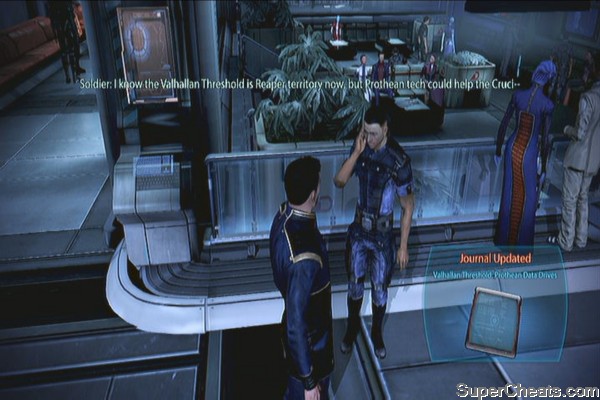
Hospital
As soon as you enter, you'll overhear an asari consultant talking over the phone. Stick around a bit to start the quest “Silean Nebula: Rings of Alune”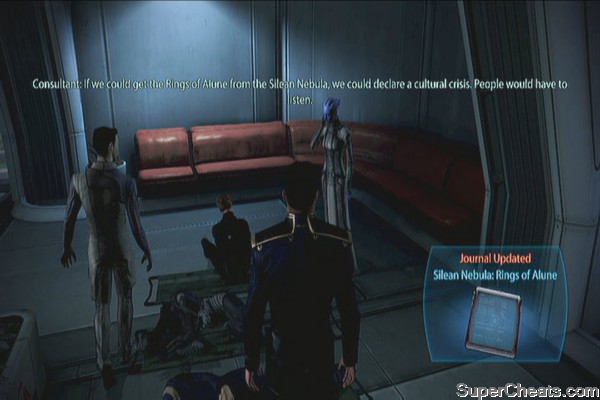
Enter the Lab Services area (check your map) then enter the room on the left side. You should find two doctors discussing. You'll get a new sidequest as well. (Citadel: Chemical Treatment)
Enter the examination room and overhear the doctor's conversation. This will start a new quest. (Citadel: Cerberus Turian Poison)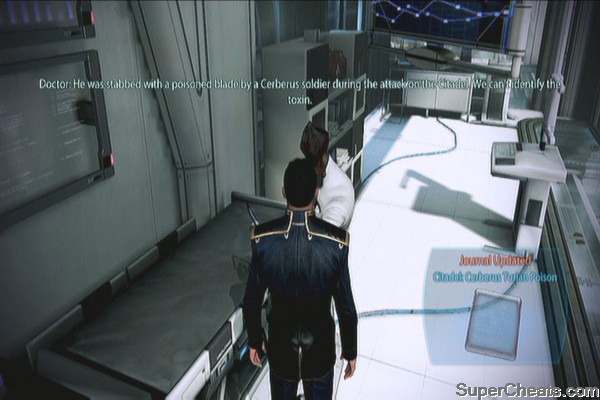
Find two arguing doctors. Give your suggestion to increase your reputation. (You can authorize the release of medical supplies in the docks using your Spectre Terminal)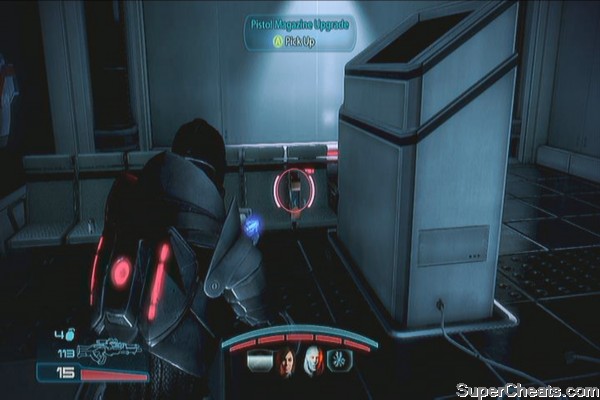
Go to Thane to proceed with the story. You're now ready to leave. Before doing any priority missions, again, it will be worth your time and effort complete the sidequests available and gather new war assets from newly available star systems.
Normandy
Talking to Specialist Traynor will also open another sidequest (Arrae: Ex-Cerberus Scientists), talking to Dr. Chakwas in Med-bay (Citadel: Medical Supplies) as well as reading Primarch Victus' message in your personal terminal (Citadel: Volus Ambassador).
You'll also receive invitations from your subordinates. You can call them up from your cabin's intercom. These interactions increase your reputation a bit.
Sidequest Items:
Heating Unit Schematics - Citadel: Heating Unit Stabilizers
Weapon Upgrades
Pistol Magazine Upgrade
Travel to the Horsehead Nebula then land on planet Noveria in the Pax system. After landing, kill all the enemies then continue forth. Check the hallway to the right first. Grab the spare parts near the entrance for some extra credits, then go downstairs to find a medical station and Pistol Magazine Upgrade. 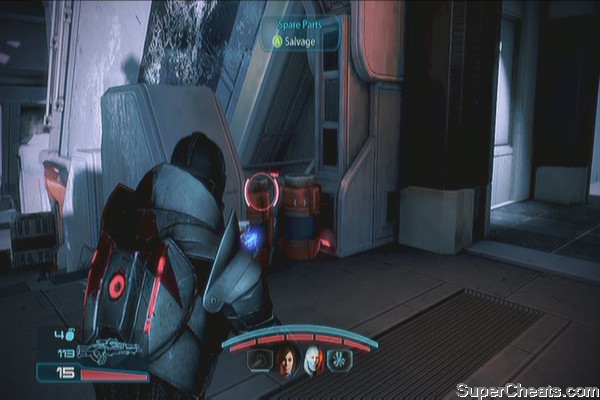
Continue downstairs and grab the spare parts and data pad on top of the consoles there to get more credits. There's another medical station on the wall as well and the Heating Unit Schematics slightly above your head. Grab it since you can turn it over to somebody in the Citadel as part of a sidequest. 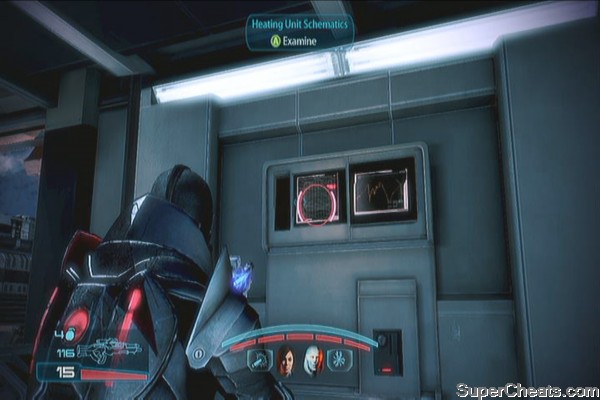
Next, continue to the security console and choose one of your allies to work on the defenses. More enemies will swarm you so take defensive positions and repel the enemy attack. Once done, check the metal catwalk outside to find a med-kit and some credits. Take out a few more enemies then finally, they'll send an Atlas down. Take it out to complete the mission. 
Unlockable Weapons and Equipment:
Disciple (Shotgun)
Serrice Council Shoulder Guards
Sidequest Items:
PDA - Citadel: Asari Widow
Weapon Upgrades
Assault Rifle Stability Damper
Pistol Melee Stunner
Sniper Rifle Spare Ammo
Assault Rifle Precision Scope
After landing, check the crates to the left near the wall to find the Assault Rifle Stability Damper. Open the door then jump to the other side. Use a couple of stairs down to reach the main floor. From the entrance, turn left then check the far end room to find a Pistol Melee Stunner. Examine the console as well for the Gallae's Electronic Signature. This will enable you to choose one free upgrade through Glyph's terminal in Liara's office. Check it later once you returned to the ship. 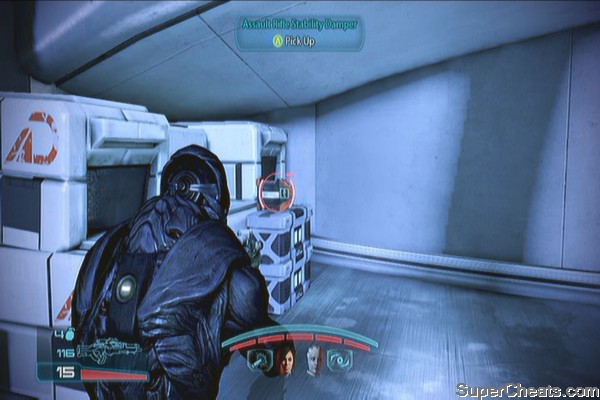

You'll find another PDA on the table in the middle of the room for some credits. Check the opened door to find the asari commandos. Before moving out, check the open room to find a wall safe and Sniper Rifle Spare Ammo.
Exit through the next door and follow the hallway then bypass the door in the end to enter the next hall. After the scene, check the asari commando corpse to your right and examine the PDA near her. This will start sidequest (Citadel: Asari Widow) and will require you to deliver her message to a certain Weshra in the Citadel. 
Head outside then carefully make your way to the Great Hall. Not before long, a Banshee will appear. It is heavily armored and has a kinetic barrier. Use your biotic and tech skills to quickly take out its shields and destroy it. Continue to the next door and open it.
After the scene, continue to the open door and kill all the reapers along the hallway. Once done, check the room to your right to find the Disciple weapon, Serrice Council Shoulder Guard and a medical station. Before going downstairs, check the room across the hall to find a weapon bench and wall safe. 

Go downstairs and you'll encounter another banshee with some cannibals. Concentrate your fire on the banshee first then clean up the remaining enemies. Exit through the door next.
Banshee
In the next room, turn left first to find an Assault Rifle Precision Scope on the floor. Open the door then take the elevator to the Great Hall. 
Once there, check the area for at med-stations and a med-kit then examine the bomb. After the scene, husks and two banshees will appear. Kill the lesser ones first then keep your distance and take out the banshees next. The mission is completed after the scenes.
Unlockable Weapons and Equipment:
Kassa Fabrication Greaves
M-6 Carnifex (Heavy Pistol)
Sidequest Items:
Turian Poison Data - Citadel: Cerberus Turian Poison
Weapon Upgrades
Assault Rifle Magazine Upgrade
Shotgun High Caliber Barrel
SMG High Caliber Barrel
Sniper Rifle Piercing Mod
After landing, take out the two soldiers then help clear the area of attacking Cerberus forces. Once done, find Jacob and talk to him. 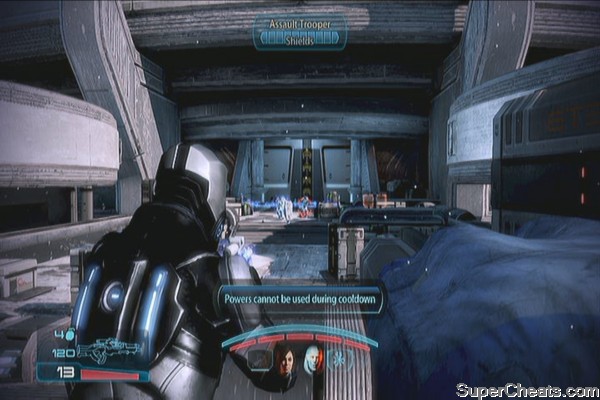
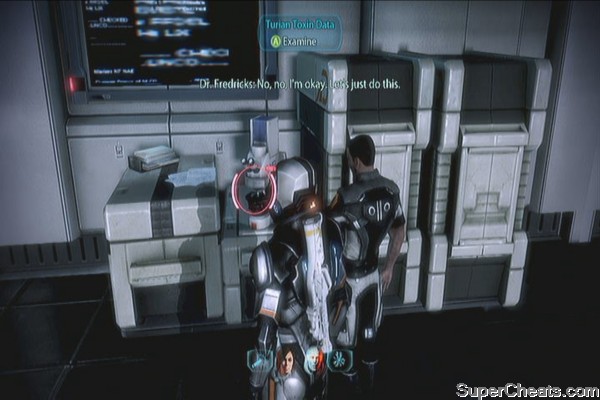
Once inside, go upstairs and check the datapad on the tables ahead for some credits. Enter the door, then find the Assault Rifle Magazine Upgrade beside the Work bench. Continue further upstairs to find Brynn. Once in control again, check the microscope near the stairs to find the Turian Poison Data.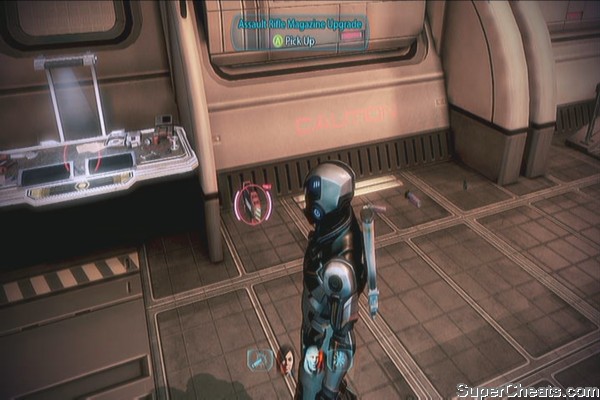
Next, head to the laboratory across the floor and find some credits, medical station and Kassa Fabrication Greaves. Right before leaving through the door, look on the ground beside the two scientists to find a Shotgun High Caliber Barrel. 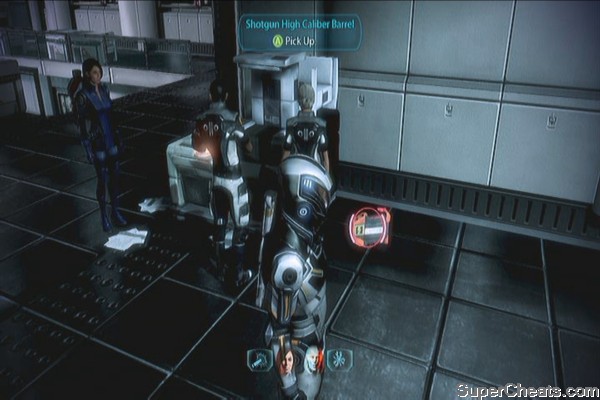
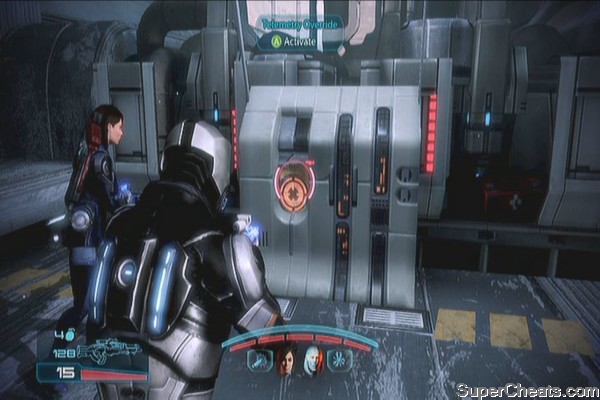
Go through the door when ready then climb the ladder. You should find the M-6 Carnifex pistol on the pipes to the left. Head out and take out the enemies. Jump down to the next area and grab the SMG High Caliber Barrel behind some crates. Continue forth and examine the data pad on the ground and med-kit before activating the Telemetry Override. 
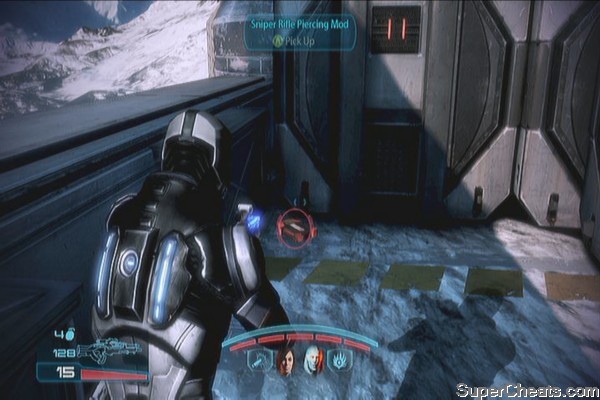
After activating it, you'll have to activate the two AA guns next. Fight off the next set of enemies then move in to the upper platform. Fight off a few more enemies as you move forth. There's also a mounted turret that will shoot at you so keep moving from cover to cover until you reach the towers. Before taking the ladder up, check the back of the large container to find the Sniper Rifle Piercing Mod. 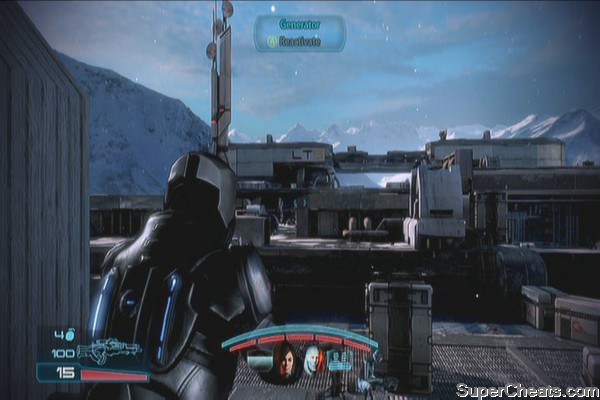
Climb up the ladder then activate the AA gun controls of the first gun. Cross to the next tower, examine the data pad and medi-kit in the middle then activate the second control. It needs to be repaired though so choose one ally to repair it while you and the other defends the position. Use the mounted turret to easily defend your position. 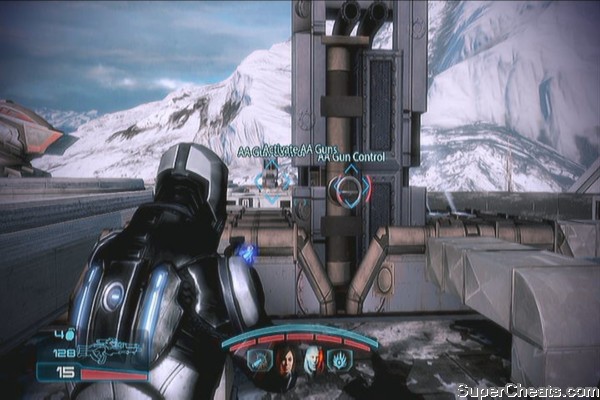

Finally, activate the second gun control again. You'll have the option to leave immediately or double-check if you're able to grab everything before leaving. Once ready, activate the evacuation console. Once done, enemies will breach the base. Kill the ones who broke in then go downstairs. Kill the others and continue clearing the path. Finally defeat the Atlas to complete the mission.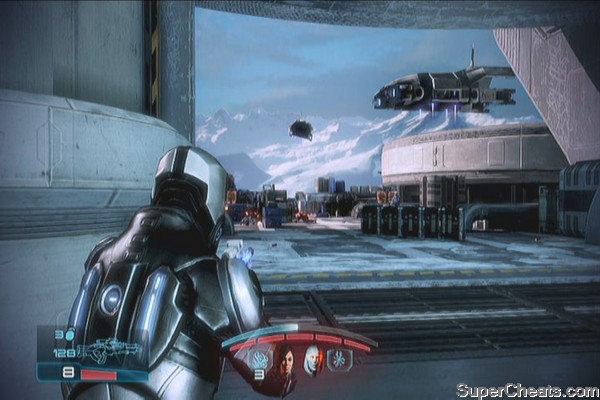
Unlockable Weapons and Equipment:
Arc Pistol
Archon Visor
Geth Pulse Rifle (Assault Rifle)
Weapon Upgrades
Shotgun Smart Choke
Sniper Rifle Enhanced Scope
SMG Scope
Assault Rifle Precision scope
Walk to the airlock until you successfully enter the dreadnought. Upon entry, check the console to your left to find a Shotgun Smart Choke beside it. 
Use the ladder to go up then jump over to the other side to reach the door. In the next room, examine the console along the long walkway to get some geth data. Use the nearby ladder again then activate the docking controls. Grab the Arc Pistol then continue to the new path.
Grab the GARDIAN data and Sniper Rifle Enhanced Scope on the console along the way. Move along and activate the bridge controls. Destroy the enemies then take the ladder down. Fight your way along the corridor then finally grab the geth data on the console before the exit to earn some credits. Exit through the door. 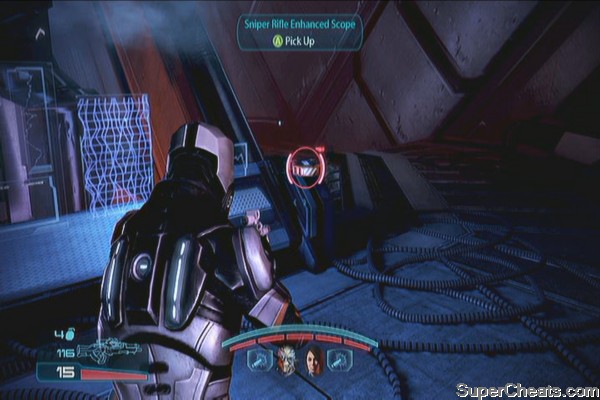
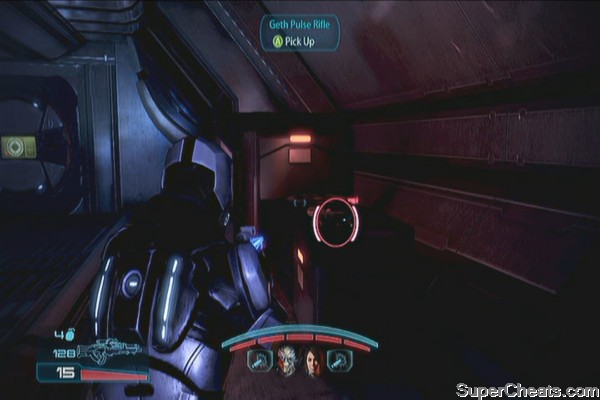
Once there, examine the consoles and grab the Archon Visor. Move to the next area, then grab the Geth Pulse Rifle on top of a crate on the wall to the right before moving forth. 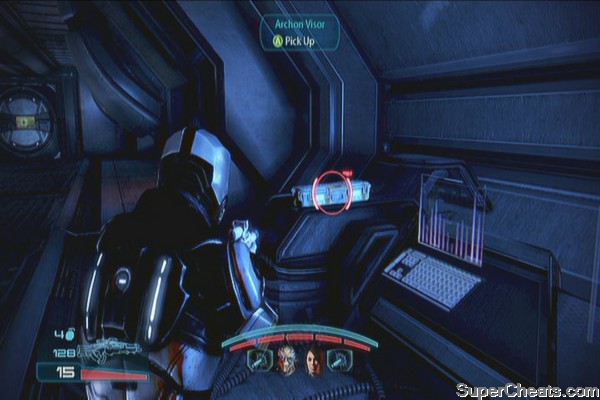
Clear the operations room then head to the consoles. Grab the SMG Scope and geth data before activating the main console. Take out the geth reinforcements that'll come your way then use the door where they came from. 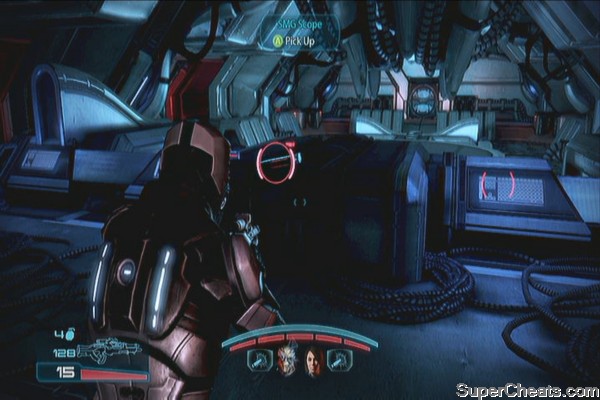
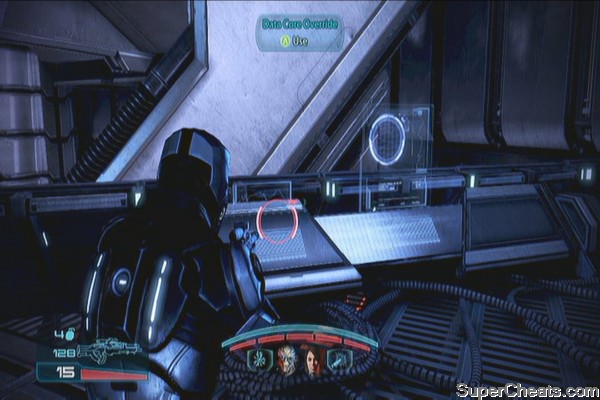
Continue following the path and go down the ladders until you reach the next door. Grab the geth data and med-kit along the way as well. Continue until you reach the main battery. This will release shockwaves from time to time and will complete take out your shield if you're caught in it. Just move from cover to cover and dig in when a shockwave is approaching your way. Force your way through until you find the maintenance console. Deactivate it. 
Run to the walkway before the gun fully activates. You have to do the same thing; fight your way to the next door while occasionally taking cover from the shockwaves. Bypass the door then grab the Geth data in the console behind the platform control before activating it. Activate the platform control then continue to the drive core.
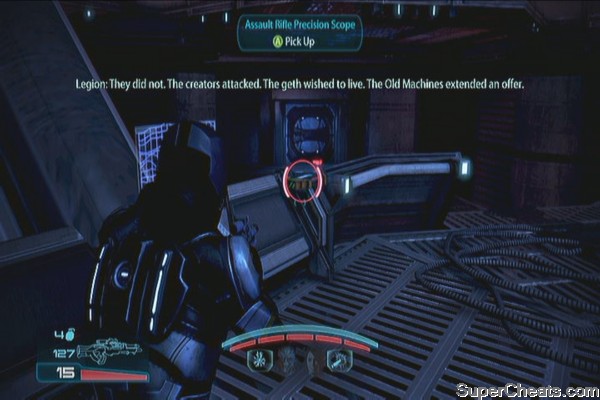
After talking to Legion, grab the geth data from a console nearby and a Assault Rifle Precision scope. Once ready, head to the upper platform and deactivate the hardware blocks. 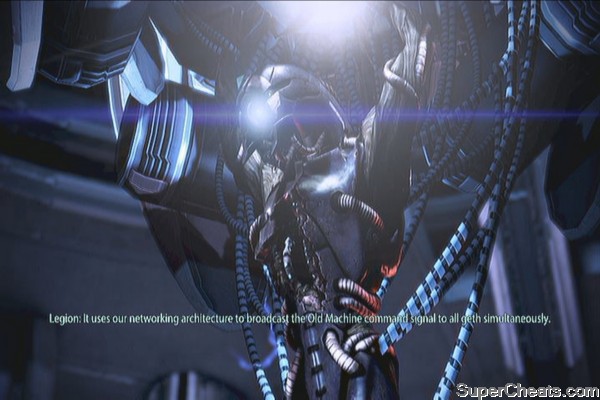
Once done, fight your way through the other side of the platform then use the ladder to go down. You don't have to do anything else here but to run. Continue running until you reach the fighter to escape.
There will be new missions available in your journal. There's also a distress signal. Clean it up and warn Raan while its playing to earn some rep. Head to the CIC and you'll unlock another N7 mission. There are a couple new star systems as well so take this chance to scour them for more war assets. You may also want to head back to the Citadel when you have time, to complete some sidequests and spend time with your squadmates. 
Unlockable Weapons and Equipment:
Rosenkov Materials Chestplate
Quest Item:
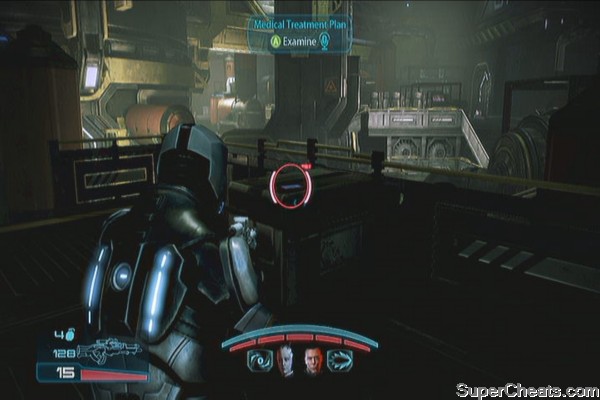
Medical Treatment Plan - Citadel: Chemical Treatment
From the starting point, go left to find Rosenkov Materials Chestplate. Continue straight ahead to find a Medical Treatment Plan on the crate near the ladder. This is necessary for a sidequest (Citadel: Chemical Treatment)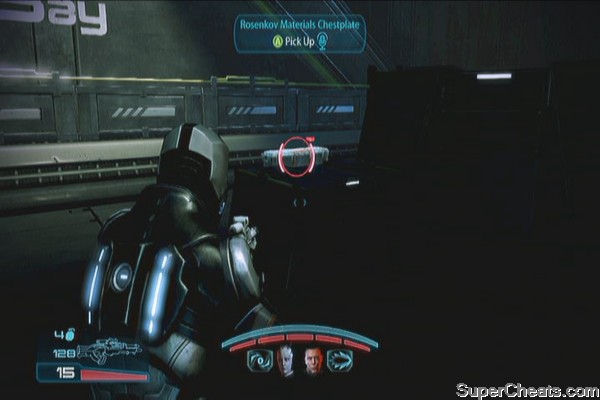
Once ready, talk to Captain Riley. Go through the newly opened path and activate the crane display. You can also find some spare parts in the far end of the corridor for some extra credits. 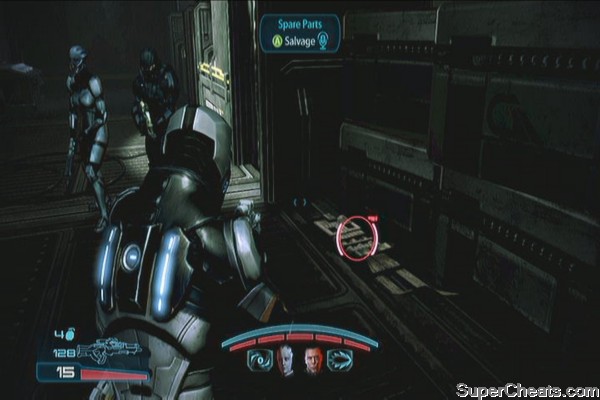
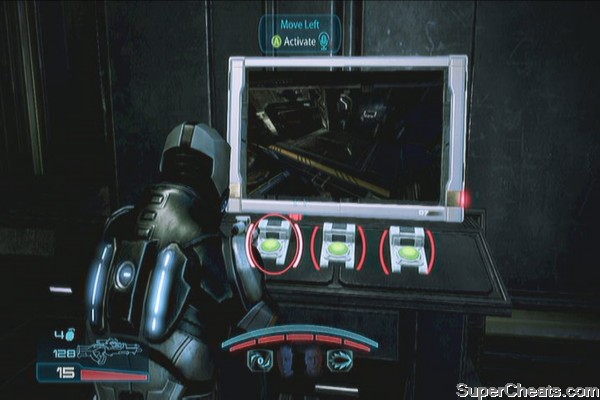
Use the crane to remove the obstacles from the left side. Once done, turn around and follow the new path. Head to the control panel near the ammo/grenade crate then Vent Sector A1. Go down to activate the fuel rod. Examine the PDA on the floor beside it as well. 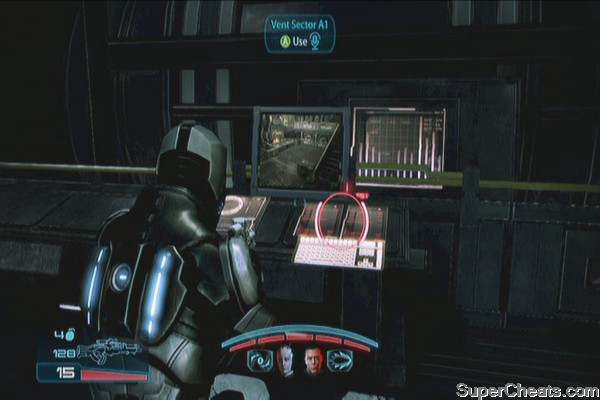
As soon as you activate the fuel rod, enemies will appear. There's a med-kit in the far end of the floor near the ladder should you need it. Take them out then move in to seal the tanks. After reactivating the two cooling tanks, you should be able to restart the reactor. Don't forget to grab the PDA nearby as well. 
After restarting the reactor, more enemies will appear. There will be barrier generators as well so it will help taking them out. Keep defending your position and Captain Riley's team will request for assistance. Send of your team mates to help them then continue defeating more enemies. 
Once clear, initiate the final startup then return to the extraction point to complete the mission.
Unlockable Weapons and Equipment:
Javelin (sniper rifle)
Armax Arsenal Chestplate
Weapon Upgrades
Shotgun Shredder Mod
SMG Magazine Upgrade
Continue on foot until you spot some geth. Take them out then examine the quarian corpse and salvage some spare parts nearby. There's also the Javelin sniper rifle on the ground beside a corpse. 
Move along to spot some geth patrols. Take them out then continue around the path. More enemies will appear. Take them out then head to the gun controls. Take out the geth guards then assign one of your team mates to work on the console. Dig in and defend the position until the task is complete. Don't forget to salvage the geth technology in one of the consoles for some extra credits. 
Move to the tower then grab the Shotgun Shredder Mod and salvage some geth parts nearby. Talk to the wounded quarian nearby. 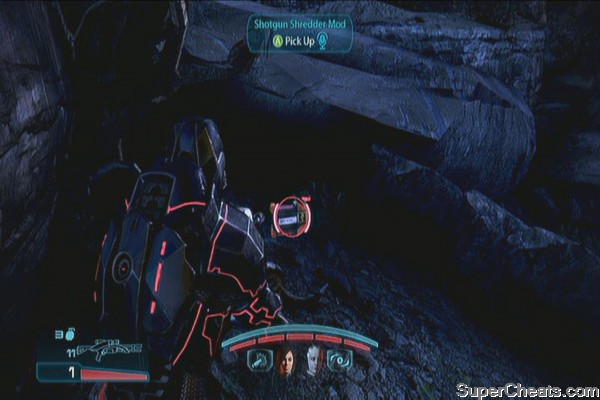
Pick up the SMG Magazine Upgrade a few steps away from the quarian. Continue to the AA gun positions. Head to the right then clear the area. Continue to the control console and grab the Armax Arsenal Chestplate there. 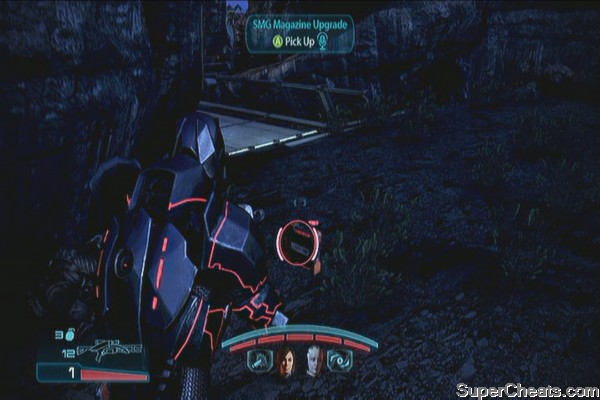
Again, choose one of your allies to shut down the gun while you and another holds the position. You can use the geth turret to easily destroy the geth. The corridor in the middle will open. Continue to the next area and take cover while you take out the enemies. Once clear, head to the gun controls and do the same thing. 
After taking out the guns, you'll need to save the Admiral. Cover his escape using the shuttle's gatling gun.
The not-so-great escape
You'll be alone in this mission. You need to use your gun to break and shoot the orange “codes”. Keep doing this until the access point is revealed. Exit there.
In the second area, destroy the connecting nodes to fully remove the large chunk of infected code. This will also earn you experience and Improved Geth Resistors. Do the same thing to the second data cluster then head to the final data cluster to reach the access point. 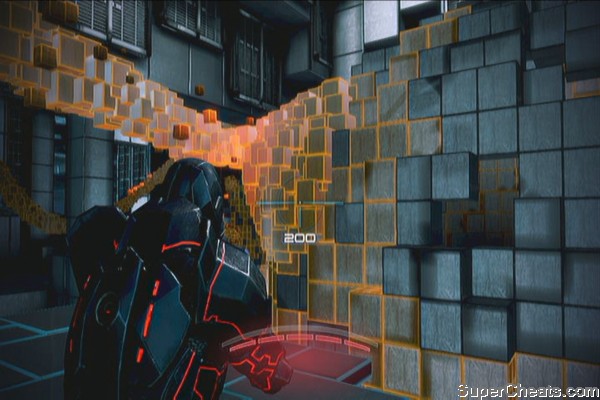
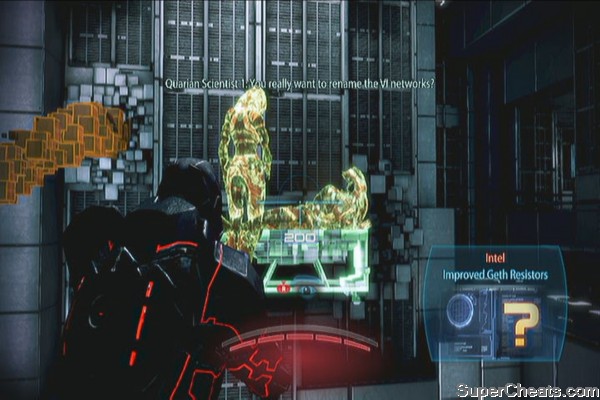
In this stage, you'll encounter replicating codes. If you shoot the codes and they keep regenerating back, look for another vulnerable spot along the line and shoot it instead. Once the replication stops, continue destroying the main codes. Continue doing this until you access the last cluster. Exit to the access point and to the connection pod. 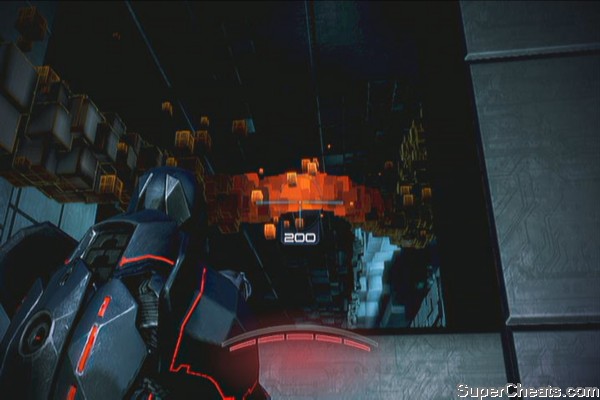
Unlockable Weapons and Equipment:
Kassa Fabrication Gauntlets
Geth Plasma Shotgun
Weapon Upgrades
SMG High Caliber Barrel
Assault Rifle Piercing Mod
SMG Ultralight Materials
Assault Rifle Stability Damper
After landing, take cover and take out the geth below. Continue downhill and take out more enemies. The door will be locked before you so you have no choice but to climb manually. You'll also find a SMG High Caliber Barrel on the ground near the closed gate. 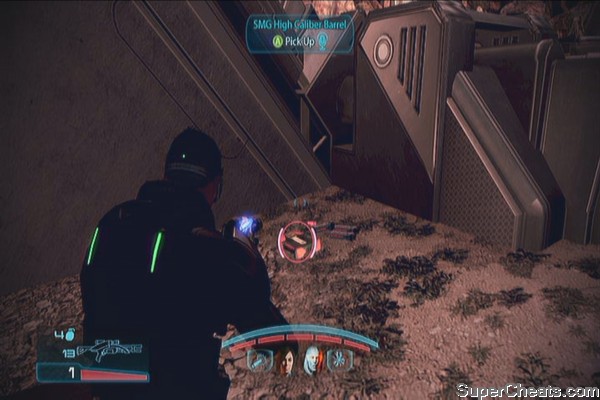
Use the pipes and crates to vault over and reach the upper platforms. You'll find an Assault Rifle Piercing Mod on the platform in the middle. You'll also find a Kassa Fabrication Gauntlet near the stairs. 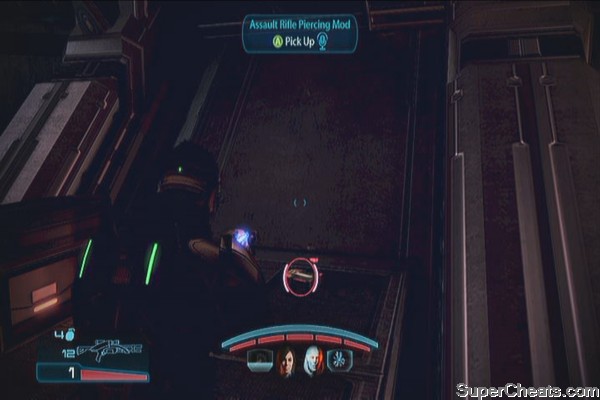
Continue to the next platform then fight your way until you reach the door. Exit to the next area then check the path to the left to find SMG Ultralight Materials. Continue along the main road and destroy all geth enemies. You should also find an Assault Rifle Stability Damper on the floor along the way. 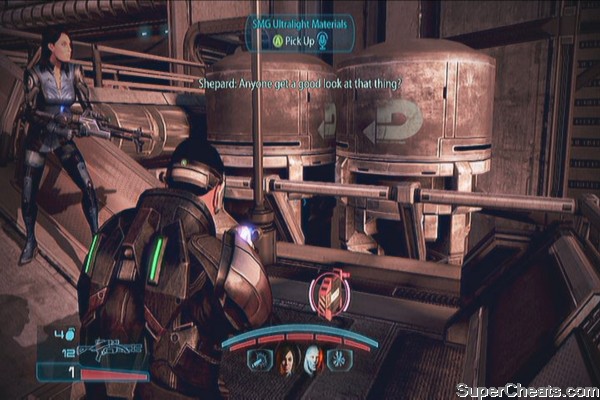
Continue forth and you should find a Geth Plasma Shotgun right beside the ammo/grenade cache before reaching the door. You should salvage the data from the console as well for some credits. 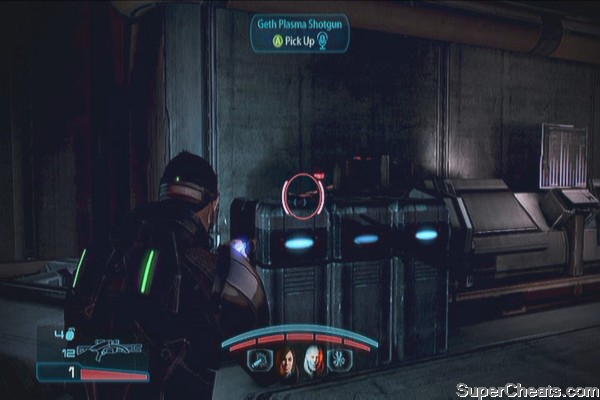
Enter the door and press forward. You should find a med-kit and salvageable data along the way. Move outside and kill more enemies. Move to the door override then dig in and defend your position. After clearing the area, head to the marked console and activate it. Head to the elevator and destroy the prime that's blocking it. Activate the elevator to reach the upper levels once done. 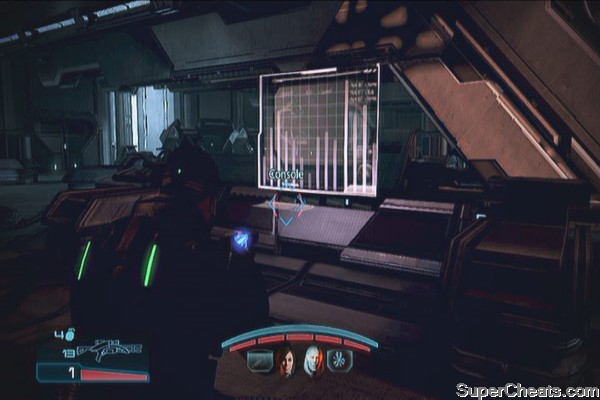
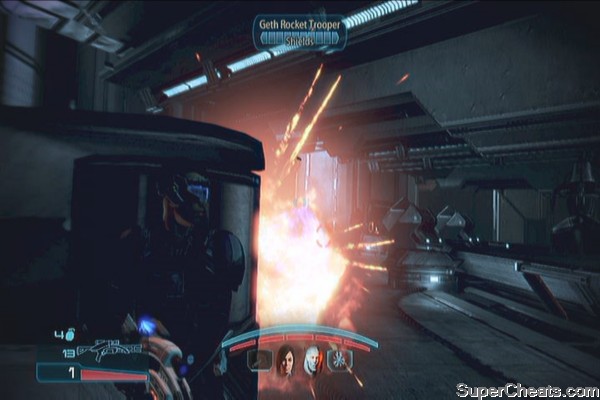
There will be three geth primes here. Make sure to move around and take cover while throwing everything you have against them. If possible, try to concentrate your fire on them. Do not stay together as this will certainly spell your doom. Just spread out, revive your allies as needed and unleash your powers and grenades as necessary.
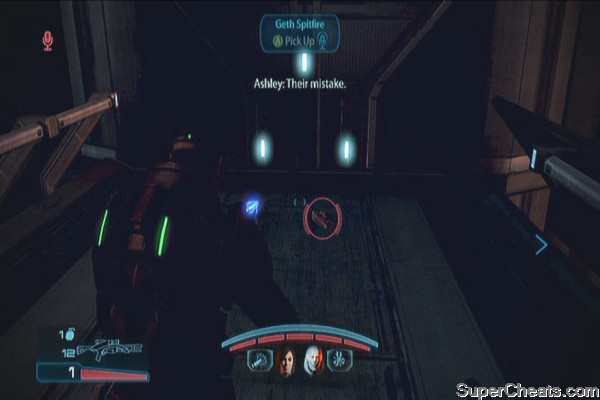
If you want to do this the easy way, there are some Geth Spitfires you can find scattered around this area. Use this to quickly kill the primes.
Geth Prime Party
Once clear, head to the far end of the walkway and use the targeting laser to paint the target. After the scene, run to the hovercraft. After the scene, you'll have to manually target the reaper. Take note that you need to move side to side to avoid getting hit.
Concentrated fire
After the scene, you'll have to decide whether to destroy the Geth or support the quarians. If you have Tali and if your paragon level is high enough, it is possible to get both forces join you into battle. To do this, you must select the option to upload the Reaper codes to the Geth, and then choose the second paragon option.
After the last mission, new star systems will appear as well as a new priority mission. Like before, it will be beneficial if you'll scan them first for war assets before doing heading to the Citadel.
Before meeting with the Asari councilor, you can meet up with the NPCs who gave you side-missions to hand over the items they needed and earn your rewards. Once ready, go to the embassies and meet up with the councilor. After the conversation, your journal will be updated. Make your preparations then head out.
Unlockable Weapons and Equipment:
Umbra Visor
M-98 Widow (Sniper Rifle)
Weapon Upgrades
Sniper Rifle Concentration Module
Assault Rifle Extended Barrel
SMG Heat Sink
Travel to Athena Nebula then land on Thessia. Liara is a fixed party member for this mission so select one squadmate who will compensate your weaknesses.
After landing, go down the ramp and grab the Umbra Visor near some crates. There's also a supply crate nearby you can open for some credits. Once ready, talk to Lt. Kurin. Use the mounted turret and use it to repel the enemy attack. 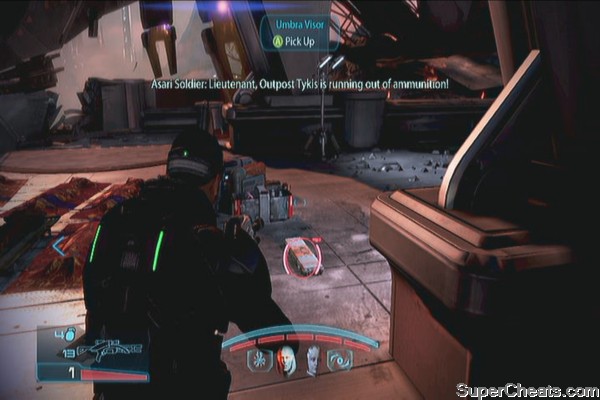
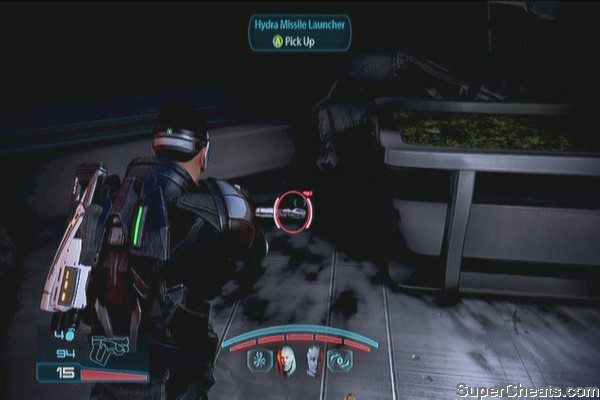
After the conversation, you'll be out in the bridge. Take out the enemies on the other side and enter the temple. Head to the courtyard and destroy all enemies. There are a couple of med-kits here so check the area and grab them for extra exp and medi-gel. There's also a heavy weapon called the Hydra Missile Launcher beside an asari corpse near the entrance to Outpost Tykis.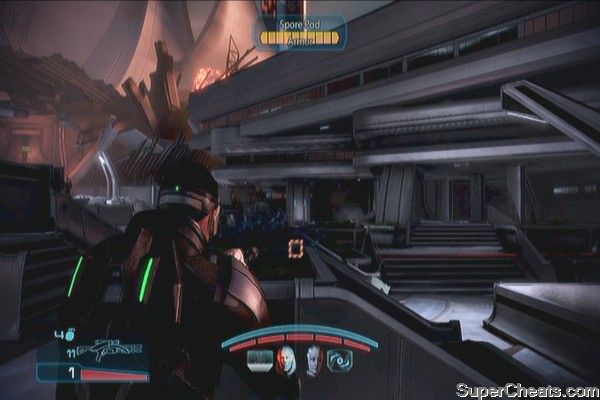
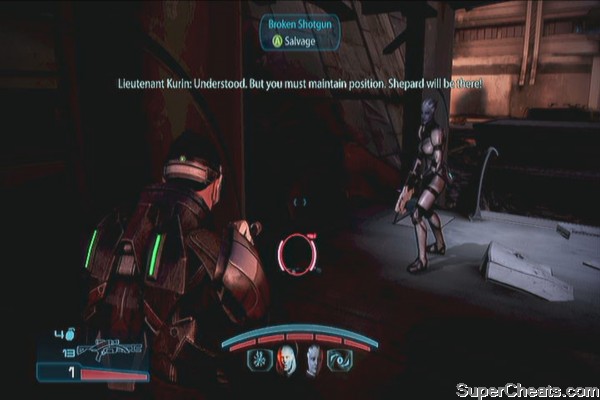
Once clear, go up the ramp and salvage a terminal along the way for some credits. Bypass the door ahead and continue to the next courtyard. You'll finally see the asari snipers ahead. Head to the courtyard and check the building entrance to the right to find a Broken Shotgun. Salvage it for some credits then continue up and regroup with the snipers.
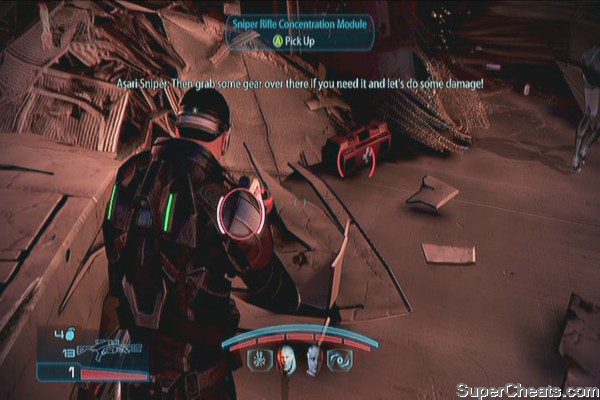
Once there, you'll find the M-98 Widow sniper rifle beside the asari sniper. Grab it, alongside the med-kit and Sniper Rifle Concentration Module. Take out the enemies below then continue forth until you meet up with a lone survivor from the outpost. 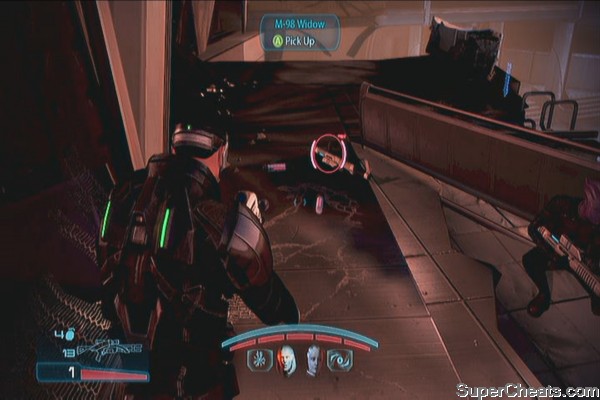
Dig and start clearing the large enemy force ahead. You may want to take out barrier generator on the wall to the left first before concentrating your fire on the banshee. Once cleared, go up the ramp then grab the Assault Rifle Extended Barrel among the debris before the spore pod field. Continue forth and defeat all the enemies, including some harvesters. Once clear, continue to the asari temple.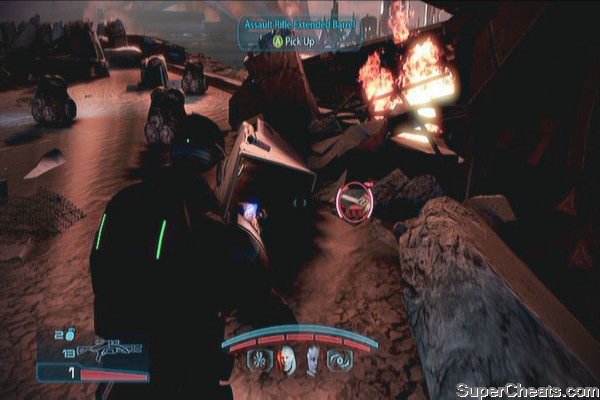
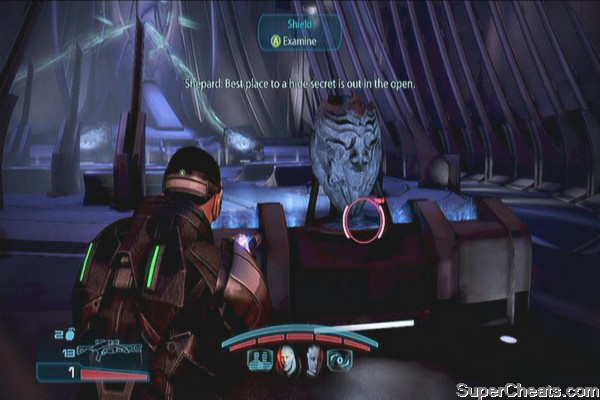
Near the entrance, you'll find an ammo/grenade cache, as well as a SMG Heat Sink part. Examine barrier controls to the right to proceed. Examine the statue in the center of the hall to continue with the story. You then have to find the hidden connections amongst the artifacts. Just look for the glowing ones. After activating all the connections examine the beacon. 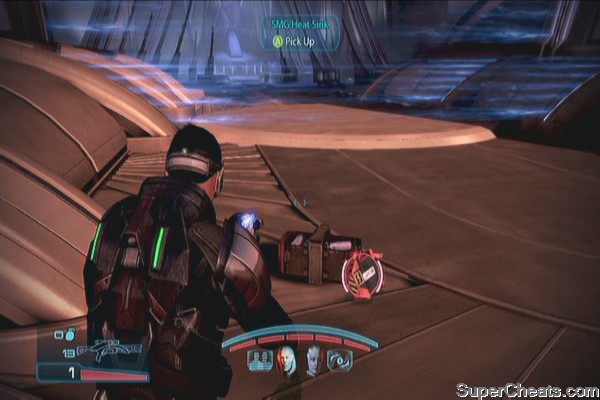
After the scene, you'll have to fight Kai Leng. Deal damage to him and wait until he calls the gunship for support. You can shoot the gunship until it's driven away. Continue dealing damage to Kai Leng until the fight ends automatically. Watch the remaining scenes until the mission is completed.
Bitter fight
After the disappointing defeat, head back to CIC to receive a new side-mission (N7: Communication Hub). You should also have access to new star systems. Like before, scour the star systems for more war assets then complete the other side-mission as well before taking the priority one.
You can return to the Citadel and talk to the elcor ambassador there to get the quest Dekuuna: Elcor Extraction. See the sidequests section for more details.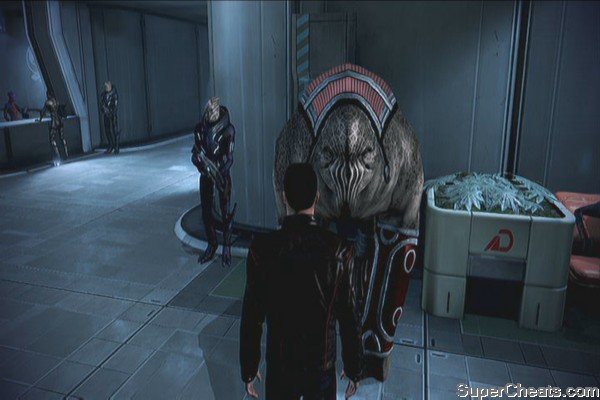
Unlockable Weapons and Equipment:
Ariake Technologies Greaves
Quest item:
Cerberus Codes - Citadel: Cerberus Ciphers
After landing, clear the enemies in the area. Once done, head to the left and check the platform up the ramp to find two med-kits and salvageable cerberus technology for credits. You can also find the Cerberus Codes here from one of the consoles near the large container tanks. 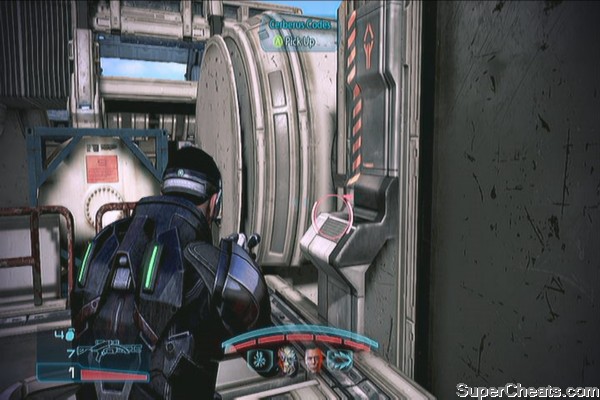
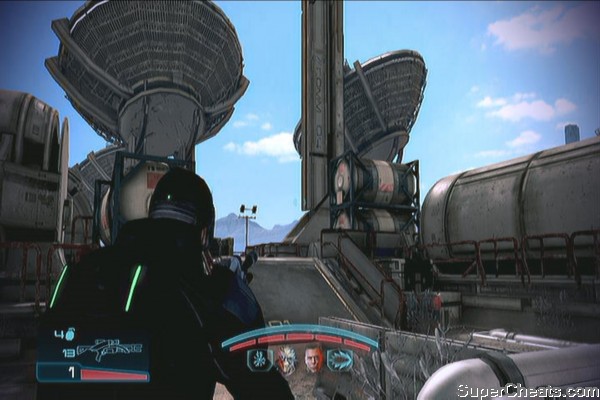
Once you have it, you can check the leftmost walkway for some cerberus tech, then return to ground level and grab the Ariake Technologies Greaves beside the pillar near some crates. There is cerberus tech beside it as well and another medkit a few walk away to the right. 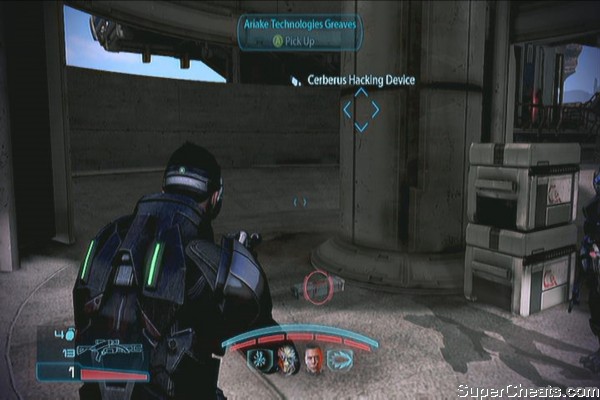
Continue to the hacking device and deactivate it. Take out the cerberus reinforcements then head to the second hacking device. Deactivate it again then run to the third and final hacking device and clear the area. Mission complete.
Unlockable Weapons and Equipment:
Rosenkov Materials Shoulder Guards
M-12 Locust (SMG)
M-99 Saber (Assault Rifle)
Weapon Upgrades
Pistol Scope
Shotgun Blade Attachment
After landing, continue forth and clear the enemies. Bypass the door and continue inside the building. Turn to your right to find a medical station. Move along and continue checking the area. Continue downstairs and take out a handful of Cerberus guards. Don't forget to grab the Pistol Scope beside a dead guard as well. 
Continue to the open corridor and examine the console. Salvage the parts in front of it as well for some extra credits. Continue outside then activate the water pump. Climb down the ladder then continue inside. Once you've reached the second room, you'll find some spare parts and a Rosenkov Materials Shoulder Guard by the door. Continue to the next room and examine the console. 
After the scene, continue to the next room and examine another console across the room. Exit through the door and take out the husks. Continue further to the main corridor and defeat the banshee and its backup of reaper forces. Once clear, head to the next door. You can grab a medi-gel just across that door with a banshee as well. 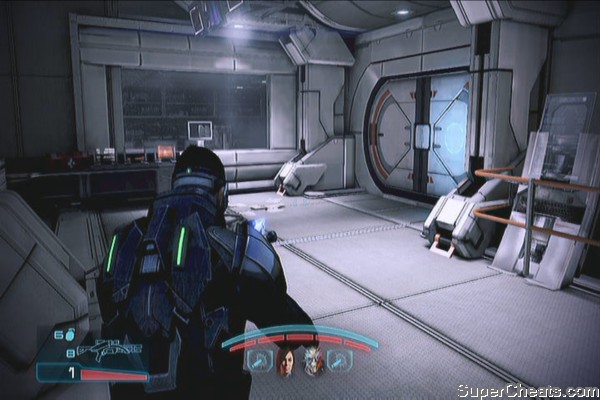
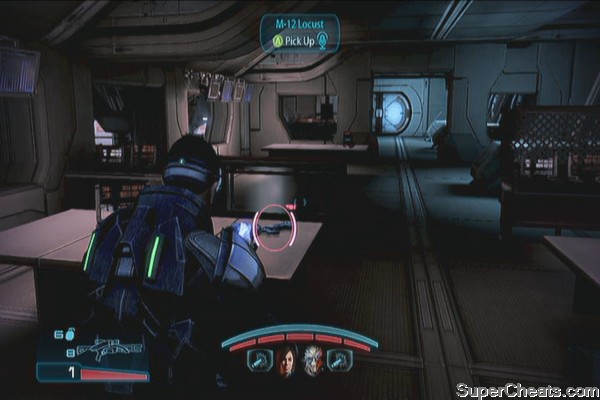
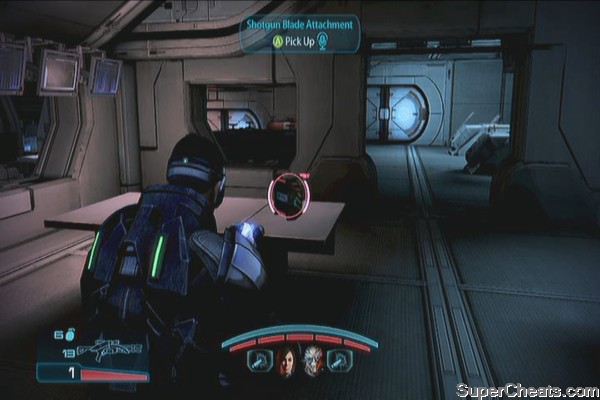
In the next room and salvage the research data then activate the console as well. Head to the laboratory area then clear the enemies. You'll also find a M-12 Locust on the table. There's a Shotgun Blade Attachment on the next table as well. 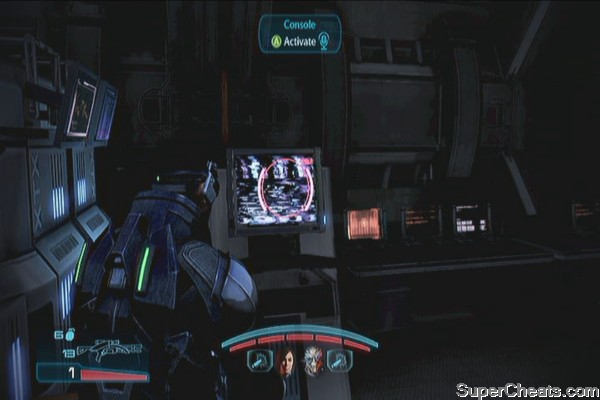
Find the next console and examine it. Take the ladder up and clear the path. Destroy the barrier engines on the roof to make your life easier. 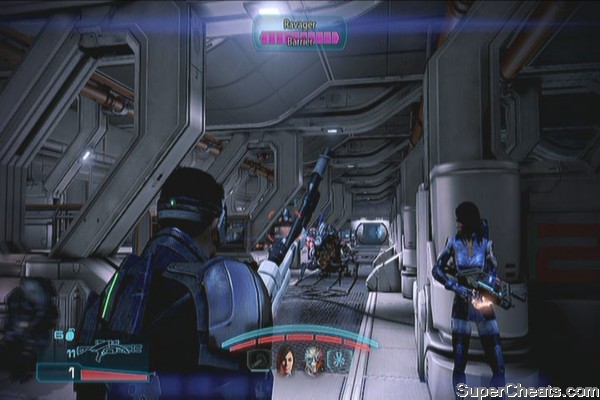
Continue to the next hallway and examine the medical station by the door. Grab the research data along the way then exit through the half open door. Jump on the lift then shoot the latch open. Activate it and wait until you reach the other side. 
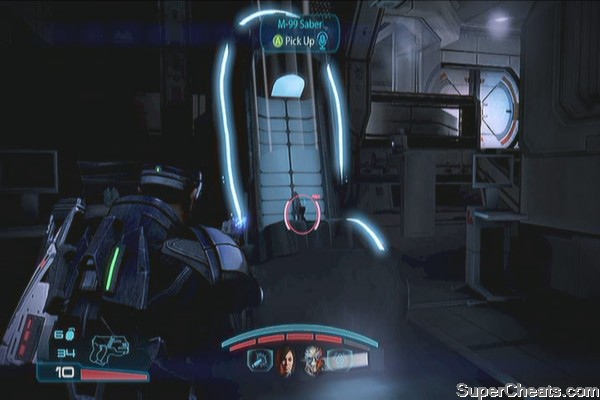
You'll have to defeat a banshee and three brutes. Concentrate your fire on them one at a time and don't stick together. After defeating them, continue forth and you'll see a holographic display of the Pod Status. Examine it then choose to override pod controls. Backtrack from where you came and activate the last pod. You should be able to pick up the M-99 Saber inside. Head to the next door. Don't forget to grab the research data along the way for some credits. Activate the elevator and open the door. After the scene, mission is completed. 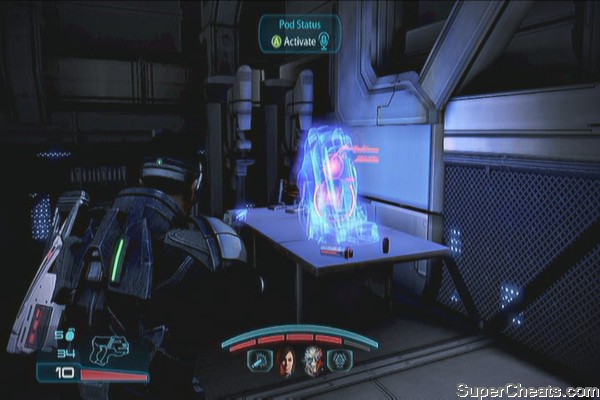
Unlockable Weapons and Equipment:
M-37 Falcon (Assault Rifle)
Serrice Council Greaves
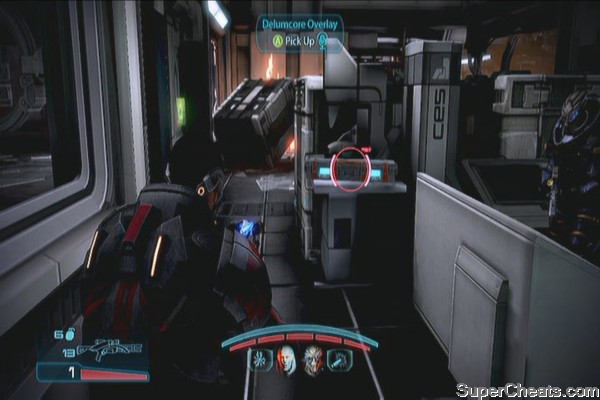
Delumcore Overlay
This is the final mission so make sure to have a back up game save before moving in. When ready, mobilize your forces.
Once inside the base, take cover and start clearing the launch pad. Stay away from where the fighters launch since they can instantly take out your shield if you're in their path. After clearing the the area, use the ladder up and access the active console. 
Head out and kill all the enemies along the way. Make your way to the second control room and activate the controls again. There's a medical station behind so don't forget to grab it as well. Continue forth but before taking the ladder down, enter the room beside it to find a PDA worth credits. 
Go down the ladder then release the clamp to blow yourself a new path. Kill the last enemy team in the area and move forward. Grab the M-37 Falcon near the flaming debris. Activate the door when ready. 
Continue to the sub-level and take out the Cerberus forces they throw at you. Before climbing the ladder up, salvage some credits and examine the medical station nearby. Climb the ladder up and watch the scene. 
You have to option to view the logs or just ignore them. Before moving out, turn around and grab the Serrice Council Greaves. Continue through the wreckage until you reach another sub-level. Clear it out then climb the ladder. There's another video log here you can examine if you want. 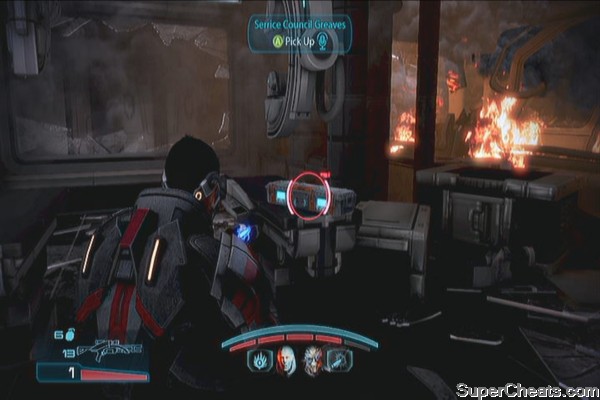
In the second room, there's a medical station and some credits here as well. Exit then continue ahead, past the hole and to the second room. Here you'll find a med-kit on the floor and Delumcore Overlay. Further inside the room, you'll find another console with a video log. Check it if you want. Once done, approach the blue-tinted hole on the floor and approach it to proceed. 
Continue to move along the walkway and take out the intercepting cerberus forces. Climb two ladders up, clear the path then climb another ladder again until you reach a door. Open it and continue along the path. Examine the PDA and med-kit on the floor. You can also examine another video log on a nearby console. 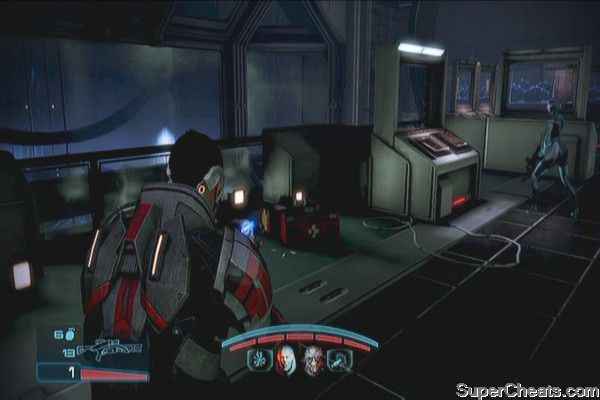
Continue to along the straightforward path until you reach the Illusive Man's room. Watch the following scenes. Once done, Kai Leng will appear for a final showdown. 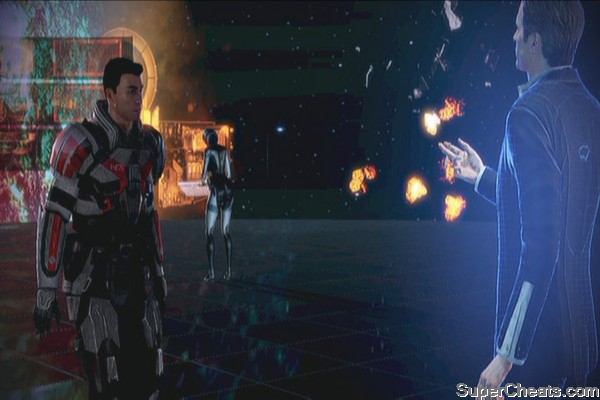
Overstayed the welcome
You don't have anywhere else to go but to Earth. Before going there, make your final preparations; upgrade your weapons and mod them as necessary.
The final push
As soon as you land, you don't have time to stand idle; take cover immediately and start tearing the enemy up. Fight your way to the parking lot. Be careful of the brutes and the enemy flankers. Once clear, continue up the building. 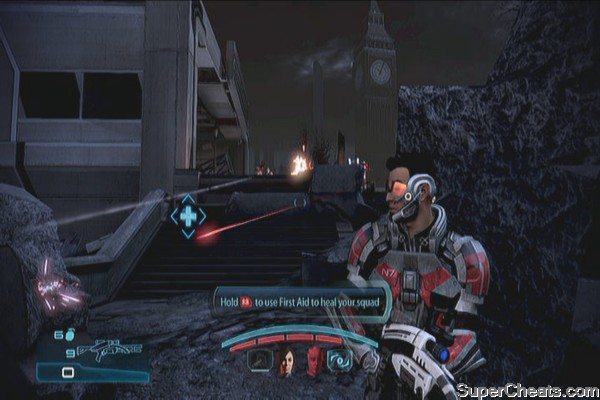
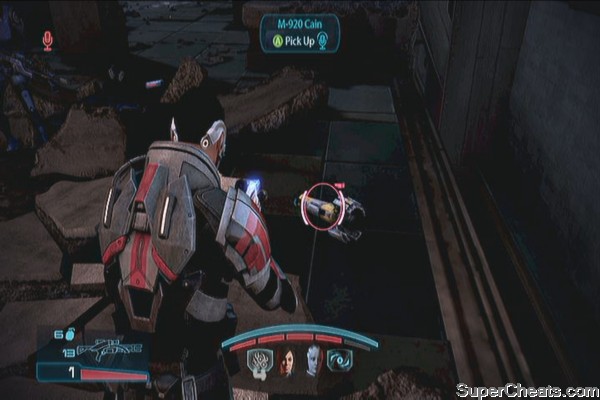
Continue to the upper floor and clear the area. Make your way to the shuttle and grab the med-kit and heavy weapons. Grab the Cain, aim it at the cannon, charge and release. Watch it go down in flames. 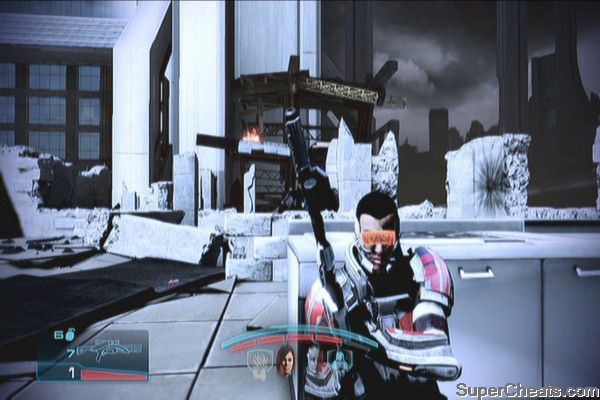
Once done, dig in and survive the attacking enemies. Wait until your shuttle arrives and throw everything you can to clear your path to the shuttle. Once clear, run towards the shuttle.
You'll be in the forward operations base. You can talk to your current squadmates and even patch to your previous team mates via Communications Tech. Once done, continue surveying the area. As you cross the bridge to the next building, you'll have to man the turrets and defend the perimeter. 
Continue along the path and grab the med-kits along the way. Start the attack when you're ready.
Continue following the path and take out the enemies along the way. A harvester will appear eventually so take it out quickly to keep your allied tank alive. Keep clearing your current position until no more enemies appear. 
Continue on foot and enter the parking lot. Defeat the husks and brutes. Press on and continue to the upper floor. Take out the enemy forces manning the turrets. Grab the med-kits inside this room as well. 
Continue outside and do the same thing. This is pretty much a straightforward path where you need to clear all enemies in order to reach the objective point. In the final stretch, two brutes will attack you in the narrow path. Throw in everything you got then open the door. This will trigger a scene. 
After the scene, continue outside. Clear the area then deactivate the firewall controls when prompted to. Dig in and defend the area.
After repelling the initial wave, more enemies will appear from the left flank. Change your positions and take aim. More enemies will appear, including banshees. Once prompted, activate the missile controls. After that, the problems just keep piling up.
The next enemy wave will consists of several brutes. Concentrate your fire one at a time and be careful not to get cornered in a tight position. Keep repelling them until a harvester arrives. When it does, take cover then get rid of the remaining brutes before finally concentrating your fire on it. 
The last wave of enemy forces will pour in, including several banshees and marauders. Once you get the prompt to activate the missile controls, run towards it and activate it. Otherwise, the enemies will just keep pouring in.
In the next part, you'll have to rush towards the conduit. After reaching the beam, you'll have to walk to the central chasm and have a conversation with no other than the elusive man.
The Return
Finally you'll meet with the catalyst. You'll have to make one of the three difficult choices. Destroy the reapers, along with all synthetics, control them or sacrifice yourself to make way for a new breed of life through synthesis. Take the path what you think is right then approach it. Watch the ending scenes.
Difficult choices
Crucible docking
Galactic Readiness and Military Strength
Your War Assets count for your overall military strength. These are the notable people, races, armies, ships, etc that you have rounded up for your cause. This will ultimately determine how well you'll do in the last battle against the Reapers on Earth.
However, your Galactic Readiness also affects it – even if Bioware denies that it has something to do with it. You can only increase your readiness by playing in Multiplayer and the IOS Mass Effect game. Unless you do those, your readiness will stay at 50%. This will halve the your total military strength's value. You need to get at least 4000 to 5000 “effective” military strength to get the best ending.
It is easy to get your “total” military strength past 6000 at least. But then again, if your galactice readiness is just at 50%, then your “effective” military strenght will just be around 3000. This is an unfortunate truth for players who prefer to play offline or just don't have access to multiplayer.
We've got all the sidequests here! Check them out below, they are listed in alphabetical order.
Apien Crest: Banner of the First Regiment
You can find the banner in planet Digeris, in the Castellus system in Apien Crest. Deliver it to the turian officer in the Purgatory to complete this sidequest. 
Aria: Blood Pack
First meet up with Aria in Purgatory to start this mission. Next, head to the Presidium Commons and meet Narl in his apartment. Just cooperate with him and you'll get his mercs' allegiance.
Aria: Blue Suns
First meet up with Aria in Purgatory to start this mission. Head to the Docks: Holding Area and find Darner Vosque in the far corner of the area. He'll need you to find a way to deal with a turian general named Oraka and stop the disruptions to his operations. Head to the Presidium Commons to find the general. He's sitting in the courtyard.
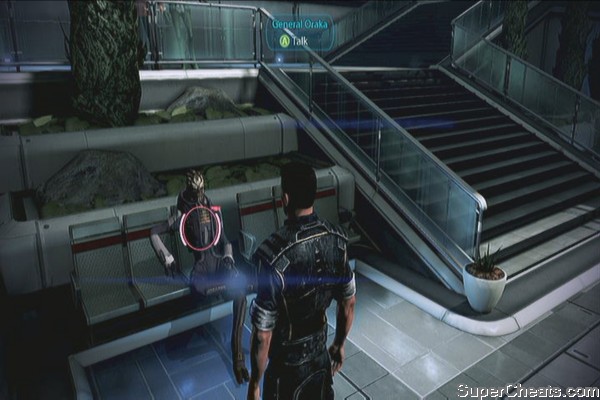
He will then mention a black market dealer where he can get weapons from. Talk to Kannik in the marketplace. He'll ask to barter some rare artifacts. You can find these black market artifacts in the Kite's Nest system, inside Vular in the planet Vana. Deliver these artifacts to Kannik to secure a weapons supply to C-SEC, ultimately taking off Oraka from the Darner's operations. This procedure is for paragons; for renegades, you have the option to simply kill him.
Aria: Eclipse
First meet up with Aria in Purgatory to start this mission. Head to the C-SEC office in the Embassies then talk to Bailey. Next, go back to the Presidium Commons and visit the CSEC Outpost there. Talk to the assistant and you'll have a chat with Sederis.
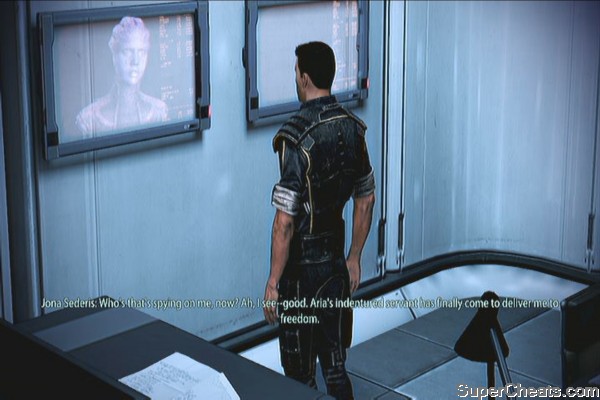
If you're a sane person, you'll probably choose not to release her and find another way to get the Blue Eclipse's support. You have to find Sayn in the Docks Holding Area and convince him to lead the Eclipse instead. Just walk around a bit and this mission will be complete. 
Athena Nebula: Hesperia-Period Statue
Head to the bank area and overhear an asari scientist's conversation to open the quest “Athena Nebula: Hesperia-Period Statue”. Head to the Athena Nebula when you have the chance then search the planet Polissa in the Vernio system. Deliver it to the scientist when you return to the citadel. 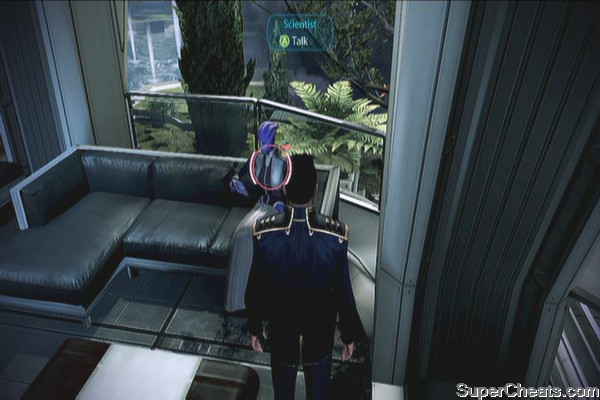
Benning: Evidence
After completing the mission in Palaven, head to the embassy to find Ambassador Dominic Osoba. Talk to him to start the mission.
Wait until you get another sidequest “N7: Cerberus Abductions” as it will enable you to land on the planet. Once there clear the first wave of enemies in the open area with the turret. Check the ground between buildings 22 and 25, by the concrete pillar to find a Dog Tag.
Return to the Citadel Embassy and talk to the Ambassador to deliver the news. In case you missed the dog tag, check the terminal in the Spectre Office to get some intel about his son. Deliver the news to complete the mission.
Citadel: Alien Medi-Gel Formula
You can trigger this quest by picking up the Failed Medi-gel Experiment in one of the consoles inside the Cerberus Laboratory. When you return to the Citadel after rescuing the turian primarch, you can find Dr. Ravin in the Hospital. Surrender the advanced medi-gel to her to complete this mission.
Citadel: Asari Widow
During the side-mission “Kallini: Ardat-Yakshi Monastery”, you'll find an asari commando corpse before heading out the courtyard to fight a banshee for the first time. Examine the pda to start the mission. Once you've returned to the Citadel, find Weshra in the Presidium Commons courtyard, along the stairs and deliver the message to her.
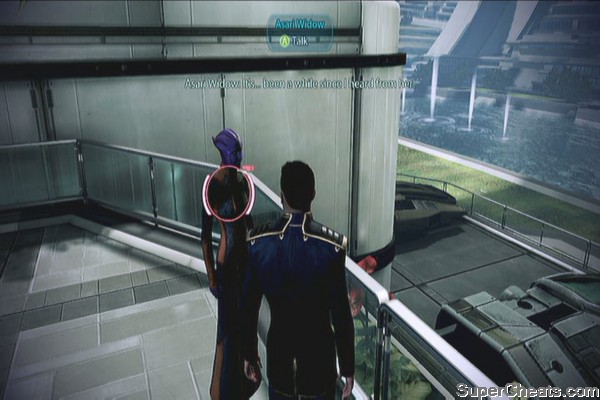
Citadel: Barla Von
Talk to Barla Von behind the counter in the bank of Presidium Commons. He'll ask you to rescue the Shadow Broker's wet squad lost in Dranek. Head to the Krogan DMZ then fly to the Dranek system. You should find the squad in the planet Rothla. Return to Barla Von in the Citadel to deliver the news and complete the mission.
Citadel: Batarian Codes
Talk to Officer Noles outside of the C-Sec Outpost in Presidium Commons. Next, head to the Spectre office and use the terminal to enable the Batarian Access Codes.
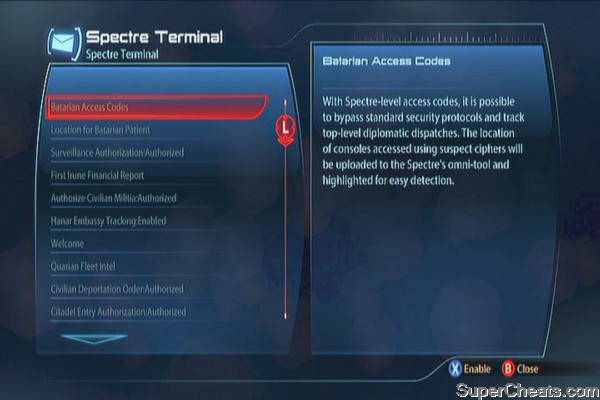
You can find the terminals in the following locations:
Hospital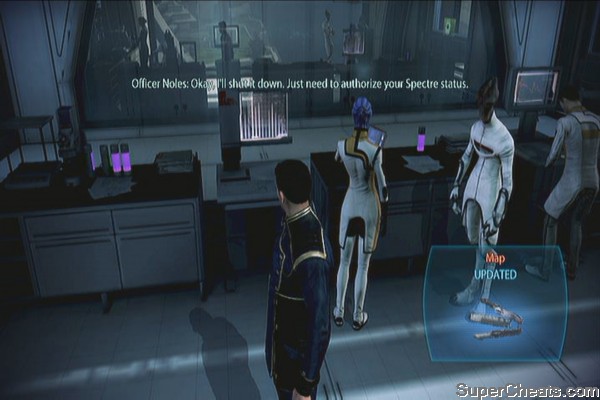
Docking Bay D24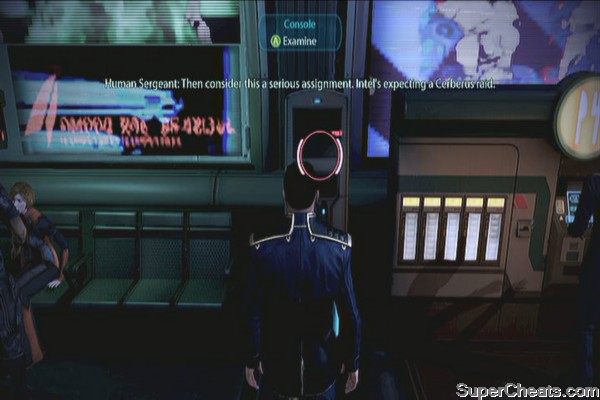
Docks: Holding Area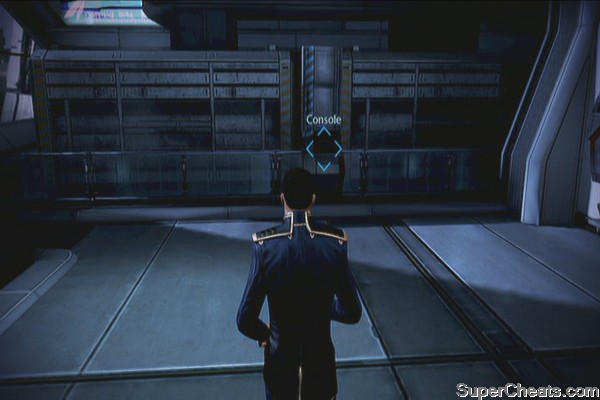
After finding the last console, a batarian will point a gun at you. You have the the option to kill him or convince him to join your alliance. After making your choices, the mission will be complete. 
Citadel: Biotic Amp Interfaces
As you enter the hospital wards, you'll encounter an asari looking for improved biotic amp interfaces. This sidequest will be automatically added to your journal.
Take the mission “Grissom Academy” and you should find the Biotic Amp Schematics near the last area of the station. It can be extracted from a terminal along the way so its hard to miss it. Deliver it to the Asari in the hospital in Citadel to complete the task and get your rewards.
Citadel: Cerberus Automated Turret Schematics
You can find the schematics during the mission “Tuchanka: Bomb”. (See the mission wakthrough for more details). Once you have the chance, head to the Presidium Commons in Citadel and look for the C-SEC officer in Courtyard. Hand over the schematics to complete the quest.
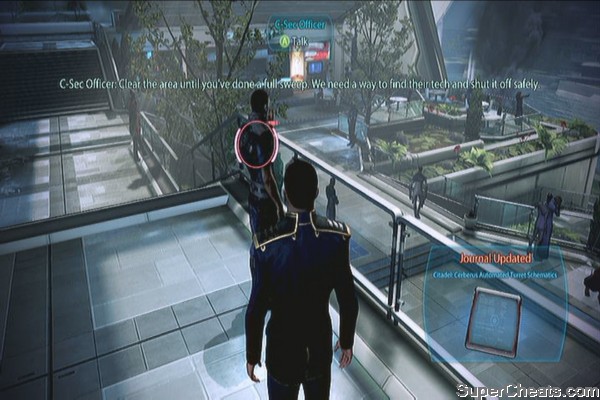
Citadel: Cerberus Ciphers
After the attempted coup in the Citadel and after exiting the C-Sec office, approach the turian talking to a console past the human embassy to unlock the quest. During the mission “N7: Communication Hub”, look for a small console containing the ciphers, in the same platform as the second hacking device. Deliver this to him to complete the task. 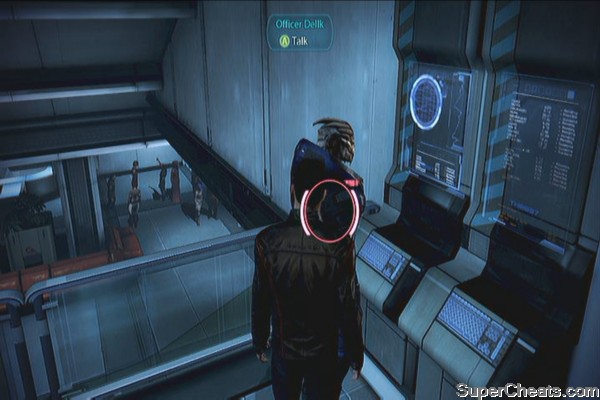
Citadel: Cerberus Retribution
Head to the stairs beside the C-Sec outpost and talk to the angry civilians to start the quest. Head to the C-Sec office and talk to Aaron Sommers. Resolve the issue via paragon/ renegade conversation options to complete the quest.

Citadel: Cerberus Turian Poison
Enter the examination room and overhear the doctor's conversation to start this task. During the side-mission “Arrae: Ex-Cerberus Scientists”, you'll find this in the main room with Dr. Brynn, by the microscope near the stairs.
Citadel: Chemical Treatment
Enter the Lab Services area in the hospital after the attempted coup in the Citadel, (check your map) then enter the room on the left side. You should find two doctors discussing. During the side-mission “N7: Fuel Reactors” you'll find the Medical Treatment Plan on a crate in the starting area, near the ladder. You should be able to get this before operating the cranes. Deliver the plans to the doctor to complete this task.
Citadel: GX12 Thermal Pipe
Talk to Engineer Adams in the Engineering bay to start this mission. Once you have the chance, go to the Citadel and purchase the Egel Thermal Conduit using the Elkoss kiosk by the bank in the Presidium Commons. Return to them twice since it will take time to install the conduit and complete the mission.
Citadel: Hanar Diplomat
Start this quest by talking to Jondum Bau outside the spectre office in the Embassies. Next, enter the spectre office and check the terminal. Enable the hanar tracking. Head to the lobby and find the terminal just outside the office suit. Next, head to the Docks: Holding Area and examine the terminal right outside the elevator.
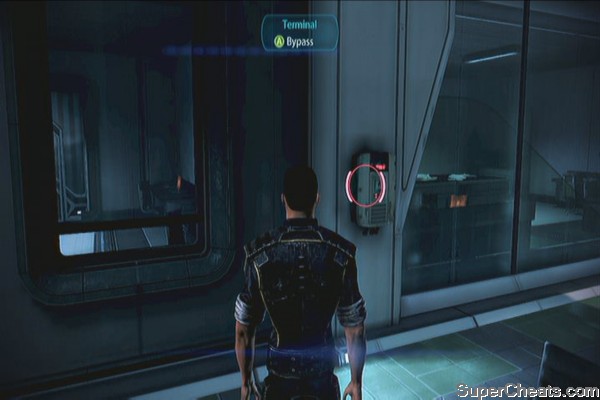
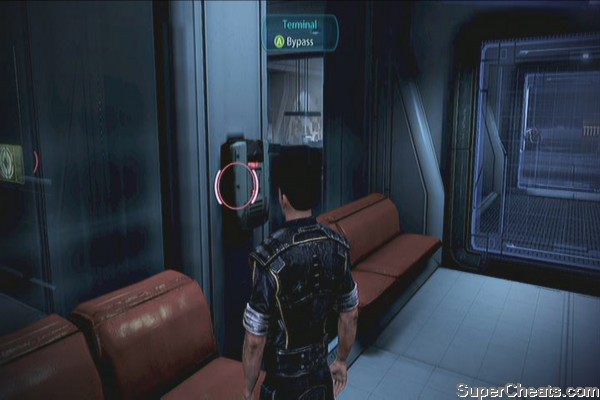
You can find another terminal in the far end of the docks. Then return to the terminal by the security checkpoint and bypass it again. Return to the Embassy and talk to Jondum. After successfully stopping the upload of the virus to the hanar planetary defense, the mission will be complete. 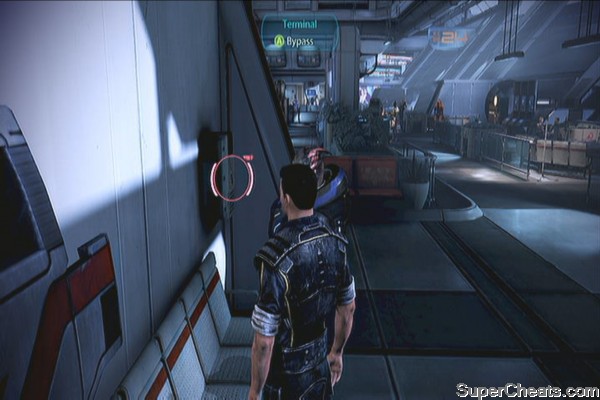

Citadel: Heating Unit Stabilizers
In front of the C-Sec Outpost in Presidium Commons, you'll find a salarian talking over the phone. Just overhearing him will start a sidequest. (Citadel: Heating Unit Stabilizers ). Wait until you get the mission “N7: Cerberus Fighter Base”. When you're about to disable to defense systems, look for a medical station nearby. The Heating Unit Schematics should be nearby, just above your head. Deliver the stabilizers to Sealle to complete the mission.
Citadel: Inspirational Stories
You'll find Solik Vass in the security checkpoint. Talk to him and agree to find footage for his documentary to start the quest. All the spots are located in the docks so you won't have problems completing this quest.
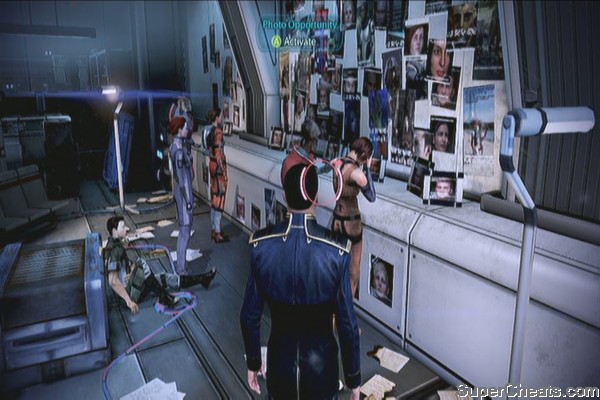
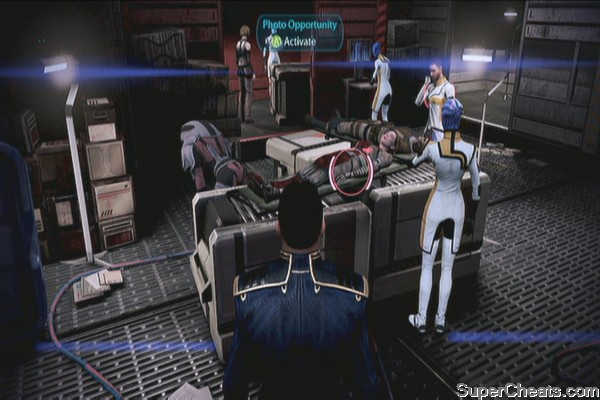
After getting three favorable footage, return to him to complete the quest.
Citadel: Improved Power Grid
Head to the Purgatory. On your way, you'll overhear a technician mentioning something about an improved power grid. This will automatically add a sidequest in your journal. Wait until you get the mission “N7: Cerberus Attack”. Fight your way to the main console and you should be able to find the Old Grid Schematics on the nearby console. Grab it and deliver it to Alison back in the Citadel to complete the mission
Citadel: Kakliosaur Fossil
After the attempted coup in the Citadel, head to the apartment area to find a salarian scientist. Stick a bit to update your journal and open the sidequest. Now travel to Argos Rho, then check the planet Intai'sei in Phoenix star system. Deliver it to the war strategist later.
Citadel: Krogan's Dying Message
During the mission Attican Traverse: The Rachni, you'll encounter a krogan corpse along the path. Examine his body to get the message then deliver to Ereba in the marketplace of the Citadel.
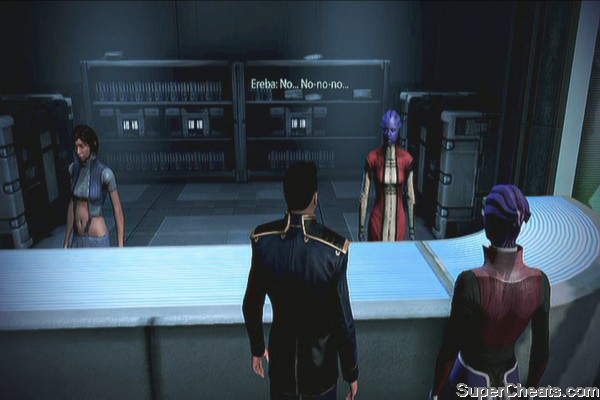
Citadel: Medical Supplies
After the attempted coup in the Citadel, talk to Dr. Chakwas to receive this sidequest. Go to the holding area once you returned to the Citadel and speak with Tactus in Cargo Bay B. Convince him to trade by using your paragon/ renegade options. Return to Dr. Chakwas in the Normandy's med-bay. In addition to the Medi-gel upgrade, you'll also get a health bonus upgrade by checking Glyph's terminal. 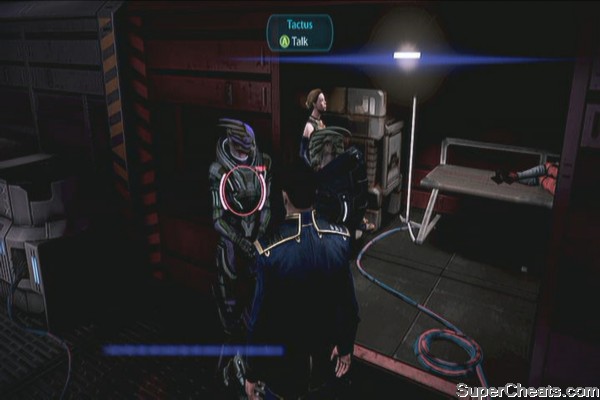
Citadel: Reaper Code Fragments
Go to the embassies and find the asari war strategist in the main lobby to start this mission. Finish some non-priority missions in Rannoch to unlock the item Reaper Code Fragment from the Spectre Requisition. Purchase it and deliver it to the strategist to complete the task.

Citadel: Target Jamming Technology
Approach the turian C-SEC officer talking to the console near Apollo's Cafe to unlock the quest. Finish some non-priority missions in Rannoch to unlock the item “Geth Target-Jamming Tech” from the Spectre Requisition. Purchase it and deliver it to the C-sec officer to complete the task.
Citadel: Volus Ambassador
You can start this quest by reading Primarch Victus' message in your personal terminal. This will available as soon as you return to the Normandy after the attempted coup in the Citadel. Head back to the embassies and talk to the embassy guard near the office suite. Talk to him again to enter the office suite. Play all the recordings when you have the chance. 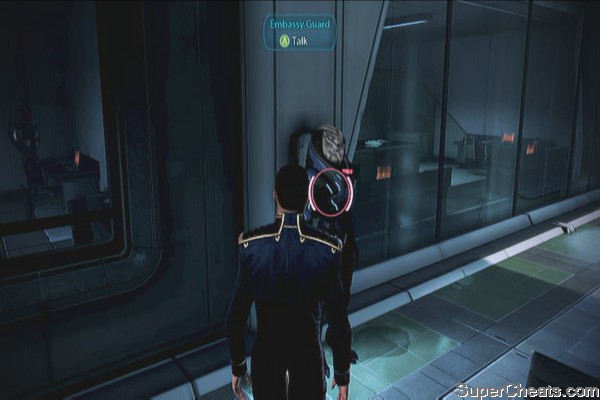
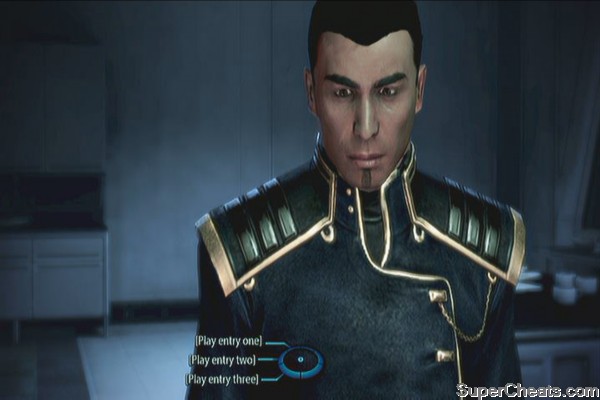
After playing the recordings, check the bug on the table behind the terminal you used. After the scene, you'll arrive in the Presidium Commons. Find the ambassador in the apartment unit to the left. In your conversation, you'll have the option to save the colony or take the bombers he offered. The task is completed after making your choice. 
Citadel: Wounded Batarian
Continue along the hallway of the Presidium Commons and overhear a turian and human talking. This will unlock the sidequest “Citadel: Wounded Batarian” and will also update your Spectre terminal. You can check your terminal first then go to the holding area. Check the makeshift infirmary there and talk to the nurse. You can then shut off his sedative or call the nurse to complete this mission.
Citadel: Medi-Gel Sabotage
Talk to the refugee camp doctor in Cargo Bay B to learn about the sabotage and somebody preaching about Cerberus. Go to Bay E24 to find Conrad Verner. Talk to him to learn about the sabotage and to get a schematics for the Dark Energy Dissertation. Next, you have to repair the three medi-gel dispensers near Cargo Hold A and Bay E28. 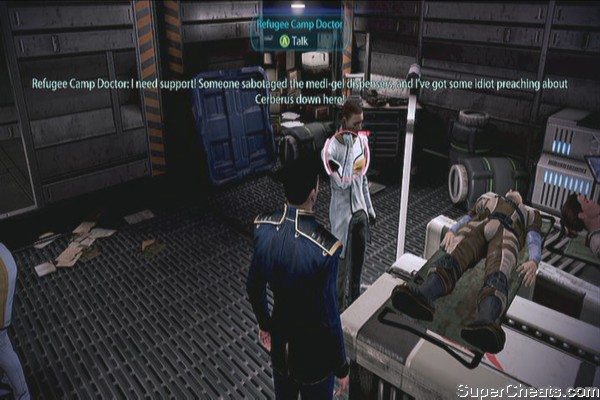

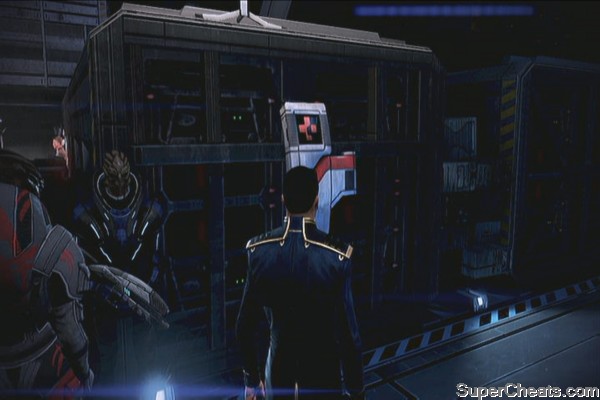

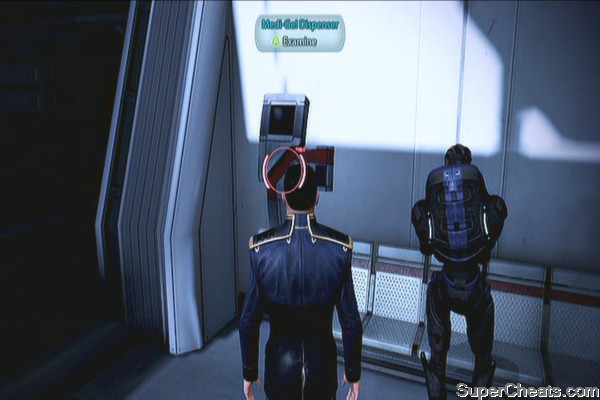
Note: If you talked to the doctor and fixed the medi-gel dispensers, you won't get this mission started and you won't get the Dark Energy Dissertation schematics.
Dekuuna: Code of the Ancients
Approach the elcor and asari near the elevator to start this quest. Fly to the Silean Nebula and enter the Phontes system. You'll find the planet Dekuuna there. Scan the planet to find this item then return to the elcor to complete the mission.
Dekuuna: Elcor Extraction
Talk to the elcor ambassador in the embassies to receive this quest. Head to Dekuuna in Silean Nebula > Phontes system. Head there and scan the planet. This can be done alongside Dekuuna: Code of the Ancients task.
If ever you returned to Dekuuna and there's no option to scan or land, just return to the Citadel and talk to the ambassador again; chances are, you already recovered his people.
Kite's Nest: Pillars of Strength
Find the preacher in the Docks: Holding Area. Retrieve the Pillars of Strength from the planet Khar'shan in Harsa, inside the Kite's Nest system.
Hades Nexus: Obelisk of Karza
Approach the researcher sitting in the long bench in the courtyard to start the quest. Once available, visit Hades Nexus and scan the planet Kopis in Hoplos system to find this obelisk. Deliver it to the researcher to complete the task.
Hades Nexus: Prothean Sphere
After the attempted coup, head to the far end of the docks to find a refugee talking to an officer. You'll find the Sphere in Hades Nexus > Sheol > Gei Hinnom. Deliver it to the refugee to complete this task.
Irune: Book of Plenix
Approach the volus near the bank in Citadel's Presidium Commons to overhear his conversation. This will open up another sidequest. (Irune: Book of Plenix)
Go to Aethon Cluster > Aru > planet Irune and scan it to recover the item there. Return to the Citadel to deliver the book to the volus. 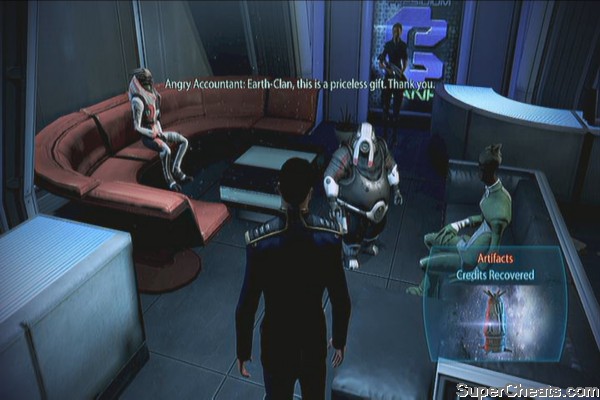
Ismar Frontier: Prototype Components
You can start this by overhearing a scientist looking for Prototype Components inside the room across the medical wards. You'll find the Advanced Biotic Implants in Ismar Frontier, in the Aquila system, planet Metaponto.
Nimbus Cluster: Library of Asha
Head to the purgatory and approach the asari military trainer near Aria's location inside the bar to start this quest. Go to the Nimbus Cluster and search the planet Carcossa in the Agaiou system. Deliver it to the quest giver to complete this task.
Shrike Abyssal: Prothean Obelisk
You'll overhear a volus diplomat near the Office Suite in the embassies regarding the Prothean Obelisk. You can find it in the Shrike Abyssal system (which will appear shortly after the mission in Palaven), Urla Rast, planet Talis Fia. Deliver it to the diplomat to complete the mission. 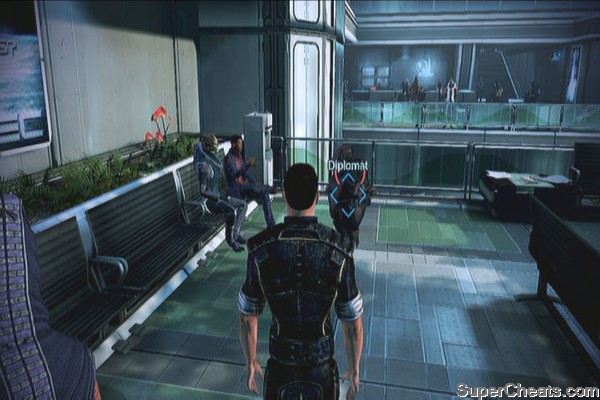
Silean Nebula: Rings of Alune
As soon as you enter the hospital (after the attempted coup), you'll overhear an asari consultant talking over the phone. After getting the mission, fly to the Silean Nebula and enter the Teyolia system. (Take note that this part of the system may only become available after completing the priority mission in Rannoch) Scan the planet Nevos to find this. Deliver it back to the consultant to complete this task.
Valhallan Threshold: Prothean Data Drives
On the way to the hatch leading to Normandy, you'll overhear a soldier's conversation with his superior. This will open this quest. Head to the Valhallan Threshold and search planet Garvug in the Paz system.
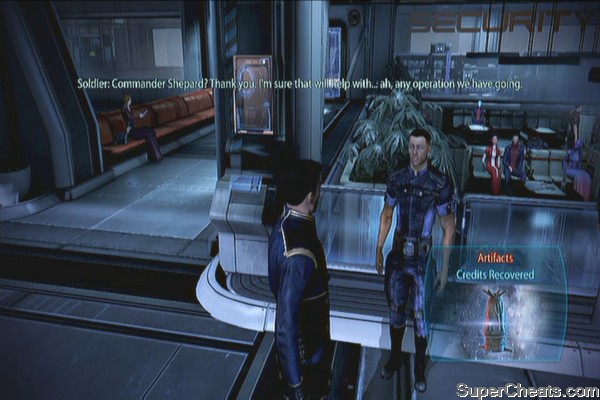
Unlike in ME2, you don't have to manually scan each planet to collect resources. You can now scan the star systems and once an object of interest appears, head there and examine it. If its a wreckage, you can immediately obtain its lost supplies (usually fuel). If its located in a planet, you'll have to enter its orbit and manually scan the planet until you find the object. Scanning is a lot easier since you'll have a white reticule that will point you to the correct spot.
When exploring Reaper controlled systems, there are high chances that they'll be alerted when you're exploring. When that happens, elude them then return later when you completed a mission. You can evade them by leaving the star system and entering back again. This will allow you to play cat-and-mouse while you gather the assets available in the area. Also, manually moving from system to system costs fuel. You can buy some from the Fuel Depot in the Annos Basin or find some in scattered wreckages.
From time to time, you'll also find curious assets which will unlock rewards that can be claimed in Liara's office. You can only select one so choose the one which you think will benefit you the most in the long run.
Exodus Cluster
Utopia
Assets:
Planet Zion – Prothean War Files
Fuel Depot Wreckage (200 Fuel)
Asgard
Assets:
Terra Nova - Alliance Cruiser Shanghai
Borr – Remains of a Reaper Destroyer*
Tyr – Alliance Naval Exploration Flotilla
Loki – Alliance Spec Ops Team Delta
Wreckage – 250 Fuel
*Unlocks the following rewards (You can only select one):
Store Discount Bonus ( 5%)
Power Cooldown Bonus ( 5%)
Kite's Nest
Harsa
Assets:
Verush – Weapon Upgrade Kit*
Khar'shan – Artifact: Pillars of Strength
Wreckage – 300 fuel
*Unlocks the following rewards (You can only select one):
Weapon Damage Bonus ( 5%)
Ammo Capacity Bonus ( 5%)
Untrel
Assets:
Adek – Salvage, 10,000 credits
Wreckage – 100 fuel
Vular
Vana – Black Market Artifacts
Wreckage – 150 fuel
Hades Gamma
Antaeus
Assets:
Trebin - Salvage, 10,000 credits
Wreckage – 300 fuel
Plutus
Assets:
Nonuel - Special Ops Team Zeta
Dis
Assets:
Klensal - Salvage, 10,000 credits
Wreckage – 200 fuel
Farinata
Assets:
Juntauma – Alliance Frigate Agincourt
Wreckage – 200 fuel
Cacus
Assets:
Chohe - Salvage, 10,000 credits
Wreckage – 400 fuel
Sigurd's Cradle
Skepsis
Assets:
Watson – Javelin Missile Launchers
Wreckage – 200 fuel
Decoris
Laena - Salvage, 10,000 credits
Wreckage – 350 fuel
Apien Crest
Gemmae
Phaeros – Turian 79th Flotilla
Wreckage – 800 Fuel
Wreckage – 750 Fuel
Castellus
Digeris – Artifact – Banner of the 1st Regiment
Wreckage - 350 fuel
Minos Wasteland
Fortis
Pietas – Credits 10,000
Wreckage – 200 fuel
Ismar Frontier
Aquila
Metaponto – Advanced Biotic Implants
Fuel Depot
Shrike Abyssal
Xe Cha
Zada Ban – 10,000 credits
Wreckage – 150 fuel
Urla Rast
Talis Fia – Artifact – Prothean Obelisk
Wreckage – 300 Fuel
Gemini Sigma
Han
Mavigon – Credits 10,000
Wreckage – 470 fuel
Ming
Parag – Alliance Cruiser Nairobi
Wreckage – 320 fuel
Arcturus Stream
Arcturus
Arcturus Station – Intel from Battle Arcturus*
Wreckage – 350 fuel
Euler
Wreckage – 100 fuel
*Enables the option to research the following:
Weapon Damage Bonus 5%
Shield Strength Bonus 5%
Krogan DMZ
Dranek
Rothla – Shadow Broker Wet Squad
Wreckage – 200 Fuel
Nith
Wreckage – 300 Fuel
Aethon Cluster
Aru
Irune – Book of Plenix
Cherk Sab – Volus Fabrication Units
Wreckage – 200 fuel
Esori
Solu Paolis – Volus Dreadnaught Kwunu
Wreckage – 300 fuel
Satu Arrd
Nalisin – Volus Engineering Team
Wreckage – 200 fuel
Nura
Oma Ker – Volus Intelligence Archives*
Wreckage – 250 fuel
*Allows you to select one of the following free upgrades:
Power Damage Bonus – 5%
Health Bonus - 5%
Attican Beta
Hercules
Eletania – Interferometric Array
Wreckage – 370 fuel
Theseus
Feros – ExoGeni Scientists
Wreckage – 240 fuel
Valhallan Threshold
Raheel-Leyya
Wreckage – 95 fuel
Paz
Garvug - Prothean Data Drives
Wreckage – 160 fuel
Micah
Elohi – Emergency Fuel Pods
Wreckage – 340 fuel
Farlas – Element Zero Converter
Athena Nebula
Parnitha
Tevura – Asari Cruiser Cybaen
Orisoni
Egalic - Asari Research Ships
Wreckage – 350 fuel
Tomaros
Pronoia – Asari Cruiser Nefrane
Wreckage – 200 fuel
Vernio
Polissa – Hesperia Period Statue
Wreckage – 400 fuel
Ialessa
Trikalon – Asari Engineers
Wreckage – 500 fuel
Nimbus Cluster
Pelion
Trategos – Intact Reaper weapon*
Wreckage – 650 fuel
Wreckage – 750 fuel
Wreckage – 750 fuel
Agaiou
Carcossa – Library of Asha
Kallini
Wreckage – 300 fuel
*Enables you to choose one of the following upgrades:
Weapon Damage Bonus 5%
Ammo Capacity Bonus 5%
Argos Rho
Hydra
Canrum – Haptic Optics Array
Wreckage – 270 fuel
Phoenix
Pinnacle Station – Turian Spec Ops Team
Intai'sei – Fossilized Kakliosaur
Wreckage – 450 fuel
Gorgon
Camaron – Advanced Power Relays
Silean Nebula
Kypladon
Hanalei – Dr. Jelize
Loropi
Yasilium – Armali Sniper Unit
Wreckage – 300 fuel
Nahuala
Hyetiana – Serrice Guard
Wreckage – 250 fuel
Phontes
Oltan – Elcor Flotilla
Dekuuna – Code of the Ancients
Wreckage – 175 fuel
Teyolia
Nevos – Rings of Alune
Quirezia – Credits, 10000
Wreckage – 375 fuel
Hades Nexus
Hekate
Asteria – Alliance Frigate Hong Kong
Wreckage – 380 fuel
Hoplos
Kopis – Obelisk of Karza
Wreckage – 250 fuel
Pamyat
Dobrovolski – Alliance Frigate Leipzig
Wreckage – 100 fuel
Sheol
Gei Hinnom – Prothean Sphere
Hourglass Nebula
Osun
Erinle – 10,000 credits
Wreckage – 100 fuel
Ploitari
Zanethu – Terminus Freighters
Sowilo
Hagalaz – Shadow Broker Support Team
Wreckage – 200 fuel
Faryar
Alingon – Shadow Broker Starship Tech
Wreckage – 600 fuel
Nubian Expanse
Dakka
Pragia – Research Data from Pragia
Wreckage – 350 fuel
Kalabsha
Yamm – Alliance Marine Recon Unit
Wreckage – 300 fuel
Qertassi
Norehsa – Alliance Frigate Trafalgar
Wreckage – 50 fuel
Mars: Prothean Archives
SMG Scope
On the food counter beside the stairs in the cafeteria. Can be picked up after clearing the enemies across the windows.
SMG Ultralight Materials
After exiting the cafeteria and re-pressurizing the it, you'll go through a newly unlocked door. You'll find this along the way.
Shotgun High Caliber Barrel
Inside the sterilization room on the table in the middle.
Sniper Rifle Extended Barrel
Inside the sterilization room on the table near the other door.
Sniper Rifle Concentration Module
Inside the control room past the auto-turret.
Shotgun Shredder Mod
In the locker to the right, in the far end of the tram station.
N7: Cerberus Labs
Sniper Rifle Enhanced Scope
Start by taking the stairs to the left then check the floor to your left as soon as you enter the room to find this mod
Priority Palaven
Pistol Magazine Upgrade
On the crate to the right, past the general's station.
Pistol Piercing Rounds
In the station near the crates where you'll find the Pistol Magazine Upgrade.
Assault Rifle Piercing Mod
On the ground, beside the M-27 Scimitar right before the barricade leading to the Comm Tower.
Assault Rifle Magazine Upgrade
Inside the barricades defending the airfield.
Sniper Rifle Spare Ammo
On your way to General Viktus, you'll find some allied soldiers along the way. The upgrade should be on the ground near them.
Sniper Rifle Enhanced Scope
After reaching the General Viktus' camp, you should find this lying on the ground beside a Med-Kit, a few walk away from the entrance.
Grissom Academy
Assault Rifle Stability Damper
On your way to Orion Hall, you'll find stairs to your right. You'll find the part there.
Assault Rifle Precision Scope
After defeating the Atlas mech, go upstairs and you'll find it on the table.
Priority: Sur'kesh
Assault Rifle Extended Barrel
On the shelf near the emergency exit.
Shotgun Blade Attachment
On the shelf inside the room a few walks away from the emergency exit ladder.
Shotgun Spare Ammo
After seeing the Yahg escape, you'll have to jump over a broken floor. This upgrade should be on the floor in the other side.
Pistol High Caliber Barrel
After activating the first quarantine checkpoint and killing the enemies on the shuttle, you'll head out. This upgrade should be immediately visible ahead. It's located on a shelf.
Pistol Scope
On your way to the second checkpoint and after bypassing a door, you'll have to fight a few more enemies. You can find this upgrade near the research terminal.
Attican Traverse: The Rachni
Pistol High Caliber Barrel
Found immediately inside the living quarters in the starting area.
SMG High Caliber Barrel
Found inside a room in the scouting camp near the starting point. It's located near a work bench.
Shotgun Shredder Mod
In the cavern where you fought the Ravager the first around, you'll find it beside a dead krogan left of where you jumped off.
Shotgun Spare Ammo
You can find this on the ground before the ramp in the second hall.
Pistol Piercing Mod
After finding Grunt and his men, clear the path and continue until you reach the switch. The mod is found there along with a Med-Gel and Firestorm.
Tuchanka (Turian Platoon)
SMG Magazine Upgrade
Walk bit from the landing area and look left. You should see this immediately.
Sniper Rifle Spare Ammo
After driving off the first harvester, climb up the ladder then look back immediately to find this upgrade.
SMG Ultralight Materials
This is found inside the alcove beside the turian corpse with the Phaeston weapon.
Shotgun Smart Choke
After driving the harvester away the second time, you'll find this along the way, after getting the Hahne-Kedar Chestplate.
Sniper Rifle Extended Barrel
After the third and final confrontation with the harvester, move along the path past the med-kit then jump down to find this upgrade.
Tuchanka: Bomb
Shotgun Blade Attachment
After going through the bombardment in the landing zone, you'll have to go up the ramp. This upgrade should be immediately visible at the end of the ramp.
SMG Heat Sink
After going up the second ramp and vaulting over to the next floor, you should find this on the floor immediately ahead.
Pistol Scope
After reaching the upper floor, you'll find another ramp going down. This upgrade is found along the way, with a med-kit nearby.
Sniper Rifle Concentration Module
After seeing the enormous digging machine, go up the ladder to your right and you should immediately see the upgrade there.
Pistol Melee Stunner
Enter the room next to where you found the Sniper Rifle Concentration Module and look behind the metal crate there.
Priority: Tunchanka
Pistol Melee Stunner
After the convoy stops, you should find this beside the case containing the Death Mask beside the krogan tank.
Shotgun Smart Choke
After the convoy stops, you should find this beside a krogan tank.
Pistol Magazine Upgrade
After the convoy stops, you should find this beside a krogan tank near the krogan scout
Priority: Citadel
Assault Rifle Piercing Mod
After Bailey opens the door, clear the lobby and find this upgrade on the counter to the right.
Sniper Rifle Extended Barrel
It should be on the same room as the work bench and power panel you need to activate to open the elevator.
Pistol Piercing Mod
After exiting the elevator, you should find this on the table inside the room to the right of the hallway.
Pistol High Caliber Barrel
Inside the small room left of the hallway, after exiting the elevator.
Sniper Rifle Piercing Mod
After reaching the canteen, clear the enemies then look for this mod on the table, in the dining area.
N7: Cerberus Fighter Base
Pistol Magazine Upgrade
Enter the hallway a few steps away from the landing point then go downstairs. You should find this part on the seat with a console and medical station beside it.
Kallini: Ardat-Yakshi Monastery
Assault Rifle Stability Damper
As soon as you land, check the crates to your left to find this.
Pistol Melee Stunner
Check the far end room left of the entrance to find this on the floor.
Sniper Rifle Spare Ammo
Check the trashed room to the right of the asari commando remains. The upgrade is on the shelf.
Assault Rifle Precision Scope
After fighting a banshee the second time, you'll be in another large room with water. Check the left side of it to find this upgrade.
Arrae: Ex-Cerberus Scientists
Assault Rifle Magazine Upgrade
Once inside the base, go upstairs then enter the door. It should be on the floor right beside the Work Bench.
Shotgun High Caliber Barrel
After talking to Brynn and before moving to the AA guns, you'll find on the floor near the door.
SMG High Caliber Barrel
After reaching the roof and clearing the first set of guards, you have to jump down to the next area. The part is located in front of you, behind some crates.
Sniper Rifle Piercing Mod
Found on the ground in the middle of the two AA gun towers, behind a container.
Priority: Geth Dreadnought
Shotgun Smart Choke
Upon entry, check the console to your left to find this part beside it.
Sniper Rifle Enhanced Scope
After your party joins you, continue along the path and you'll find a large console. It's hard to miss.
SMG Scope
Inside the operations room beside the main console.
Assault Rifle Precision scope
Inside the drive core where Legion is housed.
Rannoch: Admiral Koris
Shotgun Shredder Mod
On your way to the tower and after disabling the first tower, you'll find this mod along the way before you meet the wounded quarian.
SMG Magazine Upgrade
You'll find this on the ground a few steps away from the doomed quarian you talked to.
Priority: Rannoch
SMG High Caliber Barrel
After landing and clearing the area, the main gate will be closed. Approach it and you should find this upgrade on the ground.
Assault Rifle Piercing Mod
Found in the middle platform on your way to the upper entrance.
SMG Ultralight Materials
After reaching the blast shield, turn left to find this upgrade
Assault Rifle Stability Damper
Past the blast shield, you'll encounter more enemies along the way. It should be on the ground, in the small space off the path.
Priority: Thessia
Sniper Rifle Concentration Module
On the floor beside the med-kit, after regrouping with the asari sniper.
Assault Rifle Extended Barrel
After getting support from an asari gunship and clearing the initial wave of enemies, go up the ramp. You'll find this part before the spore pods, among the debris.
SMG Heat Sink
By the asari temple entrance, beside an ammo/grenade cache
Priority: Horizon
Pistol Scope
You'll find this downstairs beside a dead guard in front of the main desk.
Shotgun Blade Attachment
On the table next where you'll find the M-12 Locust. This is in the laboratory area past where Shepard repairs a console.
Heavy Pistols
Arc Pistol – (Priority: Geth Dreadnought)
You'll find this on the console after your party members joins you.
M-3 Predator – (Default weapon)
M-5 Phalanx – (Priority: Tuchanka)
Near the end of the mission where you get the objective to activate the hammers, you'll need to clear your landing zone. There's some stairs you need to take to the left. This weapon is on the floor as the stairs turn left.
M-6 Carnifex – (Arrae: Ex-Cerberus Scientists)
After meeting up with Jacob and the other scientists and once you get the objective to fix the auto-turrets on the roof, you'll have to go through a narrow, dark corridor with the ladder going to the rooftop. You'll find this pistol along the pipes on the left side.
M-77 Paladin – (Can be bought from Spectre Requisitions)
M-358 Talon – (Priority: Citadel)
This weapon is inside a locked room, past the locker room. To open it, you need to find the console named “Door Control” inside the room to the right, in the far end of the corridor. Activate it and return to the locked room to access it.
Scorpion – (Priority: Sur'kesh)
In the second security checkpoint, you'll need to restore power through the power terminal. This weapon is on the floor in front of it.
Sub-Machine Guns
M-4 Shuriken (Priority: Mars)
This is found inside the security room you'll reach shortly after Liara joins the team.
M-9 Tempest (Tuchanka: Turian Platoon)
This is on the ground beside two dead turians and a wrecked escape pod.
M-12 Locust (Priority Horizon)
On the table inside the laboratory area. You'll reach this after the scene where Shepard fixes a console.
M-25 Hornet (Priority Citadel)
Found beside a corpse near a broken door, past the locker room. This is the same corridor where you'll find the room containing the M-358 Talon heavy pistol.
Assault Rifles
Geth Pulse Rifle (Priority: Geth Dreadnought)
This is found in the same room where the Archon Visor is located. It is sitting on top of a crate to the right.
M-8 Avenger (Default)
M-15 Vindicator (Priority: Mars)
Inside the locker to the left, past the security station after disembarking from the tram.
M-37 Falcon (Priority: Cerberus Headquarters)
After launching a fighter through the walls, you'll find this on the floor beside the burning debris.
M-76 Revenant (Priority: Citadel)
After reaching the locker area past the lobby, turn left to find the bathroom door It is sitting on the wall, next to the sink.
M-96 Mattock (Grissom Academy)
After clearing the second classroom of enemies, (the left corridor has the Eviscerator), turn to the right to find this weapon on the red bench, right in front of you.
M-99 Saber (Priority: Horizon)
After facing off three brutes and a banshee, continue along the corridor until you find a holographic display to your left. Examine it then press B to override then backtrack to the other end of the corridor. You'll find a pod there with the weapon. Open the pod and get the weapon inside.
Phaeston (Tuchanka: Turian Platoon)
After defeating the harvester, you'll find a dead turian along the path. The weapon is on the ground right beside him.
Shotgun
Disciple (Kallini: Ardat-Yakshi Monastery)
After fighting a banshee for the first time and entering the next hall, you'll eventually reach a corridor packed with enemies. There's a room to the right where you can find this weapon, along with the Serrice Council Shoulder Guards.
Geth Plasma Shotgun (Priority: Rannoch)
Found on a crate to the left, before going to the shield override controls.
Graal Spike Thrower (Priority: Tuchanka)
Beside railings to the left, behind the krogan scout.
M-11 Wraith (bought from Spectre Requisition)
M-22 Eviscerator (Grissom Academy)
After fighting off a handful of Cerberus forces in the second classroom, check out the corridor to the left of the room. You'll find this weapon on the bench to the right.
M-23 Katana (Priority: Mars)
You'll find this beside a corpse in the middle of a hallway, right before the room with the auto-turret.
M-27 Scimitar (Priority: Palaven)
Right before your leave the main turian camp in search of General Victus, check the metal barrier to your left to find this weapon.
M-300 Claymore (Attican Traverse: The Rachni)
As soon as the mission starts, check the living quarters to the left to find this weapon along with other items.
Sniper Rifles
Black Widow (bought from Spectre Requisition)
Javelin (Rannoch: Admiral Koris)
After starting the mission, continue along the path and take out the enemies. You'll eventually encounter a quarian corpse. This weapon is right beside it.
M-13 Raptor (Priority: Sur'kesh)
On your way to the second checkpoint, you'll reach a corridor after climbing up a ladder and bypassing the door. There's a salarian corpse to the right of the door. If you see the checkpoint in front of you, the corpse is behind.
M-92 Mantis (Priority: Mars)
After jumping down and before checking out the group of enemies ahead, you'll find this immediately on the ground.
M-97 Viper (Priority: Palaven)
You'll find this on top of some crates in the middle of the turian command outpost.
M-98 Widow (Priority: Thessia)
After meeting up with the asari sniper, you'll find this on the floor beside some supplies.
Helmet and Headgears
Archon Visor: Power Recharge Speed 10% (Priority: Geth Dreadnought)
Capacitor Helmet: Shield Regen Speed 10% (N7: Cerberus Abductions)
Death Mask: Melee Damage 10% (Priority: Tuchanka)
Delumcore Overlay: Headshot Damage 5%, Weapon Damage 10% (Priority: Cerberus Headquarters)
Kestrel Helmet: Ammo Capacity 10% (Batarian State Arms)
Kuwashii Visor: Weapon Damage 5%, Headshot Damage 10% (Aegohr Munitions)
Mnemonic Visor: Power Recharge Speed 5%, Power Damage 5% (Grissom Academy)
N7 Breather Helmet: Health 10%
Recon Hood: Weapon Damage 10% (Priority: Citadel)
Securitel Helmet: Shields 5%, Health 5% (Priority: Citadel)
Sentry Interface: Shields 10% (Priority: Sur’Kesh)
Umbra Visor: Power Damage 10% (Priority: Thessia)
Armor Sets
N7 (All parts 10% Health)
Chestplate (default)
Shoulders (default)
Gauntlets (default)
Greaves (default)
Ariake Technologies (all parts 10% melee damage)
Chestplate (Kass Fabrications kiosk)
Shoulders (Attican Traverse: The Rachni)
Gauntlets (Priority: Mars)
Greaves (N7: Communication Hub)
Armax Arsenal (all parts 5% weapon damage and 10% melee damage)
Chestplate (Rannoch: Admiral Koris)
Shoulders (Priority: Palaven)
Gauntlets (N7: Cerberus Attack)
Greaves (Priority: Sur'kesh)
Hahne-Kedar (all parts 10% weapon damage)
Chestplate (Tuchanka: Turian Platoon)
Shoulders (Elkoss Combine Supplies kiosk)
Gauntlets (Kanala Exports)
Greaves (Priority: Palaven)
Kassa Fabrication (all parts 10% shields)
Chestplate (Priority: Mars)
Shoulders (Cipritine Armory)
Gauntlets (Priority: Rannoch)
Greaves (Arrae: Ex-Cerberus Scientists )
Rosenkov Materials (all parts 10% power recharge speed)
Chestplate (N7: Fuel Reactors)
Shoulders (Priority: Horizon)
Gauntlets (Tuchanka: Bomb)
Greaves (Spectre Requisitions)
Special Armor Sets
Available at 50,000 credits each in various Citadel Shops
Cerberus Armor (Elkoss Combine)
Ammo Capacity 10%
Weapon Damage 20%
Shields 10%
Health 10%
Terminus Armor (Batarian State Arms)
Melee Damage 15%
Ammo Capacity 15%
Shields 30%
Inferno Armor (Kassa Fabrication)
Power recharge speed 30%
Power Damage 30%
Blood Dragon Armor (Kanala Exports)
Power Recharge Speed 10%
Power Damage 30%
Shields 20%
Collector Armor (Nos Astra Sporting Goods)
Shield Regeneration Speed 20%
Shields 20%
Health 20%
Most of the achievements in the game are pretty much straightforward and linear. Most of them can be unlocked by simply completing various missions, reaching levels and getting certain number of kills. As such, this section will just provide details to achievements with notable information.
Driven (5 points)
Return to active duty.
Bringer of War (10 points)
Chase down an assassin.
Mobilizer (15 points)
Bring a veteran officer aboard.
World Shaker (15 points)
Destroy an Atlas dropped from orbit.
Pathfinder (15 points)
Explore a lost city.
Tunnel Rat (15 points)
Survive the swarm.
Party Crasher (15 points)
Sabotage a dreadnought.
Hard Target (15 points)
Call down an orbital strike.
Saboteur (15 points)
Disable a group of fighter squadrons.
Arbiter (25 points)
Win a political stand-off.
Last Witness (25 points)
Extract ancient technology.
Executioner (25 points)
Defeat an old adversary.
Well Connected (15 points)
Send a warning across the galaxy.
Fact Finder (15 points)
Discover an enemy's monstrous origin.
Liberator (15 points)
Stop a Cerberus kidnapping.
Problem Solver (15 points)
Evacuate a scientific facility.
Patriot (25 points)
Make the final assault.
Legend (50 points)
Mission accomplished.
Shopaholic (10 points)
Visit a store in the single-player campaign.
You can visit the store in the Citadel. However, you can also unlock this by visiting the Normandy's requisitions.
Master and Commander (50 points)
Deliver most of the Galaxy at War assets to the final conflict.
This achievement should pop up as soon as you tell Hackett to send the fleets to the Cerberus base. It was generally agreed that your “effective” military strength should be above 4000 by the time you attack the base. As discussed, it will be easier to raise your effective military strength by playing in multiplayer since it also increases your Galactic Readiness. Take note that your overall readiness somewhat divides your total strength. For example, even if you have completed all missions and retrieved all possible war assets in all available systems, and your total military strength is 6000, with 50% galactic readiness, your effective military strength will just be around 3000. It is said that it is possible to get your effective military strength around 4000 without multiplayer but that will require a second playthrough (*unconfirmed personally*), a series of good decisions (like getting BOTH the geth and quarians to your side) and other factors. For more information, I suggest checking out the forums discussing this matter.
Lost and Found (25 points)
Dispatch 10 probes to retrieve people or resources in Reaper territory.
Long Service Medal (50 points)
Complete Mass Effect 3 twice, or once with a Mass Effect 2 import.
If you imported your character from Mass Effec 2, just complete the campaign and you'll get this achievement. For players that started the campaign fresh, you need to finish the campaign, then import the same character (to carry over the level, money and skill points) and finish the campaign again.
Insanity (75 points)
Finish the game on Insanity without changing difficulty after leaving Earth.
Insanity mode is recommended for high level players only since the enemies can deal greater damage, has more shields, faster shield regen rate and more aggressive. Having high tier skills and weapons will definitely help in completing missions in this difficulty.
A Personal Touch (10 points)
Modify a weapon.
Simply modify a weapon using a work-bench. The first one you can find is in Mars.
Paramour (25 points)
Establish or rekindle a romantic relationship.
If you have romanced Ashley/Kaidan or Miranda, you can rekindle your past love by talking to them in between missions and giving the favorable replies in conversations.
Combined Arms (25 points)
Perform any combination of 50 biotic combos or tech bursts
You can manually order your team mates to use their biotic/ tech powers then deal the finishing blow using your own powers. You can also use special ammo like cryo or incendiary then finish off the target using powers like Carnage or Concussive Shot.
Focused (25 points)
Evolve any of your powers to rank 6.
Recruit (10 points)
Kill 250 enemies.
Soldier (15 points)
Kill 1,000 enemies.
Veteran (25 points)
Kill 5,000 enemies.
Bruiser (10 points)
Kill 100 enemies with melee attacks.
Untouchable (10 points)
Escape a Reaper in the galaxy map.
You just need to enter a reaper-controlled system, scan there until they show up then exit.
Defender (25 points)
Attain the highest level of readiness in each theater of war.
You need to play in multiplayer or the iOS game “Mass Effect: Infiltrator” to increase your galactic awareness to maximum. Take note that readiness decays over time so make sure to play multiplayer regularly to raise itup.
Overload Specialist (15 points)
Overload the shields of 100 enemies.
This can be done using the power “Overload”. Take note that you should be using this ability; ordering your allies to do this won't count. If ever your class doesn't have this skill, you have no choice but to use character class that does have one OR play in Multiplayer mode and choose a class that has this skill.
Sky High (15 points)
Lift 100 enemies off the ground with powers.
This can be done using the powers “Throw”, “Pull”, “Singularity” and “Lift”. For some reason, Carnage also counts. It is even mentioned in the forums that Concussive Shot also counts. Take note that you should be using this ability; ordering your allies to do this won't count. If ever your class doesn't have this skill, you have no choice but to use character class that does have one OR play in Multiplayer mode and choose a class that has this skill.
Pyromaniac (15 points)
Set 100 enemies on fire with powers.
This can be done using the power “Incinerate”. Take note that you should be using this ability; ordering your allies to do this won't count. If ever your class doesn't have this skill, you have no choice but to use character class that does have one OR play in Multiplayer mode and choose a class that has this skill.
Eye of the Hurricane (10 points)
Kill a brute while it's charging you.
This requires timing. Concentrate your fire at the brute until it is until its down to 2-3 bars, get its attention then throw everything you have at it while its charging.
Mail Slot (10 points)
Kill 10 guardians with headshots from the front while their shields are raised.
This is easiest done as an Infiltrator and with a sniper rifle, preferably an upgraded/ high-level Mantis. Infiltrators will can slow down time for a few seconds after zooming in, giving them more than enough time to aim and fire. For other class, you can use sniper rifles and other highly accurate weapons, preferably in closer distances.
Hijacker (10 points)
Hijack an Atlas mech.
You have to shoot the glass window of an Atlas Mech around 5-6 times, preferably with a sniper rifle. Once the glass breaks, kill the pilot immediately then run to the mech to pilot it. Note: It seems that this is easier done in the Atlas mech you'll encounter during the Priority: Citadel mission.
Giant Killer (10 points)
Defeat a harvester.
You'll encounter a harvester during the side-mission “Tuchanka: Turian Platoon”. You should only be able to kill it when you're near the end of the mission since you'll just be driving it off during your initial encounters.
Enlisted (5 points)
Start a character in multiplayer or customize a character in single-player.
Before starting the game, you'll be able to import a character or start from scratch. You can customize the character's appearance before starting the game itself.
Tour of Duty (20 points)
Finish all multiplayer maps or all N7 missions in single-player.
The N7 missions are listed below. They are unlocked automatically during the course of the campaign so there's no way you'll miss them.
Cerberus Labs
Cerberus Abductions
Cerberus Attack
Cerberus Fighter Base
Fuel Reactors
Communication Hub
Always Prepared (10 points)
Obtain two non-customizable suits of armor.
You can buy different armor sets from various stores in the Citadel. Bonus armors from purchasing the game seems to count as well. (Check the Weapon and Armor list section in this guide)
Tourist (5 points)
Complete one multiplayer match or two N7 missions.
Explorer (15 points)
Complete three multiplayer matches or five N7 missions.
Gunsmith (25 points)
Upgrade any weapon to level 10.
During your first playthrough, your weapons may only get upgraded up to LV5 before “disappearing” from the list of weapons you can upgrade. You'll have the ability to maximize them to LV10 in New Game . (finish the campaign and import the same character when starting a new game)
Almost There (15 points)
Reach level 15 in multiplayer or level 50 in single-player.
Peak Condition (25 points)
Reach level 20 in multiplayer or level 60 in single-player.
Battle Scarred (25 points)
Promote a multiplayer character to the Galaxy at War or import an ME3 character.
If you don't want to play online, you can just finish the campaign and start a new game (new game ) using the same file.
Unwavering (50 points)
Finish all multiplayer maps on Gold or all single-player missions on Insanity.

 Dragon Ball XenoVerse How to: Advanced Tips Guide
 3 Money-Saving Price Comparison Extensions To Install Now
 The Witcher 3 Hearts of Stone: kill / defeat Toad Prince tips
 Assassin’s Creed 3 Review
 Tropico 5 Review: The Joys of Dictatorship