

Unofficial Guide by Mike Hazleton for
BioWare are yet to make a substandard game, and following on from the success of Mass Effect, the sequel to the Xbox 360's crowning RPG (and a great PC game) was always going to go down well. It really does continue from the previous game, allowing you to carry over decisions from the original that will affect the storyline and characters in your new adventure. If you haven't played the first one, everything is explained as you go along; it is recommended, however, just because it is such a classic experience. This guide currently is NOT COMPLETE. All of the loyalty missions, N7 quests, guides to other locations in the Mass Effect 2 universe and the remaining primary story quests will be added in the next part of this guide which will be completed shortly. The most important decision you will make in Mass Effect 2 isn't a choice of who to save or who to leave behind. In fact, it is the class that you pick at the start of your adventure, and there are quite a few to choose from (each is much more interesting than its counterpart in the original). Below is the low-down on each class, and tips on playing as them. The Soldier is a great class for newcomers to the series and experts alike, and it is a lot of fun to play as. Obviously this class specialises in the more traditional weaponry, such as assault rifles, grenade launchers, and sniper rifles. This allows the player to equip special ammunition, such as incendiary or cryogenic bullets, that perform admirably against certain enemies. While lacking biotic skills, Soldiers can deal with shields using their Disruptor ammunition. Another notable skill is Adernaline Rush, which slows time and allows precise aiming. The Adept class employs biotic powers over weaponry (though they can use Pistols and SMGs). There are a variety of fantastically satisfying attacks that they can perform, including Pull and Throw (think Jedi and Stormtroopers) and Shockwave – each of these is brilliant at lobbing enemies across the map. Some can be immune to such action, if they have a shield or barrier for example, though the Adept's Warp ability is good against barriers and armour. A good assistant to a squad of any other classes, Engineers can make use of high-tech gadgetry to help out their allies. With the same default weaponry as the other less combative classes (Pistols and SMGs), their trump card comes in the Combat Drones that they can bring to the battlefield. These cause sporadic damage to shields, while drawing enemy fire. Engineers can also cause great damage with attacks like Incinerate and Cryo Blast, while Overload will rip through an enemy's shielding, making an Engineer a clever addition to a biotic squad. The addition of the AI Hacking ability also allows them to wreak havoc among enemy robots. The stealth class in Mass Effect 2, the Infiltrator has the Tactical Cloak power which allows them to disappear and avoid enemy detection. They also have the benefit of being able to use Sniper Rifles as well as the default weaponry. One of the most intriguing powers in the game is the AI Hacking ability. This is also available for Engineers, and allows you to hack into an enemy drone and send it to attack its former allies! Infiltrators can also use Cryo Ammo as well as Disruptor Ammo, allowing them to take down enemy shields. The Vanguard class attempts to strike a balance between the Soldier and Adept classes. It can use a Shotgun in addition to the default weaponry, and sports certain biotic powers to help disable enemies and allow the player to get close-up for the lethal shot. Cryo and Incendiary ammunition increases bullet damage, while Shockwave and Pull come out of the Adept's armoury. Both of these attacks can slow targets down and allow close-quarters kills. The Vanguard class also has the fantastic Charge ability, where the player uses their biotic abilities to thrust across the room towards a target, knocking them down and setting up the killing blow from a shotgun. Unlike most biotic attacks, Charge works through obstacles as the player shifts in and out of them. Sentinels are a balancing act between the Adept and Engineer classes. They have high armour, allowing them to inflict damage and assist their squad throughout a battle, even under intense fire. They are particularly weak in terms of weaponry, but combine the shield-destroying Overload of an Engineer (and Armour destroying Warp) with the bone-crushing Throw of the biotic Adept class. With the Tech Armour ability, shields are increased and if they happen to be lowered, a shockwave is sent out, damaging nearby opponents. They also have the Cryo Blast attack available to unlock, freezing enemies where they stand. This is a simple pair matching minigame. Move the cursor over one of the circles on the circuit board to see an image. Match each of these images into a pair to complete the hack. Note that it is also possible to follow the circuit lines of the circuit board to see which two circles connect, but this takes some practice. This minigame to hack into various computer systems involves matching up the image at the top of the window, to one in the scrolling list. You must avoid the red sectors as you move down, and then press the action button on the matching segment. You need to do this three times (i.e. with three different segments) to complete the hack. At the start of Mass Effect 2 you have a couple of choices. You can either import a character from Mass Effect 1 (you can change their look and class shortly, and abilities have all been reset – the main purpose of importing is to keep the decisions that you made in the first game present in the universe of Mass Effect 2), or create an all new character. You will be asked certain questions later as if you did have a character from the first game, and your answers will determine certain factors of the galaxy. So pick either Male, Female, or Import ME1 Character to continue. You then have the ability to set up the Options menu, and it's recommended that you pick the Normal difficulty if you are on your first play through. As for 'Auto Level Up', this is ideal for those gamers hoping for an action game rather than a RPG, as it removes much of the micro-management (although it is negligible to begin with).More useful is the setting to have your squad use their own powers automatically – with this off, you need to deploy their abilities yourself, which can be difficult in the heat of battle. Subtitles are also recommended as it means you do not have to wait for the speech to finish to get to the next scene and can just read the text – if you want a slightly less immersive experience. You can then check up on your character's details, if imported, or set them up yourself if it's a new character – you then have your first epic cut scene of the game. The Normandy is shot down by an unknown vessel, and a mysterious character speaks of how crucial it is to save Shepard's life. This a short and very linear section just to get players acquainted to the most basic controls and story. Stumble straight forward, up the stairs and past the hull breach until you come across Joker right at the front of the ship. A cut scene will then play out. You are then treated to a cut scene showing Shepard's mangled frame being reconstructed – as such you are able to change your appearance to fit your own tastes. Your face from the original game can also be used. Achievement Unlocked: Missing in Action (5G) Pick a class, from Soldier, Infiltrator, Vanguard, Sentinel, Adept and Engineer. For more details on these, see the Character Creation section. Get to Miranda Practice going into cover where indicated with the orange marker.
Pick up the ammunition for your Pistol which is located just by the door to exit the medical room. TIP: All ammunition works in all weapons in Mass Effect 2, and it is particularly scarce. You must be careful to conserve your ammo and make your shots count. In the next room enter cover at the barrier and then push forwards and the cover button (A on Xbox 360) to vault over the obstacle. An enemy mech will activate on the stairs to the right – try to take it out before it can get any shots away. Collect the ammo and proceed up the stairs and through the door. When Miranda comes over the communicator warning you about incoming enemies, take cover by the glass. Pop out and dispatch the mech that comes from the door straight ahead, and do the same to the pair incoming from the left.
Collect the ammo from the downed enemies to the left, before returning to the main room and heading straight up the stairs. Follow the path past the corpses and into the door marked with a green light (green lights indicate the door can be opened without problems). The body on the floor inside this next room has dropped a grenade launcher, so pick it up. Select it from your weapon inventory (using LB on Xbox 360, then A to confirm) and some more mechs will come out of the door below your high position. One direct hit should deal with the four enemies who enter. Get in the lift and take it to the lower floor. Pick up the ammo of the dead as your sprint through the fire (hold A on Xbox 360). As you pass through the next couple of rooms Miranda will come on the radio and is evidently in trouble. You will come to an office with two mechs crawling along the floor. Take them out and hack the Wall Safe in this room (see Hacking section of this guide) for plenty of credits. Scavenge to two computers in the room for some Data Logs too. Turn left outside this room and move up the stairs. You'll see a human getting pulverised by a mech, but there's nothing you can do, so get through the door into an open area. Here you will meet your first ally, Jacob. Join him in cover on the edge of the gangway and help him to deal with the mechs.
A cut scene will then play out and you can casually ask Jacob some questions. You can either find lots out about him now, or get on with the mission and deal with that stuff later (there will be adequate opportunity for this). Party Member Acquired: Jacob Jacob's speciality is biotics. He can, at this early stage, pull enemies towards him, lifting them off the ground just like in Star Wars. With stronger enemies you can then finish them off in mid-air, while weaker ones will be killed by the initial attack. To use a team mate's attack, activate the proper menu (RB on Xbox 360) and push A on the desired ability while looking at the enemy target. It works much the same as the weapon menu.
Now that the coast is clear you can finish with your questions, or proceed to get off the medical station. The Chief Medical Officer will radio in requesting help. With Miranda's inexplicable absence, he becomes the priority. Locate Chief Medival Officer Wilson Party Member Acquired: Wilson Before he can answer your questions you need to sort out his injuries. Pick up the Medi Gel from the dispenser on the wall. You can then use your Unity ability, which is suitable for reviving downed party members. It is shown by a group of silhouetted figures in the Power Wheel. Once he's back on his feet, pursue your desired conversation trees. The main decision here is whether you think it's worth looking for Miranda. Agreeing with Jacob, to search for her will earn you Paragon (good) points, while agreeing with Wilson will get you Renegade (bad points). Either way the result is the same, but it's your attitude that is important here. TIP: More so than the first game, it is possible to hit a middle ground throughout the game with Paragon and Renegade points – don't feel that you have to be one or the other, but it will unlock more conversation options in the future if you do. Once the conversation is over, aim at the mechs that enter the room. You should now use Jacob's Overload ability on the barrels they are hiding behind to clear a path. Take note of the conversation that takes place now about the shady Cerberus organisation and their interest in you. When you're done, go into the corridor that the mechs came from. Interact with the Datapad by a corpse on the floor to start a second Hacking mini-game (see the Hacking section of this guide). This one is different to the former, requiring you to match Target Code Segments. Doing so successfully will earn you some credits. Follow the route down the steps and through the door until you enter a large cargo-bay type room. Destroy the mechs on the lower level before moving up and doing the same to those upstairs. As you are attacking, more will come through the door at the far end. Hack the Datapad and Wall Safe in the room these mechs came from for more credits, and view the personal logs on the computer.
Double back on yourself and go straight across the gangway to the door on the other side. Open the door inside the next room (it will open despite being red) to find Miranda by the shuttle. Allow the cut scene to play out and find out anything you wish to know about this new character. NOTE: You obviously no longer have Wilson as a party member. During this journey you set out a few decisions that people importing their characters from the first Mass Effect will already have made. They may not mean much to you, but allow you to create a different story each time you play at this stage. If you have imported a character, you will get a recap on some of the major events in the last game. Party Member Acquired: Miranda Talk to the Illusive Man:
The basic crux of the meeting that goes on here is that human colonies have been disappearing from the outer reaches and that Cerberus believe the Reapers are responsible. As the only human to have killed a Reaper, there seemed to be only choice for the job, and hence Shepard was resurrected. You are to be sent to one of the most recent colonies to go off the radar, Freedom's Progress. Investigate Armour Locker Talk to Miranda and Jacob You have an opportunity during the shuttle flight to earn some Paragon or Renegade points, the conversation lines to take for each should be obvious!
Move into the room directly ahead (don't jump when the lights come on!). Follow through the next door outside onto a gangway. This leads sown some stairs into a large, flat area. There is not much to see here, so continue downwards and through the large bay doors where you'll get your first enemies of the colony. These are LOKI Mechs and FENRIS Mechs, each much tougher than the ones we encountered earlier (though they still shouldn't pose a problem). Take out the LOKI Mechs behind the barricade and move into the room. As you deal with the LOKI Mechs on the stairs, watch out for a four-legged dog-like FENRIS Mech that will come galloping at you (use Pull on it if possible). With the area clear, collect the ammo and head up the stairs. Go into the building with the open door. Bypass the wall safe and collect the medi-gel. Once back outside you can salvage some spare parts to the left, but first you should look out for a LOKI Mech and a FENRIS Mech. Again, use Pull to take the aggressive dog out of the equation.
With the route ahead cleared, proceed into the next room. Here you'll run into some Quarians, all of whom are thankfully friendly, and one of whom is a familiar face (or mask) from the first game. They need you to find one of their own, who, while taking part in a Quarian rite of passage, had lost contact with his home. That's why these Quarians, including Tali, are here. The Quarians are going one way, while your team are going another – this should increase the chances of finding Veetor. Head back outside and into the next room. Be sure to hack the wall safe in here, but watch for the LOKI Mech hiding cleverly underneath it. Once outside again you will have some Assault Drones to deal with. These are particularly tricky due to their explosive rounds. They also have shields, so Jacob's abilities won't work. Miranda's Overload will, however. With the Drones down continue through the colony buildings. Pick up the med kit in the first, and pass straight through the second. Take the metal steps down and hide behind the cover half-way. More Assault Drones. Take them out and continue back to solid ground. Pick up the medi-gel nearby. It has emerged that Tali's friend Prazza has raced on ahead, and is currently being torn apart by Veetor's hacking ability. He has programmed a Heavy Mech to deal with them. Of course, we have to be the ones to sort this out. Move to the bay door when prompted, and set Jacob and Miranda on either side of it using the team orders (DPad Left and Right on Xbox 360). Take cover yourself in the centre. After Prazza gets her just-desserts in the cut scene, you are thrust into action. This is the first 'boss' in the game, but if you play intelligently it should cause few problems. Your team has changed position since you last had control, and the YMIR Mech is a formidable foe. Watch out for destructible cover, but your priority should be to get Miranda to use Overload on the mech to take out its shields. With this done, proceed to take down its armour, and finally its health. Be sure to pick up the Iridium canister and the Heavy Weapon Ammo Upgrade on the broken remains of another mech nearby.
Get the med kit from the nearby building with an open door, and take note of Tali and her remaining companions inside. Go back outside and locate the colony building with the sealed door, but which has a green light on it. You've found Veetor. Either console or intimidate him into showing you what he knows. You have the opportunity to perform Paragon or Renegade actions here, by pressing LT (Paragon) or RT (Renegade) when prompted during the scene (Xbox 360 controls). Another opportunity to be nasty or nice comes when deciding what to do with Veetor – you can opt to try and force him back to Cerberus, or just take his Omni-tool and suck up to Tali by asking if she will join your squad (she won't!). You will find yourself back in space and talking to the Illusive Man again. Veetor's revelation that the Collectors are responsible for the disappearing humans is a worrying one. Ask the questions you want answered before the Illusive Man tells you that he wants you to investigate this issue. He's selected some possible candidates to join your team to help. You can ask the whereabouts of your old team for some interesting backstory. The Illusive Man suggests you go to Omega to find your first new teammate, a scientist who can work on the research department of your vessel. He also introduces you to a new friend, or more correctly, two.
Back on your ship from the first game, and with your original pilot, Joker, The Normandy is a vital location for forging relationships with your crew. Before you can start fraternising, however, you need to hear out your crew with regards to which location to head to first. Being a BioWare game, you can choose any option (and even pay a visit to the new Citadel). You can feel free to make up your own mind, but for this guide we will be going to Omega to locate Professor Solus. It is at this point that you will be introduced to a new factor of your ship. While a near-exact replica of the original Normandy, it now has an Artificial Intelligence named the Enhanced Defence Intelligence or EDI. For those new to Mass Effect, this cute computer will show you around the ship. The bridge or Command Information Center has also changed significantly. This is on Deck 2 (where you begin this part of the game) and has a number of features. Deck 1: 1) Personal Quarters: The question of where the rest of the crew's quarters are is a pertinent one, but the main thing is that Shepard's got a roomy suite. In here you can access your Personal Terminal like on the bridge (see below for more details), change your armour and ship-wear, and examine your medal case, reporting your past feats (pretty empty as yet). You will also notice a display cabinet and fish-tank. Around all the places we visit you can buy model ships and fish that then appear in these locations – it is a bit of a nerdy distraction, but can be a good way of getting to know the game's lore. Deck 2: 1) Galaxy Map: This is the most important part of the bridge, as it is used to travel to, and dock or land at, the various locations during the game. You can travel to any of the places on the map at will, steering the ship manually via a 2D interface, before interacting with them. 2) Personal Terminal: Shepard's Personal Terminal is a new addition, and is the location where you can receive personal emails, analyse the crew and check the statistics of you squad. You can also watch some brief tutorial videos here. 3) Yeoman Kelly Chambers: From your first conversation with Kelly you will realise that a possible love-interest lies underneath. She operates the console to the right of the galaxy map and seems the perfect foil for a Paragon-style player. Talk to her, investigating her personality and character. She is designed as your personal admin assistant, notifying you when a new message has arrived for you (though often after you have already read them…) and handling the crew's morale. 4) EDI: The EDI terminal on the bridge is located near Joker's seat (at the head of the vessel). Ask some prying questions about its function, capabilities, and whether it will interfere with the ship.
5) Joker: Joker and Shepard are good friends, and can reminisce about old times. You should also value his opinion, as he knows your character (including that from the first game) best. 6) Armoury: Here you can pick the weapons for yourself and the squad using the console, but it should primarily be used as your point of contact for Jacob. 7) Jacob: Having Jacob's biotic powers is vital at this early stage, and he also suits a Paragon character well. Talk to him to improved your relationship and find out the story of his past. You may notice some sparks of romance going on, but he will only be interested in a female character. 8) Lab: There will be a science lab available on this deck, but only once you get Professor Solus on board. 9) Briefing Room: Frequently after missions you will begin back here, talking to new recruits or other characters. You can also examine interactive consoles marked at the side of the bridge to gain XP. After the bridge, Deck 3 is worth a visit. Deck 3: 1) Medical Lab: It is important to pay a visit to the lab to catch up with Dr. Chakwas, a returning character from the first game. The main reason for this visit is to open up a new side-quest, Serrice Ice Brandy. Ask her what she needs. While a Doctor shouldn’t be interested in such a rare alcoholic drink, it will net you some XP, and can be completed on Omega. 2) Miranda: Found in her office on Deck 3, Miranda is the third romantic interest on board your ship. She can seem outwardly hostile, so rather than just being nice and flattering as with Jacob, you must pick your dialogue carefully and intelligently. Having saved your life, you may find that Miranda can seem a bit big-headed, but you may like this in a character. 3) Mess Hall: Where the crew go to relax and eat. The next side-quest you can activate (this one can not be completed on Omega, rather the Citadel, but is worth activating nonetheless) involves Sergeant Gardner, the ship's cook. He also does a lot of maintenance work. When asked if he needs anything, he'll tell you how he is frustrated at Cerberus rations, he wants you to find some ingredients to spice up the menu. Pursuing the correct conversation adds Special Ingredients as a side quest.
Deck 4: 1) Engineering: Deck 4 is a minor deck at this stage, but the third side-quest of the Normandy can be initiated here. Speak to the engineers and ask if they need anything. They will tell you that they need a new piece of equipment for the engines, which you can get on Omega, and it will be accepted as a side-mission called FBA Couplings. Continue to speak to Daniels and the Scottish Donnelly as they really seem to appreciate the company and can tell you quite a bit about events since the first game. While on the Normandy it is a great time to catch up on the Mass Effect back-story and additional detail that BioWare have provided. This can be done through the Codex, where a range of voiced and text-based content can be browsed. Use it to get the low-down on new locations, species and phenomenon ahead of each mission so you know what to expect, and don't forget to explore your surroundings in every location fully so as not to miss any new additions, if you are interested. Before departing for Omega, you should ensure that the following side-quests have been accepted: Serrice Ice Brandy (speak to Dr. Chakwas in the Medical Lab, Deck 3 [see above]) FBA Couplings (speak to the Engineers on Deck 4 [see above]) You will then be ready to use the Galaxy Map and navigate a course to Omega.
Ensure you have activated the side-quests listed previously before landing. As you land in Omega you will have to pick your squad. With still only two options, Jacob and Miranda, you must take them both with you. As you leave you may also have to level up both your Shepard character, and that of your allies. There are three main tasks in Omega: Recruit the Veteran (DLC character) Upon arrival a Batarian named Mokkari will introduce himself, requesting that you head to the Afterlife nightclub (do they have nightclubs in space?) to meet Omega's main player, Aria. She will be willing to answer your questions. You will also be told that Dr. Martin Solus is currently involved in a quarantine operation in the city's slums. As Aria's case seems particularly urgent (and she's a powerful alien), you may as well head to Afterlife. Before this, however, if you purchased a new copy of the game and have downloaded the DLC (you should have got a code with the game to do this for free – you can activate it all via the game's main menu), there is a new character to recruit to your party.
The next chapters of this guide deal with recruiting the Veteran, Archangel and The Professor. As you move down the corridor you will notice a human beating up a Batarian. This unorthodox figure is your first recruit. You learn that his name is Zaeed Massani, a legendary mercenary that Cerberus has recruited to help your cause. Pursue the conversation and allow him to return to the ship. You can now go back to the dock and switch out Jacob or Miranda, or leave your squad as it is. Zaeed is essentially a soldier, with powerful assault capabilities such as Concussive Shot. There is also a side-mission associated with him, but it requires taking the Normandy somewhere else, so we should leave it for now. Party Member Acquired: Zaeed Massani With that done, you can now head for Afterlife. Proceed through the corridors and open the door ahead. Right in front of you should be Afterlife.
Take some time to listen to the humorous conversation between a Human and an Elcor bouncer, whose lack of emotion can lead to some hilarious comments. Head inside the club when you're ready by activating the main door. As Aria knows you are coming you will be allowed in and not kept outside like the other Humans. Once inside the club there are a few things to do, including a few side-quests (see below): Go up the steps in the corner and introduce yourself to the blue-headed female. She is on a platform sticking out over the dance-floor. Aria is an Asari who was once a newcomer on Omega but has since throttled it for all she can get. Ruthless and efficient, she is not to be trifled with. Having heard that you are the infamous Human Spectre, but back from the dead, she wants to establish your identity. Go along with her questions, and ask her about Archangel, one of the people in the Cerberus dossier. She'll tell you that due to the problems this guy has been causing, a mercenary army is currently attempting to take him down. The obvious way for you to get to him is to join up with this force (which is said to be struggling) and meet him that way. You should also ask about Mordin Solus, gathering any information you can. Aria will tell you that he's down in the quarantine zone which is currently heavily guarded. For now though we'll go after Archangel, as the people we need to talk to for this are close by. Go back down the stairs and locate the Mercenary Recruiter.
As you are leaving a kid comes in looking to join up. To earn Paragon points, press LT when prompted to ensure he doesn't sign up. Before you leave you may want to finish the two side-quests available in Afterlife, but they will still be available later. When ready, head out of the club. As you are in the final corridor leading outside there is one more chance to earn some Paragon/Renegade points. Speak to the Batarians lurking at the side. Deal with their leader peaceably or forcibly as you see fit. When outside and near the entrance to the corridors leading to the Normandy, turn right to find the Transit Hub (use your map [Click the right thumbstick on Xbox 360] if you get lost). Speak to the Blue Suns Driver when you get there, and he will take you to the mercenaries. You can pick your party before embarking on what is essentially an action mission. Get some information from the Batarian that greets you when you arrive. You will learn that Archangel is holed up in a building with a vantage point over a bridge. That is the only way to get to him (there is a basement but it is filled with rubble after Archangel blocked the route) and any mercenaries are getting picked off. Your job is to distract Archangel while a team try to work their way around the back stealthily. The mercenaries also have access to a gunship, but Archangel took it down and it is being repaired. Pass the mercenary barricade on the right and follow the path to the door at the end. In here, pick up the datapad – this gives details about an attempt to take out Aria being planned in the near future by the mercenaries. If you take it to her, she'll be very grateful – this is one of Omega's side-quests. Listen to some of the conversations, before moving out. Head out of this room and into the next area. There are three doors. The one on the left is vital. Inside is a mech-suit. Hack the 'Heavy Mech Diagnostic Station' to change the targeting sensors to attack the mercenaries as opposed to Archangel.
Pick up the Refined Element Zero and hack the Eezo Smuggling Accounts to get everything you can from this room. Back to the three doors. The one straight ahead from where we initially entered the corridor contains Garm, a member of the Blood Pack. Ask him some questions to add to your Codex. The door to the right is the way ahead, and contains a pad with details of bank accounts to hack. Continue onwards and hack to the door to the right. Interact with the gun to gain a Sub-machinegun upgrade, steal the Blue Suns Gunrunning Accounts and nab the Power Cells on the desk. There is also a med station by the door. Head back to the main room and speak to the Freelancer by the barricade. He'll direct you to Cathka, but you can go through the other door and follow the corridor to locate the leading hierarchy of the mercs. Speak to Tarac and he'll palm you off onto a female Human, Jentha. Get some additional Codex information from Jentha, and then go to talk to Cathka (or more accurately, his assistant) in the previous room by the gunship. You have the chance to use a Renegade action once you get to speak to Cathka and he explains the role of the gunship and his work in repairing it. This allows you to shock him with the omni-tool, disrupting his work on the gunship and making a later encounter with it significantly easier. It will give you some hefty Renegade points though, so think carefully about your decision. The gunship is not too hard to take down, but obviously the easier the better. The battle will soon start. As soon as the cut scene ends and Shepard states that we'll be giving them 'a surprise of our own', you are thrust into the action. You don't have to shoot anyone at this point, but they are marked as enemies and you can take them down. Similarly, Archangel has his own health-bar and, should it fall too low, you will have failed. I recommend engaging enemies from the off – as long as you pick off stragglers and don't reveal your true intentions to the entire group, they will not return fire for a while.
Take out the two nearest you and proceed inside. Here you will find a Freelance Bomb Tech – aiming to set off explosions to kill Archangel. I suggest continuing on into the main room to take out the enemies directly attacking Archangel first – otherwise the Bomb Tech may alert his friends about your change of allegiance. Deal with the enemies on the stairs and in the main hall, then pick off the Freelance Bomb Tech. You can blow up the bomb by shooting it, but you may wish to save that for later when it would potentially catch more targets. Once on the upper floor kill the mercenary hacking into Archangel's door and he will open it for you. Continue inside and enjoy the cut scene. Having greeted an old friend, it is revealed that more soldiers are on their way. The main idea here is to first help Archangel with the enemies on the bridge. Be sure to pick up the Vindicator Battle Rifle from the seat just behind where the cut scene ends. Return to the balcony and take out the advancing LOKI Mechs using a combination of weaponry (Sniper Rifle is best here) and the Pull and Warp abilities. Once they are down the real mercenaries will come across the bridge. These are harder to stop – primarily due to their massive numbers. Stay upstairs and snipe until they get underneath the balcony and you lose sight of them. You may be able to keep them back until the next stage, in which case you can remain with Garrus. With all the enemies down, Jaroth will send in the Mech Suit we tampered with earlier. Revel in the results, go downstairs and push up next to the Mech to protect it (so it can continue to deal heavy damage on the mercenaries for as long as possible) and to nab some kills yourself.
Note: if you didn't hack the suit this fight is much harder. Use the usual cover and shoot tactics, as well as Miranda's Overload ability to take out the Mech's shield. The best option is to attack from extreme range, out of reach from its most deadly weaponry. When all of the grunts are down (your Mech will probably have been destroyed by this stage) Jaroth will emerge. He has Shields and Armour but should put up little resistance if you engage him from behind cover at a sufficient distance.
With the boss destroyed go and collect all the ammo now strewn around as you will no doubt be running low. With that done, return to Garrus for an update. Remember to collect the Omni-tool Power Boost Upgrade at the bottom of the stairs, the medi-gel at the top and hack the wall safe in the room to the left (when going upstairs) while we have a lull in combat. There is also medi-gel in Garrus's room, The cut-scene when you speak to Garrus will reveal a little more of what he has been doing since the first game, but more importantly will be interrupted by mercenaries breaking through the basement – they have cleared a path into the building. You can now choose to leave Garrus on his own, or leave a team member with him. Doing the latter will earn you Paragon points, and help to ensure his protection. When the decision has been made, move down the stairs and double back on yourself at the bottom, entering the door. You can access the Medical Station in here, but move on quickly. You need to run down the steps towards the open door ahead. The green panel to the right brings some security shutters down that will keep the onrushing mercenaries at bay. It takes about ten seconds to shut, however, so you need to stand there and guard it (if anything gets in the way it will terminate the command). As soon as you push the button, enemies will emerge from the door behind. Note that one of the intruders is a Blood Pack Warrior. These guys have heavy armour and carry shotguns, always attempting to get up close to you – they can be deadly at this range. Focus on keeping him at bay first – when the shutter comes down he’s history.
With the first shutter sealed, head through the door to the left. Enemies have already got into this room, so you need to be careful. Take out the first wave – use Incendiary ammo to make things easier. You then need to run as fast as you can and as far forwards as you can before the next wave arrives – get close to the button, but don't risk being up too close to an incoming Blood Pack Warrior's shotgun. They will also deploy Varren – attack dogs aimed to bite up close and flank your squad. Use Pull to take these enemies out of the equation, should they get too close. Once you get down to the last enemy of the second wave, begin to move up, killing him as you come near the shutter. Press the button as the third wave emerges and guard the area underneath until it is down. Keep the enemy suppressed and they'll stay in cover. Note: Time is important here as Garrus continues to take fire – keep an eye on his health bar as an indication of how much time you have left. It helps if you did well in the first section and he was high on health following that. With this done, go back into the previous room, collecting ammo on your way. You will see a door with a green light on straight ahead. Venture inside. Unlike the other two shutters, this protects a narrow and circuitous corridor. Fight your way over the barricades, vaulting each one as you come to it. The last barricade is by the door. Clear the wave that approaches and then vault over to initiate the shutter. Vault back over the barricade and defend the area underneath it.
Congratulations, but it's not over yet. You need to get back to Garrus quickly to prevent his health from falling. Garm is now on the scene and his Blood Pack mercenaries are here to cause trouble. You have been handily warped back to the main room. You can use the bomb if you left it from earlier. Deal with the enemies in here as quickly as possible so you can fight up the steps and to Garm and Garrus before it's too late. Use Incendiary Ammo on the Blood Pack Troopers, Pull on the Varren, and Overload and Pull on the Blood Pack Warriors, depending on your class. You should be able to see enemies moving up the stairs early on – you must get to them quickly. With Garm down, investigate the Footlocker and then speak to Garrus. All that's left now are the Blue Suns mercenaries. Unfortunately, once the conversation with Garrus ends they will also hit you with the gunship. As long as you stay in cover you are relatively well protected, but you also need to watch out for the ground soldiers that are unloaded. The gunship will rarely attack at the same time as the mercenaries, so use that to your advantage. In the first wave Jentha will attack, replete with shields and armour. Focus on her, using Overload to get rid of her regenerative shield. The next wave will come from the ground floor. Use the open plan design of this level to look over the side and get a flanking angle on the stairs. Take out the mercenaries, using Pull to stop any getting too close to the top. If you take a position at the top of the stairs, you will be able to catch the mercenaries in crossfire with Garrus as they approach. With the ground troops dealt with, the gunship will return.
Even if you didn't use the Omni-tool to disrupt the gunship's progress earlier, you still should be able to beat it as long as you don't get too close and allow your health to recharge when low. Once it moves away from the first window, more mercenaries will drop in. Deal with them and it will reappear. This pattern will continue until you finish off the gunship – it only has Armour, no health, so shouldn't take too long to destroy.
With that the mission is complete and all attention turns to Garrus and getting him back aboard the Normandy. Party Member Acquired: Archangel/Garrus Back on board the Normandy, Garrus is healing nicely. You can take this time to explore the ship and check out the new conversation options, deliver the Serrice Ice Brandy to Dr. Chakwas (if you have done that side quest), or head straight back to Omega using the Galaxy Map (select the Dock option). Garrus will also want to talk to you at the Forward Battery (Deck 3). Read your Personal Messages to receive some titbits about your recent activities on Omega (most notably from the kid you may have stopped from fighting against Archangel) as well a new assignment from Cerberus to investigate a nearby planet.
Gain Access to the Quarantine Zone You will have to charm your way in, as the zone is completely locked down. Speak to the District Guard on the door (note that the District Guards are far more accommodating than the mercenaries!).
You can use your Paragon or Renegade experience to help your cause here. Take note of the warning about Blue Suns mercenaries inside, and the cut scene will end. The Blue Suns will cause you the most problems down here, but it should only be friendly District Guards in this first section (unless you provoked the doorman upstairs!). Collect the Refined Element Zero behind the stack of crates and the ammo next to the Batarian corpse. Continue through the door and you will come to a barricade. Those manning it should let you past if the doorman radioed on ahead for you. Make use of the Medical Station in the next room and you will come out behind the barricade. Proceed through the door as you are warned about Blue Suns and Vorcha up ahead. Downstairs you will see two figures in the distance. They are hostile, but will only attack when you reach the bottom. They shouldn't give you any trouble. It's clear that the plague is well out of control and those in these slums are being holed up by the mercenaries in the area. Hack the Bank Terminal near where the pair of mercenaries were standing. Head through the door next to it and collect the Power Cells. Hack the other door in here to find a dead plague victim. Play the logs on the computer for some XP. Back in the main room with the plague-fire you will find an infected Batarian.
This is an opportunity to score some mean Paragon points. Firstly, however, get any information from him that you see fit. He will tell you about Mordin's unusual methods, skill in combat, and the lethality of the Vorchas roaming the area. They are immune to the plague like the Humans, suggesting that one of these two species is responsible. In the next area, hack the door to the right to find a room with a Wall Safe and some Data Logs. Piecing together the mystery of the plague is an interesting diversion. The next room is a large one. In the courtyard area you will be accosted by Blue Suns Mercenaries. Take out the half-dozen or so that enter the room, then head upstairs. Pick up the Med Kit and salvage the Circuit Boards. Back downstairs, work your way through the courtyard area – turning right before the barricade. Hack the locked door to find an apartment with a Med Kit and two Humans in! They are scared about the mercenaries prowling outside, so had locked the door. After stealing from their Wall Safe, you can use your Paragon or Renegade skills to convince the pair to visit Mordin, once you clear the route ahead. Of course, you could just leave them to die. It's your call. Back in the main room continue past the barricade, making sure to take the Assault Rifle Damage Upgrade from the fallen mercenary. Head through the door and go straight ahead – you'll come across a Blue Suns versus Blood Pack fight. You can let it play out, but the Blue Suns are outnumbered.
You will find tonnes of Blood Pack soldiers in here, including Varren. Watch out in particular for the Pyro units. If you get caught in their flamethrowers it's nearly a guaranteed death. You will have to try and get a team mate to Pull the Pyros away, or try to regain control of Shepard and pump them full of lead. Avoid them if possible, however. Use Incendiary Ammo or a Sniper Rifle to engage from distance. They also have Blood Pack Warriors, so don't let them get too close. With the area clear, locate the side door to the left of the barricade complete with Refined Element Zero. Go into the adjacent room and you'll find a pair of looters. You can ask some questions and deal with them aggressively if you don't agree with their actions. In the mercenary room we were in previously, go past the barricade and through the door. You should see a sign for the clinic. Remember to collect all the ammo in the room before heading out.
You should be out of harm's way now – Mordin has got the Clinic well guarded by friendly troops. Inside you can change your weapons using the Armoury, and talk to the various patients milling around. Most of them hate Humans. Move through the Clinic until you get to a crossroads of rooms, the forward path blocked by a barricade and some guards. Go left first, collecting the Platinum, Med Kit, Palladium and a Medi-gel Capacity Upgrade from the computer. Now go into the right-hand room to see Mordin. You have Renegade and Paragon opportunities in this conversation. Ask him some questions, most importantly to recruit him into your squad. He'll tell you that he first needs to spread the cure for the plague that he has developed across the entire slums. The sensible way to do this is through the ventilation system. Mordin gives you the cure (as well as a new weapon) and sends you on your way. He also requests that you look out for his assistant, Daniel. Be sure to mention the Batarian plague victim at the entrance to the slums too. You can also take Power Cells, Refined Element Zero and Refined Iridium from this room. Head out of the Clinic using the other door (i.e. not the one you came in through). It is located next to the grumbling Batarian Patient. Up the stairs, the first room on the left is packed with Blood Pack soldiers, including Pyros and Warriors. Deal with the fleshy ones using Incendiary ammo, while your Grenade Launcher is great against the Warriors.
As you move up, more enemies will appear. Remember to target explosive containers to deal the most damage. Clear the room and use the Medical Station. You will also find a hackable Gambling Terminal and upstairs a Bank Terminal. Continue up the next set of stairs too and you'll find a door to the left. Inside is Mordin's assistant, Daniel. He was delivering a cure, but as Humans are suspected of creating the virus, and Batarians are naturally suspicious, the situation has escalated. Either talk the Batarians down or agree to fight them, receiving Paragon or Renagade points as a result. Daniel will return to the Clinic with the hostilities defused (or eliminated). Go back into the previous corridor and into the door straight ahead. More enemies must be dealt with inside. Proceed downstairs with the area clear and you'll come into a tricky room. Take cover behind the door and snipe any RPG soldiers you can see on the balcony in the distance. You should try and eliminate these enemies before heading downstairs, as their rockets will easily target you with a height advantage. TIP: Use the explosive canisters to take out the upper enemies. With the upper ranks defeated, head downstairs and mop up the rest of the room. As always, watch out for Blood Pack Warriors. Collect all the ammo in the area and proceed out of the door at the back of the room. Some Blood Pack troops are in the next corridor, and you should quickly eliminate them. In the right hand room you can salvage some Spare Parts and get a Med Kit, whereas the room to the left leads upstairs to Environmental Control. Inside you'll find quite a welcoming party.
Kill the Vorchas and Blood Pack troops, focusing on the RPG units and the Pyros. Head to the large array of computer terminals on the far wall and interact with the orange controls. You have now inserted the cure into the system. All that's left to do now is turn on the fans. Enemies will pop out as soon as you turn around. Take cover and clear them out, before proceeding down the stairs to the right (near where you came in). More Blood Pack emerge from the door down here. Ensure the Pyros don't get too close, and move up. Interact with the orange terminal as before to get the first fan whirring. Another ambush awaits as you leave this room. In particular you should watch for Pyros as you round the corners and move up the stairs. Try to wait until they are in range and ensure the area is clear before continuing. TIP: Send your team up the stairs first to ensure the Pyro threat has diminished. Back in the middle, enemy soldiers with rockets will attempt to pin you down from the balcony on the other side. Use the pillars to prevent them from getting clear shots on you in numbers, and equip a sniper rifle to pick them off.
As long as you are behind cover, the rockets will not cause serious damage. Watch out for ground troops (Pyros again) as the Vorcha above are defeated, and press on into the second fan room. Interact with the terminal and you'll be helpfully warped back to Mordin. Mission complete! Party Member Acquired: Mordin Solus
Accept the gratitude of all involved and you can choose to either return to the ship or explore the Clinic some more. There's not much left to see, though the Human couple you may have advised to follow your path of destruction have arrived, as has the Batarian you may have asked Mordin to help. Daniel (Mordin's assistant) also needs someone to talk to about Mordin, but it's inconsequential. When ready, press B (Xbox 360) to return to the Normandy. Speak to Mordin to explain what he's here for, catch up with the crew and check your personal messages. You'll find one from the wife of a man on Garrus' fateful assault team and a message from Chakwas regarding possible face regeneration. Her tip is to be nice, and your skin will heal. When ready, return to Omega via the Galaxy Map so we can finish our business there. There are just a few side-quests to tie up. You could, of course, head to the next objective if you are going for a quick play through, in which case skip ahead. The side quests we still have to do on Omega are listed below. The first four are in Afterlife, the other two in the Market District: Serrice Ice Brandy
Batarian Bartender You can choose a Paragon or Renegade option here. Either stir up some trouble amongst the patrons to get them to turn on the Batarian, or force the bartender to drink the concoction himself. Deliver Datapad The Patriarch You have a few choices here. The best one for a Paragon is to convince The Patriarch to allow you to kill the mercenaries for him – this will show the Krogan's power, influence and reputation, while not risking his life. You can also get The Patriarch to run off, or tell him to fight the mercenaries himself – at least he'll die heroically.
If you choose to kill the mercenaries yourself, head back up to the main floor of Afterlife and make to leave via the main doors. You should meet them on your way. The fighting is all done in a cutscene. With the mercenaries dealt with, visit Aria (who is less then pleased), but at least you got the job done. Both these involve a visit to Kenn's Salvage in the Market District: Struggling Quarian Go to his store, up the ramp. You can choose the Paragon or Renegade options here, and with Harrot suitably intimidated, return to Kenn.
You can now buy the FBA Couplings from him. If you feel like being really nice (this option also allows you to skip the talking to Harrot bit), offer to pay for Kenn's ticket off Omega. This will net you plenty of Paragon points, but costs 1,000 credits. It's your call. FBA Couplings With the side-quests completed, return to the Normandy. Back on board, catch up with your crew, messages and upgrades. Now that you have Mordin on the ship, you can interact with any of the main characters (or the Science Terminal in the Lab) to upgrade aspects of the Normandy, your weapons, shields etc., providing you have enough resources. In particular, speak to Mordin, Garrus and Zaeed as these men are all new to the ship. We now need to locate the next target on the Illusive Man's list. We'll go after Jack first. This criminal, suitable for your team because of impressive biotic abilities, is located aboard a prison ship run by Blue Suns Mercenaries. Having intervened at Horizon, Shepard can then encounter two Salarians on Omega, standing to the right of the space-port entrance outside Afterlife before the doors to the Apartments section. Take Miranda or Jacob for some interesting backstory, but the main reason to go is to get a side-quest. Ish wants you to collect two packages for him, one on Illium, in the Eternity bar (at the back on a seat) and the other on Omega (outside Saronis Applications on Level 26). With these both collected, you can then return to Ish and hand them over. Doing so results in Renegade points, but a high enough Paragon rating allows you to convince Ish not to use the dodgy data and that his life is at risk. He will thank you and flee (note that this mission is glitched, and Shepard will not receive Paragon points for this, and the side-quest will not be ticked off in the Journal [giving him the data works, however]). You can also give the data to Anto, Aria's Batarian bodyguard on the stairs below her seat in Afterlife. If you do this, it spells the end for Ish. You can extort money from Anto, as the data implicates him in a betrayal of Aria, or just hand the data over. You get Paragon Points if you handle this the right way, warning Anto to be careful. Extorting him or advising him to deal with Ish is not the nicest thing to do. Whatever your advice, Ish will be gone next time you pass his seat on Omega. Back in the Command Centre, plot a course from Omega and into the Mass Relay. Then fly to the Hourglass Nebula. You can then make your way to the Prison Ship Purgatory. Team Selection: I would suggest bringing at least one Biotic with you. The Pull ability will be vital here, while someone with Overload will also be useful, as there are many shielded enemies to deal with. Pick up Jack from Purgatory In one of the cells to the right you will see a guard beating up a prisoner. He's going overboard, so you can flex your Paragon or Renegade muscles here. Either intervene or applaud the guards' actions. The next cell houses Prisoner 780. He wants to get out of Purgatory, but not if Jack is going with you. You can ask him some questions but it sounds like the biotic's got something of a reputation. Once you go through the door out of the cell block, head straight on into Outprocessing where we are supposed to pick up Jack.
The Warden turns on you now, hoping to keep the valuable Jack and take you into his custody. You will have to deal with shielded Blue Suns Mercenaries, as well as the galloping FENRIS Mechs. Fight your way through the corridors, using Incendiary Ammo on the unshielded enemies. Kill the Technician raising the alarm in the next room, loot the Medical Station, Refined Element Zero and access the Purgatory Security Controls to set Jack free. The problem is that everyone has to be let out at this stage, but the quality of life in this prison seems to warrant a bit of generosity on their behalf anyway. As Jack emerges you may be surprised by her gender and personality. A punky female biotic, she demonstrates her incredible power on some mech suits before running off. Head through the now unlocked door and venture downstairs. Scan one of the piles of remains representing what used to be a mech to get a Damage Protection Upgrade and travel through the debris-strewn corridor ahead. Pick up the Power Cells in your way and search the Dead Prison Guard on the floor. You will emerge in a large, red-tinted room.
Use the bridge for a height advantage to take out the mercenaries and pick off the Mech from range once you see it. Scan the Shotgun of a dead soldier near the door on the other side of the room from where you entered to get a Shotgun Damage Upgrade. Cross the bridge over here to find a pad on another dead mercenary. Proceed through the door near the first soldier and make use of the Medical Station, Power Cells and the data on the Dead Prison Guard. The next room is almost exactly the same as the last one, but is much tougher. Use the crates immediately next to the door for cover and pick off the enemies up high. When they are down, move into the trench (the bridge doesn't offer enough cover). Once you have cleared out the enemies underneath, move to the right. About this time a Mech will appear at the far end of the room. Try to use Overload to disable its shields and then deal some damage, but you'll also have plenty of infantry-based targets to think about too. TIP: Some of the cover in this area is triggered when you move close to it. Look for the black squares on the ground – they flip up when you are near enough. With the Mech down, focus on mopping up the rest of the mercenaries in the room.
There is a Dead Prison Guard you can interact with to get some credits. Remember to pick up as much ammo as possible, as the fighting is not over yet. In the next room you'll find some Medi-gel, Power Cells and a Wall Safe to bypass. Open the door that follows to see a cutscene of the Warden picking off prisoners trying to escape. Luckily his first shot at you missed as your squad ran for cover. Defeat the Warden TIP: Follow the blue electronic waves to see where the generators are. Move up the ramp near to where the second generator is (or was) and you will have a sniper shot on the third generator. Move closer if you need to, but make sure that once it's destroyed you are well away from the Warden's bubble. This room has the same dynamic cover as the last (where it pops up as you approach). Make use of it! Some more enemies will spawn once the shield goes down. Take them all out from cover so you can focus on the Warden, who is trying to pick you off from range. As long as you don't spend too long out of cover, this is a doddle. With the room clear of other targets, equip your sniper rifle and take some shots at the Warden. His health won't last long, especially if you use Overload on his shields first.
You will then be treated to another cut scene showing off Jack's powers, before saving her life. Unsurprisingly, she is ungrateful. You need to convince her that working for you, and Cerberus (who she hates), is the right choice for her. Luckily, faced with death in Purgatory, with the prison about to meet its destruction, she agrees. You have to agree to give her something in return, however. She wants access to all the files Cerberus has on her. You can just lie and say you'll do it and back out later, but at the expense of your relationship with Jack. Note that she can't be a proper romantic interest, and if you have a fling with her you won't be able to have a proper romantic interest with the other members of your squad. Party Member Acquired: Jack Back on board the Normandy, Miranda and Jack don't exactly hit it off (as you would expect with Miranda's Cerberus background). Jack will ask you to fulfill your end of the bargain, and you can either give in now or fob her off. Miranda won't be happy if you pass over the files, but you did make a promise and you may want the Paragon points. You may want to get Kelly's opinion on Jack (your personal assistant) can pay a visit to Jack down at the bottom of the Sub-Deck Stairwell in Engineering (Deck 4).
Find out a bit about her past, and why she has a very good reason for not trusting Cerberus. You can also pursue her idea to use the Normandy as a pirate ship and go rogue. The Paragon and Renegade choices here should be obvious. Next and final stop from this dossier is a scrapyard-planet (with the second-highest murder per capita level in the galaxy), where ships go to be recycled. There is something shady going on there, however, involving the Krogan (called Okeer) that we want to sign up. Using the Mass Relay, travel to the Eagle Nebula and land on the planet of Korlus. Team Selection: As usual, it's useful to have someone adept at the biotic arts (maybe a good time to give Jack a try), a soldier, and someone with the Overload ability. Infiltrate Blue Suns Compound
Round the corner and move over the ramp. It is here that you will find your first hostiles: a group of Blue Suns Mercenaries. Try to pick them off with a sniper rifle from distance, if your character has one. Continue over the next ramp and you'll find an injured mercenary. Something obviously attacked him. Offer him some Medi-gel to get in his good books. Ask plenty of questions and you will learn that someone called Jedore has decided to create a Krogan army, the construction of which is Okeer's job. Unfortunately it hasn't gone to plan and the indoctrination given to the freshly-created Krogan has turned them insane – making them fodder for the mercenaries (though still causing plenty of problems). When the merc's base radios him, choose the Paragon or Renegade statement after enquiring about the 'Krogan pack'. You can ask further questions about the layout and defences of the labs once the danger of incoming mercs has abated, before moving out. Move around the corner and get into cover by the crates. Pick off the Blue Suns troops up high using a long-distance weapon or incendiary ammo. More will appear on the bridge and on a landing up ahead as you drop down into the trench below. Take the Medi-gel as you move through. Move up the ramp and get into cover once again.
Pick the Blue Suns mercs off as before, stopping to remain in cover to allow your shields to recover every now and then. Continue through the wasteland until you come upon a team of Krogan attacking the mercenaries. Help them out from behind cover and talk to the lead Krogan when clear Luckily the lab-bred Krogan recognises that you mean him no harm and will assist with your enquiries. After explaining what he knows of his origins, you can ask him to show you the way to the labs. On the route ahead you will quickly find a Blue Suns Corpse, which you can access for some credits. It appears the Krogan have escaped and are attacking their oppressors as you head down a steep slope. Attack the enemies that come your way as you near the bottom. Here you will find the loose Krogan, and they pack a punch.
Use Pull once their armour is down to keep them at a safe distance, and concentrate on attacking early and from range. Head round to the right, trying to pick off one Krogan at a time. Proceed across the ramps, continuing to keep the Krogan at bay. There are a lot of them, at least a dozen – fortunately they all arrive one at a time. Once you clear the ramp you can collect some Refined Platinum. Climb the steps and hack the door ahead. Take the next flight of stairs and take the Sniper Rifle Damage Upgrade, Power Cells and make use of the Medical Station in the next room. Eliminate the guard directly behind the door and get into cover on the balcony. Destroy the cover of the Blue Suns Mercenaries on the other side of this abyss and take them out when unprotected. Continue along the balcony until you come to another room full of mercs. Shoot as many as possible through the doorway before getting into cover inside. Use a sniper rifle to deal damage from range, and Incendiary Ammo to hurt the fleshy enemies, if available. Move through the room, hacking the PDA on the floor by the exit door. Another flight of steps beckons. Head left at the top and get into cover by the Med Kit – the area is swarming with Blue Suns Mercs. Push up to get a better angle on some of the shielded enemies and use Overload on them if possible. Get the Med Kit when the area is clear and go round the next corner.
There should only be a couple of enemies in sight. Take them out and move on, rifling through the Blue Suns Corpse around the next corner. Get into cover again and deal with the onrushing mercs. Use a sniper rifle on the most distant enemies if you are carrying one. In the next room you will find Power Cells and a Wall Safe. Proceed but ignore the door and move round the corner for a hackable PDA. Return to the door and go through. Up the stairs you'll find yourself in another rampy area. Deal with the enemies you can see from behind cover on the lower floor and then push up the ramp to the next piece of cover. Follow the path down and more Blue Suns are blocking the route ahead. Again, long range weaponry is ideal. The radio chatter suggests the mercs are getting overrun, and as you move on into a new area with stairs leading up to some desperate mercenaries, you can see proof that their chatter has foundation. You can ignore the stairs and go underneath the upper section, but the height advantage is worth making use of. Take out the Blue Suns Heavies from this vantage point and watch out for their powerful shots. Take cover immediately as you reach the bottom as you have more Heavies to deal with. Ensure their shields are down and let rip with the Incendiary Ammo and Biotic powers. Go through the door at the end of this lengthy section. Depending on your Mass Effect 1 character, you may now meet a slightly shady scientist. Either way, she has little to add (except Paragon/Renegade points), so ask your questions before hacking the Security Terminal and using the Medical Station. The next room contains Okeer.
The conversation ahead reveals that Okeer has been attempting to make the perfect Krogan soldier. His failed attempts join Jedore's ranks. It is all about purifying the troubled Krogan race. Okeer is willing to join you, but his super-soldier will remain his property. Unfortunately, Jedore is giving in and shutting down the whole operation. This will kill Okeer's prototype and so Jedore must be stopped. Bypass the Lab Terminal in this room to unlock the Krogan Vitality Upgrade. Open the door and follow the steps downwards. The next room is very tough, largely due to the presence of a Mech Suit and Krogan Berserkers. As you are focusing on the Mech Suit the Krogan will flank you, so set your team up to keep you covered while you take on the main enemies. You can use Overload on Jedore and the Mech, and then whittle down their armour. Have Push reserved for the Berserkers, just in case they get through to you (and be ready to switch to a shotgun of your own!). TIP: Now is a good time to break out the heavy weaponry. The grenade launcher can kill the Berserkers comfortably in a couple of shots.
Rush back the way you just came to find Okeer on the floor. He doesn’t appear to have known anything, but a recording he has left makes further remarks on the perfection of his prototype Krogan. You can have a discussion with your team about the viability and ethics of taking the Krogan back to the Normandy to join your squad, but eventually the decision will be made to take him along. Despite the risks, he could prove invaluable against the Collectors. Suffice it to say, not everyone agrees with your decision to bring the Krogan back on board. Miranda in particular is very worried about the consequences of opening the tube. You should know that the Illusive Man wants to speak to you, but this will trigger your next mission – so do anything you want to catch up on now, especially releasing the Krogan. Feel free to speak to Yeoman Kelly Chambers and get the opinion of other crew members, but eventually make your way down to the port cargo hold on Deck 4.
There is little reason not to release him, as he provides a valuable, strong and effective grunt (as his name suggests) in your squad. The only real motivation for doing otherwise is if you are on another playthrough and want to try something different. Cerberus protocol demands that you don't trust alien technology, but who cares what they think, this guy is a very cool character. Once he is out of the tank and gives Shepard a warm welcome, you have to aim to diffuse the situation and convince the Krogan to join your team. You need to try and show yourself as a strong and brave leader, but don't start a fight! When you have the option, use the Paragon or Renegade options to convince the Krogan. Party Member Acquired: Grunt With Grunt on board, you can ask about his past, where he hopes to be in the future, and all the usual team-building stuff. Once you're happy with this, pay a visit to Kelly to see what she thinks about your new addition, and then head to the briefing room to meet the Illusive Man and see what's next for your intrepid crew (note that this will trigger the next mission, so do whatever you need to on the Normandy and elsewhere before visiting the briefing room). The Illusive Man informs you that another human colony, Horizon, has just gone silent. As well as duty-bound to intervene to protect the humans on the planet, it is a perfect opportunity to catch the Collectors in the act. Unfortunately, Shepard has someone with history on Horizon. If you have a Mass Effect 1 game save, it is the character you saved at the end of the game. If you don't, the character is Ashley Williams if you are a male Shepard, or Kaiden Alenko if you are female. Shepard will pay a visit to Mordin to see whether he has developed a resistance to the Collectors' attacks.
You will be greeted to a cut-scene showing your previous ally under attack by the Collectors. It is unclear whether any humans could get to safety or not, but regardless, you must discover as much as possible about the Collectors and stop them from ravaging all of Horizon. You will also be introduced to the Harbinger, a supremely powerful Collector who assumes control of its drones on the planet and increases their potency. Watch out for this in battle. Team Selection: Biotics are always vital, but there are some melee-only enemies on this mission too, so taking a hard-hitting combat character with you isn't a bad idea. Overload is vital against the Harbinger and other Collectors.
From the start, move up the slope until the area opens up. Get into cover when you see the Collectors swarming down ahead. Here you will see a few Collector Guardians. They have Barriers, so deal with these first and then use your preferred anti-flesh weapon to finish the job. There will also be Collector Drones, unshielded and relatively easy fodder, and Collector Assassins. These pack a serious punch with their laser weapons, and you should avoid getting hit by it twice in quick succession. They also have barriers. With the Collectors down, pick up the Power Cells in the centre of the area, and hack the datapad on the picnic table up ahead. Continue on and you will lose contact with the Normandy. Just before you drop down into the urban area, try to pick off any Collectors you can see in the distance. Take the plunge when ready and clear the lower area. More Collectors will float into the battle. Prioritise the Assassins as you are introduced to Husks. These featured at the start of Mass Effect 1, and are not really a threat as they lumber slowly towards you. If you become surrounded by too many of them they can defeat you, but as long as you remember your melee attack button (B on Xbox 360) you should be fine.
Move inside the building to the right to access a Datapad and move out of the other end. You can also scan a Dead Collector at the far end of this lower section for a Heavy Skin Weave Upgrade. When ready, move through the archway, examining the Dead Husk on the path ahead. The Collectors are taking the colonists alive, but why? Proceed through until you come to another colony area. Pick off the Collectors on the balcony of the building ahead. This will attract others to your position, so get into cover. Some will also be sniping you from the room up high. Search the building on the left for a Med Kit and the one on the right for a Safe. Move past the furthest building and up onto the white area filled with explosive canisters. Continue ahead and up the stairs, taking note of the colonists in stasis on your way. In the building at the top of the stairs you can hack a computer. After you've done this, head back down the stairs and back onto the earth past the pair of frozen colonists. Be sure to take the Particle Beam from the Collector just in front of you – this weapon is vital for future progression.
With the Particle Beam in your inventory, go into the building on the left and move into the area ahead. A cut-scene will play showing the Collector General taking control of a Collector once again. Get into cover in the doorway and pick off your targets. You will need to remove the Harbinger's Barrier, before his Armour is exposed. Once a Harbinger's Barrier is down you need to take it out quickly, because it can recharge. Investigate the building on the right of this area once you have cleared out the Collectors to find a Computer to access. In the corner of this battle-zone you can also find a tiny colony room with some Power Cells inside. Head for the large structures in the other corner and hack the bay door beneath them. Inside this room you will find the first survivor of Haven colony. He's a mechanic, and is just concerned with his own safety. He informs you about some defence towers that your former ally had installed. We can use them against the Collectors. First we need to calibrate the targeting systems. Finish up the conversation with any questions you want to ask, then make use of the Med Kit, take the Refined Platinum and hack the Wall Safe in this room. You can also use the Weapons Locker to switch up your weapons if you wish. Advance out of the room into an open area. Ahead is a very dense colony section. Pick off the Collectors amongst the buildings from behind cover.
Watch out for Husks, Harbingers, Collector Guardians and Assassins. You will also be introduced to Scions for the first time. These are heavily armoured Collectors with high-powered attacks. Luckily they have no shields, but still take a heck of a lot to bring down. Neither of the buildings in the middle are noteworthy (except for some Power Cells outside the back of the one on the left), so head to the rear of this area once you've dealt with the Collectors. You will find a Dead Collector to scan for a Biotic Damage Upgrade on your way. Ignore the bypassable door for now, climbing the stairs to the overpass above. In here is a Computer to access. Back downstairs you can now bypass that door. You are now in the area with the Defence Tower (the big spike in the middle). The cover in this section is poor to say the least. Not only is the area covered in explosives, but the Husks can easily outflank you and your team. The Scions that drop in at the start of this battle can rip your to shreds if you are not clever defensively. As soon as you enter the area, sprint to the left and up onto the raised walkway between the two buildings. This provides the best cover in the area (though this tactic is not without its flaws). Ignore any gunfire until you get there and are in position (and ensure your team is up with you too). You may have to blast a Husk that has taken up residence in this area.
Use the Collector Particle Beam to zap any Husks from behind cover, and then focus your attention on the Scions. The Particle Beam will drain their extensive armour rapidly, but you will still have to duck into cover every so often. Once the wave is over, pick up an additional Med Kit if you haven't done already from the box at your cover-spot. Don't be fooled into leaving cover, the next wave will come to you. Husks will rush your position. Your Particle Beam will make light work of them, otherwise use Biotics to fling them around the arena. Once the Husks stop coming, move into the middle of the area to investigate the tower. Don't interact with it yet, collect as much ammo as possible that has been dropped by the Collectors – you're going to need it. When ready, hack the Computer at the tower. Shepard re-establishes contact with the Normandy, where EDI informs you that it will take time to get the defences back online and up to full power. You'll have to hold out until then, so rush back to your cover position from before. To make matters worse, EDI's meddling will attract even more Collectors due to the increased power output.
The Collectors will come in from the far corner and you should have plenty of time to get back to the cover spot with your squad. Use the Particle Beam to thin the Collectors out and finish off the rest with long-range weaponry and incendiary rounds. After the first wave you need to be on your guard as Husks will spawn in our cover area. Deal with them quickly and get back behind the wall. Collector Assassins will now be in the area and you must focus on them. A Harbinger will also have been deployed, so work on getting the Barriers of these targets nullified. Watch out for the Harbinger's weird missile as this will dislodge you from cover, even if you are completely out of the way. A cut-scene will follow after this second wave. A new enemy and an intimidating boss is introduced here.
You will also have been warped out of your position in cover (though your team should still be there). The Praetorian is clumsy and slow, but deals a heck of a punch. Rather than going back to your previous position, it is important to stay on the move against this thing. You can use any weapon on the Praetorian, and as you move around the arena you should pick up ammo from the dead Collectors to replenish your weapons. There is a problem, however. Once you get the Praetorian's barrier down, you must deal as much damage as possible because before long it will have a new one back up again. After every devastating shot at you it has a period required to recover where you can deal a lot of damage on it. When it turns blue it slams the ground and replenishes its barrier. When you hear it firing at you run behind cover (don't lock to it, just get out of the Praetorian's line of sight) and then dart back out to get some hits on its armour or barrier while it's resting. Once its armour is at zero, it will disintegrate and the Defence Turrets can open fire.
The cut-scene shows the Collectors' vessel leaving with its tail between its legs, chased off by the newly-activated defences. Your familiar friend will then make an appearance in a cut-scene, at which point you will have to try to justify your role working for Cerberus. After that, you'll find yourself back on the Normandy. The Illusive Man will have a talk with you, congratulating you for your work. It will be revealed that he started the rumour that led to the Alliance (and the Collectors) going to Horizon, but at least you were able to stop them and gather more intel. You will be told to sort your team out and recruit some more people from the Illusive Man's dossiers. You only need to recruit two of the three, but it's always nice to have extra options, so we'll cover all of them. Two of the recruits are on Illium, a planet with all the trimmings of Omega, so it makes sense to head there first. As mentioned above, if you want to blast through as quickly as possible, just go to Illium and get these two recruits. On the Galaxy Map head into the Mass Relay and then into the Crescent Nebula. Land at Illium. Like Omega, Illium has bars, shops and side-quests galore. Plus, someone from your past has a high-ranking job here. Choose a balanced squad when you land. There are a number of main story quests and side-quests to explore on Illium, all of which are listed below. Investigate the Assassin
Move through the reception hall and out onto the trading floor. As you move along speak to the Asari standing to the right of the trading floor, as she will fill some of the gaps surrounding the Rachni from the first game. Head up the stairs to Administration and open the door to find yourself in Liara's office. Liara is busy bullying an associate over the phone, and has clearly changed her character somewhat since the first game. Liara has a job as an Information Broker, and as such knows pretty much everything you could want to know. Catch up on her current life and recent history before asking about your two potential recruits. You can also take this opportunity to initiate the Liara side-quest, The Observer. You have to start this before taking on the second-recruit or will be forced to return to Illium later in the game, so bear that in mind. When talking about the assassin you will learn that his name is Thane and is currently working to target a corporate executive. He has a contact in the cargo area. You may also want to talk to Liara's assistant on your way out. Discover Thane's Location
Speak to Seryna in her partitioned office. Seryna takes you aside when you ask about Thane. You learn that his target, Nassana Dantius has a nasty way of doing business, and that Thane is working his way to the Penthouse of Dantius Tower One. You (and Thane) can access the top of the tower via Tower Two, still under construction. Dantius has a mercenary army, but Seryna can get us inside the tower – it's up to us to work our way to the top. Tell Seryna that you are ready to go and you will be transported to outside Tower Two. Find Thane Focus on the FENRIS variety to stop them from getting too close. Use biotic powers if they overwhelm you, then deal with the LOKI mechs behind them. Inside the tower, go to the left and hack the Secure Terminal and pick up the Medi-gel from the Medical Station. Go back into the main lobby and through the other door. Talk to the injured Salarian on the floor. Help him using the Paragon prompt to give him some Medi-gel and get him to talk some more. At the end of the conversation the door opens and you can proceed towards the elevator. Once the corridor opens up into a larger room you need to deal with the mercenaries and some more FENRIS dogs. You will also encounter some Eclipse Vanguards, complete with Barriers. Move through the room taking them out and more enemies will come in as part of a second wave. Watch out you don't get ambushed by the FENRIS mechs and push through the door when you are done. Take the Med Kit at the top of the slope and take cover in the centre of the next room. Pick off the mechs and mercs that come your way.
The corridor to the left is packed with enemies, so use attacks that damage many at once if possible. Be careful you don't miss any hiding in the corners as you press forward as they can be lethal when flanking. The next room is also pretty full with targets, but there is more space to move around. Stay in cover and pick off one enemy at a time, again watching for flankers. Ignore the elevator door for now, as there is another door to the left that you can bypass. There is a group of Salarian workers hiding inside. Interrogate them for information and then release them. The room also has a Med Kit and Secure Locker inside. Back in the main room and to the left of the one we were just in is a long corridor. There is a very good sniper rifle at the end with a high rate of fire, as well as a Secure Terminal to hack and some Power Cells. When you've done all this, head back to the elevator door. As you may have guessed, some mercenaries will ride the lift down to you. The main threat is the Bounty Hunter, who will be in the middle of the three mercenaries. Position your team members behind the cover to the left and right, then call the lift. Use Overload on the Bounty Hunter if possible, and focus all your fire on him (your team should keep the other two mercs busy).
Once his armour's down, use Pull or something similar to take him out of the equation. His two cronies also have shields, but can be destroyed pretty quickly. Get in the lift once you have dealt with this problem. At the top you'll find an Eclipse Trooper preoccupied with a communication. He's not being very helpful, so you can use a Renegade manoeuvre to throw him off the tower, but he does have information if you persuade him in conversation. We now need to get to the bridge between the towers. Collect the datapad up ahead (required for the completion of a side-quest) and proceed through the door. Take cover as you enter and destroy the mechs before they wake up. This will get the attention of the nearby Eclipse mercenaries. Clear the area and bypass the door on the left-hand side of the room. There is a jumpy Salarian inside with his brother, and you can return his aggressiveness in kind with a Renegade option. Or, you can use conversation options to get information from him. Apparently the assassin saved these workers from one of Nassana's goons. Take the Med Kit from this room and hack the PDA on the mercenary's corpse. Back in the main room grab the Power Cells at the bottom of the ramp leading out. You can also use the terminal to speak to Nassana. At the top of the ramp are some LOKI mechs and Eclipse mercenaries, so deal with them before moving on.
More enemies will come into view as you round the corner. At the end of this section there is a Weapons Locker should you want to change your loadout. Collect the Med Kit next to it and the Refined Element Zero at the edge of the precipice opposite. Take cover round the next corner and use a sniper rifle to take out as many targets as you can see if such a weapon is in our armoury. Watch out for the Eclipse Vanguards whose barriers will make the rifle less effective. You will also encounter an Eclipse Commando who not only sports a barrier but armour and health as well. Get his defences down and then use biotics to finish the job. Push on as you near the bridge. Just before dropping down onto the bridge, hack the PDA of a dead merc (suggesting Thane went this way) and more importantly, scan his submachine-gun for a damage upgrade. Down the slope get into cover as there are lots of enemies ahead. Use a sniper rifle if possible to take out as many as you can before pushing up. Use biotics to blast and throw the mercs off the bridge – the wind should help out here. Once you get to about half-way across, turrets in the windows above the bridge will fire rockets at you. Again, try to pick them off from range. At the end of the bridge some Eclipse Troopers and Vanguards will engage you in close quarters, so watch out for that and back off rather than taking them on up close. Nearly there now, and around the final corner at the top of the stairs is an Eclipse Commando. Get his Barrier and Armour down and finish the job. Watch out for his shotgun, and head through the door.
You will now meet Thane, who completes his mission. He is no longer an ordinary assassin, however, as he only has a short time to live and is trying to do good with his final months to redress the balance of his life. As such, a mission to save Humanity is also a good way to do this. With that, you will return to the Normandy. Party Member Acquired: Thane Krios You can pay Thane a visit to learn more about him, or return to Illium to pursue the Justicar. Talk to Liara on Illium who will tell you that Samara the Justicar is currently investigating a murder. To get to her you need to speak to Officer Dara at the Transport Hub (take the door to Shipping underneath Liara's office and follow the corridors). Dara tells you about the Justicar and how to get to her. You can either summon a taxi by pressing the button when prompted, choose the appropriate conversation option, or seek out the taxi stand on your own, in the centre of this area – access the taxis via a terminal overlooking Illium. Dara also gives you details on the Justicars' strict code of conduct. Squad Selection: Plenty of mercenaries will stand in your way on this mission, so be sure to have someone with Overload and a suitable biotic or grunt. In the cut-scene you will be introduced to Detective Ayala. She is an Asari who feels threatened by the imposition of the Justicar. You will also meet Pitne For, a trader whose partner was the one murdered by mercenaries. He is under investigation. Locate the Justicar Detective Anaya can't wait for you to get rid of the Justicar, so she will give you access to the crime scene. Anaya also has another problem. Her bosses want her to take the Justicar into custody, but under the Justicar code she will be killed for getting in the way.
Head for the crime scene, making sure that you pick up the Shipping Details to your right as you enter (this is necessary for a side-quest later). Salvage the Circuit Boards at the end of the corridor and then head back up the stairs. There will be a group of mercenaries unaware of your presence, so use a grenade launcher blast or your favourite group-biotic power to kill them all in one. Enter the door to the left surrounded by police 'tape'. Inside you'll find the Justicar terrorising some Eclipse Mercs. You can criticise her methods, but your main goal should be to convince her to join your squad. After some persuasion from Detective Anaya, she'll agree, provided you help her get the name of the ship that the fugitive left Illium on. It is suggested that you ask Pitne For if he can get you into the Eclipse base to discover the ship's designation. Infiltrate the Eclipse Base Use the windows in this area to look out to the left and snipe some mercenaries. When you can see no more, head through the door and mop up the rest of them (watch for Eclipse Vanguards with their barriers).
More enemies will come in pretty quickly. Some will target the toxic barrels. The red mist which forms does indeed boost your biotic powers, but you also have a meter that will appear – if it is full then you are too deep into the gas and should fall back or suffer health loss. You will also come up against some Sisterhood Initiates here – each of whom has already committed one murder to earn their stripes. Push on into the next room, where there is a Weapons Locker and a Scimitar Automatic Shotgun – the first new weapon for some time. Get your team kitted out with their new armaments and enter the door on the lower level. Inside is a nervous Asari who has tried to join the Eclipse Mercenaries – but doesn't have the stomach for it. You can interrupt her worrying with a Renegade action. Find out what you can from her, but the ship name remains elusive. Don't leave this room as soon as the conversation is finished, but first collect the Biotic Damage Upgrade from the Sample Analysis machine in the corner, and the Power Cells nearby. After this, head up the stairs. LOKI Mechs and Sisterhood Initiates will come at you from around the next corner. Once you leave the corridor look to the right to engage some Eclipse Vanguards.
Clear the next room and collect supplies from the Medical Station, hack the Eclipse Terminal, then head upstairs. The room to the right is another one sprawling with Eclipse soldiers and toxic canisters. Move through with care, hanging back to let the dust settle should any chemicals leak out. Head left and access the Eclipse Terminal for lots of credits. There is also a Medical Station to use, just before going up the stairs. Deal with the Eclipse Vanguard to the right at the top of the stairs. In the background you may notice a Gunship. You can deal damage to it from here, and it is not a bad idea, as it will soon fly off out of range. As you move closer, more Eclipse will engage you. Collect the Refined Platinum to the left, then snipe the mercenaries visible in the distance, or move closer and take them out with biotics or from cover. Still on the left hand side, go up the stairs on the left and use the height to keep the mercenaries at bay. With the hangar clear, collect the Power Cells in the next room (you'll need them for your heavy weapons against the gunship) and make use of the Medical Station. You should also read the Data File in here, as it makes your reaction to what we thought was a cowardly mercenary earlier hard to justify.
Once you go through the next corridor you should begin to get ready for a gunship fight. Eliminate the mercenaries who initially engage you. Collect the Power Cells in front of you and then move across to the other side of the area. The gunship will then attack. Equip your heavy weapon and let it have it. You should have no more infantry to deal with, so just throw everything you have at the main target. If you run out of ammo, just use your next most powerful weapon. TIP: The grenade launcher is perfect for this due to its homing-ammunition Use the stairs as cover from the gunship's rocket attacks and return fire when it stops firing. It will begin to fall back, but you can still deal damage at range, so finish it off.
Pick up the Med Kit near the door exiting this area, and head through after bypassing its circuits. Be sure to read the Shipping Manifest inside to open up a new side-quest, as well as accessing the Eclipse Terminal nearby. In the next corridor you will meet another Volus. This one is high on the biotic chemical Pitne For was selling. Use a Paragon interrupt to prove that he is not in fact a god, ask any questions you want to, then move on. Raid the Weapons Locker in the next section and use the Medical Station, before heading through the final door. Defeat Captain Wasea With Wasea down, mop up the rest of her cronies. We still need to find the name of the ship, however, so access Wasea's datapad on her desk. Opt to look around some more and hack into the Eclipse Terminal, before exiting the quest and returning to the Police Station.
Talk to the Justicar when you get back. Ask whatever you feel necessary, but opt to remain on Illus for the moment, rather than heading back to the Normandy. Tell the Detective that you discovered who the murderer was. There is also a side-quest to complete here, so see the Smuggling Evidence quest below. You can then return to the Normandy by talking to the Justicar. Party Member Acquired: Samara When talking to Liara, ask if she needs help with her problem. This is a quest that will net you Renegade points, but if you want 100 percent completion you don't have a choice. Liara wants you to disable security in certain areas to create a glitch allowing access to data potentially revealing vital data about a mysterious agent known only as the Observer. You will then need to use a server nearby to physically get the information. You can find the first set of terminals in the transport area, the same location where you caught the taxi to find the Justicar. Hack each one you find and a time limit will appear. You then have to use the radar-like signal to get close to the paired terminal. Usually it’s just the nearest computer to the first one. When you come into the transport hub the first terminal is immediately to your right, with the other two near the weapons shop. With all of these done, Liara wants to talk to you later. You now need to go off and do another mission before this one can proceed any further. Once returned, go to speak to Liara in her office. She wants to know who the ‘Observer’ is, and has armed assassins ready to take out a person at your request. This will earn you Renegade points and they are unavoidable if you see this part of the side quest through. To discover the Observer’s identity, you need to head to the Trading Floor and hack the terminals there. Each of these will give you hints to reveal your answer. There are terminals at the bottom of the stairs going to Liara’s office, in the Eternity Bar, by the corridor leading to the trading area, and next to the upgrades stand. You may struggle to make sense of the hints within these terminals. That is because none of these were really the killer – Liara will eliminate the wrong target if you give her misleading information. Say that none of the names she supplied are the Observer, and another conclusion will be reached. Upon entry into the Eternity bar you will come across a Quarian and Asari. The former is the slave of the latter, but she doesn't mind as it's a very different prospect on Illium than elsewhere. Her contract was up for sale, but the company interested in buying it has changed its mind. You should talk to the company representative on the bar's veranda, making the benefits of buying a slave and then freeing it for the company's image clear. Alternatively, talk to the Asari that currently owns the Quarian's contract and convince her to let her go. Or, just ignore the slave's problems for some Renegade points!
Near the hallway from the trading floor to the Shipping department and Liara's office is a human Shepard knows from his past. She is now in control of an operation investigating an Asari businesswoman believed to be selling illegal schematics. She wants your help to catch her, so having spoken to her and received the secret message, approach the Asari at her stall towards the back of the trading floor. Use your persuasive conversation to get her to spill about the designs and Gianna will come in to catch her in the act. Speak to Gianna back at her table and ask any more questions you want to and complete the quest. In the Transport Hub sitting on a bench outside Officer Dara's office is a woman from Feros in the first game. You saved her life before, but now she needs your help again. Medical investigations into the effect of the Thorian's control on the colonists led to a contract which allows the medical company to perform invasive procedures without the colonists' consent. While the company can't actually operate on them, it would force a breach of contract which the colony cannot afford. Speak to the Baria Frontiers representative at the top of the Transportation Hub near their shop terminal (she should be straight ahead when you finish your conversation).
When the opportunity presents itself, choose the Paragon or Renegade conversation options to convince the rep of her mistake. Return to Shiala to inform her of your success to complete the quest. (Note that it now may be a good time to buy the star charts from the Baria Frontiers shop as you need these to complete every side-quest and exploration mission in the game!). Also in the Transportation Hub you will find an Asari clearly in some distress (she's standing against the wall of the taxi rank, on the opposite side of the hub to the Baria Frontiers rep. She is having problems with her hubby's constant attempts to woo her with poetry. And her boyfriend is a Krogan, which makes things even more hilarious. He wants children, but the Asari thinks that this is just to continue his line rather than because he loves her. Make your decision (with the obvious Paragon or Renegade implications) and she will take your advice to heart. You also get a discount at her shop (Memories of Illium, selling fish and model ships).
There is an Asari just to the left of the corridor to the lobby and Normandy dock when you emerge outside at Illium. She is near the vista spot where Miranda can comment on the view. You must have completed Miranda's loyalty quest and collected the locket at the end of the boss-fight. Hand it to the Asari to make her day. The Salarian that is always on the phone on the way to the shipping department of Illium has lost a datapad. You can find it during the recruitment mission for Thane the assassin. Return it to its rightful owner for a suitable reward. During the Justicar recruitment quest you will locate a Shipping Manifest towards the end of the level. You can give it to Pitne For to aid a criminal, or turn it over to Detective Anaya for Paragon points. During the Justicar recruitment quest, pick up the data just as you enter the crime-scene. If you choose to release the information you receive Renegade points as Thrax, who the items were stolen from, is a criminal. Keep it hidden and this does not occur. If you made it public, next time you return to Illium a representative of Thrax will approach you with his thanks and a reward. If you have spoken to the Salarian Ish on Omega (see Omega walkthrough), he will have asked you to collect two Datapads of information for him. One is on Illium, resting on seat at the back of the Eternity bar. Collect it while you are on Illium if you want to help. To hand in the package, return to Ish on Omega. Having seen what Tali can do in combat, the Illusive Man and Cerberus are willing to pull out all the stops to get her on your team. She is currently investigating the history of the quarians on their former planet, Haestrom. It was taken over by the geth and the quarians forced out. The intense solar activity of the system’s star has made living and working on the planet impossible, and you should be aware that staying in the sunlight will drain your shield in seconds. First, however, you have to get there. From the Mass Relay enter the Far Rim system and land at Haestrom. Squad Selection: As a geth outpost, you will want someone with Overload to take down enemy shields, and a Soldier class with Disruptor Ammo. Any other classes are secondary, though Biotics are always useful. Locate Tali
At the bottom of the ramp, enter the door to the right. A log entry will play, stating the importance of finding Tali and the data she has unearthed. Salvage some credits from the Damaged Geth and take the Med Kit, before accessing the gate controls. Once through the gate you will have to deal with an onslaught of geth soldiers. Most are the unshielded Geth Troopers, but some do have this method of protection. Remember too that the right hand side of this area is covered in sunlight and so should be avoided while enemies are in the area. Stick to the left and move up. Once you get to the middle of the area, more geth will come from the bay ahead. Snipe as many as you can if you have the option, otherwise wait for them to come to you and engage close up. With the geth taken care of, move down the ramp and to the right. You will have to pass through the sunlight to do this, so sprint. In this area to the right you will find a weapon to scan for a Heavy Pistol Damage upgrade. There is also a Medical Station at the top of the ramp nearby. Turn right at the top and proceed until you come out into the sun. Take cover to allow your shields to recover before moving down the ramp and back into the shade. More geth may engage you at this point, but you may have eliminated them in the wave earlier. Pick up the Refined Iridium that is visible straight ahead of your ramp and head towards the red bay door that the geth appeared to be coming from. In fact, they were coming from the right, so proceed through the opening, dealing with the geth en route.
Around the next corner you will find some geth with their attention elsewhere. Eliminate them and salvage credits from the Damaged Geth Hunter. You should also be sure to pick up the Tempest SMG in this area - a great addition to your armoury. There is also a Quarian Radio on the floor, which you can use to establish contact with Tali’s team and see what’s going on. Inform the squad leader about the fate of his squad and ask any questions you see fit to ascertain the situation of Tali and the other quarians. Apparently Tali is in a secure bunker while her security team are trying to hold off the geth. We should get there as quickly as possible to lend a hand. Unfortunately, a dropship has come in and destroyed a pillar, blocking the door to Tali in a suspiciously neat way. You need to find two sets of charges to destroy the obstacle. Once the cutscene ends you will have to contend with some Geth Hunters – these tricky enemies are shielded and can cloak (though you can see their shimmering outline and blue light). As you move down towards the pillar you can pick up some Refined Iridium before being attacked by more geth.
You will have another two Hunters to deal with as you move into the underground bay. Clear the room. Play Tali’s Journal and pick up the Demolition Charges. There is also a Med Kit behind the table and a Medical Station on the way upstairs. On your way back out a Geth Prime will drop in. This formidable foe has shields, armour and health. Once outside, turn left and move towards the lower area. Geth Troopers and a Geth Destroyer will block your way forward. When you have dealt with them, go up to the bridge across this lower area and play Tali’s Journal up here. Across the other side is a Medical Station. Back down below (the way you came) there is some more Refined Iridium to nab. To the right is a room sunken into the ground where the second lot of demolition charges are. There are also some Power Cells to recharge your heavy weaponry in here, as well as a Medical Station. As usual, back outside more geth will drop in. Watch out in particular for the Geth Rocket Troopers on the bridge we found the journal on. These enemies have rockets to bombard your position. They make this section especially troublesome, so be sure to drop back into the previous room if things get too hairy. Be aware of the Geth Destroyer, who will use his flamethrower to take your health down in seconds. Once you get back to the pillar, plant the charges and retreat to safety before the eight second timer expires.
With the way clear, proceed through the pair of doors in your way. Finish off the geth soldier crawling on the floor and explore the room. There are two Damaged Geths, an Ancient Wall Safe, another instalment of Tali’s Journal, a Disassembled Geth Rifle providing an Assault Rifle Damage Upgrade, a Weapons Locker, and most importantly, a Communications Console with which to contact Tali. Seek information from Tali and get her to open the door in this room. Through this door is a Medical Station, before a ramp leads downwards. Take cover against the wall before the doorway ahead. In the next area Geth Recon Drones are introduced. These pesky machines can gang up on you and really cause some damage, and are tough to hit accurately. Concentrate on getting rid of them as soon as possible. As well as all the Drones in this area you will have a couple of Geth Primes to deal with – if the drones are targeting you at the same time, death is almost inevitable. Move through the area, using the right hand side to flank the Primes if necessary, but don’t forget about the sunlight. Your ammo will probably be wasted on the Drones, so be sure to pick up any you find as you move through. Eventually you will come to a door, leading to a security room.
There is an Ancient Wall Safe in this room, and a panel to lift the security lockdown. Access this to open up the shutters and view a Geth Colossus up ahead. Get away from the windows and go through the now-unlocked door. Descend the slopes and you will come across a Med Kit and Tali’s friend Reegar. He is the leader of her security team, but his team mates have been eliminated. You can get Reegar’s assessment of the battlefield, which can be helpful. He’ll tell you where the Colossus will have the least effect on you though here the Geth soldiers have a good angle on you. You can also ask for his help (he has a hole in his suit so any activity in the sunlight is a risky business), or tell him to stay in cover. If you want the latter, you need to use a Paragon interrupt. If he gets killed, Tali will be upset, though he may have taken down the Colossus’s shields, and Renegade Points are your reward. The route I recommend is on the left hand side. Here you are shielded from the Colossus until the last minute. You can still get shots on it and reduce its shield, but when it goes into regeneration mode you will not be able to get to it and take down its armour. It is therefore prudent to save your ammo until up close, and then let him have it with a barrage of heavy weaponry.
Before that, however, there will be an army of geth blocking your way. First, you will need to expose yourself in the middle area to move up the ramp to the left hand side. Push through the ranks of geth, collecting the Refined Iridium not far in. You may be able to get shots on the Geth Colossus from here, so look out for its legs sticking out from cover to get shots on it without risking its own powerful weaponry. You will need to push closer to be able to destroy it completely, however, as it ducks out of range to recover its shields. On the level below the Colossus you can pick up some Refined Iridium. As you get closer the geth threat will intensify until you round the corner and are looking straight at the Colossus. On the pillar of this corner you will find some Power Cells, perfect for recharging an expended heavy weapon. Cover behind this pillar, and move out of the Colossus’s line of sight when it charges its weapon (otherwise it can dislodge you from cover). As you deal damage to it more geth will arrive to attempt to stop you. Prioritise the Colossus but make sure Geth Destroyers do not get too close or they will flamethrower you. Once you start eating away at the Colossus’s armour you can use Warp to further decrease its HP. Once it falls, mop up any surviving geth and explore the rest of the area for additional supplies.
There are more Power Cells on the opposite side of this level of the area, some more Refined Iridium, again in the opposite location to the first batch (that’s on the right hand side of the middle area from where we first entered this large room) and a Med Kit up on the gangway on the left (again, in terms of where we entered). You can drop down from here using the gap in the railings to get to Tali more easily. Open her door. In here you can salvage a Damaged Geth, but the main objective is to talk to Tali. With that conversation, the mission is over. Find out what she has been up to, and ask if she’ll join your brigade. Back on board the Normandy, Tali and Jacob have a little argument about Cerberus and its history with quarians, but that will be for you to disarm later. For now, catch up with the crew, Yeoman Chambers and the rest. To continue the main story, speak to the Illusive Man for your next quest. That concludes this section of the Mass Effect 2 guide. After you have completed five missions since Horizon (these will probably include the recruitment of Tali, Samara and Thane, and two loyalty quests (see below) if you have been following this guide), the Illusive Man will contact you with information about a Collector Ship, apparently undefended and ripe for exploration. The course will be automatically plotted for you, and after a few cut-scenes you will appear on board. Note: If you want to play available Loyalty Missions now, skip past this section of the guide and refer back to this stage when you encounter the Collector Ship. Move through the corridors until you come to a Pod to examine. It's the same as the ones on Horizon. Continue on and investigate the Dead Bodies in the corner. Soon you will come to an area with some Collector Technology to salvage to the right, and a Med Kit further on. Save your game and then use the Control Terminal to give EDI some information to dissect. She makes a startling discovery. Once you have digested this, you are given a choice of character upgrades. These change based on your class, so pick wisely. Having saved here, you can always change your mind having tried out the new perks. You will find some Power Cells, Refined Element Zero and a Weapons Locker nearby.
Salvage the Collector Technology at the top of the ramps. Through the short corridors, access the Control Terminal for an upgrade. Up the top of the next set of ramps you'll come 'outside'. Eventually you'll drop down and have access to the Collectors' Command Console. Doing so will force a cut-scene, and then trigger a Collector trap. The platform we were standing on has been raised up, and other platforms full of Collectors are heading our way. Try to pick off any you can see on approaching platforms, before retreating behind cover to allow them to get closer. Note that the Harbinger takes control of enemies on this level, so try to destroy any prospective hosts before it gets the chance. A platform will arrive with a Scion on it, and you should prioritise this (unless the Harbinger is in the area). Collector Assassins will also pose a threat, but not anything you should not be able to handle. Remember to use heavy weaponry if necessary, and there are also some more Power Cells on one of the platforms that arrives. When the area is clear, head back to the green console to contact the Normandy once again.
Following this, you will be sent back into the centre of the Collector Ship, and it will be revealed that the Illusive Man led you into this situation deliberately. There will be time to debate that later, however, and the Collector Ship is beginning to power up, so it's time to get back to the shuttle. Descend the ramps, collecting the Med Kit and salvaging the Collector Technology on the way. In the next area some Collector Drones will attack. Take them out quickly to prevent the Harbinger from intervening, but it is inevitable that it will possess one of your targets. Break out the heavy weaponry to deal with it quickly. Dispatch the Drones and Collector Guardian the next level down. Move up the ramp to the left once you get to it, ignoring the route straight ahead. More enemies will appear as you move in this direction, including Collector Assassins.
Move as far along the upper area as possible, and you should see some Power Cells below. Collect them, and then move into the next alcove along. Pick up the Refined Element Zero and Med Kit. Walk back into the centre of the area and drop down to the left. Continue down the slope and the Praetorian will emerge. It is good to split your squad here, having them keep it busy down low while you pummel it with heavy weaponry (there are more power cells on the lower floor if you want to risk getting them) and other attacks from above. It can still pursue you upstairs, however. Note that as on Horizon, the Praetorian will recharge its Barrier regularly, damaging everything in the area in the process, so it is important that as soon as the Barrier is down, you do as much damage to its Armour as possible, and then retreat when the warning signs of its recharge show. You will also need to watch out for Husks lumbering towards you, but these obviously do not take priority. With the Praetorian defeated, collect the Power Cells on the lower level (if not done already), and move out.
Once EDI gets the doors sorted out, proceed through the corridor and access the Control Terminal and salvage the Collector Technology on each side of the room. Through the next door you will be assaulted by Collector Assassins, Drones, Guardians, the Harbinger and Abominations (these explode when they are killed or get close to you). Up the ramps more will attack, as well as a Scion. If you still have the ammunition, use your heavy weaponry to deal with the Harbinger or Scion in this section, as you are near the end of the quest now. With the room clear, move back down and through the corridors. Dozens of Husks will attack you on this final slope, so switch to a shotgun if possible and favour close-range, area effect attacks. With the Husks destroyed, progress to the end of the level. Joker gets the Normandy away from the Collector Ship just in time. Back on board, you can confront the Illusive Man and report back to the crew, with Paragon and Renegade points available along the way. The location of the Collector homeworld was discovered from the information given to EDI, but getting there won't be easy. You are asked if you want to continue to upgrade your team before heading out to the next objective. I recommend doing this, simply because there is no reason not to, unless you are going for a super-speedy play though. You can still do the loyalty missions after the next main story mission, however. At this point there is an optional break from the game's main story. At the end of the game a difficult battle ensues and the more of your crew that is loyal, the better your chances of survival. By now you may have noticed many of your crew members asking to speak with you and sharing their many problems with you. The Illusive Man thinks it is a good idea to help everyone straighten out their lives before attempting what is essentially a suicide mission. Without giving the game away, loyalty is very important at the end of the game. It doesn't matter which order you do the loyalty missions in, though some will only open up after others. We will start with Miranda. Miranda's loyalty mission is located on Illium in the Crescent Nebula. Speak to her on the Normandy and she'll tell you about her past, a difficult relationship with her father (who she ran away from when young), and a twin sister. The sister, Oriana, is on Illium but apparently Miranda's father is attempting to capture her - Miranda had previously liberated her from her father. You need to go to Illium and make sure Oriana makes it off Illium. Investigate Oriana: On Illium, head for the Eternity bar. In one of the side-rooms you will find Miranda's contact (you need to have Miranda equipped for this). Miranda's friend Niket has offered to escort Oriana to the shuttle terminal as her father is intent on finding her with his mercenary army, and may be watching Miranda. Our job is to distract the mercenaries with a little diversion. Team Selection: You have to take Miranda on this mission, so pick a biotic or heavy to accompany her (depending on what your own speciality is). Distract the mercenaries: Your car is shot down as planned, so now it's time to keep the mercenaries busy. Unfortunately, the mercenary leader reveals that Niket has betrayed Miranda. Miranda also didn't tell you that Oriana is just a girl, having been created from her DNA and still young. You have the chance to do a Renegade interrupt once it's clear that diplomacy won't get Oriana back, but Miranda will do the job for you if you do not want to tarnish your rating. When combat begins, watch out for the Eclipse Engineers, who will use their shields and heavy weaponry to knock you out of cover.
Push through the docking bay and round the next corner, where more mercenaries will confront your squad. You will then come to an elevator. Once you get to the top, head to the right into a shipping container. Hack the PDA inside and then move out into the open. Use a sniper rifle to take out the mercenaries from range. Push up once the area is clear. Travel through the shipping container on the right, collecting a Med Kit in the first part and a Submachine Gun Damage Upgrade in the second. Around the next corner you will have LOKI mechs to destroy (scavenge the locker on the left before entering the main room). You can use the cover on the right to get a height advantage on the mercs on the other side of the area.
Watch out for the combat drones that the Eclipse Mercs release – they can be a pain if they get up close to you, so take them out at distance – they don't have much health. TIP: Look out for explosive canisters to take out multiple mercs at once Move into the main area when ready, stopping to scan the Eclipse Merc on the floor to get a Medi-gel Capacity Upgrade. In the shipping container nearby you will also find a Secure Terminal to hack. Continue on with the area scavenged and more mercs will jump out at you as you prepare to round the next corner. Follow the path ahead and you'll come across more LOKI mechs. Cleave a path through towards the machinery in the centre. Take out as many Eclipse Engineers as you can see from distance. TIP: You can shoot the container that is moved across the top of the room to send it falling onto your enemies below. Push up to the central reservation, continuing to pick off distant targets. When you have dealt with all the mercenaries, ignore Miranda's suggestion to cut through the middle and instead head to the left. Access the Secure Terminal for some credits and raid the shipping container nearby for some Refined Element Zero. There is another shipping container further to the right which contains a dead merc and a PDA to hack. Leave the area when you're ready. Destroy the enemies that come in via the door at the far end of this hangar. There will be quite a lot of them (some sporting combat drones), so it may be a good time for a heavy weapon.
Be sure to collect the Power Cells and use the Medical Station on your way out of this room. At the top of the elevator a cut-scene will play. Niket had betrayed Miranda, but perhaps had his reasons. Miranda will be ready to pull the trigger on her former-friend. If you want some Paragon points and to do the right thing for Miranda, push LT (Xbox 360) when prompted. The end result is the same regardless, and a boss fight ensues. Defeat Enyala: In this fight you should concentrate on Enyala while attempting to have your team suppress her cronies. The Eclipse Operatives in the area all have shields and armour, and Enyala obviously does (she actually has a barrier and armour) as a boss. You can try to deal with the Operatives first, and then get rid of Enyala, but just be sure to take your chance on any enemy without a shield, before it recharges. Miranda's Overload is great in this situation, and any heavy weapon ammo you have left should come in handy.
Once Enyala's army is defeated, you should access the Secure Terminal near the door, and examine the Trinket next to it – this is essential for a side-quest. With that all done, head into the Elevator. Be sure to pick up the Trinket! This spawns a cutscene which ends the quest. Back at Nos Astra Miranda watches Oriana. You can recommend she talks to her sister, or back off and let nature take its course. You will then appear back in the Eternity Bar as your first loyalty mission finishes. The last known location of Jacob's father was a planet called 2175 Aeia. He had been missing, presumed dead for ten years, but the distress beacon of the ship he was on has now been activated. Speak to Jacob to accept the quest and then set a course through the Mass Relay, into the Rosetta Nebula, and towards Alpha Draconis. You will need to scan the planet 2175 Aeia to work out where to land a shuttle. Note that before doing this, you may want to mine the planet as it is rich in resources that can upgrade your character and the Normandy. 2175 Aeia: Look for Survivors: Take a moment to examine the fine vista on offer, before proceeding towards the downed ship, the Gernsback.
Investigate the Partial Officer's Log to get an idea of the horrific things that have happened to the crew. You should also talk to the orange beacon up ahead. He tells you that the flora on the planet causes neural decay, and that Jacob's father, Ronald Taylor, was promoted to Acting Captain. Probe the beacon for any more information, and then double back to investigate the innards of the Gernsback. Find Ronald Taylor: Inside the Gernsback are a Doctor's Log, another two Partial Crew Logs, and a PDA. From these it is clear that many of the crew were forced to eat the planet's plants that cause neural decay, and some have taken advantage of this. We still do not have the full picture, however, so head back out the way you came in and salvage the Spare Parts directly ahead. Continue back on the sandy path, past the beacon, and a woman will come stumbling out in front of you. She tells you about the exiled Hunters, who are now obsessed with destroying Taylor and all those who follow him. A Hunter will emerge and aim a shot at the woman. You can use a Paragon interrupt to save her life, if you wish. Following this, you will have to fight the Hunters. They don't pose too much of a threat, but stay in cover and pick them off using Incendiary ammo or other attacks effective against unshielded enemies.
With the area clear, you can proceed. On the left of where the Hunters took up cover are some Spare Parts to scavenge. Examine the Stripped Mech on the path by the coast, and continue on into the settlement ahead. The people in the settlement, all women, recognise Jacob's face, and fear it. Speak to all the survivors, and examine the Statue in the middle of the settlement. There are also some Spare Parts to salvage at the back of the area, and a PDA on a crate on the rim of the centre of the settlement. When you move forwards, some LOKI Mechs will attack, having detected your weaponry. For the best results, use a Sniper Rifle to decapitate them from range. Once the LOKI Mechs are dealt with, push on and you will come across the Doctor who left the log message inside the Gernsback. She gives Jacob the crew logbook. Inside, it shows that all the male crew were exiled, and the each woman assigned to an officer. Jacob's father acted intelligently initially, preserving the food for the officers so that they would have time to build the beacon before mental decay set in. Once he realised the power he held, however, he turned the Mechs on his other officers, not wanting to activate the beacon and leave all he had gained on the planet. Confront Taylor: You will come to a Mech by a barricade ahead. Hack into it to trigger a five-second delayed explosion. This clears the path; just make sure you're out of harm's way.
Examine the Dead Bodies on the route ahead. LOKI Mechs will attack as you reach the top of the slope. Once you move into the main area, more will engage you. They should still be easily taken care of, allowing you to scavenge the Spare Parts and collect the Heavy Pistol upgrade in the area. Move on when ready, battling through more Mechs. Around the corner more will attack, but it's when you reach Taylor's location that things get serious. Use the Medical Station just before entering the main compound and salvage the Spare Parts and collect the Power Cells. You now have to fight Brainwashed Guards, who are more intelligent and deadly than the LOKI Mechs. Taylor also has a YMIR Mech, which obviously poses the greatest risk to your mission. Flank around the outside of the central ring of crates to get angles on the guards and YMIR Mech. Use your heavy weaponry and Overload abilities to take down the shield of the Mech before finishing off its armour and health.
Once you have successfully defeated Taylor's last line of defence, collect the Refined Element Zero, access the PDA near the door out of the compound, and then move through it. Talk to Taylor once you reach him. He tries to play the innocence card, pretending that his mechs were just programmed to defend him and not attack you specifically, and that everyone else turned on him. You can choose how to deal with Ronald Taylor, whether leniently or severely, but Jacob will be happy for your help either way. Jacob is angry that the Illusive Man appears to have leaked the information about Jacob's father to him, but in reality it was Miranda. Jack wants to revisit the prison colony where she was raised and experimented on, and plant a bomb to destroy it. The prison, long abandoned, is located in the Nubian Expanse, on a planet called Pragia. Pragia: Enter Facility: Land on Pragia and move down the rain-soaked metal ramps until you come to be inside the facility. Hack into the Locked Terminal for some credits, and proceed through the door. Listen to the security message at the bottom of the next ramp before disabling it and entering the next room. Bypass the Locked Storage Crate and move through the circuitous route. As you reach the end of this large hall you will hear a howling, so be prepared to fight some wild animals, in this case Varren. You should be able to take most of them down with weapons fire, but you may have to use Jack's biotic abilities to pick the rest up and stop them from reaching you.
Talk to Jack about the Old Blood Stains towards the door out of this area, and then head through it. Collect the Med Kit in the next room and investigate the Security Log nearby. You can then move out down the stairs, going past some Varren which have clearly been recently killed – perhaps this facility isn't as empty as we thought. Hack the door next to the Varren to get some Refined Element Zero, and continue downstairs. Through the next door you will come into a more open area, and be attacked by Blood Pack Troopers, Warriors and Pyros. As always, prioritise the Pyros, as they can kill you in one, and then focus on taking down the Warriors' armour. There will be Blood Pack behind the glass windows and on the balcony above, too. Hack the PDA on the right hand side of the room, behind the windows, and then bypass the door to allow progression. Soon you'll be ambushed by two Blood Pack Troopers on a gangway above you, but they should be dealt with easily.
At the bottom of the stairs some Varren will attack. Salvage the Circuit Boards in one of the side-rooms to the right. Follow the gangway in the next room to find a Med Kit. In the next room access the two Security Consoles for log entries. The reveals some information about the facility that Jack did not know about. Hack the Research Terminal and collect the Power Cells before moving on. In the next room a Krogan named Kureck will engage you. He is being paid by someone to eliminate your team. Kureck has a Barrier, but does not move around much, so you can take out his cronies first, most importantly the Pyros. Use long range weaponry and heavy weapons to defeat the Krogan and his men. There is no more combat after this, so feel free to rinse all your ammo on the encounter.
Find Jack's Cell: Jack's cell is through the next door, but you will want to hack the Security Container in the main room first. In the cell you will meet Aresh, a fellow inmate of Jack when she was on Pragia. Aresh wants to restart the program on Pragia, to make all the suffering they went through mean something. Understandably, Jack begs to differ, and wants to kill Aresh. You can intervene depending on Paragon or Renegade points, but Jack is satisfied just to blow up the facility. On the shuttle ride out, Jack decides to do it and destroy the base, a little close to when your shuttle leaves, but it has completed her loyalty mission nonetheless. Back on the Normandy, she has a fight with Miranda. Jack is angry that Miranda will not accept the Cerberus involvement in Pragia, but if your Paragon or Renegade score is high enough you have the option to diffuse this encounter. If not, however, you will have to side with one of them.
This does not affect the gameplay in the rest of the game (i.e. in terms of picking team members), but means you cannot pursue a relationship with the wronged team member, and you lose their loyalty – vital for the final mission. A relationship with Jack removes the possibility of romance with another crew member anyway, so picking Miranda to support is probably the most logical choice (unless you just don't like her, of course), if you have to choose. The Citadel: Garrus' loyalty mission is on the Citadel, a place that reappears from the first game, but which we have not yet visited in the course of this guide. As such, you can look at the Citadel section towards the end of this guide for more info, or carry on (there's not much you need to know for this loyalty quest). First, ensure you have spoken to Garrus about his problem on the Normandy. If he doesn't appear to be very talkative, try completing other loyalty missions first. He will tell you about one of his old missions, where his team was betrayed, costing the lives of all his men. We need to locate Fade, a shifty-individual who knows where Garrus' old enemy is. Once you arrive at the Citadel, head for Level 26 and the entrance to the Shipping Warehouses.
Meet Fade: Go through the door and down the stairs to meet a Volus, claiming to be Fade, and his goons. In the conversation which follows, you may end up fighting the Volus' Krogans, or you can use a Renegade interrupt to take them out before they get a chance to fight. They may be so afraid of your reputation that they will just stand down and leave you alone, however. Without his Krogan, the Volus reveals that he is not in fact Fade, and tells you where you can find the real thing (whose real name is Harkin, confusingly). Apprehend Harkin: Harkin can be found in the Warehouse District, a previously inaccessible destination of the transit system. He is a character that also appeared in the first game, when Shepard was first trying to locate Garrus. You can head to the Warehouse District now. Upon arrival, Harkin will be waiting, but leaves some Blue Suns Mercenaries behind to deal with you while he flees. Deal with the first wave of mercenaries and head through the pair of doors. Directly ahead in the next room is a Med Kit and some Trash to search (next to the door you come in through). You will have some LOKI Mechs to fight as you move forward.
Push through the Blue Suns Troopers, using the explosive canisters to make your life easier wherever possible. You will find a Wall Safe around the row of crates once the enemies have died down. Move through the bay doors into another area. Bypass the Circuit Boards in the machinery near the coach at the entrance before moving around the corner to the left. Use the ramp to give yourself a height advantage, and pick of any enemies that you can see. Some Loki Mechs will come from a red-area to the right hand side. Continue forward and more LOKI Mechs will drop down from cranes above. Eliminate them and the Blue Suns Troopers that follow, before scavenging the Circuit Boards to the right of this area. Once you reach the end of this room you will find Refined Iridium, Power Cells (vital for the battle ahead), a Laptop to hack and a Med Kit. With all this collected, you can then activate the Bridge Controls to open up a route ahead. Take out the initial wave of Blue Suns Mercs and you will come up against their commander, replete with shields and armour. This is a tricky section as the Commander's men will all attack together, and in addition to a heavy mech! Use attacks that deal damage to a large area, such as Jack's Shockwave, or upgraded versions of Pull and Push to best cope with the situation. Use Overload on the Commander and his mech to get their shields down, before switching to heavy weaponry to finish the fight.
At the end of the area there is a Med Kit to restock your supplies, before rounding the corner and entering the door to the next section. In the next room be sure to pick up some more Power Cells, access the Wall Safe, and collect the Forged IDs from the desk, to access a side-quest on the Citadel for later. When you're ready, access the Window Console, before heading through the door. Hack the Terminal in the next room, and continue outside. Be sure to pick up the Forged IDs! Engage the LOKI Mechs that attack initially. Soon a Blue Suns Commander will join the fight. Use Overload and heavy attacks to take down his defences before letting rip with a biotic attack. With him out of the way, climb to the right of the level and you will find a Datapad on the far side. Hack this for credits. Note that to 'climb' you need to press yourself up against the wall, as if using it as cover, and then push over the top while pressing to leave cover – as if you were vaulting an obstacle. Once you have investigated this initial area, you should move to the right hand side of the area, on the raised section, but without dropping down into the next. Two YMIR Mechs will attack when you press up against the crates at the edge of this level. Even all your heavy weaponry is unlikely to be enough to deal with one, so use Overload and any other relevant attacks to chip away at their defences. Sniper rifles are very effective for this, especially if you have unlocked a quick-firing version.
With the mechanical menaces dealt with, move up the ramp towards Harkin's position. He'll send some LOKI Mechs down the lifts towards you, but these should be easily dispatched. Vault your way up to Harkin, and allow Garrus to deal with him. You can intervene to allow Harkin leniency, or join in the torture to gain Renegade Points. Eventually, Harkin will agree to set up a meeting with Garrus' old acquaintance, Sidonis. You are sent straight there, and have a difficult choice to make. You can either allow Garrus to kill Sidonis, or warn him of the plan. You must then talk Garrus out of his anger, as it becomes clear that Sidonis is haunted by what happened. So, you can block the shot and keep Sidonis alive, or allow Garrus to have his wish – the Renegade and Paragon options should be obvious, but Garrus will be grateful either way, as this loyalty mission is completed. This is the first of two loyalty quests available on Tuchanka. We have not visited this planet yet, so for more information about the location and its side-quests, check out the appropriate section at the end of this guide. Mordin wants your help to liberate Maelon, a fellow Salarian who worked on creating the Genophage. As he has been captured, it seems the Krogan are hoping to develop a cure. For now, set a course through the Mass Relay and to the Krogan DMZ, and land on the Tuchanka. Team Selection: It is worth taking Grunt with you until you get to the actual Mordin quest, as everyone reacts to his presence. Tuchanka: If this is your first visit, you will be intercepted upon reaching the bottom of the ramp below your shuttle. The clan leader wants to meet you, and he will undoubtedly have information about the missing Salarian. Follow the corridors into the main area of Tuchanka, and then up to the right to meet the clan leader. Depending on choices in the first game, this may be Urdnot Wrex, a familiar figure, or Urdnot Wreav, a new creation for Mass Effect 2. Ask the pertinent questions and you will find that the chief scout of the clan has information about a missing Salarian. Disengage conversation with the clan leader and locate the scout, who is across on the other side of this area, past the Varren Pit.
The chief scout has lost one of his own men to the Blood Pack, who are responsible for Maelon's disappearance. A side-quest is available here, if you find his missing man (see Tuchanka section below for the full details). You have been given permission to use one of the trucks to get to the Blood Pack, but first, head to the other side of the room and speak to the mechanic by one of these trucks. He needs you to look for a Combustion Manifold on your journey, so accept this quest (see Tuchanka section below for the full details) and return to the chief scout. Be sure to accept the side-quests from the Chief Scout and Mechanic before you depart! Agree to leave, and a cut-scene will ensue. Team Selection: Mordin has to travel with you, so pick a biotic or a soldier depending on what your own class is. There is a Weapons Locker in the initial area when you arrive at the Blood Pack base. Enter the Base: Move through the door and outside. Soon you will be assaulted by a new enemy, the Klixen. These scramble up to you and explode, also detonating when their health runs out. Take them out from range, and use biotic attacks to move them away from your squad. Another wave will attack around the next corner, along with some Varren. Once you reach the cover, a couple of Blood Pack Boom Squads will engage you. Watch out for their RPGs, before moving up the slope. Some Blood Pack Troopers will attack once the road levels out, followed by some Blood Pack Warriors. Stop them from getting close enough to use their shotguns.
More Varren attack after this, along with more Warriors. Collect the Med Kit and Refined Iridium en route to the end of this road. Blood Pack Pyros are on the road below, and more jump out around the next corner, so watch out for their flamethrowers. Troopers will engage you next, some with armour, so make use of the cover in this arena-style section. Explore the area and you will find the Combustion Manifold that the Krogan mechanic was looking for. Be sure to pick up the Combustion Manifold! With all this done, bypass the door into the Blood Pack base. Enter the Hospital: Examine the human on the floor to get Mordin's analysis. It appears it had been forcibly experimented on in attempts to cure the genophage. After you discuss the ethics of using live test subjects with Mordin, move on downstairs. At the bottom is some Refined Iridium, and once you open the door around the next corner, a cut-scene will play out. The 'Clanspeaker' for Clan Weyrloc emerges and demands combat. You can use a Renegade interrupt to make the battle easier, by shooting the gas tank underneath the Clanspeaker. From where you are once the cut-scene ends, take cover. Attempt to take them all out from range, but they will probably move along the gangway and down to your position. Try to use heavy weaponry when they all bunch up to take many Blood Pack out at once.
With the fight won, pick up the Refined Iridium on the lower floor, use the Medical Station on the way up, and enter the open door at the top. When you reach the labs, salvage the Circuit Boards in the first room on the right, collect the Refined Iridium in the second right-hand room, and access the files on the Computer Terminal to allow Mordin to unearth just what has been going on. Examine the Krogan Body in the room opposite to discover a willing volunteer for the experiments to find a genophage cure. Hack the Research Terminal in this room before entering the next area through the door ahead. In the door to the right is the missing scout from Tuchanka. He has been convinced (with words and drugs) that he is helping find a cure for the genophage and that this is the best he can do with his life. Use Paragon or Renegade conversation options to attempt to convince him to leave, or allow him to stay there to die. Be sure to hack the Datapad on the floor before leaving. Move down the corridor and into the other room. EDI warns you about explosive containers in this room, but the main threat from these should be to your enemies. Target them wherever possible, while using ranged attacks to attack the Blood Pack Troopers and Warriors across the way. If the Warriors try to rush you, get their armour down and use biotic attacks to take them out of the equation.
Use the Medical Station over the gangway, and some Varren will attempt to get a jump on you. Take out the Blood Pack Warriors that follow behind them, collect the Power Cells and move downstairs. More Warriors will attack down here, and some Varren assisted with Warriors when you begin to cross to the other side of the room. Eventually, the leader of the Weyrloc clan, Guld, will emerge. He boasts a Barrier, armour and health, so you should use heavy weaponry to remove his defences.
Enter the door on the right hand side of this large room to bypass a Locked Crate. You can then cross the room and enter the opposite door. Hack the Research Terminal at the bottom of the stairs and enter the adjacent door to trigger this level's final cut-scene. Shepard, Mordin and Maelon now debate the ethics of what has been going on. You can use a Paragon interrupt to prevent Mordin from killing his former student. You also have the option of destroying or saving all of Maelon's data, with differing motives and conversation available for both. Destroying it will earn you Paragon points, and saving it is the Renegade option. Mordin doesn't care at this point, and his loyalty is now assured. Be sure to choose to explore the final room before heading back to the Normandy, as there is a computer to hack. You can then press B (Xbox 360) to exit the quest. This assumes that you have already explored Tuchanka, and have done the Mordin loyalty quest. If not, it is recommended that you familiarise yourself with the Mordin loyalty quest above, and the Tuchanka exploration section towards the end of this guide. Speak to Grunt aboard the Normandy at it will be clear that there is something missing in his life. He has pent up aggression and is very tense. The logical step is to visit the Krogan planet of Tuchanka. Tuchanka: As soon as you touch down on Tuchanka, if you take Grunt along, a Krogan will comment on the fact that he has not yet taken the Rite. Speak to Urdnot Wrex or Wreav to get his view, and he will agree that Grunt must take the Rite. Not everyone has this point of view, however, and Urdnot's rival, Uvenk, is your main adversary at this stage. However, Urdnot makes it clear that you have his permission to continue, and allows you to speak to the Shaman upstairs to begin the Rite. While speaking to the Shaman and Uvenk, use the Renegade interrupt if you want to assert your dominance in this case. Eventually, Unvenk will slink off and you can accept the duty of being Grunt's krantt, and assisting him in the arena battles that make up the Rite. Confirm that you wish to begin.
Team Selection: As Grunt is with you, the soldier category is covered, and you will want a biotic with you to deal with the early rounds of the Rite. Pick the second character based on whatever you won't be able to cover with your main character. Survive the Rite: You will find yourself in an arena. There are many ammo, power and medical stashes to collect once the rounds begin, as well as a crate of Refined Platinum and parts to salvage behind the keystone. You may want to save some ammo and health for the third round of the Rite, though more ammo will be dropped along the way. Be sure to plunder any corpses you come across in the arena, too. The first wave contains Varren. Activate it by interacting with the green keystone. You should be adept at dealing with these critters by now. Stand back from the slopes leading down to the lower level to give you plenty of time to line up shots and take out the creatures before they get too close. Use biotic attacks as a fall-back should you get overrun. Concussive Shots are good to render the Varren helpless to further attacks, too.
With the first wave down, collect any ammunition and med-kits you need before returning to the keystone. Activate it again to begin the next wave. The second wave contains Klixen. You will have experienced these if you have done Mordin's loyalty quest, but if not, they explode when close to your team and on death. As with the Varren then, the key is to take them out from range. The only risk is the splash damage that may reduce your shields once you destroy each Klixen. Just be sure to strafe out of their way wherever possible, keep an eye on your team's position in relation to the Klixen (remember that you can direct them around the arena using the D-pad [Xbox 360]) and use biotic and stun attacks like Concussive Shot to keep the beasts at bay. At the end of the round be sure to let your shield recharge and stock up on ammo. You'll need full supplies of heavy weapon and your favourite other weapon ammo for this intense final fight.
The third and final wave contains a Thresher Maw. This emerges from the ground to the right, centre and left as you look out of the arena into the distance. At first just its tendril shows. Resist the urge to waste ammo on it, and wait until the full crab-like enemy is in view. As soon as it is, use heavy weapons. You should be able to see when it is readying a shot, and at this point you should ensure a pillar is in between you and the Maw. Don't cover behind a pillar, because the Maw will just destroy your cover. You should be able to strafe behind a pillar and use it as an object between you and the enemy to block its shots, without those shots destroying it (see video). Once it has fired some shots it will dive back underground and appear in one of the two other locations. You should be able to spot where it is going to appear by the debris cloud that follows it underground. Be ready with your weapons to inflict damage. A sniper rifle is a good high powered option, but when scoped you cannot see the Maw readying its attacks so easily.
You must beware of its powerful rocket attack. This will destroy your shield even if it misses you by some distance. About three hits without considerable time to recharge health and shields will kill Shepard on Normal difficulty. As soon as your shields are down, seek cover, and if you get to the bloodshot stage, run away and let your team take the heat temporarily! Note that you do not have to kill the Maw. The objective is merely to survive five minutes in the ring with it. If you are really struggling, therefore, just try to spot which side it is appearing at, and then hide using the walls of the upper level for impenetrable cover, but which you cannot reasonably fire back from. There is kudos to be had, both from the Krogans back in the town and in an achievement (Big Game Hunter - 10G) for killing the Thresher Maw, as opposed to merely surviving.
If you thought that would be the end of this quest, then think again. Right on cue, Uvenk turns up, professing admiration for Grunt's skill in battle. It is clear that he is not being sincere, however, and Uvenk and his Krogan henchmen engage your squad in combat. This is easy compared to the Thresher Maw. As with fighting all Krogan, attack the nearest one first as they are deadly in close-quarters. Use a sniper rifle if availablee, to take down their defences and allow your biotic team member (or yourself) to finish the job. Thankfully, there is plenty of cover available, and you should find this battle relatively straightforward. With Uvenk defeated, the Shaman returns to congratulate the newest member of the Urdnot clan. Grunt honours you as his battle-master, tying him to you in a clear profession of loyalty ahead of your great trials to come. No combat is involved in this one, so feel free to take some of your less used characters on the quest. Thane has not seen his son for many years, but has learnt that he is now on the Citadel and has fallen in with a bad crowd, becoming an assassin like Thane. We need to travel to the Citadel and prevent Kolyat, Thane's son, from making his first kill. Use the section on exploring the Citadel later in this guide for more information if this is your first visit to the station. Citadel: Enter the Zakera Ward straight ahead when you dock, and enter the C-Sec Offices to ask Captain Bailey if he has heard of this Kolyat. Indeed he has, and informs you that he has been hanging around with a criminal known as Mouse. Bailey appreciates Thane's willingness to help out his son, and states that he will offer any help he can once Kolyat's intentions are discovered. Find Mouse: You can find Mouse on Level 28, near the steps up to this deck, so head there next. Mouse is leaning against the wall near Rodam Expeditions, looking conspicuous. You can use a Renegade interrupt to get your answers more quickly, or Paragon or Renegade conversation to convince Mouse to tell you what you want to know. A man named Elias Kelham has given Kolyat his first shot at being an assassin. With this information in hand, return to Bailey and see what he knows about him. Talk to Bailey: Unfortunately, Elias has Bailey under his thumb, but the C-Sec boss still agrees to bring him in for interrogation, as long as you don't let slip that Bailey was behind it. You can work on a plan with Thane, such as a good/bad cop routine, but it is not strictly necessary (though helps for getting more Paragon/Renegade interrupts depending on your position). Elias is difficult to get any information out of, unless you use the early Renegade conversation option or take the Renegade or Paragon interrupts offered to you multiple times throughout the interrogation (depending on whether you are the good or bad cop – note that the neutral cop has renegade interrupts too). If you are forced to justify yourself to Elias's lawyer, just state that you are a Spectre and he realises that he has no jurisdiction over you. Eventually you will learn that Thane's target is Joram. Bailey knows Joram, a Turian who promises to eradicate crime on the Zakera Ward. He happens to be a racist, but this does not stop the fact that we must prevent Kolyat from throwing his life away with the assassination. Bailey provides a car to take you to the 800 blocks. Thane is the expert at espionage, and suggests you track Joram and his krogan bodyguard using the maintenance walkway above the street. Thane will follow below, staying in the shadows and relying on your updates as to his position. Track Joram: Note: Ensure you save your game before this section, as it can all go wrong resulting in Thane's lost loaylty. From where you begin, spot Joram standing next to his red krogan bodyguard in the street below using A (Xbox 360 control). Note that Joram will not spot you above him, but if you fail to update Thane, Kolyat will succeed in killing Joram with Thane not able to intervene in time. This results in Shepard not gaining Thane's loyalty. As Joram is talking to the voters, hack the pad on the desk for a weapon upgrade. Follow him when he moves off, by going through the set of doors ahead. When he stops to talk to the next set of voters, update Thane again, before following the gangway and moving through more doors as Joram sets off. He will emerge round the other side and stop, so update Thane. His krogan stops in Aquila, before re-emerging and jogging off down the street with Joram. Make sure you keep up, and pass through the doors as they go into the next section of the street. Soon they will enter the club across the street. Move over the gangway and inside. Spot them when they stop by the bar. Pass through the next set of doors when they move again. After Joram meets the mercenaries, enter the next door. A human will intercept you in here, and you can either charm your way out of the situation or use a Renegade interrupt to get it over with quickly. You need to make sure that you get through this room in time to see Joram in the next room, when a cut scene will play. Kolyat misses his initial shot thanks to Shepard shouting a warning (though his krogan bodyguard is not so lucky). He then runs to Joram's apartment to finish the job. Everyone arrives on the scene shortly after. You can use a Paragon interrupt to distract Kolyat and take his weapon, choose to wound Kolyat, or kill his target, Joram, with obvious moral repercussions. Eventually Bailey talks to you about Kolyat and Thane. Thane appears to be responsible for some Citadel murders a decade earlier, but you can convince him to ignore these. Then the matter of charging Kolyat emerges. You can either suggest he does community service using a Paragon conversation option, threaten Bailey to land him a private job, or leave it up to C-Sec, which will send Kolyat to prison. Whatever you choose, you now have Thane's loyalty. This is a very short loyalty mission, and requires no combat. This one's all about conversation and character. It takes place on Omega, so set a course there once you have talked to Samara and accepted her quest. Use the Omega city walk-through earlier in this guide for help navigating the area. Samara's daughter is a serial killer who seduces her targets and then drains the life out of them during sex. Understandably, her Justicar mother is not exactly proud of her daughter, and wants to Talk to Aria: Once on Omega, head to Afterlife to talk to Aria about Samara's daughter. Aria is the source of all information on Omega, so is a good first port of call for this quest. As expected, the Asari is aware of Morinth, Samara's daughter, and recommends you check out the apartment of the last person she killed, a human woman. Go to Apartment: Turn left out of the main Afterlife entrance and head through the doors towards the shopping district. Turn right just before the mad prophet and then left into the previously sealed door of the tenement area. Once inside, talk to Diana, the mother of the woman killed. Note that in this quest, anything you can find out about Nef, the murdered girl, is crucial (though Samara sums it up for you before the important stage). Ask Diana a variety of questions, and she will allow you to search Nef's room. Find VIP Password: Specifically, you are looking for a pass-code for entry to Afterlife's VIP area, which Morinth is supposed to frequent. You can also unearth a variety of clues which will give you an indication of what Morinth is into, so as to attract her attention once inside Afterlife's VIP suite. In particular, you can watch three video entries to Nef's diary. Things to take note of are the name Jaruut, to enter the VIP room, the drug Hallex, which Nef and Morinth love, and a love of art. There is also a note mentioning an artist called Forta. Go to VIP Club: With all that information in mind, speak to Diana and then make your way to the Afterlife VIP area (check your map, or turn right from the apartment, then left, following the path up the stairs and to the guarded door). Speak to the bouncer and mention Jaruut. At this point, Samara will update you on what we have learnt about Morinth so far. Confirm with her when you are ready to enter. She will be waiting outside until you and Morinth leave. A lot of Samara's advice can be misinterpreted, but generally you should bear in mind that Morinth loves confidence, art and drugs. Attract Morinth: Note: Save your game before doing anything here, as you can fail to get the required information and lose the loyalty of Samara. Enter the club and talk to Vi, standing to the left as you enter. He mentions an Asari that fits Morinth's description, and claims that she loves Expel 10. Remember this for later. In the club are a variety of events that Shepard can interact with to catch Morinth's attention. Head into the middle area of the club first. A turian is hitting on an Asari dancer who is not welcoming his advances. Intervene. You can also dance with an Asari here yourself, if your Paragon points are high enough. Back at the side of the room, sitting at the bar, is a krogan that you can insult to show off your confidence. Unlike most conversations in Mass Effect 2, you cannot try any of these interactions again should your initial option not work as intended. If you speak to the barman you can get a round of drinks for everyone on the house. Sitting down at the side is a turian who steals from people outside the club. If you are Renegade enough, you can intimidate the turian into leaving, and impress Morinth in the process, or pay them to stop, gaining Paragon points. You can also speak to Horftin, who's friend you can help save. Eventually, Morinth should approach you and invite you to a private area. Use any available Paragon or Renegade conversation options in these encounters generally to get her to come over. This is where the clues from Nef's apartment are vital. Tell her you are confident, and when she asks what you think she likes, ignore the Justicar and Family options completely, going for each of the others in turn. Under music, mention Expel 10, and when Morinth talks about 'ways to enhance' it, talk about Hallex or a history with drugs. Under art, name-drop Forta, and when Morinth mentions vids, cite the Vaenia vids that you may have unearthed in Nef's apartment, or your love of violent ones. Finally, under travel, tell her how much you love the danger involved. When this leads to a statement about violence and power, tell Morinth that you believe power is its own reward. With all this done, Morinth will invite you back to her apartment. Distract Morinth: Keep Morinth busy by wandering her apartment, scanning the assault rifle on the wall in particular to gain an upgrade for your own assault rifles. You can interact with various items in the apartment for conversation. Eventually, Morinth will engage you in direct conversation. You can use Renegade or Paragon conversation, if your level is high enough, in each of the rounds of dialogue, but with little real effect. It will be the third round that is the crucial one, however, as Morinth looks into your eyes. You can then drop a Paragon or Renegade bombshell to show Morinth that her game is up. Samara then enters the room and fights Morinth. If you used Paragon or Renegade earlier to prevent Morinth from controlling you, Shepard can choose to help Morinth in this battle. Doing so will kill Samara, adding Morinth to your squad. The default option if you were seduced is to help Samara, and this is the obvious Paragon choice. If you choose to save Morinth, she will basically assume Samara's position and character (and dialogue) on the Normandy. Kelly notices the difference, and you can still talk to her as Morinth in private, but publicly it is like you never made the choice. You can pursue a romantic relationship with Morinth, unlike Samara, but this results in a hilarious gameplay death for Shepard, forcing a restart from your last save! You can leave the apartment with your loyal team mate when ready. Speak to Tali once she has a problem and you will learn that she has been accused of treason by the quarian Migrant Fleet. This quest offers the chance many Mass Effect fans have been waiting for, to visit the fleet itself, though the circumstances of her treason are initially unclear. Use the Mass Relay to travel to the Vallhallan Threshold and then to the Migrant Fleet. Migrant Fleet: Tali has a lot of friends on the flotilla, but that doesn't change the fact that she has been accused of treason. The accusations are elaborated on. Apparently, she is accused of giving live geth to her father to to experiment on. The repercussions of this for the security of the fleet is clear. Go to Hearing: When ready, move through the corridors, stopping to talk to the various quarians en route, and Shala 'Raan specifically. It emerges that Tali has been stripped of her heritage, now referred to as Tali'Zorah vas Normandy, instead of her traditional Tali'Zorah vas Neema. You also learn at this point that the ship's captain is expected to represent their crew, and so Shepard's role in the hearing ahead comes to light. With the conversation over, a cut-scene plays and the hearing starts. You will discover that Tali sending parts to her father coincided with a geth attack on his science ship, the Alarei. The suspicion is that this was all Tali's doing. With the revelation of her father's fate, Tali understandably wants to board the Alarei and assist, and the quarians appreciate Shepard's help. This would be a clear statement of innocence from Tali, too. Board the Alarei: Before departing, feel free to talk to the quarian admirals nearby to learn their opinions on Tali and the trial. You then need to follow the path up the ramp and through the doors until you come to an larger room. Speak to the shuttle guard, and confirm your desire to head to the Alarei. Retake the Alarei: Through the very first door you enter, geth will be waiting to take you out. Take cover and destroy the Geth Troopers. There will also be a Geth Hunter, with shields, so focus on this once it comes into range. Access the two Latptops and play the Quarian Log in the corner of this room. There are also some Power Cells to collect. Proceed into the next corridor, entering the room to the left to get Tali to comment on a Repair Drone, and to collect some medical supplies from the Medical Station and hack a Terminal. Back in the main corridor is another Quarian Log to play, documenting the moment when the Geth became active. In the next room a Geth Hunter will engage at close range. There are two Laptops to access in this room and a Wall Safe to bypass, with a Quarian Log just next to it. This one speaks of how measures were taken to protect the rest of the fleet from the Geth threat. Head up the stairs and two more Hunters will attack, this time assisted by Geth Troopers, some shielded. Focus on the big guys first, using the excellent cover in this room. Enemies will keep piling in for some time. Once the room is clear, collect the Med Kit and Refined Palladium. The small room joining onto the larger one also contains a Wall Safe and a Console that Tali can use to attempt to decipher what went wrong aboard the Alarei. With this done, go through the next door. Take cover as soon as you enter. This is a really tough section, with Geth Hunters and shielded Geth Troopers coming from below and both flanks (some from the left, the others from the right, up the stairs). Break out the heavy weaponry if they begin to overwhelm you. Be aware of cloaked Geth Hunters flanking in particular. With the area clear, move downstairs and access two Laptops for some credits. There is also the last Quarian Log to listen to, and a Med Kit. Move out of the room to find the body of Tali's father on the floor of the corridor. Talk to Tali about it. You can comfort her during the cut-scene with a Paragon interrupt, before a message plays back that states that we need to destroy the main hub of the geth. Disable Geth Console: Proceed up the stairs and collect the model Flotilla ship and access the Laptop without revealing your position to the geth behind the screen ahead. This is another close-quarters encounter with some heavily armoured Geth. When ready, equip some heavy weaponry and pile the rounds on the Geth Prime. Use biotic attacks on it once its shields and armour are down, then take out the Troopers backing it up. Use the Quarian Console at the back of this room to shut down any remaining Geth. A log entry will play, where Tali's father states that all of this he did to allow him and Tali to get a house on the homeworld. He was clearly reactivating geth to experiment on them, but this log proves that Tali knew nothing about it. Tali pleads with you not to destroy her father's reputation, but it is ultimately at the trial where it will be decided. Return to Trial: Note: a wrong decision in the trial can lead to Tali not being loyal, so it is a good idea to save beforehand, in case you make the 'wrong' choice. Back at the trial, everyone assumed Tali died in the attempt on Alarei. You have returned to defend her reputation, however. When asked if any new evidence was discovered on the Alarei, you have three main options. You can deny that you found anything incriminating Tali's father, in which case Tali herself will bear the shame; you can show the evidence to the court, destroying her father and ruining Tali's respect for Shepard; or, if you have a high enough Paragon or Renegade rating, you can convince the court of Tali's good character, clearing her of any charges. Clearly the latter is the best option, but if it is unavailable you will have to choose (note that picking to submit the evidence will result in Tali not being loyal to Shepard). Press B (Xbox 360 controls) when you are ready to return to the Normandy. Feel free to look around a bit more first, however, in particular speaking with Veetor, who you may have saved on Freedom's Progress all those hours ago. This is available as soon as you recruit Zaeed (DLC character only accessible through the Cerberus Network) from the dock at Omega. He has a job to finish, on a planet called Zorya, where a refinery has been taken over by Blue Suns mercenaries and must be liberated. There are a lot of choices to make during this quest. Zorya: Travel to Zorya through the Mass Relay and into the Ismar Frontier, before directing the Normandy towards Faia. Land on theplanet Zorya in this system. Liberate the Refinery: Once you land you can see the refinery in the distance. Use the sun-baked path to proceed. Zaeed has helpfully tapped into the Blue Suns' radio system, so you can hear the mercenaries react to your presence. There are no enemies for a while, however. First, you will come to some Dead Bodies that you can investigate. Zaeed recognises the workmanship.
On the path ahead feel free to shoot the pyjaks scurrying around. Soon you will go under a small bridge and come to an open area with cover in. As you may have guessed, this is the first location for a Blue Suns encounter. Take cover and pick off the Blue Suns Troopers in the region, as well as the Heavy firing rockets from the gangway above. As you move around the area reinforcements will come in, signalled through the radio. As well as Troopers, you will encounter some Pyros and a shielded Heavy in this battle. Once you hear 'all squads, fall back', the level is clear for you to explore. Access the PDA leaning against a crate towards the exit of the area and collect the Med-Kit in the corner underneath the structure built into the cliff. Move along the path out of this area and access the Bridge Controls. Zaeed reveals that he started the Blue Suns mercenaries, along with Vido, the man in control of the refinery. These two did not end on the best of terms (Vido having shot him in the head...), and Zaeed now wants revenge. Paragon or Renegade points are available depending on how you handle this conversation. Once you have crossed the bridge, follow the path, collecting the Refined Palladium on the way, and enter the door at the end. Vido meets you inside. He taunts Zaeed until he loses his cool and fires, eventually blowing igniting the gas in this refinery. Deal with him how you see fit, with obvious good/bad morality choices.
Defeat the Blue Suns: Once all this is done, you will be back in gameplay and face a few Blue Suns mercenaries as Vido retreats. Kill the first mercs and stumble through the explosions to get some Refined Palladium and through the door. It is at this point that the major decision in this quest must be made. Note: if you choose to save the refinery but your Paragon rating isn't high enough, you risk losing the loyalty of Zaeed. It is recommended that you save your game here in case the decision does not work out. Above you is a refinery worker who states that there are other workers trapped inside. You can choose to go and help the refinery workers, who of course are only trapped because of Zaeed's petulance, or continue on to chase down Vido. While you will come pretty close to getting Vido if you help the workers, Zaeed will not be best please as he still escapes. The two choices are given walkthroughs below – skip to whichever one you take and ignore the other. Saving the Trapped Workers: If you choose to save the refinery workers, Zaeed is angry but eventually follows you. From where you begin following the cut scene, head straight on and enter the door to the left by bypassing it. Go up the stairs and through the next door. Redirect the fuel using the Fuel Control in the next room. Do the same at the next panel. To your right will be a Generator Pipe to salvage, so do this and move through the flames to go upstairs. Ignore the trapped workers, focusing instead on diverting the fuel using the panel nearby.
Go up to the next floor with this done. Get the Refined Palladium in the nook to the left, before using the gangway to bypass the flames blocking your original path. Enter the next door and access the Research Terminal for an ammo upgrade. Access the Fire Extinguisher System using the panel by the window to save the refinery workers. You now have a chase on to catch Vido. Move through the door that unlocked when you extinguished the flames to see a refinery worker thanking you below. Skip the 'Stop Vido Santiago' section to get the walkthrough for the rest of the mission. Stop Vido Santiago: If you choose to stop Vido, you will have plenty of Blue Suns to fight. Move through the door and the next room until you come upon some Blue Suns Troopers. Take them out and move on. Soon you will engage some more Troopers but most importantly, a Blue Suns Pyro. Do not allow him to get close to you, using biotics if necessary to pick him up and remove the threat. Access the terminal for an assault rifle upgrade, and get the nearby credits from the Servo before pressing onwards. In the next area you will encounter more Troopers and another Pyro. With the first wave taken care of, more will follow, including a Blue Suns Heavy, complete with RPG, to the flank. After all this has been done, both paths (whether you saved the refinery workers or not) now form up for the last stage of the level. Chase Vido: Follow the path ahead, collecting the Refined Palladium, then pick up the M-451 Flamethrower on the floor in the next room. Move into the room to the right and engage the Blue Suns Troopers inside.
Be sure to collect the Power Cells in this room, and use the Weapons Locker to swap out the Flamethrower if you would prefer something more functional for the battle ahead. You can also salvage the Servo in this room for some credits. Proceed through the door by the Weapons Locker to begin a fight with a lot of Blue Suns Troopers. Use the pipes for cover as you press through the room. There are Troopers throughout the room, including the corners, so check your flanks as you move. Once in the centre, more Troopers will enter the room as the fuel tanks above spring into action. If you get caught in the flames underneath them it will dislodge your from cover, so ensure you bring them down with weapons fire, preferably on top of the enemy, as soon as possible. Some sneaky Pyros may also try and get around behind you, so try to spot them as early as you can to avoid this. With the room clear, move up to collect the Med-Kit as a YMIR Mech shows itself. As usual, equip heavy weaponry and use Overload to take down its shield and armour. You can then move into the rooms on the left and right hand sides of the area to salvage the machinery inside before returning to the middle. Directly ahead is the door you want to proceed. When you enter, a cut-scene will play and the level will effectively end. You still have choices to make, however. If you picked the Renegade option of ignoring the refinery workers earlier, Vido will be killed be Zaeed. If you did the Paragon one, however, Zaeed narrowly misses Vido. Zaeed turns on you, before being crushed by a pillar from the crumbling refinery. You can use a Paragon option to save him and gain his loyalty, or regular conversation to merely salvage your team mate but fail the loyalty element.
In order to get through the Omega 4 Relay, an IFF (Identify Friend/Foe) module must be acquired or the Normandy will be destroyed on arrival. Helpfully, there is a derelict reaper ship that has been ignored by most but spotted by Cerberus scientists. The possibility of taking this mission is given by the Illusive Man following the Collector Ship mission. KEY: It is vital that you do not take this mission until you have done every loyalty quest (apart from Legion's, and possibly Tali's if you want to take Legion along for that one, though it is a risk that the endgame will trigger before Tali is loyal) as you only have time for the Legion loyalty quest after this one, and possibly Tali's before mandatory quests trigger. You may be able to do some N7 missions too, but to avoid any mistakes, do everything you want to first! You are required to go through the Omega 4 relay quickly following the next mission, unless you don't mind some of your crew dying. If you are not bothered about this, you can still take your time. To get to the derelict ship, enter the Thorne system through Hawking Eta in the Mass Relay. Joker notices a Geth ship alongside the Reaper. We will be boarding via the Cerberus science vessel. Explore the Science Vessel: Turn left from the airlock, passing the bloody corpse and accessing the two Wall Safes and Terminal in the section to the left. Play the Work Log before leaving. The science crew were worried about the ship from the get-go.
At the end of the corridor use the Medical Station and play the next Work Log. It appears that those working on the Reaper data were beginning to be contacted by it. Go through the doors nearby as the ship wakes up. A shield has gone up preventing us from leaving. We need to get to the core powering the shield and destroy it. This will cause the ship to fall towards the nearby planet, so time is of the essence once the core is down. Escape the Wreck: Access the log on the gangway to view the effects of the Reaper mind-control on the science crew. Once you get up to the explosive crates, everyone's favourite Mass Effect enemy, the husks, will keep spawning and running at you. Fall back if they are beginning to overwhelm you. Use area attacks and shotguns to spread the damage around. Blow up the containers to take out multiple Husks at once. A sniper rifle is also a good weapon for Husks, as it takes them down in one or two shots. There are many ways to deal with the Husks, but here are a few of the best. Try to use big area effect attacks such as Shockwave or a levelled up Push-field. Concussive Shot also kills Husks in one, so is a good attack to use on Husks as they rush at you. Shotguns, SMGs and Assault Rifles are all good for ripping up masses of these enemies, in association with Incendiary Ammo, while Sniper Rifles can take off their limbs and prevent their running attacks. They will often outflank you by spawning at the side of the level, and come in waves, sometimes fooling you into thinking that the coast is clear. Make sure you retreat if more than four or five run at you to give yourself time to kill them. Luckily there is plenty of ammo around, particularly in corners and by crates. Don't be afraid to go back to a previous area to collect more ammunition if you find yourself without your favourite gun going into a particular section.
Move up slowly, as the Husks emerge from underneath the platform you are walking on and you can get surrounded if you don't move slowly. Midway along is another log, so hit that as you go past. The crew were beginning to get headaches from the Reaper, and seeing some of its creatures behind the walls. Collect the Power Cells, Refined Iridium and Sniper Rifle damage upgrade as you move upwards. It appears a sniper is in the area. Soon you will descend into the next area. Again, it is filled with spawning Husks, as well as Abominations and a heavily armoured Scion. You will have to fall back as the enemies pile up.
Just remember, if you are struggling use melee (B on Xbox 360) and retreat back up the gangway when the Husks overrun you. Activate the Log in this area when finished. Take the Med Kit and hack the Research Terminal at the front of the hall before backtracking and bypassing the door to the right (as you entered the hall) to move on. The pressure equalises as you enter the Reaper vessel. You are treated to a cut-scene with a Geth sniping some Husks about to feast on Shepard. It also speaks to him, a first for a geth. Before long you will be attacked by Abominations and Husks. Move down to the next area once the first wave is eliminated, and retreat back up when the Husks down here begin to overwhelm you. A Scion will also engage your squad, so target it with heavy weaponry if necessary. Once the horde stops coming, move up to the next level, collecting the Med Kit and accessing the Terminal to the left, before continuing right. Access the Terminal in this direction, as more Husks attack.
Move down the next slope, collecting the Med Kit before descending further. At the bottom, turn right to collect some Power Cells and a Shotgun upgrade. Turn round, as Husks will be charging in your direction by now. A couple of Scions will also join the fray – try to wait until they are next to an explosive crate to make light work of them and remember to retreat if necessary. Take the slope out of this area and turn right, accessing the Terminal for credits. Enter the next area to trigger Husks and Scions, before falling back. Shoot the explosive crate when it's surrounded with enemies. More waves will enter following the first one. In the next area Power Cells are available, and Husks will engage as you pick them up. Some will climb up the side, while Scions will attack from the front. You will be pleased to know that this gruelling Husk section is over now, so move downwards and collect the Med Kit. Bypass the door. Inside the corridor is the Reaper IFF to collect. Leave with IFF: You enter the final room of the level to see the Geth fighting off the Husks while accessing a computer terminal. Eventually one sneaks up on him and knocks him out. We need to destroy the core while fending off the Geth.
When the armour plating comes off the core and it pulses with blue energy, unload all you have at it. Your squad should keep most of the Husks off you, while you can throw all your heavy weaponry and ammo at the main core. Access the Terminal on the left hand side of the core and take out as many Husks as possible while the core is protected, but make sure you keep an eye on it for your opportunity to attack. There is plenty of ammo around the arena, so keep moving around to stock up. The Husks generally attack while the core is protected, but will keep spawning indefinitely until you destroy it.
With the core down, there is a choice to make about the Geth. No one has every captured a fully functioning Geth before, and Cerberus would want to study it. Shepard decides to take it as the squad race back to the Normandy (in a somewhat unorthodox fashion) and get the heck out of there. Back on board the Normandy there is a discussion about the Geth. Miranda wants to give it to Cerberus to study (for which you would get 50,000 credits and many Renegade points), but Jacob wants to destroy it. It is waiting for you at the Normandy's AI Core for activation. EDI also states that the Reaper IFF is several hours away from being ready for use, so you have time to complete a mission or two before the next mandatory mission is triggered, but hopefully all your loyalty quests have been done by now (except for Legion, who should be your priority now [unless you sold him to Cerberus!]) If you want to have the Geth from the Reaper ship as a member of your squad, head down to the AI Core (located through the Medical Bay on Deck 3) immediately after acquiring it and reactivate it. The Geth explains that there are some Geth known as 'heretics', who worship and cooperate with the Reapers in order to attack humanity and other races. On the subject of a name, EDI pops up and suggests Legion, because there are in fact 1,183 Geth intelligences inside the body in front of Shepard. Note that to be able to do the Legion loyalty mission before the mandatory mission triggers (you can still do it after, but with a heavy price to pay), you must talk to him about his problem now, and accept it, before doing anything else! Legion is now a part of your squad. He also has a loyalty mission to embark on, and you can set this up as soon as you finish activating him. Speak to him and he will inform you that he has discovered a weapon that the Reapers plan to use against the Geth. It is a virus to reprogram the non-believing geth to the heretical viewpoint. Understandably, Legion does not like the idea of this. He recommends you set a course for the Heretic Station, an ancient and long-forgotten space station dominated by the heretical geth. Once on board, Legion will be able to access the virus, stored on the station's data core. The Normandy's stealth systems will come into play to safely get to the station. Set a course as soon as possible, because otherwise EDI brings the IFF online and it minimises your options later. The station is in The Sea of Storms system of The Phoenix Massing through the Mass Relay. Heretic Station: Once aboard, Legion informs you that destroying the station is not the only option to stop the virus. They could reprogram it to alter the minds of the heretic geth to revert to the mainstream point of view. This is a decision you will have to make later. Legion has distracted the heretics, who are now working to remove some faulty data that he uploaded to their system. This means that any alarm raised will only alert geth in one room. Collect the Med Kit to the right and head downstairs to see the first alarmed room. Do not step over the green lines!
Move to the left to avoid the green data stream, before approaching the locked door ahead. Look to the right as you get near it to see some geth linked with the main system. You will have to break the green line to reach the door, so these geth must be deactivated first. Shoot the hub that they are connected to. This will create an explosion damaging the units, but you will still have to fight some. Focus on the Hunter to make light work of this room. The initial explosion will knock the geth down, but few will have been destroyed. Some of the geth may be able to flank you if you are not paying attention, too. Salvage resources from the destroyed hub once the room is clear. Head through the next door and turn right down the corridor. Press A (Xbox 360 controls) while looking at the two turrets ahead to get Legion to assume control over them, allowing you to use them to attack the geth. As you reach a certain point geth will spawn in, but the turrets should help take them out relatively easily. Go through the door at the end of the Geth barricade to enter another alarmed room. There are two hubs in this one, so you will have to choose which to destroy first. You may as well blow up the one nearest to you as you go in, but bear in mind that this will have activated the geth coming from the other direction. Mop up the geth by the first hub, then wait for the other active geth to reach you before taking them out. When the room is clear, head to the second hub and destroy it, deactivating the alarm. Salvage both hubs and move out of the room.
In the next corridor you will find a couple of the few active geth on the station (shielded Geth Troopers in this case) roaming around. Take them out from range and collect the Med Kit at the end. Proceed up the slope to the right when ready. Once you reach the top, two more Geth Troopers are active. Enter the door at the end of the corridor. Inside are two turrets for Legion to take control of. Once this is done, move quickly into the room to trigger a geth attack (note that the turrets spontaneously explode after a certain period, so activating them too early is therefore a bad move). You will have Geth Hunters (at least one cloaked) and Troopers in this wave, but the turrets combined with your team should deal with them easily enough. Just make sure you don't focus too much on the centre of the room, or you may be outflanked. Move into the next corridor, collecting the Power Cells and Med Kit before entering the door on the right hand side of the corridor. Move down the set of slopes, picking up the Refined Palladium to the right at the bottom. Go through the door behind you. As soon as you enter, have Legion activate the turret to the right and it will begin ripping into some geth. Assist with this, then bypass the Geth Terminal once the room is clear for a Geth shield upgrade for Legion. Go through the door out of this area, moving down more slopes and through the door at the bottom. Stick close to the edge of the path to avoid the data streams. This is quite a tight road to move along, so if you accidentally trigger the geth early, just stay calm and wait for them to come into range before attacking. At the bottom, one hub is to the left, the other to the right, by the door. Move round so are you close enough to one hub to take all the geth near it out, and blow it up. The geth by the other hub will activate, so turn your attention to them when this is done.
Once the geth are taken care of, blow up the second hub to deactivate the data streams and open the door (don't forget to salvage the hubs too). Go through into the next corridor, getting Legion to comment on the Geth Servers to your right. When you enter the next room, resist the urge to access the turrets as soon as you enter. We will be defending this area and they will be invaluable, later. Collect the Med Kit overlooking the large area below and access the Geth Terminal. Legion will wait for your command to begin before uploading the command to the core, as heretics will stream towards your position to defend the station. Defend the Core: There are four defence turrets on the lower level, with two upstairs. Obviously you want to save the latter for the end when you may be getting overrun. Once you agree to begin, pick one or two of the turrets on the ground floor as the first wave of enemies enters the room. The first wave contains Geth Troopers, and a turret combined with sniper or biotic support should prevent any from reaching the ramps up to your position. Note that you can choose to save the turrets for the second and third waves, but as you can only control two at once, there is no point in leaving them all to the end. For the second wave, activate another turret or two. This one contains rocket geth, who can really hurt you even in cover upstairs. Focus unreservedly on the rocket geth, leaving the Troopers for the turrets. Some may reach your position up high, but don't activate the last two turrets unless you really have to. Wave three is Geth Hunters and Geth Troopers. There are no rocket geth, so it is not much more difficult than wave two. Activate any remaining turrets downstairs (save the two upstairs until you get overrun, or they will just explode before anything comes into range), and focus on the Hunters. Break away from your cover to guard the ramps if the geth advance too far, and activate your last turrets if need be.
With the waves repelled, you have to decide what to do for Legion and the geth. Rewrite the heretical geth using the virus, or destroy them. Rewriting the programming of sentient AI is arguably as bad as killing them, so it is more of a grey area, but the Renegade option is still most definitely destroying the station. Rewriting the heretics may cause problems when they merge with the rest of the geth, while destroying the station will leave heretics unaffected elsewhere in the galaxy. Escape the Station: Once your decision has been made, a timer starts and you have three minutes to escape the facility. You should be able to do this comfortably, as long as you don't get bogged down in cover too much against the earlier enemies. First, run along the gangway and through the now-open door. Around the next corner are a few Geth Troopers. After you have killed around five Troopers and rounded a couple of corners, a Geth Prime will loom large. On harder difficulties this takes much longer to kill. Switch to heavy weaponry and use Overload if available to take him out as soon as possible. The Prime is guarding the dock to the Normandy, so as soon as you destroy it, run for the door behind to escape the station.
Back on the Normandy, Tali, if recruited and her loyalty quest completed, goes to have an argument with Legion. She hates the geth, and wants to shoot Legion rather than have him on board. This, like the argument with Miranda and Jack earlier, will result in one of the two losing their friendship and loyalty to Shepard for the rest of the game, unless you have a high enough Paragon or Renegade rating to pick those respective conversation options. Tali caught Legion sending information about the location of the Migrant Fleet to the other geth, but the experiments of Tali's father suggests to Legion that the quarians were planning to attack them. You can solve it amicably with Paragon or Renegade conversation, with Legion agreeing to stop transmitting, and Tali offering some non-critical information for him to send, or you can side with one squad member, again at the expense of the other's loyalty. Hopefully at this point when you return to the CIC EDI will state that she is ready to install the IFF, but that you need to take a shuttle to your next mission because of the downtime on Normandy required to do it. This is mandatory, and you cannot in fact do another mission (a cut-scene triggers when you access the Galaxy Map). As all of Shepard's squad departs in the shuttle, the IFF goes online, but disables the Normandy's engines and defences, while transmitting its location to the Collectors. A Collector ship arrives on the scene and its inhabitants board the Normandy. Joker is unwilling to let EDI take control of the ship, so must manually unlock the AI's databases at the AI Core on Deck 3. You take control of Joker for this short section. EDI will show you the way using floor lighting, as the usual corridors are crawling with Collectors. Once you get control of Joker, turn left and enter the Tech Lab, ignoring the Praetorian that has barged onto the CIC. Enter the Maintenance Shaft in the lab to get onto Deck 3. A crewman offers to cover you through the corridors, so head past the lift to the right while the Collectors are busy with Kelly Chambers. Enter the Medical Lab and AI Core and access the controls. EDI needs you to access the primary drive in Engineering next. Once you exit the cut-scene, work up the stairs, stopping to allow the Collectors to move away before turning left into the door behind them. Access the Engineering Controls within. EDI states that she will open the airlocks once the drive is online, blasting the Collectors into space. Joker rightly questions what this would do to the crew, but EDI informs him that the entire crew have been taken. EDI sends a message to Shepard's shuttle. Once Shepard returns, Miranda lays into Joker for the loss of the crew and nearly the ship. EDI sticks up for him, claiming that she should have spotted the virus. You can choose to berate or comfort Joker for Paragon or Renegade points. At least the IFF is now online, allowing the Normandy to travel through the Omega 4 Relay when you are ready, and begin the final stage of the game. The sooner you go through, the better the chance of saving the crew. If you want to save the likes of Kelly Chambers, you should avoid doing anything else, including the Legion loyalty mission, and just head straight for the Relay. If you do a one assignment, about half the crew survives, but if you take too long, only Doctor Chakwas comes back. Preparing for the Suicide Mission: You do have time to mine as many planets as you want before the mission, so make sure you stock up on Element Zero, Iridium, Platinum and Palladium (see Mining walkthrough at the end of this guide). There are three Normandy upgrades that you MUST buy before engaging in the Suicide Mission, as otherwise one of your squad for each missing upgrade will be killed. The upgrades you need are: Multicore Shielding, available after talking to Tali: 15000 Palladium Spend any resources you have left on weapon, shield and general upgrades for your squad members to give you that extra helping hand on the final mission. In particular, try to max out the Heavy Weapon Ammo (Microfusion Array) upgrades, and personal upgrades, like Mordin's Omni-tool for example. These will have an affect on the final batle. When you are ready, head for the Omega 4 Relay to begin the Suicide Mission. There are many facets to the Suicide Mission, but if you have all your squadmates loyal, and the three Normandy updates references above, you should be able to do it with no fatalities. However, you may not want certain team members to survive, and it is still entirely possible to cause the death of much of your squad, and indeed Shepard himself! Once you make the decision to go through the Relay, any romantic relationships you may have been pursuing should come to fruition. See the Romance section of this guide for more on this. The Illusive Man will also offer some final words of advice, before a cut-scene showing entry to the Relay plays out. Oculus Attack: As Joker skilfully avoids the debris of all the vessels to try and cross through the Omega 4 Relay, a Collector Oculus attacks. Without the Normandy's armour upgrade, Jack will die when the Oculus fires on the ship. After missing the rest of its initial attacks, the Oculus latches onto the Engineering Deck. Shepard must go down to deal with the intruder. The team you pick for this is not as important as later sections of the Suicide Mission, but anyone you bring with you to attack the Oculus will not be killed in a cut-scene elsewhere on the ship. For example, you can save Tali from death when the Normandy enters the debris field by picking her to accompany you against the Oculus (and Legion will take her place as the sacrifice, unless you have upgraded the ship sufficiently). Note that the possible deaths referenced in this guide are only what has been experienced so far, and there may be other variables involved which are not yet known. To ensure survival, upgrade the Normandy and gain the crew's loyalty.
So throughout the cut-scenes as you enter the Omega 4 Relay, three squad members could be lost. In picking your squad to fight the Oculus, bear in mind that it is only armoured, so you are better off taking heavy crew members like Grunt and Garrus. Pick your squad and weapons loadout, with your favourite Heavy Weapon the most important here. With all this done, you will be thrust into gameplay against the Oculus. Any weaponry will hurt the Oculus, while biotic attacks are ineffective. Use heavy weaponry to take down its armour quickly. You will see it charge its laser, and should get well out of the way before it fires or you will lose your shields and some health. Fortunately it takes a while to charge, so you can probably down it before it gets too many shots away. It will also move out of the ship and back in, until its health is so low that it retreats and a cut-scene of Joker entering the debris field is shown. This is where you may lose Tali or Legion without sufficient shields. The Oculus returns, repaired, but now you can completely take it down. Pick up more Power Cells to replenish your heavy weaponry and med-kits from around the room, and finish off the Collector Oculus.
Having cleared the debris field, a Collector Ship launches at you as the last line of defence to the Collector base. If you upgraded the Normandy with the Thanix Cannon, it will take out the Collector Ship. If not, Joker will attempt to get close to the ship to take it out with conventional weaponry, resulting in the death of a crew member (Thane, by default). Stage One: Plan: The end result is the Normandy crashing onto the Collector Station. You can give some rousing advice to your crew, or play down your chances. Once the team looks for options to get to the centre of the station, suggest looking for alternatives with the door-dilemma. The idea is to pick a team mate to send through the ventilation shaft, and open the door. Jacob volunteers due to the risky odds, but you should pick a tech specialist, such as Tali or Legion, to perform this task. If you choose someone else, or if Tali or Legion are not loyal to Shepard, they will die during this endeavour. Next, you have to choose someone to lead the second strike team that will divide the Collector defences. Miranda volunteers, and is a good choice, but Jack is not happy at the idea of taking orders from her. Viable choices for this role are Garrus, Miranda and Jacob – all experienced leaders (again, ensure they are loyal to Shepard). The team leader is not at risk here, but a poor choice will result in the death of your tech expert, regardless of who it is. With these tough choices made, choose to give an encouraging speech, request vengeance, or say nothing at all, as the team departs. Personal Team Selection: You will probably have Tali/Legion and Miranda/Jacob/Garrus unavailable for selection. You will encounter many Collector Drones, Assassins and Guardians, as well as Harbinger-controlled drones. Ensure you have a heavy character, someone with Warp to deal with Collector barriers, and a biotic to deal with any onrushing drones. When the cut-scene ends, you will be aboard the station.
Enter Base: Move through the corridor and take cover when you reach the open room. Deal with the Collector Drones inside. More will fly in once the first wave is down (note that you can pick them off as they land). Move around to the left once the last batch has been eliminated. Disable Valves: Soon, your tech expert will come over the radio stating that they need you to disable some valves to prevent heat from blocking their route through the vents. There are eight valves to unlock, and the first should be right near you, glowing green. Push on through the corridor into the next room, filled with Drones. Keep an eye on the bar in the bottom right hand corner of the screen. If you take too long to open the valves, you will fail the mission and have to try again. The Harbinger will probably intervene at this stage, so concentrate on him and his Barrier. Once he is down, activate the second valve on the left. As you move up towards the third one, a flying Drone taken over by the Harbinger will drop in on you.
Eliminate the Harbinger and then the drones that accompany it, and you should have access to valve three. Climb up to the fourth valve, where no resistance should be encountered. Through the wall ahead you may see the Harbinger swoop past and indeed, he will attack in the next section. Take cover and pick off the Drones, remembering that time is vital to prevent the failure of the mission. Once you close about half the gap to the fifth valve, the Harbinger will return with more Drones. Depending on the level of the progress bar for your tech expert, you may want to run to the valve and activate it before dealing with the enemies, but you will put yourself at risk so close to them (and the bar for the next valve will begin to lower, eating into your time as you destroy the Drones in this area). Use a heavy weapon to remove the Harbinger if they start to slow you down. The next valve isn't far, so proceed with the Collectors removed and activate valve six. In the next corridor, three Drones are waiting for you. Try to take them out quickly. The next room is a tricky one. Collector Assassins with Barriers bar your route.
Watch out for the Assassins' penetrating laser and move up to activate the penultimate valve. A wave of enemies will attack as you do this. In theory, you can run to the next valve and activate it to complete this section of the level, regardless of whether any enemies remain. When the Harbinger in this area is down, it is certainly a possibility. Activate the eighth valve to finish this section and meet up with the second team and your tech expert.
If you made a poor choice with regards to your tech expert or team leader, the tech expert will die in the next cut-scene. Hopefully, however, you are able to continue unhindered. In the next room, the Normandy's crew and some of the captured colonists are being stored in pods by the Collectors. Depending on how long you took to get through the Omega 4 Relay following the capture of the crew, you will lose everyone except Dr. Chakwas (two missions or more since the abduction), half the crew including Kelly Chambers, Engineer Daniels and Mess Sergeant Gardner (one mission), or no one except a colonist (if you left for the relay without doing any missions). Stage Two: Plan: Pick a biotic: The path ahead to where the tubes are leading is covered by seeker swarms. Your biotic crew-members state that they could possibly create a biotic field to prevent the swarm from getting through, and you have to choose someone for this role. Those with biotic abilities are selectable, but the only ones that are actually capable of doing it are Jack and Samara, so pick whoever is loyal. If you make the wrong choice, you will lose a squad member to the horde. Pick a leader: In addition, you need to choose another team leader for the second squad, as your biotic can only protect three people at a time. The second team will create a diversion, and again, Miranda, Jacob or Garrus can all perform the task, if loyal (though Miranda cannot die in this situation, regardless of loyalty, so is a good choice).
Pick an escort: Joker and EDI have sorted the Normandy out, but you still need to get the crew back to the ship. You can choose to send the crew back unescorted for lots of Renegade points, but they will all die along the way. Any loyal squad member will get them back alive, while no one is particularly suited or weak in this role. You cannot use the character that you send for the rest of the mission. Mordin is the best choice, as he is the most likely to die later in the mission, even if loyal, so getting him away from the action is a good idea. Not sending anyone has serious repercussions and is a definite Renegade action. Escort Biotic Specialist: You need to remain inside the biotic bubble that keeps the Seeker Swarm back, or your shields and soon health will be rinsed by the Collectors. Your biotic is at no real risk here, so just concentrate on the Collectors threatening you and your main two squad-mates. When your biotic stops the first time, press A (Xbox 360 Controls) to get her to move out. Shortly after this Collector Drones and the Harbinger will land ahead of you. You can fire out and receive fire inside the biotic dome, so take shots at the enemy as soon as they are in range. The biotic will hide behind a pillar and allow you to take out this first wave of Collectors. The Collectors will push up the ramp and try to flank you, so watch out for this. Once the first wave is down, tell the biotic to move out again. You should see a moving platform in the distance, and some Husks and Abominations will lumber towards you. Use biotics and your choice of weapons to kill them before they reach your bubble, particularly concentrating on the exploding Abominations. After this brief wave, the Harbinger will take station around the next corner with some more Drones. Your biotic takes cover to give you a chance to fight back. Use heavy weapons if you are struggling to break through the Harbinger's repeated possessions, before telling your biotic to move on when ready.
Collect any ammunition lying around as you move up. When your biotic stops again, you will have the Harbinger, Husks and a Scion to contend with. You may well get overrun by the Husks here, but continue to focus on the Scion unless you are in real danger of death. Use biotics to fling the Husks away as you prioritise enemies. There are loads of Husks, so use Concussive Blast, Push-field and Shockwave to take multiple units out together. Move your biotic on when ready. Around the next corner, Husks emerge to run at you. You should be able to take these few out with ease as you approach the slope for the final descent. Your biotic will be struggling to hold the bubble here. Take out the Abominations and Husks that flank from the sides on the way down. Clear the last blocks of cover and a cut-scene will trigger. If you picked the right team, everyone will make it safely through the door, and the survivors will get back to the Normandy. Stage Three: Shepard plans to take one of the moving platforms to the central chamber to destroy the station. You need one team to stay behind and hold the door, however, to prevent the main team from getting outflanked. You have a choice between 'Someone has to hold this door' and 'We'd better hurry'. It is unclear exactly what difference each choice makes, though it appears that the latter may end up killing some of your team if you take too long on the final boss. The best option is to confirm that you need people to defend the door. You will then be asked to pick your team for the final encounter – everyone else will hold the line.
You then pick the squad to travel with you to the final boss. Anyone left holds the line. The team to 'hold the line' needs defensive, strong, brutish characters. Good choices are Grunt, Garrus and Zaeed, so try to avoid taking these people in your squad for the final showdown. Jack, Mordin, Tali and Legion are all very poor defensively, so take any of these to accompany you towards the end of the level. On higher difficulties you may feel the need for certain characters against the final boss – it's a risk you will have to consider. You should avoid taking disloyal characters with you, as they won't survive the station explosion. They also reduce the competence of the defensive line, however, if you leave them there. The line has a combined defensive rating. If it is not high enough, you will start to lose team mates. Loyal team mates gain an improved defence rating. Having chosen your team, you can then give a speech before heading out. You begin on a platform, and another one, filled with Collectors, will dock with yours and unload its inhabitants. Try to take out all three Drones before the Harbinger gets involved. Another platform and another two Drones and a Guardian with a Barrier will dock. They come in waves, so the next platform won't arrive until you have defeated the previous enemies. With the second platform taken care of, move onto it, collecting any ammo, to wait for the next one. The Harbinger will be present on this one, along with a couple of regular Drones. The Harbinger will aggressively use the other Drones once you kill its original host, so it's not a bad idea to take out the others first, to save you having to down the Harbinger more than once. The next platform (number 4) contains Collector Assassins and a Guardian. The fifth platform has two Scions and some Abominations. Kill the Abominations to cause them to explode and damage the Scions, which won't attack or move closer to you until you are very near them.
Once the Scions are down, you have to activate a console to move down to the final area of this level. You do this at your leisure, however, so collect as much ammo as you can beforehand. The platform moves into a big area with a Reaper inside, constructed in the image of a human. The Collectors are being used as pawns to build the Reaper, while they are using humans as the physical resource to do so. Millions more humans are needed to complete it, so it is imperative that we destroy it and the station to prevent this happening. The tubes pumping the resources into the Reaper are the weak spot, and in the upcoming boss battle we will use those to destroy it. First, however, another platform of Collectors arrives, assisted by the Harbinger. The Assassins also pose a threat. With these enemies down, however, the tubes open up, and you are able to target them.
You should be able to take down one or two of the tubes at this point. Use heavy weaponry or better yet assault rifle ammo to break the tubes off the Reaper. It doesn't take much to destroy them, but once one is down, the armour comes back up to protect them. You can certainly take two down at once, however, if you are quick. As soon as you eliminate the last enemy on a platform, move your weapon up and spray the tubes with bullets. When the armour comes up, another platform will dock. Destroy the Drones to eliminate any host for the Harbinger, then focus on the Guardians. Listen out for your squadmates to inform you when the tubes are open again. Try to take two down as before, using Adrenaline Rush if available to slow down the Reaper's reactions and buy yourself a bit more time. If tubes remain, another platform arrives. Again, Assassins and Guardians are the order of the day. Take a tube or two down. Repeat this until you have all the tubes out of action.
Once you have done this, the Illusive Man will contact you. He wants to use an EMP blast to save the Collector Station, keeping the Reaper technology for the Cerberus cause. If you have Miranda with you, she will resign over the Illusive Man's request for her intervention in this decision. Agreeing with this is a definite Renegade action, and the clear Paragon decision is to destroy the station as planned. This is easier said than done, however, as the Reaper comes to life, with a devastating laser beam, and attempts to stop you. You can shoot the eyes or chest of the Reaper to do great amounts of damage to it. The weapon in its mouth takes a long time to charge, but if you are hit by it you need to get in cover and stay there until your shields are back to full, or you will be killed by the next blast. Use up all your Heavy Weapon ammo early on, trying to hit the Reaper's eyes. You can then switch to a regular weapon and pound away. When the Reaper crouches to the right so all you can see is his eyes, a great tactic is to use Adrenaline Rush and a Sniper Rifle, if both are available, to do massive damage in a short space of time. Make sure that when you are scoped you are aware of what the Reaper's weapon is doing, as it can catch you off guard (listen for the charging sound). Note that you should stay behind the cover in the middle of the platform where you begin, as it is possible to die off the edges and this also offers you some protection from the Reaper's main gun. Bear in mind that you can shoot into its mouth while charging, too. Meanwhile, Collectors will attack. You should be able to leave most of these to your squad, assisting them with enemies only when the Reaper dives out of shot. In addition, you should not have to get through too many of these waves if you attack the Reaper effectively. As you damage it more and more, its attacks intensify and it dodges more. Eventually, however, you will have done enough to strike the killer-blow.
With that, you are relying only on the loyalty of your squad as to who comes out alive in the race back to the Normandy, as the Reaper collapses inside the station. The Harbinger struggles to save the station as it begins to crumble, ultimately failing in its efforts as Shepard jumps onto the Normandy. If you didn't have anyone left to help Shepard back onto the Normandy, he will die, meaning this save will not be valid for Mass Effect 3, where you will have to start from scratch! You will have done pretty well (or played through very carelessly) to be in this situation, however, so the likelihood is that you are left to remember the dead in the next few cut-scenes. The Illusive Man is either very pleased or somewhat pleased but very perturbed that you did not salvage the station. Deal with him as you see fit – you are the boss now. The Illusive Man had a point, however, as you see a Reaper army massing on the edge of the Milky Way. With all this done, you can choose to begin again, with your levelled up Shepard, with blank morality points, or continue on to complete all your remaining side-quests and exploration of the Mass Effect universe.
There are various assignments and side-quests that you are given through your Personal Terminal and from exploring the universe. Note that you should purchase the star charts available at Baria Frontiers on Illium to unlock all of the necessary star systems for some of these quests. There are various assignments and side-quests that you are given through your Personal Terminal and from exploring the universe. Note that you should purchase the star charts available at Baria Frontiers on Illium to unlock all of the necessary star systems for some of these quests. You receive this through your private terminal soon after getting your hands on the new Normandy. Cerberus needs you to investigate the disappearance of one of their operatives. They believe he is being held by Eclipse mercenaries on the planet of Lorek. From Omega, travel to the Fathar system and scan the planet near the sun. This is Lorek. Fire a probe at the anomaly and land at that location. Near the landing site, check behind some crates for some Platinum. In the building ahead take cover as soon as you enter. Defeat the enemies within, most of whom are Eclipse Troopers, some sporting Barriers. Hack the Holding Cell Access terminal and access the Security Logs inside the main room. From these you will learn that the operative was called Agent Rawlings. He didn't survive the Eclipse interrogation. When you disengage from the terminal you will be attacked by more soldiers from the door across the room. One of the enemies is in charge of this facility, Morl. As such, he has a Barrier and Shield, so take him out quickly. Go through an open door in the main room to find some Medi-Gel and a Wall Safe. There is also another door leading outside to some Refined Platinum. The door you want to find Rawlings' last location is at the end of a short corridor. You need to hack the door to get in. Once inside, access the Data Logs. These could harm Cerberus if they went public, so you have the choice to surrender them to the Alliance, Cerberus, or keep them yourself. Giving it to Cerberus will net you some extra cash. Back on the Normandy, Cerberus will have contacted you in your Inbox regarding Rawlings and the events on Lorek. Aria gives you the information for this assignment after you provide her with the datapad located on the dossier mission for Garrus. You can find the planet to scan on Daratar in the Faryar System or the Hourglass Nebula for an Eclipse Smuggling Depot. You should take Miranda and Garrus with their Overload ability and plenty of heavy weaponry. A smuggling base was once used on this planet but is in the process of being abandoned having seen that the Normandy had spotted it from orbit. Cerberus want the resources in the base, while the last occupants left three YMIR Mechs behind to destroy their cargo and prevent it from falling into anyone else's hands. There are 20 crates of cargo, and you get paid more depending on how many remain at the end.
You can gain the attention of the mechs from a vast distance by shooting them, interrupting their concentration on the crates. Use heavy weaponry to take them down. You can locate more heavy weaponry on a landing pad at the side of the base and to the edge of the main arena itself, as well as Refined Element Zero and a Med Kit. There is also the Maintenance System and Security Systems to access for more info on the smuggling operation. Once all the Mechs are down, collect any supplies and return to the Normandy when ready (B on Xbox 360). Scan the planet Helyme in the Zelene System of the Crescent Nebula to find an anomaly. Locate it to discover that it is an Eclipse base, but in the place of what used to be a mining-facility. We must liberate it. Land at the anomaly and proceed through the corridors. In the first large room is a Cargo Log to access. As you move through into the metallic corridor, Eclipse Vanguards and Troopers will attack. Turn left before bypassing the door to collect some Refined Palladium, you can then return to go through the door. Examine the PDA on the floor to read about the moment when it all went wrong for the miners. Move up the slope into a large area. There are many enemies in here, so take cover and take it slow. Concentrate on Vanguards and Heavys with their rocket launchers, particularly those on gangways up high. The computer mainframe is in the centre of the room, so work your way around the side, clearing out the Eclipse Mercenaries as you go, until you have a clear path to the centre. Also in this room is a Med Kit up above the mainframe and some Refined Palladium in a nook at the side of the room to the left of where you first entered. When you're ready, hack the Mainframe.
As the system decrypts the last location of Ter Alan, Eclipse Mercenaries led by Captain Vorleon will slowly come to engage you. Try to pick them off as they come into view one at a time. Vorleon has shields, armour and health. With the decrypting complete, return to the mainframe and download the data. You can then return to the Normandy when ready. Scanning the planet Gei Hinnom in the Sheol System of the Hades Nexus reveals a quarian ship crash. Land at the anomaly site having sent a probe, to begin the search for survivors. You start at a campsite where there is some Refined Palladium to collect. EDI detects a single quarian lifesign, so we had better start looking for it. Over the other side of the camp is a Med Kit and Personal Logs. The ship had to crash-land on this hostile planet following an encounter with the Geth, and the surviving crew have been carried off by something over the time since the crash. One quarian remains. Soon you come upon the area with the survivor in. She is Lt. Forzan vas Idenna, the creator of the logs, and has clearly been in a serious fight for life down here. Interact with her to stabilise her lifesigns. EDI states that we need to prepare the area for her extraction, but the Varren that have been terrorising the quarians have other ideas. You need to keep the Varren from reducing Forzan's health too much, but with the likes of Concussive Shot, Shockwave and Biotic attacks few should get to the quarian. On higher difficulties, you may prefer heavy weaponry to deal with them.
After about fifteen or twenty Varren, the shuttle will arrive allowing you to sprint to it and confirm that you wish to get the heck out of there. When you enter the Nariph system in the Pylso Nebula, it is clear that there is a ship dangerously close to impacting on the planet Jonus, carrying dangerous munitions cargo and heading directly for a massive human colony. You need to board the ship to attempt to avoid the disaster. You must reactivate the engines to avoid the collision. Read the Captain's Logs in the first area. It documents the disastrous situation the ship MSV Broken Arrow found itself in against the Geth. Bypass the door ahead and straight in front of you will be some Geth. Once through the door, a timer starts. You have nearly six minutes to get to the engine room and activate the engines. This should be plenty of time on the regular difficulty. Override the Engine Room Emergency Seal to allow access to the engines. You should also check the Ship Status console next to this, as it shows the condition of the Broken Arrow. Also in this room is some Refined Iridium and a Medical Station. With all that collected, head into the next corridor and turn right to enter the Engine Room. Once you get down the steps, Geth will attack from above. They spawn in up there in waves, first with Troopers, then a Rocket Trooper on the gangway overlooking the first Power Coupling. You need to take out everything up to the Rocket Trooper to buy yourself enough of a window so you can take the few seconds needed to activate the Power Coupling.
Collect the Refined Iridium behind the crates at the bottom of the ramp you entered the room on. You should then cross the floor via the hard-to-spot ramp made up of pipes. Once across the other side, attack the next wave of Geth, having reinforced the position their allies held before. There will be more Geth in this attack, but the same applies: once all the Geth are down, you have a respite to activate Power Coupling 2. With this done, head up the ramp nearby to get to the Engine Control and restart the engines, ending the mission. Thankfully, this one does not take time, and you can do it while being attacked by the next wave of Geth which will have spawned in. If you are struggling to do the mission in the allotted time, don't stop for the Datapad or to collect resources, just prioritise getting to the engine room, clearing the waves of Geth, and activating the consoles. By scanning the planet Zada Ban in the Xe Cha system of The Shrike Abyssal, a Blood Pack Base is located that you are obligated to investigate. It appears to be a weapon manufacturing plant. Land with your squad once the anomaly has been pinpointed. Read the Datapad near the shuttle once you land to read a message from a Salamul to Kalusk. Salamul is evidently struggling with the conditions in getting enough Vorcha to complete the operation. There is another Datatpad across the stone bridge, as well as some Refined Palladium. Take the metal slope down and engage the Vorcha inside the cave. Watch out for Blood Pack Boom Squads and armoured Troopers. Down the next slope, double back on yourself to locate some Refined Palladium and another Datapad. Pick up the Med Kit on your way across the gangway into the next section of the base. Take out the Blood Pack Troopers that engage you, watching in particular for Boom Squad who spawn above and to the right, and Blood Pack Pyros who will try to flank you and get close. Turn right once across the gangway and enter through the door. In this room you will have to fight some Blood Pack Troopers, but most notably the Krogan Kalusk. Take down his shields and armour, before finishing him off. You can then shoot the two explosive containers by the main gas tanks of the base to set off a chain reaction destroying the facility.
Note that you should search the area for ammo and Refined Palladium. Run back out the way you came to evacuate back to the Normandy. Having done the Blood Pack Base N7 mission, you are given the location of a Blood Pack Communications Relay on the planet Tarith in the Lusarn system in the Crescent Nebula. There is heavy fog on the planet, meaning you need to use relay beacons to work your way through. Upon activating one, a blue light will shine towards the next one, showing you the way to go. Make your way along the path to the first Beacon as well as a Datapad. It is from Salamul, the leader of the Blood Pack mining operation at the previous base. The next beacon is just down the hill. When you move across the expanse to the next one, a Klixen will attack, but can be easily dispatched. Activate the next beacon. You can mine some Raw Material nearby to collect some Platinum by diverging slightly from the beacon path to the left. Kill the Klixen on the way to the next beacon. Climb up the hill to access it, along with another Datapad.
Go downhill in the direction of the next beacon, heading left at the fork to mine some more Platinum. Return to the proper route and you will soon engage more Klixen. Activate the beacon and read the Datapad before continuing. Mine the Platinum to the right when the area widens. The next beacon is uphill on the floor, and is easy to miss. Turn it on and continue. Soon more Klixen will attack. Take the left-hand path and you will find another Datapad. Head towards the next beacon from here. Activate it when ready, and proceed to do the same to the next one. Around the next corner you will see a dropship taking off. There will also be a heavily shielded and armoured krogan hiding to await your arrival: the infamous Salamul. Use heavy weaponry to take his defences down and allow your biotics to do their thing. Try to stay behind the rocks rather than going out into the open area to avoid the rocket attacks from Salamul's reinforcing Boom Squad units. Take out any other enemies once their leader is down, before bypassing the Terminal to shut down Blood Pack communications. Having completed Jacob's loyalty quest, you gain access to the Rosetta Nebula. By scanning the planet Joab in the Enoch system of the nebula, you find an archaeological site that appears to have been taken over by Blue Suns mercenaries. Land at the anomaly site. Retrieve Artefact: The Blue Suns see you land, and you can only get to about the second row of cover before their mercenaries emerge from the door ahead and engage you. Pick off the swarms that come out, focusing on the Legionnaire. More mercenaries will continue to flood out for some time. Use wide area biotic attacks like Throw Field or Shockwave to thin out the field. With the area clear, locate the two chests of Refined Element Zero, one by some crates to the left of the shuttle and the other even further left in a clearing in the rocks occupied by mining vehicles. Once this has been done, head inside the facility. Enemies will be to your right as you go in. Take out the initial three and then be aware of the door to the left where more will pile out. When the door shuts, mercenaries will appear on the balcony above you in the room. Pick them off and then open the two Personal Lockers and Med Kit in the main room. Head through the left-hand door where the first mercenaries came from and follow the corridor to find another locker. Come out of this corridor and you will end up on the balcony. Follow the path down the slope and through the door. Troopers will attack with a shielded and armoured Commander. Use Overload if available to take down his shields and then concentrate on ripping through his armour with bullets, finishing him off with biotics.
On the other side of the room are more Troopers, supported by the operation's Lieutenant Locke. He only has shields so should be easy compared to the Commander. With the area clear, collect the Refined Element Zero, read the PDA and move out through the next door. Scan the Prothean Video Log in this room to get an Eden Prime-esque sequence and end the mission. The PDA we recovered from the archaeological dig named the MSV Strontium Mule as the location of the artefact, unlocking this mission as a result. You can find the ship in the Arinlarkan System of the Omega Nebula and board it using the Normandy. We want to retake the ship. Once again, the Blue Suns are waiting for you when the gameplay begins. Take cover and pick them off as they come out of the door. There are Heavy troopers with them, sporting rockets, so watch out for those, as well as a shielded Legionnaire. Read the Transmitter on the floor by the door and then go through. Check the Airlock Security Console at the back of the first flight of stairs, before heading up the second one. Blue Suns Troopers will engage you at the top. Clear the floor and read the next Merc Transmitter. Bypass the Hub Security Console in this room. This opens the three doors at the other end. Explore the one on the right, turning left in the corridor to find a Medical Station and then return to the main room (do not go up the stairs in these corridors yet). The same area through the door to the left contains some Maintenance Records to read. Proceed through the central door. In the large room at the end of this corridor, a Senior Engineer with armour and shields attacks. Use the stairs for cover against him, while trying to get off Overload attacks. He is not alone, and has Troopers accompanying him who can flank you while you are looking up at the Engineer.
With the area clear you can head upstairs to pick up some Power Cells and read the Engine Room Main Console and Merc Transmitter. Following this, you need to go back to the central room with the three doors we were in earlier. You now want to take the side-doors and go up the stairs at the back. Once you come out at the top you need to defeat the few Blue Suns Troopers that attack. You can then go through the next corridor and clear the room on the right of the Blue Suns. Back in the main room, the other corridor has a passage on the right with a Bridge Security Console for us to unlock the Bridge Door, while the one to the left has a redundant Transmission Relay Console. With the Bridge unlocked, go inside. Inside is a Command Bodyguard, with shields and armour, Captain Vorhess with shields, and plenty of Troopers. Use Overload on the two bosses, and whittle away at their health without entering the room fully. Once you have cleared the room, enter and take cover, watching the door you just came in through. Some FENRIS Mechs will come galloping towards you (avoid using Miranda to Slam them, as this can glitch the rest of the level!), followed by some Blue Suns mercenaries. They have to go through a bottleneck to get to you, however, and it should be an easy fight. The mercenaries have Sergeant Boortis with them, supported by shields and armour, but he poses no real threat as long as you stay in the room and target him from there.
With the danger avoided, read the Ship's Main Log on the bridge, to get the codes for the cargo. You can also read the next Merc Transmitter, before going back to the main room. Go all the way through and in the door to the left at the end. Read the final Merc Transmitter on the desk to the right, collect the Refined Iridium and access the Payload to complete the mission, retrieving the Prothean artefact that the Blue Suns stole from the archaeological site on the previous assignment. Having completed the two previous Blue Suns missions, involving the archaeological dig and the MSV Strontium Mule, you can head for the planet Sanctum in the Decoris system of Sigurd's Cradle. The Blue Suns have a base here that has been luring merchant ships to their doom with a distress signal. We need to go and shut it down. As before, on landing, the Blue Suns see the Normandy shuttle and prepare a reception. Take cover and blast all those emerging from the building, paying particular attention to a rocket-toting Heavy. A smaller, second wave will follow the first. With these down, collect the Refined Iridium and read the Datapad on your way through the door to the base. Greeting you inside will be a Blue Suns Commander with shields and armour. Take him down using our usual techniques. You will then need to move around to the side to deal with his cronies. At the bottom of the stairs, turn right to enter a room with a Wall Safe and Datapad humorously noting the decision of a mercenary to go and take down Archangel/Garrus on Omega. Head back into the main room and through the opposite door near a Closure Notice. In the mess-hall you will encounter mercenaries as soon as you get about half-way across the room. Use the tables for cover until the Troopers stop coming.
Collect the Refined Iridium in the tunnel to the left, and pick up the Power Cells and two crates of Refined Iridium, and listen to the Datapad in the next section. Proceed through the door when ready. Following a cut-scene, you will have two YMIR Mechs to deal with. There is no cover near the doorway from where you can still get shots on the Mechs, so move into the room and take position behind a pillar (be sure to blow up any explosive crates first). Use Overload, Disruptor Ammo, heavy weaponry or just plenty of bullets to take down the shields and armour of both targets. Once you have defeated them, Blue Suns mercenaries will come through doors to the left and right. You may want to retreat back to the crates by the door at this stage, as the armoured and shielded Captain Narom and his men will not hesitate to run at you or attempt a flanking manoeuvre. Wait for him to come into view before taking him out.
Following this tough fight, scavenge a Med Kit and use the Wall Safe in this main room and proceed into the room to the right at the back. Access the Computer for some Interrogation Logs, detailing the shifty dealings of the Blue Suns. You can now Bypass the door in the centre and overload the Distress Beacon Control. This is marked on your galaxy map after completing the Blue Suns assignments, or can be found by merely scanning the planet. Either way, you will need to travel to the planet Franklin in the Skepsis System of Sigurd's Cradle and scan for the anomaly. Land once you have located it. Inside the facility, turn left in the first corridor to immediately encounter some Batarians. You only have five minutes for this mission, which should be enough time, but make haste all the same. Quickly bypass the door to the main room of this assignment. Get behind the scant cover, using a crate as best you can, and pick off all those in view. You may have to move up the ramp to the right to get a flanking angle on some otherwise out of sight towards the end of this gun battle.
The Batarian Commander will offer the most resistance, but even he only has a shield, while more Troopers will spawn in the room behind him. With the area finally clear, however, collect the Power Cells on the upper level if you have time (the next section takes about a minute at the most) and head down to the next floor. Take the Refined Palladium and go down the stairs to bypass the control room door. Inside is a solitary Batarian Commander, so take out his shield and throw him into oblivion. Run across the bridge, use the Wall Safe to the right and hack the Kill Switch Console. Two Javelin missiles have already been launched, but there is only one Kill Switch code. You must choose between an industrial Spaceport, helping Alliance tactical interests, or a Residential District, opting to save hundreds of lives. The Paragon and Renegade options are clear, but you get no morality points for either decision (the mission appears to be somewhat glitched). Make your choice to end the mission, but be careful: on the Xbox 360 it appears as though you should select your choice and push A, but the developers have in fact mapped the spaceport decision to A, and the residential area to B, so pushing A even while selecting the residential option will save the spaceport instead. So, push A for the spaceport, and B for the residential district! Scan the planet Neith in the Amun system of the Eagle Nebula to locate an anomaly. There is a distress call on the planet, but scans show movement at the crash site, though not biological life. Land at the anomaly site and collect the Refined Iridium behind the shuttle. You can also salvage some damaged mech parts on the left hand side of the opening area, and some more Platinum as you move through the wreckage on the left. There is a Navigator's Log, showing the malfunctioning of helm control and the ship's VI struggling to cope. Once you pass out of the corridor of wreckage you will find the Evacuation Order, reporting the moment the ship lost all control. Pick up the Med Kit and then the Shipping Manifest just beyond it. The cargo was made up of 180 LOKI Mechs and one YMIR Mech. At the back of the area up the rocks is a Security Report describing the mechs breaking loose and going haywire. Pick up the Power Cells nearby, as you'll need them. You can also explore the rest of the area for various resources and mech parts to salvage, as well as many more datapads on the other side of the level to our route to the transmitter. When ready, deactivate the Signal Transmitter. All the LOKI Mechs and the single YMIR Mech are now converging on your position. Use biotics or sniper rifles to pick off the initial wave of LOKI Mechs as you rush back to the shuttle. Before long the YMIR Mech will come into view. Use your heavy weaponry and Overload to take it out and continue back to the shuttle. To make matters worse, visibility is being hindered by an incoming sandstorm!
Eventually you should be back at the shuttle and can jump on board as soon as you arrive. This mission follows on from the last, with the data recovered pinpointing the last contact the wrecked freighter had with anyone else, at the Jarrahe Station. We must go and investigate if something there caused the MSV Corsica to crash. The Jarrahe Station is in the Strabo system of the Eagle Nebula. Upon docking, it is clear something went very wrong on board.
Through the first set of doors is a PDA. It reveals that the station's VI has gone crazy and that the crew were trying to deny it access to the resources it requires to operate. In the next room are two crates of Refined Iridium. Collect these and then access the terminal nearby to restore access to the Docking area and open the door ahead. Read the PDA on the dead crewmember to the right. You cannot access the central mainframe yet, and we must restore power to the controls first. Head through the door to the left, leading to the Research Lab. Take the two crates of Iridium from the desks and use the terminal in here to restore power to the research area. You can now use the computers overlooking the research area to divert the power supply into the main computer at the back to destroy it. Turn each one until you have a supply of power running across to the left and back to the main computer.
This unlocks the testing area. Head back to the main room and enter Engineering. Once you enter Engineering, you will see plumes of steam blocking the way. This can kill you and your squad, dealing high damage with each encounter, but you should be able to sprint past them as they turn off sequentially. Your squad may be too slow, so feel free to direct them to a safe position while you complete this section, as there are no enemies to contend with. Run to the end, ignoring the path to the right for now. You may have to wait for the steam to turn off before ascending the final slope. At the top, use the terminal to restore power to the maintenance area. This also shuts off the steam, so head back down the slopes and into the passage by the dead body that you ignored earlier to take advantage of another PDA and access two Personal Lockers. Head back to the main room and enter the Living Quarters. There is a PDA to read in here next to a bloody crewmember. This pad plans for the moment the MSV Corsica will dock. Move through into the room behind the Living Quarters. Take the Med Kit in here and reactivate power to the Living Quarters. This allows access to the computers in the centre. Use them to enable 'five doors'. You can now go back across the corridor through the previously locked-door. Open the three lockers in here for heaps of credits. Head back to the main room, and then access the previously-restricted terminal to restore power to the Hub Area. Move inside and shut down the VI using the Mainframe.
With that, the mission ends. This assignment is activated because of information on the abandoned research station. The virus that caused its VI to go crazy was created at the Hahne-Kedar Facility. You can find it by scanning the planet Capek in the Haskins System of the Titan Nebula. Once you land, as you move through the flowery field some FENRIS Mechs will attack, backed up by the LOKI variety. Enter the facility with these enemies destroyed. Straight ahead is a small room with a Wall Safe, Med Kit and Computer (containing logs describing the virus spreading inside the facility). Watch out through the window to the left as a malfunctioning LOKI patrols down there, before exploding. Go back down the corridor and through the door. Access the Datapad for the evidently vain attempts of a security officer to sort the problem out, before moving up. Some FENRIS Mechs will attack. Take care of them and collect the Refined Element Zero to the right. LOKI Mechs will engage you from the level below next. We need to head through the maze of cargo containers to get to the control room. There are tons of Mechs in there, but if you push up slowly with Cryo ammo or heavy weaponry, falling back on biotics and Concussive Shot if you get overrun, you should be fine. Use the D-Pad (Xbox 360) to force your squad mates to move up and spread the mechs' attacks out, otherwise they just hang back and let you do all the work. You must push up, or the Mechs keep churning off the production line.
Push through the maze and go through the door at the back. Pick up the Element Zero and go into the control room. Shutdown the facility using the panel, as Shepard makes his escape and the mechs all self-destruct, completing the mission. Scan the planet Canalus in the Dirada System of the Pylos Nebula (you need to purchase star charts from Baria Frontiers on Illium to unlock this, and it can also be obscured by the name-tag of the Omega Nebula even if you have). Locate the anomaly and land at the source by launching a probe. If you liked the Blood Pack fog level (unlikely), then you'll love this one, as it's more of the same, but with more fog! The brown fog is extremely thick, and the geth we have to fight are much more lethal from range than the bumbling Klixen of Tarith. The best idea is just to push towards the blue beacon in the distance, following any red flares you can see. There are resources to collect, if you want to explore the side-areas, however. As you begin to move uphill, the first Geth will attack. You may only be able to see their blue lights, and it is extremely difficult to hit them at the distance that they can accurately hit you. Biotic attacks can cut through the smog, while it is also a good idea to use homing heavy weaponry, or move your squadmates up close. They are better in close-quarters than most human players. Most of the enemies are Geth Troopers, but there is a shielded Geth Hunter in there as well.
Once past this first wave and at the top of the hill, you should be able to collect three crates of Refined Palladium with no Geth interference. After the third, vault over the rocks behind it and some will be up the hill from you. Push on using our previous tactics, engaging the Geth Destroyer and its flamethrower as a priority (the beacon lights this area a little better than during the earlier encounter). Once past this set of enemies, you can get to the Geth Device and deactivate it, returning the weather of Canalus to normal. You must have completed the Horizon mission to be able to access this quest. This is the quickest assignment in Mass Effect 2, by some distance. Scan the planet Sinmara in the Solveig system of the Caleston Rift to discover a human colony struggling in the deadly heat of a sun's solar flares with its environmental shields down. We must reactivate them. Follow the path on landing and salvage the broken generator on the left. Bypass the Station Central Control Terminal when you get to it to make the way ahead accessible. Past the barriers there is a Control Switch. This changes which of the Cooling Unit, Shield Control and Shield Generator has power. Without the Cooling Unit, the Shield Generator will overheat. First, press the switch until the left-hand Cooling Unit wires light up orange. You can then approach the Cooling Unit and turn it on.
With this done, switch the power to the Shield Generator on the right, again lighting the wires up orange and approaching it to activate. Finally, send the power straight down the middle, to the Shield Control. Bypass the lockouts to complete the mission. To get this mission, scan the planet Taitus, in the Talava System of the Caleston Rift. A YMIR Mech has been detected on the planet, and seems to have a pirate registration, while producing an odd message. We need to land and investigate. Once you arrive on the planet, collect the Power Cells at the landing site. EDI reports vast amounts of resources behind the rocks, and it soon becomes clear from the Datapad near the curled up YMIR Mech that destroying these rocks was its initial purpose. It is not very economical, however, and requires a large amount of Power Cells to keep going. The previous owner has laid a trail of Power Cells out. We need to activate the Mech and feed it these Power Cells to lead it to the resources we want, which in can then blast a route to. Interact with the Mech to turn it on. It will stumble a few feet and then deactivate. Feed it some Power Cells by interacting with it to get it going again. It will then blast a hole in the rocks ahead. Proceed through the gap and collect the Power Cells in the area to the right. Feed it to the Mech when it stops. When the ground slopes down, you will be attacked by Varren to the left. There are only a few of them, so they shouldn't pose too much of a threat. Take the Power Cells they were guarding and return to your Mech to feed him when he runs out of power.
The last set of Power Cells are further ahead to the right. Feed them to the mech when it runs out, and it will attempt to blast the rocks blocking your path. Once it succeeds, go inside the opening and interact with the rock inside to gain some resources (5,000 Platinum) and complete the mission. Sadly, the YMIR Mech was destroyed in the blast... You acquire this mission by exploring the planet Zanethu in the Ploitari system. Scan the surface to reveal a distress call, sent by an unknown source. Alliance ships are also on the look-out for the missing freighter MSV Estevanico, so we need to land near the wreckage on the planet and discover if it is that freighter. There are no enemies to shoot on this one, so Shepard does not need to take a team. From where you begin, you need to dislodge the 'loose tiles' hanging off the platform to your right. You can shoot them or walk near them. They will then drop to create a bridge below.
You can then locate the girder sloping down to the level below, and follow that over until you eventually come to cross the bridge the loose tiles created, to collect some Refined Iridium. Proceed along the trail of Iridium and you will soon need to cover and vault over an obstacle to continue. Move along the beams until you get to the red-glowing section, indicating where the mainframe is that we can access the ship's systems from. Once this is done, the Normandy shuttle will collect Shepard just in time as the freighter falls into the abyss. Scan the planet Aequitas in the Forits System of the Minos Wasteland, which contains an anomaly. It appears to be an abandoned mine with some odd alien lifesigns, so we must investigate what is going on down there. This level is crawling with Husks, so take a squad well-suited to dealing with them, particularly characters with Concussive Shot, Shockwave and Incendiary Ammo. As soon as you move through the first shaft of the mine, Husks will attack. Clear them out and read the somewhat humorous (or terrifying) datapad and collect the Refined Iridium before moving on.
Continue deeper into the mine towards the next stash of Refined Iridium. As you get near, Husks will drop down from the roof. Collect the Iridium and focus on the Abomination in the next group of Husks. Use the explosive containers to assist. The next room has another Abomination and more Husks guarding the Iridium crate. Clear the way and bypass the Locker up the slope. Move downwards, picking up the Refined Iridium on the left and clearing the next room of Husks. Make use of the Medical Station and read the Mine Logs showing how some sort of machine gained control over the miners. Go up the slope into the next section, making sure to collect the Power Cells on entry. There is a device spawning Husks inside the structure below, and in this part of the level you must reach it as the Husks will never stop coming until you do. Clear the initial mass of Husks and sprint for the machine once there is a lull when only a few emerge at a time. There is a med-kit to the right, just before the machine-room if you are desperate. Shoot the bombs on either side of the room with the Husk machine in to set it to explode and trigger the end of the mission.
EA and BioWare plan to release numerous pieces of free and premium downloadable content. All of these are examined and dissected on the following pages. For the 'free' content you need to have purchased the game new and entered their 'Cerberus' code that comes in the box into the game's store menu. Otherwise you will have to buy a Cerberus Network membership, though this gives you access to all the 'free' content. Zaeed is also a downloadable character, but he has been included in the main walkthrough of this guide due to the likelihood that the vast majority of players will have downloaded him. This content was available at launch. Having downloaded the Normandy Crash Site DLC (free with access to the Cerberus Network), you will receive an email and an 'Explore Normandy Crash Site' tag will appear on your Galaxy Map. To get to the crash site, that is the location where the Normandy ends up at the start of Mass Effect 2, head through the Mass Relay, into the Omega Nebula and to the Amada system. Highlight the Planet Alchera to receive notification of an anomaly, then scan for it and land once you have pinpointed and probed the location. There are no real objectives to this, except to put the memorial monument in a valid place, but there are plenty of chances for reminiscence and resource collection are on offer. There are no enemies to shoot on this one, so Shepard does not need to take a team. Once you land, there are three things to do. You need to collect twenty dog-tags of people who died with the original Normandy to return to their families. There are resources, such as Iridium and Element Zero to collect. You can also trigger flashbacks of the first Normandy by exploring. To the right of where you begin is the first dog-tag. They are easy to spot even from distance because of the tell-tale glint to them. Below is a list of all the dog-tag locations, along with what else you can find in the vicinity: Note that directions such as left, right and front given here are based on the direction you face when you begin, pointing from the shuttle towards the Mako. 1) To the right of where you begin There is an N7 helmet on the upper ground in front of the Mako, along the path stretching out to the right. This is placed on Shepard's desk on the new Normandy. There is also some extra Element Zero under the arch of debris to the left of the shuttle. With that, you can return to the shuttle to go back to the Normandy. This DLC is part of the Firewalker Pack which is available free for anyone with access to the Cerberus Network. It was released on March 23rd 2010. This particular pack includes the Hammerhead vehicle and five missions to try it out on. Having downloaded the Firewalker pack through the Cerberus Network, you will receive a message at your Private Terminal asking you to investigate a crashed science vessel that had been testing a new planet-exploration vehicle, called Hammerhead. The task is to locate the ship, the scientists and their prototype vehicle. The planet that they crashed on is marked on the Galaxy Map. It is the planet Zeona in the Elysta system of the Ismar Frontier. Scan the planet and land at the anomaly site. The Normandy shuttle lands next to the cargo container that houses the Hammerhead. Bypass the computer controls to unearth the M-44 Hammerhead. You can effectively fly quite high in this vehicle, by tapping A or holding it in sustained bursts (Xbox 360 controls). The idea is to aim for the blue funnels of light, where you can then collect the scientists' missing research. You hold Y (Xbox 360) to make the vehicle scan the ground. You must fight to hold it in place as it scans. The second funnel should be in view from the first one and is easy to get to. You then need to blast a hole in the debris in front of you (using the Hammerhead's missiles with RT [Xbox 360]) to access the third one. Explore the next section until you find it. The next set are up high, and you need to effectively use the Hammerhead's jump to scramble up the crevice to access them. Use a combination of boost and jump to reach those highest up, and move from rock to rock until you have collected them all. When it is confirmed that the mission is complete, return to the Normandy when prompted. You now have the Hammerhead as a permanent Normandy vehicle! This DLC is part of the Firewalker Pack which is available free for anyone with access to the Cerberus Network. It was released on March 23rd 2010. This particular pack includes the Hammerhead vehicle and five missions to try it out on. Once you have completed the initial task to unlock the Hammerhead, you can travel to Karumto in the Yakawa System of the Caleston Rift. Scan for the anomaly and land at the source. We must collect the lost research from the team behind the Firewalker project. It is inside a research station on the planet. Locate the Research Station: Now you can see why it was called Firewalker, as the Normandy drops the Hammerhead onto a volcanic planet. You will have to disembark at one point during this mission, but there are no enemies. If you fall into the lava you will be unable to get out and the Hammerhead will be destroyed, failing the mission. From where you begin, boost through the corridor and jump onto the outcrops of rock when you enter the open area. Jump from the one on the right to one on the left and mine the area (Y on Xbox 360) to unearth some Iridium. To cross back over, you will need to land on the pillar of rock in the centre of the lava. Jump between the ledges on the right-hand side until you land by a tunnel. Enter it and mine the Iridium once you emerge on the other side. The base is just ahead, so press B (Xbox 360) when prompted to disembark and enter. Find Clues: We now need to find clues to the whereabouts of Dr. Cayce. Use the Medical Station and head upstairs. Enter the room on your right once you come to a dead-end. Examine the Computer Console to play a journal of Dr. Cayce. You should bypass the door to the right before doing anything else. Inside is some Refined Iridium. You can then move back through. In the lower stage of the main room is a Locker with credits inside, a Terminal containing another log of Dr. Cayce. Once you have cleared out the room, activate the Sensors using the panel in the corner of the room. This has activated the power grid, causing the area around the base to lose stability. The level shakes a lot, but you shouldn't be under too much threat and can stop to collect any items you may have missed (within reason). The structure of the base has changed, and when back in the corridor you must go through the other door to bypass a hole in the floor. Enter the door and you will find yourself in some crew-quarters. Read the Datapad for another log and open the Wall Safe for credits. Go out of the other door and you will re-enter the cargo bay and be able to leave in the Hammerhead. You still have to get off the planet, however, which is losing its structural integrity. Jump over the first gap and boost into the tunnel ahead. Hop over the obstacles in the tunnel and jump the gap when you emerge. There is another hole in the path soon after, and a much larger one, so use a combination of boost and jump to clear it. The next gap has a small pillar with an Iridium source on it, so collect that and move to the next part. Speed through the next tunnel, manoeuvring around the obstacles once again. There is a false crest to the next jump, and you should allow the Hammerhead to travel onto the bridge before jumping or you will not be able to clear it. With this done, boost through the cave to end the level in dramatic style. This DLC is part of the Firewalker Pack which is available free for anyone with access to the Cerberus Network. It was released on March 23rd 2010. This particular pack includes the Hammerhead vehicle and five missions to try it out on. You unlock this assignment as soon as you discover the Hammerhead. Enter the Verr system of the Hawking Eta cluster and scan the planet Corang to find the anomaly to land at. This is the first Firewalker mission where the Hammerhead will be physically involved in combat. We need to locate Dr. Cayce's additional survey sites and retrieve the data from them. This level uses the same blue cylinders as before to show you where to go. From where you begin, Geth Troopers will be in a line in front of you, trying to take you down. Feel free to sit there and pick them off, or satisfyingly ram past them. Once you get close to the blue light, a Geth Dropship will land some Troopers, but most importantly, a Geth Colossus, to guard the site. Stay below the platform, out of site, and jump directly up while firing your rockets to hit the Colossus before returning safely to cover out of its reach. Repeat this until its shields and armour are down. You can then move in to finish off the rest of the Troopers. Bear in mind that the Hammerhead is not robust in combat, and a few well placed shots will set its alarm off, and a few more will make it catch fire. It does recharge its health, but can easily be destroyed by a Colossus if you take them head on.
With the platform clear, move in and mine the area indicated for artefacts. Zoom onto the next one, ignoring the Geth on the crest of the jump if you wish. You can survive in the acid briefly, but it's best to stay on dry land, so land on the rocky islands to the left as the next Colossus comes into view. Hop to the rock on the left with the mine site on. From here you should be able to target the Geth without them being able to reach you. If necessary, move onto the central island to get some shots away and then retreat back to allow your shields to recharge. Avoid the acid at all costs if the Hammerhead is damaged. Hop around and use your agility to avoid the devastating attacks. While mopping up the Geth Troopers and Destryers, run them over for the easiest kills. Collect the next artefact and move on. Jump up the wreckage and ramps behind the island and go through the tunnel to emerge next to the third artefact. Geth will again drop in, so use the right hand side of the area and the cover available to hop and dart out to get shots on the Colossus without risking your ship. With the artefact collected, climb up the brown structure in the corner of the area to get a convenient slope from which to jump to the next artefact (see video below).
Mine the Platinum on the platform in the acid, and jump towards the next objective. A Geth Prime and Colossus are guarding the dig site. Use extreme range to attack from distance and duck back behind the scenery to avoid gunfire. Move in and pick up the artefact when ready. Enjoy the huge jump nearby to speed to the next artefact (ignore the Geth en route). Don't power onto the final artefact too quickly, however, as two Geth Colossuses are waiting for you. Strafe, jump and shoot to deal with them, before getting the final artefact and volunteering to return to the Normandy once you've explored, if you wish. This DLC is part of the Firewalker Pack which is available free for anyone with access to the Cerberus Network. It was released on March 23rd 2010. This particular pack includes the Hammerhead vehicle and five missions to try it out on. As soon as you unlock the Hammerhead, you can undertake this mission by scanning the planet Lattesh in the Chomos system of The Phoenix Massing. The idea behind this one is to retrieve as much data as possible by scanning all ten sites on this icy planet. The Hammerhead's one weakness is that it cannot work in the cold (though it's great in the heat!), and as such you effectively have a time limit in which to collect all your data. The data is marked by red lights as opposed to blue on this level (presumably because blue is hard to spot in the snow). To prevent your engine from freezing, complete the level as quickly as you can. You should use boost as much as possible and only stop to get the scanning done, otherwise you will lose too much heat. When you scan successfully, you also regain some heat. You also get some Palladium from each site, adding up to 4,000 in total. The first site is straight-ahead of where you start. Sites two to eight are all down the linear route from the first. The ninth is through the tunnel behind eight, while number ten requires you to turn around after nine and go up a slope to jump across a canyon and access it. With all ten scanned, a cut-scene will play and the mission will end. This DLC is part of the Firewalker Pack which is available free for anyone with access to the Cerberus Network. It was released on March 23rd 2010. This particular pack includes the Hammerhead vehicle and five missions to try it out on. Having successfully extracted the research from the scientists' base on the volcanic planet in the Firewalker: Recover Research Data mission, you can scan the planet Kopis in the Hoplos system of the Hades Nexus. Scan the planet and land once you have probed the anomaly. We need to gain entry to the base on this planet, protected by kinetic barriers, to discover what Prothean relics were found here. The dome is protected by Geth Rocket Drones, but they should not provide too much resistance to the Hammerhead if you move quickly. They jump out of the ground, so cannot be killed from distance. You can defeat them quite easily, however, even by ramming them with the Hammerhead. First, get to the dome and follow the blue wires leading from it. These will show you where the generators are that you need to destroy to deactivate the dome. Once you get to the generators, one rocket should take each one out. Some at the back of the area are harder to reach, and you may need to jump as high as you can and then boost into the side of the rock-face to slide up the final few metres. Find the lowest point and try this tactic. One of the generators is also in a cave inside the rock, so be on the lookout for it, but simply follow any glowing wires to locate the remaining active generators. You should also see a few resource sites around the area, so stop on those and mine the goodies inside if the Rocket Drones give you enough respite. Once the dome is down, enter the crater and disembark. Being protected by the kinetic barrier, there is no one inside the facility. In the first area you can read a Datapad and collect some Refined Element Zero. Soon also you will be able to steal some credits from a Dead Body and in the next room examine a Research Terminal for a Biotic Damage Upgrade. Play the Journal in this room to see just how desperate the scientists had got to protect their find. Hack the Computer Console to reveal the spectacular Geth artefact. Be sure to read the final Datapad just by the relic, showing Dr. O'Loy's motives for co-operating with the Geth. You can then approach the relic to end the mission. Like Zaeed Massani, the character of Kasumi Goto is downloadable content. Unlike Zaeed, however, it is premium content, and a fee of 560 Microsoft Points (560 BioWare Points), which is £4.80/€6.72/$7.00 applies. In terms of value, you get the character of Kasumi, who contributes more to conversation and the main story than Zaeed, and is a lot more unique in combat; a recruitment mission taking about five to ten minutes; a loyalty mission, which lasts much longer, over thirty minutes, featuring a lot of combat; a new weapon; a new casual outfit for Shepard; a new research upgrade; a new room on the Normandy; and an achievement. The loyalty mission is also quite innovative and is unlike anything else in the game thus far, but ultimately it will be something for completionists and those wanting to experience a new character in their squad. The pack is best recommended for anyone just starting out, or planning to do a second playthrough, though of course she may be included in Mass Effect 3! Kasumi is a stealth/tech expert, and is suitable as a character to send through the ventilation shaft during the suicide mission, if she is loyal. She can also be killed in the attack on the Normandy, if you do not have the Multicore Shielding upgrade. She boasts Overload and a new attack called Deadly Shadow Strike, which beams her behind your enemies and takes out most classes of hostiles in one impressive and stealthy melee attack. Once you gain her loyalty, you will have access to Flashbangs, which stuns anyone looking at it. As soon as you have downloaded the content, and once you have completed the Freedom's Progress mission, you will be notified that Cerberus has sought out a master thief named Kasumi Goto, and she has prepared to meet you on the Citadel. The Citadel: Hopefully you should have been to the Citadel already, but if not, use the city-walkthrough in this guide. Luckily, Kasumi is easy to find, even if she is a stealthy-thief. As soon as you dock at the Citadel at the Zakera Ward, the first advertisement will talk to you. This is Kasumi contacting your discreetly. As you will know if you have read the Journal update for the mission ahead, the password you need to give upon activating the advert is Silence is Golden. If you feel like being a bit of a rebel, you can ignore the password altogether, but Kasumi will not be very impressed that you have disregarded the work she went to to set this meeting up. Kasumi has heard plenty about you, while few have heard of her, except for rumours and speculation. Cerberus has set up all the basics to get her as part of your team, so the conversation options here are all incidental. You may want to research some of her backstory. Kasumi is a master-thief, as the title of this dossier suggests, and has a reputation to keep for the care and stealth involved in her work. Cerberus has offered Kasumi plenty of money for this job, but there is also a catch – she needs some help from the Normandy crew. This comes in the form of a loyalty mission, and completing it will give you another asset for the suicide mission (and a fantastic one in combat). Kasumi reveals that she has been here in person all along, and once you are done with the conversation, return to the Normandy. Normandy: Like Zaeed, but unlike the game's main characters, Kasumi does not have much to say on the ship. You can find her on Deck 3, the crew-deck. She has more varied things to say than her DLC counterpart, but you cannot engage in physical conversation with her on the ship (and she is not another romance option). It is worth keeping her involved, however, as she is more diverse in what she says than Zaeed, and can offer advice on relationships from the moment she sets foot on board the ship. She is located in the Port Observation Deck, where there is also a bar and a window into space to shut. You can pour red and blue drinks. Each has a different effect - mix the two together for hilarious results! With Kasumi recruited, you will want to upgrade her Overload ability as a priority due to the YMIR Mechs on her loyalty mission, and then Deadly Shadow Strike, as she is otherwise a little weak offensively. With the pleasantries over with, the loyalty mission for Kasumi can be introduced. Kasumi used to work with and love a man named Keiji Okuda, until he was murdered by Donovan Hock, a notorious character of many shifty trades, and well known for his ruthlessness. Kasumi wants to retrieve Keiji's 'greybox', which stores memories, passwords and important information. Once you travel to the planet Bekenstein in the Boltzmann system of the Serpent Nebula, a cut-scene will introduce you to the plan ahead. Kasumi has set up a cover for Shepard, making Hock interested enough in us to allow our attendance at a party he is hosting, and we will be assuming the role of the somewhat humorously-named Solomon Gunn (or Alison Grundy for a female Shepard). Once at Hock's party, we will be giving the centre-of-attention a special gift: a gold statue shaped like Saren. This is also a chance for Shepard to try out his trendy (or her revealing) new outfit in public! Our armour and weapons will be inside, but we will be able to carry a pistol in case we have trouble getting to the vault where it is stored. Once we have our armour, we will go further into the vault and get Keiji's greybox. Simple! Note that it is just Shepard and Kasumi on this mission, with no extra team mates, unusually, despite there being plenty of combat. Unfortunately upon our arrival, Hock comes to greet Shepard/Gunn and Kasumi. He recognises something off-putting in Kasumi, and refuses to allow her entry to the club. Luckily, Kasumi is an expert at stealth, and also sports a cloaking device that will enable her to track Shepard and assist him at the most crucial stages of the mission. When the cut-scene ends, you will be inside Hock's mansion. Locate Vault Door: The vault is located at the back of the mansion, but to get there you need to take a circuitous route. Head through the house, taking a left turn into a picture gallery and then left again when you emerge. Past the one standing and two sitting guests are some steps leading down to the vault. Proceed down and through the door below. Kasumi will appear to give some advice. To enter the vault, we must do the following: - Disable the power to the vault's kinetic barrier First, we will take the down power to the vault. Outside the vault in the corridor you should be able to locate a power cable. Interact with it and Kasumi will modify your Omni-Tool to scan for the cable's power signatures. You can now head back upstairs and move around the mansion following the power signatures. The generator we need to shut down is actually in the art gallery we passed through earlier, so head there and use the statue to the left of the fire to open a security hatch. Kasumi will appear and deal with the power generator. Next up we should talk to Hock. He is by the water feature in the centre of the mansion. If you have high enough renegade or paragon abilities, getting him to make a speech to the surrounding crowd is easy: just choose the appropriate renegade or paragon conversation option. If not, use one of the other options to progress and unlock new ones – the level of paragon or renegade skill required should decrease as you ask more and more generic questions. Keep going until you provoke Hock to make his speech. With that, Kasumi will have enough to create a voice-print for the vault's locking system. We still need the password and DNA. The password is located in the only accessible side-room in the mansion. You need to access the door to the left as you entered the mansion for the first time. It is located by the stairs going up to the second level. Approach the door and attempt to gain entry and Kasumi will bypass it for you. Once inside, you will have to bypass the next door yourself. As soon as you go through it, two guards will be waiting for you. They should be easy to deal with, even with just your pistol equipped (note that you can of course still use Biotic attacks and the likes of Concussive Shot in combat). Take them out and then access the Wall Safe and Medical Station in the same room. The password is stored on a Datapad left by a careless worker. With the password of 'Peruggia' in hand, we can now proceed to get the DNA sample. You can try talking to the guard outside the door to Hock's private quarters, located on the right hand side of the mansion (from where you originally entered) and through another art gallery-like area, but you will have little success. You need to head through the middle of the mansion and out onto the veranda at the back. Investigate the datapad out here, to the left, then head to the right. Just to the side of the stairs heading back up from the veranda you should be able to find some pipes allowing you access to the private area. There is a possibility of some really satisfying kills here, if you wish. There are three guards round the corner ahead. You can melee the first one off the edge, and use Concussive Shot on the second, to send them both falling into the gorge below. Kasumi can use her Deadly Shadow Strike to get behind the third and create a diversion. Biotics work just as well, and you should take the opportunity for some fun, easy kills rather than using Shepard's pistol.
With this done, move along the path to the blocked door, and proceed up the ramp. Shoot the glass and cover-vault to enter the private quarters. Enter Hock's room, to the left. There is plenty to do inside, but you should be aware of an alarm clock – if you investigate it for DNA, you will set it off and alert the guards. Explore the room, interacting with every item except the alarm clock. Most items do not have enough DNA on to use, but the antique weapons by the fireplace at the back of the room and the datapad to the right hand side (as you entered the room) are good specimens. At the back of the room you can find a Wall Safe and a plant to search for DNA with humorous results. You can then head through the door at the top of the stairs, and make your way back to the vault. Interact with the DNA scanner and the microphone voice-lock to open the door and allow access inside. With the statue also in this room, you now have all your armour and weapons back. Inside the Vault: There are plenty of Hock's exhibits to look at here, including the head of the Statue of Liberty, Michelangelo's David, and many artefacts that you may find humorous or interesting from the Mass Effect universe. You are provided with a sensor to show how close you are to the greybox, so explore the room (no enemies will bother you for the time being) until you locate it. There is also the DLC's unique weapon located next to it, the M-12 Locust SMG. You will then be interrupted by a holographic head of Hock. There is a Renegade interrupt to use if you want to, which will break one of Hock's artefacts and annoy your host. Once the conversation ends, many of Hock's guards will spill into the vault. Watch out for Flashbangs, which cause a white image burn if you are caught looking at them when the grenade goes off (turn away to avoid the effects, though this dislodges Shepard from cover). Kasumi has some Flashbangs to use herself when loyal, but for this mission you have to face them regularly and cannot use them in retaliation. Use a sniper rifle if available to take out as many enemies as possible as they enter, or move up closer to deal with them. Remember to use Kasumi's Deadly Shadow Strike to get behind the enemy lines and surprise some of the opposing soldiers. You will have to bear Chief Roe in mind, a Shielded and Armoured grunt of Hock, but once this target is down you should be able to mop up the remnants. Before you leave, make use of the Medical Station in the vault. In the adjoining room there is a Weapons Locker. You need to ensure you have a weapon equipped that can deal with the likes of YMIR Mechs for the upcoming section. Go through the next door and deal with the Eclipse Troopers inside. After this the first YMIR Mech will come to attack. Use Kasumi's Overload and heavy weaponry to defeat it. It's rocket attacks can be deadly, so retreat past the concrete divide in this tunnel to allow your shields to recharge if necessary.
In the next section you will encounter some Eclipse Vanguards and Troopers. Watch out for the Vanguard's Barriers. Up the stairs on the way out of the section you can hack a PDA. In the next hall, three Eclipse Troopers will jump out from cover ahead. Try to pick them off with a Sniper Rifle or biotics. LOKI Mechs, Eclipse Heavys and Eclipse Troopers will be in the section ahead. Clear the room and salvage the parts and pick up the Refined Platinum and Med-Kit. You need to use the Mass Accelerator Cannon to blast a hole in the wall ahead to proceed. In the room near the new hole you can salvage some more credits before moving on. In the next area, another YMIR Mech will engage you.
Take out the Eclipse Troopers first so that they don't get a chance to flank you, before using Kasumi's Overload to take down the Mech's shield and finishing it off with heavy weaponry. Further along, a truck will pull in front of you, and Eclipse Troopers will emerge from the top. Collect the Med-Kit on your way up the stairs out of this section and scan the dead mercenary for a Tech Damage upgrade. The next area is a big warehouse structure. Take cover as you enter and Eclipse personnel will attack from the front. Prioritise the Eclipse Heavy at the back of the area and any enemies getting close to your position. There are more enemies to the left of this area, but to deal with them you will have to move through the blue cargo container on your left, allowing you to move closer to them. Pick up the Refined Platinum on your way through. In this section, Eclipse Engineers are the order of the day, with their combat drones and shields, as well as the more usual Vanguards. Make use of the PDA on the back of the truck once you emerge. Open the storage crate near the door out of the area and move through. When you go through the next door, a cut-scene will play as you reach the final section of this lengthy mission. Defeat Donovan Hock: Hock's dropship will arrive on the scene and pin you down. It is also assisted by Eclipse Troopers and LOKI Mechs. You cannot destroy the dropship at this stage, only damage its shields (and they will recharge anyway). To get Hock to leave you alone, however, you still need to take its shields down so that he retreats to recharge them. The best tactic here, particularly if you have upgraded Kasumi's Overload, is to stay in cover and pick off the infantry sent to attack you, while occasionally popping out to target the dropship with Overload. You can use some heavy weaponry to assist, but it is less effective for the most part than using Overload, and you can save your ammo. With the shields down, you are free to move up to the next section. Collect as much ammo as you can and move on. Trigger the wave of Eclipse Troopers and defeat them, using Kasumi to get behind them and split their fire. Also beware of enemies on the level above you. Pick up the two Med-Kits and Power Cells (important for the battle ahead) in the area where most of the Troopers were, before returning to cover to await the return of Hock, which coincidentally comes in tandem with killing the final infantry unit in the area. This is a slightly odd section, as Kasumi needs you to clear a path through the infantry to allow her to reduce the dropship's power and thus lower its shields. You cannot simply lower the shields yourself, as they will recharge quickly once they go low enough. With the return of the dropship, more Troopers and LOKI Mechs emerge out of nowhere (and on all flanks!). Take them all out, and Kasumi will be free to attack. When you have finally cleared the area, avoiding the dropship all the while, a cut-scene will play as Kasumi does her thing. She has used her Omni-Tool to disrupt the dropship's shields. You can now break out the heavy weaponry and rip through the dropship's armour to finish Hock off. Bear in mind that Eclipse mercenaries will continue to attack, so watch your flanks and don't become totally obsessed with the dropship. It usually flies off when the fighting on the ground gets hectic, giving you a window to destroy the floor. When you finally get the armour of Hock's ship down, it explodes in a brilliantly bright explosion.
You are now free to cover-vault or climb the steps up to the higher platform (which also holds a Med-Kit), where the Normandy's shuttle is waiting. Normandy: Back on board the Normandy, Kasumi watches Keiji's greybox. It is a sombre holographic record of the love between these two characters, and shows some of the couple's most tender memories. It also contains information that the likes of Hock must get their hands on. Now Kasumi is at risk, and Keiji has left a message ordering her to destroy the greybox so that she will not be involved with the risks of being the only source of access to the data. You can give her advice on which option to take: to keep the memories or destroy them. Either way, you have gained the loyalty of a very powerful team member, who will be invaluable in the future. Broke, Blind, and Bedlam: Gain the loyalty of the thief (complete Kasumi Goto's loyalty mission, Kasumi: Stealing Memory) [15G] The Citadel makes a reappearance from the original Mass Effect, but much has changed. Once you dock, talk to the C-Sec official at the front desk. She'll explain that most visitors have to surrender their weapons and biotic enhancements upon entry to the Citadel, but thankfully, we don't count. Continue through the door until you reach the checkpoint ahead. The turian manning this station will stop you, as his records show that you are dead. To clear this little matter up, you need to speak to a Captain Bailey in the next room. Clearing up the matter with Bailey is pretty straightforward, and once that is done you are free to explore the Citadel at your leisure. Locations: The Citadel is split into a variety of levels, each accessible via the transit system (orange consoles, usually next to taxis or other vehicles), but all those in the Zakera block can be reached using stairs as well. You dock on Level 27. On this level there is a shop called Citadel Souvenirs, from which you can buy fish, model ships and the like (note that it is a good idea to buy a fish here for a future side quest on the Citadel). There is also the Zakera Cafe (here you can buy the ingredients required by the Normandy's Mess Sergeant). Once people know who you are, they will willingly grant out discounts in their shops in return for an endorsement from a former Spectre. It is rather humorous to have every shop on the Citadel sporting a Shepard endorsement, so feel free to grant these out at will. Also on Level 27 are two Krogan who are talking about fish on the Citadel. Make sure you overhear their conversation to unlock a potential side-quest (see the appropriate section below for the full details). More shops are to be found on this level, including Rodam Expeditions, which offers weapon upgrades. You can also access Dark Star Lounge, the bar for this area of the Citadel. You can dance inside, or order a drink. On this level make sure to enjoy the clerk of the humorous videogame store talking about his latest favourite product. There is a conversation to be had with Khalish al-Jilani, a journalist from the first game. You can gain Paragon or Renegade points depending on how you deal with her. Finally, by talking to the Quarian, Volus and C-Sec patrol on this deck, you can get involved in the 'Crime in Progress' side-quest. Head down two levels to come to the third deck. As well as two shops, Sirta Foundation and Saronis Applications, one with medical upgrades and the other with science enhancements, you can begin Garrus' loyalty quest here, and solve the 'Crime in Progress' one that began on Level 28 (see side-quests below). Once you arrive at the Presidium, Captain Anderson will meet you. He'll explain about the Council and the position they are in following your escapades in the first game (or not), and you will have the chance to gain some Paragon or Loyalty points along the way. Anderson and the Council is pretty much it for this part of the Citadel. There are nowhere near as many side-quests on the Citadel in Mass Effect 2 as there were in the first game, but there are still a few to take part in: On Level 28, you will encounter a Volus, Quarian and C-Sec Officer in a dispute. The Volus has accused the Quarian of stealing his 'credit-chit', and the C-Sec Officer is hardly objective on the matter. As the last place the Volus used it was Saronis Applications, head there and talk to the store-owner. As it happens, the Volus did in fact leave his credit-chit behind. Inform the C-Sec Officer to save the Quarian. You can also use harsh measures to answer the officer's racial prejudices, earning Renegade Points. On Level 27, you should be able to overhear two krogan talking about a rumour that there are fish in the water of the Presidium. You can investigate this matter yourself, by talking to the Presidium grounds-keeper who frequents the Dark Star Lounge. When he tells you that there are in fact no fish living in the water, you can either break the unhappy news to the Krogan for Paragon points, or buy a fish from Citadel Souvenirs and pretend you found it in the water for Renegade ones. The Krogan will be ecstatic, but you will still have conned him out of his money. Speak to Mess Sergeant Gardener on the Normandy and he will tell you that he would like some special ingredients to make his cooking more interesting. You can pick some up from the Zakera Cafe on Level 27. Having completed Thane's loyalty mission, or having foun the Forged IDs during Garrus's loyalty mission, two Asari appear sitting on Level 27 of the Citadel, near the steps to Level 26. Listen to their conversation to begin the quest. They need help getting off the Citadel, with C-Sec customs currently unreasonably preventing them from leaving. You can either give them the Forged IDs for some Renegade Points, or volunteer to speak to the C-Sec customs official and get them permission to leave. The C-Sec official is a woman staffing the desk by the space-port on Deck 27 (the one who Shepard can comment to about heavy security), before entering through the customs corridor to Bailey's office and the Citadel proper. You need enough Paragon or Renegade points to do this successfully, otherwise you will have to fall back on the fake IDs or not help. If you talk to the customs officer, return to the Asari to receive their gratitude and some Paragon points. If you have spoken to the Salarian Ish on Omega (see Omega walkthrough), he will have asked you to collect two Datapads of information for him. One is on the Citadel, outside Saronis Applications, on Level 26. Collect it while you are on the Citadel if you want to help. To hand in the package, return to Ish on Omega. There are two loyalty quests available on Tuchanka, as well as a small selection of side-quests. It is well worth a visit, moreover, as the Krogan homeworld and a place where both Mass Effect games put much importance in terms of storyline. To get there, head through the Mass Relay and plot a course to the Krogan DMZ. Team Selection: As Grunt's 'home' planet, it is worth taking him with you (if you have access to him) to get a reaction from those on Tuchanka. Upon arrival, you may notice the Krogan and his Asari girlfriend from Illium have come to Tuchanka. If this is the case, your effort to keep the two together was evidently successful, and the Asari is still being regaled with the poetry of her partner. Once you reach the bottom of the ramp you will be intercepted by some Krogan. They tell you that their clan leader wants to met you. Follow the corridors until you come into the central area of Tuchanka. Locations: Clan Leader: The clan leader, who, depending on choices in the first game, may be Urdnot Wrex, a familiar figure, or newcomer Urdnot Wreav, is located to the right, up the slope from where you come in. He can give you all the information you need about the two loyalty quests, and if it is indeed Wrex, is a great chance for some reminiscing.
Ratch's Wares: This is the first of two shops on Tuchanka. It sells upgrades primarily, and is owned by a Krogan who could use your help with a pyjak-vermin problem. If you oblige, you will unlock a discount at his store as well as enjoying a fun minigame. Accept his offer to open-up the Killing Pyjaks side-quest (see below). One more piece of fun related to Ratch is to be had after killing some pyjaks. You can then buy pyjak meat from Ratch's store. Feed this to his pet Varren and it will follow you around the hub every time you visit! You can pet the Varren without getting any meat (which is free, incidentally), but it's not the same as having a killing-machine lovingly following you around.
Killing Pyjaks: This is a fun minigame located next to the chief scout's barricade. You must use turrets to destroy waves of monkey-like pyjaks as they run at a shopkeeper's food stores. For more information, see the Killing Pyjaks minigame below. Varren Pit Fighting: Just before you come to the pyjak minigame and chief scout you will find the Varren Pit. You can place a bet of 100 credits on one of the Varren to kill the other. You will be treated to a movie-sequence of the fight in progress. It's pretty much a 50/50 chance, so pick your favourite colour and you can increase your initial stake fivefold. Fortack's Database: Over the other side of the town, near the mechanic, is a scientist named Fortack. You can get information out of him about the role of Krogan scientists, and there are opportunities for Paragon and Renegade conversation options. He also has a shopping terminal which you can interact with for some important upgrades. No discount is available. Be sure to punch the pyjack standing on the crate in the corner of the room too. You get nothing out of it but the satisfaction of whacking the vermin is worth it. Nakmor Ambassador: The Ambassador is located on the upper level of the compound. There is also a Shaman nearby, as well as Uvenk's men. You can only speak to the latter with Grunt in your party at the start of his loyalty mission. The Ambassador, however, gives you the low-down on opinions on Urdnot and the clan leader's master plan. Side-quests: Killing Pyjaks: Speak to Ratch who owns the first shop you come to on Tuchanka. He wants your help to remove the pyjak problem that blights his food supplies. To lend a hand, head past the Varren Pit and to the chief scout who you may have encountered in Mordin's loyalty quest. Use the terminal nearby to activate the pyjak minigame. It is a little like missile defence, where you must use rockets to kill the pyjak as they run at the food stores. There are tyres in the way, and the weapons alternate from launching from left to right, so you must get used to the direction your shots are coming from to avoid these obstacles. In reality it's pretty easy, as you don't even have to hit the pyjaks to kill them, or indeed to stop every one from reaching the food. With three waves defeated, you unlock the discount on return to Ratch.
Combustion Manifold: Speak to the mechanic by the truck on the far side of Tuchanka. He is missing a Combustion Manifold which was lost in the field and is having to build one from scratch – a three day job. To help him out, keep a watch for it during Mordin's loyalty quest. The location of the device is just before entering the Blood Pack facility, and is detailed in the main loyalty quest walkthrough in this guide. Return to the mechanic when back in Tuchanka to complete the quest. Missing Scout: Speak to the chief scout by the pyjak barricade and he will tell you that one of his men went mising in the Clan Weyrloc and Blood Pack base. Coincidentally, this is where Mordin's loyalty quest takes place, and indeed, you can find the missing scout in one of the rooms of the base. You have to convince him to return to the Urdnot clan using Paragon or Renegade conversation, and for more information you should read the quest walkthrough for Mordin: Old Blood. As with the original Mass Effect, there are many romantic relationships that Shepard can have with members of his crew. In fact, the number of these has been vastly increased. Potential Romances: For playing as a male Shepard, you can have a full-blown romantic relationship with: - Miranda A female protagonist can have such relationships with: - Garrus A Shepard of either gender can have relationships with: - Samara Note that relationships with these last three do not inhibit proper relationships with the previous six. You can do these at your leisure, but they do not give you the Paramour achievement. Romantic Methodology: To convince a crew-member to join your Shepard in a romantic relationship, you need to work at it after every major mission. Completing the loyalty mission for that crew member will go a long way to helping, and picking Tali over Legion or Miranda over Jack (or vice versa) also is a great show of your affection. Speak to Mordin for relationship advice, as he has much to offer! Eventually they will express their desire to be with your character. At this stage, when you go to the Omega 4 Relay, they will pay you a visit. Should you remain faithful to them, you can then invite them to Shepard's quarters (where Kelly Chambers will dance for Shepard). Note that while it is attractive to try and romance every possible crew member in the game, this will have repercussions for the next game in the series. You can break up with a crew member, and should you wish to pursue a relationship with another character, you will be forced to make this choice. Note that once you have split up, you cannot reignite the relationship. Note that with Jack, you must turn down her initial request for casual sex, or she will refuse to speak to Shepard again. Work at the relationship with Paragon motives and she will visit Shepard before reaching the Omega 4 Relay. Note that with all the romance options, you should pursue them as much as possible before the Omega 4 Relay, and with Kelly Chambers before the Reaper IFF. Much of the progression in the relationship happens during the Suicide Mission, and cannot be easily replicated afterwards. After the Suicide Mission, you can update romantic interests to Shepard's quarters. Note that if you proceed to have sex with Morinth, it results in a Critical Mission Failure, and you will have to load a recent save. Note that Samara requires a Paragon to convince her of romance. Methodology: To mine a planet, visit it with the Normandy and hold LT (Xbox 360) to begin scanning. The noise-map to the right peaks in certain areas to indicate when certain resources have been found. You can then probe the location to unearth the resources. It is recommended that you purchase the starmaps at Baria Frontiers on Illium and unlock the Probe and Fuel upgrades for the Normandy if you are serious about scanning. Most planets have over a dozen locations featuring resources. A good tactic to speed up searching is to only hold the scan button sporadically, scanning every few inches on the screen, for example. Resource Hotspots: Certain resources tend to be common on particular planet-types. In the following section, all the planets high in particular resources will be listed. Note also that for the rare Element Zero, you need a planet that has once had an industrial population, and because of its rarity we are listing all planets containing the resource. Listings are by Cluster, then System, and finally Planet: High: Moderate: Poor: Caleston Rift, Aysur, Planet Agnin Caleston Rift, Aysur, Arvuna There are achievements for every major mission and loyalty mission in Mass Effect 2. You are also rewarded for exploring all the planets in the game, playing on harder difficulties and locating new codex entries. The full list is below and contains spoilers if you haven’t already completed the game. Note that loyalty missions are unavailable until after the Horizon quest, and they then must be activated and researched by talking to your team mates on board the Normandy. Missing in Action (5G) Very Elusive (10G) The Convict (10G) The Krogan (10G) The Archangel (10G) The Professor (10G) The Quarian (10G) The Justicar (10G) The Assassin (10G) Friend or Foe (10G) Colony Defense (25G) The Prodigal (10G) Ghost of the Father (10G) Catharsis (10G) Battlemaster (10G) Fade Away (10G) The Cure (10G) Treason (10G) Doppelganger (10G) Cat's in the Cradle (10G) A House Divided (10G) Ghost Ship (25G) Suicide Mission (50G) Mission Accomplished (125G) Against All Odds (15G) Insanity (75G) No One Left Behind (75G) Long Service Medal (75G) Paramour (50G) Head Hunter (10G) Brawler (10G) Big Game Hunter (10G) Tactician (10G) Master at Arms (15G) Merciless (10G) Overload Specialist (15G) Warp Specialist (15G) Incineration Specialist (15G) Operative (15G) Agent (50G) Prospector (5G) Explorer (10G) Power Gamer (10G) Scholar (15G) Technician (15G) Weapon Specialist (15G) Scientist (10G) Fashionista (5G) Power Full (15G) Highly Trained (15G) Revenge! (15G) Broke, Blind, and Bedlam (15G)
Character Creation
Soldier
Adept
Engineer
Infiltrator
Vanguard
Sentinel
Hacking
Circuit Hacking
Target Code Segments
Getting Started
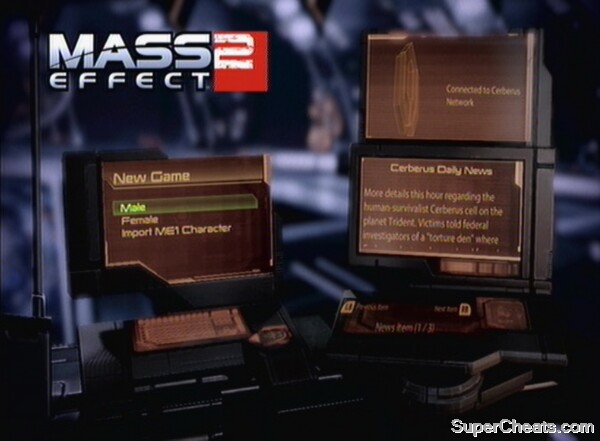
Normandy Prologue
Locate Joker
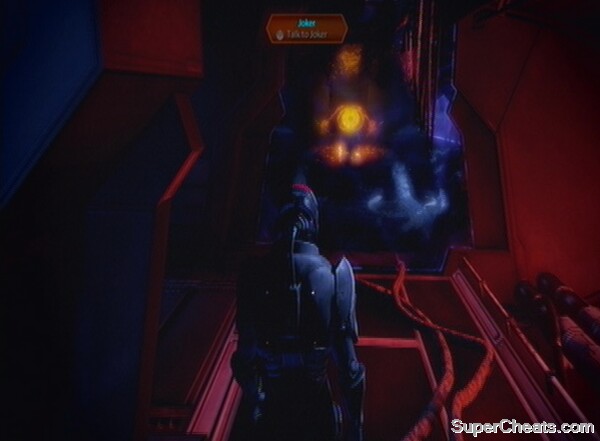
Find Joker at the head of the Normandy
Intro
Medical Facility
Once the next cut scene showing Shepard on the operating table has finished playing, you will find yourself in the same medical facility (actually a ship) that is under attack by an unknown force. When in control, walk straight forward and press the action button (A on Xbox 360) to interact with the locker – there is a Pistol inside but it's lacking ammunition. You also should have moved up your first level by now, and will receive Renegade and Paragon points based on your original Mass Effect 2 character.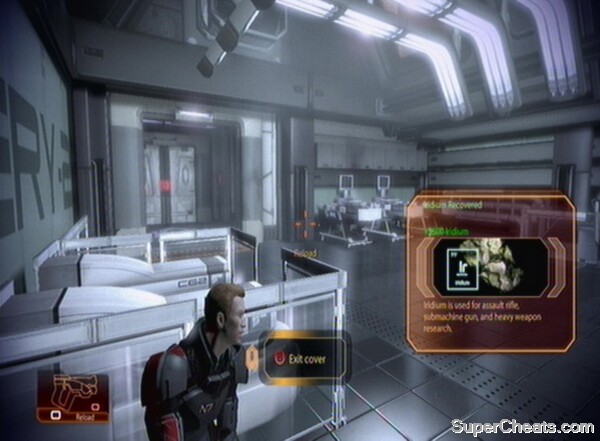
Get used to the controls in this safe area
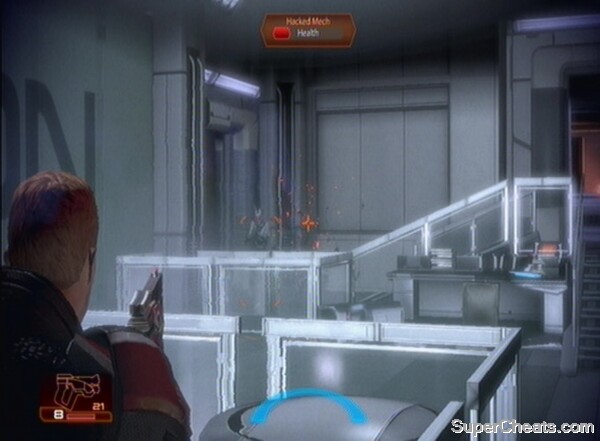
Deal with your first few enemies
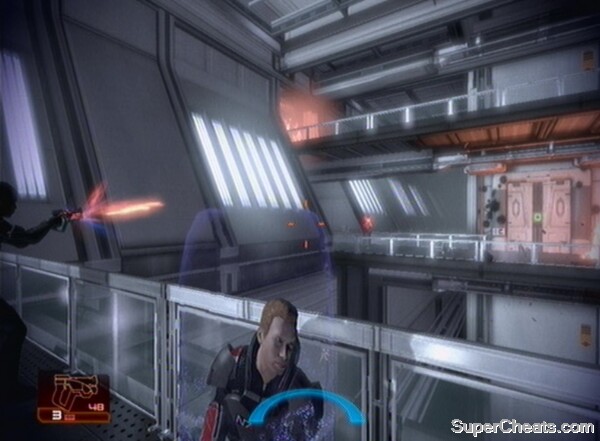
Meet up with Jacob and give him a hand
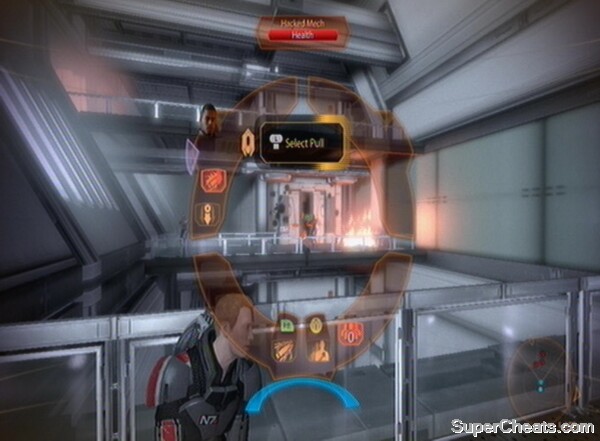
Make use of Jacob's Pull ability
Proceed through the door and down the corridor into the red-lit room. Deal with the enemies inside, using the door or the pipework inside for cover. Follow the hallways until you come across a room with bodies in – Wilson will update you on his precarious position en route – but you now should be able to see him crouched just inside the door.
Fill in some of the blanks about your recent past using the computer's logs
Shuttle Journey
Cerberus Station
Once you gain control at the Cerberus base, head down the stairs. You can't talk to Jacob or Miranda just yet. In the next room is the so-called Illusive Man.
Find out everything you need to know from this mysterious character
After this humbling conversation, head back up the stairs. You should reach Level 3 at this stage, so assign yourself some skill points. At the top of the stairs on the right you have the ability to interact with the Armour Locker, allowing you to customise your character's armour, helmet and casual clothes.
You don't have to do this, but a key part of Mass Effect 2 is conversation with your party members and characters in the game. You can forge positive or negative relationships with them, so take this opportunity to get to know your first two recruits. What you say will also have an effect on your Paragon/Renegade rating – the same applies to any conversation in the game. When ready, head for the door by the stairs to depart on your first mission for Cerberus.
Freedom's Progress
Explore the Colony
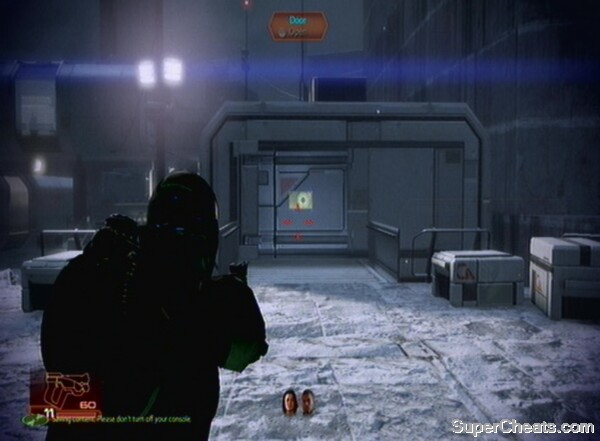
Time to search the colony for clues about the human disappearance.
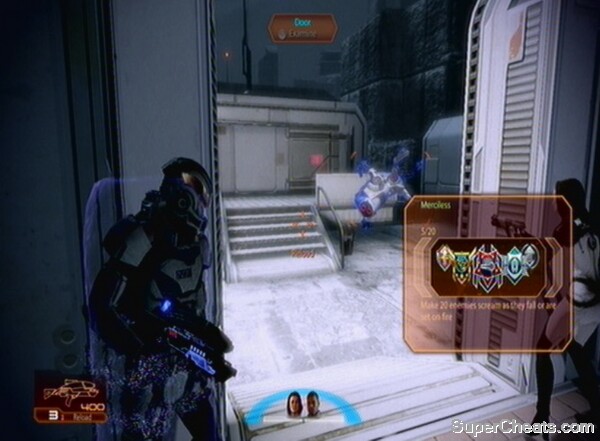
Use Jacob's Pull ability to keep the FENRIS Mechs at bay.
Find Veetor
Be careful of the mech – don't let it get too closeReturn to the Illusive Man
Guess who (and what) is back.
The Normandy SR2
Get to know your Ship
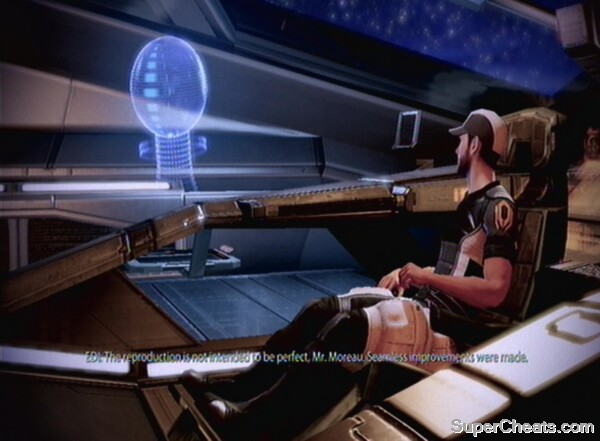
Your overall opinion on EDI may be determined by these early statements.
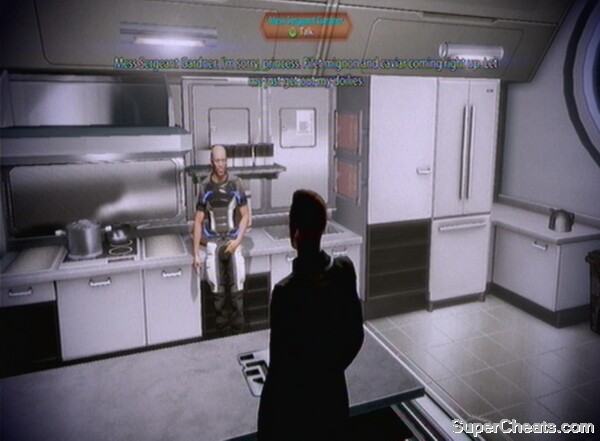
Speak to the Mess Sergeant for a side-quest.
Codex
Leave for Omega
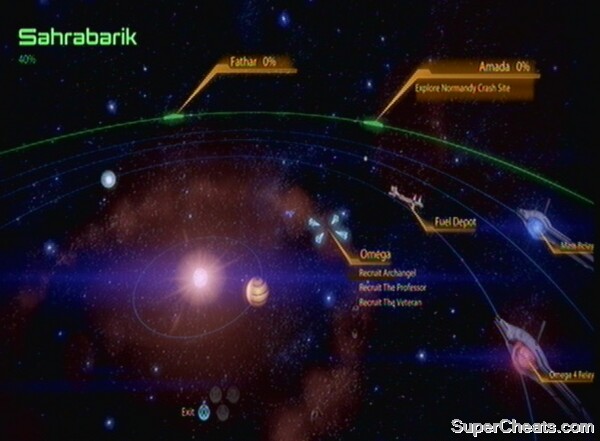
Direct the Normandy to Omega.
Omega
Recruit Archangel
Recruit The Professor (Dr. Martin Solus)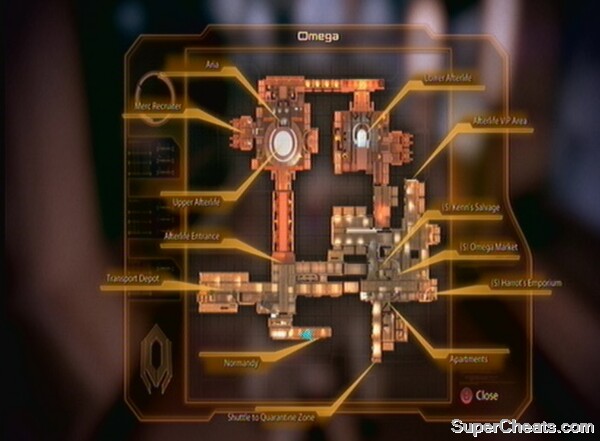
A map of Omega.
Recruit the Veteran (DLC Character)
Recruit Archangel
Meet Aria T'Loak
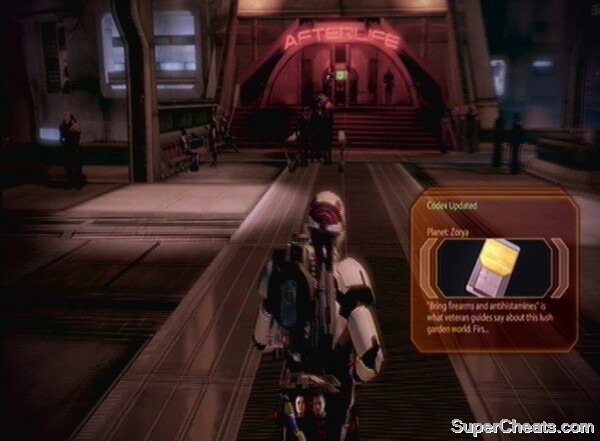
The entrance to Afterlife.
Afterlife
Talk to Aria
Join the Mercenary Force
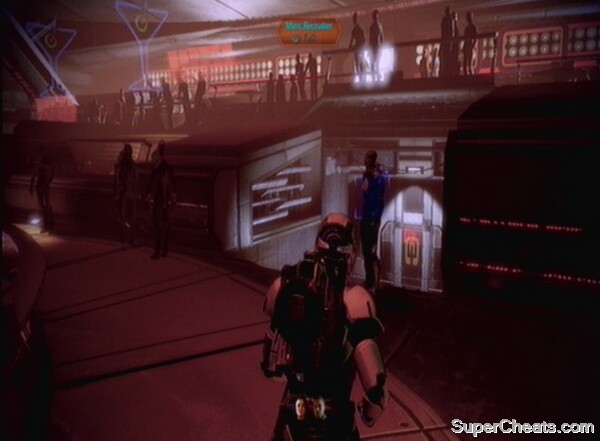
Talk to the Mercenary Recruiter.
Once allowed inside the recruitment room you'll have the ground rules and terms explained. You can proceed to ask questions about the plan of attack as well as how to get there. A member of the Blue Suns will pilot us to the area from the Transit Hub.Travel to Archangel's hideout
Speak to Sergeant Cathka
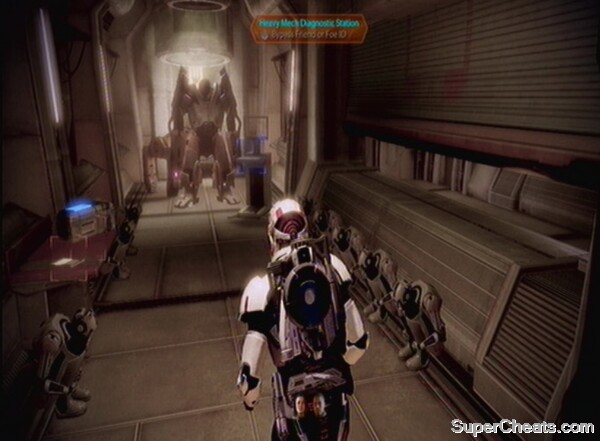
Hack into the mech suits.
Defend and Meet Archangel
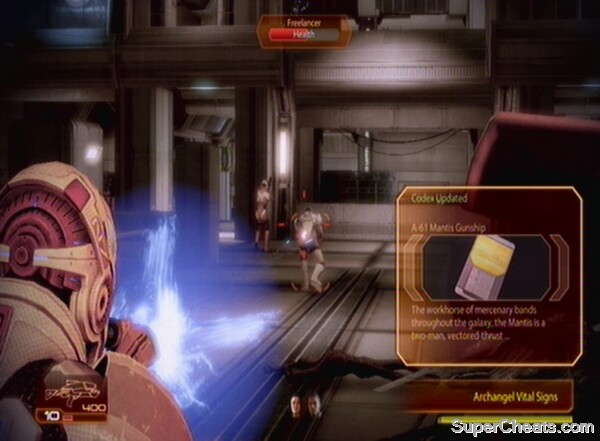
Turn on the mercenaries.
Defend Archangel
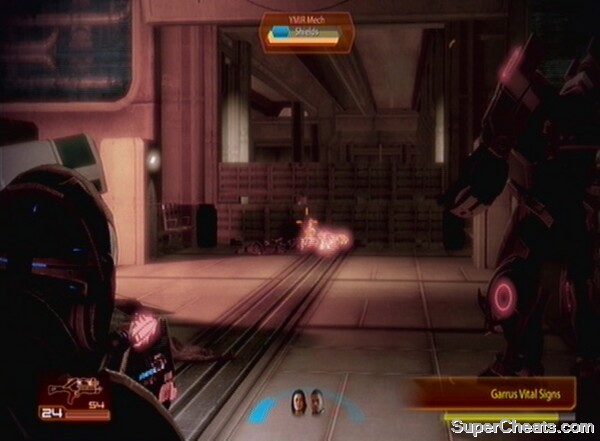
Use the hacked Mech Suit to take out the final enemies.
If the mech is on your side, this battle is much easier – try to keep it alive for as long as possible.Stop the Mercenaries coming through the Basement
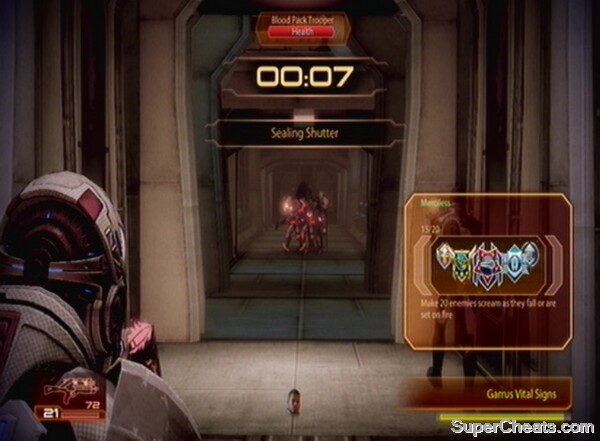
Shut out the mercenaries.
Close all the shutters.Fight back to Garrus
Escape the Facility
Watch out for the gunship's explosive weaponry.
Defeat the gunship and its mercenary cohorts.Normandy
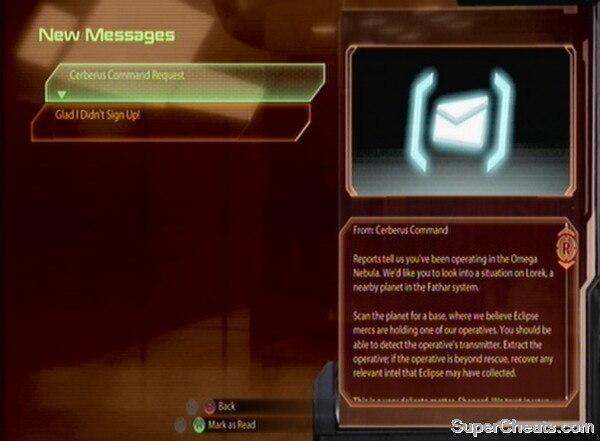
Get an update from your Personal Terminal.
Recruit Professor Mordin Solus
Omega
Return to Omega. We know that Solus is in the quarantine zone, attempting to find a cure for the mysterious plague. To get there, you need to take a shuttle – it is marked on your map as 'Shuttle to Quarantine Zone'. In picking your team you should only recruit Humans, as they are immune to the virus. So that is Jacob, Miranda or Zaeed, but not Garrus (though it won't actually have an effect on the likes of Garrus, he may not appreciate being put at risk unnecessarily). If you forget you will have another chance when boarding the shuttle. Turn right at the 'Mad Prophet' to find the correct corridor to the shuttle.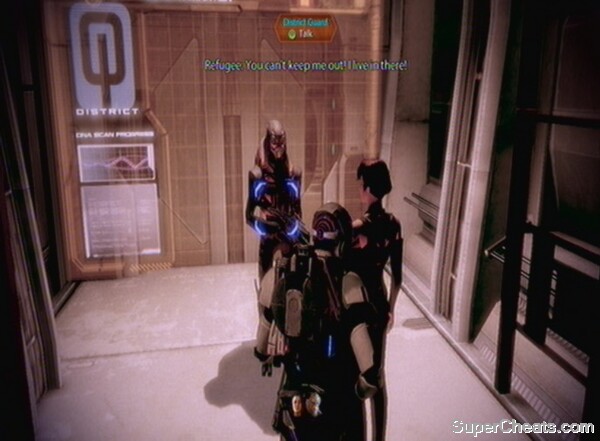
Steer the conversation to allow access to the Quarantine Zone.
Locate Mordin Solus
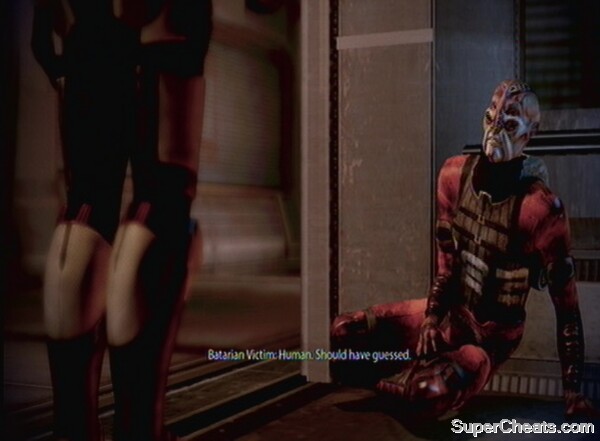
Opt to help or leave the infected Batarian
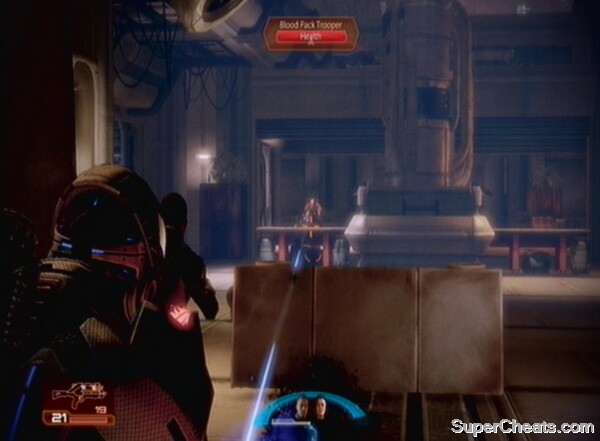
Use the distraction to take out as many mercs as possible
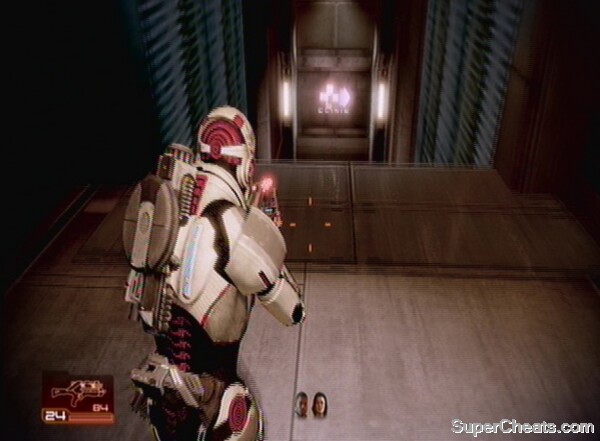
Head for the Clinic
Rescue Daniel
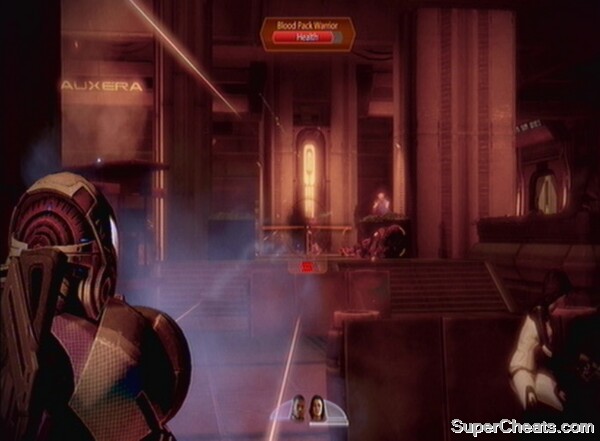
Head for the Clinic
Activate Environmental Control
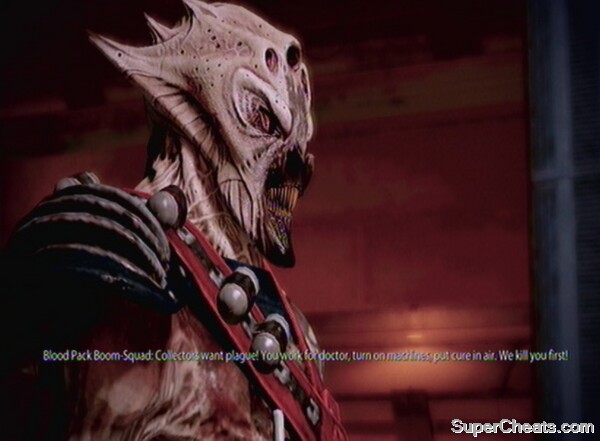
An ugly reception greets you.
Activate Fans
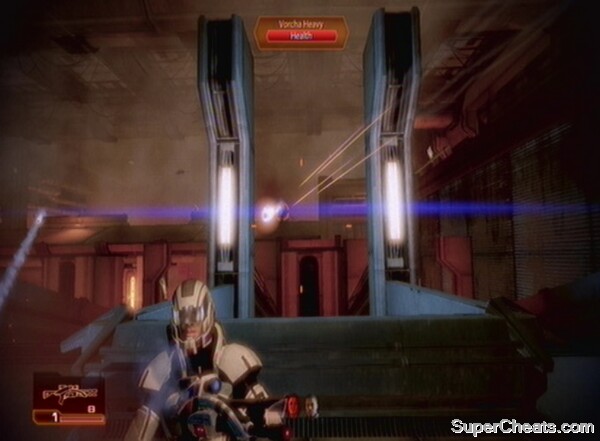
Cover behind the pillars.
Insert the cure into Environmental Control and activate both sets of fans.Normandy
Omega Side Quests
Afterlife
To get Dr. Chakwas's brandy, approach the main bar upstairs. You should see the bottle on the bar and be able to interact with it to purchase. Next time you're back on the Normandy, speak to the Doctor and finish the quest. There is a humorously drunken cut scene to enjoy as a result.
Note the camera shake after a little too much brandy!
Head downstairs in Afterlife, through the maintenance passage and into the lower bar. Approach the bar and buy a drink. This bartender has a grudge against Humans, and will poison your drink. Before you know what's going on you will wake up outside Afterlife. Make your way back in and speak to the bartender once more. He doesn't recognise you, as the potency of the poison should kill a Human (luckily you've been genetically engineered).
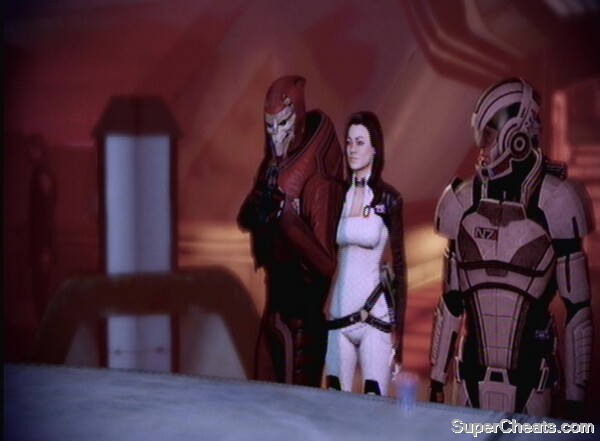
Get the crowd on your side for Paragon points.
The datapad we picked up while on the Recruit Archangel quest can now be returned to Aria in Afterlife. She will be grateful you exposed the mercenaries' plan and angry at her own goons who had no idea of the plot.
This side-quest only appears after you have recruited at least one of Archangel or Mordin. Speak to Grizz by one of the sets of stairs in Afterlife's main room. He will inform you about a job Aria has for you. There is a Krogan warlord who was once great and powerful, but now is kept alive only as Aria's trophy. Mercenaries are on their way to kill him, and Aria wants you to smuggle the Krogan (called The Patriarch) to safety. Pay him a visit in the private room off Afterlife's bottom floor.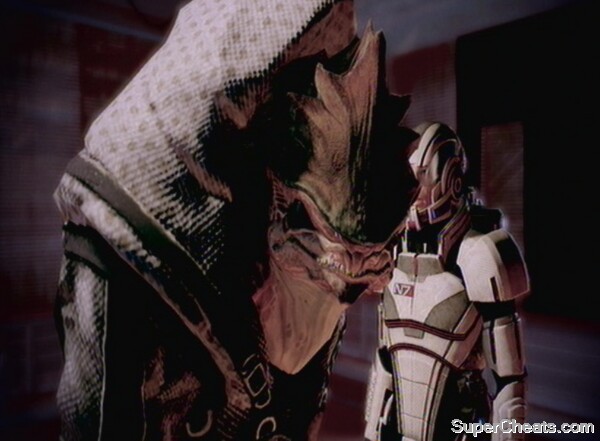
Give The Patriarch your help, or your advice.
Market District
Pay a visit to Kenn's Salvage in the Market District. If you ask why he is on Omega he'll complain that Harrot, the Elcor also in this part of Omega, is forcing him to charge extortionate prices. Agree to have a talk with Harrot.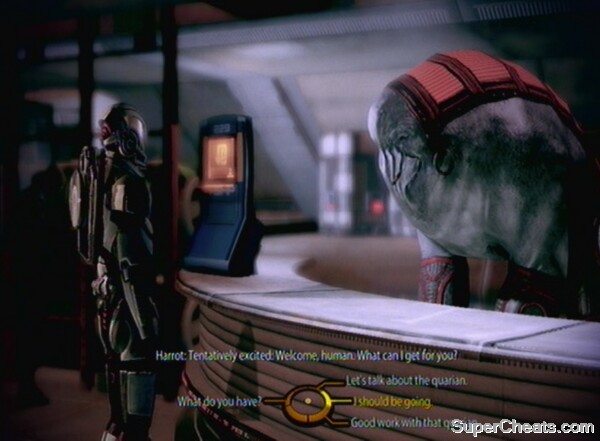
Threaten Harrot to ensure Kenn's prices are lowered.
Remember the engineers on Deck 4 of the Normandy? You can purchase the FBA Couplings that they requested from Kenn's Salvage on Omega. Do this and then pay them a visit on the Normandy. They'll ask to play cards with you, ending with you potentially winning money and Paragon or Renegade points, depending on your ruthlessness at gambling.Normandy
Packages for Ish
Talk to Ish on Omega to begin this galaxy-trekking side-quest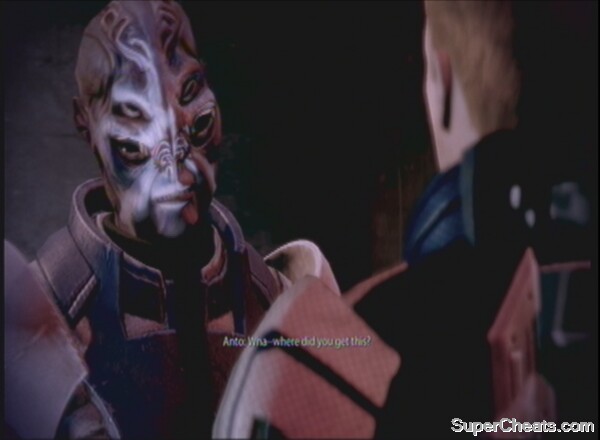
Speaking to Anto about the data is one of a variety of ways to end this quest
Recruit The Convict
Prison Ship Purgatory
Once you arrive you will be greeted by some Blue Suns Mercenaries. Ignore the request to surrender your weapons (a hint at things to come!). Warden Kuril, the man in charge of this operation, will intervene and allow you to carry on unrestricted. You can ask him a number of questions about the prison and the biotic Jack. Proceed down the corridor once the cut scene ends. Cerberus made a deal for Jack and the funds are about to arrive with the Warden. Once they do, we can pick up Jack.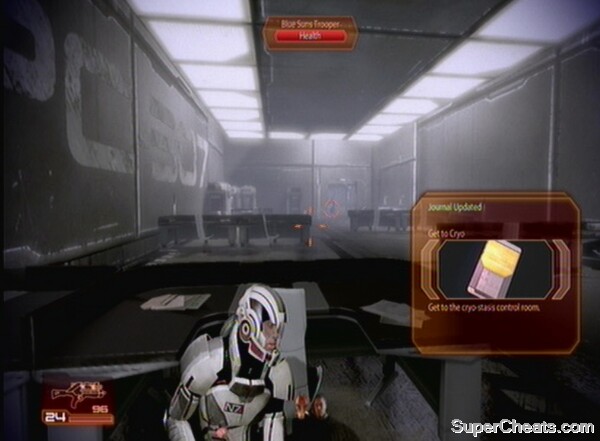
As you may have guessed, it was a trap.
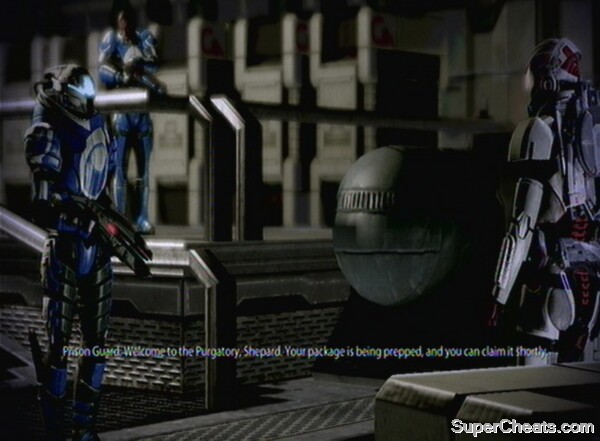
Watch out for the Mech in this room.
Beat this merc and mech-filled room.
The Warden is behind a shield, so you will have to take down the generators before you can get to him. Of course, the room is also swarming with enemies. From your starting position, fire on the blue part of the narrow columns ahead. You should be able to see two, though the second you may have to get closer to or take out with your sniper rifle.
Defeat Warden Kuril.Normandy

Catch up with Jack.
Recruit The Krogan
The Blue Suns are in control of this region, and will be hostile to you advance.
Korlus is a desolate place.
Find Okeer
Be careful of their powerful attacks.
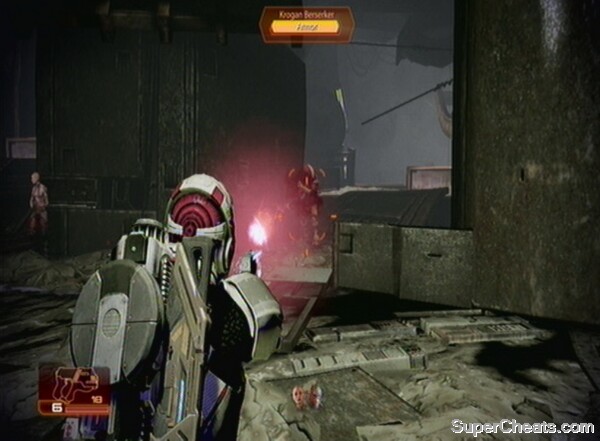
Don't let the Krogan get too close.

Keep going through this circuitous level.
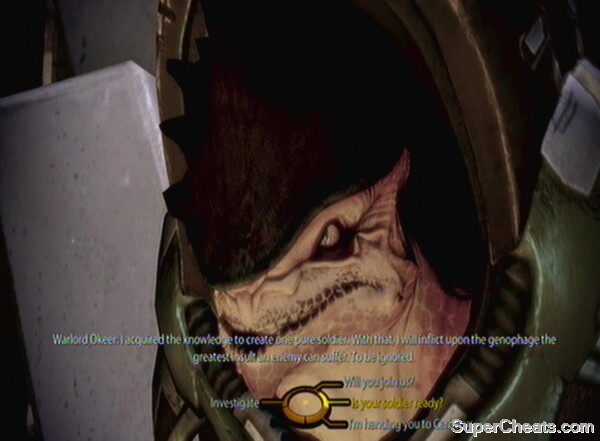
The morally confused Okeer.
Defeat Jedore
Destroy Jedore and her cronies.Get Back to Okeer
Normandy
Release the Krogan
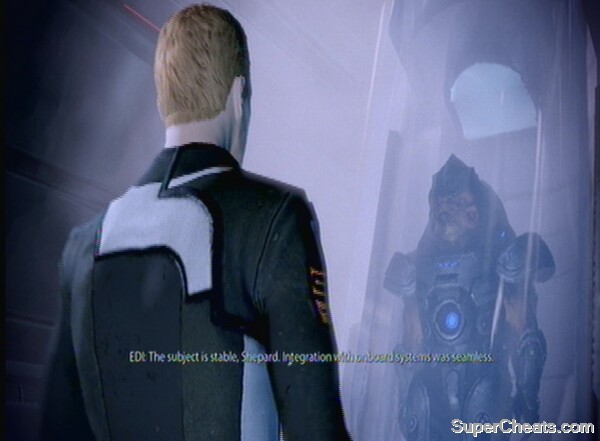
You now have a decision to make about the Krogan.
Save Horizon
Mordin has been hard at work.
Horizon
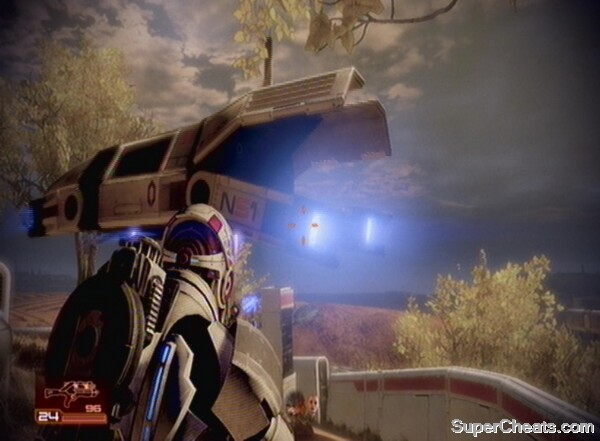
Wave goodbye to your ticket out of here.
Investigate Horizon
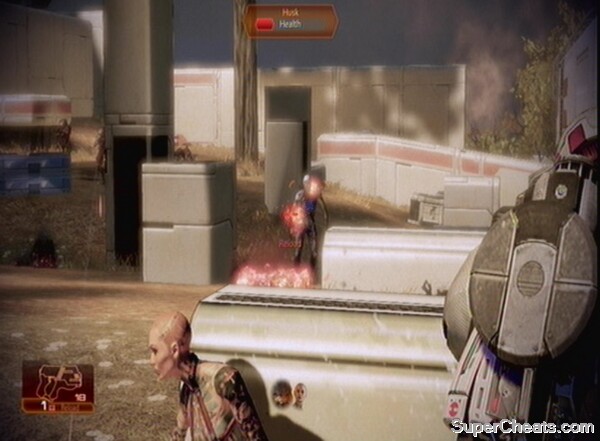
Keep an eye on the Husks, but they should rarely pose a serious threat.
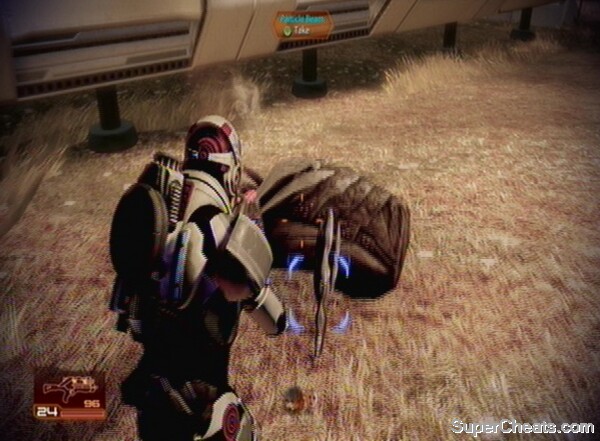
Make sure you pick up this Particle Beam.
Get to the Defence Tower
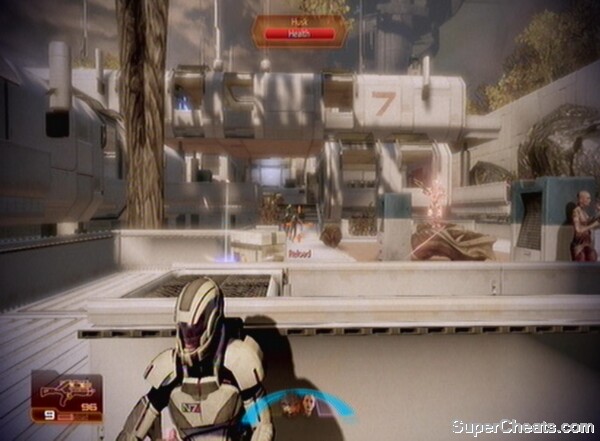
Pass through the main colony area.
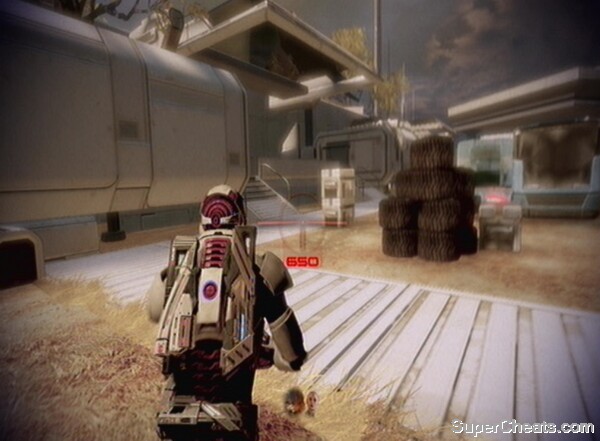
Make haste to the cover spot ahead.
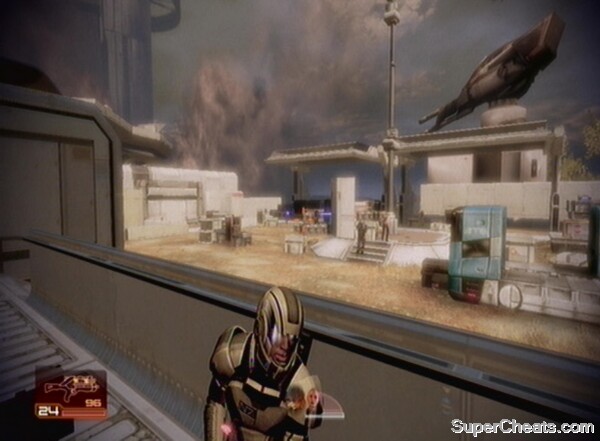
Get back to your position!
Hold Your Position
Defeat the Praetorian
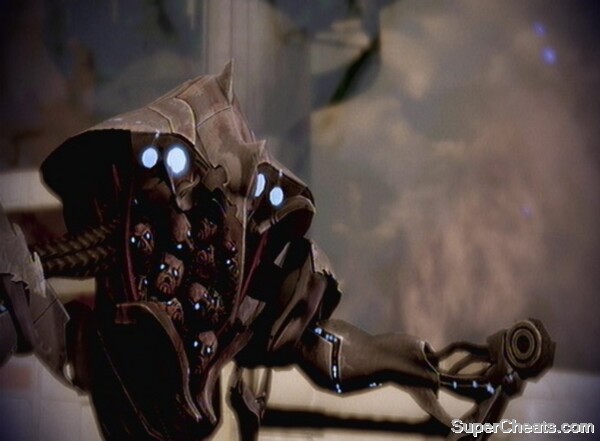
The Praetorian
Kill the Praetorian.The Normandy
Illium
Recruit the Assassin
You will be met by a concierge with some mechs. They pose no threat, so ask her any questions you want to know, specifically regarding Liara – a friend of Shepard from the first game. Liara has waived your docking fee, which was generous, and wants you to go and see her in her office. You may want to talk about slavery on Illium as well, before heading out.
Illium is a beautiful place
Head for the cargo area using the door below Liara's office, aiming for Shipping.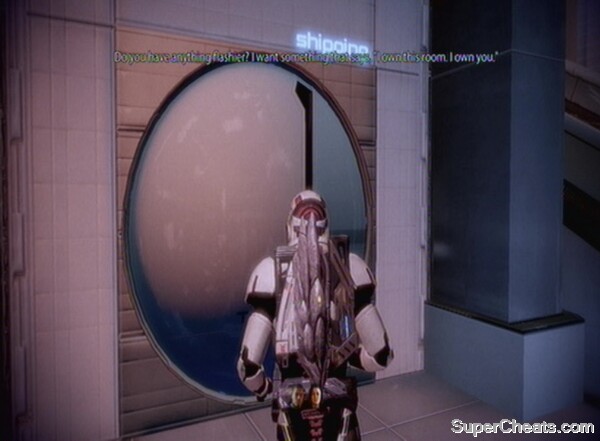
Meet Seryna in the Shipping area.
When you arrive you will see some of Dantius' unorthodox methods in action, namely in gunning down a group of workers trying to flee the tower. Her mercs then turn their attention to you.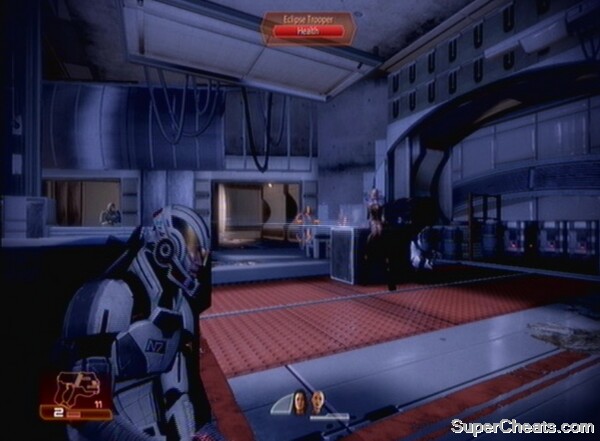
Clear the path ahead.
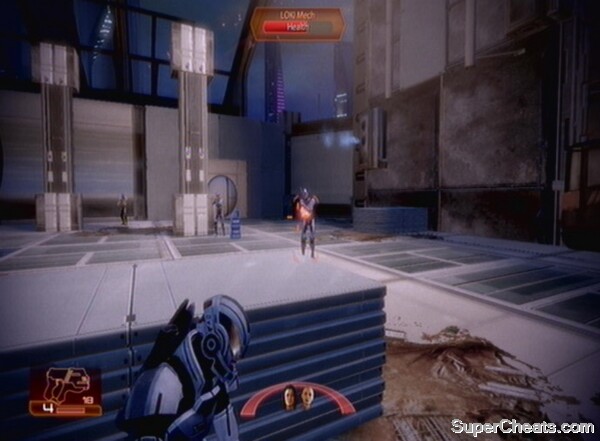
Eliminate the Bounty Hunter.

The enemy resistance is hotting up.
Cross the bridge.
Recruit the Justicar
Speak to Pitne For, the Volus at the side of this area. He will tell you about his dealings with the Detective, his fears about the Justicar and the Eclipse Mercenaries in this area. The best course of action is to speak to the Detective running this operation. You can find her inside the police station. There is also a Medi-gel station inside and a Weapons Locker.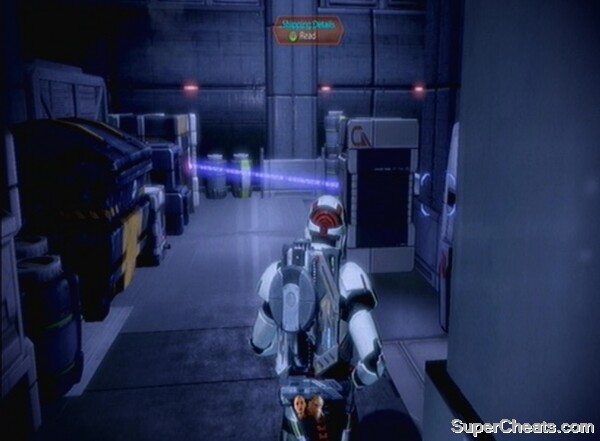
Enter the crime scene.
Back to reality and you should speak to Pitne For. You can use a Renegade interrupt to move things along, but it's easy to convince him merely using conversation. Apparently, Pitne For smuggled a dangerous chemical onto Illium. He told the mercenaries that it boosted biotic powers, which it does, but he forgot to add that it is also toxic. As such, the Eclipse Mercenaries are after him. Luckily the Volus has a pass key to the mercenary base, so agree to help him and you've got yourself a way in. You can then access the previously sealed elevator in this area. As soon as it opens at the top there is a LOKI Mech to destroy.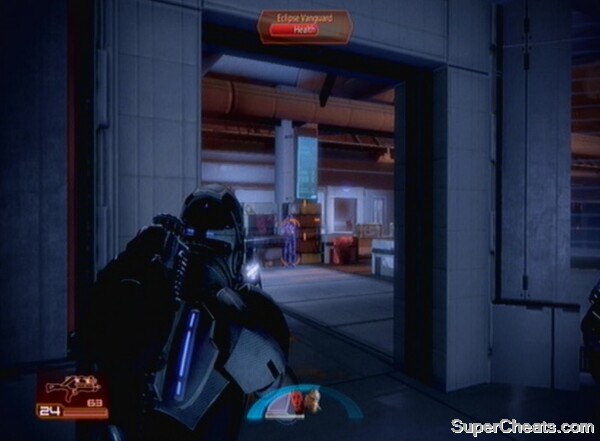
Fight your way through the Eclipse base.
Close your net on the mercenaries.
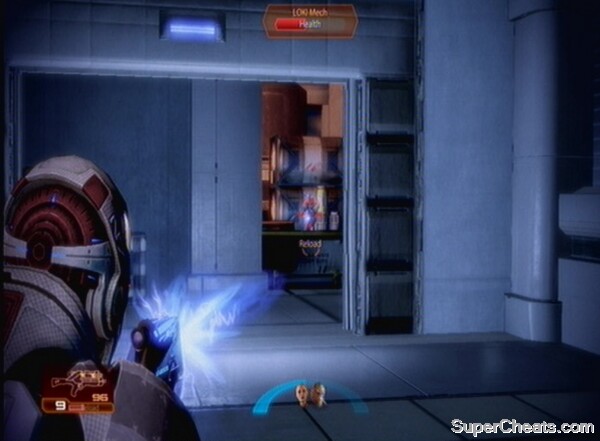
Push forward towards a showdown with a gunship.
Defeat the gunship.
A cut scene will play introducing the mercenaries' leader, Captain Wasea. Take down her Barrier with Overload or constant gunfire, then concentrate on her armour and health. As long as you attack from range you should be able to take the Captain out without too much intervention from the Sisterhood soldiers or any mercenaries.
Show Wasea who's boss.
Catch up with your crew as normal, specifically the Justicar. You should then tie up any business on Illium. After this, you can choose to pursue the last recruit from the Illusive Man's dossiers, or skip ahead to the next section of the game.
Illium Side-Quests
The Observer
Indentured Service
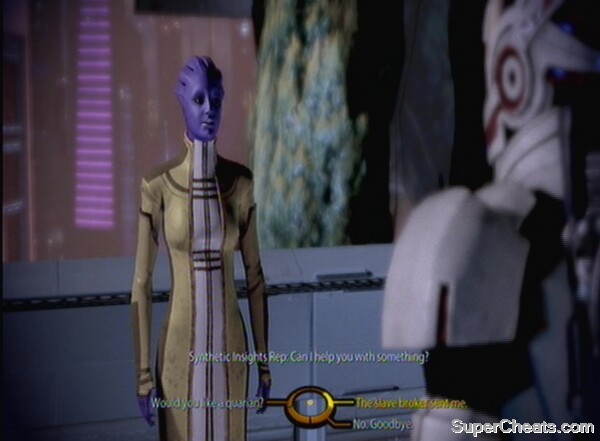
Help out the slave.
Gianna Parasini
Medical Scans
Deal with the medical contractor.
Blue Rose of Illium
Get her to date or dump the lovable Krogan.
Lost Locket Found
Datapad Recovered
Smuggling Evidence
Stolen Goods Found
Packages for Ish
The location of the Datapad in Illium's Eternity Bar
Recruit Tali
Haestrom
Upon landing it will become clear that the Geth are still all over Haestrom, as it functions as a staging and training post for the aliens. The sunlight is the first problem you must counter, however. The opening ramps are bathed in potentially lethal rays, clearly distinguishable from shadows (you will also hear a frying sound if you emerge into the light and see a warning message). You should run across these to minimise exposure.
Run through the sun.
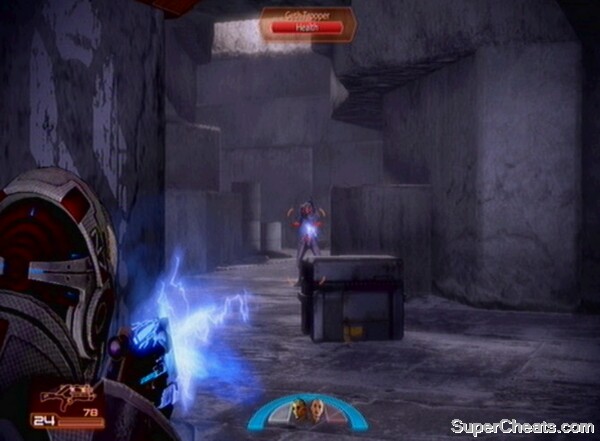
Fight your way towards the quarians.
Reach Tali
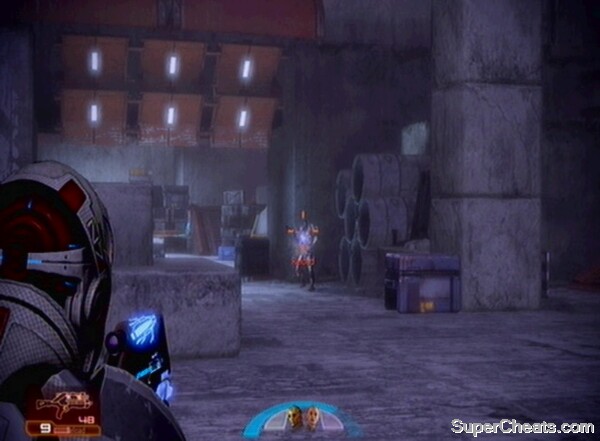
Head for the underground chamber.
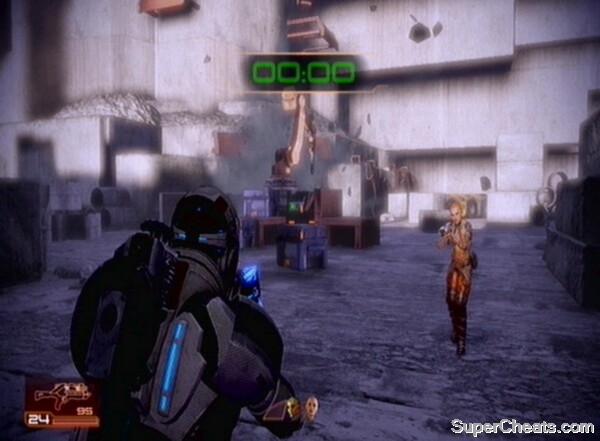
Destroy the pillar.
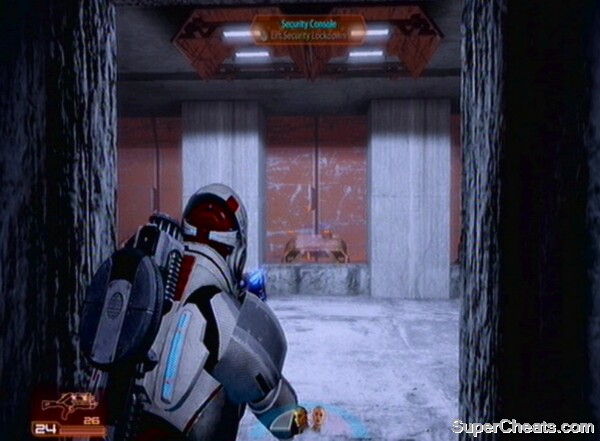
Not far to Tali now.
The Geth Colossus is a tough opponent.
Take down the Geth Colossus.Normandy
The Collector Ship
Explore the Ship
The Collector Ship is full of hidden items
Deal with the Collector trapReturn to the Shuttle
Take out the Collector Assassins as you move up the ramp
Kill the Praetorian
Loyalty Missions
Miranda: The Prodigal
Beware of the Eclipse Engineers' rockets.
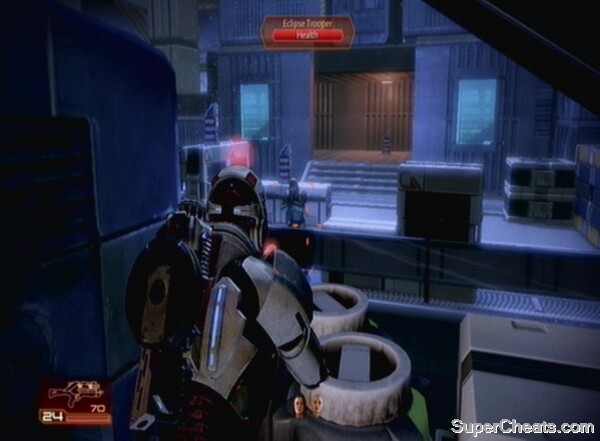
Fight your way through the mercs.

Use heavy weaponry to get past this difficult section.
Defeat Enyala and her mercenary force.
Jacob: The Gift of Greatness
The ship Jason's father served on
Deal with the initial wave of Hunters
Rig the Mech to explode
The YMIR Mech can be deadly in such a tight area
Jack: Subject Zero
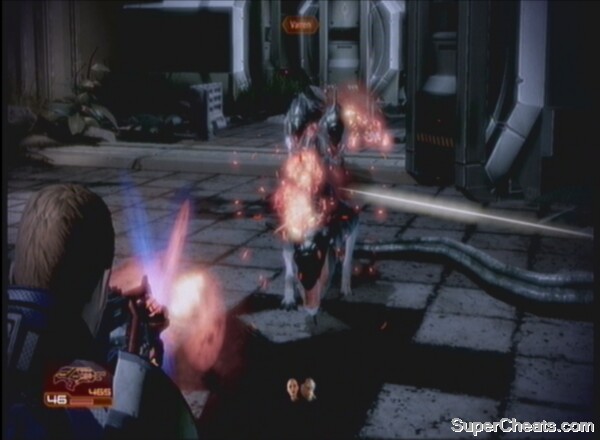
Watch out for the Varren
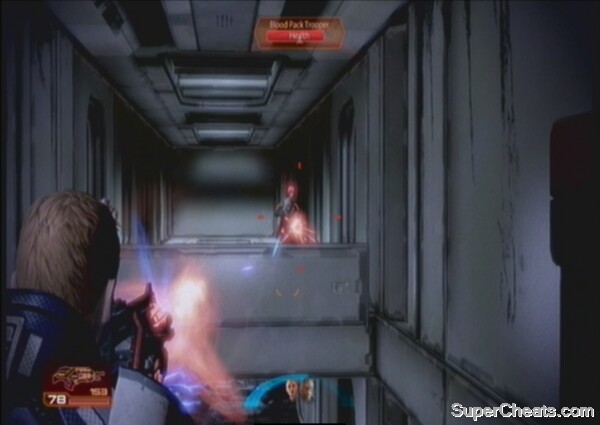
Be careful of the Blood Pack ambush
Tackle the Krogan to gain access to Jack's cell
Play peace maker or choose sides
Garrus: Eye for an Eye
Enter the Shipping Warehouses
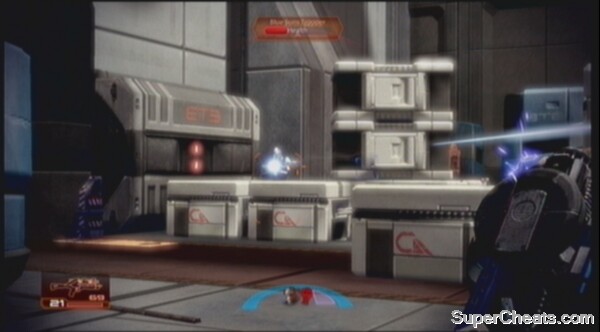
Enter the Shipping Warehouses
Tackle the Commander and his mech.
If you thought one mech was hard...
Mordin: Old Blood
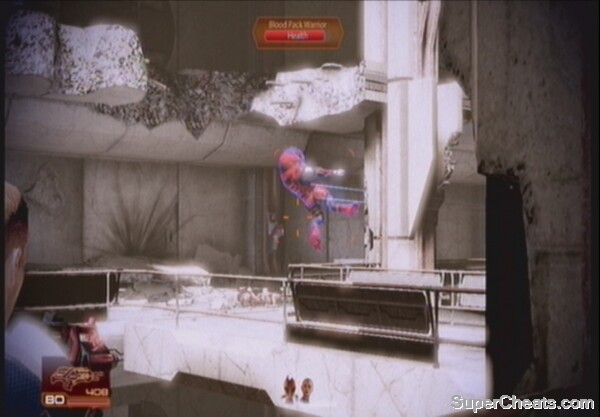
Speak to the chief scout
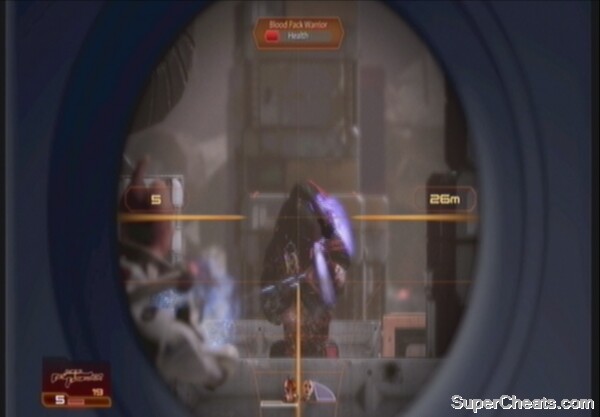
Defeat the Blood Pack Warriors
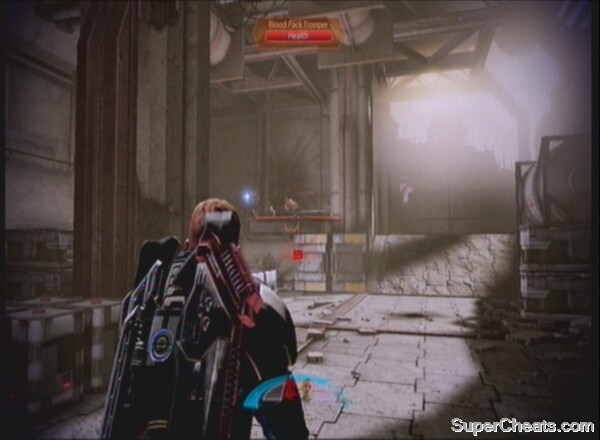
Heavy weaponry makes light work of the Blood Pack here

Use biotic attacks if your enemies get too close
Destroy the clan leader
Grunt: Rite of Passage
Speak to the Shaman with Grunt and agree to take the Rite with your squadmate.
Use your tried-and-tested tactics to combat the Varren.
Activate the final wave.
Keep a pillar between you and the Thresher Maw when it readies its main attack.
Take pride if you defeated the Maw, surviving is achievement enough
Thane: Sins of the Father
Interrogate Elias
Follow Joram from your position up high
Samara: The Ardat-Yakshi
Enter the apartment
Enter the VIP area
Impress Morinth in the club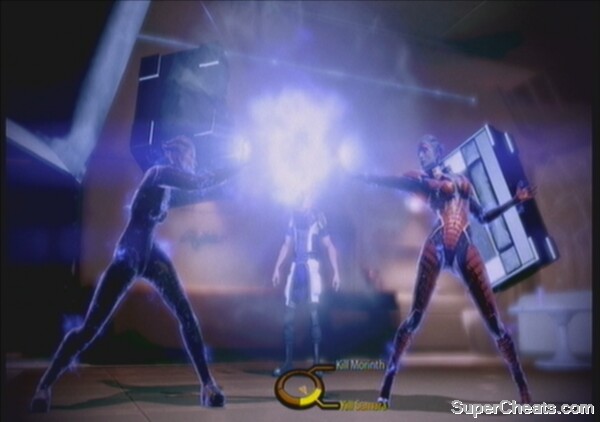
Make your choice
Tali: Treason
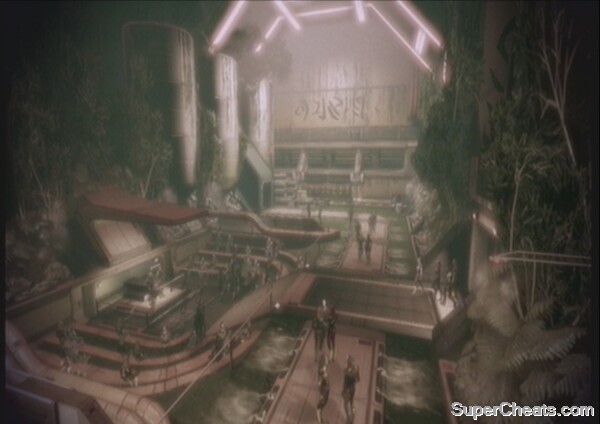
The hearing begins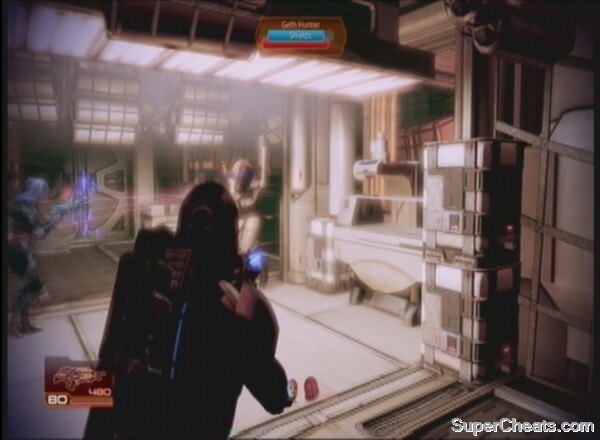
Watch out for the Geth Hunter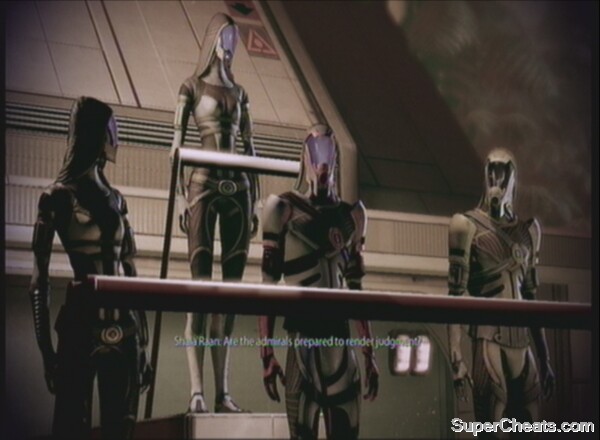
Defend Tali in front of the Admirals
Zaeed: The Price of Revenge
Evidence of the Blue Suns in the area does not take long to find.
Zaeed makes a Renegade choice of his own.
You are the refinery workers' only hope.
Eliminate the Blue Suns Troopers to move on.
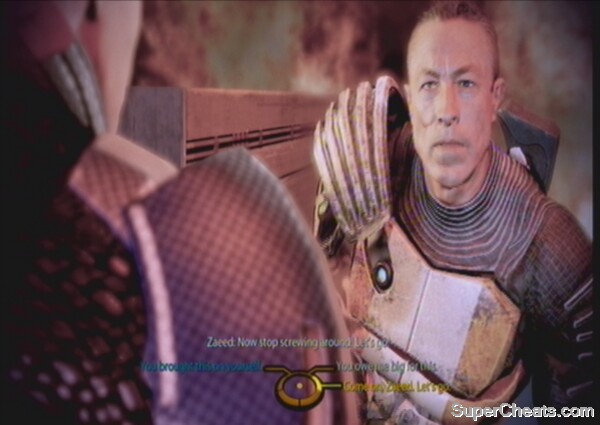
Zaeed's character may not appeal to Paragon players
Reaper IFF
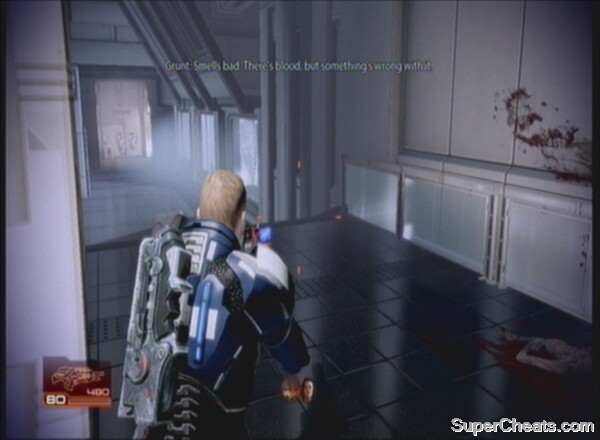
Something went very wrong here...
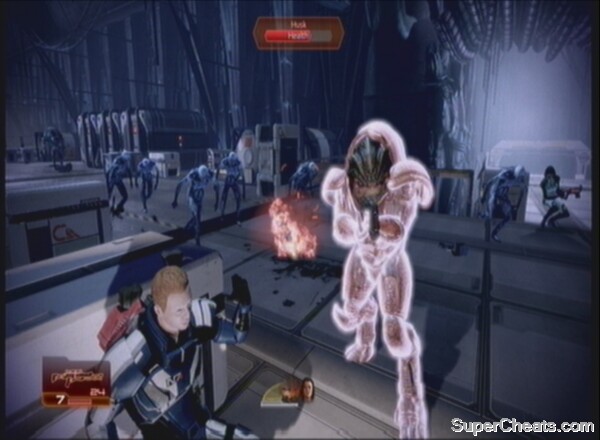
Avoid getting surrounded by Husks
Survive the first Husk onslaught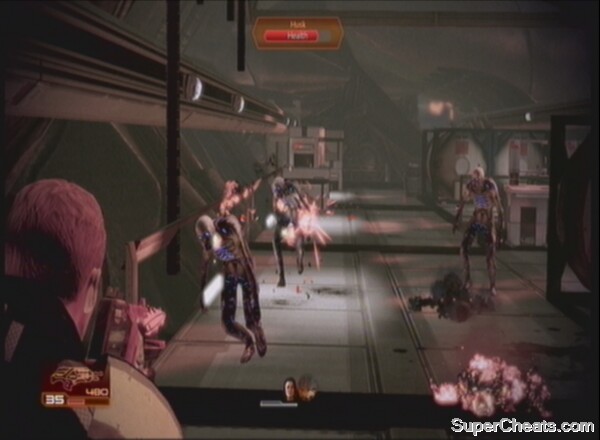
Get rid of those pesky Husks
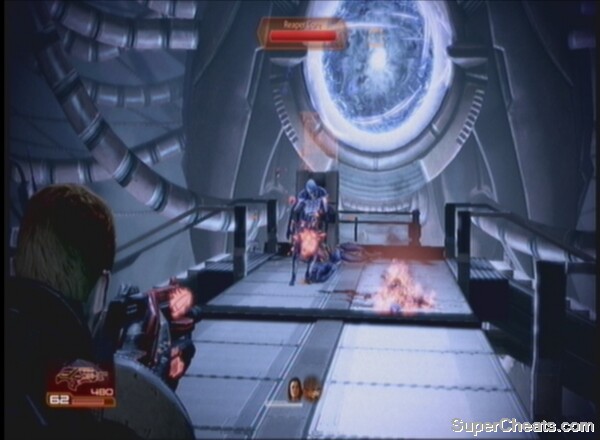
The power core must be destroyed
Take out the core
Recruitment: Legion
Legion: A House Divided
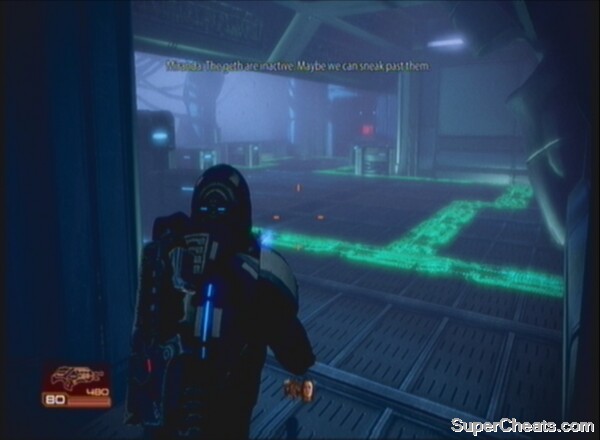
Move past the green lines, not over them!
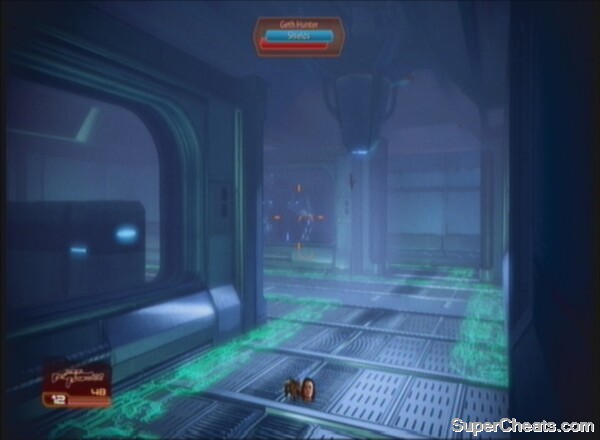
Pick a hub, any hub
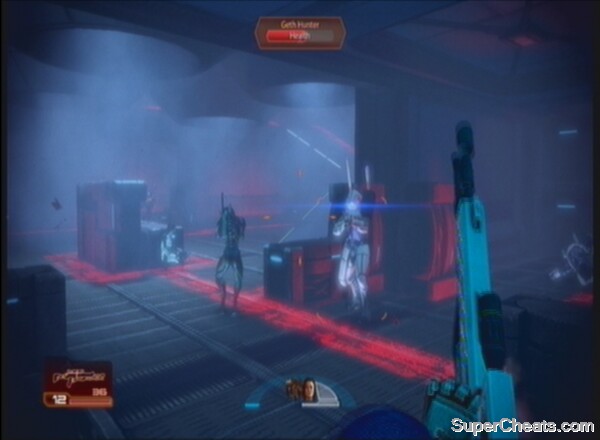
The geth are quick to get to you once activated
Defend the data upload
Race to flee the station
IFF Installation
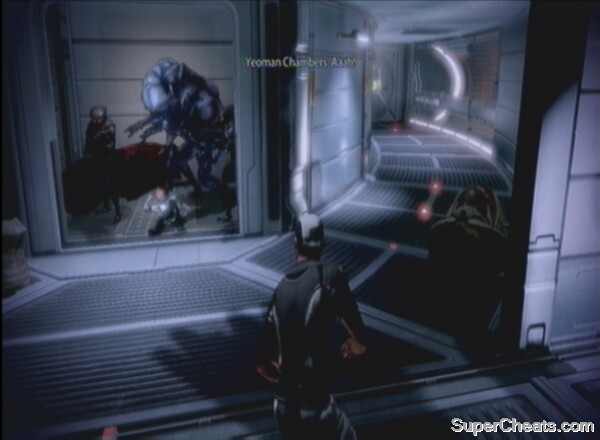
Use the distraction to limp past the Collectors
Thanix Cannon, available after talking to Garrus: 15000 Platinum
Heavy Ship Armor, available after talking to Jacob about upgrades: 15,000 Palladium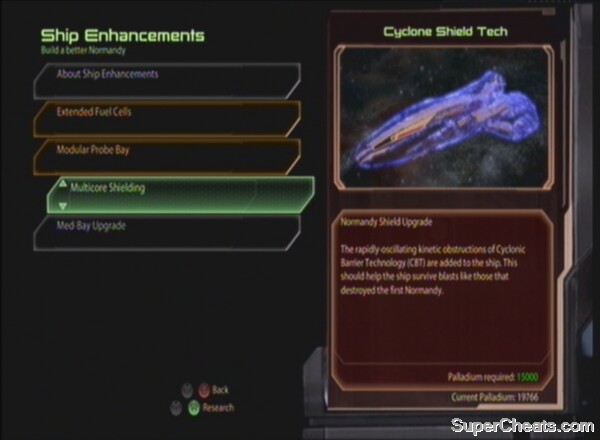
Upgrade the Normandy before entering the Omega 4 Relay
Suicide Mission
Omega 4 Relay

Without upgrades, you will lose three crew members as the Normandy takes a beating
Defeat the Collector OculusCollector Station
The Collector Station is a foreboding place
Watch out for this sneaky Harbinger-Drone
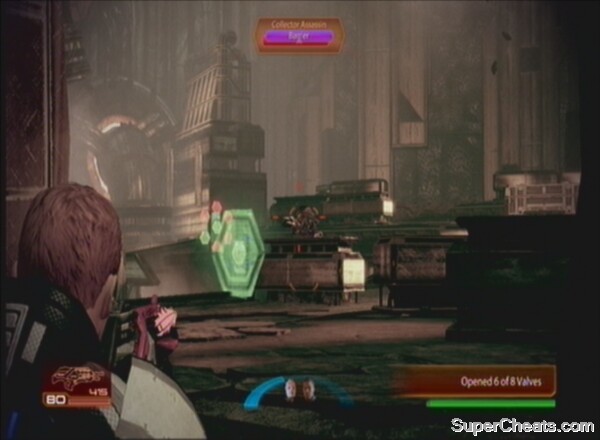
Only two valves left now
Rush to open the valves and allow your tech expert to get to the locked door
The crew (or at least Dr. Chakwas), owes you their lives. Now will you send them to their deaths?
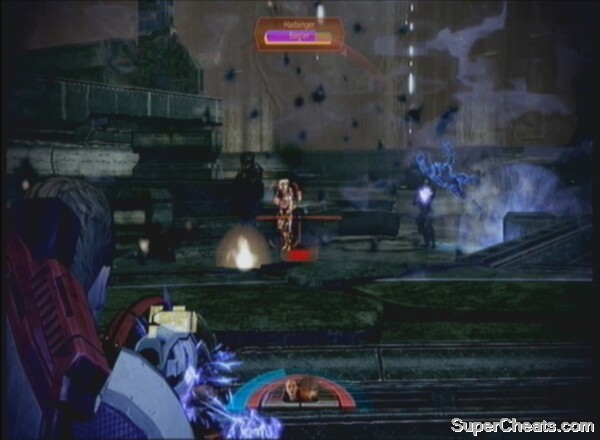
Use heavy weapons if you struggle to down the Harbinger's units.
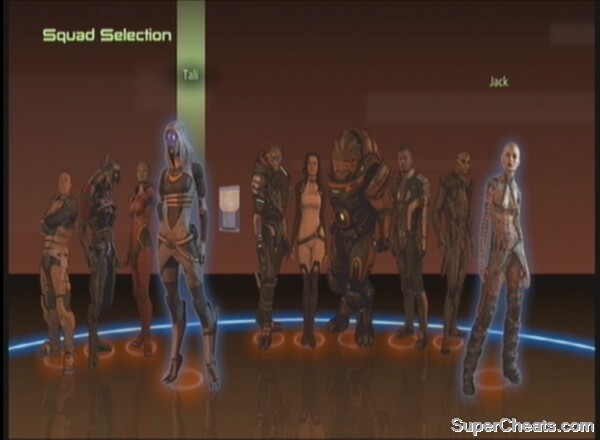
Pick your squad to take down the Collector Station.
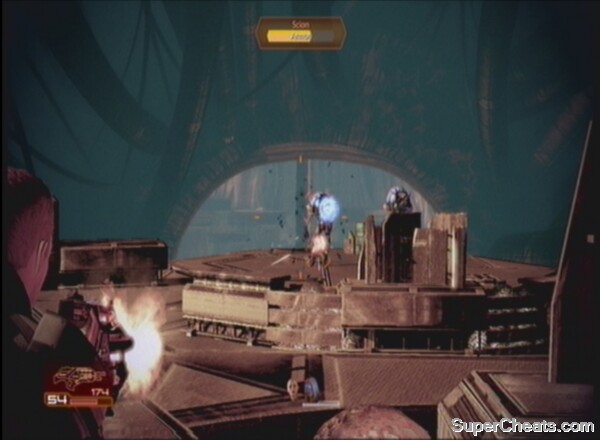
The Scions are slightly glitchy, so take advantage of it and attack them before you trigger their advance up close.
Destroy the Reaper
The Reaper won't be easy to kill.
Take out the Reaper tubes.
Defeat the Reaper
Mass Effect 3, set up perfectly.
Normandy Assignments
N7: Lost Operative
N7: Eclipse Smuggling Depot
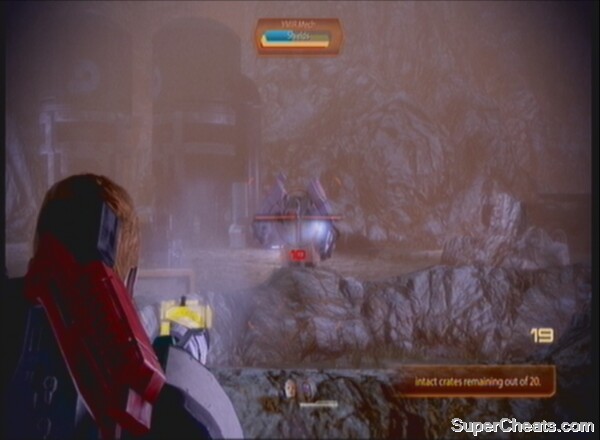
Take out the three YMIR Mechs
N7: Captured Mining Facility

Hack the facility's mainframe
N7: Quarian Crash Site

Get on board once the shuttle arrives
N7: Imminent Ship Crash

You need about three seconds to activate the Power Couplings, and a hit from a rocket or bullets will interrupt it
N7: Blood Pack Base

Shoot the Containment Cells by the gas tanks to blow up the facility
N7: Blood Pack Communications Relay

Follow the beacons through the thick fog
N7: Archaeological Dig Site

Kill the Blue Suns Commander
N7: MSV Strontium Mule

Death from above – look out for the Senior Engineer
Enter the bridgeN7: Blue Suns Base

Clear the mess-hall
Deal with the Mechs and Captain NaromN7: Stop Missile Attack

Take out all the Batarians to gain access to the missile controls
N7: Wrecked Merchant Freighter

Take out the YMIR Mech blocking your route back to the shuttle
N7: Abandoned Research Station

Welcome!

Get the panels into these positions to destroy the computer at the back in the centre

Shut down the VI that has been causing all these problems
N7: Hahne-Kedar Facility

Use an assault rifle and Cryo ammo on the mechs, if available
N7: Anomalous Weather Detected

You'll be seeing a lot of this!
N7: Endangered Research Station

Send power to the Cooling Unit and then switch it on
N7: Mining the Canyon

You may become quite attached to the comically-walking mech
N7: MSV Estevanico

Shoot the hanging section to create a bridge downstairs.
N7: Abandoned Mine

The Husks are the new residents of the facility.
Blow up the Husk machine
Downloadable Content
DLC: Normandy Crash Site
We miss the old Normandy
2) Straight-ahead from the shuttle where you begin, just to the right of the rocks where the 'Normandy' plate is.
3) To the left of the Normandy name-plate, by some cargo containers.
4) In the bottom-left corner of the map, by the Normandy hull (this also triggers a reminiscence scene)
5) Among the rocks to the left of the Mako (the Normandy's land vehicle)
6) In the breakable crate to the left of the Mako (there is some Refined Element Zero to the left of the Mako too)
7) In the corridor of hull round the corner to the left of the Mako (this also triggers a reminiscence scene). Note that this is also one of many locations where you may plant the memorial monument, just in front of the entrance to this piece of corridor.
8) Just behind this section of hull amongst the rocks.
9) In the fragile crate behind this section of hull.
10) At the end of the narrow slice of ice that goes off to the left of the Mako
11) Just in front of the Mako (the Mako is also a reminiscence scene)
12) In the corner of the slope in front and to the left of the Mako.
13) Behind the Normandy escape pod, to the right of the Mako (there is also some Refined Element Zero nearby).
14) In the breakable crate up a slope to the right of the escape pod.
15) Underneath the arch of debris to the right of the Mako
16) In the breakable crate near the arch to the right of the Mako
17) In the cockpit section of the hull submerged in the hills to the right of the shuttle and Mako (this also triggers a reminiscence scene).
18) In front of the Galaxy Map, all the way up the slope in front of the Mako (there is also a datapad containing the logs of Navigator Pressly here) (there are also two reminiscence flashbacks to be triggered)
19) In the hull section submerged in the hills behind and to the left of the shuttle and main Normandy hull, and behind the corridor memorial site (this is another reminiscence flashback).
20) Just outside this same hull section.
The Mako of the original Mass Effect
DLC: Firewalker MSV Rosalie
Use the Hammerhead's airborne capabilities to work through the blue funnels, collecting data as you go
DLC: Firewalker: Recover Research Data
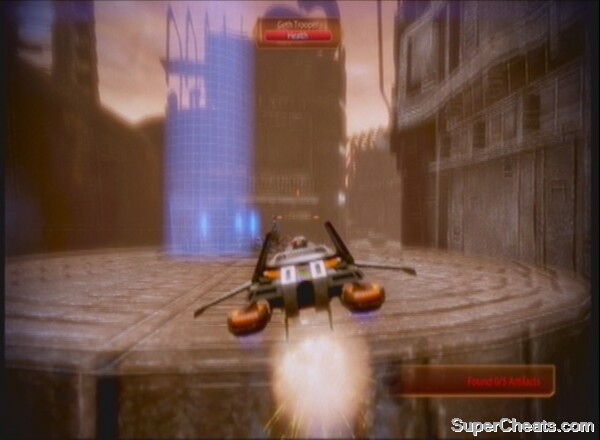
Land on this pillar to jump to the other side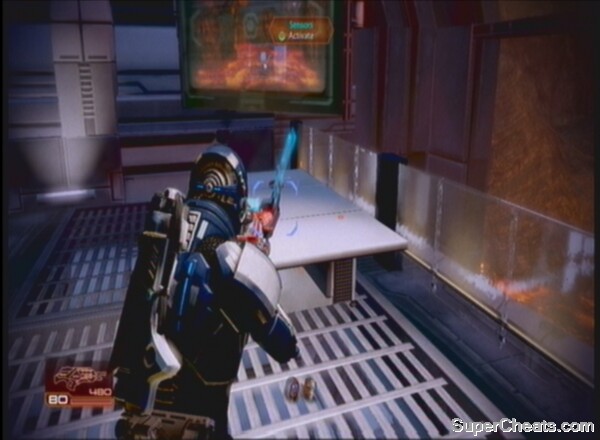
Activate the base's sensors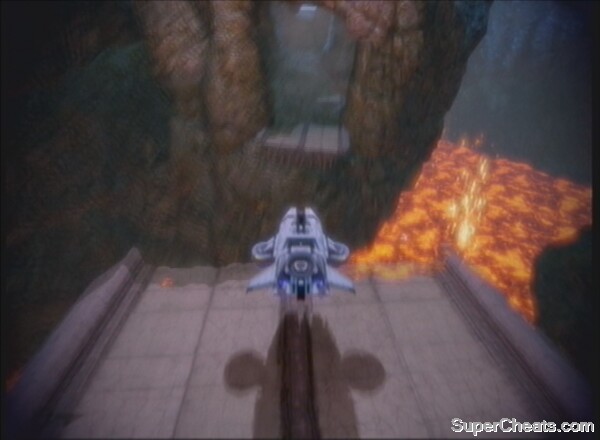
Don't jump too early or you will fall into the lava
DLC: Firewalker: Artifact Collection

Hop up the side of the platform to attack, before retreating back below
The best tactics for dealing with the Colossus, and finding your way to the fourth artefact
DLC: Firewalker: Geth Incursion
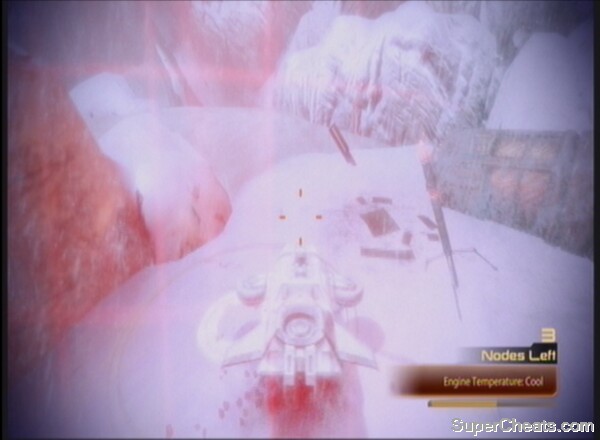
Collect all the Geth data
DLC: Firewalker: Prothean Site
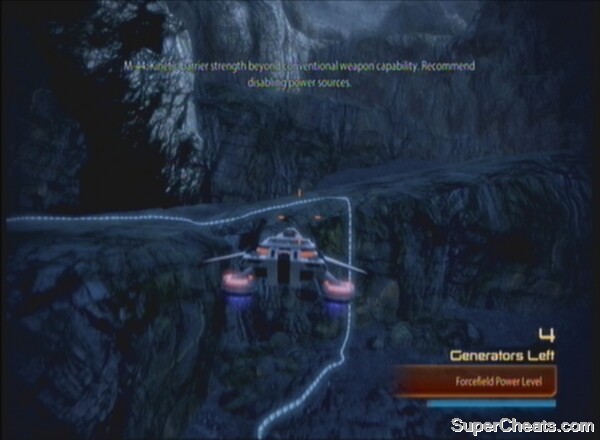
Follow these cables to find each of the four generators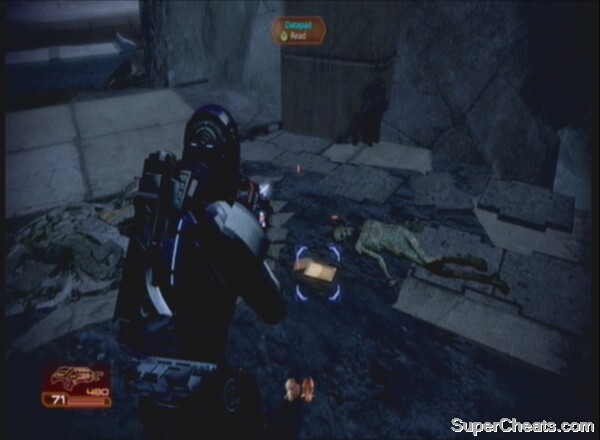
Dr. Loy met an untimely end to protect his family and a human colony.
DLC: Kasumi Goto
Introduction
Kasumi's flashbangs are completely different to anything else in Mass Effect 2, and if you are caught by an enemy's flashbang it is very disorientatingDossier: The Master Thief
You can't miss this advert, so interact with it to make first contact with Kasumi.
Kasumi will fit in just fine with Shepard and the rest of the Normandy crew.
Visit Kasumi Goto in the Port Observatory, and experiment with the drinks.
Kasumi: Stealing Memory
Our present for Hock, with a little extra.
Proceed to explore the mansion and eavesdrop on some conversations.
- Bypass the voice-lock by engaging Hock in conversation long enough for Kasumi to get enough of a voice sample
- Discover the password for the vault's lock by exploring the mansion
- Bypass the DNA Scanner using a good sample of Hock's DNA
Investigate the power cable.
Enter this door in your search for the password.
Use the secret access to get to the private quarters.
Throw the guards down the canyon.
Don't access this alarm if you want an easier fight!
Should you set off the alarm, two guards will come in via the main door. If you have done this, deal with the new enemies. Regardless, you will need to proceed back the way you came once Kasumi confirms that you have taken enough DNA. As you get back into the corridor, you will hear two guards talking if you did not alert them with the alarm clock earlier. They are up the top of the stairs, to the left. This is another perfect opportunity for a Concussive Shot or heavy weaponry kill to send the guards flailing down through the window into the canyon below.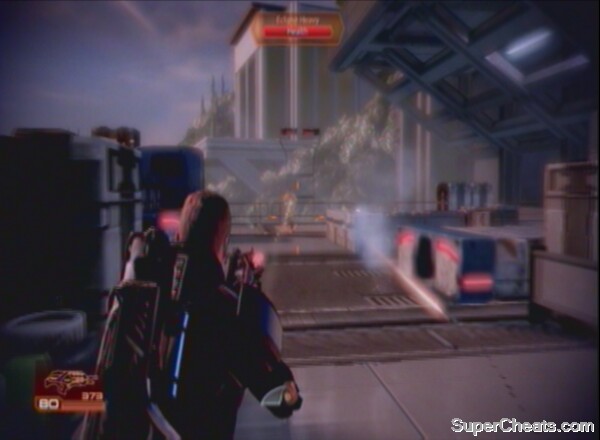
The guards will be up here if you didn't set off the alarm.
Pick up the weapon and the greybox
Defeat the first YMIR Mech.
Destroy the second YMIR Mech.
Use Kasumi to take out the dropship's shields
Eclipse Heavys make a nuisance of themselves in the final wave
Destroy the dropship and kill Donovan Hock.
Achievement:
The Citadel

You won't get much done if everyone thinks you're dead!Level 27
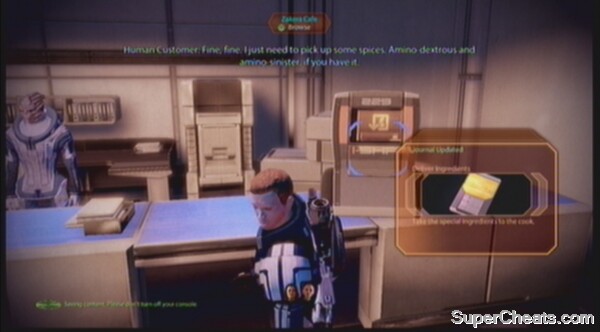
Offer out your endorsement in exchange for discounts!Level 28
Level 26
Presidium
Side-quests
Crime in Progress:
Krogan Sushi:
The Krogan would love to get his hands on a Presidium fish!Special Ingredients:
Forged IDs/False Positives:
Help the two Asari out, by hook or by crook.Packages for Ish:
Tuchanka
Speak to the clan leader to get all the information you need.
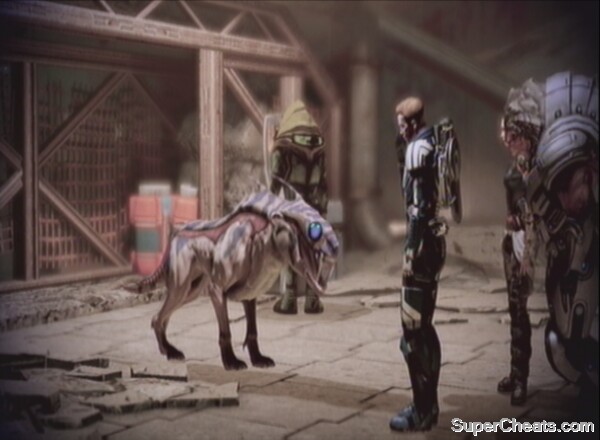
Make the Varren fall in love with you, or not.
Help Ratch with his pyjak problem, and have some fun in the process
Romance
- Tali
- Jack
- Jacob
- Thane
- Kelly Chambers
- Morinth
Planetary Mining
Element Zero
Eagle Nebula, Amun, Anhur
Crescent Nebula, Lusam, Tarith
Eagle Nebula, Relic, Preying Mouth
Hawking Eta, Schwarzschild, Etamis
Hourglass Nebula, Faryar, Daratar
Hourglass Nebula, Osun, Erinie
Omega Nebula, Batalla, Thunawanuro
Pylos Nebula, Satent, Boro
Pylos Nebula, Satent, Raisaris
Rosetta Nebula, Enoch, Joab
Rosetta Nebula, Enoch, Mizraim
The Shrike Abyssal, Xe Cha, Tosal Nym
The Shrike Abyssal, Xe Cha, Zada Ban
Valhallan Threshold, Paz, Garvug
Caleston Rift, Aysur, Arvuna
Caleston Rift, Balor, Caleston
Crescent Nebula, Lusam, Tarith
Crescent Nebula, Zelene, Helyme
Eagle Nebula, Amun, Sekhmet
Far Rim, Dholen, Gotha
Hades Nexus, Pamyat, Dobrovolski
Hades Nexus, Sheol, Gei Hinnom
Krogan DMZ, Nith, Mantun
Minos Wasteland, Caestus, Invictus
Nubian Expanse, Kalabsha, Yamm
Omega Nebula, Batalla, Nearog
The Phoenix Massing, Salahiel, Ekuna
Pylos Nebula, Dirada, Siano
Rosetta Nebula, Alpha Draconis, 2175 Aeia
Rosetta Nebula, Enoch, Laban
The Shrike Abyssal, Urla Rast, Talis Fia
Sigurd's Cradle, Decoris, Sanctum
Titan Nebula, Haskins, Capek
Valhallan Threshold, Micah, Farlas
Valhallan Threshold, Micah, Israfil
Valhallan Threshold, Micah, Kakabel
Hades Nexus, Hekate, Asteria
Hades Nexus, Hekate, Bothros
Shadow Sea, Iera, Prospect
Iridium
Caleston Rift, Aysur, Shasu
Caleston Rift, Aysur, Shir
Caleston Rift, Solveig, Sinmara
Caleston Rift, Talava, Aitarus
Caleston Rift, Talava, Kaushus
Caleston Rift, Talava, Maitrum
Crescent Nebula, Zelene, Nepyma
Eagle Nebula, Imir, Gregas
Eagle Nebula, Relic, Beach Thunder
Eagle Nebula, Relic, Fitful Current
Hades Nexus, Pamyat, Dobrovolski
Hades Nexus, Pamyat, Komarov
Hawking Eta, Schwarzschild, Atahil
Hourglass Nebula, Faryar, Antictra
Hourglass Nebula, Faryar, Quarem
Hourglass Nebula, Ploitari, Aigela
Hourglass Nebula, Ploitari, Zanethu
Krogan DMZ, Aralakh, Durak
Krogan DMZ, Nith, Mantun
Minos Wasteland, Caestus, Temerarus
Omega Nebula, Fathar, Korar
Omega Nebula, Kairavamori, Sehtor
Omega Nebula, Kairavamori, Uwan Oche
Omega Nebula, Kairavamori, Vatar
The Phoenix Massing, Salahiel, Ekuna
The Phoenix Massing, Tassrah, Pahhur
Pylos Nebula, Dirada, Siano
Pylos Nebula, Dirada, Thenusi
Pylos Nebula, Satent, Raisaris
Rosetta Nebula, Enoch, Laban
Rosetta Nebula, Phi Clio, Parnassus
Shadow Sea, Iera, Watchman
The Shrike Abyssal, Xe Cha, Tosal Nym
Sigurd's Cradle, Skepsis, Crick
Sigurd's Cradle, Skepsis, Darwin
Sigurd's Cradle, Skepsis, Franklin
Solar System, Sol, Mercury
Solar System, Sol, Pluto
Titan Nebula, Haskins, Capek
Valhallan Threshold, Micah, Farlas
Valhallan Threshold, Micah, Israfil
Valhallan Threshold, Micah, KakabelPlatinum:
Caleston Rift, Balor, Bres
Caleston Rift, Balor, Caleston
Caleston Rift, Balor, Cerunnos
Caleston Rift, Balor, Elatha
Caleston Rift, Balor, Partholon
Crescent Nebula, Lusam, Tarith
Crescent Nebula, Ondeste, Acaeria
Crescent Nebula, Ondeste, Maisuth
Eagle Nebula, Amun, Anhur
Eagle Nebula, Relic, Rough Tide
Hades Nexus, Hekate, Bothros
Hades Nexus, Pamyat, Patsayev
Hades Nexus, Sheol, Gei Hinnom
Hawking Eta, Schwarzschild, Etamis
Hourglass Nebula, Faryar, Daratar
Hourglass Nebula, Osun, Erinie
Minos Wasteland, Caestus, Invictus
Nubian Expanse, Dakka, Bannik
Nubian Expanse, Dakka, Zirnita
Omega Nebula, Arinlarkan, Utha
Omega Nebula, Fathar, Dorgai
Omega Nebula, Fathar, Lorek
Omega Nebula, Sahrabarik, Bindur
Pylos Nebula, Kriseroi, Theonax
Pylos Nebula, Satent, Anedia
Pylos Nebula, Satent, Boro
Rosetta Nebula, Alpha Draconis, 2175 Aeia
Rosetta Nebula, Enoch, Joab
The Shrike Abyssal, Urla Rast, Rosh
The Shrike Abyssal, Urla Rast, Talis Fia
Sigurd's Cradle, Decoris, Sanctum
Sigurd's Cradle, Skepsis, Keimowitz
Sigurd's Cradle, Skepsis, WatsonPalladium:
Caleston Rift, Aysur, Shir
Caleston Rift, Aysur, Tamgauta
Caleston Rift, Solveig, Surtur
Caleston Rift, Talava, Taitus
Crescent Nebula, Lusam, Doriae
Crescent Nebula, Lusam, Euntanta
Crescent Nebula, Ondeste, Zesmeni
Crescent Nebula, Tasale, Beregale
Crescent Nebula, Tasale, Ponolus
Crescent Nebula, Zelene, Epho
Eagle Nebula, Amun, Neith
Eagle Nebula, Malgus, Flett
Eagle Nebula, Malgus, Wrill
Eagle Nebula, Relic, Murky Water
Eagle Nebula, Relic, Rough Tide
Far Rim, Dholen, Gotha
Hades Nexus, Hekate, Asteria
Hades Nexus, Hekate, Ker
Hades Nexus, Pamyat, Volkov
Hawking Eta, Century, Cantra
Hawking Eta, Century, Klendagon
Hawking Eta, Century, Tamahera
Hawking Eta, Thorne, Lethe
Hourglass Nebula, Faryar, Alingon
Hourglass Nebula, Faryar, Tunfigel
Hourglass Nebula, Faryar, Wenrum
Hourglass Nebula, Osun, Aganju
Hourglass Nebula, Ploitari, Synalus
Hourglass Nebula, Ploitari, Thegan
Krogan DMZ, Aralakh, Kruban
Minos Wasteland, Fortis, Aequitas
Minos Wasteland, Fortis, Pietas
Minos Wasteland, Fortis, Vir
Nubian Expanse, Dakka, Bannik
Omega Nebula, Batalla, Logasiri
The Phoenix Massing, Tassrah, Sarapai
Pylos Nebula, Dirada, Canalus
Shadow Sea, Iera, Venture
The Shrike Abyssal, Urla Rast, Bovis Tor
The Shrike Abyssal, Xe Cha, Zada Ban
Sigurd's Cradle, Decoris, Laena
Solar System, Sol, Venus
Titan Nebula, Haskins, Capek
Valhallan Threshold, Micah, Kakabel
Achievements
Save your crew from an overwhelming attack [Survive the Normandy Prologue]
Return to active duty [Survive Freedom’s Progress]
Successfully recruit the biotic Convict [Complete the Purgatory Prison Ship mission]
Successfully recruit the krogan [Complete the mission on Korlus)
Successfully recruit Archangel [Complete the Archangel mission on Omega]
Successfully recruit the Professor [Deal with the quarantine on Omega]
Successfully recruit the quarian [Assist the quarians on Haestrom]
Successfully recruit the Justicar [Solve the murder on Illium]
Successfully recruit the Assassin [Locate the assassin on Illium]
Obtain geth technology [Reactivate the geth at the end of the Reaper IFF mission]
Defend a human colony from attack [Save Horizon from the geth]
Gain the loyalty of the Cerberus Officer [Complete Miranda’s loyalty mission on Illium]
Gain the loyalty of the Cerberus Operative [Complete Jacob’s loyalty mission which begins on the Normandy]
Gain the loyalty of the biotic Convict [Complete Jack’s loyalty mission on Pragia]
Gain the loyalty of the krogan [Complete Grunt’s loyalty mission on Tuchanka]
Gain the loyalty of Archangel [Complete Garrus’s loyalty mission on the Citadel]
Gain the loyalty of the Professor [Complete Mordin’s loyalty mission on Tuchanka]
Gain the loyalty of the quarian [Complete Tali’s loyalty mission at the quarian Flotilla]
Help the Justicar resolve her mission [Complete Samara’s loyalty mission on Omega]
Gain the loyalty of the Assassin [Complete Thane’s loyalty mission on the Citadel]
Hack a geth collective [Complete Legion’s loyalty mission on the geth space station]
Complete the investigation of a derelict alien vessel [Complete the Collector Ship mission]
Use the Omega 4 Relay [Travel through the relay]
Save humanity throughout the galaxy from certain annihilation [Complete the game on any difficulty]
Survive suicide mission [Complete Suicide Mission]
Complete the game on the "Insanity" difficulty level without changing the setting
Keep your team alive through the suicide mission [Don’t allow any of your team to die during the suicide mission]
Complete Mass Effect 2 twice, or complete it once with a character imported from Mass Effect 1
Successfully pursue a relationship with a teammate
Perform 30 headshot kills with any weapon on humanoid targets
Shoot and kill 20 enemies while they're knocked back by a punch
Thresher Maw defeated [Kill the Thrasher Maw on the third round of Grunt’s loyalty quest – you need to finish it off rather than merely surviving as the mission objective for this area states]
Hit 20 different targets with multiple biotic powers to combine the effects [i.e. use Pull to get the enemy in the air and then Warp to thrash them apart – repeat 20 times]
Kill enemies with 5 different heavy weapons during the game [More heavy weapons are found during missions or can be researched]
Make 20 enemies scream as they fall or are set on fire
Disrupt the shields of 25 enemies
Warp the barriers of 25 enemies
Incinerate the armour of 25 enemies
Complete a mission discovered by scanning an unexplored world [Use the Normandy to scan and investigate anomalies on certain planets]
Complete 5 missions discovered by scanning unexplored worlds [see above]
Retrieve mineral resources by scanning and probing a planet in the galaxy map [Uses the same method as above, but the probe collects resources rather than allowing landing]
Visit 100% of the planets in an unexplored cluster
Reach Level 30 with one character [You will need to complete the game and start again with the same character to reach Level 30]
Unlock 15 new Mass Effect 2 codex entries
Obtain 10 technology upgrades
Fully upgrade a weapon
Complete any research project in the Normandy's laboratory
Personalize your armour in your quarters on the Normandy
Evolve any power [By reaching Level 4 and upgrading]
View all advanced combat training videos at Shepard's private terminal.
Gain the loyalty of the mercenary [Complete Zaeed’s (free DLC for Cerberus Network users) mission on the planet Zorya]
Gain the loyalty of the thief (complete Kasumi Goto's loyalty mission, Kasumi: Stealing Memory)


 Until Dawn: All Totem Locations, Night of the Totem Hunter Trophy
 The Mog Who Sold The World
 inFamous First Light PS4 Complete Part by Part Walkthrough
 Sniper Elite III Wiki – Everything you need to know about the game .
 Five Nights at Freddy's 4 Guide - How to Survive Night 4