
Mass Effect is an action role-playing game set in the distant future. The year is 2183 and mankind has attained the ability to travel at faster-than-light speeds (FTL). FTL travel has brought mankind into contact with a number of alien races from other systems. These races have already established a greater galactic community, and humanity must now find its place among them.
You are Commander Shepard of the Systems Alliance Military, and executive officer of the SSV Normandy. After a beacon built by an ancient race known as the 'Protheans' is discovered on the human colony of Eden Prime, Shepard and crew-accompanied by a turian Spectre named Nihlus-land on the planet; their mission being to recover the Prothean beacon. Unfortunately, the colony is under attack by the geth; a self-aware, synthetic race. The geths’ interest in the Prothean beacon is puzzling, as is the betrayal by a turian Spectre named Saren. Something strange is afoot, and humanity must do its part to defend the galaxy.
The galaxy is monstrously huge, but luckily this guide is here to help you find your way. You’ll find a complete walkthrough for the main storyline missions, as well as walkthroughs for each optional assignment that can be undertaken. There is also a listing of artifact and mineral locations, as well as an outline of the vast galaxy that you’ll explore during your adventure.
Note: This walkthrough was written based on the NORMAL combat difficulty level. The only difference between difficulty levels are your enemies’ stats, so they are tougher to take down and will deal more damage on higher difficulty. All strategies and instructions within still apply for playthroughs on higher difficulty levels, but enemy health estimations will be inaccurate.
Selecting 'Start New Career' from the game start menu brings you to the character creation screen. At first you are given two options; you can choose to start with the pre-made Soldier character, John Shepard, or you can select 'Enter New ID' to create your own. Selecting the second option brings you to another screen where you must then select the gender of the new character. Character gender does not have a profound effect on the storyline or any on gameplay, so it all comes down to personal preference. The 'Quick-start Male' and 'Quick-start Female' options allow you to jump right in with a Soldier, an ideal class for beginners. Choosing a Quick-start character limits you in terms of customization, only allowing you to change your character's first name.
By selecting either the 'Custom Male' or 'Custom Female' option you are able to customize your character to its full extent. You can change the character's first name, Pre-service History, Psychological Profile, Military Specialization and Appearance. Your character's last name is Shepard and cannot be changed due to Mass Effect's spoken dialogue.
The Pre-service history and Psychological Profile options that are selected affect your character's morality, as outlined below.
Pre-service History
The Pre-service History that you choose for your character will affect not only certain dialogue sequences, but also the amount of morality points he or she receives when an amount is given. It would be best to decide which type of character you would like to play-either Renegade or Paragon-before you begin and make your choice that way.
Note that there are a few Pre-service History-specific assignments.
Spacer
'Both of your parents were in the Alliance military. Your childhood was spent on ships and stations as they transferred from posting to posting, never staying in one location for more than a few years. Following in your parents; footsteps, you enlisted at the age of eighteen.'
Selecting the Spacer Pre-service History for your character gives him or her a point bonus when receiving Paragon morality points.
Colonist
'You were born and raised on Mindoir, a small border colony in the Attican Traverse. When you were sixteen slavers raided Mindoir, slaughtering your family and friends. You were saved by a passing Alliance patrol, and you enlisted with the military a few years later.'
Selecting the Colonist Pre-service History for your character gives him or her partial point bonus when receiving Paragon or Renegade morality points.
Earthborn
'You were an orphan raised on the streets of the great megatropolises covering Earth. You escaped the life of petty crime and underworld gangs by enlisting with the Alliance military when you turned eighteen.'
Selecting the Earthborn Pre-service History for your character gives him or him or her a point bonus when receiving Renegade morality points.
Psychological Profile
As with your character's Pre-service History, the Psychological Profile that you select will affect some dialogue as well as your character's morality. It would be best to decide which type of character you wish to play, and then matching his or her Psychological Profile up with the Pre-service history that yields the same morality's point bonus (ex., Spacer and War Hero for a Paragon or Earthborn and Ruthless for a Renegade).
Sole Survivor
'During your service, a mission you were on went horribly wrong. Trapped in an extreme survival situation, you had to overcome physical torments and psychological stresses that would have broken most people. You survived while all those around you fell, and now you alone are left to tell the tale.'
Selecting the Sole Survivor Psychological Profile gives your character a partial point bonus when receiving Paragon or Renegade morality points.
War Hero
'Early in your military career you found yourself facing an overwhelming enemy force. You risked your own life to save your fellow soldiers and defeat the enemy despite the impossible odds. Your bravery and heroism have earned you medals and recognition from the Alliance fleet.'
Selecting the War Hero Psychological Profile gives your character a point bonus when receiving Paragon morality points.
Ruthless
'Throughout your military career, you have held fast to one basic rule; get the job done. You've been called cold, calculating, and brutal. Your reputation for ruthless efficiency makes your fellow soldiers wary of you. But when failure is not an option, the military always goes to you first.'
Selecting the Ruthless Psychological Profile gives your character a point bonus when receiving Renegade morality points.
Military Specialization
The most important choice you have to make during your character creation venture is that of your character's Military Specialization. 'Class' may be a more familiar term if you have played an RPG before. The class that you select will greatly influence how you experience Mass Effect. For example, someone playing as an Adept or Sentinel will have a vastly different gameplay experience than a player who is playing as a Soldier or Infiltrator. Each of the six classes have their own strengths and weaknesses in three different fields: Combat, Tech and Biotics.
Each class is briefly outlined below. If you are unsure of which one to select, your best bet would be to start as a Soldier, as it is the easiest class to use and therefore best suited for the beginner.
Soldier
'Soldiers are combat specialists ideal for the front lines of a firefight. Soldiers get improved health, can train in the use of all weapon types, start with the ability to use medium armor, and can specialize in heavy armour.'
Strength: Combat
Weakness: Tech and Biotics
Starting Talents:
Pistols
Assault Rifles
Combat Armor
Assault Training
Unlockable Talents:
Shotguns - Four points in Pistol talent.
Sniper Rifles - Seven points in Assault Rifle talent.
First Aid - Six points in Combat Armor talent.
Fitness - Five points in Assault Training talent.
Engineer
'Engineers are tech specialists. Using the holographic omni-tool, they can decrypt security systems, repair or modify technical equipment, disrupt enemy weapons or shields, and heal their squad. Engineers can only use light armour, and can only receive weapons training with pistols.'
Strength: Tech
Weakness: Combat and Biotics
Starting Talents:
Pistols
Decryption
Electronics
First Aid
Engineer
Unlockable Talents:
Basic Armor - Six points in Pistol talent.
Hacking - Seven points in Decryption talent.
Damping - Four points in Electronic talent.
Medicine - Five points in First Aid talent.
Adept
'Adepts are biotic specialists. Through upgradeable implants they can use biotic powers to lift or throw objects, shield the squad and disable or destroy enemies. Adepts can only use light armor, and can only receive weapons training with pistols.'
Strength: Biotics
Weakness: Combat and Tech
Starting Talents:
Basic Armor
Throw
Warp
Barrier
Adept
Unlockable Talents:
Pistols - Five points in Basic Armor talent.
Lift - Six points in Throw talent.
Singularity - Seven points in Warp talent.
Stasis - Four points in Barrier talent.
Infiltrator
Infiltrators combine combat and tech abilities to specialize in killing or disabling enemies at long range. Infiltrators are trained to use omni-tools, focusing on decryption and offensive abilities rather than healing. They can use pistols or sniper rifles and medium armour.'
Strength: Combat and Tech
Weakness: Biotics
Starting Talents:
Pistol
Tactical Armor
Electronics
Decryption
Infiltrator
Unlockable Talents:
Sniper Rifles - Five points in Pistol talent.
Fitness - Six points in Tactical Armor talent.
Damping - Four points in Electronics talent.
First Aid - Seven points in Decryption talent.
Sentinel
'Sentinels combine biotic and tech abilities. Typically they use biotic abilities and advance healing skills to defend allies, though they can also disrupt opponents with biotic or tech attacks. They are more efficient at tech and biotics that other classes, but at the expense of combat. Sentinels can only use light armour, and receive no advanced weapon training.'
Strength: Biotics and Tech.
Weakness: Combat
Starting Talents:
Throw
Barrier
Decryption
First Aid
Sentinel
Unlockable Talents:
Lift - Seven points in Throw talent.
Stasis - Six points in Barrier talent.
Electronics - Four points in Decryption talent.
Medicine - Five points in First Aid talent.
Vanguard
'Vanguards are biotic warriors. They combine biotics and weapons to take down opponents, and are especially deadly at short range. They use pistols and shotguns, and can specialize in medium armour.'
Strength: Combat and Biotics.
Weakness: Tech
Starting Talents:
Pistols
Assault Training
Throw
Warp
Vanguard
Unlockable Talents:
Shotguns - Six points in Pistol talent.
Tactical Armor - Five points in Assault Training talent.
Lift - Seven points in Throw talent.
Barrier - Four points in Warp talent.
Appearance and Combat Difficulty
Once you have selected a class for your character, you are then presented with the option of changing his or her appearance. You can select one of the preset faces by using the 'Cycle Presets' option, or you can shape your character's appearance yourself using the sliders in the submenus. Be sure that you are completely happy with your character's appearance before you hit Finalize, as there is no way to make any changes once in-game.
After hitting Finalize, you are then asked to confirm your selections. Look over the character summary to ensure that everything is in order. You can tweak the Gameplay options once your character has been created, including the Combat Difficulty option. The difficulty level that you select affects the level of the Minions, Sub-bosses and Bosses that you will encounter during your adventure.
Casual, Normal, and Veteran are unlocked from the beginning, but two more difficulties can be unlocked by first completing the game on any difficulty level to unlock Hardcore, and then completing the game on Hardcore to unlock Insane. But don't worry about that, selecting Normal is probably your best bet. You can move on to harder difficulty levels with subsequent playthroughs.
Casual: The combat levels of Minions, Sub-bosses and Bosses are scaled down based on player level. Most enemies have no special protection or immunities.
Normal: The combat levels of Minions and Sub-bosses are scaled based on player level, but Bosses are scaled up based on the player level. Some enemies have special protection.
Veteran: The combat levels of Minions are scaled down based on player level while Sub-bosses and Bosses are scaled up. Most enemies have special protection.
Hardcore: Unlocked by completing the game once on any difficulty level. Most enemies are scaled up based on the player's level. All enemies have protection, and Bosses have immunities.
Insane: Unlocked by completing the game on Hardcore without changing the difficulty level.
Auto Level-Up should remain off, as it is more beneficial to allocate the points between talents yourself rather than having them automatically assigned to various talents. By manually leveling Shepard's allies you can tailor them to compliment Shepard's class. Tinker with the remaining options and then hit the A button to continue. Keep in mind, these options can be changed once in-game.
- Smuggling
- Espionage
- Doctor at Risk/UNC: Dead Scientists
Noveria: Smuggling
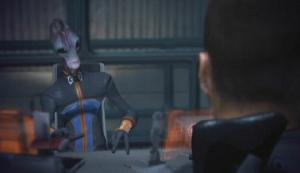
Speak to Opold, the hanar merchant in Port Hanshan Plaza near the elevator to Customs, and select the 'You heard already?' option on the left side of the conversation wheel. Spectres are generally free of restrictions, so Opold asks you to help him smuggle a package through customs. If you turn the hanar down, Opold's request still stands, so you can return to him and take on the assignment if you change your mind. Agree to help Opold and he informs you that the package can be picked up at the Docking Bay by the Normandy.

Opold
Objective: Retrieve the Package
Backtrack to the Port Hanshan Docking Bay and pick up the package on the ground near the Normandy. The package holds a powerful weapon mod.
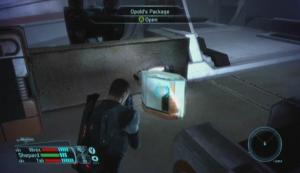
Opold's Package
Objective: Return the Package
Now that you have the package in your possession, there are a few things you can do with it. Return to Opold's store and tell him you have the package; you can then hand it over to him for a measly amount of credits, or decide to keep the weapon mod inside for yourself. Opold's initial offer of 250 credits can be doubled if you've invested enough talent points in Charm or Intimidate, but 500 credits still isn't very much. The quality of the weapon mod inside of the package is dependent on your character's level, so the higher Shepard's level, the stronger the weapon mod is. However the upgrade likely isn't anything that couldn't be acquired normally.
You may choose to ignore Opold all together and instead bring the package directly to the buyer. Ask Opold about the recipient; he won't tell you at first, but you can get the information from him if you've invested enough talent points in Charm or Intimidate. The package is for a krogan named Inamorda. He can be found on the upper walkway in Port Hanshan Mezzanine. He won't talk to you unless you convinced Opold to tell you about the buyer. Inamorda doesn't offer much more for the package, but you will earn a small number of Renegade points for selling it to him directly.

Inamorda
The package can also be given to Administrator Anoleis, who can be found in the Administrator's Office in Port Hanshan Plaza. Anoleis gives you a garage pass for Opold's package. If Shepard's Charm or Intimidate talents are developed enough, additional dialogue options appear on the left side of the wheel once Anoleis has given you the package. Selecting either of these persuasion options allows you to keep the package. The package can then be given to Opold if you wish, or you can keep the mod for yourself.
Anoleis
Noveria: Espionage
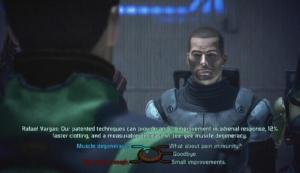
An asari named Mallene Calis wants to speak with you. She can be found in Port Hanshan Mezzanine, near the elevator. Mallene wants you to wiretap a salesman named Rafael Vargas. She believes that Binary Helix, the manufacturer of the products that Vargas sells, is illegally using asari biotic technology. Mallene offers to pay 500 credits if you pose as a buyer and talk to Vargas about business until her device has collected the necessary information. Refusing to participate completes the assignment and yields a couple of Paragon points, but you won't receive any credits this way.
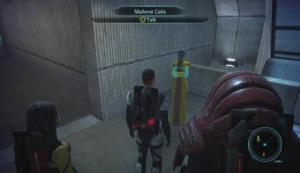
Mallene Calis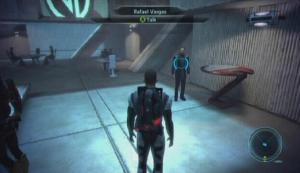
Rafael Vargas
Objective: Keep Him Talking
Vargas can be found standing next to a table at the north end of the bar. Speak to him and identify yourself. You can either tell him outright that Mallene asked you to spy on him, or go through with Mallene's job and pose as an interested buyer. Mallene mentioned that Vargas is impatient and will refuse to continue the conversation if he suspects a potential buyer is not interested.
You must keep the conversation going until Mallene's device beeps, which signifies that the information has been collected. Shepard must have enough points invested in Charm or Intimidate to prolong the conversation as necessary. Select the blue Charm option or the red Intimidate option to keep the salesman talking about business. When the device beeps, end the conversation and return to Mallene for your reward.
Conversation Wheel
Objective: Turned Mallene In/Hacking Complete
If you told Vargas about Mallene's device, you can still lie to her and receive the credit reward anyway. Going through with the assignment and bringing the device back to Mallene yields Renegade points. Informing Vargus about Mallene and then telling Mallene that you did so earns you Paragon points, while lying to her yields Renegade points. Charm or Intimidate can be used to bump up the 500 credit reward to 750 credits.
Doctor at Risk/UNC: Dead Scientists
Successfully decrypt the terminal in the room at the end of the upper walkway in Port Hanshan Mezzanine to add this assignment to your Journal.
Terminal
Objective: Find the Doctor
Travel to the Newton system of the Kepler Verge. The Normandy receives a transmission from Admiral Hackett upon entering the system. Hackett tells you that someone has been killing every scientist who was involved in a secret project years ago. Only one such scientist remains, and he is currently located in the Newton system. At this point the assignment's name changes to 'UNC: Dead Scientists.'
Objective: Find the Scientist
The last of the secret project members is being held in the Underground Facility on Ontarom. The Underground Facility is far southeast from the Mako's drop point. Open up your map and place a Destination flag near the facility to keep yourself oriented. A small number of mercenaries stand guard at the facility's entrance, but a couple of blasts from the Mako's cannon can make short work of them. When the perimeter is clear, exit the Mako and head inside.
Underground Facility Entrance
The mercenaries inside are quite tough. Immediately get behind cover upon entering the facility's main room and scan the area for threats. Destroy the containment cells if you're planning to fight at close-range to avoid having them set off while you're close by, or seize an opportunity to use them against the mercenaries. Stay near the room's entrance for an easy retreat if things take a turn for the worst. Once the mercenaries have been dealt with, make your way to the other end of the facility. Enter the hall and step into the room on the right.
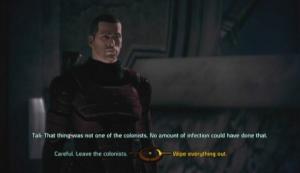
You'll find the scientist in this room, being held at gunpoint by a mercenary; one Corporal Toombs. He claims that this scientist and those working on the project with him intentionally led thresher maws to a base-which they then wiped out-as an experiment. If you've invested talent points in Charm or Intimidate, persuasion options are available on the conversation wheel. Selecting either of the choices on the right side of the wheel gets the scientist and Toombs killed, while selecting one of the persuasion options keeps Toombs, at the very least, alive. The blue 'This isn't justice' option effectively convinces Toombs to give it up and let the scientist live, while the red 'Let me do it' option has Shepard kill the scientist instead while Toombs remains alive.
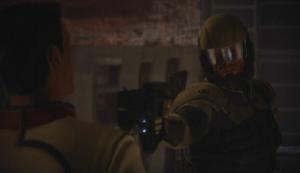
Scientist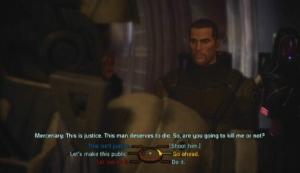
Conversation Wheel
Objective: Report to Hackett
Return to the Normandy and access the Galaxy Map to report to Hackett and complete the assignment.
On The Normandy
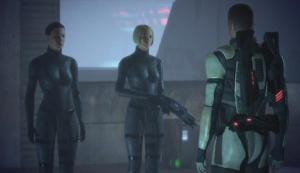
After the opening cutscene you discover that a turian Spectre by the name of Nihlus has been sent by the Council to oversee the mission taking place on Eden Prime. As Joker questions Nihlus’ presence, you are presented with your first dialogue option. Generally the top-right dialogue choice on the conversation wheel is a Paragon response, the middle-right choice a neutral one and the bottom-right choice a Renegade response.
The conversation choices you make during conversations may yield Paragon or Renegade points. If you’re striving towards a particular one, choose the top-right or bottom-right choices on the conversation wheel accordingly. In this case, you would receive a small amount of Paragon points by agreeing with Joker, or a small amount of Renegade points for chastising your crewmembers. Choices on the left side of the wheel usually further the conversation, while the choices on the right push the conversation towards its conclusion.
Objective: Speak to the Captain
Captain Anderson wants to see you in the Normandy’s comm. room. The comm room is located at the other end of the Normandy, so follow the walkway behind Joker and Kaiden until you reach the comm room door. Speak to Corporal Jenkins and Doctor Chakwas before entering the comm room and select the Paragon or Renegade choices on the conversation wheel to receive a small number of morality points. You find Nihlus waiting for you upon entering the comm room. Work your way through the dialogue tree and watch the events that unfold.

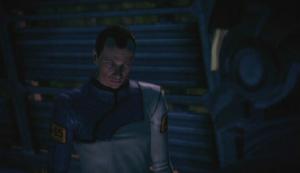
Nihlus

Comm. Room Meeting
Find the Beacon
Objective: Head to the Dig Site
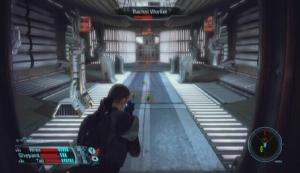
Your mission is to find and secure the Prothean beacon on Eden Prime. You are joined by crewmembers Kaiden Alenko and Richard Jenkins. Your first task is getting to the Dig Site. Placing a Destination flag on the map can help you get there. To do this, first press the Start button to call up the Mission Computer. On the Mission Computer screen, select the 'Map' option from the choices on the right. Move your cursor over to the 'Dig Site' text and press the A button to set the Destination flag there. Exit out of the Mission Computer and look to the radar on the bottom-right side of the screen. Notice how an arrow is now visible on the radar that points towards the flag you have placed.
As you move towards the Dig Site, a few geth recon drones appear and proceed to gun down Jenkins. This is an unavoidable event, so select one of the conversation choices from the wheel to receive Paragon or Renegade points and move on. The recon drones themselves are easy enough to destroy; simply shoot them down with your pistol or other weapon. When you level up for the first time, select the 'Squad' option on the Mission Computer screen. From here you can distribute the points earned between the various talents available to your character and squad members. The talents available depend on character class. For more information on character classes, check out the 'Military Specialization' section under 'Character Creation.'
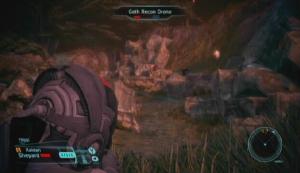
Geth Recon Drones
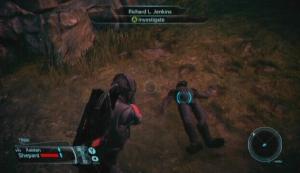
Jenkins
Continue moving towards the Dig Site and eventually you will meet up with a human soldier named Ashley Williams. Ashley joins Shepard’s squad after a short chat. A small number of geth can be found just before your destination. Take cover behind the rock as instructed and take them out while safely behind cover. This particular variant of geth is easy to destroy, but rest assured that more powerful geth will popup along the way. When the coast is clear, approach the Dig Site and press the A button to investigate.
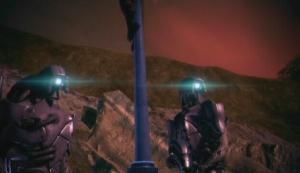
Geth
Ashley Williams
Objective: Investigate Research Camp
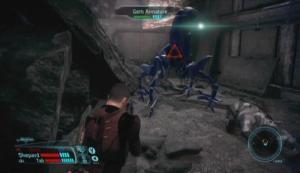
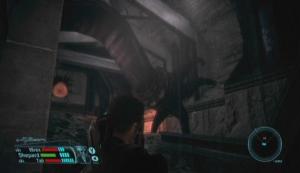
There is a small camp beyond the Dig Site. Move up the sloping path behind the Dig Site to reach the battered camp. After a short cutscene a group of husks starts moving towards the squad. Do not let one get too close to you, as the husk’s most damaging attack-a burst of electricity-can cause some severe damage at close range. If one does manage to get close enough, run right up to it and press RT to perform a melee attack which can knock the husk down. While its on the ground, you can then melee the husk or unload your weapon into it to deplete its health bar.
Husk
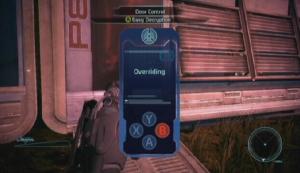
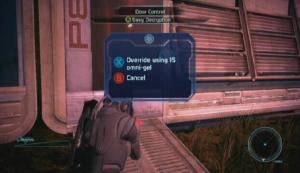
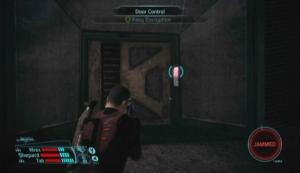
Once the husks have been dealt with, look around for a shelter with a locked door. To unlock this door, approach it and press the A button to start the Decryption mini-game. You must press the buttons that flash onscreen in a timely manner. If you press an incorrect button or do not press the correct button fast enough, the door cannot be unlocked unless you have enough Omni-gel. It is unlikely that you have collected enough Omni-gel thus far, but if you have picked up any equipment that you know will not be of use to you, enter the Equipment screen from the Mission Computer, highlight the equipment that you wish to dispose of, and press the Y button to receive four Omni-gel. You’ll need about twenty to open this door. To avoid the hassle it would be a good idea to save your game before attempting this, though unlocking this door is completely optional.
Manual Decryption
Omni-gel
Two doctors, Warren and Manuel, can be found inside of the camper. There isn’t much they can tell you, but you can earn a fair number of Renegade points by selecting the 'Assistant' topic under 'Investigate' and knocking Dr. Manuel out.
Manuel
Objective: Head to Spaceport
Your next destination is the Spaceport, located at the top of this map. Set a Destination flag near the 'Train Station' text on the map to make finding your way there easier. Remove the geth that surround the station and then investigate Nihlus’ corpse. After a short conversation with a colonist named Powell, take out the geth along the walkway and move towards the cargo train. Among the geth troopers is a geth destroyer. Use your squad’s abilities to weaken the destroyer before it gets too close, as its melee attack is quite brutal.
To use an ability first hold down the RB button, target the destroyer and then select a power from the wheel. Good powers to use against the destroyer are Overload, Sabotage, Warp, or weapon abilities (only while a weapon is out). You can command your squad members to use their powers on targeted enemies as well.
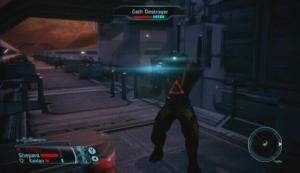
Geth Destroyer
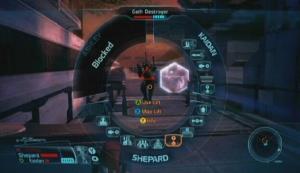
Power Wheel
Objective: Take the Train
Activate the Train Controls when you reach the end of the cargo train. There are four charges to disarm and you have four minutes to do so. The first Demolition Charge is to your left when you step off of the cargo train. Approach the charge and press the A button to begin disarming it. Once the first charge has been disarmed, head up the ramp to reach the walkway above. At the top of the ramp you can either cross to the western walkway or continue to follow the eastern walkway. Take the eastern walkway for the sake of following this walkthrough.
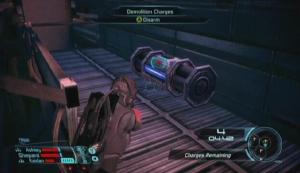
Demolition Charge
The western walkway is packed with geth, including a couple of shock troopers. Use your powers to weaken the shock troopers before they can get too close (ex., Overload, Assassination, etc.) or have your allies target them with their Assault Rifles. To order your squad to attack an enemy, press right on the D-pad with that enemy targeted. The remaining charges are found along the second walkway; one at the top, one about halfway down and the last at the very end.
When you have disarmed the final charge, proceed through the opening at the top of the second walkway. Remove the geth and husks surrounding the Prothean Beacon, but don’t investigate the beacon just yet. Take the time to open the locked containers and lockers in the area, as you might find some new equipment. Once you’re all set, investigate the Prothean Beacon to activate a cutscene.
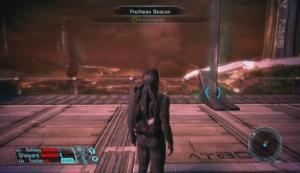
Prothean Beacon
Objective: Speak to Joker
After the cutscene you find yourself back aboard the Normandy. Once you have regained control over Shepard, leave the medical ward and take the stairs up to the Normandy’s command deck. You can speak with Doctor Chakwas, Ashley and/or Kaiden as you make your way to the bridge to gain some much needed experience. When you’re ready, speak to Joker on the bridge to activate a cutscene and reach your next destination, the Citadel.
Citadel: Expose Saren
Objective: Go to the Tower
When you gain control of Shepard, decrypt the Computer Console on the right side of Udina's office to add the 'Unusual Readings' assignment to your Journal. There are plenty of assignments to be completed at the Citadel, but it would be best not to worry about those for now. Concentrate on completing this mission first. Walkthroughs for all assignments can be found in the 'Optional Assignments' section of this guide.
Upon exiting the office, turn left and head down the stairs. Follow the ‘X' on your radar to reach an Avina Terminal. You can learn more about the Citadel and its areas by interacting with this terminal. When ready, open up your map and place a Destination flag near the Transition below the 'Citadel Tower' text. Follow the arrow on your radar until you reach the elevator. Step into the elevator and ride it up to the Citadel Tower. After a short conversation with a turian named Garrus Vakarian, proceed up the stairs and speak with Captain Anderson to enter the Council Chamber.
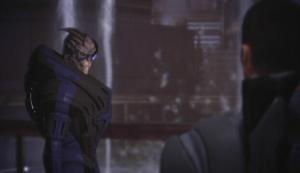
Garrus Vakarian
Citadel Council
Citadel: Garrus
Objective: Speak to Harkin
Your next task is to seek the turian C-Sec officer Garrus, as he had been working on an investigation on Saren and might be able to help. Harkin, a former C-Sec agent, may be able to tell you where Garrus can be found. You can find Harkin in Chora's Den, a small club in the Lower Wards. Approach the Citadel Rapid Transit terminal near the keeper and investigate. This console can be used to quickly reach a location in the Citadel that you have previously visited. Activate the console and select 'Wards Locations' from the wheel, then 'Chora's Den' to quickly travel there.

Rapid Transit Terminal
After stepping through the doorway you'll encounter two turian assassins. Crouch down behind the railing and attack them with a Sniper Rifle, use abilities, or get close enough to them out with another weapon. With the assassins out of the way, move towards the Chora's Den entrance and enter the club. Head to the back of the club to find Harkin sitting alone at a table. Harkin points you towards the Med Clinic in the Upper Wards.
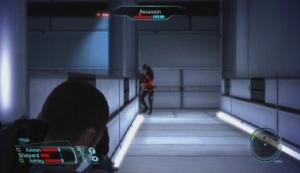
Assassin

Harkin
Objective: Go to the Med Clinic
Leave Chora's Den and head back to the other end of the walkway. Use the Rapid Transit terminal to reach the Med Clinic; it's under 'Wards Locations' on the wheel. Open the Med Clinic door to trigger a cutscene. You witness Dr. Michel being held by some thugs. Once Garrus offs the thug holding her, finish off those remaining and then speak to the turian. During the conversation, be sure to select the 'We could use him' option from the conversation wheel when talking about Wrex, as the krogan would definitely be an asset to the team.

Dr. Michel
Citadel: Wrex
Objective: Speak to Wrex
Wrex can be found at C-Sec Academy. Use a Rapid Transit terminal and travel to 'Wards Access' under 'Presidium Locations' on the wheel. From here, head south until you reach the arrows pointing towards the Embassies and C-Sec. Cross the bridge up ahead and go down the ramp on the right to reach the first floor of the Presidium. Move forward until you come to an elevator marked 'To C-Sec Academy.' Summon the elevator and ride it down to C-Sec.
Wrex is standing by the doorway to the right of the Docking Bay elevator. Wrex joins the crew after a short cutscene. As with Garrus, Wrex is a hybrid character, though his strengths are Biotics and Combat. Hybrid characters are particularly useful because they can be built-up to suit almost any squad.

Wrex
Citadel: Expose Saren
Objective: Take Down Fist
Fist is the owner of the Chora's Den club in the Lower Wards. Use a Rapid Transit terminal to reach Chora's Den and cross the walkway that leads to the bar. The thugs inside are ready for you. Don't just charge into the bar, as there is a krogan bouncer within who can make short work of your squad if you aren't careful. There are plenty of thugs, too, but they can be killed without too much hassle.
Chora's Den Raid
If you or one of your squad members has the Overload ability, lower the krogan's shields, and damage him with Sabotage, Warp, or a similar ability. If your character is trained with a Sniper Rifle, hang back outside of the bar and weaken the krogan with Assassination from a safe distance. Whatever you do, do not let the krogan get close to you, as his melee attack is absolutely brutal. You could also try to stick the krogan with a grenade, but doing so can be somewhat difficult. Don't be afraid to retreat if things start to get ugly.
Head into the backroom once the initial area is clear. There are more thugs and a couple of warehouse workers through the proceeding hallway, so be careful. The workers can be persuaded to leave by using Charm or Intimidate if Shepard has enough talent points invested in either one of those talents. Scaring the warehouse workers away with Charm yields Paragon points, while scaring them away with Intimidate yields Renegade points. If the conversation wheel does not appear, it is because Shepard does not have a high enough Charm or Intimidate skill.
Warehouse Workers
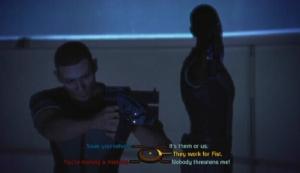
Stand back when you meet Fist, as he raises two Defensive Turrets in an attempt to protect himself. The turrets can be destroyed with Overload, gunfire, and a couple of well-thrown grenades. With both turrets down, start attacking Fist. Use every abilities available to you to take him down; particularly helpful ones being Overload, Sabotage, Throw, and weapon abilities. When Fist's health bar has been depleted a cutscene is activated. You can kill Fist to receive Renegade points. If you have Wrex in your squad, he will off Fist himself.
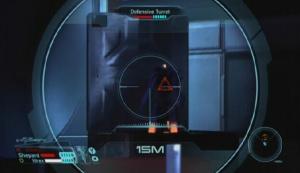
Defensive Turret

Fist
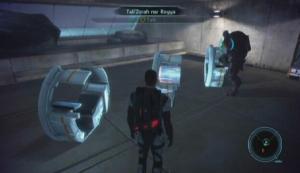
Objective: Save the Quarian
You have four minutes to rescue the quarian after speaking with Fist. The main room of Chora's Den has restocked with Thugs, so be cautious when charging in. Once the room is clear, sprint out of Chora's Den and to the opposite end of the walkway. Head up the steps near the Rapid Transit terminal and move towards the meeting place. After the cutscene, help the quarian kill the assassins.
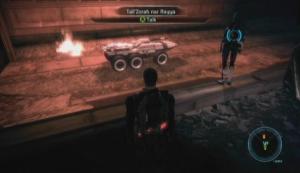
Alleyway Fight

Tali
For saving her life, Tali'Zorah nar Rayya (or simply 'Tali') agrees to present the damning evidence against Saren to the Council. After some dialogue with Anderson and Udina, Tali joins the team. She is a very strong tech user and would fit nicely into your squad if Shepard is exclusively Biotic (Adept) or Combat (Soldier). Her First Aid, Electronics and Decryption talents are a must if Shepard or a second squad member does not have access to them.
Objective: Return to the Tower
Use a Rapid Transit terminal to quickly reach the Citadel Tower. Speak with Anderson to enter the Council Chamber. After the cutscene, Shepard joins the Spectre ranks as the first human Spectre! As a Spectre, the Spectre Training talent is available, and you'll also receive a bonus to the Charm and Intimidate talents. It would be wise to start investing points in Charm or Intimidate. Focus on only one of the persuasion talents, depending on whether you want your character to follow the Paragon path or the Renegade path.
Council Chamber
Objective: Speak to the Ambassador
Use a Rapid Transit terminal to reach C-Sec Academy, which is located under 'Wards Locations' on the wheel. If you take the eastern hallway down to the Requisition Office you can speak to the turian there and purchase or sell items. You should always check in with stores and purchase any items marked as 'Unique,' such as Grenade/Medi-gel upgrades or manufacturer licenses. When you are ready, take the elevator up to the Docking Bay and meet with Ambassador Udina. Once the cutscene is over… that's it for this mission.
Mission Complete
You can enter the Normandy and continue on with the storyline or you can hang back and complete some of the optional assignments found in the Citadel. Check out the 'Optional Assignments' section for help with those.
It would be best to decide on two squad members and stick with them throughout your adventure. This is especially important if you want to unlock some additional achievements along the way. To earn the Ally achievements you must play through the majority of the game with the squad member that corresponds to each achievement (ex., Garrus to unlock the 'Turian Ally' achievement).
If you decide to remain at the Citadel and complete the assignments there, decide on a squad now. To change your current squad, board the Normandy and then return to the Citadel. Upon leaving the ship you are prompted to select two squad members to accompany you.
When you first board the Normandy you must speak to your new subordinates. Selecting the top-right or top-left options on the conversation wheel gives you Paragon points after the speech, while selecting the bottom-right or bottom-left choices yields Renegade points. After the speech has been made you are free to explore the Normandy and speak with the Normandy’s crew one-on-one. Now would be a good time to familiarize yourself with the ship’s layout.
Ship Layout
The Command Deck is the top level of the Normandy; it contains the Bridge and Galaxy Map. Speak to Joker at on Bridge and ask him about his personal history to gain some XP. Go through the door in the northern corner of the Combat Information Center and head down the stairs to reach the ship’s Quarters. Here you can speak with Kaiden, found working near the Sleeping Pods. The Medical Center is located by the Sleeping Pods; you can speak with Doctor Chakwas about her personal history to gain some XP and use the Aid Station to replenish your Medi-gel supply.
The Engineering section of the Normandy can be reached using the Quarters elevator Here, Garrus can be found by Mako, Wrex near the squad lockers and Ashley across from there. The lockers in Engineering can be used to outfit your allies without actually being in the field. Each character has a locker assigned to them, and can be equipped with available equipment from your inventory if you open one of their lockers. Equipment can be purchased from the Alliance Requisition Officer; his stock is dependent on the manufacturer licenses you have purchased, so check in often. Tali can be found in the Engineering section which can be reached by going through one of the doors behind the elevator. Speak to Engineer Adams to learn more about the Normandy, which will earn you XP in the process.
To earn the 'Paramour' achievement you must complete one of the romance subplots. Doing so entails forming a relationship with a crewmember and choosing the correct dialogue choices while conversing with them. Male Shepard can form a relationship with Ashley Williams or Liara T’Soni, while female Shepard can form a relationship with Kaiden Alenko or Liara T’Soni. It’s good practice to speak to each of your squad members after completing a storyline mission, since they will often have additional conversation points that can earn you XP and may lead to optional assignments. Speaking with the crewmembers that Shepard can form a relationship with develops the romance subplot which reaches its conclusion near the end of the game.
Your Mission
With Spectre status you are free to explore the galaxy at your own pace. You may choose to complete some optional assignments that take you to uncharted worlds, or you may wish to follow the main storyline. As far as missions go, there should be three active ones in your Journal. These missions can be tackled in an order of your choosing.
Objective: Go to Artemis Tau
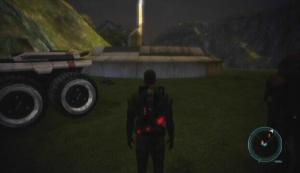
Travel to the Knossos system in the Artemis Tau cluster and land on Therum. Open up your map and place a Destination flag near the “Refinery” text. You won’t be able to head directly to the flag since there are mountains and lava between the Mako’s drop point and the Refinery, but the flag should ensure that you are moving in the right direction. As you make your way to the Refinery, a geth dropship appears and leaves two armatures behind. Destroy the armatures with the Mako’s cannon and continue down the trail.
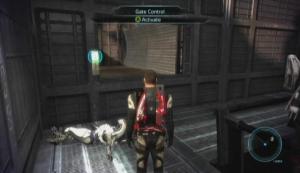
You soon reach a gate flanked by two heavy turrets. As you drive towards the gate, look to your right for an opening in the mountainside. Turn into the opening and follow the curved path to its end to find yourself behind the gate. The Mako’s cannon can make short work of the geth in this area, so start clearing them out. When the perimeter is clear of hostiles, exit the Mako and proceed through the doorway on the left side of the western-most gate. Move to the end of the walkway and use the gate control on the wall to raise the vehicle gate outside.
Gate
Gate Control
Return to the Mako and drive through the now raised gate. You’ll encounter some geth armatures along the way and a geth colossus when you reach the tunnel entrance at the opposite end of the area. The geth colossus has quite a bit of health, and its projectiles can cause some serious damage to the Mako. First and foremost, use the Mako’s cannons to remove the geth ground troops that surround the colossus. The colossus’ slow moving projectiles are easy enough to avoid if you keep your distance. Drive the Mako around the colossus—firing the cannon as soon as it’s ready—until the large geth falls.
Head down the tunnel and continue towards the ruins. There are two geth rocket troops stationed at the end of the tunnel, so be ready. After moving through a second tunnel, you soon reach a couple of boulders that the Mako cannot fit through, forcing you to exit the vehicle and travel the rest of the way on foot.
End of the Line
Start down the path that leads to the Mining Camp. This path is quite straightforward, so just follow it while taking out the geth you encounter along the way. Save your game when you can see the Mining Camp in the distance, as you’ll be facing a tough enemy soon. A cutscene is triggered as you close in on the camp. Some geth troops, geth stalkers and an armature prevent you from entering the Prothean Ruins.
Immediately take cover behind one of the nearby crates once you gain control over Shepard to avoid taking fire from the stalkers. The geth stalkers move quickly, have the ability to climb on any surface, and use Sniper Rifles, making them decidedly deadly foes. Due to their wall climbing ability, the stalkers can climb up onto the nearby structure and get a bead on you even while you’re behind cover. Move out of the way if you notice a laser sight pointing at you from up above to avoid taking serious damage. Avoid remaining out of cover for too long though, since one blast from that armature can do you in. Move behind the structure across from the ruins entrance if necessary; this way you can free roam, pick off the geth stalkers one by one, and avoid a fatal hit from the armature.
Geth

Geth Armature
When the geth troops and stalkers have been dealt with, take cover behind one of the crates and concentrate on the armature. Use Overload if useable by Shepard or a squad member to lower its shield. Remain behind cover and damage the armature with abilities and weaponry until it falls. With the geth destroyed, head up the ramp and enter the Prothean Ruins.
Prothean Ruins Entrance
Move down the catwalk, picking off any geth troops encountered along the way, and use the elevator at the catwalk’s end to reach the lower section of the ruins. Destroy the geth assault drones that appear. Use the second elevator to reach the lower catwalk, and then drop down to the catwalk below. Here you find Liara T’Soni, trapped in some sort of field. Take the ramps down to the bottom level of the ruins. Destroy the geth down below and then access the Mining Laser Controls up ahead. The override sequence is A, X, B, and Y. A tunnel is created below the catwalk once the correct override sequence has been entered. Move to the end of the tunnel and use the elevator to reach Liara’s prison.

Liara T’Soni
Laser Mining Controls
When the elevator reaches the top, a krogan battlemaster accompanied by geth appears and demands that you hand Liara over. That’s not going to happen, of course, so you but to fight him. Take cover behind something as soon as you gain control of Shepard. Concentrate on removing the geth troopers and snipers that accompany the krogan first. The krogan has a strong shield, as well as the Shield Boost ability, so don’t let up once his shields are down. His attacks are quite damaging too, especially his melee attacks, so don’t let him trap you in a corner. Be ready to use a Medi-gel if Shepard or an ally requires medical attention.
Krogan Battlemaster
When the krogan falls, the Prothean ruins begin to cave in. Luckily Shepard and crew manage to make it out safely and return to the ship with Liara. Back aboard the Normandy, a meeting takes place aas the crew welcomes Liara to the team. This mission comes to a close after a short debriefing with the Council.
Liara
Geth forces have attacked Feros. Your mission is to find out how Saren is involved and why the geth were sent to the planet.
Feros: Geth Attack
Objective: Go to Feros
Travel to the Theseus system of the Attican Beta cluster and land on Feros. Choose your squad members, exit the Normandy and start towards David al Talaqani at the end of the walkway. David informs you that Fai Dan, leader of the Zhu’s Hope colony, wishes to speak with you immediately. Your interaction with David is cut short when an explosion suddenly occurs and a large number of geth enter the area.
Objective: Speak with Fai Dan
There are geth positioned all along the walkway, but there is plenty of cover too. Move from cover to cover down the walkway while taking out the geth troops and proceed through the doorway at the walkway’s end.
There are two geth stalkers in the stairwell. This variant of geth moves quickly and can climb walls and ceilings, making them hard to hit. Stand still and wait until one of the stalkers is stationary and then quickly attack using weapons or offensive abilities. Once the geth in the stairwell have been dealt with, head up the stairs to reach the colony. Move past the colonists to the very back of the colony and speak with Fai Dan by the doorway.

Geth Stalker
Fai Dan
Objective: Stop Geth in Tower
Another conversation cut short as more geth appear and attack from the tunnels. The geth have taken hold of the tower at the west end of the colony. You are to fight your way up the stairs to reach the tower and clear the perimeter of geth. Proceed through the doorway that the geth emerged from and make your way to the stairwell. Head up the stairs and cut down any geth troopers encountered along the way. There is a heavy presence of geth in the tower’s perimeter composed of troopers, snipers, drones and a destroyer. Remove each and every geth in the area, then head back down the stairs and speak to Fai Dan once more.
Geth
Objective: Inform Fai Dan
Your next objective is to investigate the ExoGeni Headquarters, which can be reached by taking the now functional elevator to the Prothean Skyway and then driving the Mako across the skyway. However there are a number of optional assignments which can be completed first, but you’ll have to put the ExoGeni investigation on hold. Check out the “Feros Assignments” section to find instructions on activating and completing each assignment.
Objective: Get to ExoGeni Headquarters
Proceed to the elevator when you’re ready to leave the colony. Take the elevator up to the Prothean Skyway and help the colonists destroy the drones once the elevator reaches its destination. The Mako is waiting and ready to go on the lower highway. Enter the Mako and start down the skyway.
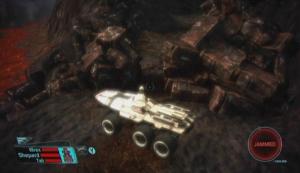
As soon as the Mako’s out of the gate, a geth ship appears and drops off a couple of armatures and some troops onto the skyway. Luckily you have the Mako’s machine gun and cannon at your disposable, allowing you to make short work of them. Fire the cannon at the armatures as you approach the geth roadblock. Keep an eye out for the armatures’ slow moving projectiles and swerve or move to the lower or upper highway to avoid taking damage from them. There is one more geth roadblock to look out for near the end of the first section of the skyway.
Mako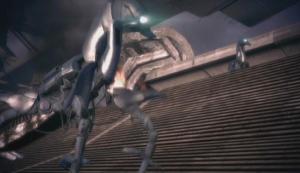
Geth Armatures
Objective: Investigate Mysterious Signal
When you reach the end of the first stretch of skyway you overhear some unidentified radio chatter. Look to the radar and follow the POI symbol to locate a ramp that leads down to a refugee camp. You meet Ethan Jeong and Juliana Bayham upon entering the camp. Ethan and Juliana work for ExoGeni and were forced to flee from the headquarters due to a geth attack. Juliana Bayham eventually asks you to try and find her daughter, Lizbeth, who remained in the building while the other refugees fled.
Camp Entrance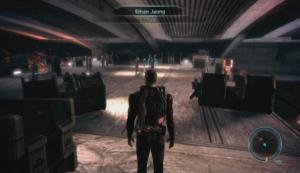
Refugees
Locate and speak to Gavin Hossle before moving on and agree to help him. He gives you an easy assignment that can be completed while in the ExoGeni building. (See the “Feros Assignments” section for more details.)
Objective: Investigate ExoGeni Headquarters
Return to the Mako and drive up the ramps to reach the Skyway Weigh Station. Be ready for another geth roadblock when the door opens. The ExoGeni Base entrance is at the end of this long stretch of skyway. Drive down the skyway—occasionally alternating between the lower and upper levels to avoid incoming projectiles—until you reach the ExoGeni Base. The Mako is too large to fit through the base’s main doorway, but you can shoot its cannon through the doorway to clear the room of geth.
ExoGeni Base
Exit the Mako once the room is clear and proceed the doorway. Once inside, head up the ramp to reach the lobby. The door at the south end of the room is blocked by an energy field which must be shut down. Its energy source is located somewhere within the ExoGeni building. There’s a drop point across from the blocked doorway, but you may want to explore the room at the north end of this area to gain some additional XP and items. The door to this room is locked, but it can be opened if Shepard or a squad member has invested an adequate number of talents into the Decryption talent. Save your game before entering the room, as you’ll face a geth armature inside. Open the Malfunctioning Object and take the items within to activate the armature. Throw Grenades and use abilities to damage the armature and try your best to avoid taking a direct hit from its cannon.
Locked Door
Geth Armature
Drop down from the drop point across from the blocked doorway when you’re ready to go. Entering the ExoGeni Midden triggers a short cutscene. Lizbeth, daughter of Juliana Bayham, tells you that ExoGeni had been conducting research on a plant-being known as the Thorian. You discover that the geth attack on Feros was due to the research being conducted on the Thorian in the ExoGeni building. Following your conversation with Lizbeth, a large pack of varren appears. Do not let them get too close to you, as they can dish out a great deal of melee damage because of their number. Sprint away from the pack if you must, then turn around and shoot at them or use abilities as they approach.

Lizbeth
Once the varren have been dealt with, move to the southwest corner of the area. Proceed through the door and start up the stairs to reach a different part of the headquarters’ main level. A krogan can be heard arguing with a VI as you near the top of the stairs. Get ready for a fight, as the krogan is alerted to your presence once you reach the top. Kill the krogan and access the VI. With Lizbeth’s access card, the terminal recognizes you as her, permitting you access to the information it holds. Work your way through the VI’s dialogue tree to learn more about the Thorian. You learn that the Thorian is actually located under the Zhu’s Hope colony, which would explain why that area was hit particularly hard by the geth.
Krogan Battlemaster
VI
Objective: Remove Force Field
The force field running in the ExoGeni building is preventing communication between squad and the Normandy. You’ll have to find some way to disable it so Zhu’s Hope can be warned of the Thorian threat. Move past the VI terminal and head up the steps at the end of the corridor. Move to the end of the walkway and look below to observe two geth shock troopers near an altar. Destroy the geth below to trigger a cutscene.
Geth Altar
Objective: Destroy Geth Ship Claws
The geth ship acts as the field’s energy source, so severing the claw used to anchor the ship to the building would effectively lower the field. The claws being used to anchor the geth ship cannot be destroyed with any of the weaponry currently at your disposal, so you’ll have to find some other way to sever it. Head through the doorway at the bottom of the stone steps and follow this corridor to its end. Clear the next room of geth and then proceed to the upper level of the ExoGeni base.
Immediately take cover upon reaching the upper level, as there are three enemy krogan at the end of its initial corridor. Wipe out the krogan before moving to the opposite end of the corridor. A storage locker and server node can be found at the corridor’s end, but of particular interest is the Computer Console. Access the console to retrieve the data needed to complete the “Feros: Data Recovery” assignment if you spoke to Gavin about it back at the ExoGeni refugee base.
Krogan
Gavin’s Computer
Take the stairs back down to the base’s Main Level and head through red-lit doorway on the right. Climb up the stairs to reach another area of the Upper Level. Take cover behind one of the stone blocks and clear the room of the geth troops that inhabit it. Afterwards decrypt the ExoGeni terminal underneath the walkway’s ramp to trigger the “Investigate Facility” assignment.
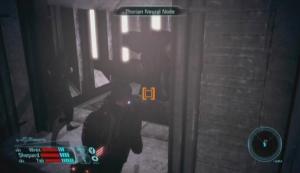
Head up the ramp to reach the walkway and trigger a short cutscene. Take cover at the end of the walkway and start attacking the geth that occupy the area below. The biggest threat here is the geth destroyer, so use every available ability (ex., Overkill, Assassination, Marksman, Carnage) to bring the destroyer down as quickly as possible. Head down the ramp once the perimeter is clear of geth. Decrypt one of the geth terminals in this area to add the “Geth Activities” assignment to your Journal, and the server node to add the “Investigate Samples” assignment.
Geth Ship Appendage
Approach the shuttle bay door controls at the west end of the area and activate them. A number of valves appear on the left side of the control system. Each valve is marked with a number value. The repair ticket attached to the control explains that a PSI of 31 to 34 is enough power to shear even the toughest of metals. A PSI beyond 34 triggers the system’s automatic safety shutdown. You must use the numbered valves on the left side of the controls to attain a pressure somewhere from 31 to 34. There are several ways to do this; an example is the 17, 5 and 11 PSI valves for a total of 33 PSI. When the pressure meter in the bottom-right corner of the screen is in the high pressure zone, use the controls to shut the bay door; doing so effectively severs the geth ship’s anchoring claw.
Shuttle Bay Door Controls
High Pressure
Objective: Exit ExoGeni
With the anchoring claw severed, the geth ship falls from its perch on the side of the ExoGeni building. The force field that is blocking doorways and preventing communication with the Normandy fails without its energy source. Joker radios in and explains that the Zhu’s Hope colonists have gone mad. It’s time to leave the ExoGeni building and return to the colony.
Take the stairs back down to the main level and move through the large doorway that was previously blocked by a force field. Lizbeth is waiting for you beyond the doorway. Follow the Paragon (top-right) or Renegade (bottom-right) options on the conversation wheel to earn Paragon or Renegade morality points after the chat with Lizbeth.
Objective: Speak with Refugees
Return to the Mako, drive down the ramps and start down the Prothean Skyway. Additional geth have taken position along the skyway, so be cautious as you make your way back to the ExoGeni refugee camp. Lizbeth quickly leaves the Mako when you reach the camp. Get out of the vehicle yourself and follow Lizbeth down the ramp. You witness a disagreement as Ethan Jeong decides that the infected Zhu’s Hope colonists must be wiped out to ensure the ExoGeni refugees’ safety.

Ethan Jeong
If you have a large amount of talent points invested in Charm or Intimidate, you can keep Jeong alive by using one of the persuasion options that appear on the left side of the conversation wheel. However it is unlikely that your character has enough Paragon or Renegade points to reach a high enough Charm or Intimidate level, unless you’ve complete a large number of optional assignments and possibly Noveria first. Keeping Jeong alive using Charm or Intimidate yields a large amount of morality points after the conversation. If the persuasion options are grayed out, the conversation ends with Shepard being forced to off Jeong when he suddenly draws his weapon.
Objective: Return to Zhu’s Hope
In the ExoGeni Base you discovered that the plant-being known as the Thorian resides in a facility underneath the Zhu’s Hope colony. The Thorian has had an effect on the colonists of Zhu’s Hope, turning them into thralls that will attack on sight. Return to the Mako and start across the last stretch of skyway. More geth have taken position on the skyway in an attempt to halt your progression. Use the Mako’s weaponry to destroy the armatures and juggernauts and then continue driving down the skyway to reach the colony. The squad encounters a Thorian creeper at the end of the skyway. This creature is not one of the Zhu’s Hope colonists, as the infected colonists only differ in mindset and not appearance.

Thorian Creeper
You have been provided with an anti-Thorian gas grenade upgrade that can be used to incapacitate the infected colonists. To install the upgrade: enter the Equipment screen from the Mission Computer, press the X button while Grenades is selected, scroll to the Anti-Thorian Gas I upgrade and press the X button again to install it. Now each grenade you throw will release a cloud of non-lethal gas upon detonation. The gas incapacitates any infected subjects caught in its effect radius.
Dealing with the colonists in a non-lethal manner yields large amount of Paragon points afterwards. Of course, an easier yet less-humane way to deal with the infected colonists is to kill them off. You are given two Paragon points for each colonist spared and two Renegade points for each colonist killed. Decide how you’ll deal with the colonists and give orders to your squad accordingly. The order selected from the wheel affects how your squad members react when an infected colonist is encountered, so choose wisely.
Squad Orders
Objective: Minimize Causalities or Kill Infected Colonists
Enter the garage when you’re ready to proceed. The counter in the bottom-right corner of the screen displays the number of colonists currently alive. There is a large mass of creepers in the bottom level of the garage; use the Mako’s weaponry to wipe them all out quickly. The first batch of colonists are positioned behind the barrier on the upper level of the garage. If you’re following the Paragon path, exit the Mako, press the Back button to throw an anti-Thorian grenade near the infected colonists and press the Back button again to detonate it. If done correctly, the grenade should incapacitate all of them. Afterwards, take the elevator down to the Zhu’s Hope colony.
Infected Colonists
Anti-Thorian Grenade
There are more creepers down below. Do not let them get too close to you, as the creepers will vomit on Shepard and allies when close enough, causing prolonged toxic damage. Use a melee attack to bat down any creeper that manages to get too close. Use an anti-Thorian grenade or kill the infected colonists that are positioned behind the barrier and then head down the first set of stairs to encounter more creepers. Eliminate the creepers and continue down the stairs to reach the main area of the colony.
A large number of colonists are positioned behind a barrier near the main area’s entrance, so use anti-Thorian grenades to deal with them non-lethally or kill them before moving on. If you’re running low on grenades, more can be found in the Upgrade Kit next to the walkway steps. There are more creepers along the walkway, as well as a couple of infected colonists at its end. Move down the walkway, kill the creepers and stun or kill the colonists.
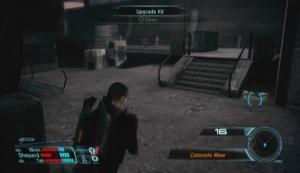
Upgrade Kit
There are plenty of creepers and colonists in the area beyond the walkway. If you’re trying to minimize causalities, first enter the area to awaken the creepers and then backtrack to the small area at the bottom of the walkway stairs. The creepers will follow; you can avoid taking damage from the colonists this way. When the area is clear, locate the Freighter Crane Controls in the middle of the colony and activate them. The controls reveal the Thorian’s lair entrance.
Creepers
Crane Controls
Head down the stairs to trigger a cutscene. The evil plant-being spawns an asari clone. As a spawn of the Thorian, she cannot be reasoned with, so you’ll have to fight her. Use every ability available to you to quickly disable her and extinguish the threat. The last auto-save occurred at the lair entrance, so be sure to save your game periodically as you ascend to avoid losing too much progress if Shepard were to die.
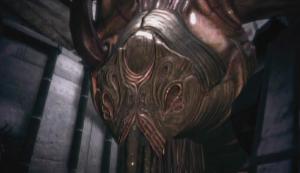
Thorian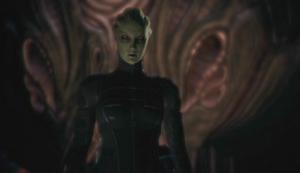
Asari Clone
Objective: Destroy the Thorian
The Thorian can be killed by destroying all of the neural nodes in its lair. The first neural node is located just before the stairs that lead up to the second level of the lair. When you find the first node, attack it until the bar in the bottom-right corner of the screen is depleted. The node can take a great deal of punishment, but the use of weapon abilities can speed up the process. With the first node destroyed, head up the stairs to reach Thorian Lair Level 2.
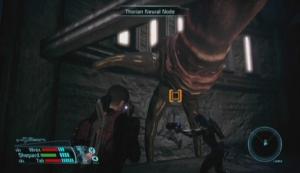
Thorian neural Nodes
The Thorian spawns another asari clone with each neural node that is destroyed. The clones are powerful biotic warriors, so remain vigilant. Their biotic abilities are especially dangerous when they are accompanied by a large number creepers, as the creepers can crowd around while you’re incapacitated and deal toxic damage. Use weapon abilities to quickly remove the clone, and then remove the creepers. Move forward until you reach the room containing the second neural node. Destroy the node to awaken some creepers and unavoidably spawn another asari clone.
Second Neural Node
Move up the rubble to reach Thorian Lair Level 3. The asari clone will come through the doorway at the top of the rubble, so be ready for her. Move forward until you reach the third node in a creeper-filled room. Kill the active creepers first and then start damaging the node. The inactive creepers in this room will awaken while you damage the neural node, so do not stand in the middle of the room. Move on once the third node has been destroyed. Kill the creepers and asari clone and then continue moving forward to reach another creeper filled room with another neural node. The inactive creepers here will awaken as the node is damaged too, so keep your distance
Third Neural Node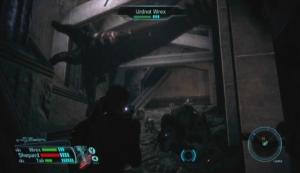
Fourth Neural Node
Destroy the neural node and then head up the ramp to reach Thorian Lair Level 4. Kill the asari clone and creepers first, then turn left at the top of the ramp to find another neural node. Attack the node until it’s destroyed. Proceed down the ramp below the node to reach some stairs that lead up to the lair’s fifth level. Do not ascend the stairs too quickly, as the inactive creepers awaken when you are about partway to the top. Run back down the stairs once the creepers awaken to avoid getting caught between them. There are two more asari clones on the lair’s fifth level, so be prepared. Move to the end of the walkway to find the Thorian’s sixth and final neural node. Destroy the final node to kill the Thorian.
Fifth Neural Node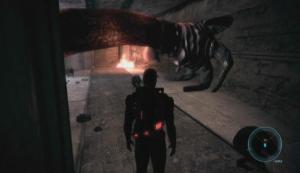
Final Neural Node
A lengthy conversation with an asari named Shiala follows. You can earn Paragon points for letting Shiala live or Renegade points for killing her. That’s the end of the mission. Return to the Normandy once you are ready to leave Feros.
Noveria is a snowy world located in the Pax system of the Horse Head Nebula cluster. As with the other storyline worlds, there is a multitude of optional assignments to be completed on Noveria. Refer to the 'Noveria Assignments' section for details on the optional assignments that can be triggered on Noveria.
Noveria: Geth Interest
Your primary mission is to find out why there is geth interest in the corporate research colony on Noveria.
Objective: Go To Noveria
Travel to the Pax system of the Horse Head Nebula cluster and land on Noveria. Select two allies to accompany you and exit to the Port Hanshan Docking Bay. Move down the walkway until you are confronted by Captain Maeko Matsuo and Kaira Stirling of Elanus Risk Control. Captain Matsuo informs you that weapons are not allowed in the Plaza. However as a Spectre on official Citadel business you are permitted to carry a weapon wherever you go, so Matsuo and the others have no choice but to let you pass.
Captain Matsuo
Proceed through the door at the end of the walkway to enter Customs. Head to the front desk with speak with a woman named Gianna Parasini. Inquire about the geth to learn that Matriarch Benezia, the asari recognized as the second voice in the recording with Saren, recently passed through customs. Benezia is now at a remote complex called Peak 15. You must pursue her, but you'll first need permission to leave Port Hanshan. One of your squad members will suggest bringing Liara T'Soni along, as she is Benezia's daughter. Bringing Liara along is in no way necessary and discouraged if you are working to unlock 'Ally' achievements that are not Asari Ally.
Noveria: Leave Port Hanshan
In order to pursue Matriarch Benezia you must first acquire a garage pass to gain access the Mako. (Refer to the 'Noveria: Smuggling' walkthrough under 'Noveria Assignments' for an alternative way to acquire the pass.)
Objective: Administrator Anoleis
Use the Elevator beyond the customs desk to reach Port Hanshan Plaza. Make your way to the Administration Office in the southeastern corner of the Plaza. Speak to Gianna Parasini at the front desk and ask about Anoleis. Afterwards, step into Anoleis' office and initiate a conversation with him. He denies your request for a garage pass, but if you have Opold's package from the 'Noveria: Smuggling' optional assignment, the option to tell Anoleis that Opold asked you to smuggle is available on the conversation wheel.
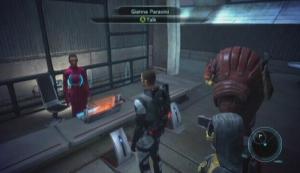
Gianna Parasini
Anoleis
Objective: A Stumbling Block
If you don't have Opold's package or are working towards unlocking any of the 'Ally' achievements, leave Anoleis' office and speak to Gianna Parasini. Gianna tells you to see a turian named Lorik Qui'in at the hotel bar about acquiring a garage pass.
Noveria: Lorik Qui'in
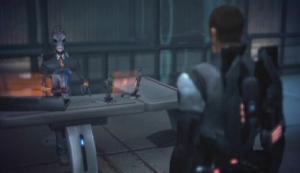
Objective: Speak to Lorik Qui'in
Take the elevator marked 'to Hotel' from the Plaza to reach Port Hanshan Mezzanine. Lorik Qui'in is seated alone at a table directly across from the elevator door.
Objective: Lorik's Dilemma
Lorik claims to have evidence of Administrator Anoleis' corruption. The evidence is on his computer, but unfortunately Lorik has been locked out of his office by Anoleis. Lorik's office is in Synthetic Insights, and the entire floor is now being patrolled by Anoleis' hired guards. Lorik asks you to break into his office and recover the evidence of from his computer. Security drones on the Synthetic Insights floor can be shut down by decrypting the Security Control Unit in the room at the end of the Mezzanine upper walkway.

Lorik Qui'in
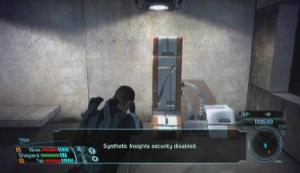
Security Control Unit
Objective: Break-In
Return to Port Hanshan Plaza and locate the elevator to Synthetic Insights; it's just before the stairs that lead up to the garage. Two ERCS guards attempt to prevent you from exploring the floor. If you've invested enough talent points in Charm or Intimidate, the two guards can be persuaded to leave using the blue Charm or red Intimidate option. You'll earn Paragon or Renegade points for persuading them to leave, however the other guards in Synthetic Insights still attack on sight. Kill the hostile guards and make your way to Lorik's Office at the south end of the upper walkway. Access Lorik's computer to retrieve the evidence.
ERCS Guards
Lorik's Computer
Objective: Evidence in Hand
Leave Lorik's office once you have files. Kaira Stirling and a few ERCS guards stand at the end of the upper walkway. Kaira has some powerful biotic abilities, so immediately take cover behind the planter on the left to avoid getting caught by one. Eliminate Kaira and the ERCS guards, and then take the elevator back down to the Mezzanine. Gianna Parasini is waiting for you near the elevator.

Kaira Stirling
Objective: Gianna
Gianna asks that you speak to her before returning to Lorik. She can be found in the Mezzanine at the end of the room opposite Lorik's table. Gianna reveals that she is not really Anoleis' secretary, but only posing as one to expose his corruption. Gianna wants you to ask Lorik to testify against Anoleis. She can't give you credits, but she can get you a garage pass.
Gianna
Objective: Gianna's Proposal
Talk to Lorik and select the 'Testify against Anoleis' option on the left side of the conversation wheel. Lorik gives you credits if you hand over the evidence without asking him to testify against Anoleis, however you can earn a large amount of Paragon or Renegade points by persuading him to testify using Charm or Intimidate. The maximum amount of credits that Lorik will give is 750, so it would definitely be best to ask him to testify.
Objective: Lorik Agrees
Once you've convinced Lorik to testify against Anoleis, make your way to the Administration Office in Port Hanshan Plaza. Speak to Gianna if you're following the Paragon path. With sufficient evidence, the corrupt administrator can be brought to justice. You receive XP, Paragon points and a garage pass for completing the mission. Alternatively, you can speak to Anoleis instead and inform him that he is under investigation. Anoleis will then call Gianna into his office where things quickly turn violent. Enter the office afterwards and remove the garage pass from Anoleis' corpse to complete the mission and gain a large amount of Renegade points.

Anoleis Arrested

Anoleis Killed
Noveria: Matriarch Benezia (Part 1)
With a garage pass in hand, make your way to the garage entrance in the southwest corner of Port Hanshan Plaza. Flash your garage pass to the ERCS guard by the door and enter the garage. In the garage, geth emerge from the shipping containers that Benezia brought to Noveria. There are two geth stalkers and two destroyers, so immediately take cover behind one of the containers in the garage.
Concentrate on destroying the stalkers first, because with their ability to climb on the walls and ceilings they can still line-up a shot while you're behind cover. Geth destroyers tend to rush and their melee attacks are quite brutal, so gun them down, use disabling abilities or sprint away before they can get too close. When the last geth falls, brief with Captain Matsuo, then move to the far end of the garage and board the Mako.
Geth Stalker
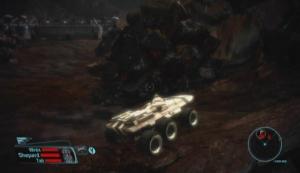
Mako
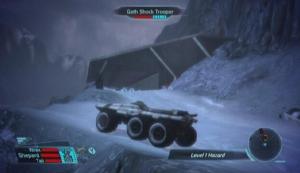
Objective: To Peak 15
Drive the Mako out of the garage to enter Aleutsk Valley. Peak 15 is located at the other end of the valley. Due to the bad weather, this area's environment is currently a Level 1 Hazard. If you must leave the Mako for any reason, reenter the vehicle before the bar in the bottom-right corner of the screen fills up or Shepard will start taking damage.
A geth heavy turret and some shock troopers are positioned at the mouth of the first tunnel you come to. Use the Mako's cannon to destroy the heavy turret, then barrel through the kinetic shields and blast the geth troopers up ahead as you move through the tunnel. A short cutscene is triggered when you reach the end of the tunnel. The armature and troopers are positioned on a small hill just before the bend. Use the Mako's cannon to destroy the armature from a safe distance and then the geth troopers.
Tunnel
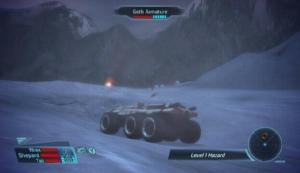
Geth Armature
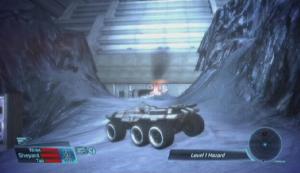
Follow the winding trail to reach another tunnel. Geth rocket troopers stand at the mouth of this tunnel; a well-placed cannon blast can take them all out at once. Once you're out of the second tunnel, the only resistance you'll encounter the rest of the way are geth heavy turrets. Keep an eye out for their slow-moving missles and swerve to the side to avoid taking damage. Follow the trail until you reach the Peak 15 entrance. Exit the Mako and step inside. It would be a good idea to save your game now if it has been awhile, as the last auto-save occurred just before you entered the garage back at Port Hanshan.
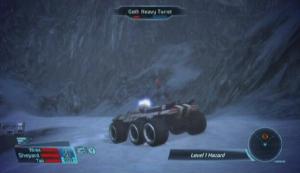
Geth Heavy Turret
Peak 15
Peak 15's garage is occupied by krogan and a geth juggernaut. Sprint ahead and take cover behind one of the containers in the area. First, take out the repair drone that follows the juggernaut, as it periodically repairs the geth when it takes damage. Once the krogan and juggernaut have been dealt with, head up the steps in the southeastern corner of the garage to reach the walkway and move to its end. Move through the proceeding corridors and you'll come to an elevator. Ride the elevator to reach the Peak 15 Administration section.
Noveria: Peak 15
Objective: Gianna's Warning
The cafeteria is initially occupied by geth. Destroy the geth in the cafeteria to trigger a cutscene. Gianna Parasini had warned you about an accident on Peak 15, though the true nature of the accident was unknown because all contact with the facility was lost for some time. The hallway on the west end of the cafeteria soon fills up with a strange, insect-like species called rachni.
The rachni soldiers can dish out some serious melee damage, so do not let one get too close. Aside from their melee attacks, you'll also have to watch out for their toxic projectile, as getting hit by one causes prolonged toxic damage. The workers are small, quick and will explode when close. As with the rachni soldier's spit, a rachni worker's blast causes toxic damage. Kill the rachni, sweep the side rooms for items, and then ride the elevator at the end of the hall to reach the Peak 15 Mira Core.

Rachni Soldier
The proceeding room is full of rachni workers which quickly make a beeline for Shepard and allies. Shoot the workers or use abilities to detonate them prematurely. After the onslaught, examine the Power Junction on the left side of the room.
Rachni Workers
Objective: Computers Damaged
Mira, Peak 15's VI, has failed and requires a manual reboot. Head through the door at the room's west end. Once in the Mira Core area, move to the opposite end of the room and take the lift down to the core. Access the Memory Core once the lift reaches the bottom. The VI core can be repaired using100 Omni-gel, or it can be reactivated manually. If you don't have 100 Omni-gel on hand, unneeded equipment and upgrades can be converted into Omni-gel via the Equipment menu. However if you are unwilling to part with sellable items, you'll just have to manually reactivate the VI core.
Mira Core
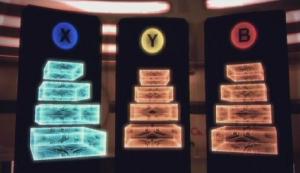
Manual Reactivation
Manually reactivating the VI core requires completing a small puzzle. You must move the module stack from column X to either column Y or B. Sounds easy enough, but the challenge lies in the fact that the stack must be transferred from largest block to smallest block. Additionally, a blue block can only be placed in a column if there is a blue block somewhere below its slot and cannot be placed if there is one above it. Pressing the X, Y, or B button selects the highest blue block in that column to be moved to another. One solution to this puzzle is as follows:
Step 01 -- X to B
Step 02 -- X to Y
Step 03 -- B to Y
Step 04 -- X to B
Step 05 -- Y to X
Step 06 -- Y to B
Step 07 -- X to B
Step 08 -- X to Y
Step 09 -- B to X
Step 10 -- B to Y
Step 11 -- X to B
Step 12 -- Y to X
Step 13 -- B to X
Step 14 -- B to Y
Step 15 -- X to B
Step 16 -- X to Y
Step 17 -- B to Y
Spike Room
Once the VI core has been restored, interact with Mira, inquire about Benezia and ask for a damage report. Before Matriarch Benezia can be pursued, repairs must be done to Peak 15 for the tram to be functional.
Noveria: Reconnect Landlines
Objective: Reconnect Landlines
Ride the elevator beyond the Mira Core to reach the Roof. You'll meet a pack of rachni up top. Use all of your abilities and weaponry to kill the rachni before they get too close. Open the landline using the terminal on the west side of the roof and then take the elevator back down to the Mira Core.
Landline
Noveria: Reactor Repair
Objective: Reconnect Fuel Lines
Proceed through the northern door in the room outside of the Mira Core and head down the corridor. Ride the elevator at the corridor's end to reach the Reactor Core. There are geth destroyers and stalkers along the walkway that leads to the fuel line repair console. The destroyers will more than likely rush you, so gun them down or use a disabling ability to avoid taking melee damage. Use an open doorway as cover to protect yourself from the stalkers while trying to pick them off. Once the walkway is clear, move to the far end and use the console to repair the fuel lines.
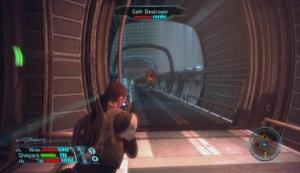
Geth
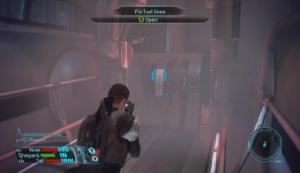
Fuel Line Repair
Noveria: Contamination
Objective: Clear the Chamber
Move down the southern corridor to reach the Tram elevator. A message over the incomes describes 'loose contaminants' in the decontamination chamber. You must pass through the decontamination chamber to reach the Rift Station, but two rachni soldiers currently occupy the chamber, causing it to be locked to ensure everyone's safety.
The easiest way to kill the rachni requires a high Electronics skill. If Shepard or an ally has an adequate amount of talent points invested in Electronics, simply repair the Plasma Purge console next to the Mira terminal to clear the decontamination chamber. Another method involves decrypting the decontamination chamber's locked door and clearing out the rachni soldiers yourself, though an average Decryption skill is required. If your party lacks Decryption and Electronic skills high enough for either method, you can instead interact with the Mira terminal and override the lock to open the door.
Plasma Purge
Chamber Door Decryption
Noveria: Matriarch Benezia (Part 2)
Objective: To Rift Station
Enter the decontamination chamber and step into the proceeding corridor. A small group of rachni workers appear, so take them out before they get too close. Make your way to the tram, step inside and activate it to travel to the Rift Station in pursuit of Benezia. Once at the Rift Station, ride the only accessible elevator to reach the Science Station and talk to Captain Ventralis when it reaches its destination. When the conversation ends, a couple of rachni soldiers attack. Help Captain Ventralis and the ERCS guards take them out. Afterwards, make your way to the mess hall.
Tram
Captain Ventralis
Noveria: Rift Station (Part 1)
Objective: The Sealed Labs
To reach the Rift Station's Medical Bay, head through the door marked 'To Medical Bay' and climb down the stairs to find Dr. Zev Cohen. Cohen tells you that several scientists at the Rift Station became sick due to a failed experiment. He explains that Captain Ventralis won't permit anyone to go into the labs to create a cure for them, as he is afraid that more people will become sick.
Medical Bay

Dr. Cohen
Noveria: Quarantine
Objective: Talk to Ventralis
Return to Captain's Ventralis' location at the Science Station's entrance and initiate a conversation with him. Tell him that you want to help Dr. Cohen. Ventralis doesn't like the idea, but he eventually gives you permission to enter the sealed lab.
Objective: Make a Cure
In the mess hall, head down the corridor marked 'To Quarantine and Barracks.' Ride the elevator at the corridor's end to reach the Rift Station's lower level. Talk to Han Olar upon your arrival to learn more about the rachni. Afterwards, talk to the ERCS guard posted in front of the Quarantine Lab door and inform him that you're going in to make a cure.
Quarantine Lab
Move to the back of the lab and interact with the equipment on the table to begin mixing the cure. To create the cure, press the highlighted button once it reaches the first arrow, but before it reaches the second. Do so four times to acquire the cure. Once you have the cure, Alestia Iallis—the asari that was standing near the Medical Bay—appears, accompanied by two geth. Alestia is actually one of the asari commandos that accompanied Matriarch Benezia to Peak 15. Asari commandos are powerful biotic warriors, so take cover to avoid getting caught by Alestia's crippling Stasis ability.
Objective: Return to Cohen
Once Alestia and the geth have been dealt with, return to Cohen at the Medical Bay and hand over the antitoxin. You are rewarded with XP, credits and a large amount of Paragon points for providing a cure.
Noveria: Rift Station (Part 2)
Objective: Alestia's Attack
Han Olar told you that the geth came from the sealed maintenance area. That means Benezia must be somewhere within. Once you've given Dr. Cohen the cure, he hands over his pass, which will allow you to enter the maintenance area without any trouble.
Objective: The Back Door
The maintenance area door is located in the Rift Station's lower level. Move through the corridor until you reach the ventilation room. Kill the rachni soldier at the end and then proceed through the door.
Objective: Sneaking In
Open up your map and place a Destination flag near the 'Secure lab' text. Whatever you do, do not ride the elevator to the Restricted Area. Captain Ventralis and the guards will attack if you do so.
Noveria: Matriarch Benezia (Part 3)
Objective: To The Hot Labs
Matriarch Benezia stands on the central platform in the Secure Lab. She cannot be reasoned with. Benezia soon summons a pair of asari commandos. Benezia's biotic abilities are even more powerful than an asari commando's, so they must be avoided at all costs. As soon as you gain control of Shepard, turn right and sprint down the walkway towards the containers and take cover. Remain on the west side of the lab during the entire battle; the Matriarch can't attack while you're separated from her, leaving you to deal with only her minions. The bar in the bottom-right corner of the screen displays Benezia's power level; it diminishes as you defeat her minions. Remain behind cover in an effort to avoid the asari commando's biotic abilities. Their Stasis ability in particular can make a mess of things.

Matriarch Benezia
When the asari commando's have been dealt with, Benezia summons a group of geth troopers and snipers. Take out the geth you can see from your current position. Once the coast is clear, you'll have to move to the other end the walkway to destroy the geth there. Benezia then summons a second batch of geth snipers. Use cover to eliminate the snipers without taking damage. When the power level bar has been depleted, Shepard and crew approach the stunned Matriarch. You'll gain control of Shepard shortly after speaking to Benezia; quickly gun her down and then turn to the asari commandos that come to her aid.
After the cutscene, approach the rachni queen to trigger yet another cutscene. Using an asari commando's body as a medium, the queen is able to communicate with you. She asks for a chance to rebuild her species as a more peaceful race. You can either allow the rachni queen to live, or kill her here and now, effectively driving the rachni race to extinction. Showing mercy and setting the rachni queen free yields a large amount of Paragon points, while killing her yields Renegade points.
Rachni Queen
Objective: Deal with Hot Labs
The elevator to the Hot Labs is right next to the Science Station elevator. This objective is optional, as you can simply return to the Tram and take it back to Port Hanshan if you wish. However there is plenty of XP to be had in the Hot Labs, so clearing out the rachni there is highly recommended. It also counts as a mission if you are working to unlock any of the 'Ally' achievements.
Talk to Yaroslev Tartakovsky in the Hot Labs to learn about the rachni race's reemergence from its supposed extinction. Afterwards, enter the room at the back of the Hot Labs and interact with the Mira terminal.

Yaroslev
Mira Terminal
Noveria: The Hot Labs
Objective: Arm the Purge
Ask Mira about the 'neutron purge.' The VI tells you that the neutron purge cannot be armed without a key card. Only administrators carry such a key card; Yaroslev happens to be one, so head back outside and speak with him. Ask him how to activate the purge; unfortunately his explanation is cut short as a rachni soldier appears and tears into him. Kill the rachni and then retrieve the purge codes from Yaroslev's corpse.
Rachni
Purge Codes
Objective: Acquired Codes
Return to the Mira terminal and interact with it. Now that you have the code, select the top-right option on the conversation wheel to arm the purge.
Objective: Code Omega
The Hot Labs quickly fills with rachni soldiers and workers. The purge is set to go off in two minutes, so you must get back to the elevator and ride it up to the Rift Station before the timer reaches zero. Quickly clear the room of rachni and get in the elevator to complete the mission.
Rachni Swarm
Mission Complete
Board the tram in the Rift Station to return to the Normandy.
A salarian reconnaissance team on Virmire has information on Saren. Travel to Virmire to meet with the team.
Virmire
Objective: Go to Virmire
Travel to the Hoc system in the Sentry Omega cluster and land on Virmire.
Objective: Disable the AA Tower
Enter the Mako and start down the trail. The path to the first gatehouse is very straightforward, just be sure not to drive off course as the Mako will sink, and that's game over. You'll encounter geth drones and troopers along the way, but luckily the Mako's weaponry can make short work of them. Look to your radar to locate hostiles and take them out as you move towards the gatehouse. Unfortunately your radar jams as you near the first barricade, so slow down at this point and scan the area up ahead for drones and troopers.
The first gatehouse is heavily occupied by geth troops. Without your radar it can be hard to spot the smaller drones, so use the Mako's zoom and visually scan the area up ahead. There are additional geth on the gatehouse's second floor. The second floor can be reached by heading up the stairs on the left side of the gatehouse. There is no need to go up there, but there are storage lockers to open, as well as XP to be had by killing the geth. Geth armatures and colossi are positioned beyond the gatehouse, so proceed with caution. Keep your distance and use the Mako's cannon to destroy them.
First Gatehouse
Geth Colossus
Continue down the path until you reach the second gatehouse. This gatehouse houses the AA tower must be disabled. You'll have step out of the Mako this time around, so use its weaponry to destroy any geth visible on the gatehouse walkway before exiting. Once the area is clear, head up the stairs on the right. Enter the room at the other end of the walkway and shut down the AA gun using the power controls. Afterwards, use the gate controls found in the same room to open the vehicle gates. With that done, return to the Mako and drive through.

Second Gatehouse
AA Gun Controls
Objective: Head to the Salarian Camp
The third and final gatehouse is located a short ways from the second. The vehicle gates are also closed here, so you'll have to clear out the geth on the second floor and use the gate controls in the room at the other end of the walkway to open them. Once you've managed to lower the gate, move past the gate and continue down the trail to reach the salarian camp.
Salarian Camp
Captain Kirrahe, the salarian in charge of the reconnaissance team, informs you that Saren's research facility has been found. It was discovered that Saren has found a cure for the genophage and is now breeding an army of krogan. With an army of krogan warriors on his side, Saren would be nearly unstoppable. If you have Wrex with you, the 'Virmire: Wrex and the Genophage' assignment is added to your journal.
Virmire: Wrex and the Genophage
Saren has discovered a cure for the krogan genophage (the hereditary virus which causes only one in a thousand krogan offspring to survive) and is currently breeding an army of krogan warriors. Your mission on Virmire turns to destroying Saren's research facility to put a stop to his plans, as the prospect of a dispensable krogan army is not a favorable one. This puts your krogan ally in a difficult position. A cure for the genophage could result in the repopulation of his race, but the task at hand is to defeat Saren. Destroying Saren's research facility would hinder his plans, but the genophage cure would be lost.
Objective: Talk to Wrex
Save your game before speaking to Wrex because plenty can go wrong here. If you've completed the 'Wrex: Family Armor' assignment, keeping Wrex alive during this tense moment is simple. Work your way through the dialogue tree until the 'We are' and 'I wouldn't do this otherwise' options appear. Select either one to set Wrex straight by reminding him that these particular krogan are not his people, and that destroying the genophage would be best for everyone. Convincing Wrex in this fashion yields a large amount of Paragon points and nets you the 'Charismatic' achievement.

Wrex
If you have not completed Wrex's assignment you'll have to use Charm or Intimidate to convince him. Unfortunately if you haven't invested enough talent points in Shepard's Charm or Intimidate talents, there is no way to keep Wrex alive if you also haven't completed the Family Armor assignment. With an adequate number of talent points invested in either Charm or Intimidate, the blue 'These aren't your people' or the red 'Don't be so naïve' options are selectable. Convincing Wrex to back down using Charm yields Paragon points while convincing him with Intimidate yields Renegade points.

Conversation Wheel
Selecting any of the options on the right side of the conversation wheel leads to Wrex's death, either by Ashley Williams or by your own hands. The 'Shoot Wrex' option yields a large amount of Renegade points and is just downright brutal. The other two cause Ashley to step in a kill Wrex; your response afterwards determines the morality points you receive. Wrex is definitely a valuable ally, so keeping him alive would be best. You'll definitely want to keep him alive if you're working towards the 'Krogan Ally' achievement.
Virmire: Saren's Plan
Objective: Prepare for Assault
Talk to Captain Kirrahe once the issue with Wrex has been settled. Kirrahe tells you of his plan to use his ship's drive core as a nuke to destroy Saren's research facility. The drive core must be placed at the heart of a facility to level it completely. Unfortunately the bomb cannot be airlifted in because of the defensive AA guns that surround the facility. For this reason the salarian captain proposes two teams: salarian assault teams to attack the base head on, and a shadow team to infiltrate the base unseen and disable the AA guns. The bomb can only be airlifted in while the AA guns are disabled.
Due to the utter lack of ground troops at the salarian camp, Kirrahe will need one of Shepard's crew members-either Kaiden Alenko or Ashley Williams-to accompany the assault team. It does not matter who you give to Kirrahe, but keep in mind that you won't be able to take that crew member with you to infiltrate the research facility. If Ashley or Kaiden have been consistent members of your squad, give the other to Kirrahe.

Captain Kirrahe
Virmire: Assisting Kirrahe's Team
This assignment is added after Captain Kirrahe's speech at the salarian camp. There are several ways to assist Kirrahe's team on the Base Approach map. Passing these opportunities by leads to Kirrahe's death.
Objective: Disrupt Communications
From the Base Approach start point, make your way to the Communications Tower to the north. Destroy the geth surrounding the tower and head up the ramp to reach the walkway. Look for the 'Triangulation Tower' terminal and activate it. You are given a small amount of Paragon points for assisting Kirrahe's team.
Communications Tower
Objective: Destroy Satellite Uplink
The Satellite Uplink Tower to the west is next. When you reach the tower, destroy the geth in the area and head up the ramp. At the top of the ramp, look up to see the destructible satellite uplink. Blast the satellite uplink to destroy it. You are given a small amount of Paragon points for assisting Kirrahe's team.

Satellite Uplink Tower
Satellite Uplink
Objective: Destroy Geth Flyers
Head to the opposite end of the tower and step onto the walkway. Start moving north towards the Refueling Platform. Proceed with caution as there are two geth destroyers along the way. There are a number of geth rocket drones on the Refueling Platform. Destroy all of the drones to earn Paragon points for assisting Kirrahe's team. That's all you can do for now, so make your way to the Research Facility entrance at the west end of the map.
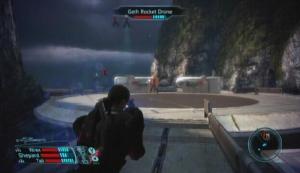
Geth Recon Drones
Objective: Disable Alarms
The facility entrance is guarded by a couple of krogan warriors and some geth. The krogan, particularly, are quite deadly, as they tend to charge. If you have a biotic-using ally, use Lift or a similar ability to stop a charging krogan in his tracks. Eliminate the krogan before he can get close enough to melee. When the walkway is clear, proceed through the door at the northern end of the walkway. In the Base Entry area, look for a security console on the left side of the walkway and examine it. Disabling the alarms will make things easier for the salarian teams. You are given Paragon points if you choose to help Kirrahe's team.

Disable Alarms
Security Console
This assignment is complete when the Virmire mission ends.
Virmire: Assault
Objective: Disable AA Guns
Head through one of the three doors on the west side of the walkway to reach the Warehouse area. There are geth destroyers, shock troopers, a juggernaut and indoctrinated salarians in the warehouse. Immediately take cover behind one of the large crates to avoid taking fire from the group of indoctrinated salarians. The indoctrinated won't seek cover, making them easy targets.
Similar to the krogans, geth destroyers are also prone to charge and melee, so keep an eye on your radar to spot a rushing destroyer and eliminate it before any damage is done. When both the Warehouse and Maintenance areas are clear, proceed through the door in the southwestern corner of the Maintenance half and head to the end of the walkway to reach the Security Office.
You can take the elevator in this room down to the Labs area, or you can go through the door to your right when first entering the room to reach the Detention Cells. If you choose to visit the Detainment Level, examine the first cell to speak to the salarian commando being held within. He tells you that his team became indoctrinated during research, though he himself is still sound of mind. It is safe to free this salarian, and doing so nets you a couple of Paragon points. Freeing the indoctrinated salarians in the second cell yields Paragon points, while simply killing them gives Renegade points.

Salarian Commando
Indoctrinated
Return to the Security Office area and either take the elevator to the Labs or go through the door to the left of the elevator to reach Cell Block B. Investigate the second cell to speak with another imprisoned salarian. Work your way through the dialogue tree until the option to free him or leave him there appears. This one definitely doesn't come off as cool as the salarian commando you spoke to in the first cell block, but leaving him in the cell by selecting the middle-right or bottom-right options yields a small amount of Renegade points, while freeing him gives Paragon points. Free this salarian and he will attacks, so you are forced to kill him anyway.
Return to the Security Office and take the elevator to the Genophage Labs. A krogan doctor named Doyas will attack as soon as he sees you. Doyas is similar to the krogan warriors and battlemasters that you have faced thus far in that he would rather charge and melee you than use his gun. The husks in the lab are also let loose, but you're likely used to dealing with them by now. Back away from the husks to avoid their close range attack or bat them down with a melee attack if necessary. When the room is clear, proceed through the large door. Follow the walkway to its end, take out the two geth troopers there, and enter the Security Office.
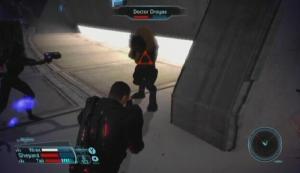
Doctor Doyas
An asari named Rana Thanoptis can be found cowering behind the desk at the other end of the office. She tells you a bit about the indoctrination process and then opens the door for you. After the initial conversation, you can either let Rana leave or have her killed. Killing her yields Renegade points. Afterwards, head through the door and take the elevator at the end of the corridor down to the Communication Tower. In the tower, move down the ramp to reach the lower walkway and examine the Communications Panel. After the cutscene, return to the upper walkway.

Rana Thanoptis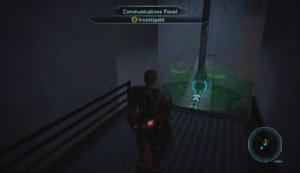
Communications Panel
What follows is a lengthy conversation with Sovereign. When you regain control over Shepard, return to the Security Office and then to the walkway outside. The previously raised bridge here has been lowered, allowing you to cross the stretch that leads to the Breeding Facility. Three krogan warriors stand in your path; use every ability available to you (useful ones include Overload, biotic Lift, Sabotage, and weapon abilities) and take them out as quickly as possible. There are geth troopers, ghosts, drones and krogan in the proceeding area, so you'll have to fight your way to the Turret Control room. In the Turret Control room, use the Turret Control terminal to disable the AA guns.
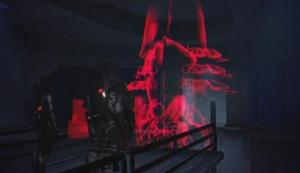
Sovereign
Turret Control
Objective: Destroy Final AA Gun
A couple of geth arrive in the elevator across from the terminal, so immediately whip around and take them out. Afterwards, take the elevator down to the Breeding Grounds. Geth stalkers and sappers occupy the Breeding Trench; take cover and destroy the geth before moving to the opposite end. Make your way to the next area, the heart of the research facility, and wait for the Normandy to arrive.
The nuke is set into place, but all is not well up at the AA tower. You receive word from the crew member you sent with Kirrahe that, in their current situation, they won't be able to make it to the rendezvous point in time.
Objective: Provide Backup for Ashley/Kaiden
Select two allies (though neither Ashley nor Kaiden are selectable as squad members at this point) and head through the large door at the south end of the area to reach the second Breeding Trench. This trench is occupied by geth stalkers and krogan warriors, so immediately take cover behind one of the pods to avoid taking sniper fire from the stalkers. The krogans will likely come after you, but you can send your allies up ahead to take out the geth. When the trench is clear, ride the elevator at its end to reach the upper walkway.
A geth ship holding a large number of reinforcements drops troops off at the bombsite, jeopardizing the safety of the team there. Your crew member up at the AA tower still needs backup and will fall without it, but leaving the crew member at the bomb site means losing him or her. You're up for a tough decision at this point. The ally you choose to leave behind will be permanently unavailable after this mission, so make your decision carefully. There's no way around this, one of them will have to remain on Virmire.
Consider whether one of the two characters in peril are linked to any of the achievements you are trying to unlock, such as Ashley for the 'Paramour' achievement for male Shepard, or Kaiden for female Shepard. If Ashley or Kaiden have been a static member of your squad, you would want to keep that person alive for the 'Soldier Ally' (Ashley) or 'Sentinel Ally' (Kaiden) achievements.

Geth Dropship
Decision
Objective: Keep Going to the AA Tower/Return to the Bombsite
When you've made the decision, either keep going to the AA tower to assist the ally there, or return to the bombsite. Both areas are densely populated with geth shock troopers and destroyers, so be ready for a fight. Once the geth in the area have been dealt with, Saren, the rouge Spectre, makes an appearance. He steps off of his glider and a conversation between Shepard and the crooked turian ensues. Saren believes that following the Reapers is the only way to save the organics from the synthetics; in essence he believes that what he is doing is right. No amount of reasoning can get through to Saren now, so work your way through the dialogue tree and prepare for a fight.

Saren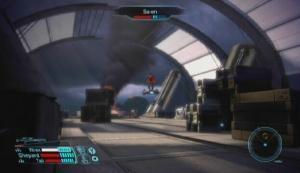
Saren Battle
The battle plan is the same in whichever area-either on the AA tower or at the bombsite-you are. Saren remains on his glider and is stationary for the duration of the fight. Immediately get behind cover to avoid his fire and from there, pop out every once in awhile to damage him. Saren has a powerful shield (as well as the Shield Boost ability) and plenty of health, so bringing him down is no easy task.
The Overload tech ability can help bring Saren's shield down, but it will have to be used several times in quick succession to take it down completely. You'll just have to shoot your way through his shield to get at his health bar. Saren is an organic, so equipping Shepard and allies with weapon upgrades that increase damage to organics would cut down the length of this battle.
Continue to hit Saren with abilities and gunfire until the mission end cutscene is triggered.
Race Against Time: Sovereign
Objective: Find the Conduit
Once you-ve completed the storyline missions on Therum, Feros, Noveria and Virmire, access the Galaxy Map to trigger an event.
Objective: Report to the Council
The Citadel Council is content to drop the issue with Saren, claiming that he is no longer a threat. However Shepard and crew know that the Conduit and Sovereign exist and insist on following Saren through the Mu Relay to reach Ilos. Shepard receives no support from Ambassador Udina on this matter, and the ambassador effectively grounds the Normandy.
Objective: Meet with Anderson
Just as it seems that this mission is over, back aboard the Normandy you receive word from Joker that Anderson wishes to speak with you at the Citadel. You are told to meet him at the Flux club in the Upper Wards. This is your last chance to complete any of the assignments you have yet to complete or trigger at the Citadel, as you won-t be able to return here once you-ve made off with the Normandy. Keep in mind that any assignment that requires you to return to the Citadel cannot be completed at this point.

Anderson
Anderson is seated at a table near the back of the club. Anderson tells you that he can bypass the Normandy lockdown by breaking into Citadel control and using one of the consoles there, though this puts him at significant risk due to the presence of armed guards in that area. Ask Anderson about other options; since Udina ordered the lockdown, Anderson could break into the ambassador-s office and hack into his computer. Anderson will succeed in unlocking the Normandy regardless of the option you choose, but the cutscene that the Udina option offers is wholly more satisfying and prevents Anderson from coming to harm.
Option
Objective: Go to Ilos
A word of warning: Once you land on Ilos you cannot return to the Normandy, so complete any assignments left undone before proceeding. Check out the 'Optional Assignments' section and its sub-sections for a complete list.
Return to the Docking Bay and board the Normandy to trigger the departure cutscene. When the Normandy is back in orbit, access the Galaxy Map, travel to thr Refuge system in the Pangaea Expanse and land on Ilos.
Udina

Escape
This is it, the final stretch. Stop Saren from finding the Conduit on Ilos to prevent Sovereign from carrying out its devastating plan. You'll be facing plenty of geth here, so install weapon upgrades that improve damage to synthetics.
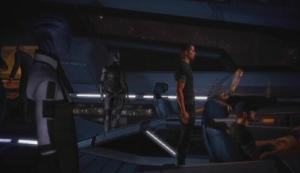
Ilos Landing
Ilos: Find the Conduit
Objective: Override the Security
Saren cannot be pursued until you find some way to open the door that shut behind him. Enter the Mako and use its weaponry to destroy the geth coming from the south. When the perimeter is clear, exit the Mako and enter the Plaza. This area is dense with geth, so immediately take cover behind the nearest object to avoid taking damage. Of particular danger are the two geth armatures; they are rather hard to take down without the Mako's weaponry, and their projectiles are absolutely lethal. Take cover behind one of the large stone blocks in the area, pop out every once in awhile to damage the armatures and dive back behind cover to avoid oncoming projectiles.
Alternatively, the two geth armatures can be shutdown using the Armature Control terminal in the Lower Ruins area. This option requires a high Decryption skill, so stand and fight if neither Shepard nor an ally has an adequate amount of talent points invested in Decryption. You could also pursue this option if you are willing to part with some Omni-gel. Sprint to the end of the area and take the series of ramps down to the reach the lower ruins. Move north until you reach a small area that contains geth stalkers and sappers. The terminal is next to the entrance to this section. Decrypt the terminal, destroy the geth, and head back the way you came.
Geth Armatures
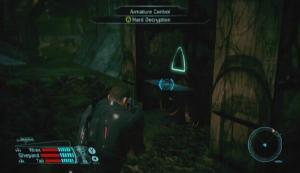
Armature Control
Follow the trail at the southern end of the Plaza to reach the Courtyard. Take out the group of geth in the courtyard and start towards the elevator at the other end of the area. A couple of geth shock troopers and a group of jumpers stand in your path, so proceed with caution. The elevator leads up to the Security Station.
At the center of the Armature Bay stands a number of geth troops and a hulking geth prime. The prime is one powerful variant of geth, so use tech abilities such as Overload and Sabotage to weaken it, and then weapon abilities (i.e., Assassination, Marksman, Carnage, Overkill) to destroy it as quickly as possible. Use the Armature Repair stations at the head of the bay to raise some geth armatures to help wipe out the remaining geth.
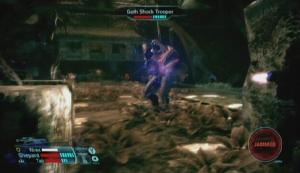
Geth Prime
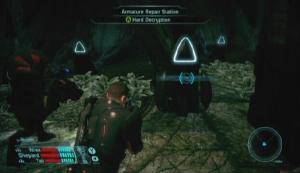
Armature Repair Station
When the area is clear, make your way to the opposite end of the Armature Bay and head up one of the ramps there to reach the Security Room. Open the Security Panel to activate a strange recording.
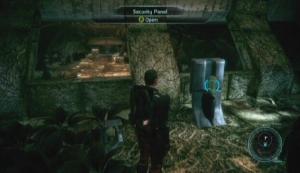
Security Panel
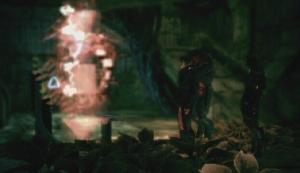
Recording
Objective: Enter the Archives
Make your way to the elevator at the north end of the Security Station and take it to the Plaza area. Return to the Landing Zone, enter the Mako and start towards the archives. The first stretch is clear of geth, but a group of rocket troopers stands guard at the mouth of the second tunnel. Blast the rocket troopers as you drive by and continue moving towards the large barrier visible in the distance.
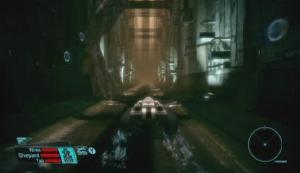
To the Archives
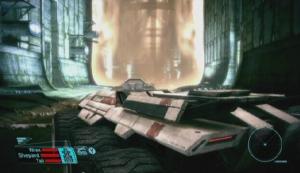
Barrier
Exit the Mako once you reach the barrier and enter the elevator to the right of it. Activate the elevator to reach the Watcher's Chamber. Move to the other end of the walkway and interact with Vigil. What follows is a lengthy conversation with the ancient Prothean VI. Vigil details the Reaper attack, the subsequent downfall of the Prothean race, and the shocking truth of the Citadel's purpose.
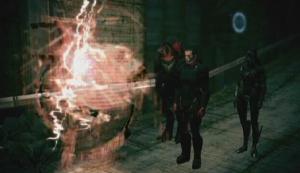
Vigil
Race Against Time: Conduit
Return to the Mako and continue down the path. A group of geth rocket troopers stand ready at the archives' end, but they are no match for the Mako's weaponry. Drop into the trench and drive down the path. You'll soon come to another group of rocket troopers, backed by a towering geth colossus, at the bottom of a large decline. Blast the rocket troopers with the Mako's cannon and then immediately turn your attention to the colossus. Keep a fair distance between yourself and the colossus and use the cannon and machine gun to damage it. Move the Mako back and forth to avoid taking damage from the colossus' projectiles and continue attacking until it falls.
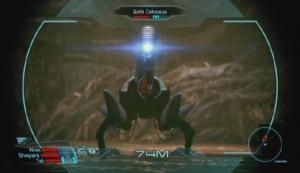
Geth Colossus
A few geth rocket troopers are stationed along final stretch, but again it's nothing the Mako can't handle. The impressive mass relay known as the Conduit is visible in the distance as you near the end of the trench run. You have forty seconds to make it to the Conduit after the cutscene. Immediately start down the decline and make haste to the Conduit. Ignore the geth forces along the way and continue moving towards the Conduit's launch pad. Hit the ramp to warp to the besieged Citadel.
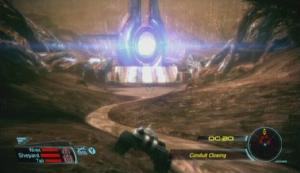
Conduit
This is it, the final battle! There's no turning back now!
Race Against Time: Final Battle
Objective: Save the Citadel
Make your way to the elevator at the other end of the walkway. Kill the husks nearby and then ride the elevator to trigger a cutscene. Move down into the Maintenance Shaft once you regain control of Shepard. The tunnel quickly fills with geth as a tram car rams into its side. Fight your way to the opposite end of the corridor and head up the ramp to reach the upper area. Proceed with caution as this section is occupied by a powerful krogan warlord. Keep your distance from the krogan because he is prone to charge. Use your squad's strongest abilities and pound the warlord with gunfire to bring him down quickly.
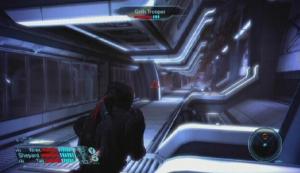
Geth
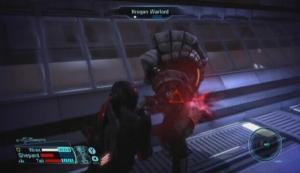
Krogan Warlord
Move up to the Exhaust Plain, which is fronted by a mass of kinetic barriers. Take out the geth troopers and snipers in the first section and then make your way to the next. A geth dropship enters the area and drops a number of geth troops. Sprint towards the first Citadel Defense Turret up ahead and open it using the control at its base. The turret across from the first requires an average Electronics skill to open, or it can be bypassed at the cost of 20 Omni-gel. There is a third turret a bit further from the second. Sprint to the next turret, open it, then take cover and let the turrets do their job.

Turret
Geth Dropship
Once the geth dropship has been destroyed, move to the end of the area to reach the Exterior Defense Grid. A pair of krogan warriors occupy the initial corridor, so stand back and take them out before they get too close. The two krogan are then followed by a geth destroyer and a juggernaut (i.e, more chargers). Destroy the two geth and move to the opposite end of the corridor. The proceeding area is guarded by four heavy turrets.
If Shepard is trained with a Sniper Rifle, stand by the entrance to the area and destroy the turrets with rifle fire and Assassination. If Shepard lacks the necessary training, slowly move towards the turrets and take cover in the trenches. Seek cover close enough to a turret and damage it from there. Be sure to get back behind cover before the turret's projectile reaches you, as it can deal critical damage.
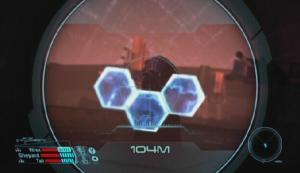
Geth Heavy Turret
Fight your way to the other end of the area, head down the ramp there and open the latch at the end of the corridor to reach the ruined Citadel Tower. Destroy the geth as you move up to the Council Chamber to confront Saren.
BOSS BATTLE: Saren
Saren is completely indoctrinated now, and claims to have been upgraded significantly by Sovereign. While this can be a two part battle, the first part can actually be skipped completely if Shepard has enough points invested in the Charm or Intimidate talents. If you were able to use all of the blue or red options that were available during your encounter with Saren on Virmire, you can convince Saren to off himself by choosing all of the blue Charm options or the red Intimidate options here. Doing so earns you a large amount of Paragon or Renegade points and will also net you the 'Charismatic' achievement if you missed it back on Virmire.

Saren
Saren's Suicide
If you are unable to convince Saren that what he is doing is wrong, however, you will have to face airborne Saren in a fashion similar to that of the Virmire encounter. Having Saren kill himself would definitely be preferable though, as his abilities have greatly improved. Make sure that Shepard and allies have weapon upgrades that up damage dealt to organics and to shields. Keep a close eye on Saren at all times because he can easily line up a shot while on his glider, even while you're behind cover; for this reason, moving from cover to cover is better than remaining stationary.
Even a high level Overload ability won't put much of a dent in Saren's shield, and the turian's constant use of the Shield Boost ability doesn't help matters. Move from cover to cover to avoid taking damage, pound Saren with gunfire until his shields are down and then don't let up. Continue this routine to completely deplete Saren's health bar and send him crashing down to the courtyard below.
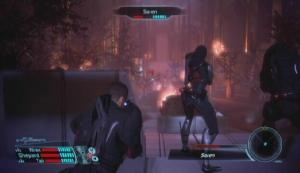
Organic Saren
Access the control panel that Saren was using to trigger an event. Joker radios in to inform Shepard that the Council is in danger. You can order the fleets to save the Ascension, or you can order them to hold back, thus sacrificing the Council to focus fire on Sovereign. The Paragon choice is saving the council, while the Renegade choice is sacrificing them. The decision you make here yields a large amount of Paragon or Renegade points and affects the ending.
BOSS BATTLE: Synthetic Saren
It's not over yet; Saren's corpse sheds its flesh to reveal a horrifying synthetic version of the turian. Synthetic Saren's movement is akin to that of the geth stalkers, sappers and ghosts you've encountered thus far, but is leagues ahead in terms of firepower, shields and vitality. Take the time to outfit Shepard and allies with weapon upgrades that increase damage dealt to synthetics and to shields before facing Saren
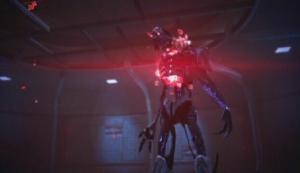
Synthetic Saren
You'll have to use every ability available to you if you want to bring Saren down once and for all. As far as tech abilities go, Overload can be used to lower the synthetic's shields a bit but won't be particularly useful unless you have more than one squad member using it due to the frequency at which your enemy's shields recharge. A high level biotic Lift ability is invaluable during this fight, as you can incapacitate Saren and keep him suspended in mid-air, making him extremely vulnerable. Lift is best used as soon as you've managed to bring Saren's shields down, as you will then have ample time to chip away at his exposed health bar. Having more than one squad member with the Lift ability is even better.
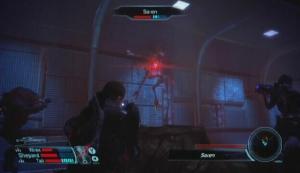
Synthetic Saren
Synthetic Saren is extremely agile and very quick, allowing him to leap over your cover, so you won't be able to remain behind one piece of cover for the fight's duration. Track Saren's movements at all times so you'll know when you need to sprint to a different piece of cover. Save weapon abilities (i.e., Marksman, Overkill, Carnage, Assassination) for moments when Saren is perched on the wall or incapacitated by an ability such as Lift. Keep an eye on Shepard's health and don't hesitate to use a Medi-gel or Unity to heal your allies.
This can be a lengthy battle, but if you work to avoid his fire, use Medi-gel when needed, and use the squad's abilities wisely, the synthetic turian will eventually fall to your might.
The End
That's it, you've completed Mass Effect! Sit back and enjoy the ending, you've earned it!
Note -- A New Game feature is now available. To begin a new game with your previous character, first select 'Start New Career' from the game start menu and then 'Select Existing ID.' Your character's level, talent point distribution, credits, upgrades and equipment are all retained with this feature, and the level cap is upped from level 50 to level 60.

The End
Citadel I: Assignments available after becoming a Spectre.
- Asari Consort
- Xeltan's Complaint
- Doctor Michel
- Homecoming
- Jahleed's Fears
- Presidium Prophet
- Reporter's Request
- Rita's Sister
- Scan the Keepers
- Schells the Gambler
- Signal Tracking
- The Fan
- UNC: Distress Call/Unusual Readings
- UNC: Hostage
- UNC: Hostile Takeover
- UNC: Major Kyle/Strange Transmission
- UNC: Missing Marines
- UNC: Missing Survey Team
- UNC: Privateers
Citadel II: Assignments available after completing Therum, Feros, or Noveria.
- Asari Diplomacy
- Family Matter
- Planting a Bug
- The Fourth Estate
Citadel III: Assignments available after completing the first four storyline planets.
- Negotiator's Request
- Our Own Worst Enemy
Citadel IV: Assignments dependent on Shepard's Pre-service History.
- Old, Unhappy, Far-off Things
Some of these assignments are only available once you've attained Spectre status. The ones that are available before that point are best completed once you're a Spectre so you can take advantage of the Charm and Intimidate bonuses the rank provides.
Citadel: Asari Consort
Locate and enter the Consort Chamber in the Presidium. Upon entering, an asari named Nelyna asks if you wish to make an appointment to see the consort. Just as it seems that you're in for a lengthy wait, the consort, Sha'ira, radios Nelyna and asks to meet with the Commander (that's you!). Make your way to the back of the chamber and head up the stairs. Speak to Sha'ira; she asks you to speak to General Septimus, a turian general who can be found in Chora's Den. Agree to help her to add this assignment to your Journal.

Sha'ira
Objective: Speak with Gen. Septimus
Use a Rapid Transit terminal to reach Chora's Den. The general is seated at one of the tables near the back of the club. Speak with him and tell him that Sha'ira sent you. If your Charm or Intimidate talents are well-developed, you can persuade Septimus to see things your way by selecting either the blue 'Straighten up' option on the left side of the conversation wheel or the red 'Get a grip' option. You do not need to persuade Septimus this way to complete the assignment, but you'll receive Paragon or Renegade points by using the persuasion options.

General Septimus
Objective: Speak with Sha'ira
Once you have set Septimus straight, he presents you with an opportunity to earn some extra credits. Agree, if you're interested, to add the 'Citadel: Xeltan's Complaint' assignment to your Journal. Return to the Consort Chambers in the Presidium and let Sha'ira know that you have spoken with General Septimus. You receive XP, credits and words of wisdom from Sha'ira as reward. Selecting the 'That's it?' option yields some Renegade points as well, while accepting words alone gives Paragon points.
Citadel: Xeltan's Complaint
This assignment is added to your Journal if you accept General Septimus' offer while speaking to him during the 'Citadel: Asari Consort' assignment. The General wants you to see an elcor named Xeltan and show him evidence that the rumours about Sha'ira revealing his secret are false.
Objective: Speak to Xeltan
Xeltan can be found at the elcor embassy, which is located in the Presidium. Search for the 'Volus and Elcor Office' text on the Presidium map and set a Destination flag there. Speak to Xeltan once you have reached the embassy and present the evidence to him. Xeltan thanks you for easing his fears. You receive credits and XP as reward.

Xeltan
Citadel: Doctor Michel
Objective: Talk to Doctor Michel
This assignment becomes available after Tali has been rescued during the main storyline. After reaching that point, talk to Doctor Michel at the Med Clinic in the Upper Wards. Dr. Michel is being blackmailed; the people doing so demand supplies from her, threatening to go public with what they know if she fails to cooperate. Agree to help Michel and she asks you to talk to a merchant named Morlan in the Lower Wards market.

Dr. Michel
Morlan
Objective: Talk to Morlan
Travel to the Lower Wards market and locate a salarian merchant named Morlan. Select 'I'm here about Dr. Michel' from the left side of the conversation wheel. Before Morlan can say anything of use, a krogan named Banes—the one blackmailing Dr. Miche—appears. If your Charm or Intimidate talent is developed enough, you can persuade Banes to leave Michel alone by selecting the blue 'You should reconsider' option or the red 'Talk and you're dead!' option.

Banes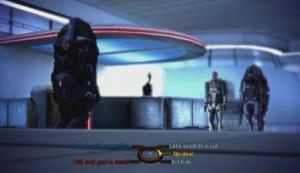
Conversation Wheel
Charming Banes nets you some Paragon points for completing the assignment, while intimidating him yields Renegade points. If you can't persuade Banes, you must fight and kill him. Killing him completes the assignment too, but you won't receive any morality points this way.
Objective: Talk to Doctor Michel
Return to Dr. Michel at the Med Clinic and inform her that Banes won't be bothering her any more. As thanks, Michel offers to give you discounts on supplies purchased from her. Ask her more about Banes; there isn't much she can tell you, but one of your squad members will suggest asking Captain Anderson about him.
Citadel: Homecoming
This assignment can be activated after Tali has been rescued during the main storyline. Locate and speak with a man named Samesh Bhatia; he can be found in the Presidium, near the asari Embassy Receptionist. You can reach Samesh's location quickly by traveling to 'Embassies' under 'Presidium Locations' on a Rapid Transit terminal's choice wheel. By speaking with Samesh, you learn that the body of his wife—a marine who died on Eden Prime—is being held by the Alliance without explanation. Samesh asks that you speak with the diplomat handling the situation.

Samesh Bhatia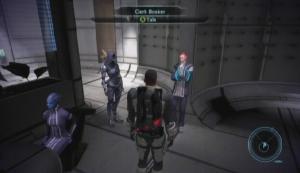
Clerk Bosker
Objective: Talk with Diplomat
Clerk Bosker can be found in the Embassy Lounge which can be reached by heading up the stairs across from Samesh's location. Speak to Bosker and ask him about Samesh's situation. He tells you that Serviceman Bhatia's body is being held due to the strange wounds left on her body because these wounds could help the Alliance further their research. If you have developed Shepard's Charm or Intimidate talent, a blue 'This isn't right' option and/or a red 'I'm releasing the body' option is selectable. Selecting either convinces Bosker to release the body. Once the diplomat has agreed to release the body, you'll receive Paragon or Renegade points depending on how you chose to convince him.
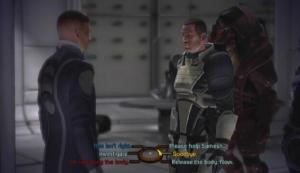
Conversation Wheel
Alternatively you could choose not to select either of the persuasion options when speaking to Bosker and instead select one of the options on the right side of the wheel. This allows you to explain the situation to Samesh and instead convince him to let the Alliance keep his wife's body. Doing this doesn't change anything; you are still given XP, as well as Paragon or Renegade points depending on how you convince Samesh to drop the issue..
Objective: Inform Mr. Bhatia
Return to Samesh with the status report to receive XP and complete the assignment.
Citadel: Jahleed's Fears
Objective: Speak with Jahleed
Speak to the volus named Jahleed at the large C-Sec office in the Security section of the Citadel. Jahleed believes that a colleague of his is trying to kill him. Agree to help and Jahleed tells you of his previous plans to meet this colleague in the markets area of the Lower Wards. His colleague turns out to be Chorban, a salarian whom you are already familiar with if you accepted his keeper scanning assignment.
Jahleed
Objective: Speak to Chorban
Travel to the Markets using a Rapid Transit terminal and head down the stairs nearby to reach the lower markets. You'll find Chorban there, surrounded by several armed salarians. Speak to Chorban and demand the truth. Chorban tells his friends to stand down, and then explains that Jahleed has deceived you. After the conversation, the assignment title changes to 'Citadel: Jahleed's Secret.'
Chorban
Objective: Talk to Jahleed
Head back to C-Sec and confront Jahleed. Tell Jahleed that you are actually helping Chorban scan the keepers (if you accepted Chorban's assignment prior to speaking with Jahleed); this will convince Jahleed to cooperate with Chorban once again. The assignment name then changes to 'Citadel: Jahleed and Chorban,' and you receive credits and XP for completing the assignment. If you have yet to complete Chorban's keeper scanning assignment, you can convince Jahleed to stop scanning the keepers illegally by using Charm or Intimidate. Convincing Jahleed to stop scanning the keepers yields Paragon or Renegade points and completes both Jahleed and Chorban's assignments.
Citadel: Presidium Prophet
In the Presidium area of the Citadel, search for a hanar and a turian C-Sec officer outside of the Wards Access corridor entrance. By speaking to the C-Sec officer, you learn that the Preaching Hanar is breaking the law, as it doesn't have a permit to preach. The hanar refuses to purchase the evangelical permit required, and continues to preach in the Presidium without one.
Objective: Resolve the Dispute
There are multiple ways to solve this issue. If you are a low level and have yet to develop your Charm or Intimidate talents, the best way to complete this assignment is to simply buy the hanar an evangelical permit. The permit only costs 150 credits, and credits aren't too hard to come by in Mass Effect. By buying the hanar the permit yourself, however, you will not earn any Paragon or Renegade morality points for completing the assignment.
Hanar and C-Sec Officer
If you are able to use the blue Charm option or the red Intimidate option on the left side of the conversation wheel, you can convince the officer or hanar to leave using Charm or Intimidate. Paragon points are given for charming the hanar or officer, and Renegade points are given for intimidating either one.
Objective: Inform the Hanar/C-Sec Officer
After convincing either the hanar or C-Sec Officer to stand down, speak to the other to receive an XP reward and complete the assignment.
Citadel: Reporter's Request
This assignment is triggered when you speak to a human reporter named Emily Wong in the Upper Wards area (near the stairs that go up to the "Citadel: Flux and Wards Access' map). This assignment can be added to your Journal without speaking to Emily Wong by picking up the Optical Storage Device (OSD) in Fist's office after he has been bested during the 'Citadel: Expose Saren' mission.
Fists' OSD
Emily Wong
Objective: Look for Information
If you don't have the evidence already, return to Fist's office in the Chora's Den club and pick up the OSD that has been left on the ground. If you have yet to defeat Fist, work on the 'Citadel: Expose Saren' mission instead, as you will come across the evidence needed to complete this assignment by doing so.
Objective: Deliver the OSD
When you have Fist's OSD, speak to Emily Wong and share it with her. She hands over credits as thanks.
Citadel: Rita's Sister
Objective: Speak to Rita
Travel to the Flux club in the Upper Wards and speak to Rita near the bar counter. Select 'Problems?' from the conversation wheel and work your way through the dialogue tree. You learn that Rita's sister, Jenna, is currently working undercover for C-Sec as a waitress at the Chora's Den club in the Lower Wards. Rita is concerned that this job is too dangerous for Jenna but has been unable to convince her to give it up. Agree to help Rita to activate the assignment.
Rita
Objective: Talk to Jenna
Use a Rapid Transit terminal to reach Chora's Den, head to the other end of the walkway and enter the club. Jenna can be found behind the counter in the middle of Chora's Den. By speaking to Jenna, it becomes evident that you won't be able to convince her to give up the job.

Jenna
Chellick
Objective: Return to Rita
Attempt to leave Chora's Den and you will bump into a mysterious turian named Chellick. He tells you to meet him at C-Sec Academy if you wish to help Jenna.
Objective: Talk to Chellick
Travel to C-Sec Academy. Chellick can be found in the bottom-left C-Sec Office (as it appears on the map). Speak with 'Detective' Chellick; work your way through the dialogue tree and he will eventually ask you to help him. If you wish to earn Paragon or Renegade points, you can convince Chellick to let Jenna go by selecting the blue 'You don't need her' option or the red 'Pathetic' option. These options will only appear if your Charm or Intimidate talents are developed enough. If the two persuasion options are not available, then you'll just have to select one of the options on the right side of the conversation wheel.
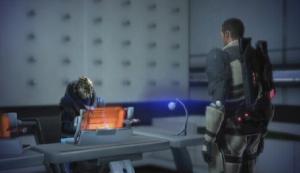
Chellick's Office
With Jenna safe, the name of this assignment changes to 'Citadel: Rita's Sister is Safe.' If you persuaded Chellick, you can choose to help him or pass and end this assignment here and now. Choosing to help him adds a new objective to the assignment. Chellick wants you to pick up a weapon shipment from an arms dealer named Jax. The meeting will take place in the Lower Wards market.
Objective: Make the Pickup
Get to the Lower Wards market to meet Jax the krogan arms dealer. Chellick has asked that you do not cause any trouble, so it would be best to simply give the credits to Jax once he has handed over the weapons shipment. Choosing to arrest Jax or refusing to pay sets him off, forcing you to fight the krogan and turian that accompany him. Killing Jax nets you some Renegade points, so if you are following the Paragon path simply carry out the pickup as instructed.

Jax
Objective: Return the Shipment to Chellick
Talk to Chellick again back in his office at the C-Sec Academy and give him the Weapons Shipment. As a reward you're given XP, credits, some Omni-gel, and Paragon points or Renegade points depending on how you dealt with Jax.
Citadel: Scan the Keepers
Speak to Chorban, a salarian scientist who can be found in the Citadel Tower area standing next to a keeper just below the Council Chamber. Ask him about his interest in the keepers and then agree to help study them. You are given a Scanner that can be used to scan any keeper that you come across. Chorban will send you a small amount of credits each time one is scanned.
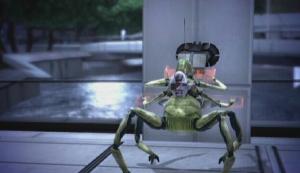
Chorban
Keeper
Objective: Scan the Keepers
There are 21 keepers to be found in the Citadel:
Citadel Tower
- The keeper that Chorban was busy scanning.
- Near some benches in the circular, eastern-most area of the tower.
- At the top of the walkway that runs along the western side of the tower.
- In the southwestern-most corner of the map.
Citadel Presidium
- Next to the window in the Volus and Elcor Office.
- Through the door in the top-left corner of the Embassy Lounge.
- From the receptionist desk in the Embassy Lounge, turn right and head up the stairs there. Go through the doorway and then through the second, northeastern doorway. The keeper is at the back of this room, just beyond the elcor.
- Just outside of the Consort Chambers in the Financial District.
- Head up the stairs at the back of the Emporium and turn left.
- In the small eastern area next to the Emporium.
- Outside of the Wards Access elevator.
- Across from the Citadel Tower elevator and next to the Avina terminal.
Upper Wards
- Near the eastern end of the Alleyway.
- At the dead-end east of the Med Clinic, near the Rapid Transit terminal.
- In the Upper Markets, near the merchant Expat's store.
Lower Wards
- Outside of the Wards C-Sec Academy entrance. Go down the stairs marked 'To C-Sec Academy' on the Upper Wards map to reach this location.
Citadel Security (C-Sec)
- In the bottom-left corner of the Requisition Office.
- At the northern end of the Traffic Control area.
Docking Bay
- On the platform to the right of the barrier at the south end of the Docking Bay.
Flux and Wards Access
- At the back of the Flux Casino.
- Take the elevator marked 'To the Presidium' from the Upper Wards. When the elevator reaches its destination, turn left, move down the hallway and turn right as soon as you can. A keeper can be found in this small area.
Use the in-game map to reach the locations described above. Once you have scanned every keeper in the Citadel, you receive a large amount of XP and credits.
Citadel: Schells the Gambler
Objective: Speak to Schells
This assignment becomes available once after completing the 'Citadel: Rita's Sister' optional assignment. With the aforementioned assignment complete, travel to the Flux to trigger a small cutscene in which a salarian named Schells is forcefully ejected from the club. Speak with Schells and ask him about the incident. He explains that he is currently developing a cheating system, and was only using the quasar gambling machines in the Flux Casino to gather data. Doran, the owner of the Flux, believed that Schells was actually cheating and had him thrown out. When you agree to help Schells, he hands over the scanner and sets you to task scanning the gambling machines.

Schells
Objective: Scan the Machines
You can end this assignment quickly by first speaking to Doran—who can be found in the northwest corner of the Flux Casino—and then selecting the 'Give him Schells' tool' option from the wheel. Doran thanks you for handing it over and rewards you with some credits. Afterwards, return to Schells and inform him that you have given away his scanner.
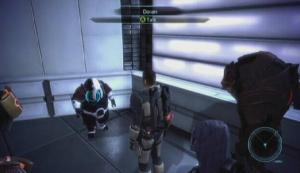
Doran
If you want to gather the data for Schells, however, start by playing the High Stakes orLow Stakes Quasar machines in the Flux Casion. It is easier to come away with positive winnings by using the Low Stakes Quasar machines, so start with those. Once you have won at least five times ('winning' meaning you won more money than you bet), return to Schells. Hand over the scanner to complete the assignment.

Quasar Machine
Quasar
Citadel: Signal Tracking
Examine the 'Suspicious Gambling Machine' at the back of the Flux Casino (then machine next to the keeper). It turns out that a signal is being used to transfer money from the gambling machines to a private account. By tracing the system, you can discover where the money is going and why.
Suspicious Machine
Objective: Track the Signal
The signal is coming from the Wards Access corridor. Use a Rapid Transit terminal to travel to the signal's location, located under 'Presidium Locations' on the option wheel. Go down the stairs and follow this corridor until you reach an elevator. Ride this elevator down to the Flux and Wards Access map. Look to your radar and follow the exclamation mark to find the Signal Source in the northwestern corner of a large room. The signal bounces off of a relay when investigated
Wards Access Signal
Objective: Follow Signal to the Presidium
The new signal points to a terminal in the Financial District of the Presidium. Take the elevator from Wards Access back to the Presidium. The signal is coming from within the Bank, which is right next to the Emporium. Investigate the Source Signal on the terminal behind Barla Von the volus. The second signal also bounces off of a relay.
Presidium Signal
Objective: Continue Tracking
The final signal is located in one of the back rooms of the Emporium, which is conveniently located right next to the Bank. Head up the stairs at the back of the Emporium and turn right. Before you investigate the final Signal Source, it would be a good idea to save your game. An AI is discovered to have been transferring the money from the casino and promptly threatens to blow up Shepard and crew.
AI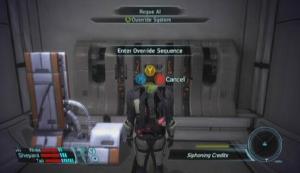
Override
Work your way through the dialogue tree and eventually a meter will appear in the bottom-right corner of the screen. This meter displays the machine's progress in saving the remaining credits, while the meter that comes after it displays its self-destruct progress. You must enter the override code before the machine self-destructs and wipes out Shepard and allies. Attempting to leave the room is an automatic game over, so stay put. You are provided with quite a bit of time to figure out the code, as the machine needs to transfer the remaining funds first and only then will it start the self-destruct process. It is possible that the override code is random, but if it is fixed, this sequence will work: Y, X, Y, A, X, A, A.
If you fail to enter the correct sequence in time, simply reload your save game and try again. Successfully overriding the self-destruct sequences completes the assignment and earns you XP.
Citadel: The Fan
Speak to a male human named Conrad Verner to activate this assignment. He can be found at the top of the stairs in the Upper Wards market that lead down to the markets in the Lower Wards. Conrad is a fan of the Commander and asks for an autograph. If you agree to sign an autograph, the 'Citadel: The Fan' assignment is added to your Journal. You can't proceed any further until you complete one of the storyline missions.

Conrad Verner
Objective: Conrad Verner
Return to the Conrad's location and speak with him again once you have completed at least one of the main storyline missions (Therum, Feros or Noveria). This time Conrad wants to take a picture of you. Agree to let him take your picture or don't, either way you'll still have a fan in Conrad Verner.
After completing at least two of the main storyline missions (Therum, Feros or Noveria), return to the Citadel and speak to Conrad Verner at the same location. This time around, Conrad has an idea that he wants to run by you. Conrad wants to become a Spectre, and asks you to sign him on as humanity's second. You can let Conrad down easy using the blue Charm option, reminding him of his family back home, or you can scare him away using the red Intimidate option. Convincing Conrad to leave you alone using Charm earns you Paragon points, while convincing him with Intimidate yields Renegade points.
Unusual Readings/UNC: Distress Call
Successfully decrypt the Computer Console in Udina's Presidium office to add this assignment to your Journal.
Computer Console
Objective: Investigate System
Use the Galaxy Map to investigate Metgos, which is located in the Hydra System of the Argos Rho cluster. The Normandy receives a garbled transmission which is then interpreted as a distress call. If this assignment was triggered at the Citadel, the assignment name changes to 'UNC: Distress Call.'
Objective: Investigate Distress Call
Select two squad members and land on Metgos. Open up your map and locate the 'Transponder Signal' (marked by an Anomaly symbol) and place a Destination flag near its location. Metgos' environment is a Level 2 Hazard, meaning you can only remain outside of the Mako's protective interior for a short period of time. Shepard will start to take damage and eventually die from exposure if the bar in the bottom-right corner of the screen fills up. If you must exit the Mako, be sure to park the vehicle right next to your reason for exiting so you hop back in quickly once you're finished.
When you reach the Transponder Signal, get ready, because the distress call was actually a geth trap! The Mako is immediately surrounded by rocket-equipped geth, so quickly drive away from the mass of geth to avoid getting hit from multiple directions. Use the Mako's weaponry to eliminate each geth; use its machine gun to eliminate the rocket drones and troops and the cannon to destroy the armatures. Make sure that there's a fair bit of distance between yourself and an armature before you try to take one on, as this will make it easier to avoid the armature's projectiles, which are severely damaging to the Mako. This assignment is complete once the last geth has been destroyed.
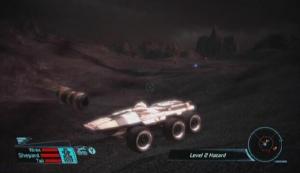
Geth Trap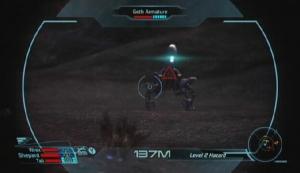
Geth Armature
UNC: Hostage
This assignment is added to your Journal once you hear a news report about fanatical biotics while riding one of the elevators in the Citadel. The report occurs randomly, so ride an elevator until the news report plays.
Objective: Board Freighter
Travel to the Farinata system of the Hades Gamma cluster and board the MSV Ontario. The main area of the freighter is packed with biotic terrorists. You are given three minutes to rescue the hostage once one of the terrorists spots you. There are many hazards in the area, and the terrorists' biotic powers can set them off and make short work of your team if you aren't careful. For this reason, it is best to fallback to the hallway you used to enter this area and allow the biotics to come to you. Tap down on the D-Pad to prevent your squadmates from charging to their deaths, then hang back and pick off the biotics as they approach.
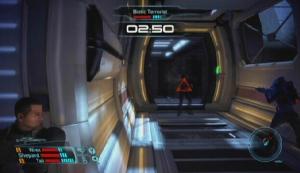
Terrorists
When all of the terrorists have fallen, make your way to the back of the freighter, enter the hallway and go through the first door on the left. Inside you'll find Chairman Burns being held by the leader of the terrorist group. If Shepard's Charm or Intimidate talents are developed enough, the blue 'You need Burns!' and/or the red 'Don't be stupid' persuasion options will appear on the conversation wheel. Without Charm or Intimidate, you'll have to kill the terrorists to save the chairman. Either fight and kill the leader to save Burns and complete the mission, or persuade him to release Burns using Charm or Intimidate to complete the mission and earn Paragon or Renegade points.
Hostage
Conversation Wheel
UNC: Hostile Takeover
Locate and speak to Helena Blake in the Presidium to activate this assignment. Helena wants you to take out two crimelords for her. You can accept her proposal outright, or you can follow the Paragon path and refuse to get involved in the gang war. Turning her down nets you Paragon points, while accepting the assignment right away earns you Renegade points. Even if you reject the offer, Helena gives you the coordinates to the criminals' bases, as she knows putting a stop to criminal operations is too much for your righteous self to resist.

Helena Blake
One of the two crimelords is located in the Han system of the Gemini Sigma cluster and the other in the Dis system of the Hades Gamma cluster. The two targets can be eliminated in any order.
Objective: Eliminate Crimelords (Gemini Sigma, Han, Mavigon)
Travel to the Han system in the Gemini Sigma cluster and land on Mavigon. The environment of this planet is a Level 2 Hazard, so stay close to the Mako if you must step out of the vehicle. Open up your map and locate the Syndicate Hideout in the southeastern quarter and place a Destination flag nearby. The hideout sits atop a small hill and is surrounded by heavy turrets. While the Mako can move across most terrain, this particular hill is quite steep. It is easiest to scale from its south side; maneuver the Mako over the rockier terrain for traction and slowly climb up to the hideout.
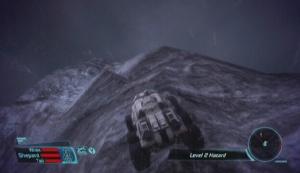
Hideout Location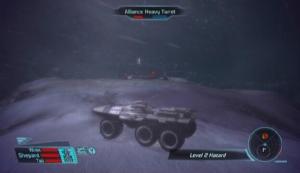
Syndicate Hideout
Use the Mako's cannon and machine gun to destroy the three turrets that surround the base. Once the turrets have been destroyed, park the Mako next to the visible Entrance Console, exit the vehicle and enter the hideout. Move through the hallway and stand before the door to the hideout's main room. There are explosive containment cells scattered throughout the room, so don't just charge in.
Get your enemy's attention and then quickly return to the entrance way and pick the mercenaries off as they approach. Retreat to the preceding hallway if you're being overwhelmed. Use all damaging abilities (ex., Overload, Sabotage, Throw, Warp, Assassination, etc.) available to you when you encounter the crime boss to take him out as quickly as possible.
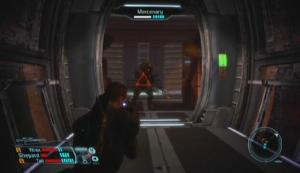
Mercenary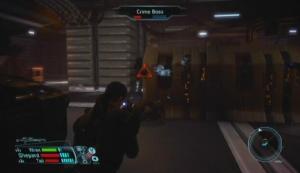
Crime Boss
Sweep the two rooms at the back of the hideout once the crime boss and mercenaries have been defeated and then return to the Normandy.
Objective: Finish Crimelords (Hades Gamma , Dis, Klensal)
The second crime boss (if you've been following along) can be found on Klensal in the Dis system of the Hades Gamma cluster. The Syndicate Hideout is southwest of the Mako's drop point, so travel in that direction until a POI appears on the radar. Wipe out the mercenaries surrounding the area, exit the Mako and enter the hideout. The hideout's main area is, of course, packed with mercenaries and snipers. Again, it would be best to hang back at the entrance and let the mercenaries come to you rather than you charging in, guns blazing. Get one of the mercenary's attention—by shooting him, using an offensive ability, or shooting an explosive cell—and the rest of them (save for the snipers and crime boss) should follow.
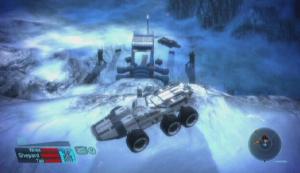
Klensal Hideout
The crime boss will likely remain at the back of the hideout, meaning you'll have to move up to get him. Use all of your squad's abilities (ex., Overload, Sabotage, Warp, Lift, Assassination, etc.) when you spot him. Duck behind one of the crates in the area if you're taking too much damage from him and use Shield Boost or a Medi-gel to restore your shields and/or health. Once the crime boss has been dealt with, enter the eastern room of the hideout and Decrypt all of the lockers within. Leave the hideout and return to the Normandy when you're ready to go.
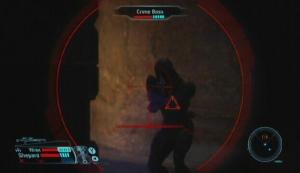
Crime Boss
Objective: Meet Helena Blake
Travel to the Fortuna system in the Horse Head Nebula once the two crime bosses have been defeated. Land on Amaranthine. Helena can be found at the Engineering Outpost, which is south of the Mako's drop point, so travel in that direction until you reach the outpost. Enter the outpost to find none other than Helena Blake waiting for you inside.
Engineering Outpost
Helena Blake
You can arrest Helena or leave her alone by selecting one of the options on the right side of the conversation wheel. If Shepard's Charm or Intimidate talent is developed enough, the blue 'Walk away' option and/or the red 'Disband the group' option will appear on the left side of the wheel. Charming or intimidating Helena into disbanding the gang yields Paragon or Renegade points respectively. You're in for a fight if you try to make an arrest; you'll be forced to fight Helena and the mercenaries in the facility, and you won't receive any morality points afterwards.
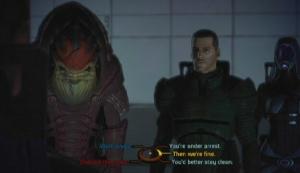
Conversation Wheel
Strange Transmission/UNC: Major Kyle
Successfully decrypt the Computer Console in the C-Sec HQ area of the Presidium. The Computer Console is on a table near Executor Pallin's desk.
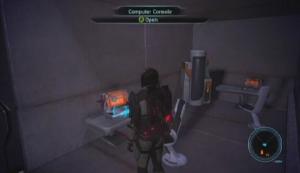
Computer Console
Objective: Find the Commune
The biotic commune is located on Presrop, a moon that orbits the planet of Klendagon. Travel to the Century system in the Hawking Eta cluster to get started. Upon reaching the Century system, the Normandy receives a transmission from Admiral Hackett. He explains that the commune is led by former Alliance officer Major Kyle. Two Alliance officers were sent to the commune to meet with Kyle, but have yet to return. The Alliance has reason to believe that Major Kyle has gone mad and that his biotic commune is a cult, as he is now known as 'Father' Kyle. The name of this assignment changes to 'UNC: Major Kyle' if it was first triggered at the Citadel.
Objective: Investigate Major Kyle's Compound
Land on Presrop and open up your map. Look to the southwestern quarter of the map for a POI marked as 'Biotic Compound' and set a Destination flag next to this location. Drive to the compound and exit the Mako once you've arrived. Approach the doorway and activate the Entrance Console.
Biotic Compound
Building Entrance
There are two ways to get into the compound: Select the 'You can't keep me out!' option to forcefully enter, or select 'I have to see Major Kyle' to handle things peacefully. The peaceful approach can only be taken if Shepard's Charm or Intimidate talents are developed enough. If Shepard's persuasion skills are high enough, a blue 'He needs my help' and/or a red 'He'll get you all killed!' option will appear on the left side of the conversation wheel. If not, you'll just have to force your way in. Selecting a persuasion option allows you to enter the building peacefully and earns you Paragon or Renegade points, while the 'You can't keep me out!' option forces you to fight the biotics inside.
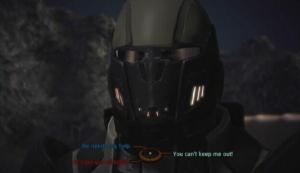
Conversation Wheel
Objective: Talk to the Major
If you have been permitted entrance, you can immediately proceed to the Biotic Compound; its entrance is east of the large building. However it would be a good idea to enter the large building either way, since equipment and upgrades can be found within. The biotic cultists inside won't attack you if you persuaded the doorman to let you in. If you had to force your way into the building, you'll have to fight your way through the biotic cultists to reach the Control Room at the back of the building. A switch in the Control Room unlocks the entrance to the Biotic Compound outside, allowing you to enter and confront the Major.
Control Room
Compound Entrance
Major Kyle is in the southwestern room of the compound. There are biotic cultists inside the compound, so you'll have to fight them too if you had to gun your way to the Control Room in the first building. Speak to the Major and ask about the investigators. Major Kyle explains that they tried to take him away from the compound, so they had to be killed. Inquire further until the blue 'You can't help them now' and/or the red 'Surrender or they all die!' persuasion option appears. If any of the biotic cultists had to be killed to reach Kyle, he won't talk to you and therefore must be killed. Persuading Kyle to surrender using Charm or Intimidate earns you Paragon or Renegade points.
Major Kyle
Objective: Return to the Normandy
When Kyle has surrendered or has been killed, leave the compound, enter the Mako and return to the Normandy. Back aboard the Normandy, access the Galaxy Map to receive a transmission from Admiral Hackett. Mission complete!
UNC: Missing Marines
After attaining Spectre status, travel to the Citadel Tower and locate Rear Admiral Kahoku. Kahoku can be found in the southeastern corner of the large area just outside of the Council Chamber. Speak with Kahoku and select 'Problems' from the conversation wheel. Kahoku tells you about his missing recon team and asks you to help find them. Agree to help Kahoku to add this assignment to your Journal.
Kahoku
Objective: Find Recon Team
Travel to the Sparta System in the Artemis Tau cluster and land on Edolus.
Objective: Distress Call
The Distress Signal is due north of the Mako's drop point. When you are near the signal, a horrifying thresher maw emerges from the earth. The thresher maw is deadly, but luckily you have the Mako's weaponry at your disposal. Use the Mako's cannon to damage the worm while it is stationary and the machine gun while the cannon charges for another use. The beast will launches projectiles while stationary; the Mako can become severely damaged if enough of these projectiles hit it, so try your best to dodge them.
Distress Signal
Thresher Maw
The thresher maw may also burrow into the ground and attempt to come back up under your vehicle. The Mako can only take a couple of hits from this attack, so drive far away when the worm burrows, and head back as soon as you see it emerge. When the thresher maw falls, exit the Mako and examine one of the corpses around the signal site.
Dead Marine
Objective: Speak to Kahoku
Return to the Citadel Tower and speak with Rear Admiral Kahoku. Tell Kahoku of his team's fate to complete the assignment.
UNC: Missing Survey Team
This assignment is added to your Journal once you hear a news report about a missing survey team in the Hades Gamma cluster while riding one of the elevators in the Citadel. The report occurs randomly, so ride an elevator until the news report plays.
Objective: Find Missing Researchers
Travel to the Antaeus System in the Hades Gamma Cluster to get started. Land on Trebin and take a look at your map. Your destination is the Research Base POI. The base is north of the Mako's drop point, so travel north until a POI icon appears on the radar. Quickly scan the Research Base for signs of life. Finding nothing, step out of the Mako and open all of the containers within the shelters to gain some items. By examining the Computer Console that is in the trailer on the right, you learn that the research team unearthed something in the dig site. The Excavation Site is just a short ways north of this camp.
Research Base
Computer Console
Objective: Explore Excavation Site
Head north from the Research Camp, exit the Mako and take the ramp up to the Excavation Site's entrance. Enter the dig site and step into its main area. Inside you'll find plenty of husks that will immediately charge towards you. Remain at the start of the area and wait until the group of husks reaches the Containment Cell that is just beyond the first two crates. When the husks reach the explosive, use a gun, biotic, or tech ability to set the explosive off. If you don't detonate the cell, the husks' electricity likely will, so keep your distance. Stand back and finish off those remaining, retreating if necessary. Don't let them get too close to you, as their electric attacks can cause some serious damage to you and your allies.
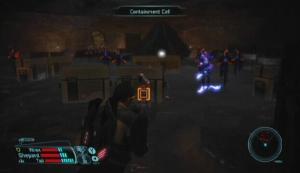
Husks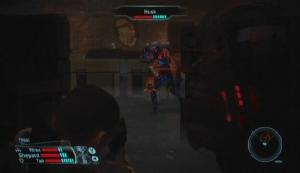
Containment Cell
Once the first batch of husks has been dealt with, move towards the back of the mining tunnel and prepare to face the next group. The husks come charging through one of the two doorways there; take note of the conveniently placed explosive next to the door. As the husks enter the main area, hit the cell to weaken them, then stand back and use a gun to finish them off. It's mission complete when the last husk falls. Explore the two rooms at the back of the dig site before returning to the Mako.
UNC: Privateers
Travel to the Citadel Tower and look for a man named Garoth. He is at the top of the steps just beyond the elevator that travels to the Presidium. Ask him about his problem and he tells you that his brother has gone missing. Garoth has reason to worry, as his brother's ship was last seen in the Strenuus System and may have been attacked by privateers.

Garoth
Objective: Go to the Strenuus System
Travel to the Strennus System in the Horse Head Nebula. Place the cursor on planet Xawin and then move the cursor to the left until you discover 'Unknown.' Scan Unknown to reveal the MSV Majesty. Scan the MSV Majesty; you can now land on Xawin.
Objective: Go to Xawin
Xawin's environment is a Level 1 Hazard, so avoid moving far from the Mako if possible. Open your map and place a Destination flag next to the Mercenary Camp located northwest of the Mako's drop point. The Mercenary Camp is heavily guarded; four heavy turrets surround it, and a few mercenary snipers are positioned at the frontlines.
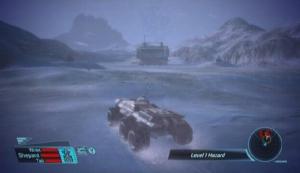
Mercenary Camp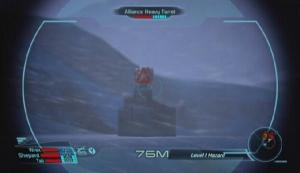
Heavy Turret
Fire from the four turrets is the greatest threat here, however the Mako's cannon can make short work of one while its shields are down. Circle around the base and blast the turrets with cannon fire, using the machine gun while the cannon recharges. Kill the snipers once all four cannons have been destroyed. With the mercenaries dead and the turrets destroyed, park in front of the building, exit the vehicle, and enter the mercenary stronghold.
The base is absolutely packed with mercenaries. You'll want to be especially careful since there's a couple of krogan among them. The area is littered with explosive cells, so running in with guns blazing probably isn't the best way to go. If Shepard is trained with a Sniper Rifle, use it pick off enemies that are visible through the door, otherwise enter the main area of the base to lure the close-combat mercenaries back through the doorway. The krogan are the biggest threat, so use all of the squad's tech and biotic abilities to lower their shields (Overload) or weaken them (ex., Throw, Warp, Sabotage, Assassination, etc.). Afterwards enter the main area and remove the snipers that remain.
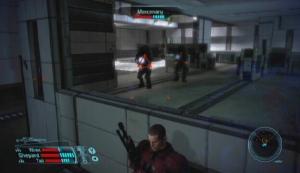
Mercenaries
When the base is clear, proceed through the doorway in the northeastern corner of the base and head up the stairs. Enter the room at the end of the walkway to find Captain Willem's corpse. Search the body and remove the Datapad it holds. Open the Weapon Locker, scan the Computer Console and use the Aid Station to replenish your Medi-gel supply before leaving the room.

Willem
Objective: Talk to Garoth
Return to the Citadel Tower and deliver the bad news to Garoth. He thanks you for providing him with closure and departs to make funeral arrangements.
These assignments are available once you have completed the mission on Therum (the 'Find Liara T'Soni' mission), Feros, or Noveria.
UNC: Asari Diplomacy
Sometime after completing the mission on Therum, Feros, or Noveria, the Normandy will receive a transmission from an asari named Nassana Dantius. Nassana is an asari ambassador working at the Citadel. It isn't clear what she wants, but she does ask to meet with you in person.
Objective: Meet with Nassana
Locate and speak with Nassana in the Embassy Lounge on the Presidium level of the Citadel. She tells you that her sister, Dahlia, has been captured by a mercenary group that operates in the Artemis Tau cluster. The kidnappers asked for a ransom, and Nassana did comply, but Dahlia was never released. Agree to rescue Dahlia to move on to the next objective.
Objective: Find Dahlia
Travel to the Macedon system of the Artemis Tau cluster and land on Sharjila. The Stronghold where Dahlia is presumably being held is due north of the Mako's drop point. Drive north until you find yourself atop a hill overlooking the mercenary stronghold. As you'll notice by taking a look at your radar, the Stronghold is heavily guarded. Luckily the Mako's weapons can make short work of pirates posted outside. Use the Mako's cannons to knock out the snipers in the towers and its machine guns to kill the ground troops. Once the outer area of the Stronghold is devoid of pirates, park in front of the Stronghold, exit the Mako and enter the base.
Stronghold
Move to the end of the initial area and enter the stronghold's main room. The stronghold's interior is heavily guarded, so it would not be wise to simply charge in. Scan the area for explosive containment cells and set them off using abilities or weaponry to avoid taking damage from them during the firefight. You might even be able to take out a couple of pirates who have unwittingly chosen to take cover near one such explosive.
Be sure to keep an eye on your radar, as some of the pirates, especially the krogans, may rush you. Among the pirates is an Asari Slaver who is especially deadly due to her biotic abilities. When all of the pirates have been dealt with, proceed through the doorway in the northeastern corner of the main room and head up the stairs. Examine the Desk to learn the truth about Dahlia and Nassana.
Explosive
Desk
Objective: Inform Nassana
Be sure to decrypt the storage locker, wall safe, and collect the items from the crates in the backroom on the first floor before leaving the Stronghold. Enter the Mako and return to the Normandy once you are ready to leave Sharjila. Speak with Nassana at the Embassy Lounge and tell her of your discovery on Sharjila. Nassana offers to give you credits as a reward, but if Shepard's Charm or Intimidate talents are developed enough, a blue 'I've got a better deal' or a red 'Credits won't cut it' option will appear on the left side of the conversation wheel. By selecting the Charm or Intimidate dialogue option, you'll be able to purchase asari mods (Omni-tools and Bio-amps manufactured by Armali Council) from various merchants.
Citadel: Family Matter
This assignment becomes available once at least one of the main storyline missions (Therum, Feros or Noveria) has been completed. Find Michael and Rebekah Petrovsky by the Bank entrance in the Presidium to get started. They are arguing about something, so approach them and see if you can help.
Michael and Rebekah
Rebekah lost her husband, Jacob, to a rare heart disease. She is currently carrying Jacob's baby, and Michael, her brother-in-law, believes that the baby should undergo gene therapy to ensure the child a life free from heart disease, as there is a small chance that Jacob's child could inherit the very disease that he suffered from. Listen to Rebekah's side of the story; she explains that there is evidence that gene therapy could harm the baby. Shepard must have enough talent points in either the Charm or Intimidate talents to complete this assignment using the persuasion options on the left side of the conversation wheel.
It does not matter whose side you take on the issue, just that you convince one of them to see the other's side. Use the blue Charm option or the red Intimidate option to convince Michael or Rebekah to back down from their stance. You'll receive Paragon points for using Charm and Renegade points for using Intimidate, as well as XP and credits once the issue has been settled.
Citadel: Planting a Bug
If you've completed the 'Citadel: Reporter's Request' assignment and at least one of the storyline missions on Therum, Feros or Noveria, Emily Wong will be waiting for you at the Citadel Tower. She can be found at the bottom of the steps that lead up to the Council Chamber. Emily asks you to plant a bug in the Citadel Traffic Control station to aid her in an investigation. Agree to help her and she'll hand over a Listening Device.

Emily Wong
Objective: Plant the Bugs
Travel to the Security (C-Sec) section of the Citadel using the Rapid Transit terminal across from Emily Wong. Traffic Control is on the far west end of C-Sec. Upon entering the Traffic Control station, turn right and walk towards the keeper at the far end of the room. Plant the bug on the aptly named 'Inconspicuous Location' to the keeper's right to complete the objective.
Traffic Control
Plant Bug
Objective: Inform Emily
Return to Emily Wong at the Citadel Tower and inform her that the listening device has been planted. You are given XP, credits and Paragon points for completing the assignment.
Citadel: The Fourth Estate
This assignment is only available once you have completed a storyline mission on Therum, Feros, or Noveria. Khalisah Al-Jilani, a reporter, wishes to conduct an interview with Shepard, the first human Spectre. She can be found in C-Sec Academy at the bottom of the steps that lead up to the Presidium elevator. Make sure that you have invested a good amount of talent points in Shepard's Charm or Intimidate talents beforehand, as they are needed to get the most out of this interview.
Khalisah
The amount of XP and credits you receive for completing this assignment is dependent on how many of the reporter's questions are answered. Choose the blue (Charm) or red (Intimidate) options on the left side of the conversation wheel to further the conversation, or the options on the right side to end the interview. Choosing the 'Time to shut you up!' option causes Shepard to punch the reporter out, effectively ending the interview and earning you Renegade points in the process. If you make the interview last, be sure to answer Khalisah's question about Saren using one of the choices on the left side of the wheel as you'll gain much more XP and credits that way.

Conversation Wheel
These assignments are only available while the Normandy is grounded at the Citadel. This event occurs once you've completed the storyline missions on Therum, Feros, Noveria, and Virmire and have returned to the Citadel.
Citadel: Our Own Worst Enemy
This assignment is available while the Normandy is grounded at the Citadel. Talk to Charles Saracino in the Upper Flux section of the Citadel (near the stairs that lead down to a C-Sec Academy entrance). Charles is a member of the Terra Firma Party, a political party that believes Earth should stand against alien influence.

Charles Saracino
His first question is whether or not he has your support in the next election. You can learn more about the Terra Firma party by selecting the 'Investigate' option on the left side of the conversation wheel. Otherwise select 'The ‘appeasers' are right' or 'Earth must walk alone' from the right side of the wheel to continue. Charles then asks if you would issue a statement supporting his candidacy. Select 'I won't support you' to complete the assignment and earn a couple of Paragon points, or 'You have my support' to complete the assignment and earn Renegade points.
Citadel: Negotiator's Request
This assignment is available while the Normandy is grounded at the Citadel. Speak with Elias Keeler, an Alliance negotiator , at the bottom of the stairs that lead up to the Flux Nightclub. Elias claims that he needs a mental stimulant to be at his best during an upcoming negotiation. The stimulant is legal, but regulated, and Elias has reached the legal limit. Thus, he wants you to get them for him. There are two ways to complete this assignment: convince Elias that he is an addict and has a problem using the Charm or Intimidate persuasion options, or purchase the stimulant he asked for and bring it back to him.
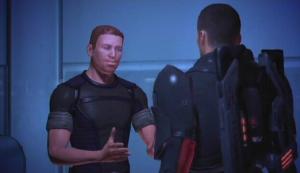
Elias Keeler
Select 'You're an addict' to bring up the persuasion options on the left side of the conversation wheel (if Shepard has an adequate amount of talent points in Charm or Intimidate). Select the blue 'Then the game is wrong' option or the 'Don't be an idiot' option to proceed. Elias still doesn't get it; he still wants the stimulant, but promises to get treatment for his addiction after the negotiation. If Shepard's Charm or Intimidate talent is higher still, an additional persuasion option is selectable. Select the blue 'You need help' or the red 'No. You'll go now' option to cut the assignment short and earn Paragon or Renegade points respectively.
Objective: Get The Drug
If you want to get the drug for Elias, first select one of the affirmation options ('No promises,' 'If you say so,' 'I'll see what I can do,' etc.) to end the conversation. Next, make your way to the Med Clinic in the Upper Wards, speak to Dr. Michel and view her supplies. Scroll down to the bottom of the list to find two unique items; a Depressant and the Mental Stimulant that Elias asked for. Giving Elias the Depressant completes the assignment and yields XP, credits and Renegade points. Given Elias the Mental Stimulant yields XP and credits but no morality points.

Stimulant
For the largest Renegade bonus, give Elias the Depressant. For a Paragon bonus, convince Elias that he has a problem using the Charm options.
These assignments are dependent on Shepard's Pre-service History.
Citadel: Old, Unhappy, Far-off Things
This assignment is only available if Shepard was given the Spacer pre-service history during character creation. After completing Therum, Feros, or Noveria, speak to Zabaleta in the Flux and Wards Access corridor. He is a retired soldier and claims to have known your mother. Zabaleta definitely does not look like a soldier, and evidently in a bad place financially as he asks if you can spare 20 credits. Hand over the credits to gain a couple of Paragon points.
Zabelta
Objective: Call Home
Return to the Docking Bay via the elevator in C-Sec Academy and board the Normandy. Enter the Comm Room and use the Comm. Terminal to contact your mother who is on duty aboard the dreadnaught 'Kilimanjaro.' She confirms Zabaleta's claim and reveals that he suffers from post-traumatic stress disorder due to a batarian raid on Mindoir. She suggests speaking to Zabaleta and convincing him to seek help at the Veteran's Affairs Office.
Objective: Speak to Zabaleta
Return to Zabaleta in the Wards and Flux Access corridor. If Shepard's Charm or Intimidate options are high enough, the blue Charm option or the red Intimidate option will appear on the left side of the conversation wheel. Convince Zabaleta to get help using Charm to complete the assignment and earn Paragon points, or convince him using Intimidate to earn Renegade points instead.
- UNC: Cerberus
- UNC: Hades' Dogs
- UNC: Lost Module
- UNC: Rogue VI
- UNC: Lost Freighter
- UNC: Geth Incursions/Geth Activities
- UNC: Derelict Freighter
- UNC: Listening Post Alpha
- UNC: Listening Post Theta
- UNC: Depot Sigma-23
- UNC: Besieged Base
- UNC: The Negotiation
UNC: Cerberus
This assignment is available once the 'UNC: Missing Marines' assignment has been completed. You should receive a transmission from Rear Admiral Kahoku the next time you access the Galaxy Map. You learn of a dangerous group called Cerberus, the very group that lured Kahoku's men to the thresher maw. Kahoku now fears for his own life and plans to go into hiding. He leaves you with the coordinates to a research facility run by the Cerberus group. You need to find out what this group is up to and put a stop to it.
Objective: Investigate Yangtze System (Northern Research Facility)
Travel to the Yangtze system in the Voyager Cluster and land on Binthu. The Mako's drop point is surrounded by three research facilities, and you have to investigate all of them. The facilities can be cleared out in an order of your choosing, but start with the northern one for the sake of following this walkthrough
The northern Research Facility is guarded by two heavy turrets; circle around the facility in an attempt to dodge their fire and use the Mako's cannon to disable them. With the two turrets down, exit the Mako and enter the research facility.
Research Facility
Make your way to the end of the hall to reach the station's main chamber. The Cerberus soldiers in this room guard what looks like a giant cage. Proceed with caution, as you're facing biotics here, and their Stasis power in particular can make a mess of things. Once the enemies have been dealt with, approach one of the diagnostic stations outside of the giant cage. Use the station to lower the cage and then kill the rachni workers within. When all of the Cerberus soldiers and rachni have been killed, a message appears onscreen, instructing you to move on to another facility.
Cerberus Commando
Diagnostic Station
Objective: Continue Hunting Cerberus (Eastern/Southern Research Facilities)
One facility lies south and the other east. Travel to the eastern facility first. This one is also guarded by heavy turrets, so take them out before exiting the Mako. It would be a good idea to save your game at this point, as you definitely don't want to revert to the Mako's Binthu drop point if something goes wrong inside. The soldiers guarding the cage in the main room are positioned behind the cage. Take out the soldiers and technician, and then use one of the diagnostic stations to open the cage. The cage contains three thorian creepers that will vomit on you if they get too close, so either back away or bat them down with a melee attack to avoid this.
Cerberus Soldiers
When the creepers and Cerberus soldiers are dead, exit the station and return to the Mako. Drive to the final research facility (the southern one, if you've been following along) and destroy the heavy turrets guarding its entrance. As with the other two, this station's interior is heavily guarded. The Cerberus soldiers are initially positioned behind the giant cage. Since they are biotics you don't want to face them all at once, so instead damage one and sprint back to the room's entrance. Hopefully the soldier you hit, and the others, will follow you there.
When all of the Cerberus soldiers have been killed, use one of the diagnostic stations around the cage to open it. A rachni soldier was being contained within; you'll want to be careful as this enemy is quite fast. When the rachni has been killed, approach Admiral Kahoku and attempt to speak with him. He's dead. There's nothing more you can do here. A new assignment, 'UNC: Hades' Dogs,' has been added to your Journal.
Diagnostic Station
Kahoku
UNC: Hades' Dogs
This assignment is added to your Journal upon the completion of 'UNC: Cerberus.' You discovered the location of a major Cerberus facility during the Bithnu raid. You're tasked with infiltrating the facility on Nepheron to prevent the Cerberus group's evil plans from becoming a reality.
Objective: Destroy Main Cerberus Facility
Travel to the Columbia system of the Voyager cluster and land on Nepheron. The Cerberus group's Underground Facility is southwest of the Mako's drop point. There are Cerberus snipers and anti-tank troops surrounding the facility's entrance, but luckily the Mako's cannon can make short work of them. Exit the Mako once the area is clear and enter the Cerberus base. The facility's interior is packed with Cerberus troops, so be ready when entering the main room.
Underground Facility Entrance
As with the Cerberus soldiers you encountered in the research facilities on Bithnu, these ones have biotic powers as well. Sweep the room of enemies and proceed through the door at the other end. Turn left when you reach the split and enter the room at the end of the hall. Use the terminal at the back of the room to steal some files from the group. Before leaving the facility, be sure to open the storage lockers and other containers in the room at the end of the hall opposite the terminal room. Return to the Normandy when you're ready to leave Nepheron.
Terminal
Objective: Complete
Access the Galaxy Map once back on the Normandy. The Normandy receives a transmission from one of the Shadow Broker's agents. The Shadow Broker is interested in the files you retrieved from the Cerberus systems and wishes to take them off your hands. Choose 'That's treason!' and then 'I don't trust you' to earn Paragon points or 'What's in it for me?' and then 'Sounds good' to earn Renegade points and a number of credits. Choosing 'Forget it' yields nothing, so select either the top-right or bottom-right options on the conversation wheel.
UNC: Lost Module
Travel to the Hercules system in the Attican Beta cluster to receive a transmission from Admiral Hackett. He asks you to recover a lost data module that was being used to gather intel on geth movements in the Attican Beta cluster.
Objective: Go to Hercules System
Land on Eletania, a mildly toxic planet located in the Hercules system. Eletania's environment is a Level 1 Hazard, so refrain from exiting the Mako unless absolutely necessary. Be sure to remain close to the Mako at all times and you'll be fine. The Downed Recon Probe is located northeast of the Mako's drop point, so head in that direction until you reach the probe. Exit the Mako and examine the Downed Probe. The data module that you are looking for is missing; it seems that an alien creature has run off with it.
Downed Probe
Objective: Track the data module
There are four monkey colonies on Eletania. You can either exit the Mako and search each of the monkeys for the module individually, or you can simply kill them to see if one drops the module. None of the monkeys present in any of the colonies are in possession of the module, however, but you can earn some extra Renegade points by visiting a colony and killing the monkeys there. To save yourself the trouble, immediately travel to the monkey colony located northeast from the Debris that appears on Eletania's map. Travel to the aforementioned colony and enter the nearby mine.
Monkey Colony
Mine Entrance
Open the map and place a Destination flag in the mine's eastern room, then move through the mine and enter the room. Search or kill the monkeys in this room, as one of them holds the data module. You receive Paragon or Renegade points depending on whether you searched or killed the monkey that held the data module. Return to the mine's main area and you'll discover that it's now flooded with geth. There are shock troopers, snipers and one destroyer. Fight your way through the geth and return to the mine's entrance. It's mission complete once you've made it out of the mine.
UNC: Rogue VI
This assignment becomes available when Shepard reaches level 20. When that condition has been met, access the Galaxy Map and travel to another system to receive a transmission from Admiral Hackett. Alliance Command needs you to shut down a rogue VI that has taken over an Alliance training ground on Earth's moon.
Objective: Engage VI
Travel to the Sol system in the Local cluster and land on Luna. Open the map and place a Destination flag next to the Alliance Training Ground. The training ground is composed of three stations. Two heavy turrets guard each station and will fire as soon as you come into view. Keep your distance from the turrets and use the Mako's cannon to damage them. A few cannon blasts and some machine gun fire thrown in for good measure is enough to destroy one of these turrets. It is imperative that you keep your distance when facing these turrets, as it is quite difficult to dodge six missiles at once if there isn't a good bit of distance between your vehicle and the incoming projectiles.
Alliance Training Ground
Alliance Heavy Turret
Objective: Destroy VI Conduits
When all six turrets have been disabled, exit the Mako and enter one of the three stations. It doesn't matter which station you enter, as they are almost identical. Each station's core contains eight conduits, all of which must be destroyed. To make matters worse, each station is packed with assault and rocket drones.
Tech abilities such as Sabotage, Overload and AI Hacking work best against synthetic enemies, while biotic abilities deal little to no damage. AI Hacking, particularly, works wonders when used on a rocket drone. The drones have powerful shields and are also quite resistant to weapon damage, but you can use weapon-specific abilities (i.e., Carnage, Marksman, Overkill and Assassination) to combat this. Remain near the room's entrance for an easy retreat, as it's easy to become overwhelmed due to the amount of drones in the room. When all of the drones in the station have been destroyed, proceed through the door at the back of the station and enter one of the two core rooms.
Conduit Core
VI Conduit
There are four conduits in each room, and you must destroy all of them. Be careful, though, because as soon as one is destroyed, toxic gas is released in the station, causing Shepard and allies to take constant toxic damage. Don't stand too close to the conduit while destroying it either, as its explosion can damage Shepard. Once you've destroyed all eight conduits in the first station, head back outside and enter one of the remaining two. Save your game before entering the next station, as the last auto-save occurred at the Mako's Luna drop point.
Drones
All of the stations have similar layouts, though the consequences for destroying a station's conduit changes with each subsequent station. When you first destroy a conduit in the second station, kinetic barrier fields deploy throughout the entire bunker complex. These barriers protect each individual conduit, as well as every doorway. It means a bit more work, but the barriers can be destroyed without too much hassle. When all of the conduits in the second station have been destroyed, move onto the last. Destroying a conduit in the final station sets up drones in the conduit room at the opposite end of the hall, so be ready for that. Destroying the last conduit completes the mission.
Specialization Class: You are given the choice between two 'specializations' based on your original class. The specialization that you select will replace your base class talent on the squad screen, and all talent points put into the base class talent will transfer over to the specialization. Read the descriptions of the two specialization classes that your class is entitled to and select the one that is closest to your play style up until this point.
UNC: Lost Freighter
Once you have completed a storyline mission on Therum, Feros, or Noveria, travel to the Ming system of the Gemini Sigma cluster and board the MSV Worthington. Move down the hallway and enter the ship's hold. Be careful as you make your way to the back of the area, as the explosive containment cells littered throughout are set to detonate when someone is in close proximity. As you move forward, scan the path you will take and shoot all visible explosives.
Proceed through the door at the back of the ship's hold and enter the first door on your left. Examine the Life Support Machine in this room. The body being kept alive shows no signs of brain activity, meaning that this is essentially just an empty shell. You can turn off the machine, or you can wait and do some investigating instead. Access the Medical Computer at the back of the room to hear a recording. After listening to the recording, leave the room and enter the one across from it. Use the Crew Computer to hear another recording, then decrypt the storage locker and leave the room. Enter the cockpit at the end of the hall and access the computer to hear a particularly disturbing recording.
Life Support Machine
Cockpit Computer
When you hear the final recording, a woman named Julia, the one mentioned in the recordings, appears and attacks. She is a powerful biotic, so be ready. The mission is both added to your Journal and completed once Julia is dead.
Geth Activities/UNC: Geth Incursions
There are two ways to activate this assignment: On Feros, decrypt the Geth Terminal in the Upper Level of the ExoGeni Base (in the same area where the geth ship's claw is severed) to add this assignment to your Journal. Once encrypted, the geth terminal revealed that the geth may be amassing a large force in the Armstrong Nebula cluster.
Alternatively you can simply travel to the Armstrong Nebula to receive a transmission from Admiral Hackett. He tells you that geth outposts have been identified on four different planets, and he wants you to take care of them.
Geth Terminal
Objective: Investigate Geth
All four geth outposts are located within the four systems of the Armstrong Nebula. You can tackle these outposts in any order you like
Objective: Eliminate Geth Outposts (Gagarin System, Rayingri Outpost)
The geth outpost on this planet can be reached by heading south from the Mako's drop point. The entrance of the Overrun Research Facility sits atop a relatively steep mountain. It takes some effort to get the Mako up to the facility entrance regardless of how you go about it. Once you've made it up top, exit the Mako and enter the facility.
Enter the facility's main room and clear out the husks that occupy it.
Rayingri Geth Outpost
Geth
When the perimeter is clear, head to the back of the room and destroy the husks that occupy the hallway there. It initially appears that there are no geth in this station, but removing all of the husks triggers a geth onslaught. Step into the hallway at the south end of the facility and use the open doorway as cover while picking off the geth that rush you. The geth destroyers are the biggest threat here, so use abilities to take them out before they get too close. When the facility is clear, head back outside to find more geth waiting for you there. Gun them down or enter the Mako and use its weaponry to finish off the geth of the Rayingri outpost.
Outpost
Objective: Eliminate Geth Outposts (Tereshkova System, Antibaar Outpost)
The geth outpost on Antibaar is located northeast of the Mako's drop point. The geth in the area cause your radar to jam as you near the outpost, so use your map to avoid moving off course. Approach the outpost with caution as it is heavily guarded by rocket troopers, snipers and a geth colossus.
Antibaar Outpost
Snipers and rocket troopers are perched in the towers surrounding the outpost, but can be easily taken out with the Mako's weaponry. Circle around the outpost and concentrate on removing the snipers and rocket troopers from their towers first. The Mako can only sustain a few hits from the colossus before its shields are down, so keep an eye out for the colossus' slow-moving projectiles and avoid them while circling around the outpost. If the Mako takes too much damage, retreat from the area and repair the Mako using Omni-gel. Unused equipment and upgrades can be converted to Omni-gel via the Equipment menu if your Omni-gel supply is low.
When the geth surrounding the outpost have been destroyed, a geth dropship appears and drops off some reinforcements. Among the reinforcements is a hulking geth prime, a boss type enemy that is your primary concern here. Even with the Mako's weaponry, the geth prime is quite hard to bring down. Its shields are strong and recharge quickly, and its weaponry are quite damaging to the Mako. If you're brave enough to leave the Mako, an ability such as biotic Lift can be used to incapacitate the geth prime, allowing you to take him out easily. Only exit the Mako if the other geth reinforcements have been dealt with, though.
Geth Dropship
Geth Reinforcements
Return to the Normandy once all of the geth in the Antibaar outpost have been destroyed.
Objective: Eliminate Geth Outposts (Hong System, Casbin Outpost)
Travel northeast from the Mako's drop point on Casbin to reach the geth outpost. The geth surrounding the Casbin outpost cause the radar to jam as you scale the mountain, but just continue your acension until you reach the top. Once atop the mountain, scan the area below and locate the Casbin outpost. If Shepard is well-trained with a Sniper Rifle, sniping the geth from above is a viable option. Be careful though, as the geth below have sniper rifles of their own. Abilities can be used from atop the mountain as well.
Casbin Outpost
Sniping
Alternate methods aside, the easiest and surefire way to take out this outpost is to simply drive down the mountain and use the Mako's weaponry to wipe out the geth snipers and rocket troopers stationed in the towers. However you dispose of them, when all of the geth in the Casbin outpost have been destroyed, a geth dropship enters the area and drops off reinforcements. This dropship has a health bar that appears in the bottom-right corner of the screen, which means it can be destroyed. Take out the reinforcements and then pound the dropship with cannon and machine gun fire to deplete its health bar.
Geth Dropship
Objective: Eliminate Geth Outposts (Vamshi System, Maji Outpost)
The Geth Outpost on Maji is almost due north of the Mako's drop point. As you approach the large mountain in the distance, look for large red dots on the radar. Each red dot represents a geth heavy turret; these turrets line the trail that leads up to the mountain outpost. Use the Mako's cannon to destroy the heavy turrets as you follow the mountain trail. When you reach the outpost, use the Mako's weaponry to take out the geth snipers and rocket troopers in the towers and swerve to avoid their fire.
Geth Heavy Turret
Maji Outpost
Once the geth troopers have been dealt with, a geth colossus appears in the middle of the outpost. Remain outside of the outpost and move back and forth to avoid the colossus' slow-moving projectiles while damaging the geth with the Mako's cannon and machine gun. The outpost is clear once the colossus falls.
Geth Colossus
Objective: Eliminate Geth Bunker
When the Rayingri, Antibaar, Casbin and Maji geth outposts have been cleared, Shepard and allies discover a locater signal for a major geth installation. The main geth base is located in the Grissom system of the Armstrong Nebula cluster and must be destroyed to stop the geth incursion. Travel to the Grissom system and land on Solcrum, the largest of Notanban's moons. Solcrum's environment is a Level 1 Heat Hazard, so don't stray too far from the Mako if you must leave the vehicle.
Head east from the Mako's drop point until the geth bunker comes into view. The bunker is surrounded by sniper towers and a couple of geth colossi. The colossi are the greatest threat here, so keep your distance from the bunker to avoid taking damage from their cannon fire. The geth snipers and rocket troopers that occupy the towers can be difficult to hit with the Mako's weaponry; a Sniper Rifle can do the job, but return to the Mako before the bar in the bottom-right corner of the screen fills up or Shepard start taking damage and eventually die from exposure. Drive back and forth to avoid fire from the colossi while blasting them with the Mako's cannon. Hit the geth with the cannon even if you are too far to see their health bars. Once the perimeter outside of the base is clear of geth, park the Mako by the entrance, exit the vehicle and enter the bunker.
Geth Bunker
Bunker Entrance
The interior is guarded by geth destroyers, stalkers, sappers, and a juggernaut. Take cover behind the open doorway and wait for the destroyers to rush you. Use disabling abilities such as biotic Lift or Singularity before the destroyer can get too close. Wait for the stalkers and sappers to land somewhere near the room's entrance and use an ability or weapon to take them out.
The geth juggernaut is up on the bunker's second floor walkway. Hide behind one of the pillars in the main area and use a Sniper Rifle—if Shepard is trained with one—to destroy the juggernaut. If Shepard is untrained with a Sniper Rifle, head up the stairs in the northeastern corner of the room to face him on the upper walkway. On the walkway, immediately take cover behind one of the containers to protect yourself from the juggernaut's fire. Use abilities and weapons to damage the juggernaut until it falls.
Geth Juggernaut
It's mission complete when the final geth in the bunker falls. Enter the southeastern room on the first floor, decrypt the geth terminal there and download the data on it to add the 'Tali and the Geth' assignment to your Journal.
Terminal
UNC: Derelict Freighter
After completing Feros, travel to the Caspian system of the Maroon Sea cluster and board the MSV Cornucopia. Enter the ship's hold with extreme caution, as husks will reveal themselves when you turn the corner. You'll have to be especially careful here because the husks' electricity bursts are prone to set off the explosive containment cells scattered throughout the area. Cautiously navigate through the shipping containers to reach the hall at the east end of the ship. Be sure to check your corners and detonate any explosives you can spot from a safe distance. Enter the cockpit at the end of the eastern hallway and access the Navigation Computer.
Husks
Navigation Computer
The computer's log files details the Cornucopia's exploration where its crew discovered a strange alien artifact in a space region outside of the Perseus Veil. The artifact was found to be connected with the geth, and the crew were subsequently brainwashed, transformed into husks and sent back to human space. This assignment is both added to your journal and completed at this point.
UNC: Listening Post Alpha
This assignment is available once the Noveria storyline mission has been completed. Travel to the Erebus system in the Styx Theta cluster and land on Nepmos to get started.
Objective: Go to the Erebus System
Drive to Listening Post Alpha in the southeastern quarter of Nepmos' map. Use the Mako's weaponry to clear out the rachni soldiers and exit the Mako once the perimeter is clear. When the first batch of rachni have been defeated, a timer appears in the bottom-right corner of the screen, counting down to another rachni swarm. You have one minute to prepare for the next wave. Speak to Lieutenant Durand who is standing behind a barrier. Evidently the base was hit quite hard by the rachni, and Durand tells you that their scanners picked up many more rachni on their way.
Listening Post
Durand
There is a generator at the northern end of the post. Examine the generator and connect the Mako to it. With the Mako connected to the generator, the listening post's two large defensive turrets are fully operational. While you can't use the Mako's weaponry to deal with the rachni soldiers while its powering the generator, the turrets are powerful enough to take out most of them for you. Stand on the frontlines and wait for the second wave of rachni to emerge from their tunnels. While on the front lines, be sure to dodge to the side to avoid the rachni soldier's toxic projectiles.
Generator
Turret
Once the second batch has been dealt with, another one minute timer appears onscreen. The final wave of rachni is much larger than the last two, so if you haven't hooked up the Mako to the generator to provide power to the defensive turrets, it would definitely be best to do that in preparation for this wave. There are two shelters on either side of the listening post that you can duck into if things get hectic. Speak to Durand once the last rachni has fallen; she tells you that they recently lost communication with another listening post. Agree to help destroy the rachni's underground lair on Nepmos to put an end to the rachni attacks once and for all.
Objective: Destroy Rachni Base
The rachni base is due west of Listening Post Alpha. Travel to the Rachni Infested Mines, exit the Mako, climb up the ramp and enter. There are plenty of rachni inside the mines, as its title suggests, so it's a good idea to save before proceeding. While no enemies initially appear on your radar, rachni emerge from the ground as you move through the lair's main area. Keep an eye out for nearby explosive cells and detonate them from a safe distance to avoid taking damage from it later, or use it to damage emerging rachni.
Rachni Infested Mines
Rachni
Clear out all of the rachni in the large room and enter one of the spawning point rooms in the northeastern corner. Kill all of the rachni that appear in each room to face the rachni brood warrior. He is quite tough, so fallback if necessary. The assignment is complete when the brood warrior falls.
UNC: Listening Post Theta
This assignment is available once the Noveria storyline mission has been completed. Travel to the Acheron system of the Styx Theta cluster and land on Altahe. Make your way to the Listening Post at the southern end of the map. Rachni soldiers emerge from the mounds of dirt surrounding the post as you approach. Use the Mako's weaponry to kill the rachni until their spawning ceases. When the perimeter is clear, exit the Mako and enter the building.
Rachni
Listening Post
It is readily apparent that all is not well within Listening Post Theta, as the building's entrance room is littered with soldier corpses. Enter the main room and clear out the rachni there. Keep your distance from the rachni workers because they will explode when close. The workers' explosions are even more deadly with the explosives in the area, so be careful. With the rachni dead, make your way to the hall at the other end of the area and proceed through the door on the right.
Access the terminal here to learn how the rachni attack occurred. The logs on the terminal mention a depot on Sigma-23 in the Gorgon System. Download the logs to simultaneously complete and add this assignment to your journal. Be sure to open the containers and lockers in the station's southeastern room before moving on.
Terminal
UNC: Depot Sigma-23
This assignment is available once the Noveria storyline mission has been completed.
Travel to the Gorgon system of the Argos Rho cluster and board the Unidentified Space Facility there. Rachni soldiers and workers occupy this ship's hold. Be especially careful of the workers, as they explode when close which inflicts prolonged toxic damage on any character caught in the blast. Cautiously navigate through the shipping containers to reach the hall at the east end of the ship. Proceed through the first door on the left.
Rachni
Objective: Set Off Demo Charge
Access the terminal in this room and listen to all three entries. By listening to the entries, you discover that the notorious Cerberus group is responsible for the rachni infestations of listening posts Alpha and Theta (from the 'UNC: Listening Post Alpha' and 'UNC: Listening Post Theta' assignments). Afterwards, arm the demolition charges next to the terminal. A timer appears on the screen and another batch of rachni soldiers and workers spawn in the ship's hold. You must return to the Normandy before the timer reaches zero to complete this assignment, so don't bother fighting the rachni but avoid them entirely if you can.
Terminal
Demolition Charges
UNC: Besieged Base
This assignment can only be triggered when Shepard's Paragon meter is at least 80% full (4 bars).Access the Galaxy Map and travel to any system once the above requirement has been met to receive a transmission from Admiral Hackett. He tells you of group of biotic terrorists that have taken over a medical station, drugged the researchers within and are now essentially using the innocents as meat shields. Hackett asks you to resolve the situation by wiping out the fanatics while minimizing innocent causalities.
Objective: Get to Medical Base
Head to the Cacus system of the Hades Gamma cluster and land on Chohe. Open up the map and place a Destination flag next to the Science Base. Drive to the base, exit the Mako and enter facility. Save your game once you're inside so you can reload at the base's entrance if things take a turn for the worst. In their drug induced state, the researchers are wandering around the facility in a daze. You must not harm or let any innocents die. If a civilian does die, a 'Researchers Killed' meter will appear in the bottom-right corner of the screen.
Science Base
Innocent
The researchers are largely vulnerable in their current state. Not only can the innocents be clipped by crossfire, they can also be killed by the numerous explosive containment cells littered throughout the base's main room. Of particular danger are the terrorists' biotic abilities, as they cover a large area and can detonate the containment cells. For this reason, you'll need to first provoke the terrorists and then lure them to the previous room where they cannot harm the researchers. Stand your ground and gun down the terrorists as they approach.
It's quite possible that not all of the terrorists will follow you back to the base's initial room with one provocation, so you may have to reenter the main room and fish for more. The leader of the group will likely hang back at the far end of the main room; sneak up on him and use a weapon ability (Carnage, Marksman, Assassination or Overkill) to take him out quickly.
Biotic Terrorists
Objective: Report to Hackett
When all of the biotic fanatics have been wiped out, return to the Normandy and access the Galaxy Map to report to Hackett and complete the assignment. The amount of Paragon points gained afterwards is dependent on the number of civilian causalities. Zero researcher causalities yields the largest amount of points.
UNC: The Negotiation
This assignment can only be triggered when Shepard's Renegade meter is at least 80% full (4 bars). Access the Galaxy Map and travel to any system once the above requirement has been met to receive a transmission from Admiral Hackett. He asks you to negotiate a treaty with a man named Darius. The Alliance is looking to obtain the mining rights to an asteroid rich in Element Zero, but Darius must first agree to it.
Objective: Meet Darius
Travel to the Plutus system of the Hades Gamma cluster and land on Nonuel. Make your way to the Warlord's Outpost in the northeastern quarter of the map. Be cautious, as Nonuel's environment is a Level 1 Hazard, so don't stray too far from the Mako. Once you've reached the outpost, park the Mako in front of the building, exit the vehicle and step inside. Make your way to the POI mark on the radar to find Darius.
Warlord's Outpost
Darius
Darius is committed to making this negotiation a difficult one. There are two ways to go about this; diplomatically or with violence. Exclusively select the top-right options on the conversation wheel to verbally form an agreement with Darius, effectively earning the Alliance the right to mine for Element Zero, albeit with heavy fees. Select the middle-right or bottom-right options and eventually Darius and his retainers will attack. The fight begins with you surrounded, so immediately sprint away and get behind some cover. Once Darius and all of his retainers have been dealt with, head up the stairs in the northeastern corner of the main room and proceed through the door at the end of the walkway. Access the terminal here to unlock the base's front door.
Lord Darius
Terminal
Objective: Report to Hackett
Return to the Normandy when you're ready to leave Nonuel and access the Galaxy Map to report to Hackett and complete the assignment. A small amount of Paragon points are given if the issue was solved without violence, while a large amount of Renegade points are given if Darius and his followers were killed.
- Geth in the Tunnels
- Varren Meat
- Power Cells
- Water Restoration
- Data Recovery
- UNC: Espionage Probe/Investigate Shipments
- UNC: ExoGeni Facility/Investigate Facility
- UNC: Colony of the Dead/Investigate Samples
Note -- 'Feros: Geth in the Tunnels,' 'Feros: Varren Meat,' 'Feros: Power Cells' and 'Feros: Water Restoration' all start in the Zhu's Hope colony and can be completed in the tunnels. For this reason, make sure that all of the aforementioned assignments are active before you venture into the tunnels underneath Zhu's Hope.
Feros: Geth in the Tunnels
Speak to Fai Dan at the Zhu's Hope colony after successfully cleansing the tower of geth during the 'Feros: Geth Attack' mission. There are still geth in the tunnels underneath Zhu's Hope, and it's your job to clear them out. There's a geth transmitter in the tunnels, too, and destroying it will aid the colony significantly.
Objective: Find the Geth
Open up your map and locate the stairs that lead down to the tunnels. They're just beyond the elevator that travels to the Prothean Skyway. You'll meet some geth as you descend, so be careful. Follow the path at the bottom of the stairs until you reach a walkway. Follow the walkway to its end and turn right. Sprint towards the rubble in the distance and then turn left into the tunnel there. Destroy all of the geth in this tunnel.
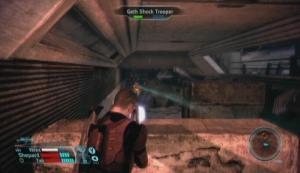
Geth
When you emerge from the first tunnel, sprint straight ahead to the rubble at the opposite end of the walkway and turn left into a second, adjacent tunnel. There are more geth in this tunnel to be destroyed. The biggest threat here is the geth destroyer; a variant of geth with strong shields and plenty of firepower. Use tech abilities such as Overload and Sabotage to lower the destroyer's shields, and then weapon abilities to deal extra damage. Be careful though, as the destroyer tends to rush if its weapon has been disabled. Crippling abilities such as Lift or Singularity can be used for an easy kill.
Once you've cleared the tunnel of geth, return to the previous area and cross the gap using the extended bridge. Take cover behind the rock on the left as soon as you enter the next area, as two geth snipers are positioned on a small platform that overlooks the tunnel. Take out the two snipers first, and then the remaining geth troopers. Make sure that each of your squad members is at full health and full shields before you proceed because you'll encounter three krogan outside of the transmitter room.
Proceed with caution when the squad is ready. Biotic abilities such as Stasis and Lift are especially helpful when facing the krogan because they can used to incapacitate one or more of them, giving you a better chance of survival. The krogan also tend to charge, so retreat without hesitation if you things get hairy. Once the krogan have been dealt with, move to the back of the room and blast the transmitter tower to deplete its life bar.
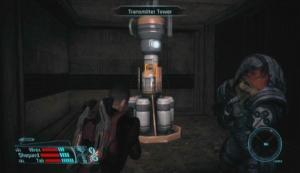
Geth Transmitter
Objective: Inform Fai Dan
Return to Zhu's Hope and tell Fai Dan that you've ridden the tunnels of geth to complete the assignment and earn Paragon points.
Feros: Varren Meat
David Reynolds can be found aboard the craft in the middle of the Zhu's Hope colony. Talk to David to learn that the colony is also suffering from a food shortage. David would like to rectify this problem by hunting varren in the tunnels and bringing the meat back to the colony. Unfortunately he is unable to hunt the lesser varren due to the due to the presence of the dangerous alpha varren. You'll have to find and kill the alpha varren in the tunnels beneath Zhu's Hope so the lesser varren can be hunted.
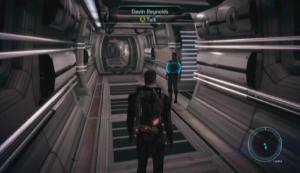
David Reynolds
Objective: Find Alpha Varren
Open up your map and locate the stairs that lead down to the tunnels. They're just beyond the elevator that travels to the Prothean Skyway. You'll meet some geth as you descend, so be careful. Once in the tunnels, open your map again and locate the door to the 'Collapsed Highway Section.' Make your way to this door and enter the area. A pack of varren—the alpha that David spoke of among them—inhabit this area. The pack of lesser varren can tear Shepard and allies to shreds if you aren't careful, so keep your distance at all times.
Do not let them get too close to you; sprint away from them if you must, and then turn around and shoot them as they approach. When all of the lesser varren have been killed, search for the alpha varren on the upper highway. The alpha varren is red and much tougher than his white counterparts. You'll have an easy time if you managed to wipe out the lesser varren before facing the alpha, however. Attack the alpha varren until it falls to complete the objective.
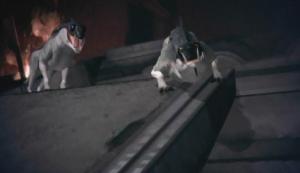
Varren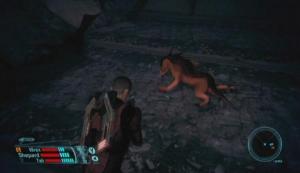
Varren Alpha
Be sure to remove the power cells from the crashed vehicle on the upper highway before leaving the area.
Objective: Inform David Reynolds
Return to David Reynolds at Zhu's Hope and tell him that the alpha varren has been dealt with. You can earn some Renegade points by selecting the 'Just pay up' option afterwards, but you're still given a credit reward after the conversation regardless so there's no reason to be rude.
Feros: Power Cells
Explore the northeastern corner of Zhu's Hope and speak to Mary O'Connell. Things sure are bleak for Zhu's Hope; aside from the geth attacks, food, and water shortages, the colony is also having trouble maintaining power. Mary asks you to find replacement power cells to fix the generator, thus restoring power to the colony. Unfortunately power cells from the Normandy are not compatible with the generator, so you'll have to explore the tunnels underneath Zhu's Hope to find the compatible cells.
Mary O'Connell
Objective: Find Cells
Open up your map and locate the stairs that lead down to the tunnels. They're just beyond the elevator that travels to the Prothean Skyway. You'll meet some geth as you descend, so be careful. Once in the tunnels, open your map again and locate the door to the 'Collapsed Highway Section.' Make your way to this door and enter the area. Kill all of the Varren in the area to complete 'Feros: Varren Meat,' and then look for a crashed vehicle on the upper highway. Approach the vehicle and remove the Power Cells from its Fuel Compartment.
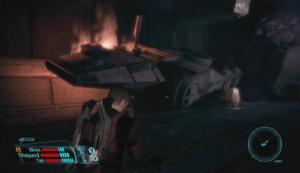
Crashed Vehicle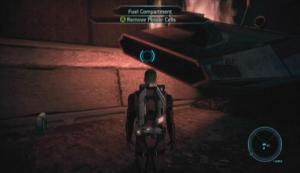
Power Cells
Objective: Deliver Cells to May O'Connell
Return to May O'Connell at Zhu's Hope and show the power cells to her. Credits, Omni-gel, Paragon points and XP are your reward.
Feros: Water Restoration
Macha Doyle can be found working on the colony's water supply in the northeast end of the colony. Speak to Macha Doyle to learn that the colony's water supply is inactive. To rectify this problem, water valves in the tunnels beneath Zhu's Hope must be activated to restore water to the colony. Agree to help to add this assignment to your Journal.
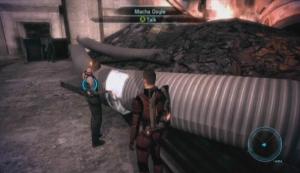
Macha Doyle
Objective: Find Water Valves
There is a total of three water valves to open. Open up your map and locate the stairs that lead down to the tunnels. They're just beyond the elevator that travels to the Prothean Skyway. You'll meet some geth as you descend, so be careful. Follow the path at the bottom of the stairs until you reach a walkway. Follow the walkway to its end and turn right. Sprint towards the rubble in the distance and then turn left into the tunnel there. First and foremost, destroy the geth present in this tunnel. Afterwards, look for the first Water Valve next to the doorway used to enter this tunnel. Open the valve to complete the objective.
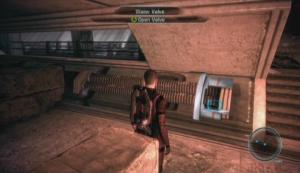
Water Valve
Objective: Find More Valves
The second valve is in the same tunnel as the first, but at the opposite end of the tunnel. When you emerge from the first tunnel, sprint straight ahead to the rubble at the opposite end of the walkway and turn left into a second, adjacent tunnel. There are more geth in this tunnel, but it also houses the final water valve. Destroy the geth and open the final water valve to restore water to the colony.
Objective: Inform Macha Doyle
Return to Zhu's Hope and talk to Macah Doyle. She thanks you for restoring the water to the colony. You are given credits, XP and Paragon points as reward.
Feros: Data Recovery
Locate and speak to Gavin Hossle in the refugee camp off of the Prothean Skyway. Gavin was forced to leave important data on his console at the ExoGeni Headquarters when the geth attacked. He claims that this data could be worth a lot of money, and promises a reward if the data is returned to him. Agree to help Gavin and he'll give you an OSD to download the data onto.
Objective: Find the Console
Gavin's console is located in the Upper Level of the ExoGeni base. The data can be recovered from his console as you follow the main Feros storyline mission. When you reach the area that contains the geth altar, destroy the two geth and then head through the doorway at the bottom of the stone steps. Follow this corridor to its end. Clear the next room of geth and then proceed to the upper level of the ExoGeni base.

Geth Altar
Immediately take cover upon reaching the upper level, as there are three enemy krogan at the end of its initial corridor. Kill the krogan and move to the far end of the corridor. Open the computer console there to move the data from Gavin's console onto the OSD he provided.

Krogan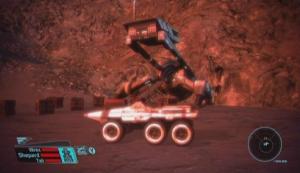
Gavin's Computer
Objective: Deliver OSD to Hossle
Speak to Gavin Hossle at the ExoGeni refugee camp, or at the Zhu's Hope colony after completing the Feros storyline mission, and hand over the OSD containing the data he asked for. You are given Omni-gel, credits and XP for completing the assignment.
Investigate Shipments/UNC: Espionage Probe
Enter the craft in the middle of the Zhu's Hope colony and successfully decrypt the terminal in the room on the far right. The ship's logs show large deliveries being made to a system in the Voyager cluster which consists entirely of uninhabitable, uncharted worlds. The fact that large deliveries are being made to an uninhabited system is strange... An investigation is in order!
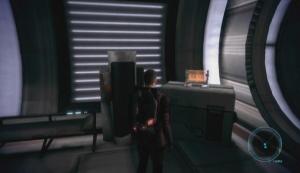
Terminal
Objective: Go to Amazon system
Travel to the Amazon system of the Voyager cluster. The Normandy receives a transmission from Admiral Hackett upon entering the system. Hackett explains that an old Alliance espionage probe carrying a nuclear payload recently sent a 'Mission Complete' signal. The probe is no longer needed, so the Admiral wants you track it down and disable it. At this point, the assignment name will change to 'UNC: Espionage Probe' if the assignment was triggered on Feros.
Objective: Find the Probe
Land on Agebinium. Be sure that Shepard or one of the squad members you choose has talent points invested in the 'Electronics' skill. Locate the Alliance Homing Beacon on the map and set a Destination flag nearby. Make your way to the beacon to discover the entrance to a mine. Exit the Mako, head up the ramp and enter the mine. After a quick inspection of the first few corridors and the main room, the mine appears to be barren. The probe's signal is coming from inside the room at the northern end of the mine, however. Save your game and enter the room.
Mine Entrance
An explosion occurs once you are in the room, effectively trapping Shepard and allies in the tunnels. You then find yourself conversing with the hologram of one Elanos Haliat. He tells you that the probe was a trap set to lure you to this location. As the man behind the attack on Elysium, Elanos wants you dead due to your status as the first human Spectre, or due to Shepard's War Hero background in which Shepard valiantly defended Elysium against his attack.
Objective: Escape
There must be another way out of the mines, but first things first: the probe carrying twenty tons of nuclear explosive must be disabled! The probe is set to detonate in ten seconds, so you'll have to act fast. There are three hardpoints that must be manually disabled or automatically disabled at the cost of 100 Omni-gel. It's quite unlikely that you possess the amount of Omni-gel required to disable all three hardpoints, so disabling one or more of them manually is probably necessary. To disable one manually, press the button that lights up onscreen in a timely manner. There is a total of ten button presses per hardpoint, all of which appear quite slowly, giving you plenty of time to react. As soon as one hardpoint has been disabled, immediately move on to the next. The timer freezes while you work to disable a hardpoint, so there's no rush once in the menu.
Bomb
Probe Hardpoint
With the bomb disabled, return to the large room, turn left and go through the door there. The door in this small room leads back outside. This second exit is atop a hill overlooking a small camp. A large group of pirates—Elanos Haliat among them—occupy the camp grounds. If Shepard is trained with a Sniper Rifle, sit atop the hill and pick off the pirates below. Be careful, however, as there are sniper rifle-wielding pirate among the others. Scan the area and you'll undoubtedly notice the Mako parked a short ways east from the camp. A simple way do deal with the pirates below is to sprint down the hill and make a beeline for the Mako. Taking out the pirates is an easy task with the Mako's weaponry at your disposal. Either way, the assignment ends when Elanos and the pirates are dead.
Sniping
Mako
Investigate Facility/UNC: ExoGeni Facility
Decrypt the ExoGeni Terminal in the Upper Level of the ExoGeni Base (in the same area where the geth ship's claw is severed) to add this assignment to your Journal.
ExoGeni Terminal
Objective: Investigate Facility
Back on the Normandy, travel to the Vostok system of the Maroon Sea cluster and land on Nodacrux. The name of this assignment changes to 'UNC: ExoGeni Facility' at this point.
Objective: Explore Colony
Locate the Science Facility using your map and make your way there. Some Thorian creepers occupy the area outside of the facility, so use the Mako's weaponry to clear the perimeter. Once the creepers have been dealt with, exit the Mako and enter the facility. Move through the corridor until you reach the facility's main room. Install the Anti-Thorian Gas I upgrade acquired at Feros if you still have it.
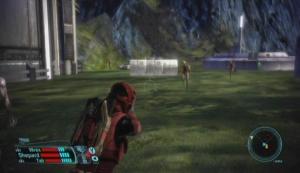
Science Facility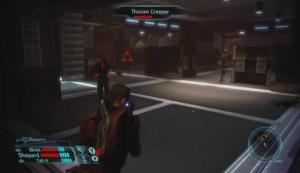
Creepers
The main room is absolutely packed with creepers. If you have the anti-Thorian gas upgrade installed, try to round up the creepers into one big pack (by luring them towards you, or by using biotic Singularity) and lob the grenades at them. You should be able to take out the lion's share of them with this method. If you have since parted with the anti-Thorian gas upgrade, you'll just have to make due with the abilities and weaponry available to you.
Once the room is clear of creepers, proceed to the facility's southeast room. Some non-infected ExoGeni scientists have been trapped in here due to the creeper outbreak. Dr. Ross, one of the ExoGeni scientists, tells you that the creepers in the Nodacrux science facility were created to be obedient and carry out monotonous tasks, but all went wrong when they suddenly attacked.
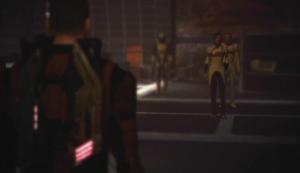
ExoGeni Scientists
Dr. Ross attempts to bribe you once she learns that you know of the Thorian and plan to turn her in. Selecting the neutral 'Okay' option on the conversation wheel accepts the bribe and ends the assignment, while selecting the top-right or bottom-right options forces you to face the scientists and the mercenaries that accompany them. The assignment is complete when you accept the bribe, or have killed the remaining ExoGeni scientists and mercenaries.
Investigate Samples/UNC: Colony of the Dead
Decrypt the Server Node in the Upper Level of the ExoGeni Base (in the same area where the geth ship's claw is severed) to add this assignment to your Journal. The ExoGeni employee's personal log reveals that ExoGeni provided samples to a group known as Cerberus, a group you may have dealt with before...
Server Node
Objective: Go to System
Travel to the Matano system in the Maroon Sea cluster and land on Chasca. Move southeast from the Mako's drop point to reach the Science Facility and civilian structures. There are three buildings in the area that can be investigated in any order, but start with the eastern-most building for the purpose of following this walkthrough. Husks roam the facility's outer perimeter of each building. Upon observing the husks, the assignment name changes to 'UNC: Colony of the Dead.'
Objective: Search for Clues
Destroy the husks outside of the facility, then exit the Mako and enter the building. Many more husks occupy the facility's main room. There are explosive cells scattered throughout the area which can be used to damage the husks, but be careful yourself, as the electric shock released by a husk can set the explosives off. Due to the hazards in the room, get the husks' attention, stand near the entrance to the room and pick them off as they approach.
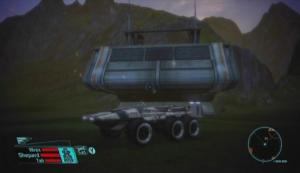
Civilian Structure
Husks
Once you've cleared out the husks occupying the first facility, move through its main room and open all of the containers and lockers to acquire additional items. Leave the facility when ready and proceed to the second (northern-most POI icon) Civilian Structure. This facility features a layout similar to the last. Clear out the husk and open all containers in the building before moving on to the Science Facility.
Enter the facility and make your way to its main room, which is of course filled with husks. Destroy the husks and move to the facility's southwestern room. Access the terminal in this room to learn that a member of the notorious Cerberus group recently passed through this colony. It's likely that the Cerberus group had something to do with the transformation of the colonists. Accessing the terminal completes the assignment.
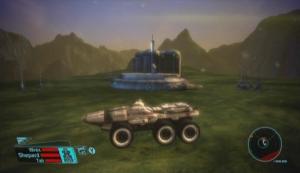
Science Facility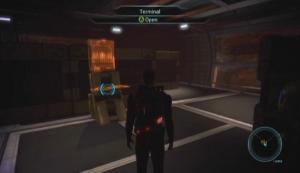
Terminal
- Wrex and the Genophage
- Assisting Kirrahe's Team
Virmire: Wrex and the Genophage
This assignment takes place at the salarian camp.
Saren has discovered a cure for the krogan genophage (the hereditary virus which causes only one in a thousand krogan offspring to survive) and is currently breeding an army of krogan warriors. Your mission on Virmire turns to destroying Saren's research facility to put a stop to his plans, as the prospect of a dispensable krogan army is not a favorable one. This puts your krogan ally in a difficult position. A cure for the genophage could result in the repopulation of his race, but the task at hand is to defeat Saren. Destroying Saren's research facility would hinder his plans, but the genophage cure would be lost.
Objective: Talk to Wrex
Save your game before speaking to Wrex because plenty can go wrong here. If you've completed the 'Wrex: Family Armor' assignment, keeping Wrex alive during this tense moment is simple. Work your way through the dialogue tree until the 'We are' and 'I wouldn't do this otherwise' options appear. Select either one to set Wrex straight by reminding him that these particular krogan are not his people, and that destroying the genophage would be best for everyone. Convincing Wrex in this fashion yields a large amount of Paragon points and nets you the 'Charismatic' achievement.

Wrex
If you have not completed Wrex's assignment you'll have to use Charm or Intimidate to convince him. Unfortunately if you haven't invested enough talent points in Shepard's Charm or Intimidate talents, there is no way to keep Wrex alive if you also haven't completed the Family Armor assignment. With an adequate number of talent points invested in either Charm or Intimidate, the blue 'These aren't your people' or the red 'Don't be so naïve' options are selectable. Convincing Wrex to back down using Charm yields Paragon points while convincing him with Intimidate yields Renegade points.
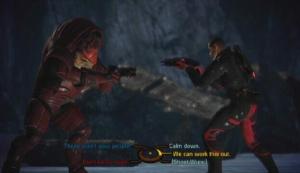
Conversation Wheel
Selecting any of the options on the right side of the conversation wheel leads to Wrex's death, either by Ashley Williams or by your own hands. The 'Shoot Wrex' option yields a large amount of Renegade points and is just downright brutal. The other two cause Ashley to step in a kill Wrex; your response afterwards determines the morality points you receive. Wrex is definitely a valuable ally, so keeping him alive would be best. You'll definitely want to keep him alive if you're working towards the 'Krogan Ally' achievement.
Virmire: Assisting Kirrahe's Team
This assignment is added after Captain Kirrahe's speech at the salarian camp. There are several ways to assist Kirrahe's team on the Base Approach map. Passing these opportunities by leads to Kirrahe's death.
Objective: Disrupt Communications
From the Base Approach start point, make your way to the Communications Tower to the north. Destroy the geth surrounding the tower and head up the ramp to reach the walkway. Look for the 'Triangulation Tower' terminal and activate it. You are given a small amount of Paragon points for assisting Kirrahe's team.
Communications Tower
Disrupt Tower
Objective: Destroy Satellite Uplink
The Satellite Uplink Tower to the west is next. When you reach the tower, destroy the geth in the area and head up the ramp. At the top of the ramp, look up to see the destructible satellite uplink. Blast the satellite uplink to destroy it. You are given a small amount of Paragon points for assisting Kirrahe's team.
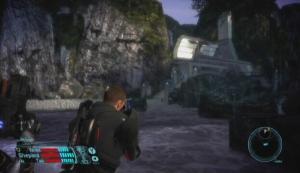
Satellite Uplink Tower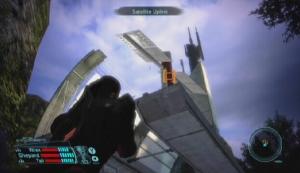
Satellite Uplink
Objective: Destroy Geth Flyers
Head to the opposite end of the tower and step onto the walkway. Start moving north towards the Refueling Platform. Proceed with caution as there are two geth destroyers along the way. There are a number of geth rocket drones on the Refueling Platform. Destroy all of the drones to earn Paragon points for assisting Kirrahe's team. That's all you can do for now, so make your way to the Research Facility entrance at the west end of the map.

Geth Rocket Drones
Objective: Disable Alarms
The facility entrance is guarded by a couple of krogan warriors and some geth. The krogan, particularly, are quite deadly, as they tend to charge. If you have a biotic-using ally, use Lift or a similar ability to stop a charging krogan in his tracks. Eliminate the krogan before he can get close enough to melee. When the walkway is clear, proceed through the door at the northern end of the walkway. In the Base Entry area, look for a security console on the left side of the walkway and examine it. Disabling the alarms will make things easier for the salarian teams. You are given Paragon points if you choose to help Kirrahe's team.
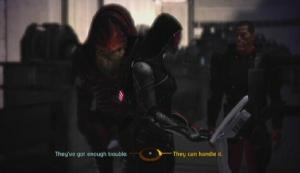
Disable Alarms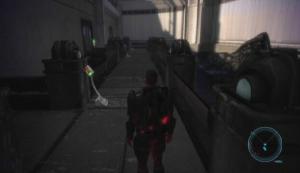
Security Console
This assignment is complete when the Virmire mission ends.
- Garrus: Find Dr. Saleon
- Tali and the Geth/Tali's Pilgrimage
- Wrex: Family Armor
Garrus: Find Dr. Saleon
Speak to Garrus in the Normandy's Engineering section after completing the Therum, Feros and Noveria storyline missions. This assignment is only available if you have previously spoken to Garrus about his history with C-Sec. Opportunities to learn more about Garrus' history arise with the completion of a storyline mission.

Garrus
Once you have met the above prerequisites, speak to Garrus on the Normandy. Garrus tells you of his encounter with a mad geneticist named Dr. Saleon during his time as a C-Sec officer. Dr. Saleon conducted a number of grotesque experiments and operations on subjects to grow organs that were then sold on the black market. Dr. Saleon managed to escape from justice and is at large to this day. Garrus, however, holds the coordinates to a ship operated by one Dr. Heart, whom he believes to actually be Dr.Saleon. Ask him for the coordinates to add this assignment to your Journal. Garrus asks to be there when you go to take Saleon down.
Objective: Head to Coordinates
Travel to the Herschel system of the Kepler Verge and board the MSV Fedele. Be sure to choose Garrus as one of the two squad members to accompany you, as he is the only one who will know for sure whether this Dr. Heart is truly Dr. Saleon.
Objective: Find Dr. Saleon
Enter the ship's main hold. The area is full of Dr. Saleon's test subjects, which are essentially Thorian creepers. There are explosive containment cells scattered throughout the area, so either detonate them from a safe distance using a gun or stand near the area's entrance and let the test subjects come to you. The test subjects' vomit or your squad's own tech and biotic abilities may set off a containment cores near you, which can then cause severe damage. Use a melee strike to knock a test subject down if it gets too close to you, as getting sprayed by its vomit induces prolonged toxic damage.
Test Subjects
Make your way to the door at the opposite end of the ship's hold and enter the hallway. Enter the first room on your right to find Dr. Heart. Garrus confirms that this salarian is Dr. Saleon. Choose 'Finish him' to let Garrus get his kill or 'Back down, Garrus' to attempt an arrest. Saleon doesn't take the prospect of an arrest well, and instead chooses to go down fighting. Whichever option you choose, the assignment ends once Dr. Saleon is dead.

Dr. Saleon
Tali and the Geth/Tali's Pilgrimage
This assignment is available after completing the 'UNC: Geth Incursions' assignment. Decrypt the geth terminal in the southeastern room on the first floor of the geth bunker on Solcrum and download the data to add the assignment to your Journal.

Terminal
Objective: Speak to Tali
Speak to Tali in the Normandy's Engineering section. Tali asks you for a copy of the data that was retrieved on Solcrum so she can end her pilgrimage. With the data in their possession, the quarians may be able to discover the geths' weakness. Even though handing over a copy of the data means the end of Tali's pilgrimage, she promises to remain with the Normandy crew until Saren is defeated. Give her the data to receive Paragon points or refuse to hand it over to receive Renegade points.
Wrex: Family Armor
This assignment becomes available once you have completed Therum, Feros, Noveria, and have spoken to Wrex in the Engineering section of the Normandy about his past several times. Opportunities to learn more about Wrex's history arise with the completion of a storyline mission.
Wrex
Once you have met the above prerequisites, speak to Wrex aboard the Normandy, select 'Investigate' and then 'Family.' Wrex tells you that he is looking for his family's ceremonial armor, which was taken from him by the turians after the Krogan Rebellion. Offer to help and he tells you that a turian profiteer named Tonn Actus currently has the korgan armor stashed in a base somewhere in the Argos Rho cluster.
Objective: Find Wrex's Armor
Travel to the Phoenix system in the Argos Rho cluster and land on Tuntau. Be sure to Make sure Shepard or another ally has talent points invested in the Decryption talent. The krogan armor is being held in a base a short ways south of the Mako's drop point. Scale the mountain south of the drop point to reach the base. There are a few pirates stationed in front of the structure's entrance, though the Mako's cannon can make short work of them. When the perimeter is clear, exit the Mako and step inside. Upon entering, if Wrex is with you, he confirms that this is indeed the place where his armor is being held.

Hidden Structure
There are plenty of pirates in this facility, so get behind cover or lure them back to the entrance room and take them out one by one. Once all of the pirates in the base have been dealt with, head up the stairs in the northeastern corner of the main room and proceed through the door at the end of the walkway. The wall safe in this room contains Wrex's family armor. Decrypt the safe to receive the armor and some other items. Open the other item chests in the room and then return to the Normandy once you're ready to leave Tuntau.
Wall Safe
UNC: Valuable Minerals
This assignment is added to your Journal once you obtain one of the materials listed above. The minerals can be found by surveying certain planets while in orbit, or by successfully mining a mineral on a planet's surface. Each material that you obtain will net you XP and credits. The amount of credits you receive is dependent on Shepard's level, so each mineral will be worth plenty later on. Six Gasses, twenty Heavy Metals, twenty Light Metals, and twenty Rare Earths are needed to complete the assignment, but more can be found; XP and credits are still given for surplus materials.
Note -- Not all of the clusters and systems in the galaxy are available from the get-go; a good number of them must be unlocked. Check out the 'Unlockable Systems' section under 'The Galaxy' for more info.
Gas Locations (Survey):
Syba, Hydra, Argos Rho
Archanes, Knossos, Armstrong Nebula
Fargeluse, Macedon, Artemis Tau
Ontamalca, Sparta, Artemis Tau
Edmos, Antaeus, Hades Gamma Cluster
Antitarra, Strenuus, Horse Head Nebula
Juncro, Newton, Kepler Verge
Tremar, Amazon, Voyager
Heavy Metal Locations (Survey):
Thegeuse, Tereshkova, Armstrong Nebula
Patamalrus, Tereshkova, Armstrong Nebula
Metallic Asteroid (hidden), Knossos System, Artemis Tau
Zatorus, Hercules System, Attican Beta
Zayarter, Cacus, Hades Gamma
Metallic Asteroid (hidden), Century, Hawking Eta
Rocky Asteroid (hidden), Herschel, Kepler Verge
Clotanca, Caspian, Maroon Sea
Farnuri, Caspian, Maroon Sea
Metallic Asteroid (hidden), Matano, Maroon Sea
Metallic Asteroid (hidden), Vostock, Maroon Sea
Quaji, Erebus, Styx Theta
Heavy Metal Locations (Mineral):
Metgos, Hydra, Argos Rho, Mercury Deposit
Tuntau, Phoenix, Argos Rho, Mercury Deposit
Casbin, Hong, Armstrong Nebula, Gold Deposit
Antibaar, Tereshkova, Armstrong Nebula, Mercury Deposit
Edolus, Sparta, Artemis Tau, Palladium Deposit
Eletania, Hercules, Attican Beta, Gold Deposit
Eletania, Hercules, Attican Beta, Palladium Deposit
Mavigon, Han, Gemini Sigma, Gold Deposit
Chohe, Cacus, Hades Gamma, Mercury Deposit
Klensal, Dis, Hades Gamma, Platinum Deposit
Presrop, Century, Hawking Eta, Gold Deposit
Amaranthine, Fortuna, Horse Head Nebula, Iridium Deposit
Xawin, Strenuus, Horse Head Nebula, Palladium Deposit
Xawin, Strenuus, Horse Head Nebula, Iridium Deposit
Ontarom, Newton, Kepler Verge, Palladium Deposit
Ontarom, Newton, Kepler Verge, Gold Deposit
Chasca, Matano, Maroon Sea, Palladium Deposit
Nodacrux, Vostock, Maroon Sea, Gold Deposit
Altahe, Acheron, Styx Theta, Gold Deposit
Nepmos, Erebus, Styx Theta, Palladium Deposit
Nepheron, Yangtze, Voyager, Platinum Deposit
Binthu, Yangtze, Voyager, Palladium Deposit
Light Metal Locations (Survey):
Verbinok, Phoenix, Argos Rho
Antirumgon, Gagarin, Armstrong Nebula
Zaherux, Gagarin, Armstrong Nebula
Treagir, Hong, Armstrong Nebula
Metallic Asteroid, Macedon, Artemis Tau
Quana, Theseus, Attican Beta
Patatanlis, Han, Gemini Sigma
Parag, Ming, Gemini Sigma
Nearrum, Dis, Hades Gamma
Metallic Asteroid, Dis, Hades Gamma
Metallic Asteroid, Farinata, Hades Gamma
Canctra, Century, Hawking Eta
Supay, Matano, Maroon Sea
Dregir, Yangtze, Voyager
Light Metal Locations (Mineral):
Rayingri, Gagarin, Armstrong Nebula, Titanium Deposit
Solcrum, Grissom, Armstrong Nebula, Magnesium Deposit
Antibaar, Tereshkova, Armstrong Nebula, Magnesium Deposit
Antibaar, Tereshkova, Armstrong Nebula, Lithium Deposit
Maji, Vamshi, Armstrong Nebula, Magnesium Deposit
Maji, Vamshi, Armstrong Nebula, Beryllium Deposit
Sharjila, Macedon, Artemis Tau, Magnesium Deposit
Edolus, Sparta, Artemis Tau, Lithium Deposit
Mavigon, Han, Gemini Sigma, Cobalt Deposit
Klensal, Dis, Hades Gamma, Beryllium Deposit
Nonuel, Plutus, Hades Gamma, Titanium Deposit
Xawin, Strenuus, Horse Head Nebula, Cobalt Deposit
Chasca, Matano, Maroon Sea, Beryllium Deposit
Nodacrux, Vostock, Maroon Sea, Cobalt Deposit
Nepmos, Erebus, Styx Theta, Titanium Deposit
Agebinium, Amazon, Voyager, Beryllium Deposit
Agebinium, Amazon, Voyager, Magnesium Deposit
Nepheron, Columbia, Voyager, Beryllium Deposit
Rare Earth Locations (Survey):
Patashi, Phoenix, Argos Rho
Rocky Asteroid, Grissom, Armstrong Nebula
Alsages, Sparta, Artemis Tau
Vemal, Antaeus, Hades Gamma
Faringor, Cacus, Hades Gamma
Nepneu, Farinata, Hades Gamma
Clocrolis, Plutus, Hades Gamma
Mingito, Plutus, Hades Gamma
Therumion, Fortuna, Horse Head Nebula
Sondema, Amazon, Voyager
Ontaheter, Columbia, Voyager
Rare Earth Locations (Mineral):
Metgos, Hydra, Argos Rho, Thorium Deposit
Rayingri, Gagarin, Armstrong Nebula, Thorium Deposit
Rayingri, Gagarin, Armstrong Nebula, Polonium Deposit
Solcrum, Grissom, Armstrong Nebula, Uranium Deposit
Solcrum, Grissom, Armstrong Nebula, Thorium Deposit
Casbin, Hong, Armstrong Nebula, Uranium Deposit
Casbin, Hong, Armstrong Nebula, Samarium Deposit
Maji, Vamshi, Armstrong Nebula, Thorium Deposit
Sharjila, Macedon, Artemis Tau, Thorium Deposit
Sharjila, Macedon, Artemis Tau, Uranium Deposit
Edolus, Sparta, Artemis Tau, Polonium Deposit
Trebin, Antaeus, Hades Gamma, Plutonium Deposit
Trebin, Antaeus, Hades Gamma, Uranium Deposit
Chohe, Cacus, Hades Gamma, Plutonium Deposit
Nonuel, Plutus, Hades Gamma, Samarium Deposit
Presrop, Century, Hawking Eta, Uranium Deposit
Amaranthine, Fortuna, Horse Head Nebula, Thorium Deposit
Amaranthine, Fortuna, Horse Head Nebula, Uranium Deposit
Chasca, Matano, Maroon Sea, Plutonium Deposit
Altahe, Acheron, Styx Theta, Samarium Deposit
Nepmos, Erebus, Styx Theta, Uranium Deposit
Agebinium, Amazon, Voyager, Samarium Deposit
Nepheron, Columbia, Voyager, Thorium Deposit
Binthu, Yangtze, Voyager, Uranium Deposit
UNC: Prothean Data Discs
This assignment is added to your Journal once you obtain a Prothean Artifact. The artifacts can be found by surveying certain planets while in orbit, or by successfully surveying certain anomalies on a planet's surface. Each artifact that you obtain nets you XP and credits. The amount of credits you receive is dependent on Shepard's level, so the artifacts are worth plenty later on. Ten Prothean Artifacts are needed to complete the assignment.
Note -- Not all of the clusters and systems in the galaxy are available from the get-go; a good number of them must be unlocked. Check out the 'Unlockable Systems' section under 'The Galaxy' for more info.
Prothean Artifact Locations (Survey):
Carbonaceous Asteroid, Phoenix System, Argos Rho
Asteroid Cluster, Sparta, Artemis Tau
Sharring, Theseus, Attican Beta
Juntauma, Farinata, Hades Gamma
Rocky Asteroid, Matano, Maroon Sea
Wermani, Erebus, Styx Theta
Alrumter, Yangtze, Voyager
Prothean Artifact Locations (Anomaly):
Antibaar, Tereshkova, Armstrong Nebula, Prothean Ruin
Chasca, Matano, Maroon Sea, Crate
Binthu, Yangtze, Voyager, Prothean Pyramid
UNC: Turian Insignias
This assignment is added to your Journal once you obtain one Turian Emblem. The emblems can be found by surveying certain planets while in orbit, or by successfully surveying certain anomalies on a planet's surface. Each emblem that you obtain nets you XP and credits. The amount of credits you receive is dependent on Shepard's level, so the emblems are worth plenty later on. Thirteen Turian Emblems are needed to complete the assignment.
Note -- Not all of the clusters and systems in the galaxy are available from the get-go; a good number of them must be unlocked. Check out the 'Unlockable Systems' section under 'The Galaxy' for more info.
Turian Emblem Locations (Survey):
Canrum, Hydra, Argos Rho
Maji, Vamshi, Armstrong Nebula, Ancient Debris
Pregel, Vamshi, Armstrong Nebula
Klensal, Dis, Hades Gamma, Raysha
Maganlis, Fortuna, Horse Head Nebula
Antida, Capsian, Maroon Sea
Carbonaceous Asteroid, Acheron, Styx Theta
Sybin, Amazon, Voyager
Turian Emblem Locations (Anomaly):
Metgos, Hydra, Argos Rho, Turian Corpse
Trebin, Antaeus, Hades Gamma, Ancient Debris
Presrop, Century, Hawking Eta, Ancient Debris
Amaranthine, Fortuna, Horse Head Nebula, Ancient Debris
Xawin, Strenuus, Horse Head Nebula, Ancient Debris
Ontarom, Newton, Kepler Verge, Turian Corpse
Nodacrux, Vostock, Maroon Sea, Ancient Debris
Agebinium, Amazon, Voyager, Scavenger Corpse
UNC: Asari Writings
This assignment is added to your Journal once you obtain an Asari Writing. The writings can be found by surveying certain planets while in orbit, or by successfully surveying certain anomalies on a planet's surface. Each writing that you obtain nets you XP and credits. The amount of credits you receive is dependent on Shepard's level, so the writings are worth plenty later on. Ten Asari Writings are needed to complete the assignment.
Note -- Not all of the clusters and systems in the galaxy are available from the get-go; a good number of them must be unlocked. Check out the 'Unlockable Systems' section under 'The Galaxy' for more info.
Asari Writing Locations (Survey):
Junthor, Gagarin, Armstrong Nebula
Matar, Hong, Armstrong Nebula
Porolan, Macedon, Artemis Tau
Paravin, Han, Gemini Sigma
Ploba, Antaeus, Hades Gamma
Veles, Pax, Horse Head Nebula
Klencory, Newton, Kepler Verge
Pataiton, Vostock, Maroon Sea
Asari Writing Locations (Anomaly):
Tuntau, Phoenix, Argos Rho, Asari Capsule
Solcrum, Grissom, Armstrong Nebula, Asari Capsule
Sharjila, Macedon, Artemis Tau, Asari Capsule
Cacus, Chohe, Hades Gamma, Locked Crate
Cacus, Chohe, Hades Gamma, Technician Kit
Cacus, Chohe, Hades Gamma, Secure Wall Safe
Nonuel, Plutus, Hades Gamma, Crate
Altahe, Acheron, Styx Theta, Asari Capsule
UNC: Locate Signs of Battle
This assignment is added to your Journal when you find a League Medallion or a Salarian ID Tag. The artifacts can be found by surveying certain planets while in orbit, or by successfully surveying certain anomalies on a planet's surface. Each artifact that you obtain nets you XP and credits. The amount of credits you receive is dependent on Shepard's level, so the artifacts are worth plenty later on. Ten League Medallions and four Salarian ID Tags are needed to complete the assignment.
Note -- Not all of the clusters and systems in the galaxy are available from the get-go; a good number of them must be unlocked. Check out the 'Unlockable Systems' section under 'The Galaxy' for more info.
League Medallion Locations (Survey):
Carbonaceous Asteroid, Phoenix, Argos Rho
Asteroid Cluster, Sparta, Artemis Tau
Sharring, Theseus, Attican Beta
Juntauma, Farinata, Hades Gamma
Rocky Asteroid, Matano, Maroon Sea
Wermani, Erebus, Styx Theta
Alrumter, Yangtze, Voyager
League Medallion Locations (Anomaly):
Antibaar, Tereshkova, Armstrong Nebula, Prothean Ruin
Chasca, Matano, Maroon Sea, Crate
Binthu, Yangtze, Voyager, Prothean Pyramid
Salarian ID Tag Locations (Anomaly):
Casbin, Hong, Armstrong Nebula, Beacon
Edolus, Sparta, Artemis Tau, Mummified Salarian
Mavigon, Han, Gemini Sigma, Mummified Salarian
Nepheron, Columbia, Maroon Sea, Mummified Salarian
Galaxy Map
Note -- Not all of the clusters and systems in the galaxy are available from the get-go; a good number of them must be unlocked. Scroll down to the 'Unlockable Systems' section below for a complete list.
Argos Rho
- Hydra System
- Phoenix System
Armstrong Nebula
- Gagarin System
- Grissom System
- Hong System
- Tereshkova System
- Vamshi System
Artemis Tau
- Knossos System
- Macedon System
- Sparta System
Attican Beta
- Hercules System
- Theseus System
Exodus
- Utopia System
Gemini Sigma
- Han System
- Ming System
Hades Gamma
- Antaeus System
- Cacus System
- Dis System
- Farinata System
- Plutus System
Hawking Eta
- Century System
Horse Head Nebula
- Fortuna System
- Pax System
- Strenuus System
Kepler Verge
- Herschel System
- Newton System
Local
- Sol System
Maroon Sea
- Caspian System
- Matano System
- Vostock System
Pangaea Expanse
- Refuge System
Sentry Omega
- Hoc System
Styx Theta
- Acheron System
- Erebus System
Voyager
- Amazon System
- Columbia System
- Yangtze System
Unlockable Clusters and Systems
Grissom system of the Armstrong Nebula cluster:
Unlocked during the 'UNC: Geth Incursions' assignment.
Han system of the Gemini Sigma cluster:
Trigger the 'UNC: Hostile Takeover' assignment.
Cacus system of the Hades Gamma cluster:
Unlocked once Shepard’s Paragon or Renegade meter is 80% full (4 bars).
Dis system of the Hades Gamma cluster:
Trigger the 'UNC: Hostile Takeover' assignment.
Plutus system of the Hades Gamma cluster:
Unlocked once Shepard’s Paragon or Renegade meter is 80% full (4 bars).
Fortuna system of the Horse Head Nebula cluster:
Unlocked during the 'UNC: Hostile Takeover' assignment.
Herschel system of the Kepler Verge:
Trigger the 'Garrus: Find Dr. Saleon' assignment.
Sol system of the Local cluster:
Reach character level 20.
Maroon Sea cluster and its systems:
Complete the storyline mission on Feros.
Pagnea Expanse cluster and Refuge system:
Complete the storyline missions on Therum, Feros, Noveria, and Virmire.
Sentry Omega system and Hoc system:
Complete storyline missions on Therum, Noveria and Feros.
Styx Theta cluster and its systems:
Complete the storyline mission on Noveria.
Columbia system of the Voyager cluster:
Complete the 'UNC: Cerberus' assignment.
Yangtze system of the Voyager cluster:
Trigger the 'UNC: Cerberus' assignment.
Argos Rho Cluster
Hydra System
Metgos
Assignment:
Unusual Readings/UNC: Distress Call
Minerals:
Thorium Deposit -- UNC: Valuable Minerals (Rare Earth)
Mercury Deposit -- UNC: Valuable Minerals (Heavy Metal)
Collectibles:
Anomaly -- Turian Corpse -- UNC: Turian Insignias (Turian Emblem)
Surveyable Planets
Canrum -- UNC: Turian Insignias (Turian Emblem)
Syba -- UNC: Valuable Minerals (Gas)
Inactive Planets
Theyar
Varmalus
Phoenix System
Tuntau
Assignment:
Wrex: Family Armor
Minerals:
Lithium Deposit -- UNC: Valuable Minerals (Light Metal)
Mercury Deposit -- UNC: Valuable Minerals (Heavy Metal)
Collectibles:
Anomaly -- Asari Capsule -- UNC: Asari Writings (Asari Writing)
Surveyable Planets
Patashi -- UNC: Valuable Minerals (Rare Earth)
Verbinok -- UNC: Valuable Minerals (Light Metal)
Carbonaceous Asteroid -- UNC: Prothean Data Discs (Prothean Artifact)
*Scan inner asteroid belt.
Inactive Planets
Sylsalto
Gorgon System
Unidentified Space Facility
Assignment:
UNC: Depot Sigma-23
Inactive Planets
Camaron
Sharblu
Slekon
Vectra
Wuo
Armstrong Nebula Cluster
Gagarin System
Rayingri
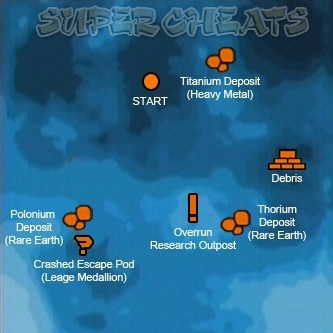
Assignment:
Geth Activities/UNC: Geth Incursions (1/5 locations)
Minerals:
Thorium Deposit -- UNC: Valuable Minerals (Rare Earth)
Polonium Deposit -- UNC: Valuable Minerals (Rare Earth)
Titanium Deposit -- UNC: Valuable Minerals (Light Metal)
Collectibles:
Anomaly -- Crashed Escape Pod -- UNC: Locate Signs of Battle (League Medallion)
Surveyable Planets
Antirumgon -- UNC: Valuable Minerals (Light Metal)
Junthor -- UNC: Asari Writings (Asari Writing)
Inactive Planets
Pressha
Sogelrus
Grissom System
Solcrum
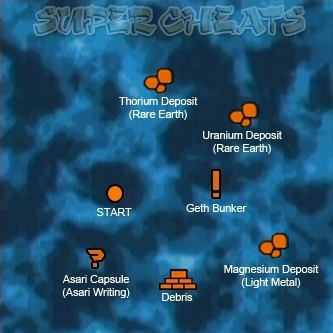
Assignment:
Geth Activities/UNC: Geth Incursions (1/5 Locations)
Minerals:
Uranium Deposit -- UNC: Valuable Minerals (Rare Earth)
Thorium Deposit -- UNC: Valuable Minerals (Rare Earth)
Magnesium Deposit -- UNC: Valuable Minerals (Light Metal)
Collectibles:
Anomaly -- Asari Capsule -- UNC: Asari Writings (Asari Writing)
Surveyable Planets
Benda -- UNC: Locate Signs of Battle (League Medallion)
Zaherux -- UNC: Valuable Minerals (Light Metal)
Rocky Asteroid -- UNC: Valuable Minerals (Rare Earth)
*Scan outer asteroid belt.
Inactive Planets
Notanban
Hong System
Casbin
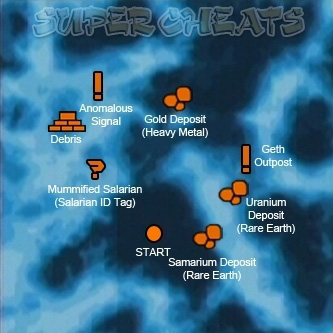
Assignment:
Geth Activities/UNC: Geth Incursions (1/5 Locations)
Minerals:
Uranium Deposit -- UNC: Valuable Minerals (Rare Earth)
Samarium Deposit -- UNC: Valuable Minerals (Rare Earth)
Gold Deposit -- UNC: Valuable Minerals (Heavy Metal)
Collectibles:
Anomaly -- Beacon -- UNC: Locate Signs of Battle (Salarian ID Tag)
Surveyable Planets
Matar -- UNC: Asari Writings (Asari Writing)
Treagir -- UNC: Valuable Minerals (Light Metal)
Inactive Planets
Pomal
Theshaca
Tereshkova System
Antibaar
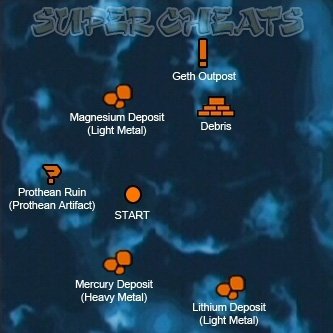
Assignment:
Geth Activities/UNC: Geth Incursions (1/5 locations)
Minerals:
Magnesium Deposit -- UNC: Valuable Minerals (Light Metal)
Mercury Deposit -- UNC: Valuable Minerals (Heavy Metal)
Lithium Deposit -- UNC: Valuable Minerals (Light Metal)
Collectibles:
Anomaly -- Prothean Ruin -- UNC: Prothean Data Discs (Prothean Artifact)
Surveyable Planets
Thegeuse -- UNC: Valuable Minerals (Heavy Metal)
Patamalrus -- UNC: Valuable Minerals (Heavy Metal)
Carbonaceous Asteroid -- UNC: Locate Signs of Battle (League Medallion)
*Scan asteroid belt.
Inactive Planets
Mawinor
Solmarion
Hunsalra
Vamshi System
Maji
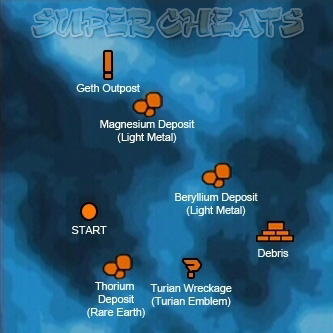
Assignment:
Geth Activities/UNC: Geth Incursions (1/5 locations)
Minerals:
Magnesium Deposit -- UNC: Valuable Minerals (Light Metal)
Beryllium Deposit -- UNC: Valuable Minerals (Light Metal)
Thorium Deposit -- UNC: Valuable Minerals (Rare Earth)
Collectibles:
Anomaly -- Ancient Debris -- UNC: Turian Insignias (Turian Emblem)
Surveyable Planets
Pregel -- UNC: Turian Insignias (Turian Emblem)
Inactive Planets
Almos
Artemis Tau Cluster
Knossos System
Therum
Mission: Find Liara T'Soni
*See mission walkthrough for details.
Surveyable Planets
Archanes -- UNC: Valuable Minerals (Gas)
Metallic Asteroid -- UNC: Valuable Minerals (Heavy Metal)
*Scan inner asteroid belt.
Carbonaceous Asteroid -- UNC: Locate Signs of Battle (League Medallion)
*Scan outer asteroid belt.
Inactive Planets
Zakros
Phaistos
Armeni
Macedon System
Sharjila
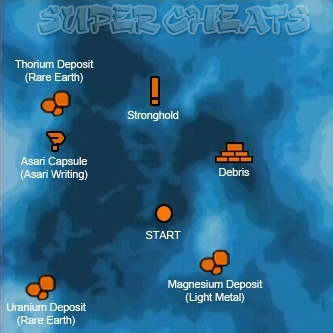
Assignment:
UNC: Asari Diplomacy
Minerals:
Thorium Deposit -- UNC: Valuable Minerals (Rare Earth)
Uranium Deposit -- UNC: Valuable Minerals (Rare Earth)
Magnesium Deposit -- UNC: Valuable Minerals (Light Metal)
Collectibles:
Anomaly -- Asari Capsule -- UNC: Asari Writings (Asari Writing)
Surveyable Planets
Fargeluse -- UNC: Valuable Minerals (Gas)
Porolan -- UNC: Asari Writings (Asari Writing)
Metallic Asteroid -- UNC: Valuable Minerals (Light Metal)
Inactive Planets
Patavig
Sparta System
Edolus
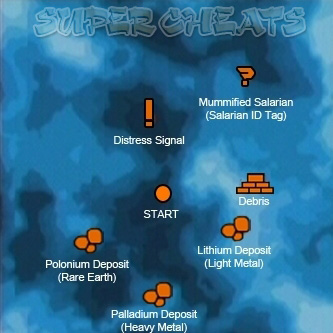
Assignment:
UNC: Missing Marines
Minerals:
Lithium Deposit -- UNC: Valuable Minerals (Light Metal)
Palladium Deposit -- UNC: Valuable Minerals (Heavy Metal)
Polonium Deposit -- UNC: Valuable Minerals (Rare Earth)
Collectibles:
Anomaly -- Mummified Salarian -- UNC: Locate Signs of Battle (Salarian ID Tag)
Surveyable Planets
Ontamalca -- UNC: Valuable Minerals (Gas)
Alsages -- UNC: Valuable Minerals (Rare Earth)
Asteroid Cluster -- UNC: Prothean Data Discs (Prothean Artifact)
*Scan inner asteroid belt
Inactive Planets
Temanre
Altaaya
Attican Beta Cluster
Hercules System
Eletania
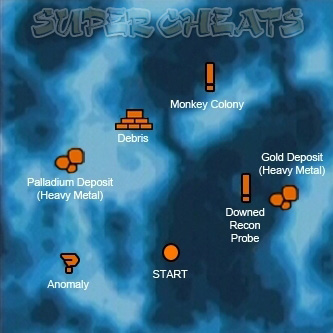
Assignment:
UNC: Lost Module
Minerals:
Gold Deposit -- UNC: Valuable Minerals (Heavy Metal)
Palladium Deposit -- UNC: Valuable Minerals (Heavy Metal)
Surveyable Planets
Syided -- UNC: Locate Signs of Battle (League Medallion)
Zatorus -- UNC: Valuable Minerals (Heavy Metal)
Inactive Planets
Xanthorron
Theseus System
Feros
Mission: Feros: Geth Attack
*See mission walkthrough for details.
Surveyable Planets
Sharring -- UNC: Prothean Data Discs (Prothean Artifact)
Quana -- UNC: Valuable Minerals (Light Metal)
Inactive Planets
Sytau
Logan
Exodus Cluster
Utopia System
Eden Prime
Mission: Prologue
*See mission walkthrough for details.
Inactive Planets
Arcadia
Zion
Xanadu
Nirvana
Gemini Sigma Cluster
Han System
Mavigon
Assignment:
UNC: Hostile Takeover (1/2 locations)
Minerals:
Gold Deposit -- UNC: Valuable Minerals (Heavy Metal)
Cobalt Deposit -- UNC: Valuable Minerals (Light Metal)
Collectibles:
Anomaly -- Mummified Salarian -- UNC: Locate Signs of Battle (Salarian ID Tag)
Surveyable Planets
Paravin -- UNC: Asari Writings (Asari Writing)
Patatanlis -- UNC: Valuable Minerals (Light Metal)
Inactive Planets
Farcrothu
Huningto
Ming System
MSV Worthington
Assignment:
UNC: Lost Freighter
Surveyable Planets
Altanorch -- UNC: Locate Signs of Battle (League Medallion)
Parag -- UNC: Valuable Minerals (Light Metal)
Inactive Planets
Antiroprus
Hades Gamma Cluster
Antaeus System
Trebin

Assignment:
UNC: Missing Survey Team
Minerals:
Plutonium Deposit -- UNC: Valuable Minerals (Rare Earth)
Uranium Deposit -- UNC: Valuable Minerals (Rare Earth)
Collectibles:
Anomaly -- Ancient Debris -- UNC: Turian Insignias (Turian Emblem)
Surveyable Planets
Edmos -- UNC: Valuable Minerals (Gas)
Ploba -- UNC: Asari Writings (Asari Writing)
Vemal -- UNC: Valuable Minerals (Rare Earth)
Inactive Planets
Ageko
Hunidor
Cacus System
Chohe
Assignment:
UNC: Besieged Base
Minerals:
Plutonium Deposit -- UNC: Valuable Minerals (Rare Earth)
Mercury Deposit -- UNC: Valuable Minerals (Heavy Metal)
Collectibles:
Anomaly -- Locked Crate/Technician Kit/Secure Wall Safe -- UNC: Asari Writings (Asari Writing x3)
Surveyable Planets
Faringor -- UNC: Valuable Minerals (Rare Earth)
Zayarter -- UNC: Valuable Minerals (Heavy Metal)
Inactive Planets
Treyarmus
Xamarri
Dis System
Klensal
Assignment:
UNC: Hostile Takeover (1/2 locations)
Minerals:
Platinum Deposit -- UNC: Valuable Minerals (Heavy Metal)
Beryllium Deposit -- UNC: Valuable Minerals (Light Metal)
Collectibles:
Anomaly --Mummified Salarian -- UNC: Locate Signs of Battle (League Medallion)
Surveyable Planets
Nearrum -- UNC: Valuable Minerals (Light Metal)
Raysha -- UNC: Turian Insignias (Turian Emblem)
Metallic Asteroid -- UNC: Valuable Minerals (Light Metal)
*Scan the asteroid belt.
Inactive Planets
Jartar
Gremar
Farinata System
MSV Ontario
Assignment:
UNC: Hostage
Surveyable Planets
Juntauma -- UNC: Prothean Data Discs (Prothean Artifact)
Nepneu -- UNC: Valuable Minerals (Rare Earth)
Rocky Asteroid: --Metallic Asteroid -- UNC: Valuable Minerals (Light Metal)
*Scan the inner asteroid belt
Inactive Planets
Tunshagon
Plutus System
Nonuel

Assignment:
UNC: The Negotiation
Minerals:
Titanium Deposit -- UNC: Valuable Minerals (Light Metal)
Samarium Deposit -- UNC: Valuable Minerals (Rare Earth)
Collectibles:
Anomaly -- Crate -- UNC: Asari Writings (Asari Writing)
Anomaly -- Mercenary Corpse -- UNC: Locate Signs of Battle (League Medallion)
Surveyable Planets
Clocrolis -- UNC: Valuable Minerals (Rare Earth)
Mingito -- UNC: Valuable Minerals (Rare Earth)
Inactive Planets
Maidla
Veyaria
Hawking Eta Cluster
Century System
Presrop
Assignment:
Strange Transmission /UNC: Major Kyle
*Biotic Compound
Minerals:
Gold Deposit -- UNC: Valuable Minerals (Heavy Metal)
Uranium Deposit -- UNC: Valuable Minerals (Rare Earth)
Collectibles:
Anomaly -- Ancient Debris -- UNC: Turian Insignias (Turian Emblem)
Surveyable Planets
Tharopto -- UNC: Locate Signs of Battle (League Medallion)
Canctra -- UNC: Valuable Minerals (Light Metal)
Metallic Asteroid -- UNC: Valuable Minerals (Heavy Metal)
*Scan asteroid belt.
Inactive Planets
Tamahera
Horse Head Nebula Cluster
Fortuna System
Amaranthine
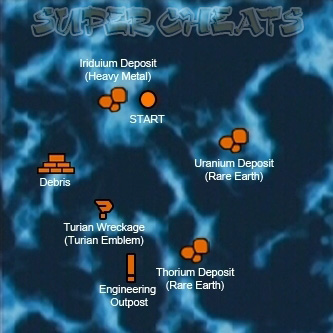
Assignment:
UNC: Hostile Takeover
Minerals:
Iridium Deposit -- UNC: Valuable Minerals (Heavy Metal)
Thorium Deposit -- UNC: Valuable Minerals (Rare Earth)
Uranium Deposit -- UNC: Valuable Minerals (Rare Earth)
Collectibles:
Anomaly: --Ancient Debris -- UNC: Turian Insignias (Turian Emblem)
Surveyable Planets
Maganlis -- UNC: Turian Insignias (Turian Emblem)
Therumion -- UNC: Valuable Minerals (Rare Earth)
Inactive Planets
Wentania
Pax System
Noveria
Mission: Noveria: Geth Interest
*See mission walkthrough for details.
Surveyable Planets
Veles -- UNC: Asari Writings (Asari Writing)
Inactive Planets
Svarog
Morana
Strenuus System
Xawin
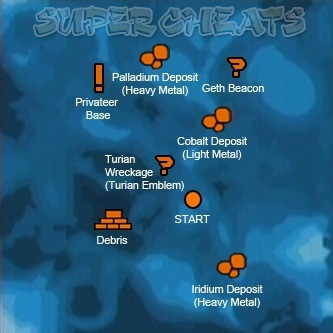
Assignment:
UNC: Privateers
Minerals:
Palladium Deposit -- UNC: Valuable Minerals (Heavy Metal)
Cobalt Deposit -- UNC: Valuable Minerals (Light Metal)
Iridium Deposit -- UNC: Valuable Minerals (Heavy Metal)
Collectibles:
Anomaly --Ancient Debris -- UNC: Turian Insignias (Turian Emblem)
Surveyable Planets
Yunthori -- UNC: Locate Signs of Battle (League Medallion)
Antitarra -- UNC: Valuable Minerals (Gas)
MSV Majesty -- Scan: Unlock Xawin.
*Scan the area left of planet Xawin to find 'Unknown.'
Inactive Planets
Trelyn
Thesalgon
Kepler Verge
Herschel System
MSV Fedele
Assignment:
Garus: Dr. Saleon
Surveyable Planets
Rocky Asteroid -- UNC: Valuable Minerals (Heavy Metal)
*Scan asteroid belt.
Inactive Planets
Tungel
Clobaka
Matol
Clugon
Newton System
Ontarom

Assignment:
Doctor at Risk/UNC: Dead Scientists
Minerals:
Palladium Deposit -- UNC: Valuable Minerals (Heavy Metal)
Gold Deposit -- UNC: Valuable Minerals (Heavy Metal)
Collectibles:
Anomaly --Turian Corpse -- UNC: Turian Insignias (Turian Emblem)
Surveyable Planets
Juncro -- UNC: Valuable Minerals (Gas)
Klencory -- UNC: Asari Writings (Asari Writing)
Inactive Planets
Sesmose
Local Cluster
Sol System
Luna
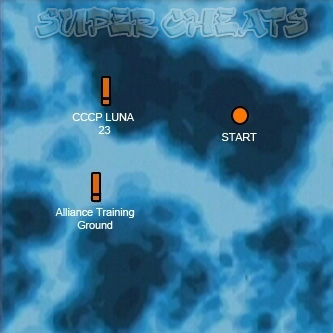
Assignment:
UNC: Rogue VI
*Alliance Training Ground
Inactive Planets
Mercury
Venus
Earth
Mars
Jupiter
Saturn
Uranus
Neptune
Pluto
Maroon Sea Cluster
Caspian System
MSV Cornucopia
Assignment:
UNC: Derelict Freighter
Surveyable Planets
Antida -- UNC: Turian Insignias (Turian Emblem)
Clotanca -- UNC: Valuable Minerals (Heavy Metal)
Farnuri -- UNC: Valuable Minerals (Heavy Metal)
Inactive Planets
Almacrux
Matano System
Chasca
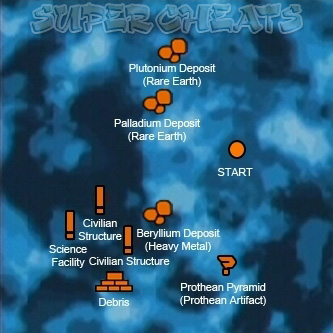
Assignment:
Investigate Samples
Minerals:
Beryllium Deposit -- UNC: Valuable Minerals (Light Metal)
Plutonium Deposit -- UNC: Valuable Minerals (Rare Earth)
Palladium Deposit -- UNC: Valuable Minerals (Heavy Metal)
Collectibles:
Anomaly -- Crate -- UNC: Prothean Data Discs (Prothean Artifact)
Surveyable Planets
Supay -- UNC: Valuable Minerals (Light Metal)
Metallic Asteroid -- UNC: Valuable Minerals (Heavy Metal)
*Scan inner asteroid belt.
Rocky Asteroid -- UNC: Prothean Data Discs (Prothean Artifact)
*Scan outer asteroid belt.
Inactive Planets
Apo
Inti
Illapa
Vostock System
Nodacrux
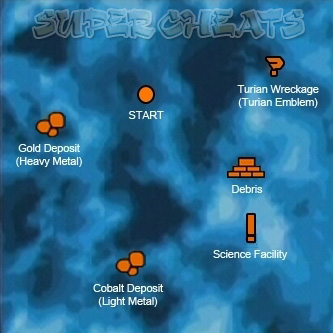
Assignment:
Investigate Facility/UNC: ExoGeni Facility
Minerals:
Gold Deposit -- UNC: Valuable Minerals (Heavy Metal)
Cobalt Deposit -- UNC: Valuable Minerals (Light Metal)
Collectibles:
Anomaly – Turian Wreckage -- UNC: Turian Insignias (Turian Emblem)
Surveyable Planets
Pataiton -- UNC: Asari Writings (Asari Writing)
Metallic Asteroid -- UNC: Valuable Minerals (Heavy Metal)
*Scan asteroid belt.
Inactive Planets
Alko
Clomarthu
Pangaea Expanse
Refuge System
Ilos
Mission: Race Against Time/Ilos: The Conduit
*See mission walkthrough for details.
Inactive Planets
Agetoton
Zafe
Sentry Omega Cluster
Hoc System
Virmire
Mission:
Virmire
*See mission walkthrough for details.
Inactive Planets
Jarfor
Nemata
Cloroplon
Prescyla
Styx Theta Cluster
Acheron System
Altahe

Assignment:
UNC: Listening Post Theta
Minerals:
Samarium -- UNC: Valuable Minerals (Rare Earth)
Gold Deposit -- UNC: Valuable Minerals (Heavy Metal)
Collectibles:
Anomaly --Asari Capsule -- UNC: Asari Writings (Asari Writing)
Surveyable Planets
Carbonaceous Asteroid -- UNC: Turian Insignias (Turian Emblem)
*Scan asteroid belt.
Inactive Planets
Farthorl
Imaneya
Grosalgen
Erebus System
Nepmos
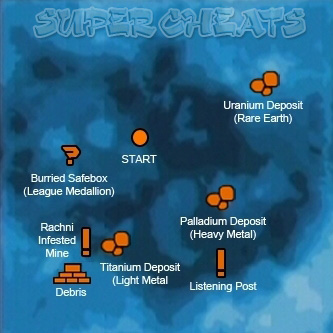
Assignment:
UNC: Listening Post Alpha
Minerals:
Palladium Deposit -- UNC: Valuable Minerals (Heavy Metal)
Titanium Deposit -- UNC: Valuable Minerals (Light Metal)
Uranium Deposit -- UNC: Valuable Minerals (Rare Earth)
Collectibles:
Anomaly -- Buried Safebox -- UNC: Locate Signs of Battle (League Medallion)
Surveyable Planets
Wermani -- UNC: Prothean Data Discs (Prothean Artifact)
Quaji -- UNC: Valuable Minerals (Heavy Metal)
Inactive Planets
Chofen
Voyager Cluster
Amazon System
Agebinium
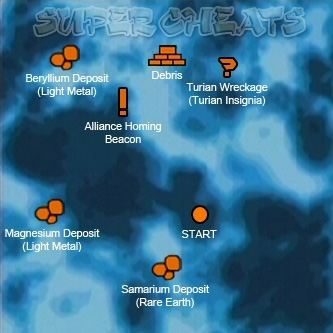
Assignment:
Investigate Shipments/UNC: Espionage Probe
Minerals:
Beryllium Deposit -- UNC: Valuable Minerals (Light Metal)
Samarium Deposit -- UNC: Valuable Minerals (Rare Earth)
Magnesium Deposit -- UNC: Valuable Minerals (Light Metal)
Collectibles:
Anomaly -- Scavenger Corpse -- UNC: Turian Insignias (Turian Emblem)
Surveyable Planets
Sondema -- UNC: Valuable Minerals (Rare Earth)
Sybin -- UNC: Turian Insignias (Turian Emblem)
Tremar -- UNC: Valuable Minerals (Gas)
Inactive Planets
Derneuca
Columbia System
Nepheron
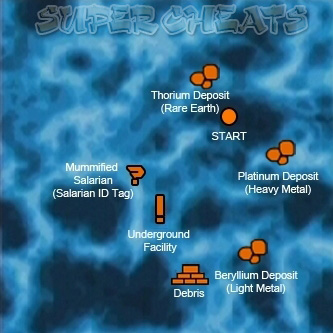
Assignment:
UNC: Hades' Dogs
Minerals:
Beryllium Deposit -- UNC: Valuable Minerals (Light Metal)
Platinum Deposit -- UNC: Valuable Minerals (Heavy Metal)
Thorium Deposit -- UNC: Valuable Minerals (Rare Earth)
Collectibles:
Anomaly -- Mummified Salarian -- UNC: Locate Signs of Battle (Salarian ID Tag)
Surveyable Planets
Gromar -- UNC: Locate Signs of Battle (League Medallion)
Ontaheter -- UNC: Valuable Minerals (Rare Earth)
Inactive Planets
Clojiia
Yangtze System
Binthu
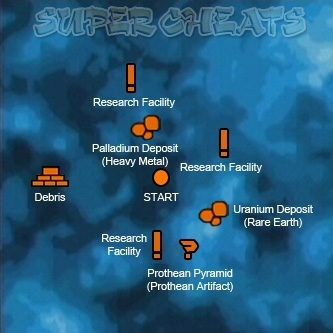
Assignment:
UNC: Cerberus
Minerals:
Palladium Deposit -- UNC: Valuable Minerals (Heavy Metal)
Uranium Deposit -- UNC: Valuable Minerals (Rare Earth)
Collectibles:
Anomaly --Prothean Pyramid -- UNC: Prothean Data Discs (Prothean Artifact)
Surveyable Planet
Alrumter -- UNC: Prothean Data Discs (Prothean Artifact)
Dregir -- UNC: Valuable Minerals (Light Metal)
Patajiri -- UNC: Valuable Minerals (Rare Earth)
Inactive Planet
Renshato
 1. Medal of Honor
 2. Medal of Heroism
 3. Distinguished Service Medal
 4. Council Legion of Merit
 5. Honorarium of Corporate Service
 6. Long Service Medal
 7. Distinguished Combat Medal
 8. Medal of Valor
 9. Pistol Expert
 10. Shotgun Expert
 11. Assault Rifle Expert
 12. Sniper Expert
 13. Lift Mastery
14. Throw Mastery
13. Lift Mastery
14. Throw Mastery 15. Warp Mastery
 16. Singularity Mastery
 17. Barrier Mastery
 18. Stasis Mastery
 19. Damping Specialist
 20. AI Hacking Specialist
 21. Overload Specialist
 22. Sabotage Specialist
 23. First Aid Specialist
 24. Neural Shock Specialist
 25. Scholar
 26. Completionist
 27. Tactician
 28. Medal of Exploration
 29. Rich
 30. Dog of War
 31. Geth Hunter
 32. Soldier Ally
 33. Sentinel Ally
 34. Krogan Ally
 35. Turian Ally
 36. Quarian Ally
 37. Asari Ally
 38. Power Gamer
 39. Extreme Power Gamer
 40. Renegade
 41. Paragon
 42. Paramour
 43. Spectre Inductee
 44. Charismatic
 45. Search and Rescue

 Mortal Kombat X vs 9 (MKX vs MK9) graphics comparison
 How to find all Jack-in-The-Boxes in Batman Arkham Knight: A Matter of Family DLC
 Dark Souls 2: Mild Mannered Pate and Creighton Of Mirrah
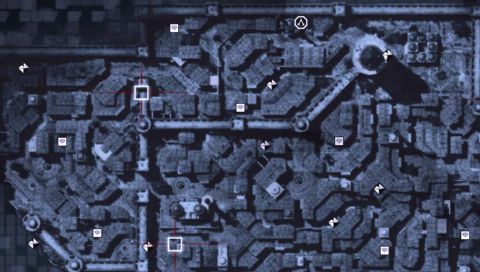 Assassin’s Creed Revelations: Animus Fragment Map Guide
 Just Cause 3: all Challenge Modes guide