Unofficial Kane & Lynch 2: Dog Days Guide by Michael Monette for
In Kane and Lynch 2, you take on the role of the medicated psychopath Lynch. After what should have been a simple job goes horribly wrong, Kane and Lynch must gun their way out of Shanghai as hordes of criminals and a corrupt police and military force hunt them across the city. This guide features a detailed walkthrough covering all 11 action-packed chapters and includes videos of the trickier parts. You'll also find a complete list of Xbox 360 achievements and PlayStation 3 trophies. Note: This guide was written based on the MEDIUM difficulty level. The strategies and directions contained within will still apply if you're playing the game on a higher difficulty, but the enemies you face will have more health and will deal more damage. Furthermore, this guide was written based on the Xbox 360 version of the game, but effort has been made to include PlayStation 3 controls where applicable. Xbox 360 Controls Left Bumper - (Hold while moving) Sprint Left Stick - Movement Y Button - Switch Weapon D-pad UP - Display Names (multiplayer) Back Button - Briefing (Story Mode), Score Display (Multiplayer) PlayStation 3 Controls L1 Button - Aim Left Stick - Movement Triangle Button - Switch Weapon D-pad UP - Display Names (multiplayer) Select Button - Briefing (Story Mode), Score Display (Multiplayer) Weapons are not named in story mode. As it is difficult to describe in text form what weapons will serve you best in an upcoming encounter without weapon names, some weapons are referred to by name in this guide. The names of the weapons used in the guide are in accordance with those listed in the buy menu that can be accessed between rounds in the multiplayer and arcade modes. This section is intended to make you aware of what weapon is being referred to when a weapon is mentioned by name in the walkthrough. Below are pictures of the weapons mentioned by name in the walkthrough. Match the picture of the weapon with the weapon icon that appears when press down on the D-pad or are standing over a weapon. If the shaky camera is getting on your nerves (or you're experiencing motion sickness), you can enable a Steadycam mode in the options menu. To do so, pause the game, enter Options and highlight the Controls section. Then, press the A/X button to enter controls and select the Steadycam option. Use the Left Stick to enable this option and then press the A/X button again to confirm. At the start of the level, move up to the gate straight ahead and then head up the stairs to your right. Kick down the door at the top of the stairs by pressing the X/Square button when prompted. The man flees, giving you no choice but to chase after him. Don't waste any bullets on Brady because you can't catch him. Just keep after him as he moves through the level. Follow Brady through the bead curtain, into the kitchen and then out of his apartment. He'll fire at you as soon as you step onto the walkway outside, so take cover by the railing until he ceases fire and breaks away. When Brady enters the apartment on the other side of the walkway, sprint to the other end of the walkway (you can sprint by holding the LB/L1 button while moving) and kick down the door there. Enter the living room through the doorway straight ahead and proceed through the doorway at the far end of the room. Head up the stairs beyond the doorway to spot Brady. Approach the gate Brady closes and kick down the door on the left to enter the apartment there. Head into the kitchen and kick down the door at the other end to reach another walkway. Some goons will arrive to help out Brady here, so take cover behind the railing across from the doorway and move over to the right. Both enemies are armed with a pistol and are hiding behind cover; aim your weapon with LT/L1 and take them with headshots when they pop out from cover to fire. Brady will take off once you've killed his two allies. Start after him and follow him through the open gate at the other end of the walkway. Sprint across the rooftops and cross the curved bridge you come to. Head up the steps beyond the bridge and then take cover behind the railing at the top. You'll need to vault over this cover to continue your pursuit. To vault over cover, push up on the Left Stick and press the A/X button while covering. With that, vault over the second piece of cover and then drop down to street level. Don't worry about fall damage, as any you do take will be minimal. Continue after Brady once you're back on the street. When a car brakes in your path, move past it and head down the stairs on the right. Sprint past the wall of monitors and continue through the curtain up ahead. Through the curtains and down the steps, turn left and then immediately take cover behind the display counter on the left side of the alley. Three more goons will confront you here -- one armed with a submachine gun. Dispatch these enemies from behind cover and then pick up the submachine gun one of them drops. You can press down on the D-pad to locate the submachine gun if you're having trouble finding it. When the way is clear, move toward the distance marker on screen to continue following Brady. Head to the end of the alley and take cover behind one of the display counters at the top of the steps. Pick off the enemies that engage you here before continuing your pursuit. You'll encounter another batch of goons as soon as you turn the corner, so have your submachine gun equipped and use it to take down a couple of them before you're forced to take cover. One of these enemies is wielding a shotgun, so be careful. Shotguns are very effective in Kane and Lynch 2, so you'll definitely want to pick this weapon up once you've dealt with the enemies here. Press down on the D-pad if you're having trouble locating the shotgun once the alley is clear. Pistols are quite effective at long range if you're adept at scoring headshots, so it's best to hold on to your pistol and trade your submachine gun for the shotgun instead. Follow Brady through the next alley and down some steps. You'll come to a fish market. Take cover behind the table at the bottom of the steps, as there are more goons here. As you clear the market, vault over cover to get closer to the remaining enemies as you make your way to the other end of the market. Once you've managed to fight your way to the other end of the market, move past the parked van, past the stacked ice blocks and enter the freezer to your right. Make your way to the other end of the freezer and take cover behind the counter there. The game will prompt you to pick up and throw one of the fuel cans behind your cover, but there's already a canister up ahead you can target with gunfire to kill the two goons there. Shoot the yellow canister behind the counter across from your cover to blow away the two enemies there. With that, press the X/Square button to pick up one of the fuel cans behind your cover and then press X/Square again to throw it over the counter. Lynch will drop the can if you attempt to vault over cover while holding it, so you'll need to throw it over before vaulting so you can use it to kill the last batch of enemies that appears. With that, vault over your cover, pick up the fuel can and immediately take cover behind the counter up ahead. Two cars full of goons will brake in front of your cover. When the enemies pile out, throw the fuel can at them and shoot the can to set it off. With any luck, you'll have taken out most if not all of the enemies. If there are any enemies remaining, blindfire with your shotgun to take them down. You can blindfire by pressing RT/R1 while covering without holding LT/L1 to aim. When the way is clear, leave cover and follow the distance marker to confront Brady.

Controls
Left Trigger - Aim
Right Bumper - Reload Weapon
Right Trigger - Fire Weapon
Right Stick - Control Camera
B Button - Take Human Shield
A Button - Enter Cover
X Button - Perform Action (when prompted)
D-pad DOWN - Weapon Locator
D-pad RIGHT - Point of Interest (when prompted)
Start Button - Pause Menu
L2 Button - (Hold while moving) Sprint
R1 Button - Fire Weapon
R2 Button - Reload Weapon
Right Stick - Control Camera
Circle Button - Take Human Shield
X Button - Enter Cover
Square Button - Perform Action (when prompted)
D-pad DOWN - Weapon Locator
D-pad RIGHT - Point of Interest (when prompted)
Start Button - Pause Menu
Weapon Names
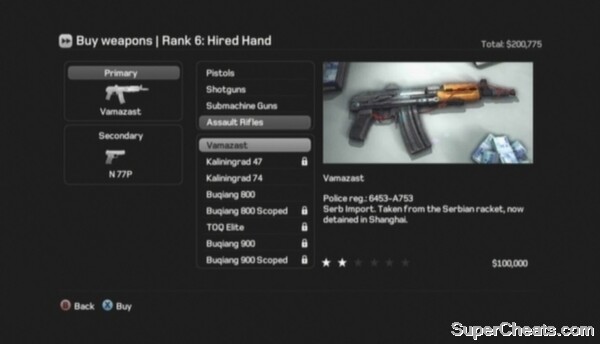
Vamazast (Assault Rifle)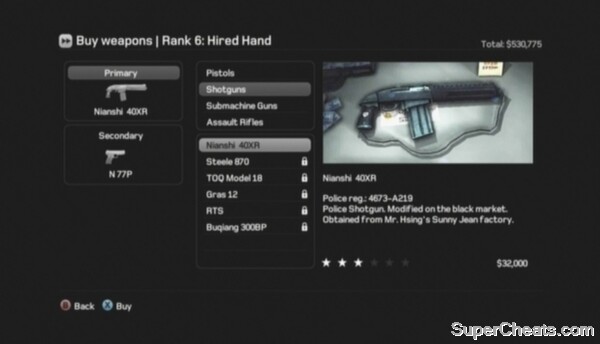
Nianshi 40XR (Shotgun)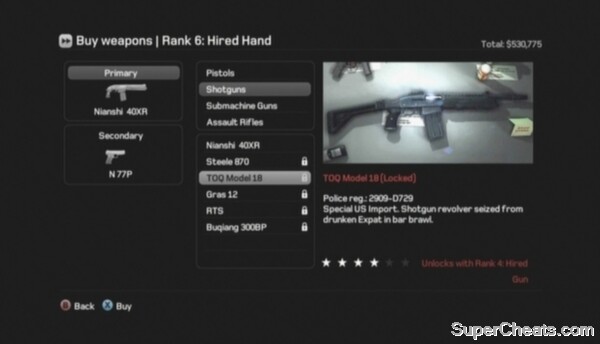
TOQ Model 18 (Shotgun)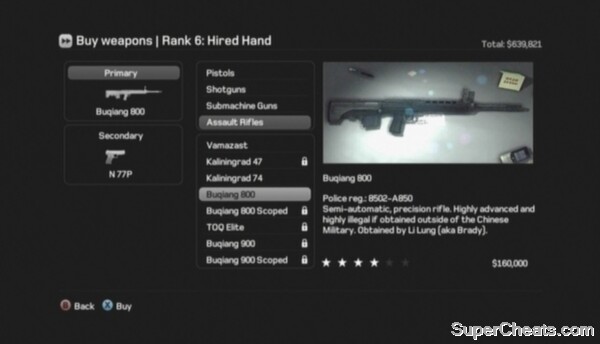
Buqiang 800 (Assault Rifle)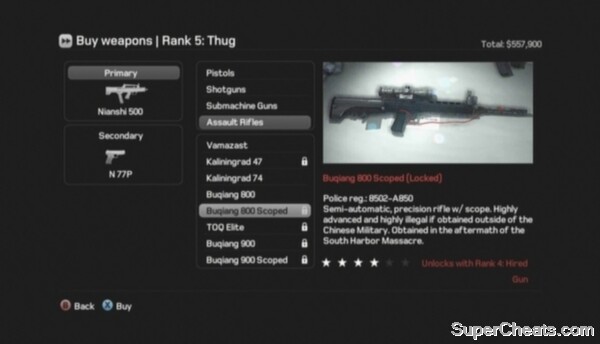
Buqiang 800 Scoped (Assault Rifle)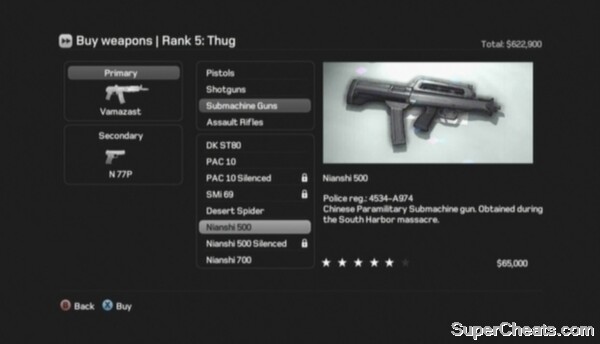
Nianshi 500 (Submachine Gun)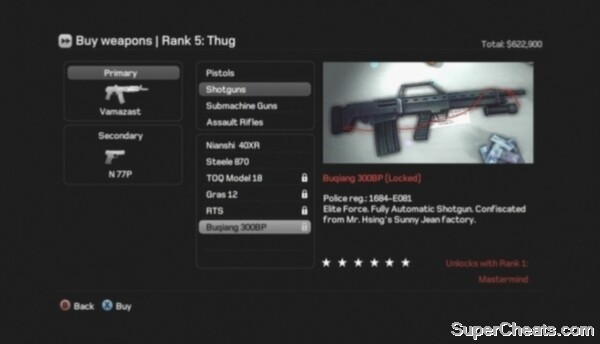
Buqiang 300BP (Shotgun)
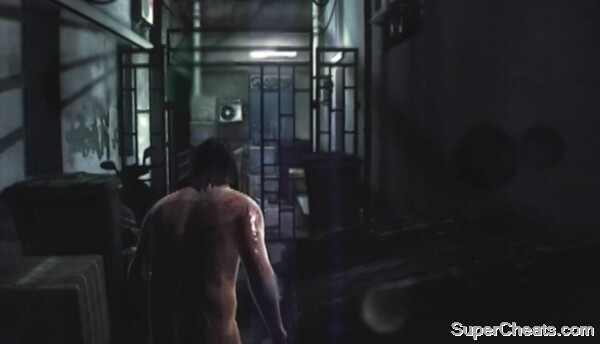
Welcome To Shanghai
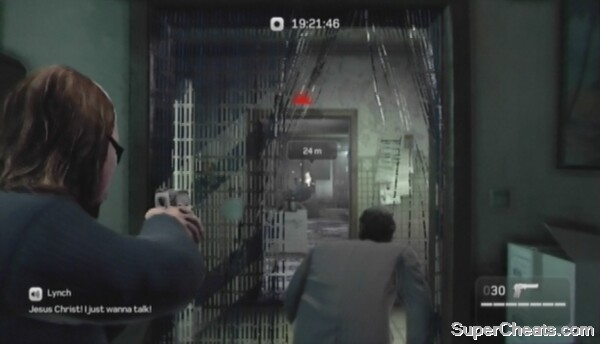
Don't waste any bullets on Brady. You can't catch him.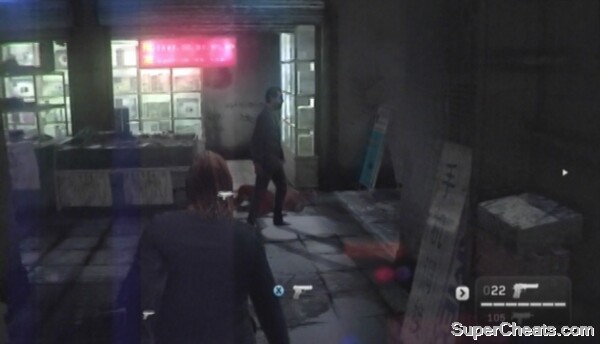
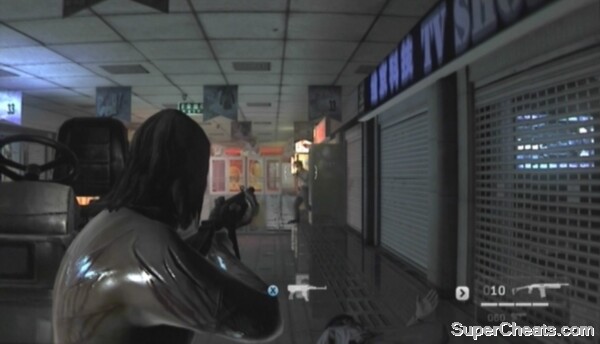
Press down on the D-pad to locate weapons.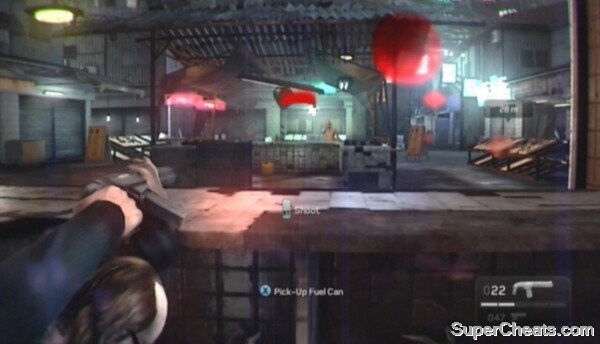
Throw and shoot fuel cans and other explosives to blow away enemies.
Catching Brady
You must protect Glazer's car from the mess of enemies now on the highway. The white bar inside the distance marker pointing to the car indicates how much damage the car has sustained. It's your job to prevent your foes from damaging Glazer's car enough to completely deplete the meter.
As soon as you gain control over Lynch, sprint forward and duck behind the white van to your right. You'll have the weapons you had when you completed the previous chapter, so you're in good condition if you still have a shotgun. If you have a pistol, you can easily unlock the “Trigger Happy” Xbox 360 achievement or PlayStation 3 trophy at the start of this chapter by killing five enemies with any pistol in 15 seconds.
While covering behind the white van, look to the left and take down the two enemies that come running toward you. Then, move around the right side of the van, kill the goon covering behind the car up ahead, the guy behind the taxi in the middle lane and then the goon covering in front of the white van. You'll unlock the achievement/trophy if you were quick enough. Be careful, as the enemy covering at the front of the white van may run at you, so you may have to gun him down first.
Unlocking the Trigger Happy achievement/trophy
Move up to the car in front of the white van once you've killed the first few enemies. Continue picking off enemies with headshots as they pop out from cover to fire. Move up and take cover behind the white pickup truck when the area is clear.
Be careful when moving forward, as there may still be an enemy covering nearby. Ensure any nearby pieces of cover are unoccupied when switching cover, otherwise you could leave yourself open to enemy fire.
Clear away the remaining enemies on the highway and then follow the car to an off-ramp. After Glazer's car drives down the ramp, two enemies on motorcycles will drive up the ramp and dismount to confront you. Be careful, as the motorcycles can run you over as they screech to a halt. Target one of these enemies and blast him with your shotgun as soon as he dismounts. Kane will take out with the other.
Start toward Glazer's car once the ramp is clear. When you reach the bottom of the ramp, step onto the sidewalk to your right and move toward the electrical box. Get up and take cover behind the box when the enemy at the other end of the sidewalk knocks you down. A truck will then ram Glazer's car, pinning it on its side.
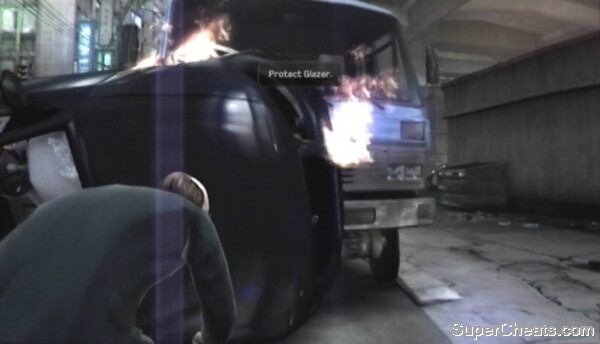
Pull Glazer from the wreckage before he expires.
You must get Glazer out of the wrecked car. His health is deteriorating, so act quickly. Move out from cover, approach the wreckage and press the X/Square button to free Glazer when prompted. Once Glazer is out of the car, kill as many of the enemies up ahead as you can while they scatter for cover and then duck behind one of the dumpsters on the sidewalk. Ensure there aren't any enemies on the left side of the truck before moving up to the green car.
Clear the enemies beyond the green car and then move up to the front of the taxi at the other end of the crosswalk. A couple of these enemies are wielding shotguns, so be sure to pick these up once they've been dealt with.
You'll have to take out the cops at the police barricade before you're able to escort Glazer to the parking garage. A couple of these guys are armed with shotguns, so keep your distance. Take cover behind the grey van by the lamppost and use your shotgun to dispatch the cops at the barricade. You should be able to headshot these officers with your shotgun even from this distance as they peek out from cover, though doing so may require a couple of shots.
Be sure to collect the shotgun and revolver used by the police before following Glazer and the others down the ramp and into the parking garage. Once inside, sprint to the other end of the first level and head up the ramp there. You'll encounter a large number of cops on the second level, so take your time once you're at the top of the ramp.
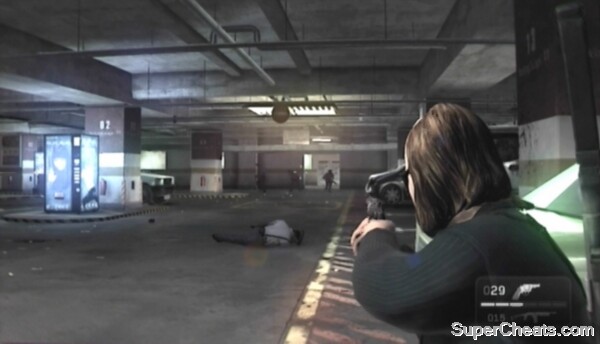
The second floor of the parking garage is swarming with cops.
Move forward and turn left at the top of the ramp. The police will appear as you near the second column, so immediately enter cover there to avoid taking fire. Make heavy use of the fire extinguishers attached to many of the columns here while engaging the police. These fire extinguishers can be picked up, thrown and then shot to create a small explosion. Pick up the fire extinguisher attached to the column you're covering behind, hurl it toward the two cops up ahead and shoot it once it reaches them to set it off.
A thrown fire extinguisher will bounce and travel quite far, so give it time to reach your target before shooting to detonate it. There's no need to take aim when shooting to detonate an explosive; just hit RT/R1 and the auto-aim will take care of it. This holds true for other thrown objects, such as fuel cans.
Also target fire extinguishers attached to columns if there are one or more cops covering nearby. These extinguishers have a considerable blast radius, so it's worth targeting one even if an enemy is behind a vehicle on the other side of the column.
The police have a couple of dogs with them. One of these dogs will come after you soon after the first two cops appear. Dogs can be a problem, as they are able to run behind your cover and knock you to the ground. Fortunately, they're quite easy to kill. When a dog is charging toward you, back out of cover, use the Right Stick to tilt the camera down and shoot a couple of times without aiming. Don't use LT/L1 to aim, as auto-aim should be sufficient here.
Move from cover to cover to get closer to the fire exit at the other end of the garage. Keep an eye out for fire extinguishers and use them to take out covering enemies. Also keep your ear open for dog barks, as there's still one dog left.
Escorting Glazer through the parking garage
Once you've cleared the garage of enemies, move through the doorway at the other end and lift the door you come to. Continue down these stairs until you're outside. You'll encounter more police officers once outside. Use the crumbling walls as cover and fight your way to the other end of the yard. Once you've dealt with these enemies, search the area for ammo and then proceed up the steps at the other end. Ensure you have one of the TOQ Model 18 shotguns used by the police entering the building.
Immediately take cover behind the overturned pillar once inside the building and use your shotgun to headshot the cops here as the pop out from cover to fire. Clear the next room and then, rather than following your allies outside, head up the stairs to reach the second floor. There are several fuel containers on this floor as well as a large opening in the wall that affords you a nice view of the street below. Use the fuel containers to clear out the cops at the seating area on the left as well as those in front of the store on the right.
When the seating area below is clear, pick up another of the fuel containers and drop down to street level. Take cover behind one of the tables facing the cop cars across the street, then throw the container toward the police covering there and shoot it to clear the area. With that, sprint to the getaway van left of the police cruisers to complete the chapter.
Escorting Glazer to the getaway van
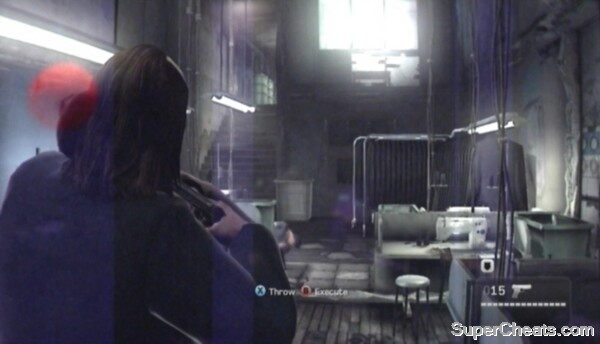
Follow Tommy into the sweatshop and through the first few rooms. An enemy will shoot Tommy dead after he kicks down a door. Take cover by the door and shoot the killer in the head when he pops up to fire. Then, enter the room and immediately take cover behind the container in front of the doorway. An enemy will jump through the window at the other end of the room and another will appear in the doorway next to the window. Gun down the enemy who jumps through the window while he's out in the open. Take down the guy by the door as well before moving out from cover.
The enemy that appeared in the doorway will have been wielding a shotgun, so be sure to pick this weapon up before moving on. There are two or three more enemies in the room through the bead curtain. You can flank them by heading through the doorway across from the door you used to enter the room, kicking open the door at the end of the corridor and then taking cover by the double-door at the other end of the room you come to.
When the room is clear, head inside go through the doorway on the right. Move through the next couple of rooms and kick down the door at the end of the corridor you come to. Head up the stairs here and then down the stairs at the other end of the walkway to get past the barricade. Continue through the series of doorways straight ahead and you'll reach another workshop.
Kill five enemies while holding a human shield to unlock the Chinese Waltz achievement/trophy.
Enter the workshop, turn right and head through the doorway there. There's an enemy in the next room you can easily take as a human shield. This is a good spot to unlock the Chinese Waltz Xbox 360 achievement or PlayStation 3 trophy, which requires you to take a human shield and kill five enemies while the shield is alive. There are at least five enemies in the next couple of rooms, so you should be able to pull it off quite easily if you go for headshots.
The enemy is standing with his back turned to the doorway. To take him as a human shield, approach him and press the B/Circle button. While you have a human shield, other enemies will be hesitant to fire. You can still use a pistol, so taking a human shield can definitely be advantageous. Do note that enemies will still shoot at you, especially if you're shooting at them.
Once you've taken the enemy in the doorway as a human shield, take aim and headshot the enemy directly in front of you. There's another enemy further up, but he will most likely retreat up the stairs. If he doesn't, take him down too and then move toward the trash bins in the middle of the room. At least two enemies should be visible in the window in the top-right corner of the room. You'll have to take these guys out with headshots. Your accuracy will improve if you aren't moving, so stand still and take your shot when these enemies pop out from cover.
When the enemies in the window are down, push toward the stairs at the other end of the room. One or two enemies should take cover by the wall at the top of the stairs. Remain at the bottom of the stairs, hug the wall to the left and take down these enemies. One of them is likely wielding a shotgun, so keep your distance. If need be, stand further back and wait for the enemy to pop out from cover to fire rather than trying to get a bead on him while he's covering.
Start up the stairs once you've cleared the enemies at the top. Don't head to the top of the stairs yet; allow Kane to run up and distract the enemies upstairs first. You should have four kills at this point. Once Kane is attracting gunfire from the enemies at the top of the stairs, proceed to the top and nab a fifth kill before executing your human shield and taking cover.
Unlocking the Chinese Waltz achievement/trophy
Clear out the remaining enemies in the room at the top of the stairs and then scan the area for pistol and shotgun ammo (by pressing down on the D-pad). Before kicking down the closed door at the other end of the room, look for a fire extinguisher on the ground to the right of it. Pick up the fire extinguisher, kick down the door, then stand back and throw the fire extinguisher to the end of the corridor. Be careful here, as an enemy armed with an Uzi gun will kick down the door on the right and fire at you. Quickly shoot the fire extinguisher when it reaches the container at the other end of the corridor and you should be able to take him out as well as one or two other enemies.
Ensure the man with the Uzi is down before entering the corridor and moving through the first doorway on your right. There's another enemy armed with a submachine gun through the next door, so be ready with your shotgun as you kick the door down. There are a couple more enemies in the room at the end of the corridor, so take cover by the doorway and eliminate these enemies before entering. Proceed through the open door at the other end of the room to head outside.
Once you've regrouped with Glazer's men, follow them to the courtyard. An enemy will immediately shoot one of Glazer's men in the head. He drops a Vamazast assault rifle; swap your pistol for this weapon, as its accuracy will help you greatly here. Your accuracy is improved while crouching, allowing you to easily gun down the enemies on the second floor and in the courtyard below. The Vamazast does have quite a bit of kickback, so push the Right Stick down while firing to keep your aim steady.
Clear the courtyard and second floor walkway of enemies and then follow your allies through the doorway at the other end of the area. Lift the door here to proceed to the next area, then follow the others up the steps beyond the door and through the door at the end of the walkway. Have your shotgun ready and kick down the door straight across from the door you used to enter the building. As soon as the door is down, point your shotgun at the doorway at the other end of the room and blast the group of enemies that comes through before they can get behind cover. Continue through the doorway once you've dealt with these enemies. Be careful, as there may be one or two more enemies through the bead curtains here.
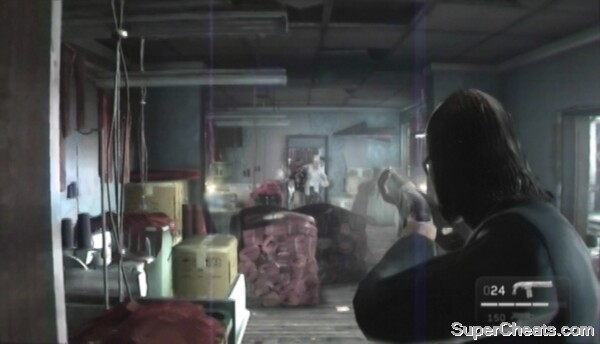
Use your shotgun to quickly put down the group of enemies as they enter the room.
Move through the bead curtains once you're certain the room is clear and kick down the door to your left. Proceed through the door, head down the stairs and lift the door at the bottom. Enter the warehouse and kick down the door on the platform at the far end of the warehouse to trigger a cutscene.
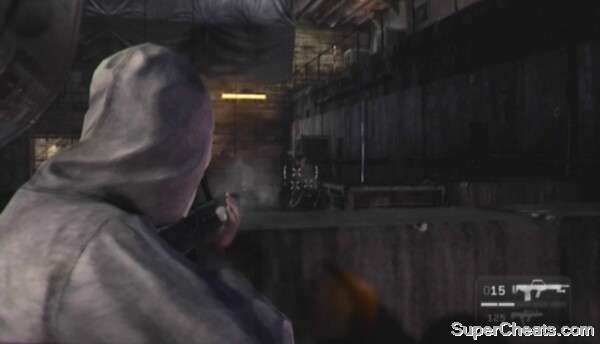
After the cutscene, sprint through the doorway straight ahead and head up the stairs. At the top of the stairs, turn through the doorway on the wall to your left and look for two Vamazast assault rifles on the table in this room. Pick up both weapons and then take cover by one of the windows in the previous room. Gun down a few of the enemies below and a getaway van will then appear. You must destroy the getaway van to prevent the men from reporting back to Glazer. You don't have a whole lot of time before the van pulls out, so act quickly. The Vamazast will make short work of the van, so just take cover by the window and continuously blindfire (by holding RT/R1 while behind cover without using LT/L1 to aim) at the van. Push the Right Stick down slightly to keep the gun steady while firing.
The white bar in the distance marker pointing to the van indicates how much damage the vehicle has taken. Deplete the meter completely to wreck the van and prevent Glazer's men from escaping.
Destroying the getaway van
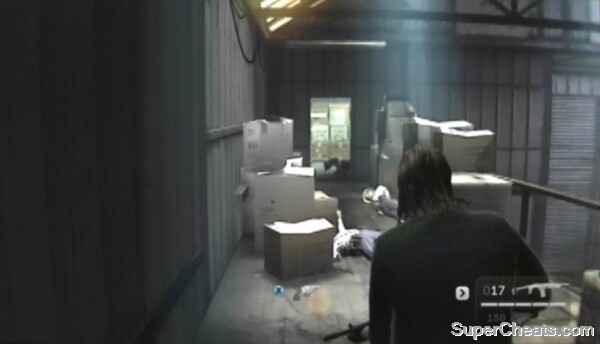
Once you've managed to destroy the van, police will appear on the walkway across from the windows. Remain where you are and use your assault rifle to eliminate as many of the police officers on the walkway as you can. When the walkway is clear, kick down the door at the end of the corridor, move through this room and step onto the walkway. Take cover behind one of the stacks boxes along the walkway if need be and blast any cops that appear in the doorway or windows at the other end.
Be sure to pick up the TOQ shotgun used by the police once the way is clear, as this weapon is one of the most effective in the early levels. Keep an eye out for revolvers as well.
When the way is clear, proceed down the steps in the room at the far end of the second floor and lift the door at the bottom of the steps to exit the warehouse. Move through the alley and you will soon encounter a strolling police officer. Blast him with your shotgun and then back up to avoid the police dog on the way. You can kill this dog with auto-aim by simply tilting the Right Stick down and firing without aiming. Once you've dealt with the dog, take cover around the corner and blindfire your shotgun to kill the officers that come after you.
The TOQ Model 18 shotgun is an effective weapon in the early chapters.
Clear the alley and turn left when you can. Climb the wall at the end of this path to complete the chapter.
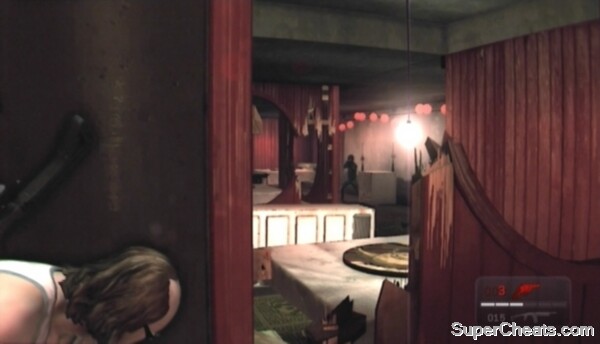
Take cover behind the counter as soon as you gain control of Lynch. Note that you can earn the Sichuan Specialist Xbox 360 achievement or PlayStation 3 trophy by escaping the restaurant without once being downed by enemy gunfire. This task is very much doable, but will require patience and precision. The weapon that would serve you best in this task is the TOQ shotgun used by police officers. With any luck, you picked up this weapon at the end of the previous chapter and are starting this one off with it in hand. A revolver would make a good companion weapon.
To earn the Sichuan Specialist achievement/trophy you must escape the restaurant without being downed in one go. In other words, you wouldn't be able to unlock the achievement by pausing the game and reloading your last checkpoint after being downed by gunfire.
The seating area is packed with officers armed with assault rifles. Making it out of the restaurant alive is just about whittling down their numbers until you're able to push out. It's very important to make good use of cover here, as these enemies' assault rifles can put you down if you leave yourself in their sights for even a moment.
Escape the restaurant without being downed to unlock the Sichuan Specialist achievement/trophy.
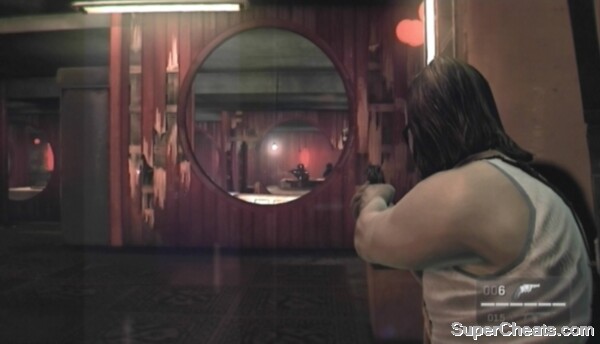
The TOQ shotgun boasts considerable range and is well-suited for scoring headshots on enemies popping out from cover to fire. When an enemy moves out from cover, quickly take aim at his head and fire. Use your revolver or pistol to take out the officers at the back of the seating area. Be wary if you decide to switch cover, as the walls with large, circular windows in the middle of them are destructible and won't protect you.
When the initial seating area is clear, make your way to the back of the area with your shotgun ready. If one of your weapons is completely out of ammo, trade it for one of the assault rifles left by your fallen enemies before pushing forward.
Watch out for an officer when you turn toward the next area. Put him down with your shotgun before moving up and taking cover behind the fridge on the wall to your right. There's a fire extinguisher right next to this fridge; pick up the extinguisher, throw it through the circular window just beyond the fridge and then shoot it to hopefully take out a couple of officers covering there.
Once you've dealt with the enemies nearest to you, hang back and start picking off the officers at the other end of the restaurant. If you have a pistol with you, use it to deliver headshots. Crouch and sit still to improve your accuracy.
Fight your way out of the restaurant.
Slowly push forward when the way appears to be clear. The game will auto-save and Kane and Lynch will exchange a couple of lines of dialogue when you kill the final enemy. Before leaving the restaurant, press down on the D-pad and search the area for shotgun ammo. If your secondary weapon is low on ammo, trade it for one of the assault rifles used by the police.
Kick down the door at the back of the restaurant when you're ready to move on. A police officer will kick down the door at the other end of the corridor and open fire, so be ready with your shotgun pointed. Pass by the bound workers and lift the door at the other end of the room. You'll unlock the Sichuan Specialist achievement/trophy at this point if you meet the requirements.
Outside, sprint to the other end of the alley, head up the stairs there and follow the corridor back outside. Keep an eye on your left for some stairs as you move forward. Proceed up the stairs when you reach them and pick up the fuel can at the top. With the fuel can in hand, move through the doorway and take cover behind the sign on the right. Once you're in position, toss the fuel can just over the wooden fence attached to the shed and then shoot the can to set it off.
Use your shotgun to clean up the remaining officers below and then focus your attention on the platform off to the right of the shed. Two officers will have moved onto this platform to take cover behind the signs there. You can headshot these guys with a shotgun from your position, so wait until they pop up, then quickly take aim at their heads and fire.
Entering the shed
When the area below is clear, drop down to street level and enter the shed at the far end. Move through the shed and lift the door you come to. There's no need to kill the cowering officer here.
Sprint to the other end of the alley beyond the door and start down the street. A police cruiser will appear shortly after a group of civilians flees from you, so take cover behind the van on the left side of the street and use your shotgun to take down the two officers that step out of the car.
Continue down the street when the way is clear. You'll soon come to a bus. Take cover behind this bus, as a couple more officers will soon appear further up. When you've dealt with these initial two officers, move up and take cover behind the taxi in front of the bus. There's a large police barricade in the kitchen across from the DVD store. There are several propane tanks in this kitchen. You just need to find a way to get a clear shot on one of these propane tanks to dispatch the officers blocking your path.
While covering behind the taxi, look for a ramp next to the pickup truck on the right side of the road. Sprint over to the pickup and take cover behind it. When your health is full, head up the ramp and immediately take cover behind the railing on the scaffolding. From here, you have a pretty good view of the police barricade as well as the propane tanks in the kitchen behind them. Target one of the yellow propane tanks to cause a large explosion, killing the officers at the barricade.
Clearing the police barricade
When the smoke clears, take out any survivors before returning to street level. When the way is clear, move through the blown-out kitchen and climb the wall you come to.
Sprint to the end of the alley on the other side of the wall and proceed up the steps you come to. Drop down from the roof, sprint to the other end of the empty yard and pass through the large piece of piping at the other end.
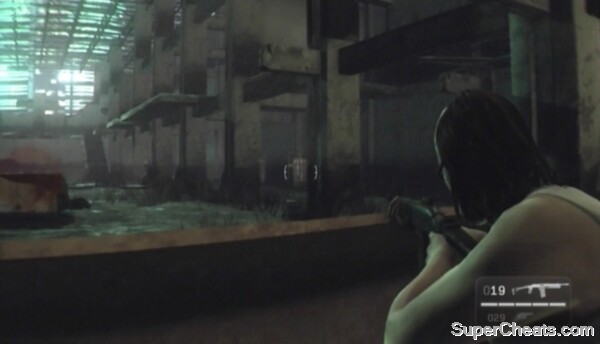
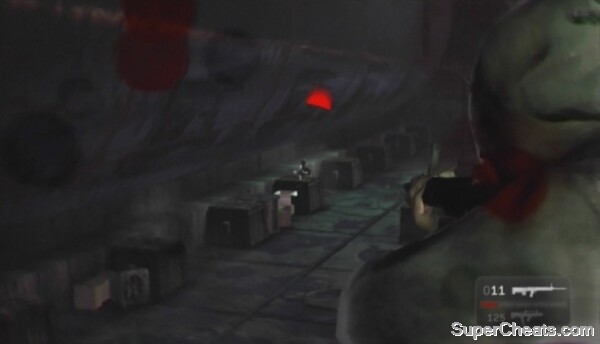
Another batch of officers will appear when you enter the construction site. Immediately sprint and take cover behind the metal scoop up ahead. There's an acetylene tank on the right side of the scoop. Pick up the can and wait for more enemies to gather by the overturned pillar on the left before throwing the can and shooting it to hopefully take out the majority of them.
After using the acetylene tank, look for some large gas tanks on a dolly along the wall on the right side of the building. Shoot these tanks to set them off, killing any enemies covering behind the pillars on that side of the building.
Pick off as many more officers as you can from behind the metal scoop before moving up and taking cover behind the overturned pillar on the left. Move to one of the pillars further up when the way is clear. Another batch of enemies will appear as you push toward the stairs at the other end of the building. Spray the officers with your shotgun as they come down the stairs. Be careful, as there's a sniper standing at the top of the stairs. To take him down, move up to the overturned pillar at the bottom of the stairs once you've dealt with the other enemies and headshot him with your shotgun when he pops out of cover to fire.
Target the gas tanks on the right side of the construction site to take out the enemies covering there.
With the sniper down, proceed up the stairs and press down on the D-pad to locate the rifle. Hold on to your shotgun and trade your other weapon for the rifle before heading down the ramp to reach the next area.
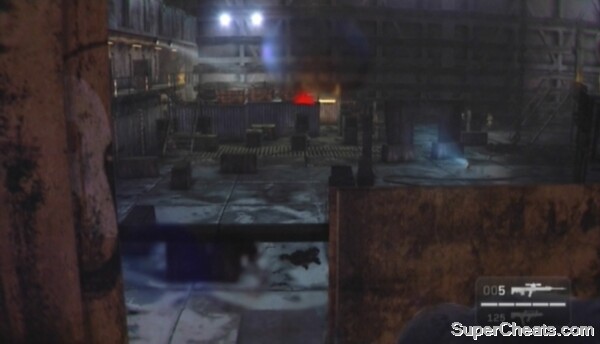
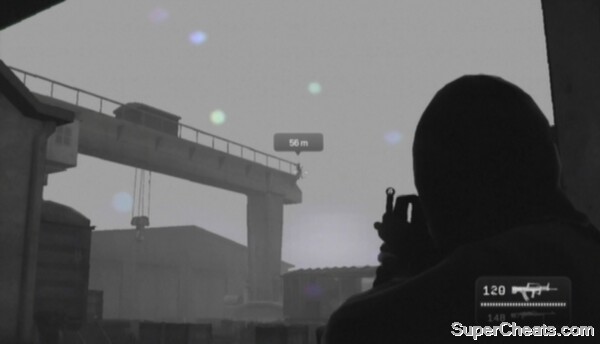
Two snipers will come into view as you pass the stairs. Both snipers have a distance marker pointing to them, so they're easy to keep tabs on. Crouch to avoid being spotted and move toward the sniper on the right. When you reach the shed, use your rifle to pick off the sniper with a headshot.
Once the first sniper is down, immediately switch to your shotgun, back up and blast the officers by the stairs further up. Use your rifle to headshot the second sniper across the yard when the immediate vicinity is clear. You should be able to just see his head peeking out if you're standing by the wall across from the stairs.
With the second sniper down, head up the stairs when the way is clear and collect the fallen sniper's weapon for more ammo. Take cover at the top of the stairs, pick up the acetylene tank there, toss it at the enemies below and shoot it to hopefully kill a couple of officers in the blast. Keep an eye on the stairs, as an officer may have come around to try to take you down.
There will be a third sniper on the walkway at the far end of the yard. Take him down with your rifle when you're no longer under fire. When the third sniper is down and the area below is clear of enemies, scour the area for ammo and look around for a gas can. Pick up the gas can before moving forward.
Taking out the snipers
Be ready when you enter the tunnel, as another batch of officers will appear at the other end. As soon as these officers appear, throw the gas can toward the other side of the tunnel and shoot it once it reaches them. Get behind cover and use your shotgun and rifle to clear out the remaining enemies before pushing forward to the next area.
Climb the fence beyond the tunnel to complete the chapter.
There's a group of enemies guarding the door at the other end of the parking garage. You can clear them out easily with a bit a stealth. When you spot the group by the two cars parked in front of the door, click the Left Stick to crouch and then move to the pillar to your left. Sneak along this row of pillars and look for a yellow gas canister by the second-to-last pillar. Pick up the canister, hurl it at the group of enemies and shoot it once it's between the two cars. With any luck, the blast will have killed all of them.
Clearing the parking garage
When the parking garage is clear of enemies, approach the door beyond the two parked cars and open it. Beyond the door, climb up the stairs and sprint to the other end of the walkway you come to. Move through the open doorway next to the elevator at the end of the walkway and head up the stairs to reach the next level.
Once you're on the second level, some enemies will appear on the walkway on the other side of the building. Kane is on this walkway, but he won't be able to deal with these enemies if he's being controlled by AI. These enemies will fire at you too, so it's best to hang back until they've been dealt with. If you have a sniper rifle from the previous level, use it to put them down. Take cover in one of the balconies, but don't move too far up the walkway or another batch of enemies will spawn.
Continue down the walkway after clearing Kane's side and take cover behind the pillar at the second-to-last balcony. Three enemies will appear at the other end of the walkway at this point. Pick them off with your weapon when they pop out from cover, then head through the doorway at the other end of the walkway and take the stairs to the third floor.
Gun your way to the fourth floor.
At the top of the stairs, take cover by the corner and gun down the enemies at the start of the walkway. You can blindfire by simply pressing RT/R1 while behind cover without holding LT/L1. Move up to the closest balcony after killing the first couple of enemies. Two more enemies will appear at the other end of the walkway; dispatch them from afar before pushing forward. Take cover by the corner and eliminate any enemies visible on the other side. Once both walkways are clear, open the door between the two and proceed up the stairs to the fourth floor.
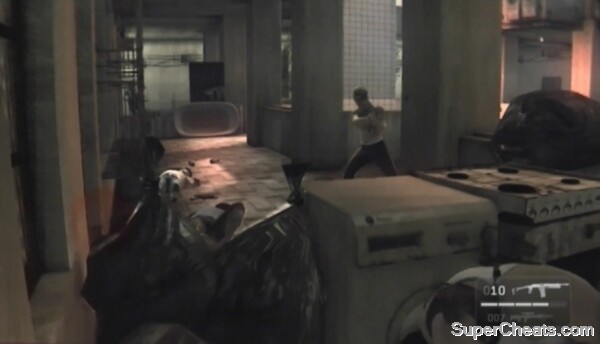
Once up the stairs, turn right and take cover behind the railing. Pick up the gas canister here, throw it at the two enemies covering behind the washing machine and stove in the middle of the walkway and then shoot the can to eliminate them. An enemy may have survived, so take cover behind the stove or washing machine and ensure the area is clear before vaulting over.
Two more enemies will appear at the other end of the walkway and some more on the fifth floor walkway on the other side of the building. Quickly take down the enemies that appear on your side of the walkway, then vault over the stove there and sprint into Xiu's apartment.
Protect Xiu from Shangsi's men.
After the cutscene, take cover behind the chair and shoot at the enemies on the walkway across from the window. When those enemies scatter, enter the kitchen and take cover behind the counter. Two enemies will break through the wall in the kitchen. They're using explosives, so keep your distance to avoid being caught in the blast.
Once you've dealt with those two enemies, move through the opening in the wall. Exit into the hallway and make your way to the kitchen. When you regain control over Lynch after the cutscene, look for a sniper rifle on the ground between the double door. Pick up the rifle before entering the living room and then taking cover on the balcony
You must use the sniper rifle to protect Xiu from Shangsi's men. At first, four will come from the right side of the walkway. Take aim with you rifle and lead your shots to put them down as they run by. Two more enemies will then appear on the left. One of these enemies will stop to fire at you while the one in white goes for Xiu. Pick off the enemy that's shooting at you and then quickly take down the other enemy before he can do anything to Xiu.
Protecting Xiu
Continue protecting Xiu from the enemies that appear on the walkway. When she manages to escape, move through the second doorway on the balcony and then make your way out of the apartment and onto the roof. Sprint forward and be ready for a couple of enemies when you come to a ramp. There's nowhere to take cover here, so fallback down the ramp if necessary and gun them down before continuing on. Once you've dealt with both enemies, continue to the other end of the roof, but don't drop down just yet.
Look for a gas canister by the stacked tires at the end of the roof. Pick up this can, then take cover behind the electrical box across from the tires and wait for some enemies to gather in the middle of the area below. Throw the gas can when the time is right and shoot it to set it off. Remain where you are and pick off any other enemies you can see below before dropping down. One of these enemies will have had a sniper rifle, so press down on the D-pad to locate it and then pick up.
Be careful as you make your way through this area, as there are many different cover spots an enemy could be hiding behind. Take the time to ensure the area is clear before pushing forward. As you move forward, more of Shangsi's men will appear on the walkway at the other end. Hang back with your rifle and dispatch them as they pop out from cover to fire.
When the way is clear, head to the other end of the area to trigger a cutscene and complete the chapter.
You have about 90 seconds to find Kane before he dies. Start by moving through the open gate directly in front of you. Once through the gate, turn right and head up the steps there. Through the doorway, head through the doorway to your left and then turn through the doorway to your right. Proceed through the doorway at the other end of this room, then turn right and make your way to the other end of this corridor. Finally head through the doorway to your right and look for Kane and Shangsi in the next room.
Find Kane before he bleeds out.
After the cutscene, return to the corridor and lift the door at the other end. Outside, turn right and head up the stairs there. Your next task is to escape this parking lot. There are a handful of patrolling guards in the area and since you don't have any weapons, you're going to have to use stealth to make it through this.
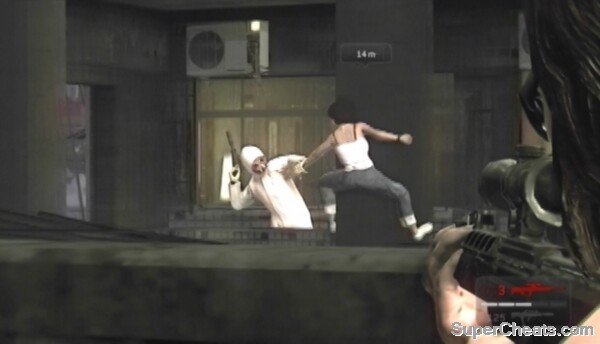
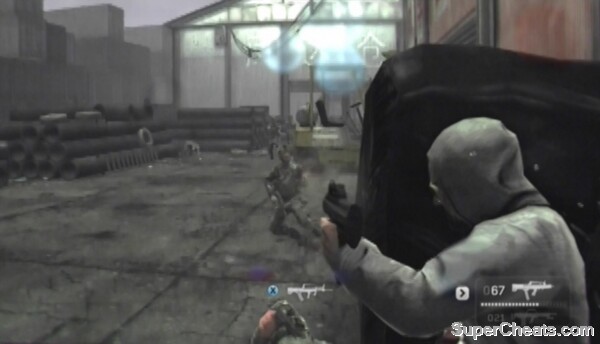
Step onto the scaffolding up ahead and move down the two ramps to get to street level. Once you're down the stairs and past the fence, turn right and walk behind the row of buses there. When you reach the last bus in line, turn left and move toward the toll booth by the wall in the distance. Wait behind the booth and a patrolling enemy will pass by. When he appears, move in and press the B/Circle button to take him as a human shield to get his pistol. Press the B/Circle button again to execute the enemy and then take cover behind the booth. Some enemies will run up and confront you here, so gun them down before moving out. One of these enemies will have been carrying a shotgun, so press down on the D-pad to locate it and then pick it up.
Once you've dealt with the enemies, peek around the corner to ensure there aren't any other enemies nearby. When the way seems to be clear, sprint around the buses on the right side of the parking lot and escape through the alley at the other end. Sprint to the end of the alley and lift the door there to escape.
Escaping the parking lot
Through the door, click the Left Stick to crouch and then move toward the two police officers standing on the sidewalk. Take aim with your shotgun, shoot both cops in the head and then cover behind the pickup truck on the left side of the street. Fight your way to the other end of the street and take cover by the wall there. Blast the officer here and pick up the shotgun he was carrying.
When the way is clear, start toward the bike shop on the left and shoot the gas canister inside to kill any officers who may be hiding there. Take cover by the doorway at the other end of the shop and pick off the cops that are around the seating area outside. Move up and take cover behind one of the tables when the way is clear and then push to the print shop entrance at the other end of the patio.
Head through the doorway at the other end of the print shop to enter the mall. Turn left and then right at the split. Sprint to the TV shop at the other end and lift the door there to trigger a cutscene.
After the cutscene, exit the TV shop and take cover behind the vehicle outside. You now must push through the burger joint up ahead and make it past the police barricade outside to escape. There is a ton of officers here, so you'd best exercise caution.
Fight your way to the burger joint.
Make sure there aren't any enemies outside the burger joint before moving forward. There are a few police officers inside to start, so take cover behind one of the booths and dispatch them from afar. There is a police dog among them, so shoot it dead as it makes a beeline for you. Ensure the seating area is clear of enemies before moving in.
Once you're inside the restaurant, look for a door on the right. Kick down this door and then kick down the second door across from it. Pick up the fire extinguisher next to the third door before kicking it down and sprinting back into the restaurant. Then, sprint over to the pillar closest to the entrance and take cover behind it. A mess of officers will soon appear outside. Hurl the fire extinguisher at them as they near and shoot it to set it off. With that, pick up the fire extinguisher next to the pillar you're covering behind and throw it as well to hopefully kill off one or two more.
As soon as you've thrown and detonated both fire extinguishers, click the Left Stick to crouch and keep an eye on your right, as any surviving officers may be gathered there. If there's an officer really close to your cover, you can blindfire by pressing RT/R1 while behind cover without holding LT/L1 to aim. Kill any officers that are to your right before falling back to the pillar behind you. There's another fire extinguisher next to this pillar, so pick it up and use it to kill one or more of the officers still outside.
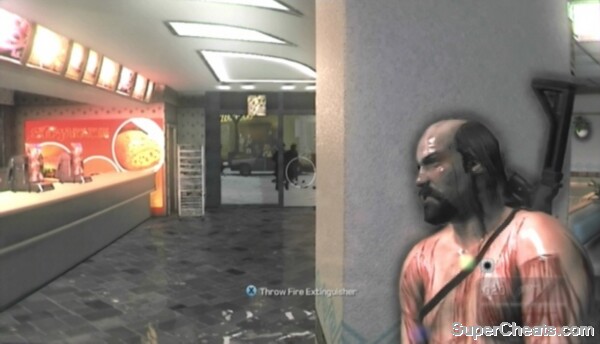
Use the fire extinguishers in the restaurant to clear out the officers outside.
The assault rifles used by these officers are quite powerful, so pick one up if your shotgun or second weapon is out of ammo.
Once there are no longer any officers inside the burger joint or near the entrance, head outside and take cover by the police cruiser there. Gun down the remaining enemies and then move past the police truck to escape.
Escaping the burger joint
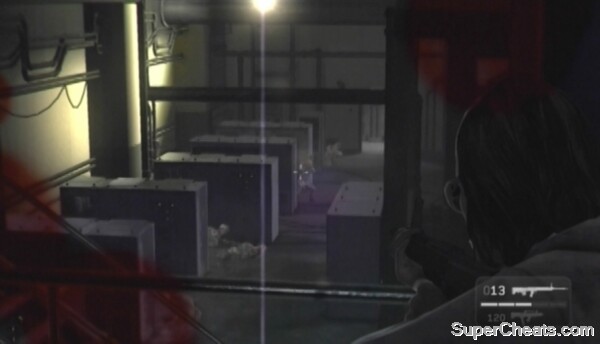
As soon as you gain control over Lynch, take cover behind the table to your left and click the Left Stick to crouch. Look for some gas tanks on a trolley next to the cargo container at the left end of the area. Target these tanks with gunfire to detonate them, with any luck killing one or two of the enemies in that area.
After the blast, quickly move out and take cover behind the wooden crates up ahead. You can't remain here long, as these crates are destructible. There are more gas tanks on a trolley at the back of the area you can detonate to kill a couple of the enemies covering there. After that, just use your shotgun to take down as many of the remaining enemies as you can. If the crate you're covering behind is destroyed and things are still too heated for you to move out, quickly take cover behind the second crate and continue picking off enemies.

Target the gas tanks at the back of the area to take out the enemies covering there.
Once things have died down, move up to the cement cover to your right. If an enemy manages to get close, you can blindfire by pressing RT/R1 while behind cover without holding LT/L1. There's also an acetylene tank at the base of this cover you can use to dispatch more enemies. You also need to keep an eye on the enemies to your right, as one may move to the piece of cover across from yours and be able to take shots at you. Your cover is indestructible, so keep behind it and use your shotgun to pick off the remaining enemies as they pop out from cover to fire.
The game will auto-save when the last enemy in the area falls. At this point, look for two gas canisters along the wall to your right. Sprint over to the cans, pick one up and then start toward the stairs at the other end of the area. Reinforcements will soon appear on the walkway. There's another trolley full of gas tanks below the walkway, so if you time it right, you can take out several of the reinforcements by throwing a gas can at the tanks and shooting it. Doing this will definitely kill the enemy reinforcements below the walkway. There also seem to be some explosives under the stairs, so you can run back, grab the other gas can, then move back into cover, throw the can at the stairs and shoot it to take out the enemies covering on the walkway.
Dealing with the reinforcements
Scour the area for weapons and ammo once you've dealt with the reinforcements. Pick up a shotgun and assault rifle, then proceed up the stairs, turn right and head down the stairs there. Lift the door at the bottom of the stairs to move on to the next area.
Sprint through the area beyond the door and stop when the game auto-saves. At this point, move forward and immediately take cover behind one of the containers here. Two enemies will reveal themselves on the walkway. Look for a gas canister on the right side of the walkway and detonate it with gunfire to take out one or both of them. If an enemy remains, keep behind cover and blast him with your shotgun when he pops out from cover to fire.
Proceed up the stairs once the walkway is clear and pick up one of the acetylene tanks at the top. Throw the tank toward the enemies covering at the other end of the corridor here and detonate it to hopefully dispatch one or more. You can fallback and pick up the second acetylene tank to throw if you wish. Move up and open the door at the other end of the corridor once you've dealt with the enemies there.
Start down the walkway and take cover behind the second large container you come to. There's an enemy covering behind the crate at the corner of the walkway, so blast him with your shotgun before moving out from cover and continuing down the walkway. Climb up the steps at the end of the walkway and turn left. Gun down the two enemies here and make your way to the other end of this corridor to trigger a cutscene.
You'll need the powerful weapons the army employs to make it through the latter half of the game.
After the cutscene, take cover behind one of the crates up ahead and dispatch the two soldiers by the stairs. The army employs powerful and accurate weapons, so swap your assault rifle for the Nianshi 500 submachine gun used by the two downed soldiers and then start up the steps. At the top of the stairs, take cover on the side and gun down the troops in this corridor before pushing forward. Swap your shotgun with the Buqiang 3000BP used by the army. You can press down on the D-pad to locate one.
There are more soldiers on the bridge, so move up and take them down from behind cover. With that, cross the bridge, turn left and start toward the other end of the walkway. Keep an eye on your left and stop when you come to an acetylene tank. Pick up the tank, throw it at the troops gathering in the area below and shoot it. There's another acetylene tank along the walkway you can use to take out the remaining enemies. Be careful, as one or more of the soldiers may have made it onto the walkway.
Clean up with your shotgun and then proceed down the stairs at the end of the walkway. If there are any acetylene tanks left in the area, pick one up before moving toward the steps up ahead. If you have an acetylene tank in hand, throw it at the platform across from the stairs and shoot it to kill the two soldiers covering there. If you don't have one, hang back at the top of the stairs and take out these soldiers with your guns before proceeding down the steps. Then, take the stairs up to the platform and walk around to the stairs at the other end. Gun down any enemies that are below and then pick up the acetylene tank by the crate at the bottom of the stairs. Take cover behind the crate and use the acetylene tank to eliminate some of the soldiers covering up ahead.
Push forward when the area is clear and put down the remaining enemies. Then, move through the doorway at the other end of the area and take cover. Scan the area for the Buqiang 800 assault rifle used by the army. This weapon has an ammo cap of 15, but is very accurate. There should be a scoped Buqiang 800 lying around, so press down on the D-pad to locate it and pick it up before moving on.
Use the Buqiang 800 to pick off distant enemies.
Move in to the next area and take cover. A group of soldiers will appear in the distance. Look for an acetylene tank on the left and shoot it when the soldiers near. Then, hang back and use your Buqiang 800 to pick off the remaining soldiers as the pop out from cover to fire.
Once you've dealt with the soldiers, move onto the walkway to the right and pick up one of the acetylene tanks along it. Proceed to the end of the walkway and move through the doorway at the end of the area. Take cover in the next area and throw the tank at the soldiers covering up ahead. Then, pick up the second acetylene tank behind your cover and move to the cover to your left. Hurl the tank toward the enemies by the stairs in the area on the left and shoot it. There's another acetylene tank here you can pick up and throw at these enemies as well. Clean up with your Buqiang 800 and then sprint up the stairs to get onto the walkway.
Cross the walkway and take cover behind the stacked crates on the side. Ensure there aren't any soldiers behind the cover by the set of stairs up ahead. Then, take cover behind the yellow board further down the walkway and start picking off the soldiers at the other end of the area. This last group of soldiers is blocking the level exit, so you'll have to take down all of them to escape.
There's an acetylene tank at the base of the yellow board you can use to kill some of the soldiers below. Other than that, just hang back and continue picking off the enemies below until the area is clear. Move out to the door at the end of the area and open it to complete the chapter.
Fight your way to the exit.
Enter the warehouse up ahead and move through to the doorways at the other end. Cross into the adjacent warehouse, take cover behind the large crate by the hangar door to your right and start picking off the soldiers outside. Remain behind cover and eliminate these soldiers as the pop out from cover to fire. Several of these soldiers may try to move in closer to your position. If this is the case, you can blindfire at them by pressing RT/R1 while behind cover without holding LT/L1. Blindfiring works best with a shotgun, such as the Buqiang 300BP used by the army.
There are a ton of soldiers here, so remain behind cover until you're certain the area is clear. You can move outside and take cover there if the troops' numbers are dwindling. Either way, your goal is to make it to the warehouse at the other end of the yard.
Once you've dealt with the first batch of troops, scour the area for weapons and ammo before entering the next warehouse. The Buqiang 800 rifle will come in handy in the next area. This weapon has an ammo cap of 15, but is very accurate and ideal for taking out key enemies. One of the soldiers you took out must have been wielding a Buqiang 800, so press down on the D-pad to locate one then swap a weapon for it.
Blindfire when an enemy gets too close to your cover.
Turn right once inside the warehouse and grab the fire extinguisher by the third doorway before heading outside. Outside, duck behind the cover near the third doorway and position yourself at the top corner. Then, equip the Buqiang 800 rifle and aim north. A large group of soldiers, including two armed with machine guns, will soon appear.
There will be distance markers pointing to each of the machine gunners. You must take down these guys quickly, as their weapons will tear you to shreds otherwise. As soon as the first machine gunner comes into view, fire your Buqiang 800 rifle at him to quickly put him down. Target the second machine gunner when he appears and do the same.
Once both machine gunners are down, pick up the acetylene tank or one of the fuel cans by your cover and throw it toward the soldiers covering on the other side of the warehouse. Shoot the fuel can or acetylene tank when it reaches the soldiers and you'll end up detonating the fuel cans behind their cover as well, making short work of them.
Taking down the machine gunners
Several of the remaining soldiers may attempt to close in on your cover. Hang back with your rifle and pick them off as they approach. You especially need to keep an eye on the stacked crates to your left, as there is sure to be a lone soldier covering there at some point. Use any fuel cans near your cover to dispatch the remaining enemies in the warehouse.
When the warehouse is clear of enemies, move out from cover and step outside. Press down on the D-pad to locate both of the machine guns dropped by the fallen soldiers and pick up both for extra ammo. There are sure to be more soldiers outside, so take cover behind the stack of skids and gun them down.
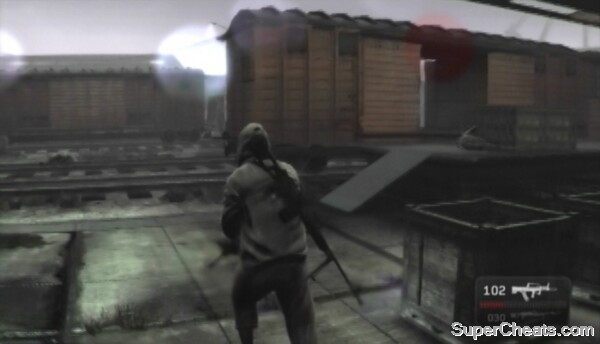
Clean up the remaining soldiers with your machine gun and then sprint to the other end of the alley. When you reach the ruined wall, drop down to the train yard, sprint across the tracks and open the door on the other side to move into the next area.
Sprint behind the two trains and take cover behind the crates along the second train. There are two gas tanks on a trolley in the doorway you can target to dispatch a couple of the enemies there. Other than that, hang back with your machine gun and put down the rest of the enemies in the station. The game will auto-save once you've completely cleared the station of enemies, so mop up with your machine gun before moving outside.
Watch out for the sniper in the train yard.
Take cover behind the pillar to the right of the train car up ahead. A wave of soldiers will appear, so shred them with your machine gun and then push forward. Take cover behind one of the pillars in front of the row of train cars and look for a sniper on top of the structure at the other end of the area. A distance marker will be pointing to this sniper. Crouch behind the pillar and continuously fire at the sniper until he falls.
Cross to the cement cover by the tracks once the sniper is down. Some more soldiers will appear by the train cars across the tracks. There are a couple of red gas tanks on a trolley on the right side of the platform you can target to hopefully kill off one or two of these enemies. Push forward to the open train car once you've dealt with these enemies and take cover inside. Yet another batch of soldiers will appear on this side of the tracks; put them down before crossing the tracks and opening the door at the other end.
Once you're through the door, hold LT/L1, slowly move out of the train car and gun down the soldier on top of the second car. Then, exit the car and take cover behind one of the stacks of crates along the side of it. Put down the soldiers covering in the distance and then move forward.
Enter the open train car when you come to it and pick up one of the acetylene tanks inside. A train is starting up in the distance and you must catch it before it leaves. There are several soldiers between here and there, so you'll have to quickly clear them out and then make a mad dash for the train.
Get to the train before it pulls away.
There's no need to kill every soldier here; just enough so you can make it to the train without being gunned down. Throw the acetylene tank you're holding and shoot it to clear out a couple of the soldiers. Target the two red gas tanks on the trolley by the train car to your right if any of the soldiers are moving into the cover on the platform there. There's another acetylene tank in the train car you can use if things are still sticky.
When the train starts to pull away, sprint out of the train car and make a beeline for the caboose to trigger a cutscene and complete the chapter.
Catching the train
This chapter consists of an on-rails sequence in a hijacked helicopter. You're armed with a machine gun that has unlimited ammo.
The pilot will start by hovering alongside an office building. Armed guards inside the building will shoot through the windows and continuously fire at you. The biggest threats here are machine guns and RPGs. There will be a distance marker pointing at any enemy that is wielding a machine gun or an RPG, so be sure to prioritize these targets.
As soon as a machine gunner appears, direct your fire at him to take him down before he can do any damage. You may be covered inside the helicopter while not shooting, but you can still get hit, so an unanswered machine gun will down you in no time. Once the machine gunner is down, cease fire and wait for the helicopter to move on. Reload your machine gun in the meantime.
You'll face an RPG launcher-wielding enemy as the helicopter hovers outside the next set of windows. The RPG launcher can destroy your helicopter, so you must kill this enemy quickly.
As soon you're able to spot the enemy with the RPG launcher through the windows, spray him with your machine gun and then take cover. You'll face another machine gun-wielding enemy when the helicopter moves up, so gun him down quickly and then get back behind cover to avoid taking unnecessary fire. You'll face another RPG in the next room; shred him as soon as he's in your sights and then immediately cease fire. You'll face one more machine gunner before the pilot pulls away from this building.
Surviving the first set of MGs and RPGs
A gunship will appear when the pilot reaches the next building. The white bar in the distance marker pointing to this gunship indicates how much damage it has sustained. You must completely deplete the meter to destroy the gunship.
Attached to the gunship is a powerful turret that can rip you to shreds if you aren't careful, so exercise extreme caution here. The key is to wait until the gunship stops shooting before returning fire. Then, as soon as it begins shooting again, cease fire and wait for its fire to lull again before popping back out to continue shooting.
Shooting down this gunship may take awhile, but its weapons can kill you very quickly if you aren't careful, so be patient. Keep the target reticule trained on the gunship for as long as possible to do the most damage.
Shooting down the first gunship
Once you've managed to shoot down the gunship, the pilot will ascend to a higher floor. Surviving this floor is a bit tougher, as you really need to clear out as many of the guards on the floor as you can before the pilot moves on to the next set of windows. Take aim as your helicopter flies alongside the building and open fire as soon as the first batch of enemies is visible through the glass. Spray the RPG user as soon as he appears.
Reload your machine gun when the pilot moves past the first set of windows, then immediately take aim and start firing at the next batch of enemies. You'll face two RPGs here, so direct your machine gun fire at them as soon as their distance markers appear to quickly put them down. Reload your weapon again when the pilot pulls away from these windows and then take to killing the last batch of enemies.
Surviving the second set of RPGs
When the pilot pulls away from the building, cease fire and wait for another gunship to appear. Deal with this gunship just as you did the first: keep behind cover until its fire lulls and then begin returning fire, keeping the target reticule trained on the gunship until it starts shooting again. Repeat this to stay alive and destroy the chopper.
Destroying this gunship may take a bit longer since it tends to hover behind the large signs on top of the building. These signs are destructible, so if the gunship's shots are being blocked by it, feel free to chip away at the sign with your machine gun.
Shoot the gunship out of the sky to complete the chapter.
Shooting down the gunship at the helipad
You're without a weapon at the start of this chapter, so your first task is getting your hands on one. A couple of armed soldiers will approach the vent up ahead, so sprint to the vent, crouch behind it and wait for them to get close. When the first soldier comes to a halt, immediately move in and press the B/Circle button to take him as a human shield. You're automatically given a pistol when you take a shield, so headshot the second soldier and then press the B/Circle button to execute your shield.
Both soldiers were carrying Buqiang 800 rifles, so pick up both guns for extra ammo. Once you have the rifle, sprint up the steps and take cover behind the AC unit on the platform. The distance marker on screen is pointing to a sniper, so crouch behind cover, take aim with your rifle and shoot the sniper in the head to put him down.
Getting a weapon
With the sniper down, you still have several armed guards to contend with. Keep behind cover and pick off any guards you can see before moving up. Be careful when switching cover, as you may inadvertently be placing yourself in an enemy's line of fire. Always ensure the surrounding units are clear before switching cover.
There are three or four soldiers by the door at the other end of the rooftop, so pick them off with your rifle before moving out into the open. Scour the platform for weapons and ammo before opening the door at the far end of the rooftop to enter the building. Be sure to pick up the two Buqiang 800 rifles dropped by the soldiers as well before heading inside.
Proceed down the stairs beyond the door. Take the guard on the walkway hostage and execute him. Then, head down the ramp to your left and take cover behind one of the machines there. A ton of guards will appear on the walkway at the other end of the area. Gun down the guards on the parallel walkway and keep an eye on the machines to your right, as a few of the guards may move there to get a better shot at you.
Once you've dealt with the guards in sight, move to the right and take cover by the stairs on the other side of the walkway. Pick off any soldiers on the upper walkway and further down before moving out from cover. The game will auto-save once you've killed the last enemy in this area.
Use the Buqiang 800 rifle to pick off distant enemies.
You can find a fire extinguisher on the upper walkway in this area before moving on. As well, press down on the D-pad and pick up any Buqiang 800 rifles that appear for extra ammo. When ready, follow the walkway into the next area and keep an eye on your left for some stairs. Head up the stairs and take cover behind the machine at the far end of the upper walkway. Throw and shoot the fire extinguisher if you brought it and then start picking off the soldiers below with your rifle.
When the area below is clear, head down the steps at the end of the upper walkway and enter the corridor straight ahead. Follow this corridor to its end and enter the elevator there to move on to the next area.
After the cutscene, move to the end of the hall and turn right. Move through the doorway here and take cover behind the desk just beyond it. Take out the two guards by the windows and then take cover behind one of the display cases to your left. Kill any remaining guards on this side of the room and the army will enter from the other side. Take cover behind one of the display cases at this point and start putting down the soldiers with your rifle.
There will be a gunship hovering outside. Ignore this gunship and try your best to avoid taking fire from it. You'll have to shoot it down eventually, but this is best done with a machine gun, which you can only acquire in the next room. It's easy enough to avoid the gunship here; just remain by the display cases and stay away from the windows.
The game will auto-save when you kill the last soldier in this room, so don't move on to the next area until you've done that. Once you're ready to move on, head through the opening at the other end of the room and take cover behind the tiled wall. There's a machine gunner at the other end of this area. There will be a distance marker pointing at him. You must dispatch this enemy so you can pick up his machine gun and use it to shoot down the gunship hovering outside.

You'll need a machine gun to shoot down the gunship hovering outside.
If you still have a rifle, you should be able to take out all of the soldiers, including the machine gunner, from behind the tiled wall. If you're out of rifle ammo or need to get closer, move up to the pillar on the left once you've killed as many of the soldiers as you can from your current position.
When the room seems to be clear of soldiers, move up to the cubicle wall beyond the pillar. From here, move over to the cubicle wall by the windows on the far right. The gunship outside will hover back and forth between this room and the adjacent one, so wait until the gunship flies out of sight and then make a mad dash for the machine gun at the other end of the room. Press down on the D-pad to locate the weapon if need be.
Once you have the machine gun, your next task is to eliminate the second machine gunner in the adjacent room, otherwise he'll give you a hard time as you're trying to shoot down the gunship. This enemy is covering by the pillar straight across from the doorway, so just approach the doorway and quickly headshot him when he pops out from cover to fire.
With the second machine gunner down, fallback and take cover at the corner of the desk by the windows. From here you can blindfire at the gunship when it reappears while taking little damage. To blindfire, press RT/R1 while behind cover without holding LT/L1. Continuously blindfire at the gunship, keeping your target reticule trained on it while it's in view, and it'll go down in no time.
Taking down the gunship
Once you've managed to destroy the gunship, return to the doorway into the adjacent room. Take cover next to the doorway and pick off any enemies you can see in this room. Move in and dispatch any remaining enemies, then pick up the machine gun on the floor and pry open the double-door at the other end of the room to move on.
Through the door, immediately take cover behind one of the display cases up ahead and begin picking off the soldiers in this room. You can move up to the pillar next to the wall on the left once you've thinned their ranks a bit. There are two guards armed with rifles behind the counter at the other end of the room, so be careful.
When the room is clear, pick up the two rifles dropped by the guards behind the counter and then proceed through the nearby doorway. Enter the smoke-filled stairwell at the other end of the hall and keep sprinting until you come to a kitchen.
Kick down the two doors in the kitchen area and immediately take cover behind the counter in the next room. A ton of soldiers will pile out of the crashed helicopter here; equip your machine gun and keep firing at the helicopter door as they come out. You'll kill the majority of them if you were quick enough. Once you've done that, look for a fire extinguisher behind the counter you're covering behind. Throw the extinguisher toward any remaining soldiers and shoot it to dispatch them.
When the first floor is clear, vault over the cover in front of the crashed helicopter and head up the ruined stairs to reach the upper walkway. Take cover behind one of the tables along the walkway, as some more enemies will soon appear. Blindfire at any enemies that try to rush your cover and then use your rifle to pick off the enemies covering in front of the windows on the other side of the walkway.
Dealing with the reinforcements
Scour the area for weapons and ammo before moving through the doorway on the upper walkway. Head up the stairs beyond the doorway to reach the executive floor. Kick in the double-door you come to and then kick down the door in the next room. Take cover behind one of the overturned couches in this room and shred the incoming soldiers with your machine gun. Clean up with your rifle and then push through the open door at the other end.
Take cover behind the stuffed zebra along the corridor and use your machine gun or assault rifle to waste the enemies that appear at the other end. Once you've dealt with those enemies, move into the next room and take cover. It's best to take cover behind one of the stuffed leopard displays on the left or right, as taking cover anywhere in the middle will likely put you in at least one enemy's line of fire.
Defeat the enemies in this room and then kick down the double-door at the other end. Move into the office here to trigger a cutscene and complete the chapter.
Head up the steps and take cover behind the unit at the top. Your goal here is to make it to the maintenance tunnel outside the airport terminal. There are a handful of armed security guards between here and there. Play your cards right and you can run past these guards without taking too much damage.
Start by killing the guard standing in front of your cover. This should cause any guards patrolling nearby to scurry for cover. At this point, sprint over to the fence to your left and continue sprinting alongside it. Take cover behind one of the units along the way if you're taking noticeable damage. Follow the fence to the runway and then move into the trench to find the maintenance tunnel entrance.
Getting to the maintenance tunnel
Be very careful as you move through the tunnel, as there are several guards stationed inside. Follow the arrows on the green signs on the walls to find your way out. Be sure to pick up the weapons and ammo dropped by any guards you put down.
Up the ladder, sprint to the hangar in the distance and head inside. There's nothing in the first hangar, so move on to the next one. Take cover behind the red tool box across from the doorway and start gunning down the guards in the area. There are a couple of acetylene tanks in the trench next to the plane you can use to make short work of them.
Open the door at the other end of the hangar once you've cleared the area of enemies. Outside, sprint down the road and kick down the door you come to. Kick down the door at the other end of this walkway and then the door at the other end of the corridor. Through the door, pick up the fire extinguisher on the wall to your right and take cover behind the conveyor belt.
When the area is relatively clear, vault over the luggage scanner by the door you used to enter the area and climb the stairs up ahead to reach the upper walkway. You can fire down at the remaining guards from here. When the last enemy falls, scour the area for weapons and ammo (be sure to pick up one of the shotguns dropped by the guards) and then open the door at the other end of the area to move on.
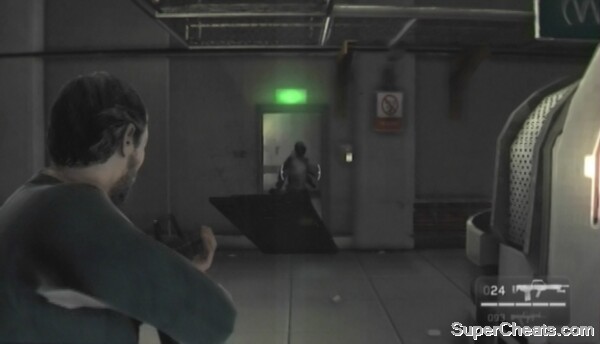
Be ready with a shotgun when approaching the exit to this area.
Kick down the door in front of you and turn right. Take cover behind one of the machines here and battle the guards on the ground floor. Take down the guards as they pop out from cover to fire and then approach the yellow door on the right. Be extremely careful when approaching the exit, as two guards -- one armed with a machine gun -- will kick down the door and immediately open fire. Take aim with your shotgun, slowly move toward the door and open fire as soon as they appear. Press down on the D-pad and look for a Buqiang 300BP shotgun before moving through the doorway. Be sure to pick up the machine gun as well.
Continue to the end of the corridor and kick down the door there. Pick up the fire extinguisher on the second machine along the wall to your left and then take cover by the corner of the conveyor belt. Throw the fire extinguisher at the two patrolling guards up ahead and shoot it to take them out.
The guards behind the signs on the upper walkway at the other end of the area are the biggest threats here. The Buqiang 300BP boasts incredible range for a shotgun, so if you picked one up in the previous area, you can easily take out the guards on the walkway with headshots when they pop up to fire. Headshot the guard covering behind the sign in front of you and then move left to the end of the conveyer belt. You should be able to take down another of the soldiers on the walkway from here.
Move under the conveyor belt ramp, take cover behind the table beyond it and start picking off the guards on the other side. You can blindfire by pressing RT/R1 while behind cover without holding LT/L1. Start moving right toward the end of the row of tables and glance back at the walkway to see if there are any more guards there you can eliminate. If there are, move down to the pillar at the end of the row of tables; you'll be able to dispatch them from here.
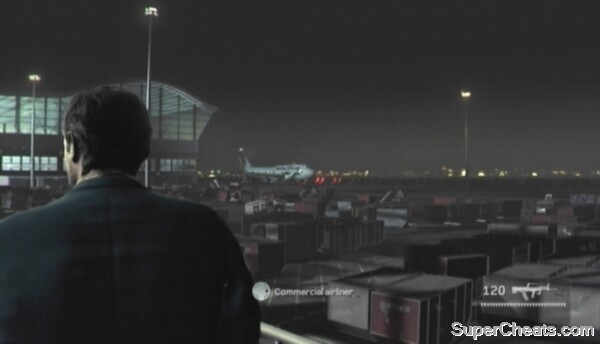
Catch the plane before it takes off!
When the area is clear of enemies, open the door at the other end of the area to proceed. Kick open the door at the end of the walkway and head outside. There's a commercial airliner visible in the distance. That's your ticket out of Shanghai. Fortunately, there isn't a whole lot standing in your way. There are several guards between here and there, but you can make it past most of them without getting your hands dirty.
At the bottom of the stairs, turn right and sprint to the end of this line of cargo containers. When you reach the end of the line, continue sprinting to the containers up ahead. Sprint along this line of containers and continue following it until the road becomes blocked, at which point turn right. Be ready to gun down a guard around the corner.
Make a beeline for the airliner once you're through the maze of containers. When you hear dogs barking, immediately turn around and fight off the two incoming dogs. You can easily kill these dogs with auto-aim, so don't aim with LT/L1; just use the Right Stick to tilt the camera toward the dogs and then press RT/R1 to fire.
Once you've dealt with both dogs, reach the plane to trigger a cutscene and win the game!
Catching the plane
Kane and Lynch 2: Dog Days features a total of 50 different achievements. Each achievement unlocked contributes a certain number of points to your overall Gamerscore. You can acquire a grand total of 1000 gamer points by playing Kane and Lynch 2.
 1. Welcome to Shanghai
2. Street War
1. Welcome to Shanghai
2. Street War 3. Death Sentence
 4. Nowhere to Hide
 5. Baby be Safe
 6. Lost Love
 7. Double Cross
 9. Bring It Down
 10. Kill or Be Killed
 11. Dog Days
 12. Dead Men Rising
 13. Catch!
 14. Can It!
 15. Mexican Showoff
 16. Sichuan Specialist
 17. Hand of God
 18. Chinese Waltz
 19. Dance Off!
 20. Trigger Happy
 21. Double Happiness
 22. Steady Hand
 23. You Want Blood?
 24. A Little Help From a Friend
 25. No Going Back
26. End of the Road
25. No Going Back
26. End of the Road 27. Giving a Hand
 28. Got Your Back
 29. Welcome
 30. Doing Good
 31. Love of Money
 32. Greedy Bastard
 33. Lightning Looter
 34. Safe Crime
 35. Battle Hardened
 36. Addict
 37. The Cleaner
 38. Escape from ...Anywhere
 39. D.I.Y.
 40. Putting on the Ritz
 41. Blackjack and Hookers!
42. Most Wanted
41. Blackjack and Hookers!
42. Most Wanted 43. Mastermind
 44. Rat Killer
 45. Law Enforcer
 46. Harry Houdini
 47. Unfinished Business
 48. Alpha Male
 49. No I in TEAM
 50. There's an I in TRAITOR
Kane and Lynch 2: Dog Days features a total of 51 unlockable trophies. There are 42 Bronze trophies, five Silver trophies, four Gold trophies and a Platinum trophy unlocked by earning every other trophy available in Kane and Lynch 2.
1. Welcome to Shanghai
Complete 'Welcome to Shanghai' on any difficulty.
Bronze
2. Street War
Complete 'The Details' on any difficulty.
Bronze
3. Death Sentence
Complete 'Blood, Sweat and Tears' on any difficulty.
Bronze
4. Nowhere to Hide
Complete 'Laying Low' on any difficulty.
Bronze
5. Baby be Safe
Complete 'Coming Home' on any difficulty.
Bronze
6. Lost Love
Complete 'A Thousand Cuts' on any difficulty.
Bronze
7. Double Cross
Complete 'The Deal' on any difficulty.
Bronze
8. Slow Train to Hell
Complete 'Out of Shanghai' on any difficulty.
Bronze
9. Bring It Down
Complete 'Air Strike' on any difficulty.
Bronze
10. Kill or Be Killed
Complete 'Resurrection' on any difficulty.
Bronze
11. Dog Days
Complete Story Mode on any difficulty level.
Gold
12. Dead Men Rising
Complete Story Mode on Extreme.
Gold
13. Catch!
Push your human shield into an opponent in Story Mode.
Bronze
14. Can It!
Kill 10 enemies with exploding canisters.
Bronze
15. Mexican Showoff
Kill 5 enemies while downed before successfully recovering.
Bronze
16. Sichuan Specialist
Escape the restaurant in 'Laying Low' without being downed on any difficulty.
Bronze
17. Hand of God
Complete a Story Mode mission without dying once on any difficulty.
Bronze
18. Chinese Waltz
Kill 5 enemies without losing your human shield.
Bronze
19. Dance Off!
Execute 30 enemies while holding them as human shield.
Bronze
20. Trigger Happy
Kill 5 enemies in 15 seconds with any pistol whilst not dropping your health below 90%.
Bronze
21. Double Happiness
Kill 6 enemies in a row with a shotgun - all of them as one shot kills.
Bronze
22. Steady Hand
Get 5 headshots in a row using the same clip.
Bronze
23. You Want Blood?
1000 kills.
Silver
24. A Little Help From a Friend
Complete 1 mission in Co-op.
Bronze
25. No Going Back
Complete 5 missions in Co-op.
Bronze
26. End of the Road
Complete Story Mode in Co-op.
Silver
27. Giving a Hand
Finish 30 enemies your Co-op partner shot 'Down Not Dead'.
Bronze
28. Got Your Back
Revive your Co-op partner 10 times.
Bronze
29. Welcome
Successfully escape once in Arcade Mode or in any Multiplayer Ranked Match.
Bronze
30. Doing Good
Successfully reach round 5 in Arcade Mode.
Bronze
31. Love of Money
Successfully reach round 10 in Arcade Mode.
Silver
32. Greedy Bastard
Earn at least $5,000,000 in every level in Arcade Mode.
Bronze
33. Lightning Looter
Reach $8,000,000 in under 6 minutes of actual playtime in Arcade Mode.
Bronze
34. Safe Crime
Finish 5 rounds in a row without getting any penalties in Arcade Mode.
Bronze
35. Battle Hardened
Complete one session in each Multiplayer Mode (Ranked Match).
Bronze
36. Addict
Win 20 sessions of Cops & Robbers (Ranked Match).
Bronze
37. The Cleaner
Escape as a traitor with 50% of any level's total loot in Arcade Mode or Multiplayer Ranked Match.
Bronze
38. Escape from ...Anywhere
Successfully escape 25 times in Arcade Mode or in any Multiplayer Ranked Match.
Bronze
39. D.I.Y.
Escape with more than $2,500,000 in a round of either Arcade Mode or Multiplayer Ranked Match.
Bronze
40. Putting on the Ritz
End a round as Criminal Expert in a Fragile Alliance Ranked Match.
Bronze
41. Blackjack and Hookers!
Accumulate $25,000,000 in your career (Arcade Mode and Multiplayer Ranked Match).
Bronze
42. Most Wanted
Accumulate $50,000,000 in your career (Arcade Mode and Multiplayer Ranked Match).
Silver
43. Mastermind
Become criminal Mastermind (Highest Rank) in Multiplayer Ranked Match.
Gold
44. Rat Killer
Kill the Undercover Cop as the last surviving criminal and escape (Ranked Match).
Bronze
45. Law Enforcer
Win as the Undercover Cop by killing all criminals yourself (Ranked Match).
Bronze
46. Harry Houdini
Escape from being held as human shield in any Multiplayer mode (Ranked Match).
Bronze
47. Unfinished Business
Kill a yellow carded criminal whilst Down Not Dead (Arcade Mode and Multiplayer Ranked Match).
Bronze
48. Alpha Male
Have the most kills in a Cops & Robbers Ranked Match.
Silver
49. No I in TEAM
Earn the highest Criminal Loyalty level in Multiplayer Ranked Match.
Bronze
50. There's an I in TRAITOR
Become Scum in a Multiplayer Mode (Ranked Match).
Bronze
51. Love of the Game
Unlock all Multiplayer Mode trophies.
Gold
52. Blood On Your Hands
Earn all Trophies
Platinum

 Mission 8 - Swords of Sanghelios: Halo 5 Guardians Guide
 Lego Marvel Superheroes Gold Brick Location Guide
 OTF vs. TTF Fonts: Which One Is Better?
 thatgamecompanys Journey Gets Perfect Review Scores
 How To Easily Beat Gargoyle Monster In The Witcher 3: Wild Hunt