Unofficial Killzone 3 Guide by vhayste for
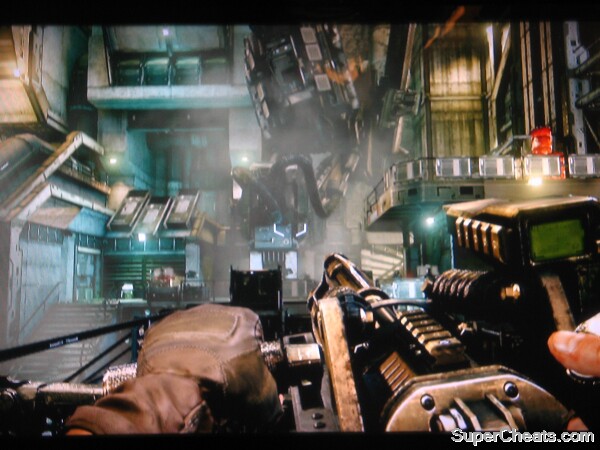
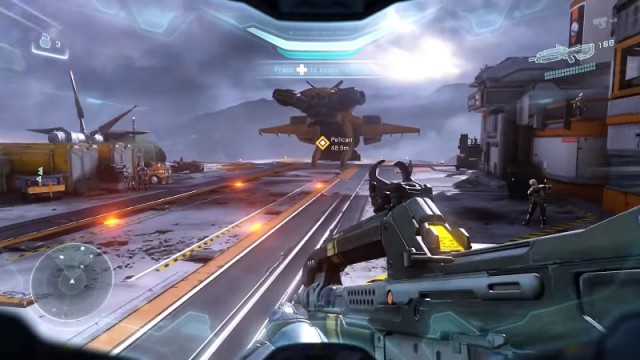
Welcome to SuperCheats.com's Killzone 3 walkthrough. Our guide takes you through the complete single player campaign, and is loaded with tons of gameplay tips and instructions and videos on how to complete all the trophies to get platinum your game. It's a fairly short guide by our standards, but that doesn't mean the quality is any less than you have come to expect from our free online guides. Written by vhayste, who has tons of guide writing experience, this guide is sure to help you complete any part of the game you are stuck on or walk you through the whole single player missions if you prefer. Health You don't die immediately after taking fatal damage. Your partner Rico can also revive you as long as he's not taking heavy fire, incapacitated or if you're not too far from him. Take note that if you die too often, he won't be able to revive you anymore, resulting in instant death. You can also revive fallen (named) allies using the same method. Fight from Cover Heavy weapons There will always be times when you can't use mounted weapons efficiently because of heavy enemy fire. In this situation, it is better to detach the weapon and shoot enemies from cover. When low in ammo, you can run and remount it to replenish its ammo. You can repeat the process until you whittle down the enemy resistance. That said, ALWAYS carry a heavy weapon. Brutal Melee Waypoints Ammo Crates Collectibles Approach the counter to the left then proceed to the next area as soon as you're able to. Head to the shooting range next. Follow your buddy until you reach the console. Interact with it then enter the door. Just continue following your buddy until you reach the objective area. Once ready, approach the quartermaster. When ready, stand by the crate and press circle to replenish your ammo. Next step by the range and shoot the targets. This is pretty much a tutorial portion of the game so try to familiarize yourself with the controls if you don't know them yet. Once done, head to the next objective. Don't forget to replenish your ammo along the way. Just stick with your comrade and you'll finally reach the chairman. Watch the next scene. Follow Rico then take out the two Helgs (Helghasts) using melee attacks. Continue running down the street and following Rico. Once you regrouped with a handful of stragglers, fight off the enemies as you make your way to the river. There will be a lot of cover there so use them for your own good. Use your grenades to blast enemies behind cover. There is a Helg here carrying a missile launcher so don't forget to grab it. Replenish your ammo using the crate by the corner, right before the objective point. After the scene, enter the next door and kill the Helg by the window. Use the ammo crate nearby if you need to resupply. Fight your way to the main hall and clear it. Once done, open the door and get rid of the helgs in the square. If you picked up a missile launcher along the way, its best to use it now. There's an ammo crate upstairs where you exited from, in case you need to replenish your ammo. Make your way to the stairs and get rid of the enemies. Open the gate using the hand valve. Jump down then move ahead the friendly APCs. Enter the building to the right then boost yourselves up. Watch the following scenes. After the scene, man one of the nearby turrets and kill all the helghasts that will appear. You can also detach this minigun and carry it with you. Next, head to the museum. There will be several enemies here as well so take cover and slowly pan the area. Go upstairs and get rid of more helgs along the way. Once you've reached the rooftop, there will be more helgs waiting to be killed. If you've detached and carried the mini-gun earlier, then it should help you clear the area much quicker. Take note that you can also shoot down the dropship to prevent any reinforcements from disembarking. There's also an ammo crate nearby to replenish your ammo.

Basics
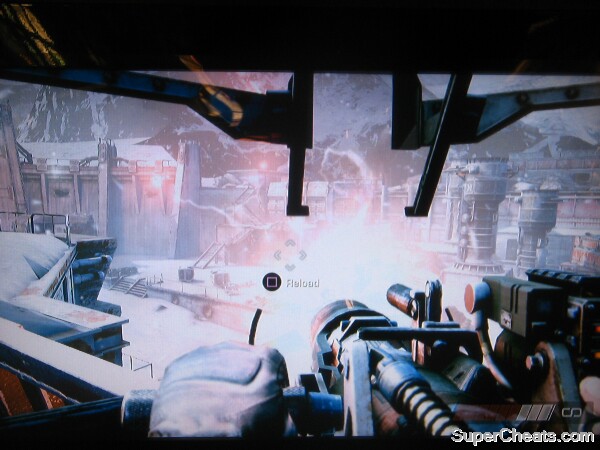
Like most shooters you've probably played, there's no healthbars or health counters in KZ3. As you take damage, splattered blood appears in your screen. If you continue to take damage, your screen will turn red, citing critical damage. You need to take cover and avoid taking damage to recuperate and restore your health.
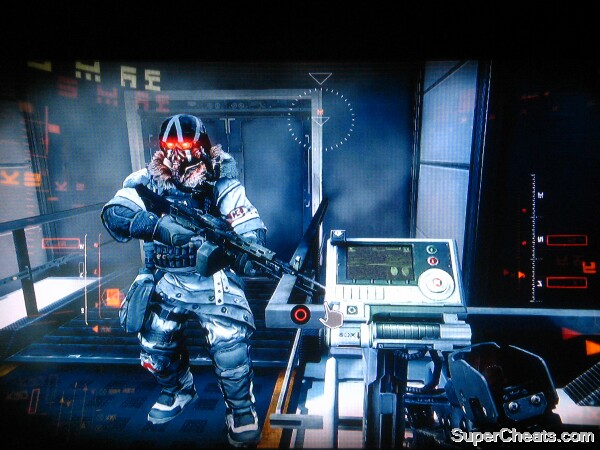
Take note that your character is not heavily armored nor bullet resistant. The Helghast sport some really powerful weapons in the game and you'll really die easily if you're not careful or if you're not fighting from cover. That said, always try to find the nearest cover as you advance through enemy fire. This will help you survive and take out enemies more efficiently.
Unlike its predecessor that only allows you to carry a primary weapon and a sidearm, KZ3 allows you to carry a heavy weapon. These include the flamethrower, WASP, missile launcher, mini-gun, arc cannon, etc. Mounted weapons have infinite ammo but they can be detached from their mounts so you can carry them with you. Take note that detached heavy weapons will have a limited ammo supply which you can replenish using the ammo crates scattered along the way or just by remounting them.
There will be instances when charging towards an enemy and finishing him off with a melee kill works best than shooting him. The game will allow you execute brutal melees and kill enemies off instantly and stealthily. For heavier enemies, you need to deal damage to them first before you can execute them with hand-to-hand combat.
Keep yourself oriented to your mission objectives by pressing the UP arrow in your DPAD to make the waypoints. This will help you get around confusing hallways and buildings.
You'll find plentiful of ammo crates along the way that will replenish all your ammo (heavy weapon included) and your grenades. Running back to an ammo crate will give you access to infinite ammo, especially if you're engaged with numerous enemies. The crates looks the same and they're glimmering, making it easy to spot them.
This game offer pure action and shooting fun. Don't worry about exploring the area too much since Kz3 doesn't have any collectibles at all!
A New Beginning

Evacuation Orders

Turret Fun
After clearing the rooftop, place the charge on the door, keep distance then blow it open. Take cover though and a small helg squad will appear and attempt to ambush you. Replenish your ammo as needed, then follow the straightforward path until you meet up with the rest of the ISA forces.
Note: There are four dropships that you can shoot down using the mini-gun and unlock corresponding trophy. See the “No Witnesses” trophy in the Trophies Section for more details.
The mini-gun owns them all
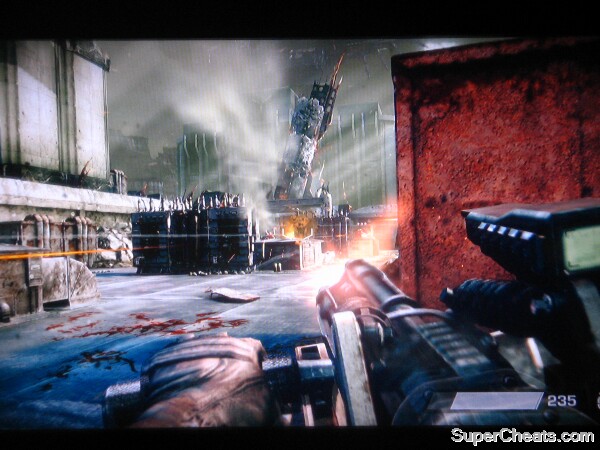
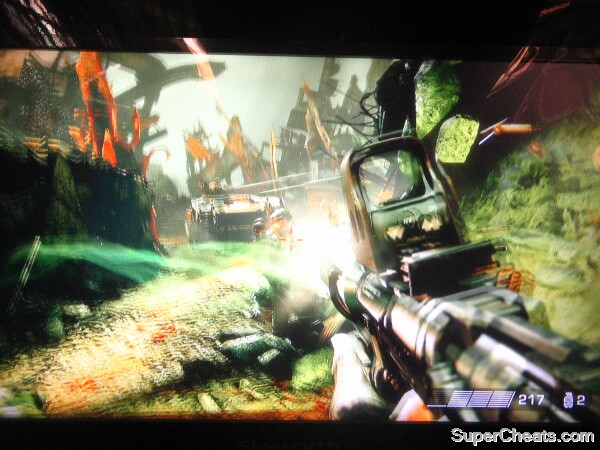
You may want to use the mini-gun all-throughout because it will make your job a hell lot easier. Assist the EXO as it clears the path ahead. This armored ally won't last long as it will fall in the hands of the enemy RPG troops. They will appear on the building to the right so make sure you're in good cover otherwise Rico won't be able to revive you easily if you die. Get rid of the enemies on the second floor to the right by shooting the pillars, making the floors overhead crumble and crush them.
After killing the RPG team, head to the next area and more helgs will start pouring in. Clear them out and follow the allied NPCs as it moves along the highway. Replenish your ammo as needed then continue sweeping the helgs along the way until the next scene.
You'll be in the gunner seat of an HAMR. You have two weapons at your disposal; the heavy machine gun to the right (R1) and the cannon to the left (L1) Use the cannon against enemies behind cover or enemy armor. Remember to go easy on the MG trigger since it will overheat after continuous fire and will take a few seconds to cool down. When you reach a section where there are turret emplacement and dropships, prioritize the turrets first as they'll easily chew you guys down. After that, take out the missile troopers, then the drop ships. A few direct cannon hits should be enough to take them out. Killing 40 foot soldiers during this sequence will unlock the trophy Mopping Up. See the Trophies section for more details.
HAMR helghan sweep
As you continue forth, enemy APC will start chasing you down as soon as you see your cruiser overhead. Just focus your gun behind the vesicle and concentrate on one target at a time to kill them faster. Get rid of them all to unlock the Sawn Off trophy.
Sawn Off Trophy
You'll encounter heavy armor as well that will take a considerable number of direct hits before getting destroyed. Make sure to make your shots count to avoid getting too damaged. Take out the MG emplacements along the way as well. Continue doing this until you trigger the next scene. Destroying all tanks in the area will unlock the Smoking Wrecks trophy.
Smoking Wrecks trophy - Ah, the smell of burning metal...
You'll be alone to flank the enemy force and take out their MGs. Go upstairs and follow the corridor. Continue breaking the doors until you find an MG emplacement. Take out the helg and man it to tear down the enemy forces below. Once your allies successfully pushed through, leave the MG and continue forth. There will laser sights as soon as you take the next hallway, indicating the snipers on the other side. Hug the walls then carefully move till you reach the corner. Kill the unwary snipers then use their rifles to take out the other snipers if you want. Move forward as you clear the enemies on the buildings and continue until the next scene triggers.
Use your sniper rifle to take out the MG positions. While here, you can also attempt to unlock the Eagle Eye trophy by shooting 6 helghasts using the sniper rifle without reloading or changing weapons. This is the best spot to do this since the enemies are technically limitless until you clear the MG positions. Make sure to get rid the ones closes to you as they'll most likely target you.
Helping the ISA, one bullet at a time.
Move along as you clear the targets within your line of sight. There's an ammo crate around the corner if case you need it. You still need to clear out of the snipers that will appear from the buildings. Don't bother killing the ground troops for now; just concentrate on taking out the snipers. Once you've cleared the snipers, the allied ground troops will request assistance in killing off the few remaining helgs. Take them out and watch them demo the arc.

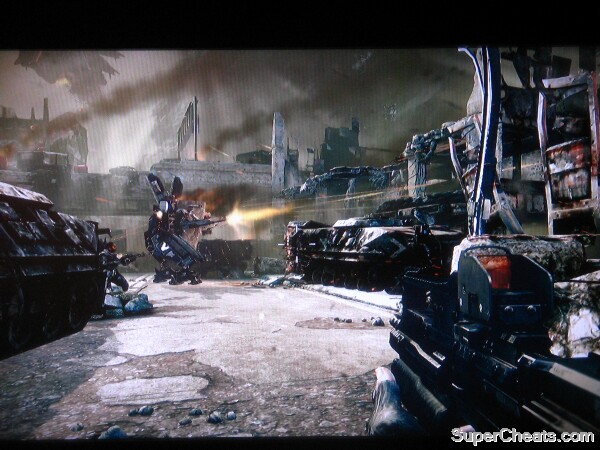
After the scene, you'll be given access to ride the EXO. Piloting the EXO is rather easy as the controls are pretty much the same as when you're walking. You can sprint, jump and fire two different weapons. The machine gun overheats as well and the missile launcher has low firing rate so do your best to maximize their effectiveness. The EXO is sturdy but it is not invincible. Use covers to avoid enemy fire as you normally do on foot.
Into the moving steel cage.
Regroup with the convoy and take out the enemy fortifications. Take the broken fly-over to the left and take out the enemy tanks as well as the arc cannon on the other side. Enemy MG emplacements may be hard to spot from a distance since they blend well with the ruined buildings so take note where the tracers are coming from and zoom it to increase your accuracy. Take out the remaining enemy armors and emplacements to update the mission objectives.
Once in control, follow the path and take out the enemy forces, including the flamethrower-totting ones. Around the second corner is a ramp to your right, which you can climb to pick up the flamethrowers dropped by the flame troopers a while ago. This is considered as a heavy weapon so you'll still have you primary weapon with you. Continue fighting your way and clear the path. You'll soon encounter an enemy NPC. Immediately take cover and shoot them with your assault rifle or burn them to crisp as they charge towards you using the flamethrower. Continue upstairs and watch the next scenes.
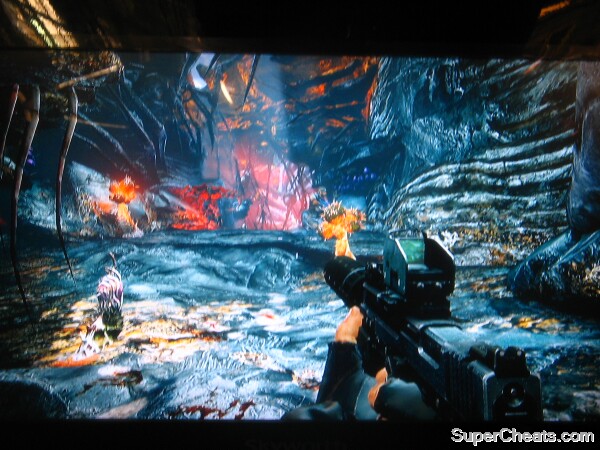
Be careful of the tentacled plants as they'll stab you if you get near. Be wary of the bomb-like bulbs that explode when shot. Continue along the path until the next scene triggers. Once in control, melee kill the guy on your right then shoot the one on the ledge. You can pick up the rifle since the silenced SMG you're carrying right now is considered as a sidearm. If you want things to go smoothly, stick with your silenced weapon. Carefully move along then crouch in the grass as your partner tells you to. Wait for the helghast to stop and turn his back before sneaking behind and melee killing him.
Continue forth and stick to the shadows. Wait for the two helghasts to move beside a burster plant then shoot it to kill them both. Killing them using this method will unlock the Spiky Personality trophy.
Spiky Personality trophy - Burster surprise
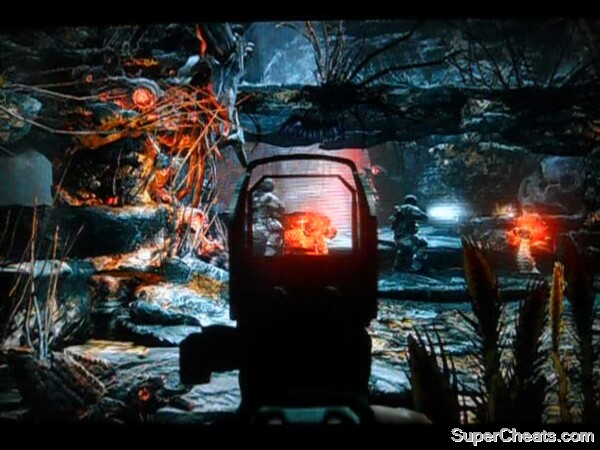
Move along and boost yourselves up. Wait for the arriving troops to disperse before leaving the tunnel. Crouch and move through the grass and behind cover. Take out the enemy soldiers one by one. When you encounter two more soldiers, stay put and use the burster plants to kill them both. Continue forth and creep to the shadows. There will be two more soldiers on the ground and one patrol on the ledge ahead. You can do this either by: (1) headshotting the patrol on the ledge (or the burster when he's near it) when the duo below are not looking or (2) wait for the duo to stop under the ledge then kill them both by shooting the burster near them.
Never There Trophy Part 1 of 4 - Ninja Trainee
If ever the cover is blown and a signal flare was launched, Capture Troopers will appear. These are those soldiers armed only with blades. Shoot them first as they rush towards you then quickly press L1 once it appears to melee kill them. If you didn't press L1 fast enough, you'll die. Doing so will unlock the trophy Turn the Tables. If you're after the trophy “Never There”, you may need to restart the chapter/section to “clean” the slate. Continue through the tunnel and outside until the scene triggers.
Turn the Tables Trophy - Hunter becomes hunted
You'll be alone here so you need to move fast and quiet. Stealth kill the first trooper as soon as his partner walks away. Follow the other helgh and kill him within the tunnel. Next, wait for the nearest trooper to stop and turn his back. Sneak behind and kill him immediately or just place a headshot on him to prevent him from alarming the others. Step back a bit then carefully snipe the trooper above the ledge. Go through the small tunnel to the right then snipe the helg ahead, beside the tunnel. Finally, take out the trooper standing on the edge.
Never There Trophy Part 2 of 4 -Stalker 101
Continue forth until you reach the next open area with a couple of helgs. Wait for the one on the ledge to go to the farthest right then snipe him. Kill the other one afterward. You can also hide behind the waterfall to the left and takeout the guards as you see fit. Move ahead and carefully take out the helg inside the cave.
There will be more enemies on the other side so don't just shoot haphazardly. Wait for the troop carrier to move then crouch in the grass. Even if it seems to obvious that they're too thin or short to provide adequate cover; but still, the enemies won't see you. Forget about engaging the enemies here as you stand no chance. Carefully thread the grass and watch out for the two helgs that will climb down from the right. Stick to the shadows and carefully move to the next patch of grass. As soon as a troop carrier walks down, quickly move back to cover as it will detect you and alarm the nearby helgs. Once it leaves, move along the grass up until you reach the next cave. Continue forth until the next scene triggers.
Never There Trophy Part 3 of 4 and Trophy unlocked: Grassman
Once ready, melee kill the first helg in view. You can get through the area by either going to the left or right. Both provide adequate cover and efficient killing spots. Take out the enemies then approach the control panel.
Never There Trophy Part 4 of 4 - Mister Assassin
Note: If you managed to reach the uplink without alerting a single guard, the trophy Never There will be unlocked after the scene. Refer to the Trophies section for more details.
After the scene, switch to your primary and fight off the helgs. The biggest threats here are the troop carriers. Run to the right and take cover. You can use the small cavern to snipe and shoot the mechs' heads to destroy them. If you need ammo, head back to the ammo crate and replenish. There's also a light machine gun beside the crate in the middle so don't forget to pick it up as well.
Climb up the ramp and through the tunnel until you reach the next open area. Take cover and fend off the helg assault. Continue whittling down their ranks until the area's clear. Continue fighting your way until you find some allies. Follow the objective marker until you reach the base. Keep following the path until the next scene is triggered.
Once in control, you need to stand your ground and fend off the attack. There will be plenty of ammo here so don't hesitate to go all out and kill as many as you can. Use the LMG against the troop carriers to destroy them faster. Fall back as your allies do. Just keep fighting them until the enemy deploys a smokescreen. Watch the following scenes and this chapter ends.

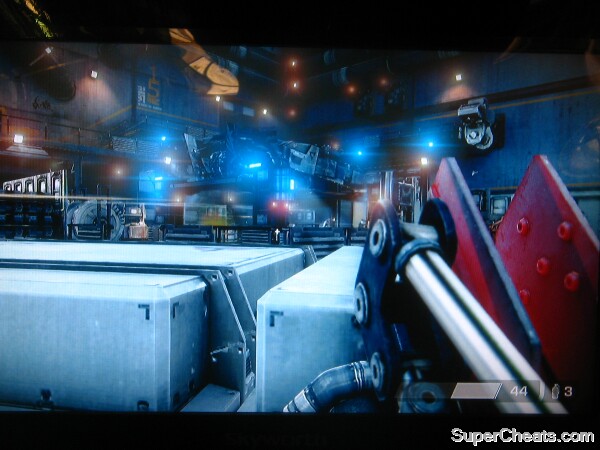
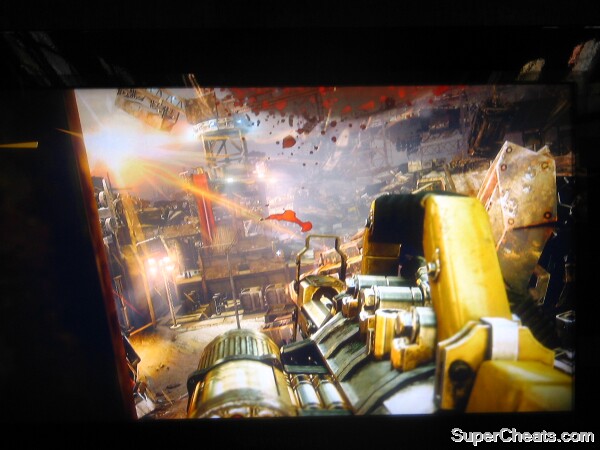
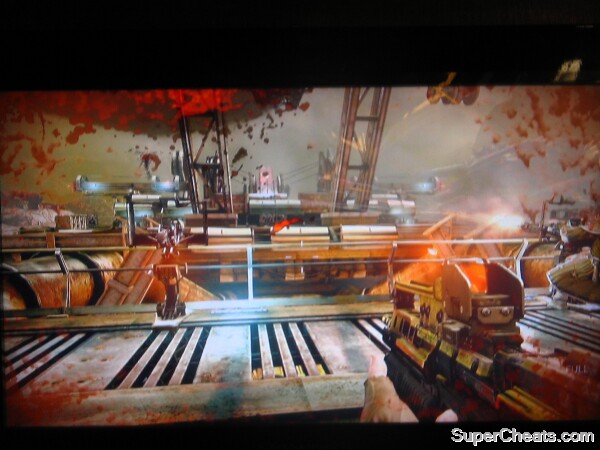
You'll be controlling a mounted machine gun. Basically, you just need to mop up enemies. Like always, take out the priority targets first. These include missile troopers, AA guns, etc. Don't let go of the fire button since the intruder guns doesn't overheat and has infinite ammo. You also need to shoot the fuel pipes to destroy the platforms and while you're at it, destroy all the destructible items. These usually glow blue so its not hard to spot them. Keep destroying targets until the next scene.
Note: If you're able to destroy all destructible targets on the two platforms and the last two dropships, this trophy should unlock during the next scene.
Shower of lead
When you're back at your feet, follow Rico and take out the enemy forces. After clearing them, replenish your ammo using the crate inside the shelter. Clear out the enemies in the next cabin then go upstairs. Clear out the enemies again then head out to the ship's main deck. You'll be introduced to new enemy flyers. Just take cover and shoot them down. There's an ammo crate and some weapons up the ramp to the right. Use it if you need then take out the missile launchers. Continue up and boost yourselves. Watch the next scene.

You'll now need to reach the next destination using your jetpack. Don't forget that it's not meant to make you fly; it will only allow you to boost your jumping distance and height. Also, take note that you're not armored either. So don't forget about taking cover and such. You can always temporarily “unequip” the jetpack and switch to your normal weapons should you wish to. Start by hopping across the ice to reach the next shipwreck. Fight your way to the AA gun then plant a charge on it.
After the scene, head to the next platform. Fight your way through the enemy foot soldiers and flyers. Then shoot the blue electrical fuse on the side of the platform to create a ledge where you can jump on. Fight your way down the ramp until you reach the support. Plant the charges. After planting the second charge, you need to clear out of the platform within 4 minutes. Be careful of the enemies that will hunt you down after setting the charge. Just take your time in clearing them since evading them will never be a good idea. Continue running to the top then run towards the edge. If you managed to escape the rig within two minutes, you'll unlock the Quick Exit trophy.
Rush job
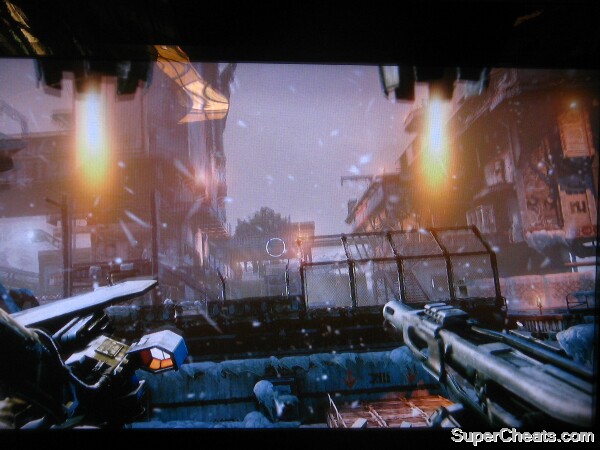
Once ready, run to the left until you reach the next accessible bunker. Clear out the enemies then continue upstairs. Use the mounted WASPs to clear out the enemy fortifications below. You can also track multiple targets so the missiles can home in on them. You can detach one of the WASPs here then attack on a different position. To replenish its ammo, you can re-mount it or grab some by the ammo crate.
Head to the next bunker and clear it. The pillbox should be visible from this point. Use one of the mounted WASPs there to destroy the target. An enemy tank will appear as long as several footsoldiers. Destroy the tank and the other enemies then move to the next objective point.
Rain of Wasps
Resupply if needed then take out the tank using the WASP. You can abuse its tracking ability and heavy damage since there are several ammo crates available. Next, clear out the building then follow Rico upstairs. Watch the next scenes.
The early part of this chapter is just like replaying the first chapter. Once you've reached the factory floor, you'll be instructed to create a diversion. Look for the glimmering valve and activate it. Next follow Rico until you reach the broadcast room. Watch the following scenes.

Note: If you want to unlock the Shattered Trophy, you need to destroy every glass panel in the next few rooms. Keep a look out and destroy them all.
You'll be carrying the portable Arc Cannon. as your heavy weapon. This is especially powerful so use it as you see fit. Start by fending off the enemy attack. There's also an ammo crate here in case you need it. In the next room, take out the enemies. Be careful of the capture and shock troopers. The arc cannon is practically effective here as it ignores light obstacles and cover, and has a spread effect. Replenish using the ammo crate before if necessary. Continue to the next objective point and go upstairs for another scene.
There's an ammo crate inside the room to your immediate right. Clear out the first wave of enemies here until Rico moves to the terminals. More higs will appear from the balcony so take cover and get rid of them as well. Before enter the data center, you may look around and destroy the glass panels. The tricky ones to find are the ones on the second level, on top of the datacenter and the ones on the second level, above where you came from. The others are not hard to miss so refer to the video below to find the ones on the second level.
Shattered Trophy - Glass hunting
Clear the first wave of enemies then the next wave of flyers. Climb upstairs and take out more enemies. There's an ammo crate here as well. Kill the enemies on the other side of the factory then take the lift down. Take out the enemies there. Be careful of the missile troopers up in the balcony and shock troopers on the ground. Head to the next lift then help the POWs clear the enemies in the next room.
Continue outside and equip the jetpack if you want. Take out the footsoldiers and the missile launcher in the far end of the factory yard. Finally, an ATAC will appear. Take cover and shoot it while its hovering. You don't need to chase it around as it has a fixed flight path and pattern. Just keep shooting it until its destroyed.
ATAC Battle - Bird of Steel
You'll now be using a Helghast Ice Saw. You need to steer your vehicle and use the guns at the same time. The gun sight is fixed so you need to manually adjust your direction to align the reticule to your target. The good thing however, is its secondary weapon that locks automatically locks to the target and fires a volley of homing missiles. Destroying all dropships and enemy ice saws will unlock the Iced trophy. Watch the following scene and the chapter concludes.
Speeding Ice Crusher
Follow the main path until you reach a deadend with a couple of explosive barrels on it. Shoot it to clear the path. Continue following the path until the scene triggers. Backtrack a bit and grab the Boltgun from the nearby weapon cache. Sentry bots and helgs will attack right before you cross the footbridge. After getting rid of them, continue along the path to reach a gate. Take out the guards then place a demo charge to blast it open.

Fight your way through the first corner then replenish your ammo using the nearby crate. Take out the sentry bots first then take down the sniper in the upper platform. Clear the area of enemies. Use your Boltgun to take out enemies behind cover. Once cleared, head to the crane then use the ladder to go up. More enemies will appear. You can switch to the sniper rifle or stick with your Boltgun to take out the Helghast reinforcements. This will consist of several dropships as well as some ground forces rushing in. Take note of Rico's prompts since he'll tell you to watch the ladders if ever there's any enemy that managed to break through. Take out the last couple of sentries and Rico will be able to operate the crane and smash open a path for the two of you.
Climb down and go through the broken gate to continue. Take cover and take out the helghs that will start rushing in. Again, the Boltgun will be practically effective (normally) here. Just don't rush and move from cover to cover.
Note: If you're after the Pinpoint trophy, you may want to pick up the Sta-14 Rifle from the weapon rack here before the next section starts. Otherwise, you won't have the chance to get it again unless you start off the previous section again.
Continue along as a scene is triggered. You'll encounter a Heavy with some footsoldiers so immediately take cover and take out the lesser armored helghs first. Then, concentrate on landing headshots on its head and force it to expose the tank on its back. Shoot the red tank on its back to damage it and to kill it. If you managed to kill the Heavy using a StA-14 Rifle, you'll also unlock the Pinpoint trophy.
Pinpoint trophy
Once you're inside the mobile factory, grab a heavy weapon of your choice (Boltgun or the LMG) then head inside. After clearing the first room, continue outside and destroy the sentries that will appear. Follow the walkway until you reach the next ammo crate. Stay put and wait for the enemies to appear. Take them all out then follow Rico. Continue clearing the path until you reach the interior. Let Rico open the door and continue to the top. Take cover and take out the helghasts as you push forward. Use the mini-gun to take out the flyers. Take note that Rico can't revive you while he is using the mini-gun. If you're having problems keeping yourself alive, take out the mini-gun and carry it on foot so you can move to cover if you have to. Just quickly mount/remove the weapon to replenish its ammo.
Continue forth; just make sure you move behind cover since there will be helgs carrying missile launchers and shotguns. Finally, you need to break through the heavy AA guns. There will be missile launchers scattered here so use them to destroy the guns. Once cleared, go downstairs and blow open the hatch using a demo charge. Immediately lob some grenades inside and kill any stragglers to complete this section.
Mobile Factory Showdown
There will be heavy resistance here. Be careful of the snipers as well. Dig in and carefully take out the nearby enemies. Use your LMG's zoom feature to take out targets. Just keep yourself alive and whittle the enemy resistance until your allies break through the enemy defensive. You'll be in the trenches next. Carefully take out enemies as you go, especially the flame troopers. Continue fighting your way through until you reach the bunker.
You'll then need to outflank the MAWLR. Run towards the next building and grab the WASP there. Take out its defensive guns first if they pose a threat to you. You need to target the vents on its main body which opens after firing its main gun. Press R3 while equipping the WASP to enter artillery mode. Manually target the vents and release all your rockets. Remember that it will turn and target your last position after destroying its vent so quickly move out of the way and find safe cover. It will also open its gun ports which you need to destroy. As you deal heavy damage on it, the enemy will send flyers and footsoldiers so take them out first. Listen to what your allies tell you as well. The MAWLR will soon sweep its massive laser across all bunkers. Get out of there and find cover. Also, do not stay behind the transformers as you'll get shocked once they're damaged. One ideal hiding location would be the corner to the leftmost side of the area, beside some forklifts.
Bringing down the giant
Note: If you're after the Completist trophy, you need to destroy every weapon port of the MAWLR on foot then later, on board an Intruder.
After crippling the MAWLR, move out and sweep the area. You can take out the mini-guns by zooming in and shooting the gap between its shields. There's also a mini-gun you can grab on the platform to the right. Push forward and take out the enemies on the stairs and take the elevator.
After the scene, you'll be manning the mini-gun again on top of the Intruder. Priority targets are the aft guns and other AA defenses. You'll be flown to the side of the other vents so concentrate on shooting down the panels while your allies keep the defensive guns at bay. After destroying the two panels, you'll then need to destroy its main cannon. Shoot the blue capsules on the limb attaching the cannon to the body. Finally, you need to destroy the MAWLR's bridge. Keep shooting on the windows and take out the last few targets until you get an update.
If you destroyed all weapon ports while fighting the MAWLER on foot, then you should unlock the Completist trophy during the scenes.
Bringing down the giant.. for good
Be careful of the orange, glowing insects since they'll explode when you get near them. Your shotgun pistol works wonders against them. Push your way forward and clear the path. There are LMGs from helghs here so look out for one. It will help you in clearing out the enemies more efficiently. Make your way to the airlock and press the button. Watch the next scene.
Once back in control, take out the volatile bugs first. Move along and take out more helgs and sentries. The gravity control will be offline somehow as well. There's an ammo cache on the ground level, to the left should you need to replenish your ammo. Continue clearing the path until you reach the gravity control Valve. Turn it to re-activate the gravity then take out the enemies in the next room. There will also be a Heavy that will appear, as well as some sentries. The Missile Launcher will be your weapon of choice here. Don't completed head inside the room so you can easily have access to the ammo crate right outside. Take the elevator afterward and fight your way to the airlock.
Continue fighting your way through again. The enemies all have heavy weapons so don't be foolish to rush. Dig in and shoot behind cover. If possible try to get one of the LMGs from fallen helgs. There's also an arc cannon halfway in this corridor. Continue to the objective point and watch the scene.
You'll be on board a strike ship. Like the other vehicles you've ridden before, R1 is MG/mini-gun fire while L1 fires the homing missiles. You need to use both in order to survive the whole ride. Concentrate on taking out the fighters until you find Stahl's transport. You'll then need to destroy his cruiser's engines and guns. Take out the fighters first then the defensive guns. Next, take out the warp coils. Watch the following scenes.
You'll need to chase the cruiser down as it descends. You need to shoot down the missiles using your MG and your own homing missiles. Finally, release your nuke once you get the prompt to do so. Watch the credits.
Final Boss Part 1 of 3
Final Boss Part 2 of 3
Final Boss Part 3 of 3
This section will feature tips and videos to help you unlock the trophies. Some need patience and practice to acquire while some can be unlocked as easy as pie. Since there are no collectibles in the game that unlocks a trophy, I suggest playing the campaign on easy mode to acquire most of them. If you're truly hardcore (and insane), you may finish the game in Elite difficulty while attempting to unlock all possible trophies along the way. Obvious and self-explanatory trophies won't be discussed.
Collect All Killzone 3 Trophies
Ready for Battle - Complete Weapons Training
In Your Face - First Brutal Melee
No Witnesses - Destroy All Dropships on the Highway
This can be done in the last section of Chapter 2 (Broken Highway). If you're replaying this chapter to get this trophy, you need to select the previous section (Bilgarsk Museum) so you'll have access to the mini-gun.
After the scene, an allied EXO will lead the advance. After the EXO defeats the Helghan Carrier, you'll get the objective to clear the RPG threat. Look above the bridge ahead and you'll see the first dropship. Aim your mini-gun and shoot it until it is destroyed. Don't worry about the ammo since there are two ammo crates ahead that will ensure you're fully loaded.
Move forward a bit and there will be more higs that will come out of the building to the left. Clear the enemies and look out for the second dropship that will appear shortly ahead, past the overhead road sign. The last two dropships will appear as the convoy moves ahead. Let the allied APC take the lead then wait for the dropships to ascend right ahead. The two of them will appear consecutively so you need to destroy them both fast.
No Witnesses Trophy
Mopping Up - Kill 40 Helghast foot soldiers
This is the during the first section (Senlin Beach) of Chapter 3. The goal is to kill at least 40 enemy footsoldiers before you head to the next part of this section. Just keep shooting at the enemy formations; use your cannon and turret fire to rack up the body count. If you didn't get this trophy after reaching the main road and where enemy APCs will pursuit you, reload the chapter and try again.
Mopping Up Trophy
Sawn Off – Destroy All Chasing APCs
Destroyed all chasing SawBlade APCs in Senlin Beach section. During the part where you'll get chased by enemy APCs, just keep your eye on the road and concentrate your fire on one APC at a time. This way, you can destroy each quicker. There's only a total of six APCs; just make sure to destroy them all to get this easy bronze trophy.
Sawn Off Trophy
Smoking Wrecks – Destroy all Tanks on Senlin
The four tanks in the area are impossible to miss. Just keep destroying the ones you find to get this trophy.
Smoking Wrecks Trophy
Turn the Tables – Melee Kill a Capture Trooper
A Capture Trooper is an enemy armed only with a blade. Shoot them first as they rush towards you then quickly press L1 once it appears to melee kill them. If you didn't press it fast enough, you'll die. They will only appear if an ordinary helghast soldier sends out a flare after detecting your presence during Chapter 4.
Turn the Tables Trophy
Spiky Personality – Kill a Helghast using a Burster
Spiky Personality Trophy
Minigunned – Destory everything while using a minigun on the Intruder.
Just shoot all the glowing blue targets in the platforms and the last two dropships in the first section of Chapter 5. You should unlock the trophy during the scene and before crashing down.
Minigunned Trophy
Quick Exit – Escape the oil rig quickly
-Got off the 2nd rig within 2 minutes. This is a fairly easy thing to do so long as you know the enemy positions and you move quickly. Refer to the video below for more details.
Quick Exit Trophy
Shattered – Destroy all the glass in the Labs
-Destroyed all the glass panels in the Stahl Arms South labortories.
There are multiple glass panels here that may not be immediately visible. Some may be damaged during the firefight with the higs so just scour the entire room for glass panels before moving to the next.
In the next room after rescuing Narville, there are glass panels in the middle of the room.
In the freezer room, there are glass panels as well.
In the mainframe room, there are several glass panels on ground level. The tricky ones to find are the ones on the second level, on top of the datacenter and the ones on the second level, above where you came from. The others are not hard to miss so refer to the video below to find the ones on the second level.
Shattered Trophy
Pinpoint – Kill the Heavy with an StA-14
Take out the other targets first then aim for the Heavy's head. One or two well-placed shots should be enough to make him expose his tank on his back. Once he does, keep firing until it blows off.
Pinpoint Trophy
Evening the Odds - Kill 500 Helghast
Cagefighter - Kill 10 Helghast with Brutal Melee
Frag Out - Kill 3 Helghast with 1 fragmentation grenade
One Each - Shot and killed 3 Helghast using the shotgun pistol without reloading or switching weapons
Treat the shotgun pistol as an ordinary shotgun. It's deadly at close range but loses its effectiveness as the distance to the target increases.
Eagle Eye - Shot and killed 6 Helghast using the Sniper Rifle without reloading or switching weapons
This is best done when you're supporting the ground troops in destroying the arc APCs by providing sniper cover. Just take your time and shoot stationary targets until you get 6 kills without switching weapons or reloading.
Eagle Eye Trophy
Power Spike - Used the Boltgun to nail and Helghast to an exploding object
This is yet another tricky trophy to unlock. One of the main challenges here is finding an exploding object and luring an enemy to run/shoot/move in front of it.
Up Close and Personal - Use Brutal Melee move against another player
Team Player -Joined and completed a match as a part of a squad
Medic! - Revived a friendly player for the first time
Handy Man -Repaired an object for the first time
Now You See Me - Killed another player while cloaked
Spy Game - Killed another player while disguised
Turf War - Capture a Tactical Spawn Point for the first time
Now it's Personal - Kill 1,000 Helghast
Fight to the Last - Kill 1,500 Helghast
Closed Quarters Killer - Kill 25 Helghast with Brutal Melee
Hand to Hand Master - Kill 50 Helghast with Brutal Melee
Victory - Completed the Campaign on Elite Difficulty
Grand Slam - Won a match in Operation, Warzone & Guerilla Warfare modes
Time For A Dip – Reached the Corinth River with the convoy
Save The Intruders - Successfully assisted with defeating the Arc APCs
Never There – Sneaked past all Helghast in the Jungle without alerting any of them
The Jungle section is from the start of the chapter until you reach the uplink. Refer to the series of videos below to learn how to effectively kill the patrols stealthily.
Never There Trophy Part 1 of 4
Never There Trophy Part 2 of 4
Never There Trophy Part 3 of 4
Never There Trophy Part 4 of 4
ISA TV – Establish communications
Made contact with Earth
Aerial Superiority – Kill 5 Helghast while in the air
Killed 5 Helghast while airborne using the Jetpack
Into The Lair – Reach the cable car
Reached the cable car and gained access to Stahl Arms South
Jail Break – Liberate Narville
Liberated Narville from Stahl Arms South
Go Down And Stay Down – Destroy the ATAC
Defeated the ATAC outside the Stahl Arms facility
Iced – Destroyed all 4 Helghast Ice-Saws and all 6 Dropships
You can't rely on your machine gun that much so you'll use the homing missiles more often. As soon as you get a lock, shoot your missiles and do it again. If ever a target crosses your reticule, use your MG. Like what the requirement said, you need to destroy 4 enemy Ice Shaws and Dropships to unlock this achievement.
Iced Trophy
You Drive – Drive the Mobile Factory
Took over the controls of the Mobile Factory
Bring It Down – Defeat the MAWLR
Defeated the MAWLR defending the Space Elevator
Completist – Destroy everything on the MAWLR
Destroyed every destructible weapon on the MAWLR while on foot and on the Intruder
This trophy has two parts; first when you attack the MAWLR on foot and the second one and when you're in the intruder. If you were not able to destroy the destructible targets on the MAWLR during the first phase, you won't be able to get the trophy even if you destroyed everything while on the Intruder.
The video below will show you all the destructible targets on foot. The tricky targets of the first phase would be the last set of turrets on the hind part of the MAWLR's body. These will open once the last heat vent opens. As for the second phase, just destroy all turrets you can find. The trophy should unlock as soon as MAWLR is destroyed.
Completist Trophy - Bringing down the giant
Completist Trophy - Bringing down the giant.. for good
Let's Go Home – Destroy Stahl's Cruiser
Destroyed Stahl's Cruiser and left the planet on any difficulty
Frazzle Dazzle – Kill 3 Helghast with one shot from the StA5X Arc Cannon
Used the StA5X Arc Cannon to kill 3 Helghast with one shot
You can do this by fully charging and releasing the projectile towards three enemies clumped together. The Arc Cannon's secondary fire has a deadly AoE (area of effect) field that's capable of destroying enemies without the projectile directly hitting them.
Excessive Force – Used the secondary fire function of the WASP launcher to kill a single Helghast
You can get this trophy immediately as soon as you gain access to WASP turrets. You need to remove the WASP from its mount then go into artillery mode by pressing R3 (right analog). Target one enemy then fire.
Spread The Love – Killed 5 Helghast at once using the secondary fire mode of the WASP launcher
This can be a little tricky since the secondary fire of the WASP covers only a small area and you rarely see up to five enemies clumped together. You may try this as soon as you have access to WASPs in Chapter 5.
Double Trouble – Reach the river in Co-op
Made it to the Corinth River in Co-op mode
Stranded Together – Reach the Extraction Point in Co-op
Made it to the Extraction Point in Co-op mode
Iron Man – Get a kill with the Exo
Killed a player using the Exo in any multiplayer mode


 Top 10 Hottest Games of Holiday 2015
 Can A Video Game Jump Start Your Next Rewarding Creative Hobby?
 The Best Gaming Podcast Ever: Episode 4
 Foo Fighters tour opens in Brazil with long show (2015)
 The Witcher 3: Wild Hunt Monster Guide - How to Beat Jenny O' The Woods