Unofficial Halo 4 Guide by vhayste for
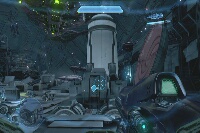
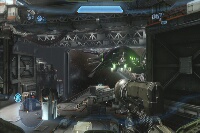
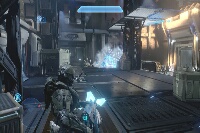
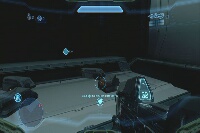
Welcome to our unoffical guide to Halo 4. Follow Cortana's directions to escape the capsule. Next, head to the observation deck to investigate. Head to the elevator and pry it open. Climb up and move from side to side to avoid falling debris. Continue up until you reach the top of the elevator entrance. An enemy awaits so eliminate him using melee kill. Move forth to find another group of enemies. You are weapons free at this point so grab the grenades nearby and clear the room. Refill your ammo and grenades then grab a secondary weapon from the downed covenant. After a while, two landing ships will drop off reinforcements. Kill them then head to elevator to the left. Follow the path and take out the enemies along the way. Once you've reached a large circular room, carefully engage and take out the enemies since there are several to be found in this area. Head outside and prepare for zero-gravity battle. Pick up the nearby Battle Rifle and snipe out some targets to lessen the annoyance. Jump down to the deck and make your way to the launch station. Once there, activate the missile controls. The missile will fail to launch so you have to manually unblock the door. More enemies will arrive via dropship. Engage them then push the magnetic accelerator to release the missile bay door. After the scene, run inside the ship then make your way to the escape pod. Follow the path until you encounter a group of lesser enemies. The floor will crumble underneath them so go down there and continue moving forth. Ignore the enemies and continue following the path until you reach the marked door. A scene will trigger afterward, ending the current chapter. Once in control, check the wreckage to resupply your ammo and grenades. Follow the dirt trail leading to crevice. Follow the passage until you make it outside. Follow the trail until you reach a part of the ship. You'll find two intact Warthogs here. There's also a weapon cabinet inside that contains a Battle Rifle. You can exchange your pistol for it if you want. Ride the Warthog and follow the straightforward path until you reach a Covenant landing spot. Engage and kill all enemies there. There's a Ghost there that you can hijack. Just kill the driver and use it against them. Continue clearing the enemy positions here then enter the ridge ahead. Follow the path until you reach a covenant structure. Clear the enemies and make your way there. Kill all enemies, including the one with the plasma blade so it drops his Active Camo. Pick it up to equip it. You know have the ability to use camouflage for a limited time. Head inside the structure. Head to the console far ahead then activate the cartographer. After a short while it will go offline so you'll have to reactivate it by activating the fluctuating cores marked in your hud. After activating the first one, covenant forces will start congregating in the floor below. Take them out then activate the second core. Fight your way to the cartographer again and activate it. After the scene, exit and take the lift down to the bridge. Kill the enemies then fight your way to the end of the bridge. You'll encounter two flying banshees ahead. You can attempt to take it down using the rocket launcher or plasma cannon found near its patrol zone or you can just simply pilot the parked banshee near the edge of the bridge. Head inside the structure and go up the ramp on foot. There's an elite in the upper level so be careful not to let it get up close with its plasma blade. Continue forth and you can take either the left or right paths. They both have a ramp leading to the upper entrance and will be guarded by the same number of enemies. Once you've reached the upper entrance, you'll find two heavy covenants. Stay away from them and don't let their cannons hit you. There are lots of plasma grenades on the nearby ramps leading to the upper entrance; use them to soften the targets. There's also a Fuel Rod cannon in the weapon cache in the middle. After clearing the entrance, head inside. Before going forth, download the terminal behind the ramp. Access the lift ahead for a scene and to complete the mission.
Dawn
Requiem
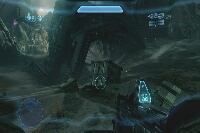
Continue inside the gate to exit to the next area. There are more enemies waiting there so find cover and engage them. You can hijack one of the Ghosts here or make your way to one of the mounted plasma cannons to help you take out the enemies faster. 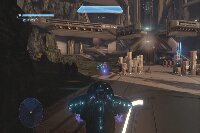
Requiem
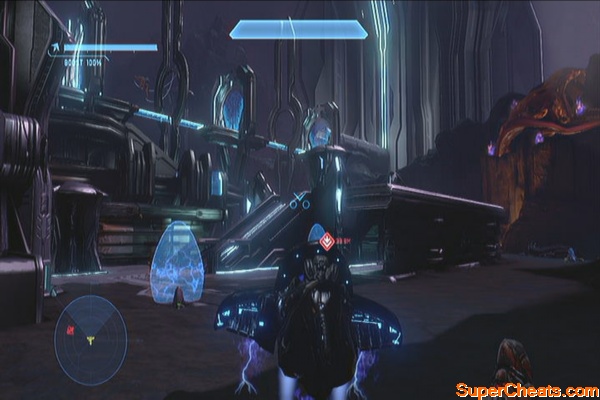
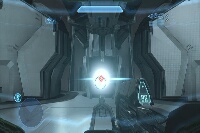
Head to the console ahead and activate it for a scene. After that, enter the portal. Follow the path and engage the new enemies coming out from the walls. Aim for their head to kill them quickly. Activate the light bridge ahead then continue forth. You'll be jumped on by one of those new humanoid enemies you encountered earlier. After that, move on until you reach a large, open area. More enemies will attack so stand your ground and eliminate them. Take note that you have a shield ability equipped, which will enable you to briefly block any enemy attack. Use this to get closer to the Promethean Knight and its drone. 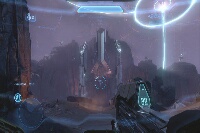
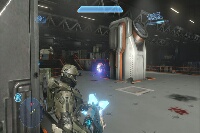
Head inside the building and grab some new weapons using the weapon caches along the way. Exit the corridor and fight your way outside until you make it to the circular area in the middle. More enemies will appear there so clear them out first before moving forward. 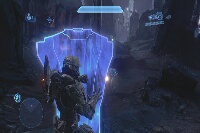
Right below the entrance leading to the pylon lies a download terminal. Continue inside and resupply from the weapon cache to the left. Continue through the locked door to exit. 
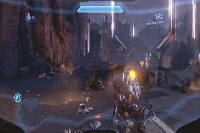
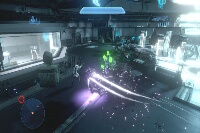
Once inside, you have to find and destroy the power cores. There are a lot of enemies here so take your time clearing them out before moving in. There are three cores in the ground level that you must destroy; two on each sides while one in the middle, under the ramp. The other ramp leading to the upper platform is located in the middle. As you head there more Promethean Knights will appear. Get rid of them then continue forth. 
Make your way to the topmost platform then follow the bridge to the lift. Activate the lift then shut down the beam array. Enter the next two portals afterward. 
In the next hallway, resupply using the weapon caches then follow the passage. Drop down to the hole on the ground then continue outside. Covenant drop pods will arrive and the two opposing forces will engage. You can let them exhaust each other's forces or you can join the fray. Fight your way to the narrow passage. Be careful since there will be several drones and an auto-beam turret that will fire in a few seconds once it has you on sight. Once the enemies are cleared go past the turret to reach the next pathway. 
Kill the Promethean Knight there and ride one of the Ghosts. Use it to clear the firefight ahead then follow the path until you make it inside the next structure. Head outside to find the second array. Like before, you have to take out the power cores to disable the shields. After destroying all three cores, make your way to the topmost part of the platform and cross the bridge until you reach the next array. Activate the elevator then disable the beam. Enter the portal afterward. 
Enter the next portal then engage the covenant forces that will be dropped ahead of you. Activate any of the two door controls then eliminate all hostiles ahead. Enter the large door ahead then resupply using the weapon caches in the next room. Step on the white spot on the floor to be lifted. Exit through the next door. 
Fight through a few more enemies until you finally reach the controls. Activate it to trigger a scene. 
Once outside, ride one of the Ghosts and boost your way to the next portal. Take note that you must release the boost button every now and then as the Ghost may flip over upon landing.
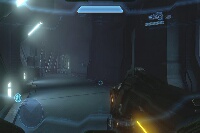
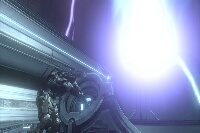
Objective: Escape!
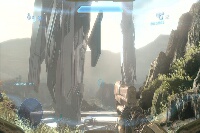
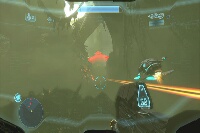
Follow the trail until you find some enemies around a human corpse. Examine the IFF tag then continue along the trail. Engage more enemies along the way until you find a soldier getting impaled by a promethean. Kill it then pick up the Promethean Vision. It will allow you to see enemy signatures through walls or obstacles. 

Head through the fog. Aside from Promethean Vision, you can also pick up the Auto Sentry ability which as the name implies, deploys a sentry for a short period of time. 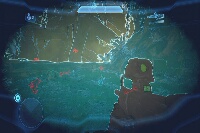
Continue along until you find another IFF. Examine it then move forth until you reach a wreckage. Follow the narrow trail until you reach it. Examine the IFF for a scene. 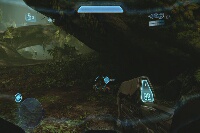
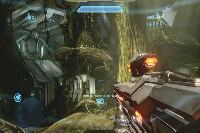
Before heading out, turn around to find a terminal. Once done, head outside and engage the group of enemies that will halt your advance. Continue forth until you find a group of friendlies under heavy enemy fire. Assist then and proceed as you clear the path. Fight your way to the door ahead and examine the interface. 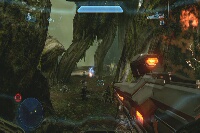
While Cortana is attempting to open the door, man one of the turrets and defend the position until Cortana successfully unlocks the door. Go through the door and follow the passageway to reach the LZ. Clear the initial wave of guards and the reinforcements coming from the drop ship. Once cleared, stay put and wait for the allied Pelican to arrive. Ride it to reach the next rally point. 
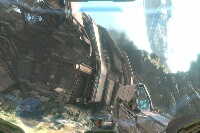
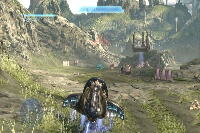
Clear the zone below then catch a ride with a Warthog or simply commandeer a Ghost. Clear all the enemy positions along the way. Be careful when you encounter watchtowers and Wraiths as they have some really heavy firepower. There's a parked Wraith in the next open large area. Make sure to use it to make your job a lot easier. 
Fight your way until you reach the hangar. Whatever vehicle you're carrying, bring it inside as there is a large enemy force inside the ship. Clear all the hostiles to update your objective. 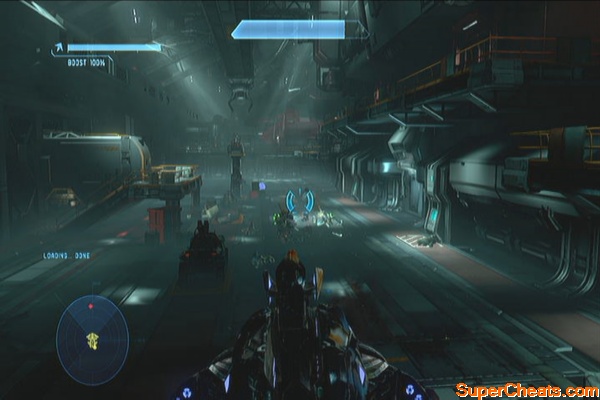
Enter the marked door and activate the console to reveal the Mantis. Pilot it and follow the onscreen instructions on how to control it. Continue clearing the path. Just make sure to take out visible targets at a distance, especially the plasma/laser turrets. Make your way to the elevator. 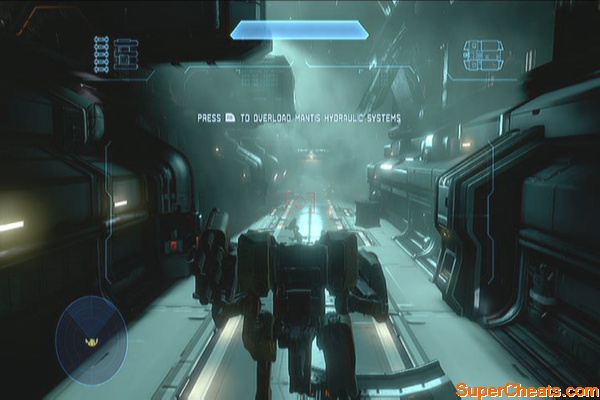
Exit to the deck and take out the jammers. Once done, keep clearing the enemies and taking out the drop ships as the weapons systems are slowly getting back online. In case you need a replacement, there are two other Mantis suits available in the area. The mission will be complete after successfully driving the Daidact out.
Defend the missile batteries
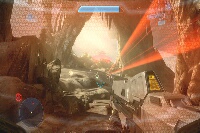
Head to the giant UNSC vehicle and talk to the office on the action deck. Grab the jetpack once prompted then wait for the mammoth to move. Man the turret on the left side and clear out the covenant position near the cliff. Next, head to the right and use the turret to clear the position there. You have to recover the target designator by foot so jump down and clear the area then recover the designator. Use it to take out the drop ship. Take out the enemy Wraith that will appear then finally target the particle cannon and watch the fireworks.
Return to the Mammoth or ride the any vehicle you have. Upon reaching the next enemy position, wipe out the enemy forces and destroy the shield generators for the Mammoth to pass through. After destroying all shield generators, return to the Mammoth to proceed. 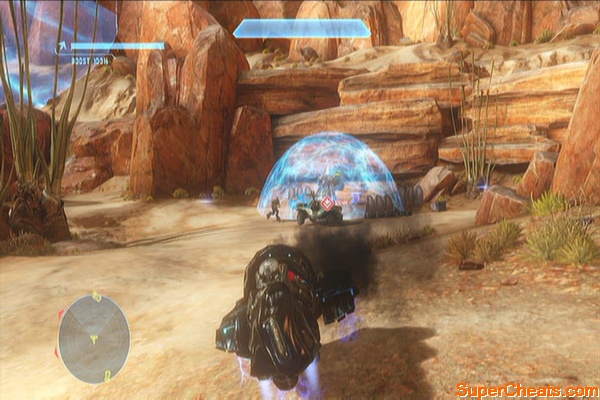
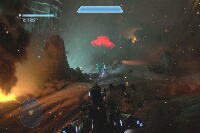
Wait until you have the second particle cannon in range. Aim for it using the designator then wait for it to be destroyed. More enemies will appear and the Mammoth will be stranded. Jump down to the ground and drive the railgun-mounted Warthog. Destroy several waves of Ghosts and Wraiths until you get the command to board the landing ship on the hill. 
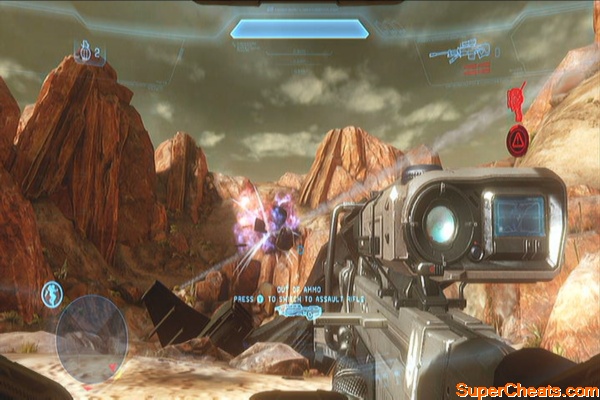
Fight your way to the tractor beam and get inside the ship. Kill all enemies inside then destroy the core. Jump off the ship then use the jetpack to break your fall. Once done, return to the Mammoth. Enjoy the ride until a pile of boulders halts your advance. Pick up the sniper rifle then clear the area to the left on foot. 
Move carefully as you explore the ridge as there are a lot of enemy snipers here. As you proceed, more will appear on the hills and mountain sides. You can use your jet pack to reach vantage points as well but it may backfire if you're not careful as you'll be visible on higher ground as well. 
Continue to the covenant structure and fight your way to the objective point. Enter the structure and follow the sentinel as it leads you to an elevator. Continue following the sentinel until you reach the console controlling the particle cannons.
After the scene, Cortana will disappear. Backtrack a bit and a light bridge will appear to the right. Follow the straightforward path to trigger a scene. After the scene, pick up Cortana and make your way to the elevator. Defeat the enemies and before taking the elevator, turn to the right to find a terminal
Reclaimer
Head outside then drive one of the Scorpion tanks there. Be careful of the Wraiths' explosive charges. Continue until you're hampered by a solid shield. Like before, you have to destroy the shield generators to proceed. 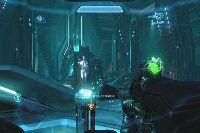

Once the shield is down, continue on foot then pick up the designator near the edge of the cliff. Aim for the gravity well and deliver the payload to complete the mission. 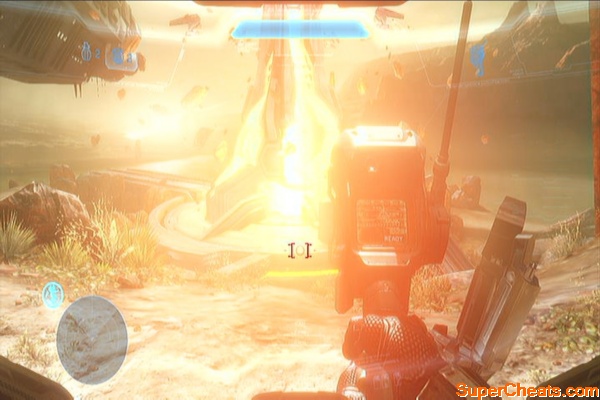
Fly using the Pelican and head to the first tower. Destroy all enemy fliers in the area then land near the entrance. Disembark from the Pelican and continue on foot. 
Activate the main core to enable the three attenuators. Then, you have to clear the enemies guarding them and destroy them all. Take note that after destroying each attenuators, more enemies will appear. Thankfully, there should be bunch of Covenant and Promethean weapons lying around. 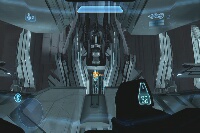
After destroying all three targets, head out and return to the Pelican. Resupply as needed then ride it. Make your way to the second tower. Like before, you have to take out enemy fliers near the entrance before landing. Head inside and find the controls of the gondola. 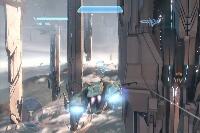
As soon as the gondola stops halfway, go to the lower level of the gondola and cross the light bridge. Fight your way through the controls in the topmost level. After activating it, don't worry if it starts to move; it will create a new lightbridge that you can cross in the other side. Just be careful since elite promethean knights will make an appearance as well. You also need to clear the enemies in your gondola as well. Upon returning there, you have to reactivate the whole thing gain. 
You won't be able to rest that long since the gondola will stop again. Like before, disembark, clear the next area and reactivate the controls. Once done, return to the gondola and head to the generator. Find the ramp behind and just step into the light to make it overload. Your shield and skill will reset so take cover as the enemy drones appear. Destroy them all then return to the gondola and activate it. Return to the Pelican and leave the tower. 
Fly a bit until Cortana gives you a new waypoint. Land there and enter the tower. Ride the current up then proceed. DO NOT run along the pathway as the Didact will alter the tower. If you ever mess up and the game saved as soon as the floor crumbles down, you'll have no choice but to restart the last checkpoint. To do this, return to the main menu, choose the chapter then select the checkpoint you want to load. (If you have a jet pack equipped, then you may escape that predicament) From this point on, it should be straightforward. Fight your way through groups of enemies. When you reach the objective point, there will be two hunters guarding the path. To get an achievement, you must lure one of them near the edge of the platform and make it charge towards you. Get out of the way; if done correctly, the hunter should fall to his demise. (refer to the video below for more information) Defeat them then ride the blue beam up to the tower.
Tricked to fall
In the next area, there are several banshees patrolling the area, not to mention plasma turrets on strategic locations. You can clear them by foot but if you want to make it easier, you can pilot any of the parked banshees in the platforms.
Owning the sky
Make your way to the objective point and go past the door. Continue to the tower controls and insert Cortana there. Pick her up after her attempt then jump from the ledge to trigger a scene. 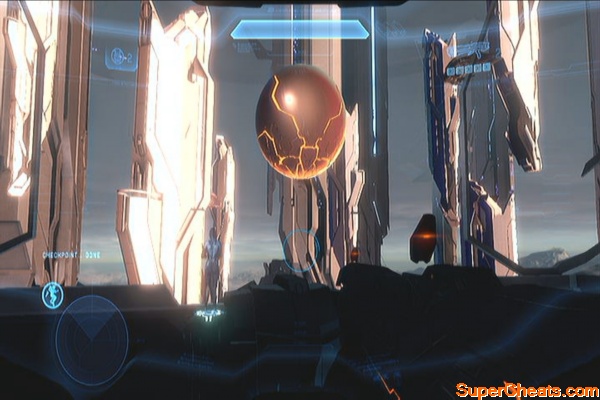
In the starting area, you can find a case containing a Hologram. Equip it if you want then follow the path and go through the door. There are a lot of covenant forces waiting outside. Take out the forces you can see first before moving in and clearing the next section. 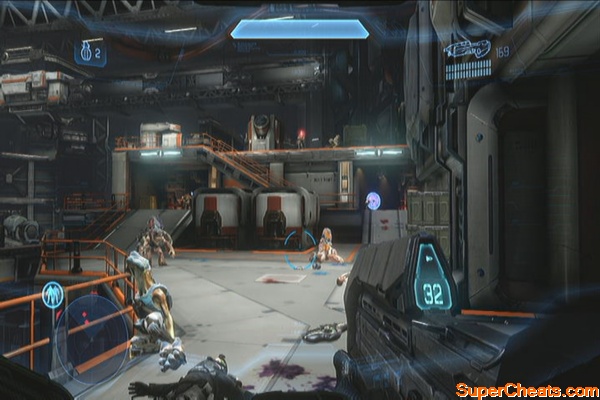
Continue forth until you catch up with some survivors. Follow the armed guards to the landing bay and take position. There's a turret there that you can use though you may want to let go of it and take cover in case your shields are depleted. Once you get the controls for the emergency barricade becomes available, clear the remaining enemies as fast as you can and activate it. 
Once the shields are raised, continue to the marked door and clear the enemies there. Continue and regroup with the other soldiers and continue clearing the area. There's a plasma cannon you can use and detach so grab it and fight through the enemy resistance. Continue upstairs to find more enemies. 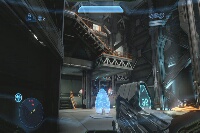
After taking them out, enter the next door and follow the corridor. You'll find a scientist along the way that will give you a Thruster Pack. This armor attachment enables you to burst to a short distance. You can equip this or just hang to your hologram. Head to the next room and deal with the two Covenant hunters. To get an achievement, you have to defeat these hunters using only the sticky detonator. Refer to the video below for more information.
Give them the stick

After killing the two hunters, open the door where the doctor is located. After the scene, head out to where the Composer is then make your way to activate the station defenses. Once you've entered a passage, wait for the soldier to open the path for you then continue forth. You'll come across a plasma cannon emplacement; take the enemies out and detach it. Use it to easily clear the next room. 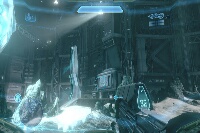
Continue forth until you find another group of survivors. Join them and one of the scientists there will open a door with some Auto-sentry attachment inside. Grab one as it can really help you deal with enemies offensively. There's also a Sticky Detonator behind that will be very useful against clustered enemies. 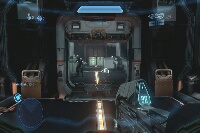
Head to the next room and engage more enemies. The Auto-sentry will be quite useful here. Just be careful of the elite covenant that has the plasma blade as it can instantly kill you. Kill the next few waves of enemies and the next door will open. Head to the defense grid controls and take out the two elites there. Take note that one of them may be in stealth so deploy your auto-sentry to be safe. Once done, place Cortana in the panel to activate the station's defense grid. 
Before heading to rendezvous with Dr. Tillson, check the small armory in the middle of the room to resupply then follow the path. You'll eventually reach a heavily guarded hallway before the gate where you must go through so deploy your Auto-sentry and lob some grenades in the middle to take them out easily. 
Continue outside then ride the Mantis. Fend off the next few waves of covenant forces until your next objective is marked. Head to the elevator platform next. Disembark from the Mantis and activate the elevator from the panel inside the room. After seeing the composer gets taken, open the elevator door for a scene and to complete the mission.
Defending the composer
You'll be controlling a UNSC fighter as you make your way to the composer's location. Don't use boost that often; remember that if you pull your stick back, it will slow you down, making it easier to maneuver. You don't have to take out all the turrets; just the ones in front of you. Refer to the video below for the first part of this mission.
Trench Run!
After reaching the objective point, you have to destroy the energy orbs powering the particle cannons. There are four and you can destroy them from the sides. Make sure to destroy the turrets along the way to avoid getting shot down. After destroying all the cannons, you'll be thrown to the next phase after the scene.
Cannon Destroyer
Destroy the drones since they'll be deploying forerunner auto-turrets. Head to the next hallway and continue clearing the hallways until you get to jump down the shaft. Head outside and insert Cortana to the pedestal. Enter the next few portals that she opens while defeating more enemies. Be careful of the enemy with the Incineration Cannon, guarding the next portal since it can instantly kill you even with full shields. 
After entering that portal, you'll be thrown in the armory. Replenish your ammo or grab more powerful weapons then head to the next portal. The next area has more enemies, including one equipped with an Incineration Cannon. Take them out then enter the next portal. 
In the next room, kill the initial wave of enemies and Cortana will have you defend the area as she hacks in the defense system. Eventually, she'll be able to override the defense turrets. Continue fending off the enemy attacks and retrieve Cortana when prompted. Make your way to the next portal while going through heavy enemy resistance. 
Ride the lift up then proceed to the catapult. After reaching the central platform, resupply using the nearby ammo cabinets then proceed. Insert Cortana in the pedestal to update your objective. You have to overload the Didact's shields by sabotaging the two shield generators. Find the catapults leading to any of the shield generators and clear them. 
Once you reached the platforms, you have to activate the light bridge first to reach the pedestal that will overload the shields. Make your way to the next catapult that will lead you to a platform with more enemies. Clear them out and make your way to the second generator platform. 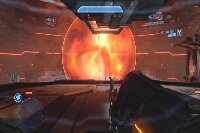
After the scene, you have to jump to the next platform, eliminate a few more enemies then jump to the lift. Follow the lightbridge for a scene. After the scene, climb up and rush towards the Didact. Plant a grenade on him then crawl towards the bomb. Activate it and detonate it for a scene. 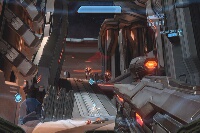
Dawn (10 points):
Completed mission 1 on any difficulty.
Requiem (10 points):
Completed mission 2 on any difficulty.
Forerunner (10 points):
Completed mission 3 on any difficulty.
Infinity (10 points):
Completed mission 4 on any difficulty.
Reclaimer (10 points):
Completed mission 5 on any difficulty.
Shutdown (10 points):
Completed mission 6 on any difficulty.
Composer (10 points):
Completed mission 7 on any difficulty.
Midnight (10 points):
Completed mission 8 on any difficulty.
Wake Up, John (20 points):
Completed the Campaign on Normal or harder.
I Need a Hero (40 points):
Completed the Campaign on Heroic or harder.
The Legend of 117 (70 points):
Completed the Campaign on Legendary difficulty.
Lone Wolf Legend (90 points):
Completed the Campaign solo on Legendary difficulty.
Skullduggery (15 points):
Completed any Campaign mission with 3 or more Skulls on Heroic or harder.
Skulls are unlocked by default to you just need to activate them. It is recommended to attempt this on the first mission with the following skulls on:
Cowbell
Grunt Birthday
IWHBYD
Bropocalypse (10 points):
Completed any Campaign mission cooperatively on Heroic or harder.
Contact the Domain (10 points):
Found a Terminal in the Campaign.
Refer to Terminus achievement
Terminus (50 points):
Found all of the Terminals in the Campaign.
There are seven terminals in the game. Refer to the guide's “Other Unlockables” section for more details
Digging up the Past (20 points):
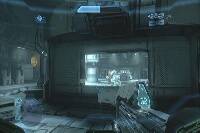
Found and accessed Chief’s record in mission 1.
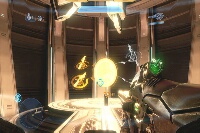
As soon as the game starts, take the stairs to the left to find a lone terminal underneath.
Digging up the past
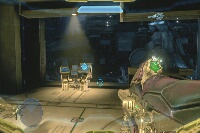
Midnight Launch (20 points):
Got significant air in the Warthog at midnight in mission 2.
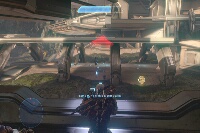
This can only be unlocked in mission 2 and is time-specific. Take note that you should be the driver of the Warthog and you have to make the jump as soon as your console's time has reached 12AM. If its past 12AM (which is most likely the case), you have to manually set your console's time around 23:50 then load Mission 2.
There are no enemies at the start of the stage so just run until you find a warthog. Drive your warthog and follow the path until you reach a destroyed metal tunnel. Wait for 12AM to strike then rush through it until you make a jump. Doing it correctly should unlock the achievement. If not, repeat the whole process again.
Midnight Launch
This is my Rifle, This is my Gun (20 points):
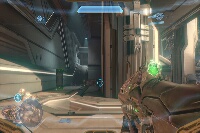
Carried a UNSC weapon all the way through mission 3 on Heroic or harder.
You'll start off with an Assault Rifle and Magnum Pistol. Choose which one to replace and keep the other one at ALL times, even if it runs out of ammo. In case you accidentally dropped it, revert to your last save and start over again.
Bros to the Close (20 points):
Completed mission 4 without one preventable Marine death on Heroic or harder.
(Rally Point Bravo) It is recommended to play this in co-op as it will be easier to get the aggro and keep the fire away from your allied soldiers. Two marines will join you after encountering Laskey, and four more will be fighting the forerunners in the hill. There are turrets near the door where Cortana will take time to unlock. Use it to keep the enemies at bay at prevent unnecessary marine death.
Mortardom (20 points):
Hijacked a Wraith and used it to kill at least four enemy Wraiths in mission 5 on Heroic or harder.
You need a Plasma Pistol for it's secondary ability – the EMP shot. Disable a wraith by using the Plasma Pistol's charged shot then quickly go its side. There are two options, one is to operate the Plasma Cannon or Operate Wraith. Choose the first then kill the gunner. Next, select Operate Wraith (you may have to disable the vehicle again).
When dealing with Wraiths, keep moving and have a safe distance away from their gunner's cannons. Their main projectiles take them to land and has a predictable arc so don't accidentally move to its landing spot. There are a total of 8 wraiths in the game.
Explore the Floor (20 points):
Tricked or forced a Hunter to fall to his demise in mission 6.
In Rally Point Delta, you'll find two hunters. You must lure one of them into charging you then get out of the way for the last minute so that one of them falls to his death.
Tricked to fall
Give Him the Stick (20 points):
Took out both Hunters using only the Sticky Detonator in mission 7.
If you're going to start Once you've reached the part where there are two Hunters inside the lab, grab a Sticky Detonator from inside the white room or from the left corner of the room. If you're replaying the mission to get this achievement, you can find a Sticky Detonator as soon as you reach the first door. The hunters can be killed with two shots on easy mode.
Give them the stick
Chief, Smash! (20 points):
Killed 3 Crawlers in one hit with the Gravity Hammer in mission 8.
You'll find a gravity hammer along the way, in the armory along side many more weapons. Dig in and survive until more crawlers converge. Time your attack when they're clustered together to get this achievement.
Not Some Recruit Anymore (15 points):
Ranked up your Spartan-IV to SR-5.
Refer to Movin' On Up
Movin’ On Up (25 points):
Ranked up your Spartan-IV to SR-20.
You must earn points and rank up your spartan by playing through the two Infinity game modes (online required)
War Games
Spartan Ops
I <3 Red vs Blue (15 points):
Won 5 War Games matchmaking matches.
Hanging on the Combat Deck (30 points):
Won 20 War Games matchmaking matches.
Operation Completion (15 points):
Completed a Spartan Ops Mission on any difficulty.
A Legendary Episode (40 points):
Completed all chapters in Spartan Ops Episode 1 on Legendary difficulty.
You can't do this with matchmaking since the games are set to Heroic only. You have to do this solo or cooperatively.
Dedicated to Crimson (80 points):
Completed all chapters in the first 5 episodes of Spartan Ops on any difficulty.
Crimson Alone (20 points):
Completed a Spartan Ops chapter solo on Legendary.
Roses vs Violets (20 points):
Found one of the RvB Easter Eggs in Spartan Ops.
No One Left Behind (20 points):
Saved at least one Marine in Chapter 3 of Episode 2 of Spartan Ops on Heroic or harder.
Best attempted cooperatively playing with 4 players. There are 4 marines to protect; just focus fire and prioritize taking out high threat targets first like Elites, Hunters, Ghosts and Wraiths.
Knight in White Assassination (20 points):
Assassinated a Knight in any Spartan Ops mission.
You have to sneak behind a Knight then press RB to assassinate him. You can find one in Infinity EP1, Chapter 4. (Sacred) If he spots you, run away and hide until he gives up and returns to his position. Attempt to sneak and kill him again.
What Power Outage? (20 points):
Completed Chapter 4, Episode 5 of Spartan Ops without losing a generator on Heroic or harder.
No Easy Way Out (20 points):
In Ch 1, Ep 5 of Spartan Ops survived the enemy assault during the defense on Normal or harder.
The Challenged (10 points):
Completed a Challenge.
Refer to “The Challenger”
The Challenger (20 points):
Completed 25 Challenges.
You can check daily, weekly or monthly challenges by accessing them from your Spartan Hub and selecting Career. You can also visit http://www.halowaypoint.com/en-us/intel/challenges for more information. 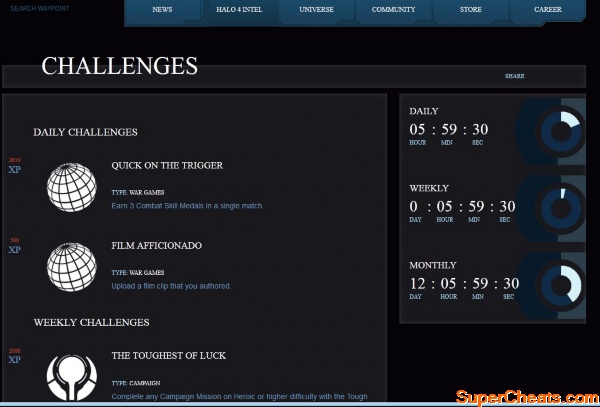
Armorer (5 points):
Changed your Spartan’s armor in the Spartan Armor card.
Access the Spartan Hub then select Customize > Spartan Armor. Change your any of your armor parts or helmet other than the default Recruit piece.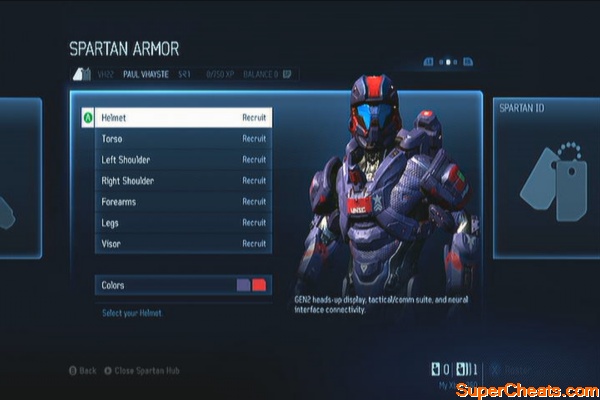
Badge (5 points):
Changed your Emblem in the Spartan ID card.
Access the Spartan Hub then select Customize > Spartan ID > Emblem. Change your emblem other than the default. 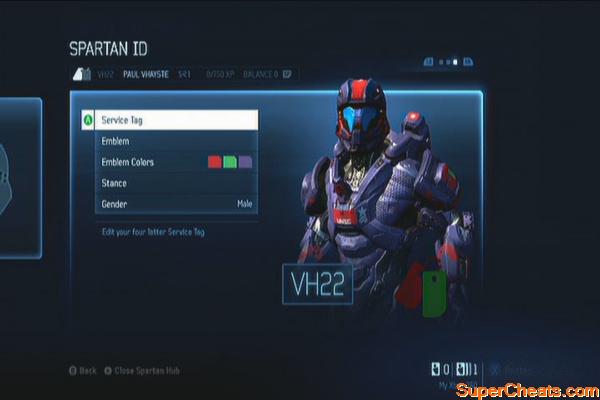
PWND (5 points):
Changed your Service Tag in the Spartan ID card.
Access the Spartan Hub then select Customize > Spartan ID > Service Tag. Change your tag other than the default.
What a Poser! (5 points):
Changed your Spartan’s pose in the Spartan ID card.
Access the Spartan Hub then select Customize > Spartan ID > Stance. Change your stance other than the default. 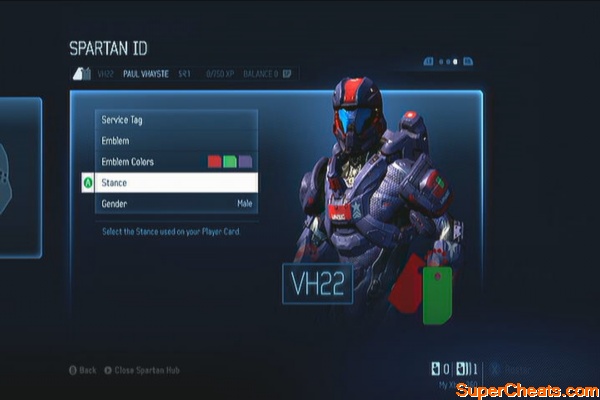
The Cartographer (5 points):
Created and saved a Custom Map in Forge.
Can be done offline, may need to install extra content from Disc 2. Select Infinity > Forge. Create a new map with the simplest settings then save it to unlock.
Game Changer (5 points):
Created and saved a Custom Game type in War Games.
Can be done offline, may need to install extra content from Disc 2. Select Infinity > War Games. Create a new map with the simplest settings then save it to unlock.
Snapshot! (5 points):
Saved a Screenshot from the Theater.
Select one of the custom maps you created then start the film. Take a screenshot and save to unlock.
The Director (5 points):
Saved a Film Clip from the Theater.
Select one of the custom maps you created then start the film. Record a clip and save to unlock.
Sharing is Caring (5 points):
Uploaded a File to your File Share.
Bromageddon (40 points):
Completed the Campaign cooperatively on Heroic or harder.
his section of the guide will give you more information about Halo 4's intensive multiplayer section.
Spartan Rank
Like any game's multiplayer feature, you need to increase your rank or level to unlock more items or features you can use. The better you perform in multiplayer (MP), the faster your progression will be. Your progress with the game's other modes, like the Spartan Ops or War Games are linked so playing in those modes as well will help increase your rank. There will also be daily, weekly or monthly challenges you can take to further increase your rank. Halo 4's loadouts are locked by default and you need to increase your Spartan Rank to unlock them. Aside from loadouts, you can unlock more armor and emblem options automatically as your rank increases. Once you've reached LV50, you'll also unlock a new specialization.
Spartan Points
Increasing your rank will earn you Spartan Points. SP is used to unlock new weapons. Every gun has different SP costs so you have to be careful of your weapon of choice.
Progression Unlockables
This section will discuss the unlockables as your level increases.
Armor Ability: 3
Tactical Package: 7
Support Upgrade: 12
Loadout 1: Default
Loadout 2: 6
Loadout 3: 14
Loadout 4: 26
Loadout 5: 41
Primary Weapons (SR,SP)
DMR (1,0)
Assault Rifle (1,0)
Battle Rifle (2,1)
Storm Rifle (5,2)
Covenant Carbine (5,2)
Suppressor (22,2)
LightRifle (22,2)
Secondary Weapons (SR,SP)
Magnum (1,0)
Plasma Pistol (8,2)
Boltshot (18,2)
Grenades (SR,SP)
Frag Grenade (-,0)
Plasma Grenade (8,2)
Pulse Grenade (18,2)
Armor Ability
If you have played the campaign first (or preceding recent Halo titles in that matter), then you should already know what each armor ability does. Here's a list of the armor abilities you can unlock and use in multiplayer.
Promethean Vision
SR: 1 SP: 0
Allows you to see enemy signatures through walls and other obstacles. A useful skill which helps in planning ambushes and flanking maneuvers.
Thruster Pack
SR: 1 SP: 0
Gives a sudden burst of movement, useful for evading attacks or closing the distance between the player and the target.
Hologram
SR: 1 SP: 3
Deploys an exact copy of the player which also appears as a blip on the radar. This is a great tactical ability which is primarily used for scouting or checking the area for possible enemy positions before moving in.
Jet Pack
SR: 1 SP: 3
Gives the player the ability to thrust vertically for a short period, allowing access to elevated areas. You can also use the jet pack to break a long, fatal fall.
Hardlight Shield
SR: 1 SP: 3
Generates a forward shield that stops most enemy fire and explosives. The player however is still vulnerable on his sides and back.
Active Camoflage
SR: 1 SP: 3
Temporarily allows the user to blend in with the surroundings and become almost invisible.
Autosentry
SR: 16 SP: 3
Deploys an autonomous sentry that can be used to defend the player or hold a key battlefield position. The sentry can be destroyed by enemy players.
Regeneration Field
SR: 16 SP: 3
Allows the player to deploy an small-range field that heals any nearby player.
In a way, these are considered as perks, which you can select to complement your playstyle.
Mobility
SR: 1 SP: 0
Grants the player unlimited sprint
Shielding
SR: 1 SP: 0
Increases the player's shield recharge rate
Resupply
SR: 14 SP: 1
Enables the player to recover grenades from fallen allies or enemies.
AA Efficiency
SR: 14 SP: 1
Increases the recharge rate of the player's armor abilities
Grenadier
SR: 24 SP: 1
Increases the player's grenade capacity
Firepower
SR: 24 SP: 1
Enables the player to use another primary weapon in the secondary weapon slot.
Fast Track (Pioneer)
SR: 50 SP: 1
Allows faster rank advancement
Requisition (Tracker)
SR: 50 SP: 1
Allows the player to request new choices once an ordnance has been granted
Wheelman (Operator)
SR: 50 SP: 1
Increases the vehicle's durability and stability against EMP charges
Dexterity
SR: 1 SP: 0
Increases reload speed and faster weapon switching animation
Ammo
SR: 1 SP: 1
Players get an extra clip upon respawn.
Sensor
SR: 20 SP: 1
Increases the motion tracker's range
Awareness
SR: 20 SP: 1
Motion tracker is retained while scoped
Explosives
SR: 26 SP: 1
Increases the grenade strength and decreases grenade damage to the user
Ordinance Priority
SR: 26 SP: 1
Personal Ordnance thershold reduced
Drop Recon (Engineer)
SR: 50 SP: 1
Incoming ordnance will be indicated in the HUD
Gunner (Pathfinder)
SR: 50 SP: 1
Decreased Turret Cooldown, Increased mobility while carrying it.
Nemesis (Stalker)
SR: 50 SP: 1
Allows the player to mark and track down the previous attacker/s by highlighting them in the default sensors
Stability (Rogue)
SR: 50 SP: 1
Reduced flinching when shot while scoped
Stealth (Wetwork)
SR: 50 SP: 1
Faster assassinations, quieter footsteps, reduced visibility vs promethean vision
Unlike the other Halo titles, the skulls in this game is already unlocked. You have to just enable/disable them before starting a solo or co-op session.
Mythic: Enemies have increased health.
Catch: Enemies are grenade happy!
Famine: Weapons drop much less ammo.
Tilt: Enemy resistances and weaknesses are increased.
Iron: Co-op: Back to previous checkpoint on death. Solo: Restart mission on death.
Black Eye: Shields don’t recharge unless you melee enemies.
Tough Luck: Enemies always go berserk, always dive out of the way, and never flee.
Blind: The HUD and the first person arms and weapon are hidden.
Thunderstorm: Major upgrade to the capabilities of enemies.
Cloud: Motion sensor is disabled.
Cowbell: Acceleration from explosions is increased.
IWHBYD: Rare combat dialogue becomes more common.
Grunt Birthday Party: Headshot a Grunt, HAPPY BOOM TIME!
UNSC Infinity Hoodie (Male / Female):
Unlock the 'Not some recruit anymore' achievement
Knight Helmet:
Unlocked the 'Knight in White Assassination' achievement
Platinum Mark IV Helmet:
Unlocked the 'Wake Up, John' achievement
There seven terminals in the game which is also tied up to a couple of achievements in the game. Finding them all will give players more background with the story as well.
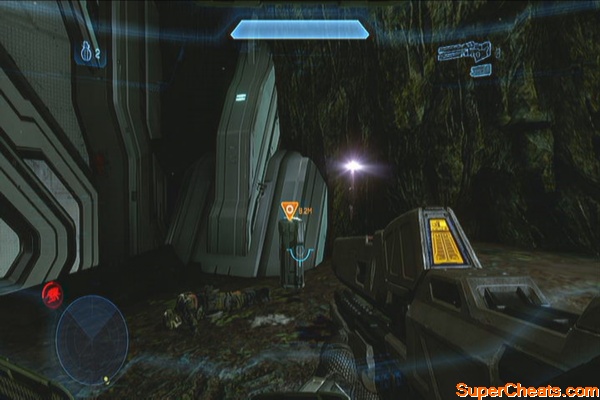
1: Mission 2 “Requiem” - RP Bravo
After going through several enemy positions, you'll come across two hunters, getting attacked by sentinels. Take them out to reach an empty hallway. Check the terminal behind the ramp and download it.
Requiem
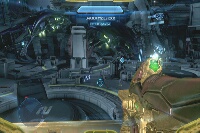
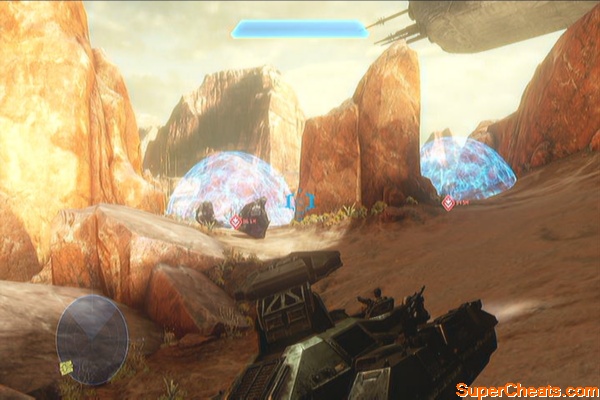
2: Mission 3 “Forerunner” - RP Bravo
After clearing the enemies outside and before reaching array, you'll find the terminal at ground level. See the video below for more details.
Forerunner
3. Mission 4 “Infinity” - RP Bravo
After the scene and meeting up with the Infinity's crew, you'll have to go out with the two marines. Before heading out, turn around to find this terminal. If you're replaying the mission, after loading the checkpoint, turn around immediately to find it.
Infinity
4. Mission 5 “Reclaimer” - RP Bravo
After meeting the librarian during the cutscene, retrieve Cortana and defeat the enemies. Before taking the next elevator, turn to the right to find this terminal.
Reclaimer
5: Mission 6 “Shut Down” - RP Delta
Make your way to the objective point until you reach a platform where there's an elite with a Fuel Rod cannon. Check the platform to the left which is out of the way to find a terminal there. See the video below for more information.
Shutdown
6: Mission 7 “Composer” - RP Bravo
As soon as you reach outside, check the rocky opening ahead under the wall with the sign “Atrium”. Refer to the video below for more details.
Composer
7: Mission 8 “Midnight” - RP Bravo
As soon as the checkpoint starts, follow the path until you defeat two knights. Just past that door is the terminal, in the middle. Refer to the video below for more details.
Terminus


 WildStar: MMO Beginner’s Guide & Walkthrough
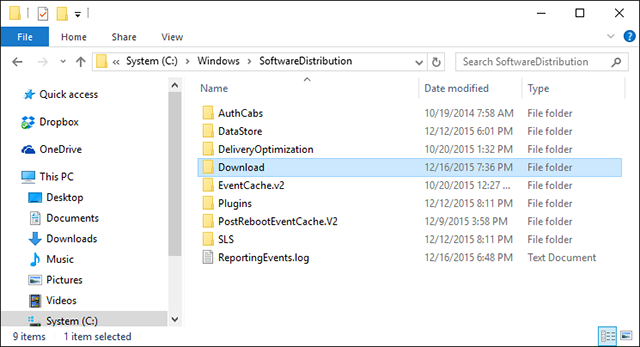 7 Hidden Windows Caches & How to Clear Them
 XCOM Sounds a Lot Like Fringe, And Thats Okay
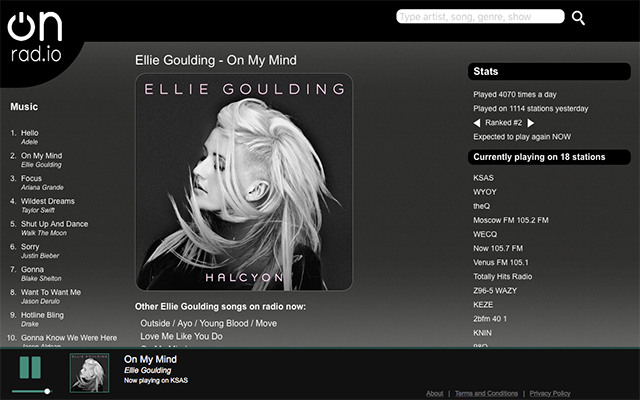 5 Online Radios That Travel Through Space and Time
 Introdution - Pokemon Leaf Green