Unofficial Halo: Combat Evolved Anniversary by CM Boots-Faubert for
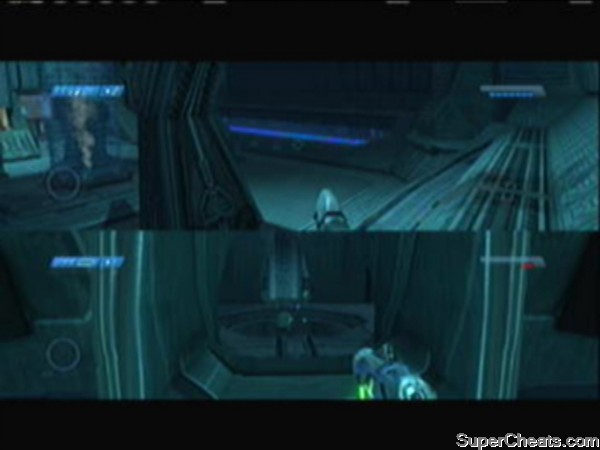
The original game, Halo: Combat Evolved (AKA Halo:CE) was the game that established the series but it had more going for it than that. When it was released on November 15, 2001 it also happened to be one of the launch titles for the original Xbox, and at the time was justifiably considered to be the "Killer Game" for the platform. It was so successful in fact that Microsoft released a version for its Windows OS, as well as Mac OSX, and it crossed over into other forms of media including novels and comics. After the launch of the Xbox 360, Halo:CE was released as a downloadable Xbox Original title, but in its original form with nothing added. When Halo:CE was created the LIVE community did not exist as it does today, and there were no Achievements in the game. The release of Halo: Combat Evolved (AKA Halo:CEA) is more than simply a re-release, and more than a revamp -- in addition to a full set of Achievements the game has had the Skull System from Halo 3, as well as a Terminal Collection that tells the background story for the Ring Worlds and why they exist as well as providing some foreshadowing for the upcoming sequel for the series, Halo 4. The events in Halo:CEA take place shortly after the attack on Reach, taking place in the twenty-sixth century, with the player assuming the role of the Master Chief for the first time (officially). As a cybernetically enhanced super-soldier, the Master Chief has an edge that few UNSC Marines enjoy, and because of that and his value to the Corps he is largely kept in cryogenic suspension while the ship he is on travels, a practice that extends his service life. This of course suggests that the UNSC views him more as an object than a free-willed person -- and you have to wonder what he thinks about that? Another treat in this first title is our meeting and getting to know Cortana, the artificial intelligence that was part of the computer in the UNSC Carrier Pillar of Autumn and who now occupies the Master Chief's neural interface. The assistance that Cortana provides the Master Chief is complicated by her own sense of identity, but our experiences with her in this game -- especially if you have only played the Xbox 360 games starting with Halo 3 -- fills in a lot of the blanks. Released on November 15, 2011 to celebrate the 10th Anniversary of the original release, Halo:CEA is an exceptional game -- and one of its most impressive features is the fact that the original game was left in place, with a second modern and graphically updated one co-existing with it, so that players can switch between them at will -- though also at the cost of some features, which is outlined in detail later in the guide. Initially we thought that a simply update to the original guide would be all that was necessary, but with the inclusion of the Skulls and Terminals, and certain other refinements like the Achievements that really round-out game play, it soon became obvious that a new guide was required. This is that guide. Halo: CEA is an enhanced remake of Halo: Combat Evolved, and is the first game in the Halo series to be developed by 343 Industries, the studio that has effectively replaced Bungie for this and all future titles in the series. This re-imagining of the original game features several updates, including a complete visual overhaul, support for cooperative and multi-player game play via Xbox Live, a full set of Achievements, the Terminal Collection, Skull Collection, and a plethora of Easter Eggs, and remakes of several multi-player maps from the previous Halo games. The first game in the series to include Kinect support, it is more than simply a re-imagining, as it was built from the ground-up using a different set of engines -- the original game engine being replaced by the Saber3d engine for story mode play, and using the Halo: Reach engine for multi-player play. Using the Back Button the player can switch between the original game and the new game, but some of the new features -- like the Skulls -- are only available in the new version. The developer of Halo: Combat Evolved, Bungie Studios, originally conceived and created the title for the Apple Macintosh, but when Bungie was purchased by Microsoft in 2000 it was very quickly converted to the Xbox platform as one of its launch titles, and developed into one of the strongest titles for that platform and the year. The release of the games in the Halo series was not in chronological order pertaining to their actual occurrence in the story-lines, due to the out-of-sequence insertion of the prequel, Halo: Reach. The actual release order was: Halo: Combat Evolved If you are just starting the series and you want to play them in the order in which the events in each game actually unfolds, you should be playing them this way: Halo: Wars Once the game starts and you have control of your character hit the Back Button -- Whoa! Everything looks all 2001! Did we break the game? Did we travel back in time? Well, sort of... You see this game was created using the two different styles and hitting the Back Button switches between the Original Mode and the vastly improved New Mode -- the differences between the two modes are striking, no? Even the universe looks massively different! Imagine how that will play out in the game world -- oh wait, we do not have to imagine it, we can experience it for ourselves! Awesome! Our adventure begins with a series of Cut Scenes (CS's) during which we see the ship -- whose name is the same as this level, Pillar of Autumn -- as it approaches a Ringworld! We overhear a conversation between the Captain and the ship's AI -- and learn that things are grim indeed. The Pillar of Autumn made a blind jump in the hopes of escaping a Covenant Attack, but it seems that the Covenant was able to track the Pillar of Autumn, and they are about to attack again! The Captain orders everyone to combat stations -- including you! The Master Chief! An uber warrior who is so valuable you are kept in suspended animation between deployments so as not to waste your best years! A UNSC Marine Squad is forming up as we watch, their Gunny giving them a rousing speech, and then we are suddenly in the Cryo-Storage Chamber! A pair of technicians are in the process of thawing you out -- and at the moment we have no idea what is going on because hey, this is title Numero Uno! The first game in the series! This is where it all began! And OMG! We are SEEING it all begin! Well perhaps again needs to be appended to that if you actually played the original version of this game, but statistically speaking the odds of that are pretty low, while the odds that you have played some of the more recent titles are pretty good -- so you know who the Master Chief is and why he is frozen between gigs -- and if you do not, pay attention to the different conversations that will take place -- mostly between you and Cortana -- and you will learn more! This is pretty much the Introducing You to the Controls bit, so follow the on-screen prompts in order to learn how the controls work and what the different bits of tech are that you have as part of your suit... Eventually as you work your way through the mini-tutorial you will hear a fellow soldier screaming -- it is OK, he just got the hotel bill for this year's E3 trip... Just kidding! He screams and there is an explosion and the bloody Covenant are coming! We have officially run out of time -- and Captain Keyes, who is the Captain of the Pillar of Autumn -- wants us on the bridge -- so follow the tech out of the Cryo-Chamber and you will find yourself begining the first part of this awesome adventure! --== Enemy Units ==-- (1) Grunts -- Low-level blue and red grunts; grenades and plasma pistols. --== ==-- The main objective for this opening mission is to get used to being awake again, and to get off of the ship without dying... Because if you were paying attention to the bloody story, the ship is presently under attack by an almost overwhelming Covenant force and has been boarded -- the idea appearing to be that the enemy hopes to capture the ship as intact as they can manage! -- Our Main Objective? -- Find Captain Keyes on the PoA Bridge After you pass the abbreviated tests to configure your Armor but BEFORE you leave the Cryo-Chamber, head to the back of the room behind the boxes and look on the floor for a white ball-shaped lump that looks suspiciously like a human skull... It IS a human skull! And in fact it is the very first collection item in the game, your first Skull, and later on when you replay the game or some levels it might be on of the special powers that you choose to activate on the configuration menu! This particular skull is called The Iron Skull, and its special powers are explained in its description: "Death carries a heavy price. Dying in co-op resets you at your last saved checkpoint. Dying solo restarts the level." So the effect of this Skull is actually negative -- when you die on single player the whole level is restarted costing you all of your progress! When you die in cooperative play, then the level reverts to the your last save instead of just re-spawning you wherever your teammate is! You might be asking yourself what the bloody point to this is, if all the Skull does is punish your failures, but later you will appreciate the different powers of the skulls when you play with them enabled... You may not want to use all of them -- this one in particular might be one you never use, but claiming it? That is a good idea!
Anniversary Edition Notes
The Halo Series Overview
Halo 2
Halo 3
Halo Wars
Halo 3: ODST
Halo: Reach
Halo: Combat Evolved Anniversary
Halo 4
Halo: Reach
Halo: Combat Evolved / Combat Evolved Anniversary
Halo 2 (Only the PC Version has Achievements)
Halo 3: ODST
Halo 3
Halo 4
The Story / Campaign
The Pillar of Autumn - Part 1
(2) Elite -- Medium-level blues; effectively utilize cover / Plasma SMG.
Your first Skull - Iron Skull

The Iron Skull
--== About Battle Skulls in Halo: CEA ==--
While we are on the subject of Skulls -- if you played the previous games (or the later games, whatever, for the purposes of this guide we will consider them to be the previous games) you might recall that in them you had to actively pick up the Skulls by holding down the 'X' Button. In Halo 2 you were not prompted to do this, you had to do it on your own. In Halo 3 you were prompted, and in both of those games once it was picked up the Skull could be used as a weapon for melee damage breifly if you wanted to.
None of that is true in Halo: CEA. First, you do not have to hit any buttons, you just walk into a Skull and it gets collected. You never actually pick up the Skulls in this game, so you cannot use them as a weapon. Finally if you are playing the game using the original graphics engine, then you failed to find the first Skull and are wondering WTF?! To be clear here -- you CANNOT collect (or even see) the Skulls under the original graphical engine. You MUST be using the enhanced engine to see and collect the skills or they simply do not appear.
If you are re-playing a level and you already have collected that Skull it is now gone from the game and you will not see it again because you cannot collect them twice. This includes replays -- once you have collected it, you have collected it!
If you are playing cooperatively with another gamer online, you will still not see any Skull that you have already collected, but they will - until they collect it themselves - but if you are playing with them in local Split-Screen Mode, they will NOT see any Skull that you can not see! What that means is that they will have to come back alone or with someone else who has not collected that Skull in order to collect it...
Only one of you needs to collect it -- in fact only one of you CAN collect it -- in Split-Screen Mode for both of you to obtain it.
--== The End of the 'About Battle Skulls in Halo: CEA' Section ==--
Collecting the first Skull (The Iron Skull) unlocks the first Achievement in the game: "Looks Like an Oddball"{ (10 GS) for what? For collecting your first Skull, that is what!
Now we set out to accomplish our first objective -- report to the Captain -- by following the only path that we can -- which will be through hatches whose lock plate glows green rather than red (red being locked) until we reach a soldier who will lead us to the Bridge...
--== The Bridge and Captain Keyes ==--
Since we do not have a weapon this first part of the adventure will be about not getting shot or killed, and using the different moves like jump, duck, open door -- which is the whole point here, along with the realization that the NPC Marines around you can fight (and die) for you! That is actually an important lesson for you to learn because allowing the Marines to battle for you will, later on, be an important thing for you to do when you are playing on the harder difficulties -- believe it!
As you enter the Bridge, but before you move over to the Captain and trigger the next CS, look on the left and you will see an empty chair before a terminal in the left wall. Walk over to the terminal and, when you are prompted to, hit the X button to engage the Terminal and unlock your second Achievement in the game: "What Have We Here?" (10 GS) which is for reading the first terminal.
POTENTIAL SPOILERS AHEAD -- SKIP THIS CHAPTER TO AVOID THEM!
About Terminals: the terminals you encounter in Halo: CEA are a little different than those you encountered in previous games. To start with rather than being computer database access points or providing you with map additions, these give you access to the personality of a companion cube who, if you have played the previous games, is instantly familiar to you!
The reason that they feel familiar to you has to do with the fact that he appeared in the previous games and because the theme from the terminals is also the theme that was used in the series of commercials and web videos about the upcoming sequel to the series, Halo 4...
Actually I should not be phrasing this like I am, because if you have not played the previous games or seen those commercials or the videos then the character of the companion cube -- whose name is 343 Spark -- is not really familiar to you at all, is he?! Well, if he is not, then hey, he is now!
The important thing for you to understand here is that the Companion Cube is actually one of the Easter Eggs in the game in that it -- and all of the Terminal Entries -- represent messages and information about events that occurred long ago with the destruction of the Installation 04 -- which is sometimes called Alpha Halo, and is one of the series of gigantic ring worlds (which are actually the Halo Array from which the series gets the name and not Mass Effect Launchers which is a totally different game and has nothing to do with Halo!) that were left behind by the enigmatic, technologically-advanced, and apparently extinct Forerunners. Hmm, I can see how you might get confused here...
Your first Terminal

The First Terminal
I am not going to go into too much detail on this because there is a chance you have not played the previous games, in which case revealing too much detail here would potentially ruin elements of those games for you, which would suck because they are really good games -- but it is sufficient to say that the Alpha Halo, the Companion Cube known as 343 Spark, and the Flood are all very important elements of the next game in the series, but I would seriously be an asshole if I told you WHY.
If you are like me -- or for that matter any gamer who is a fan of the Halo Series -- Halo 4 is going to be a pretty important event and game release for you. That being the case, and assuming for the moment that you have het to play all of the games, your best tactic is to play or replay the previous games (whatever applies) in proper game order so that when Halo 4 is released you are ready to absorb the story and be properly stunned, shocked, excited, and entertained! My best advice to you is to play the games in the following order:
(1) Access the Xbox LIVE Marketplace and download the Application Halo: Waypoint;
(2) Install and patch Halo: Waypoint so that it is ready for use on your 360;
(3) Play the game Halo: Reach (the Prequel Game to Halo: Combat Evolved);
(4) Play Halo: Combat Evolved Anniversary Edition (this game);
(5) Play Halo 2 (for Windows Vista – the Xbox Version does NOT have Achievements);
(6) Play Halo 3;
(7) Play Halo 3: ODST;
(8) Play Halo Wars
Technically you do not have to install and use Halo Waypoint to do this but really you should because in addition to being a very cool app in its own right, Waypoint is a sort of amalgamation of all of the Halo games from the series that rewards you for being such a major fan! What do I mean by that?
Well, when you first access Waypoint after installing and patching it, you are treated to the following features:
The What's New Section -- a video you can play that tells you what is new and what is happening in the Halo Universe with a focus on the most recent games and events. It tells you about any scheduled events that are coming up, and it wishes you a Happy Holiday (if there is a Holiday near enough) which is always nice!
One Click left using the Joystick or the D-Pad gets you your Character Card -- which instantly shows you your Halo Waypoint Rank, Level, and current XP -- for example I am Level 32, and my rank is Sergeant Grade 2, and I have 4451 of 12500 XP.
Clicking on the card itself gives you a very detailed display of all of the recent Achievements that you have unlocked in ALL of the Halo games! Not only that it gives you the time and date, a graphical representation of the Achievement, and makes you feel spiffy!
This sub-menu includes selections for tracking any Custom Challenges issued by you or your mates, any Halo: Reach Challenges available with timers that tell you when they will end (and so how much time you have to complete them if you want to), your Halo: Reach Summary Statistics, and all sorts of game play stats about the different co-op and online versus games you have played, which has been preserved for eternity on the Halo Servers over at 343 Industries and how cool is that??
The selection that I find to be the most interesting is that the server keeps track of every kill and action you have made in the games and online that can be broken out by weapon! For example the DMR is my most often used weapon (no surprise there but then I have only played online a few times) and I have a Kill-to-Death Ration of 1.00 -- that's right mates, I have killed 6 times with the DMR, and I have died 6 times while armed with it LOL.
In the VS Tab you can see how you stack up against your mates who have any of the games that are online enabled, and what is more the display gives you a comparison of your level and XP and theirs along with comparative statistics like total cumulative lifetime BPR, K/D Ration, Wins, and Kill Count.
In viewing the Hall of Achievements I was surprised when I realized that the very large icons for each Achievement are the actual ones from LIVE but, in this larger format, I could actually SEE what they represented, and it turns out that the individual Skull Achievements actually make sense now that I can see what the symbols are for them!
--== Begin Enemy Units ==--
(1) Grunts -- Low-level blue and red grunts; grenades and plasma pistols.
(2) Elite -- Medium-level blues; effectively utilize cover / Plasma SMG.
(3) Red Elite -- Higher-level red; effectively utilize cover / Plasma SMG / Harsh Melee.
--== ==--
After you speak with the Captain and then you are introduced to Cortana -- man it feels weird to think of this as being the point where we meet her for the first time... I mean considering the major role that she has played in our life up to now with our adventures in the previous games -- I am just saying...
After Captain Keyes finishes his reflections and issues you the orders that he has for you, Cortana is removed from the Pillar of Autumn Mainframe and inserted into the empty and waiting main computer storage for your armor -- and she settles right in!
-- New Primary Objective: Escape from the Pillar of Autumn Alive with Cortana
At this point in spite of the size of the ship there really is only one path that we can eventually follow, so proceed along and, now that we have a weapon thanks to Captain Keyes, who gave us his personal sidearm, a Model M6C Personal Defense Weapon System (his pistol in other words) -- all that we need to do is locate ammunition for it.
What?!
Yeah, seriously -- he keeps a weapon in the holster on his uniform but no ammunition in its clip! Lucky for us finding ammunition will not be that difficult as we actually cannot help but stumble upon a clip or two in the passageways. Now that we are armed it is time to kill some Covenant to make Mommy proud! And while we are about it, re-purpose a Battle Rifle or better yet an SMG while you are about it! Of course to do that you need to find a dead Marine...
You can also grab a weapon off of a dead Covenant -- it is really up to you -- but having something in addition to your sidearm is not only a really good idea, it adds to your efficiency. I am just saying...
As you progress through the ship working your way around obstacles and killing the Covenant you encounter you will also encounter Marines (living and dead) with the former helping you take out the bad guys and the latter making you sad.
Escaping the Pillar of Autumn
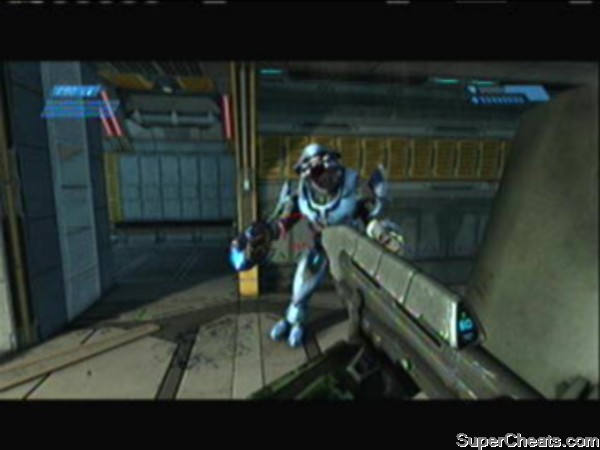
A Blue Elite
Cortana actually helps to guide you, and when you reach the main Lifeboat Deck you will notice that while there are no Lifeboats for you to take here, there are some boxes here and there with red lights on them that you can collect. These contain a device called an "Overshield" that will double your main shield capacity temporarily. Basically they turn your shield meter green (to let you know it has doubled) from the regular blue, but when this extra level is shot away it does not recharge.
You will also notice that scattered throughout the level are a handful of first aid kits -- white boxes with the universal symbol for first aid on them -- some on the ground but mostly bolted to the bulkheads. You can pick those up to recover health when you need it.
I bring this up because IF you are playing the game on Legendary and you do NOT pick up an Overshield or a First-Aid Kit (FSK)up throughout the entire level you can unlock the Achievements "Overshields are for Sissies" (10 GS), and "Walk It Off" (25 GS) respectively.
If you decided to play this level of the game in cooperative mode and you are on Legendary (or lower but the difficulty-based Achievements all stack so anything at or below your current difficulty level is also unlocked -- and in this case that would include the Achievements:
-- "Bro Hammer" (50 GS) Complete any level cooperatively on Legendary Difficulty
-- "Brovershield" (20 GS) Complete any level cooperatively on Heroic Difficulty
-- "Standard Operating Brocedure" (10 GS) Complete any level cooperatively on Normal Difficulty
If you are playing on Legendary you unlock all three of these, on Heroic just the last two, and on Normal just the third...
If you are playing on Heroic or higher and somehow manage to get through the level without taking ANY health damage (you can get shield damage as long as your actual health level is not affected) you can unlock the Achievement "He's Unstoppable" (20 GS).
When you reach the end of the area you trigger a CS in which you enter the Lifeboat chamber -- pulling another Marine in with you and basically rescuing them -- immediately after you kill the Red Elite (should be the first of these you have encountered) which is a type of Elite that is a tad bit stronger and a bit more capable than the Blue Elites with respect to melee skills...
As the CS plays out you unlock any of the difficulty-based Achievements from above as well as the Main Achievement for this level: "Pillar of Autumn" (25 GS) for completing it. Well done! Good on ya! That is ONE Level down, and just 9 or so go go!
--== Begin Enemy Units ==--
(1) Grunts -- Low-level blue and red grunts; grenades and plasma pistols.
(2) Elite -- Medium-level blues and Higher-level Reds; effectively utilize cover / Plasma / Melee
(3) Jackals -- Medium-level; good cover skills / Harsh Melee & Rush.
--== ==--
The next level is called "Halo" and it begins -- as most of the levels do -- with a rather involved CS that sets up this part of the story.
Basically your main objective is to locate and provide assistance to the Marines whose lifeboats crash-landed on the planet surface, helping them defend against the Covenant forces while you wait for a transport to arrive that will evacuate them to the newly established staging area.
In the process of completing the primary objective you will encounter some of the surface structures in the planet and, after entering them, their below-ground areas. Bear in mind that this is a ringworld, and it has structures that support the ring network, which we now know is a massive weapon -- but more on that later.
--== Halo Chapter and Level Tips ==--
Before you get too far into this level there are a couple of things you should be aware of, starting with the Achievements that are available on this level...
-- Halo (25 GS) - Complete the level "Halo" on any difficulty.
You unlock this for simply completing the level, and there are no special tips or things you need to do to get it.
-- No-Fly Zone (10 GS) - Destroy three of the four Banshees on "Halo" on any difficulty during a single play-through.
When you start the level there will be a pair of Banshee that attack you but special care must be taken if you want to shoot down both of them because as soon as you shoot down one, the other one will immediately bug-out. There are four Banshees in total in this level, so failing to shoot down the second one here is not a deal-breaker because the second pair, which you encounter in the process of rescuing the third set of Marines, does not run away.
But if you are determined to take out both of the first pair your best approach is to use either your rifle, pistol, or SMG and damage each until they are smoking, at which point you switch to pistol ONLY, and then you only fire at them when they are grouped close together, alternating which one you shoot and shooting only a SINGLE shot into them. Using this tactic you will whittle away their HP until, finally, you shoot one down, at which point you then concentrate as much fire power as you can at the remaining one before it can fly out of range. If you do this properly you will have no trouble shooting both of the Banshees down from the first pair.
The second pair attacks you when you are out in the open in the process of reaching the third and final lifeboat and group of Marines. They are aggressive in their attack on you which makes this a lot easier than the previous pair, who did a lot of evasive flying. The most effective approach is to concentrate on them one at a time, and use what cover that there is to let your shield recharge when you need to. If you shot down both of the first pair, the Achievement will unlock as soon as you shoot down the first of the second pair.
-- How Pedestrian (25 GS) - Complete the level "Halo" on any difficulty without entering a vehicle.
This Achievement can be a bit more complicated to unlock if you do not have a partner to work with but it CAN be done solo, as long as you have a second gamepad to use as the foil for the level.
Co-Op: Have your partner take possession of the Warthog that is dropped off by the transport and use it to progress through the level, with you following behind on foot. DO NOT get into the Warthog as the passenger -- riding inside the vehicle in any capacity prevents this Achievement from unlocking. As your partner progresses through the level they will reach the controls for the light bridge that is beyond the gap that you can only pass by jumping it -OR- if you are alone, by using a grenade to blow yourself over the gap (more on that in a bit).
You need to wait at the entrance to the tunnels so that after they jump the gap and proceed to the controls, raise the light bridge, then get back into the Warthog and cross they will now be far enough away for the games automatic warping system to determine that the distance between you and your partner is too great, and you will be warped to the location your partner is at on the other side of the gap, thus making it unnecessary for you to deal with the gap at all!
Once that happens simply finish the mission on foot, never getting into a vehicle, and you will unlock the Achievement -- making this one of the more annoying and time-consuming Achievements in the entire game!
Solo Play: You CAN unlock this solo, either by using a second gamepad and simply driving the Warthog over the gap and then over the bridge to get your character warped to them, and then complete the level on foot with or without the help of the second character, or you can stand on the lop of the gap and drop a concussion grenade at your feet so that its explosion blows you across the gap.
If you do that you will need to allow your shields to recharge before you proceed to the bridge controls, taking out the enemy that stand between you and the controls, then activate them and cross the bridge on foot, completing the level sans-vehicle.
WARNING: If you are using the gamepad OR you are playing with another human player and they manage to get themselves killed in the process of activating the bridge controls before you get warped over, the only option you will have is to use the grenade trick because they will re-spawn on the wrong side of the gap, with their Warthog where they left it, parked by the bridge!
Note that this is the first level where you get access to a Sniper Rifle - and it can be very useful in dealing with the enemy in the second half of the level, but when you are shooting down the Banshees you will find that the Pistol or the SMG are far more useful to you than any of the other weapons.
You should already have the Achievement "Looks like an Oddball" and "What have we here?" for finding the first Skull and first Terminal from the Pillar of Autumn level, but as there are Achievements for finding half and then all of the Skulls and Terminals you should still make an effort to locate and collect them, right?
Basic Walkthrough
You begin at a decided disadvantage -- your lifeboat has crash-landed on the surface and you appear to be alone. Get out and pick up any ammunition and kit that is scattered about and then head to the gap on the left and cross the narrow bridge here, taking shelter behind the boulders on the other side and watch as the Covenant forces arrive. They are searching for survivors to mop up the remaining enemy and really have no idea that the Master Chief was on that lifeboat -- if they did you would be facing a division not a squad.
After the initial squad arrives a pair of Banshee will also arrive ostensibly to provide air cover for the ground units -- read the notes above for the related Achievement -- so you will need to take one or both of the Banshee out before or after you take out the squad closest to you (they will cross the bridge and are mostly grunts).
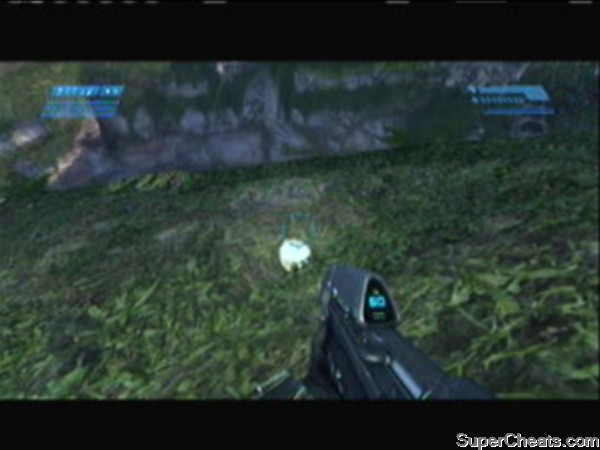
Before you do anything else, now that it is safe to do so cross back over the bridge, make sure you did not leave any kit on the ground by the lifeboat, and then follow the path on this side of the gap in the general direction of the waterfall, where you will find the next skull laying on the ground just past a boulder. Pick up the Mythic Skull, and then head back over the bridge and follow the path to where you drop down and engage the next enemy squad before you find the first of the three lifeboats.
This can be a little confusing since the level appears to suggest that there are three lifeboats you need to secure but that count really only begins just before and just after the tunnels so it is best not to fixate on it.
--== Lifeboat 1 ==--
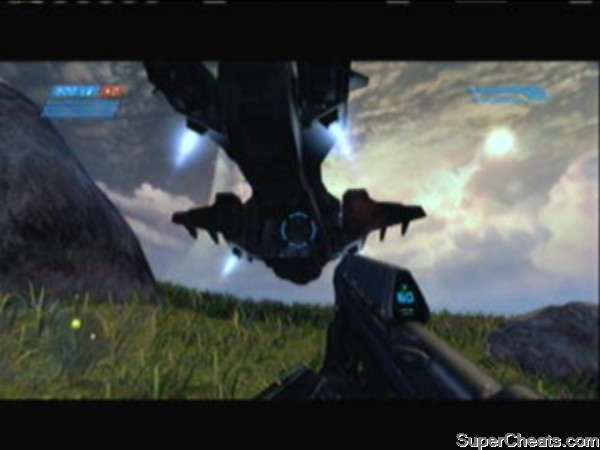
After you clear the area around your lifeboat and proceed down to the area where the next lifeboat is located you will encounter three independent squads involved in this mop-up operation very close to one of the ring support buildings -- the first pair are already on the ground when you arrive, having just been dropped off by one of their Dropships -- so let that fly off before you engage them, right?
Take out the squad that is between you and the structure, and then the other across the valley that is firing at the Marines as it approaches. The third squad will be dropped off by another Covenant Dropship, so wait for that to clear the area and then take them out.
I should not have to warn you that each of the Dropships has a set of gun turrets on it, or that the Covenant grunts manning the turrets will use them on you. Your smartest tactic here is to pick off the nearby enemy with head-shots using the limited range scope on your pistol, being careful to not give away your position by starting with the closest and working your way out.
After the Dropship arrives and drops off the third squad, wait until it clears the area and then begin seriously picking off the enemy as it does not matter if they see you at this point, as invariably they will. When they are all dead, approach structure here where the Marines have taken shelter -- there are ramps on either side that lead up to the level above, where you will find some medpacks (first aid kits that restore health) as well as ammunition and grenades. Take what you need and then get ready for several waves of enemy who will be dropped off by Dropships.
Basically in addition to needing to sit out the timer to arrange rescue for these guys, you also need to clear out the initial enemy presence, and then survive the waves of enemy who will attack. The Covenant appears to be serious about wanting to take out the Marines here!
The best strategy seems to be to use the elevation of the structure as your defensive point as the enemy will try to come up the ramps there -- so watch the radar and simply change to the side that they enemy is attacking from as needed and kill them! Keep an eye on your shield and duck into cover when you need to and let them recharge -- the idea here is to not need those medpacks, but they are there if you do...
The biggest threat from these attacks is the Needler-armed grunts and Elites since it only takes a few of them to get enough a concentration of needles into you to ruin your day. Just keep an eye on your shields and make effective use of the pile of grenades that are laying near the medpacks on top of the structure and you will be fine!
Mythic Skull, Boom Skull and a Terminal

The Mythic Skull
The Boom Skull
Once the battle is won you will have a radio cat between Cortana and the rescue ship, and then they will arrive, dropping off the Warthog that is your ride for the second half of this level -- though IF you are working on the optional Achievements for this level you may want to review the advice provided at the start of this level before you climb into that Warthog...
On the other side of the Tunnels the locations of the lifeboats are helpfully marked by blinking lights that are outside of the entrances to the narrow canyons that lead to the open areas where the lifeboats have crashed and, conveniently, where you will find the boats, survivors, enemies, and some permanent facilities including part of the support infrastructure for the rings above.
--== The Tunnels to the Operations Area ==--
The next set of lifeboats are located in the area on the other side of the mountains, and to reach that we have to go through a set of tunnels with a large base area that is part of the support system for the rings. Inside are enemy, so it is not a cakewalk, but it is also not a serious impediment provided that you go careful and think out your moves.
As you approach the entrance to the tunnels but BEFORE you enter, follow the cliff face around to the right until you can climb up, then follow it back left towards the entrance to the tunnels and you will find your next Skull -- The Book Skull -- laying on the ground here.
Collect that now and save the game. Note that you now have three skulls in your collection, so in theory if you wanted to after you finish this level you could go back to the first level (Pillar of Autumn) turn on the three skulls and set the difficulty to Heroic, and run through that level again real quick to unlock the Achievement "Tsantsa" (50 GS) for completing a level on Heroic with three or more skulls active.
Please refer to the Tips part of this Section on obtaining the conditional Achievements as that also provides you with strategies for getting through the tunnels area.
After you go down the sharp ramp that is maybe four or so turns into the Tunnels you will see a short side-alcove that has a blinking yellow and blue beacon -- this is the next Terminal that you need to access in order to collect. When you do that you will get another CS of the Spark and his take on the events that have lead up to the current situation -- this really is worth watching in addition to being required if you are collecting the Terminals -- which you should be because hey, an Achievement is an Achievement, right?
These reports that the Spark gives you are going to be wicked important when they finally release Halo 4, since this is all foreshadowing for that game -- and as I say, it is worth watching because it does not spoil anything and later you will be glad you did because it makes absorbing the entertainment capacity for the games all that much easier.
You need to jump the gap ahead then fight your way to the bridge controls and raise the light bridge, then drive across and exit the Tunnels. After you emerge from the other side it is time to locate and rescue the last two lifeboat groups. You get a checkpoint save when you exit the Tunnels.
--== Lifeboat 2 ==--
The next area is pretty easy to find -- just follow the path sticking to the right up the hill and then down, and as you approach the river the entrance to the canyon (marked by lights) is a hard right BEFORE you reach the river. If you actually reach the river, you have gone too far, so turn around and head up and to the left now, and you will locate the entrance.
Proceeding through the canyon you should stick to the left along the wall and you will come to another canyon entrance that is a little hard to see but, when you get inside of it you will see at the other end another set of blue marker lights and a path that leads up on the right side of the area... Follow that and you will jump a river from a bluff above and find yet another set of marker lights leading to an open area with another building which is the source of the flare-like light that keeps appearing in the sky.
Take out the enemy outside of the building and then Cortana will tell you that there are Marines in the hills above -- but really you want to clear the enemy out first -- as after you do that Cortana contacts the rescue ship and you hear their conversation including the locations of more survivors and boats.
As noted at the start of this level there will be Red Elites mixed in with the enemy you face here, and they should be given a slight priority when you are fighting the squads as taking them out quickly and early is a really good idea. Remember that one of the "enemies" that you are fighting in this game is the enemy called attrition -- when you lose health, when you have to empty a clip, or when you use up some other weapon or resource that is not easy to replace, you are losing to the enemy called attrition.
Be sure to re-supply from the kit scattered around the lifeboat and then continue to the next area!
Completing the Final Rescue
The Bugout Ride
--== Lifeboat 3 ==--
If you go to the lifeboat and run in the direction that its bow is facing and a little to the left you will enter a canyon that is a little hard to spot unit you are right near it -- the other end of it is lit by a set of markers -- and this is where we want to go. As we enter the open area on the other side we are attacked by the second set of Banshees -- battle them and shoot them down (there is a boulder near the entrance that you can use as partial cover here), and once they are shot down head into the area and you will follow the river to another set of markers (there is a red target marker on the screen in this direction as well).
When you head out of this short canyon you will be in the next open area and you will quickly spot the scar where the lifeboat tore up the grass as it landed (crashed). Head over and pick up the kit and ammunition there and, if you look to the left of the entrance hatch, you will see a Sniper Rifle. Whether you pick it up or not is your call -- I did, but mostly because I like that particular weapon and I am good with it, but also because it allows you to bring the fight to the enemy from a distance.
This is good practice if you are not familiar with the weapon as it will let you get a better idea of how far you need to be away from the targets to be able to shoot them without your position being compromised but be aware that after you take out the first group that lands a series of squads will arrive and you do NOT want to be sitting under one of their landing sites when they do, since you will quickly be overwhelmed by them and die... And that is not the preferred result here.
Sadly the survivors from this lifeboat were all wiped out before we arrived so there was nobody to save, but despite that this is what you call a target-rich environment! After the reinforcements arrive pick them apart and Cortana warns you that the Covenant has located and captured the entire command group from the Pillar of Autumn -- you need to find and rescue the remaining survivors and then try to rescue the officers from the ship next!
--== Lifeboat 4 ==--
After you clear out the bad guys head through the canyon and into the next open area following the marker to locate the next lifeboat -- grab the kit here to re-supply and then head in the direction that the stern of the lifeboat is facing and you will come upon a squad that is blocking your access to the path on the left -- take them out and then make your way up the marked slope here to find a large structure at the bottom of a slope.
Now here is a chance for you to give the Sniper Rifle a good workout!
You really should be able to pick off the majority of the enemy from above but I would concentrate on the elites and the shield mutts as the grunts are easy to take out with your mg -- either way though once you have them managed head into the base of the structure and down a level where you eliminate some grunts and then find the Marine survivors on the next level below. Take out a few Jackals that were engaging them on this level and then lead them to safety and call for extraction.
At this point you may need to clear out a handful of enemy from around the second building, but once you do the rescue ship will arrive and as these are the last group you climb on board with them for your own evacuation and the end of the level! Well done!
--== Enemy Units ==--
(1) Grunts -- A mixture of both types / dangerous in packs
(2) Jackals -- Try not to let them get close enough to melee you
(3) Elites -- Both types are present, the Red seem more dangerous as they melee
(4) Hunters -- Very accurate shooters / Kill On Sight (Groups of Two)
--== ==--
Level Notes: Truth and Reconciliation has three Achievements directly associated with it - the standard Achievement for completing the level regardless of difficulty level selected, and a pair of optional Achievements that are based upon specific actions/results and not difficulty.
-- Truth and Reconciliation (25 GS)
You get this for completing the level.
-- Close Quarters Combat (25 GS) Complete the level "Truth and Reconciliation" with at least four rounds left in your Sniper Rifle.
That may sound easier than it actually is -- but one way to make sure that you do end up unlocking this is to replay the level with your second gamepad active and use that character to do most of the sniping, which pretty much guarantees you unlock this one.
-- All According to Plan (10 GS) Kill all of the enemies in the first encounter of "Truth and Reconciliation" without being detected.
To accomplish this what you need to do is stick to the cliff wall on the right of the first area and snipe your targets without giving away your position. Foot-units get priority over the ones on the mounted guns, but bear in mind that if you are detected or you stray too far from the right side the Marines that are with you will attack, and if that happens you cannot unlock this Achievement. So don't let that happen!
Basic Walkthrough
Your goals here are simple:
-- Eliminate the Covenant Troops in the first area without being discovered
-- Rescue Captain Keyes from the Covenant Cruiser
The level begins with you being inserted near the enemy base with a squad of Marines -- while they will be very useful to you later, right now you need them to stay put! Using your Sniper Rifle start clearing out the enemy here -- you will know you got them all when you unlock the Achievement for that.
-- All According to Plan Achievement --
If you are going for this Achievement -- which is for taking the first group of Covenant out without being spotted using your Sniper Rifle, there are several basic strategies that you should be following:
(1) Be Patient. I once heard the professional sniper described as a man who enjoys the fascinating detail of watching paint dry -- what that translates to is that patience is a virtue for the sniper. Math is also a help, since you can use that to keep track of your kills (that was humor).
(2) Move in small and carefully planned steps. Motion is how you end up spotting the enemy and, I suspect but cannot prove this, how the enemy spots you in the game. In other words the game decides you moved too fast, too far, or too much in the open, and the enemy "spots" you and starts shooting. If they shoot at you that blows any chance of you unlocking this since it means you were spotted, and this is awarded for NOT being spotted. So use economy in motion, elevate your situational awareness to the max, and take the enemy out ideally when no OTHER enemy is around to see them get killed.
(3) Keep track of your kills. Basically you will be taking down 2 Jackals, 2 Elites, and a bunch of grunts -- the grunts will be your biggest problem because unless you are in a good position they can be hard to spot -- and the best position is unfortunately one in which you are easy to spot from below -- so you have to eliminate as many of them as you can BEFORE you move into the opening of the ledge to reduce the chance of being spotted.
(4) The fixed guns have sensors on them. Maybe. Well, we cannot say that for certain but what we can say is that a grunt manning one of the guns is twice as likely to spot you than one on foot -- so we should assume that they do have heat sensors on them or at the very least increase the grunt awareness level but it all amounts to the same thing.
The easy solution to this threat is to make damn sure you clear out the fixed gun operators because they will ruin your day brother. When a grunt becomes alarmed -- as in sees another Covenant die -- four times out of five they will head for and man the nearest fixed gun, so watch for that and kill them when they do.
(5) Once you have the enemy down to the last two or three is when you will make a dumb mistake. Murphy is waiting for you mates, so don't amuse him. Treat the last three with the same level of care you gave to the first three, even though it will take 20 times longer to kill the last three than it did the first three, in the end your reward is a bitching Achievement and the personal knowledge that you accomplished something!
Once you take out the last Grunt -- and it will be a Grunt, it is always a Grunt -- the Achievement will unlock, and you will immediately hear the music start up and the Marines start to chatter -- which is a good thing because it means you accomplished this goal and you can now be a bit more up-front about engaging the enemy.
Taking out the Hunters

The Ascension to Reconciliation
-- Back on the Mission --
After you have eliminated the first group of Covenant (and hopefully obtained that Achievement) you will want to carefully make your way along the path ahead, which follows the edge of the cliff on the other side of the Covenant encampment past the fixed gun emplacements. As you approach the threshold of this path Cortana will tell you to stop, and warn you that her sensors are picking up movement ahead...
That is spot-on! Ahead of you is a mixed pair of enemy squads, and they know you are coming so progress carefully and use what cover is available as you work your way along the path. Ahead and slightly above you is a gap with mixture of Jackals, Grunts, and Elites and one of the Advanced Elites (Type 3? Whatever, you will know when you run into one because they are a lot tougher than the two types you have faced before) -- you will want to make good use of your Sniper Rifle here to thin them out, which will make crossing the gap a lot easier -- but save for a concentration of needlers your greatest threat is the mounted fun on the far ridge so take its operator out quickly to save yourself some grief.
Personally I found that the best way to take the Type 3 Elite out who is around the corner to the right was to switch to sticky grenades, quickly dodge around the corner and plant one on him then just as quickly back up -- the grenade going off takes out his shields, and all that you need to do then is hit him with a short burst from your rifle and he is toast.
As you work your way along the path you will run into a small cluster of Grunts -- this was really not funny at the time but after the fact it is funny -- but when we got to this section there was one Grunt who ran back and forth BETWEEN my two groups of Marines, causing them to shoot at it and hit each other because they were directly across from each other. That was when I learned that friendly fire was actually in effect in the game, as a few of the Marines killed each other trying to kill the Grunt. *Facepalm*
Further ahead on the trail is another mounted gun and it is manned -- but if you stop just past the large clump of brush and switch to your Sniper Rifle you will find that you can *just* target the top of the Grunts head that is manning the fixed gun, and kill him. You actually have to aim a smidgeon above his head to do it, but that way you do not have to walk around the boulder and into his range to take him out!
Ahead of you is a pair of Type 3 Elites as well as the other types scattered around -- we already discussed a way to kill them but just so you know if you are going to try to kill them with guns instead of softening them up with a grenade first you need to try to target their heads to damage them quicker...
To the left of the other side of the land bridge you will spot a blue glowing object on the ground that you can pick up -- this is an Active Camouflage Unit (ACU) -- a device that makes you blend into the background and hard to see -- but it does not make you invulnerable (you can still be shot). It will let you slip in behind the next group of enemy through the narrow cut in the canyon, so you may want to do that in order to quickly take out the turret there but there is still the matter of some Jackals, Grunts, Elites, and some Type 3's...
Personally I find that softening up the Type 3's by tossing a grenade between them and THEN taking out the turret from behind is a more effective strategy but your mileage may vary here... So do it however you like. Bear in mind though that if you get killed when you re-spawn at the last checkpoint you have to find your body to recover your Sniper Rifle from it.
I am uncertain that this interferes with the optional Achievement since I did not get killed but it might? It is a good idea not to get killed anyway, I am just saying... You will know it when you arrive at the lift to the ship -- it is huge, it is pink, it is obvious!
At this point the Marines are no longer hanging back but are actively with you assuming that any of them are still alive -- speaking of which while it is a nice idea to try to keep them alive if you can, remember that they are there to help you, not you to help them! If a few have to die to get the mission accomplished than hey, that is what has to happen...
As you approach the launch pad for the cargo lift you will notice that it is protected by several SHADE Guns (fixed turrets). Of course it is! That is just the sort of facility you would use turrets to defend after all -- so you will want to make sure that you clear them as you approach and then look for a spot you can easily defend because before you can use the lift you are going to need to defeat a few mixed waves that will include pairs of Jackals, Elites, and lots of Grunts. The trick is to not let the Grunts man any of the SHADE guns that can hit you and to have some bolt hole near enough so that you can duck into it to let your shield recharge if you need to.
Chances are good that you will run out of ammo for your MG before the battle against the waves is over - I recommend holding on to the Sniper Rifle and swapping your empty MG for one of the Plasma Rifles from an Elite... When you get to the end of the waves of attackers you should feel good about yourself -- assuming you did not die that is and if you did not, well then good job! -- and the good feeling will last... For about 20 seconds before the ominous music kicks in and you see a double flash from the launch pad...
If you have been gaming for long you probably know that games like Halo usually have a boss mob you have to face every few levels -- and we have not seen one of those yet have we? Well, not we get to see two of them! Maybe they are not really boss mobs -- but this new mob you are about to meet is called a Hunter -- and they are very hard to kill since they are only vulnerable from behind.
Seriously, you want to let them rush you assuming they do not just kill you outright with that canon they are armed with. Stick to cover because you cannot take more than two shots from their gun before you die -- and you are going to die (probably many times) before you figure out how to deal with these things. That sucks but call it a learning experience, right? I would be totally lying to you if I said that I took them down no hoo-hoo... The truth is I got my ass handed to me the first few times I fought these!
What I found was the easy way to deal with the pair was to man one of the SHADE turrets and, as soon as they spawned open up on them. Generally I was able to kill one of them dead before the second one blew me -- and the turret -- to hell. So yeah, that only works once, but the remaining Hunter was a lot easier to handle all by his lonesome, so you should find it easier that way.
After you kill the second Hunter Cortana contacts the rescue ship and has a conversation with the pilot, which is your clue that you have accomplished your goal and cleared out all of the ground forces here, which means this part of the level is finito!
Note: You may be tempted to save and quit at some point in this level if just because it is so long and daunting a level. My advice? Don't do that. When you come back to play you will discover that 9 times out of 10 the save causes you to restart at the beginning, so if you have already worked your way through the first half and are on the ship, it is not much fun to have to re
Head over to the launch pad and step onto it to join the Marines that the rescue ship just dropped off -- you get a CS of you being lifted up to the ship and Cortana tells you she has a lock on the location of the Captain then you are told that there are no Covenant here... But that cannot be right?
Before you can really think about that you hear this mad screaming -- mad as in insane -- and then you are attacked! See? There are Covenant here after all! And one of them is a Type 3 Elite with an ACU and he has a nasty Plasma Sword that will one-hit-kill you if you let him get close enough... If this were a conventional situation your Marines would go back-to-back in a circle and fire a mad minute off (that is where they basically empty their weapon spraying rounds on every direction hoping to hit something... Anything... Not an option here!
Basically you want to start by hitting what you can actually see, and thinning out the enemy in this room. Once you kill the Elite with the sword and thin out the rest you get another pair of Hunters coming through a door -- which by the way is the door you need to get through before it closes to grab the Skull for this area (and good luck on that, as chances are you will have to replay this level to get it since you are not likely to get it the first time through because you are more interested in staying alive than in collecting a Skull but still...).
This gets a little complicated because the door you need to go through below is locked -- and to unlock it you have to go through one of the two other doors in the main area (they both go to the same place) and battle your way to the control room -- you will know you are in the right place because music will start to play and you will battle a ginormous number of enemy and, finally, an pair of Hunters!
After you beat them Cortana will find the code that will get you through the door below that was locked... So head back down there (on the way you will deal with relatively minor resistance) and go through, working your way to the lower section and the door. I don't know about you but I experienced this as being a fairly complicated and involved process...
Rescuing Captain Keyes

The Skipper
Basically you will find several waves of regular mobs that end with a pair of Hunters -- when you reach the second hanger (with the big blue glowing wall) make sure you grab the Skull from one of the doors that the enemy comes in through -- it will be on the left and as you work your way up you will arrive in the hanger and Cortana will tell you that she has the combo, then you continue climbing levels until you reach the Bridge -- at the center of which is the Terminal for this level that gives you a very interesting CS that I recommend you watch -- interesting!
Follow Cortanas directions to the Brig and search for the Captain -- at the first level you will find dead marines who you can resupply from -- the first Brig is a dry hole but further down the halls is another and that is where you find the Captain!
You get a CS in which you learn a little about the Halo Rings -- Cortana figures out that the Covenant is looking for the Halo Control Room -- and the Skipper has a new mission for us: Beat the Covenant to the Halo Control Room! Well duh!
You need to keep the Captain alive -- and that means actively protecting him -- because otherwise if he dies you have to restart from the Checkpoint on the Bridge. Even on the higher difficulties this is not all that hard to do, just stick close to him, right?
You fight your way back to the Bridge and then wait for the audio CS to run its course, holding the Bridge until the Captain tells Cortana to find a Covenant Dropship -- she does that and leads you to it, at which point the Skipper flies you all to safety!
Reaching the Drop ship and getting the CS in which you all fly away completes the Level and unlocks the following Achievements:
-- Close Quarters Combat (25 GS) Complete the level "Truth and Reconciliation" with at least four rounds left in your Sniper Rifle.
-- Truth and Reconciliation (25 GS) Complete the level "Truth and Reconciliation" on any difficulty.
Personally I thought that the hardest part of this level was finding the Skull -- YMMV -- well, that and the fact that the Checkpoint System is a little wonky so you really have to complete the entire level in one go or it will very likely start you from the beginning...
--== Enemy Units ==--
(1) Grunts -- A mixture of both types / tend to appear in packs
(2) Jackals -- A mixture of both types / tend to appear in packs
(3) Elites -- All three types are present / Type-3 are mostly invisible with swords!
(4) Hunters -- Singles AND groups / Type-2 Prefer to Melee
--== ==--
Level Notes: The Silent Cartographer includes three Achievements that are attainable:
-- Beachhead (10 GS) Storm the beach on “Silent Cartographer” without losing any marines on Heroic or Legendary difficulty.
-- Grenadier (25 GS) Escape the map room on “Silent Cartographer” without firing off a single shot on Heroic or Legendary
-- The Silent Cartographer (25 GS) Complete the level “Silent Cartographer” on any difficulty
Generally speaking one of the main strategies that is used by most players on the higher difficulties is to gather up a bunch of Warthogs at the staging area as that makes it a bit easier to deploy the troops, but YMMV on this.
Unlocking the optional Achievements on your first run through this level is really not likely unless you are playing with another human gamer, in which case yes, you can manage it, but it means adopting a rushing run-and-gun strategy and aggressive use of your grenades. You might find that it is better if you do this on a replay, and just stick with accomplishing the story campaign, but it is your call... Remember though that you have to set the difficulty level to a minimum of Heroic to unlock these!
Basic Walkthrough
You arrive at the beachhead in a pair of Pelican Troop Carriers, and when they land you have two groups of Marines with you and you are facing a mix of enemy that is mostly grunts with the odd Elite and Jackal thrown into the mix. If you are trying for the optional Achievements (which means you are on at least Heroic) you will want to immediately and without delay run in to the fray and start killing the enemy. Pay particular attention to the left side of the area as there are some Grunts that will make quick work of one or two of your Marines straight away, which will ruin the Achievement run for you.
If you are doing this with a partner your best approach is to have them handle the left side while you head right up the center and begin popping grenades and using the pistol to head-shot any enemy you can actually see.
After you clear the beachhead you will start to get Warthog deliveries -- there are some tipped-over Warthogs further up the beach in the direction of the Security Facility as well -- after you have your troops properly supplied, proceed along the path to the entrance to the facility (to the right facing in from teh beach landing point), where you will notice that the actual entrance is a sort of choke-point. Inside are some Elites and Grunts -- the easy way to deal with them is to chuck a grenade in to take out the Grunts and drop the shields on the Elites, then walk in and give the Elites a burst each to finish them off.
As you pass the landing spot where we first arrived look for the small plateau on the beach -- there is a path on the water-side that will take you to the top -- and at the end of it is the first of the two Skulls for this level (Famine) so be sure to grab that and then mount back up and continue along the beach until you get resistance from the enemy, which means you are near the entrance to the path to the Security Facility!
A few Tricky Achievements and Bandana Skull

The Bandana Skull
Fight your way to the main doors, clearing out all of the enemy that you encounter -- and then the doors get slammed in your face and locked. D'oh! You need to find a way to get them open -- and that means backtracking and following the other path at a rapid clip but taking out the enemy you encounter as you go (don't leave any alive).
You can make the whole trip in your Warthog, but when you reach the clearing with the pair of Hunters you will want to dismount to deal with them as quickly as you can. The next Terminal is at the base of this circular building so after you take out the Hunters go ahead and access the Terminal to get the next CS and piece of the story.
After the CS ends keep progressing along the path and killing the enemy and you will eventually reach the Security Building -- inside of which is a mix of enemy including another pair of Hunters. After you kill them use the terminal inside to unlock the door way back at the end of the other path, now BEFORE you leave this building -- because you are thinking "I should leave this building!" don't. Look around the corner from where the terminal is that unlocked the doors and on the right where the catwalk ends you will see that there is a ledge above.
You need to pop a few grenades at the base of the ledge and then run onto them before they detonate so that they blow you up on to the ledge -- where you will find the next Skull -- the Bandana Skull -- which is particularly desirable to have!
It is time to backtrack to that door, but on the way out you will be jumped by a pack of invisible Elites so take them out as quick as you can then head for your Warthogs and make the trip back to the first facility.
When you arrive you get a CS and then you make your way to the Map Room and activate the terminal there -- and battle your way back to the surface where the Pelican is waiting for you -- there are also some invisible Elites -- you can fight them or not, but if you are going for the optional Achievement for escaping without shooting you will not want to do that... So just run to the Pelican and hit 'X' to get on board -- that triggers the closing CS for the level and, if you were a good boy and did not shoot anyone after you activated the terminal in the map room, you will unlock the Grenadier and The Silent Cartographer Achievements for your trouble!
--== Enemy Units ==--
(1) Grunts -- A mixture of both types / a lot are asleep so melee them
(2) Jackals -- A mixture of both types
(3) Elites -- All three types are present / Type-3 are mostly invisible
(4) Hunters -- Appear in pairs
--== ==--
Level Notes: This is probably the longest level in the game -- it sure felt like it anyway! If you have been following the guide you will be able to unlock the following Achievements on this level:
-- Skulls Taken! (25 GS) Discover half of the skulls hidden throughout the Campaign
-- Heavy Reading (25 GS) Read half of the terminals hidden throughout the Campaign
-- Wraith Hunter (10 GS) Destroy 4 wraiths on the level “Assault on the Control Room” with a scorpion tank
-- I'll Take That (25 GS) Fly a Banshee on the level Assault on the Control Room
-- Assault on the Control Room (25 GS) Complete the level Assault on the Control Room on any difficulty
Basic Walkthrough
The level starts with you being dropped inside the facility -- there is token resistance, some Grunts and an Elite who you can easily manage, but as you progress through the building the resistance gets a lot stiffer. In fact this is one of the levels that even on normal will be trouble for you of you try to rush through it or take a gangbusters approach -- you will need to use a mixture of stealth (where you can) and calculated shooting where you cannot.
After you work your way into the first control room you will notice a vent opening in the center of the chamber -- grenade jump up to the pillar in front of it and then jump the gap and grab the Fog Skull from inside the vent while you are here.
Now head outside -- you have a choice to make here -- if you are going for the optional Achievement for killing the four Wraith with the tank you need to head to the right and down the drop into the next area and grab the Scorpion Tank, then turn it and wait for the Wraith from the first area to follow you down into the lower area, and take it out. With the first Wraith dead, proceed ahead, using the tank's MG to take out the ground forces and then its cannon to take out the second Wraith.
The third Wraith is on the ledge above the tunnel leading down to a door you have to open with a control panel - it will move from side-to-side on that ledge to avoid your shots -- but you need to take it out -- just be sure you take out the turrets in this area first, and the Banshee that is providing air cover BEFORE you try to angle in and take out the Wraith above, as otherwise you are likely to end up dead.
With the third Wraith out of action, head down into the tunnel, open the door, make your way through the tunnel and open the door to reach the next area -- which is a bit tricky because you have to maneuver the tank around to the left and across a bridge to reach the exit from this area, clearing out the defending troops as you go. Once you have the defenders cleared out but BEFORE you exit this area go back to the other side we entered from and look down on the ledges below and you will see the second Skull for this level!
The two easy to miss Achievements
The Fog Skull
Jump down and grab the Malfunction Skull FTW, and then jump back in the tank and exit the facility to reach the next outside area and your final Wraith! Once you take out the fourth Wraith the Achievement Wraith Hunter (10 GS) unlocks. There will be some Ghosts and ground troops, including a pair of Hunters to be dealt with, but good on ya mates!
Continue along the path taking out the mixed enemy units including some Hunters, air cover, and ghosts, then move to the other side of the area and use the door to continue along the path, entering another facility. Clear out the bad guys and take the lift up at the end to the upper area and work your way around to the exit to the second skybridge, where you just do more of the same, taking out the enemy.
When you exit out the other side into a long corridor you will face a Type-3 Elite with a sword who is invisible -- take him out and then exit the facility to the outside. This is the part where you need to grab one of the two Banshees that are parked ahead -- so rush forward shooting the enemy and grab one of them to unlock the Achievement -- I'll Take That (25 GS) -- and then land the Banshee below and you will see a structure you can go under -- go to the bottom and you will find supplies, a Rocket Launcher, and a Sniper Rifle, as well as the Terminal for this level -- use the Terminal to unlock the Achievement Heavy Reading (25 GS).
Note: if you fail to grab the Banshees you can reach the bottom area by heading into the other side of the facility and taking the lift down, which puts you right next to the area you need to drop down in to get to the supplies and Terminal.
Battle your way up the ramps to the top of the area taking out the mixed units including several groups of Hunters, and then open the large door and take out the defenders there, then another pair of doors for a CS with Cortana that goes a little sideways... She integrates to the Control Center Computer and then freaks out on us, telling us we have to stop Keyes but not why...
That ends the level, unlocking the Achievement for completing it.
--== Enemy Units ==--
(1) Grunts -- A mixture of both types / a lot are asleep so melee them
(2) Jackals -- A mixture of both types
(3) Elites -- All three types are present / Type-3 are mostly invisible
(4) Squids -- the odd little mind-screwing mobs
(5) Flood -- Mobs of different type taken over by the Squids
--== ==--
Level Notes: You can unlock the following Achievements on this level:
-- This Ones for Jenkins! (10 GS) Kill 50 Flood Combat Forms on the level “343 Guilty Spark” on Heroic difficulty or higher.
-- Breaking Quarantine (25 GS) Escape the Forerunner Facility on the level “343 Guilty Spark” in under 21 minutes
-- 343 Guilty Spark (25 GS) Complete the level “343 Guilty Spark” on any difficulty
Basic Walkthrough
You start out in a swamp -- and after you kill the attacking enemy search the base of the trees to locate the Skull for this level -- the Recession Skull -- and then work your way along the path to the facility and enter, battling your way through the various defenders until you reach the room with the burning wreckage -- hop on that to reach the upper level and go through the door there, and you will find an insane trooper who fires on you. Basically you have no choice but to put him out of his misery.
When you reach the next area you trigger a CS in which you view the video recorded on a Sergeant's Helmet Cam... This lengthy CS shows us what happened to this squad -- and the Captain. They are attacked by a new type of mob that appears to latch onto the brain and take control of the body...
It turns out that these Squid are the only thing that the Covenant actually fear -- well, we will teach them to fear us, but still... This must have been what Cortana was freaking out about...
We will do battle with many groups of them before facing Flood, but it soon becomes obvious that we need to get the hell out of this facility as fast as we can!
343 Guilty Spark - The Recession Skull and another two easy to miss Achievements

The Recession Skull
You work your way through the passages to a room with a light bridge you can turn on -- but that leads to a dead-end -- the door you want is in the opposite wall from the one at the end of the bridge -- where you will find a lift to take down into an area where you encounter more Squids and a new type of Flood that uses weapons! Defeat them and then work your way through the next three areas climbing up to reach the chamber with a lift NOW STOP.
You need to activate this lift and IMMEDIATELY jump off onto the platform about 12 feet up with the Terminal on it. If you are playing co-op your partner must ALSO jump, or you will quickly find yourself teleported back onto the lift without the Terminal to your credit and screwed! Seriously, fail to do this here and you have to repeat the entire bloody level! You should unlock the Achievement Breaking Quarantine when you activate the lift as well -- and after you do the Terminal, call the lift and head up where you will meet up with a squad of Marines.
At this point you get your comm back and arrange extraction -- as you progress through the swamp you encounter the Spark during a CS and are teleported out of the area, effectively ending the mission and unlocking the Achievement for this level! Well done!
You should not have much trouble unlocking the Achievement Breaking Quarantine (25 GS), though This Ones for Jenkins! (10 GS) can be a bit of a challenge... If you are doing this level co-op be sure that whichever of you unlocks it STOPS killing Flood as if they don't the one who has yet to unlock it may not have enough targets to get to 50.
--== Enemy Units ==--
(1) Squids -- the odd little mind-screwing mobs
(2) Flood -- Mobs of different type taken over by the Squids
(3) Exploding Flood -- These guys explode before dying and release a swarm of Squids!
--== ==--
Level Notes: There are three Achievements for this level -- two are optional and require you to play through on the highest difficulty -- but considering how short this level is you should be able to manage that if you are very familiar with the Halo Universe... It will also help to turn on the Bandana Skull for this since if gives infinite ammo...
-- That Just Happened (10 GS) Complete the level “The Library” on Heroic or Legendary without dying
-- Speed Reader (25 GS) Complete the level “The Library” on Legendary in under 30 minutes
-- The Library (25 GS) Complete the level “The Library” on any difficulty
Basic Walkthrough
This is a relatively short level from a complexity POV as all it consists of is following the Spark and killing the Flood and Squid you encounter, but there is a new Flood found here -- the Exploding variety that release a swarm of Squid when they die -- basically they are pregnant Flood giving birth... Eww..
This is basically a recycled set challenge - the Spark will go into a new area, you clear that area of enemy, then it will go into another new area, and you clear THAT area, then rinse and repeat until you get to the Index Room entrance.
Black Eye Skull, Eye Patch Skull and a Terminal

The Black Eye Skull
The first Skull on this level is the Black Eye Skull -- from the start move around to the third set of events before entering the Index Room for the first time -- the Skull is in the vent here and you will need to Grenade Jump to reach it!
As you work your way through the Library you will get to the third level -- there is a large round room here that does not have a lift in the center -- the Terminal for this level is on the other side -- you should be able to see it. Just jump around the room and collect that now.
Continue along the path following the arrows and the Spark clearing out the enemy until you ride a large lift up, and then work your way through the next level with the Spark opening he doors until you reach the Eye Patch Skull -- and shortly after taking that trigger a CS in which you obtain the Index.
You then unlock the Achievement for this level and it ends! Well done!
--== Enemy Units ==--
(1) Grunts -- A mixture of both types / a lot are asleep so melee them
(2) Jackals -- A mixture of both types
(3) Elites -- All three types are present / Type-3 are mostly invisible
(4) Hunters -- Appear in pairs
(5) Squids -- the odd little mind-screwing mobs
(6) Flood -- Mobs of different type taken over by the Squids
(7) Exploding Flood -- These guys explode before dying and release a swarm of Squids!
--== ==--
Level Notes: There are two optional Achievements you can do on Legendary Difficulty and the standard Achievement for the level as well. Read the details for these carefully so you know what to do!
-- Look out for the little guys (10 GS) Beat the level “Two Betrayals” on Heroic or Legendary without killing any grunts
-- Leave it where it lay (25 GS) Complete the level “Two Betrayals” on Legendary without picking up a new weapon
-- Two Betrayals (25 GS) Complete the level Two Betrayals on any difficulty
Basic Walkthrough
The level starts with a lengthy CS in which we learn that the small task with the Index that the Spark was getting us to do would have killed all of the Covenant and humans in the universe -- and left the Flood alive! Now to his way of thinking there was really nothing wrong with that, but Cortana is pissed!
Cortana has the Index now, and she tells the Spark where to sit and spin -- you tell her you trust him and then Cortana sets you straight... You removed her from the system and the Spark gives you an ultimatum -- then you get attacked by its minions.
Before you do anything else run around the other side of the ring here and collect the Terminal that is on the outside of the ring -- then RUN!
Once you get outside take out the HUGE enemy force as you work your way down to the ground, then grab the Banshees and use their rockets to clear the landing spot marked above, proceed into the Halo Central Chamber and overload the core -- walking into it works as Cortana modified your shields to EMP it.
A Terminal, and Piñata Skull
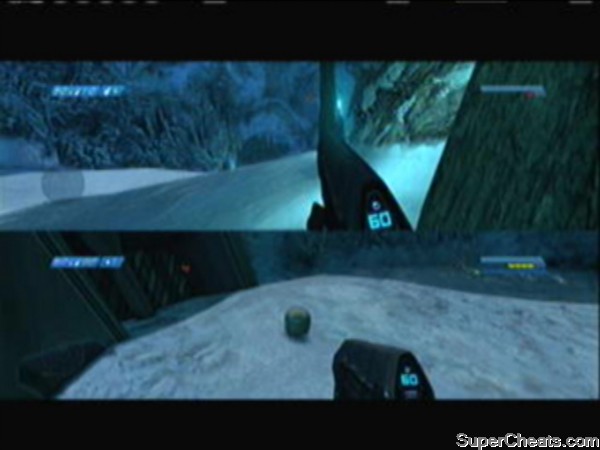
The Pinata Skull
Once you do that though, a bunch of Sentinels spawns so you have to take them out as you retreat! Exit the way you entered and use the Banshees waiting for you to drop down to the next marked entrance and proceed inside.
At this point you are basically taking the reverse route that you used to get here and covering a path you already have been over, so simply follow the arrows pointing at you and you will get to the next core to overload. This is a major battle so take it slow and use your grenades!
Once you get outside battle your way to the Banshees and take off, landing on the designated platform for yet another major battle to the core! Getting out of this one is a bit tricky because the enemy spawns between you and the exit -- so be ready to battle a mob of them. Once outside you go through the tunnel but when you get to the end the door jams so you have to proceed by foot.
In the large area at the end are a bunch of different mobs including Wraith, Ghosts, and Banshees -- there are also Banshees off to the right that you can take -- which is good because you need to grab one of them after you thin out the enemy, and fly it all the way back to the other end of the area to land on the snow-covered ledge above the tunnel entrance where you will find -- and take -- the Pinata Skull! Excellent!
Now fly back and take out the defenders on the marked ledge -- including the Sentinels -- land and fight your way in to EMP the final core, triggering a CS in which you see the end of this level and unlock whatever Achievements you were working on! Again, well done mates!
--== Enemy Units ==--
(1) Grunts -- A mixture of both types / a lot are asleep so melee them
(2) Jackals -- A mixture of both types
(3) Elites -- All three types are present / Type-3 are mostly invisible
(4) Squids -- the odd little mind-screwing mobs
(5) Flood -- Mobs of different type taken over by the Squids
(6) Exploding Flood -- These guys explode before dying and release a swarm of Squids!
--== ==--
Level Notes: This level has a pair of optional Achievements but unless you are already playing the game on the higher difficulties you may want to come back and do these later... And of course the standard Achievement for completing the level...
-- Tying up loose ends (10 GS) Kill every elite on the level “Keyes” on Heroic or Legendary
-- Popcorn.gif (25 GS) Kill 100 Infection form flood on the level “Keyes” on Heroic or Legendary
-- Keyes (25 GS) Complete the level “Keyes” on any difficulty
Basic Walkthrough
We begin the level with a CS and the need to find the control room of the Covenant ship Truth and Reconciliation -- we have been here before mind you so this should be familiar territory... Bit of humor at the start with Cortana's teleportation skills that...
After we pass through a few passageways we fall down into a pool of reactor coolant and then continue to battle our way through the organic passages looking for a lift we face a huge number of Squids -- do not underestimate them, they can kill you if your shields are blown...
The Terminal and Keyes Story

Discovering Captain Keyes
Once you reach the gravity lift you have to clear out the area of enemy and then wait for it to reactivate, taking you back up to the main crew levels. From there you have an almost straight shot to the Control Room -- once you enter after you clear a few of the defenders out head immediately to the Terminal that is under the bridge and use it -- and you get an entry from the Captain!
After the Terminal CS plays out you need to head up onto the bridge above and get the CS with the Captain -- who we kill.
All that is left is to escape to the launch bay and get in a Banshee -- once you do that the level ends, and you unlock the level Achievement.
--== Begin Enemy Units ==--
(1) Grunts -- A mixture of both types / a lot are asleep so melee them
(2) Jackals -- A mixture of both types
(3) Elites -- All three types are present / Type-3 are mostly invisible
(4) Squids -- the odd little mind-screwing mobs
(5) Flood -- Mobs of different type taken over by the Squids
(6) Exploding Flood -- These guys explode before dying and release a swarm of Squids!
(7) Metalic Flood -- Not real sure about these, this is our first encounter...
--== ==--
Level Notes: Assuming that you have been following the guide you should unlock the Achievement for the Skulls and Terminals, while the Warthog ride should also be doable, you may need to replay to get the Never tell me the odds Achievement... You will also unlock the Difficulty Achievement for whichever difficulty you have been playing on.
-- This side up (10 GS) Complete the warthog Circuit on “The Maw” without being forcibly ejected from your seat
-- Never tell me the odds (25 GS) Complete the Warthog circuit on “The Maw” on Legendary with over a minute left on the clock left.
-- Dear Diary (50 GS) Read all of the Terminals hidden throughout the Campaign
-- Headhunter (50 GS) Locate all of the skulls hidden throughout the campaign
-- The Maw (25 GS) Complete the level “The Maw” on any difficulty
Basic Walkthrough
To start off you should try to keep moving as much as possible -- stopping here just brings the enemy down on you in large numbers -- you will also want to be skillful with your grenades as they really do help with groups...
The level begins with a panoramic CS of the Pillar of Autumn -- which is our destination. We need to blow its reactors to destroy the ring... To do that we need to get to the bridge -- as you reach the Bridge Cortana activates the overload and tells you to run -- but then Spark appears, causing more trouble.
You think up Plan B and head for Engineering!
When you head into the Cryo-Chamber head up the ladder and activate the Terminal there to get yet another interesting CS in which Spark tells his story... You will unlock the Achievement for collecting all of the Terminals at this point.
The Maw - Terminal and Grunt Birthday Party Skull

Grabbing the Grunt Birthday Party Skull
Now continue to the Engineering Bay and you will find the area well defended by both Sentinel and Covenant. Open the three vents and throw grenades into each vent -- then run for the lift and get the hell out of here!
When you get out of the lift grab one of the Warthogs here and drive like your life depends on it -- because it does -- until you reach the outside area and Cortana tells you this is where you are to meet Foehammer (your rescue ship). The final Skull is out here on the end of one of the rails where it meets the wall -- so look for that (you can see it from the deck) and use the Warthog to jump up on the rail and grab the Skull!
Now hopefully you have time on the timer because your rescue is not going to make it -- Foehammer gets shot down! So get back in the Warthog and DRIVE! There is a ship in Launch Bay 7 that can be your ride out of here -- assuming you have enough time to get to it that is...
I don't know about you but making it all the way to the end without durfing the Warthog was impossible for me... I call it Epic Fail... But getting to the end to witness the kaboom? Easily doable! And after the CS that wraps up this level and the game! Well done mates!
M12 Light Reconnaissance Vehicle (AKA The Warthog)
The M12 Light Reconnaissance Vehicle -- commonly abbreviated as the M12 LRV or simply called The Warthog -- is the most common UNSC ground vehicle, in fact most of the large transports and atmospheric combat ships carry one or more on board for the convenience of Marines they are deploying to the battlefield.
It is a variant of the M12 Force Application Vehicle and features a mounted M41 Light Anti-Aircraft Gun and a potential crew of 3 combatants. In addition to serving as a gun platform it is also one of the primary ground transportation units available to the Marines.
M808B Main Battle Tank (AKA The Scorpion)
The M808B Main Battle Tank is commonly called The Scorpion (though usually the troops manning one give it a name that they make up, like "The Betsy" or "Blue Balls") and represents the cutting edge of UNSC heavy ground combat vehicles. Let's be honest here, this is one sexy beast!
Designed for the dual-mode function of tank and vehicle killer and close support vehicle for troops, the M808B can carry its driver, gunner, and up to four passengers. We hear that Valet parking can be a problem with these.
Type-26 Assault Gun Carriage (Covenant Wraith)
Hijack-able: Yes!
The Type-26 Assault Gun Carriage is called the Wraith by the UNSC, and is the Covenant's primary heavy assault vehicle used for ground engagements. Armed with a Plasma Mortar as its main gun, the Type-26 also has a pair of Automated Plasma Cannons and a Secondary Plasma Turret that the two-person crew can make excellent use of to ruin your day!
The unit is heavily armored and can take quite a beating so Marines are recommended to target the hears of the gunner and driver rather than the vehicle itself, as they are a lot easier to kill!
Type-26 Ground Support Aircraft (Covenant Banshee)
Hijack-able: Yes!
The Type-26 Ground Support Aircraft is more commonly known as the Banshee, and presents an ideal target and considerable threat to forces on the ground... An atmospheric vehicle typically used for reconnaissance, ground support, ground attack missions, and suppression of ground forces (you more often than not) -- the Banshee is lightly armored and, while not particularly vulnerable to small arms, can be brought down by concentrated fire from either rifle or pistol...
Type-32 Rapid Assault Vehicle (Covenant Ghost)
Hijack-able: Yes!
The Type-32 Rapid Assault Vehicle is commonly called the Ghost by the UNSC for obvious reasons like the fact that it can sneak up on you and then scare the hell out of you with its weapons!
This is the Covenant's standard reconnaissance and rapid attack vehicle and it is well known and deared for its nearly silent anti-gravity propulsion system and its energy weapon system.
Important Note: You can shift between the new enhanced mode and the classic graphics mode of the original by hitting the Back Button -- but IF you switch to classic mode you CAN NOT collect Skulls or Terminals.
The first thing you need to understand if you are not familiar with the Skulls in Halo games is that now all Skulls are actually beneficial. Some of them will reduce your abilities -- for example the Foreign Skull prevents the players from using Covenant weapons. These are used to configure custom games when you are playing with groups of human players, which is why they have such a variety of positive and negative effects. You are not likley to want to use them for the story mode, though there is an Achievement associated with having three Skulls active during a level you may want to unlock.
In the previous games collecting the Skulls required an overt act on the part of the player -- usually holding down the 'X' button. That is not the case here, as in this game all that you need to do is walk on top of a Skull to collect it. Once collected, the Skull can be turned on only at the start of a level or game when you are setting up the conditions for that session.
Note that there are some special issues with collecting Skulls depending upon the configuration of the game -- for example if you are playing co-op and the host has already obtained that Skull but one or more of the other human players has not, because the host has it the Skull will not appear or be collectible in the level. The players who do not have it will have to replay the level without any players who do have it in order to obtain it.
The locations of the Skulls are included as an element of the main walkthrough but here is the list and locations in case you just need to find them in order to complete your collection:
(01) Iron Skull (The Pillar of Autumn) Death carries a heavy price. Dying in co-op resets you at your last saved checkpoint. Dying solo restarts the level.
At the start of the level in the Cryo-Chamber, the Skull is located on the deck in the area behind the cryo-container. Look for some crates at the back of the room and then look behind them on the deck.
Your first Skull - Iron Skull
(02) Mythic Skull (Halo) All Covenant AI have twice the health. All Sentinels have energy shields.
As soon as the level starts and you land on Halo, you'll see a large waterfall directly ahead of you. Search the base of the waterfall and you'll find the skull around some rocks to the right.
(03) Boom Skull (Halo) Explosions have twice the damage radius. Light fuse, run away.
After you receive the Warthog for the first time, keep driving until you see an entrance to some underground tunnels. Before entering, look above to see some pipes. Scale the cliff edge to the right to find the skull.
Mythic Skull, Boom Skull and a Terminal
(04) Foreign Skull ( Truth and Reconciliation) Covenant weapons. How do they work? Player cannot pick up or use Covenant weapons.
Check behind one of the one-way doors from which the enemies spawn from.
Foriegn Skull
(05) Famine Skull (The Silent Cartographer) Weapons dropped by AI have half the ammo they normally would. You might want to pack an extra magazine.
Once you clear the first set of enemies on the beach, turn around and face the ocean. Now follow the path right and you'll see a small plateau. Search the top of it to find the skull.
Famine Skull
(06) Bandanna Skull (The Silent Cartographer) Infinite ammo.
This skull is located at the end of the first facility. You'll need to grenade jump to reach it. If playing in co-op, your partner can commit suicide once you're up top so he/she can spawn next to you and get it as well. This skull is very had to get.
A few Tricky Achievements and Bandana Skull
(07) Fog Skull (Assault on the Control Room) The motion tracker is disabled. You'll miss those eyes in the back of your head.
In the patrol room, before you head outside again onto the battlefield, search the vent in the center of the room, grenade jump required. Your partner should commit suicide to spawn by you if playing in co-op.
Fog Skull and Terminal
(08) Malfunction Skull (Assault on the Control Room) Every time you respawn, a random element of your HUD is disabled.
When you reach the gorge, you'll see ladders leading down to lower platforms, jump or climb down to get the skull.
(09) Recession Skull (343 Guilty Spark) Every shot is worth twice the ammo. Save those bullets, playa.
Check behind the first shade/tree you see in the swamp, at the start of the mission. Follow the video strictly for reference as it's hard to see.
343 Guilty Spark - The Recession Skull and another two easy to miss Achievements
(10) Black Eye Skull (The Library) Your shields only recharge when you melee enemies. Bash your way to better health.
From the start of the level, walk around until you reach the 3rd set of vents, just before you enter the index room for the first time. It's in the right vent; you'll need to grenade jump.
(11) Eye Patch Skull (The Library) Auto aim features disabled for all weapons. You'll miss it when its gone.
Avoid the index on this floor and walk around the edge of the room. It's in-between 2 crates. If you go into the index, you will miss this.
Black Eye Skull, Eye Patch Skull and a Terminal
(12) Piñata Skull (Two Betrayals) Punching enemies makes them drop grenades. Beat them till candy comes out!
After you capture the last Banshee, fly back past the third generator room, then back to the tunnel. It's on the snow hill above the tunnel opening where you came from.
A Terminal, and Piñata Skull
(13) Grunt Birthday Party Skull (The Maw) Kill a Grunt with a headshot and see a spray of confetti to the delight of children everywhere.
Use your Warthog to climb up on the railing where Foehammer goes down near the end of the mission. The timer stops here so it's another hard to miss skull.
The Maw - Terminal and Grunt Birthday Party Skull
This page gives you details of where to find all the Terminals in Halo: Combat Evolved Anniversary.
-- Terminal 1 (Pillar of Autumn) When you first enter the bridge, this terminal is located on the left hand side of the bridge opposite Captain Keyes at an unmanned computer station.
Your first Terminal
-- Terminal 2 (Halo) After you receive the last skull, enter the tunnels with the Warthog. Head all the way down until you need to jump a gap to continue, don't. Continue on and take a left downhill and you'll see the terminal in a dead end corridor.
Mythic Skull, Boom Skull and a Terminal
-- Terminal 3 (Truth and Reconciliation) Found on the Covenant Bridge, you walk through this room twice so it's hard to miss. Go up and get it the first time to avoid confusion.
Terminal 3
-- Terminal 4 (The Silent Cartographer) It's at the base of the circular structure where you fight two hunters in the middle of the map.
Terminal 3
-- Terminal 5 ( Assault on the Control Room) At the base of the final snowy battlefield. Climb down the large pyramid, turn around at the bottom and you'll see the terminal in the hole.
Fog Skull and Terminal
-- Terminal 6 (343 Guilty Spark) *MISSABLE* Located on top of the final doorway of the facility. When leaving on the last elevator, jump off at the right time to get to it. Make sure you don't ride this all the way up or you may have to restart the level.
Fog Skull and Terminal
-- Terminal 7 ( The Library) On the third level of the library, you'll come across a large circular room with no elevator. Jump around the sides to reach it. You should be able to see it before going to get it.
Black Eye Skull, Eye Patch Skull and a Terminal
-- Terminal 8 ( Two Betrayals) This terminal is directly opposite you at the very start of the level, hard to miss.
A Terminal, and Piñata Skull
-- Terminal 9 (Keyes) When you reach Captain Keyes, search the lower walkways underneath him, but clear our the area first.
The Terminal and Keyes Story
-- Terminal 10 (The Maw) Upper cryo-storage room. Climb the ladder to the platform and enter the room in front of you. Search the nearby computer panels on the wall for the terminal.
The Maw - Terminal and Grunt Birthday Party Skull
(A) Unlocking the Halo: Reach Credits and Bonus Terminal Video
Load Halo: Waypoint on your console and press Start and then from the main menu press X to reach the hidden Terminal Access Screen. On the screen are a series of colored discs -- they may be different for everyone, I am not sure about that, but you basically hit the corresponding buttons on your gamepad to match the colors from left to right and you will gain access to a screen with all of the possible symbols from the last part of each of the Terminal CS's in the game.
When you are playing the game, copy the symbols for each terminal and enter them here -- you can find some of these in the videos here, or you can find them on YouTube or you can follow this link to an image of all of the codes: http://last2stand.com/codes.JPG
Accessing the Secret Waypoint Terminal Display
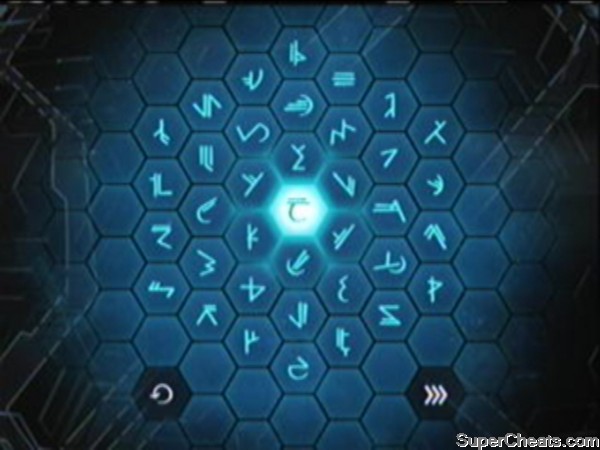
The Secret Waypoint Terminal Display
Change the Forerunner symbols to match those noted from the Terminal videos, then press A, then confirm the code by highlighting the ">>>" symbol, and press A.
Each of these codes, when they are entered successfully, will unlock the corresponding Terminal video in Halo: Waypoint as well as bonus credits.
(01) Pillar of Autumn -- 7,000 Credits Terminal Background 1 Unlocked
(02) Halo -- 7,000 Credits Terminal Background 2 Unlocked
(03) Truth and Reconciliation -- 7,000 Credits Terminal Background 3 Unlocked
(04) The Silent Cartographer -- 7,000 Credits Terminal Background 4 Unlocked
(05) Assault on the Control Room -- 7,000 Credits Terminal Background 5 Unlocked
(06) 343 Guilty Spark -- 7,000 Credits Terminal Background 6 Unlocked
(07) The Library -- 7,000 Credits Terminal Background 7 Unlocked
(08) Two Betrayals -- 7,000 Credits Terminal Background 8 Unlocked
(09) Keyes -- 7,000 Credits Terminal Background 9 Unlocked
(10) The Maw -- 37,000 Credits Terminal Background 10 & 11 Unlocked
When all ten codes are entered the system will unlock the secret eleventh Threshold Terminal Video that can only be viewed in Halo: Waypoint.
(B) Alternate Ending
After you complete the Campaign mode on Legendary difficulty you will unlock an extended ending CS.
(C) Spartan II Linda
In the Cryo-chamber control room (where the tech was killed) there is a set of display panels -- one of which is for you (the Master Chief) and the other of which is for the Spartan II Linda from Red Vs. Blue.
(D) Trollface
An Internet Meme, Trollface is a black and white drawing of a face with a large mischievous grin that is meant to convey the expression someone makes while trolling a board. The use of the Trollface image in a forum message is generally used to indicate that you believe that someone has been fooled or intentionally angered and is reacting to a Troll.
The Trollface Meme

The Trollface Meme
The face commonly appears in rage comics indicating that the character is being mischievous in some way.
In the level Pillar of Autumn, after you receive the pistol from the Captain, look at the bulletin board on the way out of the bridge and you will see, in addition to the Trollface.
Video Game Ranger Maxim Number 1: It is always faster to switch weapons than to reload.
One-Shot Hunter Kills: The Magnum Pistol will one-hit-kill a Hunter if they are shot from behind on one of their orange spots.
Using a second controller and Gamer Tag you can avoid the forced checkpoint resets on death on the higher levels by strategically placing the second character as you progress through the level.
Keeping the Bandana Skull active after it is obtained will solve all of your ammunition and grenade needs as it provides unlimited amounts of both.
Q1. What Difficulty Would You Recommend Starting On?
A1, If you have plenty of experience with the Halo series you should not have much trouble with Heroic and that will allow you to unlock most of the Achievements -- a few actually require you to be on Legendary Difficulty... But if you are not well-versed in the arts of Halo, you will be best off doing your first play-through on Normal -- which will allow you to collect the Skulls (they are not available on Easy).
Q2. That Just Happened Achievement Tips?
A2. The following will help you immensely:
- Proceed through the level slowly and carefully, Take Your Time!
- Make sure you activate the Bandana Skull (and ONLY the Bandana Skull)
- The best weapons for this challenge are the Shotgun and the Rocket Launcher.
- Learn the level.
- If you die you can quit to dashboard (NOT Save and Quit) and restart the game to resume at your last checkpoint without the game realizing you died.
Q3. Is there an easy way to unlock the Achievement Popcorn.gif?
A3. Yes indeed! Simply set up the Level Keyes on Heroic with the Bandana Skull active and then when the level starts make your way to the end of the passageway where you will need to jump down from the open door and destroyed deck. Now turn around and head back to the hall and start chucking grenade after grenade down the hall to the Squid spawn point. You will unlock the Achievement in around 30 seconds!
An Easy Popcorn.gif Achievement
There are 44 Achievements worth a total of 1000 GS. Some of the Achievements require that you play on specific difficulty levels -- check the individual Achievements for which...
Where they occur during the game, we have more details on how to complete the achievements on the chapter pages in this guide.
(01) Pillar of Autumn (25 GS) Complete the level Pillar of Autumn on any difficulty.
(02) Overshields are for Sissies (10 GS) Complete the level Pillar of Autumn on Legendary without picking up an Overshield.
(03) Walk it Off (25 GS) Complete the level Pillar of Autumn on Legendary without picking up a health kit.
(04) Halo (25 GS) Complete the level Halo on any difficulty.
(05) No-Fly Zone (10 GS) Destroy three of the four Banshees on Halo on any difficulty during a single play-through.
(06) How Pedestrian (25 GS) Complete the level Halo on any difficulty without entering a vehicle.
(07) Truth and Reconciliation (25 GS) Complete the level Truth and Reconciliation on any difficulty.
(08) All According to Plan... (10 GS) Kill all the enemies in the first encounter of Truth and Reconciliation without being detected.
(09) Close Quarters Combat (25 GS) Complete the level Truth and Reconciliation with at least four rounds left in your Sniper Rifle.
(10) The Silent Cartographer (25 GS) Complete the level The Silent Cartographer on any difficulty.
(11) Beachhead (10 GS) Storm the beach of The Silent Cartographer with no marine casualties on Heroic or Legendary.
(12) Grenadier (25 GS) Escape the map room in The Silent Cartographer without firing a shot on Heroic or Legendary.
(13) Assault on the Control Room (25 GS) Complete the level Assault on the Control Room on any difficulty.
(14) I’ll Be Taking That! (25 GS) Pilot a Banshee on the level Assault on the Control Room.
(15) Wraith Hunter (10 GS) Destroy four Wraith tanks in Assault on the Control Room with the Scorpion tank, in a single play.
(16) 343 Guilty Spark (25 GS) Complete the level 343 Guilty Spark on any difficulty.
(17) Breaking Quarantine (25 GS) Escape the Forerunner facility on the level 343 Guilty Spark in 21 minutes or less.
(18) This One's for Jenkins! (10 GS) Kill 50 Flood Combat Forms on the level 343 Guilty Spark on Heroic difficulty or higher.
(19) The Library (25 GS) Complete the level The Library on any difficulty.
(20) That Just Happened (10 GS) Complete the level The Library on Heroic difficulty or higher without dying.
(21) Speed Reader (25 GS) Complete the level The Library on Legendary difficulty in 30 minutes or less.
(22) Two Betrayals (25 GS) Complete the level Two Betrayals on any difficulty.
(23) Look Out for the Little Guys (10 GS) Complete the level Two Betrayals on Heroic difficulty or higher without killing any Grunts.
(24) Leave It Where It Lay (25 GS) Complete the level Two Betrayals on Legendary difficulty without picking up a new weapon.
(25) Keyes (25 GS) Complete the level “Keyes” on any difficulty.
(26) Popcorn.gif (25 GS) Kill 100 Flood Infection Forms on the level Keyes on Heroic difficulty or above.
(27) Tying Up Loose Ends (10 GS) Kill every Elite on the level Keyes on Heroic difficulty or above.
(28) The Maw (25 GS) Complete the level The Maw on any difficulty.
(29) This Side Up (10 GS) Complete the Warthog ride on the level The Maw without being forcibly ejected from your vehicle.
(30) Never Tell Me the Odds (25 GS) Escape The Maw on Legendary with at least a minute left on the count down.
(31) Birth of a Spartan (10 GS) Complete every level of the game on Normal difficulty.
(32) Believe in a Hero (20 GS) Complete every level of the game on Heroic difficulty.
(33) Living Legend (50 GS) Complete every level of the game on Legendary difficulty.
(34) Standard Operating Brocedure (10 GS) Complete any level on Normal difficulty cooperatively.
(35) Brovershield (20 GS) Complete any level on Heroic difficulty cooperatively.
(36) Bro Hammer (50 GS) Complete any level on Legendary difficulty cooperatively.
(37) He’s Unstoppable! (20 GS) Complete any level on Heroic difficulty or higher without taking health damage.
(38) What have we here? (10 GS) Read a terminal.
(39) Heavy Reading (25 GS) Read half the terminals hidden throughout the campaign.
(40) Dear Diary... (50 GS) Read all of the terminals hidden throughout the campaign.
(41) Looks like the Oddball (10 GS) Find your first campaign skull.
(42) Skulls Taken! (25 GS) Locate half of the skulls hidden throughout the campaign.
(43) Headhunter (50 GS) Locate all the skulls hidden throughout the campaign.
(44) Tsantsa (50 GS) Complete any level with at least three skulls active on Heroic difficulty or higher.
For so popular a shooter the selection of weapons in the game is actually quite limited, mostly because the game was not created to feature a historic collection of weapons as a primary game element, but rather the weapons in the game are intended to facilitate moving the story along ans as such, are much more utilitarian in their functionality and placement.
First and foremost Halo: CEA is primarily a story-based adventure, with the weapons systems being heavily standardized to make obtaining ammunition and replacement weapons easier. With that in mind the player will still find that developing skill with, and understanding the best tactical use of the weapons has direct consequences upon performance and success -- the process of switching out your weapon is accomplished by a single button-press, and the practice of carrying a pair of complementary weapons allows the player to select the correct took for the job in most cases.
When running-and-gunning remember that it is ALWAYS faster to change weapons than it is to reload.
Many of the weapons systems that are employed by the modern day UNSC as well as ground-based special operations units are either based upon or a product of the Short-Stroke Gas-Operated Rotating-Bolt firing system that was developed by the Misriah Armory to solve issues related to discharge of chemically-propelled weapon systems in the vacuum of space.
The standard UNSC ammunition design includes oxygen-boosting filler as part of the propellant charge to counteract the effects of vacuum; the presence of these additives in atmosphere has the effect of slightly boosting the muzzle and breach pressure of the rounds, creating a more pronounced muzzle flash.
Weapons tested by the Verdoon Proving Grounds that fall within the top 1% for accuracy are stamped with a VPG Star-Emblem to the left of their serial number. Star-Barrel Weapons are highly desired by special operators in the field for their improved accuracy and reliability.
BR55 Rifle (Battle Rifle)
The BR55 Battle Rifle is the standard designated UNSC Infantry Service Weapon first issued in 2525, when it replaced the M221 as the standard infantry longarm. The original design for the BR55 was for a switch-selectable variable rate weapon with four available selections: Safe, Single-Fire, Burst-Fire (3 Shot) and Fully Automatic.
The current specifications for the BR55 include the M634X Experimental Military-Grade Ammunition Load which consists of a 9.5mm x 40mm High-Power / Semi Armor-Piercing half-jacketed Teflon round.
It was discovered during the live troop evaluation phase during the standard weapon testing at Verdoon Proving Grounds that 9 out of 10 Marines preferred to leave the weapon set to fully-automatic mode, which delivered an effective accuracy rate of just 7% (93 out of every 100 rounds fired failed to hit the target or hit a different target than the one being aimed at), while accuracy in the Burst-Fire configuration averaged 98% (with only 2 rounds per 100 fired failing to hit the designated target). The Fully-Automatic mode was subsequently removed from the weapon design prior to it being accepted by the UNSC.
Further development of the BR55 lead to the addition of a 2x aiming scope, boosting the accuracy and effectiveness of the weapon and increasing its effective range to almost double that obtained from use of the iron sights alone.
--== Model Stats ==--
Dual-Wieldable? No
Effective Range: 100m to 950m
Clip Capacity: 36 Rounds, M634X 9.5mm x 40mm HP-SAP (Experimental)
Standard Ammunition Load: 144 Rounds (4 Clips)
--== Recommended Applications ==--
Effective vs. all organic targets.
Limited effectiveness vs. mechanical targets - use of this weapon system on mechanical targets requires firm stability to allow all three rounds from a single burst to penetrare the same target area, especially at longer ranges where the shot spread (or splintering) can render the weapon ineffective.
Remember the UNSC Infantry rhyme: When in Danger, If in Doubt, the BR55 will Get You Out.
M6C/M6D Magnum (M6C Personal Defense Weapon System / M6D Covert Pistol, Suppressed)
Standard-issue sidearm for United Nations Space Command organizations, and particularly the UNSC Marine Corps, UNSC Navy, UNSC Defense Security Forces, and the UNSC Special Operations Command.
The design of the M6C Sidearm is based upon the well-established Misriah Armory's M6 handgun series, and is best described as a semi-automatic, spring-based recoil-operated gas-fed double-action handgun. A number of different special-use variants of the M6 series have been created throughout its eight decades of active use, with their primary differences being the ammunition caliber they are chambered to fire and the aiming-assistance schemes built into them, with the most common example being the M6C, which is chambered for the M228 12.7mm x 40mm Semi-Armor Piercing, High Penetration (SAP-HP) round.
Known for its rugged and reliable frame, its accuracy, and its high rate of fire (the C-variant has an average cyclic rate of 6 rounds per second, or 360 rounds per minute), the M6C has an effective killing range of 200 meters under normal conditions, but its target accurately rating is generally thought to be only 1/10 that range, or roughly 20 meters, is it is configured and intended for use as a close-range personal defense sidearm.
--== Model Stats ==--
Dual-Wieldable? Yes
Effective Range: 20 Meters
Clip Capacity: 12 Standard Rounds, M228 12.7mm x 40mm SAP-HP
Standard Ammunition Load: 48 rounds (4-clips)
--== Recommended Applications ==--
Drones
Grunts
Jackals
M90 Shotgun (M90 CAWS -- Close Assault Weapon System)
The M90 Close Assault Weapon System (AKA M90 CAWS), is perhaps the least understood and most desired weapon system in the services of the United Nations Space Command due to its extremely limited operations function and sexy appearance. The primary shotgun system approved for use by UNSC troops, access is restricted only to soldiers who have completed the CAWS Training Program de to the inherent limitations of the weapon.
The M90 and is one of the most effective close range infantry weapons used by front line and shipboard security forces; with a maximum effective range of less than 10m however it is not considered to be a useful weapon system for troops stationed and deployed in open areas.
The use of the M90 -- and its limitations -- are best summed up by the words of Master Gunnery Sergeant Leroy Jethro, who said: "The M90 is the most devastating and effective hall-clearing tool in our inventory, but the Golden Rule for its use is simple; the only targets you should aim the M90 at are targets that are close enough for you to hit with a thrown can of cat food. If they are not close enough to hit with a can of cat food, they are too far away.
--== Model Stats ==--
Dual-Wieldable? No
Effective Range: 1m to 10m
Clip Capacity: 12 Round Tube, 8-Gauge Magnum, 3.5-Inch
Standard Ammunition Load: 60 Rounds (2 Belts)
--== Recommended Applications ==--
Close-Range Targets. The M90 is like a knife; you need to be close to the target to attack it. At close range the M90 is extremely effective against armored targets and shields.
M199 SSM Rocket Launcher
--== Model Stats ==--
Dual-Wieldable? No.
Effective Range: Long
Clip Capacity: 2 Rounds, 102mm Uranium Core Tungsten Jacketed HEAT
Standard Ammunition Load: 8 Rounds (4 Canisters)
--== Recommended Applications ==--
The M199 is designed for maximum effectiveness in direct application versus armored targets; while it is also effective against larger units, groups of smaller units, in the case of the latter it is the splash damage (shrapnel) responsible for the effectiveness and not the kinetic or explosive force of the round itself. When dealing with unarmored targets it is recommended that you aim the M199 at their feet nearby the targets or at any object likely to explode and add its mass to the shrapnel created by the explosion.
MA5B Individual Combat Weapon System (MA5B ICWS or MA5B Assault Rifle)
The MA5B is an air-cooled, gas-operated, magazine-fed assault-class weapon system that was designed to compliment the established squad tactics of the UNSC, and is widely considered to be "the workhorse of the UNSC" due to its wide application in a variety of settings and its rock-solid reliability.
The MA5B includes a built-in electronics suite which, in addition to monitoring the status of the weapon and to display its remaining ammunition, also provides directional aids such as an electronic compass heading, and directly connects to the Front Line (TM) Battle Tracking and Logistics Coordination System that is used by CENTCOM to track the location of every UNSC Marine.
The MA5 weapon system can be outfitted with a number of optional modifications thanks to its versatile hard-threaded and rail-based mounting systems, including sound suppressors, grenade launchers, or a standard issue flashlight, as well as utility and special-use ammunition like the shredder and H-PAP rounds, being one of the most versatile weapons in the UNSC’s arsenal.
--== Model Stats ==--
Dual-Wieldable? Yes
Effective Range: Varies depending upon Ammo Type and Extensions but generally 4m to 50m.
Clip Capacity: 60 Rounds, M118 7.62mmx51 AP-FMJ
Standard Ammunition Load: 600 Rounds (10 Clips)
--== Recommended Applications ==--
The MA5 series of assault rifles has a mixed effectiveness level due to the need to utilize proper tactics when the weapon system is designated as the primary rather than back-up weapon. Specifically when it is used as the primary weapon system -- and this only under conditions that meet with close-combat -- it should be used as a dual-wielded weapon in order to compensate for the extremely long delay in reloading (up to 1.5 seconds) so that the combatant is never without available firepower.
Ideally the dual-wielded MA5's are fired alternating left and right, so that a full clip is available while the empty weapon is reloaded. It cannot, however, be emphasized enough that a pair of MA5's together provide an incredible amount of firepower, and when combined with the tactic of strategic retreat have been found to be very effective at preventing loss of life by UNSC operatives.
The MA5 is considered to be one of the more effective firearms for melee combat.
S99C-S2 AM (Sniper Rifle System 99 Revision 2, Anti-Matériel)
The S99C series is a long-range sensor-assisted weapon system that was originally developed to address the threat posed by the Covenant Banshee and its armored windscreens. The Banshee made use of three different techniques that served to protect its operator from vulnerability to standard-issue UNSC weapons: triple-laminated glass (AKA "armored glass"), severe angled redirection design, and kinetics-resistant material.
Advances in kinetics-resistant material were undertaken by Covenant armorers when they came to better appreciate the effectiveness of new ammunition systems that were deployed by the UNSC in the years just before the Covenant attack on Reach; specifically these developments stem from what is historically known as "The Commonwealth Incident."
The new type of kinetics-resistant material used for constructing the Mark-VIII Model Banshee allows the viewing ports and cockpit screens to intentionally deform rather than shatter when they are subjected to the forces of the standard UNSC kinetic ammunition that was previously standard-issue in the UNSC. Combining the kinetics-resistant material with a third layer of laminate and mounting it with a severe angle allowed the new armored glass to shrug-off hits, deflecting the energy of the round away from the material and thus preventing fracture and failure.
This new design and material effectively protected the Banshee from attack by the three-round Burst-Fire in the standard-issue UNSC rifle regardless of accuracy and stability of the placement of the rounds, however the new Vacuum-Compensating rounds proved to cut through the new armor like it was made out of fairy floss -- which caused great concern on the part of the Covenant.
-- The Commonwealth Incident --
During its deployment with the 4th Expeditionary Forces the Frigate UNSC Commonwealth was detached from the main fleet with orders to transport the (CENSORED UNIT DESIGNATION) which was made up entirely of the new Spartan-II Unit, accompanied by (CENSORED) and Dr. Halsey, who were being dispatched as per the requirements of Operation (CENSORED) to the Verdoon Proving Grounds located at the Damascus Testing Facilities on Chi Ceti IV.
When it arrived at Chi Ceti UNSC Commonwealth discovered a battle underway as irregular Covenant forces were attempting to invade and seize the planet; it is speculated (and later confirmed) that their primary goal in addition to capturing the planet and its military assets was to capture the data contained in the computer database of the Damascus Testing Facilities.
Recently declassified Printed orders recovered from the body of a Covenant officer thought to be in command of the main SpecOp Unit charged with capturing the offices at the Proving Grounds indicates that the enemy were concerned with the "very effective new ammunition" being used by UNSC Marines, and part of the objectives contained in the Strike Team orders were to obtain samples of the ammunition as well as any technical documents, manufacturing information, and test results pertaining to it discovered in the facility.
Elements of the (CENSORED UNIT DESIGNATOR) remaining on board the Commonwealth during the battle successfully repelled a boarding party from the Covenant Light Cruiser Unrelenting and, in the process, fired for the first time the experimental Vacuum-Compensating ammunition while inside the Commonwealth and so observed the increased effects of the ammunition when it is fired in atmosphere, which easily penetrated both the shields and body armor of the enemy.
Noting the unexpected but markedly improved effectiveness of the ammunition, the commanding officer of the Spartan boarding party ordered his Marines to replace their clips of standard-issue jacketed ammunition with the experimental Vacuum-Compensating rounds for their boarding operation against the Covenant Light Cruiser, and it is speculated that the ammunition, combined with the new MJOLNIR Mark IV Armor, greatly contributed to the success of the boarding party, which was able to
destroy the light cruiser in record time.
The UNSC Commonwealth was severely damaged during the battle and, following a standard damage survey conducted in the UNSC shipyards on Chi Ceti IV, it was declared damaged beyond repair and subsequently ordered to the breaking yards on Reach where it was to be salvaged.
Thanks to the observations contained in the after-action reports and subsequent debriefing sessions of the Spartans, and information discovered within the orders recovered from the bodies of Covenant forces, the UNSC armorers became aware of the unusual properties of the Vacuum-Compensating rounds, and their increased power in atmospheric conditions provided by the filler that is used to generate extra gases for the effective discharge of light and medium impact ammunition in vacuum.
Experimentation with the new mixtures for ammunition propellant directly lead to the creation of the S2 and S3 variants of the Sniper Rifle System 99 Anti-Matériel, which is itself loosely based upon the ancient Barrett Model 82A1 CQ US Marine AM weapon system.
Although the Sniper Rifle System 99 Anti-Matériel weapon system is an entirely new and modern design, as an homage to the weapon system from which it draws its inspiration, its design team engineers retained the original soft-mount system and the M1913 Floating Optics Rail.
Use of and issuance of the System 99AM in all of its variances requires certification and the successful completion of a special series of UNSC training classes. While it is officially designated as an Anti-Matériel weapons system (and thus is not approved for use against unarmored targets), the System 99 is widely considered to be one of the best Sniper Rifles ever made.
--== Model Stats ==--
Dual-Wieldable? No.
Effective Range: Limited only by line-of-sight.
Clip Capacity: 4 Rounds, 14.5mm x 114mm Fin-Stabilized AP-Sabot
Standard Ammunition Load: 24 Rounds (5 Clips)
--== Recommended Applications ==--
The System 99 Sniper Rifle is effective against all targets and in all environments, however it should be noted that the use of sound suppression and/or subsonic rounds severely handicaps the effectiveness of this weapon system.
While it has been said that the standardization of UNSC weapon systems has created a very limited range of weapons this is more true for the weapons used by the Covenant forces, which essentially consists of two basic technologies: Superheated Plasma and Proximity-based Needle Ammunition.
Type-25 Directed Energy Pistol (Plasma Pistol)
The Type-25 Directed Energy Pistol -- more commonly known as the "Plasma Pistol," is a Covenant infantry weapon commonly issued to the smaller species in Covenant military services including the Kig-yar, the Unggoy, and the Yanme'e as well as occasionally being issued as the designated sidearms for larger species such like the Jiralhanae and the Sangheili.
The Plasma Pistol is a Directed Energy Weapon that appears to have been reverse engineered from Forerunner mining tech that was weaponized.
--== Model Stats ==--
Dual-Wieldable? Yes.
Effective Range: 2m to 30m.
Clip Capacity: N/A Charged Energy Weapon Pack
Standard Ammunition Load: N/A 2500 Standard Shots / 25 Charged Shots
--== Recommended Applications ==--
An overcharged plasma bolt is capable of completely removing the shield protecting an enemy due to its EMP effect -- a tactic that is extremely useful on higher difficulties. This weapon system is most effectively used in combination with a traditional UNSC weapon -- particularly the M6C or the MA5.
Simply use the Type-25 to disable the enemy shields and then quickly switch to your M6 or MA5 and finish-off the enemy using their excellent kinetic rounds!
Marines using this as a weapon of opportunity when picking them up on the battlefield should be made aware that the standard Plasma Weapon Tech of Covenant forces was engineered to be used by units drawn from some of the less intelligent species in the universe, and because of this it includes saftey overrides that prevent the weapon from being damaged through overheating, which can happen when it is repeatedly fired without giving the system time to cool.
The safety overrides on the Type-25 DEP temporarily shut down the weapon and open cooling vents built into it that allow excess heat to be quickly released before the weapon reactivates -- but during this process the weapon system is non-functional and, obviously, a Marine who is not aware that this will happen can find themselves without a weapon... It is for this reason -- and the increased effectiveness of the tactic -- that Marines are recommended to use the Type-25 only to remove shields, and to do their actual killing with a UNSC weapon system.
Type-25 Directed Energy Rifle (Plasma Rifle)
The Type-25 Directed Energy Rifle (Plasma Rifle) is a Covenant directed energy weapon reverse engineered from commercial Forerunner mining tech that generates a superheated ionized gas called Plasma instead of projectile ammunition through the use of a battery charge pack and a Plasma coil and is capable of semi-automatic and full automatic fire in part due to the dual plasma collimator design from which it is engineered.
The Type-25 DER is the primary weapon system for Covenant officers and is routinely used by both Brutes and Elites, the bodies of both of which are an excellent source for obtaining this weapon in the field if you need a replacement or run low on ammunition for your rifle.
Please consult the entry for the Type-25 Directed Energy Pistol for additional background information.
--== Model Stats ==--
Dual-Wieldable? Yes.
Effective Range: 3m to 100m.
Clip Capacity: N/A Charged Energy Weapon Pack
Standard Ammunition Load: N/A 400 Standard Shots
--== Recommended Applications ==--
The Type-25 DER is particularly effective at dropping enemy shields and will usually dispatch a Grunt with a single-shot, making it an ideal choice for an emergency replacement weapon on the battlefield.\\
As with the Plasma Pistol Marines are recommended to utilize this weapon expressly for disabling the enemies shields, and then switching to a UNSC kinetic weapon to dispatch the enemy.
Type-33 Guided Munitions Launcher (Needler)
The Needler is a Covenant projectile weapon that fires an ammunition that is engineered from sharp crystalline shards that are guided until they reach the target by a complex system of energy discharged from their surface areas that, several seconds after reaching their target, discharges at a vastly increased rate and thus generating the appearance of an explosion.
The effect that is observed as an explosion is not actually a detonation -- rather it is the rapid discharge of all of the stored energy in the crystal that was not expended in its guidance -- but it may as well be an explosion as it has the same basic effect.
The Type-33 Guided Munitions Launcher is one of the most unusual weapons in the Covenant arsenal and until recently the least understood; the technology behind how the weapon functioned and how the shards were able to track their targets remained a mystery to human military weapon engineers and scientists until the capture and deciphering of a handheld computer that belonged to a Covenant weapons researcher attached to the SpecOp unit deployed in the invasion of Chi Ceti IV during the event known as The Commonwealth Incident.
From the recently declassified data that was recovered from the handheld computer it was revealed that each of the ammunition crystals is actually a living sentient being -- an artificially created crystalline entity that is specially endowed with the ability to store and discharge energy -- with each of the "rounds" having been programmed to track and attach (embed) themselves to the designated target and, when a sufficient number of entities reach the desired density, to release all of the remaining energy stored in their bodies as one rapid discharge to devastating effect.
--== Model Stats ==--
Dual-Wieldable? Yes.
Effective Range: Model-dependent but thought to be 100m.
Clip Capacity: 20 Rounds, Low-Order Density-Based Guided Explosive Rounds
Standard Ammunition Load: 80 Rounds (4 Charging Clips)
--== Recommended Applications ==--
Use of the Type-33 Guided Munitions Launcher (Needler) by UNSC troops is especially troubling due to the fact that its construction violates the Hegemony Accords of 2560 that outlaw the use of AI and sentient beings in weapons. While it is true that these weapons were created by the Covenant, who are not signatories of the Hegemony Accords, according to the wording of the interstellar agreement the simple use of these weapons is a violation of the Accords.
In spite of this fact no official order has been issued by the UNSC with respect to the use of the weapon, though Marines are reminded that any Needlers that are obtained on the battlefield are subject to immediate confiscation and destruction as contraband upon return to their UNSC ship, base, or operational area. This has not prevented Marines from retaining and smuggling these weapons home as war trophies.
M9 HE-DP Grenade
The M9 High-Explosive Dual-Purpose grenade is of a type commonly referred to as Grenade, Fragmentation, and its design and function has remained unchanged for over a thousand years.
--== Model Stats ==--
Dual-Wieldable? N/A
Effective Range: N/A
Clip Capacity: N/A -- Single Disposable Container
Standard Ammunition Load: 4 Rounds, High-Explosive Concussion/Shrapnel
--== Recommended Applications ==--
Recommended for use when you just want to clear a room or send the enemy running for cover.
Type-1 Antipersonnel Grenade (Plasma Grenade)
The Type-1 Antipersonnel grenade -- which is more commonly known as the Plasma Grenade -- also happens to be the Sticky Grenade that most players are referring to when they tell you to hit an enemy with a Sticky Grenade, or when they mean to unlock the Achievement Lee R. Wilson Memorial in Halo 3, an Achievement that is of particularly high value to the players because of the twisted way that gamer minds think in... There is actually a story behind this you see...
Lee Wilson, also known as Phlegm Brulee, is an English artist and at the time of the establishment of the Lee R. Wilson Memorial Achievement was a relatively new employee at Bungie Studios -- the game development studio that can be blamed -- or credited as it depends on your PoV -- for the Halo games...
Wilson moved to America to pursue a career in film production in 1991 but, in 1995 he moved to New York to attend film school with his ultimate goal to be a film director -- but real life has a way of crushing such dreams and the story of little Lee is no exception, because fate, Karma, life -- call it what you will -- had other ideas. In a common accident Wilson was exposed to a video game and, no surprise here, the viral infection that exposure to this video game caused became deep-rooted and incurable, so he had no choice but to relocate to Seattle, Washington in February of 2005.
Seeking treatment at the Bungie Clinic, where he served as a storyboard artist for Halo 2, Wilson was very nearly cured of the infection but, as often happens, caught CJ Cowan stealing the bag lunch of Joseph Staten, who upon condition of his ongoing silence in the matter was offered the Memorial Achievement. Being no fool and having a keen sense for history, Wilson agreed to the bribe... And now you know...
Oh yeah, you should probably also know that the Plasma Grenade is a Covenant anti-personnel weapon that explodes a short time after coming to rest you know, wherever you happen to throw it, which had better not be next to me!
--== Model Stats ==--
Dual-Wieldable? N/A
Effective Range: N/A
Clip Capacity: N/A Single Disposable Container
Standard Ammunition Load: 4 Rounds, Chemical-Reaction Plasma/Heat Damage
--== Recommended Applications ==--
The ability of the Plasma grenade to stick to its target is very useful for taking out moving targets that keep evading your other grenades, and besides the funny looks on their faces when they run up to a group of their buddies and then explode are priceless.
Type-26 Anti-Infantry Stationary Gun (Shade Stationary Gun)
The Type-26 Anti-Infantry Stationary Gun -- commonly referred to as the Shade Turret -- is the Covenant's standard stationary gun turret and anti-infantry weapons platform.
--== Model Stats ==--
Dual-Wieldable? N/A
Effective Range: Longer than you feel comfortable with...
Clip Capacity: No Clip.
Standard Ammunition Load: Boat loads.
--== Recommended Applications ==--
The Shade is very effective against both enemy ground forces and light vehicles and is often very helpfully placed in the center of the enemy defenses, making it an ideal target to hijack and turn against the emeny!
This section was created to thank specific people and to provide credit to external and third-party sources that were consulted in the process of writing this Walkthrough / Guide. Wherever possible the external source for information is attributed within the guide.
--== Acknowledgments to Websites ==--
The following websites were consulted with respect to various details and information that was acquired within the game in the course of play. The most common reason for these consultations was to verify through independent sources information that was acquired inside the game in order to assure as high an accuracy level as we could manage.
SuperCheats -- www.SuperCheats.com
--== Shout Outs and High Fives ==--
The Guide Writing Community is a very small and exclusive club that is made up of some of the best people and gamers in the world who often do not receive the by-lines that are deserved, write for no or very little pay as they work through the process of "paying their dues" and otherwise put out incredible effort for very little tangible result save for the guides that they create.
Guide writers are supported by people -- from family to friends and the editorial staff at their publisher (whether that is a website, magazine, newspaper, or other traditional or non-traditional publication) -- and all of these individuals deserve recognition for the role that they play in the process!
To Richard Gardner -- a very patient bloke and publisher who provides encouragement and assistance whenever it is needed and commissions guides for awesome games so that the gamers of the world can find what they need to get past the levels that are hanging them up -- Thanks mate!
To Peter (Swash01) -- For just hanging out; for your take on the different strategies; for your cheerful assistance in running through the levels over and over and over again while we sussed out their secrets. Good on ya mate!
Absolute Steve -- I wish you the best of luck as you embark upon your new career - I know that you have been waiting years and working hard to make it happen and though we are going to miss your guides (especially when the next Fallout game is released) we wish you success and happiness!
To Yvonne (YvonneBF) -- who does most of the formatting and editing for my guides, and who keeps me sane through the really nasty parts of each game by always being there to provide constant words of encouragement that really do help, as well as a never-ending supply of tea and a biscuit and a few kind words when and where needed; you have no bloody idea how much that helps!
To the Crew at The Pan Pacific Trading Company and their invaluable website "Simply Australian" (http://www.simplyoz.com) who are the most reliable source for the life-saving substances that I require on a daily basis in order to function, including Billy Tea and Tim Tams. It is appreciated mates!
Finally I need to thank you, because without you this guide would never have been commissioned. Thanks mates!
Legal / Usage
This unofficial guide and its content, excluding Halo CEA logos and marks, screenshots and videos is Copyright © 2011 Web Media Network Ltd. All rights reserved.
The SuperCheats Unofficial Guide to Halo: Combat Evolved Anniversary was written by CM Boots-Faubert as a work-for-hire for Web Media Network, Ltd.
The Guide is licensed to appear exclusively upon the website SuperCheats.com and may not be reproduced in whole or in part on other websites, apps, electronic or printed media without written persmission from Web Media Network Ltd.
Questions about the contents of the Guide may be directed to its author, CM Boots-Faubert, by email to [email protected] with the subject to include the words 'Halo:CEA Guide' as otherwise your email may not be received due to the odd behavior of the author's spam filter.
Before writing to CM Boots-Faubert, please be aware that he cannot and will not grant permission for you to display this guide on your website no matter how deserving you feel it is. Questions of that sort should be directed at Web Media Network Ltd., the actual owner of the Guide.

 Top 5 Most Wanted Unlikely RPG Sequels
 Xbox One Price Cuts Insult Launch Day Gamers
 Saints Row The Third Guide
 Moonster Safe Walkthrough
 Fallout 4: Unlucky Valentine - Find Nick Valentine, Discover Vault 114 and Park Street Station