
A spin-off of the massively popular Halo 3, Halo 3: ODST introduces some new gameplay elements to the series and reintroduces a couple of familiar ones. The campaign mode follows a group of UNSC Orbital Drop Shock Troopers (ODSTs) after the Covenant assault on the city of New Mombasa that took place during the Halo 2 storyline. As The Rookie, you’re tasked with scouring the ruined streets of New Mombasa for clues to the whereabouts of your lost ODST squadmates.
This guide is to include a complete walkthrough to the campaign mode, as well a map and videos of all 30 Audio Log locations. You’ll also find an overview of the new Firefight multiplayer mode and a complete listing of the Xbox 360 achievements.
Note: This guide was written based on the HEROIC difficulty level. Enemies have less health and deal less damage on the Normal and Easy difficulty levels, and have more health and deal more damage on the Legendary difficulty level. Furthermore, enemy placement and outfit may differ on a lower or higher difficulty level. Despite this, all of the strategies outlined in this guide will still apply if you’re playing the game on a lower difficulty level, but you’ll have an easier time.
Left Bumper - Select Grenade type.
Left Trigger - Throw selected Grenade type.
Right Bumper - Perform Action / Reload Primary Weapon
Right Trigger - Fire weapon.
Left Stick - Move. (Click) Crouch.
Right Stick - Aim / Turn / Look. (Click) Zoom.
Y Button - Swap weapon.
B Button - Melee.
A Button - Jump.
X Button - Activate VISR.
D-pad UP - View Waypoints.
Back Button - View VISR Database.
Start Button - Pause menu.
Occupied city center
Character: The Rookie
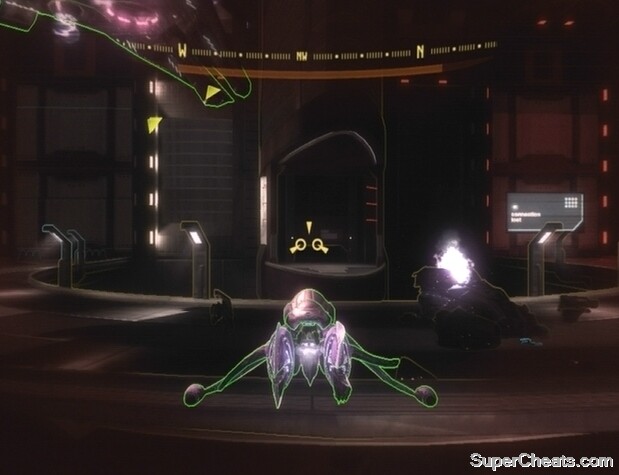
At the start of the game you’re given the option of activating a tutorial. Even if you’re familiar with the Halo series, activating the tutorial would be beneficial because Halo 3: ODST introduces several new features to the core game. If you choose to opt out of the tutorial, skip the next paragraph.
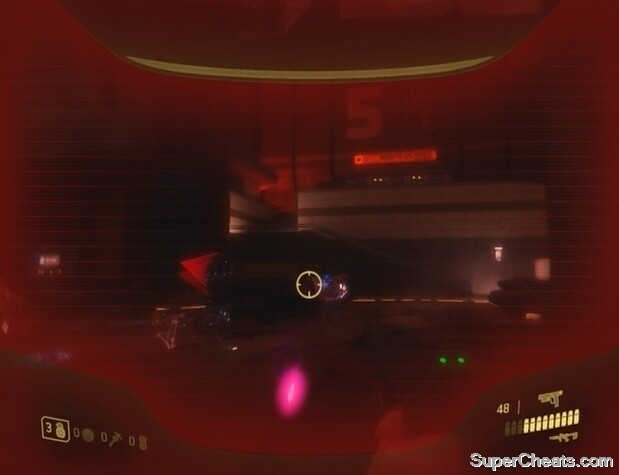
Once your aiming style has been set, move the target reticule over one of the green lights on the hatch and hold the RB button to plant an explosive bolt there. When the first explosive bolt has been planted, move the target reticule over to another one of the markers and do the same. There are four markers total.
When the four explosive bolts have been planted, the hatch will be blown open and you’ll fall to the street below. A notification informing you that your Stamina is low will appear at the top of the screen when you hit the ground. Stamina is a new feature in ODST, but can be likened to the rechargeable shields and health system of Halo: Combat Evolved. When your Stamina is low, the edges of the screen will redden; take cover and stay out of combat until your character has recovered. If you continue to take damage once your Stamina is depleted, further attacks will result in damage to your health bar, which is visible at the top of the screen.
Stay out of combat to restore Stamina. Without Stamina, taking further hits will damage your health bar.
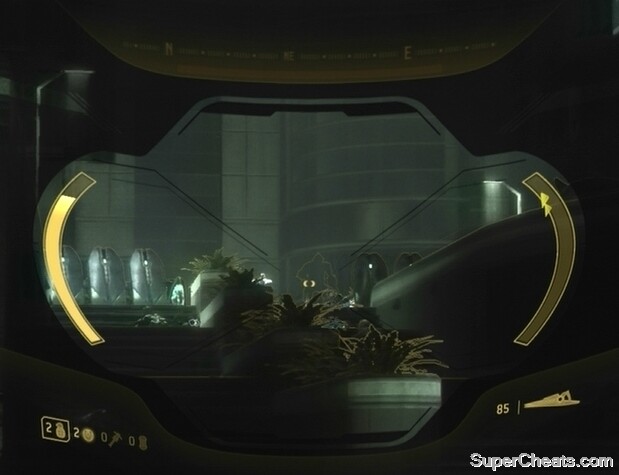
The only way to replenish the health bar is by picking up a health pack, which can be found on the ground or at an Optican kiosk. In fact, turn right and look for an Optican kiosk on the building there. Approach the kiosk and pick up the health pack there to restore your health bar, unlocking the “Heal Up” Xbox 360 achievement in the process.
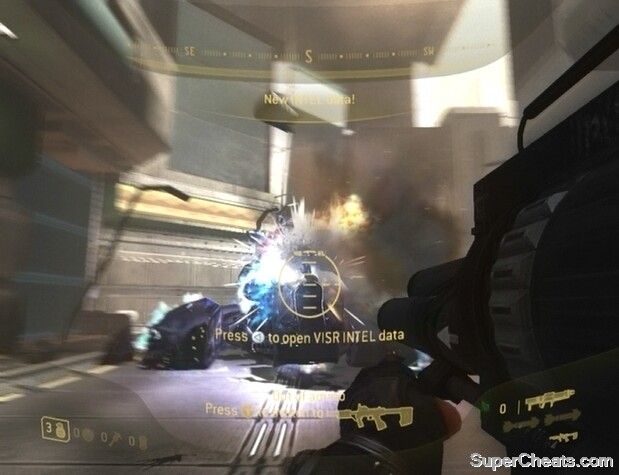
The VISR is another new feature. Toggle VISR with the X button. Use VISR to find your way around dark areas and to highlight clues or data terminals. Clues and data terminals are outlined in yellow, weapons in cyan, and enemies in red.
Objective: Explore the city
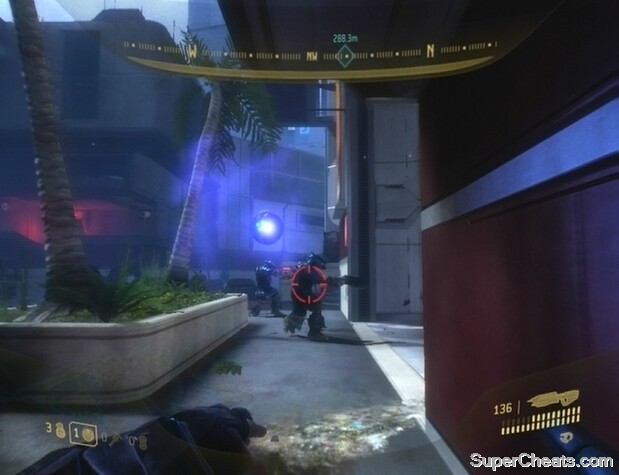
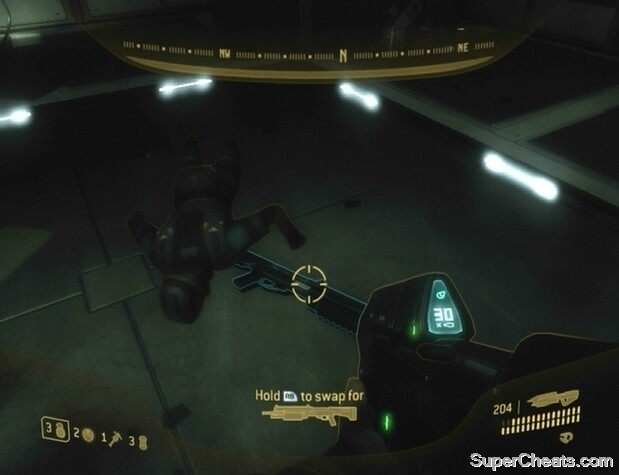
Continue down the street beyond the Optican kiosk. Be ready to face a Brute and a few Grunts. The Plasma Pistol can be used to quickly take out a Brute at close range. With the Plasma Pistol equipped, hold RT to charge a shot, and then release with a Brute in your sights. If the shot hits, the Brute’s armor will be destroyed and his shield lowered, allowing you to finish him off with a quick headshot from your Magnum. Some Grunts carry a Plasma Pistol, so look around for one after dispatching the first group of enemies you encounter. The Silenced SMG is unnecessary when you’re just facing Brutes and Grunts, so consider swapping the weapon for a Plasma Pistol.
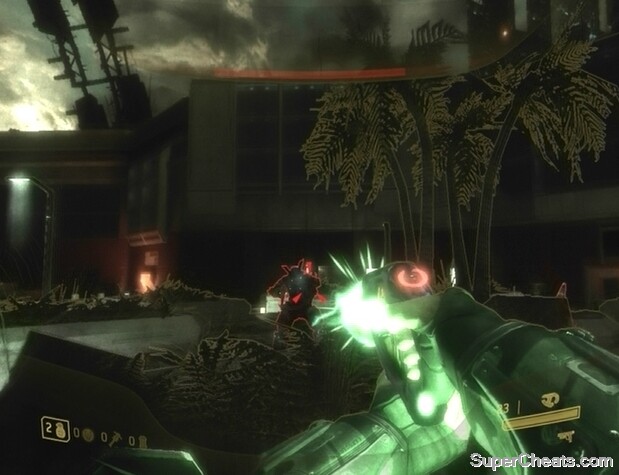
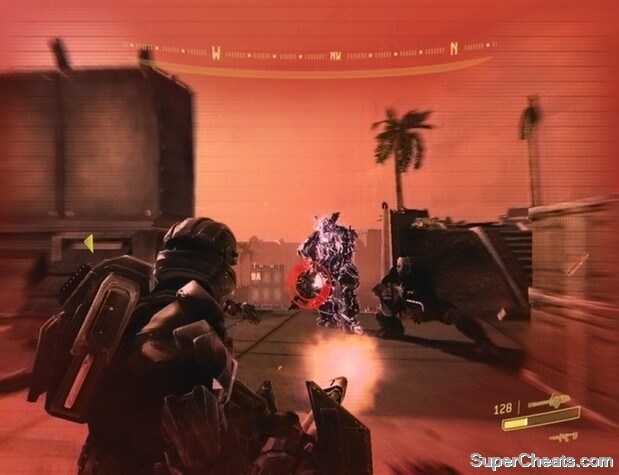
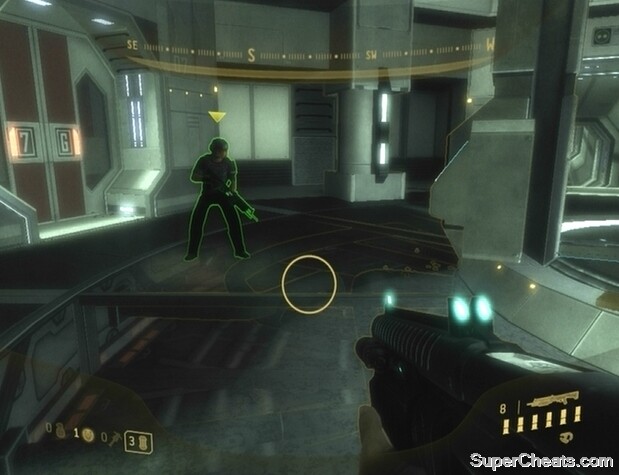
A charged Plasma Pistol shot will remove a Brute’s armor and lower his shield, allowing you to pick him off with a headshot.
When you reach the circular street, kill all the enemies in the surrounding areas to receive your next objective. In every case, you’ll come across a Brute and a group of three or four Grunts. Use the Plasma Pistol and Magnum combo to take out the Brute, then pick off the scurrying Grunts and move on to the next group.
Objective: Contact the Superintendent
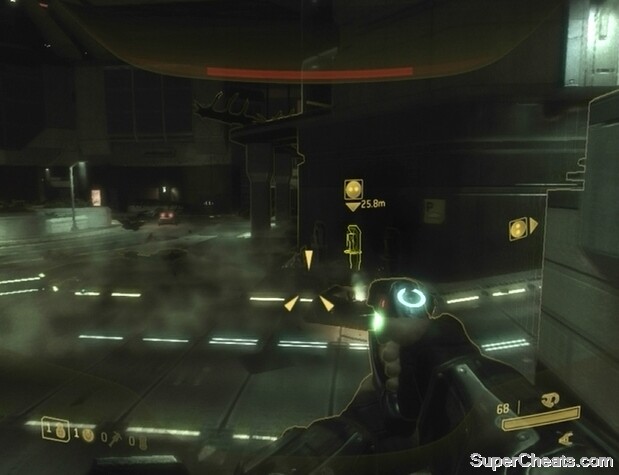
Activate VISR if it isn’t already and press up on the D-pad to call up two objective markers onscreen. Follow one of the markers to a highlighted data terminal. Hold the RB button to access the data terminal. Do so to download a handy map of New Mombasa, which can be accessed by pressing the Back button. Note that a compass now appears above the health bar at the top of the screen.
While viewing the map, press the A button to set a waypoint where the cursor is placed. While a waypoint is set, it will appear on the compass at the top of the screen.
Interact with one of the marked data terminals to complete the objective.
Objective: Search TAYARI PLAZA for ODST squadmate
You must make your way to the Beacon in Tayari Plaza to find the first clue. Follow the blue marker on your compass to an unlocked door with a sign that reads “Detour” next to it. If the marker on your compass is doing a poor job of pointing you in the right direction, open your VISR NAV and place a waypoint by the mid-red block at the south end of the district. The door you’re supposed to head through is just northeast of the locked security door.
Approach the door and hold the RB button to open it. Activate VISR to enable you to see more clearly in this dark building and follow the marker at the top of the screen to a door outside. Assassinate the sleeping Grunt by hitting him with a melee attack (B button) from behind, and then quickly take out the second Grunt in the same fashion.
Fight your way to the other end of the courtyard and enter the building there. Inside, head up and through the series of steps and corridors to reach the room with the first clue. Look to the cracked monitor on the northwest side of the room. Activate VISR if it isn’t already and inspect the RECON HELMET lodged in the monitor to trigger the first mission.
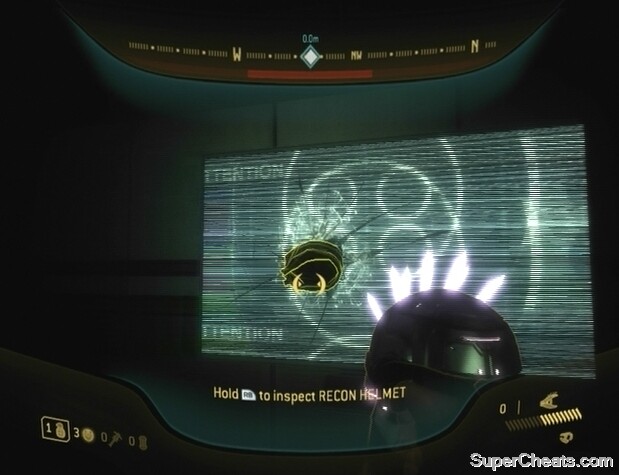
Clues and data terminals will be highlighted while VISR is active. Look for the first clue in Tayari Plaza.
Tayari Plaza
Character: Buck
Achievement: Tayari Plaza
Objective: Find Dare’s crash-site
Wait on the ledge until the Phantom unloads a group of Grunts and Brutes. Remain on the ledge until a few of the Grunts come forward, then aim for their heads and pick them off with your Magnum. When the area below is clear, drop down and get your hands on a Plasma Pistol; one or more of the Grunts will have been carrying one. Swap out your Assault Rifle for the Plasma Pistol and continue north down the street.
With your Magnum equipped, headshot any further Grunts you encounter and look for a Brute by the pillared building along the northeast side of the street. When you reach the purple barrier just before the building, use your Magnum to kill any Grunts nearby and then switch to your Plasma Pistol. Charge a shot by holding RT and when fully-charged, take aim at the Brute and fire. If the shot hits, quickly switch to your Magnum and headshot the Brute to finish him. Be careful, as he’s armed with a Brute Shot. Any Grunts in the immediate area should scatter once their leader is dead, allowing you to effortlessly pick them off. There is another Brute further up; use the same strategy to dispose of him.
Killing a Brute with the Plasma Pistol and Magnum combo.
When the area is clear, follow the marker on your compass to encounter a couple of allies. If one of your weapons is low on ammo you can trade weapons with one of your allies by holding the RB button when prompted. At this point, you’ll want to trade your Magnum for an Assault Rifle, since you’ll need the extra firepower very soon. Use the Optican kiosk north of the flatbed to restore health if need be, and then follow your allies to the alley.
You’re faced with five Brutes here. If you still have a Plasma Pistol, save it to remove the armour of the Brute Captain (gold armour) who is wielding a Brute Shot. Look for an unlocked door into the building southeast of where your allies take position and head through.
Once in the building, turn right and approach the door at the end of the corridor. Don’t head through just yet; wait in the doorway for a Brute to appear outside, and then use your Assault Rifle to gun him down. Hang back until you hear signs of battle outside, then step through the doorway and turn right. A couple more Brute infantry will be preoccupied with your allies, so try to stick one with a Plasma Grenade. You can find additional Assault Rifle ammo next to the downed UNSC marine directly across from the doorway.
Stick preoccupied Brutes with Plasma Grenades or Spike Grenades to quickly put an end to them.
When only the Brute Captain remains, rush out with your Plasma Pistol equipped and hit him with a charged shot to remove his armor. Then, quickly switch to your Assault Rifle and finish him off. Hit him with a melee attack if he charges and misses.
Before moving on to the next area, pick up the Assault Rifle dropped by your allies if they didn’t survive the skirmish and swap your Plasma Pistol for the Brute Shot dropped by the Brute Captain. Some Grunts will come from the north, so hang back and take them out with your Assault Rifle before continuing down the street.
The biggest threat in the next area is the Grunt on the mounted Plasma Turret. The Plasma Turret is mounted on the platform along the northeast side of the street. Hang back just out of range, take aim at the plasma container to the right of the turret and fire to disable the mounted Plasma Turret. Save what Brute Shot ammo you have left and switch to your Assault Rifle. Use it to kill the Brute and Grunts further up the street. The Brute Shot also makes for an effective melee weapon.
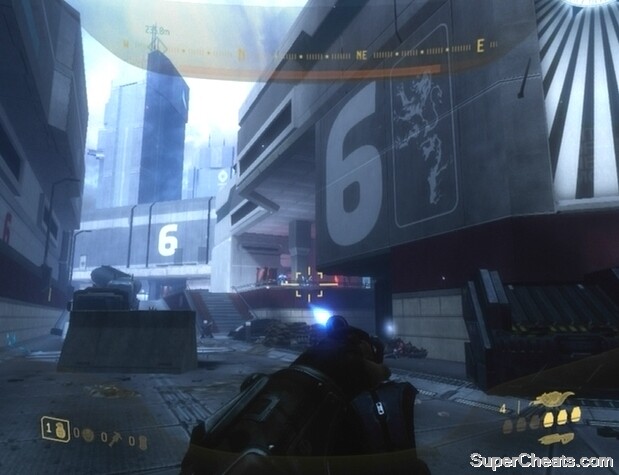
Target the plasma container with a Brute Shot to take out the gunner.
Pick up the detached Plasma Turret before moving on. The next area is full of Grunts and Jackals. Mow down the Grunts and Jackal as you make your west. Keep moving; if you have a decent amount of health remaining, you should be able to plow your way through to the security door. The Jackal Sniper in the purple tower is armed with a Beam Rifle, so take the gravity lift up and melee him to death. Before moving on, look for a Carbine (one of the Jackals will have been carrying one) and swap your Brute Shot for it.
When the area is clear, approach the security door at the west end of the street and hold the RB button to open it. Upon entering the next area, step onto the walkway to your left and look for an Optican kiosk along the building there. Take one of the health packs to restore any lost health and then swap your Brute Shot (if you haven’t already) for the Carbine by the dead Jackal.
Proceed through the doorway at the other end of the walkway and turn right. Activate VISR, start down the corridor, and turn right when you can. Approach the security door, but don’t head through when it opens. Instead, use your Carbine to eliminate the three Jackal Snipers on the bridge, a fourth sniper on the walkway to the west, and a fifth sniper in the window far north of the bridge. There should also be a Brute wielding a Carbine at the other end of the bridge; use your Carbine to kill him, too. With that done, continue down the corridor. If you turn left at the dead Brute you can find a Shotgun next to a dead marine; hold on to your Carbine and swap your Assault Rifle for it.
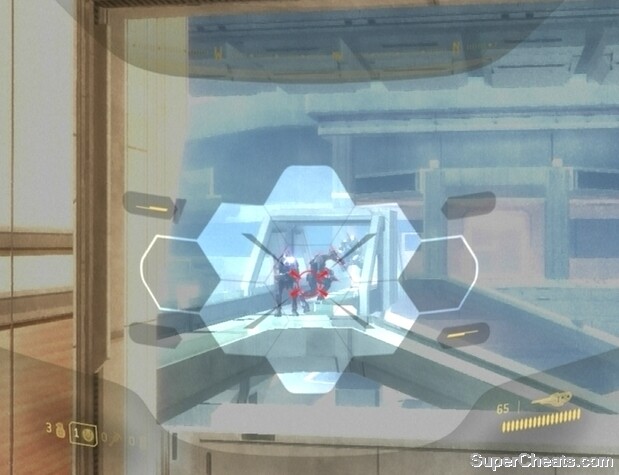
Use a Carbine to pick off the snipers on the bridge and surrounding platforms.
Continue to the end of the corridor and proceed down the stairs there. Note the two health packs on the ground here. Hang back in this area and use your Carbine to pick off any Grunts you can see. There are a couple of Brutes among them, but wait until they’re close enough for your Shotgun to be effective. If a Brute spots you, fallback to the stairs and wait for him to approach. When he’s by the pillars, use them as cover while you blast him with the Shotgun.
When the area beyond the pillars is relatively clear of enemies, venture out and start heading north. There may be a couple more lower-ranked Brutes in the area, so have your Shotgun ready. There’s a Grunt and a mounted Plasma Turret on the walkway before the large door at the end of the street, so don’t move too far ahead.
Keep an eye on the large, locked door at the north end of the area. When the lights on the door turn from red to green, two Hunters will soon come through. Any enemies in the area will momentarily fallback while the Hunters get to work. As soon as you spot the Hunters in the distance, fallback yourself and take cover behind one of the pillars on the building along the east side of the area. If you have any Plasma Grenades or Spike Grenades, wait until the Hunters are close and then stick one anywhere to do some damage.
If you don’t have grenades, you’ll have to hit the exposed weak-spots on the Hunters’ backs to damage them. If you didn’t manage to take out the gunner on the Plasma Turret, fallback far enough to avoid taking unnecessary damage while facing the Hunters and wait for them to come to you. The projectiles shot by the Hunters are easy enough to dodge, but you’ll want to stay quite close to coax them into performing a melee attack rather than firing. Dodge the Hunter’s swings and other attempts to hit you until it lunges forward, at which point spin around and deliver two swift Shotgun shots to its weak-spot. Two direct hits to the exposed membrane are enough to take one out.
Using a Shotgun to kill the Hunters.
When both of the Hunters are dead, the enemies will once again pursue you. If you can get through the security door up the street, it will close behind you, so your best bet is to make a break for it and just run past the remaining enemies. Continue north through the security door at the end of the street to reach the crash-site.
Objective: Open crashed drop pod
Follow the marker on your compass to reach the drop pod. Kill the Grunts in the area and then approach the front side of the pod; hold the RB button when prompted to open it, completing the mission in the process.
Mombasa Streets
Character: The Rookie
Objective: Search UPLIFT RESERVE for ODST squadmate
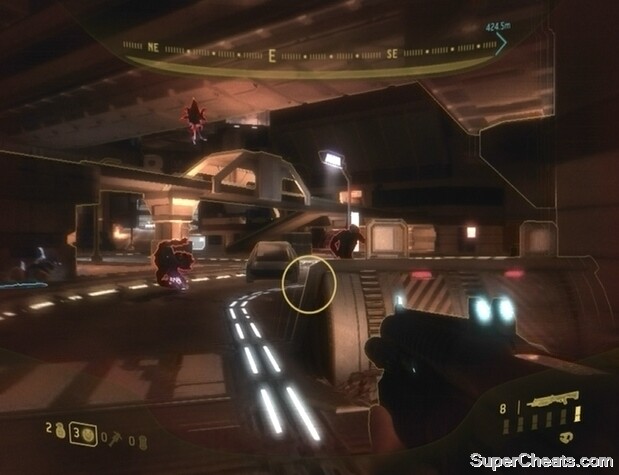
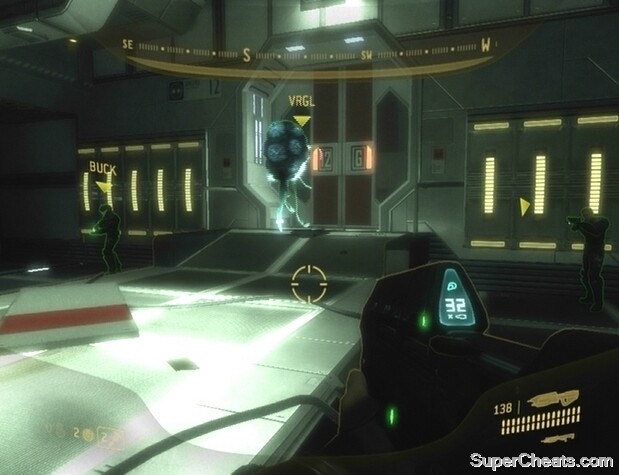
Make your way back down to street level and start following the marker on your compass to the next Beacon. At about 440 metres from the Beacon, you will encounter a group of three Brutes and an Engineer. The Brutes are affixing a charge to the Engineer, which will eventually cause it to explode.
Kill 10 Engineers to earn the Naughty Naughty achievement. Play through an entire campaign without killing a single Engineer to earn the Good Samaritan achievement.
The Engineers are associated with two different Xbox 360 achievements: Naughty Naughty (worth 5 Gamerpoints) and Good Samaritan (worth 30 Gamerpoints). To unlock Naughty Naughty, one must kill 10 Engineers in a campaign. To unlock Good Samaritan, one must play a campaign from start to finish without killing a single Engineer. So clearly, earning both of these achievements will require two separate playthroughs. Decide what you want to do now and act accordingly when you encounter an Engineer in the future.
Regardless of your intent, the Brutes have planted a charge on the Engineer, so keep your distance to avoid being caught in the initial blast as well as the ensuing scattered explosions. If you’re aiming for the Naughty Naughty achievement, immediately begin firing at the Engineer once it’s up in the air or stick it with a Plasma Grenade while the Brutes are still holding it for the kill the count.
After dealing with the Brutes and Engineer, continue following the marker on your compass. When you reach the Beacon, keep an eye out for a Jackal sniper on top of the building along the southeast side of the area. Either kill him or avoid his fire and head straight for the clue at the bottom of the stairs at the southwest end of the area. Activate VISR and look for the DRONE FIGHTER OPTICS on the ground there. Hold the RB button when prompted to start the level.
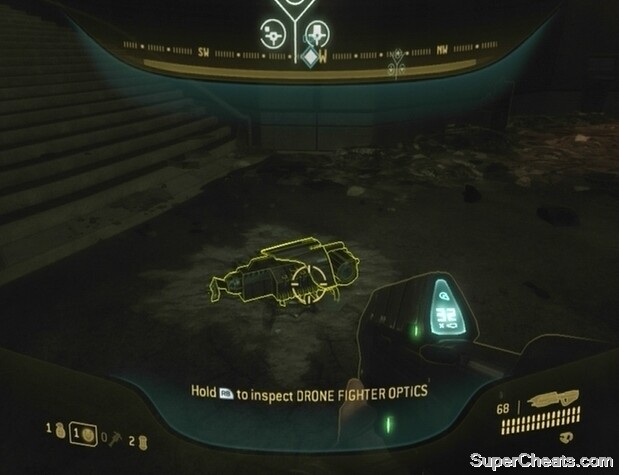
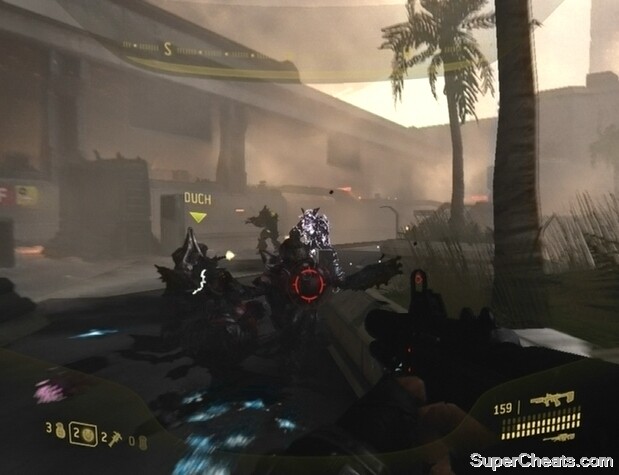
Find and inspect the clue in Uplift Reserve to start the mission.
Uplift Nature Reserve
Character: Dutch
Achievements: Uplift Reserve, Wraith Killer (destroy all six Wraiths).
Objective: Link up with friendly forces
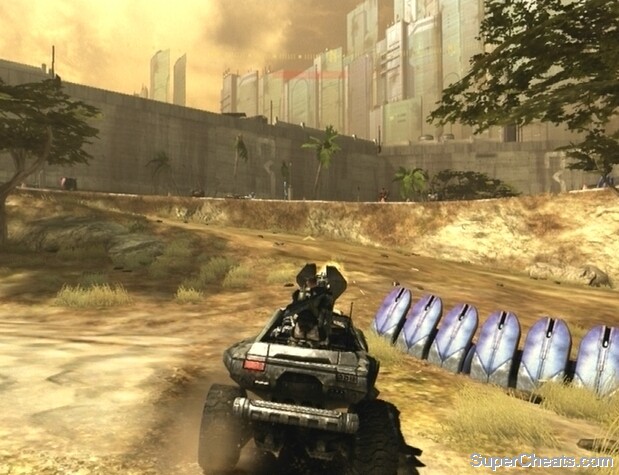
You’re armed with a Spartan Laser and a Silenced SMG. Save your Spartan Laser for Wraiths, especially if you’re after the Wraith Killer achievement. Start down the path northeast of the beach. When you reach the next area, flip the overturned Warthog. If you have faith in your AI allies get on the turret, otherwise hop in the driver’s seat and wait for them to board.
A couple of Choppers and Ghosts will come from the west. If you’re on the turret, take out the enemy drivers as your Warthog passes by. If you’re driving, try to get your gunner alongside an enemy vehicle to give him a better shot at the driver. Continue further west and you’ll soon spot a Wraith in the distance.
Immediately hop out of the Warthog and equip your Spartan Laser. Begin by holding RT and move around to avoid enemy fire while the weapon is charging. Keep the target reticule trained on the Wraith until the Spartan Laser fires to destroy it. Don’t switch weapons just yet, as another Wraith will soon be dropped by a Phantom. Do the same to the second Wraith and then return to the driver’s seat of the Warthog (provided it’s still in one piece).
Use the Warthog to clear the area of enemies.
Objective: Find marine second platoon
Follow the trail at the northwest end of the first area and drive through the tunnel you reach to enter the next. As soon as you’re through the tunnel, turn left and drive west to the beach. Drive around to the pond along the northeast side of the area. On the hill overlooking the pond is a Brute armed with a Fuel Rod Gun, a Brute wielding a Brute Shot in the purple tower, as well as a couple of Ghosts to contend with. Continue driving around the hill and try to get your gunner in position to take out the two Brutes. Keep driving because it all takes is one direct hit to trash your vehicle.
When the Brutes on the hill have been taken care of, continue west. Three Banshees will soon appear overhead. When they appear, reverse and drive around the Banshees while your gunner shoots them down. Once the Banshees have been destroyed, continue down the path.
There are two Shade turrets along the ridge at the north end of the area. Don’t drive any further than the purple cover between the hill and rock to avoid taking fire. There’s also a single Chopper in the area below the ridge; your gunner should be able to take out the driver without too much difficulty. If the Chopper approaches, back up and wait until your gunner manages to kill the driver before concentrating on the turrets.
While facing the ridge, move forward to allow your gunner to fire at one of the turrets along the ridge, but reverse when the turrets fire to avoid taking damage. Keep this up until both of the turrets have been destroyed or the operators killed. Continue up the ramp below the ridge and ram into the Shade at the top to disable it. A Ghost will soon speed through the tunnel at the other end of the road; take out the driver before he warns the Brute Chieftain in the next area.
Allow your ally to kill the Shade turret gunners before driving onto the ridge.
Objective: Find Colonel across bridge
There are Choppers, Wraiths, and Shade turrets in the large, open area at the end of the path. Drive down the ramp and get your gunner in position to take out the driver of the Chopper below. Continue along the east side of the building in the middle of the area. There is a Shade turret on the hill around the corner of the building; move forward to allow your gunner to fire at the turret, but reverse to avoid getting hit by its projectiles.
When the first turret is down, drive up to the ridge. Be careful, as there is another Shade turret next to the stairs. Allow your gunner to take out the turret before continuing south. There is yet another Shade turret on the same ridgeline next to a second set of stairs; get your gunner in position to take the turret out, as well as any other enemies visible on the hill.
There are two Wraiths on top of the hill, so once all three Shade turrets are down, get out of the Warthog, equip your Spartan Laser, and start walking along the ridge. Use your Spartan Laser to take out each Wraith when you encounter them.
Achievement Tip -- Wraith Killer: If you’re after the Wraith Killer achievement, you can find another Spartan Laser in the building in the middle of this area. After destroying the two Wraiths on the hill, before leaving the area, get back in the Warthog and drive to the building. Look for a fresh Spartan Laser in a puddle next to the two sets of stairs at the south end of the building.
Grab this Spartan Laser if you’re after the Wraith Killer achievement.
After destroying the two Wraiths, return to the driver’s seat of the Warthog, drive up the hill and continue north through the doorway to the next area. Speed down the bridge and through the corridors that you come to.
Objective: Drive up and out of park
At the end of the bridge, follow the trail to another hill. There are two Shade turrets along the start of the spiral ramp up the hill, and a purple sniper tower at its base. Drive below the ramp while your allies work to kill the gunners. When both turrets are out of service, drive up the ramp to reach the next area.
When a purple platform comes into view, slow down and inch your way up the incline. There’s a Shade turret by the tree on the left, as well as a couple of Jackals. Inch up to the top of the incline to allow your gunner to fire at the turret and Jackals, but reverse to avoid taking fire. Keep this up until the turret and Jackals have been dealt with.
The fifth Wraith of the level is in this area. The enemy vehicle should be to your right once you’re past the incline. Drive a bit further into the area, hop out of the Warthog, equip your Spartan Laser if it isn’t already and use it to destroy the Wraith. With that done, return to the driver’s seat of the Warthog and start down the trail beyond the wrecked Wraith.
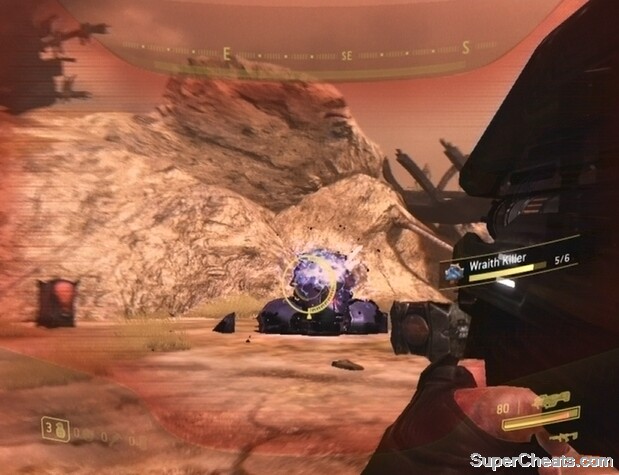
Destroy the Wraith and then continue on into the next area.
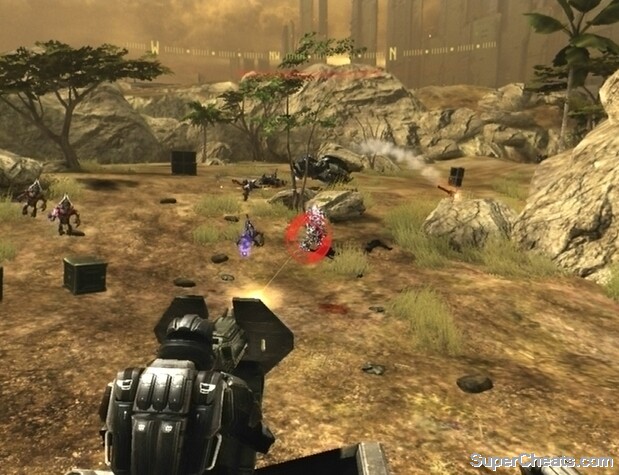
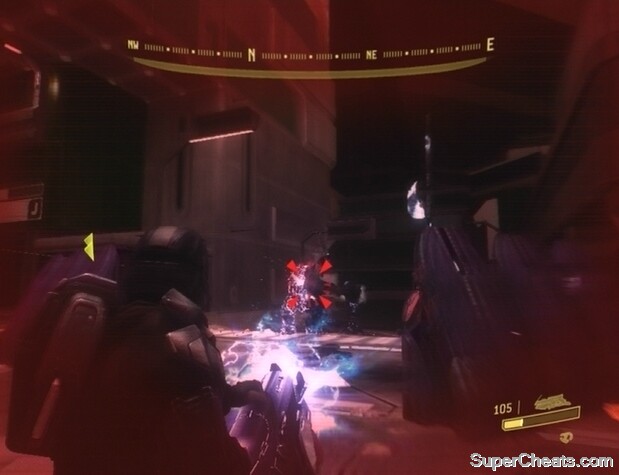
As you drive along, keep an eye out for a Brute wielding a Brute Shot and steer clear to avoid getting hit. The final Wraith is in the next area, but it’s surrounded by Grunts, Jackals, and Brutes. Among them is a Brute War Chieftain wielding a Fuel Rod Gun. Take to the Grunts behind the purple barriers at the start of the area first.
There are two Plasma Turrets and two Brute gunners, as well as some more Grunts, behind the second set of purple barriers further up. Try to stick the Brute gunners, and then gun down Grunts with your Silenced SMG. Luckily the two Brutes are wearing light armor so they won’t take much to kill.
When the start of the area is clear, equip your Spartan Laser and take to destroying the Wraith. With that done, try using your Spartan Laser to kill the Brute Chieftain at the northeast end of the area and then any other enemies with whatever ammo you have left.
Once the area is relatively clear of enemies, return to your Warthog (or grab the Ghost behind the first purple barrier if the Warthog was destroyed), head to the north end of the area, and drive off the cliff to the east to complete the level.
Unlocking the Wraith Killer achievement.
Mombasa Streets
Character: The Rookie
Note that you can tackle the Kizingo Boulevard, ONI Alpha Site, NMPD HQ, and Kikowani Station missions in any order you wish. To set a different Beacon on your compass, first press the Back button to access your VISR NAV and then use the up and down buttons on the D-pad to switch between the available Beacons. Press the A button to set the selected Beacon to the compass.
Objective: Search Kizingo Boulevard for ODST squadmate
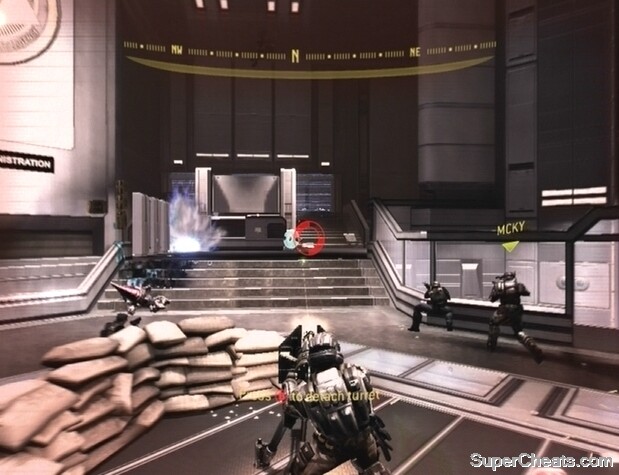
Activate VISR and look for a highlighted turret on the building at the northwest end of the area. Enter the building by the door along its east side and take the stairs up to the turret on the balcony. Inspect the GAUSS TURRET to start the mission.
Kizingo Boulevard
Character: Mickey
Achievements: Kizingo Boulevard, Both Tubes (get 10 Rocket Launcher kills).
Objective: Save marines and Scorpion tank
At the start of the mission, switch to your Rocket Launcher, turn around, and fire both rockets at the Wraith down the street to destroy it. Doing so will net you three Rocket Launcher kills.
Use your Rocket Launcher to destroy the Wraith at the start of the level.
Use your Silenced SMG to kill the two Jackals that accompany the Wraith. Swap your empty Rocket Launcher for the Plasma Pistol carried by one of the Jackals. Then, head northwest until you reach some marines, a Brute, and a couple of Grunts. Hit the Brute with a charged Plasma Pistol shot to remove his armor, then switch to your Silenced SMG and finish him off
Kill the Jackals on the street further north. Some Covenant reinforcements will then appear to the west; ignore them and make a beeline for the Scorpion tank to the north. Get in the driver’s seat and immediately take to destroying the Wraith in the middle of the street to the west. Hit the Wraith with cannon fire until it explodes and then turn your attention to the Ghosts and other enemies in the area.
When the area is clear, start heading west.
Objective: Drive tank to rally point
Blast the Jackals and Ghosts you encounter along the way. When you pass an energy shield on your right, aim the turret up and blast the two Brutes on the walkway connecting the two buildings on either side of the street, and then take out the Ghost that’s headed your way.

Push through to the rally point.
Continue down the street and blast the Shade turret on the walkway to the east when you enter the next plaza. Hit the Brutes and Ghosts in the area and then take out the second Shade turret on the walkway to the southwest. There is also a Jackal Sniper on top of the building at the southeast end of the area. Fire at the purple tower at the bottom of the ramp to destroy it and then continue down the road to the east.
You’ll be in range of three Shade turrets when you turn the corner, so immediately take aim and blast each one. Next, hit the groups of Grunts and Brutes in the middle of the area and then fire at the purple tower in the distance. There are Brutes wielding Brute Shots on the walkway next to the tower and a Brute War Chieftain wielding a Fuel Rod Gun nearby. Hit these enemies with cannon fire before continuing to the security door at the end of the southern street.
Objective: Rescue Dutch
Shoot the two Banshees that appear out of the sky and then hit the Brute and Grunts on the sidewalk to your left. Before moving on, there’s some Rocket Launcher ammo nearby that will make the encounters to come much less of a hassle
Step out of the Scorpion tank when the immediate area is clear and enter the building next to the Gauss Turret along the right side of the road. Inside, move down the corridor to find a Rocket Launcher and a health pack. Pick them up, then turn around and start back down the corridor. Turn left when you can and climb up the stairs there. Head up the stairs and move through the corridors you come to until you reach the balcony. Look next to the piece of cover to the right of the Gauss Rifle to find some additional Rocket Launcher ammo.
Collecting Rocket Launcher ammo.
When you have the Rocket Launcher ammo, hop back down to street level and get in the Scorpion tank. Move further south and look for a Brute gunner on a Plasma Turret along the left side of the street. Blast the gunner, then take aim at the Wraith in the area further south and hit it with cannon fire until it explodes. If you’re after the “Both Tubes” Xbox 360 achievement, you may want to hop out of the Scorpion and destroy the Wraith with a couple of rockets instead. Doing so is not necessary however, as there will be plenty of other opportunities to rack up Rocket Launcher kills very soon.
Once the Wraith has been dealt with, turn your attention to the Grunts and Brutes dropped by a Phantom on the road to the west and fire at them. Then, continue south to encounter another Wraith. Destroy the Wraith with the Scorpion tank if it’s still intact, otherwise hit it with a couple of rockets. It’s very important that you save at least two rockets for the finale, so don’t waste them.
After destroying the second Wraith, abandon the Scorpion tank and make your way to Dutch’s marker. As soon as you reach Dutch, turn your attention to the security door to the south. A Brute and a group of Grunts and Jackals will soon march through. Now’s the time to get those last few Rocket Launcher kills to unlock the achievement. The enemies will be packed together when they first appear, so quickly take aim and fire to score multiple kills.

Be ready with a Rocket Launcher when the security door opens.
Don’t waste all of your rockets on these enemies; save at least two for the next area. Fight your way south to reach the rally point.
Objective: Help Dutch defend rally point
A Phantom will soon appear and drop a Wraith off in front of the building at the west end of the area. Equip your Rocket Launcher and hit the Wraith with two rockets to destroy it, then fallback to cover. You can find a Sniper Rifle next to the container at the east end of the street. There’s also a Magnum and health pack at the bottom of the steps at the southeast end of the area.
To complete the objective to end the mission, you must kill each and every enemy at the rally point. Phantoms will appear to drop off more batches of enemies as the battle progresses. The Carbine-wielding Jackals that take position along the walkways on the northeast and southeast sides of the area can be a problem, so take them out with a Sniper Rifle or other weapon when they appear. You can distinguish the snipers from infantry by the energy shields the infantry carry.
Kill every last enemy at the rally point to complete the mission.
Keep fighting until the last enemy falls to complete the mission.
Mombasa Streets
Character: The Rookie
Note that you can tackle the Kizingo Boulevard, ONI Alpha Site, NMPD HQ, and Kikowani Station missions in any order you wish. To set a different Beacon on your compass, first press the Back button to access your VISR NAV and then use the up and down buttons on the D-pad to switch between the available Beacons. Press the A button to set the selected Beacon to the compass.
Objective: Search ONI Alpha Site for ODST squadmate
Activate VISR and look for the clue on the ground by the bombed out bridge. Inspect the REMOTE DETONATOR to start the mission.
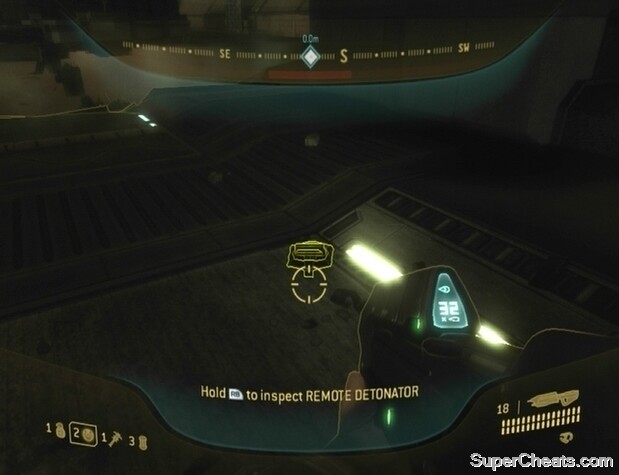
Look for the clue in the ONI Alpha Site area and inspect it to start the mission.
Oni Alpha Site
Character: Dutch
Achievements: ONI Alpha Site, Laser Blaster (get 10 Spartan Laser kills).
Objective: Arm all charges on bridge
Though you should be busy setting charges, you can unlock the Laser Blaster Xbox 360 achievement right at the start of the level.
Achievement Tip -- Laser Blaster: Start by taking out the Wraith at the northwest end of the bridge to score three Spartan Laser kills. Click the Right Stick to zoom in if necessary. Then, turn around and keep an eye out for Banshees coming from the south. Use the Spartan Laser to blast each Banshee as they fly overhead. One Banshee is worth two kills. Finally, face northwest again and hug the railing along the west side of the bridge. You should be able to spot another Wraith across the way; hit it with your Spartan Laser to unlock the achievement.
Unlocking the Laser Blaster achievement.
Travel southeast down the bridge and activate the three charges as you pass each one. When all three charges have been armed, join your allies behind the barrier at the southeast end of the bridge and fire at the approaching Covenant.
Objective: Use Detonator in watchtower
Wait until you receive order to detonate the charges. Then, climb up the watchtower northeast of the barricade and power up the terminal to set off the charges and blow up the bridge. Swap your Spartan Laser for the Sniper Rifle in the tower.
Objective: Fall back, defend inner courtyard
Continue southeast to the inner courtyard. There are some Brutes, Grunts, and a pair of Hunters in the middle of the area. Try using your Sniper Rifle to pick of the Brutes with headshots. Keep an eye on the Hunters as well; if you spot one with its back turned, shoot its weak spot with your Sniper Rifle to inflict a large amount of damage. A couple shots should do it.
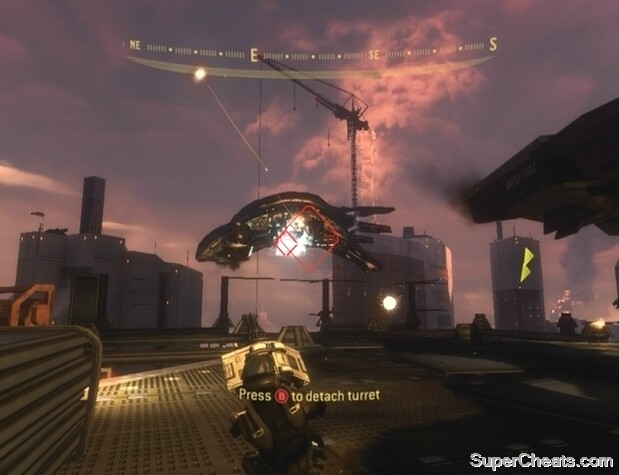
Once the first batch of enemies has been taken care of, join your allies at the other end of the courtyard. Two Phantoms will soon appear to drop off some troops. You can find a mounted Machine Gun on the jutting platforms on either side further up the steps. Use the Machine Gun to cut down some of the enemies below. While the Machine Gun does have infinite ammo while mounted, you remain very vulnerable while gunning, so consider detaching the weapon if you’re taking heavy fire.
Use a detached Machine Gun to mow down enemies as they appear.
There is a Wraith among the enemies dropped by the Phantoms, but it won’t be able to do much damage where it is so just leave it alone. When you receive order to fallback, detach the Machine Gun if applicable and then climb up the steps to the top of the ridge. Walk along the ridge and gun down the Brutes and Grunts as they climb up the stairs. Be wary of fire from the Wraith and continue to mow down Covenant until another pair of Phantoms appear.
Fallback when you receive order and enter the ONI building.
Objective: Retreat, defend ONI building interior
Hop on the turret behind the sandbags in the lobby and face the north entrance. When the Covenant cuts through, fire at the suicidal Grunts as they come down the stairs. More suicidal Grunts will then come from the west entrance followed by some Brutes, Jackals, and more Grunts. Mow the enemies down with the mounted Machine Gun but detach it if you’re taking heavy fire.
After the first wave, more enemies will pour in from the south and east entrances. If you haven’t detached the turret yet, do so now. Fire at the enemies that come through the south and east entrances using the detached Machine Gun turret or your Silenced SMG. Crouch in front of the sandbags to recharge your Stamina if necessary. There is a health pack on the ground by the pillars in front of the east exit, but only go for it if you’ve cleared that part of enemies.
Defend the ONI building interior.
Objective: Take the elevator to roof for evac
Once the last enemy has fallen, follow Mickey and any remaining allies onto the elevator. Stand in front of the terminal and hold the RB button when prompted to start the elevator. A swarm of Drones will appear partway up; move around to avoid their fire and use your Silenced SMG to clear away as many as you can.
At the top, follow your allies outside. On the roof you face Jackals, Grunts, and several variants of Brute. Pick off as many enemies as you can from inside. Try to get your hands on a Plasma Pistol if you can; one or more of the Grunts you encounter should be carrying one. Hit Brutes with charged Plasma Pistol shots to remove their armor, then switch to your secondary weapon and quickly finish them off.
Keep this up until the Pelican reaches the rooftop, at which point approach it and hold the RB button to board.
Mombasa Streets
Character: The Rookie
Note that you can tackle the Kizingo Boulevard, ONI Alpha Site, NMPD HQ, and Kikowani Station missions in any order you wish. To set a different Beacon on your compass, first press the Back button to access your VISR NAV and then use the up and down buttons on the D-pad to switch between the available Beacons. Press the A button to set the selected Beacon to the compass.
Objective: Search NMPD Headquarters for ODST squadmate
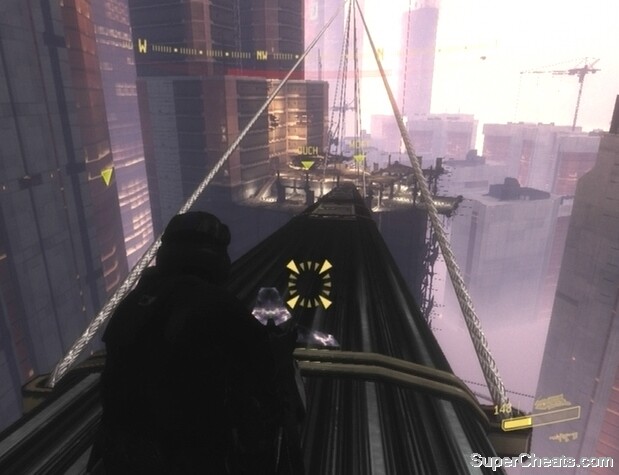
Activate VISR and look up for a Sniper Rifle hanging from the steel wires above the west end of the plaza. Inspect the SNIPER RIFLE to get started.
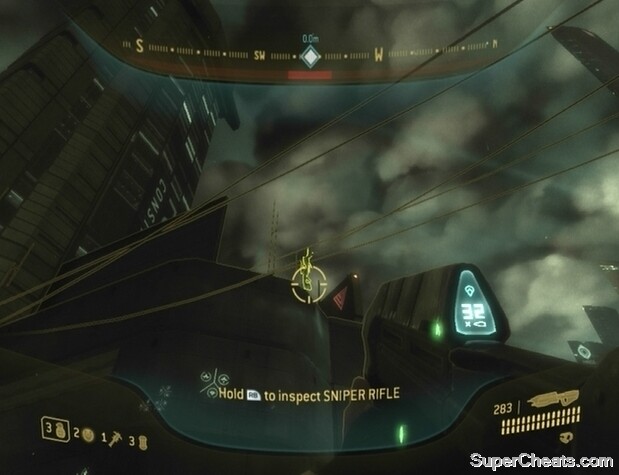
Inspect the hanging Sniper Rifle to start the mission.
NMPD HQ
Character: Romeo
Achievements: NMPD HQ, Dome Inspector (get 15 headshot kills).
Objective: Find Mickey and Dutch’s Pelican
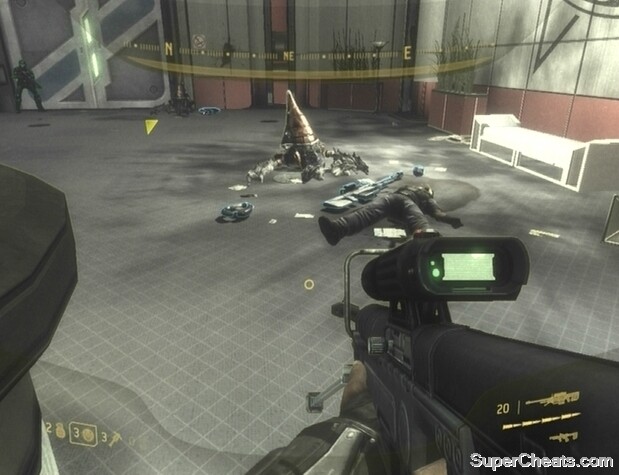
Follow Buck up the ramp and through the security doors. Upstairs, head through the security door and with your Sniper Rifle equipped, take aim at the Brute among the Grunts to the south. Shoot him in the head once to remove his armour and then again to end him. Switch to your Magnum and pick off the two scurrying Grunts with headshots.
There’s a Shade turret at the southeast end of the platform. Move a bit further south and aim for the Grunt gunner while he is busy targeting Buck. As long as you’re on the upper walkway, you should be able to spot the top of the Grunt’s head even if the Shade is turned toward you. Two Brutes and some Grunts will soon come through the doorway along the east side of the platform. Remain on the walkway and help Buck take down the two Brutes. A Phantom will also appear and drop off a group of Grunts nearby; use this opportunity to rack up some headshots for the Dome Inspector achievement.
Use your Sniper Rifle to knock out the Shade turret gunner.
When the first area is clear, continue through the first doorway at the east end of the platform. Start firing at the Jackal infantry and Grunts through the open doorway on the other side of the lobby. There’s a Grunt on a mounted Plasma Turret at the top of the steps to the right; use your Sniper Rifle to take him out.
With the immediate area clear, head up the steps and quickly take to killing the Carbine-wielding Jackals up the steps at the north end of the area. There are four of them. Duck behind the metal crate to allow your Stamina to restore if necessary. After clearing away the Jackals, make your way up the steps at the north end of the area. You’ll encounter two Brutes and some Grunts. Use your Magnum to clear away the Grunts, falling back if necessary, and then take to the Brutes. If the Brutes are at a distance, take cover behind one of the pillars at the west end of the platform and take them out with your Sniper Rifle.
Once the area is clear of enemies, look for a Silenced SMG on the ground at the west end of the platform. Swap out your Magnum if its ammo is low, but hold on to your Sniper Rifle. Continue through the door at the northeast end of the platform. Pick up the Sniper Rifle ammo by the corpse across from the eastern corner of the desk and then follow Buck through the security door at the northeast end of the room.
Pick up this Sniper Rifle ammo before moving on.
Outside there are three Jackal Snipers on the balconies attached to the building to the northeast and two more on the bridge to the east. Don’t move past the pillar and start by taking out the snipers on the balcony. Two are on the lowest balcony and one is on the middle balcony. The two snipers on the bridge to the east for sure have Beam Rifles; on the Heroic difficulty level, two shots from one are enough to kill you, so hit them quickly.
Move up once the snipers are out of the way. A Phantom will appear beyond the bridge and drop off some Jump Pack Brutes. Move to the pillars at the north end of the walkway and use your Sniper Rifle to take out the Shade gunner in the northeast corner of the platform. The Brutes can commandeer the Shade, so keep it clear. Kill the two Brutes that are armed with a Carbine using your Sniper Rifle, as they’ll most likely hang back and take shots at you from afar. Two of the Brutes are wielding a Brute Shot as well, so be careful.
After the skirmish, proceed through the doorway at the northeast end of the platform. Look for a health pack and some Silenced SMG ammo next to the dead soldier in the southeast corner of the room.

Take out the snipers before moving into the area.
Upon entering the next area, immediately target the Jackal Sniper on top of the shelter up the steps at the northwest end. There’s also a Grunt on a mounted Plasma Turret at the top of the stairs at the southwest end. With the sniper down, step onto the platform at the east end of the area and kill the Jackal infantry there.
Four Brutes will then come through the door at the top of the stairs across the way. A Brute Chieftain armed with a Plasma Turret is among them. He requires a ridiculous amount of fire to take down; if you’ve managed to kill his entourage, try to get to the Plasma Turret at the top of the steps at the southwest end and detach it for use against him. Then it’s just about dodging his fire and taking him down. If you’re low on health, look for a health pack on the wall through the security door at the north end of the area.
Continue through the doorway at the northwest end once the area is clear. Be sure to bring along the Brute Chieftain’s Plasma Turret. Continue through the security door at the bottom of the stairs. Mow down the Jackal Sniper on the platform and then cross the bridge to reach Mickey and Dutch. A couple of Banshees will fly overhead partway down, but just keep moving.
Cross the bridge to join your allies at the crash-site.
When you reach the very end of the bridge, remain there and use the Plasma Turret to clear away the Brutes and Grunts below. With that done, hop down and join your allies on the platform.
Objective: Defend Pelican crash-site
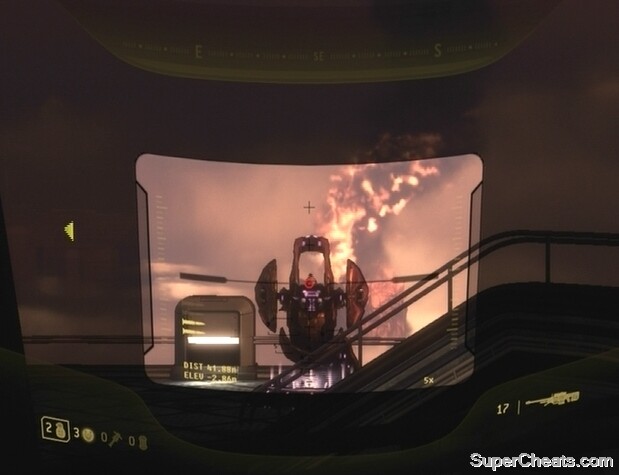
Immediately get on one of the mounted Missile Pods on either side of the platform. The Missile Pod has infinite ammo while mounted, so fire profusely at the incoming Banshees. When a Phantom appears, immediately divert your fire to the engines on its visible side. Make sure you’re not aiming at the gun on the front of the ship, but at the engines on its side. If you’re quick enough, you can destroy the Phantom without having to deal with the enemies it’s set the drop.
If a Phantom manages to unload, get off of the Missile Pod (don’t detach it) and look for a detached Missile Pod on the ground by the crashed Pelican. Use it to quickly clear away the Covenant dropped by the Phantom.
When a Phantom appears, continuously fire at the engines on its visible side to destroy it.
Banshees and Phantoms will come from both sides, but each mounted Missile Pod has limited coverage. If you hear your allies call out a Phantom and your side isn’t busy, step off of the Missile Pod and hop on the other so you can reach the approaching craft. You can push off an ally if it’s occupied.
Your AI allies are actually a huge help here, so you should be able to complete this objective with little difficulty. Continue shooting the Banshees and Phantoms out of the sky until the final Phantom appears, triggering the end mission cutscene.
Using Missile Pods to defend the Pelican crash-site.
Mombasa Streets
Character: The Rookie
Note that you can tackle the Kizingo Boulevard, ONI Alpha Site, NMPD HQ, and Kikowani Station missions in any order you wish. To set a different Beacon on your compass, first press the Back button to access your VISR NAV and then use the up and down buttons on the D-pad to switch between the available Beacons. Press the A button to set the selected Beacon to the compass.
Objective: Search Kikowani Station for ODST squadmate
Activate VISR and look for the clue on the ground behind the pillars along the northwest side of the street. Inspect the BIO-FOAM CANISTER to start the mission.
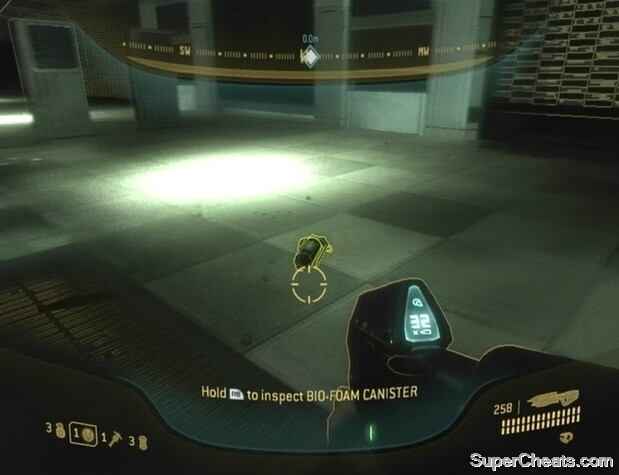
Find the clue in Kikowani Station and inspect it to get started.
Kikowani Station
Character: Buck
Achievement: Kikowani Station.
Objective: Capture Phantom drop-ship
Activate VISR, follow Mickey down the stairs, and use your Magnum to headshot the Grunts at the bottom. Cross the tracks to the southwest and look for two Beam Rifles on the weapon rack on the opposite platform. Swap your Assault Rifle for one of the Beam Rifles and use it to pick off the Grunts, Brutes, and Jackals in front of the Phantom to the west. It takes three body shots or a couple of headshots to down a Brute.
Note that there are one or two Engineers among the enemies; only fire at them if you’re after the “Naughty Naughty” Xbox 360 achievement, otherwise leave them be. When the area before the Phantom is clear, grab the fresh Beam Rifle on the rack and join Mickey at the stairs. Use your Magnum to take out any remaining enemies and then approach the docked Phantom.
Objective: Escort Phantom in a Banshee
After Mickey flies off with the hijacked Phantom, head up the stairs at the southwest end of the area and hop in one of the Banshees at the top. Join your allies to the east and then start flying northwest. Target the two Shade turrets you come to. You can fire a Banshee bomb by pressing the B button. If you manage to kill the gunner but leave the turret intact, be aware that nearby enemies can take control of the unoccupied turret. With VISR equipped, you can differentiate between occupied turrets (red) and unoccupied turrets (cyan).
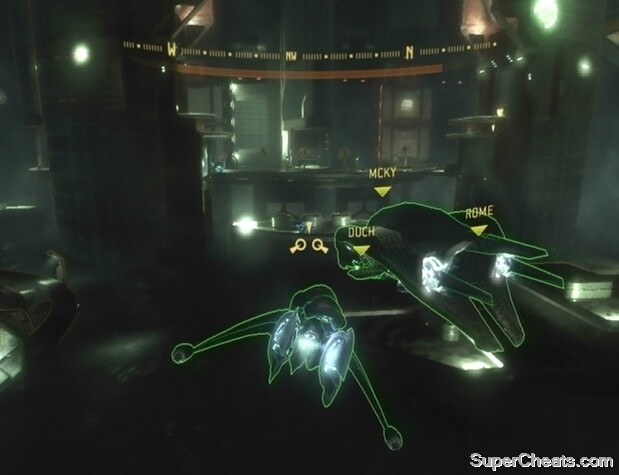
Escort the hijacked Phantom.
There are two more Shade turrets along the curved road ahead. Also, watch out for the Brute Shot-wielding Brutes and the Fuel Rod Gun-wielding Grunts on the walkways to the east and west.
Shoot down the two Banshees that come out of the tunnel and then fly through. Fire a bomb at the sniper tower at the start of the tunnel and then fly around to the gate at the other side. There is an Engineer among the Brutes and Grunts below so again, if you’re after the Good Samaritan achievement, avoid firing at it. Through the gate, fire a bomb at the highlighted structure on top of one of the buildings and then take to the Banshees that are flying around.
Objective: Open all blocking doors
You’ll soon be pointed to an override switch for the large security door at the northwest end of the area. Fly down to the platform, hop out of the Banshee, and use the RB button to activate the switch. Immediately return to your Banshee and fallback, as you’ll be greeted by a barrage of gunfire as soon as that door is opened.
Use bombs to clear away the enemies in the opening area before flying in. Inside, turn left and fire a bomb or two at the Phantom in the distance to destroy it. There’s a fresh Banshee parked by the door, so hop out of yours if it’s damaged and get in. Fly around to the door at the other end of the tunnel and use a bomb to kill the Ghost that comes through as it opens. Once through the door, immediately turn right to spot an AA Wraith. Hit it with a few bombs to destroy it.
Use Banshee bombs to destroy AA Wraiths.
Fly further into the area and target the highlighted structures. There’s another AA Wraith on the bridge, so fly to the side to dodge its fire and hit it with bombs until it explodes. When the area is clear, park your Banshee by the security door at the west end of the bridge. The override switch by the security door will only open the smaller doors along its base, so you’ll have to head through on foot.
If you’ve been following this walkthrough, you will still have that Beam Rifle from the start of the level. If not, there are two Beam Rifles on the weapon rack at the northwest end of the first set of steps. You can also find two Carbines on the weapon rack across from it. Use the Beam Rifle to kill the Brutes, Grunts, and Jackals at the far end of the area. Keep the mounted Plasma Turret clear; with any luck the Brutes will one by one take control of it, allowing you to pick them off with easy headshots.
There is a couple Brute Stalkers among them, but they will be outlined in orange if you have VISR active. Grab a fresh Beam Rifle if yours runs out of energy and keep plugging away at the enemies. A Brute Chieftain wielding a Gravity Hammer will charge you once you’ve killed his allies. Continuously hit him with shots from your Beam Rifle as he approaches. If you run out of energy, start throwing grenades his way. With any luck the chieftain will be dead before he can reach you. If not, just move aside to dodge his melee attacks and continue firing at him until he falls.
Use VISR to detect Brute Stalkers.
Once the chieftain has been dealt with, proceed up the steps. At the top of the stairs you can find a Fuel Rod Gun on the weapon rack at the northwest end. You might as well swap your Beam Rifle for it. Continue to the curved room further up and activate the switch there to open the security door. Return to your parked Banshee and hop in.
Objective: Evade or destroy the Scarab
A Scarab lies between you and the exit. You can make a break for the override switch and run past it, or you can destroy it. Destroying things is always fun, but doing so in this case is a bit of a risk.
If you choose to evade it, press up on the D-pad to add an onscreen marker pointing to the override switch, and then just fly to it while dodging the Scarabs cannons and make a break for it.
Destroying the Scarab is deceptively simple. Start by flying southwest when you first enter the area to avoid taking fire from the turrets surrounding your target. Be ready to dodge the Scarab’s projectiles as you approach. Press the X button and push the Right Stick to the left or right to perform an evasive manoeuvre.
Fly your Banshee right to the deck of the Scarab and hop out. Toss a Frag Grenade down the ramp and use your Fuel Rod Gun to kill the Brute and Grunts below. Then, make your way to the power core at the back of the Scarab and hit it with your Fuel Rod Gun a couple of times. When the light on the core is flashing red, hop out of the bay door and move as far as you can from the Scarab to avoid getting caught in the ensuing explosion.
Destroying the Scarab.
Whatever you decide to do, once you’re through the door, hop in one of the parked Banshees and shoot a bomb at the first structure in line at the other end of the area. Destroying it will set of a chain reaction, ending the level.
Mombasa Streets
Character: The Rookie
Objective: Locate UNDERGROUND ENTRANCE to search for Captain Dare
Start by following the arrow on your compass to the Beacon. When you reach the Beacon zone, press up on the D-Pad to call up a marker onscreen pointing to the Underground Entrance. Approach the door the marker is pointing to and hold the RB button to start the level.
Data Hive
Character: The Rookie
Achievements: Data Hive, I Like Fire (kill 10 enemies with Flamethrower).
Objective: Find Dare on sublevel 9
Hop down to the area below. Activate VISR and look around. Pick up the Plasma Pistol next to the dead Grunt if you don’t already have one, as well as the Shotgun and ammo by the dead officers. Once you’re suited up, continue through the unlocked door at the northeast end of the area.
Grab the Shotgun by the dead officer before continuing on.
Make your way to the very end of the corridor, killing any Grunts you come across along the way, and proceed through one of the unlocked doors to enter the next corridor. You’ll encounter three Jackal infantry at the start of the corridor. There is plenty of cover leading up to the Jackals, so move up from cover to cover to get close. Use your Plasma Pistol to dissolve a Jackal’s shield and then plug him with the Shotgun. There’s a pack of Grunts toward the end of the corridor; take them out and then continue through the unlocked door at the southwest end.
In the first circular room, exit through the passage to the southeast. A Brute, a couple of Grunts, and a Jackal will confront you as you enter the second circular room. Be ready with a charged Plasma Pistol, hit the Brute to remove his armour and then stick him with a Plasma or Spike Grenade.
Grab the health pack by the start of the southwest corridor if need be. There is a Brute Captain armed with a Brute Shot and some Grunts in the room at the end of the corridor. Hit the Brute with a charged Plasma Pistol shot, stick him with a Plasma or Spike Grenade, and then take to the Grunts.
Continue through the northeast corridor to meet up with a friendly NMPD officer. Approach one of the computers on either side of the data-stick and hold the RB button to raise it. Some Drones will then fly up; blast them with your Shotgun and drop down to sublevel 8.
Interact with one of the monitors to raise the data-stack and then drop down to sublevel 8.
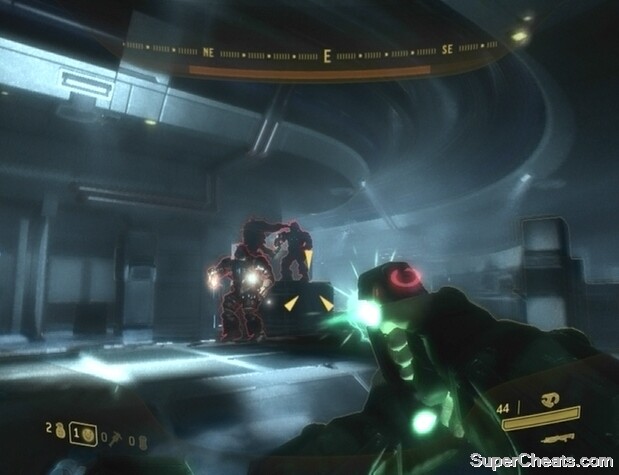
In sublevel 8 you can restore your health using the health pack along the north wall if necessary. Swap your Plasma Pistol for the full one by the dead Drone next to the southeast door and look around for some Shotgun ammo to the left. Start down the southeast corridor and blast the two Drones up ahead. There are three Brute Stalkers up ahead, so have VISR active to detect them (outlined in orange). Use your Plasma Pistol to remove their armour and then stick them with a grenade or blast them with your Shotgun.
Fight your way to the end of the corridor and exit through the door there. Use your Shotgun to kill the Drones as they fly into the room through the southwest corridor. With the Drones dead, swap your Plasma Pistol for one of theirs and grab the health pack by the southwest corridor if you’re wounded
There are some Jackals and perhaps a Brute in the circular room at the end of the southwest corridor. Use your Plasma Pistol to dissolve each Jackal’s shield and then blast them with your Shotgun. Hit the Brute with a charged Plasma Pistol shot and then stick him with a grenade or throw a Frag Grenade at his feet while he’s stunned.
Once in the next room, start down the southeast corridor to spot another group of Covenant. This group is composed of Grunts, Jackals, and one or two Brutes. It’s quite easy to stick enemies while they’re in the middle of a narrow corridor such as the ones that connect each circular room, so try to use your stock of grenades to kill the Brutes while they target your ally. Be sure to collect any grenades dropped by enemies after each encounter.
Stick stunned Brutes with a Plasma Grenade or Spike Grenade after a charged Plasma Pistol shot.
Three more Brutes—two minors and a Brute Captain—will come through the southeast corridor when you reach the next circular room. Take them out with a couple of well-thrown grenades or your Plasma Pistol and Shotgun and then exit the next room by the southeast corridor. Dispatch of the next batch of enemies you encounter in the same fashion. When the room is clear, look for a health pack along the south side of the room. The Grunts will most likely have dropped some Plasma Grenades and at least one Plasma Pistol, so collect those before starting down the southwest corridor to encounter—you guessed it—even more Covenant.
With the last batch of enemies dead, approach one of the monitors on either side of the data-stack and hold the RB button to raise it. Then, equip your Shotgun and drop down to sublevel 9. A group of Drones will fly through the southeast corridor shortly after you enter sublevel 9. Blast them with your Shotgun and then swap your Plasma Pistol for a fresh one dropped by one of the Drones. When the room is clear, continue through the southeast door.
Making it through this next stretch of corridor is a bit of a hassle because you’re pitted against so many Brutes. If you have a decent stock of grenades and a Plasma Pistol you should be fine. Start by using your Plasma Pistol to remove the armour of the Brute surrounded by Grunts at the start, and while he is stunned stick him with a grenade or throw a Frag at his feet to kill him. Use your Shotgun to blast the scurrying Grunts and collect any Plasma Grenades they drop. There’s a health pack you can grab on the platform across from the door you used to enter if necessary.
Fight your way through the Brute-packed corridor.
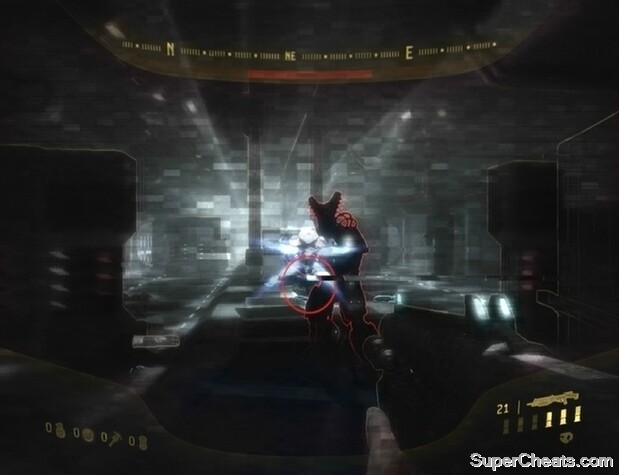
Continue down the corridor and you will soon encounter a group of Brutes. There is plenty of cover along this corridor, so be sure to use it to your advantage. Move from cover to cover to get in range of one of the Brutes and then hit him with a charged Plasma Pistol shot to remove his armour. While he is stunned, stick him with a grenade or throw a Frag Grenade at his feet to kill him. If you run out of grenades, you can instead quickly run in with your Shotgun and finish the Brute off after removing his armour. As you fight your way down the corridor, keep an eye out for Spike Grenades dropped by Brutes.
Most troublesome of all is the Brute War Chieftain at the end of the corridor. He’s armed with a detached Plasma Turret and requires quite a bit of gunfire to take down. A charged Plasma Pistol shot will not remove his armour but it will stun him momentarily, allowing you to move in with your Shotgun for a couple of hits or to lob a grenade at his feet. Definitely use the cover to your advantage and don’t be afraid to fall back toward the start of the area to recover your Stamina.
If lesser Brutes remain after the War Chieftain’s death, pick up his Plasma Turret and use it to quickly kill them off. Before moving on there is a Flamethrower nearby that will definitely come in handy, and is also the key to unlocking the “I Like Fire” Xbox 360 achievement. Follow the paragraph below to locate the Flamethrower.
The Brute War Chieftain is armed with a Plasma Turret.
Achievement Tip -- I Like Fire: After killing the last Brute in the corridor, continue northeast. You’ll soon come to a decline but ignore it and continue heading northeast to the frost-covered dead-end. Look for the Flamethrower by the officer’s corpse behind the see-through cover in the eastern corner.
Unlocking the I Like Fire achievement.
Achievement Tip -- Audiophile: If you collected all 29 Audio Logs in New Mombasa, the NMPD officer will have followed you down to sublevel 9. Normally he remains on sublevel 8 and dies. To find the last Audio Log you must have kept the officer alive through the Brute corridor. When the last Brute falls, follow the officer to a locked security door. When he heads through, follow him in, activate VISR and look for the device in the corner of the room. Activate it to unlock the Audiophile achievement. The NMPD officer will then turn hostile; he’s armed with a Shotgun, so kill him quickly.
Audio Log 30/30 (See Audio Log Locations Page for more)
When you have the Flamethrower (even if you’re not after the achievement, bringing it along would definitely be a good idea), continue down the southeast decline. You won’t encounter anymore enemies in this corridor, so just continue on into the next area. The next corridor is empty as well, so proceed through to the other end. This next stretch contains more than 10 enemies, allowing you to unlock the Flamethrower achievement if you so choose. Be careful, however, as such a large amount of enemies means an even larger amount of gunfire headed your way.
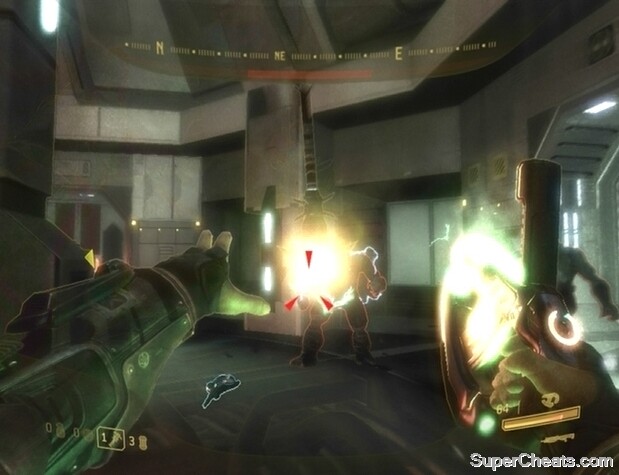
Start by ducking behind the cover to your left. The Flamethrower has awesome range, so send a burst of fire toward any enemies you can spot from behind cover. While using the Flamethrower there is no need to keep RT held down the entire time, and doing so is sure overheat the weapon. Just tap RT with enemy is in your sights and provided that enemy is within range, he should soon be set aflame. Start by targeting the Jackals and Brute before taking to the Drones. The Jackals will most likely be at the front of the central platform at the start, allowing you to set them aflame by quickly ducking out of cover and sending a burst of fire their way. Once an enemy is on fire he is pretty much done for.
When the Brutes and Jackals have been taken care of, move out and target the Drones. With full Stamina you should be able to clear the room fairly quickly while sustaining minimal damage. When you have the achievement, use the Flamethrower to finish off any remaining enemies and approach the door at the southwest end of the room.
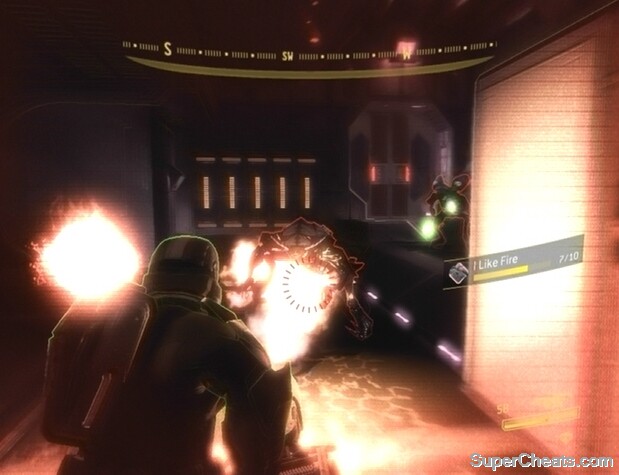
Get 10 kills with the Flamethrower to unlock the “I Like Fire” Xbox 360 achievement.
When the door opens, proceed through and move to the end of the corridor. Hold RB to knock on the door there to trigger a cutscene and complete the objective.
Objective: Fight through hive to data-center
Follow Captain Dare back through the corridor and you will soon encounter a Brute and a couple of Grunts. The Flamethrower can make short work of them, but move from cover to cover to get close. There is another Brute and some more Grunts further up. Help Captain Dare eliminate them and then continue following her. Use the Flamethrower to eliminate the Brute, Jackals, and Drones you encounter. Captain Dare will rush past most of the enemies, so feel free to follow suit.
Drop down the hole you come to and grab the health pack by the door. There are more Brutes, Jackals and Grunts here. Your Flamethrower should still have plenty of juice if you’ve been using it sparingly. Just be sure to move up from cover to cover to get close to your enemies rather than making a beeline for them.
Follow Dare into the next area and you’ll soon reach an elevator. Approach the panel and hold the RB button to activate the elevator. Continue following Dare onto the bridge. When you come to the swarm of Drones, use what’s left of your Flamethrower to scorch them. If your Flamethrower runs out, drop it and switch to your Shotgun. There are a lot of Drones so you’ll be taking a lot of fire; be sure to duck behind the weapon racks or any other piece of cover along the bridge to recover Stamina.
A Shotgun will make short work of Drones.
As you follow Dare to the other end of the bridge you’ll encounter more swarms of Drones, so keep your Shotgun loaded at all times. Fight your way to the other end of the bridge to reach sublevel 10. Grab the health pack next to the door if need be before heading in.
Objective: Rescue Superintendent
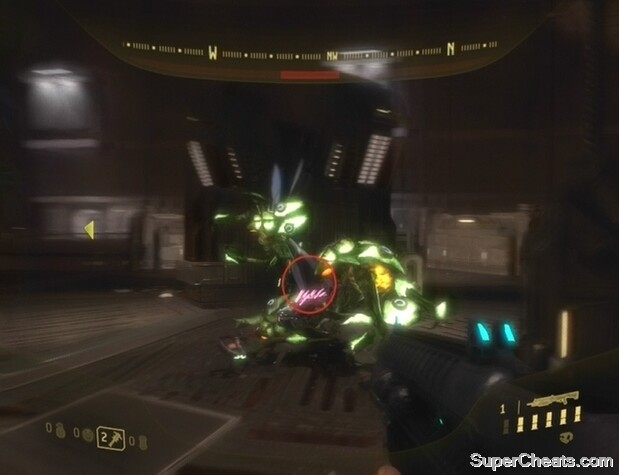
Continue following Dare down the corridor and then down the hole you come to. Outside, you’ll find two Brutes and a Brute Chieftain armed with a Gravity Hammer at the other end of the area. The Brutes are busy trying to break through the door; if you have a supply of grenades, stick the two Brutes shooting at the door and then immediately fallback to avoid the Brute Chieftain. The Plasma Rifles the Brutes were using can be used to quickly remove the Brute Chieftain’s armour; grab one while the Brute is preoccupied with Dare and continuously fire at him until his shield is lowered. Then, switch to your Shotgun and finish him off when the opportunity arises.
Killing the Brutes and Brute Chieftain to rescue the Superintendent.
Pick up the Gravity Hammer dropped by the Brute Chieftain when he falls, as it will surely come in handy. Continue through the door once you’re granted access and proceed to the door at the end. Hold the RB button to access the data-center.
Objective: Escort Engineer to safety
For this part you’ll have to stay close to the Engineer, as it can be killed if it sustains too much damage. With the Gravity Hammer in hand you should be able to clear away most of the enemies you encounter without much effort. Move from cover to cover to get close to your enemies, however, rather than just making a beeline for them.
There are some Jump Pack Brutes on the bridge, so kill each one as you encounter them. You’ll also run into a Brute Captain, some Grunts, and some Jackals. Use the cover along the bridge to avoid taking fire or to recover when your Stamina is low. When you reach Buck at the other end of the bridge, proceed through the door and drop down the hole to reach sublevel 12.
There are idle Drones hanging from the ceiling at the start of this corridor, so activate VISR and be ready for them with your Shotgun. If one of your weapons is out of ammo or low on ammo you can trade with Buck for his Assault Rifle. If you have a completely empty weapon, swap it for one of the weapons dropped by the Drones and trade it to Buck.
Defend the Engineer!
You’ll soon come to a locked door. Stand by as it is opened by the Engineer. There are more Drones on the ceiling through the door. Fight your way to the elevator and step on to complete the mission.
Character: The Rookie
Achievements: Coastal Highway
Objective: Find elevator to highway
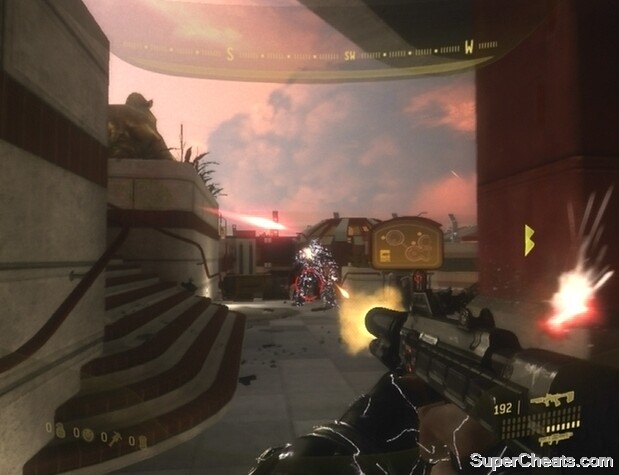
Follow your allies into the streets and start heading east. Beyond the checkpoint is a whole mess of enemies, including a Grunt on each of the mounted Plasma Turrets on top of the prominent purple tower. Switch to your Magnum, click the Right Stick to zoom and pick off the Grunt you can see before moving further into the area.
Clear away the Brutes, Grunts, and Jackals along the east side of the plaza and then use the gravity lift to reach the tower platform. Kill the two remaining gunners in the tower, detach one of the Plasma Cannons and drop back down to street level. Use the Plasma Turret to mow down the enemies in the area, ducking behind cover to restore your Stamina as necessary. There are three health packs on the ground along the east end of the area, so seek one out if you’re wounded.
Detach one of the Plasma Turrets surrounding the tower and use it to mow down the enemies in the plaza.
When the plaza is clear of enemies, continue down the northern road. Enter the building through the door you come to. After the Engineer has powered the elevator, approach the elevator doors and hold the RB button to move on to the next area.
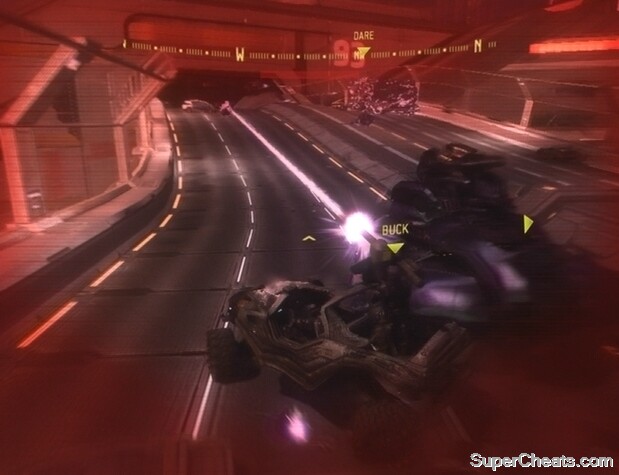
Objective: Escort and protect Dare’s vehicle
After the cutscene, hop in the driver’s seat of the Warthog and start down the highway. Down the first stretch of highway you’ll encounter a group of Grunts. One of them is armed with a Fuel Rod Gun, so don’t sit in one spot. If you spot the Grunt with the Fuel Rod Gun try to splatter him, otherwise circle around and dodge his fire while Buck takes him out. Wait by the security door at the end of the first stretch until the Engineer opens it, then proceed through.
Between each set of security doors is an Optican kiosk which you can use to restore lost health. Hop out of the Warthog and grab one of the health packs if need be before continuing on.
At the start of the second stretch of highway is a group of Jackals. They aren’t of much concern, so just speed past them. You’ll encounter more Grunts as you drive down, and eventually a Brute Captain armed with a Brute Shot. Don’t try to splatter him (he’s the one outfitted in golden armour) as driving straight for him would be a bad idea considering the weapon he’s wielding. Just steer clear and allow for Buck to kill him with the turret. There are some lower-ranked Brutes on the same platform, though you can just drive past them.
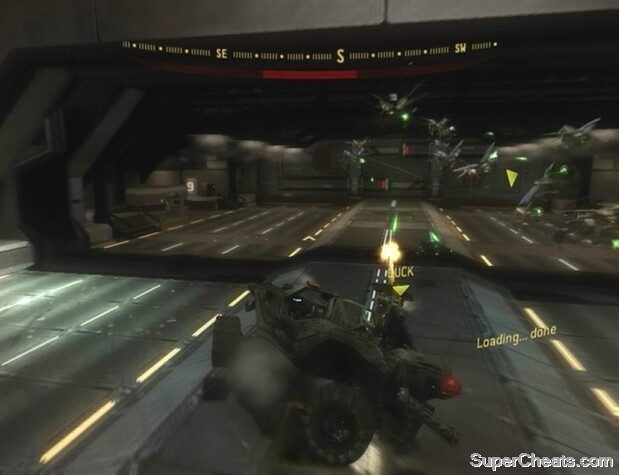
Hop in the driver’s seat and start down the highway!
In the purple tower at the start of the third stretch of highway is a Grunt armed with a Fuel Rod Gun. If Buck manages to take him out, great, otherwise just speed past. You’ll encounter many more Fuel Rod Gun-wielding Grunts, but just drive on while making an effort to dodge their fire. A swarm of Drones will be there to greet you when the security door opens. Park the Warthog in the middle and use your Silenced SMG or Magnum to shoot down the Drones while Buck fires from the turret.
You face a lot more Grunts and two Brute Captains along this next stretch of highway. Just speed past the Grunts. When you spot a Brute Captain near the end, try to splatter him if he’s preoccupied with Dare’s vehicle. If his attention is on you, steer clear because he’s armed with a Brute Shot. Allow Buck to kill the second Brute Captain before moving on.
This next stretch is occupied by Ghosts. Take it slow here, as concentrated fire from multiple Ghosts will quickly spell the end for you. Allow Buck to take out the drivers as you approach each Ghost. If you’re taking heavy fire, speed past them but swing back around to give Buck another shot at the drivers.
Between the two security doors is a parked Gauss Turret Warthog. Hop out of your current vehicle and take the driver’s seat of the new one before continuing on. Grab a health pack from the Optican Kiosk if you’re missing any health.
Trade your vehicle for the Gauss Turret Warthog when you come to it.
With the Gauss Turret Buck can easily take out the Ghosts along this stretch of highway, as well as the Banshees flying overhead. When you spot a Ghost, slow down and allow Buck to kill the driver or blow up the vehicle before pushing forward.
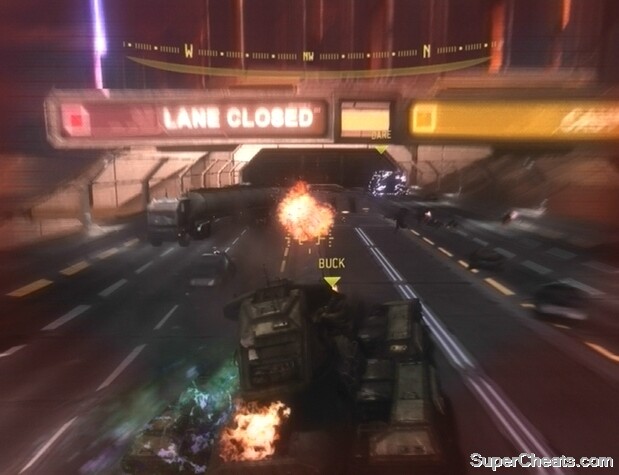
Continue through to the next set of security doors. Down this next stretch of highway are several Ghosts and some Banshees flying overhead. By far the biggest threat is the Wraith about halfway down. Take it slow here; start by driving behind Dare’s vehicle, in the same lane. The shielded vehicle can sustain a seemingly unlimited amount of punishment so there’s no need to worry about its condition, at least not at this point. Allow Buck to shoot down the Banshees and destroy any Ghosts as you come to them. Don’t try to keep up with Dare’s vehicle and instead go at your own pace. Buck should automatically prioritize taking down the Wraith, which should be focused on Dare’s vehicle if you let her go first. If Buck is firing the Gauss Turret at the Wraith while it’s preoccupied with Dare’s vehicle and there aren’t any enemies firing at you, stop moving and wait for him to take out the driver and gunner before continuing on.
Through the next set of security doors is a Scorpion tank. Hop out of the Warthog and get in the driver’s seat. The tank is a great deal slower than the Warthog but the added firepower is a real benefit. There are a couple of Shade turrets, an AA Wraith and a bunch of Banshees down this next stretch. Use the Scorpion’s turret to blast the Shades and the Wraith when you come to it. Also shoot the Banshees out of the sky near the end.
The next stretch is unoccupied, but a string of Phantoms will fire at you as they fly by. Make your way to the security doors at the other end and drive through. Here you’ll encounter a Shade turret and plenty of Ghosts. Use the Scorpion’s turret to blast the Ghosts as you encounter them. Don’t let one of the Ghosts make it by you, as they can deal a large amount of damage to the Scorpion by driving behind you and firing continuously at the back of the vehicle.
The Scorpion tank will make the rest of the trip a cinch.
Brutes occupy the next stretch of highway. There is a Brute War Chieftain armed with a Fuel Rod Gun among them, as well as at least one Brute Captain with a Brute Shot. Quickly blast each Brute you see as you drive on to the next set of security doors. Once through, destroy each purple tower you see and continue to the next set of doors. The Scarab will damage Dare’s vehicle, but this is unavoidable, so just continue on.
Drive down the off-ramp and hop out of the tank when you reach the bottom. Help Buck kill the Grunts outside of the building at the north end of the area.
Objective: Defend Engineer until friendly Phantom arrives
By the door inside the building is a rack of Silenced SMGs; grab one. There is also a Rocket Launcher on the rack in the eastern corner, and a Shotgun on the rack in the north-western corner. If ever during this fight you’re low on health there are several health packs by the benches closest to the entrance. If you head up the stairs outside you can find a Sniper Rifle and some Frag Grenades by a downed marine. There are more health packs up there, too.
Defend the Engineer!
The first wave consists of Grunts and many Brutes. If you grabbed the Sniper Rifle above, it would still be best to join your allies below. Use your Sniper Rifle to pick off the Brutes, leaving the Grunts to your allies. Pick up any dropped grenades and the Fuel Rod Gun once the Brute wielding it has been killed.
Next up are Jackals—a lot of them. There are many snipers in the mix, which can be distinguished from infantry by the plasma shields the infantry carry. The Beam Rifles carried by some snipers can be effective, so pick one up if you need a quick weapon. Stand up the steps and take cover behind the railing while the Jackals appear. When they reach the front of the building, use your Fuel Rod Gun to make short work of them. One or two of the snipers will also take position along the walls at the far west end of the plaza, so use a Sniper Rifle or Beam Rifle to take them out.
After the Jackal wave a couple of Hunters will appear. Three Plasma Grenades or three Spike Grenades (or any combination of three) will kill one Hunter. However it’s best to hold on to your grenades and instead try to hit the weak spot on its back. Wait until the Hunter is preoccupied with one of your allies before delivering two Sniper Rifle or Beam Rifle shots to the exposed membrane on its back.
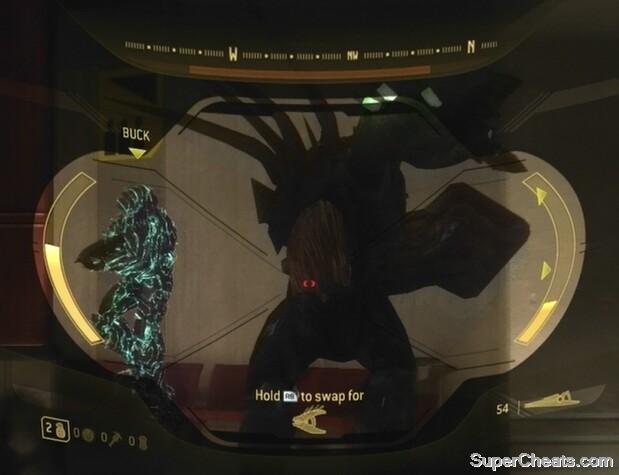
Hit the weak spot on the Hunter’s back while it’s preoccupied.
The third wave consists of many Brutes, including a number of Jump Pack Brutes who can easily get behind you. To avoid this, stay in front of the building before the pillars. There is a Brute Chieftain among the others; try to use a Beam Rifle to take him out from afar before he can do any damage. If you haven’t taken the Rocket Launcher inside the building do so now, as this is the final wave of enemies. With it you can easily take out the remaining Brutes
Make your way to the Phantom when the final Brute falls to finish the level and win the game! Be sure to sit through the credits to view the Epilogue!
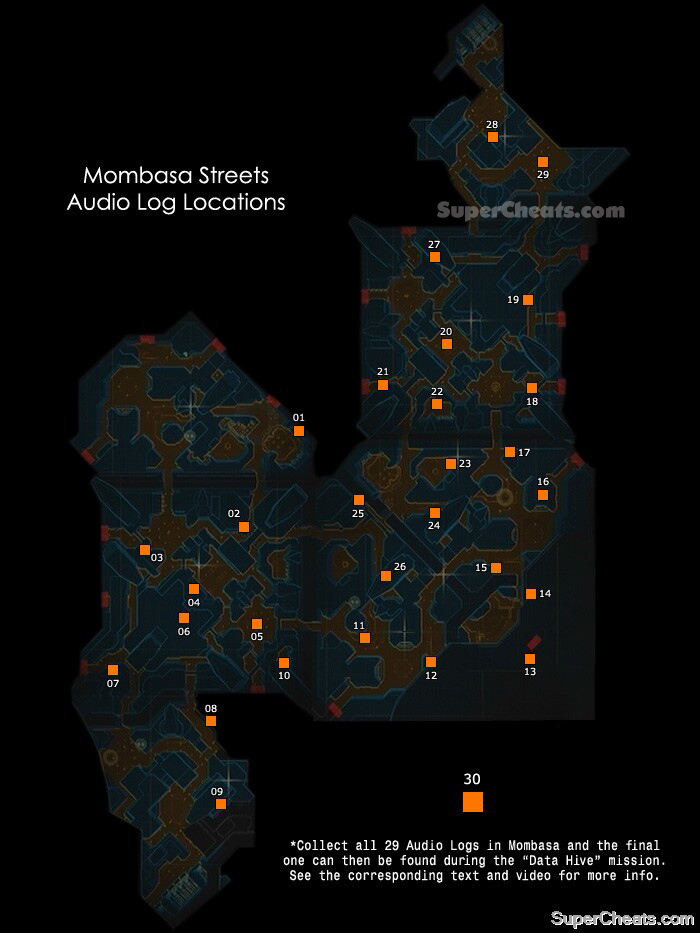
There are 30 Audio Logs to find. Each Audio Log will reveal the story of a girl named Sadie. Finding one, three, 15, and all 30 of the Audio Logs will each unlock an Xbox 360 achievement. Furthermore, as you collect more Audio Logs you’ll unlock Supply Caches around the city. Each Supply Cache unlocked will be marked on your map. Travel to a Supply Cache to find an assortment of weapons and possibly a Mongoose or two.
Terminals will be outlined in yellow while VISR is active, so leave it on while searching for the logs. Car alarms, flashing lights, and ringing payphones all tell of a nearby terminal.
Twenty-nine of the Audio Logs are in the Mombasa Streets hub and the last one is in the Data Hive level. To find the Audio Log hidden in Data Hive, one must first find all 29 Audio Logs in Mombasa Streets. This is best done solo after having completed the campaign once solo or co-op. Once the campaign has been completed, you can then select the “Mombasa Streets” level, where all areas of the city are unlocked from the get-go. Find all 29 Audio Logs in Mombasa Streets during solo play, then save and exit and load the Data Hive level to get the last one. This is best done on the Easy or Normal difficulty level since you will encounter plenty of Covenant while scouring the city.
Advising that the Audio Logs be collected during the solo campaign is not to say they can’t be collected during co-op play. They can, but there may be some complications with the collected Audio Logs saving upon exiting a co-op session. If you’re determined to find the Audio Logs in co-op, try to do so in one sitting, which shouldn’t be a problem with a few buddies.
It’s also possible to collect the Audio Logs your first time through the campaign. Some parts of the city will be locked before and after certain missions, however, so you’ll have to plan ahead and collect the Audio Logs in the areas accessible to you before and after each mission.
Match a marker on the map with the corresponding video for a clear demonstration of the location of that Audio Log.
Currently all of our videos for ODST Audio Log locations can be found on this page: http://www.supercheats.com/video/Halo 3: ODST/Alphabetical,Guide/halo3odst.htm
Audio Log 30/30: Collect all 29 Audio Logs in New Mombasa and then start (or replay) the Data Hive level. If you have fulfilled this prerequisite, the friendly NMPD officer you encounter during the level will follow you down to sublevel 9 (the second data-stack you come to). Normally he’ll remain on sublevel 8 and die.
To find the last Audio Log you must keep the officer alive through the Brute-packed corridor. When the last Brute falls, follow the officer to a locked security door. When he heads through, follow him in and look for the terminal along the northwest wall. Activate it to unlock the Audiophile achievement. The NMPD officer will then turn hostile; he’s armed with a Shotgun, so kill him quickly.
This section is coming soon...
Earn achievements to unlock characters and maps for the Firefight multiplayer mode.
Firefight Characters
Buck - Complete Tayari Plaza on Normal, Hard, or Legendary.
Dutch - Complete Uplift Reserve on Normal, Hard, or Legendary.
Mickey - Complete Kizingo Boulevard on Normal, Hard, or Legendary.
Romeo - Complete NMPD HQ on Normal, Hard, or Legendary.
Dare - Complete the campaign on the Legendary difficulty setting.
Firefight Maps
Alpha Site - Complete ONI Alpha Site on Normal, Hard, or Legendary.
Lost Platoon - Complete Lost Platoon on Normal, Hard, or Legendary.
Chasm Ten - Complete Data Hive on Normal, Hard, or Legendary.
Last Exit - Complete Coastal Highway on Normal, Hard, or Legendary.
Halo 3: ODST features a total of 47 different achievements. Each achievement unlocked contributes a certain amount of points to your overall Gamerscore. You can acquire a grand total of 1000 gamer points by playing Halo 3: ODST.
 1. Heal Up
 2. Tourist
 3. Dark Times
 4. Boom, Headshot
 5. Stunning!
 6. Ewww, Sticky
 7. My Clothes!
 8. Pink and Deadly
 9. Trading Down
 10. Headcase
 11. Tayari Plaza
 12. Uplift Reserve
 13. Kizingo Boulevard
 14. ONI Alpha Site
 15. NMPD HQ
 16. Kikowani Station
 17. Data Hive
 18. Coastal Highway
 19. Campaign Complete: Normal
 20. Campaign Complete: Heroic
 21. Campaign Complete: Legendary
 22. Junior Detective
 23. Gumshoe
 24. Super Sleuth
 25. Wraith Killer
 26. Both Tubes
 27. Laser Blaster
 28. Dome Inspector
 29. I Like Fire
 30. Good Samaritan
 31. Naughty Naughty
 32. Listener
 33. Tuned In
 34. All Ears
 35. Audiophile
 36. Be Like Marty
 37. Firefight: Crater
 38. Firefight: Lost Platoon
 39. Firefight: Rally Point
 40. Firefight: Security Zone
 41. Firefight: Alpha Site
 42. Firefight: Windward
 43. Firefight: Chasm Ten
 44. Firefight: Last Exit
 45. Vidmaster Challenge: Classic
 46. Vidmaster Challenge: Endure
 47. Vidmaster Challenge: Déjà Vu


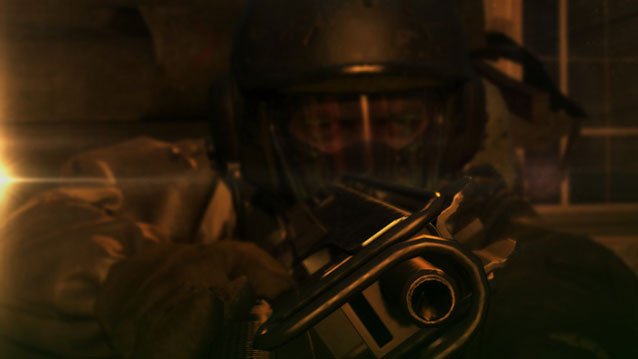
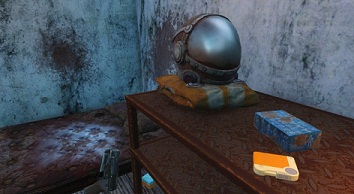 Fallout 4 Hazmat Radiation Protection Suit locations
 Trophy List: Plants vs Zombies Garden Warfare: Zomboss Down
 How to get Destiny Dead Ghosts locations from all Four Planets And the Tower
 10 Gift Ideas for Those Who Work From Home
 Bloodborne Guide: How To Summon Co-Op and PvP Hunters