

Grand Theft Auto: San Andreas is the third title in the GTA III trilogy. First released on the PlayStation 2 in October 2004, and later ported to the Xbox and Windows, San Andreas was a marked success across all platforms. Unlike Liberty City that players explored in GTA III, and the Vice City of the eponymous sequel, San Andreas is an entire state, comprised of three cities: Los Santos, which is based on Los Angeles; San Fierro, which is based on San Fransisco; and Las Venturas, which is based on Las Vegas. Aside from the three cities there is also the expansive backlands of San Andreas, making for a tremendously large mass of land to explore.
Set in the early 90s, you take on the role of Carl “CJ” Johnson. After a long stay in Liberty City, CJ returns to his home in Los Santos, San Andreas after learning of his mother’s murder. The streets of Los Santos are rampant with gang violence, corruption, and drug trafficking, and CJ’s friends and family are in turmoil. It’s up to CJ to investigate his mother’s murder, reunite the family, and take back the streets of Los Santos.
This guide contains strategies for each and every mission in the game. There are also maps showing the locations of the Tags in Los Santos, the Photo Ops in San Fierro, the Horseshoes in Las Venturas and the Oysters in the waters of San Andreas. You’ll also find a list of what is needed to attain 100% completion.
Note -- This walkthrough was written based on the PS2 version of San Andreas, but the strategies contained within still apply to the other versions of the game. In an effort to make this guide apply to all versions of the game, the controls are referred to by their function. Refer to the instruction manual that came with your copy of the game for the buttons that these labels refer to.
L1 Button - Center Camera/View Stats/Fire Weapon
L2 Button - Cycle/Weapon Left
R1 Button - Target
R2 Button - Cycle/Weapon Right
Left Analog Stick - Move Character
Right Analog Stick - Move Camera
L3 Button - Crouch
R3 Button - Look Behind
Triangle Button - Enter Vehicle/Activate Mini Game/Secondary Attack/Pick Up Object
Circle Button - Attack/Fire Weapon
X Button - Run (Hold)/Sprint (Tap)
Square Button - Jump/Climb/Block
D-pad UP - Gang Active Mode
D-pad RIGHT - Talk Positive Response
D-pad DOWN - Gang Passive Mode
D-pad LEFT - Talk Negative Response
Select Button - Switch Camera Mode
Start Button - Pause Menu
L1 Button - Car Weapon/Activate Nitro (Modded Vehicle)
L2 Button - Look Left
R1 Button - Hand Brake
R2 Button - Look Right
L2 Button R2 Button - Look Behind
Left Analog Stick - Car Steering/Camera
Right Analog Stick - Manual Camera/Change Cinematic Camera/Turret Control
L3 Button - Hover
R3 Button - Trigger Sub-Mission
Triangle Button - Exit Vehicle
Circle Button - Car Weapon/Activate Nitro (Modded Vehicle)
X Button - Accelerate
Square Button - Brake/Reverse
D-pad UP - Cycle Radio Stations
D-pad RIGHT - Trip Skip (When Prompted)
D-pad DOWN - Cycle Radio Stations
Select Button - Switch Camera Mode
Start Button - Pause Menu
L Button - Center Camera/View Stats/Fire Weapon
White Button - Cycle/Weapon Left
R Button - Target
Black button - Cycle/Weapon Right
Left Thumbstick - Move Character
Right Thumbstick - Move Camera
Left Thumbstick Button - Crouch
Right Thumbstick Button - Look Behind
Y Button - Enter Vehicle/Activate Mini Game/Secondary Attack/Pick Up Object
B Button - Attack/Fire Weapon
A Button - Run (Hold)/Sprint (Tap)
X Button - Jump/Climb/Block
D-pad UP - Gang Active Mode
D-pad RIGHT - Talk Positive Response
D-pad DOWN - Gang Passive Mode
D-pad LEFT - Talk Negative Response
Back Button - Switch Camera Mode
Start Button - Pause Menu
L1 Button - Car Weapon/Activate Nitro (Modded Vehicle)
White Button - Look Left
X Button - Hand Brake
Black Button - Look Right
White Button Black Button - Look Behind
Left Thumbstick - Car Steering/Camera
Right Thumbstick - Manual Camera/Change Cinematic Camera/Turret Control
Left Thumbstick Button - Hover
Right Thumbstick Button - Trigger Sub-Mission
Y Button - Exit Vehicle
A Button - Car Weapon/Activate Nitro (Modded Vehicle)
R Button - Accelerate
L Button - Brake/Reverse
D-pad UP - Cycle Radio Stations
D-pad RIGHT - Trip Skip (When Prompted)
D-pad DOWN - Cycle Radio Stations
Back Button - Switch Camera Mode
Start Button - Pause Menu
Fire Weapon - Number Pad 0/Left Control/Left Mouse Button
Next Weapon/Target - E/Enter/Mouse Wheel Down
Previous Weapon/Target - Q/Number Pad ./ Mouse Wheel Up
Aim Weapon - Del/Caps Lock/Right Mouse Button
Zoom In - X/Page Up/Mouse Wheel Up
Zoom Out - Z/ Page Down/Mouse Wheel Down
Move Forward - W/Up
Move Backward - S/Down
Move Left - A/Left
Move Right - D/Right
Enter Vehicle - F/Return
Walk - Left Alt
Sprint - Space
Crouch - C
Jump/Climb/Block - Left Shift/Right Control
Gang Active Mode - G
Talk Positive Response - Y
Gang Passive Mode - H
Talk Negative Response - N
Switch Camera Mode - V/Home
Look Behind - Number Pad 1/Middle Mouse Button
Fire - Right Control/Left Alt/Left Mouse Button
Secondary Fire - Left Control/Number Pad 0
Exit Vehicle - F/Return
Accelerate - W
Brake/Reverse - S
Move Left - A/Left
Move Right - D/Right
Steer Forward / Down - Up
Steer Back / Up - Down
Handbrake - Space/Right Control
Next Radio Station - Insert/4/Mouse Wheel Up
Previous Radio Station - Del/R/Mouse Wheel Down
User Track Skip - FS
Trip Skip (When Prompted) - Y
Sub-Mission - 2/Number Pad
Horn - Caps Lock/H
Switch Camera Mode - V/Home
Look Left - Q
Look Right - E
Look Behind - Q E/Middle Mouse Button
Mouse Look - Right Mouse Button
$250,000, full health and armor -
R1, R2, L1, X, Left, Down, Right, Up, Left, Down, Right, Up
Infinite Health (no damage from bullets, melee attacks, and fire) -
Down, X, Right, Left, Right, R1, Right, Down, Up, Triangle
Commit Suicide -
Right, L2, Down, R1, Left, Left, R1, L1, L2, L1
Hitman Rank and Perks in All Weapons -
Down, Square, X, Left, R1, R2, Left, Down, Down, L1, L1, L1
Infinite Ammo -
L1, R1, Square, R1, Left, R2, R1, Left, Square, Down, L1, L1
Infinite Lung Capacity -
Down, Left, L1, Down, Down, R2, Down, L2, Down
Jump Higher -
Up, Up, Triangle, Triangle, Up, Up, Left, Right, Square, R2, R2
Jump Higher on BMX -
Triangle, Square, Circle, Circle, Square, Circle, Circle, L1, L2, L2, R1, R2.
Lower Muscle Stat -
Triangle, Up, Up, Left, Right, Square, Circle, Right
Max Fat Stat -
Triangle, Up, Up, Left, Right, Square, Circle, Down
Video showing the max fat cheat
Max Muscle Stat -
Triangle, Up, Up, Left, Right, Square, Circle, Left
Max Respect Stat -
L1, R1, Triangle, Down, R2, X, L1, Up, L2, L2, L1, L1
Max Sex Appeal Stat -
Circle, Triangle, Triangle, Up, Circle, R1, L2, Up, Triangle, L1, L1, L1
Max Vehicle Stats -
Square, L2, X, R1, L2, L2, Left, R1, Right, L1, L1, L1
Never Hungry -
Square, L2, R1, Triangle, Up, Square, L2, Up, X
Weapons 1
(Brass Knuckles, Bat, 9mm, Shotgun, Micro MP5, AK-47, Rifle, Rocket Launcher, Molotovs, Spray Can) -
R1, R2, L1, R2, Left, Down, Right, Up, Left, Down, Right, Up
Weapons 2
(Combat Knife, Desert Eagle, Sawed-Off Shotgun, Tec-9, M4, Sniper Rifle, Flame Thrower, Grenades, Fire Extinguisher) -
R1, R2, L1, R2, Left, Down, Right, Up, Left, Down, Down, Left
Weapons 3
(Chainsaw, Silenced 9mm, Spaz Shotgun, MP5, M4, Sniper Rifle, Rocket Launcher, Satchel Charges) -
R1, R2, L1, R2, Left, Down, Right, Up, Left , Down, Down, Down
Spawn Bloodring Banger -
Down, R1, Circle, L2, L2, X, R1, L1, Left, Left
Spawn Caddy -
Circle, L1, Up, R1, L2, X, R1, L1, Circle, X
Spawn Dozer -
R2, L1, L1, Right, Right, Up, Up, X, L1, Left
Spawn Hotring Racer #1 -
R1, Circle, R2, Right, L1, L2, X, X, Square, R1
Spawn Hotring Racer #2 -
R2, L1, Circle, Right, L1, R1, Right, Up, Circle, R2
Spawn Hunter -
Circle, X, L1, Circle, Circle, L1, Circle, R1, R2, L2, L1, L1
Spawn Hydra -
Triangle, Triangle, Square, Circle, X, L1, L1, Down, Up
Spawn Jetpack -
Left, Right, L1, L2, R1, R2, Up, Down, Left, Right
Spawn Monster -
Right, Up, R1, R1, R1, Down, Triangle, Triangle, X, Circle, L1, L1
Spawn Parachute -
Left, Right, L1, L2, R1, R2, R2, Up, Down, Right, L1
Spawn Quadbike -
Left, Left, Down, Down, Up, Up, Square, Circle, Triangle, R1, R2
Spawn Rancher -
Up, Right, Right, L1, Right, Up, Square, L2
Spawn Rhino -
Circle, Circle, L1, Circle, Circle, Circle, L1, L2, R1, Triangle, Circle, Triangle
Spawn Romero -
Down, R2, Down, R1, L2, Left, R1, L1, Left, Right
Spawn Stretch -
R2, Up, L2, Left, Left, R1, L1, Circle, Right
Spawn Stuntplane -
Circle, Up, L1, L2, Down, R1, L1, L1, Left, Left, X, Triangle
Spawn Tanker -
R1, Up, Left, Right, R2, Up, Right, Square, Right, L2, L1, L1
Spawn Trashmaster -
Circle, R1, Circle, R1, Left, Left, R1, L1, Circle, Right
Spawn Vortex -
Triangle, Triangle, Square, Circle, X, L1, L2, Down, Down
Aggressive Drivers -
Right, R2, Up, Up, R2, Circle, Square, R2, L1, Right, Down, L1
Aggressive Traffic -
R2, Circle, R1, L2, Left R1, L1, R2, L2
All Black Cars -
Circle, L2, Up, R1, Left, X, R1, L1, Left, Circle
All Cars are Country Vehicles -
L1, L1, R1, R1, L2, L1, R2, Down, Left, Up
All Cars Equipped With Nitro -
Left, Triangle, R1, L1, Up, Square, Triangle, Down, Circle, L2, L1, L1
All Junk Cars -
L2, Right, L1, Up, X, L1, L2, R2, R1, L1, L1, L1
All Pink Cars -
Circle, L1, Down, L2, Left, X, R1, L1, Right, Circle
All Taxis Equipped With Nitro, Jump with L3 -
Up, X, Triangle, X, Triangle, X, Square, R2, Right
Cars on Water -
Right, R2, Circle, R1, L2, Square, R1, R2
Destroy All Cars Onscreen -
R2, L2, R1, L1, L2, R2, Square, Triangle, Circle, Triangle, L2, L1
Floating Car After Collision -
Square, R2, Down, Down, Left, Down, Left, Left, L2, X
Flying Boats -
R2, Circle, Up, L1, Right, R1, Right, Up, Square, Triangle
Flying Cars -
Square, Down, L2, Up, L1, Circle, Up, X, Left
Full Weapon Aiming in Vehicles -
Up, Up, Square, L2, Right, X, R1, Down, R2, Circle
Improve Car Suspension -
Square, Square, R2, Left, Up, Square, R2, X, X, X
Increase Car Speed -
Up, L1, R1, Up, Right, Up, X, L2, X, L1
Perfect Handling -
Triangle, R1, R1, Left, R1, L1, R2, L1
Invisible Vehicles -
Triangle, L1, Triangle, R2, Square, L1, L1
Spawn Faster Cars -
Right, R1, Up, L2, L2, Left, R1, L1, R1, R1
Traffic Lights Always Green -
Right, R1, Up, L2, L2, Left, R1, L1, R1, R1
Turn Vehicle Into Tank -
L1, L2, L2, Up, Down, Down, Up, R1, R2, R2
Lock Current Wanted Level -
Circle, Right, Circle, Right, Left, Square, Triangle, Up
Lower Wanted Level -
R1, R1, Circle, R2, Up, Down, Up, Down, Up, Down
Six-star Wanted Level -
Circle, Right, Circle, Right, Left, Square, X Down
Cloudy -
L2, Down, Down, Left, Square, Left, R2, Square, X, R1, L1, L1
Faster Clock -
Circle, Circle, L1, Square, L1, Square, Square, Square, L1, Triangle, Circle, Triangle
Faster Gameplay -
Triangle, Up, Right, Down, L2, L1, Square
Fog -
R2, X, L1, L1, L2, L2, L2, X
Freeze Time at 00:00 -
Square, L1, R1, Right,X, Up, L1, Left, Left
Morning -
R2, X, L1, L1, L2, L2, L2, Square
Night -
R2, X, L1, L1, L2, L2, L2, Triangle
Noon -
R2, X, L1, L1, L2, L2, L2, Down
Orange Sky -
Left, Left, L2, R1, Right, Square, Square, L1, L2, X
Overcast -
R2, X, L1, L1, L2, L2, L2, Square
Sandstorm -
Up, Down, L1, L1, L2, L2, L1, L2, R1, R2
Slower Gameplay -
Triangle, Up, Right, Down, Square, R2, R1
Storm -
R2, X, L1, L1, L2, L2, L2, Circle
All Elvis Pedestrians -
L1, Circle, Triangle, L1, L1, Square, L2, Up, Down, Left
Video showing the All Elvis Pedestrians cheat
CJ Beach Clothes, Pedestrians Bikinis, Change Traffic -
Up, Up, Down, Down, Square, Circle, L1, R1, Triangle, Down.
CJ Clown, Pedestrians Workers, Change Traffic -
Triangle, Triangle, L1, Square, Square, Circle, Square, Down, Circle
Pedestrians are Gang Members -
Left, Right, Right, Right, Left, X, Down, Up, Square, Right, Down
CJ Gimp Suit, Pedestrians Prostitutes -
Square, Right, Square, Square, L2, X, Triangle, X, Triangle
Katana-wielding Pedestrians and Black Traffic -
X, X, Down, R2, L2, Circle, R1, Circle, Square
No Pedestrians, and Sparse Traffic -
X, Down, Up, R2, Down, Triangle, L1, Triangle, Left
Only Gang Members on Streets -
L2, Up, R1, R1, Left, R1, R1, R2, Right, Down
Pedestrians Attack (cannot be disabled, do not save game) -
Down, Up, Up, Up, X, R2, R1, L2, L2
Pedestrians Attack with Weapons (cannot be disabled, do not save game) -
X, L1, Up, Square, Down, X, L2, Triangle, Down, R1, L1, L1
Pedestrians Carry Weapons -
R2, R1, X, Triangle, X, Triangle, Up, Down
Pedestrians Riot (cannot be disabled, do not save game) -
Down, Left, Up, Left, X, R2, R1, L2, L1
Prostitutes Pay CJ -
Right, L2, L2, Down, L2, Up, Up, L2, R2
Recruit Anyone (with 9mm) -
Down, Square, Up, R2, R2, Up, Right, Right, Up
Recruit Anyone (with Rockets) -
R2, R2, R2, X, L2, L1, R2, L1, Down, X
Adrenaline Mode -
X, X, Square, R1, L1, X, Down, Left, X
Chaos Mode -
L2, Right, L1, Triangle, Right, Right, R1, L1, Right, L1, L1, L1
Super Punch -
Up, Left, X, Triangle, R1, Circle, Circle, Circle, L2
Video showing the Super Punch cheat
$250,000, full health and armor -
R Trigger, Black, L Trigger, A, Left, Down, Right, Up, Left, Down, Right, Up
Infinite Health (no damage from bullets, melee attacks, and fire) -
Down, A, Right, Left, Right, R Trigger, Right, Down, Up, Y
Commit Suicide -
Down, A, Right, Left, Right, R Trigger, Right, Down, Up, Y
Hitman Rank and Perks in All Weapons -
Down, X, A, Left, R Trigger, Black, Left, Down, Down, L Trigger, L Trigger, L Trigger
Infinite Ammo -
L Trigger, R Trigger, X, R Trigger, Left, Black, R Trigger, Left, X, Down, L Trigger, L Trigger
Infinite Lung Capacity -
Down, Left, L Trigger, Down, Down, Black, Down, White, Down
Jump Higher -
Up, Up, Y, Y, Up, Up, Left, Right, X, Black, Black
Jump Higher on BMX -
Y, X, B, B, X, B, B, L Trigger, White, White, R Trigger, Black
Lower Muscle/Fat Stat -
Y, Up, Up, Left, Right, X, B, Right
Max Fat Stat -
R Trigger, R Trigger, B, Black, Up, Down, Up, Down, Up, Down
Max Muscle Stat -
Y, Up, Up, Left, Right, X, B, Left
Max Respect Stat -
L Trigger, R Trigger, Y, Down, Black, A, L Trigger, Up, White, White, L Trigger, L Trigger
Max Sex Appeal Stat -
B, Y, Y, Up, B, R Trigger, White, Up, Y, L Trigger, L Trigger, L Trigger
Max Vehicle Stats -
B, Y, Y, Up, B, R Trigger, White, Up, Y, L Trigger, L Trigger, L Trigger
Never Hungry -
X, White, R Trigger, Y, Up, X, White, Up, A
Weapons 1 (Brass Knuckles, Bat, 9mm, Shotgun, Micro MP5, AK-47, Rifle, Rocket Launcher, Molotovs, Spray Can) -
R Trigger, Black, L Trigger, Black, Left, Down, Right, Up, Left, Down, Right, Up
Entering the Weapons #1 cheat
Weapons 2 (Combat Knife, Desert Eagle, Sawed-Off Shotgun, Tec-9, M4, Sniper Rifle, Flame Thrower, Grenades, Fire Extinguisher) -
R Trigger, Black, L Trigger, Black, Left, Down, Right, Up, Left, Down, Down, Left
Weapons 3 (Chainsaw, Silenced 9mm, Spaz Shotgun, MP5, M4, Sniper Rifle, Rocket Launcher, Satchel Charges) - R Trigger, Black, L Trigger, Black, Left, Down, Right, Up, Left , Down, Down, Down
Spawn Bloodring Banger -
Down, R Trigger, B, White, White, A, R Trigger, L Trigger, Left, Left
Spawn Caddy -
Down, R Trigger, B, White, White, A, R Trigger, L Trigger, Left, Left
Spawn Dozer -
Black, L Trigger, L Trigger, Right, Right, Up, Up, A, L Trigger, Left
Spawn Hotring Racer #1 -
R Trigger, B, Black, Right, L Trigger, White, A, A, X, R Trigger
Spawn Hotring Racer #2 -
Black, L Trigger, B, Right, L Trigger, R Trigger, Right, Up, B, Black
Spawn Hunter -
Black, L Trigger, B, Right, L Trigger, R Trigger, Right, Up, B, Black
Spawn Hydra -
Y, Y, X, B, A, L Trigger, L Trigger, Down, Up
Spawn Jetpack -
Left, Right, L Trigger, White, R Trigger, Black, Up, Down, Left, Right
Spawn Monster -
Right, Up, R Trigger, R Trigger, R Trigger, Down, Y, Y, A, B, L Trigger, L Trigger
Spawn Parachute -
Left, Right, L Trigger, White, R Trigger, Black, Black, Up, Down, Right, L Trigger
Spawn Quadbike -
Left, Left, Down, Down, Up, Up, X, B, Y, R Trigger, Black
Spawn Rancher -
Up, Right, Right, L Trigger, Right, Up, X, White
Spawn Rhino -
B, B, L Trigger, B, B, B, L Trigger, White, R Trigger, Y, B, Y
Spawn Romero -
Down, Black, Down, R Trigger, White, Left, R Trigger, L Trigger, Left, Right
Spawn Stretch -
Black, Up, White, Left, Left, R Trigger, L Trigger, B, Right
Spawn Stuntplane -
B, Up, L Trigger, White, Down, R Trigger, L Trigger, L Trigger, Left, Left, A, Y
Spawn Tanker -
R Trigger, Up, Left, Right, Black, Up, Right, X, Right, White, L Trigger, L Trigger
Spawn Trashmaster -
B, R Trigger, B, R Trigger, Left, Left, R Trigger, L Trigger, B, Right
Spawn Vortex -
Y, Y, X, B, A, L Trigger, White, Down, Down
Aggressive Drivers -
Right, Black, Up, Up, Black, B, X, Black, L Trigger, Right, Down, L Trigger
Aggressive Traffic -
Black, B, R Trigger, White, Left, R Trigger, L Trigger, Black, White
All Black Cars -
B, White, Up, R Trigger, Left, A, R Trigger, L Trigger, Left, B
All Cars are Country Vehicles -
L Trigger, L Trigger, R Trigger, R Trigger White, L Trigger, Black, Down, Left, Up
All Cars Equipped With Nitro -
Left, Y, R Trigger, L Trigger, Up, X, Y, Down, B, White, L Trigger, L Trigger
All Junk Cars -
White, Right, L Trigger, Up, A, L Trigger, White, Black, R Trigger, L Trigger, L Trigger, L Trigger
All Pink Cars -
B, L Trigger, Down, White, Left, A, R Trigger, L Trigger, Right, B
All Taxis Equipped With Nitro, Jump with L3 -
Up, A, Y, A, Y, A, X, Black, Right
Cars on Water -
Right, Black, B, R Trigger, White, X, R Trigger, Black
Destroy All Cars Onscreen -
Black, White, R Trigger, L Trigger, White, Black, X, Y, B, Y, White, L Trigger
Floating Car After Collision -
X, Black, Down, Down, Left, Down, Left, Left, White, A
Flying Boats -
Black, B, Up, L Trigger, Right, R Trigger, Right, Up, X, Y
Flying Cars -
X, Down, White, Up, L Trigger, B, Up, A, Left
Full Weapon Aiming in Vehicles -
Up, Up, X, White, Right, A, R Trigger, Down, Black, B
Improve Car Suspension -
X, X, Black, Left, Up, X, Black, A, A, A
Increase Car Speed -
Up, L Trigger, R Trigger, Up, Right, Up, A, White, A, L Trigger
Perfect Handling -
Y, R Trigger, R Trigger, Left, R Trigger, L Trigger, Black, L Trigger
Invisible Vehicles -
Y, L Trigger, Y, Black, X, L Trigger, L Trigger
Spawn Faster Cars -
Right, R Trigger, Up, White, White, Left, R Trigger, L Trigger, R Trigger, R Trigger
Traffic Lights Always Green -
Right, R Trigger, Up, White, White, Left, R Trigger, L Trigger, R Trigger, R Trigger
Turn Vehicle into Tank -
L Trigger, White, White, Up, Down, Down, Up, R Trigger, Black, Black
Lock Current Wanted Level -
B, Right, B, Right, Left, X, Y, Up
Lower Wanted Level -
R Trigger, R Trigger, B, Black, Up, Down, Up, Down, Up, Down
Six-star Wanted Level -
B, Right, B, Right, Left, X, A, Down
Cloudy -
White, Down, Down, Left, X, Left, Black, X, A, R Trigger, L Trigger, L Trigger
Faster Clock -
B, B, L Trigger, X, L Trigger, X, X, X, L Trigger, Y, B, Y
Faster Gameplay -
Y, Up, Right, Down, White, L Trigger, X
Fog -
Black, A, L Trigger, L Trigger, White, White, White, A
Freeze Time at Midnight -
X, L Trigger, R Trigger, Right, A, Up, L Trigger, Left, Left
Morning -
Black, A, L Trigger, L Trigger, White, White, White, X
Night -
Black, A, L Trigger, L Trigger, White, White, White, Y
Noon -
Black, A, L Trigger, L Trigger, White, White, White, Down
Orange Sky -
Left, Left, White, R Trigger, Right, X, X, L Trigger, White, A
Overcast -
Black, A, L Trigger, L Trigger, White, White, White, X
Sandstorm -
Up, Down, L Trigger, L Trigger, White, White, L Trigger, White, R Trigger, Black
Slower Gameplay -
Y, Up, Right, Down, X, Black, R Trigger
Storm -
Black, A, L Trigger, L Trigger, White, White, White, B
All Elvis Pedestrians -
L Trigger, B, Y, L Trigger, L Trigger, X, White, Up, Down, Left
Video showing the All Elvis Pedestrians cheat
CJ Beach Clothes, Pedestrians Bikinis, Change Traffic -
Up, Up, Down, Down, X, B, L Trigger, R Trigger, Y, Down
CJ Clown, Pedestrians Workers, Change Traffic -
Y, Y, L Trigger, X, X, B, X, Down, B
Pedestrians are Gang Members -
Left, Right, Right, Right, Left, A, Down, Up, X, Right, Down
CJ Gimp Suit, Pedestrians Prostitutes -
X, Right, X, X, White, A, Y, A, Y
Katana-wielding Pedestrians and Black Traffic -
A, A, Down, Black, White, B. R Trigger, B, X
No Pedestrians, and Sparse Traffic -
A, Down, Up, Black, Down, Y, L Trigger, Y, Left
Only Gang Members on Streets -
White, Up, R Trigger, R Trigger, Left, R Trigger, R Trigger, Black, Right, Down
Pedestrians Attack (cannot be disabled, do not save game) -
Down, Up, Up, Up, A, Black, R Trigger, White, White
Pedestrians Attack with Weapons (cannot be disabled, do not save game) -
A, L Trigger, Up, X, Down, A, White, Y, Down, R Trigger, L Trigger, L Trigger
Pedestrians Carry Weapons -
Black, R Trigger, A, Y, A, Y, Up, Down
Pedestrians Riot (cannot be disabled, do not save game) -
Down, Left, Up, Left, A, Black, R Trigger, White, L Trigger
Prostitutes Pay CJ -
Right, White, White, Down, White, Up, Up, White, Black
Recruit Anyone (with 9mm) -
Down, X, Up, Black, Black, Up, Right, Right, Up
Recruit Anyone (with Rockets) -
Black, Black, Black, A, White, L Trigger, Black, L Trigger, Down, A
Adrenaline Mode -
A, A, X, R Trigger, L Trigger, A, Down, Left, A
Chaos Mode -
White, Right, L Trigger, Y, Right, Right, R Trigger, L Trigger, Right, L Trigger, L Trigger, L Trigger
Super Punch -
Up, Left, A, Y, R Trigger, B, B, B, White
Video showing the Super Punch cheat
$250,000, full health and armor - HESOYAM
Infinite Health (no damage from bullets, melee attacks, and fire) - BAGUVIX
Commit Suicide - GOODBYECRUELWORLD
Hitman Rank and Perks in All Weapons - PROFESSIONALKILLER
Infinite Ammo - FULLCLIP
Infinite Lung Capacity - CVWKXAM
Jump Higher - KANGAROO
Jump Higher on BMX - CJPHONEHOME
Lower Muscle/Fat Stat - KVGYZQK
Max Fat Stat - BTCDBCB
Max Muscle Stat - BUFFMEUP
Max Respect Stat - WORSHIPME
Max Sex Appeal Stat - HELLOLADIES
Max Stamina - VKYPQCF
Max Vehicle Stats - NATURALTALENT
Weapons 1
(Brass Knuckles, Bat, 9mm, Shotgun, Micro MP5, AK-47, Rifle, Rocket Launcher, Molotovs, Spray Can) -
LXGIWYL
Weapons 2
(Combat Knife, Desert Eagle, Sawed-Off Shotgun, Tec-9, M4, Sniper Rifle, Flame Thrower, Grenades, Fire Extinguisher) -
PROFESSIONALSKIT
Weapons 3
(Chainsaw, Silenced 9mm, Spaz Shotgun, MP5, M4, Sniper Rifle, Rocket Launcher, Satchel Charges) -
UZUMYMW
Spawn Bloodring Banger - OLDSPEEDDEMON
Spawn Caddy - RZHSUEW
Spawn Dozer - ITSALLBULL
Spawn Hotring Racer #1 - VROCKPOKEY
Spawn Hotring Racer #2 - VPJTQWV
Spawn Hunter - OHDUDE
Spawn Hydra - JUMPJET
Spawn Jetpack - ROCKETMAN
Spawn Monster - MONSTERMASH
Spawn Parachute - AIYPWZQP
Spawn Quadbike - FOURWHEELFUN
Spawn Rancher - JQNTDMH
Spawn Rhino - AIWPRTON
Spawn Romero - WHERESTHEFUNERAL
Spawn Stretch - CELEBRITYSTATUS
Spawn Stuntplane - FLYINGTOSTUNT
Spawn Tanker - AMOMHRER
Spawn Trashmaster - TRUEGRIME
Spawn Vortex - KGGGDKP
Aggressive Drivers - YLTEICZ
All Black Cars - IOWDLAC
All Cars are Country Vehicles - FVTMNBZ
All Cars Equipped With Nitro - SPEEDFREAK
All Junk Cars - EVERYONEISPOOR
All Pink Cars - LLQPFBN
Destroy All Cars Onscreen - CPKTNWT
Floating Car After Collision - BUBBLECARS
Flying Boats - FLYINGFISH
Flying Cars - CHITTYCHITTYBANGBANG
Full Weapon Aiming in Vehicles - OUIQDMW
Perfect Handling - STICKLIKEGLUE
Invisible Vehicles - WHEELSONLYPLEASE
Spawn Faster Cars - EVERYONEISRICH
Traffic Lights Always Green - ZEIIVG
Turn Vehicle into Tank - JCNRUAD
Lock Current Wanted Level - AEZAKMI
Lower Wanted Level - TURNDOWNTHEHEAT
Raise Wanted Level - TURNUPTHEHEAT
Six-star Wanted Level - BRINGITON
Cloudy - AUIFRVQS
Faster Clock - YSOHNUL
Faster Gameplay - SPEEDITUP
Fog - CFVFGMJ
Freeze Time at Midnight - NIGHTPROWLER
Sunny 2 - TOODAMNHOT
Sunny - PLEASANTLYWARM
Orange Sky - OFVIAC
Overcast - ALNSFMZO
Sandstorm - CWJXUOC
Slower Gameplay - SLOWITDOWN
Storm - SCOTTISHSUMMER
All Elvis Pedestrians - BLUESUEDESHOES
CJ Beach Clothes, Pedestrians Bikinis, Change Traffic - LIFESABEACH
CJ Clown, Pedestrians Workers, Change Traffic - CRAZYTOWN
Pedestrians are Gang Members - ONLYHOMIESALLOWED
CJ Gimp Suit, Pedestrians Prostitutes - BEKKNQV
Katana-wielding Pedestrians and Black Traffic - NINJATOWN
No Pedestrians, and Sparse Traffic - GHOSTTOWN
Only Gang Members on Streets - BIFBUZZ
Pedestrians Attack (cannot be disabled, do not save game) - BAGOWPG
Pedestrians Attack with Weapons (cannot be disabled, do not save game) - BGLUAWML
Pedestrians Carry Weapons - FOOOXFT
Pedestrians Riot (cannot be disabled, do not save game) - AJLOJYQY
Recruit Anyone (with 9mm) - SJMAHPE
Recruit Anyone (with Rockets) - ROCKETMAYHEM
Adrenaline Mode - ANOSEONGLASS
Chaos Mode - STATEOFEMERGENCY
This mission line becomes available after completing the first mission in CJ's mission line. After completing “Big Smoke/Sweet and Kendel,” enter CJ's house and touch the floating diskette in the kitchen to enter the Save Game menu. After saving your game, head back outside to continue. Ryder's house is just across the street from CJ's; follow the ‘R' on your radar and step into the red marker to start.
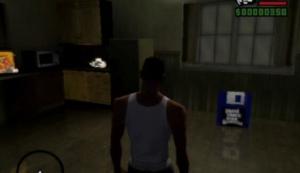
Save File
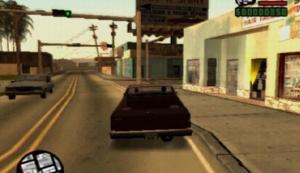
Ryder's House
This mission serves as an introduction to a couple of the outlets in the city of San Andreas. Get into the driver's seat of Ryder's car and start towards the yellow square that appears on your radar. The barbers is the first stop; drive into the red marker that the yellow square points to, then step out of the car and enter the shop. Once inside, step into the red marker to enter the selection menu. The hairstyle you select for CJ has absolutely no effect on the core gameplay, so it all comes down to your preference. If you're just starting out, then chances are your funds are limited, so pick something cheap and exit the menu.

Barber Shop
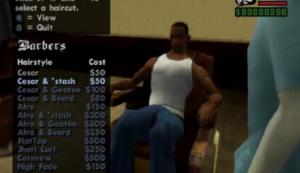
Barber's
Back outside, walk across the street to the Restaurant and head inside. Step into the red marker at the front counter and buy a pizza. Afterwards, Ryder attempts to hold up the place, which causes the man behind the counter to take out a shotgun. Once you're back outside, get into Ryder's car. You can simply drive away or run over the shotgun-wielding cashier and take the weapon for yourself. Follow the yellow square to Ryder's home and drive into the red marker outside to complete the mission.
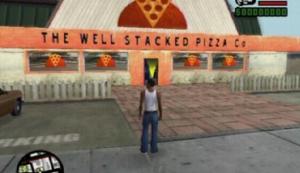
Restaurant
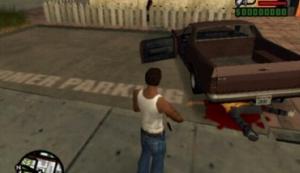
Shotgun
This mission is available following “Drive-by” in Sweet's mission line, and can only be undertaken between 12:00 and 20:00. Ryder knows the location of a retired military officer's home who supposedly possesses a large amount of high-power weapons. Ryder wants to go to the officer's home before dawn to steal the weapons. You're in an armored truck for this one, which is incredibly slow but unmatched in durability. There's a time limit, too, so waste no time. Drive to the yellow icon on the radar and hit the red marker to start the robbery.
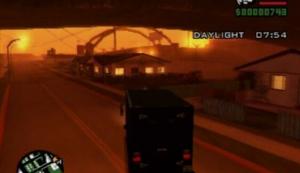
Armored Truck
Move very slowly once inside, as you don't want to wake the house's occupant. Keep an eye on the Noise meter in the top right corner of the screen as you move around the house and cease movement if it's close to being full. To move quietly around the colonel's house, gently push on the control stick to move forward and do not brush up against anything. There are three crates of weapons in the house that must be picked up and brought back to the truck outside. One crate sits behind the cannon in the living room, another can be found at the very top of the stairs, and the third at the end of the upstairs hallway. CJ can only carry one crate at a time, so you'll have to carry one to the front door, put it into the truck and then head back inside to retrieve another.
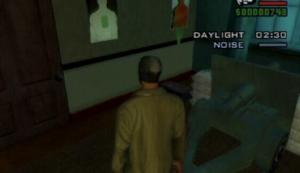
Colonel's House
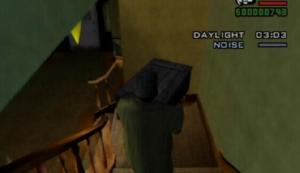
Crate
Once you've placed the three crates of weapons in the back of the truck, travel to the yellow icon on the radar to reach the lockup. Park the truck in the lockup to complete the mission.
Ryder's accompanying you again for this one. Get in the truck and start towards the yellow icon on the radar. When you reach the train, you discover that the two officers set you up for a shootout, as two rival gangs were also informed about the shipment. Step out of your vehicle and fight off the gang members already in the process of robbing the train. Crouch to increase your accuracy, and wait for the Ballas to exit their vehicle. Take out the Ballas and then step into the red marker to investigate the shipment.
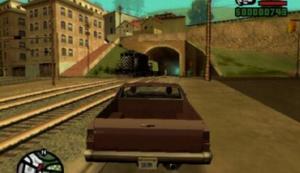
Train
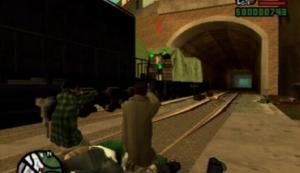
Rival Gang
The train starts to move once you step on. Now you must toss ten of the crates to Ryder within the time limit. Hold down on the button as instructed to power up, then release it to launch the crate towards the truck. Don't hold down the button for too long, though, as the crate will bounce with too much power or you'll overshoot the truck. The amount of power required depends on the truck's distance, so it's hard to know exactly when to release the button. Essentially you want to aim for the truck's hood or roof so the crate bounces or slides into Ryder's open arms. Wait until Ryder sets down the crate before throwing another one.
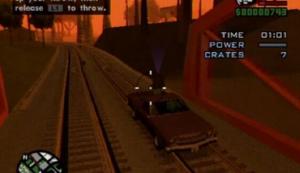
Crates
Getaway
The train ride ends once Ryder has ten crates. You're given a three-star wanted level, so follow the yellow icon on the radar to reach a spray shop. The police will pursue you aggressively with a three-star wanted level, but luckily you can stay on the train tracks most of the way, only turning into the street to travel a short distance to the spray shop. Drive into the spray shop for a paint job. Wait until the wanted stars stop flashing before pursuing the yellow icon on the radar. Hit the red marker to complete the mission.
This is another theft mission; you're stealing weapons directly from the army this time. Make sure you have weapons of your own before attempting this. The warehouse is located in the Ocean Docks, which you'll have to cross a bridge to get to. Drive into the red marker outside of the base to get started. Face the wall and jump up to grab hold of it. Pull yourself up and drop down to the opposite side of the gate. Kill any soldiers standing nearby, then take aim and shoot the switch next to the gate to open it.
Van
Switch
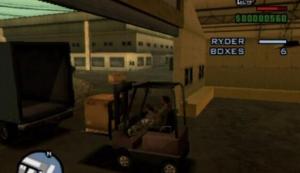
Once the gate is open, take out the soldiers outside of the warehouse. Take aim and shoot the switch next to the warehouse door and kill the two soldiers inside. Quickly board the forklift at the back of the warehouse. You need to use the forklift to load a total of six boxes onto the back of the van. Picking up a box with the forklift is delicate work, as the fork must be lowered completely and then placed into the skid that the box sits on. With the fork placed correctly, raise the box up about three-fourths of the way. Turn back towards the van and push the box into the back of the van to automatically load it.
Forklift
Box
While Ryder will try to keep the angry soldiers at bay, he can't take them all, so you'll have to stop what you're doing and help him out. It's mission failure if his health bar reaches zero, so get out of the forklift when you hear gunfire and kill the soldiers. Once the four boxes at the back of the warehouse have been placed onto the back of the van, move the forklift outside and start moving the boxes near the warehouse. The soldiers may shoot and destroy a box you are carrying, so in that case you'll have to venture a bit further from the van to get another box.
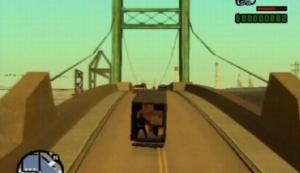
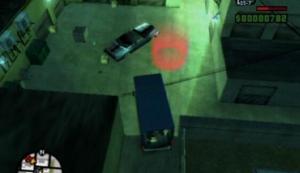
Once six boxes have been placed onto the van, hop into the driver's seat and start towards the yellow icon on the radar. Army vehicles are in hot pursuit; you can signal Ryder to toss one of the boxes at the oncoming vehicles by sounding the van's horn. Wait until a vehicle is directly behind the van before honking the horn. If the box hits, the vehicle will veer off the road and eventually explode. The enemy vehicles will try to tip your van over, so avoid making sharp turns because it's all over if your van falls on its side. Drive to Emmet's and into the red marker to complete the mission.
Getaway
Red Marker
This mission line begins after completing the “Ryder” mission in Ryder's mission line. These missions are denoted by an ‘S' on the radar. Travel to Ganton and step into the red marker to begin.
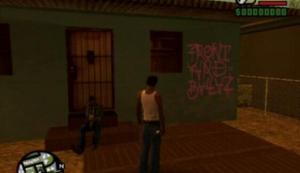
There are a total of 100 rival gang tags in Los Santos, and you'll spray paint over six of them during this mission. Get into Sweet's Car and follow the yellow square on the radar to reach the first tag. A short cutscene clears the first one for you. There are two more tags to spray over, and both are nearby. The two tags are denoted by green squares on the radar. After finding the first tag, equip the spray can, lock-on and hold the Shoot button until the Grove Family gang tag covers the rival tag. If a police officer observes the action, you'll earn one wanted star, so scan the area before you begin. Any rival gang members in the area that see this will attack, so be careful.
Tag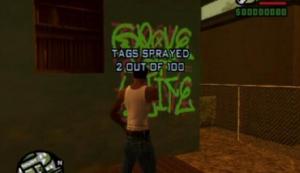
Cleared Tag
Once you've cleared the two remaining tags, sprint back to Sweet's car and follow the yellow icon on the radar to another red marker. Get out of the car and spray the first tag and then follow the green icon to reach the second. Two Ballas stand near this one; approach them and use the spray can to temporarily blind them. While they're blinded, quickly spray over the tag and then sprint away. Hit the next red marker, denoted by the yellow icon on the radar, and jump the two fences beyond it. Climb up onto the wall behind the small building and pull yourself up to the roof from there. The tag up here is on the wall's northern face; spray over it and drop down to the street below.
Ballas
Wall
Get into Sweet's car, follow the yellow icon on the radar and hit the red marker to complete the mission. A can of spray paint now spawns in the upstairs room of CJ's house.
This mission is available right after “Tagging Up Turf.” After the cutscene, get into one of the cars outside and drive towards the yellow icon on the radar. Ryder accompanies you during this mission so you'll have to wait for him to re-enter the vehicle if you step out. When you reach your destination, get out of the car and hit the red marker to trigger a cutscene. Afterwards, return to your vehicle and follow the red square on the radar. A drug dealer can be found conversing with a fellow gang member in front of a house. A red arrow is visible above the dealer's head. Approach the two and once the gang member leaves, lock-on to the dealer and beat him to death.
Red Marker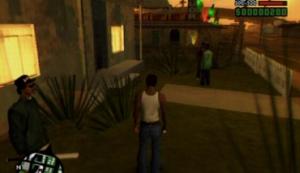
Target
Pick up the baseball bat that the dealer left behind and return to your vehicle. Follow the yellow icon to another red marker. Drive into the red marker, then step out of the car and enter the building there. Equip the baseball bat and start attacking the men inside. You're outnumbered here, so don't stand in one spot while fighting them, but rather move around the room and take swings at them as they approach. The dealer is the main threat here, so take out the gang members first to so you can face him without interference.
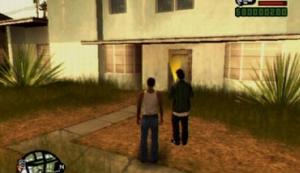
Building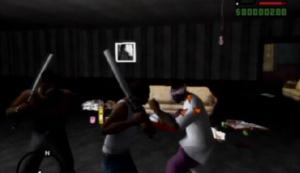
Brawl
When the den is clear, head back outside and re-enter your vehicle. Make your way to Sweet's house and step into the red marker to complete the mission.
This mission is available following “Cleaning The Hood.” Get in the car with the others and start towards the Cluckin' Bell drive-thru, denoted on the radar by a yellow square. Once you reach the restaurant, hit the red marker to trigger a cutscene. After the cutscene, your task is to prevent the car full of Ballas from reaching your neighborhood. All you have to do here is drive behind, in front of, or alongside their car so your allies can hit it with gunfire. It is best to drive ahead of them, brake, and turn your car into theirs to slow their progression while allowing your allies to fire at them.
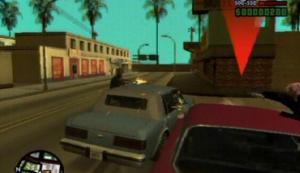
Ballas
SMG
Once the enemy car catches fire, drive as far away from it as you can to avoid getting caught in the explosion. The Ballas were carrying Micro SMGs, so if you wish you can step out of the car and pick up their weapons before moving on. Drive back to Sweet's house and hit the red marker. Afterwards, follow the yellow icon on the radar and drive into the second red marker to drop off Smoke and complete the mission.
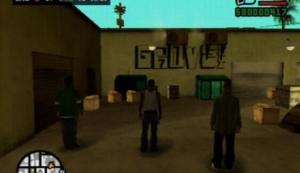
Time to get some weapons; hop into the driver's seat and start towards the yellow icon on the radar. Drive into the red marker to trigger a cutscene. Once you've regained control over CJ, take aim and shoot the bottle. There are a few more exercises to complete; follow the instructions as they appear on screen, then drive Smoke back to his house.
Target Practice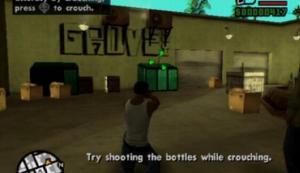
Crouching
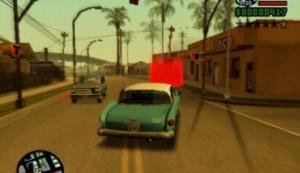
Afterwards you'll receive a phone call from Sweet. He tells you that, to get any respect, you'll need to purchase some new clothes that let others know you're part of the gang. Drive over to the clothing store that appears on the radar, hit the red marker, then get out of the vehicle and head inside. Step into the red marker in front of the changing room door to get started. You have to try on a piece of clothing to see its price, but generally the clothes at Bincos aren't too costly. Buy yourself some new threads and then head back outside to complete the mission.
Clothing Store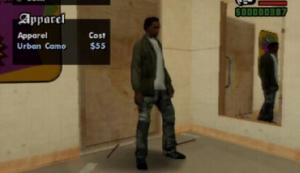
Clothes
Get in the car with the others and start towards the yellow icon on the radar. Drive into the red marker to begin. You're in enemy territory, and as the wheelman it's your job to position the vehicle in such a way that your allies can hit the rival gang members with gunfire. There are several groups of Ballas that must be taken out in this neighborhood; each batch is marked on the radar with a red icon. You can shoot at the Ballas yourself with the camera looking right or left, but for the most part you should leave it up to your allies, as your main concern should be preventing the car from getting too damaged.
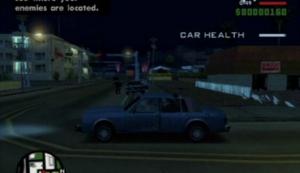
Drive-by
If the ‘Car Health' bar in the top right corner of the screen is depleted, the car will catch fire, forcing you to get out and leave your allies behind. If the car is destroyed, you'll have to restart the mission because the others won't follow you out. When first encountering a batch of Ballas, drive straight into them to try and run a couple of them over, then just drive around the group until your allies have managed to gun them down You don't want to remain stationary here, as the Ballas have Micro SMGs of their own and can thus severely damage your car.
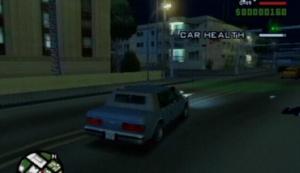
Drive-by
Once the last batch of Ballas has been wiped out, you'll attain a two-star wanted level, which means that the police will be pursuing you quite forcefully. To lose them, seek out the spray shop as shown on the radar by a spray can. When you reach the red marker, drive into the spray shop to get a fresh coat of paint. The police won't be able to recognize your vehicle this way, but they'll remain suspicious for a short while. Don't move until the two wanted level stars cease flashing, because if you do anything deemed socially unacceptable, the cops will be right on you again. Drive the others back to Sweet's house to complete the mission.
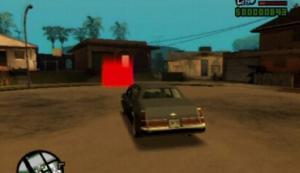
Spray Shop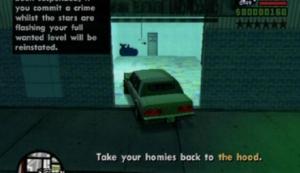
Wanted Level
Before triggering this mission park a durable, four-door car in CJ's garage. If you lack a weapon, there's a Micro SMG on top of Sweet's house. Trigger the mission when ready. Sweet is in a shootout with a rival gang and needs you to get him out of there. You'll have to get there quickly because the mission is failed if Sweet's health bar reaches zero. It's a good idea to recruit a couple of gang members to help out. To recruit: lock-on to one of the gang members walking around Ganton and press the Gang Active Mode button (up on the d-pad in the PS2 version). The amount of gang members that can be recruited is dependent upon your Total Respect level, but since most vehicles can only hold a total of four people, take three at the most.
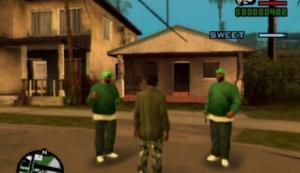
Gang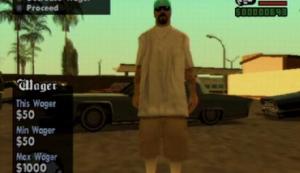
SMG
Get in the car you stored in the garage and start towards the red icon on the radar. If you need a weapon (which you definitely do for this), stop by Emmet's (marked by a gun on the radar), and pick up the weapon that's there. Make haste to Sweet's location and try to run over the line of enemies on the sidewalk across from the motel. Some of them will likely dive out of the way, but try your best to take out at least a few of them. If your vehicle begins to emit black smoke, get out before it catches fire to give yourself and your allies time to get away from the explosion.
Gun down the gang members that remain in the street, and the one located up the motel stairway. Don't stand in the middle of the street firing; crouch or sprint while shooting to avoid taking too much damage. When the area is clear, get into a four-door vehicle and drive into the red marker. A couple of cars filled with rival gang members will tail you here, but luckily Ganton isn't too far away. Now it's just a matter of getting there in one piece. Once you've lost them, drive into the red marker outside of Sweet's house to complete the mission.
Shootout
Red Marker
Sweet isn't happy with your sister's new boyfriend, and he wants you to go and see for yourself. Travel towards the yellow icon on the radar to reach a garage and drive into the red marker there. The man at the garage will give you a lowrider outfitted with hydraulics. You can return to this garage at a later time with another vehicle and customize it with a variety of different mods. For now, make your way to the lowrider competition at Unity Station, which is marked on the radar by a yellow icon.
Lowrider
Lowrider Meeting
Once you've reached the meeting place, drive into the red marker to enter the Wager menu. $50 is the lowest you can wager, and since this is likely your first time attempting this mini-game it would be best to go with that amount. This is a simple rhythm mini-game; tilt your lowrider in the same direction as the arrow at the bottom of the screen when it reaches the middle of the ring. You don't have to perform exceptionally well here; your goal is to simply get a higher score than the opposition. The mission is complete once you've managed a higher score than your opponent.

Wager
Mini-game
Cesar will phone you sometime after the completion of the “Cesar Vialpando” mission in Sweet's mission line. He invites you to partake in a race, but you'll need a lowrider to participate. If you've since parted with the lowrider that you obtained during the “Cesar Vialpando” mission, you can find a parked Blade just a couple of houses down from the red marker that the ‘CV' on the radar points to. Once you're in a lowrider, drive into the red marker outside of Cesar's house to get started.
Lowrider
Race
This is a simple checkpoint race; hit the final checkpoint while at the head of the pack and you'll walk away with one grand in your pocket. Each checkpoint is marked with a directional arrow, be sure to take note of them so you'll know where to turn next. There isn't much more that can be said; hit the checkpoints along the way, easy on the turns, and gun it when you reach the pier. Reach the final checkpoint while in first place to complete the mission.
Finish
Complete Ryder's, OG Loc's, and Big Smoke's mission lines and you'll eventually receive a phone call from Sweet, telling you to head to an Ammu-nation to suit up. The ‘S' on your radar now points to a red marker outside of the Ammu-nation in downtown Los Santos. Step into the red marker when you're ready to go.

Ammu-nation
Ammu-nation
Your goal here is to take Glen Park from the Ballas and claim it as Grove Street territory. Obviously you're going to need guns to do this, so step into the Ammu-nation and purchase some. The Ammu-nation doesn't have really anything spectacular in stock, and what is there is quite costly, so just pick up some body armor and an SMG if you can afford it. When you're ready to get started, make your way to Glen Park by following the green icon on the radar and step out of your vehicle. Find and gun down a Balla while in the purple area on the radar in order to provoke a gang war.
Ballas
Gang War
Three waves of Ballas will enter the Glen Park territory currently being contested; you must survive each wave by killing all of the Ballas to complete the mission. Purple icons on the radar reveal the locations of your enemies, so keep an eye on your radar at all times to ensure that you aren't attacked from both sides. Most of the Ballas will spawn on the bridge. Position yourself near the side of the bridge and pick them off as they move down the hill to meet you. Body armor and a health regeneration pack can be found on the street surrounding Glen Park, so sprint away and grab these if you're in need. After surviving all three waves, chase down and kill the final Balla to claim the territory for the Grove Street Families.
After the mission you'll learn how the Los Santos turf war works. Claiming territory is a good way to make some money, and you can also collect weapons and ammunition from fallen enemies. To contest a territory, kill gang members in their territory until a gang war is provoked.
Step into the red marker outside of Sweet's house sometime between 9:00 and 17:00 to get started. Make sure you have a powerful weapon, such as an SMG or AK47, before attempting this. Target each of the two gang members with blue arrows over their heads and recruit them. Afterwards get in the car with Sweet and the others and start towards the yellow marker on the radar. You're on a time limit here, but luckily there's plenty of time to make it. Drive into the red marker when you arrive. Climb over the wall and approach Sweet to trigger a cutscene.
Gang Member
All you have to do here is take down Kane, the Balla marked on the radar with a red square. Kane is wearing body armor, so he'll take a significant amount of gunfire to drop. First and foremost, however, is dealing with the group of Ballas that accompany Kane. Gun them down as you close in on Kane; be sure that none are left standing so you can face Kane with a number advantage. With you, Sweet, and your allies firing at Kane, he should fall quickly. Once Kane has been dealt with, get back in the car with Sweet and head back to Ganton. Drive into the red marker to complete the mission.
Ballas
Get in the car with the others and follow the yellow marker on your radar to reach the motel. Drive into the red marker there to trigger a cutscene. Things take a turn for the worst as a SWAT team shows up to storm the place. Once you've regained control over CJ, do not engage the SWAT outside, but inside turn around and head through the door there to enter the motel.
Motel Raid
You're going to have to be light on your feet here as the SWAT inside the motel are carrying SMGs and wearing body armor. Remain crouched at all times as you move through the hotel, because doing so both steadies your aim and allows you to quickly roll behind cover. Head up the stairs and take out the two SWAT down the hallway. As you turn the first corner, three SWAT step into the hallway; immediately roll through one of the doorways down the hall to avoid getting cut down by their gunfire. At the end of the hall, some SWAT grapple down from a helicopter through a skylight. Kill them off, then those down the adjacent hallway as well. As you move down this hall, turn into the first room on your left to meet with the woman there; she'll replenish your health bar.
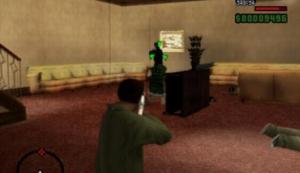
SWAT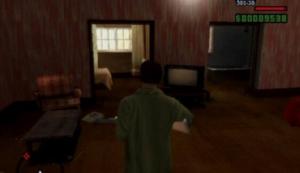
Health Replenish
Sweet is at the very back of the motel, so move to the end of the hallway and take out the SWAT there. Move slowly down the hall, as enemies will step in as you progress. Meet with Sweet in the room at the end of the hall to get to the roof. Lock-on to the SWAT hanging off of the helicopter and take them out, then manually aim at the helicopter and unload into it until it loses control and crashes. Follow Sweet down the fire escape to meet with the others.
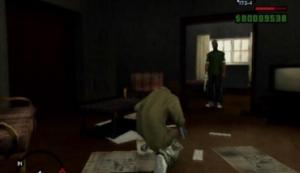
Sweet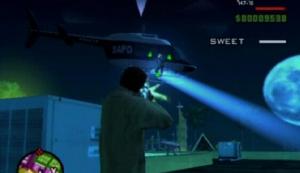
Helicopter
This is an on-rails sequence; you are armed with an AK47, and your job is to prevent the car from being totaled by the police pursuing you. Pound the police cars with gunfire until they explode; hit their fuel tanks for instant destruction. Occasionally an officer will jump onto the hood of the car and start punching you; shoot him off quickly, as getting hit makes it difficult to aim and also lowers your health. Make it to the end of the line with the car intact to complete the mission.
This is the mission that will get you out of Los Santos. It's a good idea to clear any missions left undone in Los Santos before attempting this one. Hit the red marker when you're ready to go. Answer the phone once you're out of the house. It's Cesar; he wants you to meet him under a freeway in Verdant Bluffs. Stop by the Ammu-nation in downtown Los Santos first and pick up a powerful weapon and body armor if needed. Follow the yellow marker on your radar, drive into the red marker and step out of your vehicle. Get in the car down the alleyway to trigger a cutscene.
Cesar
After the cutscene, immediately get in a car and speed towards the yellow icon on the radar. You have to make it to the site before Sweet's health bar is depleted. Drive into the red marker to save Sweet. Now you must fight off the Ballas until the police arrive. Crouch down behind cover and pick them off one by one. Keep an eye on your radar at all times to avoid getting hit from behind; the red icons on the radar denote the position of Ballas. After several waves of reinforcements, the police arrive and the mission ends.

Shootout
You can start taking missions from Big Smoke after completing the “Nines and AK's” mission in Sweet's mission line. The starting point of each of these missions is denoted by with a ‘BS' on the radar.
Big Smoke's House
A member of the gang, Jeffery, has been locked up in prison; he's on parole now, so it's time to pick him up. Follow the yellow icon on the radar to reach the prison and drive into the red marker. After the cutscene, drive to Freddy's house, marked on the radar by the yellow icon, hit the red marker, then get out of the car and ring the doorbell. Jeffery's first deed out of prison? Killing this Freddy. Jeffery's target slips out the back door, hops onto a motorcycle and takes off. What ensues is a potentially lengthy motorcycle chase through the streets of Los Santos.
Prison
Jeffery is armed with a Micro SMG, and if you have one of your own, you can also fire at Freddy while on the motorcycle. This doesn't seem to do much good, though, as it is quite hard to actually hit Freddy as he speeds by. It would be best to simply concentrate on following Freddy, because eventually he will park his motorcycle next to a group of gang members and step off, allowing Jeffery and yourself to gun him down. You could probably end this one quickly in the streets, but simply keeping up with the target is work enough, let alone getting close enough to take him out. If you're content with seeing the chase through to the end, just follow Freddy's path exactly. Otherwise you can try to cut him off as he emerges from an alleyway.
Chase
Afterwards, head towards the yellow icon on the radar and drive into the red marker in the Burger Shot parking lot to complete the mission.
You're going with Big Smoke to pick up his “cousin.” Get in the car and start towards the yellow icon on the radar; you'd better pick up a weapon from Emmet's while you're at it. When you reach the meeting place, drive into the red marker to trigger a cutscene. All you have to do here is catch up with the dealer and kill him. This is enough, as your target does not run exceptionally fast. While CJ can't sprint forever, the distance between you and your target can be closed quickly by simply tapping the Sprint button. When you're close enough to the target, gun him down to complete the mission.
Chase
Target
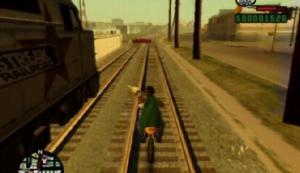
Follow the yellow icon on the radar to reach Unity Station. Drive into the red marker there to trigger a cutscene. The four Vagos at the station drop down onto the moving train in an attempt to escape; immediately hop onto the nearby motorbike and speed after the train. All you have to do here is keep up with the train while Smoke fires at the Vagos, all four of which must be dead before the train leaves Los Santos. This mission can be somewhat difficult because each of the four Vagos has quite a bit of health. Not only that, but several obstacles are encountered on the tracks.
Train
Smoke will target the second Vagos (from the back to the front of the carriage) initially, then the first, then third, and finally the fourth. Even if you're riding in front of the train, Smoke still focuses on the targets in that order, so you'll want to trail a bit behind his current target to give him the best shot. Hold down the Accelerate button and move along the tracks until you are a bit ahead of Smoke's current target, then release the Accelerate button, periodically pressing down on it to maintain speed. If the train starts to get too far ahead, hold down the Accelerate button to pick up speed. Make sure you're moving along the outside of the track for best results.
As mentioned, there are a couple of obstacles along the way: an idle car on the tracks that promptly explodes upon impact with the train, and an oncoming train that forces you to take a high ground trail. These obstacles are easily avoided if you can see them coming; slow down when you spot the parked car on the tracks, and listen for Smoke's cue to take to the high ground. The mission's a failure if even one gang member is left standing when the train reaches the city exit.
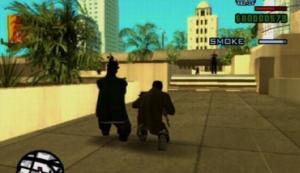
Make your way to the yellow icon on the radar to reach Downtown and drive into the red marker there to get started. Yet again you've managed to find trouble; after the cutscene, you're immediately thrust into the middle of a heated shootout. Remain crouched and take out the hostiles while safely behind cover. When the enemies in the plaza have been dealt with, follow Smoke outside. You'll find yourself in a similar mess once outside; a large number of hostiles are scattered along your escape route. Gun them down and follow Smoke to a nearby motorbike.
Shootouts
Escape
What follows is a rather lengthy on-rails sequence; while Smoke drives the motorbike, your task is to keep the pursuing enemies at bay. You're followed by a variety of vehicles, including a large transport truck. Although you have infinite ammo during this portion, don't waste any time firing at the truck, as gunfire is ineffective. Focus on the motorcycles first and foremost because each one holds two gunmen and they are quick and versatile enough to keep up with your bike. Always aim for the driver rather than the gunner, as taking him out will send the motorcycle out of control. Fire at the front of the bike and chances are you'll take out the gunner. The enemy's cars can be trouble too, but if you hit a car grille with enough gunfire, it will eventually catch fire and subsequently explode.

Gunning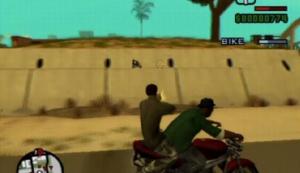
Getaway
Reach end of the line with both the bike and yourself intact to complete the mission.
You can start taking missions from OG Loc after completing the “OG Loc” mission in Big Smoke's mission line. The starting point of each of these missions is in the Burger Shot parking lot where you dropped him off, denoted by an ‘OG' on the radar.
This mission can only be attempted between 22:00 and 6:00. Make your way to the yellow icon on the radar. Step into the red marker and reply to the DJ in a positive manner. This is another rhythm mini-game, but significantly more difficult than the last. You need to score at least 4000 points to gain access to the sound van so it can be brought back to Jeffery.
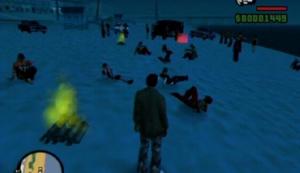
Beach Party
DJ
Wait until one of the buttons scrolling across the bottom of the screen reaches the ring, then press the corresponding button when the button is in or near the center of the ring. You don't have to perform overly well here; if you can manage to at least hit all of the correct buttons somewhat near the center of the ring, you should have a score of at least 4000 by the end of it. Just try your best to maintain a “good” rating, because the mission is a failure if your final score is less than 4000.
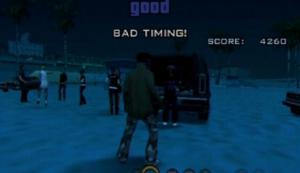
Mini-game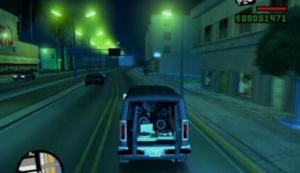
Sound Van
Once you have the required score, reply to the DJ positively and get in the van with her. Drive off with the van and bring it safely to the garage to complete the mission. Be careful on your way there, though, as there may be a car tailing you.
OG Loc wants you to steal the rhyme book of a prominent rapper in San Andreas. You'll have to travel to Madd Dogg's mansion, break in, steal the rhyme book and bring it back to OG Loc at the Burger Shot. When you reach the mansion, locate the backdoor and head inside. The rhyme book is in Madd Dogg's recording studio, and unfortunately his home is being patrolled by a number of security guards.
Madd Dogg's Mansion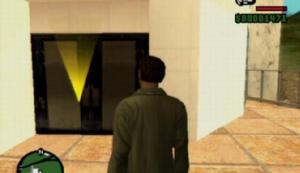
Door
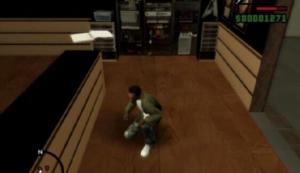
Don't use guns at all while inside, as making too much noise will alert the guards to your presence. Slowly approach the guard standing by the doorway up ahead, target him and press the Attack button when CJ raises his arm to perform a stealth kill. Be sure to target the guard before pressing the Attack button, otherwise CJ will just slash normally. A second guard patrols the swimming pool area beyond the first doorway; creep through the doorway, step into the shadows nearby and lie in wait. Do not move until the guard walks past you to avoid being detected. When the guard walks past, slowly move up behind him and perform a stealth kill.
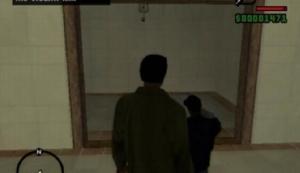
Stealth Kill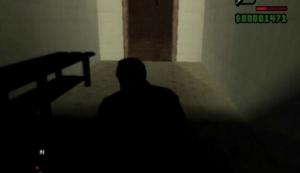
Shadows
Move through the doorway and into the next room. When you receive the message that a guard is coming, immediately duck into the room on the left. Wait for the incoming guard to pass by, then creep up behind him and perform a stealth kill while he's looking through the doorway. Afterwards, move through the proceeding corridor until you reach the bar. Crouch down and hug the counter to move across the room without alerting the bartender.
Sneak down the hall, stealth kill the guard in front of the recording studio, then enter the studio and touch the book to pick it up. Now it's just a matter of getting out, which is no simple task because the number of guards patrolling the perimeter has increased. You can get your hands on a silenced weapon by killing the idle guard nearby; slip through the doorway across from the recording studio entrance, turn left to spot him near a second doorway and stealth kill him while his back is turned. With a silenced weapon, you can gun down a guard without alerting the others.
Rhyme Book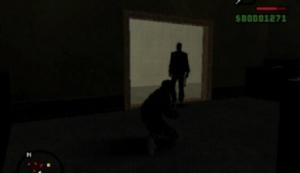
Guard
Once you're out of the mansion, return to OG Loc and hand over the rhyme book to complete the mission.
This mission can only be attempted between 12:00 and 5:00. Loc's next task for you is to kill one of Madd Dogg's managers. You first need to take the place of that manager's driver to get close enough to him. Start towards the red icon on the radar; OG Loc eventually phones, informing you that the driver has left the Burger Shot. Continue to follow the red icon on the radar to locate the target and damage the car with your own to force the driver out. Step out of your own car, kill the driver and get into his car. Seek out an Auto-repair shop and repair the car there to avoid rousing suspicion.
Target
Car Repair
If your car is damaged at all on the way to the meeting place, you'll have to return to the spray shop to repair it. You'll have to drive carefully then, because you must make it to the meeting place before the other drivers leave at 22:00, so there's little time to spare. Be especially careful when backing out of the spray shop, as even a little ding is cause enough for another repair. When you reach the spot, your next task is to park between the two cars already there. This can be tricky as the cars in the street leave you with little space to maneuver. If it helps, have the front of the car in the correct position, then step out of the car, sprint against the backend of the car to push it into place and then get back in the car.
Drivers
When you've managed to park the car correctly, a short cutscene is triggered. Afterwards, carefully travel between the two cars until the destination is reached. When the manager gets in, immediately start following the yellow marker on the radar. The other cars will try to run you off the road as you make your way there, so be careful. When you reach the pier, speed down the length of it and bail out just before it ends to send the car—passengers and all—into the watery depths below. Mission complete!
Activate the mission at the Burger Shot and wait until sometime after 20:00 and before 5:00 before stepping into the red marker outside of Loc's home in Ganton. If you wish, you can pass the time by saving your game in CJ's house. At the house party, things take a turn for the worst when a large number of uninvited Ballas show up.
Loc's House
You'll be facing three waves of Ballas here. The first can be taken out while crouching safely behind the makeshift barricade; gun down the Ballas out in the open, then move along the cars to get a bead on those who were sensible enough to seek cover. The second wave consists of four Ballas on the overpass above. It can be tough to lock-on to these guys; you'll have to move behind one of the cars further down the street and from there pick them off one by one.
Ballas
The final wave is the largest, and the Ballas come from multiple directions. They'll emerge from the alleyways running along the houses, so get behind cover and wait for them to come into view and then gun them down. The mission is complete when the final gang member has fallen.
As you complete missions in Los Santos, you will eventually receive a phone call from Officer Tenpenny. After receiving the call, you can then take missions from the two officers. This mission line begins at the donut shop in the market, marked on the radar by a ‘C.'
Follow the green marker on the radar to reach the stashed Molotovs in an alleyway and pick them up. Make sure you have a weapon of some sort before moving on to the gang house, as you'll have to defend yourself against the gang members outside. With the Molotovs in hand, make your way to the gang house, which is denoted on the radar by a yellow marker. Try to run down the gang members located at the front of the house, then step out of your vehicle. There will likely be more gang members around the side of the house, so scout the perimeter and gun down any you see.
Molotovs
Gang House
Now you must lob five of the Molotov cocktails through the five windows to set the place ablaze. You're holding a dangerous weapon in your hand; you'll have to throw the Molotov just right to avoid getting caught in the blast yourself. In the unfortunate circumstance that CJ is set alit, sprint around like mad until the flames dissipate. The flames can eat away more than half of CJ's health bar if you aren't careful so make sure you're a good distance away from a window before throwing the Molotov. You don't have to hit the windows directly, but the glass won't shatter if the Molotov is thrown too high. As the game instructs, do not just simply tap the Attack button when using Molotovs; hold the button down for a second or two to avoid having it land right at CJ's feet.
Window
Be ready to switch to your handgun, as hostiles will periodically spawn while you carry out the deed. Once you've managed to shatter all five of the windows with Molotovs, it is revealed that you inadvertently trapped an innocent girl in the burning house. Well, you're not a monster, are you? Run in there and save her! Tread carefully inside, as touching the flames will set CJ ablaze. The girl is on the second level of the house, but you'll need to grab the fire extinguisher from the kitchen before heading up there. The kitchen is the room on the right upon entering the house. With the extinguisher in hand, make your way up the stairs at the very back of the house.
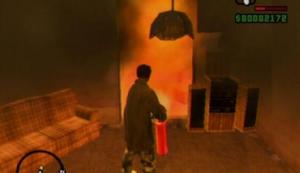
Extinguisher

Fire
To put out a fire with the extinguisher, hold down the lock-on button and aim into the base of the fire. Steam will emit when you're hitting the right spot. Keep the extinguisher trained on the fire until it dissipates. Follow the blue marker on the radar to locate the girl. Once you've found her, start back towards the stairs. Stick with her at all times, because she'll quickly become lost without your guidance. Clear away the flames along the way and exit through the front door. Drive the girl home to complete the mission. She's your girlfriend now, so you can take her on dates by stepping into the red marker outside of her house.
According to Tenpenny, the Ballas are set to meet with some Russian importers to acquire some powerful weaponry. This meeting will take place at the docks warehouse, and it's in your best interest to intervene. Follow the yellow icon on the radar to reach the docks and drive into the red marker. Start by running over the two workers up ahead. If you lack a Micro SMG, try to get your hands on an enemy SMG. While quite powerful and fairly well suited for this mission, the downside to this weapon is that you can't run and gun with it, so stick with the Micro SMG if you're carrying one already.
The two forklifts outside of the warehouse will try to run you down, but they're rather slow, so just sprint away. One of the two forklifts is carrying a couple of explosive barrels; manually aim and shoot the explosives to destroy the vehicle. A protective vest can be found atop the containers to the right of the warehouse door, so be sure to grab it before continuing. Shoot the switch to the left of the door when you're ready to face the enemies inside.
Body Armor
The warehouse's interior is packed with enemies, so take it slow here. Some helpful pop-ups explain a few combat maneuvers as you make your way through the warehouse. Aiming manually rather than locking-on to your targets is effective during close quarter combat situations such as this, as you'll need to be able to strafe to avoid gunfire, and possibly shoot conveniently placed explosives to take out dimwitted enemies. More body armor can be found as you make your way through the maze, so keep an eye out for it if yours is falling apart.
A large number of enemies occupy the very back of the warehouse, so crouch when you emerge from the maze and start picking them off. When the enemies have been dealt with, climb up the stairs at the far end of the room and chase after the arms dealer. A group of Ballas occupy the office at the top of the stairs; take them out, then grab the body armor before following the arms dealer through the door and down the fire escape.
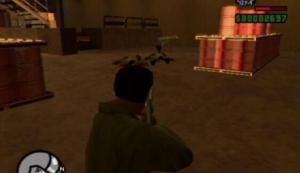
Warehouse Shootout
If you have a Micro SMG with you, taking out the arms dealer is as simple as running after him and gunning him down. However if running and gunning is not an option, sprint a bit ahead of him and fire as he approaches. There are Ballas and Russian importers along the dealer's path, but it would be best to just sprint past them because the arms dealer is actually making a break for his car. If the car you used to storm the place hasn't disappeared and is still in one piece, you can hop in and run the arms dealer down before he gets to his ride. Whichever way you choose to take him out, the mission is complete when the arms dealer is dead.
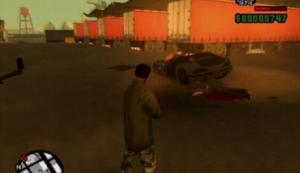
Arms Dealer
Right after the “The Green Sabre” mission in Sweet's mission line, you are brought to Flint County by officers Tenpenny and Pulaski. Before you can move on to San Fierro, you'll have to complete some missions in Flint County, Whetstone and Red County. You've been stripped of all weapons, but luckily there is a small Ammu-nation in Angel Pine.

Ammu-nation
Step into the red marker that the ‘CJ' symbol on the radar is pointing to when you're ready to get started. Drive into the red marker at the foot of Mt. Chiliad and start up the mountain trail. The witness' log cabin is partway up the trail, its surrounding area patrolled by FBI officers. Make your way up the mountain and take a left when you reach the fork (the right path is blocked).
When you spot the cabin, crouch down and move behind the trees around back. You'll have to sneak in through the cabin's back door, so wait until there are no officers walking along the back of the cabin, then head for the door and slip in. Kill the suspect, photograph the body and hightail it out of there. There's a motorbike by the front door; hop on for a quick escape. Return to Angel Pine and drop off the camera to complete the mission.
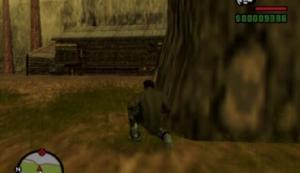
Log Cabin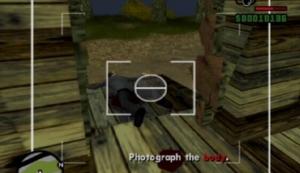
Witness
You'll receive a call from Cesar after completing the “Badlands” mission for C.R.A.S.H. Cesar tells you to meet up with a cousin of his at a diner in Red County. This mission line begins outside of the diner, and is initially marked with a ‘?' symbol on the radar. You'll have to complete all of these missions in one go.
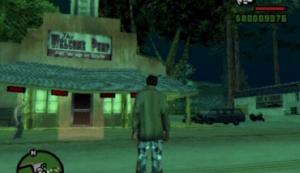
Mission Start
Cesar's cousin, Catalina, demands that you help hold up five different outlets in Red County. Find some mode of transport and make your way to the gas station in Dillimore (though you can complete these missions in any order you wish). Each robbery location is marked on the radar by a dollar sign.
Drive into the red marker outside of the Dillimore gas station to trigger a cutscene. Afterwards, get in the cab with Catalina and back it directly into the trailer to attach it to the cab. Catalina knows of a buyer in Flint County, which is quite a ways away from Dillimore. You have to be very careful when driving the tanker, because too sharp of a turn will detach the trailer which results in a mission failure. The two gas station attendants will pursue you and try to destroy the tanker; the trailer will explode if the health bar the top-right quarter of the screen reaches zero.
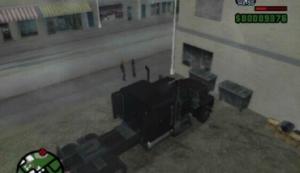
Cab
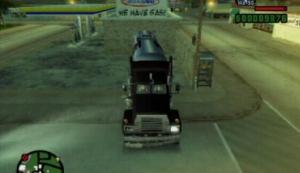
Tanker
For an easy trip, step out of the tanker and hit the attendants' car with gunfire until it explodes, killing them both. Catalina will help you damage the car, and she wields a shotgun so it should be quick work. You may want to at least drive the tanker out of Dillimore to avoid attracting attention from nearby police officers. If you took care of the attendants, it's just a matter of getting to the buyer with the trailer still attached. There is no need to drive too fast; keep to a slow pace here, and release the Accelerate button when traveling downhill. Drive the tanker into the red marker to complete the mission and earn a nice amount of cash.
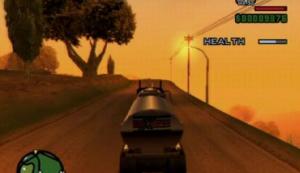
Getaway
Attendants
You can attempt another robbery with Catalina by accepting “King in Exile” from Cesar. You'll receive a call from Catalina after the cutscene. You have to help Catalina carry out another robbery to complete this mission, which means another long trip to Red County. You won't find her at the diner in Dillimore this time around though; she can be found at her place in Fern Ridge. Make your way to the ‘C' symbol on your radar and drive into the red marker. Take Catalina to one of the targets and hit the red marker there to get started.
Catalina's target in Montgomery is an off-track betting shop. Step inside and throw a satchel charge on the door once you regain control over CJ. Stand away from the door, equip the detonator and press the Attack button to set off the charge. Enter the room, throw a charge onto the safe, step out of the room and use the detonator to open the safe. This deed has earned you a four-star wanted level, so the police will pursue you quite aggressively. Back outside, immediately get in your car if it hasn't disappeared, otherwise take off down the alleyway located next to the betting shop in order to avoid the police.
Target
Door
Drive to the Pay ‘n' Spray in Dillimore and use it to lower your wanted level. Be careful on your way there because with a four-star wanted level, the SWAT team will be pursuing you as well. Wait until your wanted level stops flashing, then drive Catalina back home to receive some cash and complete the mission.

Spray Shop
This mission is available immediately after you've helped Catalina with a second robbery.
Make your way to the town of Blueberry and drive into the red marker outside of the liquor store. It appears that a group of likeminded individuals got to the liquor store before you, and are in the process of making off with the money. This doesn't sit well with Catalina, however, so you'll have to chase after them and claim the cash for yourself. While you start off on a quadbike, you are free to use a different vehicle to take the robbers down. The rancher is a vehicle well-suited for this mission; acquire one before triggering the mission and you can then ditch the quadbike and hop into the nearby rancher immediately after the cutscene.
Liquor Store
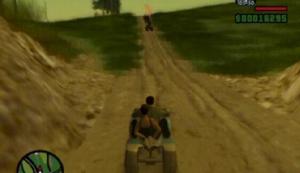
Robbers
The quadbike is rather difficult to control, but it is an all-terrain vehicle so you aren't limited to streets and dirt roads. Each of the robbers holds a briefcase full of money, so your job on the quadbike is to get Catalina close enough to gun them down. You can use your own SMG if you're carrying one, otherwise you're limited to driving. If the robbers get too far ahead the mission is a failure, so try your best to keep up. With the rancher, all you must do is collide with the robbers' quadbikes to send them flying off. You'll have to be especially careful on dirt roads though, because if the rancher tips over, it will be nearly impossible to catch up with the bandits.
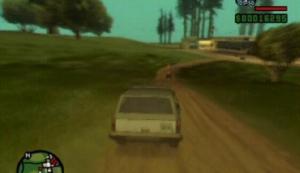
Chase

Briefcase
When one of the robbers has been killed, leave the briefcase alone and continue pursuing the others. The briefcases are marked on the radar, so you'll have no problem tracking them down. Once the final robber has fallen, backtrack to collect the briefcases and then drive Catalina back to the hideout to complete the mission.
This mission is available immediately after you've helped Catalina with a third robbery.
Travel to Palomino Creek in Red County and drive into the red marker outside of the bank. After the cutscene, lock-on to one of the bank employees and cycle through the group with the shoulder buttons to keep them from making any sudden movements. If one of the employees lowers their arms, they'll pull the alarm, earning you a three-star wanted level. You won't be able to keep the employees at bay for long, so just get it over with by killing the security officer (the man on the far right), as he's the only one in the group with a weapon.
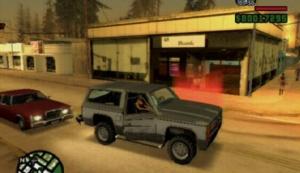
Bank
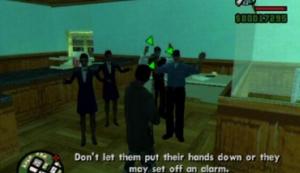
Bank Staff
Destroy the three ATM machines in the bank, collect the money from them, then follow Catalina out the back door. The back alleyway is littered with cops; gun them down and follow Catalina to the end of the alley to trigger a brief cutscene. One of the two officers is wielding a shotgun, so quickly kill them with your own to avoid taking damage. Afterwards, hop onto one of their motorcycles and trail after Catalina. The cops will surround you in Montgomery; fight them off, get into one of their vehicles and drive Catalina back to the hideout to complete the mission and earn a nice sum of money.
ATM
Escape
After completing the “Body Harvest” mission in The Truth's mission line, Cesar will phone you. You can then accept missions from him by stepping into the red marker outside of his trailer in Angel Pine, which is marked on the radar with a ‘CV' symbol.
You'll receive a call from Catalina after the cutscene. You have to help Catalina carry out another robbery, which means another long trip to Red County. You won't find her at the diner in Dillimore this time around though; instead she can be found at her place in Fern Ridge. Make your way to the ‘C' symbol on your radar and drive into the red marker to get started. Refer to the “Catalina” section for more info.
Catalina's Cabin
This is another waypoint race, similar to the “High Stakes, Low-rider” mission in Los Santos. You must hit the final waypoint while at the head of the pack to complete this mission. The track here is lengthier than the last, and mostly consists of dirt road, but this time you can use whatever type of car you wish. The Rancher seems to be the best suited for this race, as it controls very well off-road and is also fast enough to surpass the other cars in the race. There isn't a great selection of vehicles in the badlands, so definitely choose the Rancher over a Tahoma or Virgo, as those two are prone to spinouts.

Waypoint
Similar to the race in Los Santos, each waypoint here is marked with a directional arrow which signifies where you'll need to turn to reach the next one. You are against three other racers here; fortunately their cars aren't anything spectacular, and they usually keep to a slow pace, making them easy to get ahead of. There's really no need to go too fast once you're in first place, just concentrate on following the trail and hitting the next waypoint without spinning out or tipping your vehicle over. Remember, slow and steady wins the race. A spinout can knock you back to last place, so you'll have to speed up and take more chances to make up for lost ground in the event of one.
Final Waypoint
This race takes place right after “Wi Zi Mu.” You can't choose your car for this one, but luckily the one you're automatically strapped into is a pretty sweet ride. This track is a reverse of the track in the last race, and the three cars participating seem to be a bit quicker than your former opponents. Though more prone to spinouts, the ZR-250 is fast, so in some instances you can simply make a beeline for the next waypoint if the road is surrounded by field. Again, if you're ahead of the pack, there's no need to try to break any records; keep to a steady pace to ensure that you hit each waypoint without losing control.
Race
You'll eventually receive a call from The Truth once you've completed one of Catalina's missions. He wants you to meet him at his motel room in Angel Pine. Travel there by following the ‘TT' symbol on the radar and drive into the red marker to accept a mission from him.
The Truth wants you to procure a combine harvester for him. Follow the yellow icon on the radar to reach the farm where the harvester is located and drive into the red marker. Take out the survivalists near the farmhouse and make your way to the field where the harvester is working. Kill any survivalists you can spot in the field—avoiding those driving tractors—and then sprint to the harvester. Steal the harvester and drive it away from the field. Now all you must do is get it to the drop point, which is marked on your radar. Run over the survivalists on your way out of the farm for interesting results.
Survivalists
Combine Harvester
A trailer truck carrying a shotgun-wielding farmer will tail you at first, but the combine harvester is extremely durable, if not indestructible, so pursuers are nothing to worry about. Drive the harvester into the red marker at The Truth's drop point to complete the mission.
You'll receive a call from The Truth after completing “Farewell, My Love” in Cesar's mission line. Follow the ‘TT' on the radar and drive into the red marker there to get started. The cops are on their way; you have five minutes to burn the marijuana fields behind The Truth's house. Each field has several clusters of plants, and each cluster is marked on the radar with a red icon. Use your flamethrower and walk along each field until the mark on the radar disappears.
Make sure that each of the clusters has been burned down before moving on to the next field. Don't touch any of the plants once they're alight because doing so will do a number on your health bar. When all of the plants have been burned down, The Truth hands you an RPG. Your next task is to shoot the police helicopter out of the sky; follow the helicopter and wait until it stalls, then take aim and fire.
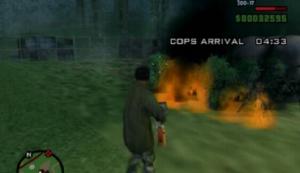
Field
Helicopter
With the helicopter out of the sky, get into The Truth's van and make your way back onto the road. Once you're back on the road, follow the yellow marker on the radar to reach a rundown garage in San Fierro. Drive into the red marker there to complete the mission.
Mothership
Garage
Grand Theft Auto: San Andreas - San Fierro
In San Fierro, your base of operations is the rundown garage in Doherty. You can save your game there and use one of the lockups to store vehicles. Step into the red marker outside to get started.
This mission will seem quite pointless, but it's actually a good way to familiarize yourself with the streets of San Fierro. Get in the car with Truth and follow the yellow marker on the radar to a nearby gas station. Drive into the red marker and sound the horn to recruit the mechanic there. Afterwards, The Truth wants you to drive him to the hospital in Santa Flora; follow the red cross on the radar and drive into the red marker when you reach the hospital. Next, drive to the hotdog vendor marked on your radar, drive into the red marker and sound the horn to recruit another worker. The next stop is the police station in downtown San Fierro. The last stop is an electronics store; drive into the red marker and sound the horn, then make your way back to the garage in Doherty to pass the mission.
Zero RC
Officer Tenpenny wants you to help him frame a troublesome D.A. He's on his way to the Vank Hoff Hotel in downtown San Fierro, so get some wheels and head over there. Follow the valet into the car park, then step out of your vehicle and kill him. Pick up the valet uniform once the deed has been done. Sprint back to the hotel and step into the red marker there to get started.
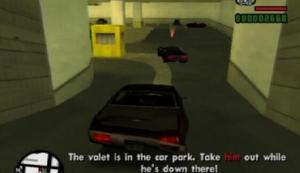
Car Park
Valet
The D.A. is driving a blue Merit, which is the second car to arrive. As soon as the car pulls up, move towards it and hop in. If the other valet gets to it before you, sprint after him and steal the car. Quickly make your way to the garage in Doherty and drive into the red marker so the drugs can be planted. Now you must make it back to the hotel with the car in perfect condition or the D.A. will know something's up. If you hit anything, you'll have to drive to a nearby auto-repair to cover up the damage, so take it slow here.
D.A.'s Car
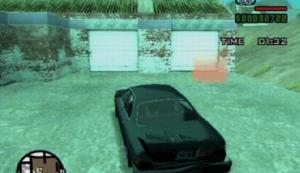
Garage
Drive the car back to the car park and into the red marker. Sprint outside to the red marker across from the hotel and step into it to trigger a cutscene. Mission complete!
Make your way to the construction site above the garage and get into the bulldozer; careful though, as the construction workers will attack on sight. Your task is to destroy the six portables on the site with the bulldozer and then take care of the foreman. You have three minutes to do so, so waste no time. When smashing the portables, be sure not to ram into any explosive barrels to avoid damaging—and possibly destroying—the bulldozer.
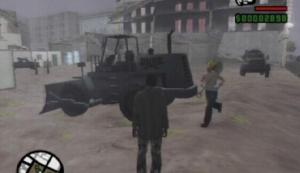
Bulldozer
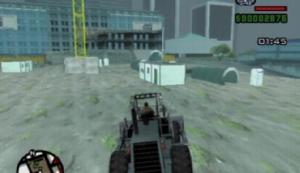
Portables
Once all six of the portables are destroyed, use the bulldozer to push the foreman's porta-potty into the nearby ditch. With that done, step out of the bulldozer and grab one of the cement trucks on the site. Back up over the red marker to fill the ditch with cement. Mission complete!
You'll receive a call from Jethro following the “Deconstruction” mission. There's a driving school in Doherty, marked with a red ‘S' on the radar, where you can take lessons. You need to score at least 70% on a test to move on to the next, so there's little room for error. Each pylon knocked down will set you back by 20%, and time is a factor in some tests as well. There are 12 tests in all; a couple can be tough, but you can retry as many times as needed so you're bound to pass them eventually. Instructions appear at the bottom of the screen at the start of each test, so there's no need to state them here.
Driving School
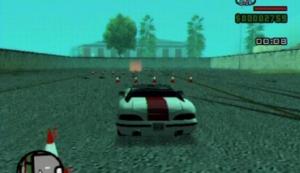
Test
Wheelie Weave: Don't hug the wall on your way to the ramp; drive towards the ramp without coming into contact with the wall, but in such a way that the car's two left tires will run up the ramp. When you've hit the ramp correctly, let your car slide—using the control stick to direct it towards the red marker—then just before the end of the track, hit the brakes and move the control stick to set the car back down on four wheels. It won't count as a pass if the car overshoots the red marker.
City Slicking: Make it to the checkpoint across town and then right back to the school in less than two minutes without severely damaging your car to pass this one. Time is of the essence here, so you can't waste any being overly cautious. Basically drive along the tramlines whenever you can, and if not, keep to the middle of the road and squeeze your way between traffic. You have to keep moving, so don't slam on the brakes or anything. Don't worry if you happen to ding or just clip another car because the damage is actually a percentage, so a small impact will have little effect on your score. You can press Triangle (on the PS2 version) at any time to end the test if it's clear that you won't make the grade. If you don't hit the first checkpoint in under a minute, end the test and try again.
Get some wheels and travel all the way to the blue marker in Red County. When you've reached the spot, get in Cesar's car and start another long journey to Angel Pine in Flint County. Drive into the red marker in Angel Pine, step out of the car and take the stairs on the nearby building up to the roof. Stand in the red marker to get started. Zoom in and take a picture of the men that arrive at the outlet across the street. Be sure to zoom back out after snapping a picture so you'll be able to spot the next to arrive. Capture the faces of all four men to complete the mission. Time for a long trip back to San Fierro…
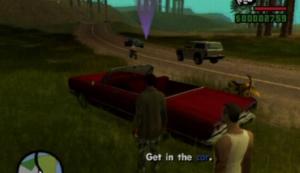
Cesar
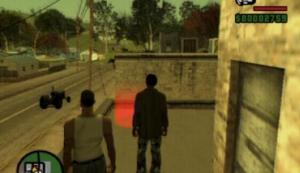
Angel Pine
You'll need to accept and complete a couple of missions from Jizzy before you can attempt the next mission in CJ's mission line. Travel to Jizzy's club, which is under the Gant Bridge in the northwestern part of the city, and step into the red marker there to get started.
Return to your garage after completing Jizzy's missions and step into the red marker to accept a mission. You'll get a phone call; it's Jizzy, he wants you to meet T-Bone at the gas station in Easter Basin. Make your way to the gas station to meet with T-Bone and Toreno. Head for the van, which is just a short ways away from the gas station, pick up the Rocket Launcher and Sniper Rifle then hop onto the escort bike. It's your job to drive up ahead of the van and clear out the roadblocks so it can pass through unchallenged. Zip towards the red marker on the radar and take out the parked cars and goons with your Rocket Launcher.
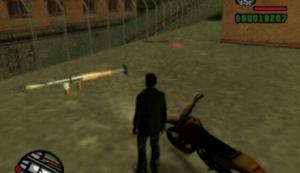
Weapons

Road Block
Get back on the bike and continue to the second road block. There are men in the windows of the building on the left side of the street, so after destroying the parked cars with your Rocket Launcher, lock-on and gun them down. There are two more roadblocks to deal with; clear the way and then follow the van to its destination to complete the mission. Quickly return to your garage and save the game to lose the three-star wanted level.
Officers Tenpenny and Pulaski want you to take out a pesky journalist for them. They have hidden a Sniper Rifle somewhere in the construction site behind your garage, so make your way to the green marker on the radar and pick it up. With the Sniper Rifle in hand, walk down to the nearby train station. The reporter will board the train to Los Santos as soon as you reach the station. Hop onto the motorbike near the tracks and take off after that train. All you must do now is either keep up with or beat the train to the Market Station in Los Santos. Follow the tracks and eventually you will reach the train's stop. Be careful though, as you will likely encounter other trains on these tracks and getting hit by one can really set you off course.
Sniper Rifle
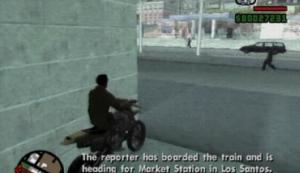
Motorbike
When the train reaches the Market Station, wait for the reporter to step out. The now visible “Spook-O-Meter” serves as an indication as to whether you are too close to the reporter. If you are following him too closely, the meter will begin to fill. If the meter fills up completely, the reporter will abandon the interview with the journalist and the mission will be a failure. Follow the reporter up the stairs and out of the station. Keep an eye on the Spook-O-Meter all the while; if it begins to fill up, immediately back off. The reporter will make his way to the sidewalk where he will then search for a cab. Move away from the reporter and get into a vehicle (anything other than the approaching cab!) and wait for your target to enter the cab.
Reporter
Cab
Your task now is to follow the cab to where the interview is to be held. The Spook-O-Meter is still in effect here, so you'll have to trail a good distance behind him to avoid having him call off the interview. If the meter begins to fill, quickly reverse until it begins to fall. When the cab stops at a light, immediately come to a complete halt until it starts moving again. The cab will eventually lead you to the pier. Once the reporter meets with the target, start moving towards them. You don't want to get too close, just close enough that you can clearly make out their heads. When you're in position, zoom in, train your gun on one of the targets and fire.
Meeting
Targets
Once you've downed one of them, the other will flee. You'll have to quickly shift your aim over to the second target and take him out before he can react. A missed shot will spook them both, but luckily they have nowhere to flee to, so you can simply sprint down to the end of the pier and take them out with a close-range weapon. You're more likely to attract attention from the law this way, but it's an option if you happen to botch the assassination.
Step into the red marker outside of the garage in Doherty between 20:00 and 6:00 to get started. For an easier time, make sure you have a Micro SMG with plenty of ammo, you can stop by the Ammu-nation in Ocean Flats if you need one. Pick up some Body Armor while you're at it.
After the cutscene, make your way to Jizzy's club under the Gant Bridge and step into the red marker outside. The two guards out front won't grant you entry, so you'll have to find some other way to get in. Luckily there is an open skylight on the roof which you can drop through. To get up onto the club's roof, first make your way onto Gant Bridge and then walk along—past the danger sign—until you are above the club. Climb down from the bridge to the wooden walkway running alongside it. Careful not to fall; it's easy to completely miss the walkway and plummet to the pavement below. Move along the walkway until you are right above the skylight before dropping down. Use the open skylight to enter the club.
Jizzy's Club
Skylight
Jizzy is directly below the walkway you land on, so drop down from it to trigger a cutscene. Every one of Jizzy's goons will have their guns trained on you following the cutscene, so immediately turn around and head for the door. Cap the two guards standing by the exit, get in the limo outside and trail after Jizzy. If you're packing an SMG, your next task is a simple one; chase after Jizzy and hit his getaway car with bullets until it catches fire. If you don't have an SMG, you'll just have to chase after him and wear away the car by ramming into it. Jizzy will likely bail once the car catches fire, so run him over or gun him down. When Jizzy is dead, pick up his phone to complete the mission.
Club
Jizzy
Travel to the red marker in Esplanade North and step into it to get started. When Cesar motions to you, move down the sidewalk and head through the doorway to your left. Climb up the stairs here to reach the vantage point. First you must help Wu Zi's men eliminate the guards on the rooftops of the two buildings surrounding the pier. You've been given a Sniper Rifle for the task, so use it to take out the three guards on the building to the right and the three on the building to the left. Afterwards, T-Bone Mendez and his associates enter the scene. T-Bone is your target now, but first you must take down the droves of Ballas on the pier.
Targets
Pier 69
Take out as many Ballas as you can from your current position on the roof using the Sniper Rifle. Once you are unable to spot any enemies, take the stairs back down to the street and try to get a view of the pier from across the street. Kill as many enemies as you can from a safe distance, but be sure to save some Sniper Rifle ammo for the final encounter with T-Bone. Be sure to pick up the SMG or Machine Pistol ammo dropped by your enemies. Make your way to the pier once the first part of it is relatively clear. There are Ballas up and down the walkway that runs along the peer so proceed with caution. Get yourself up onto the walkway and start making your way towards the end. When you reach the end of the walkway, you should be able to spot T-Bone Mendez in the sitting area below. Use your Sniper Rifle to quickly kill him off with a shot to the head. After the cutscene, jump into the water and swim towards the boat marked on your radar.
T-Bone
Boats
Ryder is your final target. Getting the job done is simple enough; all you must do is get close enough to him to perform a drive-by on his boat. Hit the boat with gunfire until it catches fire and subsequently explodes, killing him and completing the mission.
Ryder
Drive-by
It's time to take out the mastermind of this whole operation. Get yourself a vehicle and make your way to the helipad, denoted on the radar by a yellow icon. If you still have a Sniper Rifle from the previous mission, you may want to kill the guys on the helipad from a safe distance, as they are heavily armed. When the way is relatively clear, approach the steps that lead up to the helipad to trigger a brief cutscene. Toreno's helicopter takes off, so you're going to have to blast it out of the sky. The Rocket Launcher is somewhere on the helipad, so pick it up, head back down the stairs and get into a vehicle.
Helipad
Rocket Launcher
Destroying Toreno's helicopter is a decidedly difficult task; besides the fact that hitting a moving target with a rocket is not easy, there are two goons onboard who will open fire on your vehicle if you get too close which can quickly set it on fire. The helicopter seems to follow a predetermined path; it will first fly south down the highway that runs through San Fierro, then it will take a long route through the Badlands to Leafy Hollow in Flint County. The best chance you have to complete this mission is to get to the southern end of the highway before the helicopter arrives there.
When you reach the bottom of the helipad steps, get into the blue van that's there and drive through the nearby parking lot. Once you are on the road, drive south until you reach the highway on-ramp in Foster Valley. If you were able to travel from the helipad without issue, the helicopter should still have quite a ways to go before it reaches the end of the highway. Drive to the end of the highway, get out of the car and plant yourself somewhere along the dirt road. When Toreno's helicopter reaches this point it should stall for a moment, presumably to gun you down, but this is actually the perfect opportunity to end this. Quickly hit the helicopter with one or two rockets to destroy it.
Helicopter
Whetstone
If you missed this opportunity, the helicopter will go on to fly through Flint County. You can continue the pursuit if you wish, but it would probably be best to restart the mission and attempt the above method again, as downing the helicopter in the Badlands is much more difficult and a potential timewaster if you reach the end without completing the objective.
According to Wu Zi, your former friends have a factory in San Fierro; blowing up the place is the next logical course of action. Wu Zi has prepared a wired car to do the job, so make your way to the bomb shop in the Financial district to pick it up. Next, travel to the crack factory in Doherty, just a couple of blocks from your garage. Run over the two guards standing by the gate and kill them to trigger a brief cutscene. More enemies will appear and try to stop you so run over them or step out of your vehicle and gun them down.
Bomb Shop
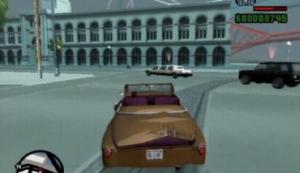
Crack Factory
Afterwards, follow the yellow marker on the radar to a ramp. Drive up the ramp to reach the lab, then drive to the other end of this area and park in the red marker. Activate the bomb by pressing and holding the button that appears in the top-left corner of the screen. When the bomb is set to blow, you have 40 seconds to escape the warehouse. A group of goons has been deployed to hinder your escape, so run-and-gun to the exit before the timer reaches zero. Outside you will encounter yet more enemies; kill them off and make your way to the gate.
Ramp
Red Marker
The gate will close when you reach it, but there is a large ramp that you can use to escape. Get in the car near the gate and start towards the yellow marker on your radar. You'll encounter more guys along the way but pay them no heed, just continue towards the ramp. Hit the ramp to reach the stacked cargo containers and from there, drive down over the wall. Drive into the red marker at your garage in Doherty to complete the mission and earn a sizeable cash reward.
Travel to Jizzy's club which is beneath the Gant Bridge in the northwestern part of the city and step into the red marker. After the cutscene, hop into Jizzy's car and drive his girl to downtown San Fierro. With that done, your next task is to take out his competition; a pimp operating in Hashbury. You have two hours (San Andreas time) to make the hit, so waste no time. Try to take him out with a quick drive-by when you first roll up; that, or you can just run him over. If he manages to take off down the alleyway, step out of your vehicle and chase after him. Gun him down before he can get to his car, because if he does manage to, you'll need to return to your own car to chase him through the streets.
Target
Next, Jizzy wants you to save one of his girls; she's being pummeled by a couple of punters beneath the overpass in Foster Valley. Make your way to the spot and take out the two punters before the victim's health bar is depleted. The last job is the toughest; you have to chase after the preacher and destroy his limo and the escort. You aren't able to drive them off the road so you'll have to use your Machine Pistol; drive right next to a target vehicle and fire away until it catches fire. Keep your distance from the flaming vehicle to avoid taking damage from the subsequent explosion. The mission is complete when both vehicles have been destroyed. You'll have a two-star wanted level afterwards, so make your way to a spray shop to lose the cops.
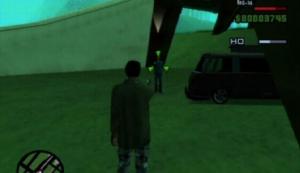
Punters

Preacher
You will be automatically placed onto a motorbike when you reach the ambushed van. You must retrieve the packages from the four bikers before they reach their rendezvous point. Use your radar to track down the thieves, then get close enough behind one to snatch the package from the back of their motorbike when the prompt appears (L1 on the PS2 version). These guys can be hard to tail as they'll occasionally do a 180 and head the other way, or take a sharp turn onto a different street. Just don't let up and eventually you'll close in on them.
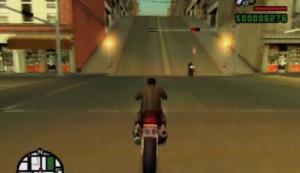
Biker
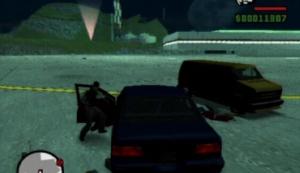
Package
The bikers can also be killed with a Micro SMG, but doing so is a bit tougher than just snatching the packages. If you happen to find yourself beside one though, use your SMG to knock him off his bike. When your target has fallen, get off your bike and retrieve the package from the fallen biker's motorcycle. Each biker is carrying a Micro SMG so be sure to pick up the weapon after downing one. Regardless of how you carry this out, bring the four packages to Jizzy's club in order to complete the mission.
One of T-Bone's associates, Mike Toreno, has been kidnapped. It's your job to rescue him, but unfortunately he is trapped in the back of a van and can't tell you where he is. To make matters worse, his cell phone battery is low, so you'll have to locate him in under six minutes. The van is actually at the Easter Bay Airport at the other end of the city. Rather than wasting your time putting around town, open up your map and put a target at the airport entrance and head over there.
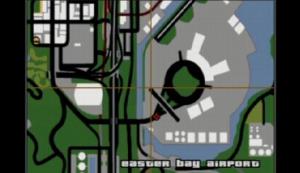
Airport
You'll start to receive a signal from Mike's tracking tag when you reach the airport gate. The van is located somewhere in the airfield behind the terminal building, so make your way onto the airfield and head in the direction that fills the Signal bar in the top-right quarter of the screen. When you've found the van, chase after it—knocking the two goons off of their motorbikes—until it stops. In order to save Mike, you will have to kill the goons that emerge from the van. After the cutscene, help the others destroy the van (one shot to its fuel tank should do it), then quickly hop back in the car and drive to the airport gate.
Van

Goons
Head to the nearest spray shop to lose the three-star wanted level, then return to Jizzy's club to complete the mission and receive a sizable cash reward.
Wu Zi will phone you sometime after the completion of “Jizzy” in Jizzy's mission line. Follow the ‘W' symbol on the radar and step into the red marker to accept a mission from him. There is a buyable safe house right around the block which you can purchase for the benefit of a nearby save point, granted you have the cash.
You'll want a powerful weapon (SMG, AK47), and perhaps some Body Armor, before attempting this mission. Wu Zi Mu, who reveals himself to be leader of the Mountain Cloud Triads, asks you to accompany him to confront a local Triad who was a no-show at the last group meeting. When you gain control over CJ, walk across the street and get into the car that's parked there. Drive around the block and into the red marker outside of the Tong meeting area. The crowd gathered there quickly funnels out into the street, so something must be amiss. Approach the gate at the end of the way to trigger a brief cutscene.
It immediately becomes apparent what caused the others to flee; several Triad gang members lie dead, their cars trashed. A couple of cars packed with rival gang members roll up; crouch down and take them out as they exit. There are more of them down the alleyway, a whole mess of them, so proceed with caution. There is a dumpster that you can crouch behind when facing the gang members at the last stretch. Once they have been dealt with, you'll have to take out the cars pursuing you. Ideally you have an SMG of your own, otherwise you will have to allow Wu Zi to take them out himself. Once the rival gang's cars have been destroyed, drive Wu Zi back to his place to complete the mission and receive a cash reward.
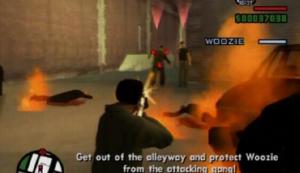
Gang
Shootout
Wu Zi introduces you to one Shuk Foo Ran Fa Li, leader of the Red Gecko Tong group. The Shuk Foo would like you to retrieve a package for him, which has been dropped off at the Easter Bay airport in San Fierro. Get into a vehicle (the ZR-350 parked across the street will do) and drive to the red marker outside of the airport car park. Make your way to the blue marker on your radar and get into the car that it points to. Upon entering the vehicle you are ambushed by the Da Nang Boys. Your task now is to get this vehicle to the docks at the north end of the city in one piece.
Package
Getaway
The Da Nang will cover the car park exits with trucks, but you should be able to squeeze through them with minimal effort. Drive out of the car park and out of the airport. Be careful though, as there are Da Nang road blocks along the way. Once you're out of the airport you will be pursued by two motorbikes. They're fairly easy to avoid, however, because, luckily, the way to the garage in Esplanade North is a single road that stems out from the airport, leaving you without the added concern of having to tackle any sharp turns. If happen to be packing an SMG or Machine Pistol, you can just take out the two pursuing motorbikes for a much easier time. There will be one last Da Nang vehicle waiting for you right outside of the garage, so swerve out of the way to avoid being hit and drive into the red marker to complete the mission.
Da Nang
Garage
Your task now is to lure the Da Nang Boys away from Wu Zi's place so Fa Li can make it out safely. Get into the decoy car parked outside of Wu Zi's place and start towards the yellow icon on the radar. The red marker is way out in Angel Pine, so you've got quite a ways to go. You must remain in the decoy car at all times, as the Da Nang Boys are under the impression that Fa Li is traveling in the vehicle. When you reach the spot, drive into the red marker to get started.
Decoy Car
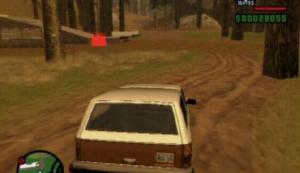
Red Marker
After the cutscene, your job is to drive the decoy car through a series of waypoints in the countryside to lead the pursuing motorbikes to the endpoint in Whetstone. The “Damage” meter in the top-right quarter of the screen represents the condition of the vehicle's doors. If the Damage meter reaches zero, your pursuers will be able to see into the car and thus realize that it is a decoy. They will then give up the chase, resulting in a mission failure. Your task is not an easy one under normal circumstances, so it is almost obligatory that you have an SMG or Machine Pistol with you to fight off the pursuers. They are relentless, and the track is of considerable length, so you'll have to gun them down while they're riding next to your vehicle. Once all of the motorbikes have been decommissioned it's smooth sailing. Hit the final waypoint in Whetstone to complete the mission.
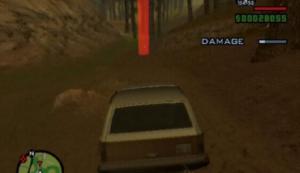
Waypoint
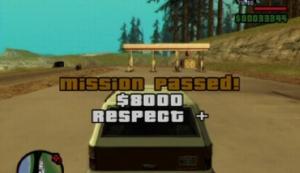
Final Waypoint
This mission can only be attempted if CJ's “Lung Capacity” skill has been upgraded a couple of times. It doesn't take very long to attain the necessary skill level, even if you have yet to swim underwater. If your skill isn't high enough, spend some time underwater—coming up for air as necessary—until your Lung Capacity skill has reached the level shown in the image below. When the skill level is adequate, step into the red marker outside of Wu Zi's place between 20:00 and 6:00 to get started.
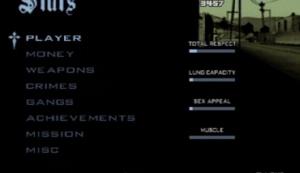
Lung Capacity
Make your way to the docks once you're all suited up and step into the red marker. You'll first have to follow a series of checkpoints out into the open waters. A couple of the checkpoints are underwater rings which you must swim through an underwater tunnel to get to. The bare minimum Lung Capacity needed to start this mission is enough to get past these tunnels without any trouble, just swim through as quickly as possible and resurface for air as soon as you're through.
Docks
Patrol
Your target is the tanker out at sea. You need to swim over to the tanker, get onboard and plant the bug somewhere. Unfortunately the waters surrounding the tanker are being patrolled by Da Nang Boys, so this will not be a walk in the park. If you are spotted by one of the boats, immediately dive under the water and wait there until they forget about you. You have to swim around the tanker to get to the stairs that lead up onto the deck, all the while avoiding the searchlights that are scanning the waters. When you reach the stairs, climb out of the water and head up the stairs.
Tanker
Stairs
Once onboard, your task is to plant the bug at the back of the tanker. There is a knife at the top of the stairs which you can pick up. This knife can be used to quietly remove any hostiles in your path. To stealth-kill an enemy, sneak up behind him with the knife equipped, lock-on and press the Attack button when CJ raises the knife. Avoid firefights if at all possible, but you can go guns blazing if you have the means to. If you want to play it stealthy, crouch down and start moving forward. The cargo containers on the deck provide some nice cover, allowing you to peek around corners to see if there is anyone waiting for you there. All of the men on the deck are marked on your radar with red icons, so refer to that to avoid being spotted.
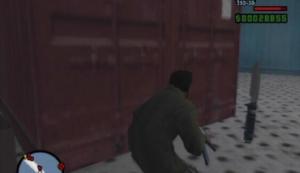
Knife
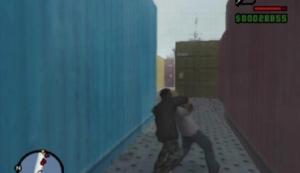
Stealth-kill
When you reach the back of the tanker, head through the doorway and climb down the steps until you reach the spot to be bugged. Step into the red marker and plant the bug when the prompt appears. Afterwards, make your way back to the deck and jump ship. You have to swim over to the red marker below the docks; the Da Nang Boys patrolling the waters are still keeping an eye out for would-be-intruders, so follow the same routine as you did when approaching the ship. Step into the red marker across from the tanker to complete the mission and receive a nice cash reward.
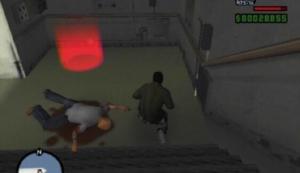
Bug Spot
Docks
You'll want some Body Armor for this one, so take the time to stop by the Ammu-nation in Ocean Flats if you need a suit before stepping into the red marker. For the first part of this mission you are strapped into a helicopter for a short on-rails sequence. Your job here is to use the mounted Mini-gun to kill off the Da Nang Boys on the ship as the helicopter flies by it. You can miss every single one of them and still pass this bit, but it would be beneficial to you to take some of them out before you have to step onboard. The helicopter will be hit by an RPG as it winds around the ship, causing it to crash into the water. CJ miraculously survives the crash, though you are now without your weapons, save for a knife. Swim over to the freighter and into the red marker.
Ship
As you are without a ranged-weapon, you'll have to stealthily take out an armed enemy to get your hands on one. The enemy nearby fits the bill; to stealth-kill him, sneak up (moving while crouching) behind him with the knife equipped, lock-on and press the Attack button when CJ raises the knife. Pick up the guy's weapon, though you will probably want to keep things low-key for as long as possible. Climb up onto the cargo containers and try your best to quietly take out the hostiles in the vicinity. Once you've got your hands on a Machine Pistol, use that to kill your enemies instead.
Stealth-kill
Containers
You must make your way down into the hull of the ship, the way there being located at the other end of the deck. You'll have to traverse a couple of cargo container stacks to make it there. The enemies onboard are not marked on your radar so you'll have to move slowly and check those corners. There is a health pack on board which can be used to refill your health bar if need be, so keep an eye out for it. Drop down into the hull when you reach it and hit the red marker to get started.
Health
Hull
There is Body Armor in the enclosed space off to the right which you can pick up for some added protection. The way from here to where the refugees are being held is littered with Da Nang Boys, so tread carefully. Kill off the guard at the end of this area and then approach the marked cargo container. Take aim and blast the padlock to free the refugees inside. Once they have been released, your next task is to kill the katana-wielding man on the bridge. Make your way to the other end of the hull and climb back up the stack of cargo containers to reach the deck.
Bridge
Climb up the containers to get a clear view of the bridge. Gun down the enemy standing by the door, then hop down onto the walkway. Head through the open door and take out the enemies at the top of the stairs. Head up the stairs until a brief cutscene is triggered. The Da Nang leader will throw you a katana with the intention of facing you in a duel. Forget honor; whip out a gun and blast him before he gets too close! Once he has been dealt with, meet the refugees on the deck to complete the mission.
Leader
Refugees
Once you've completed the “Wear Flowers in Your Hair” mission in CJ's mission line, Zero will phone you; his landlord is reclaiming his electronics store in Garcia, Zero RC. If you purchase the lot, you can then accept a couple of missions from Zero. At $30,000, the place comes with a hefty price tag. These missions are completely optional though, so you can move through San Fierro without completing them.
Zero RC
Berkley, Zero's arch-nemesis, has deployed a flight of RC Barons and is dead-set on shutting down the transmitters on the roof of Zero RC. Using the gun emplacement, you are to shoot down the Barons before they destroy the transmitters. The meter in the top-right quarter of the screen represents the transmitters' joint signal strength. The meter will fall if a transmitter is destroyed, and if the meter empties completely, its mission failed. You must fight off the planes for two minutes with at least one of the transmitters still standing. It's best to attempt this mission during the day because it can be hard to spot the RC Barons in the night sky. Keep an eye on your radar for incoming planes, set the mini-gun in their path and fire away. It doesn't take much to bring one down, but as time goes by the planes will start coming in groups.
Transmitters
This mission can be a bit tough, but it's nothing compared to the mission that follows…
This is a difficult one, considered by many to be the toughest mission in the game. Luckily it's optional, so you can skip it if proves to be too much of a bother. Apparently the difficulty of this mission was toned down for the Greatest Hits version of San Andreas, so count yourself lucky if you're playing that one. Using the RC Baron, you must eliminate all five of Berkley's couriers before they complete their deliveries, or before the RC plane runs out of fuel. Three of the couriers are in vans, one is on a bicycle and the other is on a motorbike. The fuel meter in the top-right quarter of the screen will decrease as time goes by, so you must eliminate all of the couriers and return to the rooftop of Zero RC before it's depleted. Completing this mission will require practice, a bit of luck, and plenty of patience.
The key to success here is practice. You must be able to pilot the RC Baron, which may take a few runs through the mission. If you wish, ignore the couriers and instead practice controlling the Baron, putting particular emphasis on swooping down and perhaps targeting pedestrian vehicles with the plane's machine gun. Luckily, since your life is not in immediate danger during this mission, in the event of a mission failure you can simply step back into the red marker outside of Zero RC without having to travel back there.
RC Baron
Once you feel you have the controls down pat, attempt the mission with the intent of completing it. There are two couriers nearby at the start; one in a van and the other on a bicycle. While the absence of a target marker suggests no auto-aim, the machine gun seems to target the couriers as long as the RC Baron is facing towards them. Target the van first; swoop down and hit it with gunfire, this driver should get out once the van has been hit, allowing you to gun him down. Afterwards, swoop around and go for the courier on the bicycle. He is easy enough to take out; just swoop towards him and fire away.
That's two down, three to go. That leaves two vans and the motorbike. The order in which you go for the remaining targets is up to you, but be aware that you will have to actually destroy the other vans, as the drivers won't flee from them. The final three targets are particularly difficult to take down in that they will fire at the RC Baron, which cannot sustain very much damage at all. For this reason, when targeting one of the vans, avoid flying near the passenger's side. The machine gun can destroy the vans fairly easily, so fly off as soon as you spot the van on fire. The motorbike courier will shoot at you also, so fly high for the approach and swoop in for a quick kill. When all five of Berkley's couriers have been dealt with, make a beeline for the Zero RC building. Land on the red marker to complete the mission.
Red Marker
Help Zero's RC Bandit reach Berkley's encampment before the time runs out to complete this mission. You are controlling the RC Goblin helicopter; using the magnet attached to it, you'll have to move steel barrels out of Zero's path, place planks over gaps, and destroy Berkley's RC Tigers. Berkley's own RC Goblin will be drop steel barrels along the route to his encampment to impede the Bandit's progress, so scan the path ahead and clear the way as soon as possible. You'll have to return to Zero's base to fetch planks when the Bandit reaches a river. Just carry the plank over to the gap and drop it down. Don't fuss too much over the placement, as it will automatically set itself in place.
Battlefield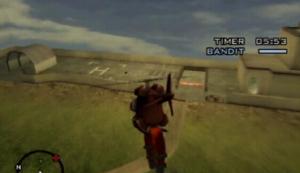
RC Goblin
Berkley has set up three RC Tiger tanks near his encampment that can damage Zero's Bandit. Drop the bomb in Zero's base onto one of the tanks; you'll have to drop steel barrels to destroy the other two. Zero has three RC Bandits in stock, so if one is destroyed he can send out another. However try your hardest to clear out the three RC Tigers before they can destroy Zero's initial Bandit, otherwise you will have to follow the new Bandit along the entire path again. The mission is complete once the Bandit reaches Berkley's camp.

 How to Summon all the NPC, Location and Requirements in Bloodborne: The Old Hunters
 Assassins Creed: Brotherhood Guide
 Demi Lovato will voice Lead Role, Lenore, in Charming
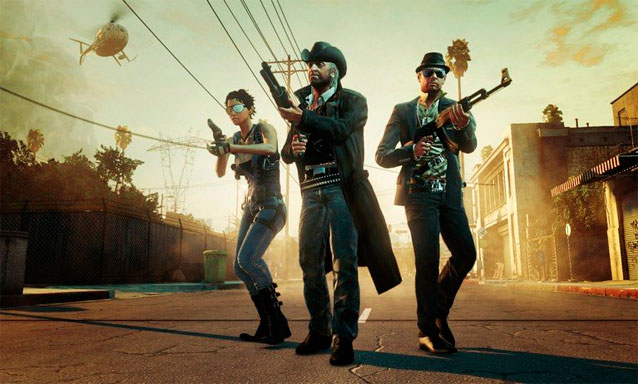 Interview: Samuel Jacques, Producer of Call of Juarez: The Cartel
 Hordes of Flesh-Eating Narratologists