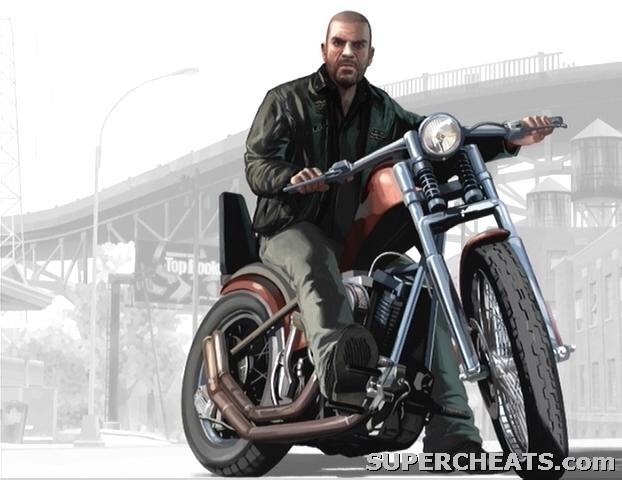
The Lost and Damned is the first of two planned episodic expansion packs for the Xbox 360 version of Grand Theft Auto IV. The expansion pack offers a bevy of new features, including a new story arc played from the perspective of Johnny Klebitz, a veteran member of The Lost Motorcycle Club.
If you were not a fan of the stand-alone game, The Lost and Damned is unlikely to change your opinion, but for fans of Grand Theft Auto IV, this content offers a worthwhile experience.
This guide contains a complete walkthrough of Johnny’s storyline, as well as information on every side mission, mini-game, random character, and new multiplayer mode.

The Lost and Damned is a downloadable expansion of sorts for Grand Theft Auto IV, available exclusively on the Xbox LIVE Marketplace.
If you’re wondering why this content is Xbox 360 exclusive, here’s why in a nutshell: Take-Two Interactive, the game’s publisher, offered additional downloadable content to both Sony and Microsoft, for a price. Microsoft paid a reported $50-million for two episodic expansion packs, while Sony passed. Therefore unfortunately, only those with an Xbox 360 and the Xbox 360 version of Grand Theft Auto IV can experience The Lost and Damned.
As of this writing, The Lost and Damned is available for download on the Xbox 360 marketplace for 1600 Microsoft Points, which equates to roughly $20 USD. The content requires 1.78 GB of free HDD space.
After downloading the content, make sure you remain connected to Xbox Live and download the latest update for Grand Theft Auto IV. To switch from Grand Theft Auto IV to The Lost and Damned, select “New Game” under the “Game” section of the pause menu, and then select “The Lost and Damned.”
The Lost and Damned downloadable content includes the following:
*23 new missions, played from the perspective of Johnny Klebitz, co-leader of The Lost Motorcycle Club.
*New side missions and mini-games.
*Six new weapons: the Grenade Launcher, Assault Shotgun, Automatic 9mm Pistol, Sawed-off Shotgun, Pipe Bomb, and the Pool Cue melee weapon.
*A collection of new bikes: the Diabolus, Hexer, Lycan, Hellfury, Innovation, Revenant, Wayfarer, Daemon, Wolfsbane, Angel, Nightblade, Double T, Double T Custom, Hakuchou, Hakuchou Custom, Bati 800, and the Bati Custom.
*Three new vehicles: the Towtruck, Gang Burrito, and Slamvan.
*Six new multiplayer modes: Chopper vs. Chopper, Club Business, Lone Wolf Biker, Own the City, Motorcycle Races, and Witness Protection
*Over 50 new tracks added to the L.C.H.C., Liberty Rock Radio, Beat 102.7, and Radio Broker radio stations.
*Additional TV and internet content.
*Five new achievements worth 250 gamer points.
GTA 4: The Lost and Damned Guide
The Brothers
Being a high-ranking member of The Lost Motorcycle Club has its perks. Several of Johnny’s friends offer services which appear as an option in their respective Phonebook menu.
Clay’s Bike Garage: If Clay is available, you can have him drive over a bike to your current location. Select “Bikes” from Clay’s phonebook menu and then choose one of the bikes from the list. As you progress through the storyline, more bikes will be added to the list.
Terry’s Gun Van: Select “Gun Van” from Terry’s phonebook menu and if he is available, Terry will drive his van out to a nearby location that is then marked on the radar. You can purchase weapons and armour from Terry at a reduced price by traveling to this location.

Jim’s Guns: From Jim’s phonebook menu, select “Weapons” and then choose one of the weapons from the list to have him deliver that weapon to The Lost clubhouse. Once you’ve spoken to him, you can find the weapon on a table in the arm-wrestling room on the second floor of the clubhouse.
Backup: Call either Clay or Terry for backup and if they are available, both of them will drive to your current location to aid you. They both have a motorcycle of their own, and will follow you until the end of the mission, or if they sustain too much damage. During certain missions, calling Clay or Terry for backup can be of great benefit.
The Lost and Damned adds five achievements worth 250 points total to Grand Theft Auto IV. Each achievement unlocked contributes a certain amount of points to your overall gamerscore.
 1. TLAD: One Percenter
 2. TLAD: The Lost Boy
 3. TLAD: Easy Rider
 4. TLAD: Get Good Wood
 5. TLAD: Full Chat
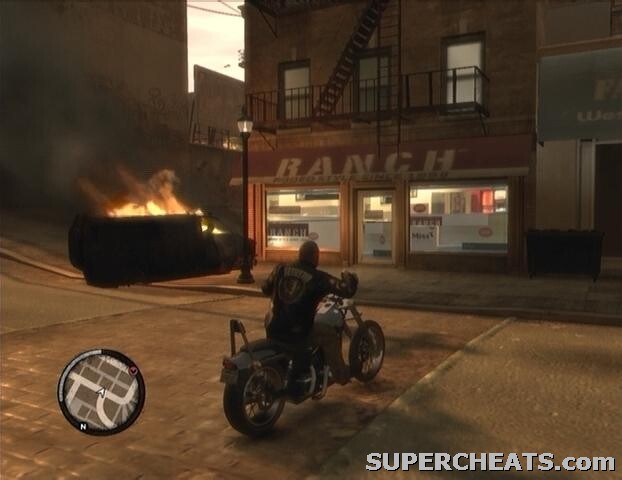
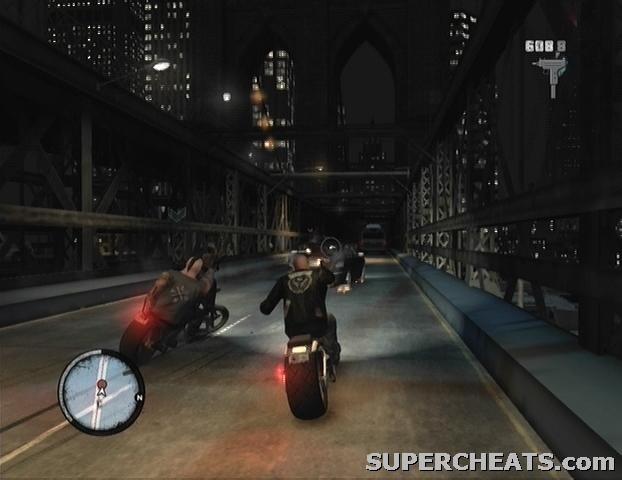
Follow the marked route on the GPS to The Lost clubhouse. Stick close to the gang on the way there to hear their chatter. When you reach the spot, hit the yellow marker to trigger a cutscene.
Your first task is to retrieve Billy’s bike from the chop shop in Bohan. Make your way to the chop shop and hit the yellow marker outside to trigger another cutscene. Unfortunately, Billy’s bike has long since changed hands, and is currently in the possession of a rival gang, known as the Angels of Death. Their hangout is located in Northwood, Algonquin. So start towards there.
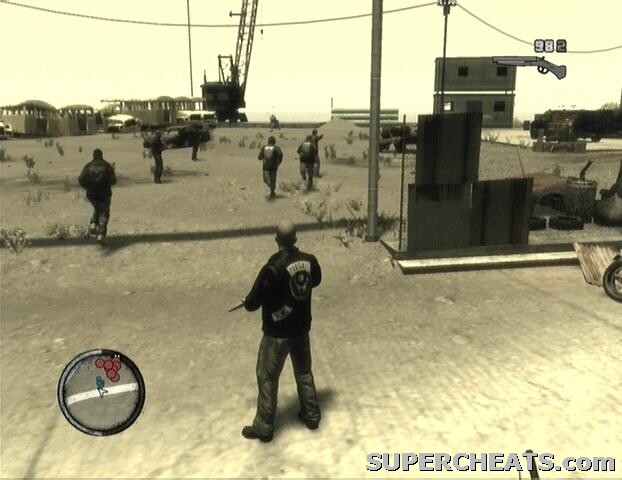
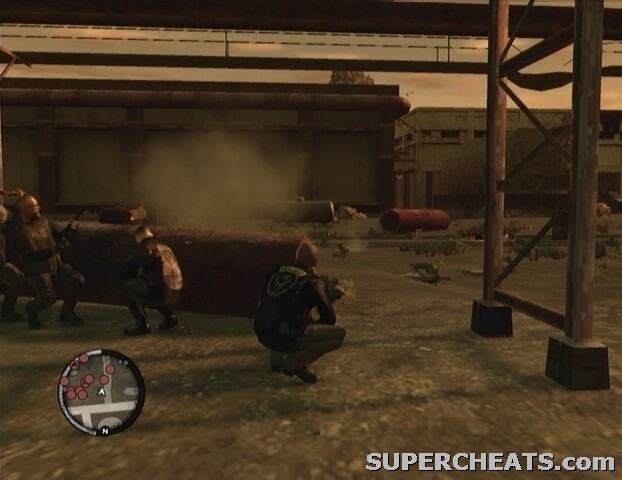
When you reach the place, a number of red markers will appear on the GPS. These markers denote enemies, and there are about eight of them. Fortunately you aren’t flying solo, so clearing the place and procuring Billy’s bike is not an overly difficult task. You’re armed with only a Sawed-off Shotgun, so you’ll have to get fairly close to your target to do any real damage. There are a couple of wrecked cars at the top of the area that can be used as cover. There are also several explosive barrels scattered about, so take advantage if an unwitting enemy decides to seek cover by one.

Once the Angels of Death have been dealt with and Billy has his bike, hop on your own bike and trail after him. While Billy is leading the gang, periodically a gang badge will appear on the road in the middle of the formation. If you keep in the badge for a short while, you’ll gain some health back and have your bike repaired. Follow Billy and the gang back to The Lost clubhouse to complete the mission.
You’re tasked with taking out some fleeing Angels of Death members. You have gang support here, but your allies tend to be more of a hindrance than a help, so it’s essentially up to you. Armed with a Sawed-off Shotgun, drive up behind a fleeing biker and use LB and the Right Thumbstick to send him to the asphalt. Be sure to take out the driver, as well as the passenger.
There are six bikes total to pursue; try to take as many of them out as possible before they reach the end of the line. If you take too much time in stopping the enemy bikers, you’ll have to face the remaining Angels of Death outside of their clubhouse in Middle Park, without any support from your allies.

When every one of the fleeing bikers has been taken care of, you’ll get a call from Billy, instructing you to meet with the gang in Northwood. Make your way to the meeting spot to complete the mission.
Something more suitable than a Sawed-off Shotgun will be necessary here. You can get a fully-loaded Micro-SMG by calling Jim. From Jim’s phonebook menu, select “Weapons” and then “Micro-SMG” to have him leave the weapon for you in The Lost clubhouse. Once you’ve spoken to him, you can find the weapon on a table in the arm-wrestling room on the second floor.
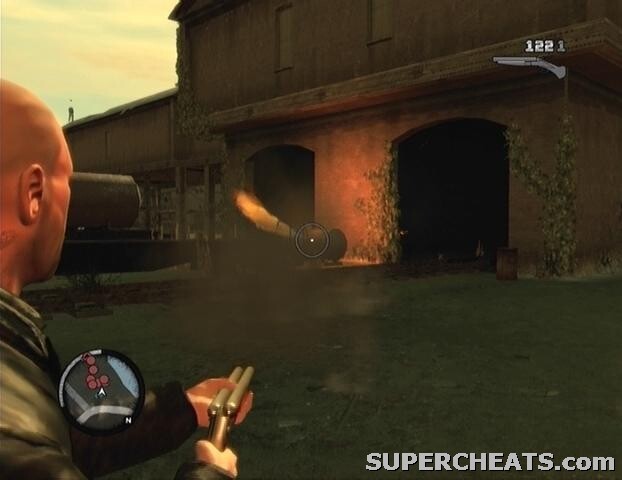
A.O.D. members have been actively attacking members of The Lost MC, so you’re going to have to hit two of their compounds to send a message. Follow Billy and the gang to the first spot, dismount, and then quickly grab some cover. There are several large propane tanks scattered throughout the area, and shooting at one will eventually cause it to explode. Be wary of taking cover behind one of these tanks yourself, because even a single bullet will puncture the tank and send flames streaming out. Keep a safe distance from the propane tank before setting it off, hopefully taking out any enemies that happen to be within its blast radius.
There are a couple of enemies on the rooftop as well; you’ll want to take these guys out first, since they can easily get a bead on you even while you’re behind cover. Check your radar for markers with an arrow pointing upward, as these denote enemies that are above. There is plenty of cover to choose from in the field, so don’t stand out in the open. A health pack can be found by the trailer parked at the south end of the compound.
Once the first group of enemies have been taken care, return to your bike and follow Billy and the gang to the next compound. There are even more enemies here, and several of them have taken to the elevated pipeline. Take cover behind the red pipe piece by the entrance and start picking off the enemies visible in the distance. There is a health pack near some rubble on the west side of the road. Some Body Armor can be found in the small building along the west side of the stone wall, however there are likely enemies hiding inside, so leave it alone until the area is clear.
When the enemies at the front of the compound has been dealt with, move around to the back. A couple of vans will soon drive up and park nearby; they should park right by an explosive barrel, so set it off as soon as the enemy gang members step out. Throughout the battle, keep an eye on your GPS for any enemies that have migrated to the pipeline. When each and every marked enemy has been taken care of, scour the battlefield for ammo, and grab the Body Armor in the small building where The Lost gang parked their bikes. When you’re ready to move on, approach Johnny’s Hexer to complete the mission.
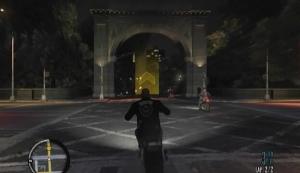
It’s time to take this fight straight to the A.O.D. clubhouse. Follow Billy and the gang until a marked route appears on the GPS, and then race for the clubhouse in Middle Park. When you reach the place, you’re handed a Grenade Launcher and instructed to launch a grenade through the second-floor window. Enter Free Aim by holding LT and aim slightly higher than your target. Aim just below the top of the window frame and the grenade should make it through.
Immediately after the grenade goes off, a drove of enemies will funnel out of the clubhouse and into the street. Keep your head down and launch a grenade or two into a cluster of enemies. These grenades take a bit of time to go off, which unfortunately affords your adversaries plenty of time to scatter. Nevertheless, the grenades can quickly destroy the parked van by the alleyway, likely taking out a number of enemies in the explosion. Stay behind the barrier and pick off the marked enemies until their spawning ceases.
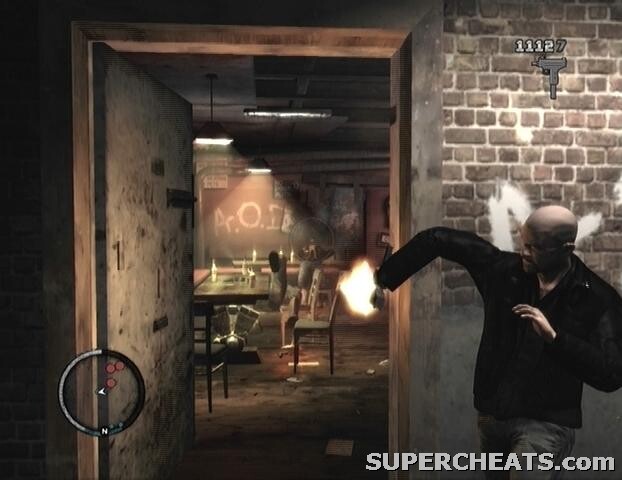
The next step is to enter the clubhouse. Follow Billy through the front entrance and take cover by the door at the end of the hall. Blast the enemies that are visible in the bar, and then move in and take cover behind the counter. An enemy armed with a Sawed-off Shotgun sits behind the bar, so quickly blast to avoid taking a hard hit. Grab the health kit behind the counter if necessary, and remain then remain behind the counter and pick off any enemies that enter from the next room.
When the bar is clear, follow Billy downstairs and take out the guys there. After the cutscene, head back outside, hop on the Hexer, and clear the area before the cops arrive to complete the mission.
Complete “Off Route” in Stubbs’ mission line to trigger this mission. While following Billy and the gang, get in formation as often as the gang badge appears, because you’ll need the extra health and armour for the firefight to come.
When you reach the marker, a couple of cutscenes will ensue. After the second cutscene, as soon as you gain control over Johnny, grab some cover behind the nearby generator. There are two Triads on the walkway, and one on the roof. Concentrate on taking out the two guys nearest to the generator first, however. Keep to the left end of the generator and blast them before they can get too close.

Pick off the Triads up above, and then help Jim take out the remaining enemies at the other end of the roof. Afterwards, start following Jim around the side of the building. Keep an eye on your radar, because a couple of enemies will slide in as you near the corner. You’ll eventually come to an open room. This room is, of course, full of enemies, so don’t rush in there. Stay outside and eliminate as many of them as you can see, and then slowly move forward and take out those that were out of view. A health kit can be found at the end of the walkway, so once the room is clear, be sure to collect it before moving on.
Your next task is to make it back to street level. You’ll meet more enemies along the way, but luckily you’ll have a height advantage this time. Before climbing down one of the ladders, be sure to clear the enemies on the floor below from up above. Once you’ve made your way to the second floor, a cutscene will ensue.
After the cutscene, return to the parked Hexer, hop on, and lead the gang back to The Lost clubhouse to complete the mission.
You’ll get a call from Jim after completing “Serene and Clean” in Billy’s mission line. He wants you to meet him in Acter; just a short ways from The Lost clubhouse. Make your way to Jim’s location and hit the marker there to get started.
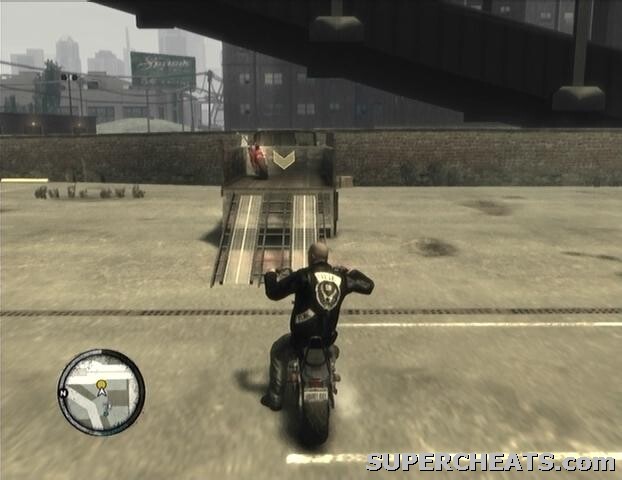
The truck is in Alderney City, so follow the marked route on your radar. When you reach the truck, dismount and get in the driver’s seat. You’re headed for a diner in Tudor, where you’ll be seizing some A.O.D. bikes. Drive the trunk into the marker in the diner parking lot to begin.
There are five bikes parked in the lot. A ramp has been affixed to the back of truck, allowing you load the bikes into the back. Get on the first bike and drive it up onto the back of the truck. A group of enemies will come out of the diner as soon as the first bike has been taken. Bring up your cell phone and call either Terry or Clay for backup. A good spot to sit is on the road along the west-end of the parking lot. From there, you have a full view of the enemies around the diner.
Once the enemies have been dealt with, continue loading the bikes onto the back of the truck. Load four bikes onto the truck, then get in and pull out of the parking lot. Some more gang members will start tailing you here, but don’t bother trying to fight them off. Just speed to Jim’s the drop-off point. Drive the truck into the marker to complete the mission.
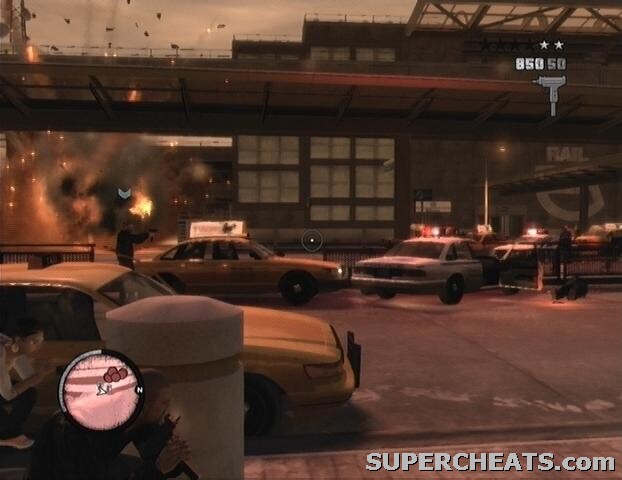
Race Jim to the marker outside of the police station to trigger a cutscene. After the cutscene, start toward the yellow marker on your radar. You have to lure the crooked cops to an ambush spot, so don’t ride too fast, otherwise they’ll lose sight of you. When you reach the spot, get ready for a fight. Drive to two stacks of oblong boxes at the back of the area and take cover there.
The two cops that were pursuing you call in backup, and a lot of backup at that. Luckily there are some conveniently placed explosive barrels that the cops tend to huddle around. If you take advantage of these barrels, surviving here shouldn’t be overly difficult. If you’re taking cover behind one of the stacks of boxes, you should be able to spot a pair of explosive barrels out in the open further ahead. Blast one of these until it goes off, hopefully clearing out some of the enemies. Take out as many of the enemies as you can from your current shelter and then move over to the west side of the south-most building.
If you peek around the corner here, you should be able to spot another pair of explosive barrels. Set these off to wipe out more enemies. Your best bet afterwards is to run around to the other side of this building, and hit the remaining enemies from behind. Take cover behind the base of the post at the west end of the area, and pick off as many of the enemies as you can from there. Crouch down and move up slowly if the remaining enemies are too far off to hit.
Clear each and every one of the marked enemies on the GPS, and then get on your bike and shake the cops to complete the mission.
Sometime after completing “This Shit’s Cursed” in Billy’s mission line, you’ll get a call from Jim. You can then begin this mission. The starting point for this mission is in Northwood, Algonquin. Follow the “J” symbol on the GPS and hit the marker there to get started.
You’re given a small supply of Pipe Bombs, which can be used to destroy the three Angel of Death vans that are driving around Alderney. Pipe bombs can be thrown while on a bike. When LB is pressed, Johnny will lob one of the Pipe Bombs to his left. The longer the LB button is held, the shorter the fuse, and the sooner the bomb will go off.
Since it takes a moment for the bomb to go off, your best bet is to drive a bit ahead of the target while holding the LB button, release the LB button to lob the bomb in its path, and then speed past it. The Pipe Bombs have a decent blast radius, so you don’t have to have impeccable aim or timing to demolish one of the targets. Just be careful that you aren’t caught in the blast yourself.
The goon in the passenger’s seat of each van will open fire as soon as you come into view, so it might be best to take out the vans as they’re coming toward you. This way you won’t need to trail after them, and can avoid taking some damage. If you just drive on the side of the road opposite that the target vehicle is headed down, you can simply toss a live bomb in its path and continue on your way.
One or more of the vans (most certainly the last) will have a number of escorts on motorcycles. Another motorcycle will spawn if manage to take one of the escorts out, so don’t bother. At this point it’s definitely best to hit the van as its coming toward you, since the escorts always follow behind the van.
It’s not imperative that you use the Pipe Bombs to destroy the vans; you can switch between weapons in your inventory while driving by pressing the X button. Furthermore, if you happen to have an RPG in your possession, it takes little effort to wait in a van’s path and send a rocket straight for it once it comes into view.
Destroy all three vans to complete the mission.
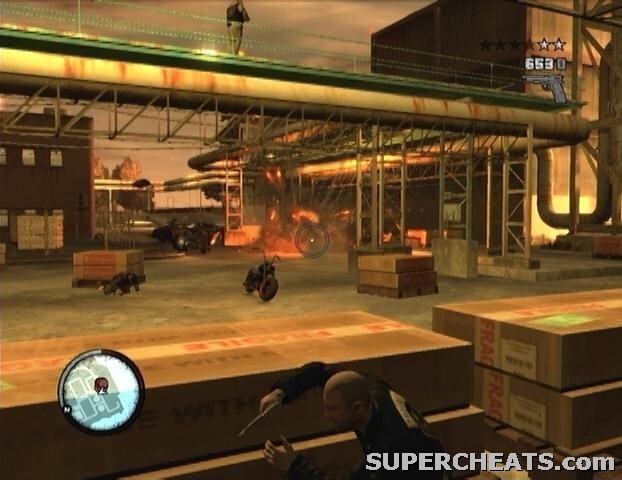
Make your way to Port Tudor to meet with Brian. Hit the marker there to trigger a cutscene. After the cutscene, remain crouched behind the stack of boxes and start blasting the enemies as they drive by on their motorcycles. They just continually circle the boxes in the middle of the dock, so stay behind cover until they’ve all been taken care of.
If you have leftover Pipe Bombs from the previous mission, they’ll be useful here, however be sure to save a good number of them for later on in the fight, when several vans full of enemies show up. As per usual, there are a number of explosive barrels scattered about the battlefield. Use these to your advantage, but make sure that none of your allies are standing by before setting one off.
Once the first batch of enemies have been dealt with, move up to one of the pieces of cover further ahead. A van full of enemies will eventually appear, so throw a Pipe Bomb next to it if you have one handy. A couple more vans will appear soon after, so be ready with an explosive. A pair of bikers will then enter the fray, so have a Sawed-off Shotgun or similar weapon out so you can quickly knock them off their bikes.
The last wave of enemies comes from the south; there’s a large propane tank by the fence that they scale, so set it off with gunfire when they appear.
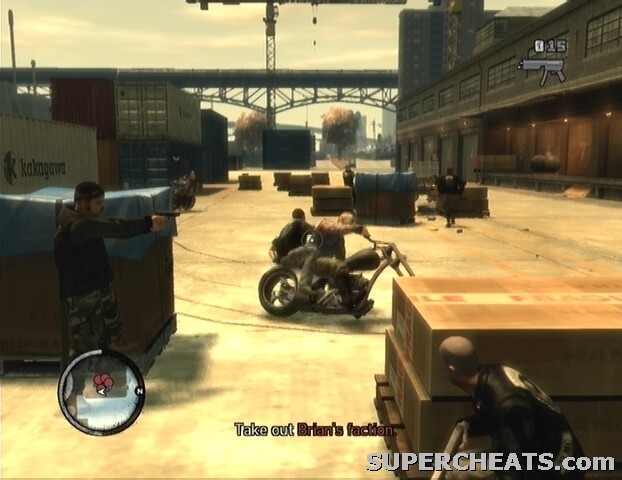
Afterwards, you’re tasked with taking out the remainder of Brian’s faction. These guys promptly take off on motorcycles, so you’ll have to go after them. Trail after the enemy bikers and send them to the asphalt. Once the stragglers have been dealt with, regroup with Jim to complete the mission.
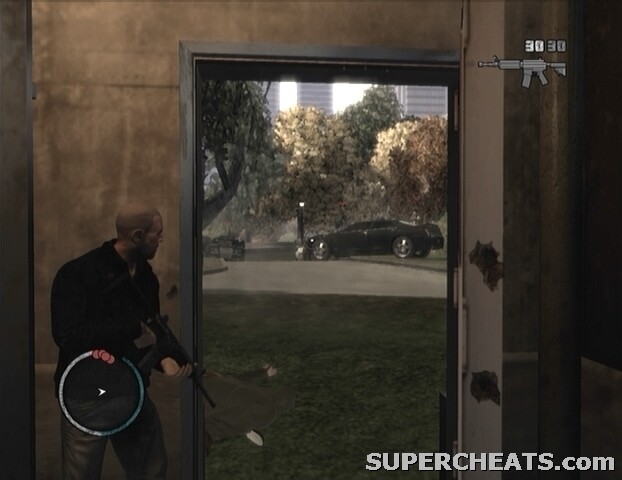
Brian’s safehouse is located in Tudor, so make your way over there and hit the marker outside to trigger a cutscene. The safehouse is heavily guarded, so phone Clay or Terry for backup before heading in. When Terry and Clay arrive, they’ll head to the back of the house and cover the rear exit. Once Terry and Clay are in position, stand in front of the safehouse and ready a Pipe Bomb. Aim the Pipe Bomb at the second floor, right-most window, and lob it through.
As soon as the Pipe Bomb goes off, dash to the back of the house with a gun ready. There’s a getaway bike waiting for Brian behind the house, and if he’s able to escape, you’ll have to chase him through the streets. If you can kill Brian before he can escape, all you’ll have to do then is clear out the safehouse.
There is another way you can go about completing this mission: if you actually go inside of the house first, rather than using a Pipe Bomb to smoke Brian out, you can fight your way to Brian and have the option of killing or sparing him. If you spare him, he will later appear as a Random Character. Note, however, that the mission associated with Brian’s random encounter does not count towards the 100% completion stat, so completing the mission as outlined above is probably your best bet.
With this mission complete, you can now stop by Brian’s old safehouse and save your game there.
After completing “Action/Reaction” in Billy’s mission line, you’ll receive a text message from Billy, instructing you to see a woman named Elizabeta in South Bohan. Follow the “E” symbol on the GPS and hit the yellow marker there to accept a mission from Elizabeta.
Make sure you have a fully-loaded Micro-SMG before beginning this mission. From Jim’s phonebook menu, select “Weapons” and then “Micro-SMG” to have him leave the weapon for you in The Lost clubhouse. Once you’ve spoken to him, you can find the weapon on a table in the arm-wrestling room on the second floor.
Follow the marked route to meet with Brian in Cerveza Heights, Broker. Once you have the package, head for the apartment in Schottler. The deal is going down on the third floor. A shotgun can be found leaning against the window across from the entrance, so swap it with your Sawed-off Shotgun or other weapon if you wish. Take the stairs up to the third floor and hit the marker by the window. Wait here for Niko and Playboy X.
As your radar lets on, the place is now crawling with SWAT members. Keep behind cover and hit the officers in the room across from you. There are more off to your right, so once you’ve dealt with all of those in the room ahead, move away from cover, enter Free Aim, and mow down every enemy in the hallway. Before leaving this room, be sure to grab the Body Armor through the doorway at the north end of the room. You’ll surely need it.
Stay in Free Aim and start descending down the stairs. Mow down any SWAT member in your sight and keep moving until you’re back on the first floor. There are cops waiting for you outside, since you’ve now amassed at least a three-star wanted level. To complete the mission, you’ll have to escape from the cops. Nudge open the door and clear away enough of the cops outside to give yourself some room to operate. When the way is relatively clear, make a beeline for one of the parked police cruisers, hop in, and tear out of there.
Complete “This Shit’s Cursed” in Billy’s mission line to unlock this mission.
When you’re ready to set out, make your way to the toll both on Charge Island and hit the marker there. After the cutscene, lie in wait as the convoy draws near. You’re after the white van, so keep behind cover as the two cars in front of it pass through. When the van reaches the toll booth, wait until Malc draws his pistol before springing into action.
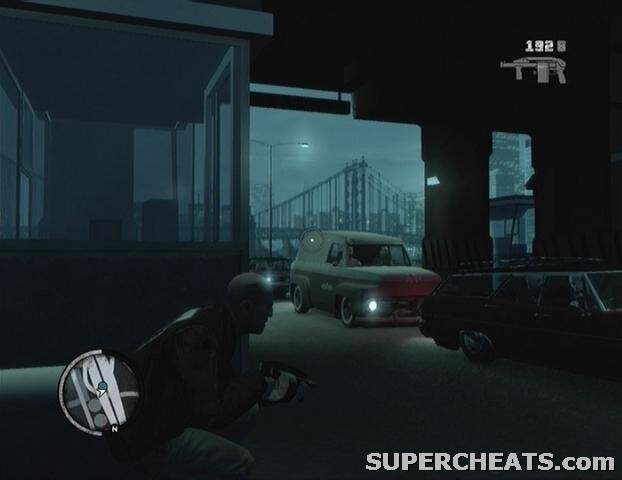
You have a fantastic weapon in the Assault Shotgun. Use it to blast the goons that step out of the target vehicle, and then quickly get in the driver’s seat. Since you’re under fire, drive a bit away from the mayhem and let Malc catch up on foot. With Malc in tow, shake the cops and start toward the lock-up in Chase Point. Drive the van into the lock-up to complete the mission.
Make sure you have a suitable weapon before starting this mission. You can get a fully-loaded Micro-SMG from Jim. From Jim’s phonebook menu, select “Weapons” and then “Micro-SMG” to have him leave the weapon for you in The Lost clubhouse. Before setting out, it might be a good idea to give Terry or Clay a call to have them come along as backup.
Once you’re all set, head to the Francis International Airport to meet with the drug mule. Hit the marker to trigger a cutscene
You have to get Marta out of there, however you first have to deal with the police force in front of the terminal building. A helicopter is flying overhead; if you acquired a fully-loaded SMG from Jim, use it to shoot down the copter from behind cover. It takes a considerable amount of gunfire to bring the helicopter down, however you should be fairly safe behind the cover you’ve been provided with. Luckily, the two-star wanted level ascribed to you won’t climb any higher until after the fight.
Once every marked target on the GPS has been eliminated, regroup with Marta. You should now have a three-star wanted level, which means shaking the cops will be a bit more difficult since there are now helicopters flying overhead. Your best bet is to take Johnny’s Hexer; though it’s not as safe as a car, it’s much faster and can easily out-manoeuvre the police cruisers. Drive up to Marta, wait for her to hop on, and then take off. Just be extra careful not to crash.
Lose the cops, and then take Marta to Elizabeta’s place in South Bohan to complete the mission.
You definitely need Body Armor for this one. You can buy Body Armor from Terry. Just select “Gun Van” from Terry’s phonebook menu and then make your way to the “T” symbol that appears on your radar. You can purchase Body Armor and weapons from Terry for a reduced price.
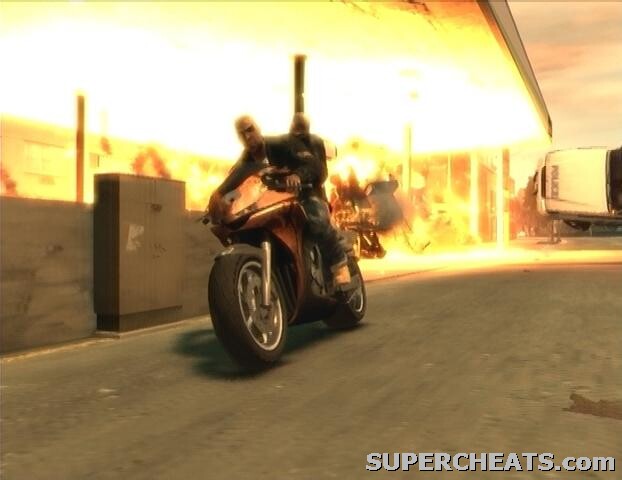
Before going to the deal, give Terry or Clay a call to have them along as backup. This is an entirely on-rails mission, so it’s your job to fend off the cops in hot pursuit. You’ve been outfitted with an Assault Shotgun that has unlimited ammo and never needs reloading. Just keep RT held down and pepper the police cruisers with bullets. Aim at the windshield, with the intent of killing the driver, or at the cruiser’s hood to disable it.
At the start of the circuit, a helicopter will appear and begin flying alongside the bike. Immediately focus your attention upon downing this helicopter. It shouldn’t take much.

Only police cruisers will pursue you during the next stretch. Keep an eye on the right side of the road for clusters of red gas tanks; blast them as your pursuers near to hopefully wipe them out, but be careful not to detonate them too soon. Eventually you’ll pass a gas station, which automatically explodes in a cinematic fashion as you whizz by. Immediately after the gas station, face forward because a pair of heavily-armed enemies will appear in the back of an armoured truck. Blast them before they can do too much damage.
Shortly after, the police will have you cornered. Blast the windows of the nearby showroom and Malc will drive the bike through there. Sometime after, Malc will hand over some Pipe Bombs. Hold on to a Pipe Bomb for three or so seconds before letting it go. Once you’re out of the tunnel, an attack chopper appears overhead. Immediately start hitting it with gunfire. Shoot down the helicopter to complete the mission.
No worries about the Hexer; you can call Clay and have him deliver another bike to you. Select “Bikes” from Clay’s phonebook menu, and then choose the bike you want from the menu. He’ll deliver it right to you.
A marker pointing to Stubbs’ location will appear on your radar once you’ve completed “Buyer’s Market” in Elizabeta’s mission line. Follow the marker to Stubbs’ home in Middle Park, Algonquin and hit the yellow marker there to get started.
Tom Stubbs’ uncle is set to arrive at the Francis International Airport by helicopter in a short while. It’s your job to eliminate him so Stubbs can reap his fortunes. There are a couple of ways you can go about completing this task.
The easiest and quickest way to eliminate the target is to blast his helicopter just as it lands. First, make your way to the gate by following the marked route on your radar. Don’t get to close to the gate, otherwise the guards will open fire. Just wait on the path to the gate until the target’s helicopter can be seen descending toward the helipad. At this point, drive to up to just a few paces short of the gate, dismount, switch to the RPG you’ve been provided with, and enter Free Aim. Just when the helicopter makes contact with the helipad, send a rocket towards it. If done correctly, the helicopter should be destroyed, and the target eliminated.
It should be noted that the guards will start firing at you, but the case is either a) they have horrible aim, or b) they are not all that interested in stopping you. Most of their shots will miss, and the rate at which they fire is pitiful. You’ll likely take minimal damage before you’re back on your bike on racing away from the scene.
If the target manages to make it safely out of the helicopter and joins the convoy, you’ll have to trail after his car instead. This route is decidedly more difficult, since he’s being escorted by a couple of cars full of armed guards who open fire if you get too close. You may be able to use the RPG to take out the convoy, however you won’t be able to use the RPG Launcher while riding.
Despite how you go about it, once the target is eliminated, all you must do then is escape the police to complete the mission.
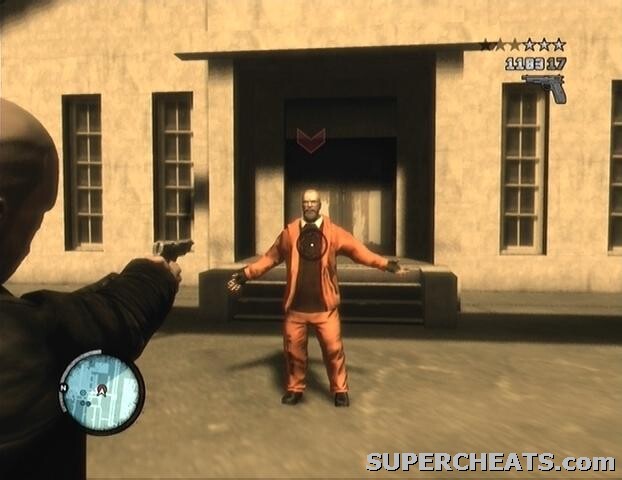
Your job is to secure a bus full of prisoners and lead them to freedom. The prison transport bus is over in Leftwood, Alderney. When you reach the place, just vault over the barrier, head down the decline, and make a beeline for the prison bus. Gun down any officers standing in your path, and approach the driver’s side door. When you get close enough to the bus, a cutscene will begin, and you will have secured your spot in the driver’s seat.
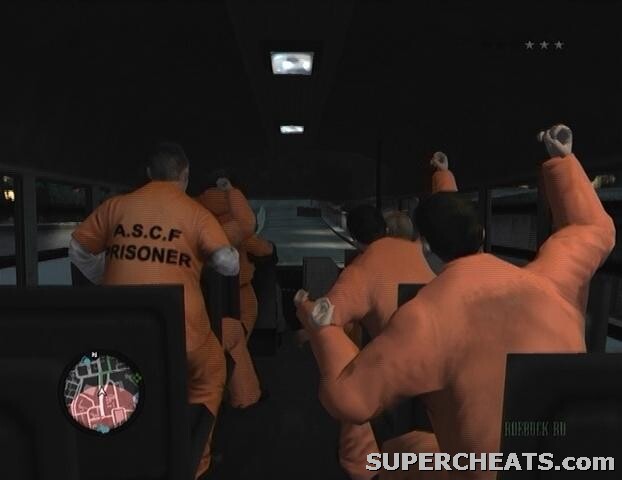
Once you’re in the driver’s seat, you first must shake a three-star wanted level. Outrunning the police here can be difficult, since the bus moves rather slowly, and it can’t make sharp turns. On the upside, the bus is incredibly sturdy, and can barrel over smaller vehicles, including, most importantly, police cruisers. It might help to set a waypoint on your map somewhere far so you’ll have something to follow on your radar.
When you’ve successfully evaded the police, drive the prison transport bus to the marker by the docks at the south end of Acter Industrial Park to complete the mission.
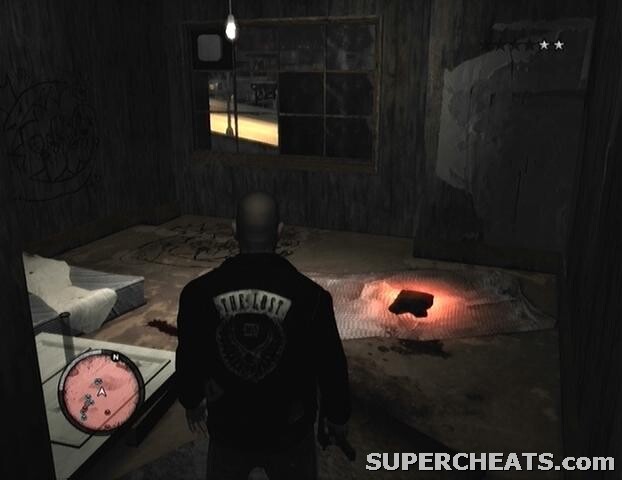
You’ll get a call from Ashley at some point during the main storyline, after which this mission automatically starts. She’s in Northwood, Algonquin, and needs help. Hit the yellow marker outside of the apartment, dismount, and enter the building.
Ashley is in one of the rooms on the second floor, so find your way over to the stairs and take them up. She isn’t in the room at the top of the stairs, but in the enterable room around the corner. There are several armed thugs inside, so crouch down, push open the door slightly, and gun down anyone in the hallway. The remaining thugs will likely take cover in one of the rooms along the hall, so shoot their arms as they fire at you to lure them out.
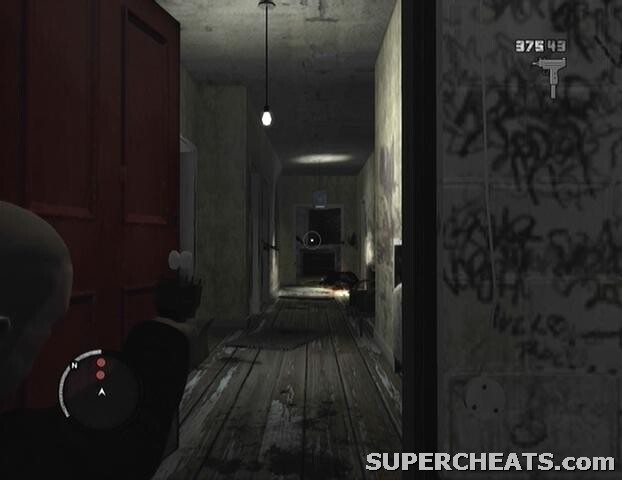
When every marked enemy has been dealt with, head into the room at the end of the hall to find Ashley. With Ashley in your company, head back outside, hop on Johnny’s Hexer, and then take Ashley to her home in Berchem to complete the mission.
This mission becomes available sometime after “Shifting Weight” in Elizabeta’s mission line. Follow the marker on the GPS to meet up with Malc in Northwood. Head to the gambling den in Schottler next. Hit the marker and wait a moment for Roman to appear. After the cutscene, start toward the warehouse in Bohan.
At one point, Roman may get out of the car and stumble off in a pitiful attempt to escape. If this occurs, knock him over with a nudge from the front of your car, and then get out and point a gun at him to coax him back inside. Make your way to the warehouse in Bohan with Roman, and hit the marker there to complete the mission.
You’ll get a call from Ashley sometime after the completion of “Shifting Weight” in Elizabeta’s mission line. She asks you to meet Ray in Little Italy, Algonquin. Follow the “RB” symbol on the GPS and hit the marker outside to get started.
Make sure you have a fully-loaded Micro-SMG before starting this mission. From Jim’s phonebook menu, select “Weapons” and then “Micro-SMG” to have him leave the weapon for you in The Lost clubhouse. Once you’ve spoken to him, you can find the weapon on a table in the arm-wrestling room on the second floor.
Meet up with The Lost gang members by the south bridge to Broker and make your way to the front of the pack. Lead the gang to the dock in East Wood and hit the marker there to trigger a cutscene. After the cutscene, start after that limo. To get the diamonds, you first must damage the limo enough to force the carrier to bail out. The gunners in the limo and the gunners in the car accompanying the limo can make retrieving the diamonds fairly difficult.
Work on taking out the support vehicle first, even if just the gunman. If you acquired a fully-loaded SMG from Jim, wrecking the limo shouldn’t be too difficult a task. Silence the gunman first, and then start hitting the limo with gunfire. If you can, get in front of the limo and take out the driver. When the diamond-carrier bails out, kill him and pick up the bag of diamonds he drops.
With the diamonds in your possession, stash them in the two trash bags marked on your GPS to complete the mission.
You’ll get a call from Ray sometime after the completion of “Roman’s Holiday” in Ashley’s mission line. The mission commences automatically after the call. The diamond deal is set to happen at the Libertonian museum in Middle Park, so make your way over there. When you reach the museum, head through the front door and climb up the steps. Be sure to grab the Body Armor on the table in the main exhibit hall. Follow the marker on your GPS to meet up with Niko.
After the cutscene, stay behind cover and gun down the enemies along the walkway as they pop out. There’s one live enemy along the walkway behind you, so take him out first. When the enemies closest to you have been dealt with, move to one of the pieces of cover further ahead. Keep moving up and killing the enemies as they pop out until you’re at the end of the walkway. There’s a health pack attached to the wall before the next room, so be sure to grab it if necessary.
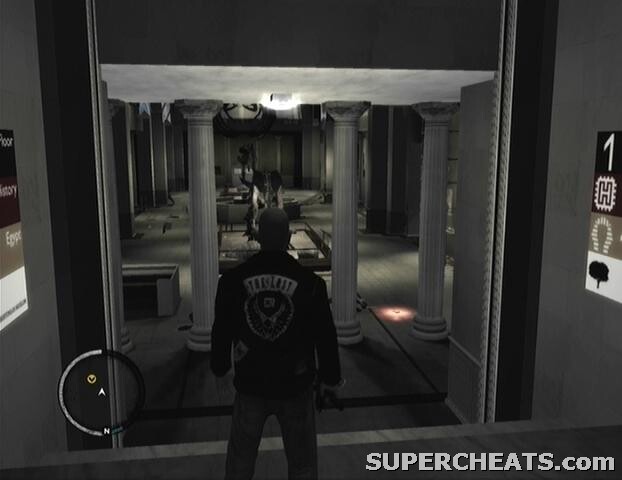
Take out the two guys in this room, and then make your way down to the main exhibit hall. There are likely a couple of live enemies here, but Niko has evidently taken care of the majority. If the enemies are at the other end of the hall, just ignore them. If you didn’t pick up the Body Armor on the desk on your way in, grab it now before continuing through the marked door.
Have your gun ready, because an enemy will rush you in the next room. Once he’s been taken care of, continue to the exit, but don’t head through the door just yet. A large number of Ray’s goons are waiting for you outside, so you’re going to have to take it slow here. There should be a car parked just over to the left of the door which you can take cover behind, but don’t step out of the museum yet. When the goons spot you, a number of them should come right up to the door, so be ready to blast them as soon when they step through.
If you can get your hands on a fallen enemy’s Carbine Rifle, it will definitely come in handy here. When the majority of the enemies outside have been eliminated, some of them will take off in a couple of cars. Quickly get in one of the vehicles parked outside and start after them. Chase after the fleeing enemies marked on the radar and kill each of them.
Bring the money to Jim in East Holland to complete the mission.
After the cutscene, travel to The Lost clubhouse to meet with Ashley. While on your way to clubhouse, Ashley calls to inform you that Ray has sent a number of hitman your way. You have to kill each and every one of them before they can kill you. You’ll definitely want help from Clay and Terry; phone either one for backup, and they will set up an ambush in Alderney City. Quickly get to the ambush spot and climb up the ladder on the front of the building.
If you have some Pipe Bombs or any other thrown explosive handy, they will be of great use here. Five or so cars, each packed with four goons, will pull up in the lot below. You have a nice vantage point up on this roof, so surviving this onslaught shouldn’t be overly difficult. If you have explosives, just toss them by the parked cars as the enemies step out.

After the battle, scour the wreckage for ammo and then make your way to The Lost clubhouse in Acter. Hit the marker outside of the clubhouse to complete the mission.
Complete the “Was It Worth It?” mission in Ray’s mission line, and eventually Stubbs will give you a call. Meet Stubbs at The Lost clubhouse to get started.
Travel to the prison in Acter Industrial Park and hit the marker outside to trigger a cutscene. After the cutscene, you’ll have free-reign over Terry’s gun van. Everything is free, so grab whatever you need. Take a fully-load Carbine Rifle, Assault Shotgun, RPG Launcher, SMG, Sniper Rifle, Pipe Bombs, and anything else you can carry. Be sure to grab some Body Armor as well.
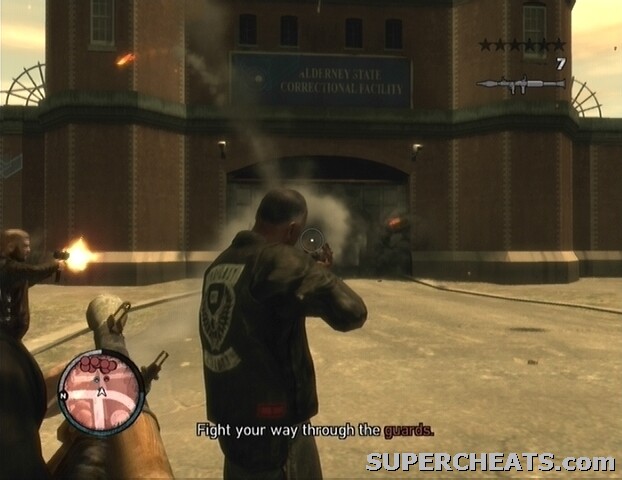
Hit the prison gate with an RPG, and then switch to your Carbine Rifle. You’ll first have to fight your way to the prison yard. The guards in the prison are heavily armed, and there are a lot of them. The Carbine Rifle is incredibly accurate and can make short work of them, so hang back and start picking off the guards visible beyond the gate. When the first batch of guards has been dealt with, follow Terry and Clay to the next area.
Another batch of guards will run around the corner, so hang back and pick them off. Grab the health pack on the stack of bricks if necessary, and then continue moving forward. Be sure to pick up any ammo along the way. There’s a sniper on the building around the corner, so take him out first. Clear the next group of guards, and then press on to the prison yard.

A couple of helicopters full of N.O.O.S.E. agents enter the prison yard. The cover you’re put behind after the cutscene isn’t the best, especially since there are a number of enemies up in the central tower and along the connected walkways. If you have plenty of health, it might help to sprint away from the commotion, so you can pick off the enemies with the Carbine or Sniper Rifle from afar. Don’t go too far, otherwise you’ll fail the mission for abandoning Clay and Terry. You’ll be taking fire out in the open, so quickly start picking off the enemies on the ground and walkway closest to you.
After dealing with the enemies nearest to you, switch to your Sniper Rifle and start killing the guards further out. When the prison yard is nearly clear, a red marker denoting Billy’s location will appear on your radar. Sprint over to Billy and switch to your pistol. Lock-on to Billy and press RT to initiate the execution cutscene.
Once the deed has been done, sprint over to Johnny’s Hexer and hop on. Follow Terry and Clay out of the prison yard and through the front gate. Lead the gang back to The Lost clubhouse to complete the mission and trigger the endgame cutscene.
The Lost and Damned introduces a decidedly more brutal style of racing to Grand Theft Auto IV. You’re goal here is to not only reach the final checkpoint while at the head of the pack, but also to dethrone your fellow bikers by delivering a solid hit to the chops with your trusty bat.
You’ll get a call from Terry at some point during the storyline. He invites you to participate in a street race. To participate, drive to the red and white motorcycle helmet icon on the GPS and touch the marker while on a bike. You can use any motorcycle you wish. If you are without a motorcycle, you can call Clay and have him deliver one to you if he is available. If you’ve completed the storyline, there should be a better variety of bikes to choose from. The Diabolus seems to be a good choice.
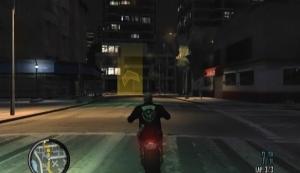
To win the race, you must hit the final checkpoint before any of the other bikers. Each race circuit has a number of laps, each consisting of the same set of checkpoints. The checkpoints appear on your radar, and inside of each checkpoint is an arrow pointing in the direction that the next checkpoint will be.
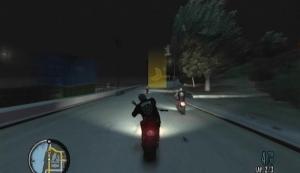
Using your bat during a race is simple: use the X button to swing the bat to Johnny’s left, and the B button to swing the bat to Johnny’s right. Hold either button and Johnny will perform a powered-up swing, capable of knocking a target off of their bike. Simply tapping the X or B button is not enough to send an opponent to the asphalt, although you may be able to set them off course that way. Be careful yourself, however, as the other bikers are armed with bats as well.
There are 12 different race circuits total. Completing all 12 races contributes some percentage towards the per cent completion stat. You’ll also receive a monetary reward for each race won. Furthermore, the “TLAD: Get Good Wood” achievement is unlocked by knocking 69 riders from their bike. You can view your progress towards this achievement under “Score” in the “Stats” section of the Pause menu.
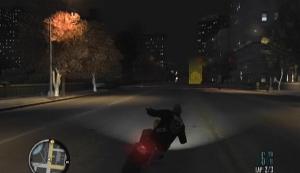
After you’ve reached a certain point in the main storyline, you can then participate in gang wars around the city. Gang wars are denoted by red and white explosion icons on the radar and map. You need to be on a bike to start one.
After triggering a gang war, a number of Lost members will appear to accompany you. The objective is to eliminate all of the rival gang members that appear on the radar. The enemy gang members are usually quite a distance from the starting point. In certain scenarios, the objective is to destroy a rival gang’s van, which is being escorted by a number of enemies on motorcycles. Just invest some money in a Carbine Rifle, some Body Armor, and some thrown explosives and you should be able to take down the target gangs easily.

The Lost members that accompany you during the fight become more battle-hardened if they survive to the end. If any of the disposable Lost members die, they will be replaced. Clay and Terry are the only two characters who cannot die. Since Clay and Terry are with you by default, completing gang wars is a good way to work towards the “TLAD: Full Chat” achievement, which is unlocked by building Clay’s and Terry’s toughness to 100 per cent.
There are 25 different gang war scenarios total, but they can be replayed. For every 10 gang wars completed, a new weapon will from then on, spawn in the arm wrestling room on the second floor of The Lost clubhouse.
Safehouse Weapon Spawn Rewards:
Complete 10 Gang Wars - Sawed-off Shotgun
Complete 20 Gang Wars - Automatic 9mm Pistol
Complete 30 Gang Wars - Carbine Rifle
Complete 40 Gang Wars - Automatic Shotgun
Complete 50 Gang Wars - Grenade Launcher
After completing a couple of Jim’s missions, Angus’ number will be added to your cell phone. You can then call Angus and select “Job” to start an export mission. In each mission, you need to steal a specific motorcycle and ride it back to The Lost clubhouse. There are 10 export missions total. You’ll receive a modest cash reward for each delivery.
Tattoo Parlor Lament: The motorcycle is parked right outside of the tattoo parlour. Just follow the blue marker on your radar to the bike, hop on, and take it to The Lost clubhouse.
Zorst Fumes: You’re after a Hellfury. The leader of a small motorcycle gang has one. The gang is currently riding around Alderney. As soon as you open fire, the entire gang will turn on you, so be ready. Kill the leader and the other gang members, then get on the Hellfury, shake the cops if necessary, and drive the bike to The Lost clubhouse to receive your reward.
Stripclub Hog: The target bike is a Hellfury. It’s over by the strip club in Northern Gardens, Bohan. The owner of the bike is standing right next to it, so take him out—as well as the stripper accompanying him—before stealing the bike.
A Ride in the Park: The Wolfbane is being driven around Middle Park, Algonquin. It’s occupied by a pair of unarmed pedestrians, so just drive up alongside them, shoot them off, and take the bike for yourself.
Get Off Your High Horse: The Angel is likely being driven around Broker. There are two other bikers driving behind the guy with the Angel, however they do not appear to be armed. Either shoot the driver off, or ram the back of the bike with another vehicle to hopefully knock him off.
Delivery Boy’s Hardship: The target here is a Hakuchou. The delivery boy should be driving around China Town, which is at the south end of Algonquin. He’s moving very slowly, so just ram the back of the bike with a vehicle to knock him off, then get on the bike and take it to The Lost clubhouse.
Take Out Liquor: The Hellfury is parked over in Schottler, Broker. There are about five guys standing around the bike, so you’ll have to take them out first. They are all armed, so kill them quickly with a shotgun or automatic weapon, or run them over with a vehicle.
Ex-Display: The Sanchez is in the West Dyke Autos show room in Alderney. Just break in there and hop on. You’ll be attributed a two-star wanted level for entering the show room, so you’ll have to shake the cops before you can deliver the bike.
Short Stay Parking: The Hellfury is parked on the second story of the parking garage over in Purgatory, Algonquin. You’ll have to use the on-ramp just south of the garage to reach the second level. The bike is parked unguarded at the far end of the floor, so just hop on and make your way to The Lost clubhouse. Escape the police first if necessary.
Beachcomber: The NRG 900 is being driven on the beach at the south end of Broker. There should be a couple of bikes at the head of the beach, which you can use to chase down the target. Kill the target, get on the bike, and take it to The Lost clubhouse to receive your reward.
Sometime after completing “This Shit’s Cursed” in Billy’s mission line, you’ll get a call from Stubbs. He tells you to call him when you’re looking for work. Select “Job” from Stubbs’ phonebook menu to get started.
The target vehicle is parked outside of one of the mansions up in Westdyke, so make your way over there by following the marked trail on your radar. When you reach the vehicle, get in and start towards the bugging expert in Acter Industrial Park. You have a limited amount of time to bring the car back, so get going immediately.
There’s no problem if the car gets a bit busted up on the way there, since the bugging expert can buff out any scratches. Once the car has been bugged, you’ll have to get it back to Deputy Mayor Dawkins home before he notices that it’s missing and reports it as stolen. The car has to be in pristine condition, otherwise Dawkins will realise that it’s has been tampered with. You don’t have a whole lot of time, so you won’t be able to get the car repaired in the event of a collision. Drive steadily around corners, but speed down large stretches of road to make up for lost time.
Get the car back to Dawkins house in time and park it back in its place, facing the same direction it was before you got to it. Once the car is in place, flee the area to complete the mission.
Head to the marked location in Port Tudor. You’ll have to climb up on the building here to reach the lookout spot. You can get up onto the roof by standing on the platform along the south side of the building, jumping onto the crate there, and then climbing up onto the roof. When you reach the lookout point, Johnny will call Stubbs. Stubbs should inform you that the politician drives a red Cognoscenti.
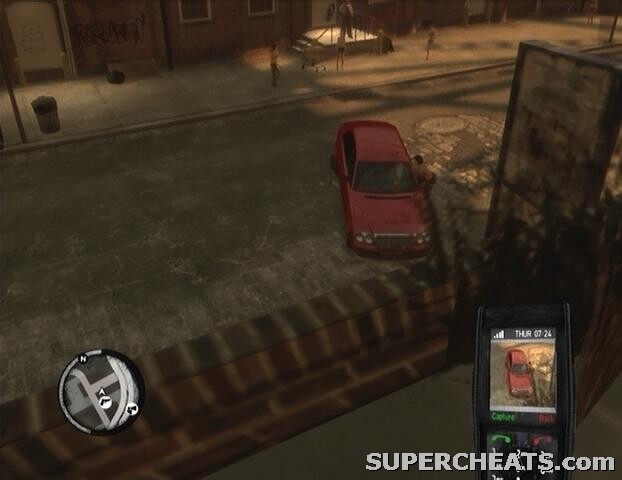
The first car that arrives is not the politician’s, but it does show you where to look. When the politician’s car pulls up, take out your cell phone, select “Camera” from the menu and then snap a picture of the politician through the windshield. Afterwards, send the photo to Stubbs to complete the mission.
The contact is over in Hove Beach, so travel there to get started. The contact promptly takes off, so get back in your vehicle and chase after him. All you must do is kill the contact to complete the mission.
The CEO is being held in an alley in Birchem, Alderney, so make your way over there. Mow down the officer blocking your path and sprint over to the cuffed CEO. Press LB to uncuff her, and then immediately get in the car and tear out of the alley. You need to bring the CEO to the helipad on top of the Booth Tunnel so she can escape. This will be difficult with the three-star wanted level that has been attributed to you, so you have to make it there quickly before your pursuers manage to wreck the car.
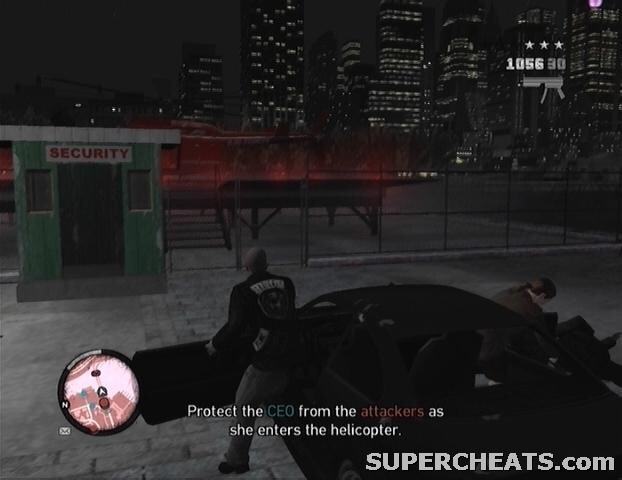
When you reach the helipad, get out of the car and protect the CEO from her pursuers while she boards the helicopter. The mission is complete when the CEO escapes in the helicopter.
This is the last of Stubbs’ optional phone-in missions. This time Stubbs wants you to eliminate a friend of his. Travel to the Superstar Cafe in Lancaster, Algonquin. Just walk in there and blast him. There are some armed guards inside though, so you may want to bring along some Body Armor to absorb their bullets while you dash out.
When the target is dead, flee the scene to complete the mission.
There are two playable mini-games introduced in The Lost and Damned: arm wrestling and the hi-lo card game.
For $100 or so, you can test your strength in an arm wrestling match. It’s best two out of three. Rapidly move the Right Thumbstick left and right to overpower your opponent. Simply using your thumb is probably not enough, but by using your palm you should be able to move the Right Thumbstick much more rapidly.
You might want to limit the amount of times you play this mini-game, since it seems like a good way to wreck a controller.
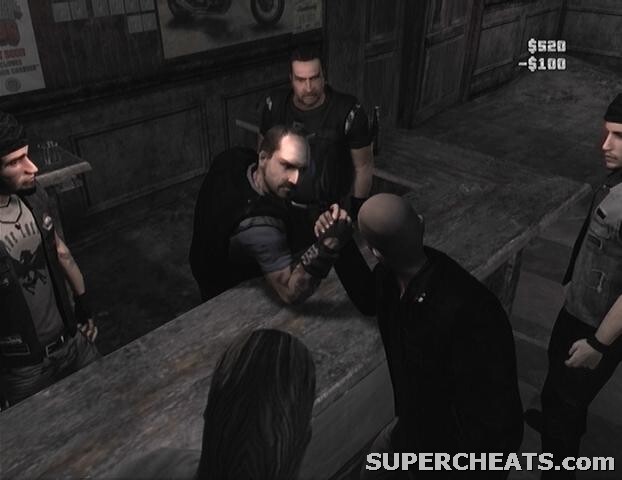
This mini-game is initially playable on the second floor of The Lost clubhouse, but there are a couple of other locations that pop up around Alderney as you progress through the storyline. Make your way to one of the arm icons that appear on the map to participate.
This is a very simple card game. When a card is thrown down, you have to guess whether the next card will be higher or lower than the current card’s value. Guess incorrectly, and you’re out. The last person in the game wins. It’s a $10 wager per hand.
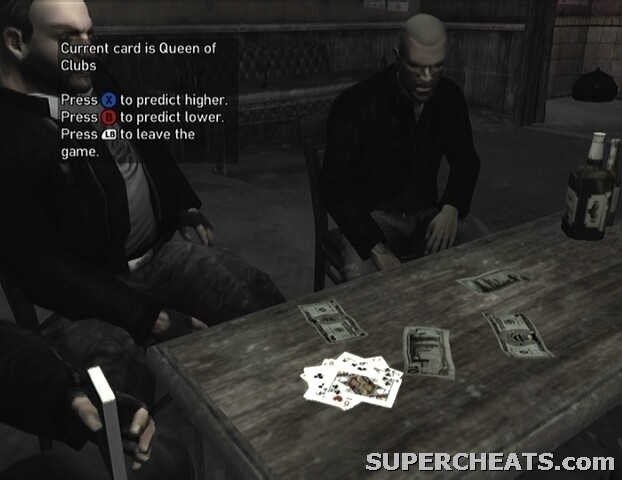
This game can be played in The Lost Clubhouse. The location of this mini-game is marked by a spade symbol on the radar and map.
There are two new Random Character encounters in The Lost and Damned. As you progress through the story, an icon denoting their location will appear on your map.
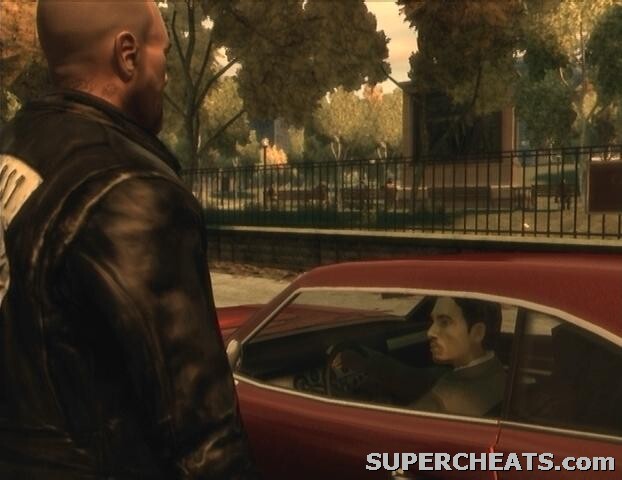
David can be encountered in The Exchange, which is in the southeast corner of Algonquin. David needs you to deal with a pesky lawyer who is threatening to expose him. After the cutscene, make your way to the red marker on the GPS to locate the lawyer. You have to chase him down and intimidate him by firing at his car. Just drive after him and continue shooting at his vehicle until he stops. Drive up to the parked car to trigger a cutscene.
1: You can first meet Malc in Northwood, which is in the northwest corner of Algonquin. Make sure you have a bike beforehand. Follow Malc to his friend DeSean, and then follow DeSean to where the cheating bikers are hanging out. When you reach the place, just fire at the explosive barrels that the bikers are standing by to wipe them all out.
2: Malc will appear again in Northwood, Algonquin sometime after the first encounter. Complete a few missions and the pedestrian icon should then appear on the map. Malc challenges you to a race. You’ll need a bike. When you have a bike, follow Malc to the starting line.
To win the race, you must hit the final checkpoint before any of the other bikers. The checkpoints appear on your radar, and inside of each checkpoint is an arrow pointing in the direction that the next checkpoint will be.
To use your bat during the race, press the X button to swing the bat to the left, and the B button to swing the bat to the right. Hold either button to perform a powered-up swing, capable of knocking a target off of their bike. Simply tapping the X or B button is not enough to send an opponent to the asphalt, although you may be able to set them off course that way. Be careful yourself, however, as the other bikers are armed with bats as well.
Complete all 23 missions.
Complete all five of Stubbs’ optional jobs.
Complete all 10 of Angus’ motorcycle export missions.
Complete all 25 gang war scenarios.
Complete all 12 motorcycle races.
Win every activity (air hockey, darts, and pool) against a random computer opponent or friend once.
Win an arm wrestling match.
Take Clay and Terry to every activity available via their Phonebook menu.
Meet random characters and complete their tasks (David once, Malc twice).
Find and kill all 50 hidden seagulls.
The Lost and Damned introduces six new multiplayer modes. The standard Deathmatch, Team Deathmatch, and Free modes are still present, but the new modes warrant explanation. Below is an overview of each new multiplayer mode.
While the main idea remains, The Lost and Damned variant of the Races multiplayer mode introduces one major change: if motorcycles are the vehicles being used, each biker will have a bat which they can use to whack other players as they drive by. Use the X button to swing the bat to the left, and the B button to swing to the right. Hold X or B to perform a powered-up swing. Knocking another player off of their bike doesn’t work the same way as knocking off a CPU opponent in the single-player races. In multiplayer you must deplete another player’s health bar entirely, which requires three or four good hits. Hold Y at any time during the race to warp back to the previous checkpoint. For 2-16 players.
This mode is inherently similar to the Mafiya Work modes from the stand-alone game, however Club Business is both competitive and co-operative. Each player controls a member of The Lost Motorcycle Club, so players are not actively fighting each other. However, players are competing to complete tasks in order to gain status in the gang. The player who currently has the most money becomes the chapter leader, which means that other players gain health, armour, and money by following them. Occasionally, NPCs will spawn and attack; killing these NPCs is worth money as well. Each player walks away with the money they earned at the end of the match. For 2-16 players.
A single player is assigned the role of lone wolf, and they must survive for as long as possible with every other player in the match hunting for them. The lone wolf must run through checkpoints only they can see while being pursued. The player that manages to kill the lone wolf then takes the role. The player who reaches the most checkpoints as the lone wolf wins. If there is a tie, the player that spent the longest amount of time as the lone wolf wins. For 2-16 players.
This is a 2-player game mode that pits a motorcycle against an attack helicopter. The player on the motorcycle must race through checkpoints, while the player in the helicopter must stop the biker.
Players on the N.O.O.S.E. team must escort witnesses to police stations around the city, while players on The Lost team have to try and kill these witnesses. One player on the N.O.O.S.E. side must drive the transport bus, while the others are in police cruisers. The Lost players are all on motorcycles. The team that succeeds in their mission wins the game. For 2-16 players.
Sections of Liberty City are designated as territories, and teams must fight to control them. Allied NPCs spawn in every territory to defend it from the opposing team. To capture a territory, every NPC and opposing player in that territory must be eliminated. NPCs can be outfitted with better weaponry from a team’s gun van, the location of which is marked by a square blip on the radar .For 2-16 players.
These five cheats can only be used while playing The Lost and the Damned. They do not work with the standalone game.
Inputting Cheats Clip
Enter these codes using Johnny’s cell phone to trigger the indicated effect. To bring up the keypad, press up on the d-pad again when you have the phone out.
Note: Entering vehicle spawn codes does not disable achievements.
826-555-0150 – Spawns a Burrito.
245-555-0125 – Spawns a Double T.
245-555-0199 – Spawns a Hakuchou.
245-555-0150 – Spawns a Hexer.
245-555-0100 – Spawns an Innovation.
826-555-0100 – Spawns a Slamvan.
 The Magic Master and the Localization of Ni no Kuni
 How Legit are FIFA 16: Free Coin Generators
 Destiny: The Taken King Guide - Upgrading Year One Exotics to Year Two
 8 Tips And Tricks For You To Be The Best On Metal Gear Online
 Batman Arkham Knight Guide: How To Find All Riddler Trophies On Bleake Island