
The Ballad of Gay Tony is the second episodic expansion pack for the Xbox 360 version of Grand Theft Auto IV. The over-the-top style of this new episode is reminiscent of the kind of action found in the Grand Theft Auto III games. Fans who bemoaned the lack of such action in Grand Theft Auto IV should find much of what they were looking for here.
As with The Lost and Damned, The Ballad of Gay Tony offers plenty of new content to make for a worthwhile purchase. The Ballad of Gay Tony is played from the perspective of Luis Fernando Lopez, personal bodyguard and business partner of Liberty City's renowned nightclub owner Anthony “Gay Tony” Prince.
This guide covers all 26 missions, with videos to help you through the trickier parts, as well as information on side missions, mini-games, and random character encounters. Also included is a list of every secondary objective, 100% completion requirement, and Xbox 360 achievement.

The Ballad of Gay Tony is the second episodic expansion pack for the Xbox 360 version of Grand Theft Auto IV.
If you're wondering why this content is Xbox 360 exclusive, here's why in a nutshell: Take-Two Interactive, the game's publisher, offered additional downloadable content to both Sony and Microsoft, for a price. Microsoft paid a reported $50-million for two episodic expansion packs, but Sony passed. So at least for the time being, you'll need an Xbox 360 to play The Ballad of Gay Tony.
At the time of writing, The Ballad of Gay Tony is available for download on the Xbox 360 marketplace for 1600 Microsoft Points, which equates to roughly $20 USD. The content requires 1.9 GB of free HDD space.
If you don't have access to Xbox Live, you can purchase the “Grand Theft Auto: Episodes from Liberty City” disc in stores or online. Episodes from Liberty City contains both The Ballad of Gay Tony and The Lost and Damned. With the Episodes from Liberty City disc, both episodes can be played without Grand Theft Auto IV, making it an ideal option particularly for multi-console owners who bought the PS3 version of Grand Theft Auto IV, but would like to experience the extra content without having to buy the same game twice.
Episodes from Liberty City includes three new exclusive radio stations: RamJam FM (Reggae), Self-Actualization FM (Ambient), and Vice City FM (80's pop music). Though these stations are not included in the downloadable versions, while playing the downloadable versions you will have access to the tracks in Grand Theft Auto IV, which is not possible with the disc-based version.
After downloading the content, remain connected to Xbox Live and download the latest update for Grand Theft Auto IV. To switch from Grand Theft Auto IV to The Ballad of Gay Tony, select “New Game” under the “Game” section of the pause menu and then select “The Ballad of Gay Tony” to get started.

The Ballad of Gay Tony downloadable content includes the following:
*26 new missions, played from the perspective of Luis Fernando Lopez, personal bodyguard of Liberty City's famous nightclub owner Anthony “Gay Tony” Prince.
*New side missions and mini-games, including Base Jumping using the new Parachute.
*Seven new weapons: the Pistol .44, Explosive Shotgun, Assault SMG, Gold SMG, Advanced MG, Advanced Sniper, and Sticky Bombs.
*New vehicles: the Buffalo, Super Diamond, Serrano, Bullet, F620, Caddy, Smuggler, Faggio, and APC.
*Two new helicopters: the Swift and the Buzzard attack helicopter.
*Enhanced multiplayer with the new content and other tweaks.
*Three enterable nightclubs: Bahama Mamas, Maisonette 9, and Hercules.
*More than 70 new tracks, added to the ElectroChoc, K109 The Studio, San Juan Sounds, and Vladivostok FM radio stations.
*Additional TV and internet content.
*Ten new achievements worth 250 gamer points.
In Vehicle Controls
Left Trigger - Brake/Reverse
Left Bumper - Fire Weapon
Right Trigger - Accelerate
Right Bumper - Handbrake
Left Stick - Steering
Right Stick - Rotate Camera/Aiming
Left Stick Button - Horn/Engage Slow Motion (while in Cinematic Camera)
Right Stick Button - Look behind
Y Button - Exit Vehicle
B Button - Cinematic Camera/Mobile Phone Back/Hang-up
A Button - Handbrake/Mobile Phone Forward/Answer
X Button - Change Weapon/(Hold) Headlights
D-pad UP - Mobile Phone Up/Use Mobile Phone
D-pad RIGHT - Next Radio Station/(Hold) Turn Radio On/Off
D-pad DOWN - Mobile Phone Down/Skip Mobile Conversation/Zoom Out Mini-Map
D-pad LEFT - Previous Radio Station/(Hold) Turn Radio On/Off
Back Button - Cycle Camera Modes
Start Button - Pause Menu
On Foot Controls
Left Trigger - Target Lock On/(Half Hold) Free Aim
Left Bumper - Pick Up/Context
Right Trigger - Fire Weapon/(Half Hold) Free Aim
Right Bumper - Enter/Exit Cover
Left Stick - Movement
Right Stick - Rotate Camera/Switch Targets
Left Stick Button - Crouch
Right Stick Button - Look behind/Zoom Aim (when targeting)
Y Button - Enter Vehicle/Mount Ladder/Melee (Alternative Punch/Counter)
B Button - Reload Weapon/Mobile Phone Back/Hang-up/Melee (Punch/Counter)
A Button - (Hold) Run/(Tap) Sprint/Mobile Phone Forward/Answer/Melee (Block/Dodge)
X Button - Jump/Climb/Melee (Kick)
D-pad UP - Mobile Phone Up/Use Mobile Phone
D-pad RIGHT - Next Weapon
D-pad DOWN - Mobile Phone Down/Skip Mobile Conversation/Zoom Out Mini-Map
D-pad LEFT - Previous Weapon
Back Button - Cycle Camera Modes
Start Button - Pause Menu
One new feature introduced in The Ballad of Gay Tony is a mission scoring system. Each mission has a number of secondary objectives. Upon completing a mission, you will be given a base score of 50% for completing the primary objective, and additional score for any secondary objectives completed.
Don't bother trying to attain 100% your first time through a mission; once you've completed all 26 missions in The Ballad of Gay Tony, a mission replay feature will be unlocked, allowing you to up your score by tackling missions again when you're more seasoned.
Note that you do not need to complete every secondary objective in a single go to earn 100% on a mission. You could do one replay where, for example, you take your time trying to sustain as little damage as possible to satisfy a player damage objective, and then another where you rush through the mission in an attempt to beat the target time. That'll have to wait until you've completed the main story though!
A couple of warnings: when playing through a mission with the aim of completing secondary objectives, do not use taxis for travel at all, and do not retry the mission via the replay text message in the event of failure. Do either and your results won't be counted.
Check out the “Secondary Objectives” section of this guide for a complete listing of the secondary objectives of each mission.

Each mission has its own set of secondary objectives.
- For the player damage secondary objective, purchase Body Armor before starting the mission. Damage to Body Armor does not count as player damage, allowing you to easily meet the mark if you're careful.
- For headshot and accuracy secondary objectives, take your time through the mission and use a pistol. The new Pistol .44 is very accurate and boasts considerable range, making it a good choice. Though the .44 can't be found in gun shops, it can be purchased from Armando's gun van.
- For car damage secondary objectives, just take your time! This might mean leaving the target time secondary objective for a separate replay, unless you're confident in your driving.
- For the target time secondary objective, acquire a good amount of explosives before starting the mission to help you get through any firefights as quickly as possible. For the driving sequences, note that the highlighted route on your radar does not mark the quickest possible route, but merely the most direct legal route. The radar won't lead your through parks or back alleys that would see you there faster. In many cases you'll have to find the most efficient route yourself.
The Ballad of Gay Tony adds 10 achievements worth 250 points total to Grand Theft Auto IV. Each achievement unlocked contributes a certain amount of points to your overall gamerscore.
 1. TBoGT: Gone Down
 2. TBoGT: Diamonds Forever
 3. TBoGT: Four Play
 4. TBoGT: Bear Fight
 5. TBoGT: Catch the Bus
 6. TBoGT: Snow Queen
 7. TBoGT: Adrenaline Junkie
 8. TBoGT: Maestro
 9. TBoGT: Past the Velvet Rope
10. TBoGT: Gold Star
9. TBoGT: Past the Velvet Rope
10. TBoGT: Gold Star
After the opening cutscene, get in the driver's seat of the car parked outside and start toward the pink marker on the mini-map in the bottom-left corner of the screen. Touch the marker when you come to it. After the short bit of dialogue, make your way to the marker south of your current location to reach Maisonette 9 and trigger a cutscene.
There are a couple of activities you can partake in once inside the club. Check out the “Mini-games” section of this guide for more info. If you're aiming for target time, it would be best to opt-out of the mini-games for now.
Make your way to Maisonette 9.
You'll get a call from Tony shortly after entering the club. After the call, make your way to the front door to trigger another cutscene. Then, get back in the driver's seat of Tony's car and start toward the marker in Northwood. Once there, hit the marker to drop your friends off. Finally, follow the highlighted route around the block to Luis' apartment to complete the mission.
Inside Luis' apartment you can save your game by approaching the bed and pressing the Y button when prompted. Sleeping will also advance in-game time by six hours. You can change Luis' outfit by interacting with the wardrobe in the bedroom.
Secondary Objectives
Time: 0:04:30
Player Damage: 0%
Car Damage: 10%
Return to Maisonette 9 by following the pink ‘T' icon on the mini-map. When you reach the club, hit the pink arrow outside to get started.
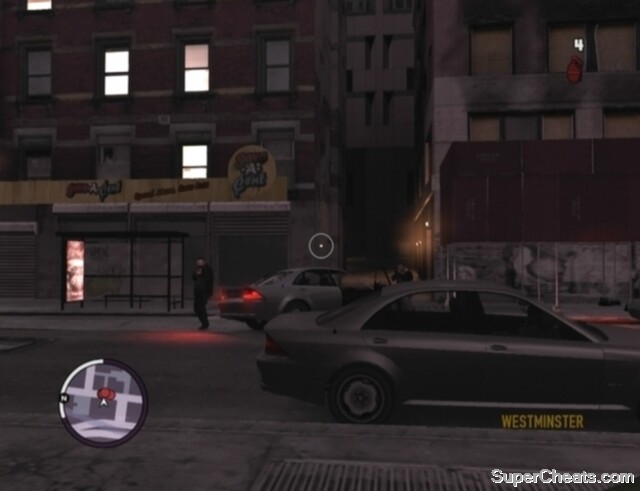
After the cutscene, get in the driver's seat of Tony's car and start following the highlighted route to the marker in Chinatown. Once there, hit the marker, watch the cutscene, and prepare for an immediate dose of action. The deal goes bad, as these things so often do, so you're going to have to fight your way out of there.
There is a ridiculous number of goons between your current location and the exit, but fortunately you're armed with an Assault SMG, one of the powerful new weapons introduced in The Ballad of Gay Tony, and you start with a fresh suit of Body Armor.

Use the new high-powered Assault SMG to clear the way!
Remain behind cover and blast the first baddie when he appears in the doorway up ahead. Move through the open door and be ready for the next enemy, who will roll through the doorway further ahead. When he's down, take cover by the doorway he rolled through and pick off the enemies as they pop out from their cover at the other end of the hall.
When the way is clear, enter the first unfinished room in the middle of the hall and look for fresh Body Armor along the wall. Grab it if yours is damaged, otherwise move to the far end of the room and take cover when you spot an enemy further down the hall. Be sure to collect the enemies' dropped ammo along the way.
Be ready for another enemy when you near the door at the far end of the hall. Take him out and then continue down the steps to the next lowest floor. There are two enemies through the doorway at the bottom of the stairs, so take your time climbing down. Be careful of the grenade thrown by one of enemies down this next hallway. Grenades have quite a large blast radius, so fallback to the stairway if you spot one. Provided there isn't a live grenade near, take cover behind the corner at the start of the hall and pick off the visible enemies at the other end.

Refresh your body armor in the stairwell.
Move further up when the way is clear, but be ready for the enemy through the doorway at the end of the hall. Pick up the Grenades at the top of the stairs and look for fresh Body Armor at the bottom of the first flight of stairs. At the bottom of the stairs, fire at the goons at the other end of the hall and then move up to the corner. A couple more enemies will pop up, so remain behind cover and kill them before moving on.
When you reach the stairs, an enemy will appear on each of the stairways. Quickly kill both enemies and then take the stairs down to the first floor. This is the final push; fight your way to the front entrance and wait for Tony before returning to his car. Take your time though, as one of the goons is armed with a shotgun.
Once outside, get back in the car and follow the highlighted route on your radar to Tony's apartment to complete the mission.
Secondary Objectives
Time: 0:05:20
Player Damage: 10%
Accuracy: 70%
100% Headshots
Hit the marker outside the Golden Pier golf club to trigger a cutscene. Your first task is to intimidate the Union official strapped to the front of the golf cart in the middle of the course. You are to accomplish this task with a golf club and a bucket of golf balls.
Start by using the Left Stick to move the cursor over to the man strapped to the golf cart below. Then, press the A button to start a backswing. Wait until the power bar reaches the small, black segment on the meter next to the radar and press the A button to swing. You have to be right on the mark for the golf ball to hit the target, so timing is everything. If you miss the black marker, it's no big deal, as you can just try again. If you want to complete the 100% Golf Accuracy secondary objective, you must hit the official all three times without any misses.

Time it right to hit the Union official.
With each successful hit Rocco will drive the cart further away, and consequently the black marker will move up the meter, so you'll have to hit the A button sooner after starting a backswing. On the third occasion, that means hitting the A button less than a second after.
After the third hit, a band of enemies will bound onto the scene to rescue the official. Exit the room and climb down to sets of stairs to reach the bottom level. Outside, sprint to the unmanned golf cart and click the Left Stick to crouch. You should still have plenty of Assault SMG ammo from the previous mission, so use Free Aim from behind cover to pick off the enemies with headshots.
Continue targeting the enemies until you are instructed to get in the golf cart, at which point hop in the driver's seat. Then, immediately start following Rocco across the course. Don't wait around for even a second, as another car-full of enemies will soon be right behind you.
Take cover and clear away the Messinas.
Once off the course, you won't have to drive too far to lose your pursuers; just continue following Rocco until he comes to a stop. Then, hit the marker to trigger a cutscene. Afterwards, drop Tony off at his apartment to complete the mission.
Secondary Objectives
Time: 0:04:00
Player Damage: 50%
Headshots: 11
Accuracy: 70%
100% Golf Accuracy
You're tasked with killing three targets, and you've been given Sticky Bombs to do the job. Get in one of the cars parked in front of Tony's apartment and start toward the first target; a construction foreman who is operating a crane on a nearby construction site.
When you reach the place, step out of the car, sprint past the barriers and to the crane in the middle of the construction site. Take aim at the base of the crane by holding LT and tap the RT button to throw a Sticky Bomb. Stick the base of the crane with three Sticky Bombs and then sprint back to your car. Tap down on the D-pad to detonate the planted Sticky Bombs, levelling the crane and killing the foreman.

Use the Sticky Bombs to kill each target.
The second target is on a subway train. Start toward the tunnel exit marked on your radar. As soon as you get there, step out of your car, take aim at the tracks, and wait for the train to appear. Throw one Sticky Bomb onto the tracks and detonate it as the train passes by.
If you fail to destroy the train at the tunnel exit, follow the train using your radar and it will eventually reach the station in Fortside. Then, step out of your car, climb the stairs up to the platform, attach just one Sticky Bomb to the train, and return to your car. Detonate the Sticky Bomb once you're a safe distance away.
Using the Sticky Bombs to destroy the crane and train.
The final target is on a small plane at the Francis International Airport in Dukes. The plane is readying for takeoff, so waste no time in speeding to the runway. When you reach the airport, push through the gate and follow the blip on your radar to the grounded plane.
You'll be attributed a four-star wanted level for being on the runway, so get the job done quickly. Park next to the plane, step out of your car, take aim and attach one Sticky Bomb to the plane. With that done, get back in your car and tear out of there. Press down on the D-pad to detonate the bomb once you're a safe distance away to eliminate the final target.
Blowing up the plane.
With all three targets dead, all that's left to do is shake the cops. Lose your wanted level to complete the mission.
Secondary Objectives
Time: 0:05:00
Player Damage: 50%
No Bombs Wasted: Three on the crane, one on the train, and one on the plane.
This is a real simple mission, but you'll have to be especially quick (and a careful driver) to meet target time. Drop off your passengers at the marker in Acter, Alderney, and then make your way to the nearby internet café. Inside, approach the nearest computer and press the LB button to log on. Click on the ‘Web' icon on the desktop, and then the Celebinator banner on the homepage. Click the “Leave Comment” link below the picture and text and then click “Submit.”

Click the Celebinator advertisement on the homepage.
Secondary Objectives
Time: 0:02:30
Target Car Damage: 0%
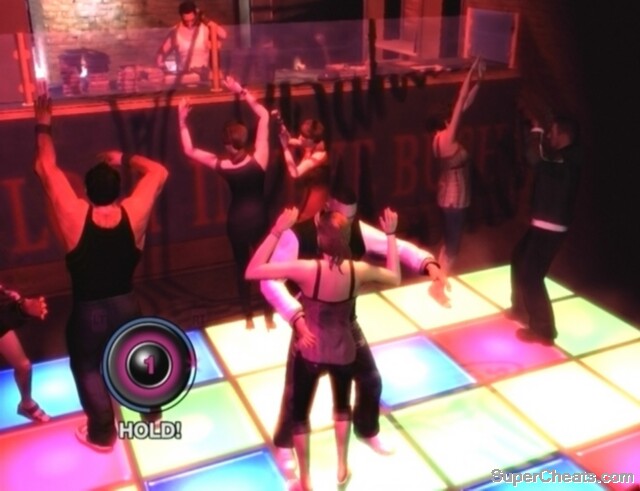
Get in the car with Tony and drive around the block to the marker in front of Bahama Mamas. Once outside the club, stroll through the front door and climb down the steps. Make your way over to the dance floor, follow the marker on the radar to locate Monique, and press the A button to start dancing.
The goal here is to fill the circular meter in the bottom-left corner of the screen completely. To do so, simply move both the Left Stick and the Right Stick to the beat of the music. When “Hold” appears below the meter, hold both sticks down until a number appears in the middle of the speaker. Tap both LT and RT each time a number appears. Continue doing this until the meter is full.
Complete the dance mini-game to move on.
After the cutscene, immediately lock-on to the club owner and headshot him. Be sure to pick up the Pistol .44 he drops! The .44 is a fantastic new pistol that will serve you well in the missions to come (especially when it comes to satisfying accuracy and headshot secondary objectives).
You'll have to fight your way out of the club, as there are quite a few armed goons in the next room. There's a health pack right by the door, so grab it if you need it. There's one enemy right through the first door, so take him out and then slowly push open the next door. There are three enemies around the dance floor; from the doorway, lock-on to the first enemy and headshot him. Without entering the room, peek your head out and pick off the other two, and then approach the platform beside the counter next to the dance floor. Climb up onto the stage to get behind the counter and take cover by the opening.
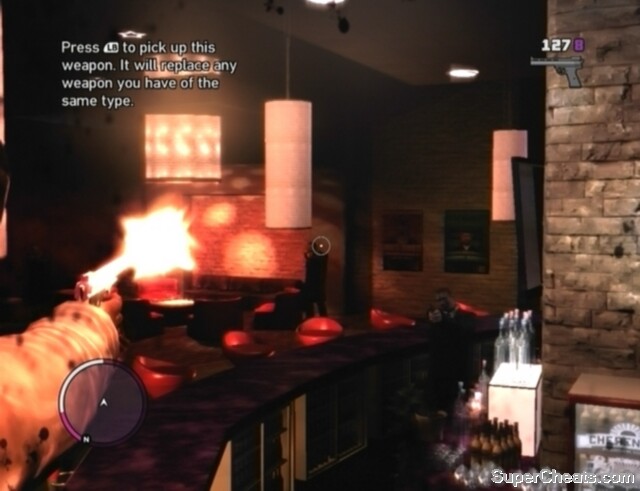
Fight your way out of Bahama Mamas!
Blast the one goon behind the counter, then peek your head out and pick off the other three around the tables. When the room is clear, approach the stairs and take out the guy partway up. There are two more enemies at the top of the stairs, so slowly ascend and kill them when they come into view.
Once outside, sprint away from Bahama Mamas until the mission complete screen is triggered.
Secondary Objectives
Time: 0:03:10
Player Damage: 40%
Groove On: Complete the dance mini-game at Bahama Mamas.
Good Guy: Do not shoot any innocent people.
Make your way to the marker in East Hook to trigger a cutscene. An on-rails sequence follows. You have an unlimited number of Sticky Bombs at your disposal, and must use them to take out the bikers pursuing you.
Use the Right Stick to aim, the RT button to throw a bomb, and down on the D-pad to detonate it. You can detonate bombs that are in mid-air, so there's no need to wait for them to stick before hitting the switch. Detonate a thrown bomb while it's by a target in mid-air, or throw it on the street next to a target and detonate it immediately.

Use Sticky Bombs to fight off the pursuing bikers.
Red blips on the radar mark hostiles, so keep an eye on your radar for blips indicating enemies up ahead. When you notice a group of enemies is coming up, turn to face them and try to clear them away the car reaches them.
Eventually you'll reach a police barricade and attain a three-star wanted level. Quickly lay some Sticky Bombs down by the police cruisers and detonate them to clear the way. Following the barricade, an APC Tank will appear and start tailing you. Continuously toss Sticky Bombs at the approaching APC and detonate them until the vehicle explodes. It might help to stick the bombs to the street and wait for the APC to roll over before setting them off.
As you cross the bridge, some more bikers and a police helicopter will trail after you. Use Sticky Bombs to kill the pursuing bikers, and then turn your attention to the helicopter. Aim up above the blades of the helicopter, throw a bomb, and set it off while the bomb is in mid-air to knock the helicopter down.
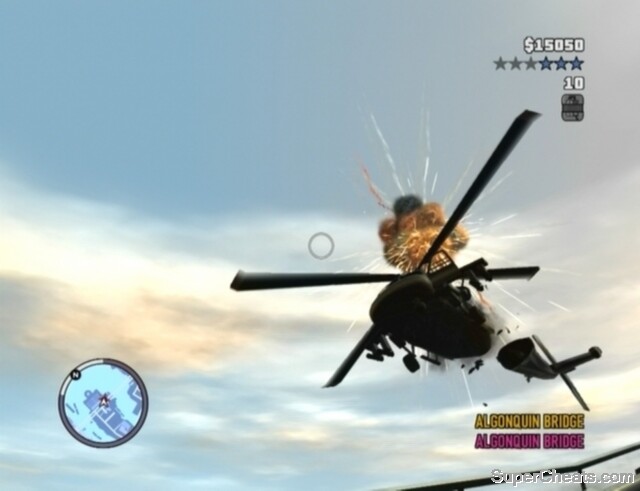
Bring down the police chopper!
At the other end of the bridge, Luis will be forced to take the wheel. You'll have to lose your wanted level next. Continue speeding straight when you reach the end of the bridge until you're out of the flashing circle. Then, take a left or right to avoid any approaching police cruisers and remain out of sight long enough to shake the cops. With that done, follow the highlighted route to Tony's apartment and drop him off to complete the mission.
Secondary Objectives
Time: 0:05:45
Player Damage: 50%
Bomb Accuracy
Escape Cops Time: 0:00:35
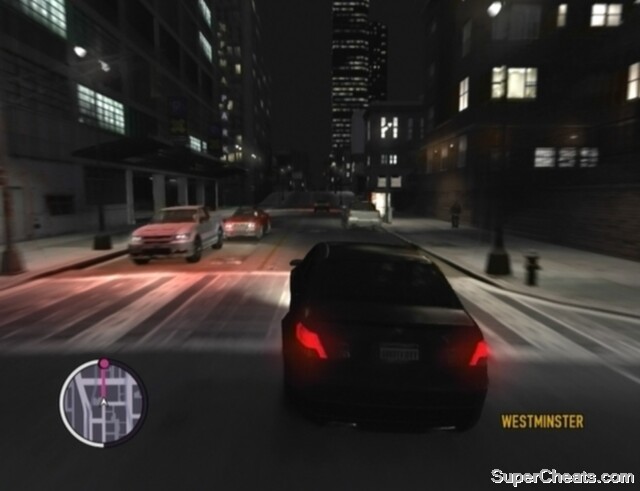
This mission will automatically trigger sometime after “This Ain't Checkers” in Mori's mission line. When you get the call from Tony, follow the marker on your radar to the helipad in Westminster.
When you reach the helipad, get in the helicopter and start ascending. When you're on level with the first checkpoint, fly toward it. The second ring is a bit higher up, so as soon as you've cleared the first ring, ascend until you are on level with the second. Hit the second ring, and then ascend even higher and hit the final ring high above Happiness Island.

Throw the Celebinator out of the helicopter when Tony takes control.
When Tony takes control of the helicopter, you can use the B or X buttons to punch the Celebinator, or simply press the Y button to throw him out. Rough him up enough and Luis will automatically throw him from the helicopter, so it's best to avoid wasting time and just get it over with.
Once the blogger has been thrown from the helicopter, you then must catch him before he hits the ground. While freefalling, push the Left Stick up to dive. When you're above the Celebinator, just continue to let Luis freefall until he catches him. Then, activate the Parachute and land somewhere on Happiness Island to complete the mission.
Throwing and saving the Celebinator]
Secondary Objectives
Time: 0:02:10
Player Damage: 0%
Time to Catch Blogger: 0:00:08
It's time to grab those diamonds. After the cutscene, grab a car and make your way to Yusuf's helipad in Westminster. There, get in the ridiculously extravagant Buzzard and fly to the Libertonian in Middle Park. Land the Buzzard on top of the museum and get out. Walk over to the scaffolding on the southwest side of the building and drop down to the window to overlook the deal.
With the diamonds in hand, approach the ladder, press the Y button, and hold the A button to quickly climb up. Once back on the roof, immediately get in the Buzzard and take off. Before you can escape the authorities you must shoot down three police helicopters. The helicopters are marked on your radar.
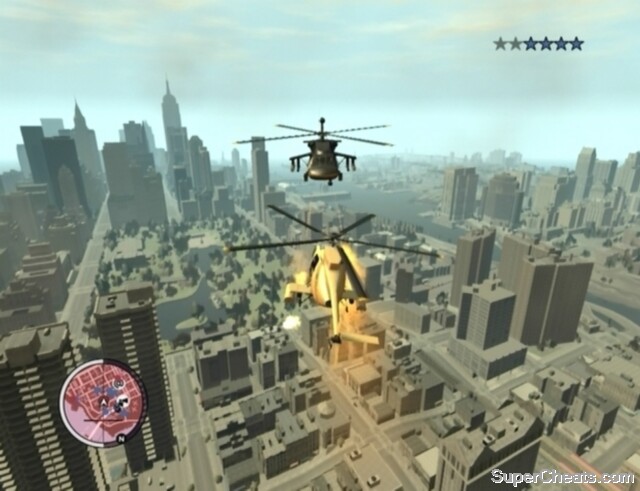
Fight the enemy helicopters high above the city.
The weaponry attached to the Buzzard cannot lock-on to targets, so downing the choppers will require some finesse at the controls. It's best to fly a bit above a target, and then push the Right Stick up to tilt the front of the Buzzard toward it, tapping the X button to let off some missiles. With any luck, one of the missiles will hit and destroy the helicopter.
You might find it easier to shoot down the helicopters with the camera set to first-person. To switch to the first-person camera view, press the Back to cycle through until the camera is set. A word of warning: If you suffer from any degree of motion sickness, stick to the third-person view.
Missiles fired by enemy helicopters are homing, but they can be dodged. The Buzzard can take a direct hit and come off seemingly unscathed, but try to dodge incoming missiles regardless.
When the first helicopter has been destroyed, two more will appear. Shoot them both down, fly the Buzzard back to the helipad in Westminster and land it to complete the mission.
Secondary Objectives
Time: 0:04:35
Player Damage: 20%
Helicopter Damage: 80%
Follow the marker on your radar to the helipad on top of the Booth Tunnel exit. There, get out of the car, hop into the helicopter, and wait for Tony to get in as well. Fly over to the marker in Meadows Park to spot the suspected kidnapper.
Once you've spotted the kidnapper, it's just a matter of following his red car. Unfortunately the target is not marked on your radar, so it can be easy to lose track of him. However if you hold the B button the camera will focus on him. So if you lose track of him, hold the B button and fly in the direction it points to.

Keep track of the red car as you fly overhead.
To satisfy the “Close Pursuit” and “Low Fly” secondary objectives you must remain close to the kidnapper during the entire mission and not fly too high up. How low you're supposed to fly is not clear.
When the kidnapper enters a tunnel, hold the B button to keep track of him.
The target will eventually reach a building in Westdyke, Alderney. When he stops there, fly to the marked helipad in Alderney City and land the helicopter to complete the mission.
Secondary Objectives
Time: 0:08:50
Helicopter Damage: 0%
Close Pursuit
Low Fly
This mission becomes available following “In the Crosshairs” in Bulgarin's mission line. This is a short one. Drive to Pier 45 in Fishmarket South and get in the boat docked there. Follow the blip on your radar to the Charge Island Sewage Works and hit the marker there to trigger a cutscene.
Following the cutscene, you must shake off the goon who is grasping the back of the boat. Immediately hold LT to reverse, as when the boat reverses, the goon will be knocked off. Hold LT as soon as you regain control after the cutscene able to complete the “Hanger On Time” secondary objective. With that done, return to Pier 45 and hit the marker there to complete the mission.
Completing Hanger On Time.
Secondary Objectives
Time: 0:03:55
Hanger On Time: 0:00:07
You'll get a call from Yusuf following the “Chinese Takeout” or “Practice Swing” missions in Tony's mission line. He has work for you, so follow the ‘Y' icon on the radar to Yusuf's apartment near Middle Park and hit the marker outside to get started.
You're tasked with stealing a helicopter. There's just one problem: it's on helipad, which is on top of a yacht that's currently out at sea.
First, it's off to the marina in Castle Garden City to grab a boat. After the cutscene, quickly steal a car (or hail a taxi if you don't care about score) and follow the marker on your radar to reach the marina. When you reach the marker, climb down the stairs and hope in one of the Jetmax motorboats along the dock.
Once you have a boat, start toward the marker on your radar. There is one patrol boat protecting the yacht, so you don't want to make a beeline for it. When the yacht comes into view, continue heading straight until you are near the front of the yacht. Then, turn toward the yacht and move along its side to its back end. Slow down as you near the back of the yacht and then jump out of your boat. Quickly swim to the back of the yacht by holding the A and then press the X button once to grab hold and again to climb up.

Get behind the yacht and climb onboard.
After the short scene, make your way onto the helipad and get in the Buzzard. As soon as you're in, hold the RT button to ascend and press the RB button to turn toward the Statue of Happiness. If you want to satisfy the “Boats Destroyed” secondary objective, you'll have to destroy the patrol boat before flying off. Either way, fly toward Happiness Island, but not too quickly. As soon as Luis dials Yusuf's phone number, slow down and hold the RB or LB button to turn back around to face the yacht.
Yusuf asks that you destroy the yacht, killing everyone onboard. Doing so might be a bit of a hassle if you're not used to the helicopter controls. If you take your time, you can fly over the yacht and destroy it with missiles in one pass.
While piloting the Buzzard, the X button fires missile and the A button the machine gun. Start back toward the back end of the yacht, flying just a bit above it. As you near, push the Left Stick up to tilt the front end of the Buzzard toward the yacht and start tapping the X button to fire missiles. If you're too high and the missiles miss their target, hold the LT button to descend a bit or continue pushing the Left Stick up. You need to hit the back, middle, and front of the yacht with missiles to sink it. The Buzzard's onboard computer will notify you when a missile is headed your way.
Using the Buzzard's weaponry to sink the yacht.
When you've managed to sink the yacht, you'll then have to kill the three fleeing arms dealers. Use the Buzzard's machine gun for this task. Start toward the three motorboats, making sure you're not too high up in the air. Once you're above the arms dealers, stop moving forward, push the Left Stick up and hold the A button while trying to direct the fire to one of the three boats. It's quite difficult to hit the boats while moving forward, but slowing down to a near stop seems to improve accuracy greatly. The goons onboard are armed with RPGs, so keep an eye out for missiles headed your way.
You might find it easier to destroy the boats with the camera set to first-person. To switch to the first-person camera view, press the Back to cycle through until the camera is set. A word of warning: If you suffer from any degree of motion sickness, stick to the third-person view.
Once all three targets have been dealt with, fly to the helipad on top of the skyscraper in Fish Market South and land the Buzzard there to complete the mission.
Secondary Objectives
Time: 0:06:00
Player Damage: 0%
Boats Destroyed: 4
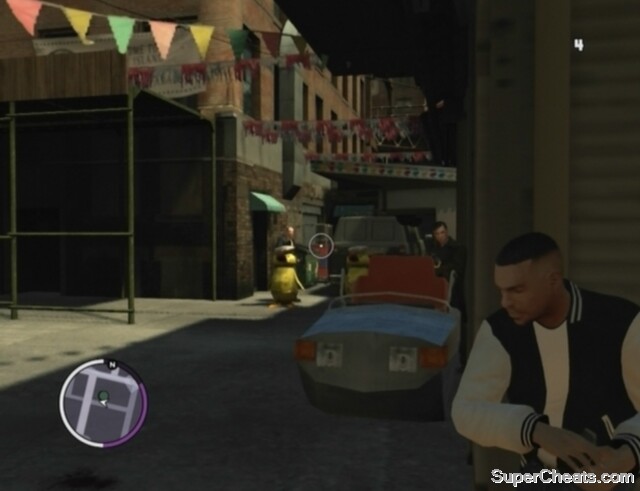
This mission becomes available following “Corner Kids” in the Mom's House mission line. After the cutscene, follow the marker on your radar to Rotterdam Tower in The Triangle. Once there, hop out of the car and head through the front door. Hit the marker in front of the elevator to ride the elevator up to the top of the tower.
When the elevator reaches its destination, walk around to the blue marker on your radar to meet Ahmed. Yusuf has given you an Explosive Shotgun with explosive shells, which will definitely come in handy for what is to follow.
Use the explosive shotgun shells Yusuf has given to down the helicopters.
After the cutscene, Ahmed will begin climbing the building in an attempt to escape. A NOOSE team has descended upon the tower, so you'll have to fight them while chasing after Ahmed. At the start, wait for a helicopter to appear to the west. Take aim and continuously fire shells at the helicopter until it explodes. There are two enemies around the corner, so be ready with your Explosive Shotgun and blast them when they come into view.
Continue around to the first set stairs and take out the enemy at the top of them before heading up. Up the stairs, another helicopter will soon come into view and you'll encounter another NOOSE agent. Quickly down the agent and then take to destroying the helicopter before climbing up the yellow ladder. Once up the second ladder, quickly kill the agent that appears and be ready for another helicopter.
Chase Ahmed to the top of Rotterdam Tower.
Down the third helicopter, and then run around to another yellow ladder. Before climbing up, look up and blast the agent above it. Climb the next two short ladders and then start climbing up the long one after Ahmed. Hold the A button while climbing to climb faster. When you reach the top of the first long ladder, be ready for another helicopter. Shoot it down to satisfy the “Helicopters Destroyed” secondary objective (provided you've destroyed the three previous helicopters as well).
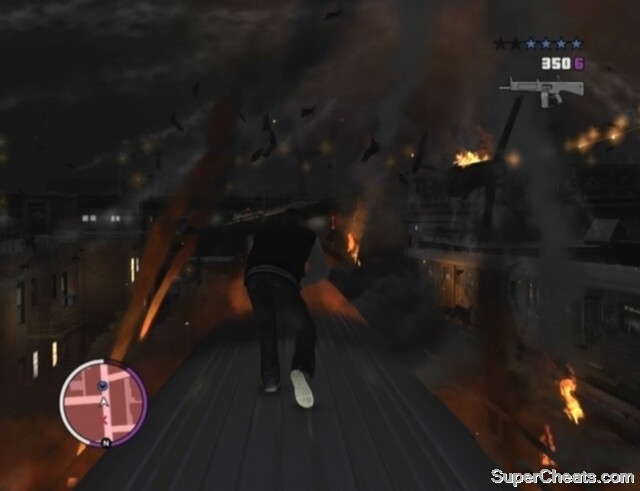
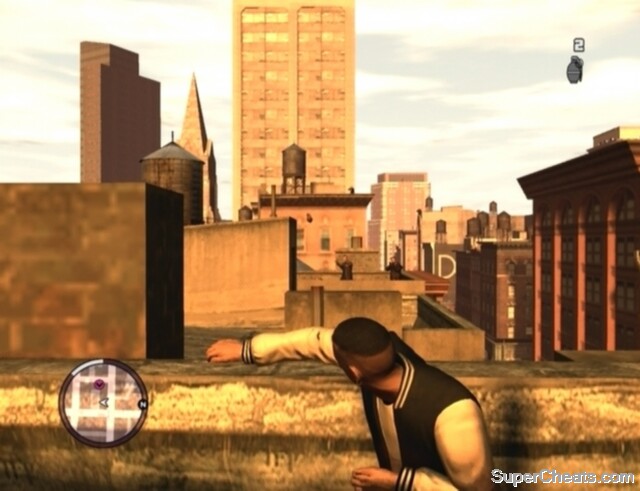
Climb up the final ladder to reach the top of the tower. Once you have the Parachute, leap from the tower to freefall. Let yourself freefall for as long as possible to satisfy the “Freefall Time” secondary objective. Press the A button when you're ready to activate the Parachute, and then glide safely down to street level to complete the mission. From here on out, you can purchase Parachutes from Armando's gun van.
Giving chase to Ahmed.
Secondary Objectives
Time: 0:04:10
Player Damage: 50%
Headshots: 6
Accuracy: 70%
Helicopters Destroyed: 4
Freefall Time
Hop in the car outside and follow the marker on your radar to meet Yusuf in Star Junction. The NOOSE APC Yusuf is after is being airlifted across the city, so you must intercept it by helicopter. Step out your car, get in the helicopter, and ascend. Follow the blue marker on your radar to reach the suspended APC. At this point, Yusuf will take control of the helicopter while you attempt to release the APC before it reaches the police station.
You've been given an Advanced Sniper, a fantastic long-range weapon introduced in the Ballad of Gay Tony. Hold LT to look through the scope and push the Left Stick up to zoom in and down to zoom out. To release the APC from the crane you have to shoot the four yellow bolts on the cables attached to each end of the APC. It's impossible to get a steady shot while sniping from a helicopter, but zooming in very closely seems to help.
Shoot the four yellow bolts to release the APC.
When all four bolts have been destroyed, the APC will plummet to the city streets. After a short scene, Luis will leap from the helicopter with a Parachute strapped to his back. Press the A button to activate the Parachute and try to land as close to the APC as possible. Once on street level, sprint to the APC and hop in.
Upon entering the APC you'll be attributed a four-star wanted level. The APC is quite slow so you will likely have a difficult time losing the cops. Your wanted level will eventually decrease by itself if you wait it out long enough, but trying to shake the cops before that happens is probably your best bet, especially if you're looking to beat the target time. Don't temporarily ditch APC in favour of a faster vehicle for the getaway, as straying too far from the APC will end the mission.
Attached to the APC is a surprisingly ineffective cannon, which you can aim with the Left Stick and fire with LB. Use the cannon to destroy six cop cars to satisfy the “Cop Cars Destroyed” secondary objective.
Once you've lost the cops, drive the APC to the building site at the south end of Algonquin and hit the marker there to complete the mission.
Secondary Objectives
Time: 0:07:25
Player Damage: 50%
Tank Damage: 50%
Cop Cars Destroyed: 6
Sharpshooter: Release the APC by shooting all four yellow bolts without missing a shot.
This mission will become available sometime after “Dropping In” in Bulgarin's mission line. You'll want to acquire some Body Armor beforehand. Travel to the construction site in Castle Gardens when you're ready and hit the marker there to get started.
The next item Yusuf desires is a subway train car. Drive to the marker on the Algonquin bridge and get out your car once there. Stand at the marker overlooking the tracks and wait until the subway train comes into view, at which point leap from the off-ramp and onto the moving train.
Make your way to the front of the train.
Once on top of the train you'll be promptly attributed a four-star wanted level. Yusuf has provided you with another batch of explosive shells for your Explosive Shotgun, making shooting down the police helicopters that will soon swarm you possible. Each helicopter takes three to four direct hits to take down.
Inch your way toward the front of the train and shoot down police helicopters as they appear. When you reach the front car, you must hold out until Yusuf appears in his crane helicopter before Luis will disconnect the car. While waiting for that, use your Explosive Shotgun to blast any helicopters that engage you.
When the train reaches the Schottler station, be ready to duck down by clicking the Left Stick, as a gunship will soon appear before you and continuously fire. Duck as soon as you're through the Schottler station and remain down until the gunship is behind you. Lock-on and blast the cops at the next station as the train passes through and Luis will soon detach the car to complete the mission.
Helping Yusuf steal the train car.
Secondary Objectives
Time: 0:04:20
Player Damage: 50%
Duck Chopper
Helicopters Destroyed: 8
Sometime after completing this mission, Yusuf will call to tell you that he has left a car for you in front of his apartment near Middle Park. Travel to the ‘Y' icon on your radar and to find Yusuf's Super Drop Diamond. Get in the car to obtain a unique golden SMG. The Super DD will spawn in front of Yusuf's apartment from now on.
Look for the Super DD in front of Yusuf's apartment.
You can take a mission from Mori following “Practice Swing” in Tony's mission line. Follow the ‘M' icon on the radar and hit the marker there to get started.
Drive Mori to the docks in Chase Point at the south end of Bohan. Once there, step out of the car and follow Mori down the nearby stairs. After the cutscene, equip a weapon (the Pistol .44 is ideal) and use Free Aim or auto-aim to score some headshots on the two or three enemies closest to you.
After killing the first few enemies, an enemy armed with RPG will appear on the third level of the parking garage along the north side of the dock, and another with a pistol on the second level. After dealing with the enemies closest to you, step out of cover and walk along the railing to the shipping container covered by a green tarp. Take cover behind the container and pick off the two enemies in the parking garage when they pop up to fire. Once those two enemies are down, move up to the two boxes further ahead and pick off the remaining enemies there

Help Mori take out his rivals.
When the dock is clear of enemies, hit the marker at the east end to board a dinghy. Now you must destroy the three marked boats using Sticky Bombs. You can throw a Sticky Bomb while driving a vehicle by pressing the LB button. Luis will throw the bomb to his left, so you'll have to be next to the boats to make the kill.
Don't drive right up alongside your target, as doing so would give the driver a prime opportunity to hit you with gunfire. Leave a sizeable gap between your boat and the target before throwing a bomb. When the bomb hits the water, immediately press down on the D-pad to detonate, destroying the target in the process.
Destroy all three boats and then dock in Fishmarket South to complete the mission.
Secondary Objectives
Time: 0:05:00
Player Damage: 50%
Headshots: 10
Accuracy: 70%
Boat Damage: 60%
Top Boat Speed: 70 mph
Quickdraw the RPG: Kill the RPG-wielding enemy in the parking garage before he can fire.
This mission will become available after “High Dive” in Yusuf's mission line. To complete this mission you must beat Mori and two other participants in a vehicular triathlon. Hit the marker in Fishmarket South to get started.
First, participants will skydive out of a helicopter and aim for one of the boats docked at Happiness Island. The boat will be used to clear a series of waypoints. Once on land, participants will get into one of the cars parked nearby and clear another series of waypoints. First one to the final waypoint in Middle Park wins.
Winning this race is really not much of a challenge; as long as you can get in first place and maintain it, your lead on the other participants will steadily grow larger, making for an easy win.
Landing on one of the boats at the start of the race.
At the start, allow yourself to freefall a bit, trying to direct yourself toward the boats below, and press the A button to activate the Parachute when ready. Don't use the Parachute right away because you'll be left gliding in the air high above the boats if you're too quick and likely end up completely missing the mark. Ideally you'll land onto one of the boats; it doesn't really matter which one you take, since they are all suited to beat out the competition.
Once in a boat, start it up and make for the first waypoint. Hold the RB button and use the Right Stick to turn the rudders left or right to make sharp turns. In each waypoint is an arrow pointing in the direction the next waypoint will appear, so use these arrows to guide you on your way.
When you hit the final waypoint in the water, drive the boat up the beach and toward the cars parked there. Get one of the cars and start toward the first waypoint. The car is equipped with nitro, however definitely wait until you're off the beach before using it! Traction is poor on the beach, so take your time or you might have a difficult time making up the hill and onto the road. If you performed well enough on the boat portion you should have enough of a lead for such a delay to not matter much.
Clearing the final series of waypoints.
As soon as you're off the beach and on the first straight stretch of road, hit the B button to activate nitro. Don't be too liberal with the nitro though, as a turn is coming up. While using nitro, be sure not to move the Left Stick to the left or to the right, as your car is likely to spin out if you do so. The best opportunity to use nitro efficiently will come when you reach a bridge. As soon as you reach the bridge, hit the B button and do so after each boost until your tank is empty. You'll have to turn right when you reach the north end of Middle Park, so use some discretion.
Push on to the final waypoint to win the race and complete the mission. You can now participate in multiple-vehicle races around the city by travelling to one of the checkered flag icons on the map and radar.
Secondary Objectives
Time: 0:07:35
Player Damage: 0%
Landed in Boat: Land on one of the boats at the start of the race.
Always First: Get in first place and remain there for the rest of the race.
You're going along with Brucie and Mori to steal three cars. Get in the car with the two brothers and make your way to the marker near Middle Park. After the cutscene press the LB button to activate the lift controls and use the Right Stick to lower the car on the platform above when Mori drives out. Lower the platform completely, wait for Brucie to get in the car that's on it, and then lower the third platform. Get in the last car and line up behind Mori and Brucie.
Now it's just about keeping up with Mori. Two blocks later you'll be attributed a three-star wanted level, so you'll have to outrun the cops as well. All in all, not a tough mission, however make careful turns and such to avoid spinning out. If you end up too far from Mori and Brucie, you'll fail the mission.

Keep pace with Mori and Brucie.
After speeding down a narrow walkway, you'll come to a series of small jumps. Hit them all, landing on the barge with Mori and Brucie to complete the mission.
Secondary Objectives
Time: 5:15
Car Damage: 20%
Top Speed: 140mph
Followed Close: Never trail more than a certain distance from Mori.
Travel to the house icon when it appears on your map and radar and hit the marker there to get started.
Walk with Santo to the L.C. Cage Fighters. Once inside, you will face three opponents. You must beat the first two, but take a dive on the third so Santo can win his bet. Winning the brawls is quite simple, but don't go in there just mashing buttons. If you tap the A button just as your opponent takes a swing, Luis will dodge the attack, allowing you to hit the opponent with a counter attack by tapping the B or Y button.
If you manage to force your opponent to the boundaries of the ring, kick him repeatedly to hopefully satisfy the “Crowd Helped” secondary objective. Defeat one of your opponents with a counter attack to satisfy “Counter Finish.”
Take a dive in the third round. Or don't.
Once you've beaten the first two opponents, the third will enter the cage. You have a choice: allow him to beat you to below 50 per cent health (if you aren't already) and then press the LB button to take a dive, or fight to win. If you are looking to 100% the mission, the obvious choice is the latter, as you can't sustain more than 10% of damage.
Your decision might depend on how much health you have left come the third round. If your health is low and you don't think you can beat the last guy, it's probably best to dive, otherwise you can fight to win. If you win the third round, Santos will pull a knife on you after the cutscene; pull out a gun and shoot him dead.
Secondary Objectives
Time: 0:03:10
Player Damage: 10%
Crowd Helped
Counter Finish
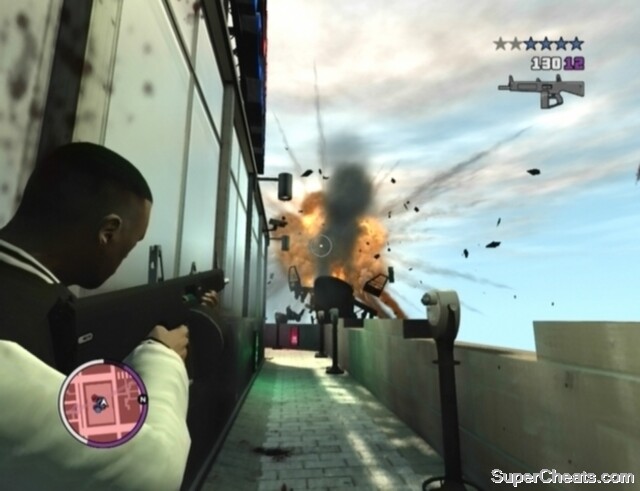
After the cutscene, get in the car and make your way to the meeting spot in East Hook. Not at all surprisingly the deal goes bad, as the authorities soon show up. You've been armed with an Explosive Shotgun and some Grenades. Start by hitting the cop on the roof with a shot from your Explosive Shotgun, which should send him to the pavement. Then, switch to your Grenades and throw a couple by the police cruisers in the middle of the street. If you hold the grenade for a few seconds once the pin has been pulled (hold RT), you can likely kill enemies hiding behind cover before they can scatter.
When the street is clear, move out from cover and duck behind one of the stacks of bricks in front of the rows of columns. Use your Explosive Shotgun (or .44 if you have one) to blast the cops as they pop out from cover. The Explosive Shotgun is deadly at close-range, but deals minimal damage at long-range. If you're armed with a .44 as well, use it to headshot enemies from afar, using your Auto Shotgun to kill those nearby. Of course, be sure to pick up any ammo dropped by your enemies when you have the chance.
The Explosive Shotgun is very effective at close-range.
Once past the columns, wait for Armando and Henrique to blast the wall with explosives. With that, move through the opening and immediately take cover behind the wrecked car. Blast the three cops on the roof with your Explosive Shotgun to send them to the pavement. When the cops on the roof have been dealt with, sprint to the car by the lamppost to the east and take cover behind it. Clear away the remaining enemies and then make a break for the marked car.
After the short scene you'll be armed with an RPG, which you must use to down the helicopter flying overhead. The helicopter will be flying north, so take aim and fire where the helicopter will soon be to knock it down.
With that, steal a four-door vehicle and drive Armando and Henrique to the marker in Northwood to complete the mission.

Use the RPG to knock down the police chopper.
Secondary Objectives
Time: 0:07:50
Player Damage: 40%
Headshots: 20
Accuracy: 55%
If you don't have a Pistol .44, call Armando by selecting “Gun Van” from the list of phone options. Travel to the ‘A' icon to meet Armando and purchase a .44 (and some Body Armor). The .44 is not available at gun stores, so you'll have to call Armando to get one.
Drive Armando and Henrique to the nearby pier in Bohan and hit the marker there. Follow Henrique down to the pier. Once at the bottom, a rival gang will show up, looking to steal the drug shipment. You must eliminate all the targets (red blips on your radar) and take the shipment to a lock-up in Northwood to complete the mission.
Some of the rival gang members are heavily-armed with Carbine Rifles, so smart use of cover is absolutely essential here. At the start, equip your .44 and use auto-aim to eliminate the enemies along the railing. While locked-on to a target, use the Right Stick to aim for his head.

Wipe out the rival gang.
When you've cleared away all of the enemies visible from the pier, climb up to the top of the stairs. Before moving completely up the stairs, kill any enemies you can see along the walkway and then take cover behind the white cargo container. If you notice one of the downed enemies was carrying a Carbine Rifle, be sure to pick it up.
When all of the enemies on the current level have been taken care of, another group will appear above. Head up the stairs at the south-end of the walkway and take cover behind one of the cargo containers in the area at the top. Kill off the remaining enemies with headshots from your .44 or a hail of gunfire from your Carbine Rifle and then head to the marked van below. Drive the van out of Bohan and into the nearby lock-up in Northwood to complete the mission.
Secondary Objectives
Time: 0:05:00
Player Damage: 40%
Headshots: 20
Accuracy: 55%
You'll get a call from Bulgarin sometime after the second part of the “Blog This!” mission in Tony's mission line. Travel to the ‘B' icon in Meadow Hills, Broker, and hit the marker there to get started.
This one's a doozy. Before getting started, call Armando by selecting the “Gun Van” option from his phone menu, meet him, and purchase some Body Armor. RPG ammo would help as well. Upon starting this mission you'll be given an Advanced MG and some Sticky Bombs, so don't spend money on either of those.
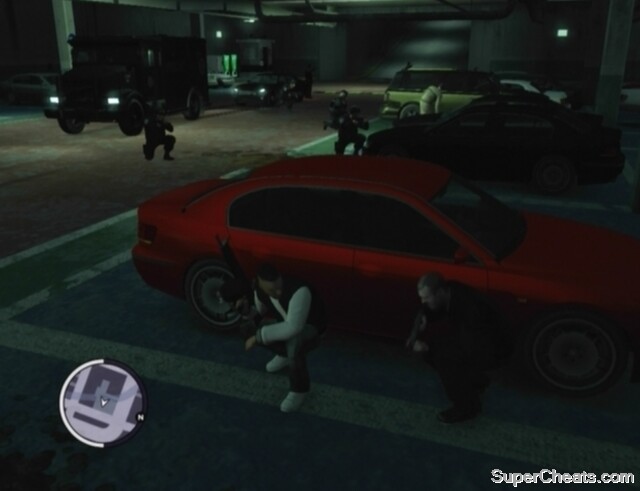
When you're all suited up, hit the marker outside of Bulgarin's place to get started. After the cutscene, follow the marker on your radar to the underground parking lot near Middle Park. When you reach the entrance, drive down and park the van on the marker near the pillar. After that, get out of the van and place one Sticky Bomb on the front grill of the car, then join Bulgarin behind the red car a view spaces away. Remain crouched behind the car and wait for the corrupt NOOSE agents to enter the parking garage.
Wait until the inspector is next to the van before detonating the Sticky Bomb.
When the agents arrive, wait until the inspector reaches the car before pressing down on the D-pad to detonate the Sticky Bomb. What ensues is an all-out firefight between you and the NOOSE.
The agents are all wearing Body Armor and wielding powerful automatic weapons, so you must use cover efficiently. The Advanced MG and Explosive Shotgun are your best weapons here. Move from cover to cover in an attempt to get closer to your targets and blast them with the Explosive Shotgun or gun them down with the Advanced MG. Be careful though, as the agents tend to rush cover, so keep an eye on your radar for any red blips moving around your place of cover. Use an RPG (or whatever Sticky Bombs you have left) to destroy NOOSE trucks as they enter the garage, as well as blowing up cars that agents are hiding behind.

Fight off the NOOSE agents in the parking lot.
Keep fighting until the NOOSE stop coming. There is a fresh vest of Body Armor in front of the car at the southwest end of the lot (right across from the exit), so be sure to grab it on your way out. Up the ramp, another NOOSE truck will appear, so be ready with your Explosive Shotgun and blast the agents when they step out. With that, get in the truck, wait for Bulgarin and Timur to get in as well, and then travel back to the marker outside of Bulgarin's house to complete the mission.
Secondary Objectives
Time: 0:06:30
Player Damage: 50%
Headshots: 20
Accuracy: 70%
Vehicles Destroyed: 5
Bomb Hidden
Sticky Bomb Carnage
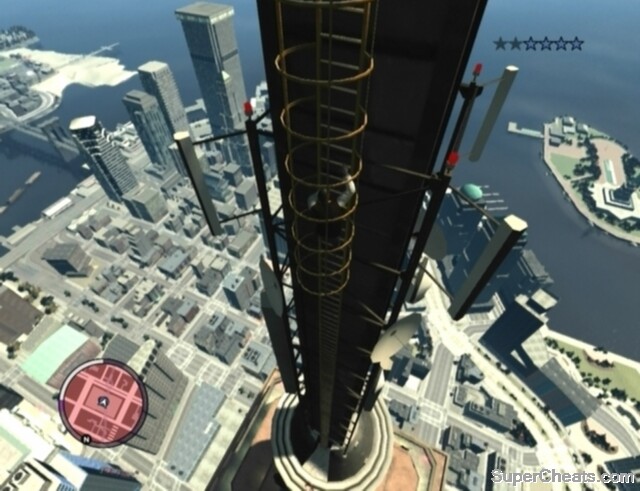
Bulgarin wants you to storm the Liberty City Rampage building in Algonquin and kill the owner, a man named Ashvilli. Since simply strolling through the front door would be too easy, you must instead Parachute from a helicopter and land on the helipad atop the building, fighting your way down from there.
You'll want to purchase Grenades or Sticky Bombs before starting this mission, so give Armando a call beforehand. Grenades are the better option, but enemies don't seem to scatter when a Sticky Bomb is thrown, so those are suitable as well. When throwing a grenade you can hold on to it after pulling the pin by holding down RT; do this and enemies won't have as much time to react before it goes off.

Hit the checkpoints as you ascend to position the helicopter.
Make your way to the helipad in Fishmarket South and hit the marker there. Get out of the car and into the helicopter on the helipad. Wait for Timur to get in as well and then ascend. Fly high enough that you're level with the first checkpoint, and then fly through it. Look to your radar and ascend until you're on level with the second checkpoint, and then fly through it. Fly through the next two checkpoints and you'll be over the building.
After hitting the final checkpoint, move the helicopter forward just a bit more. You're aiming for the pink marker on the helipad on top of the building. Once you've spotted the target, jump out of the helicopter. Allow Luis to freefall for a few seconds, angling him toward the target, and then press the A button to activate the Parachute. Push up on the Left Stick to slow down while gliding, or push down on the Left Stick to glide forward. Land as close to the marker as possible.
The “Perfect Landing” secondary objective doesn't seem to be overly particular, as even landing near the market seems to satisfy it.
Landing on the helipad.
Enter the building after the cutscene and head down the stairs. At the bottom of the stairs look for a vest of Body Armor to your left. There are four goons in the hallway beyond the yellow double-door, so toss a Grenade in or be ready with an automatic weapon or your .44 to quickly take them out with headshots. At the end of the first hall is an elevator shaft. There are two guys below, so either kill them before dropping down if they are visible or toss a grenade or Sticky Bomb to clear them out.
Drop down the elevator shaft and quickly gun down the enemies in the hallway. Take cover off to the side if need be. When the way is clear, move to the double-door at the end of the hall. There are two enemies through the double-door. One of them should be out in the open, and the other will likely be covering by the table on the right side of the room. Gun down the visible enemy with an automatic weapon and headshot the other when he peeks his head out.
Nudge open the yellow door at the end of the room and gun down the enemy in the stairwell. At the bottom of the stairs, have a grenade or Sticky Bomb ready and nudge open the door. Toss the explosive behind the desk at the other end of the room to clear out the two enemies there.

Storm the building in search of Ashvilli.
There's a mess of enemies in the board room adjacent to the desk, so inch forward, break the glass with gunfire and lob a couple of explosives in there. To satisfy the “Ashvilli Plummet” objective you must push him out the windows at the back of the boardroom with gunfire. To do so you will first have to clear away his bodyguards, leaving Ashvilli (who is unarmed) for last and moving in to knock him out with gunfire when he's in front of one of the windows.
When Ashvilli is dead, jump through the window at the north end of the board room and attempt to land on the back of the truck marked on your radar. You don't have to land right on the truck to make the escape; if you land on the street next to it, you can just get in passenger's seat, however you will fail to complete the “Truck Landing” secondary objective. If you land too far away from the truck and Timur takes off, just grab any car in the street and drive away to escape the bodyguards coming after you. Lose your pursuers to complete the mission.
Killing Ashvilli and escaping.
Secondary Objectives
Time: 0:06:40
Player Damage: 40%
Accuracy: 70%
Perfect Landing: Land in the marker on the helipad atop the target building.
Ashvilli Plummet: Kill all of Ashvilli's body guards first, then lock-on and shoot him when he moves in front of the window.
Truck Landing: Glide onto the back of the flatbed truck driven by Timur after jumping through the window at the end of the mission.
You'll want to buy some Body Armor before setting out on this one. Grenades and RPG ammo too if you have the cash. Also, if you haven't yet completed the last mission in Yusuf's mission line (“For the Man Who Has Everything”), do that first to get extra explosive rounds for your Explosive Shotgun. Hit the marker outside of Bulgarin's house when you're ready to get started.
Make your way to the marker in Little Italy, Algonquin, to travel up to the top of the building. Following the cutscene a number of snipers will have you in their sights. You're armed with an Advanced Sniper, but you're also severely outnumbered. There are snipers all over surrounding rooftops; you need only kill four of them.
Each time a sniper takes a shot, he will appear on your radar as a red blip for a few seconds.
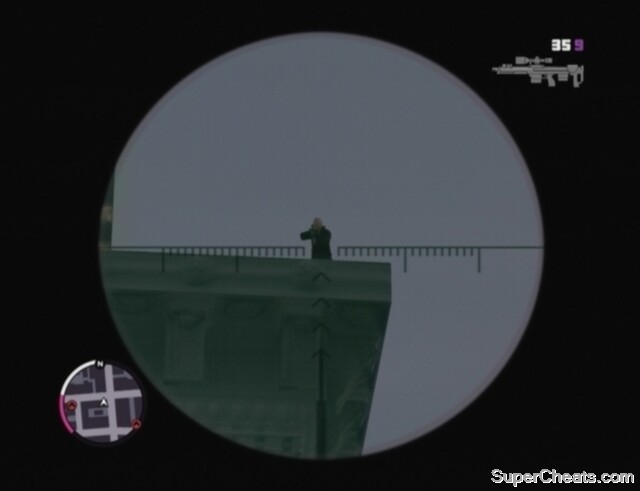
Sniper vs. snipers!
You must find some way back to street level. Start by walking around to the south side of the roof. Look southwest for a sniper on the building, take aim with your rifle, and shoot him when he pops up. Then, take out the sniper on top of the high building with the green trim to the north. Once that sniper is down, jump over the railing along the west side of the building to the lower rooftop.
Climb up the wall to the west and take cover behind the small structure there. Look west and take out the sniper on the building that has a water tank on top of it. Then, move to the southeast corner of the rooftop and look southeast for a sniper perched on the building there. Kill the fourth sniper to trigger a wave of enemies.
Completing 4 shots, 4 snipers
When the gunship appears, use your Explosive Shotgun or RPG Launcher to shoot it down. Take another look at the red building with the water tank for more snipers; there should be another sniper there.
If you brought Grenades along with you, throw one or two at the enemies further west along the rooftops. Hold on to the grenade for a few seconds after pulling the pin by holding RT; doing so will give the enemies less time to react before it goes off. The enemies at this portion seem to spawn indefinitely, so clear the way and then quickly move further along the rooftop.
Toss a grenade to take out the enemies along your escape route.
There's an enemy armed with what appears to be a Grenade Launcher on the building where the third sniper was, so if you see him fire his weapon, either quickly fallback or run forward to avoid getting caught in the blast.
Continue heading west when the way is clear and grab the vest of Body Armor along the way. When you reach the water tower, take out the enemy on the building across the street to the west as well as the one below before dropping down to the lower rooftop. Then, make your way to the marked fire-escape and climb down to street level. Steal a car and flee the scene to complete the mission.
Secondary Objectives
Time: 0:04:30
Player Damage: 40%
Headshots: 10
Accuracy: 60%
4 shots, 4 snipers
You'll get a call from Rocco sometime after “Ladies Half Price” in Tony's mission line. Before starting this mission, purchase Body Armor, a bunch of Grenades and a some RPG ammo from Armando's gun van.
When you're ready to get started, make your way to Middle Park and hit the marker in the public restroom there. After the cutscene, travel to Maisonette 9 in Westminster. Enter the club and hit the marker by the stairs to trigger a cutscene.
Cut down Bulgarin's men as they enter the club.
You must stand your ground and defend Tony against wave after wave of Bulgarin's men as they funnel into the club. You've been given an Advanced MG with plenty of ammo, but the Assault SMG actually seems to work better here. The best way to position yourself is crouched at the top of the stairs at the east end of the platform. If you remain where Luis is after the cutscene, you're likely to take much more fire and any enemy who makes it up the stairs may be able to take out a large chunk of your armour or health.
A good opportunity to cut down an attacking wave is while the enemies are entering the club. If you use Free Aim and aim above the divider where the enemies' heads will be as they are running in, you can likely knock out a few of them with headshots. The Advanced SMG seems to work better for this. If the few enemies remaining before the next wave are out of your view, inch down the stairs and gun them down to trigger the next wave. You might also want to try throwing a grenade.
If your armour is gone and your health is low, look for a health pack in the northwest corner of the platform.
Use Grenades to clear away the enemies outside.
When Bulgarin's men stop pouring into the club and the final enemy has fallen, make your way to the entrance at Tony's command. There is a mess of enemies outside of the club, but they seem to have a tendency to group around their vehicles. Throw a grenade or hit the vehicles with an RPG in an effort to wipe out any enemies grouped around it. Kill all of the marked enemies outside of the club to complete the mission.
Secondary Objectives
Time: 0:04:30
Player Damage: 90%
Headshots: 25
Accuracy: 70%
Enemy Cars Destroyed: 4
Buy Body Armor, .44 ammo, Advanced MG ammo, Grenades, and some RPG ammo from Armando's gun van before starting this mission. Hit the marker in front of Tony's apartment in Shafter to begin.
Drive to Firefly Island in Broker and hit the marker to enter Funland and trigger a cutscene. After the cutscene, equip your RPG, take aim at the truck to the south, and fire. The RPG should blow up the truck, killing the two goons standing next to it.
Your first task is to destroy the four heroin shipments to cut off Bulgarin's income.

Fire an RPG at the first heroin shipment to destroy it.
There are two more heroin vans marked on your radar at the moment, and both are in the fenced area to the east. Wait until the flames surrounding the wreckage of the first van have dispersed and then take cover by the doorway there. Step out from cover (but remain out of the doorway), equip your Grenades, take aim, and lob one at the van that's visible through the doorway.
When the second van has been destroyed, move through the doorway and take cover behind the ticket booth there. Keep an eye out for red propane tanks; use Free Aim to set them off if enemies are near. Use your .44 to score some headshots on any goons you can spot before moving out from cover. Move up to the detached car and pick off any enemies you can see. Continue moving from cover to cover, killing any enemies you spot along the way, until you are up to the third heroin van. Destroy the van and grab the health pack attached to the building behind it if necessary.
After the third van has been destroyed, the final one will appear on your radar. Make your way back to the doorway you came through and gun down the two enemies there. Grab the Body Armor by the ticket booth before moving back into the alley. Take cover by gate on the opposite side and use your .44 to headshot any enemies you can see. Fight your way to the last heroin shipment and toss a grenade to destroy it.
Destroy all four marked vans to lure Timur out.
Timur will appear when all four vans have been destroyed. You have to kill Timur and get to the Francis International Airport within two hours. Equip your Advanced MG and start after Timur, mowing down any enemies in your path. When Timur is dead, follow the blip on your radar to a parked Bati Custom. Hop on the bike and start toward the airport.
Bulgarin's men are on your tail, but Yusuf will soon show up to aid you in his Buzzard. Drive down the freeway, being careful to avoid the missiles fired from the Buzzard, and follow the highlighted route on your radar to the runway. Once on the runway, make a beeline for the Blue Chawar jet. Speed after it and hit the pink marker behind it to get onboard.
When you regain control over Luis, clear away the enemies and approach Bulgarin when he emerges from the cockpit. Equip your .44, lock-on to Bulgarin, and press RT to perform a special execution.
After the cutscene, push down on the Left Stick to glide forward. Keep this up until you are near Meadows Park. Push up on the Left Stick to descend and try to land somewhere near the park. Once on street level, head to the marker on your radar to complete the mission.

Land as close to the marker in Meadows Park as possible.
You've completed the main story! Good job! There is plenty more to do if you haven't touched the side activities yet, and now you can replay missions and complete more secondary objectives to improve your score. To replay a mission, select the “Missions” option on the phone menu and choose from the missions on the list. Have fun!
Secondary Objectives
Time: 0:10:00
Player Damage: 50%
Headshots: 25
Accuracy: 70%
I Luv L.C.
Time: 0:04:30
Player Damage: 0%
Target Car Damage: 10%
Chinese Takeout
Time: 0:05:20
Player Damage: 10%
Accuracy: 70%
100% Headshots
Practice Swing
Time: 0:04:00
Player Damage: 50%
Headshots: 11
Accuracy: 70%
100% Golf Accuracy
Bang Bang
Time: 0:05:00
Player Damage: 50%
No Bombs Wasted: Three on the crane, one on the train, and one on the plane.
Blog This!...
Time: 0:02:30
Target Car Damage: 0%
Boulevard Baby
Time: 0:03:10
Player Damage: 40%
Groove On: Complete the Dance mini-game at Bahama Mamas.
Good Guy: Do not shoot any innocent people.
Frosting on the Cake
Time: 0:05:45
Player Damage: 50%
Bomb Accuracy
Escape Cops Time: 0:00:35
...Blog This!
Time: 0:02:10
Player Damage: 0%
Time to Catch Blogger: 0:00:08
Not So Fast
Time: 0:04:35
Player Damage: 20%
Helicopter Damage: 80%
Ladies’ Night
Time: 0:08:50
Helicopter Damage: 0%
Close Pursuit
Low Fly
Ladies Half Price
Time: 0:03:55
Hanger On Time: 0:00:07
Sexy Time
Time: 0:06:00
Player Damage: 0%
Boats Destroyed: 4
High Dive
Time: 0:04:10
Player Damage: 50%
Headshots: 6
Accuracy: 70%
Helicopters Destroyed: 4
Freefall Time
Caught With Your Pants Down
Time: 0:07:25
Player Damage: 50%
Tank Damage: 50%
Cop Cars Destroyed: 6
Sharpshooter: Release the APC by shooting all four yellow bolts without missing a shot.
For The Man Who Has Everything
Time: 0:04:20
Player Damage: 50%
Duck Chopper
Helicopters Destroyed: 8
Kibbutz Number One
Time: 0:05:00
Player Damage: 50%
Headshots: 10
Accuracy: 70%
Boat Damage: 60%
Top Boat Speed: 70 mph
Quickdraw the RPG: Kill the RPG-wielding enemy in the parking garage before he can fire.
This Ain’t Checkers
Time: 0:07:35
Player Damage: 0%
Landed in Boat: Land on one of the boats at the start of the race.
Always First: Get in first place and remain there for the rest of the race.
No. 3
Time: 5:15
Car Damage: 20%
Top Speed: 140mph
Followed Close: Never trail more than a certain distance from Mori.
Momma’s Boy
Time: 0:03:10
Player Damage: 10%
Crowd Helped
Counter Finish
Corner Kids
Time: 0:07:50
Player Damage: 40%
Headshots: 20
Accuracy: 55%
Clocking Off
Time: 0:05:00
Player Damage: 40%
Headshots: 20
Accuracy: 55%
Going Deep
Time: 0:06:30
Player Damage: 50%
Headshots: 20
Accuracy: 70%
Vehicles Destroyed: 5
Bomb Hidden
Sticky Bomb Carnage
Dropping In
Time: 0:06:40
Player Damage: 40%
Accuracy: 70%
Perfect Landing: Land in the marker on the helipad atop the target building.
Ashvilli Plummet: Kill all of Ashvilli’s body guards first, then lock-on and shoot him when he moves in front of the window.
Truck Landing: Glide onto the back of the flatbed truck driven by Timur after jumping through the window at the end of the mission.
In the Crosshairs
Time: 0:04:30
Player Damage: 40%
Headshots: 10
Accuracy: 60%
4 shots, 4 snipers
Party’s Over
Time: 0:04:30
Player Damage: 90%
Headshots: 25
Accuracy: 70%
Enemy Cars Destroyed: 4
Departure Time
Time: 0:10:00
Player Damage: 50%
Headshots: 25
Accuracy: 70%
With the new Parachute item comes Base Jumping. The Base Jumps are unlocked early in the main story, and will be denoted on your radar and map by pink parachute icons. Travel to one of the Base Jump spots, stand in the pink arrow there and press the LB button to begin. You don't need to have a Parachute beforehand, as you'll be given one upon starting the activity.
There are three different types of Base Jumps: Target Jumps, Vehicle Jumps, and Heli Jumps. There are 15 Base Jumps total - five of each type.
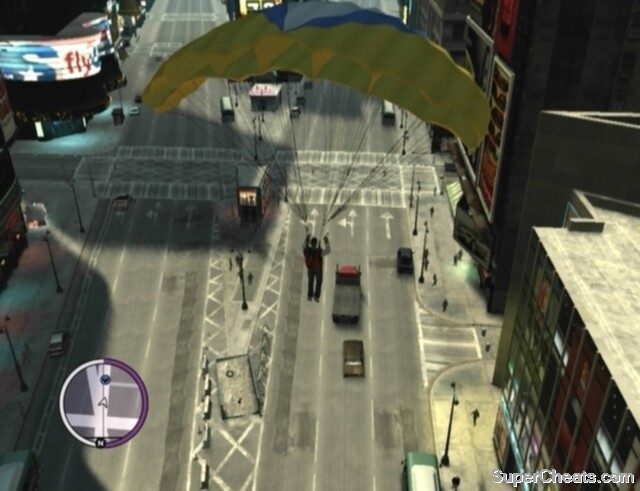
Base Jumping will have you landing on a target or onto a moving vehicle.
While freefalling, pushing the Left Stick up will make Luis dive, while pushing the Left Stick down will slow his descent. Move the Left Stick to the left or right to reorient Luis as he falls. Press the A button to activate the Parachute. While gliding, push the Left Stick up to glide further, down to descend, and left or right to change direction.
In most cases, after jumping you'll want to let Luis freefall for at least sometime before activating the Parachute. How long you wait before pulling the cord depends on the location of the target.
The goal of a Target Jump is to land as close to the center of the pink marker as possible. The closer you land, the higher percent your score. You just need to land anywhere on the target for the jump to count.
video=tbogt-v15.avi title=Target Jumps]
Vehicle Jumps typically have you jumping from a high building and attempting to land on a moving truck or boat. The target vehicle is always moving at a snail's pace, so it's not as difficult as it sounds.
video=tbogt-v14.avi title=Vehicle Jumps]
During a Heli Jump you must glide through a series of rings and then land as close as possible to the bull's eye of a target. Heli Jumps are very similar to Target Jumps, however for Heli Jumps the target you have to land on is not visible from the start.
The rings just seem to be there to guide you to where the target will be. Missing one or more rings does not appear to affect score; all that seems to matter is how close to the centre of the target you land.
video=tbogt-v13.avi title=Heli Jumps]
Complete all 15 Base Jumps with any percentage to unlock the “Gone Down” Xbox 360 achievement and also add a respawning Parachute to Luis' safehouse.
With the new Parachute item comes Base Jumping. The Base Jumps are unlocked early in the main story, and will be denoted on your radar and map by pink parachute icons. Travel to one of the Base Jump spots, stand in the pink arrow there and press the LB button to begin. You don't need to have a Parachute beforehand, as you'll be given one upon starting the activity.
There are three different types of Base Jumps: Target Jumps, Vehicle Jumps, and Heli Jumps. There are 15 Base Jumps total - five of each type.
Base Jumping will have you landing on a target or onto a moving vehicle.
While freefalling, pushing the Left Stick up will make Luis dive, while pushing the Left Stick down will slow his descent. Move the Left Stick to the left or right to reorient Luis as he falls. Press the A button to activate the Parachute. While gliding, push the Left Stick up to glide further, down to descend, and left or right to change direction.
In most cases, after jumping you'll want to let Luis freefall for at least sometime before activating the Parachute. How long you wait before pulling the cord depends on the location of the target.
The goal of a Target Jump is to land as close to the center of the pink marker as possible. The closer you land, the higher percent your score. You just need to land anywhere on the target for the jump to count.
Target Jumps
Vehicle Jumps typically have you jumping from a high building and attempting to land on a moving truck or boat. The target vehicle is always moving at a snail's pace, so it's not as difficult as it sounds.
Vehicle Jumps
During a Heli Jump you must glide through a series of rings and then land as close as possible to the bull's eye of a target. Heli Jumps are very similar to Target Jumps, however for Heli Jumps the target you have to land on is not visible from the start.
The rings just seem to be there to guide you to where the target will be. Missing one or more rings does not appear to affect score; all that seems to matter is how close to the centre of the target you land.
Heli Jumps
Complete all 15 Base Jumps with any percentage to unlock the “Gone Down” Xbox 360 achievement and also add a respawning Parachute to Luis' safehouse.
Drug Wars
(work in progress)
Cage Fighting
(work in progress)
Triathlons
(work in progress)
Club Management
(work in progress)
Complete “Clocking Off” in the Mom’s House mission line to unlock the Drug Wars side missions. Travel to the pill icon on the map and radar to get started.
While on one of these missions, you will be aided by Henrique and Armando, who are actually quite helpful. Unlike most AI allies, they aren’t a burden at all because you can leave them behind and they will eventually appear in the same or separate vehicles and follow you. So once you have the drugs and are in a vehicle, immediately start toward the drop off rather than wait for them to get in.
It’s a good idea to purchase some Body Armor and an Uzi with plenty of ammo before setting out. Body Armor becomes especially important once you have completed many Drug Wars, as the difficulty increases: you will face more and more enemies outfitted with powerful weapons that can cut down your health in an instant if you aren’t careful.
There are five different Drug War scenarios, all outlined below.
The Hijack
In a Hijack scenario, you must steal a marked boat or car, which will usually be surrounded by several rival gang members. They can easily be picked off from afar with a Sniper Rifle, or you can drive right in and gun them down from inside your car.
Once you’ve killed the surrounding gang members, get in the vehicle and drive it to the drop off marked on your radar. You’ll likely be pursued by rival gang members on your way there. The drugs are in the vehicle, so you must remain in that vehicle. If the vehicle is destroyed, you’ll fail the job.
The Hijack
The Stickup
A drug deal is going down between two rival gangs. The deal will be taking place either outside or in a club. When you reach the location, all of the enemies will appear on your radar as red blips. One of these enemies is carrying the stash. Keep killing the enemies until the stash is dropped; it will be appear on your radar as a dark green blip.
If the deal is taking place outside, you can use a Sniper Rifle from afar to thin the enemy ranks a bit, or you can drive in gun them down with an automatic weapon, an RPG Launcher, or a few Grenades.
If the deal is happening inside of a club, park outside, lock-on to the bouncer and shoot him dead. This will cause the enemies in the club to rush to the front door, allowing you to take them out with the Explosive Shotgun. It’s best to use Free Aim rather than auto-aim for this. Just keep the reticule trained on the front door and keep killing enemies as they appear until the drugs are dropped and the club is empty. If one or two of the enemies refuse to exit the club and the drugs haven’t been dropped yet, head inside and take them out.
When you have the drugs, follow the highlighted route on your radar to the drop off to complete the mission.
The Stickup
The Stash
The drugs will be marked on your radar at the start of the scenario. It’s usually in a lot, surrounded by rival gang members. Pick them off from afar with a Sniper Rifle or drive in and gun them down from inside your car. Clear the way, grab the drugs (or just grab the drugs and make a run for it), and make your way to the drop off.
The Stash
The Convoy
A rival gang has the drugs in a car with them. You’re tasked with stealing the car and driving it to a drop off. There are two ways you can go about hijacking the car: box it in with your own vehicle, get out and oust the driver, or trail after the target vehicle and kill the driver and passengers by shooting them through the windows. To shoot while driving, hold LB to fire while driving and use the Right Stick to aim.
When trying to take out the driver, avoid shooting up the target vehicle too much or popping its tires, because that’s the vehicle you have to get to the drop off in one piece. Cars full of rival gang members will trail after you, so if the car has taken too much damage, you might not be able to make it there.
The Convoy
Complete 25 Drug Wars to unlock the “Snow Queen” Xbox 360 achievement. Each time you complete 10 Drug Wars, a respawnable weapon will be added to Luis’ safehouse.
Safehouse Weapon Spawn Rewards:
Complete 10 Drug Wars - Pistol .44
Complete 20 Drug Wars - Advanced MG
Complete 30 Drug Wars - Explosive Shotgun
Complete 40 Drug Wars - Sticky Bombs
Complete 50 Drug Wars - Gold SMG
Complete “Momma’s Boy” in the Mom’s House mission line to unlock Cage Fighting. Travel to the fist icon on the map and radar and step through the door in the alley. Downstairs, approach the door, press LB, and press the X button to compete.
Winning the L.C. Cage Fighter’s championship unlocks the “Bear Fight” Xbox 360 achievement. To win the championship, you must survive six rounds; you’ll face three fighters per round, so you must best a total of 18 fighters. Doing so is no easy feat, especially since several of the fighters will bring a melee weapon into the cage.

Punch and kick your way to victory.
The controls are simple: lock-on to your opponent with LT, hold RT to block, use the B and Y buttons to swing your fists, the X button to kick, and the A button to dodge. The first couple of rounds are a cinch, but the difficulty increases dramatically after the third. Sometimes you can get through a round using nothing but kicks (X button), but this method can take awhile.
There are a couple of tricks you can use to your advantage.
One trick involves exploiting a bit of a glitch. When your next opponent is running into the ring, if you can keep him in the hall long enough with kicks, he might glitch into the cage but just stand on the spot once inside, allowing you to effortlessly take him out. You shouldn’t bet on this trick, though, as pulling it off is a bit of a crapshoot, and it is potentially dangerous: if you accidently step out of the cage, you will be disqualified from the match. Even if your opponent hits you out of the cage, you’ll be disqualified (though, curiously, the opposite is not true).
If at the end of a round you’ve lost a lot of health, you can sit out a round as a spectator to refill your health bar. Doing this is very important, especially in later rounds. You can also place a bet on one of the fighters and potentially make a large amount of money. It seems the leaner fighters fare better than the larger ones, though there probably isn’t anything to it.
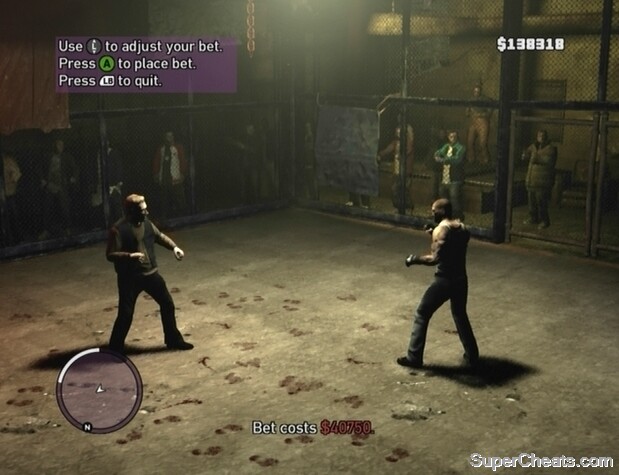
Spectate between rounds to regain lost health -- and possibly make some quick cash.
Some of the opponents enter the ring with a bat or knife. For these opponents, it’s best to just try and kick them to death rather than potentially giving them an opening by missing a swing. You can disarm these opponents and use their own weapon against them, but attempting to do so is a gamble. To disarm an opponent, you have to first dodge one of their attacks with the A button, and then press the Y or B button to grab the weapon. It’s all about timing, but can be hard to pull off.
Complete “This Ain’t Checkers” in Mori’s mission line to unlock the Triathlons. There are three different triathlons; each is a different track, but with the same format.
First, participants will skydive out of a helicopter and aim for one of the boats docked nearby (marked by a blue blip on the radar). The boat will be used to clear a series of waypoints. Once on land, participants will get into one of the cars parked nearby and clear another series of waypoints. First one to the final waypoint wins.
Winning these races is really not much of a challenge; as long as you can get in first place and maintain it, your lead will steadily grow, making for an easy win.
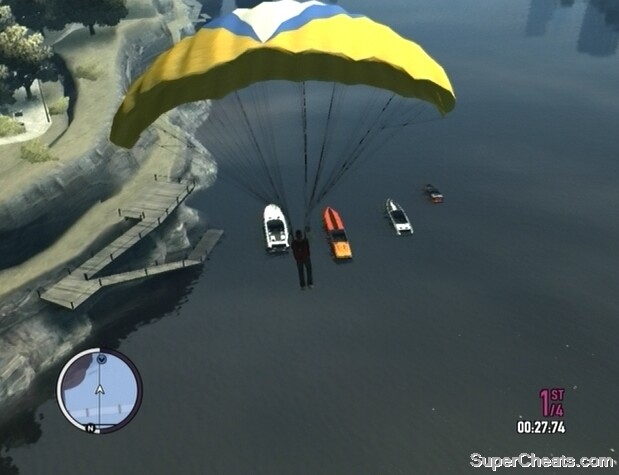
Try your best to land on one of the boats at the start of the race.
At the start, freefall for a bit, trying to direct yourself toward the boats below, and press the A button to activate the Parachute when ready. Don’t use the Parachute right away because you’ll be left gliding in the air high above the boats if you’re too quick and likely end up completely missing the mark. Wait until you’ve passed the other participants before activating the Parachute, at least. Ideally you’ll land onto one of the boats; it doesn’t really matter which one you take, since they are all suited to beat out the competition.
Once in a boat, start it up and make for the first waypoint. Hold the RB button and use the Right Stick to turn the rudders left or right to make sharp turns. In each of the waypoints is an arrow pointing in the direction the next waypoint will appear, so use these arrows to guide you on your way.
When you hit the final waypoint in the water, drive the boat up the beach and toward the cars parked there. Get in one of the cars and start toward the first waypoint. Each car is equipped with nitro, however definitely wait until you’re off the beach and dirt road before using it! Traction is poor on the beach, so take your time, or you might have trouble making it onto the road. If you performed well enough on the boat portion, you should have enough of a lead for such a delay to not matter much.

Activate nitro on straight stretches of street.
Slow and steady wins the race, but you’ll want to take advantage of your car’s nitro on straightaways. Hit the B button to activate nitro. While using nitro, be sure not to move the Left Stick to the left or to the right, as your car is likely to spin out if you do so. You can use nitro twice in a row, but you’ll then have to wait for the tank to refill to at least halfway before you can use it again.
Triathlons
Enter Maisonette 9 between 9 p.m. and 6 a.m., enter the management room (second door on the left), and press the LB button when prompted to start managing the club. What follows is a tedious string of tasks. Start by following the pink marker on your radar to the first spot. There, use the Right Stick to look around, and then move on to the next marker. Occasionally, you’ll have to boot a drunk or an abusive patron from the club; when they’ve been spotted, simply approach them to trigger the event.

Survey the club for trouble.
There’s more to it, though. There are eight nightclub missions, which count toward the 100% completion stat. Continue surveying the club and eventually one of the missions will be triggered. The order the missions are given in seems to be random, and if you fail one, you’ll have to complete all of the other missions before you can try that one again.
It’s best to complete one mission a night, because if you try to get two in, it may be too late after you’ve completed one, and the club will close while you’re working.
Once all eight missions have been completed, they can’t be replayed. You can continue to mange the club, though.
Clay PG Jackson
Get in the car outside of Maisonette 9 and follow the blue marker on your radar to the parked car surrounded by paparazzi. Get in the car and nudge your way past the photographers. You mustn’t kill any of them, so inch your way out of the alley, using the front or back of your car to push the paparazzi aside, and then take off down the street.
The paparazzi are annoyingly persistent, and will follow you on motorcycles once you’re out of the alley. Lose them by making frequent turns and driving through alleys and parks. When you’ve succeeded, drive Clay to the Majestic Hotel near Middle Park to complete the mission.
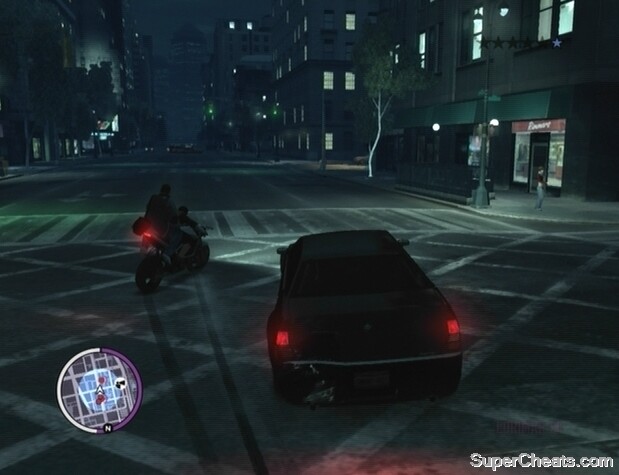
Escape the paparazzi.
Iron Belly Deli
Exit Maisonette 9 and drive all the way to the Iron Belly Deli in Bohan and hit the marker there. Deliver the food to the Hercules nightclub to complete the mission.
Royal Guest
Follow the marker on your radar to meet the VIP. Lead him to the car outside the club and make your way to the Easton Station. Park outside and click the Left Stick to sound the horn. Do not move until the two girls are in the car, otherwise the police will start after you. Drive the VIP and two girls to the marked hotel in the Star Junction to complete the mission.
Poppy Mitchell
Meet Poppy in the VIP section above the bar. Then, exit Maisonette 9 and get in the car parked outside. Follow the highlighted route on your radar to the fire truck parked nearby. Get in the fire truck and drive back to Maisonette 9. Hold the LB button and use the Right Stick to spray the paparazzi gathered outside.
When the paparazzi have been dealt with, get in a car with Poppy and drive her to the marked hotel in Lower Easton to complete the mission.

Use the fire truck to spray the paparazzi.
Cloe Parker
Follow the marker on your radar to meet Cloe. Exit Maisonette 9 and get in the marked car parked in the lot next to the club. Wait for Cloe to get in and then drive her to her mansion in Westdyke to complete the mission.
Al Di Napoli
Exit Maisonette 9 and make your way to the Hercules nightclub down the street. Head inside and meet Al Di Napoli. Drive the Al Di Napoli to Vespucci University in Varsity Heights to complete the mission.
MeTV
Make your way to the MeTV building in Star Junction and get in the marked car there. Avoid running over any of the women gathered around the car as you pull out of the alley. Drop the VIPs off at Maisonette 9 to complete the mission.
Bruce Spade
Exit Maisonette 9 and make your way to the marked helicopter in Westminster. Get in and fly to the marker in Northwood. Land in the field there, wait for Bruce to get in the helicopter, and then fly toward Maisonette 9. Land the helicopter in the street outside the club to complete the mission.
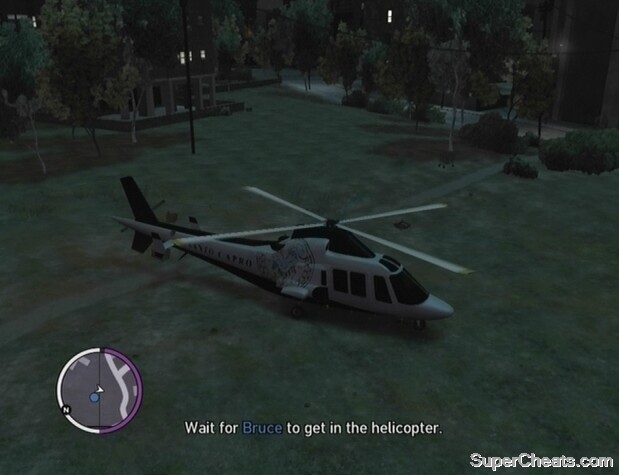
Pick up the VIP and fly him to Maisonette 9.
Visit either of Tony's nightclubs (Maisonette 9 or Hercules) and partake in the dance mini-game by approaching the dance floor and pressing the LB button when prompted. The clubs open at 9:00 p.m. and close at 6:00 a.m. (Hercules is just up the street north of Maisonette 9, along the east side.)
At each club there are two different types of dances: a partner dance and a group dance. To participate in the group dance, you must complete the partner dance first.
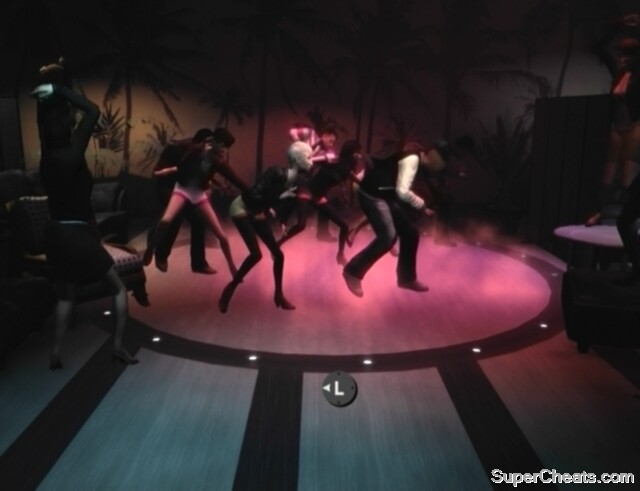
Do well enough during the single-partner dance to move on to the group Bus Stop dance.
To complete the partner dance, you must fill the circular meter in the bottom-left corner of the screen completely. To do so, simply move both the Left Stick and the Right Stick to the beat of the music. When “Hold” appears below the meter, hold both the Left Stick and the Right Stick down until a number appears on the speaker. Tap both LT and RT to the beat as the numbers count down to fill the meter. Continue doing this until the meter is full.
If you did well enough during the partner dance, you'll move on to a group dance. To complete the group dance, you must press the correct buttons as they appear. Focus on the bottom of the screen and move the Left Stick in the direction indicated, or press the face button indicated. You don't have to press the button immediately or anything, so go at a steady pace to avoid messing up.
Unlocking the Catch the Bus achievement.
Complete the Bus Stop dance at both Maisonette 9 and Hercules without missing a single button press to unlock the Catch the Bus Xbox 360 achievement.
Make your way to the Golden Pier golf club in Algonquin and you can hit the driving range. You can play against one of Luis' friends or a random computer opponent.
The goal is to hit the golf ball as close to the flag as possible. Hit the flag to earn five bonus points. The flag will change position each turn. The game ends when both players are out of balls, and the winner is the player with the highest score.
Start by using the Left Stick to move the cursor over to the flag below. Then, press the A button to start a backswing. Wait until the power bar reaches the small, black segment on the meter next to the radar and then press the A button to swing.
You have to be right on the mark for the golf ball to hit the flag and score big points, so timing is everything. Note that even if you do swing on the black marker, your ball won't necessarily hit the flag.
Unlock the “Four Play” Xbox 360 achievement by hitting at least four flags with golf balls. The four hits do not need to be in a single session, so this is an easy achievement to get as you can easily make a hit when the flag is close to the platform.
Unlocking the Four Play achievement.
To start the champagne drinking off, enter Maisonette 9 while it's open (hours are 9:00 p.m. to 6:00 a.m.) and head up the stairs to the VIP section above the bar. Look for a man standing between the two couches and press LB when prompted to start.
Start by moving the Right Stick up and down to shake the bottle, and then press the A button to pop the cork. Use the Left Stick to spray the patrons sitting on the couches if you wish.
When the drink off begins, rotate the Left Stick at a steady speed to fill up the circular meter in the bottom-left corner of the screen. This is a very simple mini-game; as long as you remain at a quick but steady pace, you're sure to come away as the victor.
There are three new Random Character encounters in The Ballad of Gay Tony. As you progress through the main story, an icon marking their location will appear on your map.
Margot
1: Margot is first encountered outside of the Hercules in Westminster. Get a car and drive her to the nearby hospital in Lancet.
2: Look for Margot along the railing on the top level of the Pier 45 building. After the cutscene, sprint away from the angry bystanders and get back to street level. You'll soon be attributed a two-star wanted level, so steal a car and lose the cops to complete the mission.
Arnuad
1: Look for Arnuad in front of in the Viendemonte restaurant in The Triangle, Algonquin. Get a car and drive Arnuad to the Massage Spa in Chinatown.
2: Arnuad will appear in front of Pawnbrokers in Waypoint, Bohan, a couple of days after you've completed his first encounter. Get a car and drive Arnuad to Bronco Street. Then, chase after the pimp and kill him. Pick up the money he drops, escape the cops if necessary, and then drive Arnuad to the marker on your radar to complete the mission.
Daisy
Take a cab to Maisonette 9 between 9 p.m. and 6 a.m. and look for Daisy at the bar inside. After the cutscene, get in a car with Daisy and start toward the marker on your radar. Drive first to a Perseus clothes store, then to the Squid Row restaurant, and finally to Star Junction to confront Chris Hunt.
Complete all 26 main story missions.
Complete all 8 of the Nightclub missions at Maisonette 9 during Club Management.
Complete all 15 Base Jumps.
Complete at least 25 Drug War scenarios.
Complete the 3 Triathlons.
Win every activity (air hockey, darts, golf and pool) against a random computer opponent or friend once.
Complete the group dance at the Maisonette 9 and Hercules nightclubs.
Win the L.C. Cage Fighters championship (survive six rounds).
Win a champagne drink off at Maisonette 9.
Take both Armando and Henrique to every activity available via their Phonebook menu.
Meet random characters and complete their tasks (Margot twice, Arnaud twice, and Daisy once).
Find and kill all 50 hidden seagulls.
The new cheats can only be used while playing The Ballad of Gay Tony. The cheats will not work with the standalone game or The Lost and Damned.
Enter these codes using Luis's cell phone to trigger the indicated effect. To bring up the keypad, press up on the D-pad again while you have the phone out.
Note: Entering vehicle spawn codes will not disable achievements.
Entering cheats
New Cheats
486-555-0100 – Add advanced weaponry to inventory: Knife, .44, Explosive Shotgun with explosive shells, Assault SMG, Advanced MG, Advanced Sniper, Grenade Launcher, and Sticky Bombs.
938-555-0150 – Spawn Floater (boat)
625-555-0200 – Spawn Akuma (bike)
625-555-3273 – Spawn Vader (bike)
272-555-8265 – Spawn APC
359-555-2899 – Spawn Buzzard (helicopter)
227-555-9666 – Spawn Bullet GT
359-555-7272 – Add Parachute to inventory
276-555-2666 – Super Punch
486-555-2526 – Explosive rounds for sniper rifles
The Super Punch cheat
Grand Theft Auto IV Cheats
482-555-0100 – Restore health and armor, give weapons.
362-555-0100 – Body Armor
486-555-0100 – Outfits Luis with a Baseball Bat, Handgun, Shotgun, MP-10, M4, Sniper Rifle, RPG, and Grenades.
486-555-0150 – Outfits Luis with a Knife, Molotovs, Handgun, Shotgun, Uzi, AK47, Sniper Rifle, and RPG.
267-555-0100 – Lowers wanted level
267-555-0150 – Adds a star to wanted level
468-555-0100 – Changes weather/brightness
359-555-0100 – Spawns an Annihilator
938-555-0100 – Spawns a Jetmax
625-555-0100 – Spawns an NRG-900
625-555-0150 – Spawns a Sanchez
227-555-0100 – Spawns an FIB Buffalo
227-555-0175 – Spawns a Comet
227-555-0142 – Spawns a Cognoscenti
227-555-0168 – Spawns a SuperGT

 Scenes from a Marriage and Boss Fight: The Caretaker - The Witcher 3 DLC Hearts of Stone Guide
 Bloodborne Gehrman, the First Hunter Guide: How to Beat, Strategy, and Tips
 Inazuma Eleven GO Chrono Stones Thunderflash / Wildfire tips
 Call of Duty: Ghosts Nemesis Guide to Unlock The Snow Monster, Star Power With Eyeballs, 10,000 XP & An Egg Emblem
 Five Third Party Franchises Sony and Microsoft Might Want to Court