
The Grand Theft Auto series made its debut on the PlayStation console and Windows PCs in 1997. However the series did not reach widespread popularity until 2001 with the release of Grand Theft Auto III for PlayStation 2. This game, in which players took control of a nameless, voiceless sociopath, introduced the series to a fully 3D world, ditching the top-down view for the now GTA standard forward view. Largely since then, the Grand Theft Auto series has been the target of many organizations, politicians, and concerned parents for its digital portrayal of crime and violence. Despite the fact that the series is often portrayed by the media and other outlets as nothing more than gratuitous gorefests, those who actually sit down to play the games will typically find a captivating storyline, interesting characters, and superb production values.
With that stated, the Grand Theft Auto games have been assigned the ESRB rating of “Mature,” intended for audiences ages 17 and older, as they contain a plethora of content not suitable for players below that age.
In the latest incarnation of the controversial series, players take on the role of one Niko Bellic, a European immigrant from the war-torn country of Serbia. The game is set in a remodeled Liberty City, the GTA universe's fictional New York. Niko—lured to America by his cousin's talk of mansions, women, and fast cars—rapidly discovers that he has been misled by his idealist cousin when he finds an old crummy apartment instead of a mansion, more cockroaches than women, and an old cab in place of a sports car. Moreover, the bad times Niko sought to escape have followed him to Liberty City and now threaten his own life, as well as the life of his cousin Roman. Will Niko achieve the American Dream, or find nothing but bloodshed?
If you need help with any aspect of the game, we've got you covered with this complete guide to each and every mission, as well as everything you'll need to achieve that coveted 100% completion stat. There are location maps for the pigeons, stunt jumps, and random characters, as well as text descriptions and plenty of screenshots. There's even more than that, so take a look!
Left Trigger - Brake/Reverse
Left Bumper - Fire Weapon
Right Trigger - Accelerate
Right Bumper - Handbrake
Left Stick - Steering
Right Stick - Rotate Camera/Aiming
Left Stick Button - Horn/Engage Slow Motion (while in Cinematic Camera)
Right Stick Button - Look behind
Y Button - Exit Vehicle
B Button - Cinematic Camera/Mobile Phone Back/Hangup
A Button - Handbrake/Mobile Phone Forward/Answer
X Button - Change Weapon/(Hold) Headlights
D-pad UP - Mobile Phone Up/Use Mobile Phone
D-pad RIGHT - Next Radio Station/(Hold) Turn Radio On/Off
D-pad DOWN - Mobile Phone Down/Skip Mobile Conversation/Zoom Out Mini-Map
D-pad LEFT - Previous Radio Station/(Hold) Turn Radio On/Off
Back Button - Cycle Camera Modes
Start Button - Pause Menu
Left Trigger - Target Lock On/(Half Hold) Free Aim
Left Bumper - Pick Up/Context
Right Trigger - Fire Weapon/(Half Hold) Free Aim
Right Bumper - Enter/Exit Cover
Left Stick - Movement
Right Stick - Rotate Camera/Switch Targets
Left Stick Button - Crouch
Right Stick Button - Look behind/Zoom Aim (when targeting)
Y Button - Enter Vehicle/Mount Ladder/Melee (Alternative Punch/Counter)
B Button - Reload Weapon/Mobile Phone Back/Hangup/Melee (Punch/Counter)
A Button - (Hold) Run/(Tap) Sprint/Mobile Phone Forward/Answer/Melee (Block/Dodge)
X Button - Jump/Climb/Melee (Kick)
D-pad UP - Mobile Phone Up/Use Mobile Phone
D-pad RIGHT - Next Weapon
D-pad DOWN - Mobile Phone Down/Skip Mobile Conversation/Zoom Out Mini-Map
D-pad LEFT - Previous Weapon
Back Button - Cycle Camera Modes
Start Button - Pause Menu
L1 Button - Fire Weapon
L2 Button - Brake/Reverse
R1 Button - Handbrake
R2 Button - Accelerate
Left Stick - Steering
Right Stick - Rotate Camera/Aiming
Left Stick Button - Horn/Engage Slow Motion (while in Cinematic Camera)
Right Stick Button - Look behind
Triangle Button - Exit Vehicle
Circle Button - Cinematic Camera/Mobile Phone Back/Hangup
X Button - Handbrake/Mobile Phone Forward/Answer
Square Button - Change Weapon/(Hold) Headlights
D-pad UP - Mobile Phone Up/Use Mobile Phone
D-pad RIGHT - Next Radio Station/(Hold) Turn Radio On/Off
D-pad DOWN - Mobile Phone Down/Skip Mobile Conversation/Zoom Out Mini-Map
D-pad LEFT - Previous Radio Station/(Hold) Turn Radio On/Off
Select Button - Cycle Camera Modes
Start Button - Pause Menu
L1 Button - Pick Up/Context
L2 Button - Target Lock On/(Half Hold) Free Aim
R1 Button - Enter/Exit Cover
R2 Button - Fire Weapon/(Half Hold) Free Aim
Left Stick - Movement
Right Stick - Rotate Camera/Switch Targets
Left Stick Button - Crouch
Right Stick Button - Look behind/Zoom Aim (when targeting)
Triangle Button - Enter Vehicle/Mount Ladder/Melee (Alternative Punch/Counter)
Circle Button - Reload Weapon/Mobile Phone Back/Hangup/Melee (Punch/Counter)
X Button - (Hold) Run/(Tap) Sprint/Mobile Phone Forward/Answer/Melee (Block/Dodge)
Square Button - Jump/Climb/Melee (Kick)
D-pad UP - Mobile Phone Up/Use Mobile Phone
D-pad RIGHT - Next Weapon
D-pad DOWN - Mobile Phone Down/Skip Mobile Conversation/Zoom Out Mini-Map
D-pad LEFT - Previous Weapon
Select Button - Cycle Camera Modes
Start Button - Pause Menu
Suit Up - Before setting out on a mission, it's always a good idea to stop by a weapon store, or to give Little Jacob a call, in order to acquire ammunition and fresh body armor. Whether or not you have body armor could mean the difference between failing and completing a mission.
Help From Friends - As you progress through the storyline, Niko will meet new people and make friends in Liberty City. Your friends will like you more if you hang out with them and answer the phone when the call; they will come to resent you if you continuously turn down their invitations or neglect them. Each friend has a special call-in ability which can be utilized once they like you enough. To unlock these abilities, hang out with these characters until their “Like” and “Respect” values are high enough. If their like and respect falls below the required percentage to unlock their special ability, it will be lost until you reach that percentage again. Perhaps the most useful of these special abilities is Little Jacob's (whom you meet early on in the storyline) gun car, which will allow you to purchase weapons at a reduced price. Check out the “Friends” sub-section for a full rundown of all friends and their special abilities.
Take Cover - Cover is of the essence during most firefights; you won't last long if you stand out in the open with guns blazing. Many objects can be used as cover, but you have to choose a suitable piece of cover carefully; enemies above you or behind a nearby piece of cover, may still be able to get a bead on you even while you're behind cover. If you're facing a large number of enemies, keep behind one piece of cover until you have killed as many of them as you can from there before moving up.
Free Aim - While auto-aim returns in this installation of the Grand Theft Auto series, it may be beneficial to turn it off (via the pause “Controls” menu) this time around. Free aiming will allow you to use the cover system much more effectively, and you won't be completely lost in multiplayer if the host decides to disable auto aiming for the match. If you don't want to disable auto-aim completely, you can still free aim with it enabled by half-holding the fire button. It's a good idea to wean yourself off of auto-aim early, especially if you plan to play a lot of multiplayer.
Gray Matter - As is the case with most any gun-heavy action game, delivering a shot to your target's head will deal severe to lethal damage. As such, take advantage of enemies whose heads are visible even while behind cover.
Auto-save - Be sure to make use of the auto-save feature, which can be enabled or disabled via the Game pause menu. Don't rely entirely on the auto-save file, however; it is good practice to save an actual save file every once in awhile, or at the very least before you are finished playing. Healthcare costs are noticeably steep, so you may find yourself using the auto-save feature quite often. The game auto-saves after a mission or after an activity with a friend; make sure you see the saving dialog in the upper-right corner of the screen to ensure that you won't lose progress by reverting to the auto-save file.
The G.P.S. - Now mission objectives are easier to get to than ever; a highlighted route appears on the radar whenever a mission marker is present, directing you through the streets of Liberty City. Keep in mind that the highlighted path is only the shortest, legal route to the location; you can almost always make it to the point in less time by cutting through alleys or driving on the wrong side of the road. The highlighted routes are best used when traveling from one island to another, otherwise it would probably be best to simply ignore it.
Waypoints - You can place a waypoint on any location via the pause Map menu. This waypoint will appear on your radar, along with a green highlighted route.
Time Flies - If you need to pass the time for an event to trigger, you can rest at one of your safe houses to put the clock ahead six hours. There's no need to save your game when you do this; you can just enter the save menu and then exit out for the same effect either way.
Flee The Scene - Shaking the cops works quite differently this time around. To lower your wanted level, you must get out of the flashing circle on your radar and remain out of it until the stars disappear. The circle represents the area of the city that the authorities are actively searching. The zone readjusts each time you are spotted by a police officer, making it more difficult for you to escape. The zone becomes larger with a greater wanted level, so it is best to avoid causing anymore trouble once you are being sought after. Each patrol car and individual officer is marked on your radar, so avoid going down roads that will force an encounter with one.
Fast Travel - Taxis are a quick way of traveling to almost any point in the city. There are plenty of taxis cruising around Liberty City; when you spot one, hail the taxi while on foot and if it pulls over, hold the Enter Vehicle button to enter as a passenger. Taxis will not stop if it is already transporting someone; you can oust the passenger by holding the Enter Vehicle button, but the driver won't stop for you when hailed. Taxis are relatively cheap, and you can even skip the trip entirely—making this the fastest way of moving around the city—for an extra cost. A taxi can take you to or close to any stationary marker on your radar, including waypoints.
Health Matters - There are various ways of replenishing your health if you're close to death. You can take a nap at your safe house; stop by a Cluckin' Bell, Burger Shot, 69th Street Diner or hotdog stand and buy some food; buy a can of soda from a vending machine or vendor, eat out with a friend, pick up a health pack, or even through a private dance at a strip club. If you have money to burn, you could also phone the paramedics and have them rush to your location to heal you; dial 911, select the second extension, and stand on the sidewalk (out of a vehicle) until the ambulance arrives. One of the paramedics will then approach and replenish your health for a price; just train your weapon on him if you change your mind.
Police Cruiser - For easy access to a cop car, first dial 911, select the first extension, wait for the passenger to step out of the police car when it arrives, then enter from the passenger's side to oust the driver.
Birds of a Feather - While driving down the road in a really snazzy car, you may soon find yourself surrounded by several of the same vehicle. This has been a common occurrence in the past few installments of the Grand Theft Auto series; that is, vehicles that spawn on the road tend to be of the same class as the vehicle you are currently driving. You can use this to your advantage if your current car is a wreck; simply pull over and take one of the others on the road. Furthermore, if you're trying to obtain a rare car such as the Infernus, try driving around in a different high-class vehicle and you might just find one.
To start a multiplayer match, select the “Multiplayer” option from the cell phone menu while in the single player game. There are several options available from the get-go:
Player Match: Brings you to the Player Match menu, in which you can select “Quick Match” or “Custom Match.” Quick Match will send you to a lobby in the game type of your choosing, while Custom Match allows you to host a match yourself, giving you free reign over the pre-game options.
Ranked Match: Unlike Player Match, you are not able to decide whether you would like to host the current game or not. After selecting Ranked Match, you are simply presented with a list of game types; pick one and you will be sent to a lobby of that type, where you may or may not be host depending on the amount of players already there.
Party Mode: This is fairly similar to the Free Mode game type, though with no customization. Players always spawn at the old casino at the north end of Alderney, where a variety of respawning weapons—and sometimes helicopters—can be found. Party Mode is only open to players you invite to the game.
Player Model: Allows you to customize your in-game persona to be used during multiplayer matches. You can create a male or female character, and also edit several aspects of its appearance. The clothes selection is limited from the get-go, but you can unlock more by increasing your personal rank (more on that further down).
Tutorial: Takes you to a tutorial that explains many aspects of the multiplayer game; a good idea to pursue before hopping online.
Cold hard cash is the way of prestige in the multiplayer game. To improve your personal multiplayer rank, you must participate in Ranked game sessions. Though you still earn money in non-ranked matches, this money will not accumulate beyond a simple stat on the non-ranked leaderboards. You need a certain amount of money to progress to the next rank; the requirement starts out as quite attainable, but soon increases exponentially; you can see how much money is needed to reach the next rank at the post-game screen. A personal rank of 10 is currently the highest achievable rank.
How you go about earning money depends on the game type, but the universal method is by simply killing your opponents. You are awarded $100 for a kill, and the dead player will also drop a small amount of cash that can then be picked up. In object-oriented game types such as Mafia Work, however, it is much more beneficial money-wise to complete the objectives rather than simply killing the other players.
If you're looking for a quick way to earn money in multiplayer, try the ranked co-op game types: Hangman's Noose, Bomb da Base II, or Deal Breaker. Before trying any ranked game type, it would be best to experience it first through a non-ranked instance, where the environment is a lot more relaxed and there isn't anything at stake.
There is a total of 14 multiplayer game types. Here is a quick rundown of each one:
Deathmatch: Simply put, it's a free-for-all kill-a-thon. It's $100 a kill, and don't forget to pick up money dropped by fallen players. The player with the most money at the end of the game wins. For 2-16 players.
Team Deathmatch: The team-flavored version of Deathmatch. Players must work together with their team to collectively earn more money than every other team to win the game. At the end of the game, each player walks away with the money that they individually earned for their team, so in a sense this game type can still be just as competitive. For 3-16 players.
Mafiya Work: A free-for-all, object-oriented game type. Players must compete with each other to complete contract work for one Kenny Petrovic. Petrovic will phone each of the players with the same task, after which the task will be marked on the radar for all to see. Blue markers denote delivery, escort, or vehicle theft tasks, while red markers denote kill and destroy tasks. There is a large number of tasks, each with a different worth. Though completing the objectives definitely offers the biggest payout, killing other players will also net you $100 per kill. The player with the most money at the end of the game wins. For 2-16 players.
Team Mafiya Work: It's Mafiya Work, but with teams. Teams must compete against each other to complete contract work for Kenny Petrovic. The team with the most money at the end of the game wins; the total amount of cash earned is split equally between the remaining team members. For 3-16 players.
Car Jack City: Much like Mafiya Work, but with only car-jacking objectives. In this free-for-all game type, players must compete against each other to steal cars for Kenny Petrovic. Although stealing cars definitely offers the biggest payout here, killing other players will also net you $100 per kill. The player with the most money at the end of the match wins. For 4-16 players.
Team Car Jack City: It's Car Jack City, but with teams. The teams must compete against each other to steal cars for Kenny Petrovic. The team with the most money at the end of the mat wins; the total amount of cash earned is split equally between the remaining team members. For 4-16 players.
Race: There is no killing or destruction to be found here; the Race gametype is similar to Brucie's races in the single player game. Simply put, just follow the checkpoint around the track, and be ahead of the pack when the final checkpoint is reached. If you're even in a really bad wreck, don't forget that you can respawn your vehicle near the last checkpoint. Each player is able to select their car at the beginning of the match, so be sure to pick the fastest one available. (If you aren't sure which vehicle is the fastest, take a look at what the other players are selecting). The first four racers to finish will earn a small amount of cash depending on the number of players left remaining in the game. For 2-16 players.
GTA Race: This is Race with road rage. This is a no holds barred, gun-toting affair. That is, you can use drive-by weapons to mess your opponents up. The weapons available depends on the hosts' pre-game settings; you can switch weapons by driving over them and holding the Change Weapon button. The first four racers to finish will earn a small amount of cash depending on the number of players left remaining in the game. For 2-16 players.
Cops 'n Crooks: The players on one team are cops, and the players on the other team are crooks. It's the cops' job to best the crooks, and it's the crooks' job to outsmart the cops. The objective for both teams depends on the game type selected; in All for One, the crooks must get their boss (a player on the crook team selected at random) to safety, while the cops must kill the boss; in One for All, the crooks help each other escape, while the cops work together to wipe out the crook team. For 4-16 players.
Turf War: In this game type, teams compete with each other to take over and hold marked locations in the city. Players on one team trying to take over another team's turf must hold that location for a certain period of time, and with more players at that location, the faster it can be captured. Furthermore, the turf cannot be captured if any member of the opposing team is in the area. While a location is under a team's control, that team will periodically earn money from it. The team with the most cash at the end of the game wins. For 4-16 players.
Deal Breaker: This is one of the cooperative game types. In it, you and 1-3 other players are working for Kenny Petrovic. It's your job to crash a drug deal between the bikers and Mafia, eliminate all witnesses, and get out with the merchandise.
Hangman's N.O.O.S.E.: Another cooperative game type wherein you and 1-3 other players must deliver Petrovic to safety. If Petrovic dies, the mission is a failure.
Bomb da Base II: In this co-op game type, it's the job of you and 1-3 other players to steal some explosives, plant them on a docked tanker, and flee the scene before the bombs go off.
Free Mode: It's anything goes in this non-ranked exclusive game type. The host can tweak a variety of options on the pre-game menu, but there is neither an objective nor winners or losers. Invite some friends in and have fun! For 1-16 players.
This is the first set of missions in the game. It will introduce you to the control system, your safe house and quite importantly your cousin Roman who will no doubt get you in no end of trouble.
You can select the missions from the menu on the left or use these quick links:
- Roman's Missions
- Vlad's Missions
- Little Jacob's Missions
- Faustin's Missions
- Brucie's Missions
After the opening cutscene, follow the marked route on your radar to reach Roman’s place.
You are to meet Roman at the cab depot on the corner of Cisco Street, which isn’t too far from the apartment. Get yourself a ride and make your way to the ‘R’ symbol on the radar. Hit the marker outside to start the mission. Get in Roman’s car and drive to the hardware store on Dillon Street. When you reach the spot, Roman hands over a cell phone with his number in it; he wants you to idle outside and keep on the lookout for loan sharks. Keep an eye on the other side of the street and eventually a car will park there and a couple of men will step out. At this point, bring up your cell phone, enter the “Phonebook” menu and give Roman a call before the two men reach the door.
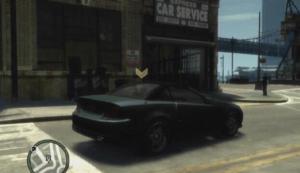
Cab Depot
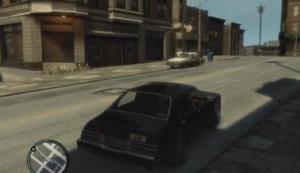
Loan Sharks
Once Roman is in the car, spin around and start back towards the cab depot. The loan sharks are easy enough to lose; just keep to the path and try not to crash into anything. Drive into the marker outside of the cab depot to complete the mission.
Make your way to the Hove Beach subway station and drive into the marker there. Sound the horn to call Mallorie and her friend Michelle to the cab. You are to drive the two to Michelle’s apartment on Mohawk Avenue. Drive over there and hit the marker outside of the apartment to drop them off, then head over to the clothes shop down the street and step inside. Though you don’t have much money to start with, your first clothes purchase is free, so make it something expensive. Once you have made a purchase, exit the shop and get back in your car.
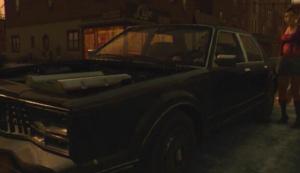
Mallorie and Michelle
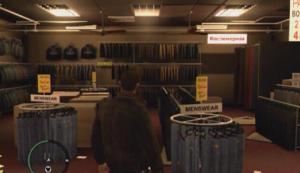
Clothes Shop
Answer the phone when Michelle calls. You can now take her out on a dates. Her place is marked on the radar with the M and heart icon. You should receive a call from Roman too; he needs protecting. Make your way over to the ‘R’ on the radar to help Roman before it’s too late.
This mission is triggered when you drive near the ‘R’ on the radar after Roman calls to ask for help. If you fail to help Roman the first time, you’ll then have to give Roman a ride from the hospital to the cab depot. Roman will phone you soon after; he’s in trouble again, so quickly make your way to his location in the Firefly Projects to lend him a hand. If this is your first experience with the melee combat system, pay attention to the top-left corner of the screen for instructions. Both Bledar and Kalem must be bested to save Roman. Once you have taken care of both of them, sprint over to Roman’s car and start after Dardan.
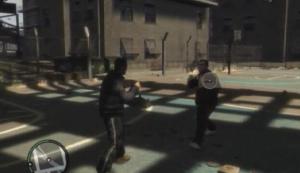
Bledar
Stay close to the target until you reach an old warehouse. At this point, Dardan will abandon his car and try to escape on foot. Get out of Roman’s car and run up the stairs. Move down the walkway until you come to the warehouse. Dardan is wielding a knife, so you’ll have to disarm him. To disarm an enemy, first lock-on to your target, dodge an attack, and then press one of the indicated buttons to disarm. Once you have the knife, slash away until Dardan’s health ring is empty. Get back in Roman’s car and drive him to the cab depot to complete the mission.
Dardan
Get in the cab and drive to Rotterdam Hill to meet with Roman’s customer, Jermaine. He needs to go to Masterson Street to pick up some stolen goods. Follow the marked route on your radar to reach the spot. Jermaine is caught by the authorities while picking up the goods, earning you a two-star wanted level. To lower your wanted level, you must get out of the flashing circle on your radar. The circle represents the area of the city that the authorities are actively searching. The zone readjusts each time you are spotted by the police, making it more difficult for you to escape. Each patrol car is marked on your radar, so avoid following routes that will force an encounter with one.
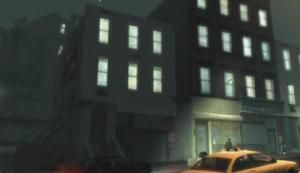
Jermaine
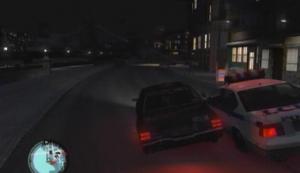
Wanted
Once you have made it out of the zone, refrain from committing any crimes until the wanted level is completely gone. Afterwards, take Jermaine to the marker in Gibson Street to complete the mission.
Roman needs you to pick up another customer of his. Get in Roman’s taxi and drive to Rotterdam Hill to meet with Little Jacob. Sound the horn to call him over. He wants to go to Shottler, so follow the marked route on your radar to reach the spot. Little Jacob will hand a pistol over to you on the way there; it seems that he is expecting trouble. When you reach the spot, turn into the alley and then step out of the car. Make your way over to the lookout spot nearby and crouch down. When the group of men shows up, fire down at them to aid Jacob. More of them will step into the alleyway and one will appear on a nearby rooftop, so be careful.
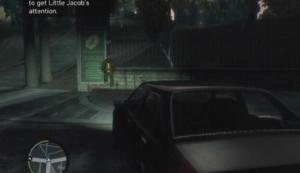
Little Jacob
Lookout Spot
Once all of the hostiles have been dealt with, pick up any ammo and cash on the ground and then get back into the cab with Jacob. Take him to the nearby café to complete the mission.
This mission becomes available once you have completed Vlad’s mission line. Get some wheels and drive to Comrades, the bar across the street from Roman’s apartment. After the cutscene, blast the two goons in front of you and then follow Vlad through the back door. Quickly get back to your vehicle and start chasing Vlad’s. Keep up with him, because if he gets too far ahead, it’s mission failure. Continue chasing after him until he crashes near the docks. At that point, get out of your vehicle and confront him. After the chat, with your pistol equipped, take aim and press the Attack button when the target reticule changes. Mission complete!
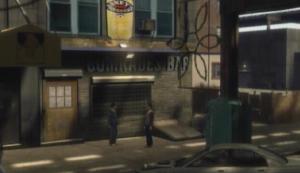
Comrades Bar
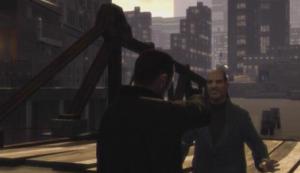
Vlad
Give Roman a call after completing the “Uncle Vlad” mission to trigger this one. Travel to the marker on Tulsa Street to begin. Your first task is to steal a police car. If the following is a scripted event, there will be a police car speeding down the road up ahead. Wait until the officer steps out, then exit your vehicle and hop in the police car. If the police car does not show up as described above, take out your phone and dial 911 to lure the police over to you. To bring up the keypad, press the Mobile Phone Up button again when you have the phone out.
When you have a cop car, start towards one of the blue markers on the radar. You have to find a shipment of TVs, and one of the three vans marked on your radar is carrying it. When you reach a van, turn on the siren and follow closely behind it to make the driver pull over. When the driver has stopped, step out of the car and approach the driver’s window.
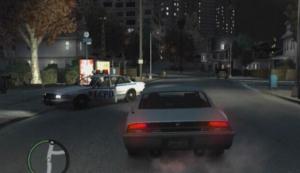
Police Car
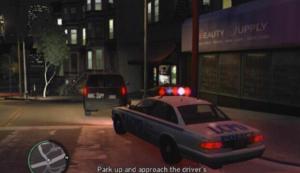
Van
If the van you pull over is carrying goods other than the TV, get back in the police car and start towards the next one. When you have pulled over the correct van, gun down the pistol-wielding man that steps out and then get in. If you attracted the authorities’ attention you’ll have to lower your wanted level first. Afterwards, drive to the lockup in East Island City and drop the van off to complete the mission.
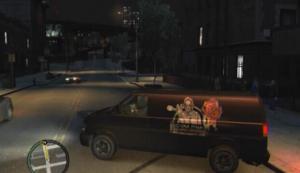
TV Shipment
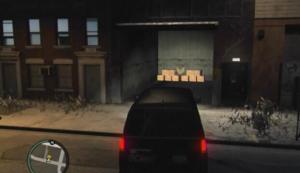
Lockup
This mission is available following “Final Destination” in Faustin’s mission line. Get in Roman’s cab and drive to the internet café that is just a short ways from the depot. When you arrive, exit your vehicle and step inside. Upon entering, speak to the assistant at the desk to the left and then approach one of the computers. Click on “Web” and check your mail from the homepage. Reply to the e-mail from the Eyefind Team to activate your account. With that done, log off and exit the café to complete the mission.
Incidently you should remember the location of the Internet Cafe as there is quite a useful cheat which can be executed at this location to display some maps of special items and other things in the game. If you are not interested in the cheat then we won't spoil it for you by publishing it on this page, but if you do want to to know more, please go to the cheats section in this guide.
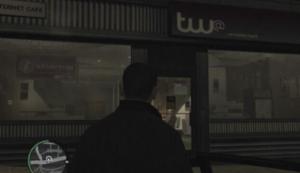
Internet Café
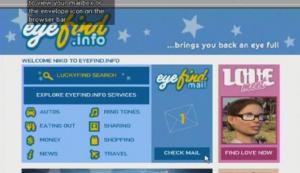
Homepage
Call Roman after completing Dimitri's mission line to trigger this mission. Drive to the yellow marker on the radar to trigger a cutscene. Travel to apartment with Roman, and then check out the cab depot. It's off to Bohan now. Meet Mallorie in South Bohan to complete the mission.
As you progress in Bohan, you'll eventually get a call from Mallorie. It seems that Roman has been kidnapped. This mission is triggered right after that phone call. Make your way to the warehouse in South Bohan where Roman is being held and hit the marker there to get started. This won't be easy: Roman is on the top level of a four story warehouse that is guarded by an inordinate number of enemies, and you have to rescue him.
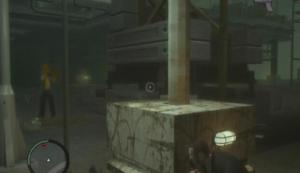
The odds aren't in your favor, so you're going to have to take it slow here. Cover is of the essence, as it's the only way that you'll make it out of this one alive. Luckily the area you start off in provides great cover, enough that you should be able to clear the entire ground floor from there. Before moving up, be sure to scope out a suitable piece of cover further ahead. Careful though, as there are enemies along the walkways above you who will fire down at you. Kill as many of the thugs above you from the ground floor as possible, then take the stairs up to the next level.
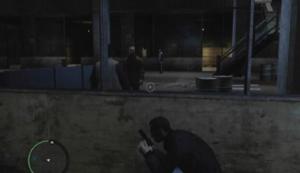
Enemies
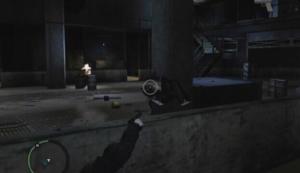
Cover
There are a few health packs to pick up along the way, so keep an eye out. There was one on the ground floor, across from your initial cover (hard to miss), one on the wall along the third level walkway, and one at the end of the third level walkway. When you are on the top level and have cleared away all the hostiles, proceed to the room where Roman is being held.
This is a tough one: you must to cap the man holding Roman, but this is particularly dangerous because you cannot get too close. Unless you have a Sniper Rifle, the standard pistol is your best bet here. Pay attention to the top-left corner of the screen, as tips to improve your aim will appear. The two will shuffle around a bit, so wait until the aiming reticule is clearly on the man's head and away from Roman's before taking the shot.
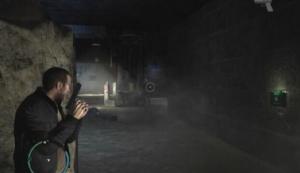
Health Pack
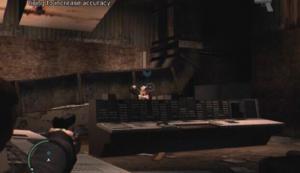
Roman
Once Roman is in your care, follow him out to the getaway car and drive him back to the Bohan apartment to complete the mission. You will be given a safehouse in Algonquin shortly after the completion of this mission.
Ray Boccino will call you sometime after the “Museum Piece” mission. This mission begins right after the call. You first have to pick up Roman from the Algonquin safe house. You are to meet a man named Talbot in The Triangle sector of Algonquin. After the meeting, get a four door car and pick up Roman and Talbot. Talbot will give directions to the place as you drive down the street, so you must keep to a slow pace so Talbot can see where you're headed. Hit the marker when you reach the spot to trigger a cutscene.
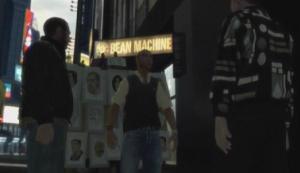
Talbot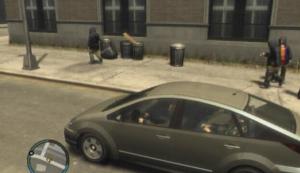
Florian's Place
Soon after completing the “Jamaican Heat” mission in Roman’s mission line, you’ll get a call from an unknown source. It’s Vlad, and he wants you to do work for him. Make your way to the ‘V’ symbol on the radar and hit the marker there to get started.
Vlad wants you to collect some unpaid debt money for him. Get over to the china shop in Cerveza Heights and step into the marker outside. The proprietor has locked the doors, so you’ll need to find something to break the shop window. There are some cement bricks around the block; head over to the green marker on your radar, pick one of the bricks up and return to the shop entrance. Throw the brick through the window to scare the proprietor. He’ll then step outside and give you the money. Take the money back to Vlad to complete the mission.
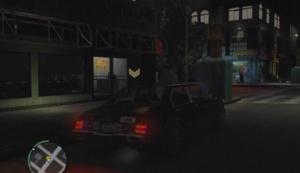
China Shop
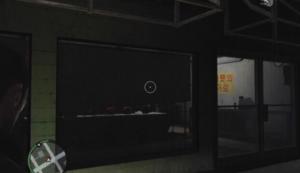
Shop Window
More debts need collecting. Make your way to the laundromat on Masterson Street and step into the marker outside to get started. The shop keeper immediately flees when you make your entrance. Take off after him through the back door of the laundromat. Jack one of the cars outside and start after the van that the shop keeper is attempting to escape in. All you must do now is ram the van until a cutscene is triggered to complete the mission.
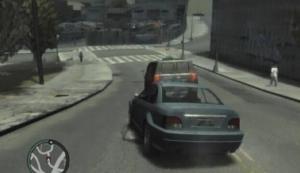
Van
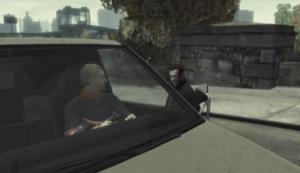
Shopkeeper
You are to steal a silver Blista as compensation for some unpaid debts. You’ll have to ride the nearby subway train to reach the location where the car is parked. Make your way to station, get up to the station platform and wait for the train to arrive. Enter the train when it arrives. When the train reaches its destination, start towards the blue marker on your radar. The owner is currently with the car, so you’ll have to knock him out to make a quick getaway. You can perform a stun punch to drop an unsuspecting enemy instantly. To perform a stun punch, without a weapon drawn, lock-on to a target and approach them. When the target reticule changes, press the punch button to knock out the target.
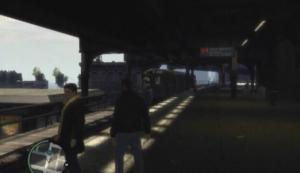
Train
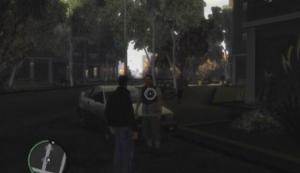
Stun Punch
When the owner has been taken care of, get in the Blista and start towards the lockup in Hove Beach. Vlad is not happy to hear that the car is covered with dirt, so you’ll have to take it to the car wash in Beechwood City first. Once that’s done, drive the car to the lockup to complete the mission.
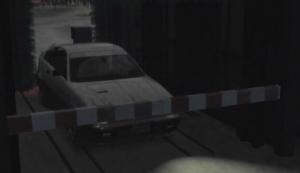
Carwash
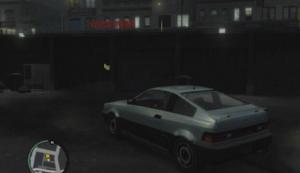
Lockup
Vlad wants you to eliminate Ivan, a man who is supposedly planning to steal from Roman. Start towards Roman’s garage. As you near the depot, you’ll spot Ivan already on the getaway. Chase after him and eventually you will reach a construction site. There, Ivan will abandon his car and start climbing up the building site. Climb up after him until you reach the top. When you reach the top, Ivan will leap to a nearby building. Continue after him—jumping between buildings when necessary—until you reach the end of the way. You are now faced with a decision to make: let Ivan live, or kill him as Vlad had ordered. It is best to help Ivan up because there is no reason not to, and he may be tied to a mission that occurs later on in the game.
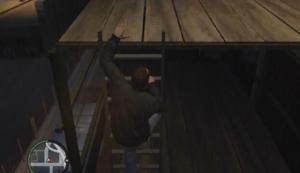
Construction Site
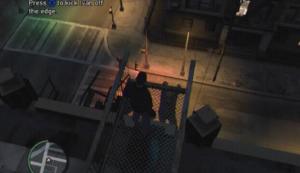
Ivan
Soon after completing the “Jamaican Heat” mission in Roman's mission line, you'll get a call from Little Jacob. You can now accept missions from him. Make your way to the ‘LJ' symbol on the radar and hit the marker there to get started.
Get in the car with Jacob and start towards the marker on your radar. When you reach the spot, drive into the nearby alleyway and answer the phone when Jacob calls. Three drug dealers will come into sight and run to the end of the alley As soon as you spot them, try to run them down with your car, or at least prevent them from leaving the alleyway. If they weren't all killed by the impact, step out of your car and kill off any of the remaining dealers. When all three of the dealers have been dealt with, get back in the car and pick up Jacob. Drive to the townhouse in Meadows Park.
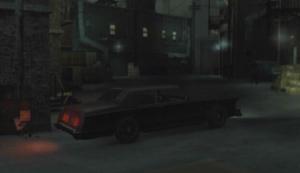
Alleyway
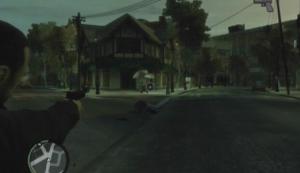
Drug Dealers
When you reach the place, step out of the car and follow Jacob up the stairs. Take cover to the left of the door and wait for Jacob to breach the place. There are several more drug dealers inside; take out the ones visible through the doorway, then move over to the window to the left of the door and gun down the shotgun-wielding dealer. Afterwards, follow Jacob inside and take cover behind the couch. Kill off the remaining drug dealers and then pick up any ammo left behind. Use the health pack on the kitchen table to patch yourself up before returning to the car. Drive Jacob back to the Homebrew Café in Shottler to complete the mission
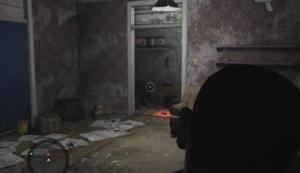
This mission becomes available after the completion of “Do you have Protection?” in Faustin's mission line. After the cutscene, get yourself some wheels and make your way to South Bohan. You'll need to use the East Borough Bridge at the northwest end of Broker to reach Bohan. Be sure to slow down at the toll booth to pay the fine once on the bridge, otherwise you will attract attention from the authorities. Hit the marker in South Bohan to get started. When the dealer walks out into the street, step out of your vehicle and start following him on-foot. Do not sprint at all, as doing so may alert him to your presence. The dealer will eventually reach an apartment block; follow him inside and up the stairs until you reach the suppliers' room.
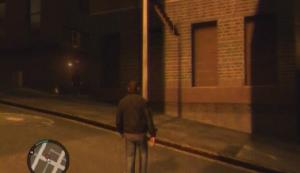
Dealer
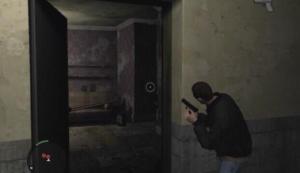
Suppliers' Room
There are three guys in the room, and all three must be eliminated. You can take cover to the right of the door if you wish, but you'll have to periodically shoot it to keep it open. Kill the dealer and two suppliers to complete the mission.

Target
You will be able to accept missions from Faustin shortly after completing “Crime and Punishment” in Roman's mission line. Travel to Faustin's home in Beachgate—denoted by the ‘F' symbol on the radar—and hit the marker there to begin.
Travel to the sex shop in Hove Beach and follow Dimitri inside. In the backroom, keep your gun trained on the marked target and shoot the guy in the leg when Dimitri orders it. When that is over and done with, follow Dimitri out of the shop and get back in the car. Next stop, the gun store downtown. When you reach the place, step out of the car and enter the gun shop. Faustin's buying, so approach the Micro-SMG that's marked by the green arrow and purchase it. Afterwards, drive Dimitri back to Faustin's place to complete the mission.
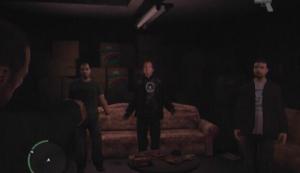
Sex Shop
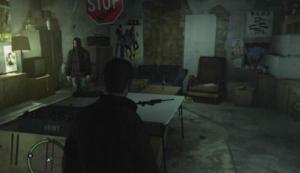
Gun Shop
Hit the marker outside of the Perestrdika in Hove Beach to accept a mission from Faustin. Your target can be found on Guatanamo Avenue, all the way in South Bohan. You'll need to use the East Borough Bridge at the northwest end of Broker to reach Bohan. Be sure to slow down at the toll booth to pay the fine once on the bridge, otherwise you will attract attention from the authorities.
Once in Bohan, follow the highlighted route on your radar to the marker. When you are underneath the target, step out of your car and locate the stairs that lead up to the station platform. Be sure that you have a weapon equipped and then confront Lenny. He quickly flees, and the guy next to him will open fire. Kill the shooter and then take off after the runner. Lenny will get in his car at the bottom of the platform stairs; quickly get some wheels and start after him. The Micro-SMG you acquired in the previous mission can destroy Lenny's car quite easily, so drive up next to him and open fire until it explodes. The mission is complete once Lenny has been dealt with.
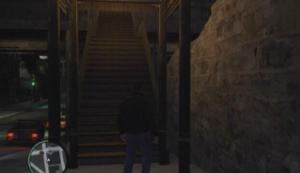
Platform Stairs
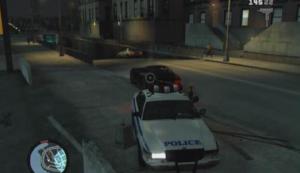
Lenny
Meet Faustin at his house in Beachgate to trigger this mission. Faustin wants you to find his daughter in Firefly Island. Make your way to the marker there to spot her. When her boyfriend takes off on his motorcycle, hop on the nearby motorbike and start after him. Just keep up with him until he meets with his gang. At that point, your task is to kill each and every one of the bikers. They are all armed with SMGs, so be careful. Wipe out the biker gang to complete the mission.
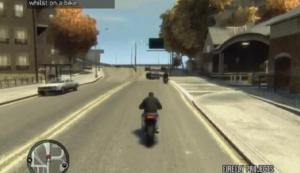
Biker
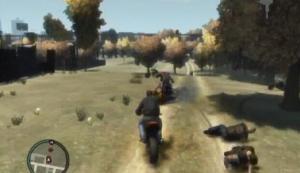
Shootout
This mission is available following the “Logging On” mission in Roman's mission line. After the cutscene, starts towards the old factory in Schottler. When you reach the place, step out of your vehicle and get into the truck there. The truck must be driven to the garage in South Bohan. The truck is fitted with explosives, so drive carefully. The flashing light on the back indicates its condition; a quickly flashing light indicates that the explosives are becoming more unstable. Try your best to avoid collisions on your way to the garage, otherwise the truck might explode with you in it. When you reach the garage, drive the truck in and trigger the explosives to blow the place. Sprint away from the scene to avoid arousing suspicion. Mission complete!
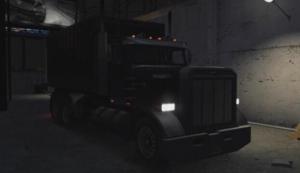
Truck
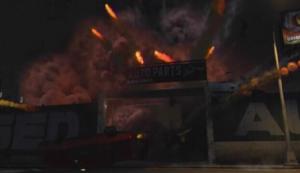
Garage
After completing “Rigged to Blow” in Faustin's mission line, Roman will call to tell you that his friend Brucie has work that needs to be done. Hit the marker outside of Brucie's Executive Autos in East Hook to accept a mission from him.
Your first task is to find a steal a cop car. If you can't find a police car, take out your phone and dial 911 to lure the police over to you. To bring up the keypad, press the Mobile Phone Up button again when you have the phone out. Lose the wanted level once you have the cop car and Niko will then automatically call Brucie. Afterwards, park somewhere and access the police computer. Brucie wants you to take out a man named Lyle Rivas. From the computer menu, select “Search Police Records” and then “Search by Name.” Type in “Rivas” using the on-screen keyboard and then select “Lyle Rivas.” Mark the target's house on your radar and then exit the menu.
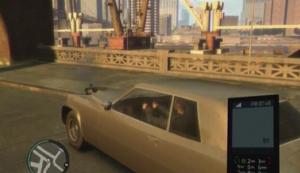
Phone
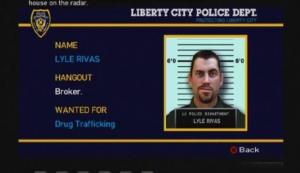
Police Computer
When you reach Lyle Rivas' place, step out of your vehicle and head through the front door. He immediately attempts to flee; quickly leave the house and get back in your vehicle. Rivas' car is quite fast, so try hard to avoid collisions as they will just slow you down. Start firing at the target vehicle when you're close enough. Fire away until the car is about to explode, at which point Rivas will bail. Kill Rivas to complete the mission.
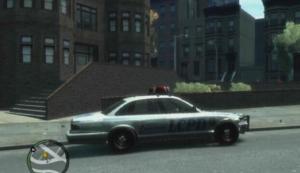
Rivas' House
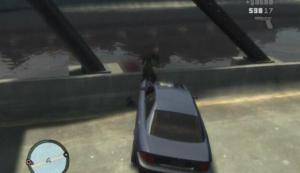
Rivas
Meet Brucie at his home in Boabo to trigger this mission. Brucie wants you to steal Lyle Rivas' car and bring it to his garage. Make your way to the marker on Yorktown Avenue, then walk over to Rivas' car and get in. A group of goons will pull up into the alleyway and try to stop you. Immediately drive out of the alley and start towards Brucie's lockup in East Hook. The goons will pursue you relentlessly, and you must get the car to the lockup before they manage to destroy it.
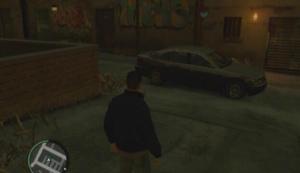
Rivas' Car
Your pursuers are particularly dangerous because they will shoot at you through the car windows when they have a chance. The lockup is quite a long way from here, so keep moving. If you happen to miss a turn, continue heading down the road you're on, as stopping to turn around could lead to death. Drive the car into the lockup to complete the mission.
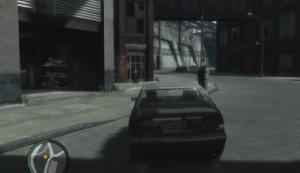
Lockup
Brucie will send you a text message sometime after you acquire a safehouse in Bohan. Drive back to his place in Broker and hit the marker there to accept a mission from him.
Head to the internet café marked on your radar, answer Brucie when he calls, and then step inside. Access the internet and click on the Lovemeet ad on the right. Click on the Male category under “Find Love,” then find and click on French Tom's profile. Click on the “Date” button in the bottom-right corner of the screen and then log off. Now you must wait for French Tom's reply. Go to check your webmail when you receive a text message from Roman about it. When the time comes, open Tom's e-mail and reply.
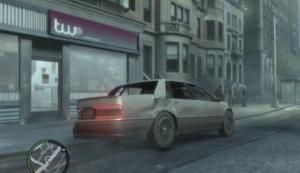
Internet Café
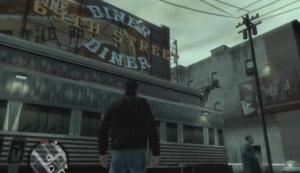
Diner
The date will take place at the 69th Street Diner in Hove Beach. You must be there before the specified time. The place is marked on your map; it's within the southwest quarter of Broker. When you're at the dinner, stand around until a cutscene is triggered. Stand up at any time during the conversation and shoot Tom dead to complete the mission.
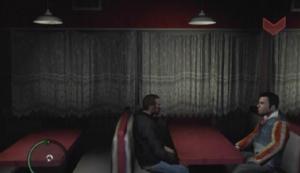
Date
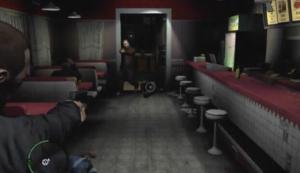
French Tom
Brucie needs you to drive him to pick up his friend Steve's car. The race car is over in Willis, so get some wheels and head over there. When you reach the car, hop in and travel to the race start. This is a checkpoint race, so the goal here is to follow a series of checkpoints and be ahead of the pack when the final checkpoint is reached. Each of the checkpoints contains a directional arrow that points to where that the next arrow will be. All you must do is win this race to complete the mission.
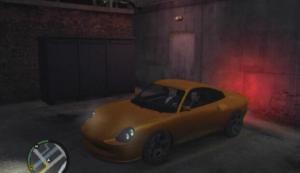
Comet
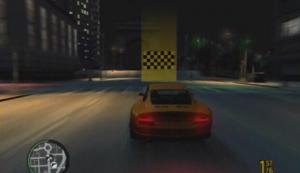
Finish
There are some side missions related to Brucie, we have information on these on different pages, just follow the links below to go there. These side missions and more are listed on the navigation list on the left of this guide:
Brucie's Exotic Exports
Brucie's Races
You can accept missions from Dimitri after completing “Rigged to Blow” in Faustin's mission line. Travel to the ‘Dm' symbol on the radar and hit the marker there to accept a mission.
Make your way to Perestroika, Faustin's club in Hove Beach, and hit the marker across the street. Dimitri will send you a text message at this point, explaining that some protection has been left for you around the side of the club. Follow the green icon on your radar and pick up the Body Armor that's next to the dumpster. Enter Perestroika when you're all suited up. After the cutscene, whip out a gun, kill the two goons in front of you and then grab some cover. Take out Faustin's men first, and then hit Faustin until he flees. Follow him through the door to the left of the stage.
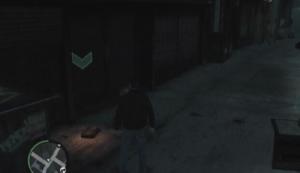
Body Armor
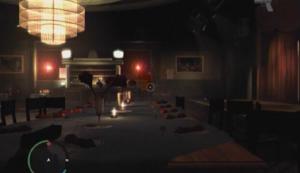
Shootout
A shotgun would come in handy here, as you'll be facing a number of enemies in this cramped hallway. When the path is clear, exit into the alley through the double door. There are more goons out in the alley too, so take them out before following Faustin up the staircase. Once you're up top, fire away until Faustin falls.
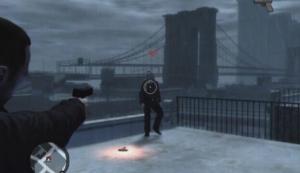
Faustin
Give Dimitri a call after completing his first mission to trigger this one. You are to meet Dimitri at a warehouse in East Hook. After Jacob calls, head to the warehouse to trigger a cutscene. Things quickly take a turn for the worse as you find yourself facing off against an inordinate number of hostiles. There is Body Armor behind the piece of cover in front of you, so move up and grab it when you have a chance. Be sure to crouch when not behind cover, as this will both improve your accuracy and make you harder to hit. The new cover system is heralded here, so put it to good use.
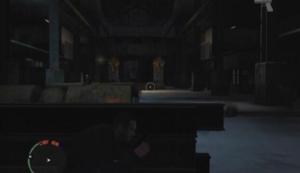
Hostiles
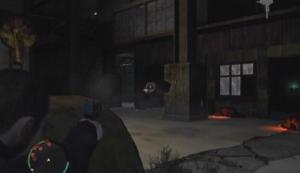
Cover
Each enemy in the warehouse is marked on your radar. Pay close attention to the markers that contain upward directional arrows, as those indicate enemies that are above you. There are several enemies along the walkways on either side of the warehouse, as well as in the windowed rooms near the exit. From these vantage points these enemies can get shots on you even while you're behind cover, so pay close attention to your radar and kill them off first to avoid taking fire. Continue moving up between cover and clearing out enemies until the police arrive. Sprint out of the warehouse, get in a car with Jacob and shake the two-star wanted level. Afterwards, drive Jacob to the Homebrew Café in Schottler to complete the mission.
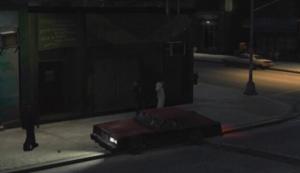
Homebrew Café
The second major set of missions are in here, they are the various missions in Bohan.
You can select the missions from the menu on the left or use these quick links:
Follow the ‘M' on the radar and hit the target marker at the community centre in South Bohan to accept a mission from Manny.
Get in a car with Manny and drive to Boulevard. Park in the indicated space and wait for the dealer to arrive. Once he drives off, all you must do is follow him to his destination while remaining inconspicuous. Drive at least two car lengths away from him at all times, otherwise he'll start to get suspicious. After a lengthy drive the dealer will pull up near of a warehouse and head inside. Manny drives off, so you're going to have to go in there and wipe out the dealers on your own. The warehouse door is locked, but you can enter through a window instead. Shoot out the window to the left of the door, then jump up up into the window and Niko will pull himself through.
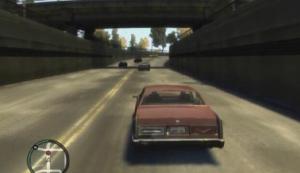
Dealer
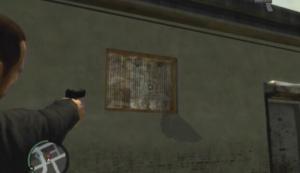
Warehouse Window
The warehouse is packed with armed dealers; a few of them are standing right outside of the room you are in, so don't just rush in there. While crouching, push open the door and start firing at the dealers closest to you. If you start taking damage, immediately duck back into the room. When you are able to move up without being killed, head through the door and take cover behind the stack of boxes nearby. The new cover system is the key to success here. When the warehouse is clear, shoot the warehouse door and step outside to complete the mission.
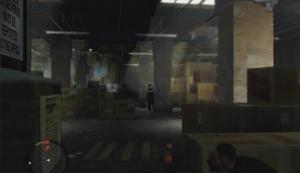
Dealers
Manny wants you to clear out another batch of street thugs. They're on Windmill Street in South Bohan. Drive up to them and start firing away. A few of them will try to escape in a car; chase after them and shoot their vehicle until it catches fire, at which point the thugs will bail. Kill all of the gang members marked on your radar to complete the mission.
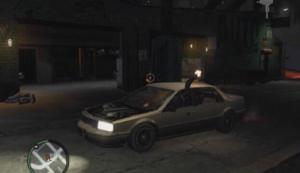
Thugs
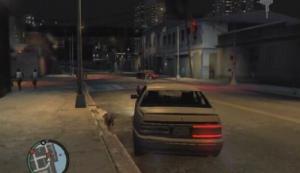
Getaway
This mission is available following “Blow Your Cover” in Elizabeta's mission line. Get to the Algonquin Bridge in Broker and drive into the marker there. You arrive just in time to see the target's train zip by. All you must do here is keep up with the train as it heads towards the station at the other end of the city. Just follow the red marker on your radar until the train arrives at the station. At this point, get out of your vehicle and make your way onto the station platform. Kill the target and his two friends to complete the mission.
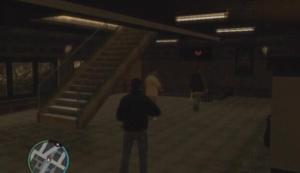
Train

Target
Mallorie will call you shortly after the completion of “Street Sweeper” in Manny's mission line to tell you of a friend of hers who needs some work done. Hit the marker outside of Elizabeta's place—denoted by the ‘E' symbol on the radar—to get a mission from her.
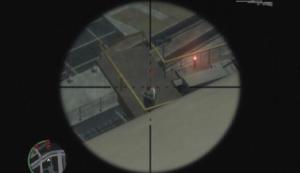
Get to the building that's marked on your radar and step inside. Climb the stairs all the way up to the rooftop and pick up the Sniper Rifle there. Step over the vantage point to observe the meeting. Pay attention to the instructions that appear in the top-left corner of the screen to learn how to use this weapon. The meeting quickly goes sour as the dealers pull guns out and start firing at Packie and his associate.
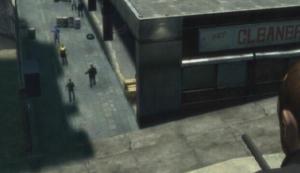
Vantage Point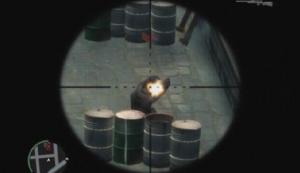
Dealers
Immediately start sniping the attackers below. Try for headshots, as it'll take a couple of flesh shots to down one. Keep watch over Packie too, because at one point an attacker will grab hold of him and attempt to stab him. You'll know this is happening when a marker on your radar is flashing red and blue. Afterwards, kill the second batch of attackers that enter the alleyway to complete the mission.
The contact's apartment is in Schottler, which is back in Broker. Drive over there with Playboy and enter. Upon entering, grab the rifle that's leaning against the window up ahead before following Playboy up to the 3rd floor to make the deal. It's a setup. Gun down the two cops in the initial area, then crouch down and head into the hallway. You have to get up to the rooftop, but there are four SMG-wielding cops between here and there. Move carefully as you make your way up to the roof, because the cops are quick to react and are wearing Body Armor, making them considerably harder to take down.
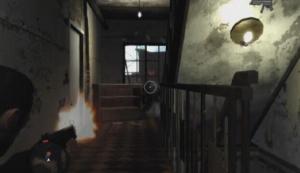
Cops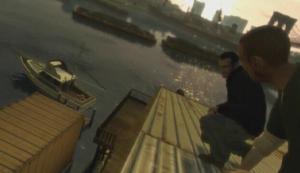
Rooftop
When you reach the rooftop, grab the health pack behind the nearby cover and start firing at the cops up ahead. Be sure to pick up the Body Armor that is near one of the generators just before the rusty set of stairs. Your deeds will net you a two-star wanted level, and you now have to get Playboy back to his place in Northwood. Follow Playboy down the stairs; there are a couple of unmarked cops on the way down, so proceed with caution. Once you're outside, lose the wanted level and then drive Playboy home to complete the mission.
You should get a call from Elizabeta sometime after completing “The Puerto Rican Connection” in Manny's mission line. You first must travel to the old hospital all the way on Colony Island. It's quite a long way, so take a cab if you aren't feeling up to the journey. When you reach the place, hit the marker in the parking lot to get started. Approach the place, but be careful, as the old hospital is crawling with enemies. Start by gunning down the two guys in the fenced in area outside, then head through the gap in the fence.
There is a ladder along the hospital's south wall that can be used to reach the second floor, which would provide a nice vantage point. There are a couple of guys up here as well, so quickly take them out before they can get a shot off. You can use the explosive barrels against the enemies down below by shooting them; just don't set one off too close to yourself.
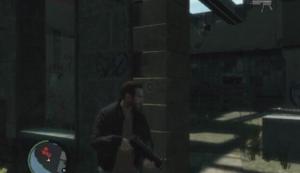
Old Hospital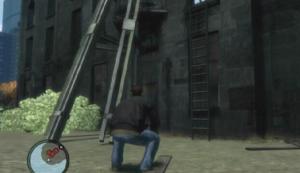
Ladder
Once the ground floor is clear, drop down to the left and head through the northward doorway. Turn into the first room on your left to find the coke that Elizabeta is after. There is also Body Armor here, so be sure to pick it up for extra protection. Unfortunately, the cops show up to raid the place just as you are about to make your escape. Here's the escape route: exit the coke room and turn left, sprint through the doors until you are at the second to last one, then turn into the room to your right; here, go through the doorway on the left and then exit through the arched doorway. Of course, you'll have to fight your way out, and the sheer number officers standing in your path makes this a decidedly difficult task.
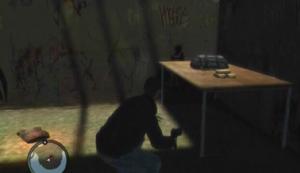
Coke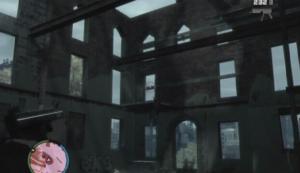
Cops
Be especially careful of the two cops stationed outside; try to gun them down through the windows before heading outside. When you've made it out of the hospital, quickly get a vehicle and start flee the scene. You now likely have a three-star wanted level to shake. A good way to escape is to set a way point somewhere far (South Bohan, in this case) and follow the marked path on your radar. Doing this ensures that you won't be caught circling around the same area. Once you have lost them, meet Jacob in Chase Point to complete the mission.
Get in the car outside and start towards the doctor's location in Broker. Drive carefully, because a collision may jar the car's trunk open, revealing the contents to any passersby; including the police. If the trunk does open, however, you can always step out of your car and shut it. Hit the marker in East Island City to trigger a cutscene and complete the mission.
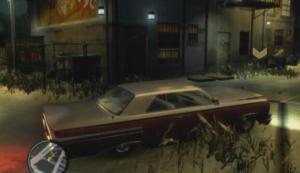
Doctor
You'll get a call from an unknown source sometime after “Luck of the Irish” in Elizabeta's mission line. It's Packie, and he has some work for you. His place is back in Broker. Travel to the ‘Pm' symbol on your radar and hit the marker there to get started.
Get some wheels and travel to the harbor in Algonquin with Packie. When you reach the place, follow Packie up on to the rooftop to trigger a brief cutscene. You are to intercept the shipment of meds by stealing the truck. Climb down to the walkway below using the small cabin to your right. The truck is pretty well-guarded, so you're going to have to fight for it. The yellow shipping container provides good cover, just be sure to make the guard standing in the corner of the platform above the ramp to the east your first kill.

Rooftop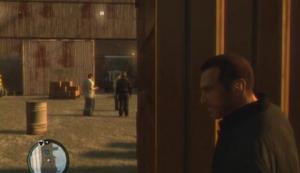
Guards
Once the area surrounding the truck is clear, move out from behind the cover and kill the guards in the truck garage. There is a health pack in the small office in the southwest corner of the garage, so use it to patch yourself up before getting in the truck. When you're ready to go, get in the truck with Packie and start towards the lockup in Westminster. A couple of cars will pursue you, but there are some grenades in the truck that can be used to get them off your tail. Be careful though, as live grenades being thrown out of a truck's window will surely catch the attention of the authorities.
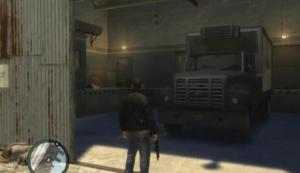
Truck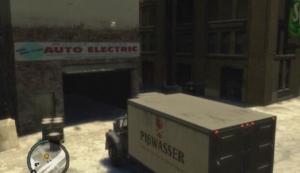
Lockup
After the cutscene, find a four door car and pick up the others. Make your way to the wasteyard on Colony Island and drive into the marker there to get started. Follow Packie and the others over the fence and into the wasteyard. You first need to clear out the enemies outside. There is plenty off cover in the area, and you have allies to help you out, so this shouldn't be a problem.
When the yard is clear, pick up the health pack next to the warehouse door to patch yourself up if need be, then head inside and take cover. Kill the enemy in the office and those on the walkway first, and then clear the ground floor. When the warehouse is void of enemies, climb up the stairs at the back and head into the office at the end of the walkway.
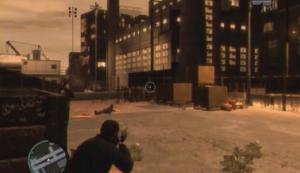
Wasteyard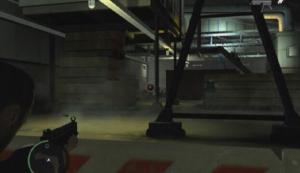
Interior
Pick up the bag of money in the office, then turn towards the office window and fire away at the enemies that just entered the warehouse. Drop down to the exit where Packie is standing, follow him out of the warehouse and swim out to the boat in the distance. Wait for Packie to get in, then drive the boat to the spot marked on your radar to complete the mission.
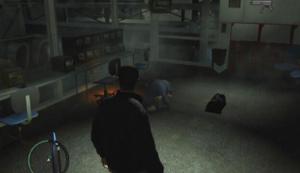
Money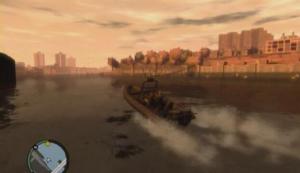
Escape
A suit and tie and a pair of smart shoes are required to start this mission. These items can be purchased at a Perseus clothes store, or you may already have the necessary clothes from the “Final Interview” mission. You may also want to purchase Body Armor from the weapon store in Downtown Broker. Once you're appropriately dressed, step into the marker outside of Packie's place to begin. The target is the Bank of Liberty at the south end of Algonquin. Steal a four door vehicle and make your way to marker there to trigger a cutscene. Things quickly take a turn for the worse, netting you a five-star wanted level. Make your way down to the vault and collect the money there.
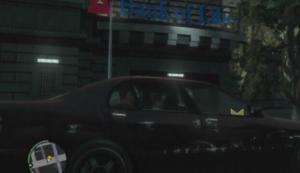
Bank of Liberty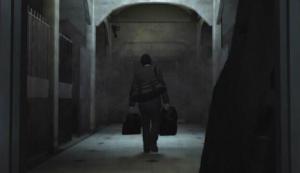
Vault
Needless to say, the escape won't be as easy. A host of police officers stand ready outside, and with a five-star wanted level it will take a whole lot for them to give up. Luckily you've been given a powerful weapon for this heist, so lack of firepower won't be an issue. Gun down the cops outside and then follow Packie and Derrick down the street. To escape, you have to clear out the cops marked on your radar; the others will not continue to lead the way until the marked cops have been taken down.
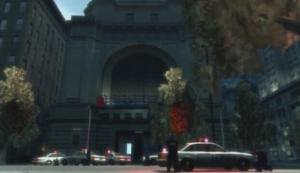
Police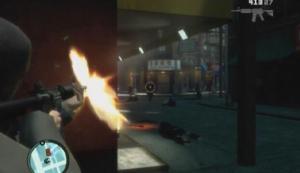
Escape
Eventually the group is forced down into the subway. The subway, of course, is also packed with cops. Fight your way to the tracks (watch for trains!) and follow the others up onto the street. Once you're on street level, quickly find a four door vehicle and get in with the others. Your wanted level has diminished, so lose the cops before crossing the bridge if you can. Drive back to Packie's place with the others to complete the mission, earning a substantial cash reward.
This is the third set of missions in the game. You can use the navigation bar on the left to pick missions from each characters or our click links below:
- Francis McReary's Missions
- Playboy X's Missions
- Dwayne's Missions
- UL Paper Missions
- Ray Boccino's Missions
- Gerry's Missions
You will receive a text message from an unknown source sometime after completing “The Puerto Rican Connection” in Manny's mission line. Travel to the ‘?' symbol in Castle Gardens, Algonquin to meet with the contact.
Francis McReary is being blackmailed, and he needs you to eliminate the individual behind it. Get some wheels and travel to the viewpoint in Lancaster. After the call, McReary will send you a text message with the blackmailer's phone number in it. Bring up your cell phone, open the “Phonebook” menu and give the blackmailer a call. While you're chatting with the man, scan the area below for a person currently using a cell phone. When you have the guy in your sight, keep track of him once the conversation has ended.
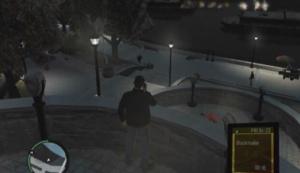
Blackmailer
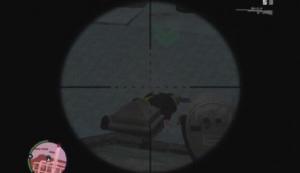
Storage Device
All you must do now is kill the blackmailer, retrieve the storage device and bring it back to McReary. Use a Sniper Rifle to pick him off from the viewpoint if you have one, otherwise head down to the area below and simply gun him down with something else.
Now that he has been identified, McReary's mission start point is denoted on the radar by an ‘Fm' symbol. Travel to the LCPD in Westminster and hit the marker there to get some more work from him. You'll need to get an interview with one Tom Goldberg, your target for this mission. After the cutscene, get to an internet café and access the web. Click on the “Need Legal Help?” ad on the main page, go to “Careers” and then “Submit Resume.” Once that is done, you'll have to wait to hear back from the lawyers. You can attempt other missions in the meantime.
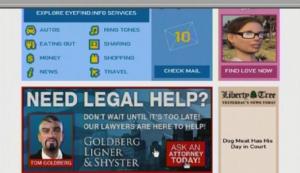
Legal Ad
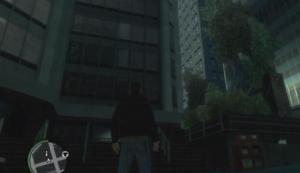
Building
The Goldberg, Ligner and Shyster building is on Amethyst Street in The Exchange sector of Algonquin. A tie symbol will appear on your radar and map to denote the location when the interview becomes available. A suit and tie and smart shoes are needed before you can take the interview; these items can be purchased from the Perseus clothes store nearby. Buy a suit and some shoes and head off for the interview when the time comes. Once you're inside, see the receptionist and then follow her to Goldberg's office.
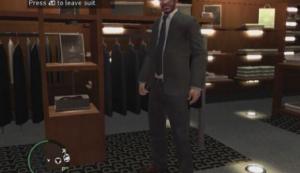
Perseus
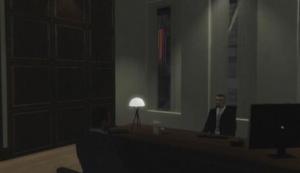
Interview
You are free to stand up at any time during this interview and eliminate Goldberg. The security guards in the building will promptly show up when Goldberg's death is discovered. The deed also earns you a two-star wanted level to start with, so you'll have to deal with police downstairs as well. Take the stairs down to the bottom floor and escape through the front door. Once outside, quickly get yourself a vehicle and then lose the cops. Bring the files to McReary at the police department in Westminster to complete the mission.
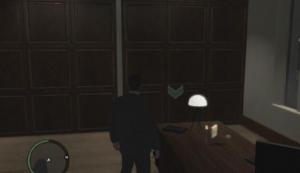
Files
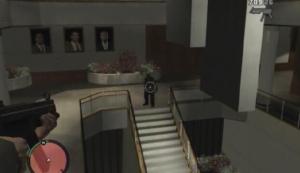
Escape
Yet again, McReary wants you to kill someone. Travel to the projects in East Holland and hit the marker there to get started. As McReary advised, do not start trouble with the residents on the ground floor. Don't even draw your weapon until you are up the stairs and on the second floor. Ignore the onslaught of insults thrown your way and find a set of stairs and take them up to the second floor.
You'll be attacked as soon as someone spots you up here, so get a weapon out and remain vigilant. Fight your way over to where your target is. He'll flee when you reach him, so finishing clearing the way and follow him up the stairs. He can't be killed at this point, so don't bother trying to hit him as he runs by. The target will climb up a couple of flights of stairs and eventually make it to the rooftop. Take out the thugs in the area before confronting him.
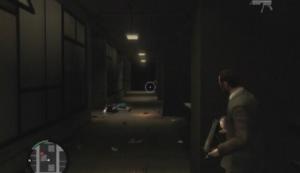
Thugs
When you confront Clarence, this mission's target, you then have a choice: execute him, or walk away and let him live. If you are playing the Xbox 360 version, you'll probably want to let him live, as he may be needed to unlock the “No More Strangers” achievement. Either way, there's no harm in letting him live, but it's your choice. Once you have made your decision, you'll have to shake a two-star wanted level to complete the mission.
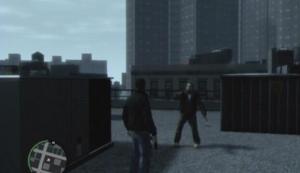
Clarence
Meet Francis in Castle Gardens to accept a mission from him. Francis has left a Sniper Rifle in a car in Hatton Gardens, so make your way over there and get in the marked vehicle to pick it up. Afterwards, drive to the Dealer's apartment and park across the street. To get up to the rooftop, head through the red door nearby and climb the stairs all the way up to the top of the building. Step into the marker on the rooftop to scope out your target.
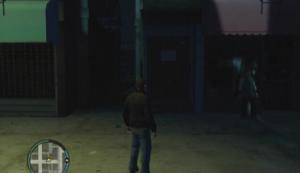
Stairs
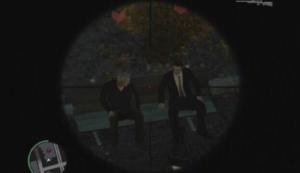
Viewpoint
The target is in the apartment across the street watching television, inconveniently out of your view. You're going to have to lure him away from the couch and into your view. Shooting the TV will get him to stand up. Make sure that you have a clear view of the TV and the door before taking the shot, and then quickly shoot him when he stands up. That's it. Get back down to street level to complete the mission.
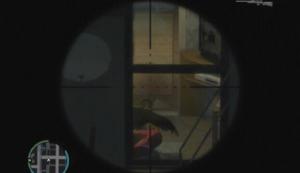
Dealer
You'll get a text message from Francis shortly after completing “Tunnel of Death” in Derrick's mission line. He needs to meet with you in Castle Garden. You'll have to choose to kill either Derrick or Francis. If you kill Derrick, you can then make use of Francis' call-in ability that completely lowers any wanted level. It's a nice ability, however you will miss out on an additional mission in Francis' mission line if you keep him alive, so killing Derrick would effectively prevent you from attaining 100% completion. All things considered, you've been fine without Francis' ability up to this point, so it'd be better to kill Francis for completion sake.
Francis and Derrick are to meet each other at the courtyard park in Lancet, Algonquin. Make your way over there and climb up onto the scaffolding in front of the marked building. Ride the lift up to the roof and step into the marker there to trigger a cutscene. Afterwards, pick your target and fire away. With the McReary brother you have chosen dead, get back to street level and leave the area to complete the mission.
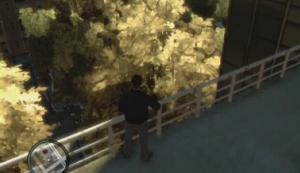
Park
Francis and Derrick
If you choose to kill Francis in “Blood Brothers,” you will get a call from Packie shortly after, inviting you to his brother's funeral. Change into a suit and tie and smart shoes, or purchase them from a Perseus clothes store, and then make your way to the church in Suffolk. After the cutscene, some Albanian gangsters roll up and open fire. Another car full of them will arrive after you have dealt with the first batch, so be ready. When all of the gangsters have been taken care of, get in the hearse with Packie and start towards the graveyard where Francis is to be buried.
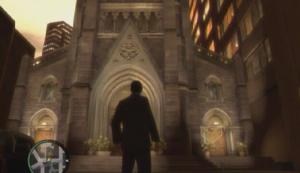
Church
Gangsters
More Albanians will start to pursue you, and unfortunately the back of the hearse is quickly opened due to their gunfire. Drive slow enough that the coffin will not fall out of the hearse, but fast enough to avoid being rammed into by your pursuers. Drive into the marker in the graveyard parking lot to complete the mission.
Hearse
Graveyard
You'll get a message from Playboy sometime after the completion of “Blow Your Cover” in Elizabeta's mission line. Hit the marker outside of his home in Northwood, Algonquin—denoted on the radar by the ‘X' symbol—to start a mission.
First you'll need to pick up the weapons Playboy left in an alleyway in Castle Gardens, which is at the south end of the city. Make your way over there and get into the marked vehicle to collect the weapons. Afterwards, step onto the nearby lift and use the controls to raise it up to the rooftop. There are three lookouts in the construction site below, each of whom is marked on your radar. Use the Sniper Rifle to scan the area below and take out each lookout with a headshot. They'll all remain stationary, so it's easy pickings. When all three are down, step onto the platform and lower it back down to the alleyway.
Weapons
Lookout
There are four union leaders in the construction site that must be eliminated. The Sniper Rifle will definitely come in handy for this task, but use it sparingly. Creep through the construction site gate and take cover behind something once you've been spotted. The first union leader will come down to assist the workers in the initial area, so you'll be able to hang back and snipe him.
The second union leader is up on the building in the distance with about a dozen workers. Clear out the remaining workers and then head up the ramp alongside the building site. There is a health pack at the top of the ramp, so patch yourself up with it before moving on. Niko will automatically seek cover when you reach next area. The grenades will come in handy here, particularly against the two workers to the left of your cover. Throw a few grenades to clear out the workers around your cover, then swap for the Sniper Rifle and kill the second union leader.
Construction Site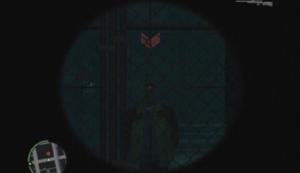
Union Leader
The third union leader is just around the corner. Eliminate each and every worker in the area before eliminating this leader. Once the third leader is down, a helicopter packed with reinforcements arrives and the last guy makes a run for it. Don't turn back and head for the ramp, just continue moving along to the end of the building. There's a health pack near a stack of spool tables along the way, so keep an eye out. The fleeing union leader is traveling on-foot, so there's no need to rush; just concentrate on killing the enemies on the rooftop to clear the path. When the area is clear of hostiles, take out your Sniper Rifle and eliminate the union leader before he can get away.
Playboy X needs you to silence someone for him, though he is unable to provide a differential description of the target. So, make your way to the spot across from the basketball courts on Exeter Avenue, bring up your cell phone, select “Camera” from the menu and snap a picture of the group of people depicted in the cutscene. You can't get too close to the group or they will become suspicious. Stand in the middle of the road, between the two lanes, to take the picture, then send it to Playboy and wait for his call. If you captured the correct group in the photo, Playboy will give you a call and identify the target. He'll tell you what Marlon is wearing, at which point a marker will appear over Marlon's head.
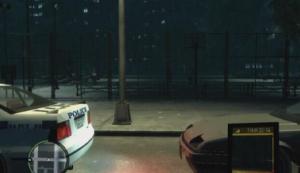
Camera

Marlon
Ideally you still have the Sniper Rifle from the previous mission; if so simply snipe Marlon to complete the mission. Marlon and his friends are all carrying weapons, and Marlon will flee at the first sign of danger, so take him out quickly if you are unable to from afar. The mission is complete once Marlon has been taken down.
This mission becomes available shortly after the “Undress to Kill” mission in Dwayne's mission line. Playboy X wants Dwayne dead, and he wants you to do it. Great. Give Dwayne a call after the cutscene, and then call Playboy X. You're faced with a choice here: kill Playboy X, or kill Dwayne. This isn't a very tough choice if you are aware of the reward for each beforehand. If you kill Dwayne, you get a $25,000 payment from Playboy X and nothing more. If you kill Playboy, you get his loft in Algonquin, Dwayne as a friend, and eventually Dwayne's backup ability, which allows you to call for backup. If you're looking for authorial advice, kill Playboy X, as the reward is much greater, and $25,000 isn't much this far in the game.
When you've made your choice, visit either Playboy X at his loft in Northwood, or Dwayne at his 2nd floor apartment in Northwood. If you choose to kill Dwayne, he doesn't put up a fight; just stroll into his apartment and take him down. Playboy X, on the other hand, is armed and surrounded by his friends. He'll flee once you've dealt with his friends, too, forcing you to chase him into the streets. A van full of Playboy's friends will try to halt your pursuit, so be careful. Playboy will trap himself in a nearby alleyway, so follow him there and end it.
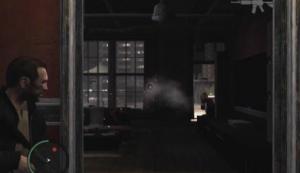
Playboy X
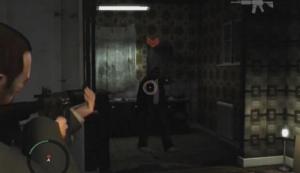
Dwayne
Playboy X will give you a call shortly after the completion of “Deconstruction for Beginners.” You can then accept missions from Dwayne by traveling to the ‘D' marker on your radar.
Travel to the arcade in Chinatown and hit the marker nearby to confront Cherise, Dwayne's old girlfriend. Her boyfriend will take a couple of potshots at you and then speed off, leaving you alone with Cherise. Letting her live is the better choice, because taking the time to kill her will give Jayvon an even bigger head start than he already has, and Dwayne will be unhappy if you do. Quickly jack a vehicle and speed towards the red target marker on your radar. When Jayvon is down, step out of your vehicle, retrieve Dwayne's money, and then meet Dwayne at the Cluckin' Bell on Burlesque Street to complete the mission.
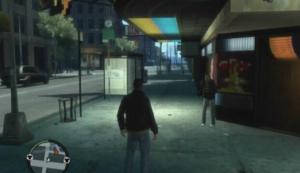
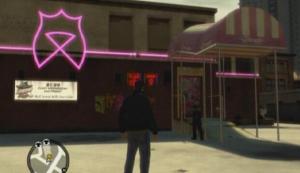
You're going to take back Dwayne's club for him. It's “The Triangle Club” in Northern Gardens, Bohan. The place was claimed while Dwayne was locked up, so you're going to have to take out the three strip club managers. Do not walk in with a weapon drawn, otherwise you'll get some trouble from the guards. One of the managers can be found in the staff room, which is through the door to your left when you first enter the main area of the club. Use your knife to eliminate him, preferably. Take the Shotgun in here too, as it'll be of use later.

Dwayne's Club
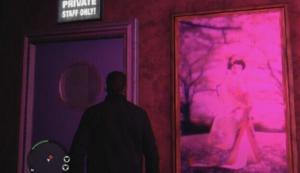
Staff Room
Another manager can be found talking to a dancer near the stage. The third manager is in one of the backrooms. You'll want to kill the manager in the backroom first, because the gang members in the club will start firing at you as soon as you draw a weapon. If you kill the guy in the backroom, you can hole up there and not start this firefight surrounded. Blast the man blocking the doorway with your Shotgun and then quickly blast the manager before he stands up. Hold here and kill the security guards that confront you. When the security guards have been dealt with, you'll have to clear out the guys in the club's main area. The last manager will wait for you outside the club, so take your time.
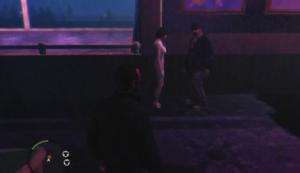
Manager
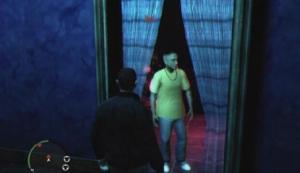
Backroom
Once the main area is clear, head outside to spot the final target in a getaway car. Quickly get in a vehicle and chase after him. Hit his vehicle with gunfire until it is destroyed, or shoot him through the windows until he is dead to complete the mission.
Michelle will contact you sometime after the completion of “The Snow Storm” in Elizabeta's mission line. She wants to meet with you in Algonquin. Travel to the ‘?' in The Triangle and step into the marker there to begin.
Your target has an apartment back in Hove Beach. Make your way over there and step into the marker to enter. There's nothing suspicious here at first glance, so use the laptop on the coffe table to access the web and open Oleg's inbox. Read the e-mail with the subject “Meet me,” to learn of Oleg's whereabouts. He is meeting someone at a jewelry store in Hove Beach. Leave the house and drive to the jewelry store on Tulsa Street. Oleg promptly drives off; chase after him and wreck his car to force him to bail. Eliminate him to complete the mission.
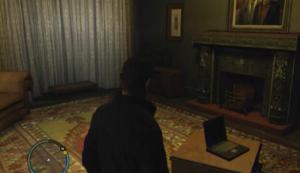
Laptop
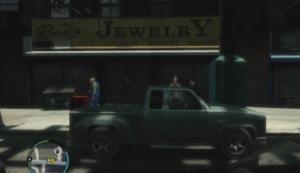
Jewelry Store
Travel to the ‘U' symbol on the radar and hit the marker there to accept another mission. You need to access a police computer. If there isn't a police car in the area, get in a car, dial 911 and have the police come to you. Wait until the officer gets out of his car, then step out of your own and steal the police car. Once you have a cap car, lose your wanted level and then access the police computer.
Since your contact has provided a photo of the target, you'll be able to use that to acquire some information. First select “Search Police Records,” then “Search by Photo.” Upload the photo and the target's information will appear onscreen. You're looking for one Adam Dimayev, whose hangout is the Kamayashev Import/Export in Broker. Mark the location on your map before exiting the menu. Afterwards, make your way to Dimayev's location, ready for a firefight.
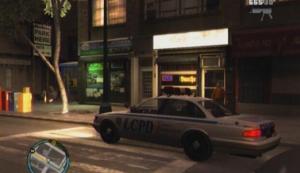
Cop Car
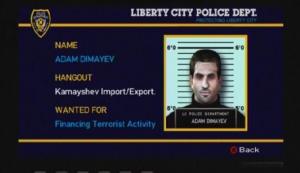
Target
Dimayev and his associates must be eliminated to complete the mission. The place is packed with armed gunmen, so just strolling in would not be wise. Approach the hideout from the east, as doing so will allow you to use the tollbooth as cover. When the guys in the parking lot have been dealt with, climb up the tollbooth and then to the second level. Take cover behind one of the shipping containers and clear out the remaining enemies to complete the mission.
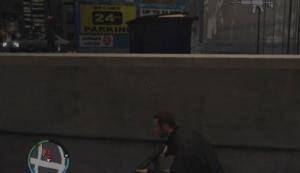
Kamayashev
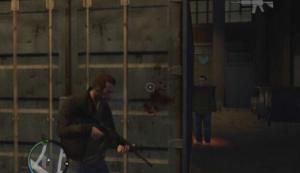
Cover
Make your way to the Civilization Plaza in Lancet and drive into the marker there. You arrive just in time to spot the helicopter taking off. You must follow the helicopter to its landing zone. Drive after it until you reach the spot. Stealing the helicopter is your next task. Be sure to clear out the armed goons around the landing zone beforehand, or you'll have a hard time lifting off while getting shot at. Once you're in, fly the helicopter to the dropoff point and land on the marker there to complete the mission.
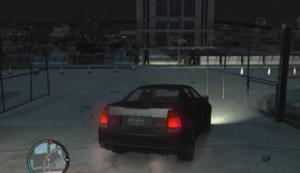
Landing Zone
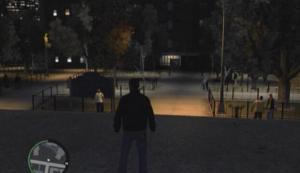
Dropoff Point
You will get a call from your contact at U.L. Paper sometime after “Dust Off.” This mission is automatically triggered after the call. You are to meet Little Jacob at the salvage yard in Northwood, Algonquin. When you reach the spot, get in the helicopter with Jacob and take off. The helicopter that's marked on your radar must be destroyed to complete this mission, however you are only permitted to shoot it down while it's flying over water. Jacob is packing an RPG, and since you're the one flying the helicopter, he has to take the shot.
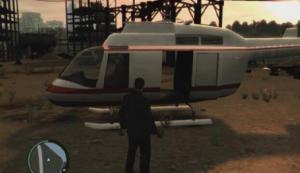
Helicopter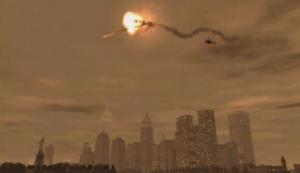
Target
Continue to fly after the helicopter until it is far enough from civilization. At this point, you'll have to fly to the right of the target helicopter and at the same altitude to provide Jacob with a clear shot. If he misses at first, don't let up; he has plenty of ammo. Once the helicopter has been shot down, land on the marked location in Castle Gardens to complete the mission.
Ray will phone you sometime after the “Harboring a Grudge” mission in Packie's mission line. Meet him at the marked location in Little Italy, Algonquin for some work.
Ray wants you to get rid of someone for him. The target won't be pointed out to you at first, so you're going to have to do a bit of digging. Get to the projects in North Holland and step into the marker there. Ray has sent you a photograph of an individual who should know where the target is located. Take a look at the picture and then find the person who matches it. He won't divulge the information at first, so draw a weapon and point it at him to get him talking. You learn that Teddy Benavidez, the target, lives on the top floor of apartment 151 K. Kill Alonzo when you're done with him if you wish; he ends up calling Teddy to warn him of your approach, but you're up for a firefight either way.

Galveston Street Projects
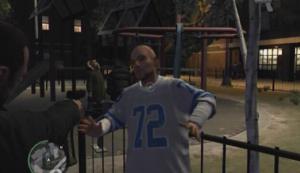
Alonzo
Enter the apartment and ride the elevator up to the 20th floor. The goons on the 20th floor will either already be on the offensive, or just suspicious of your intentions. Kill them regardless, and start towards the stairs that lead up to the 21st floor. At the top of the stairs, a health pack can be found through the first door to the right; there's an enemy there, though, so be sure to clear the way. You have to go to the other end of the hallway to continue up the stairs to the 22nd floor where Teddy's apartment is. There is another health pack just before these stairs, so be sure to grab it before continuing.
On the 22nd floor, enter Teddy's apartment and clear out the goons inside. Make your way to the kitchen to encounter Teddy. Follow him out of his apartment and up the stairs to the rooftop. There are a couple of goons along the way, so be careful. When you have Teddy cornered, blast him to send him plummeting down to the concrete below. Mission complete!
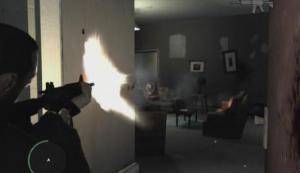
Teddy's Apartment
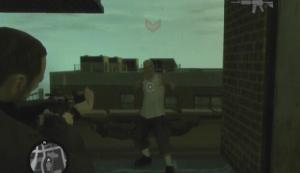
Teddy
The Trashmaster is in the alleyway behind the restaurant. Approach the truck to trigger a cutscene. Following that, get in the truck with the others and start towards the marked location in China Town. When you reach the spot, wait while the others retrieve the bag and then open the back of the truck. Afterwards, make the second pickup, at which point some resistance will show up. Get the Trashmaster to the drop-off in Fishmarket South to complete the mission.
Trashmaster
Pickup
It seems that Luca pocketed some of the diamonds from the last job, so you have to hunt him down and get it back. Make your way to the marked location in Castle Gardens and step into the marker there to confront Luca. Luca and his gang quickly take off; Niko will automatically jack a nearby vehicle, allowing you to start the pursuit straight away. All you must do here is keep up with Luca and the others and they will eventually wreck at the fountain in Middle Park.
Luca
Pursuit
When you reach Middle Park, step out of your vehicle and gun down Luca's gang before following Luca into the restroom area. He's hiding in one of the stalls; shoot each door that is marked as occupied to find him. When you've found him, kill him and pick up the diamonds. Afterwards, meet Ray on the Middle Park bridge to complete the mission.
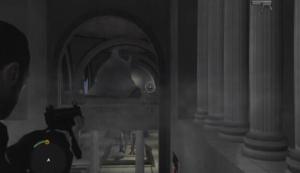
Middle Park
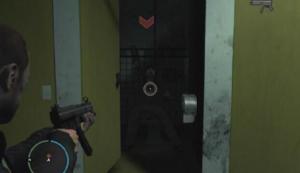
Luca
You are to meet Johnny, whom you have met prior to this, outside of the Libertonian in Middle Park. Make your way to the spot and approach Johnny to trigger a cutscene. The deal quickly goes sour, setting everyone there on the offensive. You have to make it out of the museum alive, but unfortunately a couple dozen mobsters stand in your way. First you must get to the ground floor. When you have regained control over Niko, immediately seek cover and start clearing the mobsters along the walkway. There is a health pack on the wall to the left of the archway at the end of the walkway, but only move up for it when you are certain that the way is clear.

Escape
When you reach the stairs, head down to the ground floor, take cover, and start eliminating the enemies in the area. Body Armor can be found on a table to the left, so pick it up when you have a chance. You're going to have to exit through the museum's main entrance, which is at the other end of this room. Fight your way to the front door, grab the health pack next to the door if need be, and then take out the two goons by the cars parked outside. Get in one of the cars and speed off. There is no need to kill the enemies marked on the radar, all you need to do is lose them to complete the mission.
Make your way to the marked location in East Holland to meet with a couple of The Lost gang members. Hop on the bike when they speed off and start following them. The two bikers will eventually enter the subway system, so drop down yourself. All you must do here is take out the two bikers to complete the mission. Careful though, because there are several trains along the tracks that will certainly impede your progress if you smack into one.
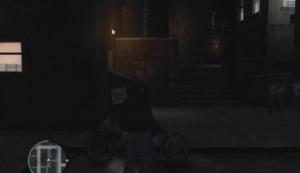
Bike
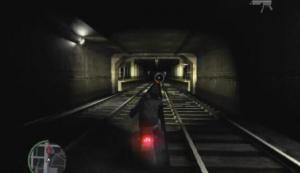
Subway
Isaac, one of Ray's associates, has been blaming the diamond deal mishap on Ray. So, you're going to shut him up. It would be a good idea to pick up some Body Armor for this task, and maybe grab a bite to eat if your health isn't completely full. Travel to the Majestic Hotel in Star Junction, step inside and walk over to the elevators. Isaac and the diamond dealers are in the penthouse suit; an elevator can take you to the floor below that. What is it with these guys always seeking refuge on floors with broken down elevators? When the elevator reaches its destination, cap the guy up ahead and then take cover. Fight your way to the other end of the hall and enter the stairwell there.
The Majestic Hotel
30th Floor
Climb up the stairs to reach the penthouse door. There are two diamond dealers along with Isaac to kill off here. Don't just storm in, of course, as there is also a bunch of goons in the penthouse too. One of the dealers is in the kitchen, and the other is in the room at the top of the first set of stairs. There is a health pack in the kitchen, so use it to patch yourself up if need be. When the living room and kitchen are clear, head up the steps and head through the double door. Kill the dealer inside, and then clear the steps that lead up to the roof where Isaac is.
Penthouse
Isaac
Isaac is definitely tough to get at, because there is no immediate cover at the top of the steps, and he and his goons can shoot at you through the glass. You'll have to sweep the roof quickly. Stand far enough down the stairs that you are out of sight and face towards the window; hold down the Free Aim button and move up the stairs until you are in line to hit Isaac or one of his goons. Gun one down, then roll back down the stairs to avoid taking too much damage. If you managed to kill Isaac, you can start to leave the hotel now, but there is a vest of Body Armor on the roof that will come in handy during the escape.
Gerry will call you shortly after the “Three Leaf Clover” mission in Packie's mission line. Visit him at his place in East Island City—denoted by the ‘Gm' symbol on the radar—to get work from him.
First you must pick up the bomb in the alleyway off of Inchon Avenue. The targets' car is parked near a restaurant in Little Italy, Algonquin. Make your way over there and plant the bomb beneath the car's trunk. With that done, get a vehicle and drive into the marker nearby. When the Ancelottis get in their car and drive off, follow them, but not too closely as to not arouse suspicion. Keep a good distance away from the targets at all time; at least three car lengths.
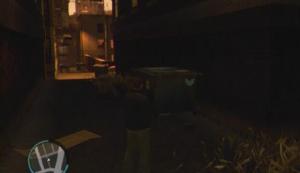
Bomb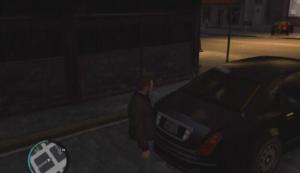
Car
When the Ancelottis reach the spot, step into the marker on the hill across the street. Bring up your cell phone, select Gerry from the “Phonebook” menu and then select the “Detonate” option to set off the bomb. With that done, move in and gun down the remaining Ancelottis. Afterwards, shake the two-star wanted level you have acquired to complete the mission.
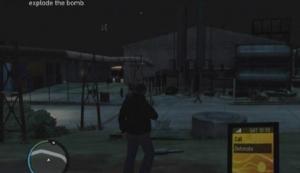
Detonate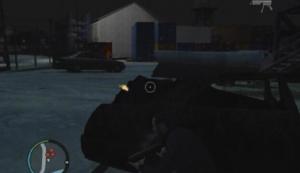
Ancelottis
Hop on the motorcycle parked outside and start towards the meeting point in Star Junction, Algonquin. Frankie Garone, your target, quickly speeds off on a motorcycle. All you need to do is chase after Frankie and kill him to complete this mission. You'll run into several obstacles on the course, though, so keep your eyes on the road.
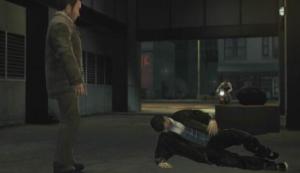
Frankie Garone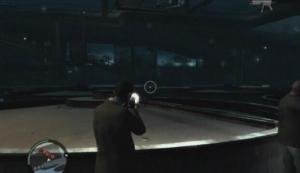
Target
You'll get a call from Gerry sometime after the “Blood Brothers” mission in Francis' mission line. He's at the Alderney State Correctional Facility, and he wants to you to stop by for a little chat. You are to kidnap Grace Ancelottis, so you'll have to find some way to get close to her. Get to an internet café and use one of the computers there to access the web. Click on the “AutoEroticar” ad on the home page, and then from that page click on “View Cars.” Scroll down to the pink Feltzer to acquire Grace's phone number. Log off when you're done.

Car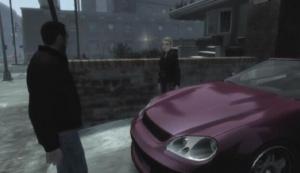
Grace
Call Grace sometime between 8:00 and 21:00 and then make your way to her home in Acter, Algonquin. When you meet up with her, you'll first have to fake a test drive to the south end of Algonquin, and then it is off to the safe house in Leftwood. She'll put up a fight on the way there, making the drive a bit difficult. When you reach the place, drive into the marker outside of the safe house to complete the mission.
You'll get a call from Packie sometime after; you need to take a picture of Grace at the safe house in Leftwood to prove that you have her. Travel to the “Ransom” marker and head upstairs. Have Grace look up at you, bring up your cell phone, snap a picture of her and send it to Packie.
Packie will text you sometime after the previous mission to tell you that Gerry needs to speak with you. Travel to the Alderney State Correctional Facility to get started. After the cutscene, make your way to the safe house in Leftwood to pick up Grace. The Ancelottis are on to you, so you must transport Grace to another safe house. All the while the Ancelottis trailing behind will open fire on your vehicle, so you'll have to move quickly. Avoid collisions too, as a particularly rough one can kill Grace. Drop her off at the safe house in Northwood to complete the mission.
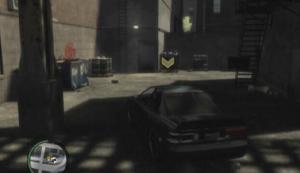
Safehouse
It would be a good idea to pick up some ammo and Body Armor before attempting this mission, as you're in for quite a shootout. Once you've spoken to Packie, make your way to the marked car in Northwood and get in. The exchange is to take place on Charge Island, so drive over to the exchange point there with Grace in tow. Of course the deal can't go off without a hitch… you had to see that coming. Remain behind cover, kill off all of Bulgarin's men, and then follow Packie up onto the nearby walkway.
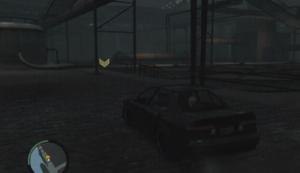
Exchange Point
Bulgarin's Men
Keep an eye out for some Body Armor along the left side of the walkway. There are more enemies up here, so take cover behind the generators along the walkway as you encounter them. A couple of cars full of reinforcements will roll in as you move down the walkway, so be sure to take them out before moving on. Continue to clear the enemies that appear on your radar until you reach the guy with the diamonds. After the cutscene, kill off the remainder of Bulgarin's men, and then use the ladder to get back to street level. Drive Packie back to his place to complete the mission… with nothing to show for it, unfortunately.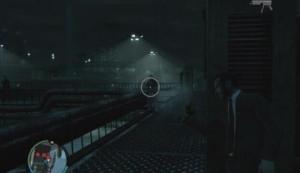
Walkway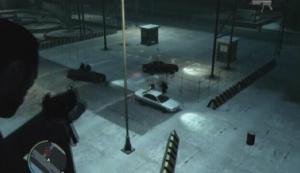
Reinforcements
This is the fourth set of missions in the game, although you will be going back and forth between each set of missions. You can use the navigation bar on the left to pick missions from each characters or our click links below:
- Derrick's Missions
- Assassin's Missions
- Bernie's Missions
- Phil Bell's Missions
- Jimmy Pegorino's Missions
Packie will contact you sometime after the “Three Leaf Clover” mission. He wants you to meet with his brother Derrick in Acter, Alderney. Travel to the “Dm” on the radar and hit the marker there to get started.
Your target is one Bucky Sligo. You'll have to do a bit of digging to find out where he is. If there isn't already a cop car nearby, bring up your cell phone and dial 911 to call the police over to you. When the police arrive, steal their car and then lose the wanted level. When you're free, park somewhere and access the police computer. Select “Search Police Records” from the menu and then “Search by Name.” Type “Bucky” into the search field and hit Enter to pull up the target's profile. Mark his hangout on your radar and then exit the menu. He's at the Burger Shot in Westdyke, so drive the police car over there.
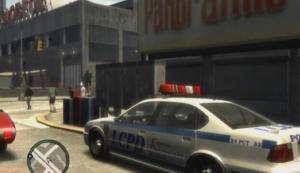
Cop Car
Bucky quickly takes off when you pull up. Derrick wants you to eliminate Bucky and his entire crew, so start following Bucky as he makes his way over to his gang's hideout. When you reach the spot, drive around to the back of the house. One of the targets is standing on the front porch, so he can be a bit hard to get at from the street. Shoot open the back door and start clearing the ground floor. When the first room is clear, move in and kill the guy on the front porch, and then the guy at the top of the stairs. You are attributed a two-star wanted level once the targets have been taken care of. Lose the wanted level to complete the mission.
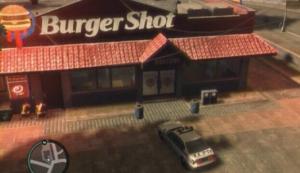
Burger Shot
Drive over to Kim, Derrick's contact, to get started. You must protect Kim while he transports a shipment of counterfeit bills. Keep close to Kim's boat and help Derrick fight off the attack boats that appear. Eventually a helicopter joins the fray, but luckily there is an RPG onboard which you can use to shoot it down. These aren't homing missiles, so you're going to have to plan your shot before firing. Do not fire directly at the helicopter, but rather where you think it might be by the time the rocket reaches it. When you have succeeded in shooting down the helicopter, continue following Kim until the dock is reached.
Kim
Helicopter
Derrick wants you to kill a man named Aiden O'Malley. He's in government custody, but that's not going to stop you. Packie has left a RPG in a truck that's parked off of Mahesh Avenue in Alderney. Make your way over there and get in the truck to collect the weapon. After the cutscene, drive the flatbed down the Booth Tunnel until you reach the two markers. Park the truck across the markers to block the tunnel. When Packie has blocked off the other end, it's your job to clear the escorts around the stockade. The RPG might come in handy here, but it isn't really necessary; you could just as well take out the escorts with any other gun, so you may want to save the RPG for another occasion.
Booth Tunnel
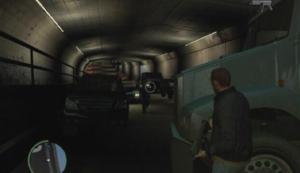
Escorts
When the tunnel is clear, get in the police stockade with Packie and drive out of the tunnel. You must lose your wanted level before moving on to the next step. With that done, drive the stockade to the location that appears on your radar and hit the marker to exchange it for the car parked there. Bring O'Malley to the cliff in Leftwood and kill him after the cutscene to complete the mission.
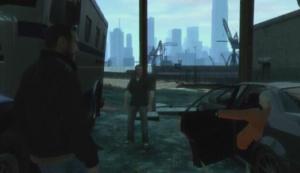
O'Malley
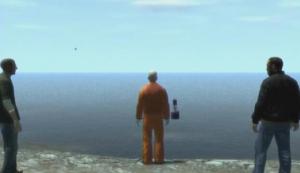
Cliffs
Bernie becomes a contact following the “Weekend at Florian's” mission in Roman's mission line. Meet Bernie at his place in Middle Park West, Algonquin when he is available to accept a mission from him.
Take Bernie to Middle Park and then follow him down the path until he reaches the tunnel. After the cutscene, follow the attacker up onto the bridge and hop on one of the mopeds there. Chase after the attacker and gun him down, then pick up Bernie and drive him to the Perseus clothes store in The Exchange to complete the mission.
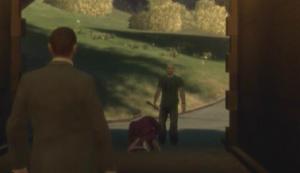
Attacker
Attacker
Get a car, pick up Bernie, and then make your way to the rendezvous spot in Northwood. After the cutscene, your task is to kill the fleeing blackmailers. The car they are driving is quite fast, so getting close enough to wreck it can be difficult. If you're having trouble catching up, just concentrate on at least keeping up with them because they will eventually stop and exit their vehicle, allowing you to continue the pursuit on foot. Kill the two blackmailers, and then take Bernie back to his apartment in Middle Park West to complete the mission.
Meeting Spot
Blackmailers
Bernie will send you a text message sometime after the previous mission; he wants you to meet him at Pier 45 in Algonquin. Head for the marker near Firefly Island to trigger a brief cutscene. All you must do here is kill Dimitri's men; their boat is quite fast, but they will eventually reach land, leave the boat, and start to travel on foot. Just concentrate on keeping up with them until they reach the dock in Steinway. Follow the targets onto land, chase them down, and eliminate the three of them. Return to Bernie at the dock to complete the mission.
Target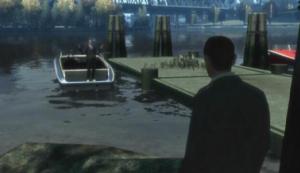
Bernie
Sometime after, Bernie will call to tell you that he has something to give you; Bryce's old car. You can pick it up at the ‘Bc' symbol on your radar. It's pretty sweet. Be sure to store it in a lot outside one of your safe houses.
Phil Bell will call sometime during Ray Boccino's mission line. Meet with Bell in Normandy, Algonquin after the call to accept a mission from him.
After the cutscene, get to the spot in Leftwood and step into the marker there. The truck that you are to steal rolls in, along with a couple of vehicles full of enemies. You start off behind cover, and the truck is parked at the other end of this area. Start by clearing away the enemies nearest to you, and then move up to one of the parked pickups to get a better shot at the enemies further down. Kill as many enemies as you can from your current position before moving up to another piece of cover. Keep an eye on that truck, though, because once you get close enough one of the Triads will get in and drive off. When that happens, immediately start sprinting after it like a madman. Continue to mash the Sprint button until you can hit the marker, at which point Niko will grab hold of the truck.
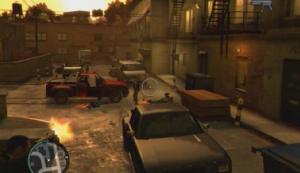
Triads
Truck
Once you're on the truck, read the pop-up boxes in the top-left corner of the screen for instructions. You have to crawl over to the front of the truck to get into the cab and take control. Basically, keep an eye on the road ahead and hold down the analog stick when you see that the truck is coming up on a corner, otherwise continue moving forward. If you do fall from the roof of the truck, immediately start tapping the button to get back up and then roll to the left or to the right to distance Niko from the edge. When you have secured the truck, drive it to the location marked on your radar to complete the mission.
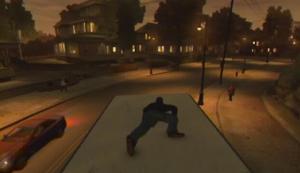
Truck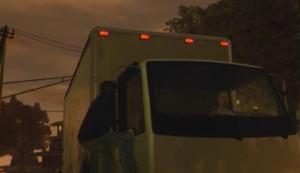
Truck
Meet Bell at the Honkers in Alderney to accept another mission from him. After the cutscene, drive to the marked truck in Leftwood and get in. Make your way to the docks on Charge Island and drive into the marker there to begin. The guys at the boatyard aren't willing to hand over the drugs, so you're going to have to acquire them with force. Start by killing the two thugs by the truck and then get out and take cover near the entrance. The shipment is heavily guarded, so try to clear out as many enemies as you can before entering. There are plenty of enemies on the catwalk above, so be sure to take them out too. Bell can die here, so keep an eye on him and take out any enemy that's gunning for him.
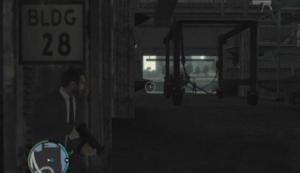
Boatyard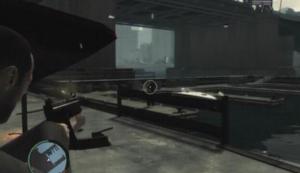
Boats
When the warehouse is clear, move on to the dock outside and remove the enemies around the boats. Some Body Armor can be found off to the left, so be sure to pick it up. Get in the marked boat and start following Bell towards the docks. A couple of attack boats appear and attempt to impede your progress. You may not need to completely destroy these boats, just distract them enough to allow Bell to get a good distance ahead. When you reach the spot, step into the marker on the jetty to complete the mission.
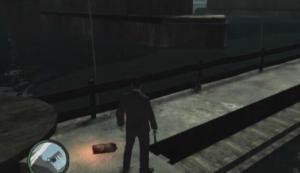
Body Armor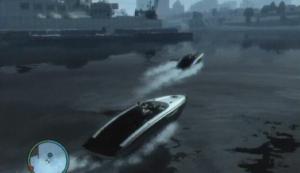
Getaway
Make sure you have full Body Armor and a powerful weapon with plenty of ammo before attempting this mission. Get in the car with Bell and start towards the old Sprunk Factory in Tudor. Your target is one Chubby Charlie, and he is somewhere within the abandoned factory. You can attempt to kick in the front door and go Rambo if you wish, though doing so is not recommended. Instead, head west from the front door and follow the tunnel there to a hole that leads into the factory. The factory is comprised of three floors, with heavily-armed enemies on each.
Sprunk Factory
Tunnel
There's some Body Armor to be found on the first floor, next to a broken piece of ceiling, so pick it up if needed. Clear away the enemies on the first floor, as well as those you can see on the upper floor through gaps in the ceiling, and then head up the stairs to the next level. Chubby Charlie is on the second floor, but he'll quickly flee to the next level, leaving you to deal with the enemies. Take cover and clear the room, then climb the stairs up to the final level.
Factory
Charlie hops through a window to reach the rooftops, so follow him out once you've dealt with the enemies on the third floor. There is a health pack near the generator to your right as soon as you are on the rooftop, so grab it if need be. Charlie isn't going anywhere, so take your time taking out the enemies on the rooftops. Follow Charlie up to the highest point of the factory by climbing up the ladders along the walls. When you reach the top, a helicopter swoops in to rescue Charlie. Continuously hit the helicopter with gunfire to ground it, sending Charlie to his death. Mission complete!
Chubby Charlie
Get in the car with Bell and start towards the mansion in Westdyke where the stuff has been stashed. After the cutscene, drive through the mess of feds outside and follow Bell down the dirt road. You must keep up with Bell to prevent the authorities from catching him, as they for the most part don't seem to care a whole lot about you. Eventually you will have to take off on foot towards an escape van, but not without first becoming trapped in an alleyway by the police.
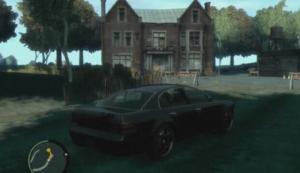
Mansion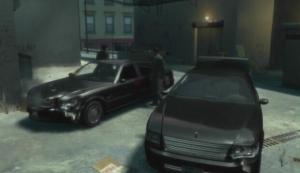
Bell
You have been given a powerful weapon in the Assault Rifle, so clearing the alleyway shouldn't be too much of an issue. Cop cars will block off both ends of the alley, so watch your back as to not be gunned down from behind. When the way is clear, follow Bell to the escape van that is parked nearby. Before you get in, be sure to shoot down the helicopter flying overhead, otherwise you will have a very tough time losing your wanted level. Just unload into the helicopter with your Assault Rifle until it explodes, then quickly get in the van with the others and take off. When you've successfully dodged the authorities, drive Bell and Frankie to the marked safe house in Leftwood to complete the mission.
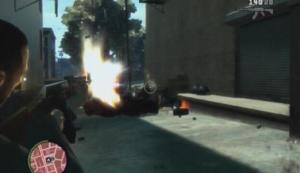
Alleyway
Escape Van
Phil Bell will call you sometime after the “Truck Hustle” mission. His friend Jimmy Pegorino is looking for someone to work for him. Stop by Pegorino's mansion in Westdyke, Algonquin wearing a smart suit and smart shoes to accept a mission from him.
Get in the car with Pegorino and the others and then start towards the old refinery in Acter Industrial Park. When you reach the spot, make your way to the vantage point in the building across from the meeting place. Use the Sniper Rifle to observe the meeting. Keep your weapon trained on one of the people Pegorino is speaking with and take the shot when red markers appear over the enemies. Quickly pick off the marked enemies surrounding Pegorino, and then take out the car full of enemies that arrives shortly after. When you can't spot anymore enemies from the vantage point, get back to street level and move towards the refinery.
Vantage Point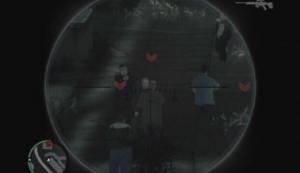
Meeting
Pegorino's been hit and his life is fleeting fast, so you can't afford to take your time here. Use the Sniper Rifle to kill the two guys to the right of the refinery, and the guy at the top of the stairs, and then start towards Pegorino's location. There is an enemy hiding to the left of the first doorway, so watch out. Fight your way over to Pegorino before he expires to rescue him. The Pavanos then attempt to make off with Pegorino's tribute, so you're going to have to follow them and get it back. Pursue the Pavanos until they crash, then kill all four of them and pick up the tribute. Drive Pegorino back to his place to complete the mission.
Pavanos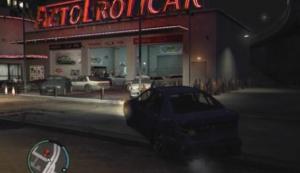
Tribute
Make your way to the marked diner in Acter. The Pavanos are headed to a meeting, so start following them there. Don't drive too closely behind them because they'll be able to fire at your vehicle that way. They'll lead you to an AutoEroticar showroom in Alderney; keep your distance from the place when they first pull in, as its swarming with enemies. You could probably wipe most of the enemies out with an RPG or Grenade by blowing up the cars parked in the lot. That kind of destruction will surely catch the attention of the authorities, however. Kill each and every marked enemy to complete the mission.

Meeting Place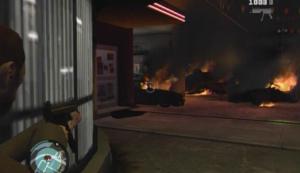
Pavanos
Make your way to the nearby hospital in Leftwood and enter unarmed. Enter the changing room, which is next to the ER reception desk, and change into doctor's scrubs. Then, head down the hall beyond the desk and enter the room where Anthony is being treated. When the guest leaves, unplug the life support machine next to his bed and stand by while he kicks the bucket.
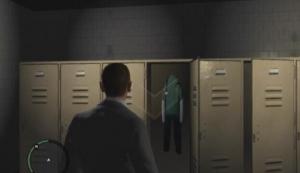
Changing Room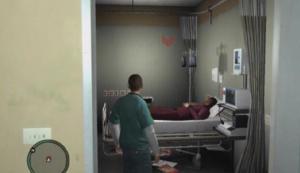
Anthony
As you surely noticed on your way in, there are quite a few cops in the hospital, so trying to make a run for it probably isn't your best bet. You'll have to fight your way out, and in this case a Shotgun will serve you well in the narrow corridor. Fight your way to the car you used to drive in and take off. There is a spray shop a short ways north from the hospital if you want to go for that, but it will only work if the police do not see you enter. The mission is complete once you have lost the wanted level.
You're going to have to kill somebody, but whom? You'll get a call from Pegorino shortly after the cutscene; he's made up his mind, and it's Ray. Travel to East Holland, and drive into the marker there to begin. Ray and his bodyguards must be eliminated. They are not wise to you at first, but they'll turn hostile as soon as you fire at one of the vehicles.
Cars
Targets
Everyone in Ray's party is armed and will fire at you in unison, which can result in an exceptionally quick death. For this reason, make the first strike a lethal one. Drive right up behind the bodyguard vehicle and fire at the goons inside through the back window. You can probably empty the car without destroying it, just make sure that everyone is dead before you move on to the next vehicle. You'll probably need to destroy the second vehicle to kill them all, but aim for the first gunners to avoid getting killed yourself. The mission is complete when all eight of the targets have been eliminated.
Your contact at U.L. Paper will call you sometime after the “Payback” mission in Jimmy Pegorino's mission line. He knows of an individual who needs some work done. Meet Mr. Gravelli at the hospital in Schottler, Broker to get started.
Travel to the Grand Easton Terminal in Algonquin to meet with the politician. Get in the car with the politician and start following the convoy car. When the unexpected roadblock is reached, you then must fight off a couple of waves of gangsters before you can move on. Each enemy is marked on your radar, and a couple of them will appear on the roof of the building to your left when you first regain control over Niko.
Convoy
Roadblock
There is a health pack in the alleyway you start off in, and also a couple of cars parked nearby. For the most part you will want to remain in the alleyway, only moving out to eliminate the enemies on the building next to you once the others have been dealt with. Just make sure that you remain close to a car, because you'll have to get Jefferson out of there quickly once things have cooled down.
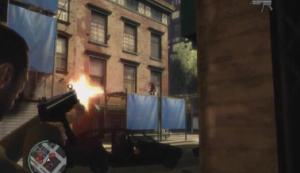
Gangsters
As soon as all of the enemies have been eliminated, get in one of the cars and start towards the civic citadel. Four attack cars appear shortly after the initial waves, so you'll have to lose them first. Once you have escaped, drive into the marker outside of the civic citadel to complete the mission.
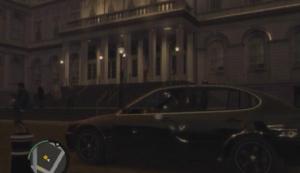
Civic Citadel
You may want to invest in some Body Armor for this job. Make your way to the marked restaurant in Alderney City and step inside. The guy at the front desk won't let you meet with Kim, so you'll have to use a gun to get your way. Kim is having a meeting with the restaurant manager on the second floor. Kill the guy at the front desk and then move over to the nearby doorway.
There are a number of SMG-wielding enemies up the stairs and along the walkway in this area that can tear through your health if you aren't careful, so be sure to clear the walkway from the ground floor before heading up the stairs. When the way is clear, enter the manager's office and point your gun at him to get him talking. He tells you that Kim heard the commotion downstairs and has since taken off. Grab the Body Armor on the manager's desk, kill him to be safe, and then exit the room.
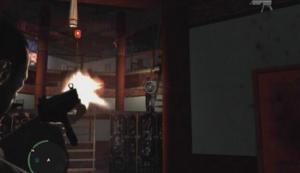
Restaurant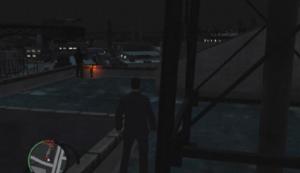
Manager
The walkway has been repopulated with enemies, so seek some cover and clear the way before moving on. Kim went through the kitchen, the entrance to which is along the walkway. Enter the kitchen, grab the health pack at the other end if need be and then step out onto the fire escape. There is a car and motorcycle below; Kim gets in the car, leaving you to the motorcycle. Chase after Kim's getaway car and hit it with gunfire. Be sure to keep to the left side of the vehicle, as to not give Kim's passenger a shot at you. Eliminate Kim to complete the mission.
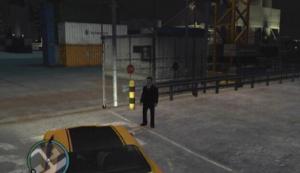
Kim
Get to the compound in Acter, Alderney. You are to destroy the five vans in this compound, but they are well-guarded. There are a couple of ways to get into the compound; you can hop right over the fence and go in with guns blazing, or you can try the more subtle approach. For the latter option, start by climbing over the fence to the right of the compound's main entrance. From the giant, red Xero tank, head north until you reach a wall (refer to the radar in the image below for the exact location). Climb up onto the dumpster next to the nearby building, then onto the roof of the shed behind it, then up onto the wall and from there onto the first vent. Ascend using the upper vents and then finally climb onto the building's rooftop. Next, climb up onto the taller, neighboring building, and then climb up the ladder to reach a sniper perch.
Building
Sniper
Cap the unsuspecting guard up here and then pick up the Sniper Rifle that he was neglecting. From this spot, and with this weapon, you can clear the enemies on the rooftops around the compound to make things a bit easier. Of course, it's not as if you are invulnerable here; the enemies below, as well as those on the surrounding rooftops, can still hit you, so you're going to have to stand a bit back and snipe them quickly. Before you start sniping, be ready for the enemy that will come through the stairwell door, as he will certainly be a problem if ignored. There is also a Body Armor vest near the stairwell door, so pick it up or save for later. Once your Sniper Rifle is spent, use your other weapons to eliminate the visible enemies below. You can crouch to improve your aim, and zoom in by clicking the Right Thumbstick/Right Analog Stick.
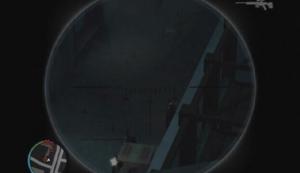
Sniper Rifle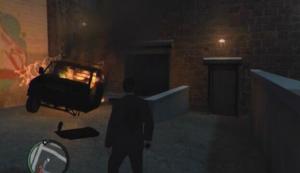
Van
When the compound is empty, take the stairs down to the ground floor and exit the apartment. Seek and destroy each of the five vans to complete the mission. Remain vigilant and ready to deal with any enemies you may have overlooked, however.
Warning ... Container spoiler at the end.
This is the tail end of the GTA IV storyline. Complete Gambetti's mission line to trigger the first mission.
Make your way to Hove Beach back in Broker and pick up Roman at the marked location. Then, travel to the rendezvous point at the Francis International Airport to trigger a cutscene. Your choice to kill Darko Brevic or let him live will only effect the dialogue afterwards, so do what you will with him. Once you've made your decision, drive Roman to Brucie's place to complete the mission.
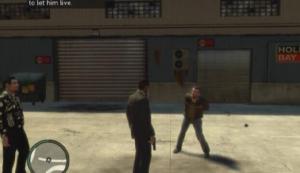
Darko
Shortly after “That Special Someone,” you will get a call from Jimmy Pegorino; he needs to speak with you. Travel to the Honkers club in Tudor, Alderney and hit the marker there to trigger a cutscene.
Just a heads up: there are two different endings, and the ending you unlock is determined by a choice you will have to make shortly. If you wish to see both endings without having to play through all of the missions a second time, create a separate save file after the cutscene.
Now you must choose between “Deal” and “Revenge.” Travel to the marker of your choosing to trigger that mission. What you choose to do will affect the ending. If you need to know how the ending will be affected based on your decision, scroll down to the bottom of this page, but only if you're okay with having the ending spoiled.
Deal: If the Price is Right
If you chose to listen to Roman and work for Dimitri, travel to the “Deal” marker in Tudor, Alderney to meet with Phil Bell. If you aren't well-suited, pick up some Body Armor and a Carbine Rifle with plenty of ammo before you begin. Get in a car with Bell and drive to the nearby docks. Once you're inside, hit the marker to trigger a brief cutscene. Afterwards, get out of the car and follow Bell up the nearby ladder. Follow him across the rooftop and drop down the skylight after him.

Docks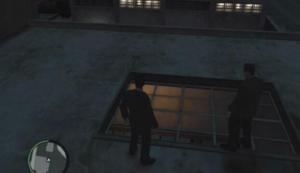
Skylight
The office with the cash is at the other end of the building, and unfortunately there are about four dozen enemies between here and there. However there is plenty of cover in the warehouse and if you are outfitted with a Carbine Rifle, dealing with these enemies should not prove too difficult. There's no time limit, so no need to rush. You can zoom in with your weapon by clicking the Right Thumbstick/Right Analog Stick; by doing this and crouching at the same time, your shots should be quite accurate granted you are using a Carbine Rifle. Kill as many enemies as you can from the upper walkway before moving down to the walkway below. Once you're on the ground floor it's just about moving between cover to clear the enemies around you until you reach the midpoint. There is a health pack next to a pillar in the middle of the warehouse, so pick it up if needed.
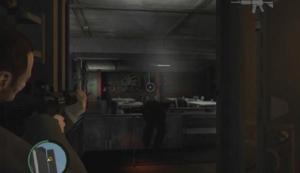
Cover
Follow Bell up onto the walkway at the other end of the room and take out the enemies along there. The office door is at the far end of the walkway. The buyer takes off with the money, forcing you to chase after him. Get back down to the ground floor and get in one of the vehicles parked outside. The buyer chooses to use a bulky truck as a getaway vehicle, so catching up with him won't be a problem. Drive to the left of the truck to give Bell a shot at the driver through the window, or aim and take him out yourself. When the buyer is down, collect the money and drive Phil back to Tudor to complete the mission, earning a substantial monetary reward in the process.
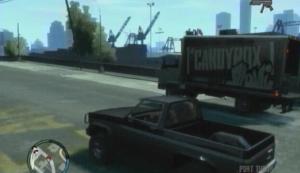
Buyer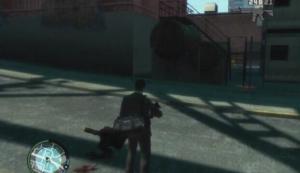
Money
If revenge is what you're after, travel to the “Revenge” marker in East Hook, Broker to get started. Bring along Body Armor and a Carbine Rifle with plenty of ammo because you're in for quite a firefight. When you reach the spot, you'll be given an overview of the situation. Dimitri's in the ship's hold and the doors to the hold are controlled from the bridge. So, you must first get to the bridge to open up the hold, allowing you to drop in and exact your revenge. There is a fairly heavy presence of goons aboard the ship, so Dimitri will be a bit hard to get at, but conveniently enough there is a Sniper Rifle on the nearby crane. Climb the ladders up to the vantage point and pick up the rifle that's there.
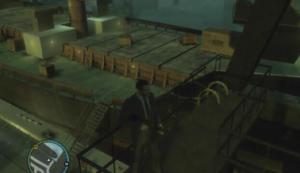
Crane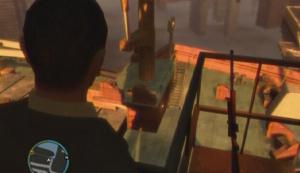
Sniper Rifle
Note that this thing isn't rife with ammo, nor are you invulnerable from this location, but you can at least take out a good number of the guys around the ramp if you're a good shot. Don't underestimate the range of the Carbine Rifle, either; click the Right Thumbstick/Right Analog Stick to zoom in and crouch for a better shot. When the deck is relatively clear, climb down from your perch and step onto the ship. Once you're on the deck, it's just a matter of taking cover and picking off the enemies that remain. Afterwards, head to the doorway at the south end of the deck and eliminate the enemies in the cabin.

Interior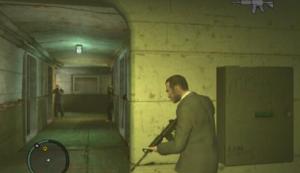
Goons
When the room is clear, climb up the stairs at the other end and take cover next to the corridor entrance. There are several enemies down this corridor, so make sure that they've all shown themselves before moving through. You can find Carbine Rifle Ammo through the first door on the left, and Body Armor through the second door on the right. At the other end of the corridor, step through one of the doorways and open fire on the enemies along the walkway. When the walkway is clear, climb up the steps to reach the bridge. Kill the guy inside, pick up the body armor, and then use the controls to open up the cargo hold.
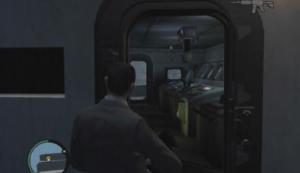
Bridge
Controls
Enemies have spawned on the deck and on the walkways below you, so proceed with caution. Make your way over to the opening on the deck and drop through. You're dropping right into enemy territory, so take cover immediately. There is plenty of cover to choose from, and not very many enemies standing between you and Dimitri. There is a health pack at the north end of the hold; use it to patch yourself up, or note it for later use. Move up between cover and clear out the enemies around you, then move to back of the hold to confront Dimitri.
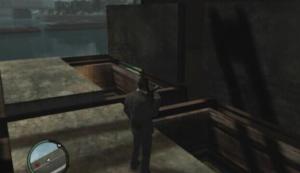
Cargo Hold
Hold
Be ready to take cover immediately following the cutscene, as Dimitri will send one last wave of goons your way. Kill off the goons—using the explosive tanks to your advantage—and then set your sights on Dimitri. You can take him out with a well-thrown Grenade if he's hiding behind cover, otherwise switch to a piece of cover that will allow you to get a bead on him and then fire away. After the brief cutscene, aim at Dimitri and pull the trigger when the reticule changes to perform a satisfying execution. Once you've exacted your revenge, make your way out of the hold and off of the ship to complete the mission.
Dimitri
Dimitri
Put on your best suit and make your way to the church in Little Italy, Algonquin when the time comes. Watch the cutscene…
Endgame: A Revenger's Tragedy/Out of Commission
Make sure you have Body Armor and a Carbine Rifle before attempting this mission, as the two will make for a much easier time. Your target is either Pegorino or Dimitri here. Travel to Alderney City and get in the marked car with Little Jacob. Start following the goons, but not close enough to give the gunmen in the passenger's seat a shot at you. Remain at least three car lengths from the car to avoid getting hit by gunfire. You're in for a long drive, but eventually you will reach the spot in Westdyke, Alderney. There's a mess of enemies outside of the old casino where your target is holed up, and you're going to have to take them all out before heading inside.
Goons
Goons
Take out the enemies on the roof of the casino and as many of them as you can in the lot from behind the car before moving up to a different piece of cover. When the lot is clear, locate the hotel entrance and start picking off the enemies inside. There is a health pack next to the stairs that are to your left upon entering, so use it to patch yourself up when you have the chance. When the first room is clear, head through the doorway at the other end to trigger a cutscene.
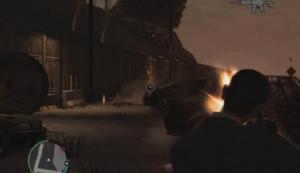
Shootout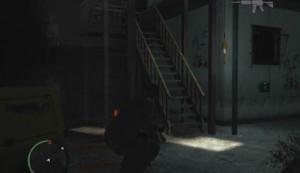
Health Pack
This is where things differ…
Deal: A Revenger's Tragedy
Head up the stairs after Dimitri, but don't charge through the door, as several goons are waiting on the other side. Dimitri isn't going anywhere, so take your time. Kill the two guys through the door, and then look to your right to spot two more guys up on the roof. Continue after Dimitri afterwards to spot him getting into a helicopter. After the cutscene, quickly swim over to the boat, get in the driver's seat, and start after Dimitri's helicopter. Be very careful, as rockets and gunfire will be sent your way. The rockets are easy enough to dodge, just keep an eye out for them and bank if one is about to hit the waters close to you.
Dimitri
You'll be taking fire from one of Dimitri's goons if you are close enough behind the copter, but you must stay as close behind him as possible because eventually Little Jacob will show up in a helicopter of his own to rescue you. You must hit the marker beneath Jacob's helicopter before it disappears. It is a relatively small window of opportunity, so with any luck you're fairly close behind Dimitri's helicopter when Jacob shows up.
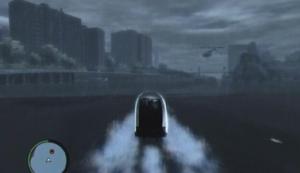
Dimitri
Helicopter
When you've gotten hold of the helicopter, mash the indicated button to pull yourself up. You'll then be in control of the helicopter. Keep up with Dimitri's helicopter until the inevitable crash on Happiness Island occurs. This is where you shall exact your revenge. Dimitri is denoted by the large, red circle on your radar, so avoid all other hostiles by running around them and towards Dimitri. When he finally stops running, stand your ground and hit him with everything you've got until he falls.
Dimitri
Revenge: Out of Commission
Head up the stairs after Pegorino, but don't charge through the door, as a couple of his goons are waiting for you on the other side. Pegorino isn't going anywhere, so you can take your time here. Kill the two guys outside the door, and then follow Pegorino down the ladder at the far end of the roof. Immediately take cover and pick off the goons along the street. Get to Pegorino's boat and hop on the motorbike on the beach. Now all you must do is follow the boat from the coastline. Eventually Little Jacob will appear overhead in a helicopter; speed up and hit the marked jetty to reach him.
Goons
Pegorino
When you've gotten hold of the helicopter, mash the indicated button to pull yourself up. You'll then be in control of the helicopter. Keep up with Pegorino until the inevitable crash on Happiness Island occurs. This is where you shall exact your revenge. Pegorino is denoted by the large, red circle on your radar, so avoid all other hostiles by running around them and towards Pegorino. When he finally stops running, stand your ground and hit him with everything you've got until he falls.
Happiness Island
Pegorino
If you choose to make the deal with Dimitri, Roman will die during “Mr. & Mrs. Bellic,” but you will also earn $250,000. If you choose to get revenge on Dimitri, Kate will die during “Mr. & Mrs. Bellic.” Either way, you're going to lose someone. It's your choice, but if you're looking for authorial advice, keep Roman alive; you won't be able to make use of his free taxi ride call-in ability if he dies, and while losing Kate sucks, there are other datable girls in Liberty City.
We've got a complete guide for The Lost and the Damned covered on SuperCheats.com
Just follow this link to go straight there.
As you progress through the storyline, Niko will meet new people and make friends in Liberty City. You can arrange activities with these friends once they have been made by selecting one via their Phonebook menu, or you can wait for them to call you. Each friend has activities that they prefer, though they will most likely have a good time wherever you take them. Furthermore, each friend is only available during a certain time of the day, so you'll get their answering machine if you call them while they're not available. Your friends will like you more if you hang out with them and answer the phone when the call; they will come to resent you if you continuously turn down their invitations or neglect them.
Each friend has a special call-in ability which can be utilized once they like you enough. To unlock these abilities, hang out with these characters until their “Like” and “Respect” values are high enough. If their like and respect falls below the required percentage to unlock their special ability, it will be lost until you reach that percentage again.
Note: Roman and Dwayne are not needed to unlock the “Liberty City (5)” achievement on the Xbox 360 version, nor for the 100% completion requirements that involve friends.
Complete “Bleed Out” to gain Roman as a friend.
Special Ability: Taxi - Roman will send a cab that you can use free of charge.
Complete “Shadow” to gain Little Jacob as a friend.
Special Ability: Weapon Sale - Buy guns from Little Jacob at a reduced price, though his selection is limited.
Complete “No.1” to gain Brucie as a friend.
Special Ability: Helicopter - Brucie will fly to your location and pick you up in a helicopter.
Complete “Three Leaf Clover” to gain Packie as a friend.
Special Ability: Car Bomb - Packie will prepare a car bomb, which you can then plant on a car and use your phone to detonate.
Complete “The Holland Play” to gain Dwayne as a friend (if you make the right choice).
Special Ability: Back Up - Dwayne will send gang members to help you.
As you progress through the story, Niko will be able to wine and dine with a number of Liberty City women. Dating is much like hanging out with friends in that each girl has their own preferable activities. Conversely though, Niko's choice of wardrobe and vehicular transport will also affect whether or not his date has a good time.
Both Michelle and Kate like Niko for who he is, so wearing something upscale (i.e., anything not from the Russian clothes store) and showing up in a flashy ride is typically to be avoided when dealing with either of them. Since Kate and Michelle are fairly easy to please and only pertain to the storyline, they won't be covered here.
There are three other girls that Niko can meet and date via the www.love-meet.net and www.craplist.net websites. Dating these girls is not a requirement to attain the 100% game completion stat, however each has a special ability that is unlocked once they like you enough. This feature is available after the “Out of the Closet” mission in Brucie's mission line.
After requesting a date, you'll have to wait awhile (a week or more) for a reply. The e-mail will contain a time and meeting place. Reply to the e-mail to trigger the appointment, and be sure to show up on time. After the initial date, you can then collect the girl's phone number so you can call and set up additional dates. As with friends, each girl is only awake for a certain number of hours, and calling them while they're sleeping or busy will negatively affect the relationship. After a couple of successful outings, “try your luck” when dropping the date off and if she accepts you will later get a phone call from her, unlocking the special ability.
Kiki can be dated via the Lovemeet website. Her online username is “LawChick.” Kiki is quite easy to please; she prefers clothes from the Russian shop and downscale cars. Her favorite activities are eating, bowling, darts, and pool. Do not take her drinking or to any shows. She is available from 6am to 2am.
Special Ability: Lower Wanted Level - Call Kiki to have her lower your current wanted level by three stars.
View Carmen's profile on the Lovemeet website, username “SoBoHo,” and request a date with her. She seems to like flashy clothes (from Perseus) and mid-level cars. Do not wear anything from the Russian clothes shop. Her favorite activities are drinking, going to shows (strip clubs included), and darts. She is awake between 1pm and 6am.
Special Ability: Health Boost - Call Carmen to restore some health.
Alex can be dated via the Crap List (www.craplist.net) website. Check out the “women seeking men” section under CRAP personals, scroll down and (despite your better judgment) click on the “Party girl seeks man for NSA fun and blog material - 29 (Lancaster)” post. Click the “Contact Me” link to request a date. Alex only likes clothes from Perseus and upscale cars (Turismo, SuperGT, etc). She prefers expensive restaurants, shows (strip clubs included), darts, bowling and pool. She is available from 6am to 2am.
Special Ability: Perseus Discount - Get a 50% discount on clothes bought from Perseus.
There are a total of 14 unique pedestrians in Liberty City. They are denoted on the radar by a blue person symbol, which will only appear when you are relatively close to one of them. Several of the characters have more than one task for Niko; in this case, they will appear at their next location only if their previous task has been completed. Refer to the map for each character's initial location, as well as their subsequent locations. Keep in mind that these characters are unlocked by completing missions, so refer to the text to determine if a character will appear for you.
Note: These characters will not appear at their next location the instant you complete their previous task; you may have to wait a couple of in-game days or a week before they appear. Furthermore, some characters will only appear at certain times of the day. The exact time of day that each character can be found is not known, so return to their location at a later time to see if their appearance is triggered then.
Ivan, Cherise, and Clarence are not needed to attain 100% completion.
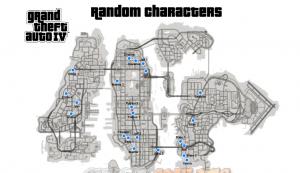
Random Characters - Click the map to see a larger version
Brian
Complete the “It's Your Call” mission in Roman's mission line to unlock this character.
Brian 1: Meet Brian.
Brian 2: You'll have to wait a day or two before Brian will appear again. Take Brian to the dealers, and then to his place on Wappinger Avenue to complete the task.
Brian 3: It may take quite awhile after the second encounter (more than one in-game week) for Brian to appear here. When you do run into him, first take Brian to see his dealer, kill the attackers, and then drive him to his place on Wappinger Avenue to complete the task,
Mel
Complete “Escuela of the Streets” in Manny's mission line to unlock this character.
Mel: Drive Mel to the meeting place, kill the three guys there, and then drive Mel to the yellow marker.
Badman
Complete the “Shadow” mission in Little Jacob's mission line to unlock this character.
Badman: Get a vehicle, drive to the red markers and clear out the Russian gang members in the alleyway.
Ilyena Faustin
Complete “The Puerto Rican Connection” in Manny's mission line to unlock this character.
Ilyena: Meet with her daughter's boyfriend, and then kill or beat him up.
Cherise
Complete “The Holland Play” in Playboy's mission line to unlock this character. Note: If you killed Cherise during the “Ruff Rider” mission in Dwayne's mission line, she won't appear here for obvious reasons. She does not count towards 100% completion, however.
Cherise: Make your way to the yellow marker in Northwood, and then meet with Cherise's boyfriend. Beat him up, and then return to Cherise.
Clarence
Complete “Blood Brothers” in Francis McReary's mission line to unlock this character. Note: If you killed Clarence during the “Holland Nights” mission in Francis' mission line, he won't appear here for obvious reasons. He does not count towards 100% completion, however.
Clarence: Kill Clarence.
Jeff
Complete “Photo Shoot” in Playboy X's mission line to unlock this character.
Jeff 1: Follow Jeff's wife to a café, step inside, find the couple upstairs and take a picture of them using your cell phone camera.
Jeff 2: Jeff will call you sometime after his first task; could be a few days. After you get the call, meet him in the car park marked on your radar to get started. Dump the body into the water to complete the task.
Jeff 3: It may be awhile after the second encounter (up to a week) for Jeff to appear here. He should be at the location at around 20:00. When you do run into him, stand and watch what happens after the cutscene. Nothing to it.
Pathos
Complete “The Puerto Rican Connection” in Manny's mission line to unlock this character.
Pathos 1: Kill the two guys that are hassling Pathos.
Pathos 2: Kill the two attackers, get a vehicle, and then drive Pathos to the hospital.
Hossan
Complete “The Puerto Rican Connection” in Manny's mission line to unlock this character.
Hossan: Take Hossan to collect his money. Chase after and kill the guy that cheats him, pick up Hossan's wages, and then drive him to the yellow marker.
Marnie
Complete “Actions Speak Louder Than Words” in Gerry McReary's mission line to unlock this character.
Marnie 1: Take Marnie to the dealer's place in Alderney.
Marnie 2: Take Marnie to the station.
Sara
Meet Hossan and complete his task to unlock this character.
Sara 1: She only seems to appear at night here. Drive Sara home to complete the task.
Sara 2: She will only appear during the day; try at noon. Purchase the package from the Perseus store, and then deliver it to Sara to complete the task.
Eddie Low
Complete “Actions Speak Louder than Words” in Gerry McReary's mission line to unlock this character. Note: Eddie Low will only appear between 20:00 and 4:00.
Eddie 1: Take Eddie to the docks, and then to Westminster.
Eddie 2: Kill Eddie.
Ivan
Complete “Actions Speak Louder than Words” in Gerry McReary's mission line to unlock this character. Note: If you chose to kill Ivan during the “Ivan the Not So Terrible” mission in Vlad's mission line, he won't appear here for obvious reasons. He does not count towards 100% completion, however.
Ivan: Take Ivan to collect his money. Kill the men there when they refuse to turn over the cash. Start by killing the guy on the roof to your right, and then the guy on the fire escape to your left.
Gracie
Complete “Diamonds are a Girl's Best Friend” in Gerry McReary's mission line to unlock this character.
Gracie: Kill all of the Ancelottis.
There are a number of side missions in GTA 4 each have been detailed on their own page in this guide so you could spot the titles more easily in the index on the left. Please go to the menu and select the one you are interested in. They include:
Little Jacob's Drug Deliveries
Brucie's Exotic Exports
Brucie's Races
Stevie's Text Message Cars
Most Wanted
Vigilante Missions
This work is available after “Shadow” in Little Jacob's mission line. Select “Job” from Little Jacob's Phonebook menu to accept a job from him. There are a total of 10 deliveries available, all of which take place in Dukes and Broker. Each one consists of first entering the vehicle that contains the package and then delivering said package. There is sometimes a time limit, but if none is given you will instead meet some resistance—in the form of a rival gang or the police—upon stashing the package or handing it over to the buyers.
You don't have to deliver the package in the jalopy that it's found in, so be sure to have a fast car on hand in case it's a timed delivery. If there is no time limit, you will then have to face either a rival gang or the police. If it's a rival gang, you'll start off surrounded, so quickly sprint away to be out of the thick of it, switch to a powerful gun and wipe them out. If it's the LCPD you're facing, don't make matters worse by firing back at them; a two-star wanted level is much easier to shake than a three-star, so flee the scene and leave the buyers to deal with the cops.
The package for the last job will be in a Huntley Sport; that's your reward, so be sure to park it in front of one of your safe houses.
You can start these missions sometime after the “Logging On” mission in Roman's mission line. There are a total of 10 vehicles that Brucie wants you to steal for him; start by replying to Brucie's e-mail on the subject. All but one of the vehicles is located on the first island, and each is to be delivered to Brucie's garage on Monahet Avenue in Broker. You will more than likely meet resistance when you reach the vehicle's location, so be sure to suit up beforehand. The target vehicles won't always stay put, either; in some instances, you may have to chase after the vehicle and eliminate the driver.
Once you have acquired and delivered a vehicle to Brucie, check your inbox for the next Exotic Export e-mail and send a reply to get started. The next e-mail will arrive in your inbox right after the previous delivery; there is an internet café close to Brucie's lockup, allowing you to complete all of the exports in a relatively short amount of time. The condition that the vehicle is in upon delivery determines how much money you will be given in return, however Brucie does not pay nearly as well as Stevie, so don't fuss too much over the car's condition.
After the “No.1” mission, you can call Brucie to participate in street races taking place around the city. There are a total of 9 races, and each consisting of 3 or 5 laps around a different part of the city. There are three tracks in Dukes/Broker, three in Algonquin, and three in Alderney, so once Brucie tells you that there aren't any races going on, move on to one of the other islands and call him from there.
There really isn't much to these races; get a fast car, meet the others at the start point, follow the waypoints around the track, and be ahead of the pack when the final waypoint is reached. A Comet, Infernus, Turismo, Banshee, or Super GT is best suited for these races. You can use motorcycles too, but they aren't recommended. The quality of your opponents' cars will improve as you win more races, but either way, once you get a good lead you should be able to keep it the whole way through as long as you keep your eyes on the road. You're not trying to break any records here, so once you're in first, just concentrate on avoiding crashes—which can set you back quite a bit—rather than reaching the finish line blazingly fast.
Note: The races can be replayed; just call Brucie a couple of times after he tells you that there aren't any more races, and he will set you up with one of the previous race. Though winning yields little reward in terms of money, replaying these races is a must to unlock the “Genetically Superior” achievement on the Xbox 360 version for which a total of 20 races must be won.
There are a total of 30 cars to steal for Brucie's friend Stevie. These jobs become available sometime after the completion of “No. 1” in Brucie's mission line. Stevie will send you a text message with the name of the car he wants you to steal, its location and a picture of the car. When you have the car, deliver it to the garage in Chase Point, Bohan (a marker will appear on your map and radar once you have the car) to receive payment. The amount you are paid for delivering the car depends on its condition. Stevie will send a text message six hours after the last delivery, but you can sleep at your safe house to pass the time.
Use the map to locate the parked vehicles that Stevie is after. If you are unsure what to look for, refer to the picture in the text message.
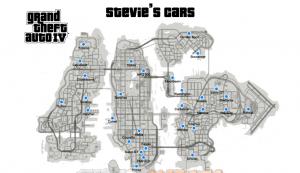
Stevies Cars - Click the map to see a larger version
Dukes/Broker Thefts
Intruder: $8,250
DF8-90: $5,940
Bobcat: $8,250
Washington: $7,260
Sabre GT: $8,250
Voodoo: $6,600
Dilettante: $6,600
Contender: $8,250
Manana: $3,960
Infernus: $33,000
Freeway: $6,600
Algonquin Thefts
Faggio: $2,310
Patriot: $16,500
Rebla: $11,550
Banshee: $26,400
Dukes: $7,260
Super GT: $36,300
PMP 600: $10,560
NRG 900: $8,250
Comet: $19,800
Coquette: $13,530
Alderney Thefts
Sultan: $11,550
Turismo: $36,300
Cavalcade: $23,100
Rancher: $8,250
Sentinel: $8,250
Cognoscenti: $29,700
Bohan Thefts
Huntley Sport: $13,200
Buccaneer: $5,940
Moonbeam: $7,260
These missions are available following “Crime and Punishment” in Faustin's mission line. You'll need access to a police car computer to start. For easy access to a police cruiser, first dial 911, wait for the passenger to step out of the police car when it arrives, then enter from the passenger's side to oust the driver. You must come to a complete stop to use the computer. Select one of the targets from the Most Wanted list for a rundown. Mark their location on your radar, make your way over there, and kill every marked criminal in the area. There of 30 targets; 10 targets in Dukes/Broker, 10 targets in Algonquin, and 10 targets in Alderney. When every target on one island has been marked as deceased, move on to one of the other islands and access a police car computer from there for a new list.
Most often the criminals are surrounded by goons, so you'll want to suit up before attempting these. Get some body armor and a powerful weapon (such as the Carbine Rifle) with plenty of ammo. You must remain in a cop car during the hunt, otherwise you have 30 seconds to get in a cop car before the current mission is failed. If you do fail, however, fear not, as you can attempt any of these as many times as necessary.
These missions are available following “Crime and Punishment” in Faustin's mission line. You'll need access to a police car computer to start. For easy access to a police cruiser, first dial 911, wait for the passenger to step out of the police car when it arrives, then enter from the passenger's side to oust the driver. You must come to a complete stop to use the computer. Select the “View Current Crimes” option from the computer menu to view a few crimes. There are three types of crimes; criminal on foot, stolen vehicle, and gang activity. By far the easiest to clear is “criminal on foot,” since you're only dealing with one guy. The other two are a bit more involved; for stolen vehicle, you're up against a car full of criminals, all firing at you; for gang activity, you're against a group of criminals out in the open, but their combined fire can be deadly.
After you have selected one of the current crimes, there is a time limit (visible in the top-right corner of the screen) to reach the crime scene. When you do reach the scene, however, the timer disappears. All of the crimes are taking place relatively close to your current location, so the timer shouldn't be much of an issue. You need only complete 20 of these vigilante missions to both earn 100% completion and unlock the “Clean The Mean Streets” achievement on the Xbox 360 version. You can continue to fight crime once you have completed 20 of these, though there isn't much point then.
As you progress in Phil Bell's mission line, he will refer you to an individual who needs some work done. Travel to the marked payphone in Alderney and step into the marker to accept a job. The missions are in random order, and there are nine of them in all. Your contact will provide you with weapons and Body Armor for each mission, so be sure to suit up before getting started.
Derelict Target
The targets are in the northeast quarter of Alderney. All you must do to complete this mission is eliminate the three marked targets. The first guy is standing outside, and the other two are in the abandoned multi-story building. The three targets are accompanied by other enemies too, making them a bit harder to get at. When the first target is down, enter the abandoned building and clear the first floor.
Target
One of the targets is about mid-way up, and the other is on the top floor. There is little cover within the building, and the enemies are usually standing by the stairs, so you'll have to progress carefully. When moving up to the next floor, crouch and move up the stairs just enough to see if there are any enemies standing nearby. If so, clear the way before emerging completely. There are also propane tanks scattered throughout the building that can be used against your enemies, but avoid setting them off too close to yourself.
The target is at the police station in Leftwood, Alderney. Pick up the Body Armor and weapon that the contact has left for you before heading over there. This is a simple one; gun down the target as he is escorted out of the station, and before he gets in the car parked outside. His escorts are armed, but if you bolt quickly enough after making the kill your Body Armor should absorb their retaliatory fire.
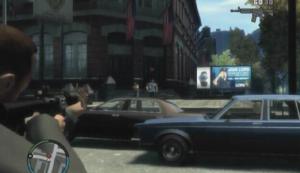
Target
The target is to board a helicopter on top of the Booth Tunnel in Alderney. Pick up the Sniper Rifle and Body Armor that have been left for you before traveling to the spot. If for some reason the contact did not leave you a Sniper Rifle, take the time to travel to a weapon store and purchase one yourself. Stand in the small sitting area across from the helipad and use your Sniper Rifle to take out the target before he can board the helicopter.
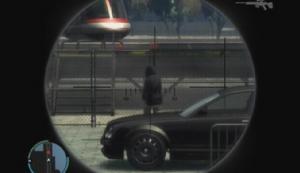
Target
The target is on a boat in the canal between Tudor and Acter. If you don't yet have a Sniper Rifle from one of the previous missions, stop by a weapons store and purchase one, as it will make completing this mission a whole lot easier. Make your way to the spot in Tudor, plant yourself by the binoculars along the walkway, and snipe the target to complete the mission.
Boat
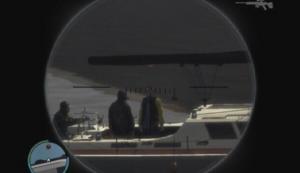
Target
The target is in Alderney City. Travel to the spot and follow the target's vehicle through a nearby alleyway to reveal a whole mess of additional gunmen. It turns out that you have to kill each and every one of these guys to complete the mission. There isn't much to doing this, though, as they will all swarm towards you right off the bat. Use a Grenade, RPG, Carbine Rifle, or whatever to clear them out. If you find that you're getting overwhelmed, don't hesitate to retreat.
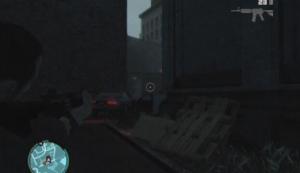
Targets
The targets are making a deal in the Acter Industrial Park. Travel to the spot and scope them out. If you have an RPG or something you could probably take them all out at once, otherwise just gun them down as per usual. They're on bikes, so you might have to chase after them if one or more takes off.
Taken Out
The target is traveling through the streets of Alderney City in a limousine. You'll want to have an RPG for this mission; you should have the available funds this far in, and it will make completing this mission a whole lot easier. When you reach the convoy, use your vehicle to block off the limo, then get out, stand back, and use the RPG to blow it up. If you weren't willing to splurge for an RPG then you'll have to chase after the target and hit their vehicle with gunfire until it explodes.
Convoy
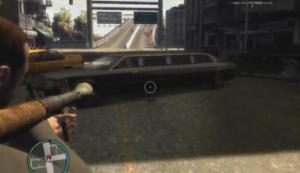
Targets
The target is on a boat in the waters outside of Westdyke. If you don't yet have a Sniper Rifle from one of the previous missions, stop by the weapons store across the street and purchase one, as it will make completing this mission a whole lot easier. Get in the boat that's docked on the beach and set out towards the target. Stop when you're fairly close, stand up, whip out your Sniper Rifle and use it to eliminate the target. If you missed, or only managed to wound the target, get back behind the wheel, chase after the target and wreck his boat instead.
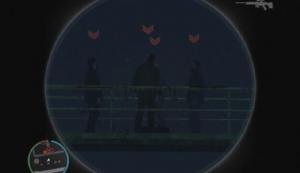
Boat
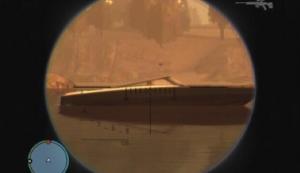
Target
The targets are at the refinery in the Acter Industrial Park. You'll want to buy a Sniper Rifle for this mission if you don't already have one. Your contact likely left you one, at any rate. Assuming you have a Sniper Rifle, climb to the top of the series of walkways across from the refinery and use that spot to snipe the targets and their bodyguards from a safe distance. They're packing some powerful weapons, so this is definitely the way to go. Eliminate all of the targets to complete the mission.
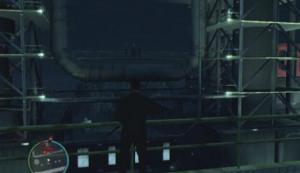
Targets

Sniper Rifle
There are two maps, with 100 pigeon locations on each. You will most likely come across pigeons that are marked on the other map, but it would be best to leave them alone until you are finished with the first if not using the two maps in conjunction.
The maps will guide you to the general location of the pigeon, but you'll have to refer to the text descriptions and screenshots to pinpoint them, as most are difficult to spot. The pigeons emit an orange glow, like that around weapons and armor, so the pigeons tucked away in dark places aren't impossible to make out. You'll also be able to hear the pigeon's call when you're really close.
The text descriptions are nigh useless without the map, so be sure to refer to the map to get a general idea of where the pigeon is hidden before looking to the text for clarification. The pigeons are not numbered in any coherent order, so go about getting them however you wish, though it might be convenient to follow the numbering in place. The larger circles signify that there are more than one pigeon at that location.
A sniper rifle with plenty of ammo, and in some instances a helicopter (you can take one of the Helitours Mavericks from the landing site in Fishmarket South, Algonquin).
Finish the story - Or at least have all of the islands unlocked before attempting this. It would be best to ignore the pigeons you stumble across while you're playing through the main storyline, as you will have a hard time trying to remember which ones you've snuffed out once you're ready to use a guide such as this one to find them all.
Use Waypoints - Approximate the location that is depicted on the map and place a waypoint there. This way you won't have to constantly pause the game to make sure you're headed in the right direction.
Sleep Mode - Put Niko's cell phone on sleep mode while pigeon hunting to avoid being constantly bombarded with calls from your acquaintances. Since you'll likely be at this pigeon hunting thing for awhile, your friends will start to hate you if you keep turning them down, and that's not a good thing. To enable sleep mode, open the Options menu and scroll down to “Turn Sleep Mode On.”
Double Check - If you happen to come across a pigeon yourself, it might benefit you to read the text description just the same to ensure that you killed the correct one. This way, you'll avoid confusion if you happen to mistakenly kill a pigeon that is marked on the other map.
Kill Count - You can check your progress via the “Score” screen in the Stats section of the pause menu. Your kills are recorded under the “Pigeons exterminated” stat.
Here are the maps which you can use as reference points to help you find all pigeons. Each location is detailed in the location guide below with 20 pigeons on each page.
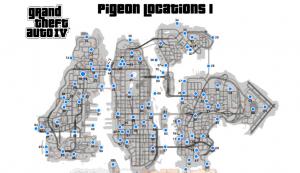
Pigeon Map 1 - Click to show large version
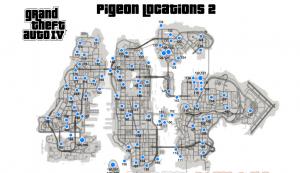
Pigeon Map 2 - Click to show large version

Pigeon Map 1 (1-100) Click for large version
Pigeon (1/200): You absolutely need a sniper rifle to get this pigeon. It is perched atop the giant tower at the back of the airfield. It's a bit hard to get at because you'll be attributed a four-star wanted level if you're spotted on the airfield. With a getaway car handy, stand below the tower and use your sniper rifle to hit the pigeon on the top railing. Now make your escape!
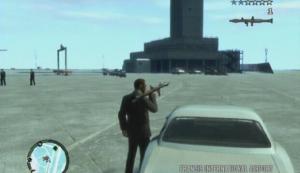
Pigeon (2/200): Get a motorcycle and look for a circular opening near the airport terminal building doors. The pigeon is tucked away in there. Drive up into the hole, step off of the motorcycle and kill the pigeon.
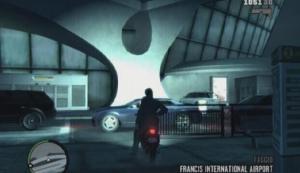
Pigeon (3/200): This is another get in get out one. First, you'll need a helicopter. Take an Annihilator from the helipads at the west end of the airfield and land on the terminal building. The pigeon is between the two ventilation machines midway along the roof. You won't be able to lose your wanted level with the Annihilator, so fly it away from the police, land, quickly get a car and flee the scene.
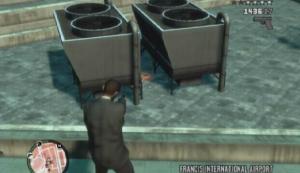
Pigeon (4/200): On a small, wooden platform near the run down factory.
Pigeon (5/200): Through the southwestern door of the large, red and white striped circular structure.
Pigeon (6/200): This pigeon is on the roof of a building. You most likely need a helicopter to reach this one, though there may be another way up. You can take one of the Helitours Mavericks from the landing site in Fishmarket South, Algonquin. The pigeon is in the doorway at the east end of the roof.
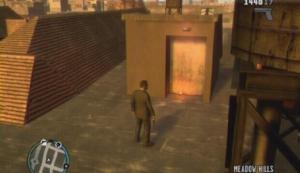
Pigeon (7/200): In a small construction site alongside the Dukes Expressway, south of the Burger Shot.
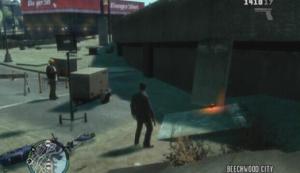
Pigeon (8/200): Go behind the apartment buildings and climb up onto the roof of the shed there from the small walkway. The pigeon is on the adjoining terrace.
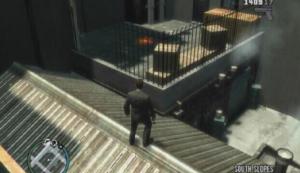
Pigeon (9/200): Perched on the lane divider along the Dukes Expressway, shortly beyond the southern interchange.
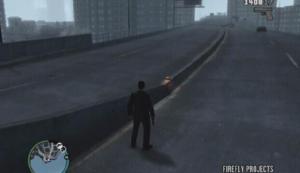
Pigeon (10/200): Perched on the back porch railing of the house at the end of Ketchum Street.
Pigeon (11/200): Atop the “Screamer” rollercoaster. The pigeon is perched above the red title sign; you'll need a sniper rifle to get it.
Pigeon (12/200): This one is inside the Ferris wheel. Approach the wheel from its northern side, and look for the “Whacker” booth next to the “Entrance to Ride” sign below it. Jump up into the Whacker booth to climb up, and then from there, climb up to the Ferris wheel platform. The pigeon is perched above the docked above the gondola track.
Pigeon (13/200): On the beach beneath the walkway that extends over the water. Walk to the shore and look for the pigeon behind one of the walkway pillars.
Pigeon (14/200): Head through the alleyway to reach a small courtyard. Look for a red door along the east side of the courtyard; the pigeon is perched above this door.
Pigeon (15/200): Perched on the railing of the large gazebo at the center of the park.
Pigeon (16/200): On the cabaret club overhang, behind the red “Perestroika” sign. To get up there, enter the club and go through the door to the left of the stage. Turn right and move to the end of the corridor and through the double door there. Locate the fire escape and take it up to the roof, then find your way to the overhang where the pigeon is.
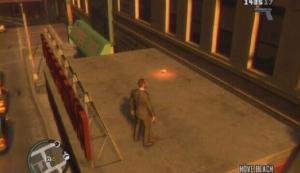
Pigeon (17/200): Atop the “Broker Navy Yard” sign. To reach it, first climb up onto the nearby bus shelter (a short ways east of the sign), and from there jump over to and grab hold of the overhang. From there, climb up onto the side of the sign. The pigeon is perched on the column at the other end.
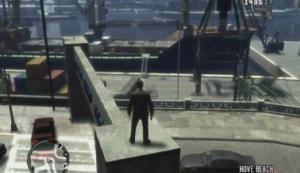
Pigeon (18/200): Get to the fenced in area behind the “Woodfellas” building and look for the pigeon perched on one of the air conditioners on the east side of the building.
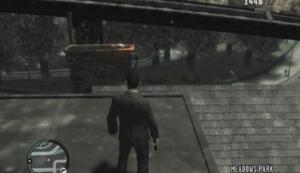
Pigeon (19/200): Perched on the fire escape in the dead-end alley next to Brucie's house.

Pigeon (20/200): Tucked underneath the Dukes Expressway. Walk through the narrow passage beneath the expressway and look up at the southernmost girder.
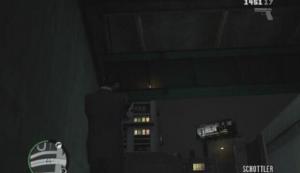

Pigeon Map 1 (1-100) Click for large version
Pigeon (21/200): Go up the western-most steps to reach the first train station platform. The pigeon is perched on the stairs marquee roofing, behind the ticket machines.
Pigeon (22/200): Perched on the roof of the graffiti covered building. There are stairs leading up to the roof along the west side of the building.
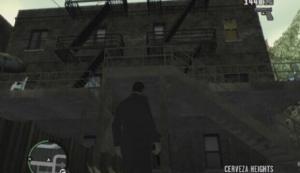

Pigeon (23/200): This pigeon is in the paneless turret atop the building with the blue banners on its side. You most likely need a helicopter for this one, but there may be another way up. Assuming that's the case, get a helicopter and land on that building. You can take one of the Helitours Mavericks from the landing site in Fishmarket South, Algonquin.
Pigeon (24/200): Perched on the highest fence behind the row of apartment buildings.
Pigeon (25/200): The pigeon is in the tunnel beneath the road.
Pigeon (26/200): Perched on the multi-level diving board in Steinway Park.
Pigeon (27/200): Perched on a tomb in the lower level of the Steinway graveyard.
Pigeon (28/200): You'll need a boat for this one. The pigeon is on one of the cement platforms that hold the support beams. When you have a boat, drive along the bridge until you spot the pigeon.
Pigeon (29/200): On some rock in the water next to the Northern Express Way.
Pigeon (30/200): In one of the bridge windows of the docked ship.

Pigeon (31/200): Look for the Menala Metal building, just north of the Alpha Mail Courier building. There are some steps along the south side of the building; head up these steps and use the ladder to reach the roof. Next, use the stairs and ladder up ahead to reach the next level. This is as high as you need to go. The pigeon is at the edge of this level, off to the right.
Pigeon (32/200): Perched on the “Welcome to Northern Gardens” sign.
Pigeon (33/200): Walk on the stone wall next to the train tunnel mouth to spot the bird on top of the building at the wall's end.
Pigeon (34/200): Underneath the cement platform that the broken down dock is attached to. Walk along in the shallow water and you should be able to spot the pigeon's orange glow.
Pigeon (35/200): Perched on a fence post in the alleyway.
Pigeon (36/200): Perched on the tip of the smallest of the three rocks. You can snipe it from the wooden walkway that's nearby.

Pigeon (37/200): In the large piece of pipe in the construction site below the East Borough Bridge.
Pigeon (38/200): In one of the containers on the east-most barge.
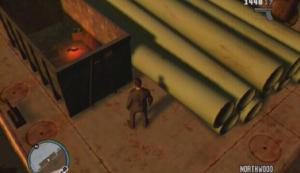
Pigeon (39/200): Perched on one of the bricks protruding from the demolished of the building on the street corner.
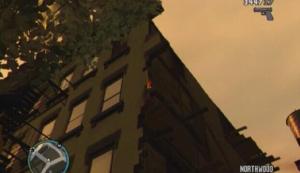
Pigeon (40/200): Perched on the fire escape railing of the building with the blue marquee shelter out front.
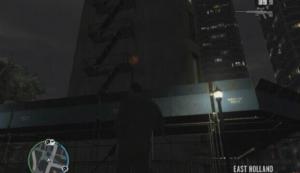

Pigeon Map 1 (1-100) Click for large version
Pigeon (41/200): This one is on top of the Holland Medical Center. To get up there, go through the white door on the north side of the building and take the stairs through there all the way up to the top. Once you've finally made it to the top, get up onto the large ventilation unit to find the pigeon perched there.
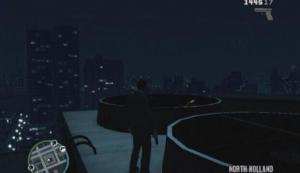
Pigeon (42/200): This pigeon is also on the hospital. Go through the white door on the north side of the building and climb up the stairs until you reach the sixth floor. The pigeon is perched on a post at the other end of the building.
Pigeon (43/200): Perched along the railing surrounding the train tunnel mouth.
Pigeon (44/200): On the railing just before the bridge to Alderney.
Pigeon (45/200): On top of the building on the northwestern side of the pond. There isn't a way up, so walk along the pond until you are in position to get a good shot at the pigeon with your sniper rifle.
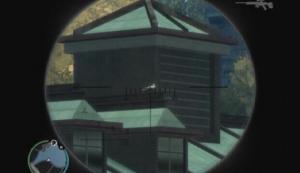
Pigeon (46/200): On the upper post along some steps.
Pigeon (47/200): Along the back wall of the building with the Greek style columns.
Pigeon (48/200): Perched on top of a bus shelter.
Pigeon (49/200): There are some stairs between the two buildings on the block. Take the stairs up to the sitting area. Drop down to the flat roof below the decommissioned train tracks to spot the pigeon.
Pigeon (50/200): This pigeon can be found along the decommissioned train track mentioned in #49, so refer to that pigeon to locate the tracks. The pigeon is near the end of the track, just before the stunt jump.
Pigeon (51/200): This one is on top of the highest building in the city; surrogate Empire States Building. Hit the blue marker on the east side of the building to get to the top. The pigeon is perched on the railing along the south side of the walkway.
Pigeon (52/200): In the grass lot behind the wall with the two green, white and red stripes.
Pigeon (53/200): On a tombstone in the graveyard behind the church.

Pigeon (54/200): On top of a stack of yellow shipping containers.
Pigeon (55/200): You'll need a boat for this one; you can stand on one of the buoys beyond the Castle Gardens docks and wait for some poor sucker to drive by with his. When you have a boat, drive it past the niches east of the docks until you reach a set of three windows, with another set of three windows a bit further back. Drive up against the wall of the closest set of windows; jump into one of the ledges and Niko will pull himself up into the niche where the pigeon is.
Pigeon (56/200): This one is in the skate park underneath the Broker Bridge. The pigeon is at the top of the ramp in the southwest corner of the park; you can snipe him through the fence from the walkway just north of the park.
Pigeon (57/200): This one is on the tall double archway closest to the Algonquin end of the Broker Bridge. You'd best use a helicopter to get up there. You can take one of the Helitours Mavericks from the landing site in Fishmarket South, Algonquin (which happens to be nearby). The pigeon is perched on the railing at the north end of the archway.
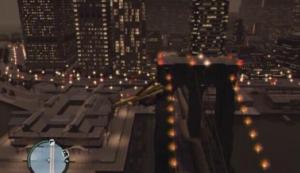
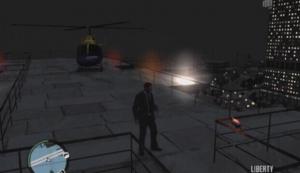
Pigeon (58/200): In one of the fenced in spaces beneath the portion of highway that runs behind the Liberty City Police Department.
Pigeon (59/200): On a pile of trash beneath the highway. Jump down from the highway when you come to the T shaped underpass. It's on the pile of trash in the corner of the first archway.
Pigeon (60/200): Perched in a window on the east side of the old hospital. Stand on the spool table near the wrecked car and look in the upper window across from it to spot the pigeon.
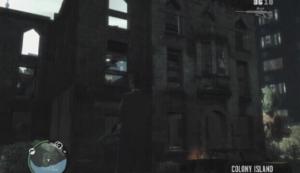

Pigeon Map 1 (1-100) Click for large version
Pigeon (61/200): You'll need a sniper rifle to get this one. The pigeon is on top of the building next to the large smokestack. Stand a short distance from the north side of the factory and look a bit to the right of the smokestack to spot the pigeon.
Pigeon (62/200): This one is tucked away underneath the Union Drive East off-ramp. Look for some stone columns at the start of the off-ramp; the pigeon is in the crevice along the west side of this ramp.
Pigeon (63/200): Tucked away behind the large, pitchfork-wielding statue.
Pigeon (64/200): In the mouth of the giant shark that is protruding above the “Prolaps” outlet.
Pigeon (65/200): In a tree next to the “Eau-de-mania” outlet.
Pigeon (66/200): This one is perched on the east-most steeple of the church. You'll have to stand quite a distance away from the church in order to aim up that high. Across the street and a bit down the block should suffice.
Pigeon (67/200): Perched on the target reticule statue outside of Liberty City HQ. Just be ready for the influx of cops after you take the shot!
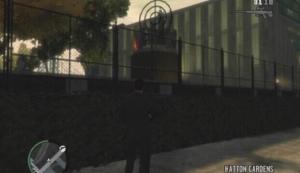
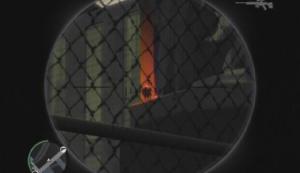
Pigeon (68/200): Atop the small cabin on the salt (?) barge
Pigeon (69/200): On the first support structure on the Algonquin side of the East Borough Bridge.
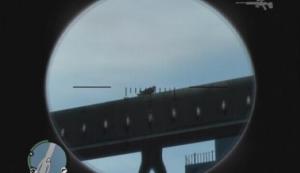
Pigeon (70/200): Perched on the front end of the grounded boat at the northwest end of the docks.
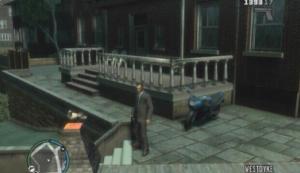
Pigeon (71/200): Underneath the ramp that is on the beach just north of where the Hickey Bridge starts.
Pigeon (72/200): Beneath the ramp that leads down to the old casino.
Pigeon (73/200): Perched on a railing post behind the east-most redbrick house on the street.

Pigeon (74/200): This one is on top of the building behind the market. You'll need a sniper rifle to get it. Head up the stairs in the market parking lot and look below the water towers to spot the bird.

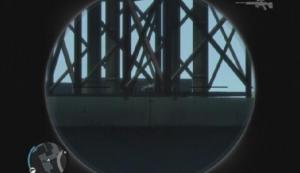
Pigeon (75/200): Above the doorway on the roof of the grayish building. There is a ladder at the end of the alleyway, and another ladder nearby when you've scaled the first. Climb up both ladders and you'll find the bird perched above the doorway there.
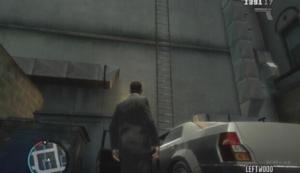
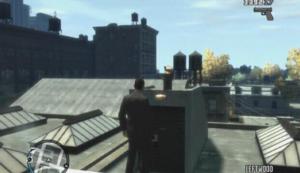
Pigeon (76/200): You'll need to be on the highway to get this one. The bird is on a small, flat-roofed building below a billboard along the Plumbers Skyway. It is on the northern half of the highway, or the side with the traffic from Algonquin.
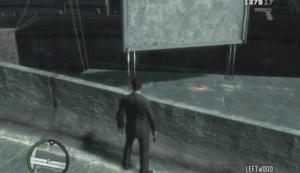
Pigeon (77/200): The pigeon is perched on the “The Science of Crime” billboard along Applewhite Street. Use your sniper rifle from the sidewalk across the street to hit the bird.
Pigeon (78/200): At the far end of the second floor balcony railing on Mr. Fuk's Rice Box.
Pigeon (79/200): Across the street from Mr. Fuk's Rice Box, perched on the railing across from the marquee awning.
Pigeon (80/200): Perched on the low wall north of the hot dog stand by the steps.
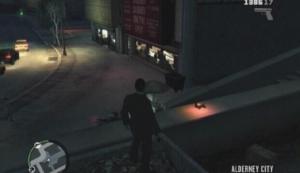

Pigeon Map 1 (1-100) Click for large version
Pigeon (81/200): Beneath the walkway ramp north of the helipad above the Booth Tunnel.
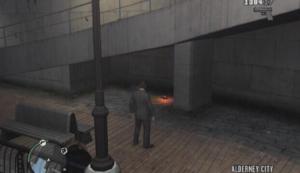
Pigeon (82/200): This one is at the north end of the tracks that run along Port Tudor.
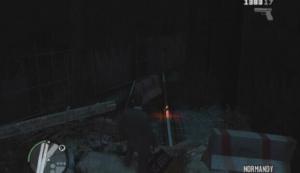
Pigeon (83/200): Search for some stairs and a ladder in the lot. Climb onto the platform next to the stairs and then climb up the ladder. The pigeon is perched on one of the ventilation units.
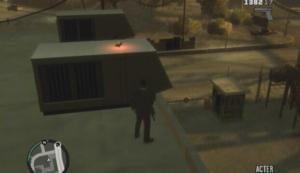
Pigeon (84/200): Tucked away in a basement entrance way of one of the apartments along Aspdin Drive.
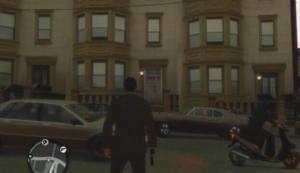
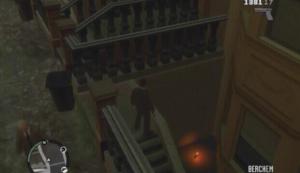
Pigeon (85/200): Perched on a balcony along the second floor of the apartment building across the street from the internet café. Stand on the other side of the street and scan the balconies beyond the low wall to spot the bird.
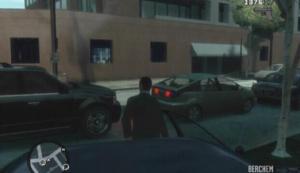
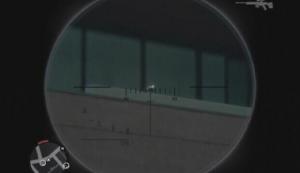
Pigeon (86/200): This one is perched on the roofing below the church steeple. When you're facing the church, the pigeon is down to the left. Stand across the street and use your sniper rifle to hit it.
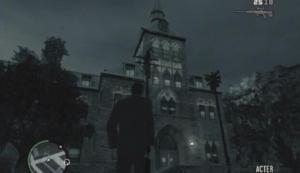
Pigeon (87/200): Perched on the railing along the east side of the warehouse at the end of the row in Port Tudor.
Pigeon (88/200): On top of the blue shipping containers at the east end of the long building.
Pigeon (89/200): This pigeon is perched on one of the highway support columns. You'll need a sniper rifle to get it. On the street below the highway, look for a Sprunk ad along the wall of the building west of the overpass. From there, equip your sniper rifle and look up at the top of the support column behind the building to spot the pigeon.
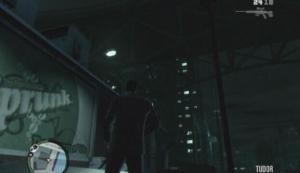
Pigeon (90/200): On the lower roof of the long warehouse at the north end of the yard. It's below the lights; snipe it from a short distance away.
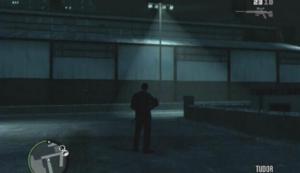
Pigeon (91/200): Get onto the on-ramp and ascend until you come to the red crane. Climb onto the cabin in front of it and peer over the edge to spot the pigeon on a small platform.
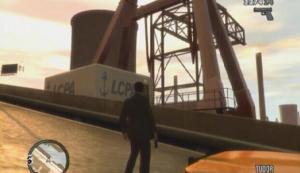
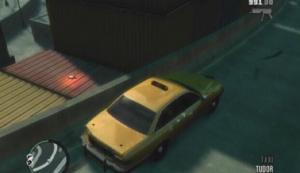
Pigeon (92/200): On a shipping container alongside the off-ramp.

Pigeon (93/200): Perched on the rocks along the waterside.
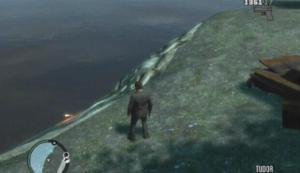
Pigeon (94/200): This one is along the walkway by the water. Hard to miss.
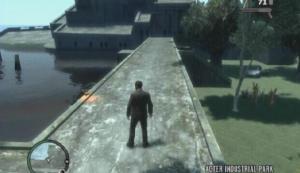
Pigeon (95/200): Just beyond the highway on-ramp, at the start of the lane divider.
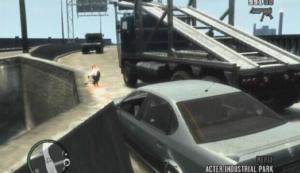
Pigeon (96/200): This pigeon is perched on a pipe in the worksite. Stand on the grass outside of the fenced in area and snipe the pigeon from there. You would stand across from the middle of the four small, gray circles on your map and radar to spot it.
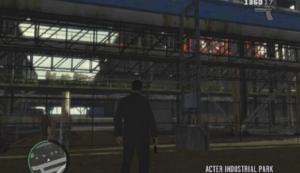
Pigeon (97/200): For some reason this one does not appear on either of the in-game pigeon location maps… But it is in a small pit in the scrapyard east of abandoned cargo ship.

Pigeon (98/200): On top of the warehouse across from the small food and drink store. To get up there, first climb onto neighboring garage using the dumpsters in front of it, then go up the slate and onto the roof.
Pigeon (99/200): Get on the walkway behind the east end of the correctional facility; the bird is perched on the abandoned ship beyond it. Swim over to the ship, or simply use a sniper rifle to hit the pigeon.
Pigeon (100/200): Make your way to Happiness Island, be it by boat or by helicopter, and get up to the base of the Statue of Happiness. The pigeon is perched on the railing at the north side of the highest walkway you can reach using the stairs.
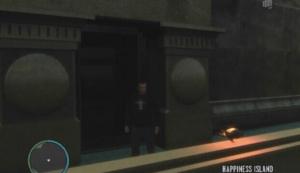

Pigeon Map 2 (101-200) Click for large version
Pigeon (101/200): Perched on a post next to the parking garage toll booths.
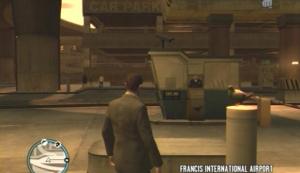
Pigeon (102/200): In the north-most corner of the highway's rusted support structure.
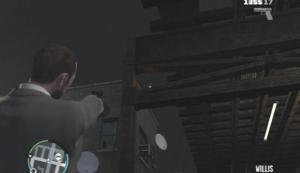
Pigeon (103/200): Above the door of the building with the marquee awning out front.
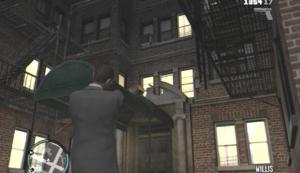
Pigeon (104/200): At the base of the statue between the two fountain pools.
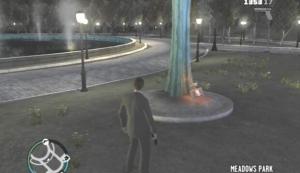
Pigeon (105/200): Perched on the fire escape of the building near the north end of Wenrohronon Avenue.
Pigeon (106/200): On the stair railing of one of the houses at the west end of Cassidy Street.
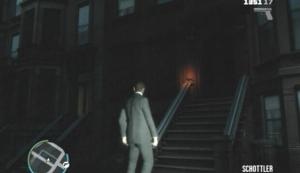
Pigeon (107/200): Atop one of the green waiting shelters along the sidewalk.
Pigeon (108/200): Perched on the "Jerkn' Gizzada" building by the train station entrance.
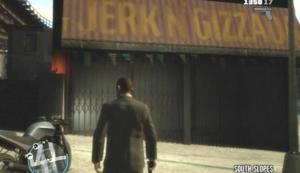
Pigeon (109/200): On the low brick wall below the railway.
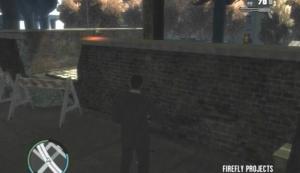
Pigeon (110/200): Perched along the railway that surrounds the projects.
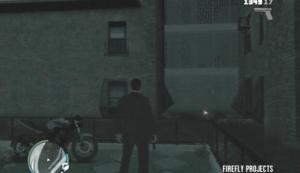
Pigeon (111/200): On the west-most archway before the gazebo and sitting area.
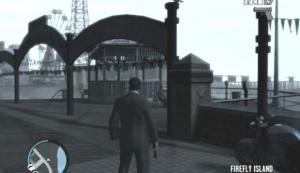
Pigeon (112/200): On the small dock off of the lower walkway.
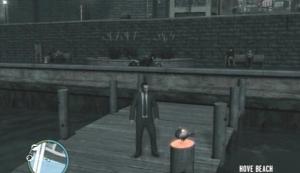
Pigeon (113/200): Along the towering brick wall behind the diner.
Pigeon (114/200): Perched on one of the basketball nets in the court through the alleyway.
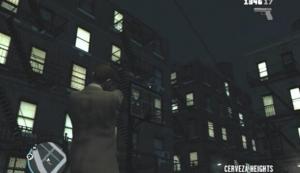
Pigeon (115/200): In the tree east of the basketball court.
Pigeon (116/200): Take the north-most stairs up to the unused train station and turn left. The pigeon is perched in the marquee roofing, next to the second support beam.
Pigeon (117/200): Underneath the stunt jump ramp at the corner of the street.
Pigeon (118/200): On a rock beneath a tree off of the intersection.
Pigeon (119/200): In the park; perched on the monkey bars of the small children's play structure.

Pigeons (120/200), (121/200): One on the low wall around the parking lot, the other below that low wall (parking lot side).

Pigeon Map 2 (101-200) Click for large version
Pigeon (122/200): Perched on one of the lights attached to the run down building next to the pipe yard.
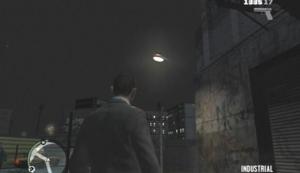
Pigeon (123/200): On the base of the large pipe midway down the alley.
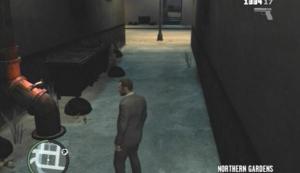
Pigeon (124/200): Look for the building with the two truck trailers parked next to it. The pigeon is perched on the railing by the door on this side of the building.
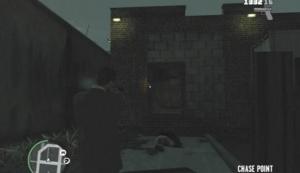
Pigeon (125/200): Perched on the low wall beneath the highway; next to the tall, run down factory.
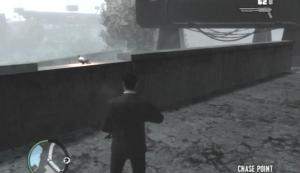
Pigeons (126/200), (127/200): Both pigeons are on the east side of the block. One is perched on the unfinished wall, and the other is perched on the beam above it; you'll be able to see it moving around.
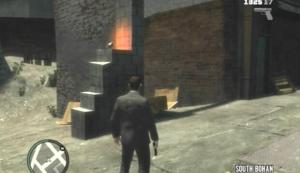
Pigeons (128/200), (129/200): Perched at the east end of the Cleaners place roof, which is just one block east of the last two pigeons covered. You can stand across the street and hit them from there with a pistol or sniper rifle.
Pigeon (130/200): In one of the fenced digging sites below the train station.
Pigeon (131/200): Perched on the front gate on the north side of the large residence building.
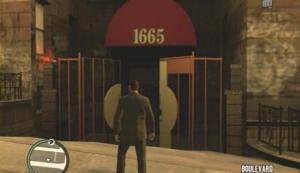
Pigeon (132/200): Along the edge of the rock wall, behind the railing where the road curves.
Pigeon (133/200): On the brick wall that runs along the walkway behind the block of apartment buildings.
Pigeon (134/200): On one of the stone dividers in the middle of the paved pier area. Can't miss it.
Pigeon (135/200): Atop the small platform at the end of the alleyway (across from the X-shaped residence building).
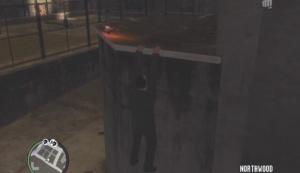
Pigeon (136/200): Perched on a post at the start of the alleyway south of the spray shop icon on the radar.
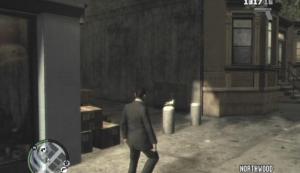
Pigeon (137/200): On the walkway railing (on the north side of the tall, white residence building).
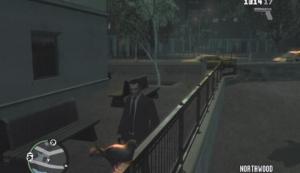
Pigeon (138/200): In the alleyway; by the upper set of steps that lead up to the end of the alley.
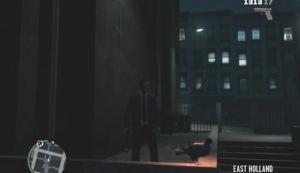
Pigeon (139/200): Perched on the low railing in the supply yard along the highway. It's across from the blocked off crater that is being worked on.
Pigeon (140/200): On one of the blocks of concrete by the water.

Pigeon Map 2 (101-200) Click for large version
Pigeon (141/200): This one is at the south end of Charge Island. It's in the middle of the parking lot underneath one of the off-ramps at the south end of the city.
Pigeon (142/200): Along the south part of the East Borough Bridge walkway. It's by the support structure midway down.
Pigeon (143/200): Perched on a subway entrance.
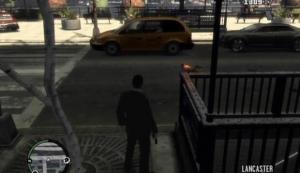
Pigeon (144/200): Atop the post at the east end of the Middle Park bridge.
Pigeon (145/200): In one of the niches along the southwest end of the civic building.
Pigeon (146/200): On top of the white marquee awning outside of the large, white office building.
Pigeon (147/200): In the tree across from the south end of the Seagull Theater.
Pigeon (148/200): Perched on a rail at the Skycar station. Go west from the fountain and up the stairs there to reach the station.
Pigeon (149/200): This one is on Colony Island. It's on one of the platform steps alongside the large walkway by the water.
Pigeon (150/200): Also on Colony Island. The bird is perched on the merry-go-round in the small park north of the parking lot.
Pigeon (151/200): This one is at the Colony Island Skycar station. It is perched on the railing at the north end of the station.
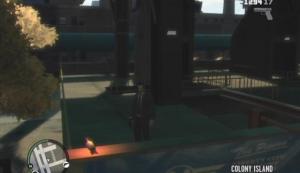
Pigeon (152/200): About three-fourths of the way down the eastbound side of the Algonquin Bridge. Keep an eye on your right after passing over Colony Island.
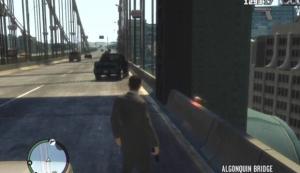
Pigeon (153/200): On the glass roofing over the outside dining area of the “Viendemonte” restaurant.
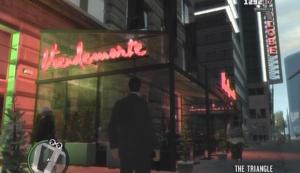
Pigeon (154/200): Perched on one of the benches along the north side of the gigantic civic building.
Pigeon (155/200): On the stairway railing through the alleyway next to the residence building.
Pigeon (156/200): On the railing of one of the wooden ramps by the pier.
Pigeon (157/200): In some plants along the south side of Denver Avenue.
Pigeon (158/200): In the middle of the path through the small park.
Pigeon (159/200): Perched on a post in the alley beside the Bank of Liberty building.
Pigeon (160/200): Perched on a post behind one of the benches along the walkway.

Pigeon Map 2 (101-200) Click for large version
Pigeon (161/200): There is a manual lift on the west side of the tall building with black window panes. Use the lift to reach the top of this building. When the lift finally reaches its destination, step off and turn left. The bird is perched on the railing along this walkway.
Pigeon (162/200): On top of some lockers on the north side of the same building that #161 is found on.
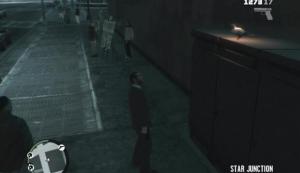
Pigeon (163/200): Perched on the stairway railing through the narrow alley at the north end of the lot.
Pigeon (164/200): Below one of the trees in the raised sitting area.
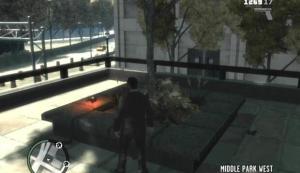
Pigeon (165/200): Perched on one of the windowsills on the east side of the Natural History Museum. The pigeon's orange glow is very distinct here.
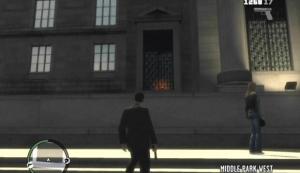
Pigeon (166/200): Atop a fence post along the west side of Ruby Street.
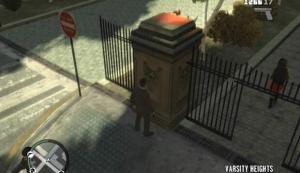
Pigeon (167/200): In a sandbox in the middle of the raised walkway south of the children's play structures.
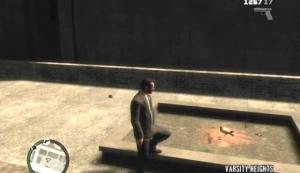
Pigeon (168/200): This one is on the support structure at the east end of the Hickey Bridge. You'll need a sniper rifle to get it. Stand at the end of the nearby dock and scan the side of the support structure to spot the pigeon.
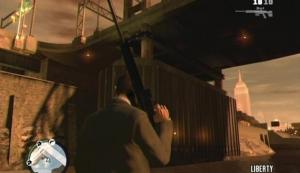

Pigeon (169/200): Perched at the end of the low wall across the street from the alleyway.
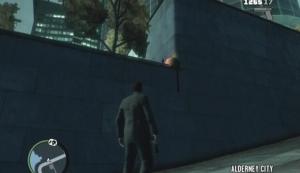
Pigeon (170/200): Beneath a tree, next to the police department security entrance. You'll surely attract some police attention upon killing the bird, so take the shot and then immediately flee the scene!
Pigeon (171/200): In the shade along the dirt road that leads to the old mansion. The orange glow is very distinct here, so keep an eye out for it to locate this one.
Pigeon (172/200): Perched on the white fence around the mansion that is across the street from the gas station.
Pigeon (173/200): On the lower brick wall of the house along the curve in the road.
Pigeon (174/200): On the vent along the west side of the Westdyke Deli.
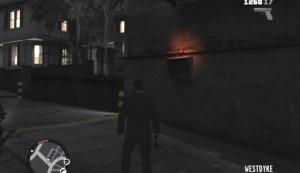
Pigeon (175/200): Beneath the birch tree left of the hospital entryway.
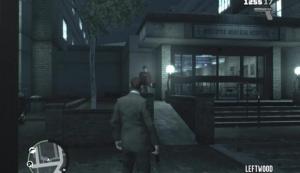
Pigeon (176/200): At the base of one of the highway supports that are along the south side of the highway.
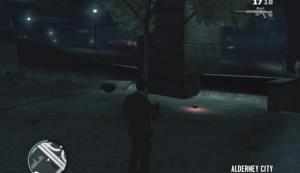
Pigeon (177/200): Perched along the railing of the building with the pillars out front.
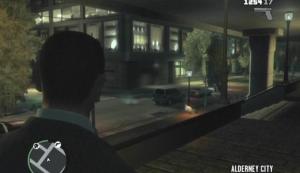
Pigeon (178/200): Behind the picket fence outside of the building with the blue “330th Anniversary Alderney” banners and several arched doorways.
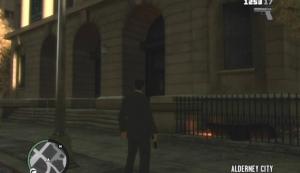
Pigeon (179/200): Along the railing on the west side of the upper road; across the street from the hotdog stand.
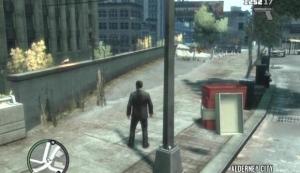
Pigeon (180/200): On top of the Booth Tunnel entrance and exit.
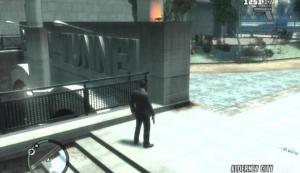

Pigeon Map 2 (101-200) Click for large version
Pigeon (181/200): Perched on the railing behind the propeller statue outside of the Port Tudor gate.
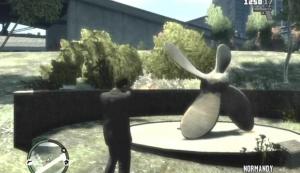
Pigeon (182/200): Among the shrubs below northwest corner of the wall surrounding the “Globe Oil” building.
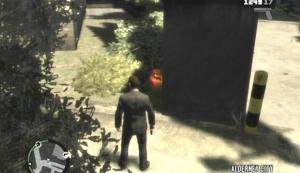
Pigeon (183/200): Atop the small cabin behind the blockade; in front of the inaccessible Cluckin' Bell.
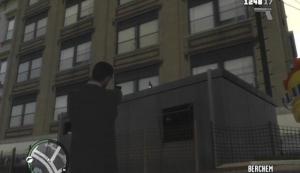
Pigeon (184/200): On a dirt mound along the corner of the low road next to the freeway.
Pigeon (185/200): Perched on the brick wall along the north side of Odhner Avenue; across from the “Used Auto Parts” building.
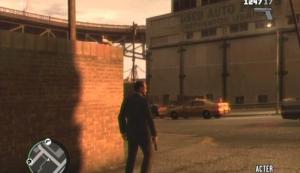
Pigeon (186/200): Above one of the rollup doors of the building on the southwest corner of Odhner Avenue.
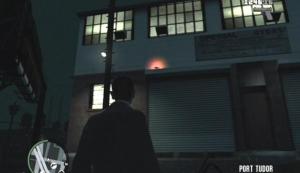
Pigeon (187/200): Beneath one of the birch trees along the tracks behind the “eCola” factory.
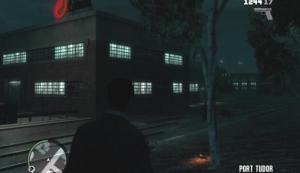
Pigeon (188/200): On the marquee awning outside of the “Honkers” club front entrance.
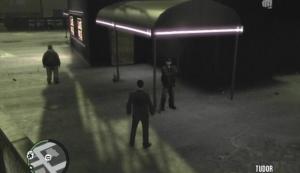
Pigeon (189/200): On top of the locker along the west side of the low brick wall.
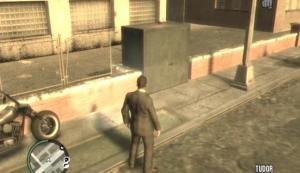
Pigeon (190/200): On the grass north of the dry fountain in the small park. You probably saw—and perhaps already killed—this pigeon during one of the meetings with Derrick here.
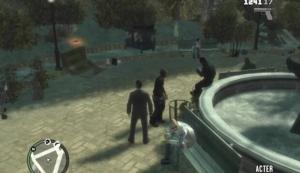
Pigeon (191/200): Above the graffiti covered wall where the freeway is above the road.
Pigeon (192/200): Below some trees on the west side of the south end of Plumbbob Avenue.
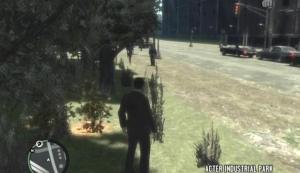
Pigeon (193/200): Perched on one of the railing posts along the east side of the bridge.
Pigeons (194/200), (195/200): One on the barbed brick fence around the small police station, and the other below the first outside of the fence. There will be plenty of cops around due to the location, so have a getaway vehicle ready.
Pigeons (196/200), (197/200), (198/200), (199/200), and (200/200): That's right; there are five birds on the Statue of Happiness. Grab a sniper rifle and make your way to Happiness Island. From the south side of the statue, you can hit the one perched on the statue's left hand (behind the plaque). From the north side, the two on the cup in the statue's right hand, and the one in the middle of its crown. From the west side of the statue you can hit the one on its left shoulder. Crouch to steady your aim.
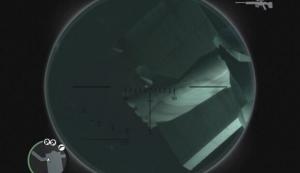
Refer to the map for the general location of a jump, but use the text descriptions to pinpoint the location. The jumps are not numbered in a coherent order, so go about completing them however you wish, though it might be convenient—and in one or two cases necessary—to follow the numbering in place. The ideal vehicle to use here is the NRG 900 motorcycle, so for best results, use one unless otherwise stated.
To complete a stunt jump your vehicle must land in a certain area beyond the ramp and on two (or four) wheels. Look for the “Stunt Jump Completed” message at the bottom of the screen for indication of your success. If your jump is “not good enough,” you either failed to land the jump, needed more of a run-up, or you didn’t land in the right area.
As you sail through the air in slow-mo, try your best to level Niko out for the landing. Sometimes, especially if you are using a motorcycle, Niko will wind up upside down; you can combat this to an extent by leaning forward (by pushing up on the Left Thumbstick/Left Analog Stick) just before hitting the ramp.
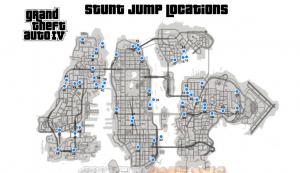
All Stunt Jumps Map
Stunt Jump 1: The ramp is the fallen “Ahead” sign along the northeast end Tudor Street (look for the construction barriers at the bend). You don’t even need all that great of a vehicle to complete this one. Make a beeline for the ramp from the top of the incline to the east of the ramp’s location. You just have to land on the west-most lane of the Dukes Expressway. Nothing to it.
Stunt Jump 2: The ramp is the dumpster along the southeast end of Tudor Street (look for the construction barriers at the bend).You must safely land somewhere on the Dukes Expressway to complete this jump. Only motorcycles (NRG 900, Sanchez) seem to work for this one. You don’t want too much speed, as you will just end up overshooting the expressway. Start from about midway up the east side of Tudor Street and get just enough speed to land at the far end of the lane.
Stunt Jump 3: Look for the dirt mound near the construction site along Lynch Street. You have to land between the two billboards to complete the jump. You’ll need a quality motorcycle (NRG 900, Sanchez) to make it. From the top of Freetown Avenue, which is north of the ramp, speed down the incline, hit the middle of the wooden ramp and you should land between the two billboards.
Stunt Jump 4: The cement ramp is along the west side of Carson Street. Drive to the top of the incline on Tutelo Avenue, which is south of the ramp, then drive down and lean forward (push up on the Left Thumbstick/Analog Stick) just as you hit the ramp. You must land over both lanes of the Dukes Expressway to complete the jump.
Stunt Jump 5: The ramp is at the end of the cross shaped alleyway off of Livingston Street. Start from the crosswalk about midway down San Jacinto Avenue (north of the ramp), hit the ramp and land anywhere on the rooftop to complete the jump.
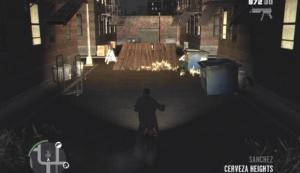
Stunt Jump 6: The ramp is on the roof that you land on after #5. Use the momentum from the previous stunt jump to hit the ramp and land on one of the roofs that also has a ramp to complete the jump.
Stunt Jump 7: This one’s a cinch. Use the ramp that leads up to the Kamayashev Import/Export parking lot (look for the “Park Here” directional sign) and land anywhere on the street below to complete the jump.
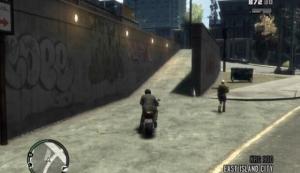
Stunt Jump 8: The ramp is on the freeway, just before the start of the Algonquin Bridge. Drive down from the westbound lane, lean forward (push up on the Left Thumbstick/Analog Stick) just as you hit the ramp and land on the walkway below to complete the jump.
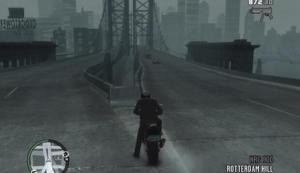
Stunt Jump 9: There is a wooden ramp at the start of the rails along the road. Start from the construction barriers further down the tracks, hit the ramp and fly over the stairs to complete the jump. Don’t get too much of a run-up, otherwise you’ll hit the railing and be propelled into the water.
Stunt Jump 10: There is a wooden ramp accessible off of the East Borough Bridge; it’s to the right of the start of the north-most walkway. Drive from the other side of the street behind the alleyway and land in the junk yard below to complete the jump.
Stunt Jump 11: Look for the dumpster by the construction site. Start from just before the decline south of the ramp and make it over the construction site to complete the jump.
Stunt Jump 12: The ramp for this one is just beyond the construction site in #10, between the crosswalks. Drive down from the incline on Morris Street, east of the ramp, and land somewhere below to complete the jump.
Stunt Jump 13: The ramp is along the bend on Brandon Avenue. Drive east down from Brandon Avenue, lean forward (push up on the Left Thumbstick/Analog Stick) just as you hit the ramp and exceed the truck station below to complete the jump.
Refer to the map for the general location of a jump, but use the text descriptions to pinpoint the location. The jumps are not numbered in a coherent order, so go about completing them however you wish, though it might be convenient—and in one or two cases necessary—to follow the numbering in place. The ideal vehicle to use here is the NRG 900 motorcycle, so for best results, use one unless otherwise stated.
To complete a stunt jump your vehicle must land in a certain area beyond the ramp and on two (or four) wheels. Look for the “Stunt Jump Completed” message at the bottom of the screen for indication of your success. If your jump is “not good enough,” you either failed to land the jump, needed more of a run-up, or you didn’t land in the right area.
As you sail through the air in slow-mo, try your best to level Niko out for the landing. Sometimes, especially if you are using a motorcycle, Niko will wind up upside down; you can combat this to an extent by leaning forward (by pushing up on the Left Thumbstick/Left Analog Stick) just before hitting the ramp.

All Stunt Jumps Map
Stunt Jump 14: There is a blue ramp by the water near the truck trailers off of Guantanamo Avenue. Drive down to Worm Street (east of the ramp), and from there, speed west, hit the ramp and land somewhere below the railway to complete the jump.
Stunt Jump 15: Get to the unfinished portion of the Northern Expressway on the east half of the island (check your map) and drive down until you reach the blue ramp. You don’t want too much of a run-up here; just enough of one to make it to the next section of the expressway. Since #16 comes right after this jump, you’ll need to be on that section of skyway to pull it off. Due to the placement of the ramps you probably won’t be able to complete both jumps in one go. All you need to do to complete this jump is land on the next section of the expressway.
Stunt Jump 16: The ramp is on the section of the Northern Expressway following #15; refer to the previous jump covered for details. Start from the edge of this section, hit the ramp, and land on the roof of the building below to complete the jump.
Stunt Jump 17: The ramp is up on the unfinished highway at the south end of the island, near the East Borough Bridge. It does not appear on the map, but the curved onramp (which is visible) can be accessed from Rocket Street in Chase Point. Start below the East Borough Bridge, hit the ramp and land somewhere in the street below to complete the jump.
Refer to the map for the general location of a jump, but use the text descriptions to pinpoint the location. The jumps are not numbered in a coherent order, so go about completing them however you wish, though it might be convenient—and in one or two cases necessary—to follow the numbering in place. The ideal vehicle to use here is the NRG 900 motorcycle, so for best results, use one unless otherwise stated.
To complete a stunt jump your vehicle must land in a certain area beyond the ramp and on two (or four) wheels. Look for the “Stunt Jump Completed” message at the bottom of the screen for indication of your success. If your jump is “not good enough,” you either failed to land the jump, needed more of a run-up, or you didn’t land in the right area.
As you sail through the air in slow-mo, try your best to level Niko out for the landing. Sometimes, especially if you are using a motorcycle, Niko will wind up upside down; you can combat this to an extent by leaning forward (by pushing up on the Left Thumbstick/Left Analog Stick) just before hitting the ramp.

All Stunt Jumps Map
Stunt Jump 18: The ramp is along the side of Grummer Road; it’s surrounded by construction barriers. Drive down east from Grummer Road and land below the archway to complete the jump.
Stunt Jump 19: The ramp is on the dirt path south of #18. Too much of a run-up will cause you to overshoot the target, so start from the nearby flatbeds, hit the ramp and land somewhere below to complete the jump.

Stunt Jump 20: The ramp is west of the parking lot, west of #18. Drive west from the crosswalk and land somewhere in the parking lot to complete the jump.
Stunt Jump 21: The ramp is in the parking lot between the two buildings. Start from the walkway north of the ramp. You just need to surpass the warehouse to succeed.
Stunt Jump 22: This jump is just before the walkway off of Astoria. Drive down from the subway tunnel entrance, hit the ramp, and land on the street below to complete the jump.
Stunt Jump 23: Look between the lane divider on Union Drive East to spot the ramp. Drive down from the support column between the two lanes and land the jump to succeed.
Stunt Jump 24: You’ll need a boat for this one (a Squalo will do). The ramp is between the two barges in the waters east of Algonquin. Get a good distance away from the ramp so you can build up speed and then hit the jump. You don’t need to fly all that far to pass. Once you’ve completed this jump, go on to get #32 because a boat is needed for that one as well.
Stunt Jump 25: This one is a bit of a pain to get at; it’s up on the roof of the building on the west end of the Civilization Committee ground, a restricted area, so you’ll end up with a four-star wanted level. First drive up the stairs on the north side of the eastern building (behind the large one), then drive around the walkway until you reach a small ramp. This is not the jump; just drive up the ramp to reach the bridge between the two buildings. Then, drive up the ramp at the other end of the bridge to reach the building with the ramp on it. Speed towards the ramp, land the jump, and then shake that wanted level!

Stunt Jump 26: The jump is at the end of the decommissioned train tracks. To get onto the tracks, go to the west end of Hematite Street and through the alleyway between the two buildings there. There are some stairs that lead up to a sitting area; slowly make your way up the stairs with a motorcycle and turn right at the top. Drive onto the tracks and to the jump at the end. You don’t need all that much of a run-up; just start from the columns and land on Union Drive West to complete the jump.
Stunt Jump 27: This jump is north of the LC Recruitment Center at the south end of Denver-Exeter Avenue and Burlesque. The ramp is the dumpster surrounded by pylons and construction barriers between the two streets. You need to land in the intersection on Burlesque, so you’ll have to hit the ramp’s left side to avoid crashing into the LC Recruitment Center. Drive south down Denver-Exeter Avenue, hit the ramp, and land in the intersection on Burlesque to succeed.
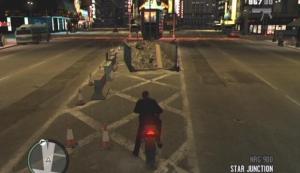
Stunt Jump 28: This jump is at the east end of Jade Street, just east of the LC Recruitment Center mentioned during #27. Drive west down Jade Street, hit the ramp, and land somewhere on Burlesque to pass.
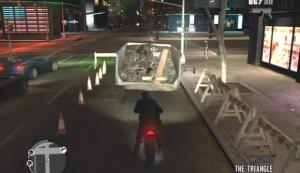
Stunt Jump 29: There are two ramps at either ends of the City Hall archway between Columbus Avenue and Denver Avenue; only the ramp on Columbus Avenue will work here. Drive west down Diamond Street and clear the second ramp to make the grade.
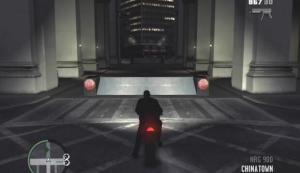
Stunt Jump 30: The ramp is up on the walkway of the tall building on the corner of the South Parkway. Start from the top of the incline on Amethyst Street (south of the ramp), hit the ramp, and fly over both lanes of the highway to complete the jump.
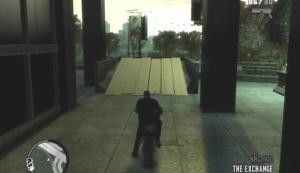
Stunt Jump 31: The jump is at the end of the alleyway off of Borlock Road. You don’t want too much of a run-up here, otherwise you’ll just end up smacking into the wall at the other end of the street. You just need to make it up onto Feldspar Street to complete the jump.
Stunt Jump 32: You’ll need a boat for this one (a Squalo will do). The ramp is next to the pier in the waters east of the south end of Algonquin. Get a good distance away from the ramp so you can build up speed and then hit the jump. You don’t need to fly all that far to pass. If you have yet to complete #24, go for that jump once you have completed this one because it requires a boat as well.
Refer to the map for the general location of a jump, but use the text descriptions to pinpoint the location. The jumps are not numbered in a coherent order, so go about completing them however you wish, though it might be convenient—and in one or two cases necessary—to follow the numbering in place. The ideal vehicle to use here is the NRG 900 motorcycle, so for best results, use one unless otherwise stated.
To complete a stunt jump your vehicle must land in a certain area beyond the ramp and on two (or four) wheels. Look for the “Stunt Jump Completed” message at the bottom of the screen for indication of your success. If your jump is “not good enough,” you either failed to land the jump, needed more of a run-up, or you didn’t land in the right area.
As you sail through the air in slow-mo, try your best to level Niko out for the landing. Sometimes, especially if you are using a motorcycle, Niko will wind up upside down; you can combat this to an extent by leaning forward (by pushing up on the Left Thumbstick/Left Analog Stick) just before hitting the ramp.

All Stunt Jumps Map
Stunt Jump 33: The jump is on the coast alongside the dirt road that leads to the old mansion. Due to the terrain, you’d best use a Sanchez for this one. You just need to make it over the patch of water to complete the jump.

Stunt Jump 34: The ramp is the driveway of one of the houses along Sacramento Avenue. Just drive south down Beaverhead Avenue, hit the ramp and make it over the backyard of the house next door to succeed.
Stunt Jump 35: The ramp is in the parking lot behind the “Deli & Grocery” place. Drive down from the opposite end of the parking lot and land the jump in the area below to complete the jump.
Stunt Jump 36: There is a ramp at the west end of the parking garage roof. Drive down from the opposite end of the roof, hit the ramp, and simply land the jump to succeed.
Stunt Jump 37: The ramp is through the alleyway off of the south side of Franklin Street. You need to fly over the Plumber’s Skyway to complete the jump, so this will require quite a large run-up. Start from as far north of the ramp as you can, drive down the sidewalk towards it, hit the ramp and hope for the best.
Stunt Jump 38: There is a dumpster at the top of the stairs along Mahesh Avenue that will bring you up to Applewhite Street. Look for the dumpster at the bend on Applewhite Street, or take the stairs on Mahesh Avenue up to it. You don’t need to fly all that far to complete this one, just back up as far as you can while still facing the ramp and then go for it.
Stunt Jump 39: The ramp is due east of your Alderney safe house. This is a big one; you have to fly over the river and land in Algonquin! As such this will require as much of a run-up as you can get. If you haven’t been using one all along, steal a NRG 900 motorcycle for this task. You can manage this if you start as far back as your safe house, but the NRG 900 is a must if that’s how you’re going to go about it.
Stunt Jump 40: The jump is on the walkway north of the helipad above the Booth Tunnel. Start from the stairs at the other end of the walkway and gun it. You just have to make it over the helipad, though unfortunately that means landing in the water and losing your bike.
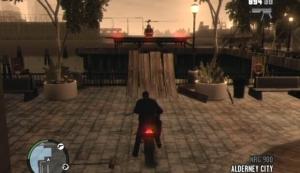
Stunt Jump 41: From your Alderney safe house, head west down the sidewalk until you come to some stairs; the jump is at the top. Hit the ramp and land somewhere on Rand Avenue to complete the jump.
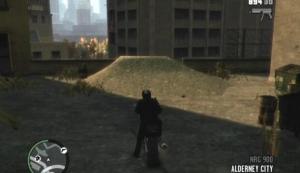
Stunt Jump 42: The ramp is the stairs off of Koresh Square. Speed south down the square, hit the jump, and fly over the stairs at the opposite end of the walkway to succeed.
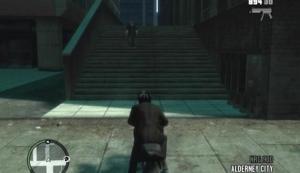
Stunt Jump 43: There is a dumpster in the area at the top of the stairs next to the hot dog stand on Koresh Square. Start from the other side of the street north of the ramp; you just need to land somewhere on the street below.
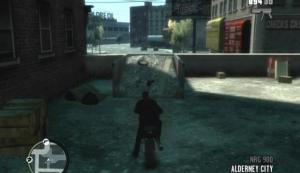
Stunt Jump 44: Look for a dirt mound along the Plumbers Skyway. You need to land on the Plumbers Skyway, though where you land appears to be quite specific. You’ll have to turn to the right upon hitting the ramp to complete the jump. Race down the dirt path that leads to the ramp, edge to the right just before hitting the ramp and hope for the best.
Stunt Jump 45: This jump is off of Aspdin Drive. Look for a dumpster on some pavement along the Plumbers Skyway. Get a short run-up and land in the southbound lane of the Plumbers Skyway to complete the jump.
Stunt Jump 46: The jump is at the end of the tracks just northwest of the Port Tudor gate. Drive down between the tracks and land on the road below to complete the jump.
Stunt Jump 47: This jump is by the water below the Plumbers Skyway. You need to make it to the other side of the water to complete the jump. Luckily you can get more than enough of a run-up by using the Plumbers Skyway onramp just north of the jump. You need to land it to make the grade, so try leaning forward (push up on the Left Thumbstick/Left Analog Stick) just before hitting the ramp to keep Niko upright.
Stunt Jump 48: The ramp is along the portion of the Plumbers Skyway over Acter Industrial Park. Look for some pylons and a gap in the railing; that’s the jump. Drive down the highway, go off the side of the ramp and land somewhere below the skyway to complete the jump.
Stunt Jump 49: This jump is also along the southern lane of the Plumbers Skyway. Look for construction barriers and pylons to spot the ramp. Speed east down the northern lane of the skyway, through the gap in the lane divider and hit the ramp. Where exactly it is necessary to land to complete the jump is not clear, but as long as you had enough of a run-up, simply landing should do it.
Stunt Jump 50: The jump is at the end of the west-most lane of the run-down skyway ramp in Acter Industrial Park. It is just north of the intersection of Plumbbob and Red Wing Avenue. Race down the lane, hit the ramp and land the jump to complete it.
If you have completed the game but have not scored 100% then one of the items below is probably the reason why. Make sure you have done all the stuff below if you want to complete the game 100%.
Complete all 94 missions.
Deliver all 30 of Stevie's text message cars.
Complete all 10 of Little Jacob's drug deliveries.
Complete all 10 Exotic Exports for Brucie.
Win all 10 of Brucie's races.
Complete all 9 assassination missions.
Unlock friend special abilities (Roman and Dwayne excluded).
Win every activity (full-game of bowling, darts, and pool) against a random computer opponent or friend once.
Beat the QUB3D high score (at least 11,000 points).
Take friends to every activity available via their Phonebook menu (Roman and Dwayne excluded).
Meet random characters and complete their tasks (Ivan, Cherise, and Clarence excluded).
Kill all 30 criminals on the Most Wanted list (via police car computer).
Complete 20 Vigilante missions (via police car computer)
Kill all 200 flying rats/pigeons.
Complete all 50 stunt jumps.
The Xbox 360 version of Grand Theft Auto IV features a total of 50 achievements. Each achievement that you unlock contributes a certain amount of points to your overall gamerscore. You can acquire a grand total of 1000 points by playing Grand Theft Auto IV.
 1. Off The Boat
 2. One Hundred And Eighty
 3. Pool Shark
 4. King of QUB3D
 5. Finish Him
 6. Genetically Superior
 7. Wheelie Rider
 8. Gobble Gobble
 9. Driving Mr. Bellic
 10. Rolled Over
 11. Walk Free
 12. Courier Service
 13. Retail Therapy
 14. Chain Reaction
 15. One Man Army
 16. Lowest Point
 17. Order Fulfilled
 18. Manhunt
 19. Cleaned The Mean Streets
 20. Fed The Fish
 21. It'll Cost Ya
 22. Sightseer
 23. Warm Coffee
 24. That's How We Roll!
 25. Half Million
 26. Impossible Trinity
 27. Full Exploration
 28. You Got The Message
 29. Dare Devil
 30. Assassin's Greed
 31. Endangered Species
 32. Under The Radar
 33. Dial B For Bomb
 34. Gracefully Taken
 35. Liberty City (5)
 36. No More Strangers
 37. That Special Someone
 38. You Won!
 39. Liberty City Minute
 40. Key To The City
 41. Teamplayer
 42. Cut Your Teeth
 43. Join The Midnight Club
 44. Fly The Co-op
 45. Taking It For The Team
 46. Top Of The Food Chain
 47. Top The Midnight Club
 48. Wanted
 49. Auf Wiedersehen Petrovic
 50. Let Sleeping Rockstars Lie
Entering Cheat Codes
These are the cell phone cheats which can be entered after Roman has given you his mobile phone in one of the early missions. To bring up the keypad, press up to get your mobile out, then up again to activate the key pad, then enter any of the numbers below.
IMPORTANT: Certain codes may disable Achievements on the Xbox 360 version. Use at your own risk.
4825550100 – Restores Niko's health.
3625550100 – Gives Niko Body Armor.
4865550100 ¬ Outfits Niko with a Baseball Bat, Handgun, Shotgun, MP-10, M4, Sniper Rifle, RPG, and Grenades.
4865550150 – Outfits Niko with a Knife, Molotovs, Handgun, Shotgun, Uzi, AK47, Sniper Rifle, and RPG.
2675550100 – Lowers wanted level.
2675550150 – Adds a star to wanted level.
4685550100 – Changes weather/brightness.
3595550100 – Spawns an Annihilator.
9385550100 – Spawns a Jetmax.
6255550100 – Spawns an NRG-900.
6255550150 – Spawns a Sanchez.
2275550100 – Spawns an FIB Buffalo.
2275550175 ¬– Spawns a Comet.
2275550142 –Spawns a Cognoscenti.
2275550168 – Spawns a SuperGT.
You can get maps whic reveal the locations of hidden weapons, items, pigeons friends and stunt jumps. To see these jus head over to an Internet Cafe in the game and enter this address into the browser:
www.whattheydonotwantyoutoknow.com
More Cheats can be found on our main pages for this game which are here:
Grand Theft Auto 4 - Xbox 360
Grand Theft Auto 4 - Playstation 3
